glbarlow
-
Posts
4,127 -
Joined
-
Last visited
Content Type
Profiles
Forums
Gallery
Events
Everything posted by glbarlow
-
 I’m a huge fan of the Proxxon mill, for me it proved to be an essential tool building Cheerful. You’re doing a great job with the model, Your deck furniture is outstanding!
- 113 replies
-
- 2
-

-
- Cheerful
- Syren Ship Model Company
- (and 1 more)
-
Nice tone to your Granado, you’re definitely making it yours. I lose little parts all the time, even in my self contained room. I’ve resorted to sweeping the floor then searching in the dust pile I’ve swept up, that’s after crawling around on the floor with a flashlight. The things we do.
-
Really meticulous work, impressive patience required I’m sure!
-
Pristine work as is your standard. The tone of the wood is just remarkable!
- 642 replies
-
- 4
-
-
- winchelsea
- Syren Ship Model Company
- (and 1 more)
-
It is kind of a kick to know it’s there
- 840 replies
-
- 2
-
-
- winchelsea
- Syren Ship Model Company
- (and 1 more)
-
There are plenty to choose from, hope I help a little. Now you need to pick up the pace and pas me again 😁
- 840 replies
-
- 3
-
-
- winchelsea
- Syren Ship Model Company
- (and 1 more)
-
Not entirely mine, I likely saw it somewhere on the forum. Still a cool idea.
- 840 replies
-
- 2
-
-
- winchelsea
- Syren Ship Model Company
- (and 1 more)
-
I turned it upside down to shake all that out. It’s when something later drops in the open hatches that I’ll also never see again 😁
- 840 replies
-
- 3
-
-
- winchelsea
- Syren Ship Model Company
- (and 1 more)
-
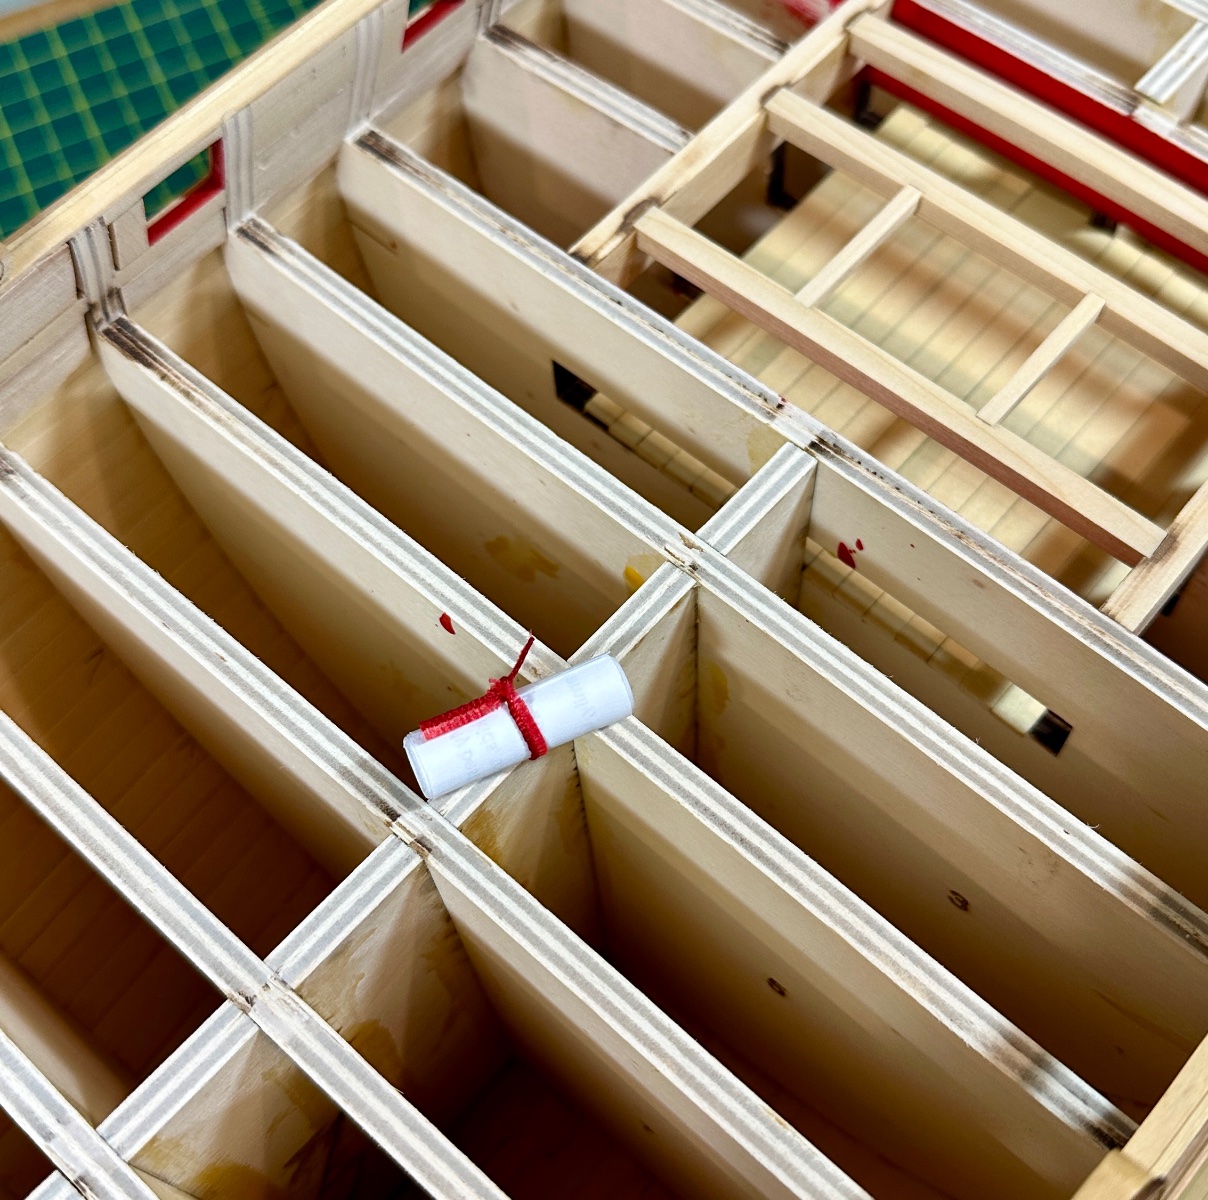
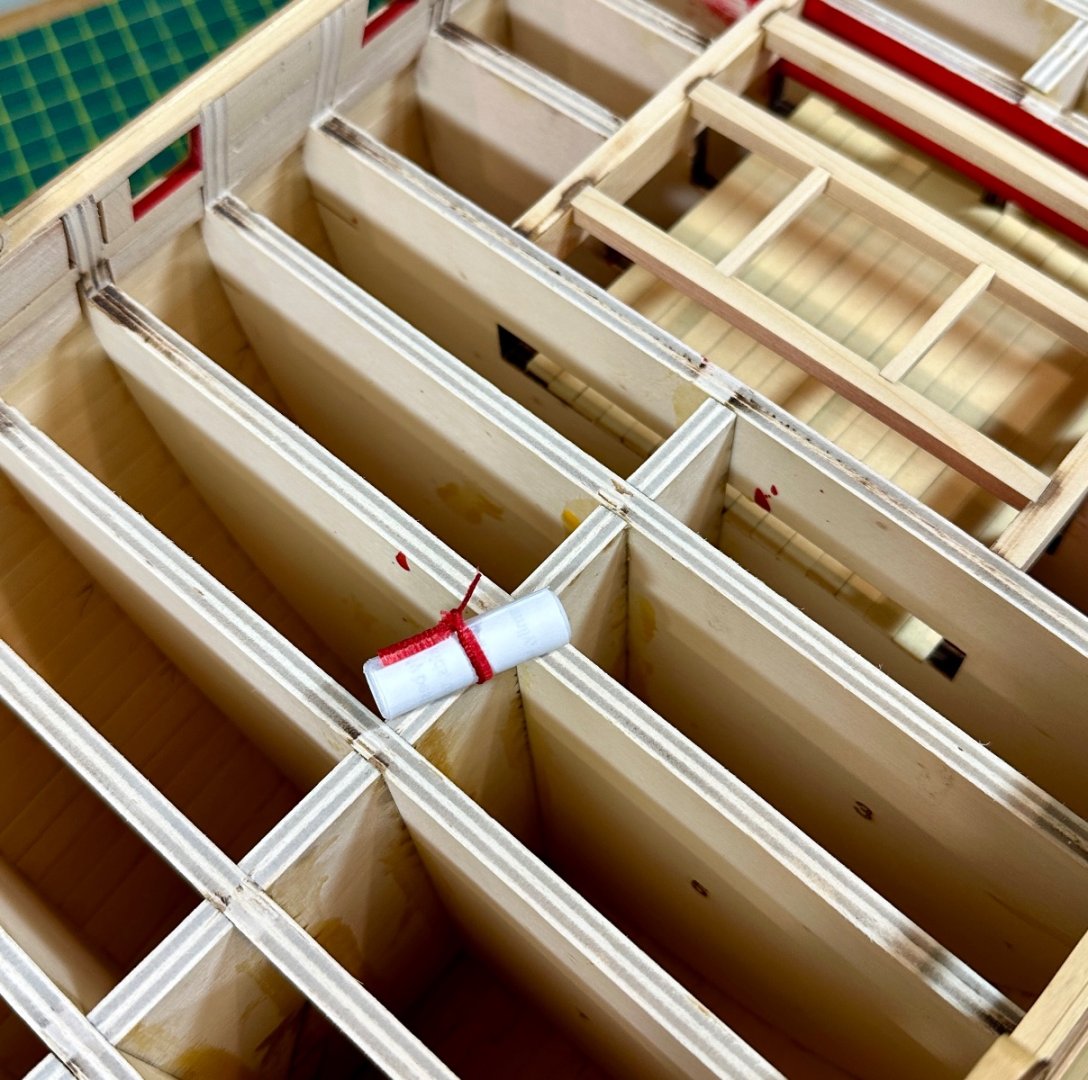
My deck is faired and ready for the false deck to be added Not before I drop this scroll, with a message I wrote to the future, into the hold below hopefully never to be seen again.
- 840 replies
-
- 10
-
-

-
- winchelsea
- Syren Ship Model Company
- (and 1 more)
-
Well, it’s a little short of perfection, but Thank You for saying so. I do try.
- 840 replies
-
- 4
-
-
- winchelsea
- Syren Ship Model Company
- (and 1 more)
-
So in 2-3 years I know what I’m doing after my Winnie is complete, meanwhile I’ll enjoy the view. Of my favorite models is my Fair American, also a POF planked from the wales up, this should be fun.
-
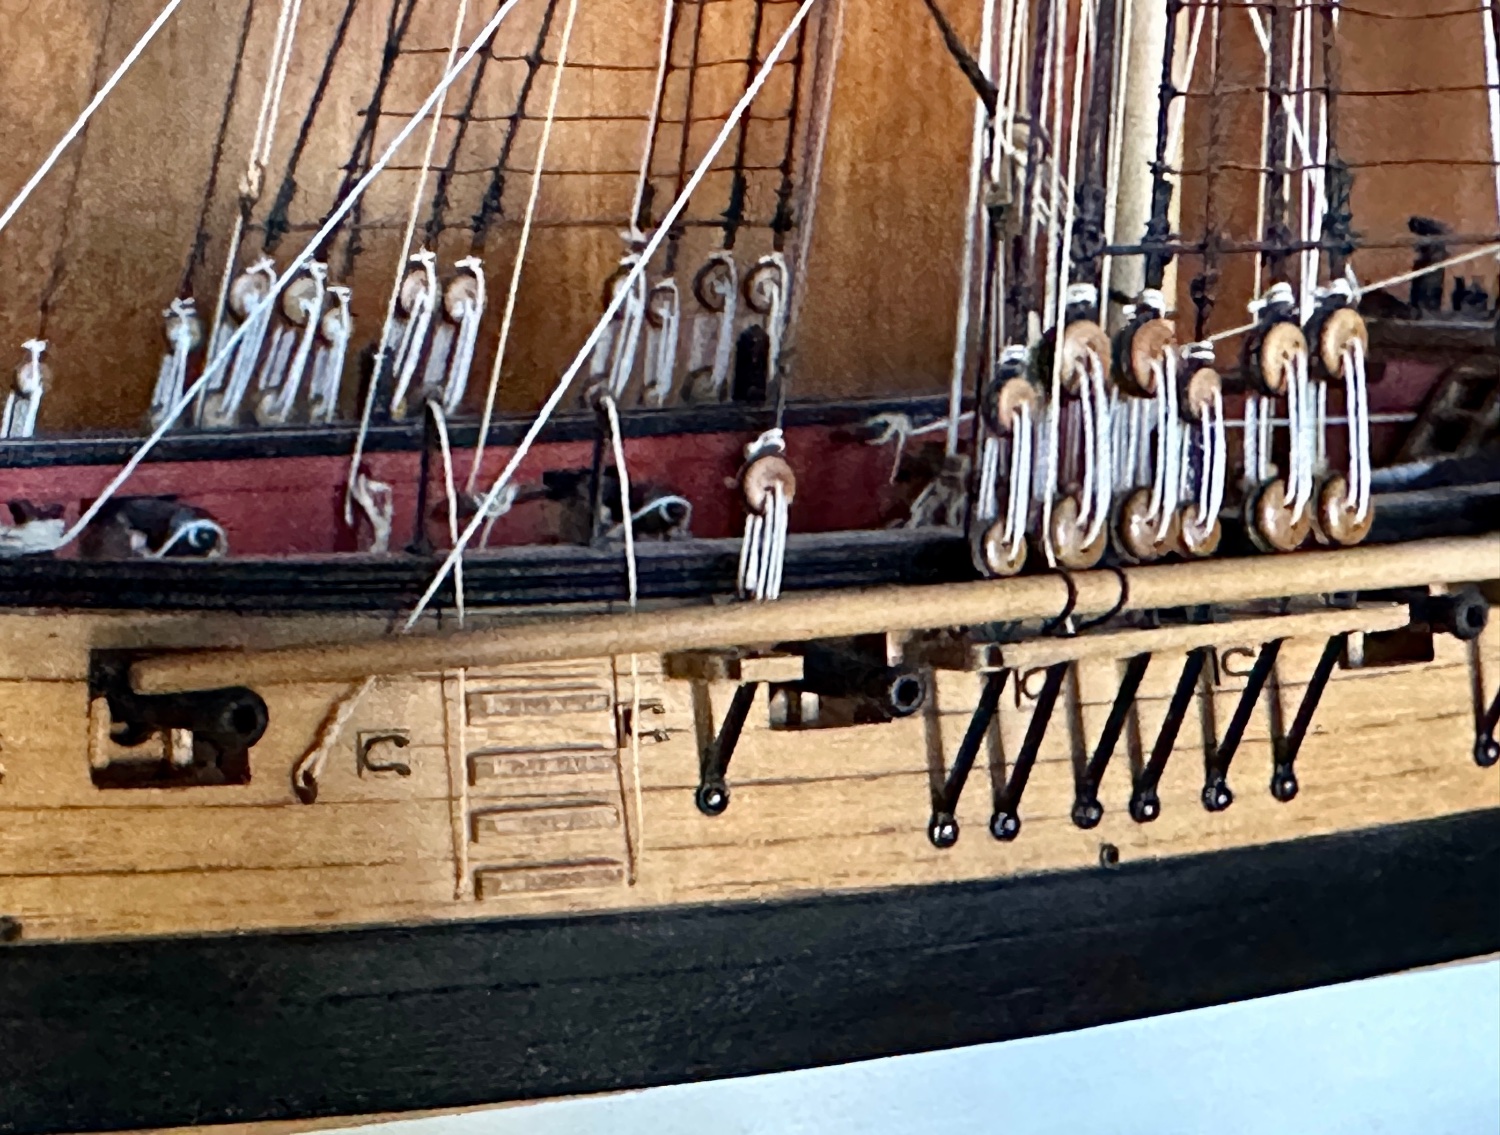
Make a little jig for the entry steps. A simple L or T. Set the first step, generally the wales can be your guide for it. The long side of the jig is the spacing between steps, the short side lines up the side edge. Glue on one at a time, I use CA and had no problem, PVA also works. Weldbond is overkill and likely messy. I can’t speak to Danish oil, but CA does stick to WOP (lightly) covered services as does PVA. My overkill is sometimes lightly etching the two surfaces to be glued. Definitely pin the channels using the method others have described, since you’re using pins, either CA or PVA are fine, My models use both depending on what’s being glued. Here’s the ladder and a channel on my Granado, built in 2009. I used mostly CA back then, everything is still attached. I’d use a scraper or my mill to make more interesting steps now, skills and tools I didn’t have then.

-
Thank you. It isn't, but I'm happy with it. The design is such a work of art.
- 840 replies
-
- 2
-
-
- winchelsea
- Syren Ship Model Company
- (and 1 more)
-
Thank you. True, but the deck is a little more fun and not so long a haul - I hope 🙂
- 840 replies
-
- 1
-
-
- winchelsea
- Syren Ship Model Company
- (and 1 more)
-
Thank you, I appreciate your stopping by.
- 840 replies
-
- 3
-
-
- winchelsea
- Syren Ship Model Company
- (and 1 more)
-
Thanks Chuck. I’m really enjoying the design and the build. It’s so exacting and requires my best effort, more good challenges ahead I’m sure.
- 840 replies
-
- 2
-
-
- winchelsea
- Syren Ship Model Company
- (and 1 more)
-
Very interesting watching "water" come to life. Your thorough descriptions will definitely help the next guy do it and no doubt encourage more to try. Well done!
- 542 replies
-
- 4
-
-
- Sphinx
- Vanguard Models
- (and 3 more)
-
Although "just" a frame - it is meticulous work well done!
-
Thank you. I kinda enjoy writing the log, I likely get carried away from time to time. I think your 12 frames are no small achievement, I'm sure there is a lot of work in those.
- 840 replies
-
- 3
-
-
- winchelsea
- Syren Ship Model Company
- (and 1 more)
-
Thanks Matt, it looks a lot like yours 🙂 - it really is a signature statement for the model - it just stands out. Looking forward to having a deck.
- 840 replies
-
- 3
-
-
- winchelsea
- Syren Ship Model Company
- (and 1 more)
-
Thanks Ron, I appreciate the comment. Photography is my other hobby, I feel like I'm giving short shrift to these photos using only my iPhone. One day I'll have to get out the good stuff and a true white screen, meanwhile I convey what I can. I appreciate your stopping by.
- 840 replies
-
- 3
-
-
- winchelsea
- Syren Ship Model Company
- (and 1 more)
-
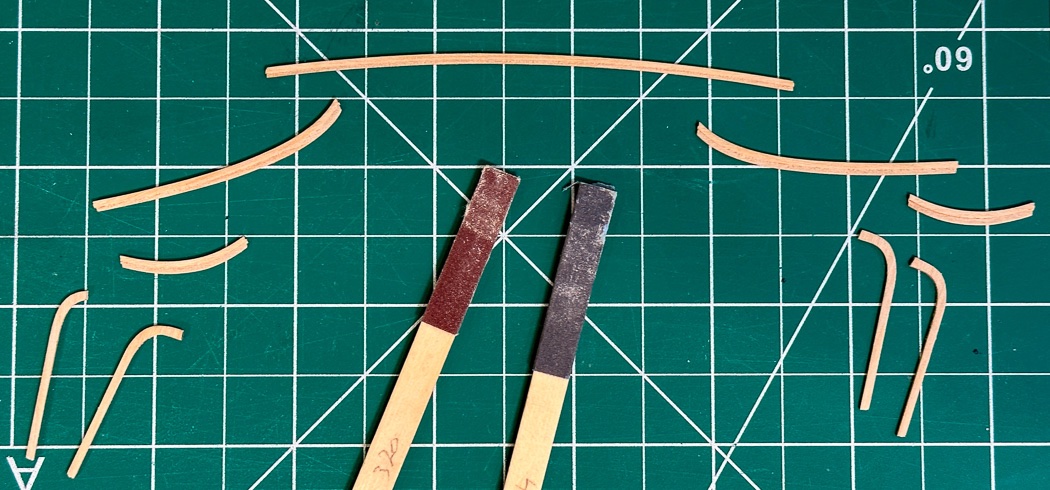
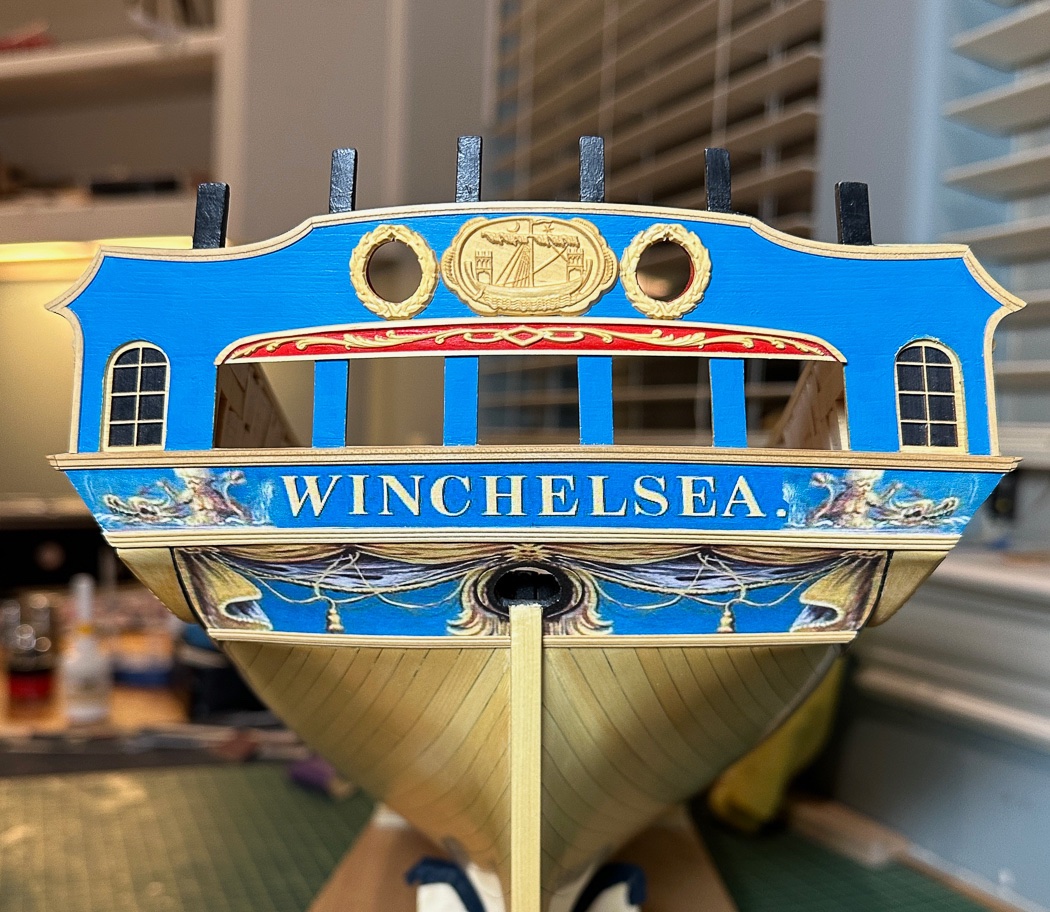
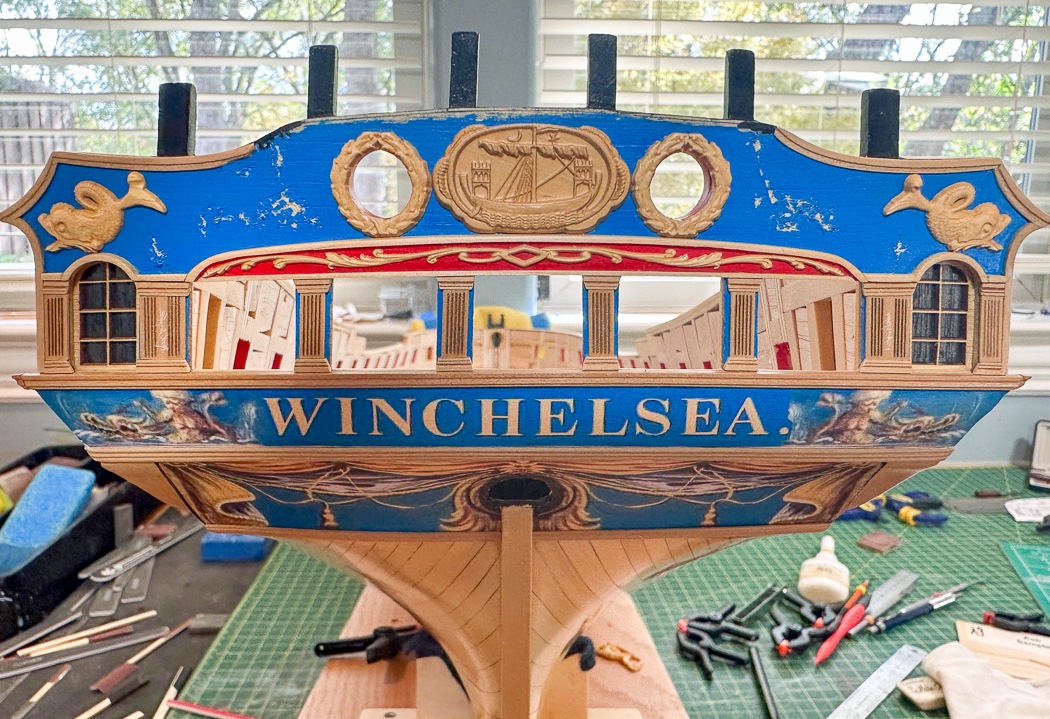
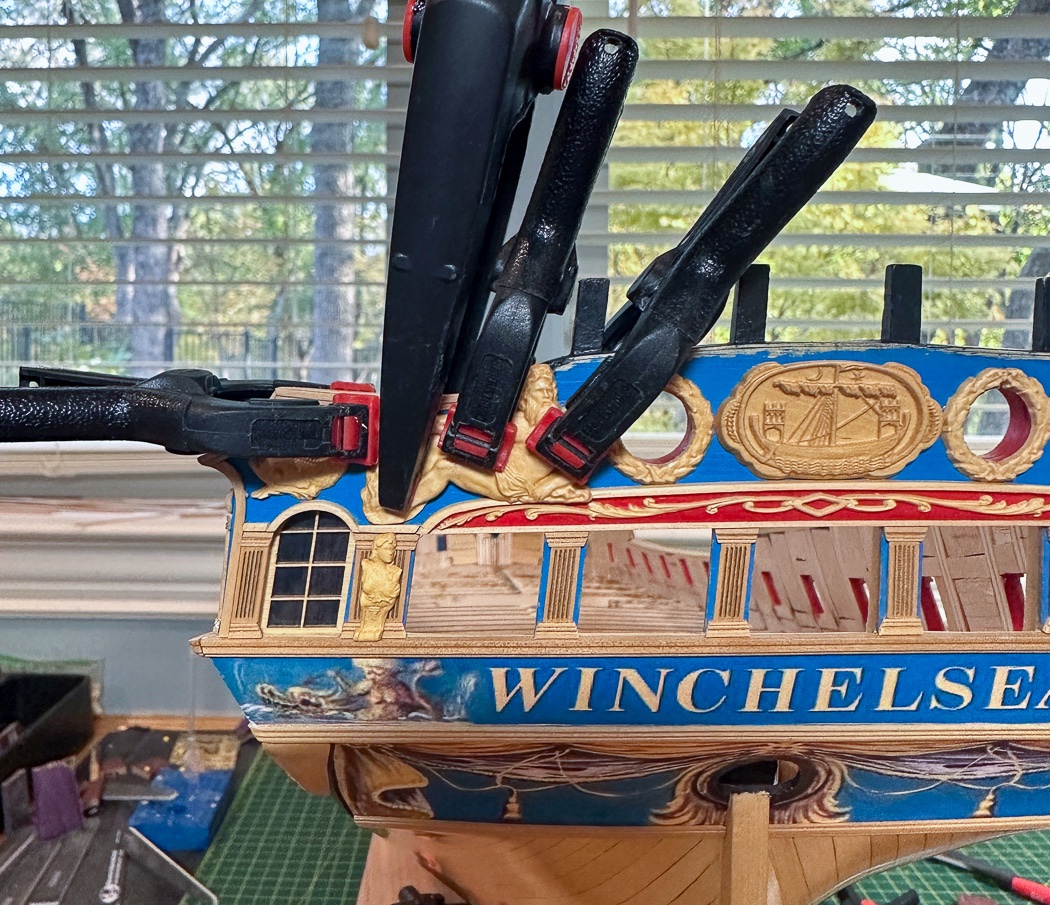
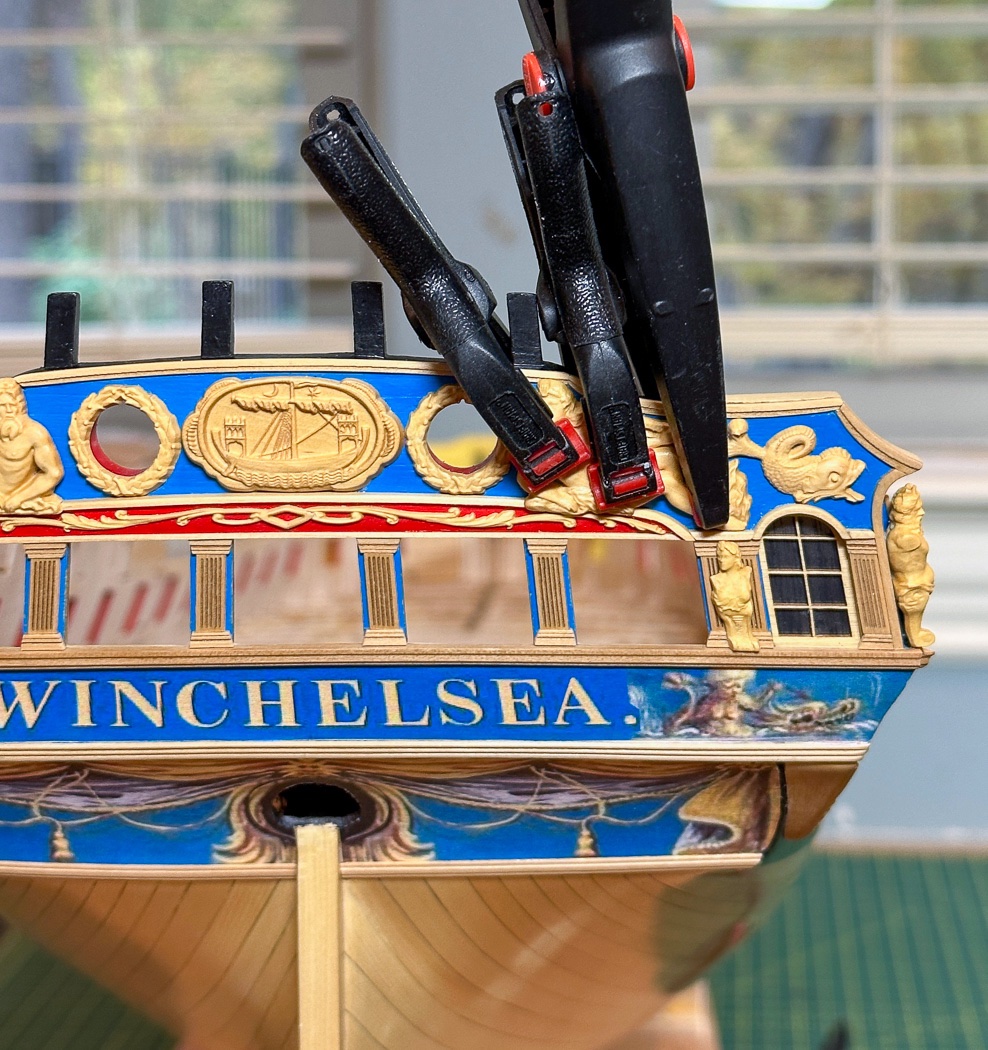
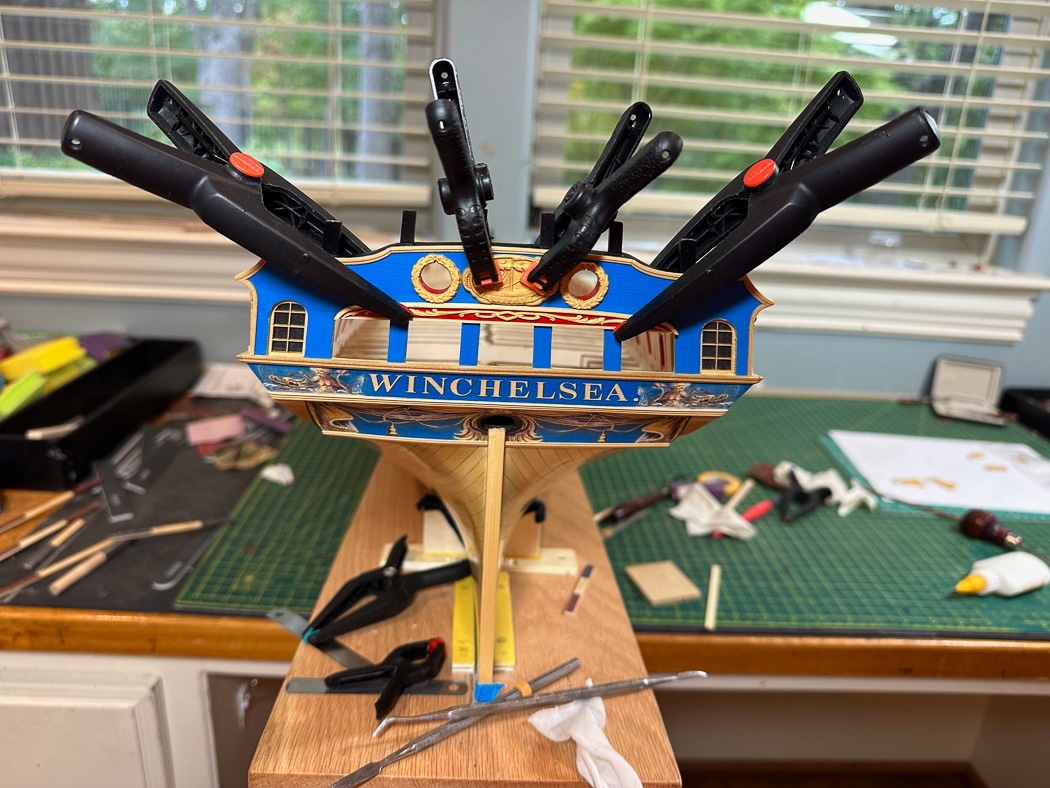
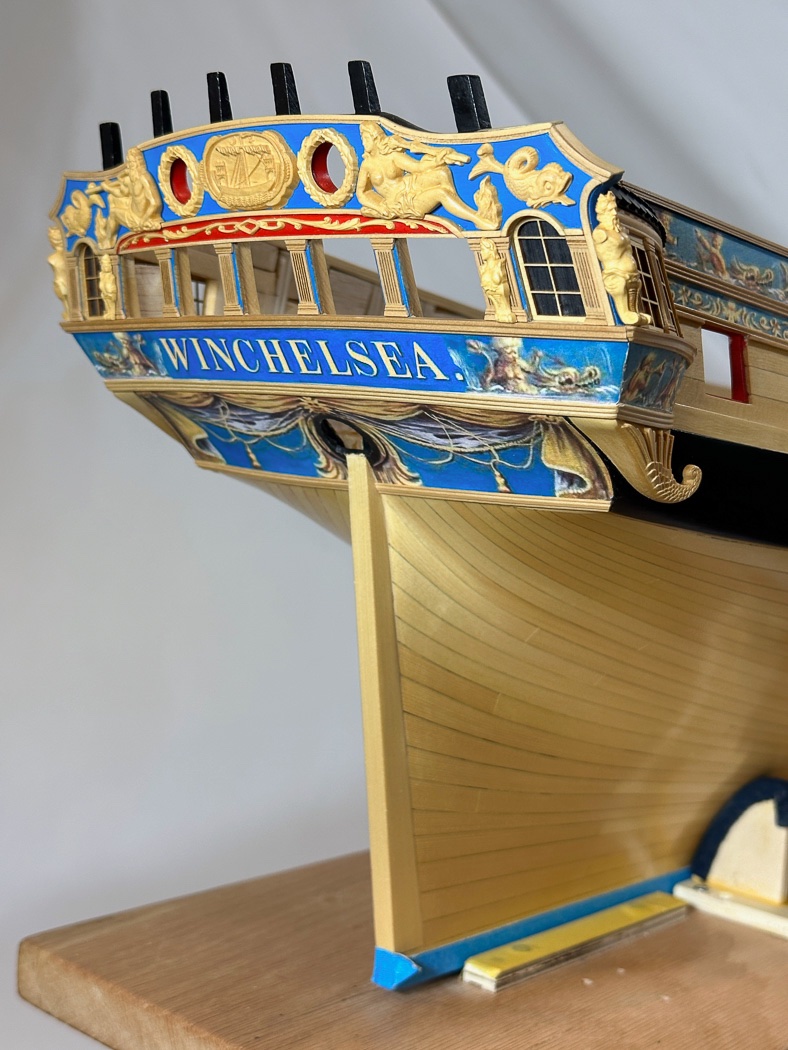
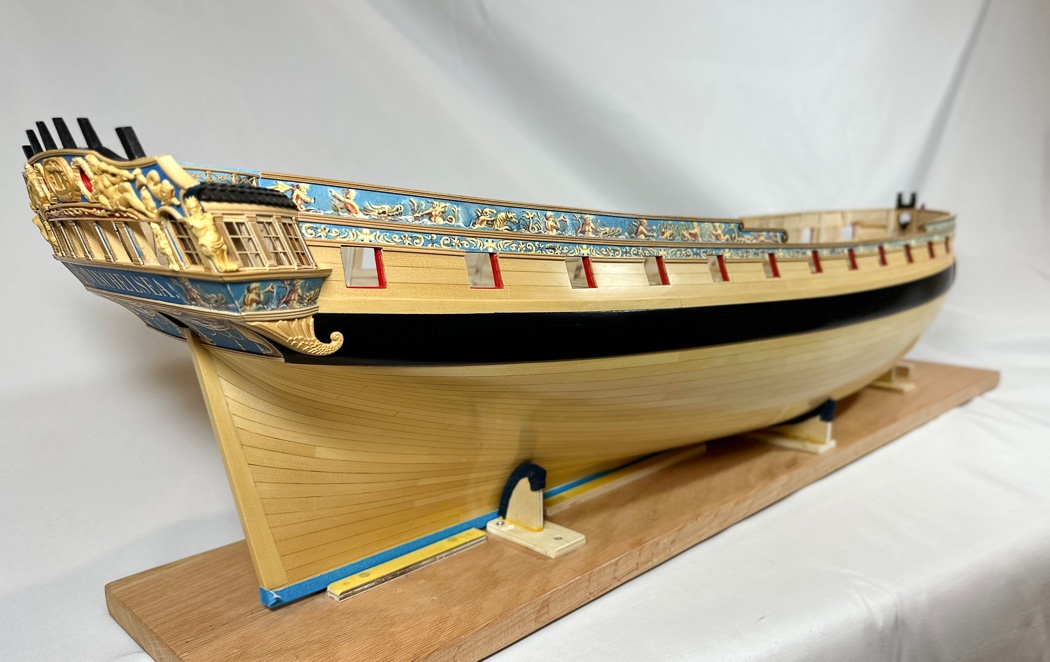
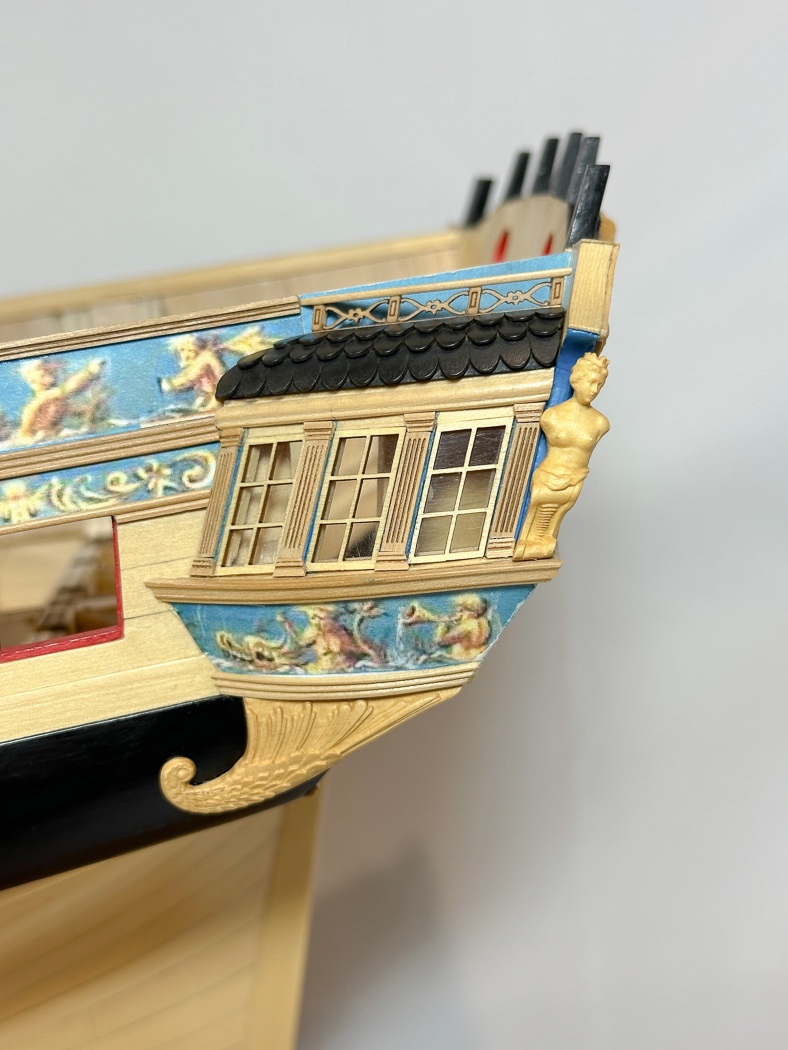
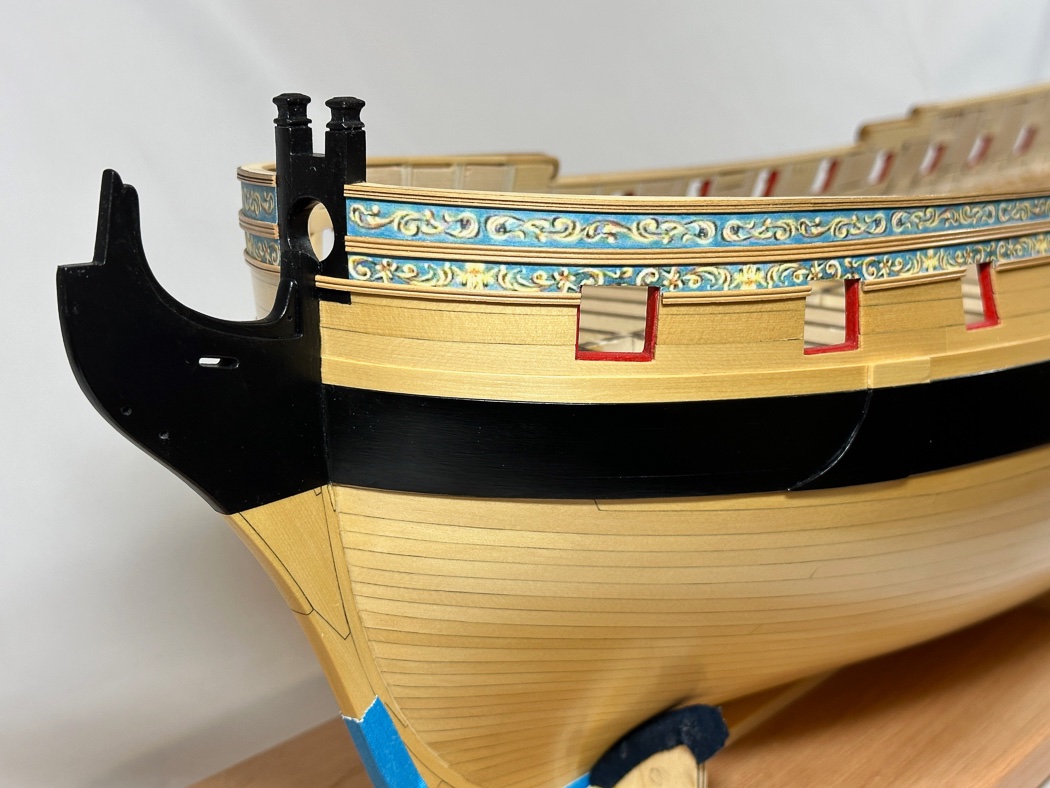
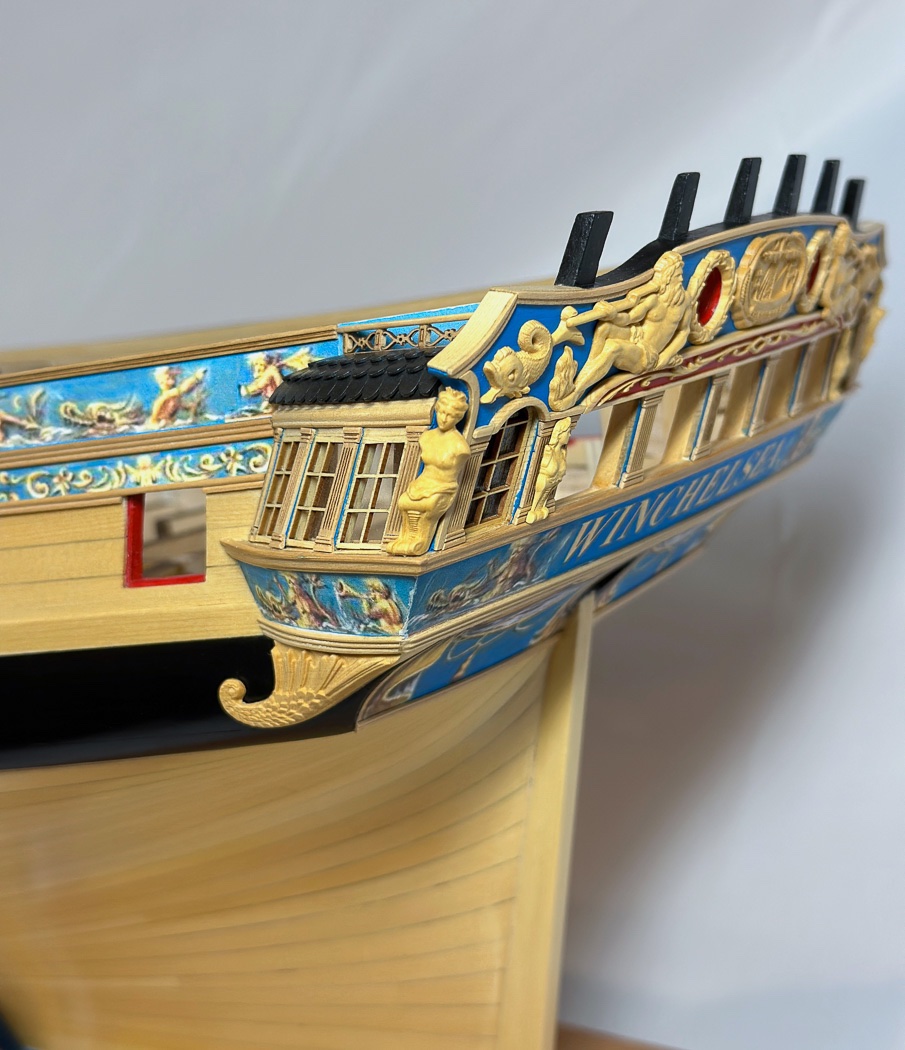
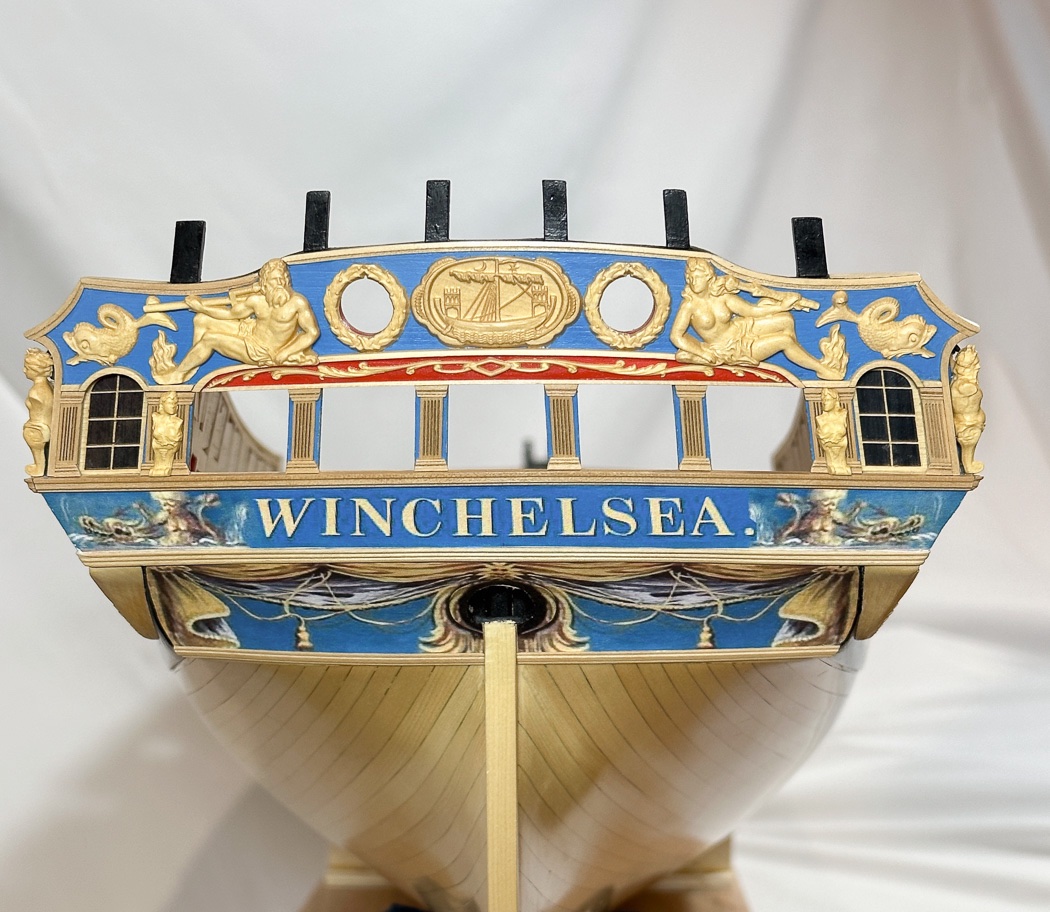
The Transom & Chapter 3 are Complete! I started my Winchelsea November 10, 2021, one year later I have completed Chapter 3. The framing, planking, and a good deal of the external hull work are now finished with the first three chapters. Chapter 4 takes me inside to the bulwarks and the deck, I’m looking forward to doing something new and different. The transom and the stern in general on Chuck’s design is certainly a signature element that separates it from other models, at least ones I’ve seen or built. From the very first step of carefully mounting the frames on the bulkhead framer to adding the last carving it has been a journey all in itself. For those that follow, take whatever time is needed in Chapter 1 to frame it up right, it pays big dividends later. First up are the top and side mouldings, laser cut and for me a near perfect fit, though with lots of char. The sanding sticks I made up helped, but the biggest help was rubbing on Gojo Pumice Hand Cleaner, it takes most of the char right off. Credit @Stuntflyer for sharing this with us, it works great. Just wash it off and let the pieces dry before installing. I had added the mouldings and decorations for the upper and lower counter a while ago, covered in an earlier post. The transom is another adventure. There are these beautiful carvings, I am fortunate to have a boxwood set, they are pure art. Following Chuck’s direction I sealed them with Sanding Sealer. “Not WOP?” I asked, ‘no’ was the answer and I now know why. The sanding sealer (Old Masters) imparted a beautiful golden touch to the already perfect boxwood. Buffing them out with a soft cloth (pieces of old cotton t-shirts) brought them to life. Now the goal was to glue them in the right spots and in a way they are all interconnected once complete. It’s crowded back there, not a lot of room to negotiate space for each, I spent a good deal of time looking at the plans, studying the work of other builders, and of course checking it against Chuck’s model, then it’s clamp on, clamp off, test fitting (as shown in the above photo) each piece and each piece together. There is an order they have to go on starting with the cove, which has to fit window edge to window edge, be the right height (or what’s above it won’t fit) and depth (other carvings use it as a seat). It includes the most intricate and fragile of carvings in two pieces, I was very careful with it when building this little bit of artwork. Once on the wreaths (wreaths, who thinks to put wreaths around some port holes, 18th century ship builders that’s who) and the center medallion go next. You could almost stop there and have a nice looking transom. I mentioned the figures are inter-related. After lots of clamping I decided the fish need to be set at the right angle for the other figures feet with fire coming out of them (not sure about the feet on fire thing, I’m sure there’s a story) to fit below. After I had spent time carefully painting the transom I now sliced it up with my # 11 blade and also gouged the back of the figures (carefully) to help (or help me believe it does) the glue to better adhere and mate the two for eternity. As I mentioned it’s crowded back there and Neptune’s head goes above the moulding. So naturally, me being me, I screwed that up and had to request a replacement part, which Chuck kindly provided. I also added the columns using the same process as the quarter galleries, the extra upper moulding pieces again making great caps for each column. There is also a six piece set of moulding connecting the cove to outside edges and rounding the window. Another fun thing to carefully match up both alignment and thickness, and, me being me, the extra’s Chuck includes were extra no more. Note the fishy on the left has a little extra carving on his tail, Neptune’s trident staff must neatly lay in there. I also had to round the staff and cut a little notch where it meets the tail. The benefit of multiple looks at clamping pieces to determine fit and location before the glue left the bottle. Finally Neptune and his bare-breasted lady friend take their place. Here was another moment for clenched teeth and held breath, a notch must be cut in the bottom of both so they sit convincingly on the cove moulding. Slow and steady wasn’t enough, I went at a crawl constantly checking the fit and wishing I had no more to do, until I didn’t - then a sigh of relief. Chuck recommended rounding the legs and shoulders, it is a nice touch that gives a more lifelike look to my stern riders. Two naked ladies looking at each other were added, sitting there on the on the columns and the lower moulding along with a pot-bellied king and another bare-breasted women to the side coves. So, did sailors spend a lot of time leaning over the side looking at these not-bashful ladies… As I mentioned, the stern was a journey by itself, here’s a little short movie sharing that journey. winnie stern.mp4 And it’s done. This photo makes the figures appear gold, they are not at all or even close to it. I'm still learning my iPhone 14 Pro, it’s supposed to be a much improved camera, so far I'm thinking I liked my 12 Pro photos better. Gotta work on that. With that Chapter 3 is complete. To record the moment and my first Winchelsea anniversary here are a few more photos: As always, thanks for stopping by. The likes and especially the comments are always appreciated. I recognize I’m but one of many Winchelsea builders and little I offer is new from those that have gone before, I just try for the entertainment value of seeing how this one is put together. Next up, my ship gets a deck.

- 840 replies
-
- 18
-

-
-
- winchelsea
- Syren Ship Model Company
- (and 1 more)
-
More than whatever time it takes to closely follow the plans and monograph to get the infrastructure correct, pays dividends over and over as you move forward.