It’s been a while since my last post, lots of stuff going on outside the shipyard.
Ratlines Completed
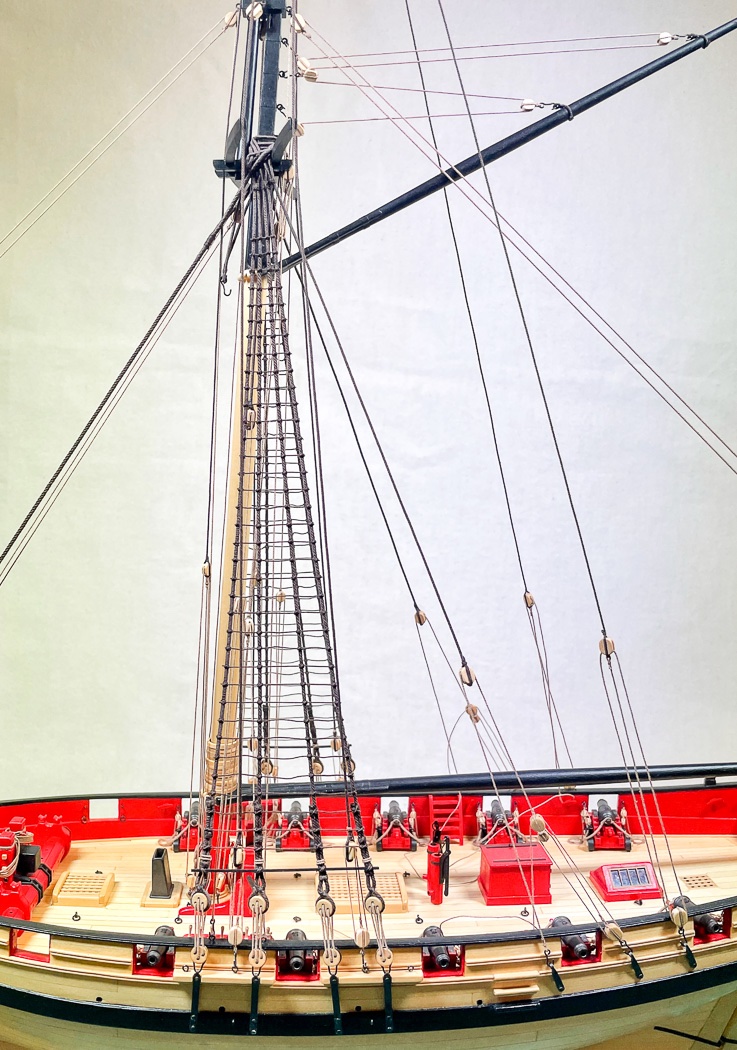
For all my delaying completing the ratlines wasn’t really that big a deal, it basically took me a days work for each side and was kind of relaxing in a weird way. Of course having only 4 shrouds per side and the the 1:48 scale made it simpler, but so did my revised method (from past models).
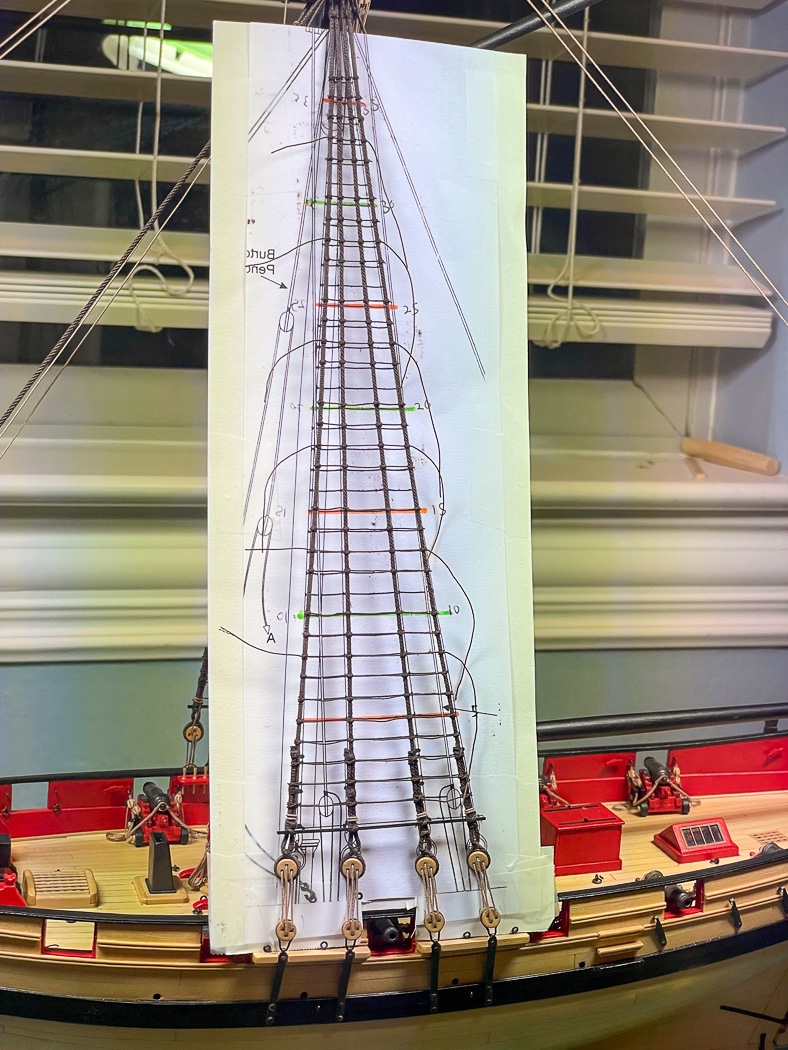
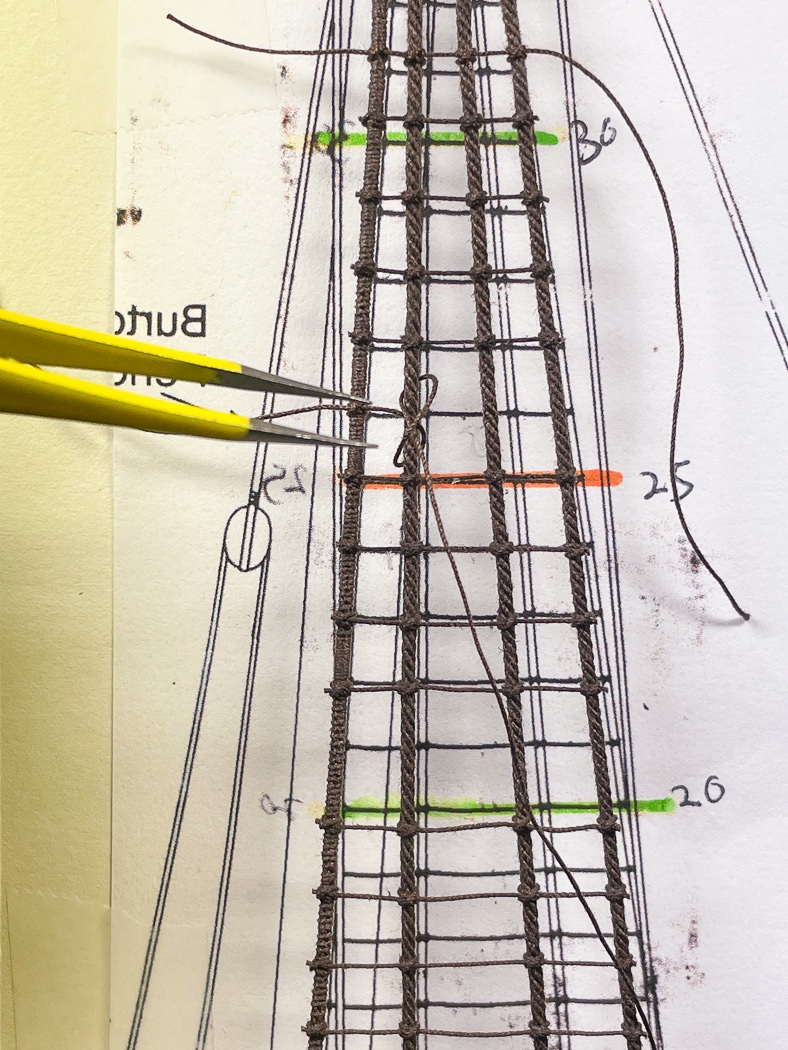
I put my own spin on what I’d learned from several other build logs by scanning a copy of the plans, printing a copy for starboard, reversing the scanned image using Apple Preview and printing that for the port side. I mounted the paper on stiff card with the bottom the right height to match the sheer pole on paper to the one on the model. This saved me the step of making a grid but more importantly gave me good vertical lines to keep the shape right. My shrouds at the start weren’t an exact match to the plans, but they are very close and consistent enough to act as a guide. The spacings are correct, the angle of the photo or the paper leaning back throws off the aspect.
I used .012 dark brown line (I should have been a hoarder, I’m going to miss Syren rope when mine runs out) I did them in sections, first the “five lines” which I’d highlighted in orange, then the “ten lines” in green ,then the three’s, ones, fours and twos. I glued each after I was done with a section, allowed them to dry and cut off the tails before doing the next section keeping the working field clean and lines from shifting.
I did all the lines using clove hitches working left to right (because I’m left handed). If you use some other knot, even if only on the outside shrouds I highly recommend using clove hitches instead. Once I got going I was whipping across the shrouds, the clove hitch allows adjusting for the right tension easily and frankly just looks good.
And then they were done. Another benefit of doing them in random spaced groups is I didn’t focus on ‘aargh…how many more rows until I get to the top….’ By doing sections I didn’t think about anything but that section and was almost surprised when there weren’t anymore to do. So I immediately strung 4 lines from my cabinet down to the worktop and weaved more ratlines for the pure joy of it….or maybe not.
Rope Coils
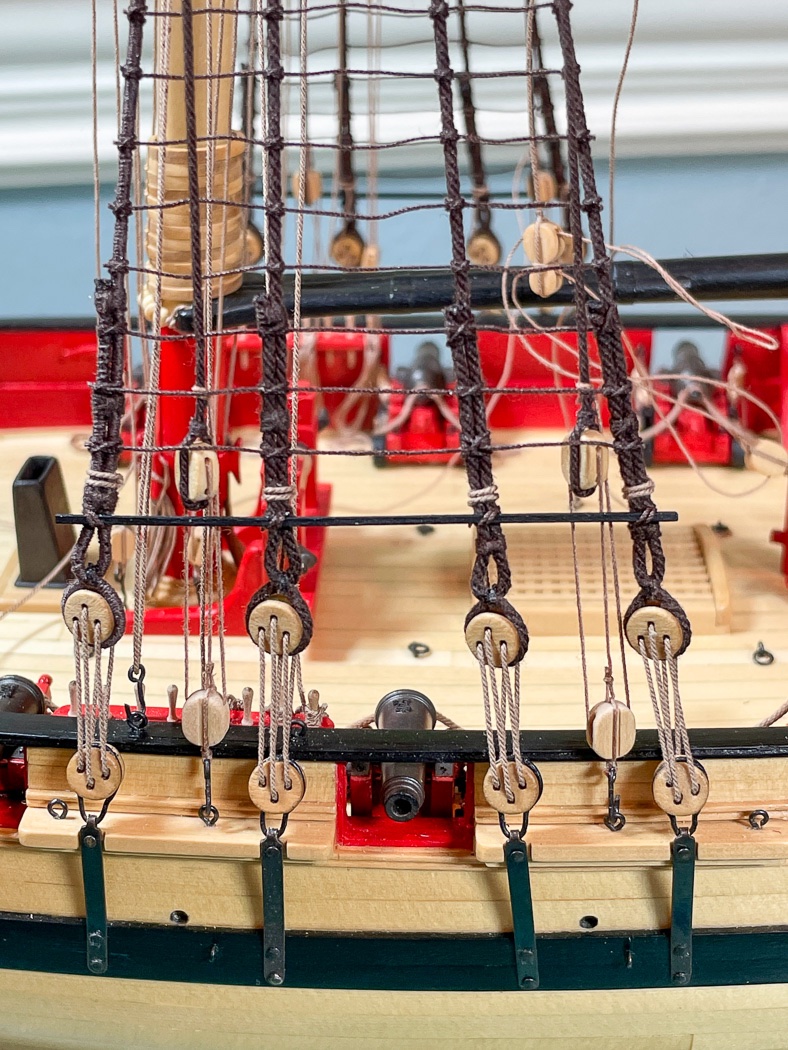
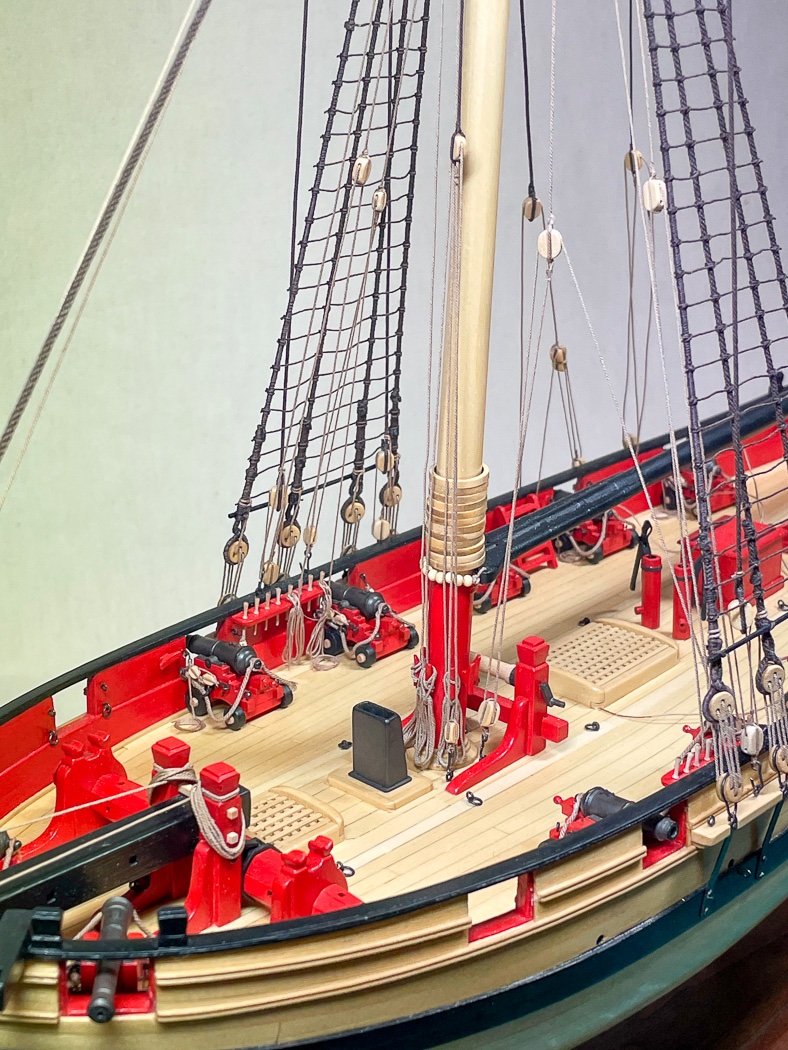
It was time to do final tension on lines, gluing them, and adding rope coils. I’ve again chosen to do them differently than on past models, I think the 1:48 scale makes me think differently. I went searching on MSW for ideas and found multiple posts on Flemish coils (which I’m not a fan of doing) however there wasn’t much on “working coils” or at least in a way I wanted to do them. I did locate a repost by @ccoyle of a method used by ‘Peter-V’ that served as a starting point, so credit and thanks to him and to Chris for further sharing it. I once again put my spin on it and wasted a bit of rope sorting out a look I liked. I also didn’t determine key steps (see below) until Googling rope coils and finding a series of images related to actual sailing. Side note for Cheerful builders, I went through a lot of .018 Light Brown rope, in fact I wouldn’t have had enough to finish the boat if I hadn’t ordered some for my next build of Flirt. I had to cut into that stock, a problem for another day. I thought I was fairly judicious but likely used too much for rope coils. One coil is a lot of rope and I have made and remade them. I probably could have been more efficient with the lengths of tackle. I’m sure it’s my fault, so just a heads up.
I want the coils to look natural and each one be somewhat consistent but at the same time different from the one next to it - like the lines are in use, not inspection ready. Each one is made, then painted in very watered down white glue, then with a wet brush to avoid white glue staining. Once dry then smushed (that’s a technical term) with my finger and bent around to shape it to its location - again being different each time.
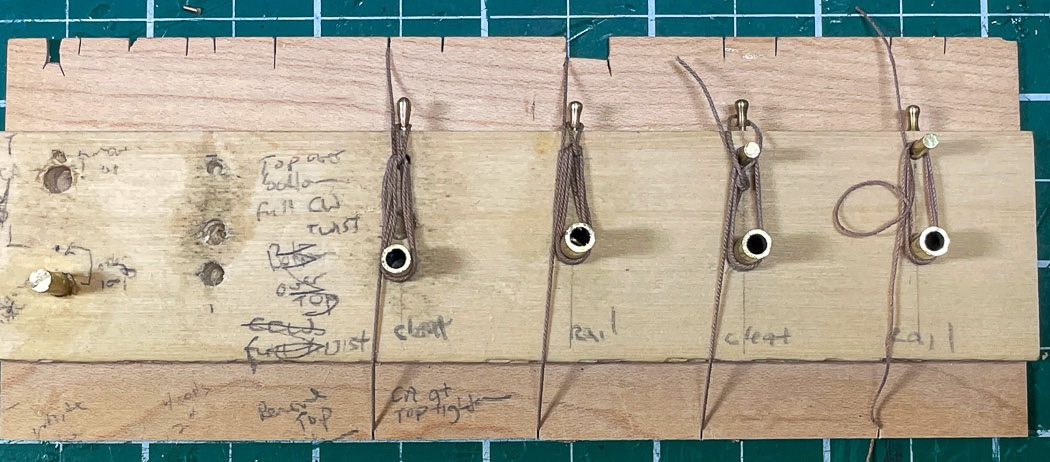
After a few false starts I came up with this ‘rope board’ using brass tubing, brass rod, and brass belaying pins. All the brass is removable, which is essential to how I make them. There are two set up for pin rails and two for cleats and another just for straight up coils, the differences being the size of the eye and length of the coils (the board shows it took a few iterations to get there).
I should do a separate post in the rigging forum to provide more detail from what I’ve learned, even more so since I took these photos. The short(er) version is to wrap the rope around the brass pins leaving the top extra long (it goes on for a few inches behind the board) before seating it in a split on the top, after 4-6 wraps (I varied them) the end of the rope seated in another split in the bottom. Loosen the top excess rope and grap the first (bottom) loop with tweezers (it’s tricky, sharp pointed tweezers are essential)and pull it out.
Loop it top over bottom (not bottom over top) then do a complete 360 degree clockwise loop (not 180) (the two key steps I’d missed from the research) and place that over the belaying pin at the top. It represents the pin rail on the boat (or the top of a cleat). Snug that up with the top rope.
Remove the top brass rod and tighten it further. Another lesson I learned is not too tight as it is in this photo - shape the loop a little. Then paint it all with watered down white glue. Remove the bottom brass rod after the glue dries and lift it off the board. Important point, I used a drop of CA (yes I like and use CA) on the back side of the coil’s top to seal the top rope that formed the loop (another lesson learned) before sniping of the excess of both the bottom and top ropes otherwise the whole thing may collapse into a wad (he said having done that). I then did the artistic smushing and bending before installing it on the ship.
I hope that makes some sense, each one I make I do a little different but this is the essence of what I learned from others then modified to work for me. A final point, getting the watered down glue the right consistency is another key - so the rope is not too stiff or not to loose. I’m still working to finding the magic formula.
Topmast Shrouds
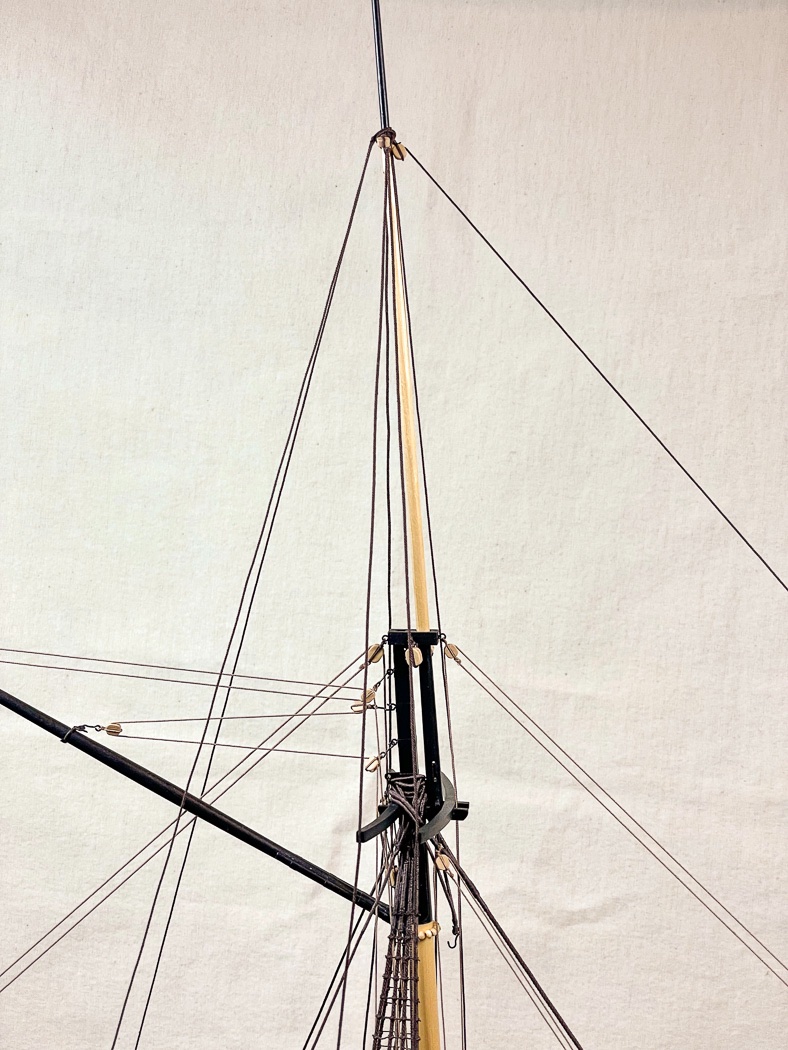
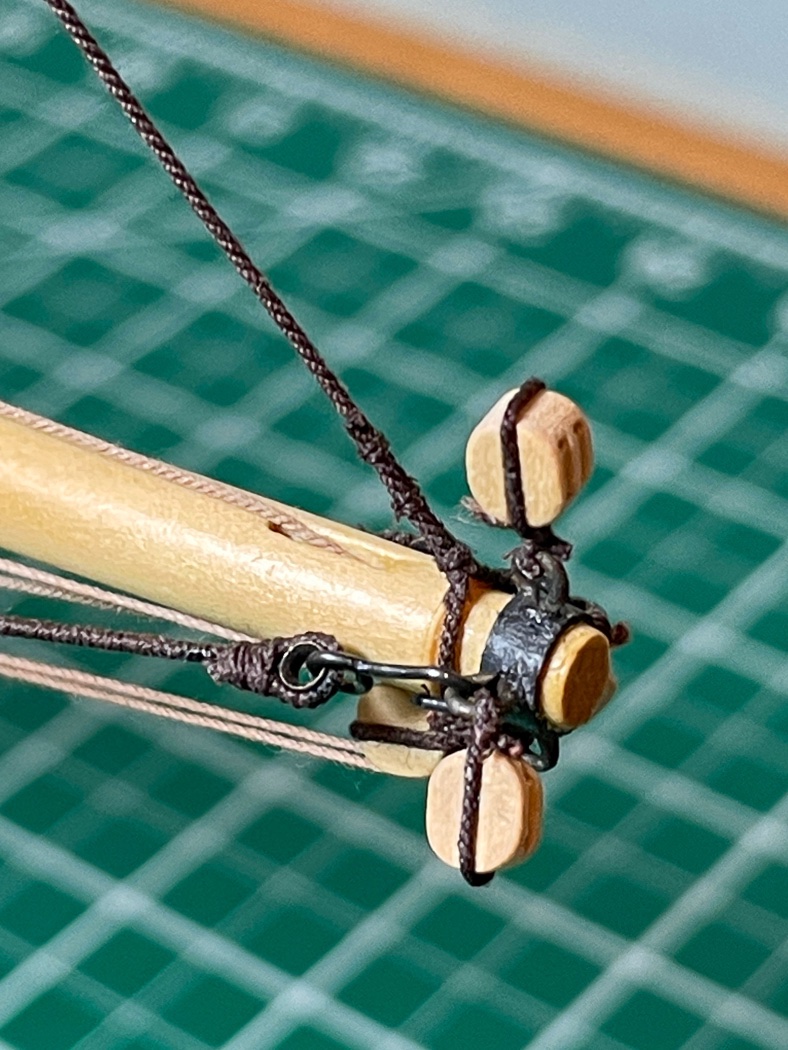
These can’t be done until the ratlines are complete they thread through the ratlines (for me the second and third) following a straight-line from the trees to their belaying points on the channels. Done with .35 dark brown rope looped seized in a loop at the topmast they end in ¼ blocks after being glued to the slots at the ends of the cross trees. It's important to get the line snug without being tight, the topmast is a relative toothpick and easy to bend. I glued both into the slots of the trees at the same time, tricky but helps keep an even tension. I used .012 light brown tackle starting from another ¼ block seized to a hook and to eyebolts in the channels. Seems easy enough and it should be but I must say I had a lot of “fiddling” to do to get them even, the right height, and the tackle seized back onto itself (like the main shrouds) while working between the ratlines. Patience and perseverance in abundance is called for, the first which I’m always wishing I had more.
Topmast Stay
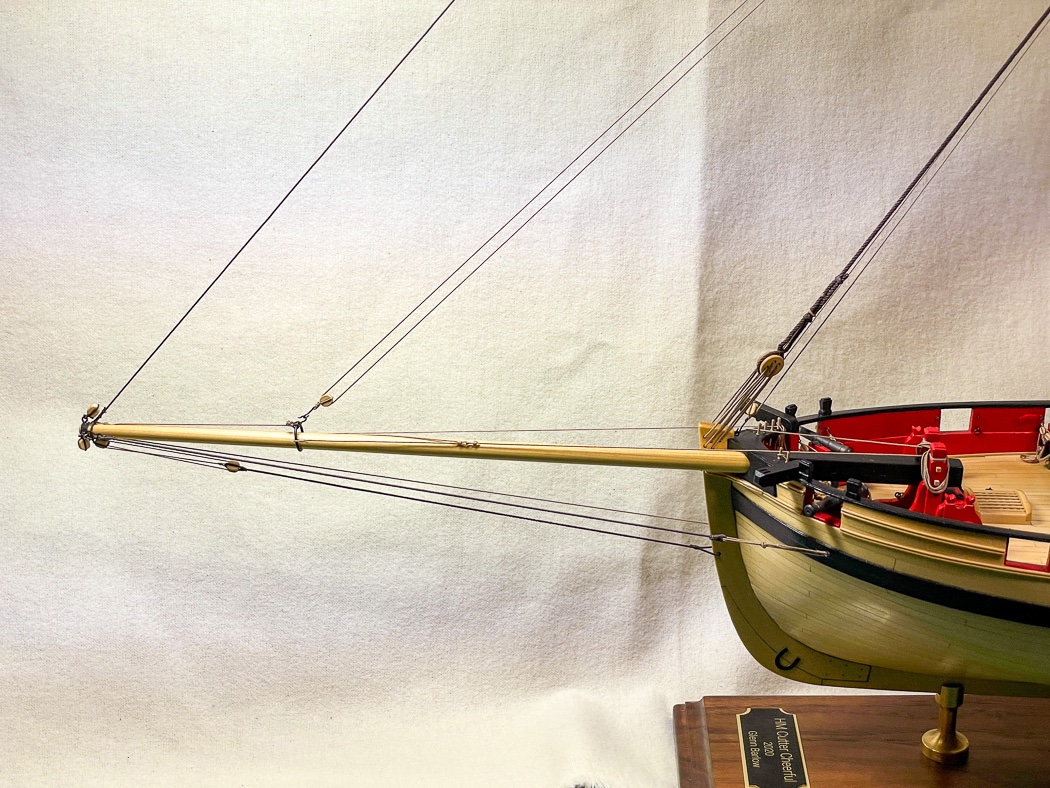
It’s a bit difficult getting a good photo of this long run of .018 brown rope. I didn’t have the light right for and my temporary off-white backdrop has fold marks. I just hang a piece of cloth behind and tacked over the window for quick and easy progress photos, not how I formally shoot white background photos on rolled white paper. I’ll do better for finished photos (though at the moment my stands have been turned into an inside tent for my granddaughter, a far better use for them). It's made from lace and pink string lights, she asked for it the first day of her summer vacation and of course that's what I did.
Anyway, the stay is seized at the bowsprit, I elected to match the main stay by leaving the seizing long then securing the extra length with two clove hitches. I thought it gave it a more finished look.
The stay runs from there through a 3/16 block at the topmast and dangles about 140mm (really to where I thought it looked good) from the deck. A 3/16 block is seized with .018 tackle which runs through another 3/16 block seized to a hook (I’m getting pretty good at knocking hooks out from 24 gauge wire) into an eyebolt at the base of the mast then back through the upper block and finished off at a cleat on the mast.
The plans do a great job of showing what rope and blocks to use in a table, how the run should look and includes an easy to follow belay map of the deck. I like sorting it all out from plans to model. If I haven’t mentioned the 3 sheets of plans are very well done and an excellent roadmap throughout the build.
Topmast Backstays
Chuck notes in the monograph while these are included in the plans in actuality they are rarely used and so are optional to install. I chose to include them because they provide a little balance to the stern and because I didn’t want the third outside metal strap left empty. Besides who doesn’t want to run more string about the boat. They consist of a long length of .018 brown line looped and seized at the topmast with ¼ blocks about 130mm above the deck where .018 light brown tackle is carried down to another ¼ block & hook connected to the third metal strap on the outside of the hull, back up to the block then finished at a cleat inside the bulwark. All of this is shown nicely on the plans. I have not tensioned and glued either these or the main backstays. I have to move them out of the way to access the pin rails and mast cleats for the remainder of the rigging. For a similar reason I haven’t glued in the tiller yet, I need the working room for my hands. Once I’m finished the rigging for the yards I’ll come back to the tiller and gluing in these stays.
Standing Rigging
With that I have completed all of Cheerful’s standing rigging and 13 of the 14 chapter monograph. I now turn to the making the yards (back to the lathe and mill) and the remainder of the running rigging. My journey is almost complete.
Thanks for stopping by, as always I appreciate your likes and especially your comments. I hope you’re still finding the log enjoyable to follow.


 Remember a plank has to run smoothly from the bow rabit slot down the side, the angle there is tight. It looks like from the photos you have more to do at the bow. The transition from the second to the fourth bulkhead is also a challenge, maybe just the angles but it looks like the second is lowere than 1 and 3. Also the first gun port area can be tricky. Running battens, even actual planks over and over is time well spent.