No Idea
-
Posts
1,036 -
Joined
-
Last visited
Content Type
Profiles
Forums
Gallery
Events
Everything posted by No Idea
-

ancre Belle Poule 1765 by j.guydal
No Idea replied to j.guydal's topic in - Build logs for subjects built 1751 - 1800
Hi I'm very late to your build but I've just read through your whole post. What beautiful work you do - I'll be following from now on and congratulations on such a lovely ship. -
NAIAD 1797 by Bitao - 1:60
No Idea replied to Bitao's topic in - Build logs for subjects built 1751 - 1800
Beautiful work mate and I have to agree - this ship deserves to be displayed in a museum! -
Hi Allan and thanks 👍 I actually didn’t know there was more than one type but I’ve looked and I am using epoxy reinforced rods. They are very flexible and the fly boys use them apparently. However when you use short lengths it does become quite brittle but it sands just as easy as wood
-
The French used both iron nails and tree nails in their ship construction hence the iron nails are dark and the tree nails just blend in. I believe that English ships only used tree nails in their construction. At 1/24 scale this ship is roughly 900mm long 👍
-
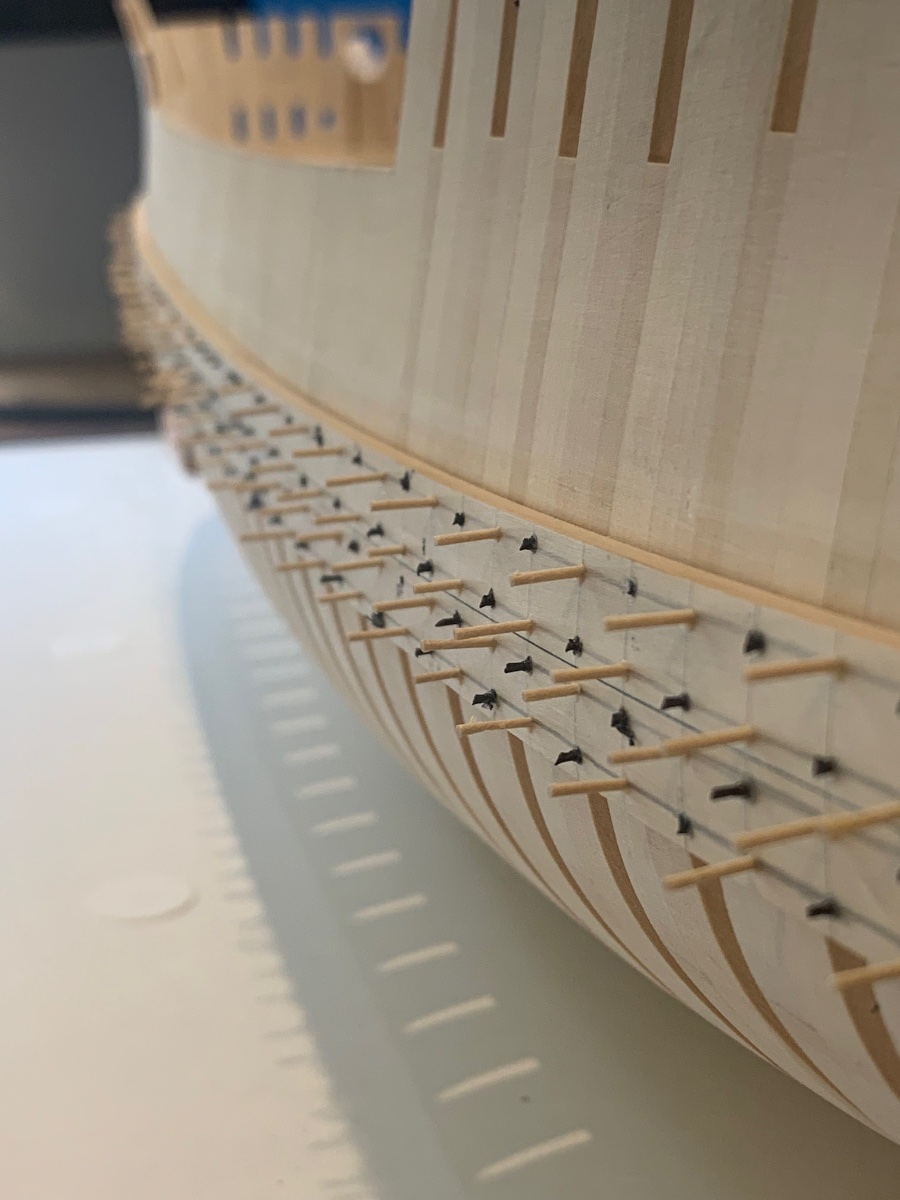
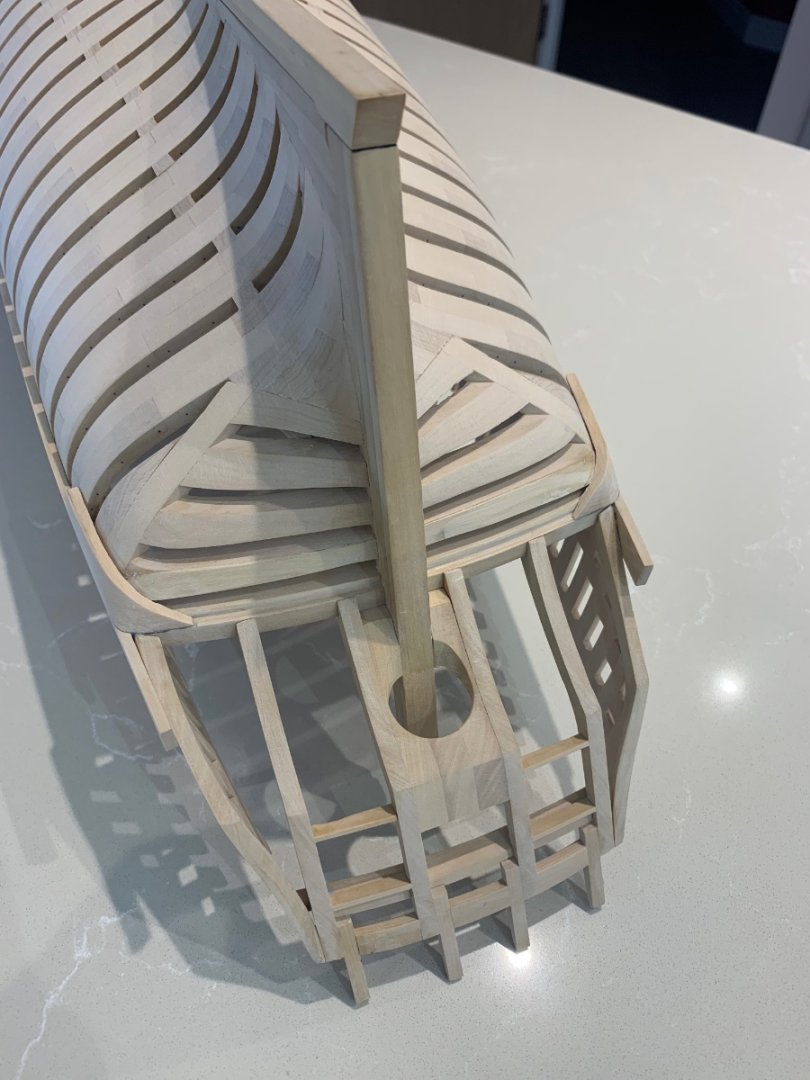
Just a small update The last plank is now in so the strake below the whale is complete. I've also placed the iron nails and tree nails in each strake too. The iron nails should be 0.75mm to be at exact scale but I downsized them to 0.7mm as this was the only size carbon rod that I could get. I did try a test piece using the 0.8mm rod that I already had but they looked way too big. The tree nails are 0.9mm and were made using vaddoc's technique utilising a needle and drill press - although I used a mill. The reason that the carbon looks a bit battered is because it is. I like to use a small hammer to make sure that they are correctly home. The results are ok - The nails look blacker than they will as the sanding makes them shiny. Once the matt shellack is applied the nails will go dull and the wood a darker shade. The tree nails just blend in really well and once again the shellack will make them just slightly more visible. So now the hull is much stronger I can proceed with cutting the frames away on the port side to make the interior visible. Its not something that I'm looking forward too but its got to be done. I'm also going to run another strake on the port side which will just frame the cut outs. I think that this addition will look nice! Mark


-
I'm still breathing - I never realised that building model ships came with a care package - but I'm grateful 🤣
-
Fantastic video Kevin 👍 I just mentioned to my wife that from now on I'm going to be sitting in front of the TV making tree nails.........she mentioned something about "over my dead body" but I think she really meant - no problem Mark you just carry on fella 😜
-
Slow is good - what's the rush? Take your time and just do your best.
-
Thats some good milling there mate - I think you've got this.
-
ancre Le Gros Ventre by ChrisLBren - 1/36
No Idea replied to ChrisLBren's topic in - Build logs for subjects built 1751 - 1800
Hi Chris I've just been reading your thread and your work looks really nice and accurate. Good luck with the restart and I'll follow along too 👍 -
Cheers druxey - I think they should be named the patience planks. It’s so easy to mess them up when you’re cutting free hand but when they fit - that’s a whiskey moment 🥃
-
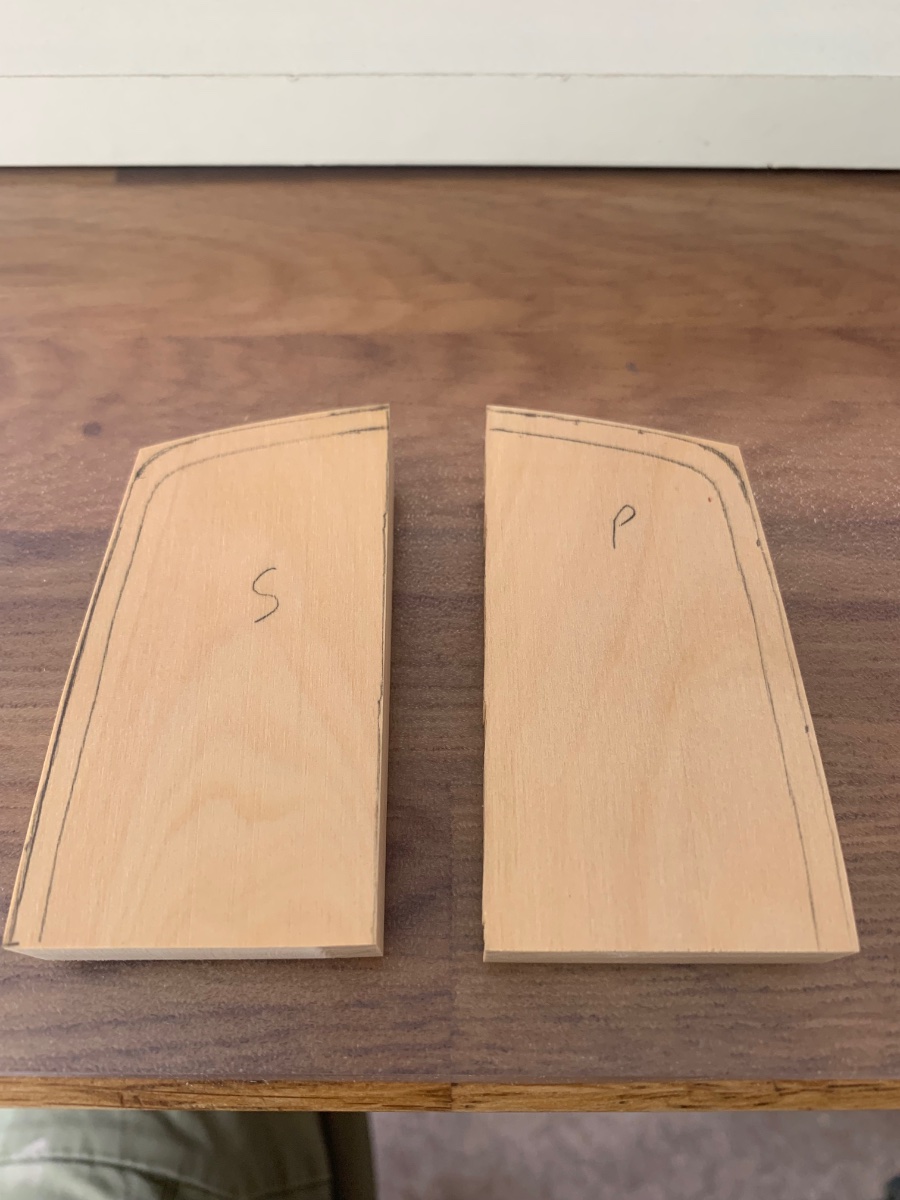
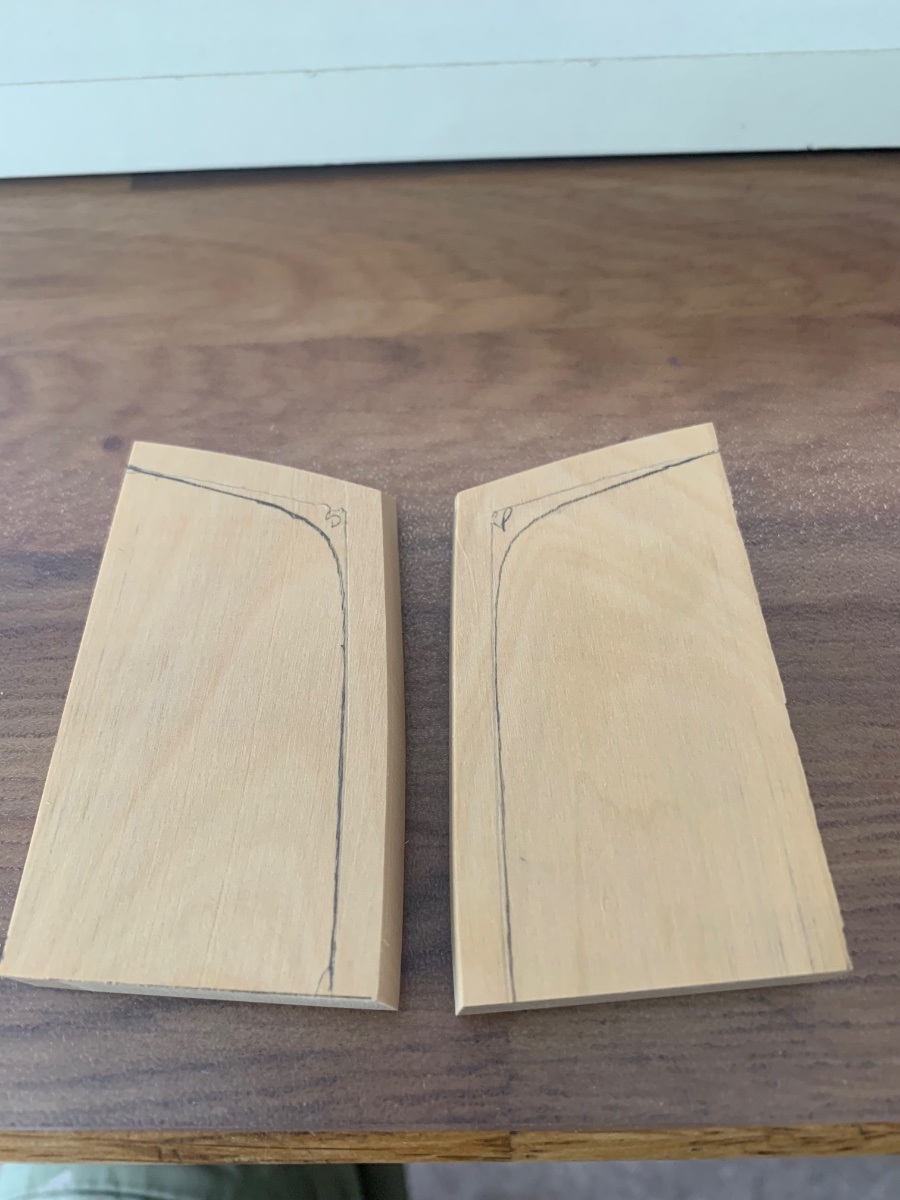
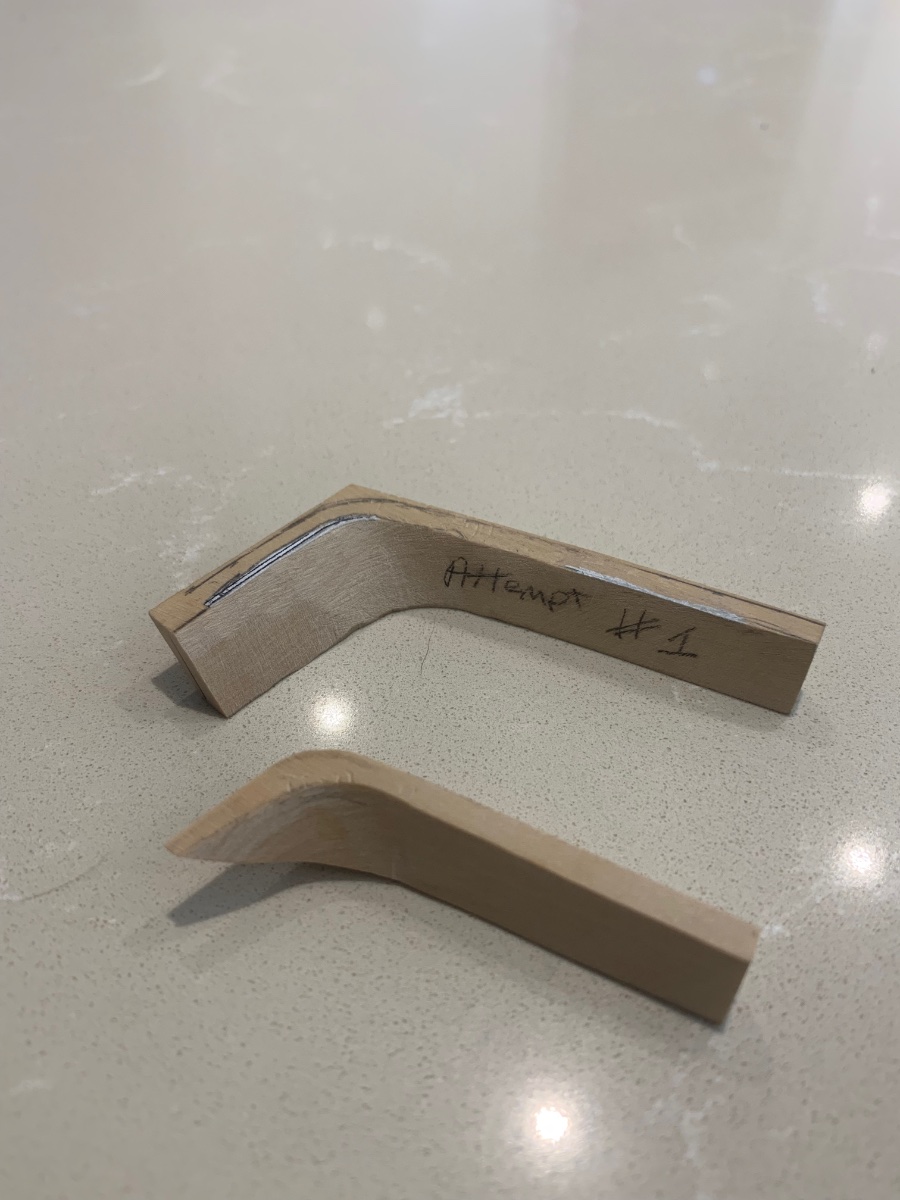
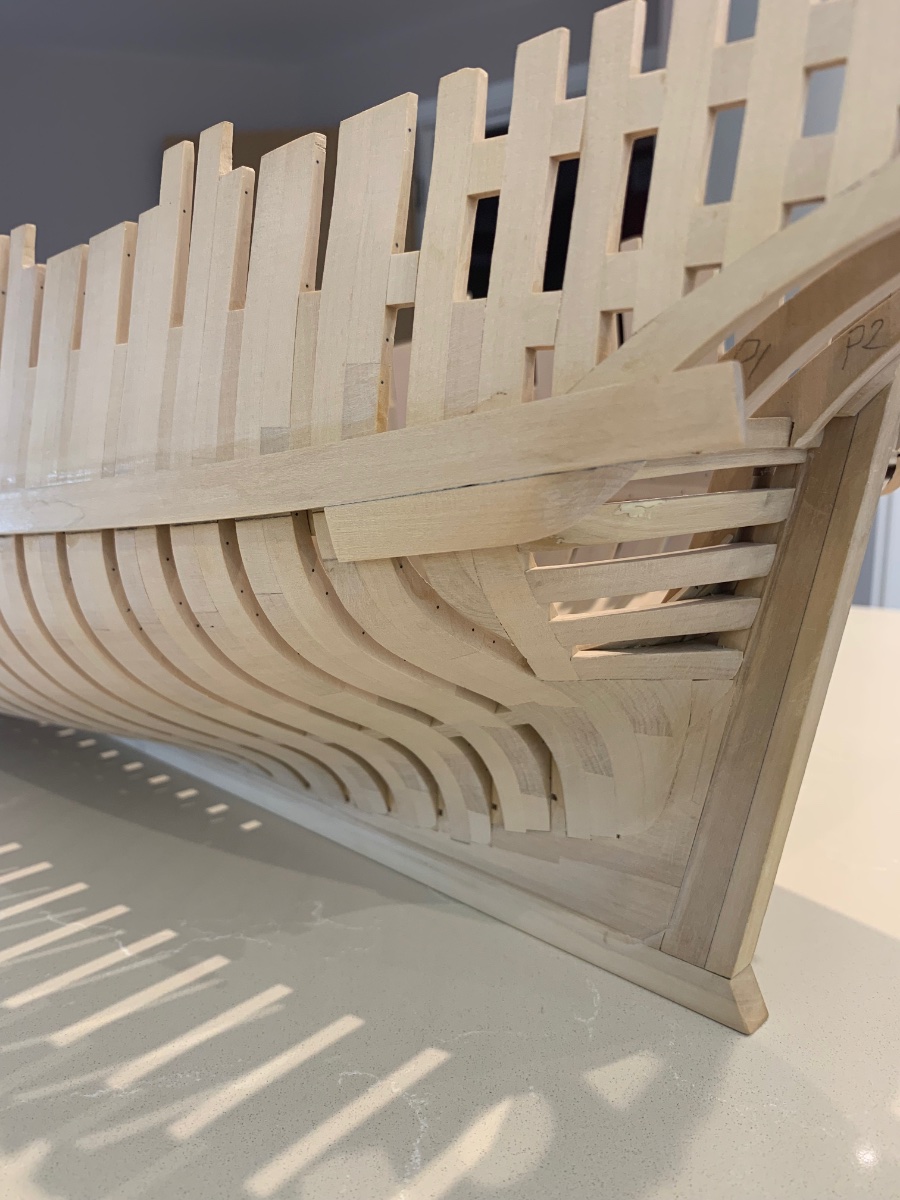
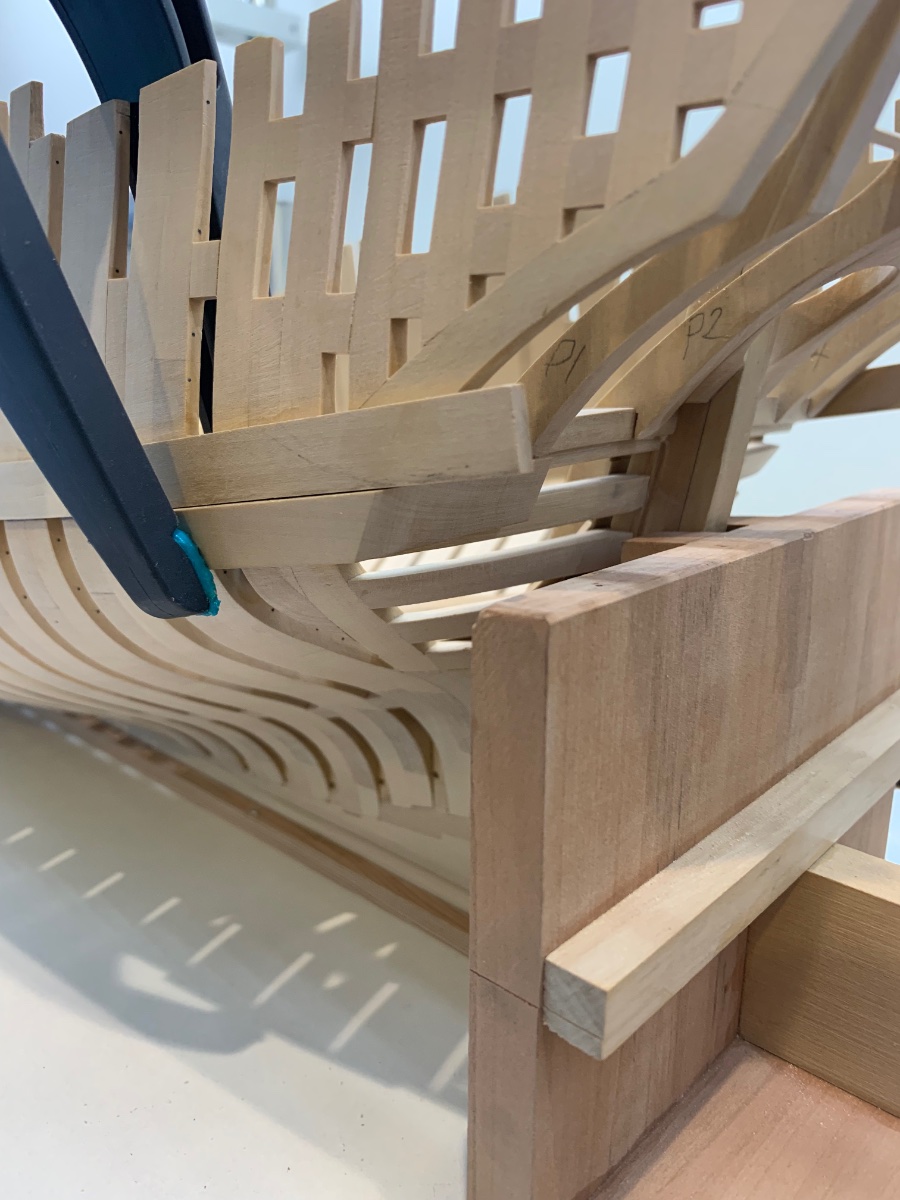
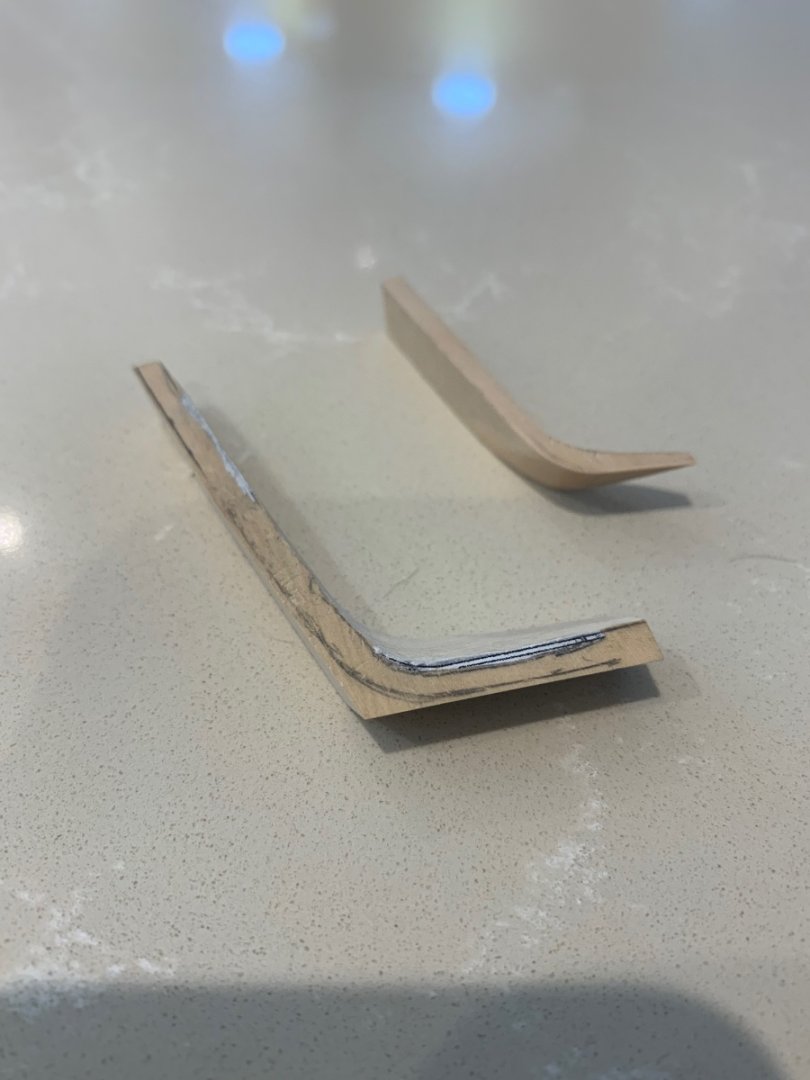
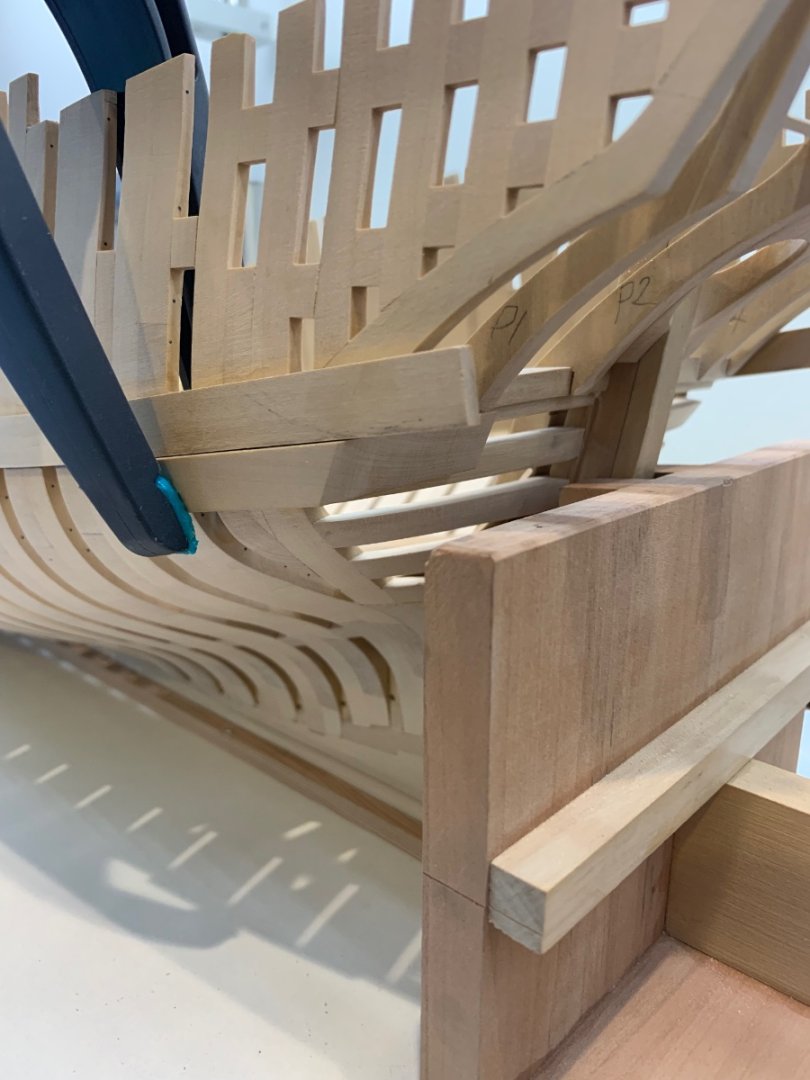
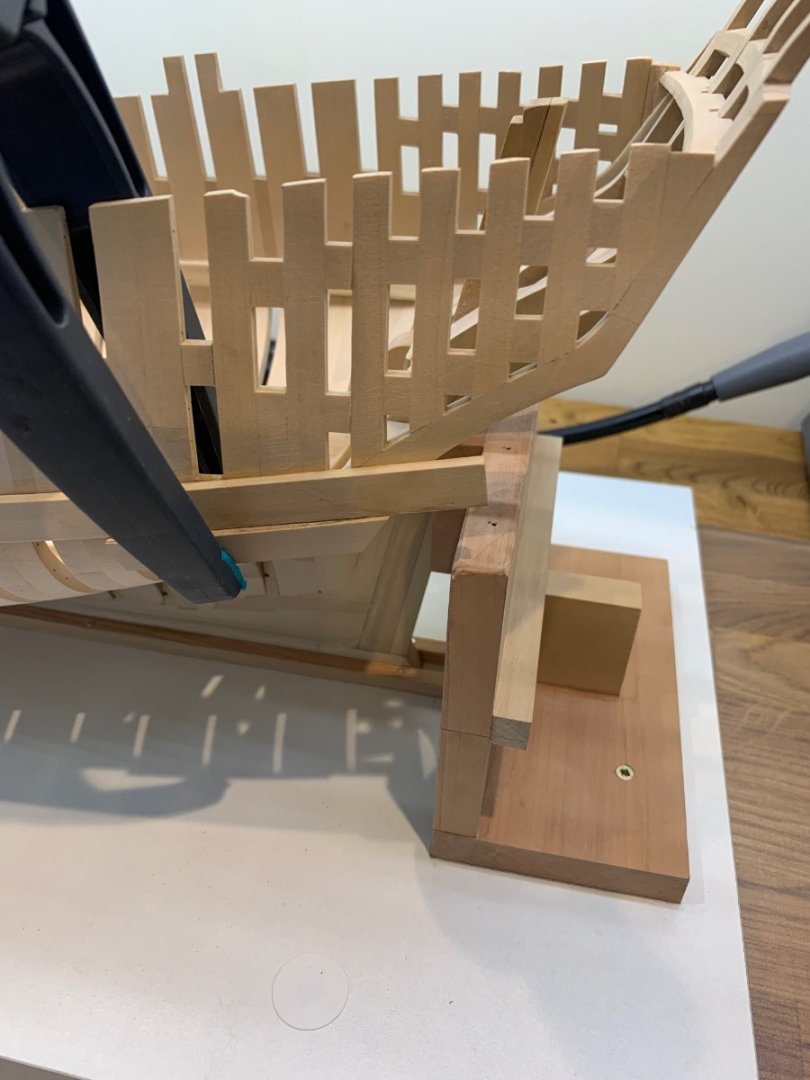
As they say - if at first you don't succeed 👍 Take two - I marked out both port and starboard sides this time as I was feeling a bit more confident. I also started by using the more accurate angles that I learnt from my first attempt. I also found it a lot easier to make them if I cut them to near enough their final size. Here's a comparison for my first go against the second attempt. Having less material to remove and a smaller contact area made the job a bit easier to see. And now both sides are on!! When you look at the results it doesn't actually look like much of a job but I bet there's about 6 hours of gentle sanding to get these to fit. They are a bit rough at the moment as I need to fit the plank below to get the final shape. Another job completed Cheers Mark


-
La Palme by Tobias - 1:36 - POF
No Idea replied to Tobias's topic in - Build logs for subjects built 1501 - 1750
That really is lovely work - I agree this is going to be a great model 👍 -
Hi Kevin - I don't know if this is what you and Gary are looking for but here is a link that gives you the OD and ID of needles. I guess that this is a good starting point. It's only a guide as in practice I have found that using a 16g needle gives me 0.9mm tree nails? https://www.hamiltoncompany.com/laboratory-products/needles-knowledge/needle-gauge-chart I also run my mill at about 1000 rpm and have found this to be the optimal speed. If you get burning try dropping the wood into water for 5 mins before cutting the tree nails as this has also worked for me too. Cheers Mark
-
Hi Kevin - I'm also trying this needle method and I'm getting great results thanks to the thread on here originally started by vaddoc. I have found that by taking his advice and using body piercing needles instead of hypodermic needle's the results are much better. Just google body piercing needles and you will see what I mean. Here's and example - Also I have found that just putting a 30 degree angle or there abouts on the end of the needles works great. https://www.ebay.co.uk/itm/252808332323?hash=item3adc8d0423:g:gfgAAOSwxEpYxC5Y&amdata=enc%3AAQAHAAAA8E%2BnzGprgTxciozHiEvBmvsFdXyWpfpBmyGeotGRlNuJL6v0ubwGUBsM%2B86sfQUiUGWDaSqhoMIFOErXTy86WmaGG%2BLBXBPfVNStypmSOx87Es3o%2BU2q5X0f9jl96uW9SC0AWN%2FYSlGTjcld34grvzItmoirt2gN60BKo%2FmDIAGZAKLqDLH7LgqBa2CM%2F7XXjCe%2BpOjBGVVSYfQRoym5X1d9mRoPY8vx%2Bm1pJn4AuNpNKqC%2B42hROWHrlxUTY%2BbK3VjJ9IhlGBuEMIxxBc31VapuRIjfopXurPuQWeQYA9wxg7A4TGyOZFRLWO3KC0%2Bz0g%3D%3D|tkp%3ABFBM9vSkytdg
-
Thats fantastic work - very impressive!
-
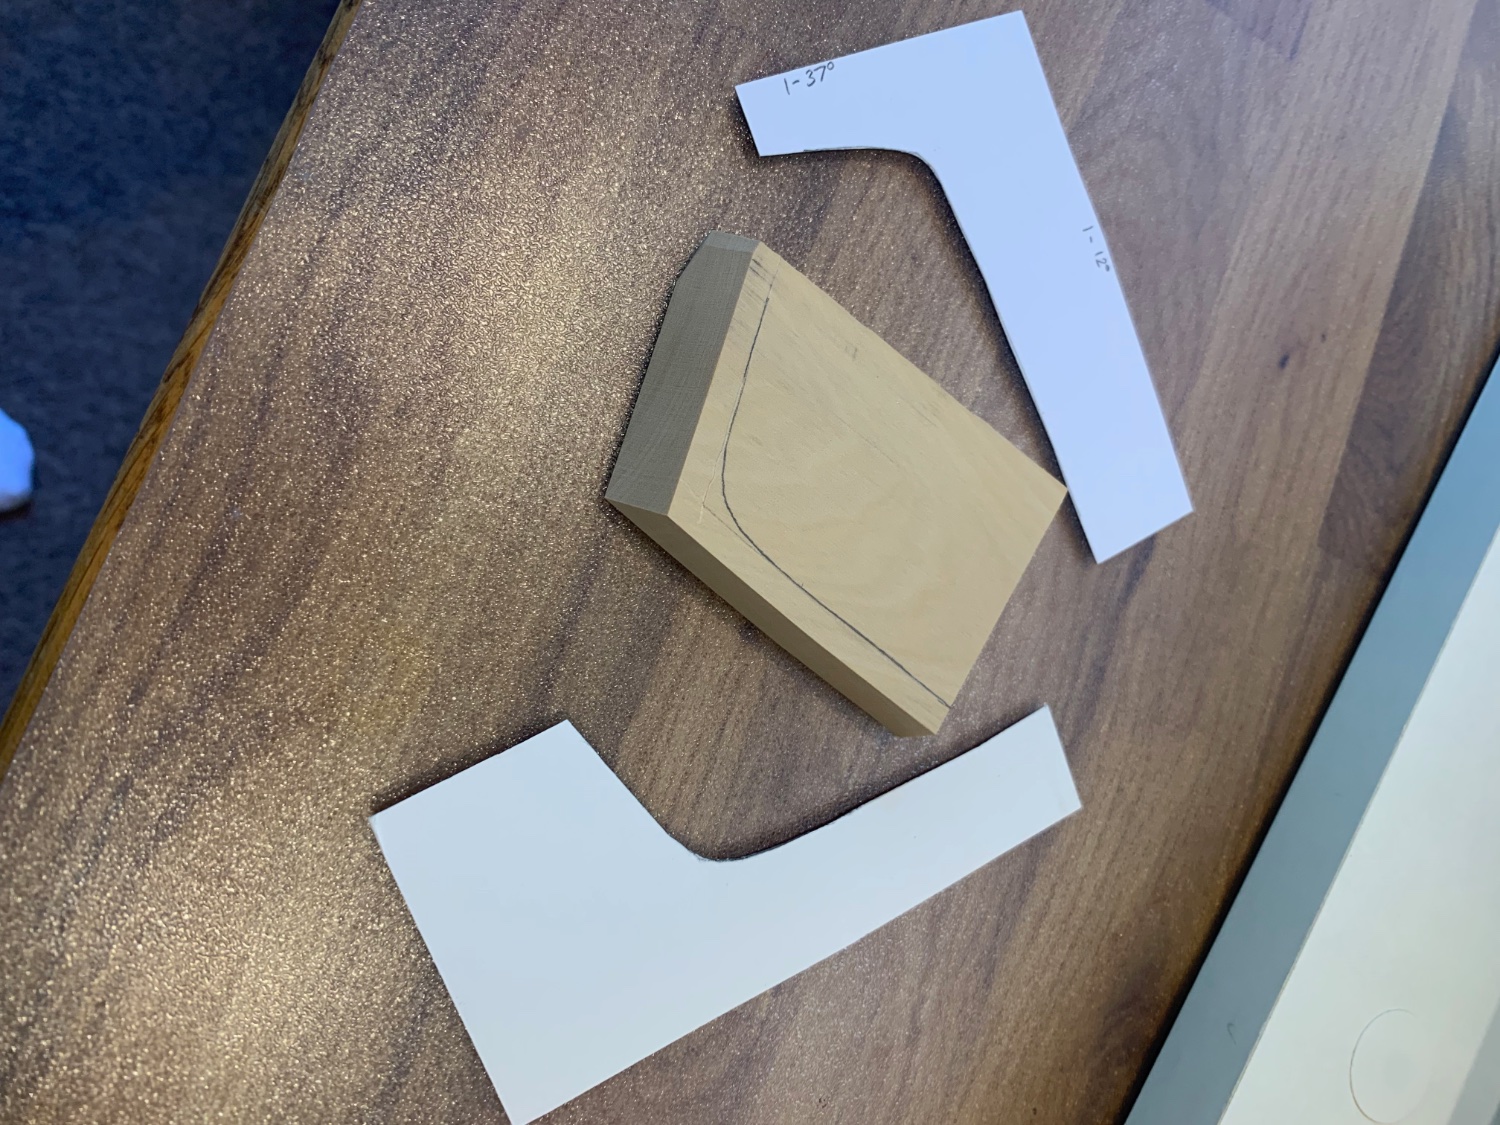
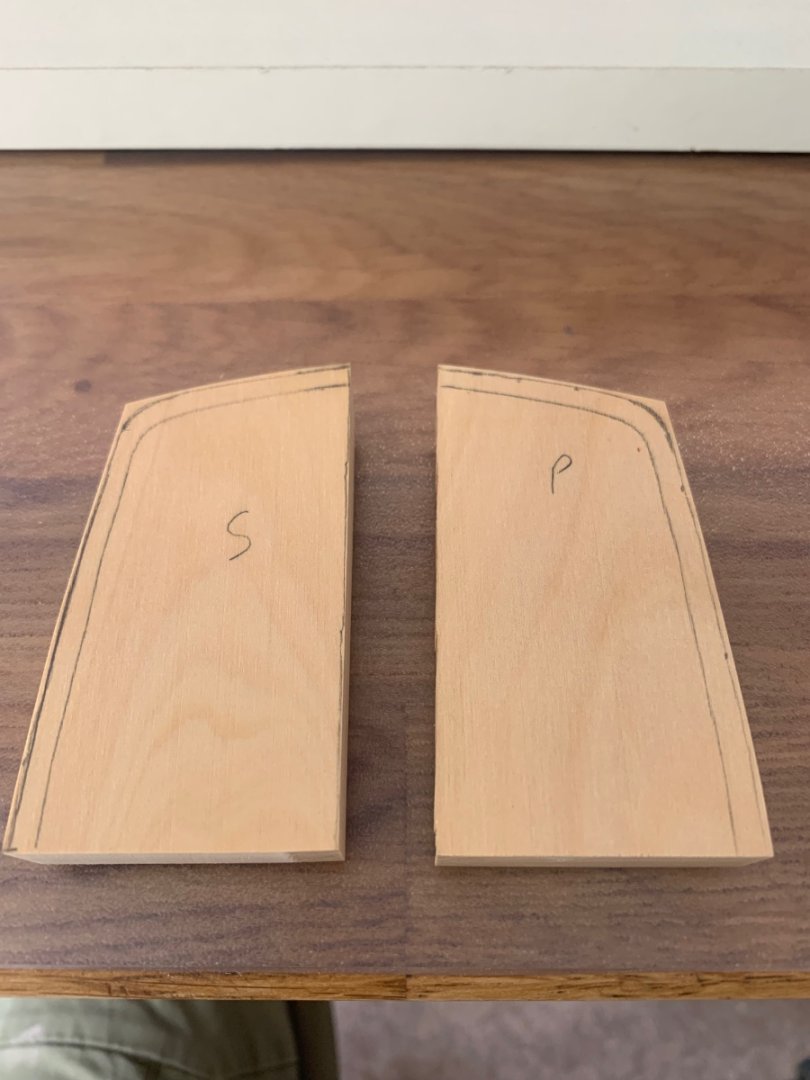
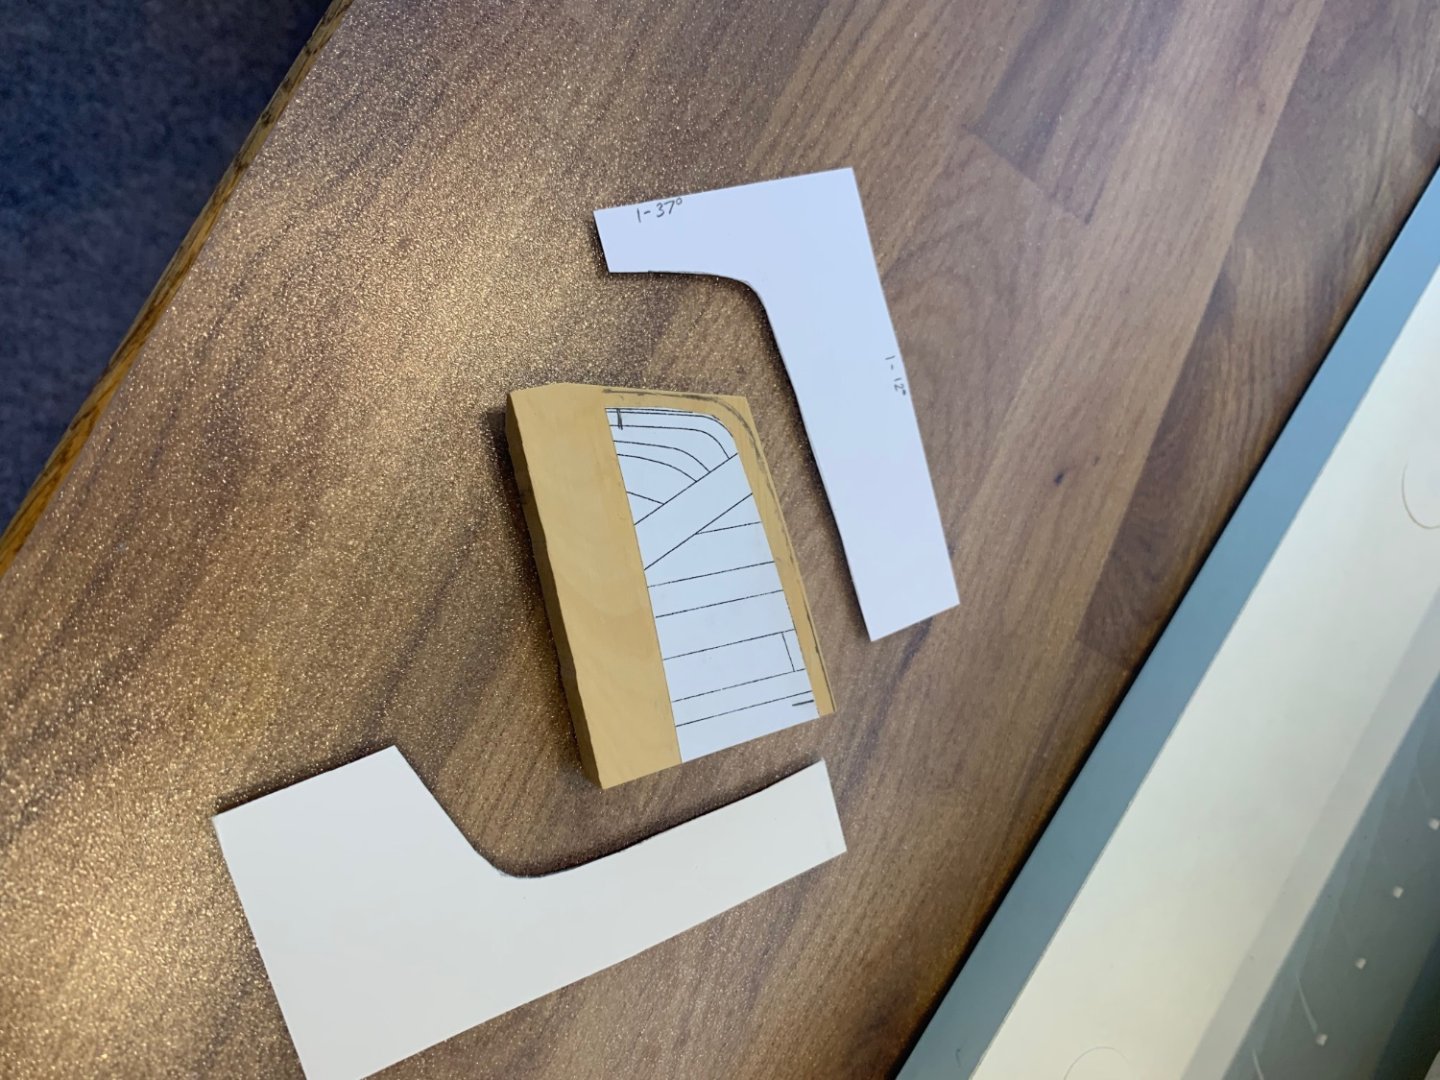
I've been having a go at making this plank and I am getting somewhere with it - I made up a couple of templates off of the drawings to get the correct shape of the plank. Its shape transitions which makes it slightly more awkward and I thought the best place to start would be to cut the outside angles. I guesstimated these using a slide bevel to be 37 degrees and 12 degrees. Anyway the result was attempt number one which doesn't fit anywhere near accurately enough but it has given me the correct outside angles which are 28 degrees and 7 degrees. I'll try another one tomorrow using my new angles 🙂 I think I'll get it right on attempt 4 or 5!! The nice thing is I know I'm on the right lines 👍 And I've just discovered how to insert pictures into posts - thats todays win for me 😜 - cheers Mark


-
Definitely - I use my Byrnes saw every day I'm working on this model for one thing or another. Best tool that I own and it flies through some of the thicker sections which on this model at 1/24 are sometimes 13mm thick. It just gives you that repetitive accuracy that helps to combat accumulative error.
-
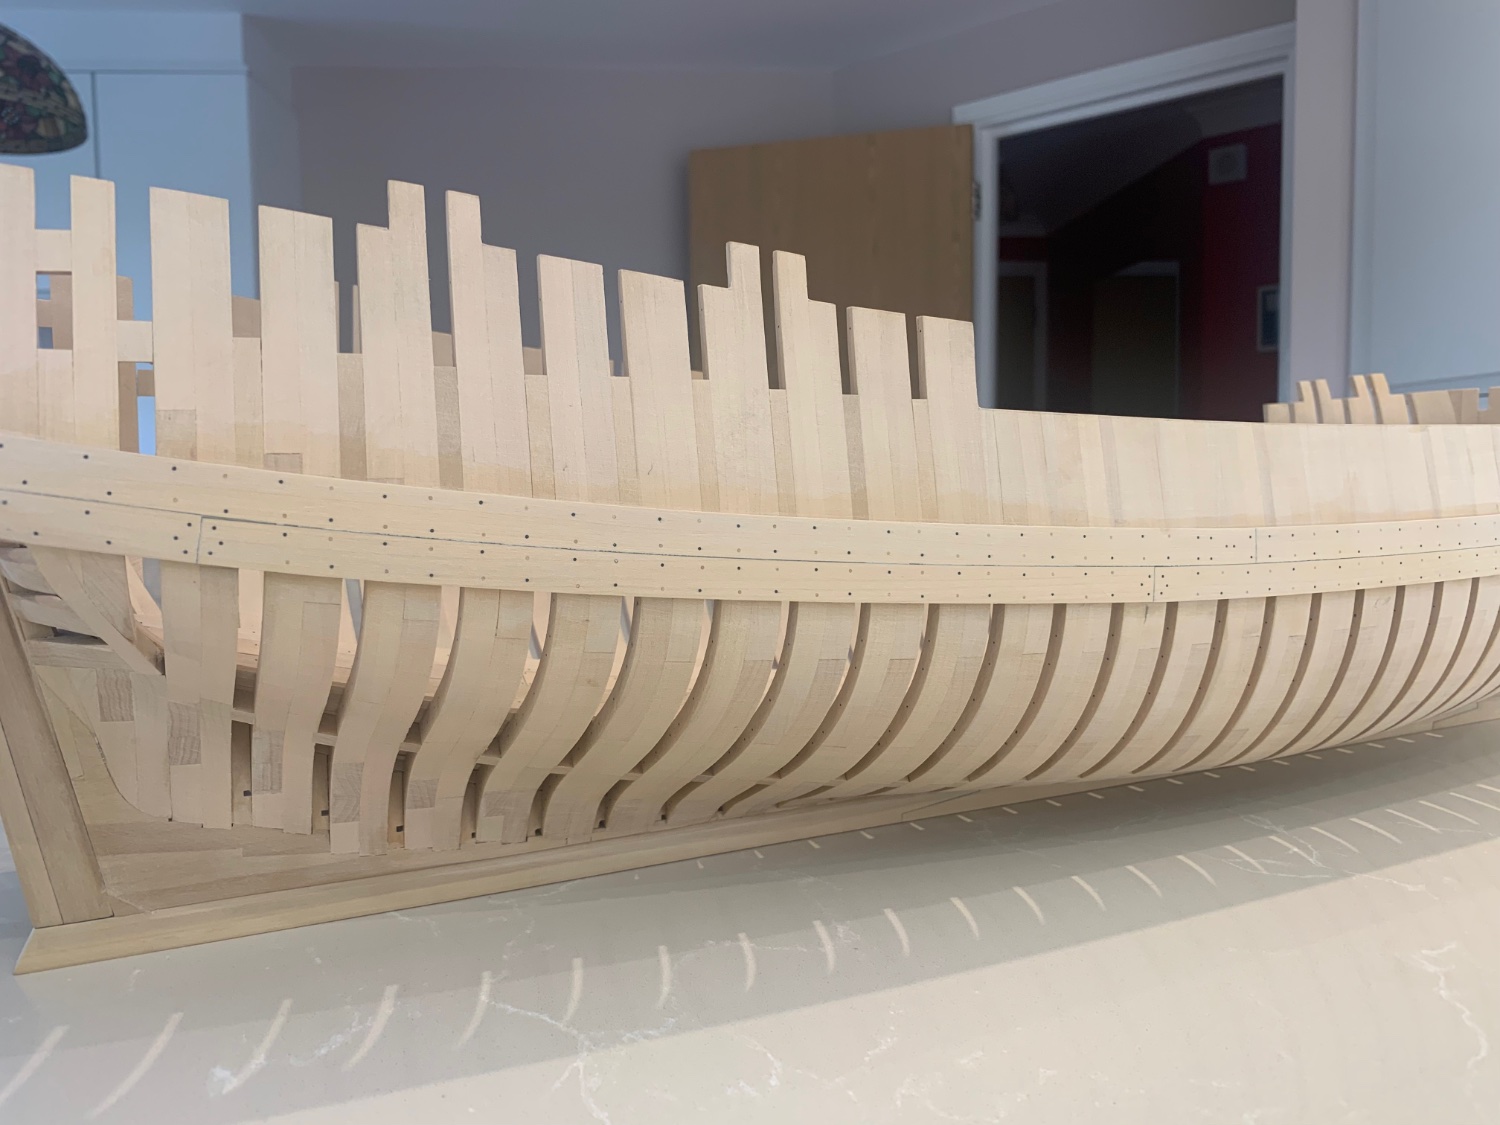
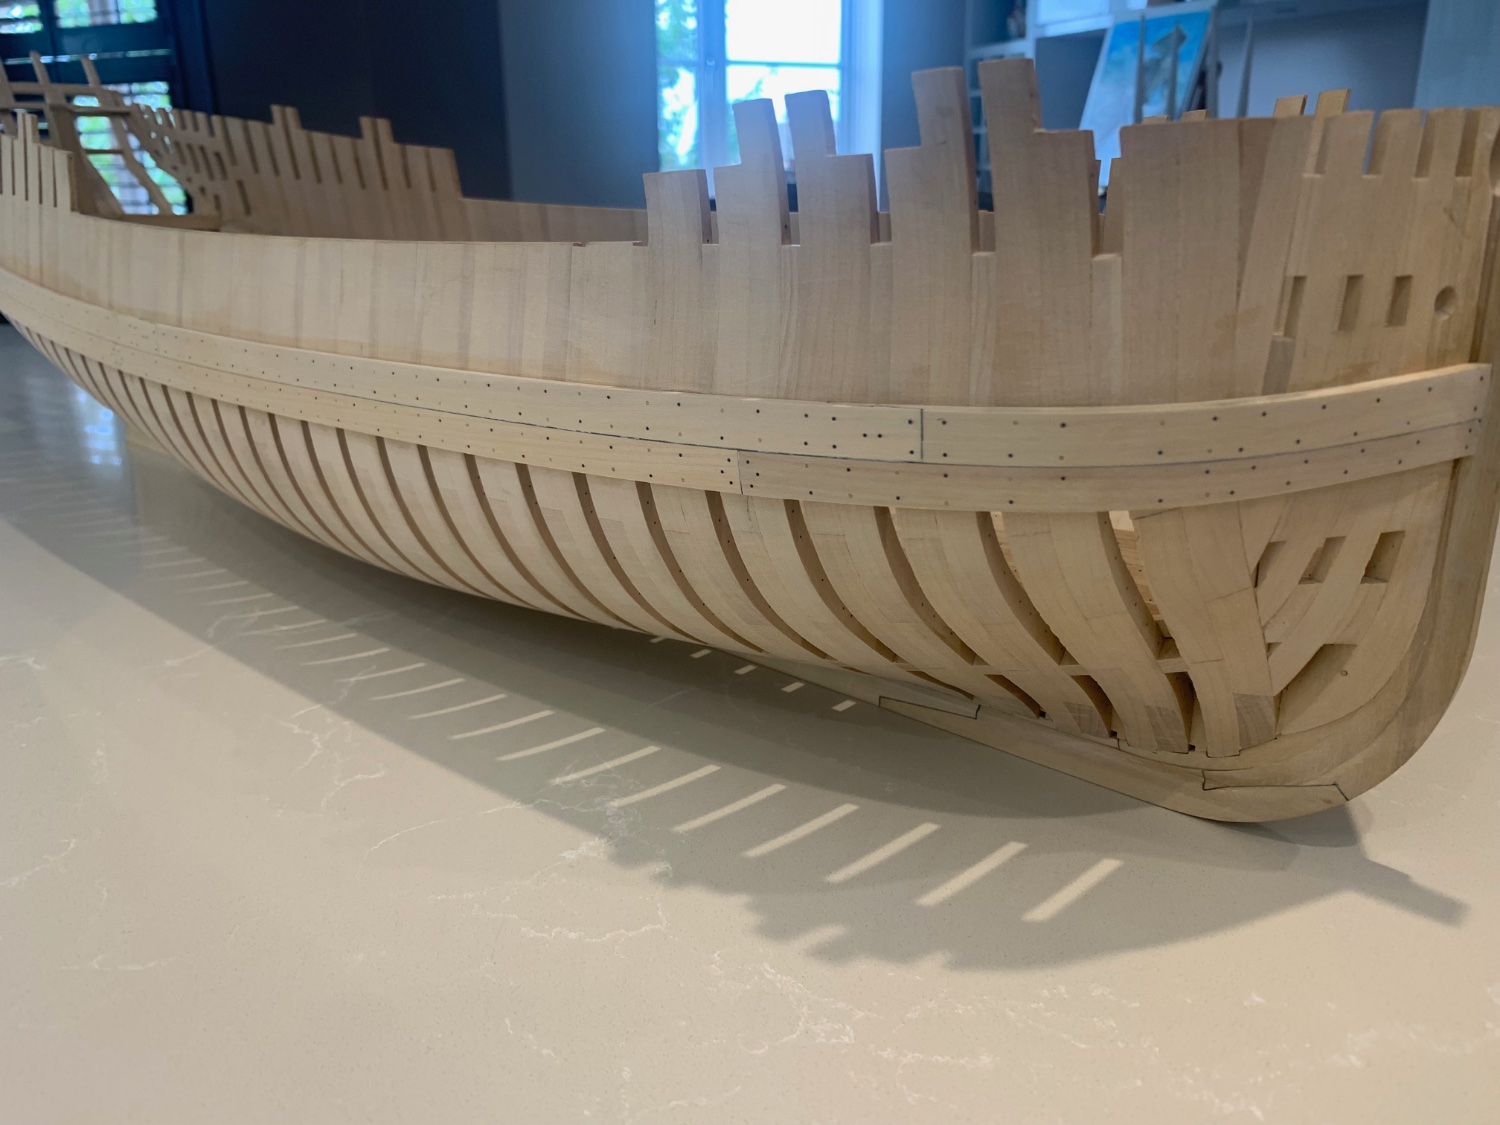
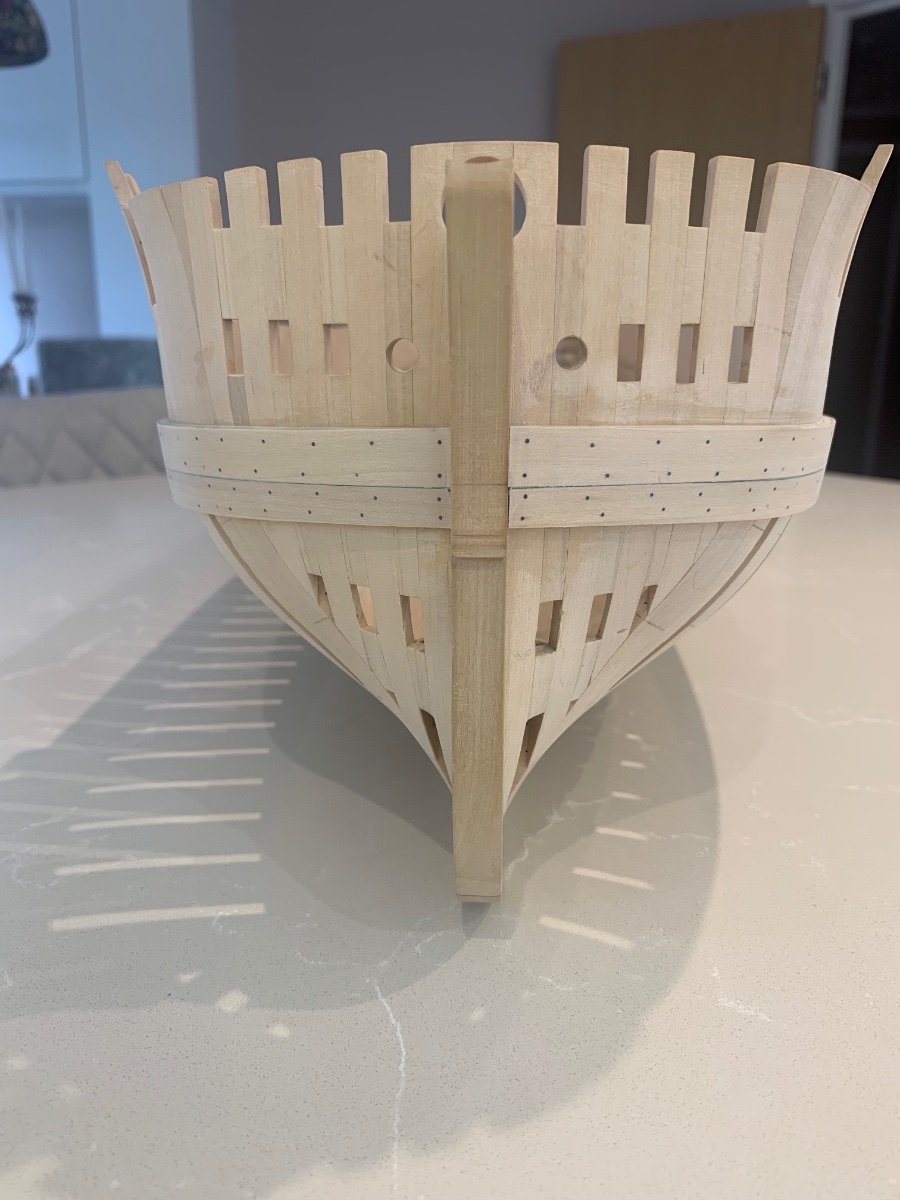
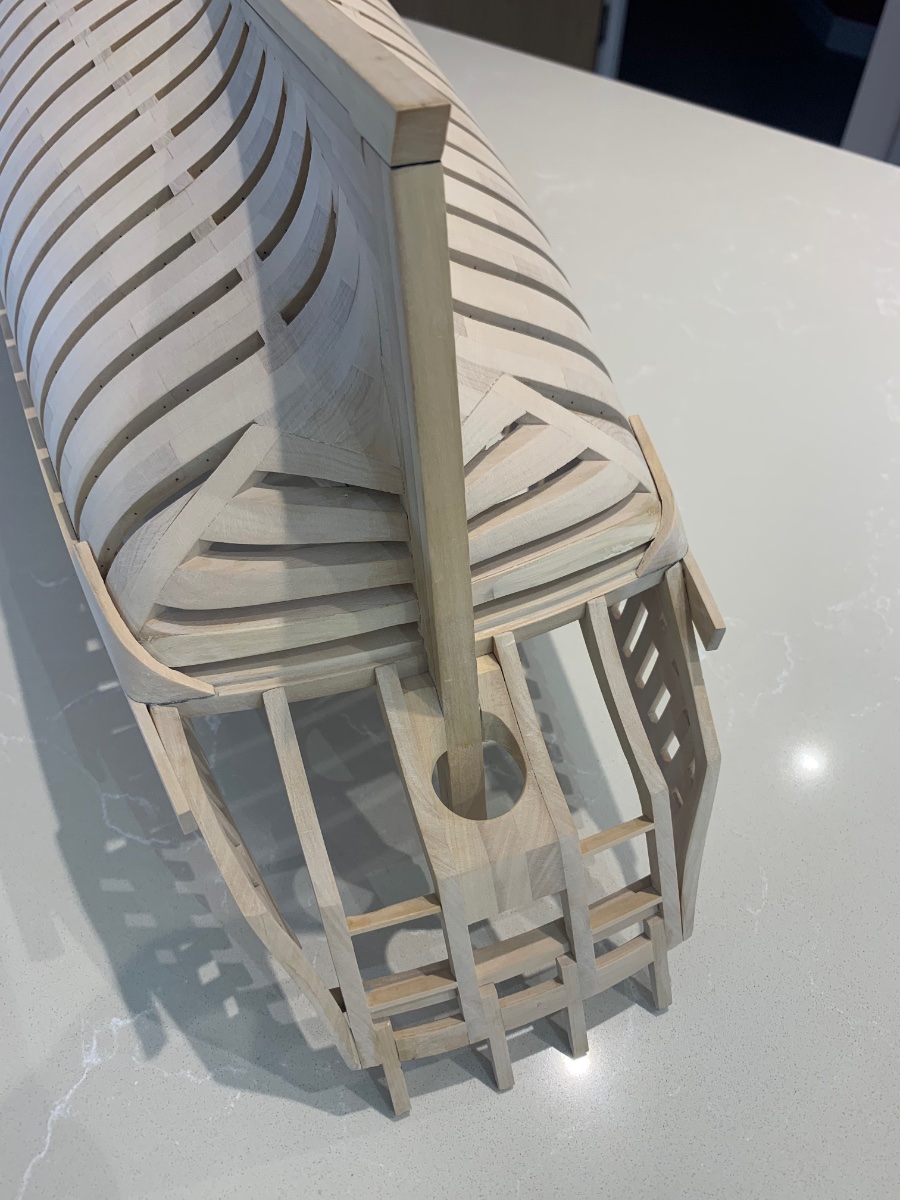
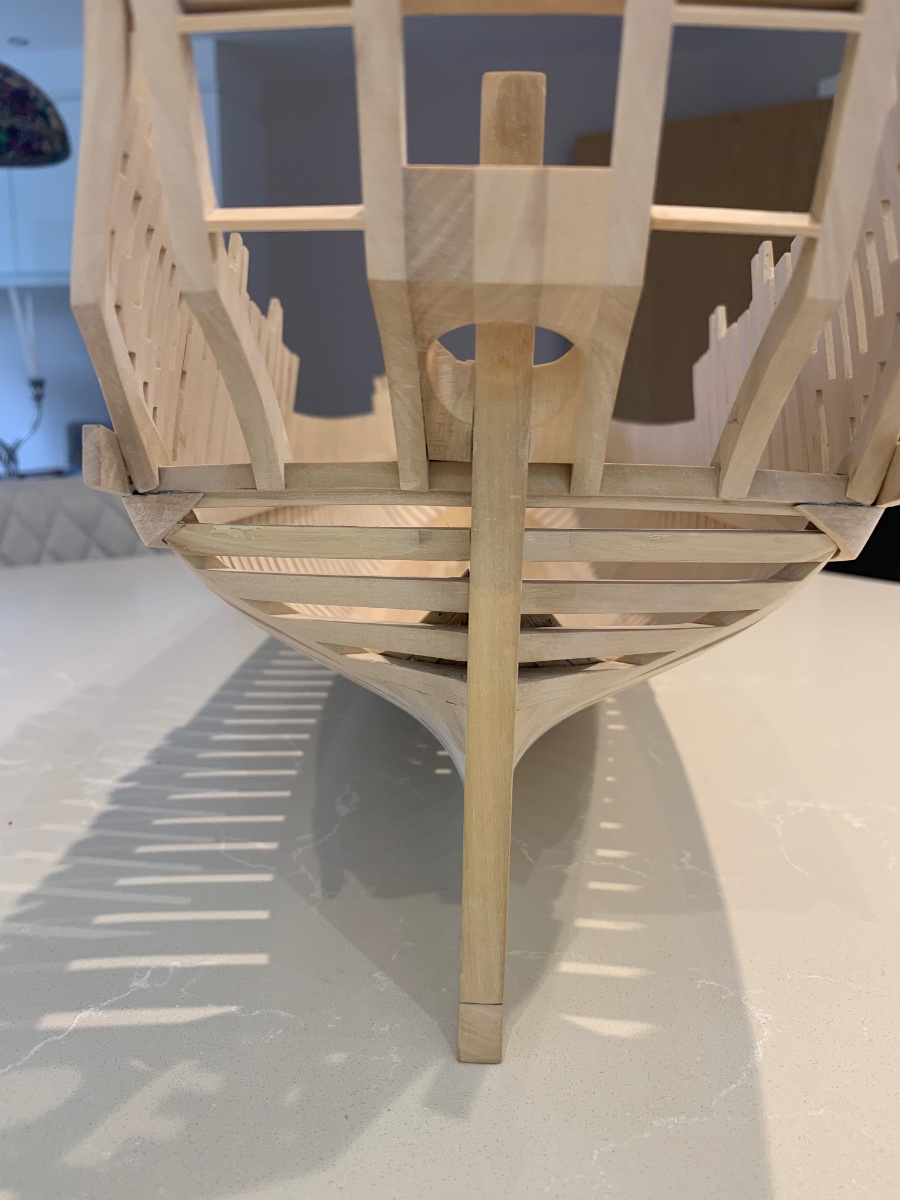
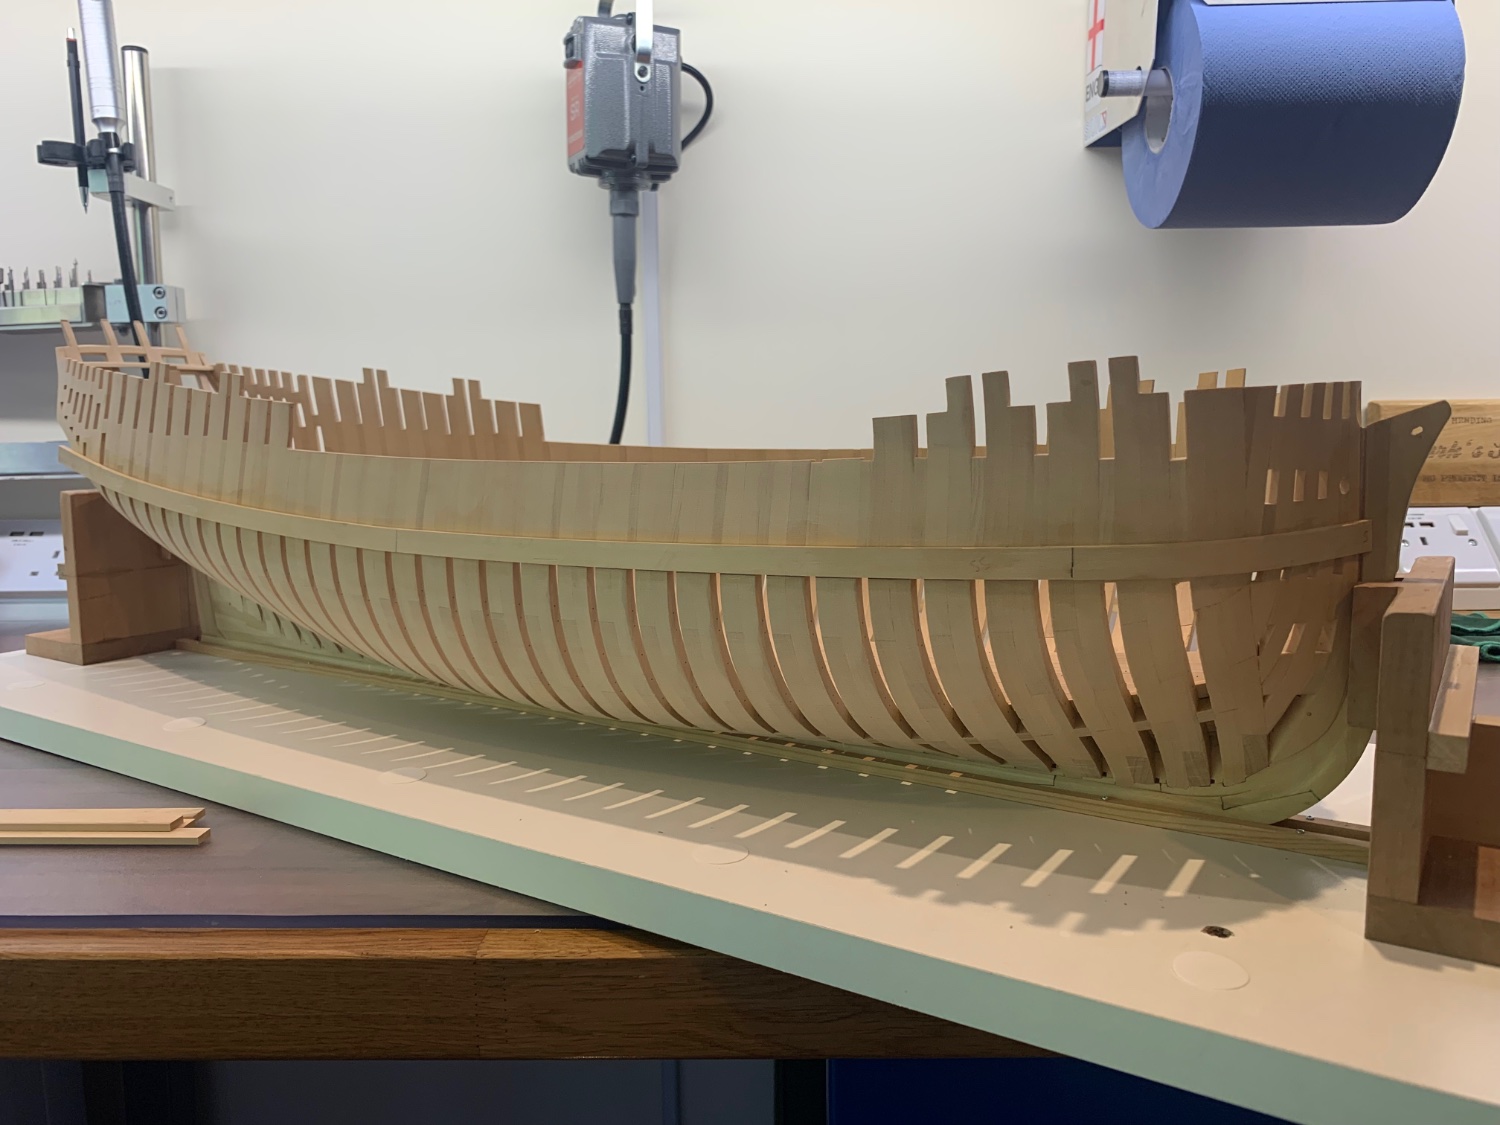
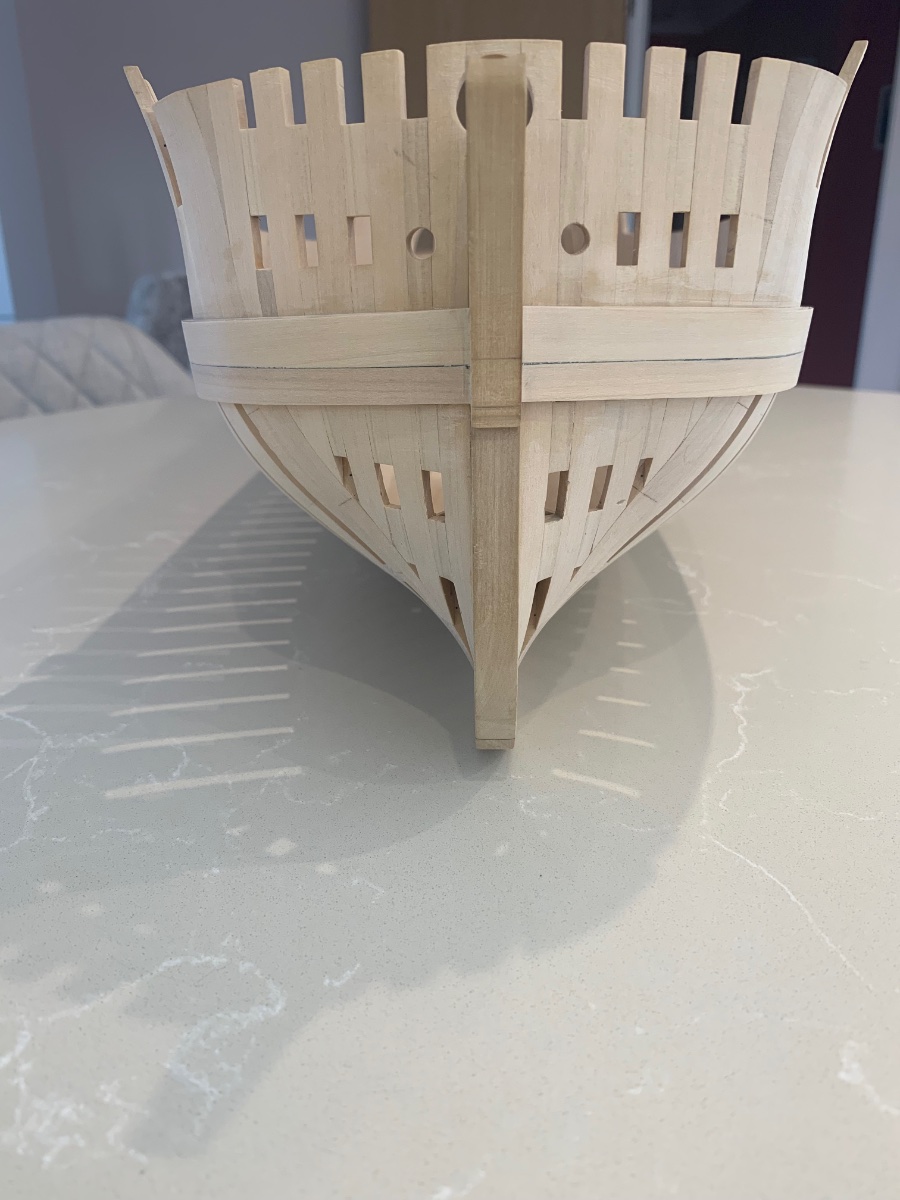
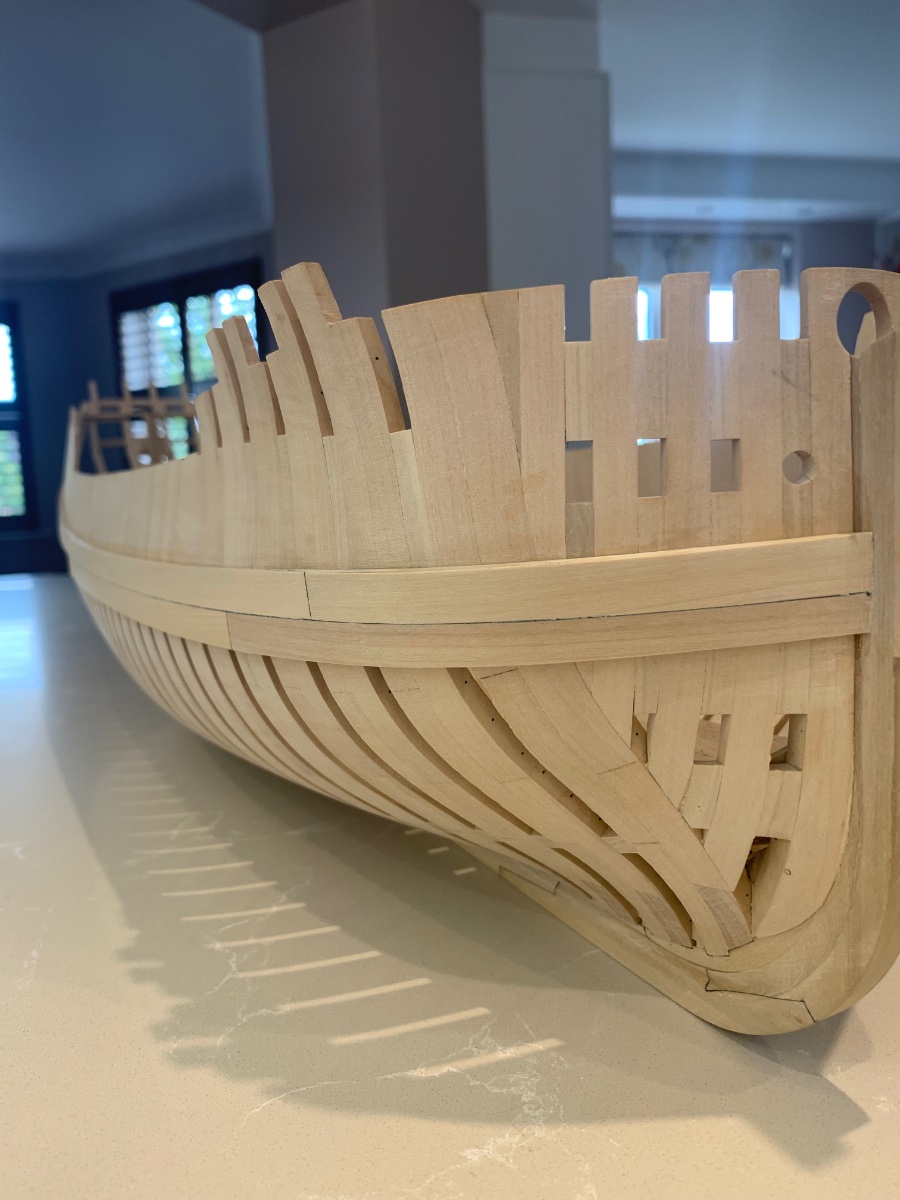
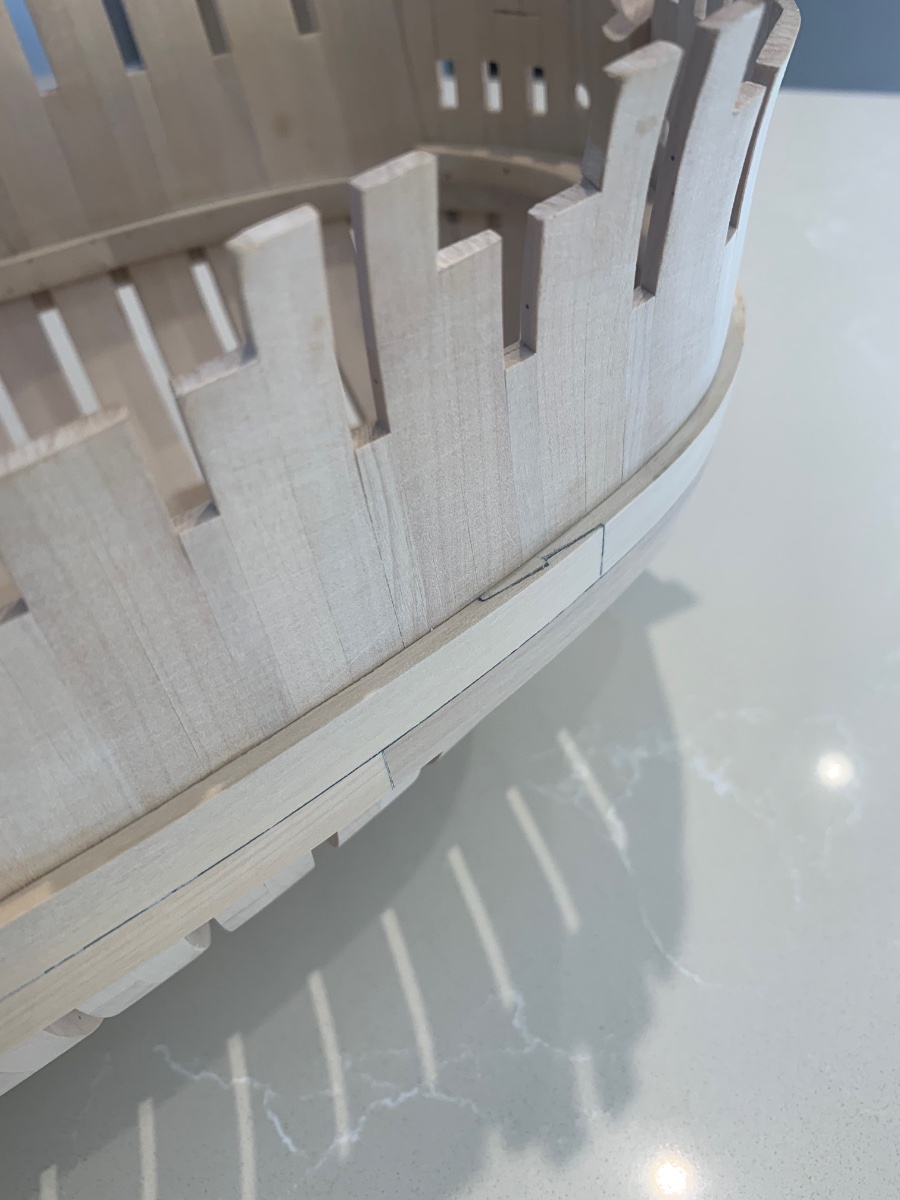
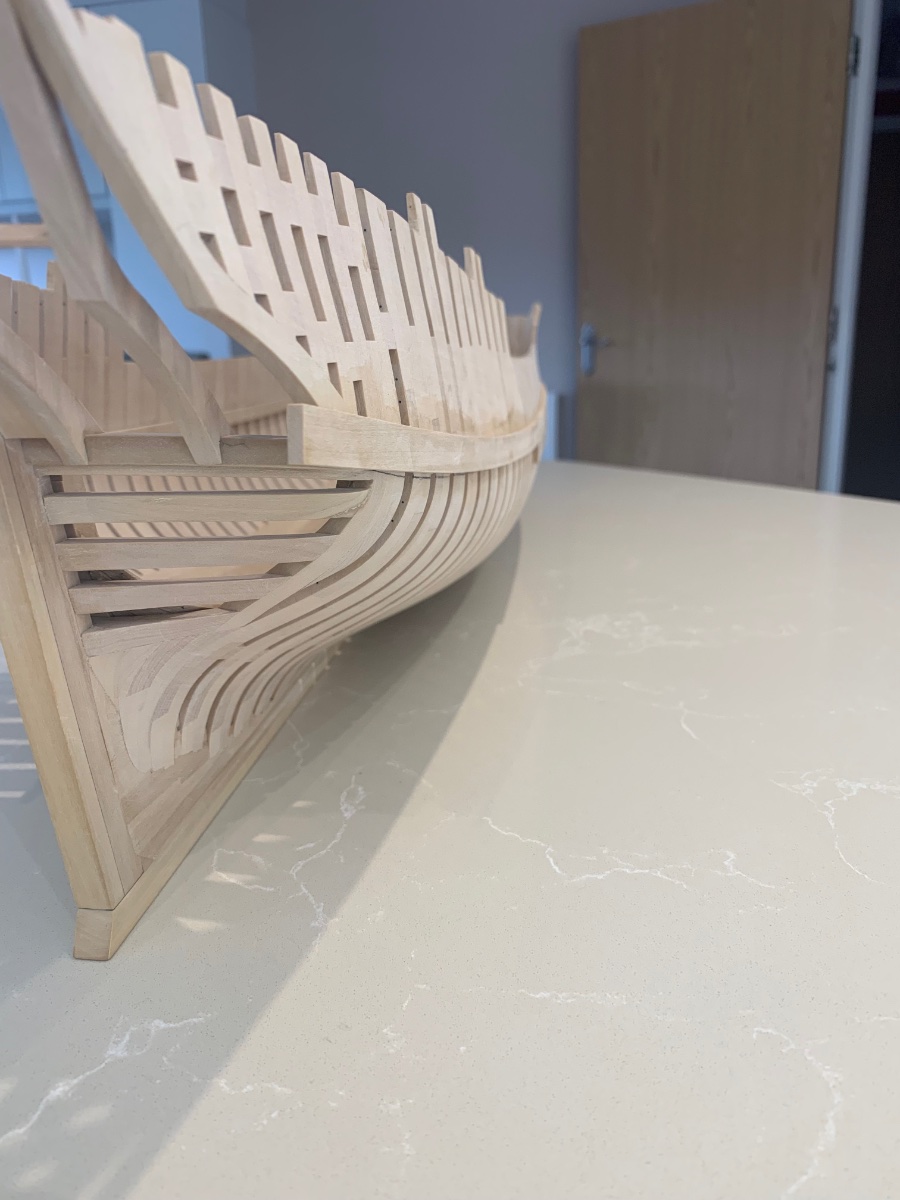
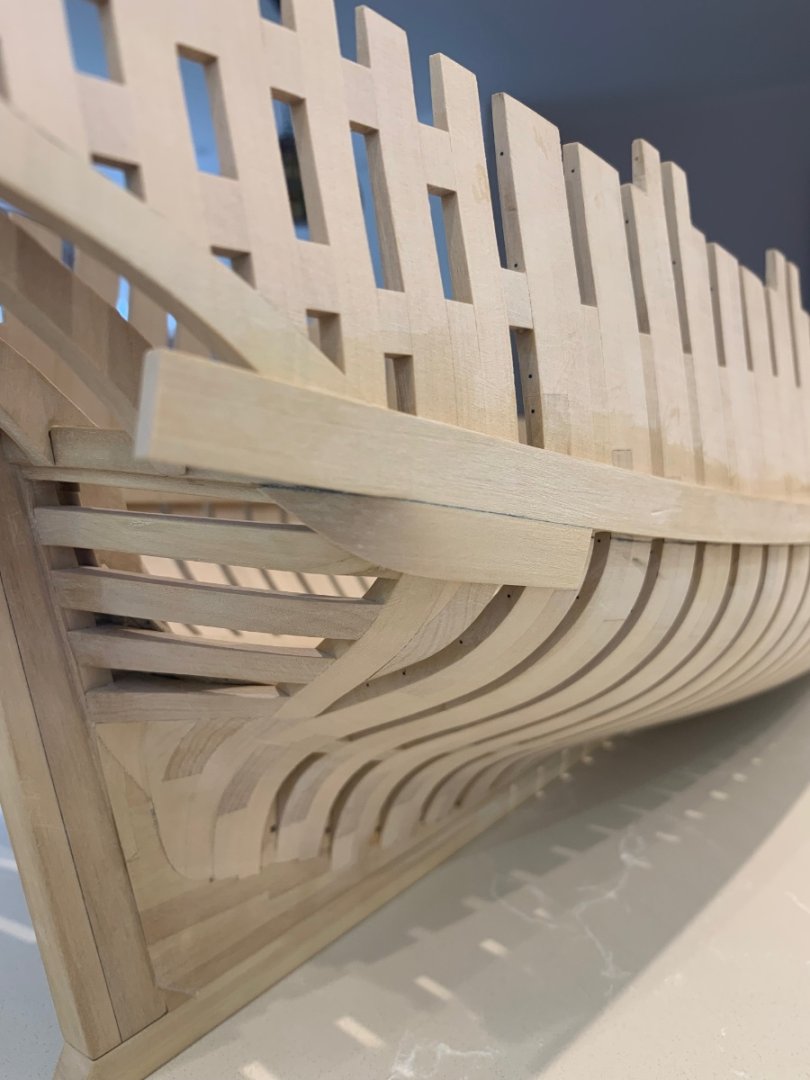
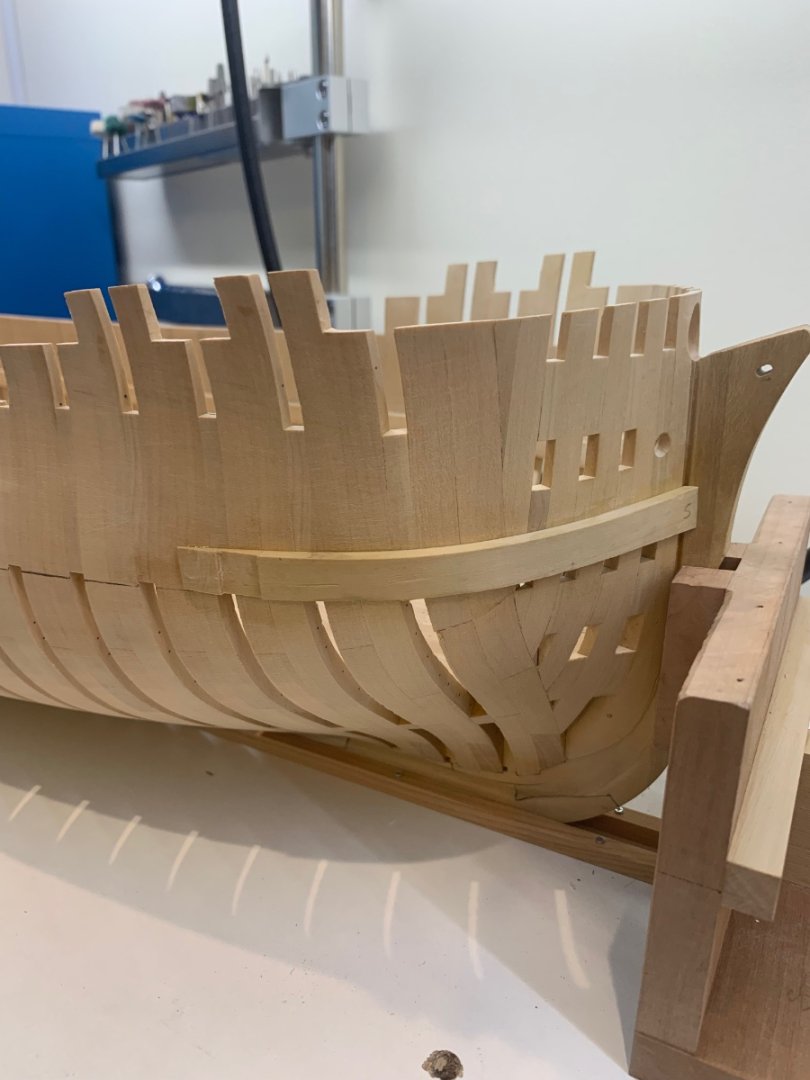
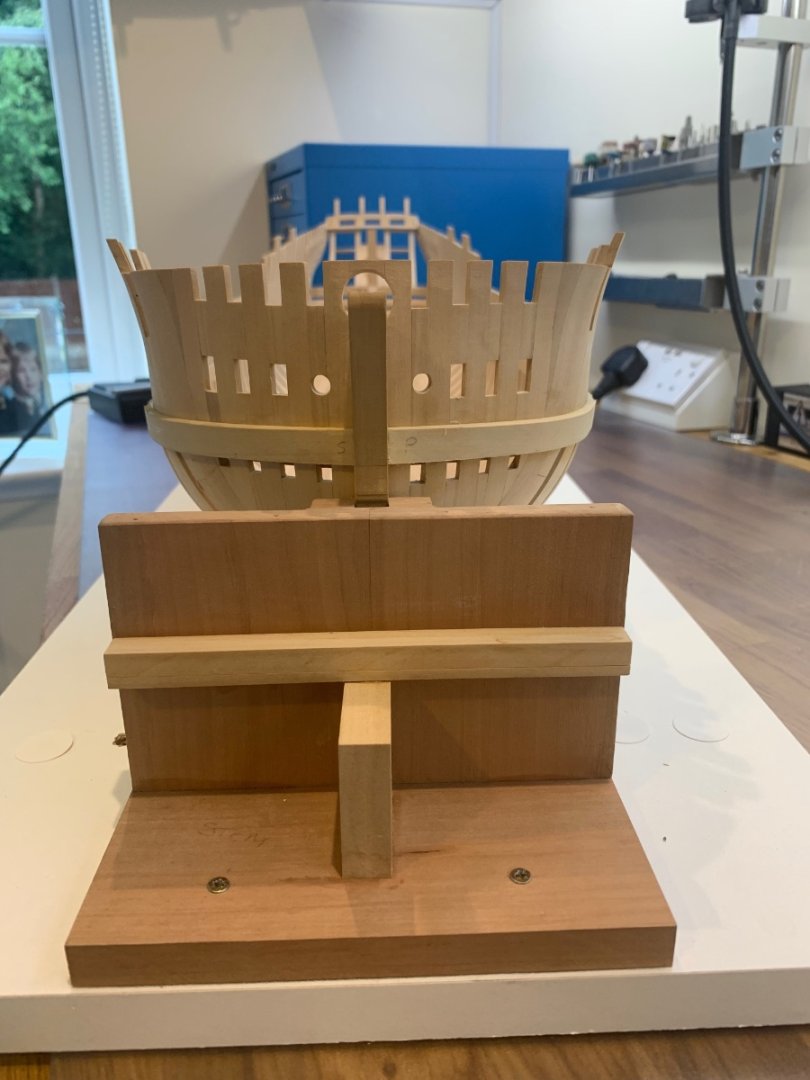
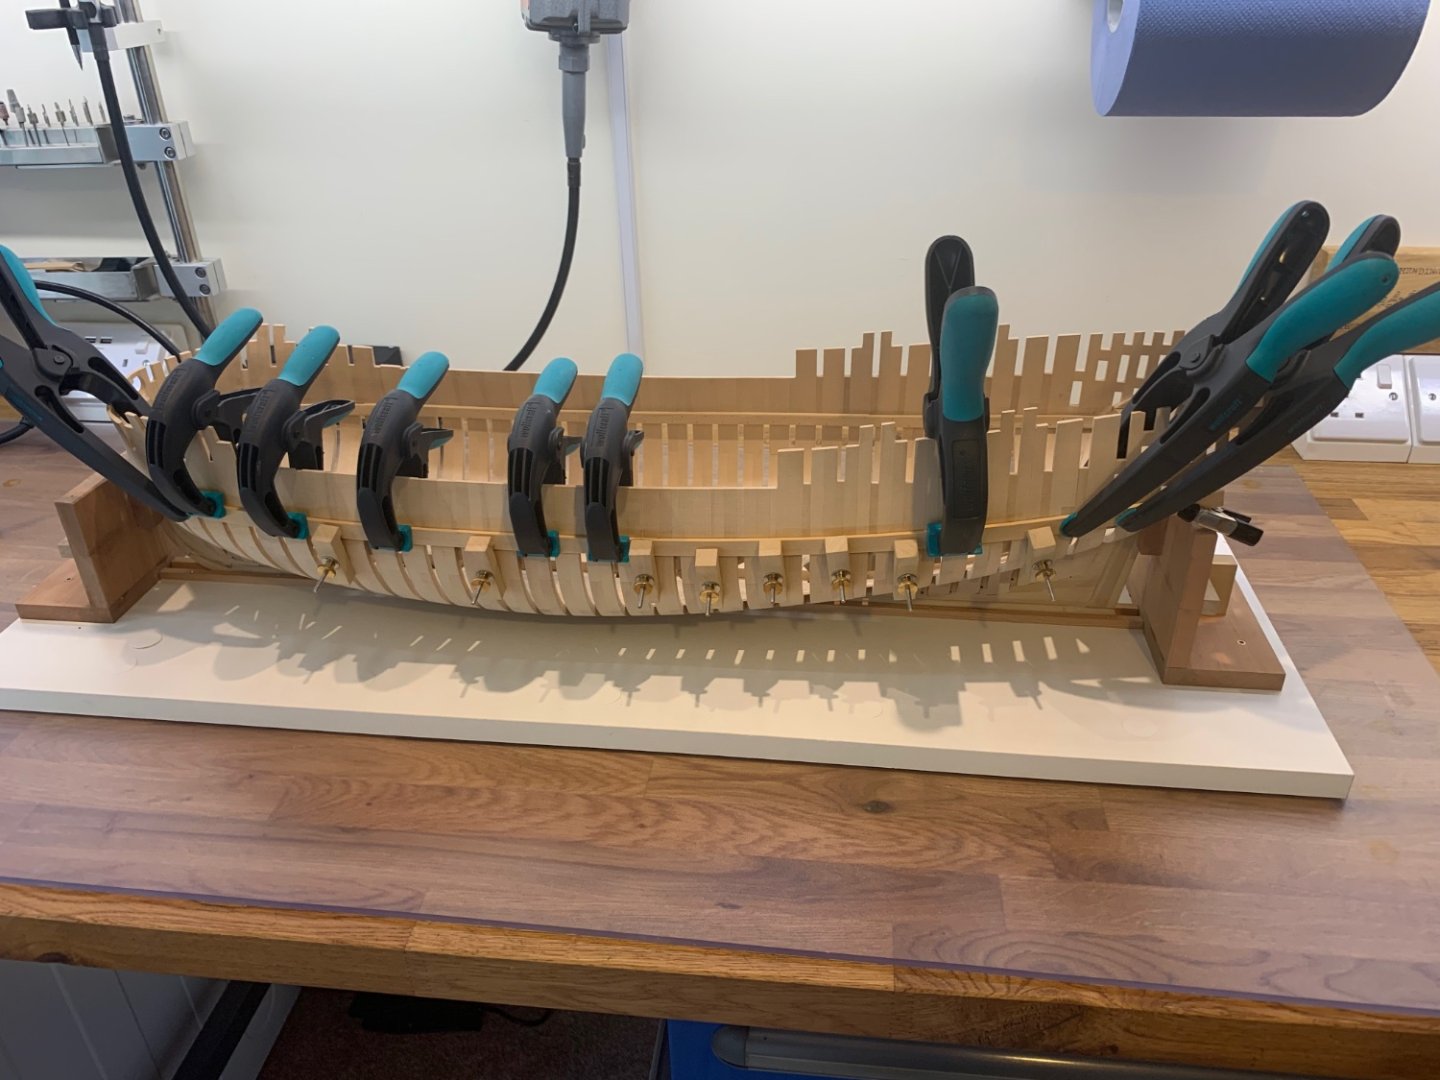
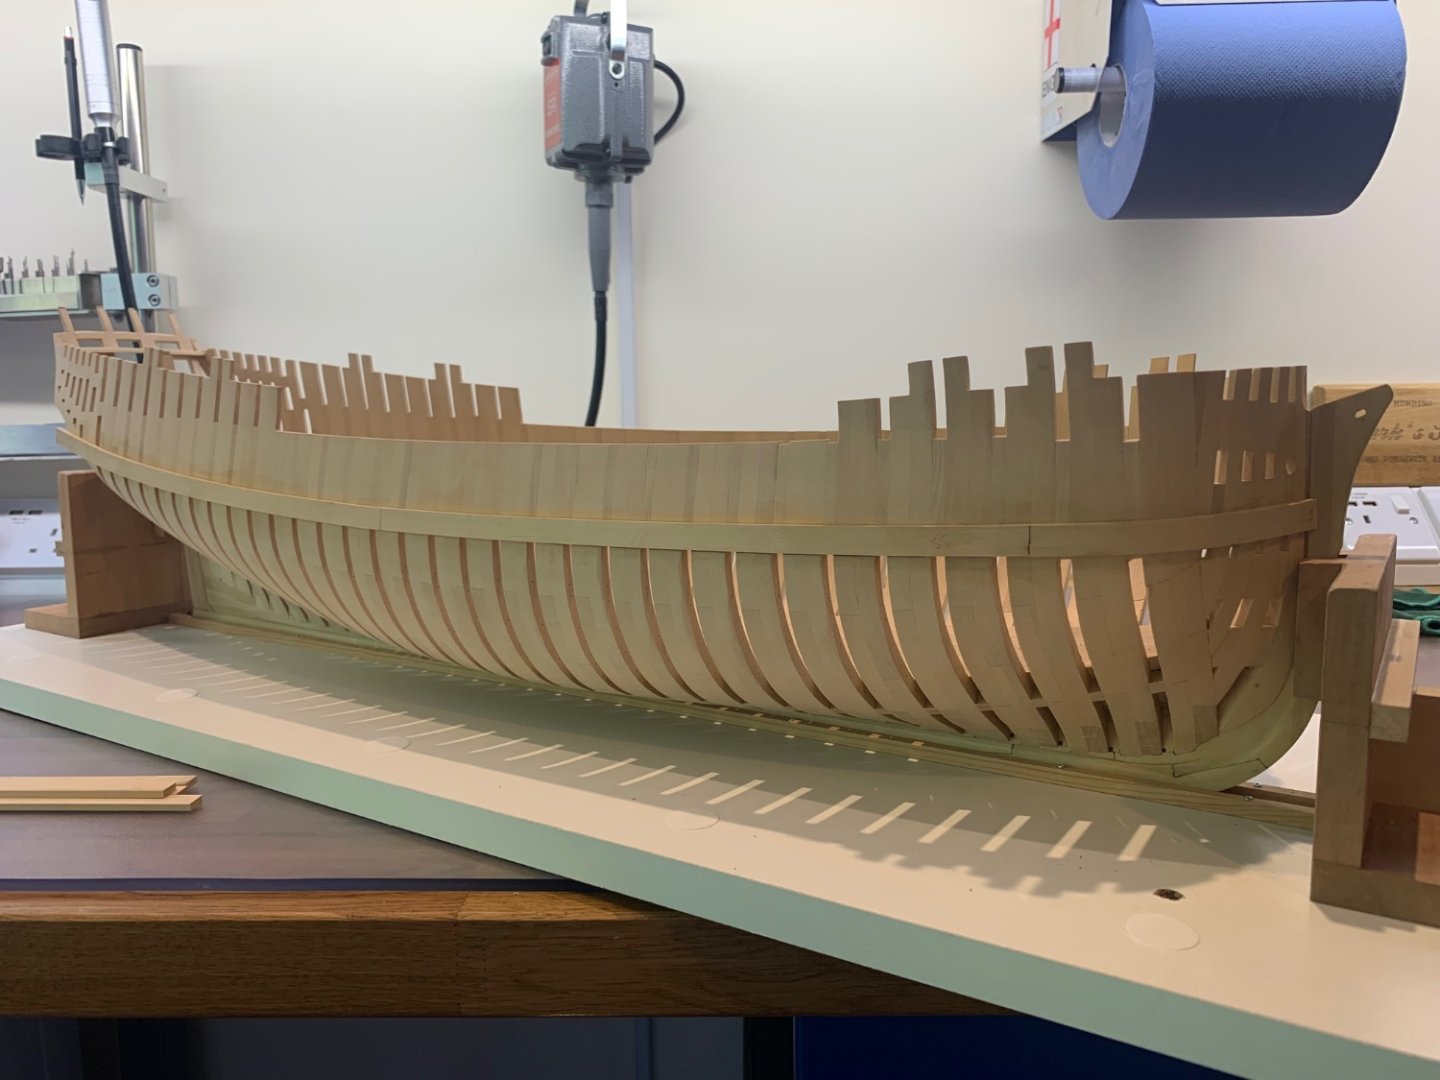
Hi All Well after a fantastic holiday and a bit of a break I've re-started work on Le Rochefort. Firstly I marked out the whales using a height gauge and then cut the timbers which are quite big. The whale timbers are 10.70mm x 3.30mm so I knew that they would be a bit of a challenge to bend around the bow. The whale is made up of 3 planks which are joined by a scarf joint which I made using the mill as I did with the deck clamp. I have also started on the strake below the whale which is slightly smaller at 10.00mm x 3.30mm. This strake only has butt joints where the planks meet which makes it a little easier too. I've also started the taper up to the stem to try and avoid too much plank crowding later on in the build. My next job is to make the very difficult carved plank that wraps around the stern to the rabbet on the wing transom. I think I've got some idea on how to make this part but I also think its going to take me several attempts to get them right. I'll keep you updated and here's a few pictures below of where I'm at now. Cheers Mark


-
Crikey Kevin - that is one hell of a lot of nails - you're going to be dreaming about nails by the time you've done that job. A nice bit of patience there though marking them all out - good luck mate 👍
-
Amazing work - thanks for sharing it must have taken such a long time to work out such a complex construction
-
NAIAD 1797 by Bitao - 1:60
No Idea replied to Bitao's topic in - Build logs for subjects built 1751 - 1800
Awesome bitao 👍 -
If my assumption is correct and I'm sure that others may have a differing opinion I would make and glue the two parts together and then simply blend them together at the joint. I think the most critical aspect is getting the offset correct. Good luck mate 👍
-
Just my thoughts - but looking at the picture and the drawing I would suspect that the 9" top timber tapers very slightly in the bend as it meets the 8 1/2" futtock. If I were making this part I would make it out of a wider piece and cut the shape into it. I don't know if this will help but thats what I see - cheers Mark
-
Hi Tony I’ve not actually used this line at all during my construction so far. I have always rightly or wrongly assumed that it is the ships waterline. If you drop Gerard a message who is on this forum I’m sure that he will be able to answer your question. I will have an update on my build pretty soon too. Mark