Some Idea
-
Posts
1,159 -
Joined
-
Last visited
Content Type
Profiles
Forums
Gallery
Events
Everything posted by Some Idea
-
 Thanks Tobias that's nice of you to say - I'll find out about the shellac tomorrow as I'm trying it under the decks first. I got it from a UK company called Finney's and I explained to them exactly what I wanted it for. They suggested a shellac with a shine reducer in it which was delivered yesterday. I was very surprised at the cost of it though as its nearly £30 for 500ml. I'll let you know what its like to use and how the finish is. Thanks druxey - I just try my best and at least I'm not making every part twice now. It's amazing how quickly you learn to use sharp edged tools when model ship building. Oh and how to sharpen them properly too - what a difference that makes when aiming for accuracy!
 -
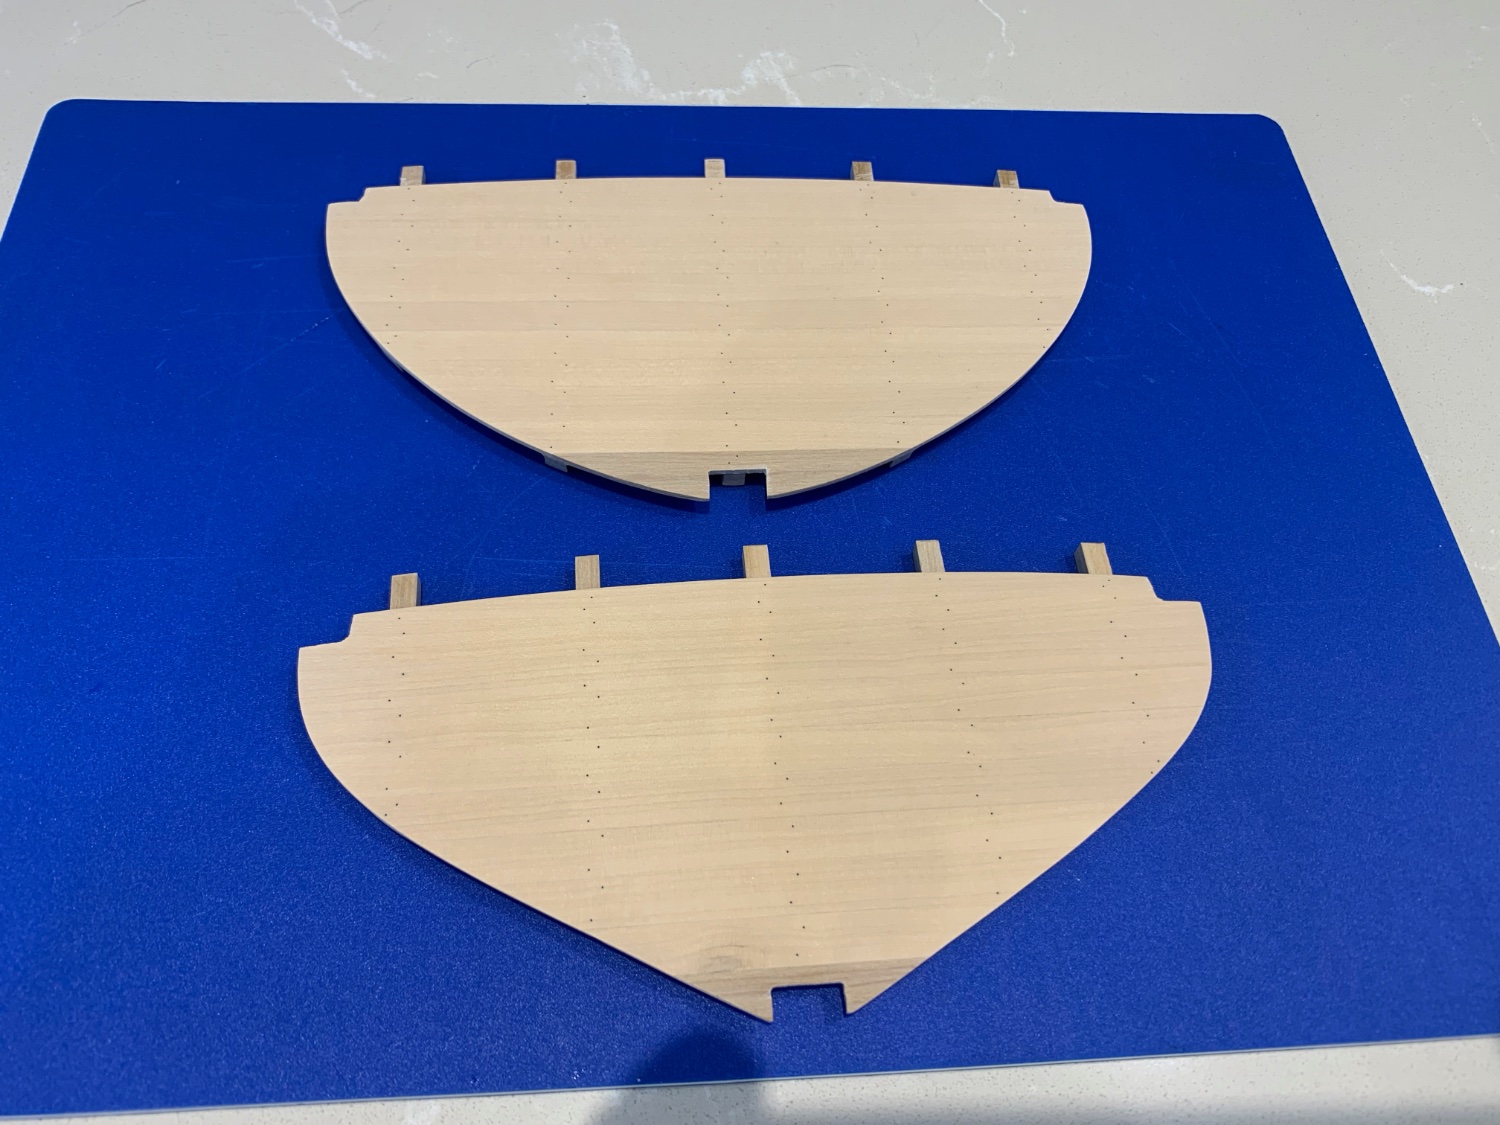
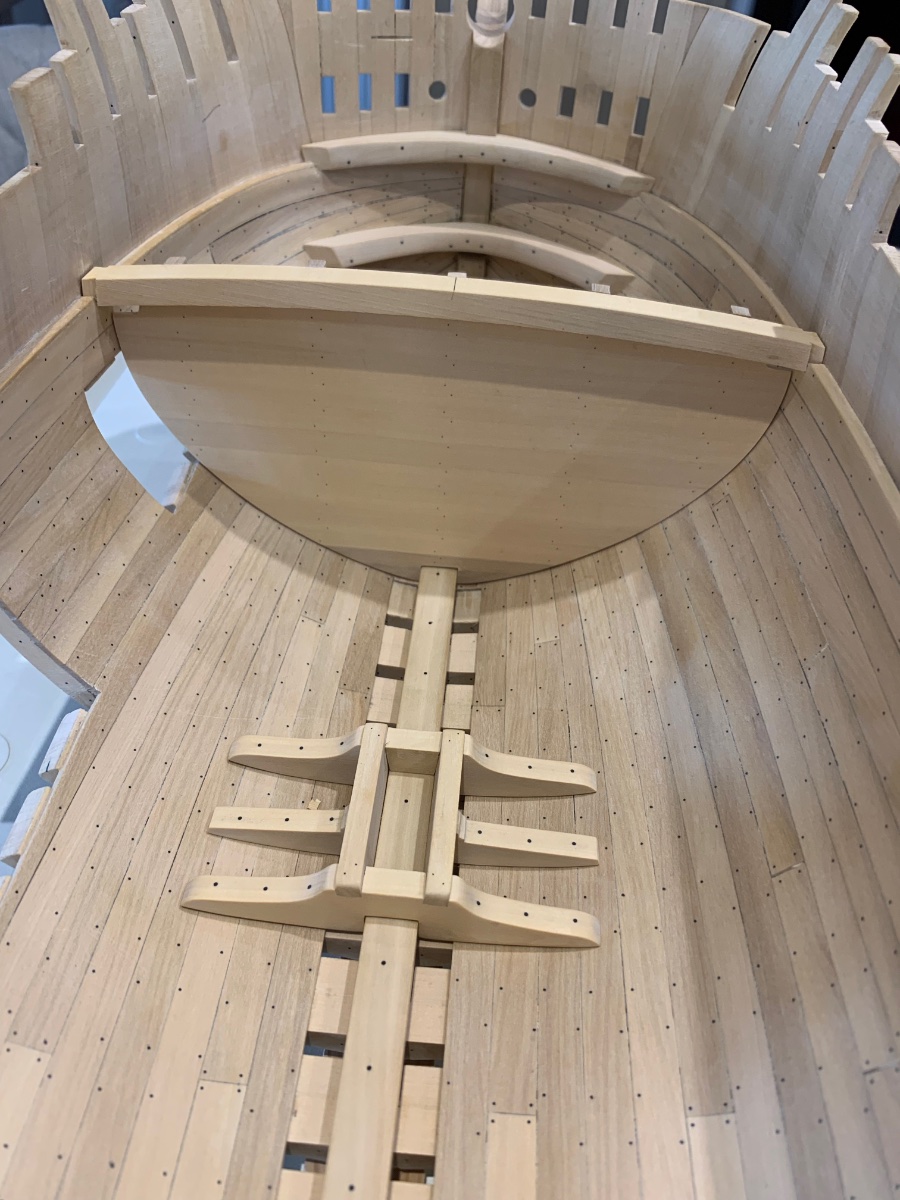
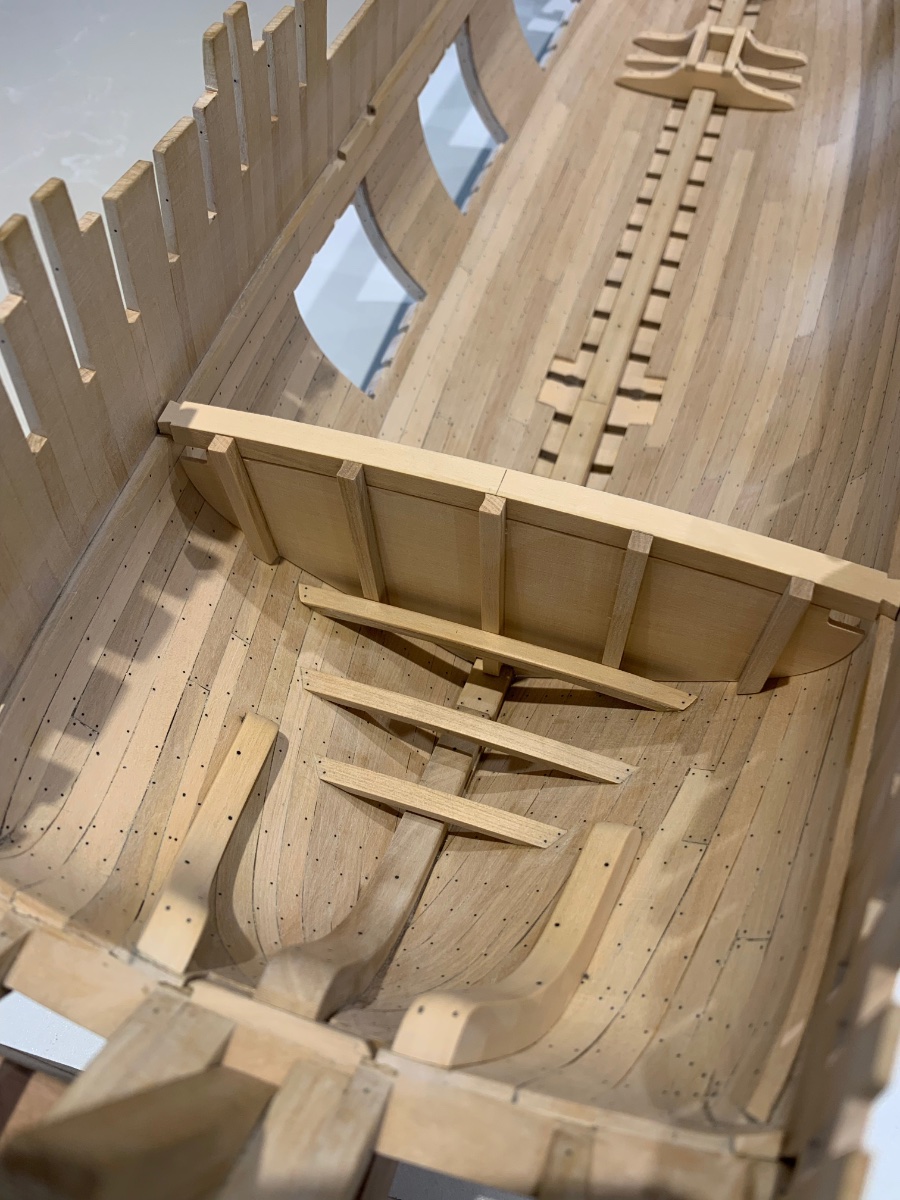
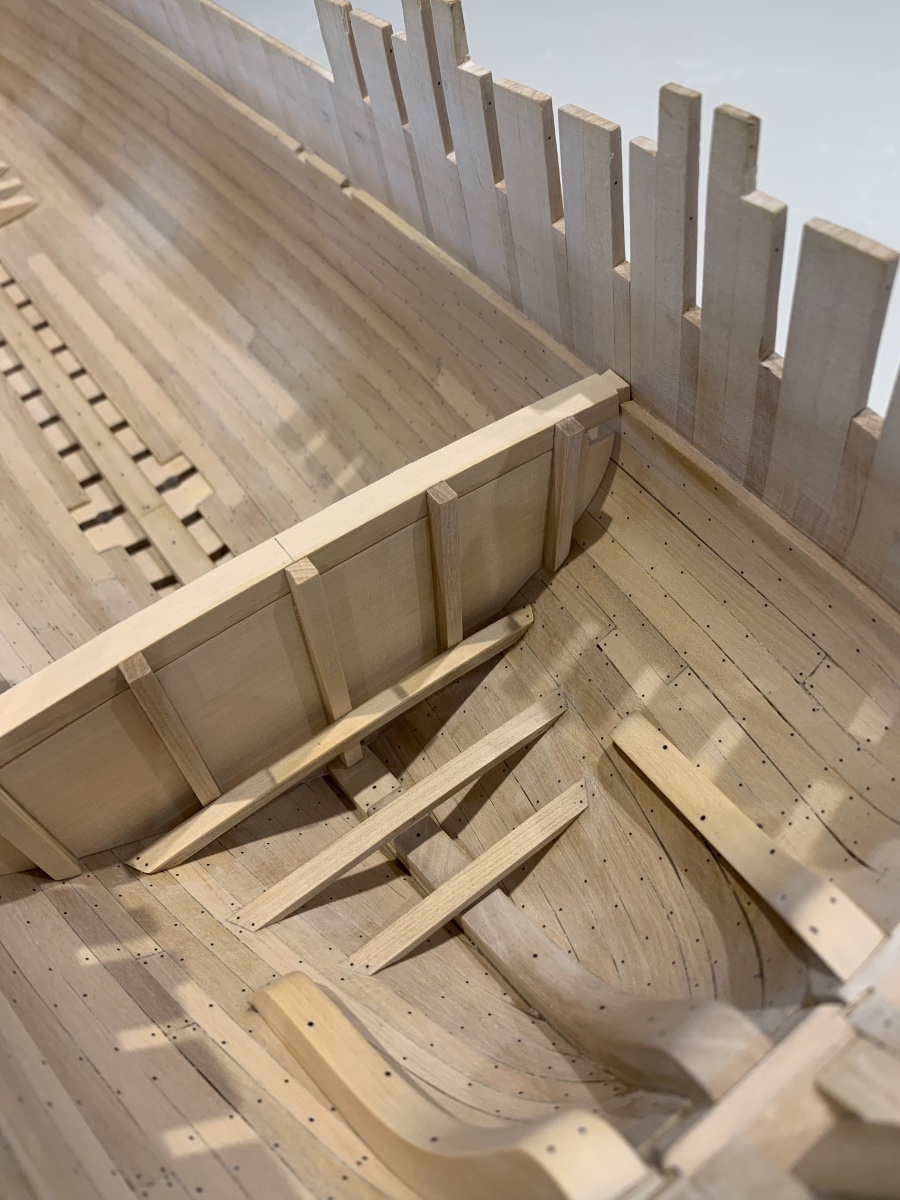
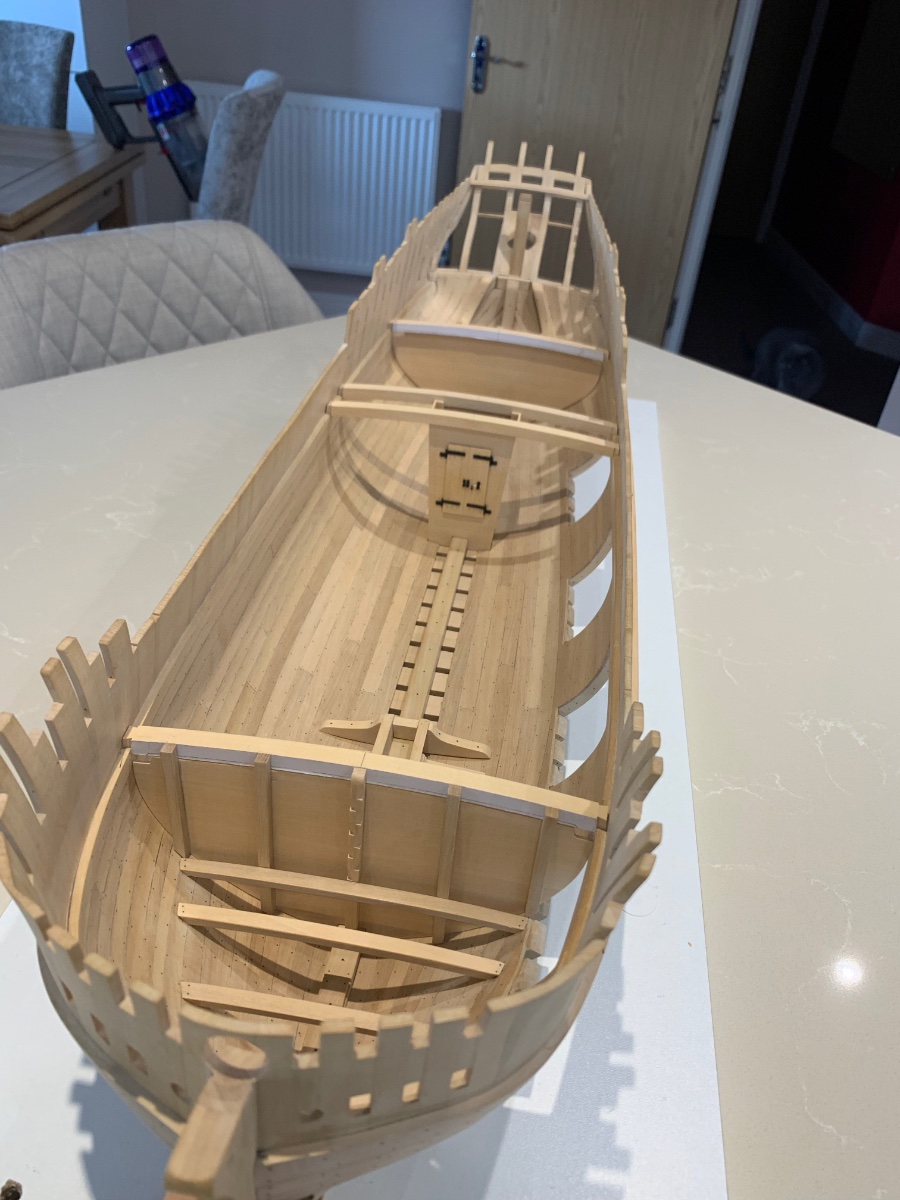
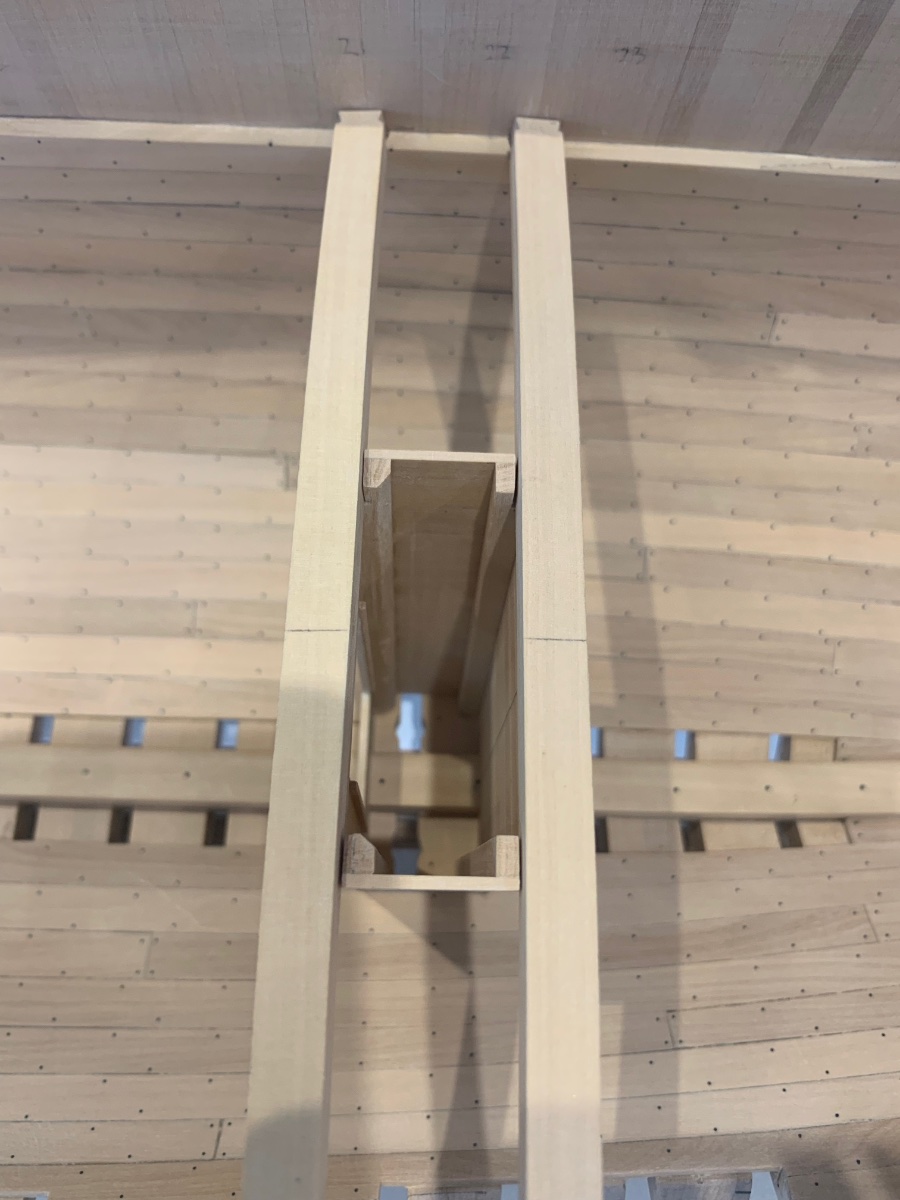
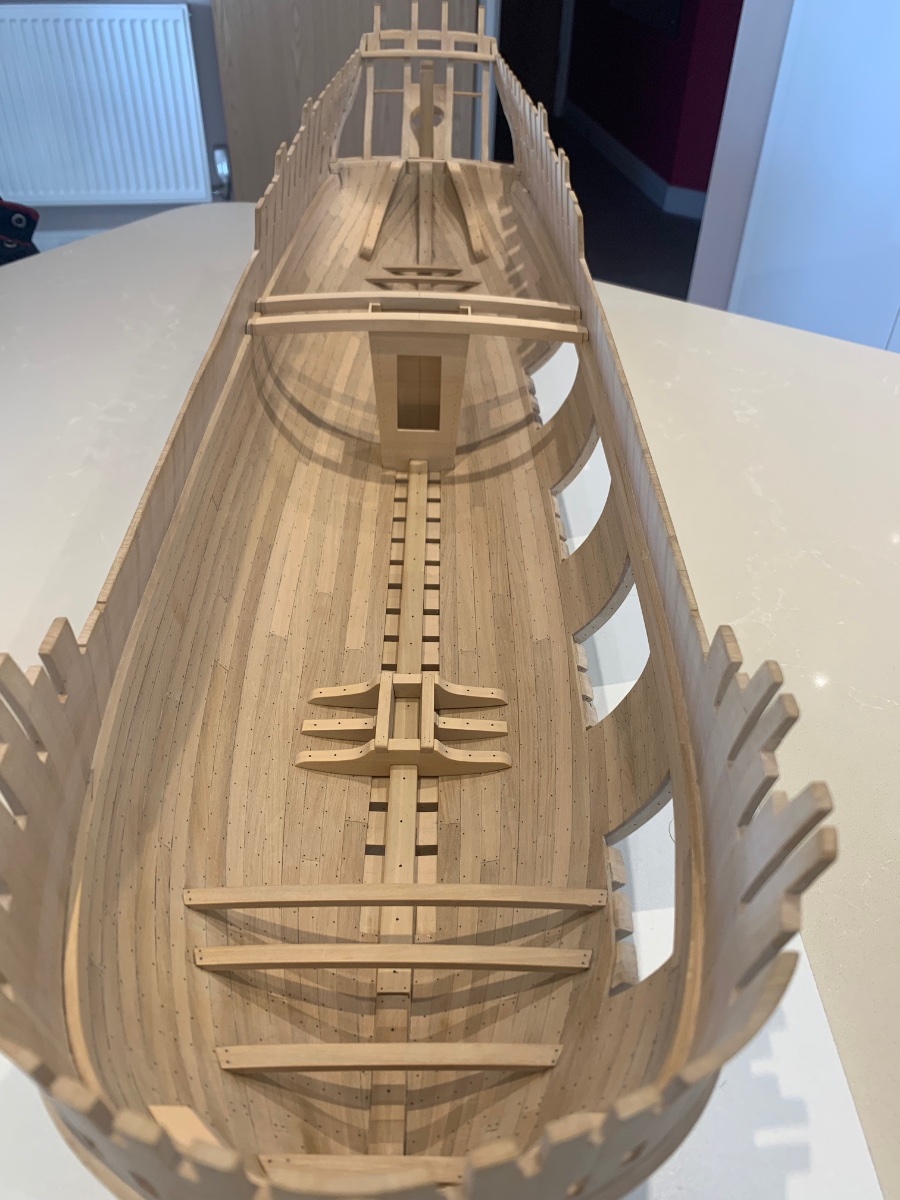
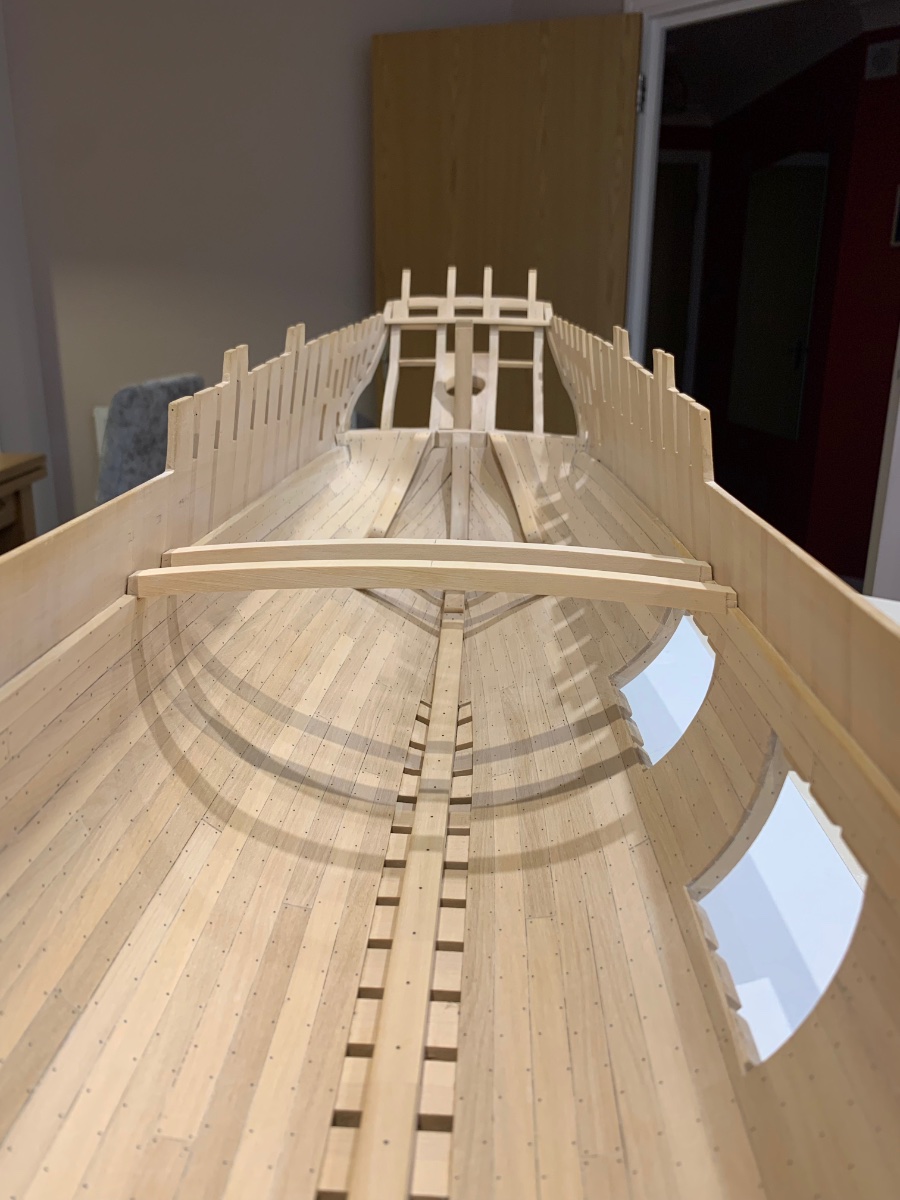
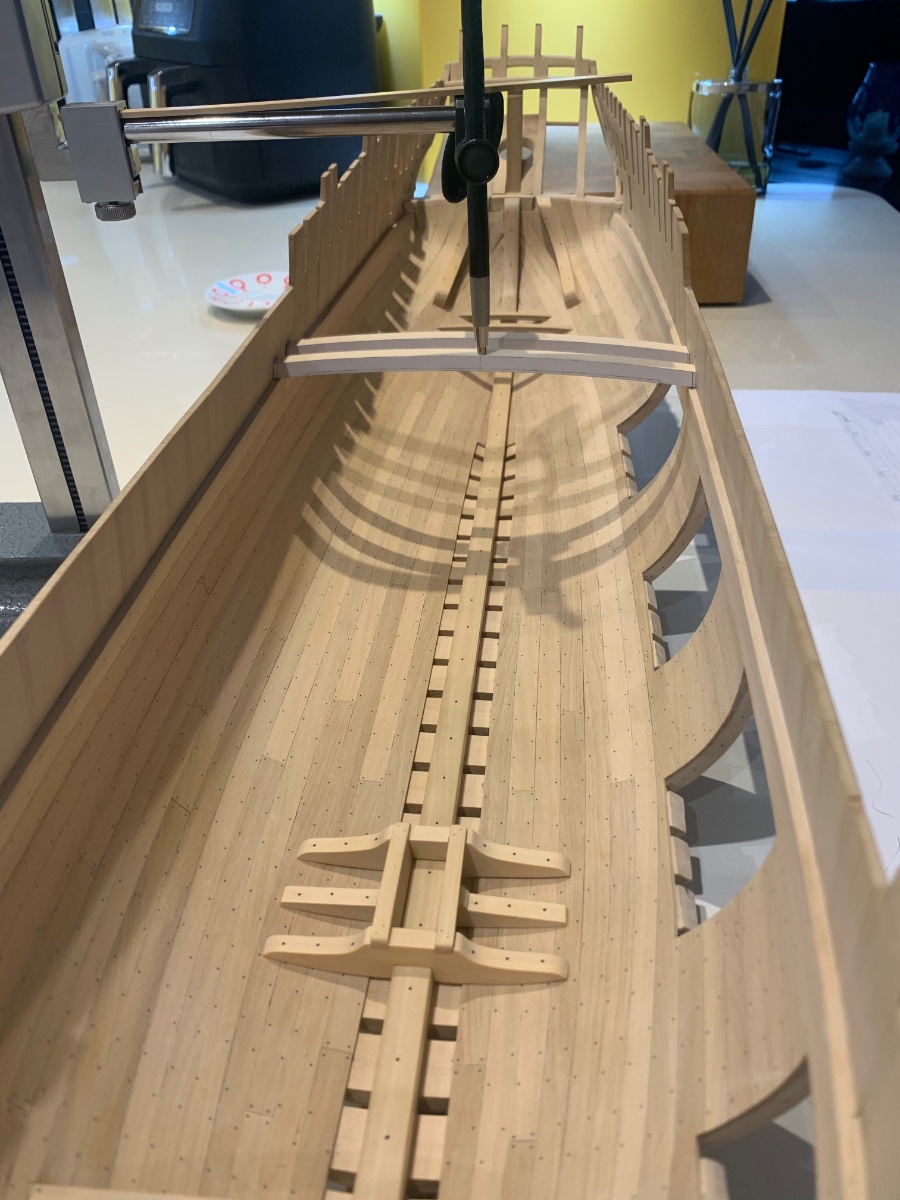
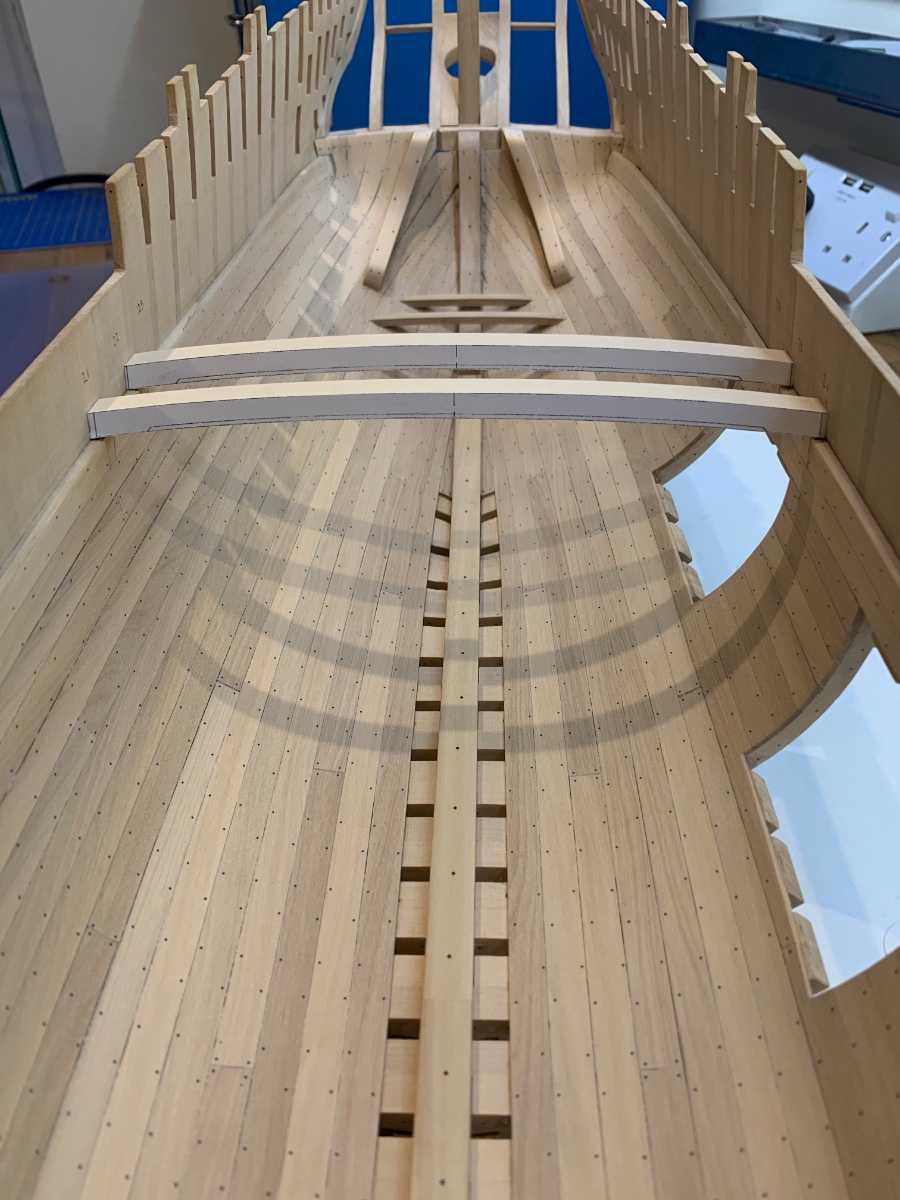
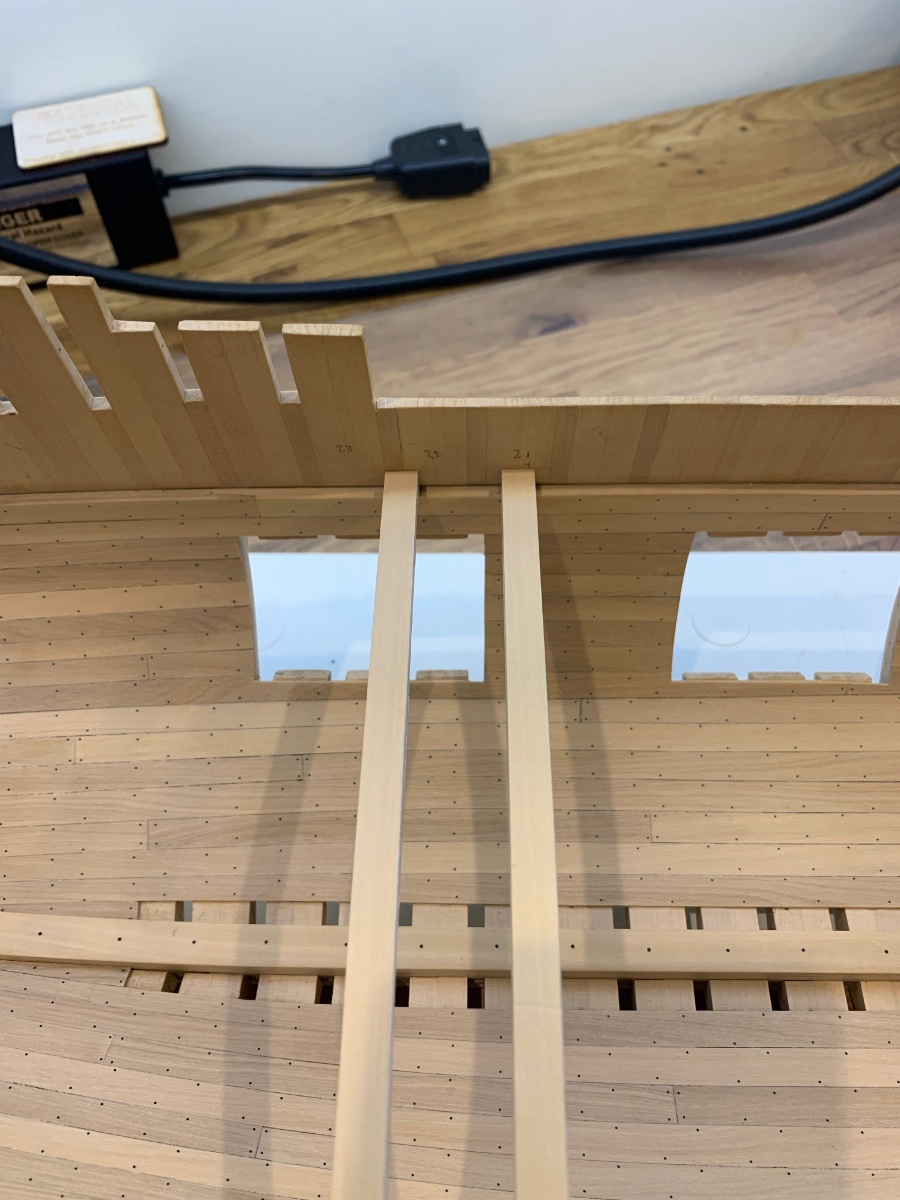
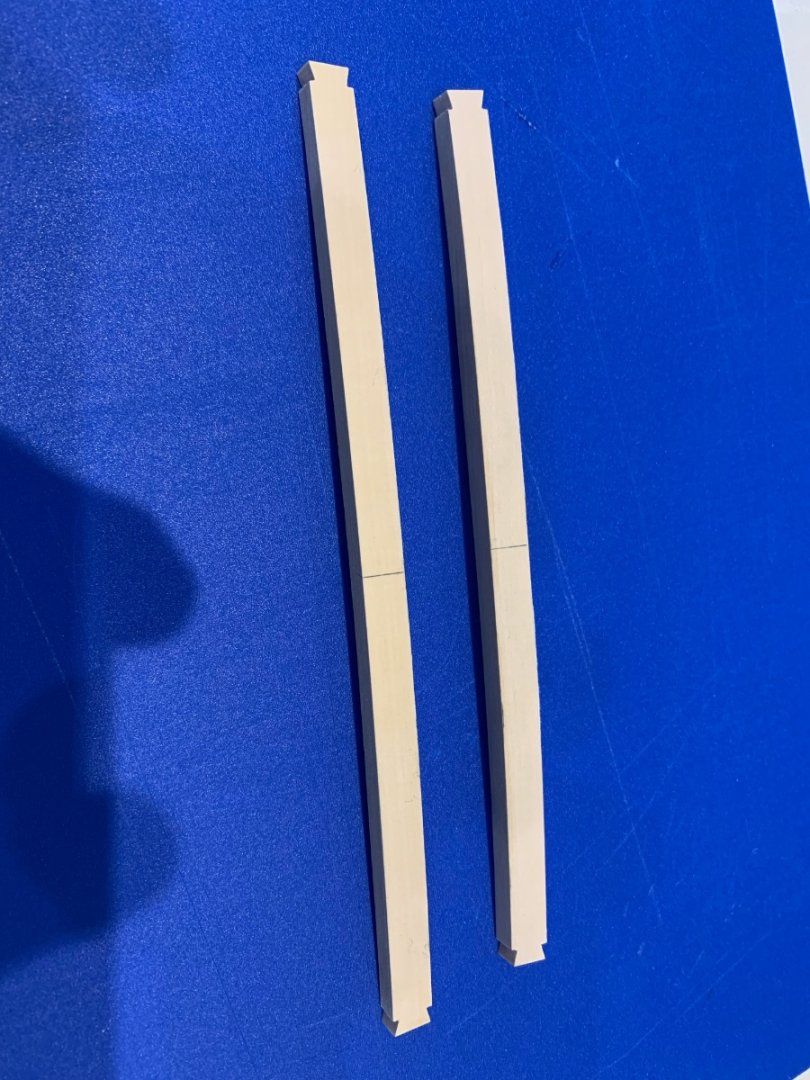
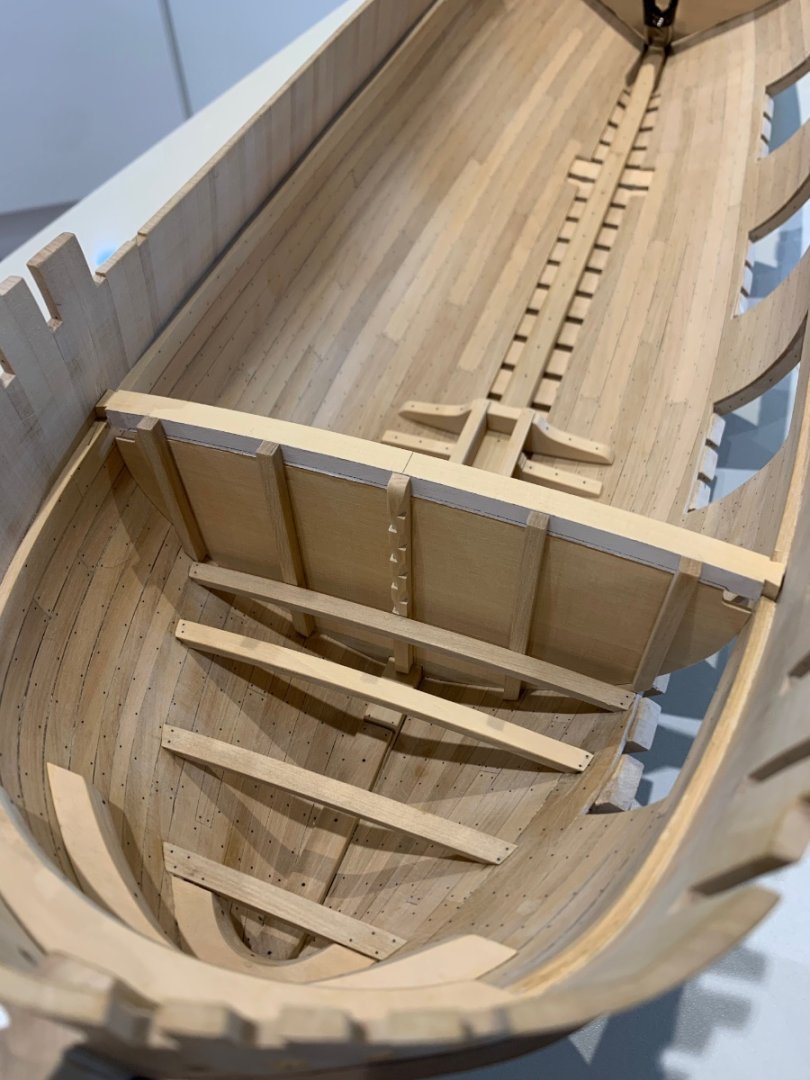
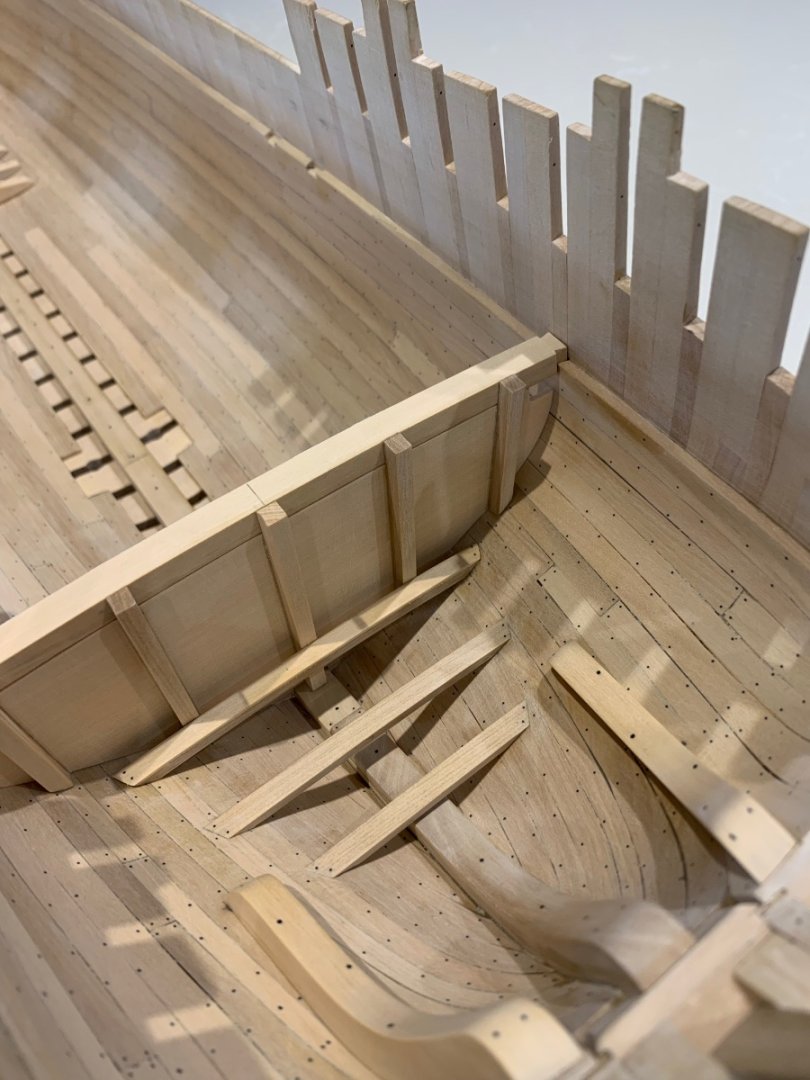
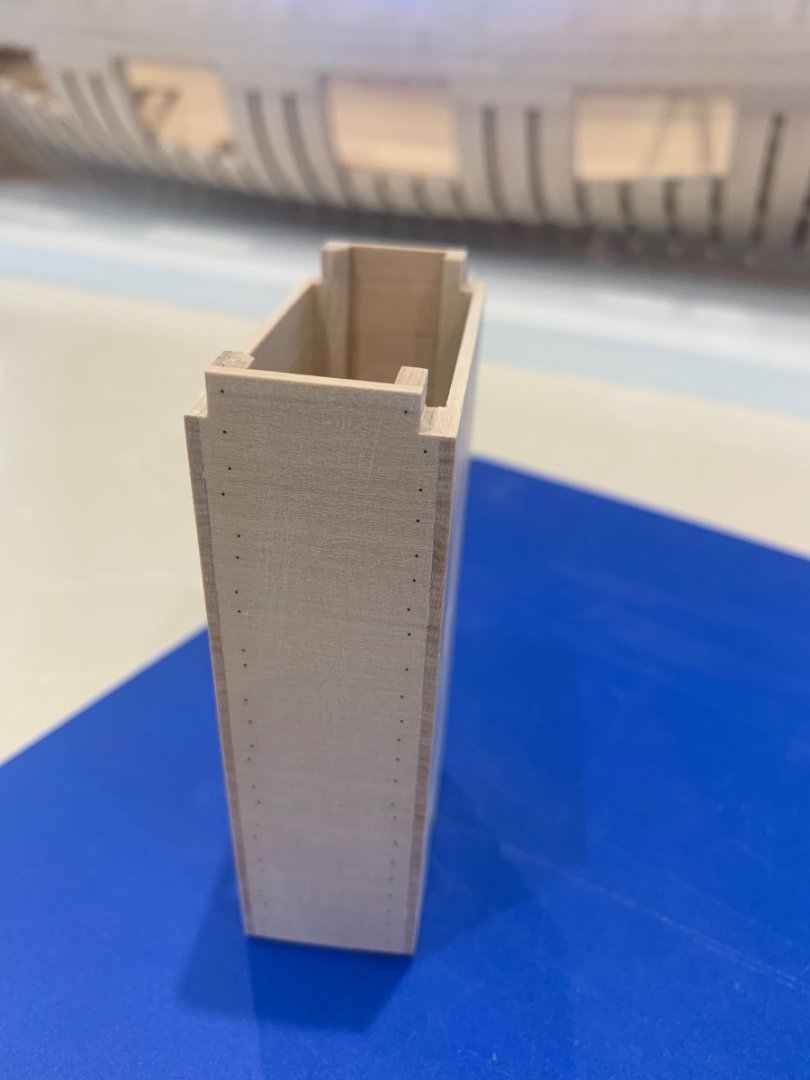
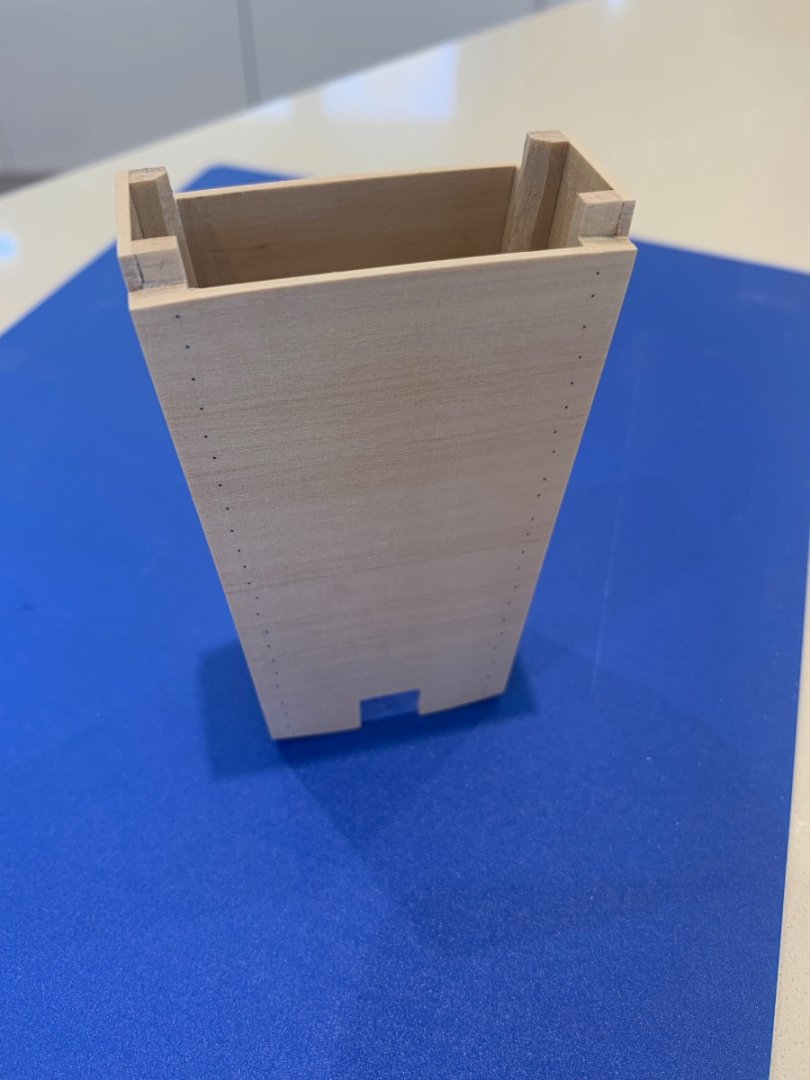
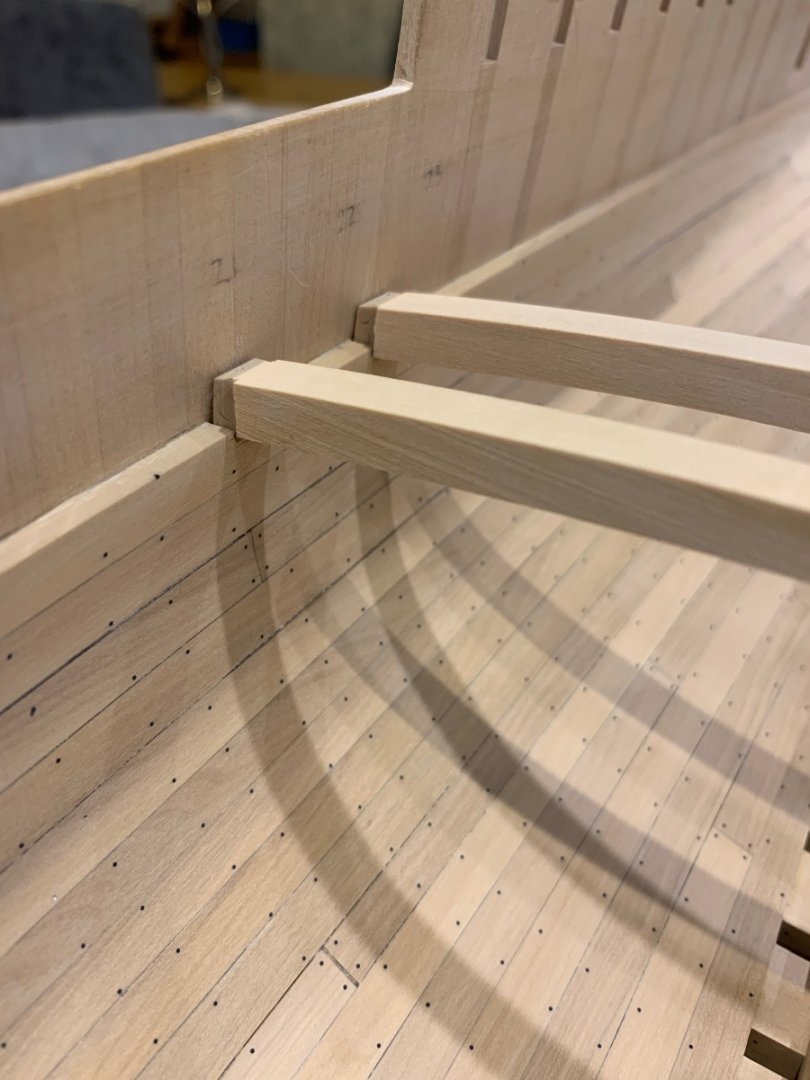
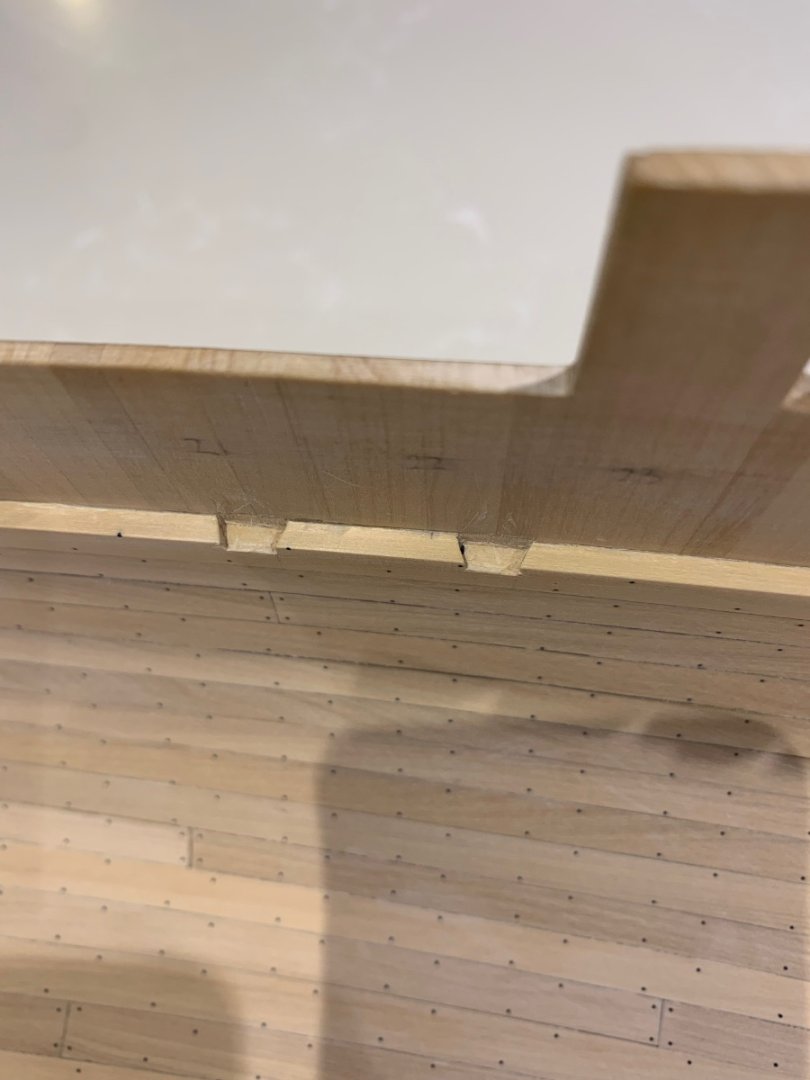
Tobias and druxey I think you both make very fair points and it's not something that I had really thought about. I quite like they way it looks and I know that once the shellac is on it will change the way that they look again. In fact it will probably make the planks look a little separate but it will be subtle. It gives me something to think about before the finish is applied so thanks for your comments Here's some more of what I've been up to - I've made up the two internal bulkheads which is another of those jobs which is easy to make and difficult to fit properly. I like the small samson post on one of the posts which leads up to a hatch on the main deck Like the pump well I had to make and fit the beams over the bulkheads to get a correct fit. More dovetails to be cut! Front and rear bulkheads fitted in place after quite a bit of fettling And this is how she stands as of now So my next job is to plank the two small decks before installing the bulkheads permanently. I've got some shellac with a shine reducer in it that I will try under these decks before I fit the planks. Thanks for all of the comments, feedback and ideas as it really does help me - Cheers Mark


-
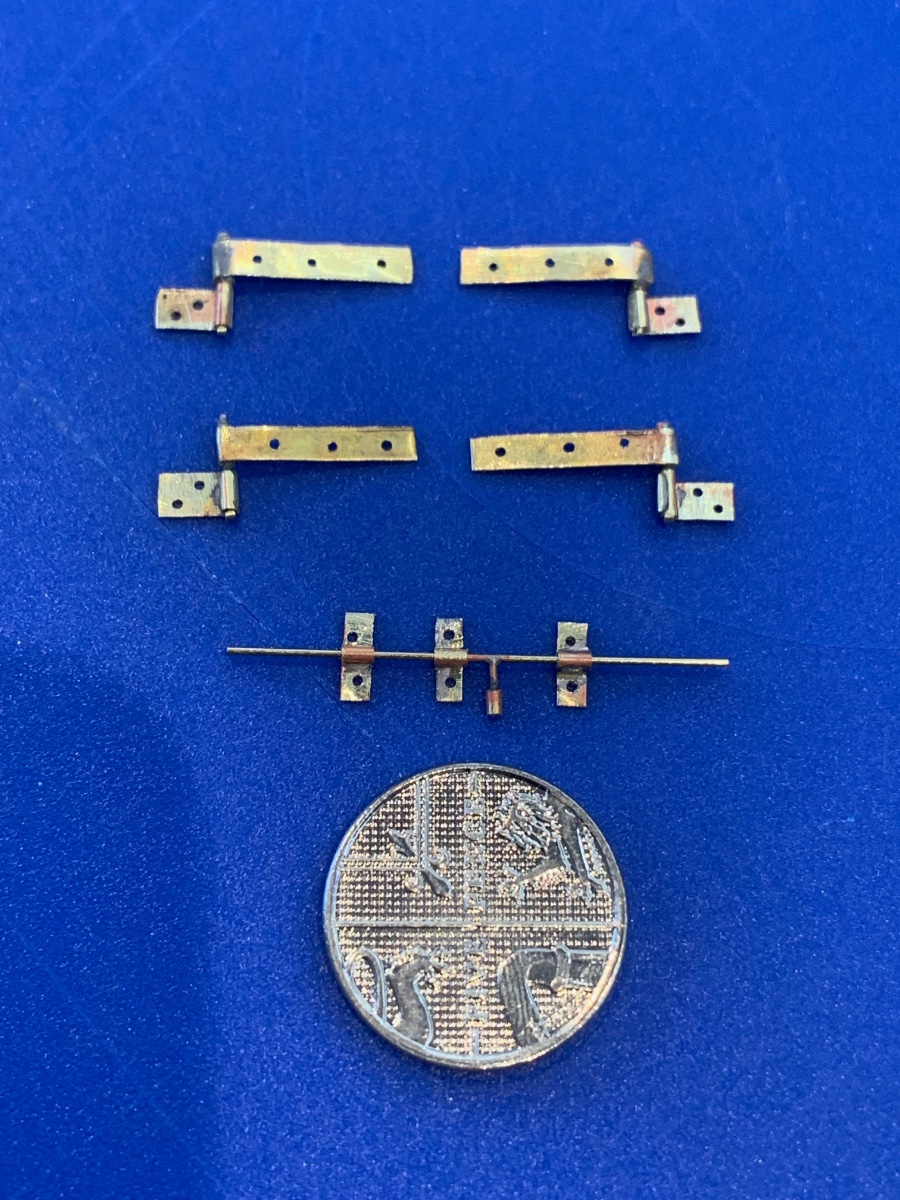
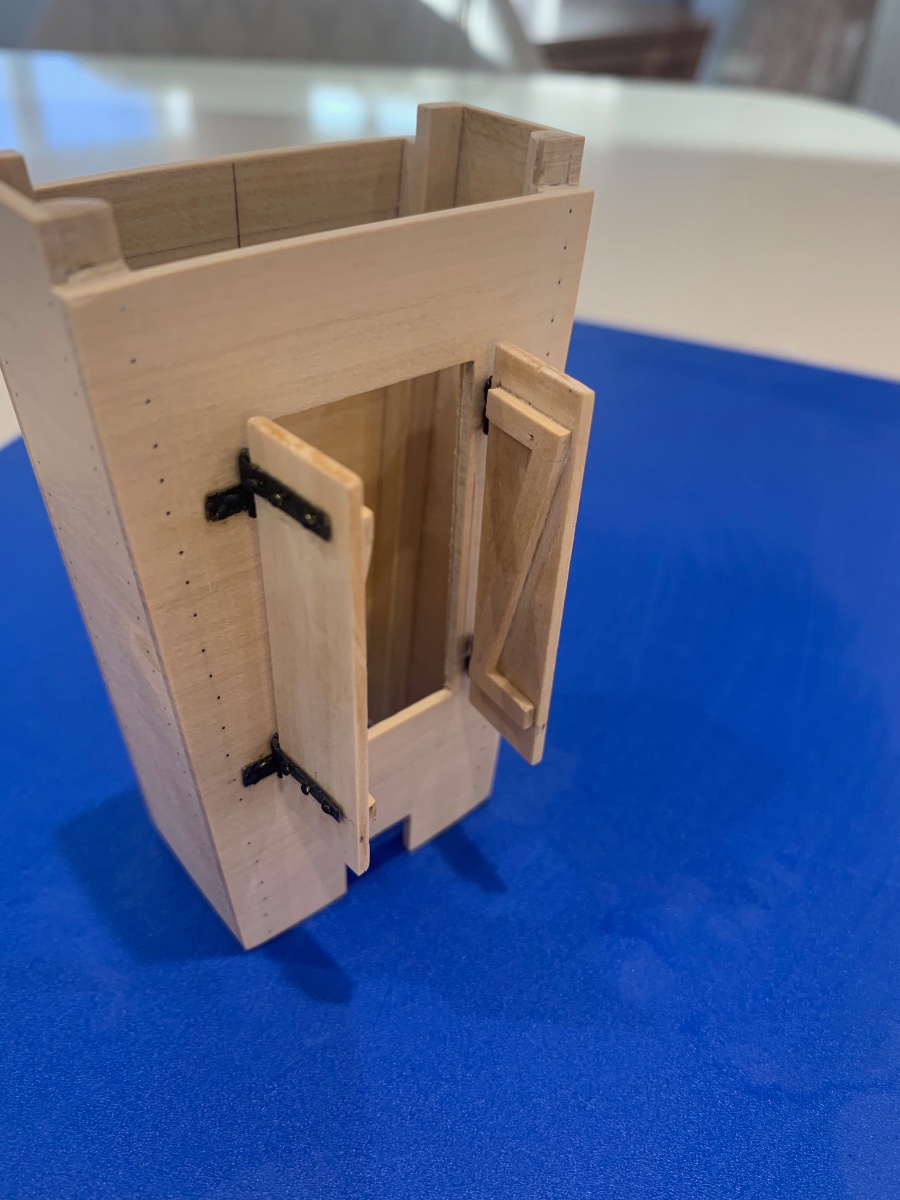
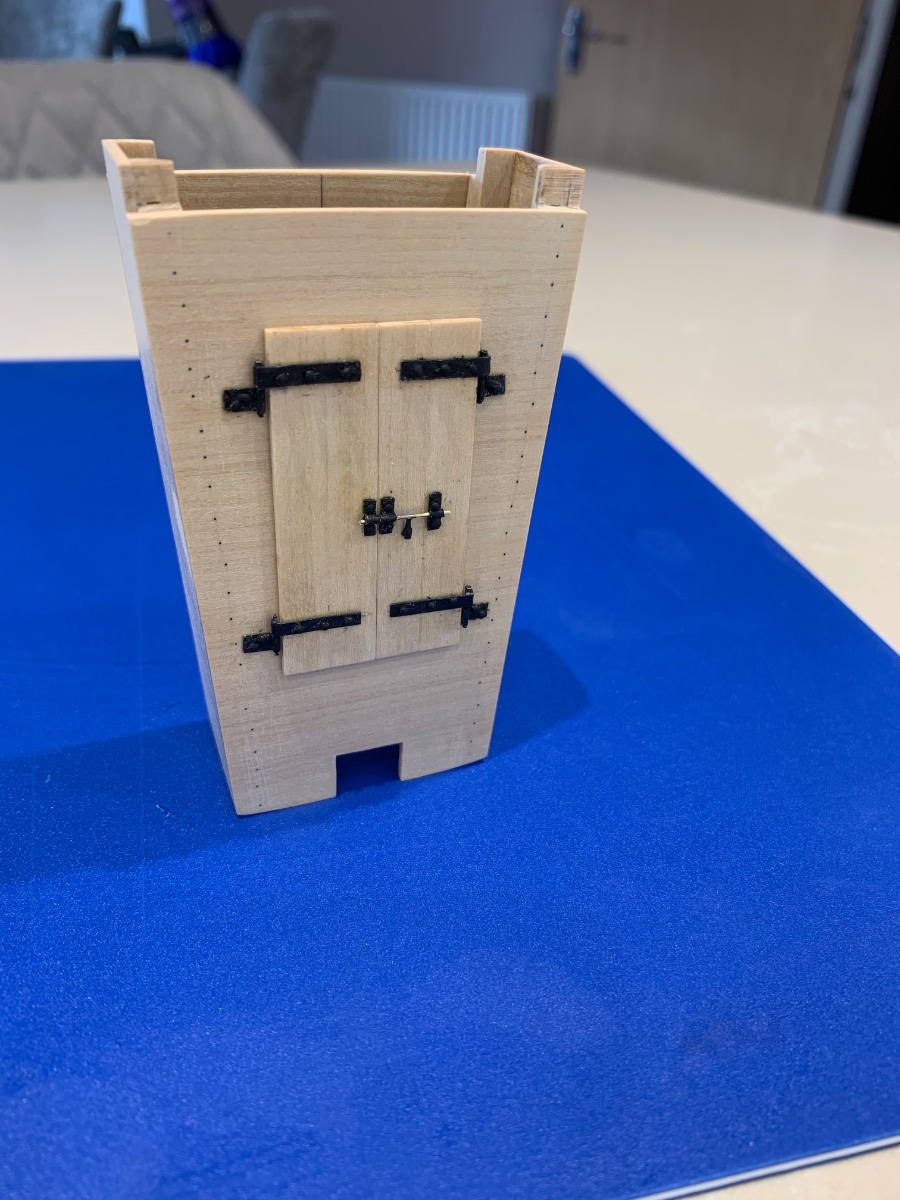
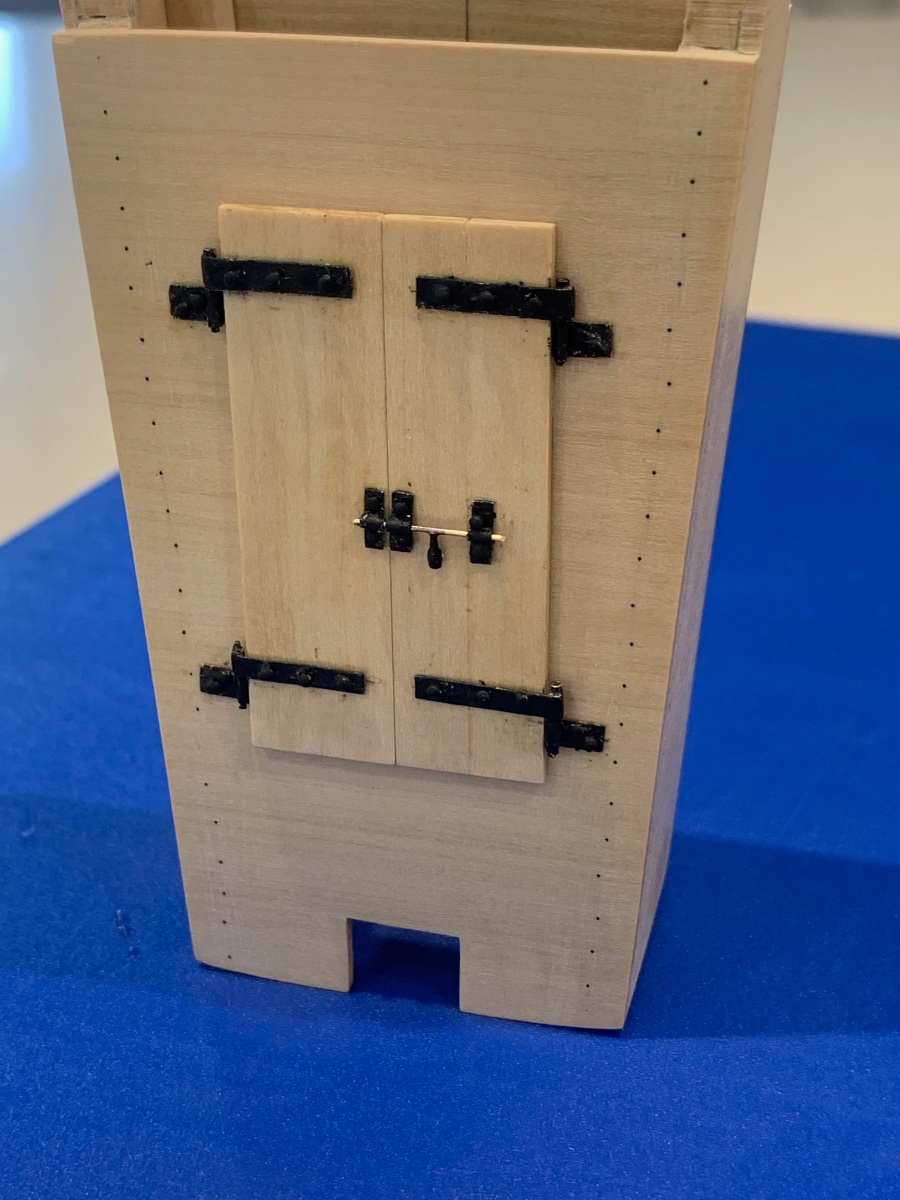
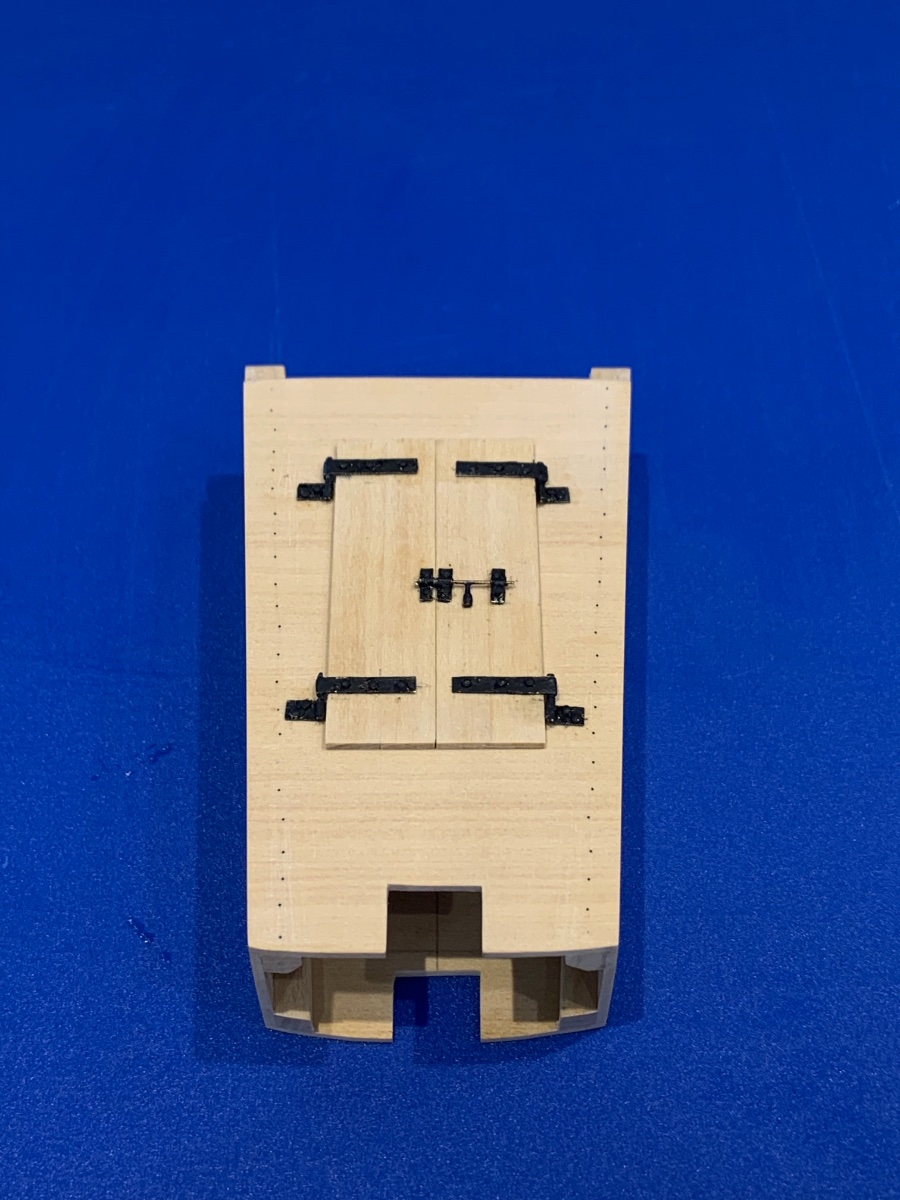
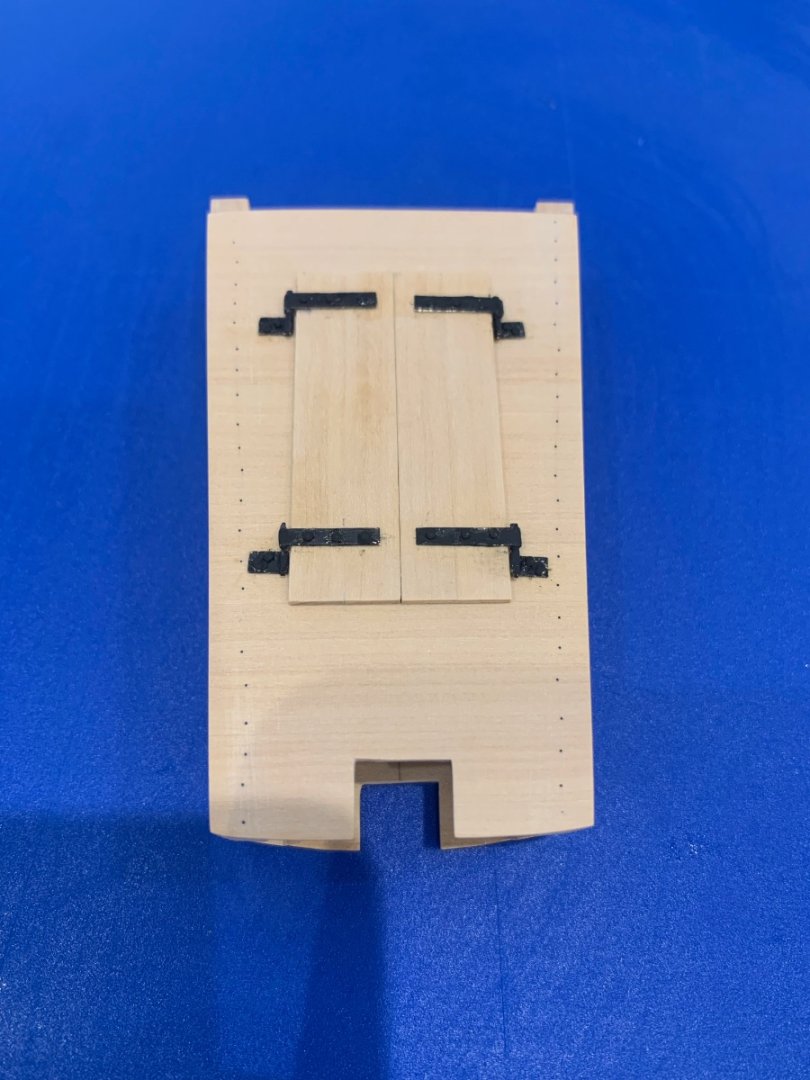
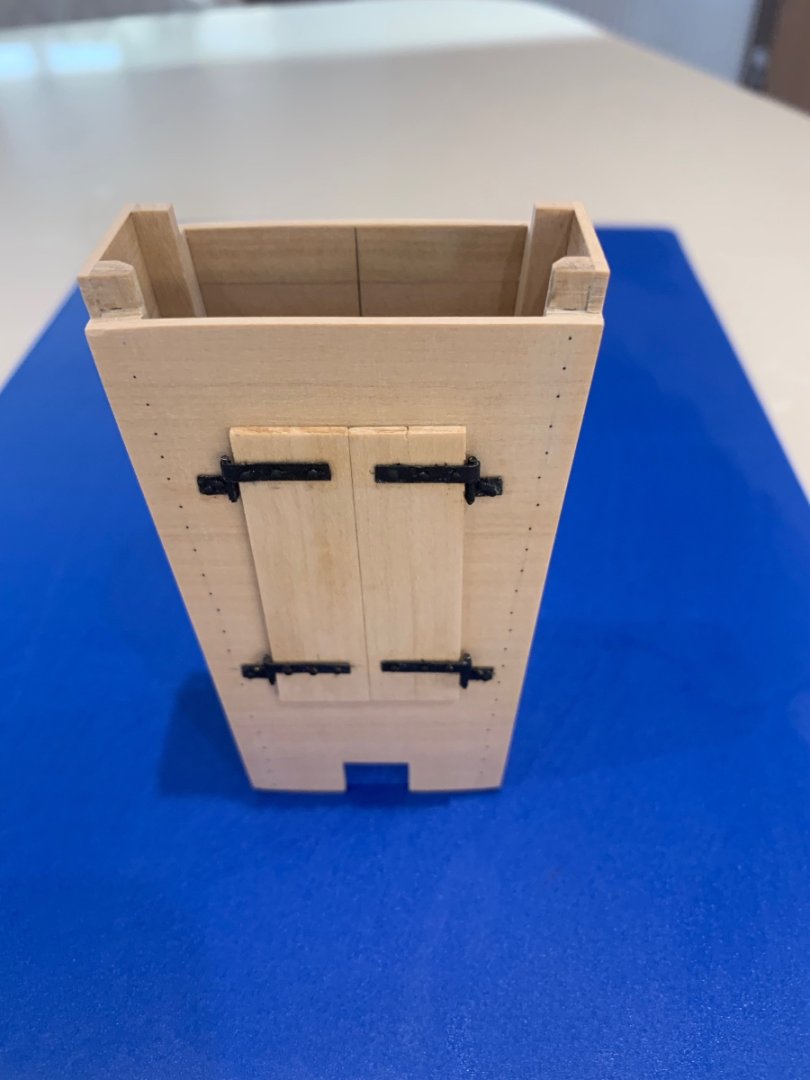
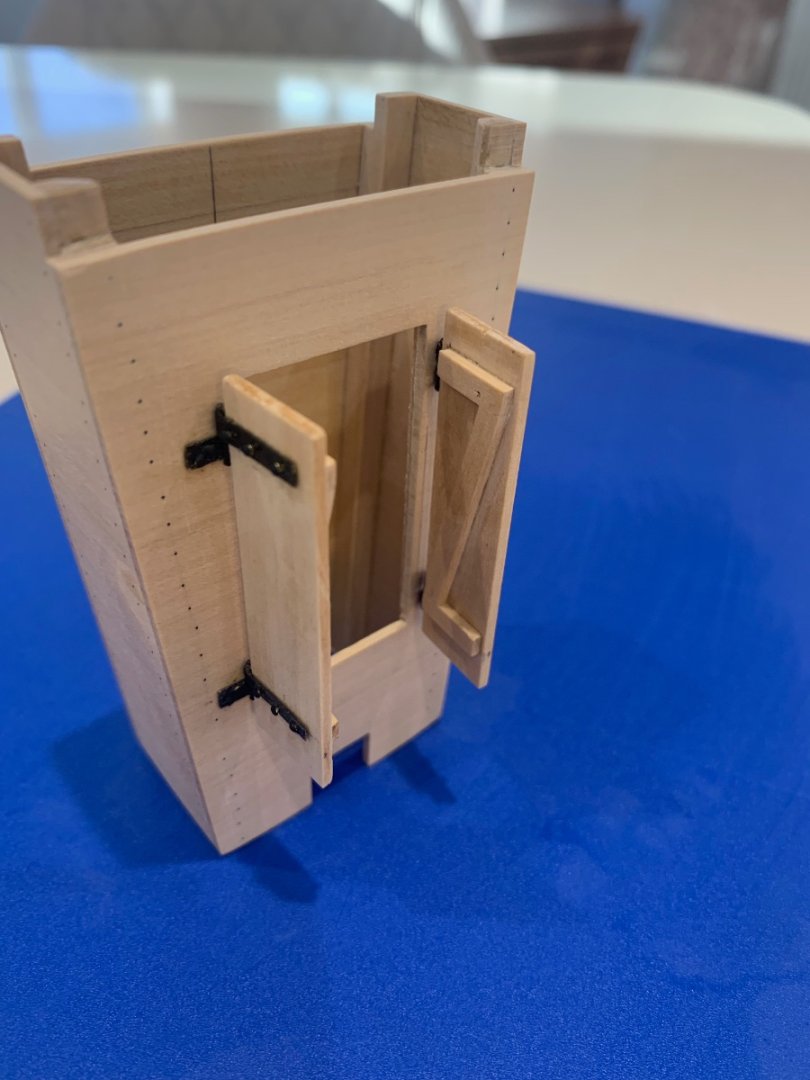
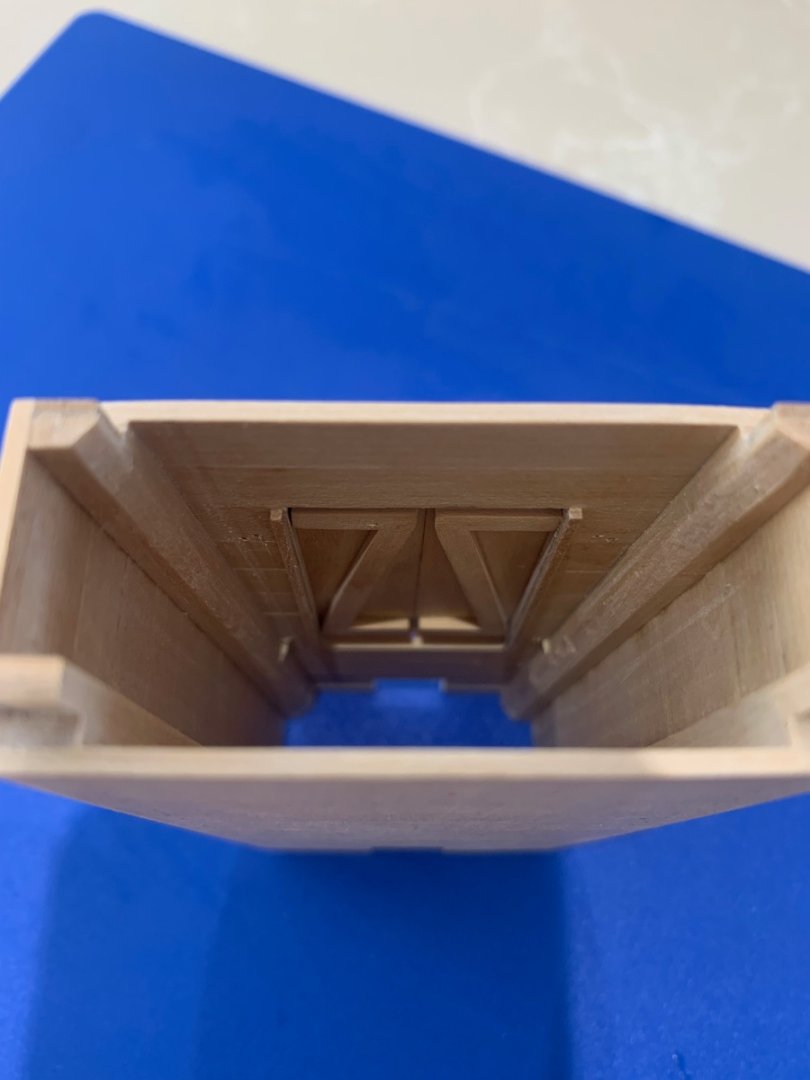
Hi All I've now made the hinges and the lock for the pump well doors. I made them out of 0.25mm brass sheet, 0.5mm brass rod and 1mm brass tubing. They are attached using 0.6mm nails as I already had these in stock and didn't want to buy any more. Here's a few pictures - I really like the one looking inside the well! Cheers Mark


-
Paasche Airbrush TG-3AS
Some Idea replied to David W's topic in Modeling tools and Workshop Equipment
I use Vallejo and I have no problem with airbrushing their paint. Buy the air paints from them and not the brush on. The air paints I have found still need thinning down. I also use their flow improver and their own thinner - It works great for me and they give good coverage too. -
Paasche Airbrush TG-3AS
Some Idea replied to David W's topic in Modeling tools and Workshop Equipment
I have this airbrush and it's the best one for modelling that I have owned. With so many attachments it does just about anything that I need. I haven't found the fixed cup to be an issue as I just move what I'm airbrushing. Its also very easy to clean and the double action works great. -
Wow that is just awesome mate - I've been following your build step by step for quite some time now and its been inspiring for me. Your finished ship looks beautiful and worth every minute that you've put into it. Really good luck with the Bismarck but I suspect it will be a walk in the park compared to your Swan. Cheers Mark
-
Derek that is one outstanding ship that you have built there mate. The attention to detail leaves me speechless
- 345 replies
-
- 6
-

-

-
- Duchess Of Kingston
- Vanguard Models
- (and 1 more)
-
Thanks Gary - the wood is castello boxwood 👍
-
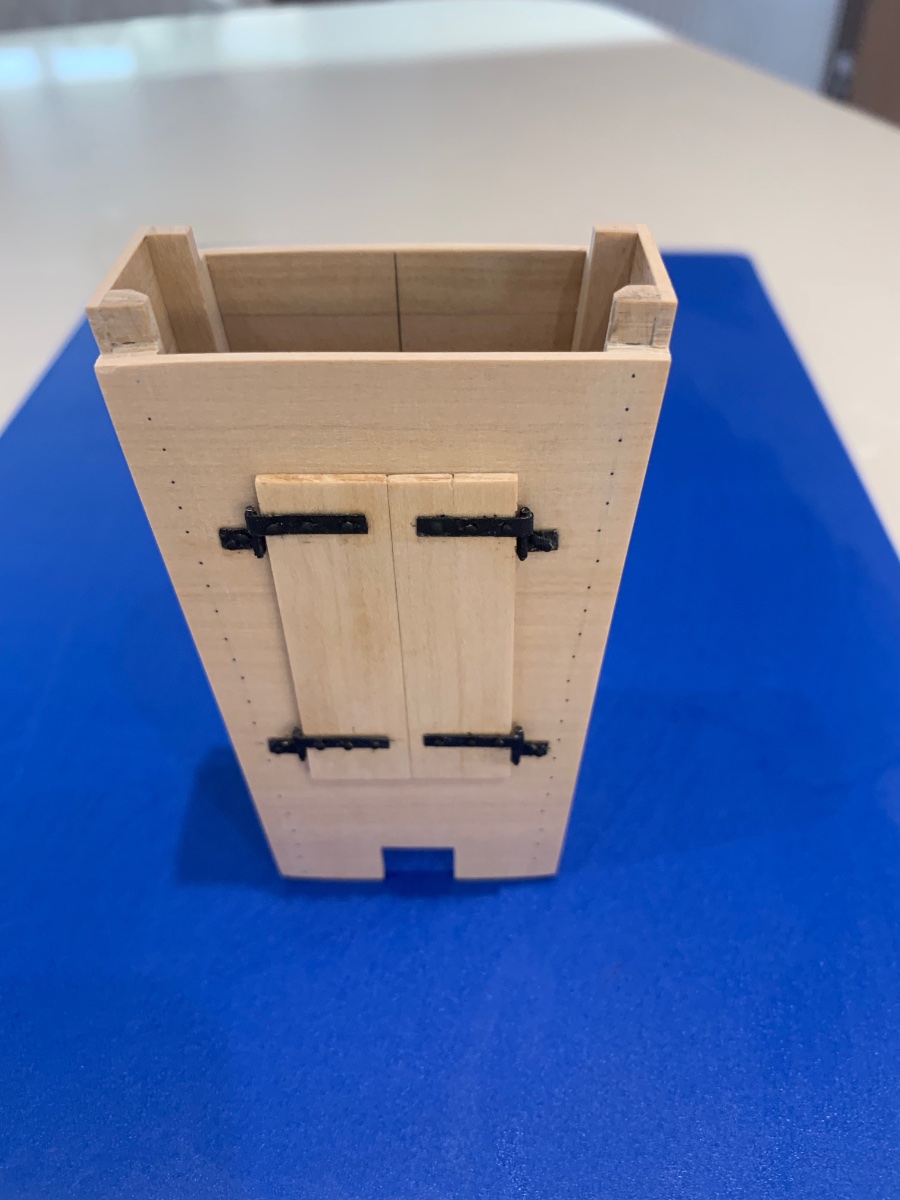
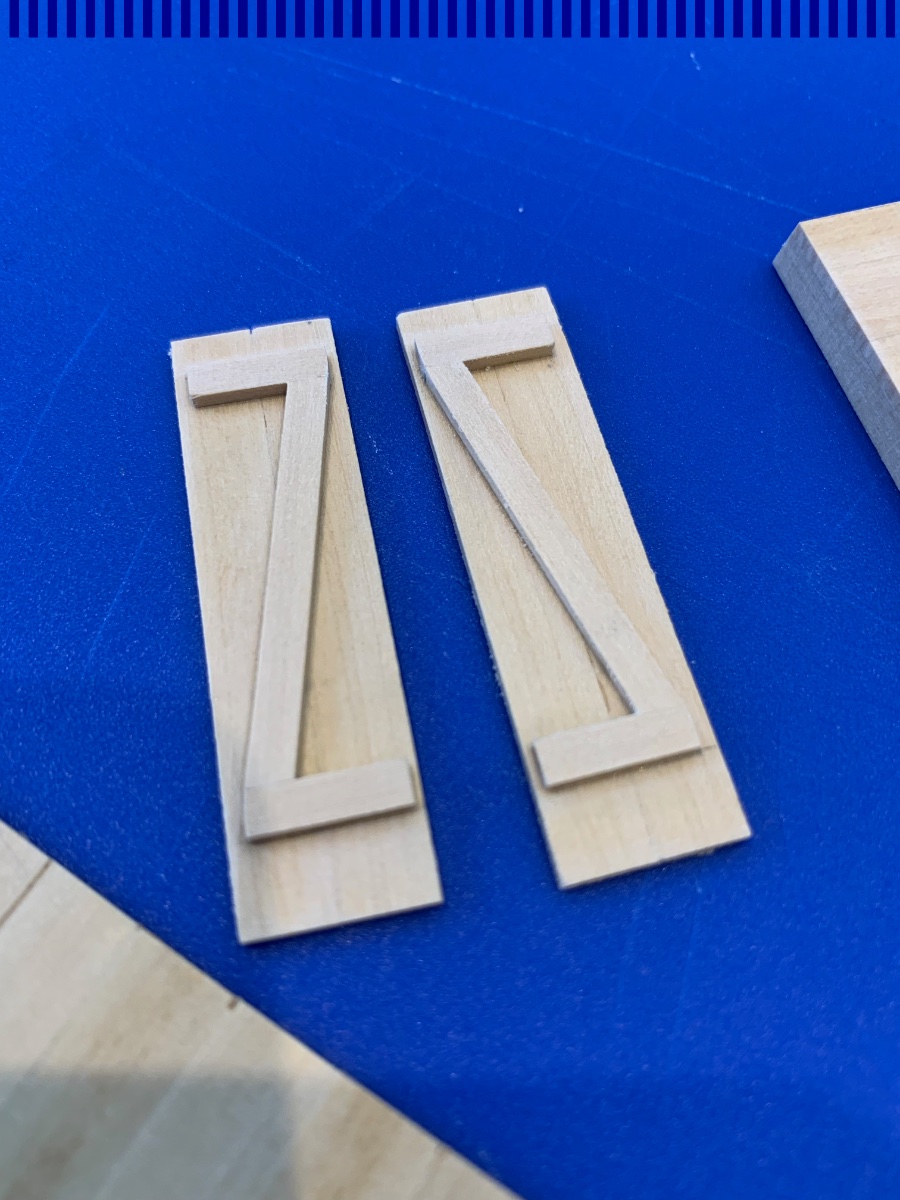
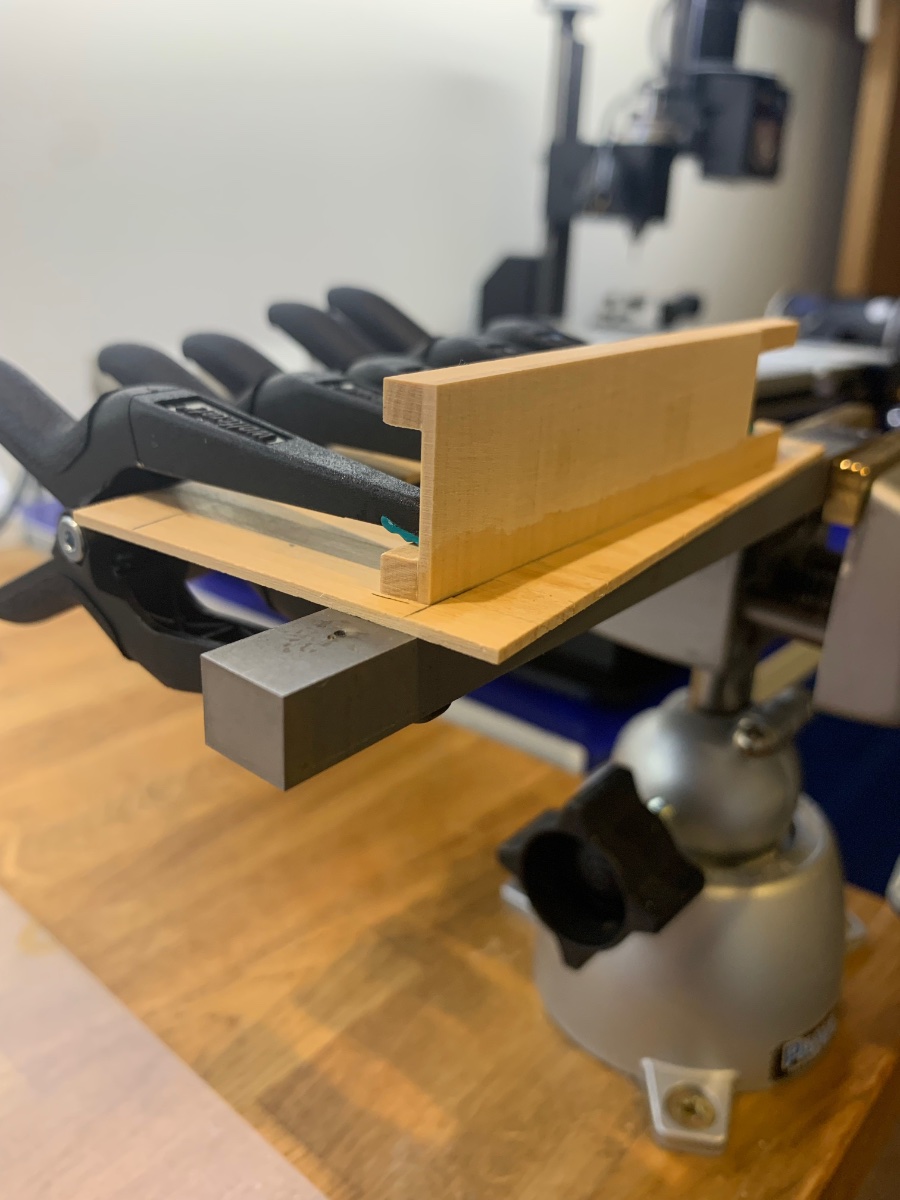
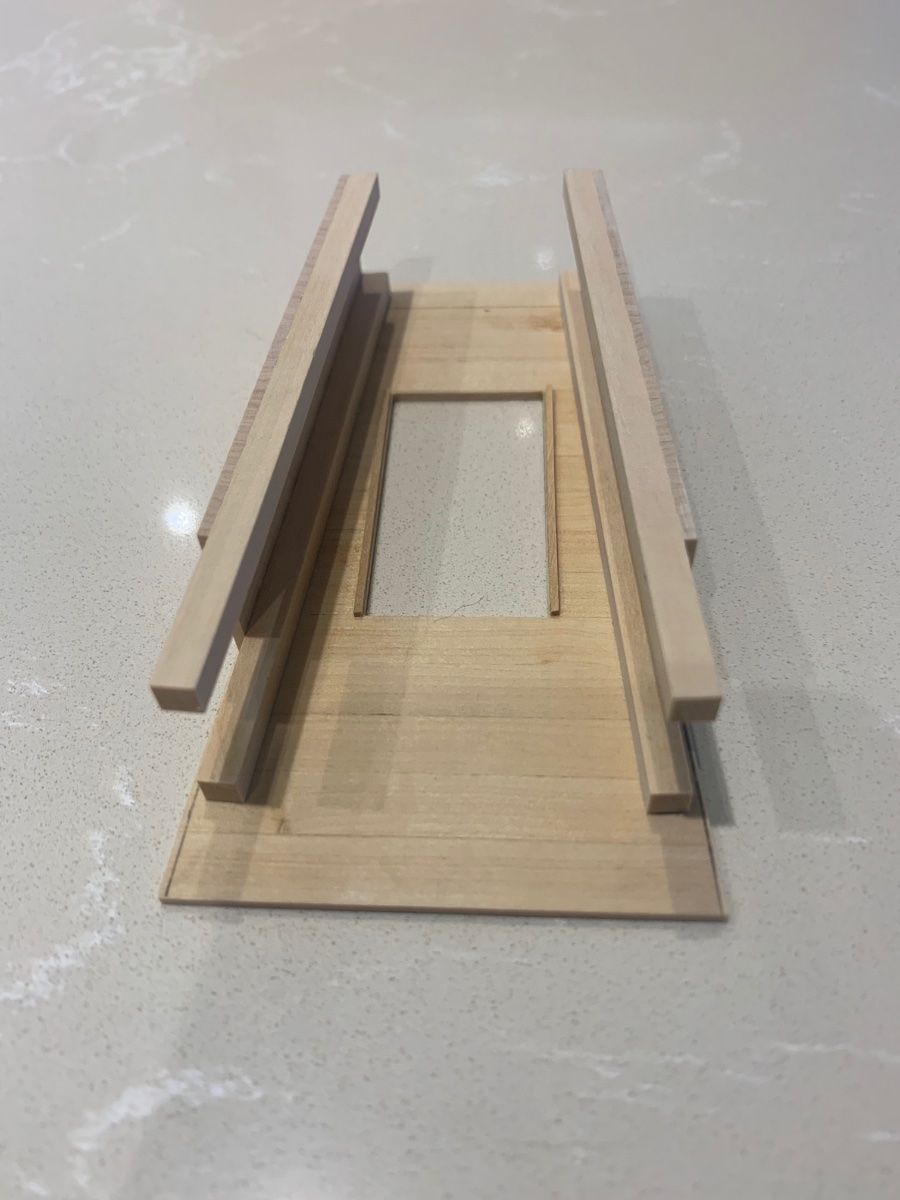
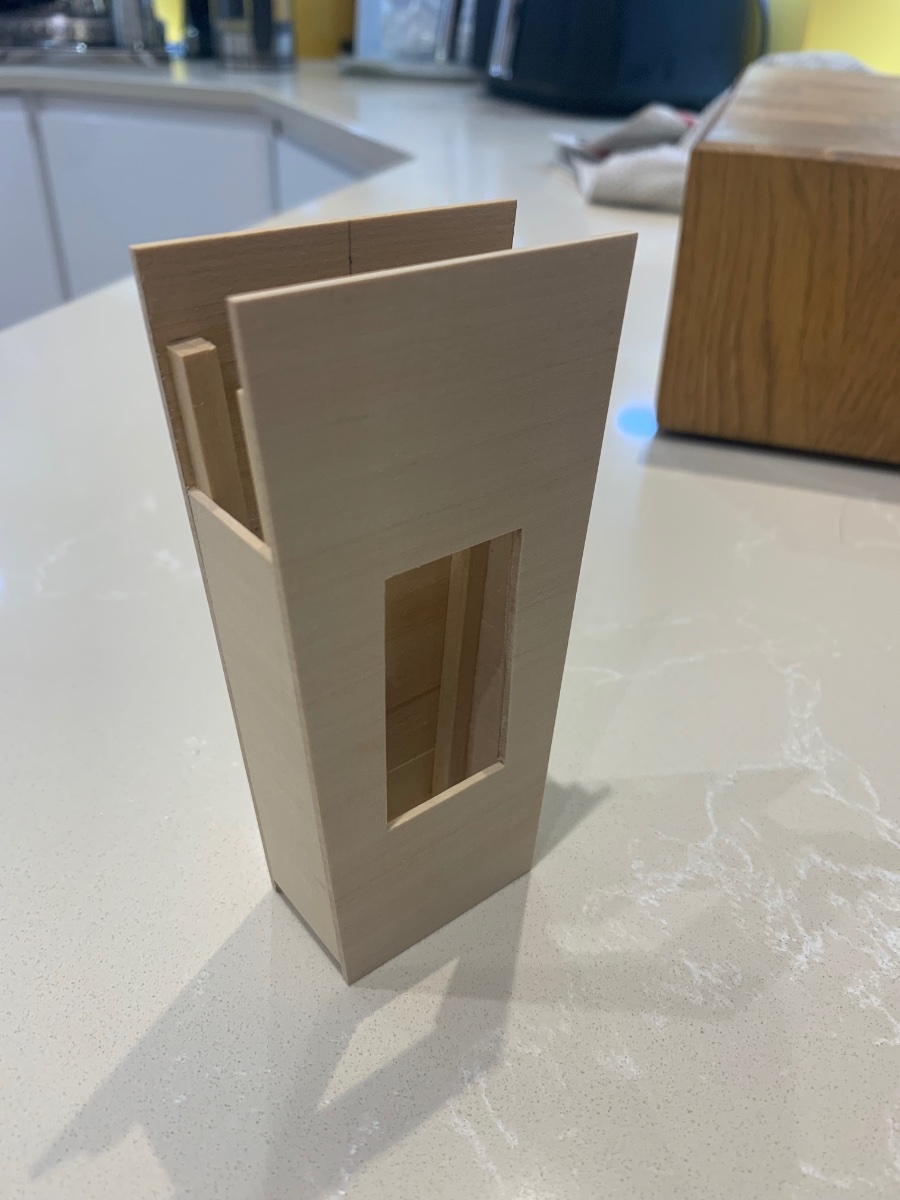
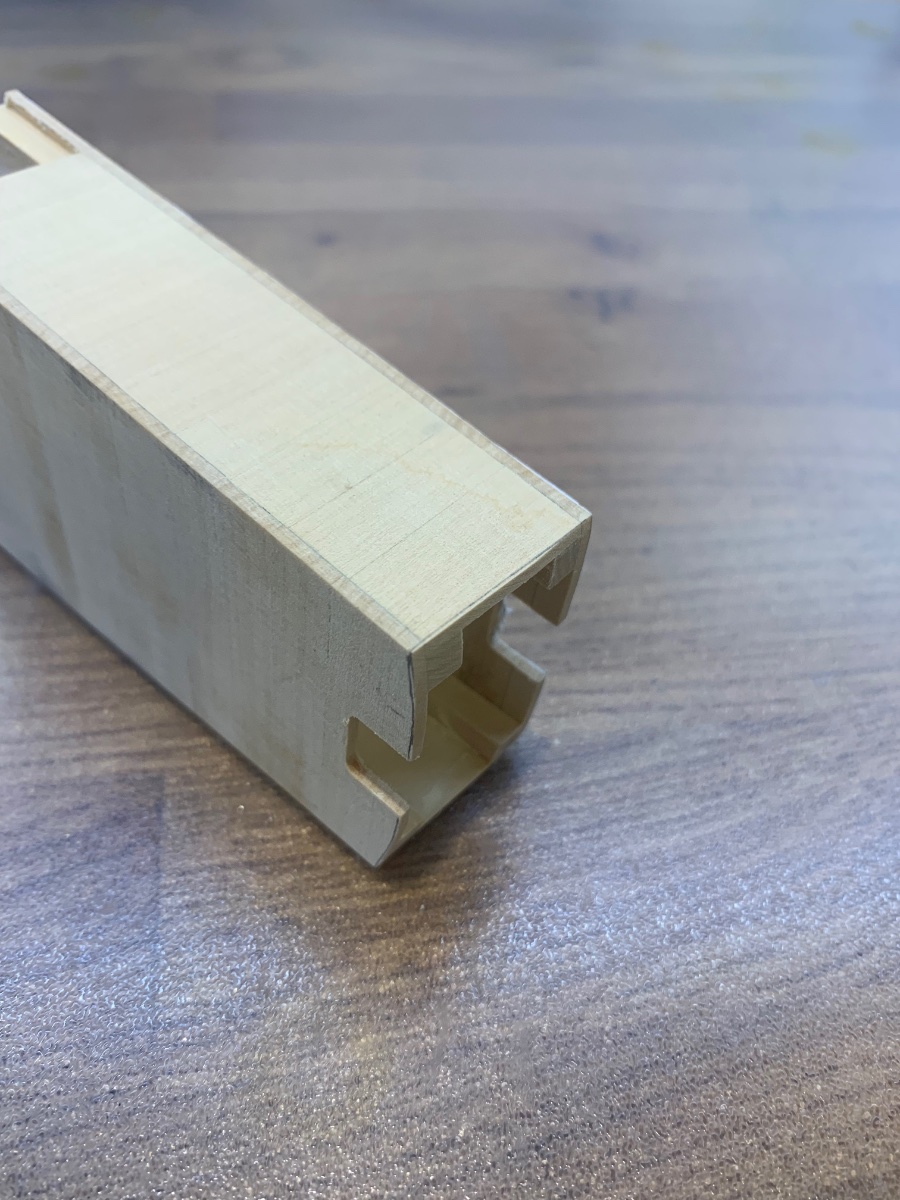
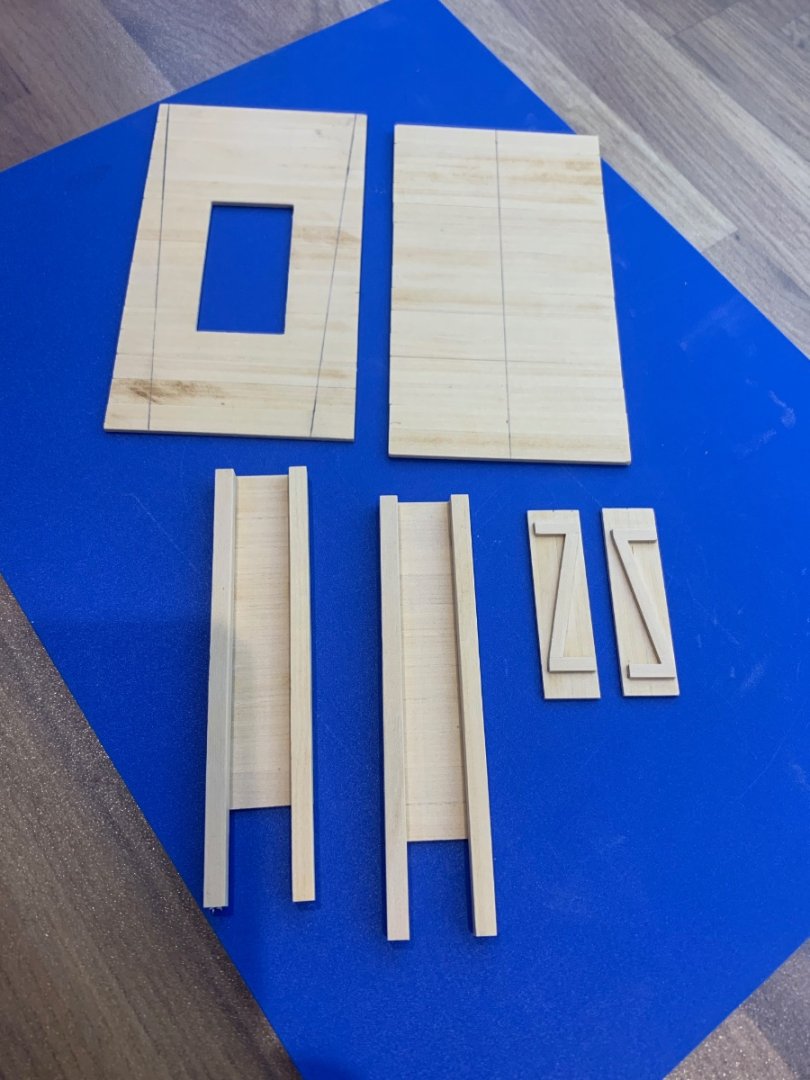
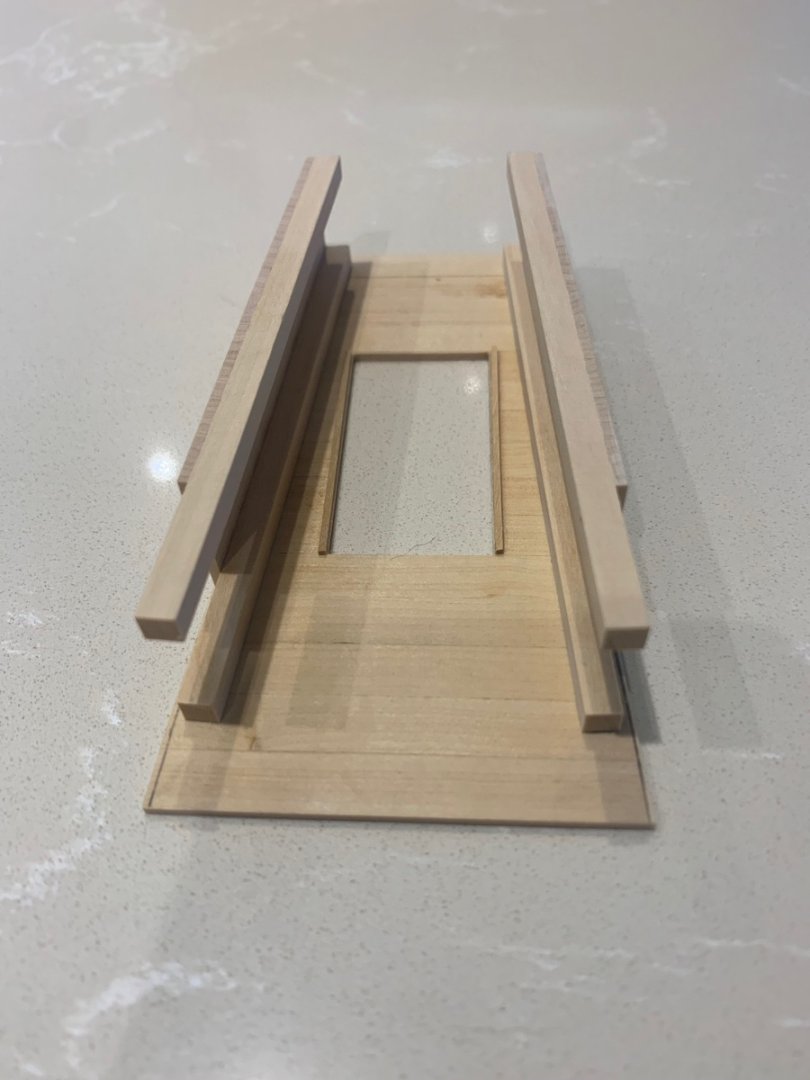
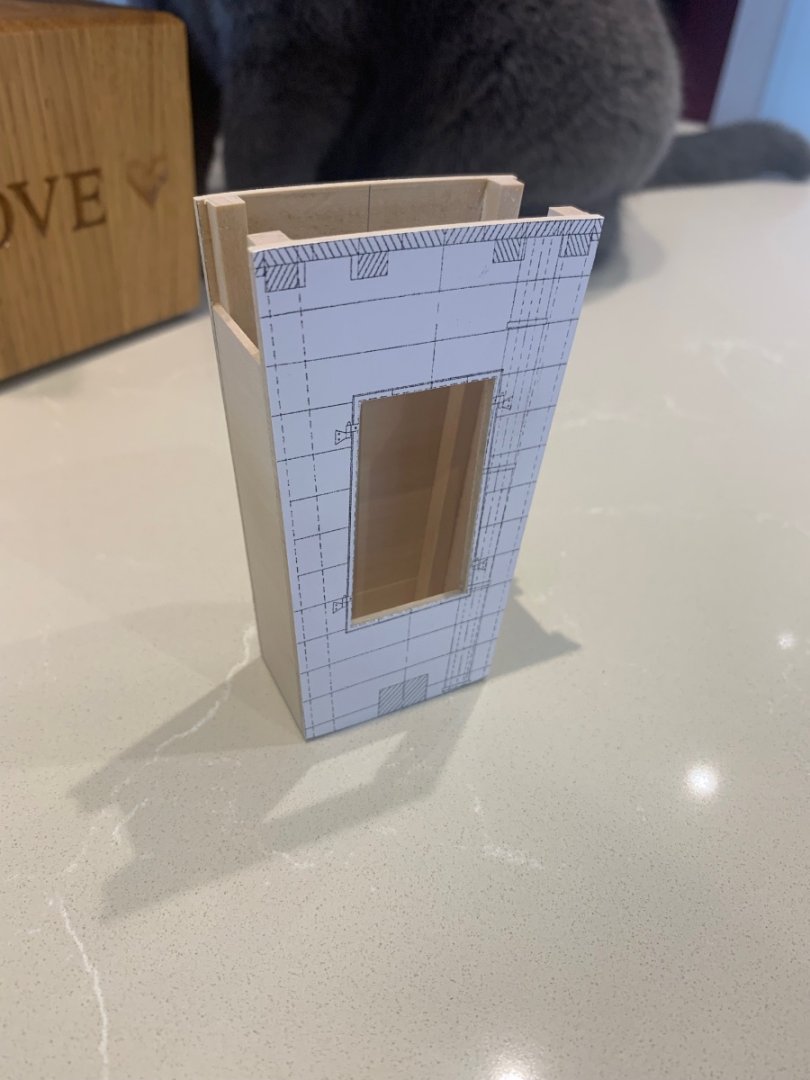
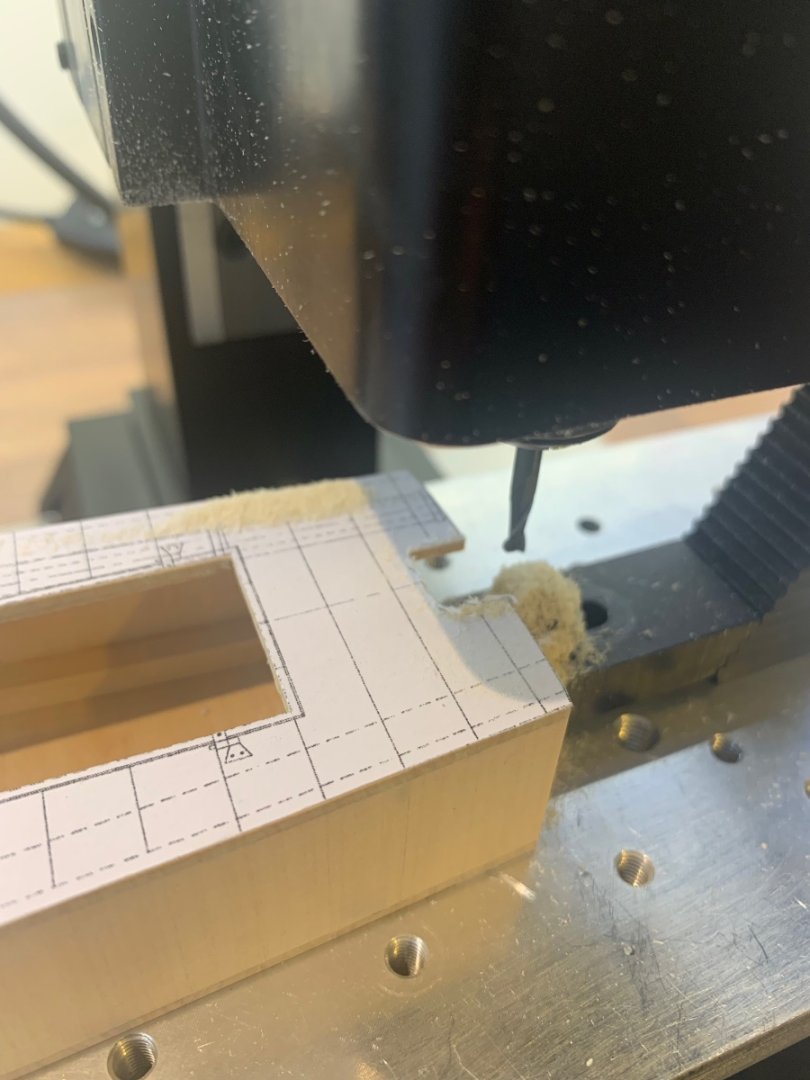
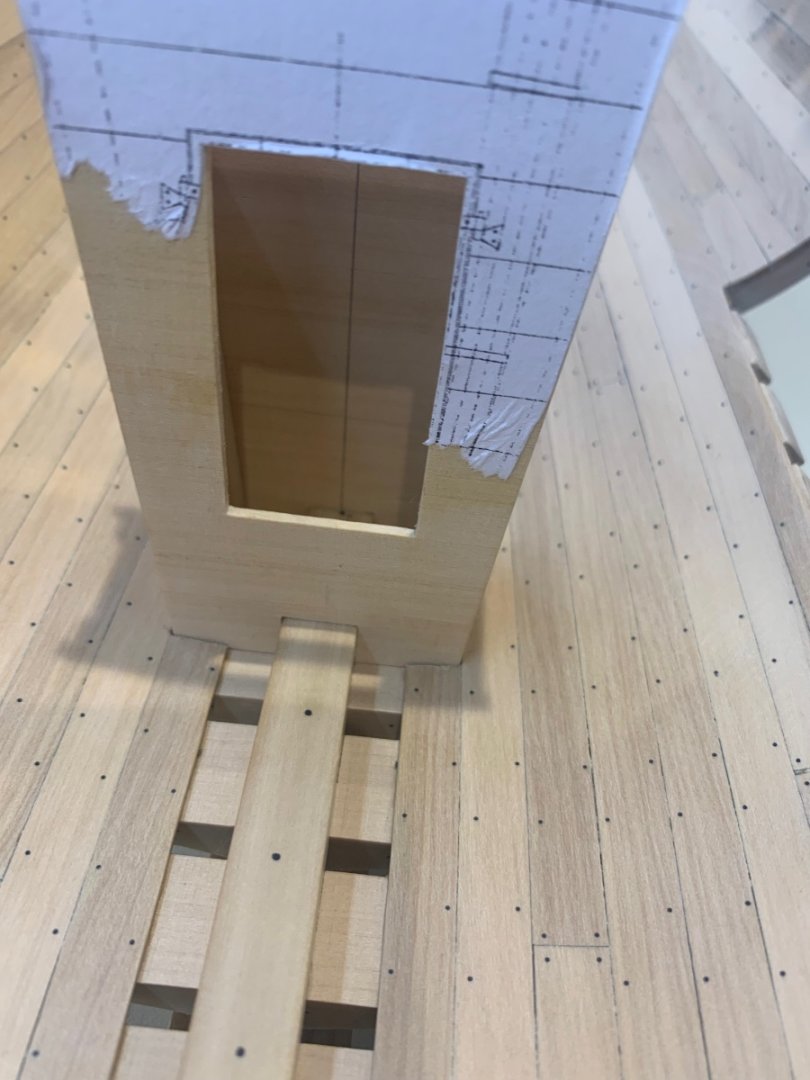
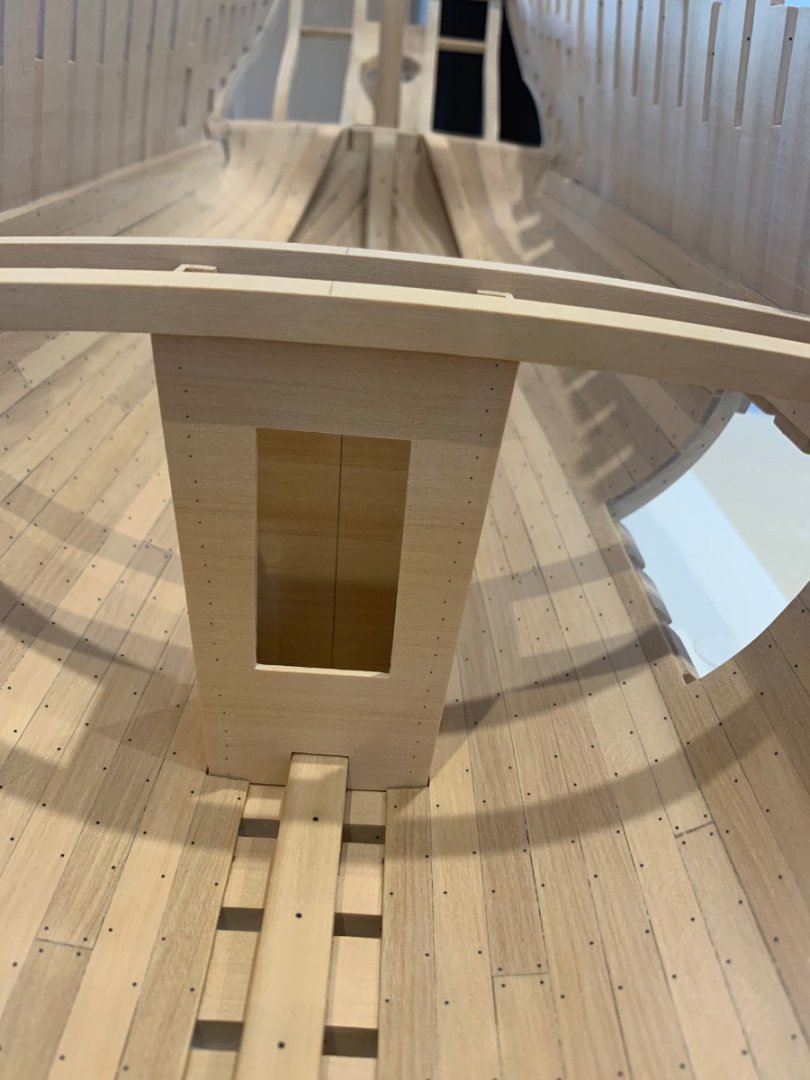
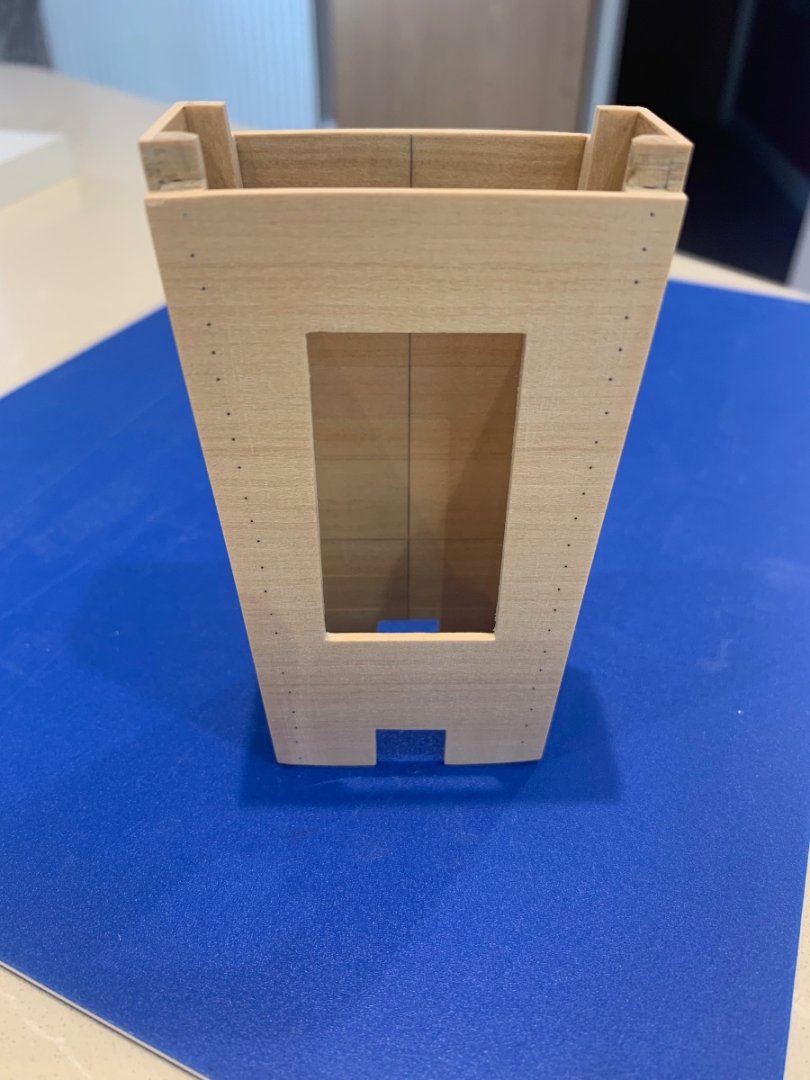
I've now made a good start on the pump well - Here's the main parts that it's made up of which include some very simply reinforced doors. Then they were assembled - They are well over sized at this point to give me loads to play with. You will also see the very thin reinforcing battens at the opening Next I used the template to cut it to the correct size but I left it overly high as this part has to fit snuggly under the main beams. I also milled out the slot for the keelson and shaped the bottom of it to match the hull. Then I removed the planks that I had previously fitted as the pump well sits directly on the frames. I also at this stage cut the holes through the frames for the actual pumps. I got a nice tight fit I then used the main beams to determine the correct height and recessed the support posts to fit between the beams. The well pump is wider that the opening between the beams. I also completed the side planking and added the planking nails. And here's the pump well in situ inside the hull I very pleased with the way it fits and I didn't have to make any alterations to the plans. So my next job is to make the hinges and lock for the doors. Cheers Mark


-
Such a tiny little boat - good luck with the build 👍 I have don't know how the manufactures make these for so little money but I'm glad they do. What a great way to get into our hobby.
-
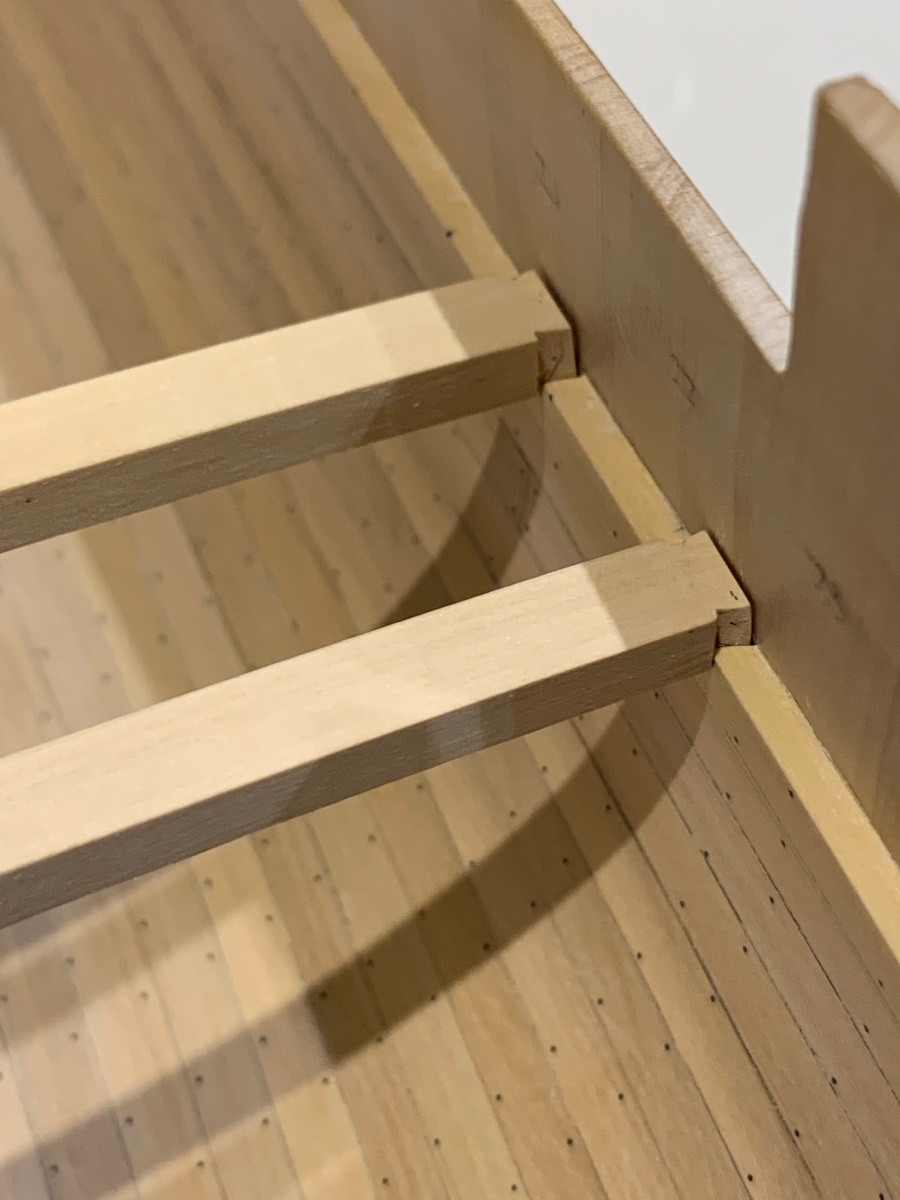
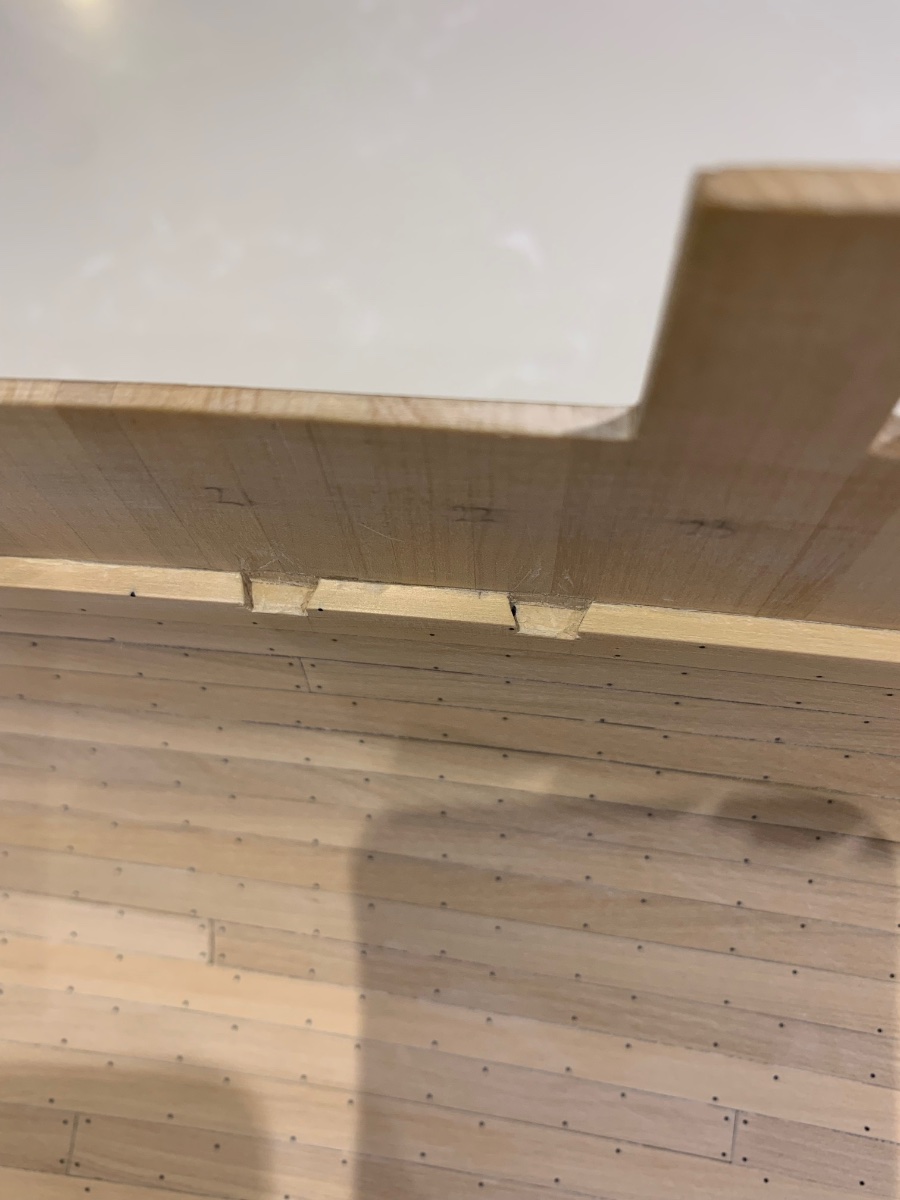
Well I have to say that I'm glad I paused and re-checked. This morning after the 1mm strip that I put onto the port side had dried I checked every frame on each side for accuracy. I found a high spot on the starboard side and also discovered that the port side was not completely 1mm incorrect. In fact the clamp was slightly wavy 🥲 So I've spent today pulling both sides to their correct dimensions as thinking forward - if I don't do this now I'm going to have to make loads of alterations to the waterway to make it fit. I'm sure it will still need fettling into place but nothing like it would have done had a not checked. The results are great as I can actually see that the clamps run far straighter than they did and now I know that they are correct. So after doing that I cut the dovetails into the two beams that I had made. I then cut the receiving dovetails into the beams. I cut these 2.5mm deep as apposed to the 2.4mm on the plans (Sorry druxey I'll try harder next time I promise 🤣) The beams are now in place and the fit is really nice - even better they are bang on the money height wise with just a little left to sand out. So now I can get on with the pump well as I now know its exact location. I can't thank enough for the encouragement and making me re-think to get this right. Cheers Mark


-
Hi Greg you completely blew me away with this comment - I just didn't know how to reply yesterday. Thanks for your really nice comment 👍 So I took a step back and decided to do a full measurement of the clamps as I was unsure if one side was high and required sanding or the other was low. I was actually hoping that I had put the starboard side a bit high but no......I was right and the port side was roughly on average 1mm too low. So I've taken your advice and added a strip today to get me to the correct level which needs feathering in towards the stern. I'm very glad that I have done this as sometimes it's so easy just to plough forward with a build and not reflect where you are. Thanks for the advice and I'll have an update soon. Cheers Mark
-
Trust me there was a huge bit of luck involved here Greg that a great idea as I just sight down the line with my eye which surprisingly I have found to be quite accurate but this will be better. Here's a question though - I have discovered after my initial happiness that the port side clamp at this point is about 1mm lower than the starboard side. So to scale that is 25mm so nothing major but still a discrepancy. I was thinking about dropping the starboard side slightly lower within the clamp with these 2 beams to pull them level. But even if I do this the waterways will still be slightly lower. So is this something that I need to worry about as on such a large scale as it certainly wont be seen. I've never tried for perfection as I'm just not experienced enough so my thoughts are just leave it but I'll be interested to see what others think.
-
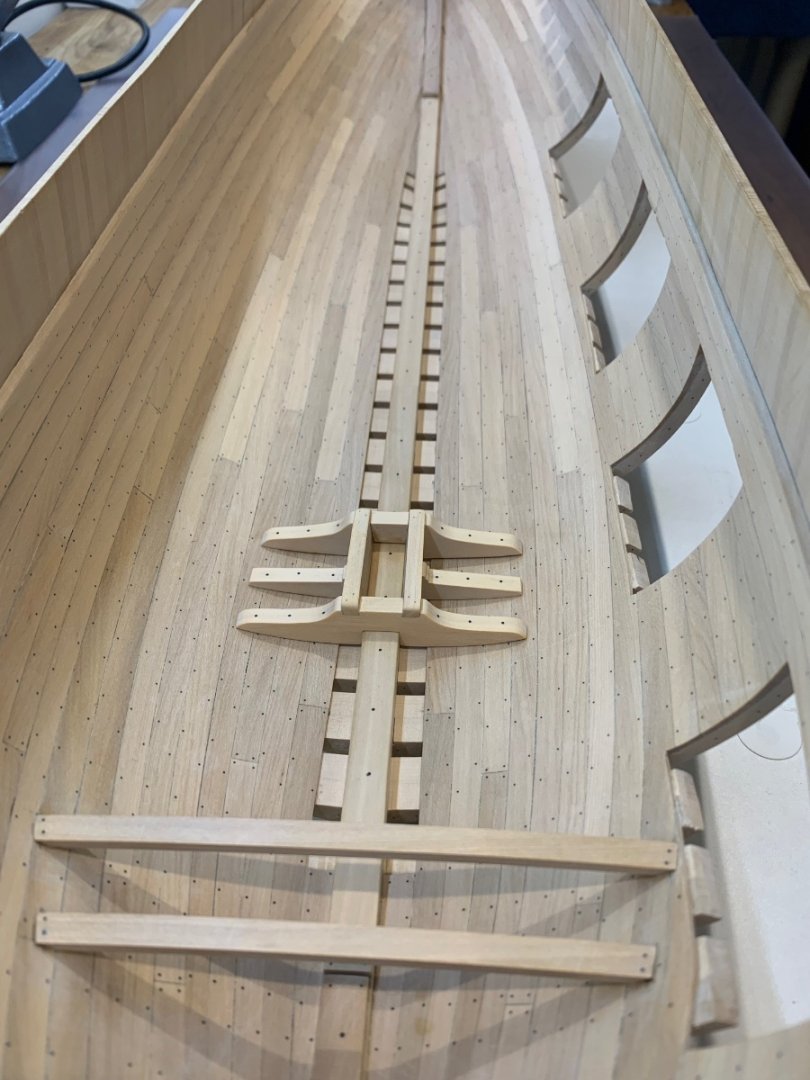
Just a quick update as I'm a little bit happy with something. So today I made a few main beams which are huge. They are each made from a piece that is 15mm x 7.9mm x 200mm. Sorry I digress - I then fitted the two that I need for the dimensions of the pump well and I thought that I had better check that the build was going the right way. So just like all of the other beams I checked the height at the crown of beams using my height gauge. The beam according the drawings should be dropped into the deck clamps by 2.6mm to be at the correct height. Mine need dropping by 3.0mm!! I am so happy about this as I fitted the clamps ages ago and things have moved on since then. I'll take being 0.4mm out everyday of the week 👍 It may be different at various points of the clamp I'll find out as I go along. I just need to work out how to cut the dovetails in both the beams and clamps but I'll sort it. I need to sit these beams at their final height to build the well. A few of pictures of these beams in place and sorry for my little self indulgence but I'm well happy with this result! Cheers Mark


-
Hi Tony - Yes mate they are carbon fibre rod. I can get most sizes really easily in the uk and it sands down at the same rate as the wood. I know most builders prefer brass but I'm not overly keen on the shininess of it and also they are hard to sand down too when in wood. Thanks Tobias 👍 Cheers druxey - I was fortunate that the two sides are pretty much identical so once I got one to fit the other just followed as I already had a pattern. They do take time though there's no doubt about it! I find getting the beams to fit exactly harder to fit funnily enough; as you are lining them up on more than one axis and they keep on moving from where you put them 😂
-
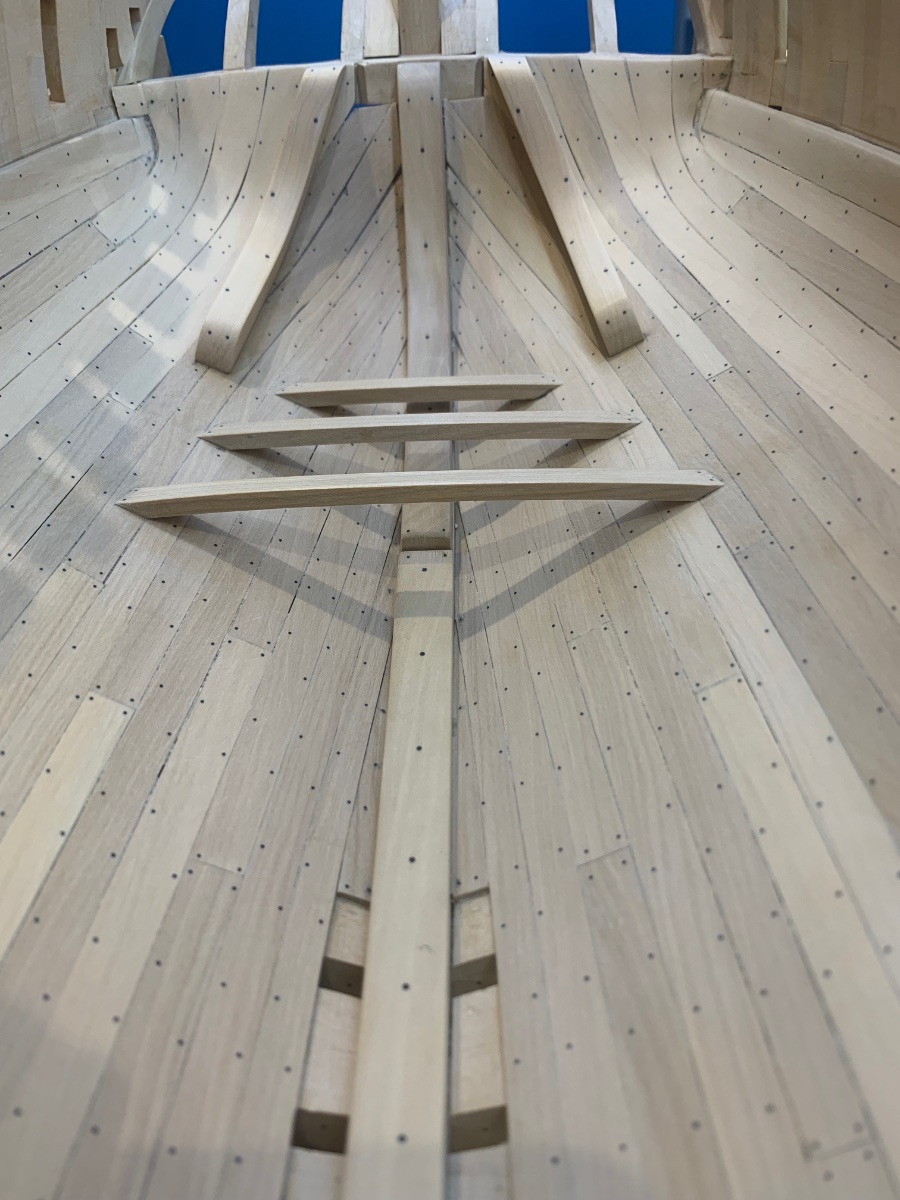
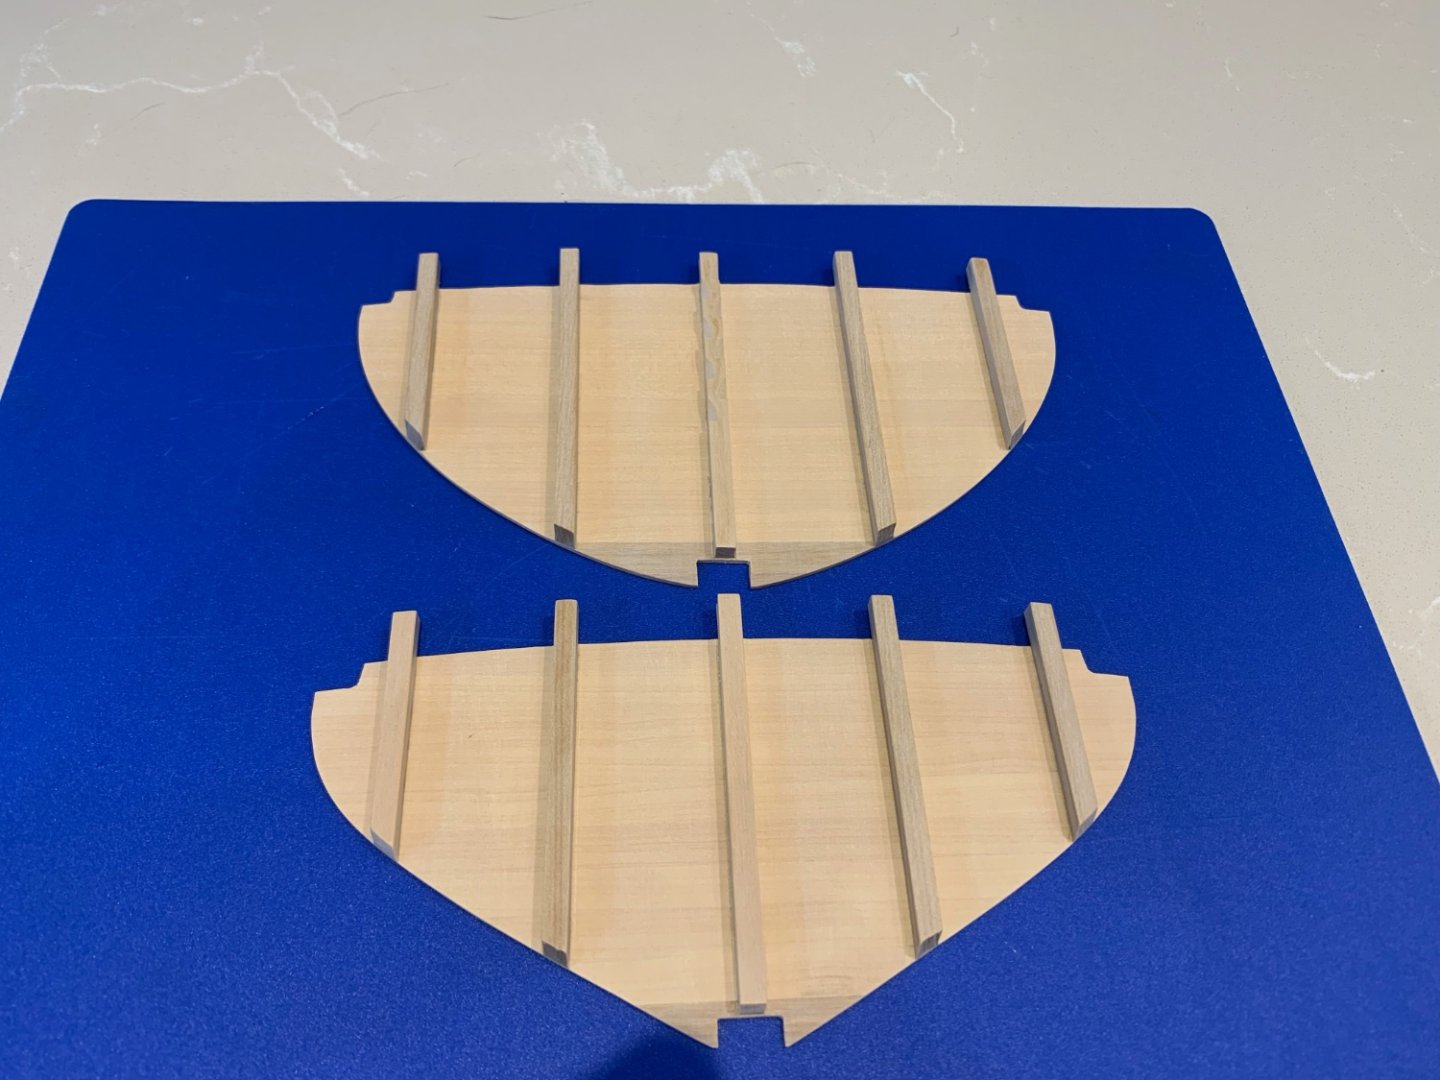
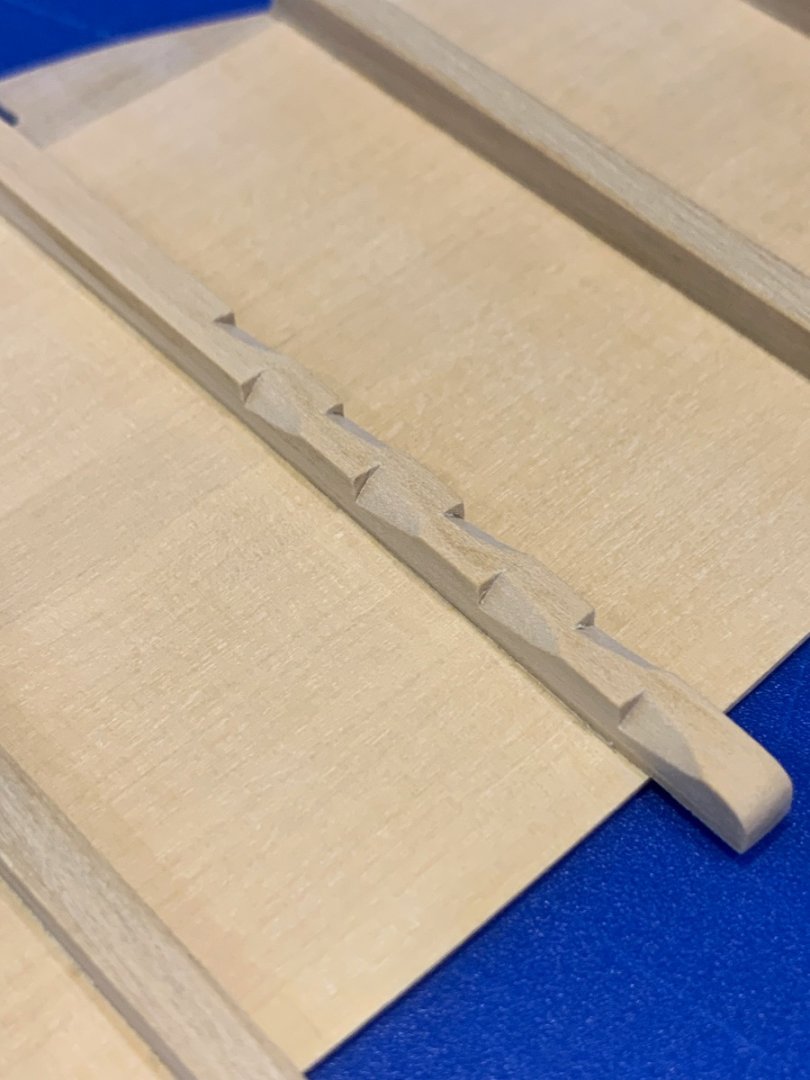
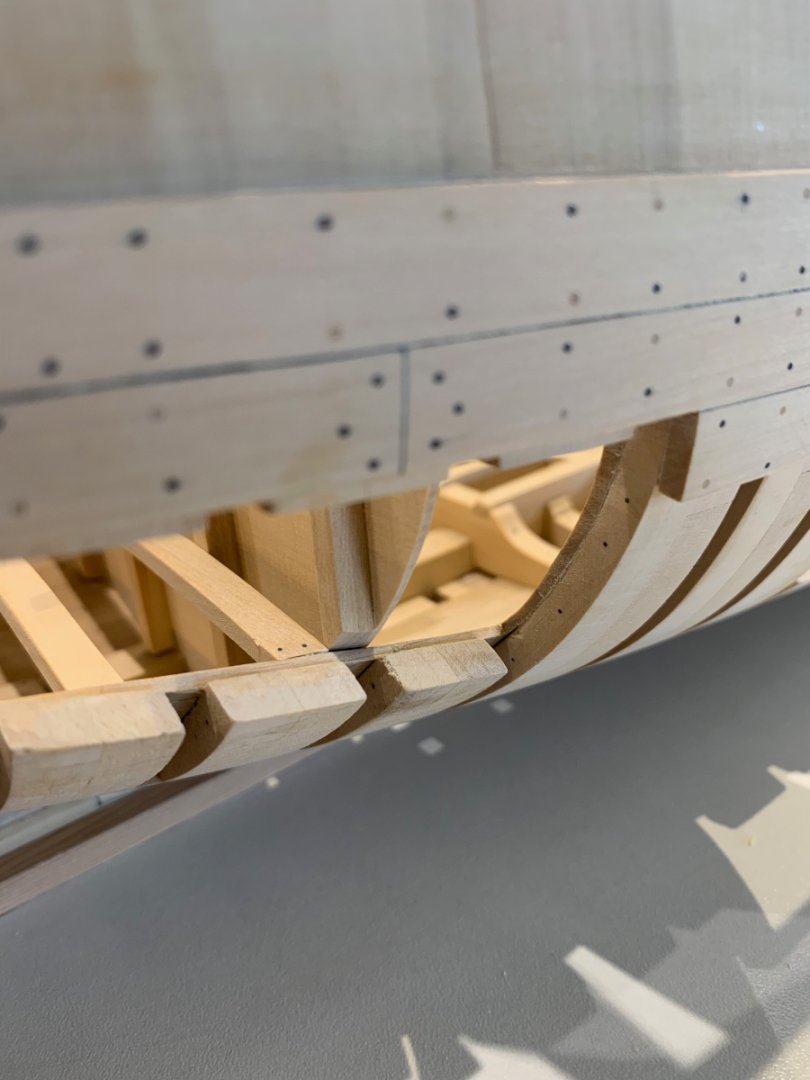
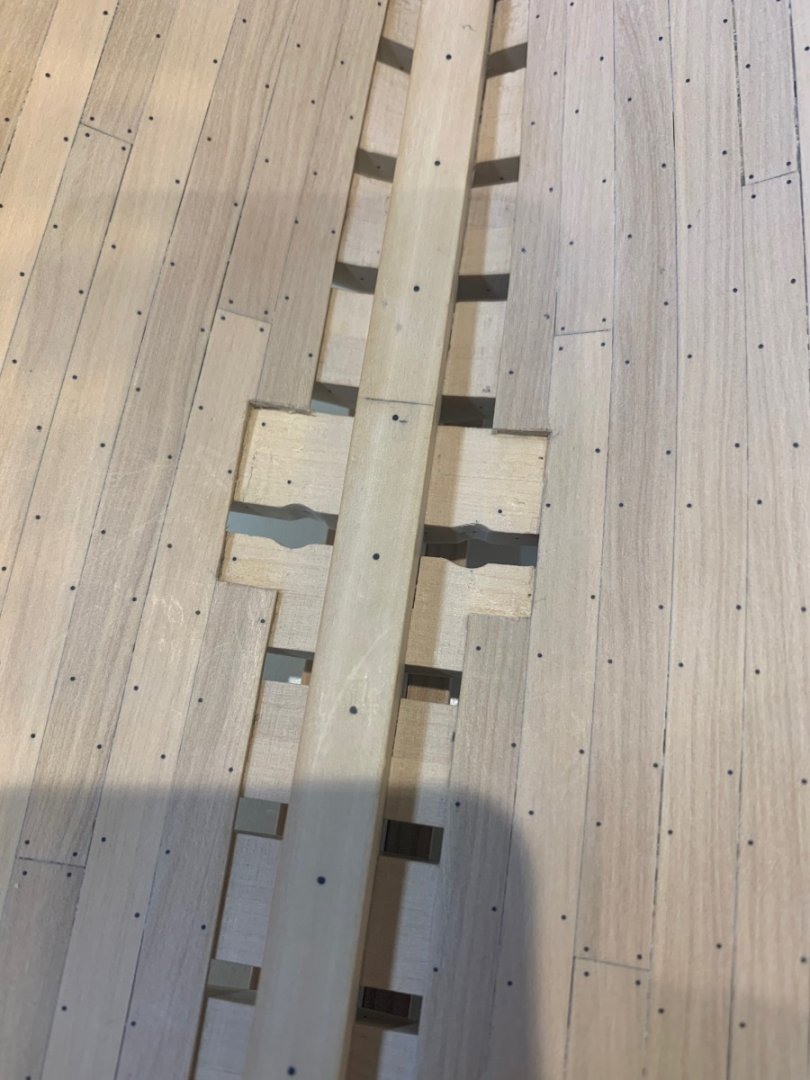
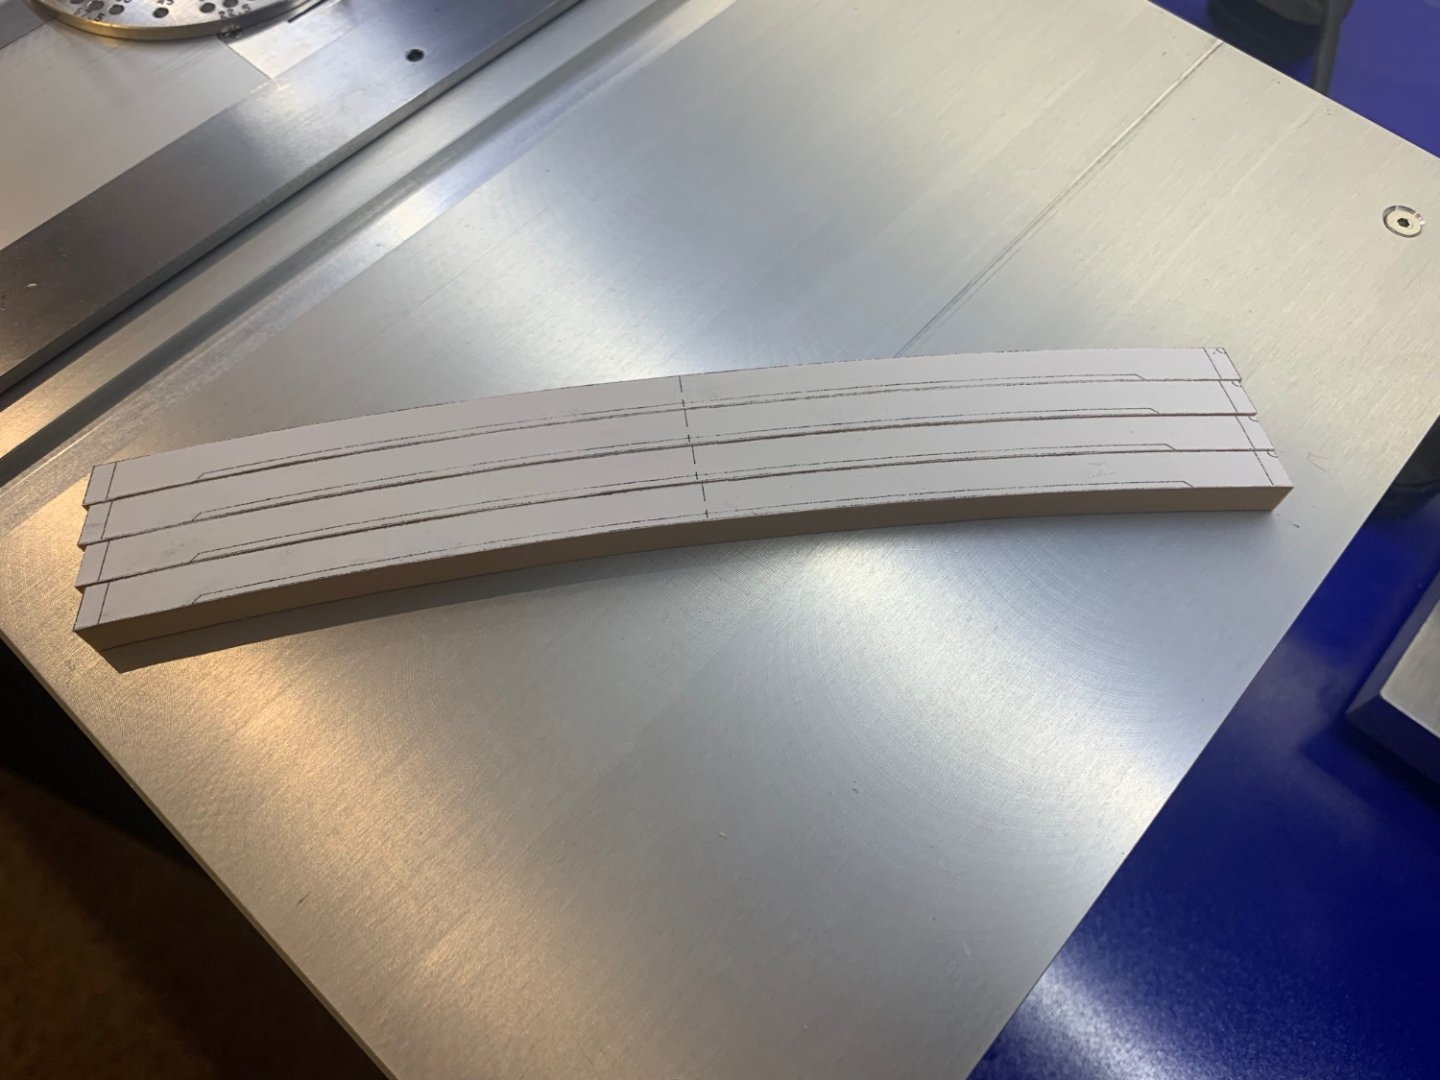
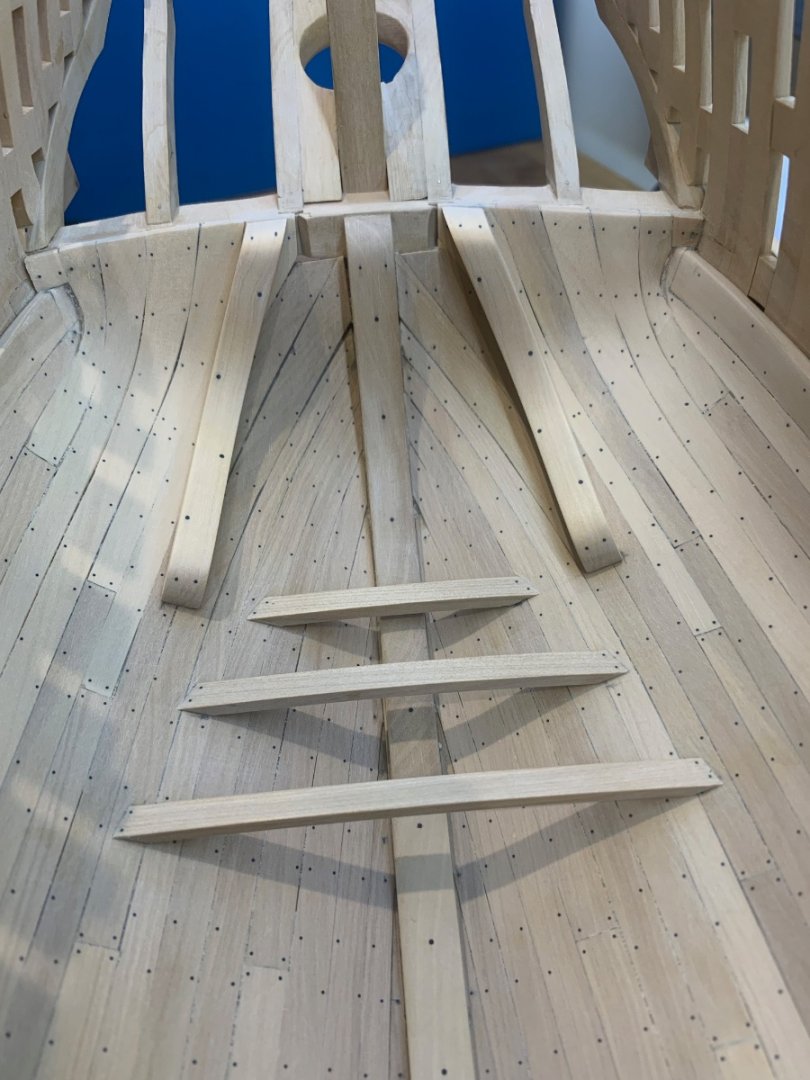
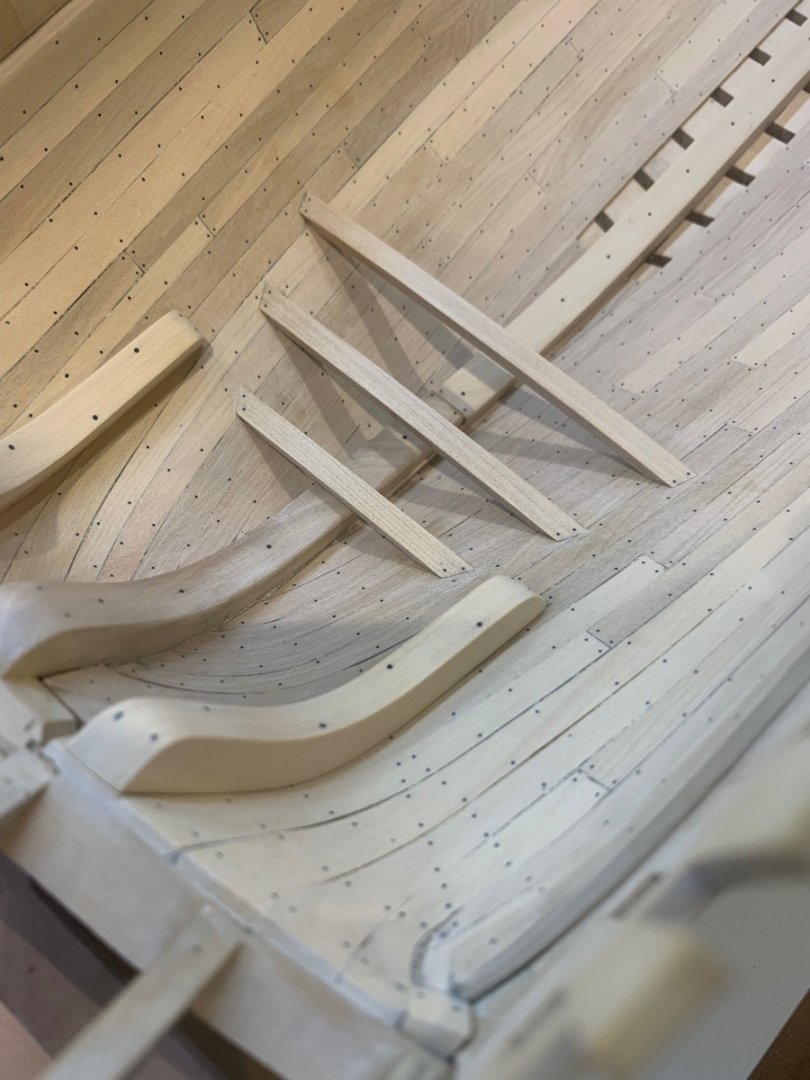
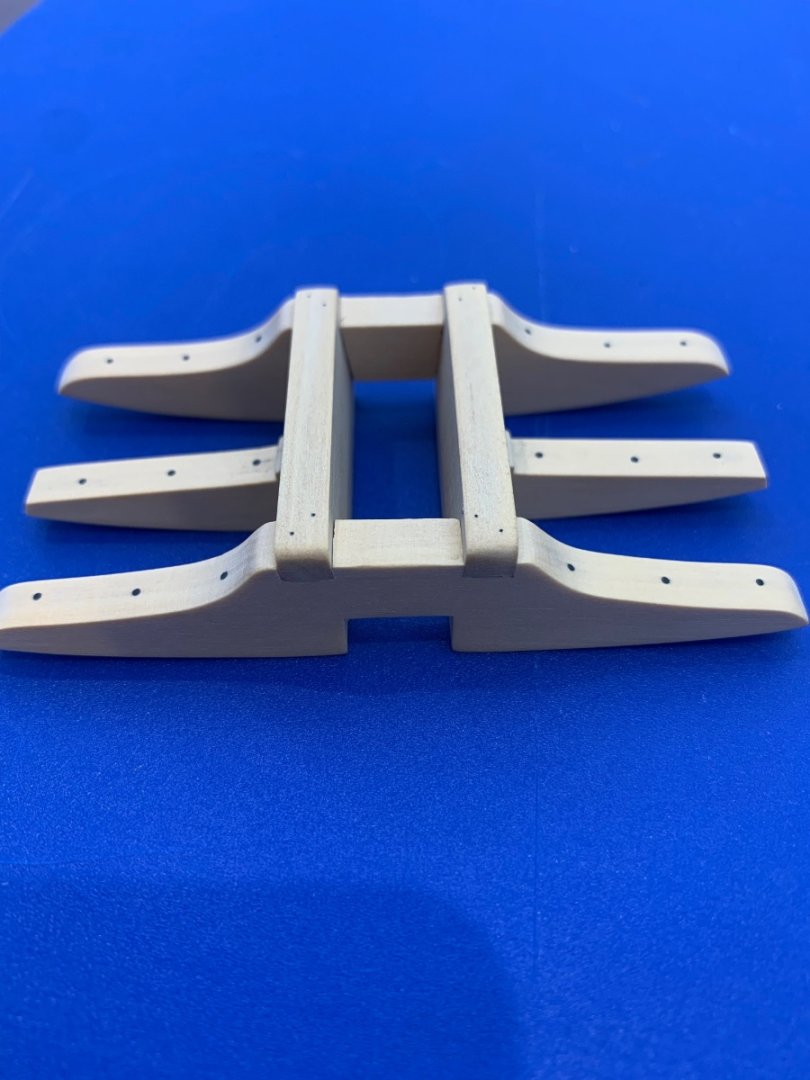
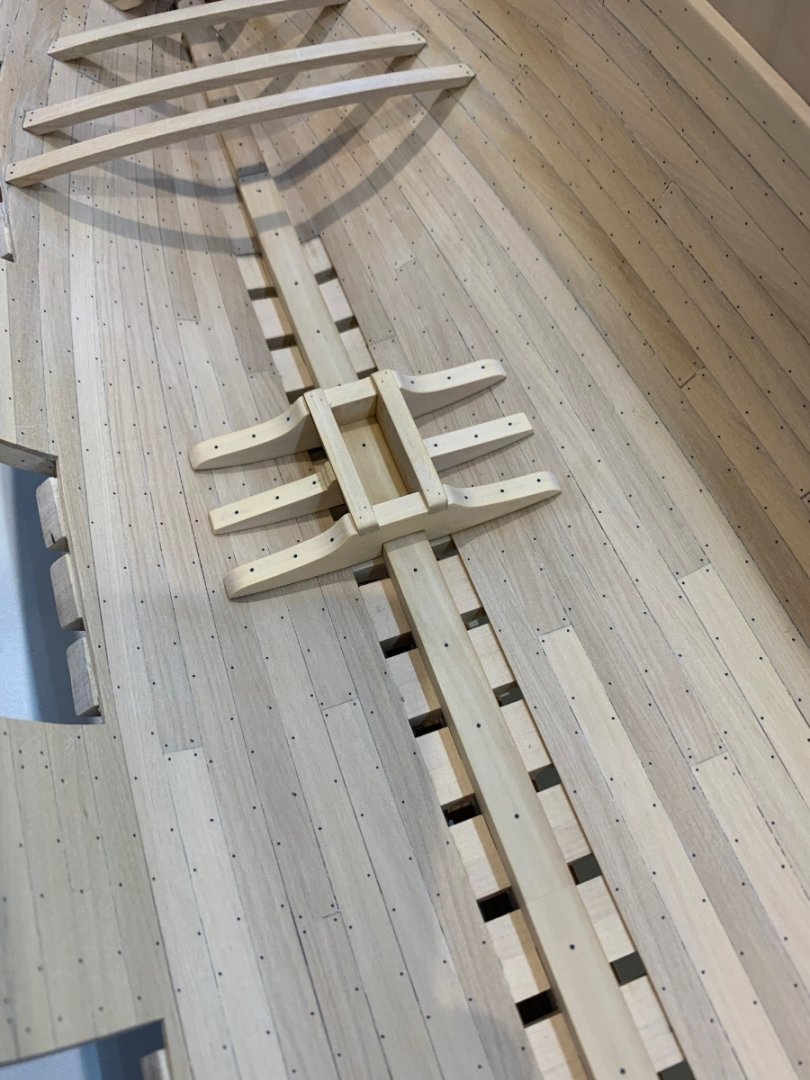
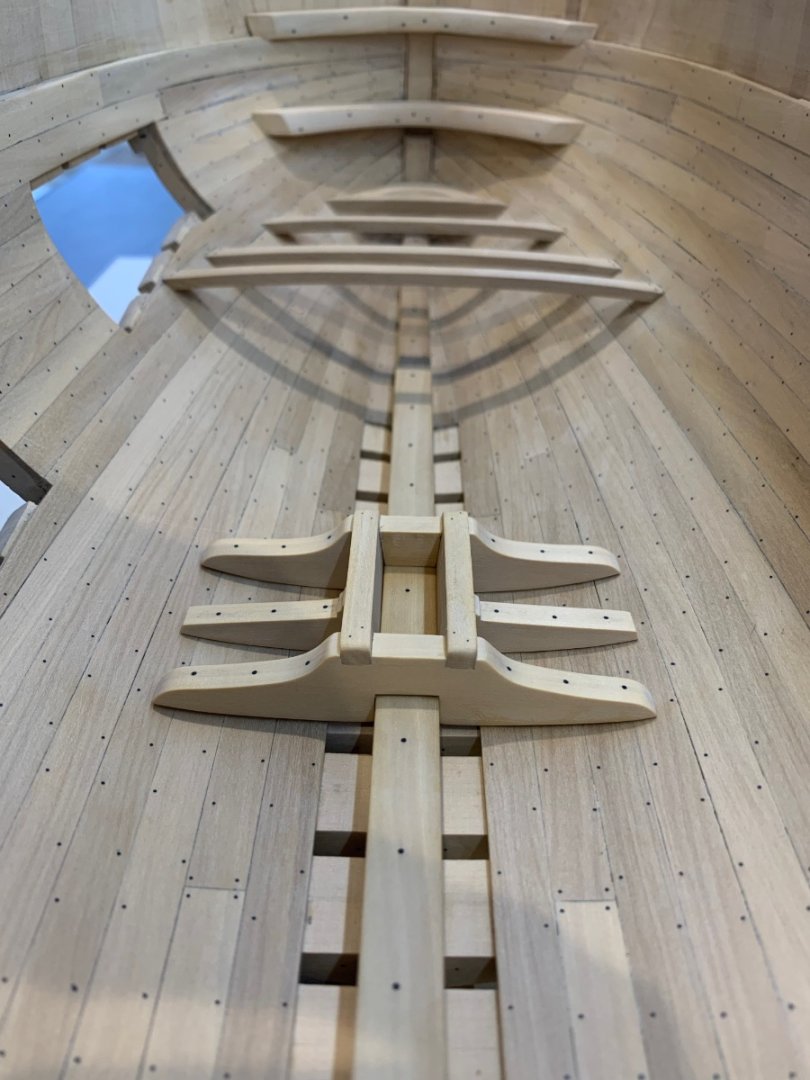
Thanks Jim Thanks Jean Paul Onto the stern sleepers - These are another really easy piece to make but very difficult to get them to sit correctly on the stern. I lost the first set but improved on the second. Here's the sleepers ready to go on. And here they are all fitted which I managed to get quite a tight fit to the hull. Also fitted are the beams for the small deck at the stern which will also have a hatch. This deck is not horizontal with the keel but has a very gentle slope downwards. They were installed in exactly the same way as the forward deck beams. I'm going to make the pump well next but to ensure the correct placement I need to make a couple of the main beams first. It's at this point when you realise what building in 1/24 scale is like as these beams are big pieces of wood. Thanks for all of the encouragement - Mark


-
Lovely work and I think using the two different types of wood sets of your work even better.
-
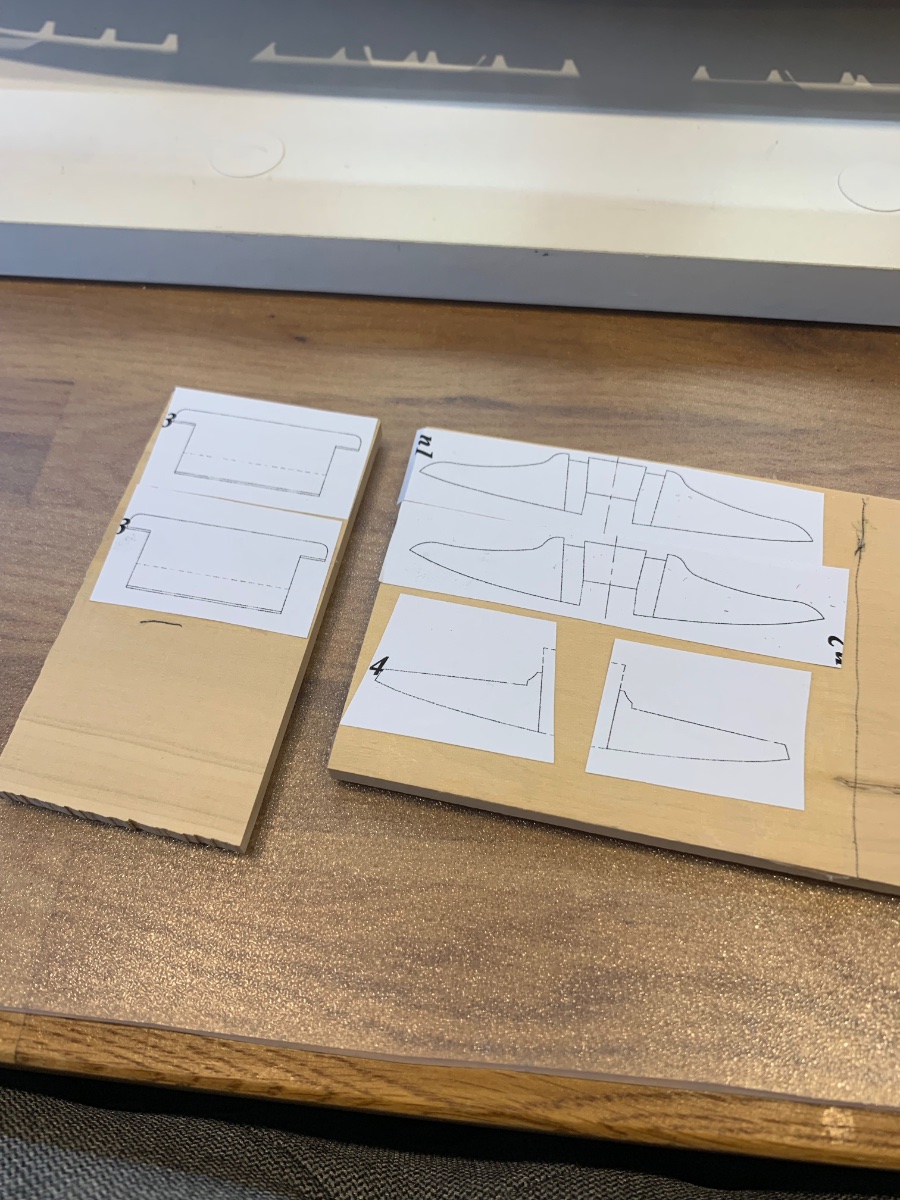
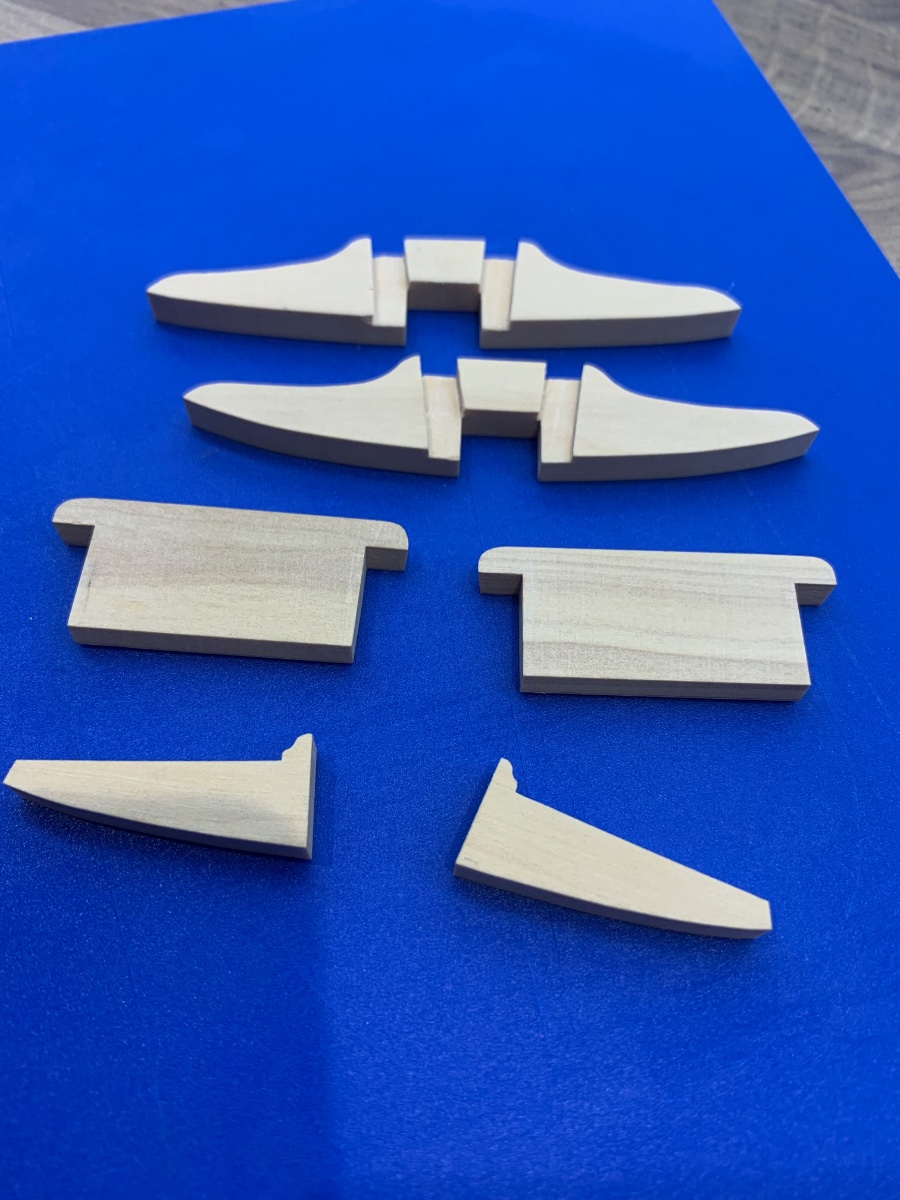
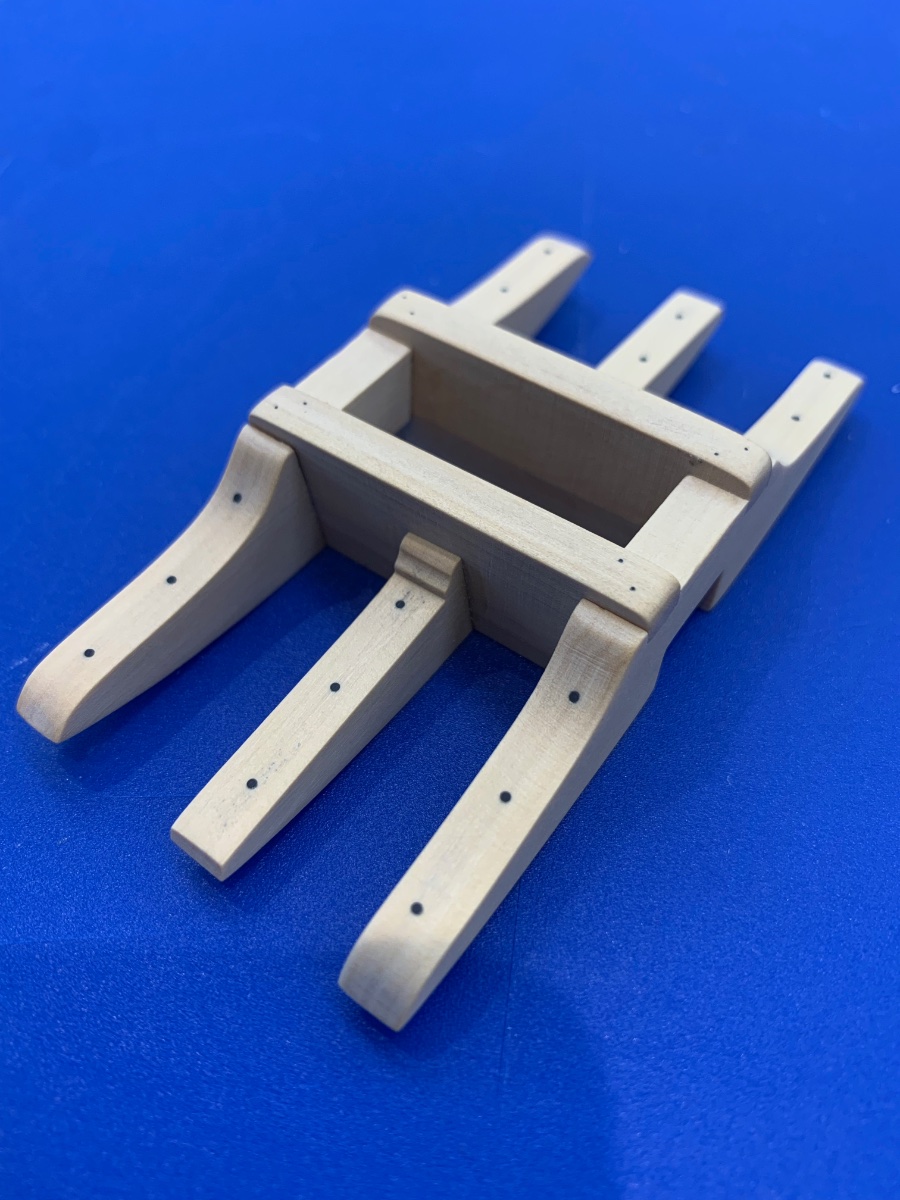
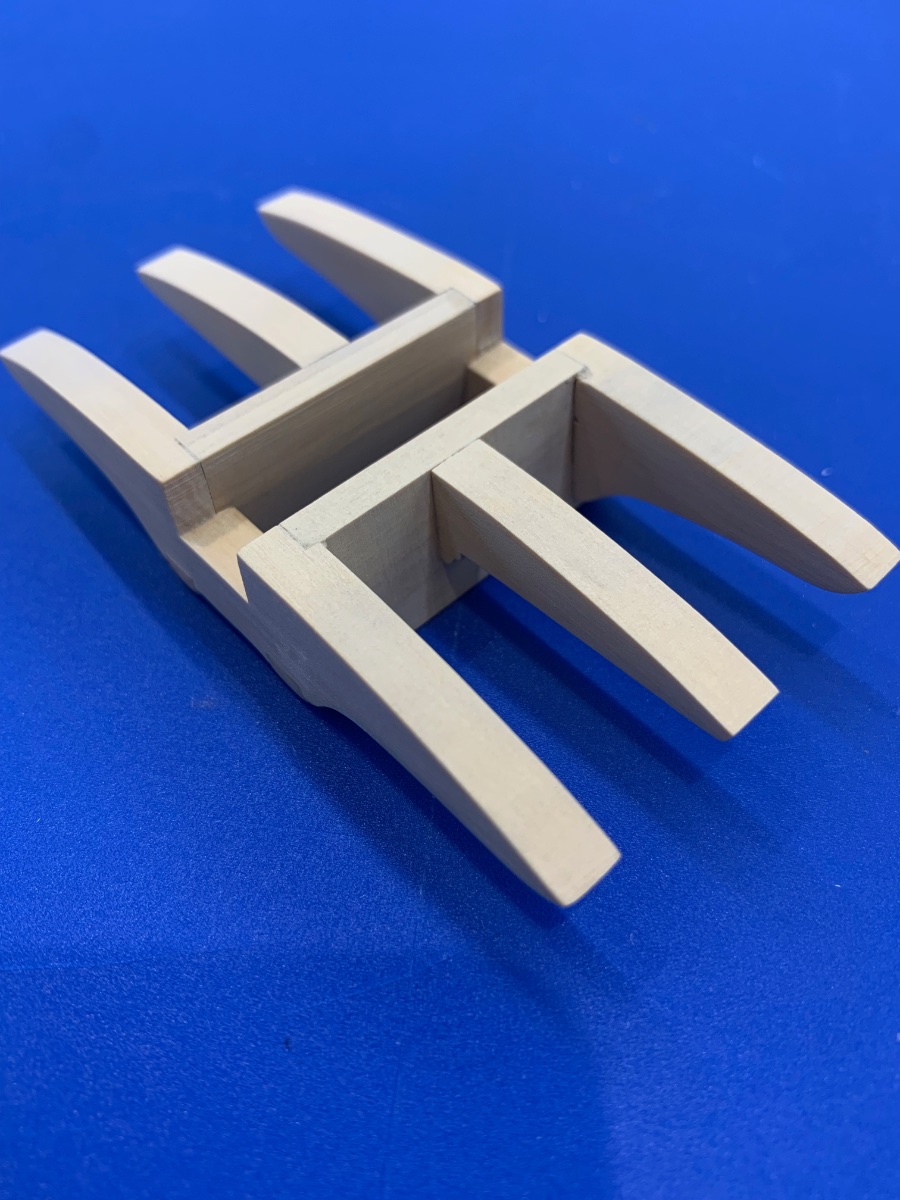
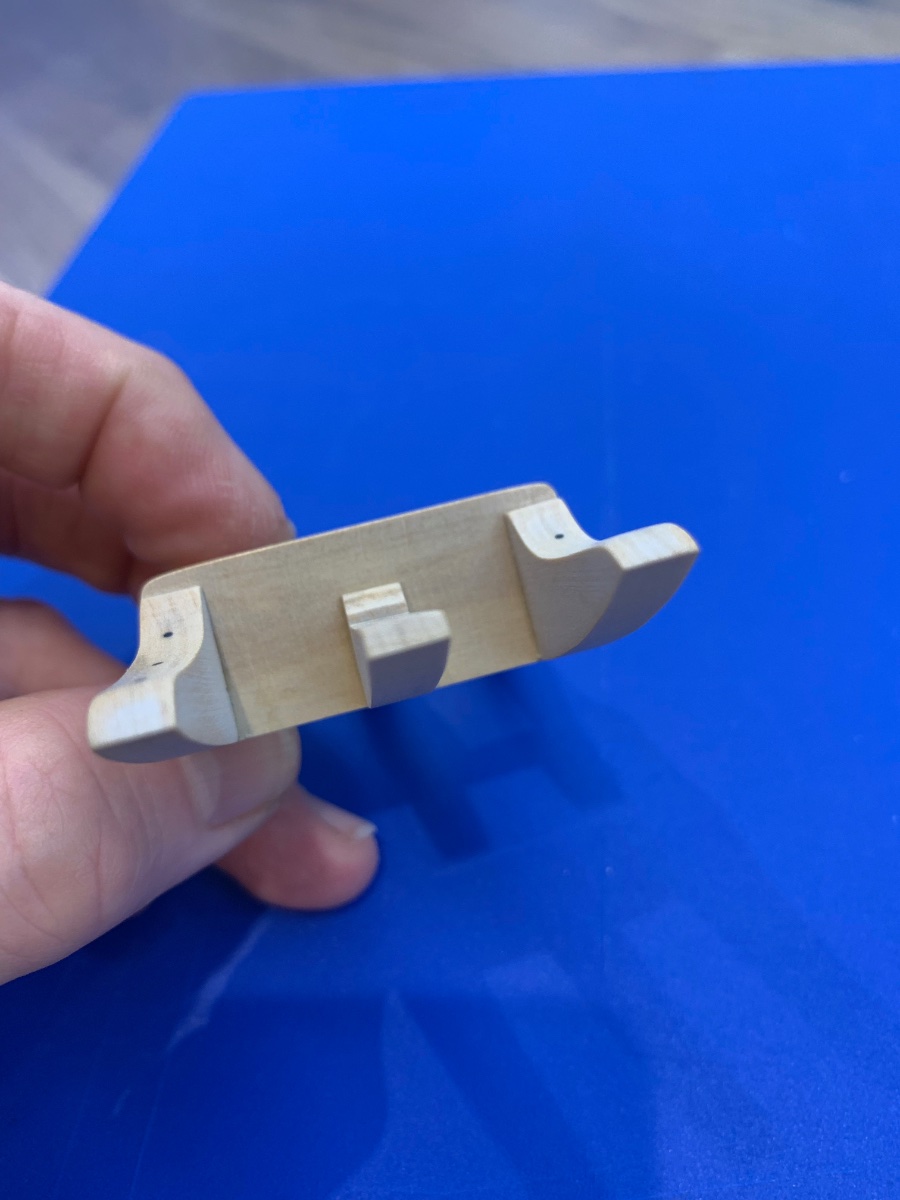
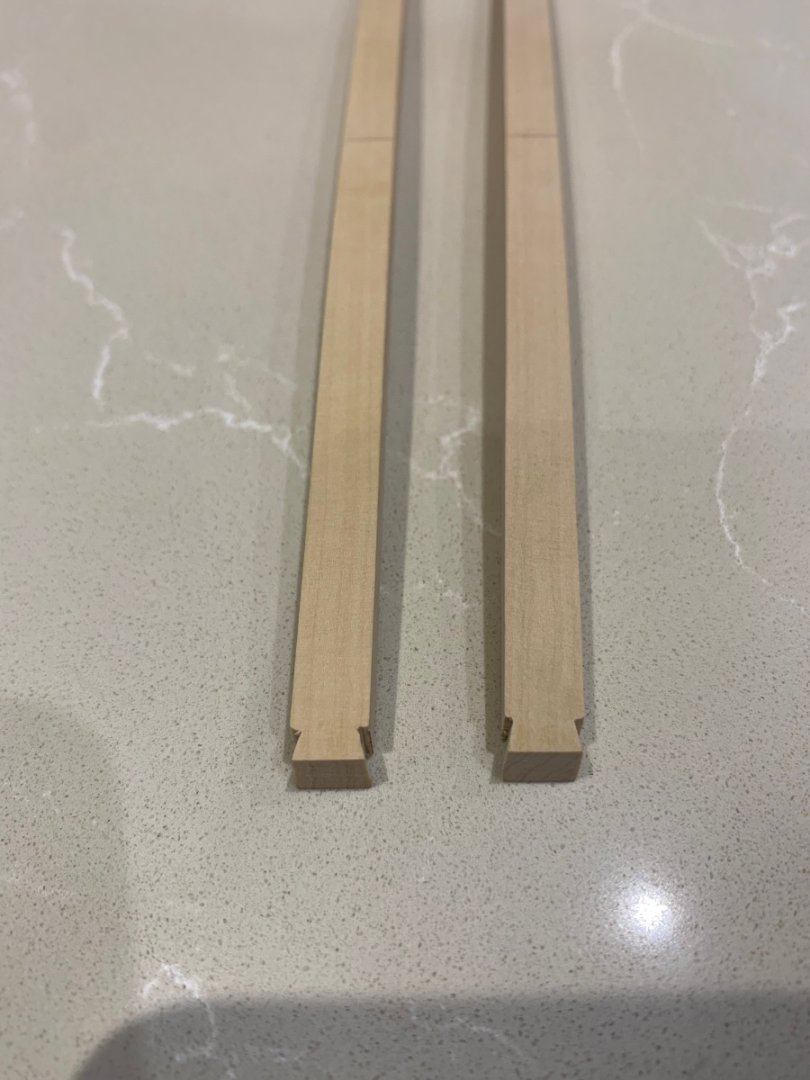
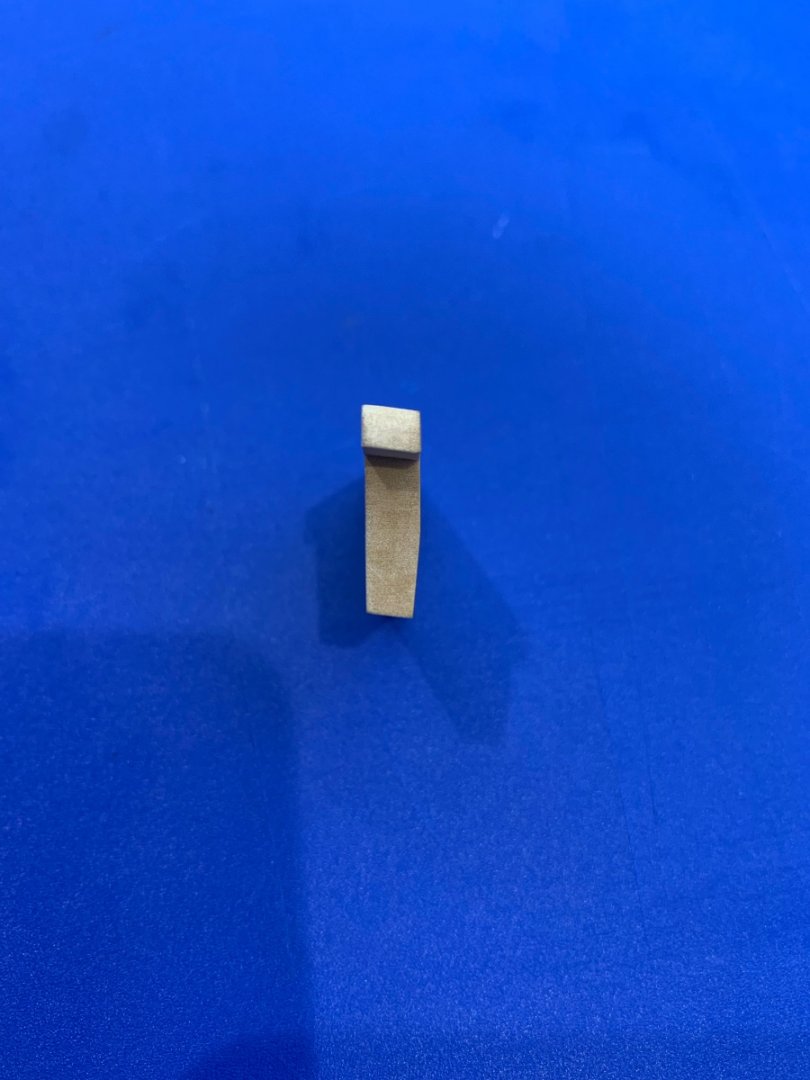
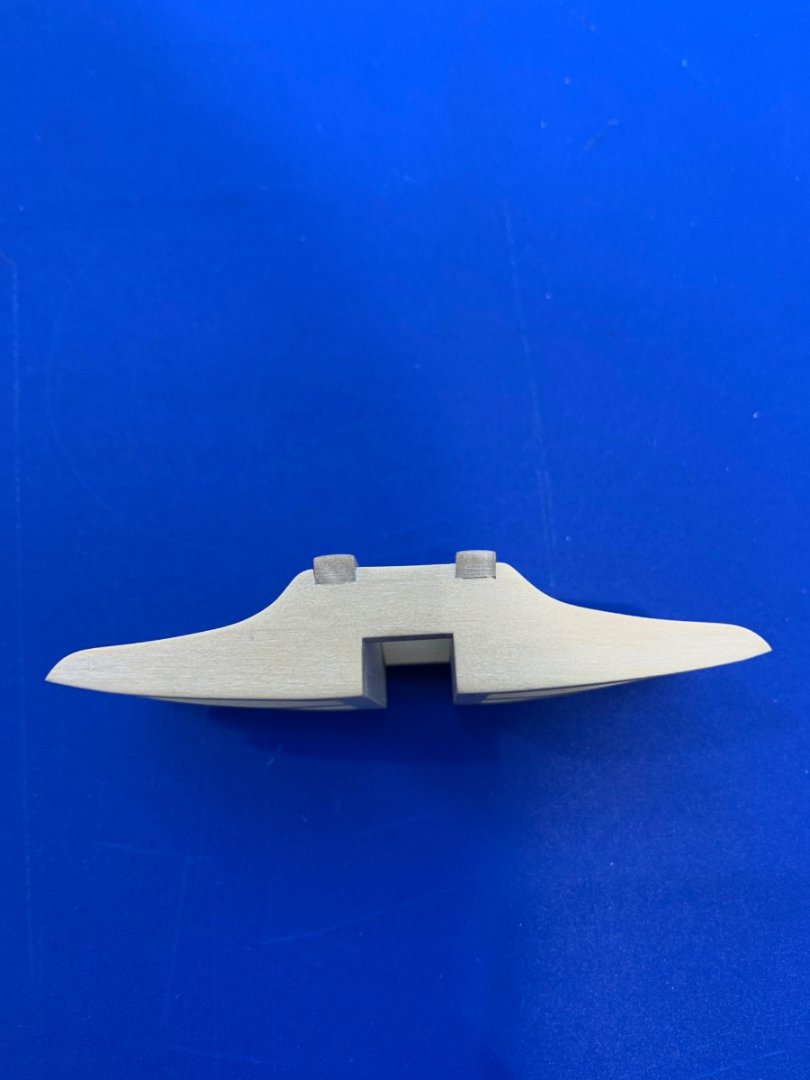
Hi All I've been working on the mast step and what a lovely little piece this is to make. It's like making a miniature piece of furniture due to its many angles and precise joints. I guess it was made that way due to the amount of stresses it must have received from the mast. The step is made of two thickness materials. The outer pieces are 6mm and the inner 5mm. After sanding and milling the parts look like this Here's the profile of the inner pieces which I cut to an angle of 7 degrees. It then has a taper at the bottom so that it sits correctly on the keelson. All assembled with the relevant nails. I used 0.28mm carbon for the first time for the very small nails and I think they look alright. Finally fitted into the hull The next job is to make the stern sleepers - Cheers Mark


-
HMS Renard 1872 by Draque - 1/24 - POF
Some Idea replied to Draque's topic in - Build logs for subjects built 1851 - 1900
I can't comment on your build but I find it so fascinating how you are going about finding the historical information that you need. I look forward to your updates as this a proper school day for me. This is such a lovely ship to build and good luck. -
Maury S - you are spot on there mate. To get a completely flat piece of wood it needs to be rotated end to end and on both sides. This removes any cupping from it 👍
-
Matrim - I've just found your build and I'll be following along too. You have some really good techniques there I think I'll steal them to help me out! Good luck with your build
-
Hi Kevin - I had this problem when I bought my table saw and thickness sander. A mate of mine made me some inserts so that my extraction fitted. So when I ordered my sander from Jim I asked if he could modify the extraction port to suit my needs. He did 😀 so when it was delivered it fitted just as the others did........Sorry maybe I should have told you this about 6 months ago! The thickness sander is something else and I use it all of the time. I have discovered though that if you want a really smooth piece without any dips - as it passes through to the sanded side place a lot of pressure with your thumb onto the piece of wood that emerges and continue to feed it through with a push stick. This method gives great results - enjoy your new tool 😁
-
Hi Del - For some reason I've missed your build until now. Wow mate you have a talent what an absolutely amazing build. That ship of your's is stunning!
- 345 replies
-
- 3
-
-
-
- Duchess Of Kingston
- Vanguard Models
- (and 1 more)
-
Thanks druxey - one of the fantastic things about this monograph is; if you look all of the angles you need to cut they are already drawn for you. I found that they just needed a small adjustment to fit my sometimes wonky build. Thanks captain_hook 👍 I'm really enjoying building this little ship.