


No Idea
-
Posts
901 -
Joined
-
Last visited
Content Type
Profiles
Forums
Gallery
Events
Posts posted by No Idea
-
-
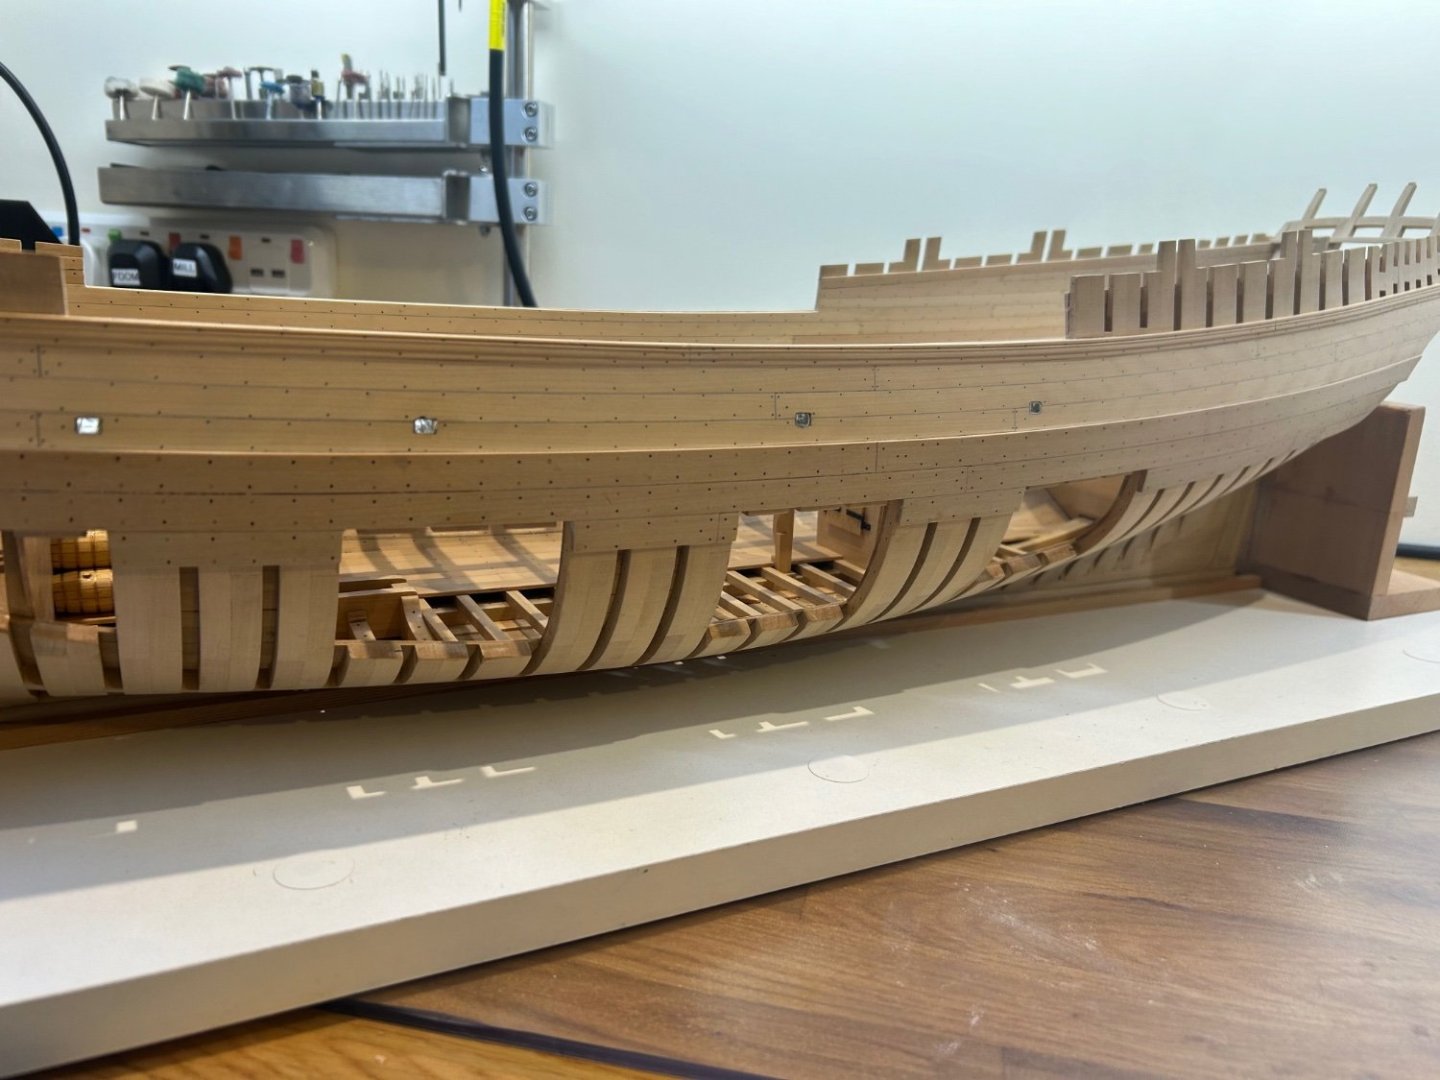
Thanks Tobias but I can assure you that this build is far from perfect mate. I'm constantly having to make allowances for earlier errors but I guess thats ship building for you.
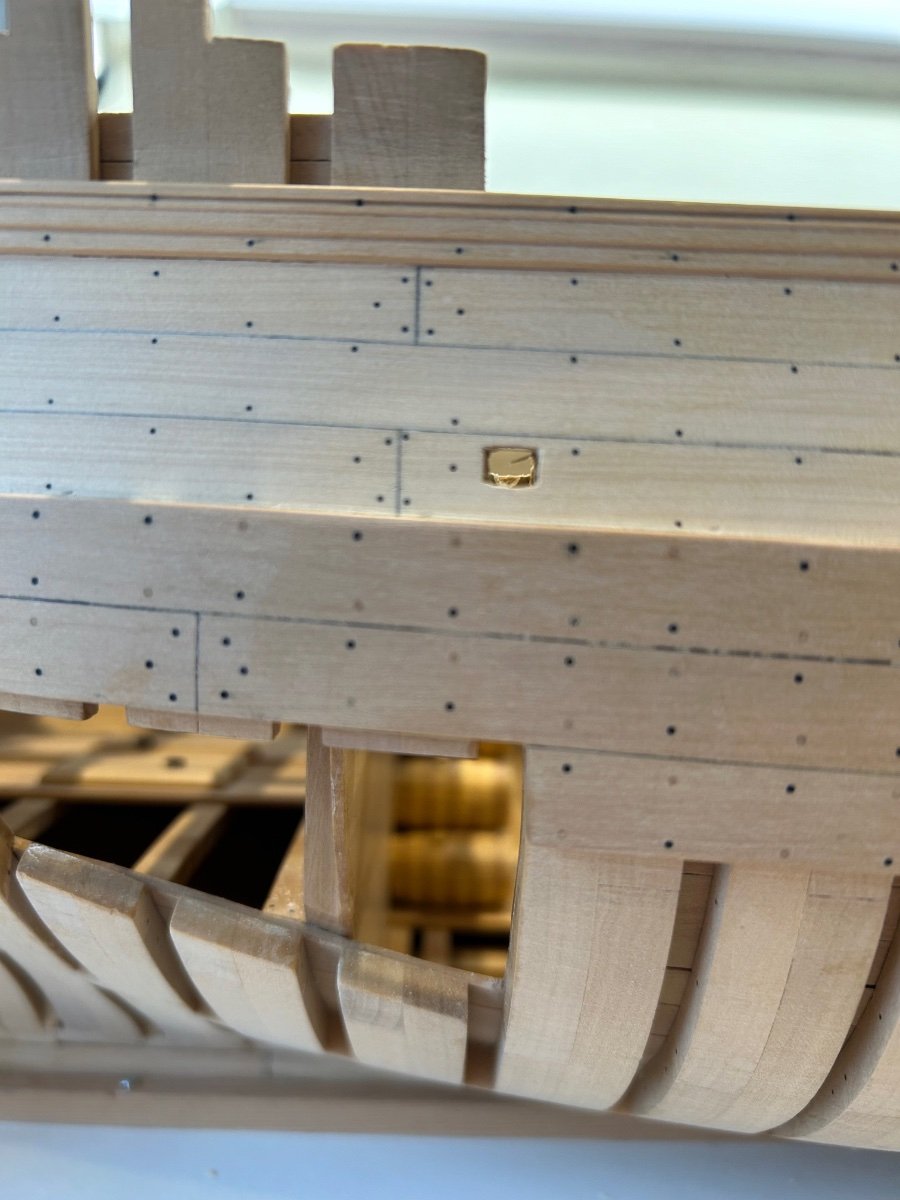
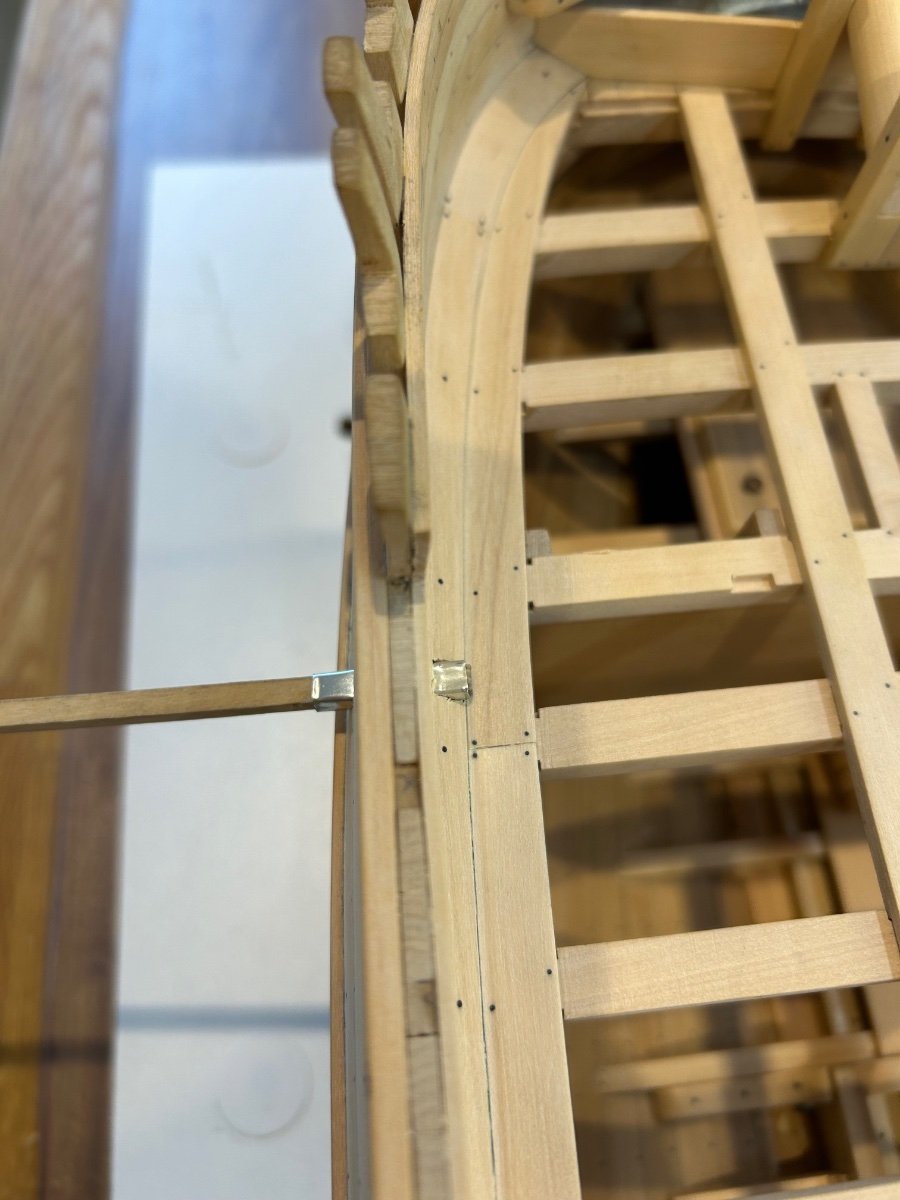
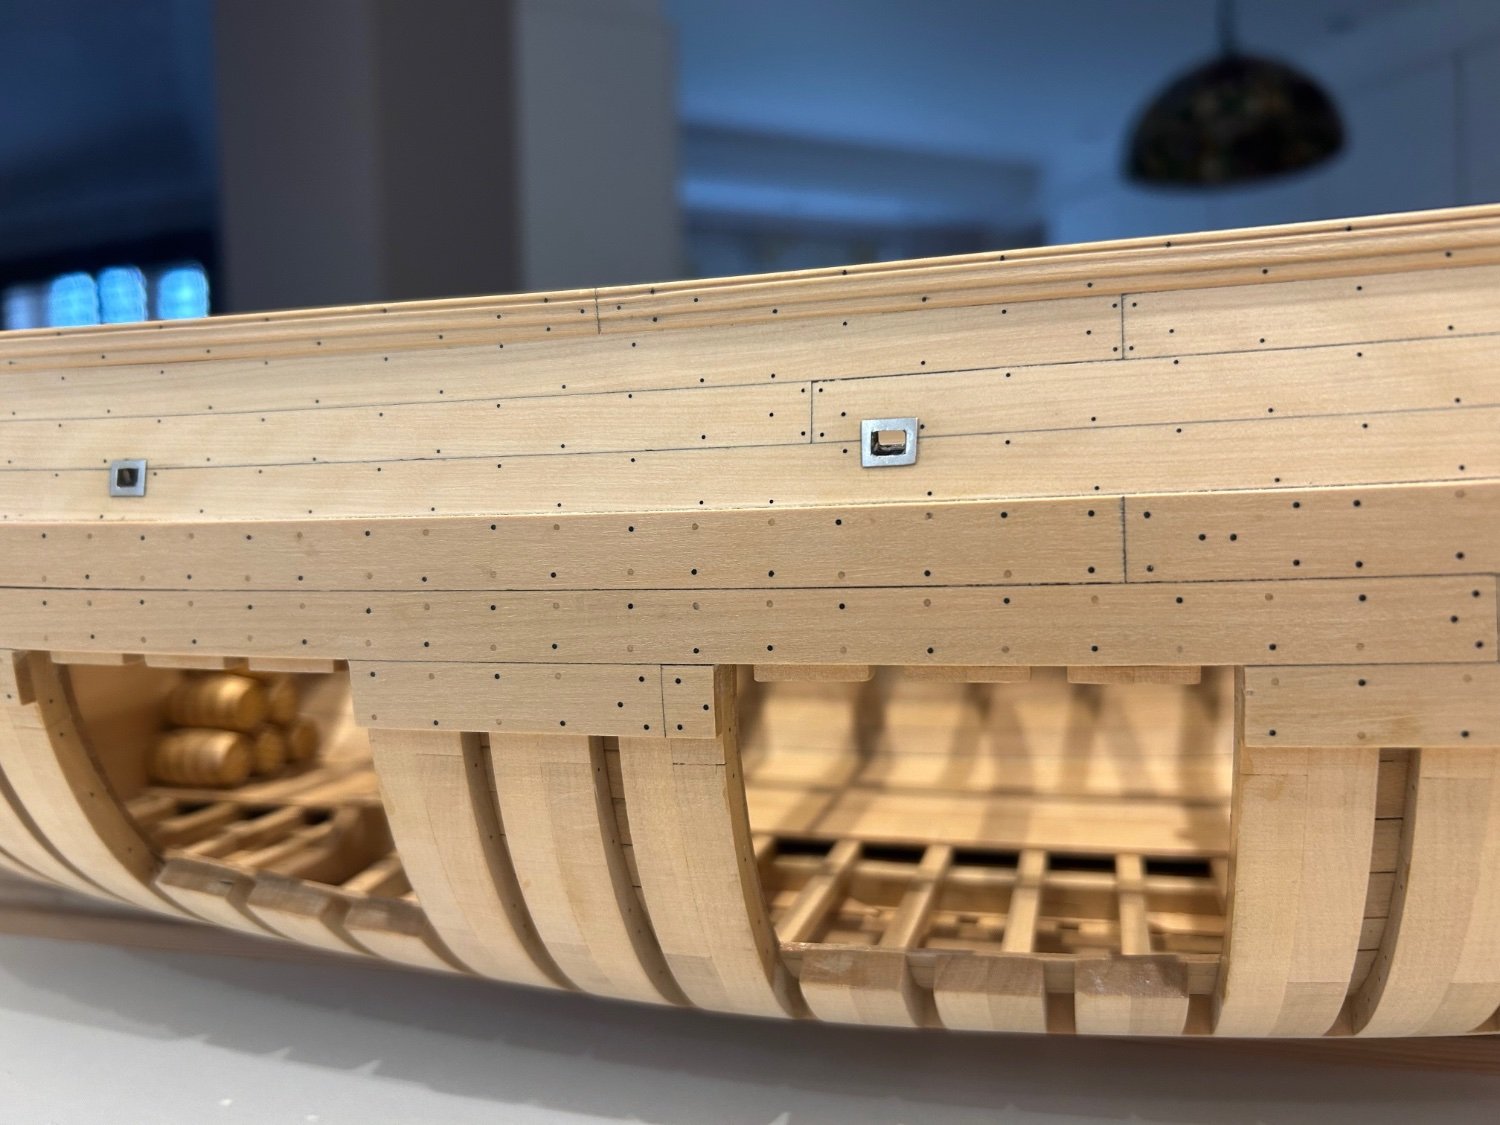
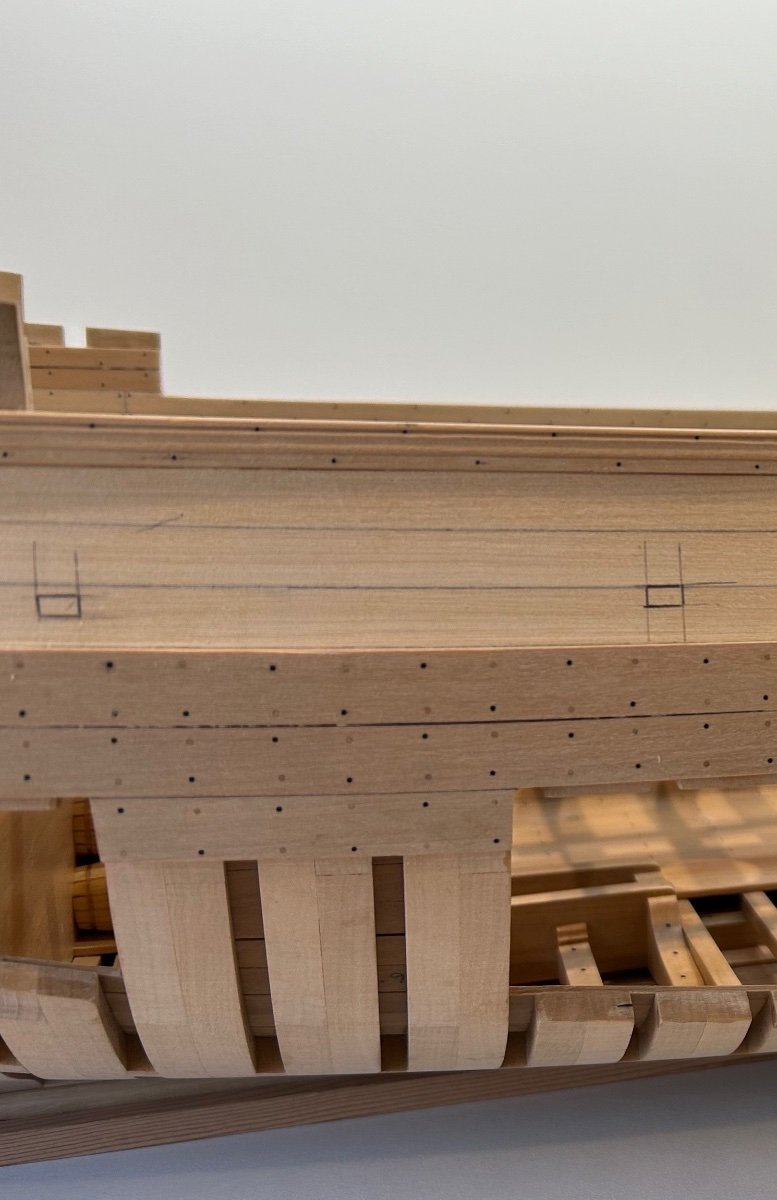
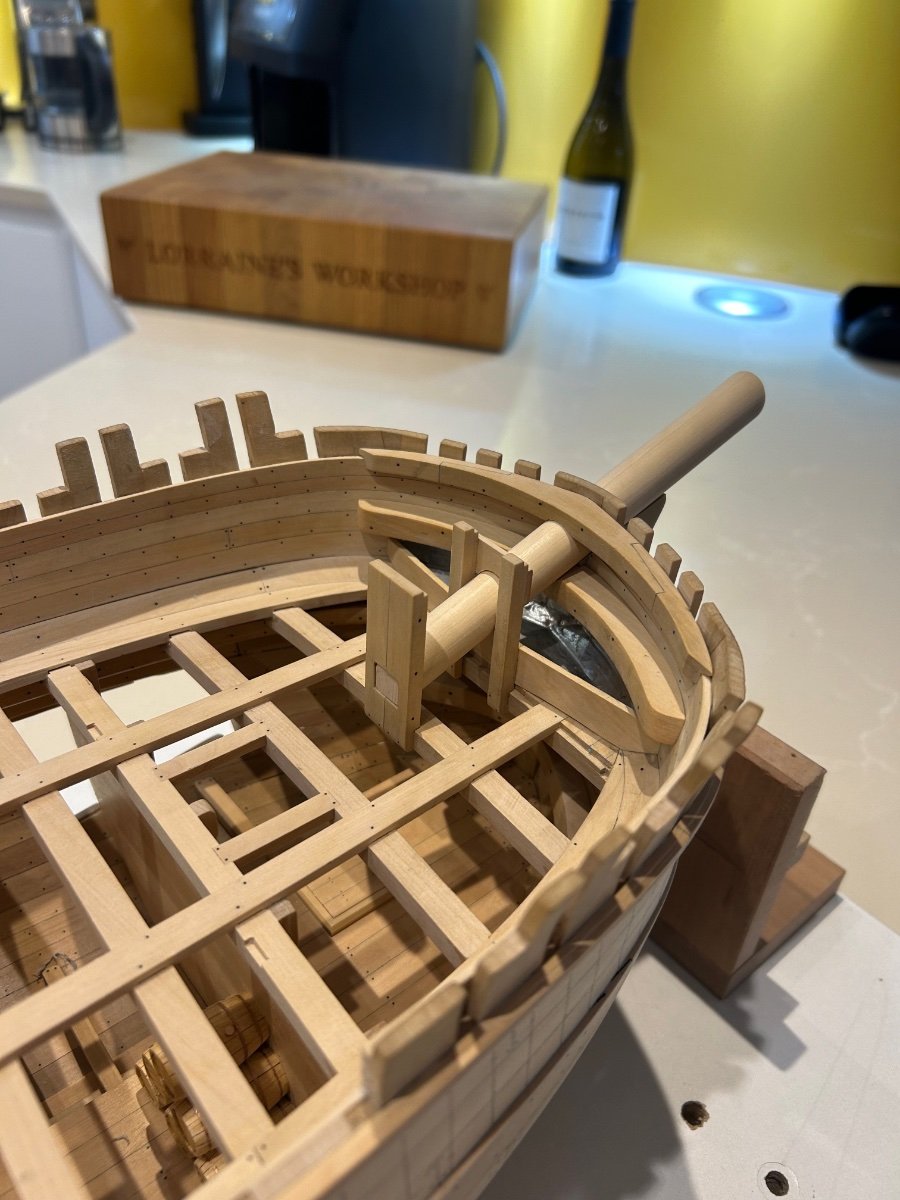
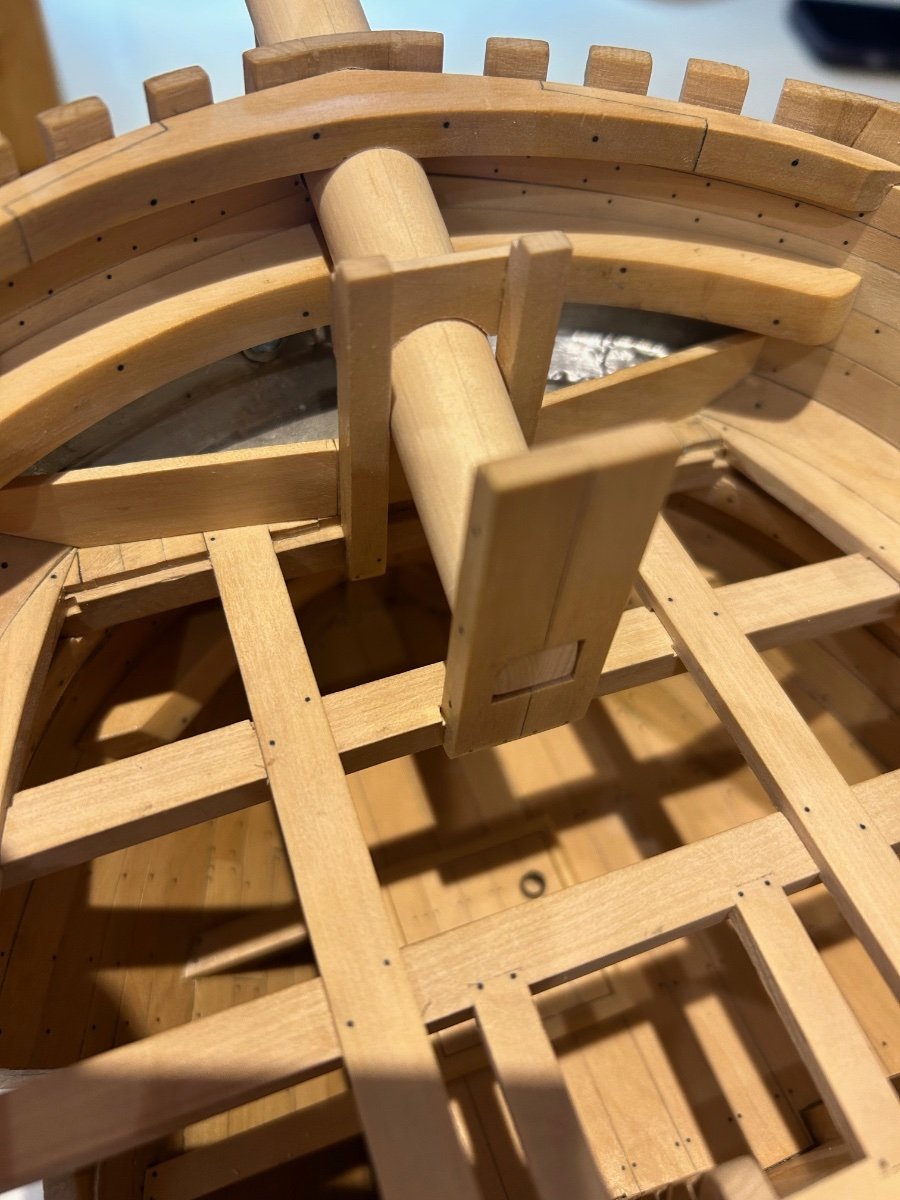
The scuppers - The technique that druxey suggested to me works great for finding the line through the hull. On this scale though it's a long way through the hull to make each side meet. I guess you just have to be brave and get cracking with a chisel. So first of all I cut the holes through as best that I could - I did pick up a little damage but nothing really to worry about. I've also learnt that these small errors disappear in the long run as you simply stop seeing them.
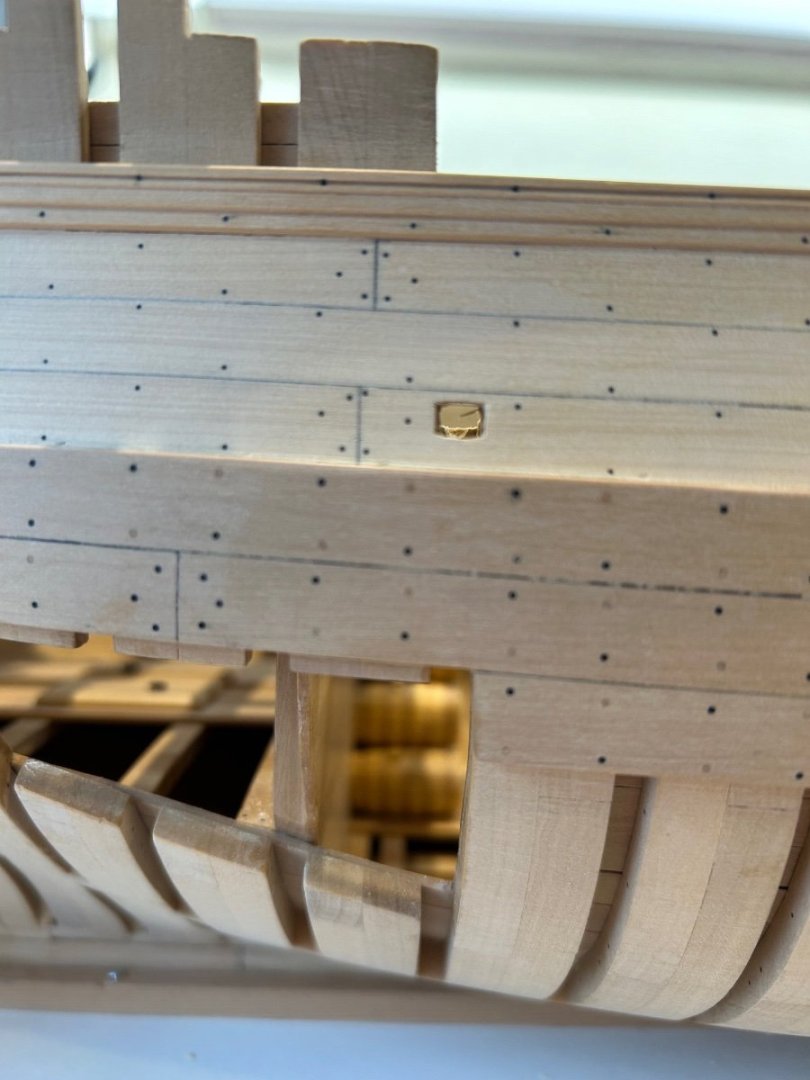
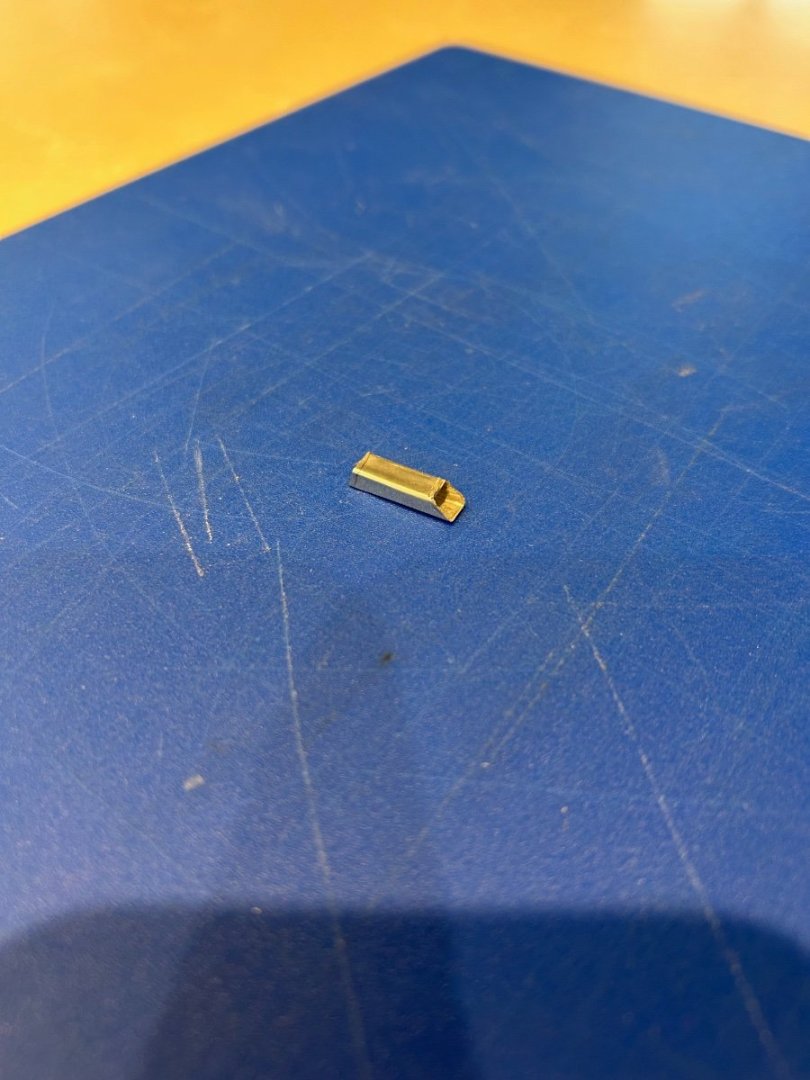
Next I made a rectangular tube out of pewter - easy to make and difficult to fit through the hull - it just takes time.

Then I roughed the tube to the correct dimensions but left some on to sand down later. Its worth noting that that the tube dimensions are slightly different from the outside to the inside.
Following on from my previous bad experience using cyano I glued these in using 20 minute epoxy resin. I really like this glue - it gives loads of time to jiggle things around and cleans up easily with IPA.
Next was to make the end plates on the inside and outside.


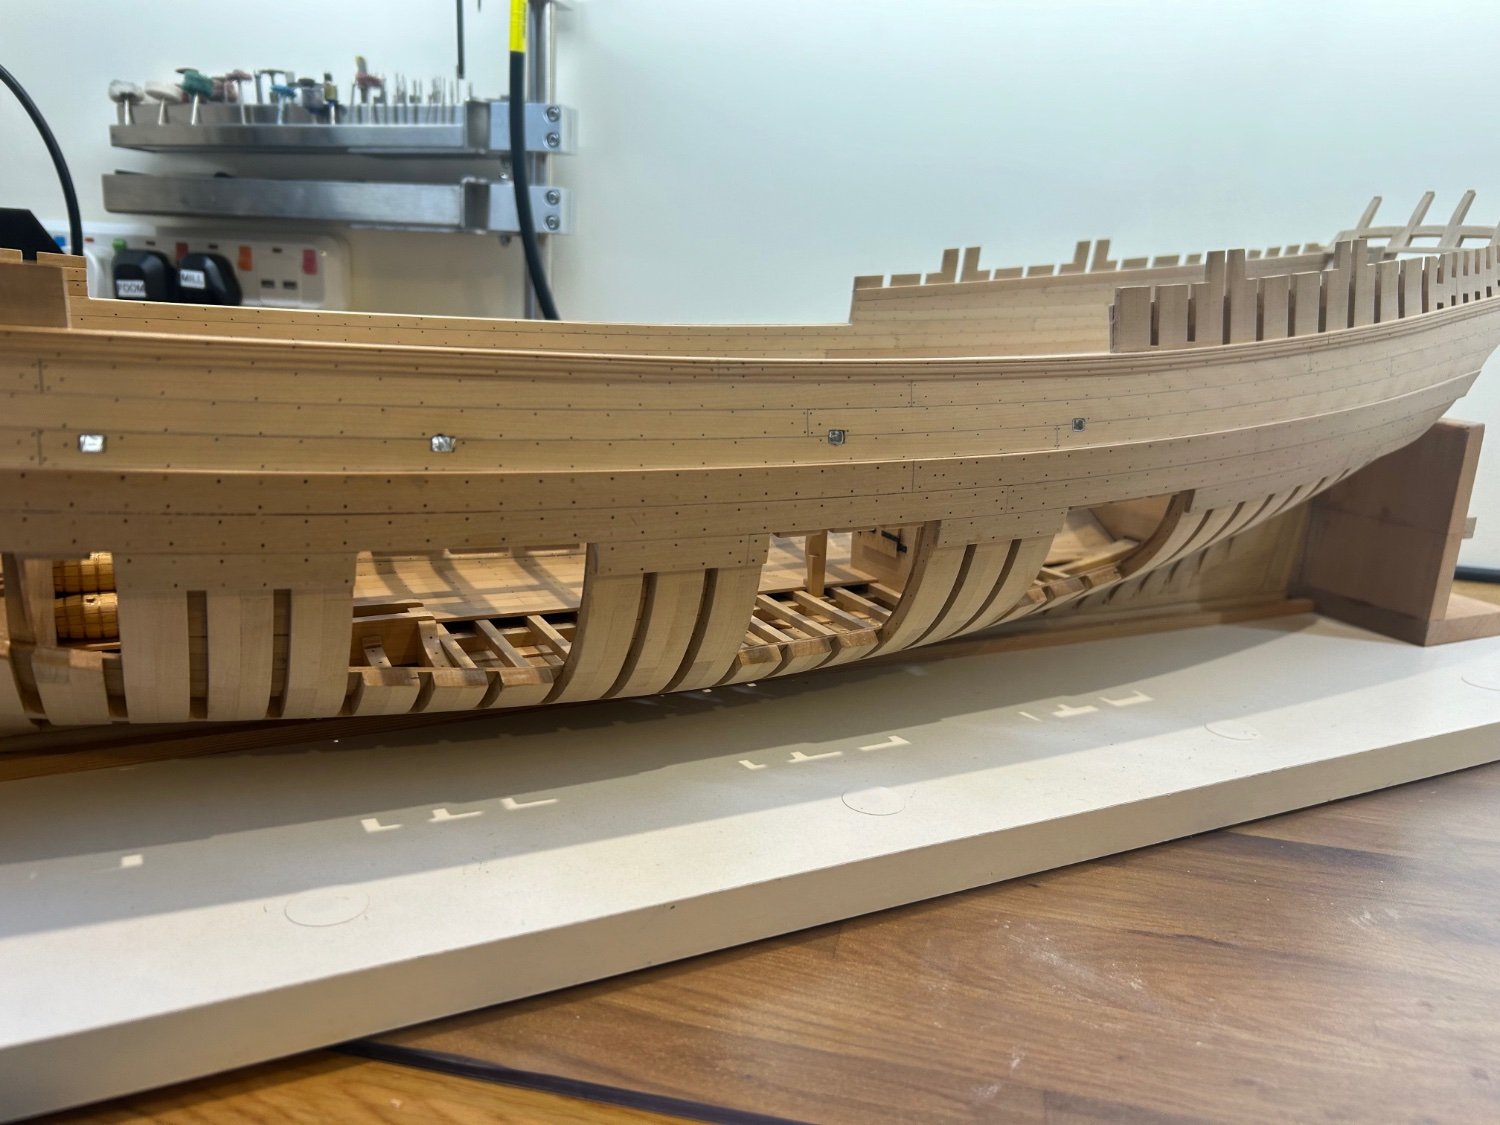
So thats one side complete and now onto the starboard side - which I still haven't finished nailing yet!
Cheers Mark
- druxey, Vladimir_Wairoa, bdgiantman2 and 22 others
-
 19
19
-
 6
6
-
-
-
-
-
-
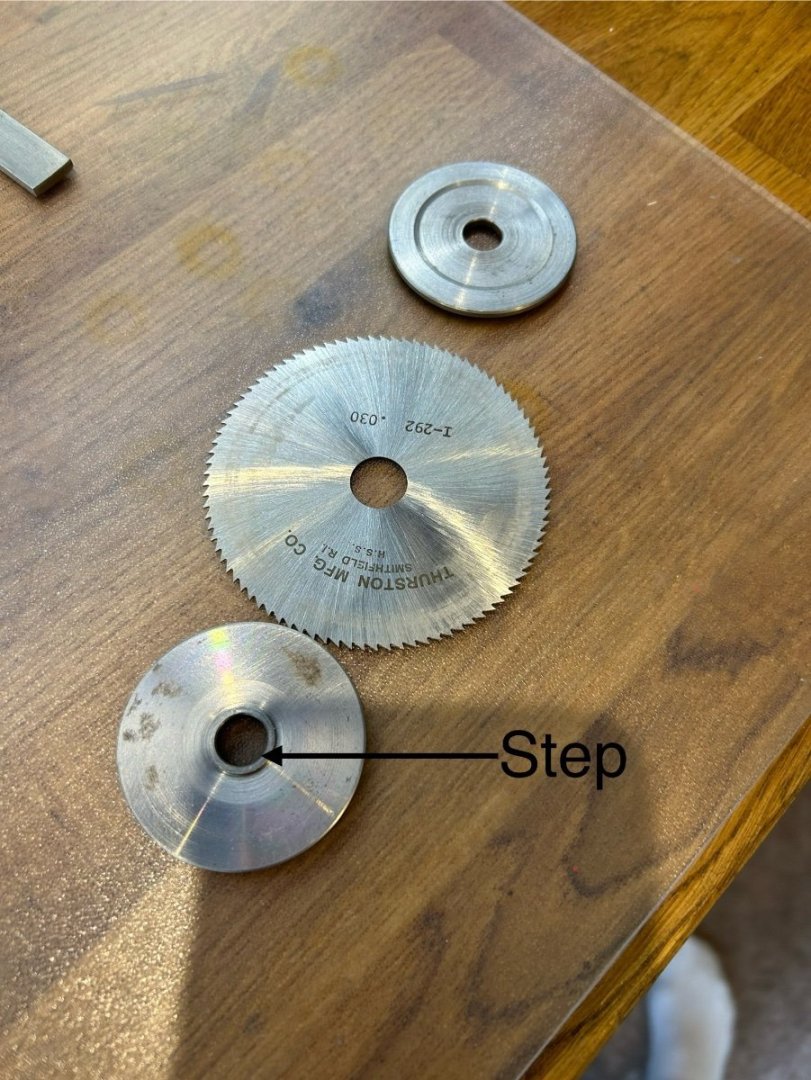
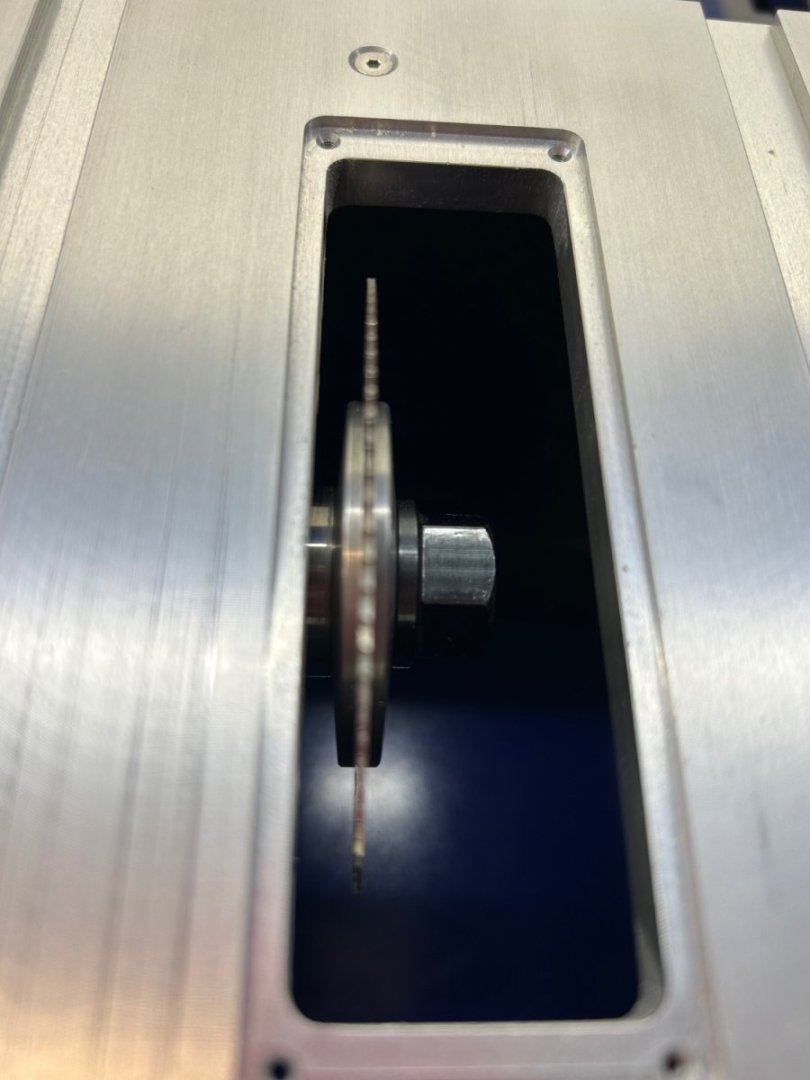
You are correct there is a large washer on either side of the blade. If you have a look one of them has a small step machined into it. The blade locates on the step which makes it central and run true. If the blade is not properly located on the step it will visibly not run straight.
- GGibson, Canute and modeller_masa
-
3
-
1 minute ago, bigcreekdad said:
NO IDEA........I am exposing my limited knowledge......Can you explain the "arbors" thing?
Yes of course - they are what you describe as the washers that secure the blade. If installed correctly they look like this and the blade runs true with no vibration or wobble.
-
Hi - If you had the arbours wrong the blade would not run true and give you all sorts of problems - you would know it wasn't right.
So assuming they are ok if your wood is tapering during a cut it could be one of many reasons.
1. The edge of the wood that is on the fence is not straight and true. This will need correcting.
2. You are not keeping the wood tight up against the fence as you cut?
3. The blade is too thin and is deflecting - what size blade and with how many teeth are you using?
Cheers Mark
- Jaager, Ryland Craze, Canute and 3 others
-
6
-
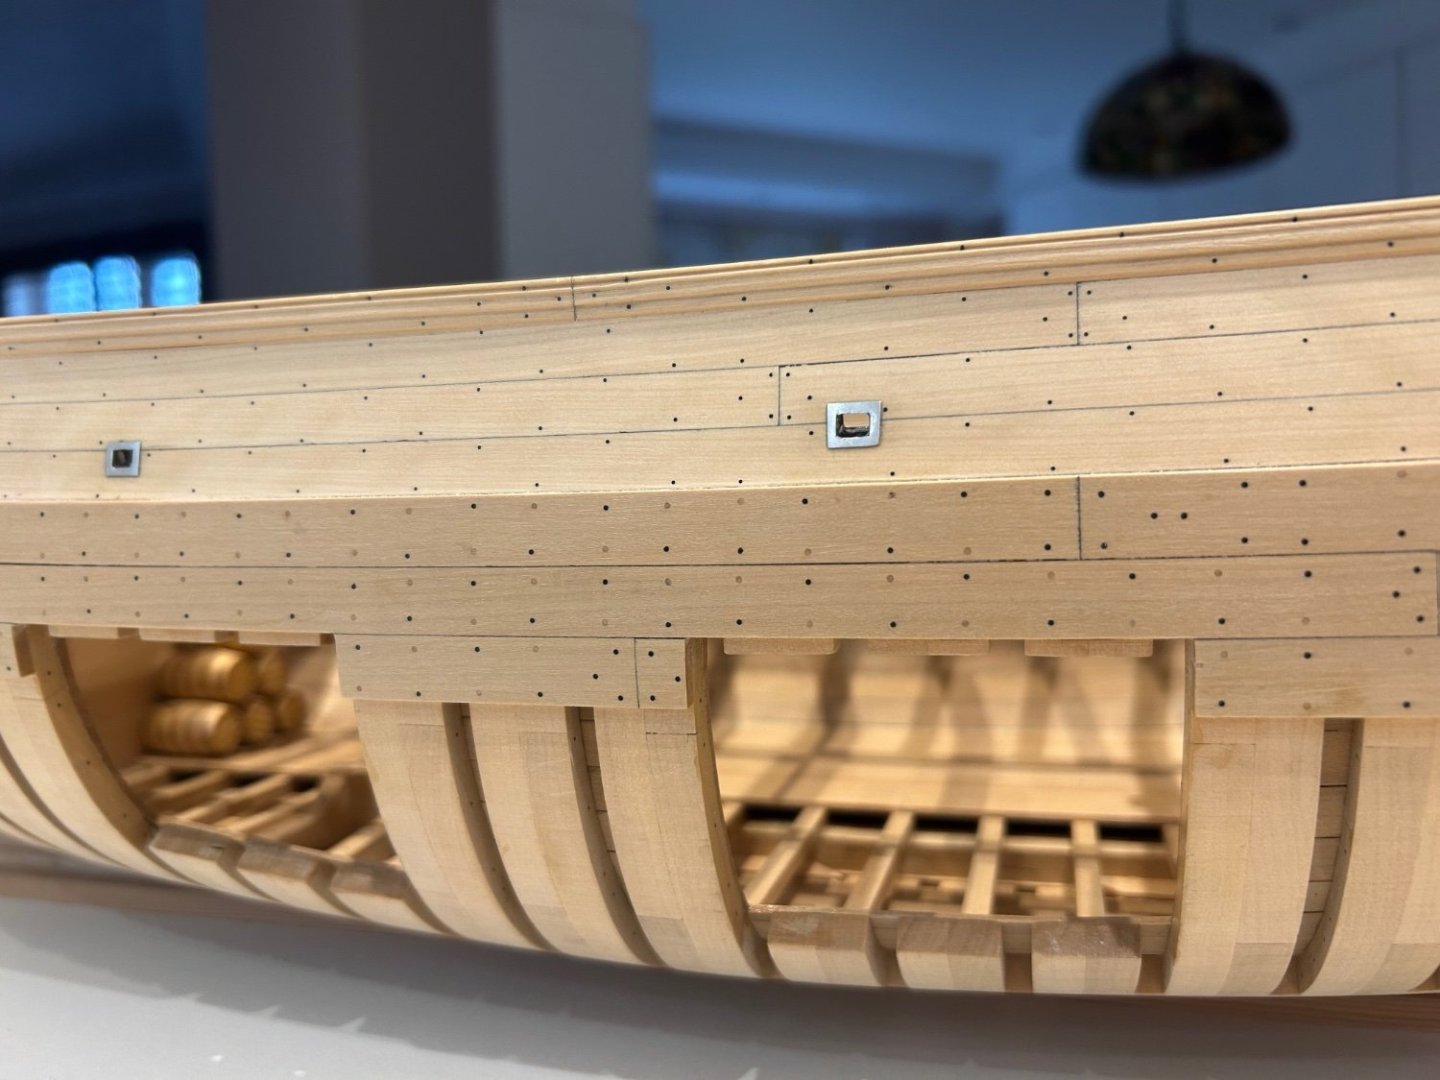
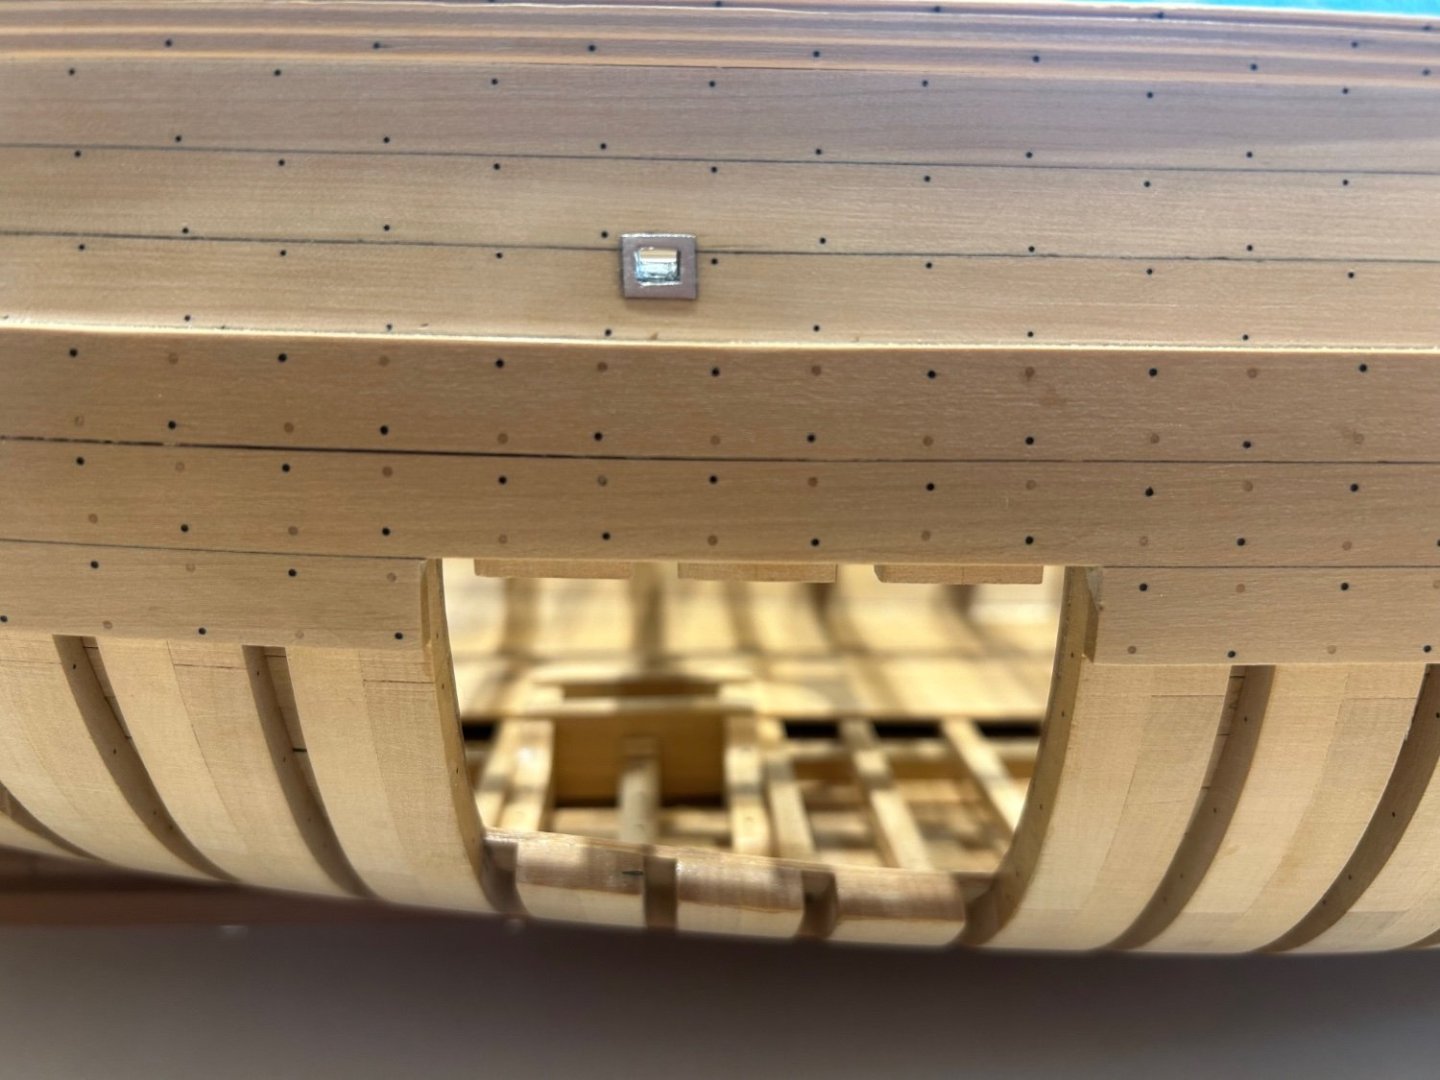
Cheers @druxey that worked nicely. I've tried it on one and slowly enlarged the hole up to 3mm. Then I used a small milling bit to remove some of the excess material and finish the hole with a chisel and file. I now have a nice rectangular scupper running through the hull. It should look good when lined with pewter.
-
8 minutes ago, druxey said:
Looks very nice, Mark.
For drilling scuppers, I start with a very small bit and drill from both sides. Hopefully the holes align, but if not, this can be corrected as one gradually opens out the hole. Again, work from both outside and inside. That way is less scary, for sure, and avoids any splintering out on an exit hole.
Thanks 👍 Thats a great idea using a small drill I hadn't thought of that so I am going to give this a try. I do have a lot of material to remove from the water way to join the holes up as a square opening. When I made the waterway I couldn't quite see how to cut the opening and get the angle right. I can see it now and would do this differently in the future. What a learning curve ship building is.
-
Hi All I hope that you all had a really nice Xmas and are looking forward to new year tonight like we are here in the UK. Also thanks very much for the nice comments
")
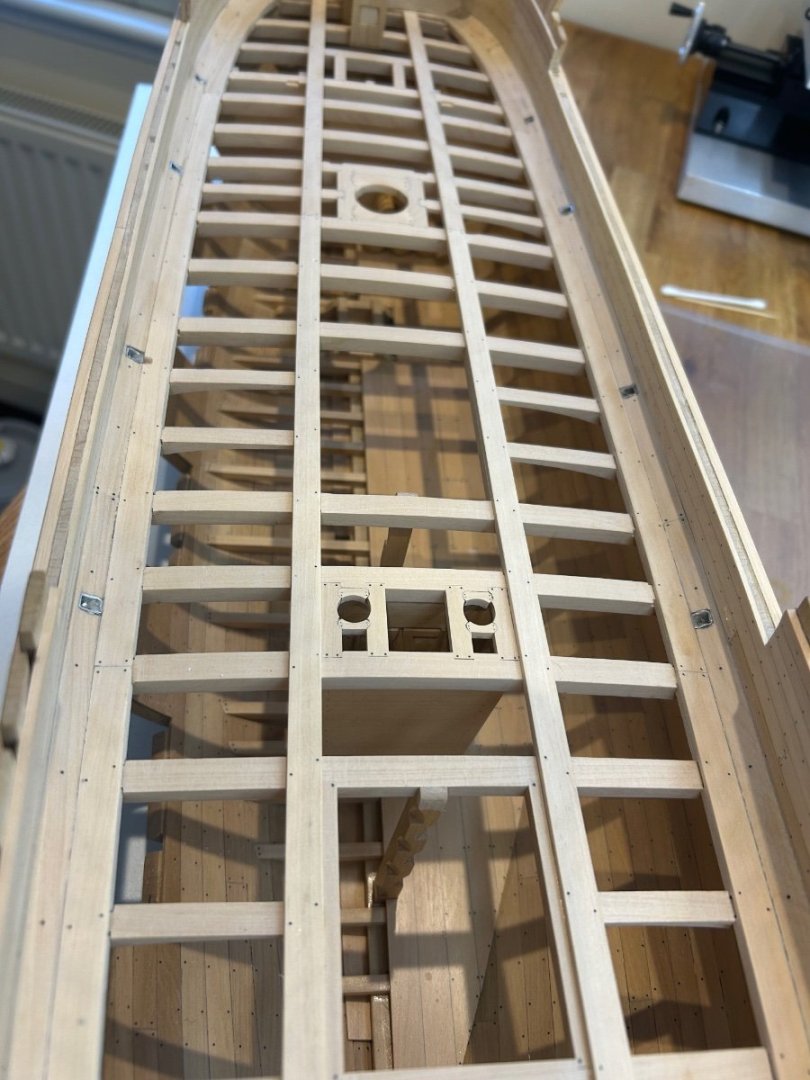
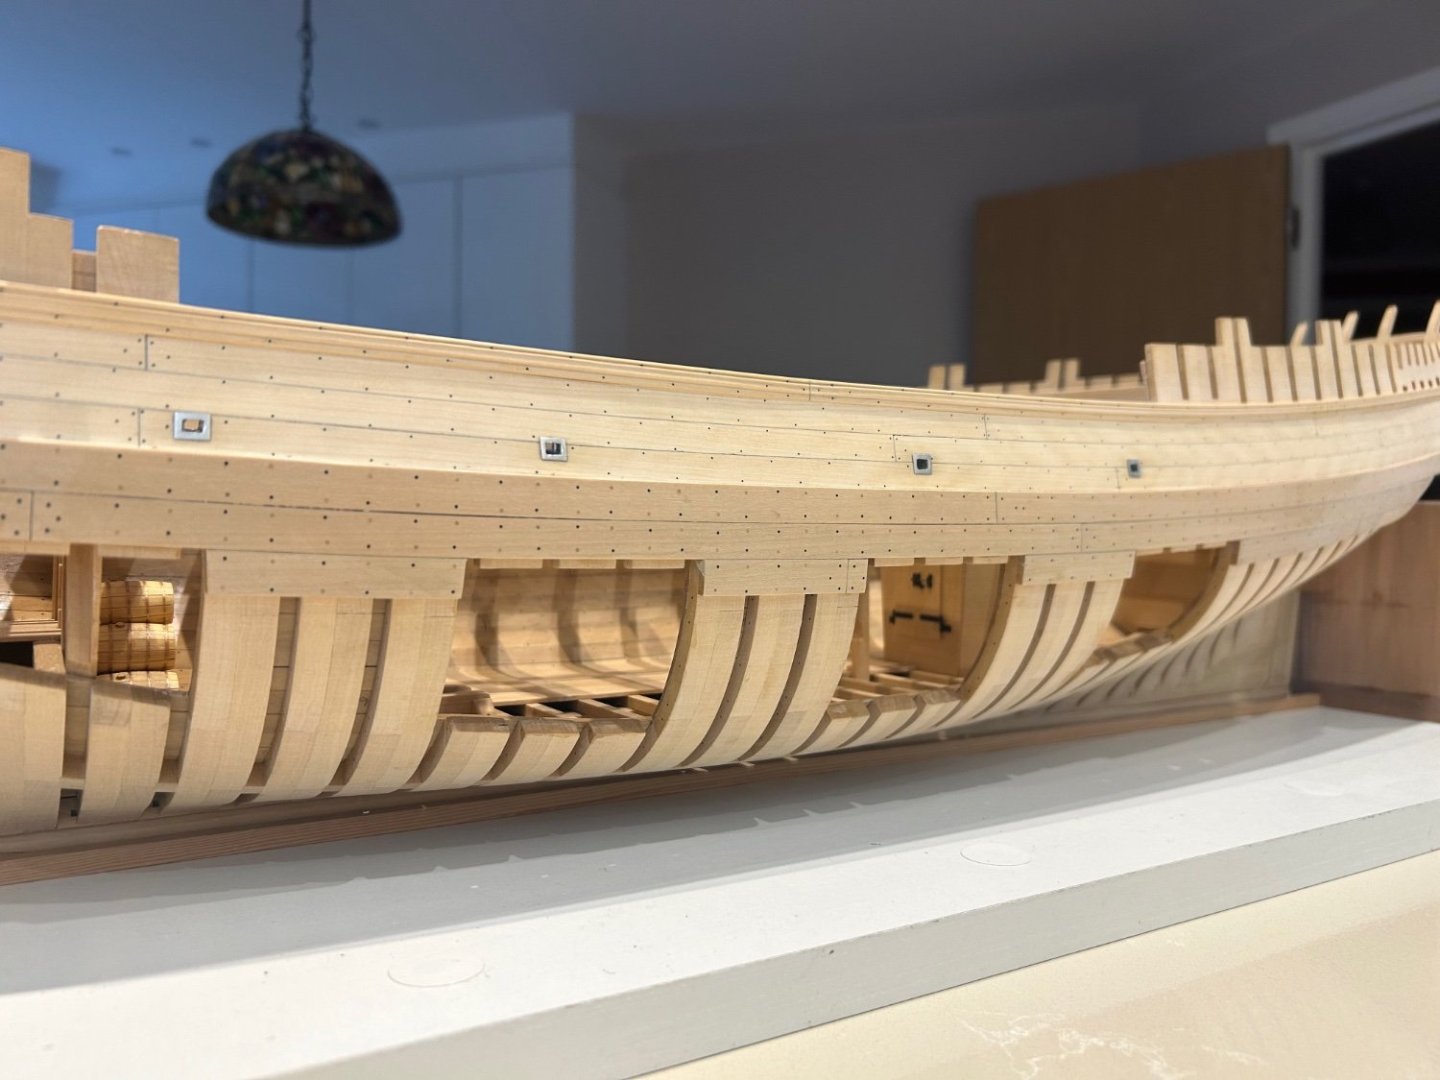
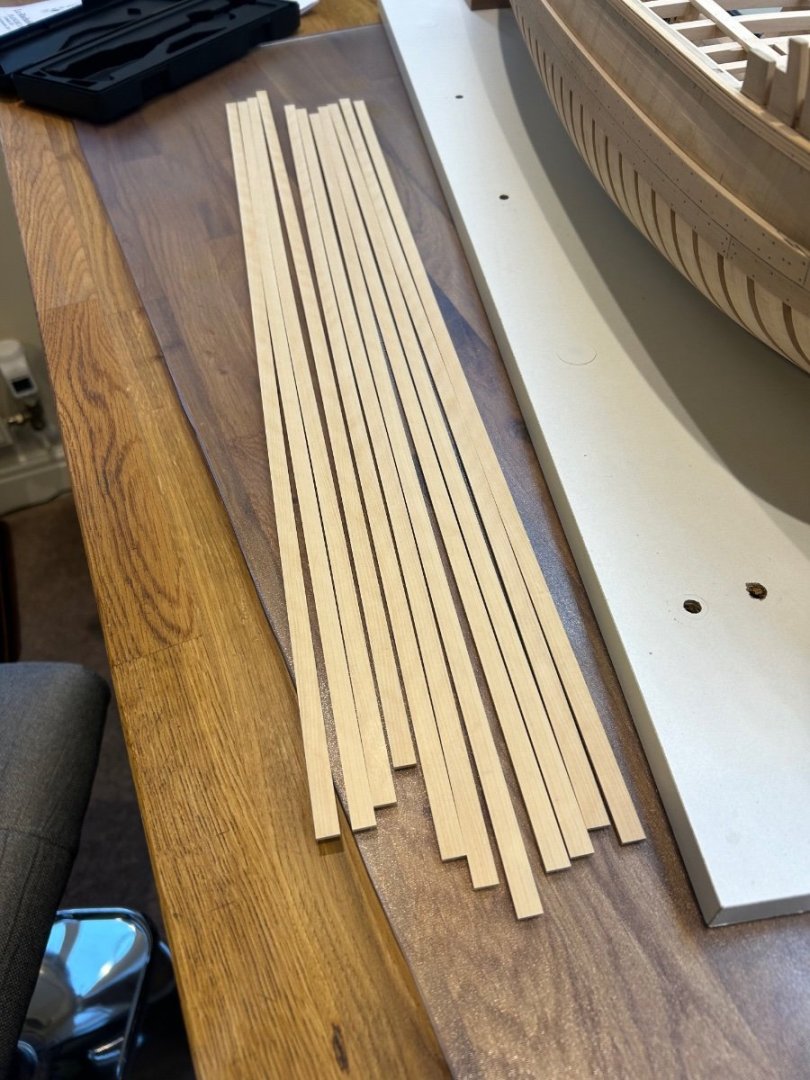
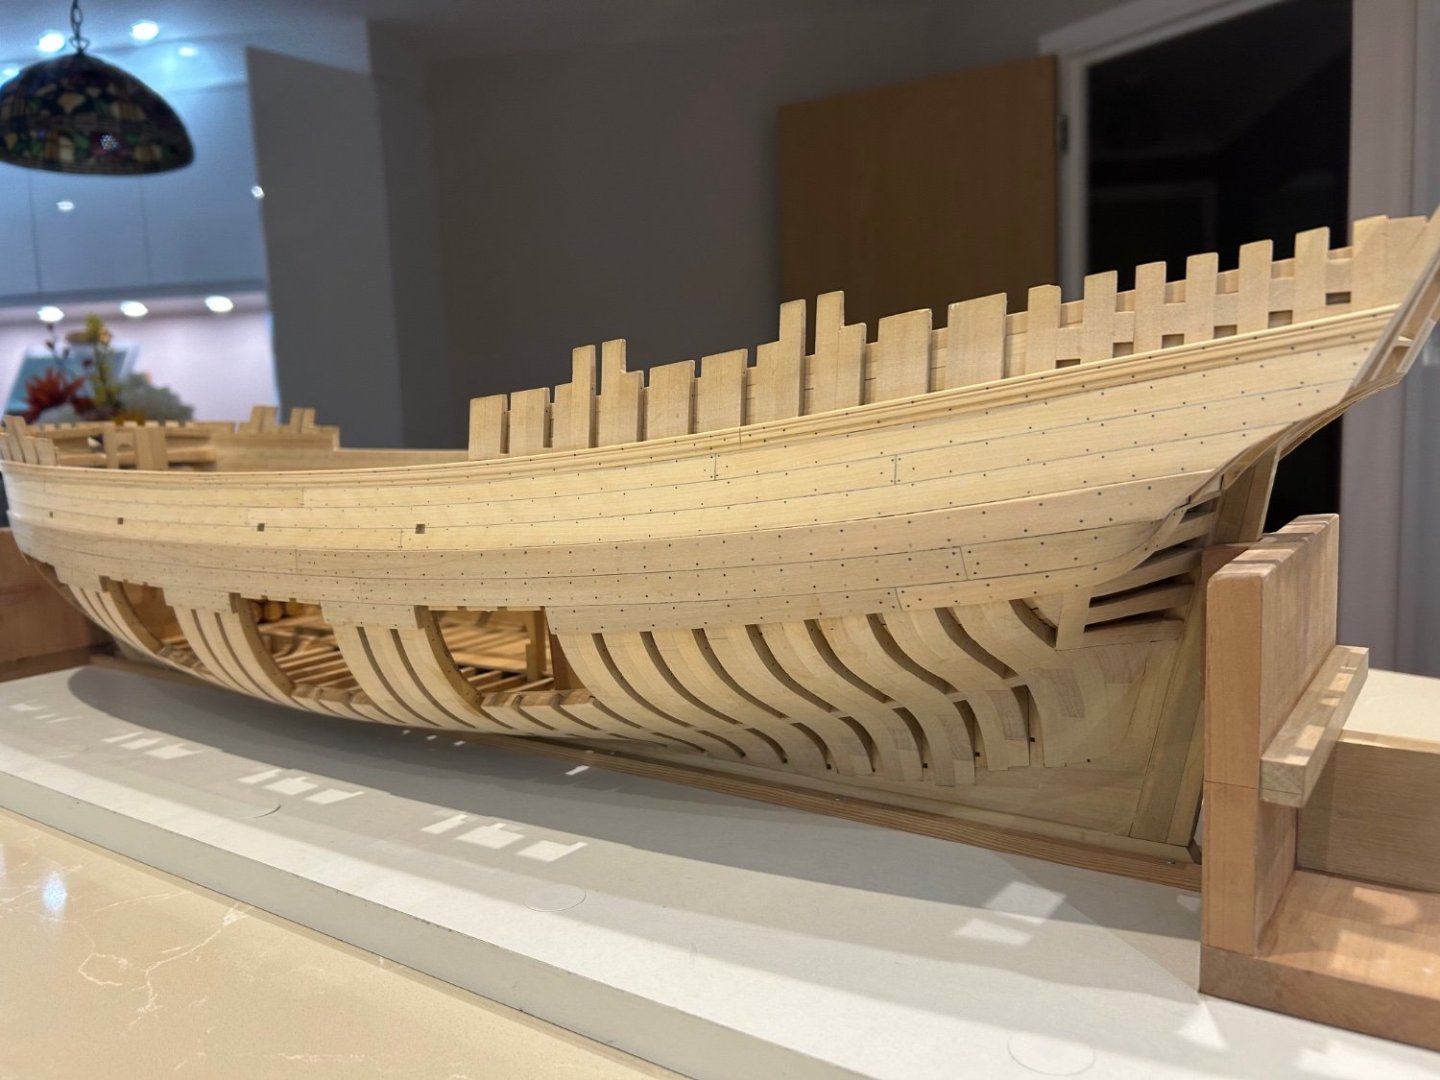
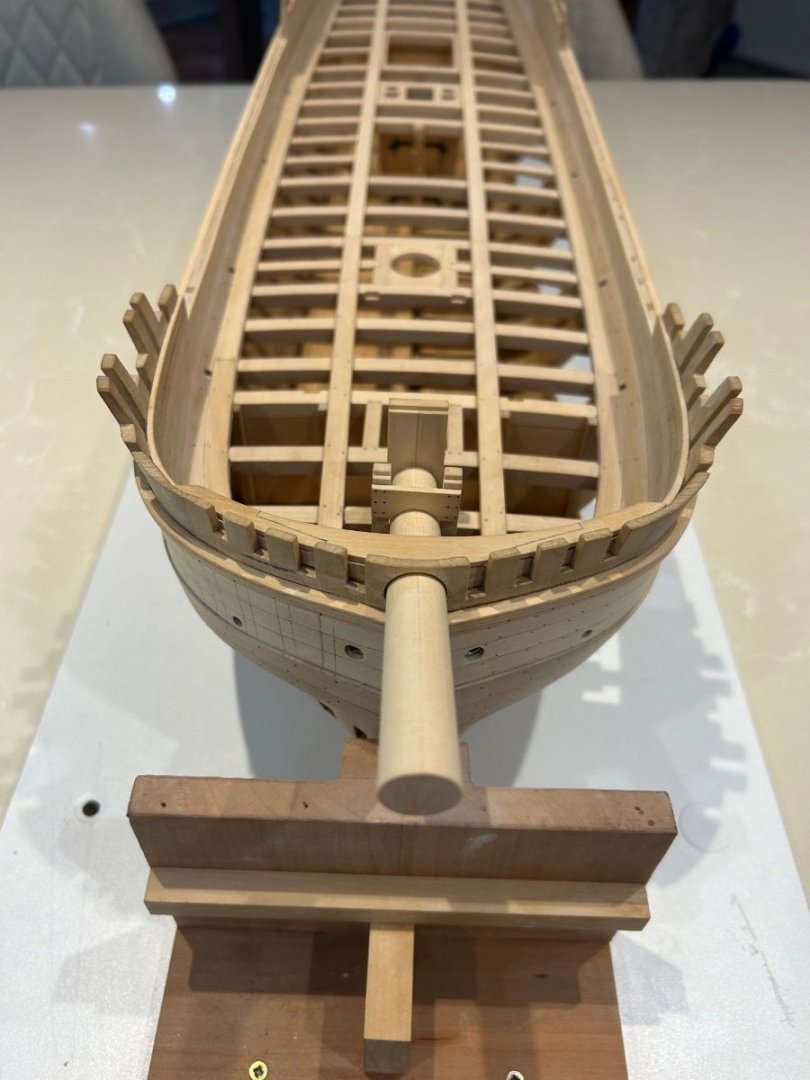
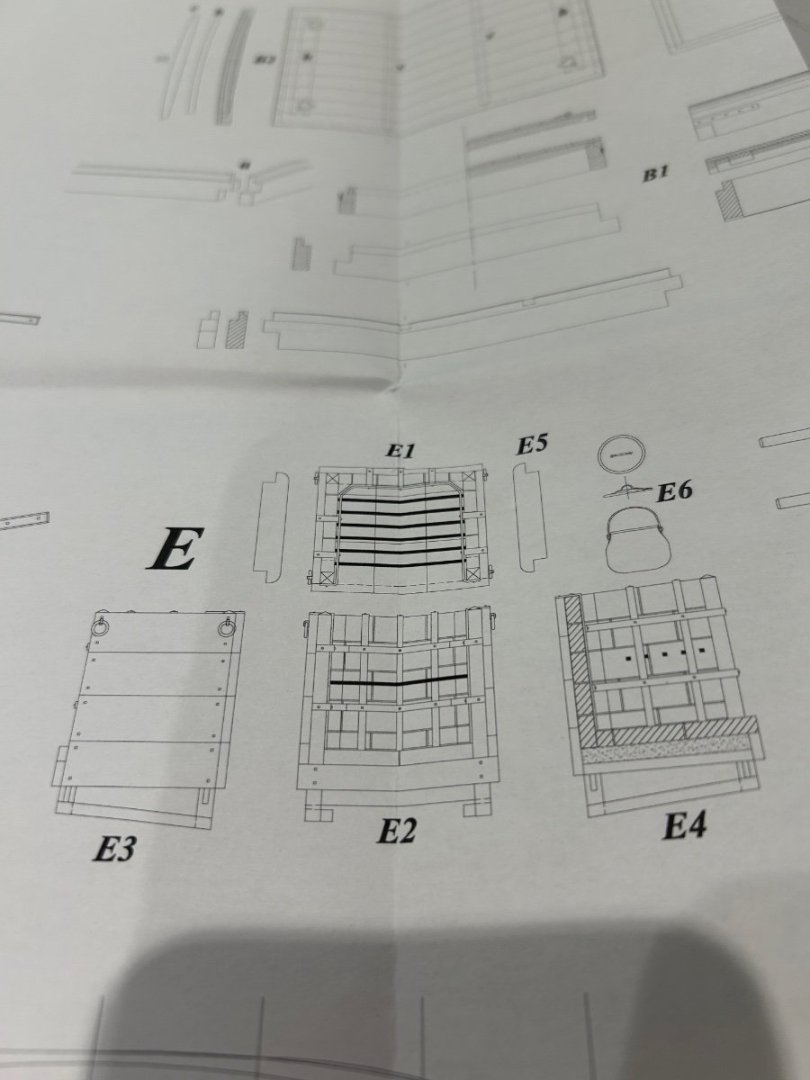
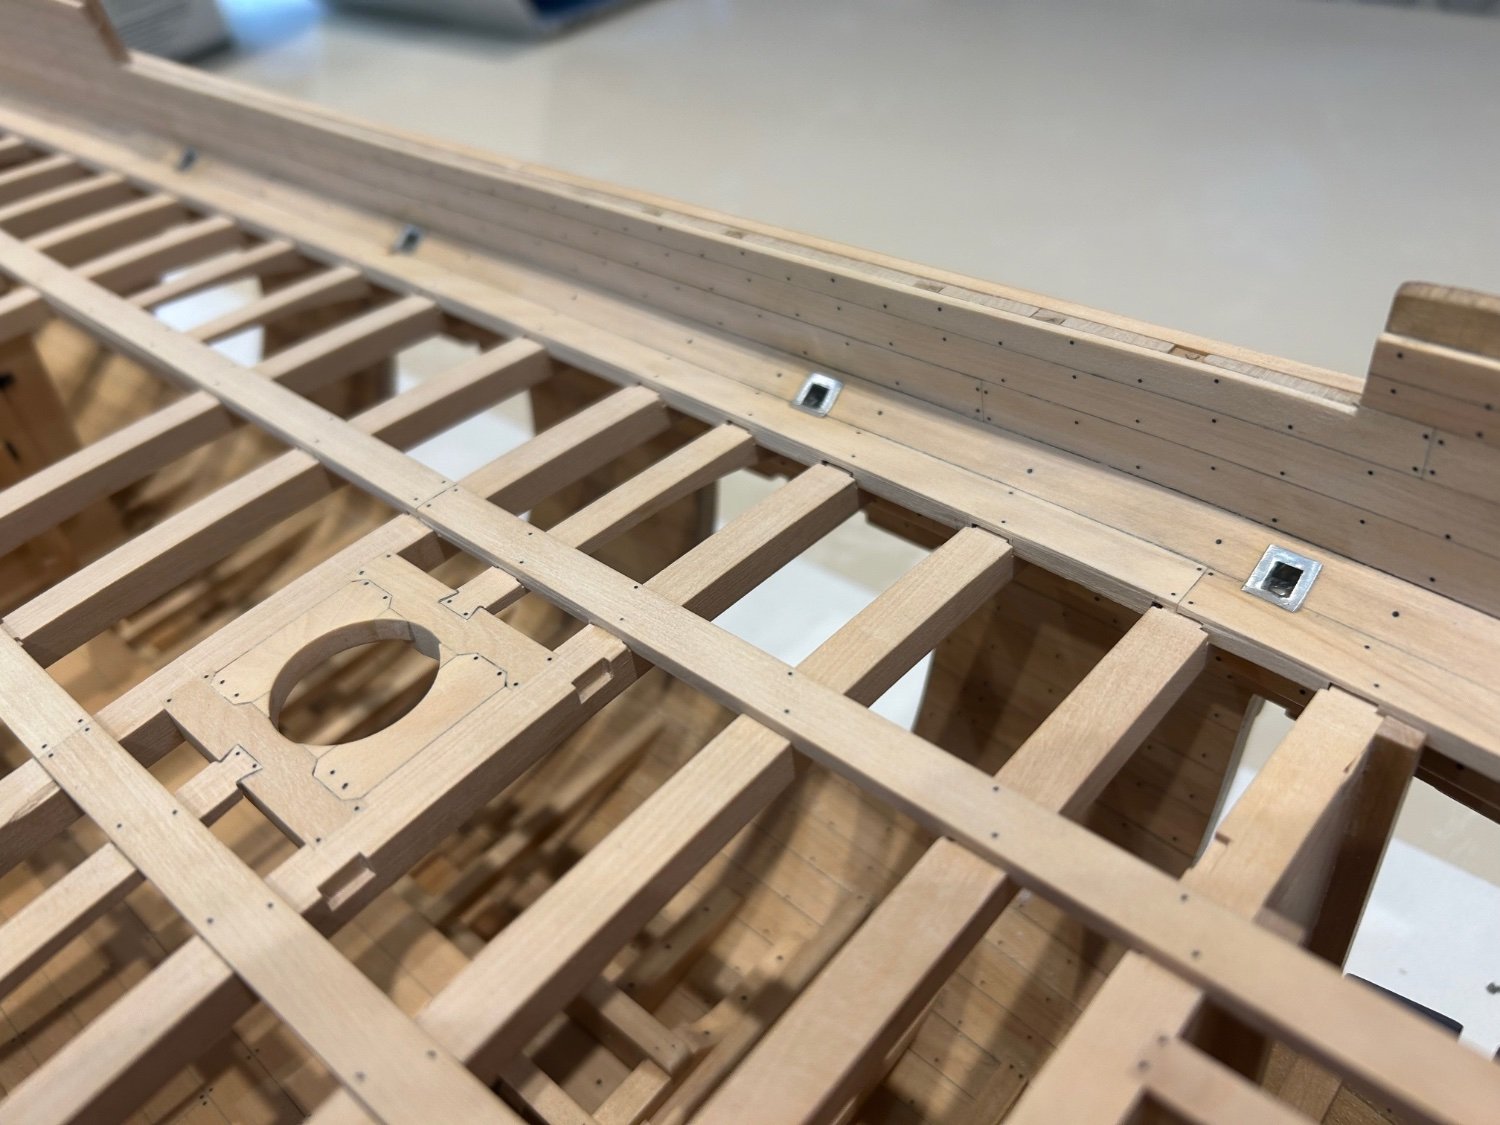
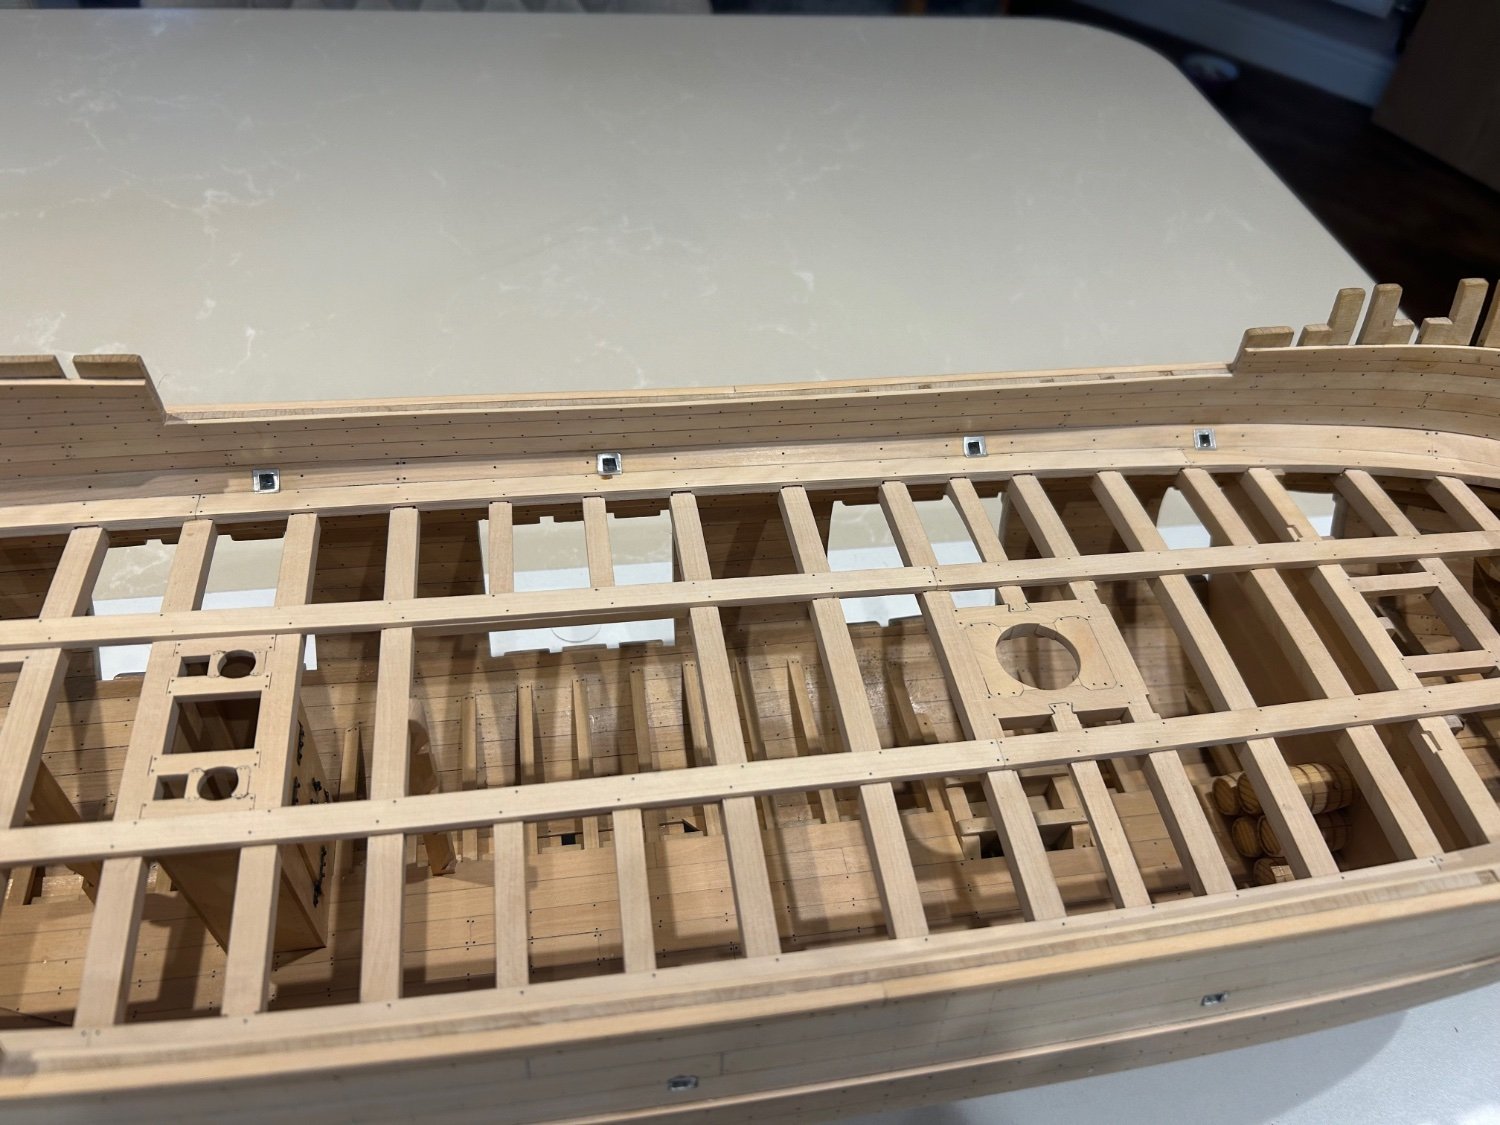
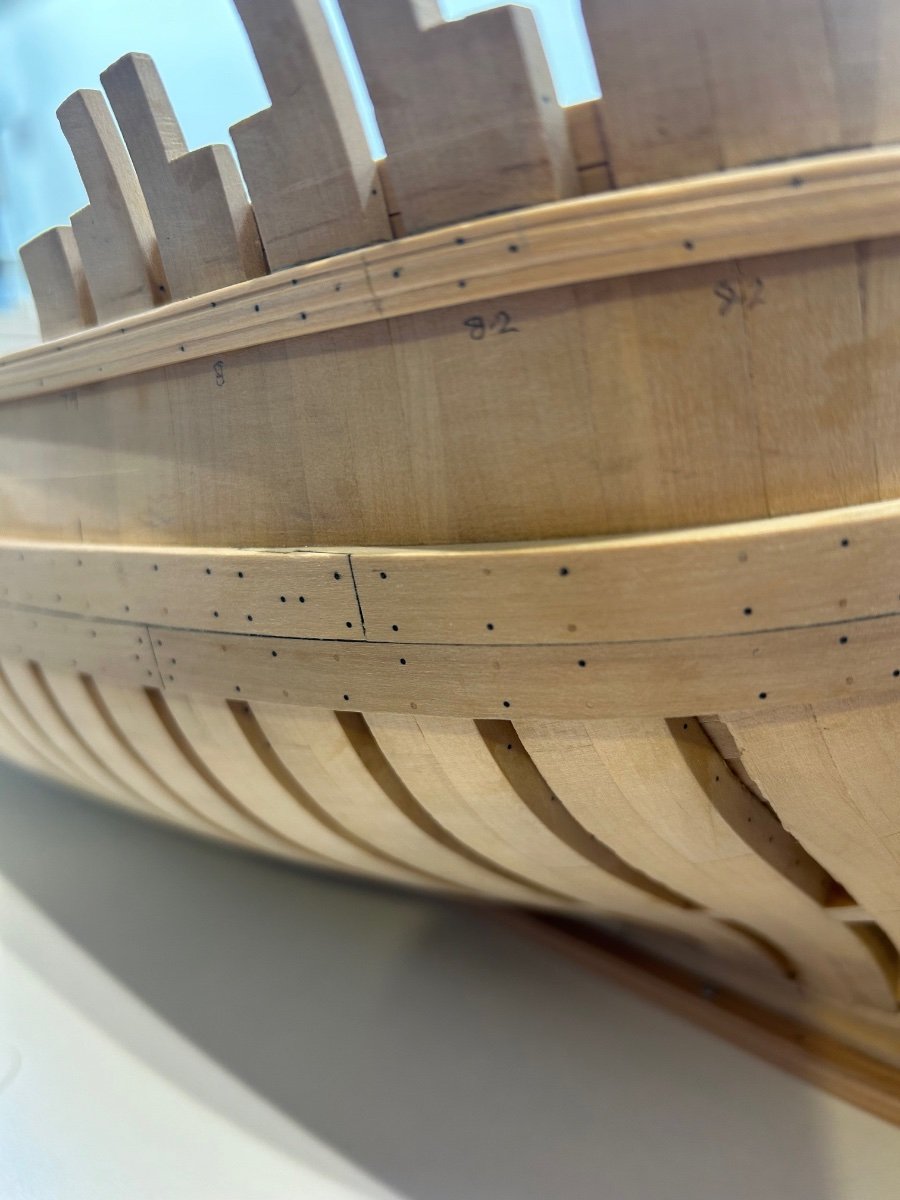
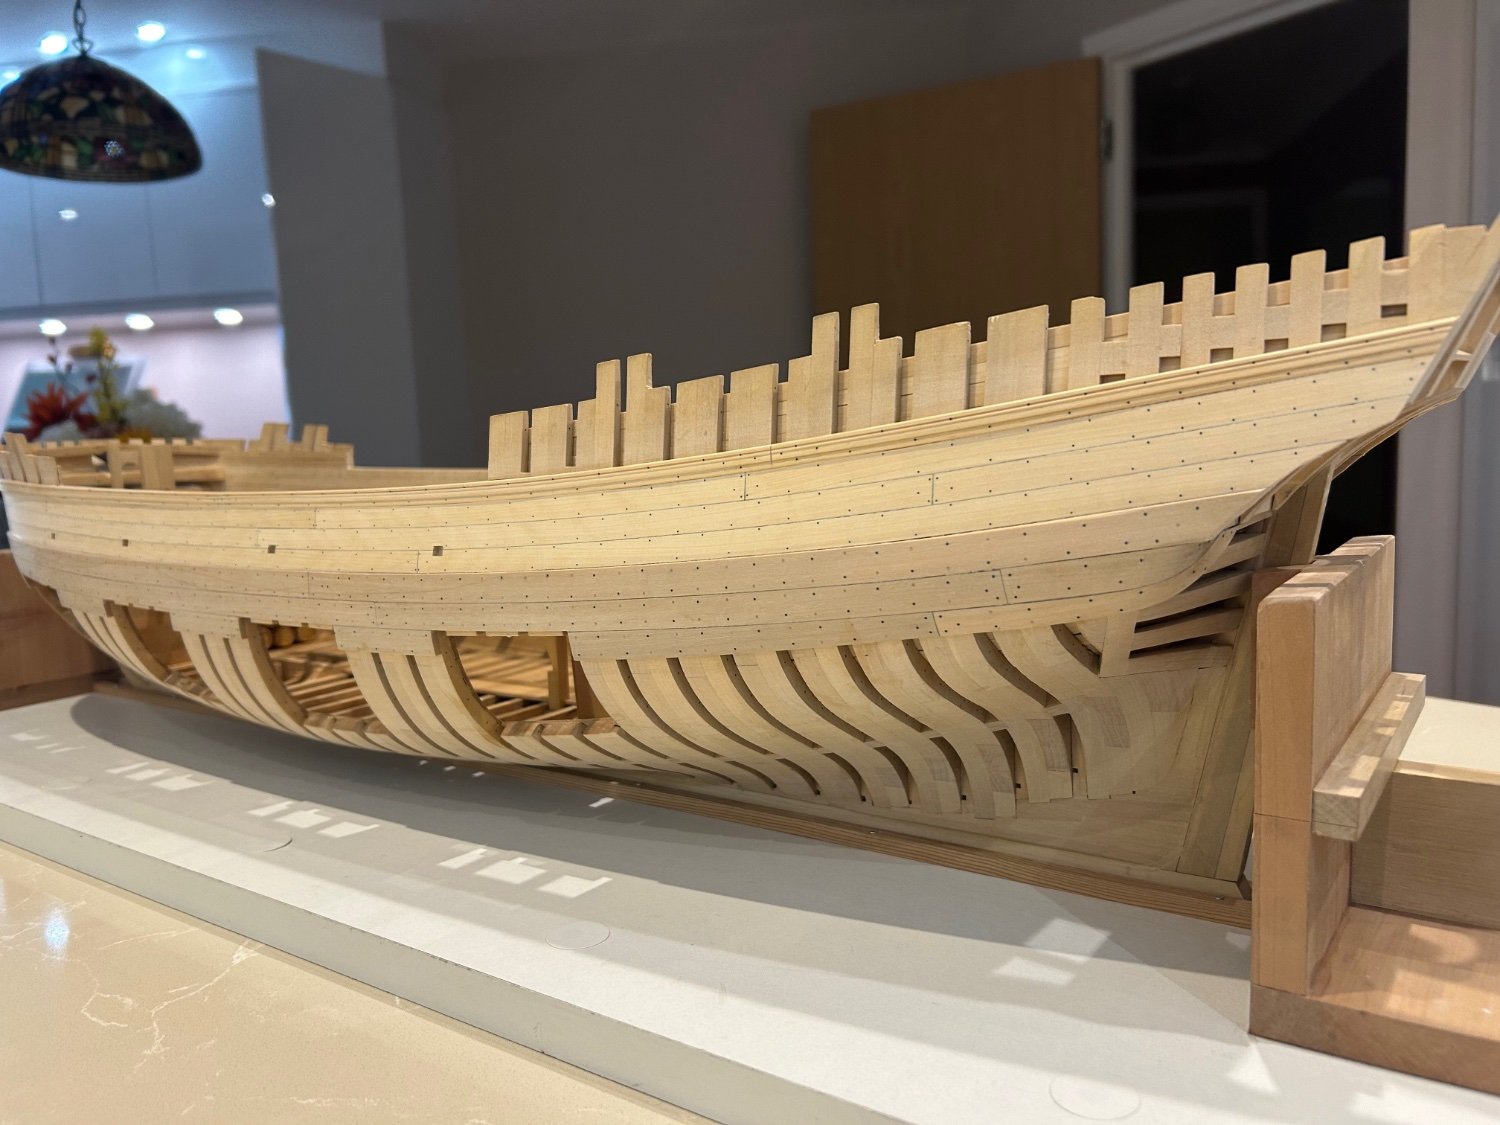
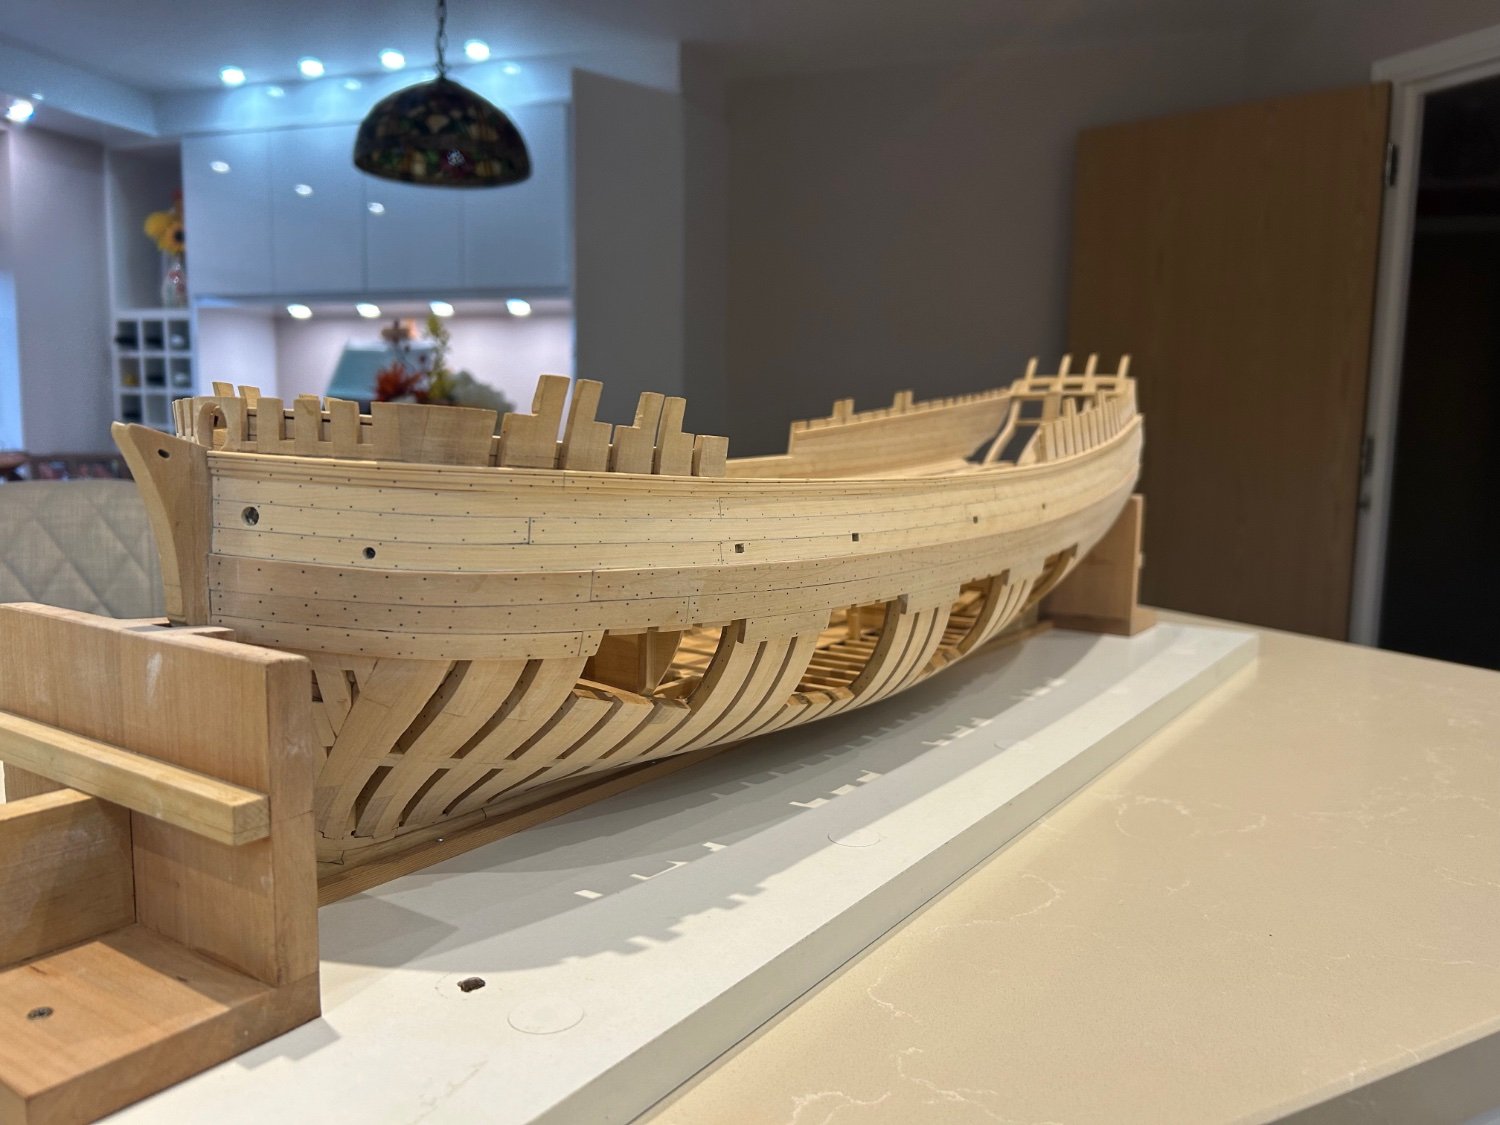
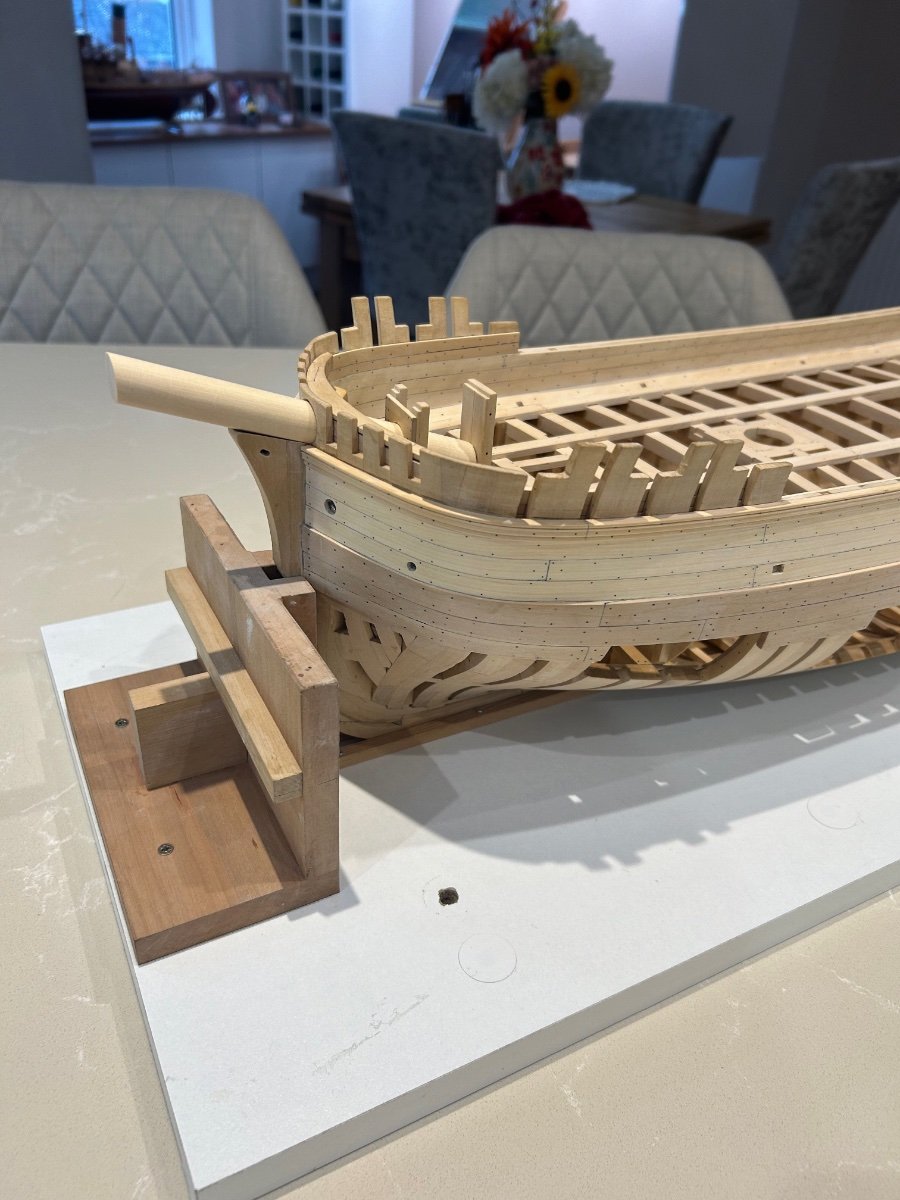
Some more done on Le Rochefort - I got on with the planking between the whale and rail. As this blog is aimed at new builders like myself I thought I would share how I go about planking. Funnily enough I see planking as a mathematical problem which just needs solving. So first off at various places along the hull I measure the gap that the planks need to cover. I then use this as my basis for the plank widths when shaping them up but also gives me my widest point which is what I cut the planks too on the table saw. The picture shows that I need 3 planks 8.2mm wide that this point.

Then I cut the planks and shape them to my measurements that I have already taken. I use a plank vice to hold them whilst planing them as I find I get the best results this way.

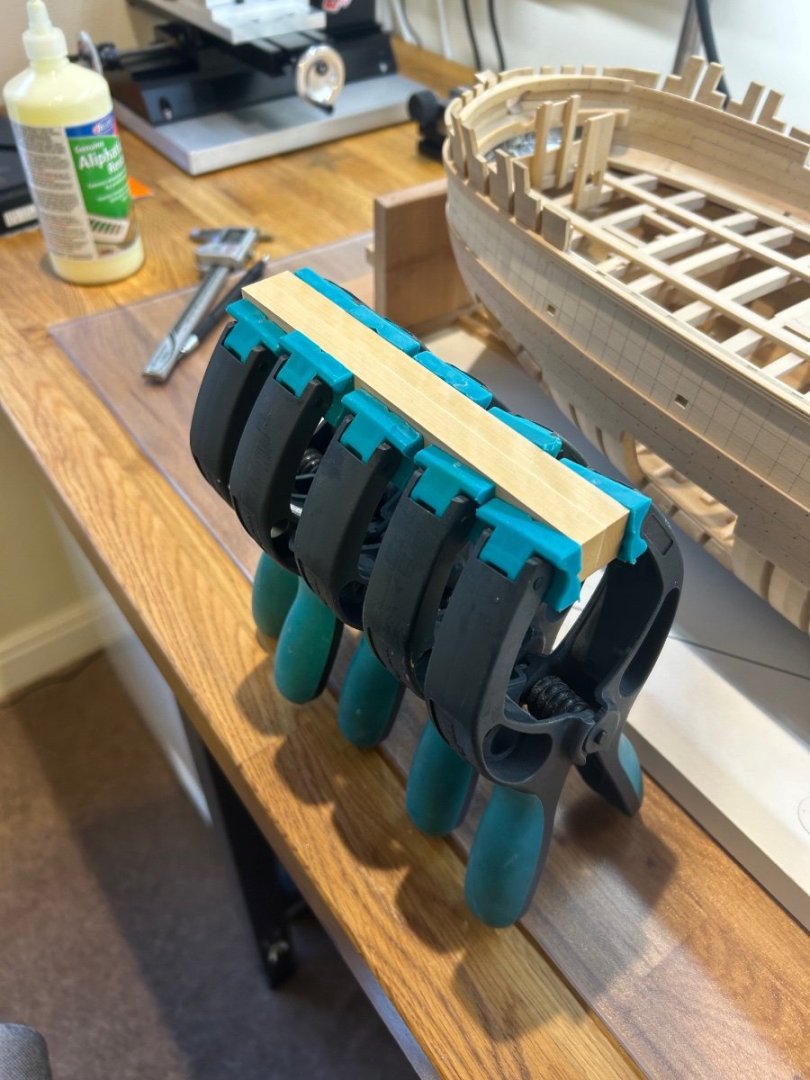
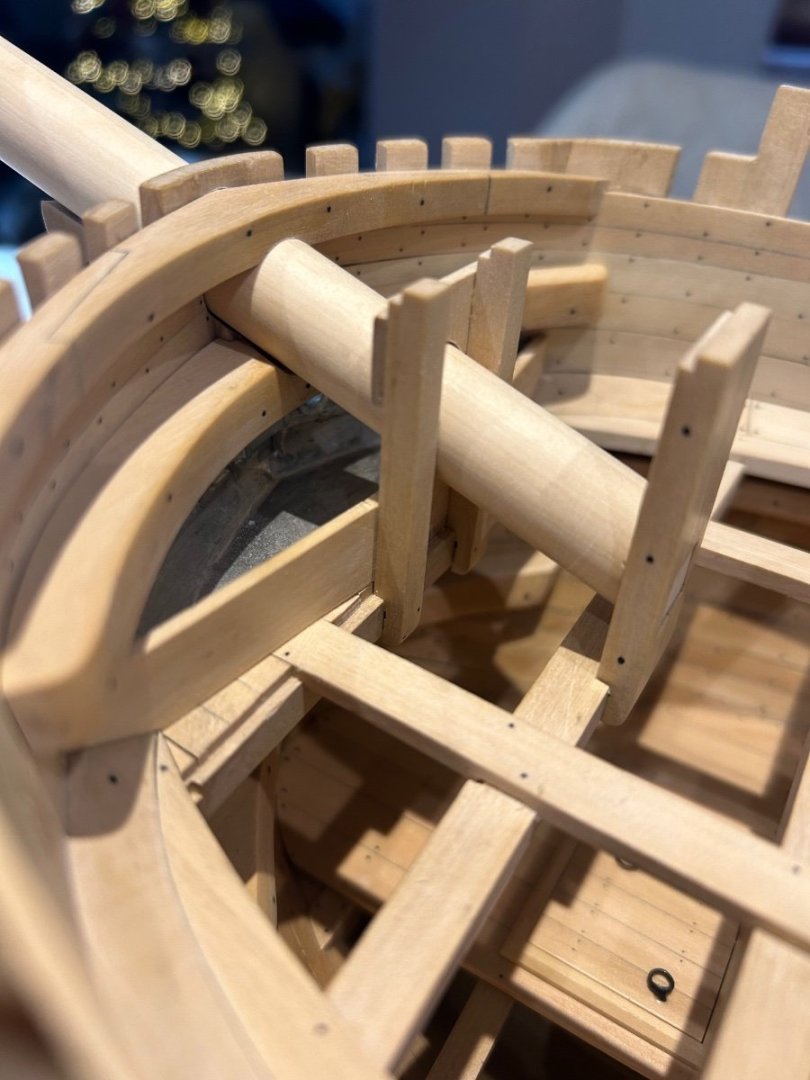
Then I just get planking - you can never have too many clamps. I also pierced the hawse holes and scupper holes at the bow too. For some reason I always seem to plank one side better than the other!
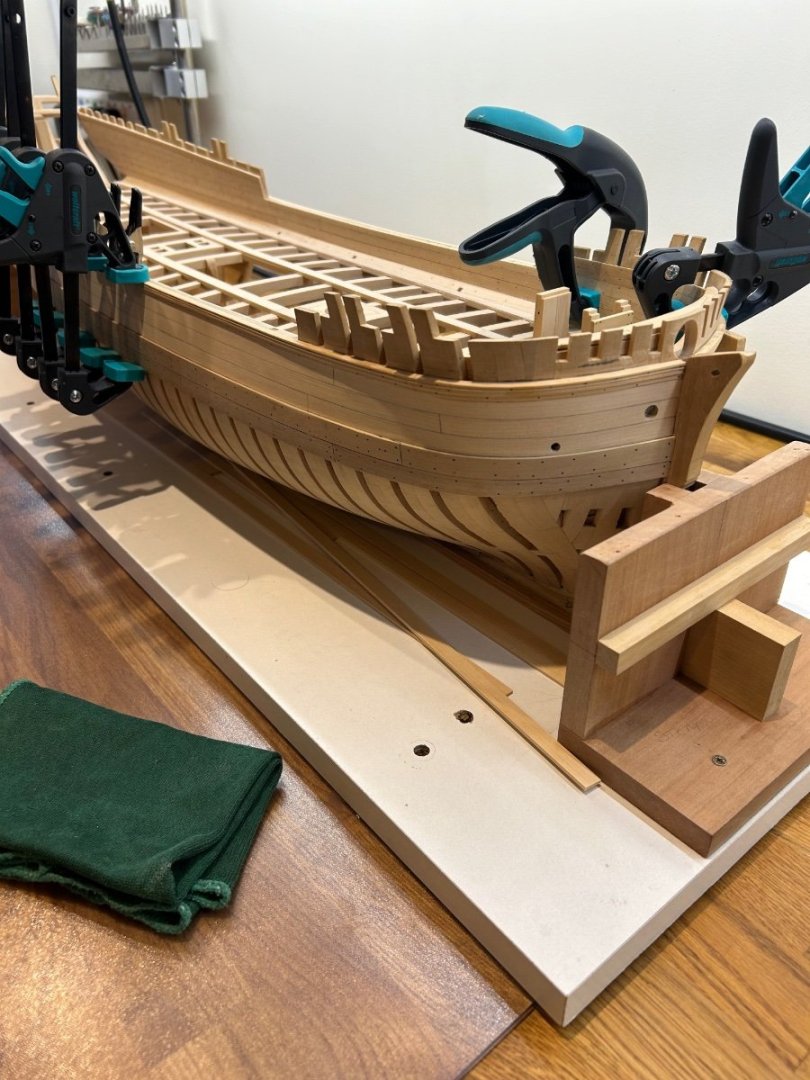
Then I marked and cut out the scupper holes and also marked out the nailing pattern. At this moment in time I must be honest I don't think I'm going to go all of the way through with the scupper holes along the hull. I don't think I'm brave enough.

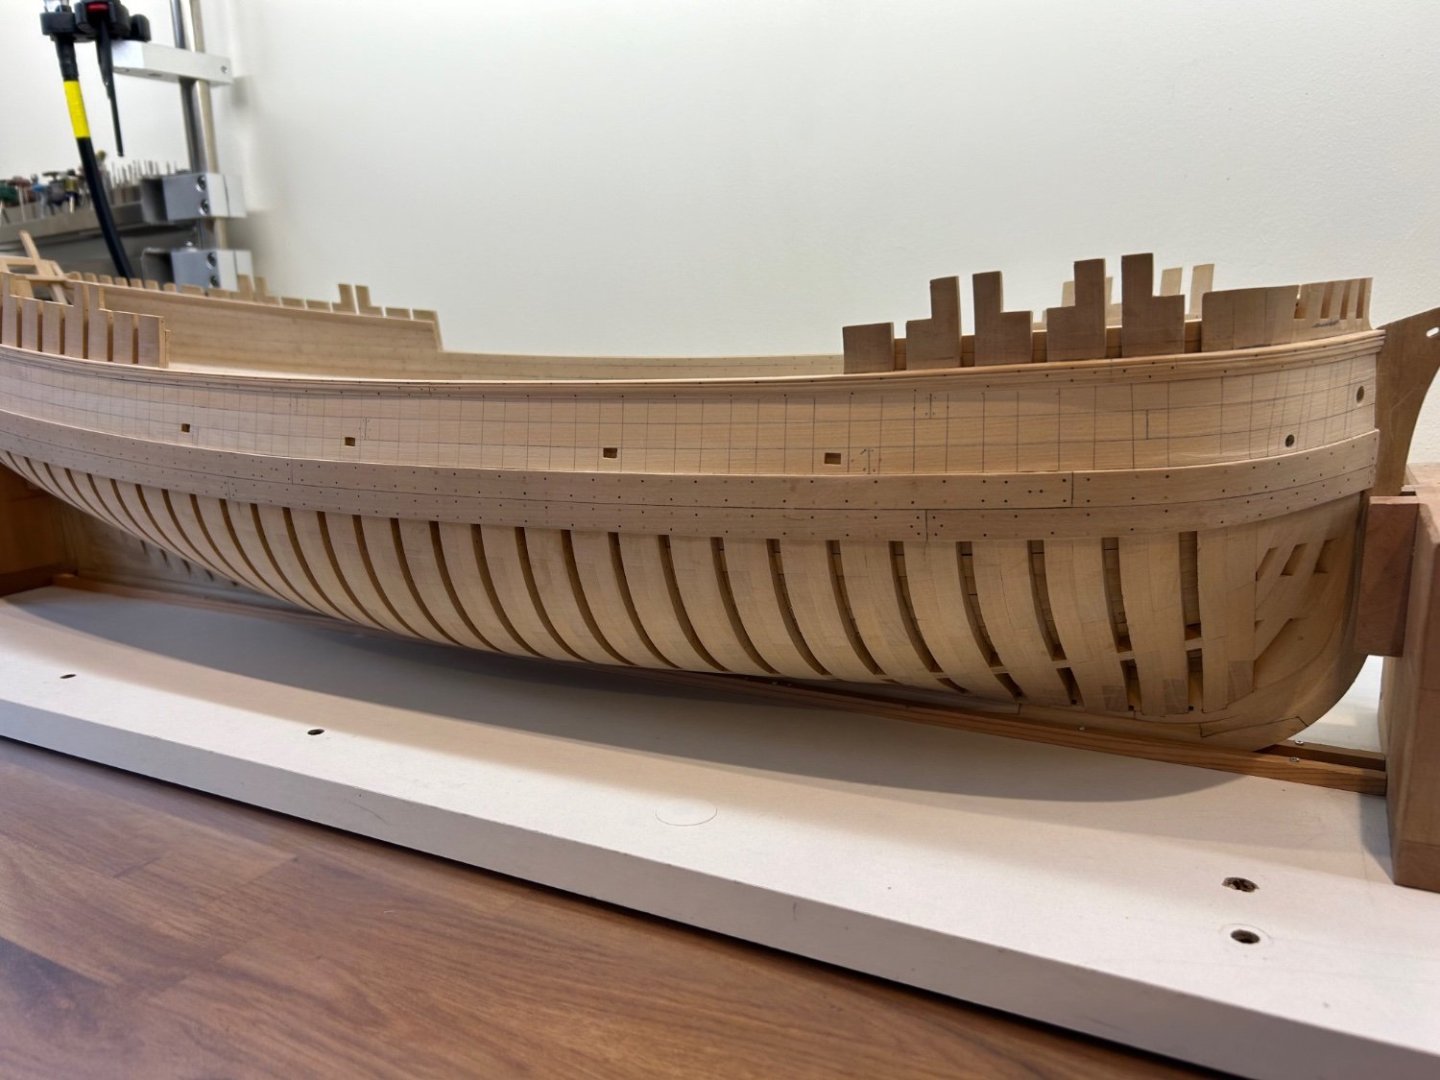
I've only nailed one side at the moment as for some reason I just can't get into it at the moment but so far the results are quite nice.


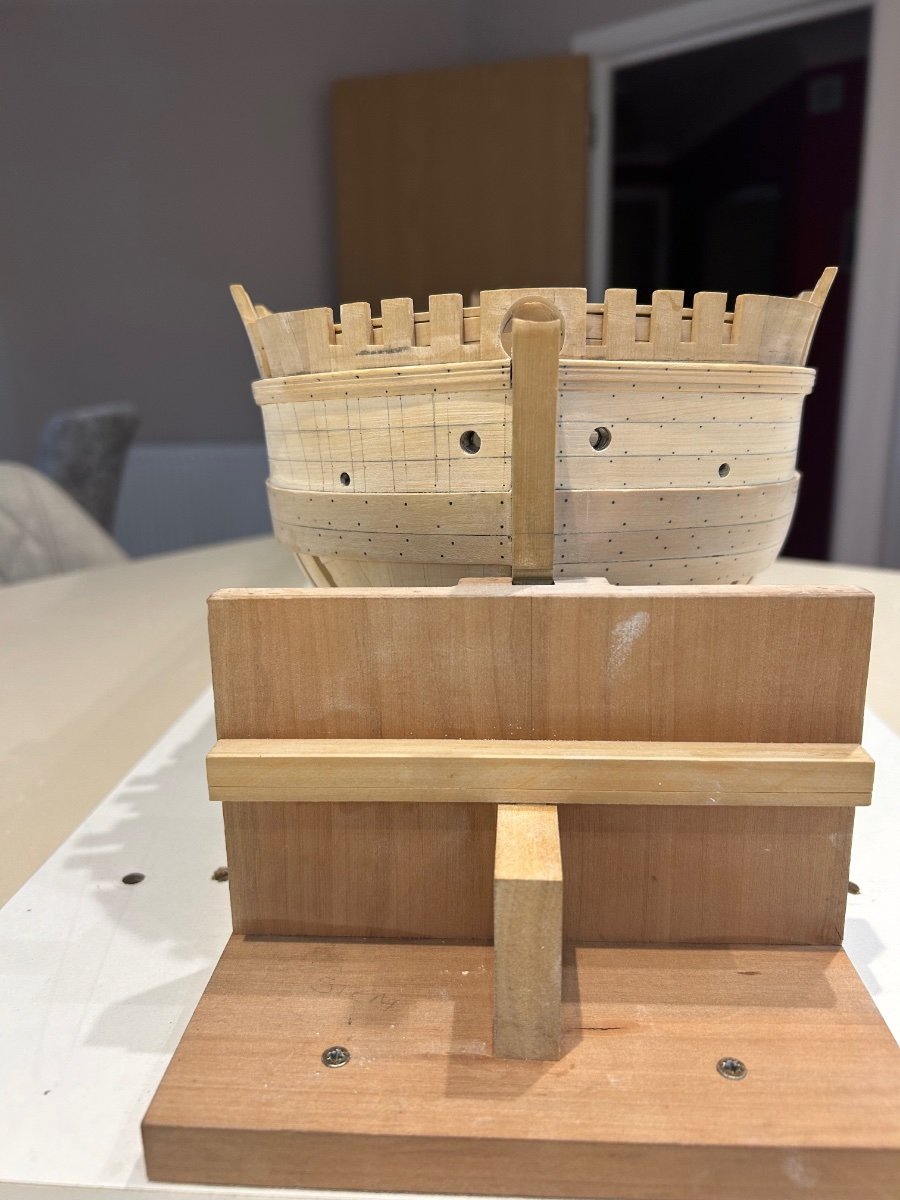
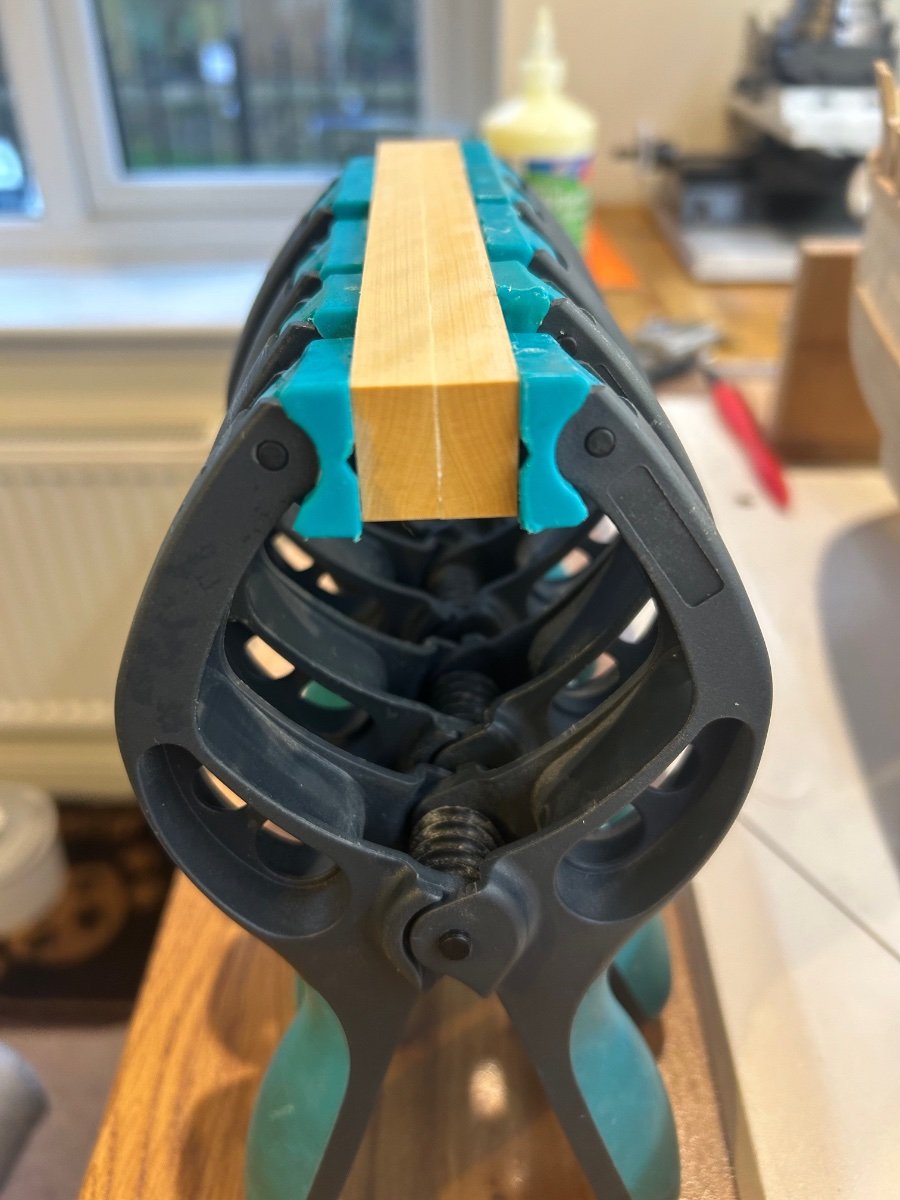
In-between nailing the planking I decided to have a go at making the bowsprit. It is 14.5mm in diameter so to get a piece this thick I started by gluing two 10mm pieces together.

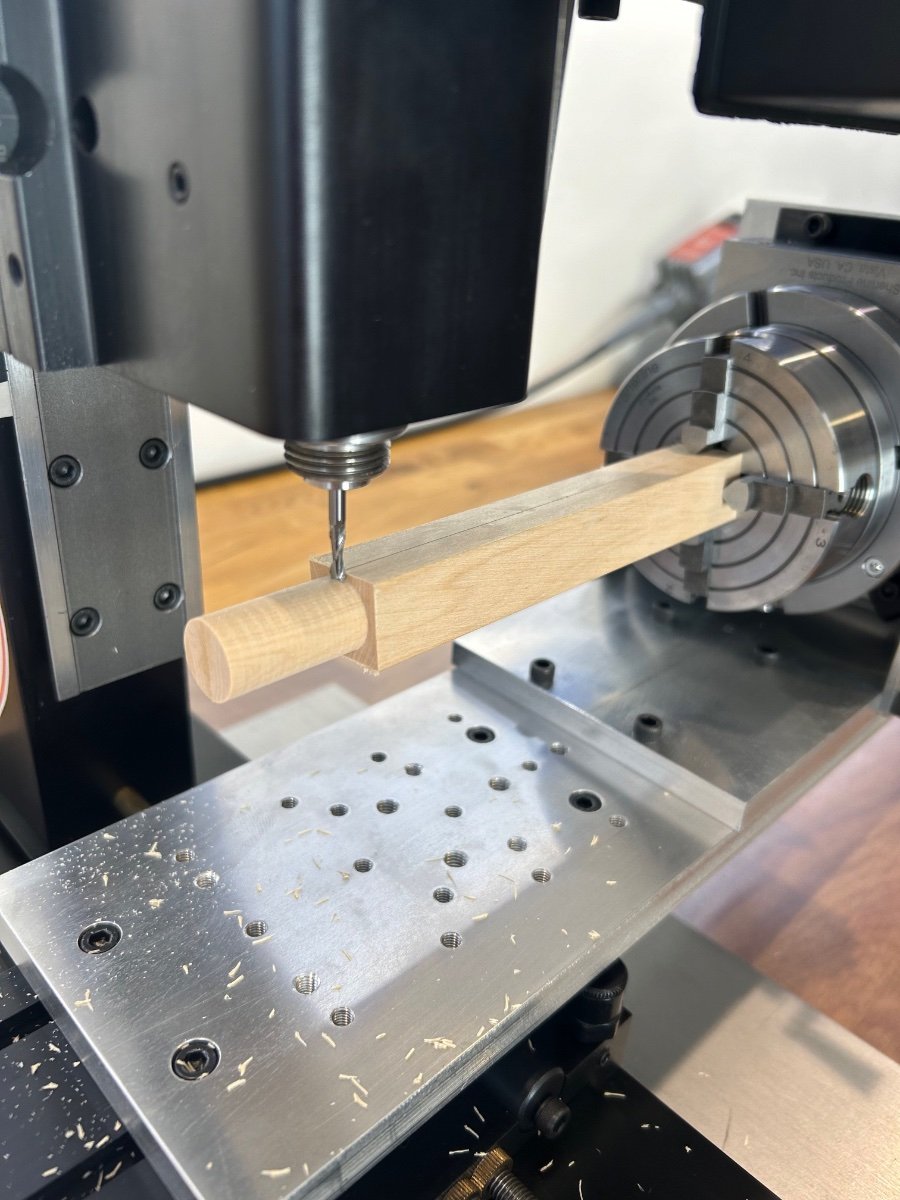
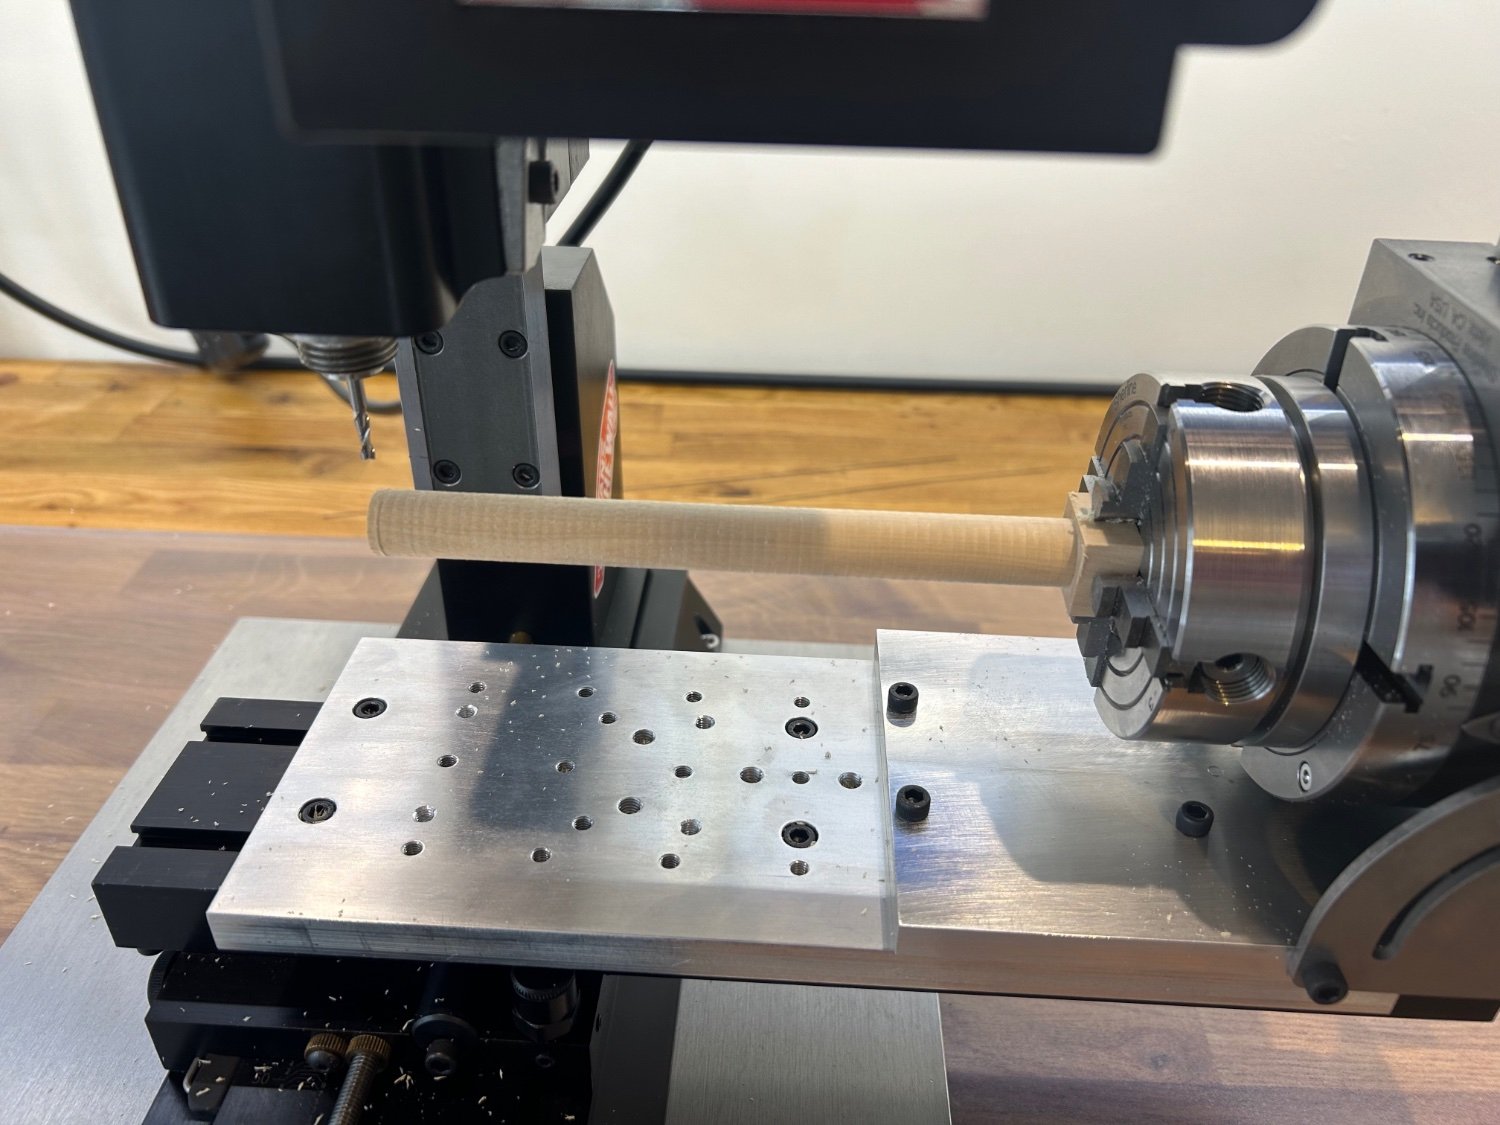
I don't have a lathe so I thought that I would give it a go on my rotary table on the milling machine. Now this was fun as I don't have a support of any kind yet but I thought well let's give it a go anyway.

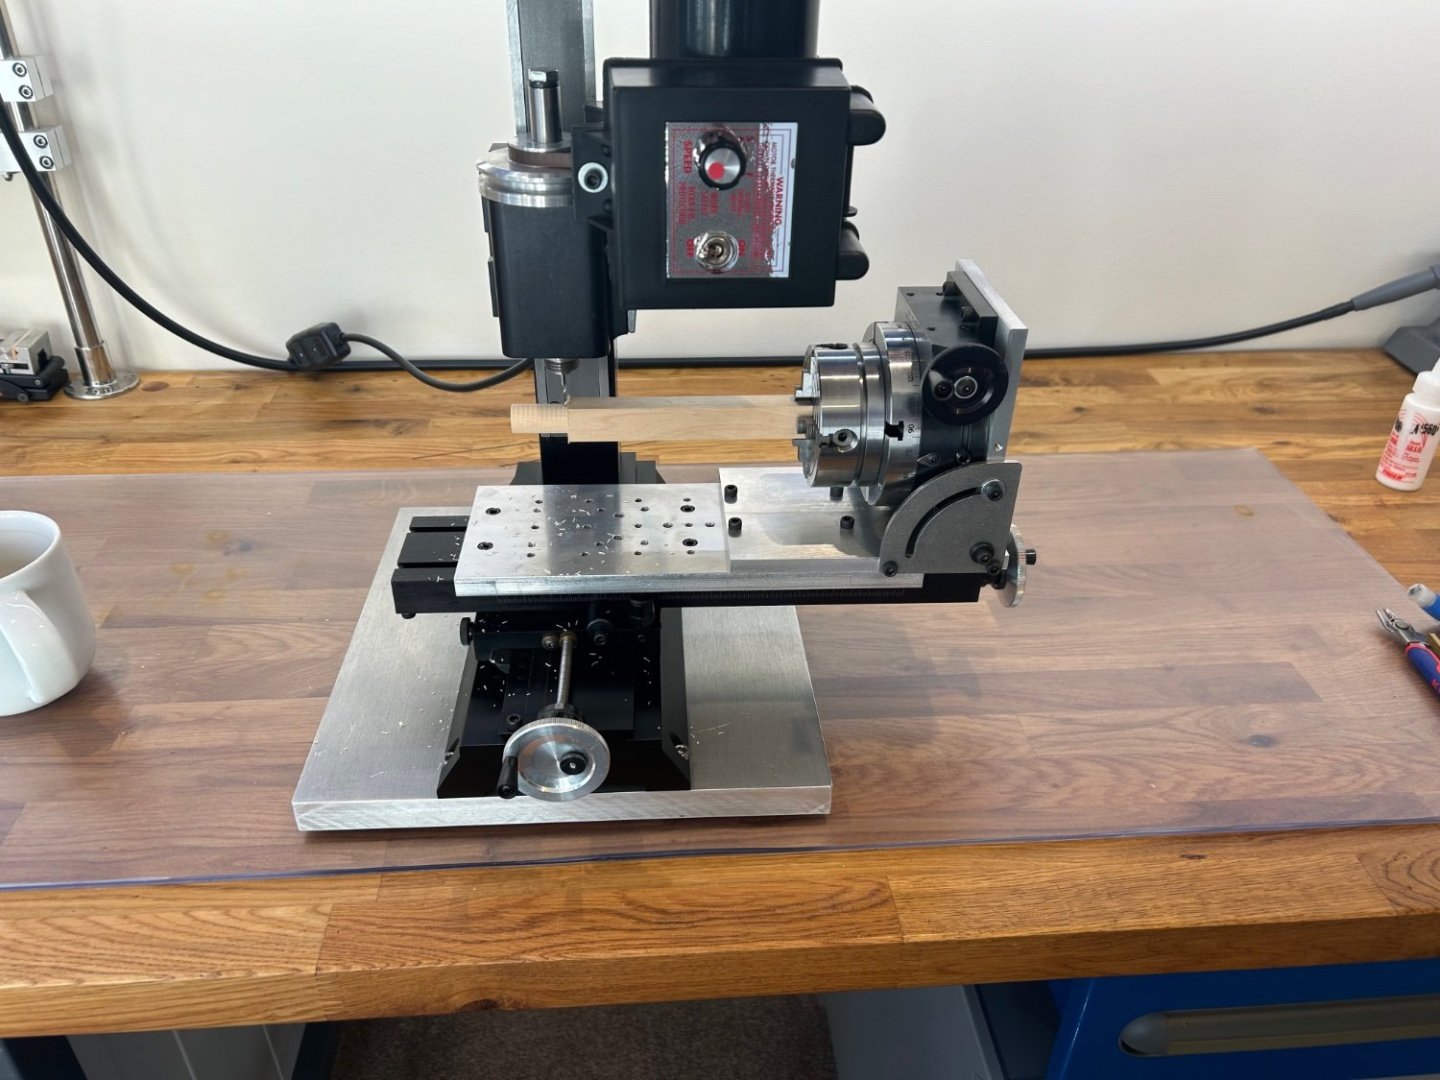
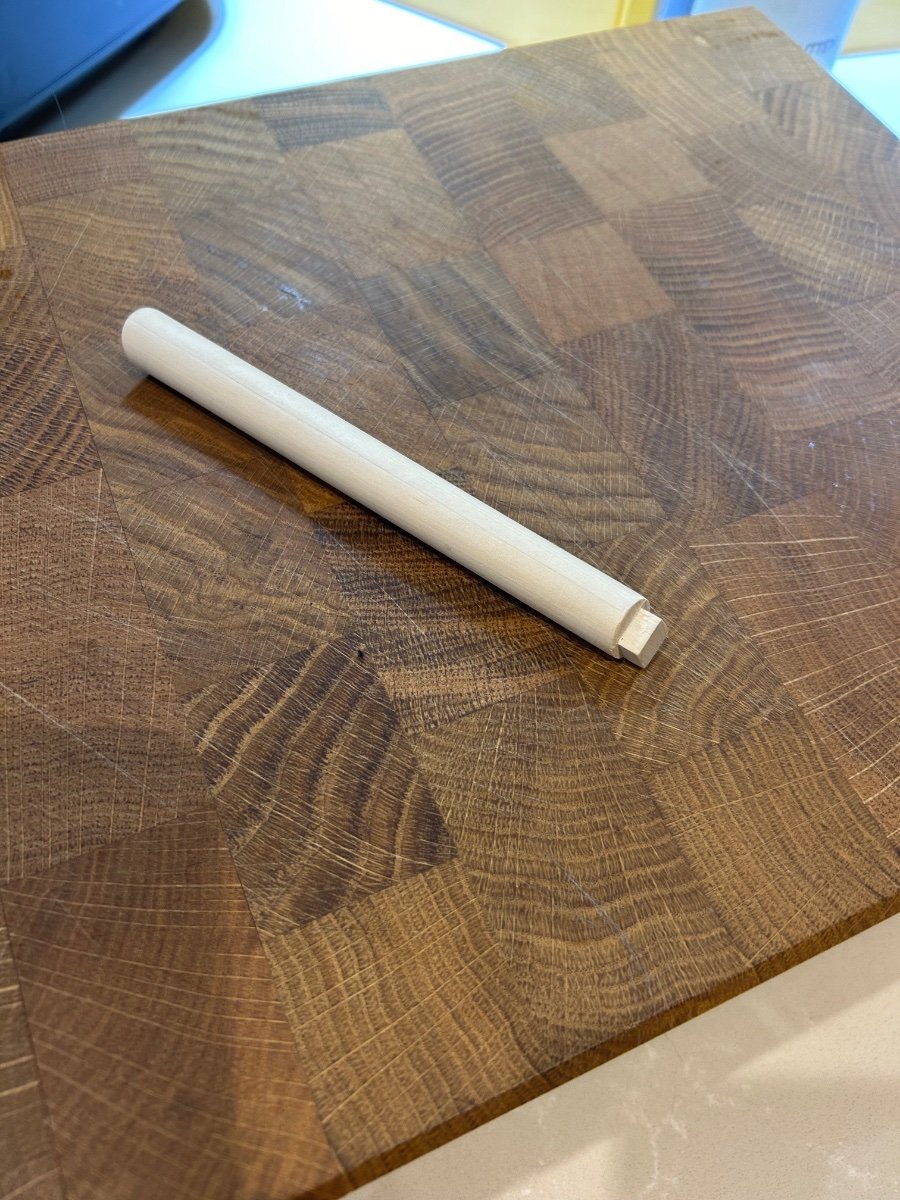
I guess I could have made something but the chatter wasn't too bad and I left some on to sand down at the end by hand.

I was going to cut the square location pin on the mill but in the end I simply did it by hand using a small saw and chisels.
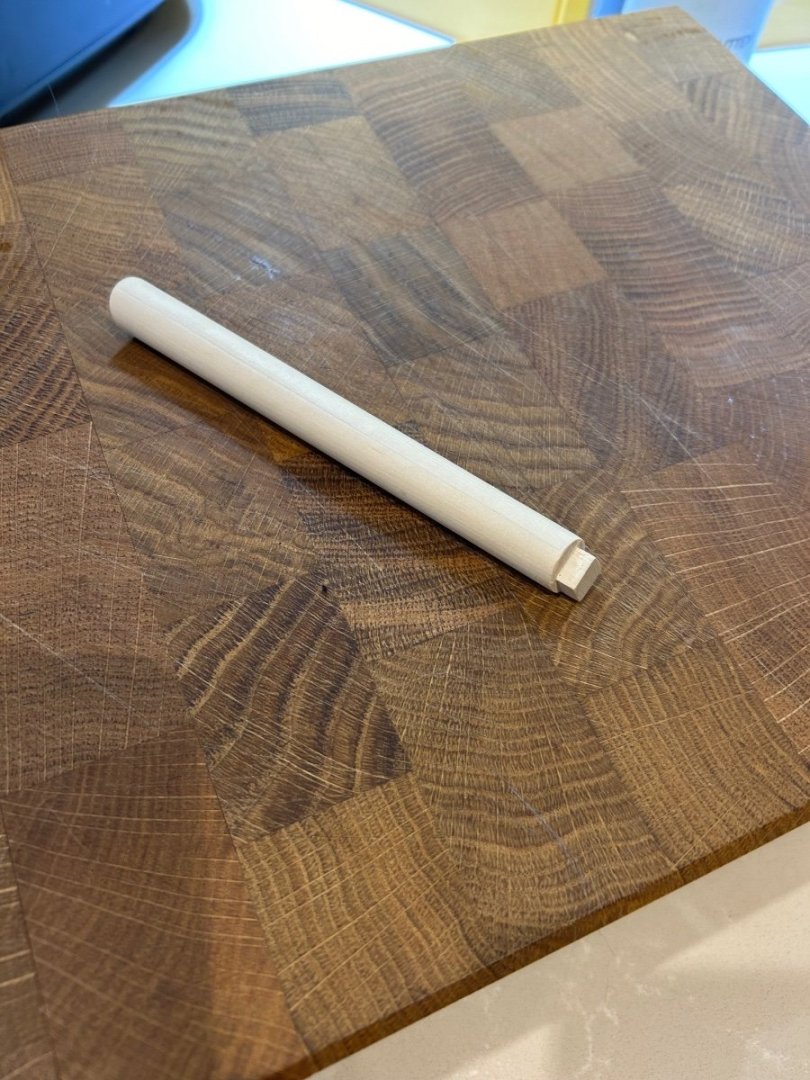
The end result looks ok and its a pretty good fit. I was never going to have full size masts on this build as rigging at this stage just does not appeal to me. Maybe it will later in my building career?
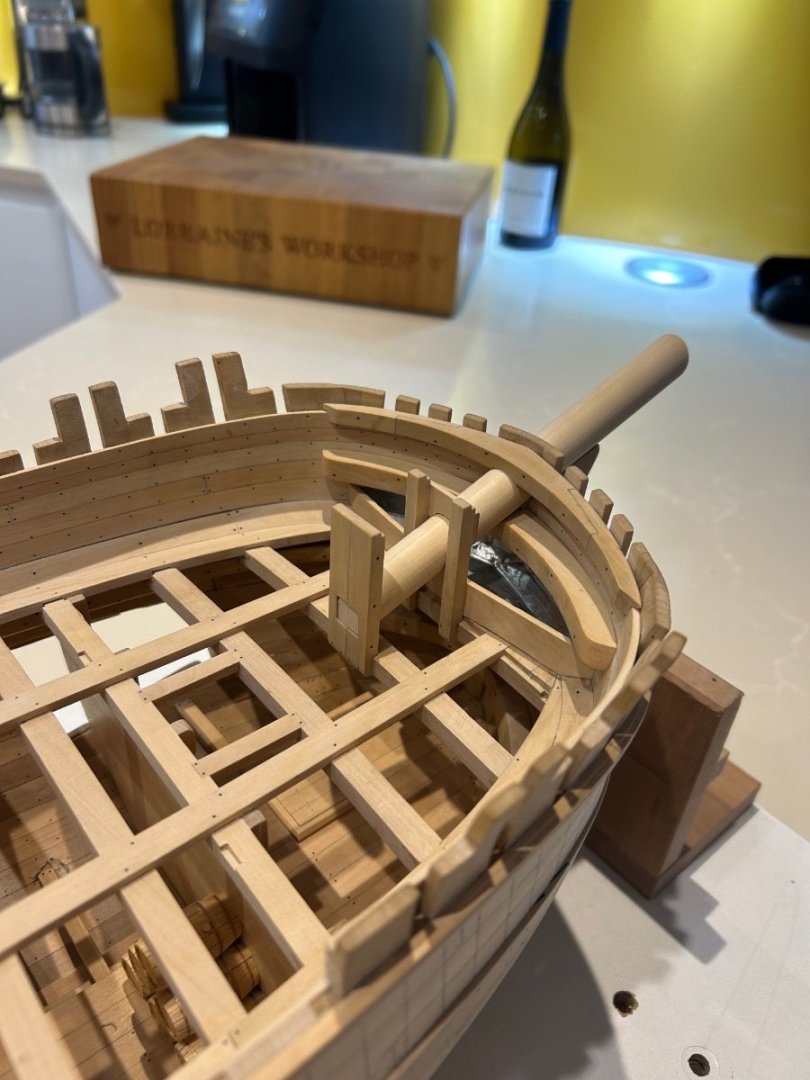


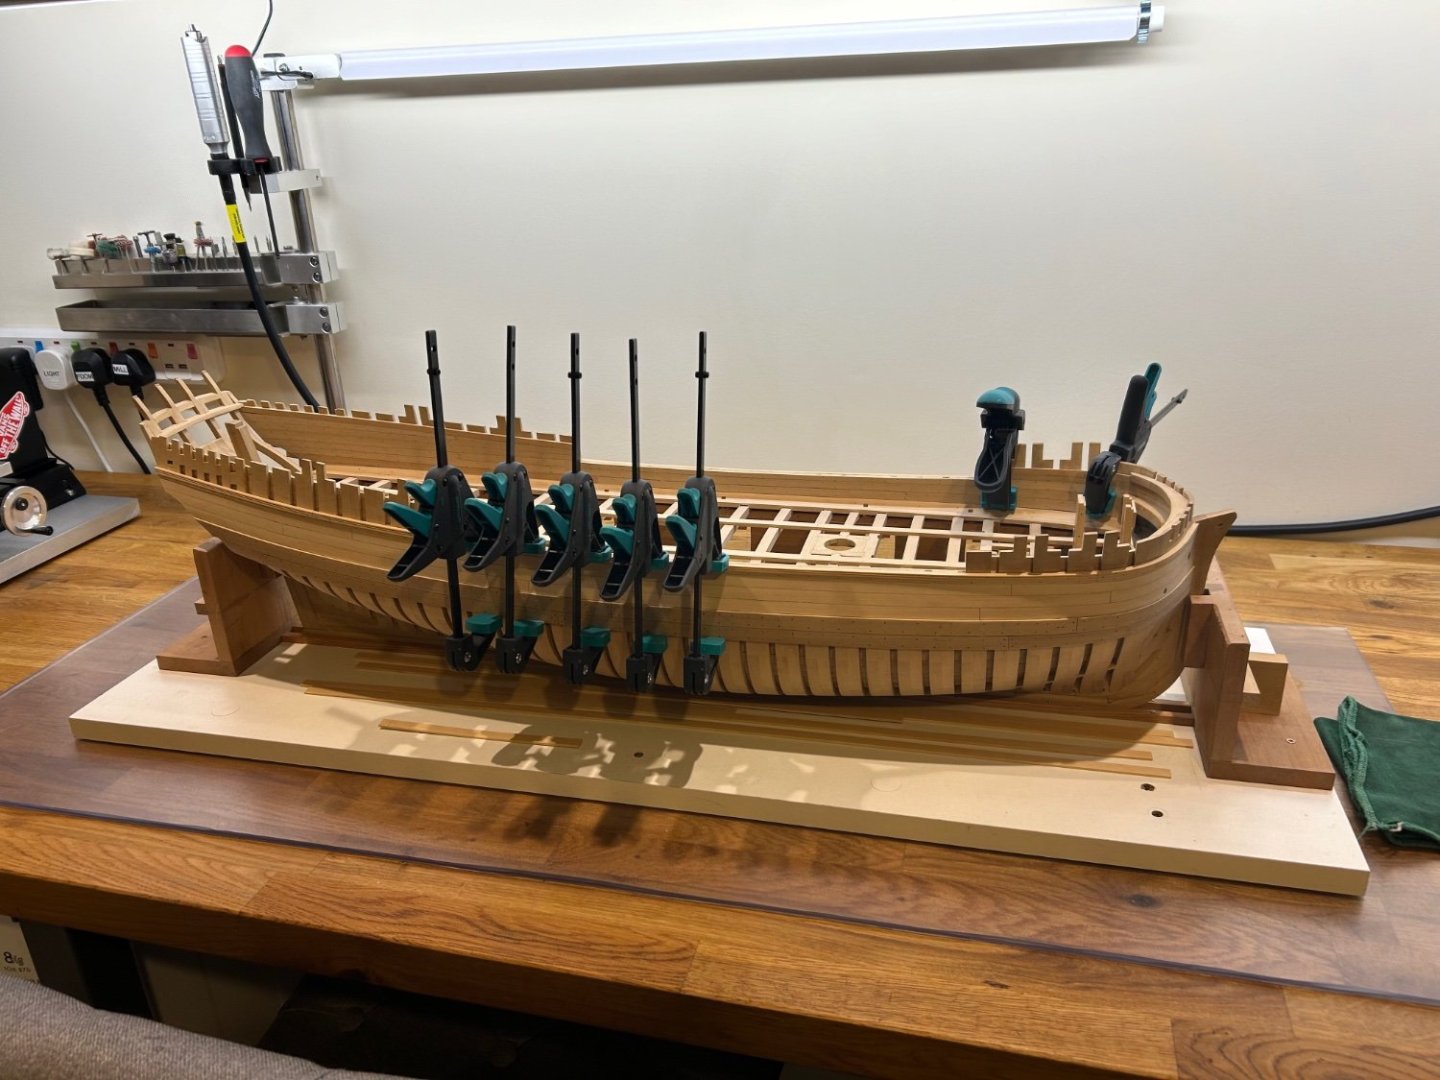
So I just need to complete the nailing on the starboard side and then I can think of my next move on the ship.
Cheers Mark
-
-
On 12/28/2023 at 5:52 PM, Roger Pellett said:
My present project requires a lot of holes drilled in brass and I recently needed to restock my supply of smaller sized wire sized drill bits. After reading previous posts here about jeweler/ watchmaking tools applicable to our craft I decided to investigate spade bits. Google search only resulted in umpteen offers for spade bits in fractional sizes (1/4” and larger) intended for rough carpentry work.
I checked a watchmaking tool source (I believe Otto Freil) and only found something called a Pivot Drill Bit that looked like it might be useful. This looks like a piece of pointed wire with two sides filed flat. I might experiment with one of these in the future. It appears that the watchmaking trade may have been invaded by Carbide too.😠
Anything that involves watchmaking then from what I've read on the forum wefalck is the man and I would take his advice. If I'm drilling into brass I always use cobalt drills. I don't know the availability of these in the US but here in the UK I can pretty much get any tiny size and they last for ages.
- Canute, mtaylor and Roger Pellett
-
3
-
1 hour ago, Malazan said:
Are cross sections a good way to gain experience and gain building skills?
Without a doubt yes they are but it does depend on your previous experience. Before I started building my current and first plank on frame ship I seriously considered a cross section first. The reason I personally chose the ship was because I knew deep down I would prefer the final outcome of a complete ship.
I also thought that if I thought I was capable of building a cross section - well I could probably build the whole ship. I was seriously mistaken as the commitment is so much more as is the learning curve. I will say though that the experience for me has been amazing and I would not change my personal journey.
So - If you don't feel that a complete ship is for you yet then this is a fantastic way to test the waters of scratch building and learn loads along the way. It also requires far less capital to get it done too.
- JacquesCousteau, mtaylor and Malazan
-
3
-
-
-
Hi Oliver - love your work mate it's absolutely fantastic to see it coming together. I really like the tool you have made for marking out the hull on the inside. This is something that I have found difficult during my build I I would like to make a tool similar to yours. Is there any chance you could send me a picture of this tool so that I have a better idea of what I need to make - Thanks Mark
-
Thank you all for the replies this has been extremely informative for me 👍
- mtaylor, bruce d, Keith Black and 1 other
-
4
-
Hi Keith that makes sense regarding mortar I hadn't thought of that. Here's a picture of the hearth - it's a very simple thing for the crew of 8. The base bricks sit on a base of sand or salt and there is a simple metal framework within.
I asked about the colour of the bricks to ensure that I put them in correctly.
- Keith Black and mtaylor
-
2
-
Ah ha! I think you are mentioning the tiles and stone on the floor whereas I’m talking about the bricks that actually go inside the fire. The bricks I’m curious about basically lined a wooden box to stop the box from catching fire. I would imagine that they also made the hearth much more efficient and easier to use.
- Keith Black and mtaylor
-
2
-
Hi Keith where abouts are you looking mate. I can see coals in an iron stove but no mortar around fire bricks?
-
Thanks for the replies - In Le Rochefort the hearth is simply a brick lined wooden box with a metal lattice. The whole thing simply sits on a sheet of metal to protect the deck and was the most basic of cookers. I am also guessing that due to the heat the bricks were placed with no mortar of any kind?
- Keith Black and mtaylor
-
2
-
Hi All
Does anyone know what colour bricks would have been used in a ships hearth? For some reason I can't help but think that they would have been made from grey clay. I see many ships with red bricks in the hearth so I could be completely wrong.
Your thoughts would be appreciated
Mark
- Keith Black and mtaylor
-
2


Type of glue to use planking a hull
in Building, Framing, Planking and plating a ships hull and deck
Posted
Paul I'm with you on this but it's also personal choice. I pretty much only use aliphatic resin as its got good quick grip and can be disassembled using IPA. I have never had a good experience with CA and this was brought home to me last week when I was gluing some pewter together.
For some reason in my own mind I always think (incorrectly) that CA is for builders in a rush. Then I see some of the amazing results that builders on this forum get using CA. I think they just have it better sussed than me as you would never guess that they had used CA.