


No Idea
-
Posts
902 -
Joined
-
Last visited
Content Type
Profiles
Forums
Gallery
Events
Posts posted by No Idea
-
-
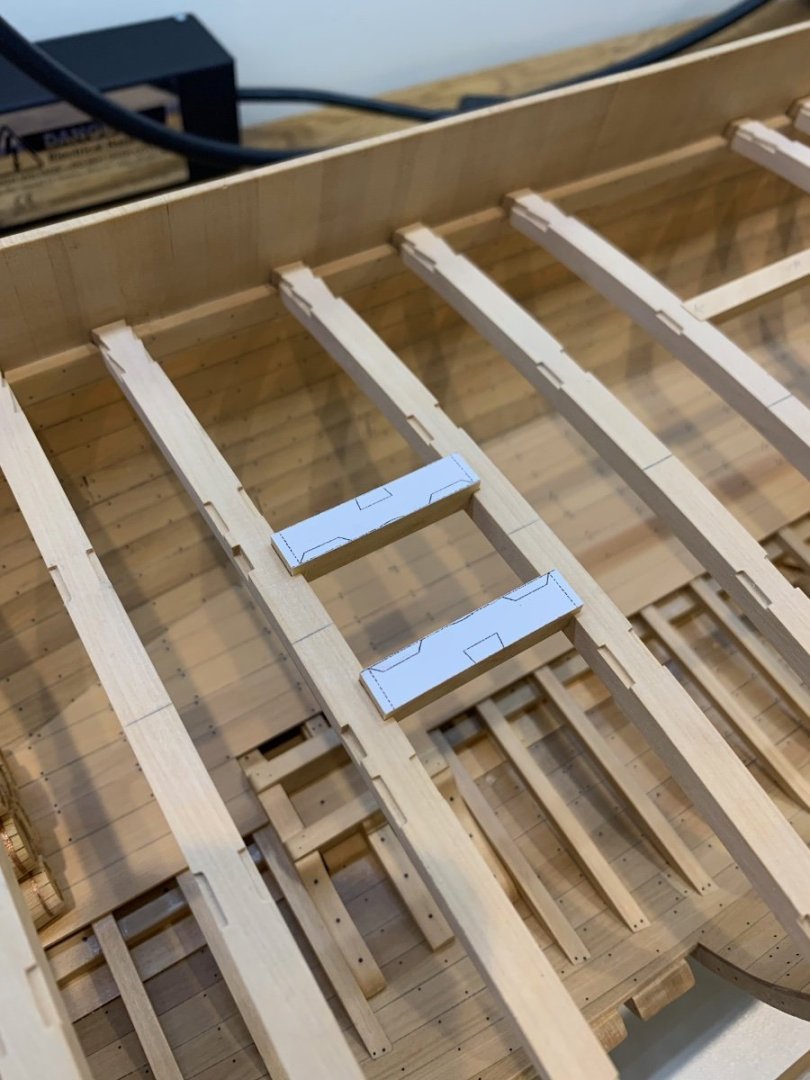
Hi All
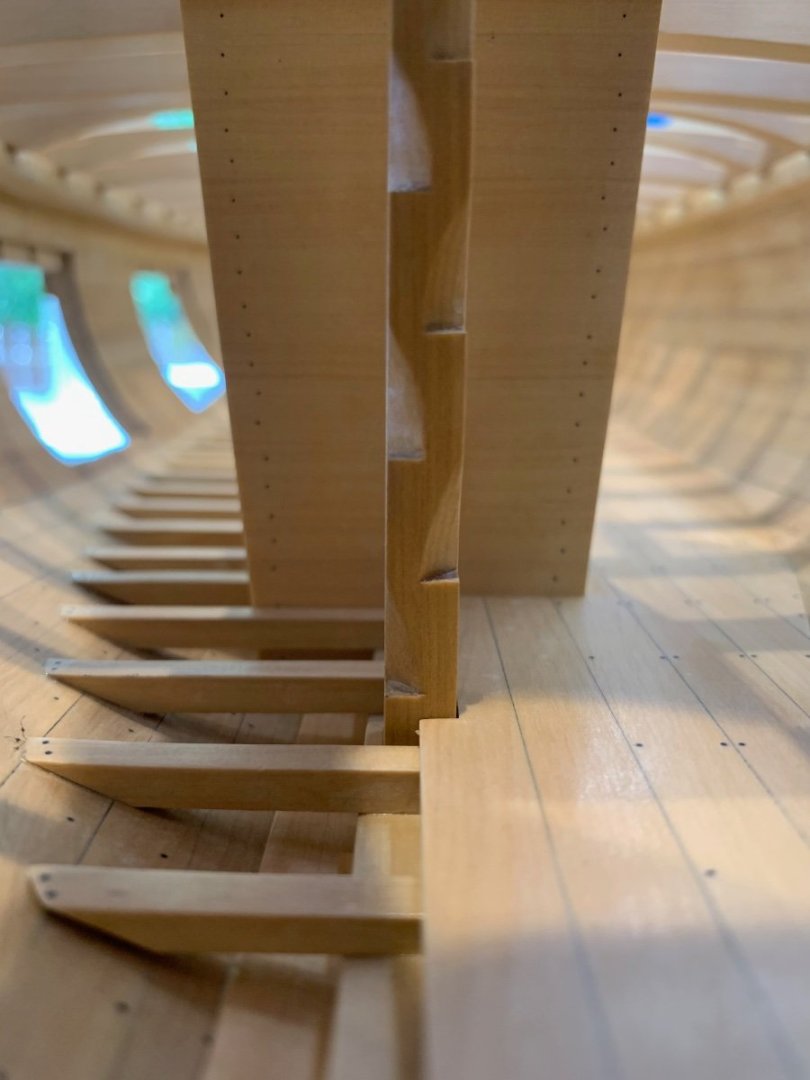
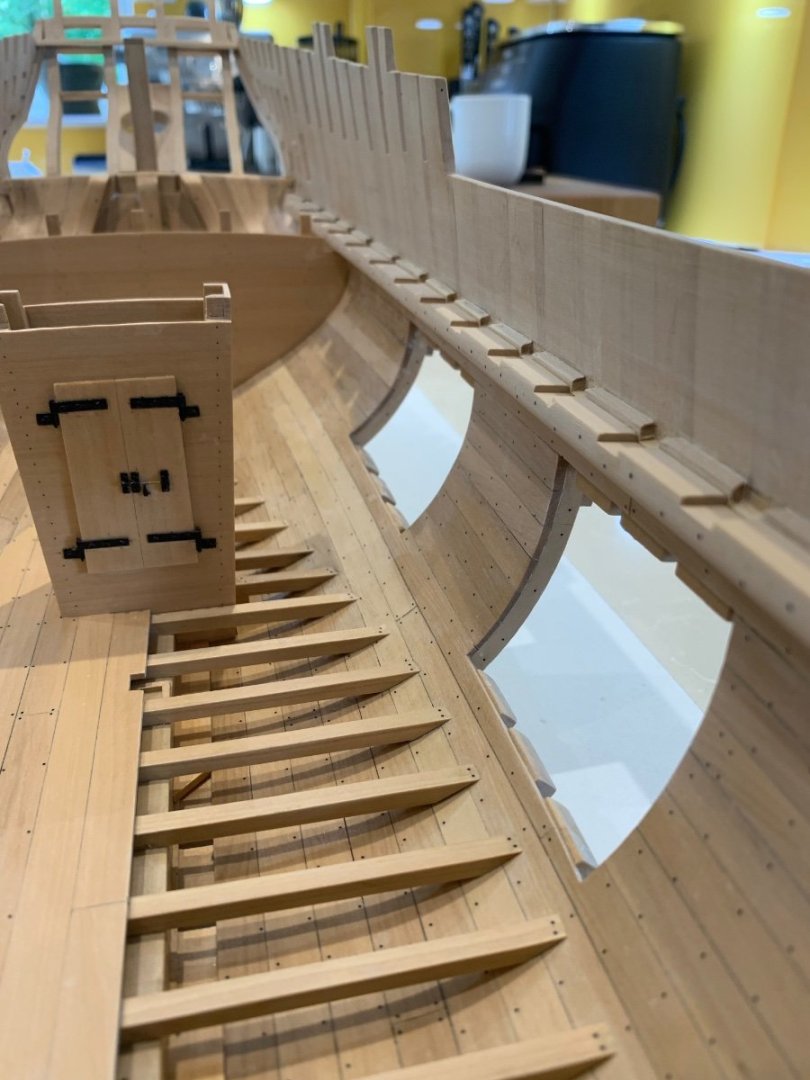
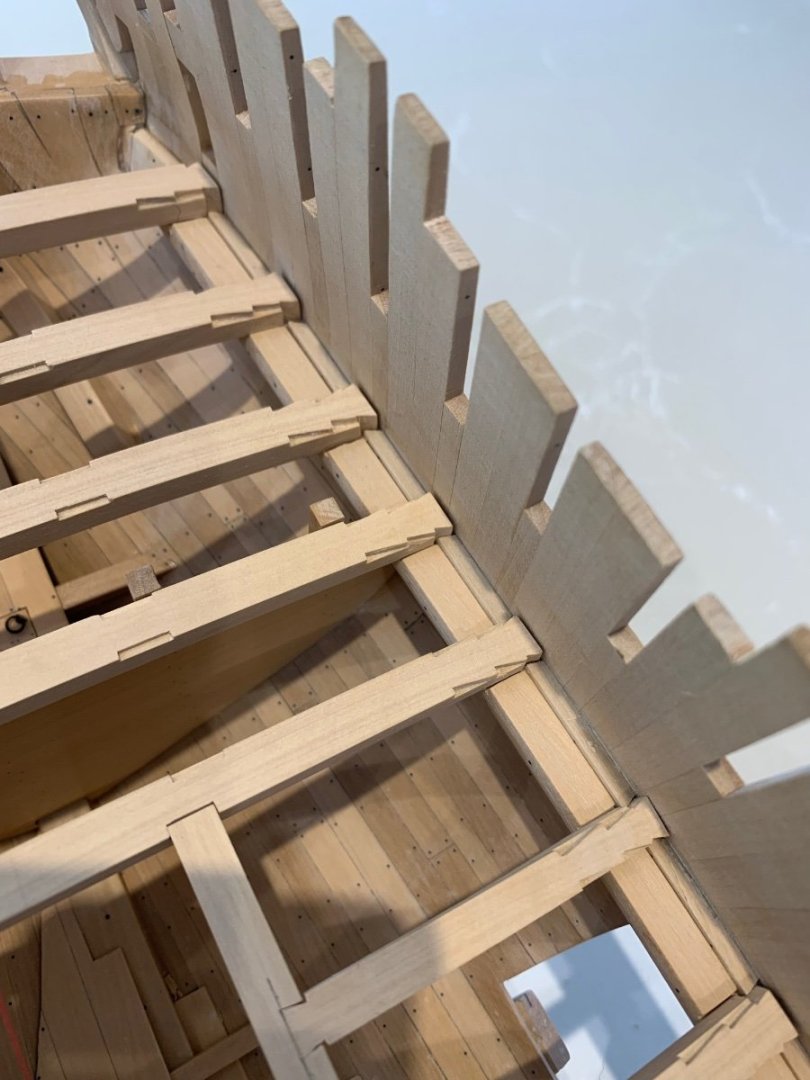
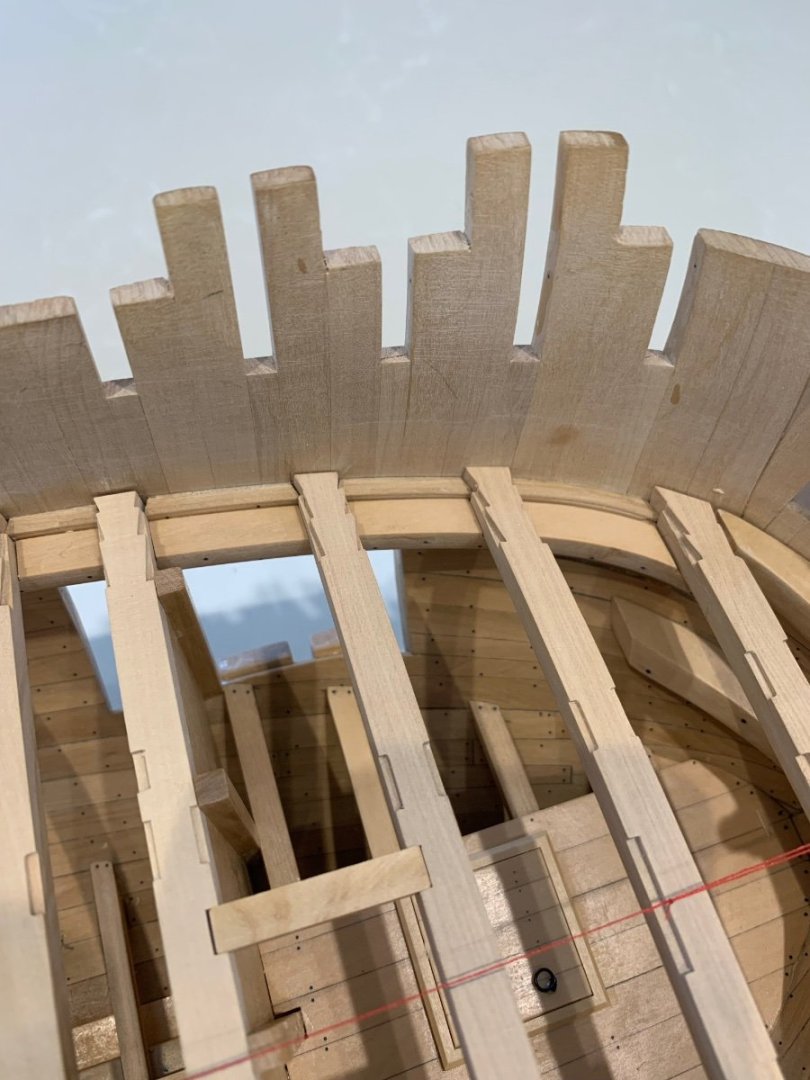
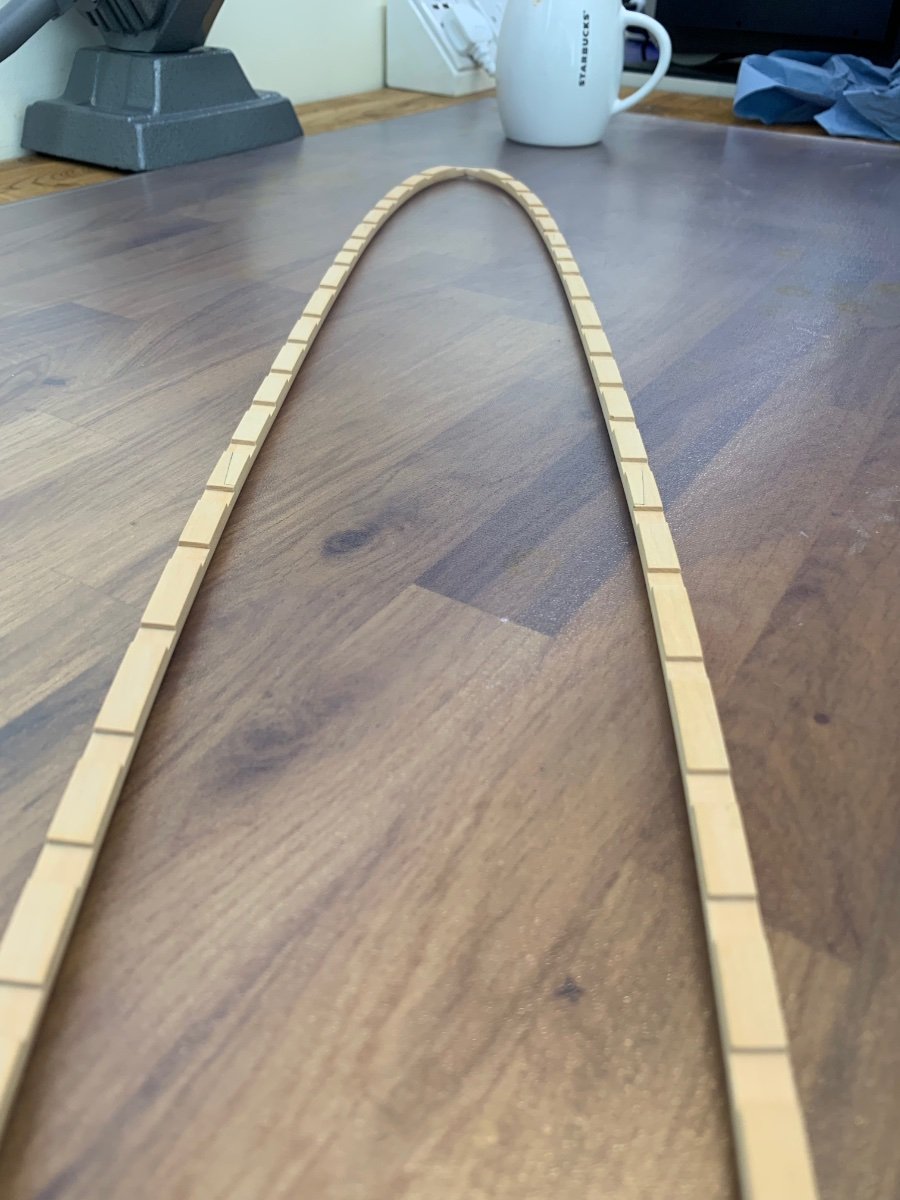
Another update from me - before the nailing I decided to have a go at the waterway first. So here's the first part of my journey trying to make the waterway around the bow.
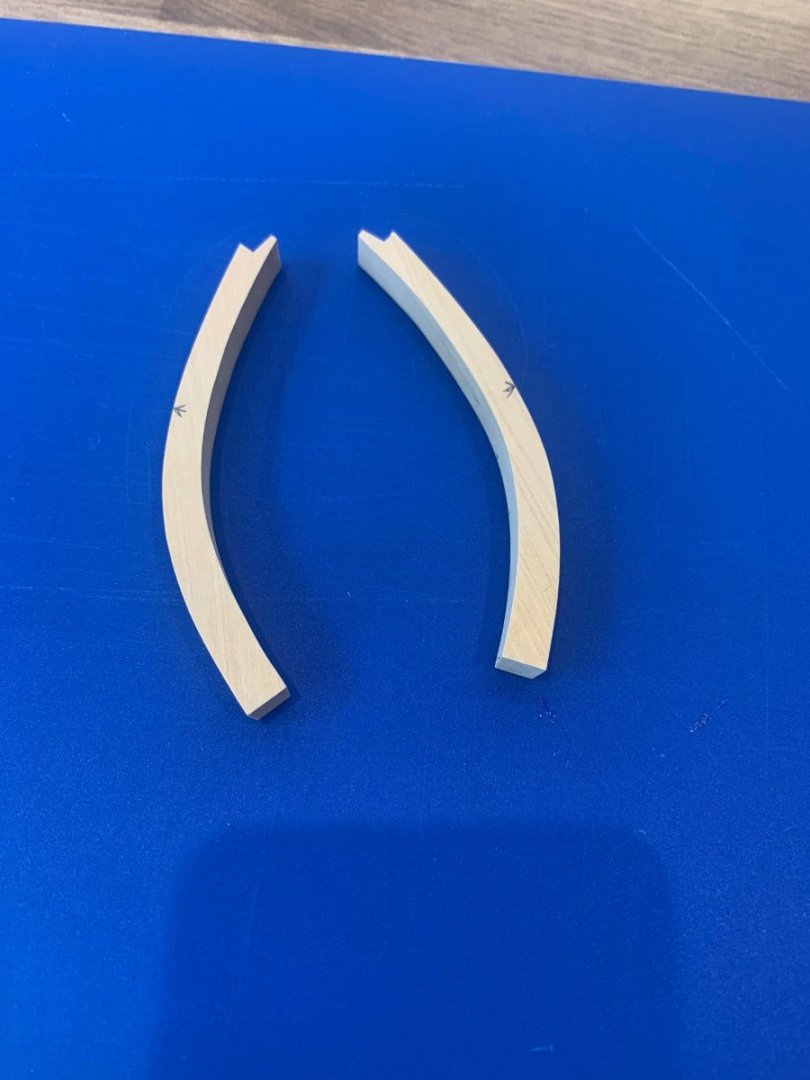
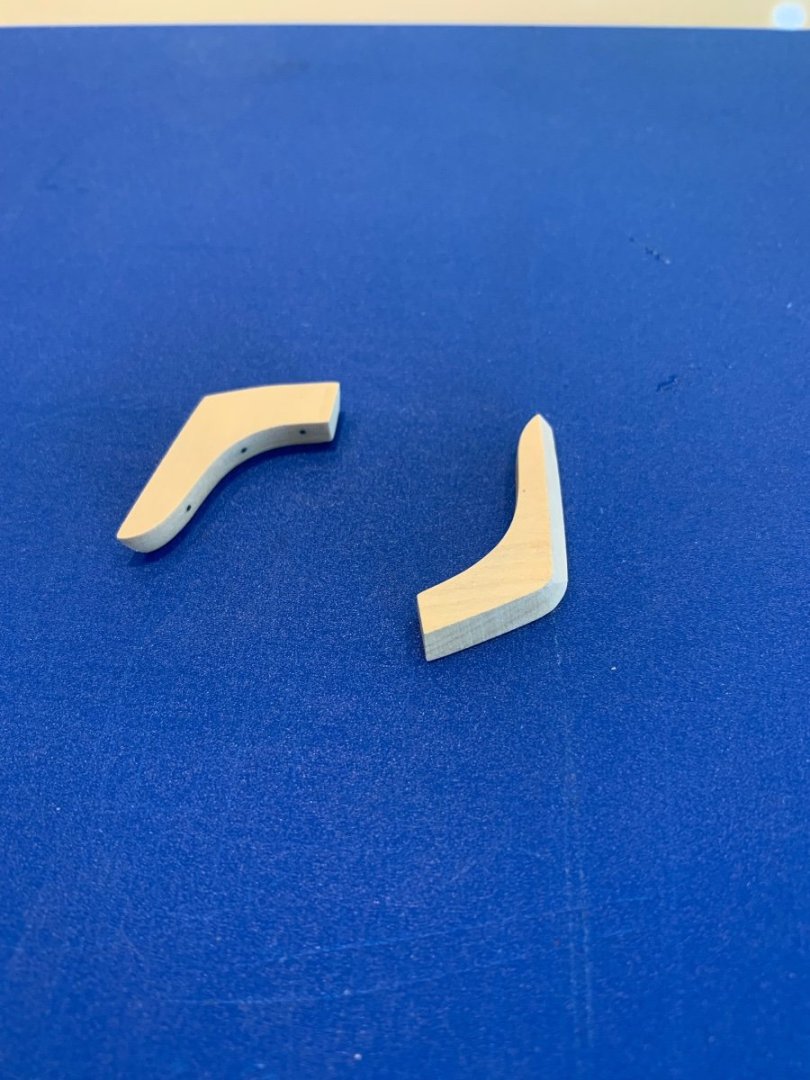
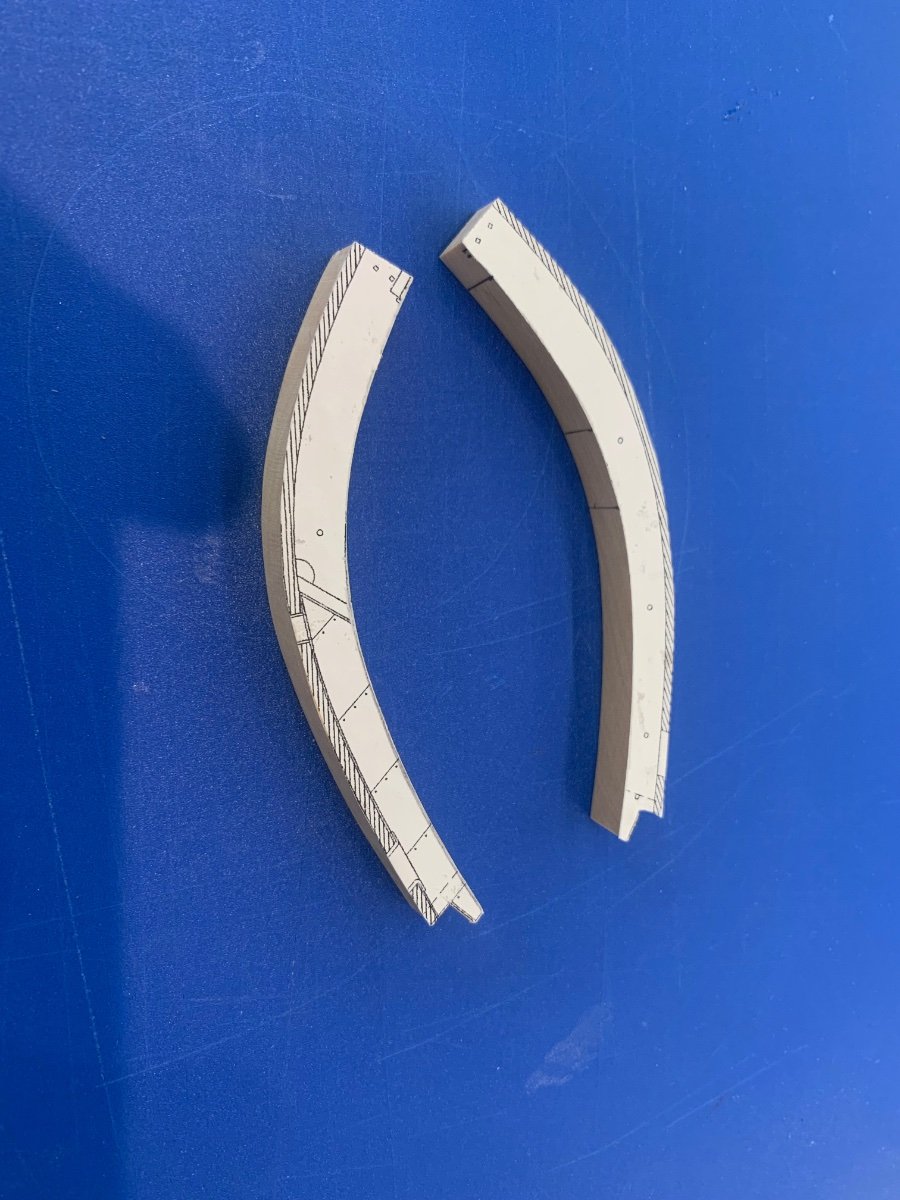
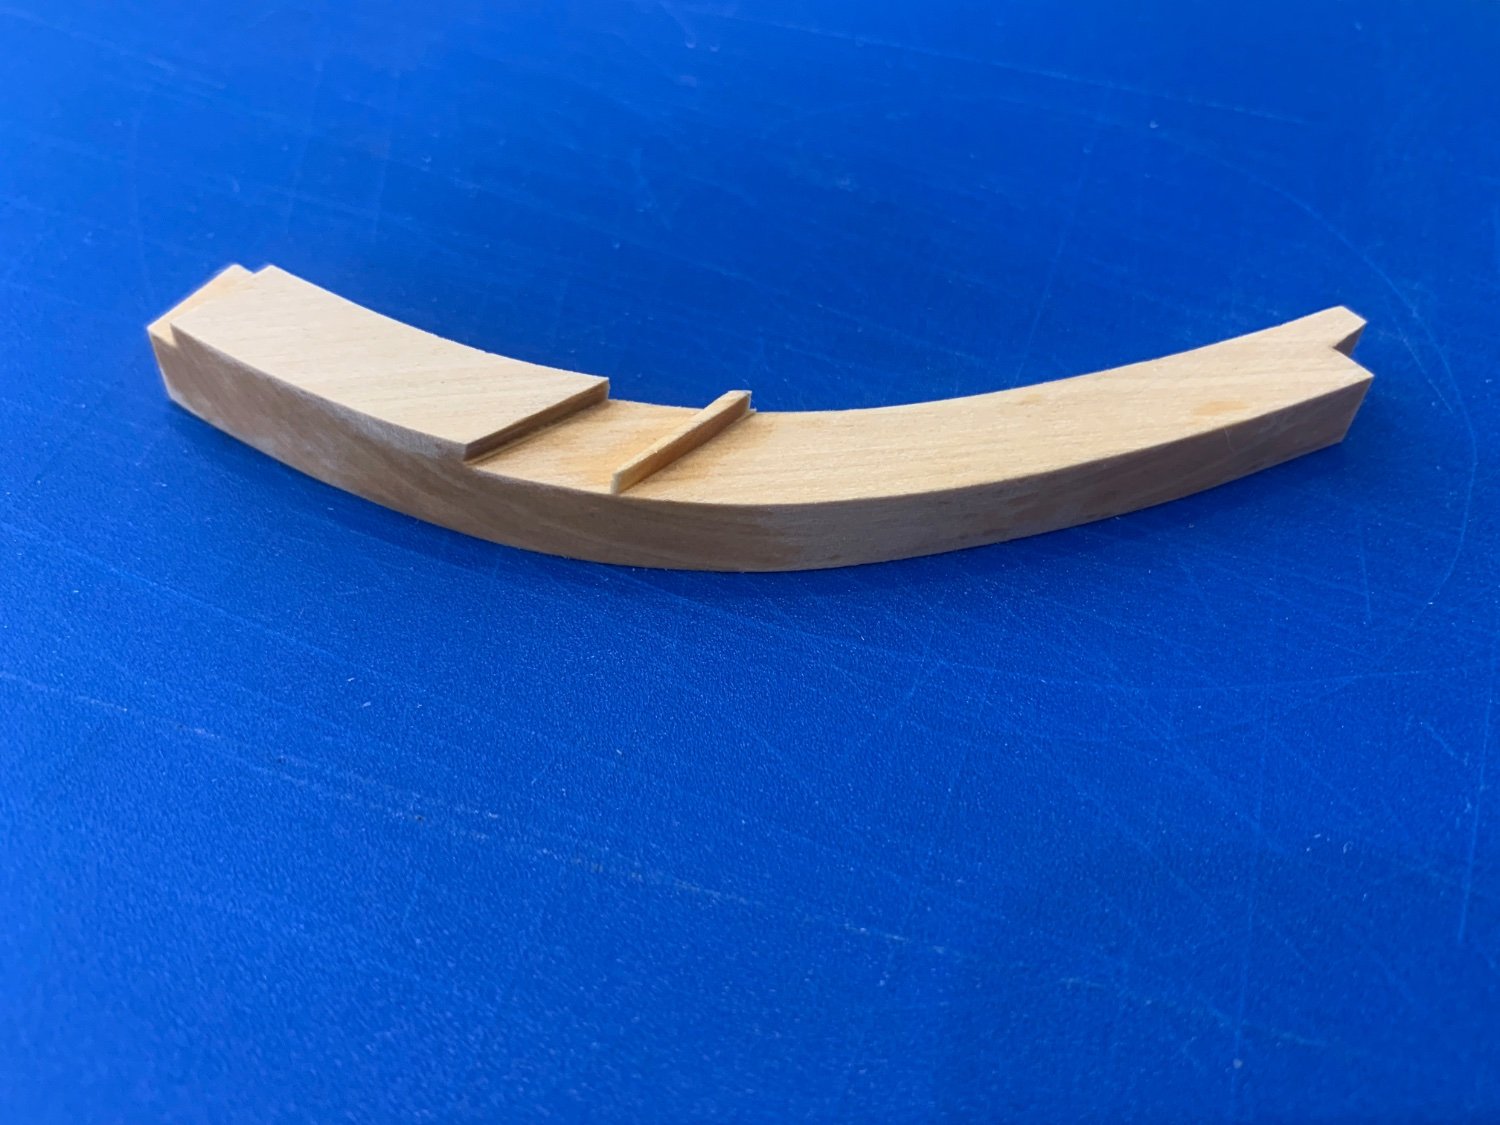
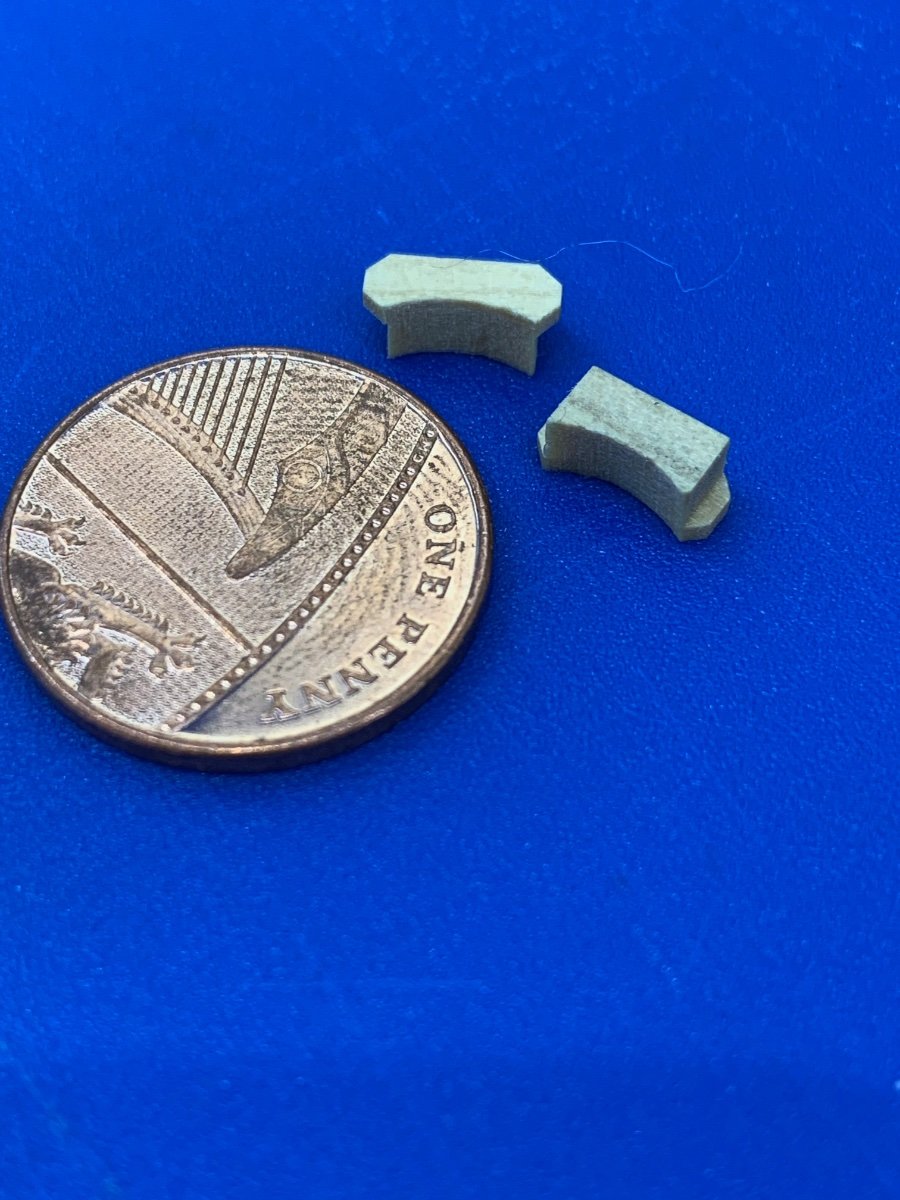
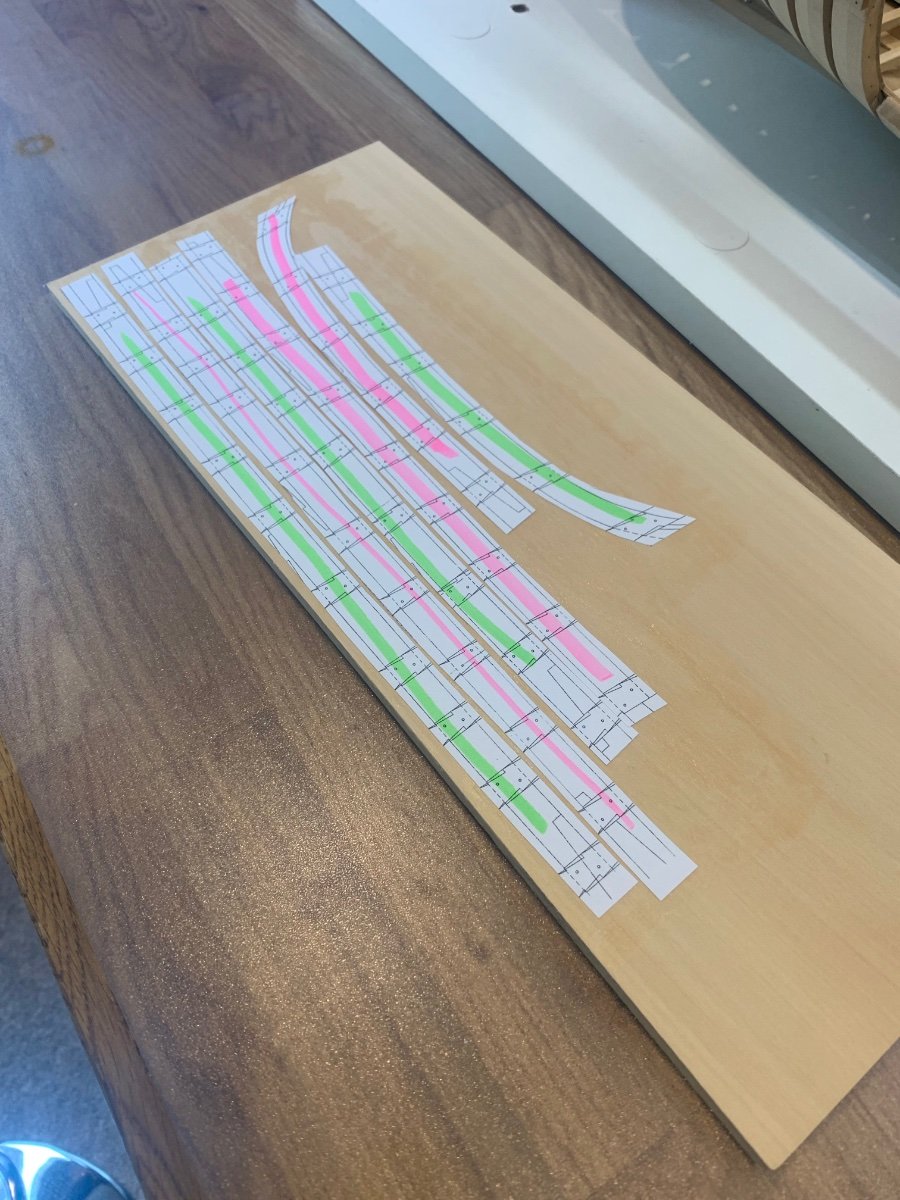
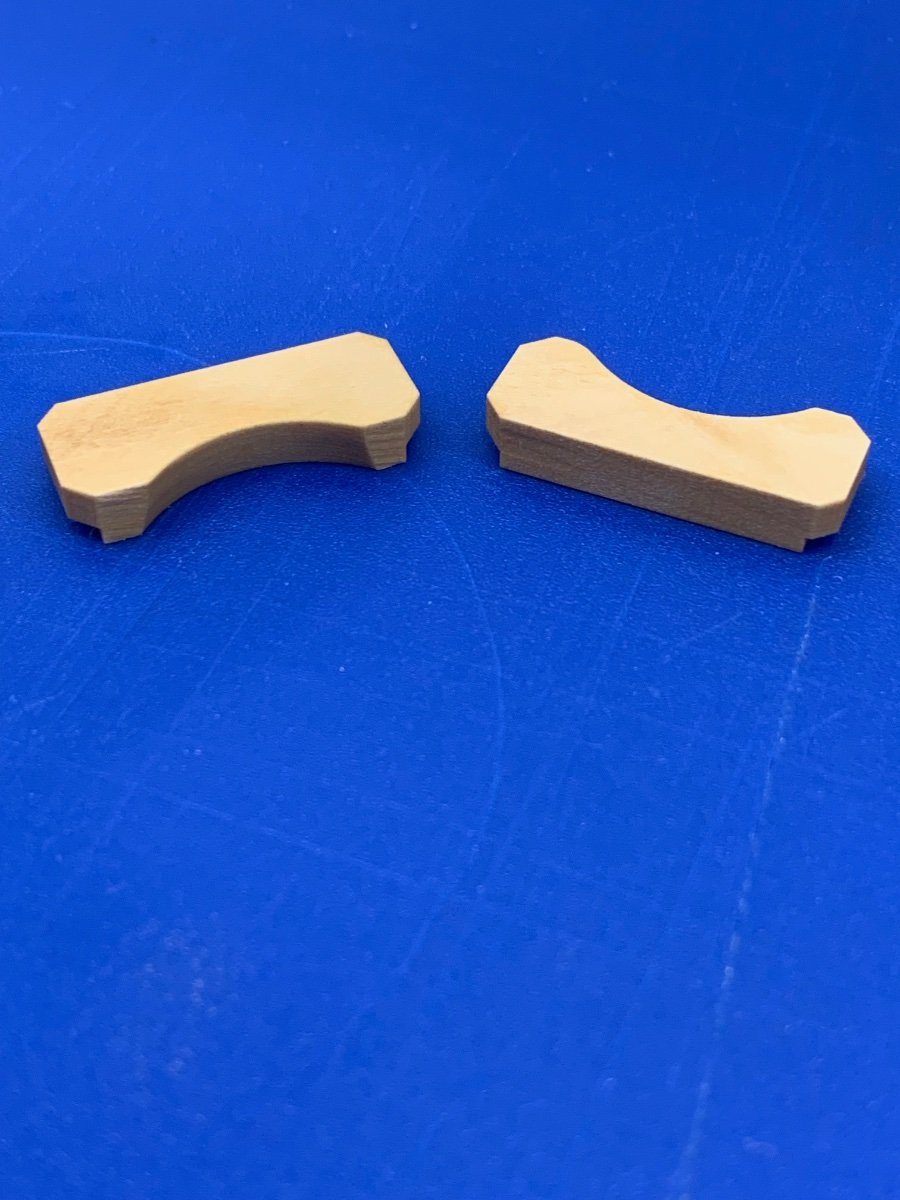
My first effort went in the bin! I made two pieces that fitted very nicely around the hawse timbers but I made them too narrow. Here's a picture of the plans and how I made my error. I used the measurement "A" which completely failed to take into account the thickness of the planking that sits above it.
Below - The binned parts and the incorrect measurement that I used.
.thumb.jpeg.8236a4eb3c373b10f4d0f0bd4a168df3.jpeg)
.thumb.jpeg.441b7b45d3c65200b57f4f1d8cca28fa.jpeg)
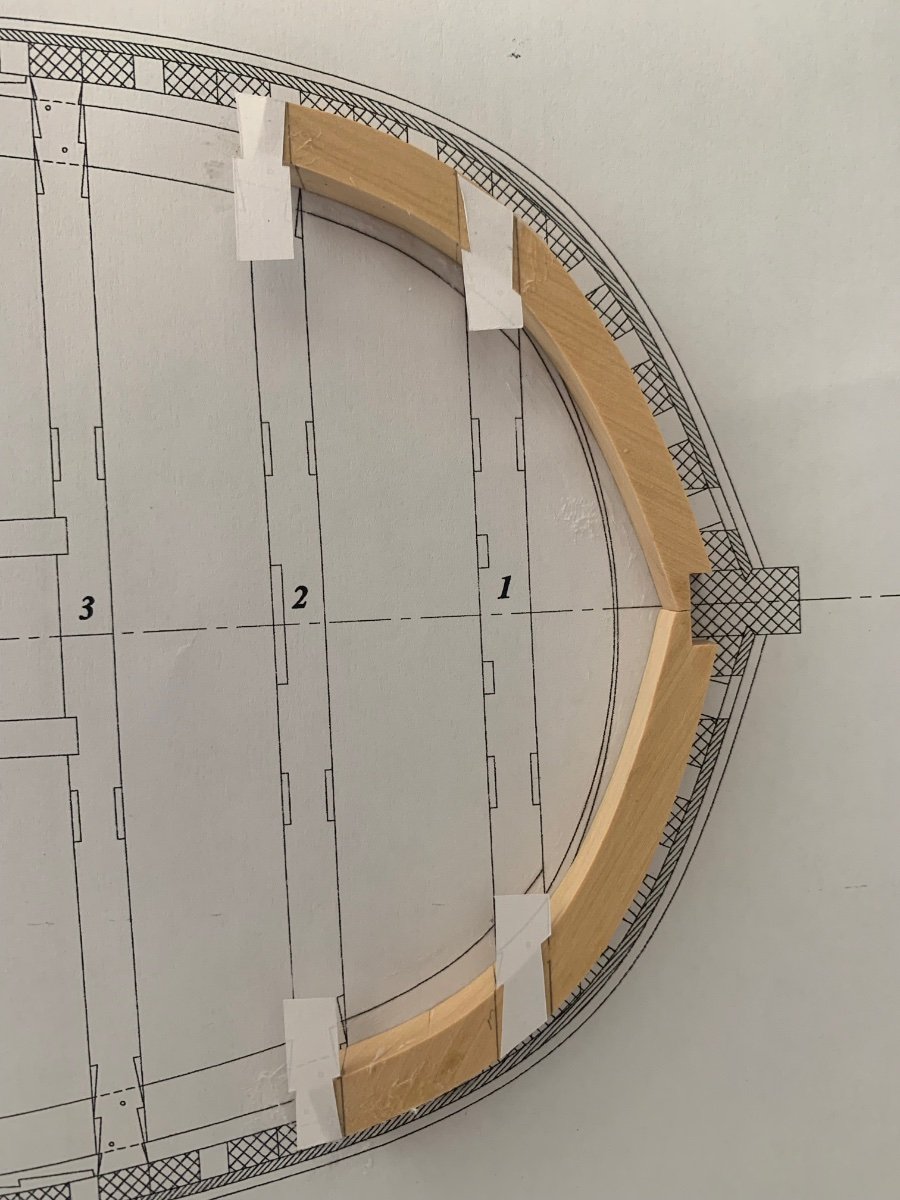
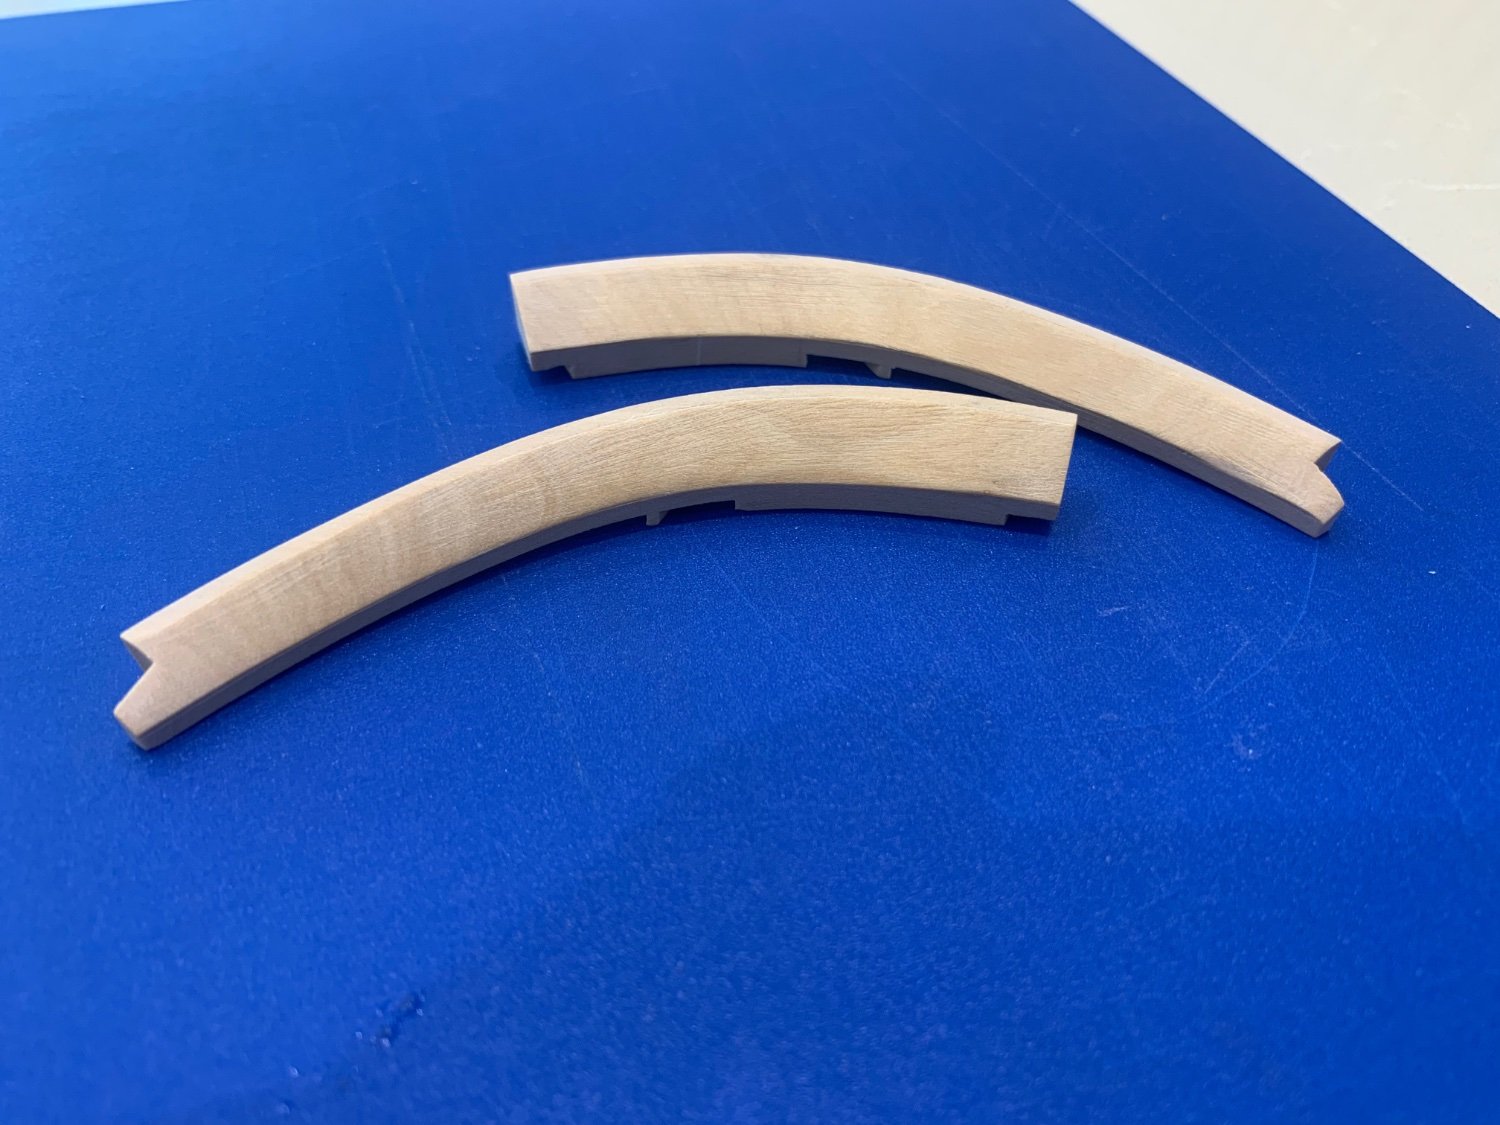
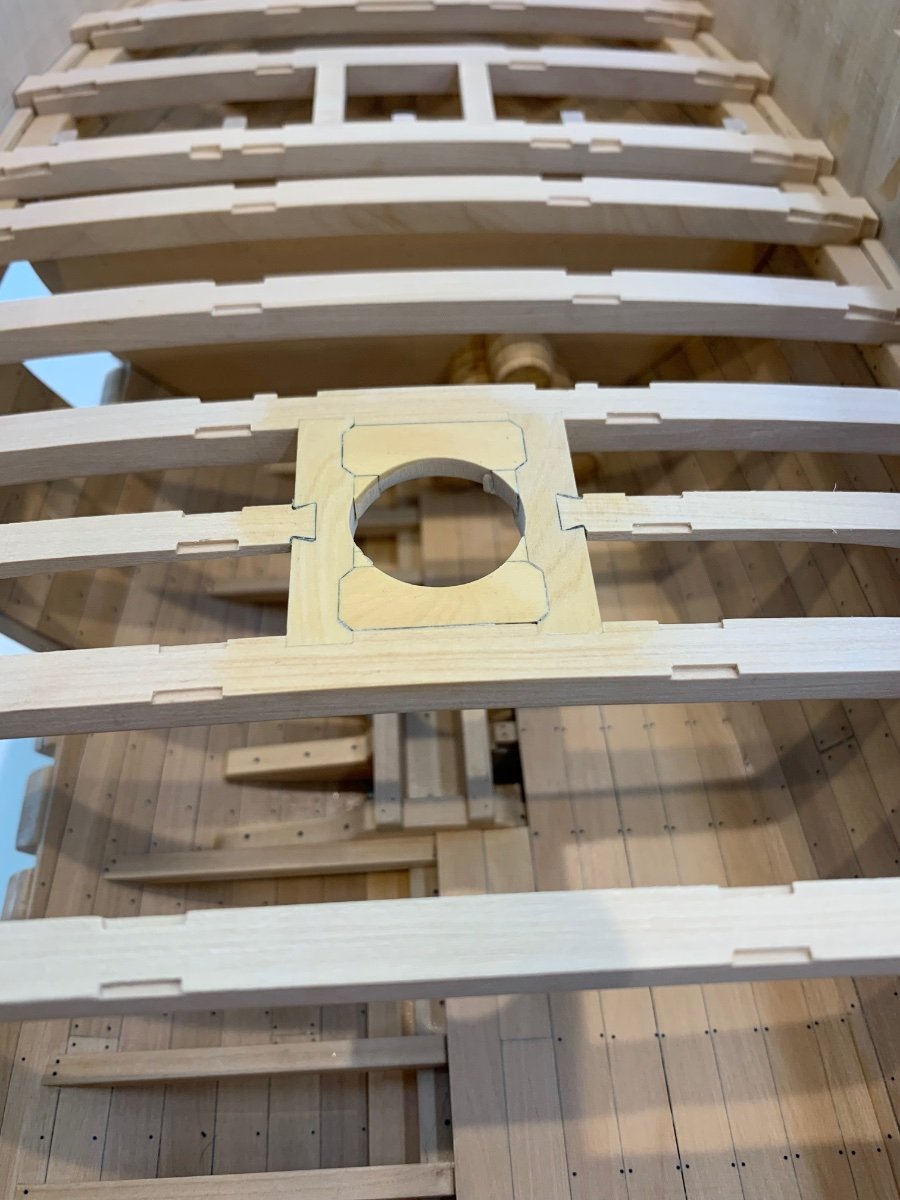
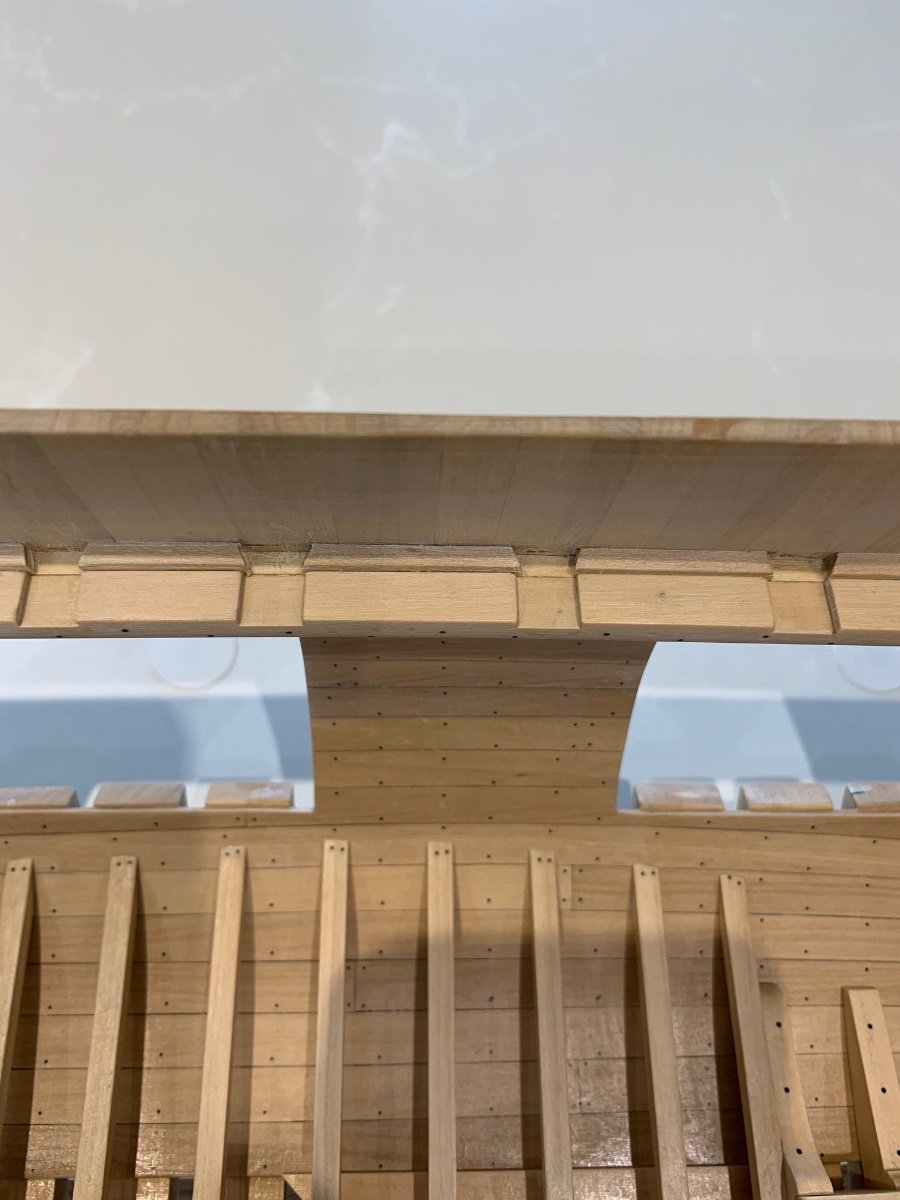
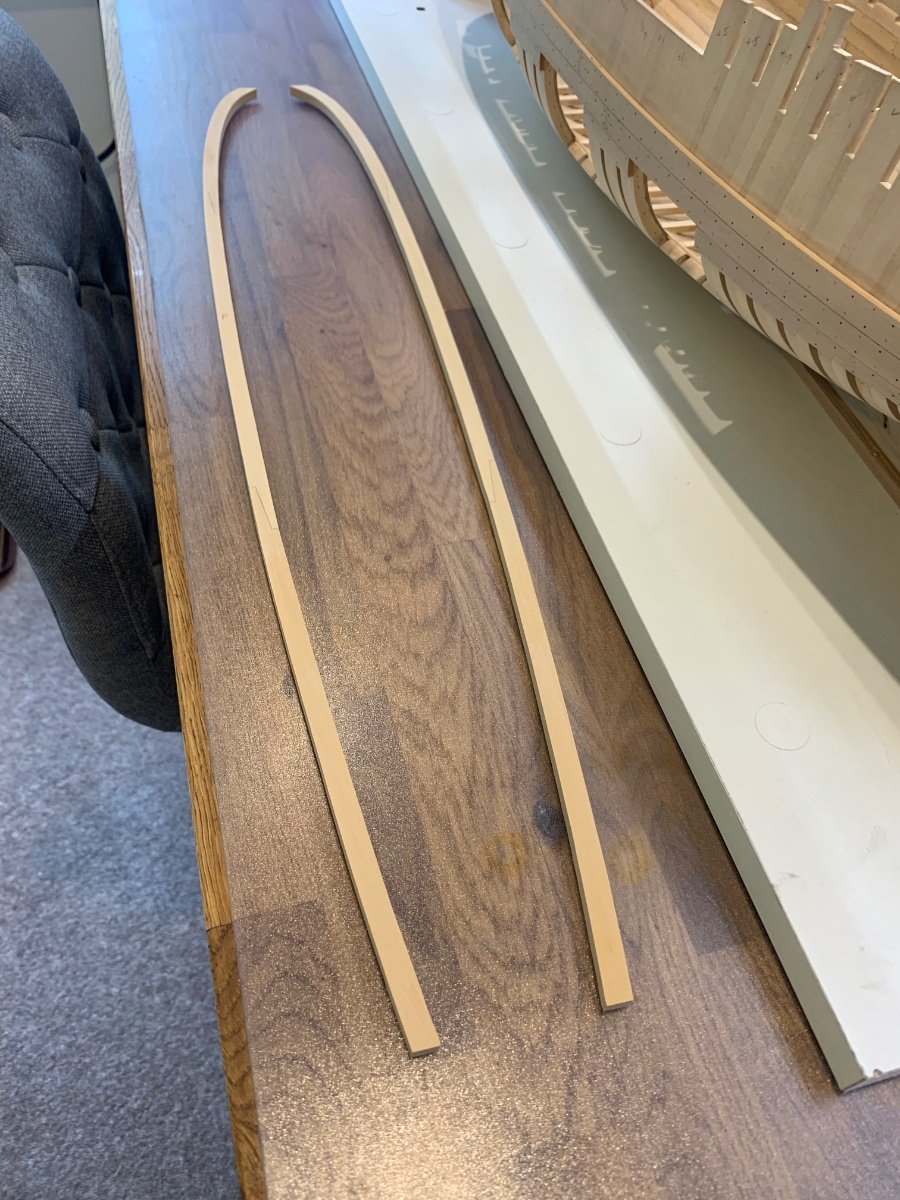
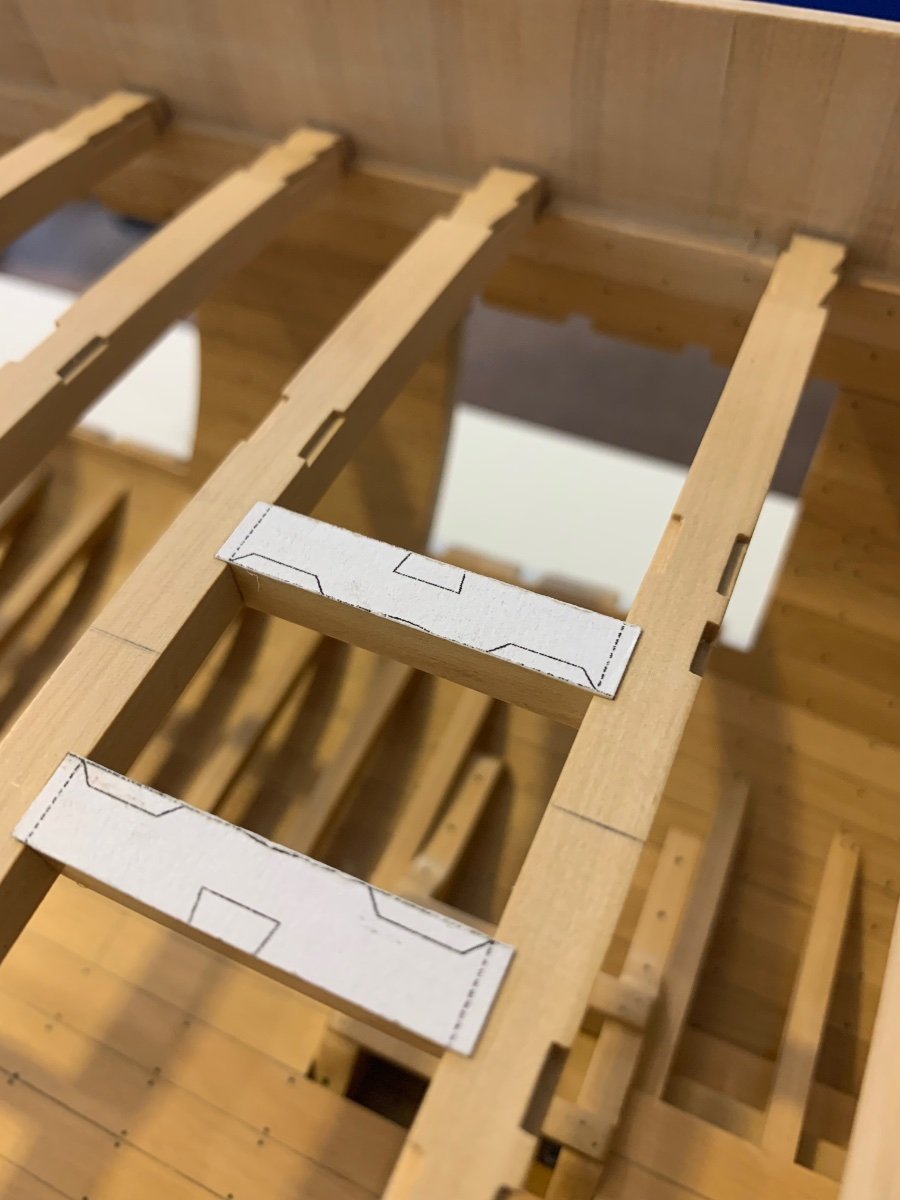
So after a quick message to Gerard Delacroix I got back onto the right track and realised that due to the camber of the pieces I needed to take my measurements from the underside to get the correct thickness. So I made the same pieces again but left them much wider. I first fitted the outside to the hull and then placed my templates on the underside to get the correct thickness (I hope this makes sense)
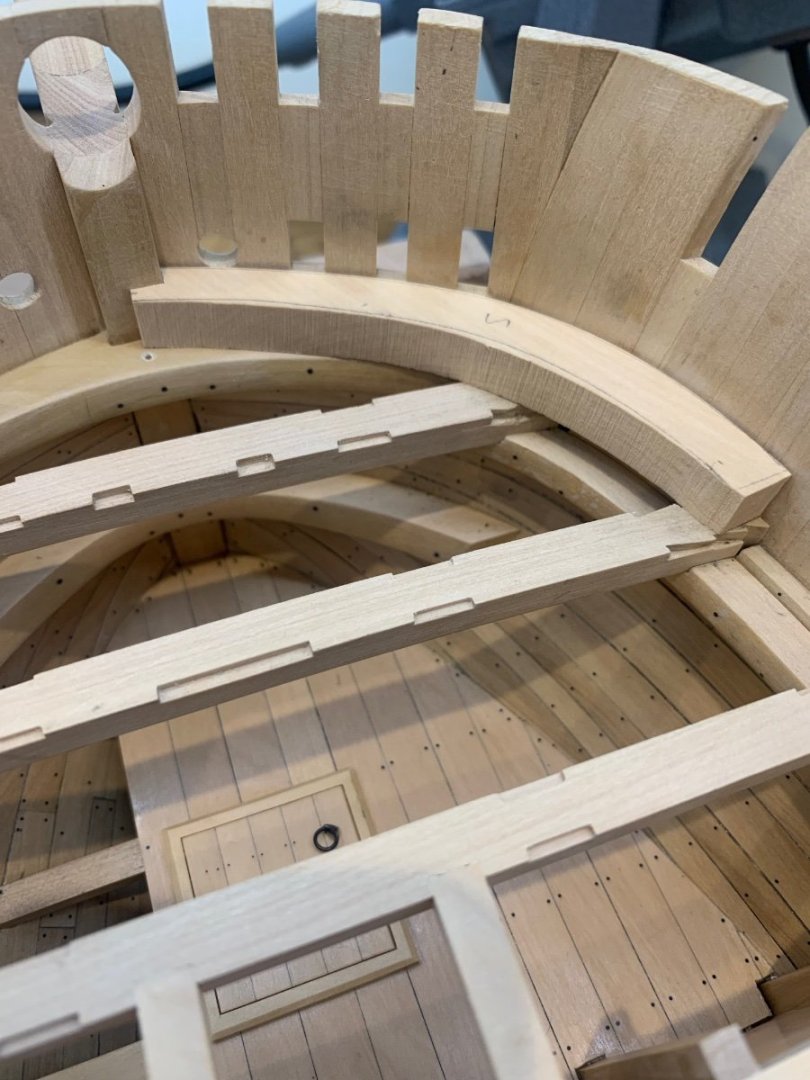

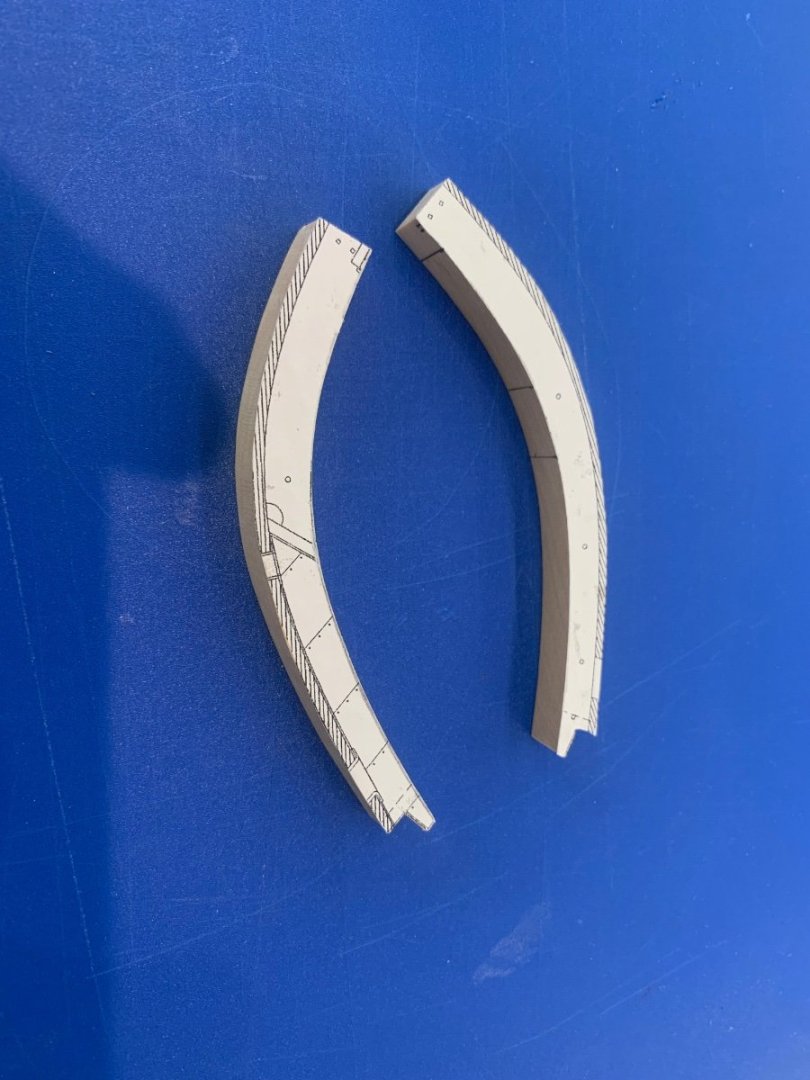
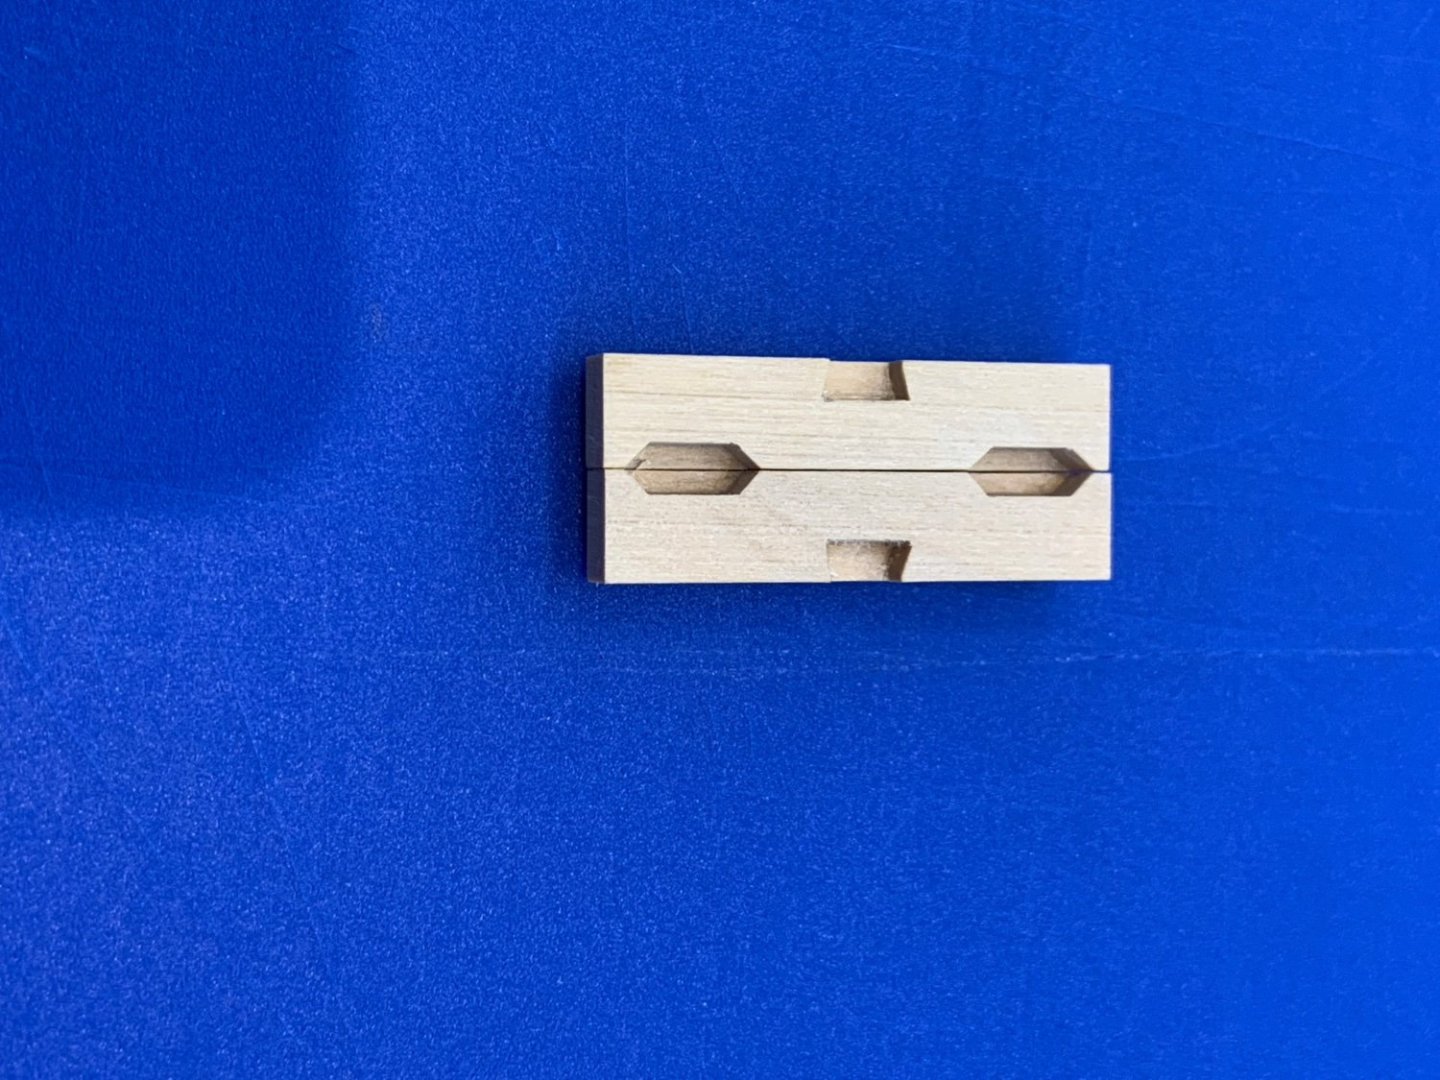
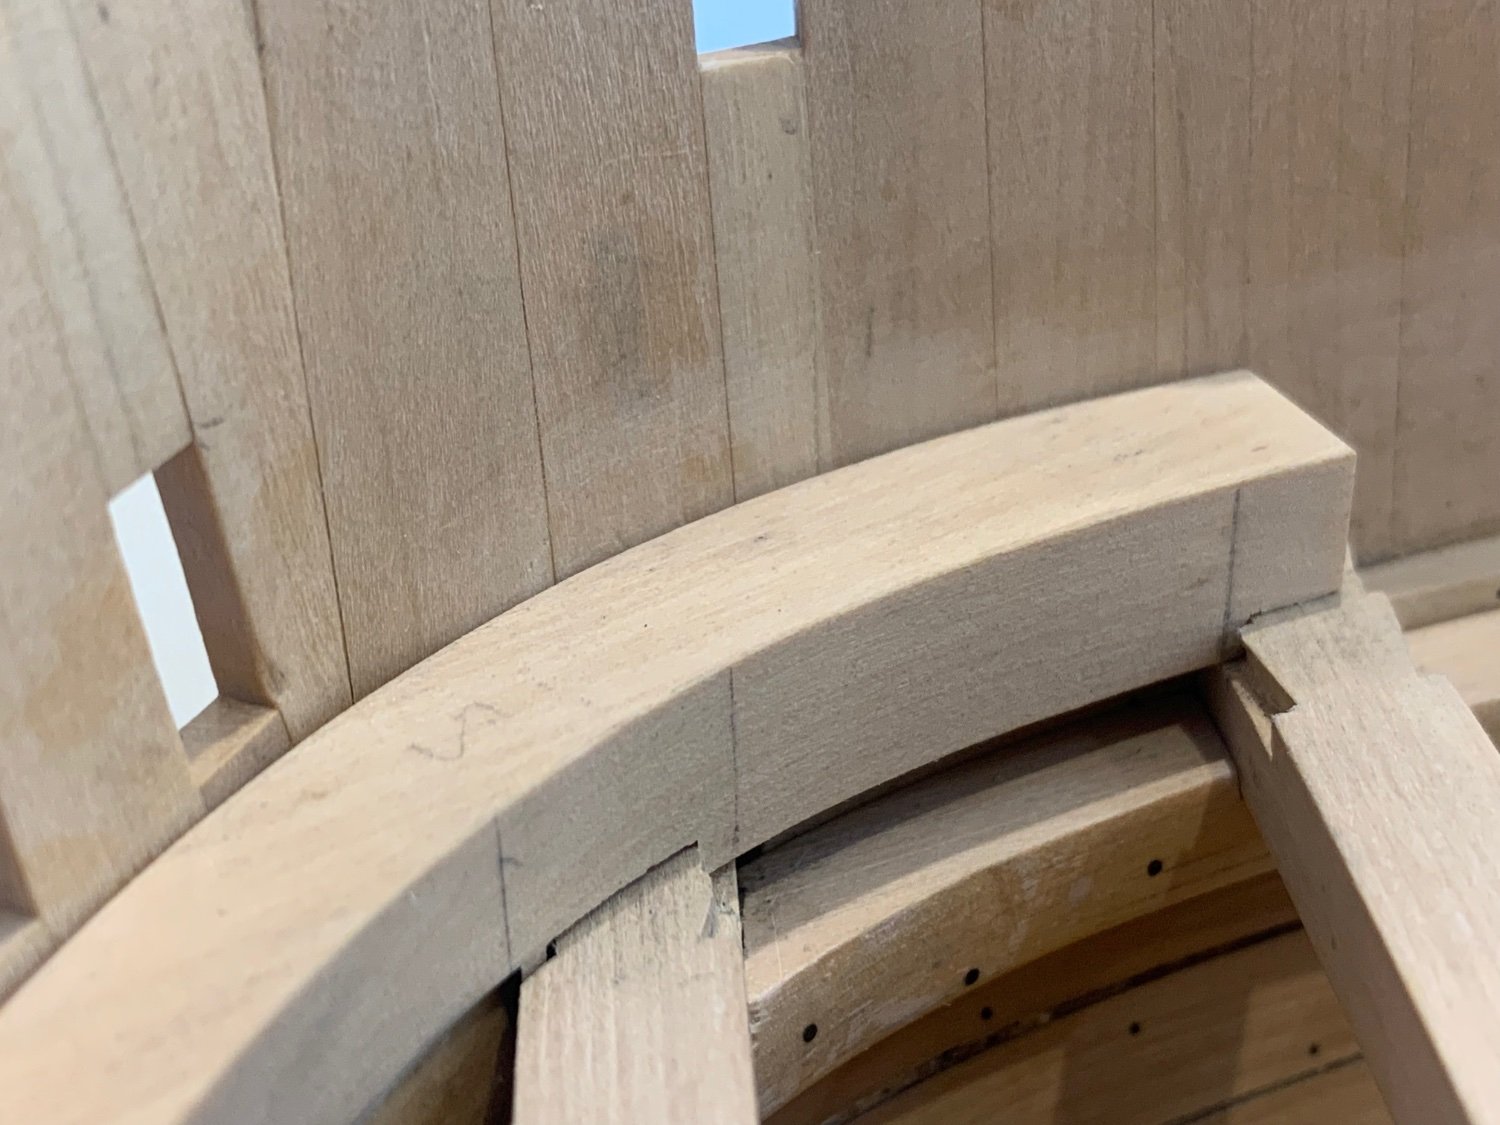
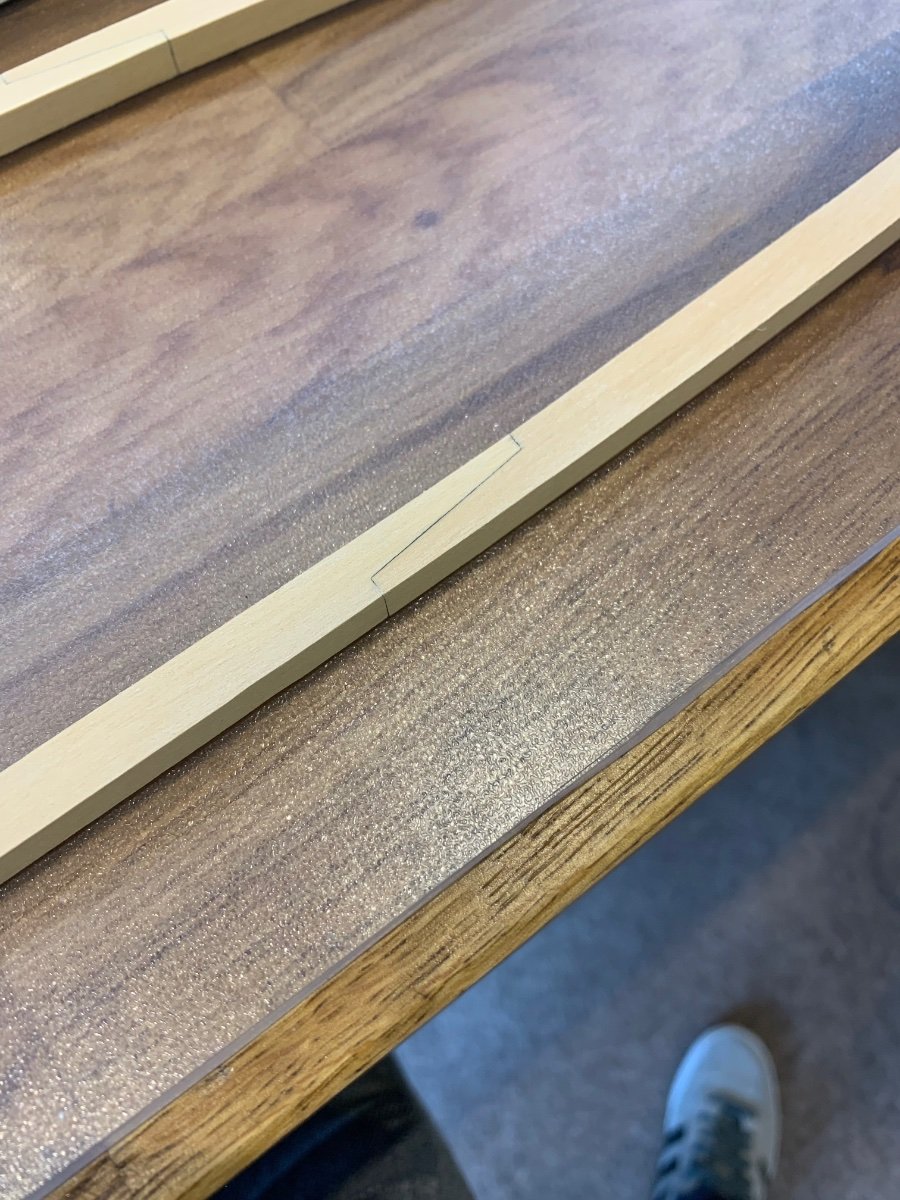
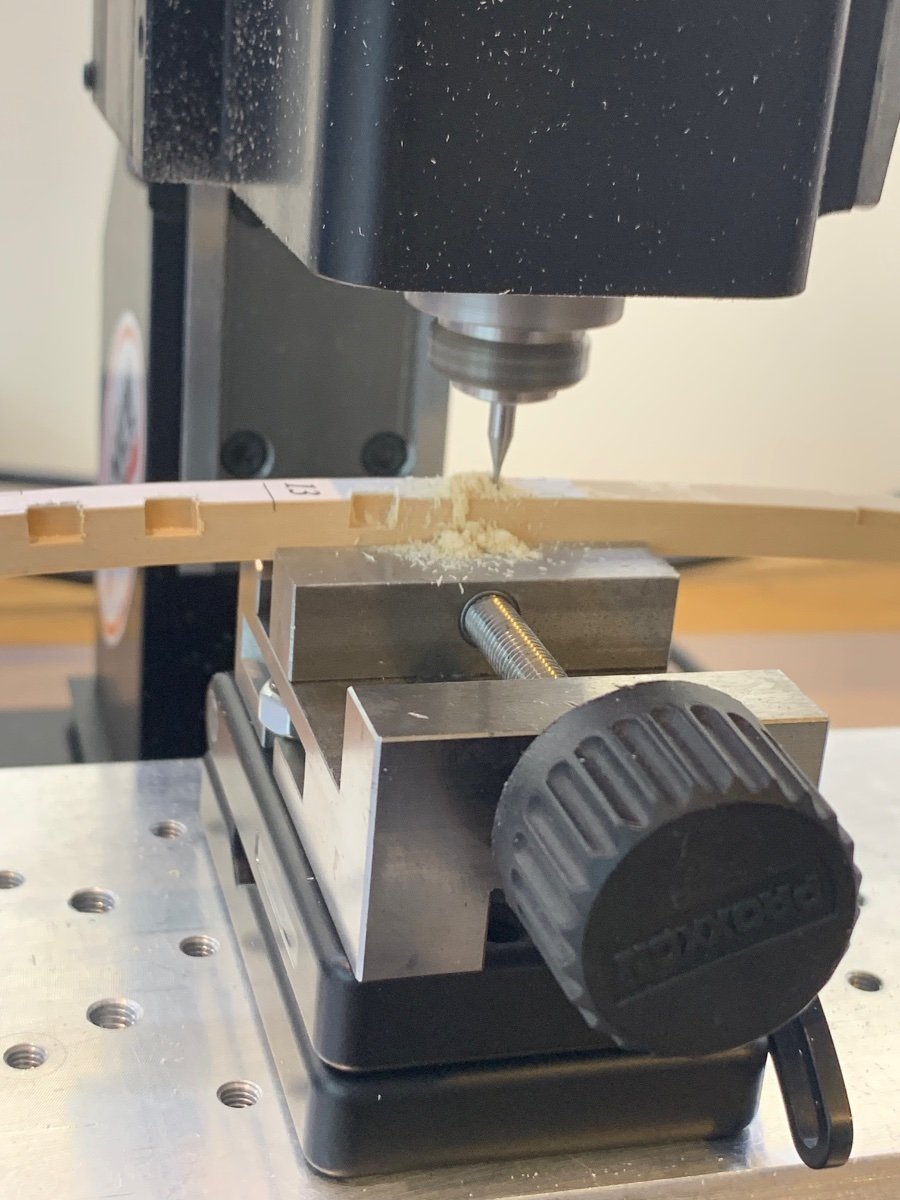
It was only then that I sanded the inside of the parts to shape and this worked quite well. Next I needed to cut the matching dovetails so that they fitted to the beams. I couldn't get a pencil in to mark them so I used the plans instead. I placed the parts onto photocopy so that I could see how the beams lined up. I then cut out the dovetail templates and glued them onto the waterway parts. All of the templates are upside down as if you are looking through the part.

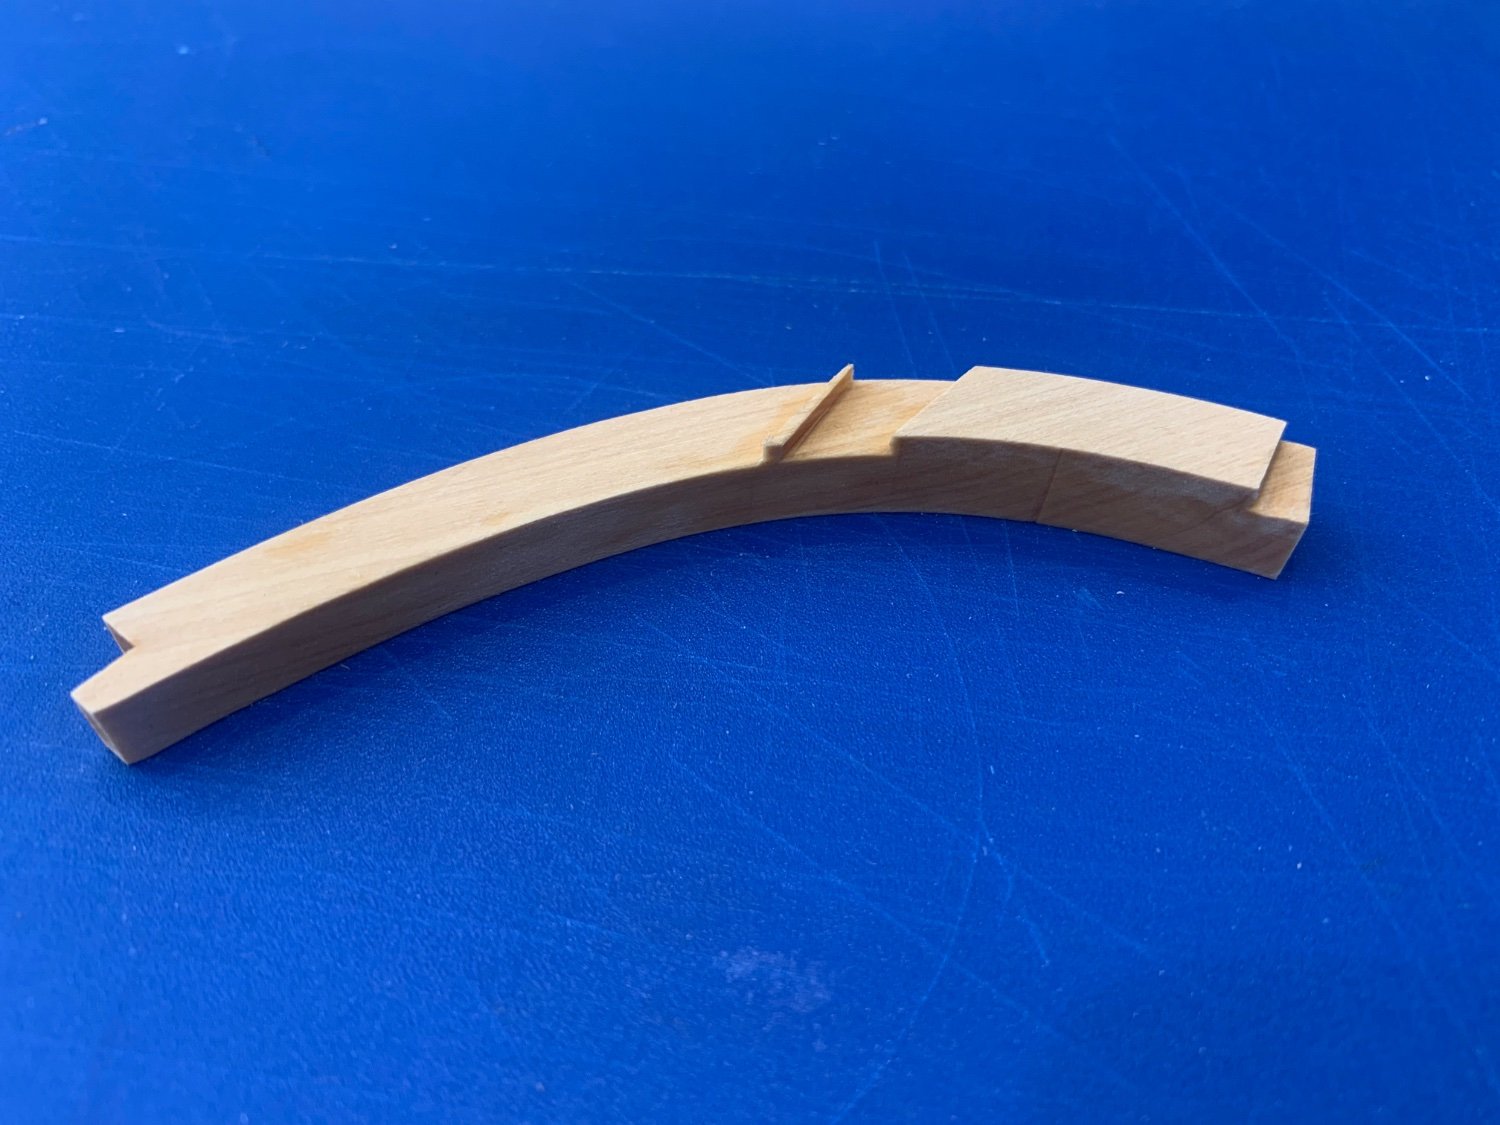
Now this may seem a bit extreme but I couldn't see the point of going to loads of trouble to make the dovetails on the beams of the waterway parts did not fit tightly. Next I milled out the dovetails.


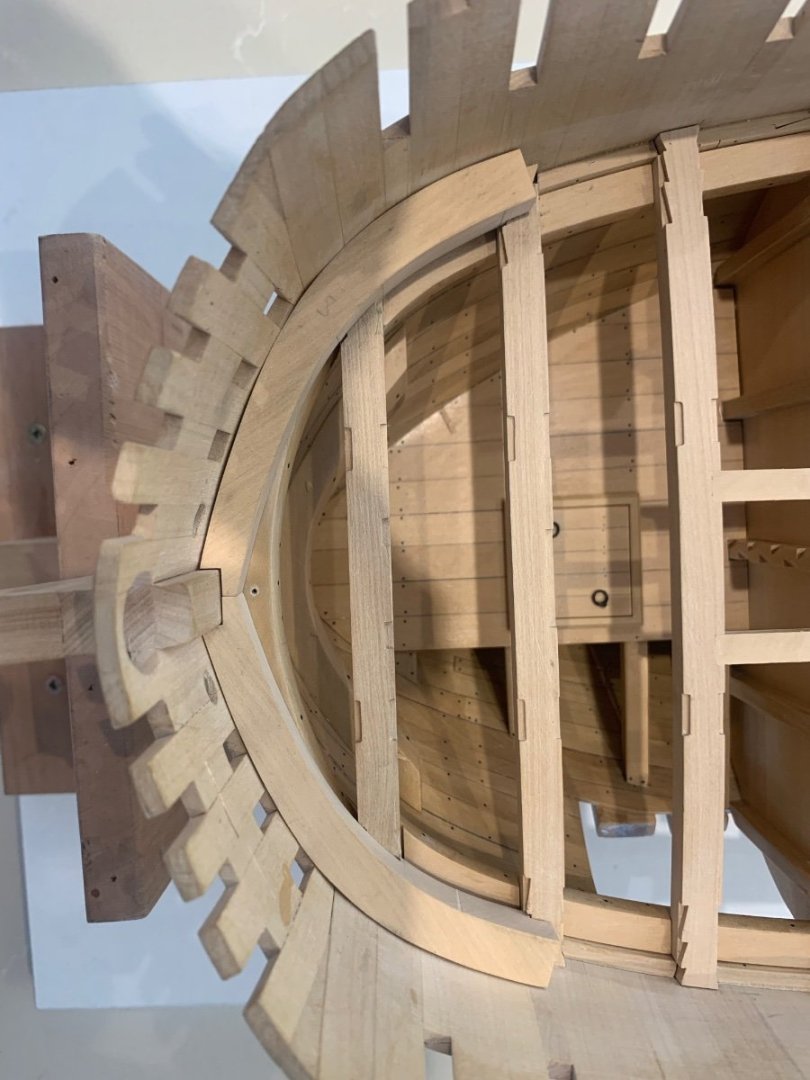
It was all worth it as I got a very nice fit.


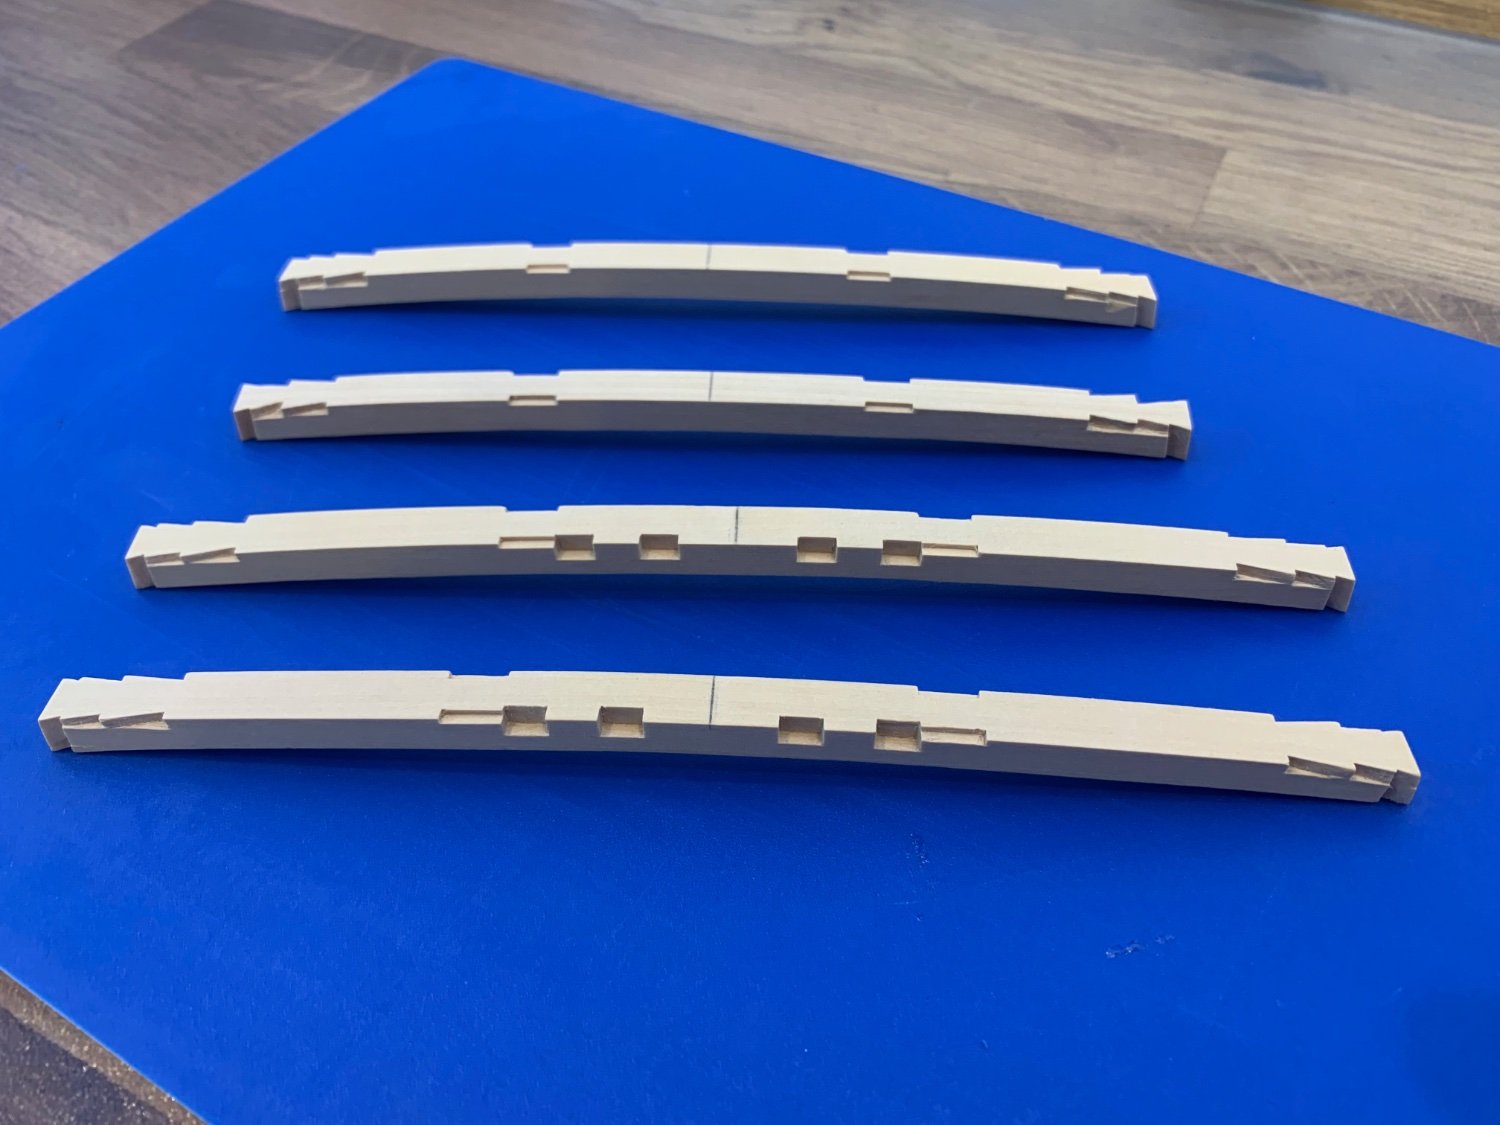
Next I marked out and sanded the bevel into the face of the parts and this is the result


They should be ok once clamped and glued permanently but I have to say these are not easy parts to make and get a good fit.
I've got to do some decorating at home now for the next couple of weeks so I'll get some more up on the build when I can
Cheers Mark
-
Very nice tight work 👍 skills and patience were required and you’ve smashed it!
- Beef Wellington, JesseLee, DaveBaxt and 2 others
-
 5
5
-
-
On 5/29/2023 at 10:22 PM, tlevine said:
That joinery looks incredible.
Hi Toni - thanks very much 👍
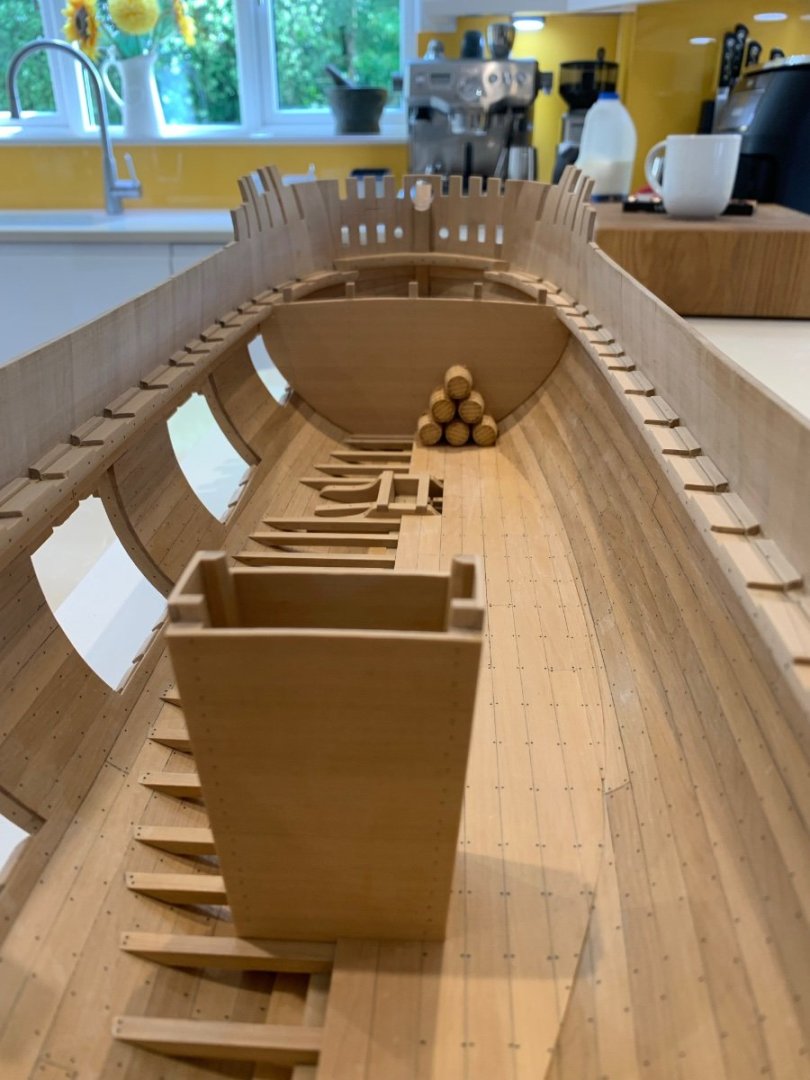
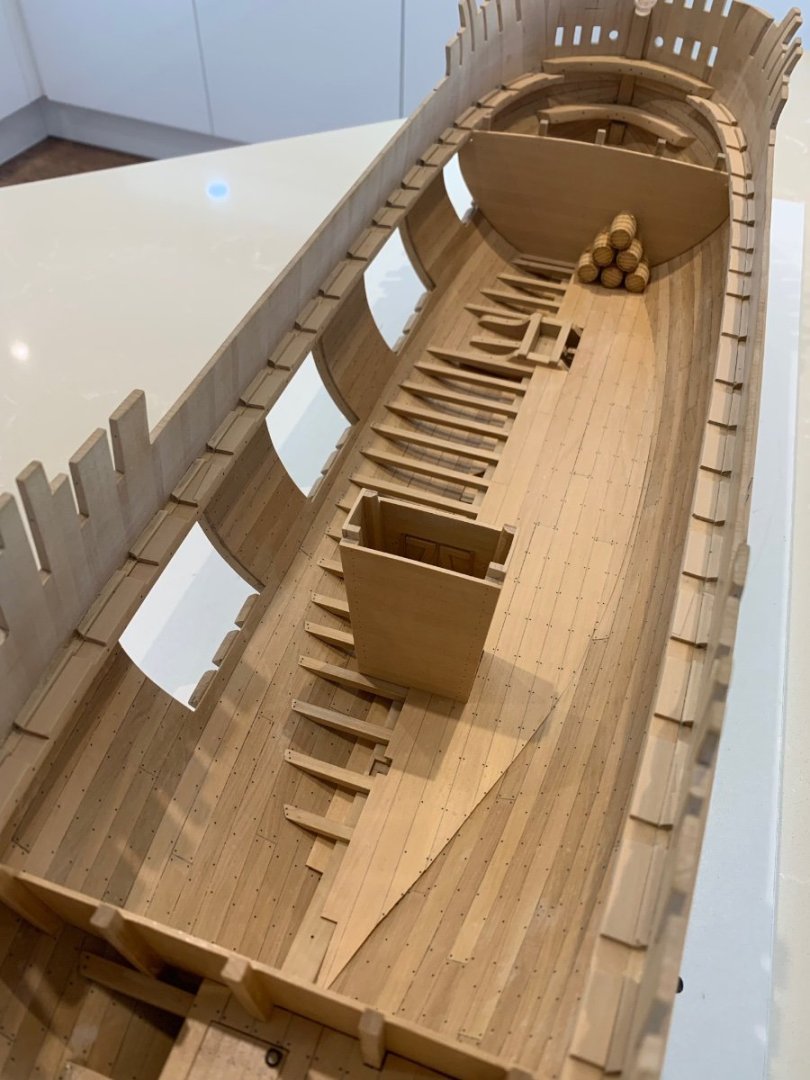
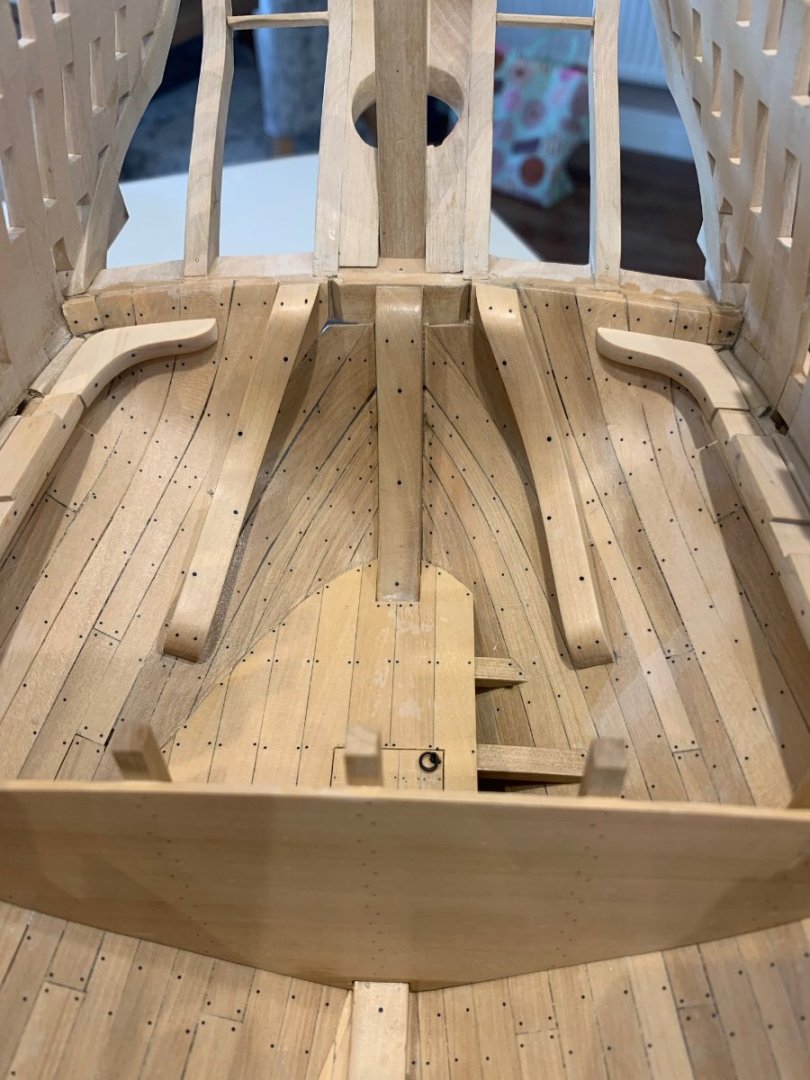
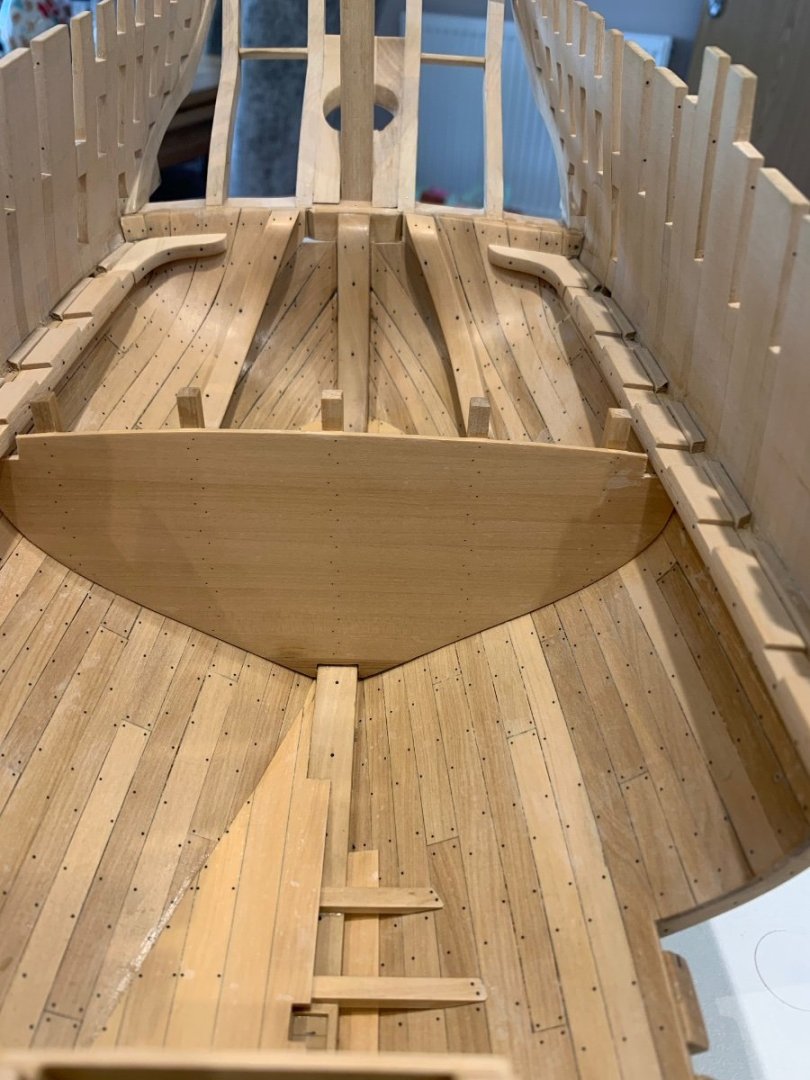
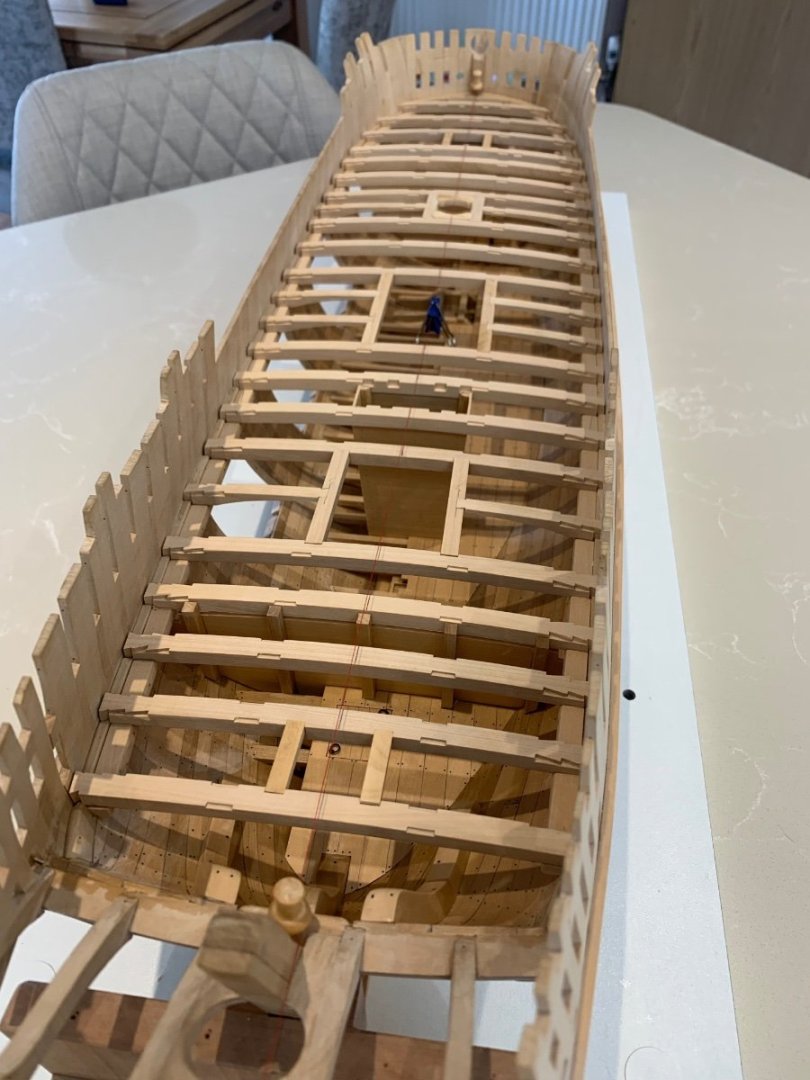
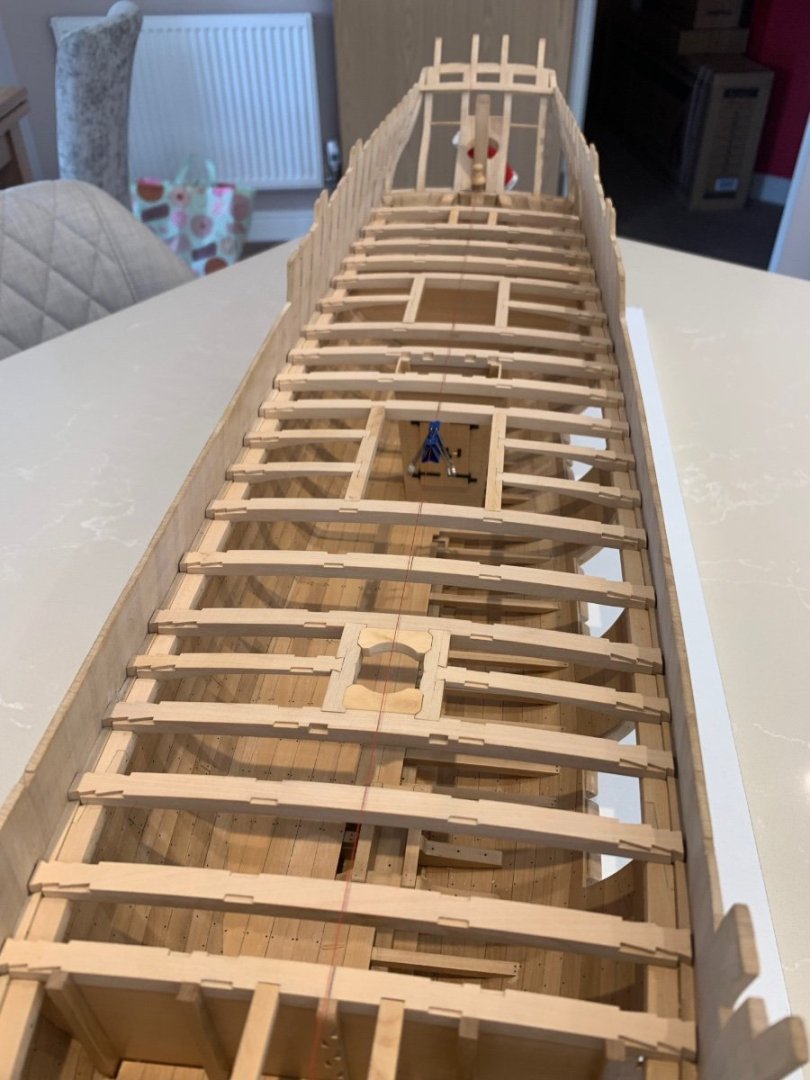
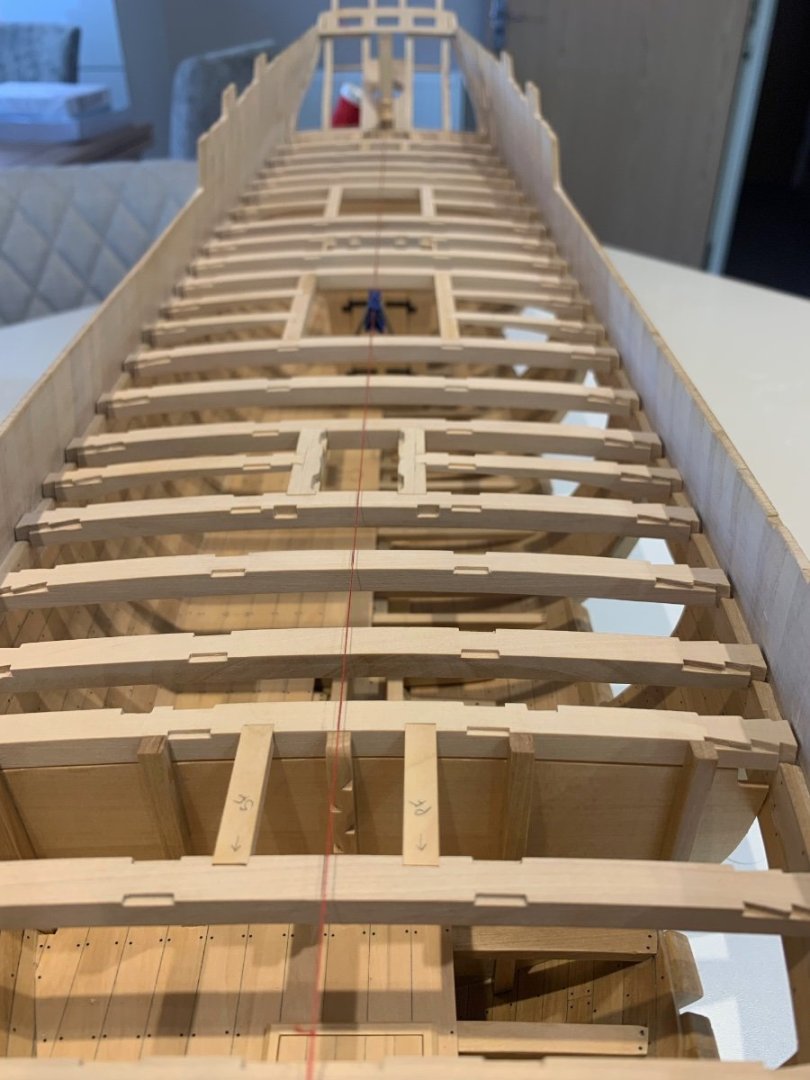
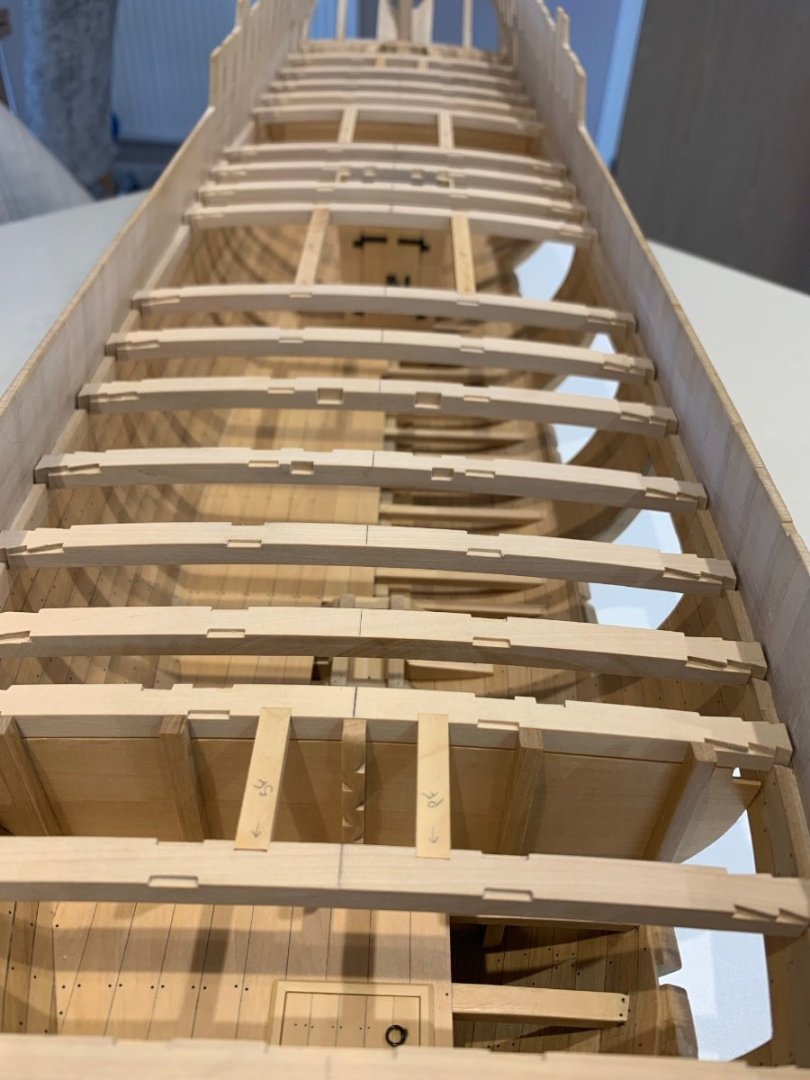
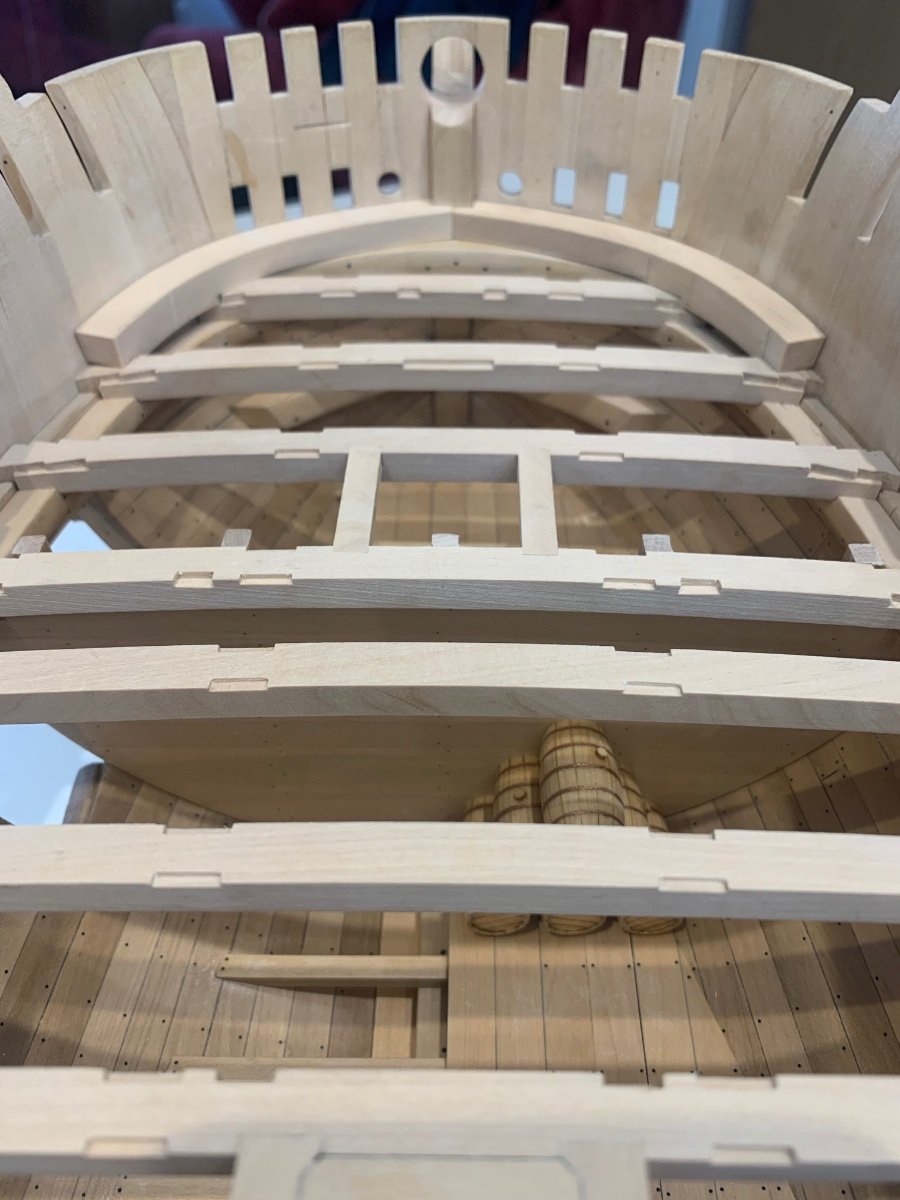
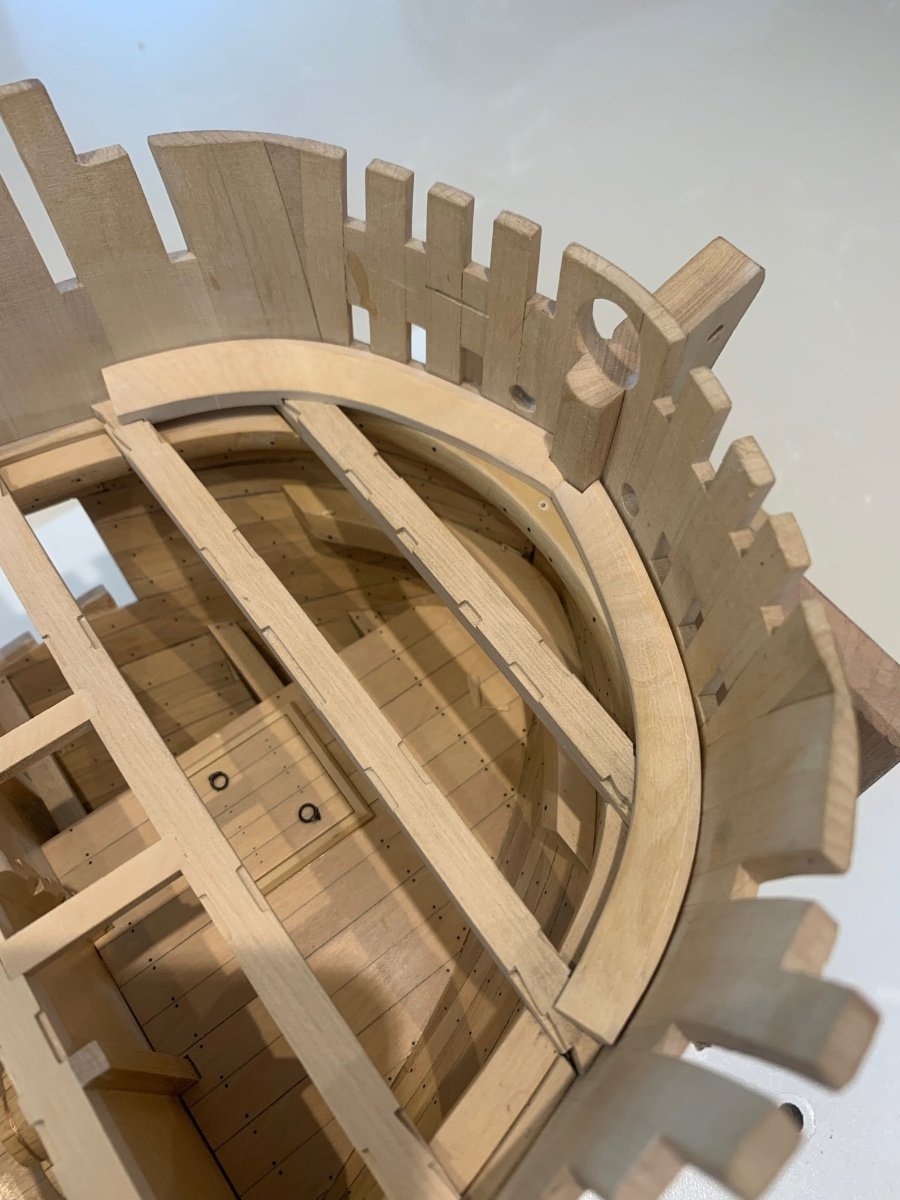
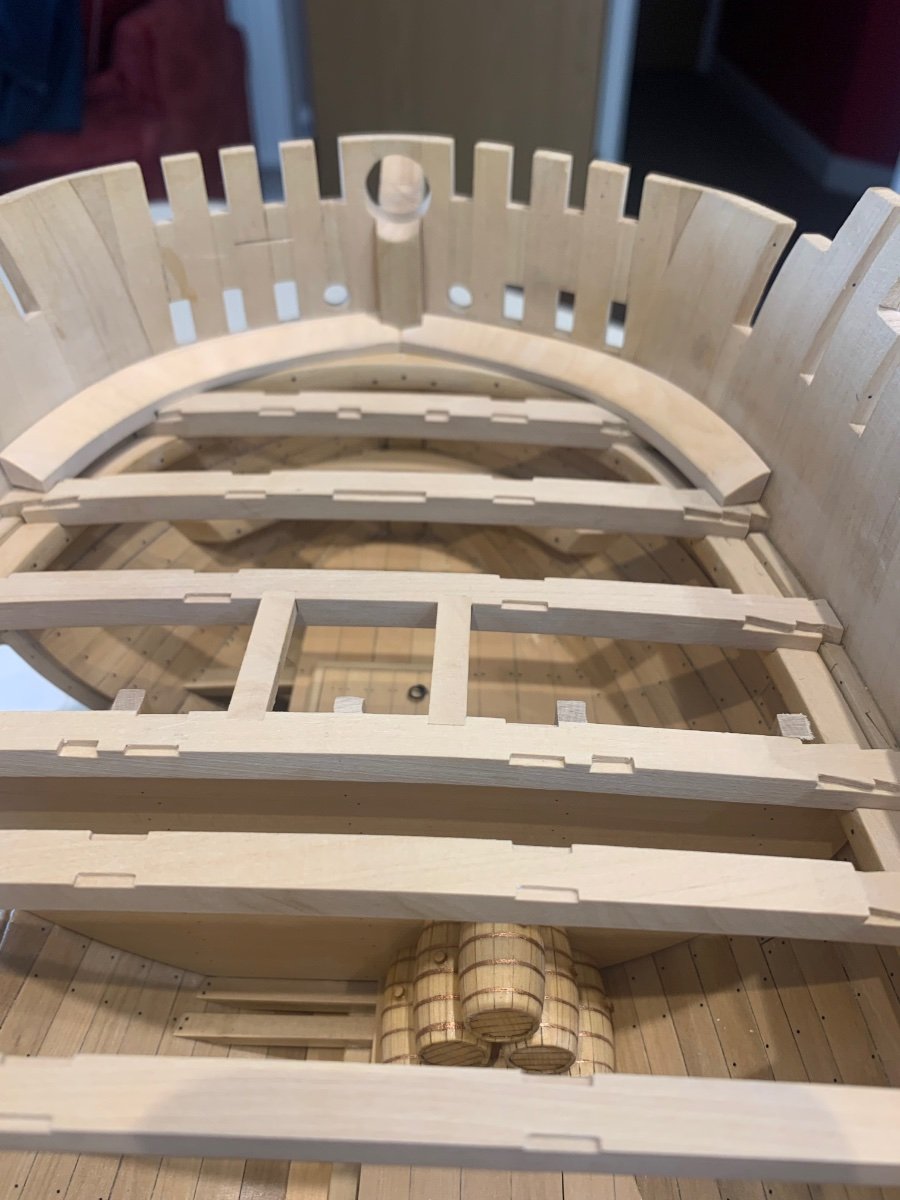
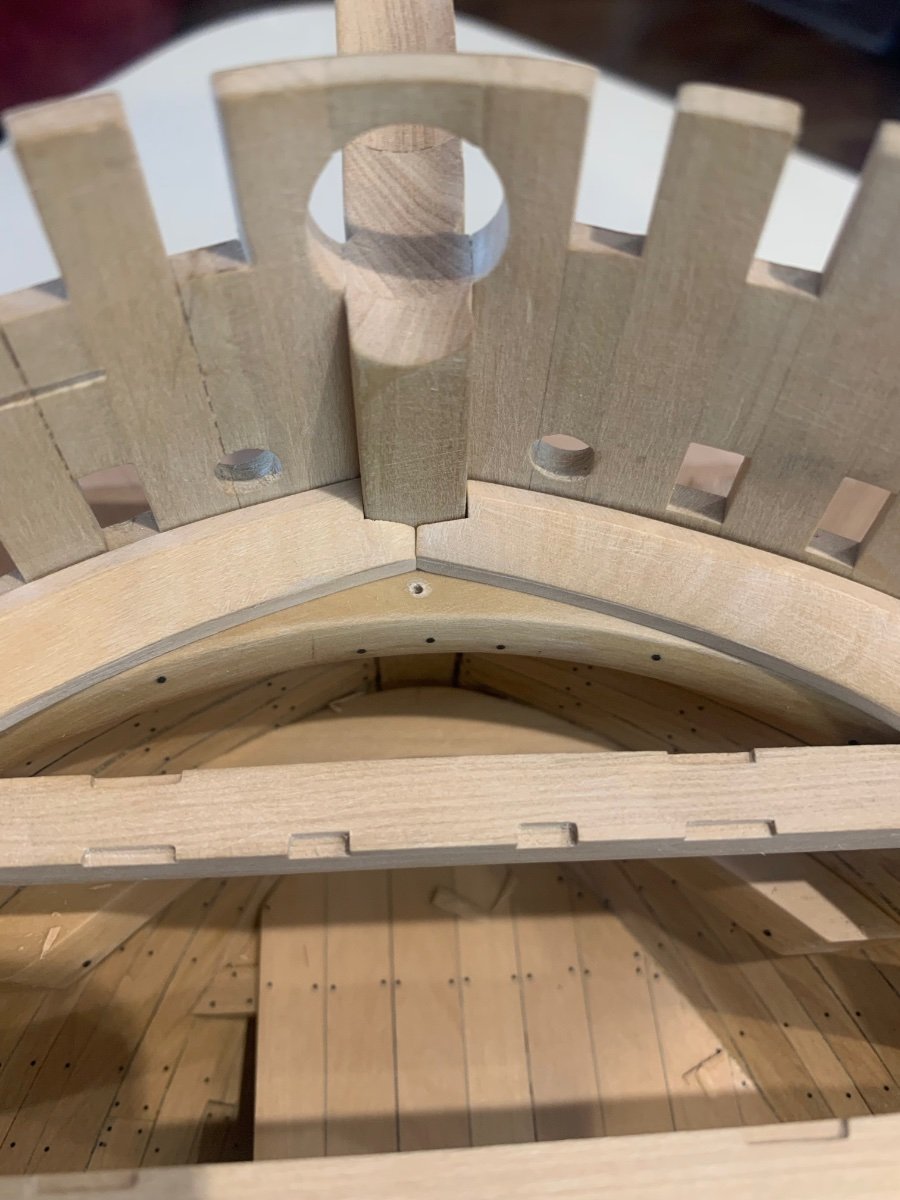
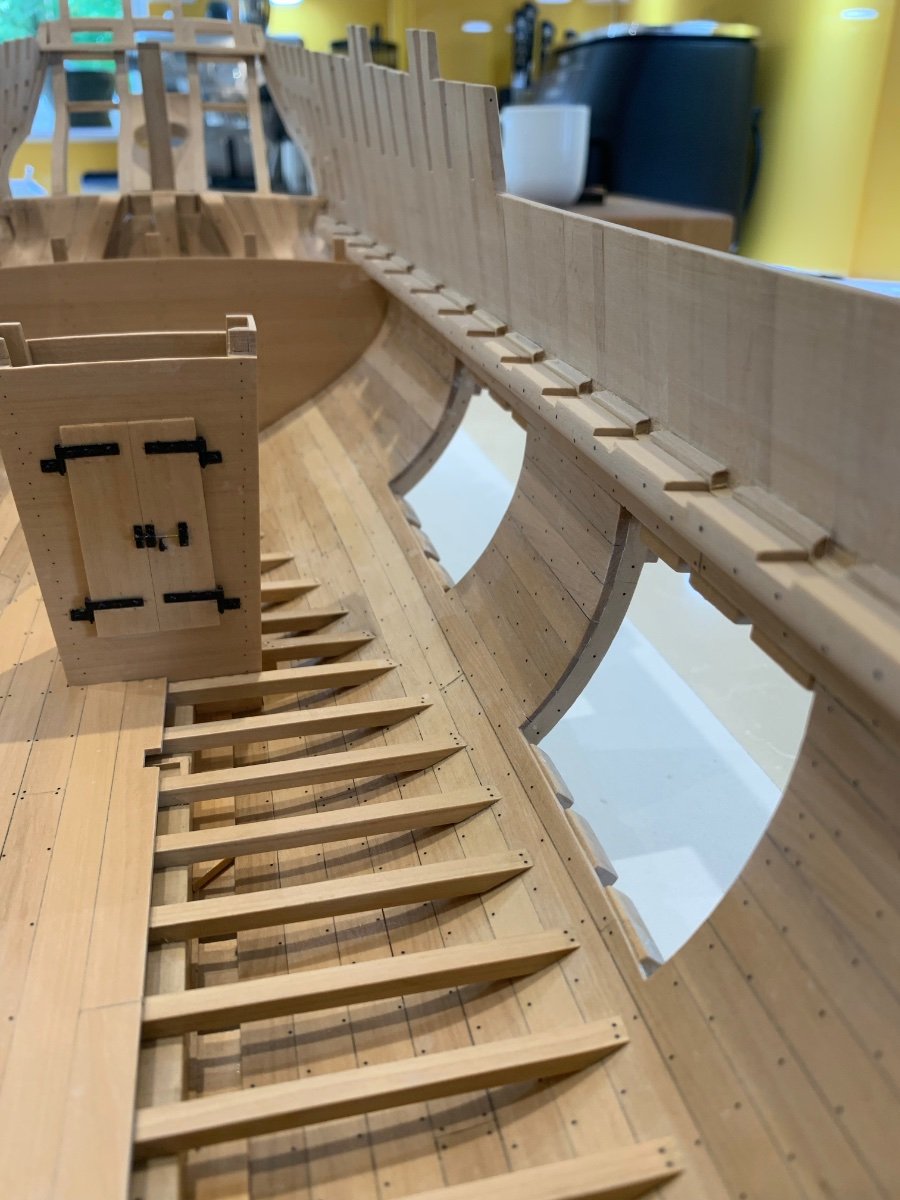
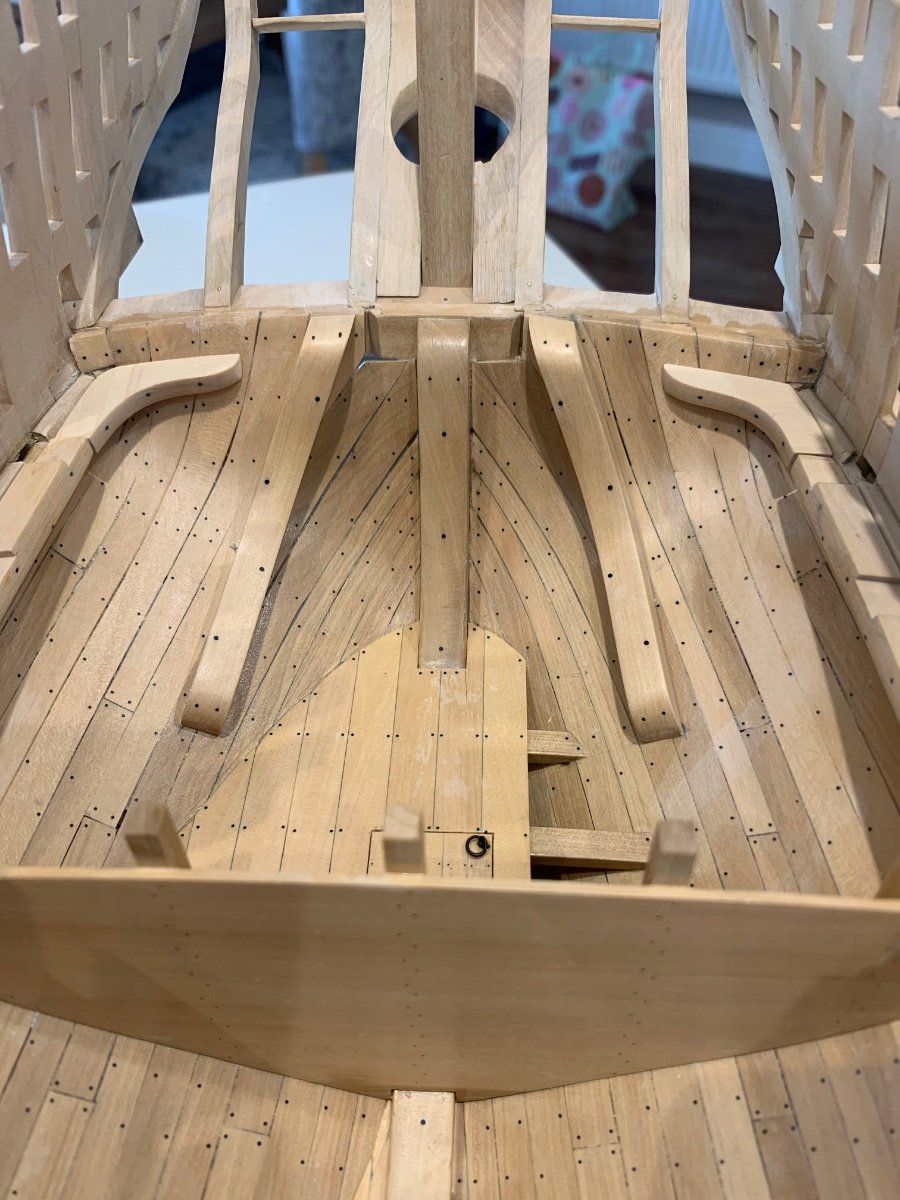
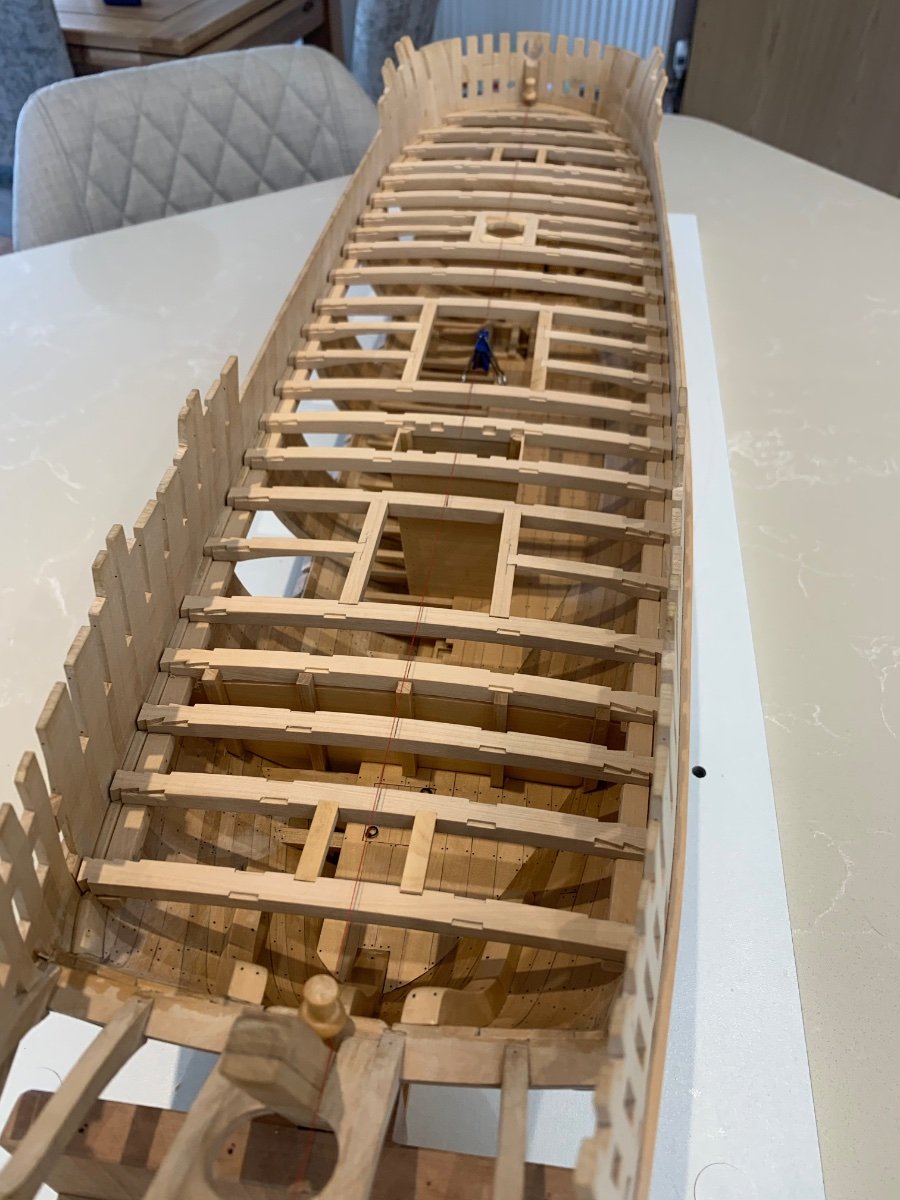
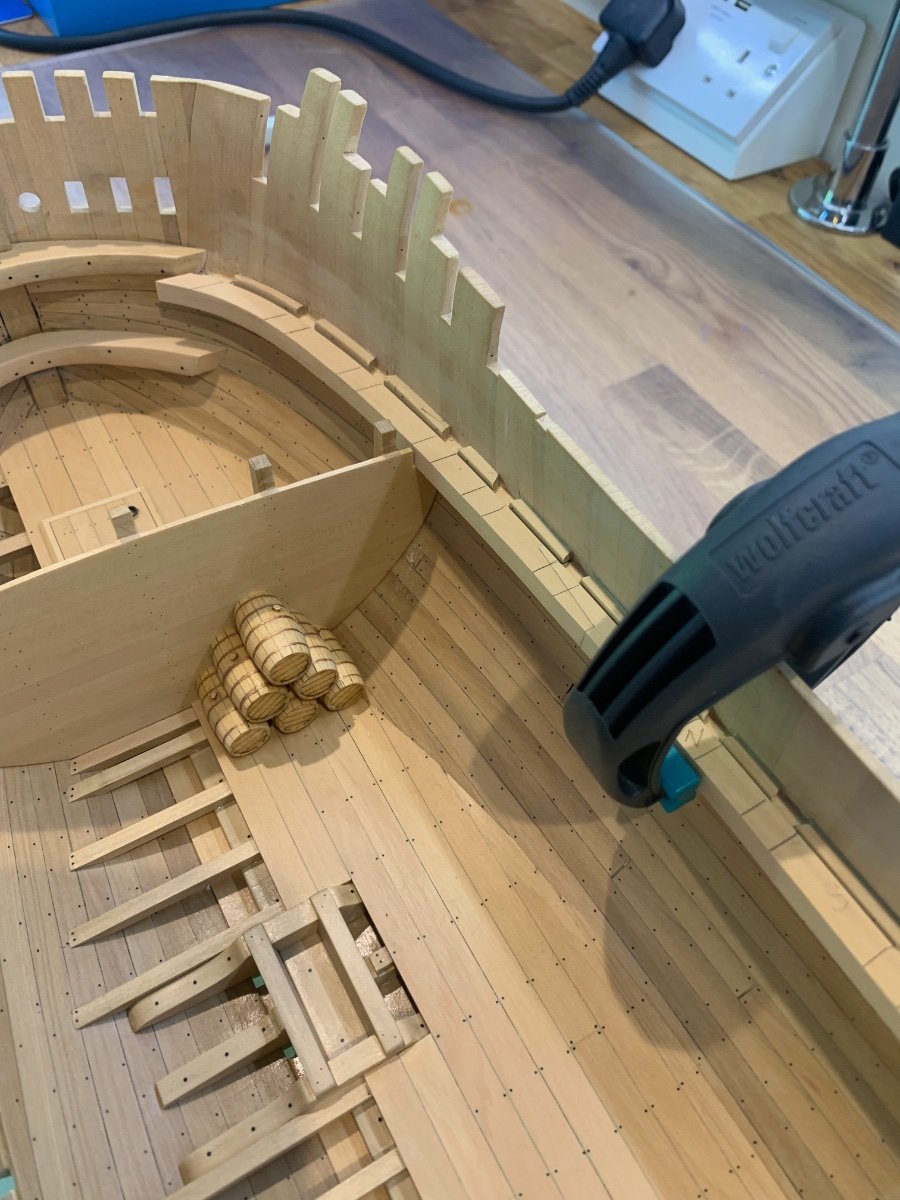
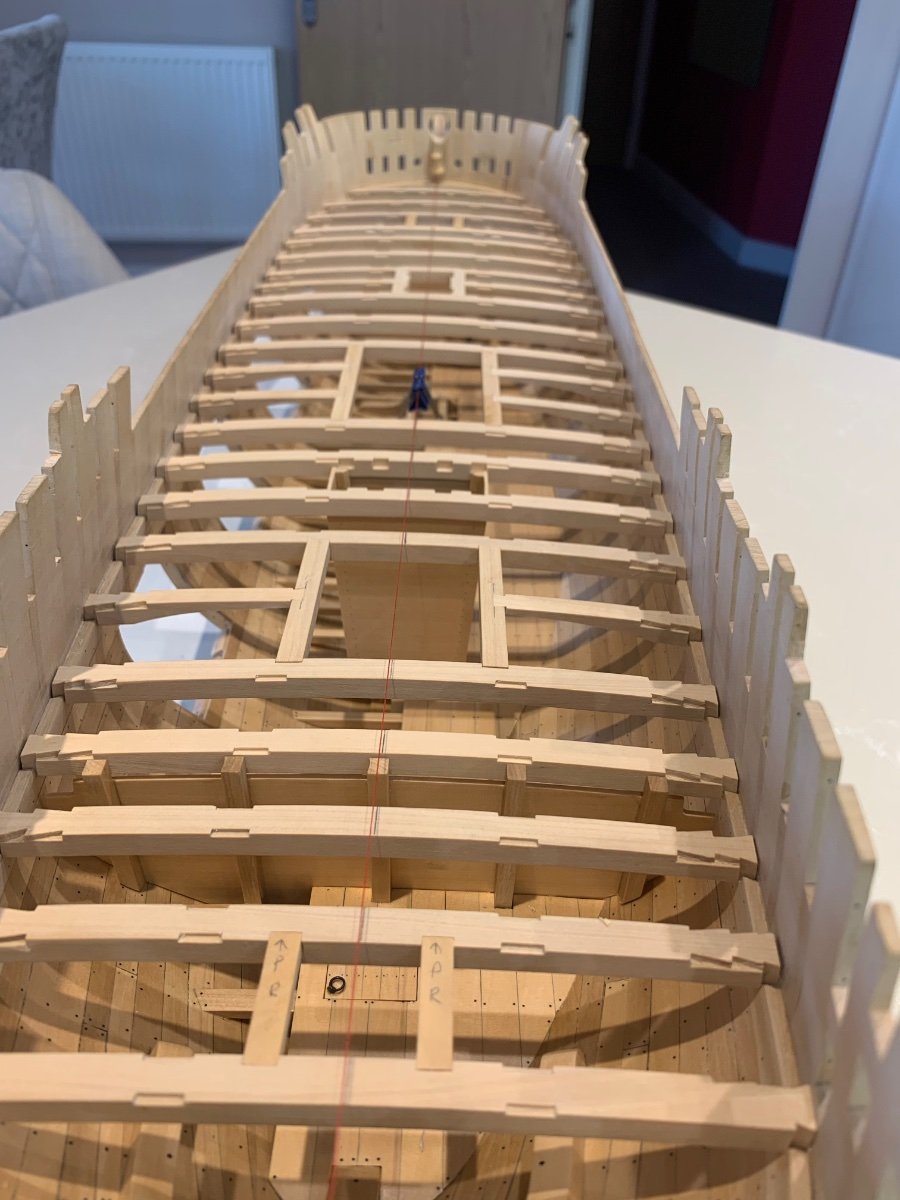
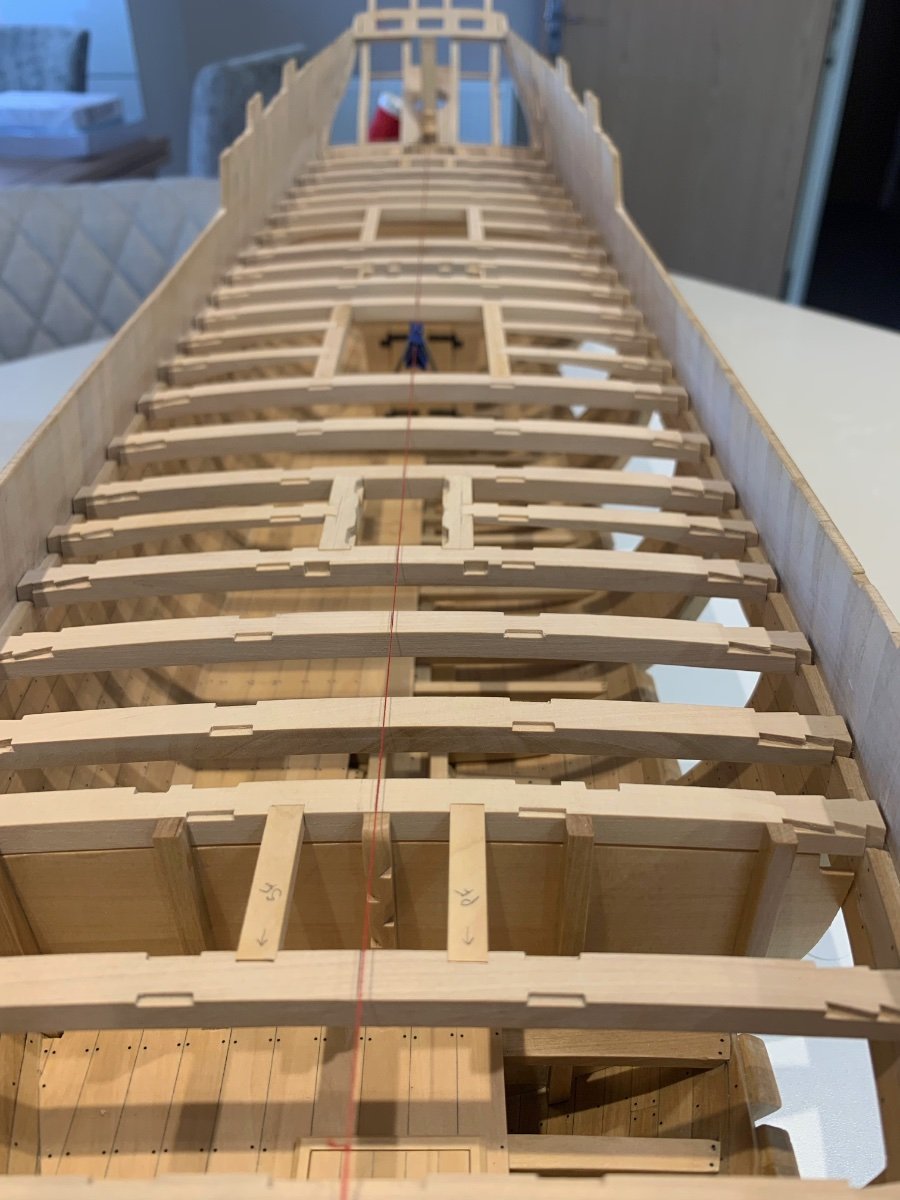
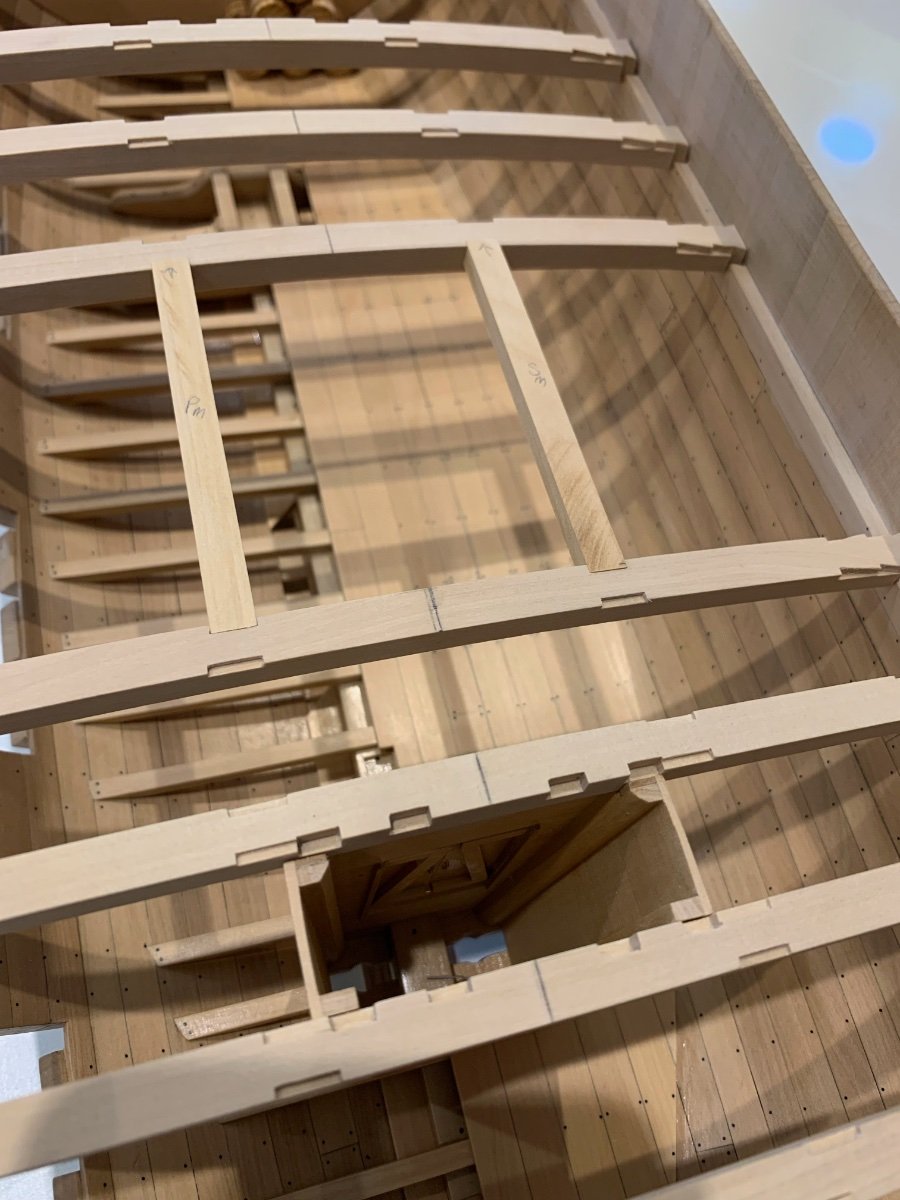
Not too much of an update but I've been installing the deck permanently - It really did just click together with very little in the way of clamps.

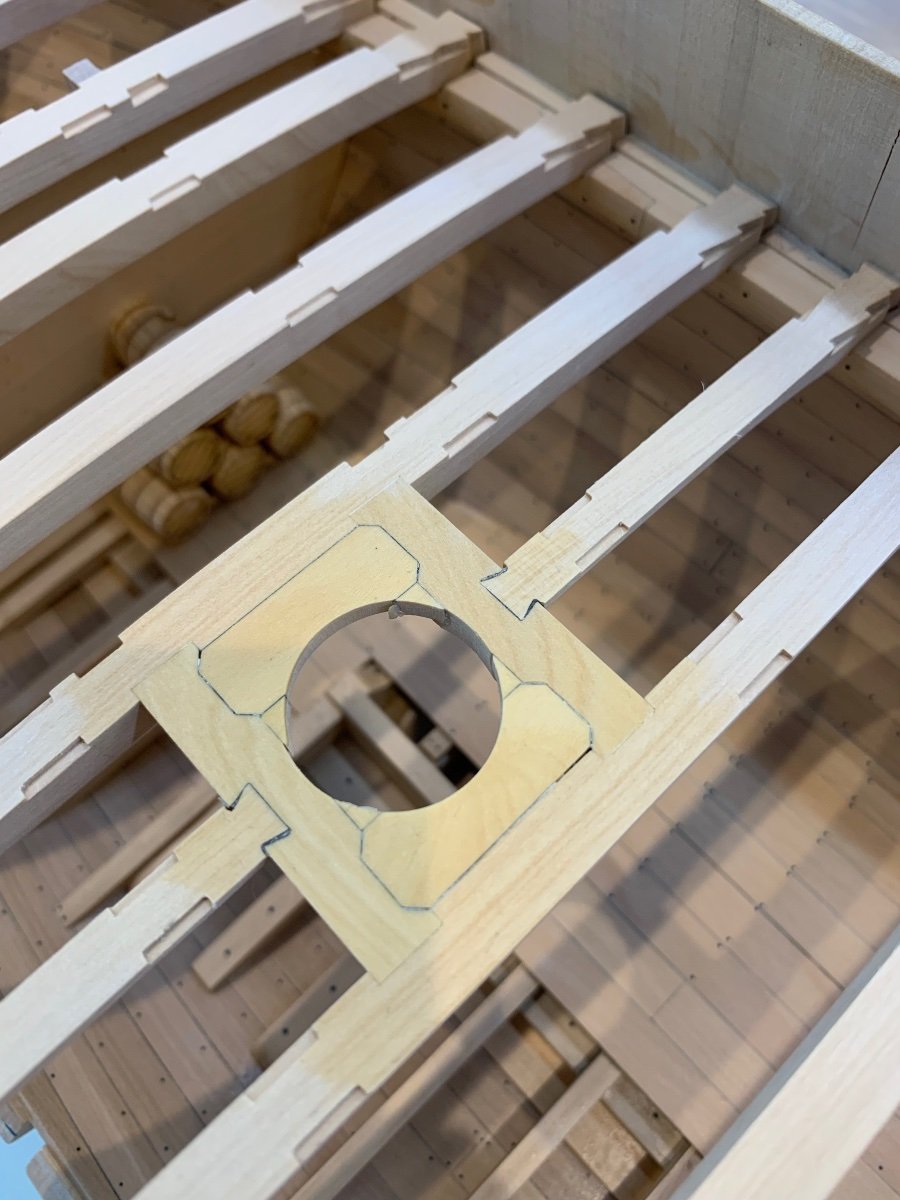
After all of the beams were installed I finished off the mast partner with the corners that I had not made originally. I also set the angle aft within it for the mast.
Next were the pump partners - I admire all of you builders who work in a smaller scale. I wanted to keep it true to the original ship and made the joints accordingly. This was tricky at 1/24th scale so how you lot do it on a smaller scale I have no idea.

Lastly I faired the deck - this is as satisfying as fairing the hull. You know that when you have done it - it's another mile stone in the build. A few pictures


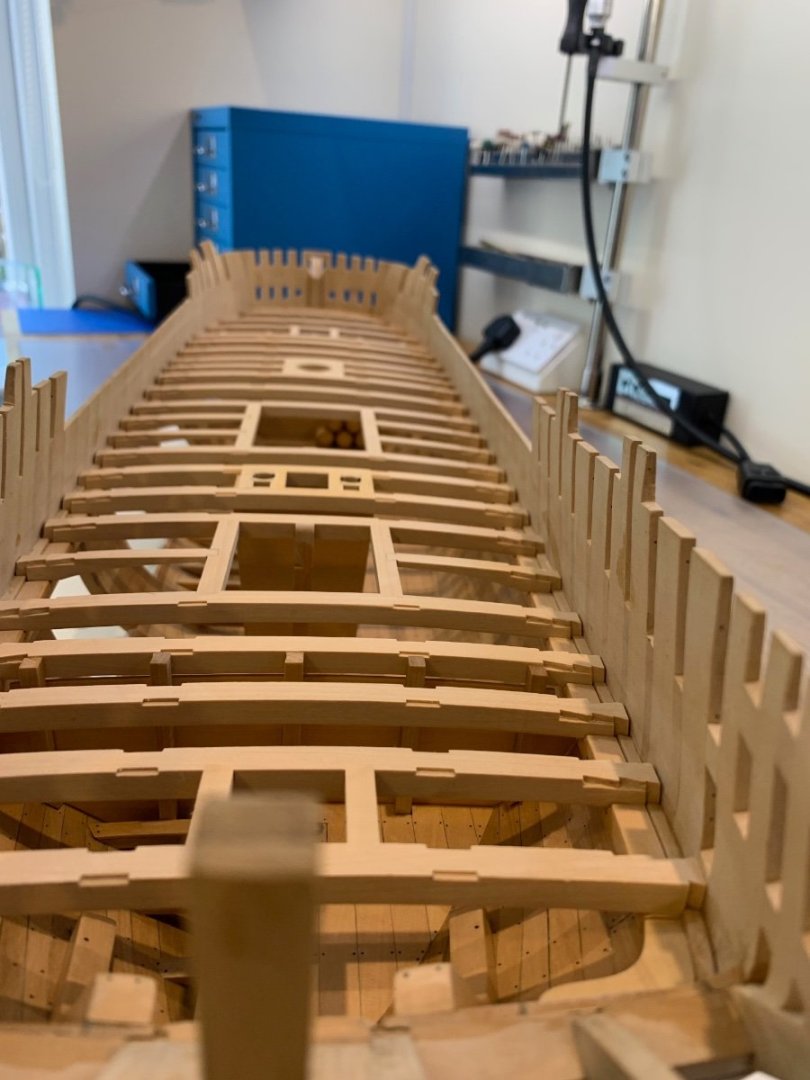
Its so annoying when you see that you cut a beam a little too short - 🤣
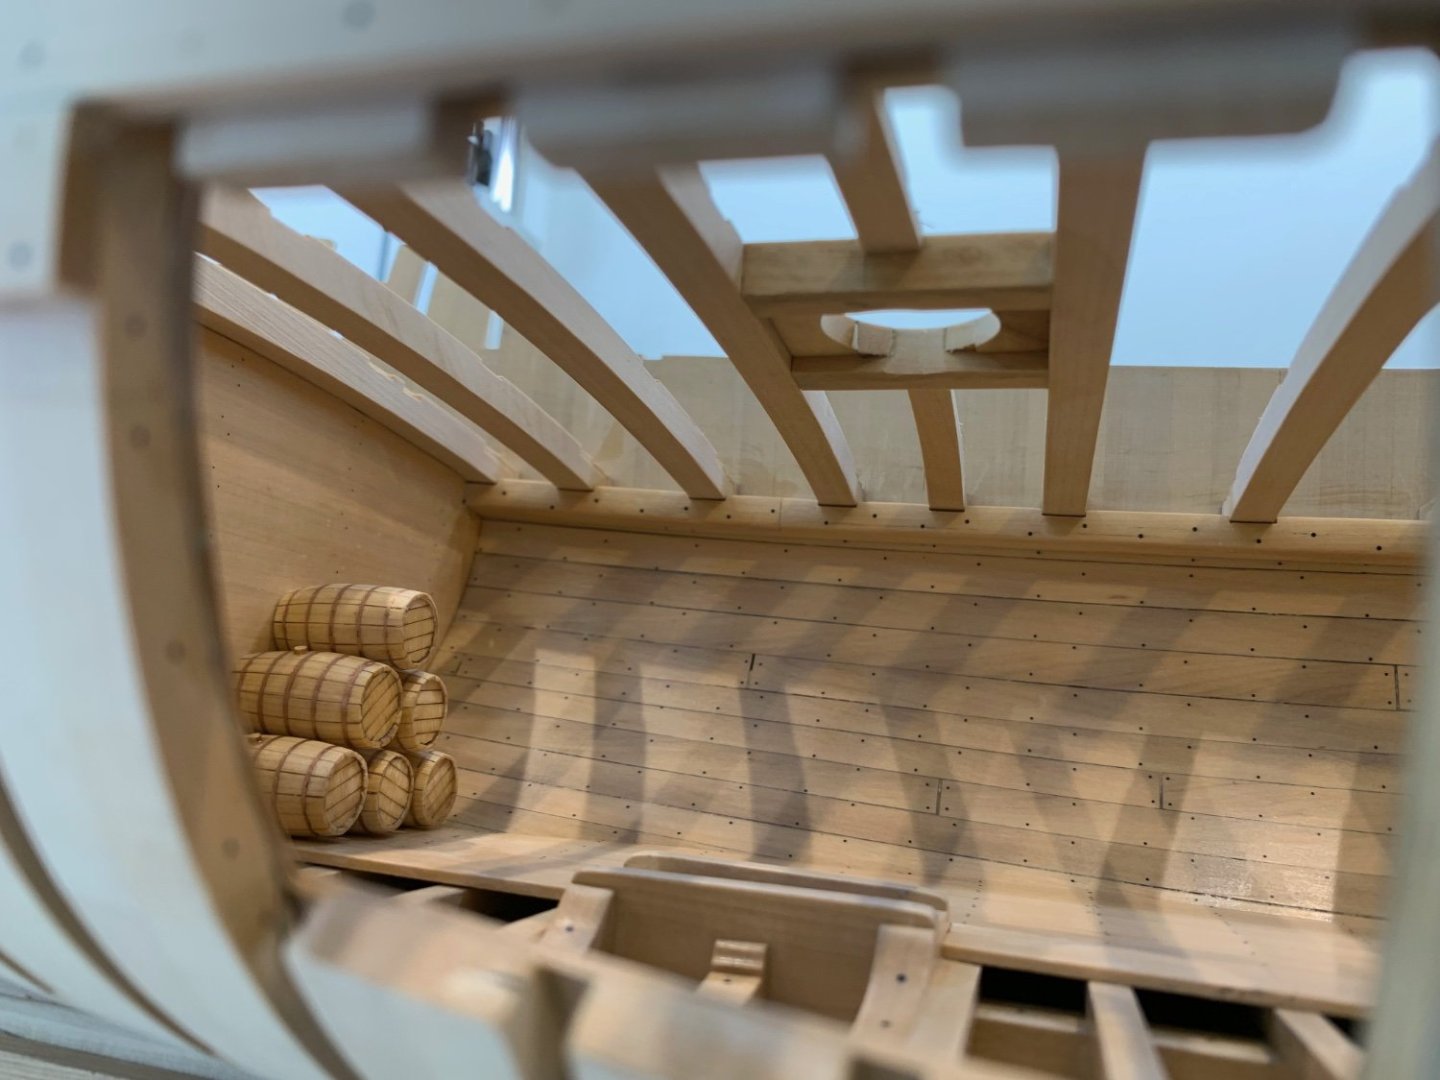
So now I need to get nailing - I've discovered that this is not my favourite job. I'll have a go at that next weekend. There are some things that I could have improved upon - Firstly the very rear stern hatch is not quite straight and square. I've obviously messed up a bit there but it's easily fixed. Secondly I can see that some of my beams are just slightly too short and this will cause some corrections when I make the waterway and spirketting. Again it's all solvable so I'll tackle those issues at a later date.
I can't thank you all enough for your kind comments - Cheers Mark
-
-
Whether a kit or scratch builder this is the quality of work to aspire too. Chuck that is amazing!
- Jack12477, Chuck, Ryland Craze and 1 other
-
4
-
2 hours ago, druxey said:
Looks great, Mark!
Thanks druxey much appreciated mate 👍
1 hour ago, dvm27 said:That's some of the best joinery I've seen Mark! In the close-ups you don't even highlight the beautiful scarph joints on the clamps.
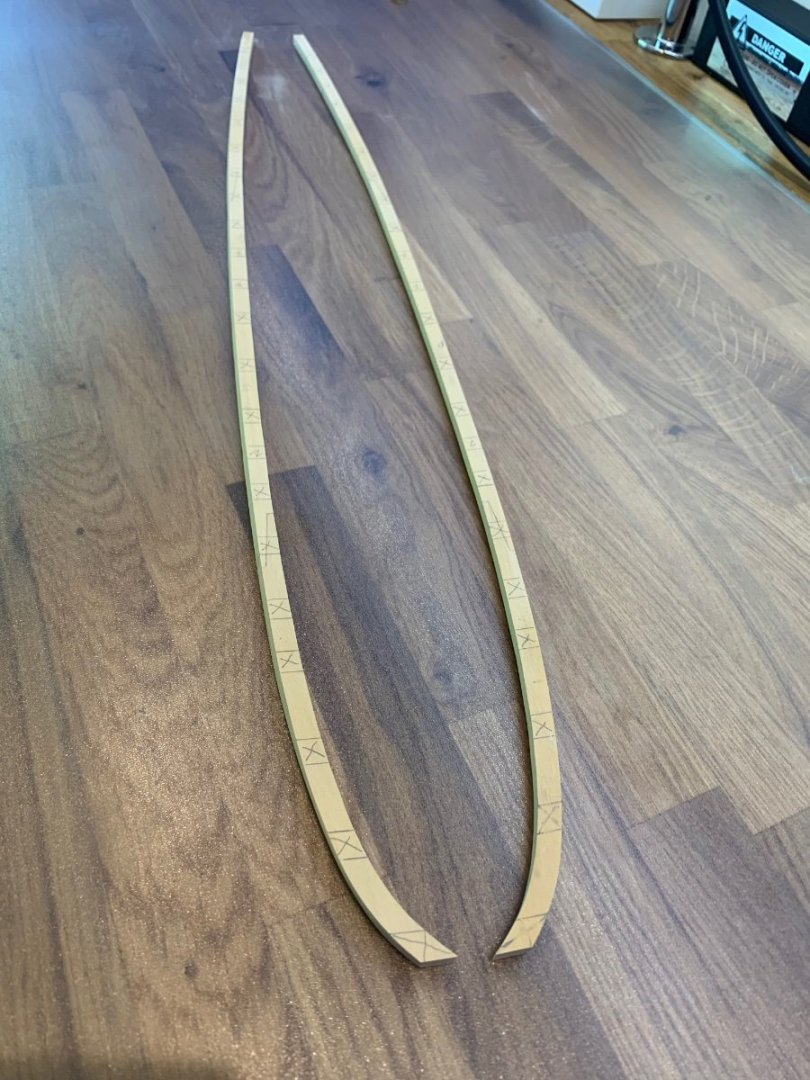
Wow thanks Greg - I think it will all look really nice once it's glued up and tightly clamped together which will take some time as there's quite a few nails to go in too. Having looked at the plans I think one of the real tests of this build will be the waterway - now that looks tricky as it has to fit tightly and be symmetrical too. That will be the next big job on my build.
- dvm27, druxey, Hubac's Historian and 1 other
-
4
-
On 5/21/2023 at 6:17 PM, Tobias said:
Hi Mark, really very precise work, very clean.
Thanks Tobias 👍
On 5/23/2023 at 9:28 AM, giampieroricci said:wonderful work!!
Cheers giampieroricci 👍
On 5/24/2023 at 10:04 AM, DaveBaxt said:Looks like a really precise piece of kit that Mark. I have the Proxxon table sander it does the job but the table isn t great and the angles are not very precise. Keep up the excellent work Mark.
Hi Dave - I used to have the Proxxon sander and they are great and do the job very well - but Byrnes tools are just in a different league.
So another update from me - First up was to get the mill out and cut out the notches for the beams.


Then they were glued in place which was quite straight forwards. I did have to bend them a bit so they they followed the line of the deck clamp.

Next was to make and fit the small knees that connect the shelf to the transom.
And finally a last dry fit of the deck to check that everything fitted OK. I also got the height gauge out and checked the beams one last time for accuracy.
So before I glue all of the beams in a need to put a final finish on the inside of the hull. Once this is done I'll glue it all together; finalise the mast partner and make the pump partners before fairing the deck. I'll get some pictures up hopefully next weekend.
Thanks for all of the encouragement - Mark
-
On 5/26/2023 at 5:08 PM, wefalck said:
I recently made a bunch of oars in 1:160 from three layers of laser-cut paper:
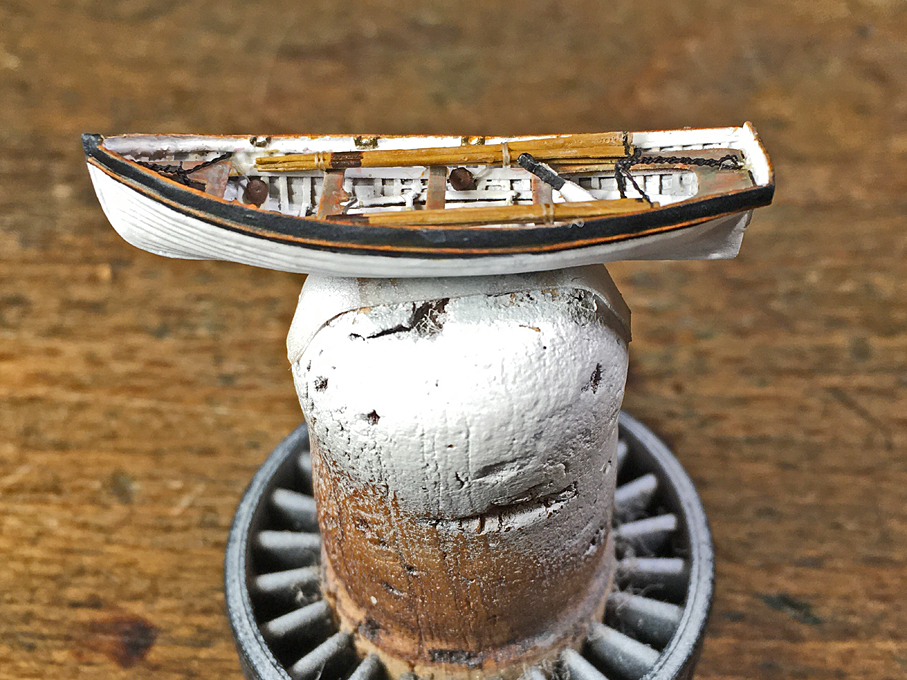
Unfortunately, I didn't take pictures of the process itself. However, they are laminated from three layers of 0.2 mm thick 'Canson' paper, trying to more or less reproduce the varying cross-sections and longitudinal profile. The layers were cemented together using varnish, which hardens the paper and makes it also amenable to (light) sanding.
Goodness me that boat is so tiny - fabulous work
- Keith Black, mtaylor and Dan DSilva
-
3
-
The difference in colour of the wood in the rudder is fantastic 😎
- giampieroricci, KentM and mtaylor
-
2
-
 1
1
-
-
On 5/14/2023 at 8:55 AM, marsalv said:
Wonderfull built
 .
.
Cheers mate its starting to come along now!
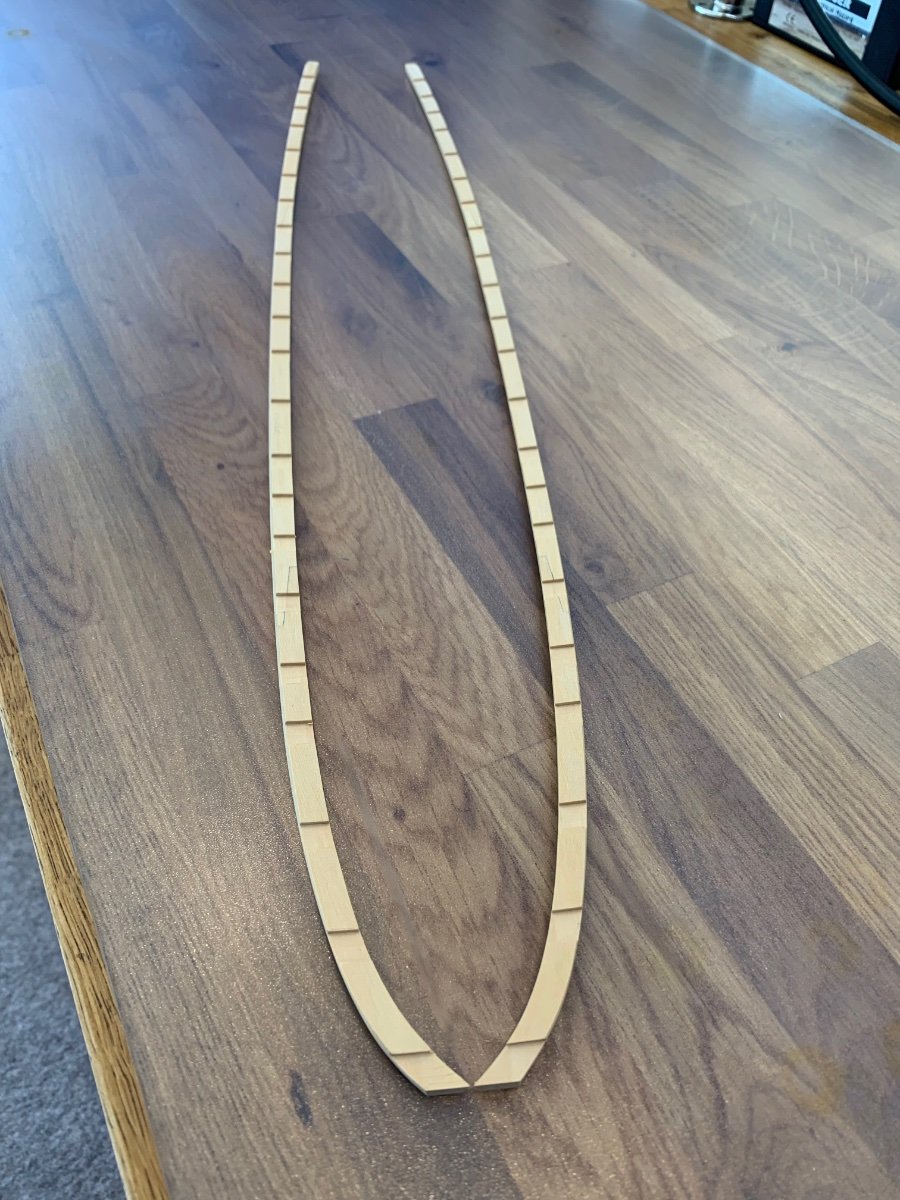
I've made a start on the deck shelves - Its the usual procedure of running some wood through the thicknesser which in this case is 6.9mm and then photocopying the plans for the templates.

Then cut them out, sand to size and join using scarf joints


The next stage just takes time as the shelves do not sit at 90 degrees to the deck clamps. The best description I can give is that the point slightly upwards as if to follow the curvature of the beams. So a bevel needs to be cut the entire length of them and then they also need to be let into the deck clamps for a good tight fit. This isn't actually hard to achieve it just takes time and a little patience. Once done I clamped them in place to mark out the recesses for each beam. I thought that the best way to achieve this accurately would be to use the beams themselves so thats what I did.

This seems to have worked well so now that I have the locations I can cut them out. I also need to bevel the front of the shelves and round the underside which will be my next jobs.

I've also been treating myself 😊 I bought my sanders little brother for some of the finer work. Wow what a lovely tool this is - Its not as powerful as its big brother but it has excellent control for both speed and direction. Just what I needed and another fantastic tool from Model Machines.

Loads to do and thanks to you all for your comments and likes on this build
Mark
-
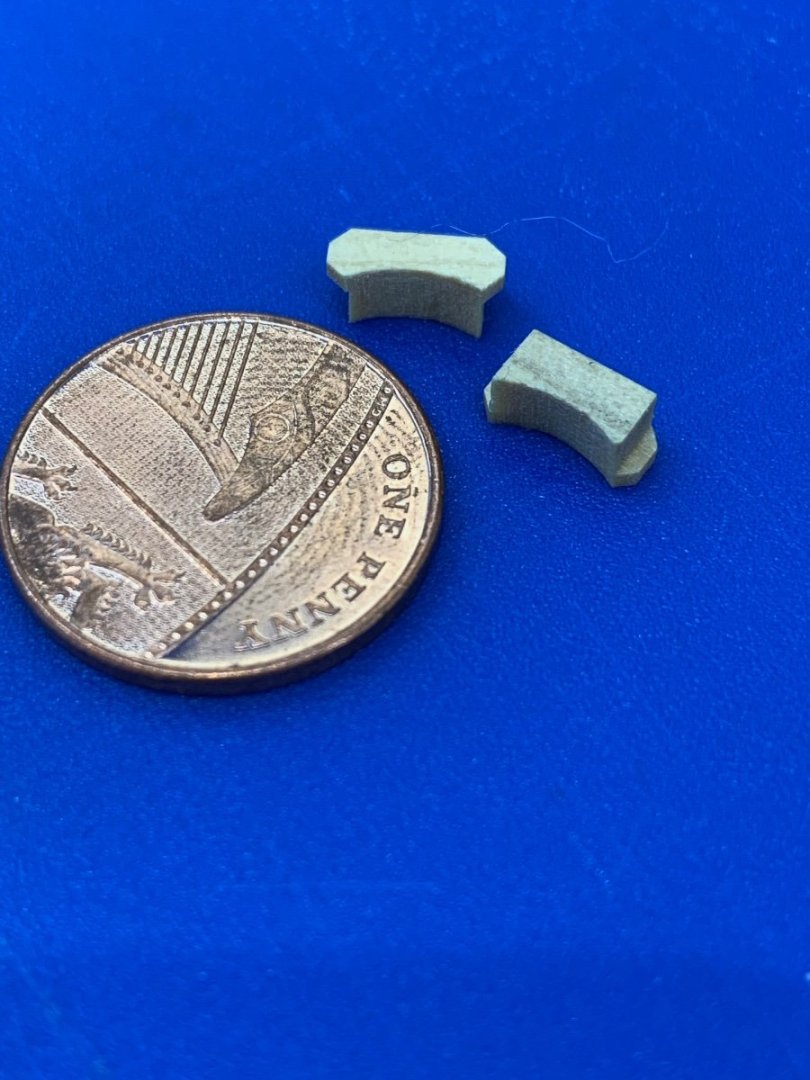
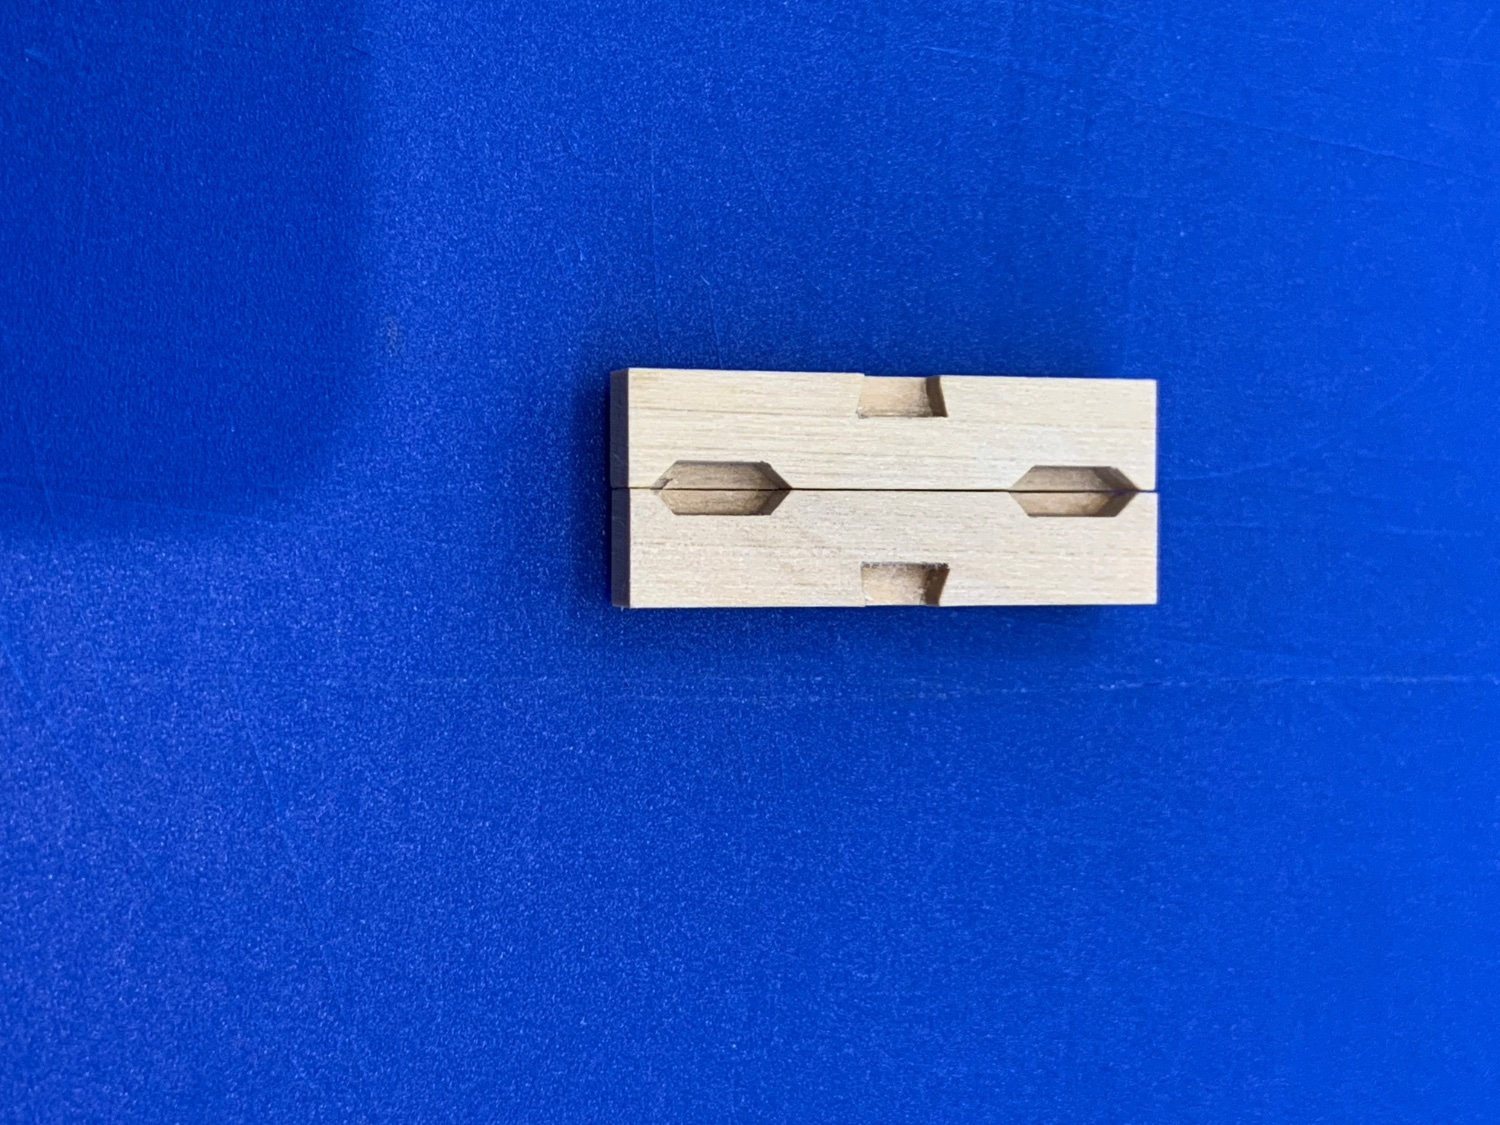
Thanks Greg 👍 Yea it is the normal way to do a joint by cutting the dovetail first and thats the way I have always done them. I just fancied trying something different to see how I would fair. They are not too bad but not as tight as they should be - I do these things to get better at using edged tools.
I will put some glue into the joint but I also think I'll run a HB pencil around the receiving part so that I don't completely loose the joint.
I've been looking at the deck shelf and the more I look at it the harder it looks. I think its going to be one of those parts that gets made more than once - just as well I've got a good stock of wood!!
- Hubac's Historian, mtaylor, Tobias and 4 others
-
7
-
Looks great Kev - those pictures show how tight you got the planking running up the stem.
-
Hi All
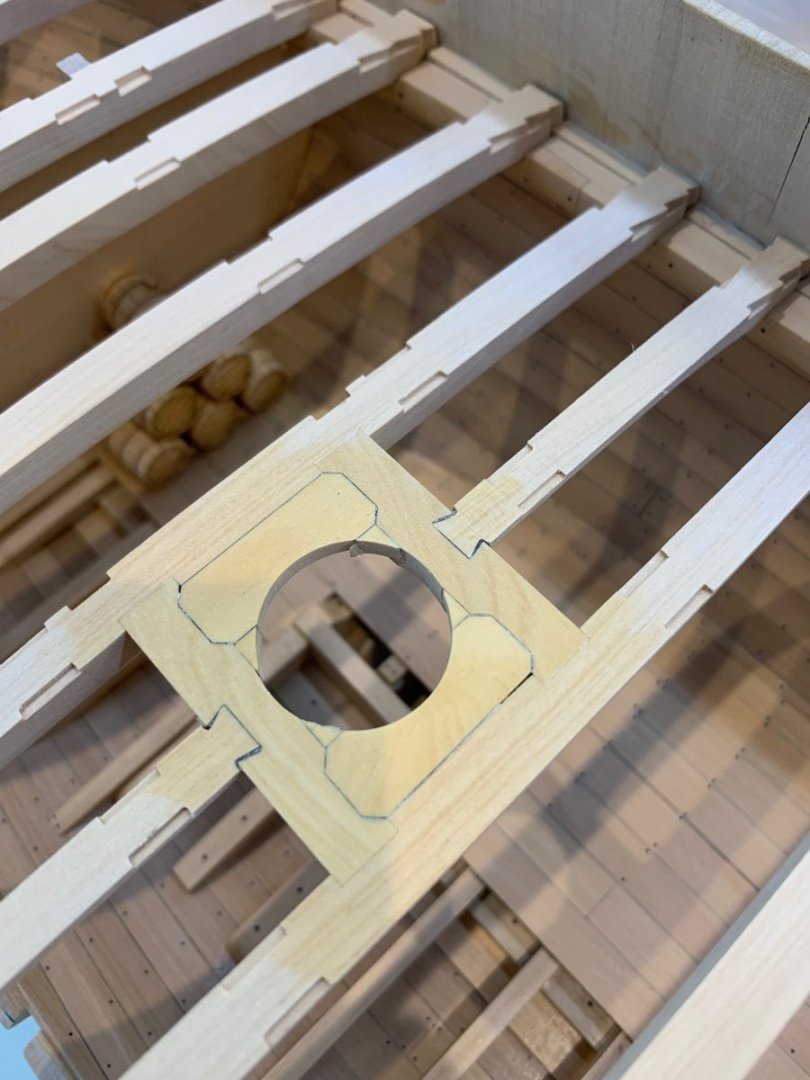
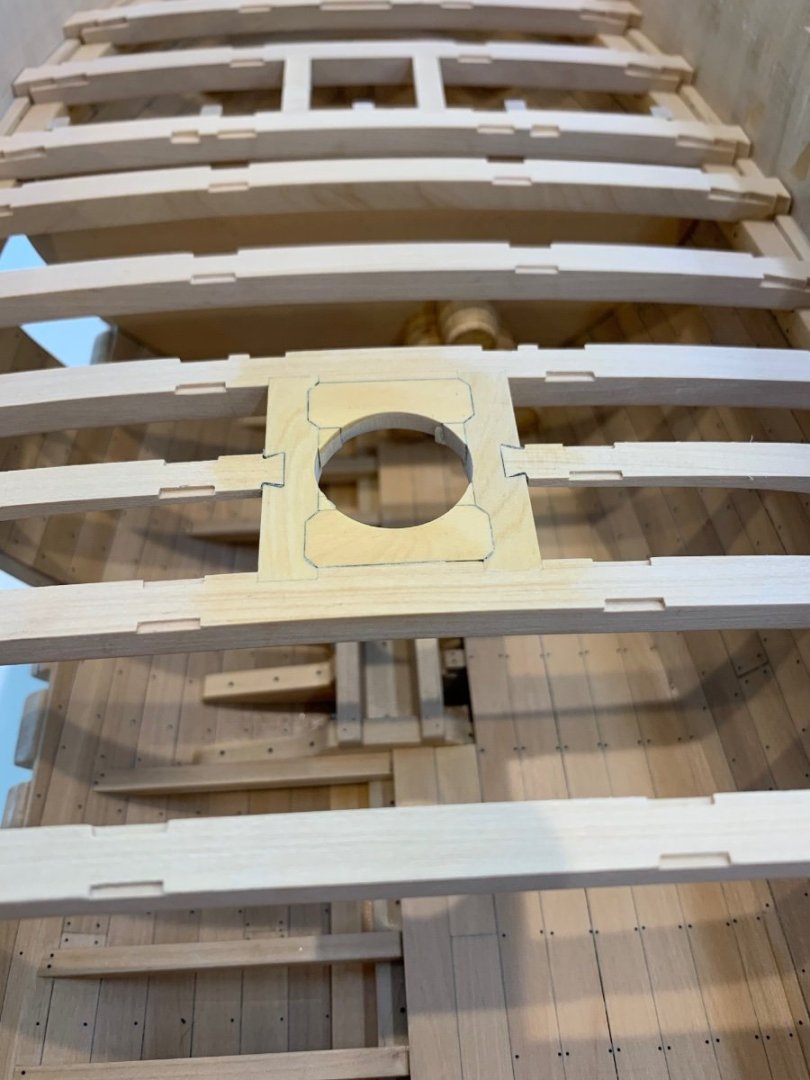
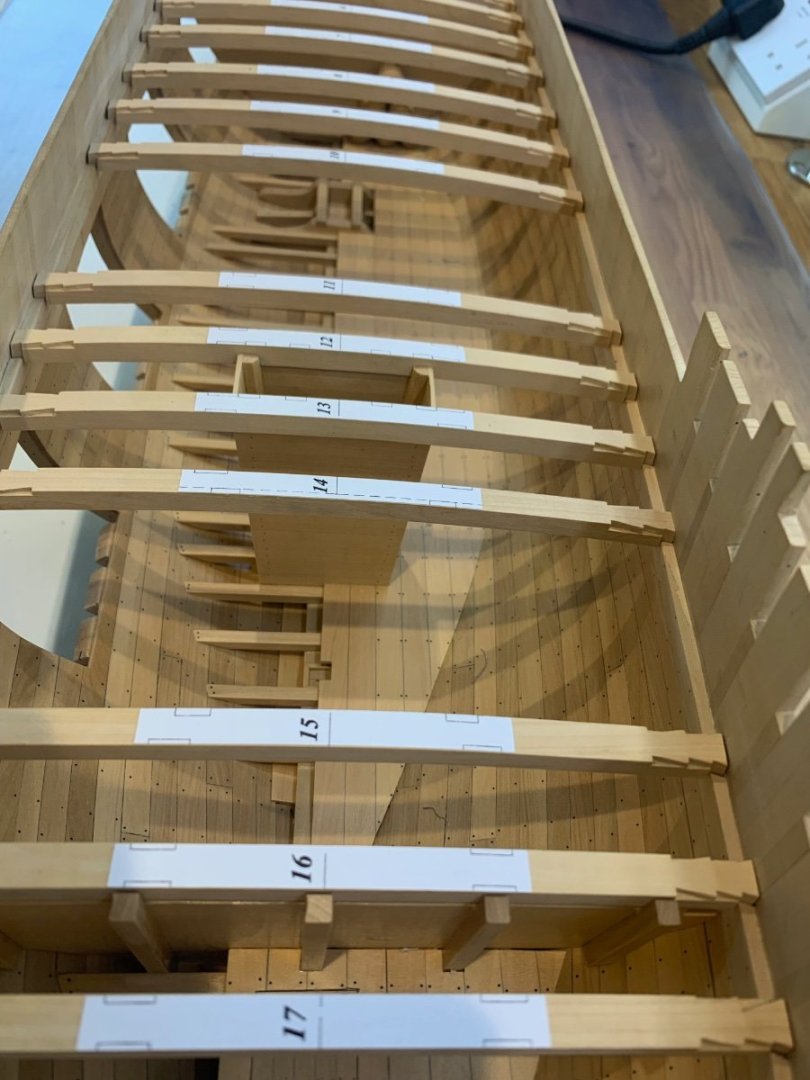
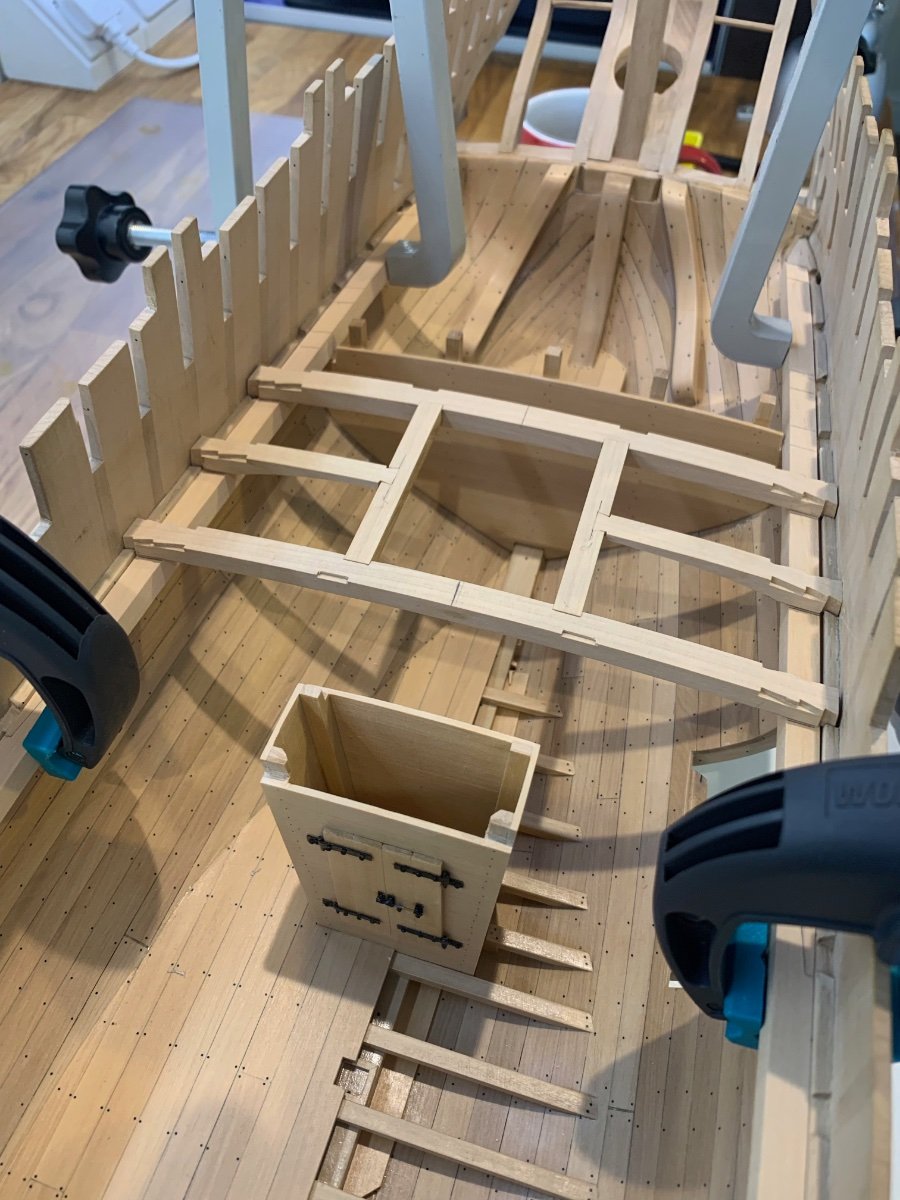
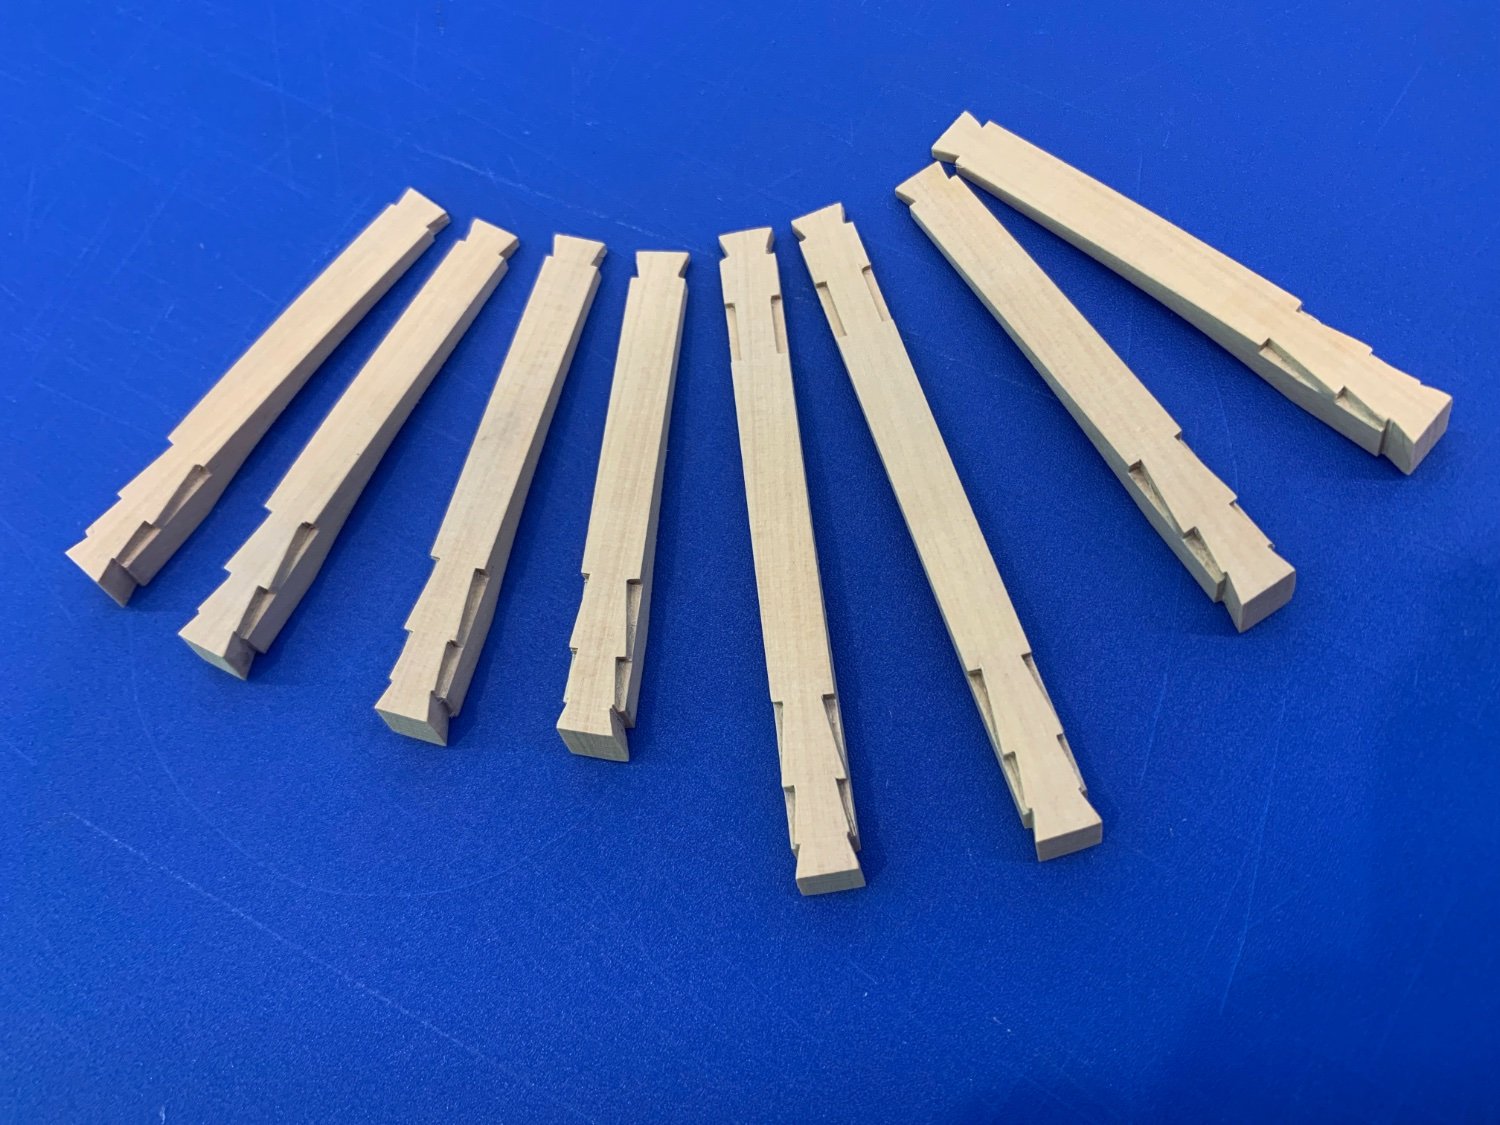
Work continues on the deck and I've been making the short and thinner half beams. The plans give you a very good idea of the shape but don't give the individual shapes for the undersides although the lengths are shown separately. This simply means that you have to use your brains a bit and translate the drawings as you see fit. Thinking back I would have struggled with this concept at the beginning of this build but now I can see what is required.
So here are the eight half beams.
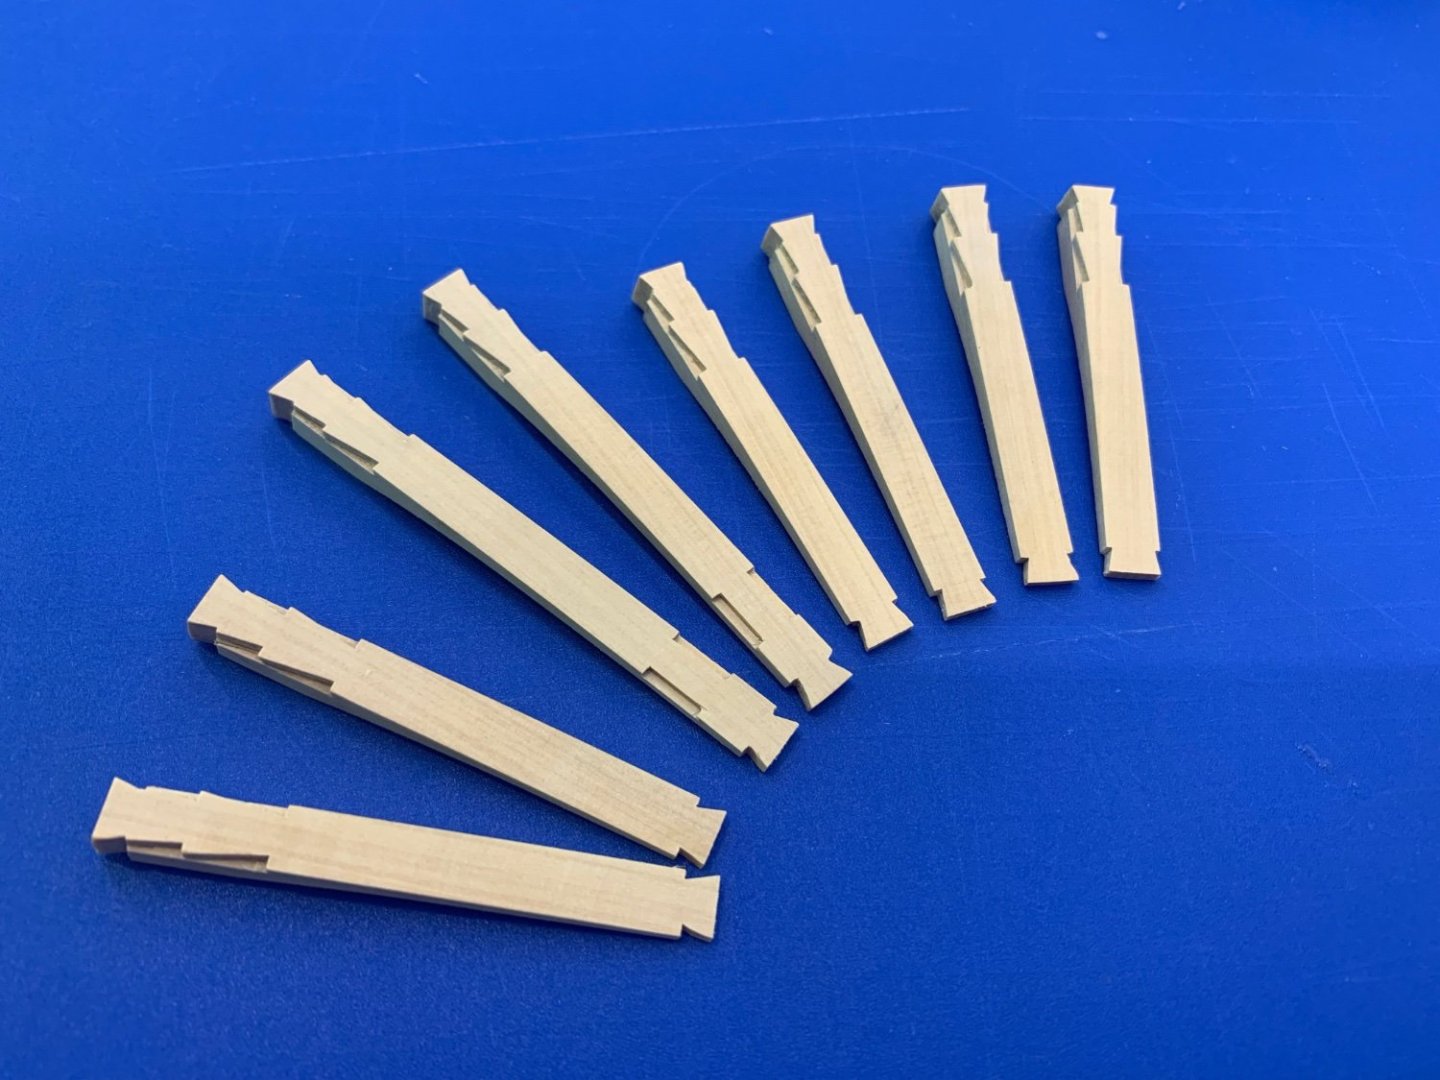

Now just for a change and to try something new I thought that I would make the female part of the dovetail joint first and then fit the end of the beams to suit. This was not a great idea and I won't be doing that again - it's so much harder that way around and I couldn't get the joints as tight as I wanted. Anyway they turned out ok and here they are fitted on the ship.

I still need to drop a few of them further into the deck clamp but thats an easy job. On the whole I think the run of the deck looks pretty good as this is only a dry fit and I don't think it will take much sanding at all.

I can see some slight variations on the dovetails for the waterway and spirketting so I guess that will need some adjustment when the time comes to make them. I'm not going to make the pump partners until the deck is fixed in place either. So now I have to remove all of this work and make a start on the deck shelf which is fitted to the entire length of the deck clamp. This shelf is there as no knees are fitted to the beams on this ship and it looks quite difficult to make. Hopefully I'll have something to share soon
Cheers Mark
-
You know what Kevin I really admire you here - A small error which has changed the course of your build in your own mind and you have risen to the challenge.
Now that the paint is on you can really see the lovely shape of the hull that you have made - this is going to be one lovely build 👍
- Canute, Obormotov, Oldsalt1950 and 8 others
-
11
-
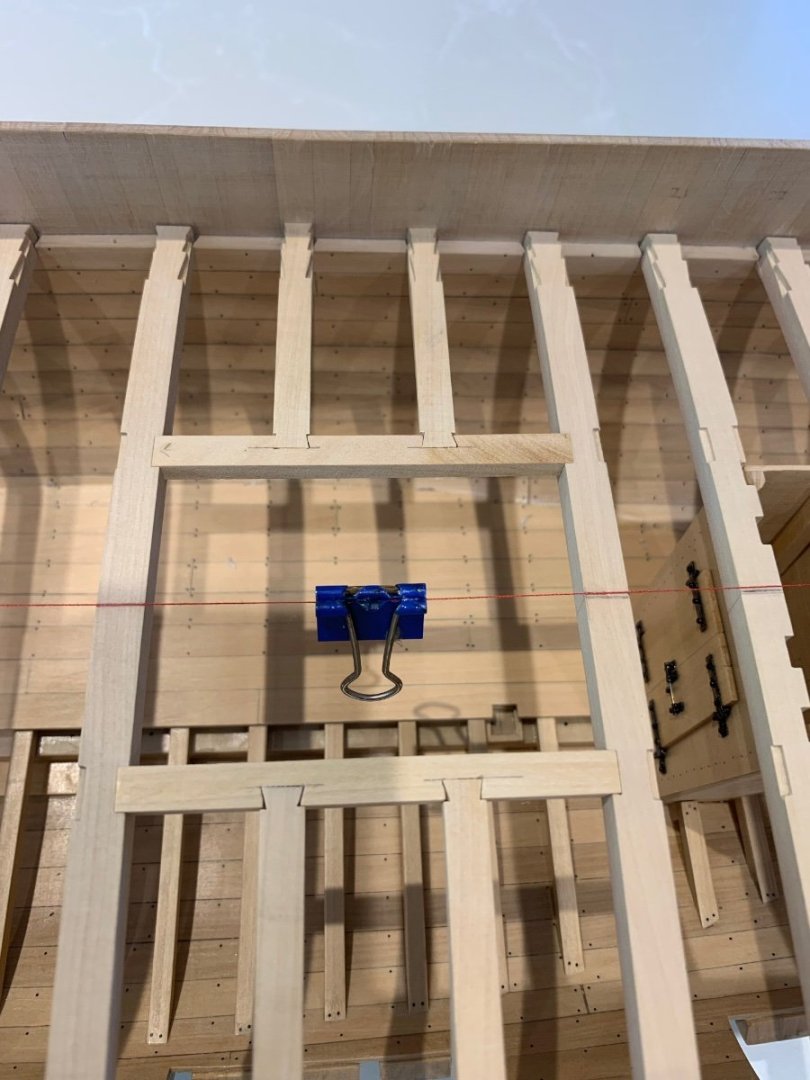
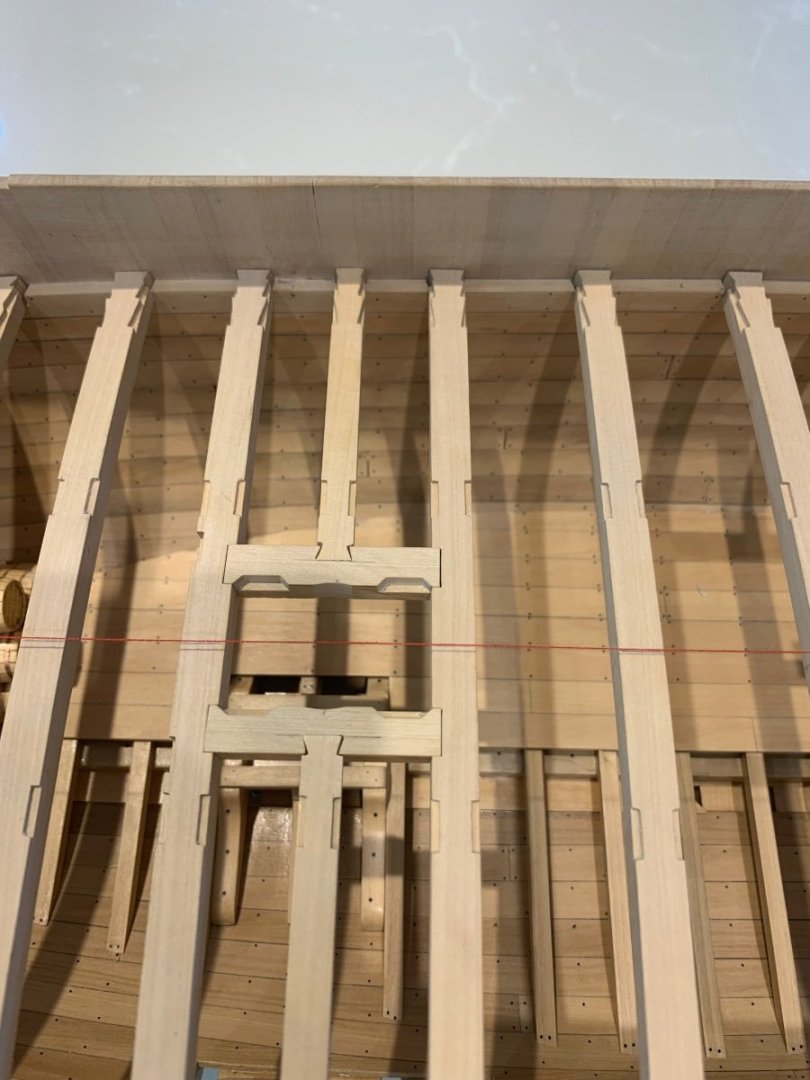
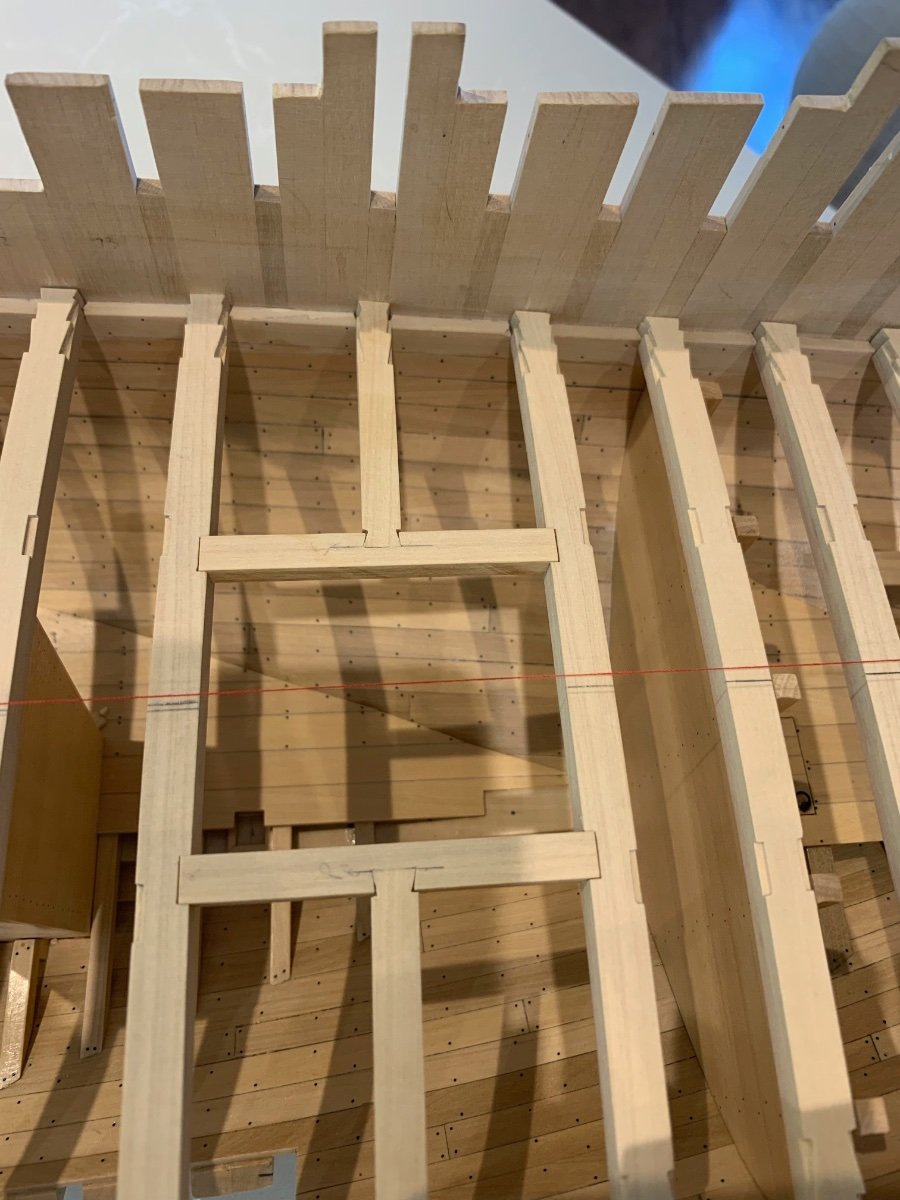
Another update from me as I finished the mast partner in far less time than I thought it would take.
The first thing I did was to make sure that the carlings were a very good fit in between the beams. As mentioned earlier I had placed beam 7 in the incorrect place and once this was sorted the parts fitted as they should. In this picture they are sitting proud as I had not yet cut the rebates to make them flush.
The cut rebates and how they sat on the beams after. I have deliberately left them slightly proud so that I have something to sand down to deck level.


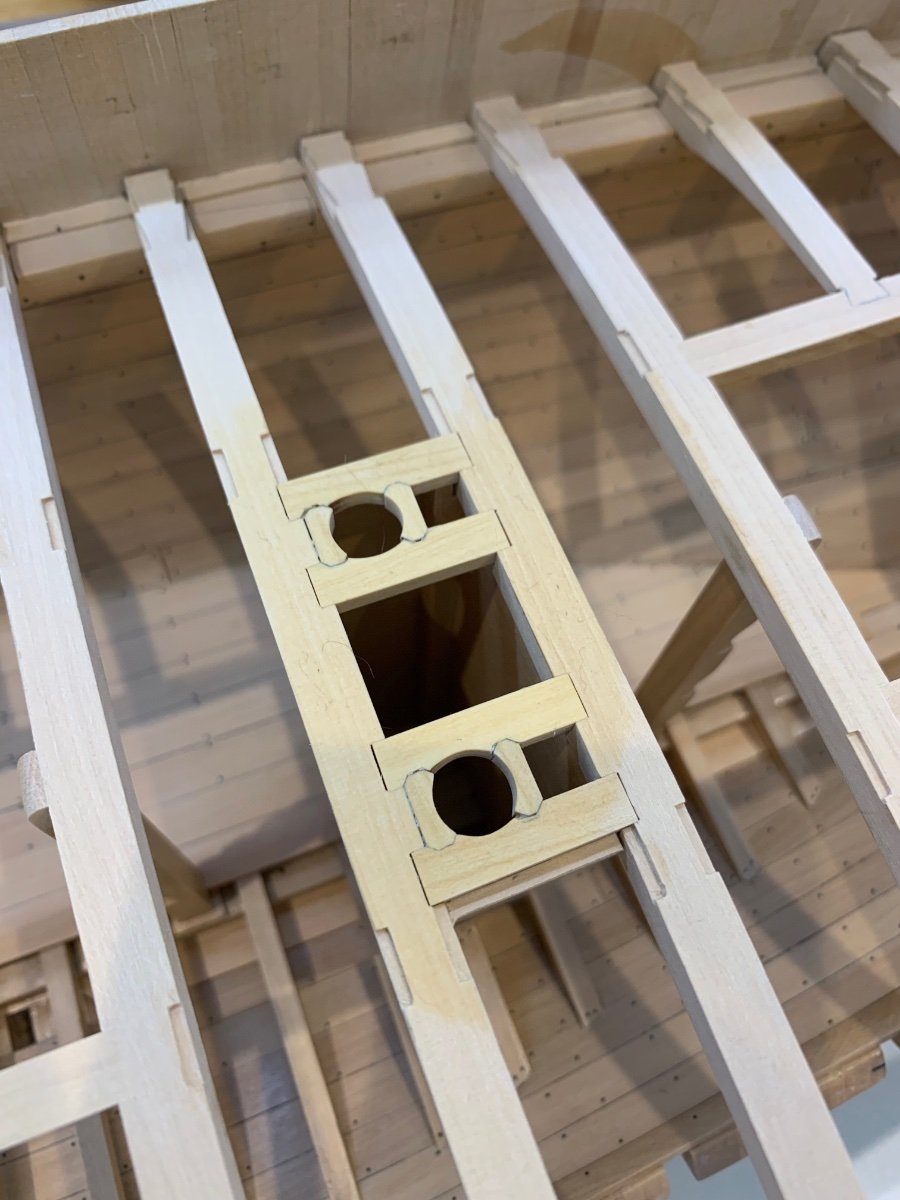
Next I cut out the notches for the other two parts of the mast partner and the dovetail for the half beam

Nothing like a nice piece of symmetry 👍
I then made the other two parts which basically followed the same process. The actual hole is bevelled towards the stern but this is not difficult to achieve.
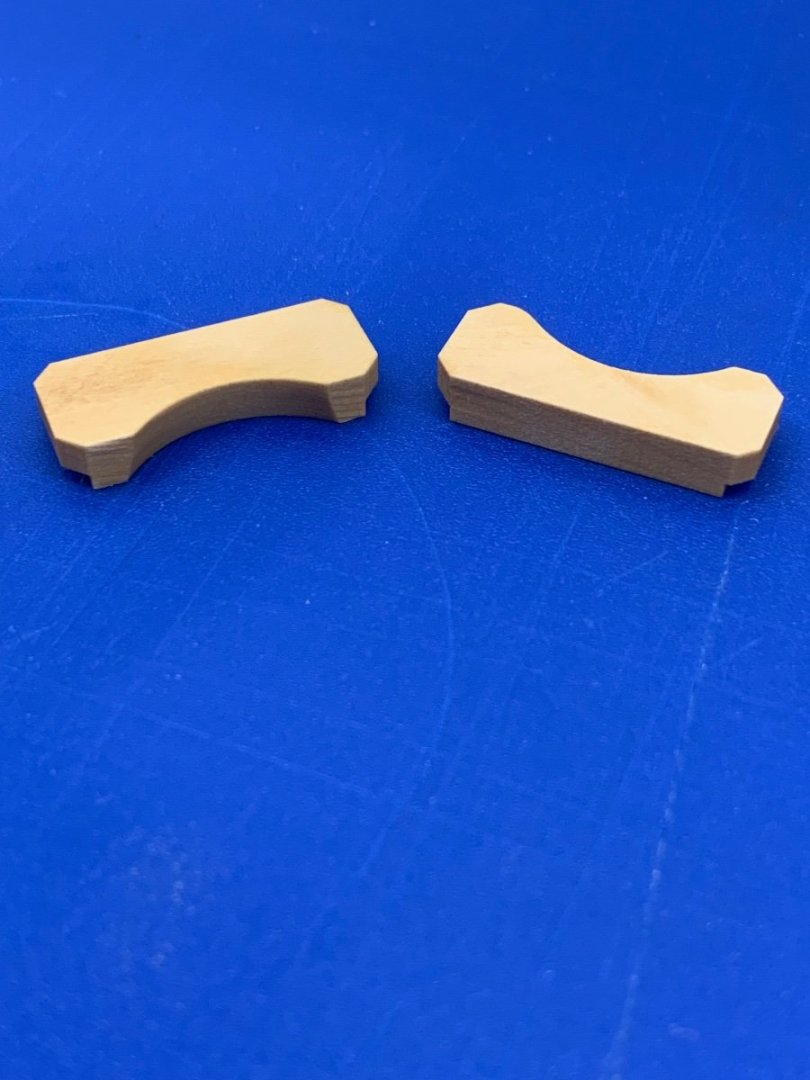
The parts assembled
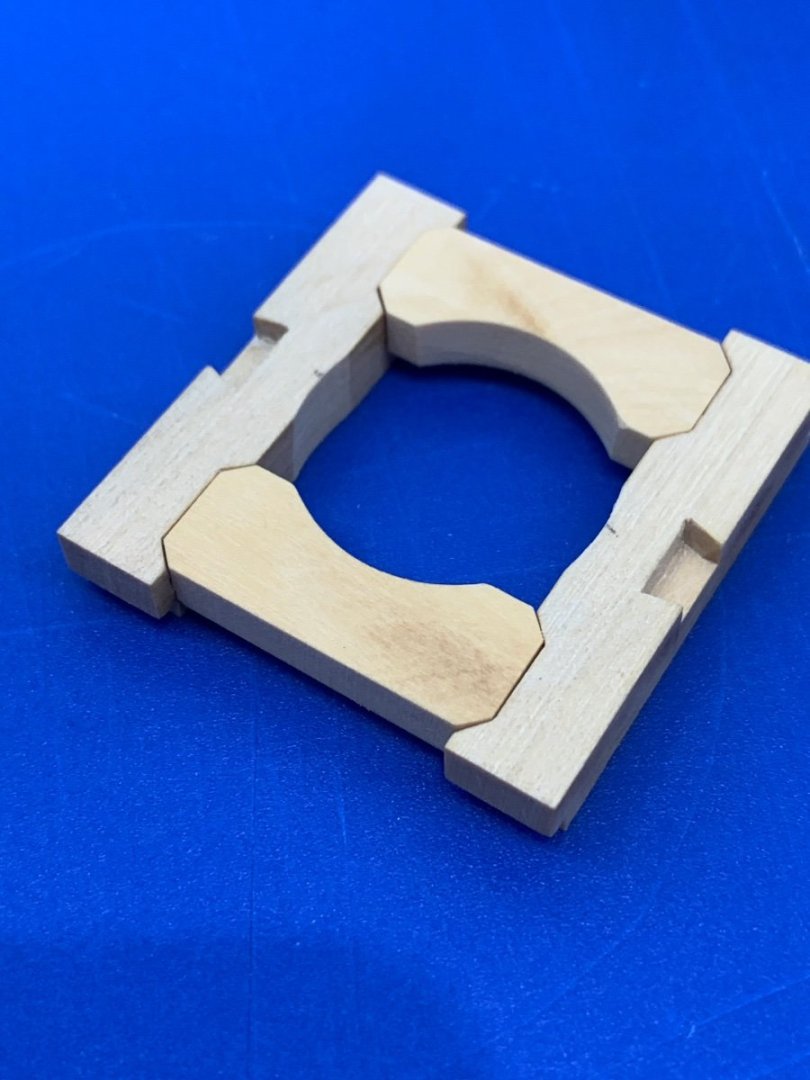
The parts on the ship between the beams.
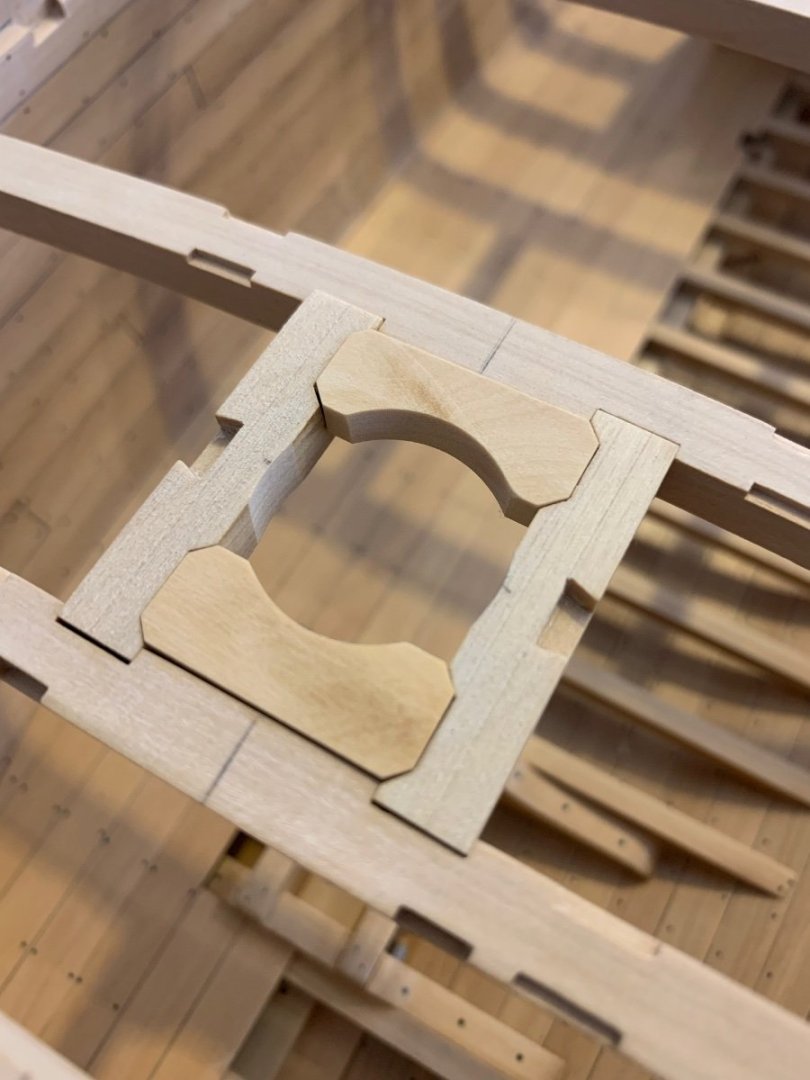
To complete them they still need some small corners made but I'll make and fit them once the mast partner is fixed in place. I've still got loads to do before I get the half beams in.
Cheers Mark
-
1 hour ago, Nersch said:
Hi Mark,
That was also my thought. I spent today some hours to measure and calculate the different angles. So let's see how it works at the end.
BTW: What milling machine and milling tools are you using? Your surface looks perfect with sharp edges and no break outs.I use a Sherline mill with a 10k rpm pulley upgrade and more importantly 2 flute end mills as these really get the chips away well. The surface finish is more down to the wood I'm using than anything else. Its Castello and is very good at keeping an edge.
-
Hi Nersch - you are correct the angle gets wider in both directions and this is a tricky job to get right. I worked out the angles and then milled the parts. The angle was achieved on the mill by packing the stern end up from the bed of the mill. It's a very slight angle which had to be replicated to obtain a mirror image on both sides. As I remember I then finished the job by hand - I hope this helps.
- Hubac's Historian, mtaylor, KentM and 2 others
-
5
-
38 minutes ago, Toolmaker said:
Seriously nice work on show there Mark. A heady mix of carpentry and wood engineering which you have combined perfectly.
Cheers
Paul
Hi Paul - cheers mate thats nice of you to say 👍 I tried to start the mast partner tonight and discovered that the beams that it sits between are 5mm to close together. After having a good look at my mistake it was obvious that the front beam was 4mm to far aft and the rear beam was 1mm to far forward. So I've been fixing this issue which is no big deal it just means a few repair pieces in the deck clamp. Ship building is amazing - just when you think you've got it right.........well something needs correcting 🤣
- mtaylor, KentM, Hubac's Historian and 2 others
-
5
-
On 4/25/2023 at 7:13 PM, giampieroricci said:
Great and neat work!
Thanks mate 👍
Work on the deck continues - Having found the centre line of the beams I placed the templates on each beam to cut out all of the required notches.
There's quite a lot of them to cut and I had to look through quite a lot of the plans to find the required sizes. I was cutting for the carlings, binding strakes, bowsprit partners, mast partner and pump partners too. Also some to the cuts follow the curve of the beam and some need to be cut vertically. There was one dimension that I just couldn't find and a quick email to Gerard Delacroix gave me the place to look - Thanks Gerard
")
So lots of cutting which I mainly did on the mill using a 1mm twin flute end mill and then squared out all of the corners with a chisel


Once that job was done it was a pretty simple job to make the carlings for the hatches - I was just trying to get the tightest fit that I could.


I now need to make and fit the 8 half beams that fit along side the hatches and mast partner. So I guess I'm going to have to make the mast partner too. I think this will take quite a while so I'll update you once I get somewhere with it. Thanks for all of the encouragement
Cheers Mark
-
-
-
26 minutes ago, ccoyle said:
Hi, Larry.
I'm going to give you some possibly unpopular advice. If you have a SOTS (Sovereign of the Seas) kit and are looking for instructions to build it, that's a pretty good sign that you aren't ready to build it. SOTS is one of the most difficult kits you could ever take on as a project, and Italian manufacturers are notorious for their poor instructions. Someone who is actually capable of tackling that kit, i.e., a seasoned modeler, doesn't really even need those instructions. So before you dig into SOTS, may I suggest you read through this topic first? I know the guy that wrote it -- he's kinda goofy, but he means well. After that, give some serious thought to investing in a simpler first project. Finishing one will increase by orders of magnitude your chance of completing SOTS successfully. For ideas on what to build first, look through the build logs and find ones that have both "finished" and "first build" in the title. Each of those represents a builder who got his or her hobby off to a good start, and everyone here would like to see you become a part of that accomplished group.
Cheers!
I really admire the honesty of this post - It says it all - SOTS is a beautiful beast of a ship and I couldn't build it yet. I see too many builds start and falter which puts the builder off of our amazing hobby. Great advice above which as the OP says will probably be unpopular.
- Baker, DaveBaxt, GrandpaPhil and 2 others
-
5

.jpeg.5f280aa482396a8f5d426fe402f9c535.jpeg)
.jpeg.7cf02b811fa8a083042e8e97ad468917.jpeg)


Le Rochefort by No Idea - 1/24th Scale - First POF Build
in - Build logs for subjects built 1751 - 1800
Posted
Thanks Bruce - I really am enjoying building this ship. I would recommend it to anyone for their first POF build.
Cheers marsalv 👍