


Bob Cleek
-
Posts
3,374 -
Joined
-
Last visited
Content Type
Profiles
Forums
Gallery
Events
Posts posted by Bob Cleek
-
-
-
8 hours ago, BANYAN said:
There used to be an article about this style of ropewalk by its original designer in a magazine - I will see if I can find it. Give me a PPM if you think it is the same.
There's lots of information about ropemaking in general and the Domanoff machines very similar to this one here: Discussions about Rope Making - Model Ship World™
-
One very handy accessory that I obtained for use with my Domanoff machine is a bobbin winder. These gizmos are sold in fabric and sewing machine stores and online. They are a stand-alone version of the bobbin winders incorporated in the design of sewing machines. They make it possible to vary the tightness of the thread wound on the bobbins and to wind the bobbins with the same amount of thread on each and all at the same tension. The tension of the thread on the bobbins is one of the determining factors in the quality of the rope made.

-
Airbrushes are one of those things where you really do get what you pay for. "A cheap tool is the most expensive in the end." is a maxim that is especially true when it comes to airbrushes.
- VitusBering, Canute, mtaylor and 1 other
-
 4
4
-
7 hours ago, DaveBaxt said:
According to Brian Laverys book.'The Arming and Fitting of English ships of war ' The Boats were covered in Rosin until 1771 and the covered with white lead. That does not mean that some copper was used on ships from other countries or perhaps later than 1800 when Learys book does not cover a later period. perhaps someone more knowlegable (Which there are many) might add something here. Hope this is of any help.
I believe that reference would be to the type of anti-fouling coating that was used rather than any anti-chafing sheathing. The "white lead" clearly refers to white lead oxide pigment paint. (White would be the preferred color for boats' bottoms carried out of the water. The white reflects the heat of the sun and so reduces shrinking planking. Less plank shrinkage means the boats would have to be placed overboard and towed less frequently when voyaging t sea. I'm not sure exactly how "rosin" was used, but I can't imagine it providing any anti-chaffing protection.
- thibaultron, Canute, DaveBaxt and 1 other
-
4
-
On 1/25/2023 at 2:22 PM, robert952 said:
Was copper applied to rudders (particularly the bottom edges) on small boats to protect them some from rocky bottoms? It would make sense. I may be dreaming that I read something on this use of copper on rudders.
Sacrificial wood chaffing strips have long been used on boat bottoms to protect them from rough landings. Lead, and I presume copper, have been employed for the same purpose, but metal, particularly lead, has the downside of adding weight. As for rudders, however, most, if not all, landings would have been done under oars which provided better control than a rudder in any event and if there was any concern of damage to the rudder, I expect the rudder would have been unshipped prior to landing. All that takes is to lift the rudder off the gudgeons. Rudders were routinely shipped when the boats were stowed aboard or hung in davits. Moreover, landings were planned to the extent possible to avoid rocky areas that risked stoving in a hull what might come down on a rock in the swells. These are just general assumptions made in light of basic seamanship considerations, mind you. I don't profess to be an any sort of particular authority on period small boat handling.
-
Ditto to what Roger and Kurt just said above. I have a Craftsman/King Seely bench top drill press my father bought in 1950 that has always been well-maintained and actually, relatively speaking, very lightly used. For drilling tiny holes, which I generally do with a pin vise, I just chuck a pin vise with the small drill bit in it into the Jacobs chuck. (This does require a high quality chuck and pin vise (e.g. a Starrett or the equivalent) to ensure concentricity. It has a 1/4" collet adapter for the quill, so it can be used for light milling. I have an X-Y table I use on it when the task requires it. I've got no complaints. Made in USA "Old 'Arn" lasts a long time and was well made to begin with.
If you are going to spend money on new drilling tools for modeling, I'd be inclined to go with a quality drill/mill like the Sherline. A drill/mill will cost more than a drill press, but will provide a lot more versatility.
-
28 minutes ago, targa4403 said:
It looks like you are missing something between the motor shaft and the planetary gear. I would say a friction pulley.
That motor looks intimidating. Are you sure you want to run that thing?
One common arrangement was simply a friction drive with the bare side of the motor shaft pressed against the outside edge of the planetary gear assembly which had some sort of rubber band around it to improve friction between the shaft and the edge of the planetary gear assembly. Alternately, a section of tight-fitting vinyl or rubber tubing can be slid over the motor shaft to reduce slippage on the bare motor shaft. It appears there is a threaded rod on the motor mount which may accommodate adjusting the tension of the motor shaft on the edge of the planetary gear assembly. There doesn't seem to be any apparent problem with that motor that some provision for variable speed-control won't solve. It would appear that the design is "first generation." It only will accommodate three-strand cordage. Domanoff's PL-4 will produce three- and four-strand cordage, right and left-handed lays, and it will permit layups around a core strand which is required for four-strand layups. This machine appears capable only of three-strand right and left-handed layups. To my mind, the biggest limitation is the lack of a speed-controlled take-up reel. This machine's take-up reel is hand-cranked. The operator will have to continually turn the crank at a speed that maintains proper tension coming off the planetary gear assembly.
-
It looks to be a somewhat basic three-strand planetary machine similar in operation to Alexy Domanoff's PL4 model. You can download instructional videos for all the Domanoff machines here: Downloads | ShipWorkshop.com
-
6 hours ago, barkeater said:
One point here. You do not want to glue a soaked or wet plank as it can shrink as it dries depending on how long you soaked it. To get the best result steam bend then let the entire plank dry before gluing. I usually glue the course I did the day before and the I'll bend the next batch once my glue is dry enough which is not long. I also trenail the batch I glued the day before so there is plenty to do and drying is not holding me up.
Some soak, boil, or steam their wood, and it's a matter of style, I suppose. There is a range of "bend-ability" among various wood species, but from a scientific standpoint, it's the heat that softens the lignin in the wood, permitting it to bend without breaking and to harden in the shape it's bent when the lignin cools. Steaming or boiling the wood only serves as a medium for applying the heat to the wood. In full-size construction, steaming is used because it is the best method of heating a full-size plank or frame timber, not because the wood needs to be wetted. It's absolutely true that a wet piece of wood may well shrink when it dries. There's no reason it needs to be wet, as illustrated by Chuck Passaro's planking tutorials.
-
12 hours ago, DaveBaxt said:
Sorry Bob for more questions. There always seems to be more of them. What sort of alcohol can be used for thinning Acrylic. There are a number of modellers who use Admiralty acrylic ( made by Caldercraft) including myself and have quite a few different colours. They also sell packages of these paints for there particular ships. There has been one or two people have mixed these 50/50 with water to use with a airbrush and I wonder what your thoughts are on this mixing acrylic with water? It is also taking about one hour to dry between coats and requires up to 20 coats. This does appear to be a bit excessive. When using alcohol or brand name thinners is there a general recommendation on mixing % or do we use the milk like consistancy as a general rule. Perhaps for a beginner one should use the paints own thinning medium and perhaps they would offer the correct % for their own paints/primers or varnishes. Your help and guidence on this subject is forever appreciated.Best regards Dave
What sort of alcohol can be used for thinning Acrylic.
It's going to depend on the chemistry of the particular brand of acrylic coating. Acrylic, like most all modern coatings, is tricky stuff. Old-fashioned oil-based paints and varnishes are much easier to work with because, basically, they are all just mixtures of linseed oil, pigment, and, solvents like turpentine and minereal spirits (paint thinner) and, if you are sophisticated about it, Japan dryer. All of these materials are complementary and work well together. They are hard to screw up. Acrylics are a mixture of a complex modern chemicals and they vary from brand to brand. Some can only be thinned successfully with the manufacturer's own proprietary thinner. On the other hand, most can be thinned with water or with alcohol, which mixes well with water. Most of the manufacturers won't tell you that, but are happy to sell you water, alcohol, or a bit of both, in a bottle with their label on it for a lot more money than plain old water or alcohol. There is information on YouTube and modeling forums (particularly from the wargame figure painters who favor acrylics) that discusses what common low-cost thinners and condtioners (e.g. "Windex" glass cleaner) can be used for thinning the various brands of acrylic paints. Otherwise, what you have to do is experiment with various materials and see what works. Keep in mind that acrylic paint "pre-thinned" and bottled as "for airbrushing" is basically, if not virtually, identical to the thicker paint the same manufacturer sells for brushing, but it's priced the same, so you're paying a big premium for the thinned paint. (Thinner is cheap. Pigment is expensive.) In fact, many sophisticated airbrush users purchase "fine artists' quality" tubed acrylic paste (and oils, as well) and use that tubed, concentrated paint paste as the base for airbrushing paint they thin themselves. The biggest advantage of this approach is the cost savings and the fact that the thicker "artist's oils" medium keeps much better in the tube than opened bottled paints. I can't say which type of alcohol can and which cannot be used for thinning any particular brand of acrylic paint. I doubt that it matters, except that I'd avoid alcohol that is mixed with something else, such as bottled rubbing alcohol. In my shop, alcohol is a "staple" solvent (used also for fueling alcohol lamps, cleaning, etc.) and I purchase plain denatured alcohol from the paint or hardware store in gallon tins. I do the same for mineral spirits and acetone. I decant these into smaller containers, often squeeze bottles, as the occasion dictates. You can purchase a pint or quart tin of denatured alcohol (called "methylated spirits" in the UK) and play with it and some of the other concoctions discussed in the airbrushing forums and see what happens. The big advantage of thinning with alcohol rather than water is that alcohol is a "hot" solvent, meaning it evaporates quickly. This speeds the drying time of your airbrushed medium exponentially over water, which evaporates slowly in comparison. Spraying with a hot solvent allows you to spray a thin film, application after application, and build up your coats without having to wait a long time between coats. Properly mixed, your sprayed paint will appear to dry in an instant, although it will take some time to harden enough to permit sanding. It goes without saying that, when working with acrylics, it's best to "dance with the girl you brought" and stick with the brand that you come to like best and with which you've become most familiar because they are all a bit different from each other. The second thing to keep in mind is that period ship modeling generally doesn't require a large pallet. A few tubes of basic colors will be all you need to mix all the colors you'll ever need. (I'm always amazed at the pictures of plastic modelers with shelves lined with hundreds of little bottles of differently colored modeling paint.) Larger tubes of black and white and smaller tubes of brown, yellow, red, blue, will cover most requirements if you learn the "color wheel." (There's a very good article on mixing colors for shop modeling in Volume II of the NRG's Ship Modeler's Shop Notes on sale by the NRG and well worth the investment.)
When using alcohol or brand name thinners is there a general recommendation on mixing % or do we use the milk like consistancy as a general rule.
It is not an exact science. There's no way to give you a recipe. Things like the ambient temperature and humidity that vary from day to day are but a few of the variables. You can find paint in a previously opened bottle has thickened some over time, so the amount of thinner is going to vary on that account. Certainly, the thickness of paint will vary from manufacturer to manufacturer. You just have to "eyeball it" and see how the mixture looks when it comes out of your airbrush. Remember that the nozzle size of your airbrush and the air pressure you set will also dictate the consistency of the paint it is going to perform best with. You just have to mix it, experiment, and see. Practicing will give you a feel for it. For airbrushing, think "skim milk" and then add thinner from there as needed. These variables demonstrate the fact that paint bottled "for airbrushing" isn't going to free you from the need to condition your paint. They just get you closer, perhaps, and charge you dearly for that convenience. Getting the hang of conditioning paint isn't rocket science and it's easy to pick up, but it's one of those things that's a lot easier to learn by doing than by trying to explain in words. Let your airbrush show you what it's happy with. These same realities also demonstrate that if you are modeling ships, you really don't need a lot of colors, particularly if you learn to mix your own. (Get a "color wheel" that will give you the proportions to yield particular colors.) The fact that a particular manufacturer offers many colors in little relatively expensive bottles is meaningless to ship modelers. If you are a "rivet counting" railroad or military modeler, you will appreciate the ability to buy ready-mixed "Santa Fe boxcar brown" or "Union Pacific reefer yellow," or "1943 German field gray" or "1944 USN battleship gray," confident that your color will be historically accurate. Ship modelers, particularly period ship modelers have no such concerns or historical limitations on color accuracy.
Perhaps for a beginner one should use the paints own thinning medium and perhaps they would offer the correct % for their own paints/primers or varnishes
Yes, that is true, I suppose, but that's only going to take care of what thinner you should use. There's no way to know "how much" except by working with it and finding the "sweet spot" that works best for you and your airbrush in any given situation. If you can find advice on the YouTube wargaming figure painting videos as to what you can use other than the proprietary thinner for the paint you're using, you can try it and see if the convenience of the manufacture's thinner is worth the additional cost or not. The proprietary thinners and other conditioners (accelerators and retarders) do provide some certainty that you are using material that is compatible with the chemistry of the brand of acrylic paint you are using.
-
3 hours ago, allanyed said:
If you are pre-shaping the planks via either spiling, or heat and edge bending as seen in Chuck Passaro's four part video series, there is no need for clamping or nailing. If a plank is too springy to hold after a minute it probably has not been properly pre-shaped. There are always some tough spots like the areas aft at the transoms that can be tricky but can be managed in a variety of ways including those above. There are also some advocates of cyanoacrylate glue that sets quickly or a combination of PVA and CA. Try these various methods and see what works best for you.
Allan
Allan's advice is worth reposting in full. If you require some sort of clamp to hold a plank's shape while the adhesive you are using takes hold, that plank hasn't been properly shaped and bent. That may often be more easily said than done, but there's no way around it and trying to overcome defects in plank fitting any other way will certainly be more work and perhaps grief than if the plank is properly shaped before it is hung.
I'd only add that if your plank is properly shaped before it is offered up to the framing, use of an electric plank bender or the equivalent to apply heat to the plank at the point of attachment will speed the evaporation of the PVA's water-base and hasten the PVA's taking hold. Care must be taken not to scorch the plank face, of course.

-
Like everyone else, I, too, have always experienced excellent service from Byrnes Model Machines. As an aside, I will share that I am now at the stage of my career when I'm easing into retirement, and am now operating a limited professional practice as a "solo" practitioner rather than as the managing partner of a firm with associates and support staff. Like the Byrneses, I am sure, I find myself under the continual pressure to meet my clients' unreasonable time expectations. It isn't that they are intentionally unreasonable, but they just don't understand that I don't have "operators standing by to take your call." The current communications technology has created the expectation of instant responses and instant gratification. A small family business, or, as in my case these days, a small solo professional practice, cannot provide instant email or phone responses nor guarantee "overnight shipping." It's just not possible. Sometimes there's just more of it than there is of you. Sometimes you need to take a vacation. Sometimes you catch a cold or just need a damn day off. There seems a continual parade of posts on MSW from forumites asking (or complaining about) why they haven't heard back from one or another "micro-business" supplier (e.g Model Machines, Syren Ship Models, Seawatch Books, Alexy Domanoff, etc.) because they haven't received an immediate reply to their email or phone call. Specialty ship modeling suppliers are often very small niche businesses. Reports are that the customer base for modeling products is less than a million nationwide in the U.S. and quickly decreasing because most hobbyists are over the age of 55. Let's try to remember that we are often dealing with "little guys" who are doing the best they can to keep up selling to a very small customer base with often quite small profit margins. Good things are worth waiting for! Let's give 'em a break! Amazon they ain't.

-
14 hours ago, tlevine said:
I will not be steam bending any frames; they will be cut out like "typical" frames.
Glad Tidings' frames are 1.75" x 2.5". At 1:24 scale, they'd be .073" x .104". If you are building a fully-framed model, it would seem very unlikely they could be "cut out like 'typical' frames." The frames would have no strength where the grain ran out across the frame and they'd break easily at that place. On the other hand, it would be possible to mill .073" x .104" strips of one of the "more bendable" modeling wood species and fit them into place "hot," as in full-size construction, and tie them onto the battens with thread or thin wire. They'd then cool and take the needed curve in place against the battens. One of the advantages of steamed frames, in addition to their light weight, is that they are twisted when bent into place so that fairing the frame faces is in large part unnecessary.
You could cut bulkheads out of plywood for a plank on bulkhead or plank on mold build, but it's very difficult to get any sort of fastener to hold plank in plywood endgrain and it doesn't do well holding with adhesives either. To avoid grain runout weakness, I have had success with making molds out of laminated pieces of birch tongue depressors, which can be bought in quantity from craft stores. The tongue depressors are cut at angles to achieve the shape desired without encountering grain runout. The lamination joints are staggered so that they don't occur on top of each other. As I recall, a lamination of three tongue depressors is about a quarter of an inch thick. The tongue depressors are about an inch wide, so you can cut the joints (I use a paper cutter) to yield a rough laminated shape and then saw the frame out of that. This method requires careful fairing of the bulkhead edges, of course, but it's much easier than using plywood where every other lamination is 90 degrees to the other and so is endgrain.
-
1 hour ago, DaveBaxt said:
I am assuming... I was wondering if thinners were inside the pot would prevent the paint from drying at the tip whilst storage between coats. I am just thinking when airbrushing a large area such as a hull, then something like this would be needed, especially when using acrylics.
There's no shortcut. Any airbrush must be cleaned immediately after each use and it is much easier to clean if cleaned before the spraying medium hardens. This may be as simple as running some water and then cleaning solvent (e.g. Goof Off) through the brush until there is no color visible in the solvent, indicating the airbrush is completely free of paint. This can usually be accomplished in about a minute.
If your paint is properly conditioned to dry quickly, you should be able to airbrush a hull with a good amount of paint going "round and round." When you thin water-based paint with water, you must expect it will take longer to dry (cure) because water doesn't evaporate all that quickly. Thinning acrylics which can be thinned with alcohol or, if not, then with a proprietary thinner, will result in thinner paint that dries quickly because the alcohol or proprietary thinner evaporates much faster than water.
3 hours ago, wefalck said:I think one has to try for oneself with one's equipment. There are so many contradictory recommendations around, that one gets easily confused and discouraged ...
This is excellent advice. You can ask a million questions in internet forums, but the internet isn't always the best place to source information. (This forum is remarkably accurate in most instances, however.) Experience begins when you start doing it. Get an airbrush and play with it until you feel comfortable. If you run into a problem doing that, you will be able to ask a specific question instead of repeatedly asking hypothetical questions about problems you'll never encounter in real life. There are tons of airbrushing tutorial videos on YouTube. Look for those posted by the airbrush and paint manufacturers as these are the best produced and most accurate. As Nike says, "Just do it!"
-
8 hours ago, tlevine said:
Bob, your response is exactly what I needed. As I mentioned earlier, this project is still in the planning stage. As with Swallow, I was captivated by the looks of the boat. Details to be worked out as I went along. My hope is to build a reasonably accurate recreation but if necessary, I will fully plank her and hide my errors.
Glad I was able to answer your questions. I wouldn't say that a "fully framed" model isn't possible and a "Navy Board style" partially-planked model of Glad Tidings would be quite nice. Given her relatively small size, the model at 1:24 would be 30" long allowing a lot of opportunity for detail or 1:48 scale would give you a 15" model that wouldn't chase you out of the room when cased. You will have to put a lot of effort into setting up molds and laying off battens to create the "basket" for forming your steam-bent frames. You would then have to remove the battens as you planked from the sheer down to the waterline, then remove the molds and replace them with steam-bent frames, and then install the stringers, clamps, and shelves. After that you could install the interior furniture and the deck beams over that. Any one of the good practicums on fully-framed construction like Tosti's or Antscherl's with show you the way. You will also find a good treatment of "basket" construction in Underhill's Plank on Frame Models, Vol. I. This won't be simplified kit model construction, though. You will have to steam your frames in place in the basket and then tie each to the longitudinal battens in order to form a fair framing system to which you can fasten your planks.
If you like the looks of Chapelle's Glad Tidings, a hull from the Smithsonian's collection that Chapelle customized as his personal yacht, you might want to take a look at some of R.D. ("Pete") Culler's designs. These are published in a number of study plans books he wrote, as well as full plans drawings sets available from Mystic Seaport. Pete Culler's Lizard King, a Baltimore Clipper, is a favorite of mine. Lizard King has built up frames which would be easier to build a model around than steamed in place frames like Glad Tidings'. She also can carry a fore course and rafee fore topsail and/or a main topsail.


-
7 hours ago, druxey said:
Bob: I respectfully disagree. 17th and 18th century vessels had these long bolts (not always 'drifted'), typically through deadwoods and other structures that required longer bolts. 'Drift' in the period sense of the word meant a change in level, such as the topside of a ship or diameter of a longer bolt.
I'll defer to your expertise with 17th and 18th Century period craft. I have no first hand experience with vessels that old. The 19th and 20th Century "drifts" to which Chapelle was referring were the same diameter for their entire length, however. Apparently, the meaning of the term changed over time.
-
39 minutes ago, allanyed said:
The drawing brings up a question though. It states that the anchor cable was sometimes bent to the jumbo halyard. Is this true and if it is, why?? Hopefully one of sailing members can explain.
That is a very good question. The jumbo halyard would be readily available and would hoist to the foremast top, but there's no readily obvious reason to bend the jumbo halyard to the end of an anchor cable. I could only guess. Why would one want to haul the end of an anchor cable aloft? To get it out of the way and dried out in order to stow it separately, clearing deck space for the wet, muddy end of the anchor cable that was going to be coming up from the bottom? Or haul the wet anchor cable around on the foredeck when it comes off the windlass. In a boat that size, wet cordage cable can get pretty heavy. Two wild guesses that come to mind.
-
1 hour ago, druxey said:
Drift in this context would be a longer bolt with different diameter sections, the narrowest near the tip. The changes in diameter would be in small steps. And yes, it would be a friction fit.
I've seen lots of drifts in my day and I've never seen one that was "a longer bolt with different diameter sections... ever. They are just "big nails" without heads or even sharp points to speak of. (Often one end will often have its sharp edge hammered round so it won't hang up when being driven.) They are driven into a tight hole in pairs at opposing angles. It's the opposing angle of the fastening that keeps the joint from separating in tension. They were a very common type of heavy fastening method in the days of wooden ships.
Below: A piece of a shipwreck with nails and a drift rod through it.
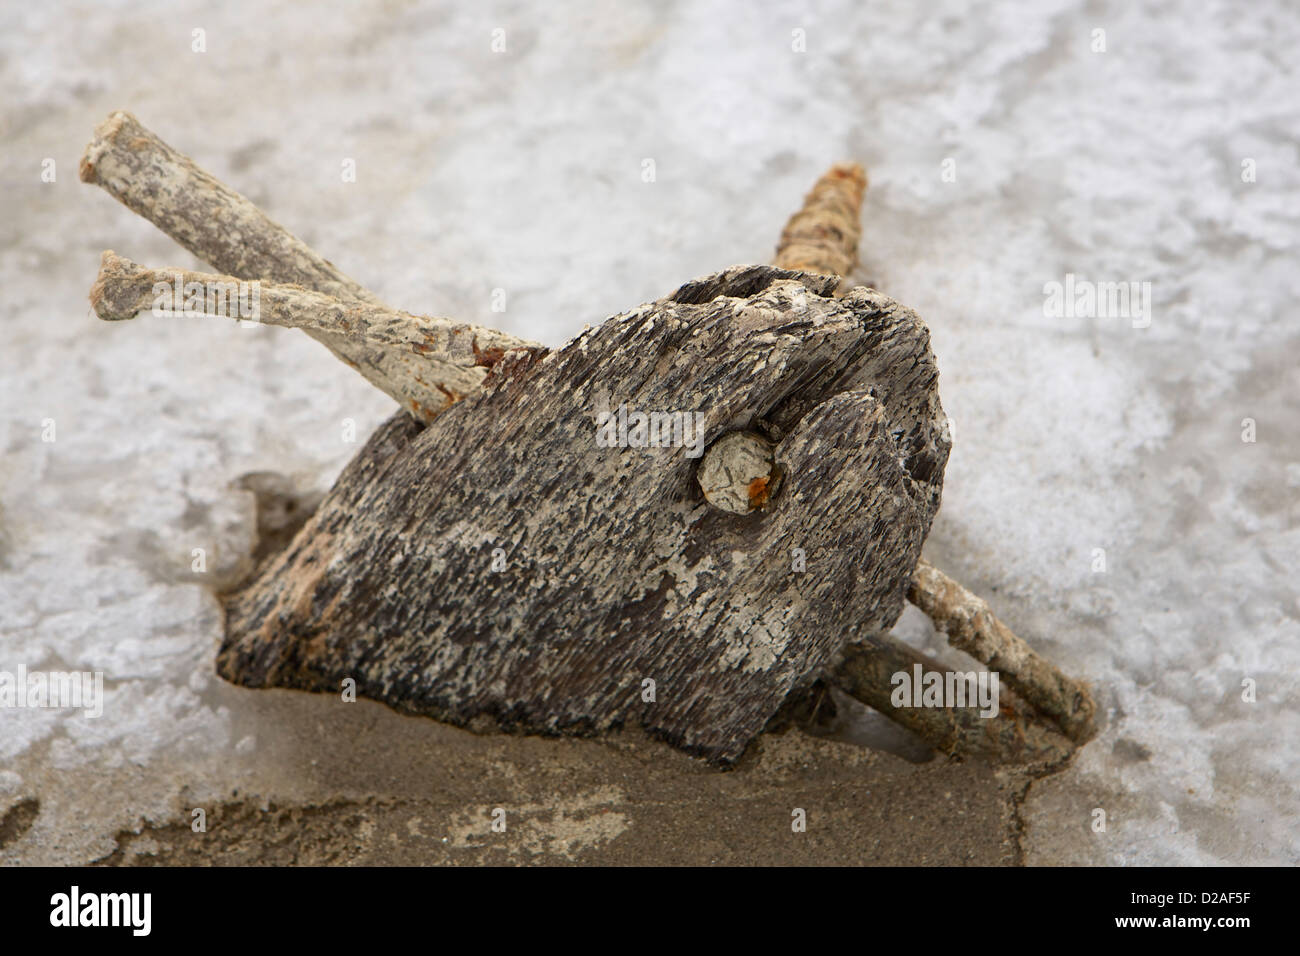
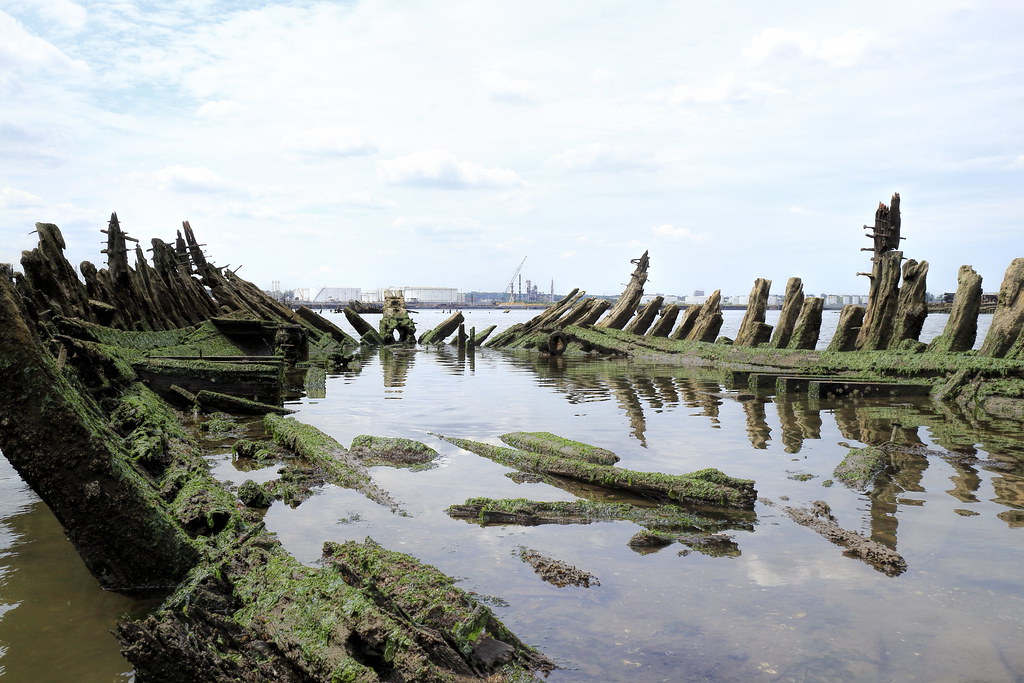
Sunken hulk with numerous iron drifts in structural timbers revealed by decay of the surrounding wood. The large number of drifts driven into large vessels was the reason they burned worn-out ships for their fastenings back in the old days. There was a serious amount of scrap metal in those old wooden ships.
- hollowneck, Canute, mtaylor and 2 others
-
5
-
1 hour ago, Jaager said:
The heel of the port F! would start a few feet on the stb. side of the keel. The stb. F! would butt against it and be shorter.
The next frame would have the stb. F1 be the longer one.
Ignoring the occasional exception, I see three options for the F1/F3 frame.
1 - cross chock over the keel - several variations - the French had some complicated joinery in some ships
2 - half floor - gets interesting at the ends if it is an actual ship - easier to use Cant frames. In a model, the opposite obtains.
3 - long arm/short arm.
Using half floors really reduces the length of the F1 timbers.
Jaager, it appears from Chapelle's construction drawings that Glad Tidings has full-length steamed frames. They aren't built frames. There aren't any futtocks. They're just fastened to the side of the floor timbers.
-
2 minutes ago, tlevine said:
I discovered that a drift is a type of fastener that is wider at the head than at the toe.
Not necessarily, but sort of, I suppose. A drift is a thick wooden or metal rod, in this case 5/16" to 3/8" in diameter, with a slightly pointed or rounded end which is driven into a tightly-fitting blind hole in order to fasten major timbers in a vessel. After driving, the top of the rod may be somewhat galled and so could be said to be "wider," but that's of no matter. Properly, a "drift" was the term used for the hole into which a trunnel (wooden) or drift rod or bolt (metal), was driven, but in later times it seems the term "drift" became synonymous with the rod stock used as well.
In modern times, drift bolts became more common. The drift bolt is a metal rod which has threads cut in the top end and a washer and nut are attached before the drift bolt is driven into the drift hole. Two nuts are screwed onto the rod but only not far as to allow any of the rod to protrude above the face of the top nut. The drift bolt is driven with a sledgehammer striking the face of the topmost nut. When the drift bolt is driven to its full depth, the topmost nut is removed, the lower nut is tightened and the excess threaded rod extending above the nut may be cut off if so desired. The use of the doubled nuts provides a "head" so the drift bolt can be driven without galling the threads on the rod by striking them with the sledge.
Drifts are generally set in pairs driven at opposing angles. In the case of a floor-to-keel fastening, as was common, the drifts would be driven through the top of the keelson and/or frame into the keel at approximately 30 degree angles, or whatever angle the size of the timbers would accommodate. In addition to the friction of the tight fit of the tight blind hole (i.e. not through-drilled at the bottom) and the washer and nut in the case of a drift bolt, the opposing angles of the paired drifts operate to sufficiently oppose any tension between the timbers and keep them from pulling apart. From an engineering standpoint, this is an extremely effective fastening system.
In short, drifts work like big headless nails that are driven into big timbers at an angle and the opposing angles of the drifts keep the timbers from pulling apart. Modernly, drifts have been replaced by rod threaded at each end and fitted at right angles to the timber joint, being secured in tension with washers and nuts at both ends. This method has the advantage of permitting the removal of keel and other major timber fastenings for inspection and/or replacement if needed. The tightly-driven drifts are often impossible to remove without destroying the surrounding structure. Iron bolts, especially keel bolts, can rust to the point of ceasing to exist in the middle of their length inside the hole, at which point, replacement is generally impossible. Replaceable keel bolts potentially extend the life of a wooden vessel exponentially.
As I recall, Chapelle explains the use of drifts in his book, Boatbuilding. He was quite comfortable with this fastening method which appears to have been somewhat dated by the time Chapelle was writing. It was then still a well-accepted "workboat" construction practice, but high-quality "yacht" or "naval" scantling practice was transitioning from drifts to threaded bolts. Chapelle's agenda was to encourage the continuation and preservation of locally evolved watercraft, many of which he felt were well-suited for use as pleasure craft and his plans often retain earlier construction details.
1 hour ago, tlevine said:Does anyone know how the remaining frames would be secured to the keel? The frames are so lightweight (1.75" x 2.5") that I would think bolting them to the keel at the foot would compromise the frame.
The structural design is indicated on the construction plan:
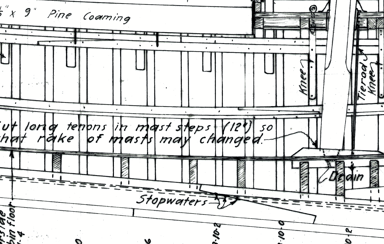
You can see the cross-sections of the floors below the cabin sole. These have been "darkened" with cross-hatching to indicate a cut-away "sectioned" view. (Note the three "dark" floor sections supporting the mast step.) Every other frame is fastened to a floor timber. Glad Tidings has steamed frames. These would have been fastened with fore and aft fasteners through the side of the frame and into or through the floor timber. The intermediate frames would have been similarly steamed and likely simply fitted into a notch cut into the edge of the keel inboard of the rabbet, or not, depending upon the preference of the designer. (There's a long history of controversy between various naval architects regarding whether a notched keel is best or not. It's one of those "six of one and half dozen of another" type things.) The intermediate frames can simply be "toenailed" to the top of the keel, or be set into a notch and fastened with a single screw set into the center of the notch. The stress on the plank-to-frame structure is primarily in shear to the plank fastenings, and the frame foot fastenings to the floors are more than adequate to keep the hull attached to the keel. In this construction, there's no need to fasten every frame to the keel. Notice also that the spacing of the floors and the deck beams alternate, with the frames terminating alternately to a floor or a deck beam. This structure is further tied together by an (apparent) shelf and clamp at the sheer and a bilge stringer. That said, the problem to be overcome is figuring out how to build it with scale-size parts that aren't going to have the relative strength that the full-size parts have.
2 hours ago, tlevine said:I am in the process of developing the next build, Glad Tidings, from Chapelle's plans.
I'm not certain if I understand you completely, but from your statement I presume you are planning to build a model of Glad Tidings from Chapelle's plans for the actual vessel. Please don't take offense if I am stating the obvious to you. If so, consider my comment offered for the benefit of others less experienced. Directly put, there is a world of difference between plans for a vessel and plans for a model of that vessel. The questions you're asking indicate that you aren't experienced with full-sized wooden boatbuilding. It's frequently quite different from scale model building if for no reason other than that the parts at scale size often lack the strength to serve the structural purposes they were designed for at full size. In order to build a model of Glad Tidings from Chapelle's plans, which are the construction plans for the full-size boat, you must determine whether you are going to build an exact structural copy of the vessel as designed but to a smaller scale, which is possible, but will require a complete familiarity with full-sized boatbuilding practices, or a scale representation of the vessel which will not necessarily bear any relation to how the original was constructed. Solid hull or plank on bulkhead construction will require devising an entirely different manner of building the hull entirely. Plank on frame will require inventing an entirely new construction sequence. If you read Chapelle's books, Boatbuilding and Yacht Designing and Planning, you will be able to learn all you need to know about building his Glad Tidings full-size and from that be able to translate it all to the model scale you want.
Translating a full-size construction plan for scratch-building a scale model is always a fascinating challenge. There are loads of full-size construction plans available for all sorts of vessels. Re-engineering those plans for modeling purposes is essential if one is going to enjoy all the opportunities of scratch-building. I'd urge you to start a log at the real beginning, the development of plans for a model, and share the process with everyone. There are plenty of tricks of the trade for developing plans for models. I'm sure that the population of MSW can come up with solutions to every challenge you encounter along the way!
-
For serious cleaning of acrylics on airbrushes, I've always found Goof Off paint splatter remover and Goof Off adhesive remover to be excellent cleaning solvents. It is designed for cleaning up paint splatters on full scale water-based painting jobs. It removes dried acrylic very effectively.
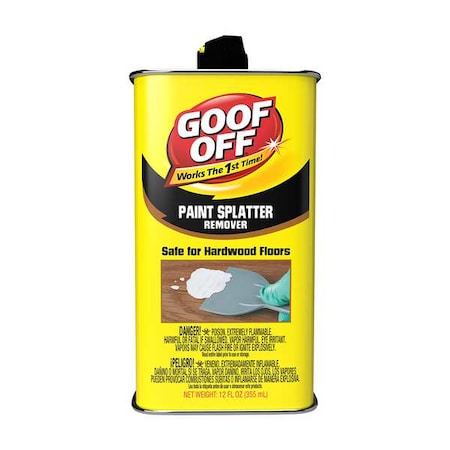
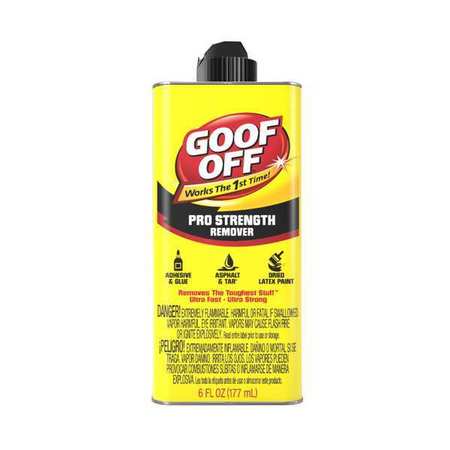
Get the strong stuff. It works well. Just dampen a folded up paper towel with some Goof Off and wipe off the paint splatters. It's specially formulated to remove dried water-based paint. It is really effective on air brush innards.
- DocRob, thibaultron, mtaylor and 2 others
-
5
-
12 hours ago, David W said:
I didn't seem to find what you referenced but a Paashe single action airbrush I did see on their website was a single action, siphon type and not what I will ever again own
See item #81018 Paasche H Series Single-Action Airbrush Set, airbrush painting set, for detailed airbrushing and coverage, H-3AS (micromark.com)
and
item #86112 MicroLux® Single Action Airbrush Set (micromark.com)
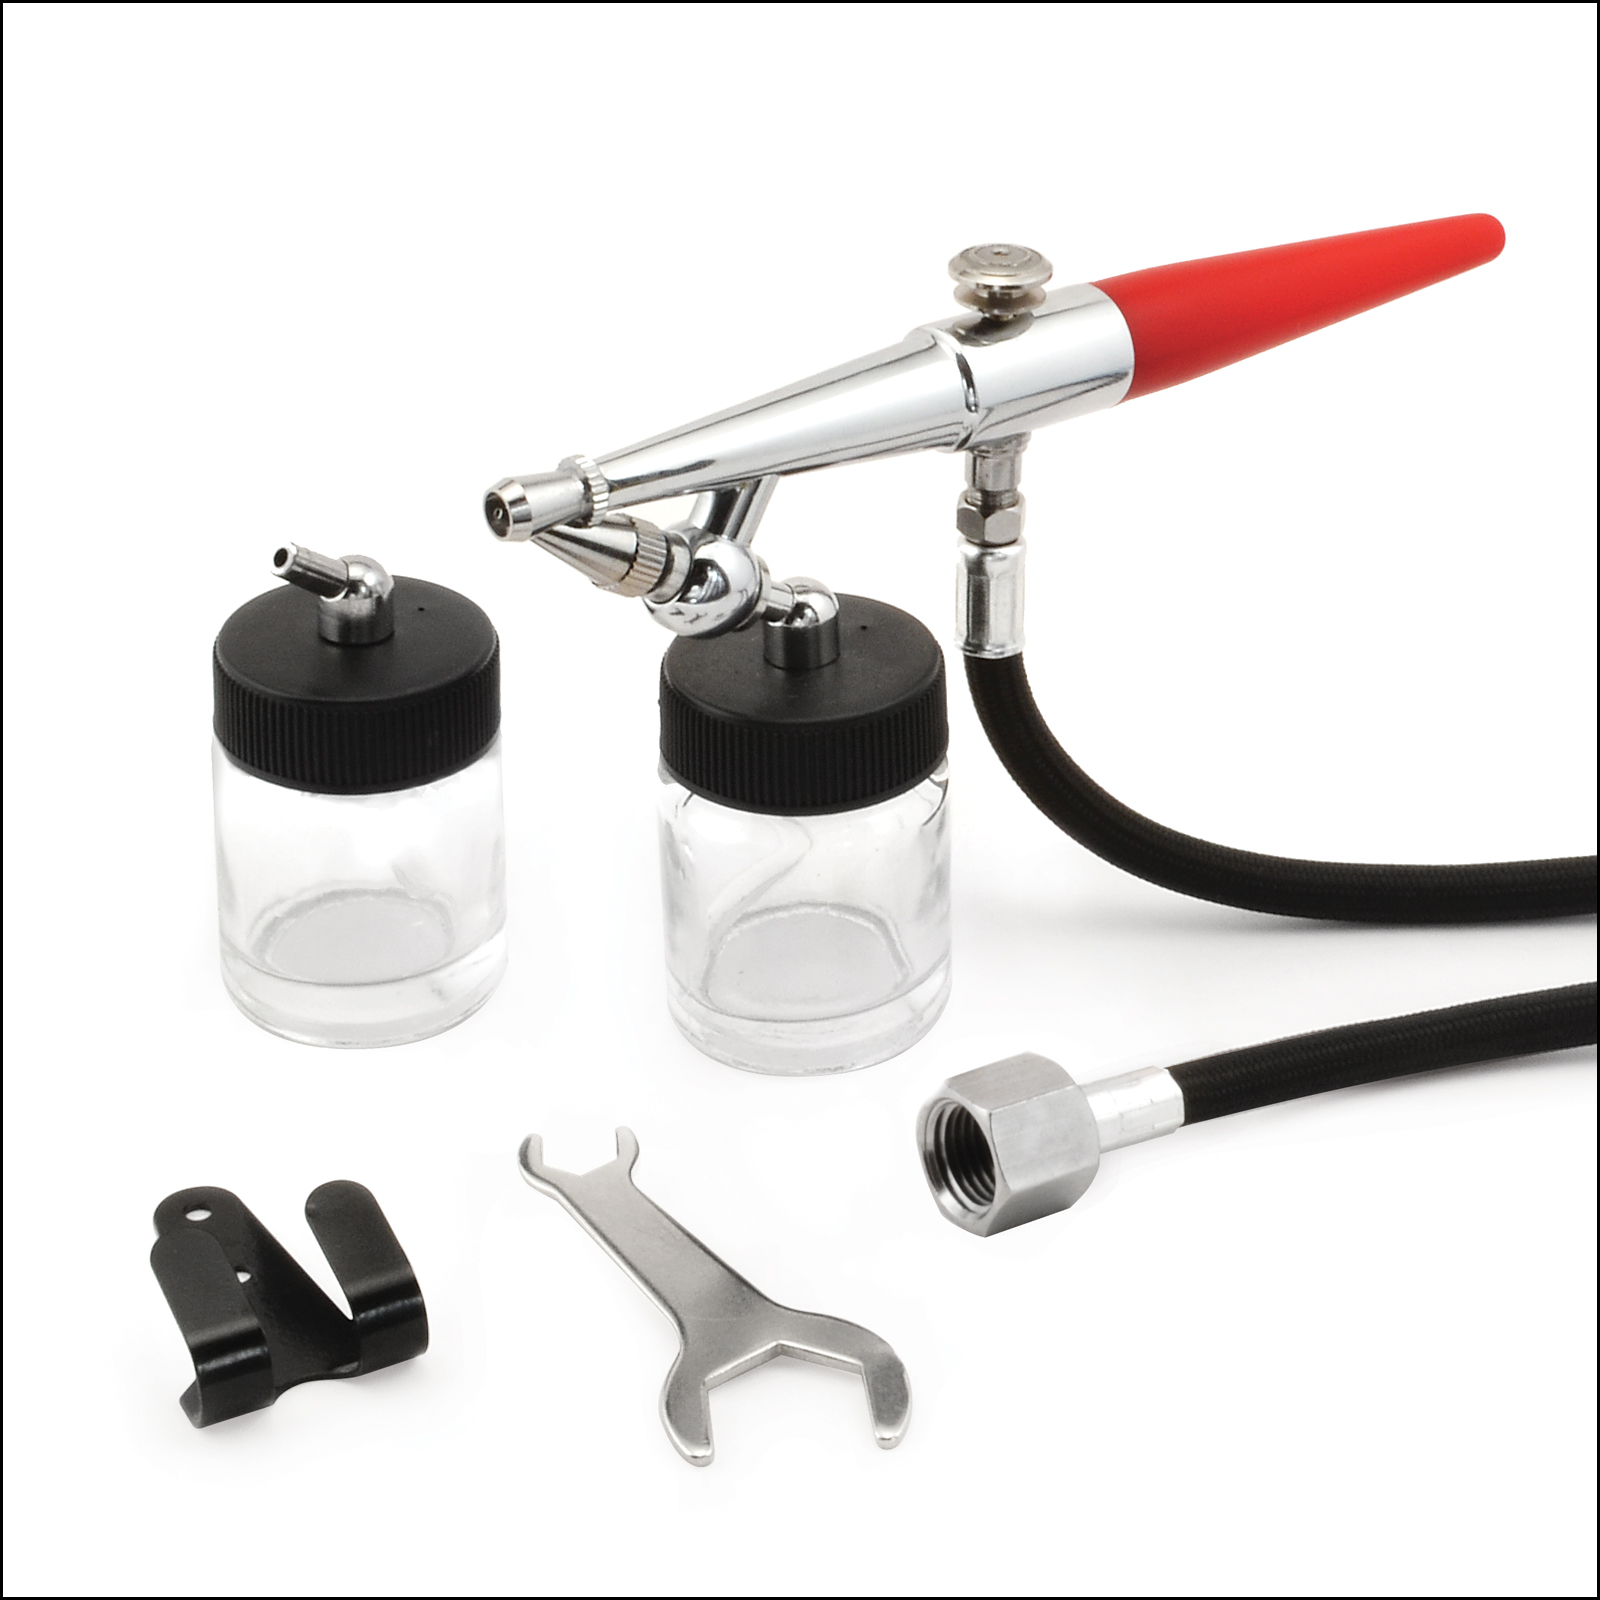
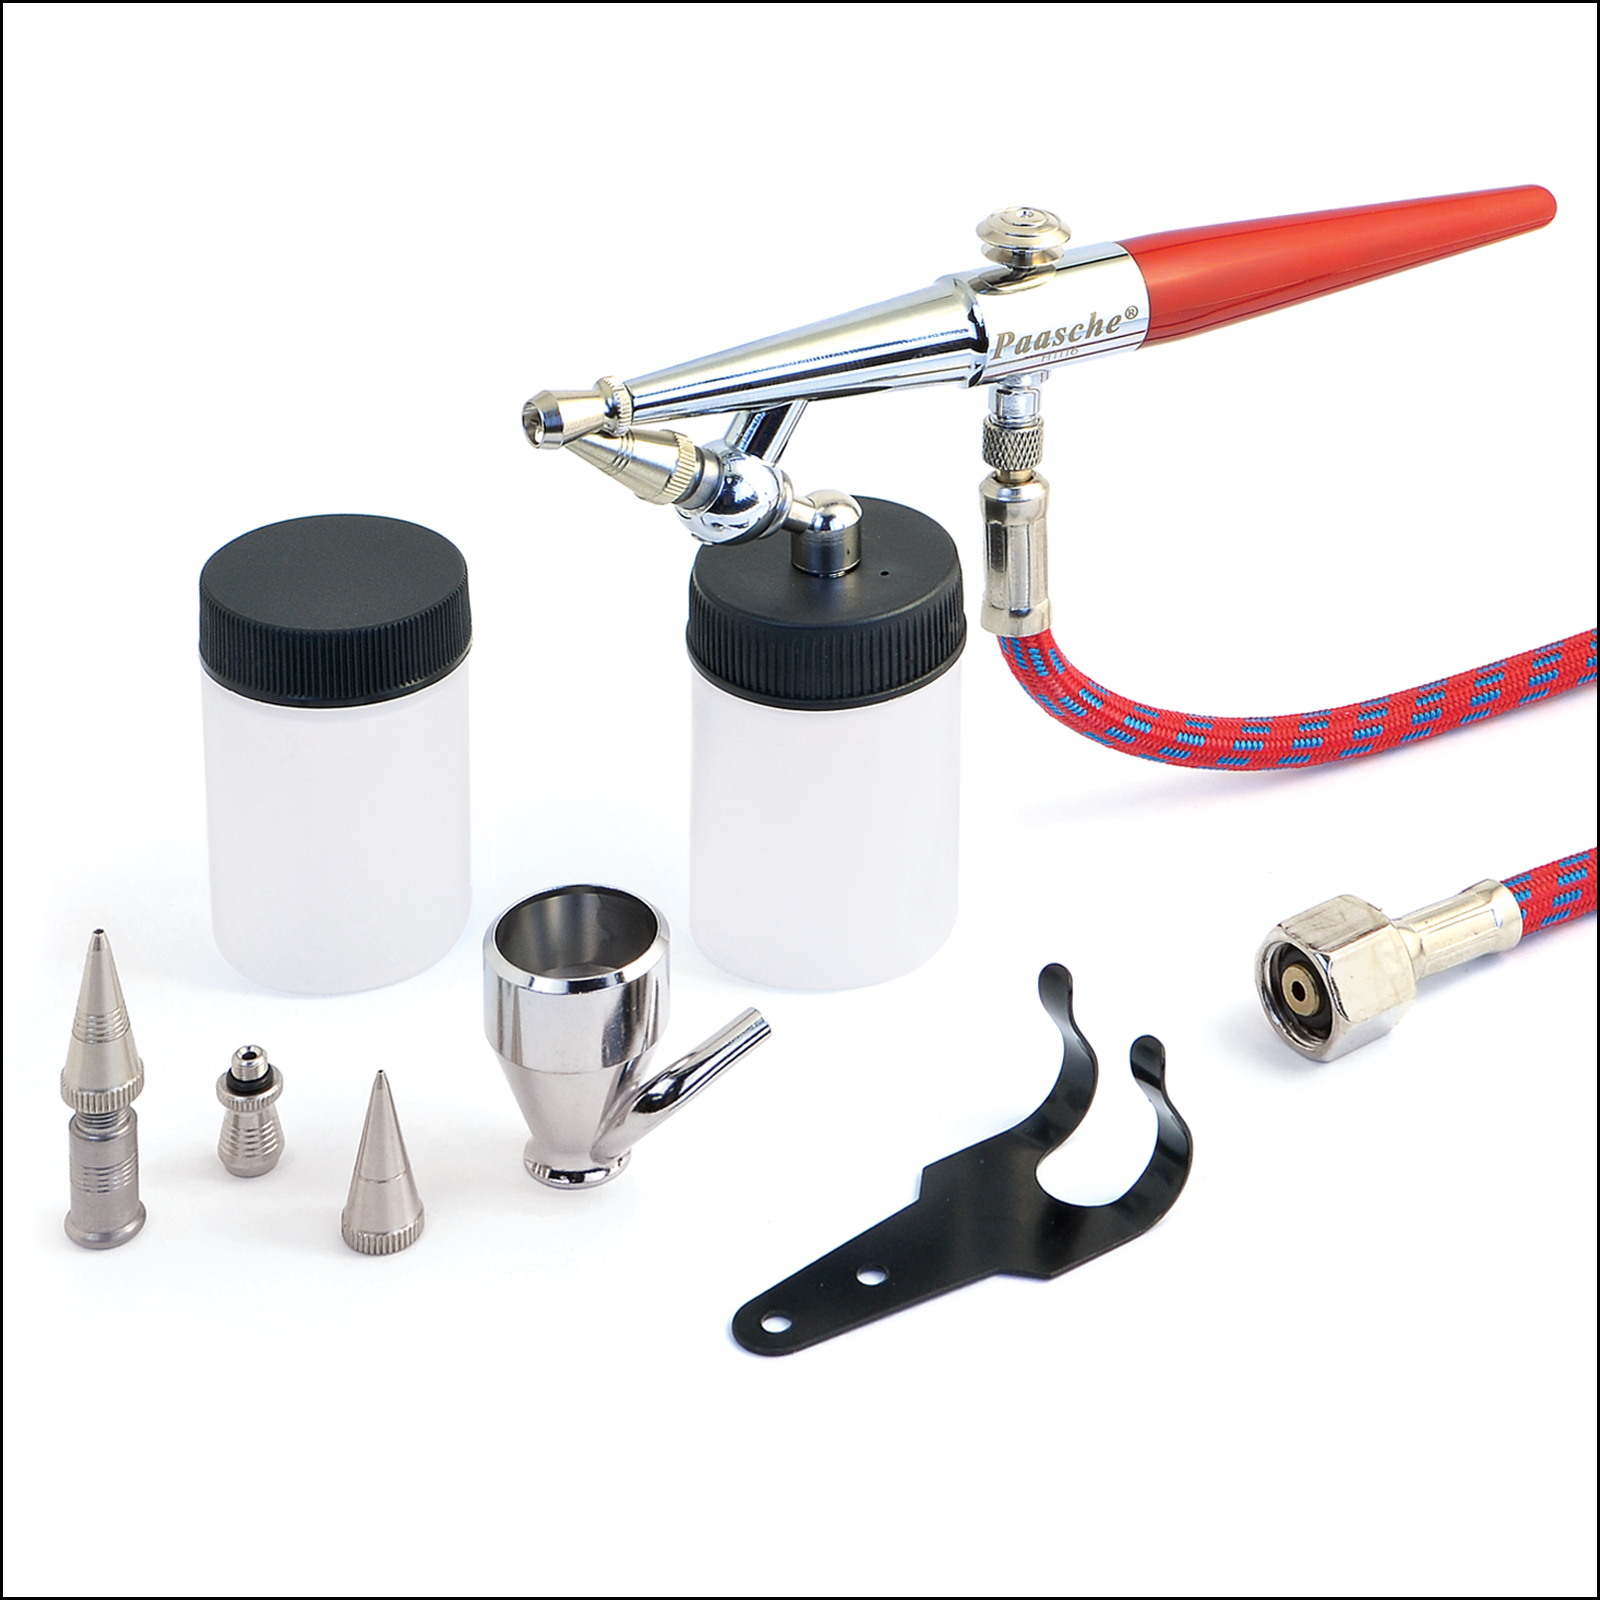
One says Paasche and the other doesn't. Can you tell them apart otherwise? One is half the price of the other.
- thibaultron and Canute
-
2
-
16 hours ago, kurtvd19 said:
I sincerely doubt the air brushes shown at Micro-Mark are actual Paasche brushes. They have been guilty in the past of purchasing Chinese copies of various brushes and passing them off as legitimate. It looks like they are back to it.
MicroMark offers a Paasche single-action airbrush and for half the price what appears to be the identical item by MicroMark. The online catalog photos of the two airbrushes are identical. Could it be that one is a Chinese counterfeit, or is it just that they are pushing the MicroMark branded airbrush by showing an identical one marked up in price so shoppers will think they are getting a bargain buying the MicroMark one. If MicroMark is pulling this sort of thing, should they not be added to MSW's "rogues gallery" of pirate retailers?
- Canute, mtaylor and thibaultron
-
3

Acrylic paint tips and techniques
in Painting, finishing and weathering products and techniques
Posted
The moral of the story with acrylic coatings is "Ya gotta dance with the girl ya brought ." All acrylic coatings are capable of producing a good scale finish with an airbrush. Some claim to be useable in an airbrush right out of the bottle. Depending on many variables, including the size of the airbrush needle, "your mileage may vary." I'd risk saying that at some point or another, any brand of acrylic coating is going to need some conditioning, even something as simple as thinning it a bit if it's thickened in the bottle over time. As explained, some thin with water, some with alcohol, and some with both. There are a lot of YouTube videos addressing conditioning various brands of acrylic modeling coatings and they are a good place to start researching the brand(s) of paint you intend to use. When you find a brand that you prefer, for whatever reason, stick with it and your experience working with that brand of acrylic coating will grow as you become accustomed to it. There comes a point where you just have to experiment and develop the experience to use the brand you choose.