


Bob Cleek
-
Posts
3,374 -
Joined
-
Last visited
Content Type
Profiles
Forums
Gallery
Events
Posts posted by Bob Cleek
-
-
On 9/28/2023 at 3:18 AM, Louie da fly said:
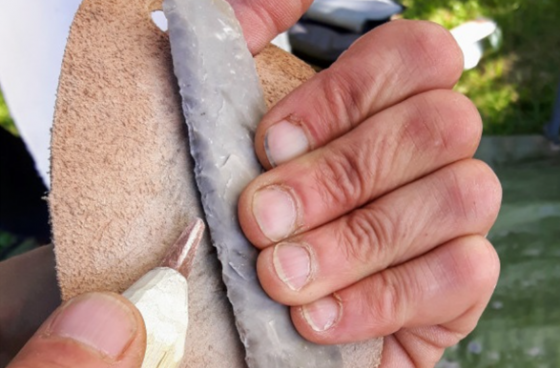
But hard on the knuckles - you lose skin either from the steel slamming against them while you hold the flint, or (worse still - it's sharp) from the flint itself.
I just saw your post. For some reason, I overlooked it when it was posted.
When shaping flint or other fracturing stone (e.g., obsidian or chert) by striking it with a non-fracturing rock as when making arrowheads, a process called "knapping" or by striking a piece of flint with a piece of iron to create sparks, it is customary to hold the fracturing stone in or on a patch of leather in a manner which protects the hand holding the stone from being cut by the razor sharp edges of the stone you are striking.
http://survivaltek.com/wp-content/uploads/2009/09/flintknapknife.jpg
-
9 hours ago, ASAT said:
But the notice on the website says they were planning on re opening mid September.
Thanks for the news. Someone posted elsewhere that they couldn't raise Byrnes by phone or email and they had earlier announced they'd be taking orders again beginning in mid-August, I believe, then later changed that to mid-September. I was starting to worry, hoping all was well with them. They are such nice people. Sometimes we don't appreciate those who provide valuable resources until they're gone and no replacement exists thereafter. While Byrnes Model Machines occupy a rather small niche in the market, they really are a "national treasure."
- Roger Pellett, Boccherini, rcweir and 2 others
-
 5
5
-
Alexii,
I believe the man you want to talk to is Ab Hoving, an MSW member. He is the retired curator of the ship models at the Rijksmuseum in Amsterdam, which has one of the better collections of ship models in the world. You can send him a message through the forum's messaging feature. His forum home page is Ab Hoving - Model Ship World™.
-
"More" is the correct answer. You've got it. It's no different than your model railroad work. Exactly the same. And the smaller the scale, the more you tone it down because the "scale viewing distance" will be greater the smaller the scale you are working in.
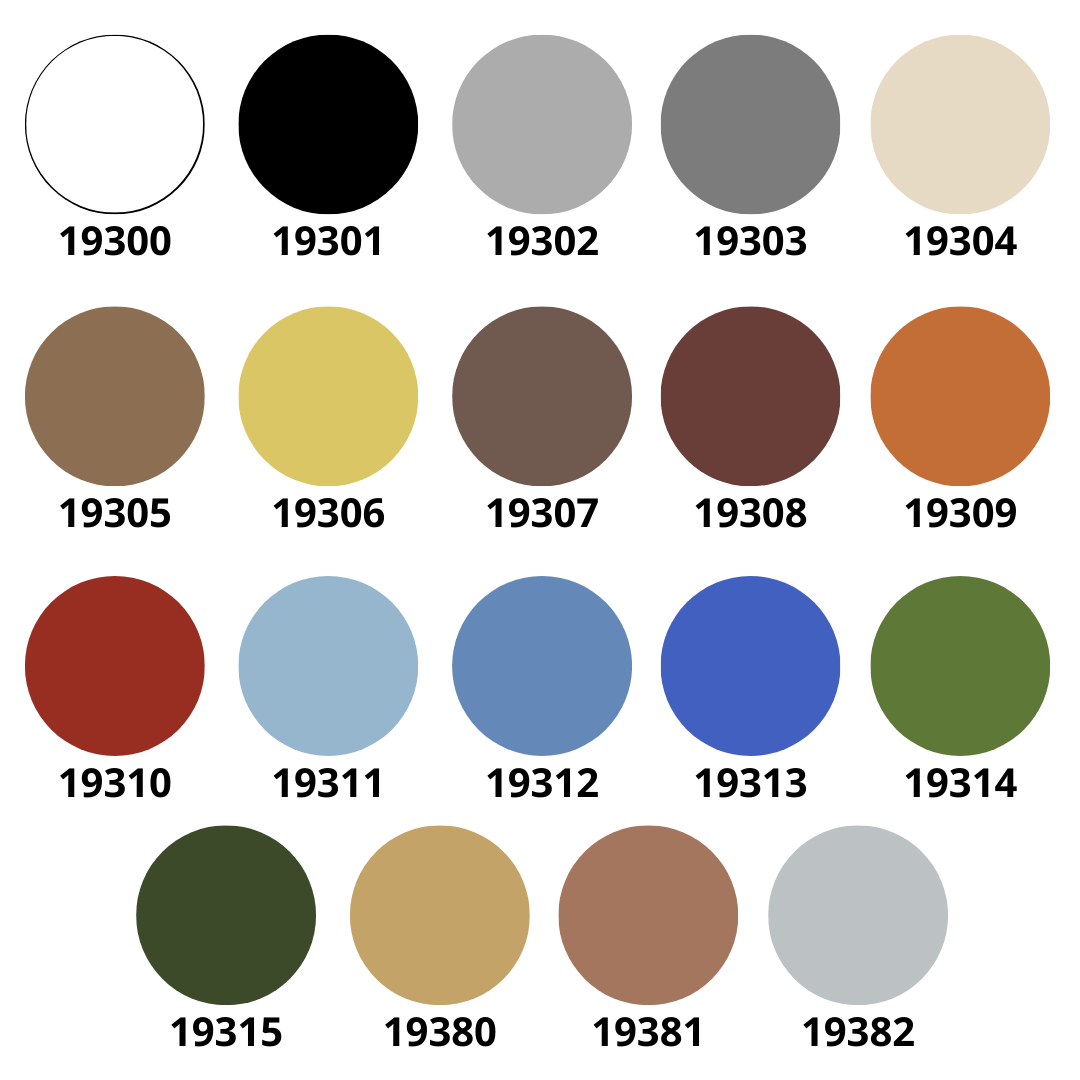
I'm glad you mentioned that you are among those of us who have started to mix our own paint from tubed artist's colors. The palate for marine models is far smaller and less demanding that railroad models, at least for those railroad cars that have to be exactly the right color livery. I never could figure how some guys have amassed those huge collections of eight and twelve dollar one or one and a half ounce bottles of various colors. It never made much sense to me unless I had to have the marine equivalent of Pennsylvania Rail Road Pullman green, which has so far been never. The modelers of modern naval vessels do have some challenges matching colors, particularly when the various combatant navies used various shades of grey and blue-gray at different times during the same war and after the invention of color photographic film.
-
 \\\
\\\
 \\
\\
These are Occre colors. Of course, they are only as accurate as your screen can make them. I'd strongly advise you to get a copy of the Ship Modeler's Shop Notes, volumes one and two. (Ship Modeler's Shop Notes, Vol. I – Nautical Research Guild and Ship Modeler's Shop Notes, Vol. 2 – Nautical Research Guild (thenrgstore.org) (thenrgstore.org) Volume 2 has an excellent discussion about painting miniatures. (Buy Volume 1 at the same time and perhaps save some on shipping. They are classics and chock full of great information. You'll want them both.) Then get a color wheel if you have to but consider mixing your own colors from high quality tubed artists' oils or acrylics. There are plenty of how-to-do-it articles on mixing your own colors for modeling on YouTube. Once you free yourself from buying pre-mixed colors in tiny little bottles for big bucks, you can save an amazing amount of money on paints.
-
29 minutes ago, William A said:
I just don't know how to drum up the enthusiasm for a tiny fishing boat

Then, perhaps you should read that thread about how to get started in this hobby again.

The Model Shipways beginner's series produces some very nice models which don't take forever to build. If they are built with care, they are great accent pieces to display. If you can't imagine the joy and satisfaction of building a small boat, then maybe what you are really enthusiastic about is just having a nice big model ship to display, in which case you should buy one already built. Collecting built models is a satisfying part of the hobby for some, as well. The secret to building good models is to "Do the common thing uncommonly well over and over again." Trying to do an uncommon thing before you master the common one will throw a wet blanket on your enthusiasm quicker than anything else.
The enthusiasm you are drumming up for building any of the kits you've mentioned is easy to do... before you start. Last chance: Listen to what the guys who've gone before you are saying. "Over and out."
-
From what you've shared about your ship modeling goals, I would very strongly urge you to read this entire thread which is a generic answer to your question.
This thread contains decades of wisdom gained from experience. Everybody in this forum wants to see newcomers succeed. Many who are not experienced ship modelers will say that they think the most important thing one needs to build a ship model is patience. Actually, I think humility is the more essential quality. The good people who sell ship model kits, God bless them, do have an interest in selling their product and giving their customers the impression that the customer can build a complex wooden ship model kit by simply following the instructions. Instilling the confidence to build any given kit is a prerequisite to selling their kits, so there is a tendency for the manufacturers to gloss over the steepness of the learning curve required to build a fully rigged model ship kit. Many are sold, but few are finished.
I will also offer my personal opinion, which is shared by some, at least, that double-planked ship model kits are not easier to build and that double planked kits are outdated at this point in the development of kit technology. Again, in my opinion, for what it is worth, the double-planked kits still sold today are generally of lesser quality than the single-planked kits and I would not advise an inexperienced modeler to choose one for their first effort. It was once true that starting with a double-planked kit was advisable, but with today's laser cut planking in many kits and much better framing design, there's really no particular reason to double-plank anymore.
As I think most experienced modelers would advise, anyone who is not familiar with model ship kit building would do well to start by building the three Model Shipways Shipwright Three Kit Combo Series. See: Model Shipways Shipwright 3 Kit Combo Series-MS1474 (modelexpo-online.com) Building these three relatively inexpensive boat models, which are progressively more difficult, will provide through excellent instruction manuals, a solid foundation in the skills and techniques required to move on to more challenging kits. I don't want to scare you off, but building plastic model kits is nothing like building wooden ship model kits. They each require quite distinct skill sets.
-
Hi Harry! Welcome to MSW. That's an amazing LEGO model! It's quite interesting how LEGO has become more and more intricate over the years and is now attracting a much older and more accomplished group of modelers.
You've got some good information and advise from the guys who've posted already and I'd say you are making a lot better progress that most who tackle the same modeling challenges.
I don't have anything to add to the good advice you've gotten already, but I do have a suggestion that may save you a lot of money and allow you to have a lot of fun. I'm "ballparking" the size of your model and can see that you will need a lot more cordage to rig your model than you may imagine if you intend to rig her accurately. The amount of "rope" you will need adds up quickly and you've also got to allow for "off cuts" of lengths that will be longer than the actual distance you need because you will need additional "working length" to tie knots and so on. Getting a proper range of rope sizes is a challenge you have already encountered. You are indeed correct that you will have to spend a considerable amount of money to purchase ready made rope and you will be limited to the sizes that the manufacturer offers. (Custom sizes may be available, but at an additional price!)
So I suggest you consider "rolling your own" rope. This is how most modelers who tackle models of the size and complexity of rigging you are contemplating do it. It's actually quite easy to make your own rope in any size or color you require from standard sewing thread and it's far less costly than buying it ready-made. You will only need an electric drill and a "ropewalk" (rope-making "machine.") The best for your purposes would probably be a Syren "Rope Rocket" which is made and sold by an MSW member, Chuck Passaro. I see where the "Rope Rocket" has increased in price a little bit since the last time I checked, but it is still only $115 and it will pay for itself several times over if you use it to make your own rope from inexpensive sewing thread. Here's the Syren Rope Rocket website: https://syrenshipmodelcompany.com/ropewalk.php There's lots of information on rope making in general and the Rope Rocket in particular here in the "Articles" drop-down link at the top of the homepage masthead: https://modelshipworld.com/forum/82-discussions-about-rope-making/
(I just saw that you are in the Netherlands. I'm pretty sure Chuck Passaro can mail you a Rope Rocket if your order one because they come disassembled and shipping should be pretty simple, but you can check that out on their website if you are interested.)
This is all just a suggestion, but with your own ropewalk, you can make tons of scale rope in any size or color you wish. (And from the sound of it, there's a ready market for scale rope in Europe that isn't being filled. It could become a career!
) If some of the rope you make doesn't look right or whatever, all you have to do is just make more and throw the "mistakes" out. Once you have the Rope Rocket, you are freed from having to wait for what you order to come in the mail, too.
Here's a couple of videos from Chuck Passaro's Syren Ship Model Company's website that show how it's done:
-
1 hour ago, druxey said:
All lovely tools and toys, but I think we have topic drift. The original question (unless I've misunderstood) is making a miniature chamfer on things like bitts, etc. A fine file or sanding stick does the trick. Is all!
Thread drift? Moi?
The original poster asked:
Wondering how others are cutting chamfers, I'm having a bit of on issue getting smooth flat chamfers at different angles. ... I suppose some type of jig used with a hand chisel might work but just cant seem to find an easy, reliable method.
Anyone have a method their using that works well for them?
I'm not sure that a broader response is necessarily a "drift. He asked, "Anyone have a method their using that works well for them?" That sounds like an invitation to a pretty wide spectrum of answers. I think there's a world of difference between "make do" and "do best." We're always free to "cut corners" (especially in the case of bevels
) and take other shortcuts when modeling. It's up to the individual to determine where their personal standard lies on the precision spectrum. I qualified that my post was addressing "best practices" at the outset.

There is a wide range of both bevels and modeling skills. I think that the difference in "crispness" which I find to be a reliable measure of the quality of scale workmanship is often determined by a shape's having been created by cutting rather than abrading. Each shaping method has its place, of course, but as I look at models I made decades ago, the difference between those made in my earlier "sandpaper period" and later when I came to use blades and scrapers more often is very apparent to me. If one can easily form a bevel with sandpaper or a file which is indistinguishable from one made with a cutting blade or scraper, the entire discussion becomes academic, of course.
- CPDDET, thibaultron and Canute
-
3
-
21 hours ago, Gregory said:
@gwish
Thanks, you just cost me a hundred bucks.. Couldn't resist..😁
Jewelry is getting very expensive these days!
Bevels on straight edges can be easily cut freehand with a flat plane and a bit of practice or a shop-made jig to provide the angle, but the problem of bevels in ship building and modeling is that there are very few straight edges! Planking, of course, is where the most beveling has to be done and plank edges are very often curved and their bevels can often be "rolling" (i.e., the angle changes over the length of the edge.) A flat-bottomed plane will work on a convex curve if your are careful (using the flat-bottomed plane essentially as one would a spokeshave), but it won't do well on a concave curve because, depending on the amount of curve and the length of the plane sole, the heel and toe of the plane sole are going to "bridge" the curve and so lift the iron up form the working surface.
What is needed is a set of small pattern-maker's spokeshaves. A basic set of spokeshaves will contain three different spokeshaves: 1) a flat blade with a flat bottom, 2) a flat blade with a rounded bottom, and 3) a rounded blade with a rounded bottom. These three will permit cutting straight and rolling bevels on straight and curved edges. (There are also spokeshaves with soles with other shapes such as curved iron edges for shaping round pieces such as wagon spokes from whence the tool gets its name.) There was once a small company called Aldon Products, P.O. Box 585, Detroit, Michigan 48224, which produced a beautiful set of pattern maker's spokeshaves pictured below. In another MSW thread some time ago, I discovered Roger Pellet and I each had a set of these beautiful bronze and stainless planes. I've never encountered them elsewhere before or since. I believe the manufacturer has been out of business for over fifty years now and they seemed something of a unicorn these days. Amazingly, though, there are presently two Aldon miniature spokeshave sets offered on eBay U.S. right now! I briefly considered trying to buy both on spec, but decided to contribute the information as my gift to the MSW community.
Grab one fast! https://www.ebay.com/itm/126108562639?hash=item1d5ca7f4cf:g:VyYAAOSwg5JlB2cy&amdata=enc%3AAQAIAAAAwAUu8LEzrj3XkZwixLDh%2B7kJCG1g8hjecPTrXDbZivA1eJFLE%2FzDmrU4a3b0ut4aMYi07VlWqJ7D7QN0%2BHxC1Rq9FwFWsDcPvroqe1IQaUGk3Lc6N0MN46bZrtrIrXDo0FMhPzWvBIl5f563W%2FgzO2YHHryZ0DR7VijXvL1Yn1XQEUVv0dain3K15X5EvWQCMg0ZvhaPw%2Bka6%2BHO2QAP800dsTQlCBIgpispX1nN%2FE%2FBAobCXa51ARDD%2Bw9fnuM%2BlA%3D%3D|tkp%3ABk9SR6iE6dPbYg and https://www.ebay.com/itm/334983383832?hash=item4dfe90cb18:g:gqYAAOSwAh5kBK5q&amdata=enc%3AAQAIAAAA4LrEMbcpMI3ZiX2XFgBbG0M2py5EyXPo%2FZHwHj7oRC6epybp6nCf%2BbXnHqkYgYnbhhY2hVIt7vv9HPnBd0OdIlx1xx%2FEIoATRD7Zq3%2FUliuZXUuFU6ekz702p4946w1SdOdPsNGDq9fO83L%2BGoEAVbgIBDaaQXSl2ij8qzwDmWS1i1i0CVETOwp6KlisCoezf5Wq9%2BXTHJa1Uz8SeADitL1ZtPXgTxge4AUB6apHi8Hmh%2FZWUMnM5%2FM4D%2F0CFuj8L7Y8mNKqVYjOu95fzOg%2BVf%2FW9IPFrP%2BZoazoBY%2BS3mu7|tkp%3ABk9SR57y9tTbYg )
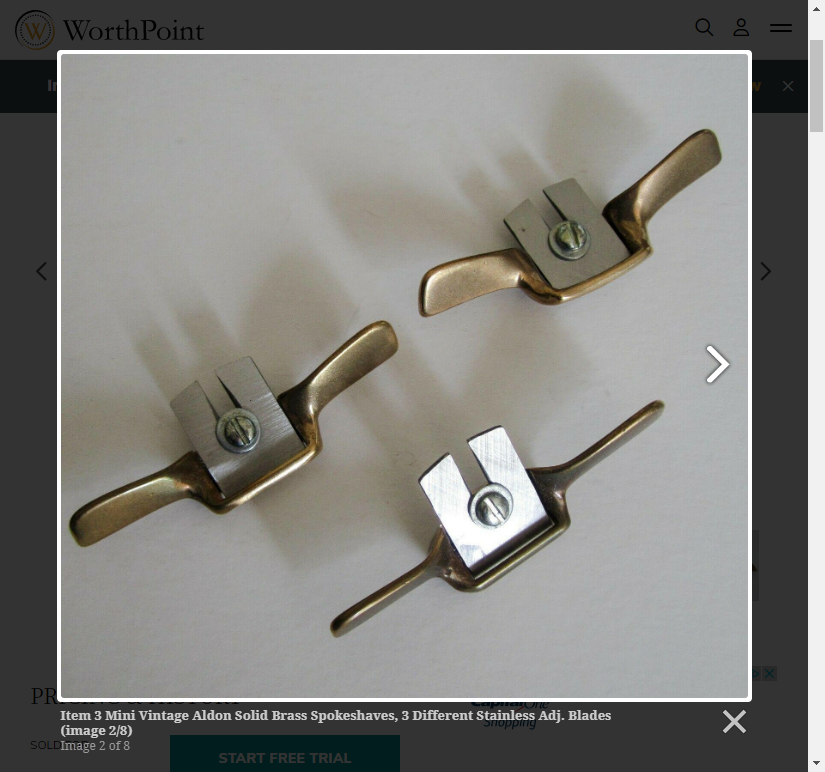
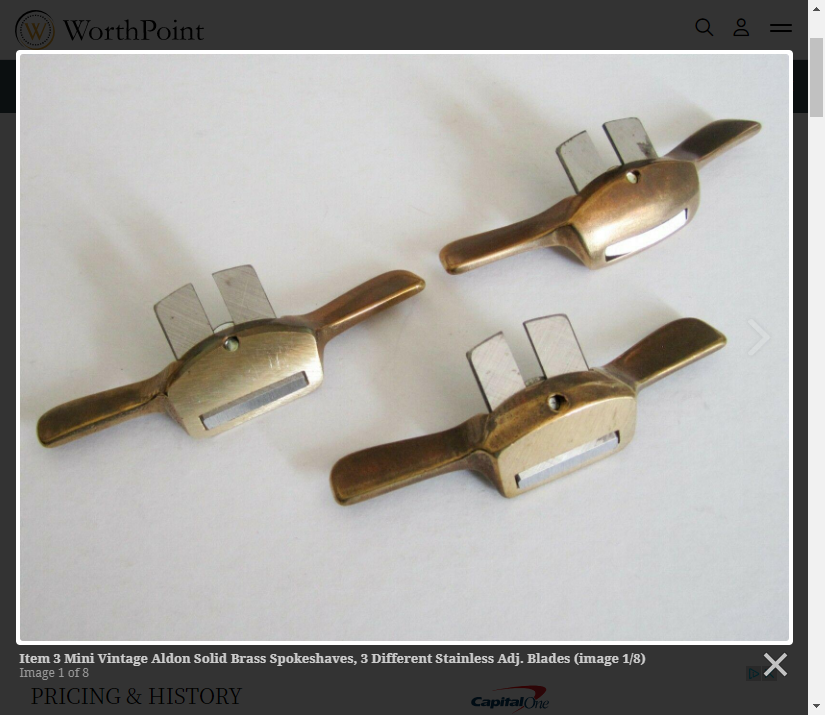
Set of Three Miniature Vintage Aldon Products Solid Brass (bronze, actually) Spoke Shaves, Stainless 15/16" Blades, Detroit Michigan. The small planes are made of solid brass, 3 3/4" long with adjustable stainless blades 15/16" wide. One has a flat blade with a flat bottom, one has a flat blade with a rounded bottom and one has a rounded blade with a rounded bottom. This is a versatile set of spoke shaves that can be used for pattern making, model making, cabinet making, and instrument making. Photo credit: https://www.worthpoint.com/worthopedia/mini-vintage-aldon-solid-brass-3863464343
I do not know of anybody who is manufacturing a set of small pattern maker's spokeshaves today. Perhaps one of the luthier's supply houses may, but I haven't found them. Lee Valley offers a very nice set of full-sized spokeshaves for around $320, but these are probably too large to really serve for miniature work. https://www.leevalley.com/en-us/shop/tools/hand-tools/spokeshaves/100613-veritas-spokeshave-set-and-roll

Lee Valley offers a flat spokeshave in Veritas' line of miniature hand tools for about $45, but not a complete set. (Whether or not one considers the Veritas working miniature tools line as very well done collectable novelties or useful working tools is an open question that must be left to those who buy them.) https://www.leevalley.com/en-us/shop/tools/hand-tools/miniature-tools/spokeshaves/71211-veritas-miniature-spokeshave?item=05P8401 $45
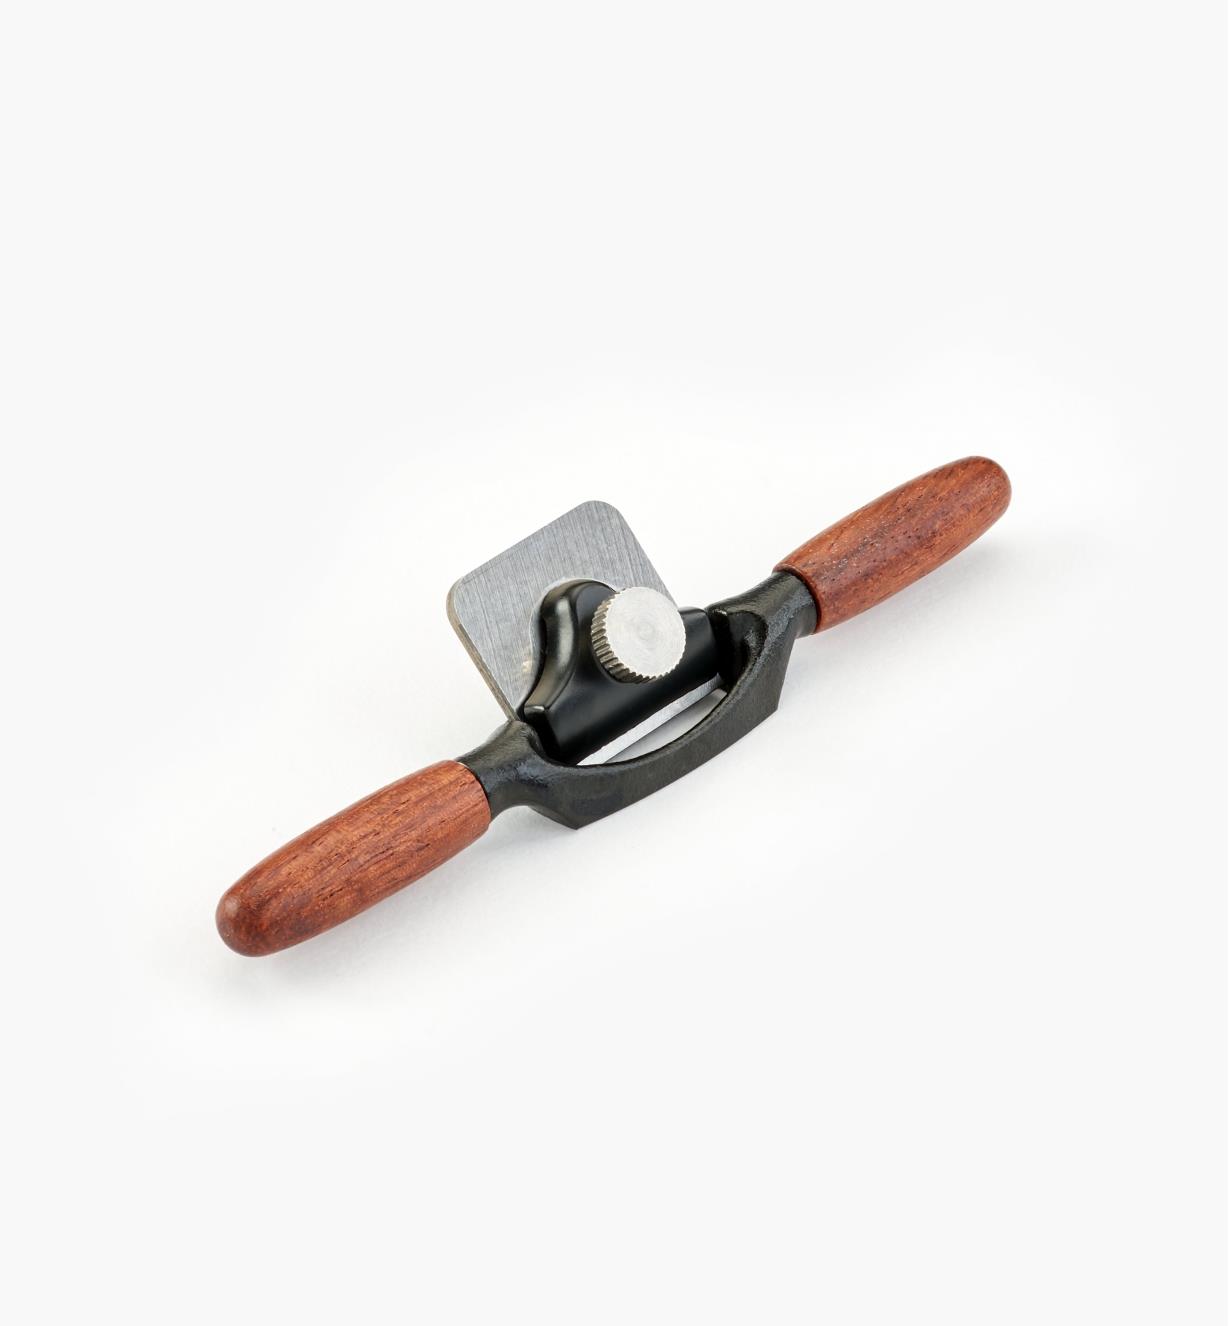
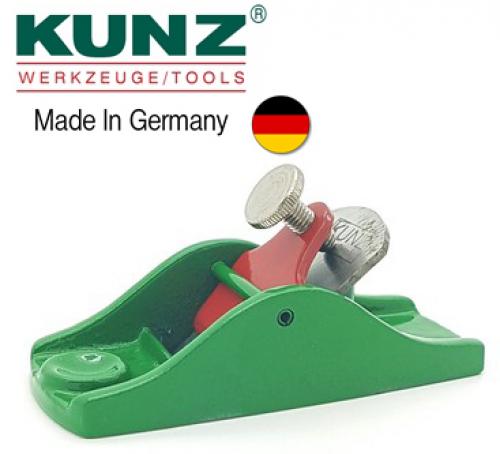
If the available spokeshaves are beyond a modeler's budget, as they certainly can be, a much lower-priced "modeler's plane" is always a better option for beveling than a chisel or hobby knife. Look for anything similar to the old cast iron Stanley "#100 series" planes. See: http://www.supertool.com/StanleyBG/stan11.htm#num100 Originals are collectable, but "users" may sometimes be had for a good price on eBay, or one can opt for the German-made Kunz replicas which are are perfectly servicable and sell for around $35. https://www.amazon.com/s?k=kunz+plane&adgrpid=1330409633793008&hvadid=83150751536610&hvbmt=bp&hvdev=c&hvlocphy=43893&hvnetw=o&hvqmt=p&hvtargid=kwd-83150945519236%3Aloc-190&hydadcr=24665_13493338&tag=mh0b-20&ref=pd_sl_7k7as92qis_p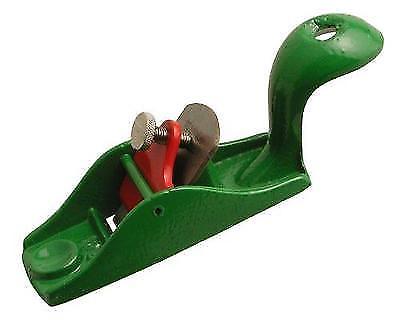
At the bottom of the price spectrum is today's Stanley #101. (Not your father's Stanley by a long shot!) It is a folded sheet metal replacement for the old #101 modeler's plane that will only set you back around $12. Not much in the "pride of ownership" department if you are a tool wonk, but entirely serviceable and you'll probably be surprised at how often you end up using it for modeling tasks.. A properly sharpened and set plane is worth a thousand sheets of sandpaper.

- mtaylor, thibaultron and Canute
-
2
-
 1
1
-
12 hours ago, Morgan said:
Falconer’s Dictionary of the Marine, 1815 Edition: -
“Limber-rope, a long rope, frequently retained in the limber holes of a ship, in order to clear them by pulling the rope backwards and forwards, so as to loosen any dirt by which they may occasionally be choked.”
Bob does say his experience is of modern practices.
I would imagine the limber rope may have had periodic knots, but can’t be certain. A rope in a silted contained channel could just pull through its own area and not actually move anything, but a knotted rope would provide the surface area to dislodge silt.
I'll defer to Falconer, of course. This is the first I've heard of a "limber rope" but it makes sense in 1815. I'd still expect non-ferrous metal chain to have replaced rope as soon as it became available at reasonable expense. I cannot see there was any likelihood. of knots being tied in the rope, though. The ropes would have run from the pump well forward and aft to the extreme ends of the vessel. That was often quite a distance. The limber holes on smaller vessels may have been just a notch cut off the corner of each floor, the hole being created by the underside of the notch in the floor, the keel, and the garboard, and on larger vessels they would be upside-down "U-shaped tunnels" cut into the lower face of the floor timbers. The Admiralty's standing order to keep bilges dry must have more often been observed in the breach, since large wooden ships are hardly "watertight." While the ship's carpenter would be kept busy chasing leaky seams, there'd still be a fair amount of water that would continually leak in through the underwater hull seams in need of re-caulking and from the decks above. There were also standing orders to sound the bilges and pump regularly, which attests more to the reality of it than does the order to keep the bilges dry at all times! Pulling on a limber rope on a ship-of-the-line probably took a few men to heave on it, owing to the friction and weight of the wet rope laying in the bilge. Tying knots in the rope would almost certainly cause the rope to hang up when pulled up against the floor timbers. We have to keep in mind the totality of context here. The whole point of a limber rope or chain is to make it possible to remotely clear all the limber holes which are at the very bottom of the hold and in many areas would have many areas where the limber holes would be inaccessible without moving large amounts of heavy stores and cargo stowed from one end of the orlop deck to the other.
10 hours ago, tmj said:Is there any chance that maybe a 'hybrid' system could have been employed? A limber system using short lengths of rope as the main component, with a link of heavier chain tied in the middle, for extra weight, to deal with the more 'stubborn' sediments and blockages? I'm reaching, I know, albeit. I can actually see a rope simply gliding over a lot of heavy sediment with little effect, just as Bob explained. I can 'also' see a knotted rope doing almost the exact same thing unless the knots were tied large enough to occupy most of the internal space within the limber channel. Maybe a rope with a heavier chain link tied into it could have been employed for dislodging any clogs? Sailors can be rather resourceful when it comes to making dirty jobs a bit easier.
In a word, "no." The more obstructions on the rope, the greater the likelihood of its hanging up in one or more holes and the greater friction when trying to pull it the length of the vessel. There is no need for "extra weight." The rope need only free up a plugged limber hole to serve its purpose. There would have been a lot of water dammed up behind a plugged hole, but once the primary blockage was freed, the weight of the dammed up water would be more than sufficient to wash the blockage material "downstream" to the pump well.
4 hours ago, Dr PR said:Holystoning also kept men busy, but the primary purpose was to keep the Admiral's decks nice and white. Some type of bleach (we used oxalic acid on a minesweeper, but I don't recall what was used on the cruiser) was added to the scrub water, and old fire bricks from the boilers were the stones. They were pushed around with broom handles fitted into holes in the stones. I don't recall sand being used.
4 hours ago, Dr PR said:I don't know how true this is, but I have heard the term "holystoning" came from the practice of stealing tomb stones from a church cemetery in Portsmouth, England. There were no boilers to supply fire brick on sailing ships, and the tombstones were a good material for scrubbing decks.
I've read that explanation as well. Somebody could certainly have done so, but it would have had to be an awfully large cemetery to keep the Admiralty in holystones at the height of her power. I've also read that the term "holystone" came into the Admiralty vocabulary when Henry VIII broke with the Pope and declared himself the head of the Church of England. At that time, Henry confiscated the property of the various monasteries in England which refused to accept his rejection of the Pope's authority. Many of these monasteries were quite wealthy and had large stone buildings. When they were closed, the stones, which were then Crown property, were often recycled for other buildings and for the Admiralty's use, primarily as ballast. These square cut stones were often the right size and shape for use as deck abrasive blocks and were generically called "holystones." Who knows? The accurate story was probably lost in the passage of time.
1 hour ago, Morgan said:The only evidence I can find states rope, and no mention of any attachments. It is important to note that fresh sea water was used regularly to wash down the ship so if these ropes were used in conjunction with wash down water the regular flow of water would prevent silts building up and blocking the limber holes.
The water which would have ended up in the bilge would have been relatively clean and there was always a ready supply of salt water for flushing out the bilges if the water accumulating from leakage wasn't sufficient alone to flush the bilges. There probably would not have been "silts" building up in the bilges in any great amount. More likely than not, it would have been things like dead rats (called "millers" and quite the snack treat when the sailors might catch one) or"tow," which is the bits and pieces of natural fiber rope which break off. The top hamper of a large sailing ship produced a lot of tow which fell to the deck and piled up in the scuppers and everywhere else. This tow is what the "sweepers" were sweeping up. This sweeping had to be done so often that there is actually a specific bosun's call for "sweepers" which is still used today.
The questions about limber holes, ropes, and chains are indeed fascinating to a number of us nautical wonks. There doesn't seem to be much "in the literature" about them. Perhaps someone here in MSW is close enough to HMS Victory or USS Constitution that they could ask a resident historian, docent, or bosun if they know anything more about the subject.
-
1 hour ago, HAIIAPHNK said:
Stones for grinding decks were certainly used. Water + sand and this mass was rubbed on the deck with stones. Then it was washed off with clean water. Cleaning was necessary not so much because of splinters, but rather to remove salt from the deck. Which harmed bare feet much more often, because it was all over the deck.
There are certainly far more knowledgeable folks in this forum that I am on the particular practices of this period, but from my own experience, some of these details don't appear correct. I doubt that decks would be rinsed with clean (fresh - not salt) water and particularly not at sea. Fresh water is a precious commodity and is conserved for cooking and drinking and, to a very limited extent, bathing and rinsing salt out of clothing. (where it will attract moisture, keeping clothing continually damp. Decks are swabbed and rinsed with salt water because fresh water leaking below causes fungal decay while salt water does not and, in fact, to a certain extent prevents it. Additionally, the salt in the decks attracts moisture and tends to keep the deck planking swelled and bleached, as well.
Decks were holystoned not to remove salt from the deck, but to remove tar (pitch) from the deck which otherwise would get tracked all over the vessel. As Allan mentioned, in the days when the Admiralty placed a high-value on its ships being highly maintained, Admiral St. Vincent even went so far as to order every ship to holystone her decks "every evening as well as morning in the summer months." The reason for holystoning twice in the summer months was because the heat in the summertime increased the amount of tar that dripped from aloft and tracked all over the ship. Pine "tar" (pitch, actually) was applied liberally to the rigging for its preservation and heated and poured as "stopping" on top of the oakum caulking material hammered into deck planking seams. In the summer sun, the dark brown, nearly black actually, pitch would liquify and drip down from the top hamper where it thickly coated everything and it would soften in the deck seams and get spread all over the deck. Holystoning decks would cause the sand to pick up the pitch and in removing the sand, a fair amount of the pitch would be removed as well. In the early 1800's, a couple of significant developments caused an evolution of practices in the Admiralty. One was that England broke free from her from dependence on the Scandinavian boreal forests as a source of naval stores such as shipbuilding timber and pine tar, competition for which exerted a great influence over European politics. England's American colonies exceeded the entire European supply of naval stores freed England from dependence on what was called "Stockholm tar" and the citizens of then heavily pine forested colony of North Carolina went into the pine tar business thereby earned their nickname, "tar heels." In 1840, an enterprising British inventor, Alfred Jeffery, discovered that bitumen or "coal tar" which was beginning to replace "pine tar" for some purposes, when melted and mixed with another relatively new material which also became commonly available around that time, latex or natural "rubber," produced a greatly improved deck seam stopping. The major advantages of Jeffrey's "marine glue," as he called it, was that it could be melted and poured into a seam and when it cooled, it would still stick to the wood, but was "rubbery" and would stretch when the seams opened and closed as the wood moved. Mr. Jeffery took his product to the Admiralty which immediately specified it for every deck seam in the British navy from then on. Jeffery's Marine Glue is still made in England today. (Check out the post at https://forum.woodenboat.com/forum/tools-materials-techniques-products/252396-for an old Jeffrey and Company's instruction manual PDF. It explains in detail all about deck seams from about 1840 on.)
1 hour ago, HAIIAPHNK said:As to the question, what could there have been but brooms and mops? What else do you need for cleaning? You can think of scoops or trowels, of course.
I expect that most of the holystoning detritus and sweepings would be flushed and/or swept overboard through the deck scuppers.
1 hour ago, HAIIAPHNK said:We can mention one more item related to cleaning. I don't know how appropriate it is to equate this with the usual brooms and mops this item is, but it is also part of the cleaning process. This is a limber rope. It's a long rope that was knotted at intervals. This rope was inside the limber hall, at the very bottom of the ship. Sooner or later all kinds of debris would fall to the bottom and get clogged up in this drainage channel. That's what the cable was for. It was used to clear the debris. When it was clear from the condition of the rope that it was beginning to rot, a new one was tied to one of the ends and pulled into the limber hall in an understandable way.
This conduit is not often mentioned. But it's interesting. There were different designs at different times. The Dutch were very different from the English or French. It seems like an insignificant detail, but without it, the ship could rot much faster. I've gone beyond the boundaries of your interest. But maybe this also fits into the topic of cleaning....While a rope would obviously serve in a pinch, I'd expect that a knotted rope would serve no purpose because the knots would foul in the limber holes more often than not and require accessing the entire length of the bilges to locate the hang-up and free it, thus defeating the purpose of the entire exercise. More over, the rope would rot rather quickly and result in a rather nasty job of removal, since it wasn't uncommon for seamen to use the bilge for a latrine when convenient. (A trip to the heads was no fun in foul weather in the Age of Sail!) This question was raised recently in another post and I don't think it was answered, but while I have always heard of and dealt with "limber chains," I've never heard nor encountered a "limber rope." Modernly, limber chains are made of non-ferrous metal, usually copper or brass to avoid corrosion. I don't know if this was the case in days of old, but there's no reason they couldn't have been.
-
54 minutes ago, CPDDET said:
I imagine, with time, a similar skill could be attained with these chisles.
If you can keep a straight razor sharp on a regular basis, you've already got it down. Don't worry about it. Just treat them like your razor and they'll stay sharp forever.
- Canute, thibaultron, CPDDET and 1 other
-
4
-
Patience, Grasshopper.
I checked their website and they've explained their current unavailability:
We are temporarily closing the website to machine orders
to allow us some personal time with family, a vacation,
and time for shop maintenance and inventory.
Our current plan is to reopen some time in mid-September.
Until then, you may continue to order accessories for all
the machines - we're just not accepting orders for the machines
themselves because our equipment will be shut down
during this time period.https://byrnesmodelmachines.com/contact5.html
I certainly hope they are well and not for some other reason indisposed, even if the untimely demise of the Byrnes Model Machines company would probably cause the value of my Byrnes machines to skyrocket like fine art does when the artist is no longer able to paint any more.
From what I have always understood, Jim and Donna Byrnes run this little "mom and pop" machine shop where they build the Byrnes Model Machines. I expect they have an employee or three, but not a lot more. From all indications on MSW, if you phone the company, you will probably get Jim or Donna answering the phone. Amazon they ain't, but then again, try getting Jeff Bezos himself on the phone at work sometime!
It's not a huge factory with machines rolling off the assembly line 24/7. There is a relatively small market for these specialty machines (which probably should more accurately be called "instruments!") These machines are practically custom-made, or as the Brits would say of their fine Saville Row suits, "bespoke." If they take time off for a vacation, and/or to clean up the shop and put things back in order at the expense of production, that's to be expected. Give them a call at 407.657.4663 during business hours, Florida time, or send an email through the "contact us" menu drop-down on your website and I expect somebody will be there to help you out. If not, wait a bit and see. It seems we get these "Where's Jim?" posts every time the poor guy and his wife try to get away for a little bit.
That said, if you have decided to "pull the pin" on buying a Byrnes machine, I certainly can understand your frustration!
-
Those look like really nice micro-chisels!
While dissimilar in size and at opposite ends of the spectrum, I'd have to say that looking for a manual honing guide for your chisels is probably a lot like shopping for a set of "training wheels" for your new Harley-Davidson.
I doubt such a thing exists short of the state-of-the-art Tormek system that doeos provide an adjustable-angled holding mechanism that will handle all sizes and shapes of micro-sized carving tools. Unfortunately, a Tormek machine will set you back around a grand.
Somebody may know of "a set of training wheels" for such chisels, but I've "been in town a long while" and have never seen such a thing. I would urge you, and everybody else, for that matter, to "study up" on "freehand sharpening" skills. Once acquired, you'll probably never look back and save the money and hassle of buying and using a guide. It's just not that difficult once you get the hang of "feeling" the sharpening angled face against the flat of your stone by rocking it to and froe. Sharpening is one of those things that seductively invites "better mousetraps" and a lot of them are pretty good. I think whichever method one uses is largely a matter of taste: oil stone, water stone, sandpaper on plate glass or your table saw table top, and on and on. YouTube is full of "How to Sharpen" videos and it shouldn't be too hard to teach yourself the basic tricks of the sharpening trade using the method that works best for you.
- Canute, thibaultron and mtaylor
-
3
-
8 hours ago, Jaager said:
Is your caution due to just sheer lack of skill or patience? I’ve done relatively well with the Graf Spee I am doing now in regard to detail. But I’ve never done wood so I’m sure lots of technique to learn
8 hours ago, Jaager said:Experience with plastic is probably more of a negative than a help for a wooden kit. The painting is a help, but for wooden sail vessels, painting a minor part. The main negative is your expectation about what the instructions provide. For a wooden hull, especially the parts that you need specialized skills to master, most of it is common to most any vessel - especially with POB. It is boring and redundant to redo the same for every kit.
In addition to what Jaager has said, I would add that it is important to recognize in terms of what wooden kit instructions provide that even with today's laser-cutting technology, wooden kits are in large measure built while plastic kits are merely assembled. To a greater degree the rigging on a plastic sailing ship is similar to the wooden kit build and, certainly, the painting is very much the same, but a plastic kit does not require the builder to actually measure and fabricate any parts from raw materials save a few pieces of wire, perhaps. Even with laser-cut planks which some of the better wooden kits provide, each plank once freed from the lasered sheet will likely require bevels to be cut on all four edges and on the two long edges these will often be "rolling bevels" which have to be carefully planed to mate to their neighboring planks. After that, the hull surface must be faired so that its shape is smooth across its entire surface. Beginning wooden modelers often discover to their disappointment that their planking job was not good enough to produce the result required and so must resort to puttying up the entire hull surface before sanding it fair and, by default, end up painting a hull they thought they were going to finish "bright" to show off the fancy, and often unsuitable and out-of-scale grain of (allegedly) walnut or mahogany kit-provided planks!
You will benefit greatly from reviewing the "build logs" posted on this forum for any wooden kit that you are considering purchasing to see, step by step, what actually must be done to build that particular kit. In this way, you can determine if that kit is within your present skill set. Keep in mind that a lot of the completed kit models you will see in MSW were built by wooden kit modelers who have decades of experience building kits. While not impossible, it's unusual for anyone to build a complex wooden kit model, and certainly a square-rigged one, as a successful first effort. I will join all the others who have recommended starting with the three-kit Model Shipways "Shipwright's Series" that is specifically designed as an "introduction to wooden ship model kit building." See: https://modelexpo-online.com/Model-Shipways-Shipwright-Series_c_815.html (Less than a hundred bucks for the set as presently on sale.) These kits can be purchased separately or as a set. See: https://modelexpo-online.com/Model-Shipways-Shipwright-3-Kit-Combo-Series_p_5465.html (The first kit of this set, the Banks dory, can be had for twenty bucks.) If you feel these models are an insult to your ability and experience (and they may be, perhaps,) then take a good look at the novice level offerings of Syren Ship Models and Vanguard Ship Models, both of which are sponsors of MSW and you can connect to their websites from the "sponsors list" at the right side of the MSW home page. Both of these companies produce the highest quality wooden ship model kits available today and both are known for the excellence of their instructions. See: https://syrenshipmodelcompany.com/medway-longboat-1742.php
On the subject of kit instructions, Model Shipways, Syren, and, I believe, Vanguard make the instructions for their kits available online. I would strongly urge anybody buying a wooden ship model kit to not only review the build logs on MSW for any kit they are considering and to read any MSW reviews of the kit, and also to read the instructions if they are available to see exactly what they are getting into. Additionally, the instructions for these high-quality novice kits often include valuable guidance regarding the tools you will require to complete the build of each particular kit. See:
- Ryland Craze, Canute and mtaylor
-
3
-
-
I've decided that I am going to have the following epitaph engraved on my tombstone: "He who dies with the most tools wins." In over a half-century of collecting tools (and inheriting my father's collection of as many years of collecting, albeit that he had a lot more restraint and a lot less money than I do) I have to admit that my involvement in a very broad spectrum of the maritime trades, primarily as a hobbyist, has caused my 1500 square foot shop building to presently be full of tools and "stuff I can't throw away," that all of it is getting in the way of getting as much done as I'd like at the moment. So be forewarned! Tool "collecting" and 'book collecting" can easily become adjuncts to a ship modeling hobby that threaten to overshadow the modeling itself! Fortunately, I will be "deaccessioning" a lot of my collection ("junk," as my wife calls it) and remodeling my shop to permit more efficient use of it all.
That said, most modelers with any experience can go on at great length about their tools and those they continue to lust after. Most also can confess to their mistakes in buying tools that were of poor quality or which proved totally useless. The best motto to live by is never to buy a tool until you need it and, unless it is for a single use and nothing more, always buy the highest quality tool you can possibly afford. Low quality tools, of which there are far more available today than there were in the past, are the most expensive because you will find yourself having to buy them over and over again.
As others have pointed out, a basic set of ship modeling tools can be had quite inexpensively, except that they will limit you to some extent because a lot of the tasks you will encounter can be done much faster and more efficiently with more expensive powered tools although those come at progressively higher prices. You get what you pay for. Without getting into specific tools, I will say that most of the tools, hand or powered, offered for sale by vendors catering to the hobbyist market are overpriced for what they are and, although they may look the same, are of lower quality. (Certainly beware of any Asian import tools which are almost always sub par.) You will have to strike a balance between what you can afford (or want to waste money on) and what you actually need and/or will be of benefit to your modeling abilities. The secret to getting the most tool "bang for your buck" is in buying only the tools you need and buying the best tools you can afford.
So, for the moment, I suggest that you look to the online or mailed catalogs of outfits like MicroMark and Model Expo primarily for ideas about tools you may find helpful, and then compare those offerings to the offerings of vendors in other markets. Very often, very high-quality tools which you are looking for can be bought for the same or even less from vendors selling to the medical instrument and professional jewelry making markets. Look to Otto Frei Company and Rio Grande Jewelry Supply for quality modeling hand tools. Look to any of the many medical (surgical) instrument companies for things like scalpels which are similarly priced and exponentially better than the ubiquitous "hobby knives" from Xacto and the myriad of Chinese knockoffs of the Xacto line. Look also at eBay and similar "auction" sites for used medical instruments and other modeling tools. You will be amazed at what you can find for reasonable prices and high quality. [You will benefit from picking up some hemostats, suture needle holders (forceps,) and an "ear polypus" or two. (Google those up and learn.)] Keep in mind that used tools, particularly older ones in good condition, are almost always a bargain.
Your first stop in tool shopping should be the MSW "articles" section: https://thenrg.org/resource/articles and https://thenrg.org/articles/basic-tools. There's no need to waste bandwidth repeating the basics. Also review the ship modeling YouTube videos of Tom Lauria (use the YouTube search feature) and Kevin Kenny (an active MSW forumite) for their comments on various tools they have found helpful. (Kevin lives in Trinidad and Tobago and finds he has to by his tools elsewhere, so he "goes shopping" when he is in the US visiting relatives and his "unboxing" videos of what he has "scored" on his travels are most informative because he's obviously a guy who knows his tools.) Pay particular attention to master modeler Paul Budzig's website https://www.paulbudzik.com/scale-model-workshop-videos/scale-model-workshop-videos.html and all of his YouTube "Scale Model Workshop" videos. Paul, a dentist, really knows his tools and whatever you can glean there will stand you in good stead. Beware, however, of some of the other YouTubers who post ship modeling videos. Their abilities are, shall we say, "uneven," some being highly accomplished, others, well, not so much, and still others apparently more indebted to the tool manufacturers who send them tools to "review" than anything else. I expect you'll figure that out rather quickly as you watch them.
One tool I will strongly suggest that you purchase at the outset which I don't hear mentioned a lot because it is fairly new on the scene and comes from the electronics assembly industry is the "QuadHands" "magnetic workbench" tool. This is the latest and best replacement for the widely available "Helping Hands" holder sometimes marketed as the "Third Hand." Its usefulness for small assemblies, silver soldering, spar-making, and rigging tasks should be immediately apparent. The "super deluxe" model with all the optional bells and whistles (particularly the PanaVise option) is pictured below. The product line ranges from fifty bucks or so on up. Available from QuadHands directly or Amazon: https://www.quadhands.com/products/quadhands-deluxe-workbench Look at the product line and see what model best suits your needs.
However, do not buy any other knock-off of this tool. It has been widely "pirated" by Chinese manufacturers, some of which even mimic the exact colors of the original. The value in the original 'real deal" version is in the quality of the alligator clips and other features and the quality of the flexible arms and magnets. (There is a big difference between cheap alligator clips and expensive ones!)

Whatever you do, don't waste even the three or four bucks that you'll see these offered for. Even the most expensive ones are total junk. (Don't ask me how I know this!)

- Sgmartz, mtaylor, MAGIC's Craig and 1 other
-
4
-
5 hours ago, Capt. Kelso said:
Never could find a use for Verdigris!
I did! I used it for weathered bronze patina. I used it as a base color and then did a bit of "weathering" on it. I had a model with copper cable standing rigging (very "yachty" in the days before stainless steel.) I used it on the standing rigging. I've also used it on deck fittings and scoop ventilators. Floquil's verdigris was, to my taste, at least, a bit too light. I'd tone it down with a thin brown wash. I also used it to good effect when air brushing hull bottoms. There will always be some verdigris highlights on copper bottoms and, to a lesser extent, on copper-containing antifouling painted bottoms, right along the waterline where the air gets to the copper and it oxidizes it.
MicroScale has one of the best Floquil equivalent color charts online. It shows all the Floquil and PollyScale (Testor's former high-quality line of acrylic miniature paint) colors matched to the equivalent colors of most of the major model paint manufacturers today.
Parenthetically, I came across an interesting booklet online the other day: The Model Railroad Hobbyist's Guide to Acrylic Painting in a Post-Floquil World, published by Model Railroad Hobbyist magazine in 2016. The PDF of this booklet can be found at 58. MRH14-12-Dec2014 (testors.com) It contains a lot of good information about acrylic modeling paints and contains a very good equivalent color chart from Floquil/PolyScale paints to other brands. It addresses formulae for mixing thinners and techniques for application. In some ways, it is a modern acrylic-themed version of the old Floquil Painting Miniatures booklet first printed in 1961 and available at: Floquil Painting Miniatures (paulbudzik.com), provided by Paul Budzig on his really valuable website: Fine Scale Modeling by Paul Budzik (His "Tools and Techinques" and "Videos" sections on the site are real treasures well.) The latter booklet has a lot of very good instructional information on miniature painting which, despite common perceptions perhaps fostered by the paint manufacturers, isn't as easy to do well as it looks. I expect the information in these two booklets would be of interest to most modelers.
-
-
5 hours ago, Jaager said:
The only difficulty that I see with using artist's oils is if the final color used is a custom mix. If not enough was prepared with the first go, I foresee a superhuman effort plus luck required to get an exact match with a second go for spot repairs.
It may be that I have only seen selected examples, but compared to organic solvent based pigments and binders, the water based acrylics look - flat - chalky - pastel-like and without the depth of enamels.
Yes, there's a bit of a learning curve to color matching. Keeping a record of the proportions of color (measured by the length of paint paste extruded from the tube) and color "chips" for matching, plus slowly "creeping up" on the color as the perfect match mixture is approached are helpful. Using hypodermic syringes to measure paint amounts is also helpful. Or you can simply mix more than you expect you'll need and save the excess in a container for later use. Alternately, there are so many premixed oil paint colors offered already that it's hard to believe the exact color someone wanted couldn't be had "right out of the tube." That said, it's always better to have paint left over than to run short before the job is done!
I wholeheartedly agree with your assessment of water-based acrylics. It seems to me that these disadvantages are more pronounced in the cheaper product ranges and probably is a consequence of lower quality pigments, the most cost-determinative ingredient in paint. I've have become more circumspect in expressing my low opinion of acrylics in comparison to oil-based enamels, not out of any concern for other people's feelings, but because I just can't be bothered responding to their whining. There was a time when I'd actually enjoy arguing with people online about such subjects in pursuit of a "right answer," but it seems cyberspace is polluted with people who are only pretending to seek information, and instead are only just fishing for compliments and affirmation. and who, when they encounter the slightest resistance to their positions, get all bent out of shape. Frankly, I can't see any practical reason whatsoever to prefer acrylic paint over solvent-based oil paint and in our modern "Special Olympics" world where everybody gets a participation trophy, nobody's forcing me to compete.
-
16 hours ago, Roger Pellett said:
If this one piece unit actually works and has reasonable endurance, it might solve my problem.
My initial impression is that if these "self-contained" airbrushes which have recently hit the market are really the best thing since sliced bread, the big-name airbrush companies would be making and selling them, too. The jury's still out and I have no first-hand experience with them, but for the low prices of a lot of them, compared to the cost of a decent airbrush alone, I greatly suspect that the airbrush part of them isn't close to the traditional airbrushes in terms of quality and reliability.
I agree that if one is "just painting models" and not interested in airbrushing fine lines and "special effects" such as weathering and camouflage patterns, a less expensive "plain vanilla" high quality single-action airbrush would be the way to go, They aren't all that expensive. That said, for a few dollars more, why not go for a double-action model because you never know when you might need one.
-
On 8/31/2023 at 9:02 AM, Landlubber Mike said:
Regarding cost - not to appear insensitive to expenses, but sure you can get a big jug of craft paint for a relatively low cost, but how much paint do you really need? My guess is that eventually one will throw out most of the bottle after it dries out since you don't need much paint when painting models (as opposed to doing canvas paintings or other larger scale painting projects). The small Vallejo dropper bottles for example cost about $3, and have excellent coverage per drop of paint. I don't think I've finished a bottle yet after a few years of airbrushing. You can't beat the convenience.
I doubt anybody who is mixing their own colors and conditioning their own paint are buying "big jugs of craft paint" because large quantities aren't required and acrylic "craft paint" isn't the quality that most would want in terms of pigment size and amount. What most are using, be it acrylic or oil-based are the tubed artists' colors that contain paint that's the consistency of toothpaste. These colors can be bought in tubes of various sizes, so you can buy a larger tube of white and black and smaller tubes of any other color you want. In general, ship modeling doesn't demand a large palette of colors at all. The tubed artists' paints have a very long shelf life if the caps are cleaned and tightly closed. Artist's oil paints don't have any driers added in the tube and the user applies drier to their own taste. Before the Japan drier is added, it takes practically forever to dry (polymerize, actually.) Because of the smaller quantities of artists' oils required, (the thick tubed paint is thinned greatly for use, so you aren't paying "paint" prices for a lot of thinner) it doesn't hurt to spend a bit more for the high-quality tubed colors which have finely ground pigment and lots of it.
-
5 hours ago, DanielD said:
I’ve put a lot of hard work into the detail and I don’t want to hide it, but at the same time, acrylic paint doesn’t like to stick well to brass, even after roughing the surface and proper primer. So I thought maybe, just maybe an acrylic finish would help.
If the paint isn't going to adhere to the metal surface, it will fail between the bottom coat and the metal. Adding more paint will do little, if anything, to make the bond between the metal and the paint any better than the paint alone. Adhesion difficulties on metal surfaces is but another reason why oil-based coatings are preferred over water-based acrylics by many modelers. That said, any yellow metal which is well-cleaned before painting with acetone or a similar solvent to remove any dirt or oil from handling and primed with a suitable metal primer coating should easily meet 100+ year archival standards.
- DanielD, Knocklouder and Dave_E
-
3
SMS WESPE 1876 by wefalck – FINISHED - 1/160 scale - Armored Gunboat of the Imperial German Navy - as first commissioned
in - Build logs for subjects built 1851 - 1900
Posted
Thanks for the updates! She's really coming along beautifully.