HOLIDAY DONATION DRIVE - SUPPORT MSW - DO YOUR PART TO KEEP THIS GREAT FORUM GOING! (89 donations so far out of 49,000 members - C'mon guys!)
×

md1400cs
-
Posts
2,848 -
Joined
-
Last visited
Content Type
Profiles
Forums
Gallery
Events
Everything posted by md1400cs
-
 Finished up the middle rail bits at the mainmast. The stern section is also done. - finally. Here are a couple of mainmast shots. Now onto the foremast. Regards,
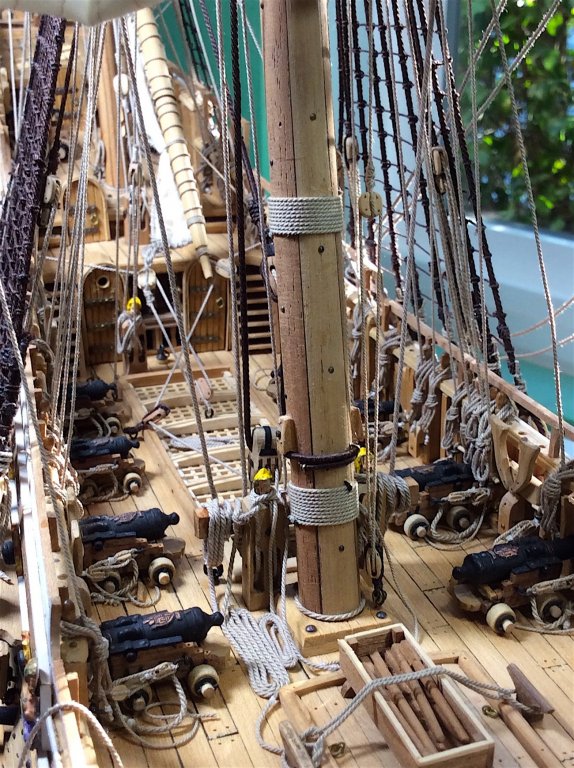

-
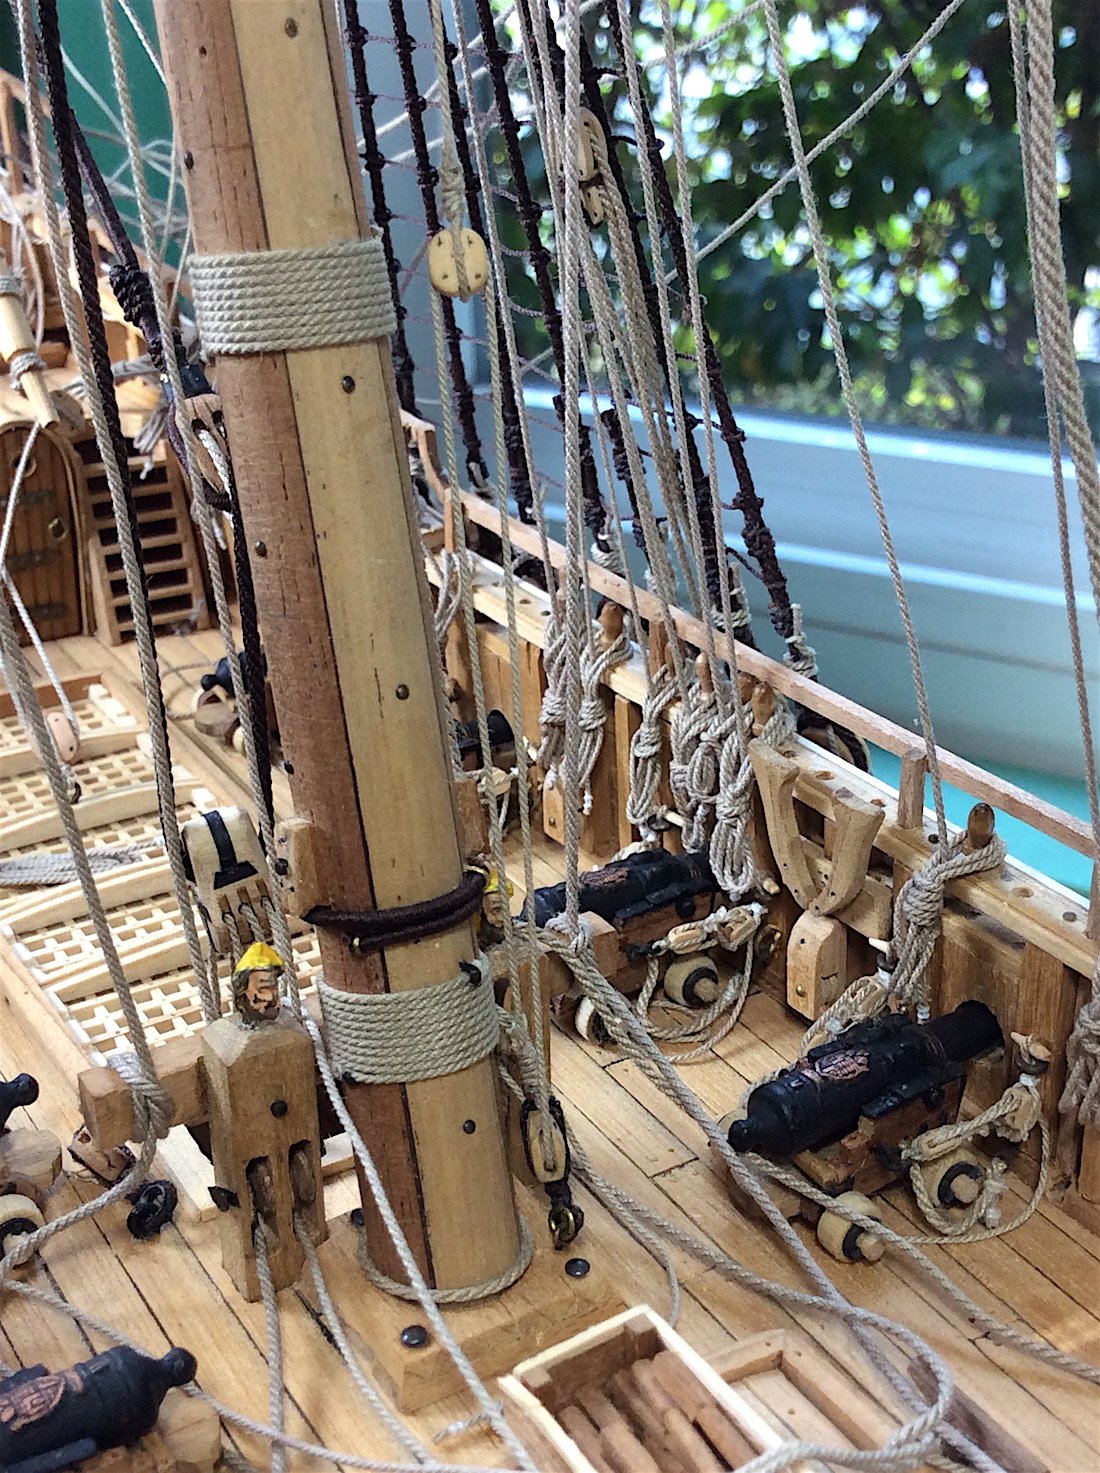
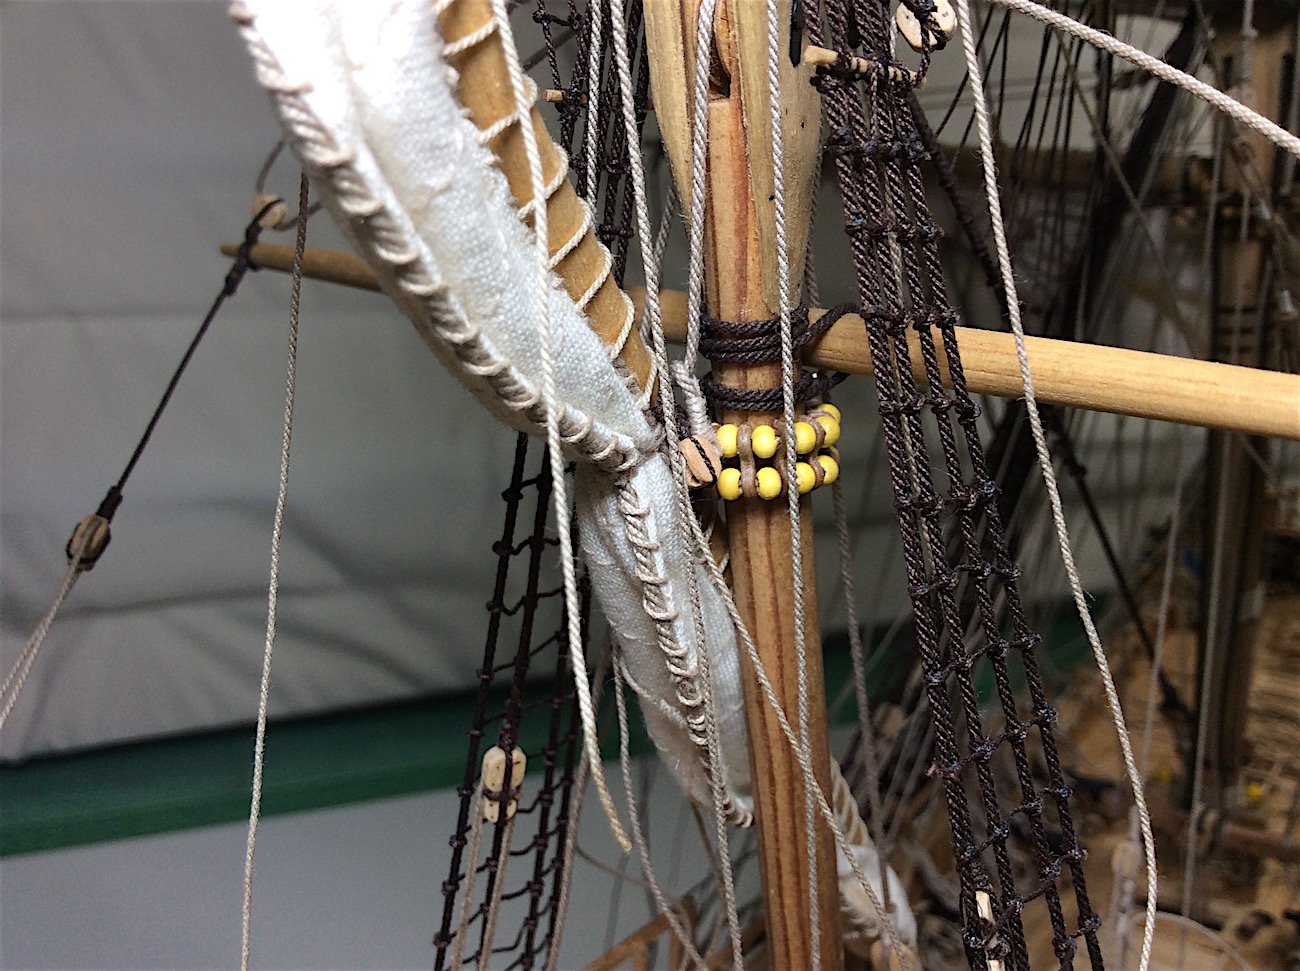
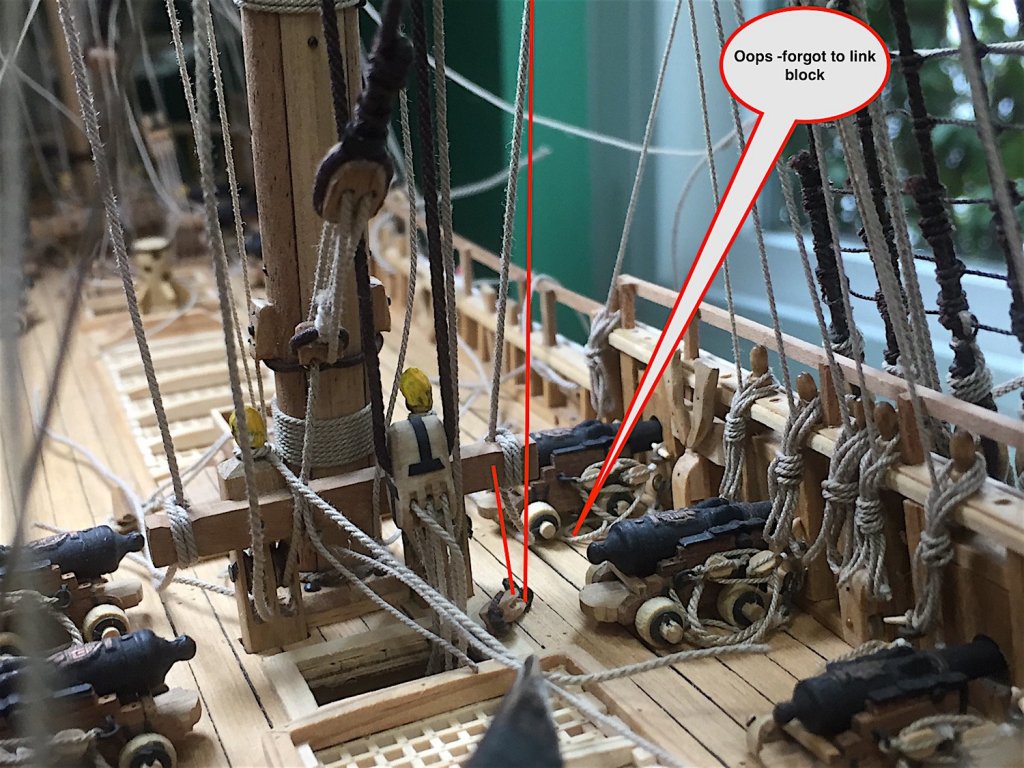
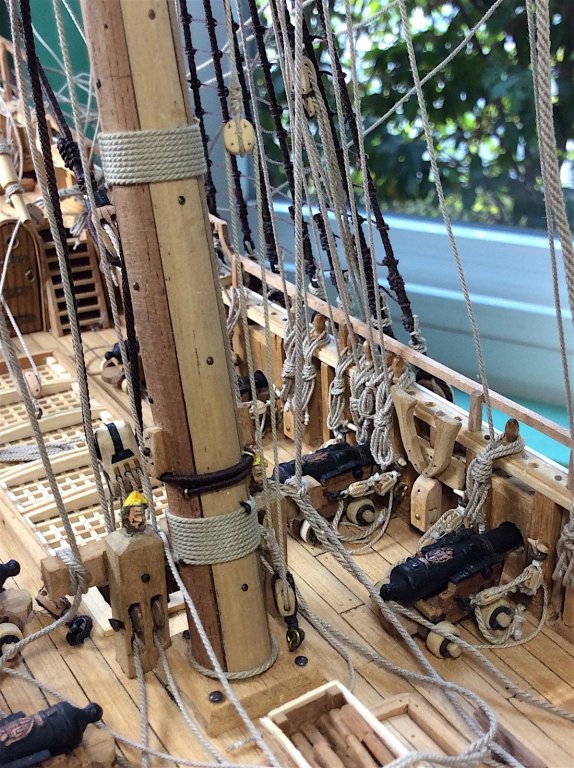
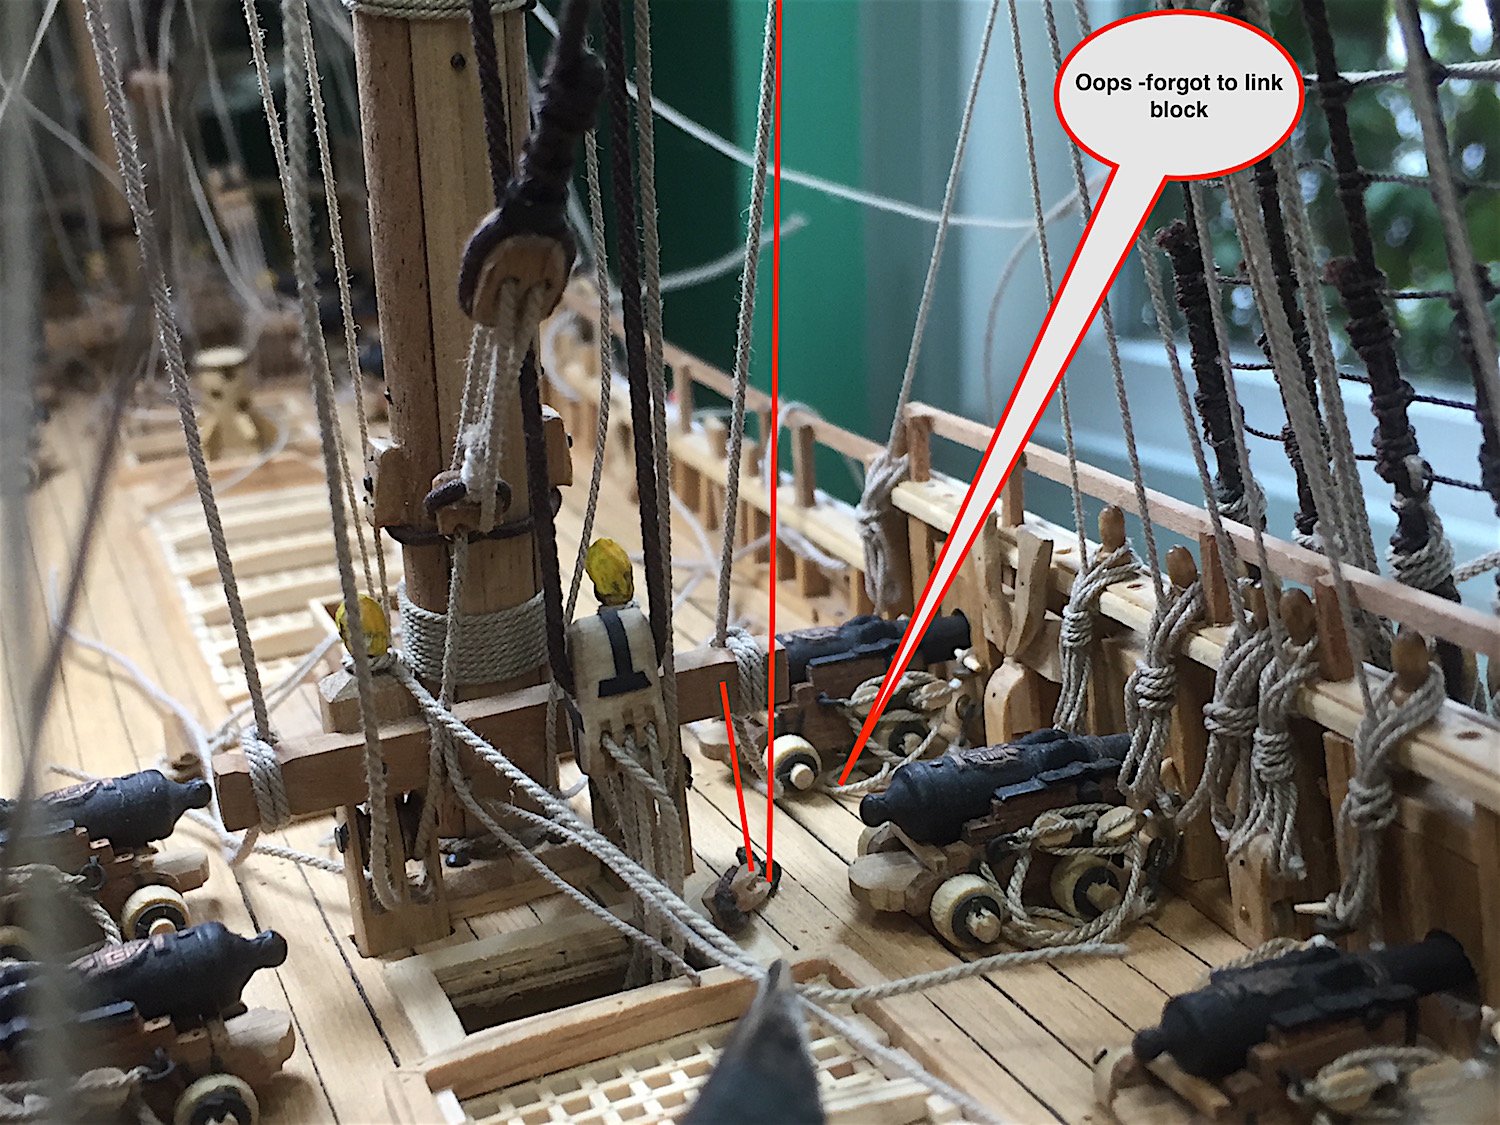
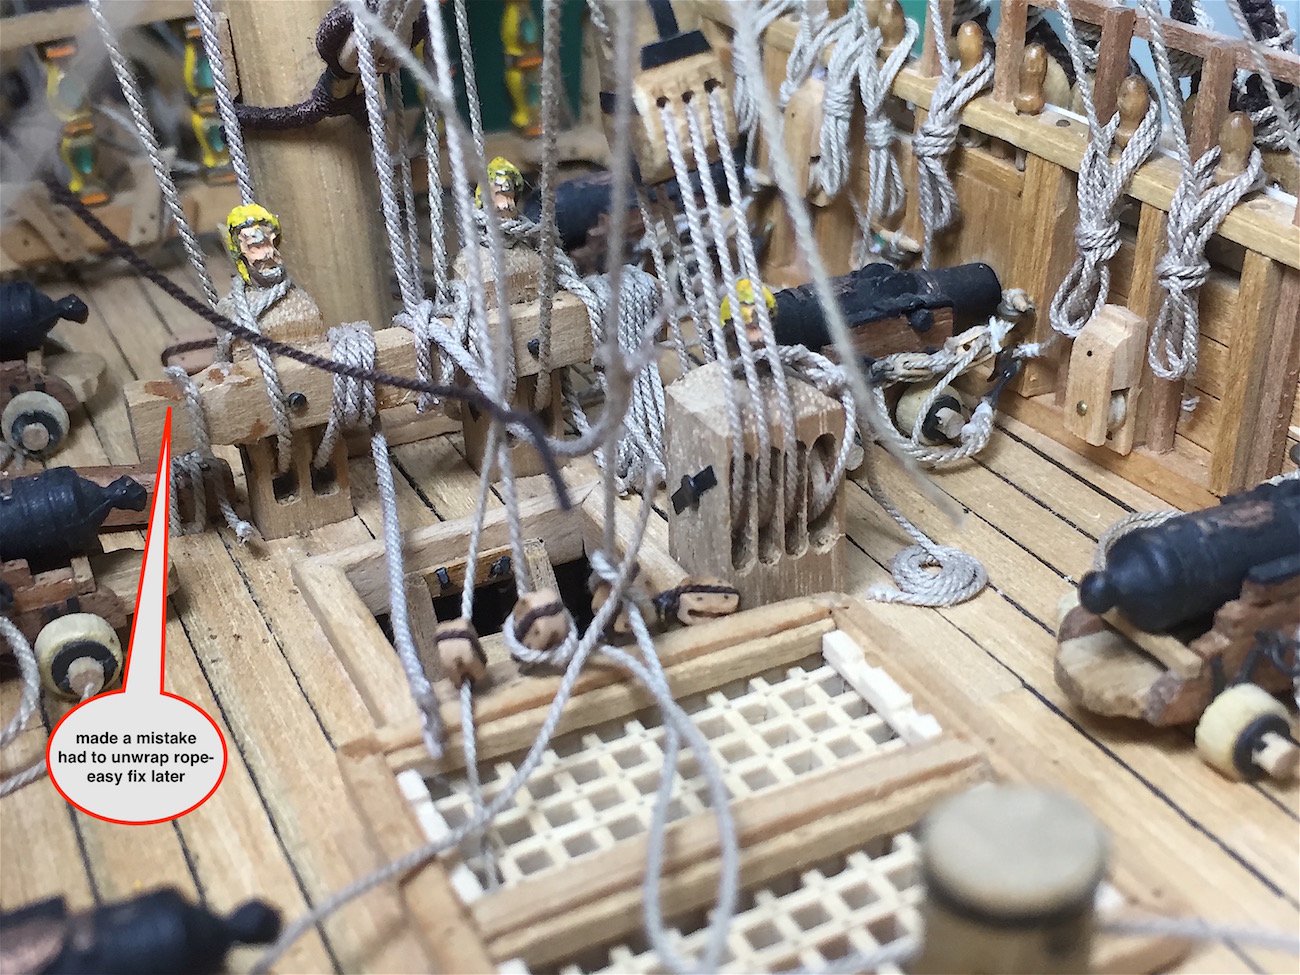
Hi Mates, Andre: Thanks – much appreciated – it has been a challenge getting a Vasa sort of looking correct. Ferit: Well the time that it has taken to almost finish this build I would imagine that some children have become teenagers. Some builders whom I happily follow have completed three amazing ships in the time it has taken me to do this one – that is still not finished. Thanks so much for following along since I joined as well as some excellent advice that you have offered. Zappto: thanks for your very nice thoughts Denis: Thanks, Yes, I am very happy with how the base came-out. Also thanks for your continued support. All of the outer lines and pin rails have been installed and looped with coils. Now focusing on the last bits of the weather deck rigging. The “inner” bits that attach to knighthead rails. PS: The mainmast rail is MUCH to close to the mast. My mistake I did not consider the stern leaning angle of the main mast. Still badly placed. Grrr. Installed - way back -before I new very much. Well these last ropes are challenging indeed. These fiddly bits are very hard to reach and “set” without disturbing/stretching already pre- attached and glued lines. Not a complaint – but it’s slow going - as you all know rigging is. Foremast ropes will be easier to get to. Thanks for the likes & just dropping by….. A few more pics. Regards,

-
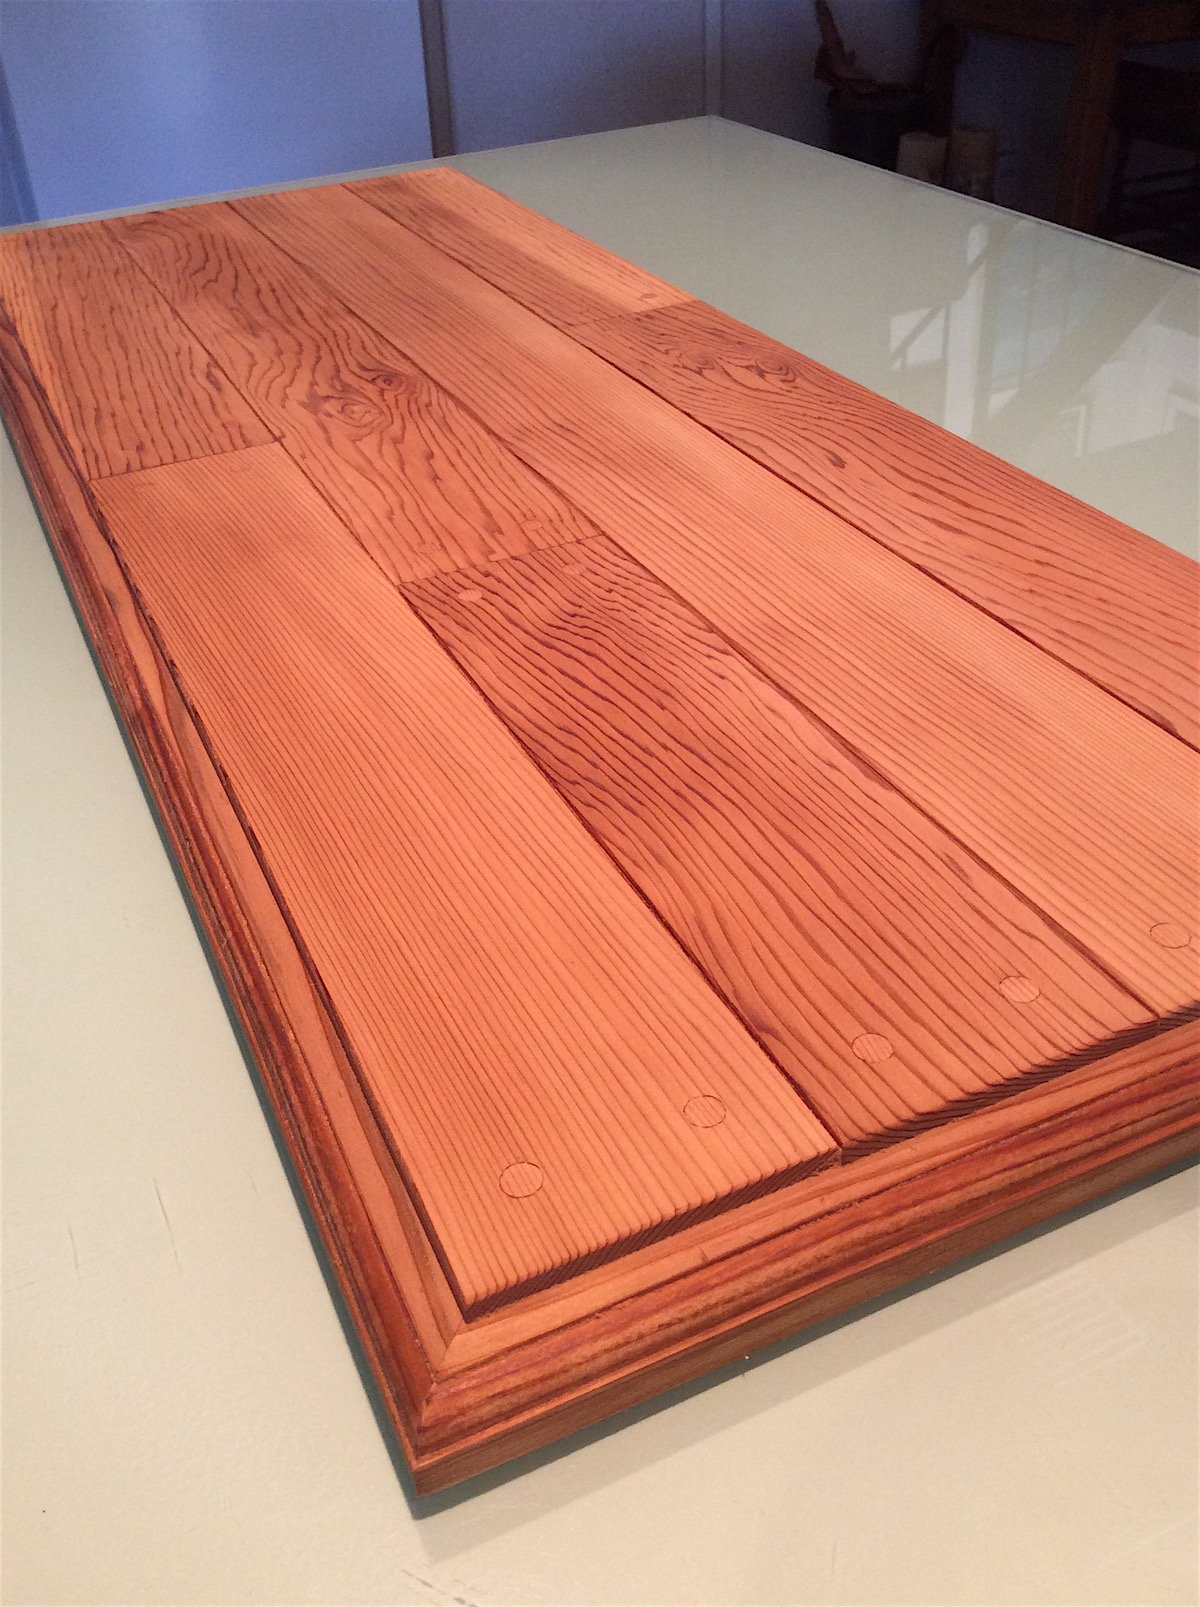
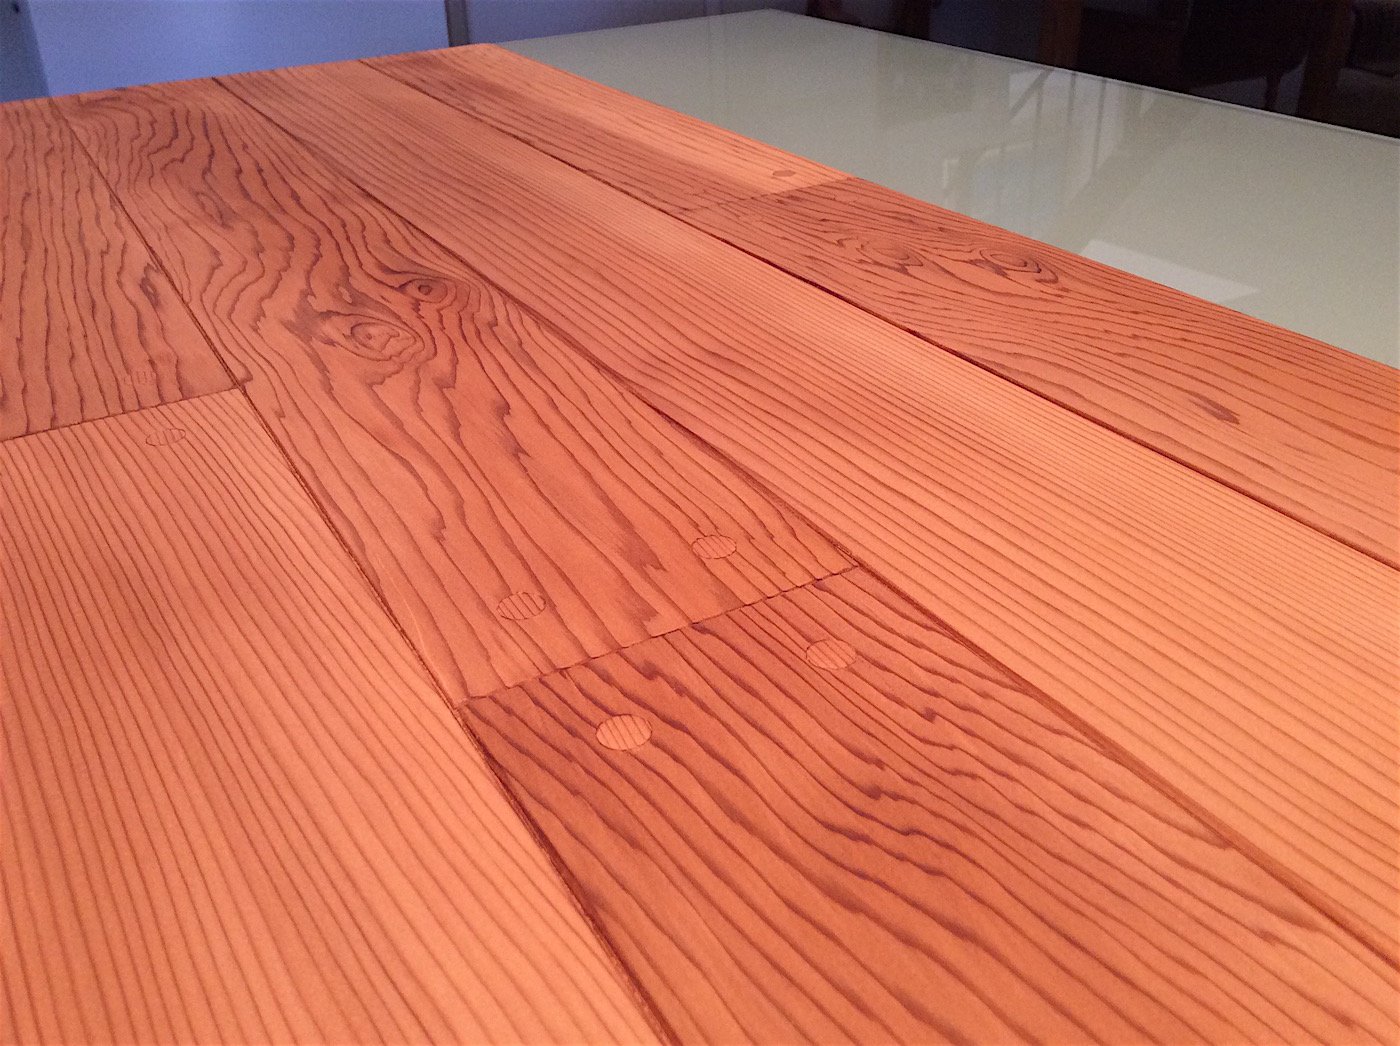
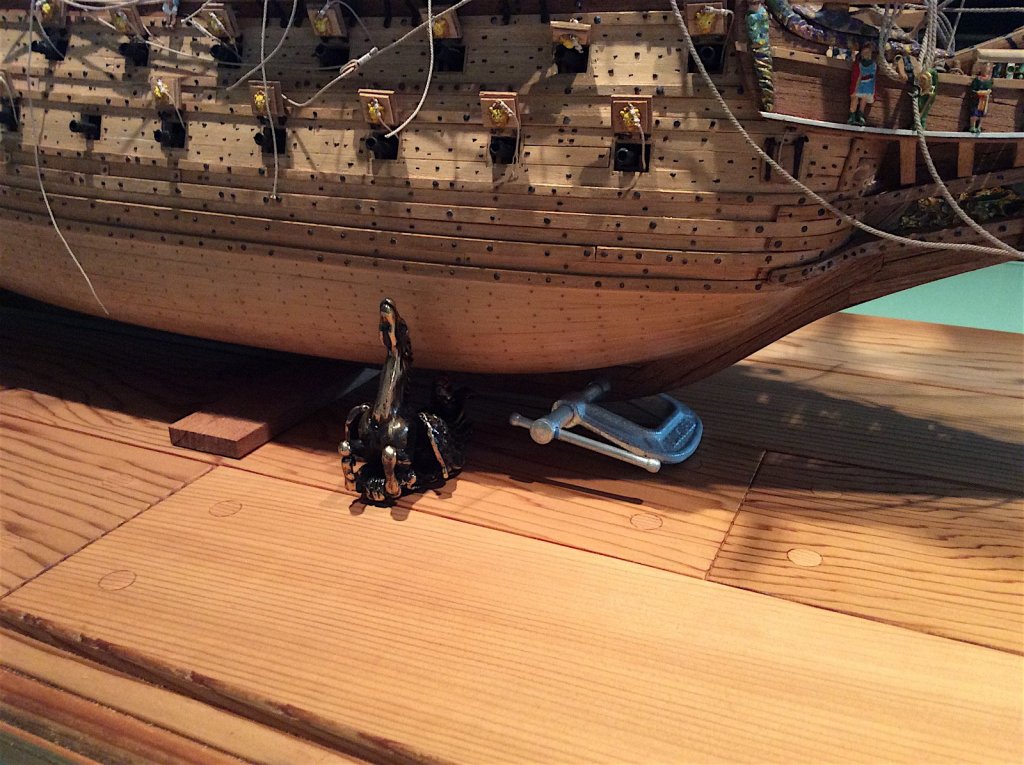
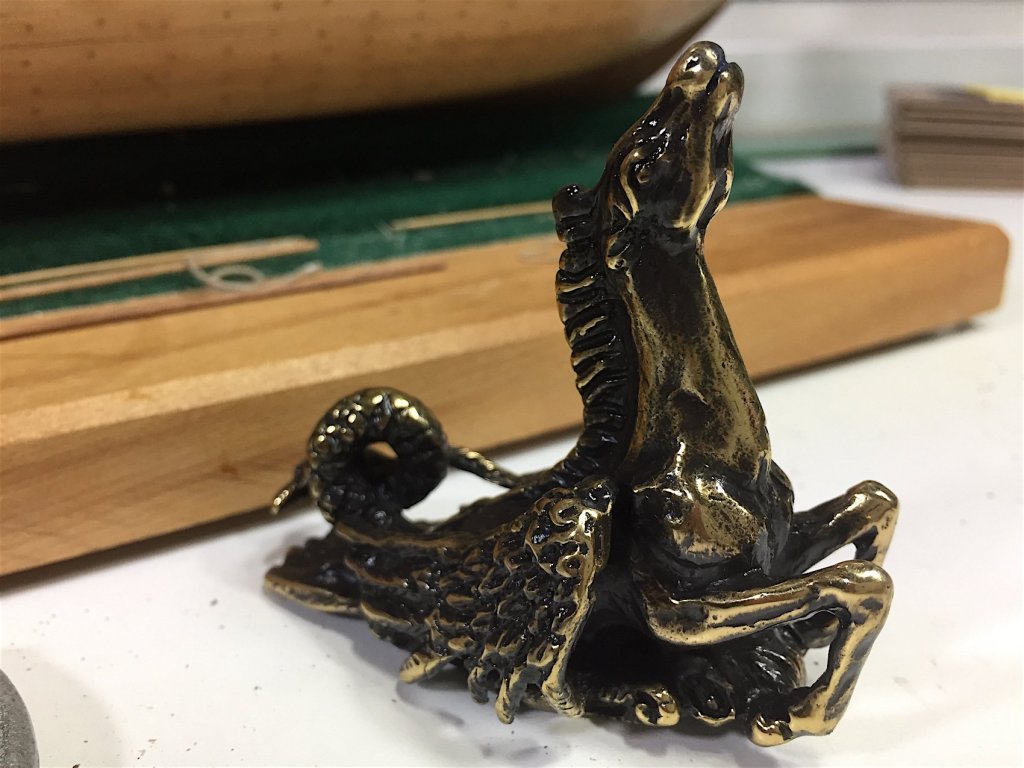
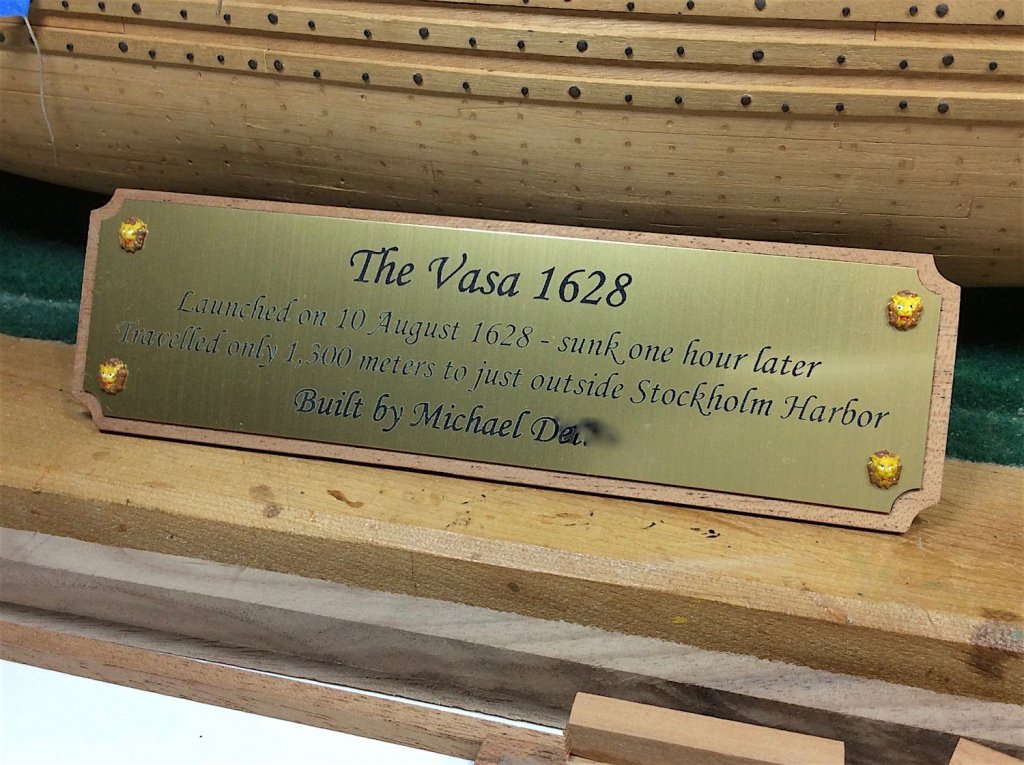
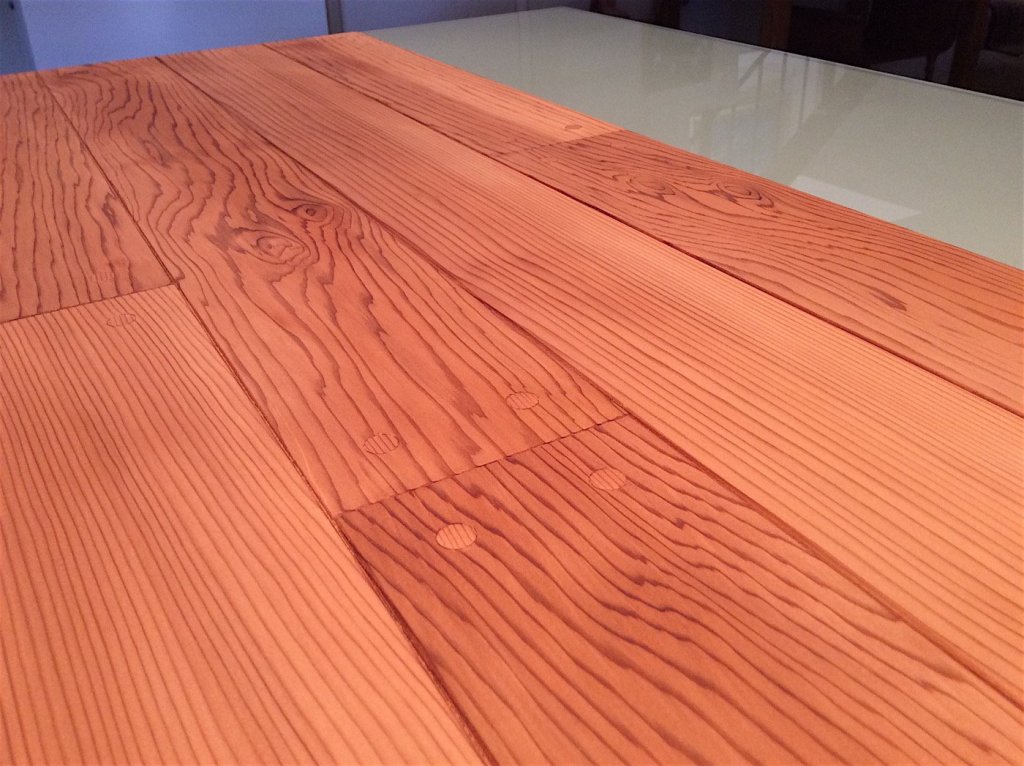
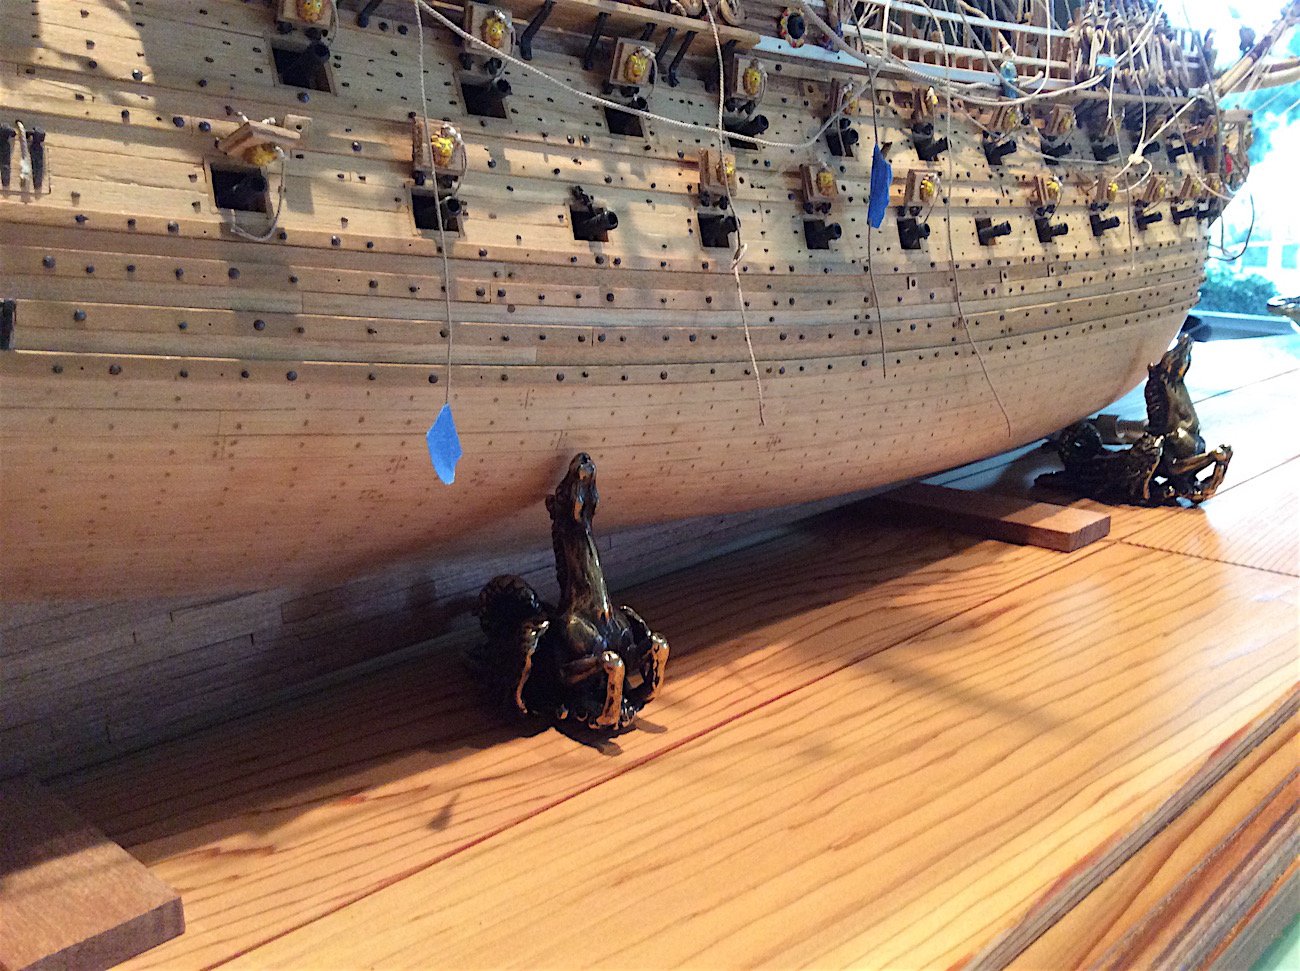
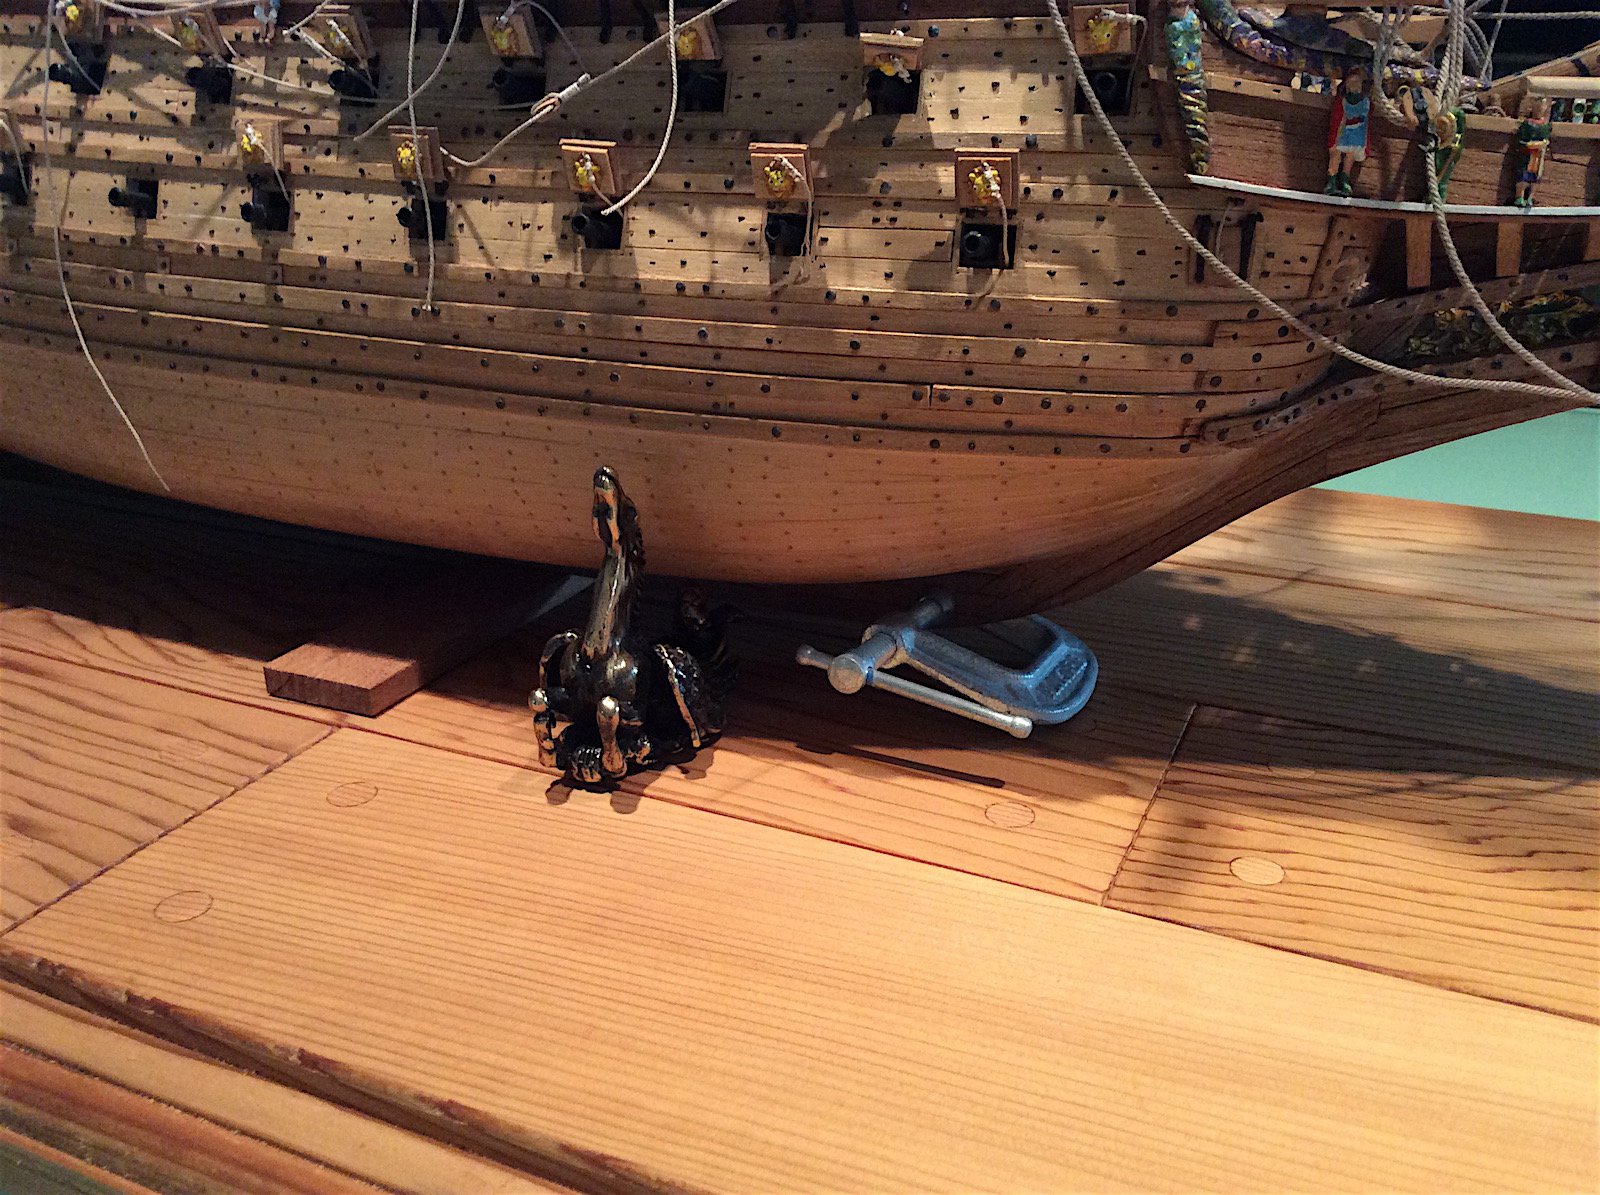
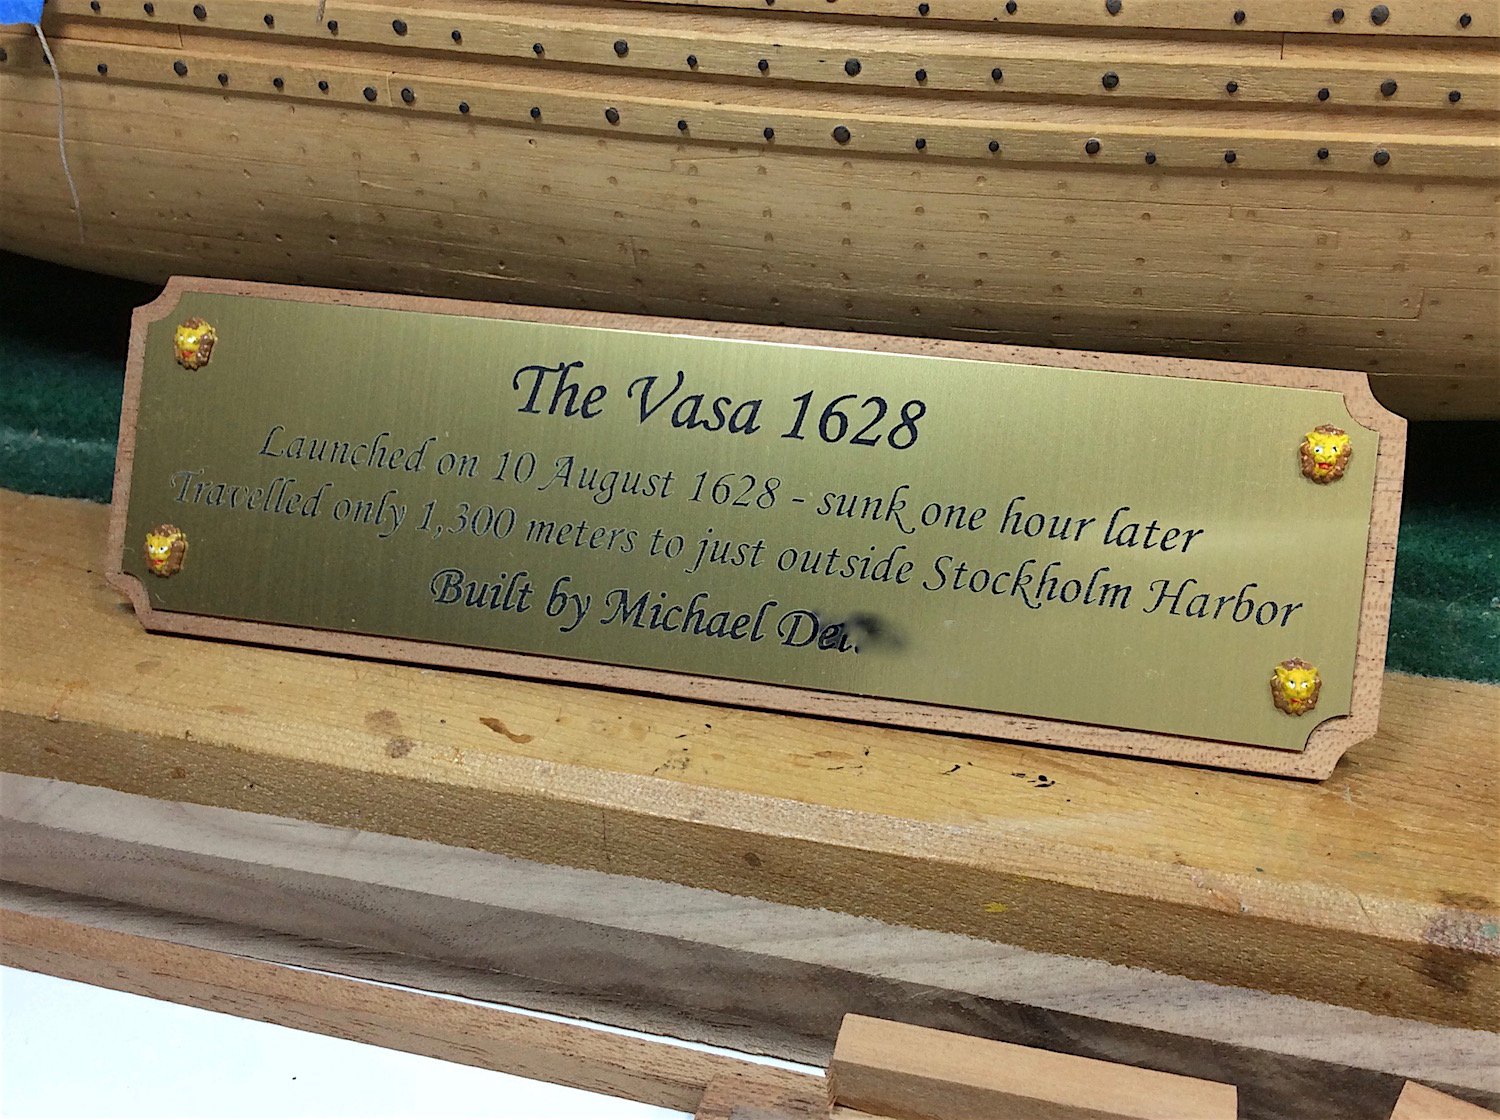
Denis, The wood is in fact Western red cedar -well done!!. It looks much too reddish in the posted photo that was taken under 3k soft halogen-ceiling lights. Here is a more representative shot. Still working on a way to attach the ship to the base. I do not want to drill side holes into the keel. These four brass Pegasus I had “antiqued” looking. They will add a nice touch. Made a nameplate. Was going to drill small holes at each corner and add brass nails, then I remembered my left over canon door lions. The nameplate (done at a local trophy shop) is not brass – they could not etch my chosen font and text in brass. So instead they laser printed the text on a “look like brass” plastic plate.


-
Old Collingwood. Very nice indeed. Might have been the first US import with a behind the driver mid-mounted engine. The Turbo variant followed the S2, if memory serves? Was yours the injected version? LTE 80s faves of mine as well, I think that Citroen was somehow also involved with the Esprit drivetrain?? But the Esprit V8s were an instant dream of mine. Out of my price range. $90k USD also loved the sheetmetal (I think that one of the designers then went on to work on the Mclaren f1 mid 90s - that is still today a "ridiculous" example of automotive art/tech....... But fell in budget love with the Mitsubishi Eclipse GSX (their four wheel drive platform) (It was a 1999) Had one of those till 05– then got my Z – a car that I always wanted as a young teen. Haha (love the 300z twin-turbo) ============================================= Nigel Thanks for catching up with my log – much appreciated - So glad that you’ve re-opened your shipyard. As you know, you were one of my teachers. Learned a lot from you, and always appreciated your sage advice. Yes a dilemma indeed. - your comment Frank haha Yes, Now that would have been a real not “fixable" mistake ================================= Stern area is pretty much completed. Needs mast, and flag - as well as rear lantern - leaning towards scratch building one Hmmm As always cheers, apologies for the car bits....
.thumb.jpg.e3f92429d83faffe7689b1715a097f22.jpg)


-
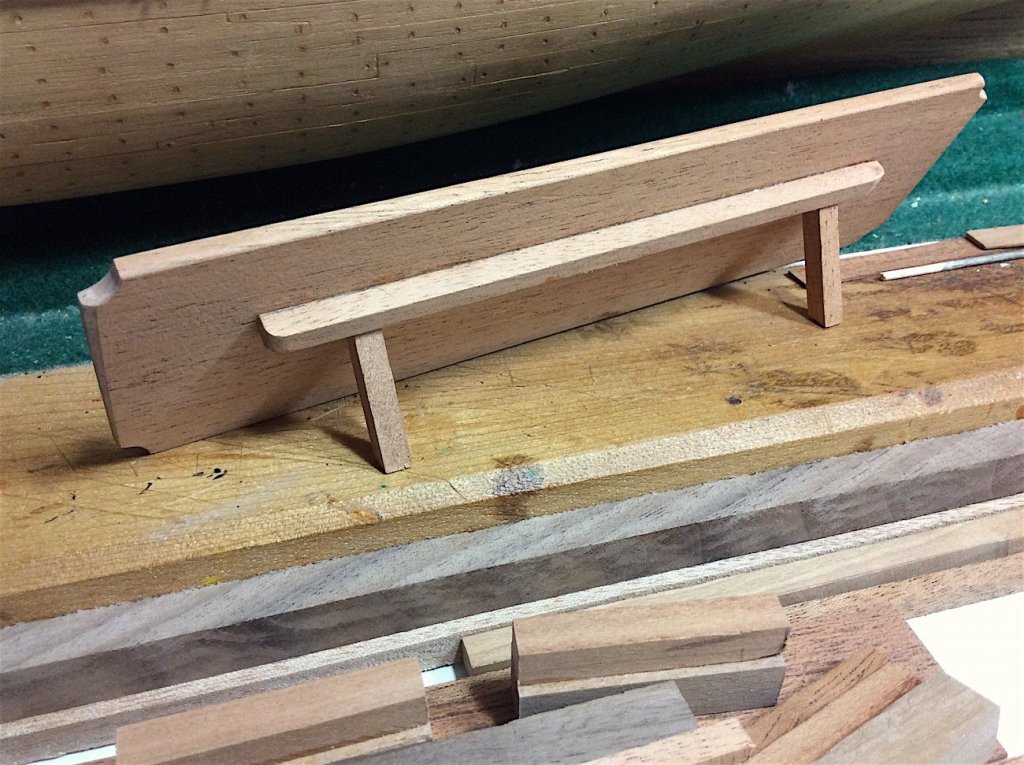
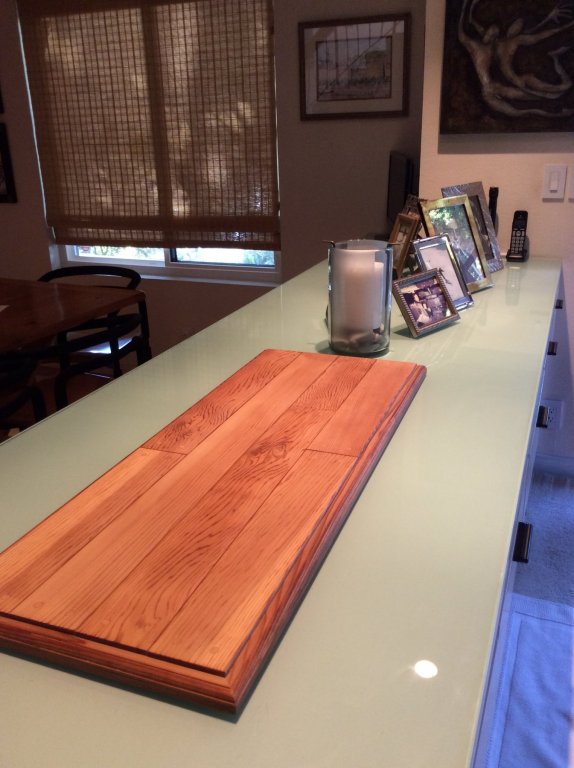
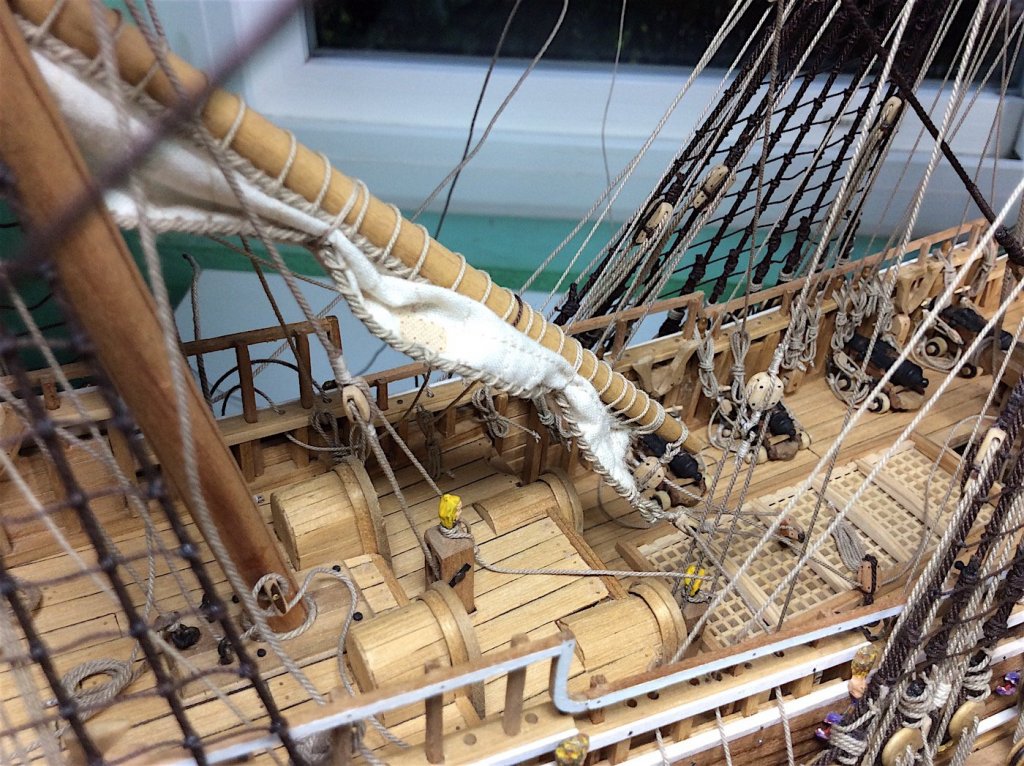
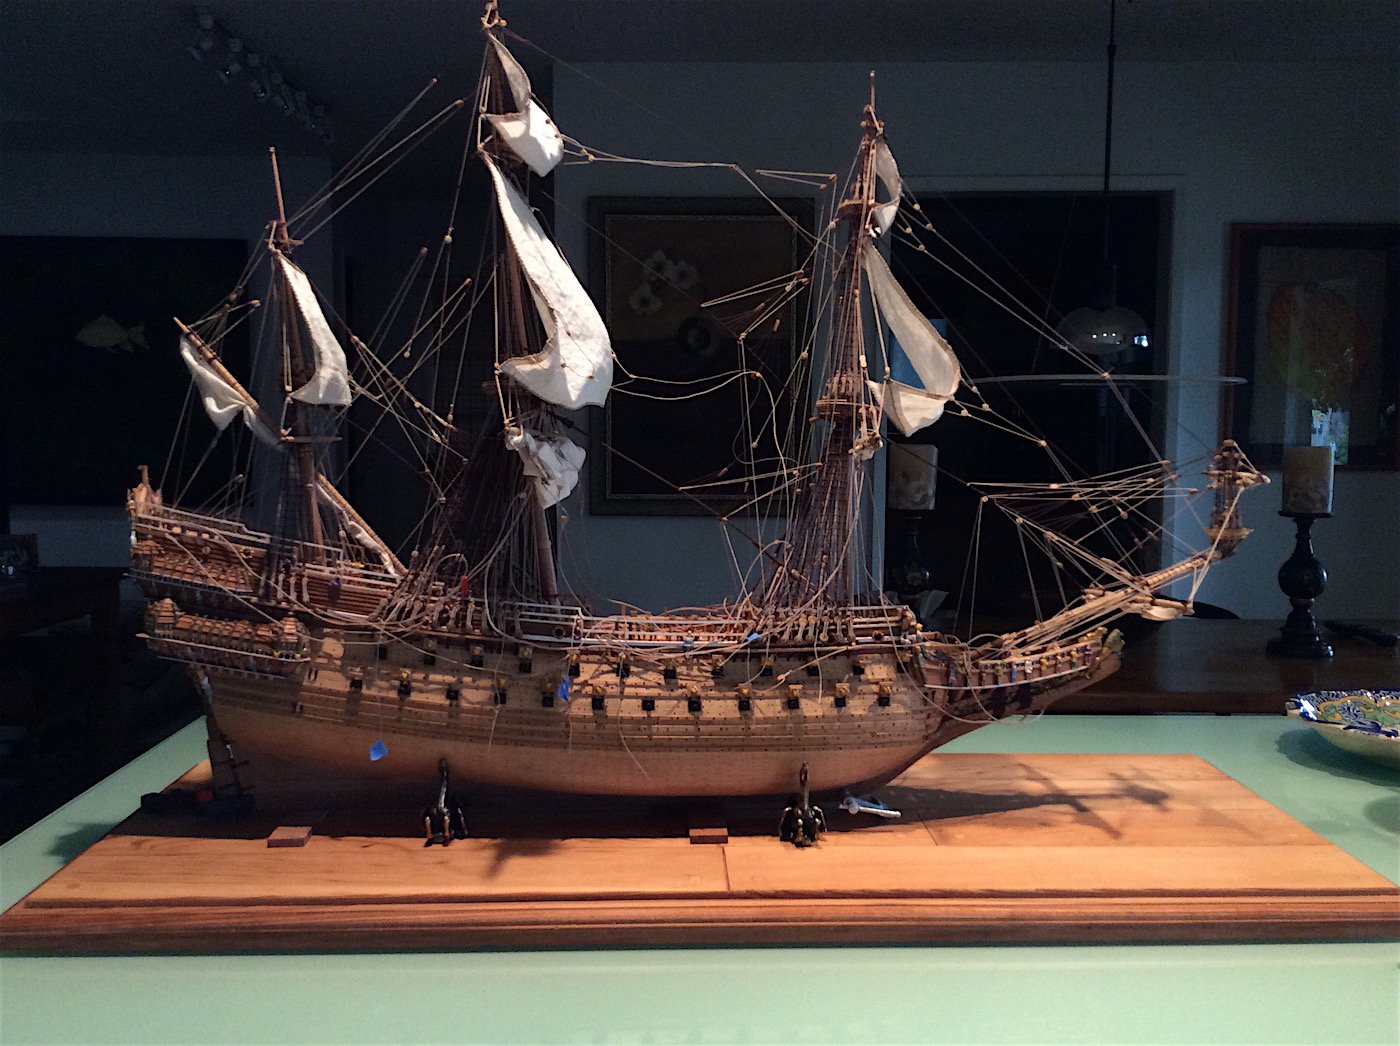
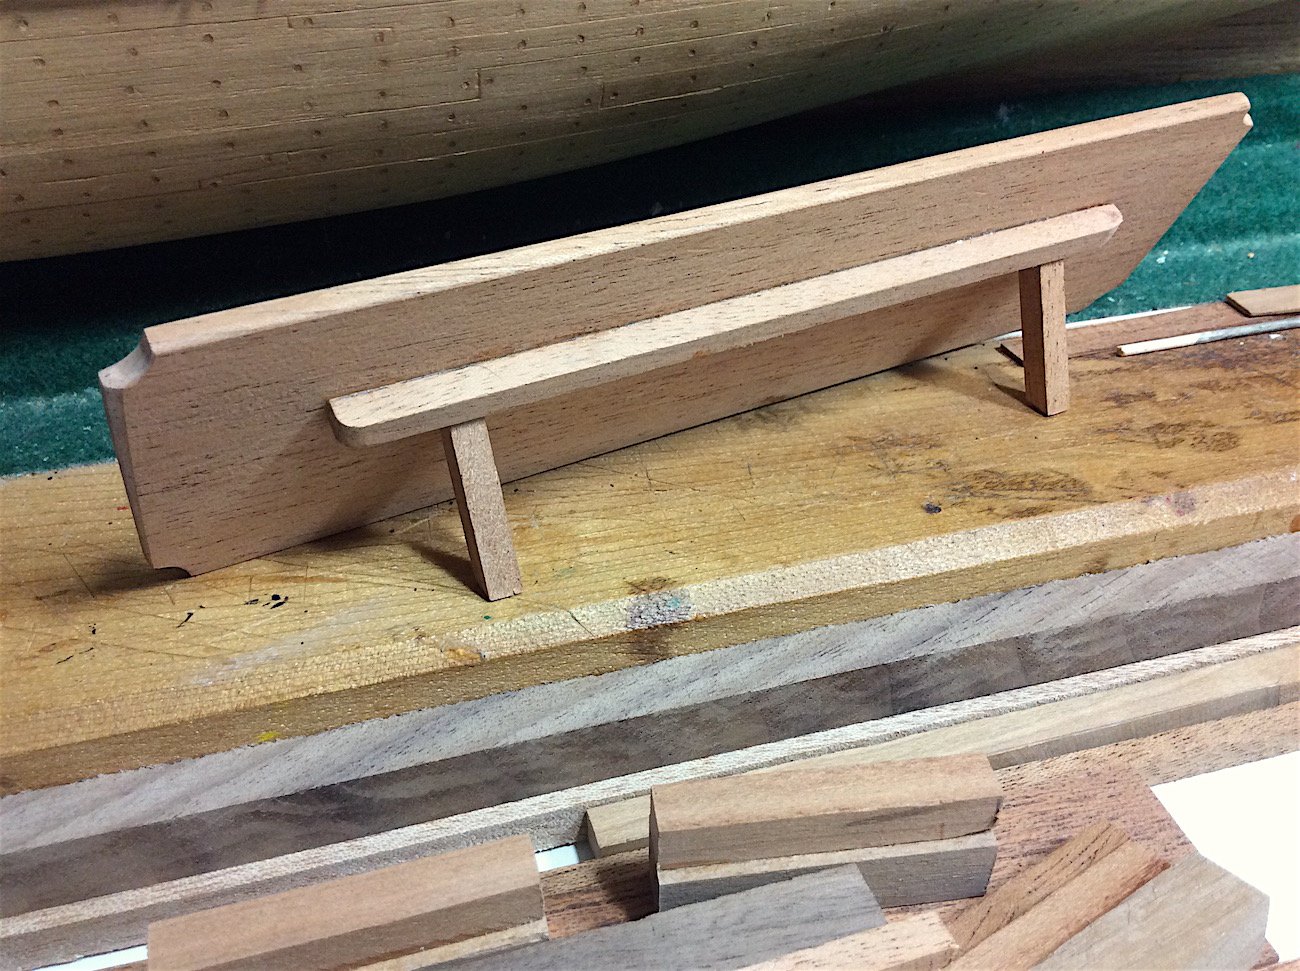
Hi Mates, Karl, Ferit, Dave, thanks so much for your so kind thoughts. --------------------- She is indeed looking like a ship that is almost ready for it’s sinking, very close to closing shop on this one. Yesterday I picked up the base from the wood shop. I’m very happy with the look that I had intended. Now need to figure out how to properly secure the keel. Then I will measure the height of the mainmast and have a Plexiglas case built. The case will also have eight buffered (rounded) edges adding to the cost, but I think that it will look more “polished” that way. The ship will live on that glass counter top cabinet that separates the dining area from the living room. Those photos will be removed and it will take its place near the wall. Need to still: Finish poop deck area Attach anchors and make the buoys Paint- touch up various knightheads Fix broken hull canon doors Make the keel support structure Then open Champagne ha ha Cheers,

-
Rossi46, Thanks SO much for your kind words Regards,
-
Slightly crooked nose is witnessing many fights this ram went through... Anyhow, for me this part went very well; Yes indeed nice thought- your build is uncommon - I so also like builders looking at, and realizing, original work from thousands of years ago. And your skills are very impressive indeed. Great project...
- 122 replies
-
- 1
-

-
- greek bireme
- scale-1/35
- (and 2 more)
-
Dan, Just catching up and back-peddling a bit adding missed likes clicks. Awesome detailing especially in such a small scale. That coin really puts your excellent work into perspective. Cheers.
- 287 replies
-
- 2
-
-
- michelangelo
- ocean liner
- (and 1 more)
-
Impressive work indeed. Well done !!
-
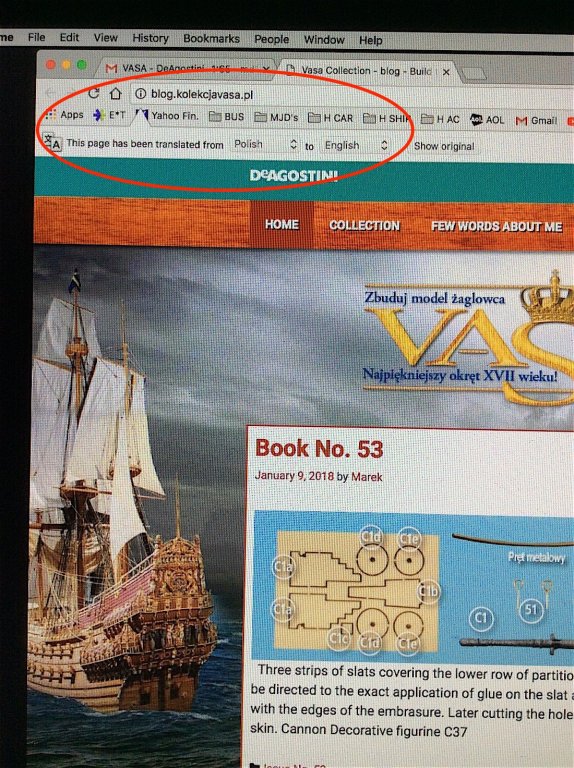
Well, at least pictures don't need to be translated! Excellent planking job!! BTW Mates in case you did not know---- or into any other language for that matter for which Google has available Cheers,
- 146 replies
-
- 2
-
-
- deagostini
- vasa
- (and 1 more)
-
Ah yes noted. In the mid 1995 I visited Barcelona and do remember seeing her at the Maritime Museum, now that I remove the cobwebs from parts of my brain (very impressive museum as well). Good that there are many photos available. So helpful indeed - as it also is for my current project.
-
Nice EJ, carving really separates the novices (me) from the pros - Good start indeed!!
-
Ferit, Yes, too bad. As Christian said -We've all been there. It could have been much worse later in your rigging work. Still I feel your frustration
-
Hi, This amazing ship has always been so intimidating for me You are doing a great job. Your detail work is great. I will follow along. I found this - you may already know, but in case you don't http://www.modelships.de/Museums_and_replicas/Musee_de_la_Marine_Paris/Photos_Reale_de_France.htm PS: If you double click on the model photos it brings up super detailed close-ups Cheers,
-
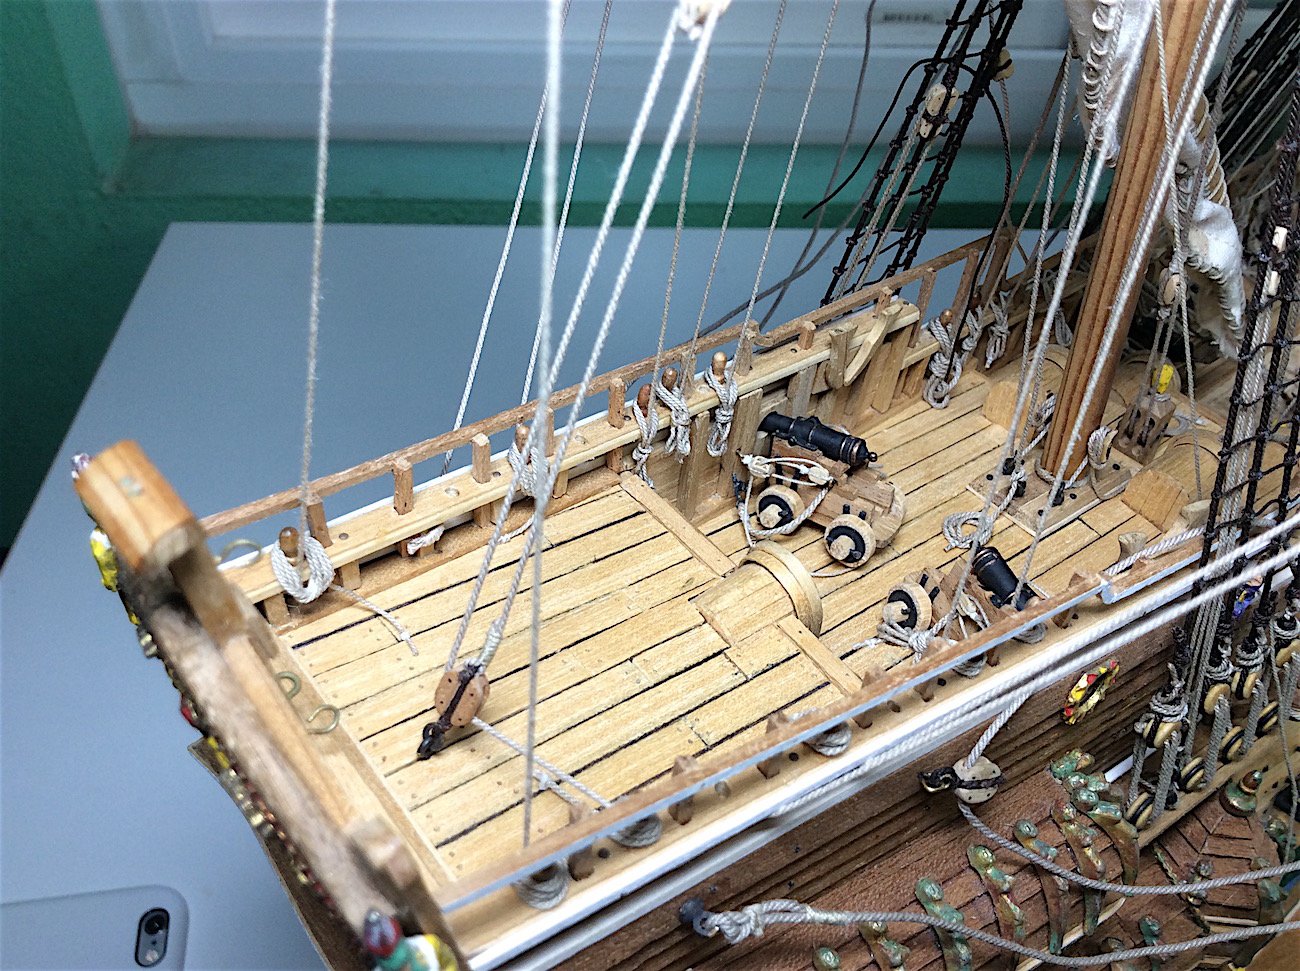
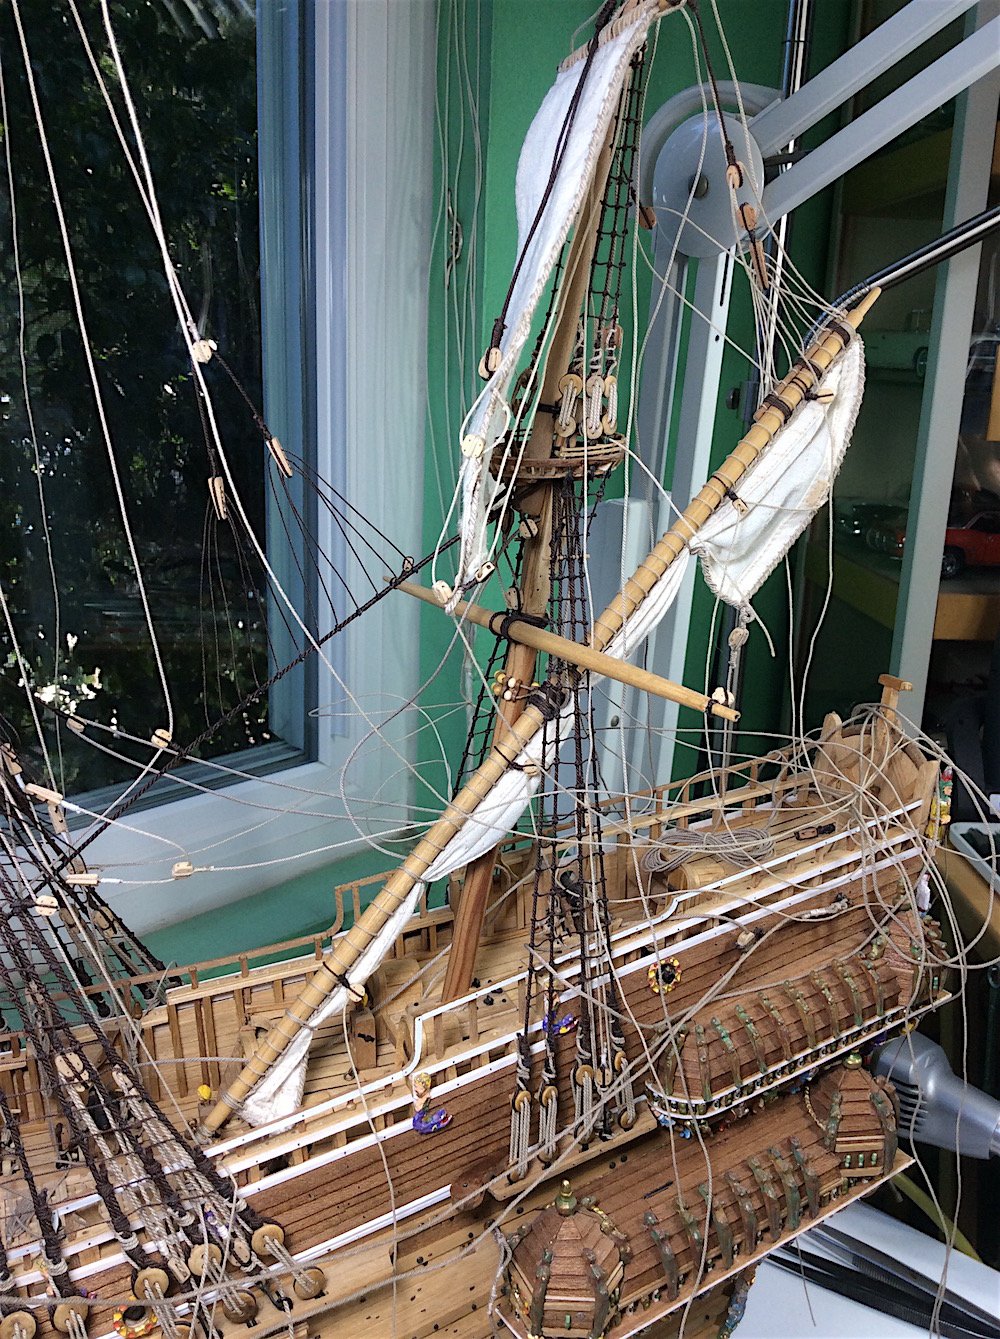
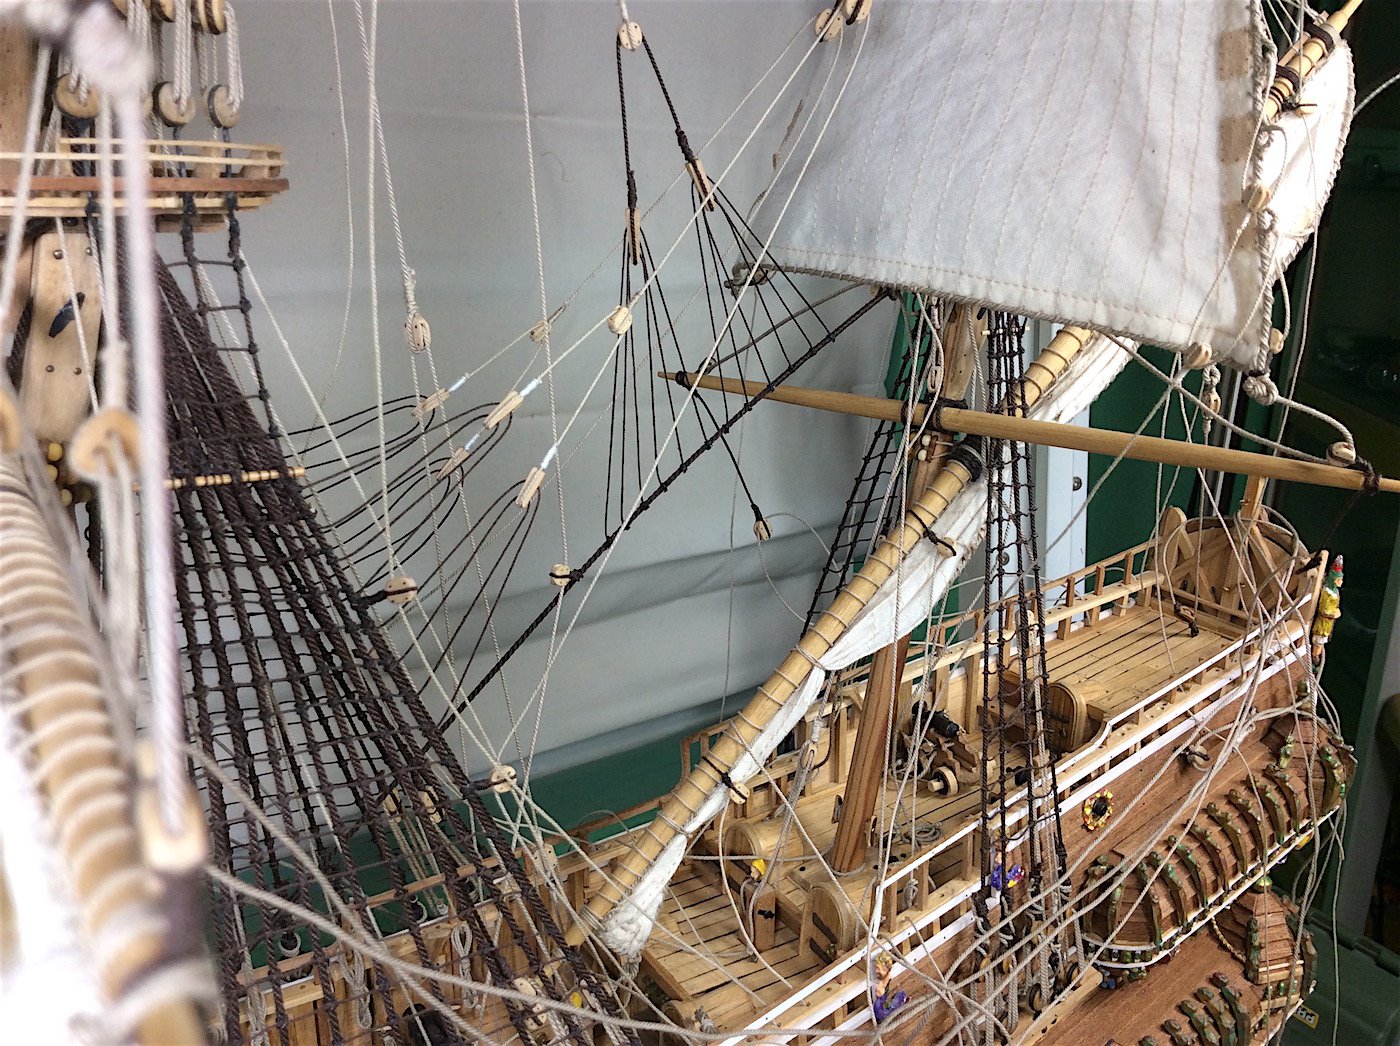
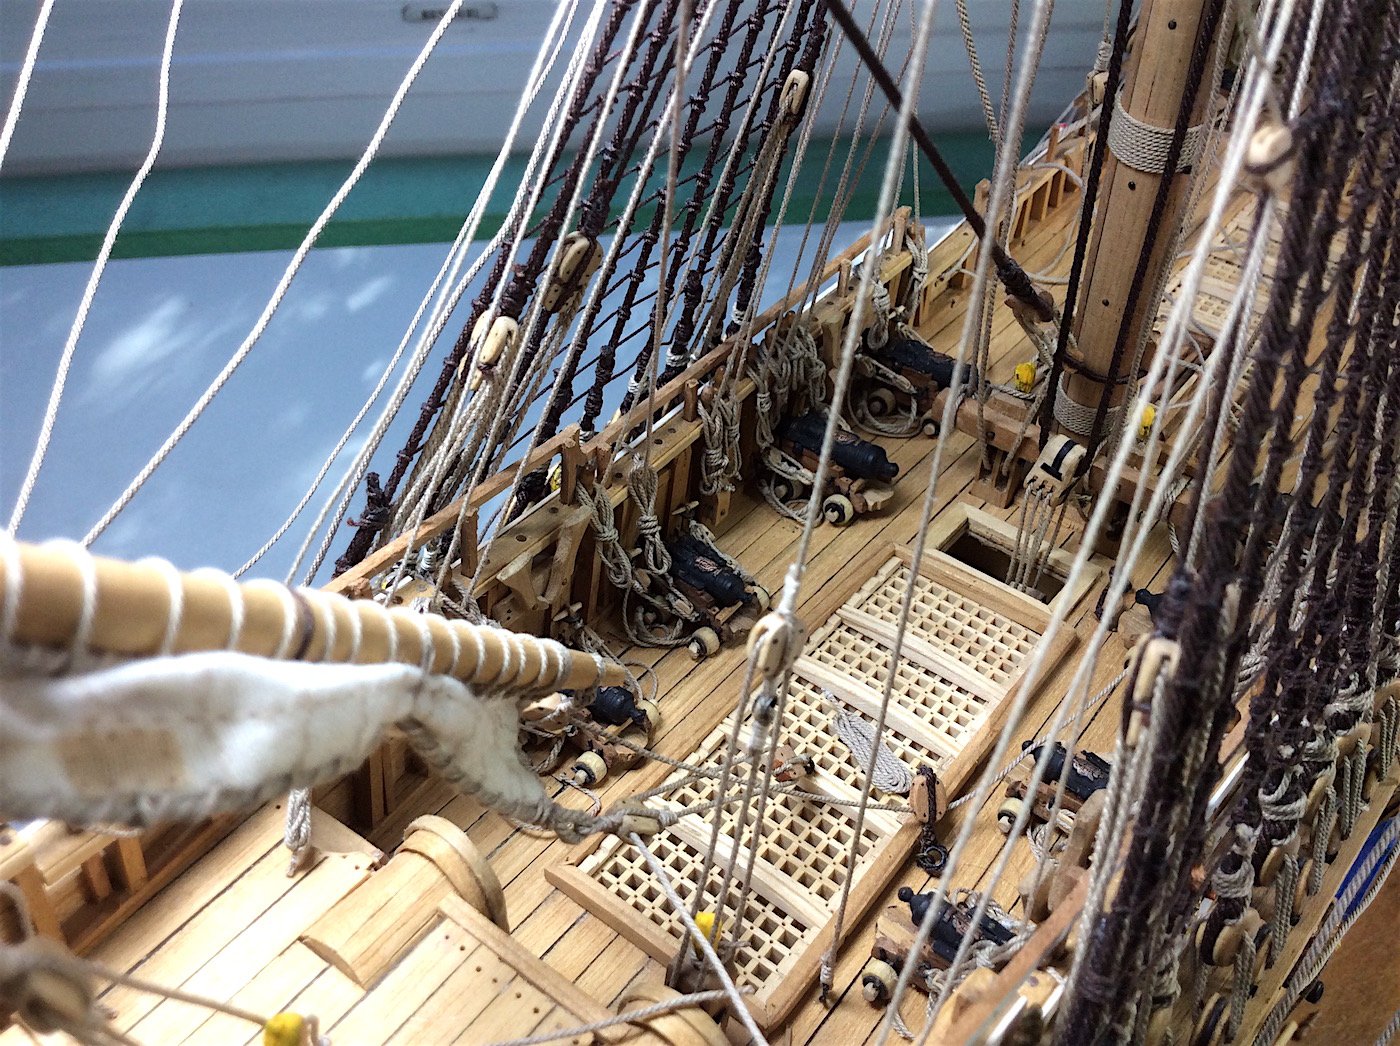
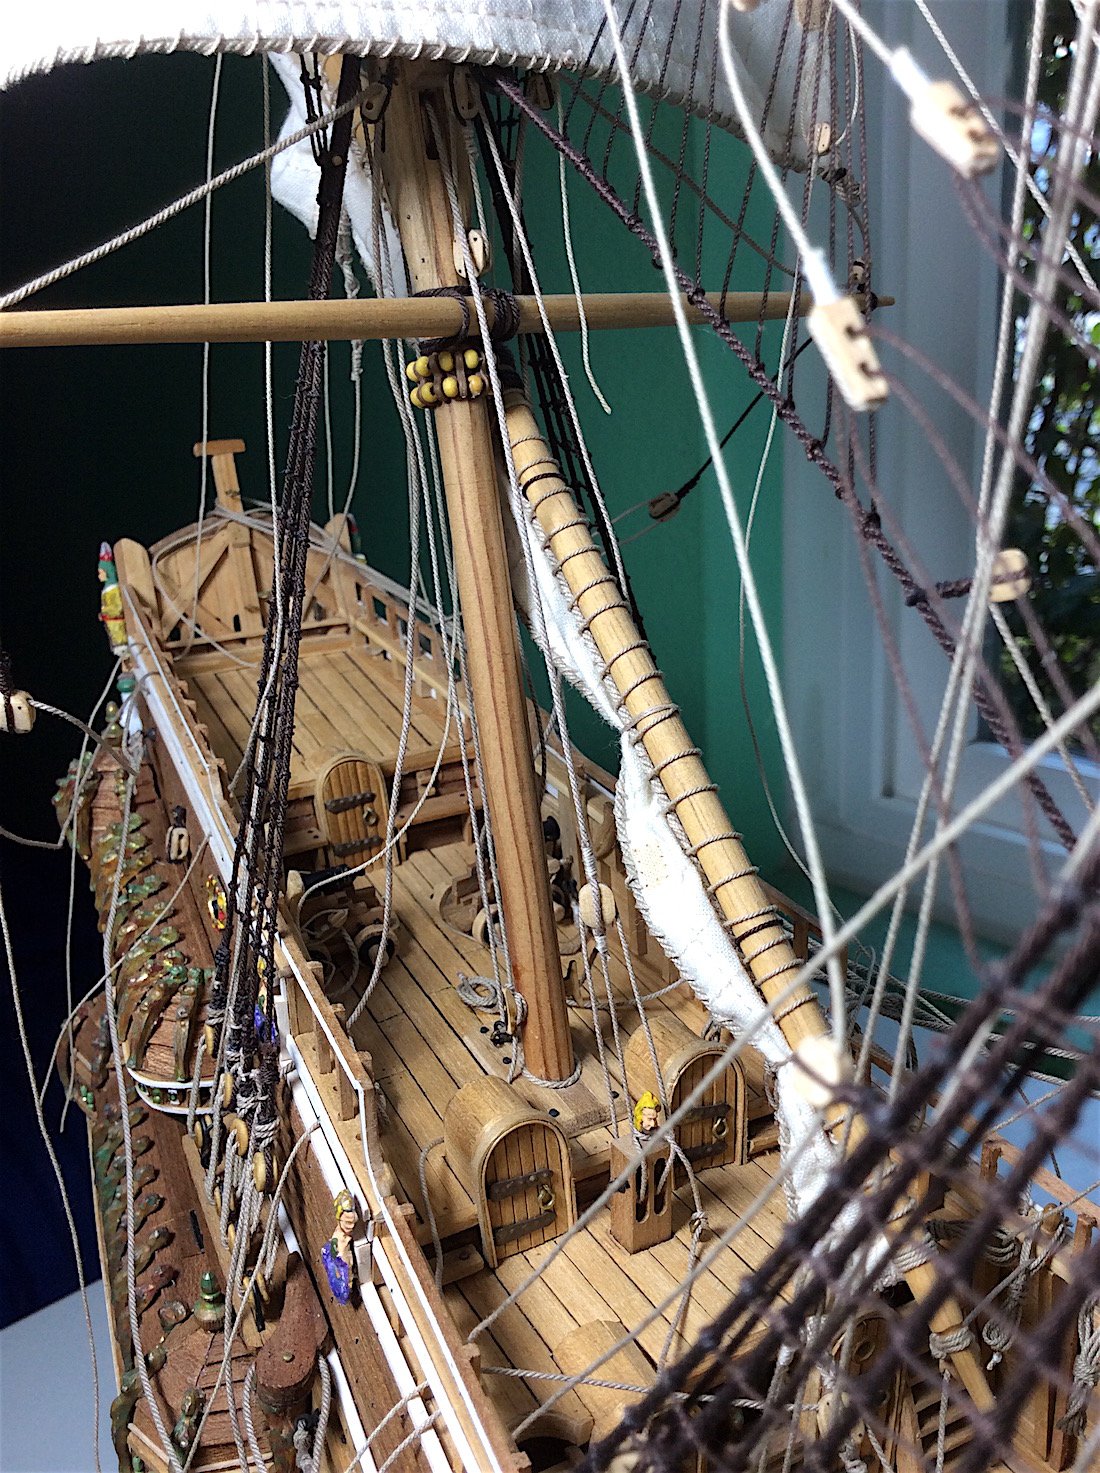
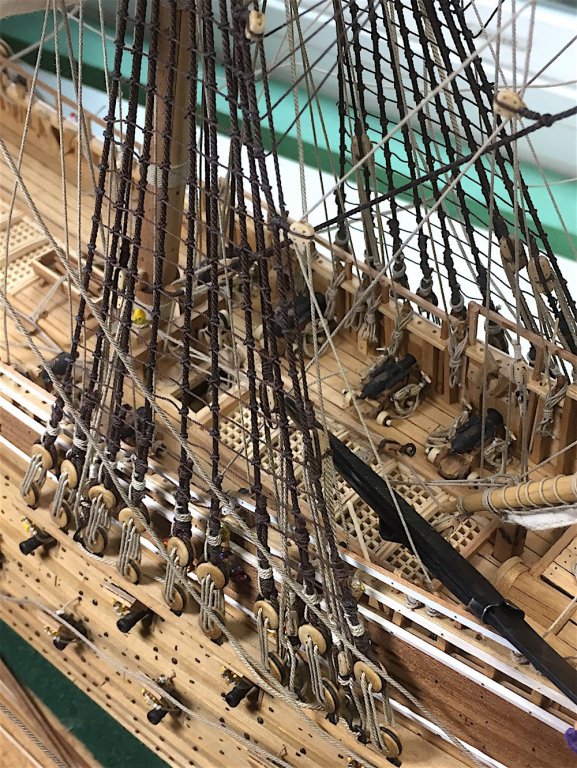
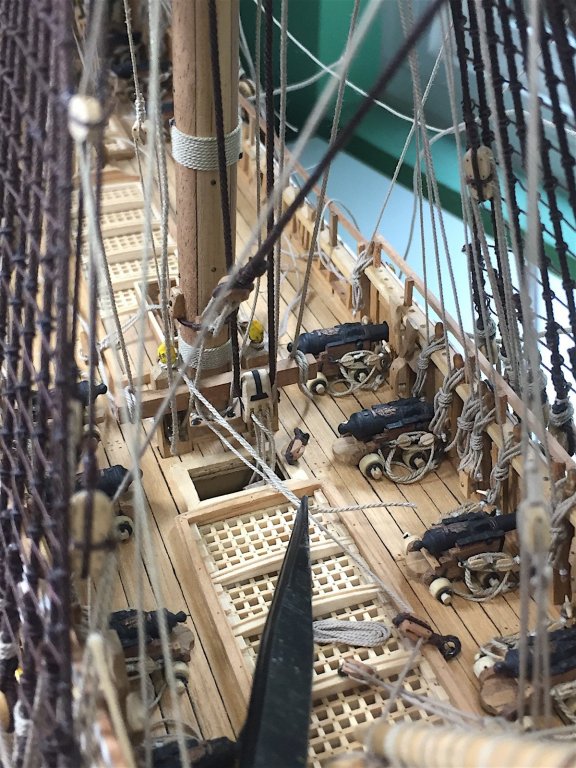
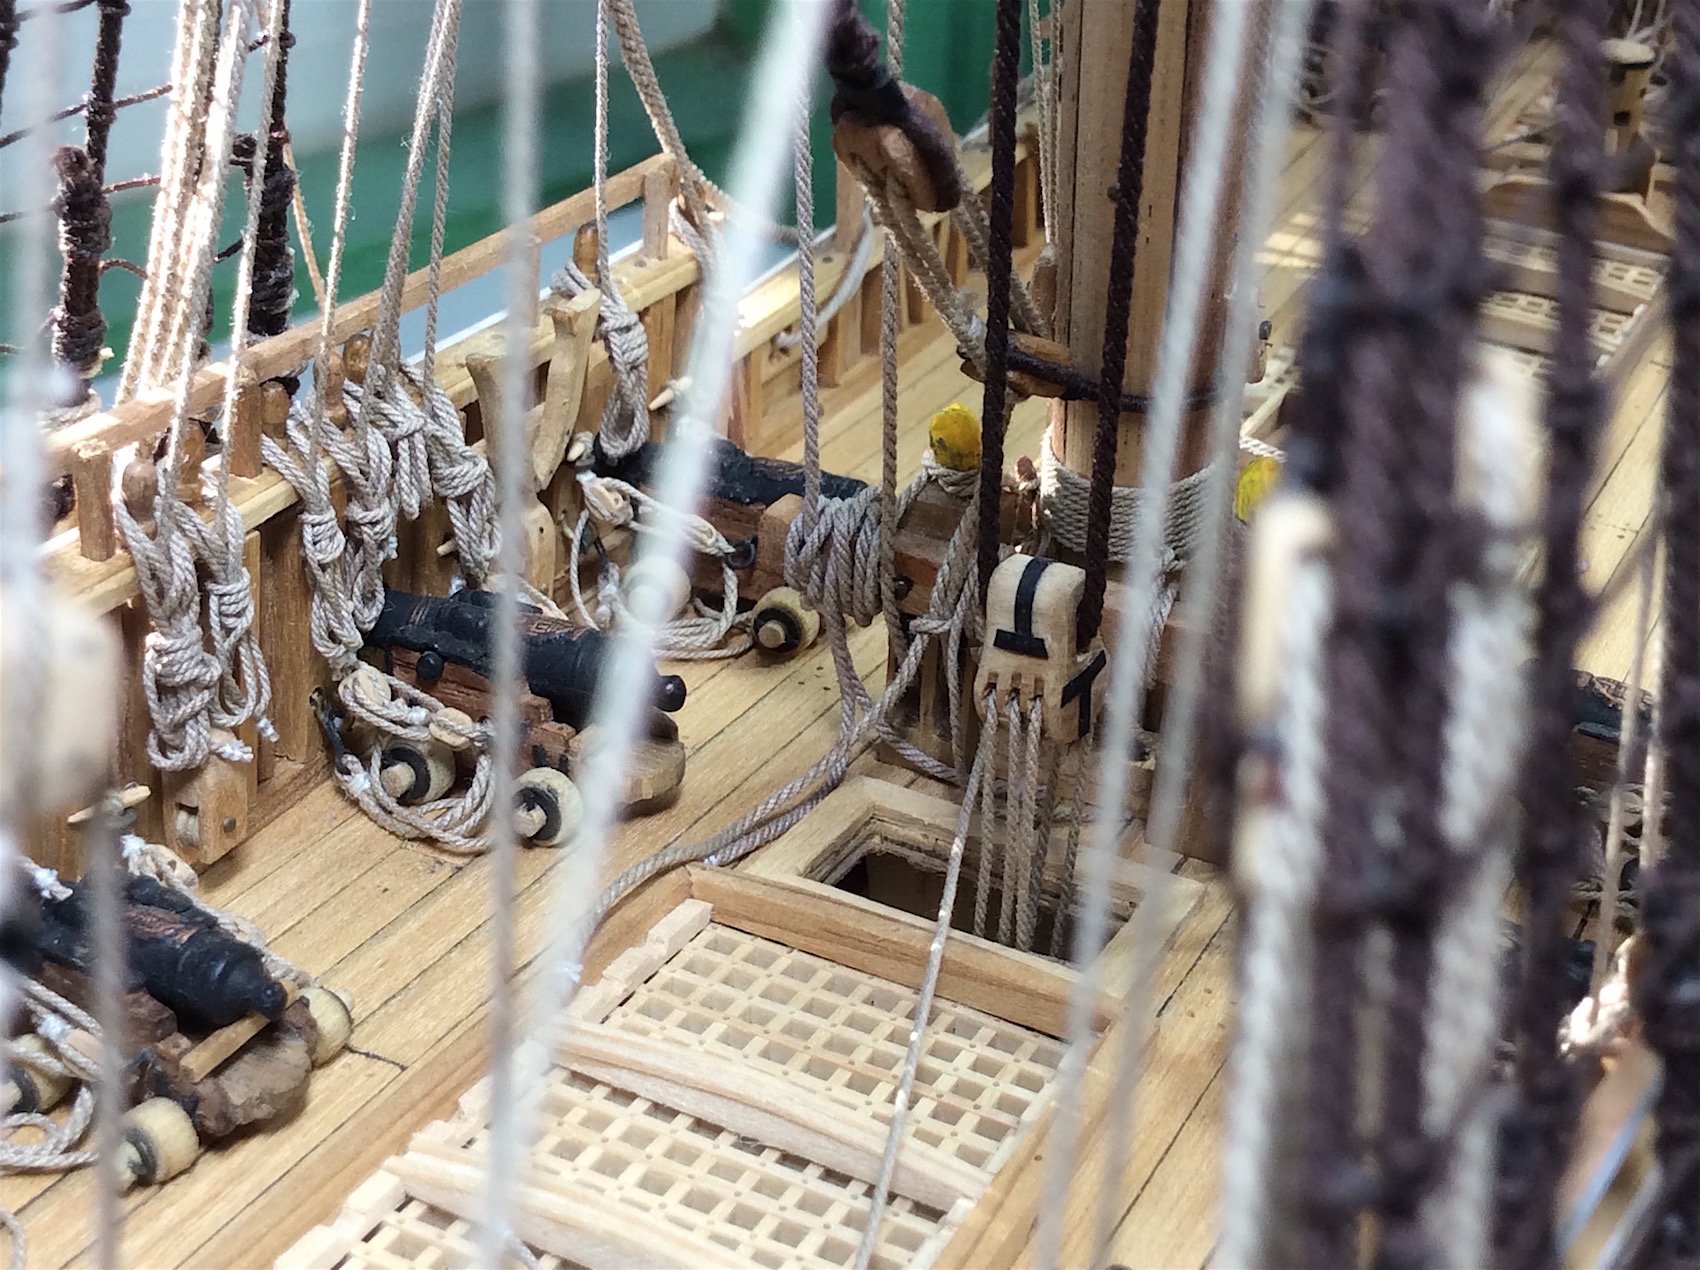
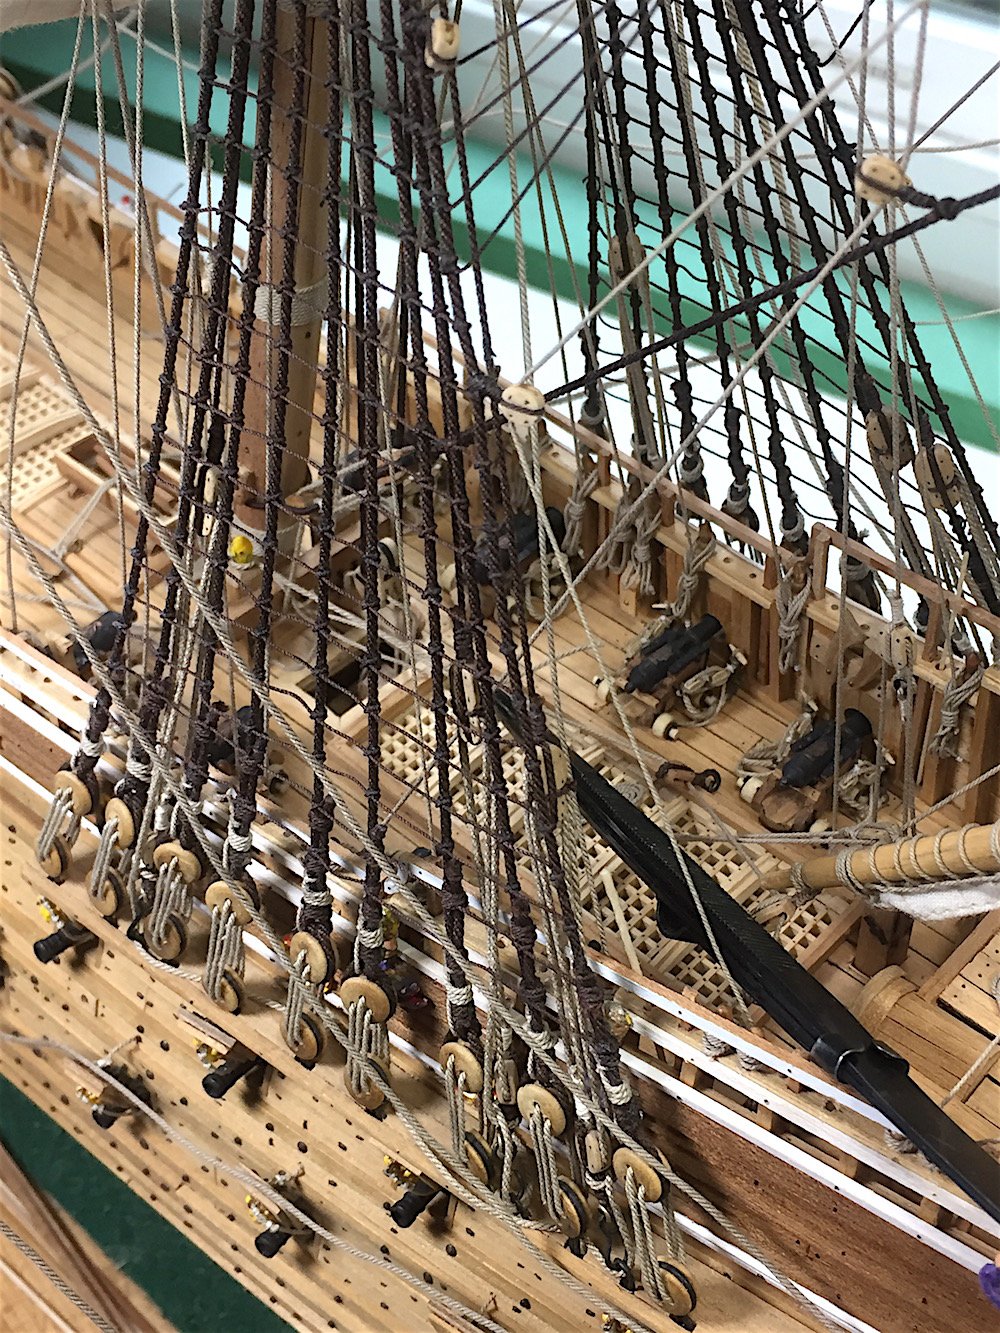
Hi Mates, Work in progress update. Have mostly attached all the mainmast area lines, some work still needs to be done along with adjustments here and there. I won't go into details, but my lack of pre-knowledge caused some issues - drilling pin holes above canon openings and behind kevels. Those spaces need to be pin and rope free (now I know). I re-located and re-drilled some pin holes as best I could, but a few lines could not be moved. There are left-over empty pin holes scares but so be it (learned this for next time) Here are a few updated pics of the mizzen area rigging- still a work area - most lines have not been tensioned or secured. Regards,


-
Patrick, As always a pleasure going through your updates. Superbly detailed work indeed. Regards,
- 756 replies
-
- 2
-
-
- galleon
- golden hind
- (and 2 more)
-
Yes beautifully detailed work with your sail - Well done!
- 122 replies
-
- 1
-
-
- greek bireme
- scale-1/35
- (and 2 more)
-
Ferit, Nice New Years treat to see that you will be active again - Your Berlin is so excellent as well. Welcome back!! Cheers,
-
Oh, I think I know how you did this. --- You used the arm from another clip inserting it inside the black part??? Very clever "out of the box" thinking.
- 59 replies
-
- 1
-
-
- artesania latina
- san francisco ii
- (and 1 more)
-
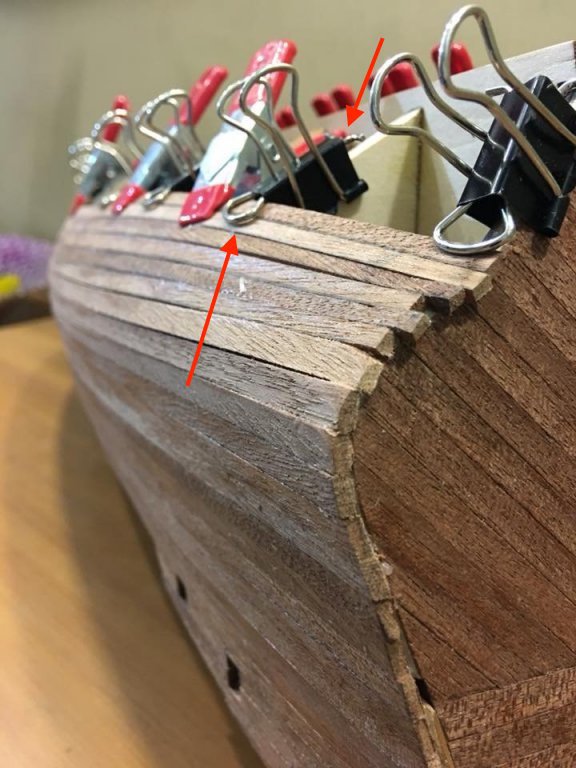
mtbediz, Very nice planking work. Good start. I have a question about those spring clamps. Very interesting - I have not seen this useful design before. Is this something you added with wire? If not what are there called? I may want to get a few. Regards,
- 59 replies
-
- 1
-
-
- artesania latina
- san francisco ii
- (and 1 more)
-
Mark, It's been a pleasure following this one from you sir. Brilliant work - congrats indeed. Regards,
- 652 replies
-
- 3
-
-
- royal william
- euromodel
- (and 1 more)
-
Sweet indeed - that close-up of the anchor and all of the surrounding details is such also excellent work!! regards,
- 652 replies
-
- 2
-
-
- royal william
- euromodel
- (and 1 more)
-
Dan, Indeed beautifully detailed, and well executed work in such a small scale - very impressive. She will look awesome when completed. Regards,
- 287 replies
-
- 2
-
-
- michelangelo
- ocean liner
- (and 1 more)
-
E.J... yea as many have said those windows are indeed superb - that will make for an awesome start for detaining this complicated stern. PS: Sure like that Micro Shapers tool. need to get one of those (;-) PS:2 found one on eBay!!


.jpg.490d54b577d55a6b576f6d8e86b3ddd7.jpg)