md1400cs
-
Posts
2,868 -
Joined
-
Last visited
Content Type
Profiles
Forums
Gallery
Events
Everything posted by md1400cs
-
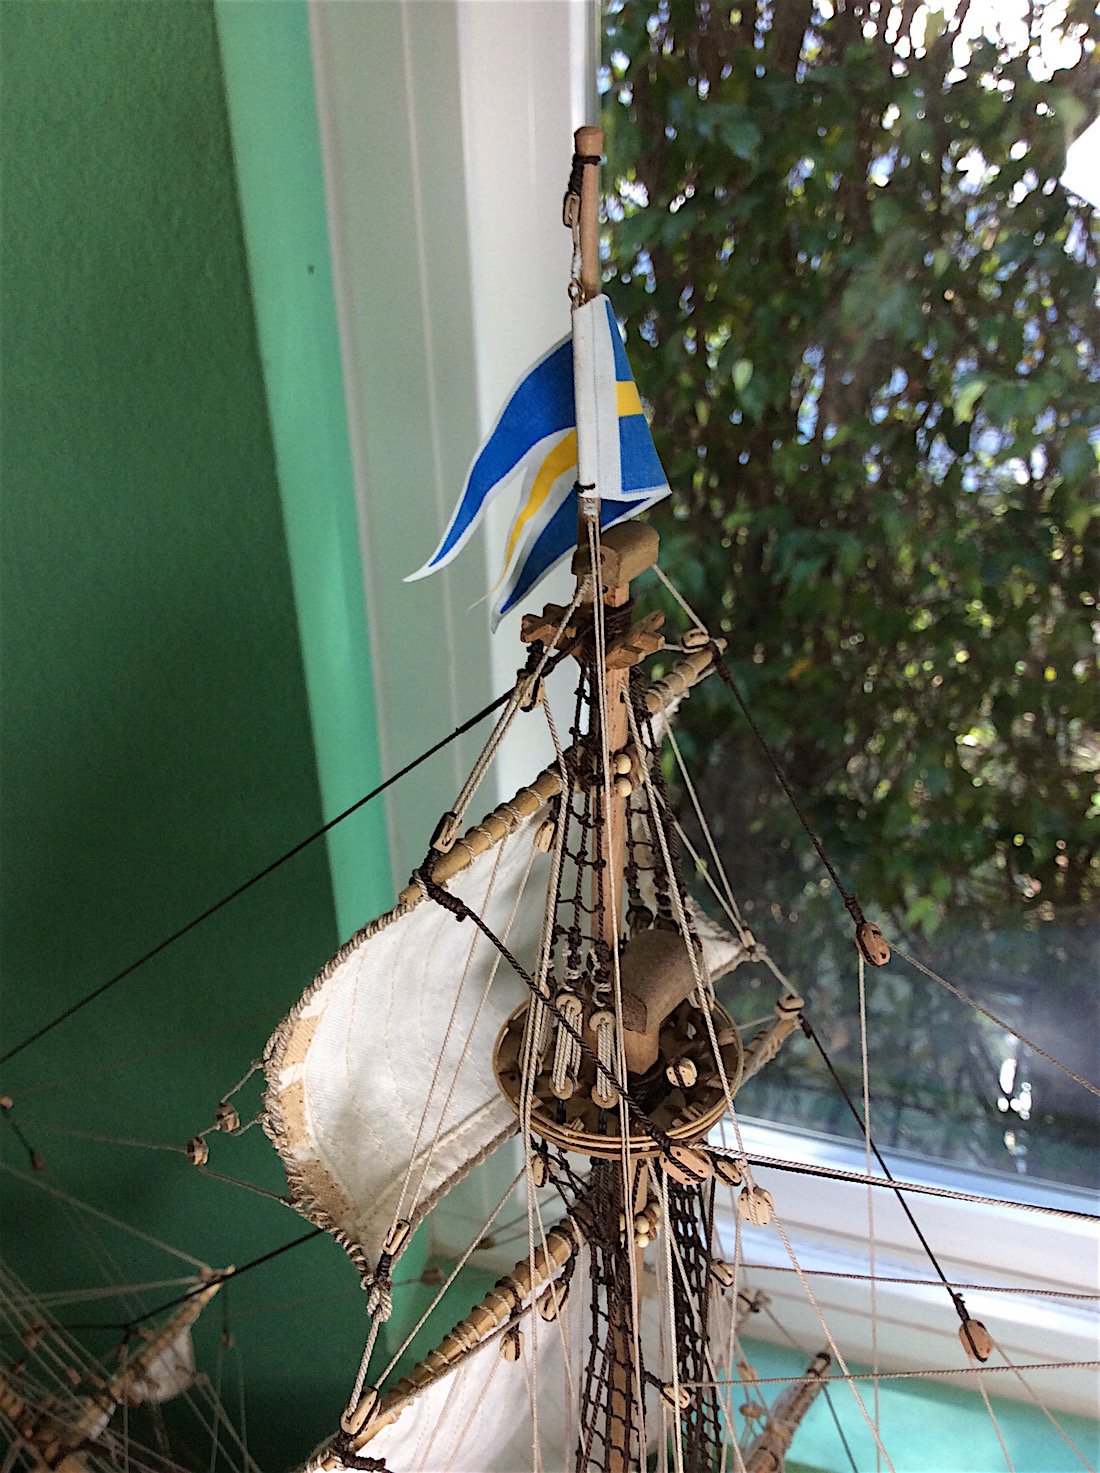
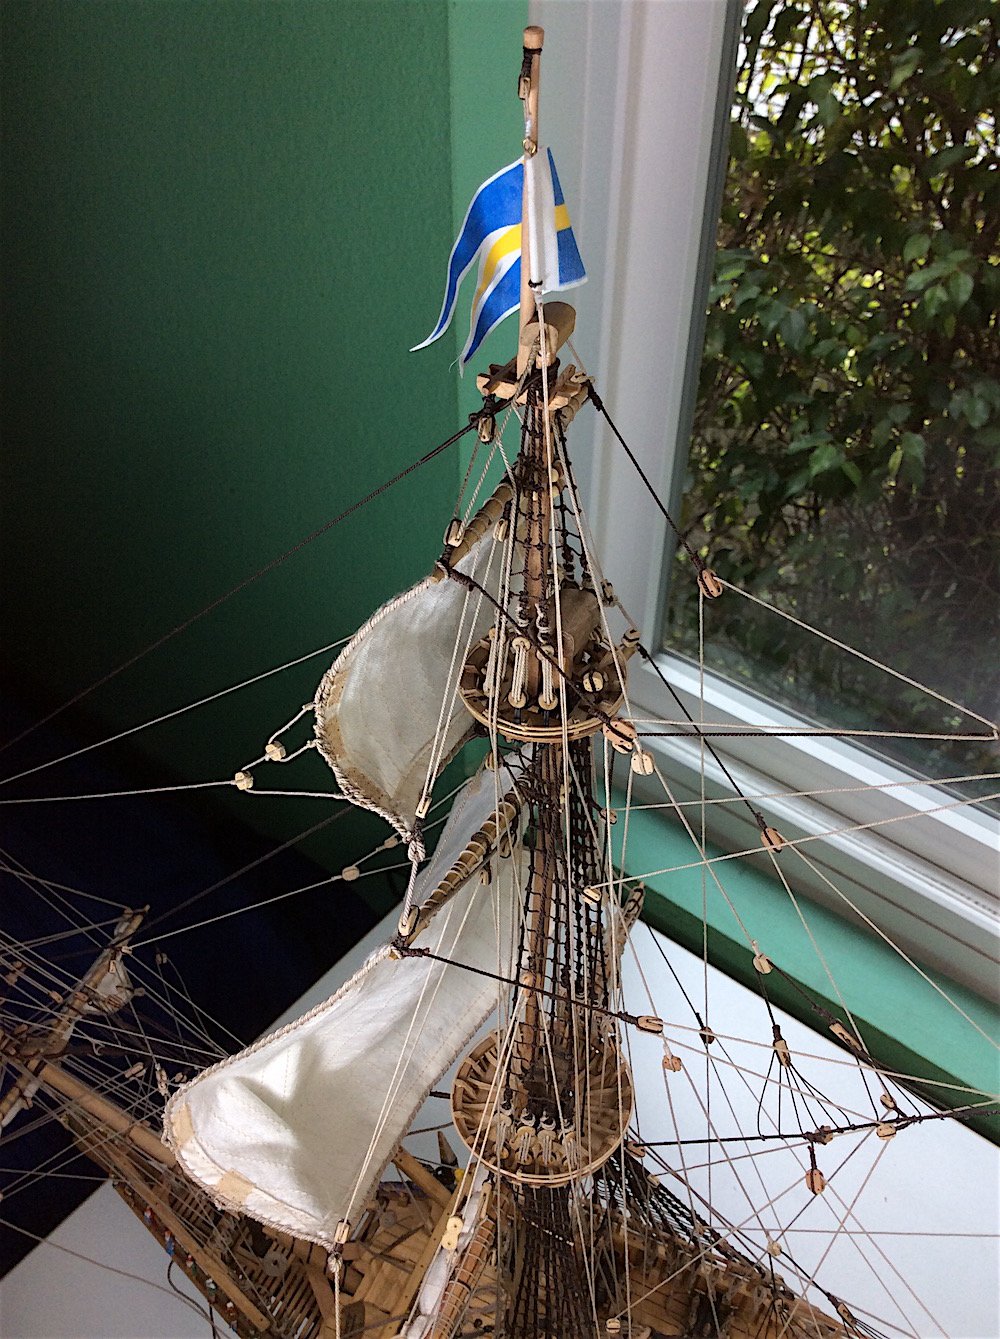
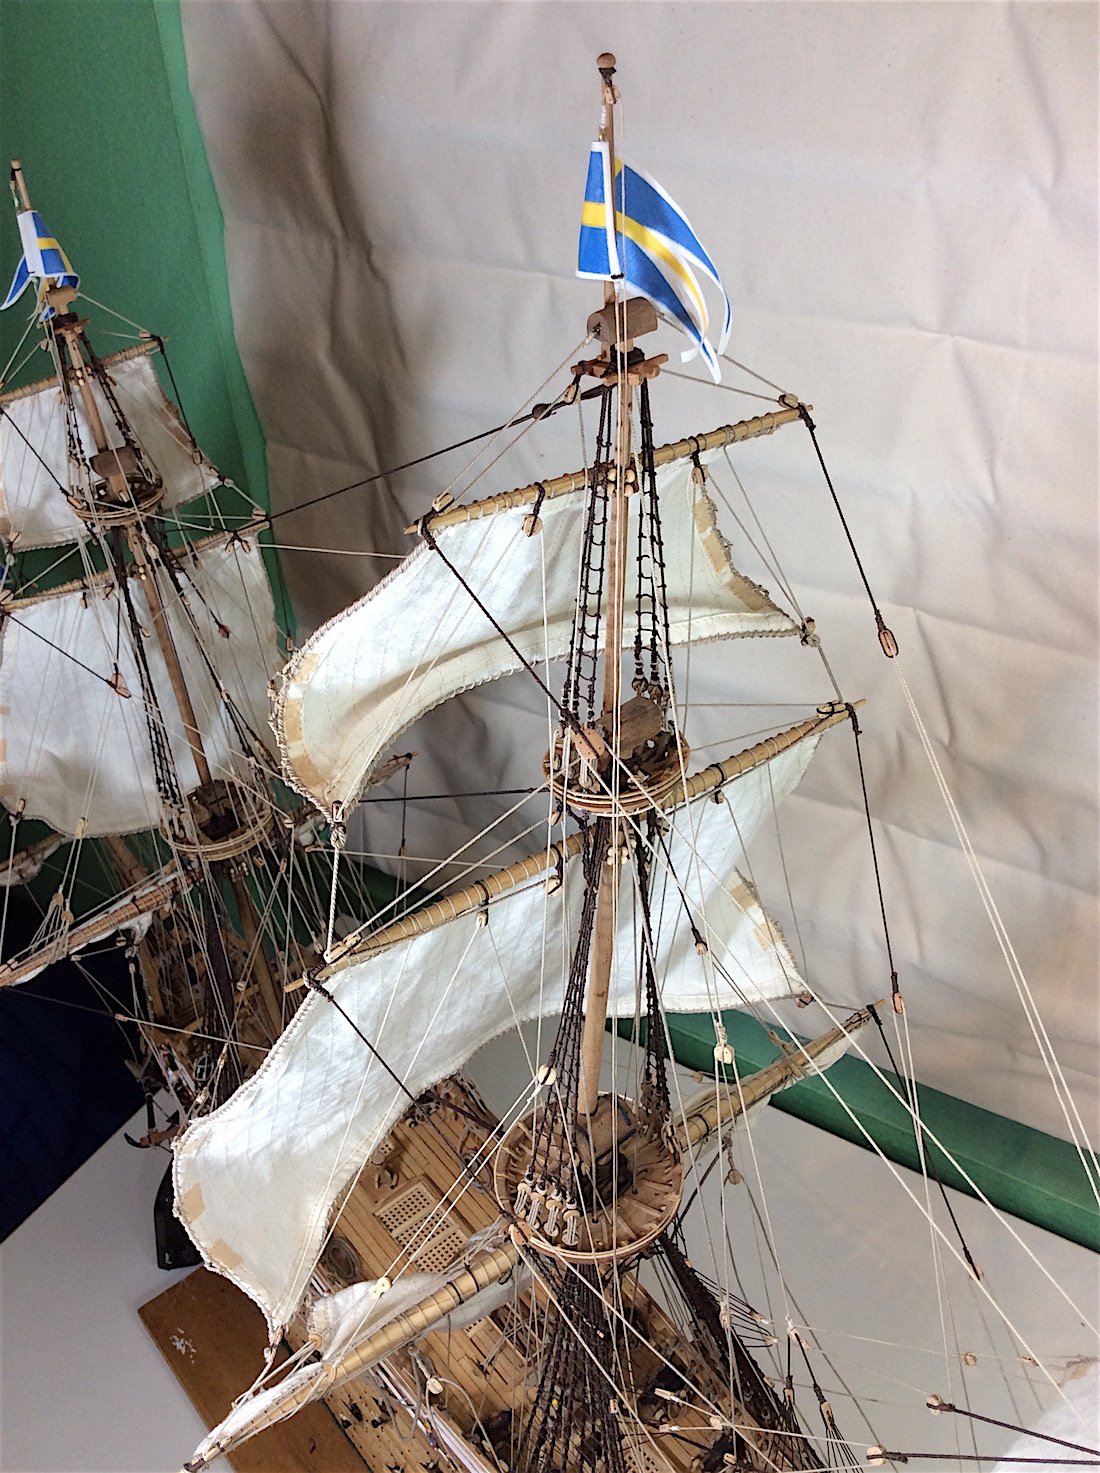
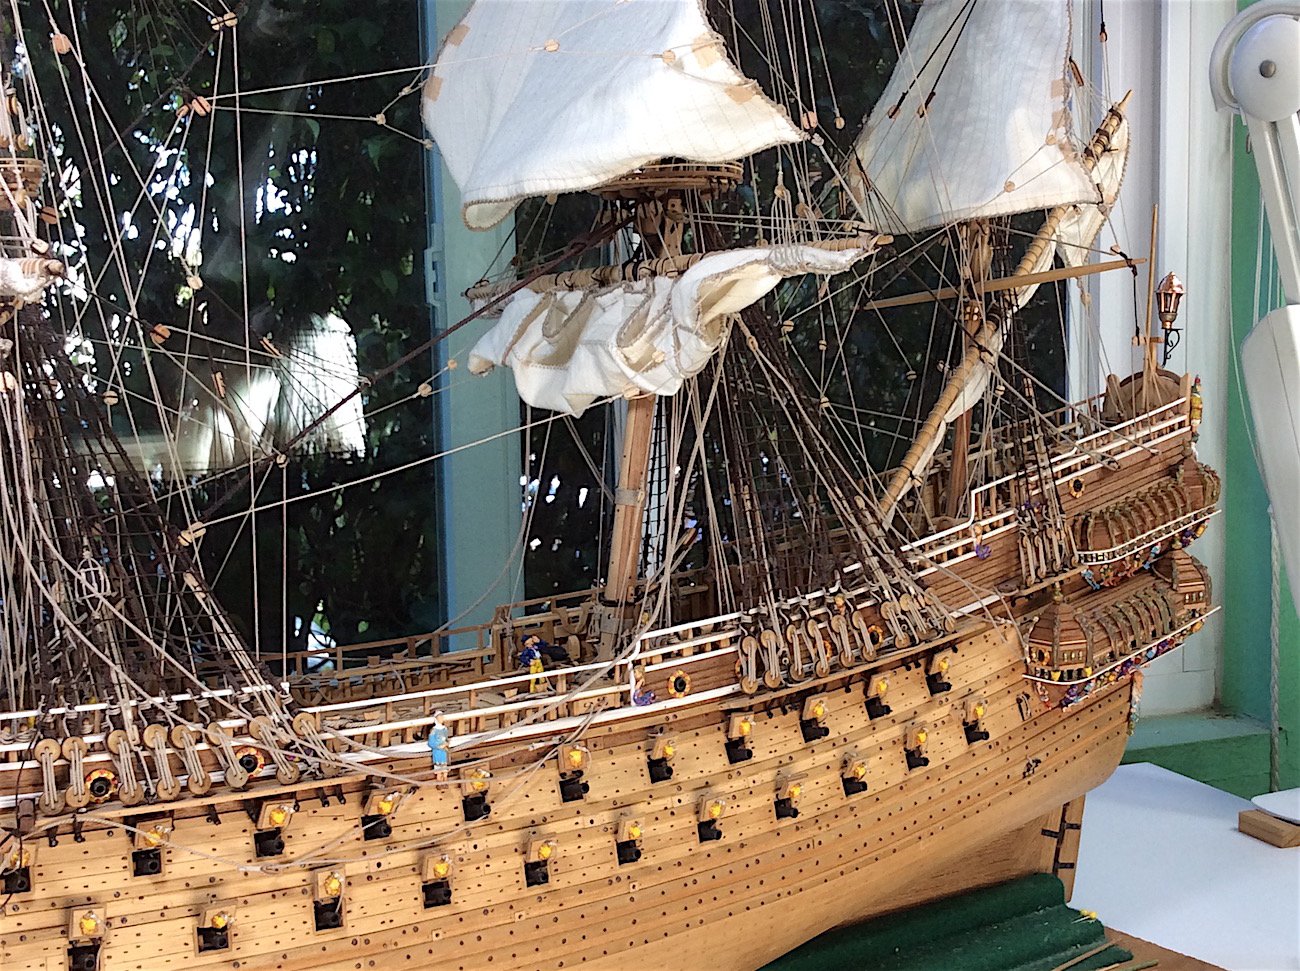
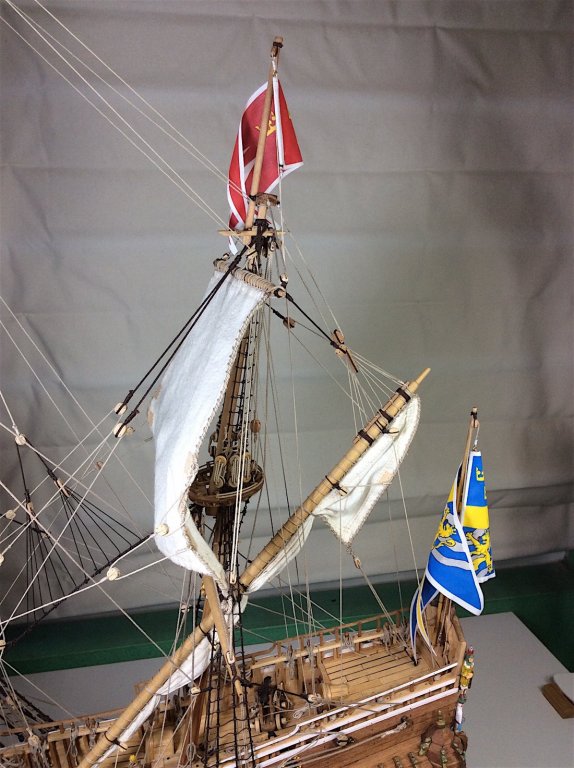
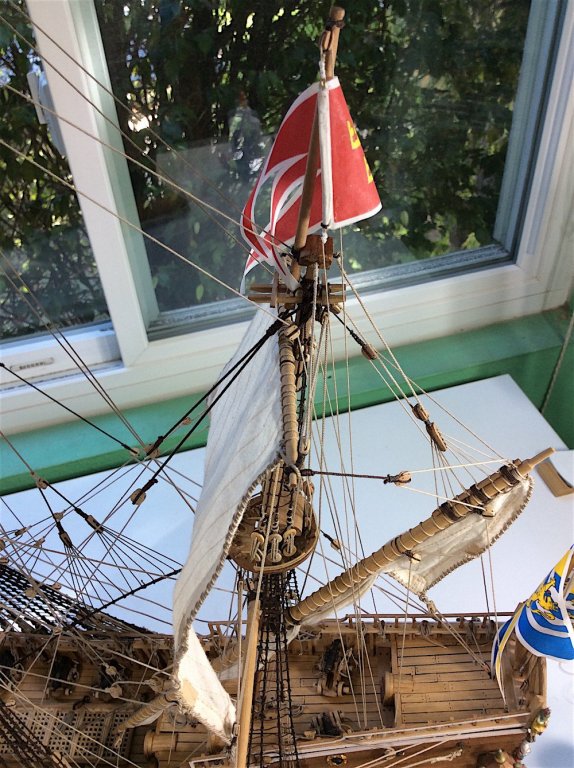
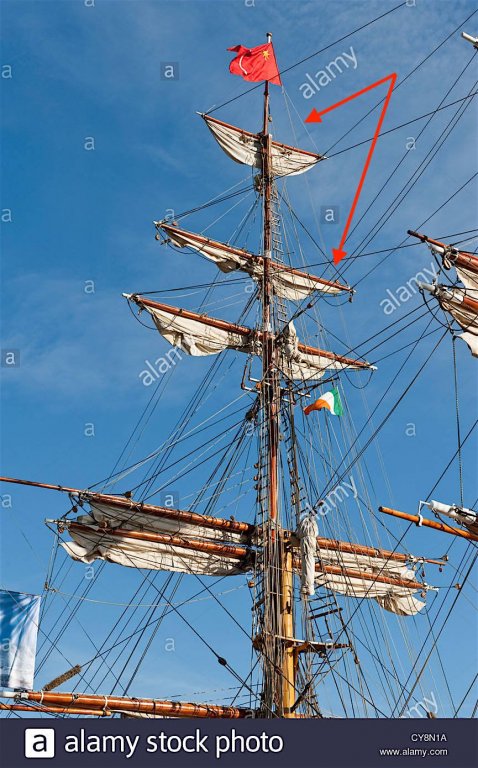
 Hi Mates, Last build update for this Vasa – the next (last one) will be some shots of her full views - completed. Hard for me to believe Just finished the flags better rigged. Henry, et al – thanks for your advice; pics of the three masts. Tomorrow I go to pick up the case cover, and move her to her new room.


-
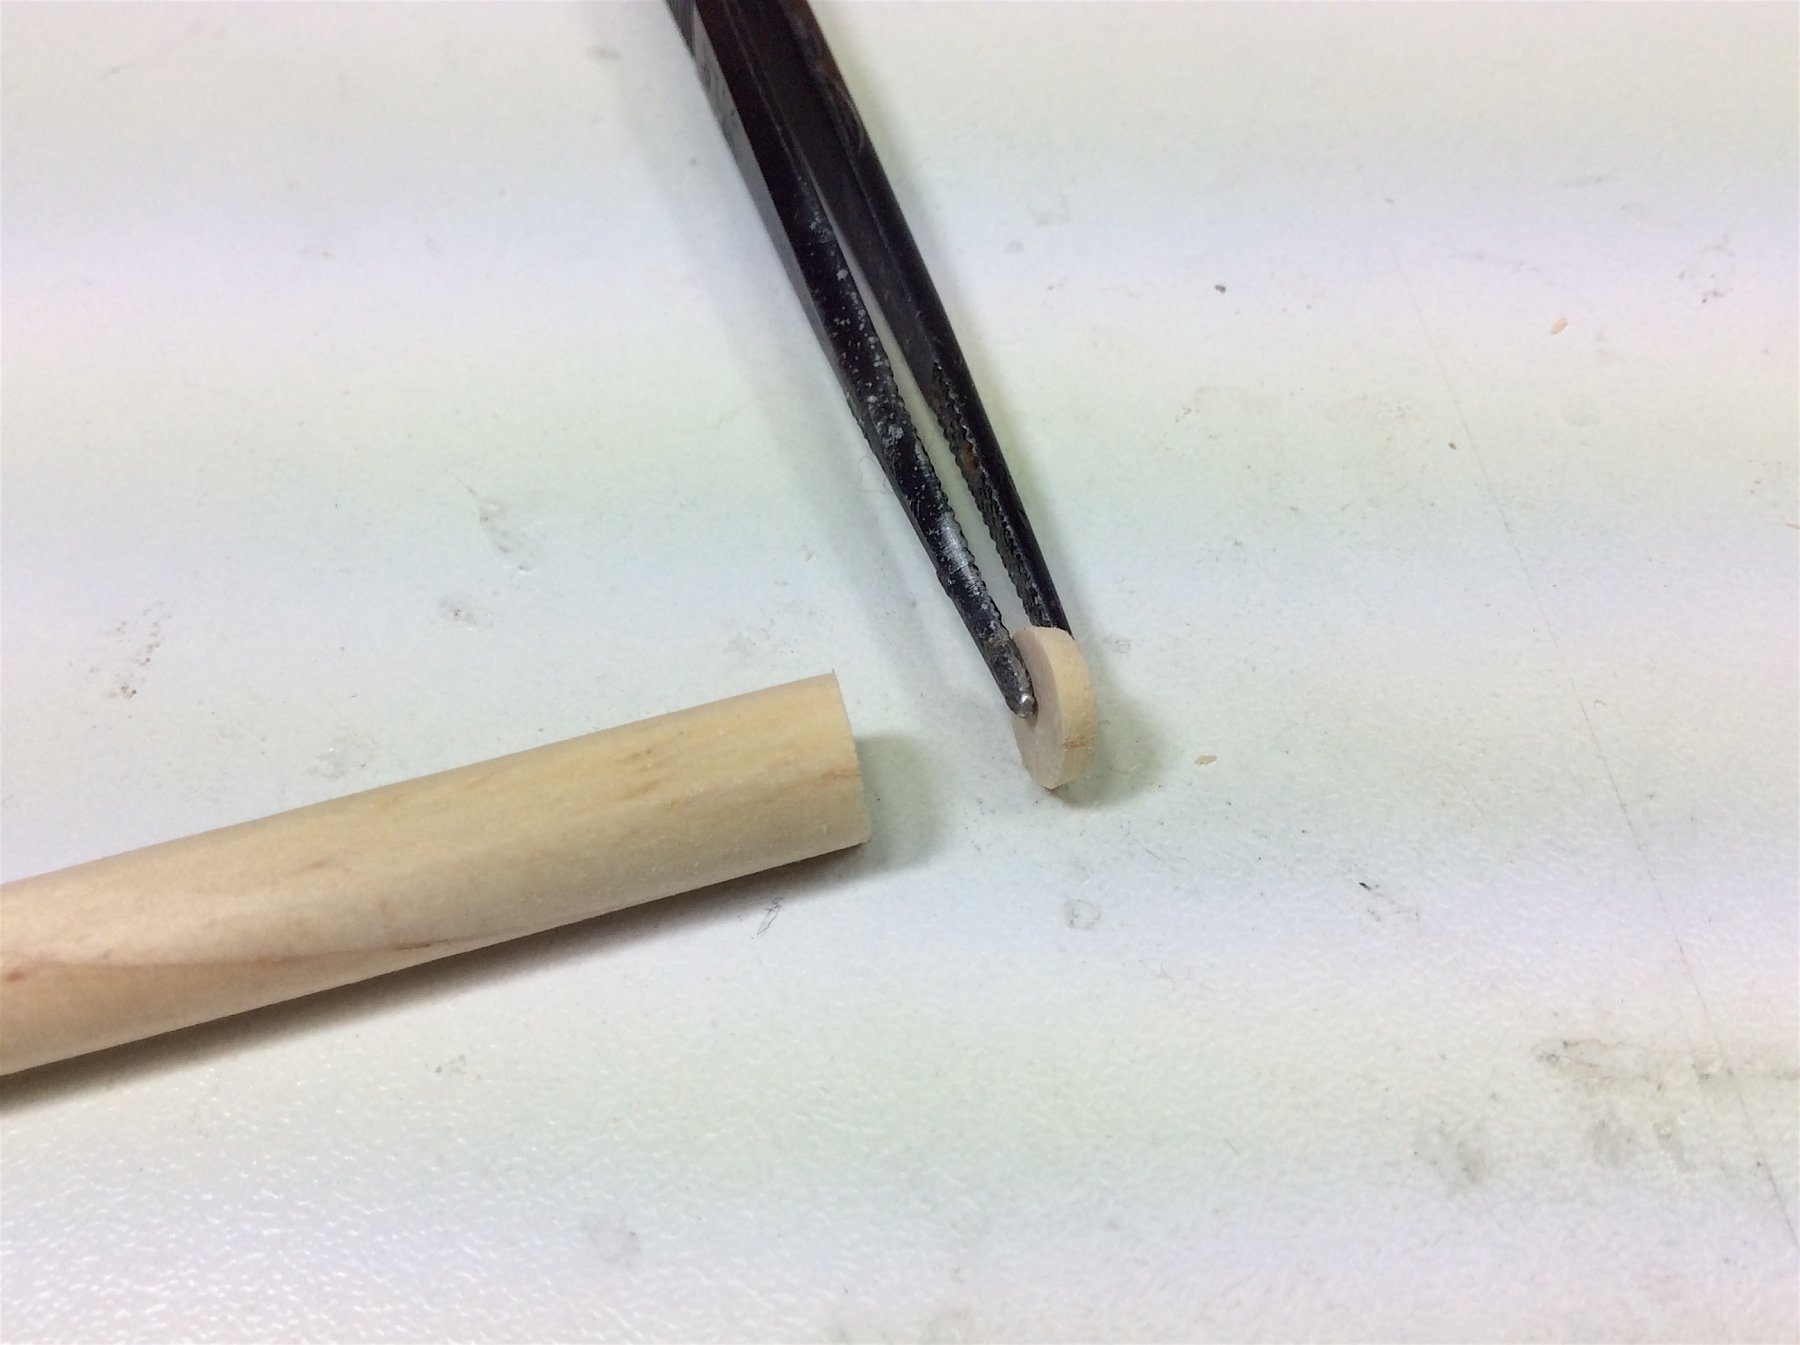
Ferit, These parrels came from Cornwall Model Boats in the UK. They are from Amati sold as fittings. Make sure that you get them from Amati - The Corel ones (that can be ordered) may be the same as what was included in your kit? Mine were metal spacers and plastic beads. The Amati have wood colored plastic spacers and wood beads. They look very good IMO. They come in doubles, or triples. 4384/10 Mast Parrels with Spacers 10mm (photo shows two rows but there are three with the 100mm) 4384/06 Mast Parrels with Spacers 6mm https://www.cornwallmodelboats.co.uk/cgi-bin/ss000001.pl?page=search&SS=parrels&PR=-1&TB=O&ACTION=Go! Regards,
-
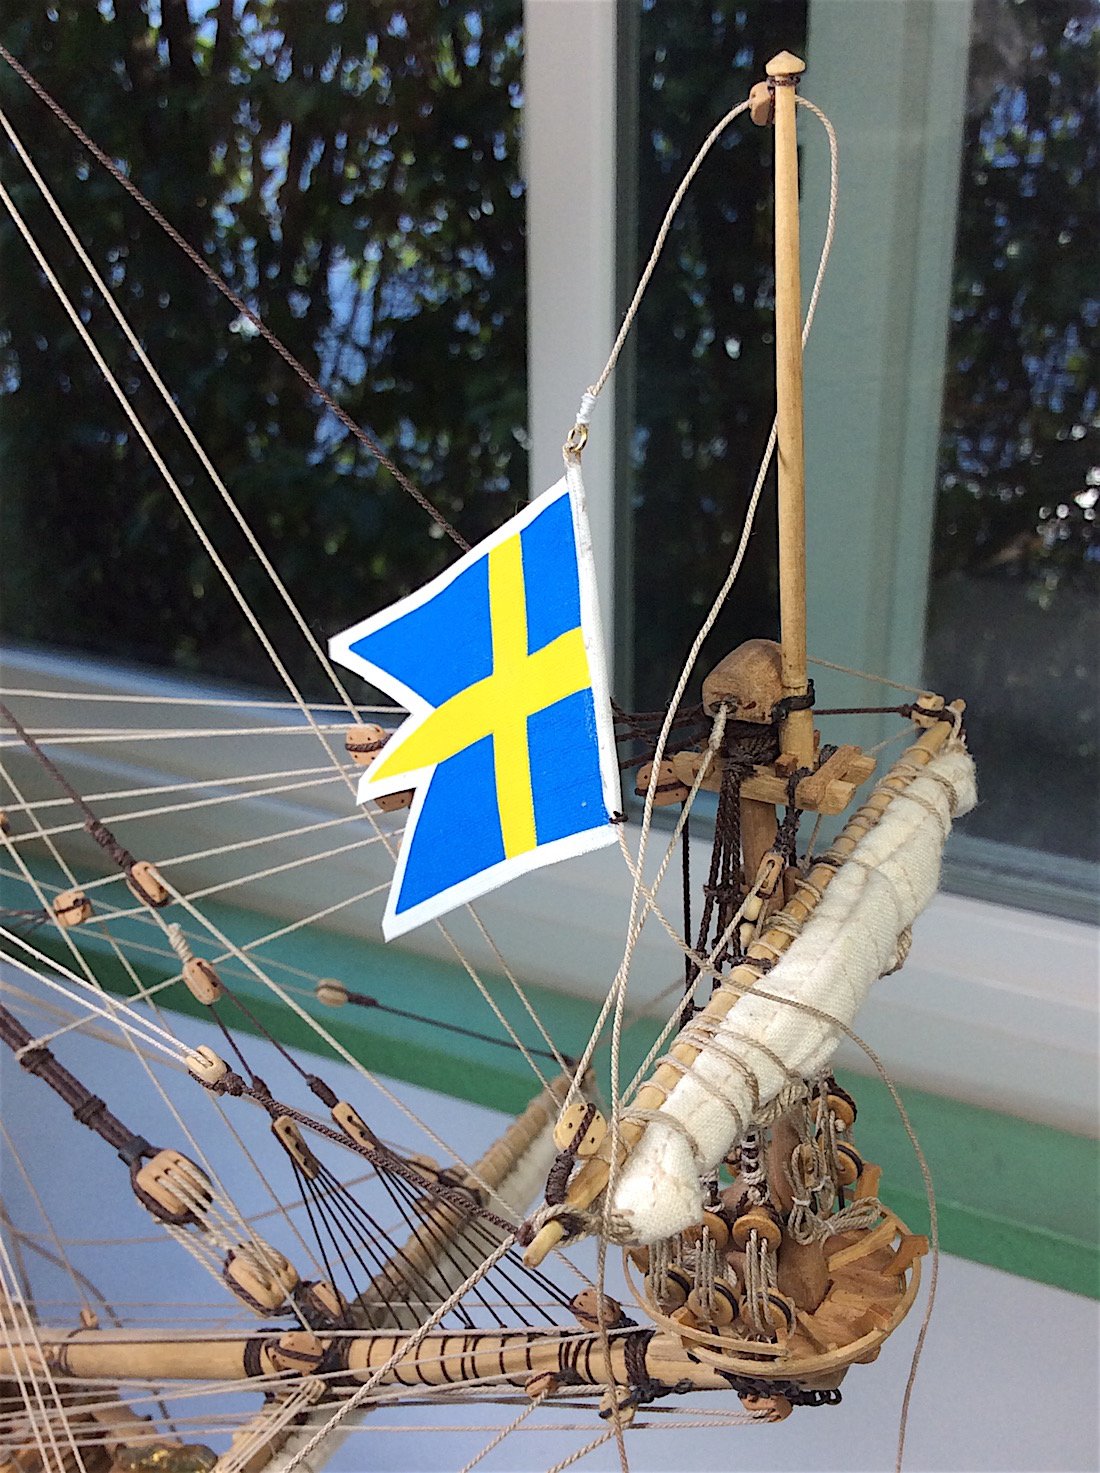
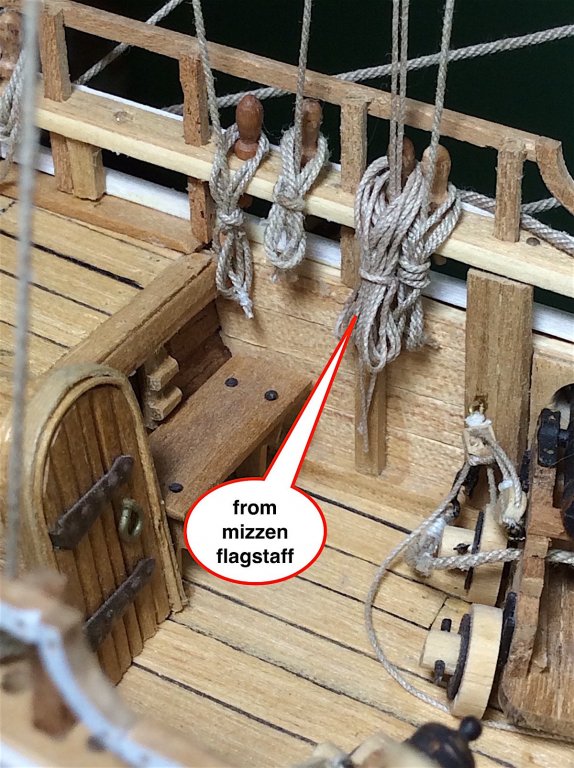
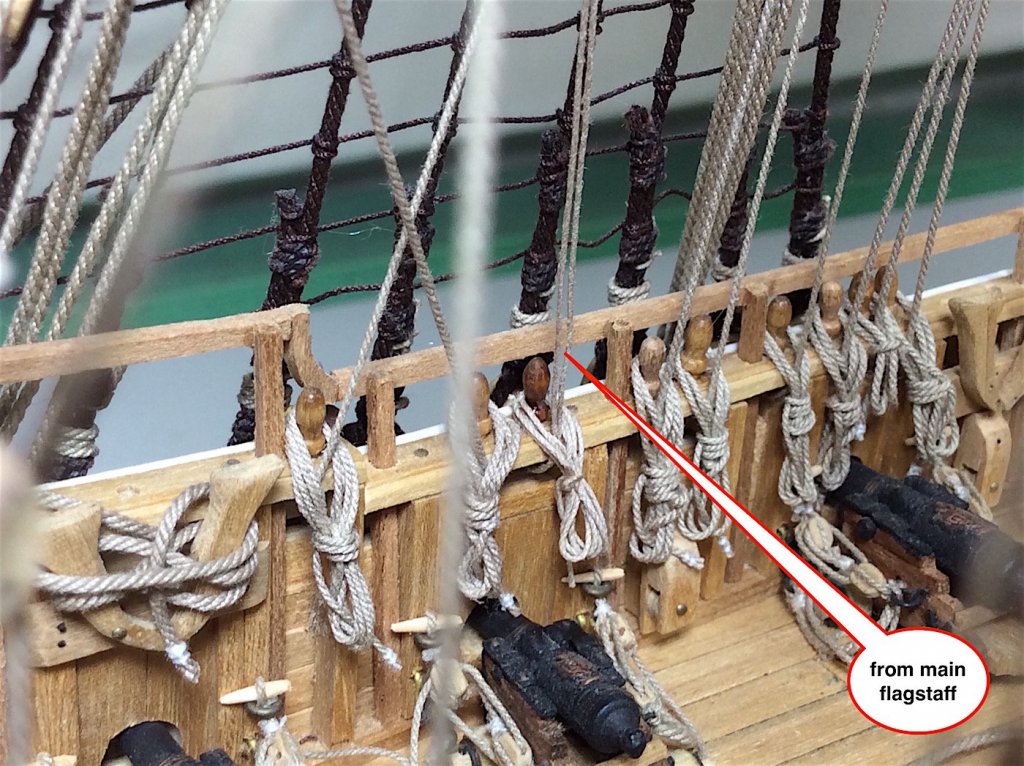
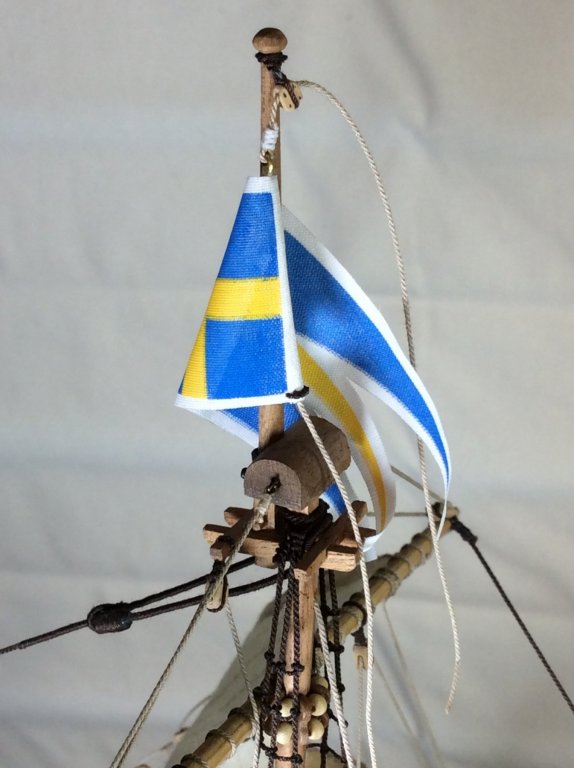
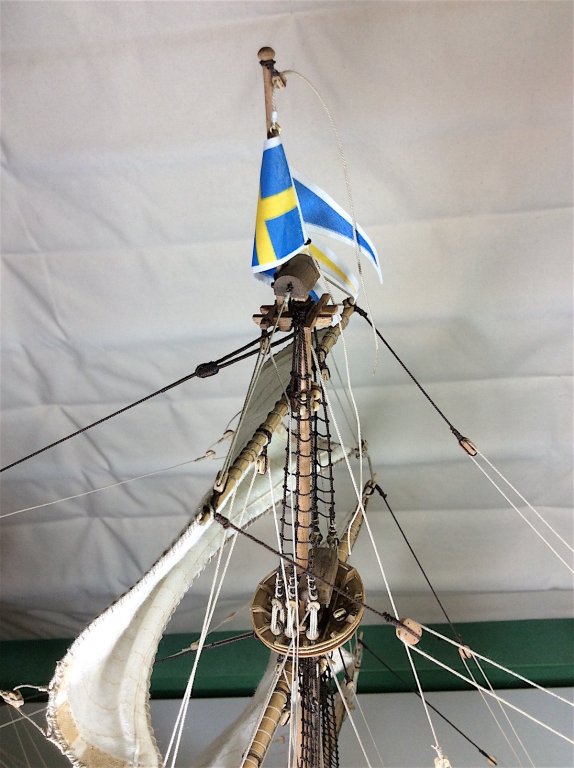
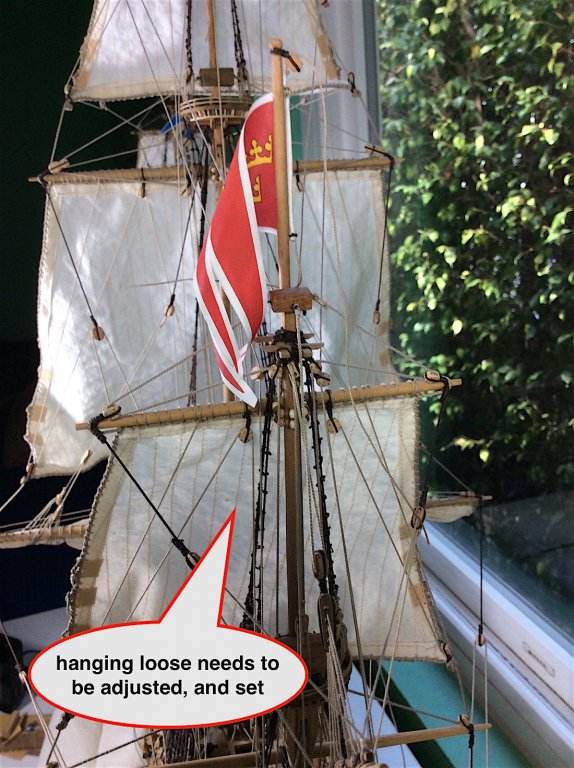
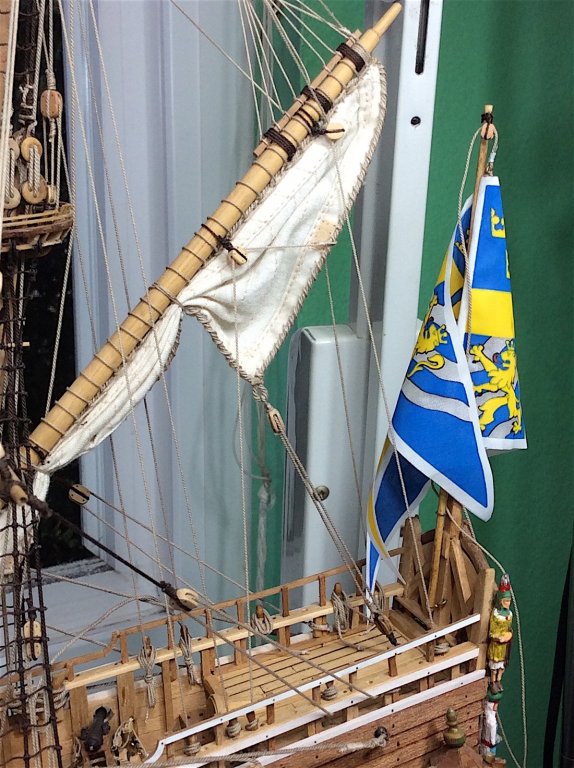
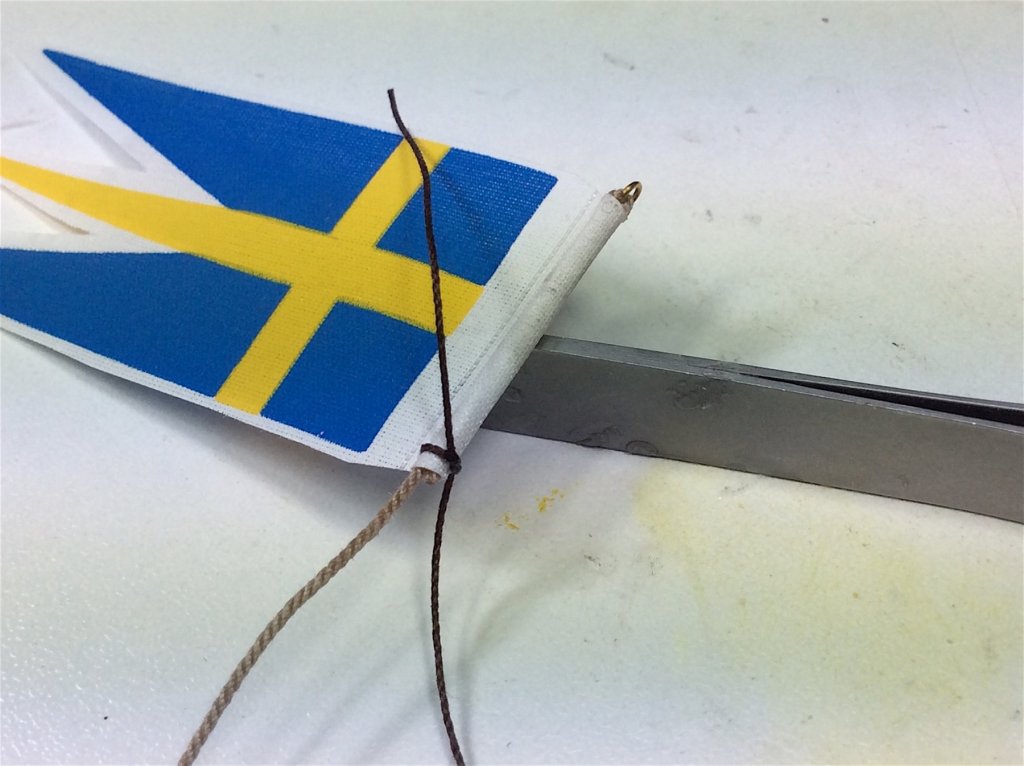
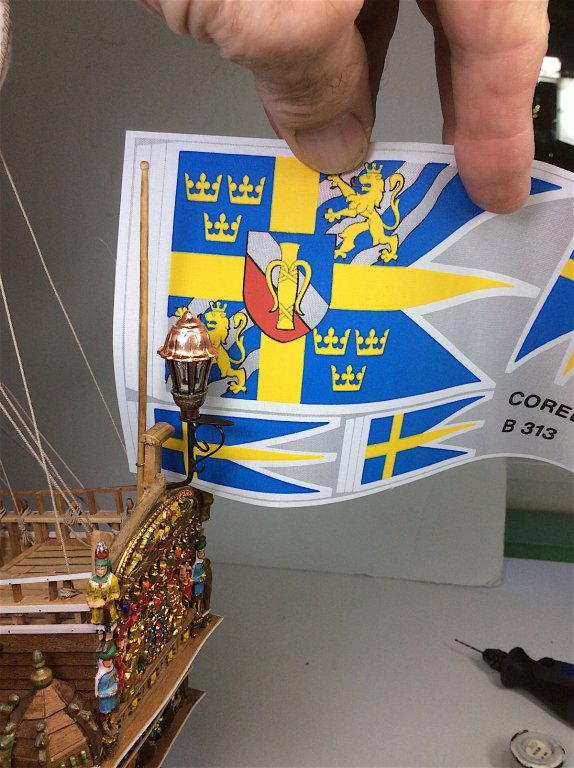
Hi Mates, Thanks for your responses. I assumed as much (sort of) but was hoping for an easy resolution. So for the fore, main, and mizzen, will re- rope the flags using much thinner/longer rope (thanks Henry) Now need to understand where the shrouds should run to the tops. Through or around the platforms? Prob. around the outsides, but that will make for sloppy looking details, and poss. criss-crossing the already numerous lines. Along with the flags not "hanging" parallel to their flagstaffs. For now doing the two easy ones, bowsprit and stern flags. Again thanks for your input mates......
-
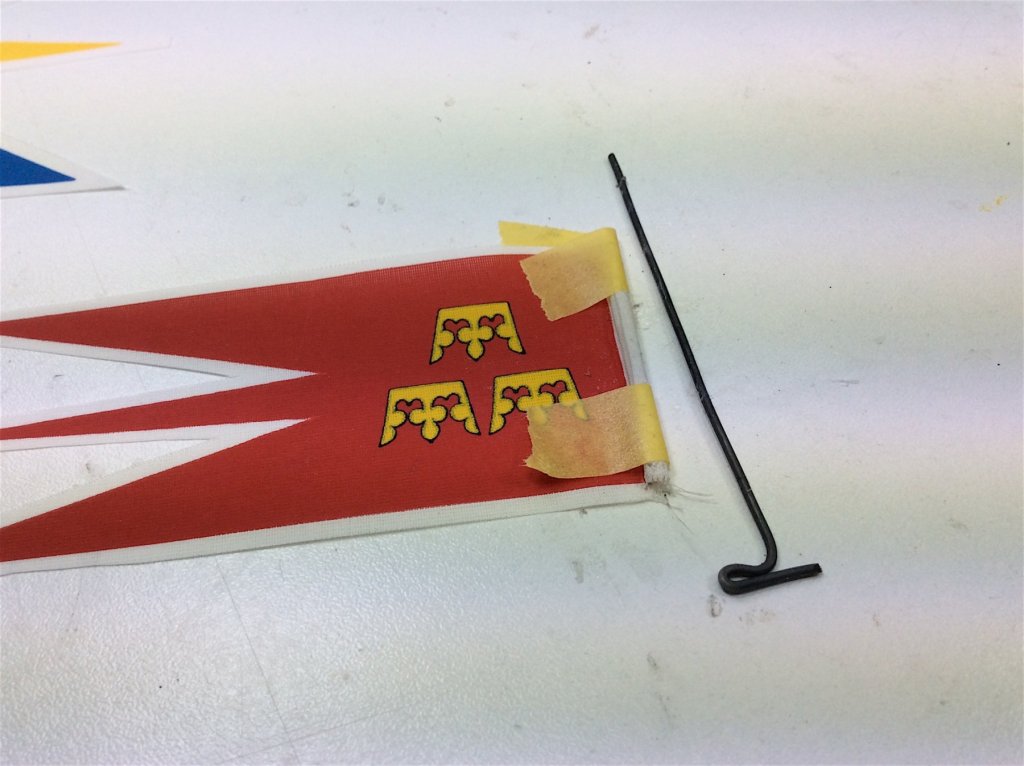
Dens, Patrick Thanks mates. Working on attaching the flags, but came up with an unanswered dilemma. Need some advice –Please. Googled this -- how to attach flags to flagstaff on 16th century ships. No help beyond the first photo below. Anderson, does not address this – only writes about proportions of flagstaffs to other masts - The next two photos are my dilemma. Should the flag rope lengths at least extend down to the closest platform in order to be properly rigged? Any help will be appreciated – might need to re-string at least two flags, not biggie but Hmmm. As always thanks for your help, dropping by and the likes. Regards,
-
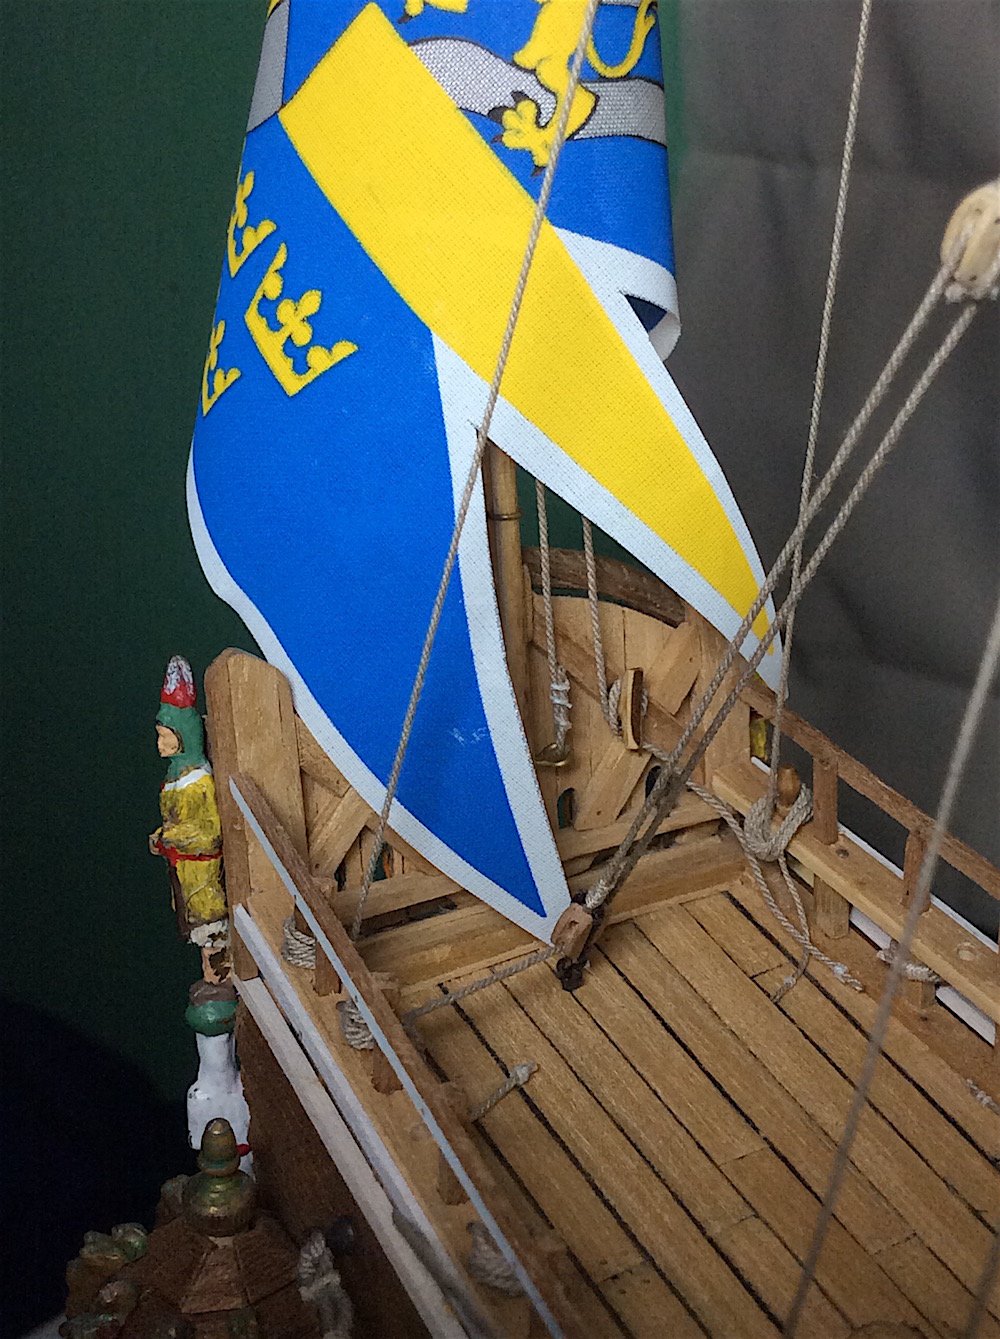
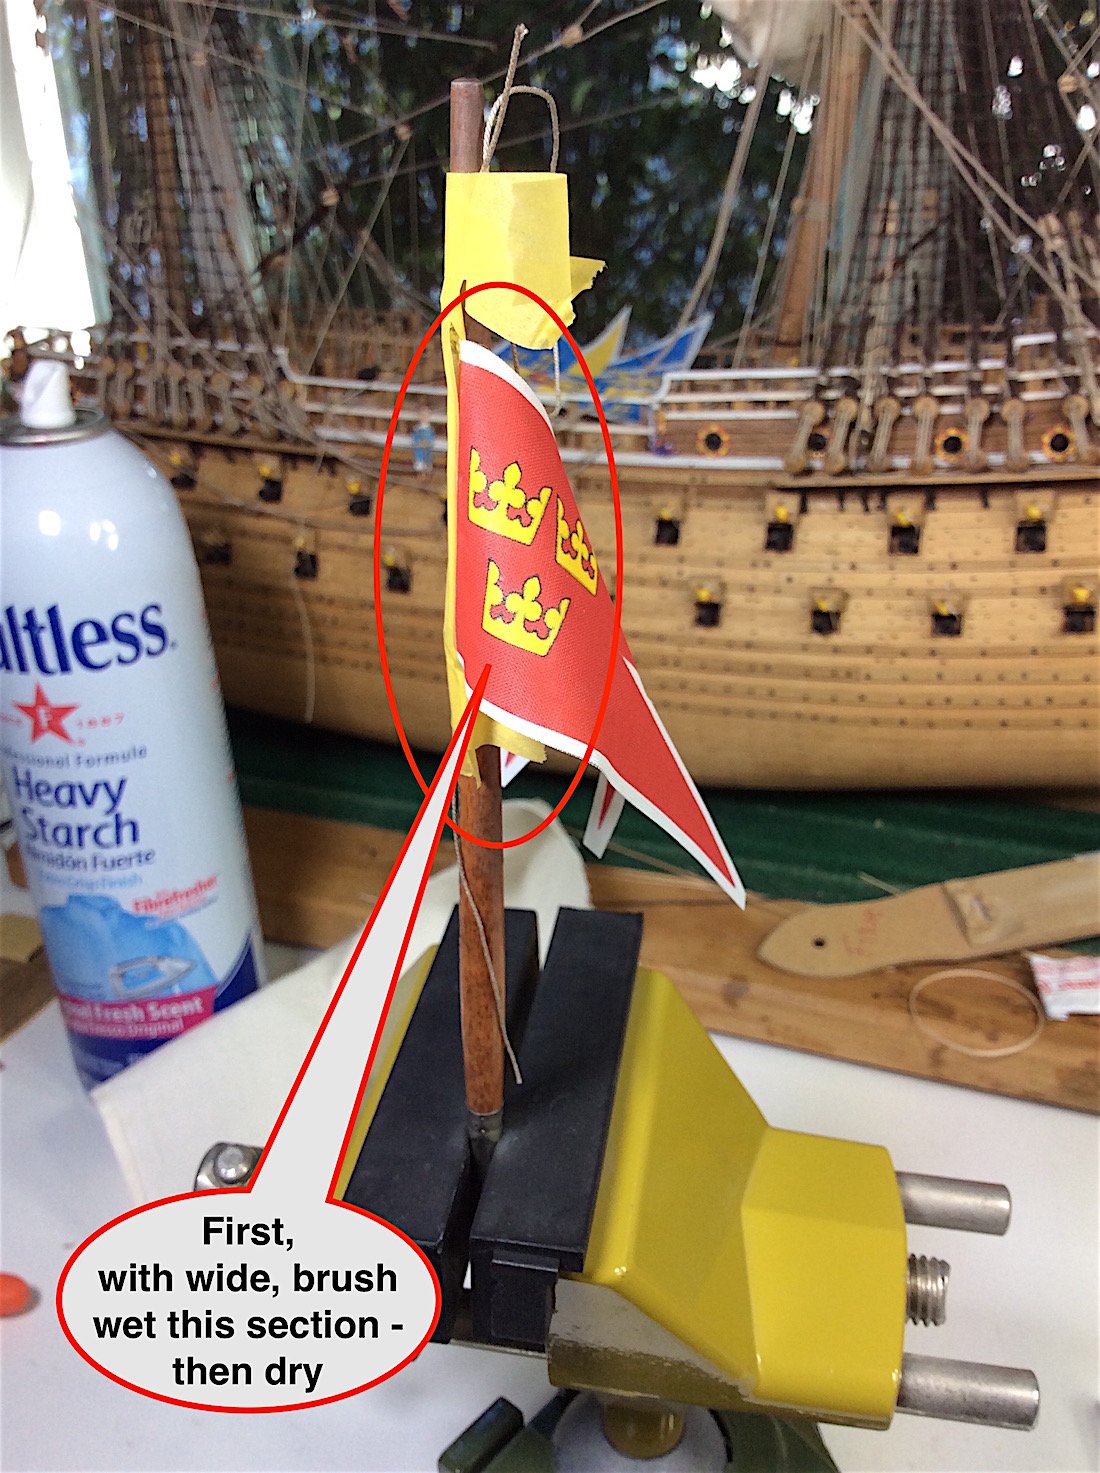
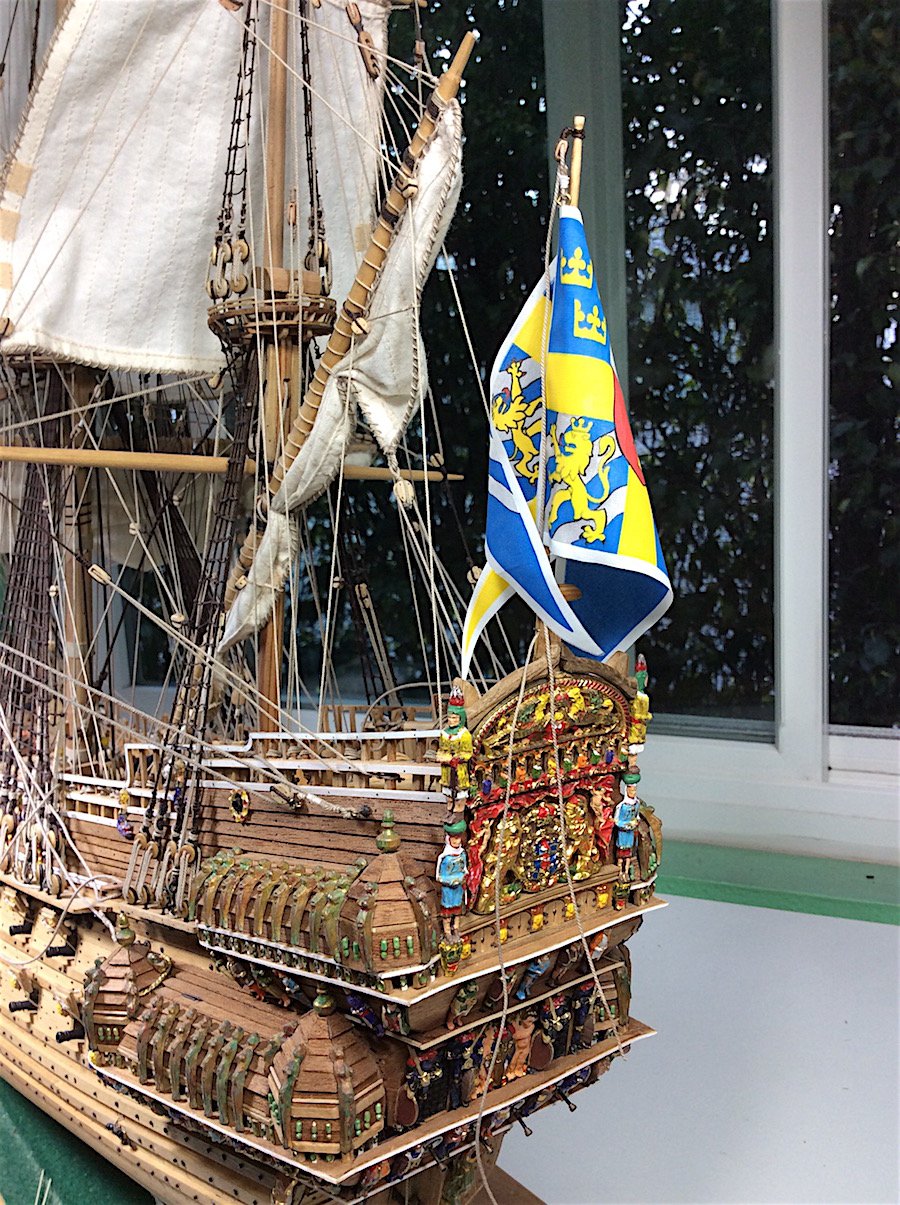
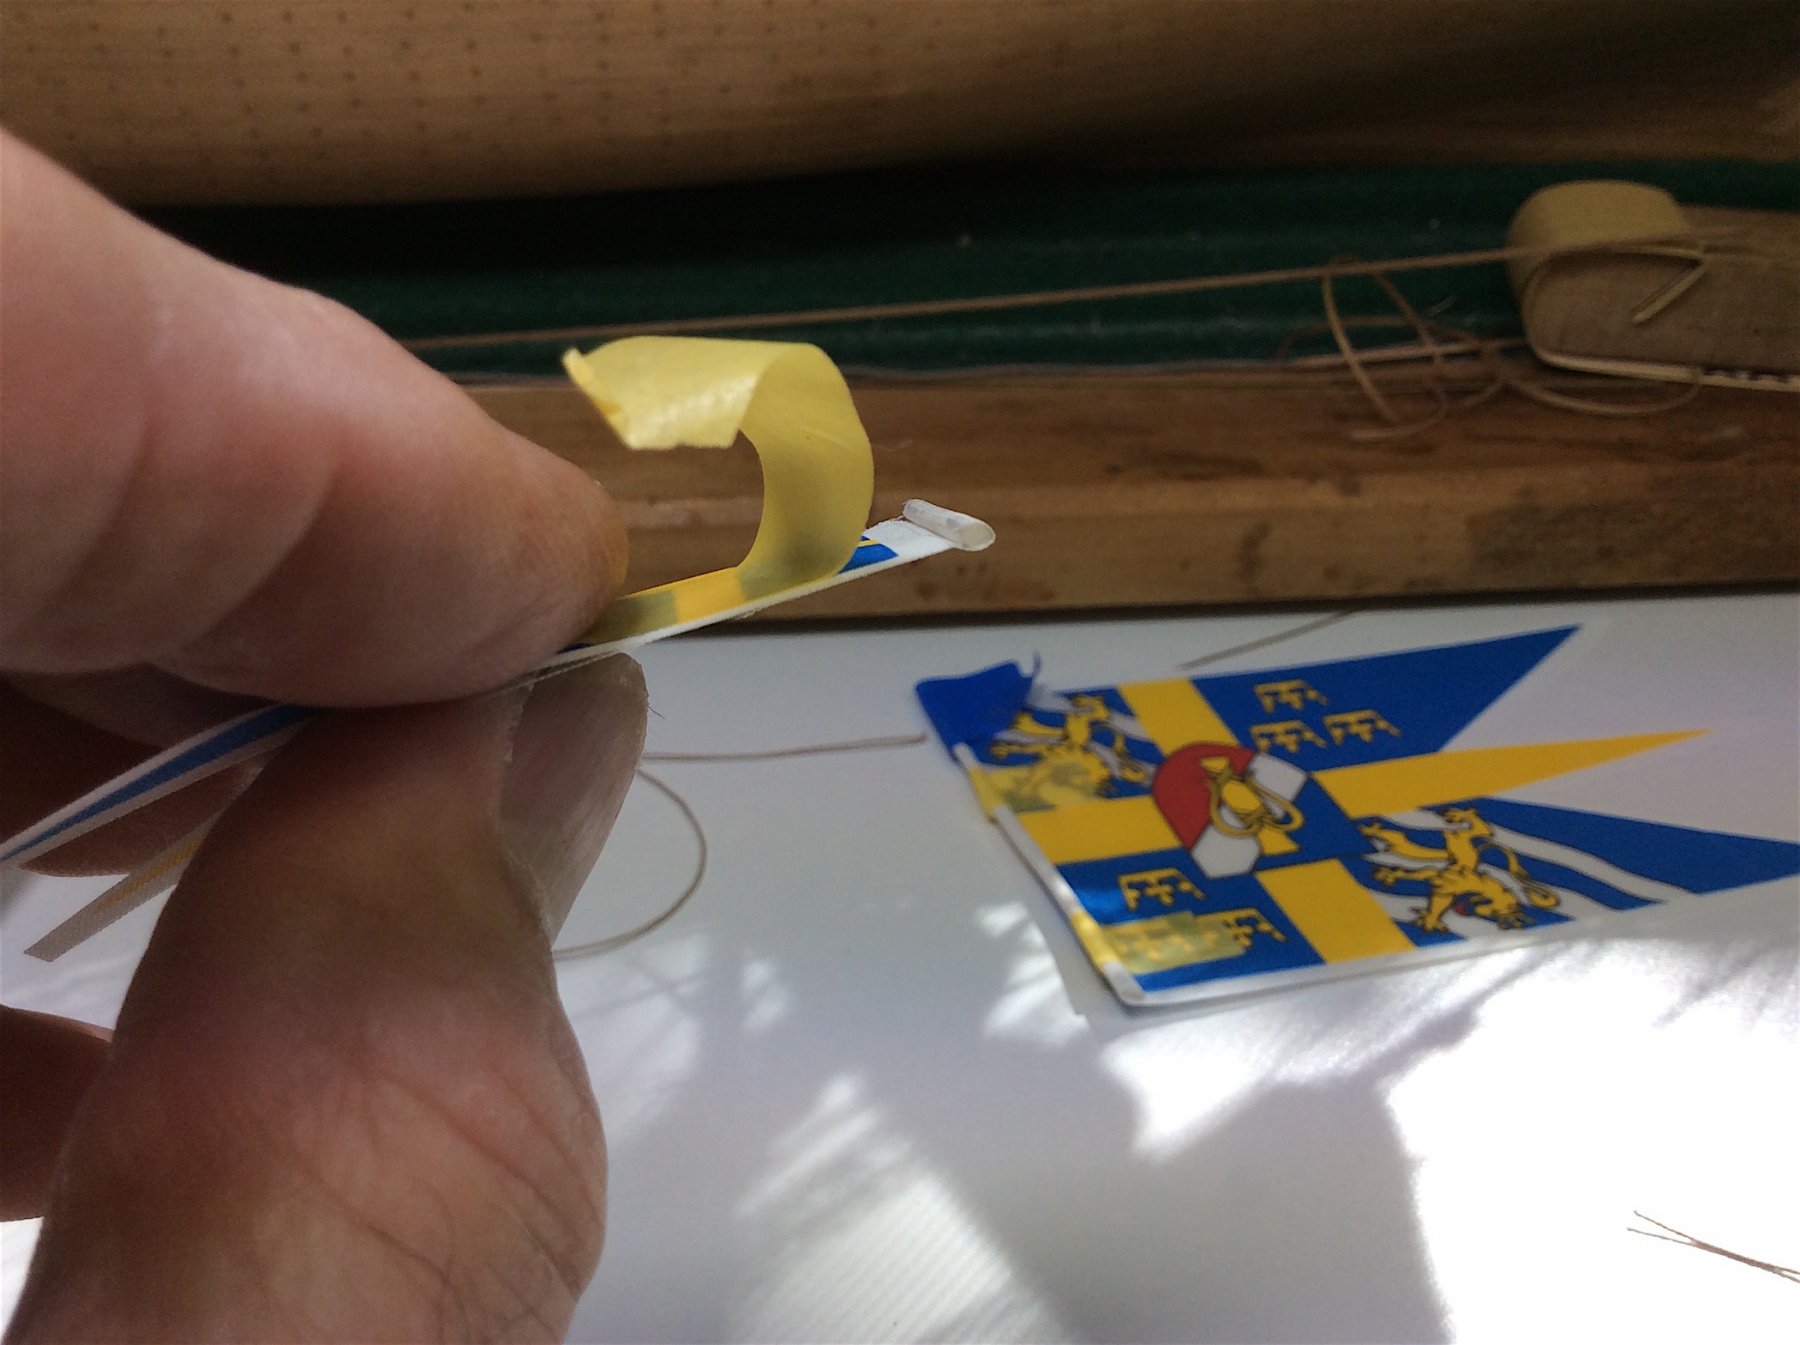
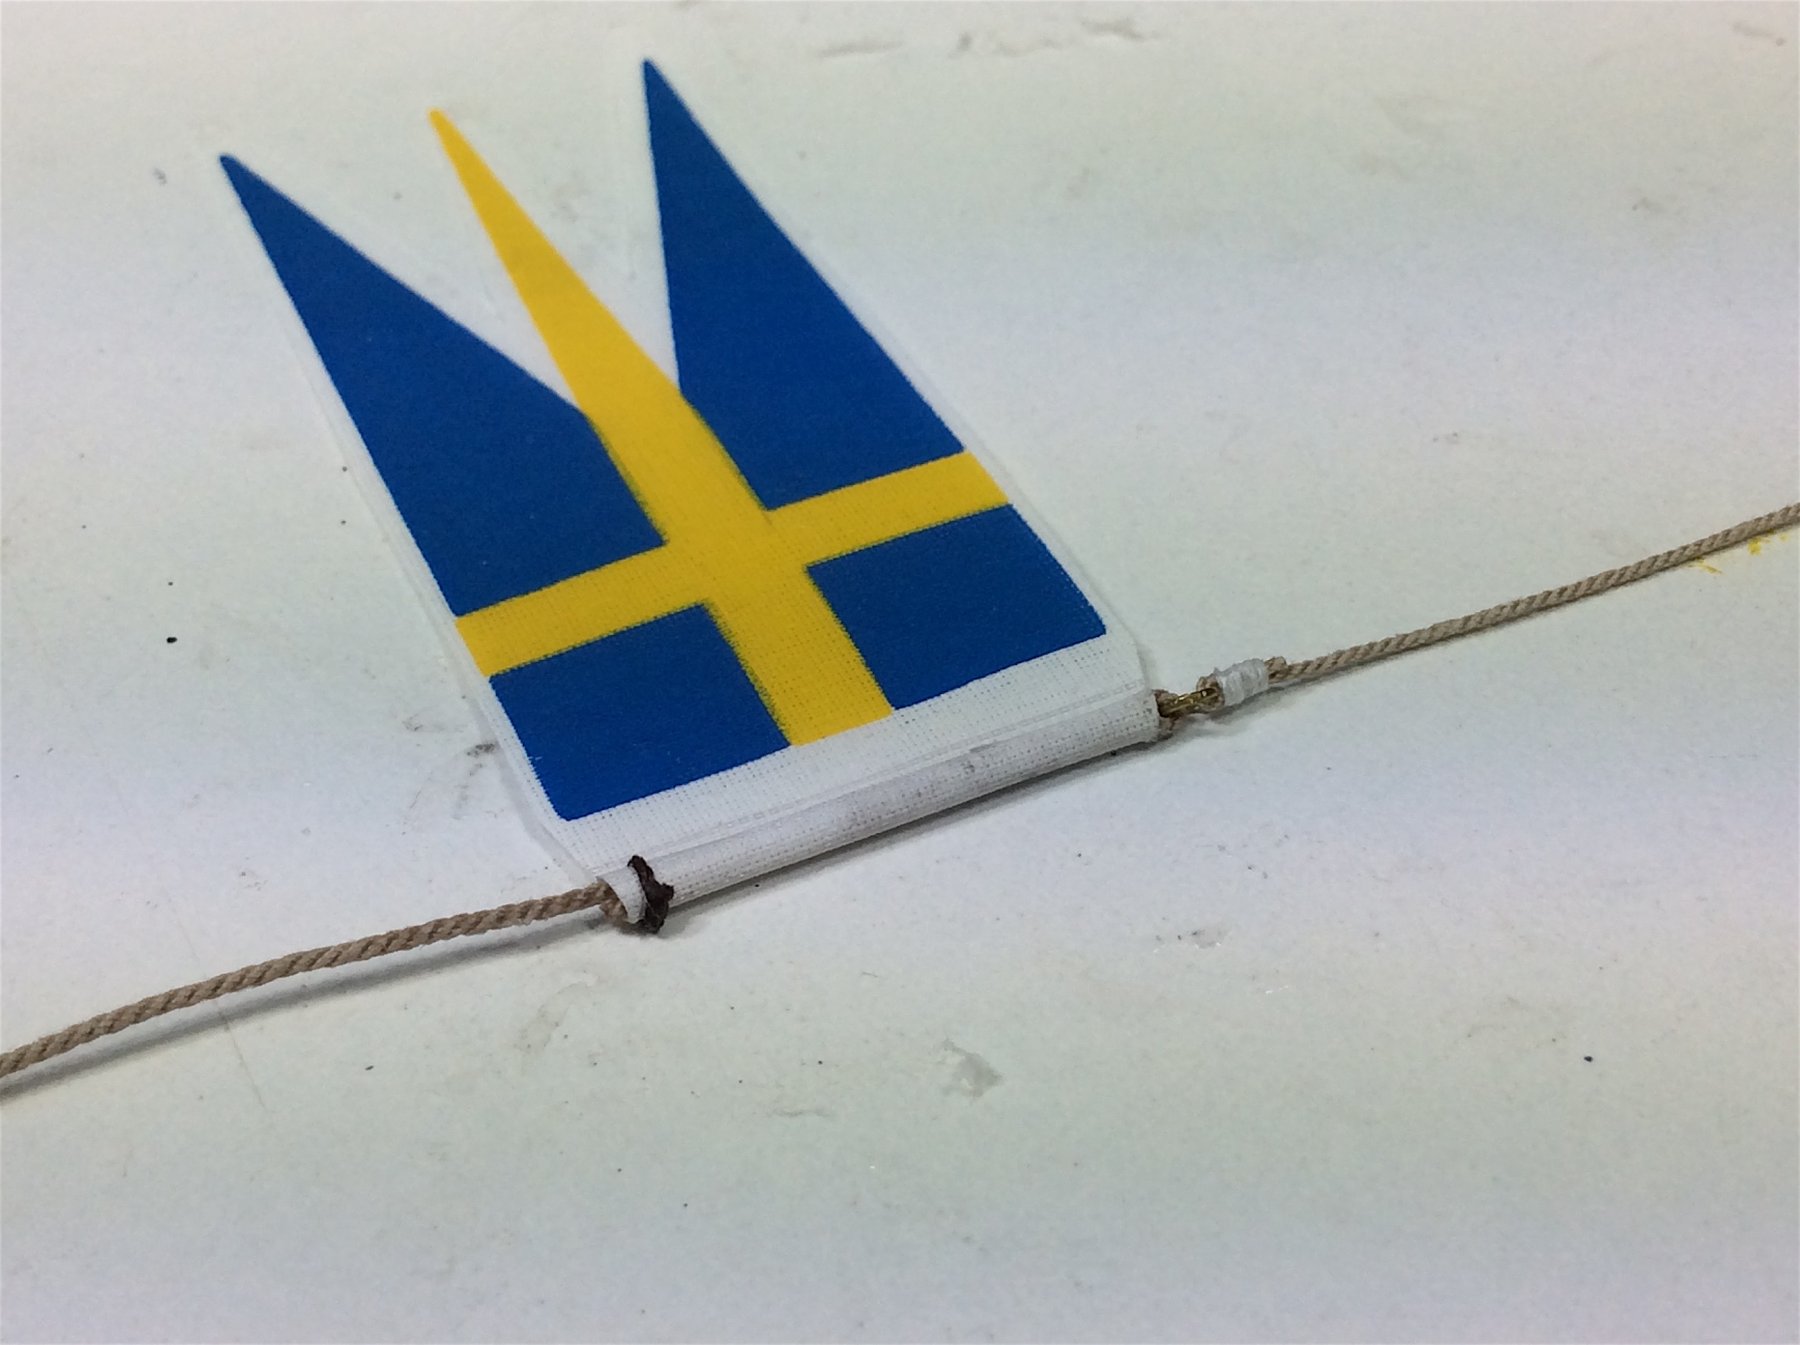
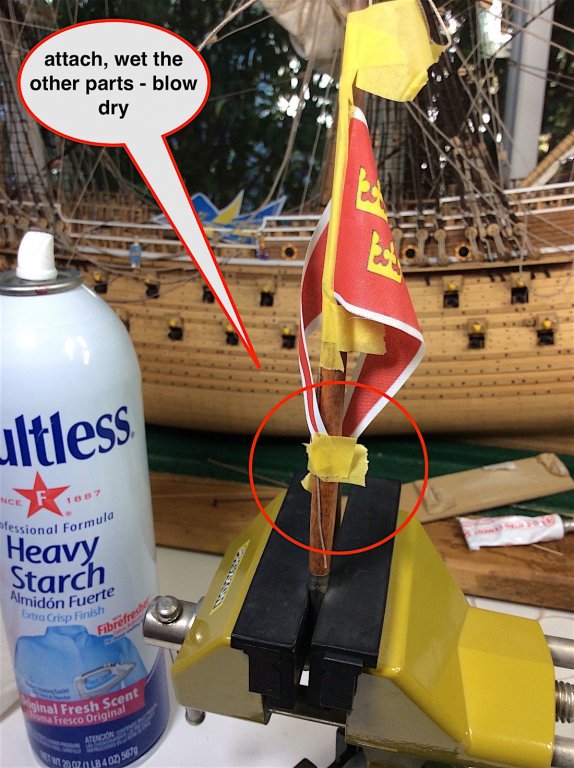
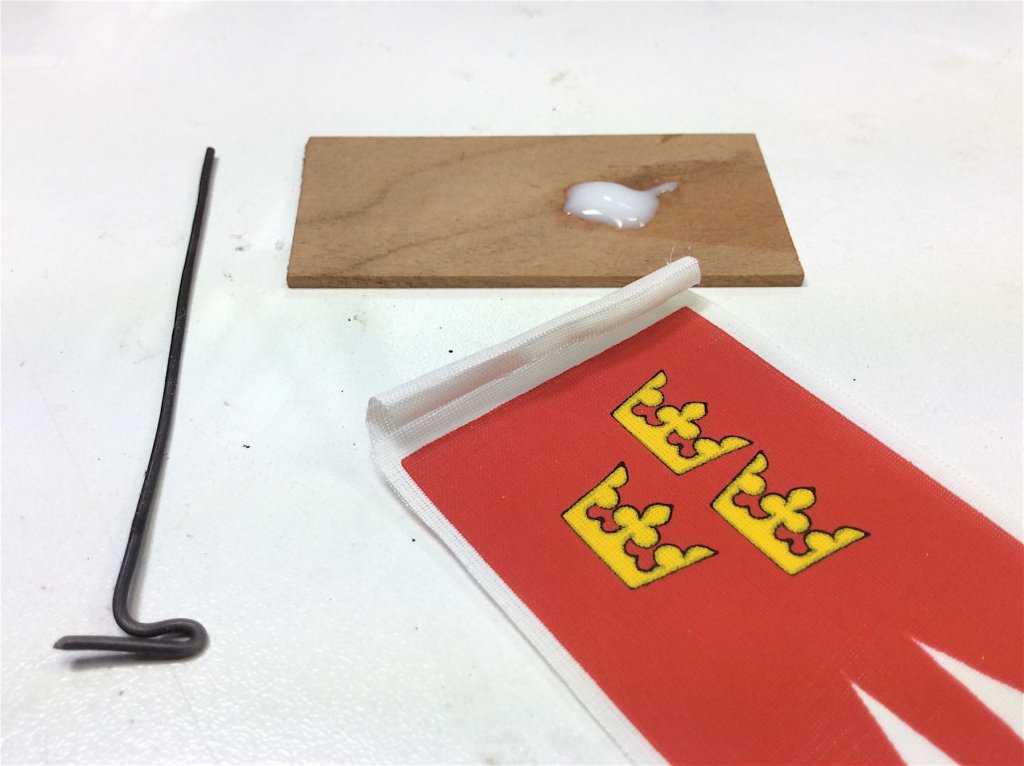
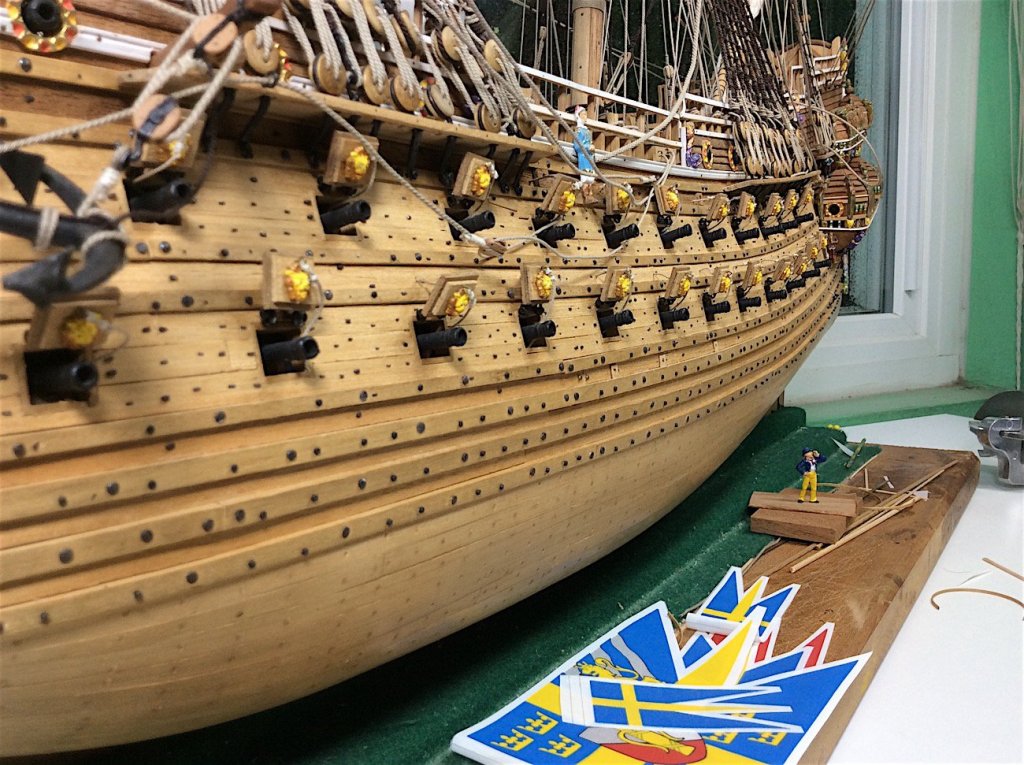
Hi Mates, Well the flags came out as I had hoped. Using starch, as opposed to watered down glue has some advantages (for me in any case) 1) It dries flags into shape as soon as the starch dries within seconds (using a blow dryer-low heat low, speed – adjusting the distance) Your fingers need to be part of the shaping as well when using the dryer – yup they can get a bit hot. 2) If the “shape” is unacceptable, you can always re-soak the area and reshape ( I had to do this for the large stern flag to get the final shape I wanted) That said – Who knows it the shapes will hold over time? Next post should be shots of the completed build along with its case. Oh PS: that stern flag is incorrect but I sure like the looks of it - haha Regards,


-
Just catching up -Super nice project congratulations indeed.
- 122 replies
-
- 1
-

-
- greek bireme
- scale-1/35
- (and 2 more)
-
Tom, So sorry to read this. Please take care and of course good luck in the short and long term. Sincerely.
-
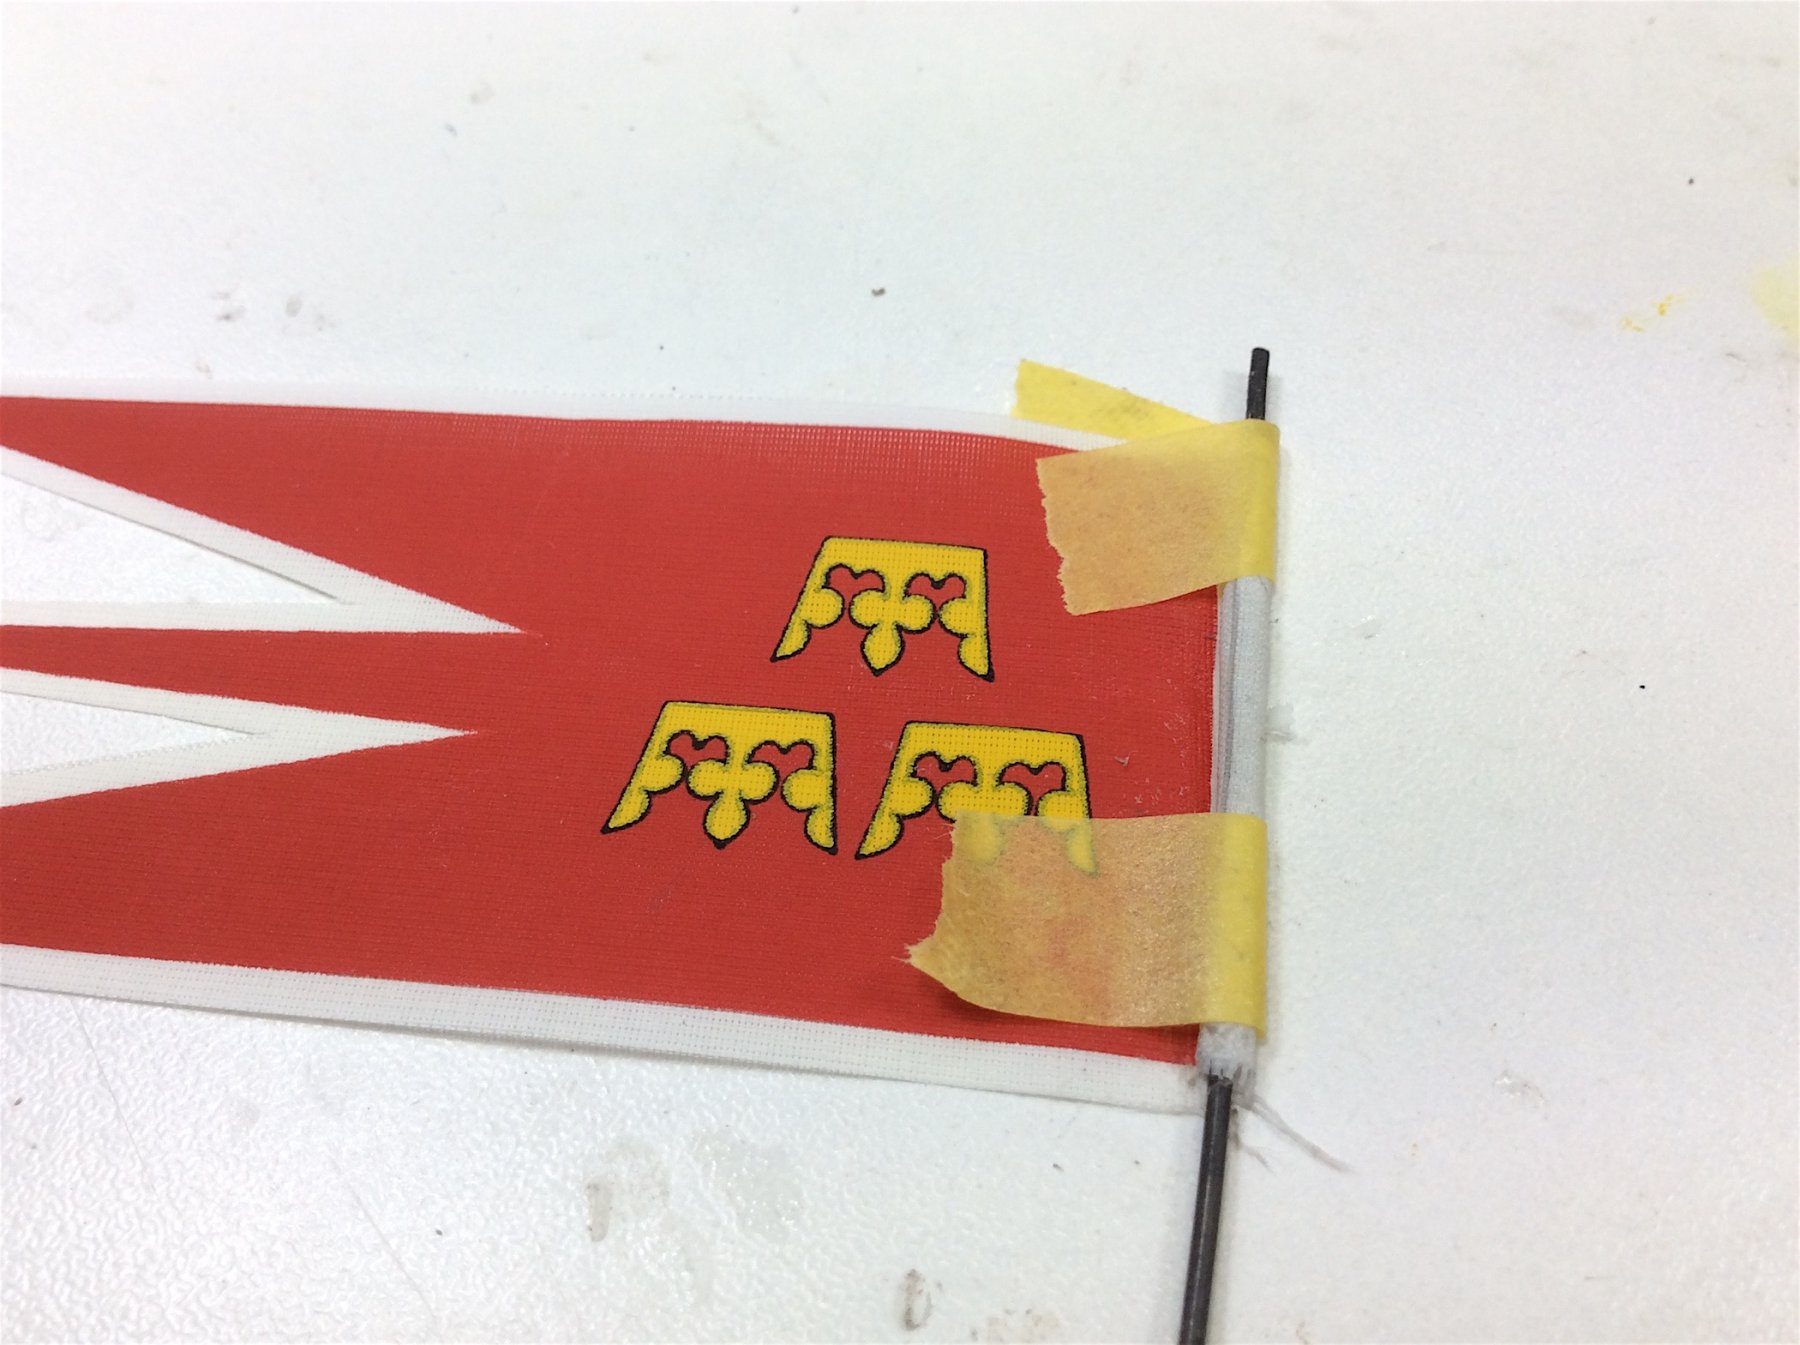
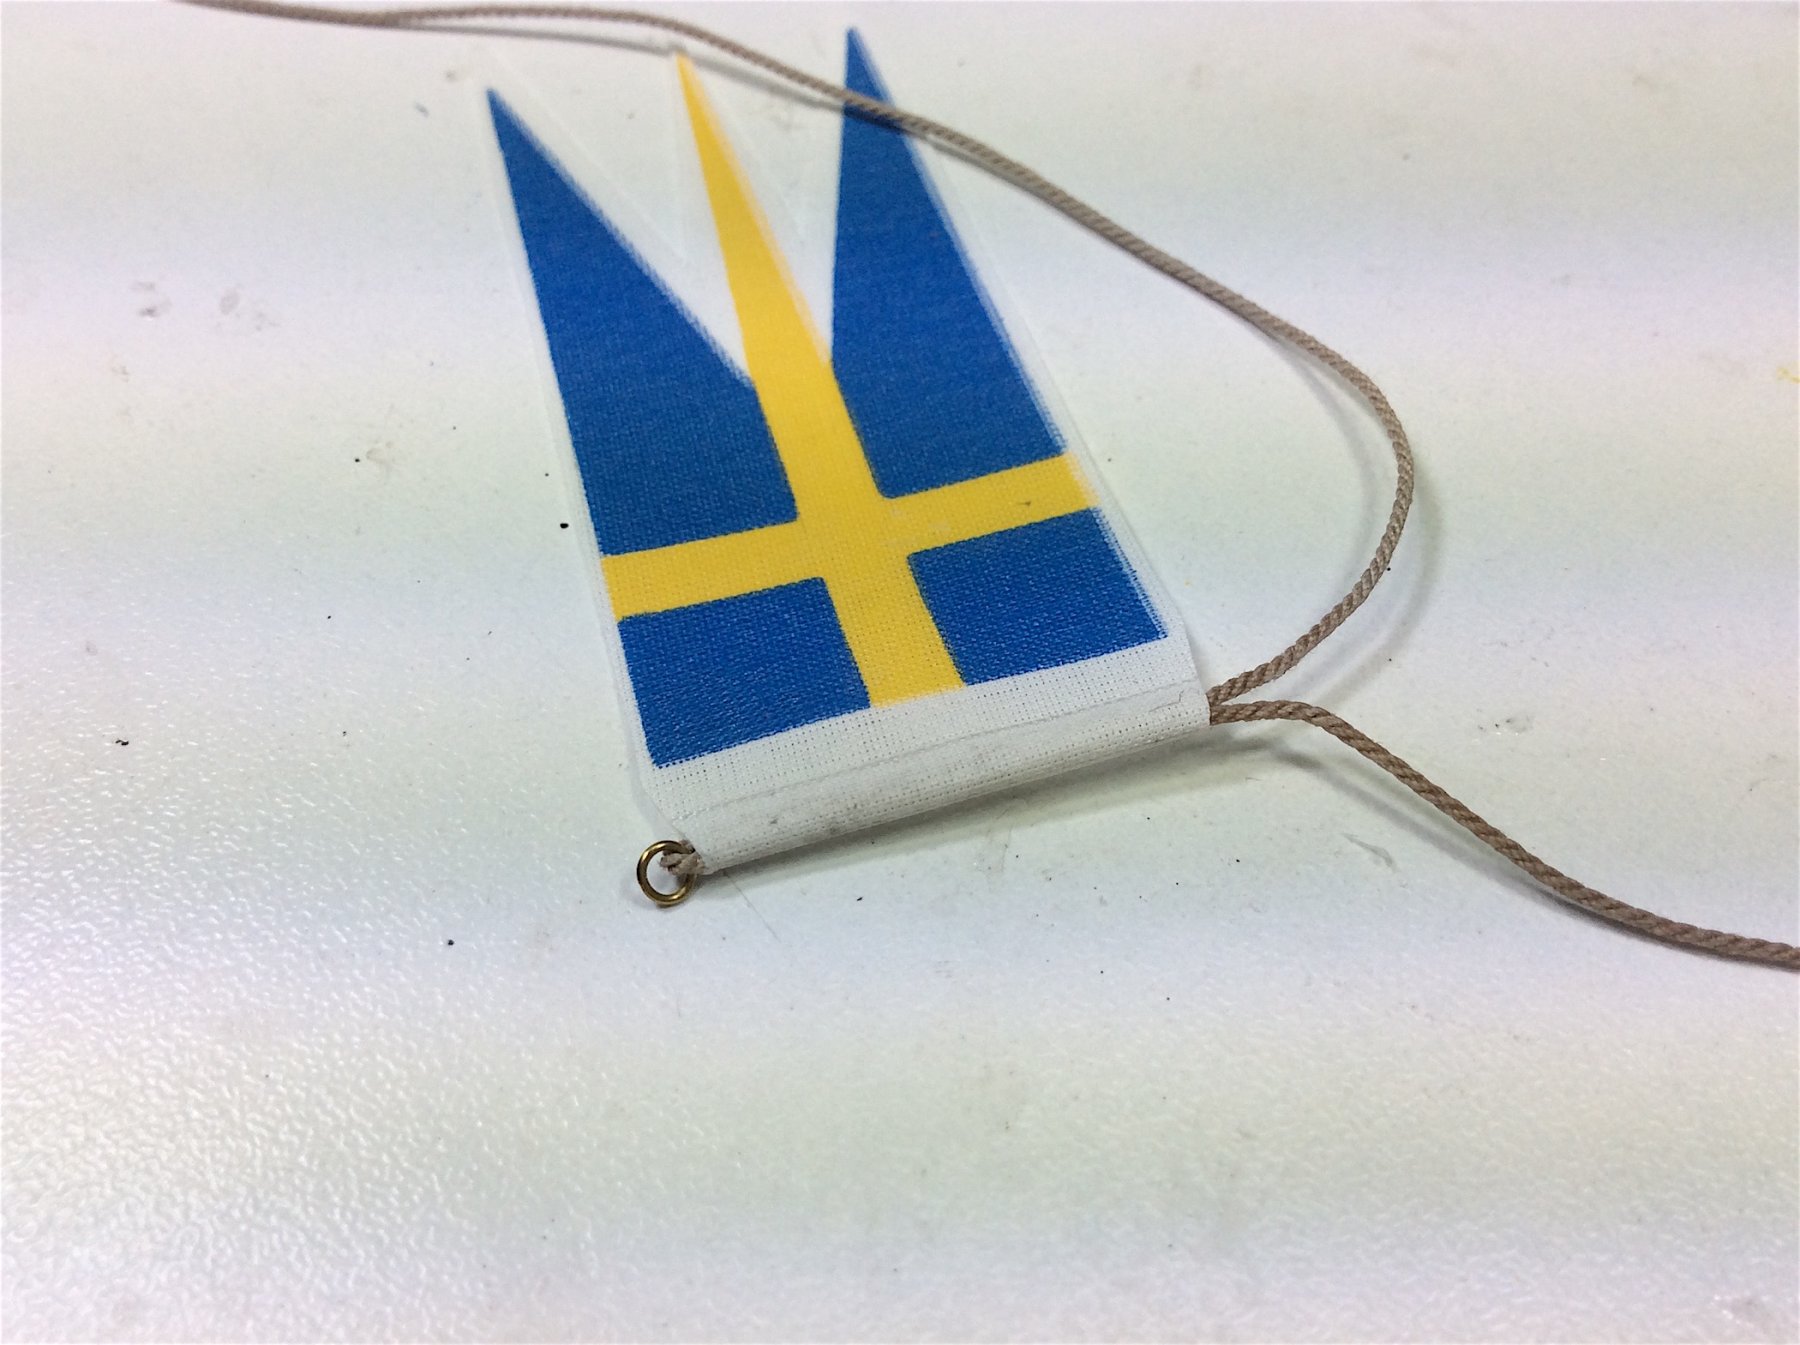
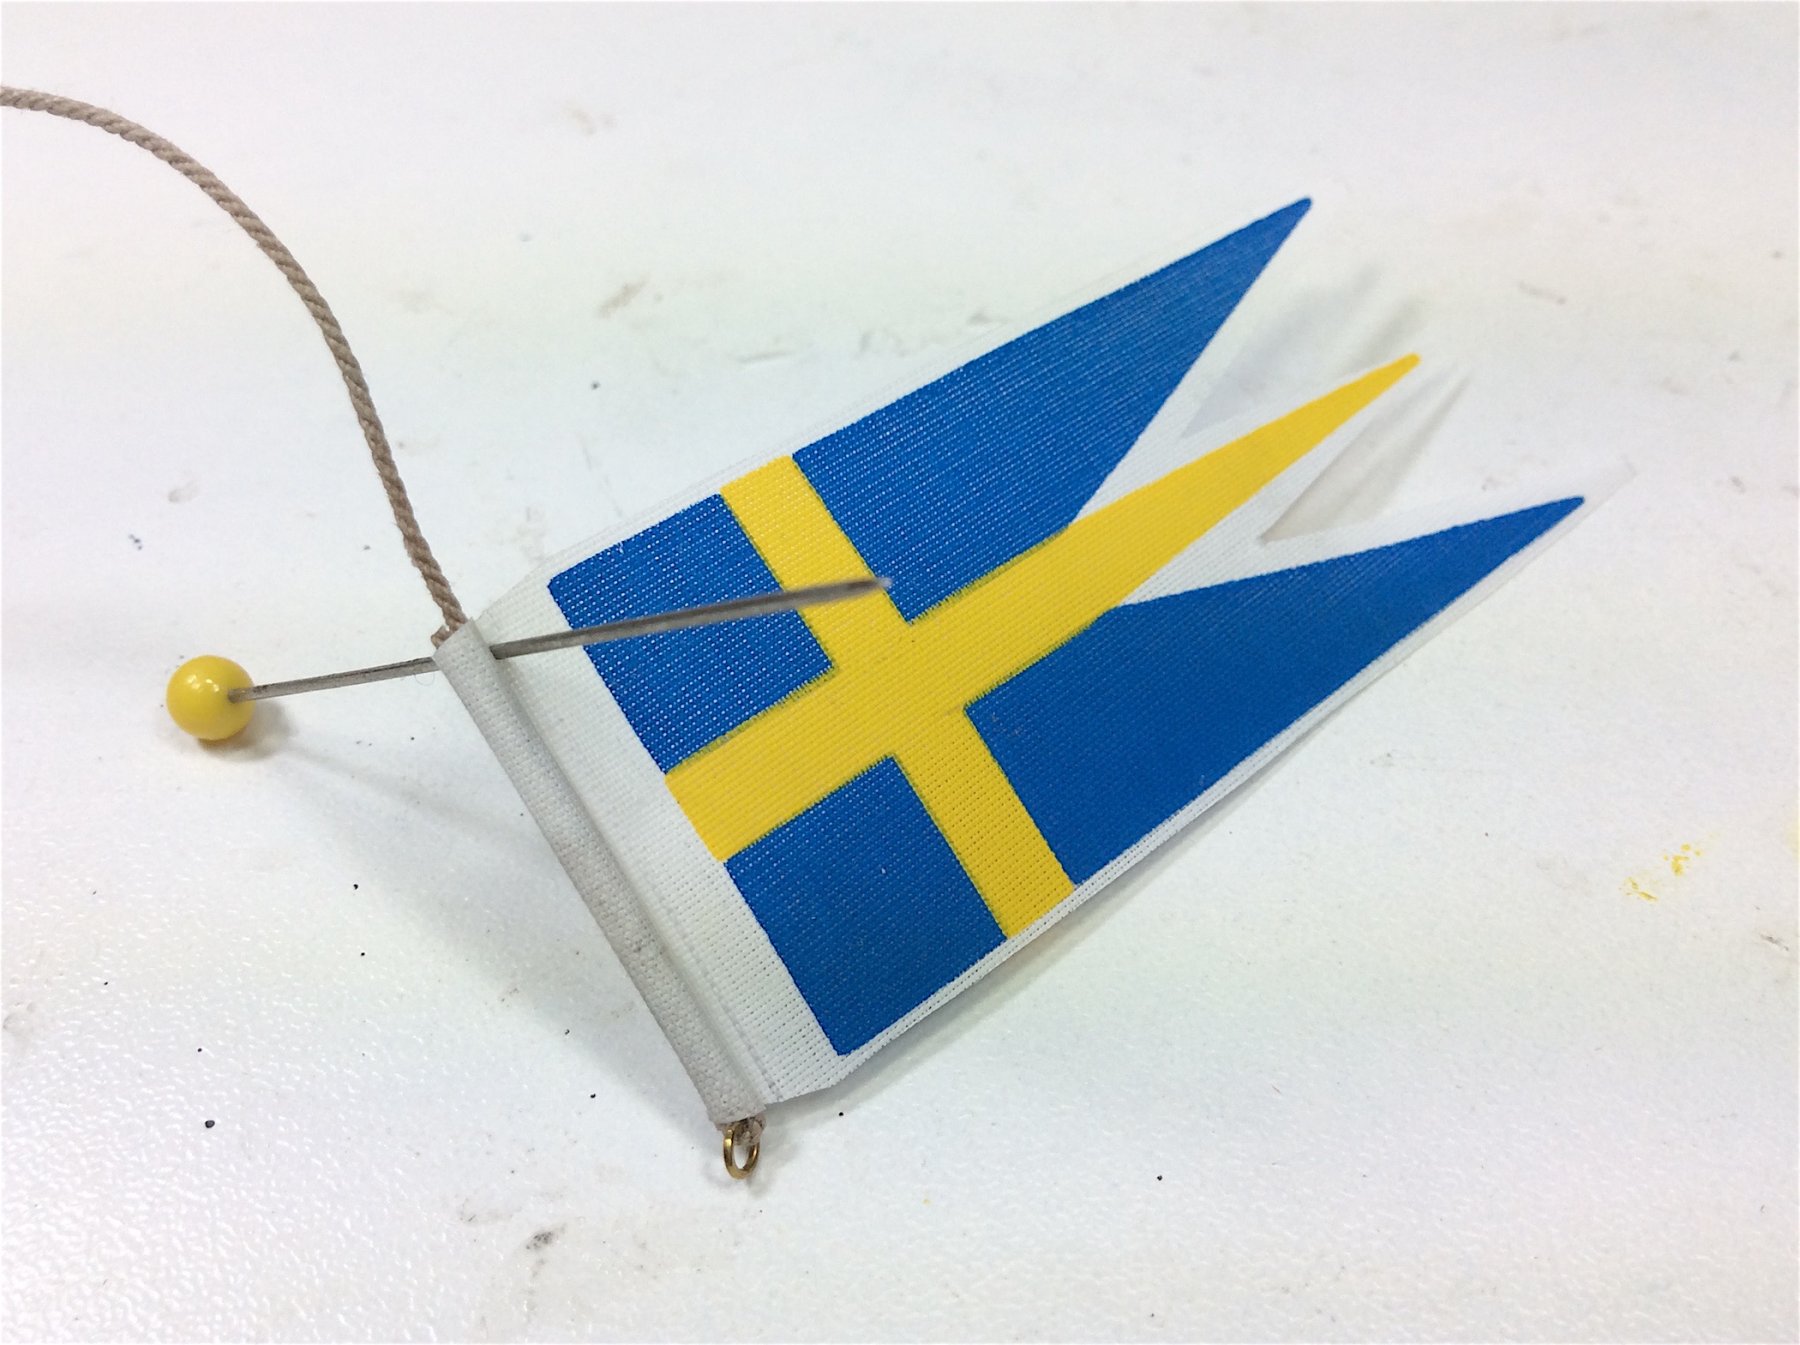
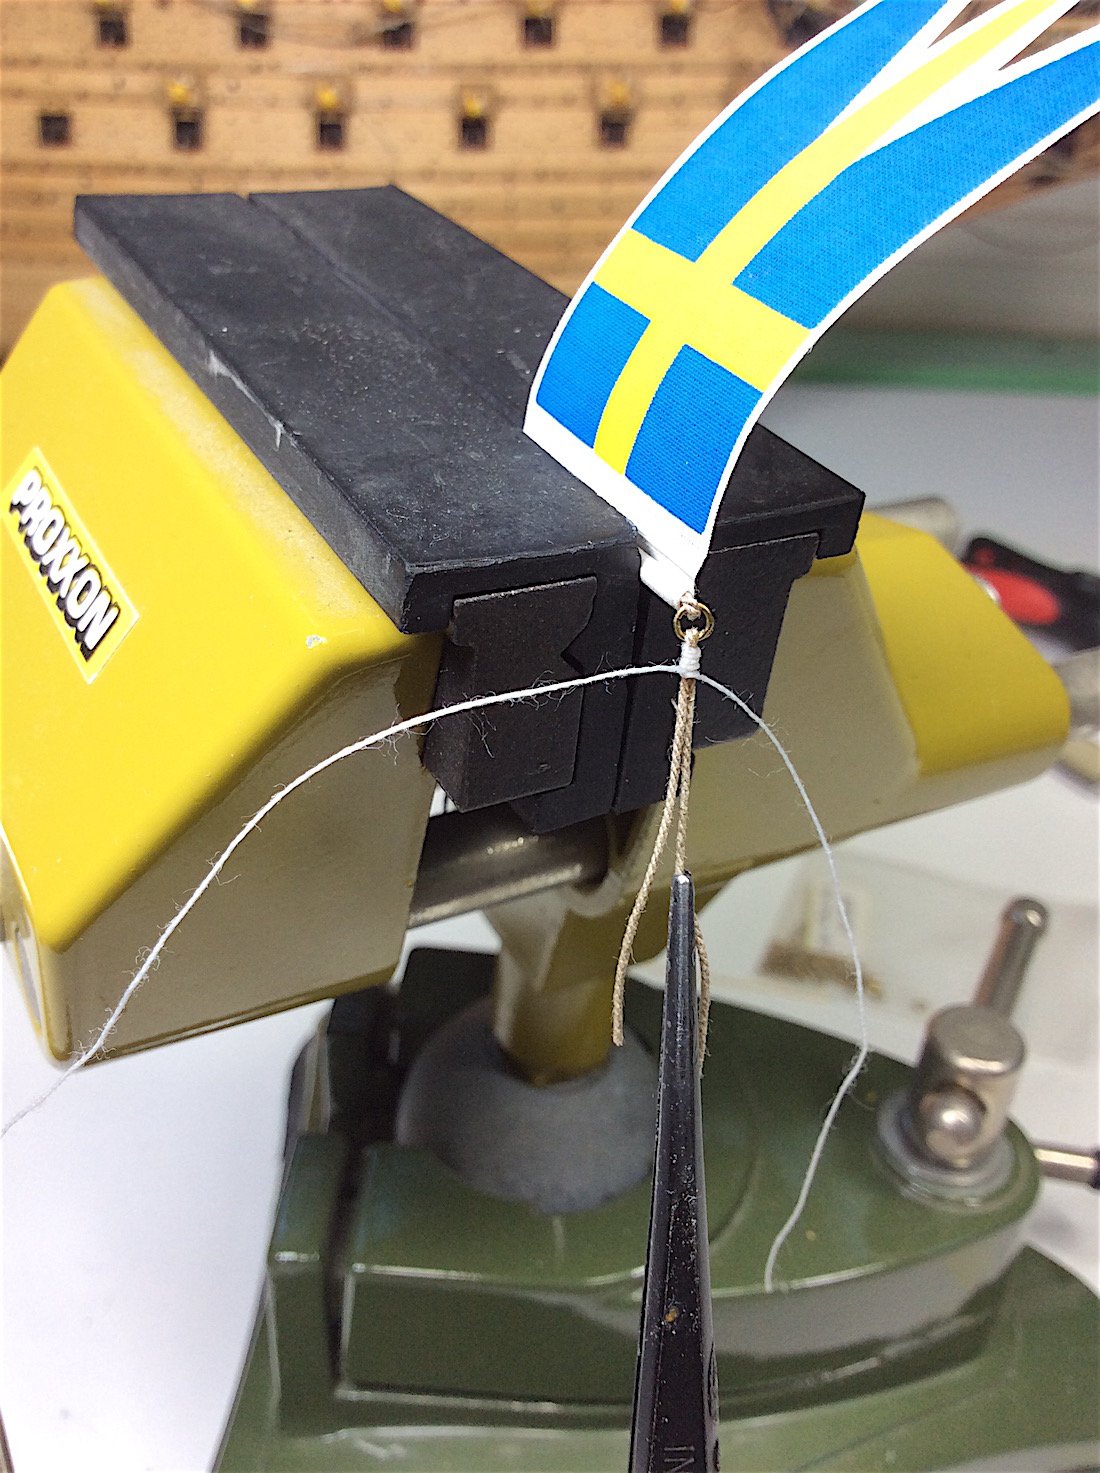
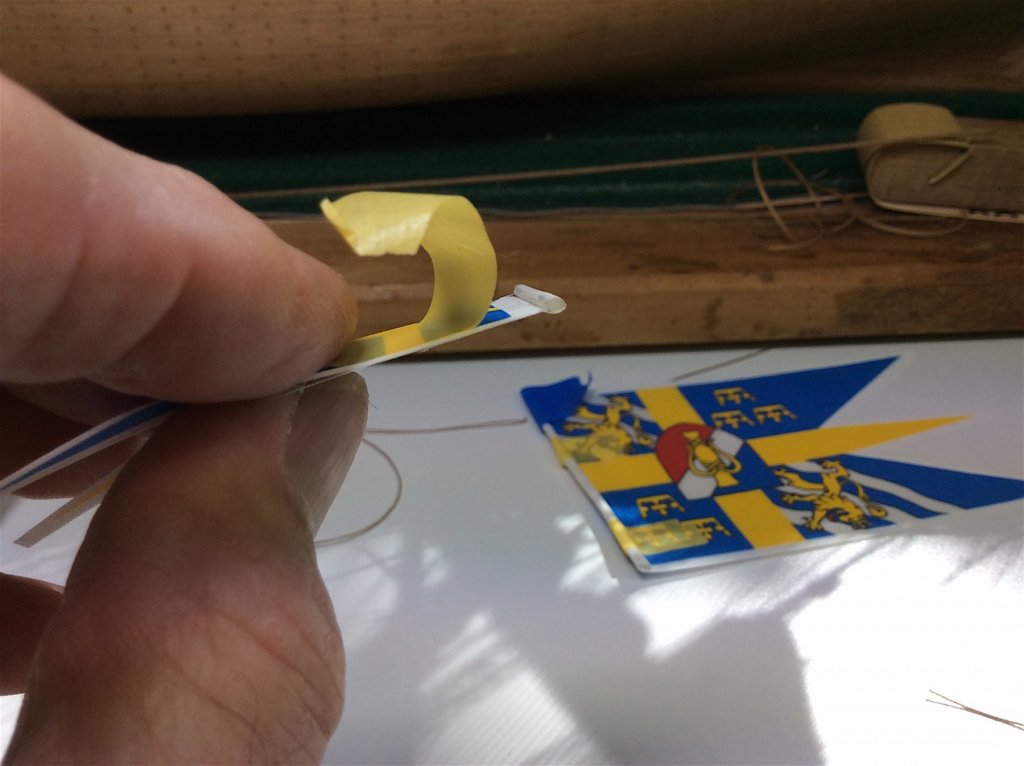
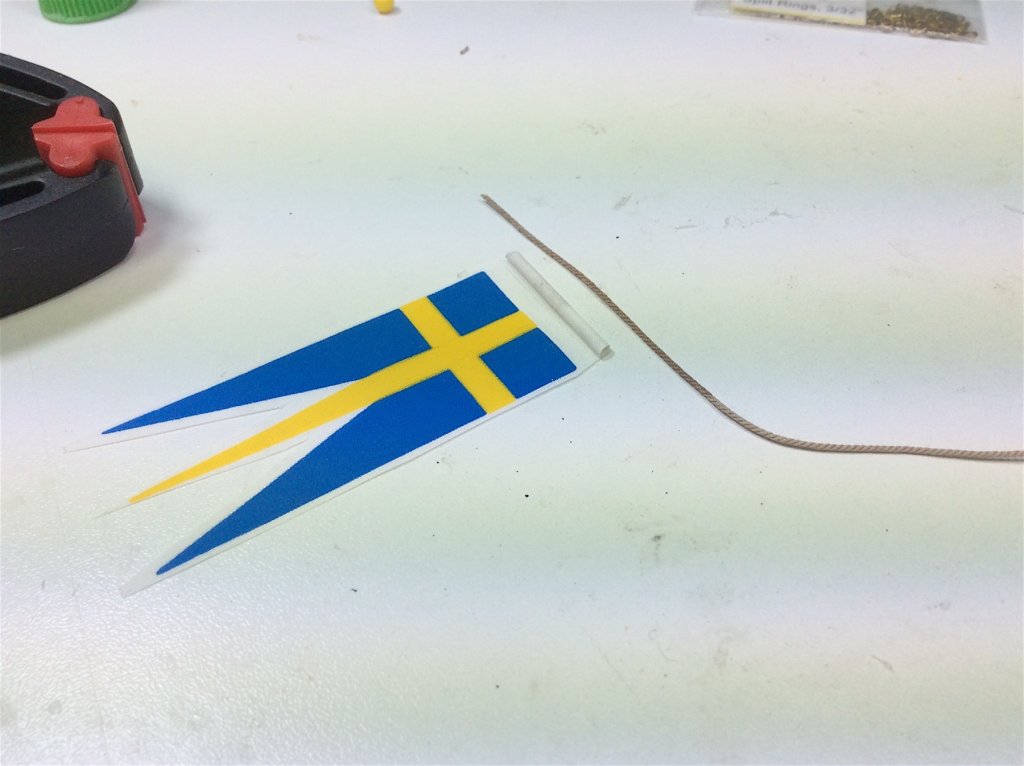
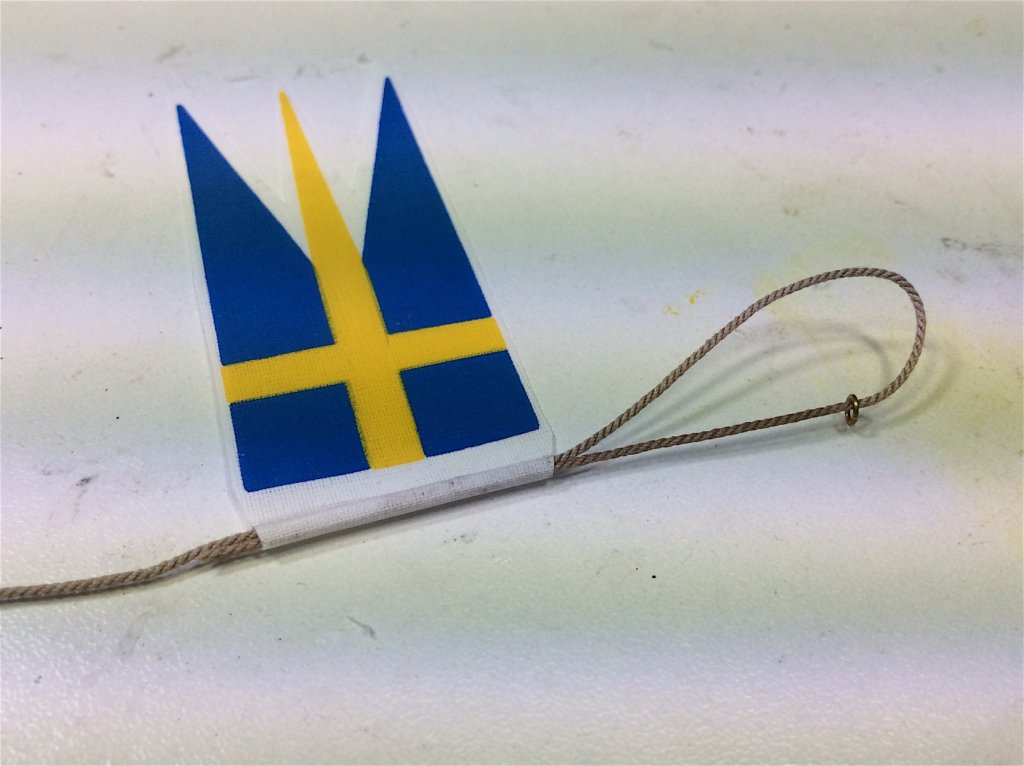
Martyn - nice touch Working on the flags - My technique - might be of use to some--- Use a wire to pre coil the ends. Add Elmer’s Glue, and now spool the end around the wire Add hobby masking tape, roll/twist the wire up and down then remove it before glue sets After glue dries here is the tube shaped end Now using CA Gel run a bit along the intended rope, double the length of the flag’s end let it harden Run the stiff rope through, add a ring and then return the end back through the flag’s coil. BUT first add, Again CA Gel along both lengths of the rope. Pull through from the other side. Next pics are self-explanatory. WORK in progress. Now need to figure out a way not to have the whole thing fall apart when soaked in starch for the flags shaping’s. BECAUSE when I initially experimented using only the Elmer’s Glue with a piece of extra flag material– the starch saturated coil just fell apart. It was as if starch removes any trace of glue – grrr My reason for the above CA glue insurance. I’ll post results of the next steps -- need to preserve the already done work _ (I have some ideas) Hmmmm PS: I did make some mistakes by coiling the flag's ends on the wrong side. I had intended, when flags just hung, that the brighter colored face would be the face of the flag. I know that I can still do that, but a couple of the coiled bits don’t look so good wanted to hide them when the flag hung around the mast. Cheers,


-
Tom, Martyn, Jörgen – thanks so much for your comments !! and support about the now infamous lantern. Denis, Yes and no haha –What is needed is a set of period correct flags. See photos below; 1/10th- the Billings kit (their official photo) – and a photo of Karl’s superb Billings Vasa - same scale as the Corel (and kit provided correct flags). PS: thanks for the offer, but will just use the kit-supplied sheet. PS: Karl again thanks, your help with my build has been so so apreciated. So kind of you sending me several (many) jpgs of your billing running rigging sheets so helpful (oh and posting the sail measurements in your build log as well), could not have done the sails without your help. Was your lantern the kit supplied example? May just order one if available as a single item. Karl about the figures here's some info http://www.agesofsail.com/ecommerce/figures/25mm-sailors/crew-8005-02-cast-metal-sailor-25mm.html https://www.cornwallmodelboats.co.uk/acatalog/8005-02-Cast-Metal-Sailor-25mm-A8005_02.html

-
One of these days my planking deck and hull will hopefully look as excellent as yours Well maybe not - Mark superb work
- 331 replies
-
- 1
-
-
- nuestra senora del pilar
- occre
- (and 1 more)
-
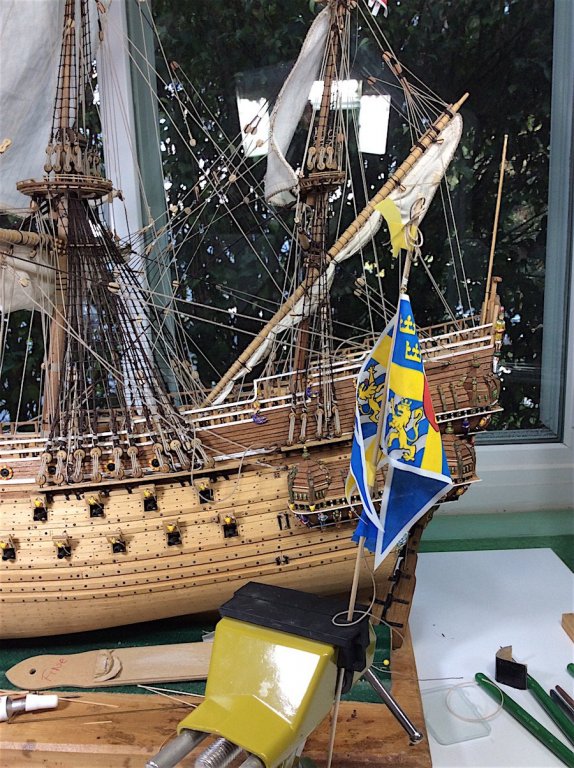
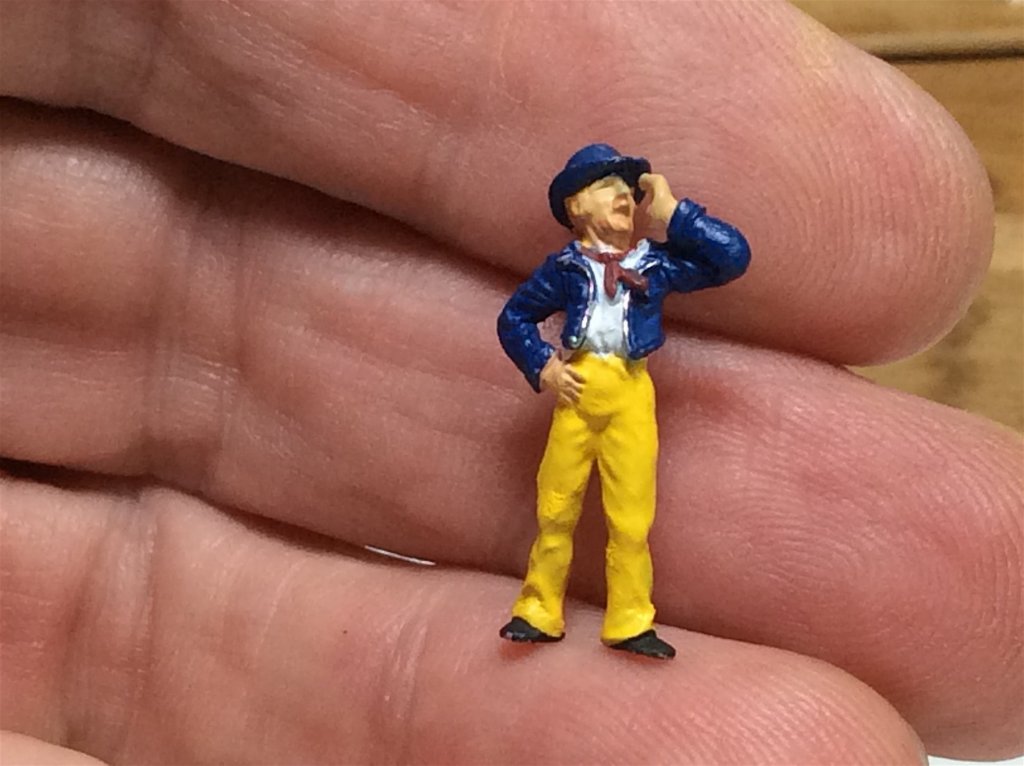
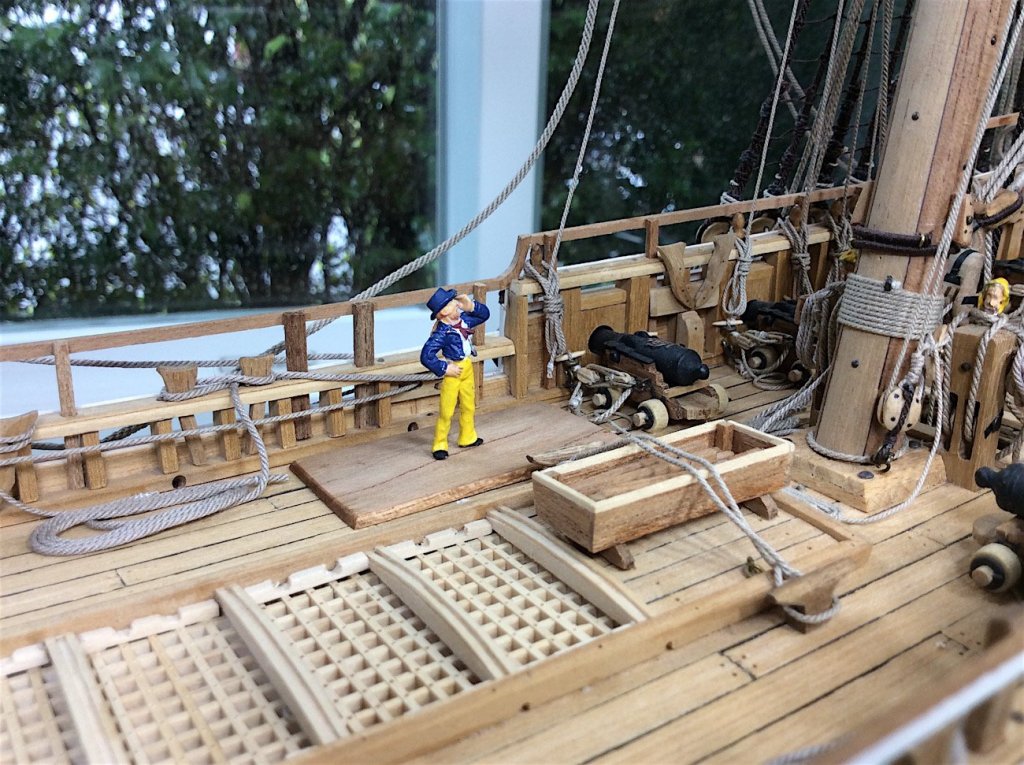
Hi Mates, Thanks for the comments and the likes. So I converted a 6 foot adult into mm = 1,828mm. Then divided that by 75 came up with 25mm So I think that this 25mm figure is close enough to approximate the scale of this 1/75 kit. I searched Google for Vasa ship uniforms and came with this drawing. The figure that I am using is actually for the English navy, but painted with Swedish colors. In any case he will stand next to the nameplate as a human size reference within the case. These figures are available in 20, 25, and 35mm height. 35mm would have been way too big. Now for the (wrong Corel) flags…. PS: I tried to get a Billing flag sheet, but not available as a "one of" item.

-
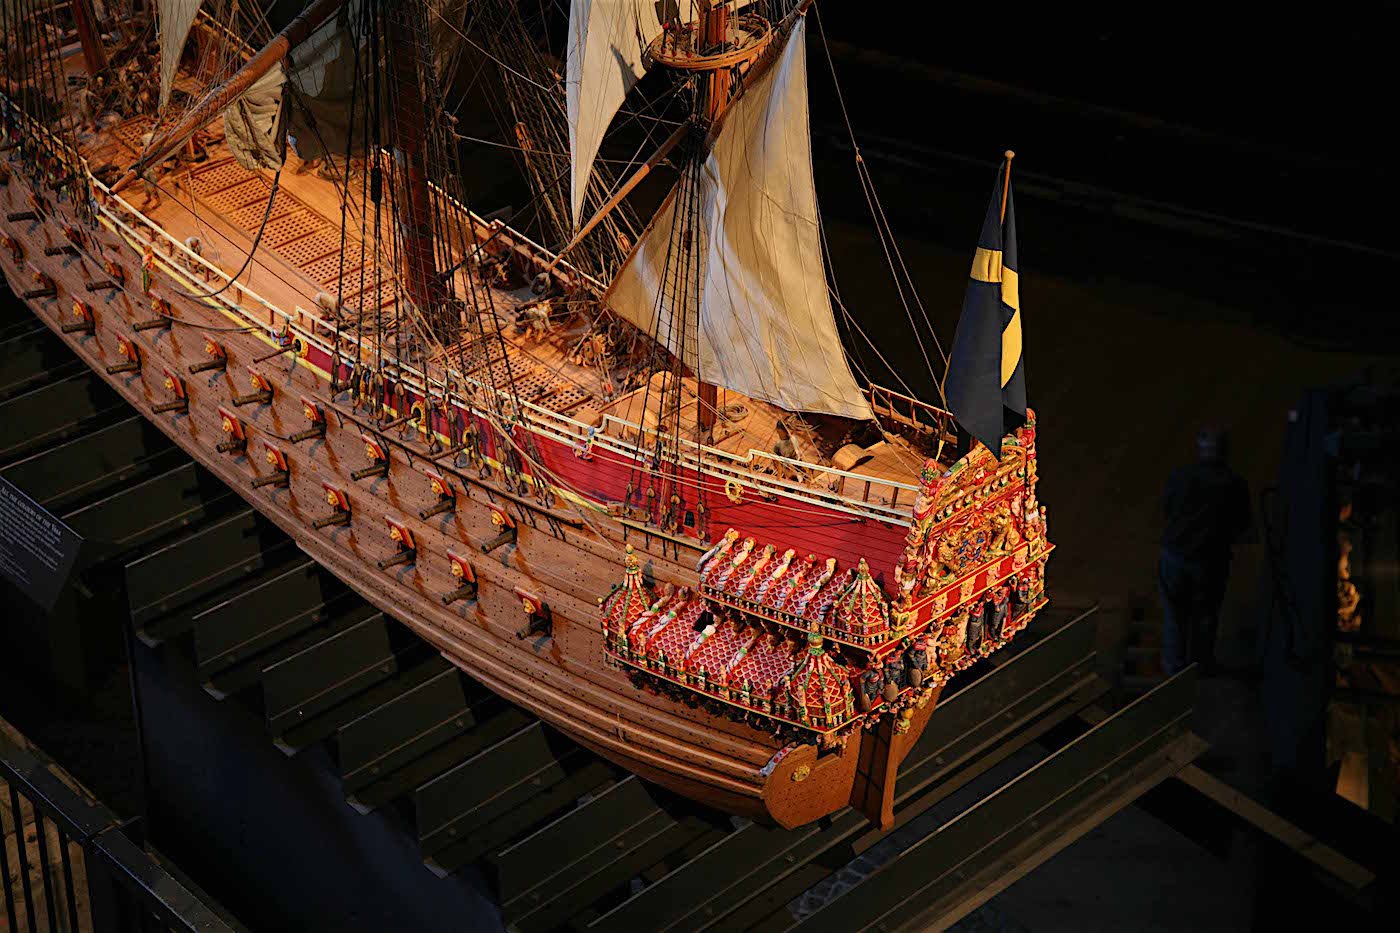
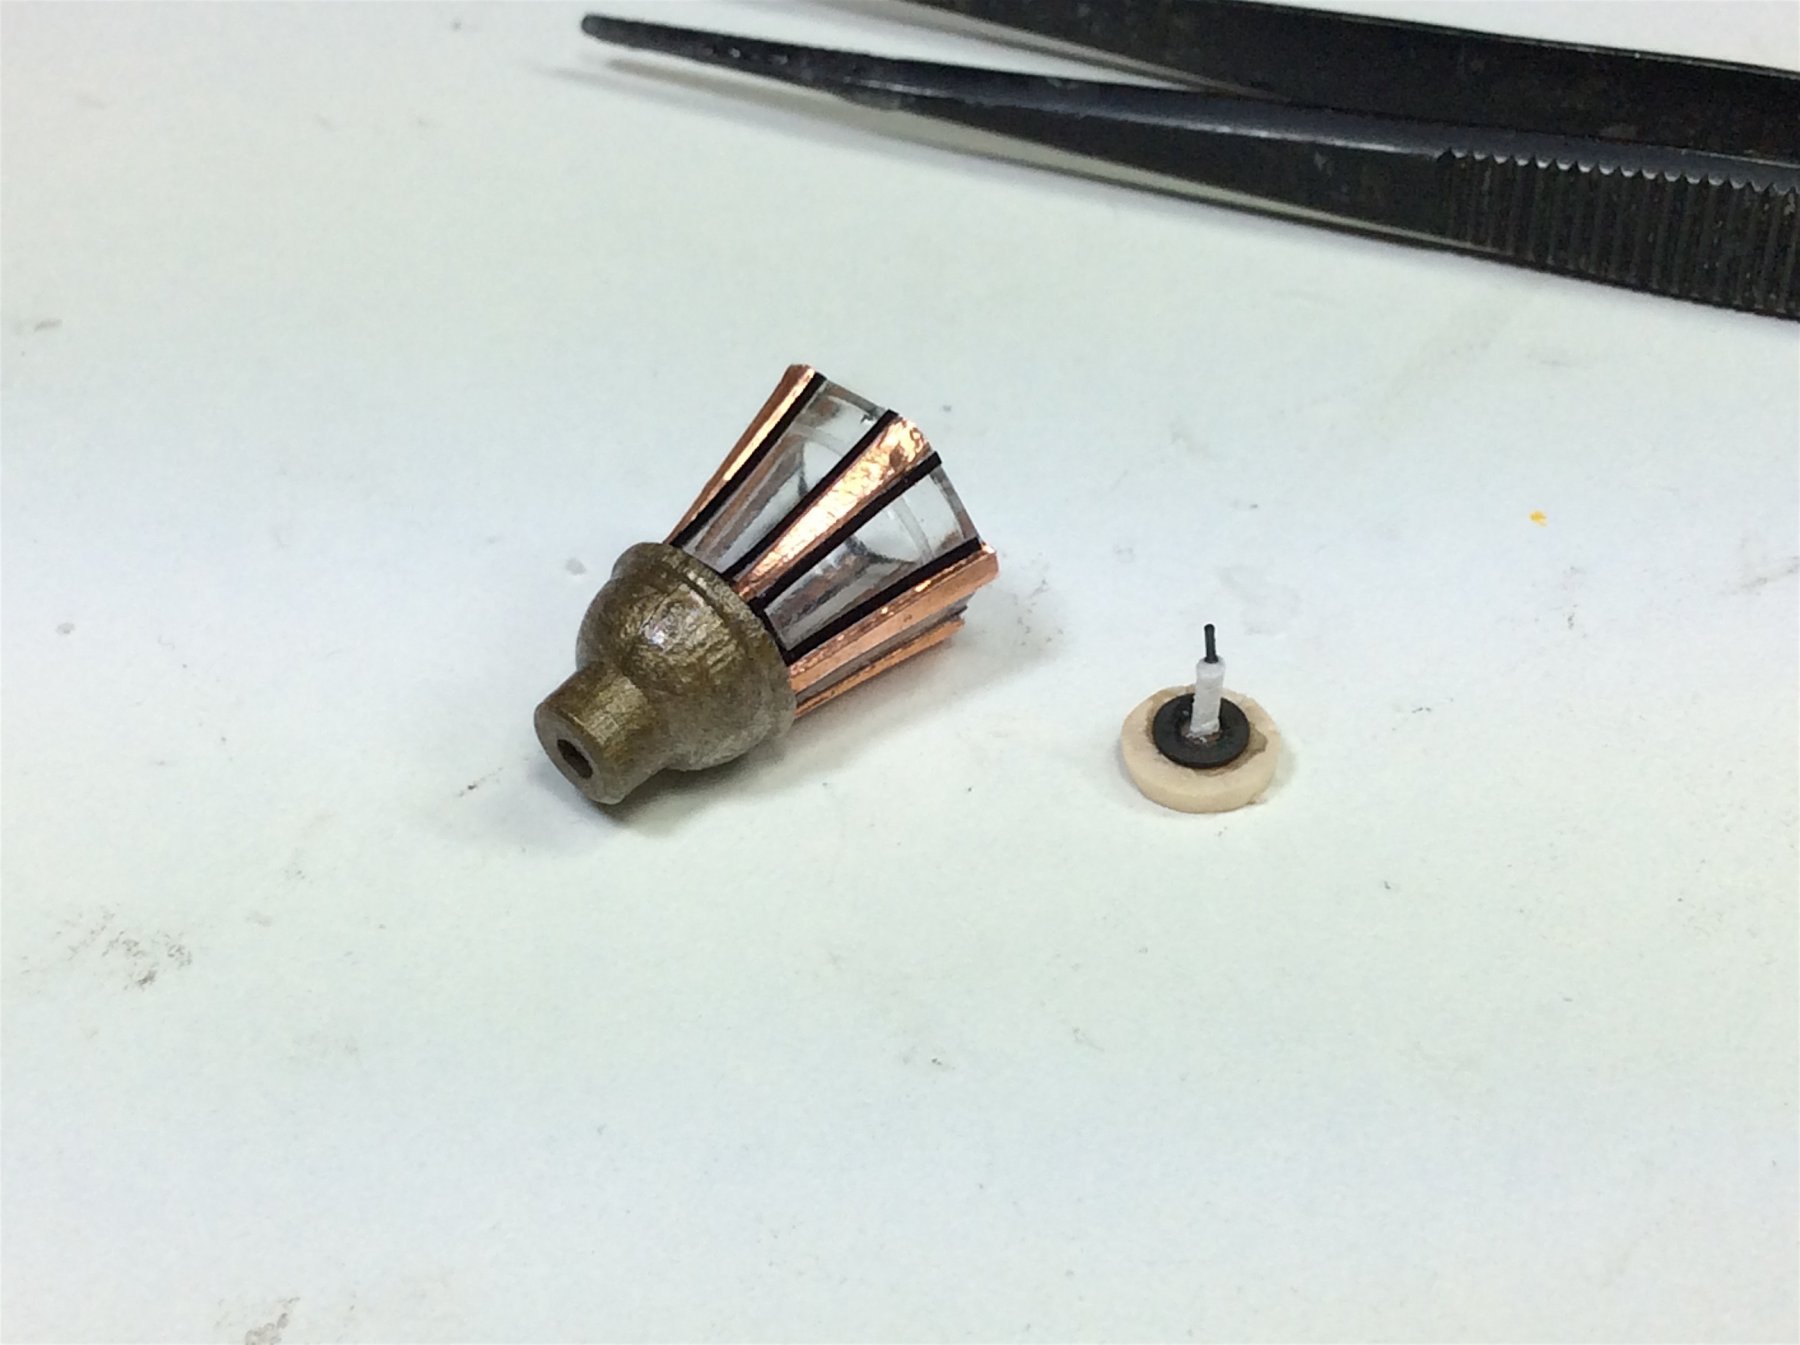
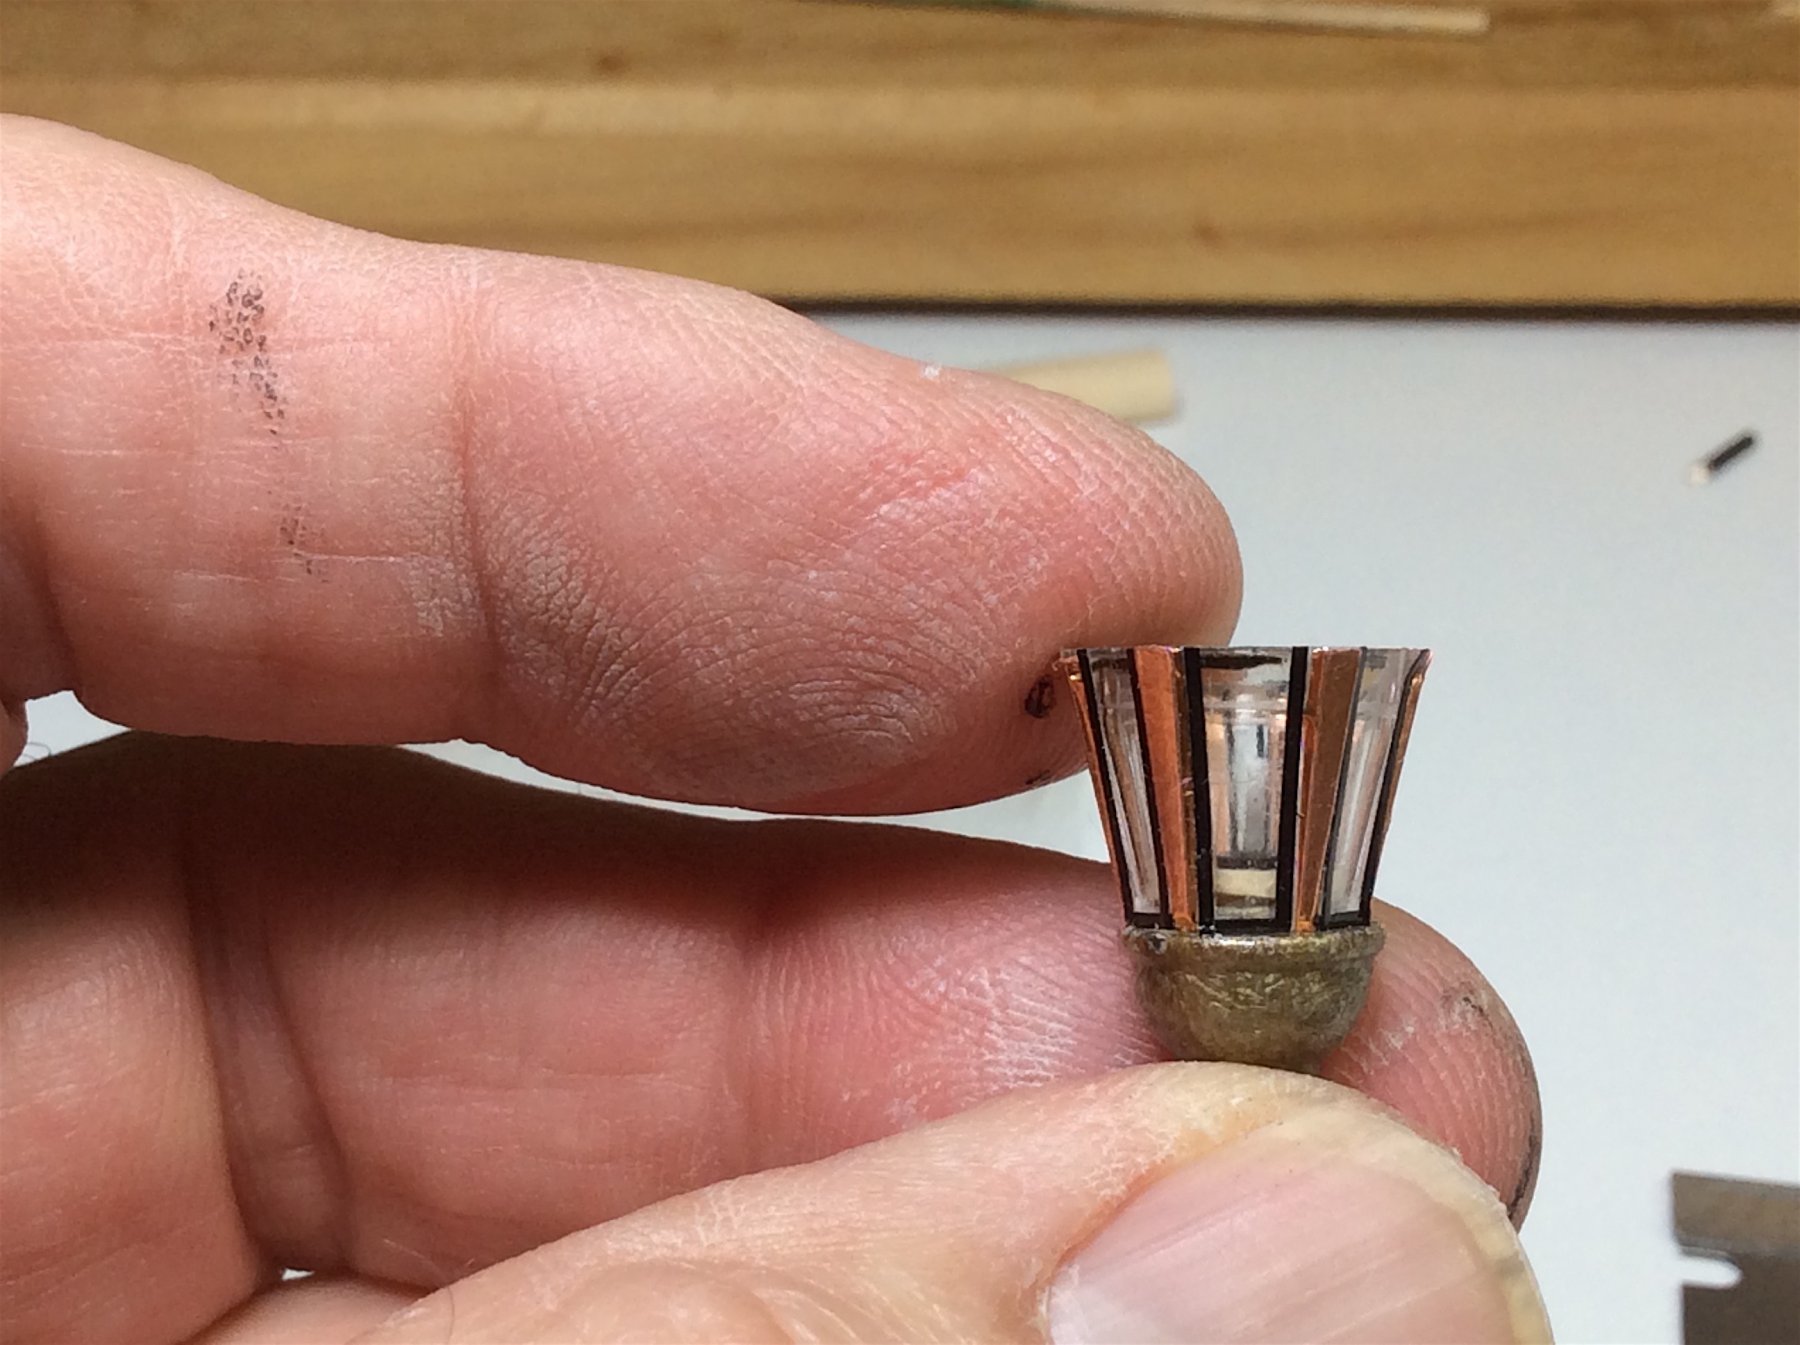
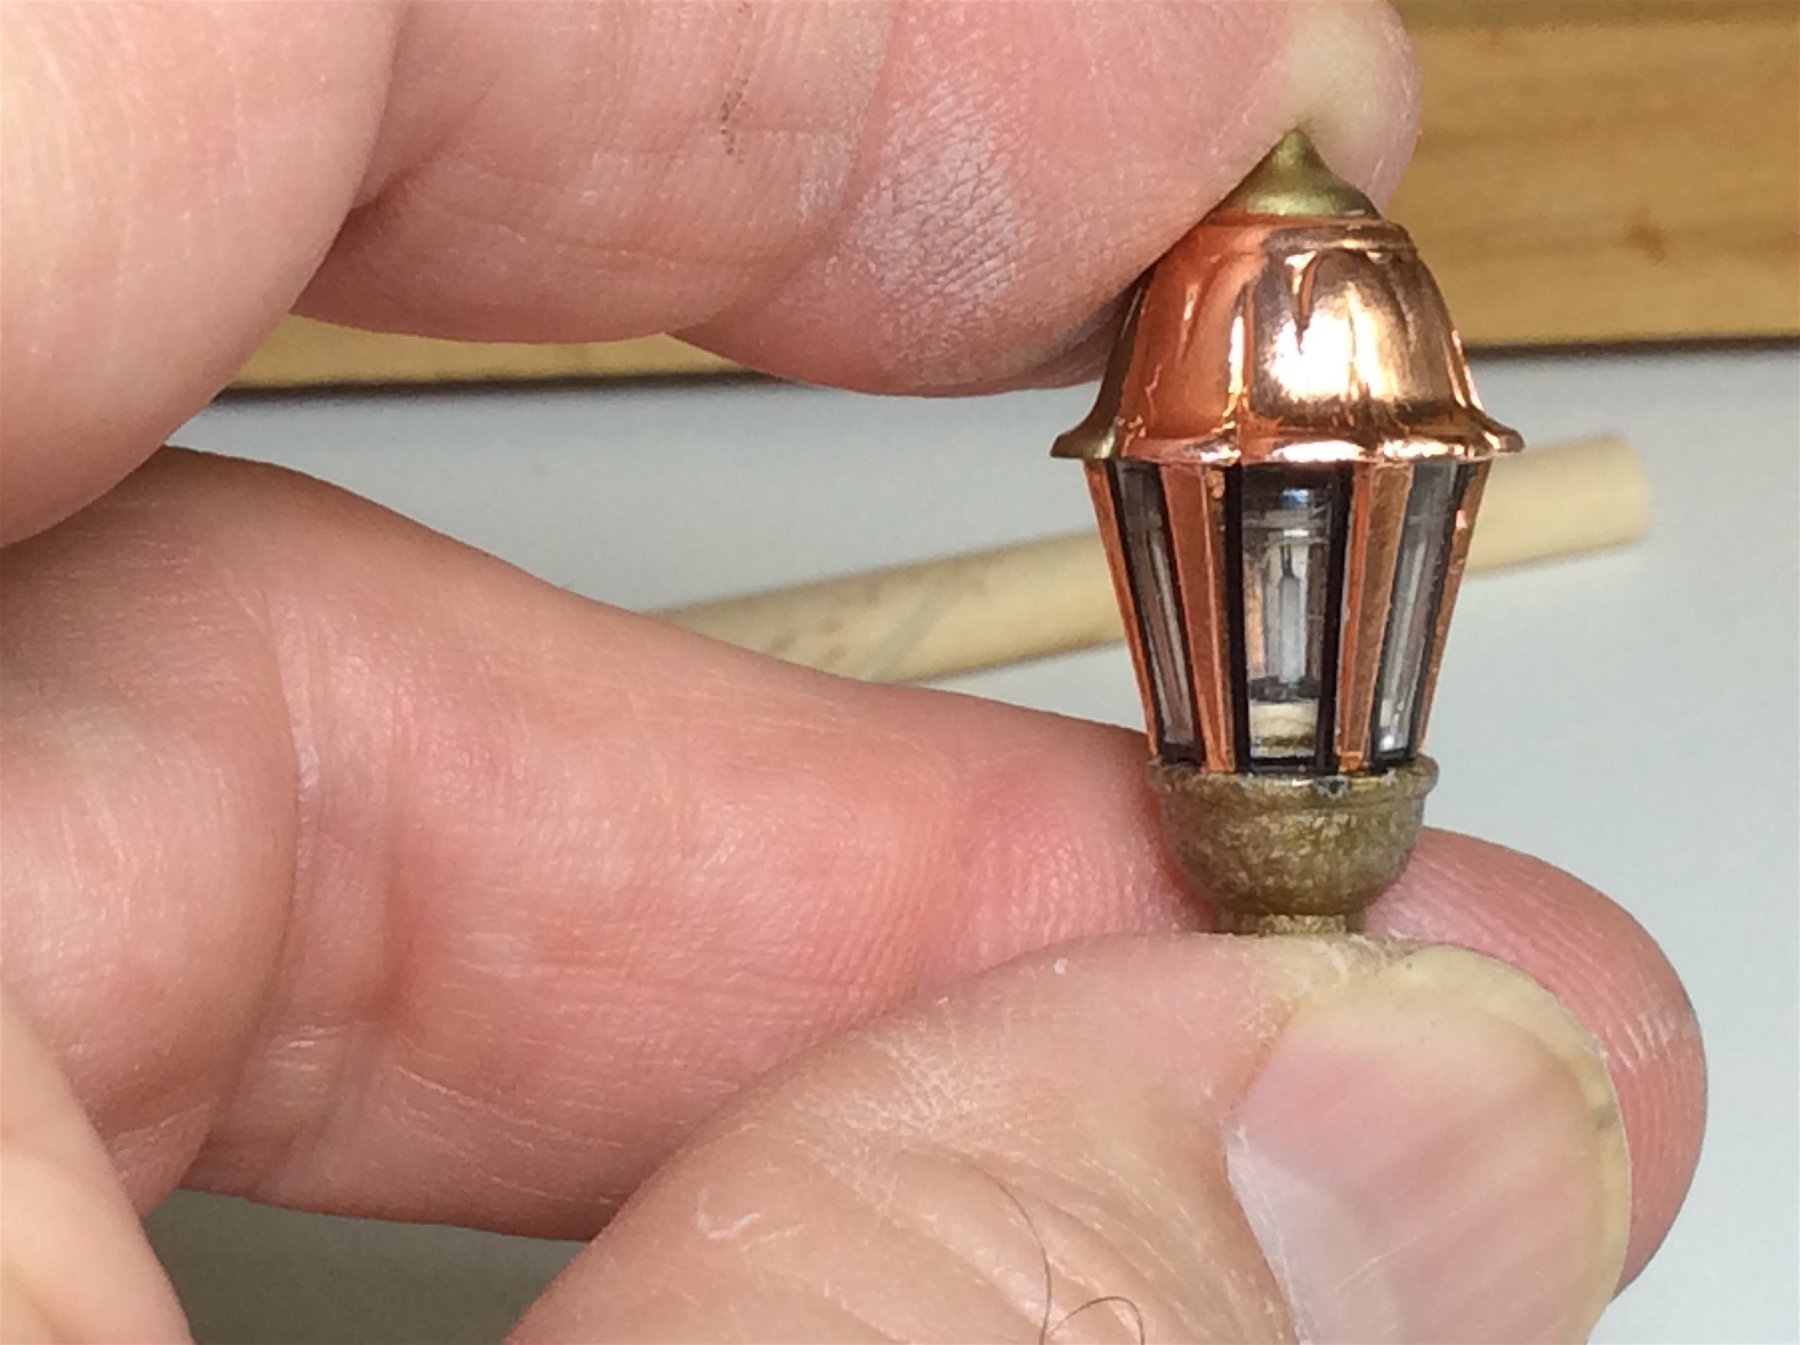
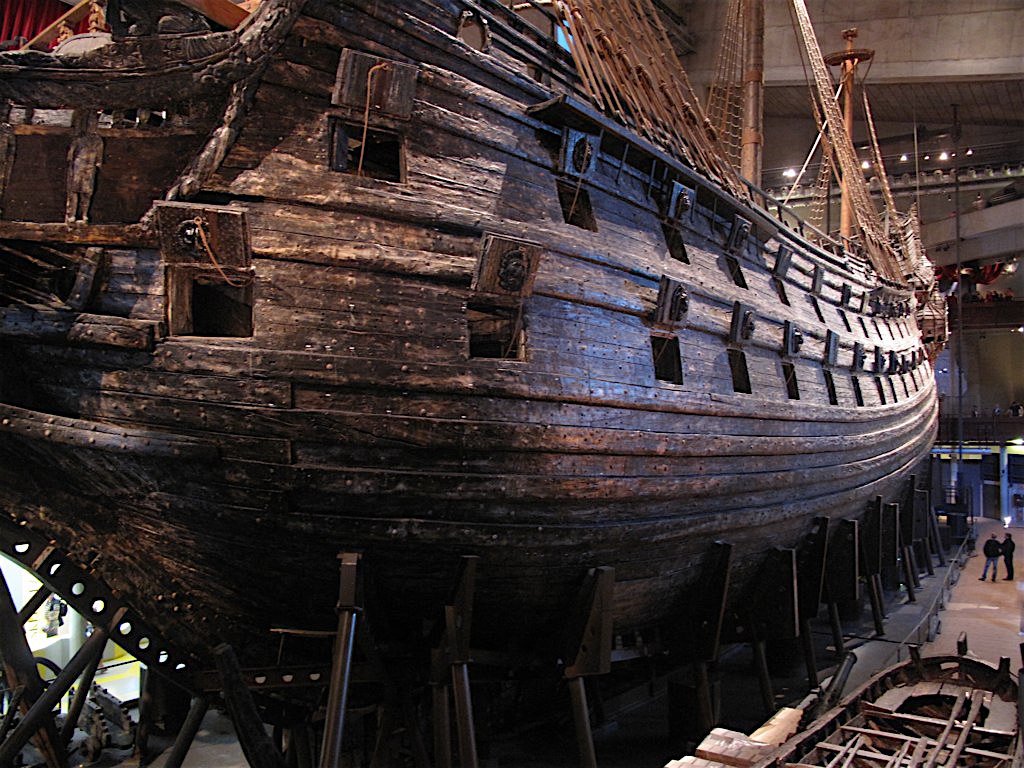
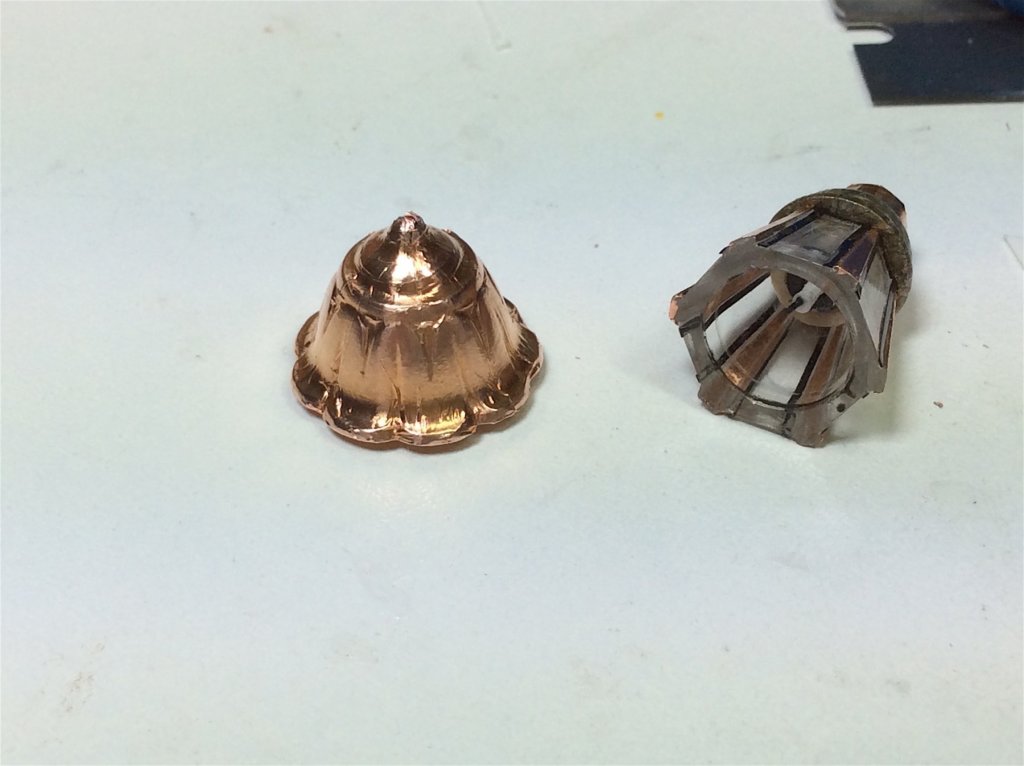
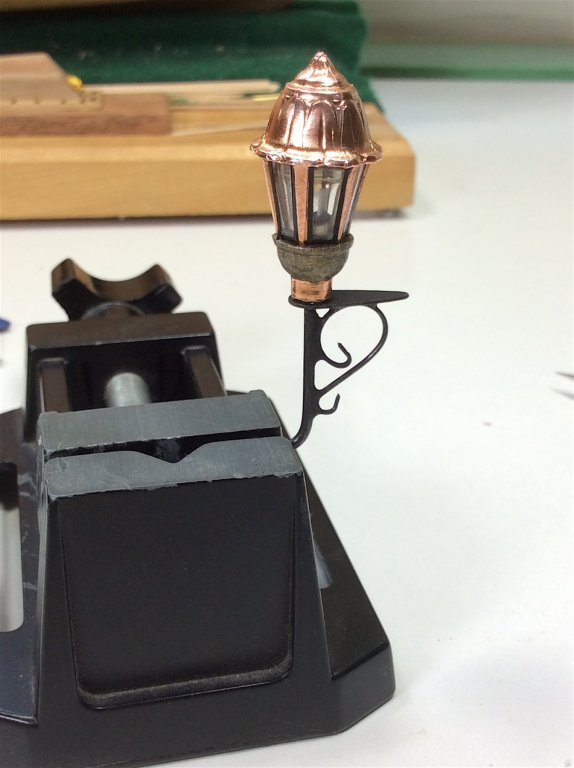
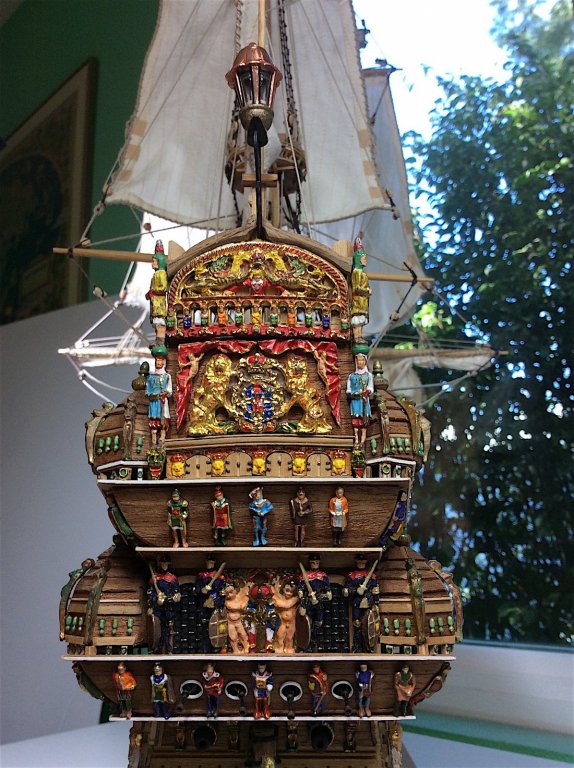
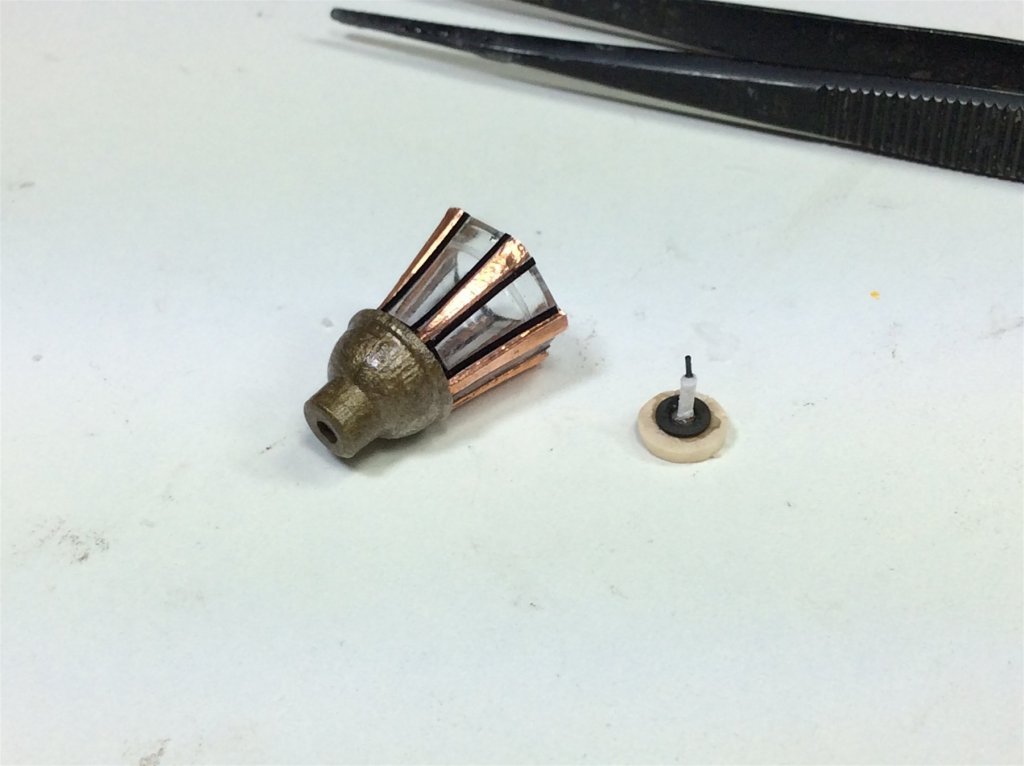
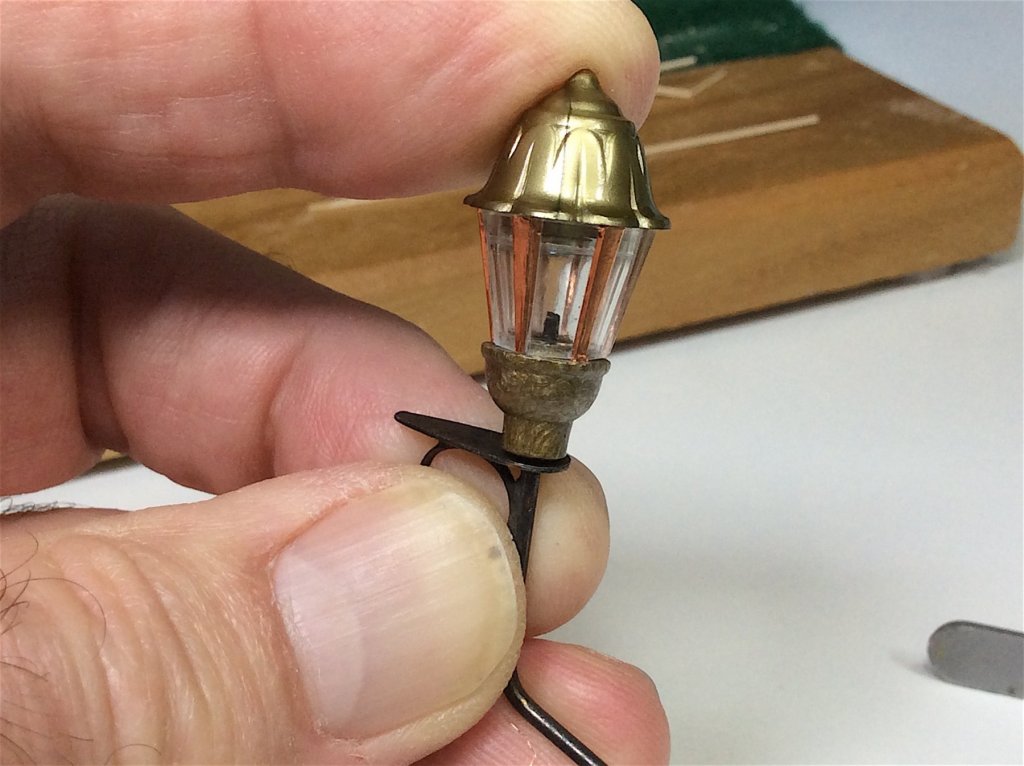
Hi Mates, EJ, Thanks so much – you are way too kind. Much appreciated. Your work with interior lighting I may need to explore in the future. JanV: Nice to see you active again. Thanks for your very nice words. I’m so happy that my build will offer you some help with the rigging. Happy that my learning, and postings will assist you as well. Huback: Yes the Vasa Museum is indeed one of the most astonishing museums. So looking forward to returning in early April. The Mary Rose is another I would like to visit again. I have not, since its re-design. I worked in London for two years mid 90s so those two museums were in the neighborhood. Along with sooo much history all over the place. Regarding the cosmos – yes – happy thinking for the masses haha …………………… Well, did finish “that” lantern. Some points; It came out ok as - a basic lantern. NO – it does not work for the Vasa, It would be great on a much smaller ship; It will stay mounted temporarily – to be replaced. It now annoys me haha In any case whatever lantern becomes part of this ship it will end up mostly covered by the stern flag. I intend to hang all flags limp (well my first attempt at this) Again mates thanks so much for your sage, and correct advice regarding this part for my build, as well as for still following along, and your so nice posts. Sincerely,


-
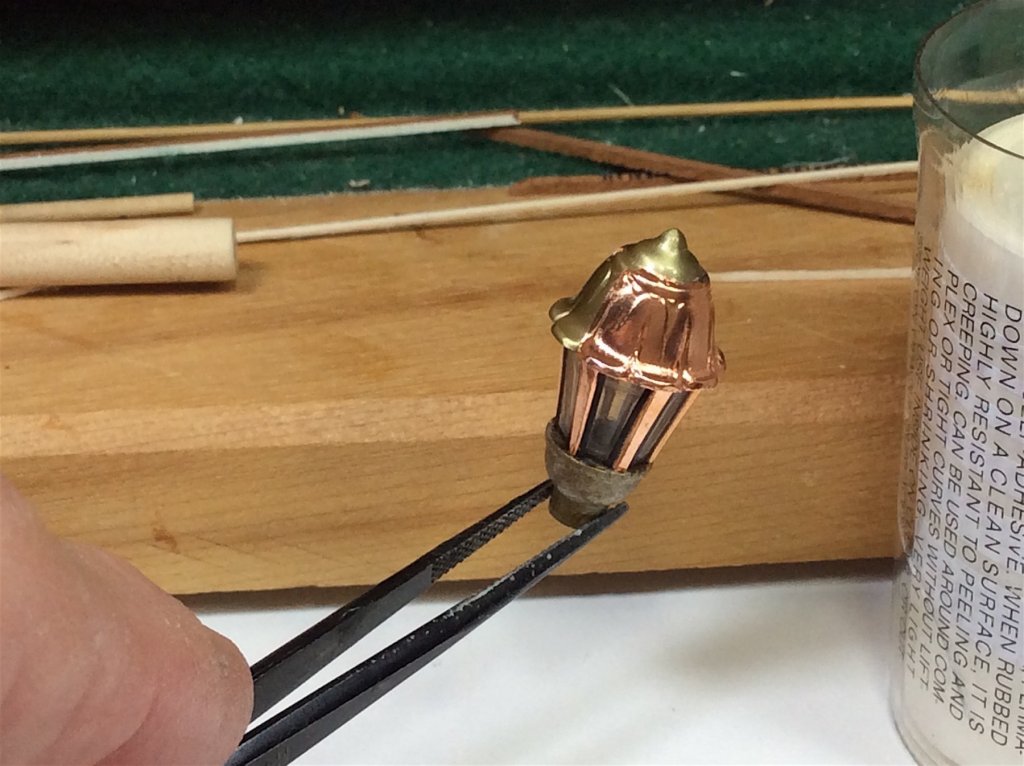
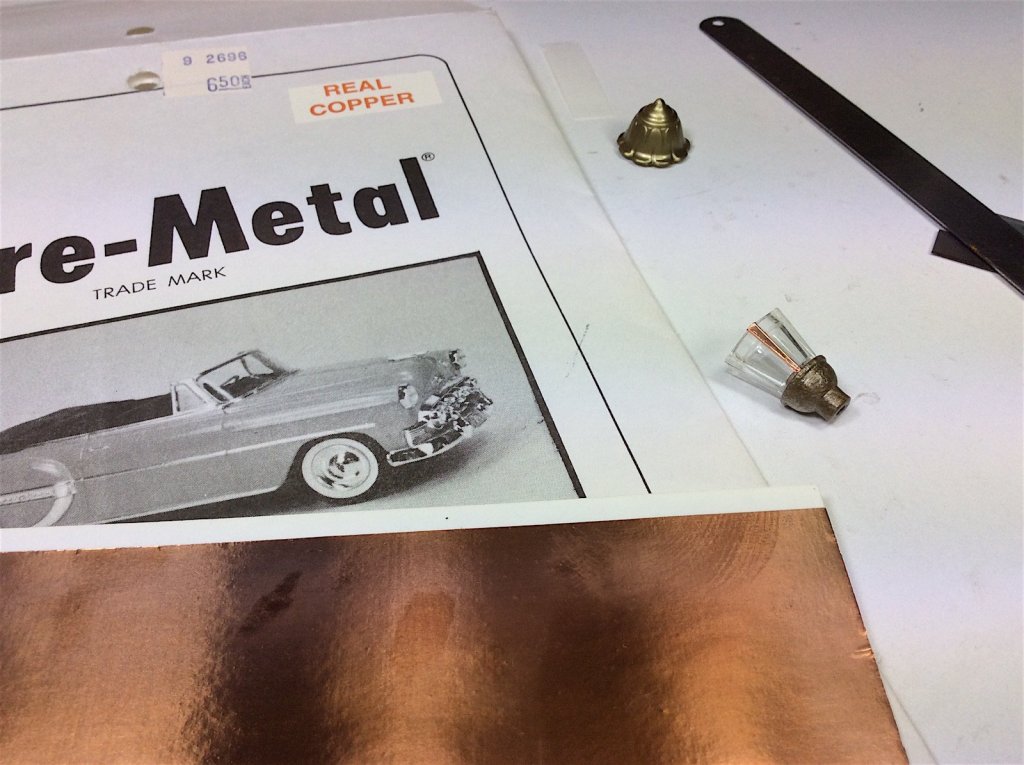
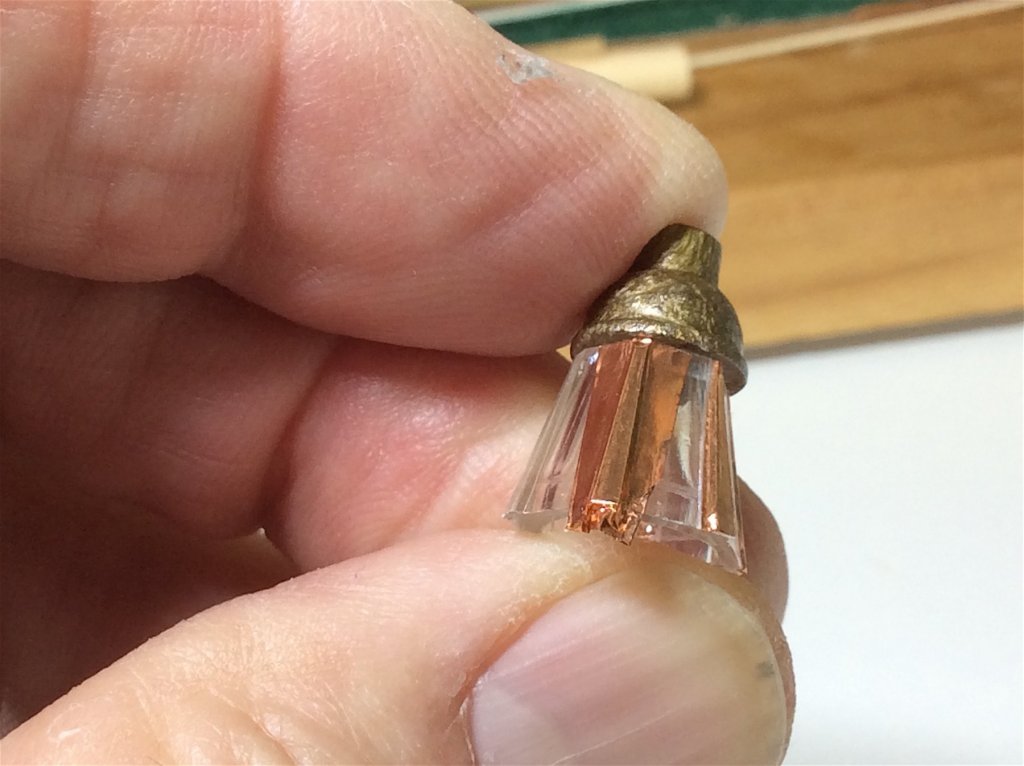
Thanks mates for your much noted, and thoughtful input. Yes my choice for the lantern is plainly too plain . Duly noted - will finish this build without a lantern, case it, and move it to where it will reside. Though I might install the one I'm working on and then change it to a much more appropriate example. Then, subsequently I will re-visit the lantern issue (after taking several breaths in between several weekend cocktails) – then work on an appropriate lantern. Easily added later. Patrick: Yours is brilliant indeed, Thanks for the link to your build. That said I have not explored the art of carving. And carvings are certainly needed for a Vasa lantern. Also I had forgotten about the Batavia of which I have many photographs. Thanks for the reminder as well. That leaves me with other ideas; one of which it to purchase a couple of Amati examples adapting one to the right-angled metal arm, and possibly adding some sculptured details. Here are the three I’m thinking of each 30mm - the oval one being 40mm. In any case I will not, in the short-term, stress any more about the lantern. I now know, that it needs to be correct looking. My choice is not. Huback thanks for initially pointing this out to me ====================== PS: I will actually re-visit the Vasa in April - meeting my son in Stockholm. Looking forward to the trip - Had been to the museum only once in 1995, certainly much more to see since then. Will also take many photos of the long boat, may want to add it to the Vasa one of these days. Or not hahaha ====================== Denis: Again thanks so much for your very kind compliment. NO the copper leaf sheet is super thin AND has an adhesive backing. You only need to keep rubbing it with a cloth or cotton bud to remove ALL wrinkles – they just disappear. Its mostly used by car modelers to add chrome details to their cars. Bare-Metal has several diff product choices. Cheers,

-
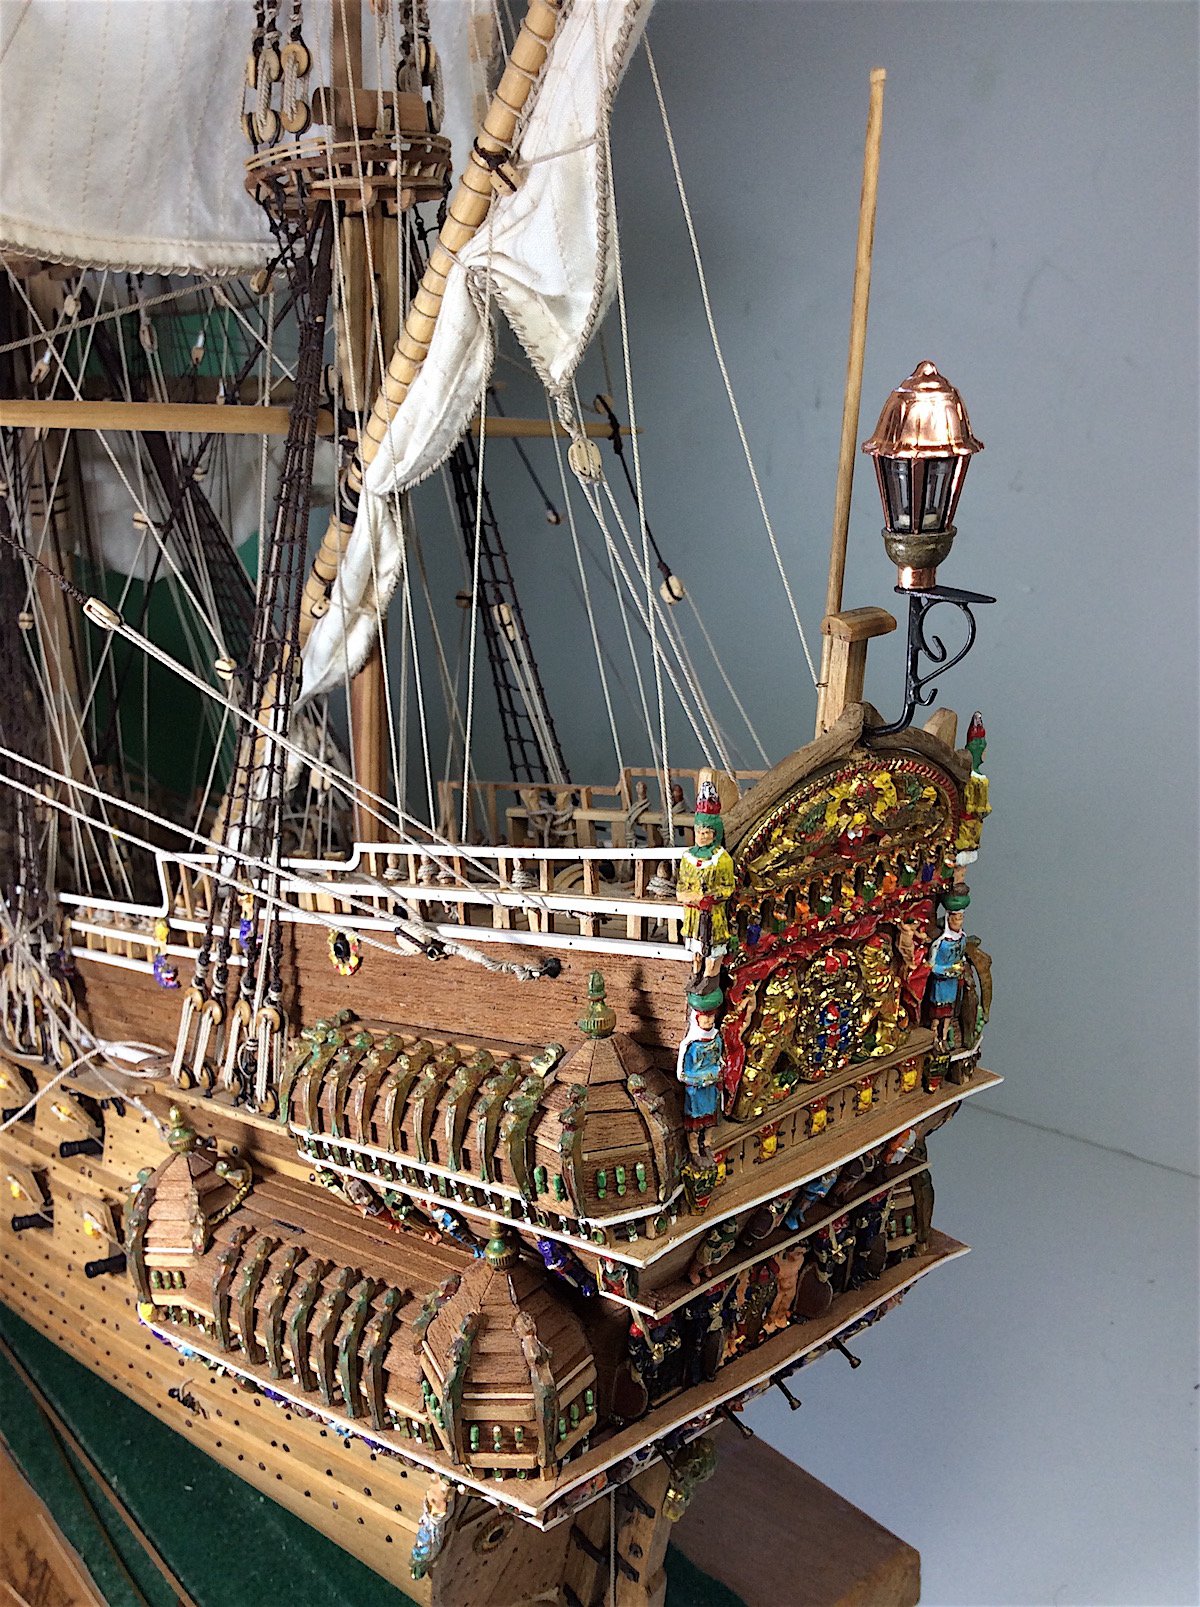
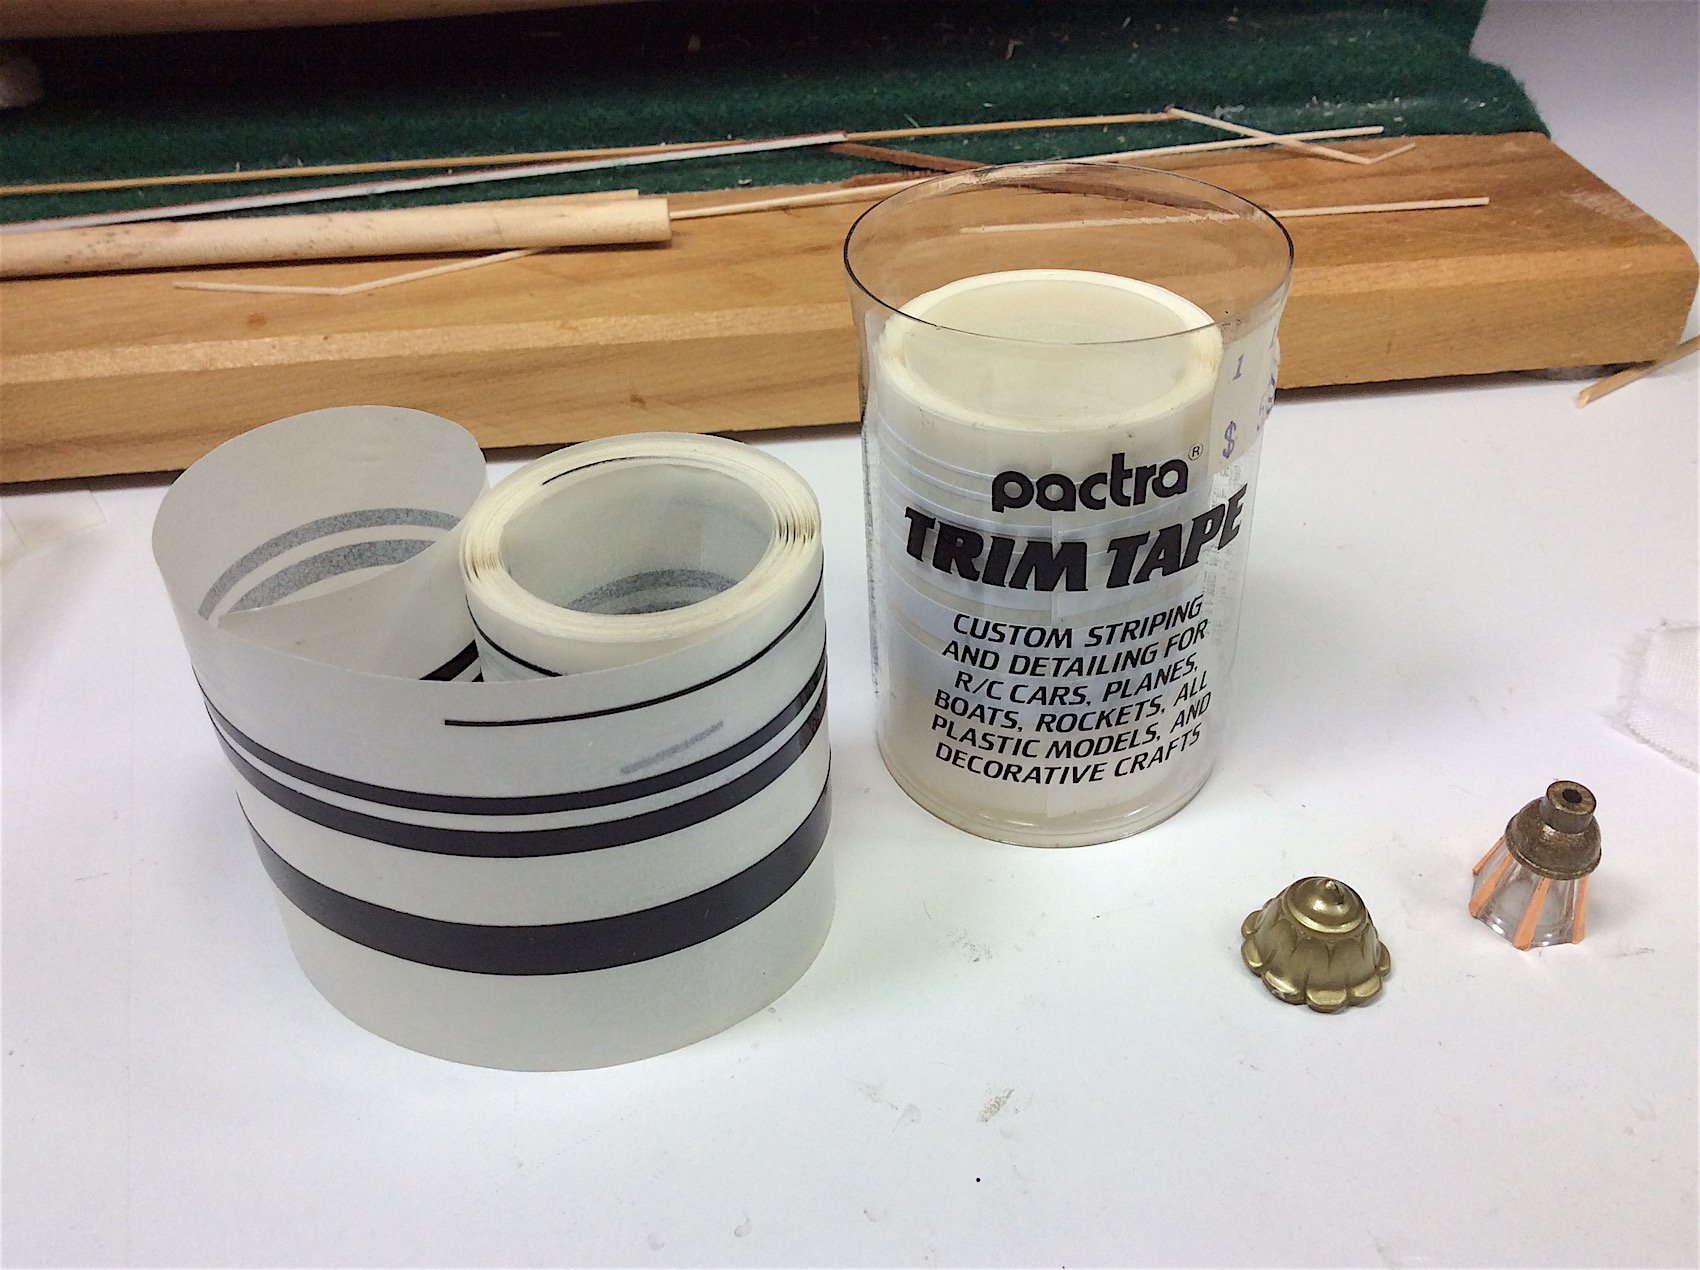
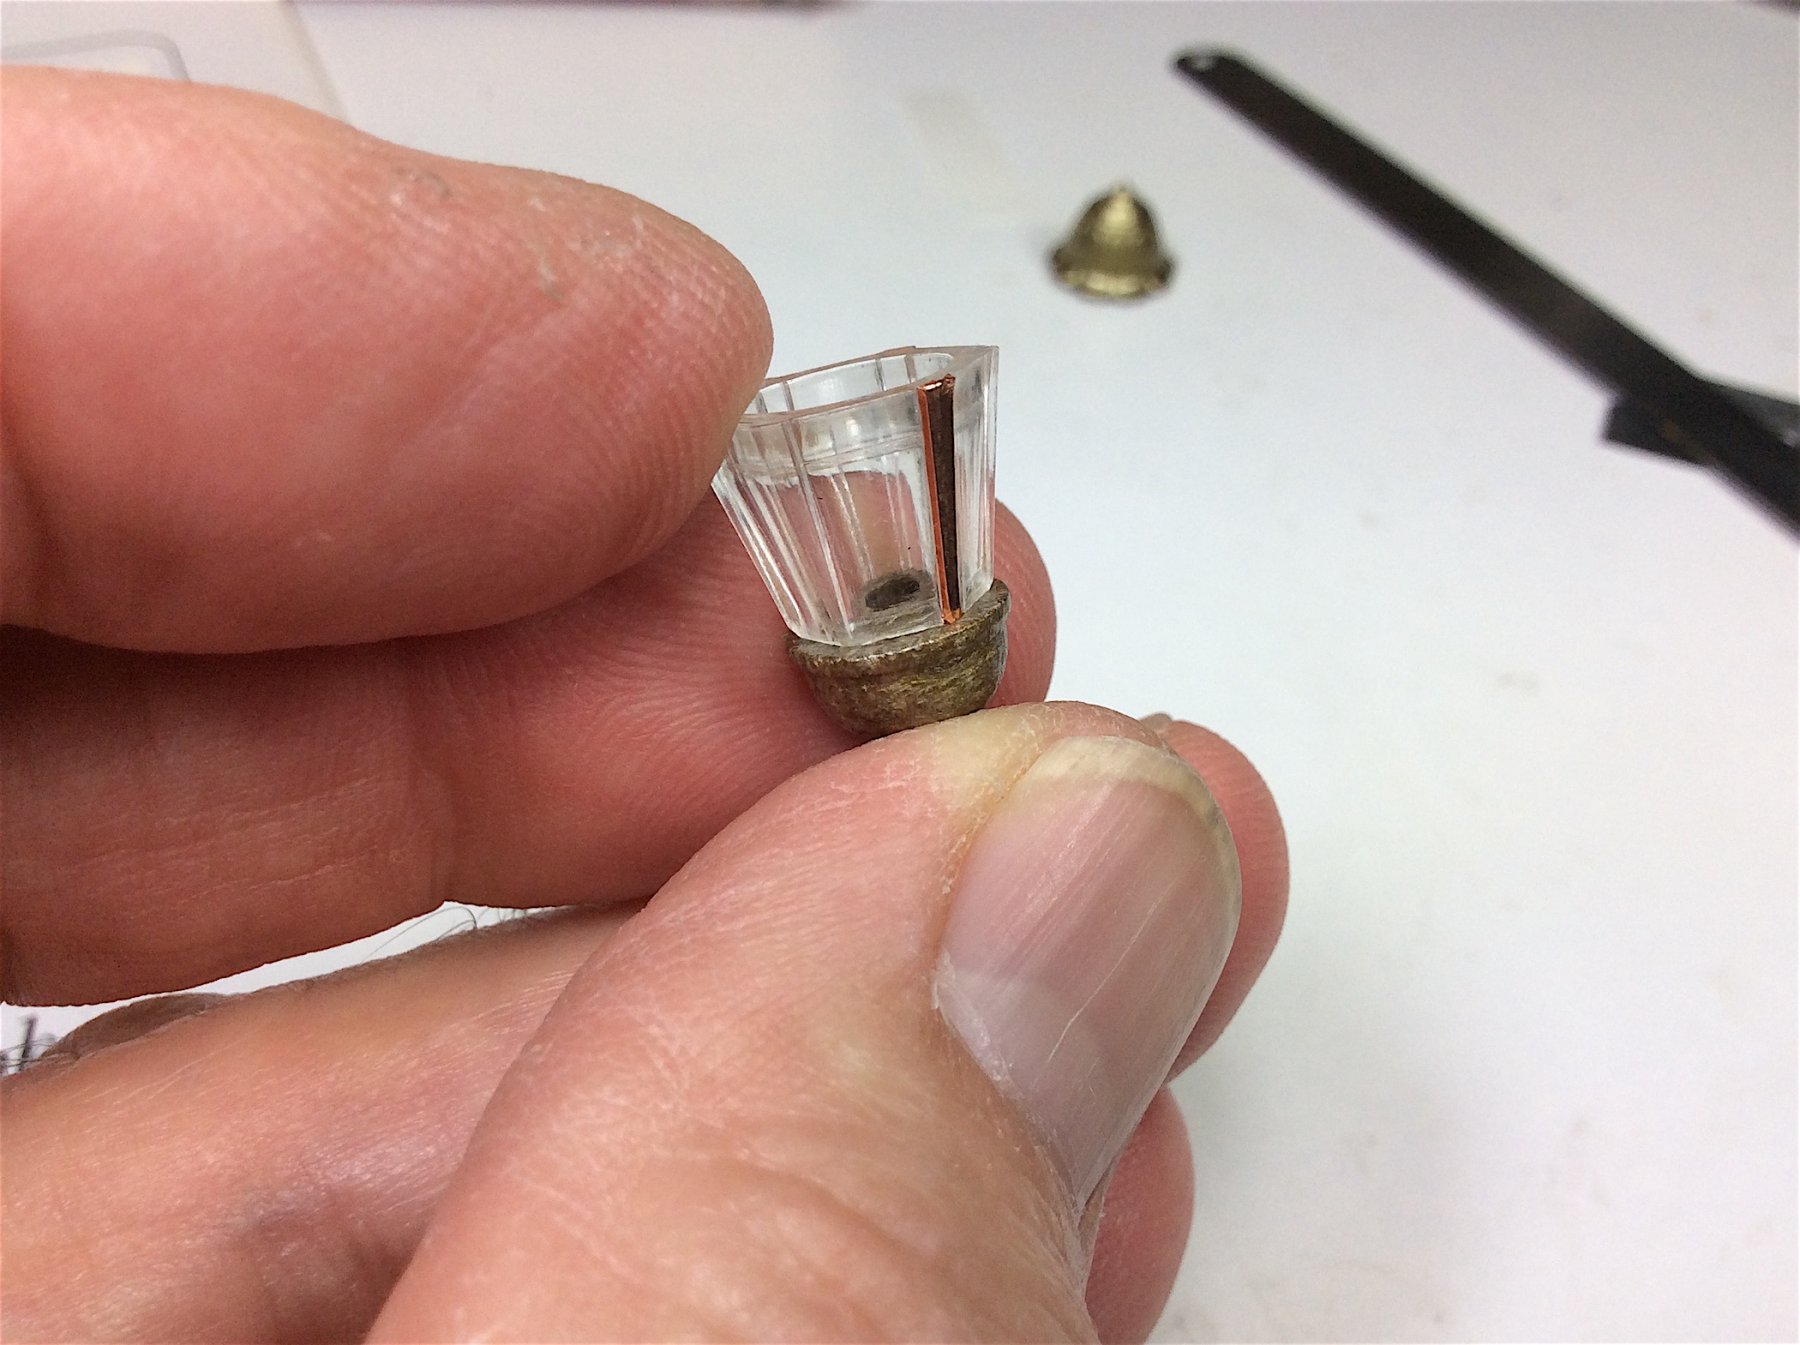
Thanks again, yes your constructive criticism is much appreciated, as it has been from other members who where kind enough to take the time to post suggestion comments. Your historical knowledge is super impressive as I have also noted from reading other logs at which you add historical information. Kudos to you. Also, thanks for looking up, and sending jpg,s of excellent contemporary lantern examples. Yes indeed mine will wilt by comparison. Those are so detailed and much more first class examples, if you will. But for, me I don’t have the skill set nor the energy to delve deeper, again into this project’s very complicated looking stern lanterns. It (this build) has gone on too long - need to move on. I had wanted to copy Alexander's and had made a folder from his log sometime back. But for-all-intent-and-purposes she is done, exclusive of a few shrouds here and there. I will have the case cover measured and made next week BUT……. Still need to; Add, shape, and rig the five flags (PS: incorrect Corel supplied flag examples no less) Make two keel bracing structures Fix two broken mast platforms Re-install missing cannon doors Touch-up paint hull and deck gilded figures. Grrrr (need to move on) haha The stern lantern will have to be what it will be, especially per Fred Hocker’s remarks with Alexander regarding the still missing lantern. ……I do, again much appreciate your sage advice, and comments about how you consider my kit build to to be a good example of how a kit can be improved upon. and conversely how this lantern may detract, a bit, the project. ======================== A few more photos of the, well, lantern lol…I will foil the top with gold leaf, bottom – not sure yet. PS2: I did order six figurines from Corel (the ones that are above the upper galeries, I may add those to the six sides of the lantern if they look "ok" after receiving them, This would add Vasa correct detail per what Corel supplied. Regards,


-
Hubac's: Thank you for your post much appreciated. I am Familiar with Alexander’s lantern. It is indeed a very excellent scratch built example. That said see the notes below from his log, along with Fred Hocker’s response. ============================ The design of Landström seems to me as enormously heavy. All over golden I can imagine the lamp is too dominant. Maybe I'm going to the roof copper or anthracite to make it look visually slightly smaller. Cheers, Alexander From Fred Hocker I agree that Landström's design is pretty heavy, and I am not sure that it fits the style of the rest of the stern that well. We also do not have any sculptural pieces anything like what he shows, so I wonder if the lantern was not so elaborate, more of a glazed house for the lights. (underlining is mine) Having the roof of the lantern and its finial mimic the cupolae on the quarter galleries is a possibility, but in that case I would expect the bottom to look more like the lower part of the gallery. The glass panes are probably rectangular, about 150x100 mm (we have a lot of fragments of glass this size)rather than the diamond shape BL shows. You have the mounting exactly right. ======================= In the meantime I’m still playing around with this particular after-market example. I just ordered some gold leaf from Bare-Metal (Amazon). I might just leaf the top and bottom in gold instead of the copper that I’m playing with. The importantly missing details would be the air four vents at the top. I’m playing with some ideas. I do appreciate your advice, and thanks for the nice comments regarding this build. I may still, in-fact, just make one as your suggestion and reasoning are very appreciated. Last photo from a Museum video about the sinking Sincerely,

-
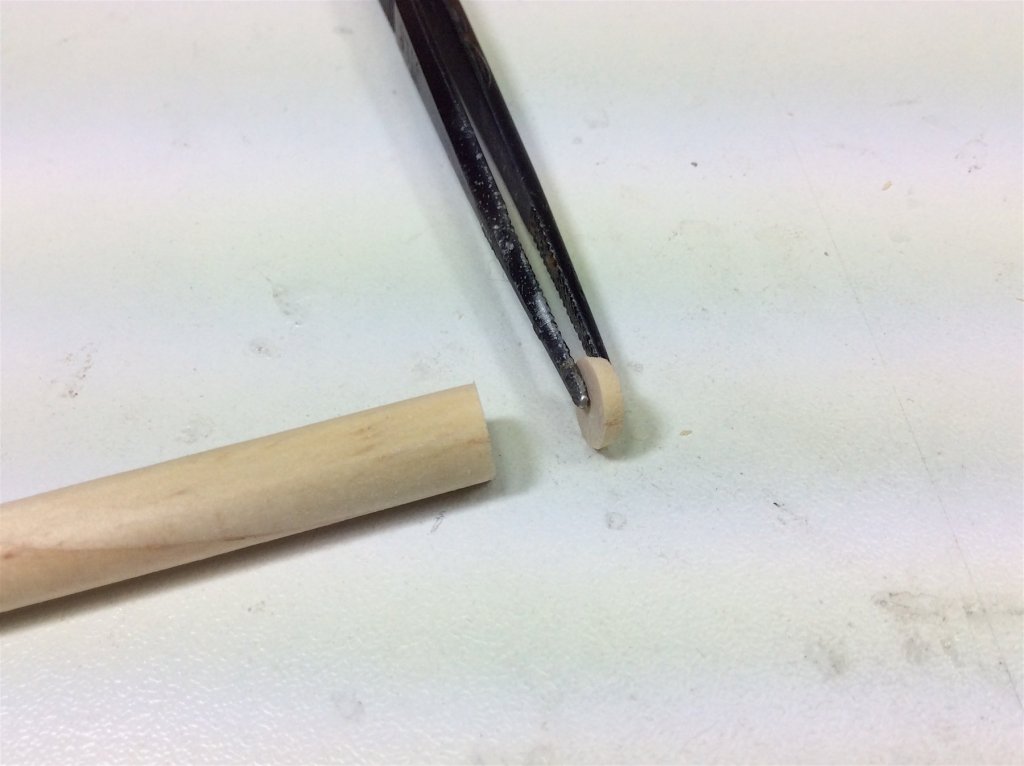
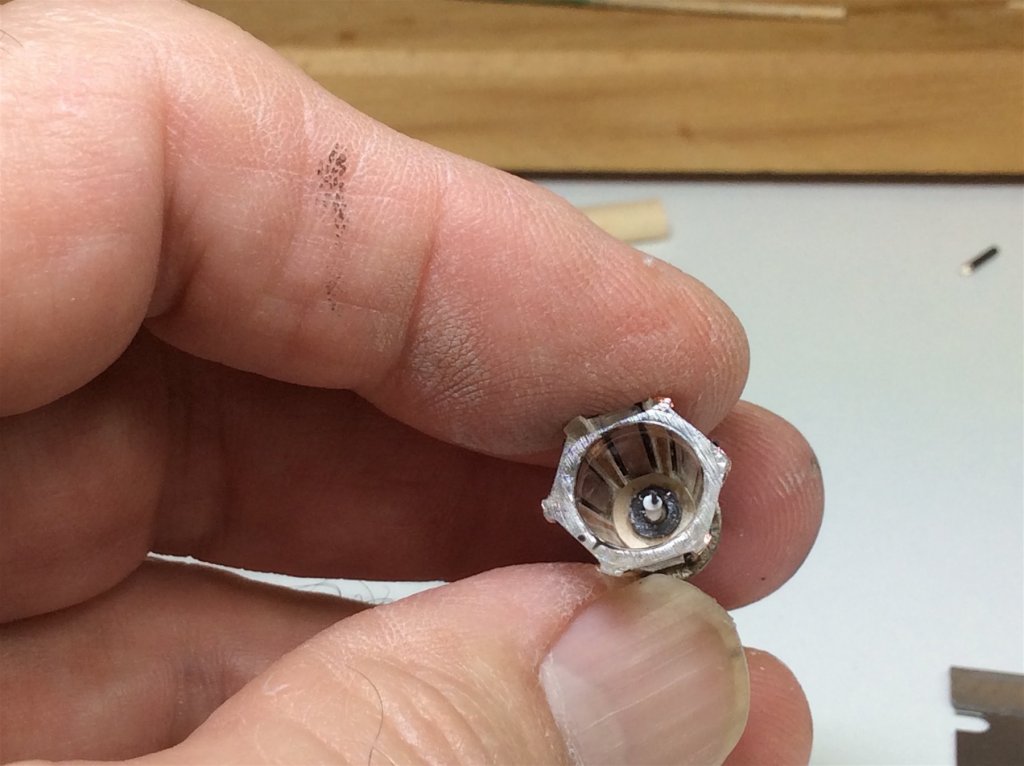
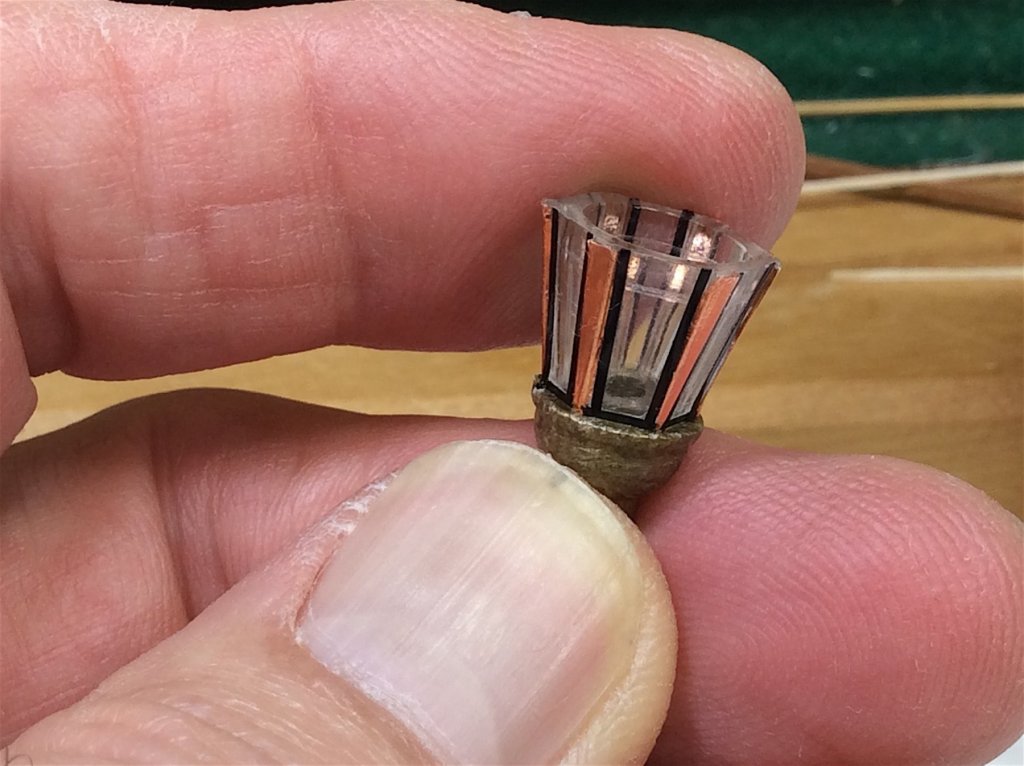
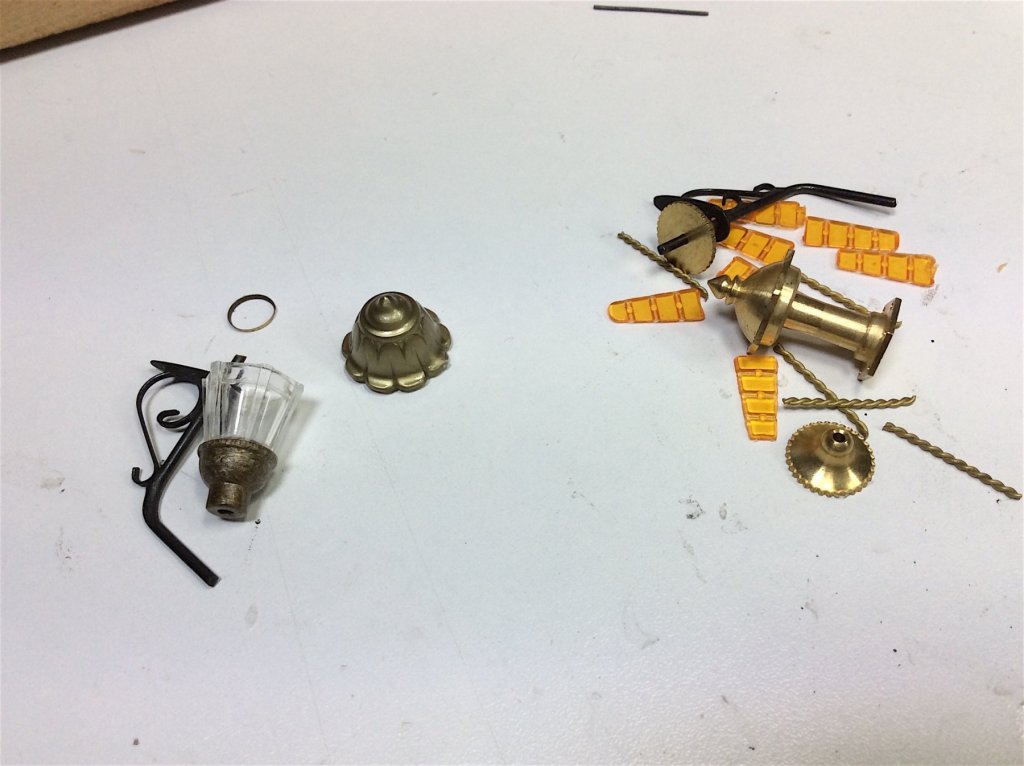
Time to start work on the stern lantern. Noting that any lantern I attach will prob. not represent the actual lantern, a part that was never salvaged. So based on Landström’s drawings, the most representative is the one on the left side of first photo. I also note that the 1/10th, as well as several other important replicas do not include a lantern. Wanted to, in any case, add some extra details to the one I chose to use. Then, I remembered that from my model car days I still had several types of foils. So, used the copper. Did not have any gold. Here are a few preliminary shots. Need to figure out the candle, and how to paint, and detail the plastic housings.

-
Denis, Just catching up - Looking great. Hull wood is perfect. and your deck work is splendid indeed.
-
Dave, Brilliant with parrels. I'm sure that we will see more builders incorporating 3D printing work for their builds. Prices are sort of still out of reach for many, but as with all tech that will change. That said the printers will eventually become an invaluable tool (along with understanding how to use the needed software prompts) IMO. PS: Your work is indeed excellent -glad to be following along and learning as well. Regards,
-
Thanks for the likes. Please note that that this entire project looks much better because of exclusively using Chuck's ropes (and blocks) from Syren. Had I coiled the threads that this kit included, along with all of the needed rigging (and horrid kit blocks) the results would have been very underwhelming, and terribly out-of-scale as well IMO. Yes there are other very good rope suppliers, I just happen to find Chuck's quality consistently excellent shipment after shipment. Cheers.
-
Ferit, Good work. Yes these home made bits when there are so many added to a project end up making a huge difference indeed. Well done. By the way also really like the staining details on your deck and railings. Very realistic looking. Regards,
-
Nice update - pelican looks great. Also your green work with no "bleed through" splotches is excellent
- 756 replies
-
- 3
-
-
- galleon
- golden hind
- (and 2 more)
-
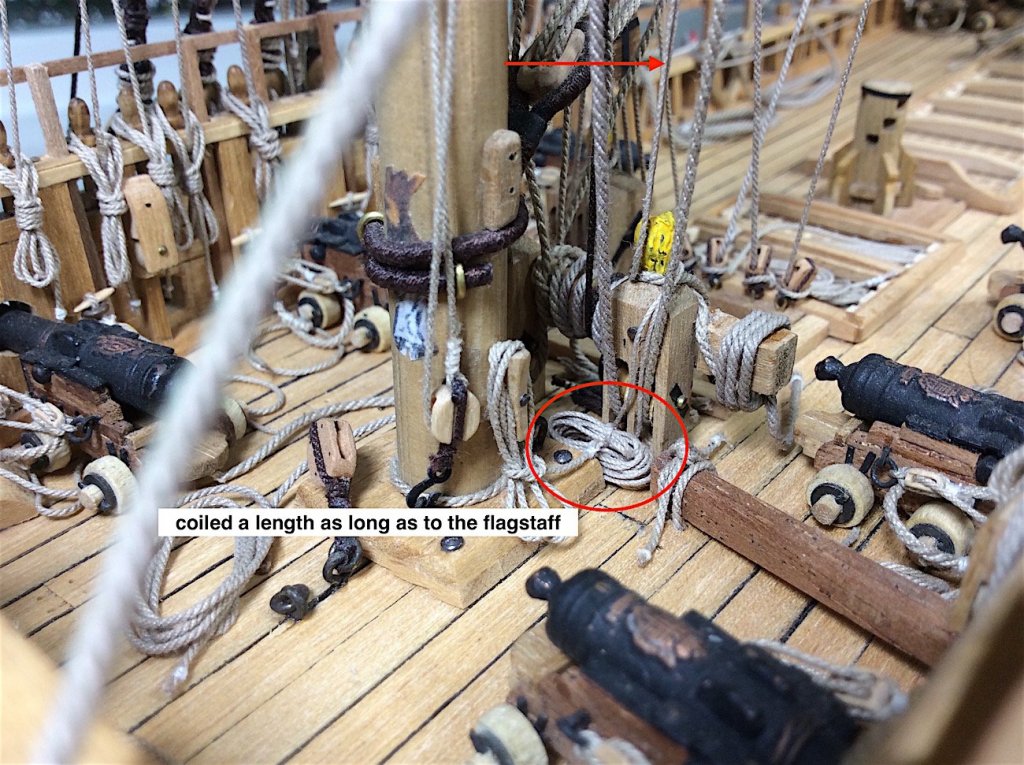
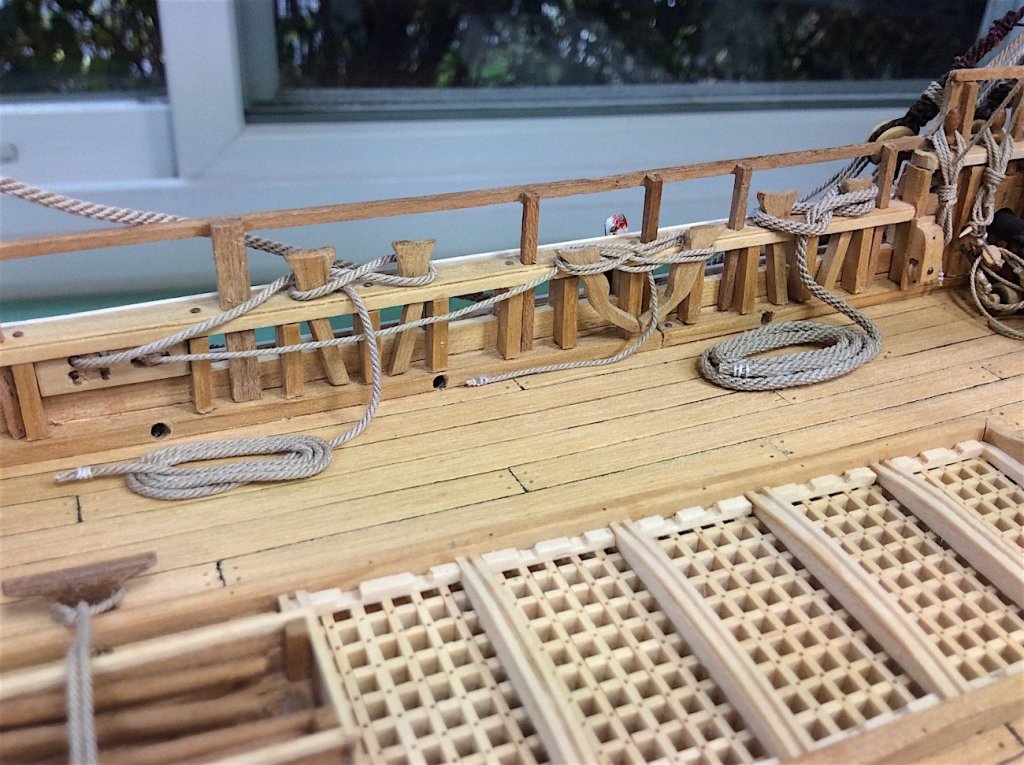
Denis: There are four very visible coils in a sparse and very open area mid deck, attached to kevels that needed to lie spooled on the deck. Those I felt needed extra attention, otherwise I agree with you – not worth the extra detail work. Just coiling a spool and laying it above the cut end is just about perfect. ============ Those four + two are done, now onto the bow area.

-
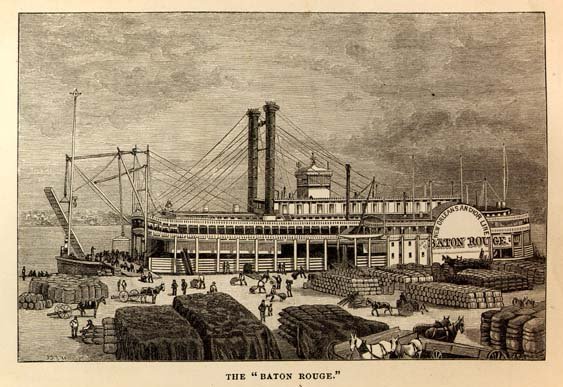
True nice ship indeed. That said the Amati Robert E Lee is prob. considered the greatest of these paddle steamers. From what I've seen in photos it also appears to be an excellent kit - one that can easily be bashed as well. But (again) having stern paddles more visible is a big detail plus!!
-
Denis, You might also consider adding a berthing location in your name. Though yours has a stern paddle this sorta gives you an idea.