md1400cs
-
Posts
2,868 -
Joined
-
Last visited
Content Type
Profiles
Forums
Gallery
Events
Everything posted by md1400cs
-
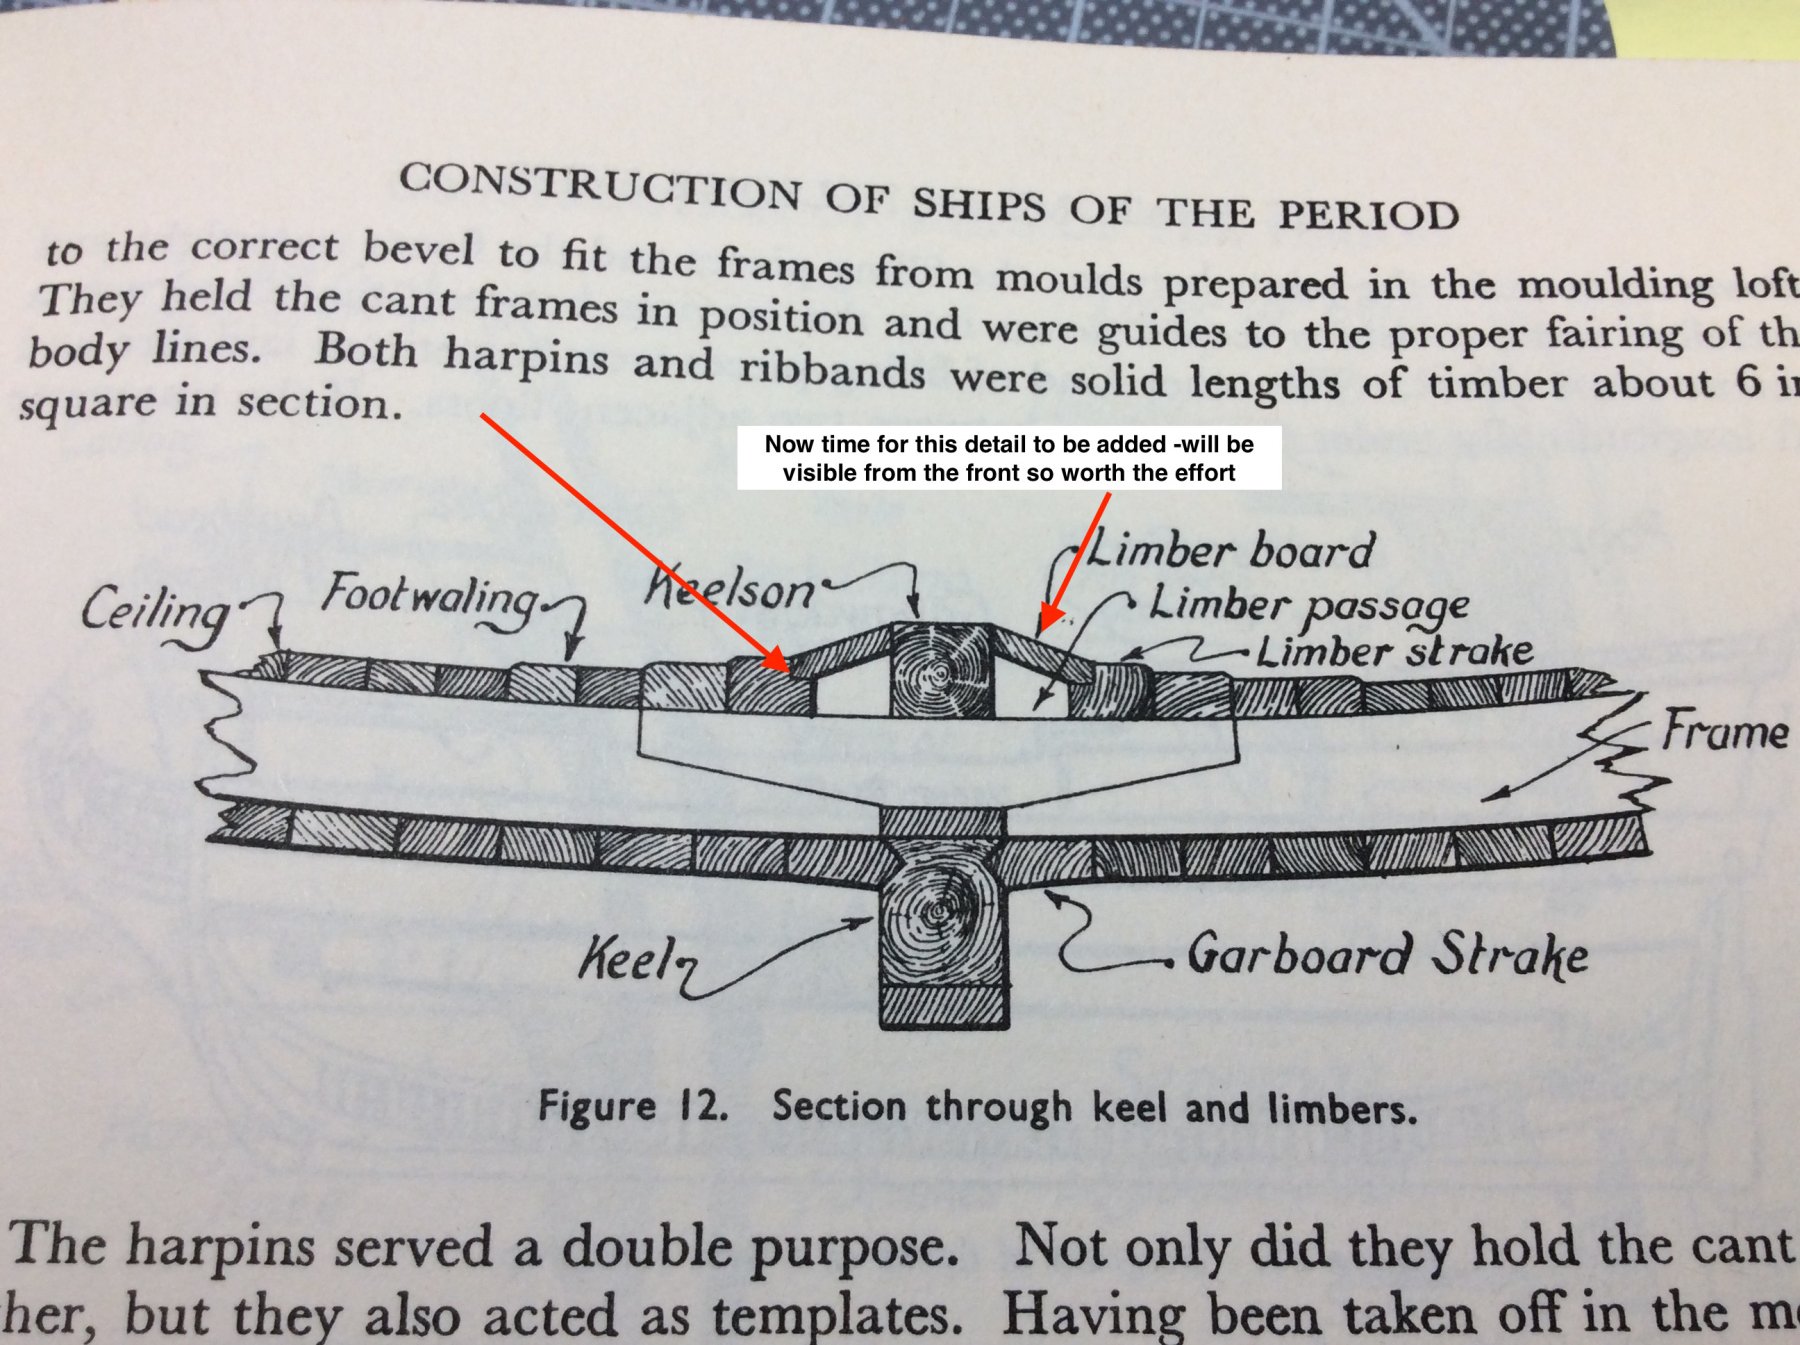
 Anthony, Thanks - again - for sharing YES ferarr's Victory is a masterpiece. The amount of replicated details are a work of art. As Martyn was so kind to post a few posts above - Well it will be a "double pinch" because I will study this amazing Victory cross-section adding some of what I will be capable of pinching form ferarr's log (I did post a note on his log (:-) ) PS: .. The Lumber boards had slots or holes in to facilitate removal to clean the Lumber passage. NOTED thanks Cheers,
 -
ferarr, Brilliant work indeed. such a feast for the senses. You captured, and replicated amazing amounts of details!! I'm starting my first cross section and will so study your work - Thanks for sharing. Regards,
-
Peter, Well done, on ships with these many cannons -dummies make a big visual improvement. Good idea. PS: Your deck 'lines" look real good as well
- 366 replies
-
- 5
-

-
- bellerophon
- victory models
- (and 2 more)
-
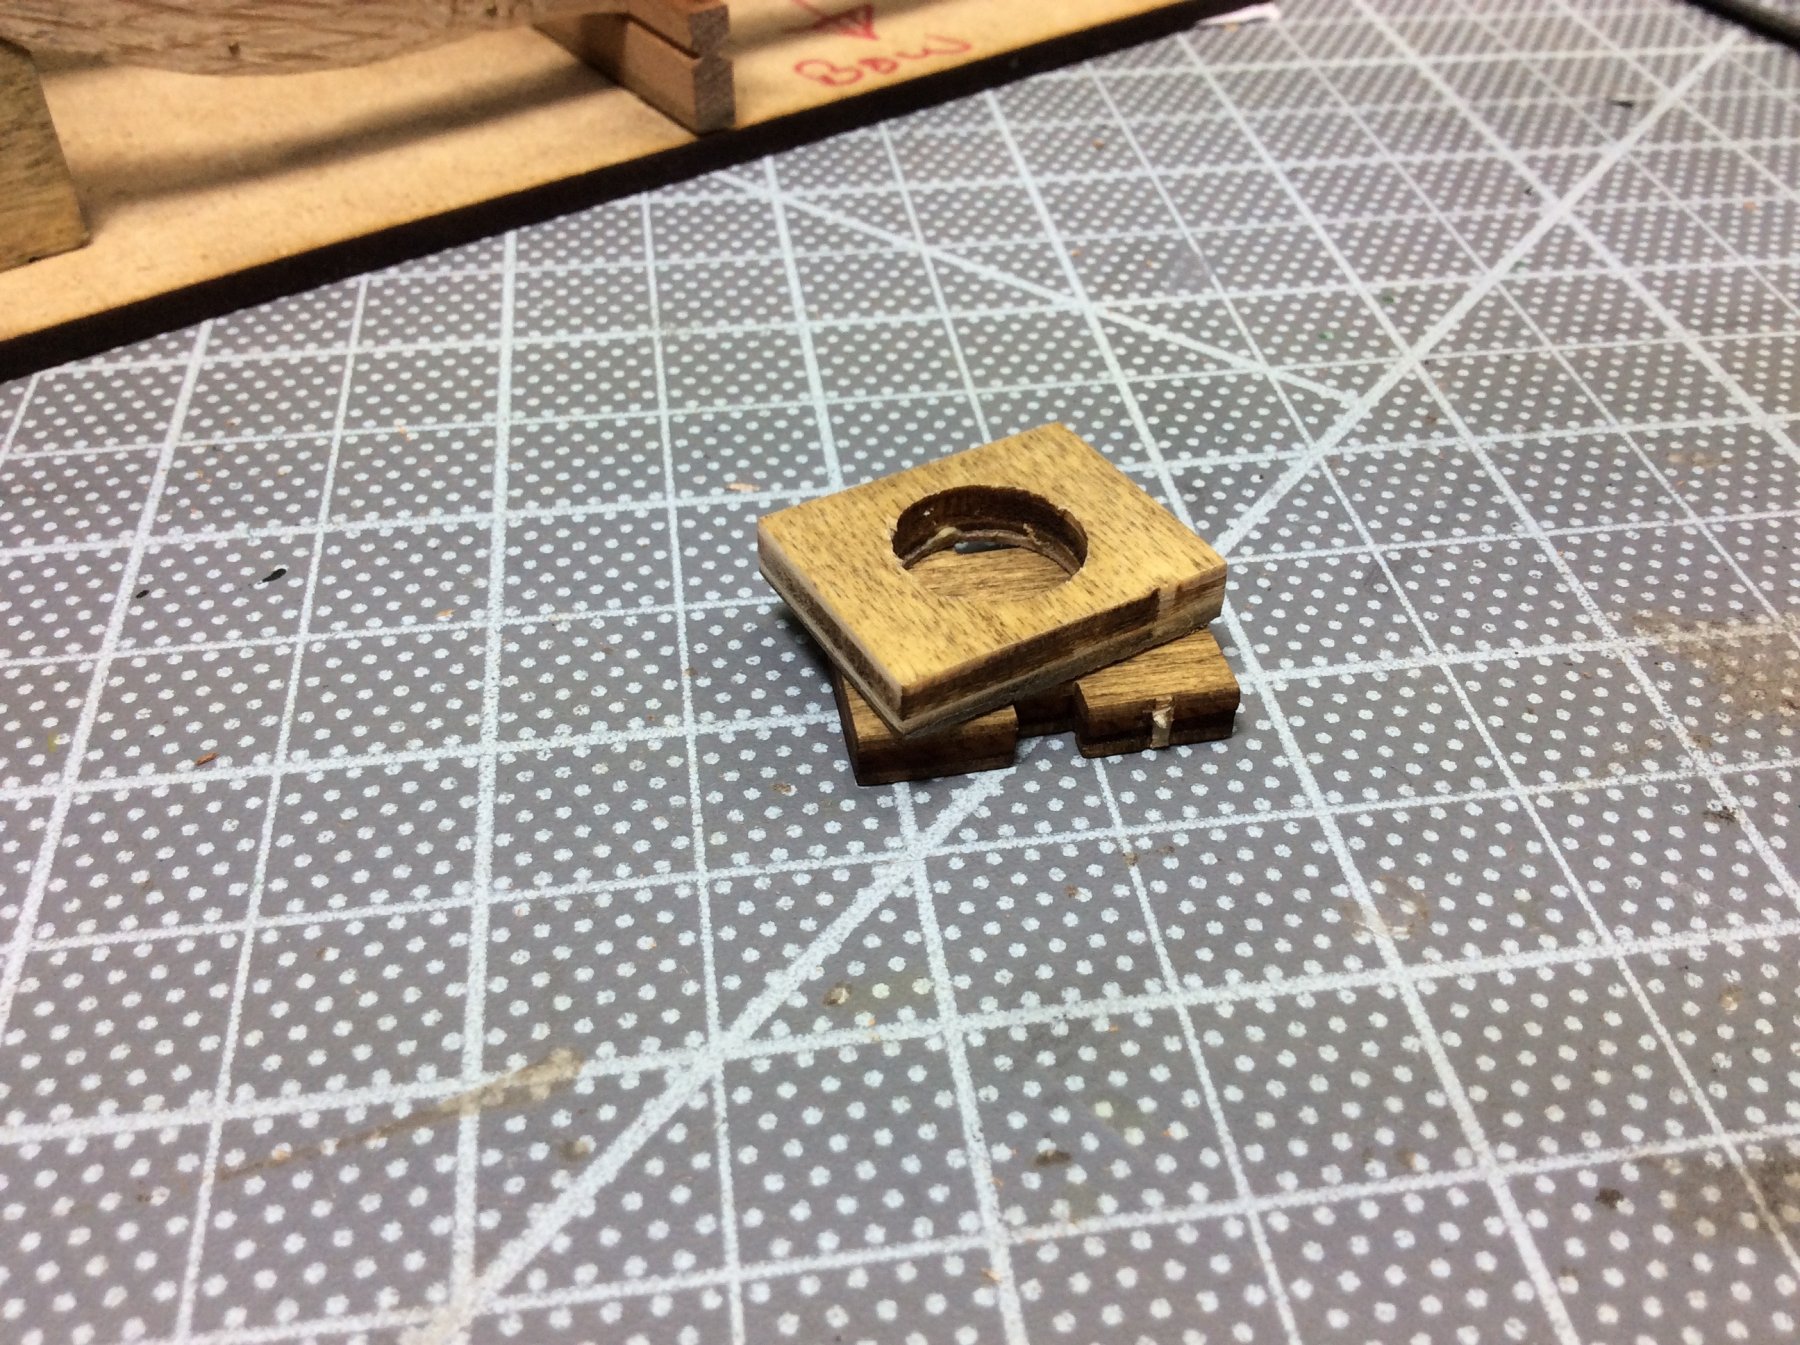
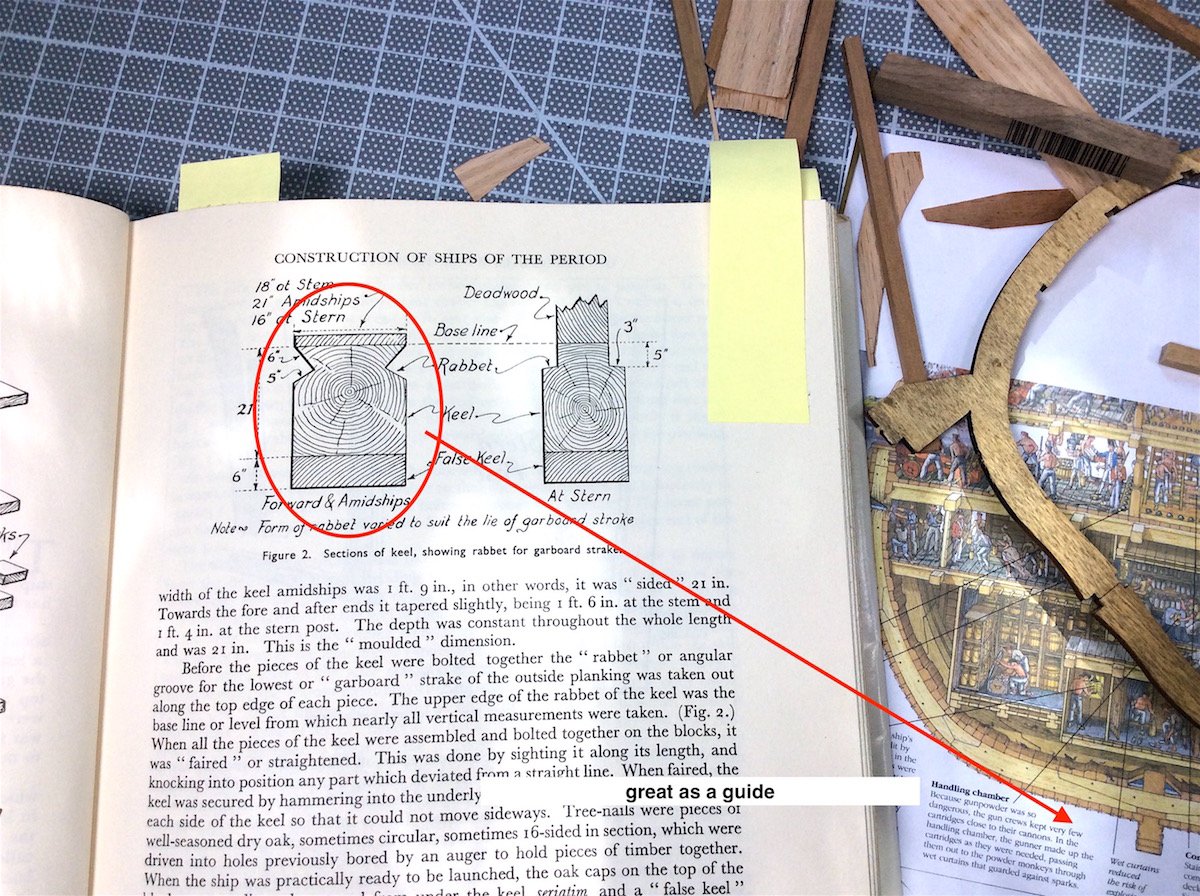
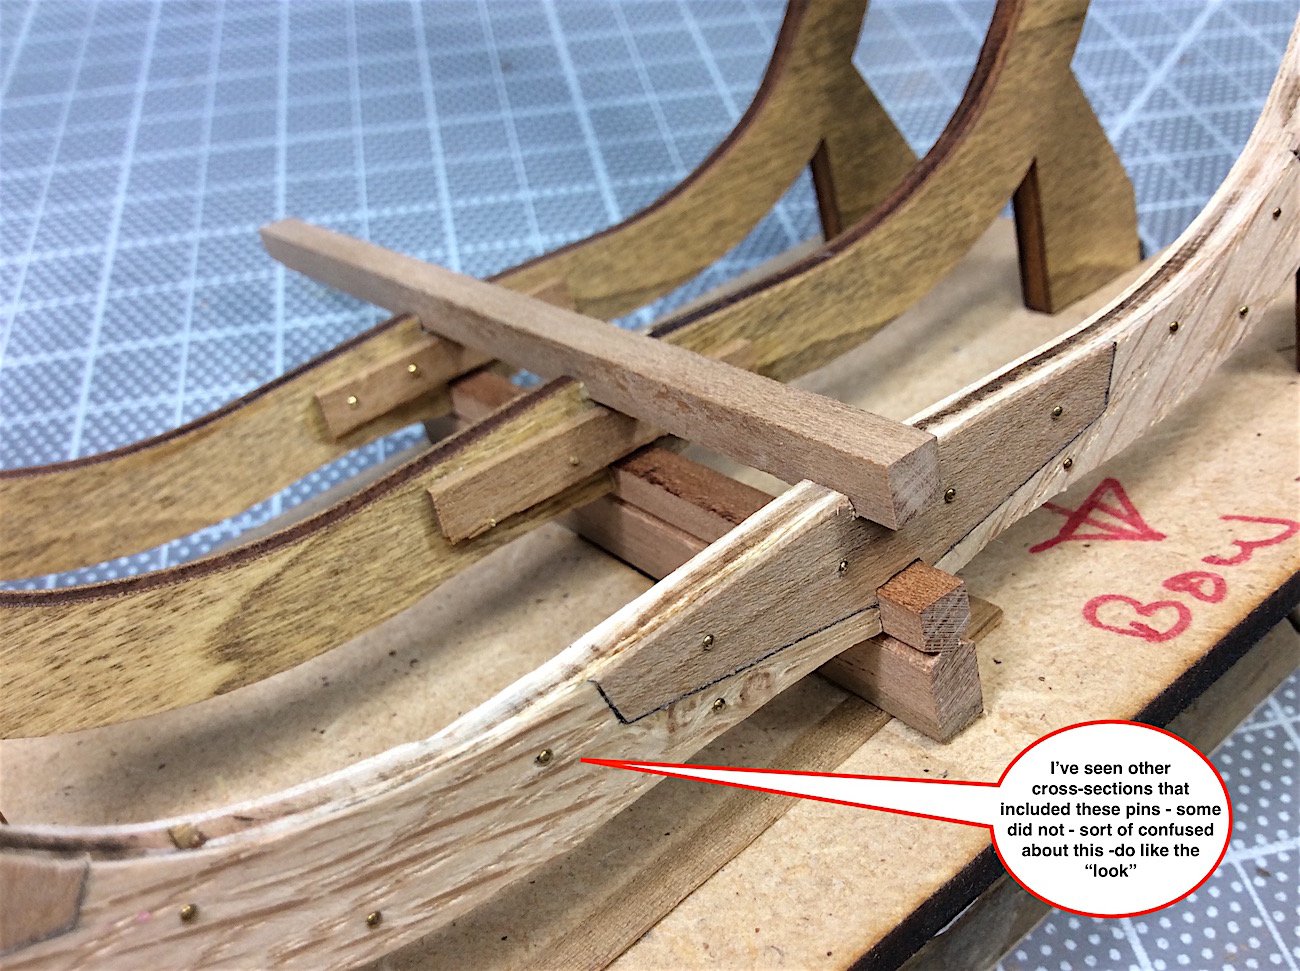
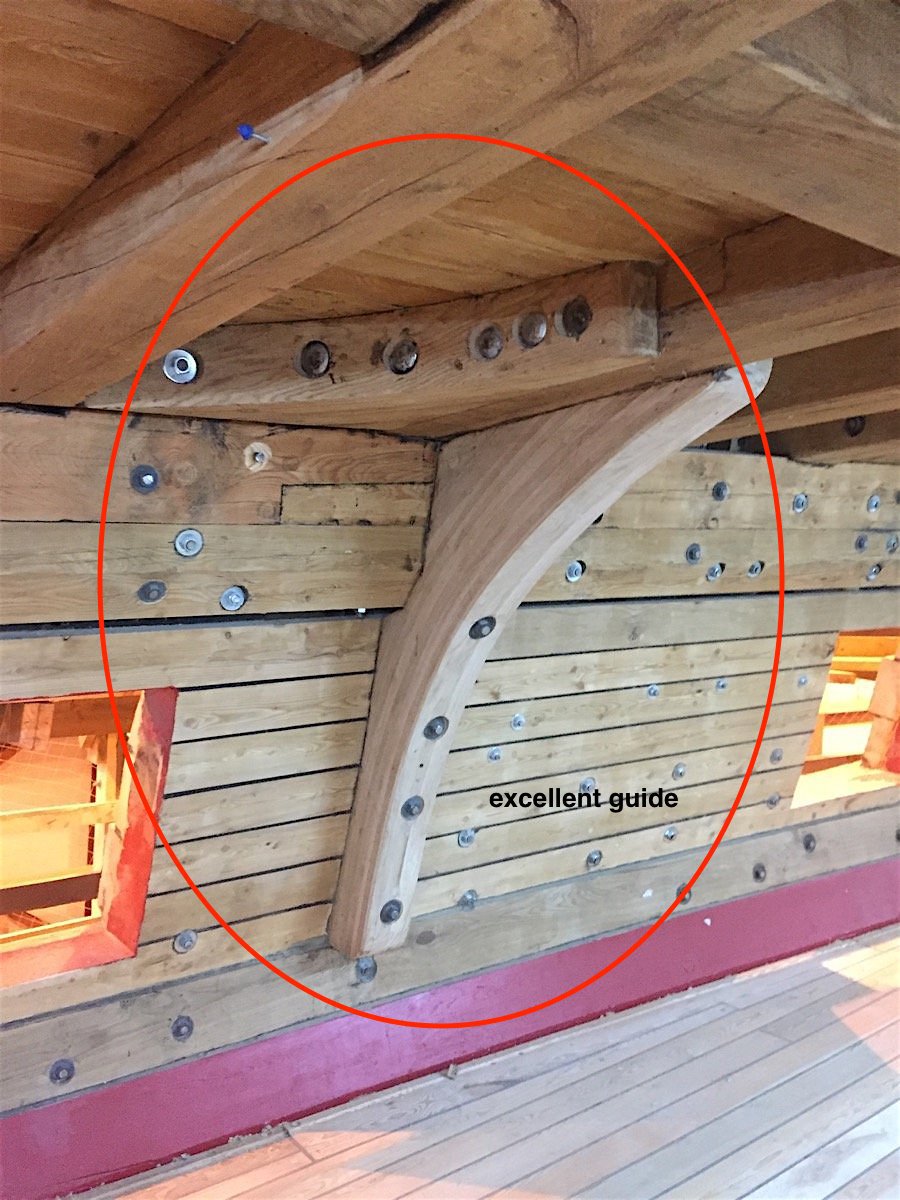
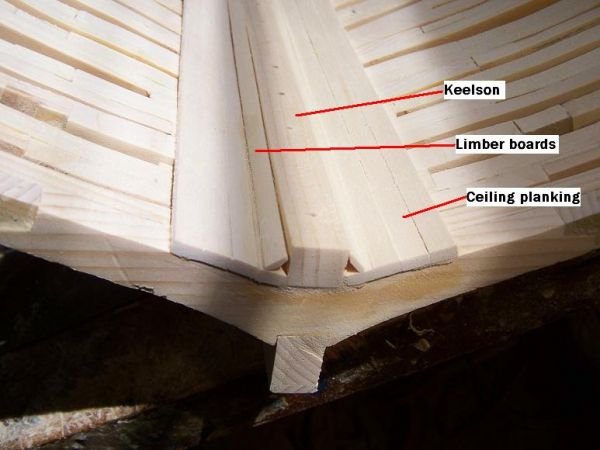
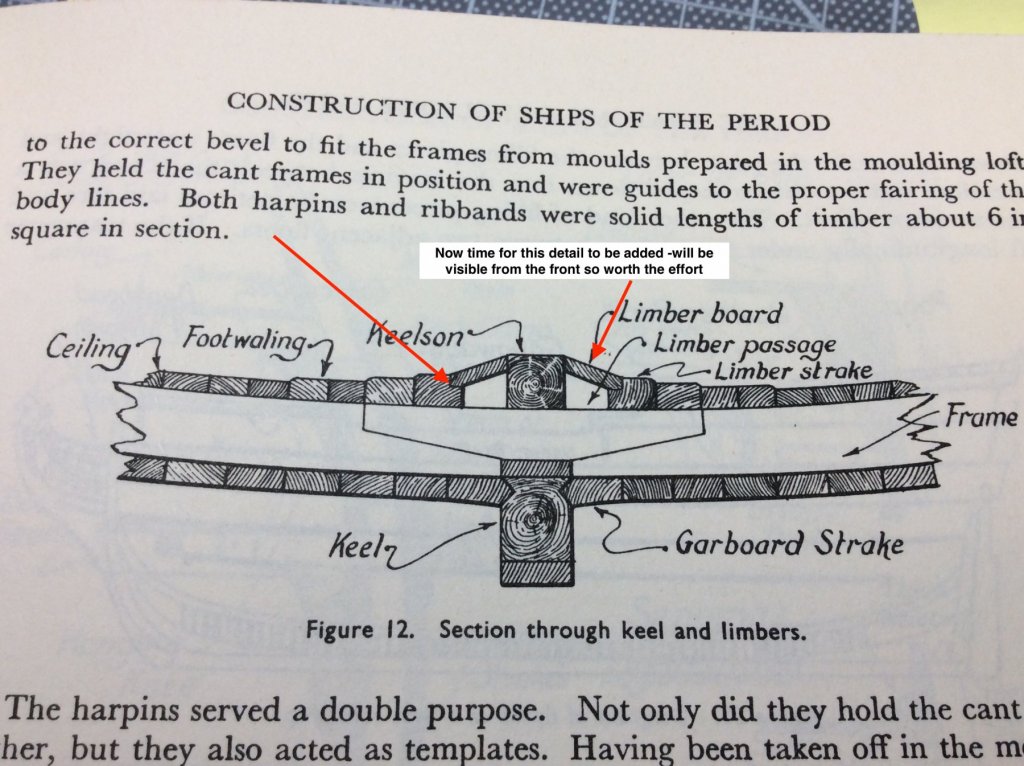
Paul, Thank You. Learning as I am going along. Went to Google University to look up limber boards, Now I understand thanks again, will cut them up a bit. Please mates, anytime - I so appreciate your advice as I go along. still learning Such a fun hobby indeed !
-
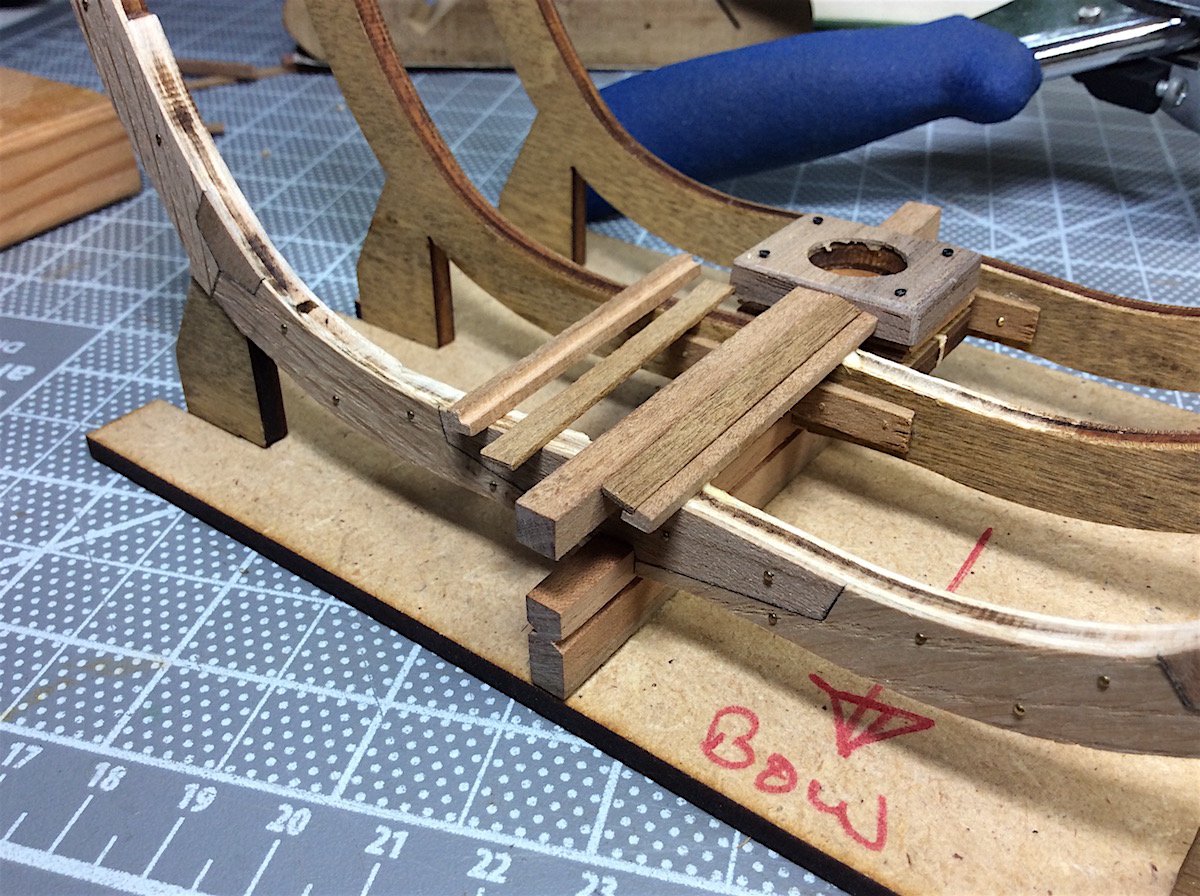
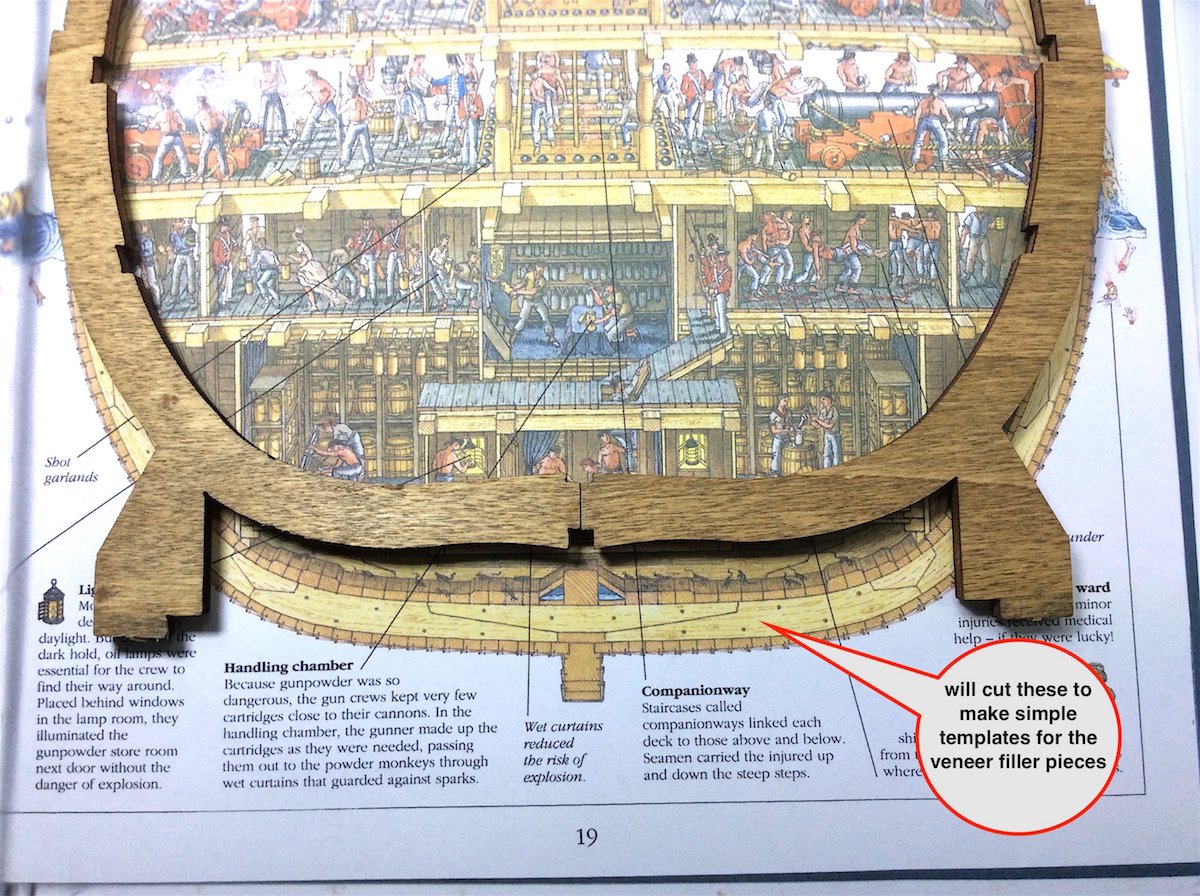
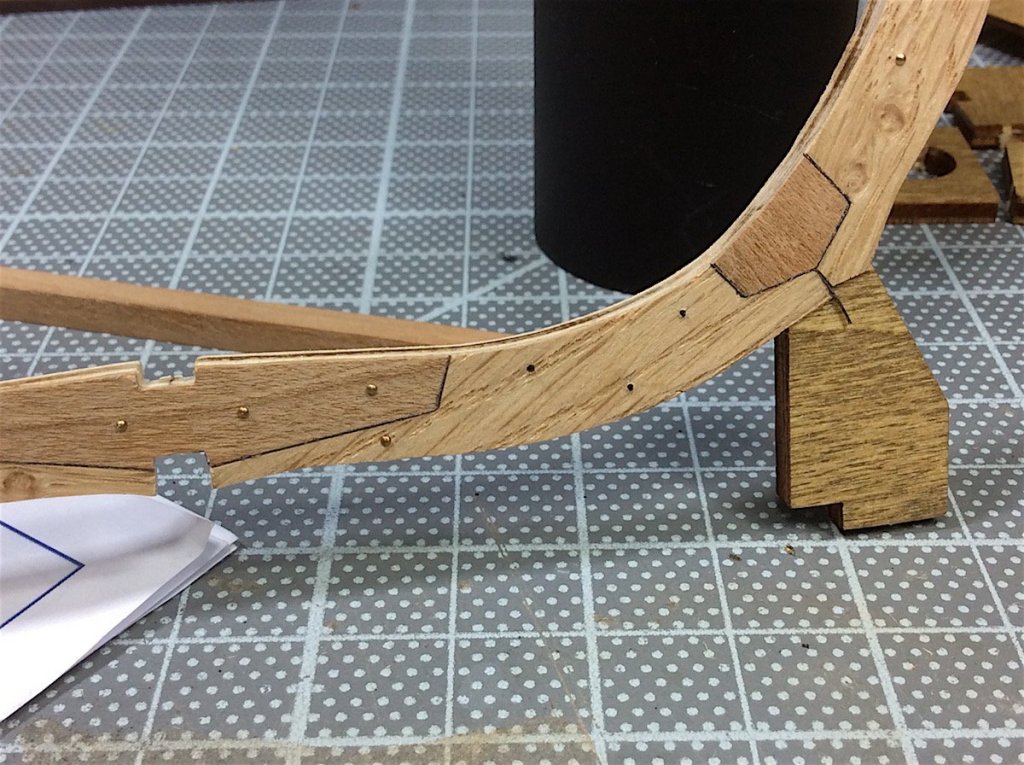
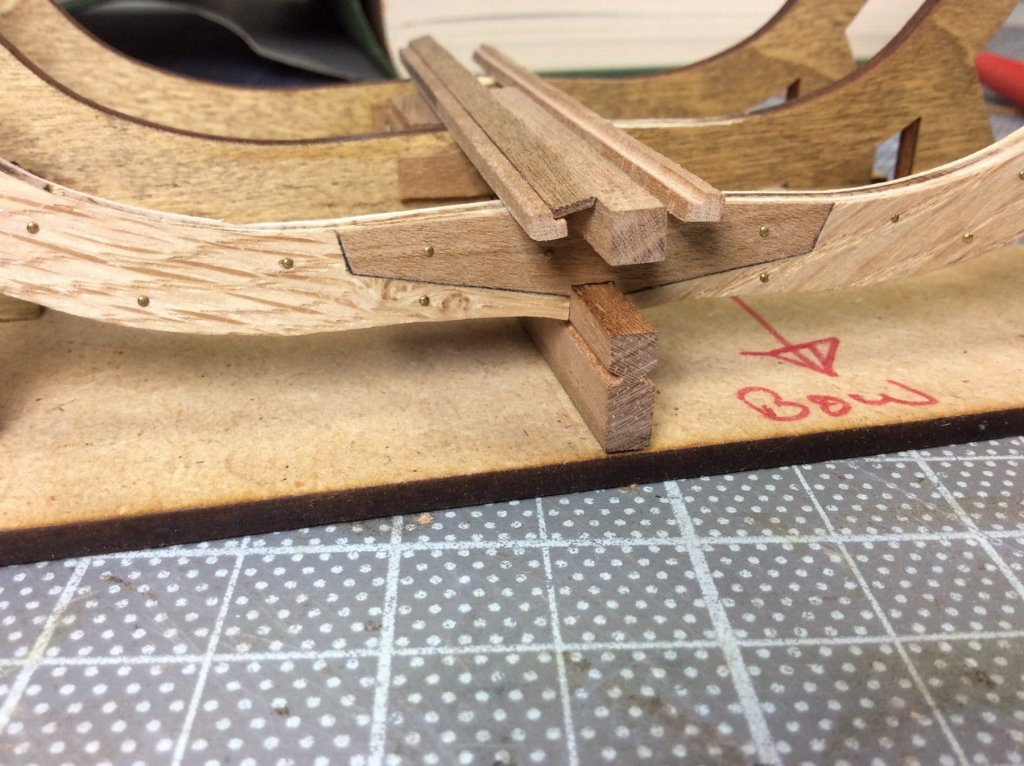
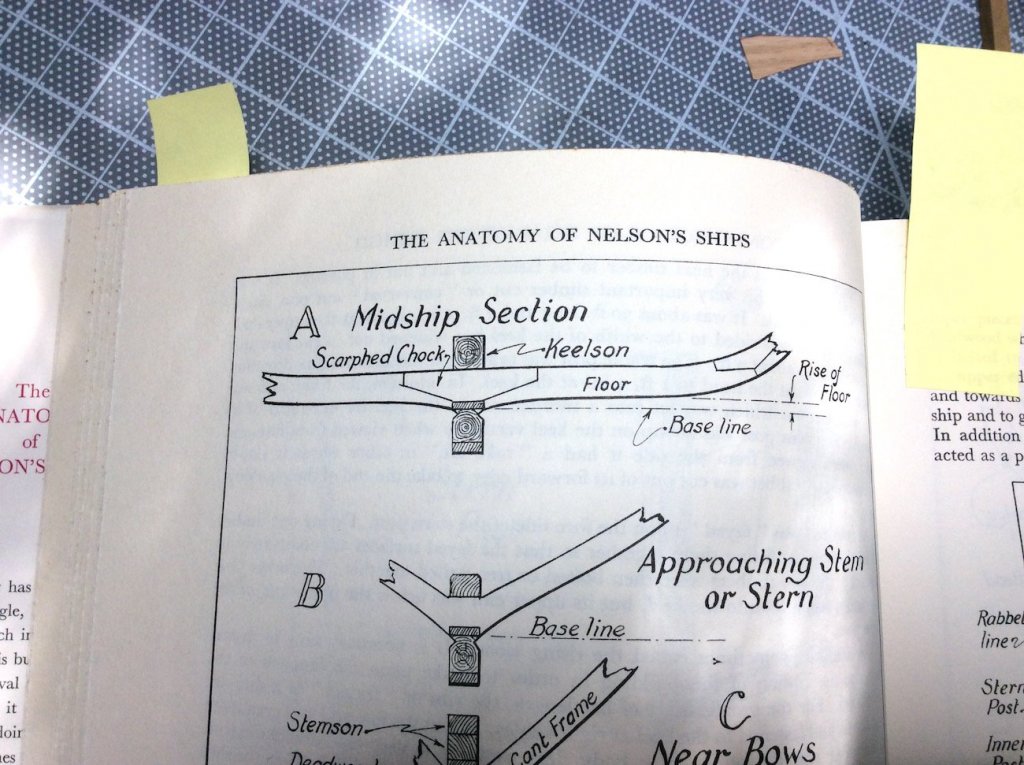
Hi mates Thanks for the likes and comments. I pulled four brass out - added black nylon fishing line, but preferred the brass pins. I agree Jim love these as well. Now started working on the inner planks. Longridge, again my guide.


- 371 replies
-
- 14
-
-
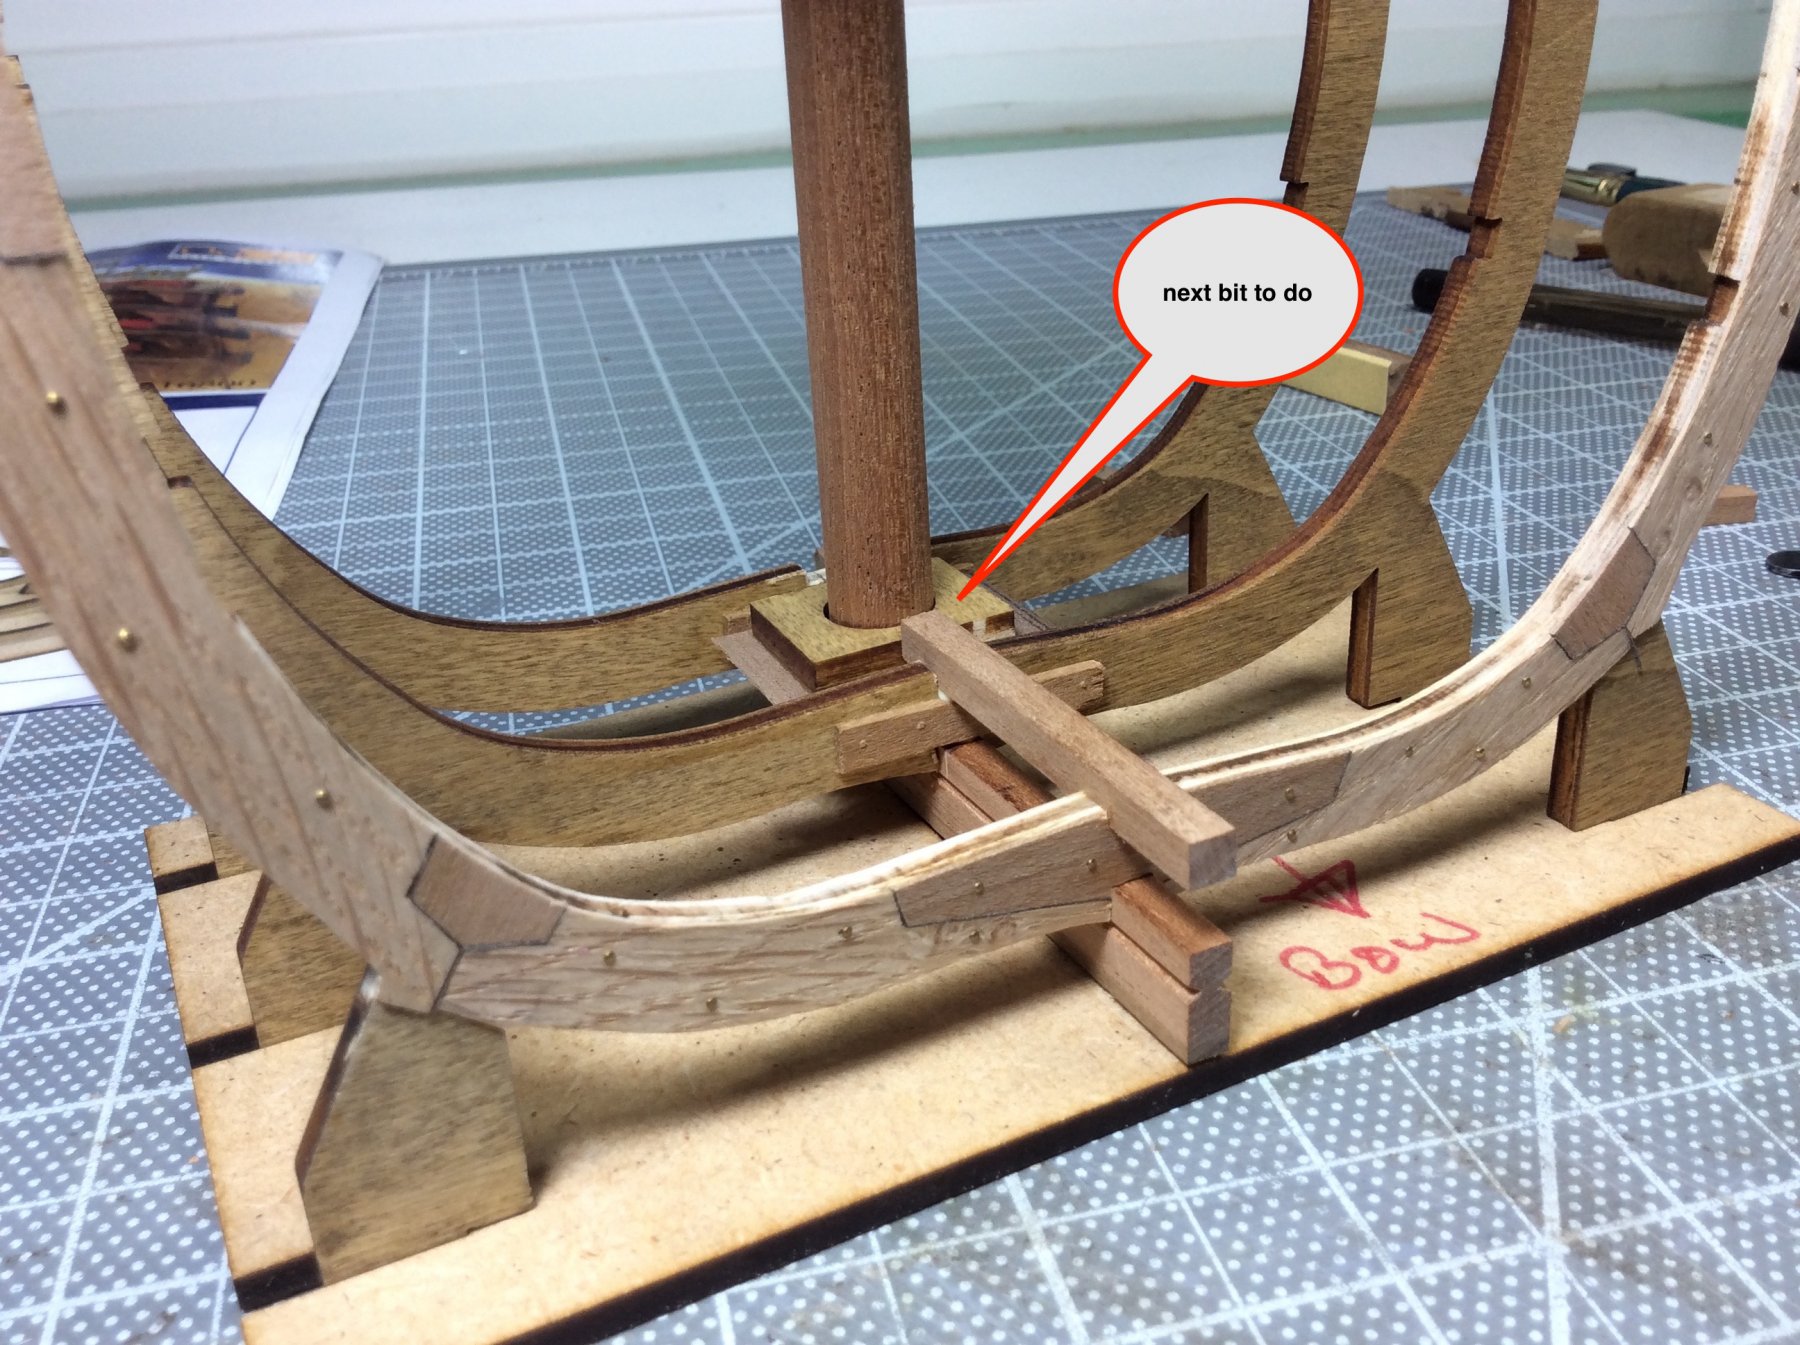
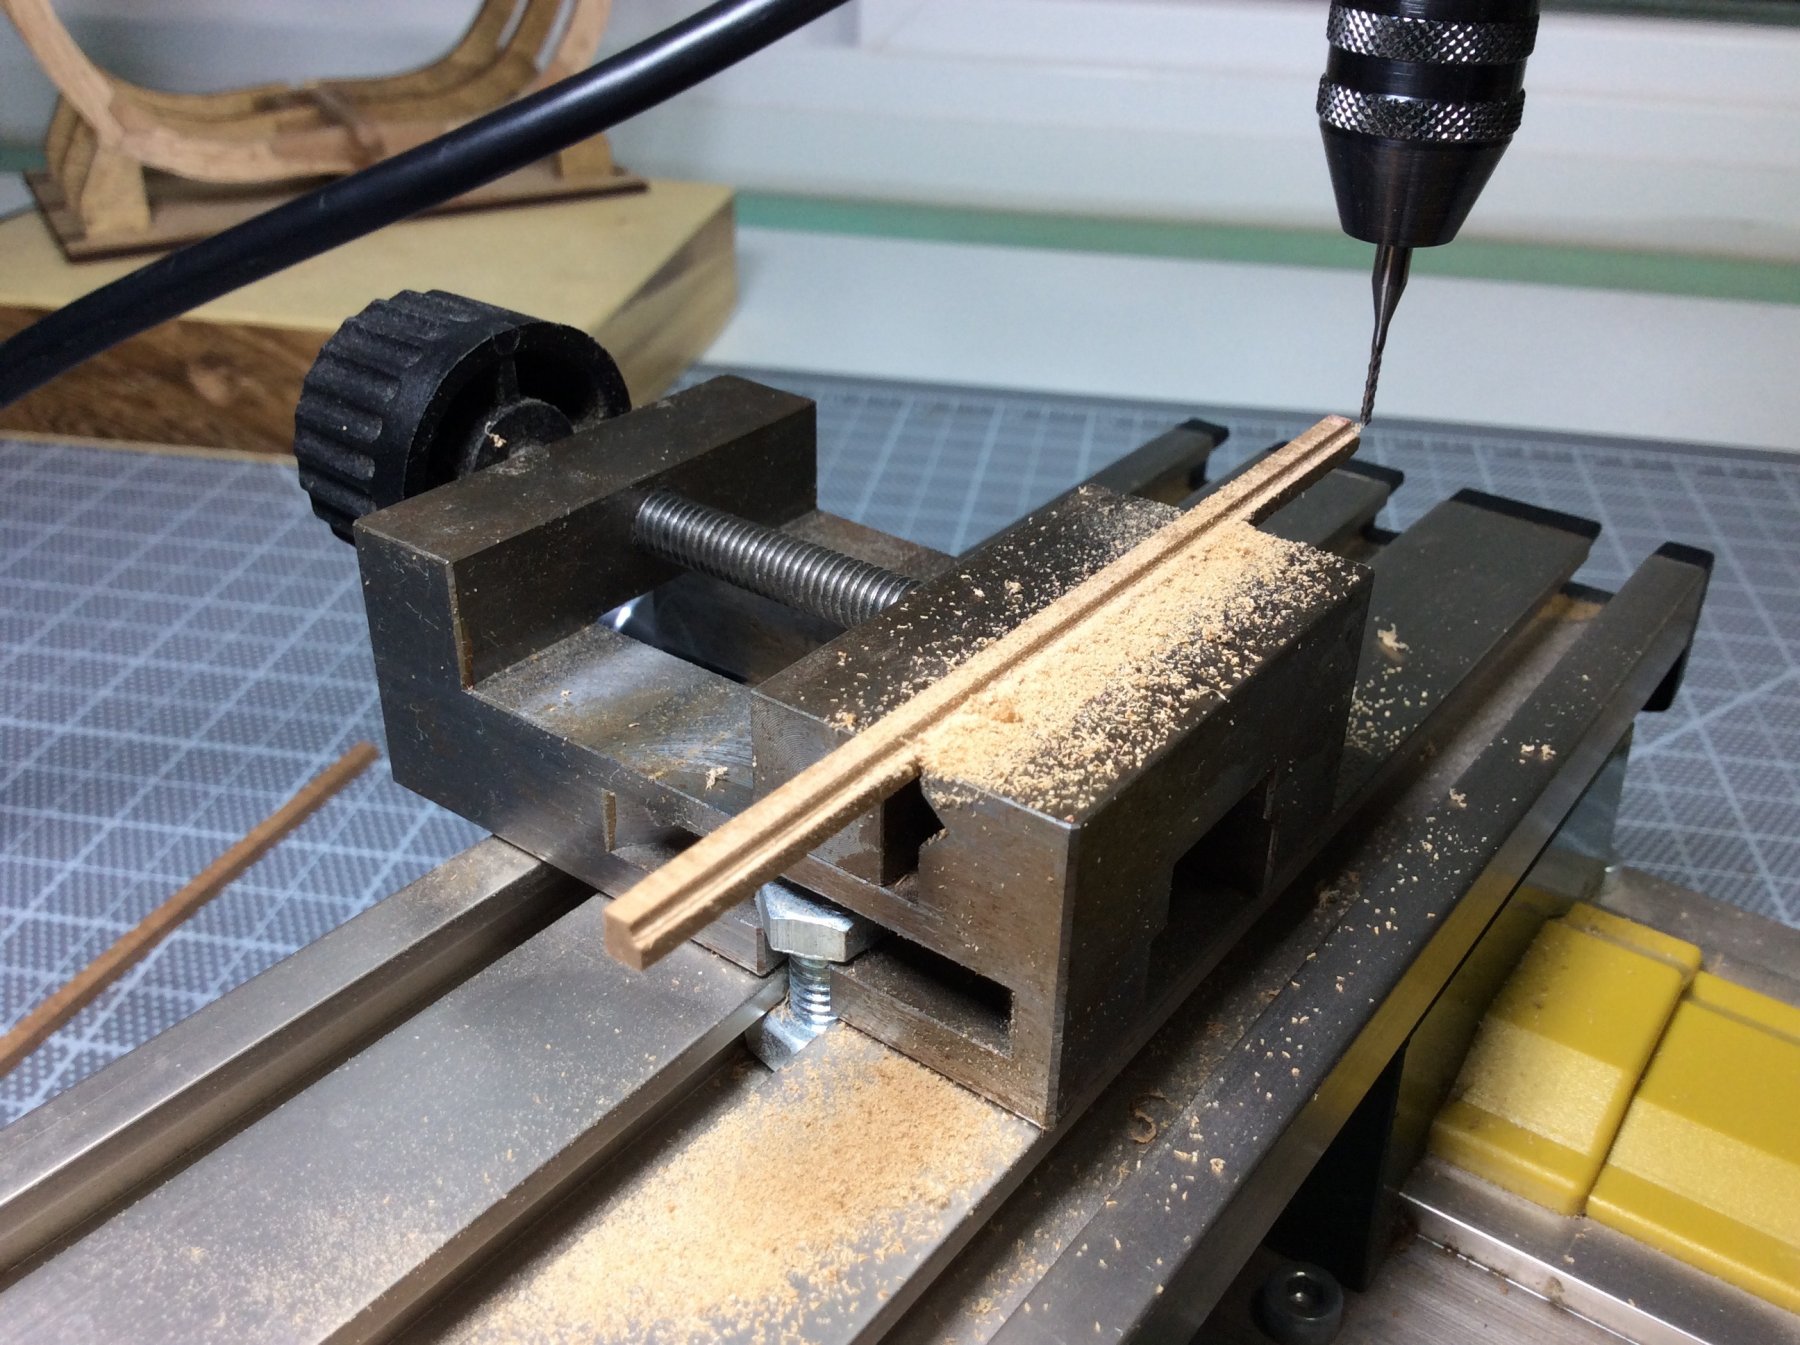
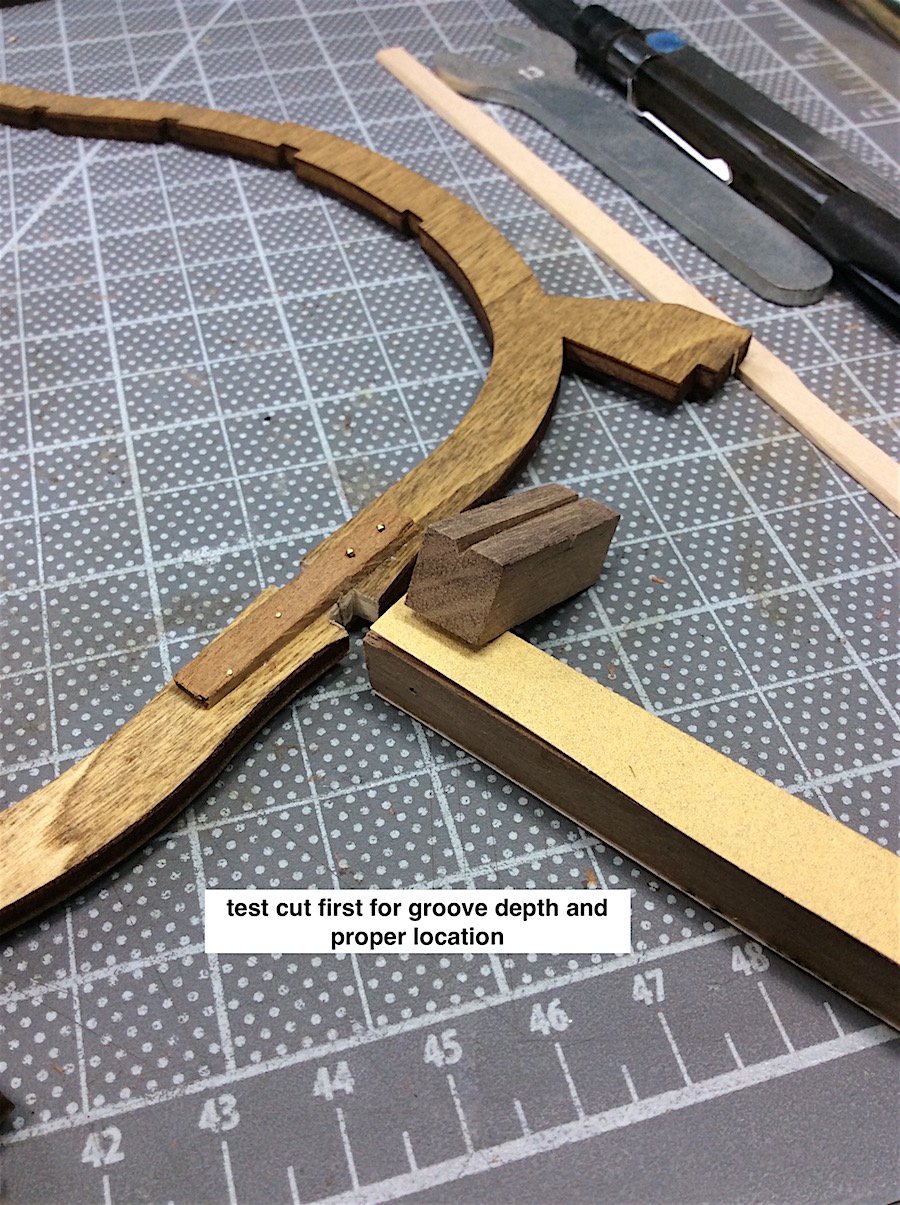
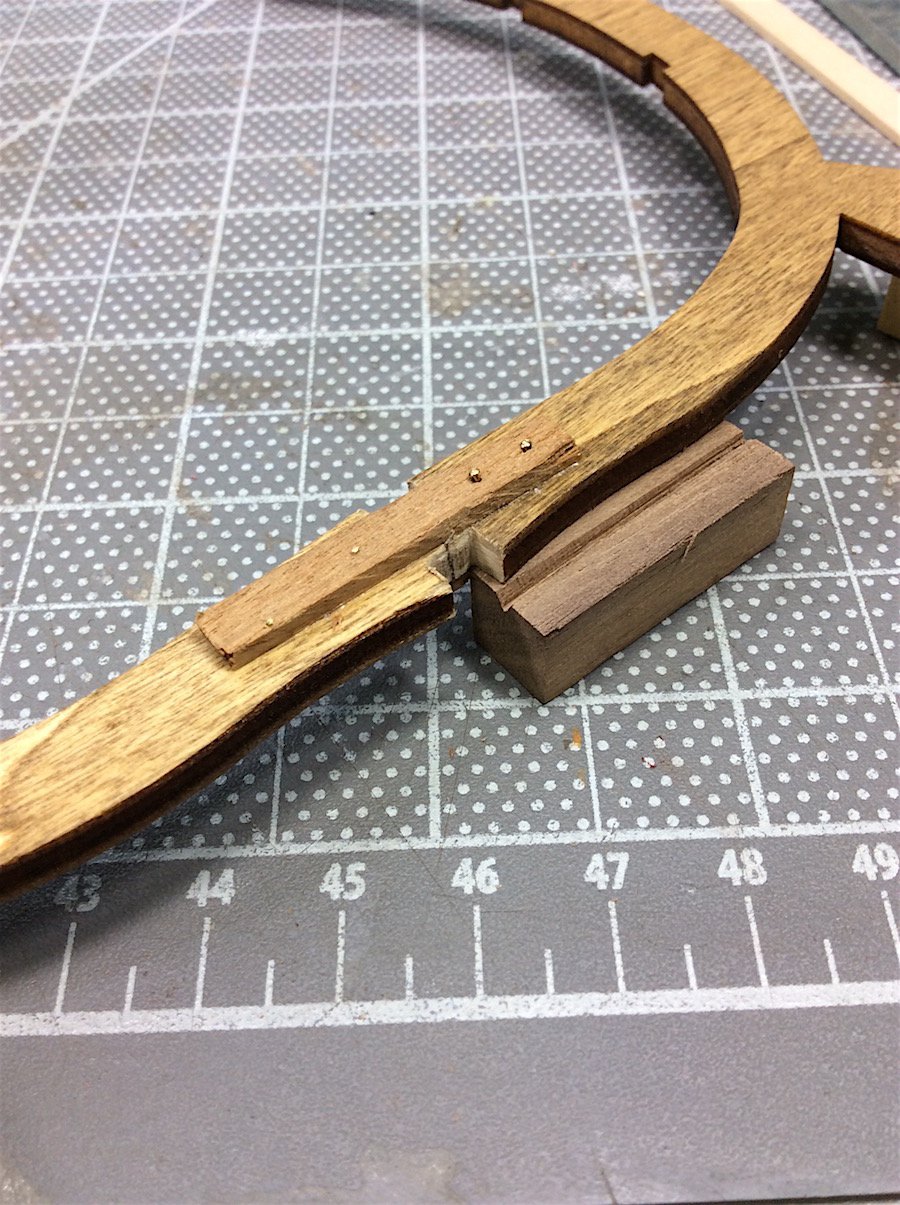
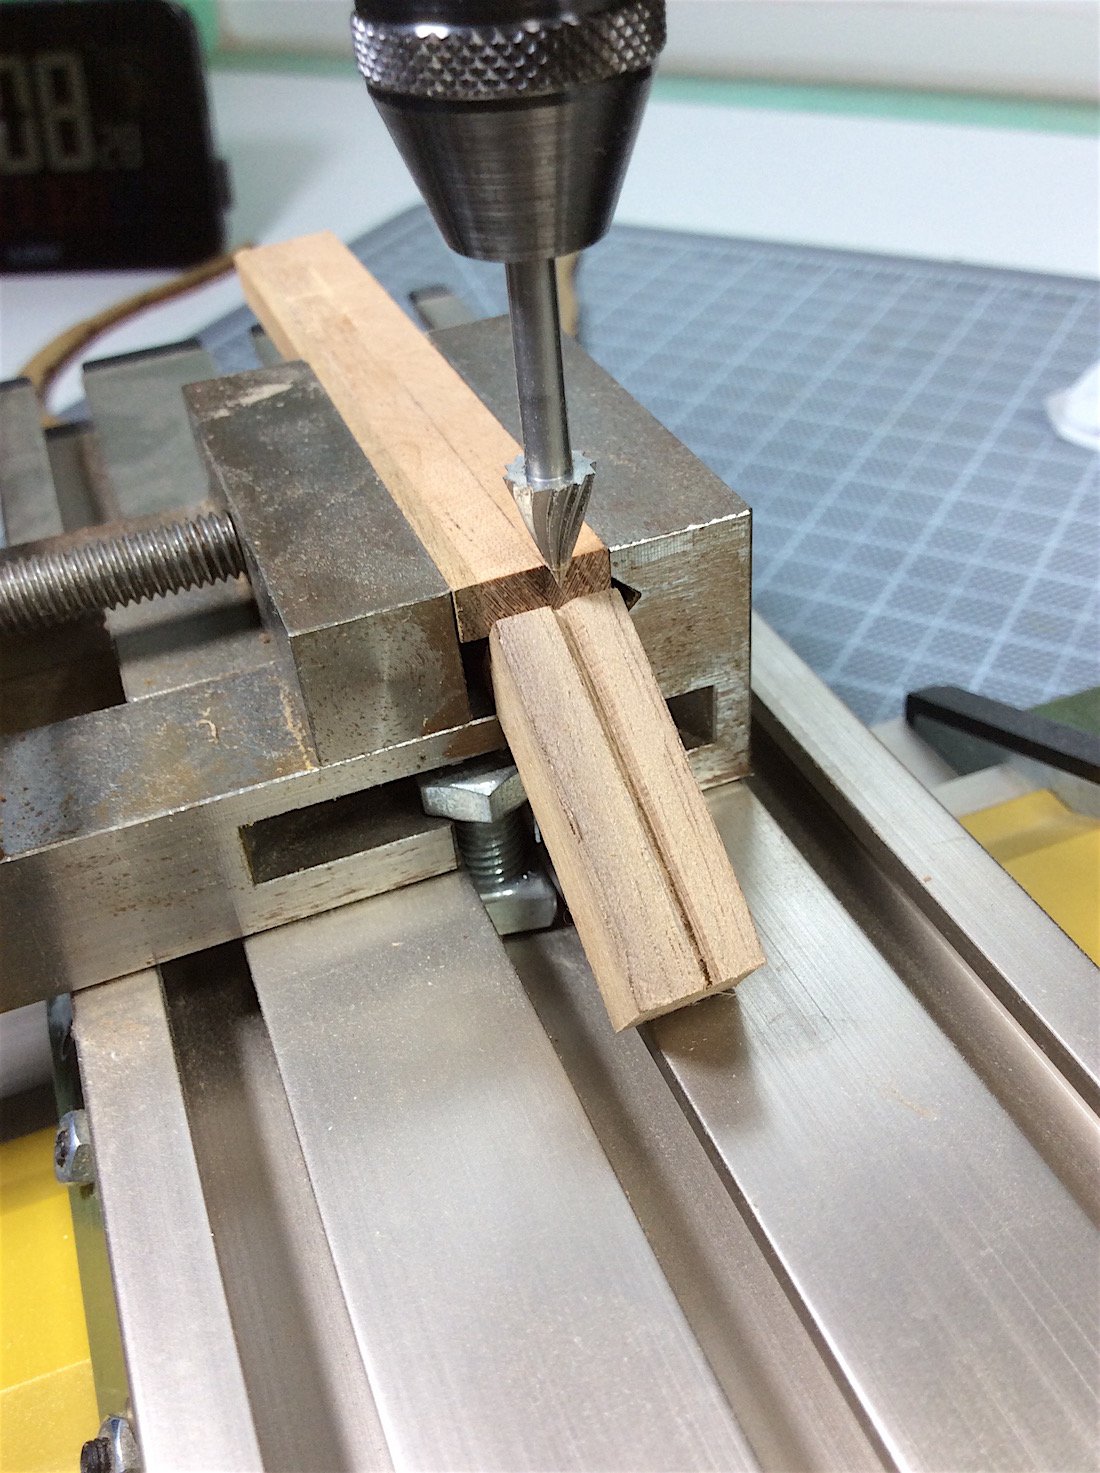
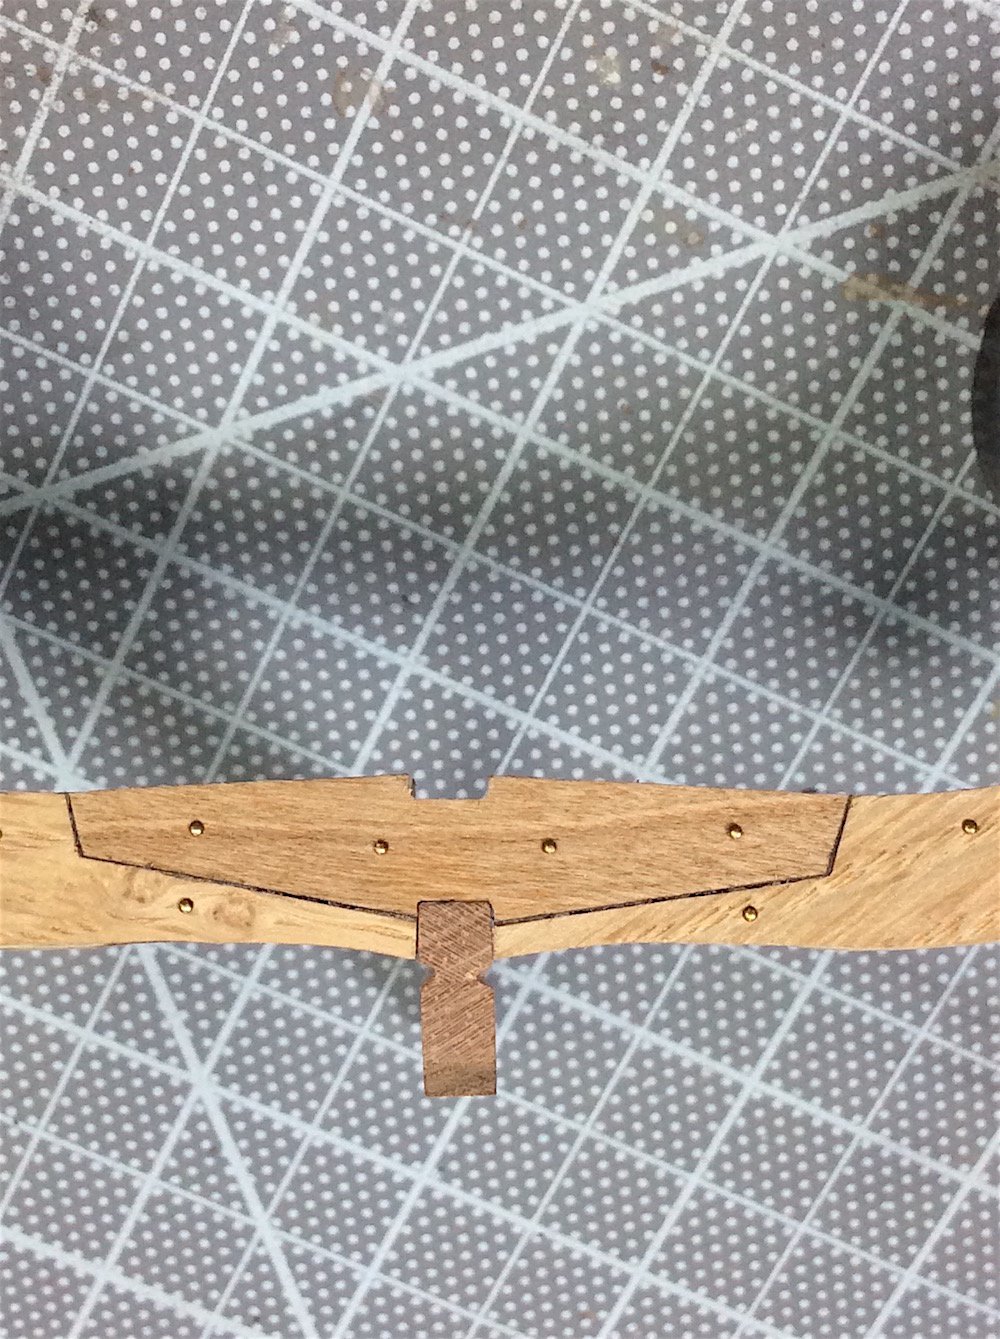
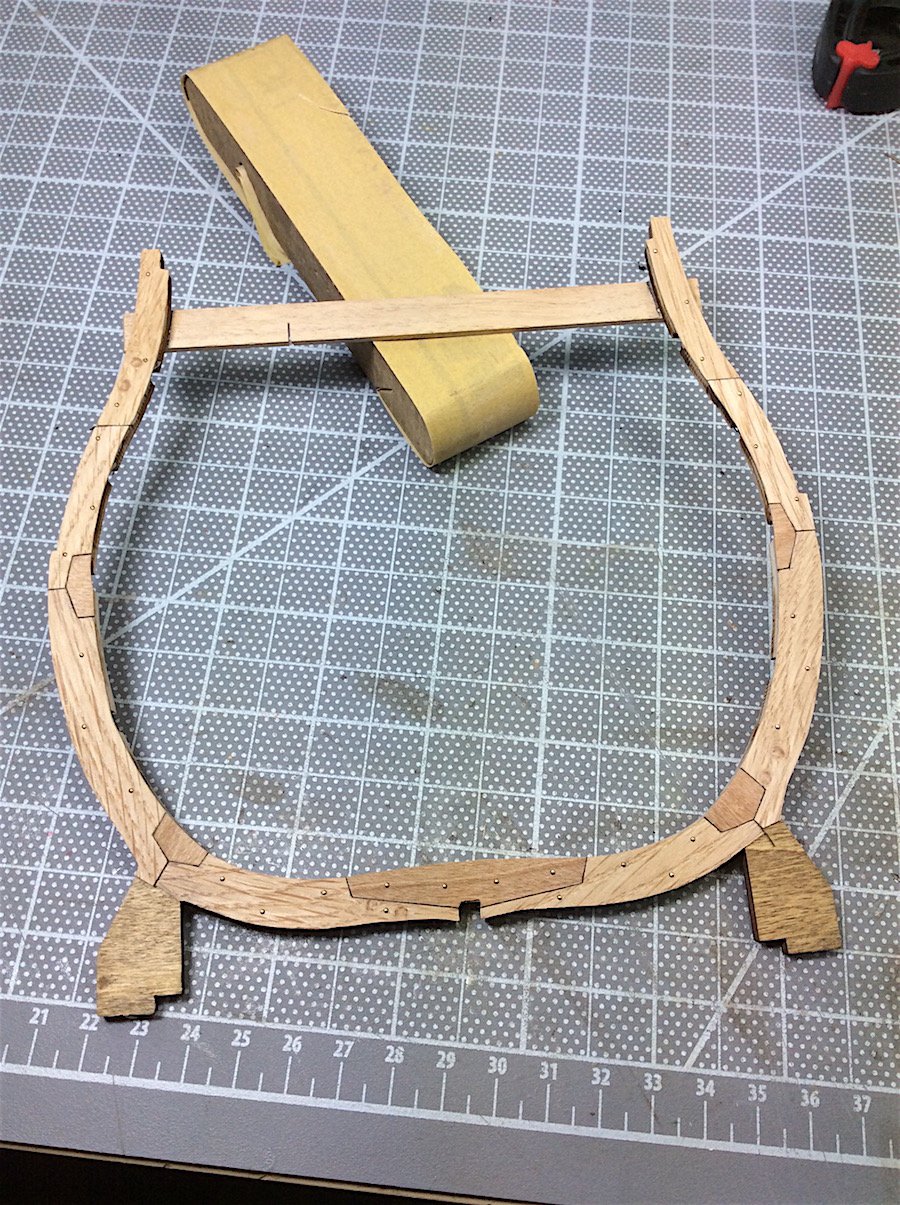
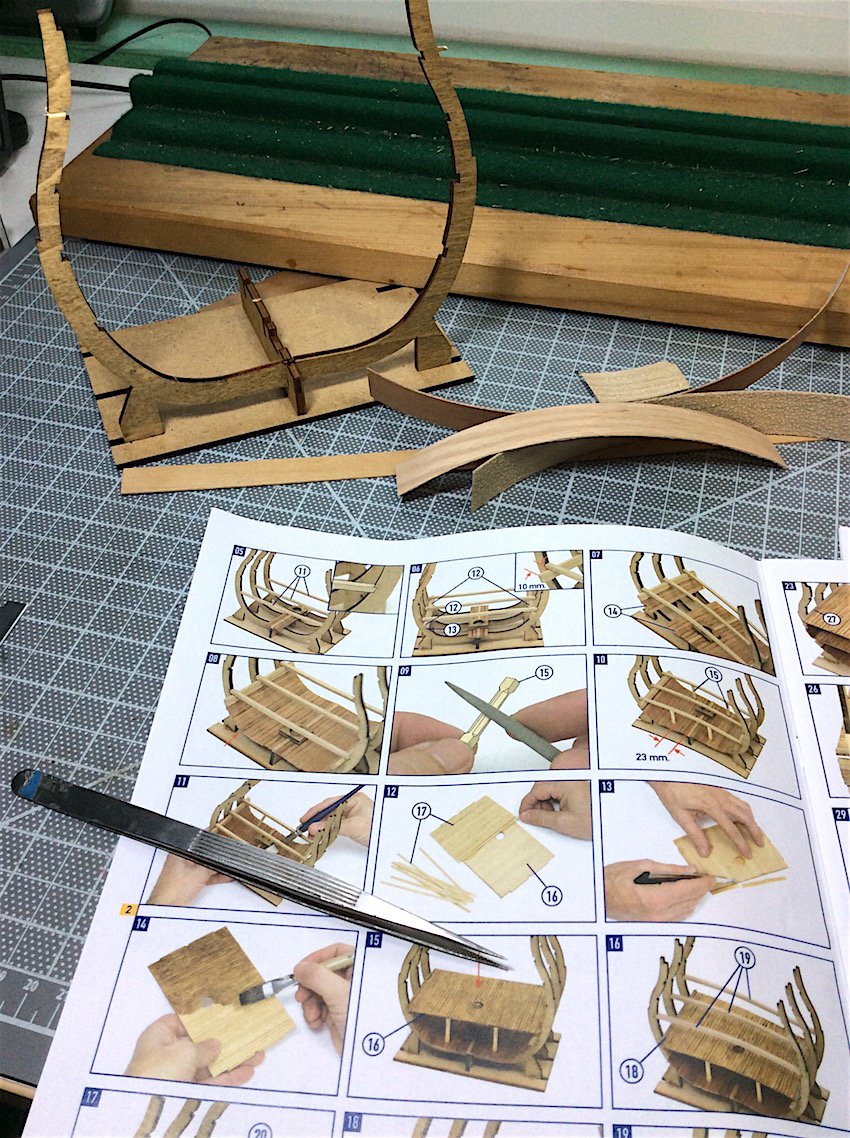
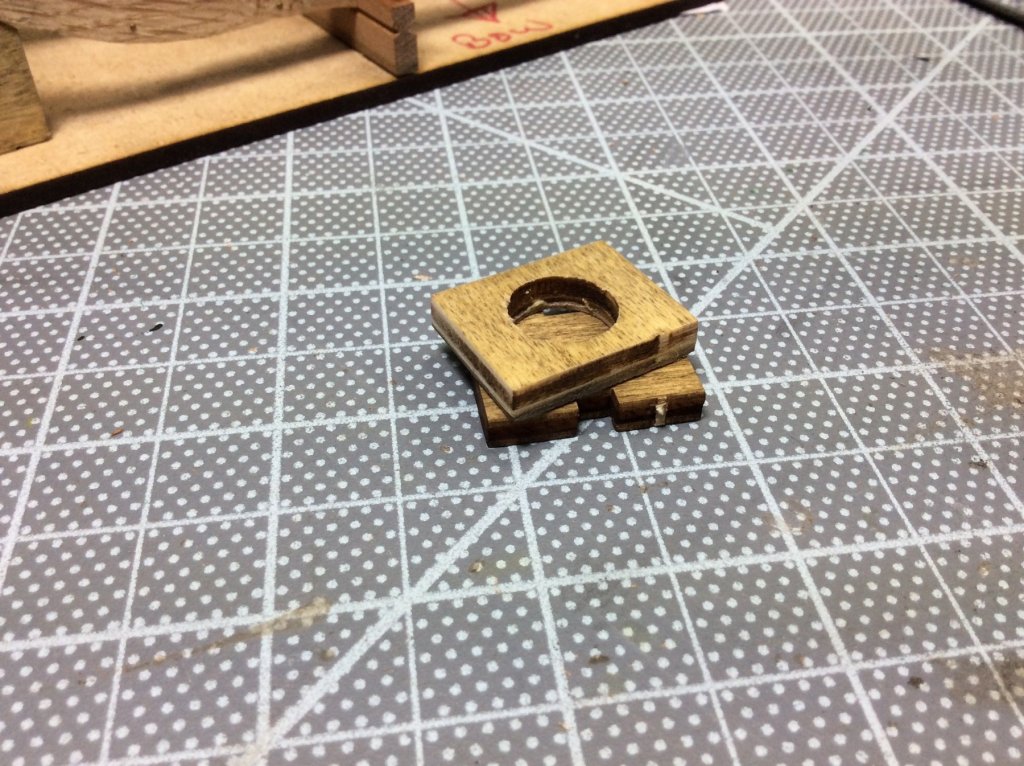
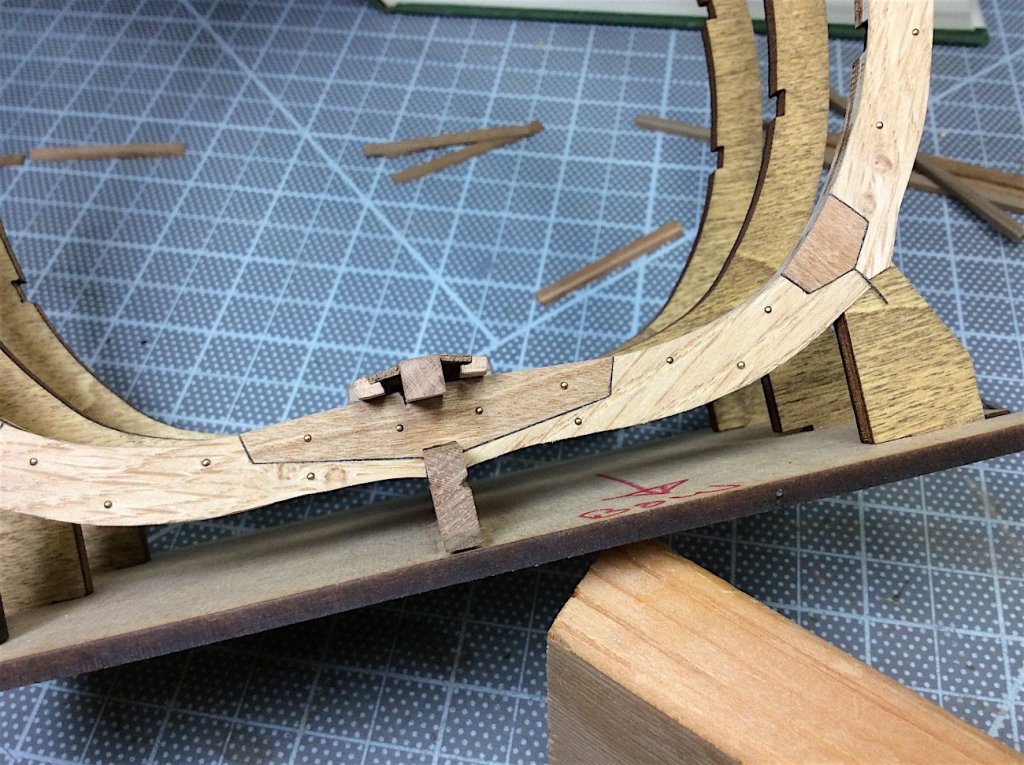
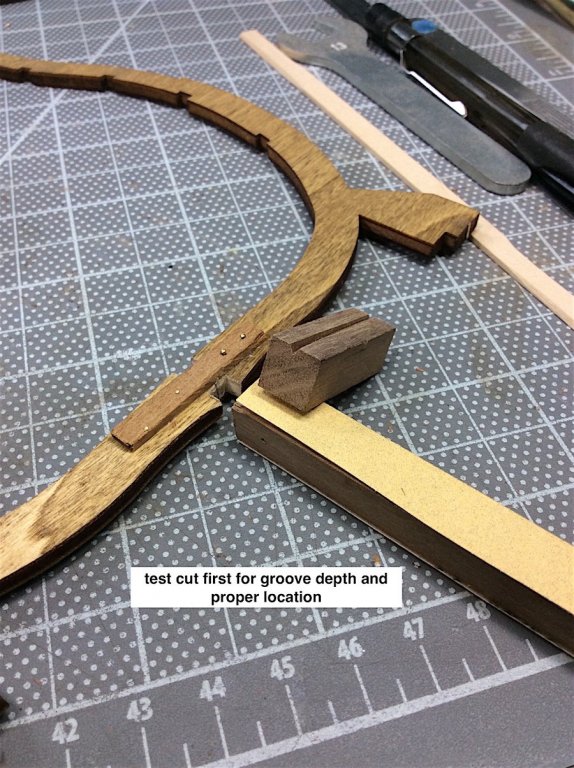
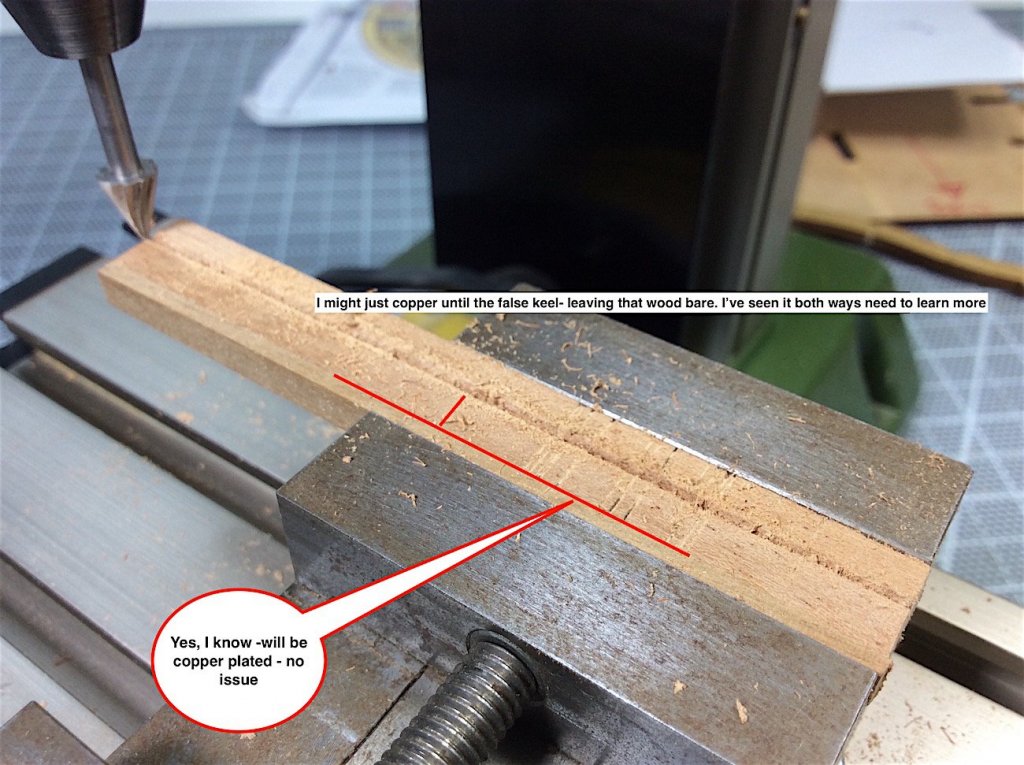
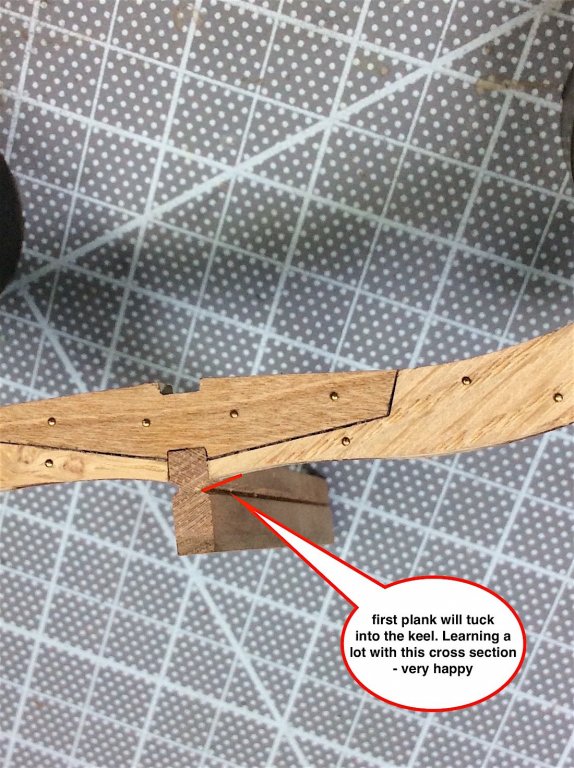
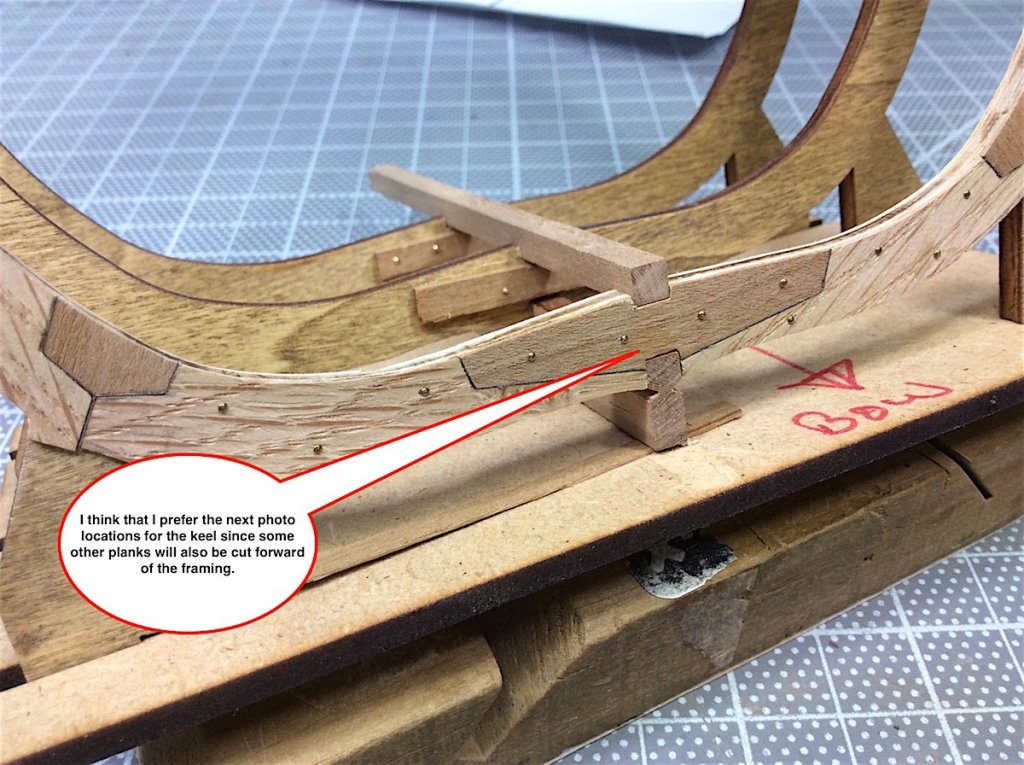
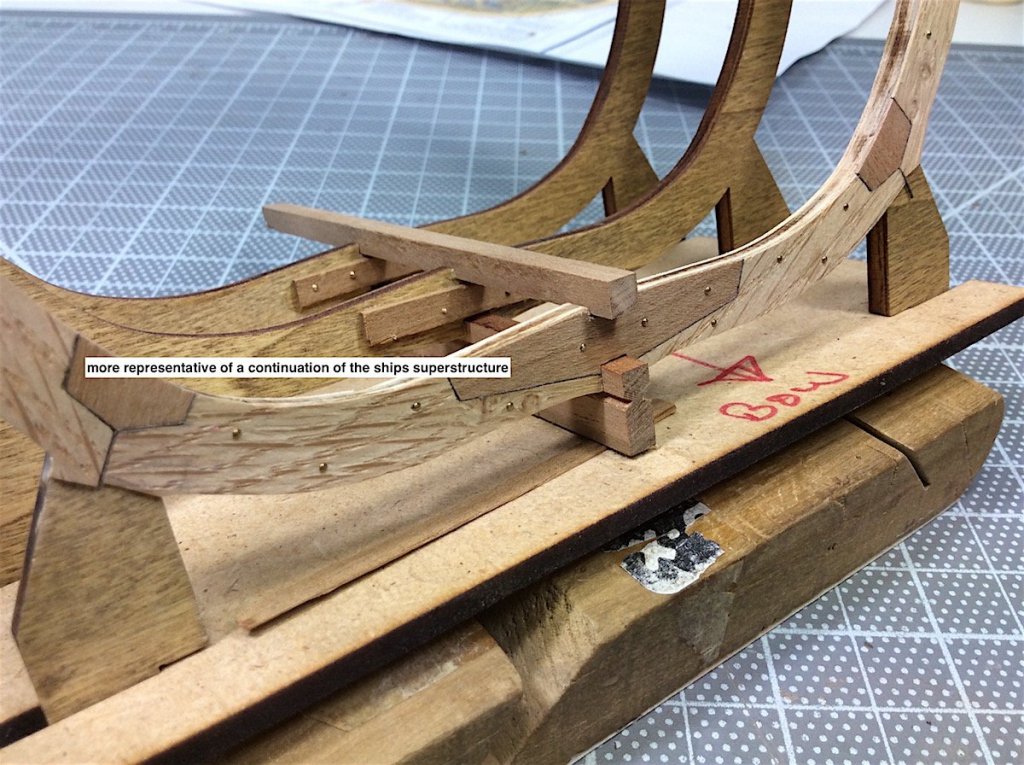
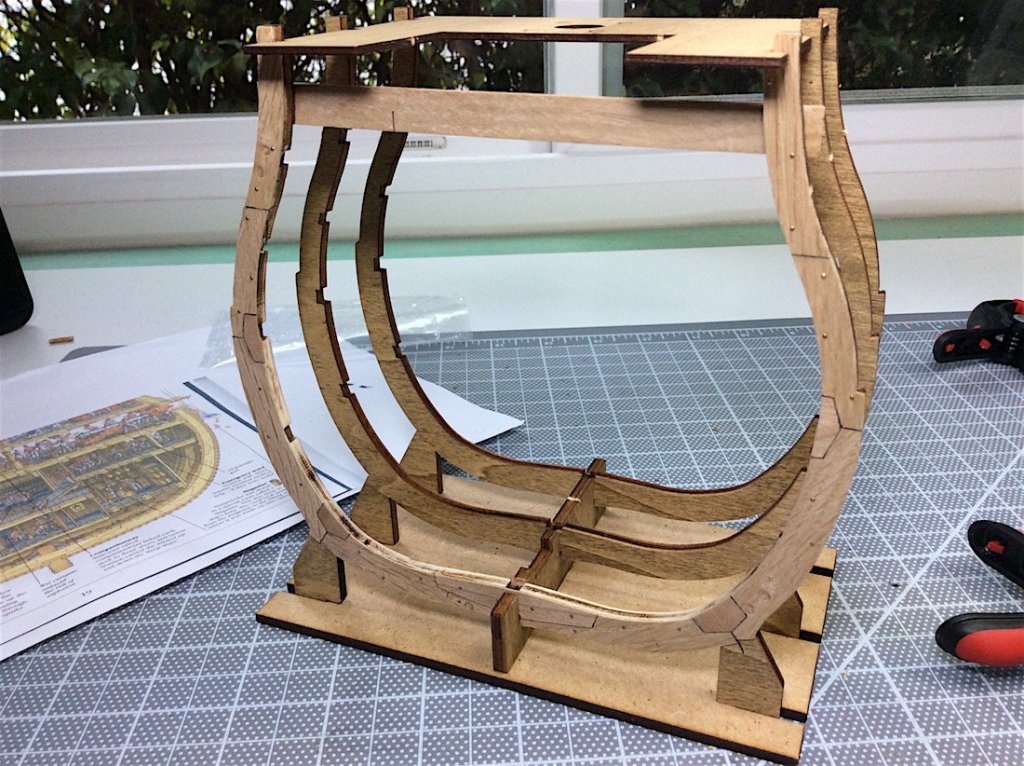
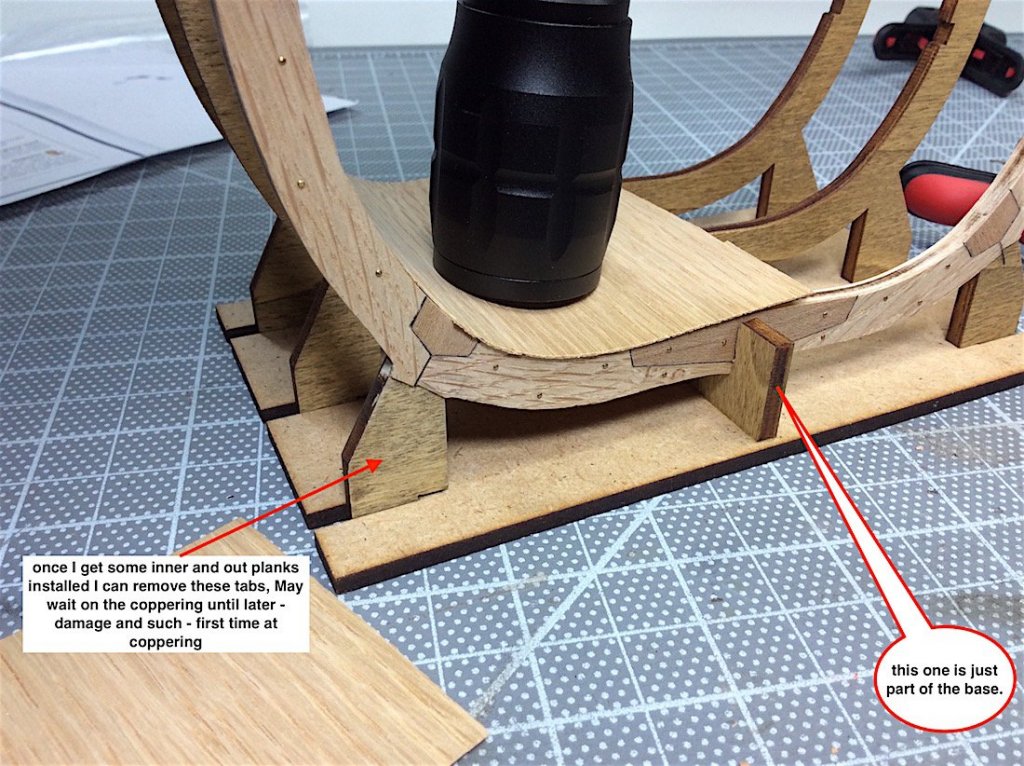
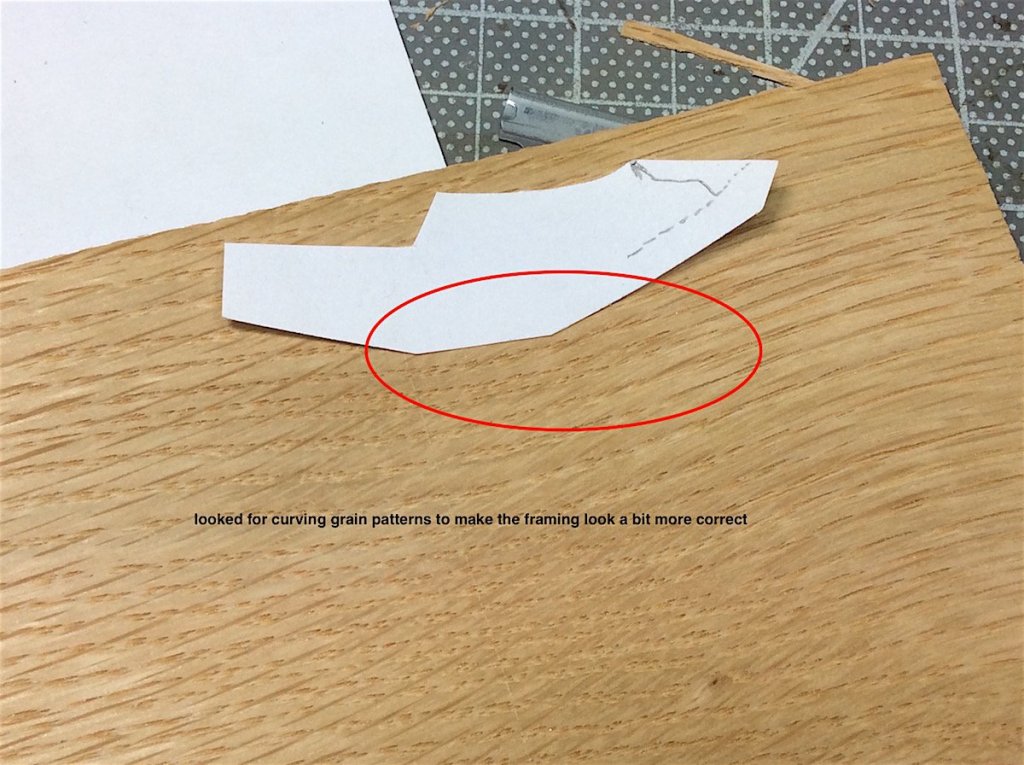
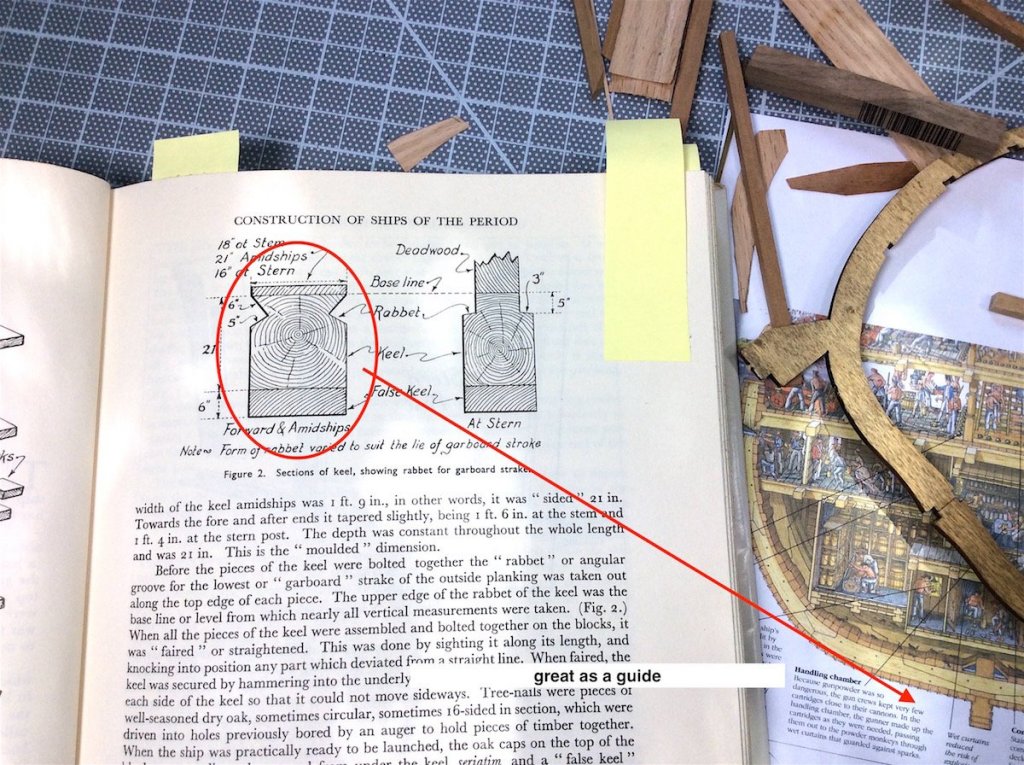
Minor update; Finished the two sections of keel. As I noted earlier used Longridge as my guide. Pics speak for themselves. I have a couple of questions for the experts within the photos Regards,


- 371 replies
-
- 12
-
-
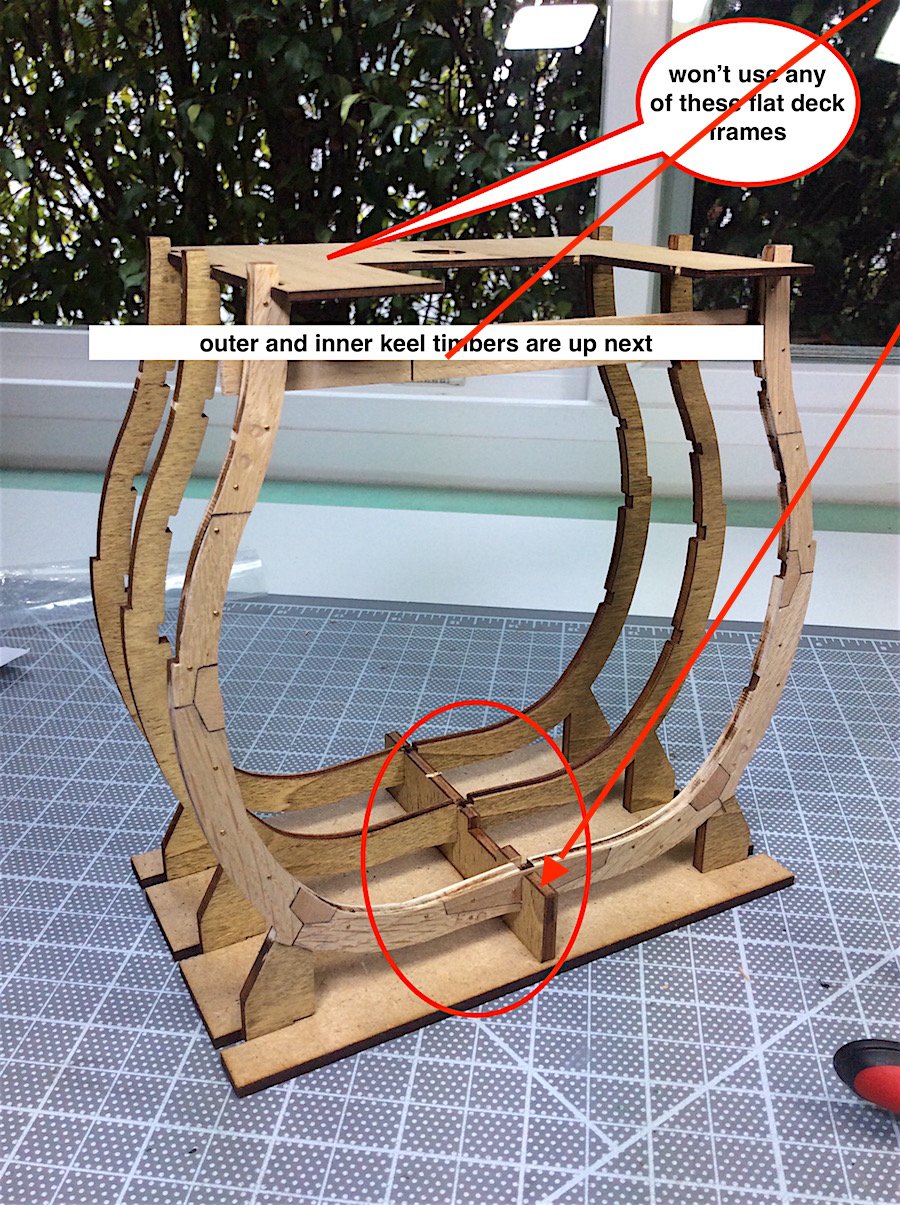
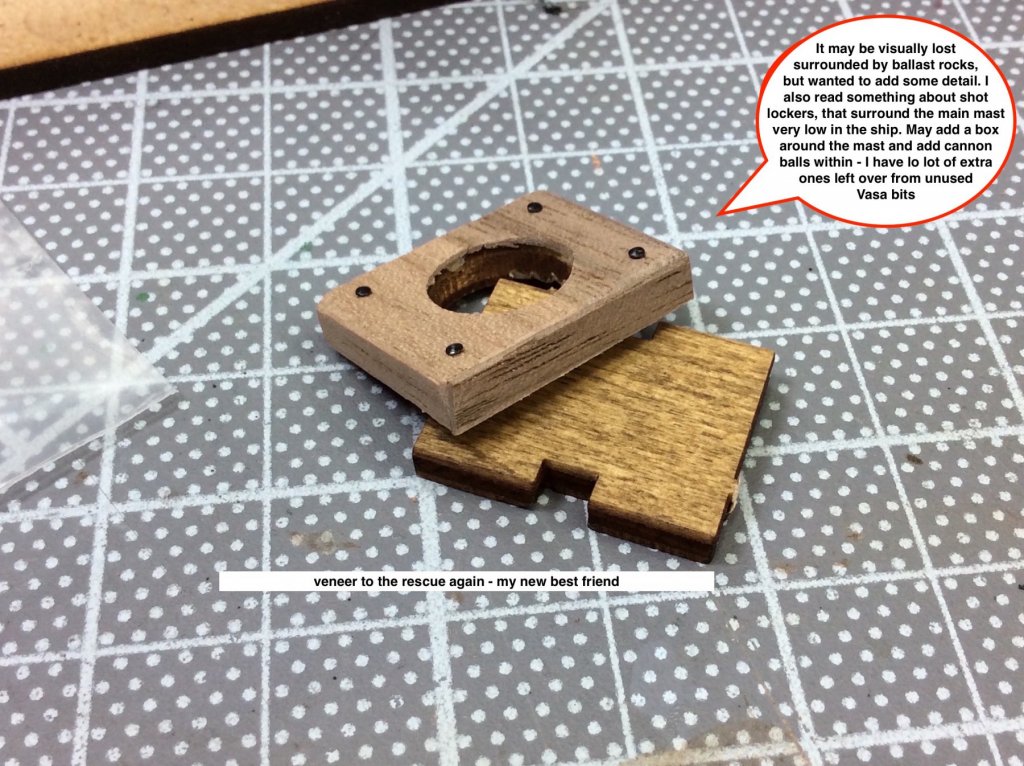
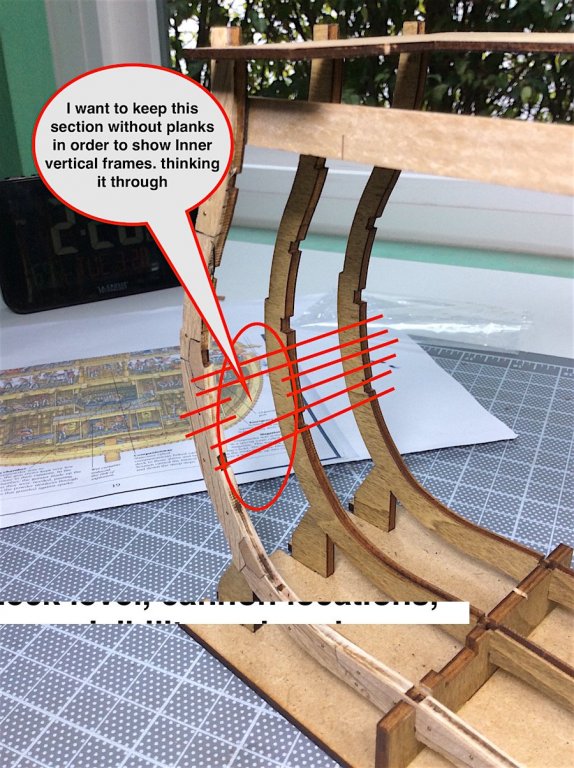
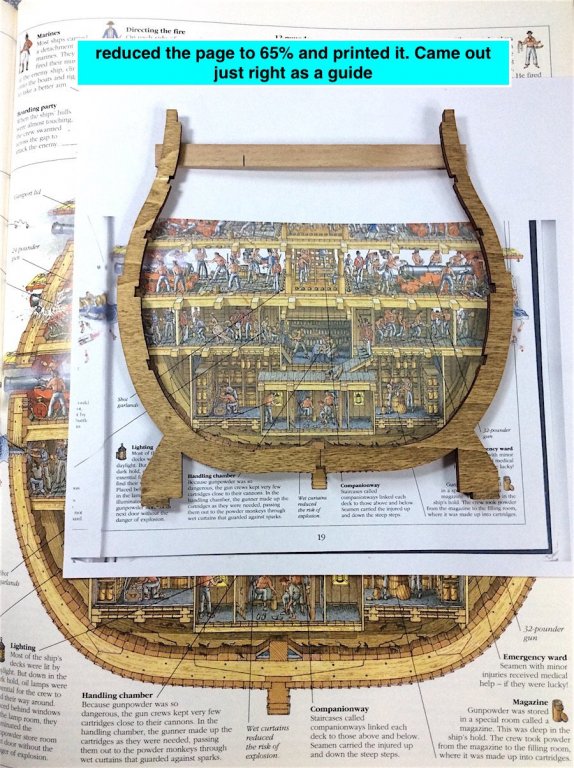
Hi Mates, Thanks for the likes and suggestions – Always appreciated. Anthony, Captain Steve: thanks – yes I understand that many, close together, frames will be needed. Actually that was my intension for leaving some wall areas bare. I have seen, and followed some amazing scratch builds – they were my idea for adding this small added internal view especially since I will leave some of the deck planks open as well. Denis: Noted – Yes your idea makes sense – but that said the interior is very claustrophobic. So I think that a small – upfront – view is the best shot. I don’t want to spend too much time adding details that are completely lost – as I did with the Vasa. Also this is a much simpler project. I may, however, do some open weather deck side wall continuing the closely placed verticals. Thanks for the idea of doing more open areas. Regarding the back frames – no I will not veneer them – I plan on building a case just like Jack’s from his log for this same cross section. Perfect case IMO The Wood shop that made my Vasa base will make this case. Jack.aubrey https://modelshipworld.com/index.php?/topic/1200-santìsima-trinidad-by-jackaubrey-finished-de-agostini-scale-190-cross-section/& Page 4 (thanks Jack if you see this post) I hope that you don’t mind that I posted from your log. Also Jack following your build made me want to do this one. Now working on the outer and inner keels..... Cheers

-
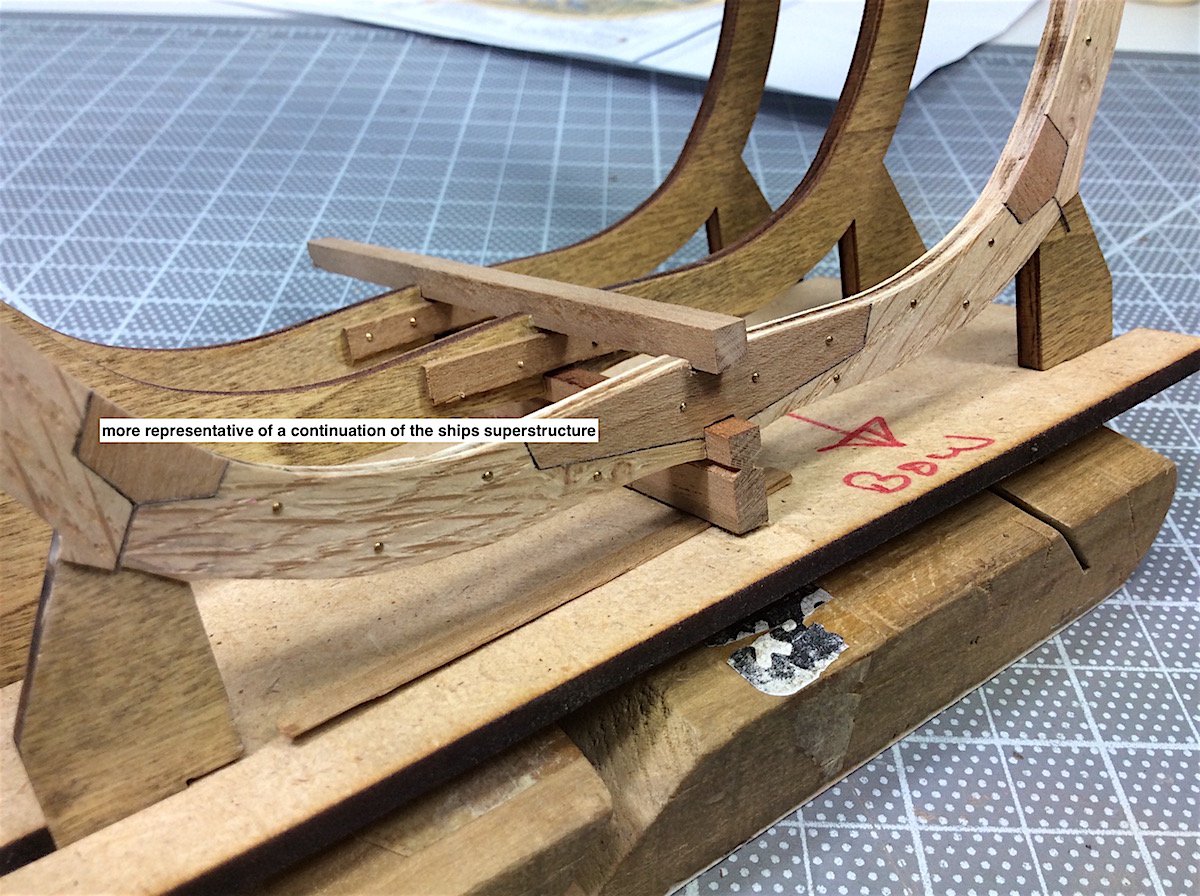
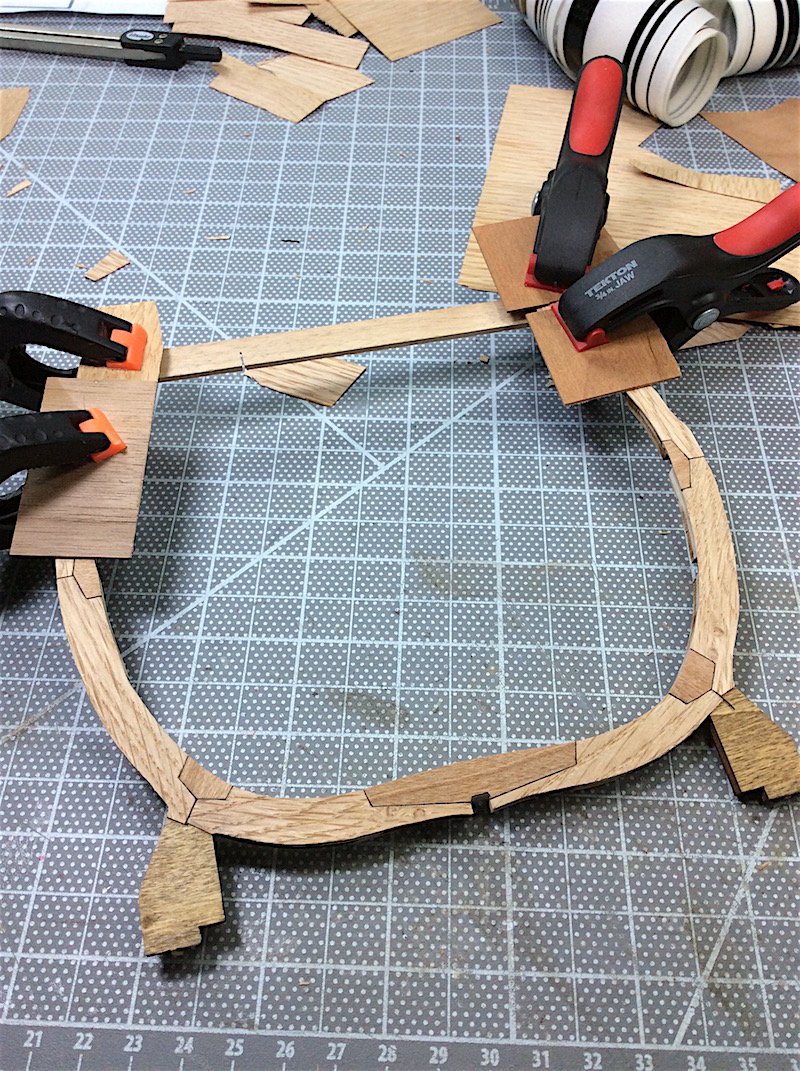
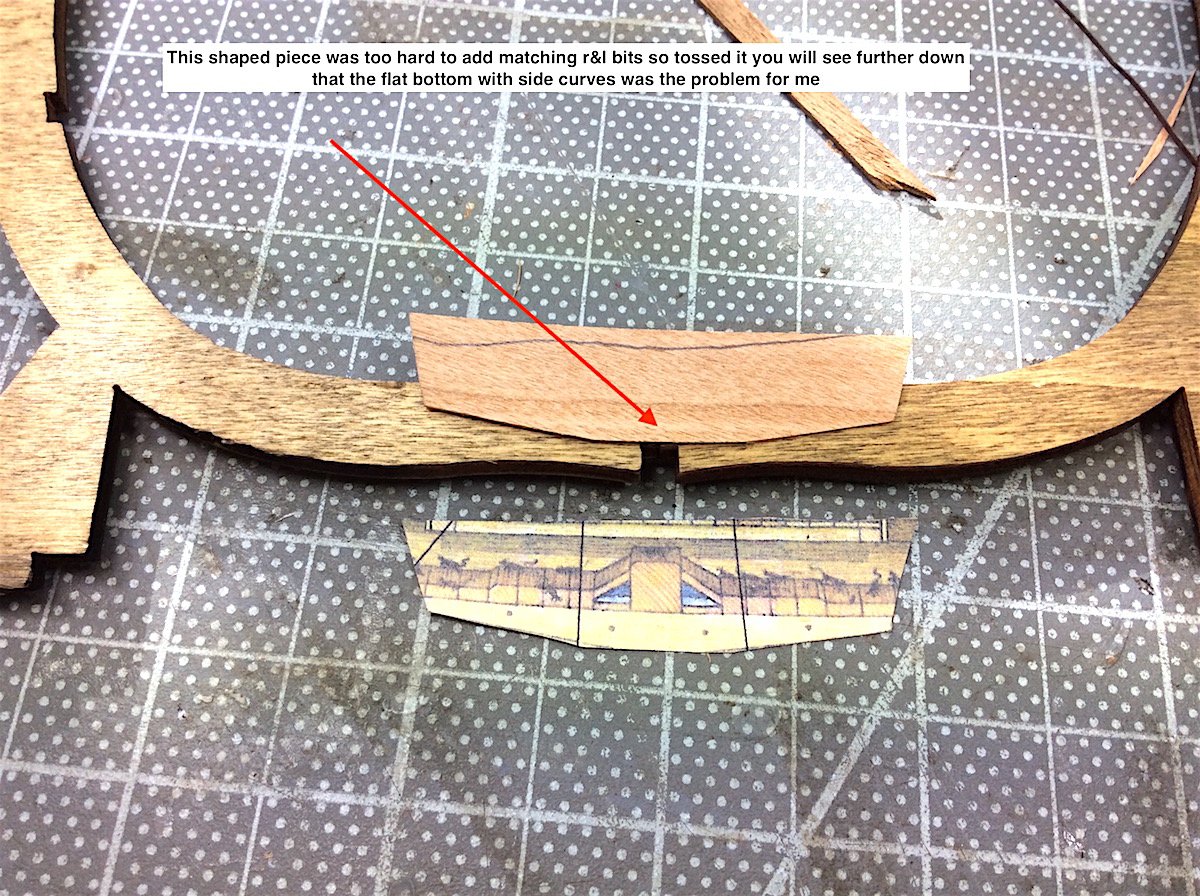
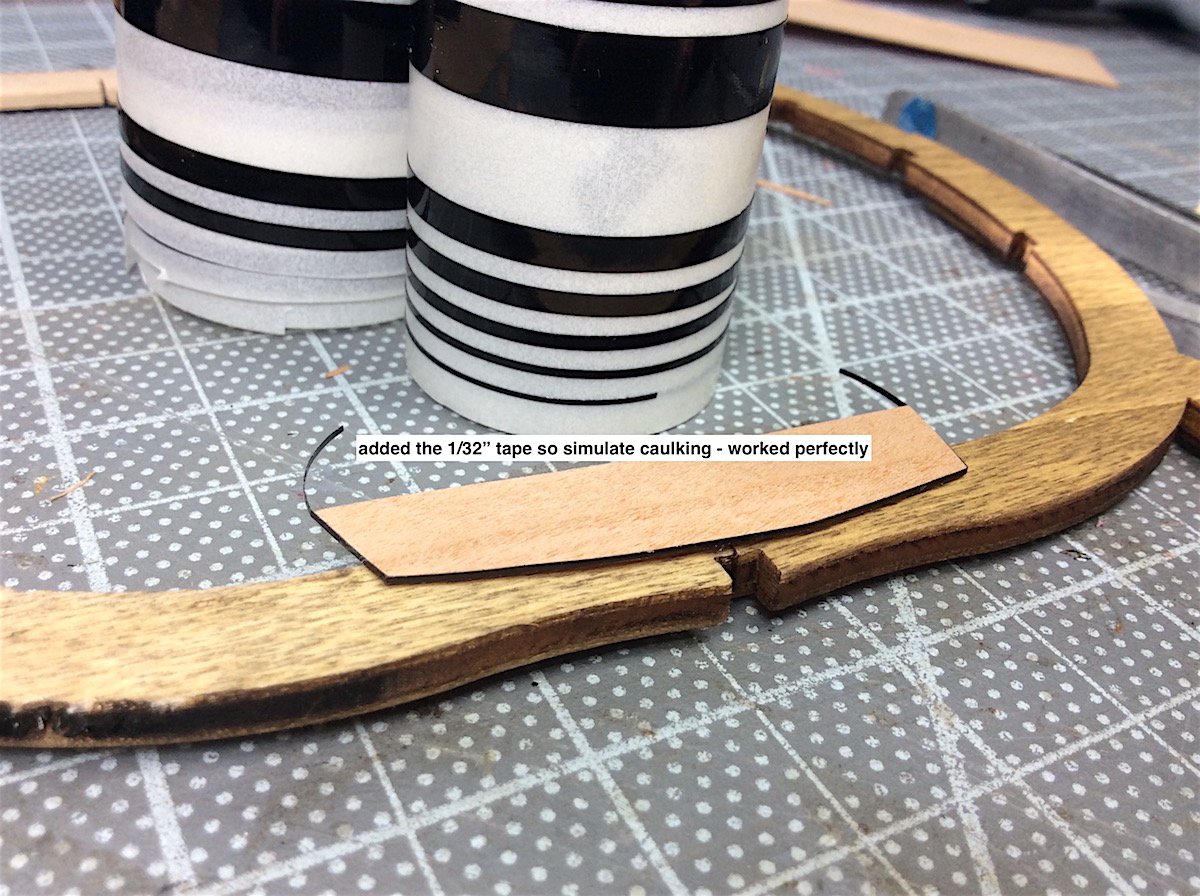
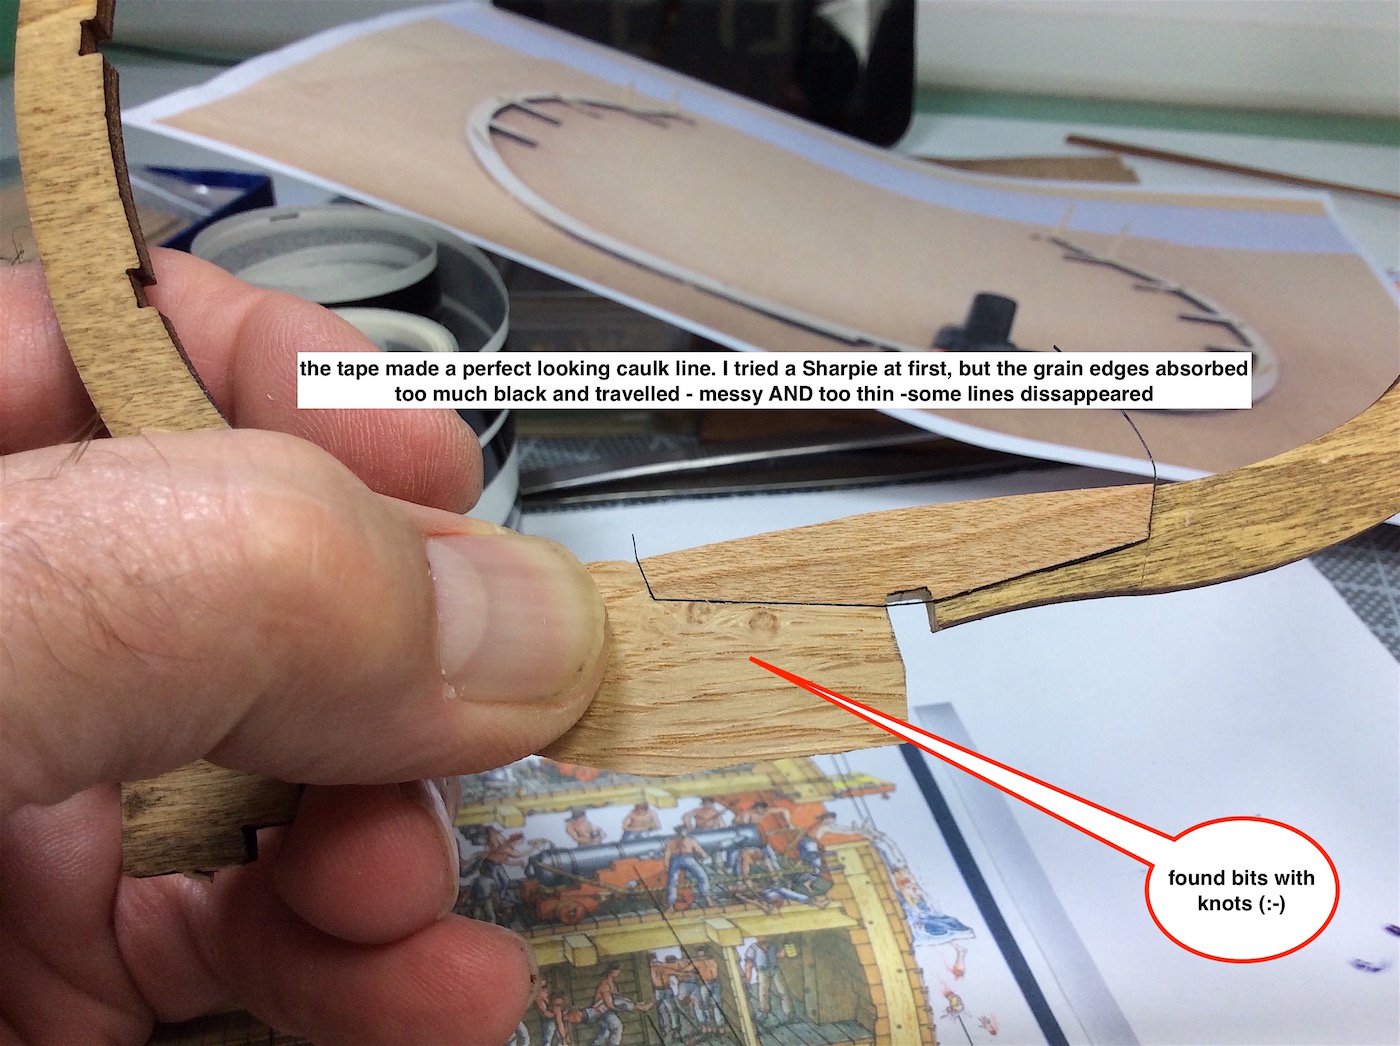
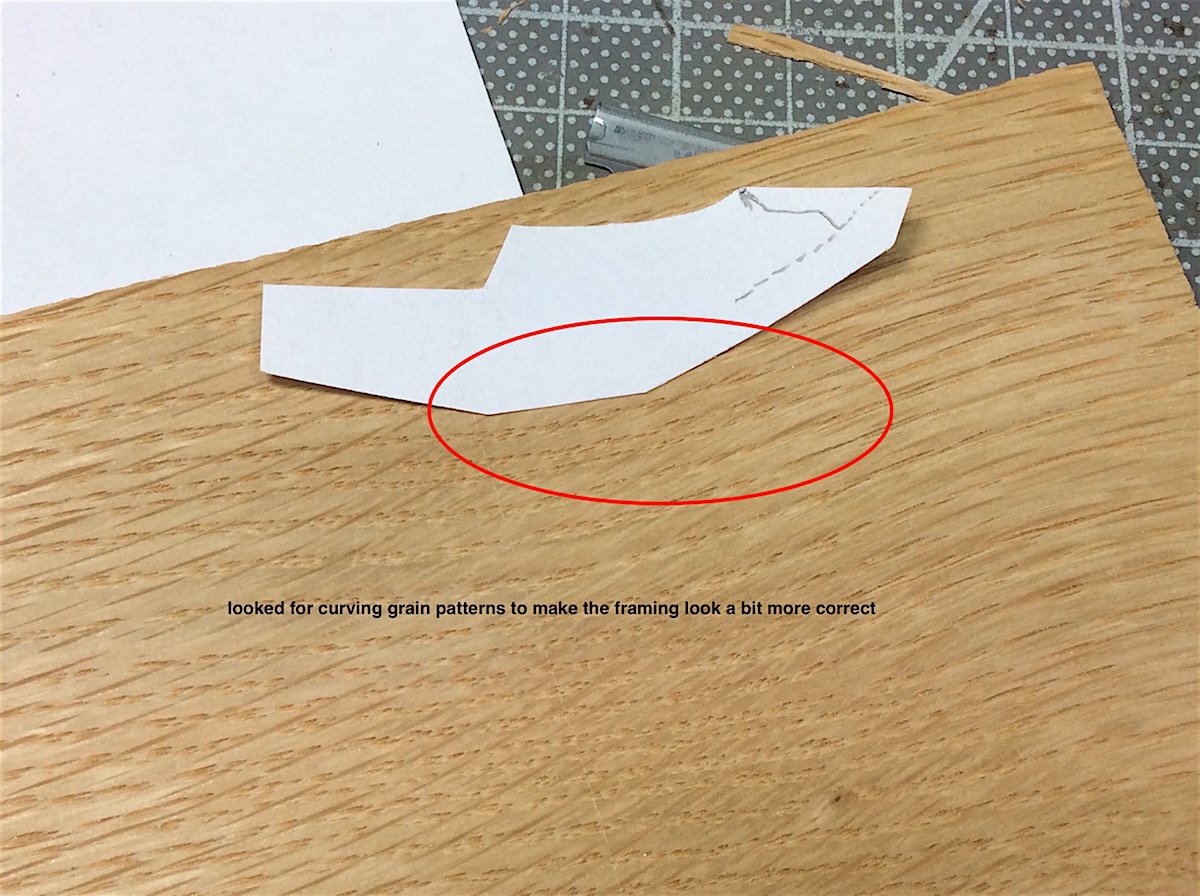
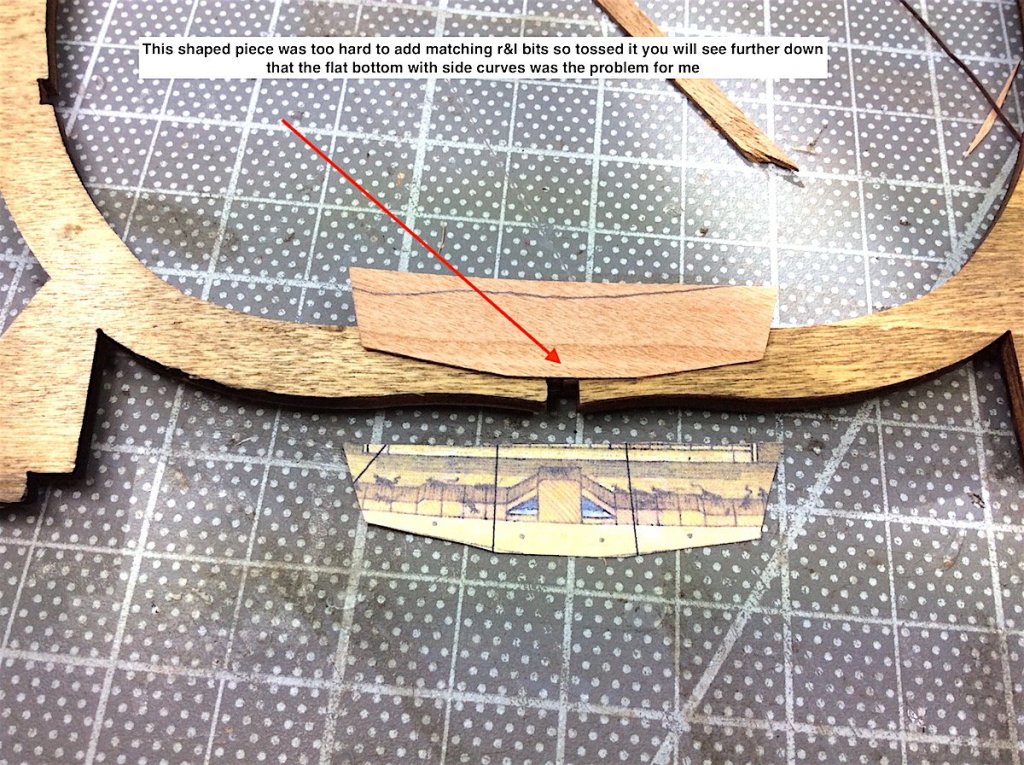
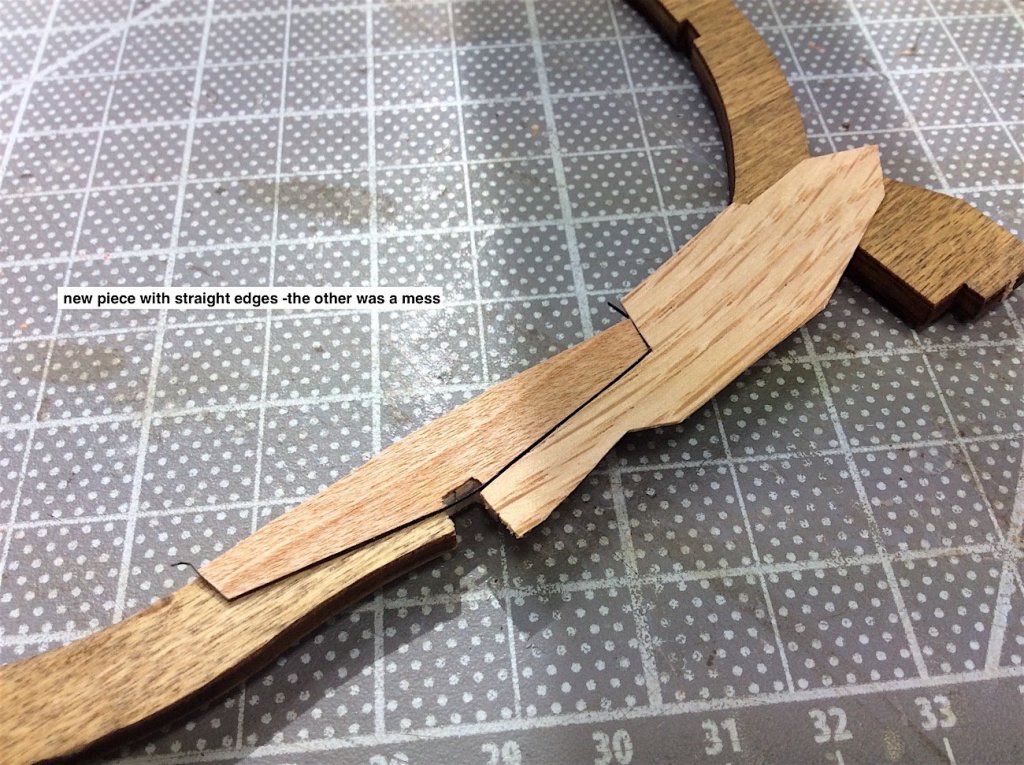
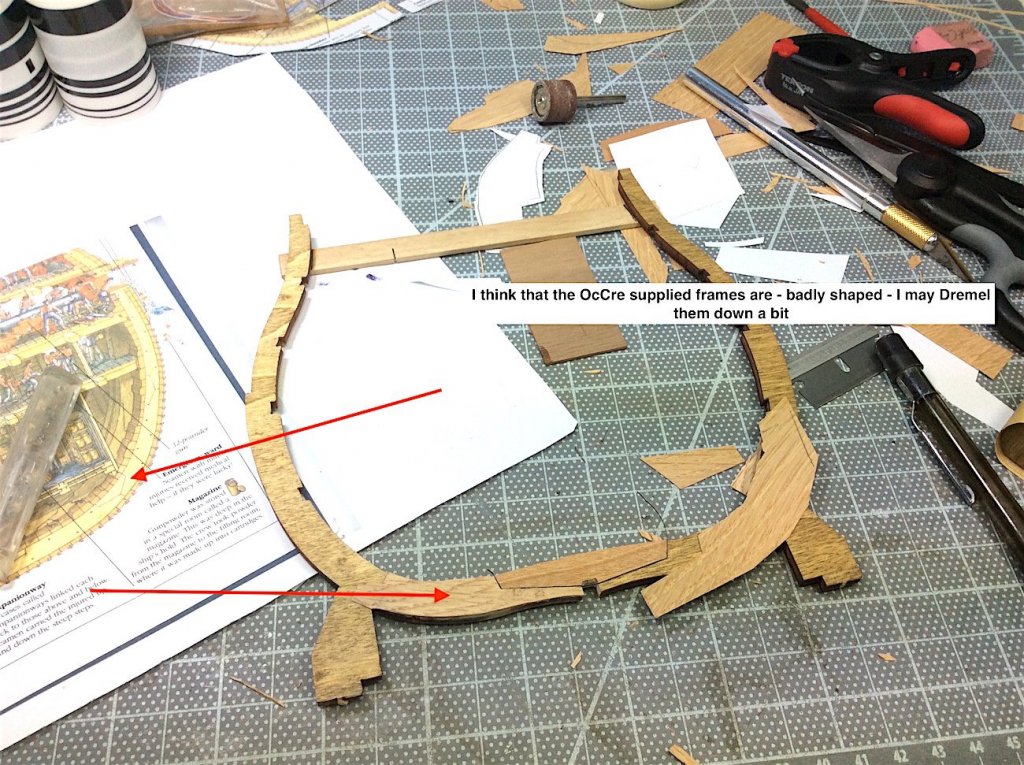
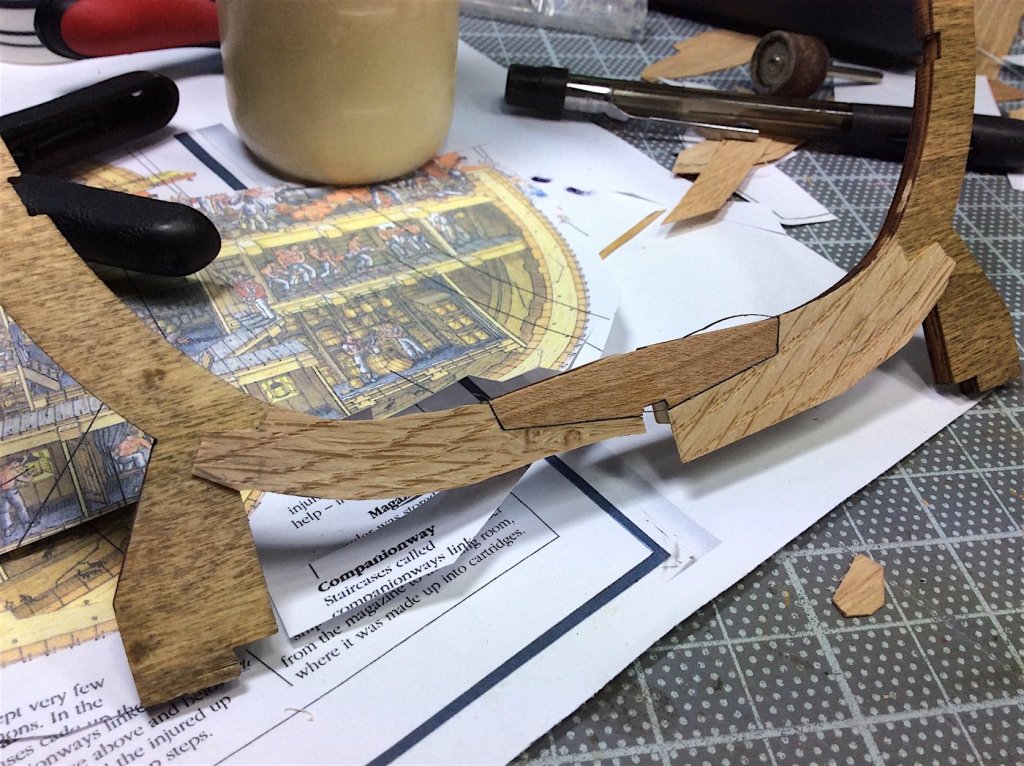
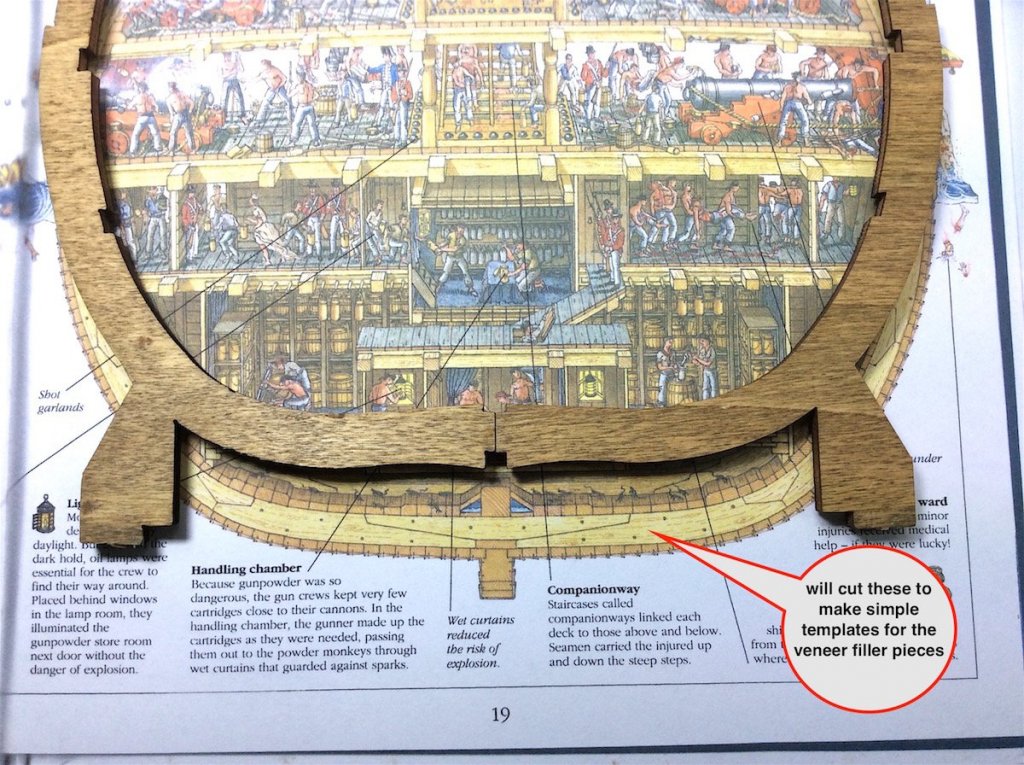
Hi Mates, Finishing up the front face of the frames. Pics speak for themselves. so again brief here. PS: I really liked working with the veneers - for this bit - much easier than actually building all of the frames segments. Glad that its only the first one Oops sorry about the last pic, the text was to say; need to think about deck hight, gun carriage or not, and how to incorporate the false vertical frames and how many? What kind of wood (they should be oak -hhmmm)


- 371 replies
-
- 15
-
-
Denis, As OC just said - splendid indeed. Your center finish is over the top perfect. Awesome detail!! I might have missed it, what did you use for the perfect looking caulking between planks? Looks superb.
-
Dave, Just catching up - excellent indeed. Your parrels look perfect. I need to learn about soldering for my next project. I've faved your section for the yards - will return to learn more - thanks for sharing Regards,
-
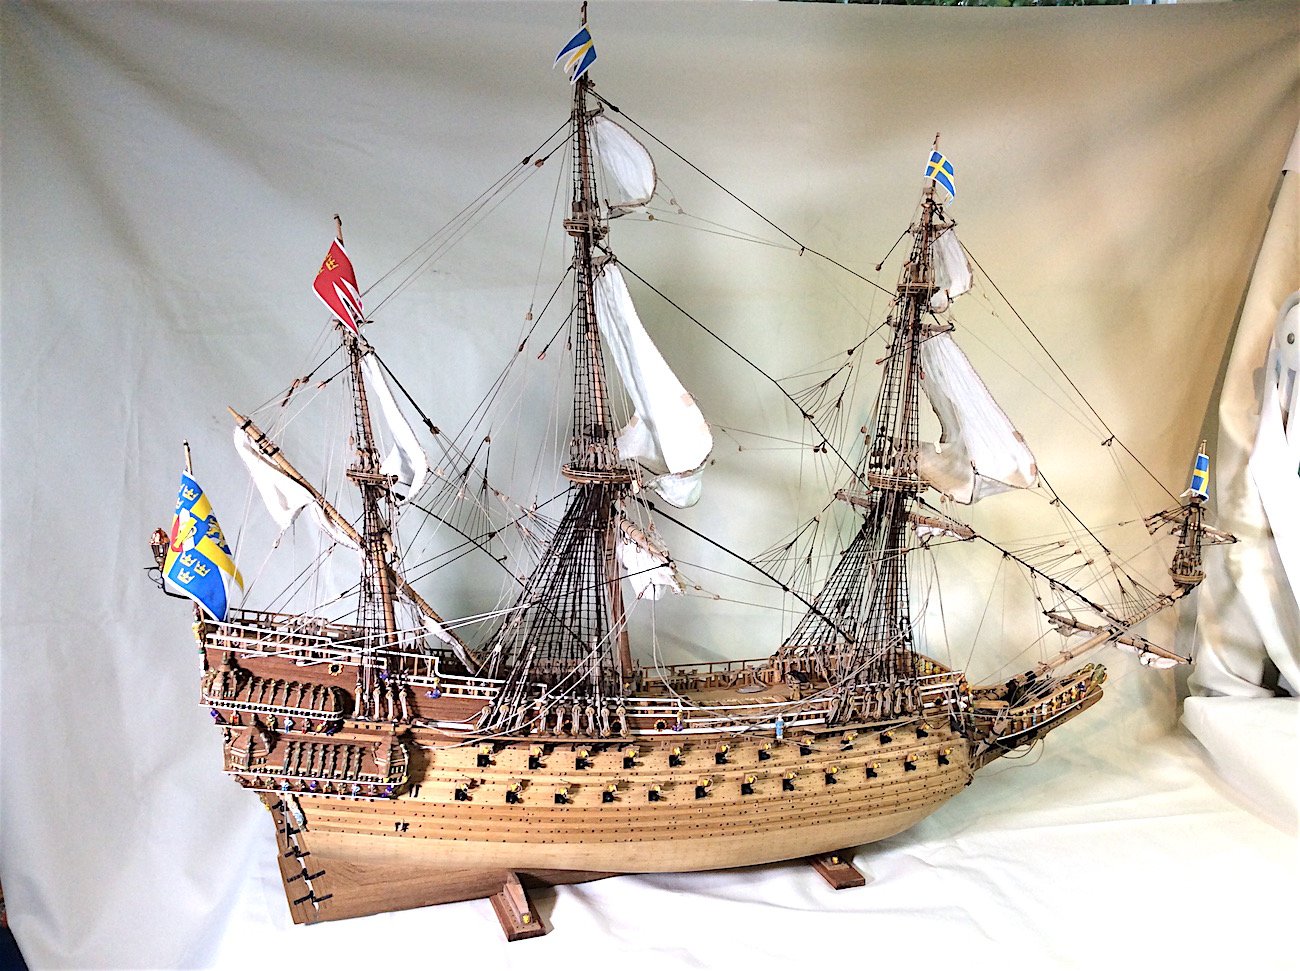
Mates, One last BIG thank you for all of your amazingly touching comments. Some of you have been my teachers. B.E., as an example, you were so diplomatic in your comments regarding how I was doing some things incorrectly (I knew so little back then). Help and suggestions such as yours, and from other kind members who posted suggestions helped to make this build what it has become today. Certainly bashing the basic kit helped. As well as available photos of the ship. Syren's ropes and blocks (thanks Chuck) I'll be ordering again soon.also helped to create a more realistic project. From other logs I learned about adding running rigging and sails. All in all -- thanks mates.
-
Keith, Just found your log by admiring your gallery photos. Stunning indeed. Apologies for loading up your in-box with likes Regards,
-
Mark, Especially ice as usual - Veneer - great idea. Yes it is rather fiddly, and you are trying to bend yours into shape?
- 331 replies
-
- 2
-
-
- nuestra senora del pilar
- occre
- (and 1 more)
-
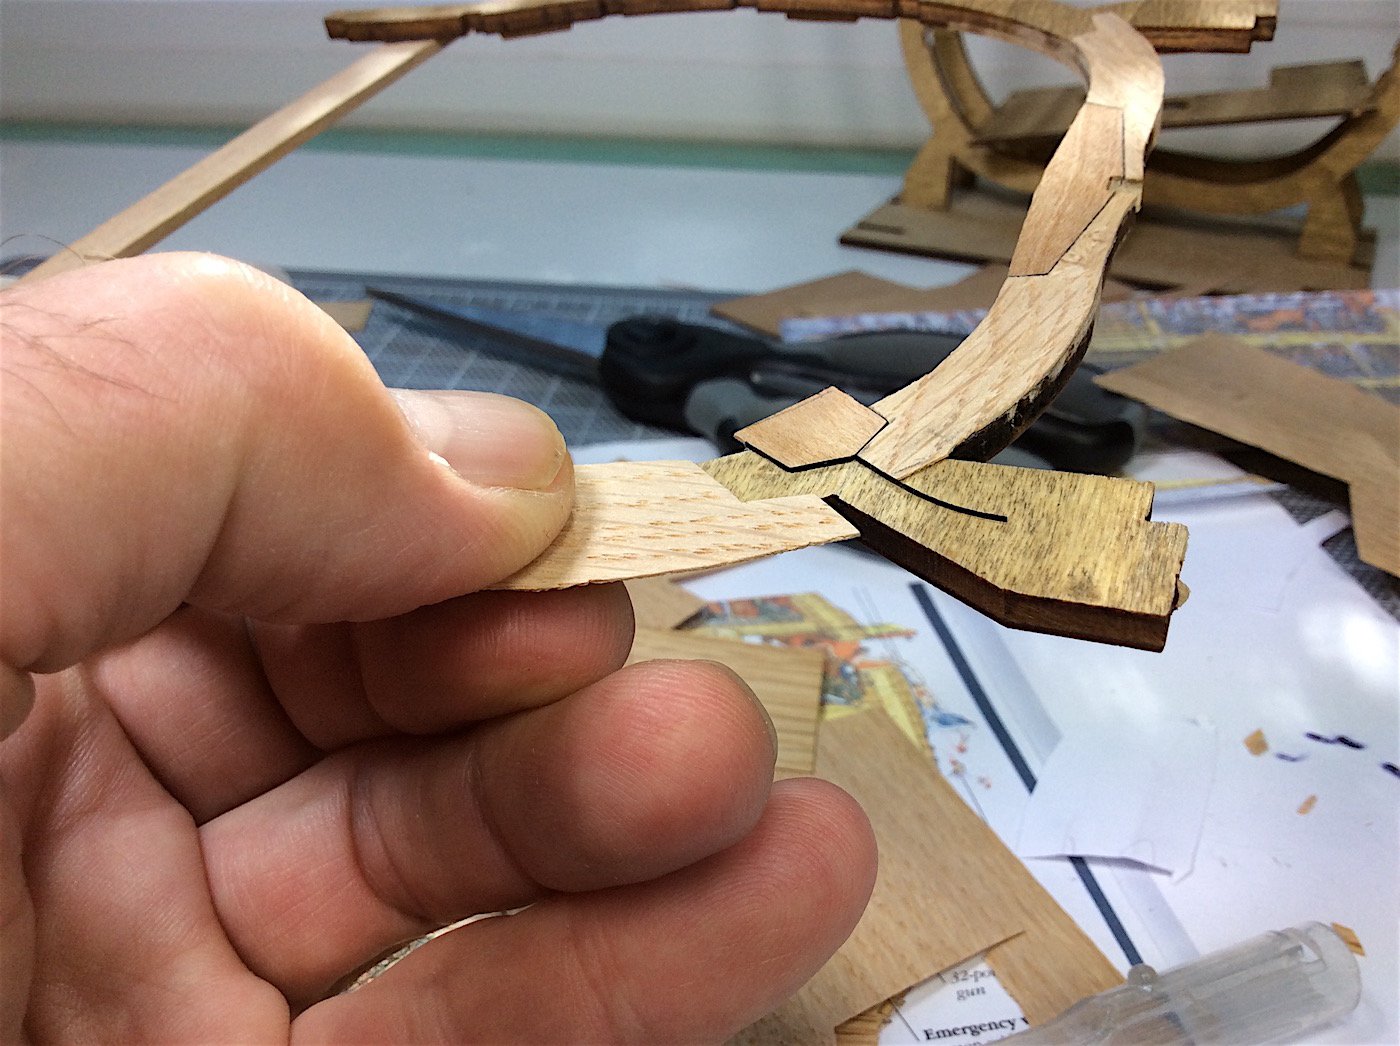
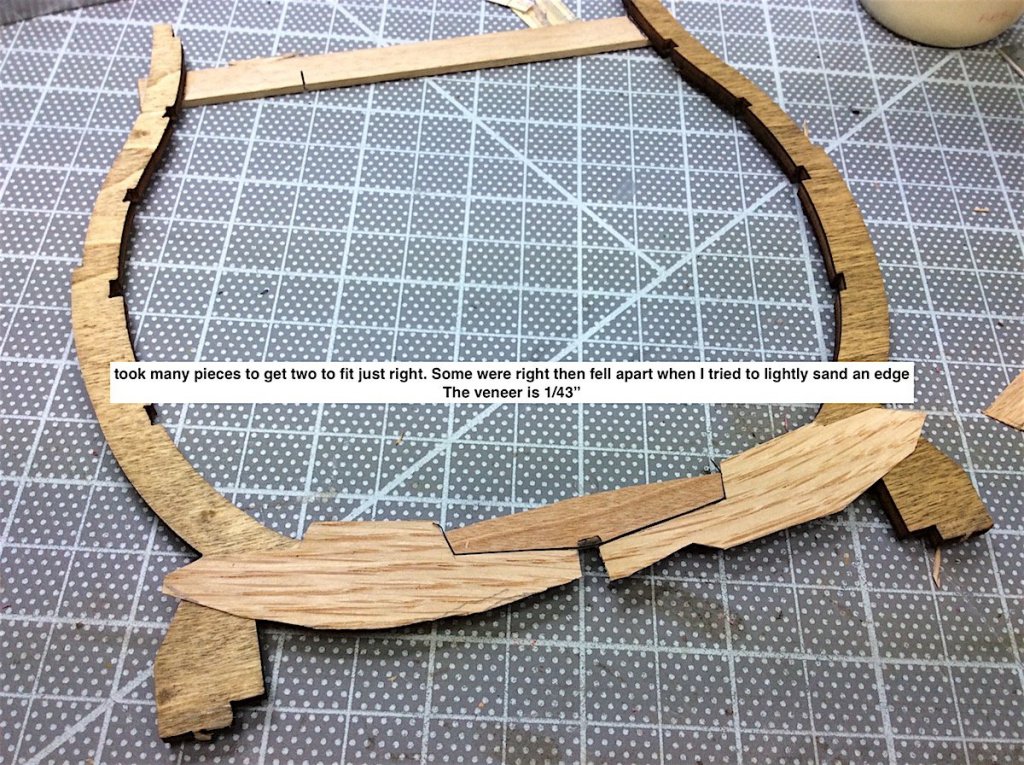
Hi Mates, Vivian, welcome aboard as well – so nice of you to want to follow along. Got the veneer from eBay so first steps have started. Self-explanatory – so will keep it brief. Added notations within – A good start – PS: The veneer is really working out. It is, however, very fragile – hates, scissors, razor blades and my fingers. But once I got the hang of it we got along well, so far haha Cheers,


- 371 replies
-
- 17
-
-
Peter, Fair question Ah yes - those now, in this household, infamous Pegasus. As some of you may know, they got “planked” by the Admiral as soon as she saw them trying to be included as part of the base. (I may be sharing too much J It turns out that with the small mounting braces that I made they crowded the area, and did not correctly fit under the ship. Also, visually they took too much away from the minimalist case that I had intended. So the Admiral was relieved that I did not place them inside the case. “It’s all good” - Oh well, I may put them on eBay.
-
Welcome aboard mates, Martyn: nice - you will prob. finish your superb ship build before I finish this little cross section. This cross section will be an excellent follow up for you indeed. Capt. Steve: Oh yes! those are very nice. Started looking around and discovered that they come with the kit. Tried to find some as Corel fittings, but no luck. They’re on my mind – thanks for the idea and link. I’ll ask Cristikc for the part number and see if Corel would send me some. They, Corel, have been so kind sending me extra metal parts for the Vasa. Though I did indicate that I had purchased it from Model Expo. Yesterday I placed a large order of various fittings with Cornwall in the UK. I will start in earnest when the shipment, and my veneers arrive. Oh they carry Oak strips of various sizes !! Cheers,
-
Mates, AGAIN I am so touched by your overly generous comments and likes. A special thanks to those of you that actually endured following this very long build to its end Signature got fixed - Thanks to moderator's team. Regards,
-
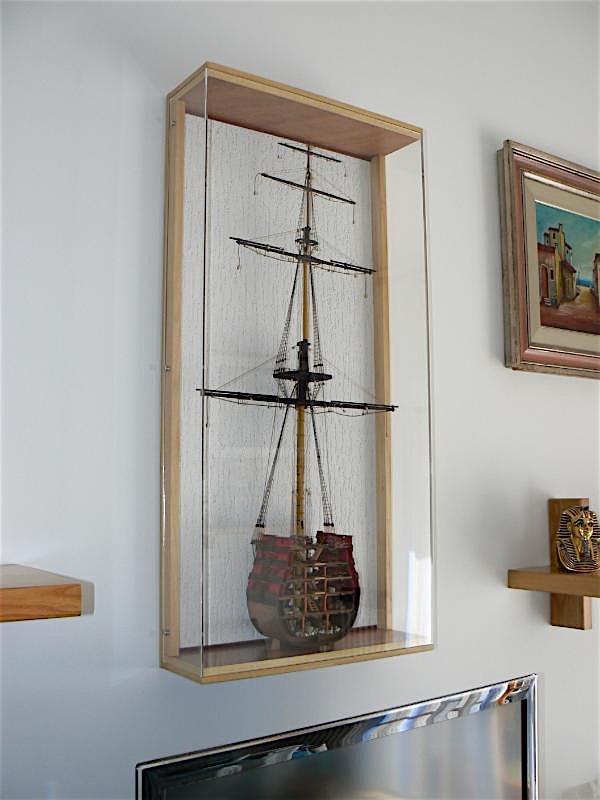
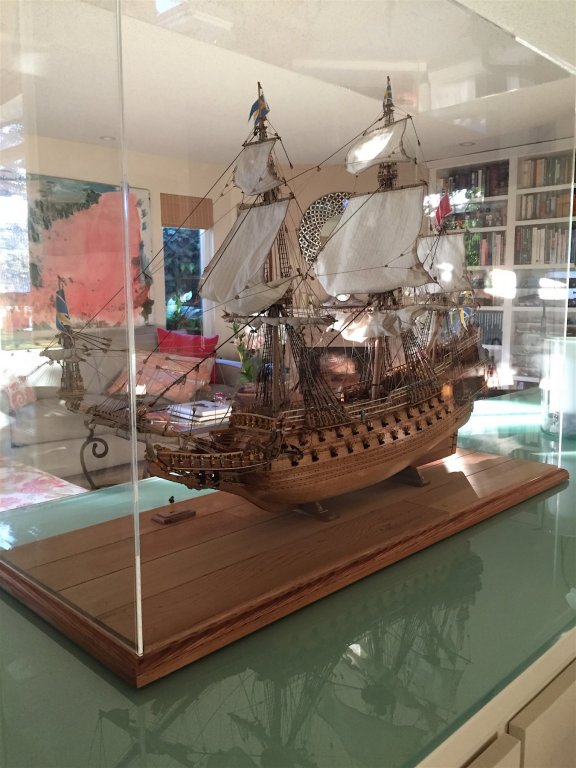
Thanks for your kind words as well. Regarding the case; it was custom made to my exact design, size and specifications by a local wood-shop. As for the cover, I took the completed wood base and had a plastic speciality shop make a plexiglass cover, again to my exact needed height and, of course to fit the wood base. Price will vary, as you know based on needed size.
-
EJ, Just catching up. Looking sweet indeed. Really like your gold gilded work excellent -well those bits that are not devoured by the carpet. I would bet that every member here has fallen prey to this kind of thievery - carpet members that is - PS: yup like me. Cheers,
-
Thanks to all of you for such kind comments. SO appreciated indeed. I goofed up trying to add a "link" under my new current build and now this huge first photo from the new log appears within my signature each time that I now post comments. I wont post until its fixed. Have absolutely no intentions of stepping over any build that I follow with my ridiculous "new" signature SORRY mates. I tried to delete the link - went to my "signature" area can't seem to just delete it. grrrr Looked for help at the appropriate site area but can't find what I need to fix this mess grrrr (2)
-
Dan Sooo sorry I screwed up with my new build log and now my signature takes over when I post to other logs. I won't post anywhere until I get this resolved. Tried to erase the link but no luck apologies Michael
-
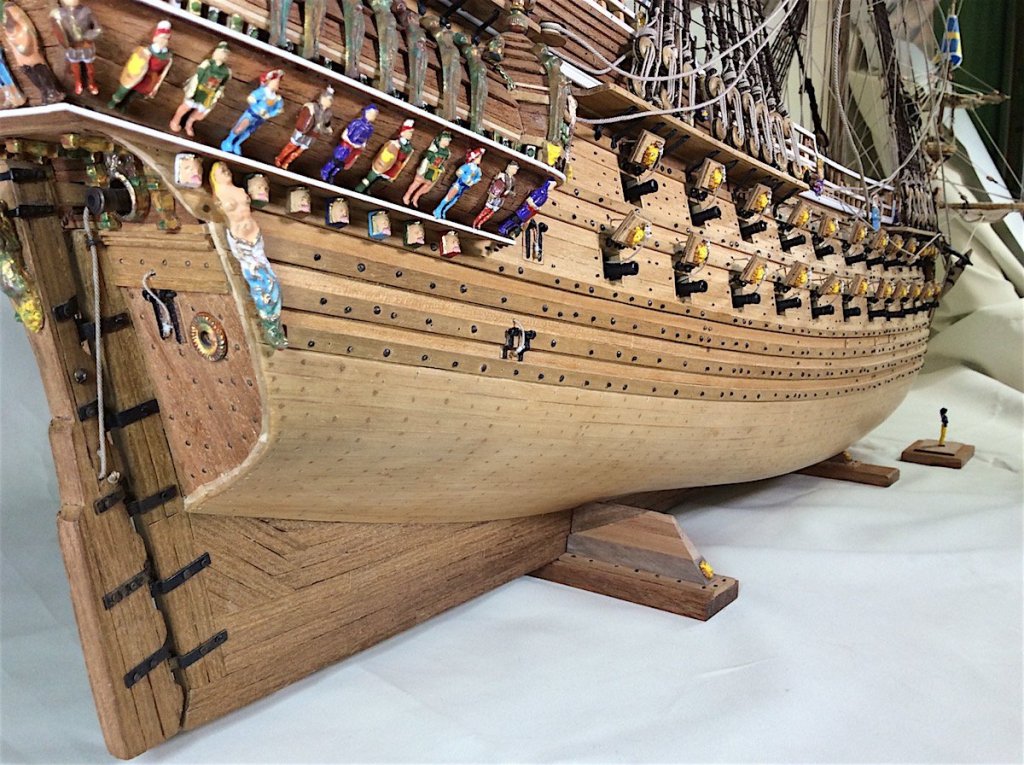
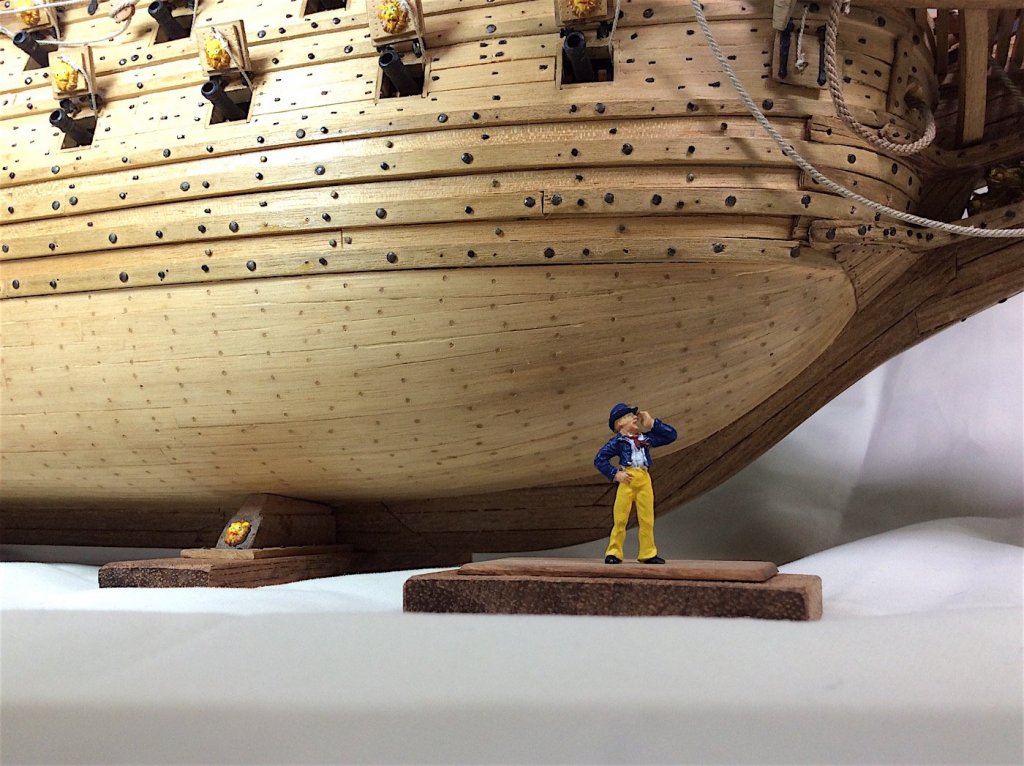
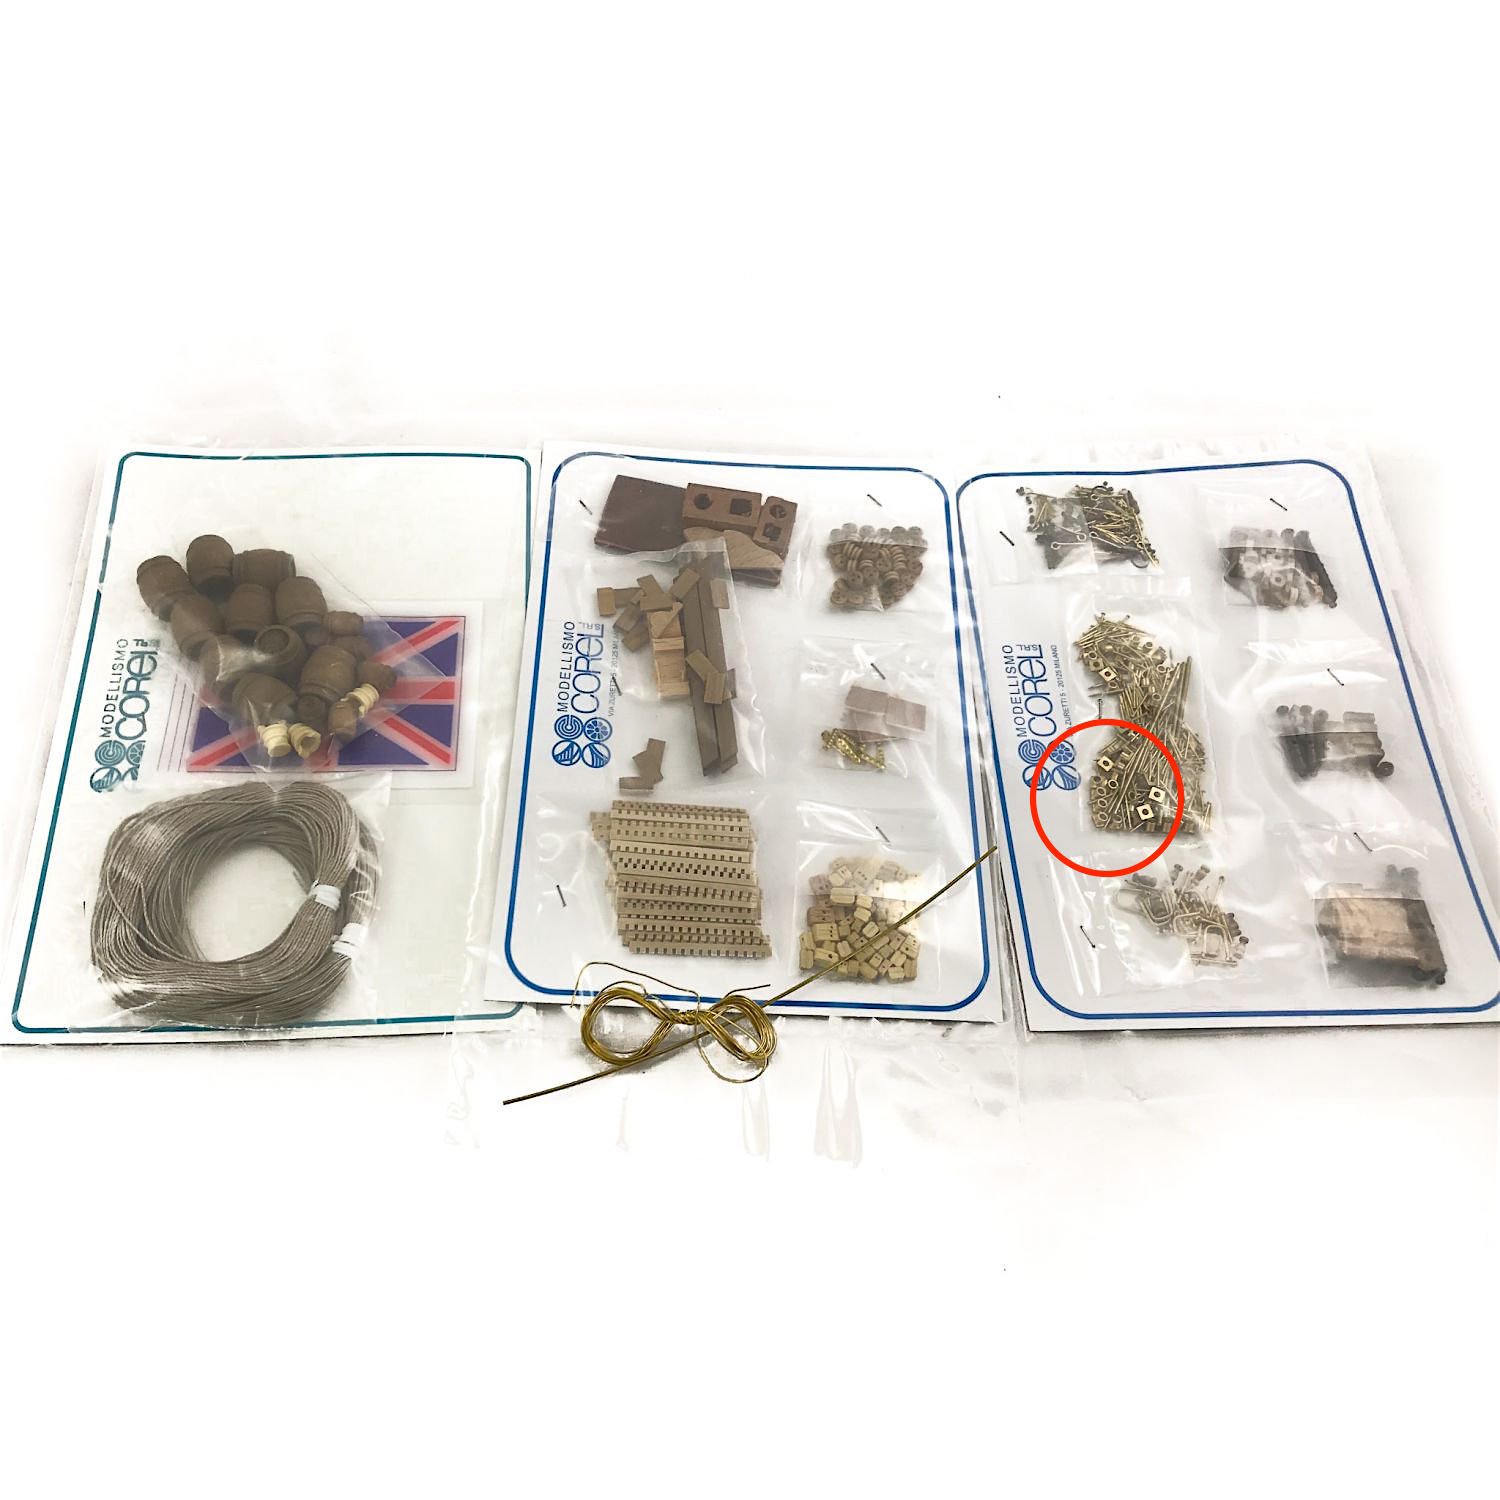
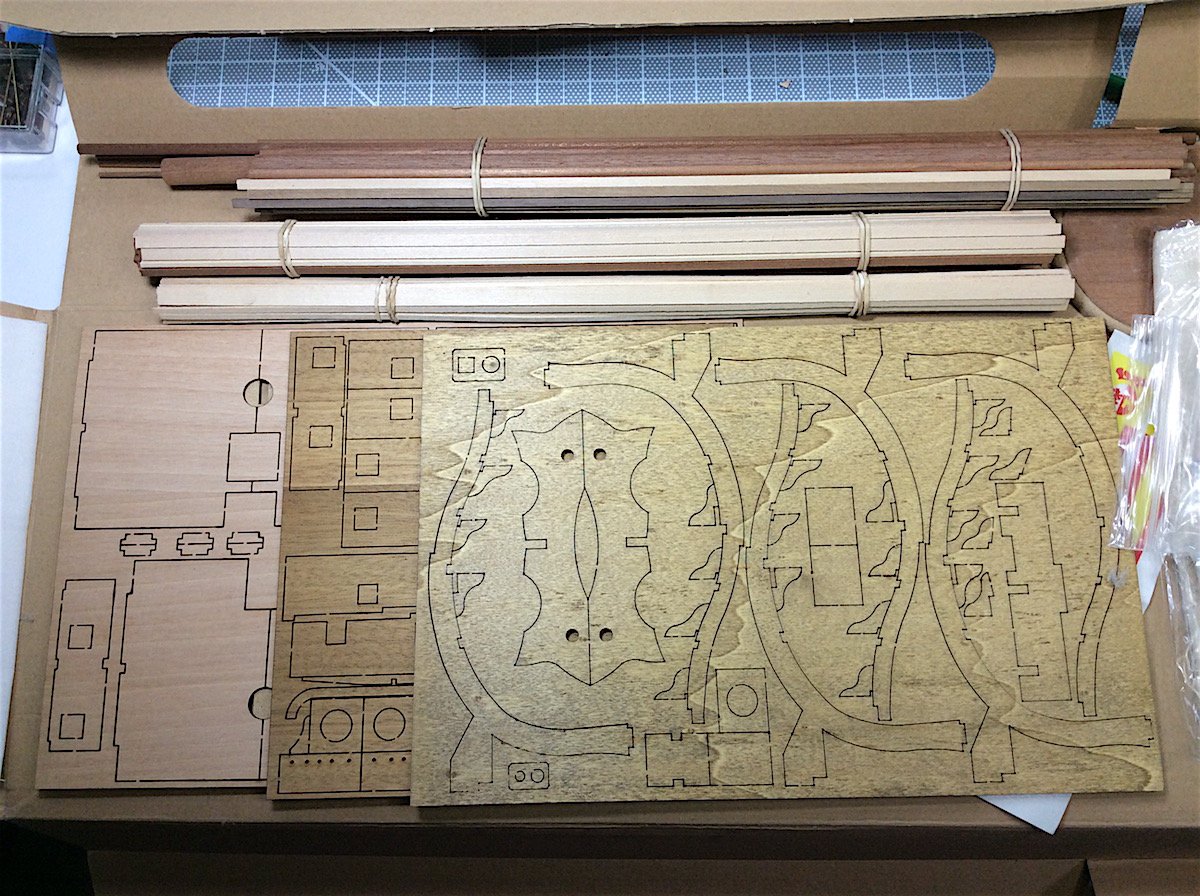
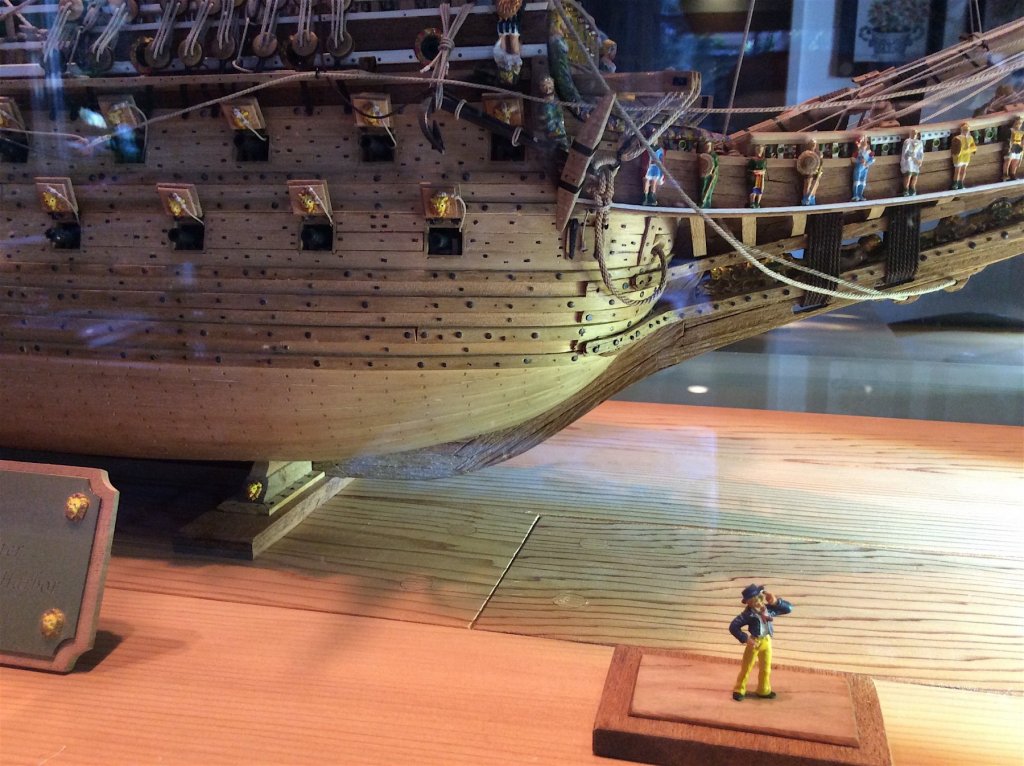
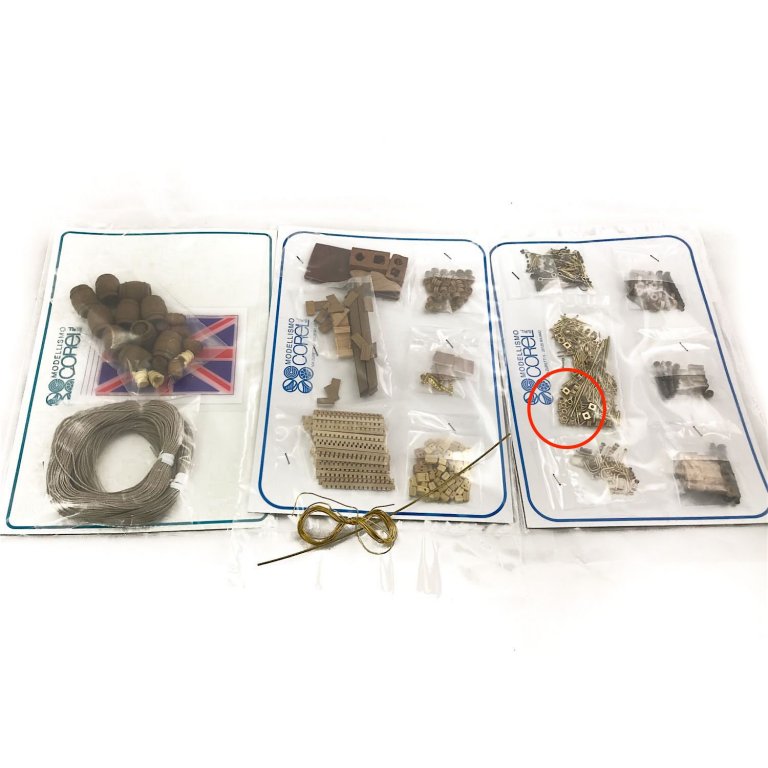
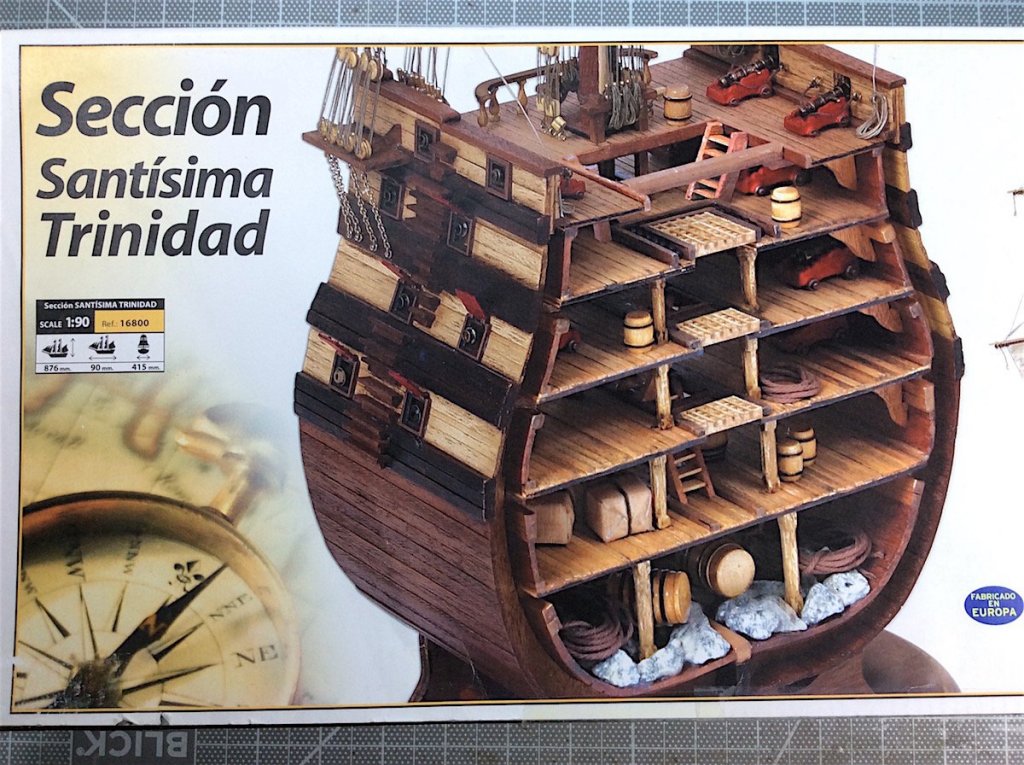
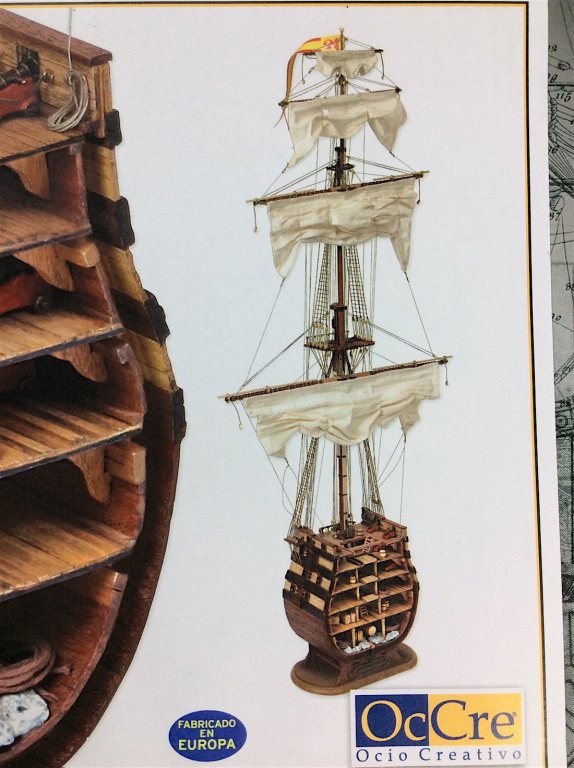
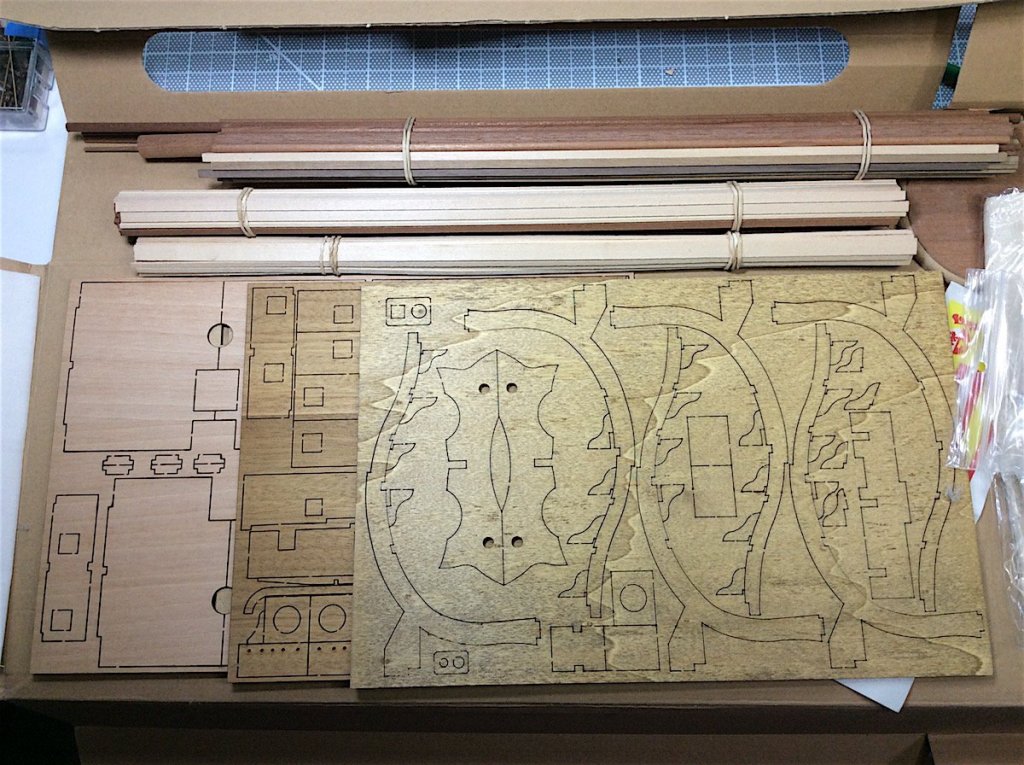
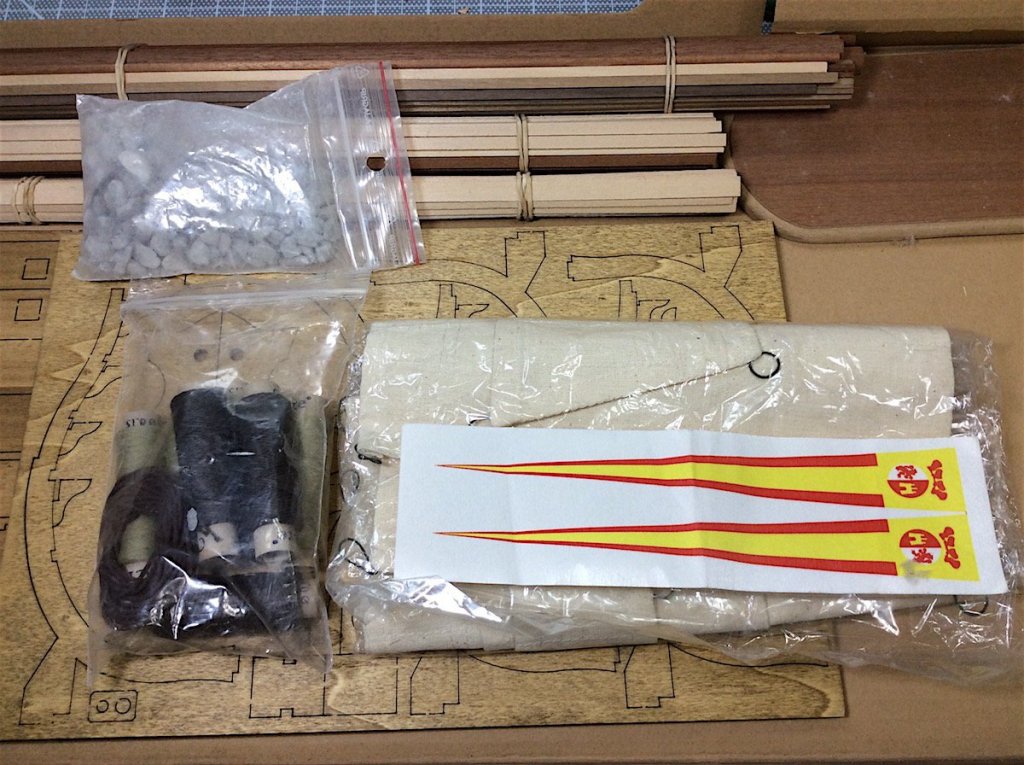
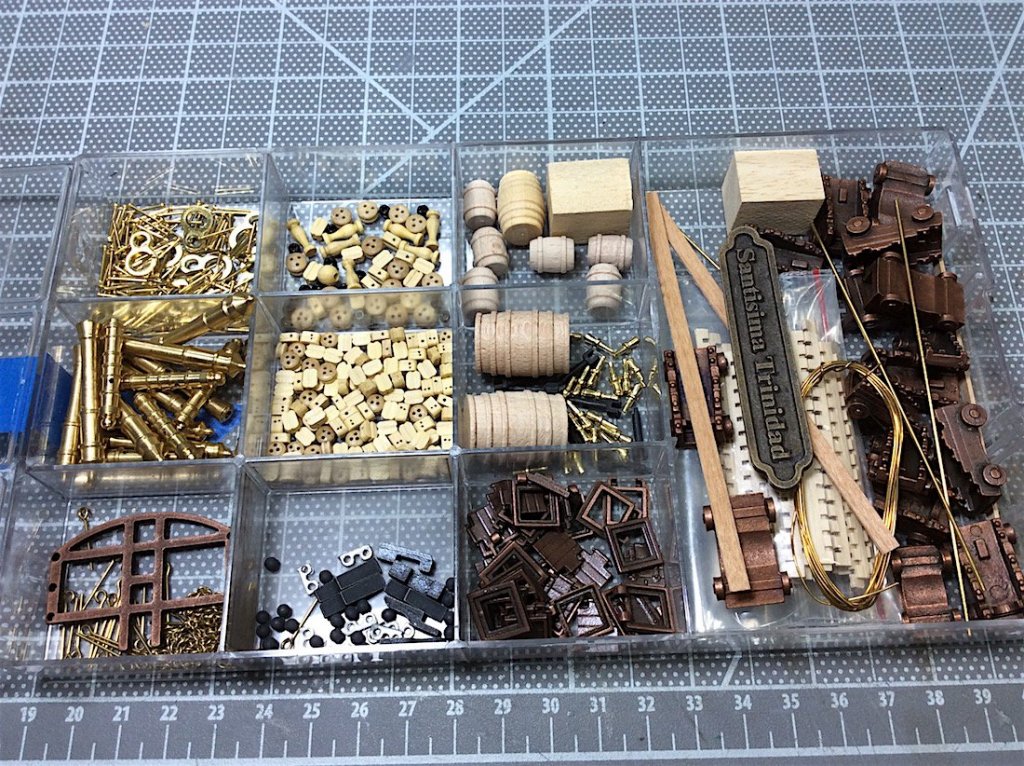
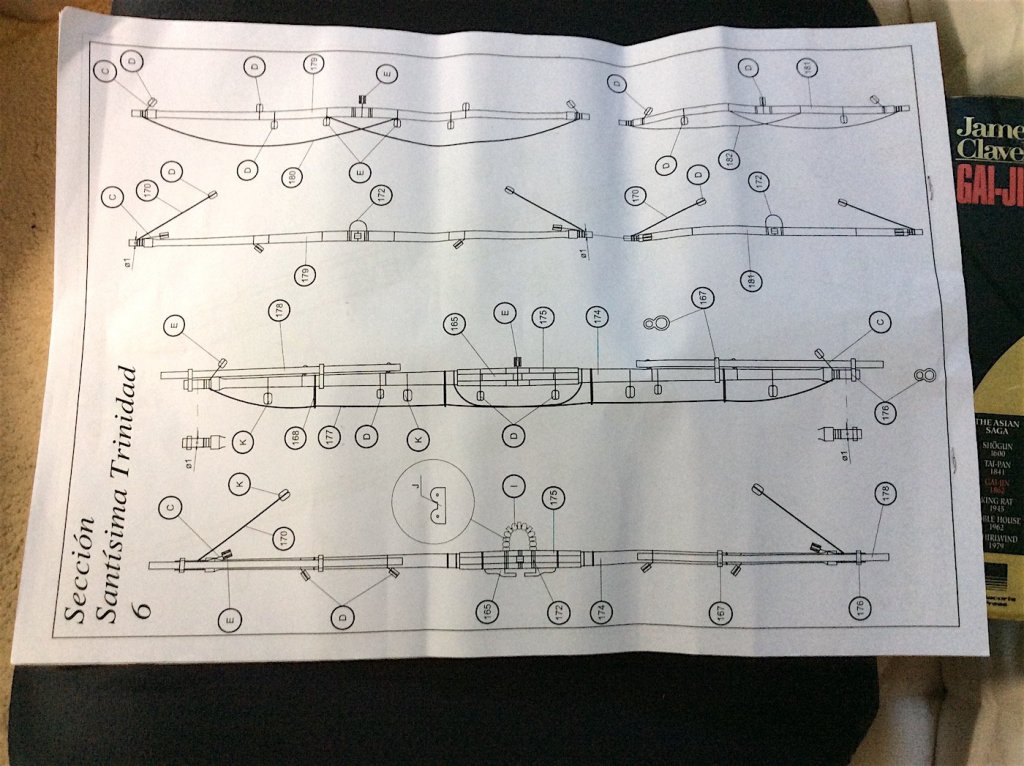
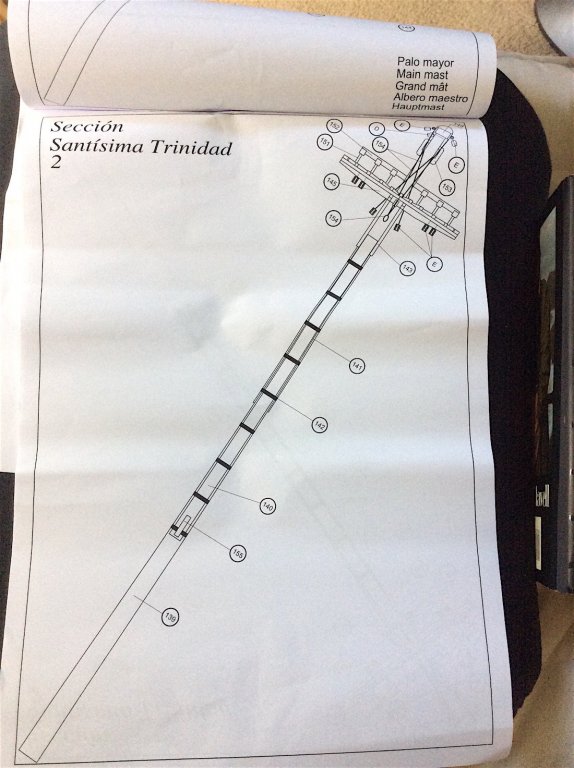
Hi Mates, Having learned so much about rigging, gun carriages and so on with the Vasa – this one seemed like a better next fit. Intend to bash this one as well. 1) Show lower, upper and weather deck framing details by leaving out some of the deck planks from each deck. 2) Will try my hand at coppering the hull 3) Scratch build much of what the kit provided. =================== Kit seems to be well thought out. I would consider this one (to me) as a basic to intermediate skill level kit. Included carriages and gun port frames and doors are pre-made of metal. The subject is certainly interesting. And its just a bit of the ship haha I like the included dark timbers, not so liking the white woods, - prob. won’t use in any case. Instructions are simple, and the mast and rigging sheets are excellent. I have no intentions of adding running rigging with sails (well for now anyway) haha So: first steps are to add a face to the front facing frames. So a first thank you; Denis (Popeye the Sailor) – I saw you write the word Veneer on your current Mississippi boat build - that struck me as a perfectly simple way to add details to the front facing frames. So ordered some veneer woods (without glue backing) from eBay. Had NEVER thought of this as a perfect addition for detailing certain areas. Will be perfect for the face of the front frame Will also use Longridge as a reference – close enough I would think. That said, oak timbers seem hard to find. I don’t have a belt sander planking type machine. No big deal it will only be for the keel – Veneers are coming for the side framing work. Welcome aboard mates, thanks to those of you already on-board – sweet indeed. OK Now I need to catch up to all of your builds…..Have fallen behind Cheers,


- 371 replies
-
- 12
-
-
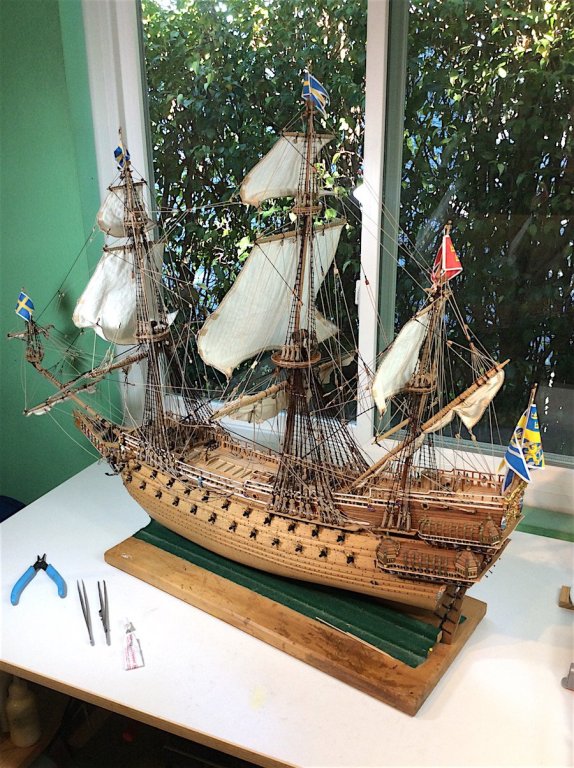
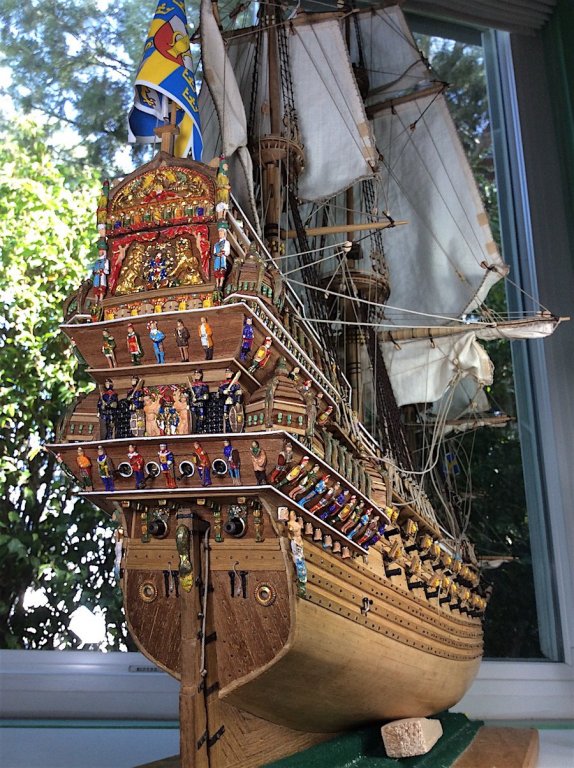
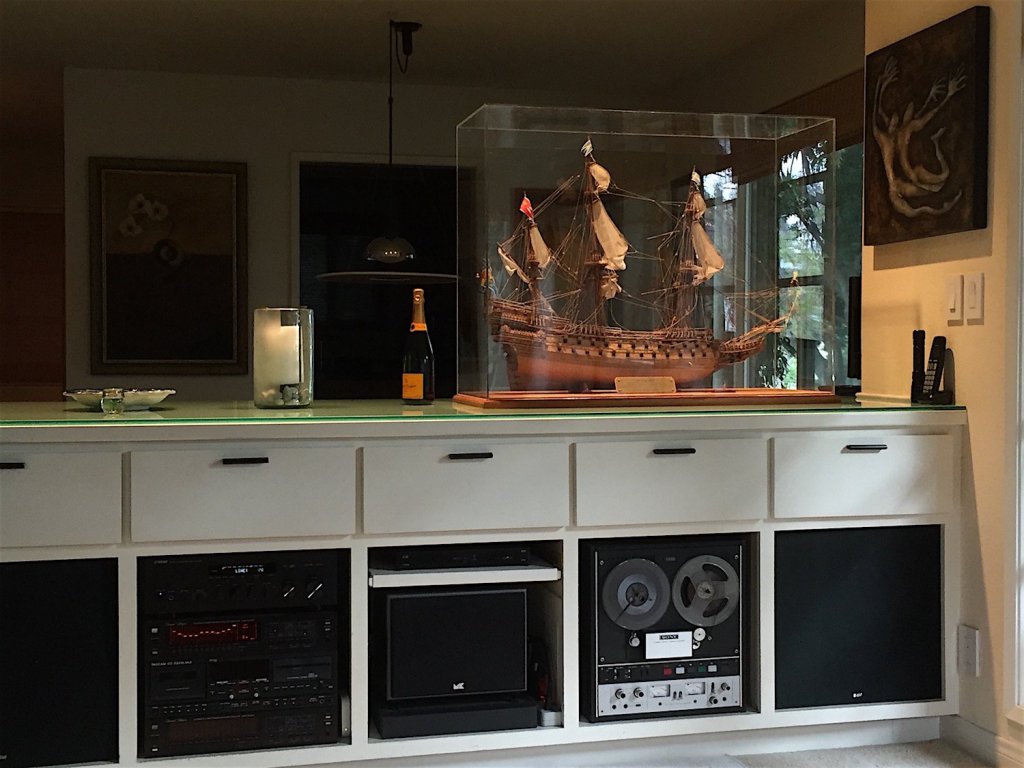
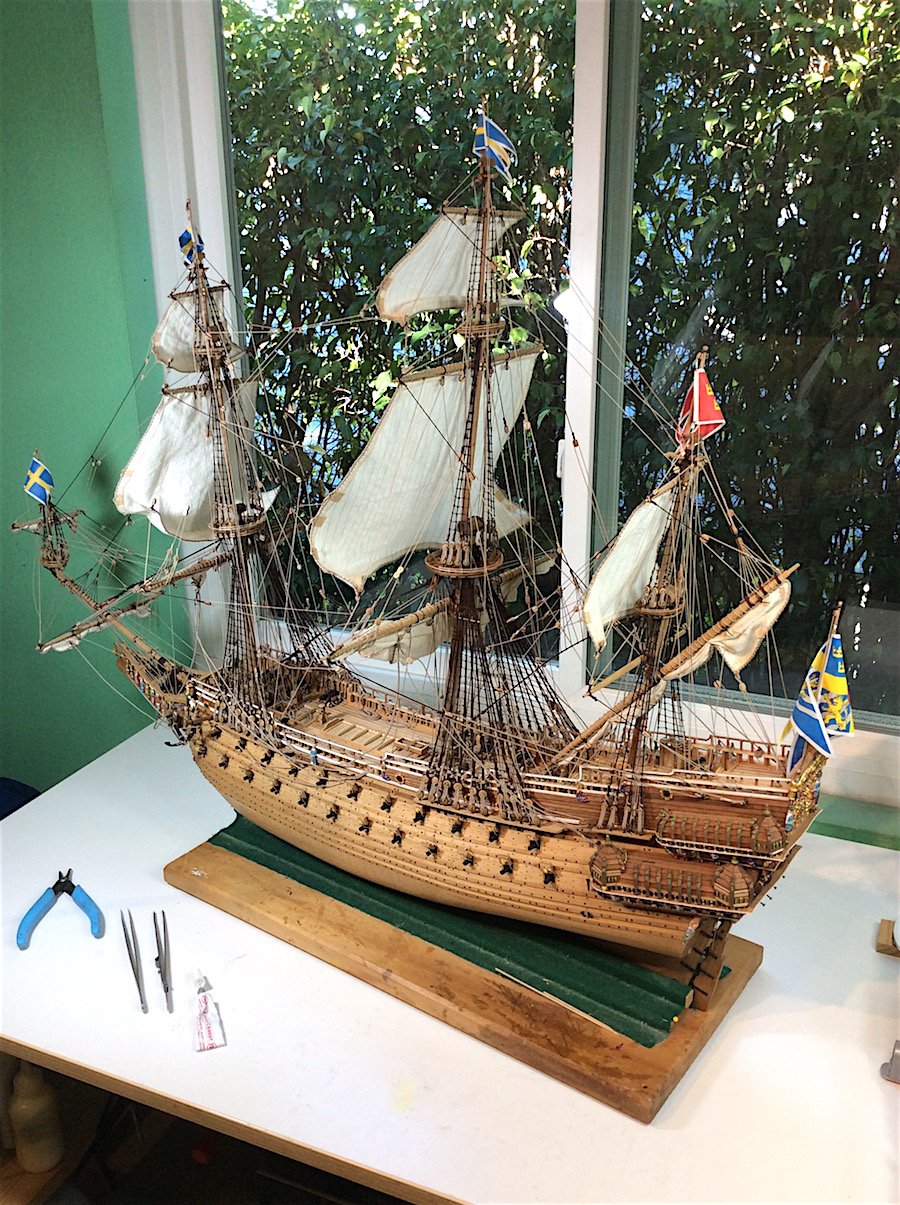
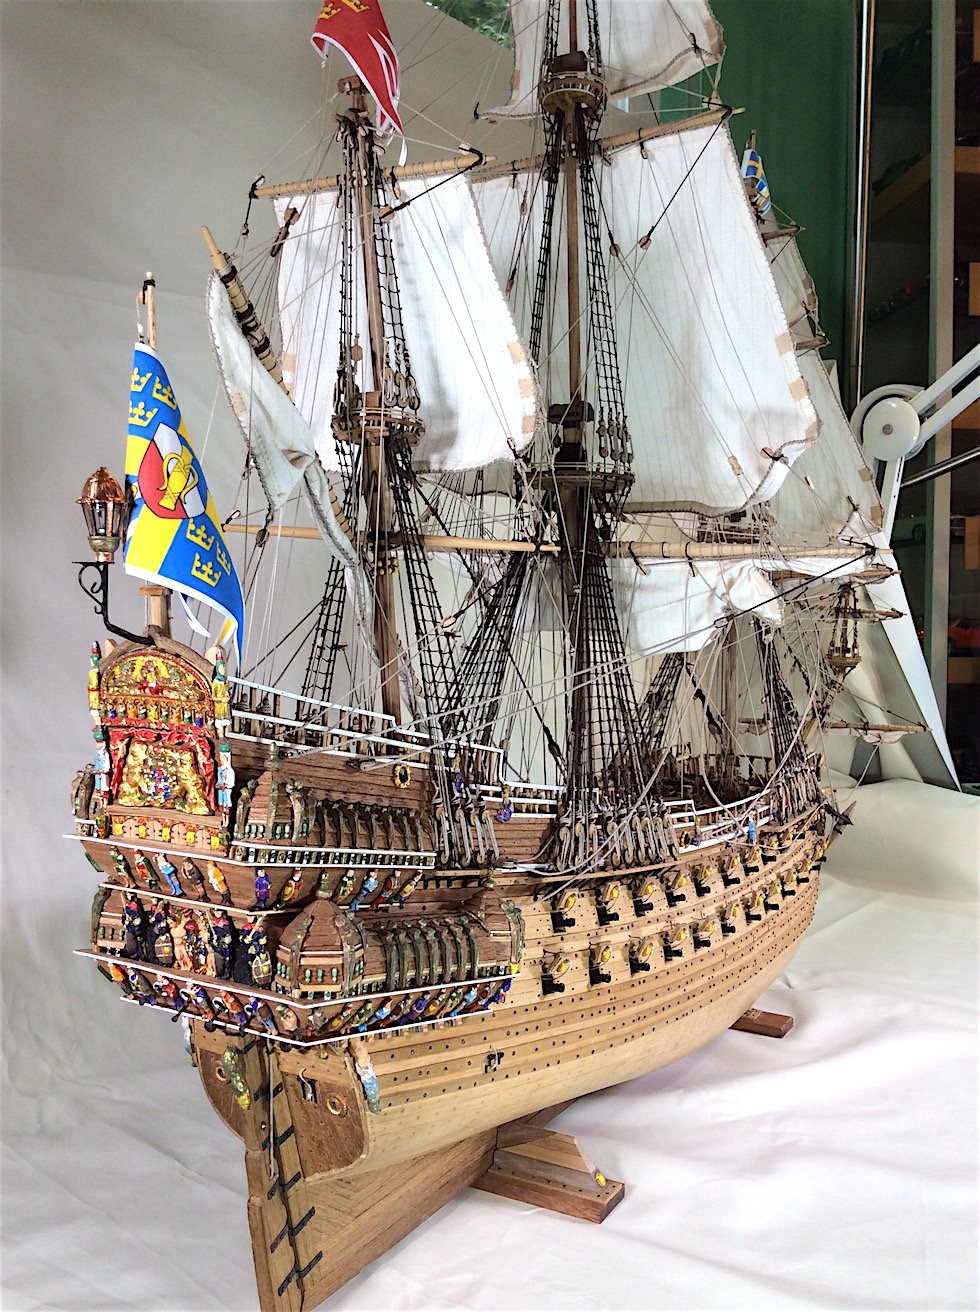
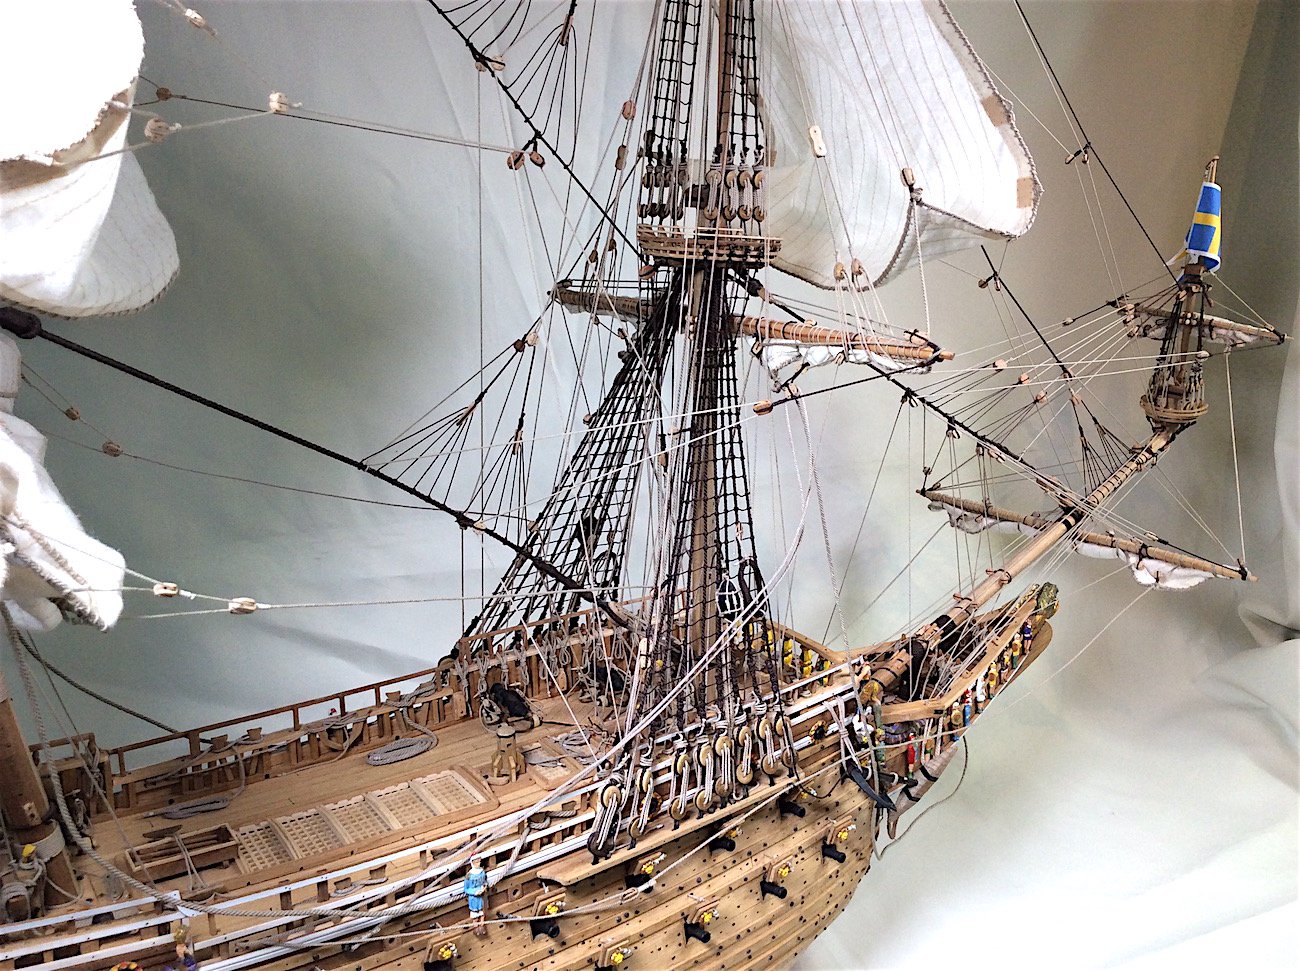
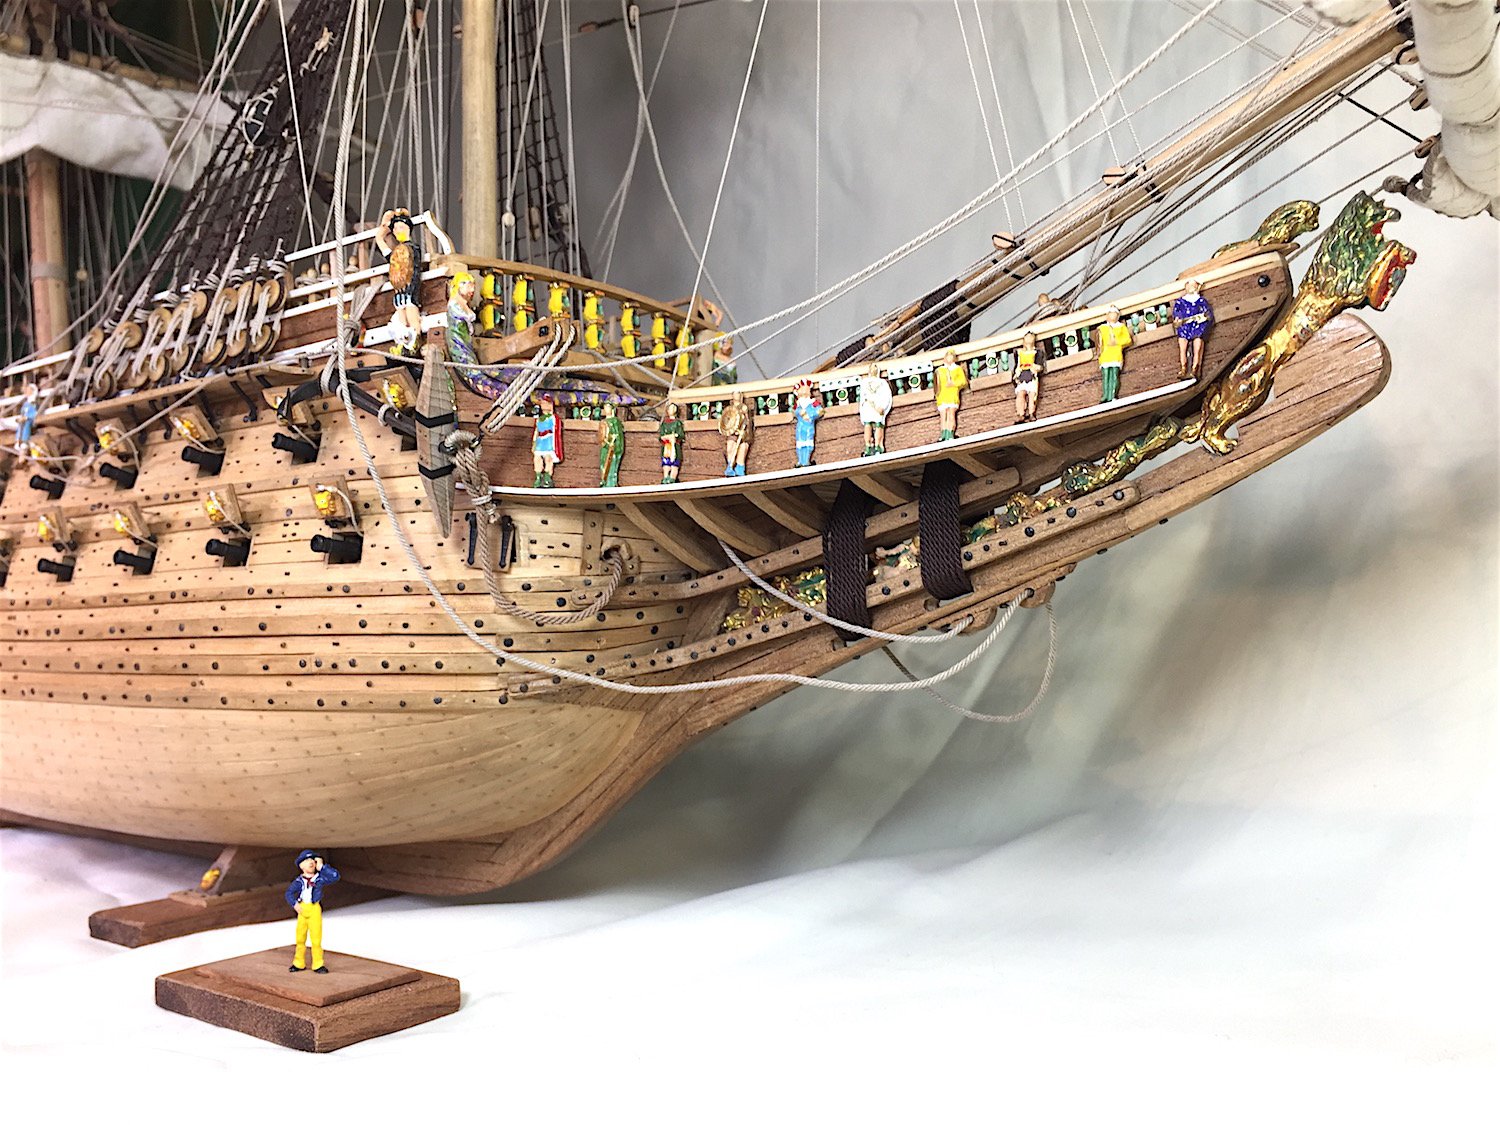
Hi Mates, Well she is done. Last pics for this log, a big thanks, especially to those of you who have followed along – for such a long time!! adding your kind and encouraging words, and all of your important advice. So many of your compliments have also helped me become a better builder – again thanks. Big thanks for so many of your Like clicks and visits as well. Captain Steve: Up next, after much hand wringing –it was between the Billing Oseberg (1/25th) As much as I became obsesses with Vikings after watching all seasons of The Vikings this kit is just too big (my fault for not paying attention to its size during the purchase) Yes there are smaller size kits – could be….. So having learned so much with Vasa, I will go with the OcCre Santisima Trinidad cross section. I intend to bash the heck out of it, including leaving some of the lower and upper gun deck planking bare, as well as poss. at the weather deck as well – showing the, to be added, under framings. And trying my first at coppering the hull. Jörgen regarding the woods – those that came with the kit, along with wood from Corel’s Mirage. Then from Midwest products; some walnut, mahogany, Cherry, and beech. I did not use any finish on this build, nor do I intend to. Again Mates THANKS SO MUCH for your kind words. Regards,