md1400cs
-
Posts
2,860 -
Joined
-
Last visited
Content Type
Profiles
Forums
Gallery
Events
Everything posted by md1400cs
-
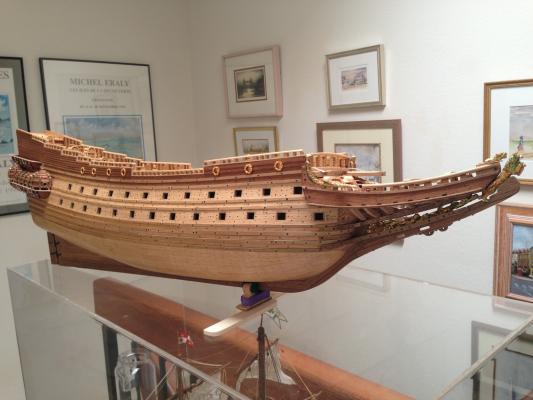
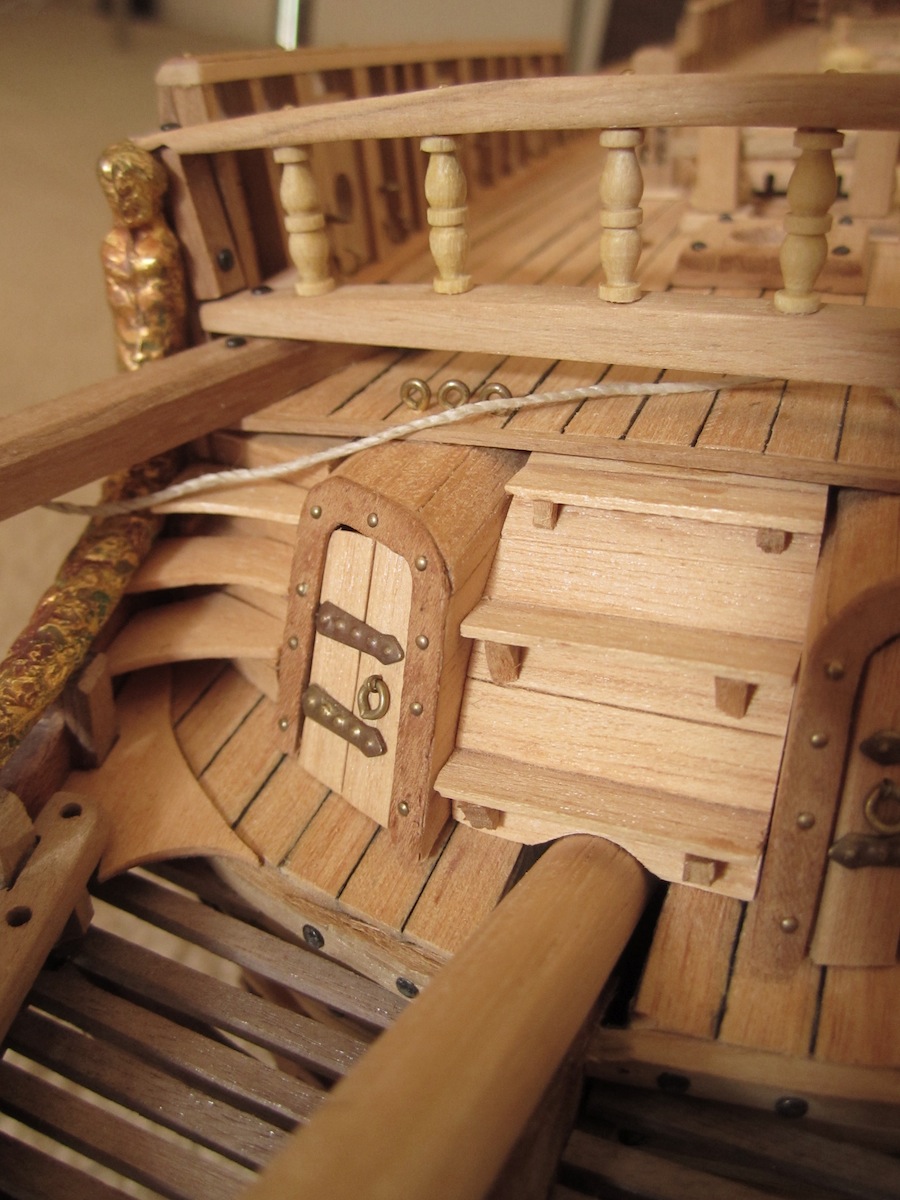
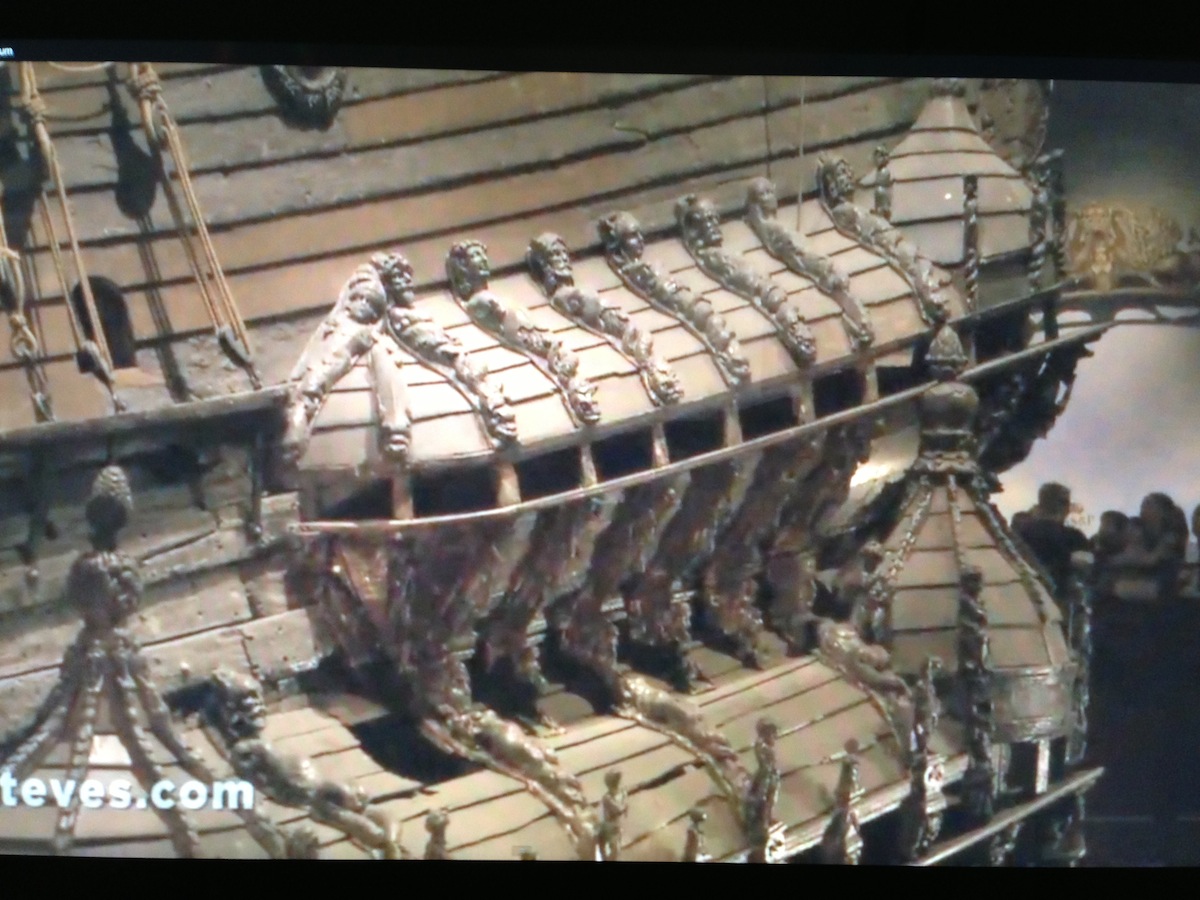
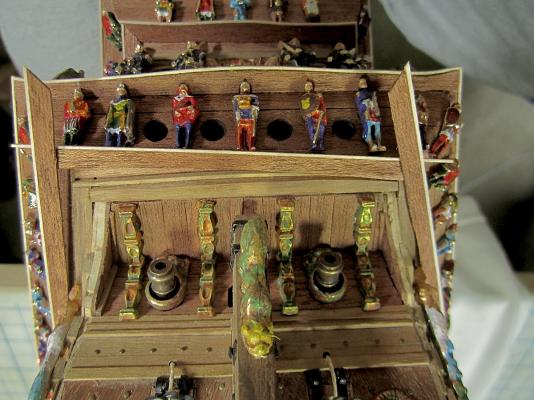
 Matti, Hi. did you by any chance take a good photo of the stern deck? I need to detail the wood framing at the very stern of the deck. This is the best photo that I have. But I think that I am missing some details. Can you help? Thanks in advance. Michael
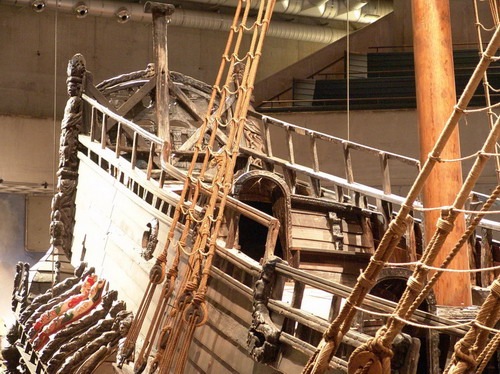
-
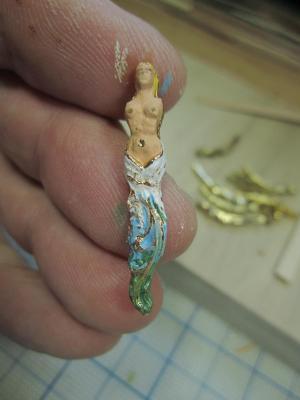
Daniel, Spectacular. The dime puts this amazing art work into perspective. Whoa!! Regards, Michael D
-
Love your sails (:-) She will be a real beauty. Regards, Michael
-
JPett, Your planking looks so good. Very nice touches using various lengths of planks, really looks nice. I also really like your separate timbers for your keel members along the longitudinal length. The cuts are so great. Nice details. I'm enjoying following your build. Regards Michael
-
Your capstan is spectacular. PS: Thanks for posting large format photos. They allow us to really see [and copy (:-)] your amazing work close up. Michael
-
Mark, That would be nice if you could dig up some info for us Vasa builders. PS: You folks who do scratch builds are like PHD rock stars. Your Licorne is so cool. I'm always so intimidated visiting the scratch build section, Though after a nice stiff single malt I always spend comfortable time there as well. You folks are so far ahead in this art form. Love the work...As you know there is a Victory build (Alexandru) that is so amazing.... Regards, Michael D
-
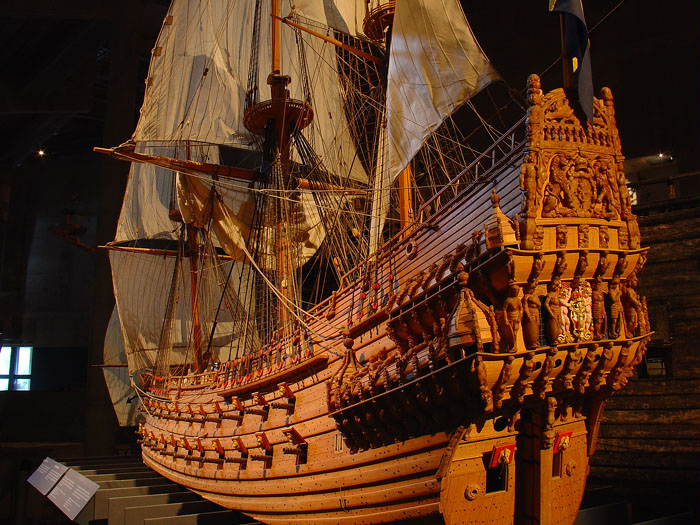
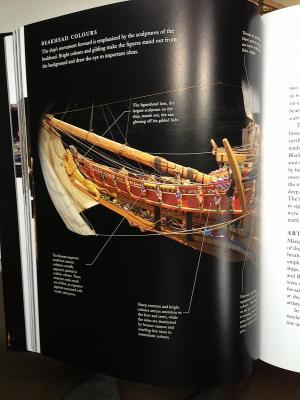
Brian, Hi, I dont think so. It seems that after many years of forensic analysis, the look of the painted 1:10th is supposedly very accurate to the original. The data are very clear about this. Which, of course, makes this ship almost impossible to fully paint accurately in a 1:75th model. Just the white scalloping of the gallerie tops would drive a model builder of off a roof. The museum 1:10th is continually being updated as the research discovers new paint details from the original timbers, and figures. When the museum first opened the 1:10th was not painted at all. It was just replicated in wood. Each year they would add more colors to the model, as the information became available. Regards, Michael D
-
Ferit, Of course, I should have known that you would take the original hinges, and do a tremendous amount of alterations to make them perfect. I looked again on your build this morning and realized that you also added the nails. That is why they looked so "not Corel". So you did not only add nails you also completely redesigned the hinges. Perfect solution. The amount of extra detail that you are incorporating into this kit is really of such high quality. It is so impressive. By-the-way you have been receiving responses from builders who "walk on water" and the lake is not frozen. Silly USA type of joke, but it is a big compliment, especially from master artists who post on MSW (:-) Congratulations. Your artistic skills are so amazing. Love your vision of how you want this ship to be. You are right with the Vasa, it is much easier to represent the look of the actual ship. In your case your artistic mind is your guide. A good guide for sure. Regards, Michael D
-
Matti, Buck and Andy are correct. Don't be discouraged with the "few" responses. There certainly is a lot of interest with your build. If you want to play a numbers game, there are some people on this forum who have over 10,000 views and only a 5%+response return. You are right in-line with most others. I also assume that you also visit other builds, as I do, but do not necessarily post remaks with every view. Many certainly visit silently. Your build is very interesting, especially given that it is the Billings kit. I think that all other Wasas are currently Corels. Your build is excellent, a pleasure to look in as you update your progress. I'm speaking as a newbie as well, but I already have very good feelings about some of the very creative and artistic people who have responded to my build, as you have...It's a very nice back-and-forth kind of thing. It takes a while, don't get discouraged, what Buck and Andy said is certainly true. Please keep us up-to-date on your progress. But, I get it artists are sensitive (:-) Regards, Michael D
-
R K, EXCELLENT ! 3D printing is the absolute future of printing. Nice to see its application in your build. Now if only HPQ understood this, its stock would soar, as it did in the early days of dot metrix. There are other companies that are only working with this tech, DDD is one of them, as is NOVO (but they are a BB stock) their application is in the medical field for surgeons (this sector will be huge). Sorry a bit "off topic" but I am so interested in this, the absolute next tech. revolution. I will follow your build with great interest. And the S Trinidad is a beautiful ship. I purchased the OcCre cross-section, it will be my next project. Regards, Michael D
-
Hello Ferit, I discovered your Build after you were kind enough to visit my Wasa (so happy you looked in). I clicked on your link, and I am super impressed. The level of added details, the rebuilding of "kit included" parts is so excellent. This Berlin will be indeed very special. I must have spent an hour looking over your entire log to date. I downloaded and put into folders several of your ideas to help me with my project. Thanks for sharing. Your custom building of the window frames, windows, canon carriages, furniture, barrels, doors (so perfect), canon doors, bilge pump, long boat, bowsprit, hull planking, and so on...Really a beautiful project. I will follow your build with pleasure. Oh, I have a question. Your canon door hinges; are they the Corel, from the kit ones? They look too good and correct to be from the kit. Regards, Michael D
-
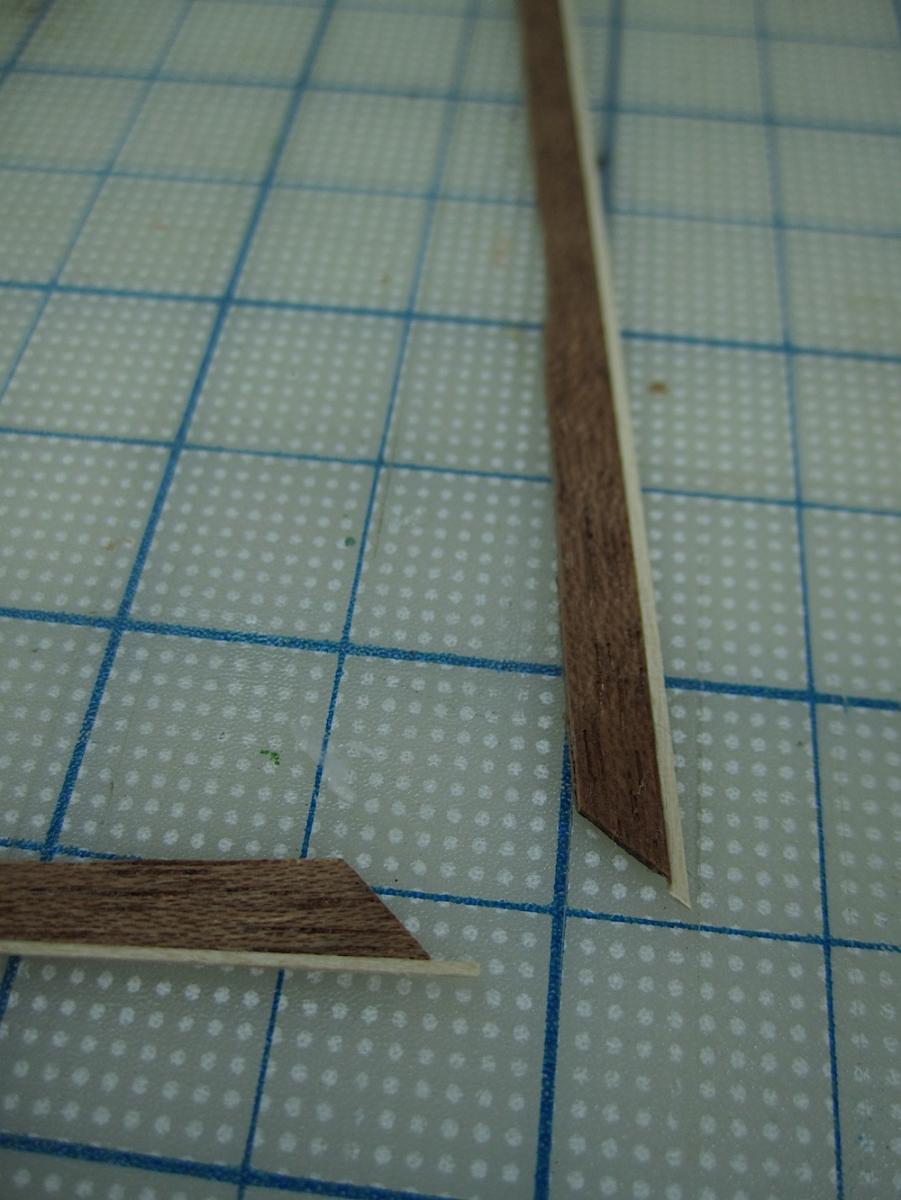
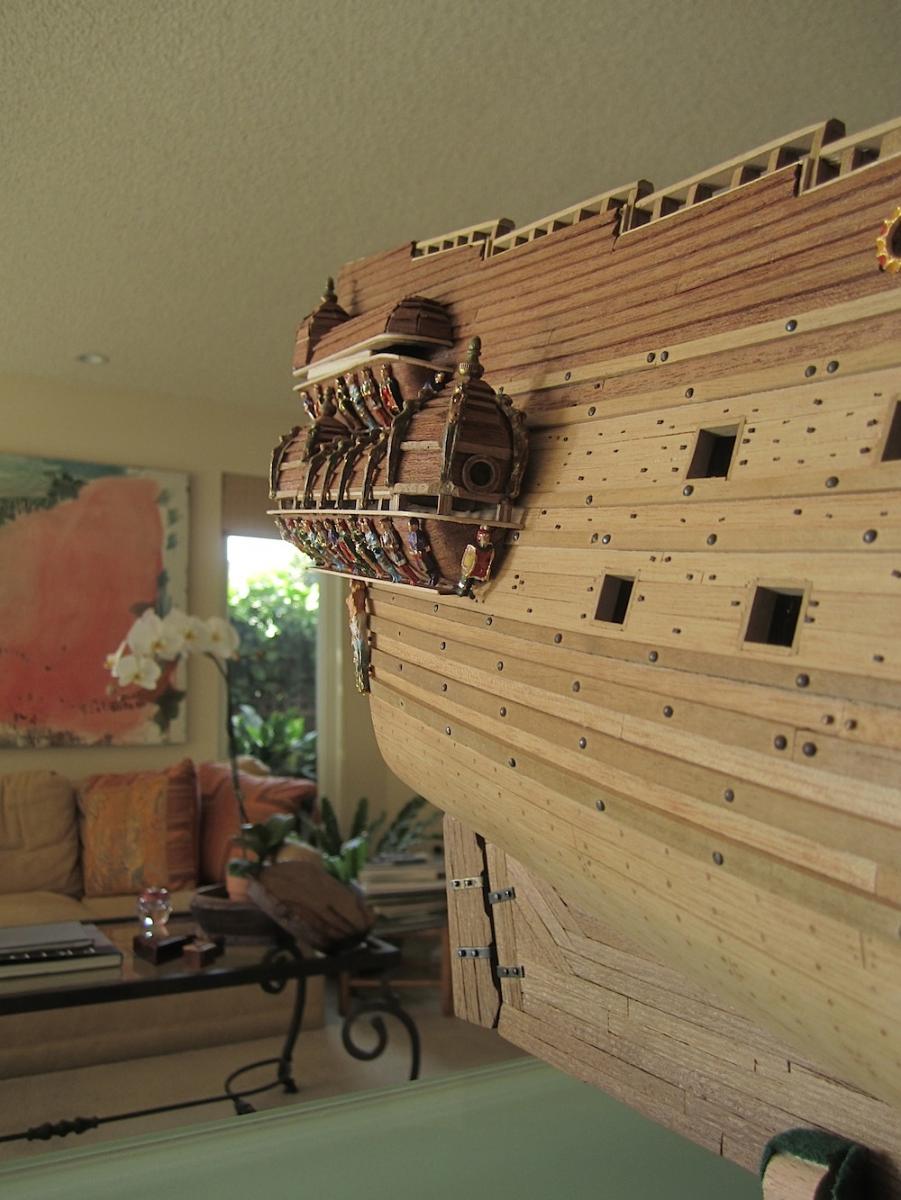
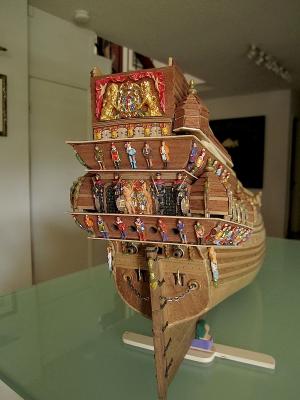
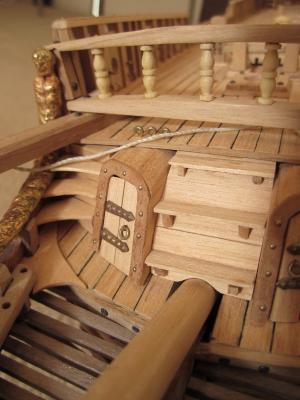
Bender, thank you - coming from you, that is a huge compliment, much appreciated ! Some minor updates, but I think that they help to formally complete the look of stern. One upper gallery is finished and needs to be attached. I have put together a log of how these were put together. I will post that build section soon. I hope that it will be useful to Wasa builders. It sure made the process much easier for me. I wish I had thought of that with the lower galleries. Learning as I'm going on..... Regards, Michael D where I left off last time trim pieces with thin basswood highlights positioning and making sure angles are correct


-
Gimo, This build has been such a pleasure for all of our eyes and minds. Thanks for sharing your superlative skills. As a novice builder, I'm somewhat out-of-place offering a suggestion but, here goes; After I took a photo of the stern of my current build something glared at me. The insides of the two stern brass canon barrels were all shiny. I took a small paint brush and painted the iside of the barrels with flat black, wiped off the tip flange, and there irritant gone. It then looked, in my opinion, more appropriate. I notice that the inside of your barrels are also shiny. (:-) PS: My problem; again, its not for me, as a second kit builder, to even offer any advice on such a beautiful work of art. It's just a thought (:-) I will do the same for all of the 60+ canons for mine when I get there. Respectfully, Michael D
-
Hi Rodger, Just came across your build. Super nice. Your sails are really works of art. Capt. Steve's remarks are perfect ! Your ship is bringing back all sorts of memories for me. This Mantua SM was my first build about 40 years ago. I am now only on my second build. My then young wife used her sowing machine to stich the kit provided sails (:-) I will follow your build. It is looking really spectacular. Again love the sails. Regards, Michael D
- 39 replies
-
- 1
-

-
- santa maria
- mantua
- (and 1 more)
-
Laps, Regarding your nail search. You may want to try this source. I assume that they ship Internationally. I have used these on my build. http://www.micromark.com/SearchResult.aspx?deptIdFilter=0&searchPhrase=nails I'm enjoying your AV. Looks really good. Regards, Michael D
-
As many of us are sounding very repetitious--- Beautiful !!!! Your work is stunning. Regards, Michael
-
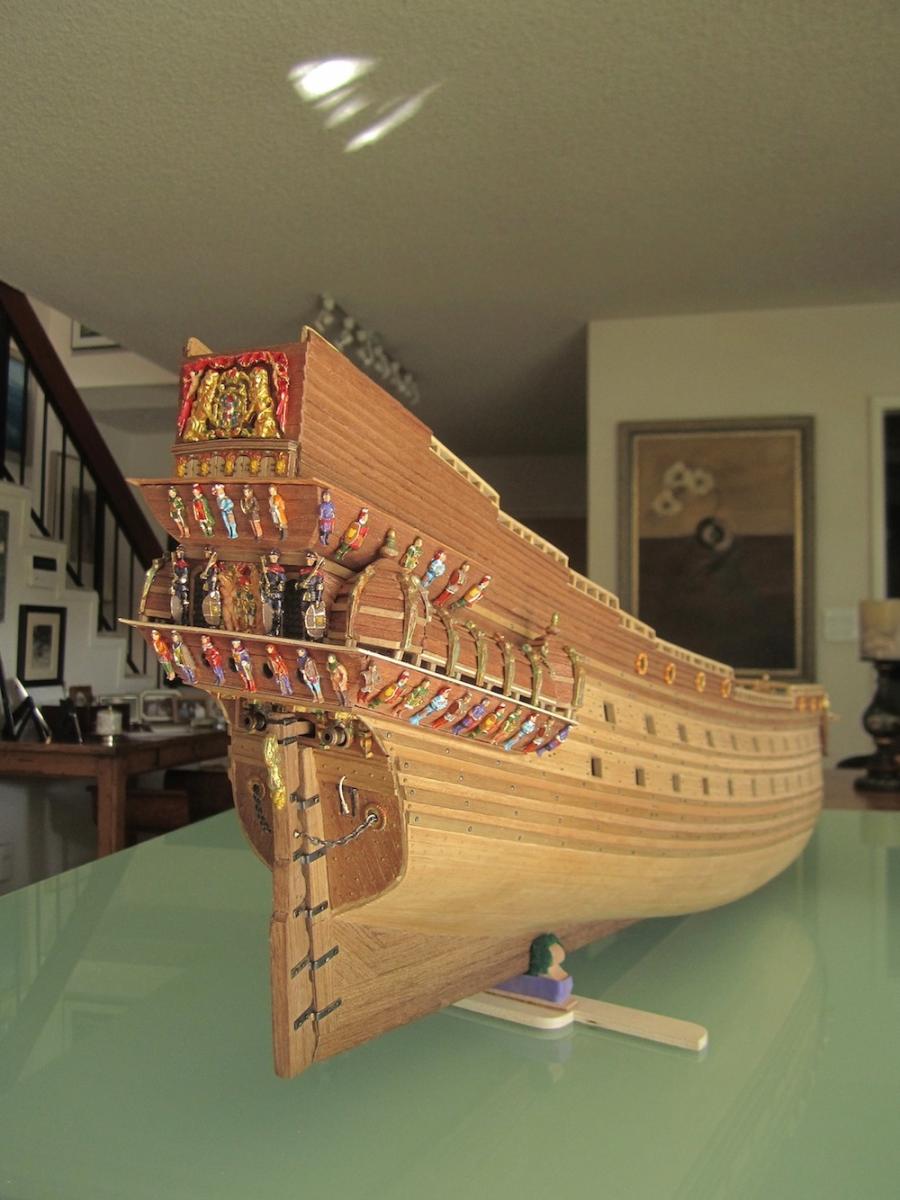
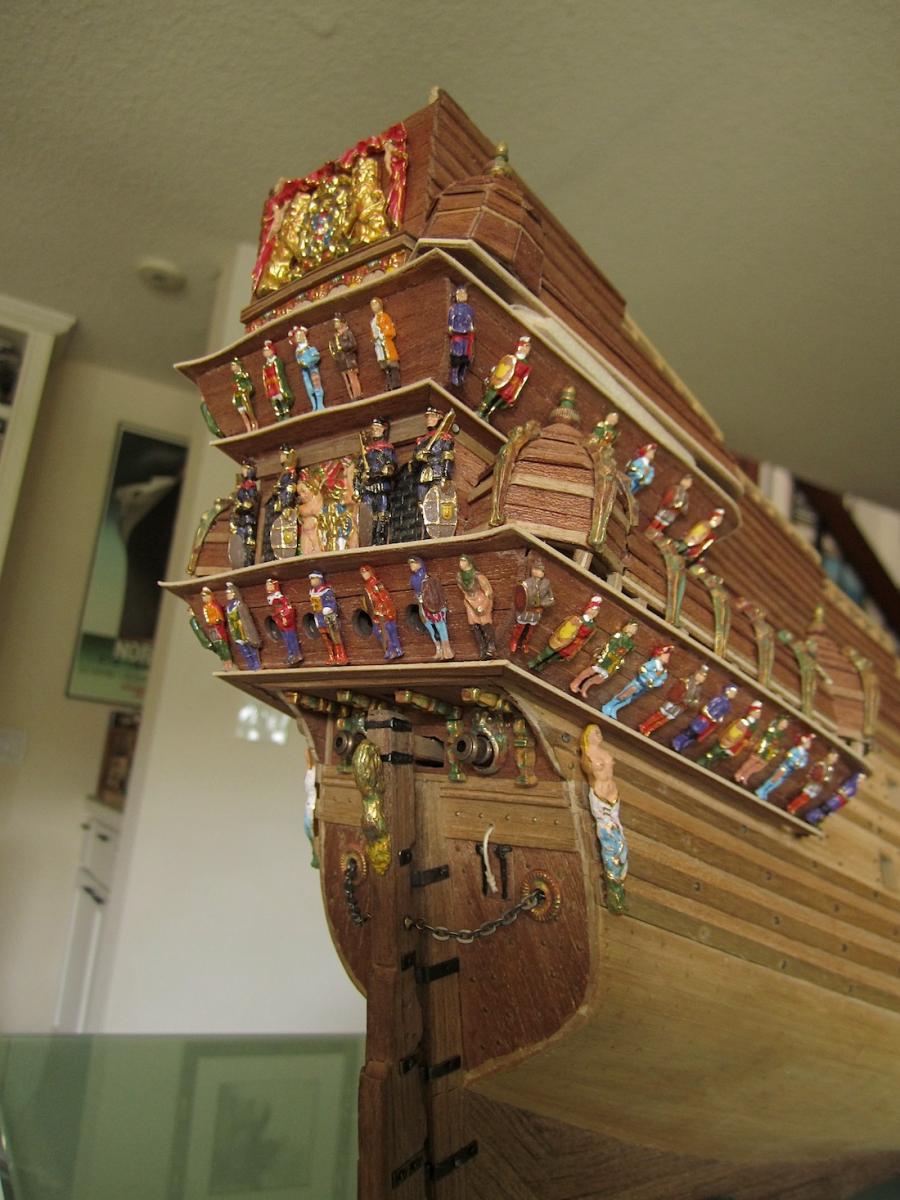
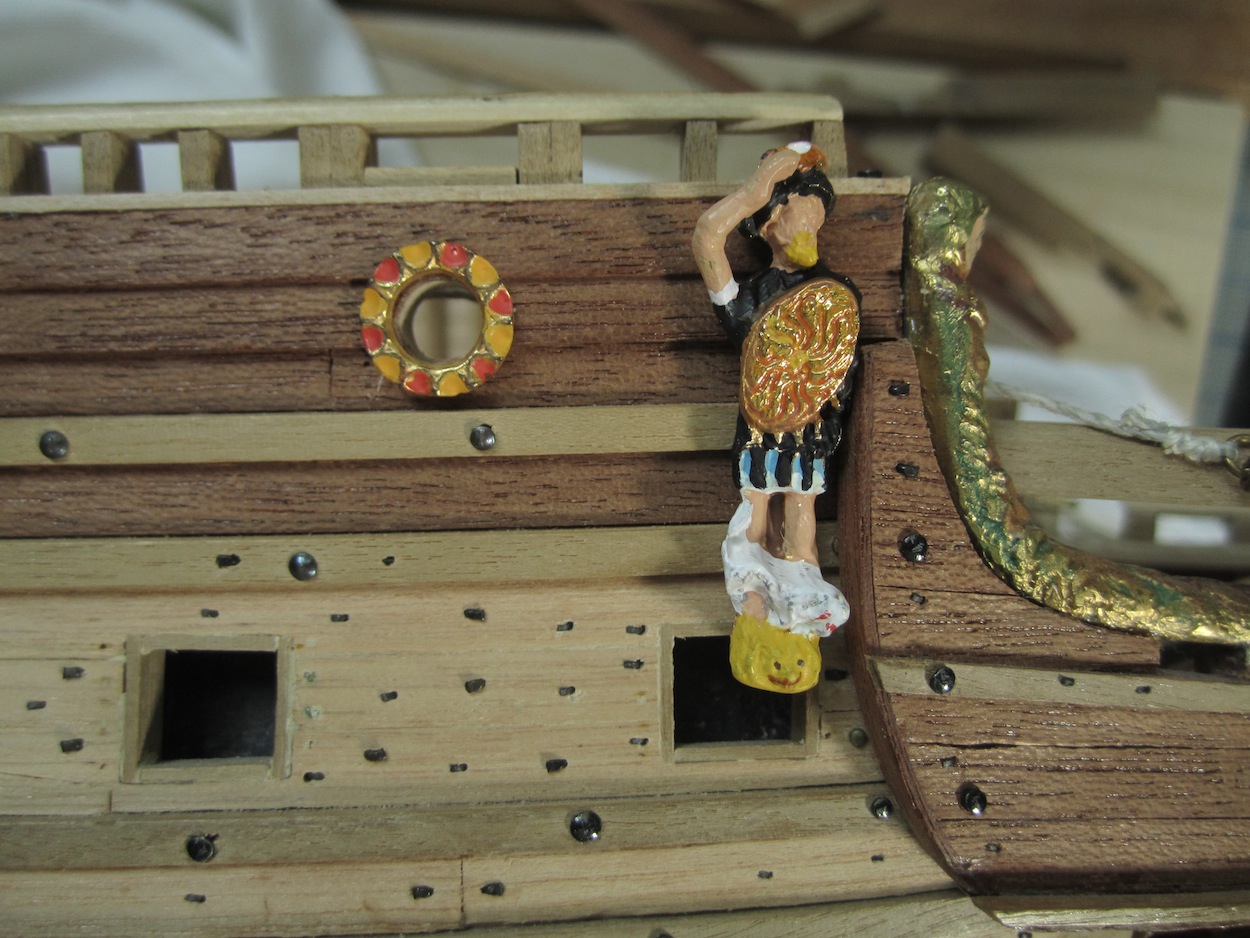
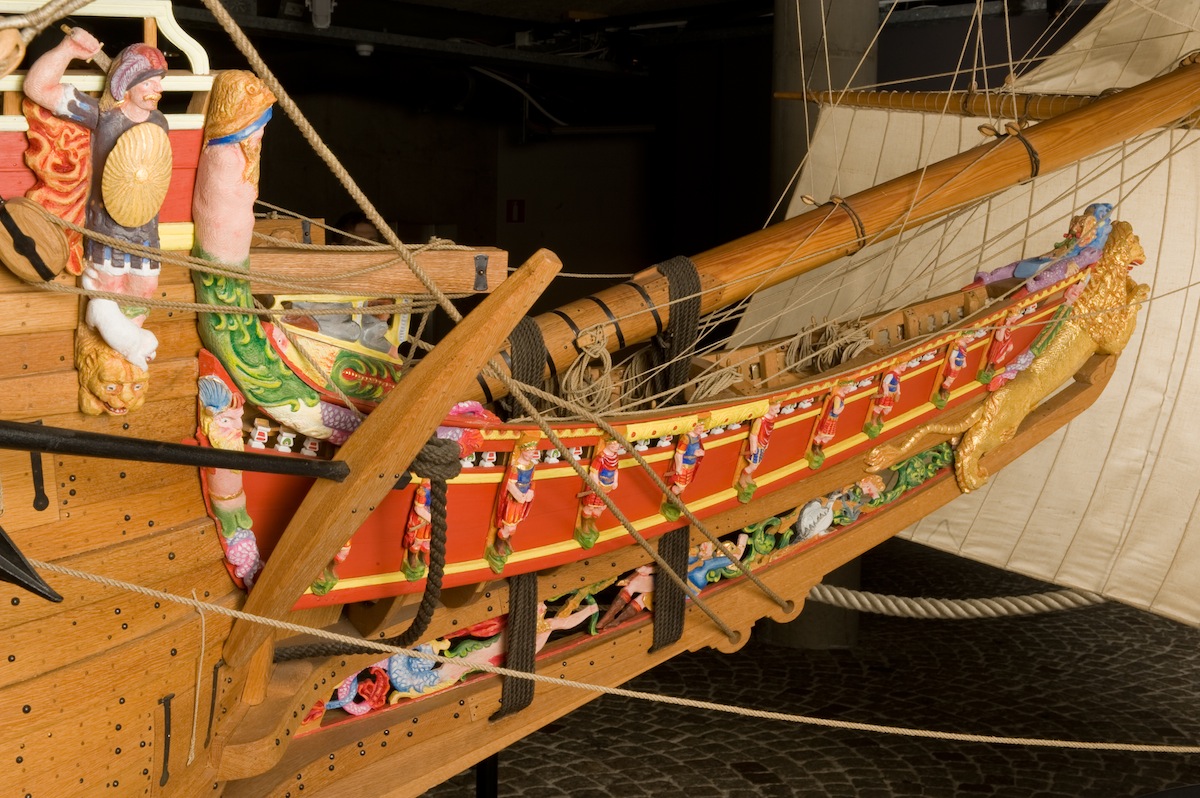
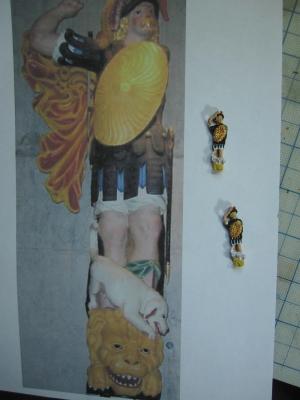
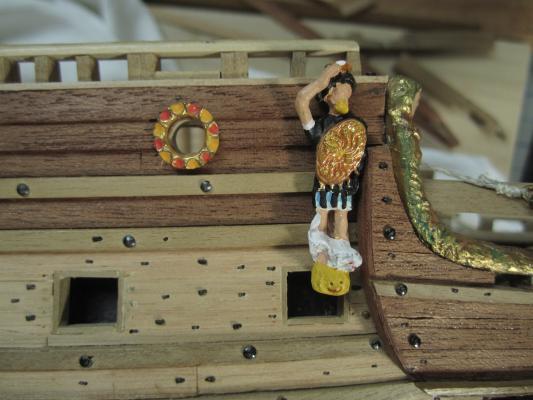
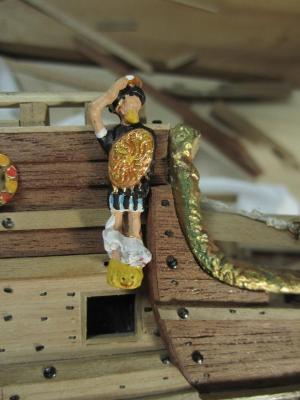
Hi, P.Pett thanks PS: your Rattlesnake is sure impressive (:-) Your written posts are so informative as well. Lot's of learning going on, on my end... So I decided to remove the bow figures and paint them. After painting those two other soldiers the bow figures looked "off" I now think that I have nourished my paint needs for now. Gallery WILL be next. I need to move on...Here are a a few pics of the change. Thanks for looking in Corel figure a bit diff. but closeintimidating 1:10th source for painting


-
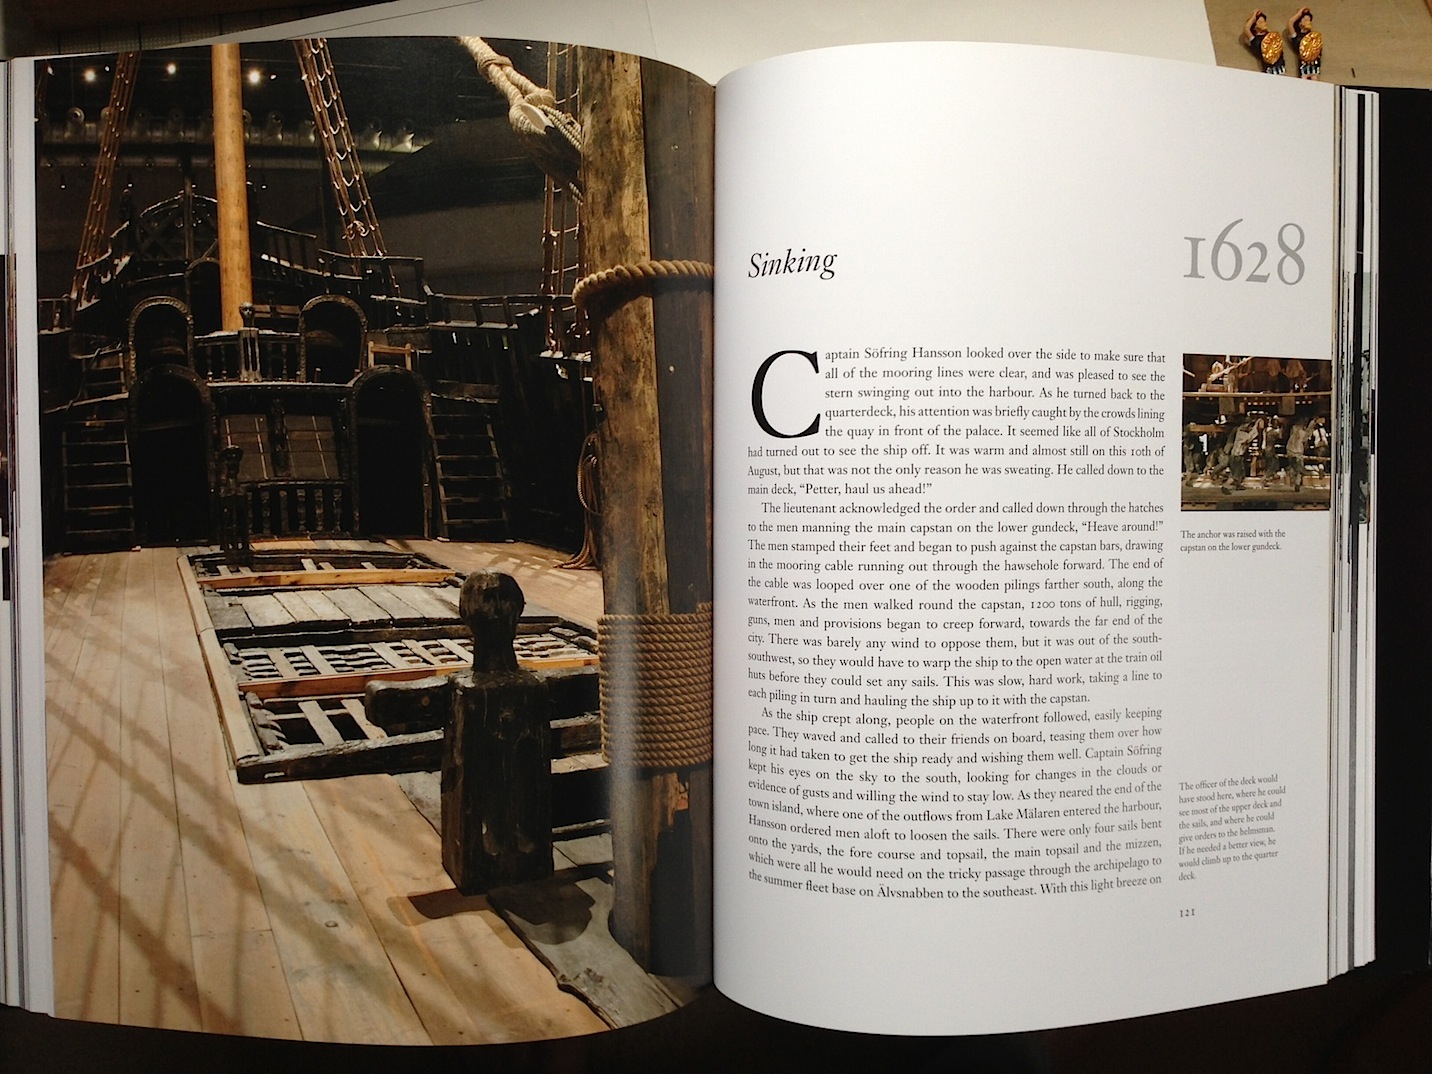
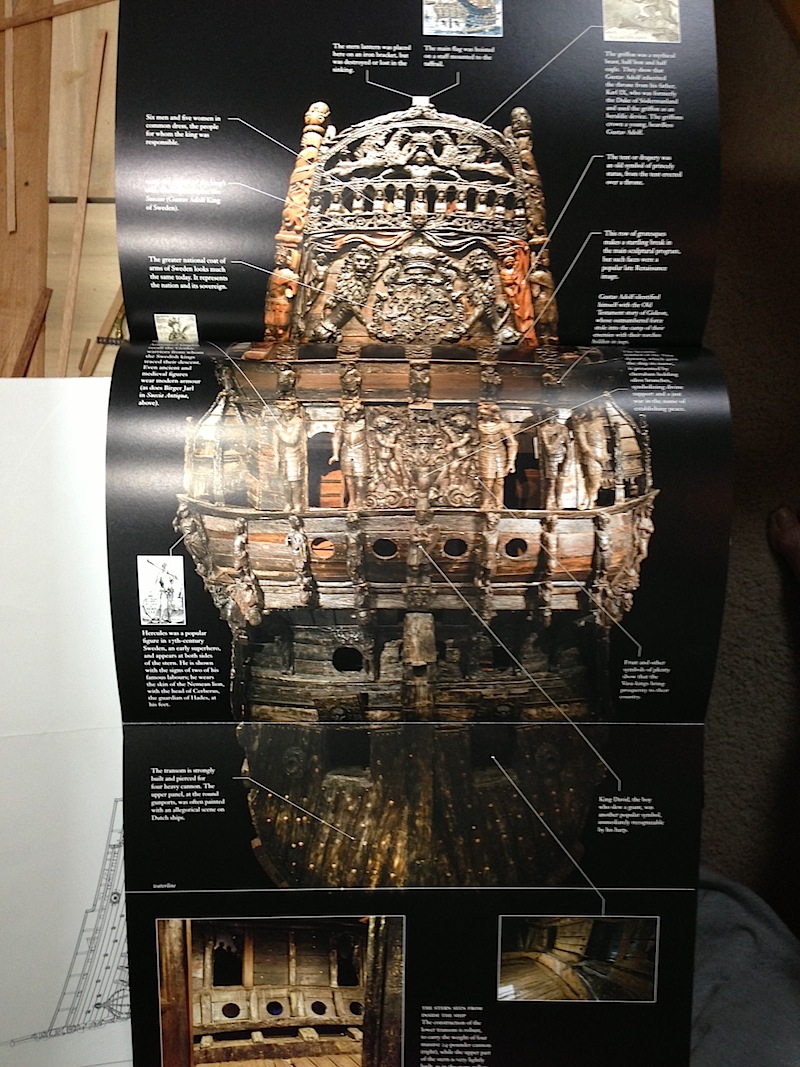
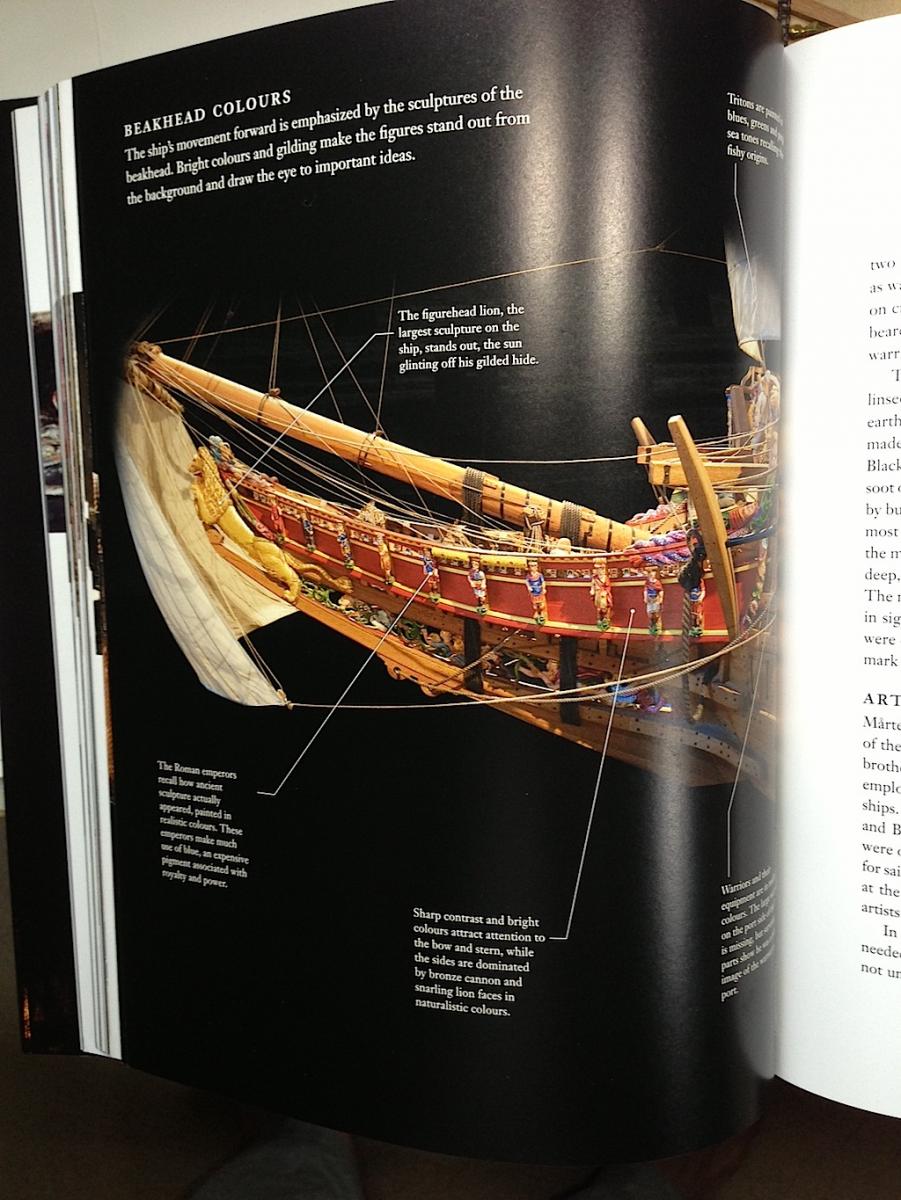
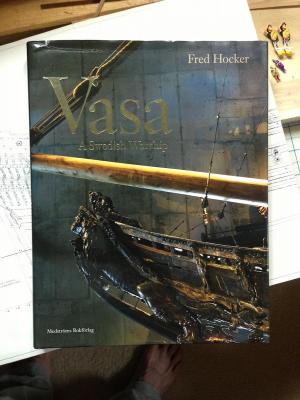
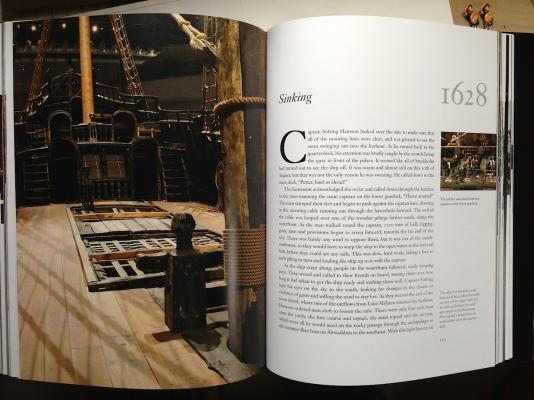
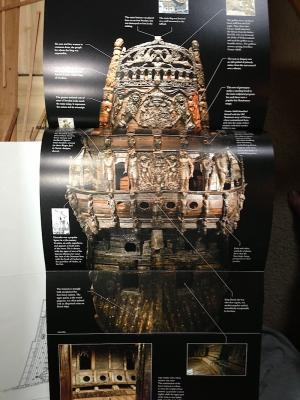
Matti, You probably already know about this book, as it is published in Sweden. I just received it after ordering it three months ago. It is a great read, as well as an excellent reference. Here are some pics in case you did not know of it. PS: I do also have the first book from the Vasa Museum (Vasa 1) excellent as well. Regards Michael
-
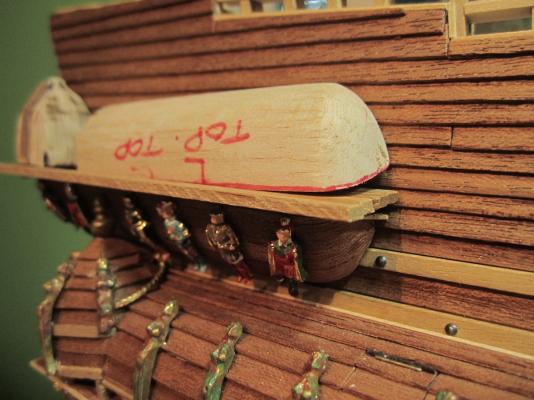
Matti, Hi. Thanks for your kind words. Yes have fun with the mermaids when you paint them. No, actually I was not going to paint the figures as "wood" but my original intentions were to "age" look all of the metal figures as I have done with the bobbinet and overhead gallery figures. Then I got motivated to paint all of the other figures/soldiers after responding to several posts asking me about it. Yes I did think of leaving those forward canon doors closed. It's a good idea. Nonetheless I would need to attach those two figure higher so that if the doors were to be opened, the canon could be moved forward. PS: I will repaint the lions that the soldiers are standing on. Those "happy faces" have to go (:-) Take care. Regards, Michael
-
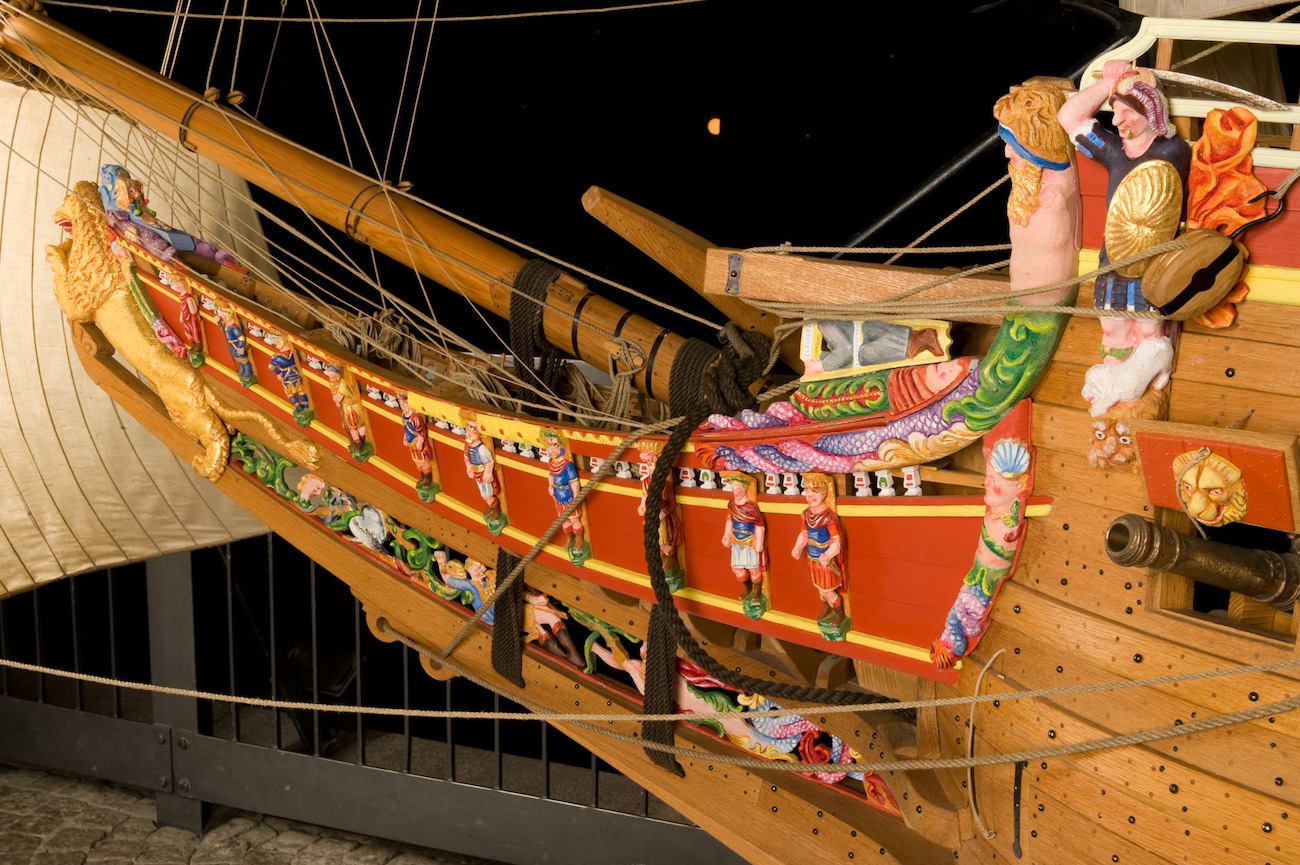
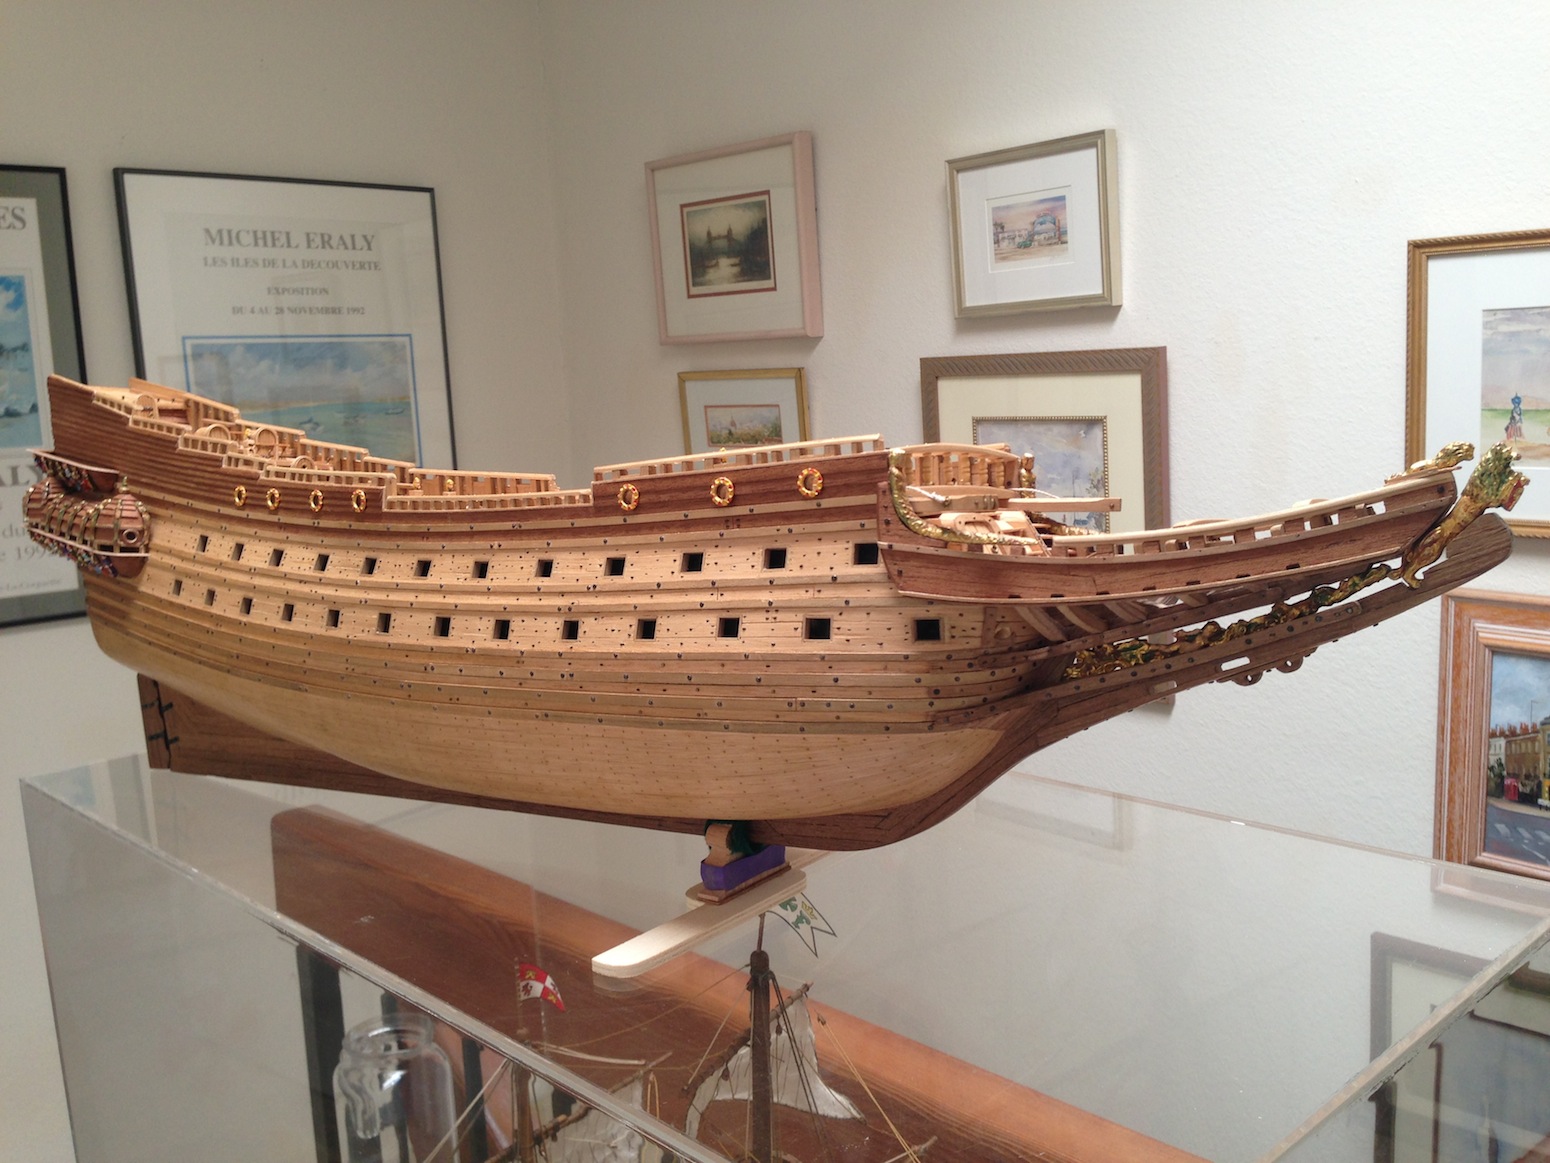
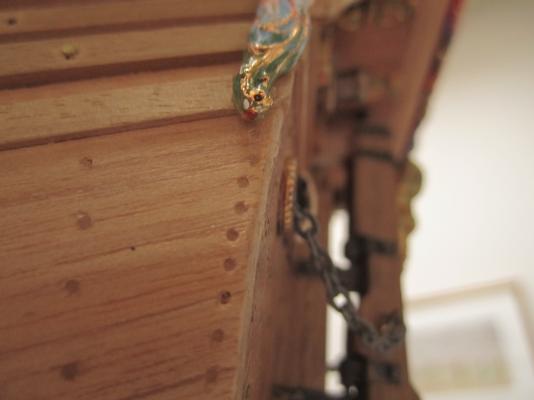
Matti, Thanks for the pic of the stern lantern. She was a beautiful ship. Regarding the nails, I thought about it and it turns out that those nails were the smallest available in black. There are many brass nails that are more the correct size, but I would then need to paint each nail head, The paint would probably rub off during further work. Thanks for your thoughts, I may just leave it as is. Still thinking about it.... Are you familiar with this web site? The first two Wasa's are really beautiful. Also as you enter those pages you can click on each photo more than one to get super close ups in HD. The Corel with sails is really nice. The hand-built is also spectacular. The more and more that I looked at it the more I thought that it was incredible. This builder got every detail correct. You will get a lot of information by enjoying the photos. http://www.finemodelships.com/Ship-models-for-sale.htm Regards, Michael
-
Hi, Every-time that I look in on your updates I end up going back, once more, to see some of the earlier work that you have done on this ship. Such a beauty. Your skill set with fine wood detailing is just so nice to look at. This is such a complicated project, so impressive. A real pleasure. Thanks for sharing. Regards, Michael
- 115 replies
-
- 1
-
-
- reale de france
- corel
- (and 1 more)
-
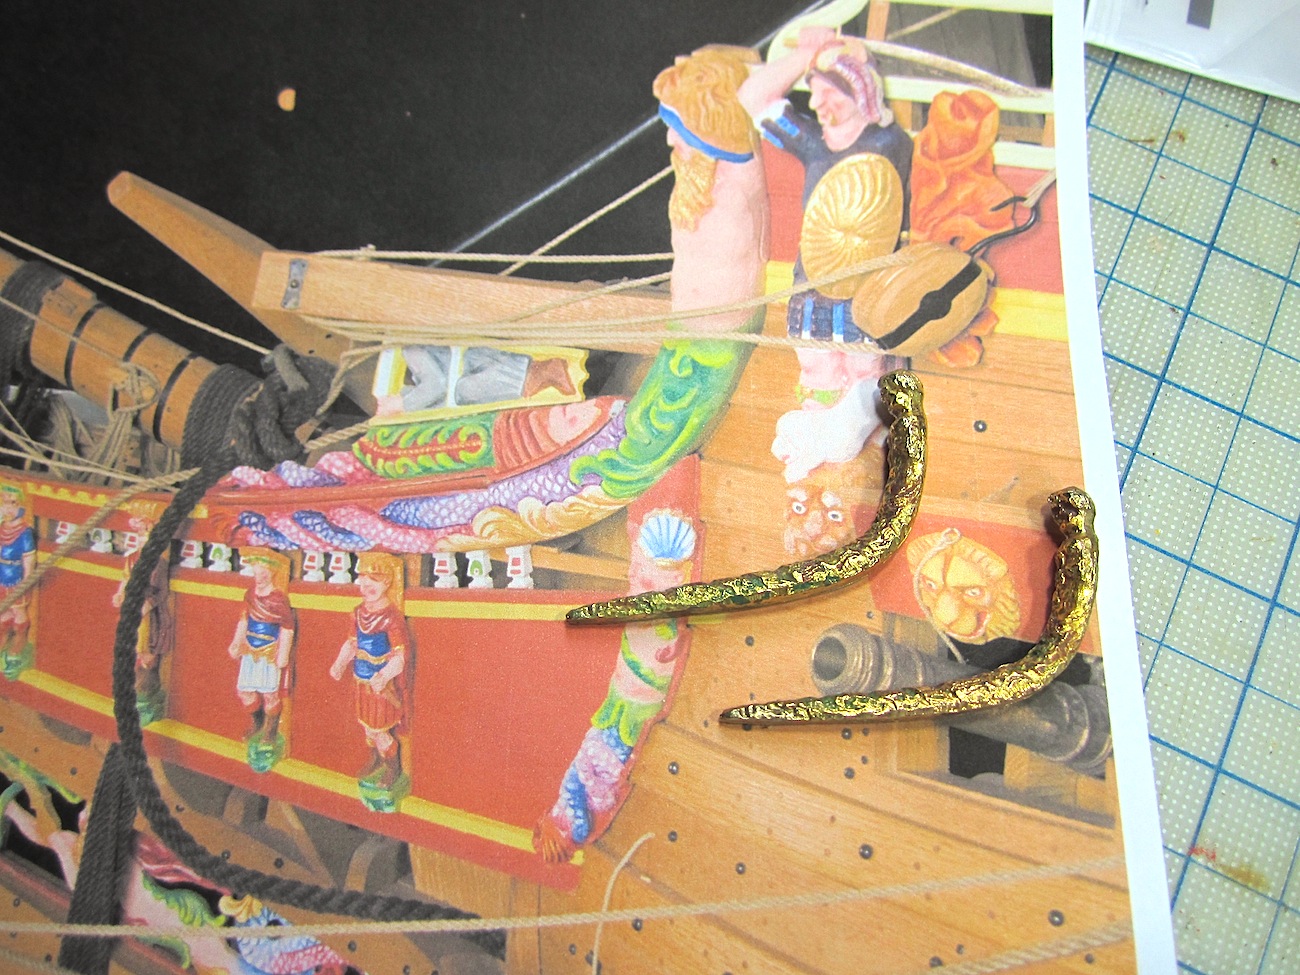
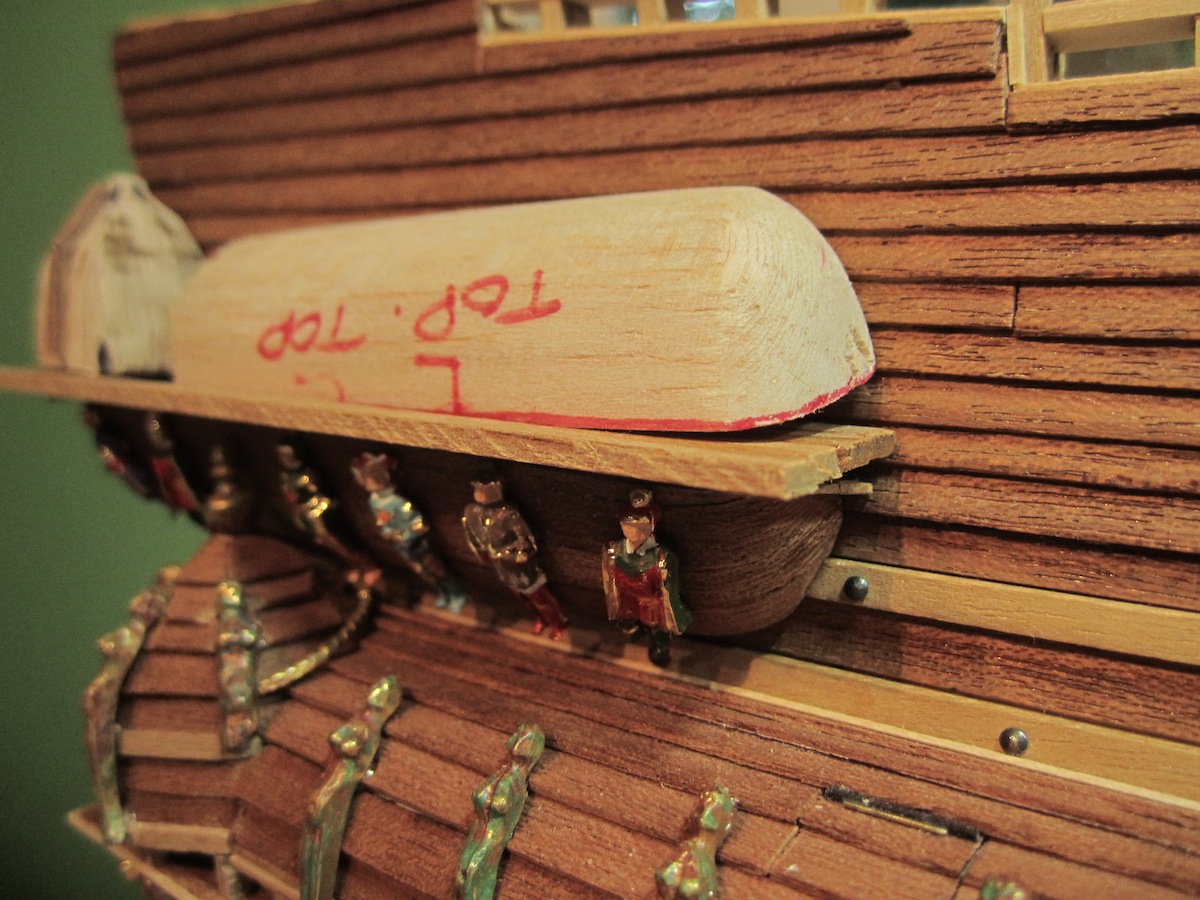
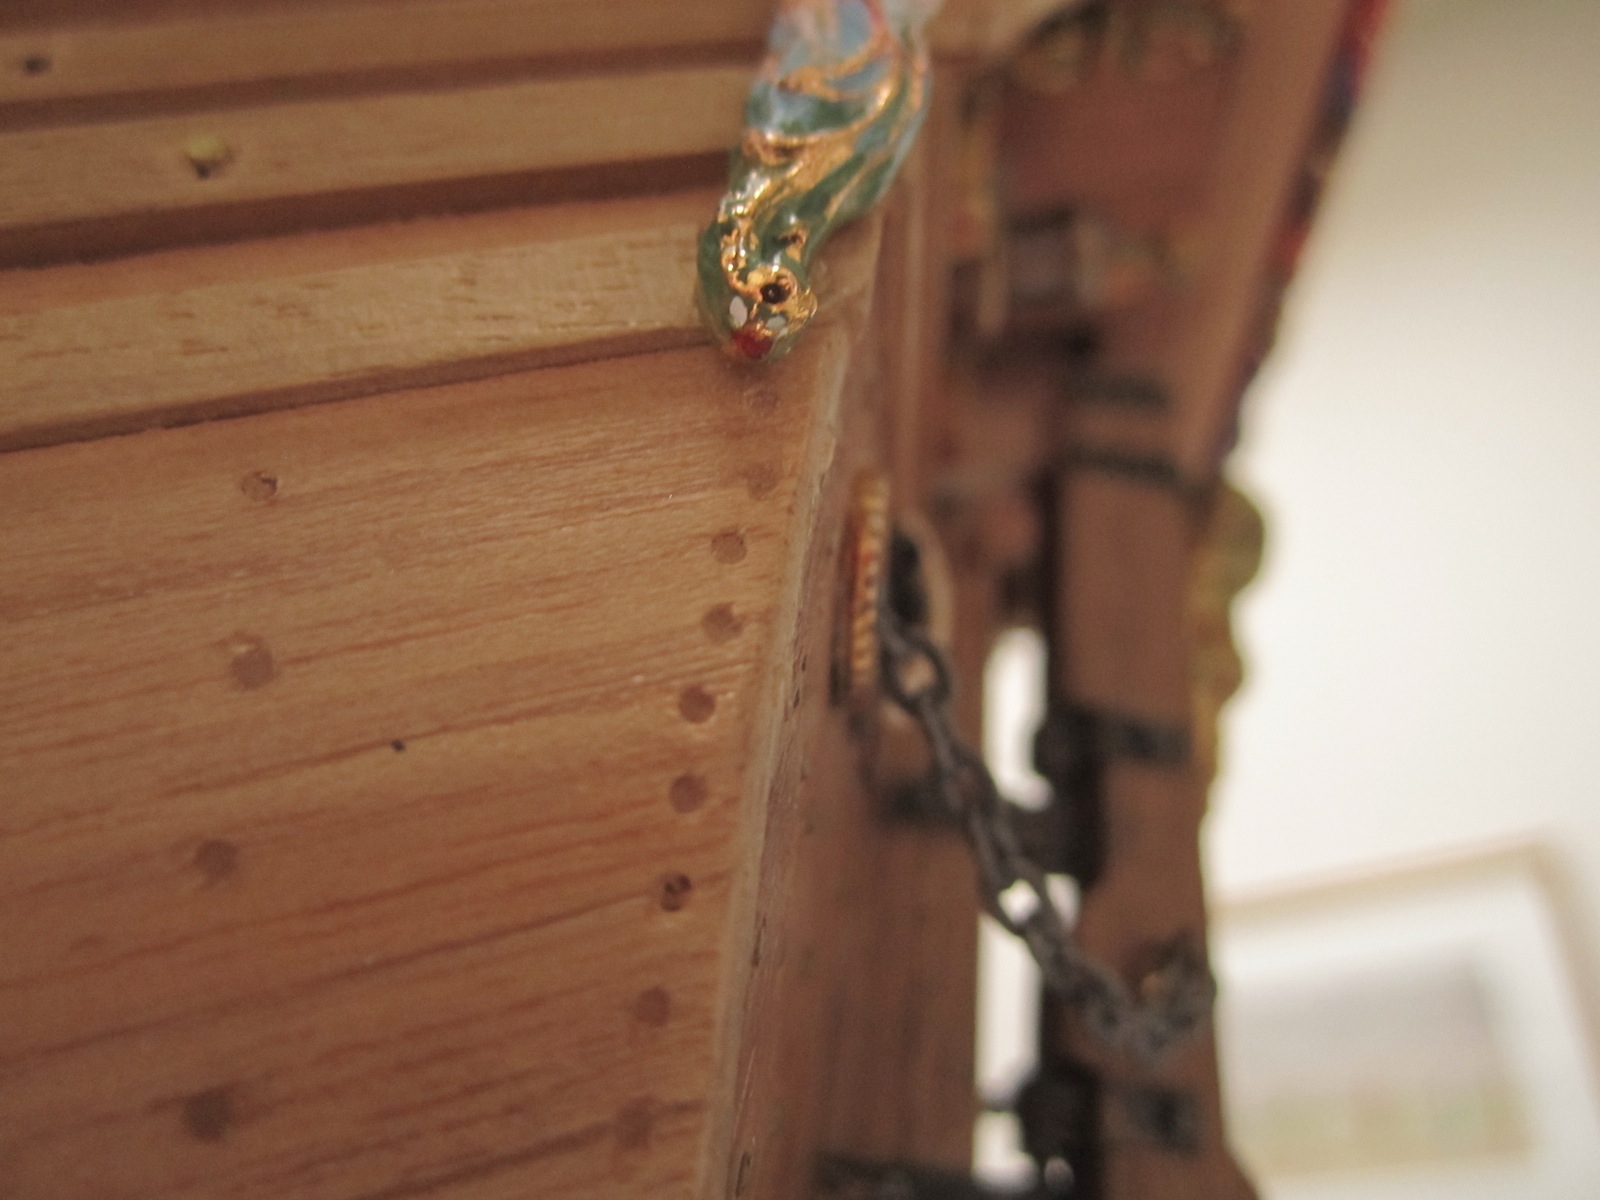
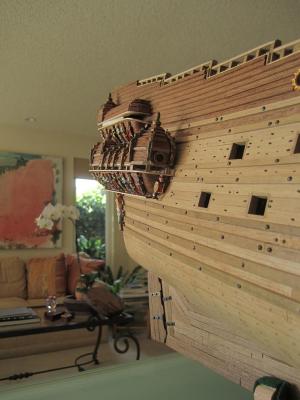
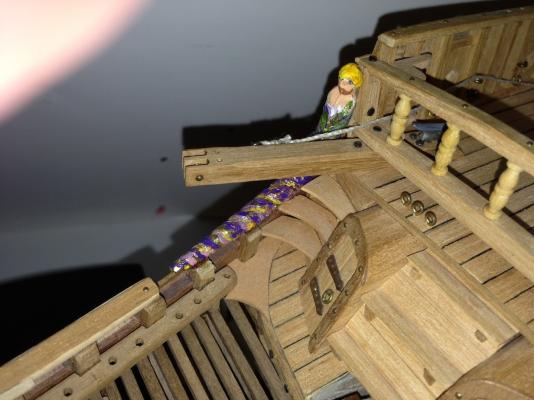
Hello again, I was intending to start working on the upper galleries, but.... turns out that the very upper bobbinets are not yet, mentally, within my sights. In the meantime I moved ahead with a couple more figures I'm hoping to follow this... I want to angle that first lower transverse bobbinet timber correctly. I need to reflect some more. Here is my first step Wasa had a bearded male. Corel gave us a mermaid? With apologies to Vasa purists - the gold belly button; I couldn't help myself (:-) the tip of the figure had some sort of sea monster; Corel was kind enough to include this at the tip of the mermaid. Figures on each side of the bow section. Hmmm here is a problem They should have been more space between the upper canon doors and the bowsprit superstructure. It should look like this. Oh well I will have to attach them much higher, to allow room for the canon door hinges as well as the door opening rope.


-
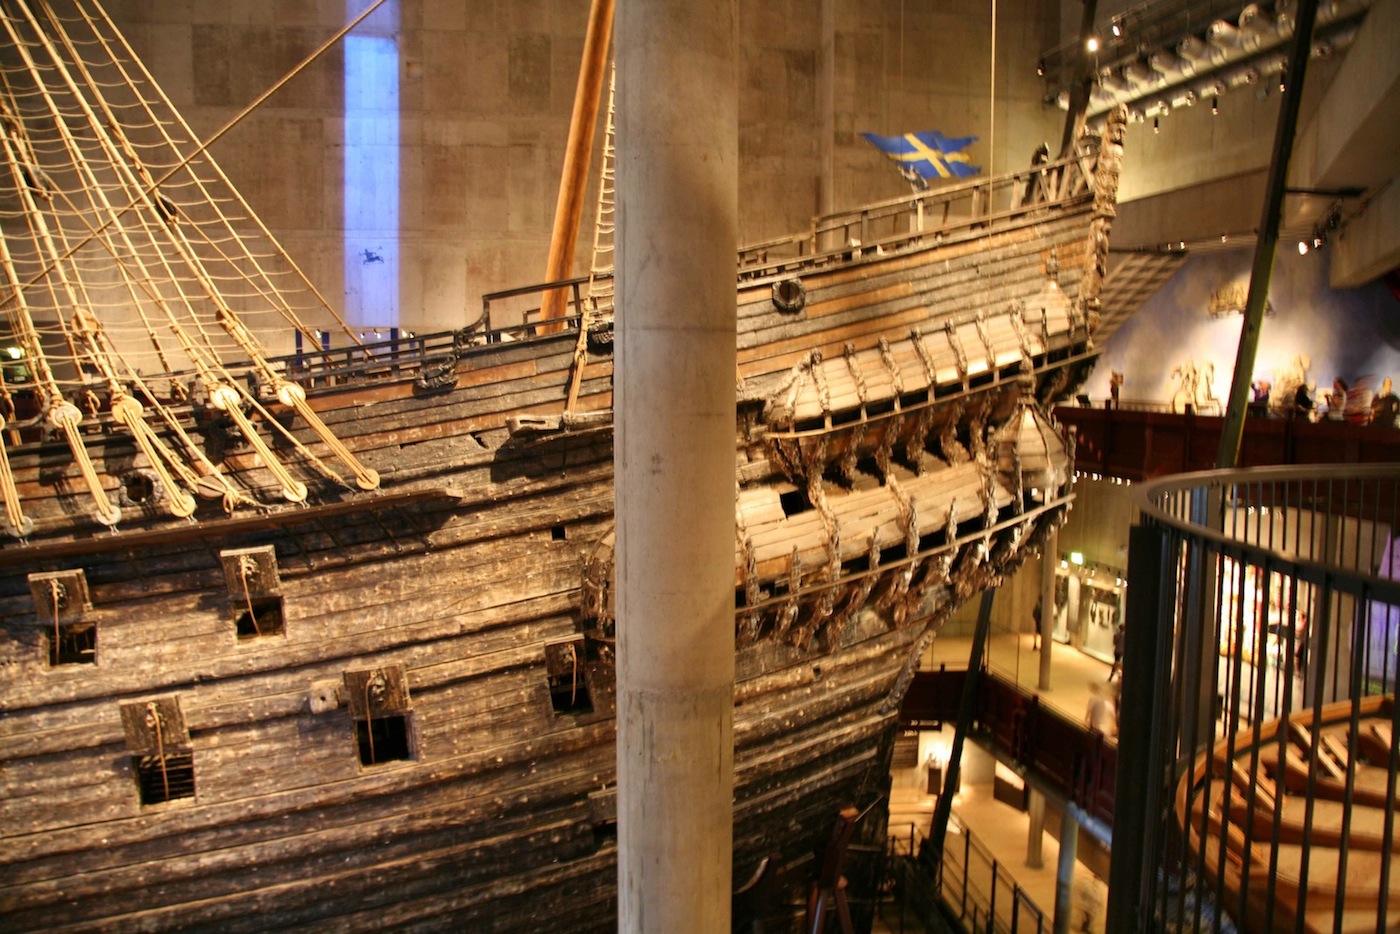
Matti, Great new pics. !! I added some to my files for later (poop deck detail) from the 1:10th. I was at the museum in the mid 90s. I understand that it was closed and has been enlarged and re-modeled. I also read that engineers had to add 1000s of new hull bolts to the ship. It was deteriorating too quickly. One thing that puzzles me. I have never seen an example of a Vasa stern lantern. I don't intend to use the Corel example, and I will certainly not anchor it to the middle of the poop deck. I have some ideas, but the examples available for sale are mostly from English or Spanish kits. Well that's for much later....If any of you have some thoughts that would be excellent. Regards. Michael
-
Need to pull those largest ones out... Brian, Hmmm you are right. these large timber nails are too large. My brain never saw it. Thanks. I'll pull them out and size them down. Now that "I see it" it irritates. Seen in full perspective they somewhat loose their out-of-scale" look but, good eye on your part thanks for pointing it out. Michael