md1400cs
-
Posts
2,870 -
Joined
-
Last visited
Content Type
Profiles
Forums
Gallery
Events
Everything posted by md1400cs
-
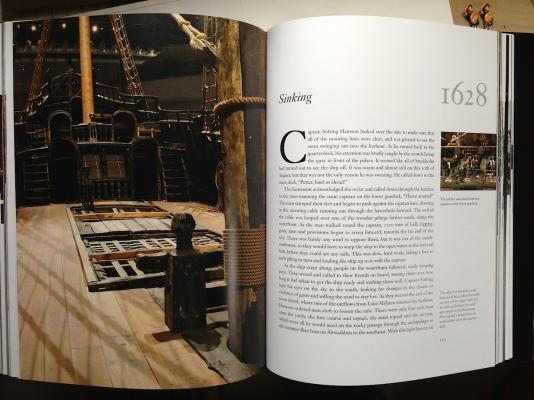
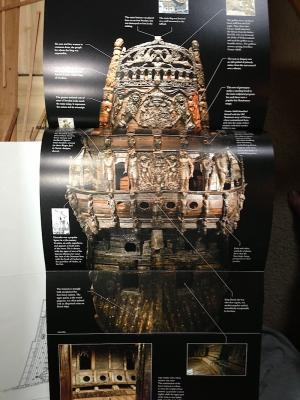
 Matti, You probably already know about this book, as it is published in Sweden. I just received it after ordering it three months ago. It is a great read, as well as an excellent reference. Here are some pics in case you did not know of it. PS: I do also have the first book from the Vasa Museum (Vasa 1) excellent as well. Regards Michael
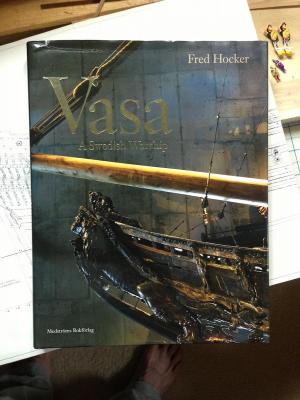
-
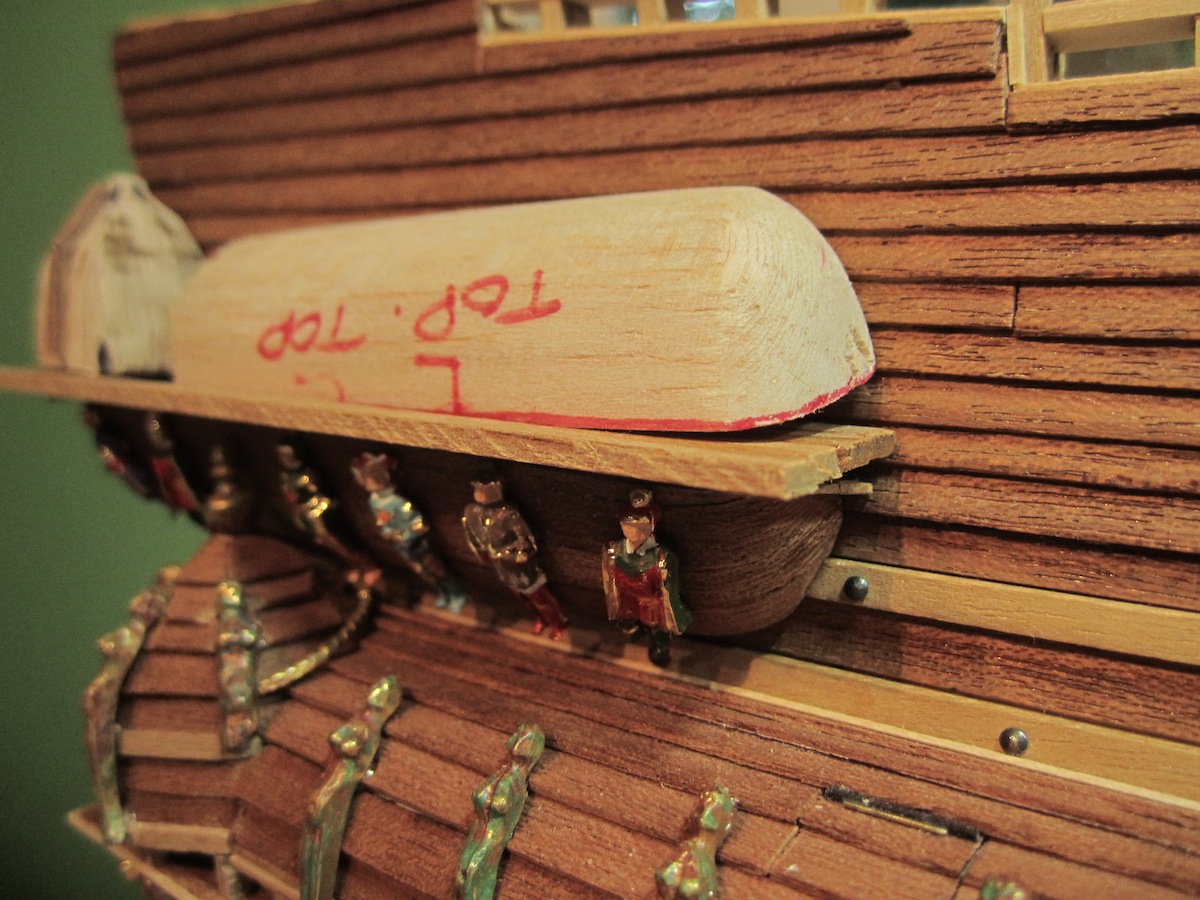
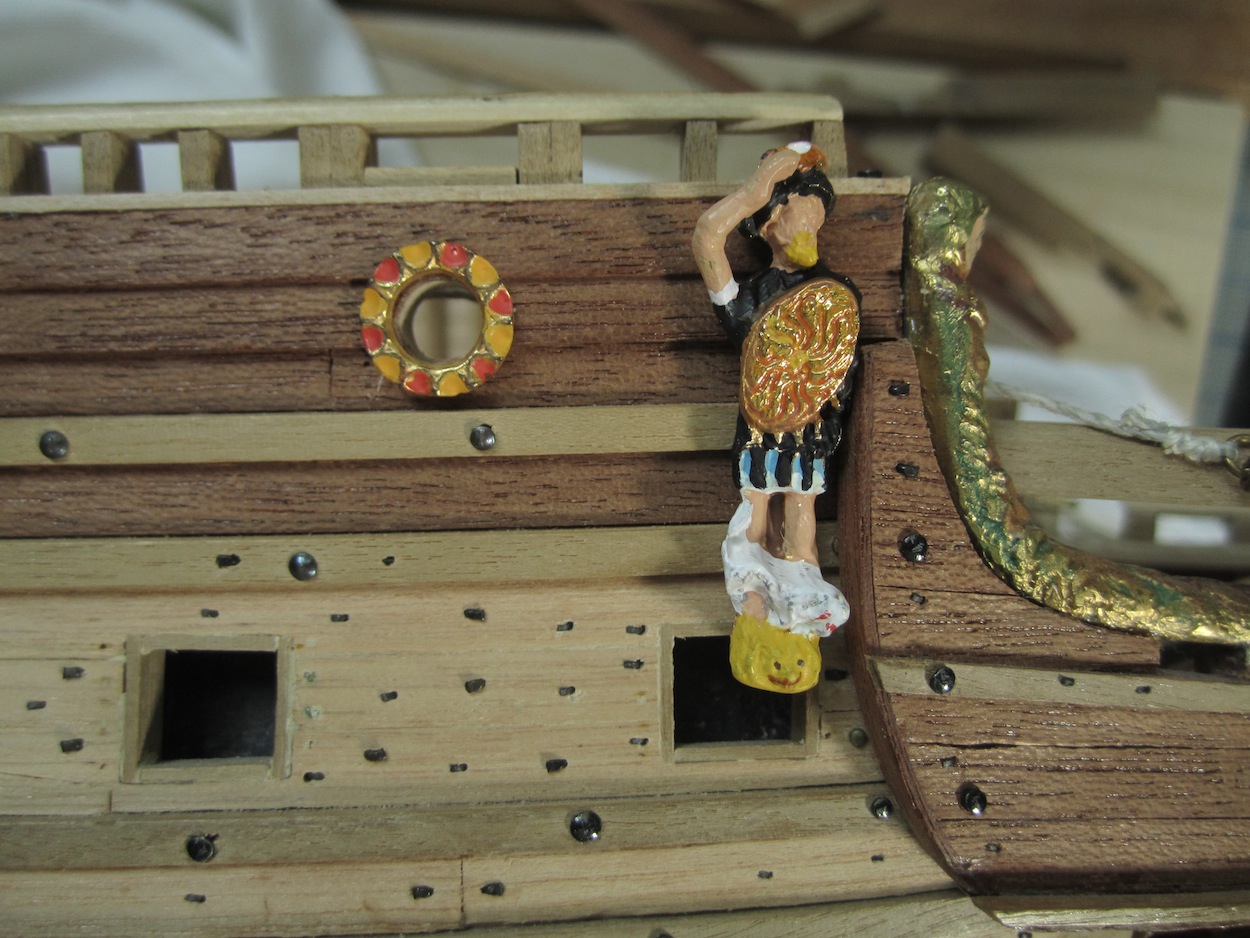
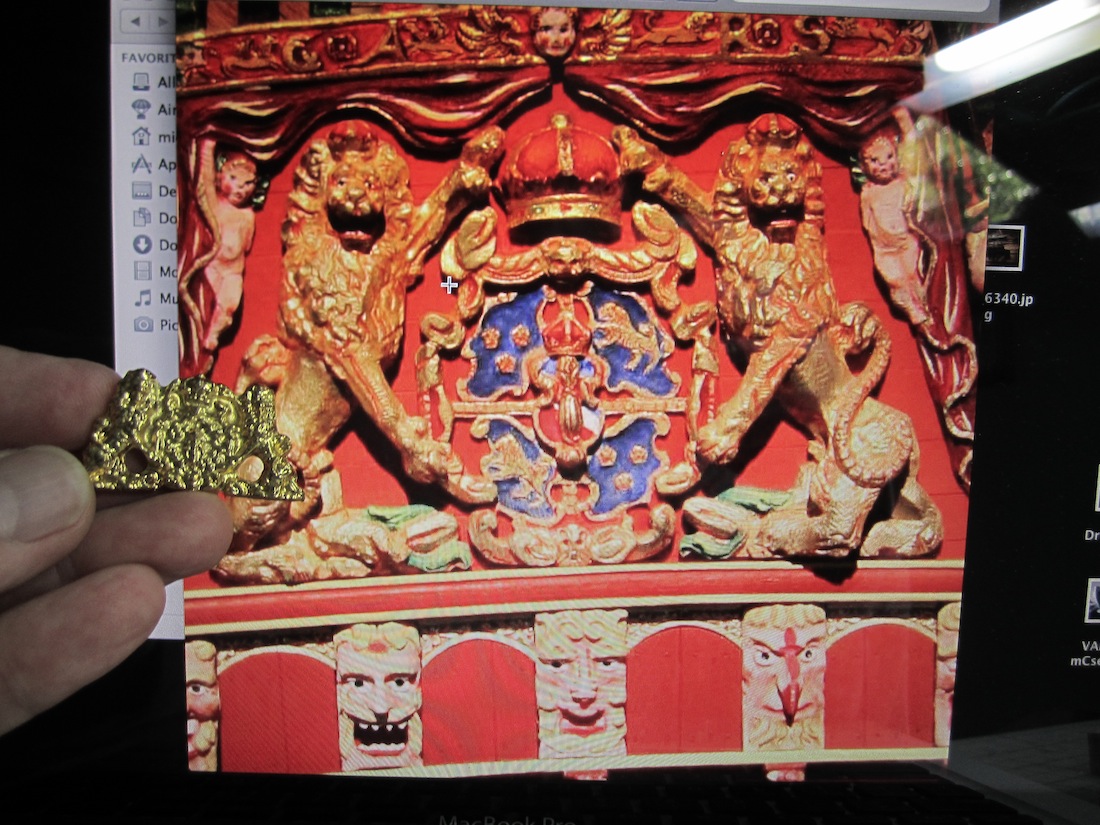
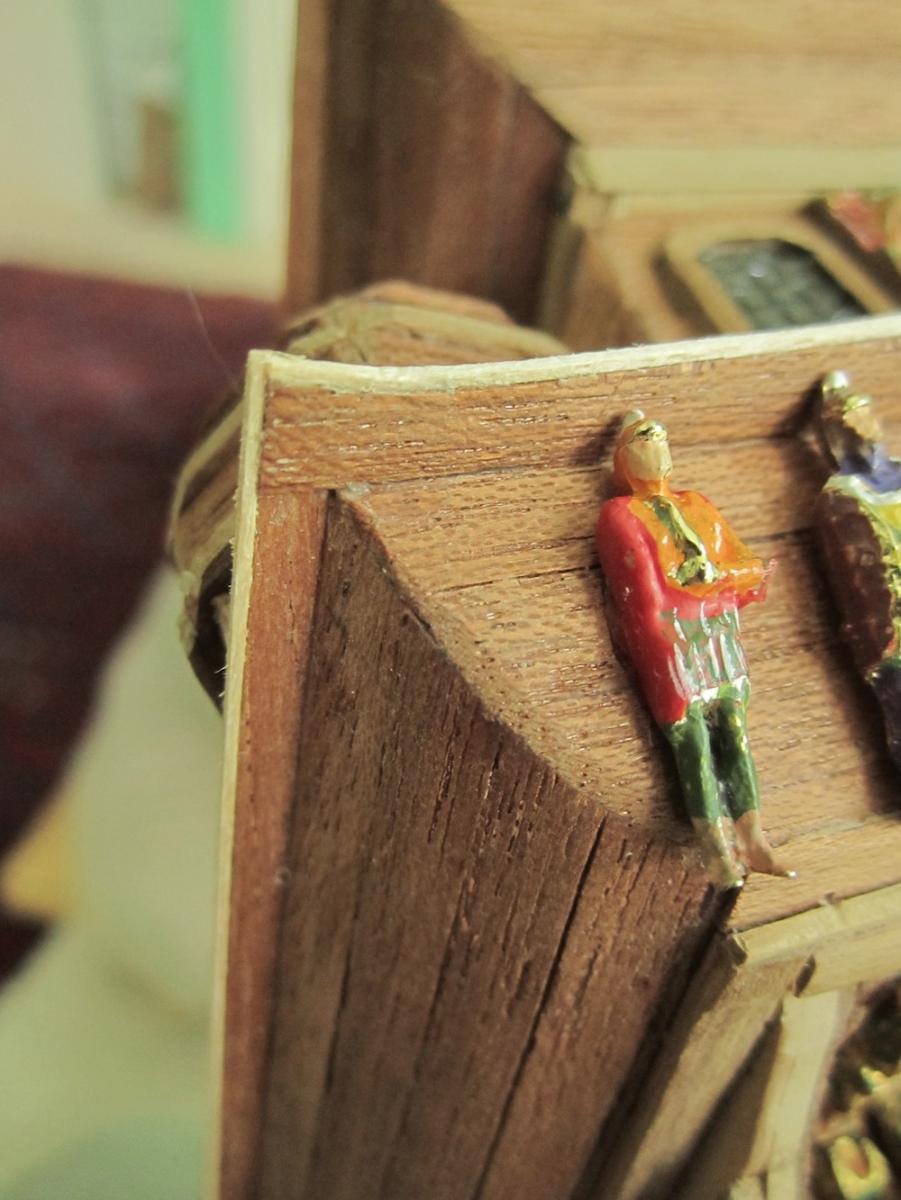
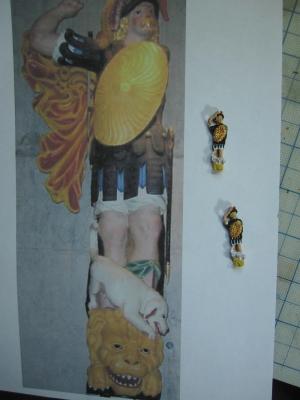
Matti, Hi. Thanks for your kind words. Yes have fun with the mermaids when you paint them. No, actually I was not going to paint the figures as "wood" but my original intentions were to "age" look all of the metal figures as I have done with the bobbinet and overhead gallery figures. Then I got motivated to paint all of the other figures/soldiers after responding to several posts asking me about it. Yes I did think of leaving those forward canon doors closed. It's a good idea. Nonetheless I would need to attach those two figure higher so that if the doors were to be opened, the canon could be moved forward. PS: I will repaint the lions that the soldiers are standing on. Those "happy faces" have to go (:-) Take care. Regards, Michael
-
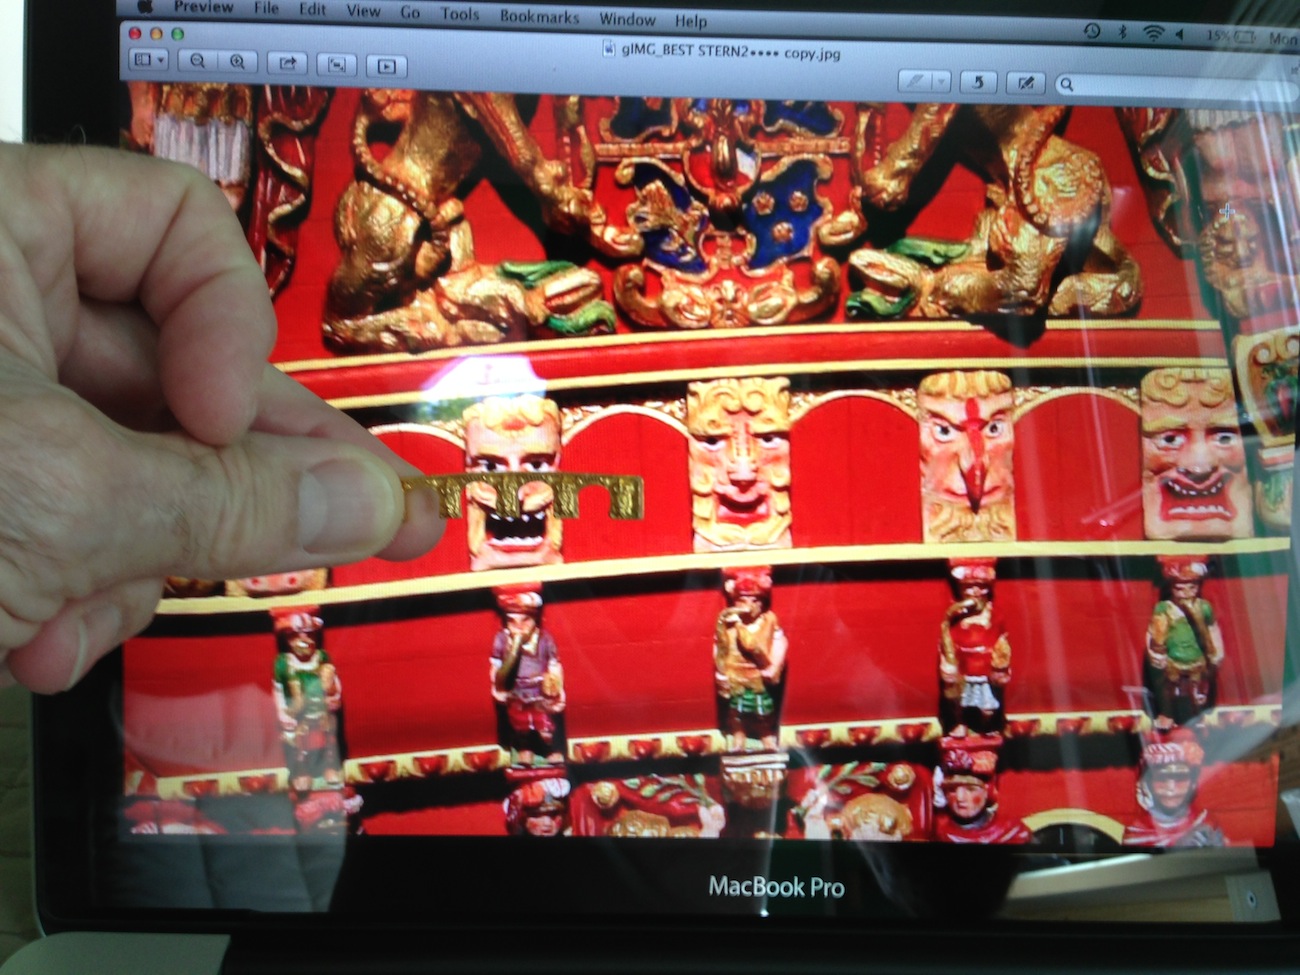
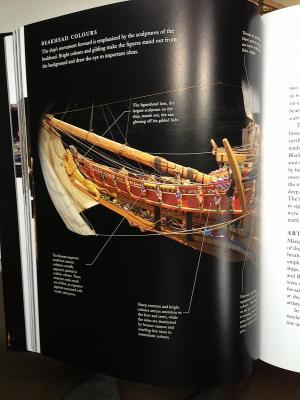
Matti, Thanks for the pic of the stern lantern. She was a beautiful ship. Regarding the nails, I thought about it and it turns out that those nails were the smallest available in black. There are many brass nails that are more the correct size, but I would then need to paint each nail head, The paint would probably rub off during further work. Thanks for your thoughts, I may just leave it as is. Still thinking about it.... Are you familiar with this web site? The first two Wasa's are really beautiful. Also as you enter those pages you can click on each photo more than one to get super close ups in HD. The Corel with sails is really nice. The hand-built is also spectacular. The more and more that I looked at it the more I thought that it was incredible. This builder got every detail correct. You will get a lot of information by enjoying the photos. http://www.finemodelships.com/Ship-models-for-sale.htm Regards, Michael
-
Hi, Every-time that I look in on your updates I end up going back, once more, to see some of the earlier work that you have done on this ship. Such a beauty. Your skill set with fine wood detailing is just so nice to look at. This is such a complicated project, so impressive. A real pleasure. Thanks for sharing. Regards, Michael
- 115 replies
-
- 1
-

-
- reale de france
- corel
- (and 1 more)
-
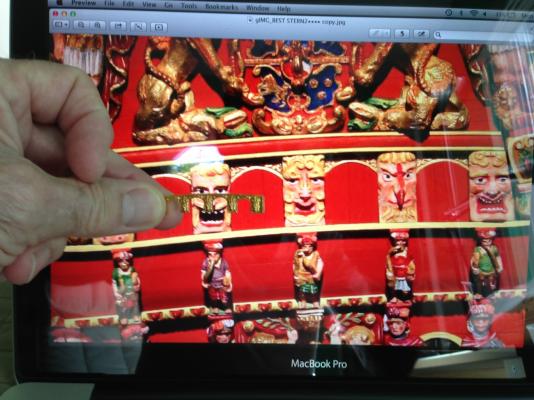
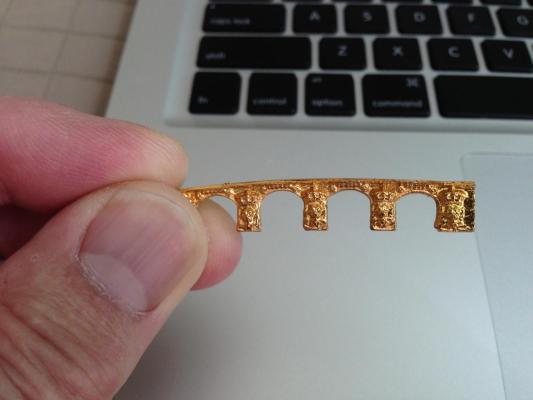
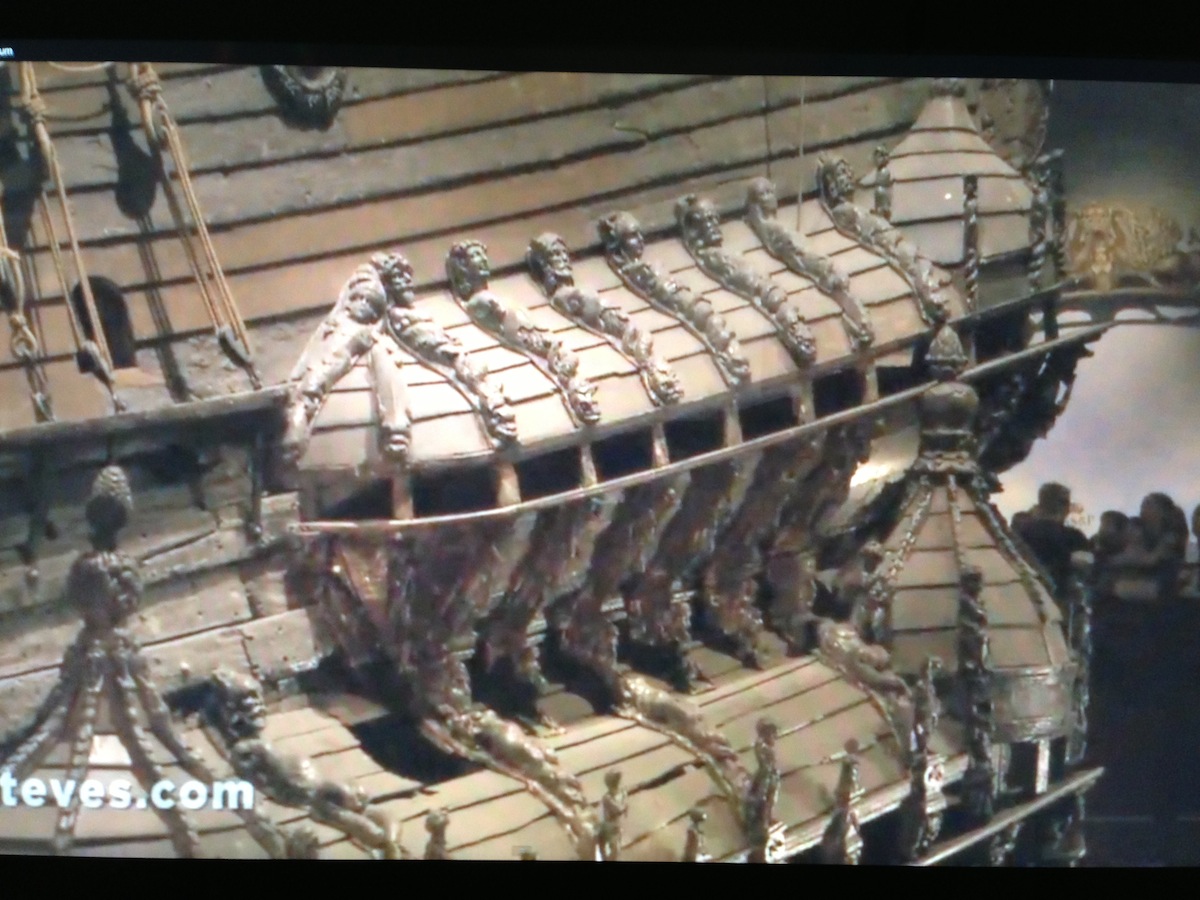
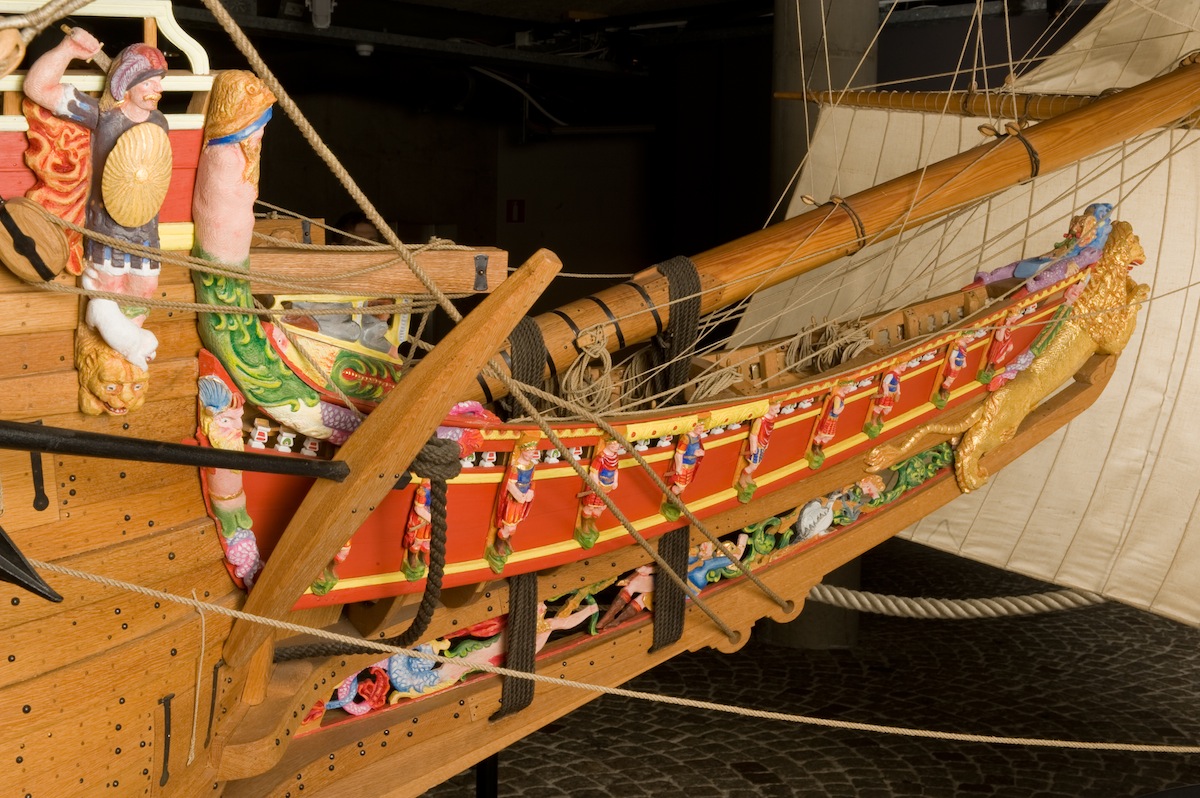
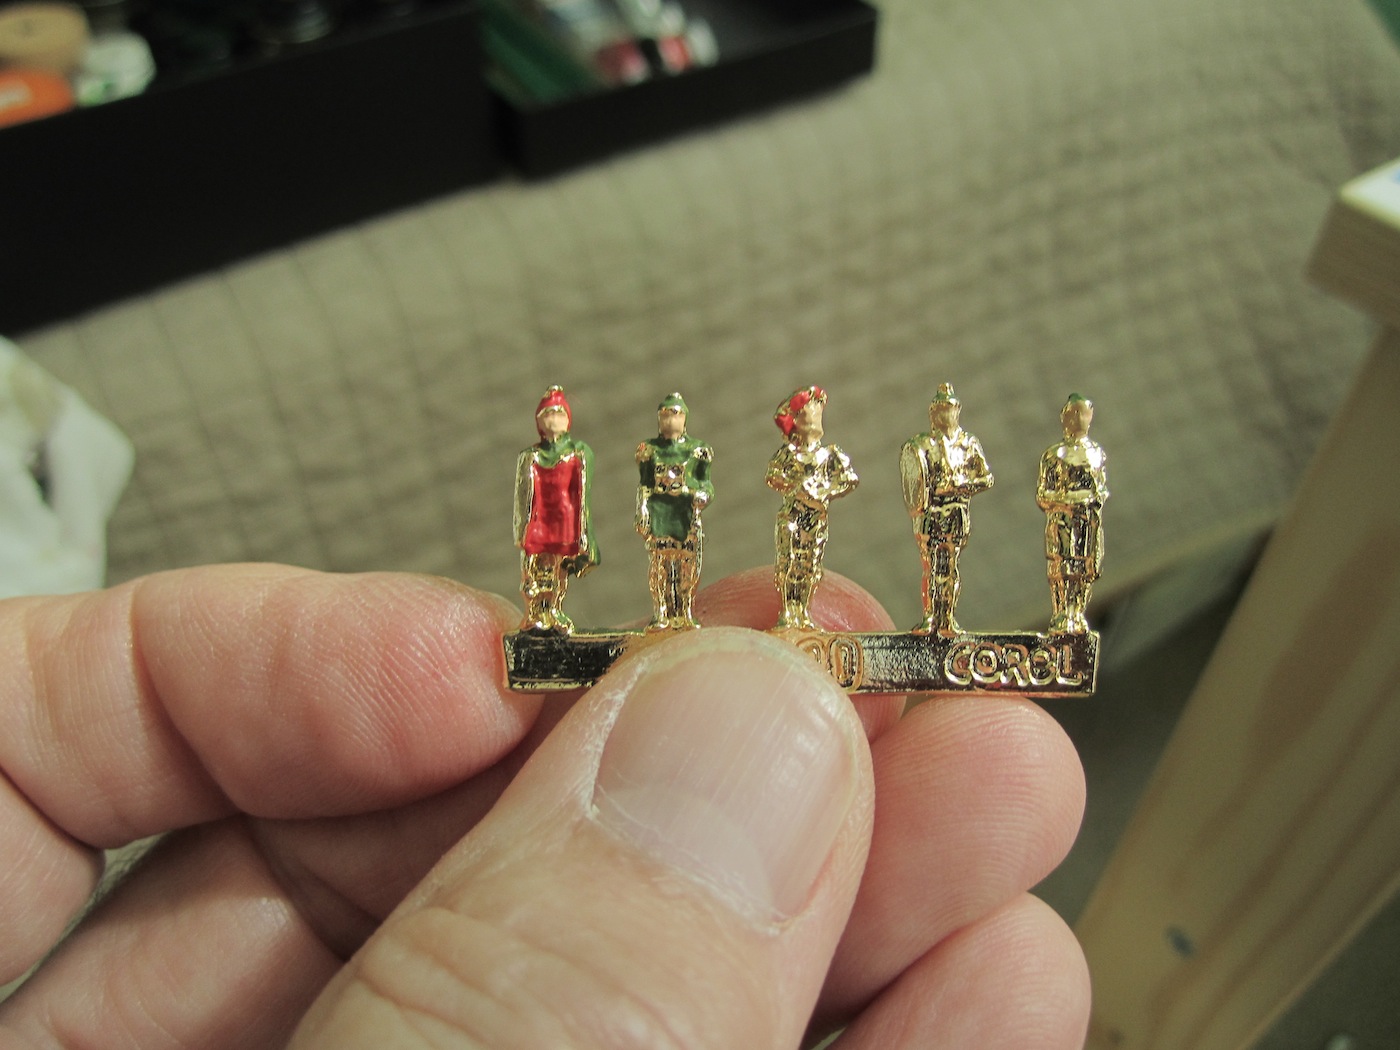
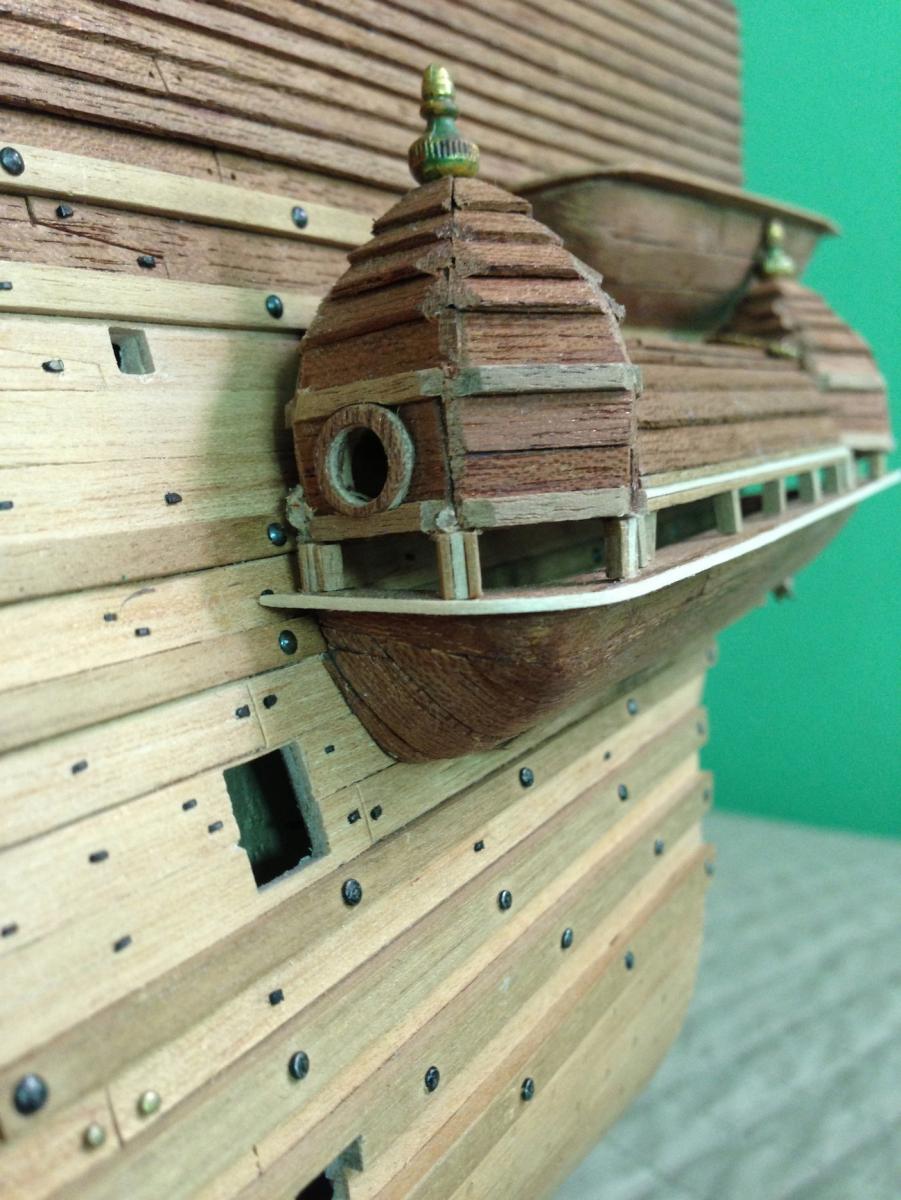
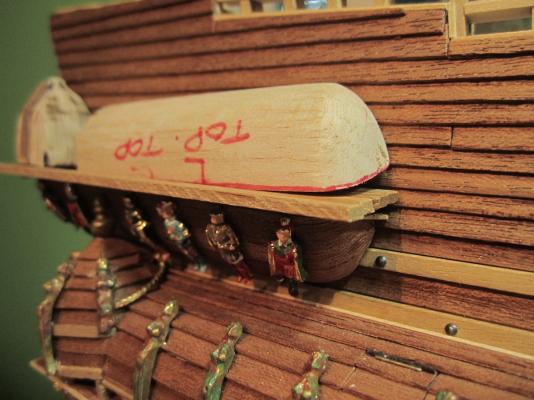
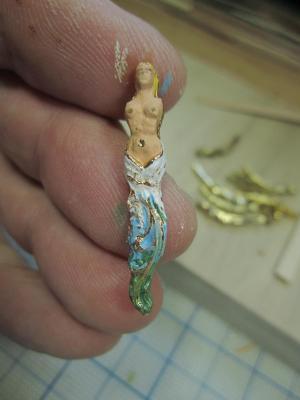
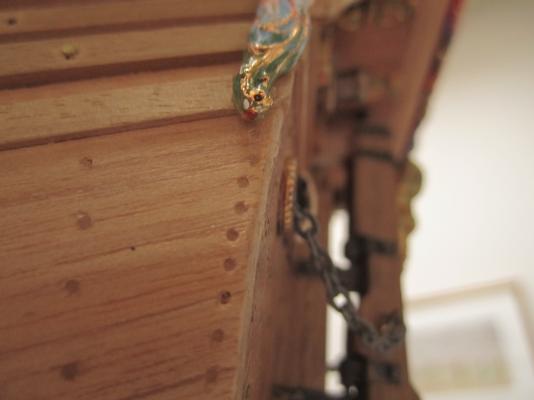
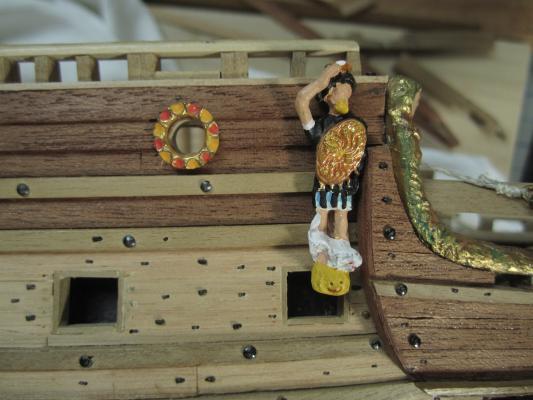
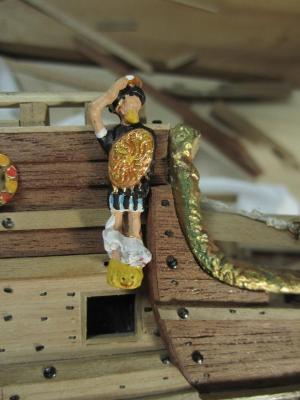
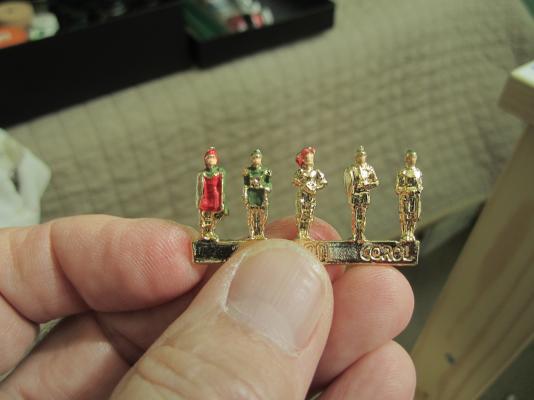
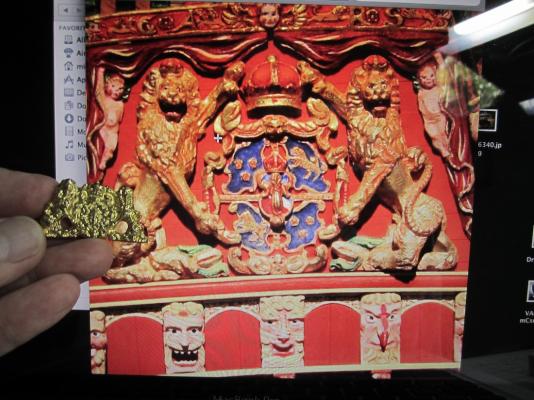
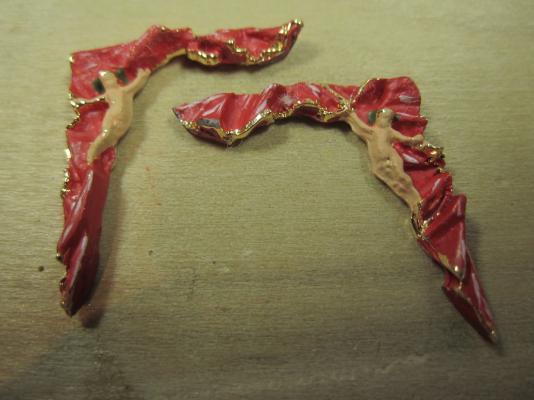
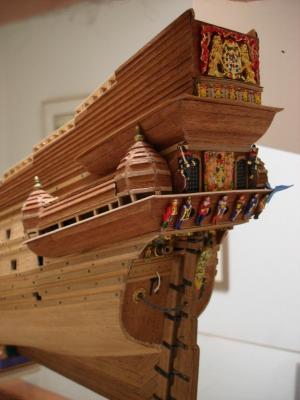
Hello again, I was intending to start working on the upper galleries, but.... turns out that the very upper bobbinets are not yet, mentally, within my sights. In the meantime I moved ahead with a couple more figures I'm hoping to follow this... I want to angle that first lower transverse bobbinet timber correctly. I need to reflect some more. Here is my first step Wasa had a bearded male. Corel gave us a mermaid? With apologies to Vasa purists - the gold belly button; I couldn't help myself (:-) the tip of the figure had some sort of sea monster; Corel was kind enough to include this at the tip of the mermaid. Figures on each side of the bow section. Hmmm here is a problem They should have been more space between the upper canon doors and the bowsprit superstructure. It should look like this. Oh well I will have to attach them much higher, to allow room for the canon door hinges as well as the door opening rope.


-
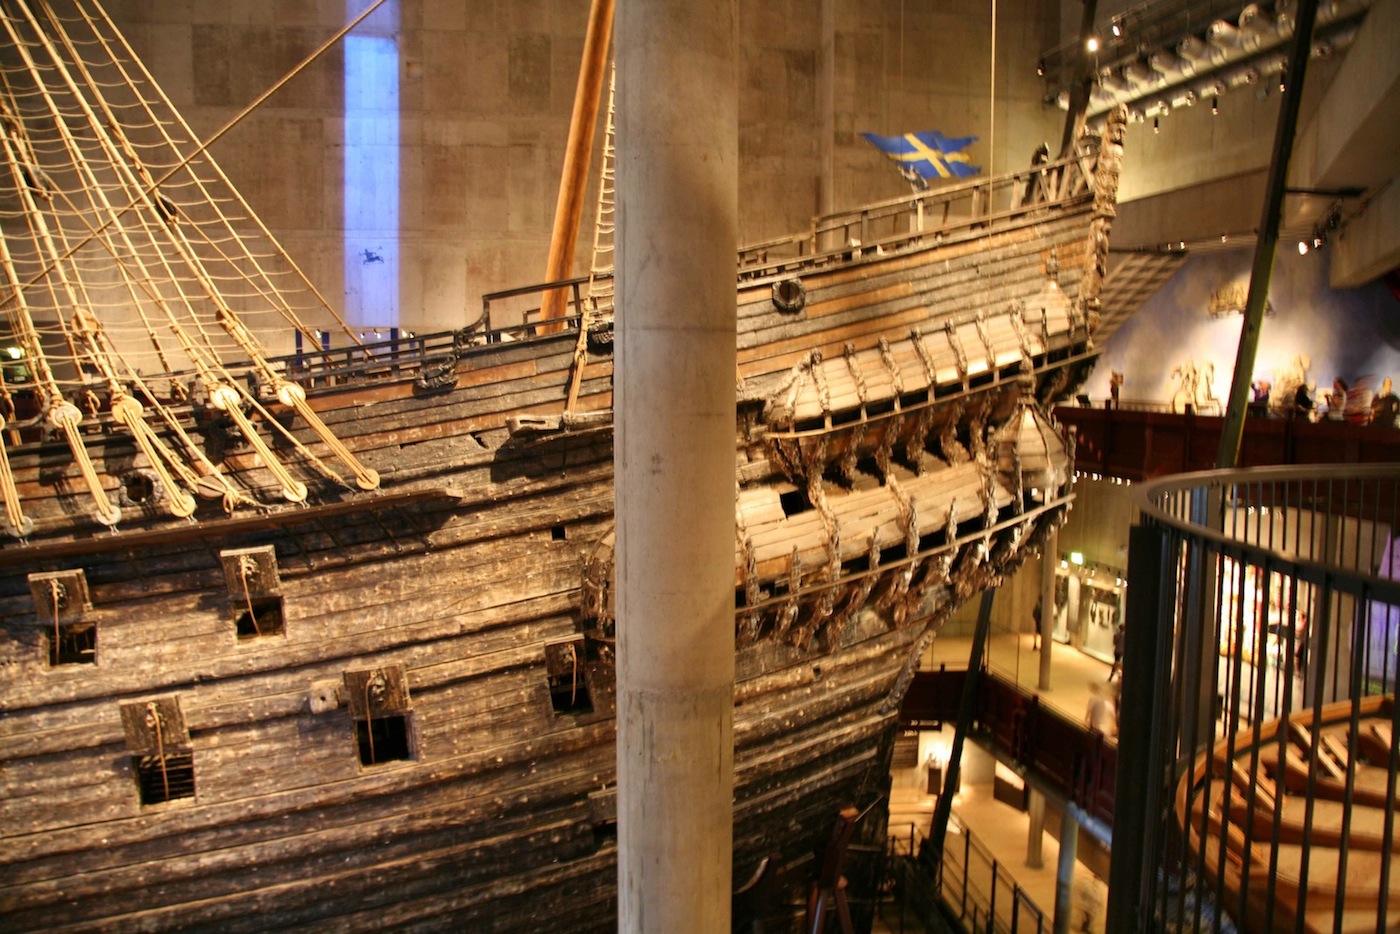
Matti, Great new pics. !! I added some to my files for later (poop deck detail) from the 1:10th. I was at the museum in the mid 90s. I understand that it was closed and has been enlarged and re-modeled. I also read that engineers had to add 1000s of new hull bolts to the ship. It was deteriorating too quickly. One thing that puzzles me. I have never seen an example of a Vasa stern lantern. I don't intend to use the Corel example, and I will certainly not anchor it to the middle of the poop deck. I have some ideas, but the examples available for sale are mostly from English or Spanish kits. Well that's for much later....If any of you have some thoughts that would be excellent. Regards. Michael
-
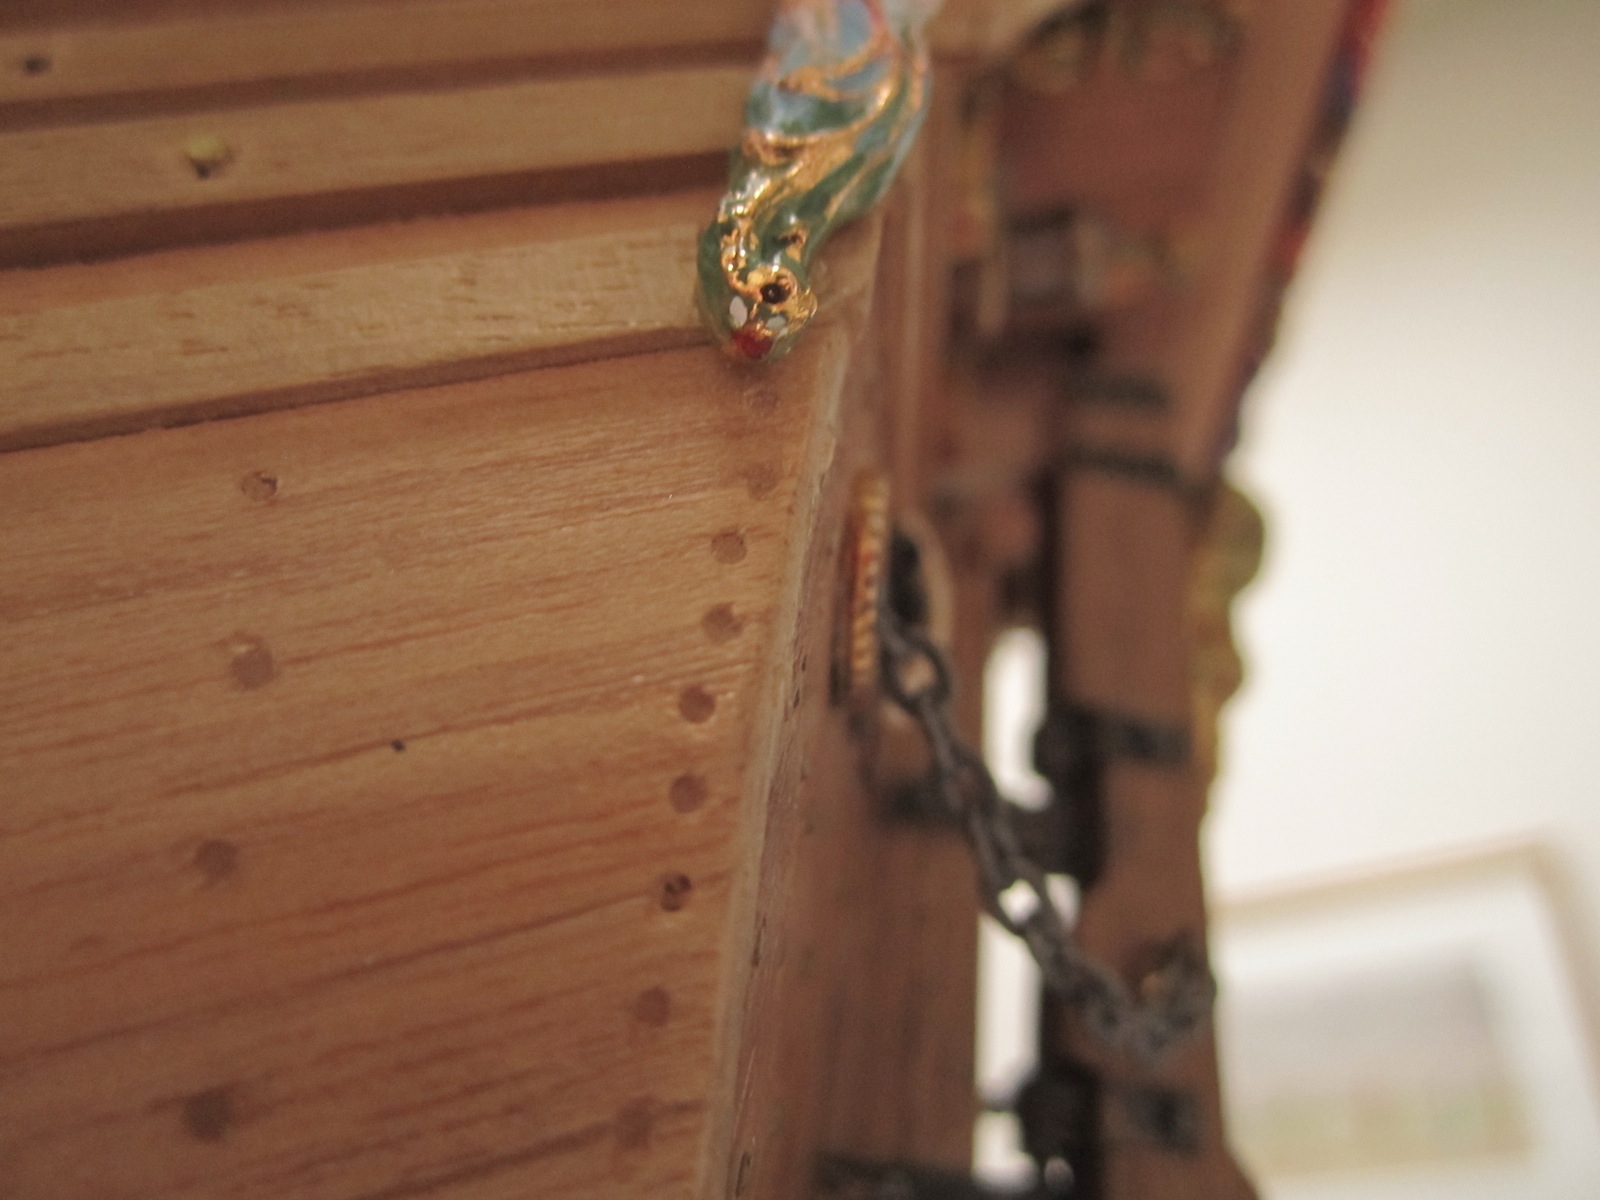
Need to pull those largest ones out... Brian, Hmmm you are right. these large timber nails are too large. My brain never saw it. Thanks. I'll pull them out and size them down. Now that "I see it" it irritates. Seen in full perspective they somewhat loose their out-of-scale" look but, good eye on your part thanks for pointing it out. Michael

-
Joachim, Always such a visual pleasure seeing your updates. Your boarding ladders are so spectacular. You must have had photos of the 1:1? Your construction of these is so precise, so well detailed. I really enjoyed how you crafted these. This ship will be awesome. Regards, Michael
-
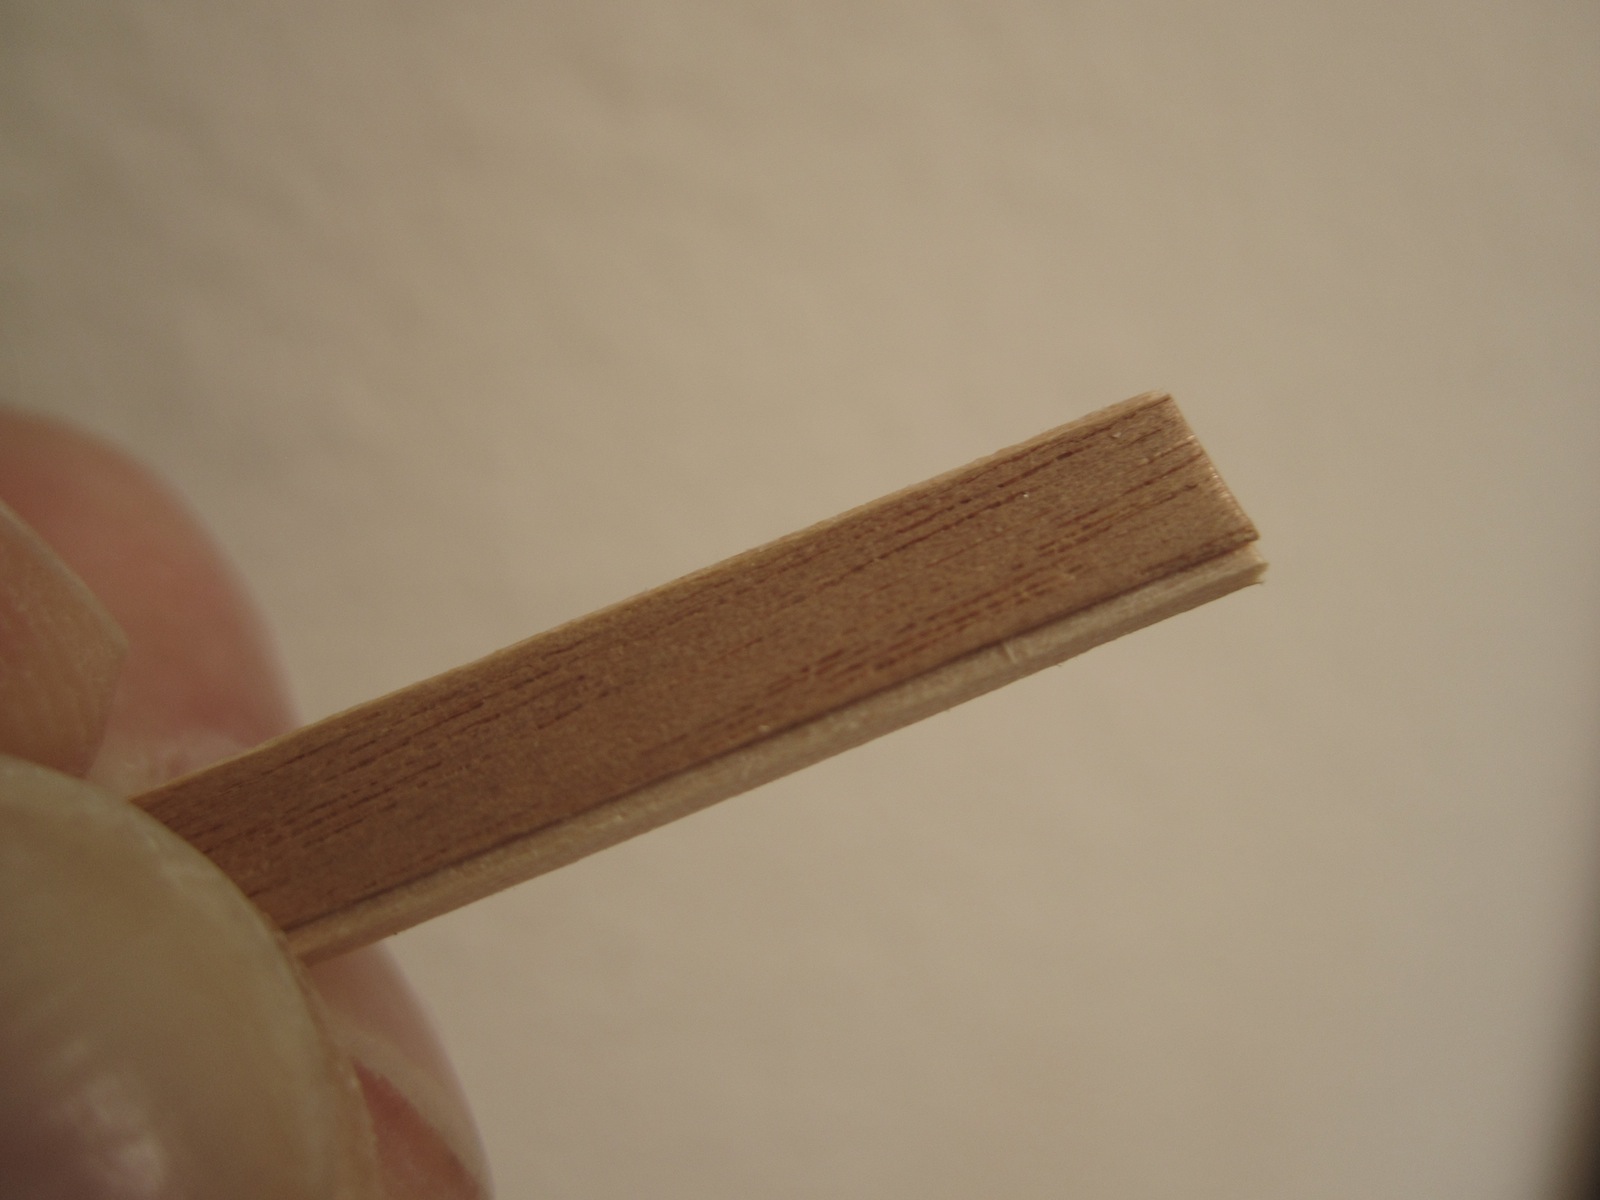
Matti, For your bow detail, try this. I cut some small pieces, glued them at an angle, and then drilled very small holes to have the appearance of nails. Close up in this pic it looks "weak" but just looking at it through normal vision the poor quality effort sort of goes away. PS: I almost totally missed this small detail on the ship. After looking at so many photos I realized that the Vasa had these planks to allow the water sto slip under the bow. Your photo is spectacular the best I have seen. Please post more pics of your visit, I'm sure that they would be great to see. Michael

-
Guys, Andre, Joachim, WackoWolf, Lambsbk, and BE thanks for following this build. I appreciate the encouragement and all of your kind words. When I see some of your work and ideas (as I'm following many of you) I get further encouraged to improve my skills. This hobby certainly is a fun part of our collective lives. As I receive comments from new builders who post regarding this Wasa, I also discover your builds and appreciate even more this hobby. I'm following, with much pleasure, a lot of hobbyists on this forum. Hobbyists is the wrong word, it should be amazing artists. Hmmm again thanks Michael
-
enemeink, I know of this. I've downloaded all of the pics. and I have been devouring their contents to help me along. I thank you for nonetheless for sharing the link. PS: Get onto, if you are not already, Model Expo's email list. often enough they run deep discounts that are emailed. I have seen the Corel Wasa for around $700 sometime back through their email promotions. Last check $1650. Which is ridiculous. I have to assume the market will accept this price. Certainly the millions or so who visit the museum yearly add to the demand for this kit. Billings is the only other Wasa available. The absolutely fun part of this ship is that 1000s of photos of the real ship are available so it's fun to try and adjust the Corel to look much closer to the 1:1. The Billings product is almost a copy of the 1:1, though all of the figures are plastic. Michael
-
Bob R, Hi I happened onto your build by looking at Matti's new Wasa build and your post to him. I then linked to your build. WOA beautiful. Your attention to detail is spectacular. Your wood working skills are superb. This will prove to be a stunning build. I have a question, if you don't mind. You note that it is a Model Shipways kit. Are you adding much detail from the "out of the box" kit? It appears as though, from your notes, you are. I will enjoy following your build. One day I will travel to the East to see the Constitution. Enjoy Japan. I spent the better part of ten years flying all over Asia (business). Just north of a million miles on Star Alliance. Now retired... PS: Your bow repair is well, awesome. Regards, Michael D
-
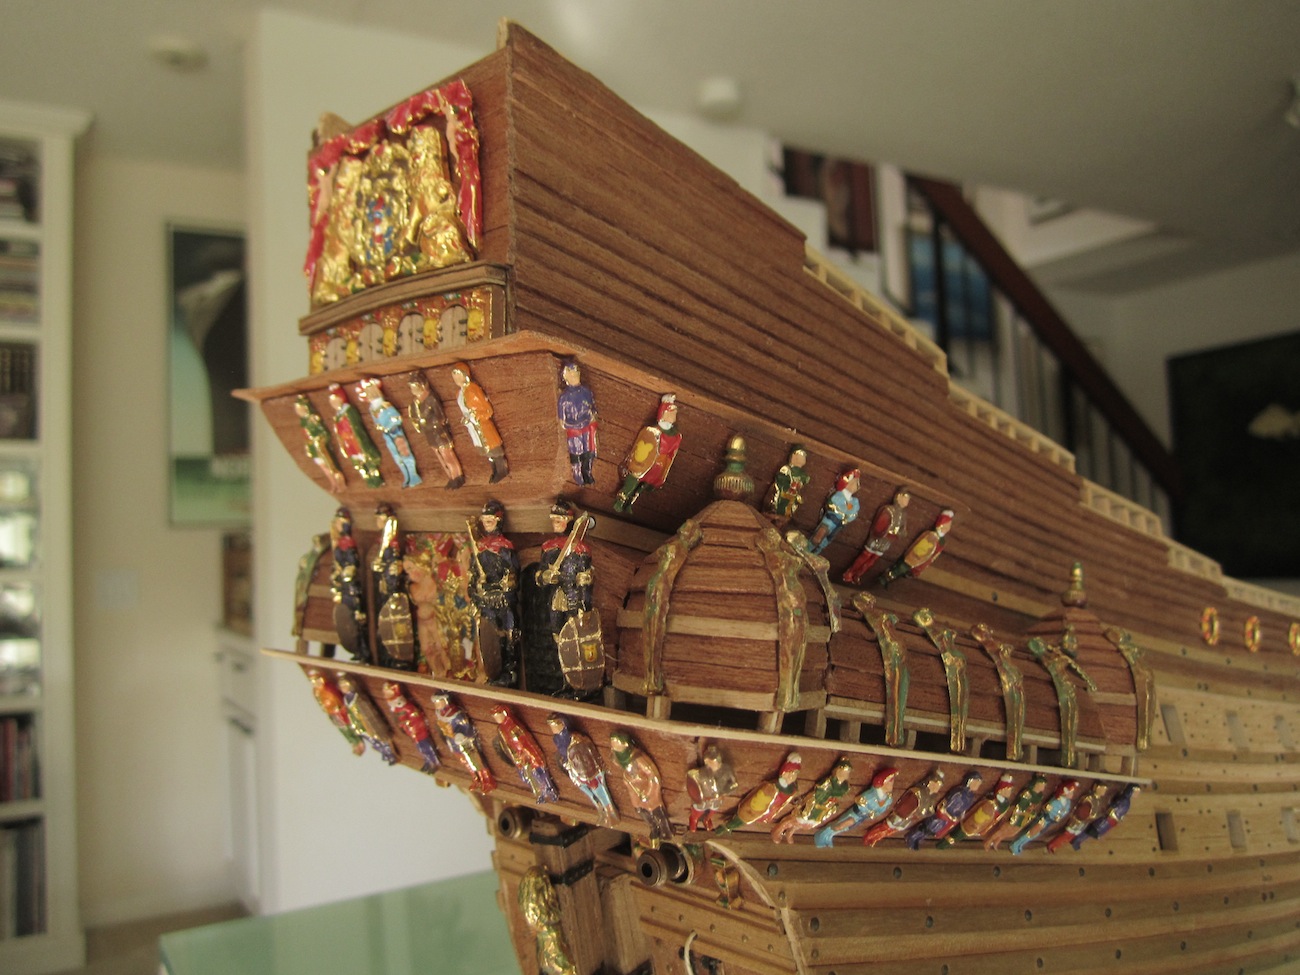
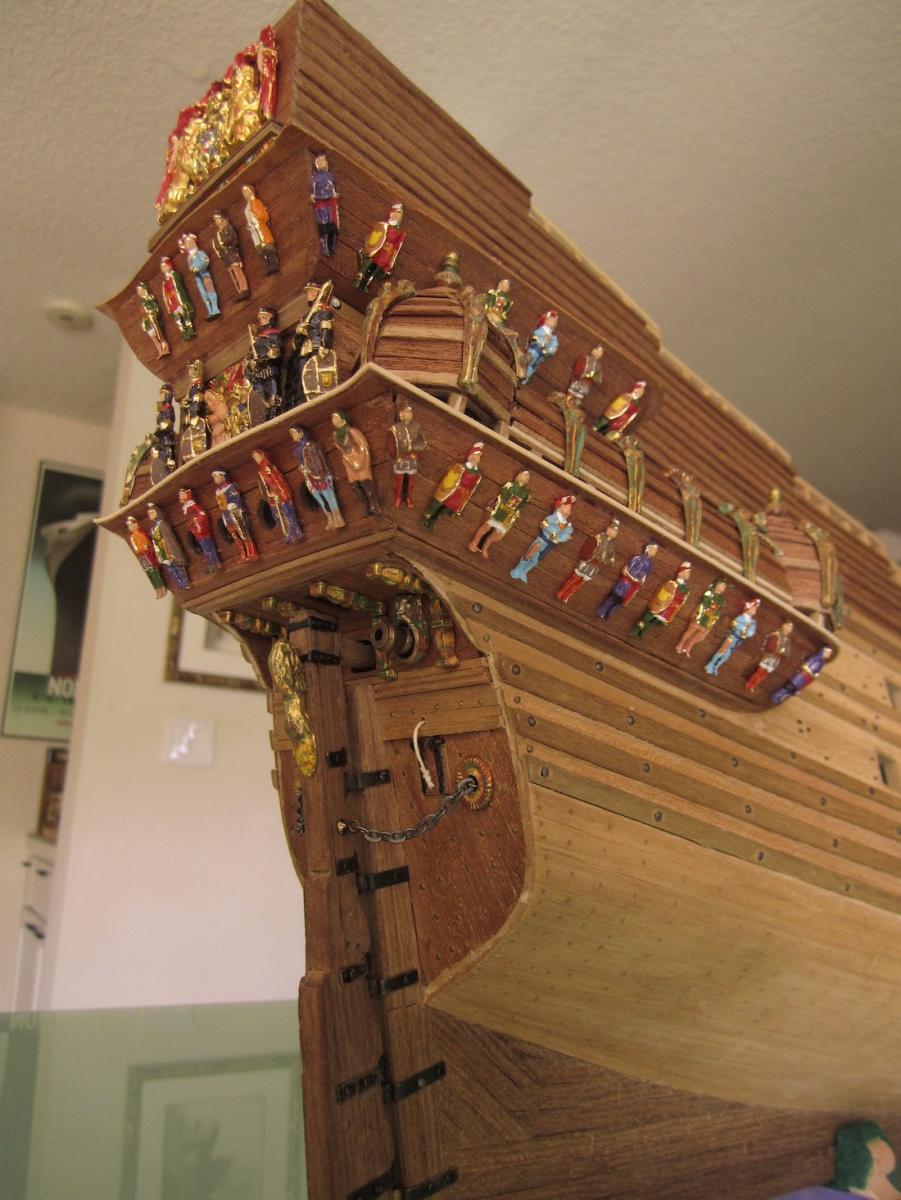
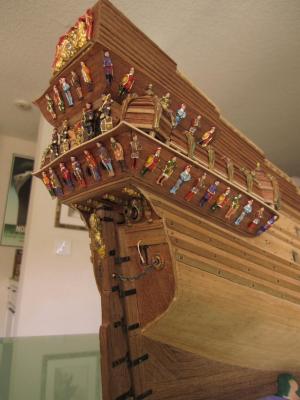
Some updates. I have been painting more figures. Installed a few more. I think that I will now change my focus and work with upper gallery wood. Need a break from the figures (:-) You mau also note that I decided to use the "aged" look for the upper gallery housing figures. My earlier posts show how they were initially painted. I did not like that "cartoon" look. I repainted them using more detail, but that also looked odd. So I ended just aging them so that they would be less apparent. I will stick with that. Again thanks to all of you for your kind remarks, and thanks for looking it is appreciated. Regards, Michael

-
Matti, Your start looks so good. The Billings kit will allow you to build the Vasa very close to the original. Several of us are building this ship at this time. I noticed that even near the poop deck you have the benches on each side of the entry door. PERFECT just as it should be (Corel has stairs). I will enjoy following your build. You may already know about this, but here is a link to the 1:10th from the museum. Many of the photos are super HD so you can enlarge them several times to get super close up details. Good Luck. Your start is really beautiful. I also visited the Vasa museum; What an Experience SO interesting.... http://www.modelships.de/Museums_and_replicas/Vasa-Museet-Stockholm/Photos-Vasa-model.htm Michael
-
Juan, Thanks for your answers. The kit came today. I think that it will be very interesting model. I will follow your beautiful build. I will certainly learn much by reading your notes and looking at the pics. that you post. Thanks for sharing. Michael
-
Andy, WOA beautiful job. I also really like how you captured the look of the deck, with what appears to be a subtle look of aging. Very nice details. Your rigging, of course, speaks for itself...Super work. It all looks so excellent. A project to be very proud of..... Michael
-
Buck, Thanks so much for your super nice comments. They really touched me. I'm over the red as of the weekend. A couple of single malts straightened out my thinking (:-) Your advice in regard to sealing the wood opens up a huge can of worms for me. I don't know how to proceed in this area. I don't know if I should even attempt it. My initial thoughts were to leave the wood as is keeping it "natural looking". The downside, of course, would be (I think) that over time some of the glue might no longer secure the ship all together, and the wood may loose its "look". I don't know how to address this. This is only my second build. My first was some 30+ years ago. At that time I used a product called Watco Oil (just checked on Amazon OMG still available). I think that I airbrushed the ship and then sorta wiped it off. That old Mantua Santa Maria seems none-the-worse for wear. It looks the same as it did back then. So fast-forwarding....I don't have the knowledge with which to make an intelligent decision. Looking at your whaleboat, I note how beautiful that French oil makes the wood "pop" So the new dilemma, such as it is, continues..Though your idea on how to proceed with wood finish seems really smart; makes a lot of sense. I will roll that over in my mind. Thanks for your suggestions. Again thanks for your superlatives regarding my work on the Wasa, very kind of you. Regards, Michael
-
Joachim, Thanks for your comments. By-the-way your Amerigo V is really special. Beautiful project, your attention to details and their execution are first class. Michael D
-
Laps, So beautiful. You have captured this project with such skill. So, there are two spectacular Amerigo Vespucci examples in progress on MSW. I will follow your build as well. Thanks for sharing. Michael D
-
Hello Jack, Your x section is beautiful. I was so inspired that I purchased this kit, and I should be receiving it next week. The copper plating is also beautiful. I will follow your example and do this as well.Thanks for noting how many were needed (+360+. May I ask what size are the copper plates? I will order the same size. Thanks in advance for your response. Regards, Michael D
-
Juan, Beautiful work. Excellent looking cross-section---very impressive indeed. My next build will be a cross section, and I have, after seeing your beautiful example, settled on the Trinidad. I have a couple of questions, if you don't mind. 1) Is yours from OcCre? 2) Are all framing pieces pre-cut, or are they just ink stamped on large boards, which then requires a LOT of sawing and cutting? Thanks in advance for your response Michael D
-
Zev, Welcome. You have come to the right place. Folks on MSW are so helpful. You will learn more than you can even imagine. They will also send you all of the encouragement that you may need, and follow along as you post updates (:-) Good luck Michael D
-
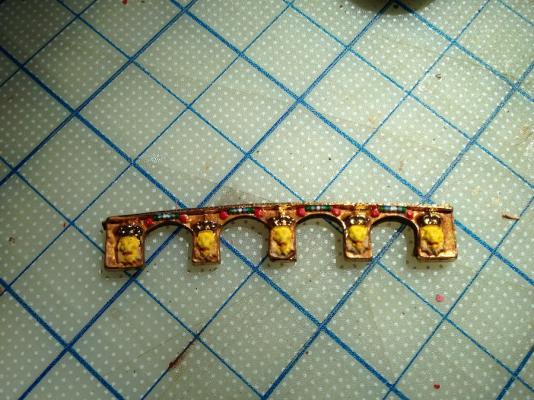
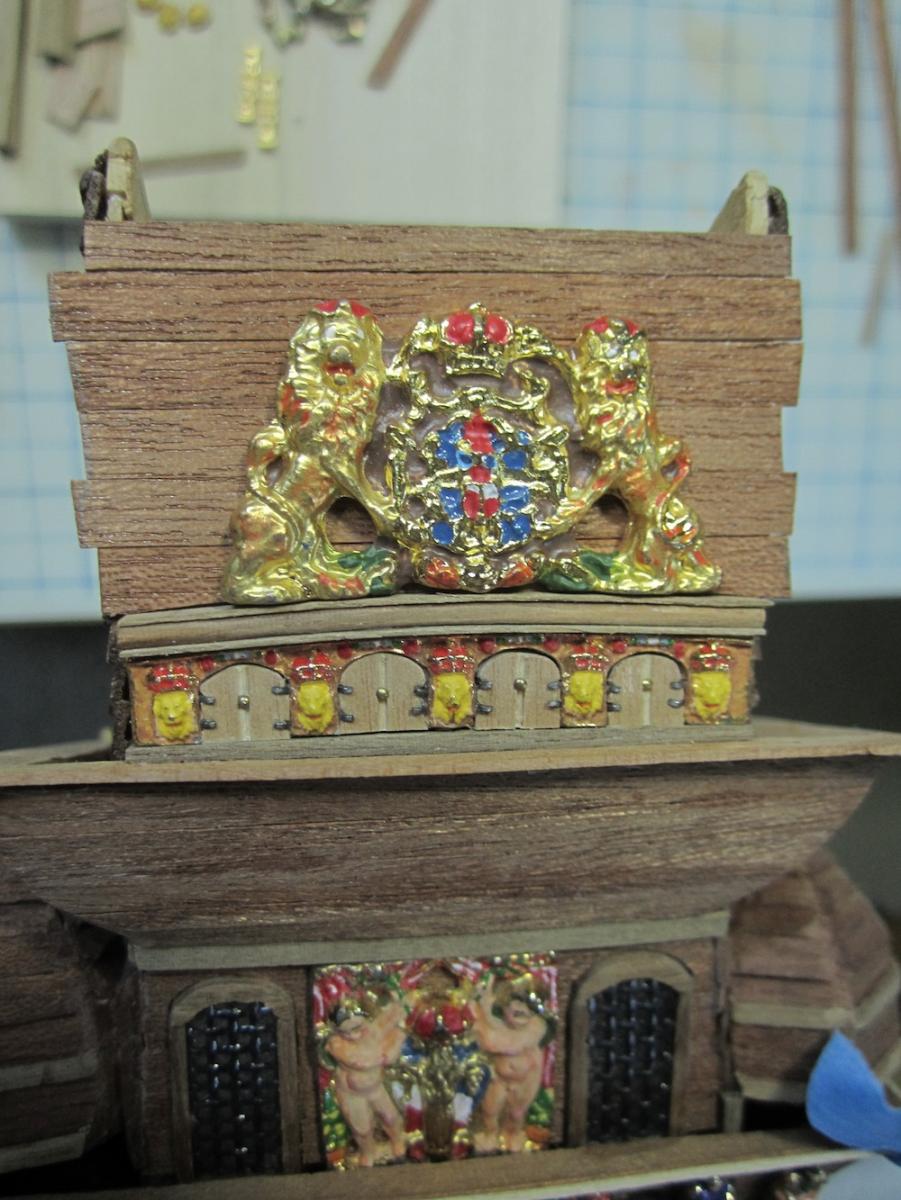
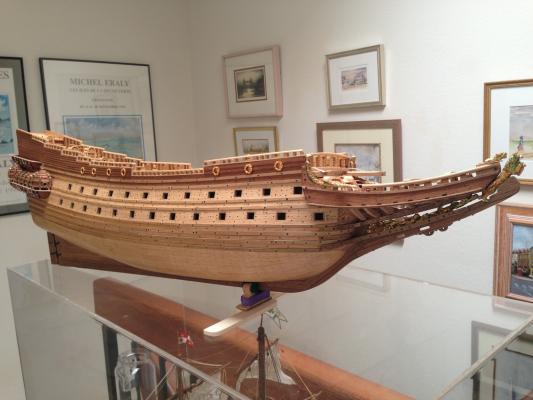
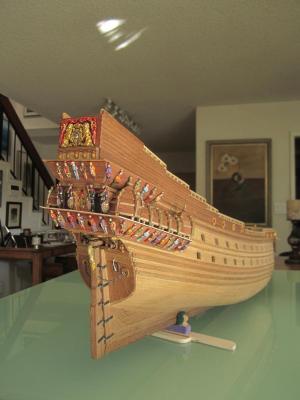
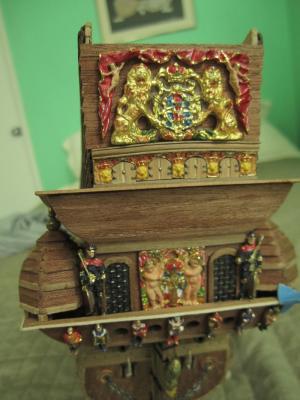
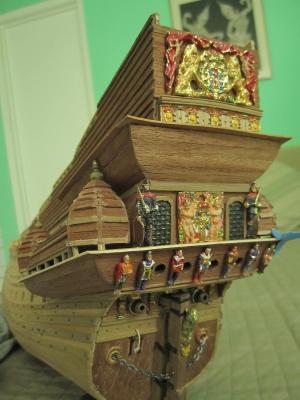
Here are a few updated pics. The stern is coming along. As I've mentioned before, I regret not painting the red portions of the hull +. But as we a all know looking in retrospect all is very clear. The brown wood was my compromise.Mmmm lots of work here. The Vasa must have been a beautiful site, for an hour or so Having all of these museum sources makes it much easier to assist in the colors It's hard to tell here, but I actually added a flat clear to the lions. The pics don't really show that too well I added a small strip of wood to the gallery edges. The same will be added to the upper ones


-
Gil, There are two things that I am now sure of; my wish of going to the moon won't happen (though I did drive large flying machines for many years), and I will never be the astonishing master that you are with this art form. Your pics, and updates leave me speechless in an absolutely wonderful way. Such a delight to see your love of this wonderful hobby. Your craft level is PHD, if that is the appropriate simili. Your knowledge certainly is. with a huge amount of respect, Michael D
- 755 replies
-
- 2
-
-
- finished
- caldercraft
- (and 1 more)
-
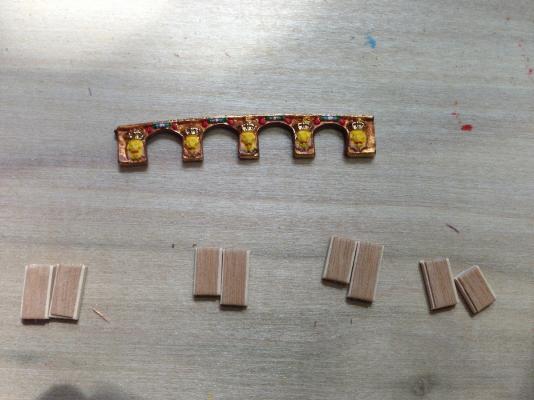
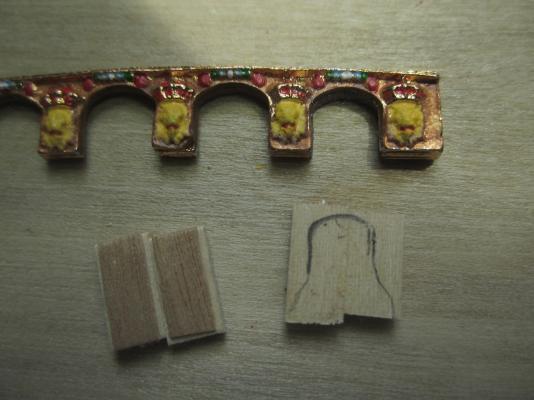
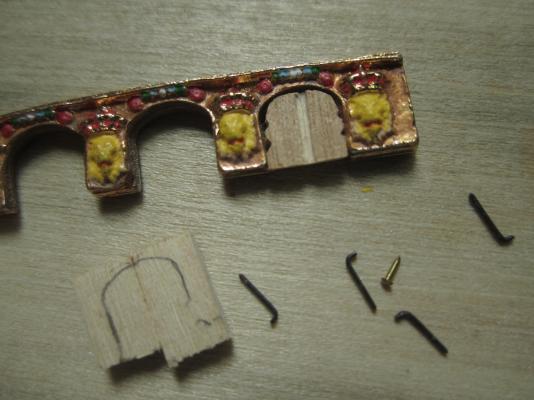
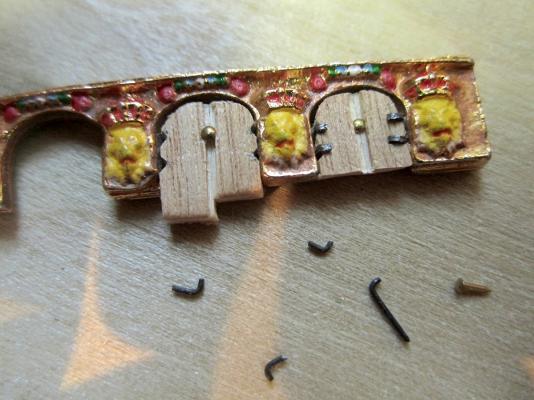
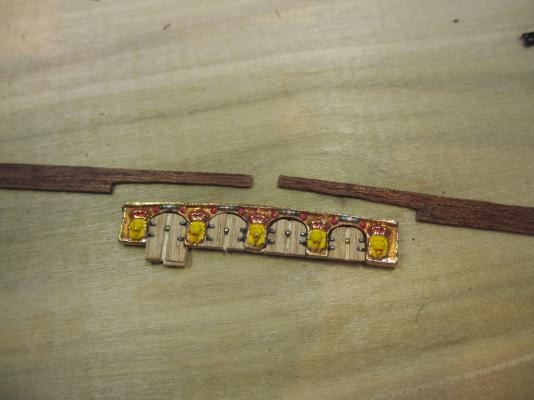
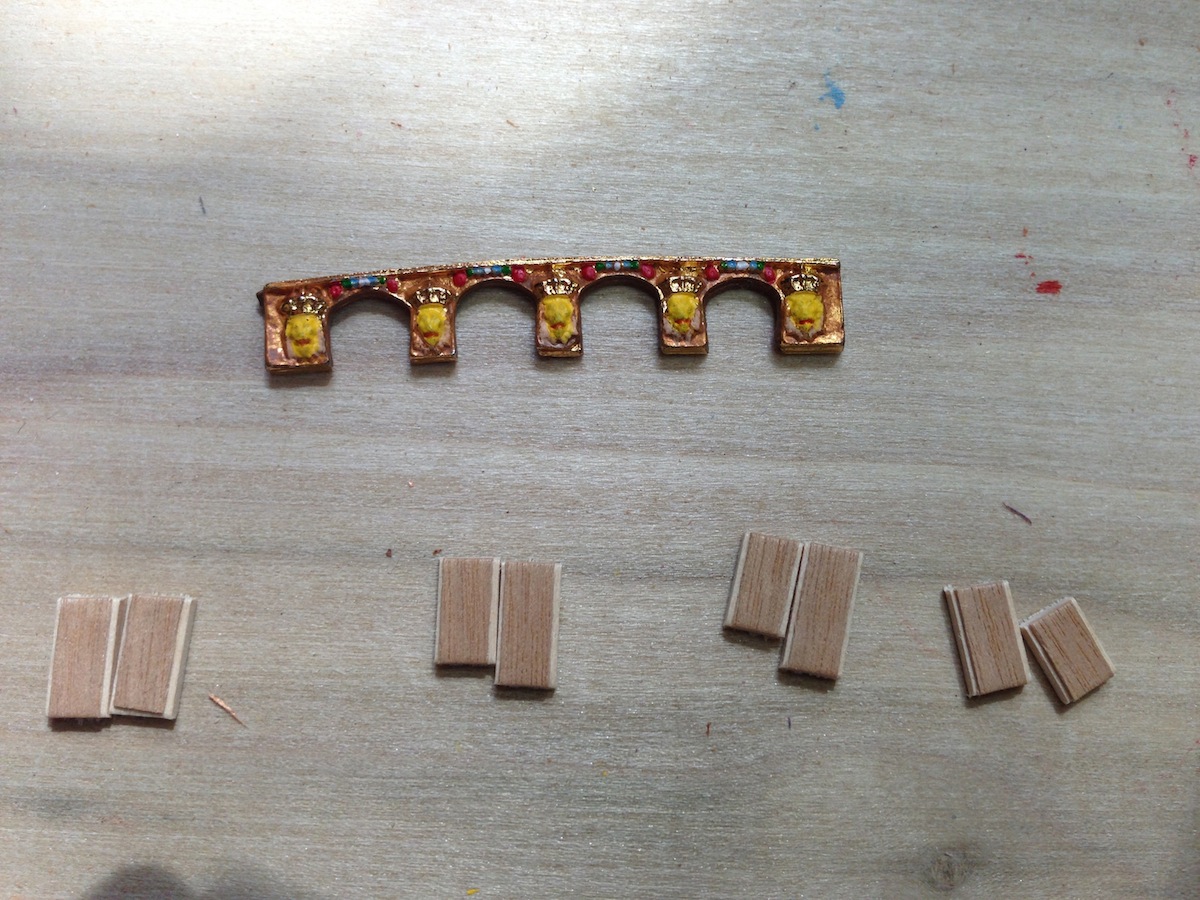
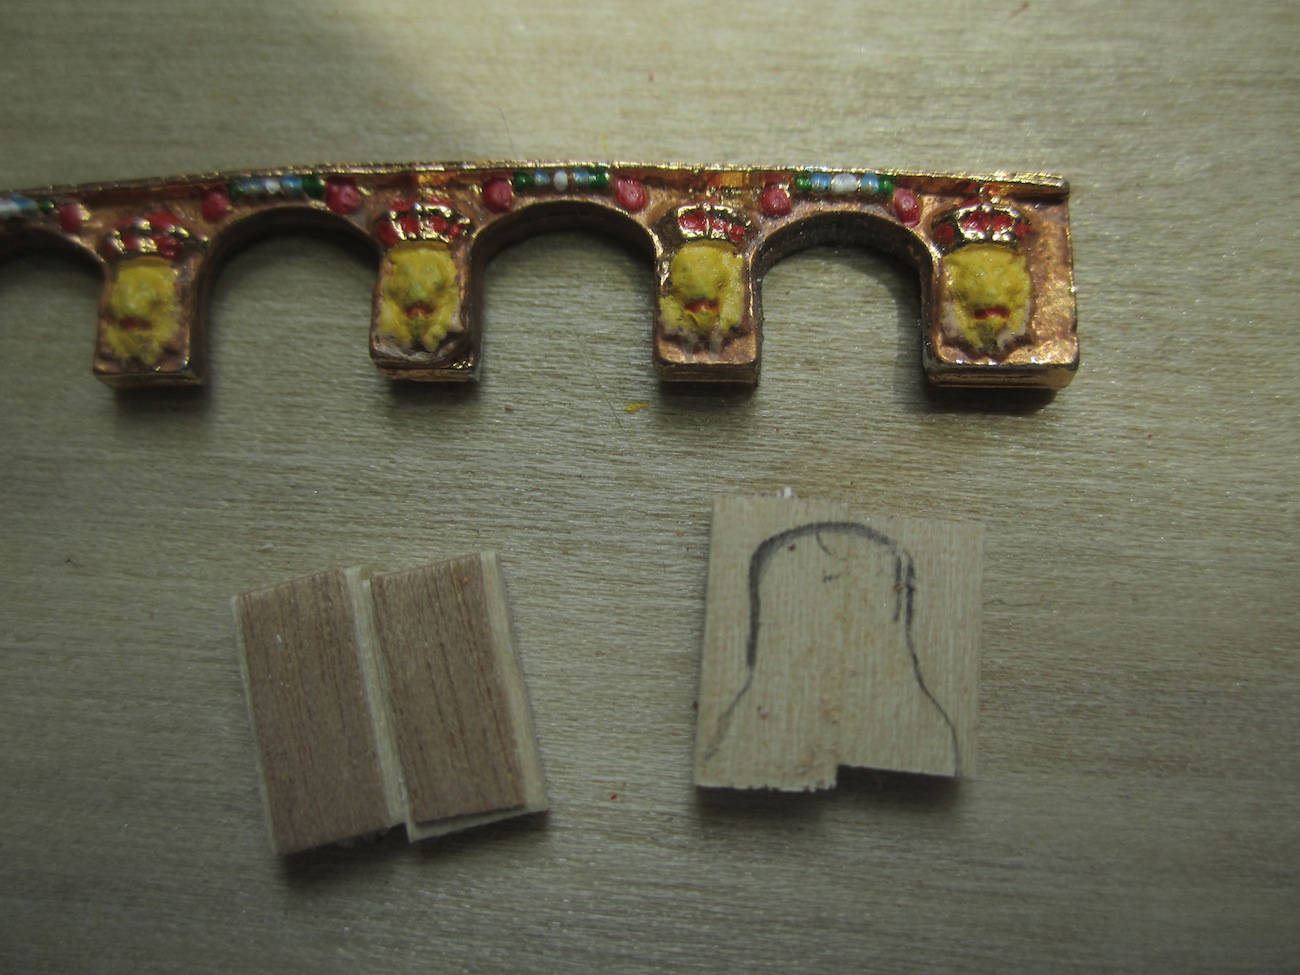
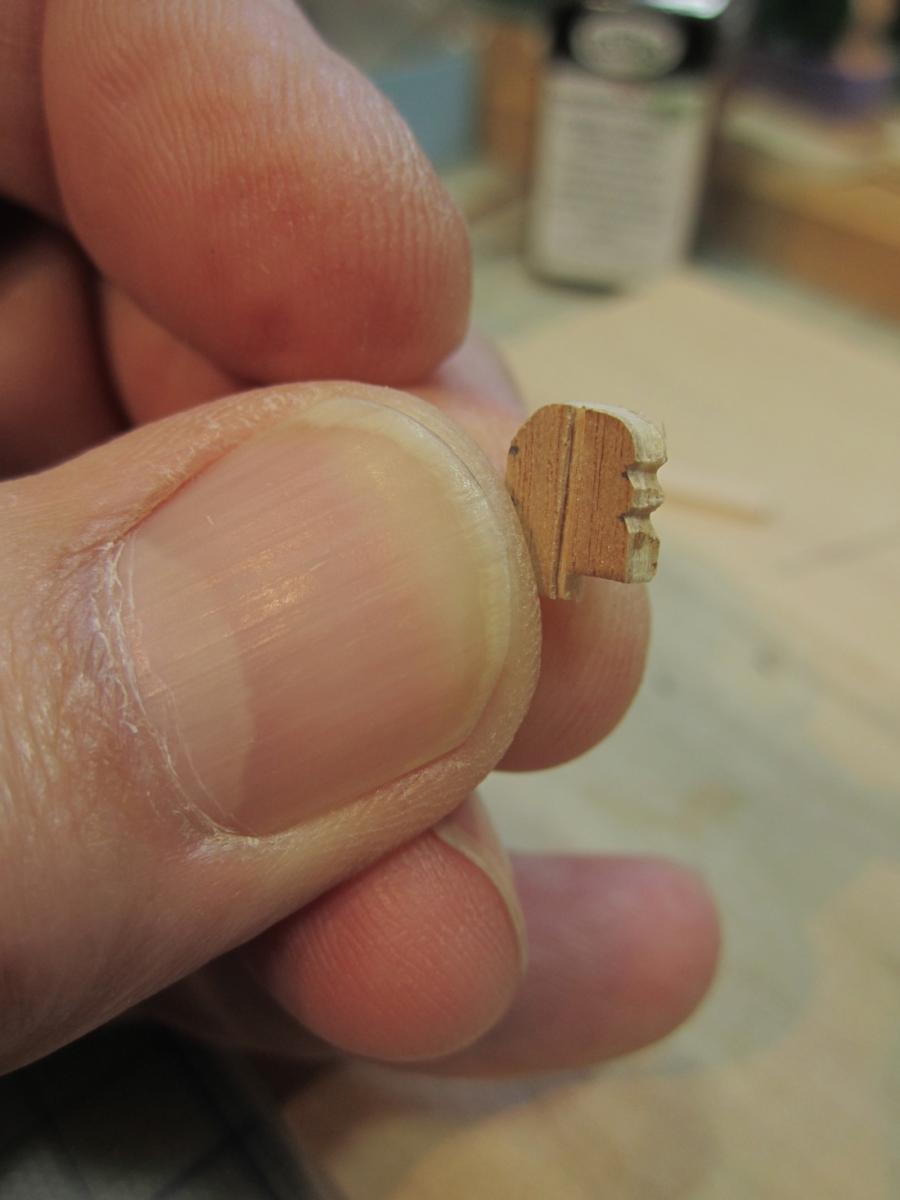
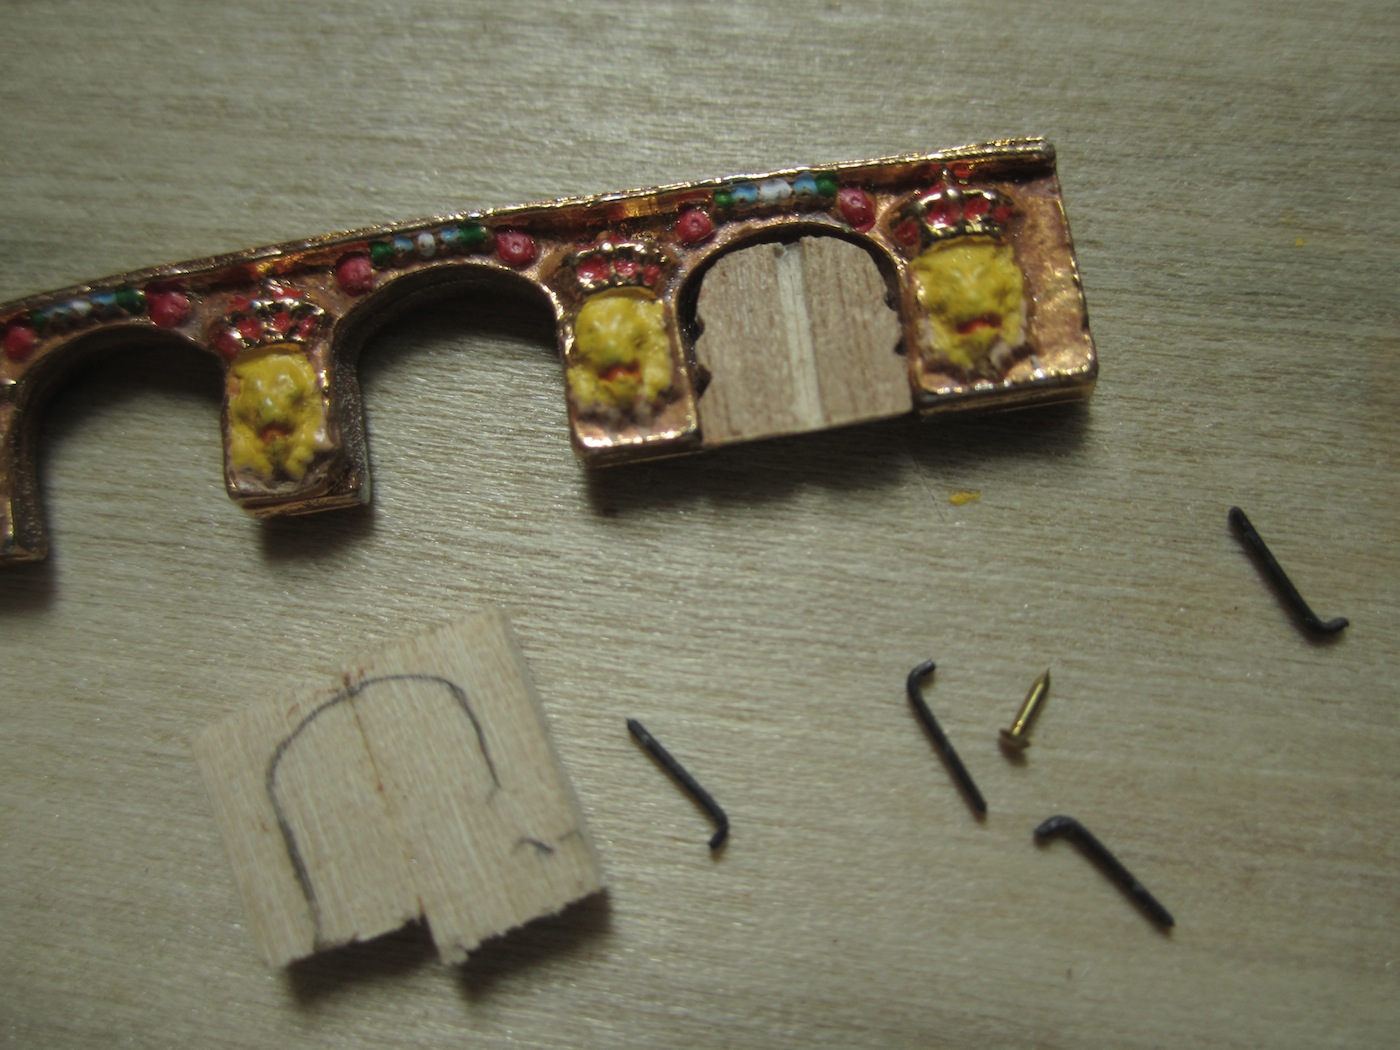
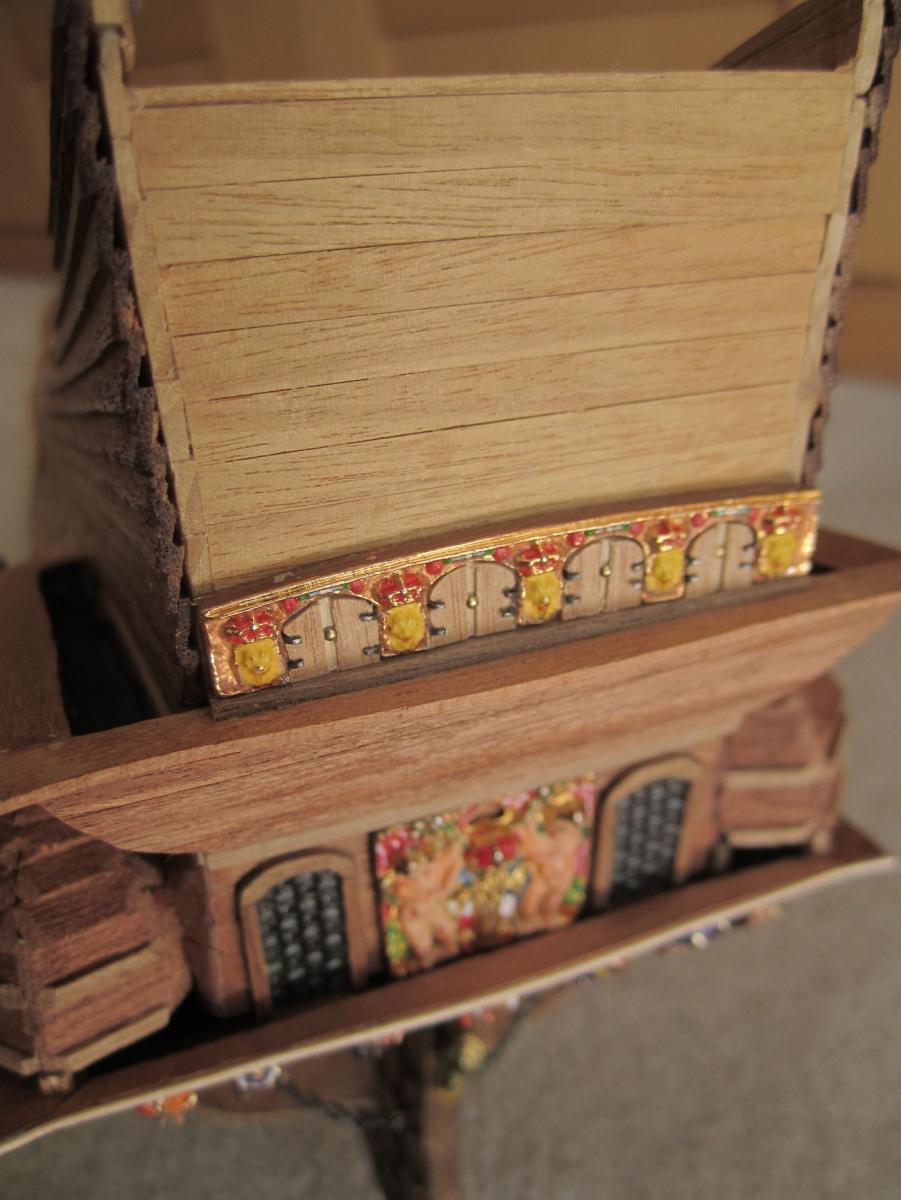
Thanks David for your nice thoughts, Finished up the stern upper windows. Here are some updated pics;I was looking for facesCorel gave us lions with crowns-no biggieSo painting, I followed the 1:10th idea for the lionsI used some leftover railing from the upper deckglued the two pieces together to form the shuttersreversed them and patterned for the Dremel sandingchecked for fitnotched the edges for the hingesUsed the micro rail cleats let glue set then Dremel'd for fit