Old Collingwood
-
Posts
11,521 -
Joined
-
Last visited
Content Type
Profiles
Forums
Gallery
Events
Everything posted by Old Collingwood
-
 Thank you kindly EG, hope things are turning for the better your end my friend. OC.
 -
Indeed mate, that's what makes the Chally 2 TES version so distinctive, it has side's and Three sections around the back. OC.
-
McLaren M8B by CDW - Accurate Miniatures - 1:24 Scale
Old Collingwood replied to CDW's topic in Non-ship/categorised builds
Superb work mate - looking every inch the racer. OC. -
That's a Beast - you are doing a Marvellous job of her. OC.
- 38 replies
-
- 2
-

-
- Queen Mary 2
- Heller
- (and 2 more)
-
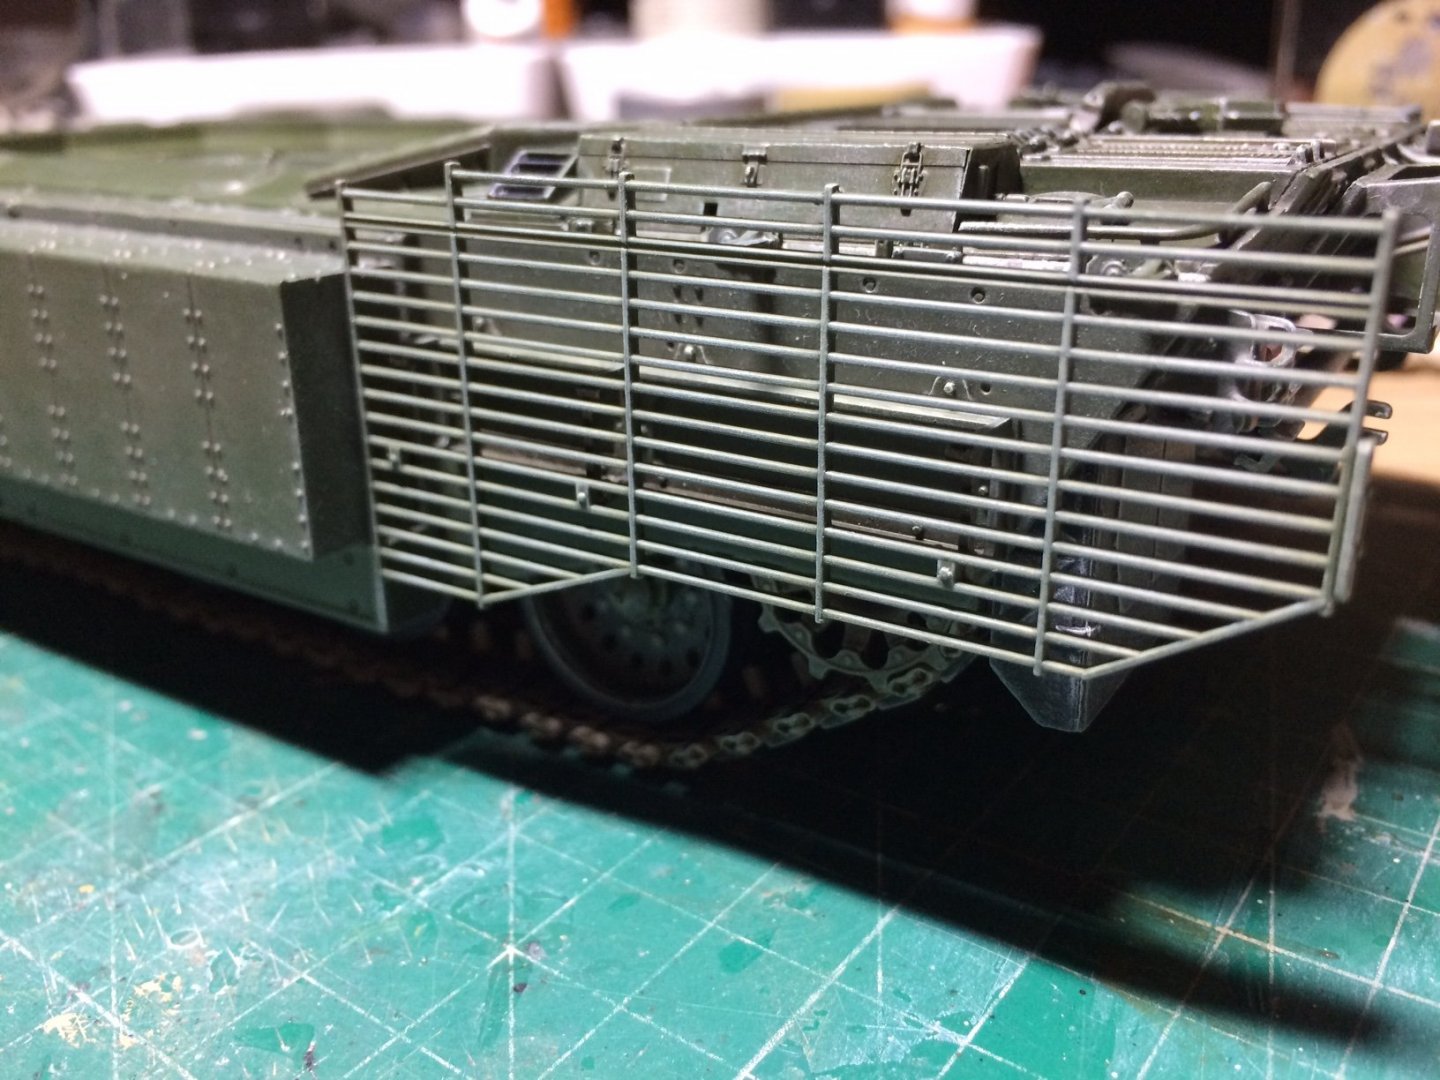
Evening all, a bit more progress this evenening - I firstly found out I had foregotten to put on the hub caps on the wheels - it was a bit of a pain as some of then where partly obscured by the side skirt, it wasn'y much of an ordeal though, next was part of the rear cage - this was painted while still on part of the spru, it was then dry brushed and fitted. OC.

- 367 replies
-
- 10
-
-
He does some amazing stuff - only critic - he doesn't do much Acrylic washes etc. OC.
- 1 reply
-
- 4
-
-
McLaren M8B by CDW - Accurate Miniatures - 1:24 Scale
Old Collingwood replied to CDW's topic in Non-ship/categorised builds
Looking great mate. OC. -
Thats good news Ken - so pleased for you mate. OC.
-
Thanks Ken. How's the eye? OC.
-
M29 Weasel family 1/72 (scratch) by Backer Finished
Old Collingwood replied to Baker's topic in Non-ship/categorised builds
Lovely work. OC. -
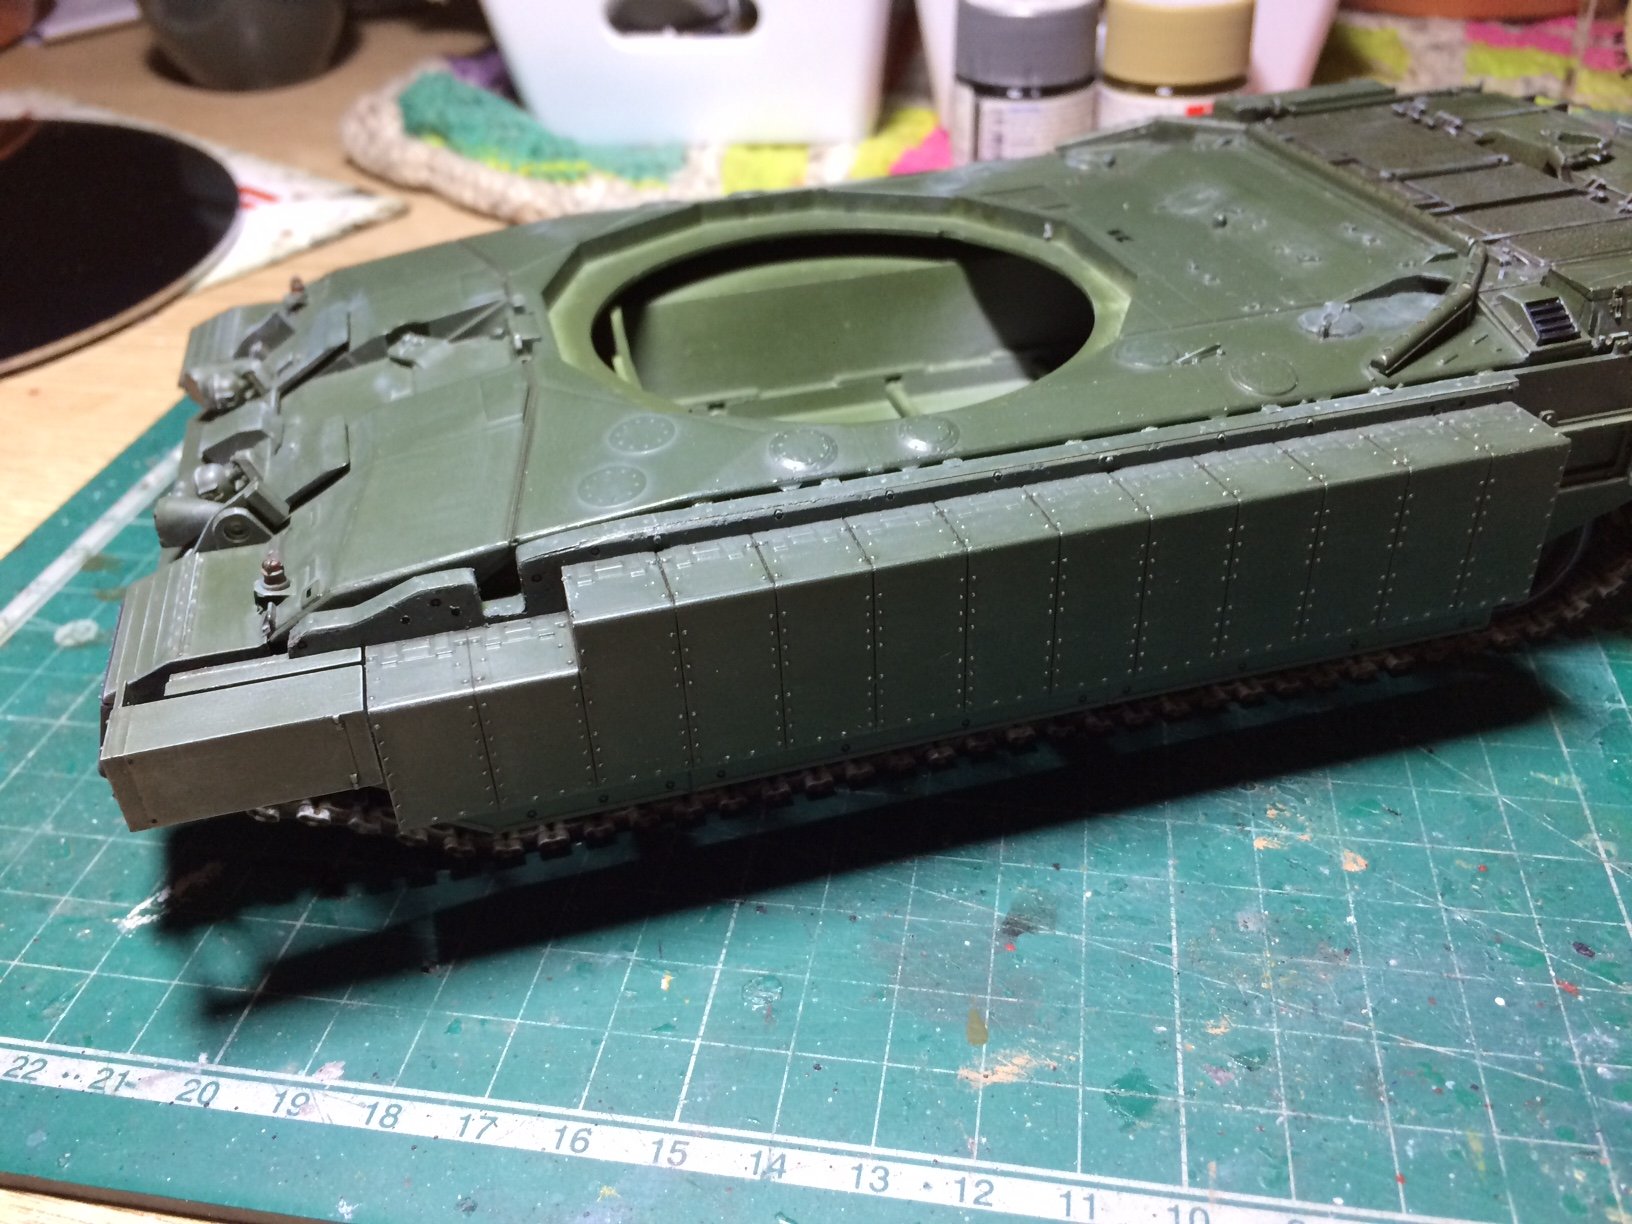
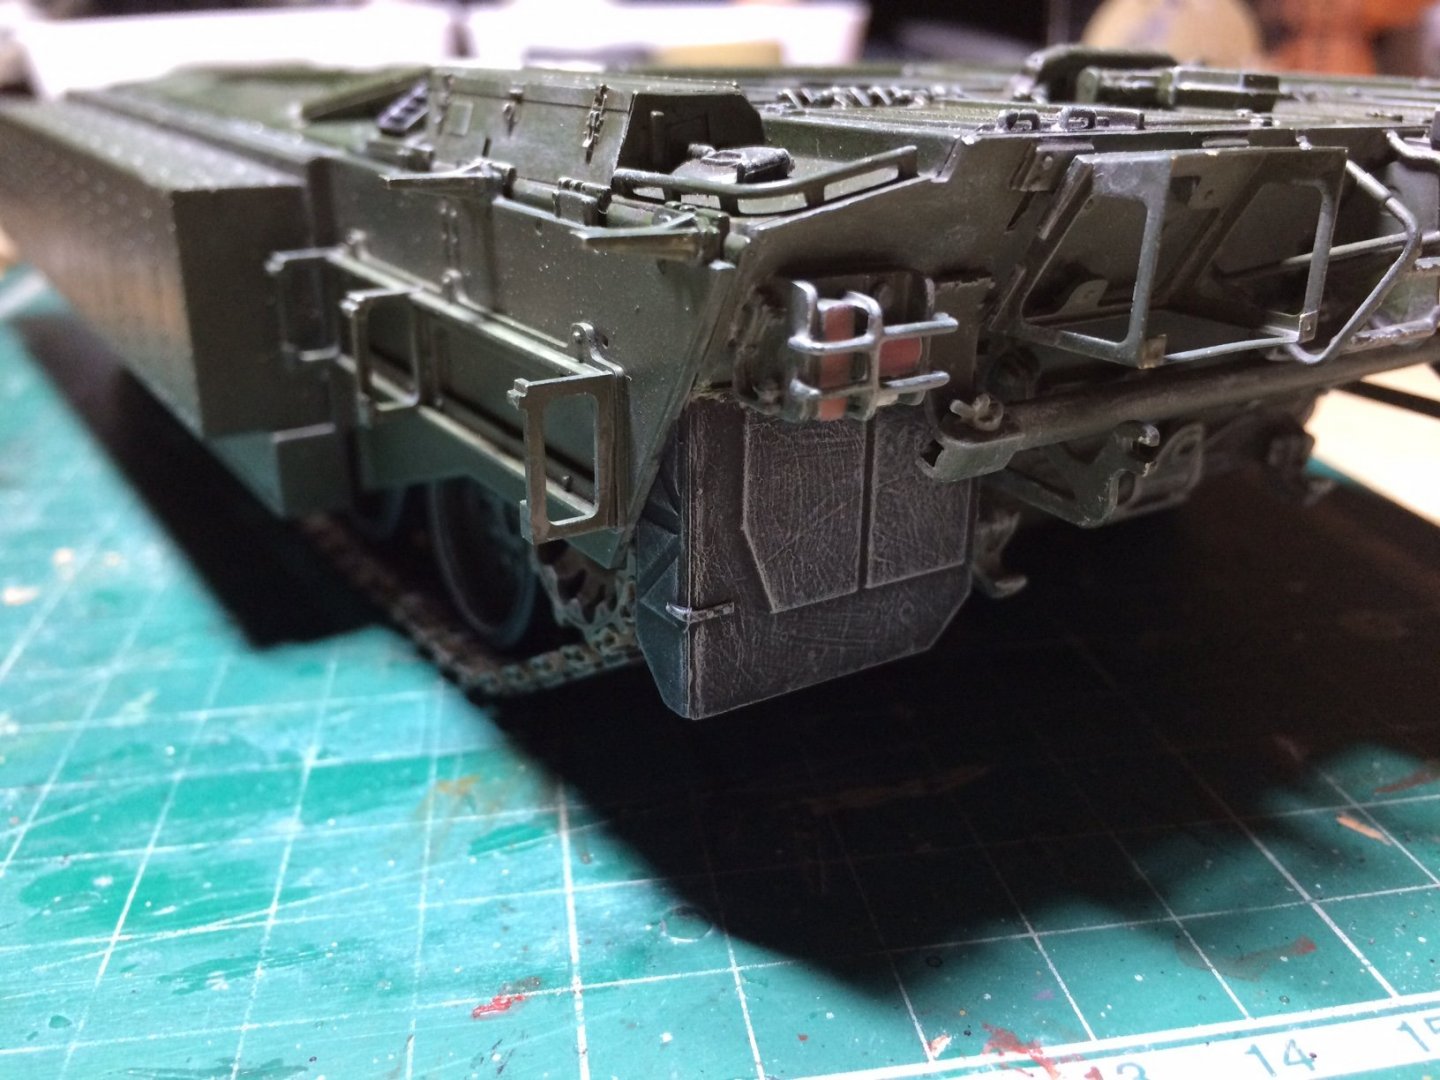
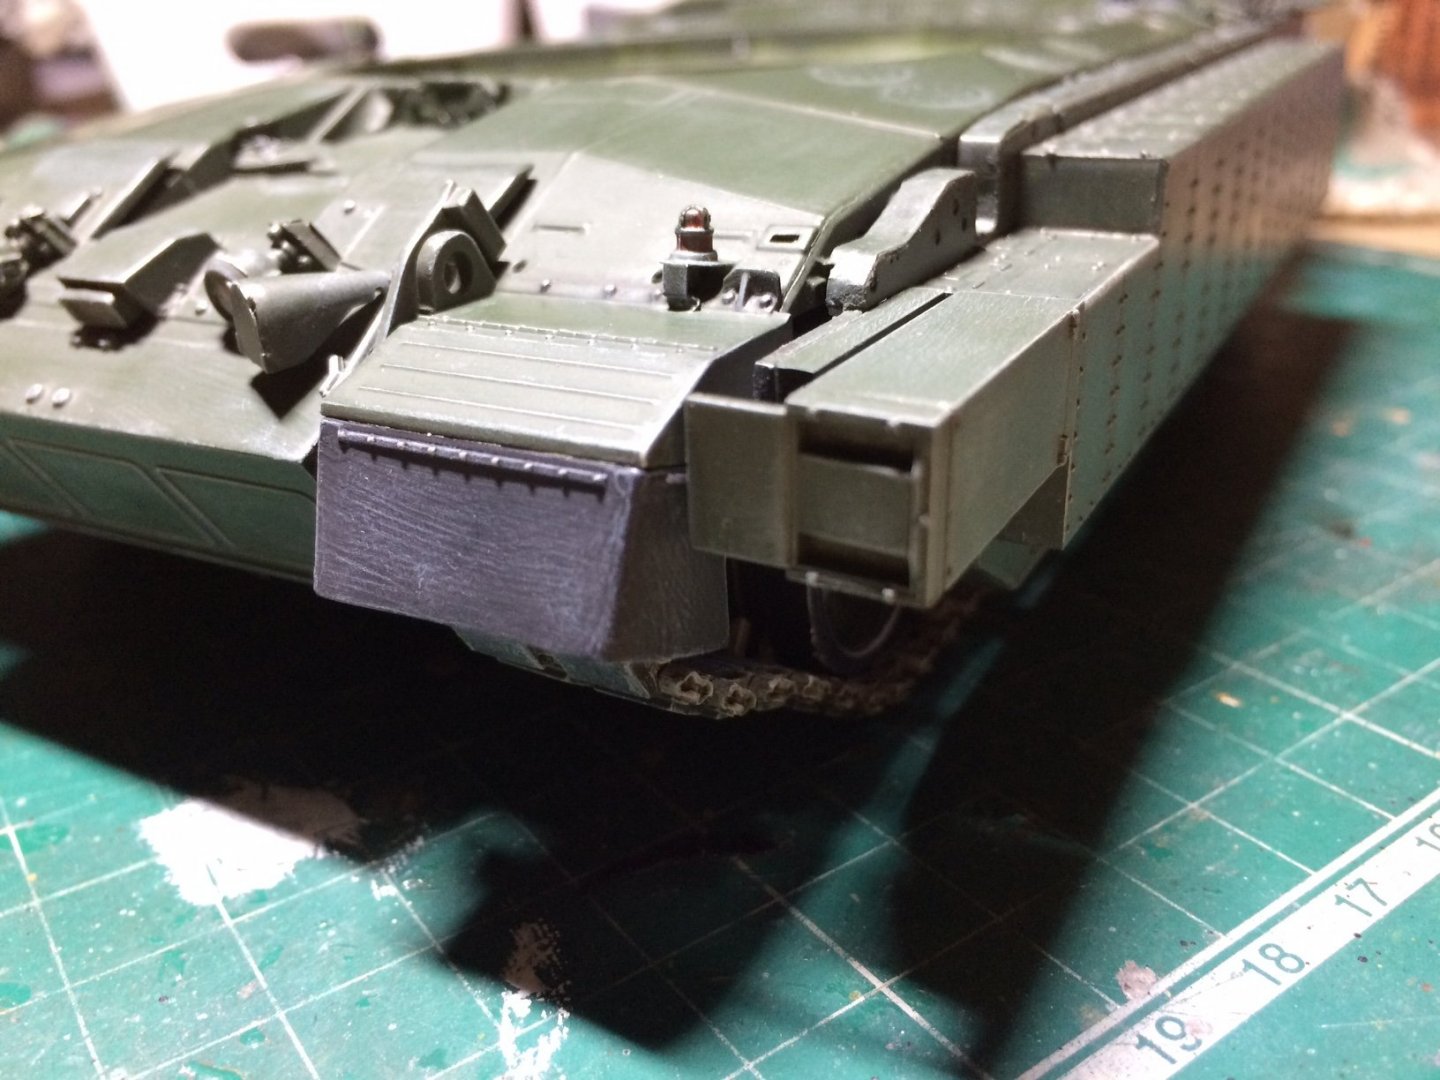
Evening all - yep its been raining so you can tell that means time at the bench, so I decided to attach the side skirt on the side where the track is on, after fitting this I was able to make and fit the rear mud guard, this was then painted a few coats of Nato Black the dry brushed White to make it look nice and dusty, then I did the same to the front guard - same paint/dry brushing, then I made up one of the thermal housings then painted/wash and dry brushed before fitting. Starting to look quite busy. OC.

-
Thank you kindly Patrick. OC.
-
That is looking mighty fine Mark. OC.
-
Really nice work mate - she is looking Super. OC.
- 268 replies
-
- 2
-
-
- panart
- amerigo vespucci
- (and 1 more)
-
Thank you kindly Mark. OC.
-
Thats looking great - so love the Two tone RN colours - typical of FAA aircraft. OC.
-
Could have been mate - but mine is made up after Collingwood from Trafalgar just for our forum. OC.
-
Same as all the other brothers have said - take care of yourself and your lady wife. OC.
-
Thank you Ken. OC.
-
Thank you Edward. OC.
-
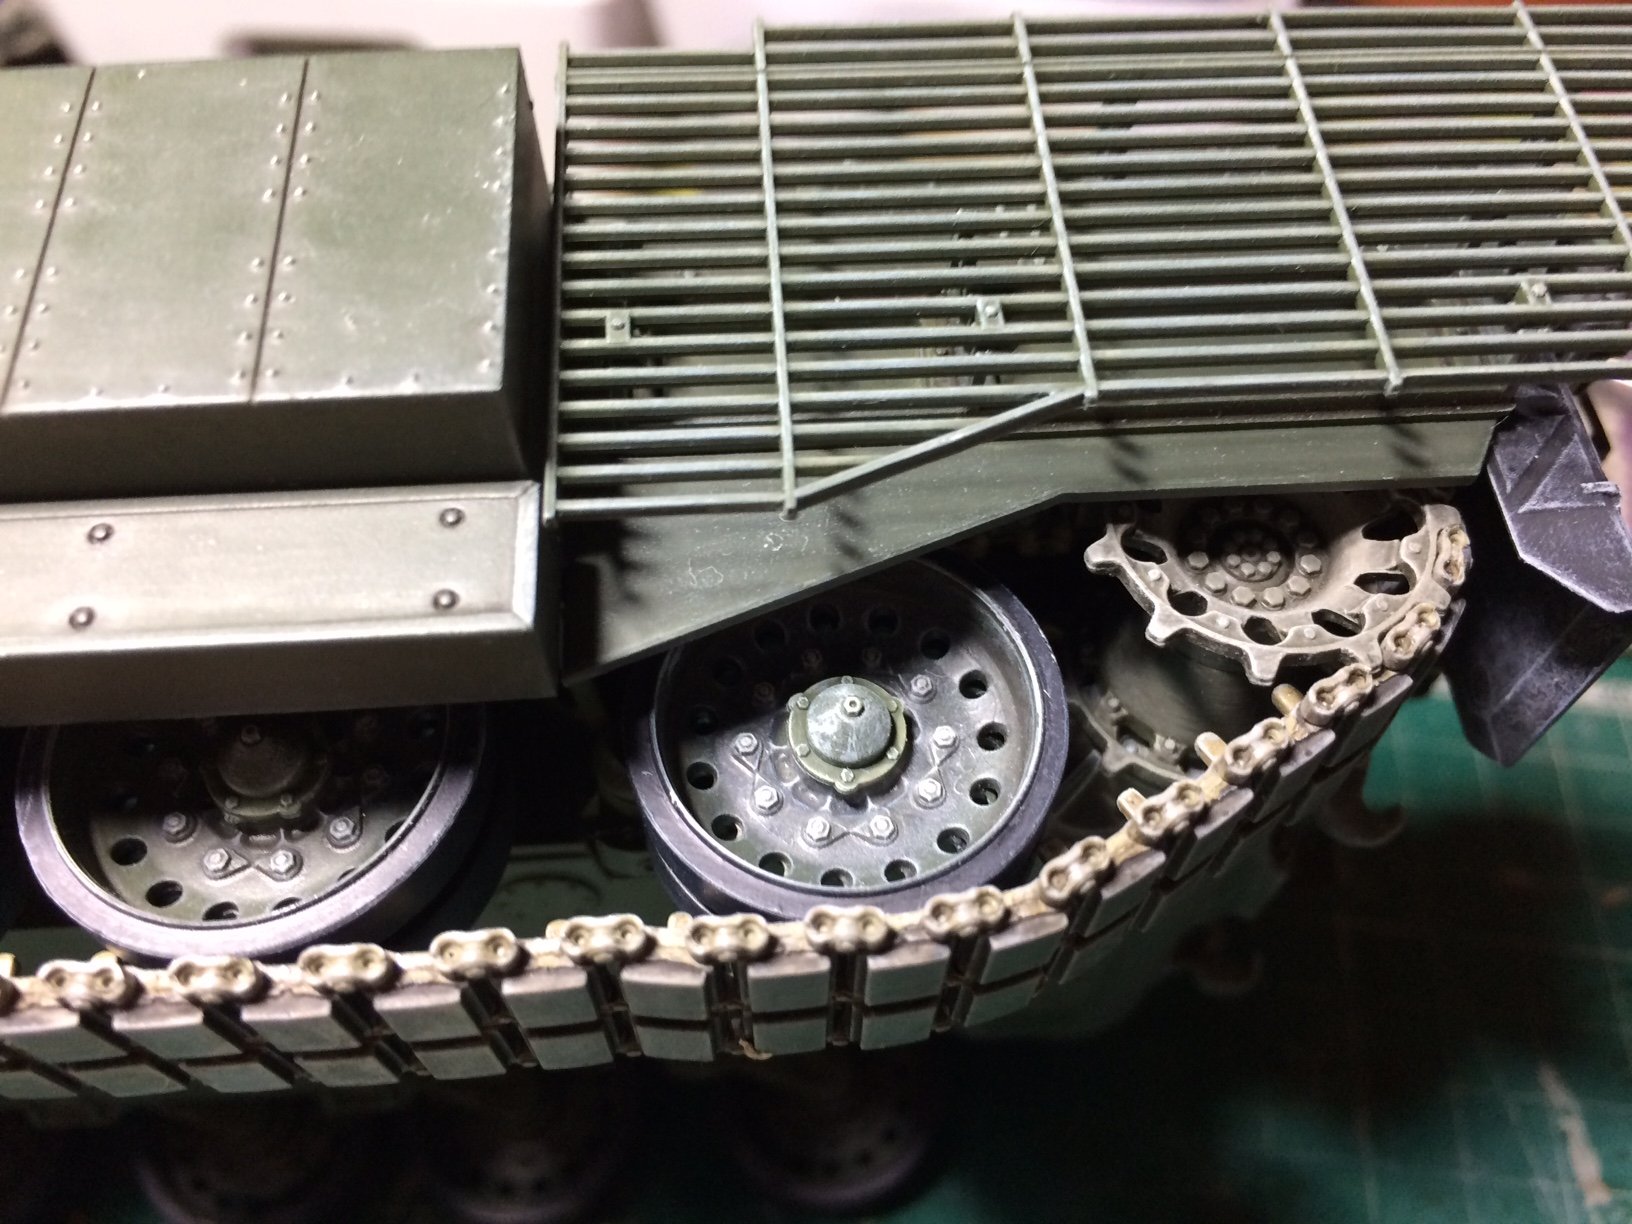
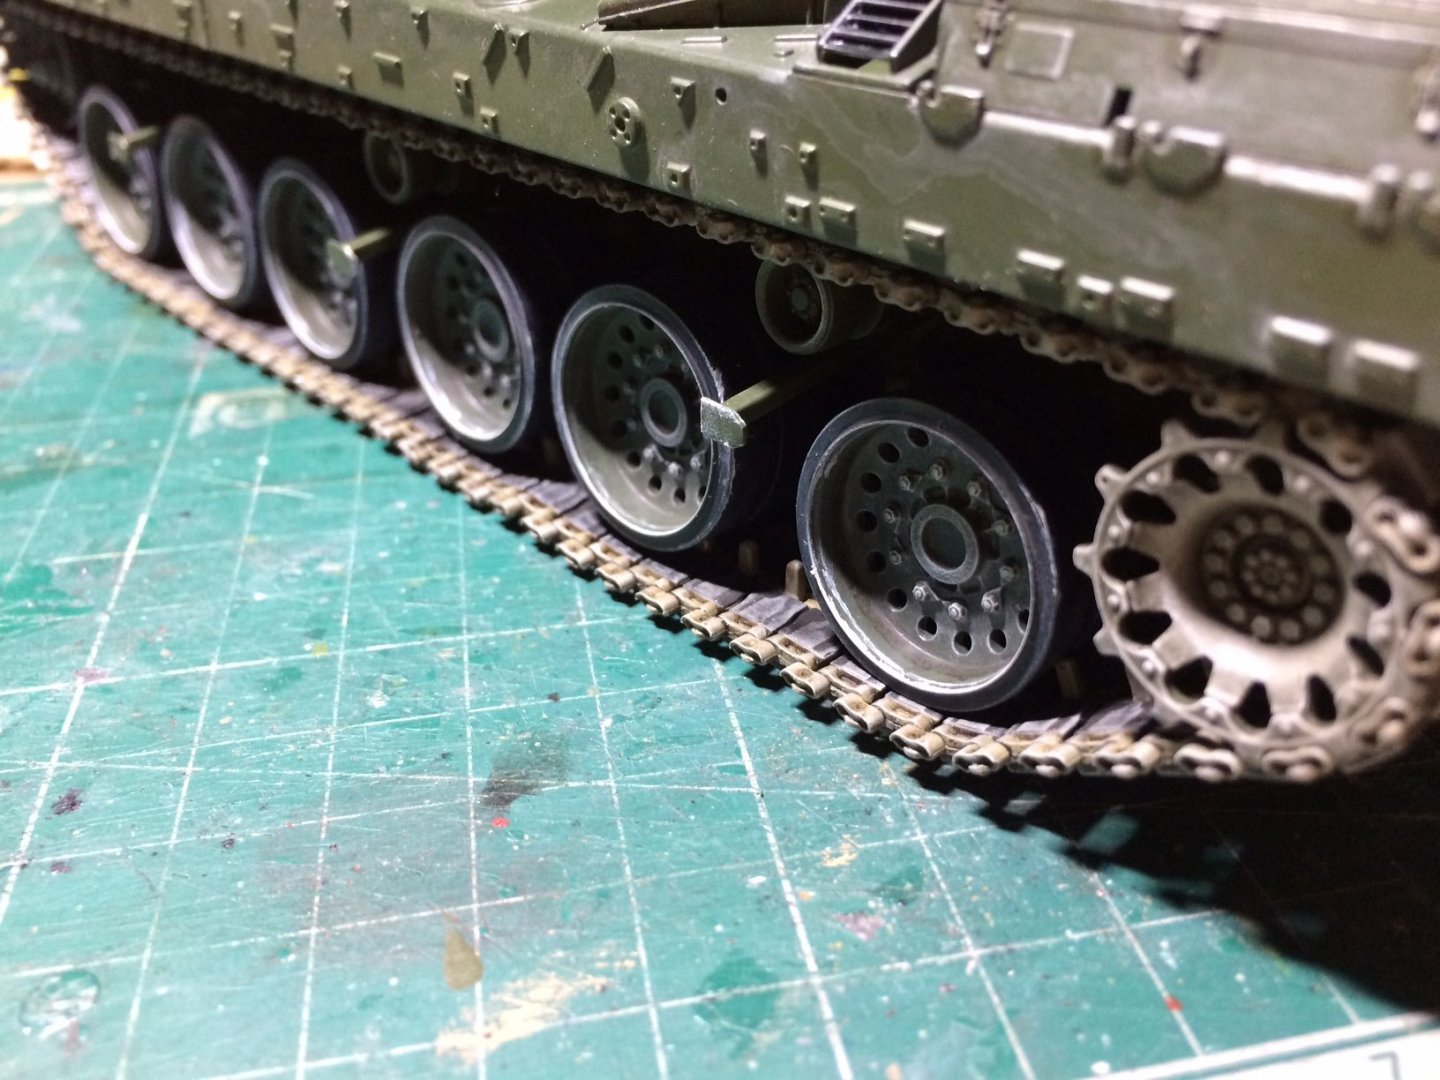
Evening all, firstly we took or poorly princess to have her post op check up - all absolutely fine she is healing very well - next appointment next wed. This eve I was able to do a bit more on the tracks - I painted the inner treads with the same Nato Black then it was wash/weathering time - the idea is to make them look quite dusty from off and on road use, after I was able to feed it along the wheels then attach the last link before attaching the rear drive sprocket. I think it turned out ok - certainly dusty. OC.
- 367 replies
-
- 10
-
-

-
My pleasure Ken. OC.
-
Another Superb piece of artwork in the making - will follow along again mate. OC.
- 38 replies
-
- 4
-
-
- Queen Mary 2
- Heller
- (and 2 more)
-
Hi Ken, its a 50/50 mix of Tamiya Acrylic XF60 Dark Yellow and Tamiya Acrylic XF16 Flat Aluminium just mixed then applied by brush. OC.
-
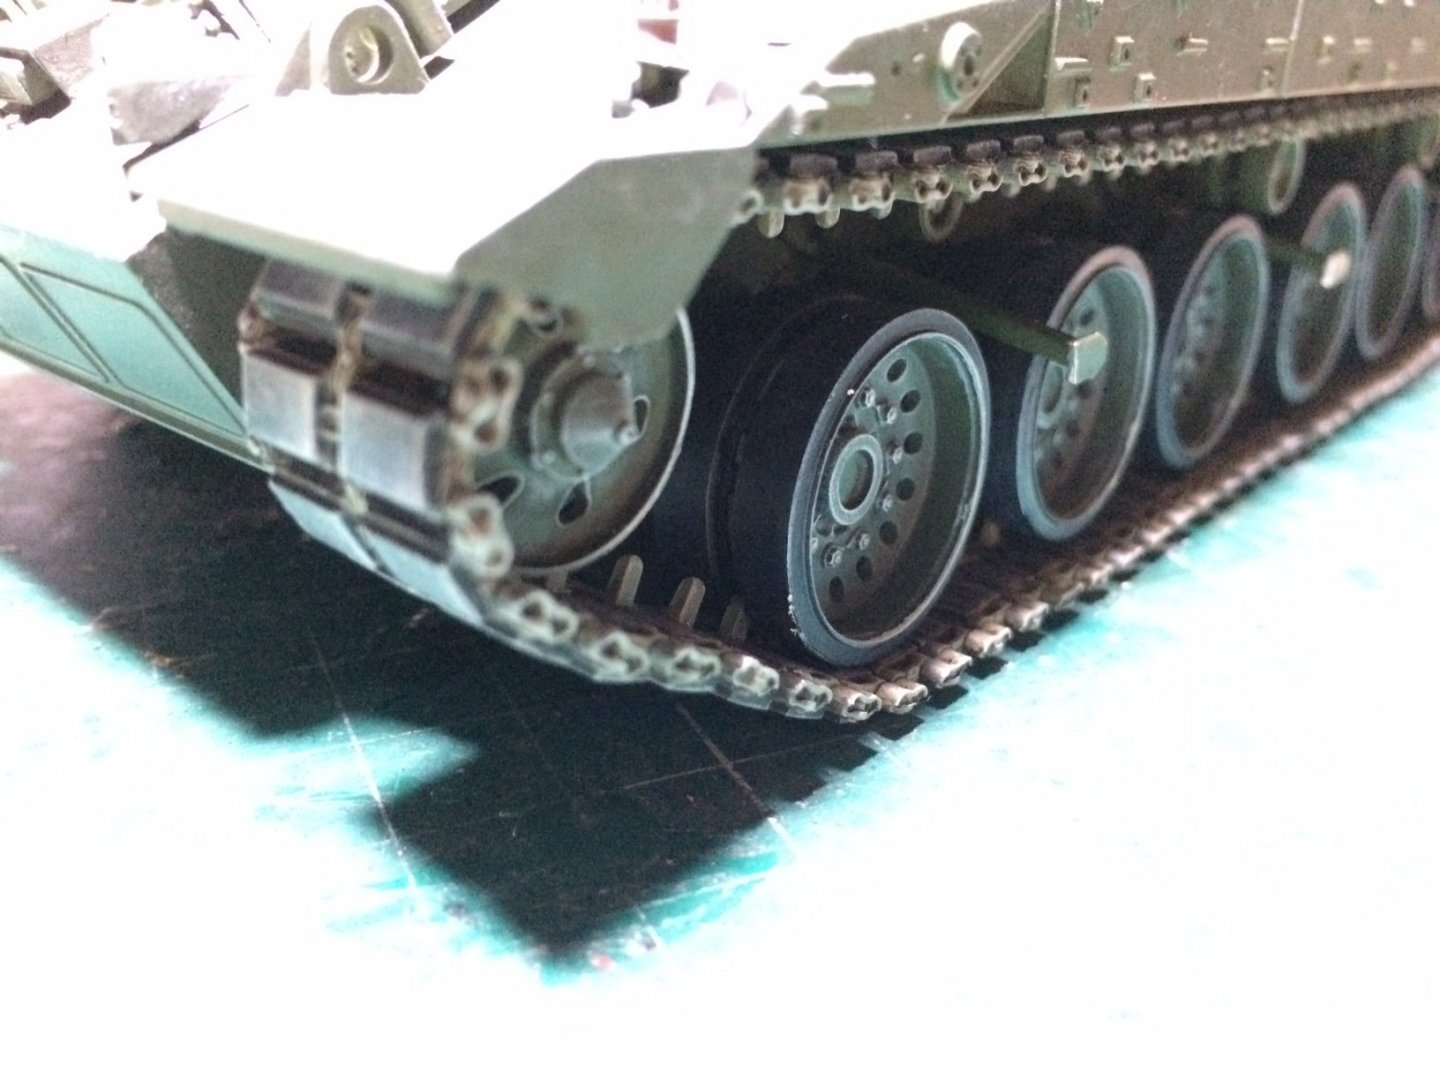
Thank you kindly brother - got a wee bit more to do to it yet - with inner treads and weathering of dark wash and highlighting. OC.