


Old Collingwood
-
Posts
12,104 -
Joined
-
Last visited
Content Type
Profiles
Forums
Gallery
Events
Everything posted by Old Collingwood
-
 Its like we are witnessing the birth of a digital cloan of the ship - amazing just can't get my head around 3D digital printing. OC.
- 321 replies
-
- 5
-

-
- Finished
- Flower-class
- (and 1 more)
-
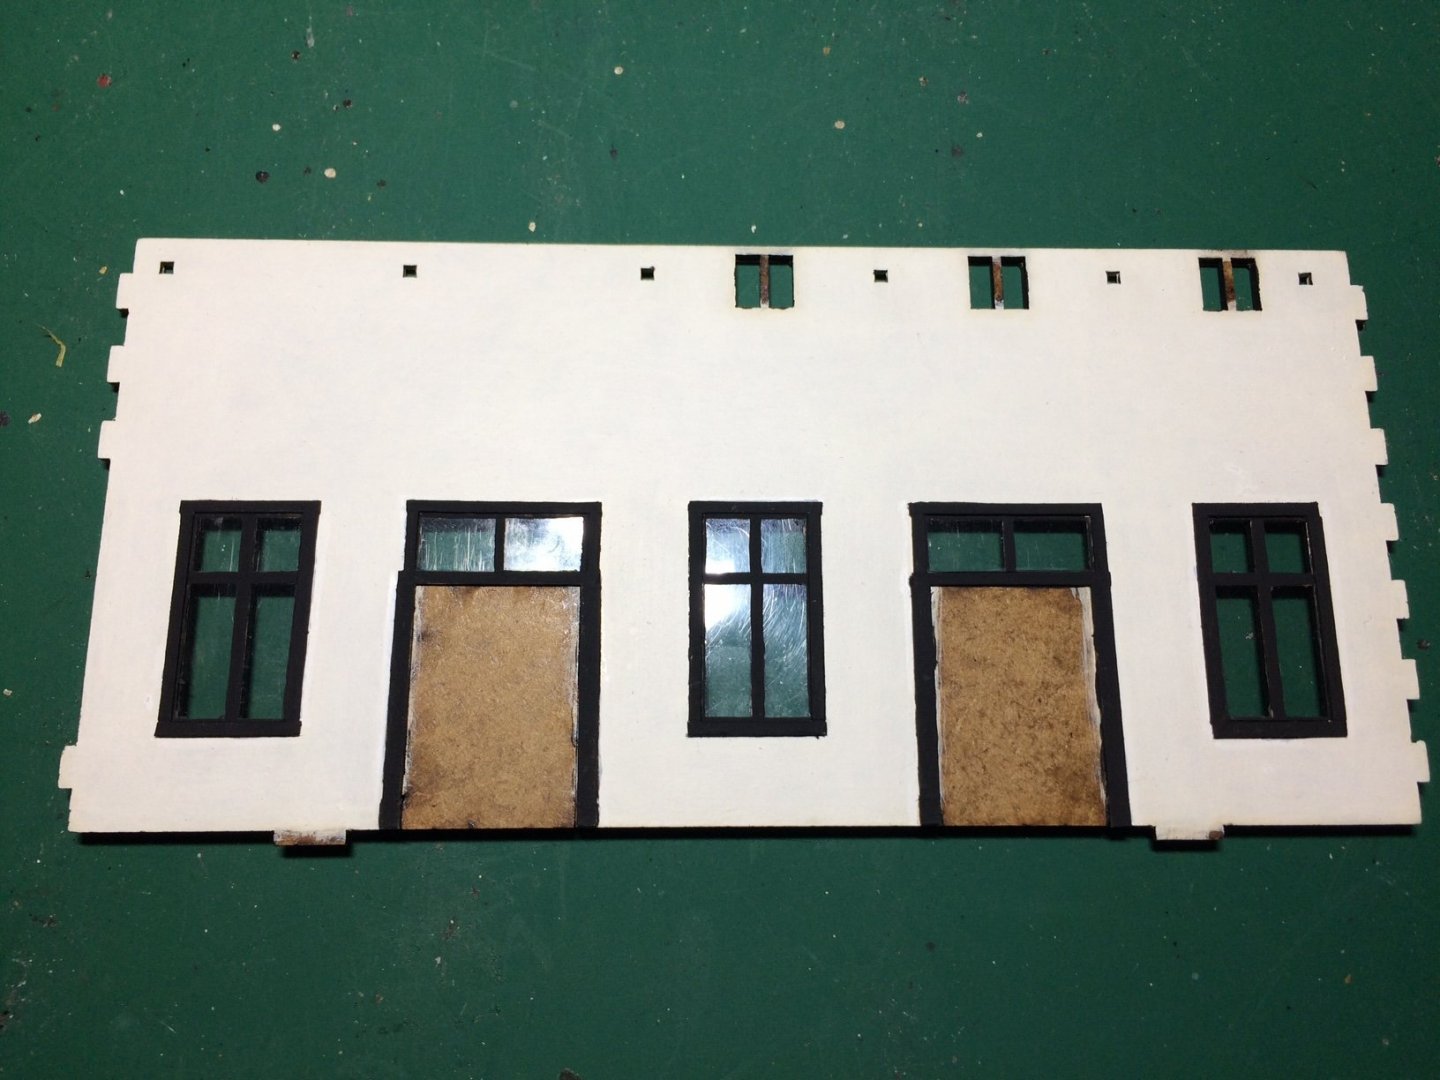
So - work for tomorrow - Paint the back of the doors and paint around the small airway windows - then do the same to the other wall/side, then I can start adding some floor beams attached to the walls on each section. OC.
-
Dug yourself a hole there Kevin - think you will need a Huge popcorn machine - even bigger than Marks😁 OC.
- 321 replies
-
- 7
-
-
- Finished
- Flower-class
- (and 1 more)
-
Thank you kindly Ken, I think when you get into your stride and it enjoyable the building of it just flows, and like I said earlier I am enjoying it as its all do-able at this scale. OC.
-
Thank you so much Mark. OC.
-
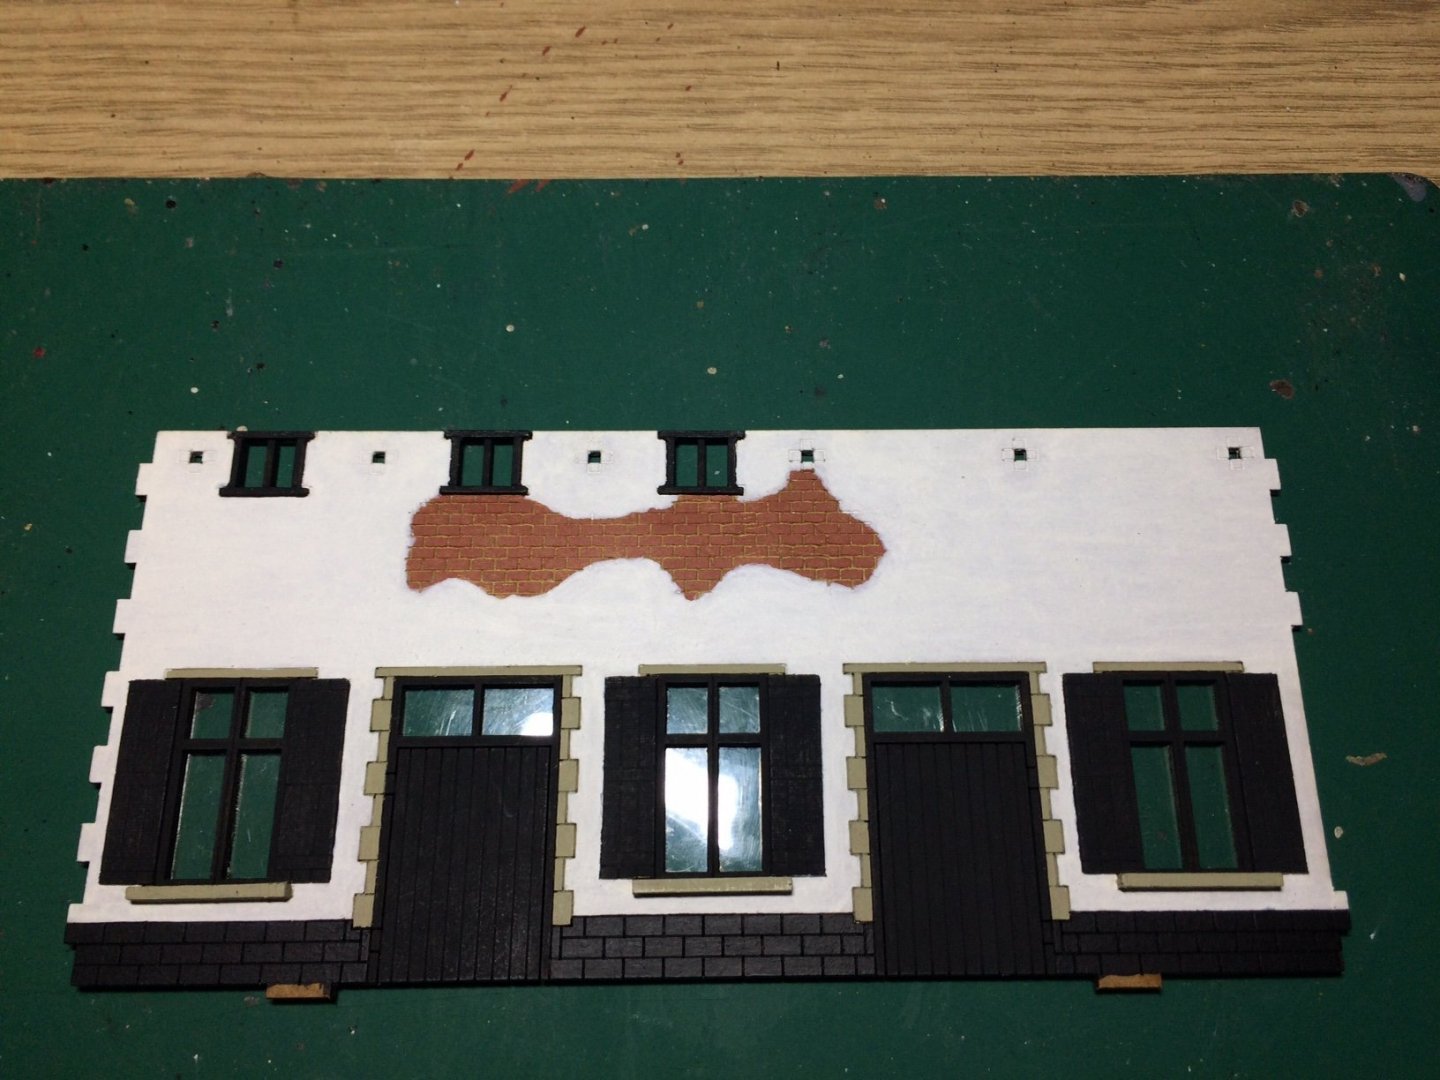
Evening all, made some quite good progress with the inside wall of the farmhouse - firstly I found some clear plastic (the casing of some jump seats) I then measured the windows and set about cutting out some plastic pieces just slightly larger than the MDF window cut outs, I then ran a film of PVA and placed the glazing sheets, then I made some cardboard strips and started framing the windows and doors, I finished off by applying a few coats of Nato Black and touched up the White after doing the edges of the frame. OC.

-
I think the main thing that is different between them - Vallejo is designed for finer work probably on smaller objects and the Admiralty range are supposed to be colour matched to period ships and possibly designed for a rougher texture like wood. I guess both can be used (as I have used both on my Waterloo dio build) - brush work tends to be roughly the same. Hope this helps.
-
Excellent build and what a tiny weeny little thing she is compared to the Battleships. OC.
- 53 replies
-
- 3
-
-
- photo etch
- resin
- (and 3 more)
-
Sutch a sharp little thing with all that detail. OC.
-
Hope the damage was minimal? OC.
-
Those decals really bring it to life. OC.
-
Thank You kindly. OC.
-
Hi all, just a quicky - I got some lovely feedback and comments off the owner of Arcane Scenery who I purchased my LHS farm kit from, he is an established builder himself and such an honour to get such lovely comments from him.😃 OC.
-
I agree with what Kevin said - I also thought you meant on the vertical, as in viewing the canon/carriage from the front and seeing the sides angled inwards towards the top. OC.
-
Sounds like a good idea Craig, correct shades of colour with our builds can be a right mine field and sometimes over complicated. OC.
- 225 replies
-
- 5
-
-
- I Love Kit
- Hood
- (and 2 more)
-
Just eyeball it mate - if it looks good to you - thats all that matters - its looking more than nice from here. OC.
- 273 replies
-
- 4
-
-
- panart
- amerigo vespucci
- (and 1 more)
-
Another engineering project - this will be very interesting to follow. OC.
-
Thats an interesting subject and to be honest I was not completely sure but - this might help. OC. https://www.sovereignhobbies.co.uk/pages/royal-navy-periodic-table-of-paints
- 225 replies
-
- 4
-
-
- I Love Kit
- Hood
- (and 2 more)
-
Thank you very much for your kind words Gary, its ambitious but fun - I am really enjoying the whole thing probably more than anything else I have built (save for my Balck Pearl build). OC.
-
What an excellent little boaty mate - see thats got you ready for 1/700 scale. OC.
- 53 replies
-
- 5
-

-
-
- photo etch
- resin
- (and 3 more)
-
Great to see you back on with this creating little engineering marvels - so love what you are creating. OC.
- 273 replies
-
- 3
-
-
- panart
- amerigo vespucci
- (and 1 more)
-
Yep stay safe Craig and as Alan said - hope it does not cause you too much grief. OC.
- 225 replies
-
- 6
-
-
- I Love Kit
- Hood
- (and 2 more)


