Old Collingwood
-
Posts
12,104 -
Joined
-
Last visited
Content Type
Profiles
Forums
Gallery
Events
Everything posted by Old Collingwood
-
 Just catching up Mark, that is some lovely work you are doing and with your carvings - nothing can be taken away from the skill to even attempt such a task - hats duly taken off my friend. OC.
 -
Excellent work - really nice. OC.
-
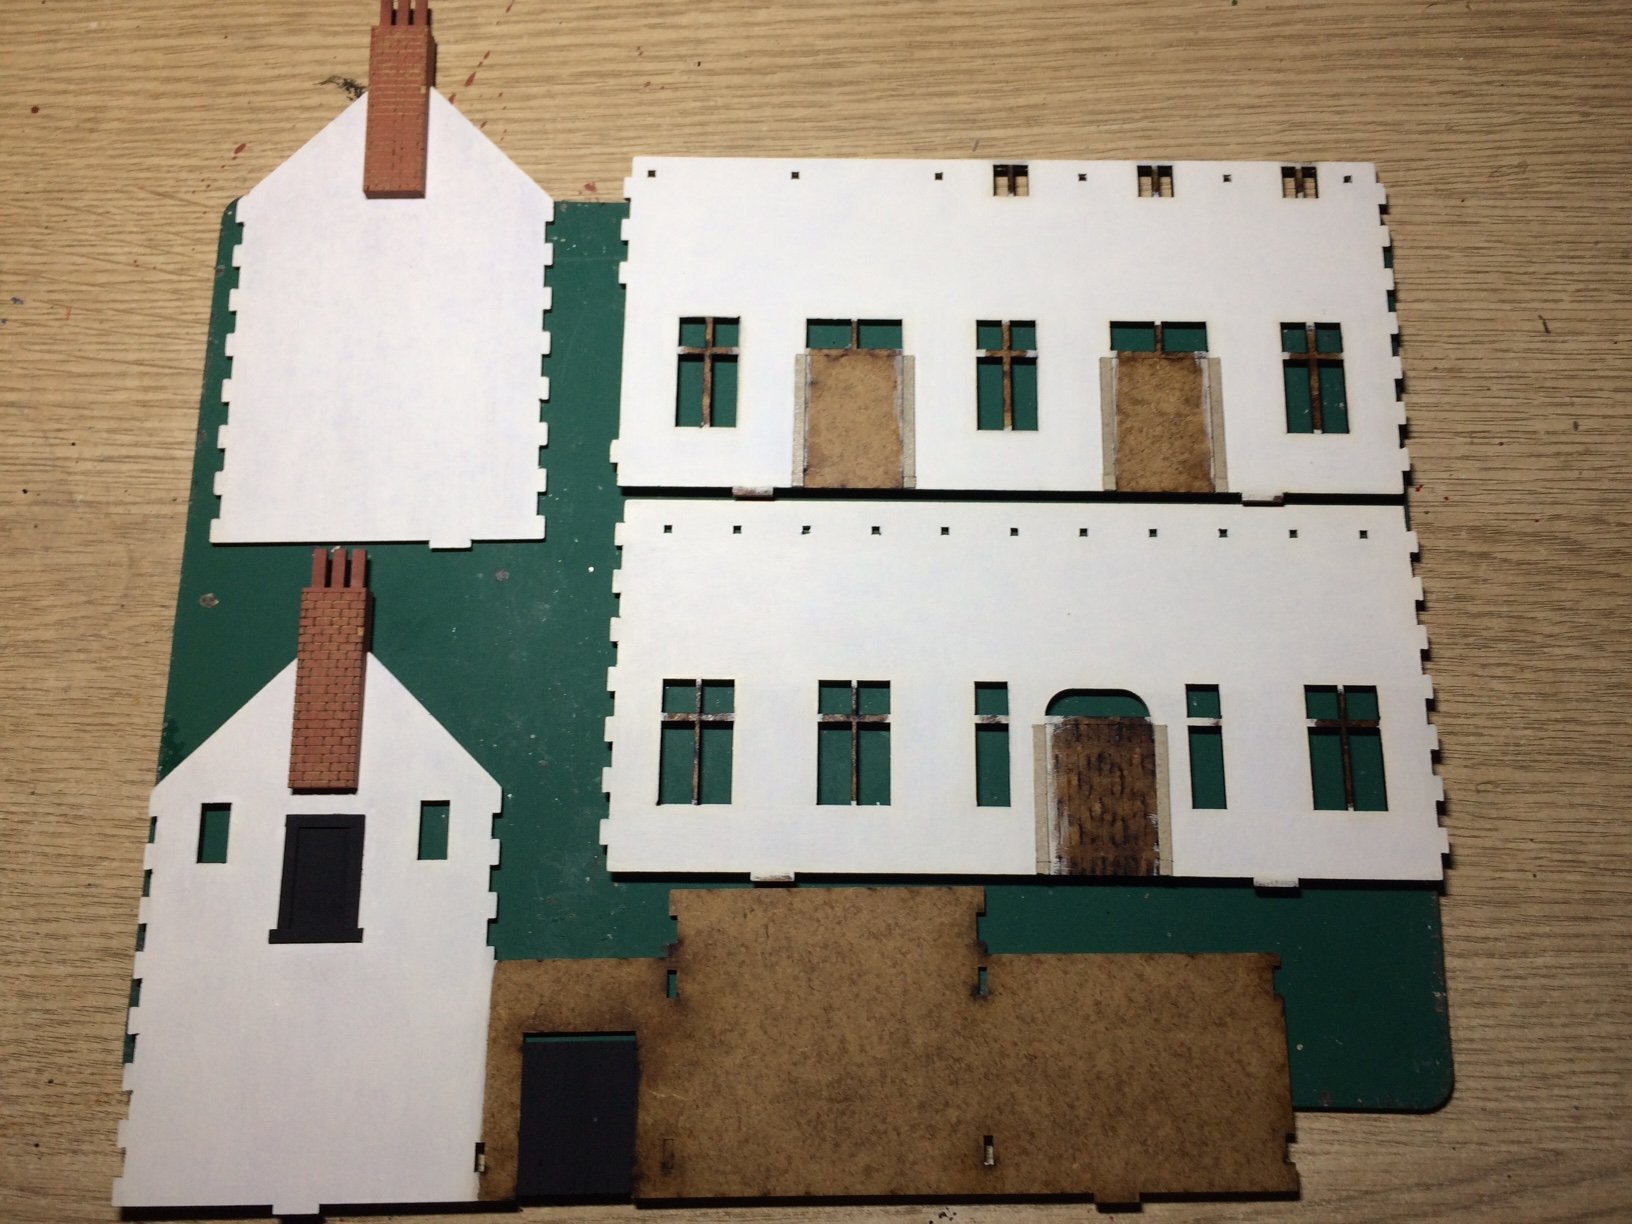
Evening all, a bit more progress on the farmhouse - I added a few more White layers then made up a few frames around the doors, they will have there head frames after I have fitted the clear plastic for the windows, I then did a bit of Black painting. I also painted and fitted the chimney stacks, OC.

-
Yes indeed Mark, I will be placing some firing form the Dorma windows as they had a vantage point over the wall and buildings, my way of looking at is - early in the battle the main farm was still intact and the KGL was uisng all of its vantage points to shoot at the French, its this stage I want to replicate - even possibly with the main courtyard gates open and KGL firing from that position also. OC.
-
Thank you so much Phil. OC.
-
Very nice start - you are really getting the hang of all the PE work especially in little land - where we all fear going into. OC.
-
So my next move with this - put a few more White layers down on the Two remaining inside walls, then when dry have a go at creating some door/window frames that will trap some clear plastic to represent my windows, then I will study and mark out my room partition's and ceiling/first floor position, then check what wood stock I have to make some attaching frames for the room walls and floor that will probably be made up using lolly sticks (wooden type) - well that's the loose plan. OC.
-
Hope your move goes well mate - never an easy thing - Will be great to see you building again mate. OC.
-
Evening all, Only a small update today - I finished painting the outside of the kitchen garden facing wall of the cottage (i'm out of breath from saying that) so next was to add some layers of White on the insides of the Four walls - yep layer after layer after layer - still havn't finsished them yet, so I know what I will be doing tomorrow, I have had to order some more White as I am getting through it like there is no tomorrow. No pics as time beat me but I will put some up tomorrow. OC.
-
Thank you Alan. OC.
-
Thank you so much Craig, its real fun I have to admit. OC.
-
Thank you kindly Ken, the admiral calls it a dolls house - my way of thinking is similar to my Pearl build when I put a table a chairs in there that no one could see but I knew was in there - it will be fun. OC.
-
So, more of the same for the other face of the house tomorrow, then I will look for some clear plastic that can be cut and glued on the inside for my windows. Oh did I say - I intend to detail the inside of the farmhouse - I am putting in a partition on the ground floor for a kitchen and lounge, will also add some stairs and a First floor with a couple of bedrooms, the dorma windows will also be opened up into the bedrooms to allow the placement of a few of my 2nd KGL firing from them poitions - what I have done sofar is just the tip of the iceberg. OC.
-
Evening all, more progress today I put a few more paint layers down - the farm side of the farmhouse is now just about painted just needs a wee bit of weathering and some clear plastic put behind to represent the windows. OC.

-
That's looking the business mate - so much going on with such a small ship. OC.
- 53 replies
-
- 5
-

-
- photo etch
- resin
- (and 3 more)
-
That sounds like a result mate - looking forward to that one also. OC.
-
Thank you so much Ken, it was a case of being careful with the brush - not loading too much paint on it almost lile dry brushing, it will start to "pop" when I add the other colours to the details and put some clear plastic on the inside for windows. OC.
-
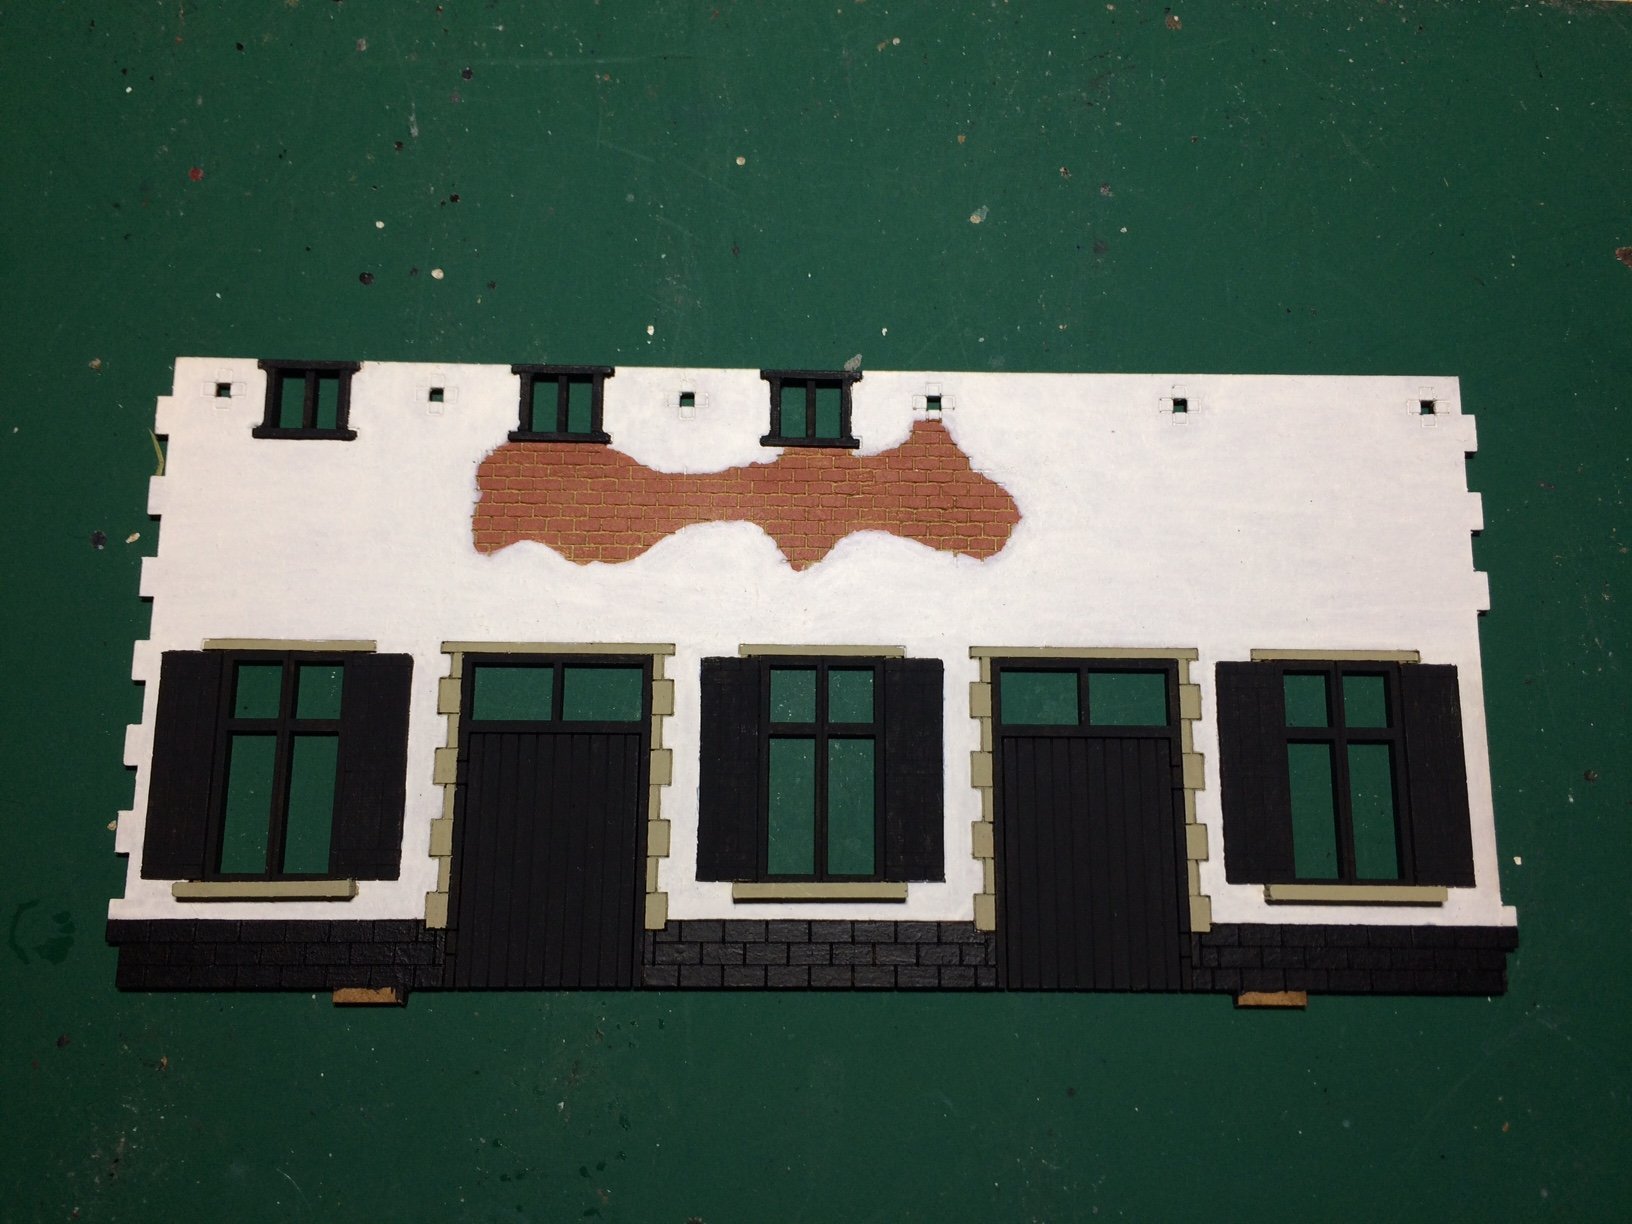
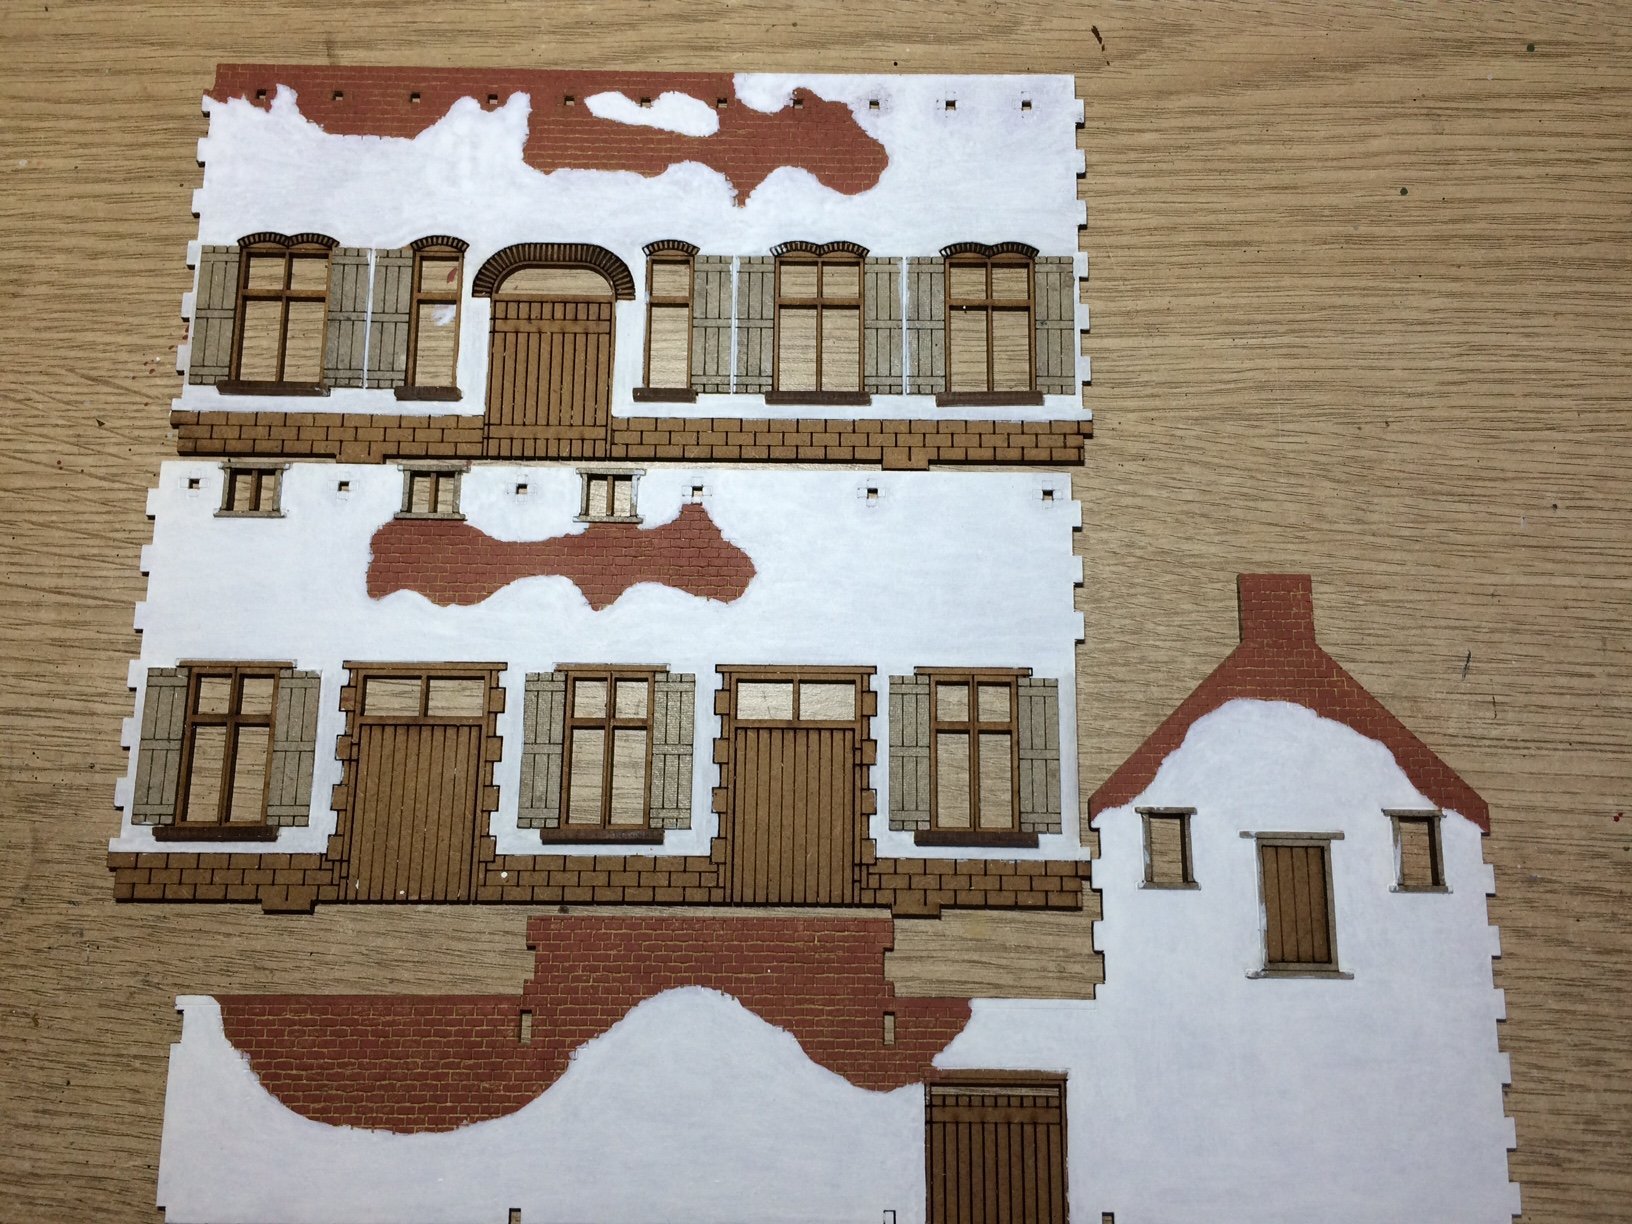
Thank you kindly Mark, From what I gather - the square bricks around the doors/windows are stone so they will receive a couple of coats of a Buff/Grey colour, I will do the frames and the doors a dark Grey/Black (think Nato Black will be fine for that - the ledges will also be stone Buff/Grey colour and around the bottom bricks a Black painted band - this will follow all the way around the farm complex on the inside. I am playing with the idea of simulating glass in the windows by using some clear plastic glued to the inside, I know some of this glass was probably shot out later in the day when the French managed to get above the wall, but as I am building it form an earlier part in the day, I don't think any of the windows would have been shot from the French outside the walls. OC.
-
Thank you so much for saying that. OC.
-
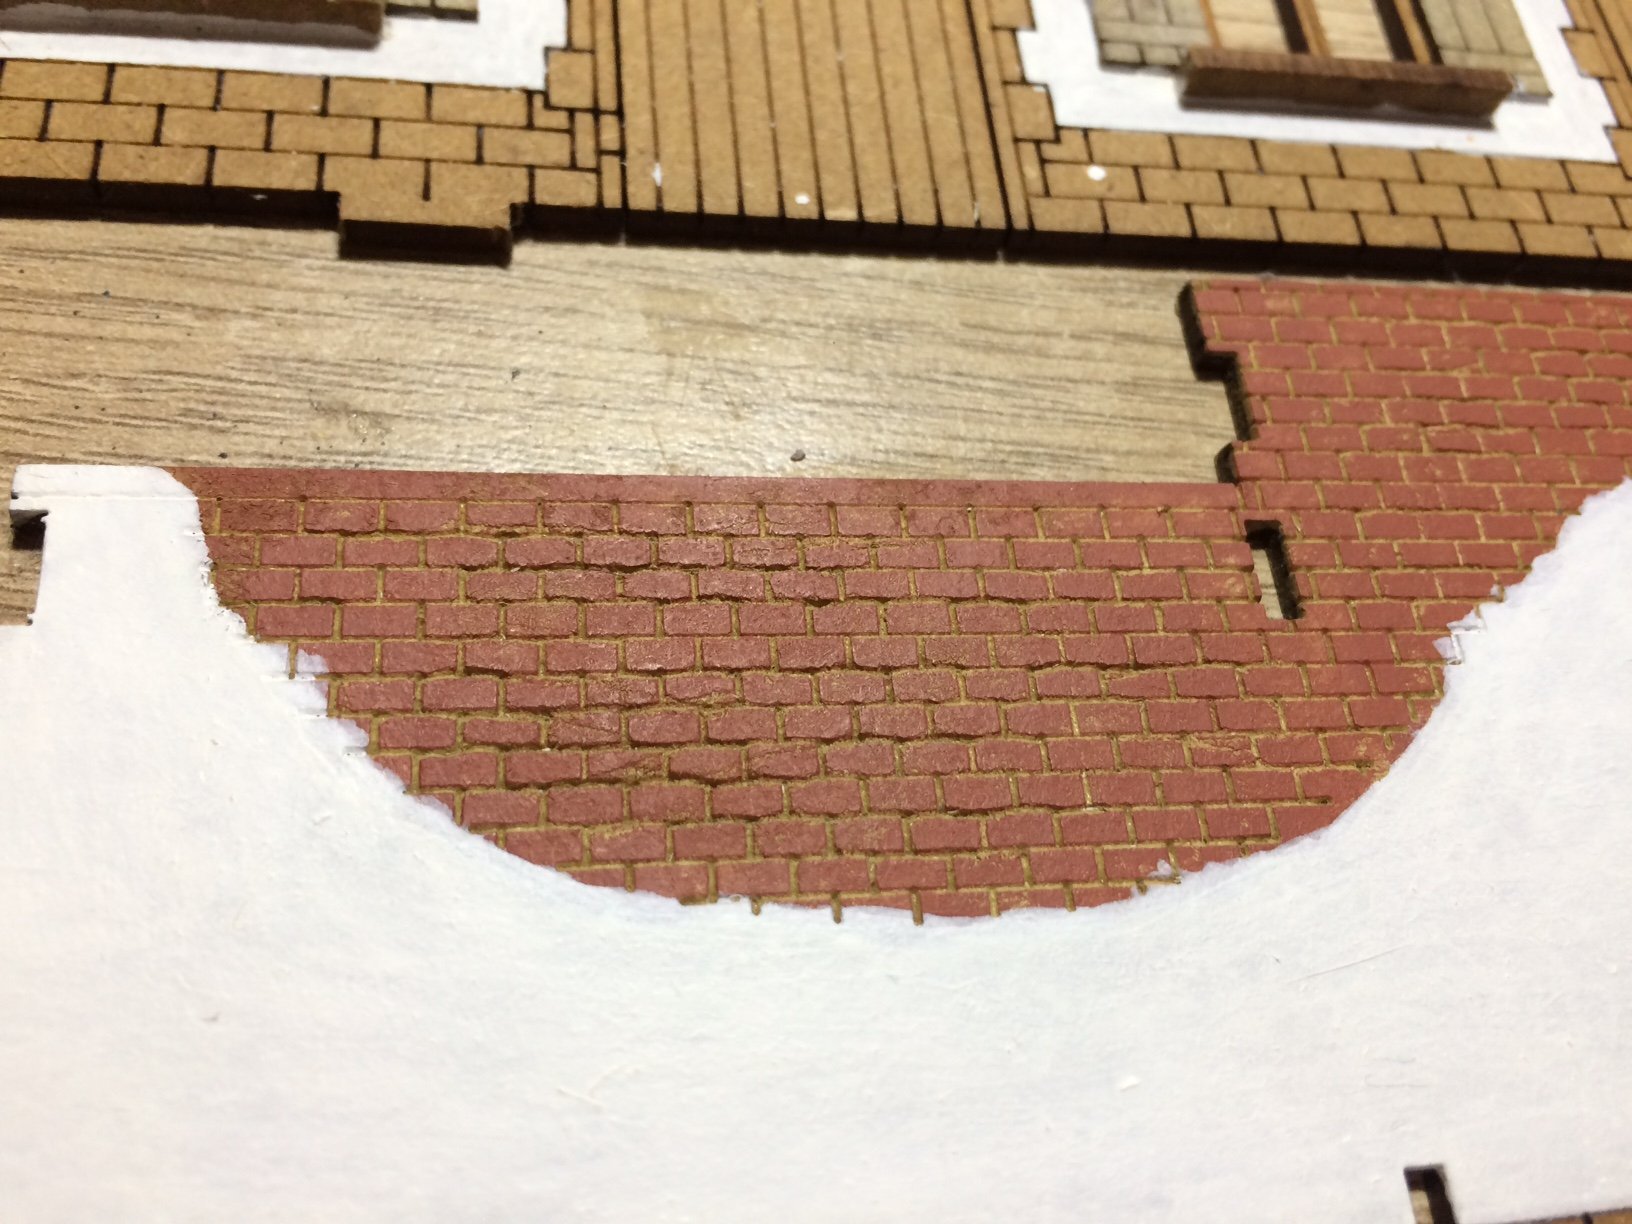
Thank you Alan, I did try to make sure the mortar showed through and make the bricks look real with some depth. OC.
-
I know the 2nd KGL engineers who were there the night before decided to take the barn door off and buned it to make a fire to keep them warm in the heavy rain - but I have not read anywhere about them dissmantling the farmhouse doors. OC.
-
Evening all, A bit of an early update before the footy match on the tv, anyway I mixed up some brick colour paint, then gently applied it over the brickwork in an almost dry brush fashion, then I started applying the White layers - still a few more layers to do - but its fairly straightforward brush work, so here is the current stage - OC.


-
Thank you kindly Kevin, will deffo do something with them but might not go over board as I guess they would not have been very battered being the farmhouse doors. OC.