


Old Collingwood
-
Posts
11,491 -
Joined
-
Last visited
Content Type
Profiles
Forums
Gallery
Events
Posts posted by Old Collingwood
-
-
11 minutes ago, Landlubber Mike said:
Looking really good OC. Nice to see it with some teeth in
")
Thank you kindly Mike.
OC.
- mtaylor, popeye the sailor, Canute and 3 others
-
 6
6
-
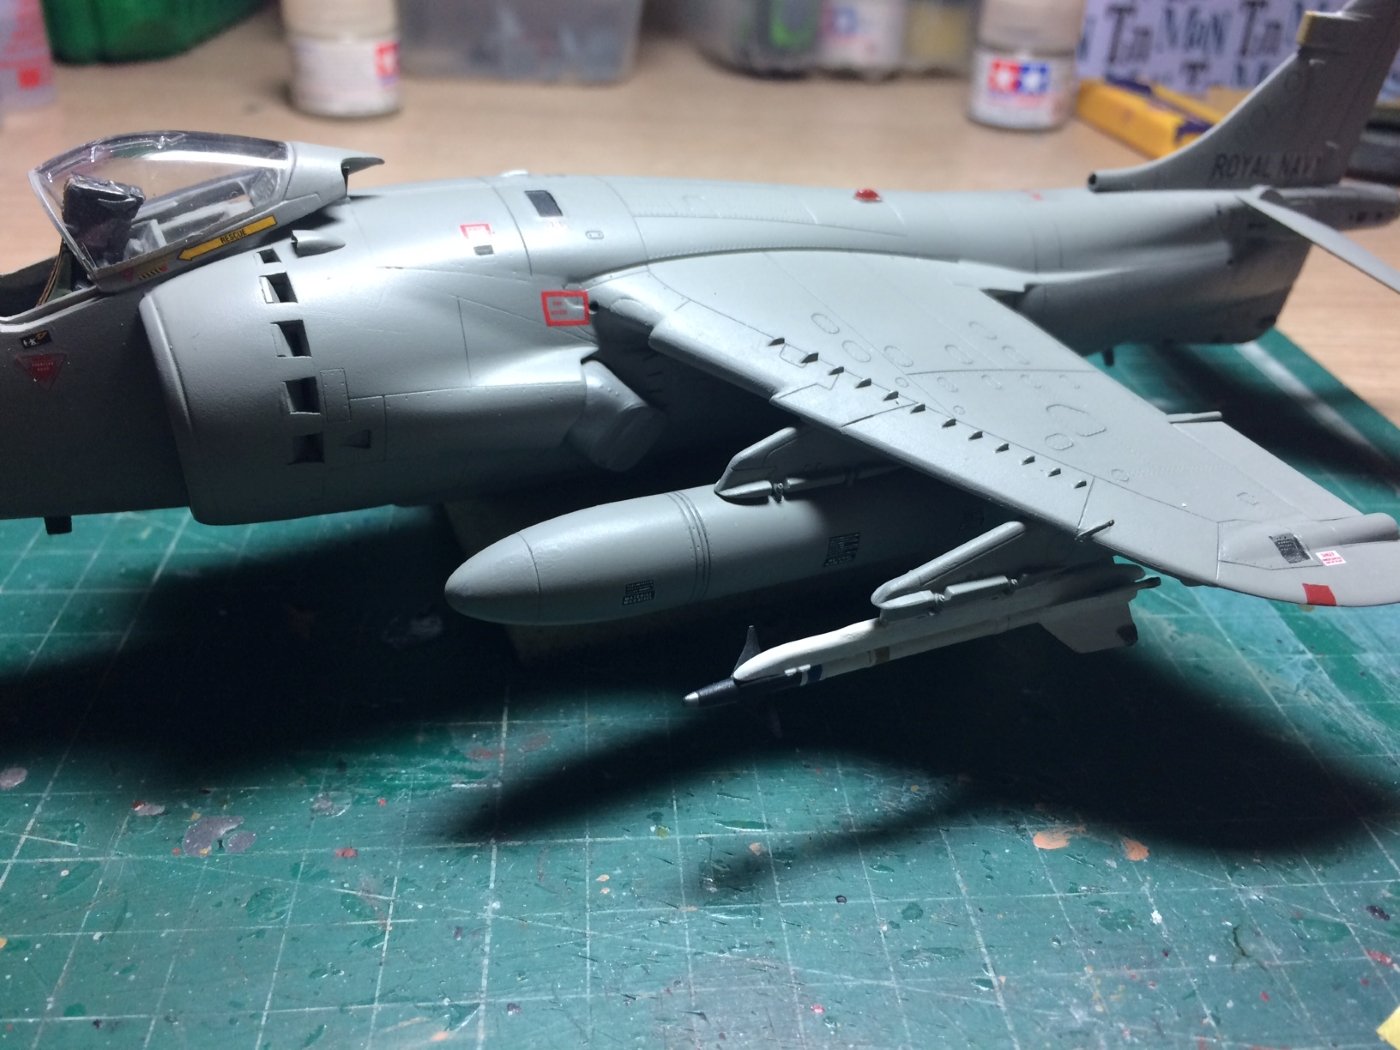
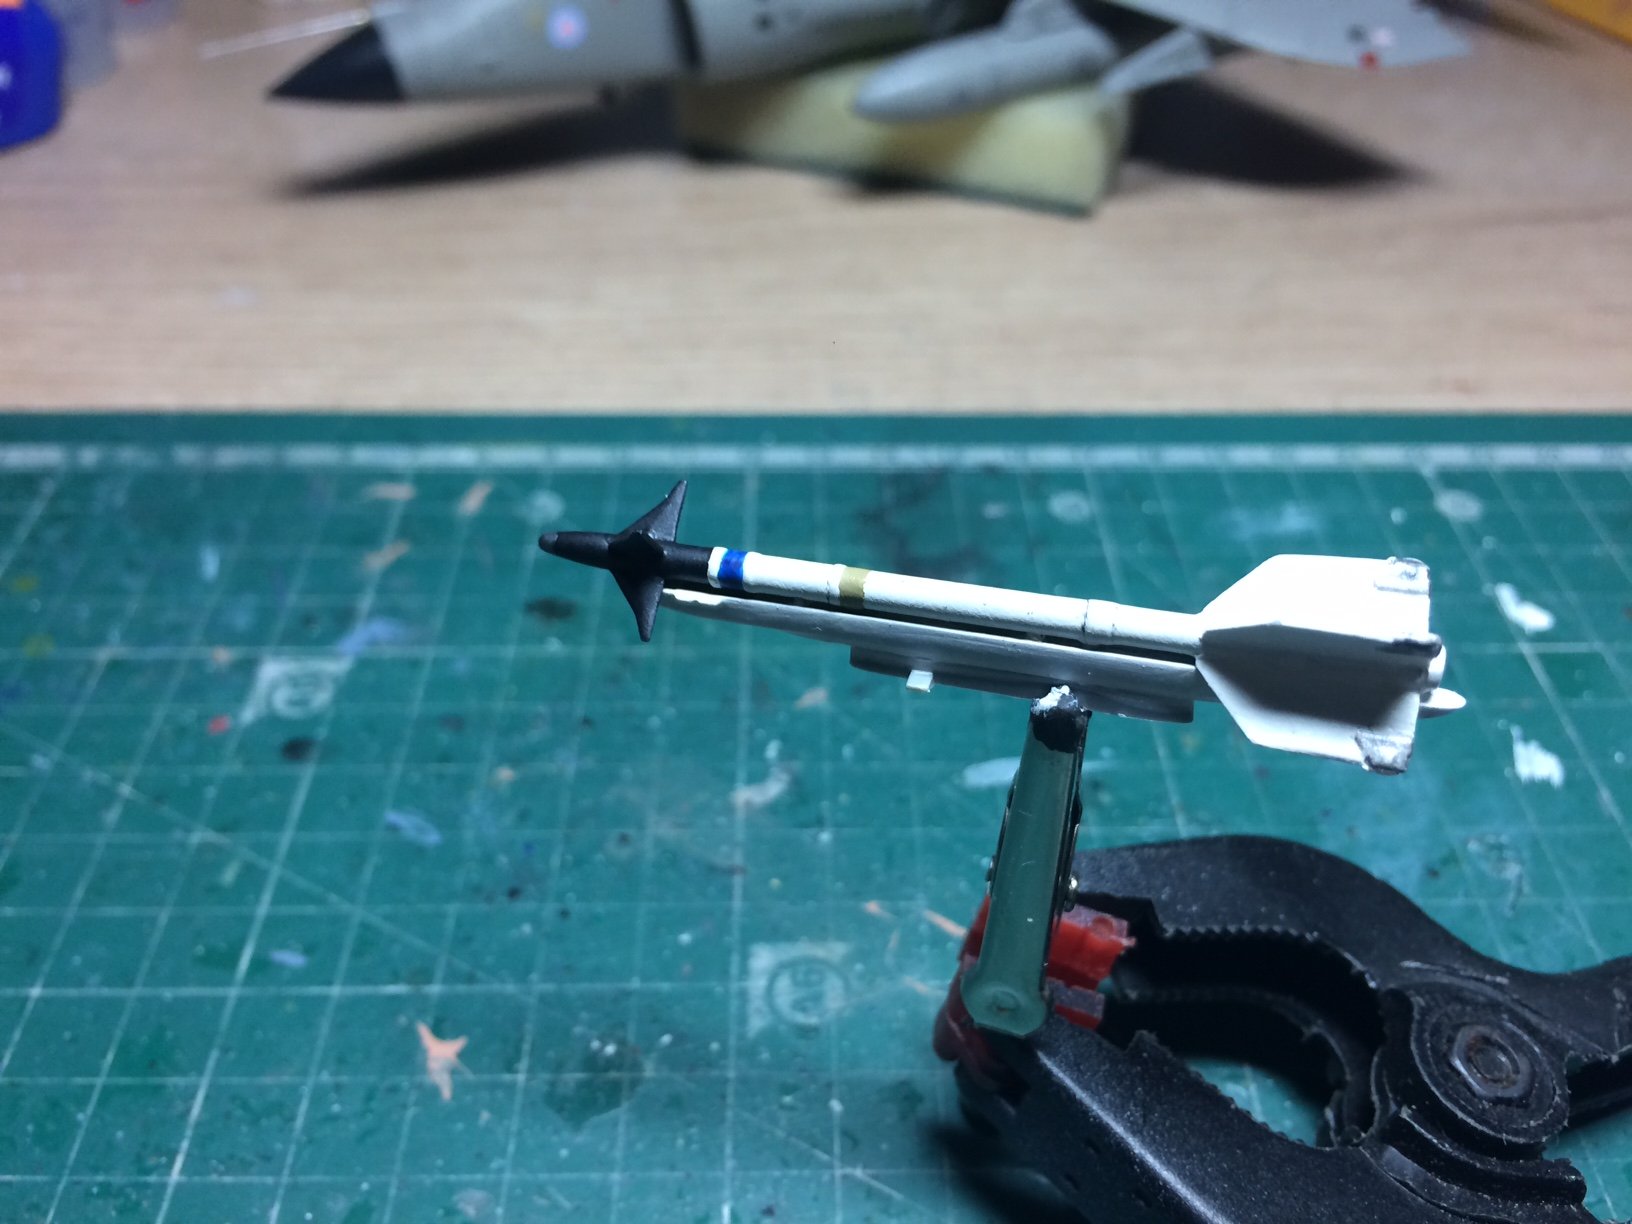
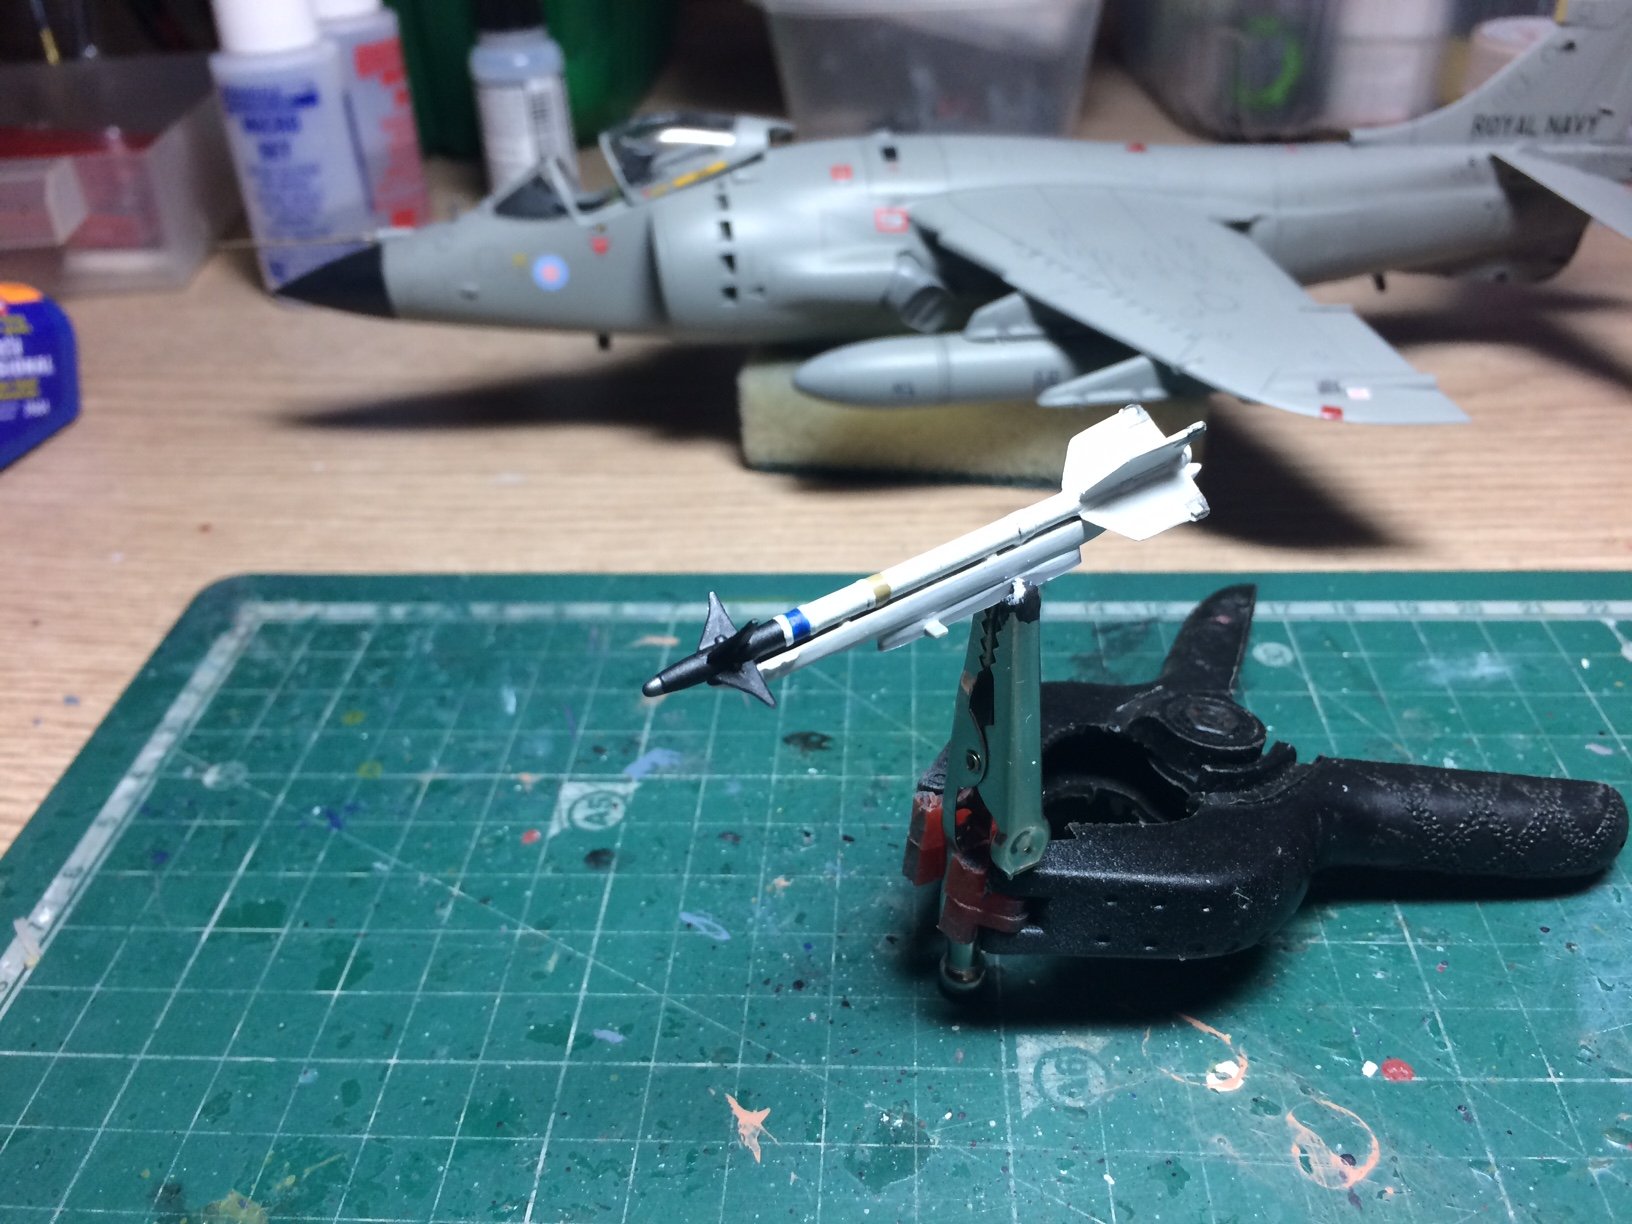
Evening all - Right both Sidewinders are on.
OC.

-
-
-
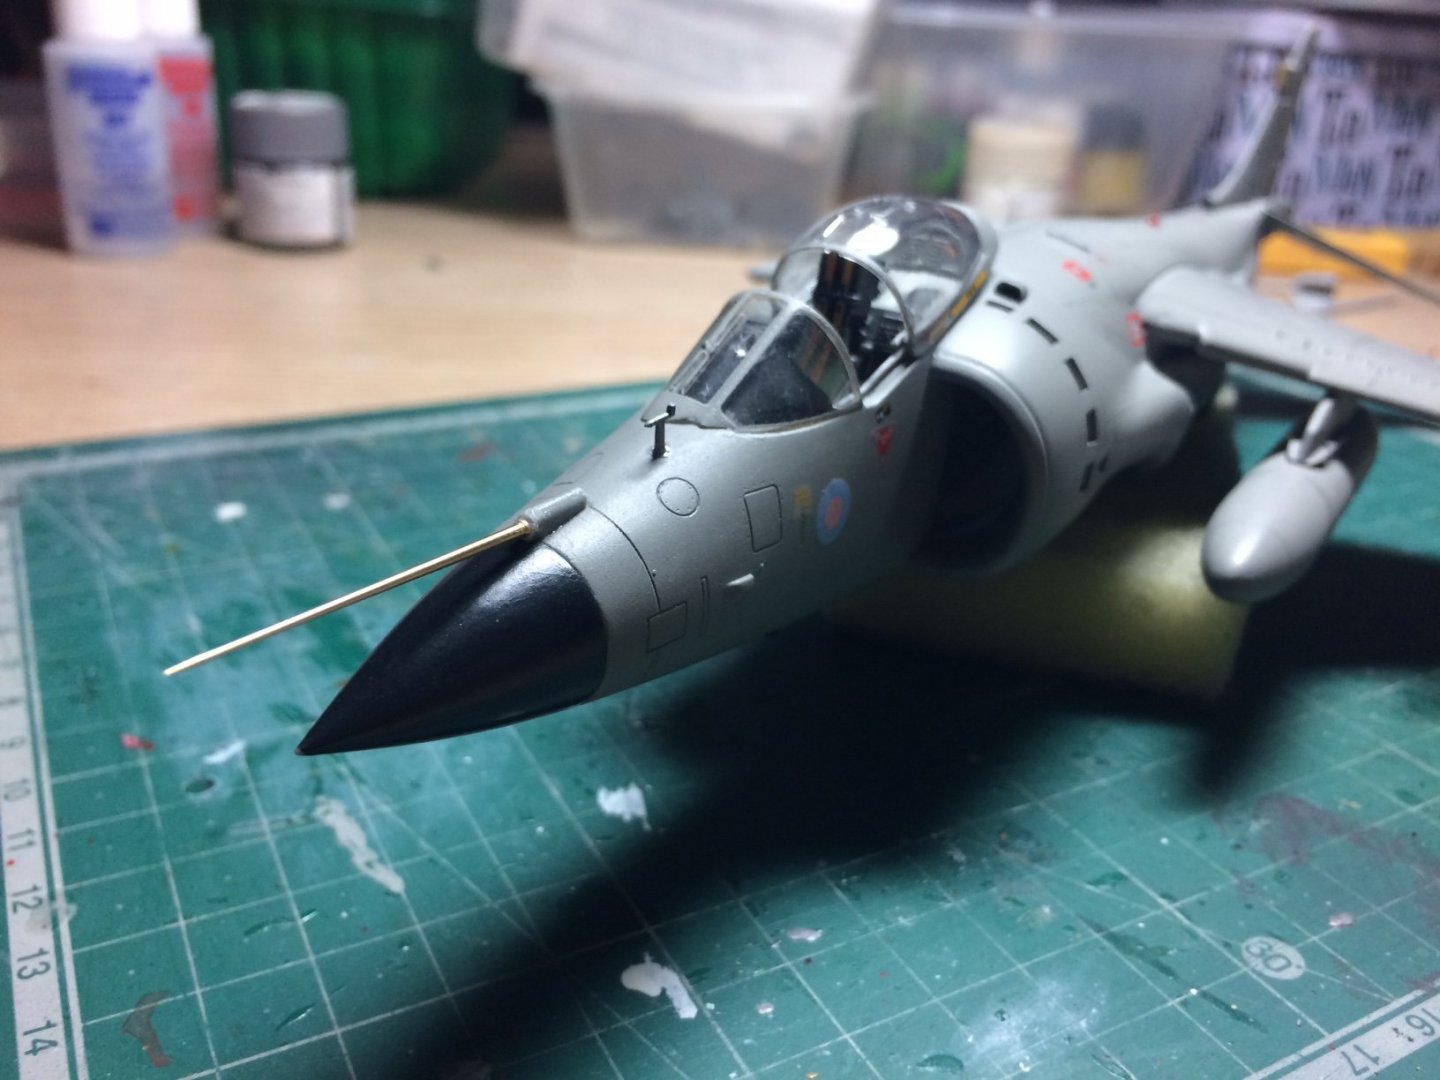
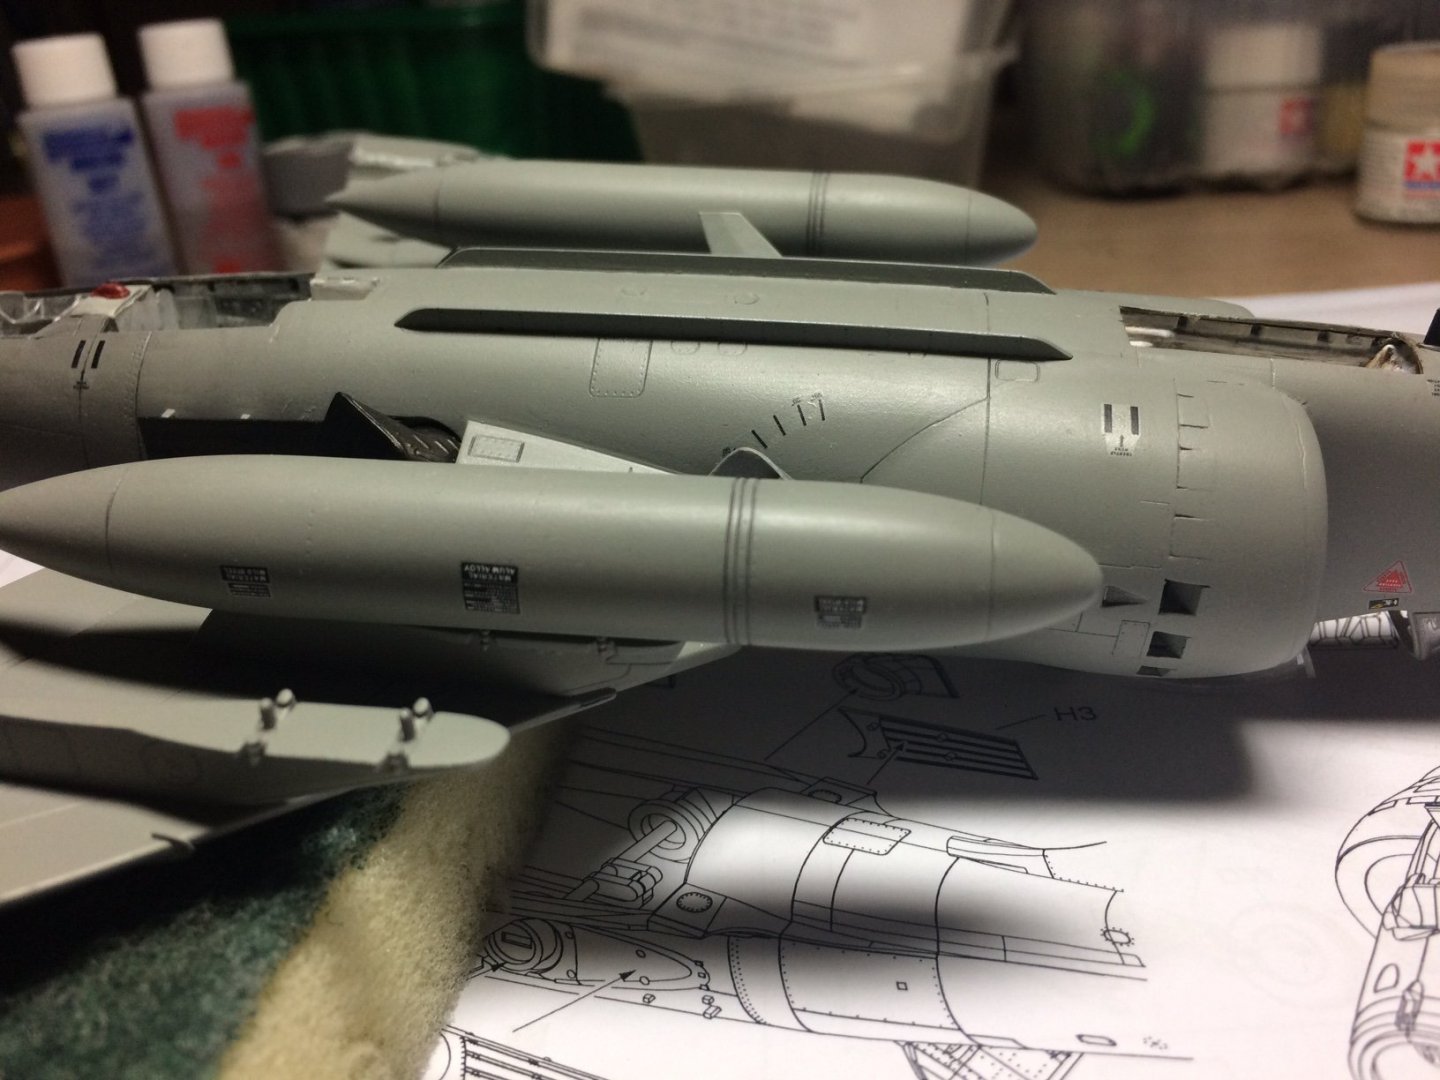
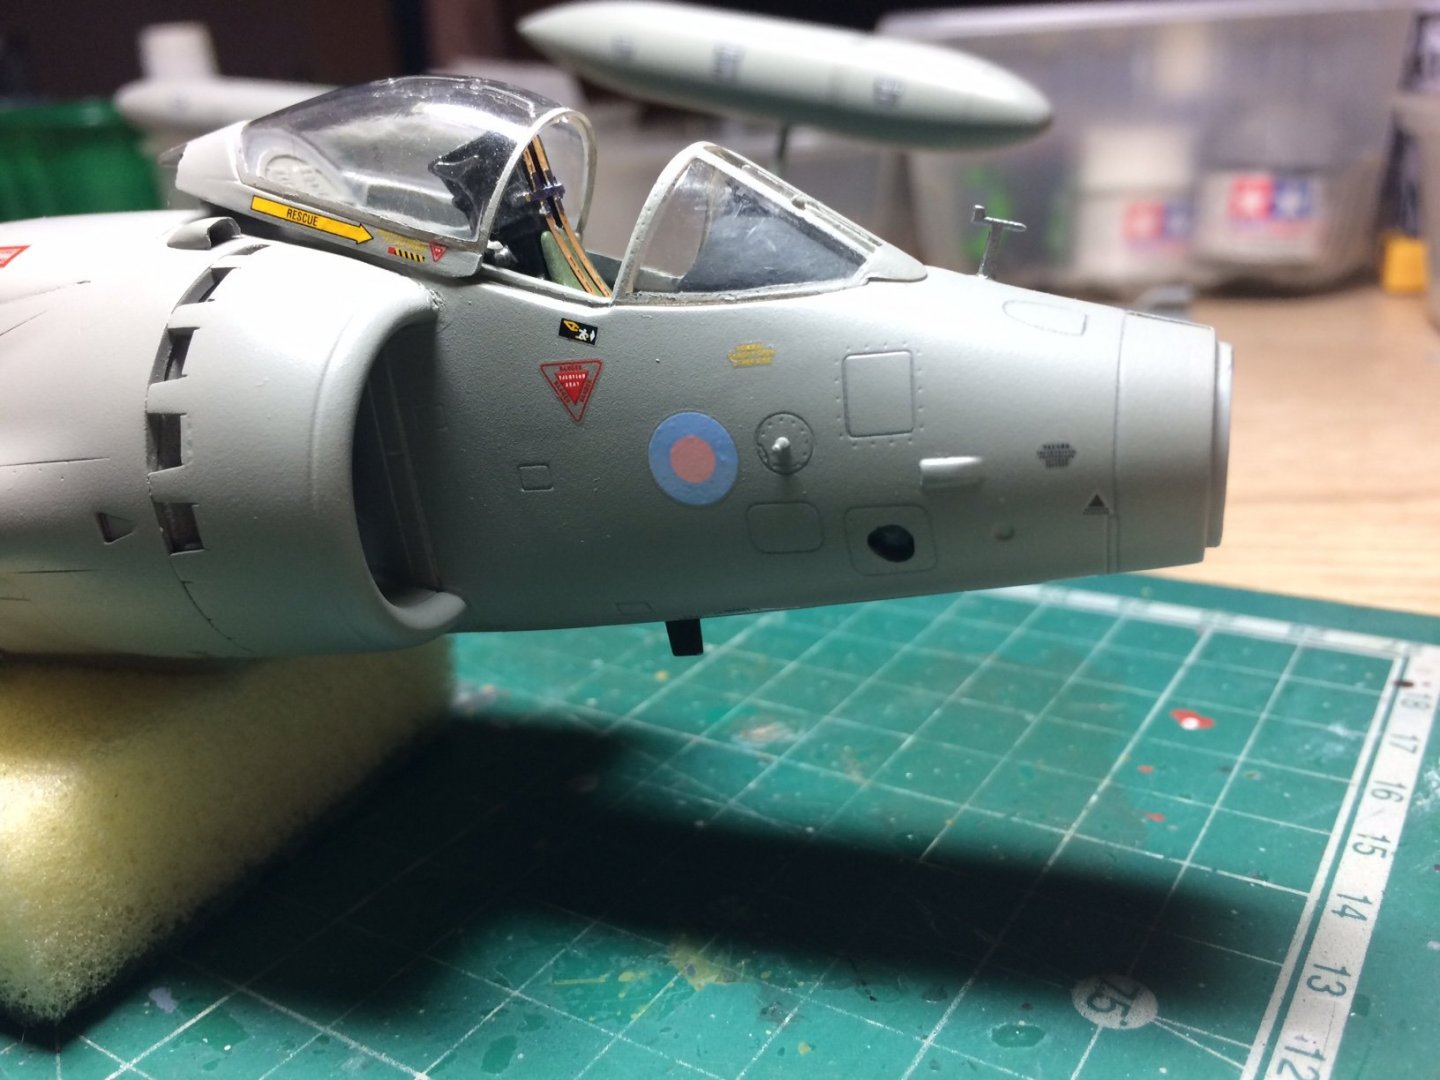
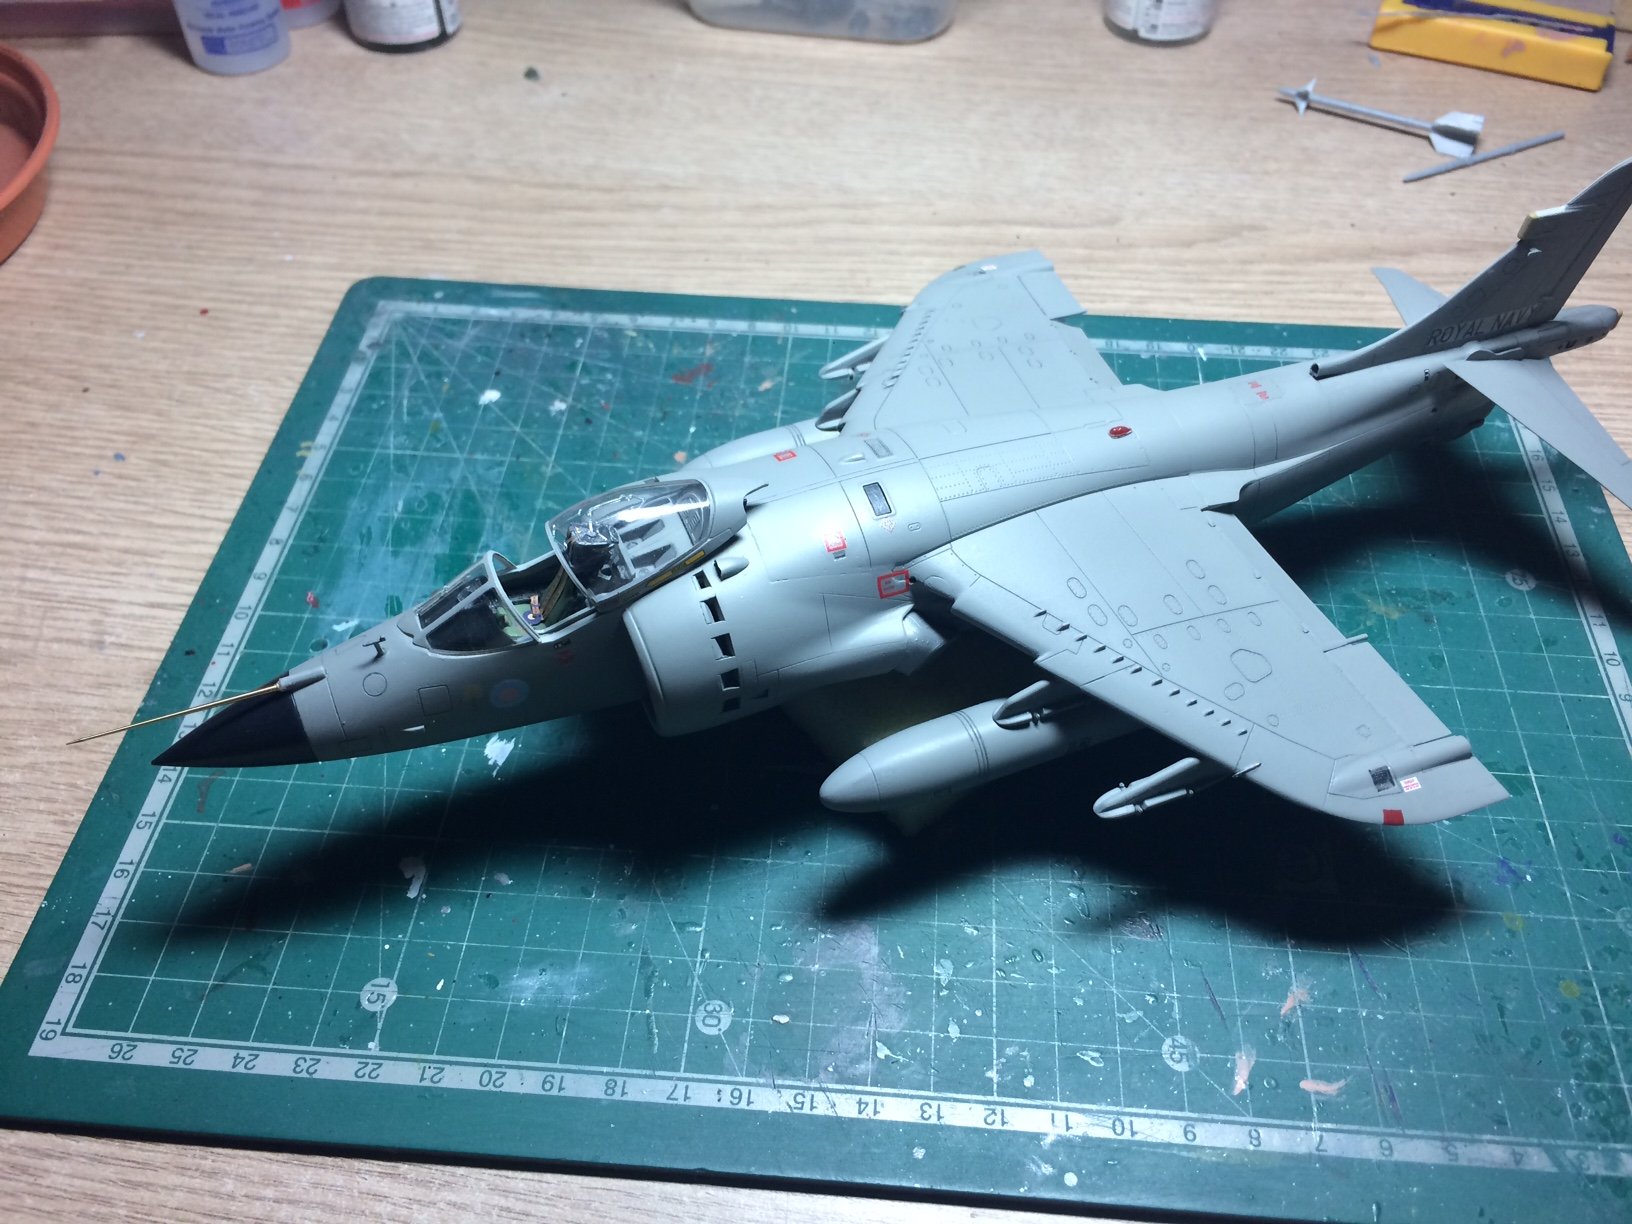
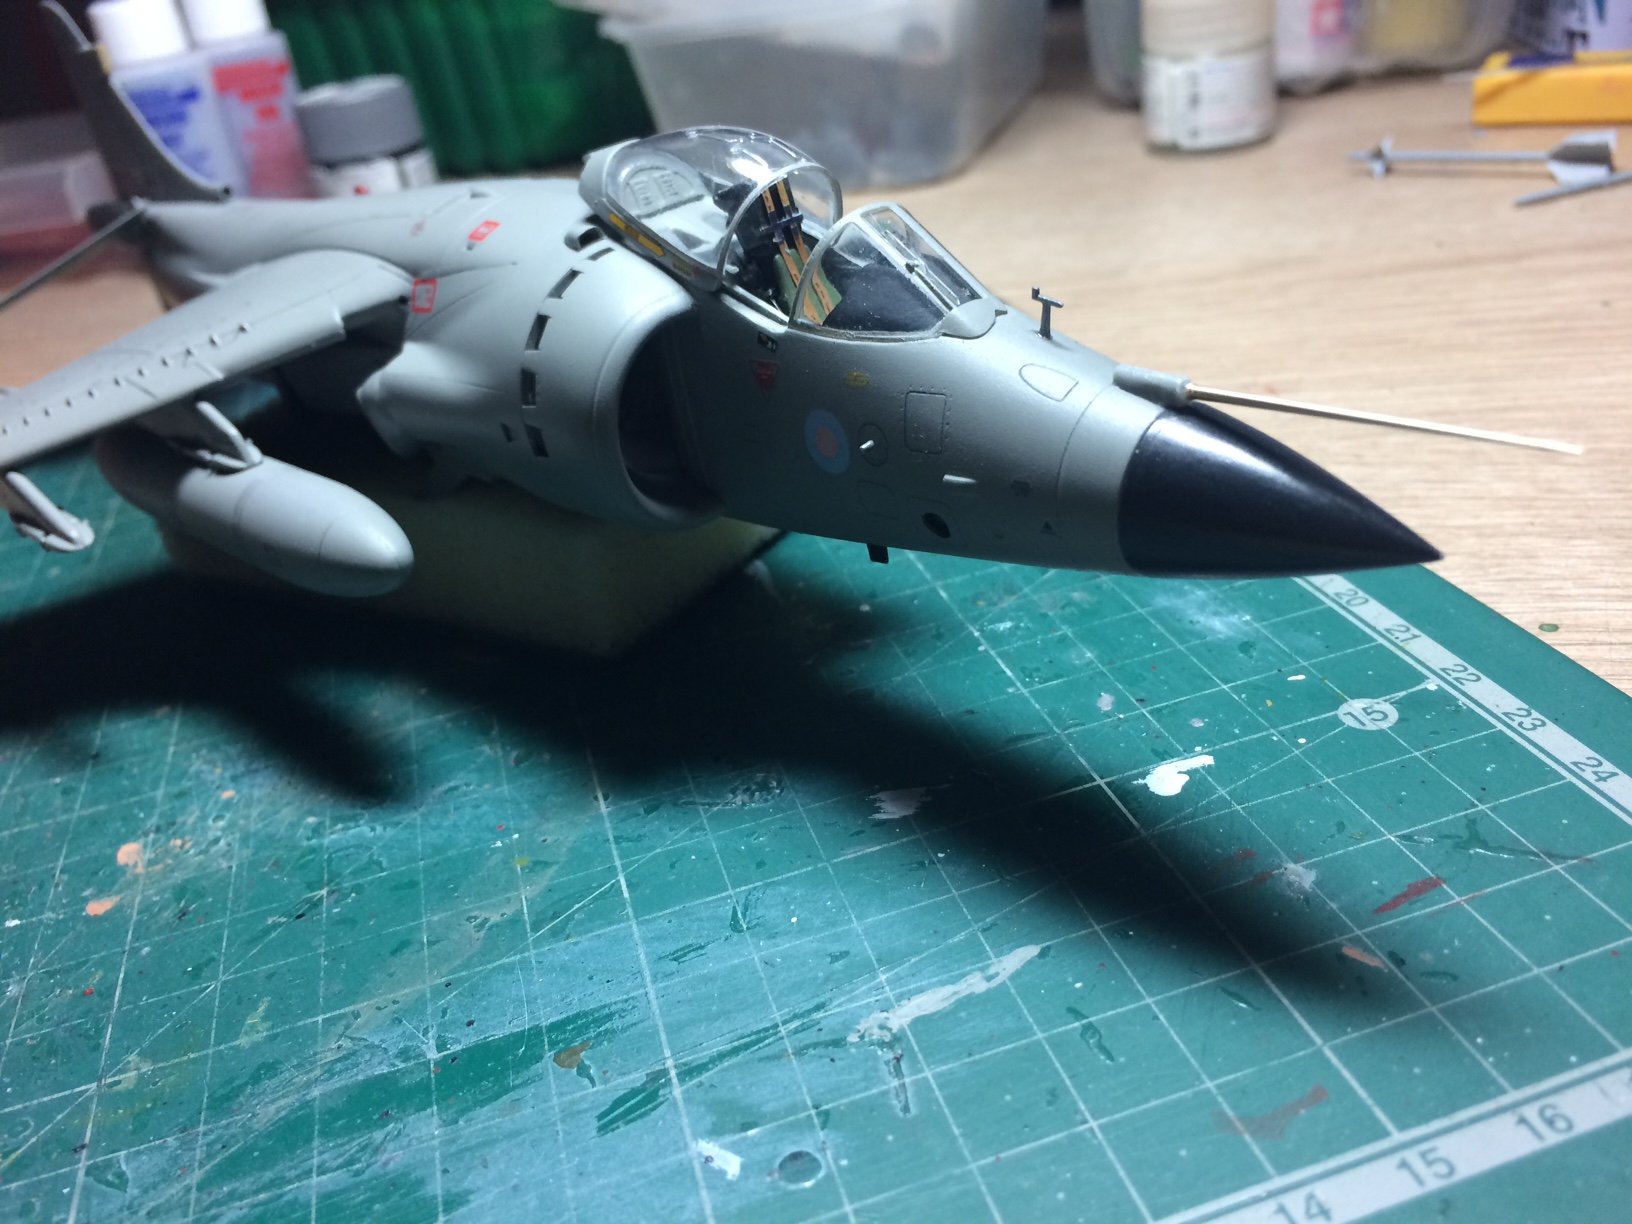
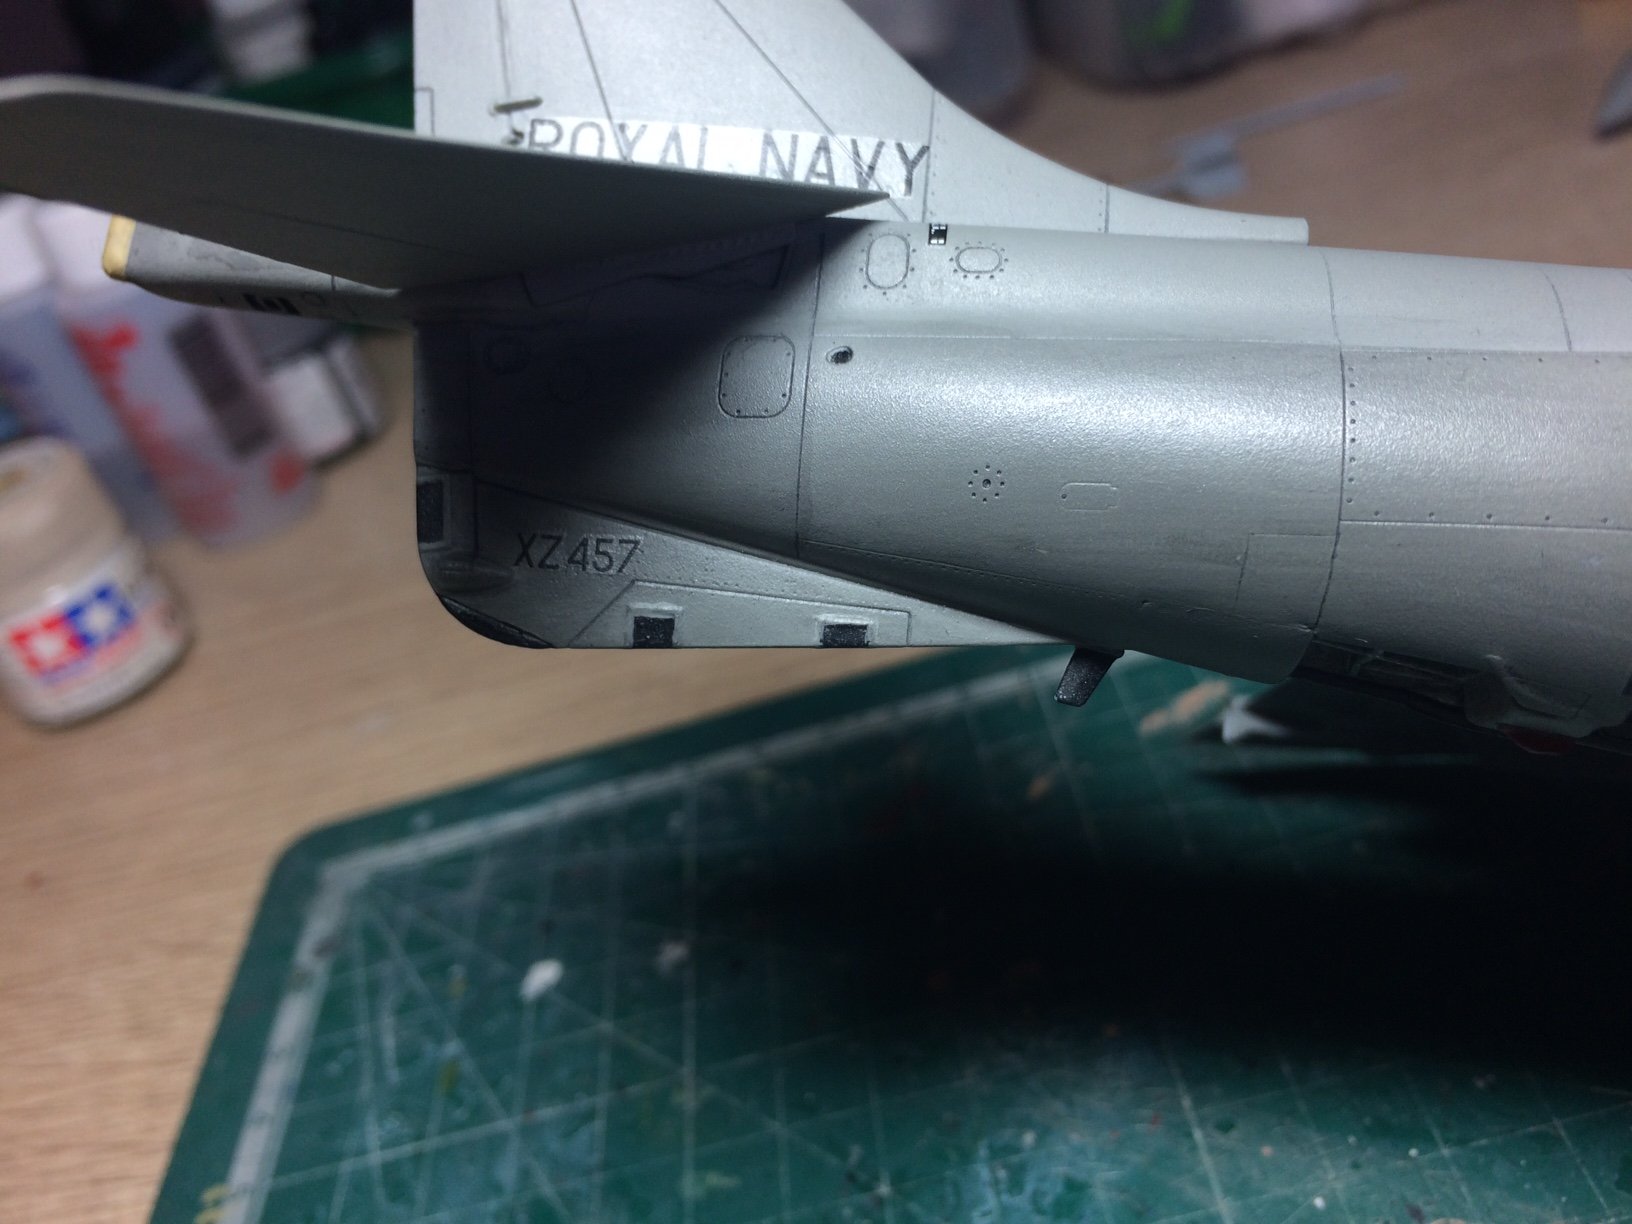
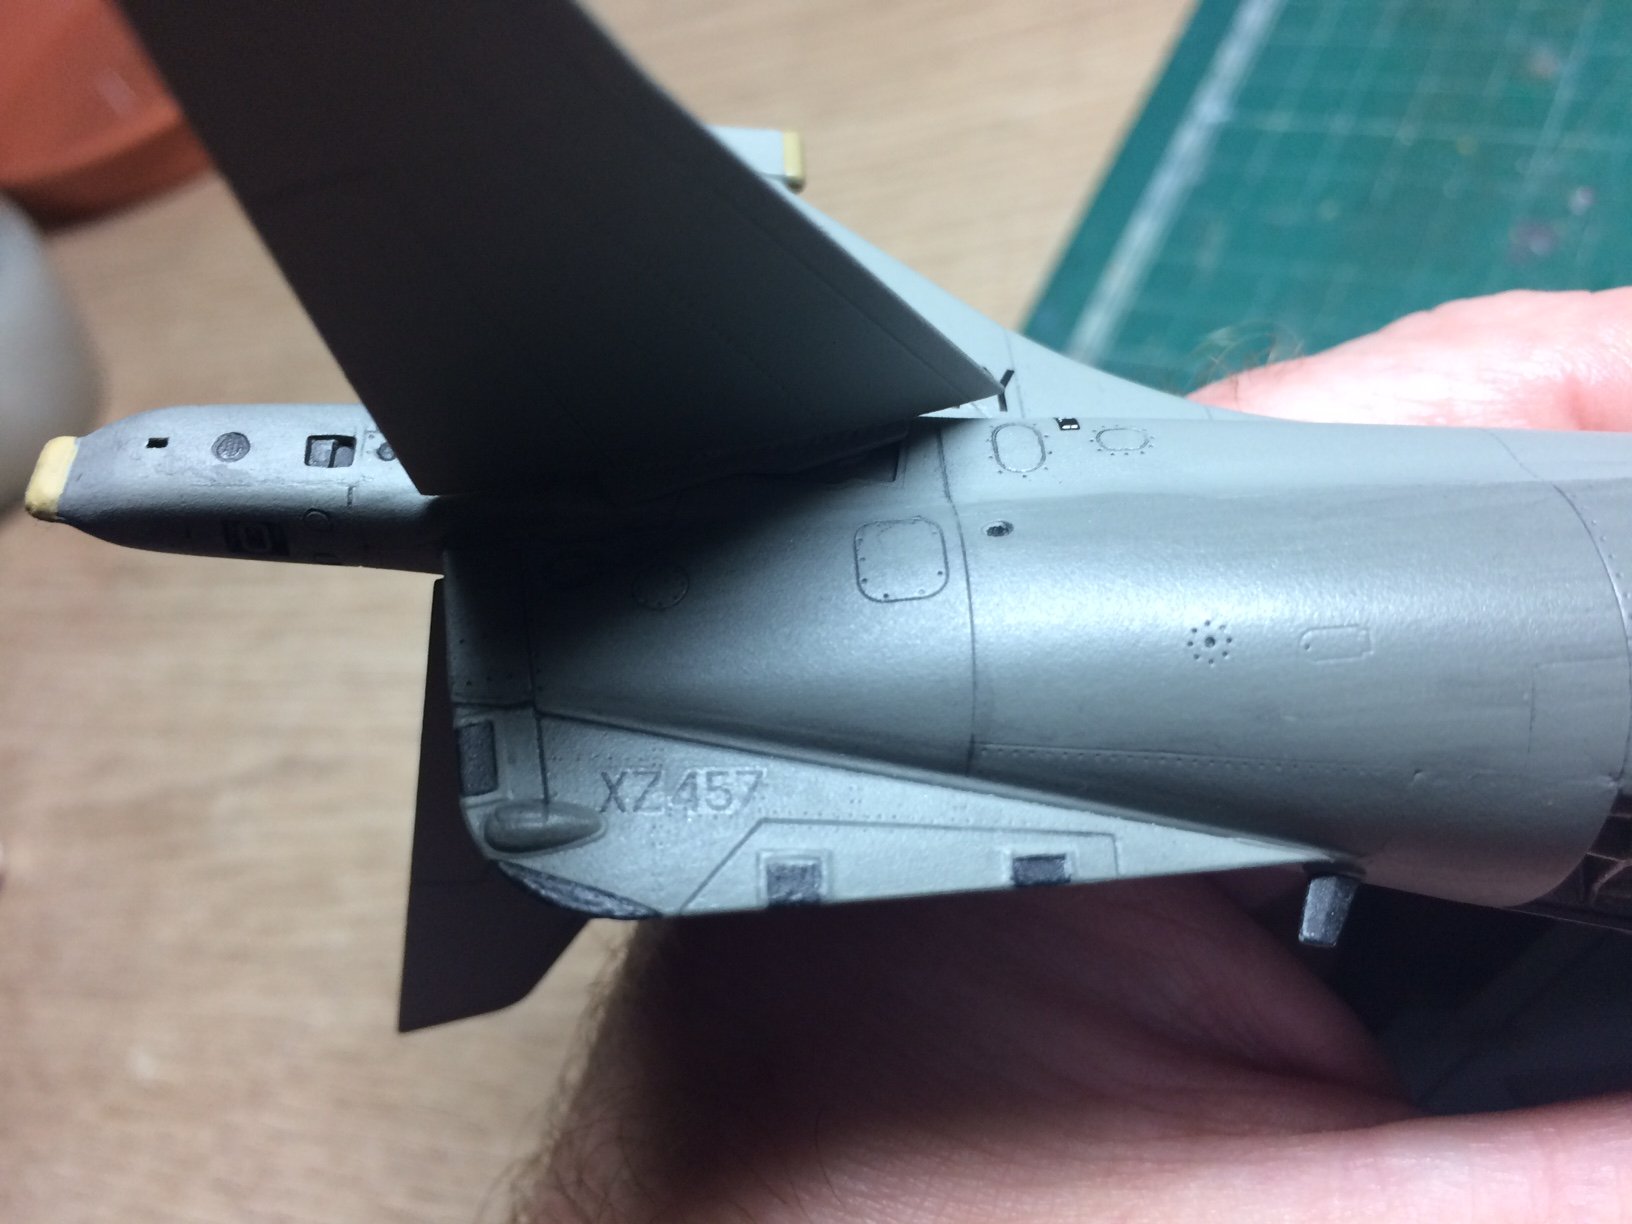
Evening all, more progress with SHAR - I decided to wortk on the Pitot Tube and nose cone, firstly the kit one is able to be improved with the addition of a brass Masters tube, but first I had to cut off the plastic one where it is joined to the fuselage frame, then it was a case of sanding the front part flat - and with a very very very fine drill I made a small hole in the end (not very easy) I managed to do this (just) then the brass tube's end (protrution) was glued into the hole with ca, this was left on one side while I worked on the nose cone.
The nose cone needed some shaping as the fuselage at the very end is not a purfect circle, so I sanded the edges where it needed flating slightly, then I maked with a pencil inside for the T.D.C alignment, then I applied a few coats of Black/Grey and after a few coats of top coat, then when dry it was lined up and glued in place, still needs some work to tidy up and a bit of paint on the tube.
OC.


-
11 hours ago, Edwardkenway said:
Yes, get well Lou, as you've been missed 😉
Same from me Lou.
OC.
-
-
Excellent work - especially considering the scale.
OC.
- Canute, mtaylor, popeye the sailor and 2 others
-
5
-
Count me in, I have seen the RN one at Yeovilton Museum, looking forward to this one.
OC.
- Canute, mtaylor, Landlubber Mike and 3 others
-
6
-
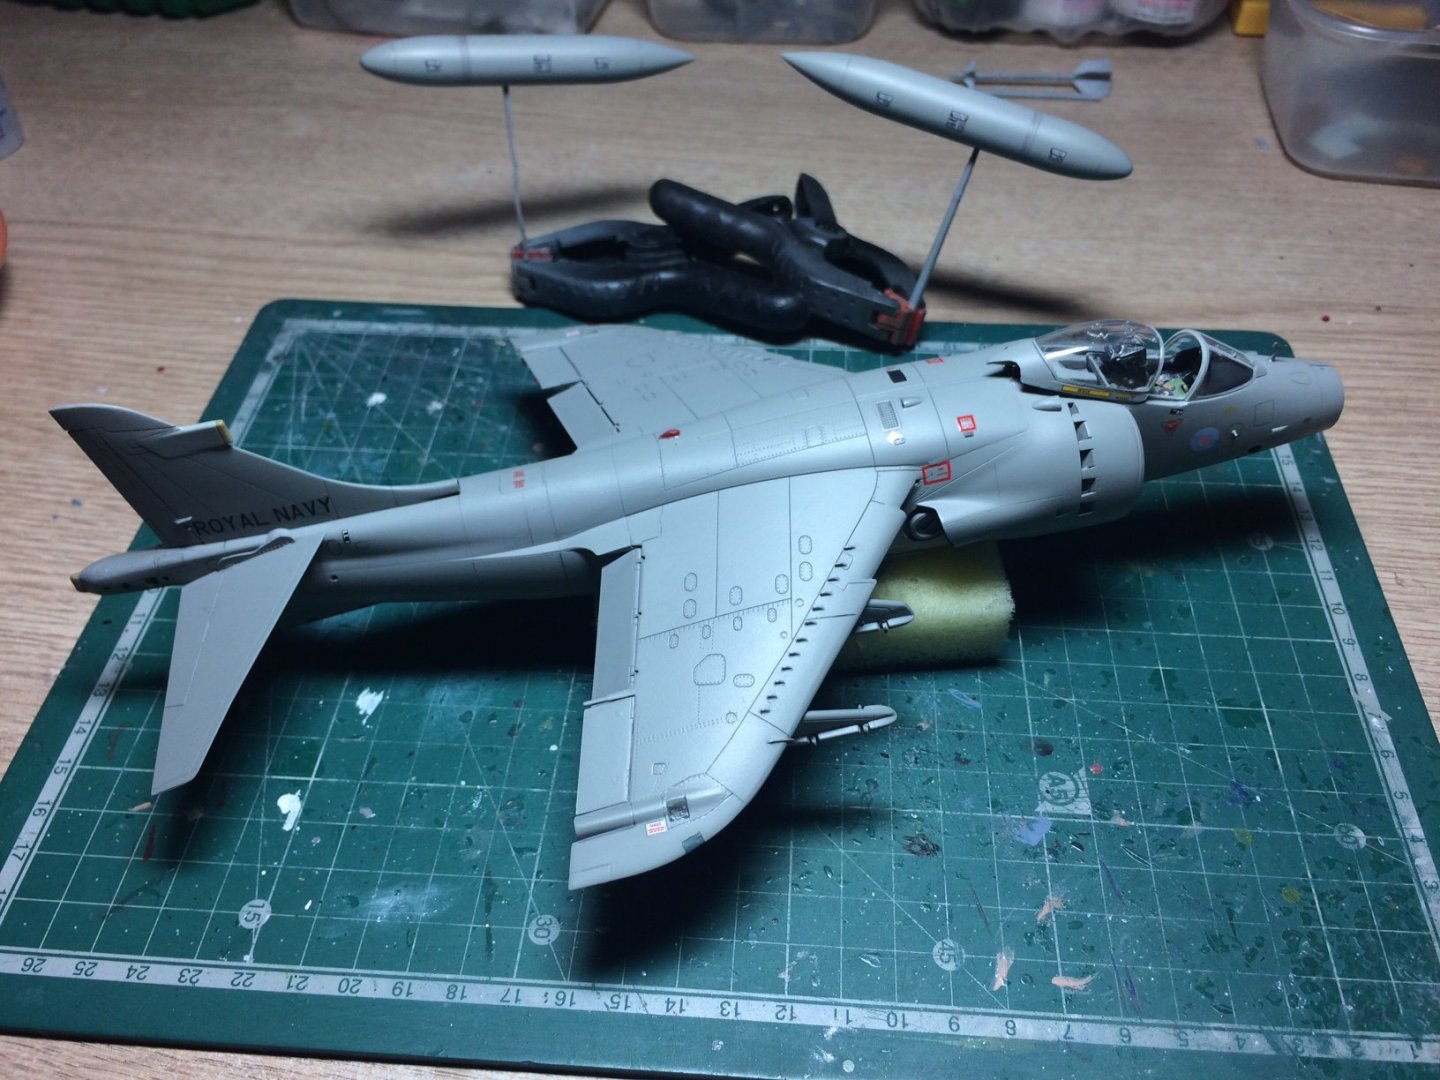
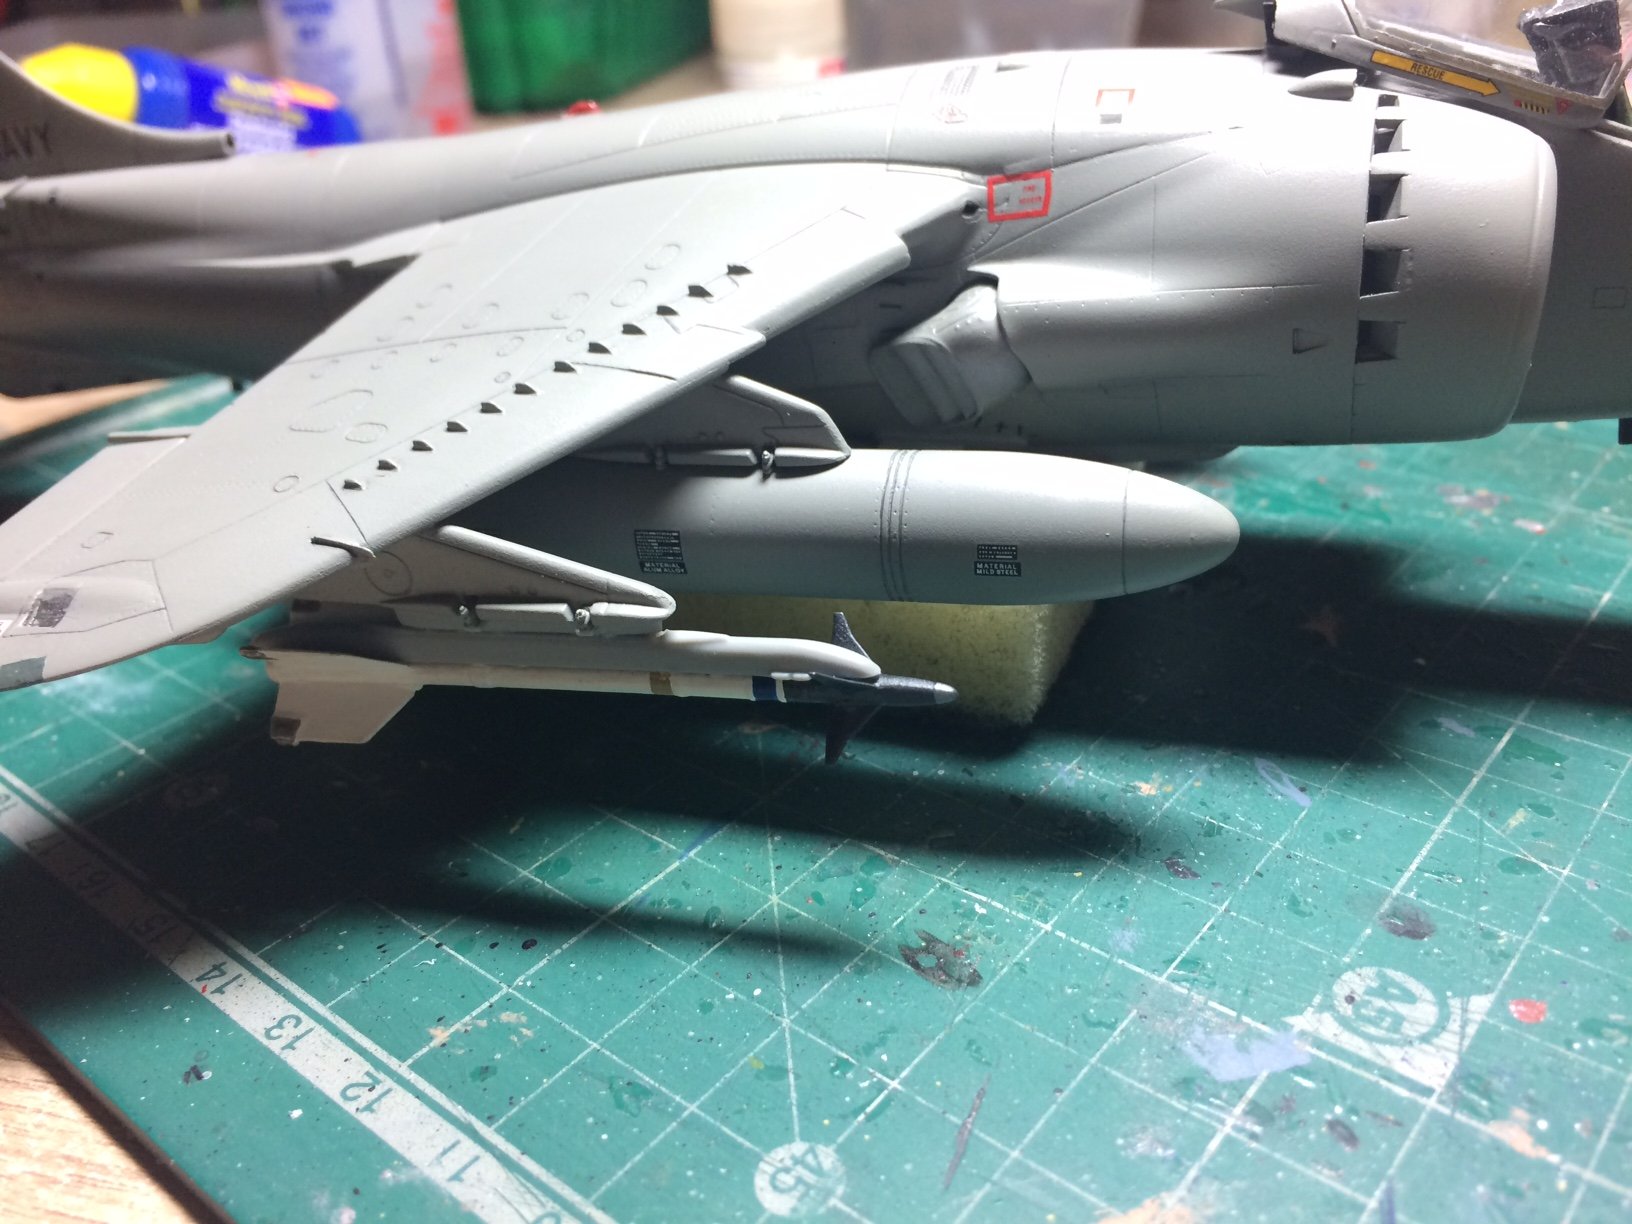
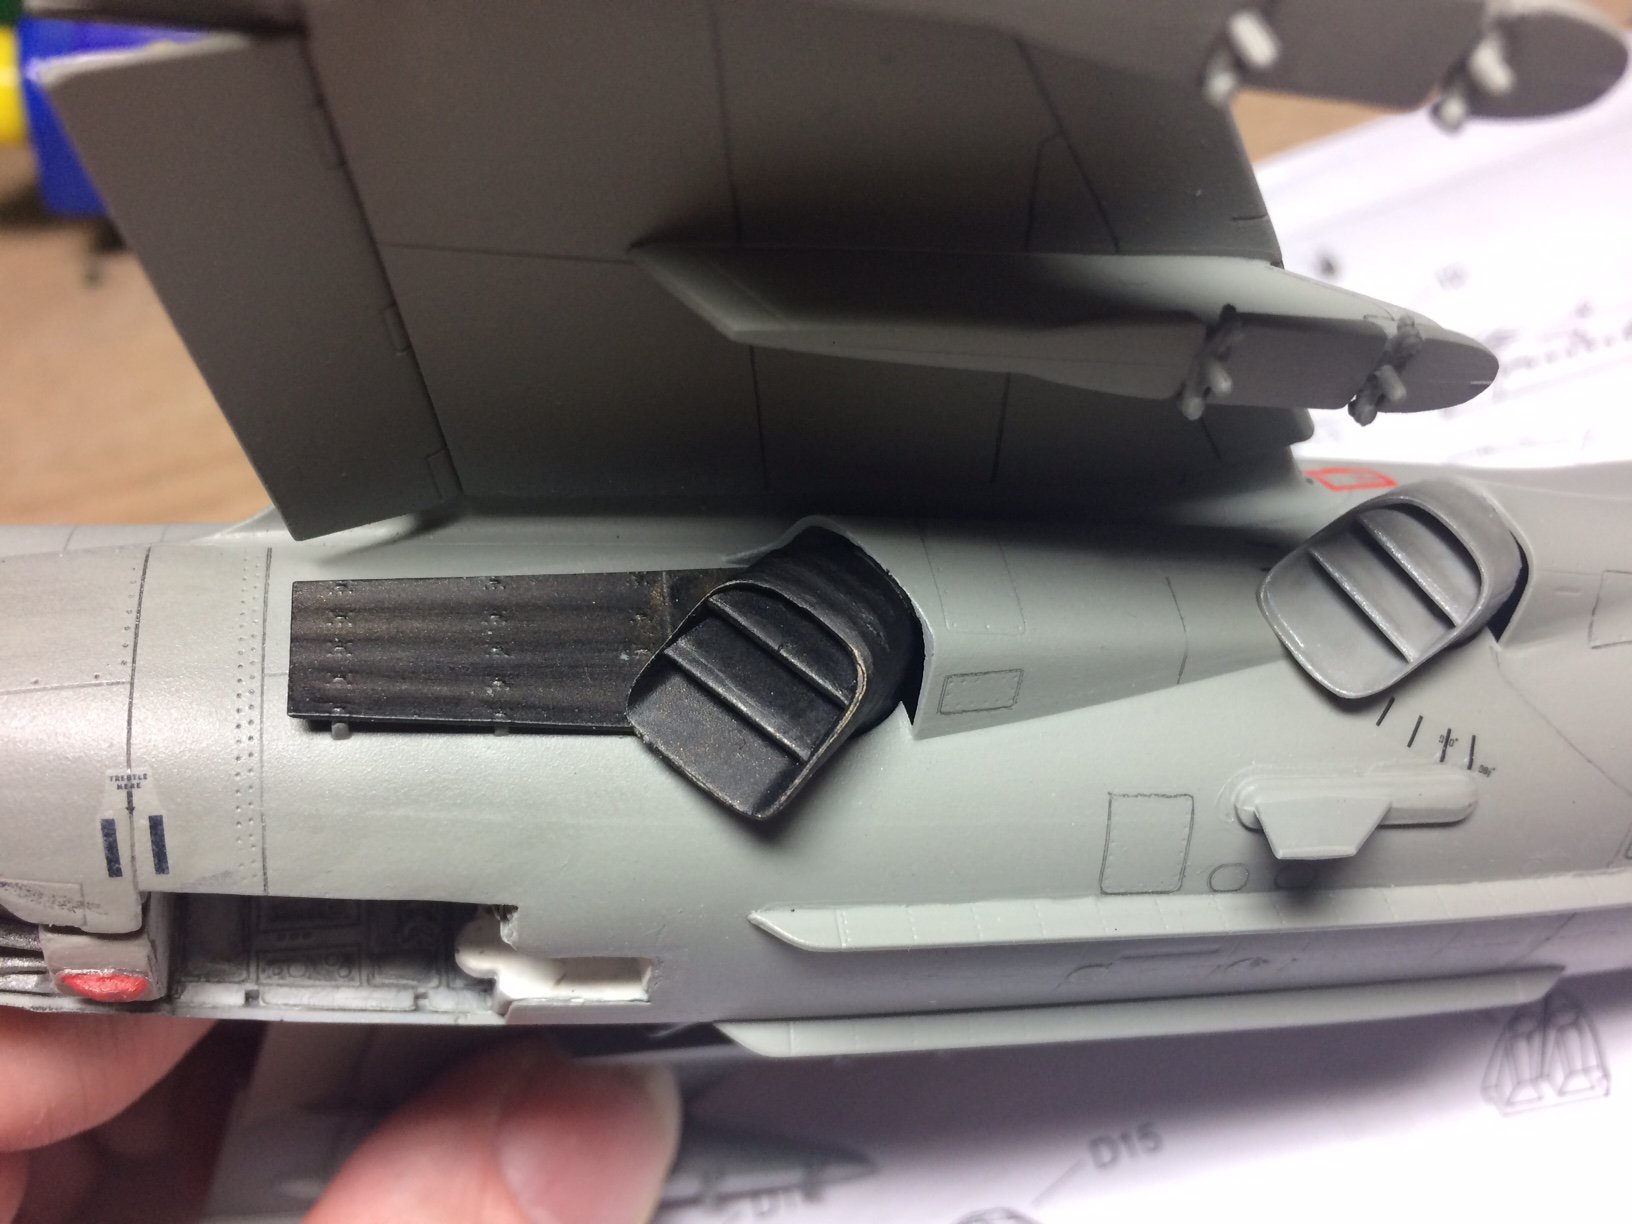
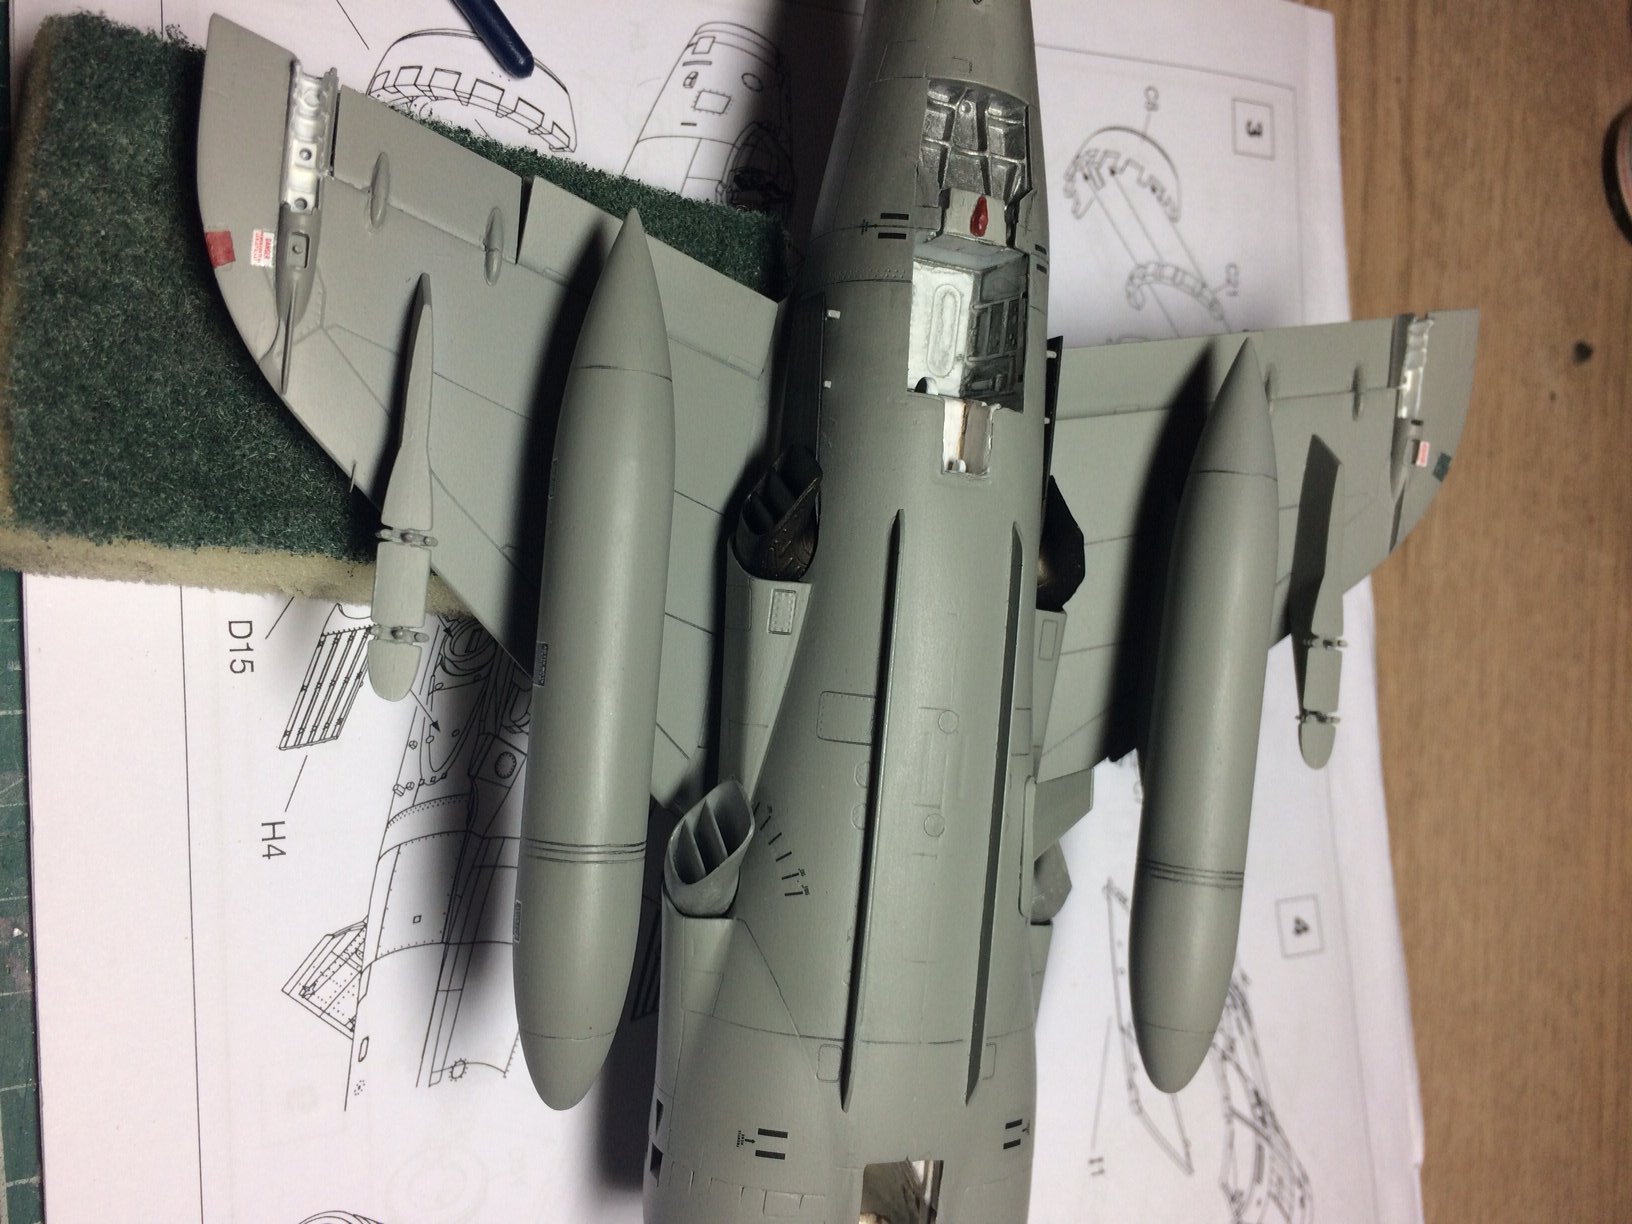
Im back again - next up was the rear jet pipe exhausts - these get very hot so they soon show a burned metal finish, I mixed up a mixuture off Brass and flat Black and gave then a couple of coats, next came the fuselage heat shields - thease again tended to get very hot and show a burned metal look.
After these had dried I applied a few coats of top coat then they were glued in place - next was the placing of the 190gal drop tanks on thier inner pylons.
Its getting there.
OC.

-
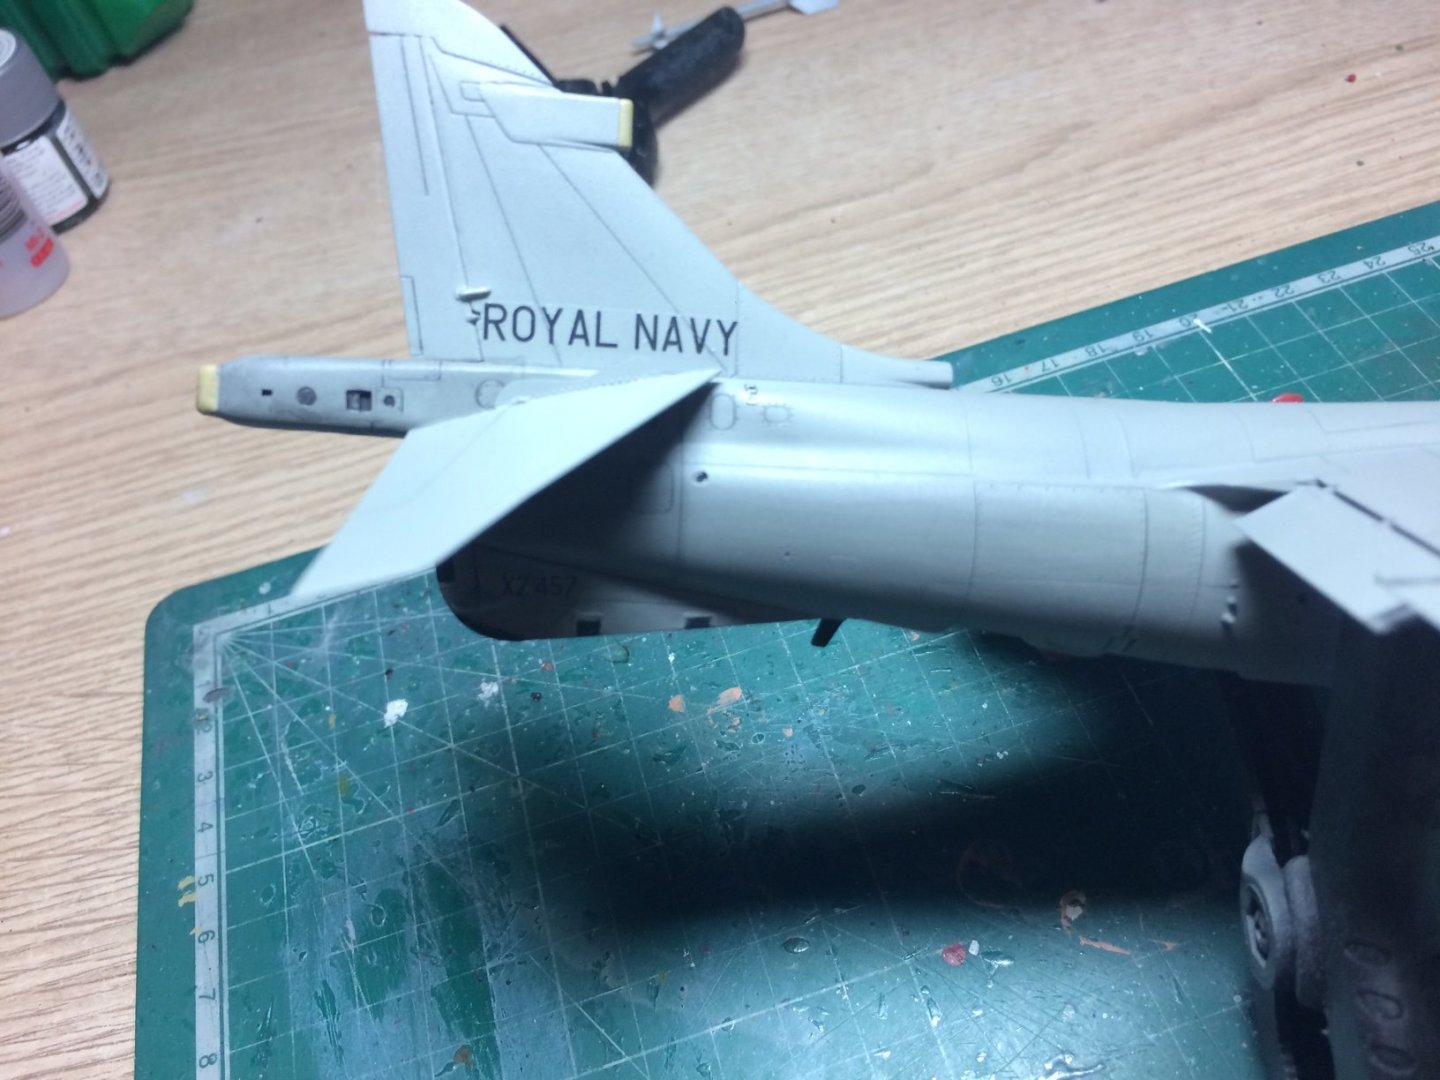
My procedure for my decals was to apply micro set to surface first, then position the decal and using a cotton bud smooth out the decal, then when set I applied a good few coats over the top with micro sol, with the tail decal it settled down even let the panel lines show through - but the silvering between the decals on the decal is showing the decal not pulling it down (its all down to me not applying a gloss coat before the decals)
OC.
- Egilman, popeye the sailor, mtaylor and 3 others
-
6
-
5 minutes ago, Landlubber Mike said:
Looking great OC! My guess is that with some weathering and a final top coat, the tail code films will be even less visible.
Thank you kindly Mike,
Yep thats what I have been doing but will continue , the tail has had about Ten coats of Matt Acrylic Callejo top coat so far, but I can keep adding more.
OC.
- Edwardkenway, Egilman, Canute and 2 others
-
5
-
2 minutes ago, Edwardkenway said:
Nice work OC !
Thank you Edward.
OC.
- Egilman, Canute, Edwardkenway and 2 others
-
5
-
Excellent - Really really nice.
OC.
- Canute, popeye the sailor, mtaylor and 4 others
-
7
-
Good day all, I have been pushing on with the varnishing with my brush - its not going too bad, the main culprit being the Royal Navy decals on the tail, its not fully blendid into the paint surface but it will do, I have also been concentrating on creating the SHARS tell tail rear dirty shiny rear lower from the heat from the rear jet pipes.
So without delay here are some pics -
OC.


- Canute, popeye the sailor, mtaylor and 5 others
-
8
-
33 minutes ago, popeye the sailor said:
mak'in some great progress on this one OC..........decaling and the cockpit glass look awesome!
Thank you so much Denis.
OC.
- Egilman, Canute, Edwardkenway and 2 others
-
5
-
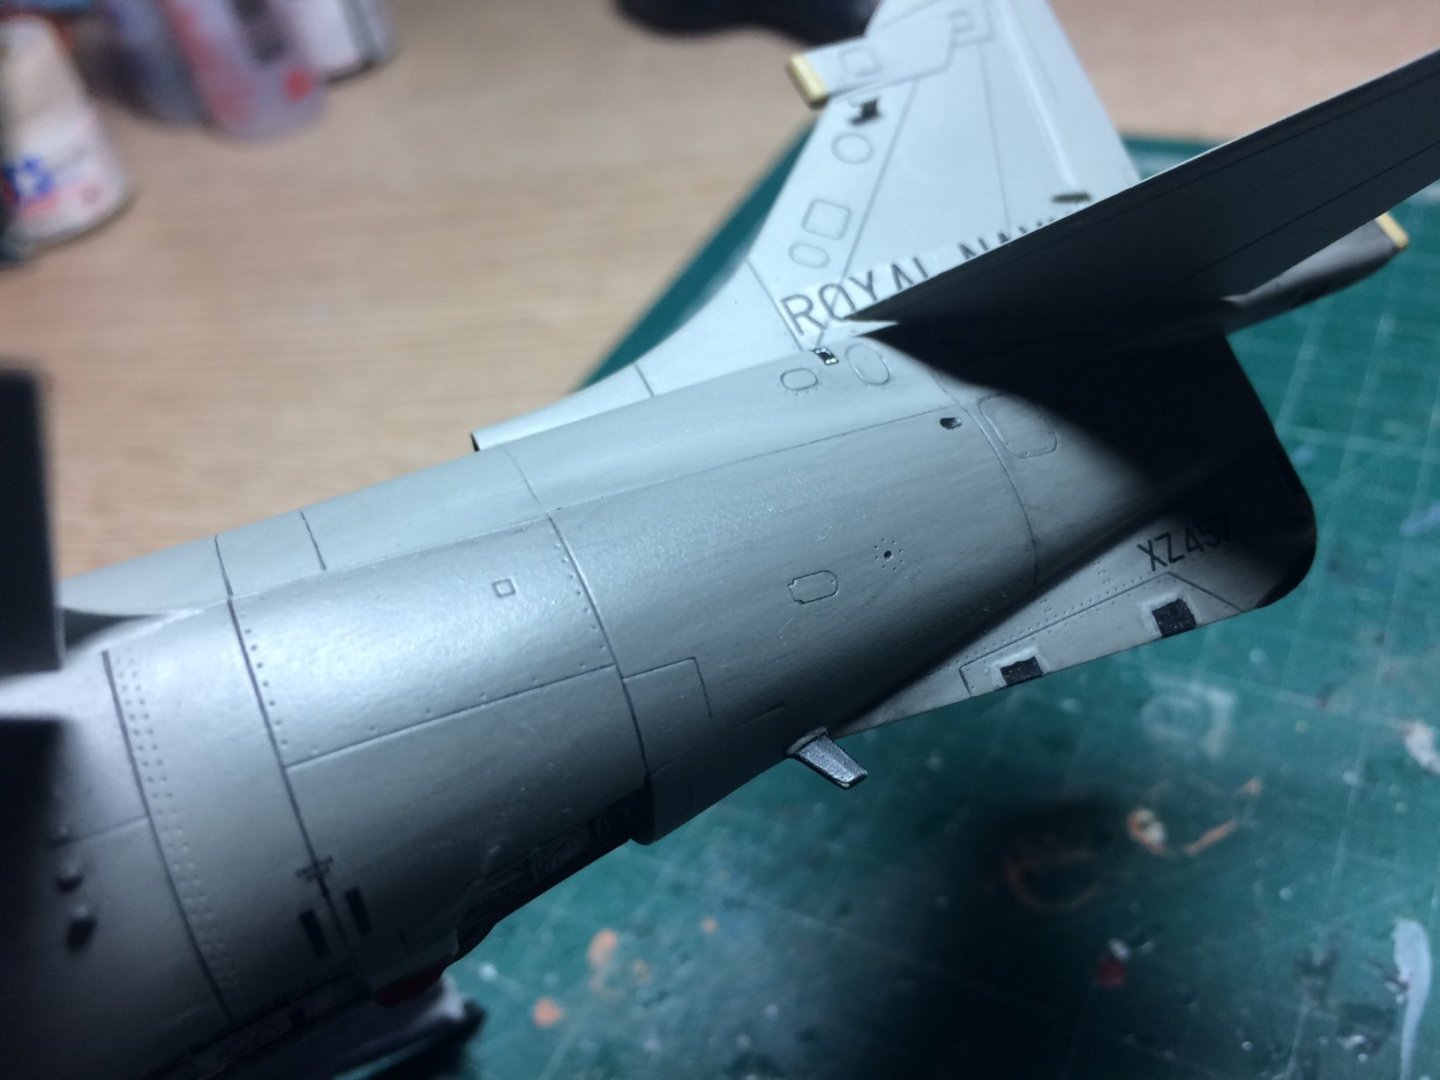
Evening all, more progress this evening - after applying the serial codes to the bottom of the tail, I then settled it down with micro sol, and when I was sure it was set I then rubbed some pancil into the rear lower part of the frame to represent staining from the Hot rear jet pipes, after I started work brushing on my Vallejo Acrylic Varnish, my method for doing this was to work in controled areas and dry between coats.
Working over the decals was/is taking its time as its needing several coats to hide/blend the silvering on the decals - it is working just slowly and some are more stubborn than the rest.
I will put some pics up when I am happy with the result.
OC.
-
That is looking so nice - this is not an exaggeration, you have improved even over what the company themselves could do.
OC.
- ChrisSC and Ryland Craze
-
2
-
7 minutes ago, Kevin said:
very nice indeed, i loved watching the harriers, they put on a great display at RNAS Yeovilton
.thumb.JPG.3bee5b9117bb23487d28e18e406eed94.JPG) during the summer of 2010
during the summer of 2010
Thanks Kevin, yep I have always loved Harrier displays and thier low level speed - very underated, was watching some vids last night of them 700mph at almost ground level - loverly jubbly.
OC.
-
Evening all, decals are on, just need to wait a few days for them to fully settle down - then I will dirty the back end abit with pencil gently rubbed over, then I will brush paint my Vallejo Matt Acrylic Varnish, it shouldn't look bad as the lighter paint finish was applied by brush out in the Atlantic on HMS Hermes by the crew.
This will (hopefully) seal in the decals and blend them in so I can handle it for the other bits and pieces.
OC,
- marktiedens, Canute, Egilman and 2 others
-
5
-
-
Very nice work.
OC.
- Canute, popeye the sailor, mtaylor and 3 others
-
6
-
3 minutes ago, Egilman said:
What you think is best my friend, your looking to match the finish in as thin a coat as possible....
Only you can see what it needs to be..... I think you'll do it right....
You have the touch....
You say the nicest things - hope my skills live up to it.
OC.
- Egilman, Canute, Edwardkenway and 2 others
-
5
-
17 minutes ago, Egilman said:
Microscale micro-flat is the answer. Of course the best way is to wait in the canopy masking removal until the decals are all on, but I've been where you are many times as well......
Sometimes we just have to see the art...
Finish looks great my friend, another piece of art...
Thank you kindly my friend, do you think Vallejo Matt Acrylic Varnish will work if I brush it over, its not very flat (as I found out on my Waterloo figures) but that would be good as the SHAR's finish was satin.
OC.
- mtaylor, Canute, Edwardkenway and 1 other
-
4


.JPG.79dd2b5047e195de6b79956e239a09c5.JPG)


Royal Louis 1780 by EJ_L - Mamoli - Scale 1:90
in - Kit build logs for subjects built from 1751 - 1800
Posted
Loverly work - she is becoming a realy beauty.
OC.