


Old Collingwood
-
Posts
11,547 -
Joined
-
Last visited
Content Type
Profiles
Forums
Gallery
Events
Posts posted by Old Collingwood
-
-
Superb work bob - really tidy really nice to watch.
OC.
-
3 hours ago, Canute said:
OC, coming along nicely, mate. Love the wire detail in the canopy, too.
Thanks Ken, yep thats engraved into the transparency.
OC.
- mtaylor, popeye the sailor and Canute
-
 3
3
-
non deficere (never give up)
OC.
- Edwardkenway, mtaylor, Canute and 3 others
-
6
-
If you apply the same attitude you do on this as your Vic - then you will deffo succeed.
OC.
- GrandpaPhil, thibaultron, Canute and 3 others
-
6
-
4 minutes ago, dkuehn said:
I think I am equally as excited for the HMS Sphinx that Chris is working on.
Indeed, there are some really excellent kits coming out at the moment - exciting boat building times.
OC.
-
17 minutes ago, marktiedens said:
Looking good as always
 . Just noticed how LARGE those air intakes are - would not want to be standing in front of one of them when they spooled up
 .
.
Mark
Thank you kindly,
Indeed, 21.000lbs of thrust that Pegasus created not bad for a none afterburner set up.
OC.
- mtaylor, Landlubber Mike, Canute and 3 others
-
6
-
Now thats looking the business very menacing.
OC.
-
13 minutes ago, VTHokiEE said:
Does that mean that you may have a mind to build this beast?
No way - would have to sell the admiral to afford one (now thats an idea) lol, I will happily follow with interest anyone else who buys and builds one though.
OC.
- VTHokiEE, popeye the sailor, FrankWouts and 1 other
-
2
-
 1
1
-
 1
1
-
9 minutes ago, ccoyle said:
Nowhere, yet. James is building the second prototype for the instruction manual. Probably be about a year before the kit is out.
I have worn a patch on the floor from tapping my foot in anticipation of this being released - the most exciting prospect when this comes out.
OC.
- popeye the sailor, dkuehn, mtaylor and 3 others
-
6
-
14 minutes ago, Landlubber Mike said:
Looking fantastic! I've always loved the lines of the Harrier.
Thank you so much Mike, I am hoping the panel lines are looking ok with the method I am using as its very controled with no mess - just rub off the pencil with the rubber end or damp cloth, the graphite will dull down when I put a flat coat over it later.
OC.
- Canute, Landlubber Mike, mtaylor and 2 others
-
5
-
On 5/25/2020 at 1:40 PM, MEDDO said:
Those look really nice especially if you were able to whip em up over the weekend. Properly scaled figures always add life to a static model and really help with visualizing the scale of the project
I couldn't agree more, but heck Im baised/biased even 😉
OC.
- Egilman, Ryland Craze, Canute and 6 others
-
9
-
1 minute ago, Landlubber Mike said:
Are you thinking of applying the finish to the entire model? Have you considered using a rattle can finish? I made some wooden magic wands for my girls and used a spray which worked really well. Easy and quick to apply, and left no residue.
To follow Mikes comments - Tamiya make a good Flat Laquare rattle can - it dries really flat and covere really well.
OC.
- Landlubber Mike and Canute
-
2
-
I agree with Mike, a flat top coat will kill off any shiny areas from the CA glue, or you could gently scrape the area with a sharp blade or light sanding, this often does the job on my projects.
OC.
-
-
Welcome indeed, you will love it here.
OC.
- mtaylor and Keith Black
-
2
-
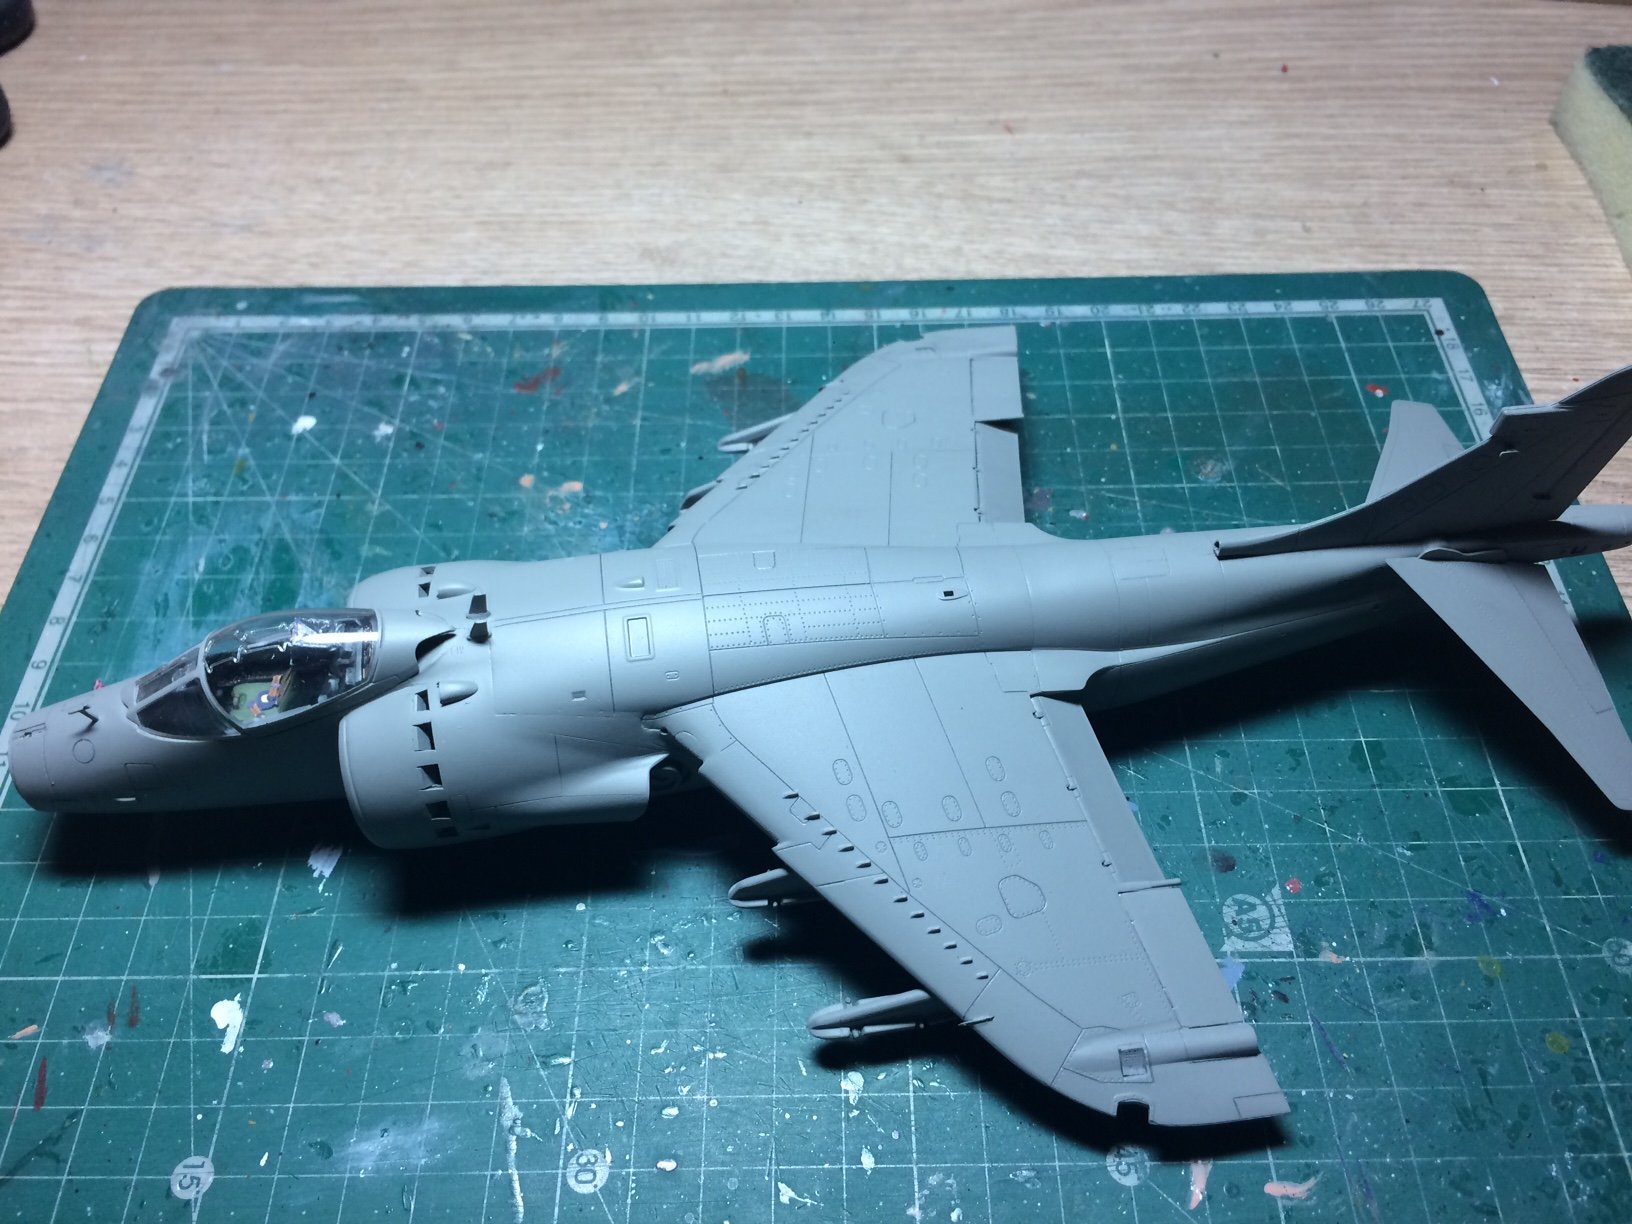
Evening all, thank you for all the likes and comments as always it really makes a difference.
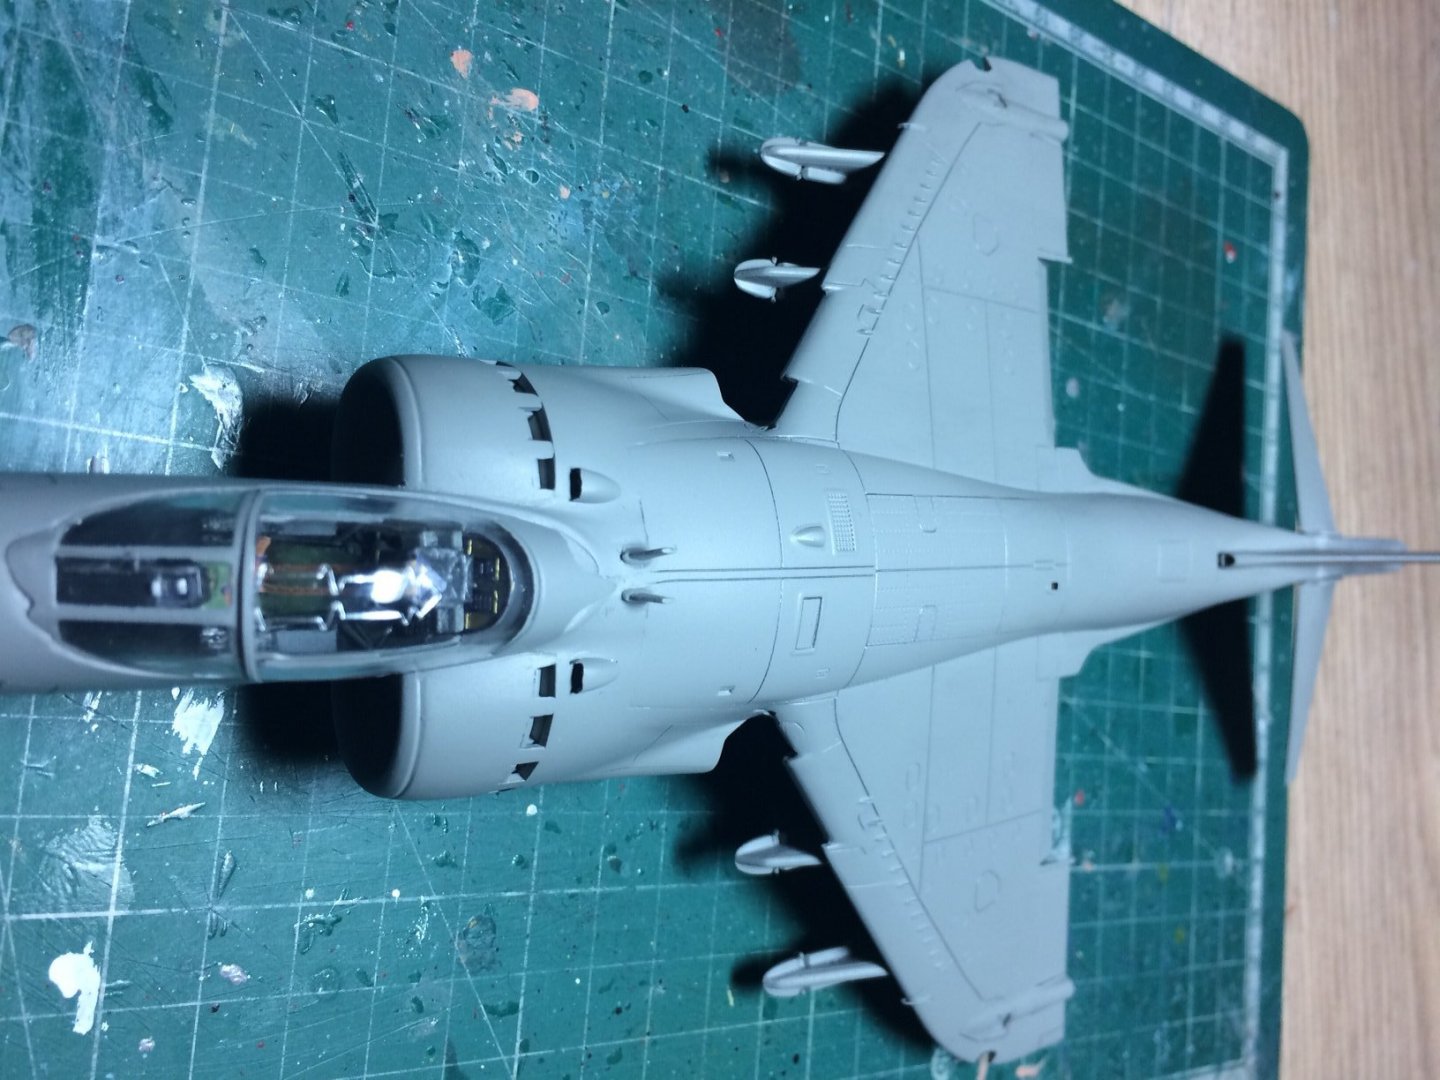
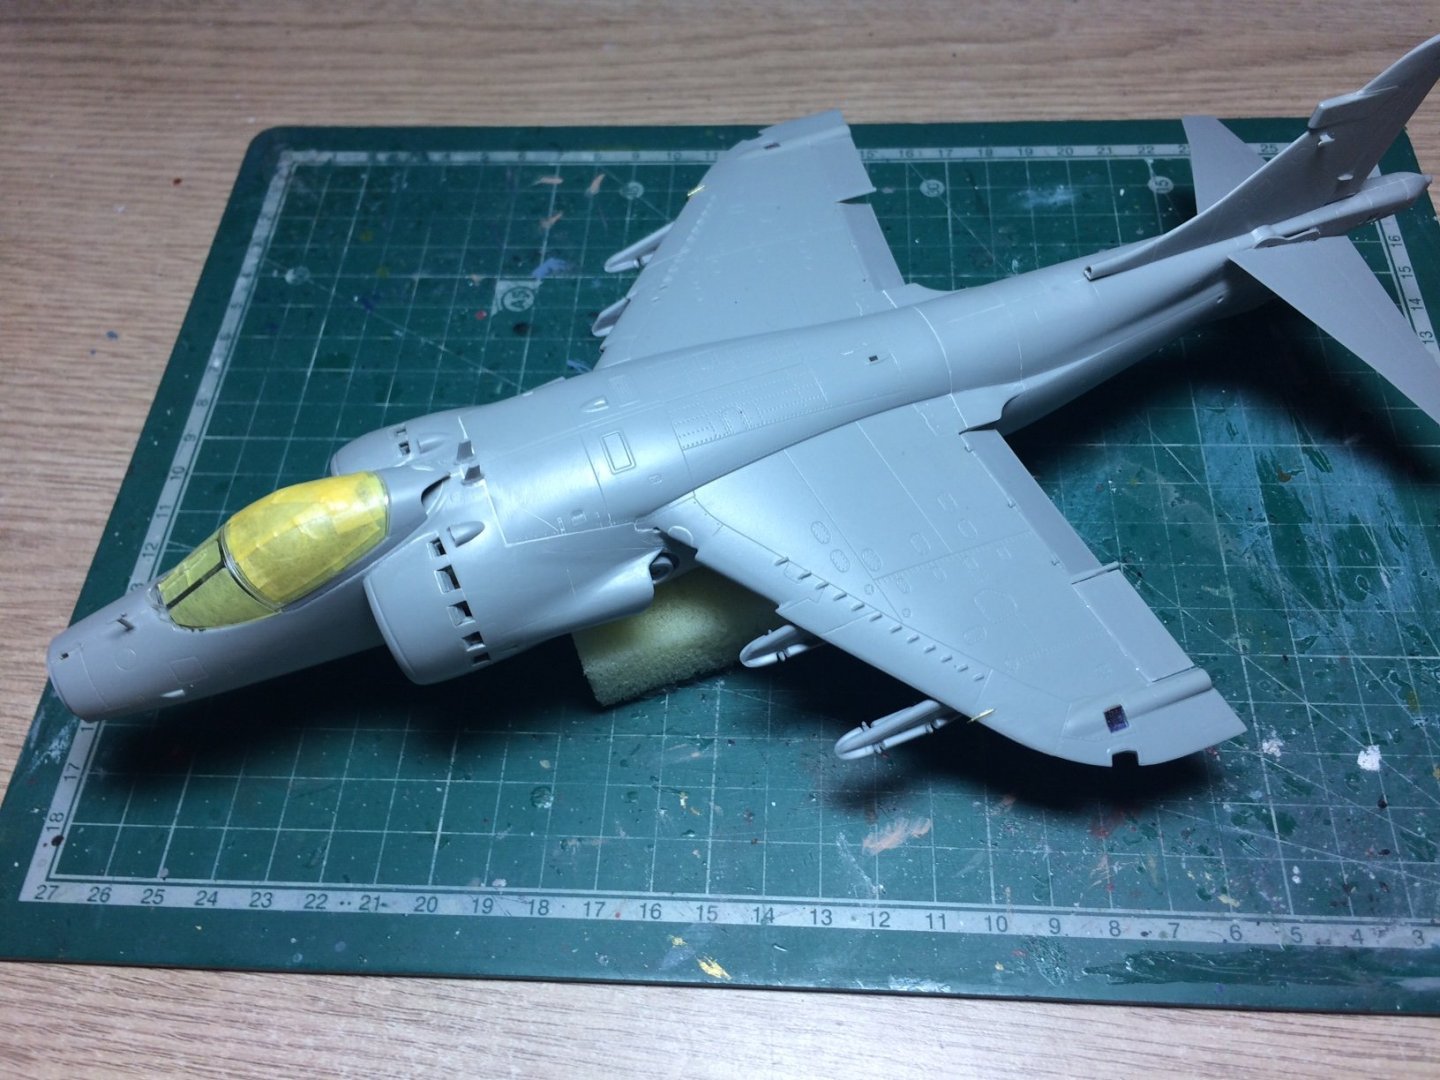
So on with the build - After checking the primer it was nice and dry with a fairly nice finish so I dug out my top coat (Tamiya Medium Sea Grey) - same as the primer outdoors and a couple of light coats waiting about a minute between coats, then back in the box.
While the shar was drying I rigged up a way of holding both drop tanks - then outdoors again and a couple of blasts of primer, then about an hour later on went the medium sea grey.
Then this evening I checked the main paintwork and it had dryed nice and solid - so I decided to do a bit of panel lining using my fine draughtsman pencil (same as I did on both my spit and mossy) then I de masked the canopy (its just dry fitted as it will be displayed open).
Not looking too bad I think.
OC.

- Roger Pellett, GrandpaPhil, Canute and 6 others
-
9
-
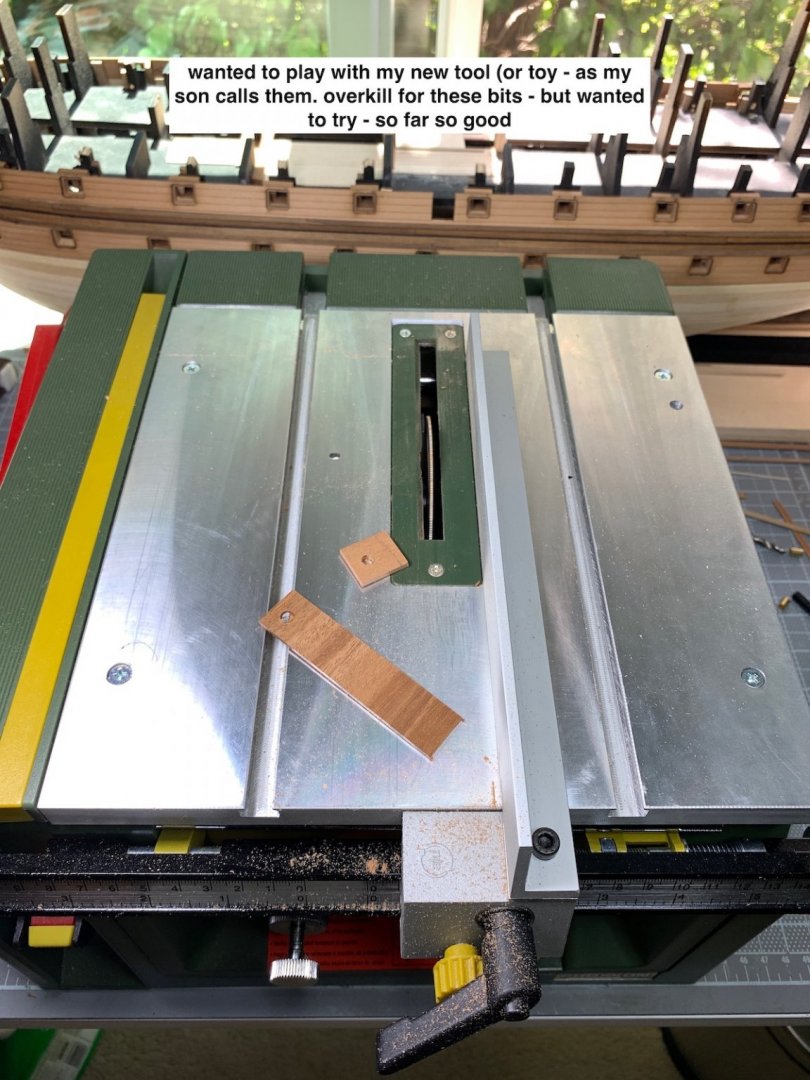
1 hour ago, Kevin said:
im here as well, late as usual, giving myself a break from sawdust
Most welcome Kevin - better late than never.
OC.
- Canute, Edwardkenway, mtaylor and 1 other
-
4
-
2 hours ago, popeye the sailor said:
I had some wild horses try to pull me away........but I wouldn't have any of that
") nice progress.........looks great at this stage of the assembly!
nice progress.........looks great at this stage of the assembly!
Thank you Denis - give the horses some water and hay and take a pew.
OC.
- mtaylor, Canute, Edwardkenway and 1 other
-
4
-
-
That is looking so nice.
OC.
- popeye the sailor, Egilman, mtaylor and 2 others
-
5
-
Evening all, a bit more progress today - First I took the Shar outside and gave it a couple of shots of primer, then I put it inside my tub closed the cover and took it indoors, then the eve I attacked a few fittings starting with the drop tanks and the sidewinders - so here we have Two 190gal D.Ts and Two 9Lima's.
OC.

- Edwardkenway, mtaylor, marktiedens and 5 others
-
8
-
-
On 9/5/2020 at 5:41 PM, md1400cs said:
Patrick, As always thank so much - As you know I'm a huge fan of your work.
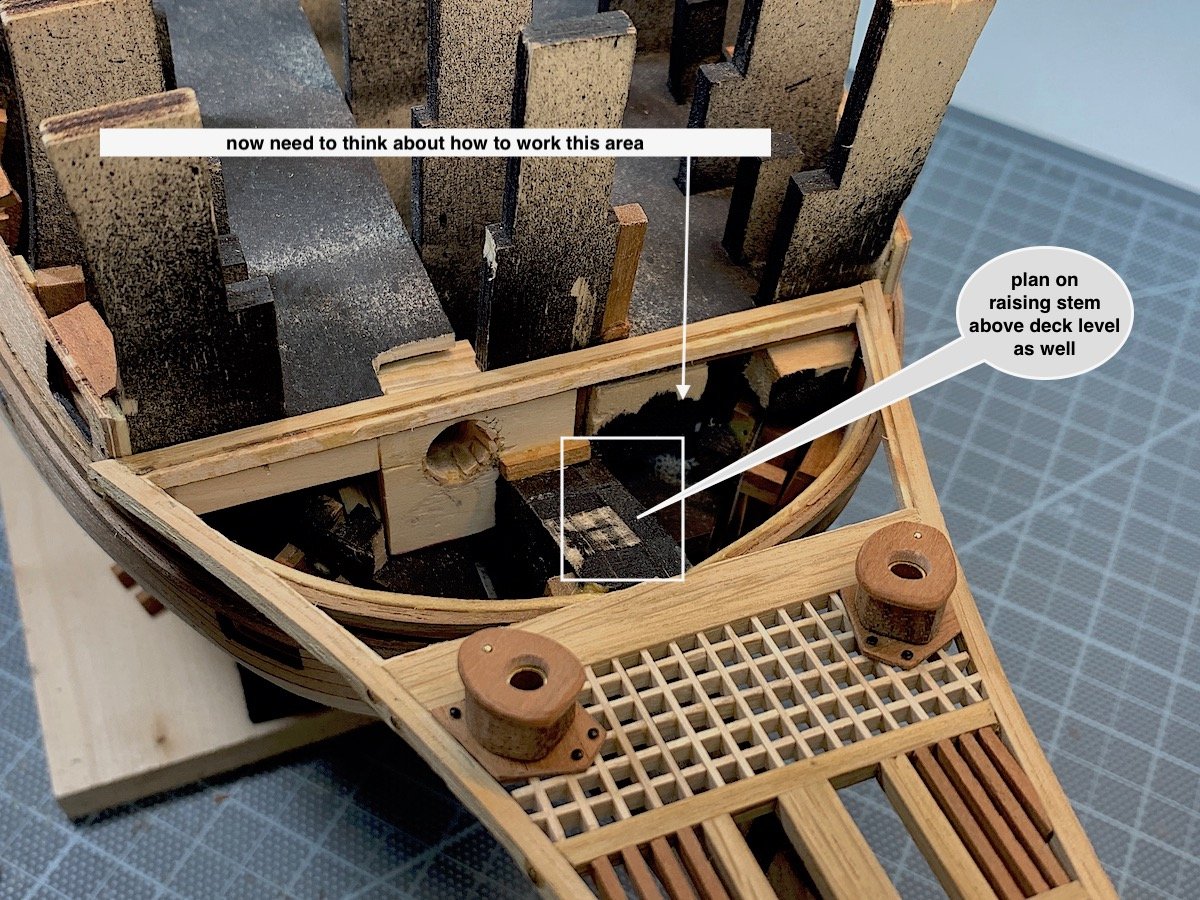
Minor update - need to re-do bowsprit area so thought I would add these two bits. Added the gratings as well.
Regards,


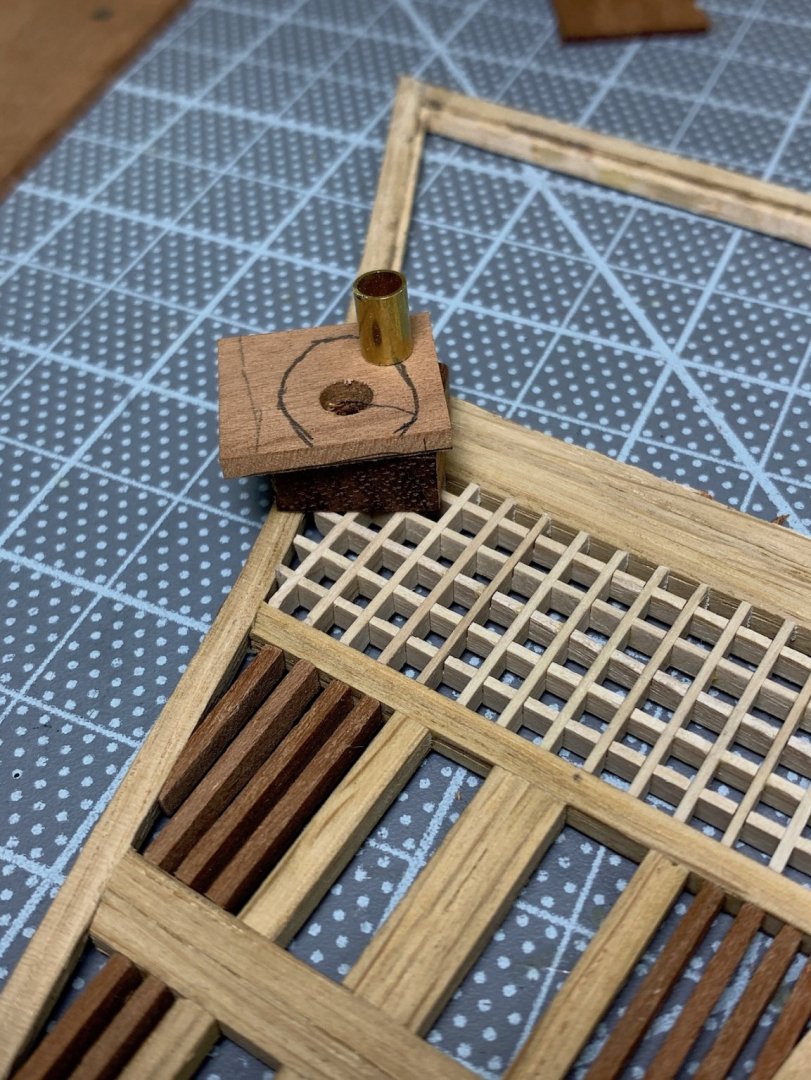

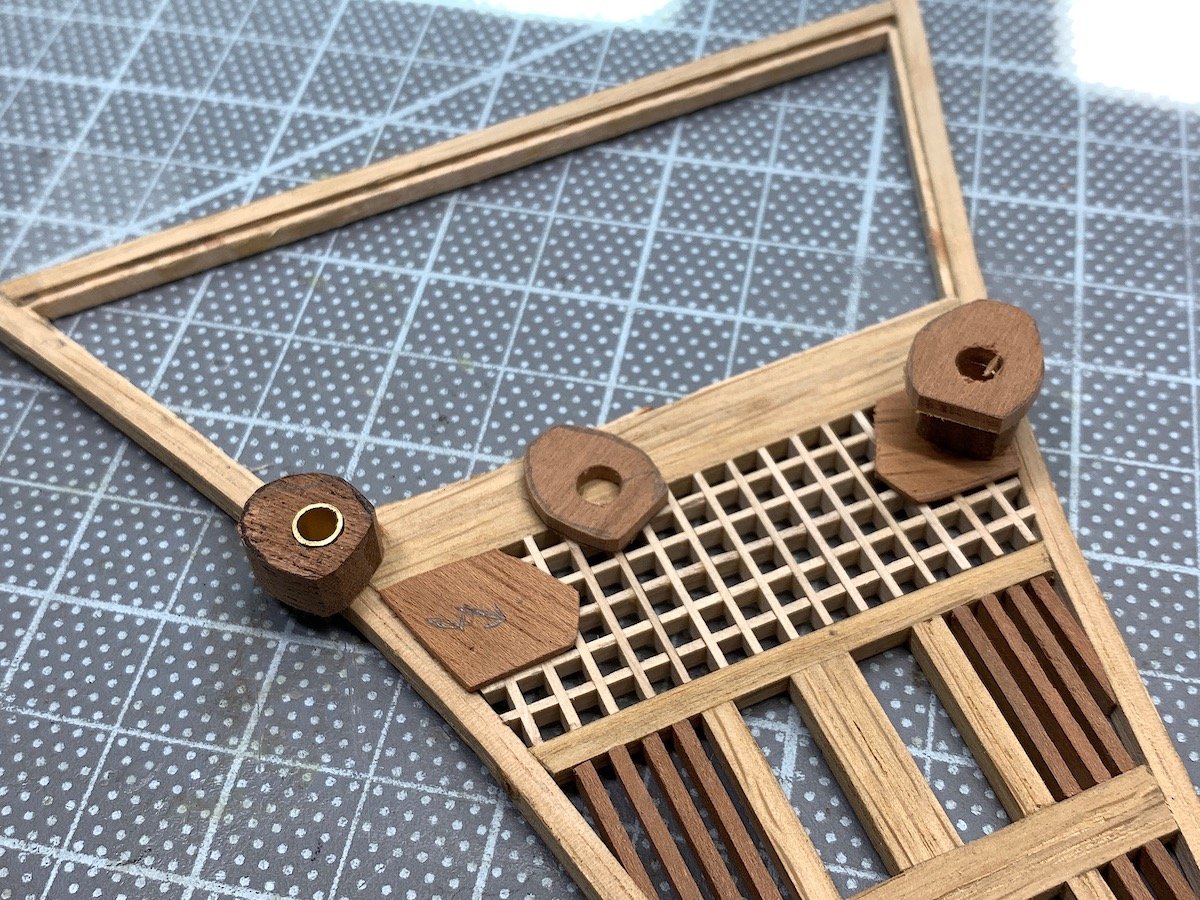
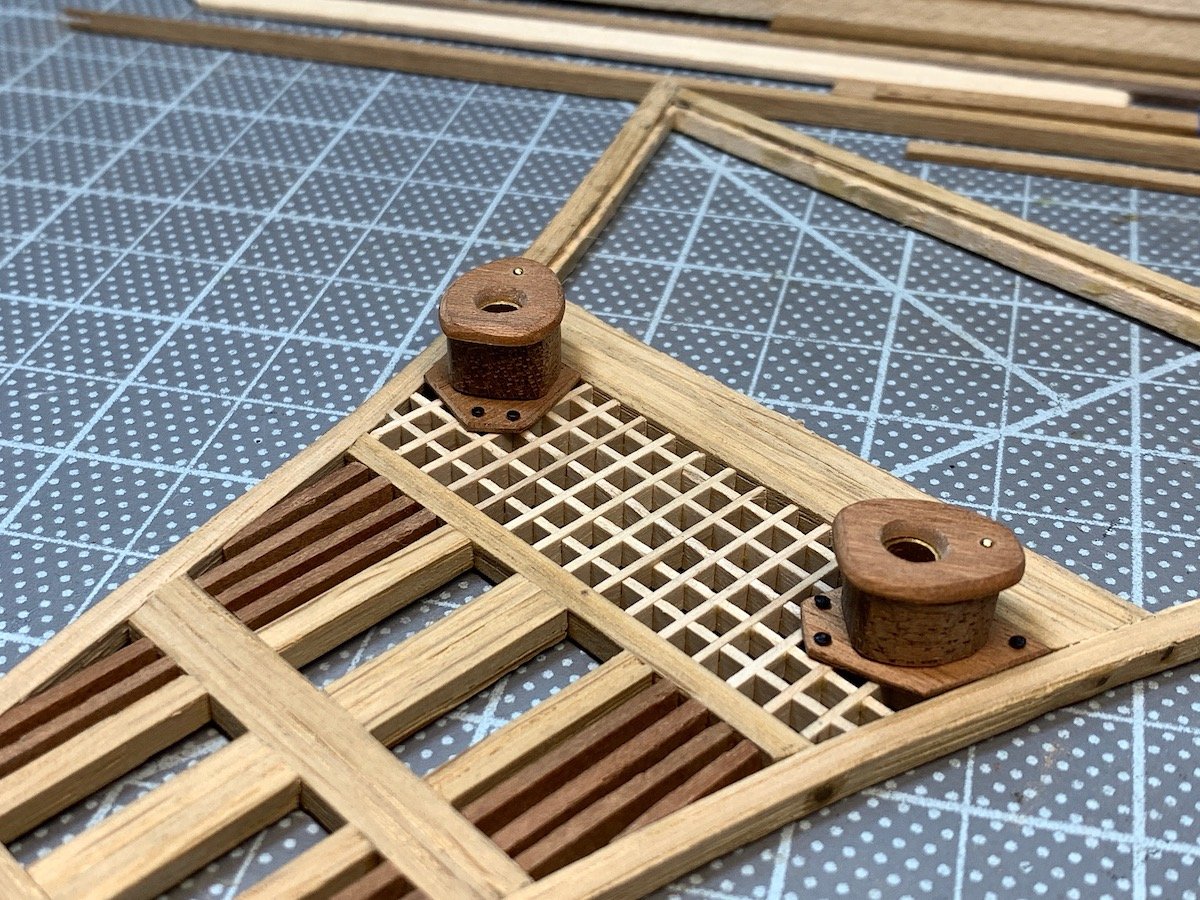
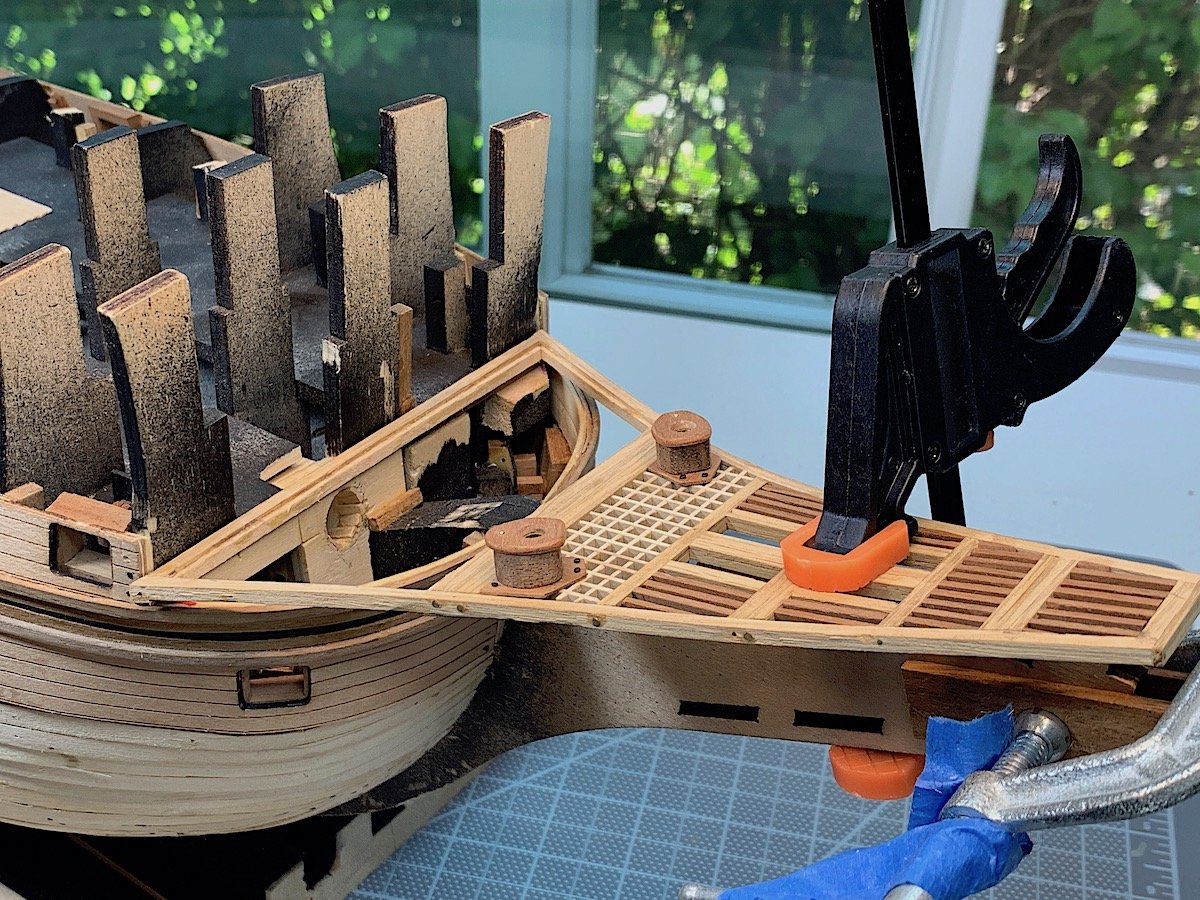
Where are the flush units and the loo rolls.
OC.
- fmodajr and FrankWouts
-
2
-
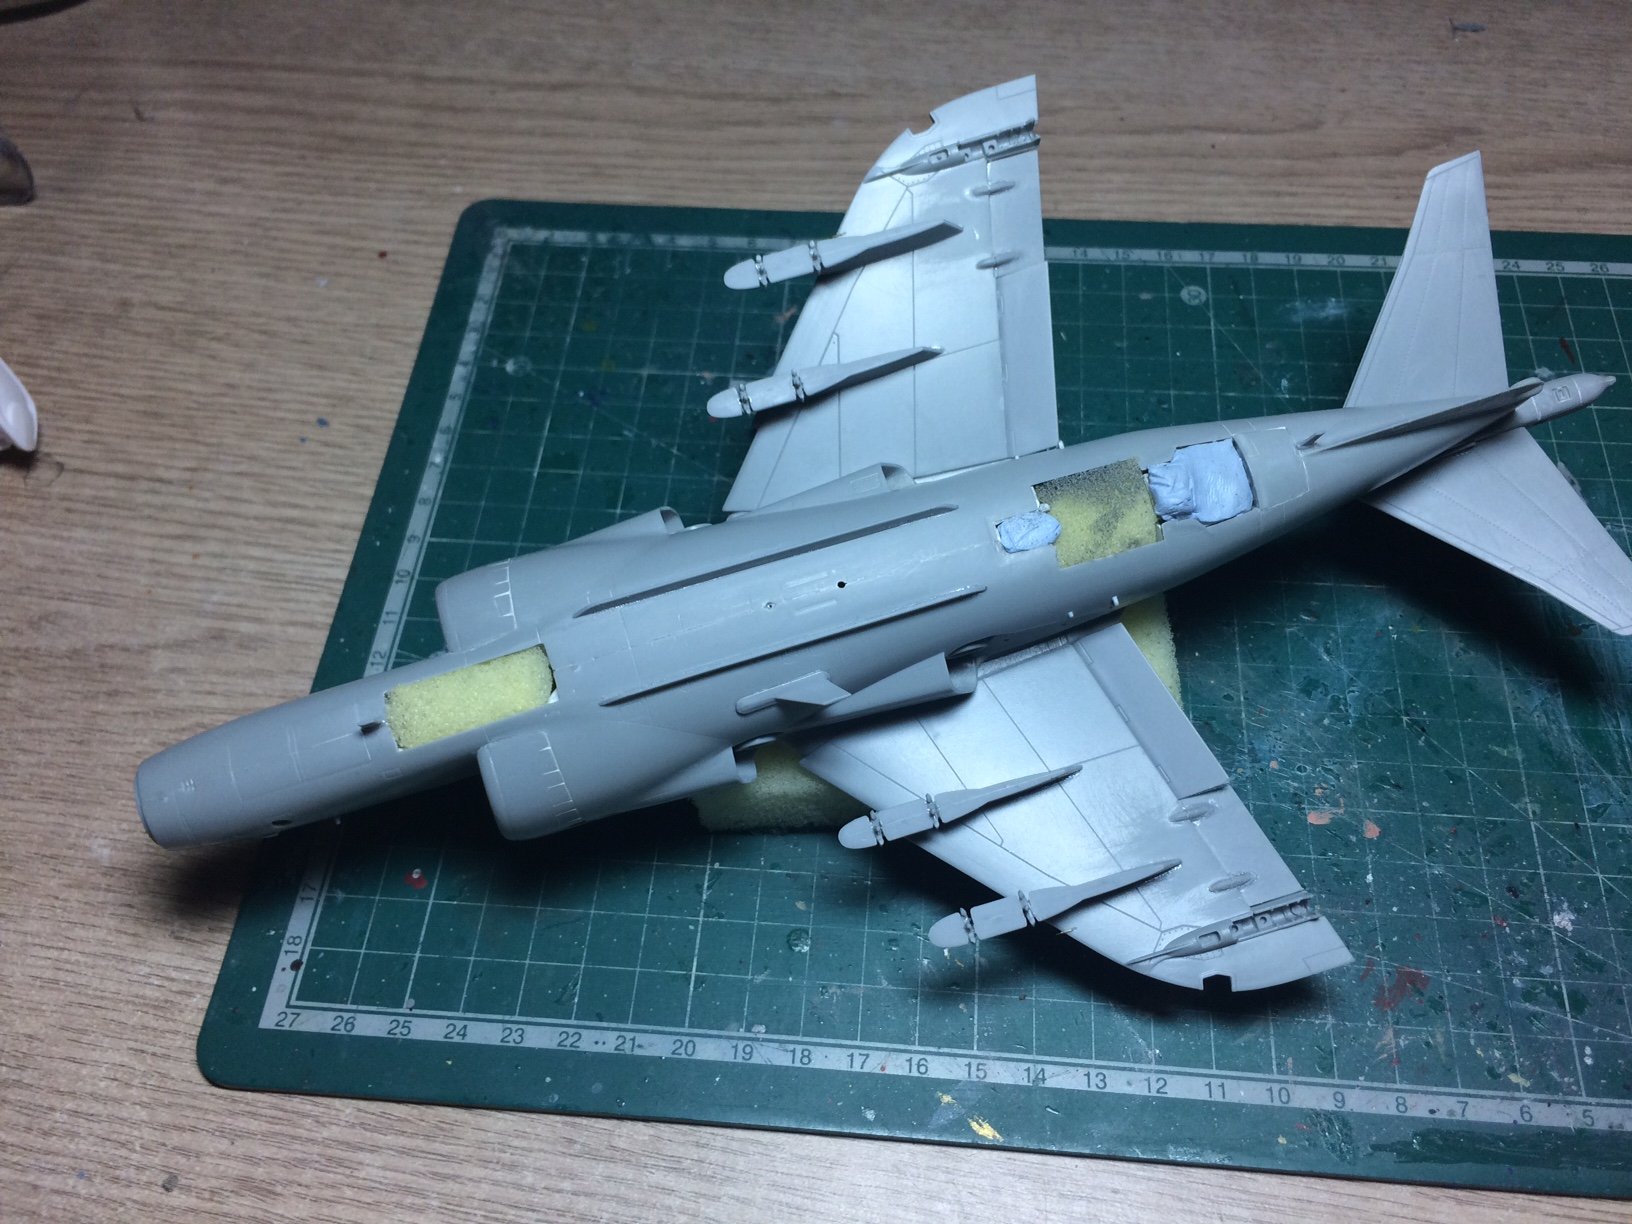
Evening all, I woke up to my Tamiya Rattle Surface Primer so it promted me to push on - first off I masked up the canopy then using some blue tack I pushed it down onto the bang seat, next I pushed sponge into the cavities I wanted protected - so its ready for primer.
OC.


Sea Harrier FRS.1 by Old Collingwood - FINISHED - Kinetic - 1/48
in Non-ship/categorised builds
Posted
I got a bit more done today - I started by painting the different fittings in Black, then I touched up the canopy farme edges and did a bit more detailing, then I decided to fit the tiny transparency parts - the top/bottom nav lights and the Two wing lights - here is where I encountered my first problem - "Boy are they fiddly to handle and position the right way round" hence I dropped the first one down onto the carpet joungle - took me a good Ten minutes to find it on my poorly knee, this was quickly glued in with a kind of - "You are going in even if your the wrong way round" then I turned to do the other side - same procedure but this time the tiny little thing snapped in Two, so I just glued the one half piece in and worked on filling the remaining cavity with Vallejo Putty, gently bit by bit assisted with heating and gentle sanding - then more filling/sanding "You see where this is going" there was a slight edge around the nav light covers with rivets - well not anymore as I had no way of controling the sanding over a small area.
Anyway they are both smooth and uniform on both wingtips awaiting a quick blast of primer and top coat just over the extreme wing tips.
When dry I will mask and paint to Two nav covers in Red and Green - best I can do.
I will post some more pics after I have rescued this stage.....................Stay tuned.
OC.