


Old Collingwood
-
Posts
11,548 -
Joined
-
Last visited
Content Type
Profiles
Forums
Gallery
Events
Posts posted by Old Collingwood
-
-
12 minutes ago, CDW said:
Please don't follow my example, Papa. I am a bad influence in the excess stash department.
You need to invest in Ten pairs of hands so you can "multi-multi-multi-multi task and build many"😁
OC.
- Egilman, lmagna, Edwardkenway and 2 others
-
 5
5
-
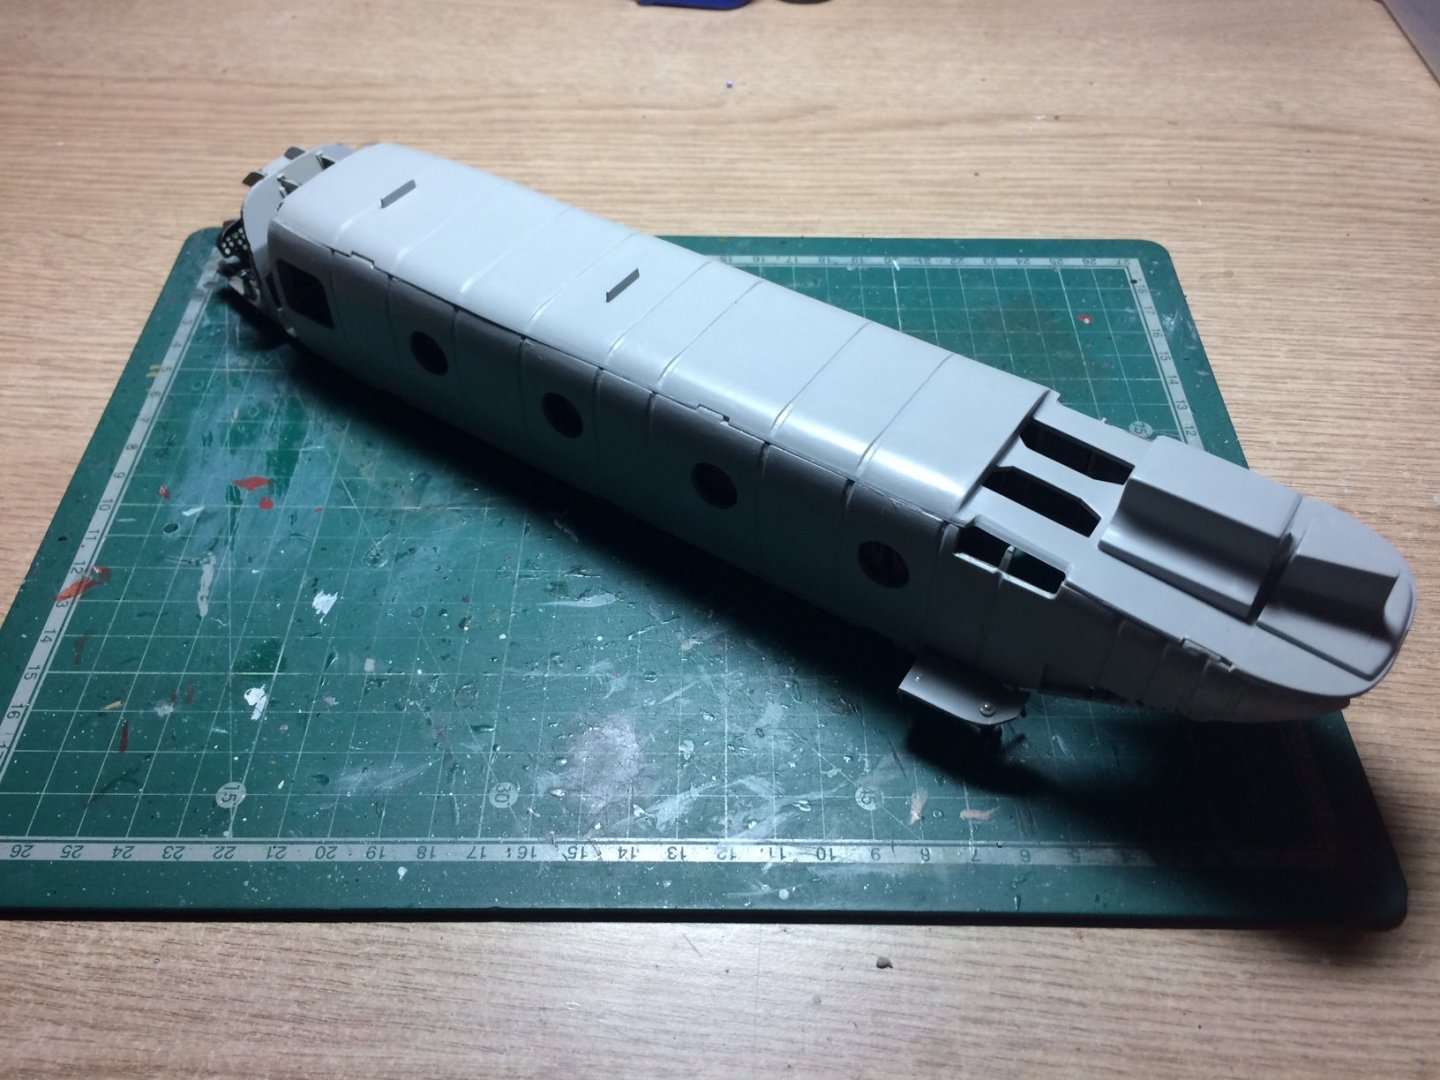
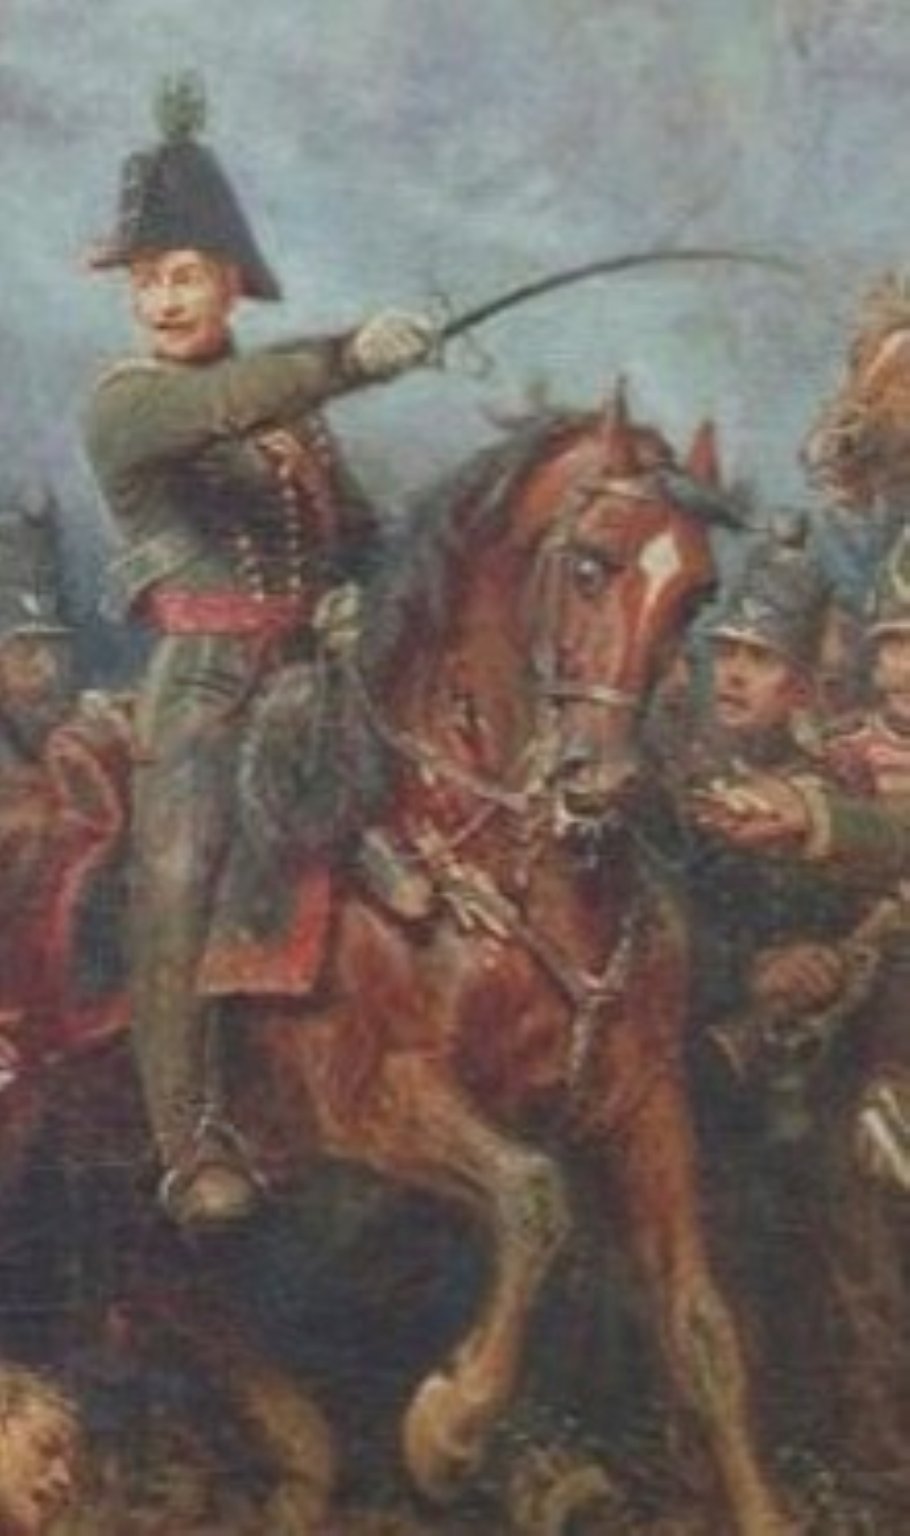
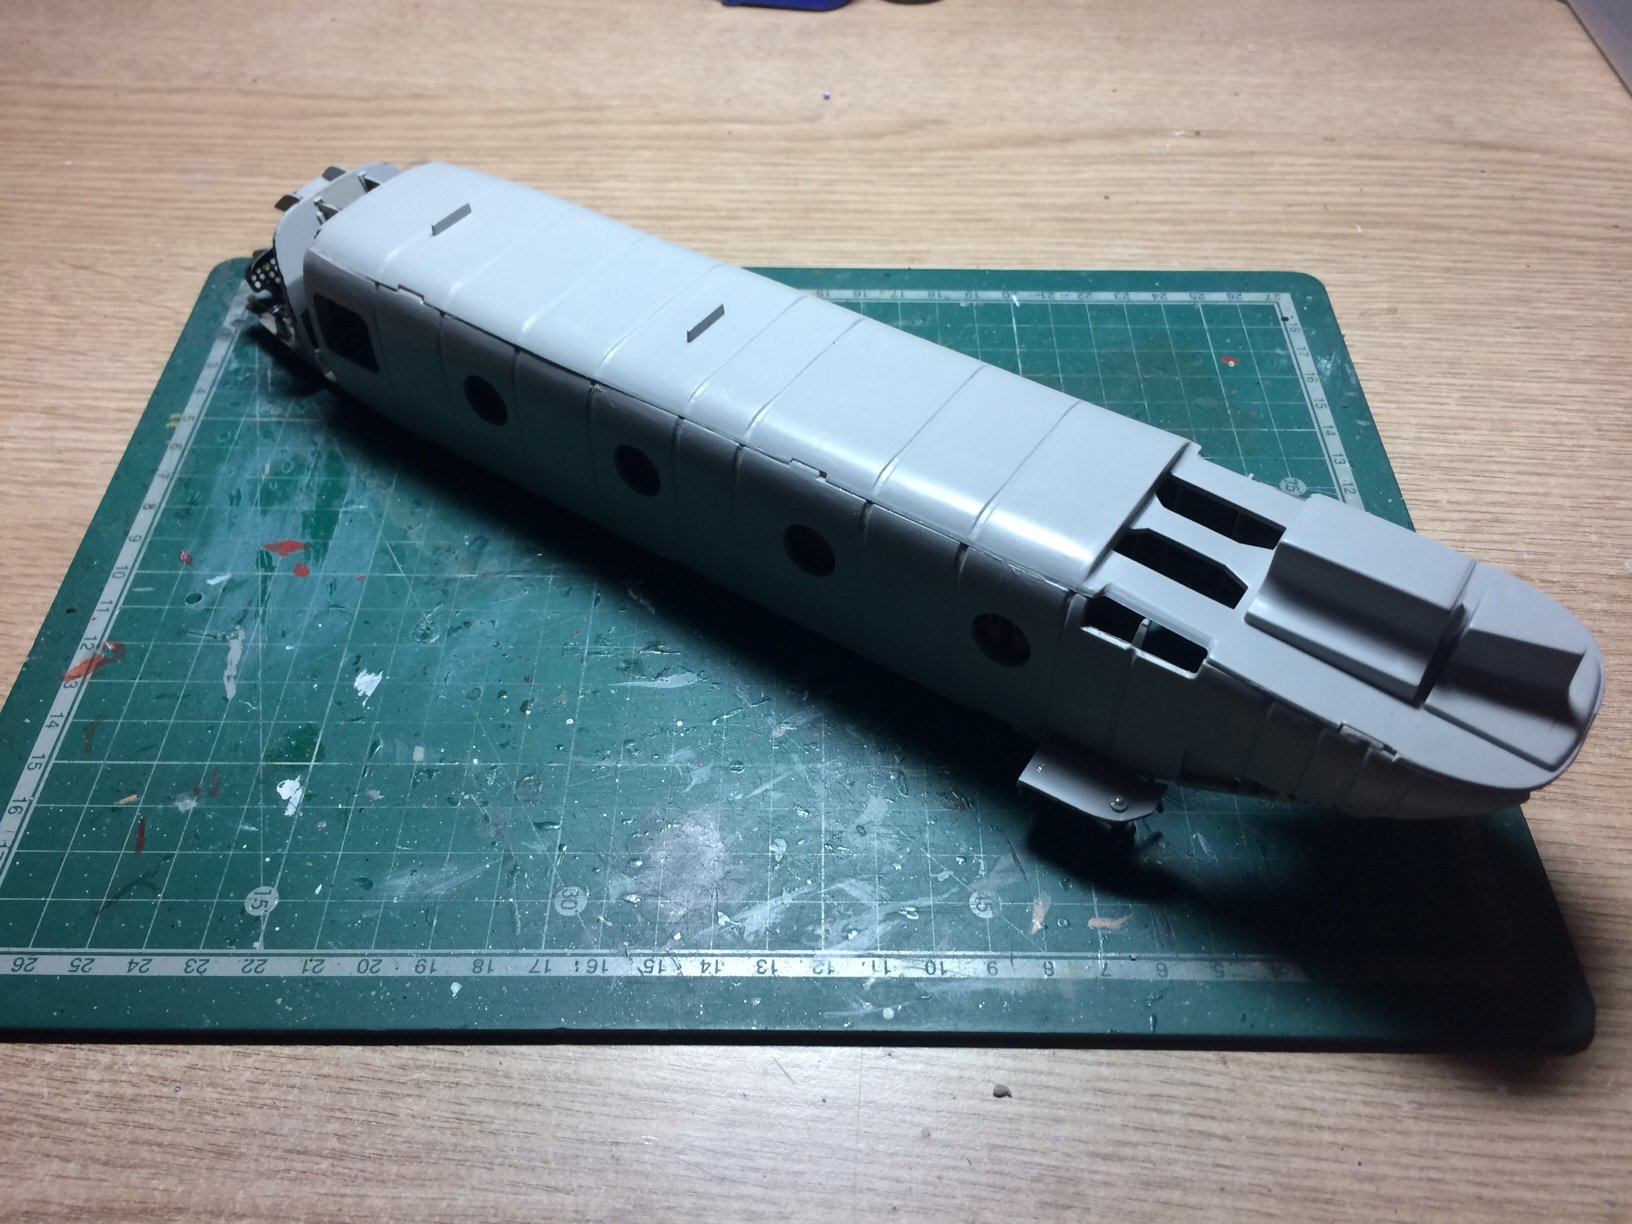
Afternoon all, I'm back - I decided to give my Chinook build a slight rest while I do somemore work here - I decided to have a go at building the chap who was in overall control over the Farm no less than - Major Georg von Baring, as he stayed "sted fast" with his army right through the battle for the farm.
Pic off the net showing him on his horse.
OC.

- Canute, Edwardkenway, Waitoa and 5 others
-
8
-
Right then everyone, I'm going to put a little hold on this - Just when it was getting interesting, as I want to do somemore work on my Waterloo project - see you over there😉
OC.
- lmagna, Egilman, Edwardkenway and 3 others
-
6
-
31 minutes ago, Canute said:
As your modeling skills grow, you get more comfortable with kit-bashing and scratchbuilding. Welcome to the Dark Side, mate.
Thanks Ken.
OC.
-
1 hour ago, Canute said:
Lots of small details that make it come alive. Good job, OC.
Thanks Ken, yep the rear roof area in the kit is a bit "basic" you can get update sets that include that area - but just as good to fo it yourself.
OC.
- popeye the sailor, Egilman, lmagna and 3 others
-
6
-
Hopefully - we will see you back at full pelt - its been fairly quite around here.
OC.
-
Sincerley warm welcome back mate - hope all is good and well with you and the family, its great seeing you back in "Plastic World"
OC.
-
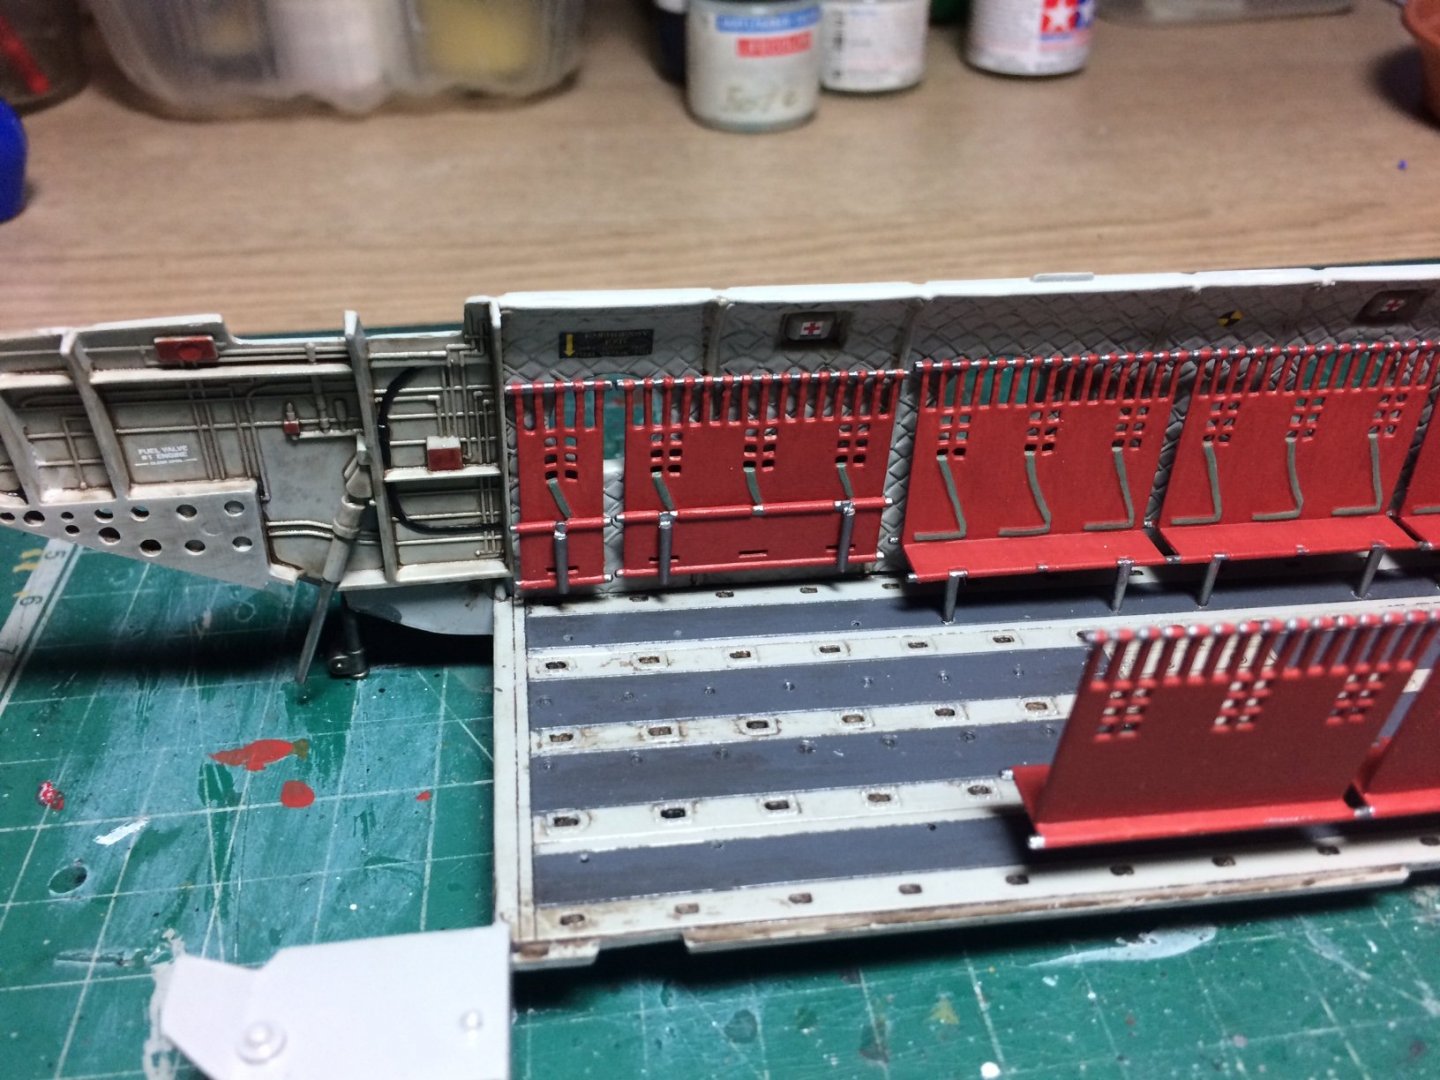
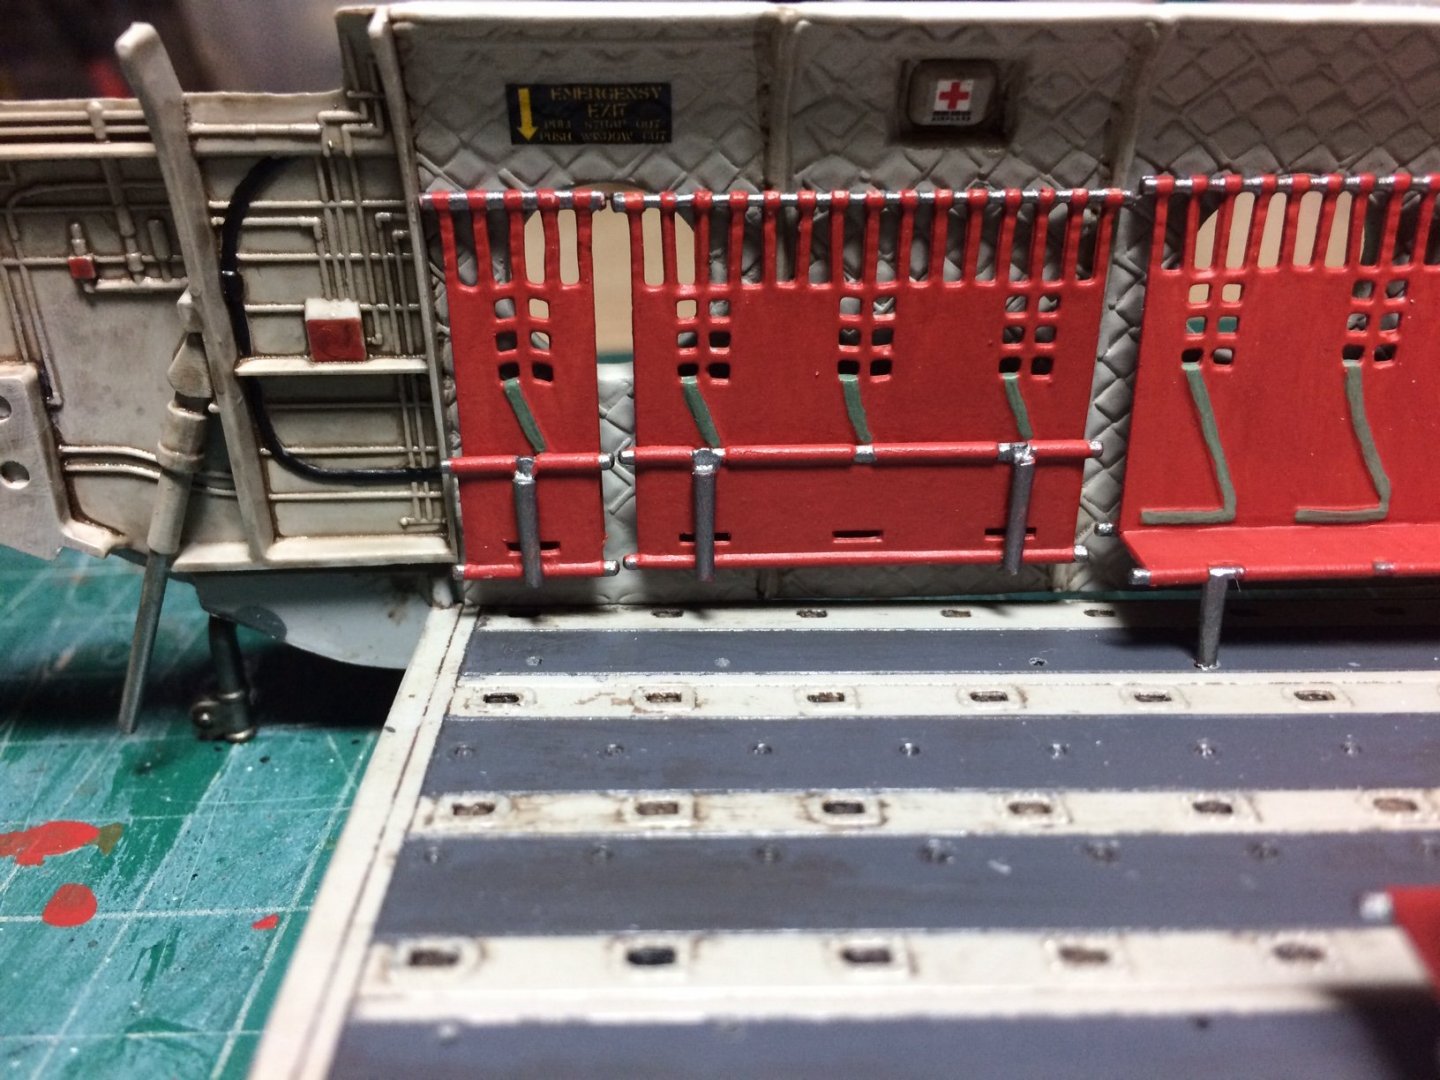
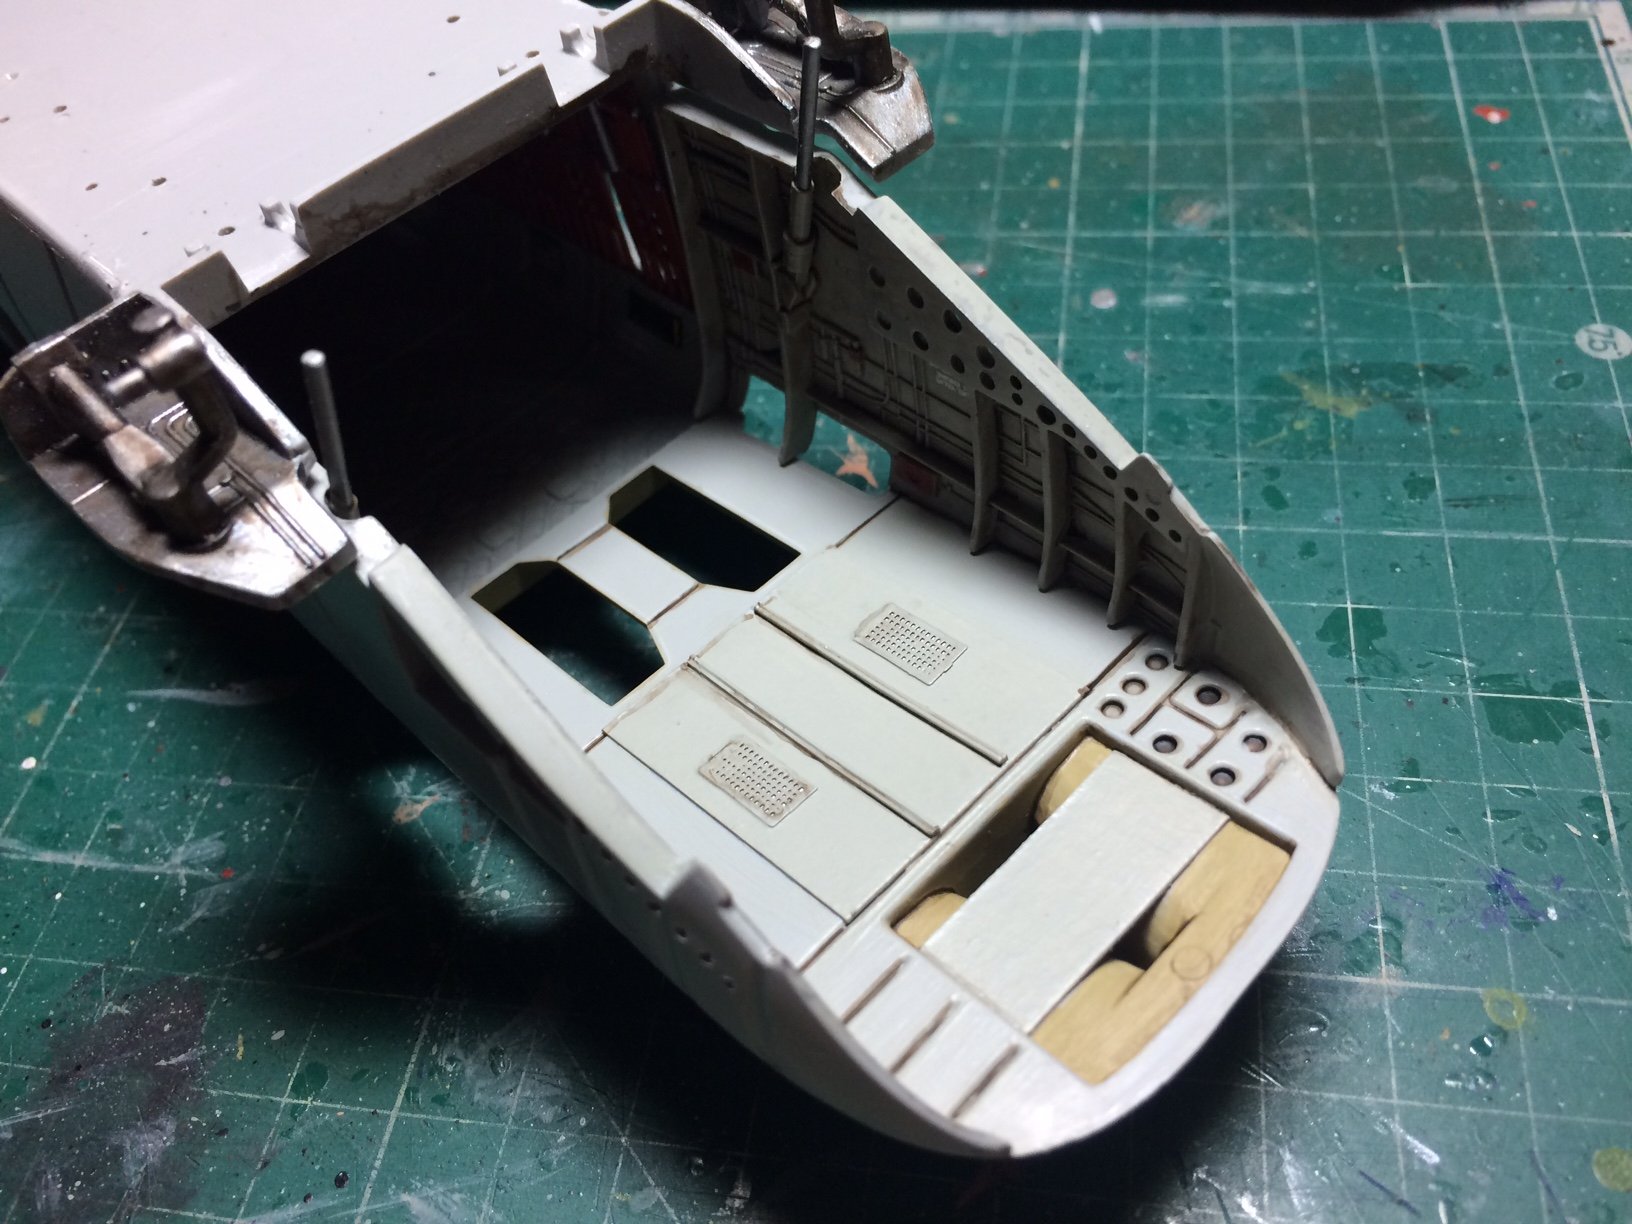
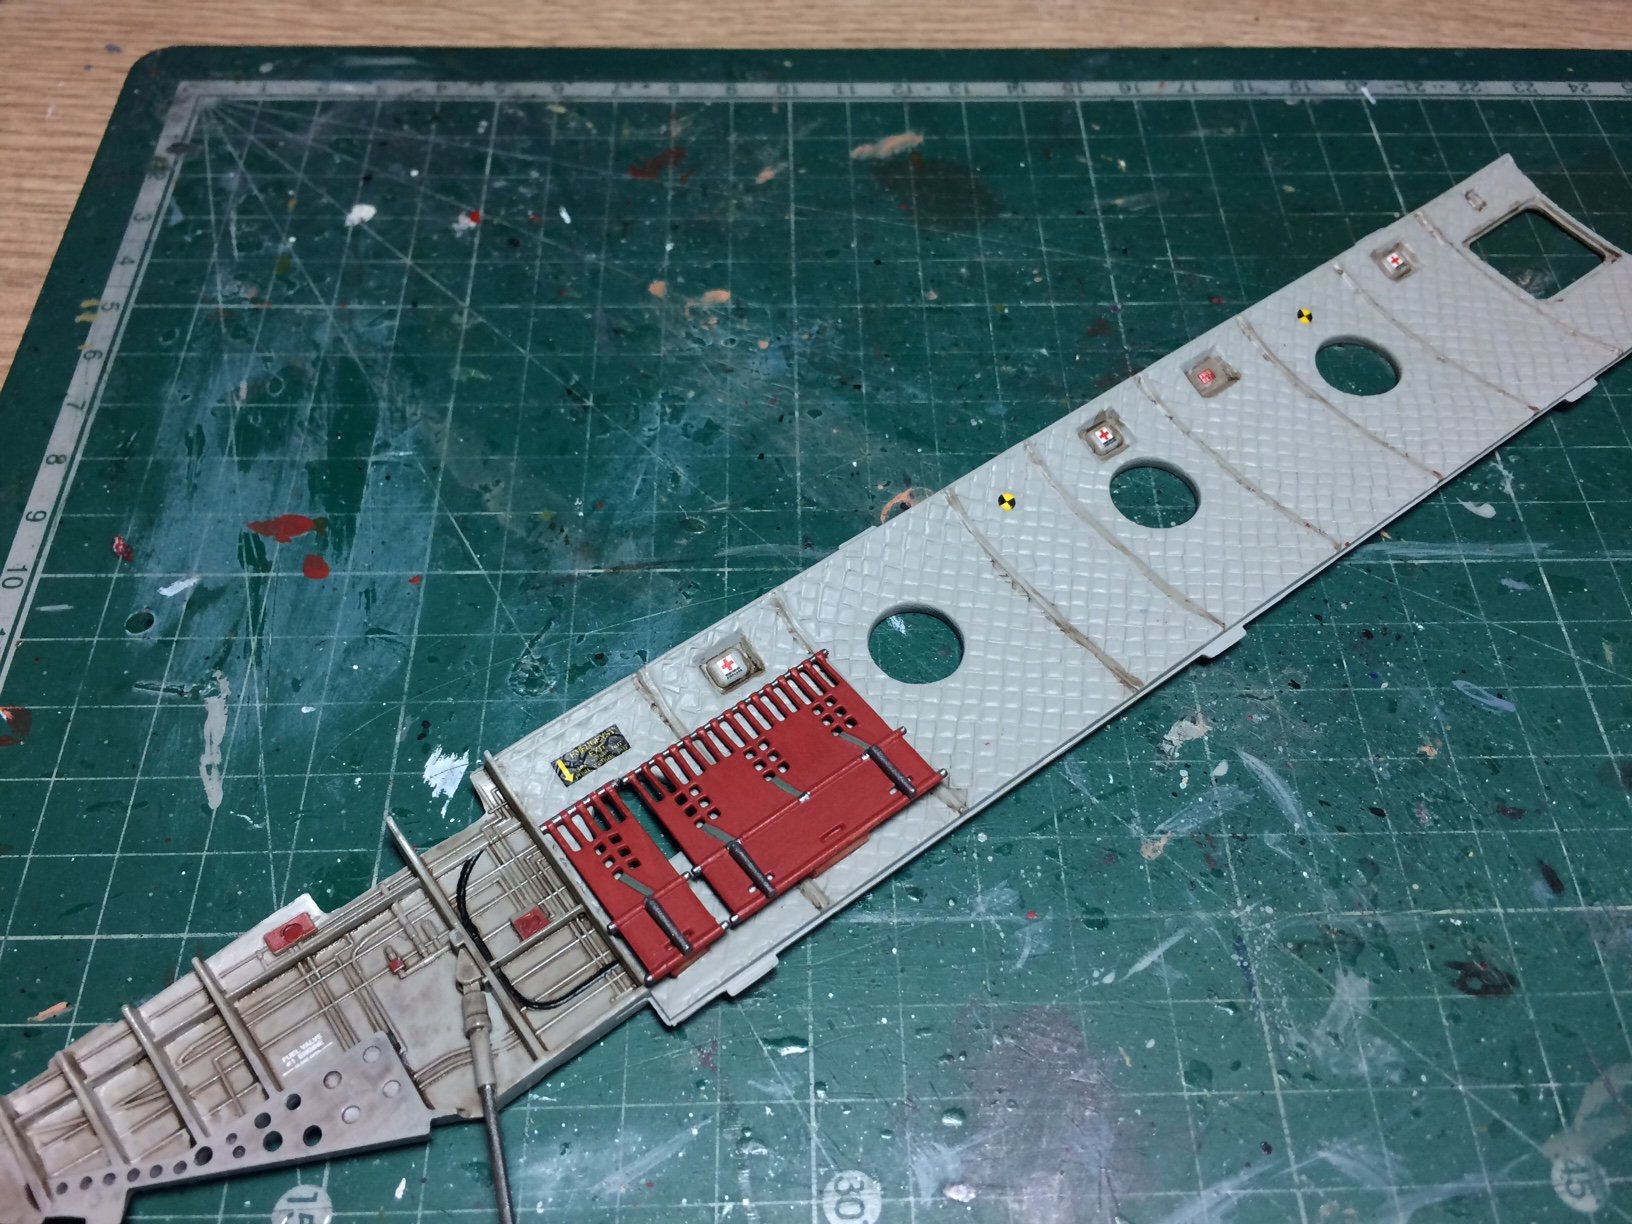
Evening all, I made some good progress today - I started on the rear roof area above the ramp, this area in the kit is a little bit bare of any detail, so after looking at some photos online - some scratch building was called for, so some card and a few other pieces later and I had a plate to be glued to the roof, I also added another one slightly smaller - then a few coats of paint and a bit of shading and this is the result.
OC.


-
6 hours ago, Edwardkenway said:
Of course, nothing out of place here in Blighty, old chap!!😁
As Lou said, coming along nicely 😀
Thank you Edward.
OC.
- Egilman, Canute, Edwardkenway and 2 others
-
5
-
8 hours ago, lmagna said:
Same here Mark. Heck, sometimes we didn't even bother with seats! And doors? Who needs stinking doors? (Well I do have to admit that we didn't often actually take them off.)
But the two times I did fly in a Sh**hook it had not only jump seats just like these but belts as well. You also have to remember that as this is an OC build it is British and will be properly shipshape and Bristol fashion at all times!

Looking nice OC
Thank you Lou, yep it was probably a requirement to amke sure they were tidy inside.
OC.
-
-
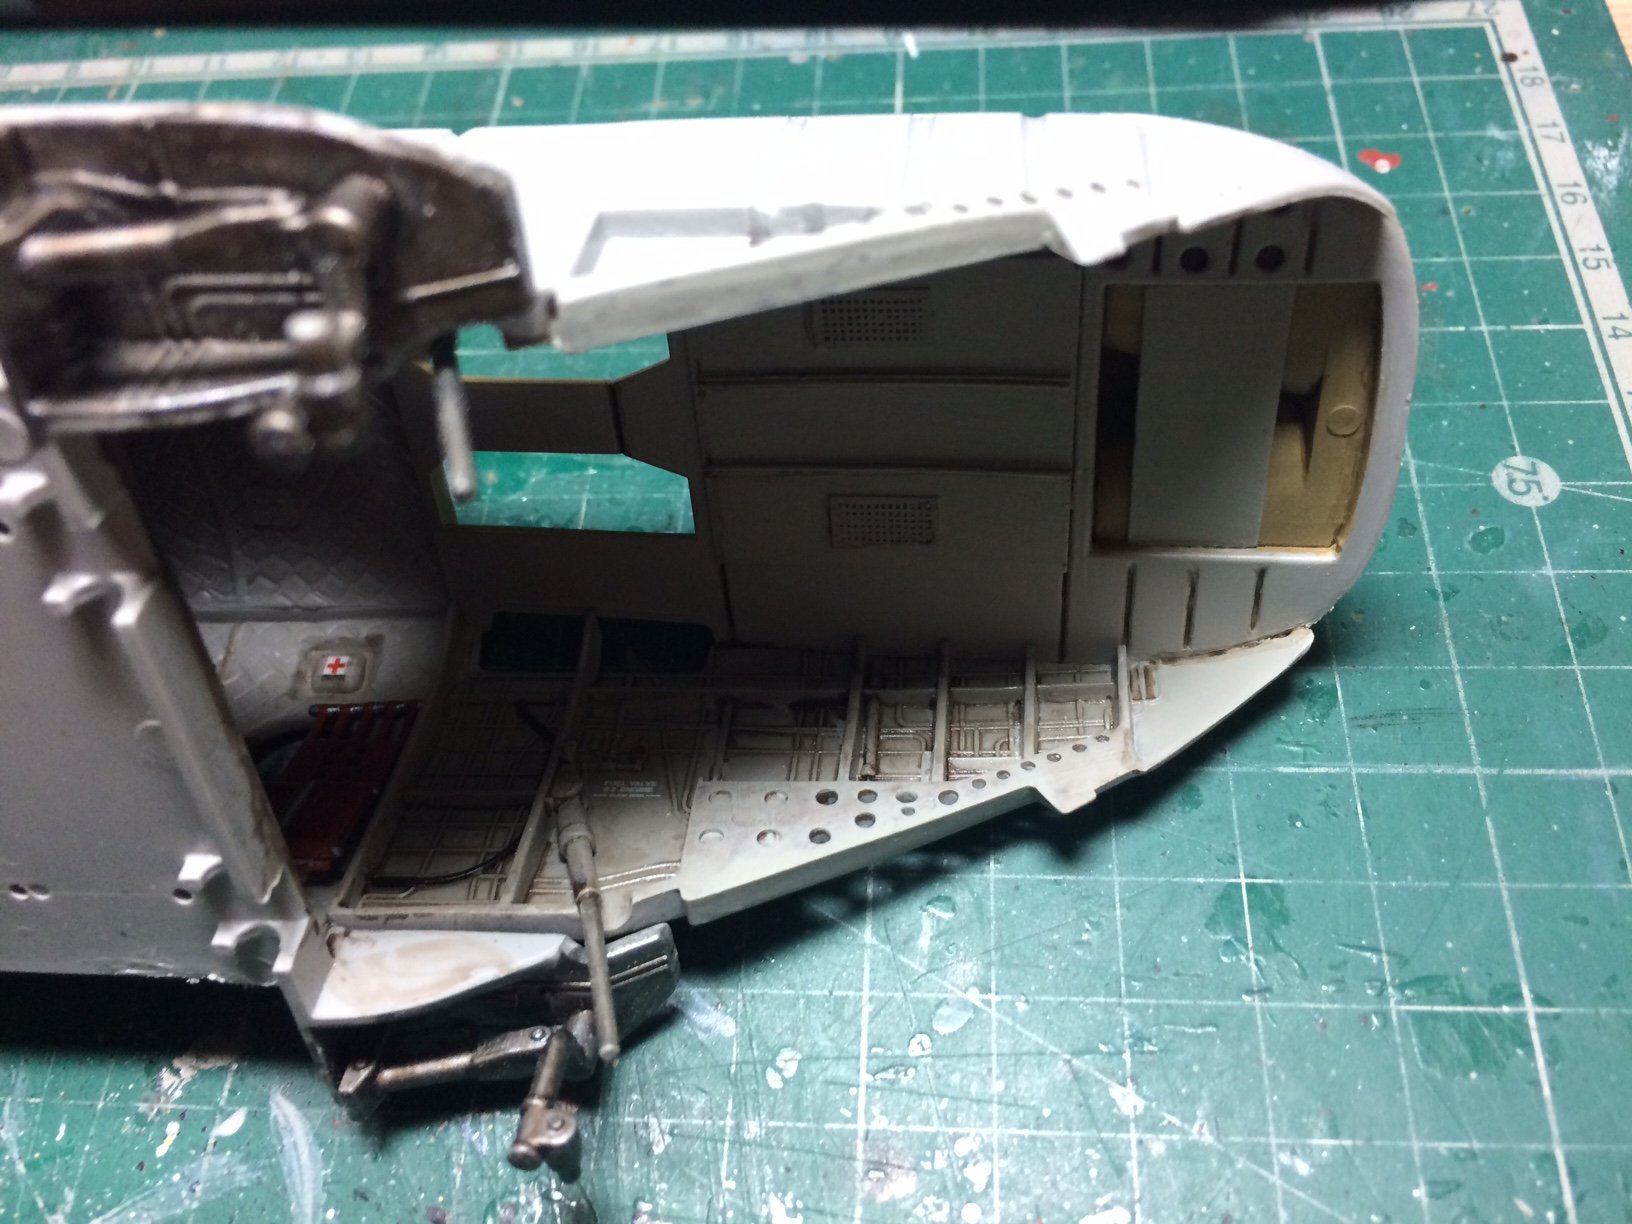
Evening all, I got some good progress done today - I finished off attaching the the other folded seats - then I glued both side walls to the floor, this was a fiddly operation getting the position right while not damaging the seats, I left them to set for a few hours then I located the roof part - this was dry fitted and I soon dicovered it needed a bit of wiggling to get it to lign up with the lugs and wall edges, after moving the side walls slightly I was able to glue the roof down - while positioning it while the glue was setting.
So this is the inner section boxed together just needs some detail painting to the inner ramp roof area, before I can fit both outer sides.
OC.

-
On 10/23/2020 at 12:24 AM, Canute said:
H, that should be a good glue. You'll find you may at times also use white glue. And sometimes super glue/CA. They all have their uses in wooden models. Read the various logs and see what others are using for a given situation. Ask them why they do what they do in a given situation. We all learn a lot by participation in these logs.
Good advice Ken - you have covered all there is realy.
OC.
- thibaultron, mtaylor and Canute
-
3
-
8 hours ago, VTHokiEE said:
I picked up a rope walk from Syren a little while ago and in order to postpone tapering the mast I put it together and tried my hand at making some rope today. I wanted to replace the anchor rope (really I may end up replacing all the rope either with my own or some from Syren for consistency) because it was a significantly different color than the rest of the rope I will be using. I wanted to end up with about 1.6mm rope so I used Chuck's Mara recipe for .055" (~1.4mm) rope as a starting point, but I ended up closer to 0.047" so I tried again using the 0.065" (~1.65mm) recipe as a starting point and got much closer, 0.06" or ~1.52mm. I'm still debugging the process a little (my rope unwinds even after baking so I'm asking Chuck what I did wrong). The darker brown rope in the pictures in the kit supplied anchor rope.


What I would be tempted to do with the end fraying is to keep it taut then serve it with fine thread near where you want the end to be to stop it fraying, you would only have to do about 5 -10mm.
OC.
-
11 minutes ago, oneslim said:
Really Nice Paint Job.
BobW
Thank you so much Bob.
OC.
- Canute, popeye the sailor, Egilman and 1 other
-
4
-
Just found this - Wow that Ice machine looks amazing - never seen anything like that before.
Hope you continue on a speedy recovery Jack.
OC.
- Edwardkenway, Jack12477, Canute and 2 others
-
5
-
-
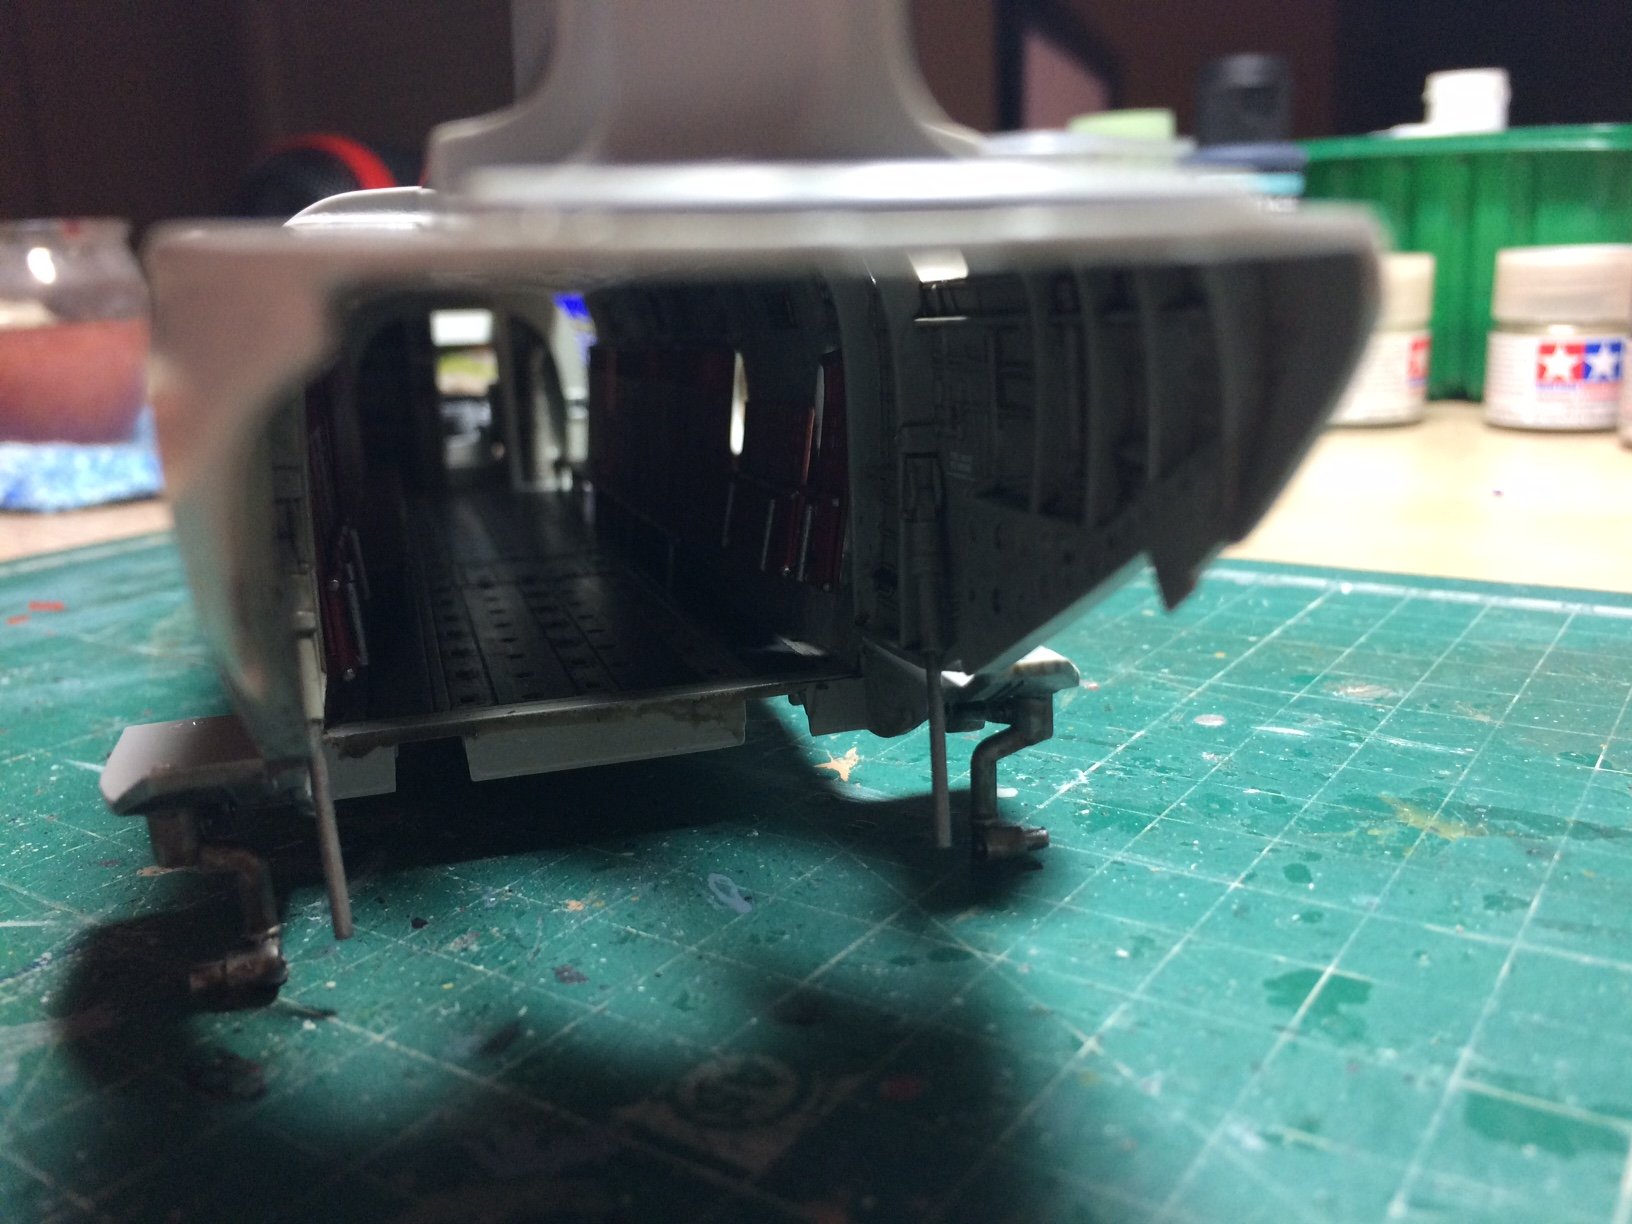
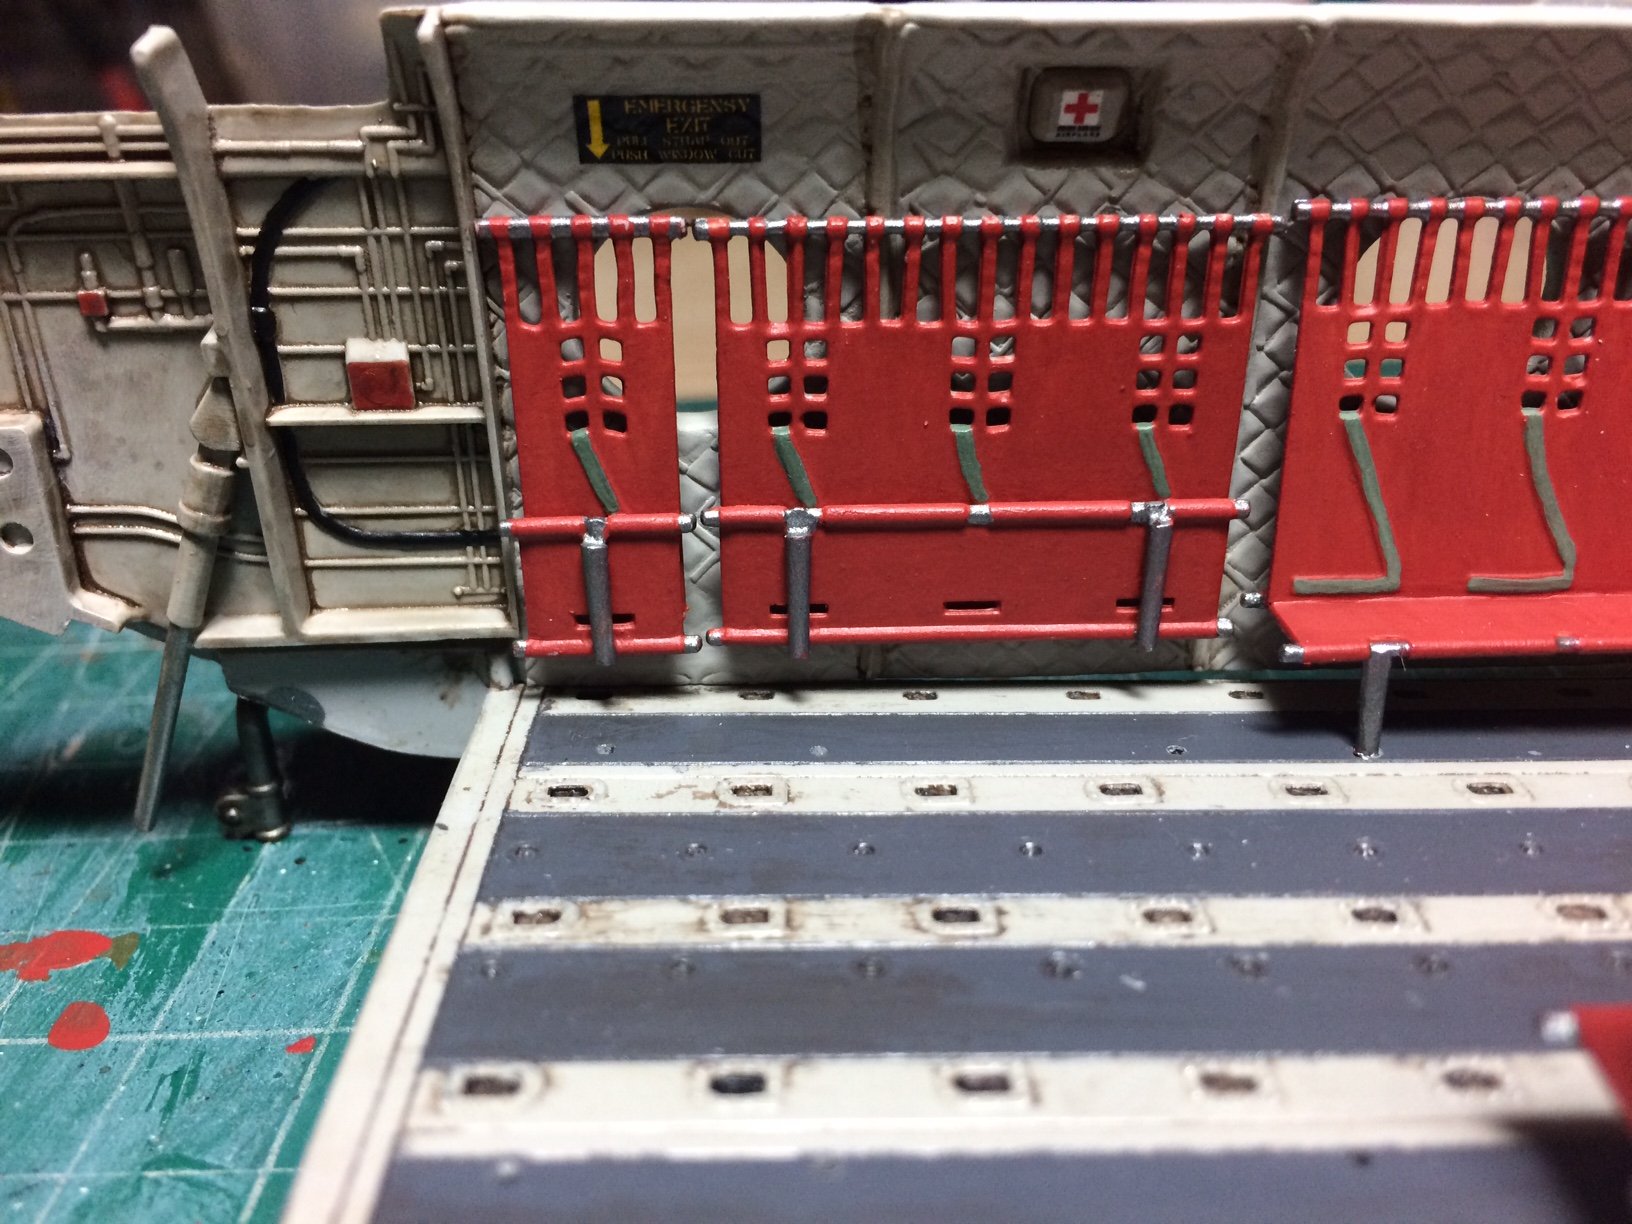
Evening all, next stage in my train build - I mean wokka build is the inner side wall details - this starts with applying a few decals for the emergency exit and first aid boxes, after these were on I put a few coats of micro sol on to settle then down in to the curves of the padding on the walls, then I worked on the last section of bench seating - this was constructed to represent then in a folded up position (they needed a bit of chopping here and there) they were then painted then glued in place.
They are not glued to the floor yet - just placed to show how they will look.
OC.

-
-
Looking forward to it bro, you are collecting some excellent stuff there - should make your build really jump out the screen.
I too have a little plan for next year to bring me back into some ship building in 1/350 scale - but that wont be till late 21.
I have a few builds planned for next year .........😉🙂
OC.
- Edwardkenway, Egilman, lmagna and 3 others
-
6
-
16 minutes ago, Egilman said:
Airforce 1 does a 1/48 diecast of Pudgy IV
But I believe they are the only one, I do know of a few modelers that have scratch built in aluminium sheet at around 1/32nd scale but usually metal is 1/72nd or smaller....
Thanks bro, I'm sure it was a kit - a friend past me over one some years ago - but I can't remember.
OC.
-
-
Wasn't there a scale metal kit of this to build in the same scale?
OC.
- Edwardkenway, Egilman, lmagna and 3 others
-
6
-
On 8/31/2020 at 11:29 PM, mtaylor said:
Ah, the joys of getting older. I heard the cell phone about week and ago and couldn't find it. It was in my pocket. I'm just about ready for the home.
Wire it up to some Very Very loud Speakers - the wires wont be too much of a head ache as you walk around with the phone in your pocket.😛
OC.
- FriedClams, Canute, EJ_L and 4 others
-
7

Battle of Waterloo Attack on La Haye Sainte Farm by Old Collingwood - 1/56 (28mm)
in Non-ship/categorised builds
Posted · Edited by Old Collingwood
So I have made another start - here is Major Baring on his horse un painted.
He is not glued in the saddle yet so I can fiddle around with his position.
OC.