HOLIDAY DONATION DRIVE - SUPPORT MSW - DO YOUR PART TO KEEP THIS GREAT FORUM GOING!
×


Old Collingwood
-
Posts
12,097 -
Joined
-
Last visited
Content Type
Profiles
Forums
Gallery
Events
Everything posted by Old Collingwood
-
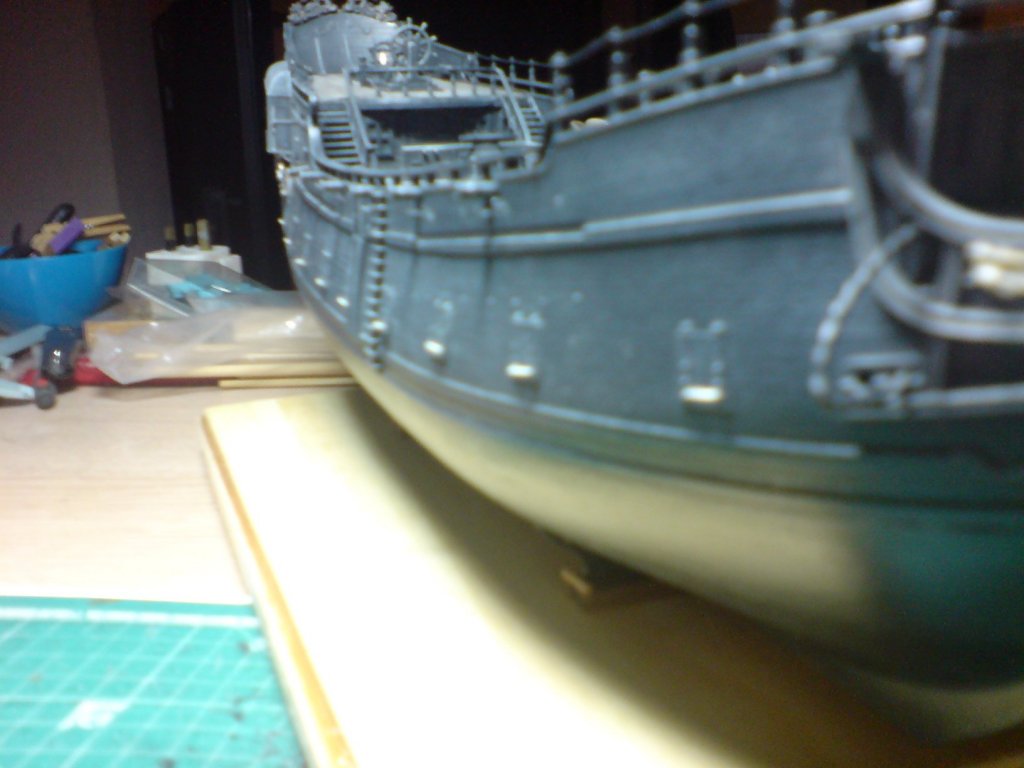
 Good day all, Thank You sincerely for all the likes it certainly helps, anyway back on the pearl today - nothing of any significant interest, I constructed the nine rope lifting beams for the other side - just a length of 1x1mm with a small block glued onto the ends, just need them to set now before drilling a hole in the ends. No pics as its just the same as previous pics. OC.
 -
Interesting looking build. OC.
-
WOW I see you have the same kit of HMS Warspite as I built, and also many other excellent kits begging to be built. OC.
-
If you mean joining the two blocks in your first diagram with the letter A, I think you need to widen the gap between them then wind some thread round and through them like in the diagram. OC.
-
Welcome to our little family looking forward to seeing your builds in here, its great you managed to join. All the best OC.
-
Looking very tidy. OC.
-
Like lou said - the best way to work at such small scales is to take it in tiny steps, I had to do that often with my Warpy build (hence why it took years to finish) kind of recharges your batteries for the next go. OC.
- 122 replies
-
- 5
-

-
- tamiya
- King George V
- (and 2 more)
-
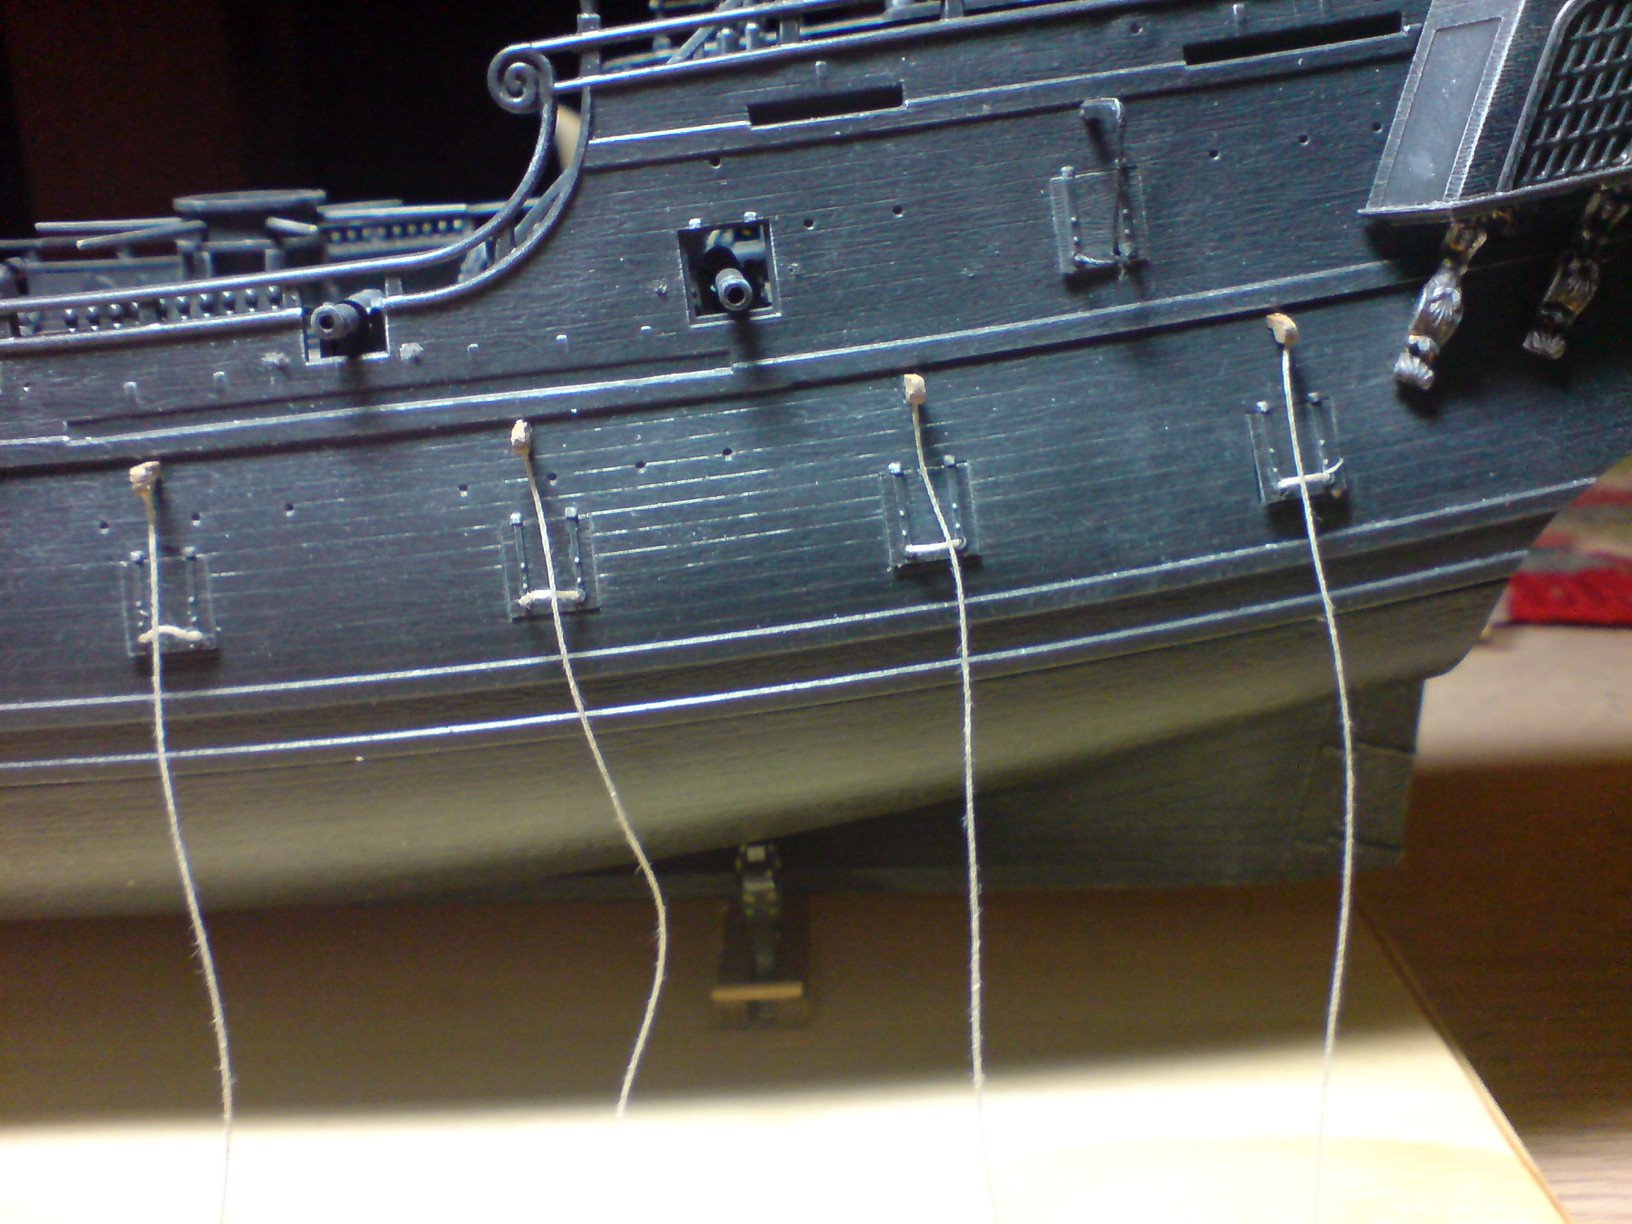
More work today - painting the first of the lid lifting tackle - then I fitted the remaining five - next off tie them and add a bit of paint. Then it will be on to the other side. OC.

-
Its certainly best doing it in small sections to break up the repetition, I have the remaining five built and drilled waiting on the ropes to be glued in place - tomorrow. Then the same for the opposite side. OC.
-
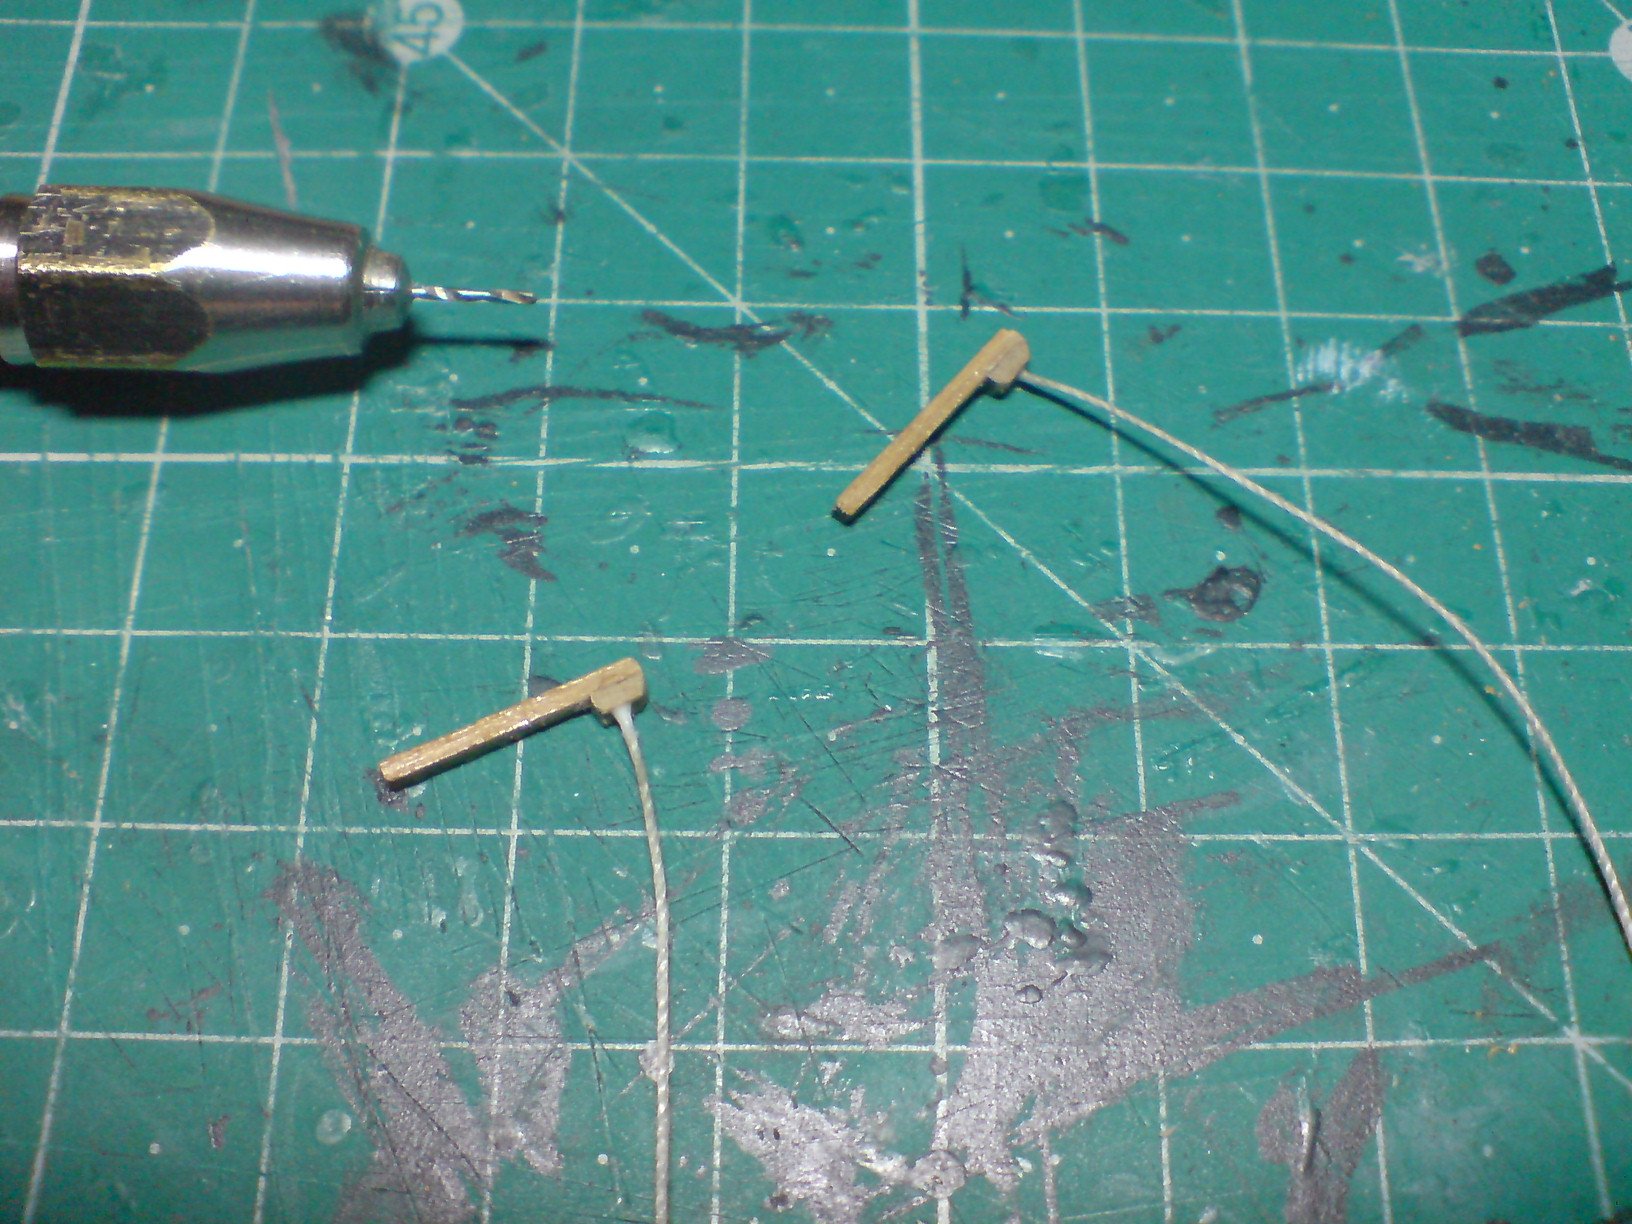
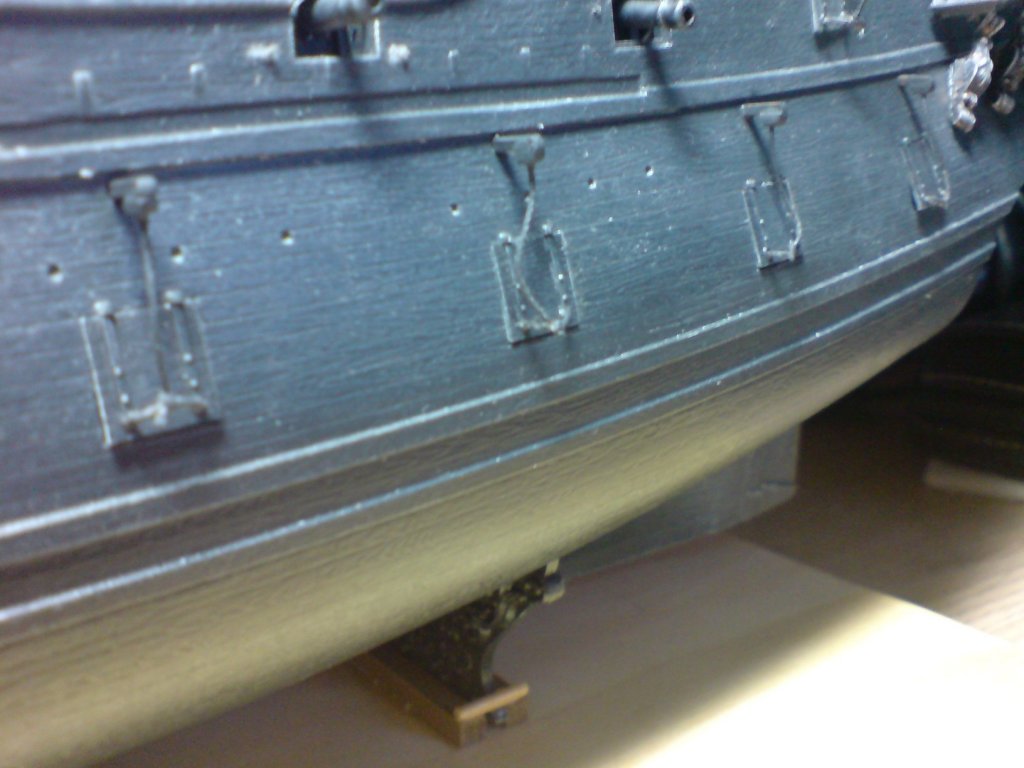
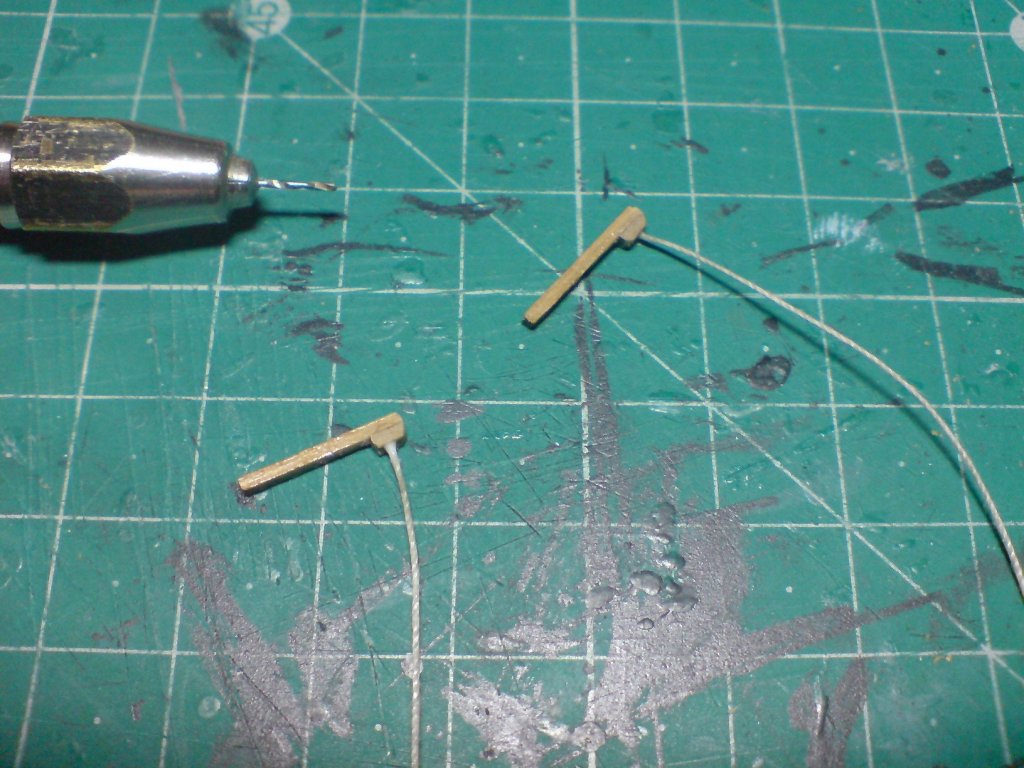
So - the work begins on the lid lifting devices consisting of a piece of 1x1mm with a piece glued onto the end, then a fine drill in the center of the end, and some rope(thread) glued into this, two done 16 to go. OC.
-
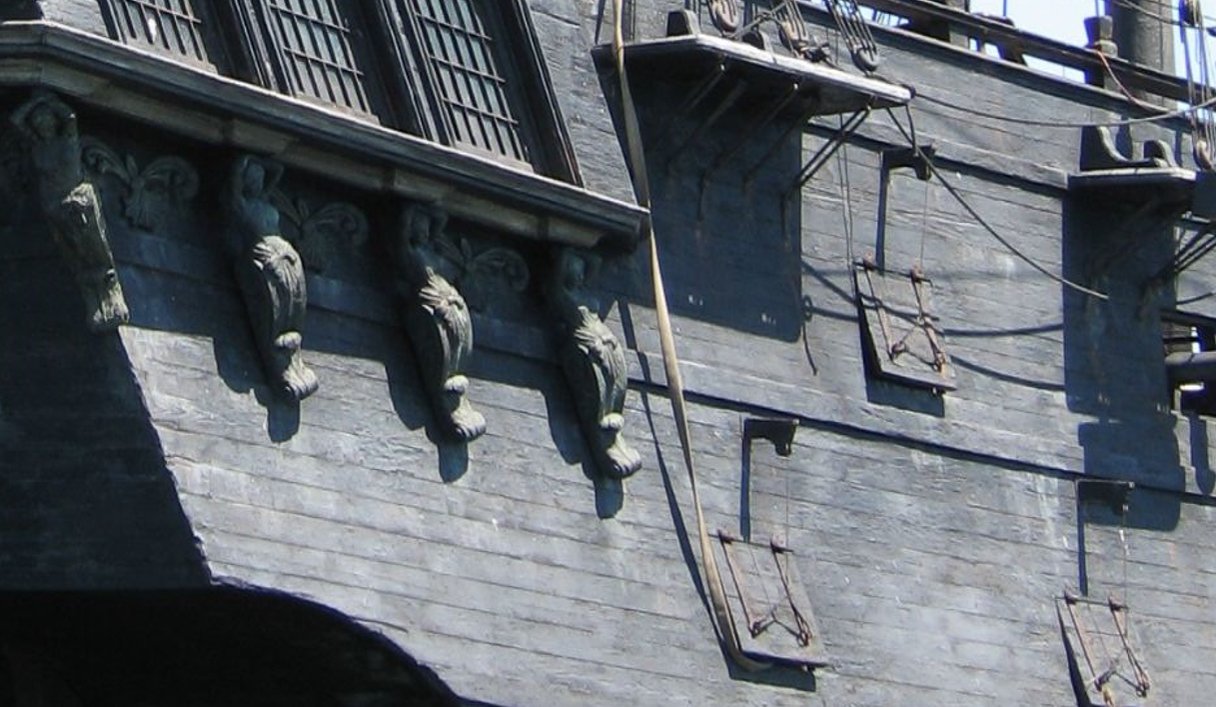
Here is a close up pick of the actual ship off the net - shows the lid devices. OC.

-
Indeed - its like a never ending cycle where we are always improving and never fully satisfied. OC.
-
Indeed mate, but guess pirates like to keep things quick and simple - hence the single rope. OC.
-
On the actual ship - the beams sticking out are hollow and they have a pulley at the end, the rope comes up from the lid past over the pulley then through the beam and into the inside of the hull, where it would be pulled/let go to open/close the lids. OC.
-
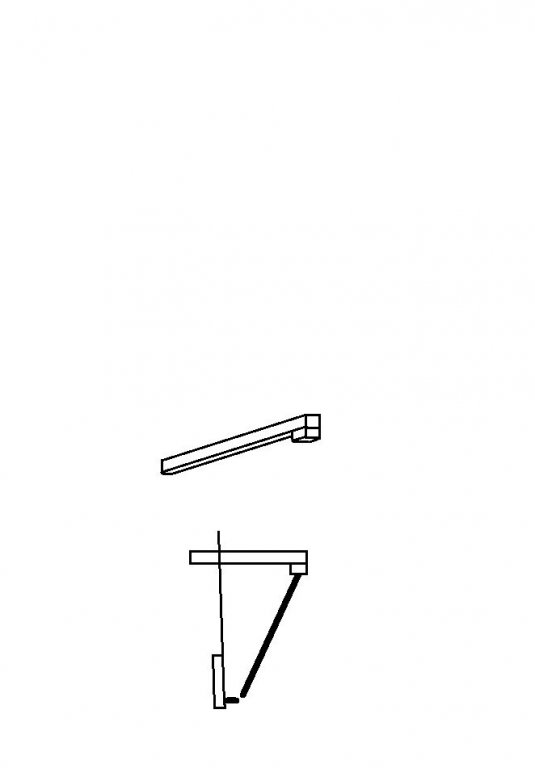
Just done a rough sketch of the lid/pully device assembly - The idea is to use a piece of stock wood, then I will add a small piece of square stock at the end (slightly wider) then I will drill a hole in the center just wide enough to take some rope (same thickness as I used on the lids) the rope will be glued in the when set I will drill a small hole through the hull, then push and glue the assembly - to allow a certain amount sticking out, then when set the rope will be joined to the rope on the lid. Only have to do this Ten times. Heres my diagram -
-
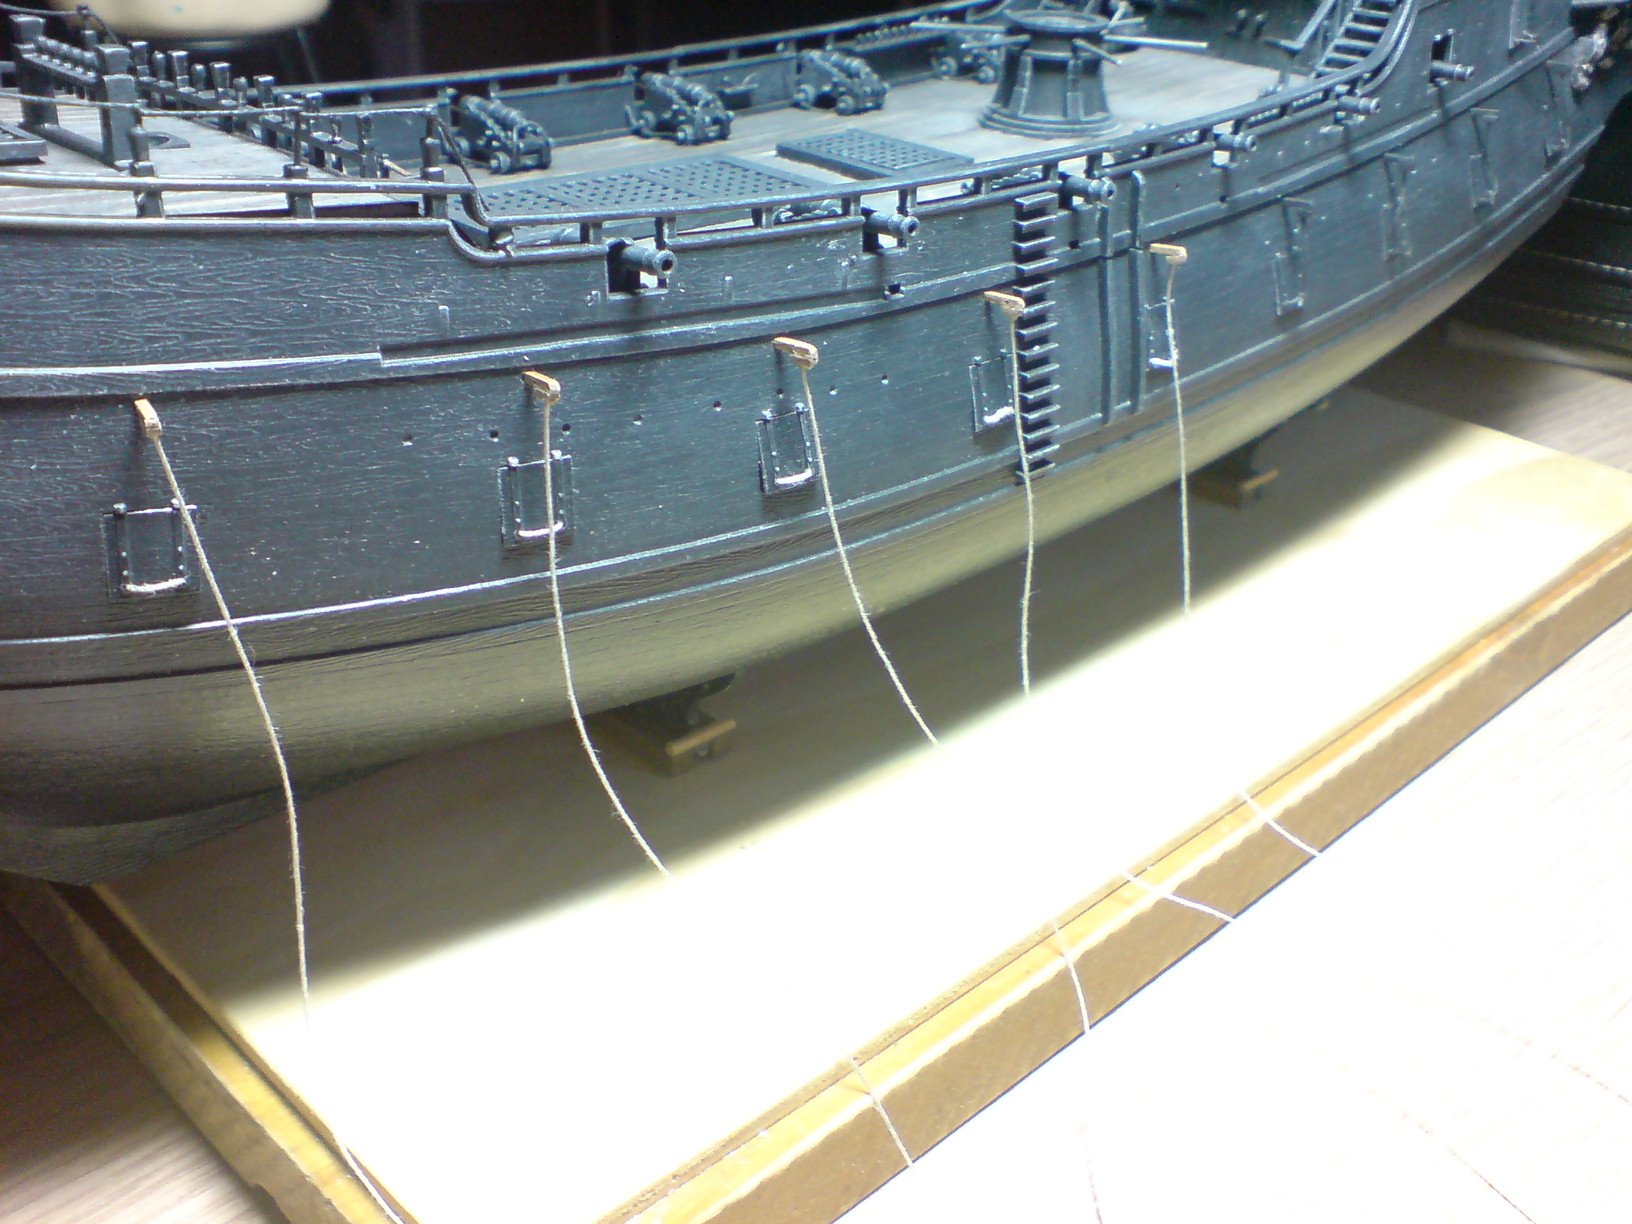
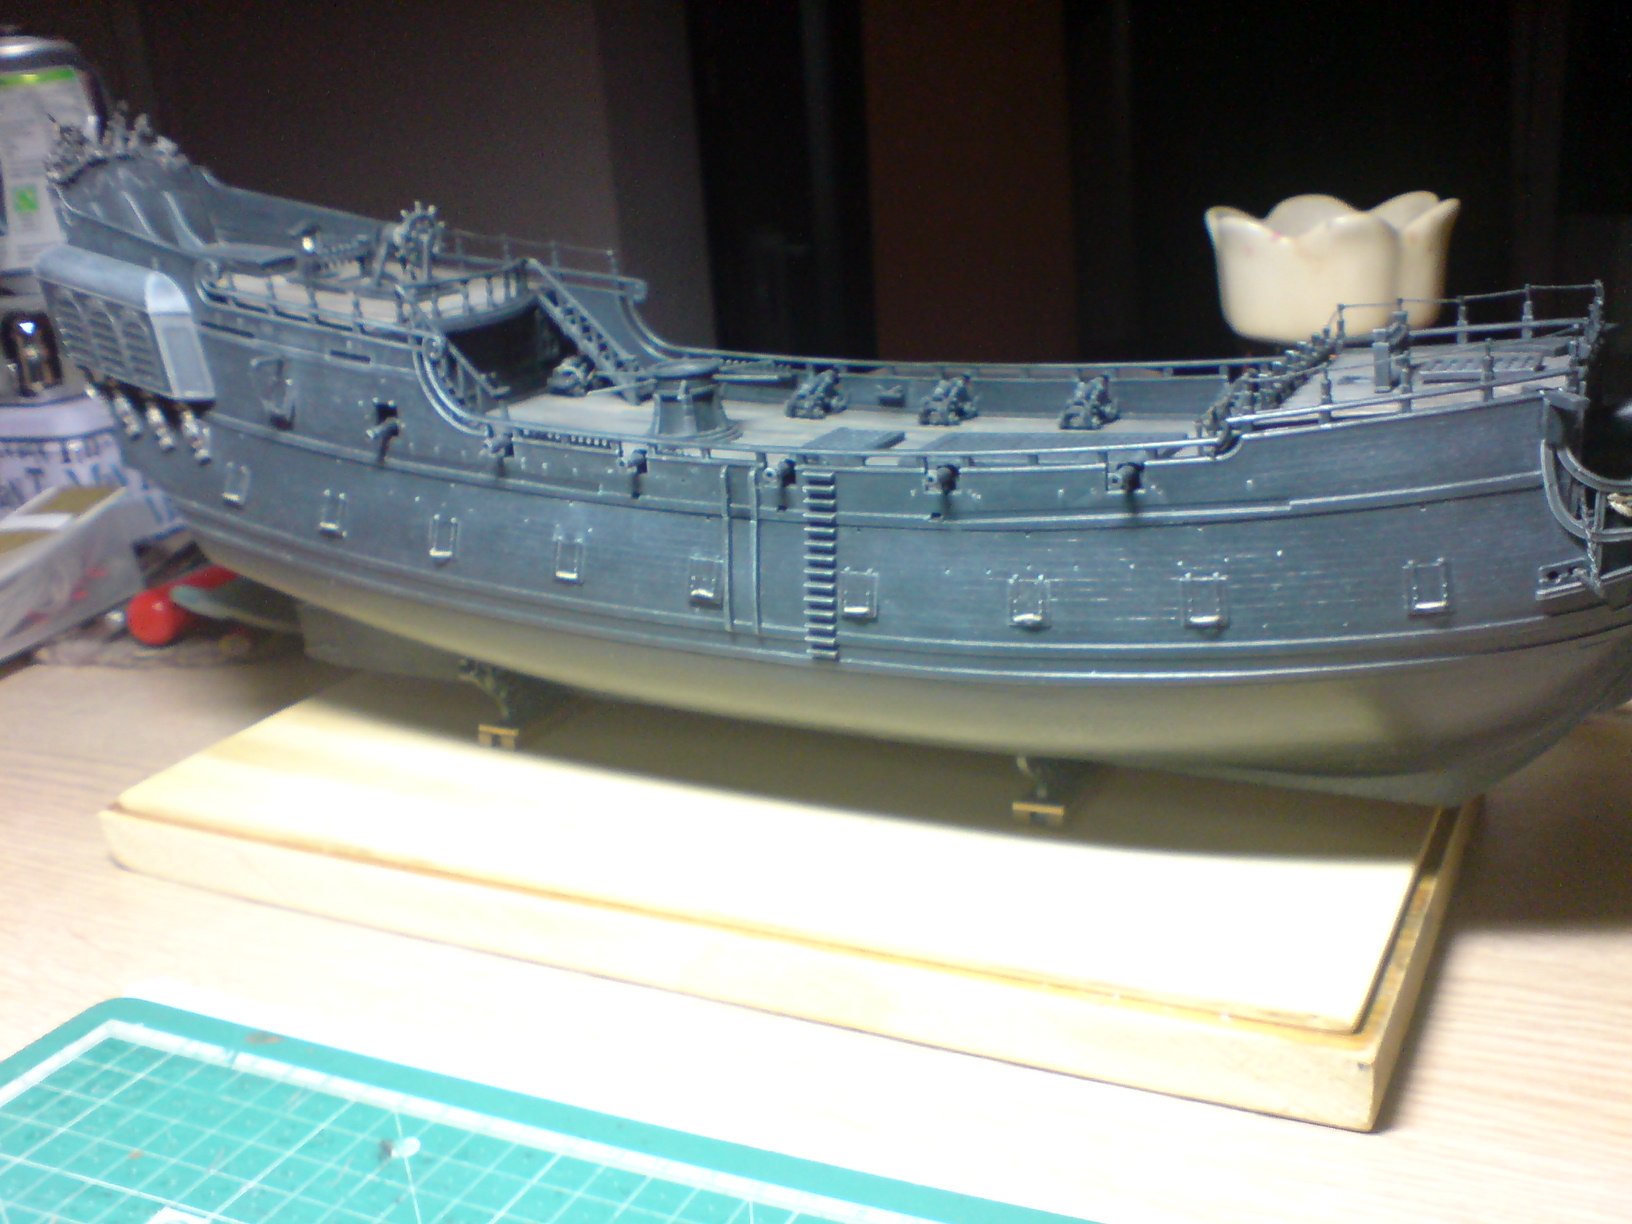
Good day all, Right stage one complated - all lids fitted with ropes attached. Slightly oof - but you get the idea. OC.


-
Evening/Afternoon/Morning all, I thougt I would do an update -still to do type list - 1) Continue making ropes and attaching them to the bottoms of the remaining gun port lids, then glue them in place. 2) Build the rope trunking devices (but this time add a slightly wider extension - and glue the end of the rope into a hole drilled here). 3) Fit the the above in place and when set tie the two ropes together -allowing some slack. 4) Give all the lid/trunking devices a coat of paint and weather. 5) Attempt to tidy up the plastic pre-moulded tackles and paint/weather as needed. 6) Have a go at attaching both ends to each side of the cannons/bulkhead. Then start the mast work...... Well that a rough idea. OC.