


Old Collingwood
-
Posts
11,998 -
Joined
-
Last visited
Content Type
Profiles
Forums
Gallery
Events
Posts posted by Old Collingwood
-
-
The fore mast is quite intricate, and the Pontos masts are just magnificent and fit like a glove.
I should be able to get a fair bit of rigging done before I plonk it on. There are lots of little bits I have prepared for painting that will go on the support struts that are only a couple of mm each.
Looking Splendid greg all that detail just give me eye ache and Im not doing her
 I have a few bits of pontos but not the whole lot including no masts or beams, i will have to try to make mine out of thin wooden dowel from my old wood build i was on.
Loving your work my friend

OC
- Elijah, Canute, Captain Slog and 3 others
-
 6
6
-
I was able to get back on the build this afternoon - just briefly as all the decorating has been finished to the house, i started on the boat deck as shown in the pics above, the plan was to drill out the boat stands to give them some detail, however this was a little more difficult than i expected due to other obstructions getting in the way, i managed to do a few at the fron nearest the funnel, I then turned my attention to removing the plastic fitted steps as i will fit the brass ones instead later.
Not a lot of work but great to be back on it, no pics though but i think the explanantion is enough.
OC.
- popeye the sailor, mtaylor and Canute
-
3
-
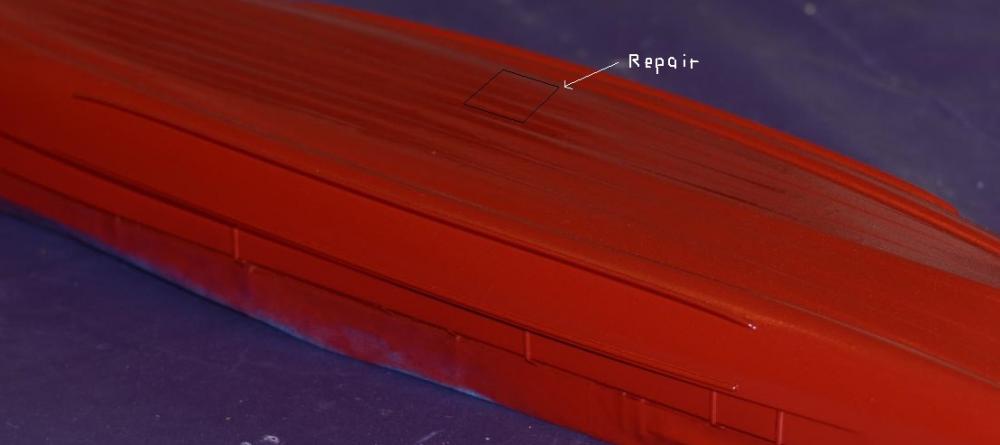
I have decided to construct her showing the bomb damage she received in 1943 at Salerno from a Fritz X guided bomb, she was struck by one and a near miss by two others, the one that struck came through on her boat deck near her funnel infont of her engine room vent, leaving a 2-3 ft hole, the bomb carried on downwards through several decks and exploded in one of her engine rooms causing severe damage, including a 20ft hole in her double skin bottom hull.
One of the near misses opened up her torpedo bulge and the third one was off her starboard stern end causing no damage.
When she got into safe port she had a patch put over her hole on the boat deck, and to her bottom hull and inside her engine room she received a concrete casement repair and a 30 ft patch on the outside bottom hull.
I am going to attemp to replicate this with two scale patches in both areas described, with a paper plate then painted the same colour.

-
-
-
And here is an update.
The hull is closed and sanded and some filler on it.
I can talk but you wanna see pictures of course.
Ok, here they are....
Sjors
I didn't realise you where making her life size - just compare her to the size of the building in the background


OC.
-
Agree with KenthW. It inspire me too start a build log over my revel Bismarck when I get home from summer holiday. Also have some nice extra photo etch wood deck and brass guns.
Yep do it please, I for one would be very interested in following you , and I know the other good folk on here would do the same
OC
-
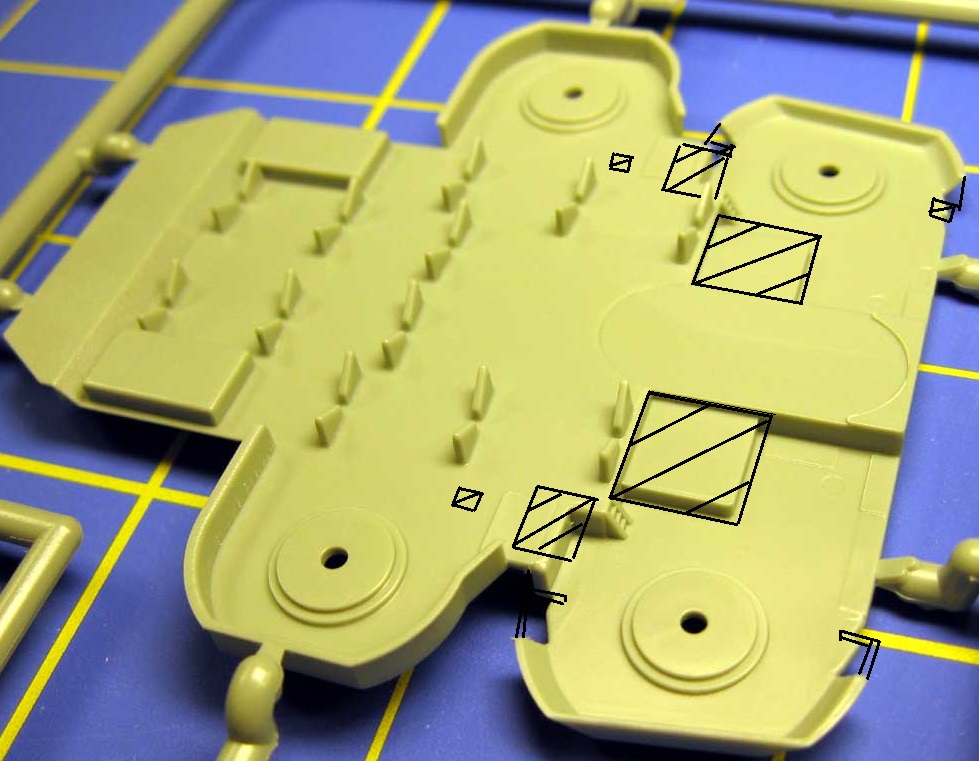
Just a quick update of what i will be tacling next when I can get past all this house painting, well I will be working on the boat deck, I had al;ready thined down the profile of the boat stands, and next will be some detail work on the fittings on the deck area where the boats sit - First off will be to construct roofs for the larger engine room vents-two of these, next will be two smaller vent roofs and details that will be made with some plastic/wood sheet, next I will move the two amo cuboards as they should be more shared between the thwo Pom poms on both sides, the small ladders will also be filed off, along with some extensions to the armour around the most forward Pom pom stations, including the ends being turned in 90deg.
Here is a pic showing the un altered deck with shaded areas to show what i will be doing(the original boat stands on the pic do not show what I have done).
OC.
-
Hi there - another plastic builder like myself and a few others here, Great Stuff

OC
- WackoWolf, Captain Slog, Canute and 3 others
-
6
-
That a nice one Collingwood !
What happened with the Vic ????
@ Frank,
Thanks
No worries about the ships because there are at other places then mine.....
I give them away when we are moving at another home is an other city.....
@ John,
I don't drink Port.....

Sjors
Hi there sjors,
I was working on her - on the other forum before it went belly up, and then we had a house move and could not take her with us so I had to leave her in a cuboard.
OC.
- popeye the sailor, Hennie, Sjors and 4 others
-
7
-
-
-
No, didn't need to, it sits perfectly flush.
Only asked greg as on my warspite build the original plastic decks had raised planks - you could feel the detail with your fingers, thats why i decided to give the laminate planking a good flat keyed area to stick to.
OC.
-
A bit of a re think and the deck has to go down so as not to catch on stuff. A simple exercise? No, after laying the thing down painstakingly, after a few hours the thing keeps popping up in sections. Using a sliver of PE and thin CA over the last few days I have been making running repairs to get the thing to sit properly. Still looks good and makes me happy with the guesstimate of the paint colour.
I have now down up all the boat deck and funnels but will now not paint or attach anything until I have done up the deck hatches.
Did you file off the original platic deck boards first before laying the wood laminate?
OC.
-
-
Ok, a heap of photo etch cut and painted off hull, .
 hull 31.jpgthen added today. The brackets for the torpedo net booms, multiple side hatches (which for some reason Pontos chose to ignore) and a bit of dry brushing
Looking Great mate - the detail really stands out, Im so missing doing mine as she is packed away upstairs while I'm decorating the house

OC.
-
nicely done
Thank you sir, its coming on seeing the woods through the trees now with the hull.
OC
- Canute, popeye the sailor and mtaylor
-
3
-
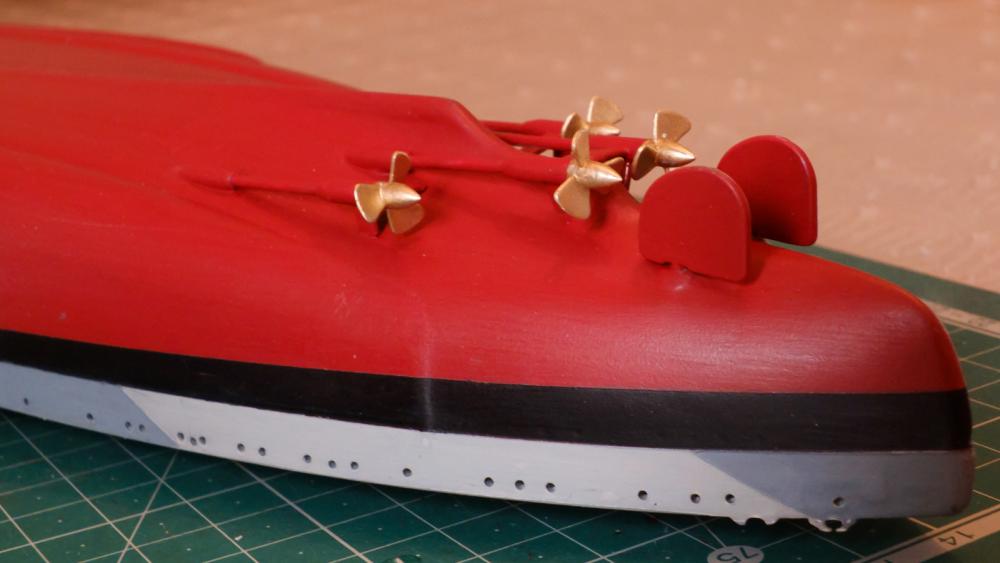
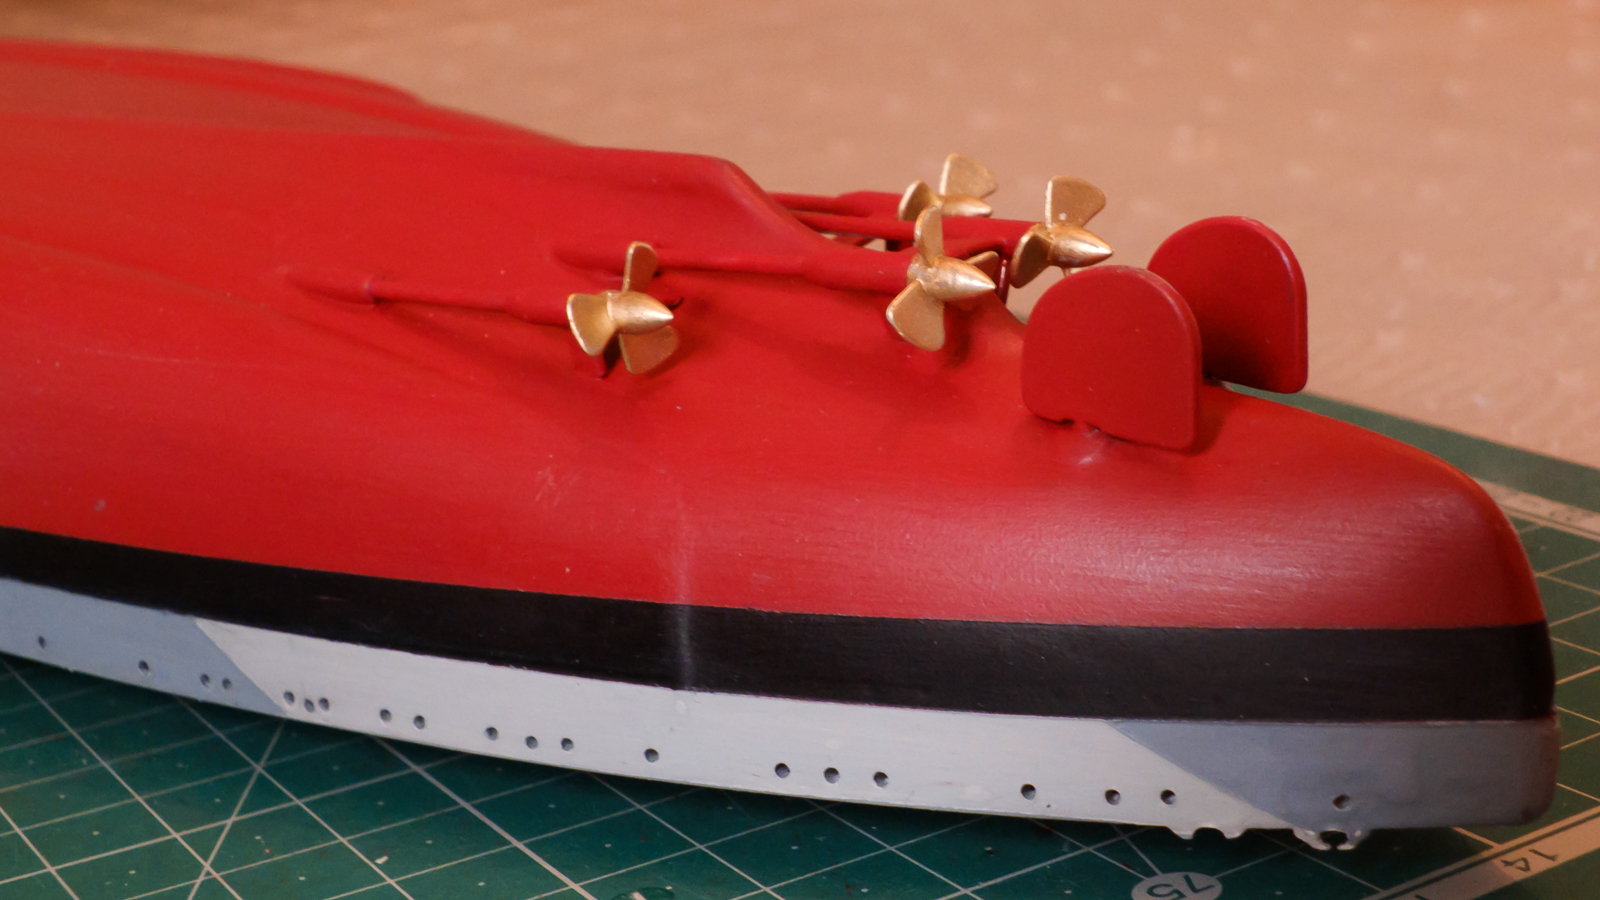
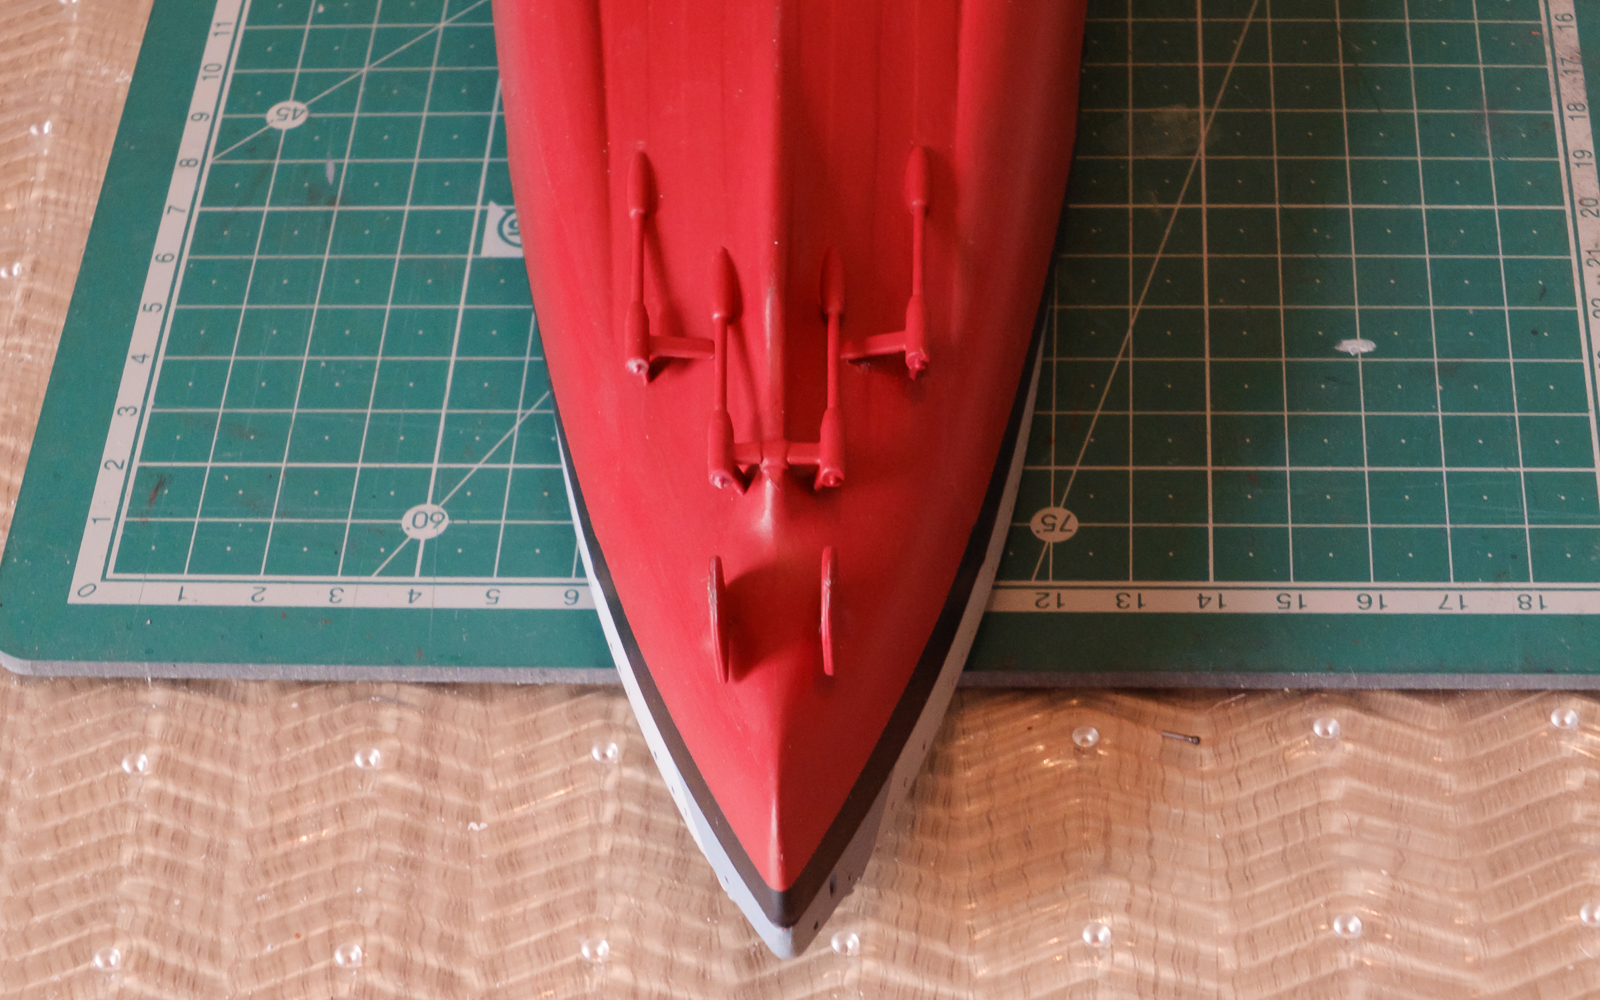
Finaly for today anf possibly a few days due to decorating, I decided to have a go at the screws, I have gone with the kit ones as they look quite good, I tydied them up a bit then gave them a coat of paint while off the shafts, then dried them with the normal hairdryer and glued them in place.
OC.


-
-
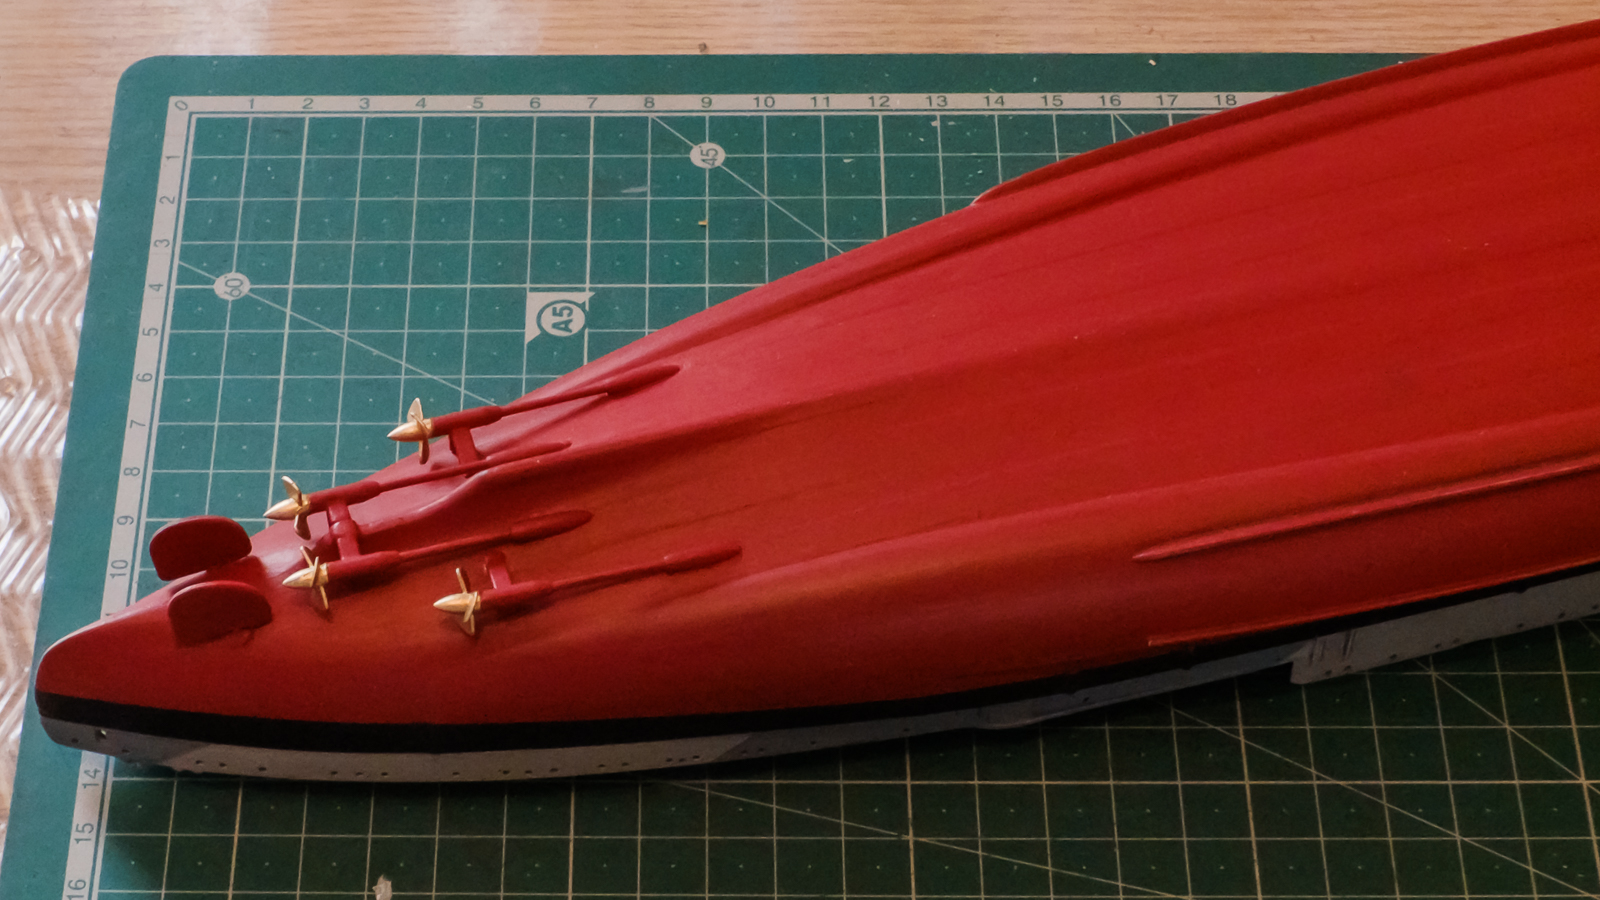
Right folks here are a few pics showing the prop shafts and the paravane mounting after I drilled out the holes for the linkages.
OC.


- schooner, Canute, popeye the sailor and 4 others
-
7
-
-
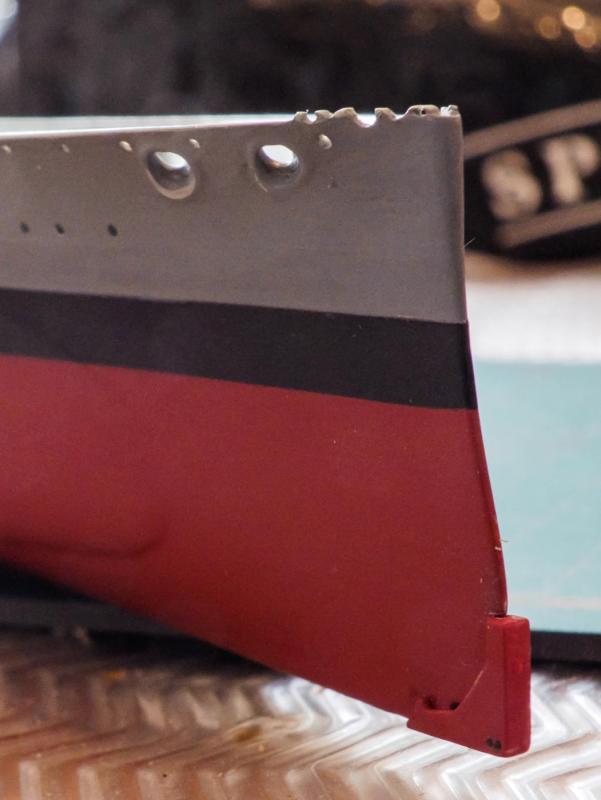
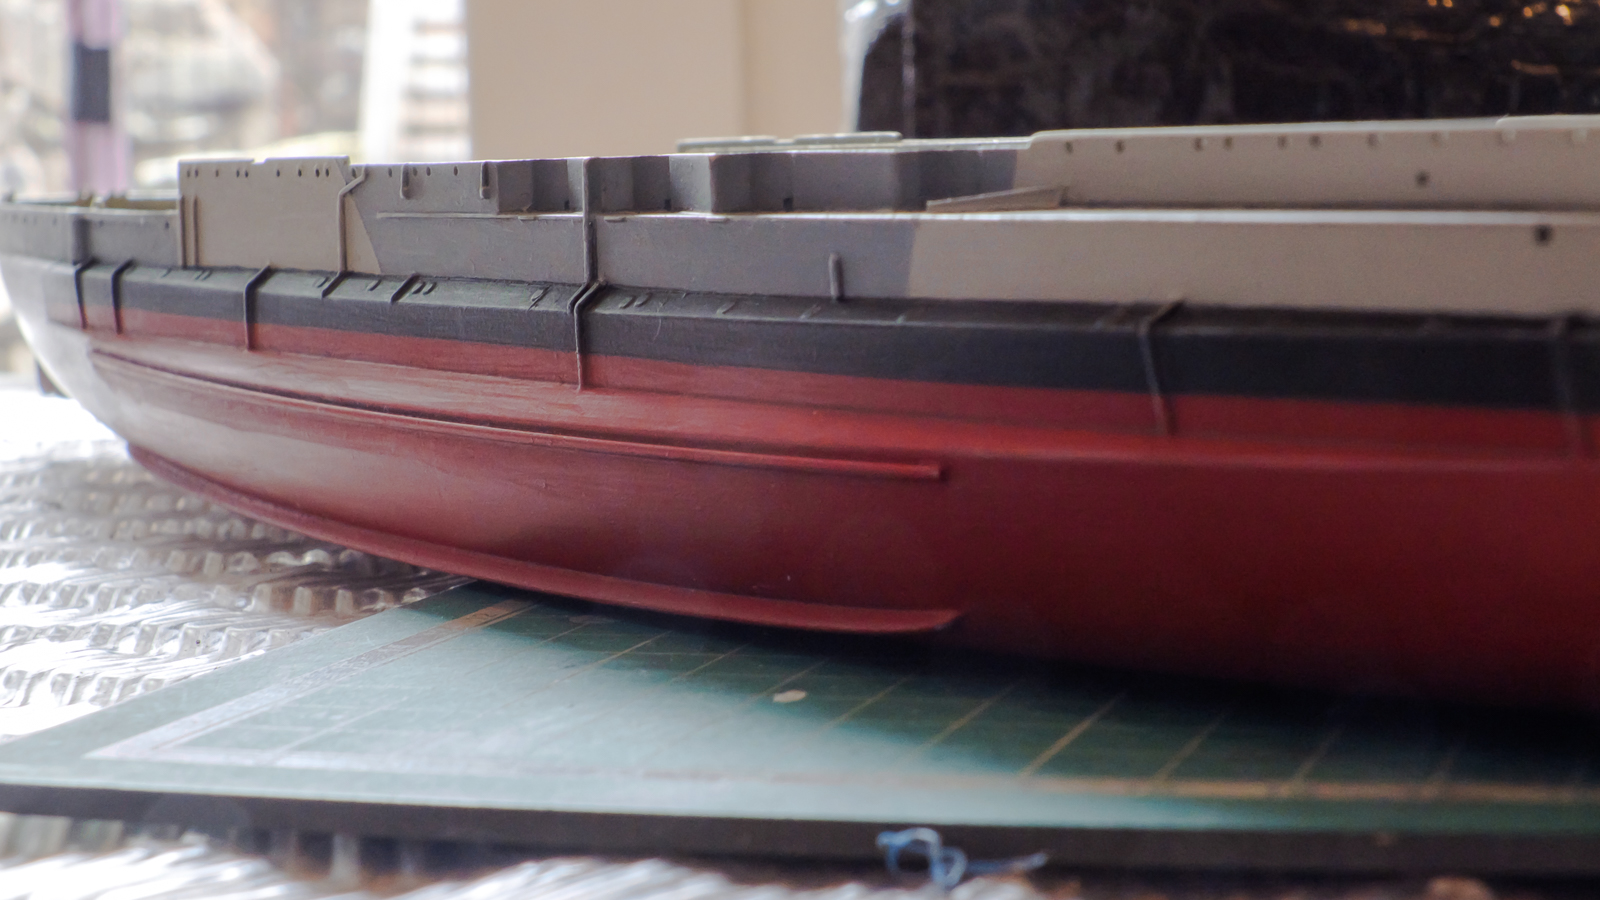
Just a quick update folks - I finnished off fitting all four prop shafts, then touched up the colour then added a couple of coats of top coat to blend it all in, then after finding out what the block on the bottom bow was for thanks to folks on here, I drilled out the two small holes taht would have had chains attached.
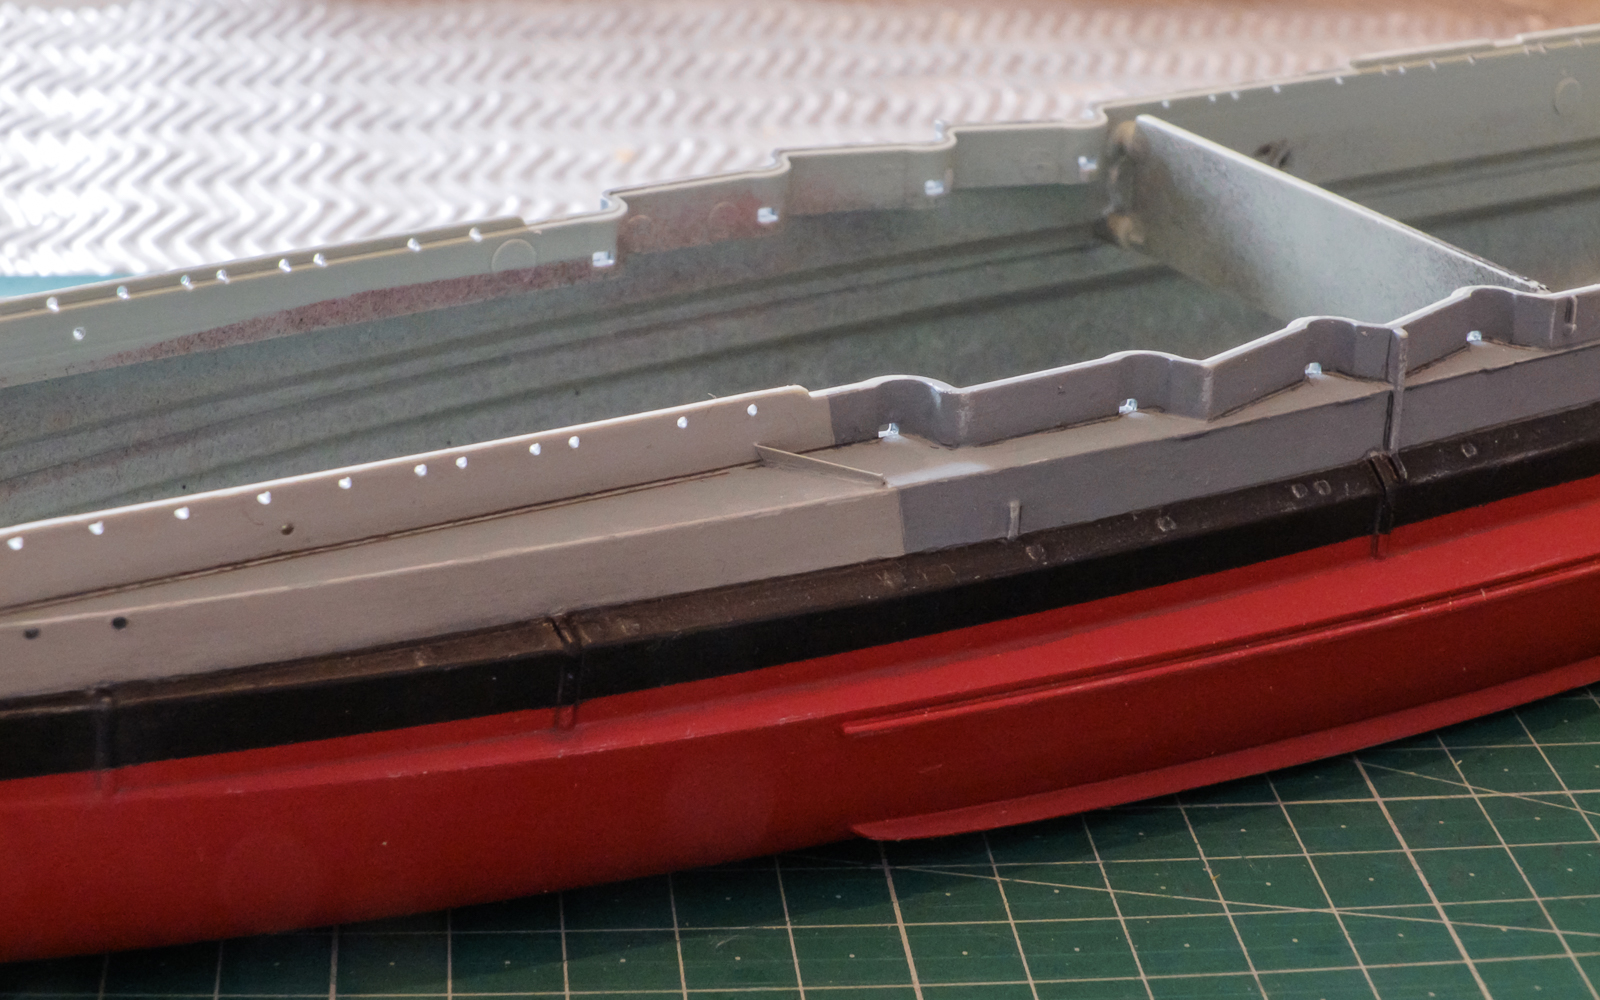
I then returned to the 6 inch gun shelf and sorted out the port and starboard waterbreaks, these had to be cut from the etch sheet then the bottoms of these needed bending 90 deg's to act as a ledge, I then sat them a small amount of watered PVA then when dry painted them as they should be.
Next will be two ladders leading down to the 6inch battery ledge from the Forecastle deck.
OC.
-
-


HMS Warspite by Old Collingwood - FINISHED - Academy - 1/350 scale - PLASTIC
in - Kit build logs for subjects built from 1901 - Present Day
Posted
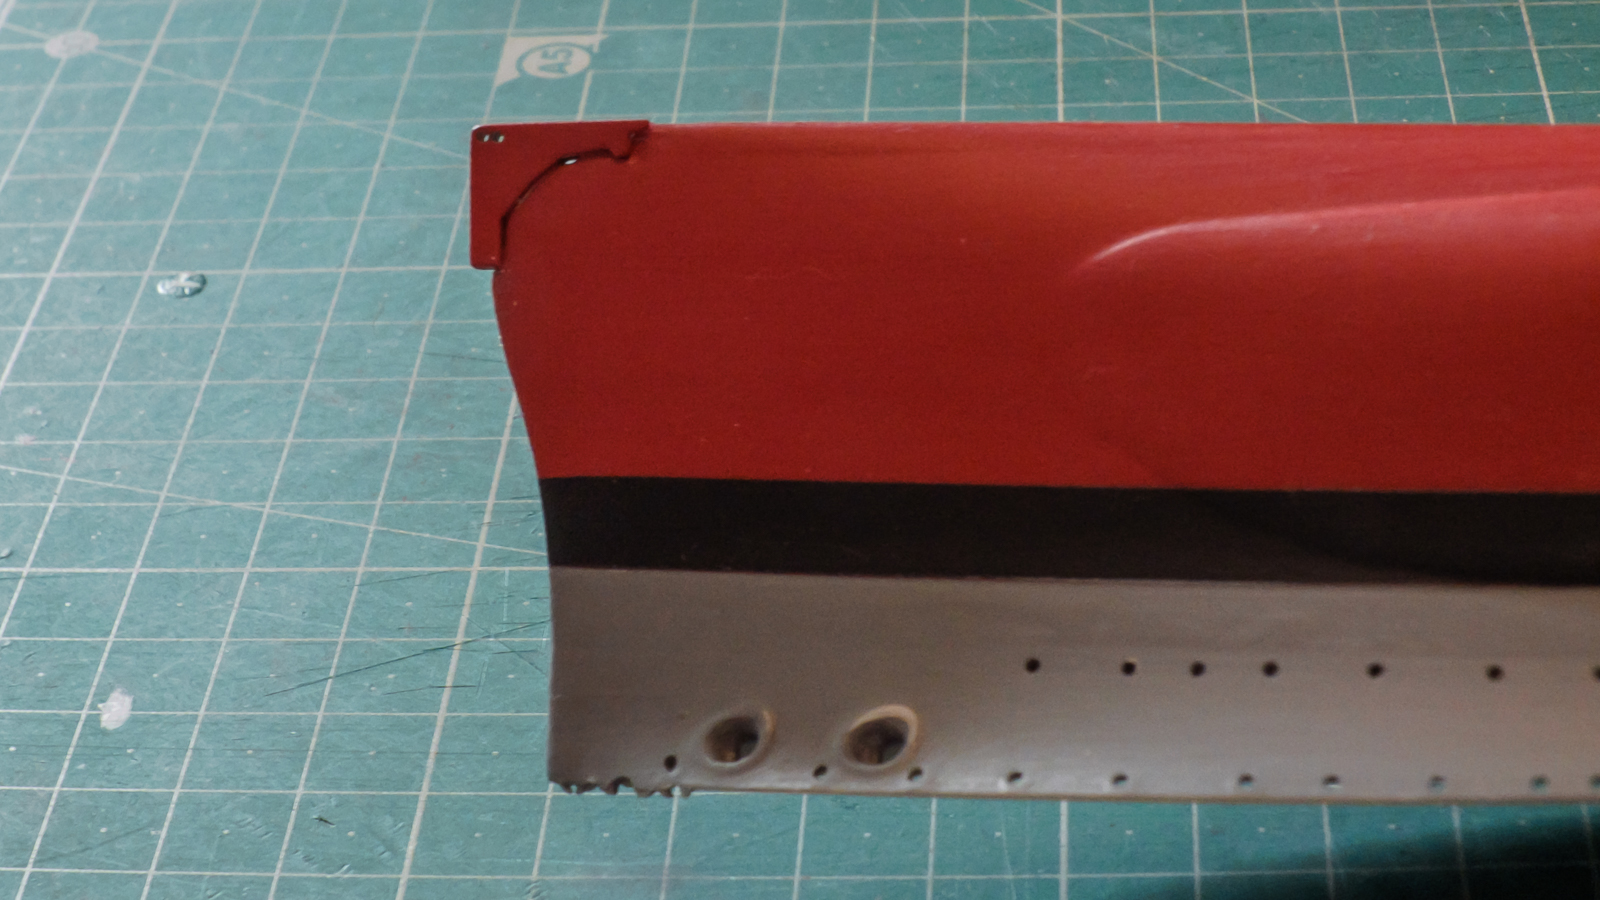
More work again today - i finished off removing both plastic stairs and cleaned up the vent sides, i also roughly fitted the plate to cover the bomb damage, this is supposed to be roughly a 5 foot square plate that was riveted over the hole, it will need sanding down a bit when it has glued.
Also i have taken a pic of my new display area showing my hull and part completed wood project, and my 700 scale type 42 destroyer.
OC.