HOLIDAY DONATION DRIVE - SUPPORT MSW - DO YOUR PART TO KEEP THIS GREAT FORUM GOING! (Only 66 donations so far out of 49,000 members - Can we at least get100? C'mon guys!)
×


Kevin
-
Posts
7,010 -
Joined
-
Last visited
Content Type
Profiles
Forums
Gallery
Events
Everything posted by Kevin
-
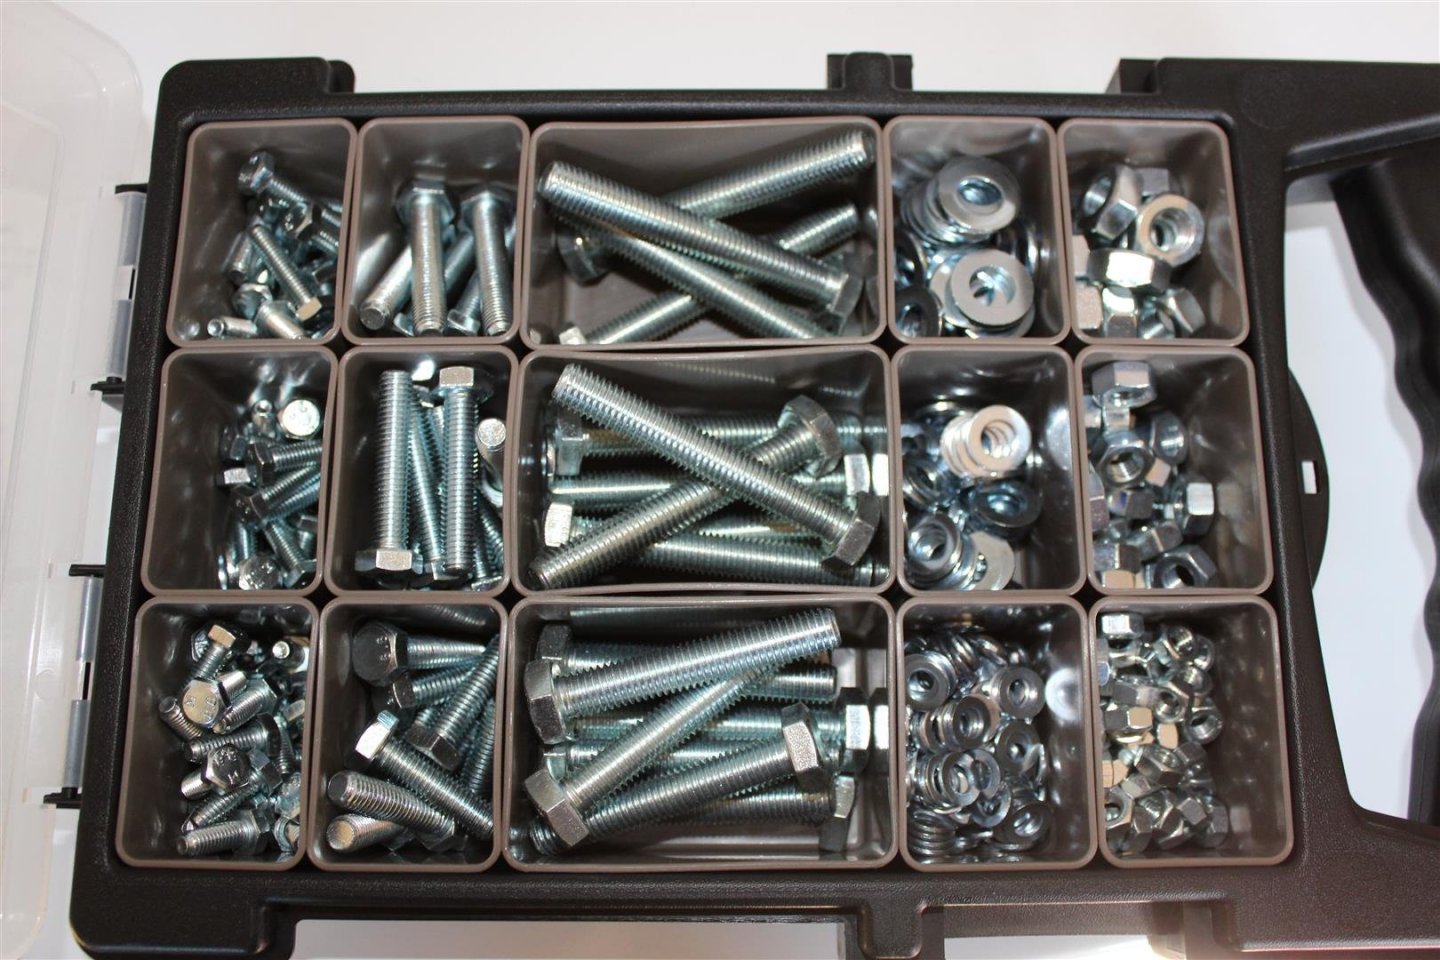
 @cafmodel are excellent to deal with, from ordering and payment through Paypal its about 10 days to the UK, Shipping is pricey due to covid limited carriers at present they are using TNT/Fedex, I ordered part 1 including Jig 7.5KGS shipping was another $72 and about $50 for customs parts 2 and 3 are here as well now so about the same again, i believe next time i will bite the bullet get the lot to cut the cost down
- 317 replies
-
- 3
-

-
- enterprise
- caf
- (and 1 more)
-
Thank you, i am at present leaving them off as i am putting in extra deck beam supports, as i plan some extra internal detailing
- 317 replies
-
- 2
-
-
- enterprise
- caf
- (and 1 more)
-
good evening Mike Tom can deliver the kit in 3 separate packages, you will also have freight and import duties on top set 1 Keel and rib 350$ set 2 Decks and guns 300$ set 3 Carving and other accessories 348$ sending a PM to cafmodel will get their attention, but it is a national holiday at present
- 317 replies
-
- 2
-
-
- enterprise
- caf
- (and 1 more)
-
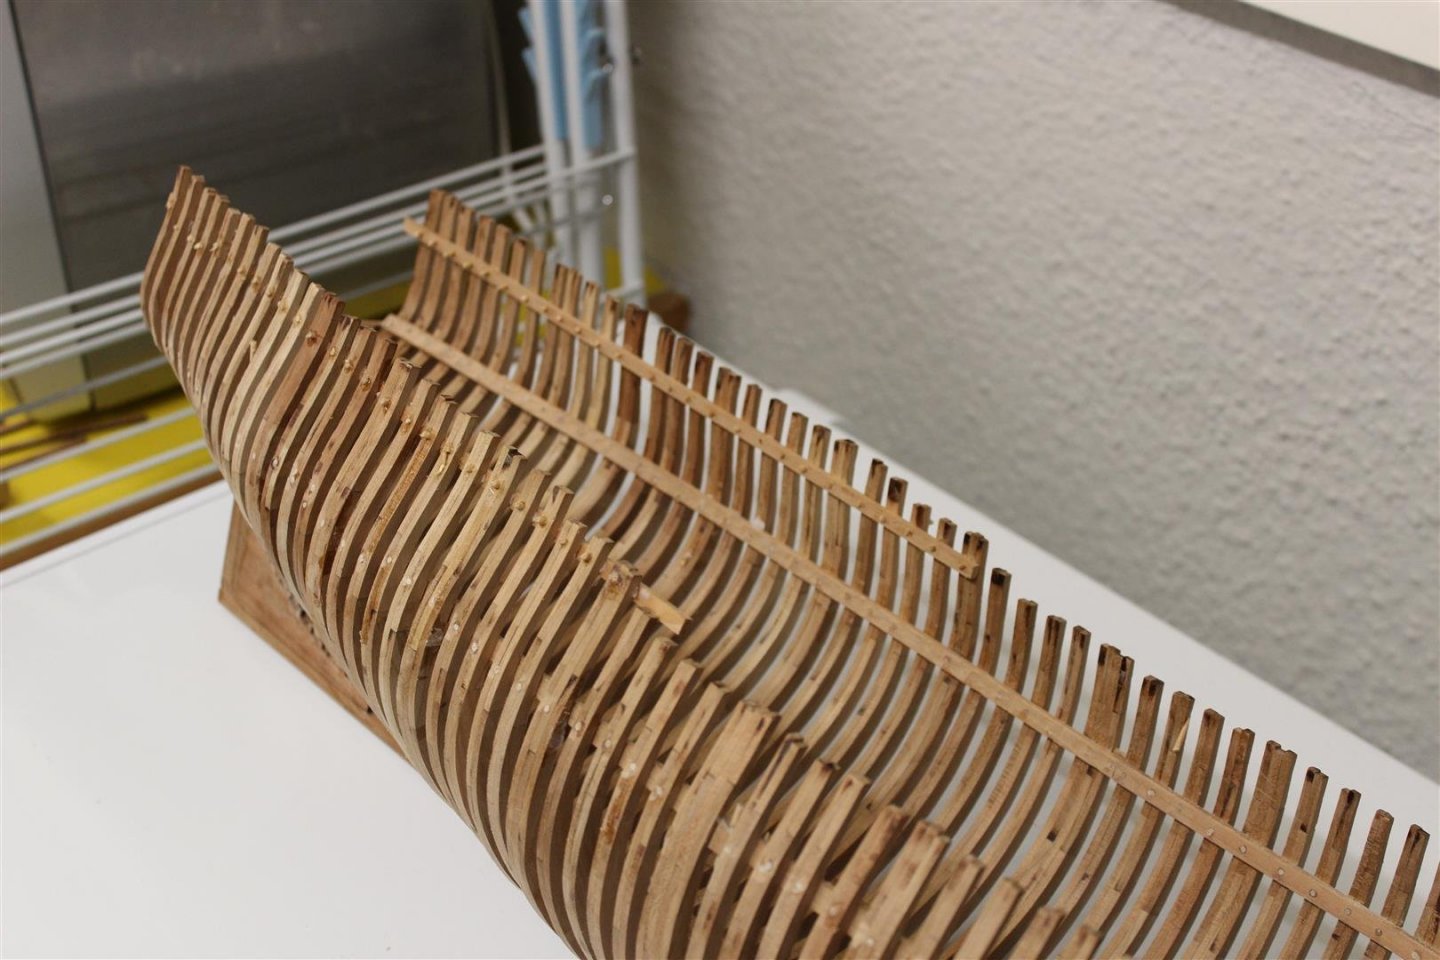
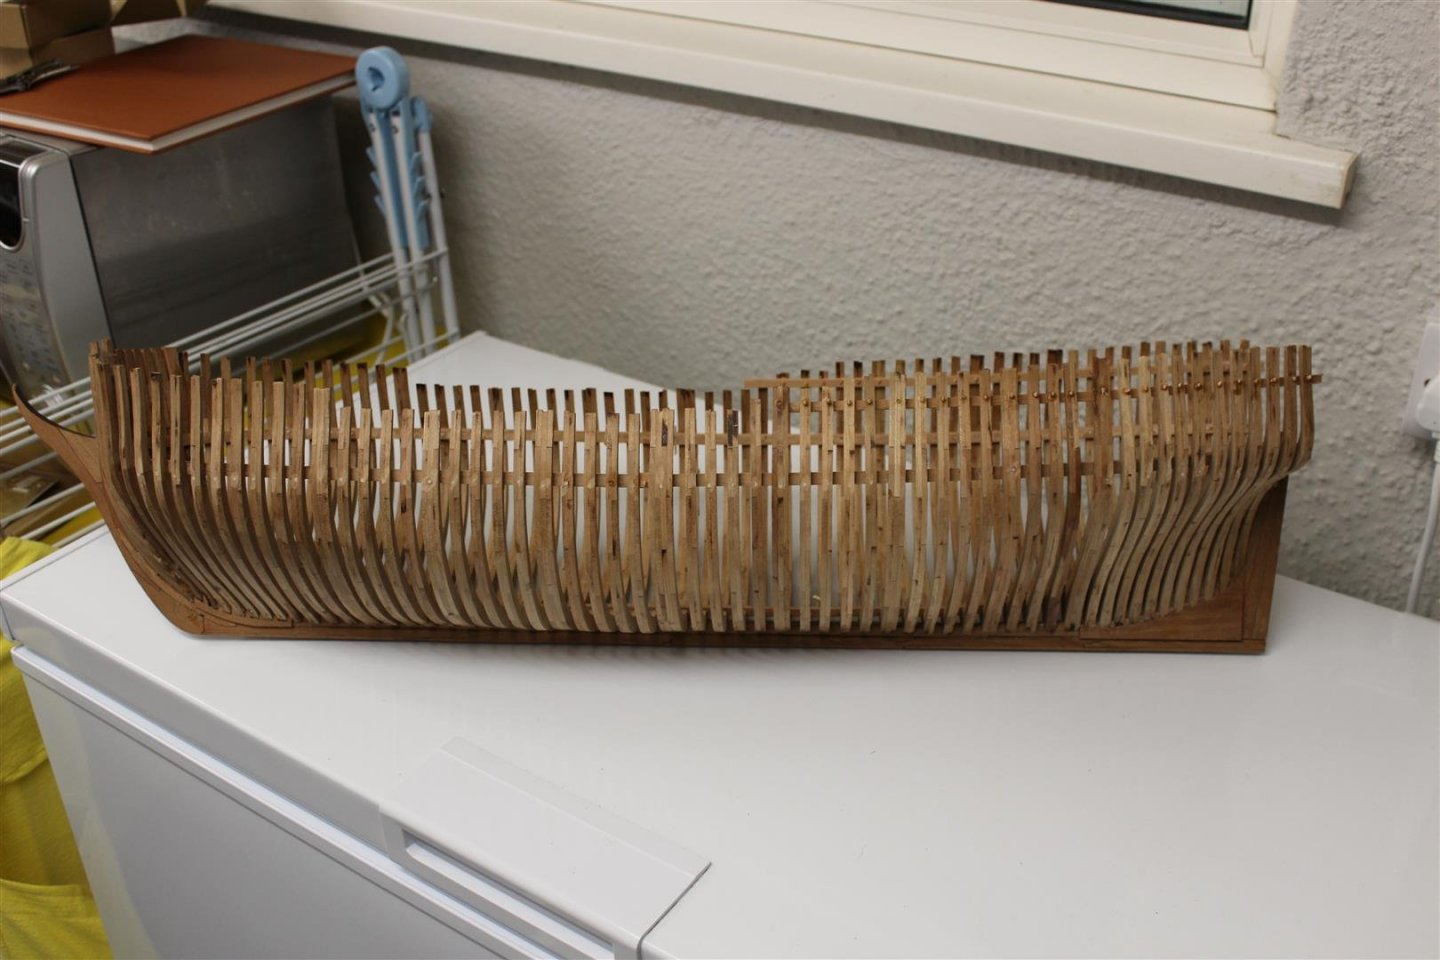
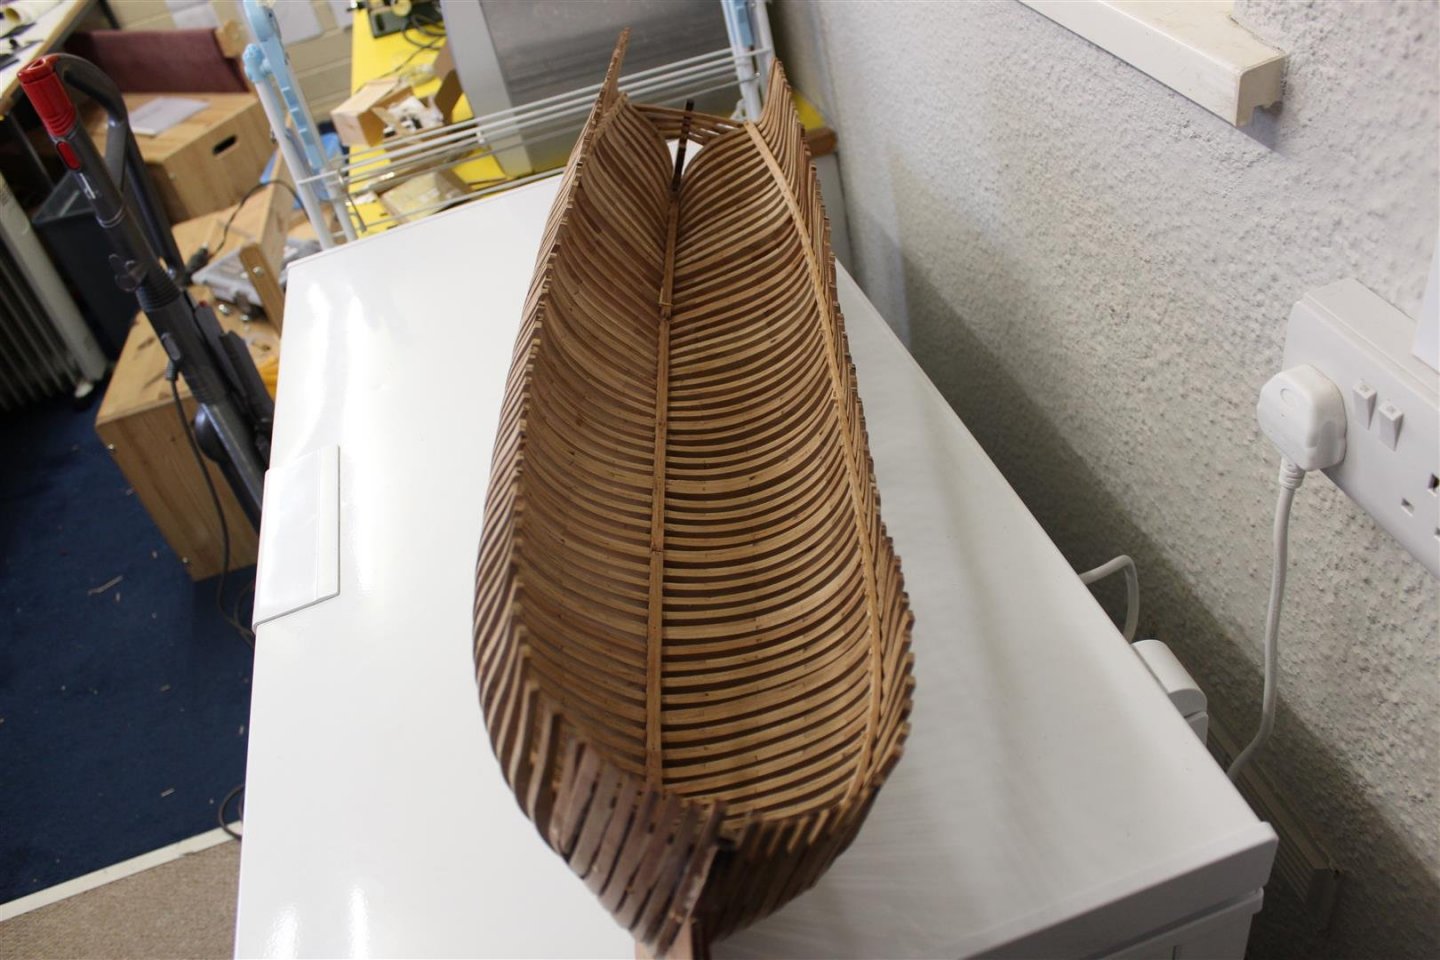
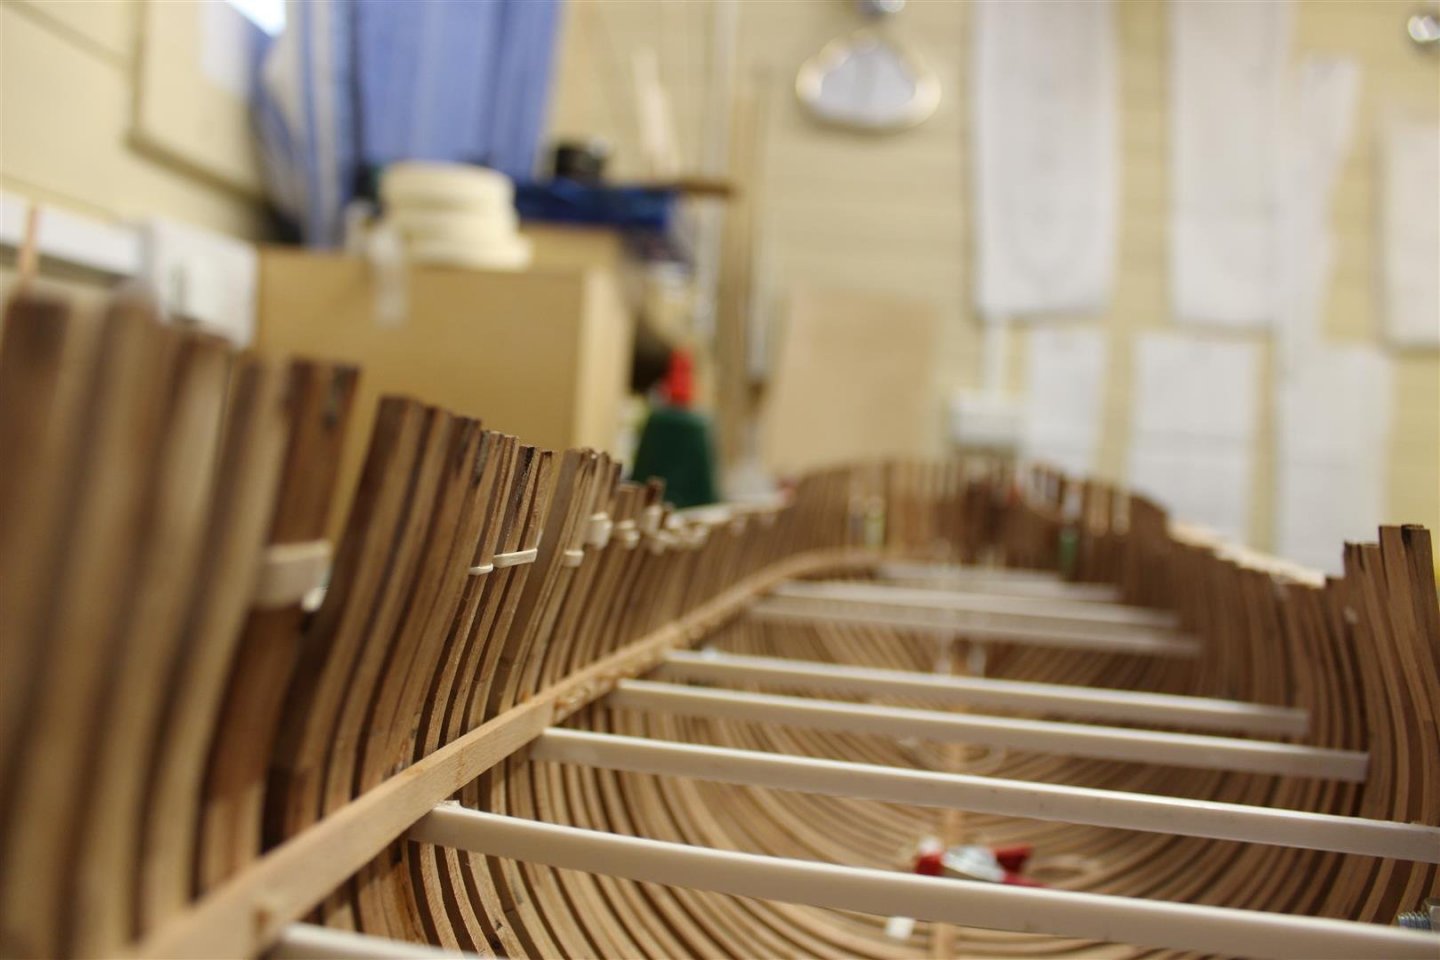
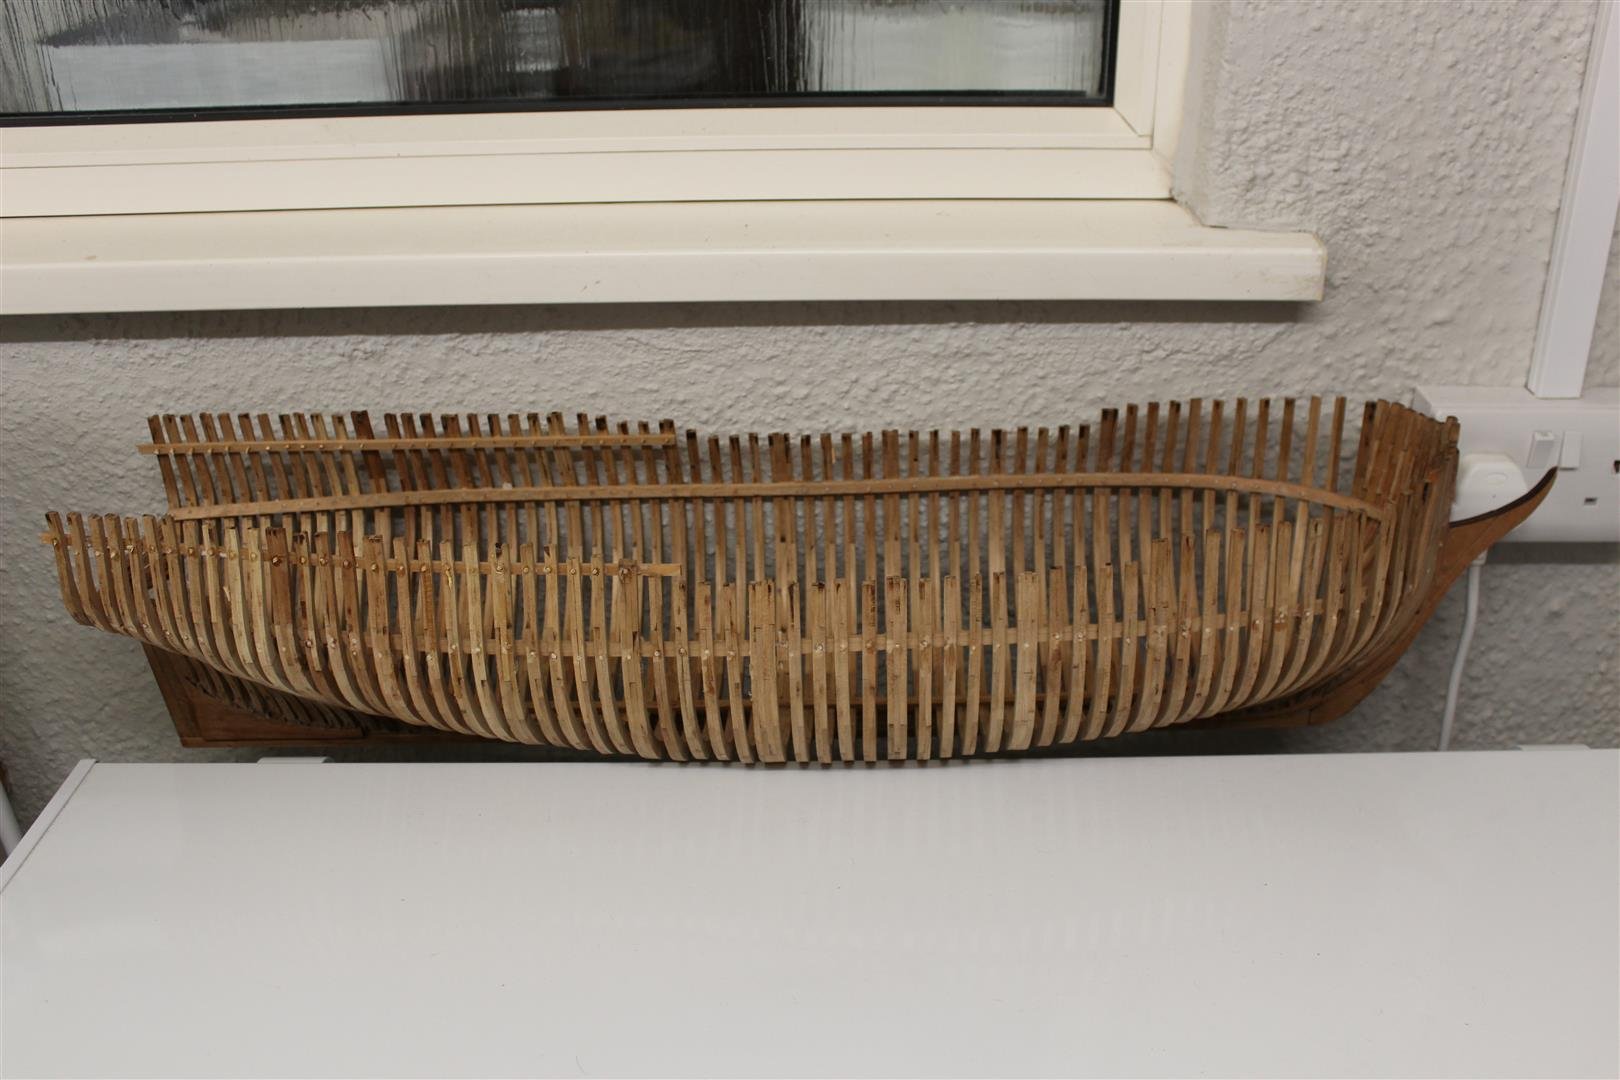
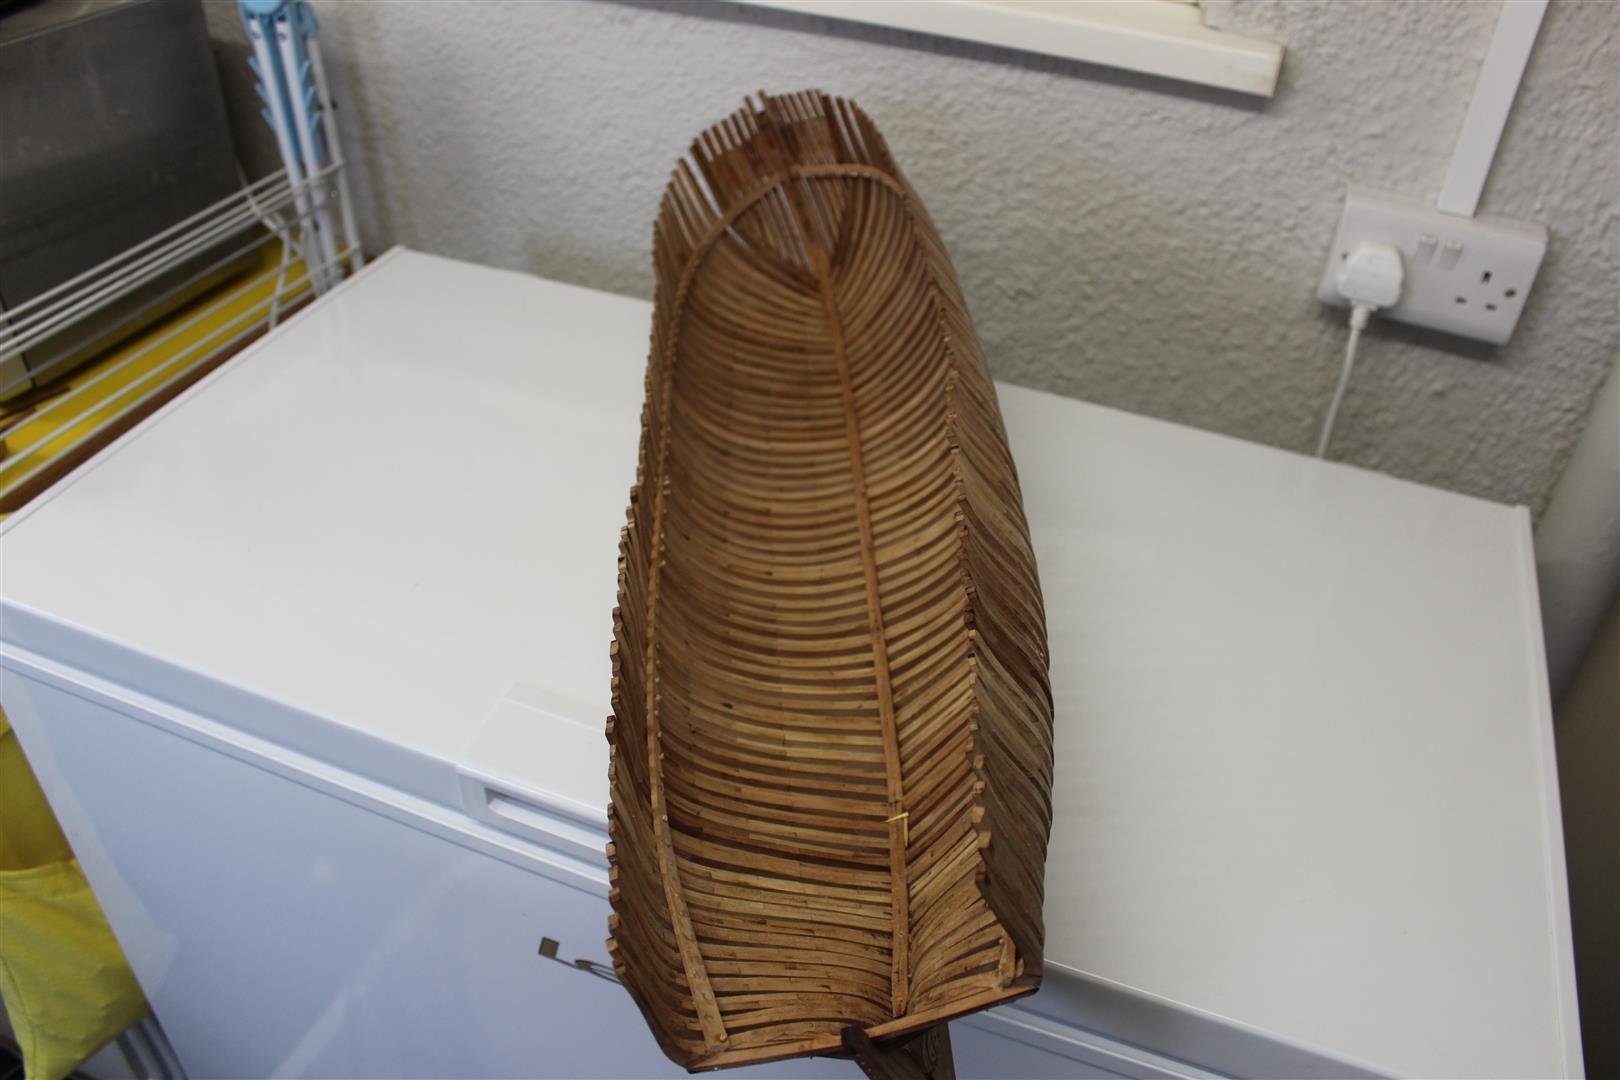
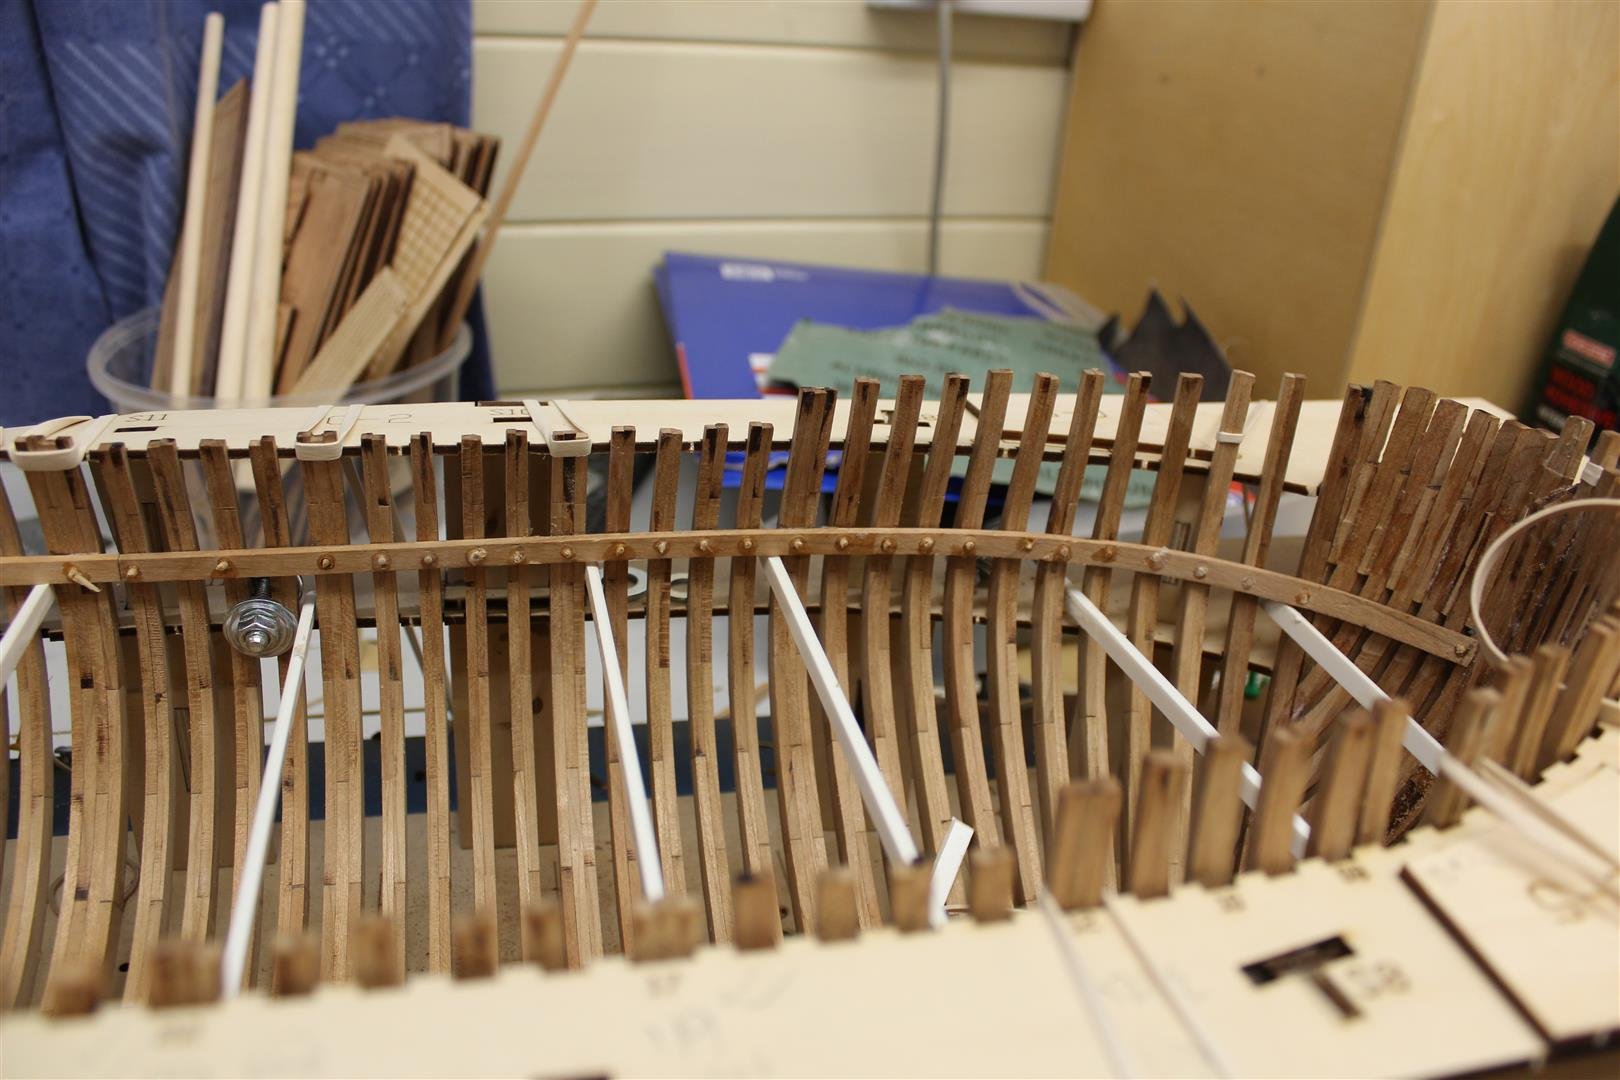
i was surprised just how rigid the hull is, but every joint other than the frames themselves are pinned and glued
- 317 replies
-
- 3
-
-
- enterprise
- caf
- (and 1 more)
-
have you tried taking photos outside, shame not to show your work off to its best ability
-
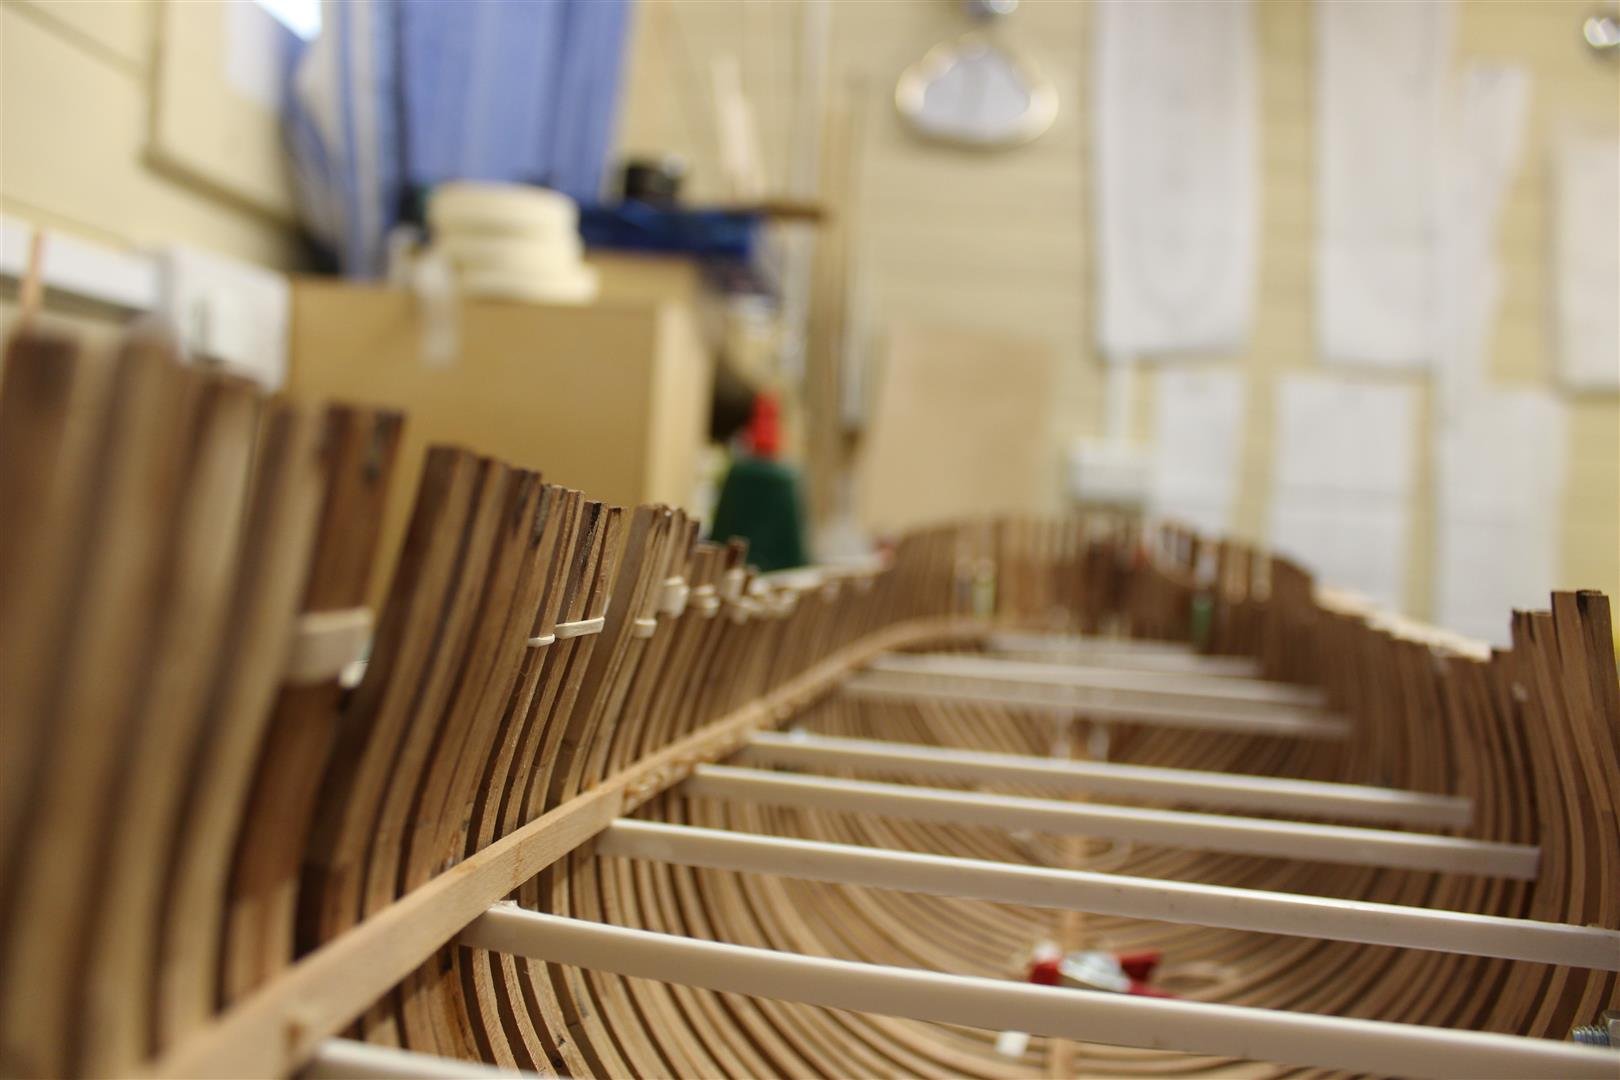
good evening everyone thats the 1/4 deck supports in, pointy end next, i am working out if i am brave enough to put all the deck in, im not quite so detailed as the build on here by @iosto

- 317 replies
-
- 13
-
-
- enterprise
- caf
- (and 1 more)
-
Thank you @ASAT that makes sense, if i was to fully plank one side and a few planks above the keel on the other i guess i could refrain from using them
- 317 replies
-
- 3
-
-
- enterprise
- caf
- (and 1 more)
-
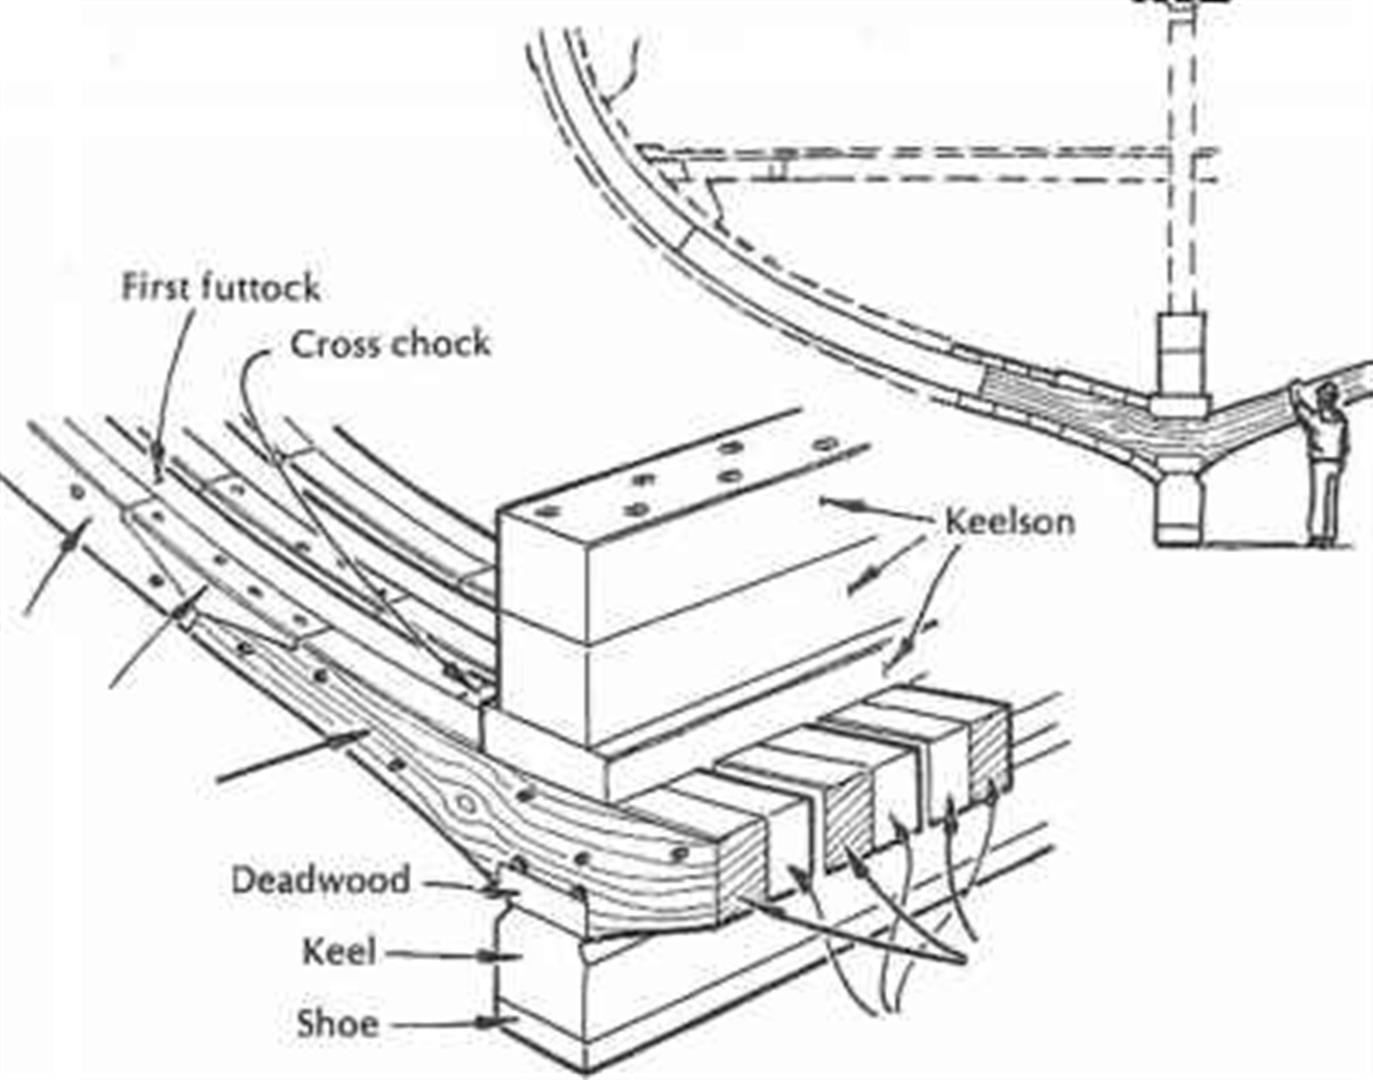
tonights silly question is the 3 stringers on the outside of the hull, why three, why there, and why dont i know?
- 317 replies
-
- 3
-
-
- enterprise
- caf
- (and 1 more)
-
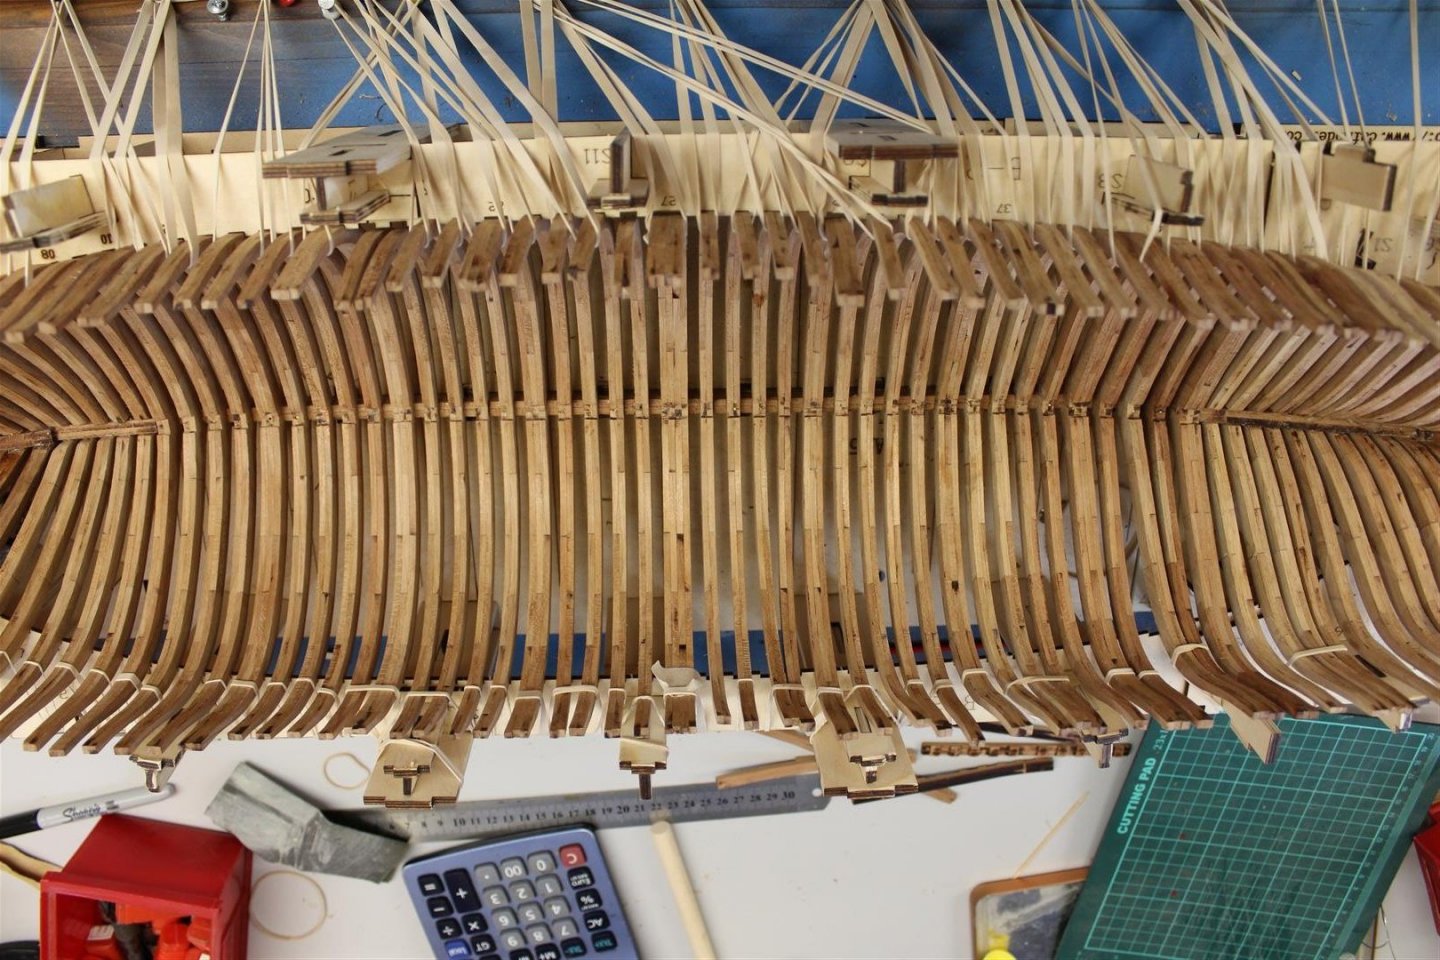
Good evening everyone Day 29 , stbd side upper deck supports God i hope i have done this right


- 317 replies
-
- 19
-
-
- enterprise
- caf
- (and 1 more)
-
very nice indeed, i loved watching the harriers, they put on a great display at RNAS Yeovilton during the summer of 2010
.thumb.JPG.3bee5b9117bb23487d28e18e406eed94.JPG)
-
Thank you my friend, i reckon completion date wil be 12 feb 2023 at 1645, fully rigged with sails
- 317 replies
-
- 5
-
-
- enterprise
- caf
- (and 1 more)
-
wow, thats stunning, very clean and tidy
- 137 replies
-
- 1
-
-
- winchelsea
- Syren Ship Model Company
- (and 1 more)
-
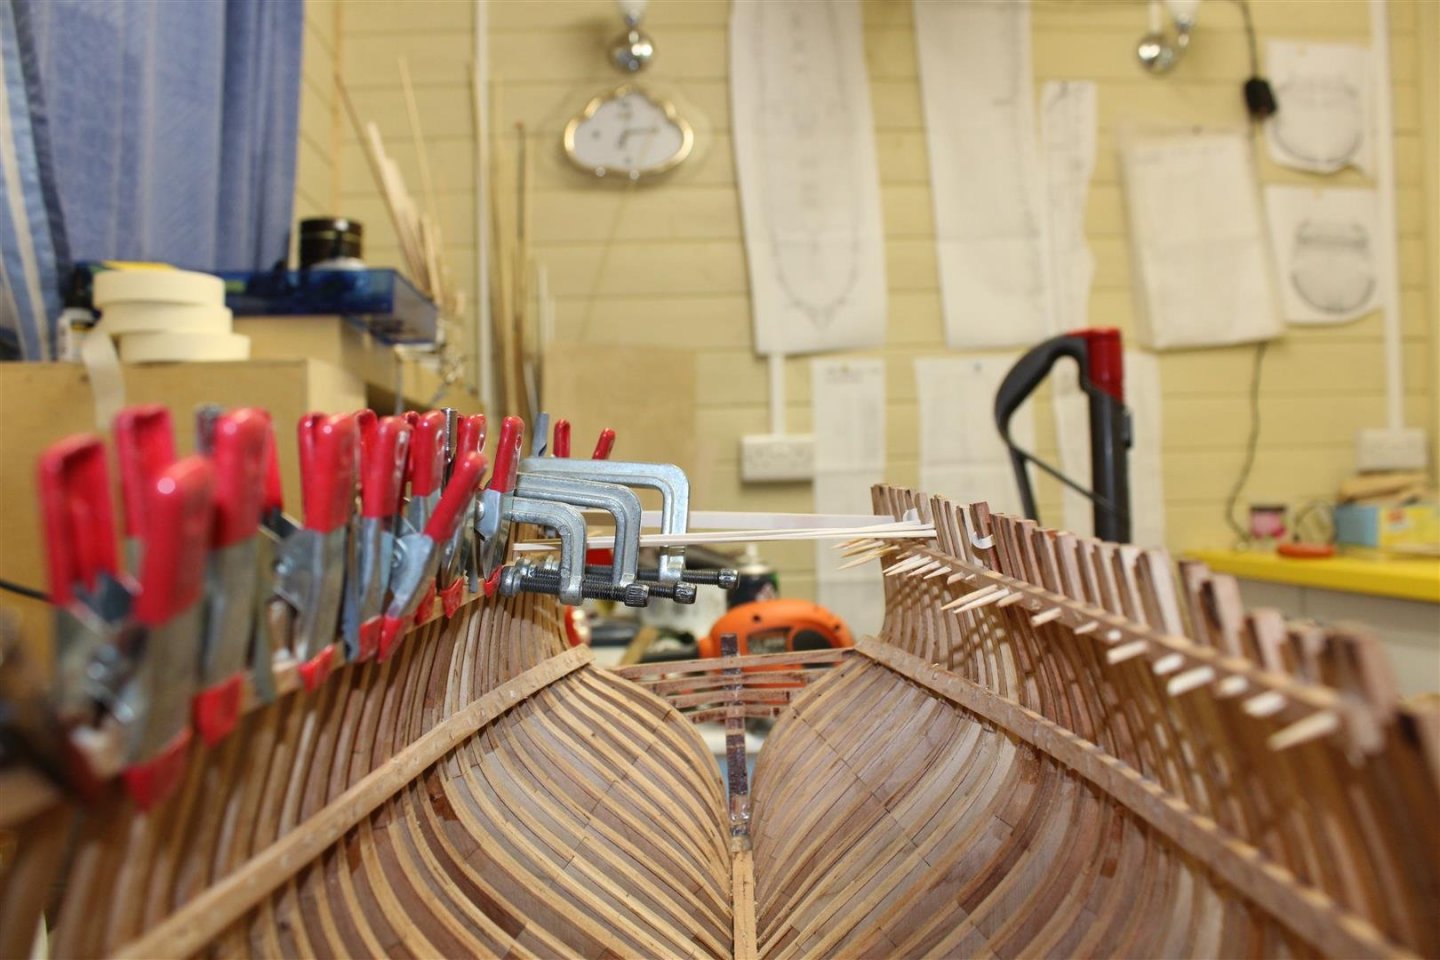
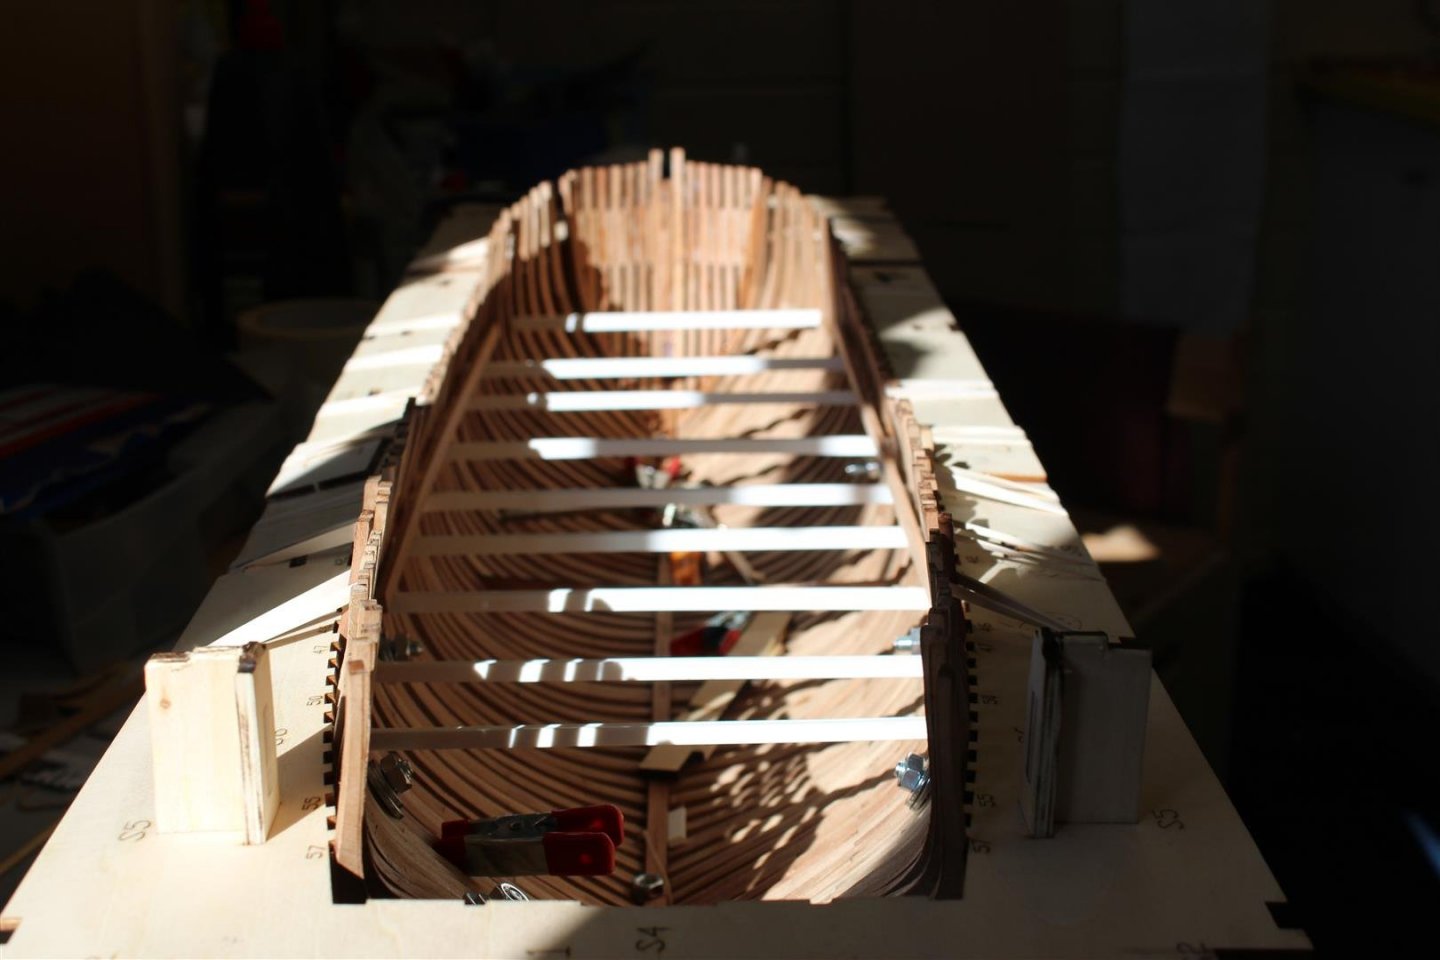
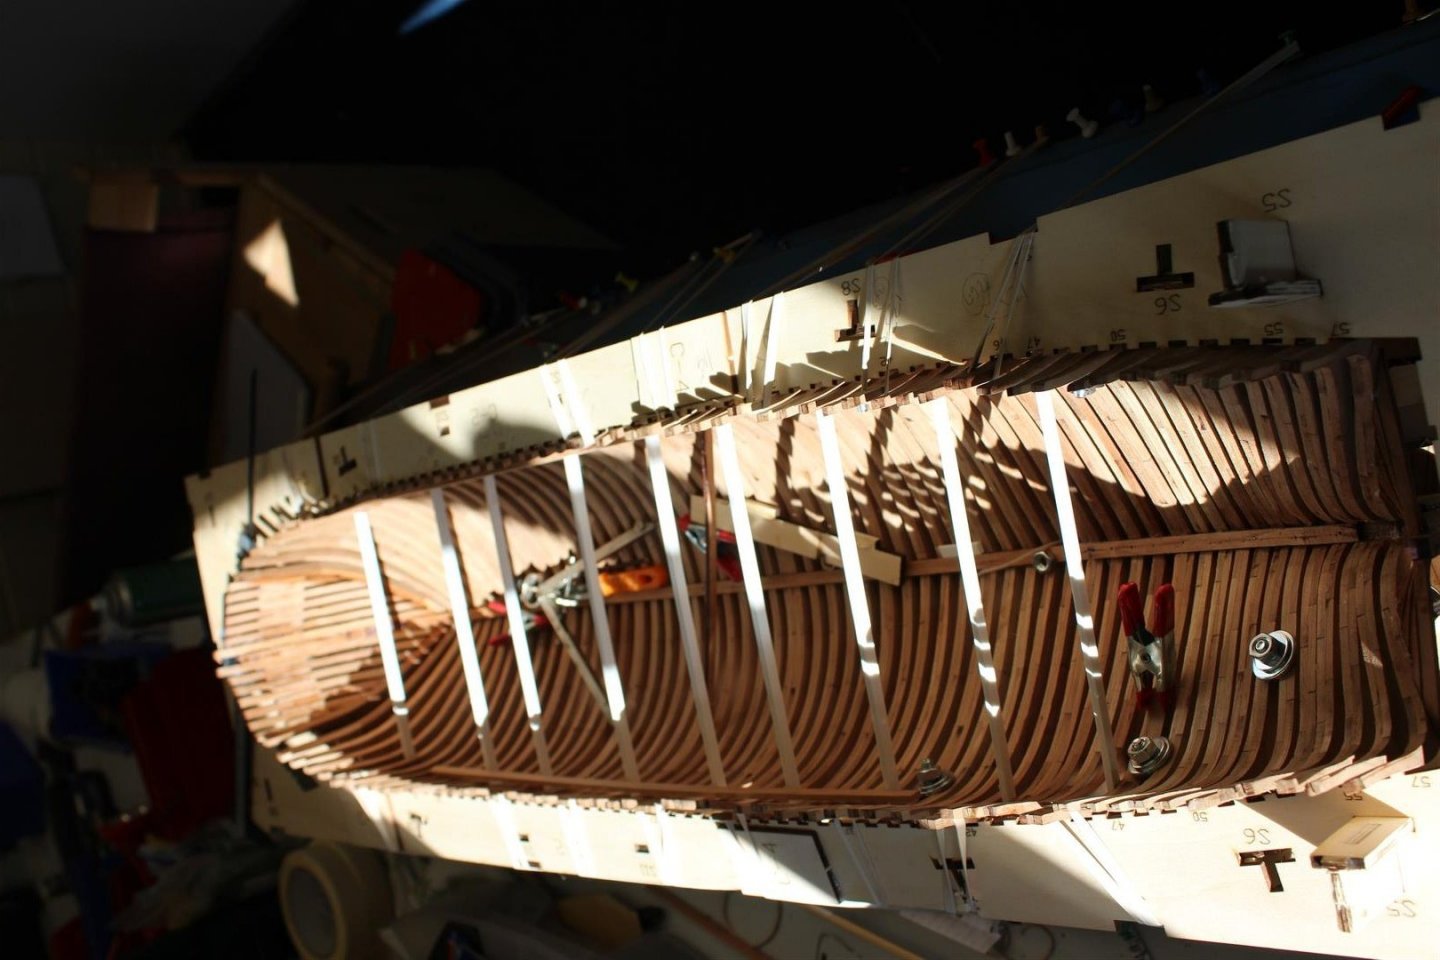
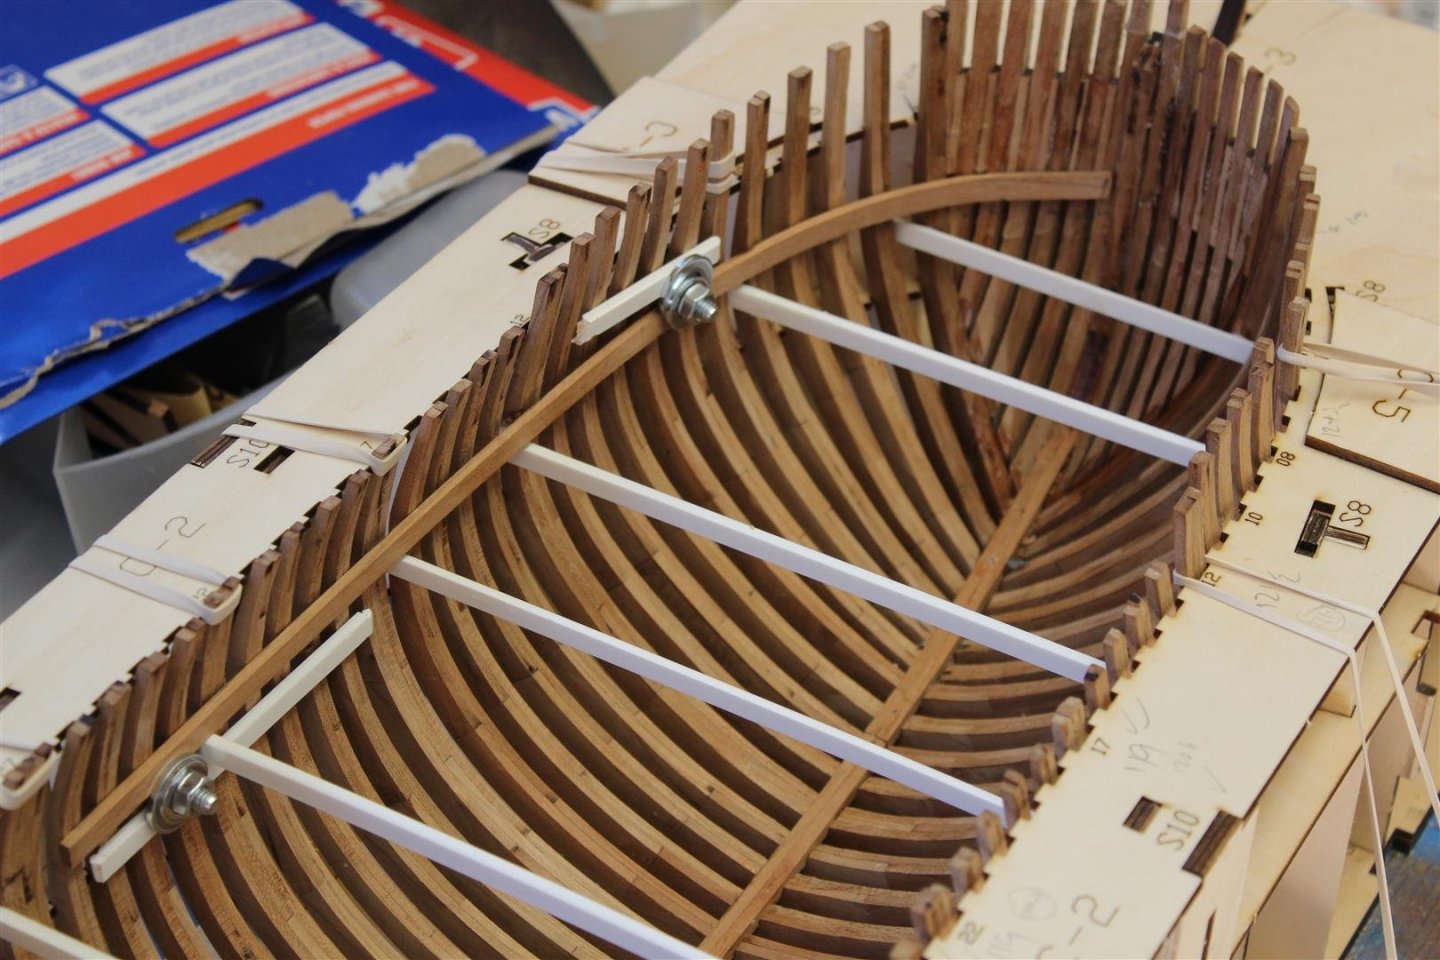
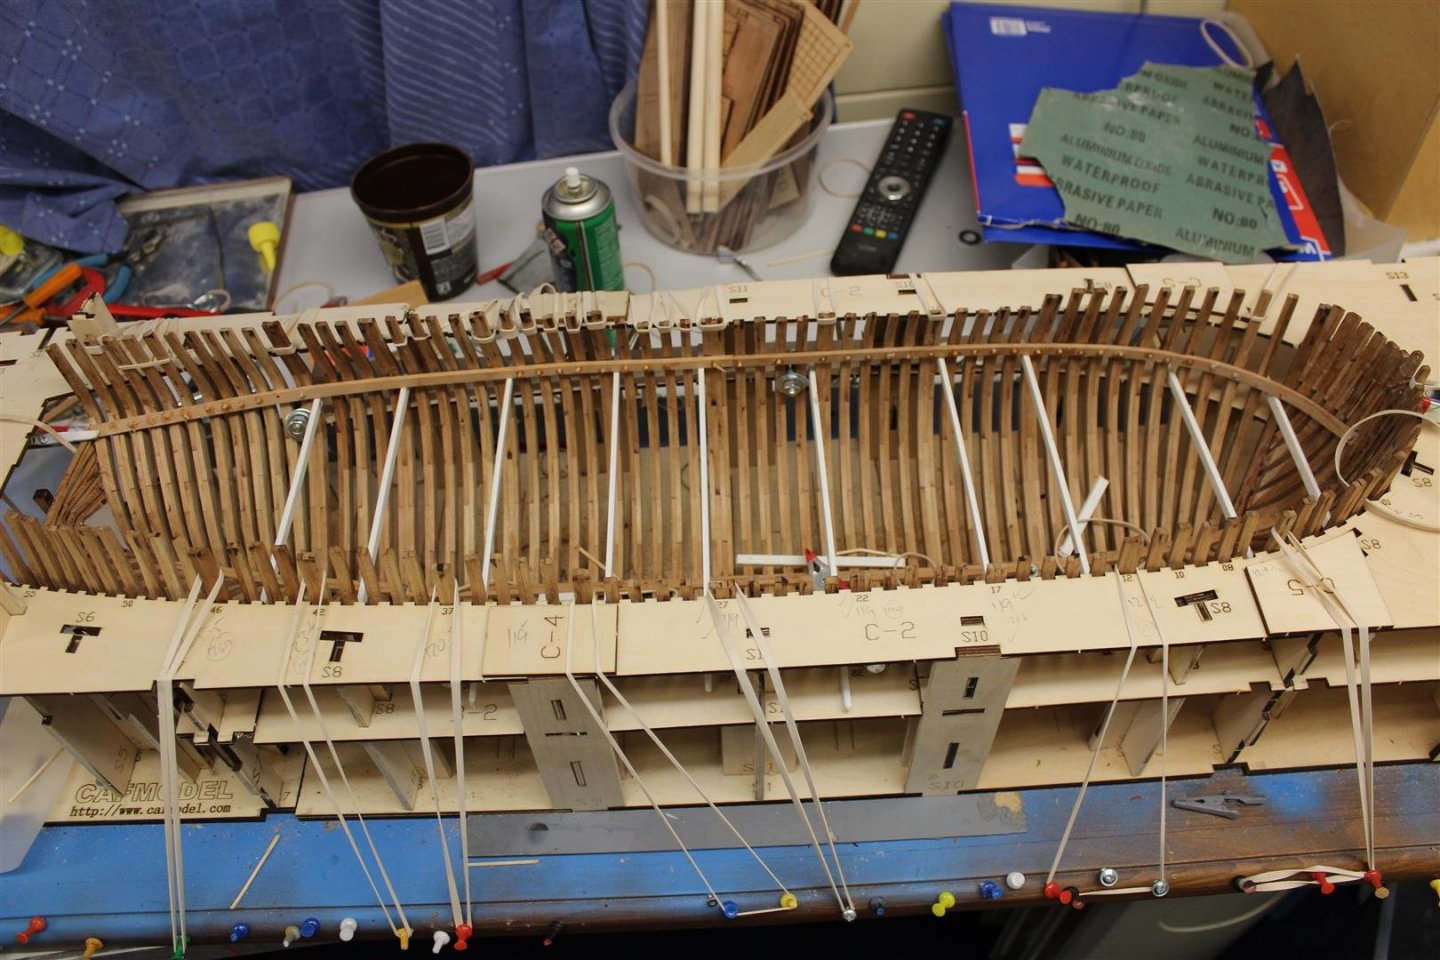
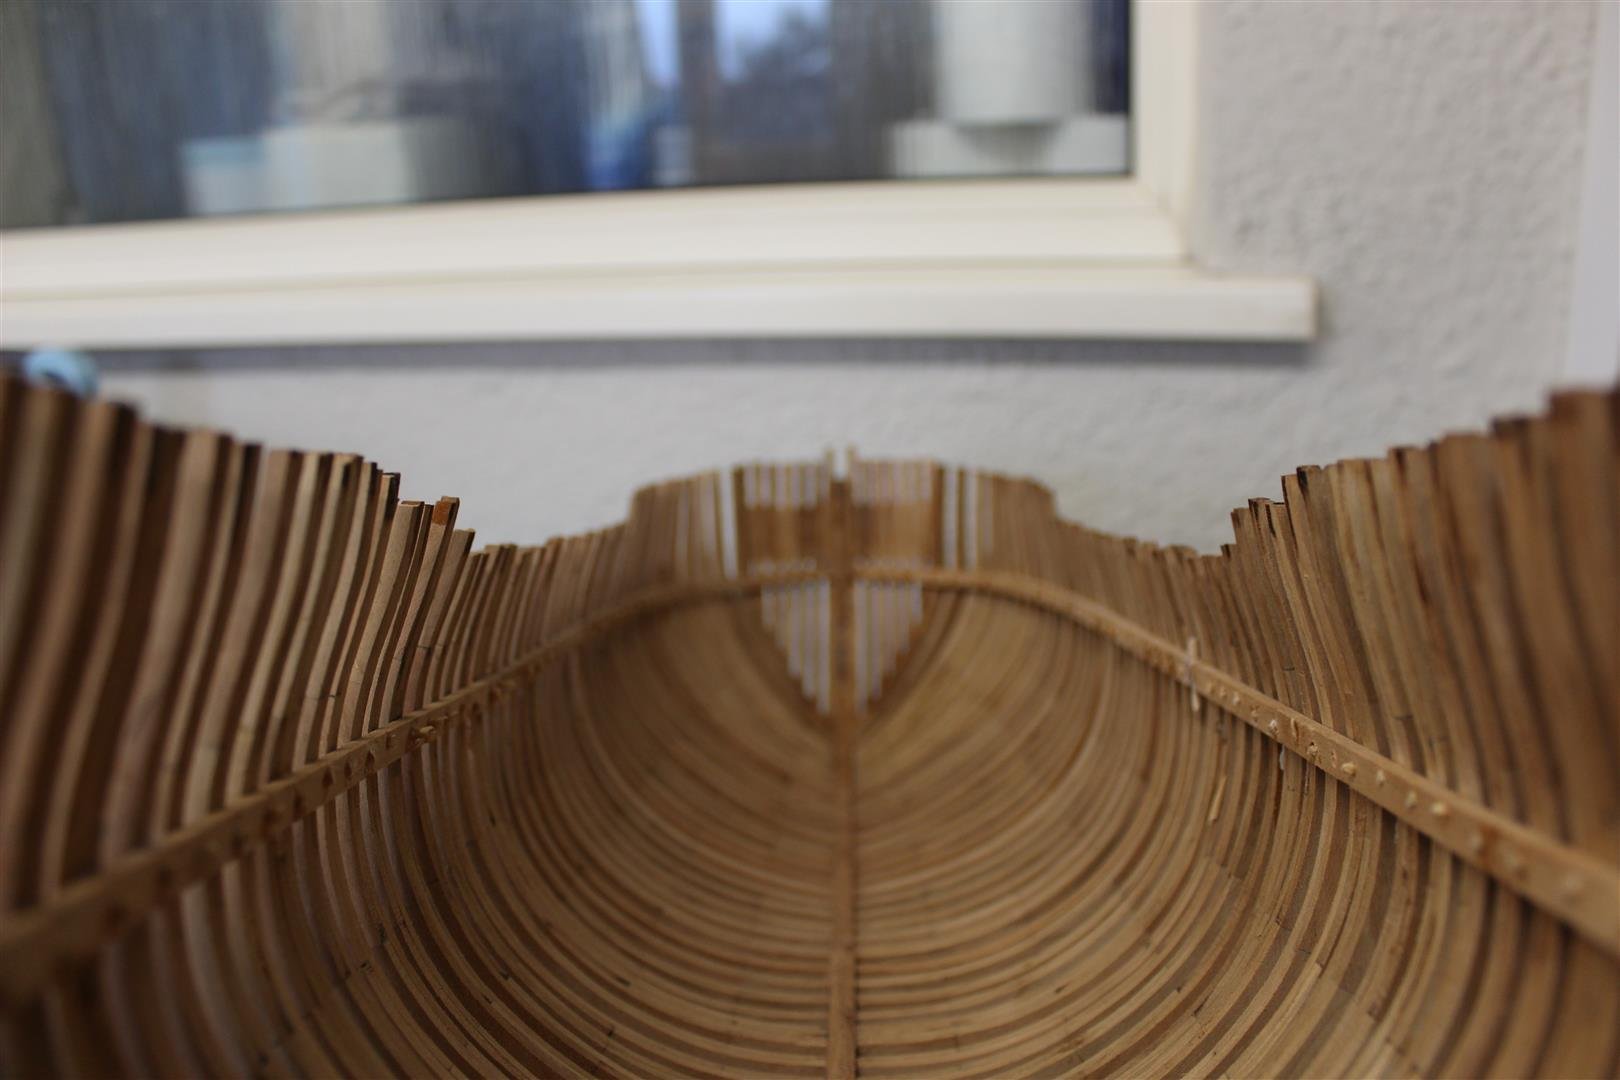
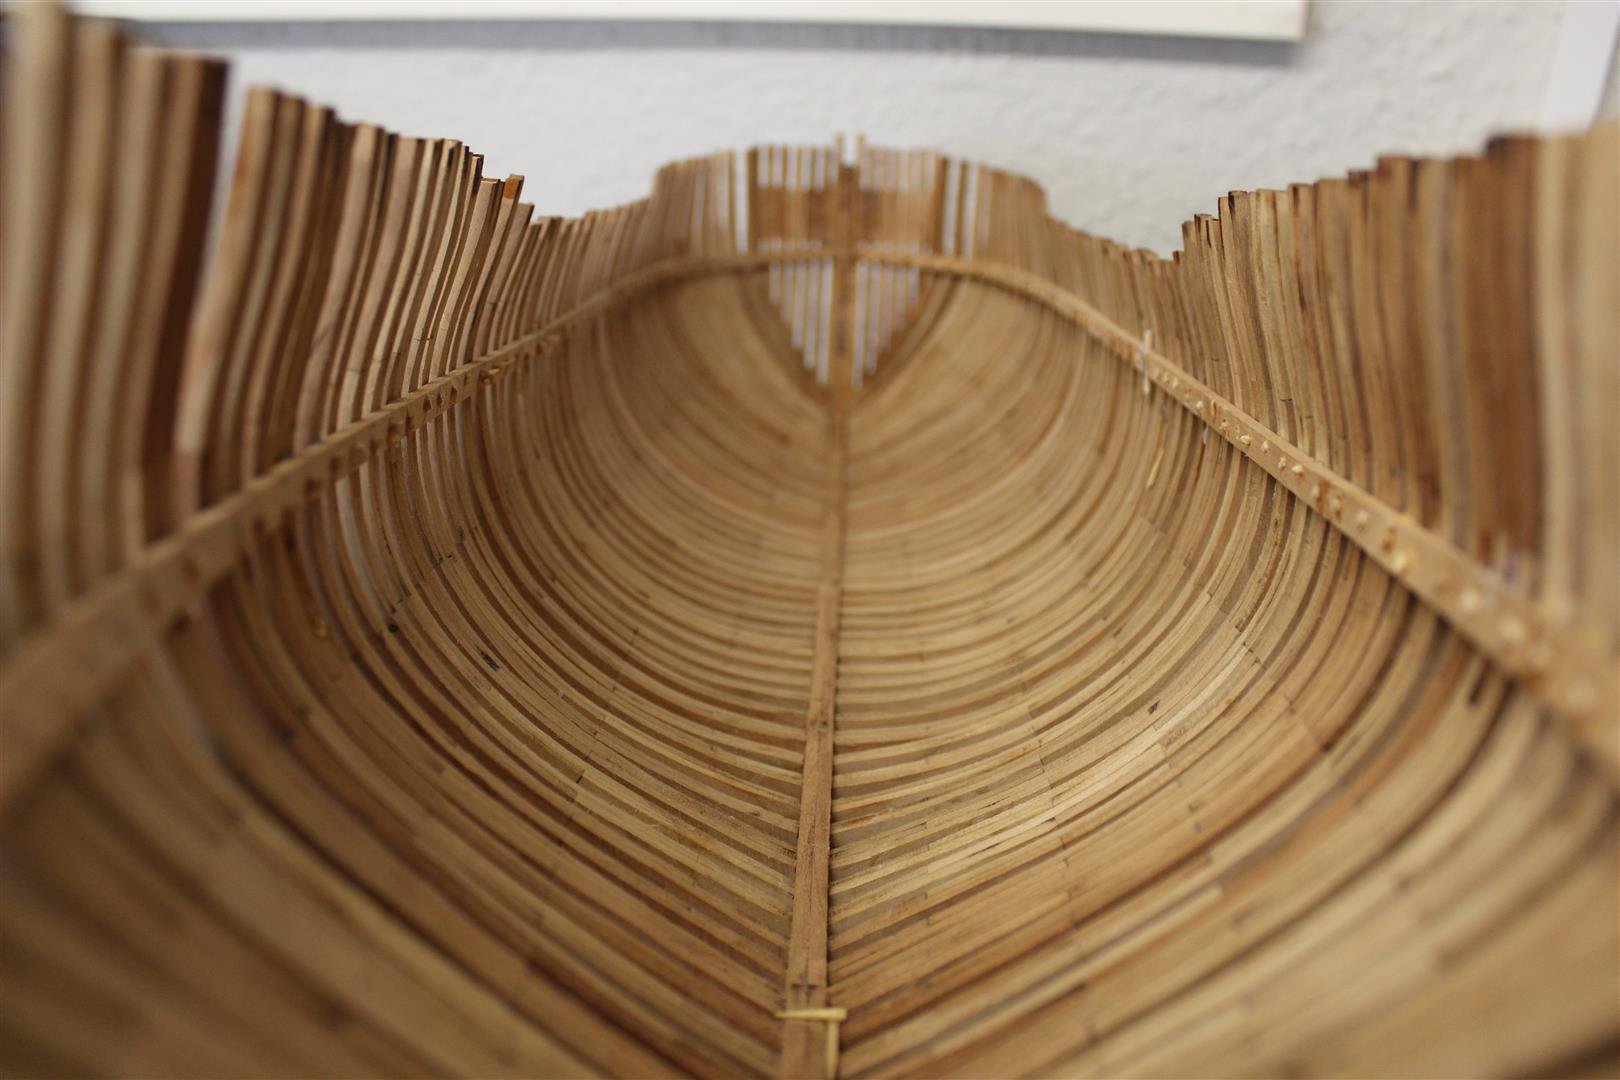
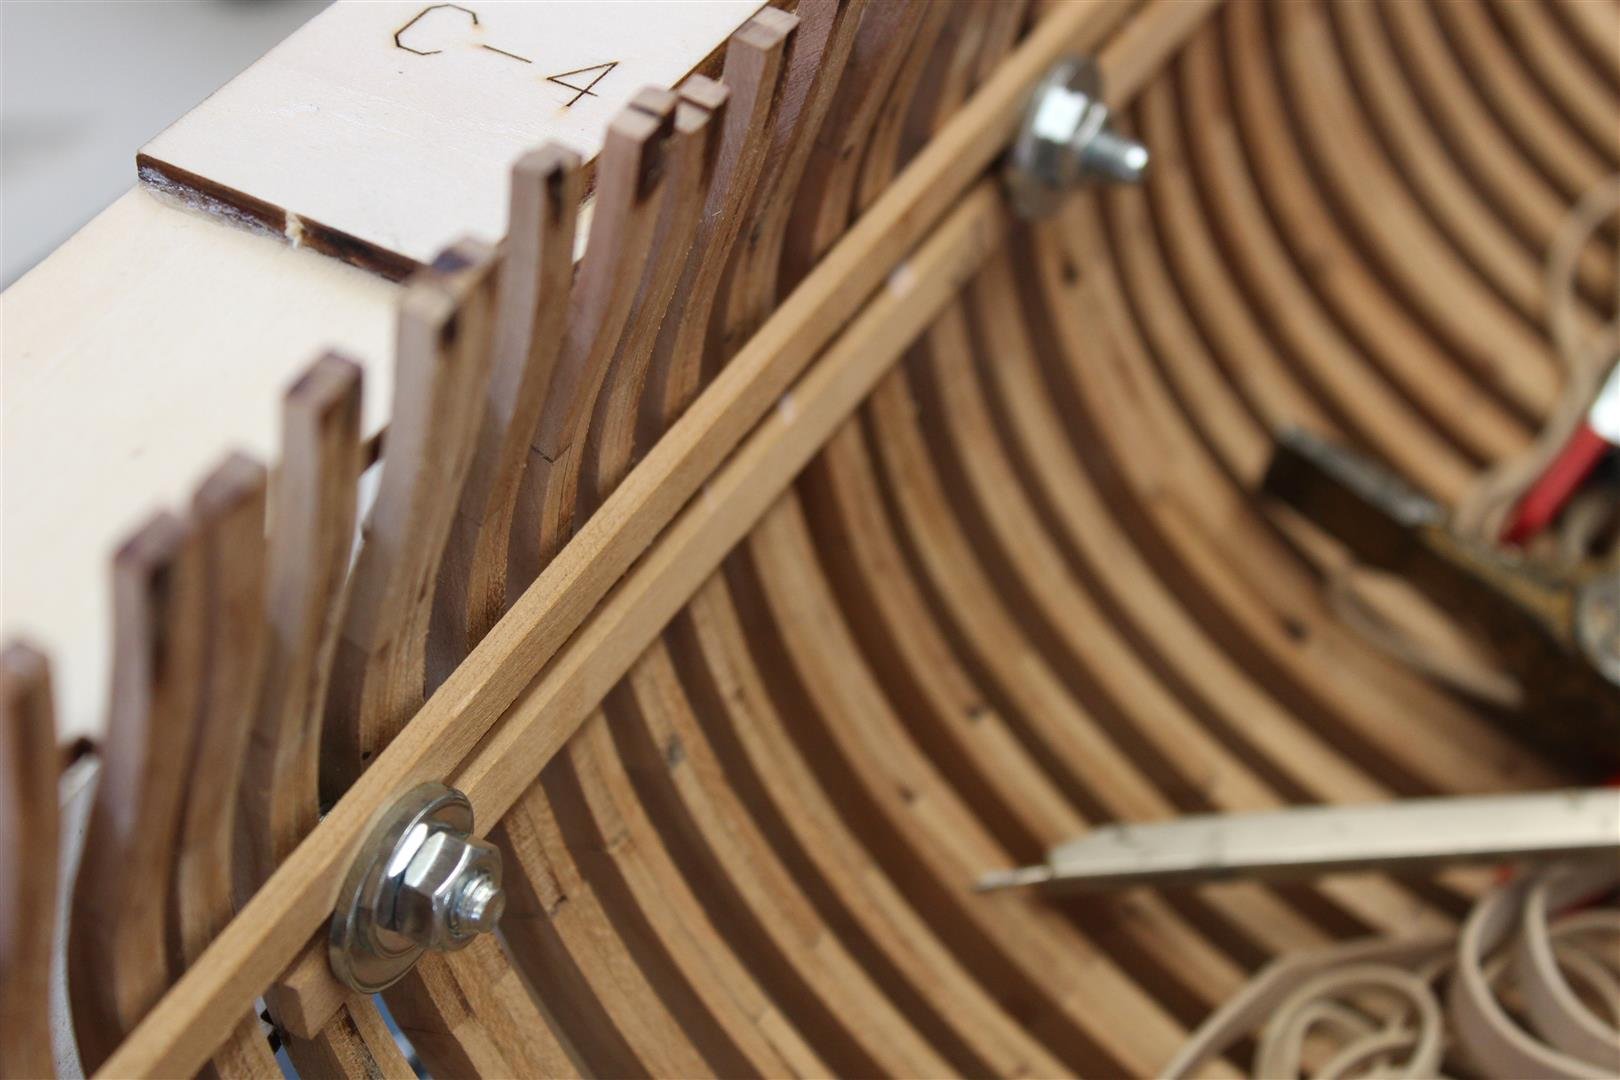
the white ones are my idea and very temp and will be removed when both side are done, i used them because with the curvature of the frames and the jig it was difficult to mark the hull with the correct height, they are set just right to fix the deck supports in place, im sure there is a much simpler way of doing it
- 317 replies
-
- 3
-
-
- enterprise
- caf
- (and 1 more)
-
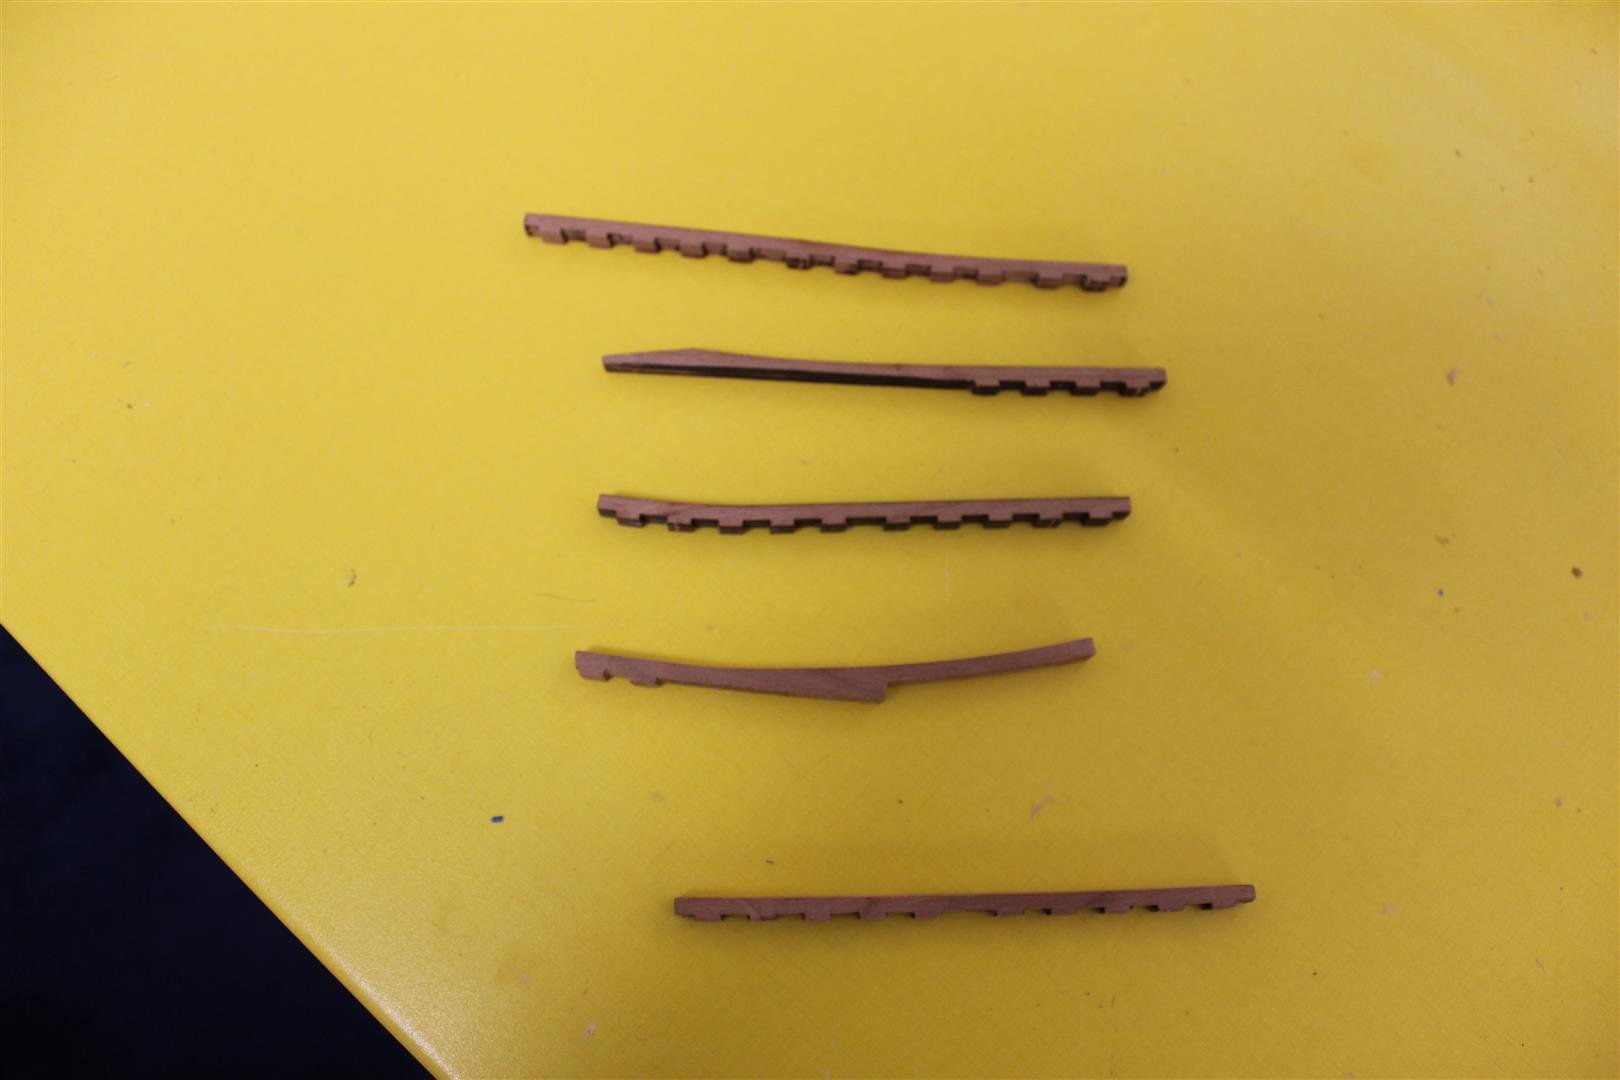
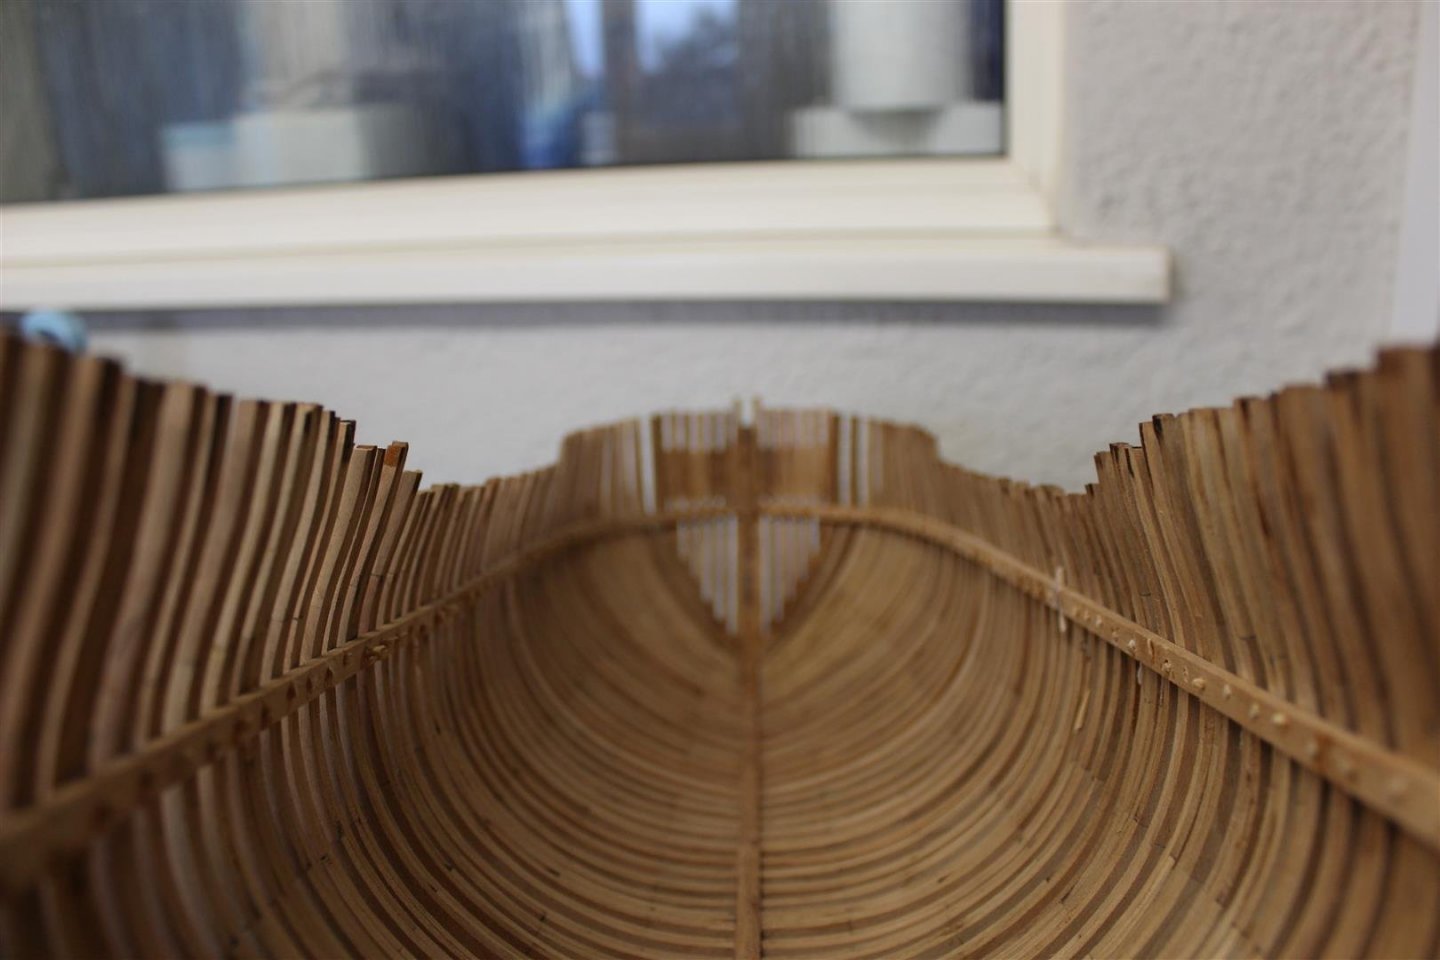
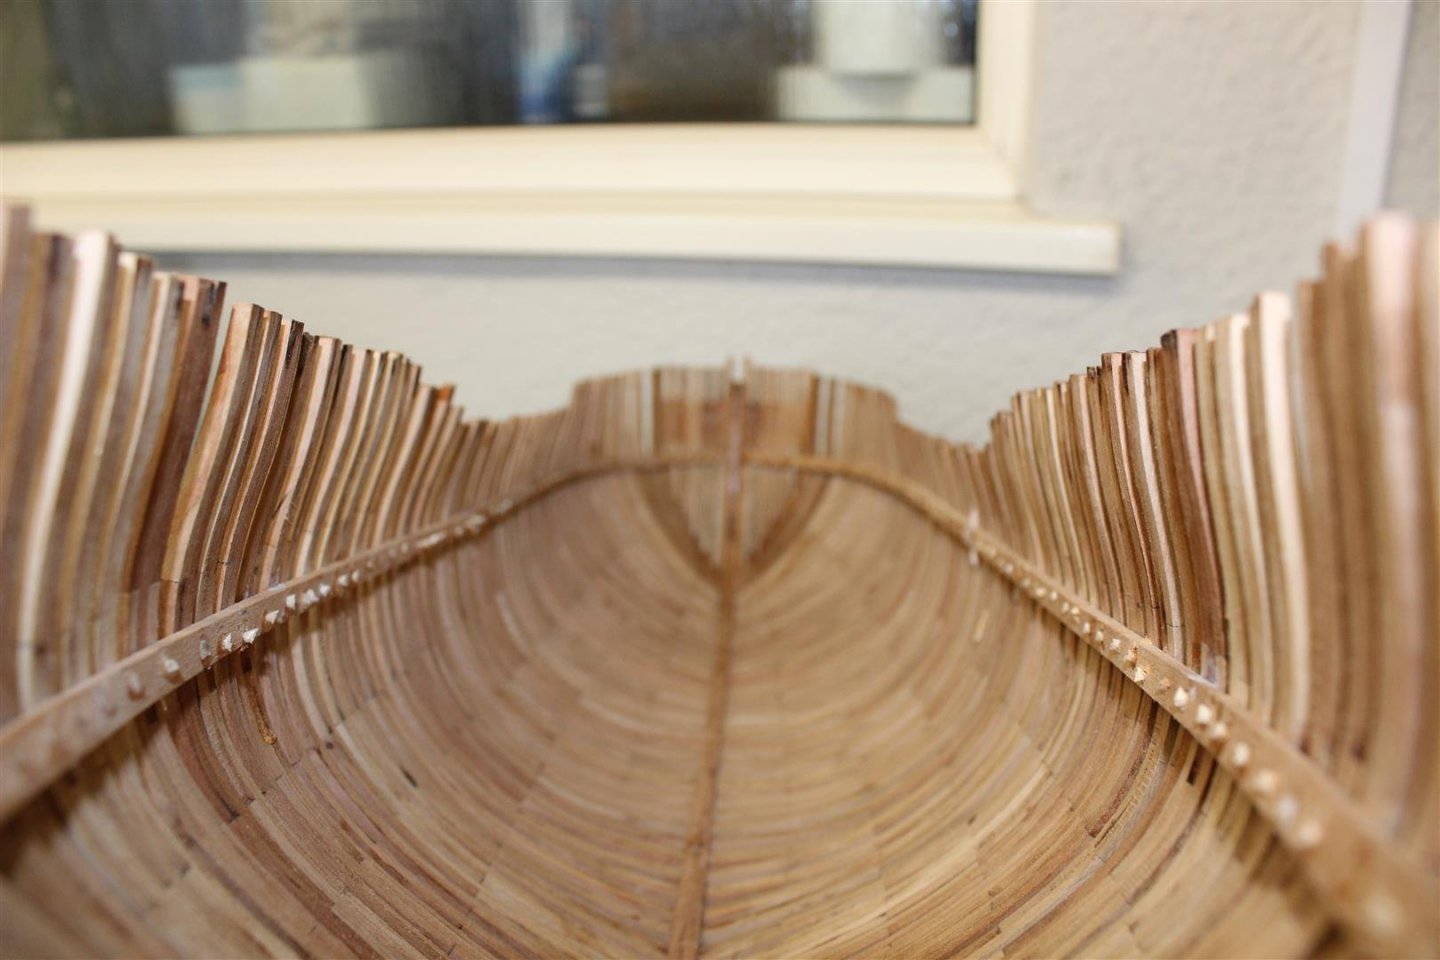
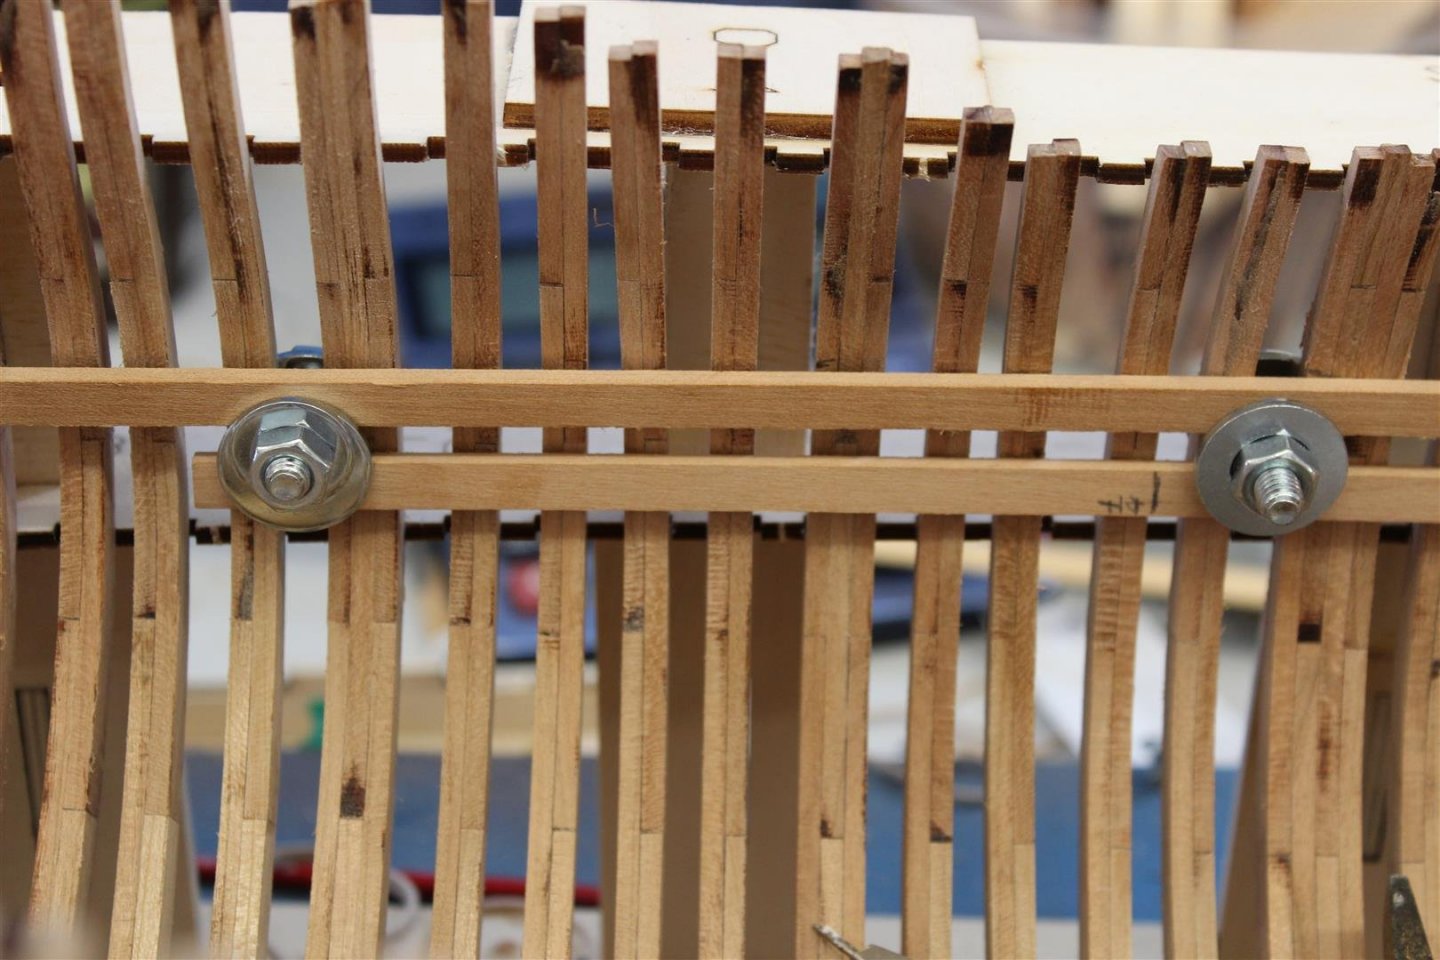
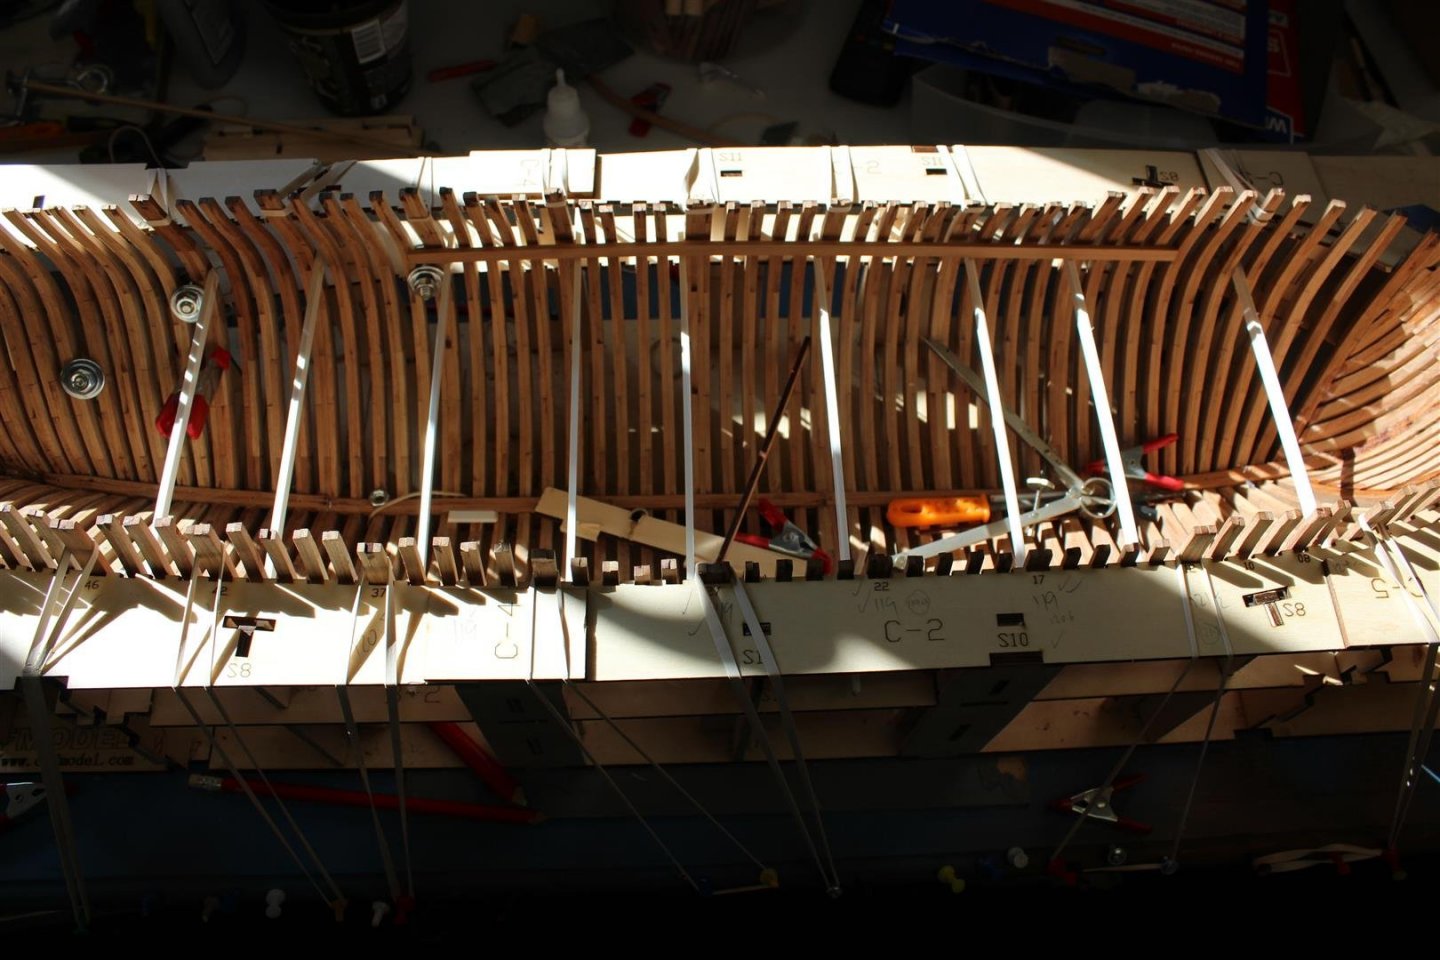
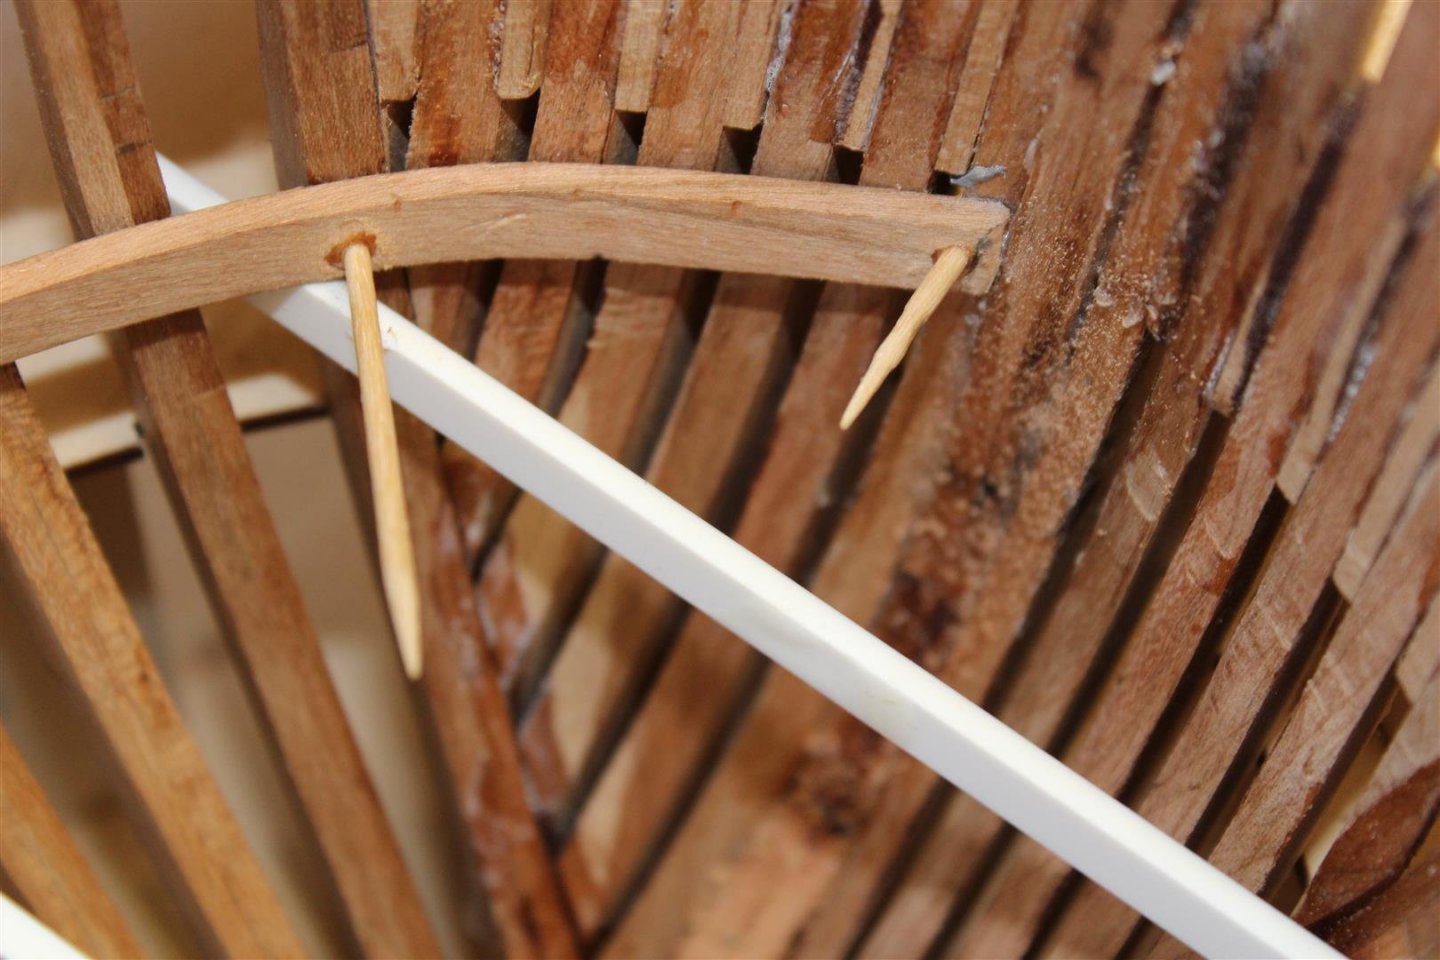
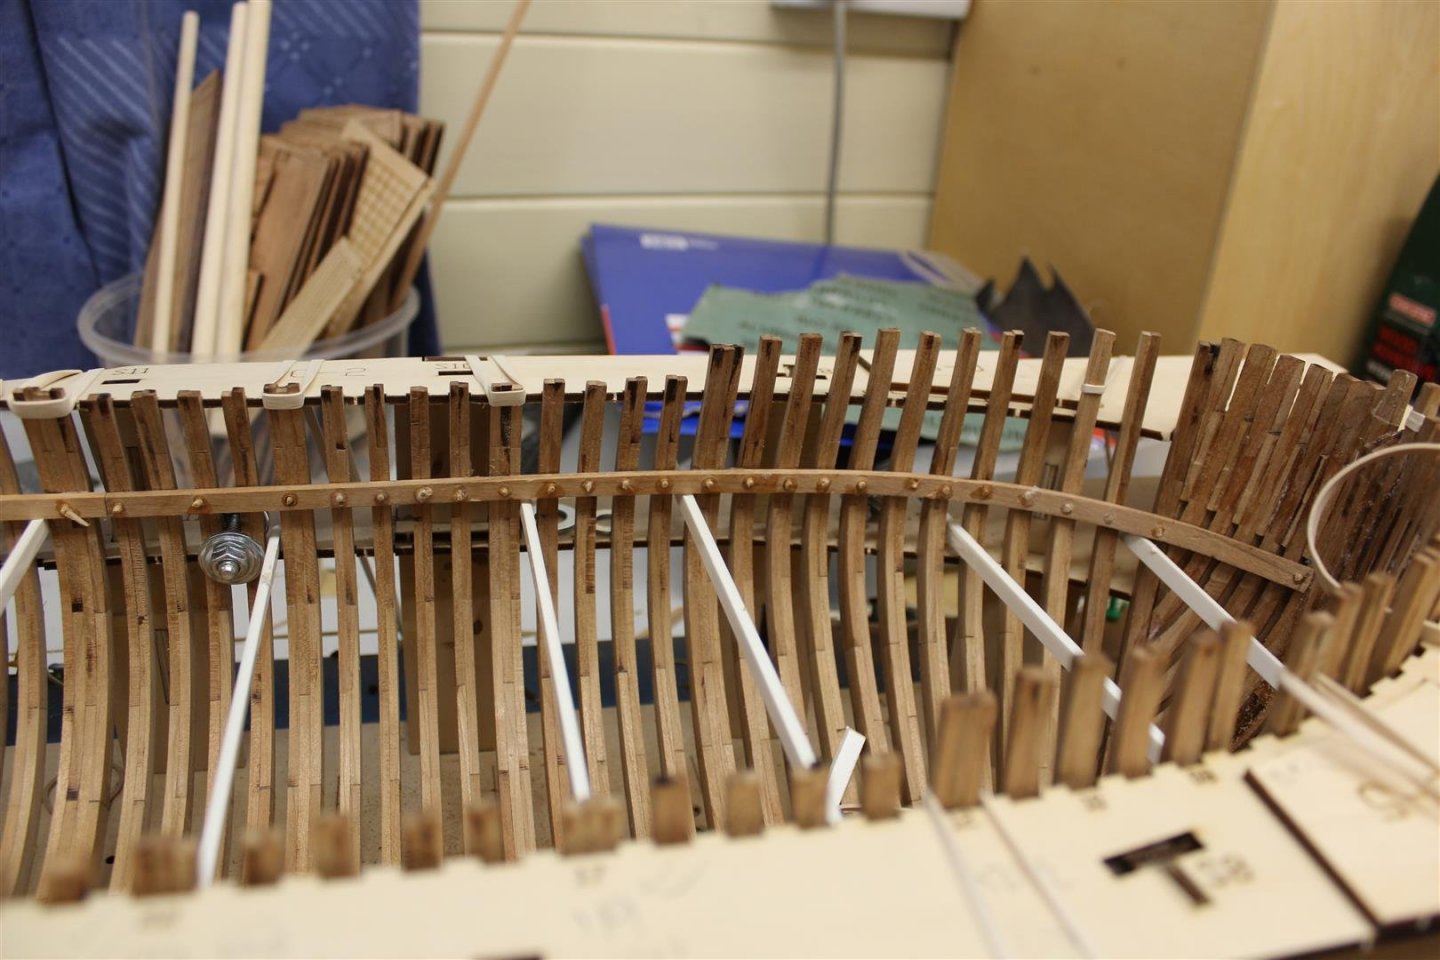
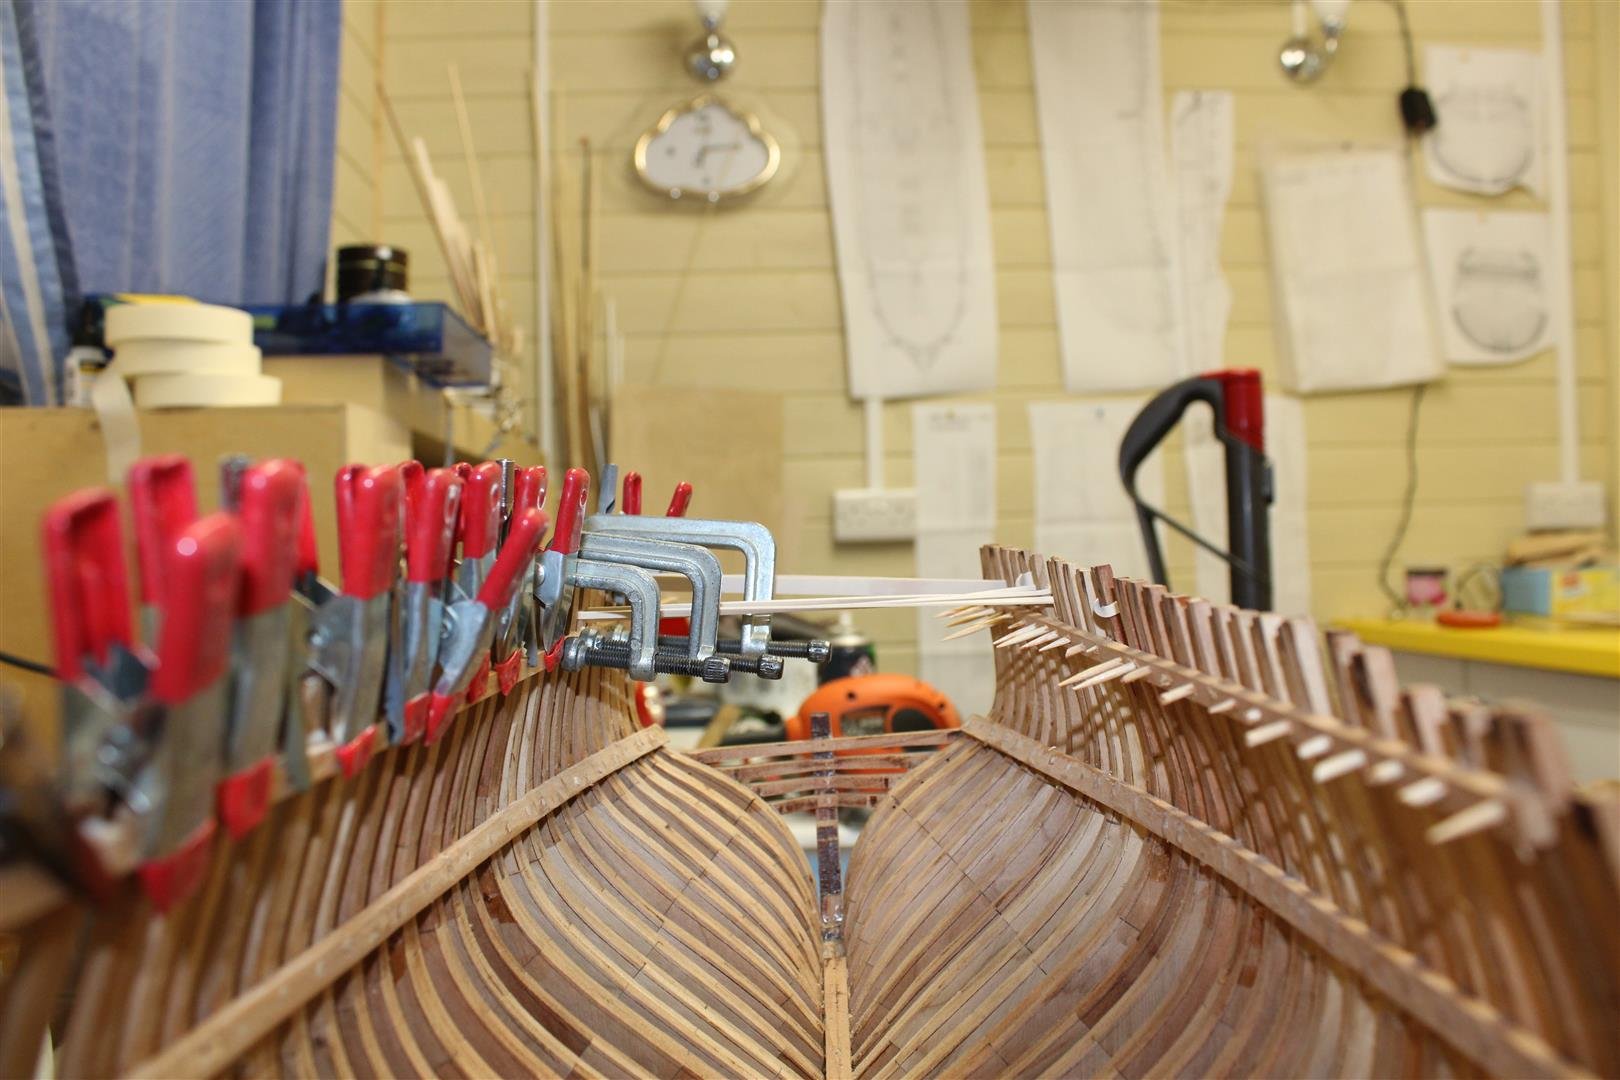
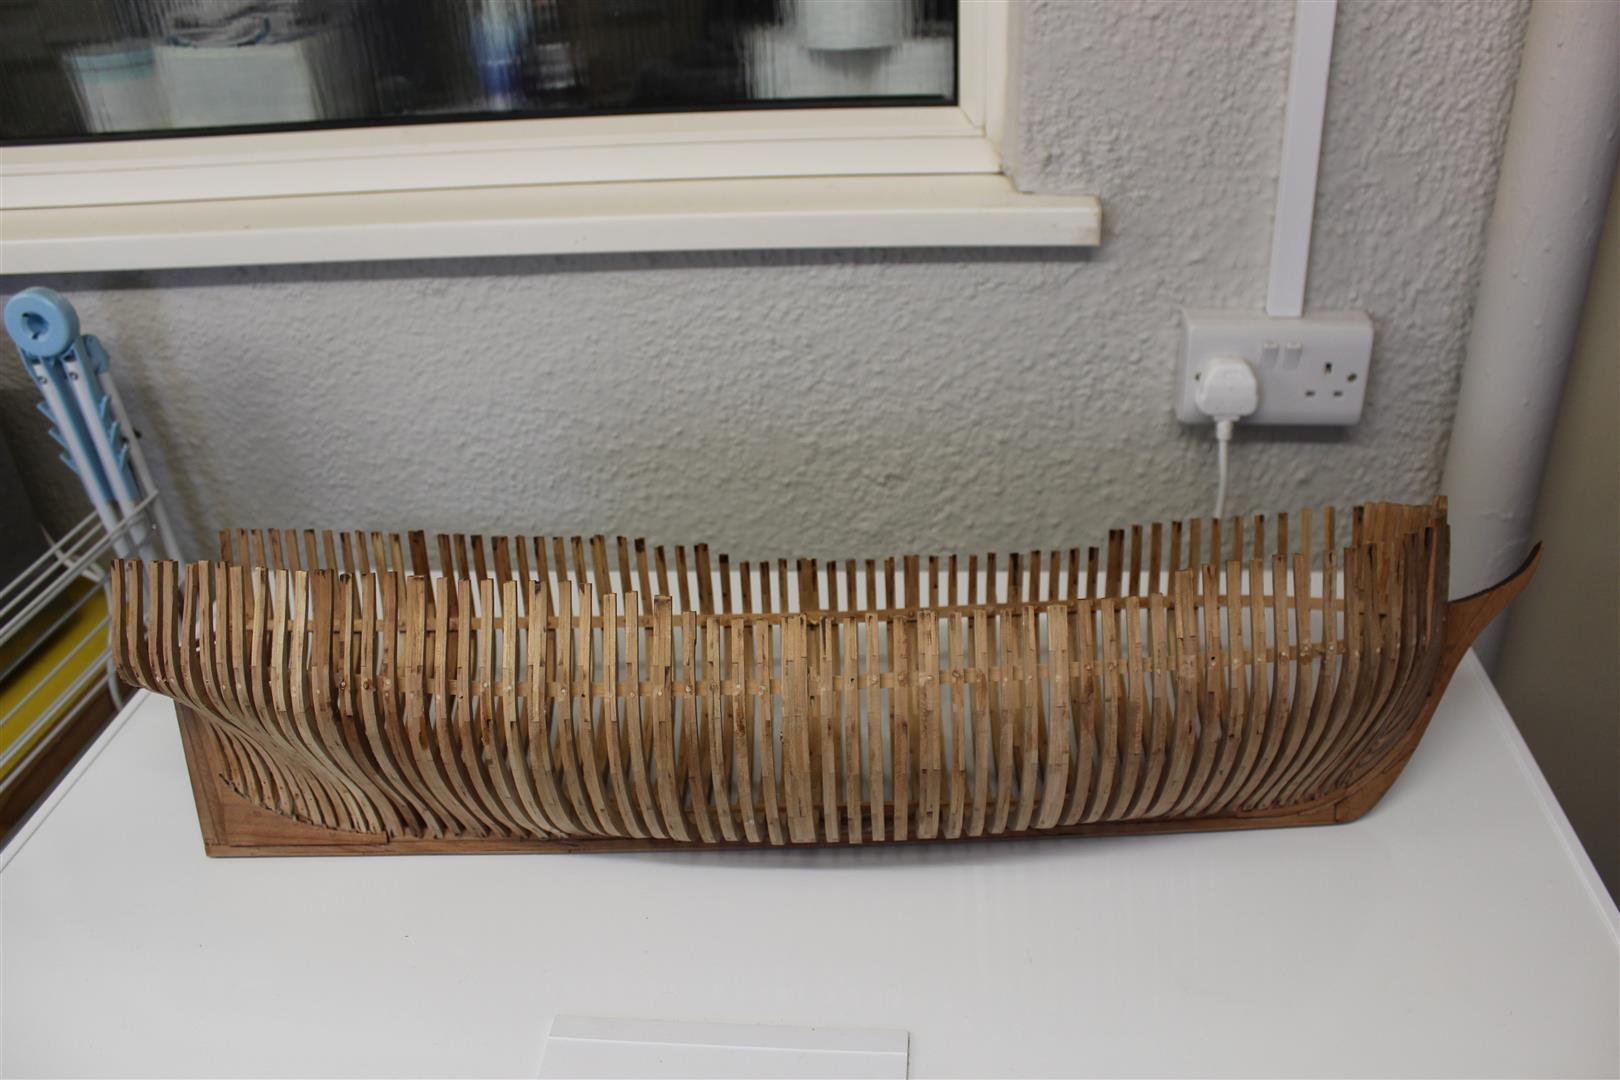
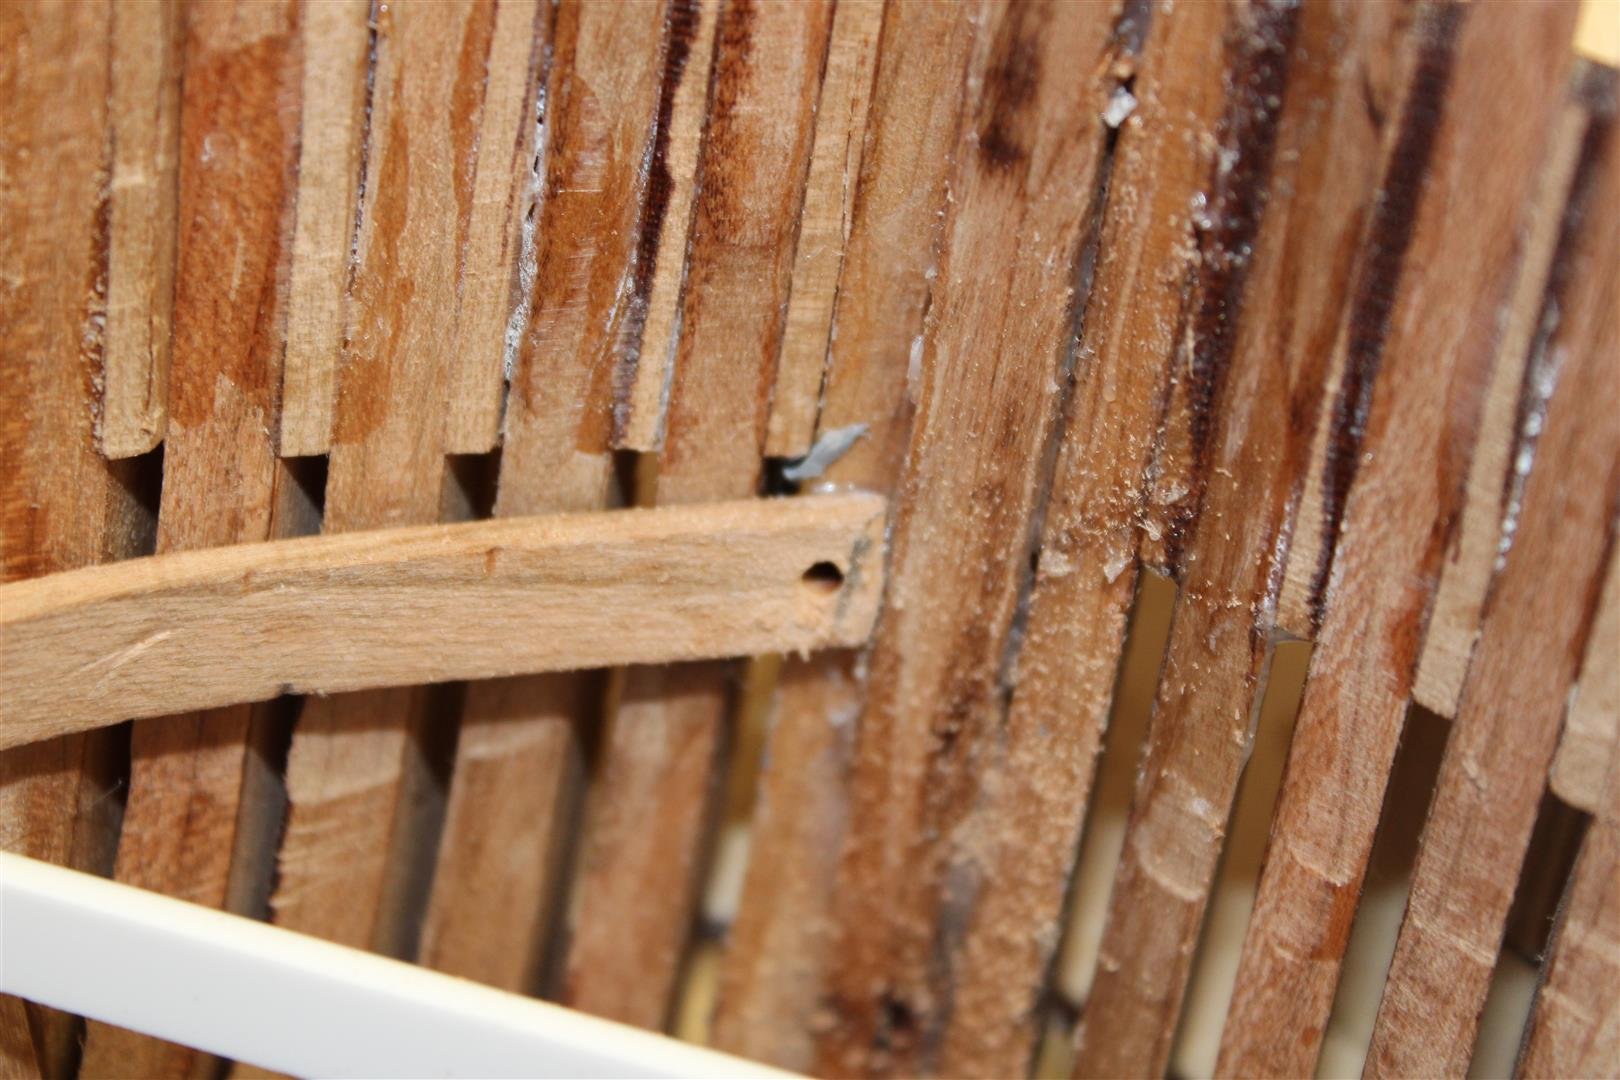
Good evening everyone, thank you for likes and comments Day 26 deck beam supports i have realised tonight, that there is so much to think about on this build, im not in a hurry to do things that are not in sequence, that might be for two reasons, 1 i dont have anything else to do that is out of sequence, and may be the 2 is the same as the first i have the next two part to the build, but CAF are resupplying some of it, hopefully will be here this week the point i was trying to make is that im in no hurry to go and make deck fitting or cannons, mast parts, as i am constantly thinking about the project that is on the go at present, and personally i think it is a good thing for me, lol its the most difficult kit i have ever done, and i aint got to the thinking about bits yet the deck beams on my build serve two purposes, first to support the deck and also to keep the frames in an upright positions, hopefully she can then be removed from the frame to enable some sanding to be done as previously mentioned the deck line on the plans is the very top of the deck not the deck supports, so the beams and deck planking has to be subtracted from the line shown which represent 7.5mm i had no idea how to put the beams supports in place so i came up with my own idea of using nuts bots and washers, it came in very useful, but very fiddly, i also put lower temp deck supports in (the white beams), to enable, ensuring both side were right, or at least both would be wrong the bow planks were soaked for a coupls of hours and clamped in place securing the planks, i never used just wood glue, i have drilled 2mm holes through the beam and frame and and used wooden cocktai sticks with glue on as a very oversized treenail, i will let you know if it works, but seams very secure at present, non of this will be seen


- 317 replies
-
- 17
-
-
- enterprise
- caf
- (and 1 more)
-
oooooooooooooops sorry lol
-
yes it would be as thats just what i am doing with my HMS Enterprise build
-
OOOOOOOOOOPS, i thought they were fairly recent kits
-
i just had a look at the model motorcars, some nice expensive goodies in there, but just asking myself if the kit could have made better components in the first place
-
US Brig Syren by Gahm - Model Shipways
Kevin replied to Gahm's topic in - Kit build logs for subjects built from 1801 - 1850
wow it is so very clean, tidy and precise, very nice indeed -
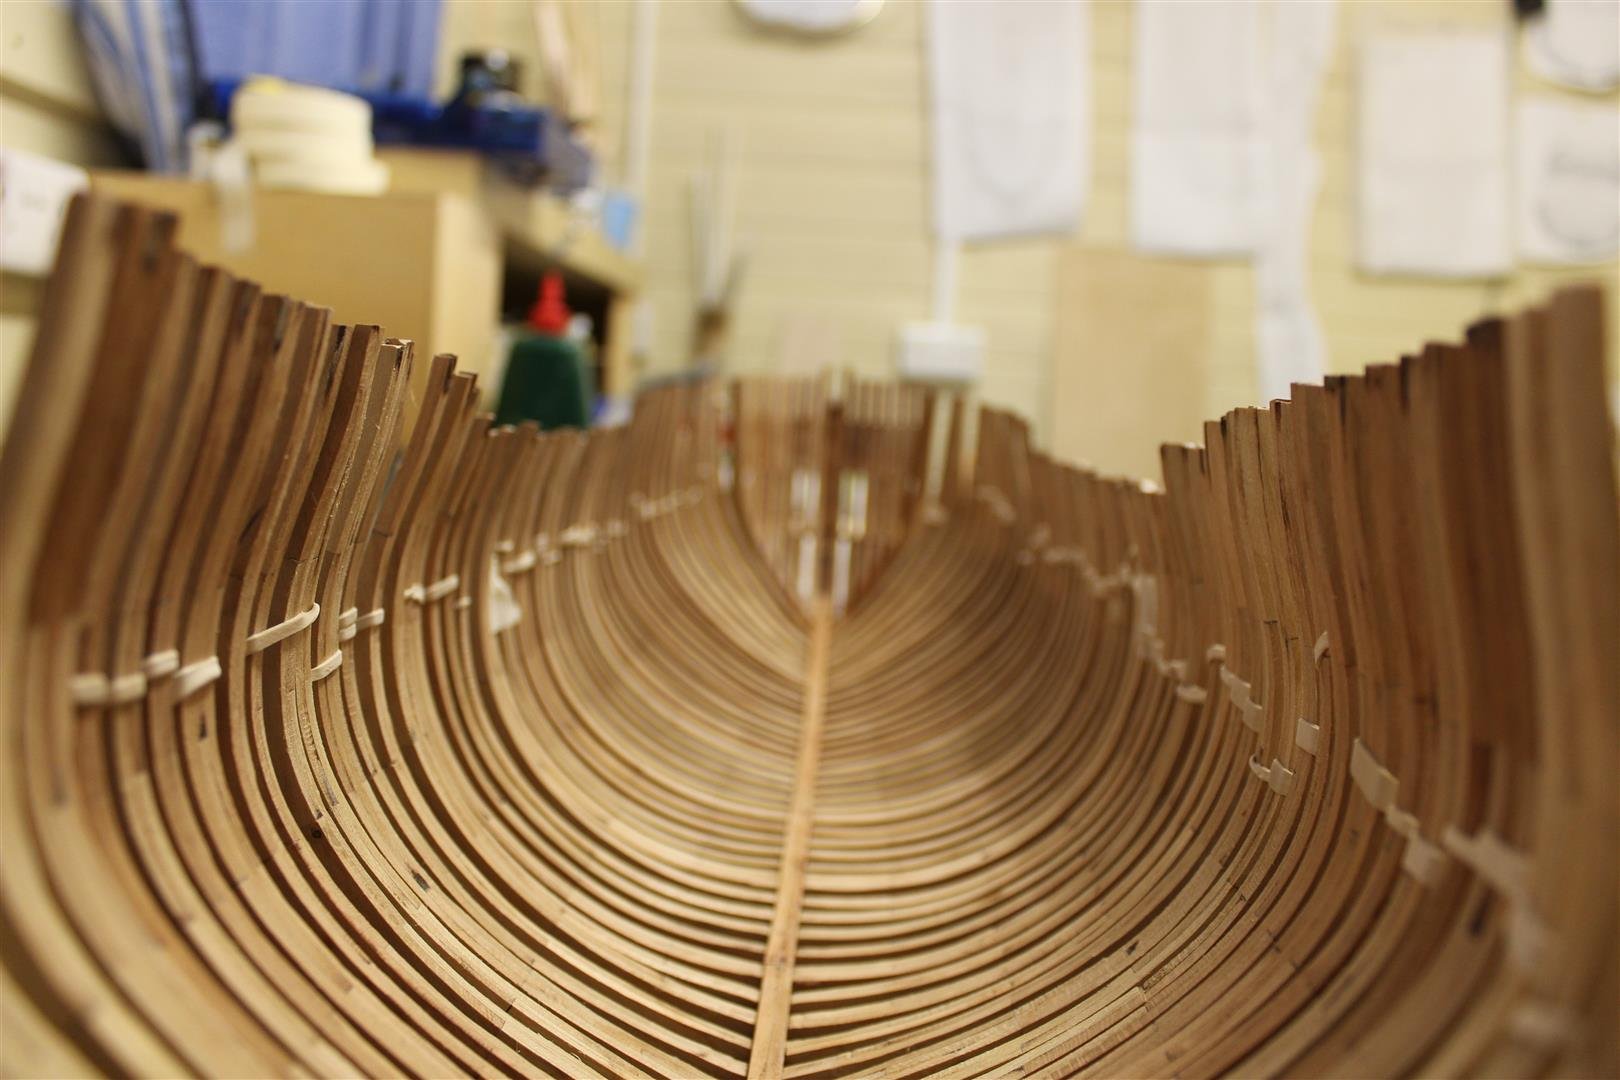
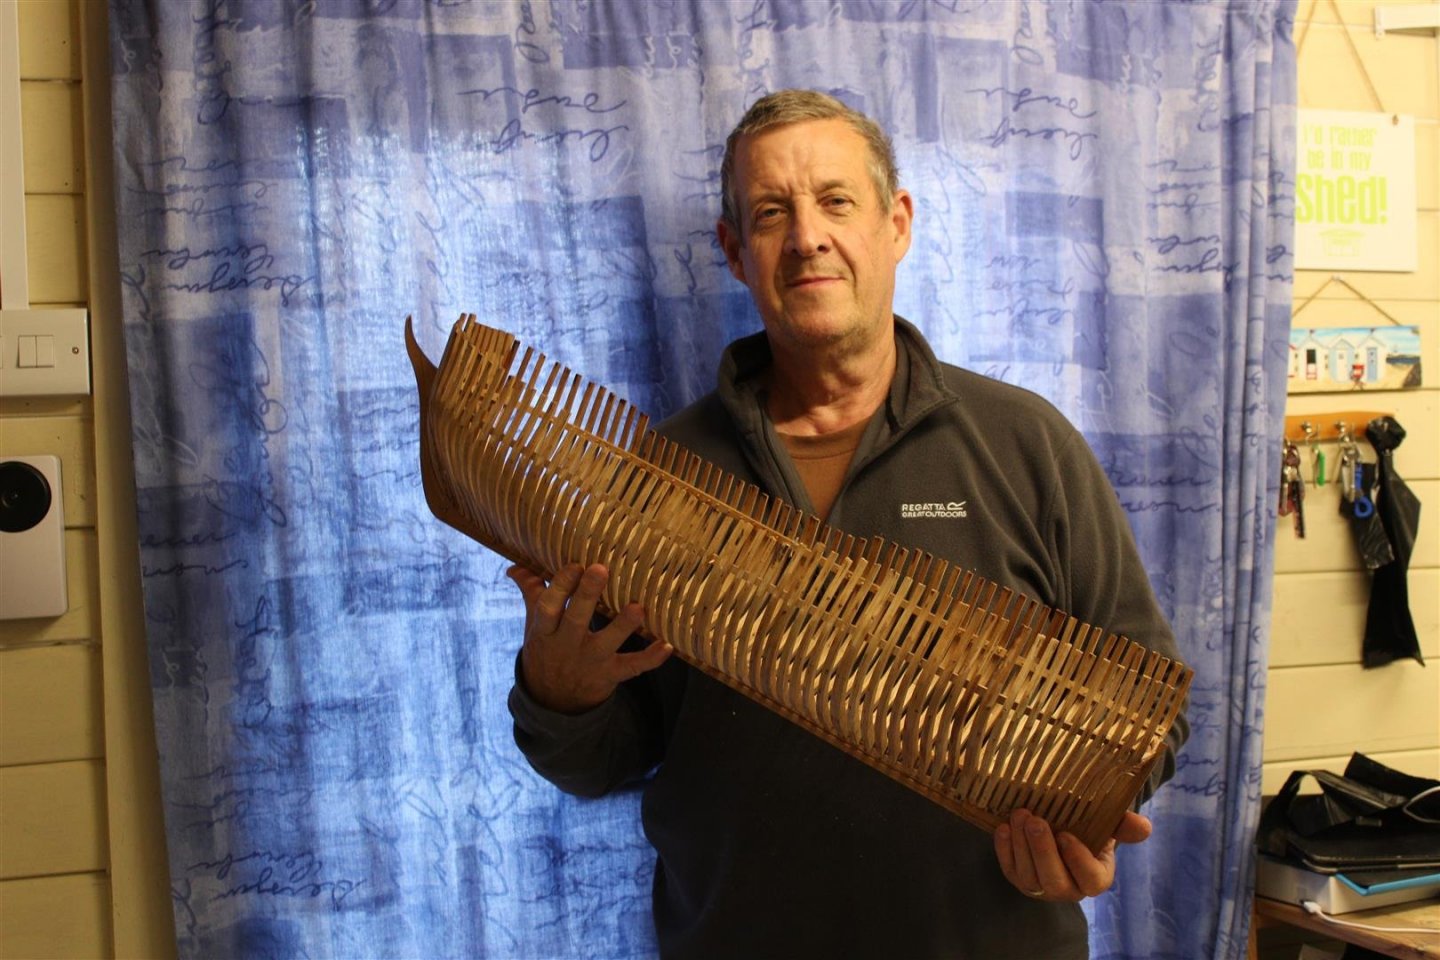
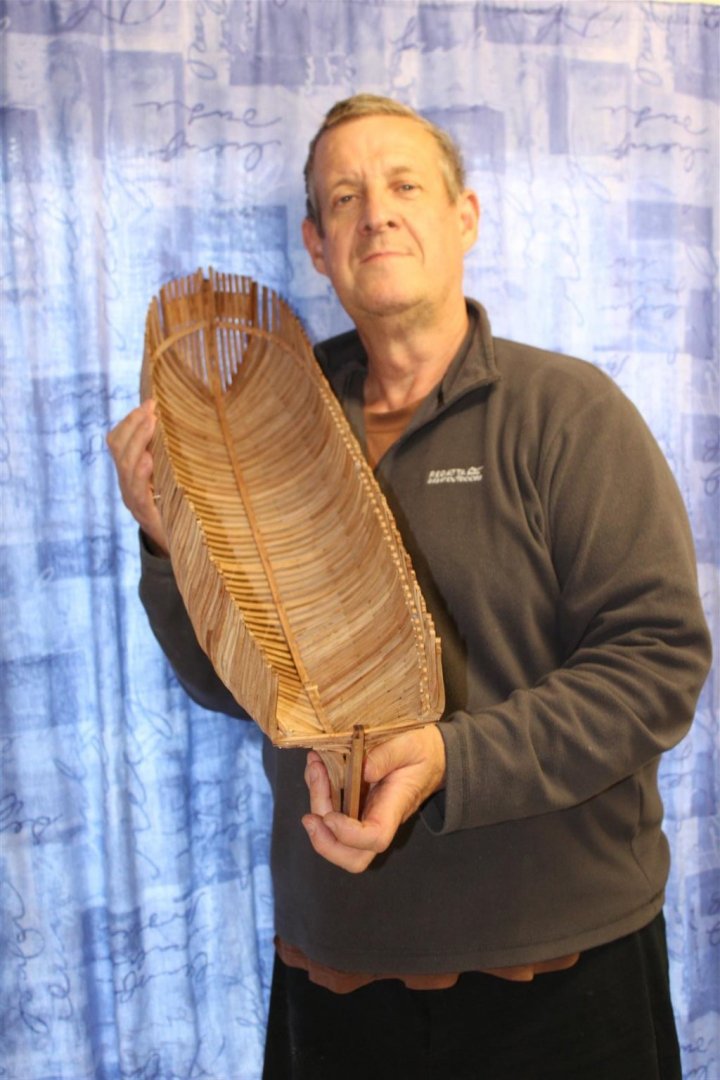
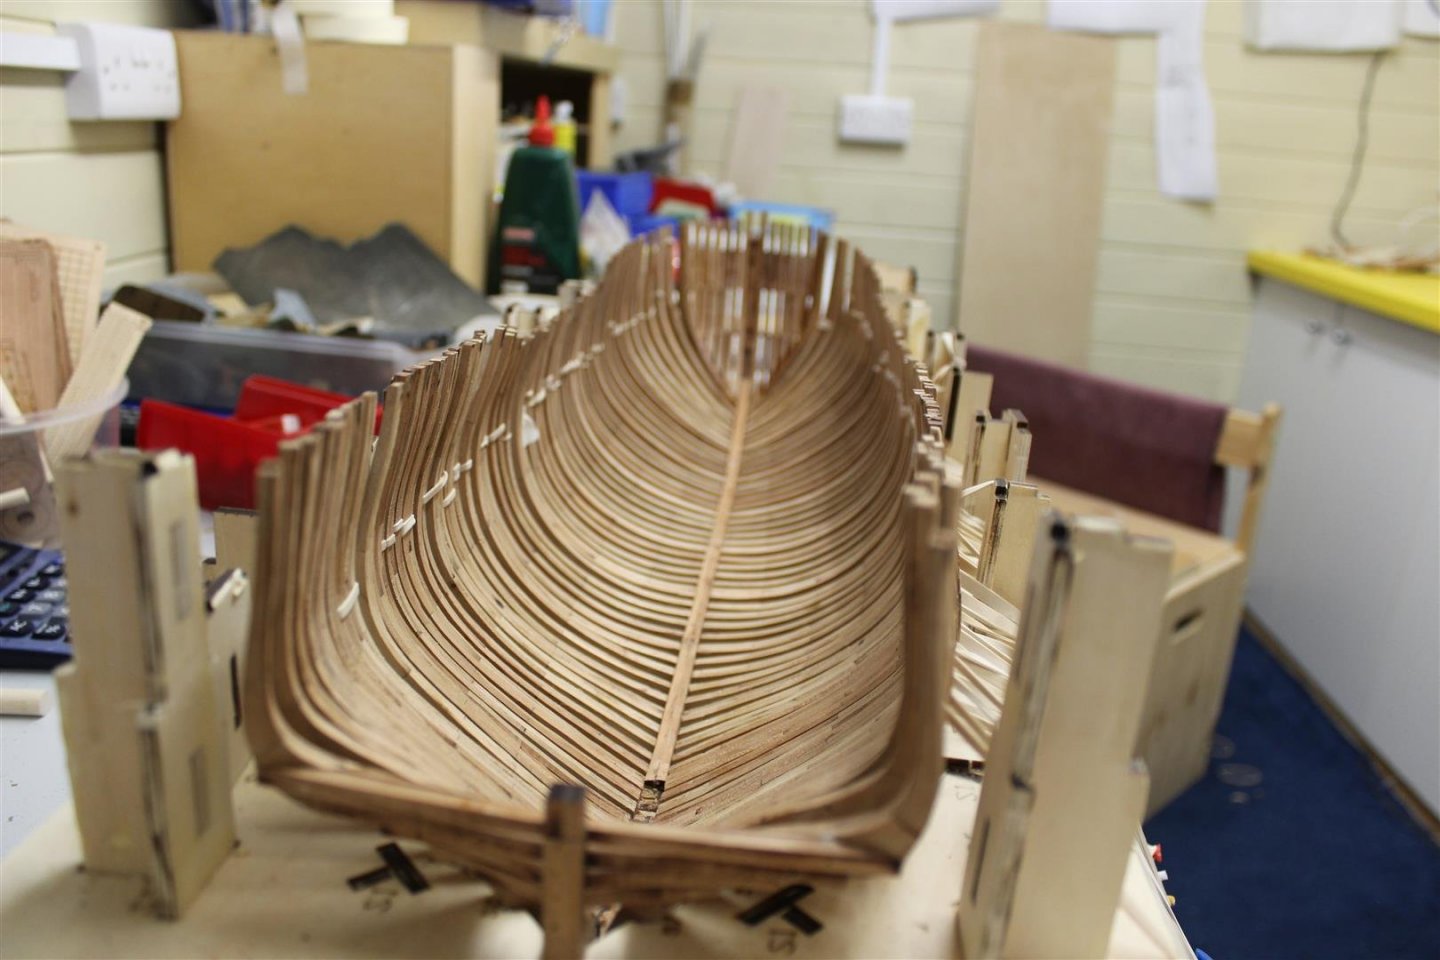
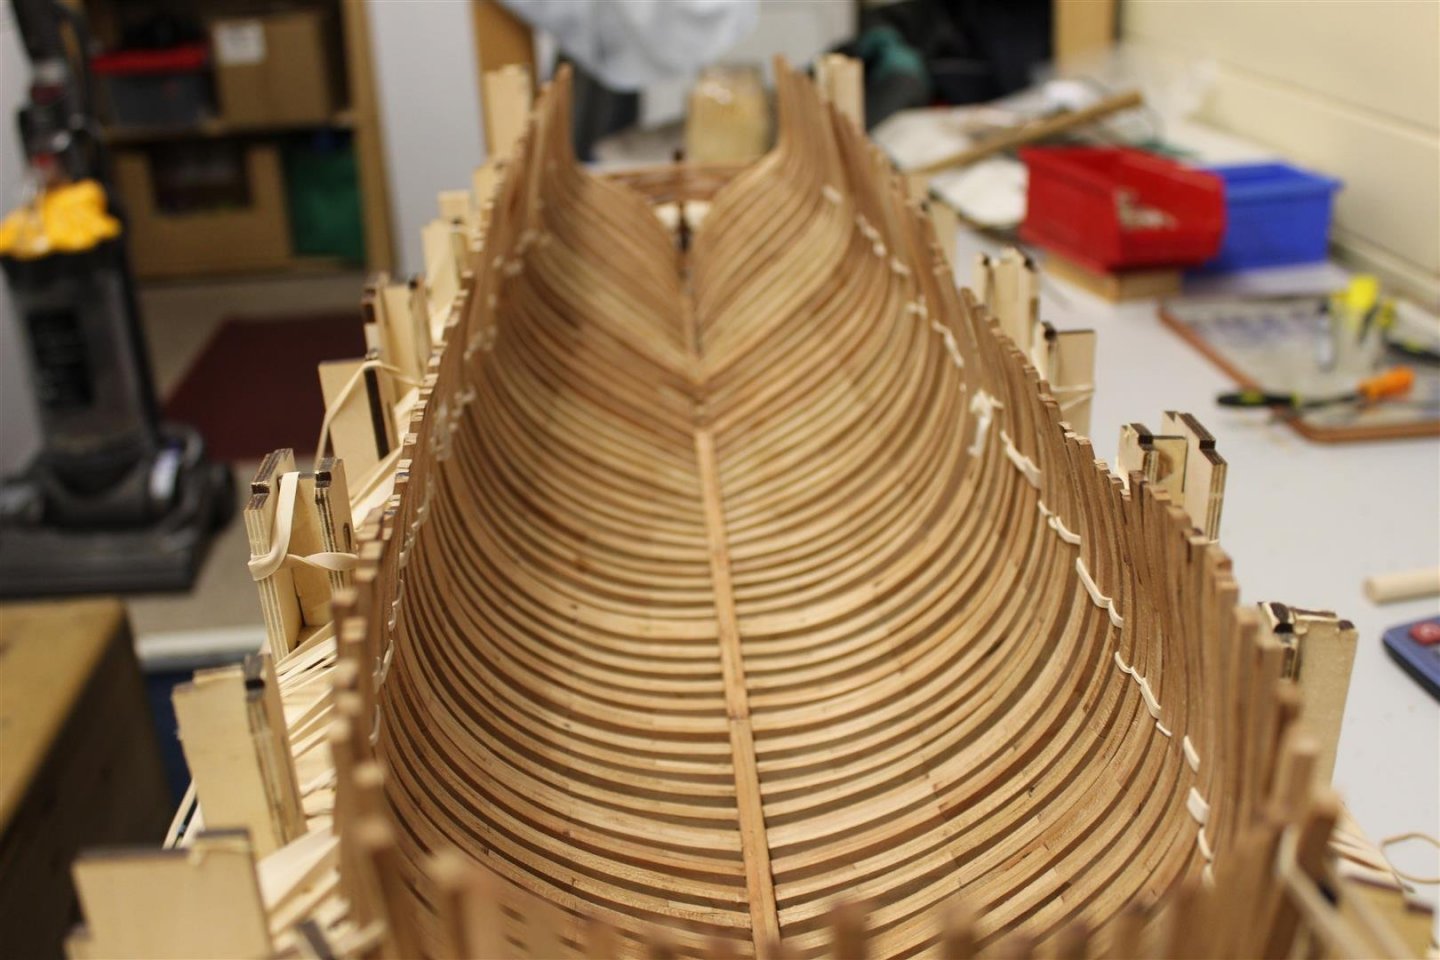
Day 24 keelson good evening everyone well i have made it this far, no where as nice and tidy as others that i have seen, but i do tend to show it as it is, and as stated many times before, i never like what i have produced, im allways wanting to do better and lol never achieving it, however the the admiral loves it and so does my doggie the upper keel. i thought would be a two minute job, as i have been test fitting as the frames went in, WRONG it has taken me hours to get a decent fit on 80% the stern one will wait until tomorrow


- 317 replies
-
- 22
-
-
- enterprise
- caf
- (and 1 more)
-
love the planking, she looks great
-
im here as well, late as usual, giving myself a break from sawdust


.JPG.83abb55d8c17b4f644d3d9dcd330fbf3.JPG)