HOLIDAY DONATION DRIVE - SUPPORT MSW - DO YOUR PART TO KEEP THIS GREAT FORUM GOING! (Only 20 donations so far - C'mon guys!)
×


Beef Wellington
-
Posts
2,249 -
Joined
-
Last visited
Content Type
Profiles
Forums
Gallery
Events
Everything posted by Beef Wellington
-
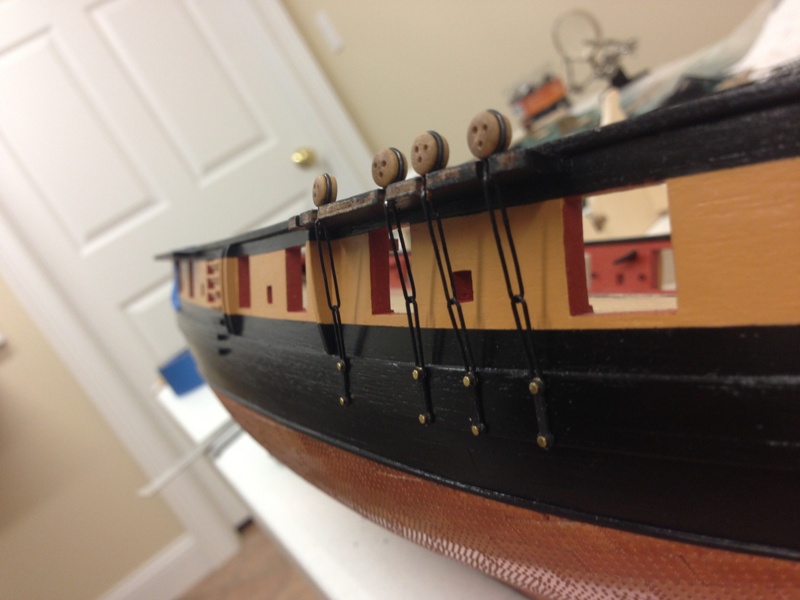
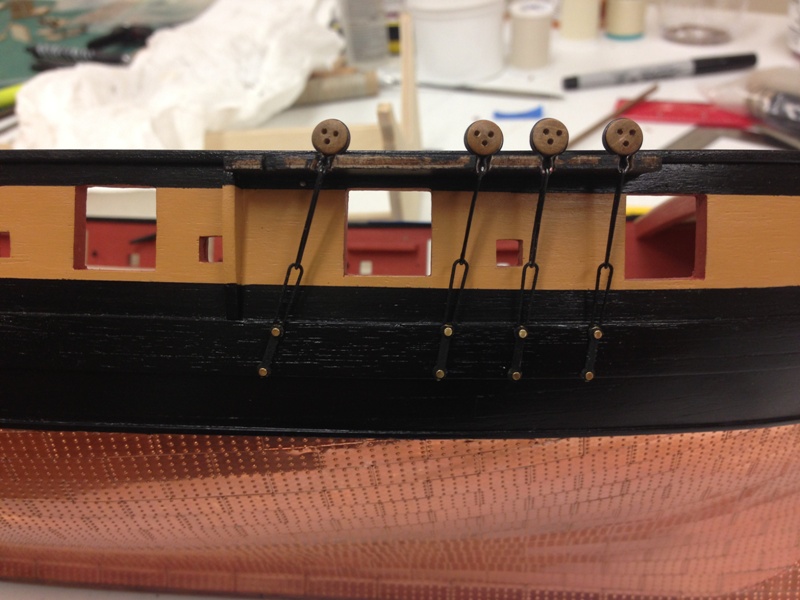
 Have been working/tinkering with the "chain problem". Decided to just plow ahead and have a go at making my own from wire. Pictures are pretty self explanatory, these are yet to be finally fixed but seem to indicate that this approach will work just fine. It illustrates the issue because the chainplate brackets have no room for movement as they are exactly the same length/width as the wale to which they attach. The lack of a gap in the chain loop looks much more authentic to my eye - the downside is that it will take much longer to complete. Photos are of the starboard fore chains.

- 800 replies
-
- 2
-

-
- snake
- caldercraft
- (and 1 more)
-
Mort - I checked when I got home, it was the .10mm line - think I'd bought it separately as there wasn't any in the kit. You're definitely right, the .25mm would be way too big.
- 800 replies
-
- 1
-
-
- snake
- caldercraft
- (and 1 more)
-
Think it was .25mm lin, it was the smallest I had at the time.
-
She looks stunning Timmo, the "small" details make such a huge difference, definitely worth the extra time and effort I'm sure it took. Combined with your precise bulkhead painting its looking wonderful. The colour combination of the wood and the blue/red/black is a real eye catcher.
-
Correct, they mount on a 'deck block', maybe easiest to see in pics below. It is a half circular block that sits just below the gunport. I did add some extra wood for the sills as you can see in following picture, this was to ensure that the gunport is the correct size, but I did not include an overhang. Hope that helps. http://modelshipworld.com/index.php?/topic/509-hms-snake-by-beef-wellington-caldercraft-scale-1-64-first-wooden-ship-build/#entry5974
-
Pete, you're correct. I forgot that the kit carronades sit on the gunport sill, so the distance is fixed as you point out. For what it worth, the carriages I'm using that mount on the deck give the same result, its just that they are susceptible to differences in deck-top of port measurement.
-
The carronades do sit up rather high, higher than cannons, and on this ship the 32lb'ers are pretty big for the ship. Its the same with the aftermarket ones as well. A lot of this gets driven right back when the gun port patterns were installed and the relative height to the deck, seems even a 1mm difference can make a huge difference with the room for the carronades.
-
Robert, BE, Kevin, Dave, Stergios - appreciate the kind words and great advice. I have run into a bit of a dilemma, that I somewhat knew was likely to be a problem from the get go. I'm trying to install the chains and have found that the PE chain 'loop' is nearly 3-4mm too short - I've re-measured the wale position against the against the plans and its not that far out (<1mm), a not unreasonable tolerance. Anyway, it is what it is so I'm trying to figure out how to address, and I can't believe I'm the first to have this dilemma. Basic geometry implies each of the chains should be a slightly different length anyway given the different slope of the shrouds and all the PE pieces are the same. Seems I have two options: 1) rework the PE piece to lengthen it, but this will mean a relative large 5mm gap in the piece which would prob look odd and stick out a mile 2) make my own loops from wire - likely most time intensive and fiddly but I suspect would give a more satisfying result Would love to hear how others have tackled this, and other possible alternatives...
-
Skippy, looking very nice! I'm with you on the carronades, I'm currently working through building 16 of the things (albeit the larger 32lb're) so I definitely recognize the work you've put into these. If you've got it down to an hour I take my hat off to you, they're looking great. Look forward to seeing more.
-
Still watching quietly Andy, shes looking very nice indeed, love the way that your shrouds are looking, you've confirmed my desire to have a go at serving when I finally get to do my shrouds.
-
Those look fantastic Len!
-
Sorry I missed the vote Timmo, the option you picked looks very sharp indeed!
-
Well, Stergios, still not too late to explore other options. I took the plunge right when I bought the kit for the same reason and didn't feel I had the skill to make the white metal carronades look anywhere near acceptable.
-
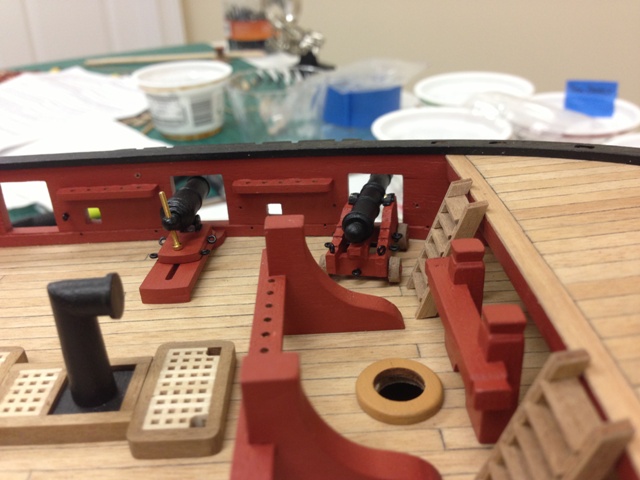
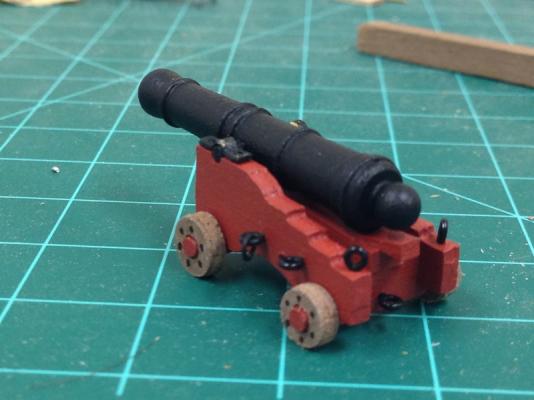
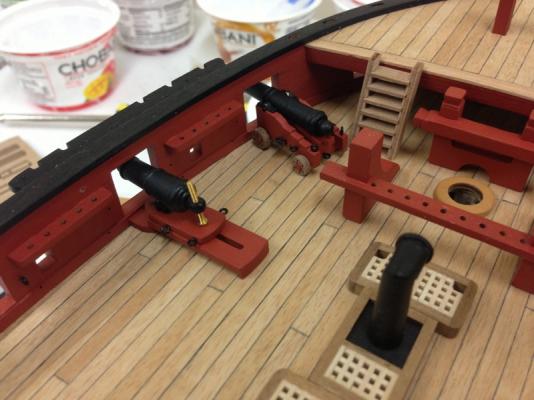
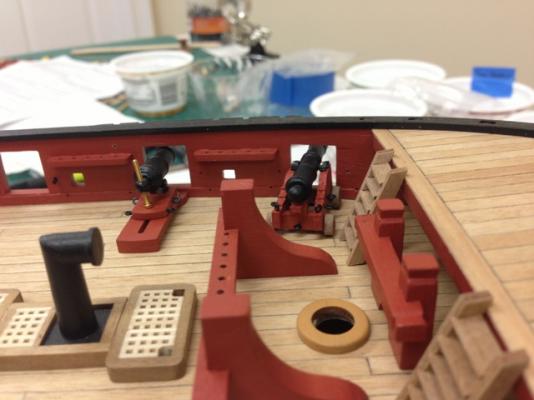
As mentioned, I wanted to arm her with the common armament at the time and deviate from the kit. I ordered a pair of Caldercraft 9lbers which are pretty much the same size as the 6lb'ers which are commonly referenced. These still need a bit of tidying up, and I'm going to try to simulate a bracket for the cap square as well as a chain for the cotter pin that I think should go into the front hole (the instructions simply call for two round headed pins) but I think something else would look better. Not sure how to do the very small chain yet...The paint finish looks a lot smoother in person, I brushed rather than sprayed and they seemed to turn out OK. Also wanted to see how these will likely sit on the deck. I plan to mount these in the foremost gunports as seems to be commonly described. You can see that its going to be pretty crowded up front as well. Its also interesting to see the lack of real difference in size between the 32lb'er carronade and the 6/9lb'er cannon. Its easy to see why the admiralty started to equip these ships with carronades given the increase in broadside weight and manpower reduction possible with the carronades. The fore ladders need some final shaping but its clear there is not a lot of room to position these.
- 800 replies
-
- 3
-
-
- snake
- caldercraft
- (and 1 more)
-
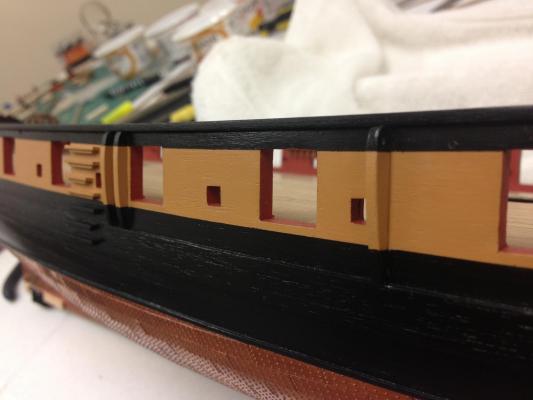
Channels fixed in place and painted awaiting chains which will be tackled soon
- 800 replies
-
- 2
-
-
- snake
- caldercraft
- (and 1 more)
-
Hi Chris, she's looking very nice indeed, I've just managed to get to your log. I 'think' you're the only Fly build here! I know you got the upgrade kit, I'm wondering if you have any idea on how the upgraded Fly kit compares to the Pegasus kit and whether there is a 'kit quality' difference between the two. Looking forward to another update "soon"!
- 69 replies
-
- 1
-
-
- fly
- victory models
- (and 2 more)
-
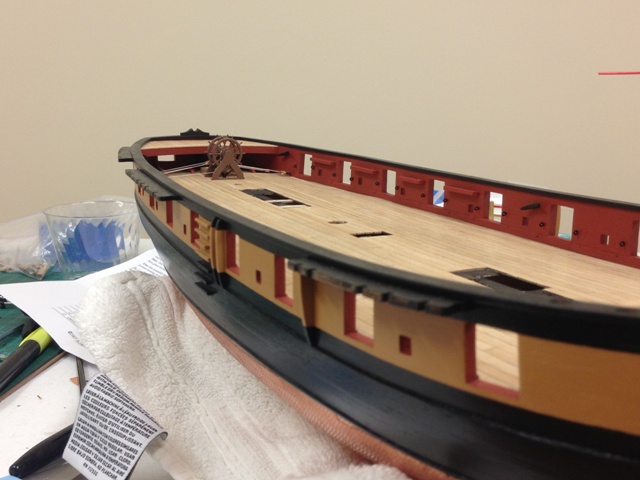
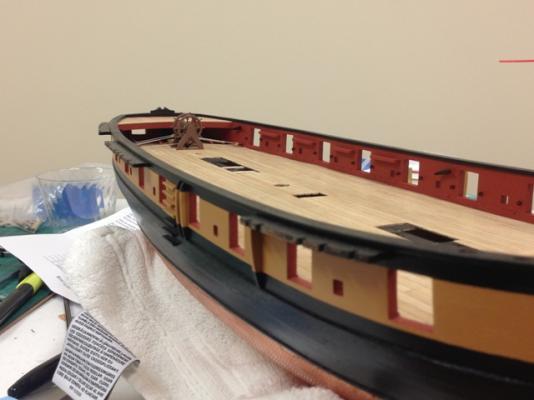
Ray, planking is looking great despite your challenges with the wood. I've read from others similar concerns over the quality of the supplied wood in CC kits, I think I just got lucky with mine, but the tanganika did need each plank to get sanded to get a decent edge. Its a shame because otherwise they seem to be high quality. You also seem to be moving on at a cracking pace Thanks for posting the side-by-side, amazing to see the size comparison between these two frigates.
- 536 replies
-
- 1
-
-
- diana
- caldercraft
- (and 1 more)
-
impressive work Jeff, nice to see some progress again. I'm curious where you got the wood from to make the cradles and the base, it looks great.
-
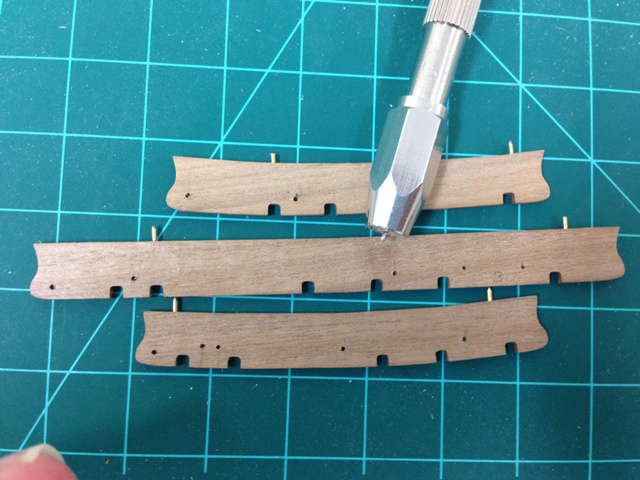
Thanks for kind words BE, Stregios, and Ferit KUTLU... All channels are completed and ready to glue. I did find that the forward channels needed little bending(very minor) to ensure that they followed the line of the capping rail which was very slightly curved, again was easily achieved with a bit of steam. I've also drilled the holes for the various ringbolts that will need to be installed on these and seems to be easier to do this now than later. I've purchased a copy of 'Rigging Period Ship Models' which illustrates these nicely and without which the instructions wouldn't be totally clear as the ringbolts are look more like accidental smudges on the plans. Main reason for adding a photo was to illustrate a very handy technique that I wish I'd tried earlier, I think I may have read this from one of DanVads posts on the old site and wanted to pass on. Attempting to show that the drillbit is set so that only 1.5mm of the bit is protruding from the pin vise, this allows the various holes to be drilled with confidence knowing that its impossible to go through the wood. Simple and effective - thanks Danny. Hopefully next photos will show attached channels which I think is the last bit of work on the hull that will require major manhandling so I can start to work on the carronades with a vengeance. I've deliberately left a few fun items so that I will have a few productive distractions as I suspect finishing and rigging 18 carronades/cannons will be a bit monotonous.

-
I think I just got it on Amazon.com, but pretty sure they are available in a lot of hardware stores.
-
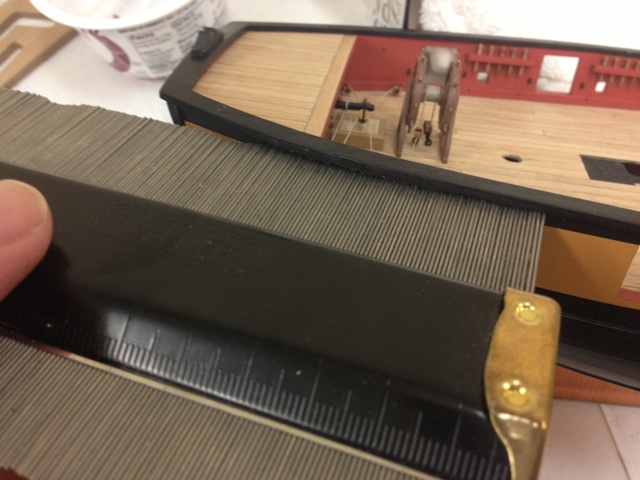
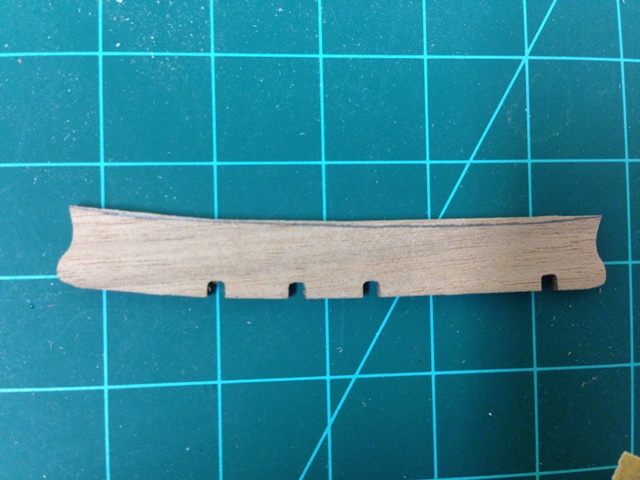
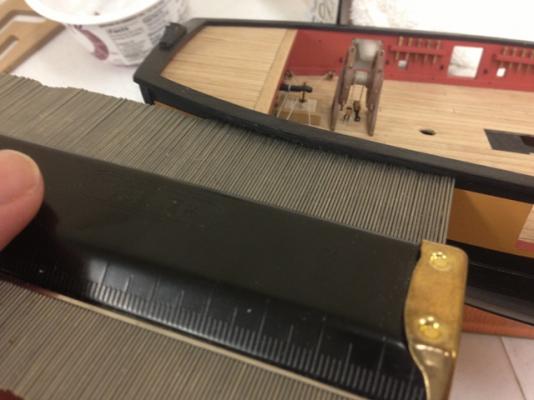
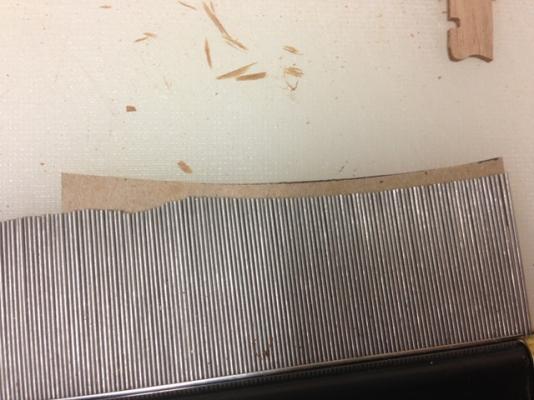
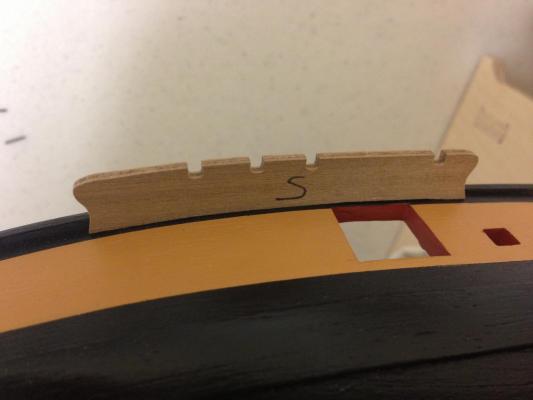
Started to work on the channels. The instructions indicate these should only require 'minor shaping', this proved to be the case for the main channels, however, the fore and aft ones needed a little more to ensure that the inner surface was flush with the hull. To get the right curvature I used the following simple technique: Used a profile gauge on the hull Transferred the curve to some card to double check the fit Transferred the curve to the channel and cut/filed/sanded Final result after pinning, these fit very solidly even without glue Overall, pretty pleased that this proved to be easier than I had expected.

- 800 replies
-
- 4
-
-
- snake
- caldercraft
- (and 1 more)
-
Thanks BE - I hope they look OK as I'm not sure what the alternative is, 2mm single blocks could work and I have some just in case, will cross that bridge when I come to it! Quick picture of the fenders and the chesstree, found these to be a real pain to paint and makes me even more impressed with the larger scale kits going with the Nelson Chequer that has a lot more ornamentation than the Snake. The relative simplicity of the Snake's lines seems to highlight even very minor mistakes. These pieces did take quite a bit to fit properly as the hull does have slight curvature and it was important to avoid any gaps as they really show with the yellow ochre. I've also drilled the hole for the mainsheet tack as this will be made much harder by the foremast channels getting in the way.
- 800 replies
-
- 1
-
-
- snake
- caldercraft
- (and 1 more)
-
HMS Havick?
-
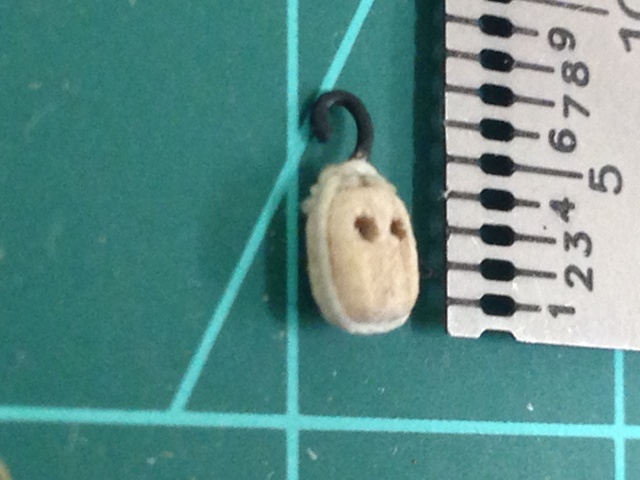
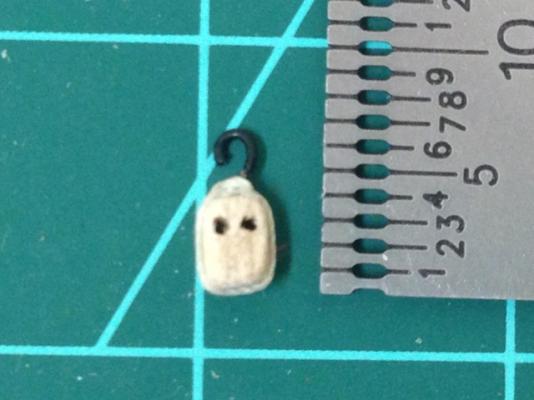
Played around with the hook and strops on the block. The wire is 26 gauge and the line is 0.1mm Caldercraft hemp. I think in real life hook would protrude more, but I think it needs to be reduced a bit to allow for the short tackle length and should look OK at this scale.

- 800 replies
-
- 1
-
-
- snake
- caldercraft
- (and 1 more)
-
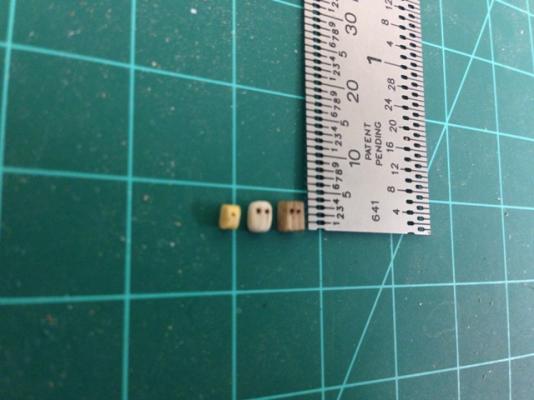
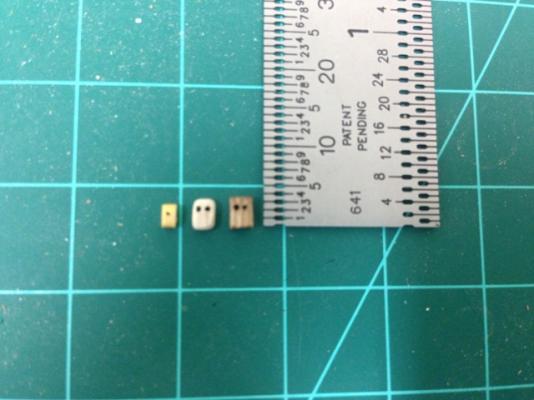
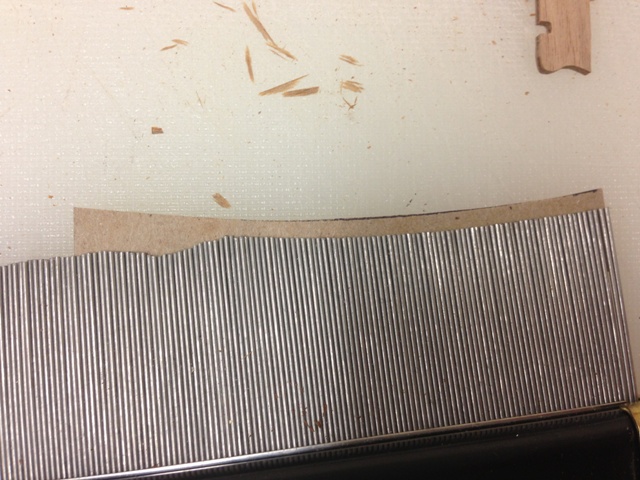
Here are the results of my experimentation with the block sander. I the photos below are shown (left to right): Untouched Caldercraft 2mm single block (natural) Caldercraft 3mm double block that has been in the block sander (walnut) Untouched Caldercraft 3mm double block (walnut) Apologies for the photo quality, an iPhone is not great for these small objects. The block sander definitely makes a big difference to the appearence of the blocks, and in person there is more of a difference. I could probably put this in for a little bit more time and may do that before I commit so they all end up the same. Note that both of the 3mm blocks are walnut, the sander lightens up the surface. The block sander I used can be seen at http://www.modelexpo-online.com/product.asp?ITEMNO=MS27 . I'm sure there are better, but seems a pretty cheap and cost effective simple approach.