MORE HANDBOOKS ARE ON THEIR WAY! We will let you know when they get here.
×


vossiewulf
-
Posts
1,477 -
Joined
-
Last visited
Content Type
Profiles
Forums
Gallery
Events
Everything posted by vossiewulf
-
 Yes, plans and instructions vary wildly in quality from wrong and internally inconsistent to non-existent to 100 page instruction manuals and 12 full sheets of plans. Knowing the quality of those items is very important before you buy. The most consistently good in this respect is Model Shipways, their plans and instructions are always quality. Otherwise even within one manufacturer's offerings, some kits can have good instructions and the next is crap. And the ones that often get the crappiest instructions are the beginner level kits where they're trying to keep costs down. Details will be a bit tricky due to Golden Hind's 16th century origin, we don't have good plans or even accurate sketches or paintings of ships, artists during this period did not think perspective and accuracy were important. I recommend you pick up Historic Ship Models as he takes each major functional element of a ship and shows versions of how they looked from the earliest records onwards. Otherwise with a ship this early your best best is to search the build logs here for similar period ships, and also in the gallery of completed kit and scratchbuilt ships. Starting from the point you finish your second planking, the order in which you do things becomes increasingly important, and it's critical to do things in the right order with rigging. Very basically, finish the deck planking and bulwarks and attach anything to the bulwarks that belongs there, drill holes in the deck for any eyebolts, and then finish the deck and bulwarks. After that finish has dried, add the eyebolts to the deck. The deck furniture should be assembled, prepped and finished off-model and only placed on deck when absolutely necessary (just prior to doing the guns). Guns are the same, finished off-model and put in place after deck furniture and then gun rigging is added.
 -
The colorful geometric shapes were an at least English style of the time. See below a review of Revenge, Drake's ship during the Armada campaign, and a build log from Xodar who is working on the Revenge. It would look a bit odd to have an English ship of the period not have some geometric styling, so don't rule out the paper. Or at least don't rule out the concept of the paper, if you don't like the quality they've provided, you get a graphics program and make and print your own, either on paper or white/clear decal film. You also need to decide the level of detail you're going for in your model. You can work quickly building just what the kit specifies, or you can make improvements and corrections and add missing detail until most of the kit parts are thrown away, or somewhere between. But it's a basic specification of the build to which you need to be consistently working.
-
Looking at it with an admittedly inexperienced eye, I assumed when looking at that Falconer drawing that he was showing an alternative arrangement for the gun tackles, and the breeching rope was hidden for clarity. It seems pretty straightforward, there is no way that light line is going to stop that big gun on recoil, so we have to be seeing an incomplete rig.
-
You'll learn something useful from every book you buy, or at least that is my experience, and it's why most modelers have a whole slew of books. Look on Amazon for ship modeling in books, anything with good reviews will be worth buying. This includes books specifically about rigging, which is a subject in and of itself. The easiest kits I'm aware of to build are the Master Korabel kits from Russia (you could even start with a small rowboat), every single part is laser cut so really it's mostly just assembling wooden parts. A normal ship kit will have a recognizable keel and bulkhead formers, but is otherwise a pile of sticks and you get to make most of the parts. Most modelers like that challenge but it can be an intimidating place to start.
-
The answer is... yes With ship modeling, everyone agrees that you should get the structure and the rigging as perfectly accurate as you can. However, when it comes to finish, including whether you paint it, paint parts of it, or none of it, and what glossiness clear coat you use, it's all up to the builder. Some contemporary models were all natural wood, others were elaborately painted as a line ship, even in the 1700s it was a matter of taste. That said, most people go with satin clear coats. I am going with matte, because I painted some of my ship and glossy paint on a scale object looks plastic to me. Poly is of course easy to work with, but I find its clarity poor with anything but pure gloss, so I went with old-fashioned nitrocellulose lacquer. Your mileage can and probably will vary. You can also get very good results with various oil finishes. WRT stain, many people use standard Minwax stains. I use alcohol-based aniline dyes from a luthier shop, dyes are molecular color whereas stains are suspending pigment in a medium and to one degree or another stains obscure the grain. You can go quite dark with dyes and still have perfect fidelity in the grain.
-
Planking Clarification
vossiewulf replied to Pond's topic in Building, Framing, Planking and plating a ships hull and deck
If you want a dissenting opinion, I found much of current planking methods complicated and tricky, more so than I felt it needed to be, so I came up with my own simplified method. The only requirement is a very sharp knife and the ability to cut following drawn lines with said knife. Short version is that I'd do all the bending/twisting required for each plank, but only vaguely taper them, just enough so I wouldn't be cutting away too much waste with my knife. I then fit the plank and once set, I used narrow vinyl pinstriping tape to lay out a fair line from the plank's widest to narrowest point, and used a .3mm mechanical pencil (that I sharpened to an extremely fine point with 800 grit sandpaper) to mark a clear but very fine and therefore accurate line along the tape. Remove the tape, cut away the waste with a knife, making sure to keep the knife exactly 90 degrees to the hull surface. I then used a piece of spring steel about .012"x.5"x6", covered on one side with PSA sandpaper to finish off that cut, again making sure to stay exactly 90 degrees to the surface. By doing that, the perfect 90 degree edge of the factory-sawn next plank already fits, no adjustment necessary- just vaguely taper it on the side you'll trim away and do the required bends and glue it on. Also, both for fit and wood movement reasons, I did not put any glue on the edges of my planks. I found it went quickly once I started doing it that way, and the fit was good enough that I have a hard time figuring out how many planks are there.
-
Planking Clarification
vossiewulf replied to Pond's topic in Building, Framing, Planking and plating a ships hull and deck
Expect bleeding The best way to think about planking is that there are a number of bulkhead stations you have to plank, the profiles of which are different from each other, and therefore the line following the profile of each bulkhead from deck to keel is different for each station. In short, you have a different width to plank at each bulkhead, so your planks must be the right width at each station for one plank to manage all. In cases where one plank can't manage the stretch or compression (planks should never be tapered to less than half their width), you either use drop planks (where you end a plank early) or stealer planks (where you add a short plank segment). If you need drop planks or stealers, look up how they were done first, practice varied among the builder nations. Other than tapering, the three other factors you need to control are 1) face bend, the basic bend required for the plank to say curve around the bow, 2) edge-curve, you can either edge bend your planks or spile them, and 3) twist. Both in the bow and the stern you'll have planks that will fit much more easily if twisted with steam/heat first. If you can accurately bend/spile/twist planks to hold the form you need, then your planking will go pretty smoothly. -
If you want to do WWI, you need to visit Wingnut Wings. They are not cheap but IMO they make the finest plastic models available today, perfectly molded and engineered and designed by people who definitely know what they are talking about (my first love is WWI aviation), I have more than a few WW models sitting in a closet waiting for the right time.
-
Congratulations Bob, I hope the next project provides more enjoyment for you. Despite your corner-cutting, she is still a beautiful model. Maybe consider doing something different than a ship for a change of pace?
- 359 replies
-
- 4
-

-
- prince de neufchatel
- model shipways
- (and 1 more)
-
If you decide to go with CA, the method I've been using for many years is to apply the glue in dots. One, no smearing glue around, and two, it increases the open time on the CA significantly. With some practice it's pretty easy to size the dots and space them correctly for continuous glue with no squeezeout.
-
Filler and glues are almost matters of religion. There are numerous talc-based fillers, usually with some wood fibers, all of which work fine but they also dry out in whatever container they are in probably before you have call to use them again. There are some petroleum-based ones like Plastic Wood. Lots of people use old-fashioned Elmer's wood filler with no complaints. Best to try a couple and see which you prefer. Ditto with glue. Most people use standard yellow PVA glue, but a minority (like me) use CA for most things, I've used it almost exclusively in my build and in lots of aircraft I built before, because I like not having to solve endless clamping problems. However CA is also consequently very unforgiving in that you really only get one chance to put a piece down in the right spot. If you want time to adjust and fiddle and you don't mind needing to clamp everything, then PVA is a better choice.
-
Well that was a fast and apparently painless first planking and it looks like you did a very good job. Usually there is considerably more angst and anguishing and questions the first time someone planks a hull. God knows I was thrashing around trying to figure out a process that worked for me. I've switched back and forth between wood and metal work for most of my life, neither is easier, they are just different. You can work to surprisingly high accuracy with wood also, if you're willing to invest the time in getting the right tools and making sure they operate as well as they can. One thing I will say about wood is when it comes to glue, less is more. You look like you're not using an excessive amount of glue already, but the tightness of your joinery is very much controlled by how much glue is in the joint, too much and you'll have a visible glue line no matter how much clamping pressure you have. In fact to make my planking fit better, I used no glue at all on the edges of my planks.
-
Looks like the waterway piece needs to be bent to follow the curve of the deck. They're specifying 3/16" into the deck area for its full run, and since the line it's following is curved, it must be bent to follow. And according to the instructions the waterway should go all the way to the bow, and therefore you have to cut notches in the outside face of the waterway for the timberheads sticking up on the first three bulkheads, I assume they are called B, 1, and 2 from the instructions.
-
Byrnes Table Saw
vossiewulf replied to Jorge Hedges's topic in Modeling tools and Workshop Equipment
Search the forum, there are lots of threads. -
Start a build log, you'll get lots of help, and adding photos and/or plans to your posts will help a lot too, as it is now I have no real idea what the problem is. The waterways should be a narrow molding running along the deck/bulwarks joint and there were many different profiles used, but all were sloped inward and generally looked like a right triangle in profile.
-
STRINGBAG! That's what the crews called them. Famous for the Attack on Tarranto and more so for damaging Bismarck's rudders, making it impossible for her to make Brest and escape her pursuers. By far the best version of the whole Bismarck adventure is the Dogfights episode. Look for the part about the Stringbags' attack and the interview with the pilot that hit the Bismarck's rudders. Very nice kit, should build into something nice to have on the shelf.
-
MONTAÑES by Amalio
vossiewulf replied to Amalio's topic in - Build logs for subjects built 1751 - 1800
Yes, everyone is amazed because as far as we can tell he never, ever does anything that's not flawless. Hence my hypothesis that he's not actually human, and has multiple prehensile arms and is orbiting Saturn. It would explain a lot. -
Once again, love those sails. That's how I like sails on a ship model, she looks like she's going to shoot off the end of the workbench at any second. Maybe you should drop a few taut anchors from her to the model base, to help explain to viewers what's stopping her from busting out of her display case.
- 1,208 replies
-
- 7
-
-
- great republic
- clipper
- (and 1 more)
-
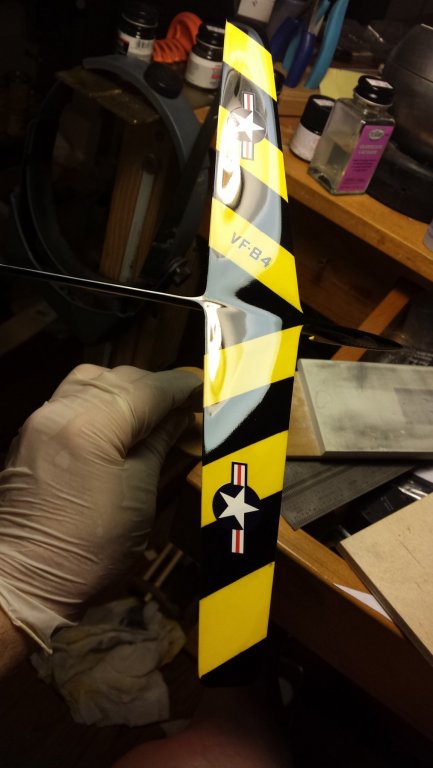
The only problem with spray cans is they distribute paint in firehose fashion, nearly impossible to get a light wet coat like you want with them, it always seems to turn into a very heavy coat for me. So I'd recommend an airbrush if you have one. If you don't, go with the spray cans and try to use as much control as you can. Any paint will work, and preferences vary even more than glue types people use. First, sand the hull out to 400 grit. Spray primer, give it a week to dry. Take 1500 grit and go over everything lightly until you have a nice smooth base. If you burn through the primer in a few places, not a big deal. Then paint and sand, and clear coat, sand, and final clear coat. Sanding between coats is very important to a good level finish. Since you want a very smooth glossy finish for a racing boat, you can spray several clear coats, sanding between. After the third coat you should be able to fully level the surface. Once the surface is levelled, start using finer and finer sandpaper, working up to 2500 grit or so. If you want even more gloss, you move from there to polishing compounds, either for car finishes or jewelers have all sorts of polishing compounds also. With a little patience, you can make things quite shiny. Below is a glider I made for a friend's son using these methods.
-
MONTAÑES by Amalio
vossiewulf replied to Amalio's topic in - Build logs for subjects built 1751 - 1800
Seriously, how do you get the lines to drape like that? Even the line-draping is ridiculously perfect. As is the joinery, as usual. -
Dave, in case your lead doesn't work out, an easy method is to find a local custom cabinet/furniture shop and give them a call. They'll know everything about local wood suppliers and who buys and sells what. That will probably quickly point you to your best options.
-
Very nice solutioning on the top piece Michael, and extremely clean metal work as usual.
-
That line has been SERVED with a 140mph ace to the backhand side Beautiful work.
-
(Artist hat on) All of them are composed and executed well with good dynamic range, and they just feel lively and have good motion to them. I'd buy prints
-
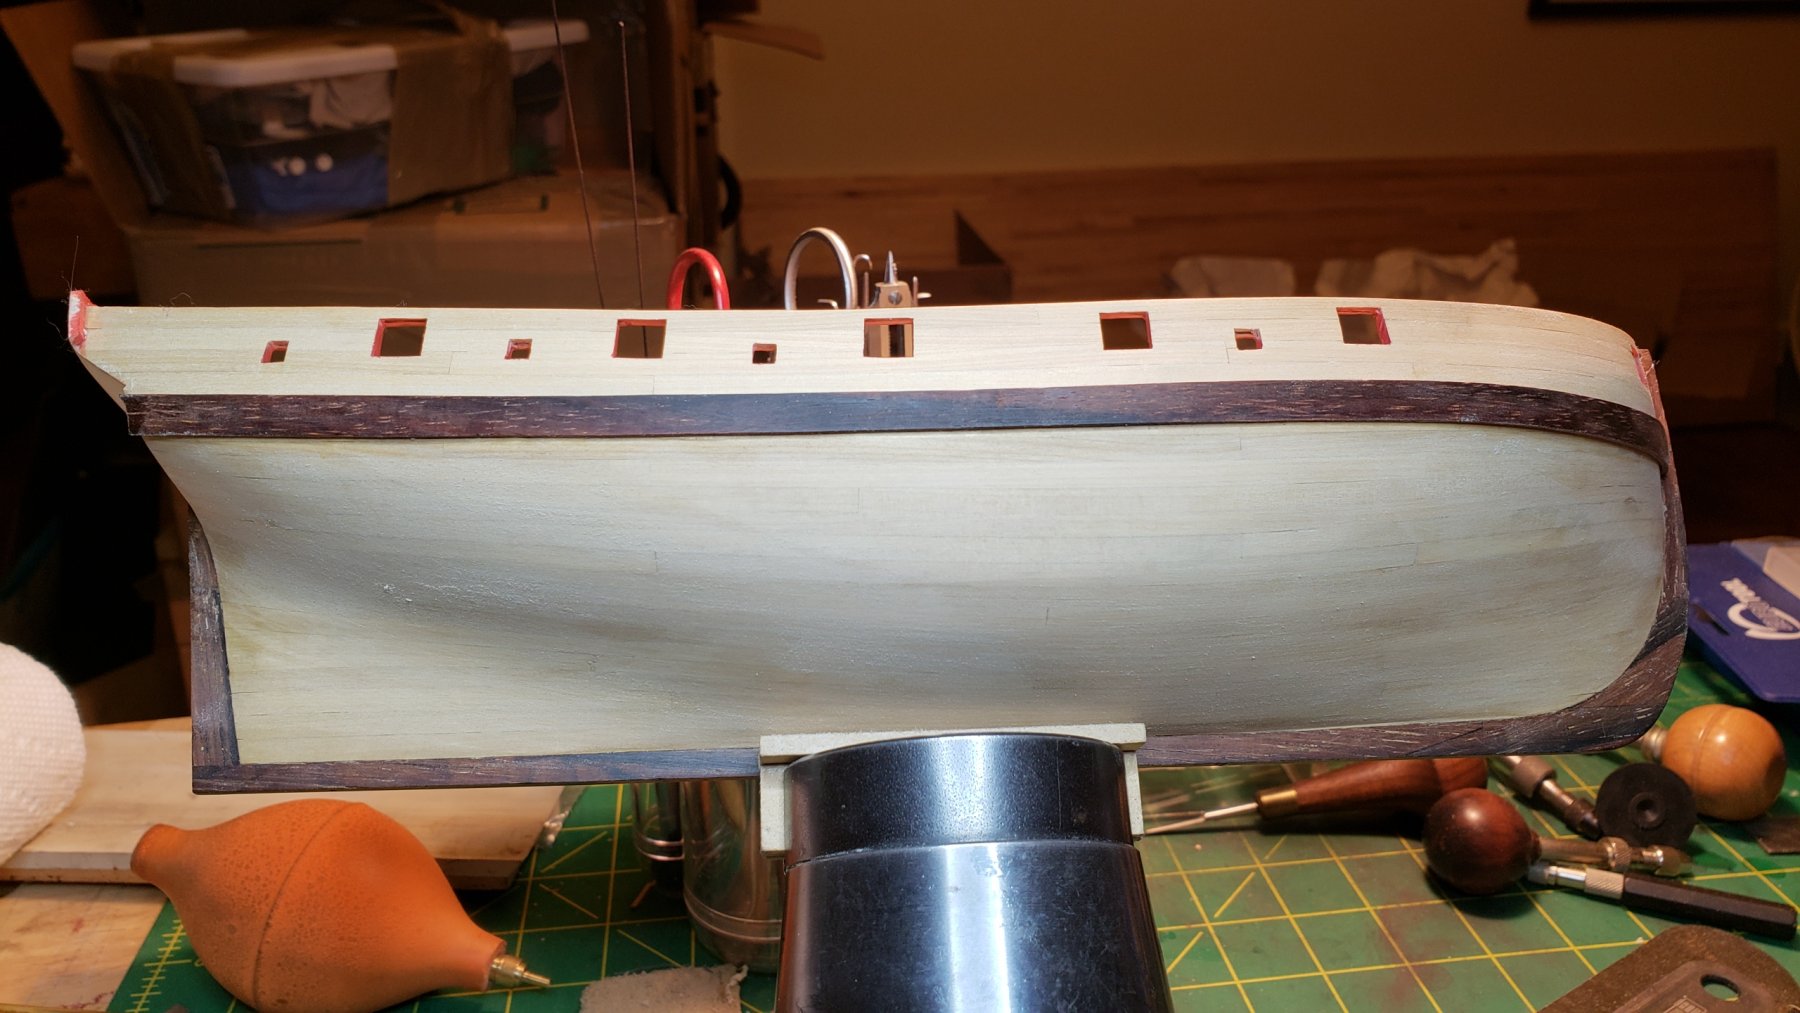
Been poking at LN every evening, but progress hasn't been stellar, although my boxwood for the masts and yards arrived, and I'm waiting on a couple more packs of 20.75mm guns from Chuck; it turned out they make much more convincing 3 pounders than the kit parts. Unfortunately that meant having to use the metal carriages, as you'll see below. First though, I decided all of the satin finishes I have are too shiny, I just don't like shiny much on scale objects that have paint. I could probably go with satin for a pure wood finish ship but with paint, it starts to look plastic to me, so I decided to go full matte and in the end settled on Tamiya flat clear lacquer, I decanted it from the spray cans and sprayed it with an airbrush. Since this is intended as the final coat for the hull, I spent several hours sanding everything down one more time, trying to reach as much as possible. Here you can see the hull bottom and the hull side sanded with some 1500 grit. The deck and fixtures were also hit with a large variety of sanding sticks and things to reach everywhere, the deck is very reasonably smooth now. And now finished. I'm much happier with this. Working on the rudder, the pintles were made with carbon fiber rod epoxied to annealed brass strips. The gudgeons are made again with annealed brass strip, bent into a tight U shape and soldered to a brass tube. Various stages of making the rudder. I really didn't enjoy this, it reminded me why I don't like using brass unless you're going with merchanical connections, because the stuff never glues worth a damn. I've tried lots of glues and epoxies, and never found anything that won't pop free if you say BOO to it. For this and smaller scales, I won't be using brass moving forward. The rudder bolts are carbon fiber, and turned into real bolts, going through both sides as I drilled the bolt holes once the strip was already glued in place. Except for the bottom strip, which popped off in that process and had to be re-glued. The gun carriages have had their train tackle holes drilled out, casting plugs filed off, and seams sanded down. I then shot some Tamiya red primer over them, and drilled holes on each side for eyebolts for the breech rope and the gun tackles, but I don't think I will fit the latter. Next is to finalize and paint and finish rudder, ditto gun carriages, then I start turning the masts.
- 714 replies
-
- 14
-
-
- lady nelson
- victory models
- (and 1 more)