MORE HANDBOOKS ARE ON THEIR WAY! We will let you know when they get here.
×


JerryTodd
-
Posts
873 -
Joined
-
Last visited
Content Type
Profiles
Forums
Gallery
Events
Everything posted by JerryTodd
-

USS Columbus 1819 by threebs - 1/72 scale
JerryTodd replied to threebs's topic in - Build logs for subjects built 1801 - 1850
Some threads you have to go though 50 "atta-boys" for every 1 post by the builder. It's like Cracker Jacks that's all popcorn and no peanuts. I like the likes and wish more forums supported it that currently don't. Besides, it tells you who "liked" your post, so except for MTaylor, who likes everything there's no robots. -
American sailing warships with no plans or records
JerryTodd replied to CharlieZardoz's topic in Nautical/Naval History
A photo I took of a painting of Macedonian in the Naval Academy
- 401 replies
-
- 6
-

-
- John Adams
- Alliance
- (and 3 more)
-
American sailing warships with no plans or records
JerryTodd replied to CharlieZardoz's topic in Nautical/Naval History
I look forward to that thread Tal- 401 replies
-
- 2
-
-
- John Adams
- Alliance
- (and 3 more)
-
A couple of sources for functional turnbuckles/bottle-screws Model Yacht Fittings: http://www.modelyachtfittings.com/Pages/default.aspx RBModel: http://www.rbmodel.com/index.php?action=products&group=019
-
Psssst, hey Tim, have you seen your private messages here?
-
Nice sticks
-
Ed, you are fast replacing Crabtree as my favorite ship modeler
- 3,618 replies
-
- 2
-
-
- young america
- clipper
- (and 1 more)
-
American sailing warships with no plans or records
JerryTodd replied to CharlieZardoz's topic in Nautical/Naval History
This was the best I could manage of the image on the wall of the Mariner's Museum in Newport News VA.
- 401 replies
-
- 5
-
-
- John Adams
- Alliance
- (and 3 more)
-
Sewn, glued, or soldiered, the boltrope does not attach the the knife edge of the cloth.
-
American sailing warships with no plans or records
JerryTodd replied to CharlieZardoz's topic in Nautical/Naval History
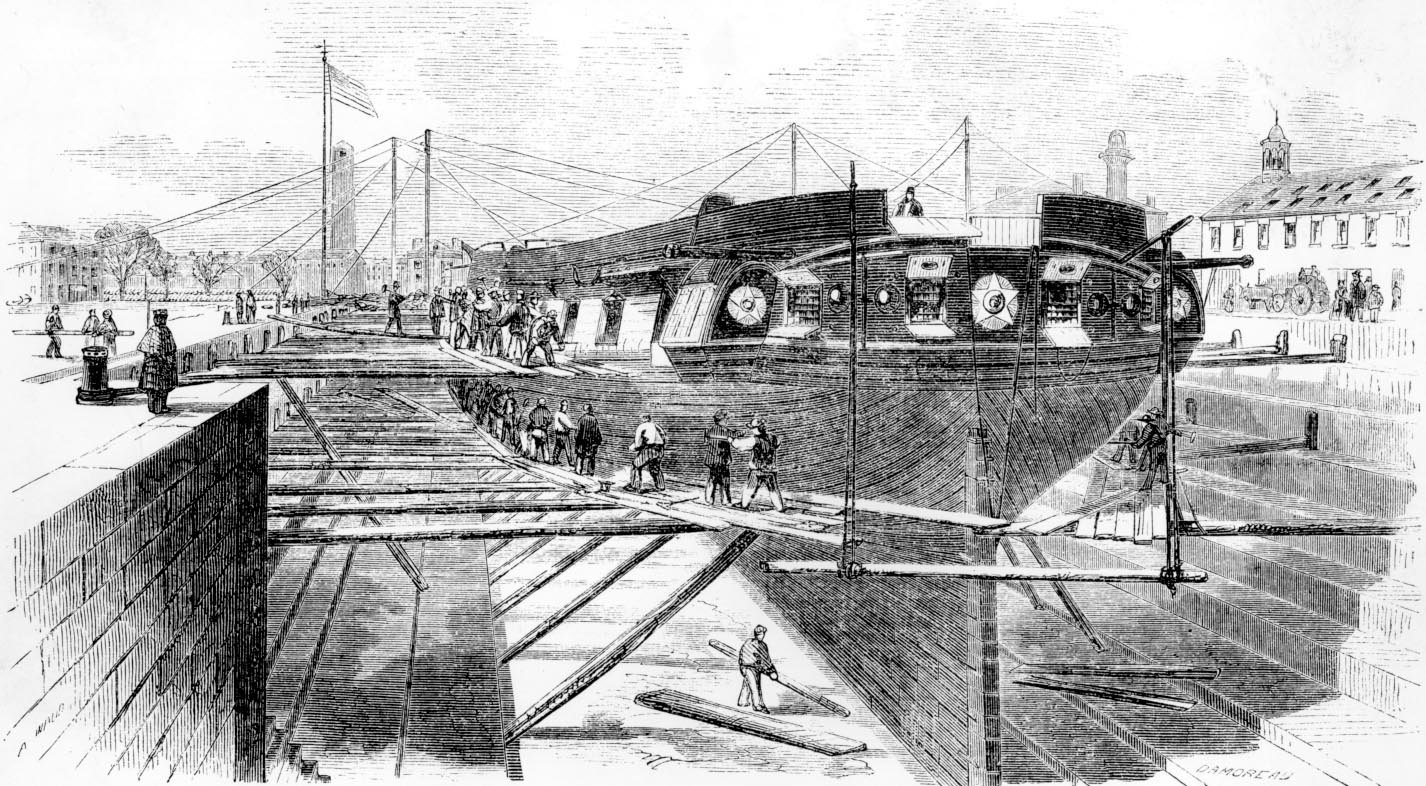
Constellation reached Fortress Monroe on Christmas Day 1864. In January 1865, the men whose enlistments had expired were "paid off" and discharged, the remainder of the crew was transferred to the frigate St. Lawrence, and the officers sent on leave to await orders. Constellation finished the Civil War as a Receiving Ship, first at Norfolk, and later at Philadelphia, until 1869. This AR Waud sketch is propably of her at Norfolk, if it's her at all. The stern is wrong and should look much like the frigate's in the storm, except ROUND. Here she is in 1859 being refitted before the African cruise
- 401 replies
-
- 5
-
-
- John Adams
- Alliance
- (and 3 more)
-
http://todd.mainecav.org/model/sail-making/
-
American sailing warships with no plans or records
JerryTodd replied to CharlieZardoz's topic in Nautical/Naval History
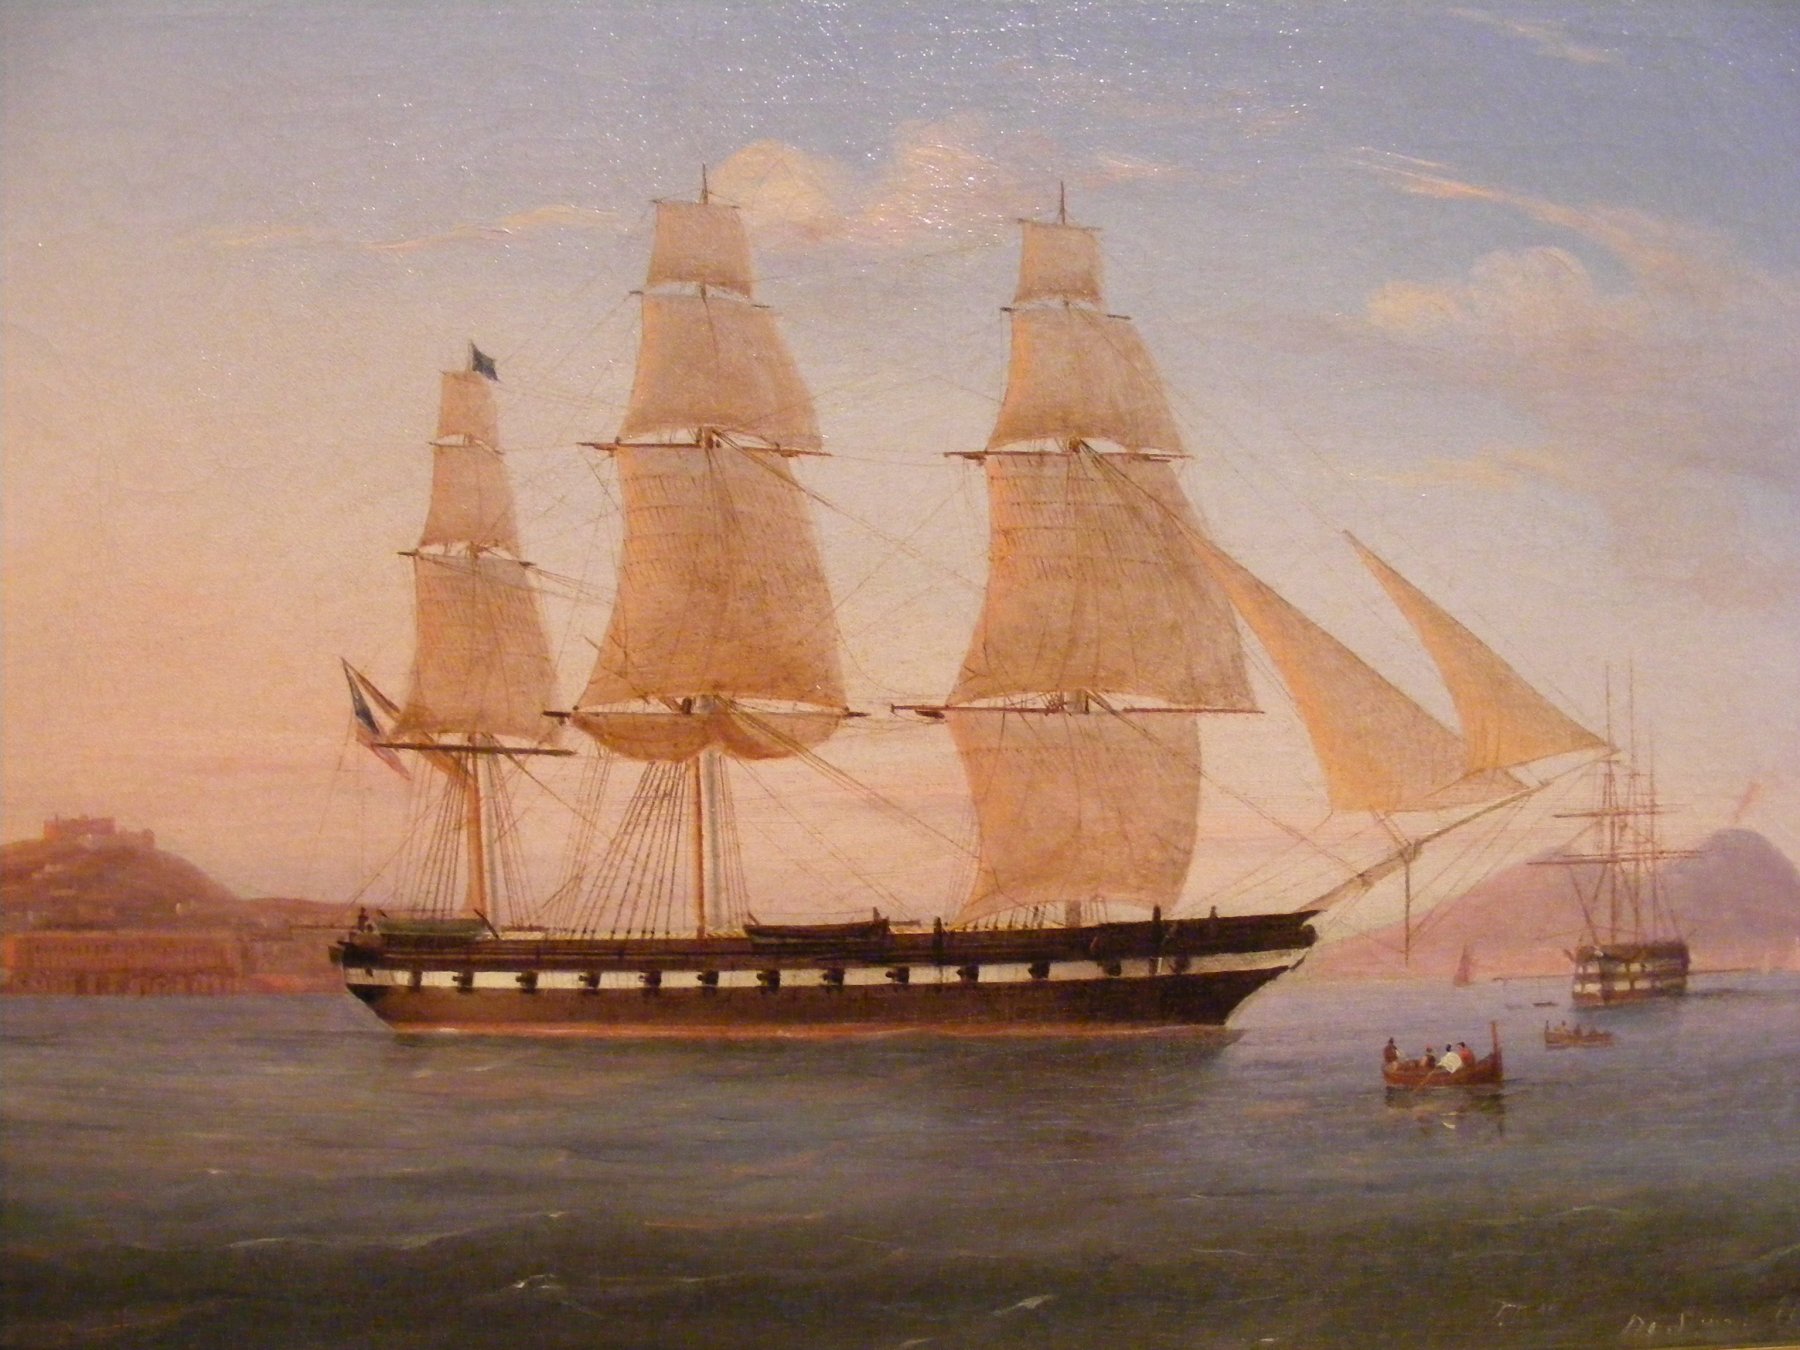
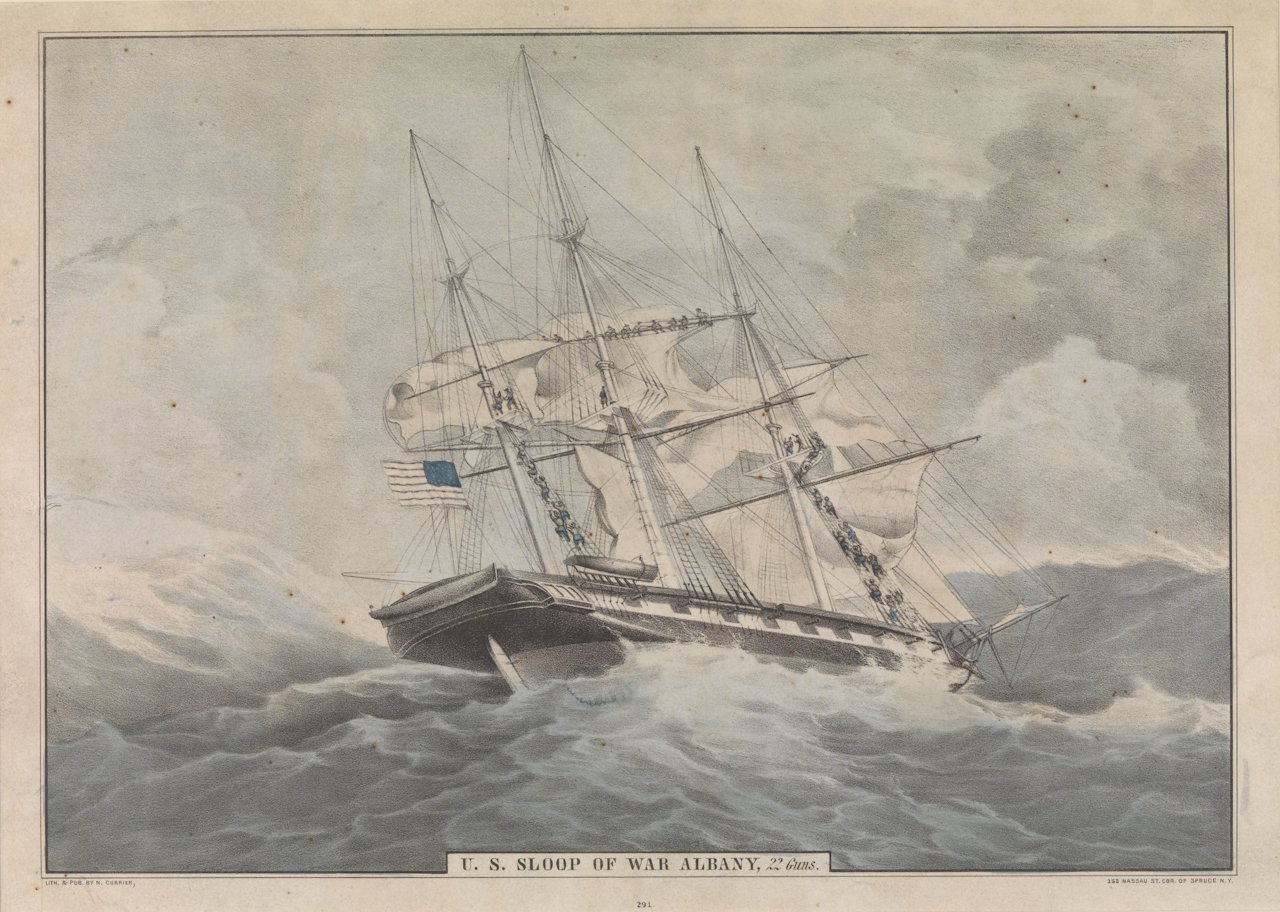
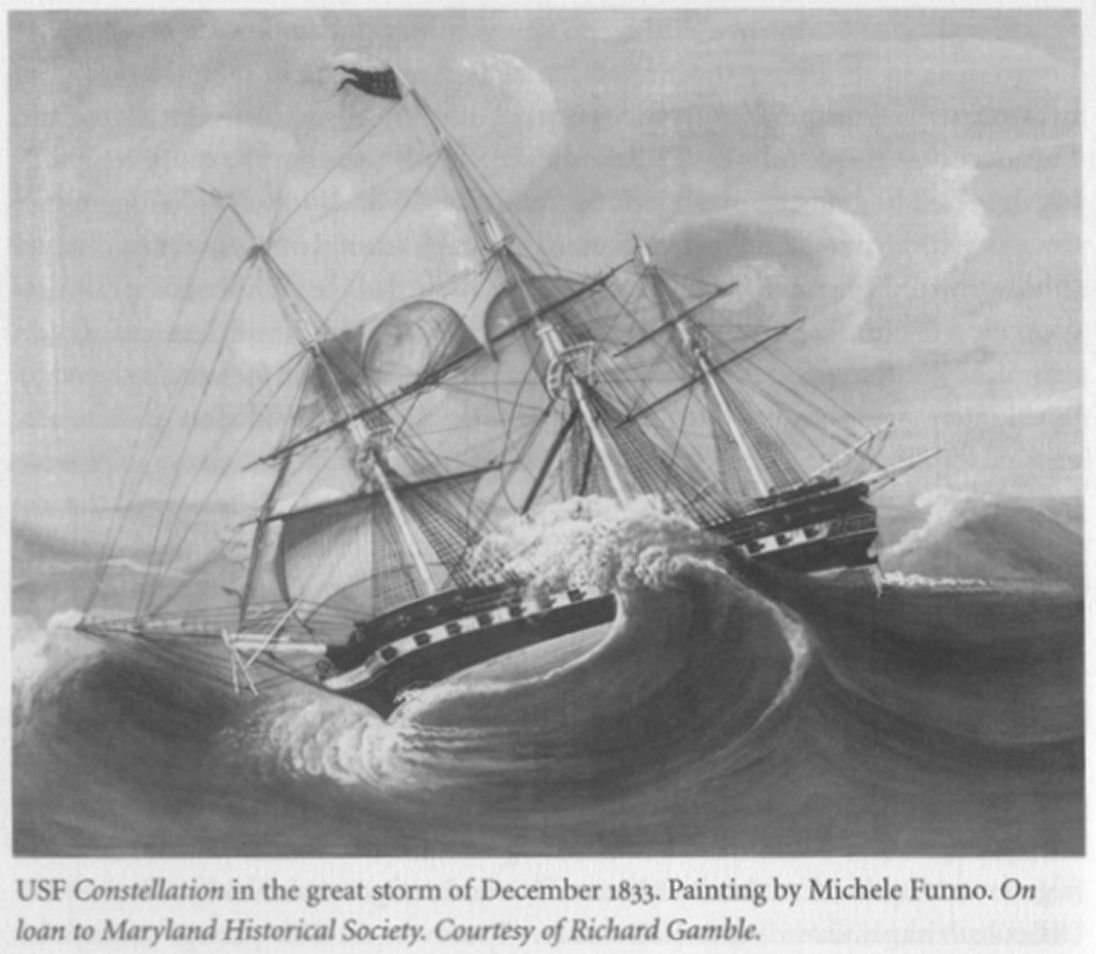
When I first saw the Constellation in the storm of 1833 I thought, wait, that's the Albany But looking closer at the image it obviously was a frigate, and I realized it was another angle of the same subject Still looking for a better image of this painting of Constellation at Naples, as it's the only one I know of that shows any of her stern. It's credited to the Naval Historical Foundation who forwarded me to the Washington Naval Yard, who said it was a photo copy of the box art from a plastic model kit. (it's not)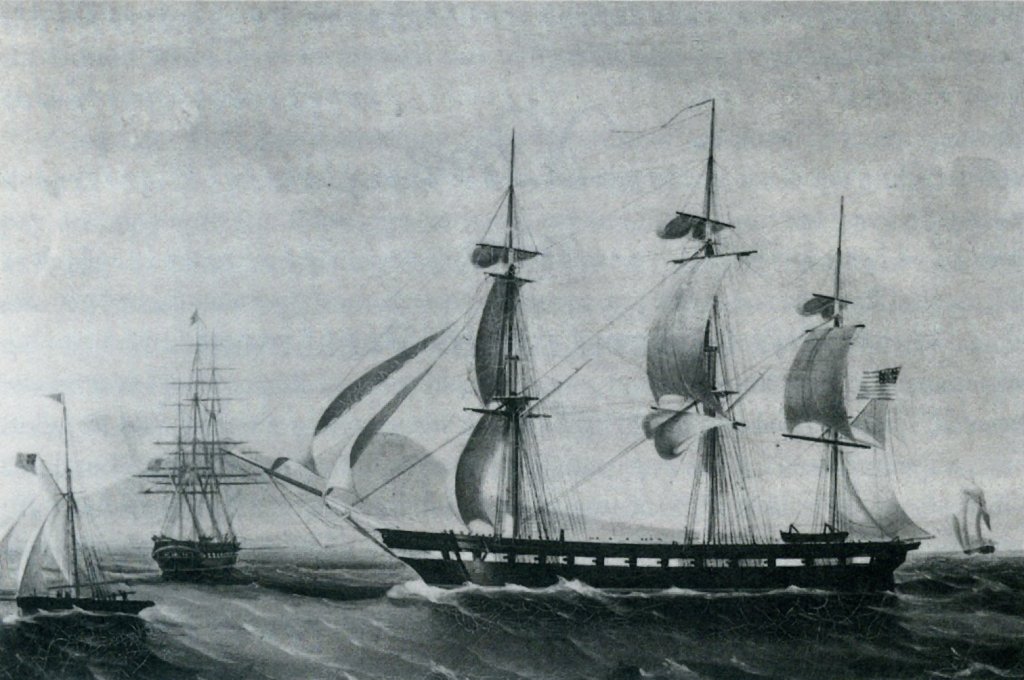


- 401 replies
-
- 4
-
-
- John Adams
- Alliance
- (and 3 more)
-
It's interesting; I noticed that the prototype model of the brig Syren has boomkins, but I've see several photos of completed models of that kit that do not, and the tacks, if rigged, were lead to the cat-heads. If the sail-plan is checked, the cat-heads would not pull the clew forward enough on Syren either.
- 648 replies
-
- 2
-
-
- niagara
- model shipways
- (and 1 more)
-
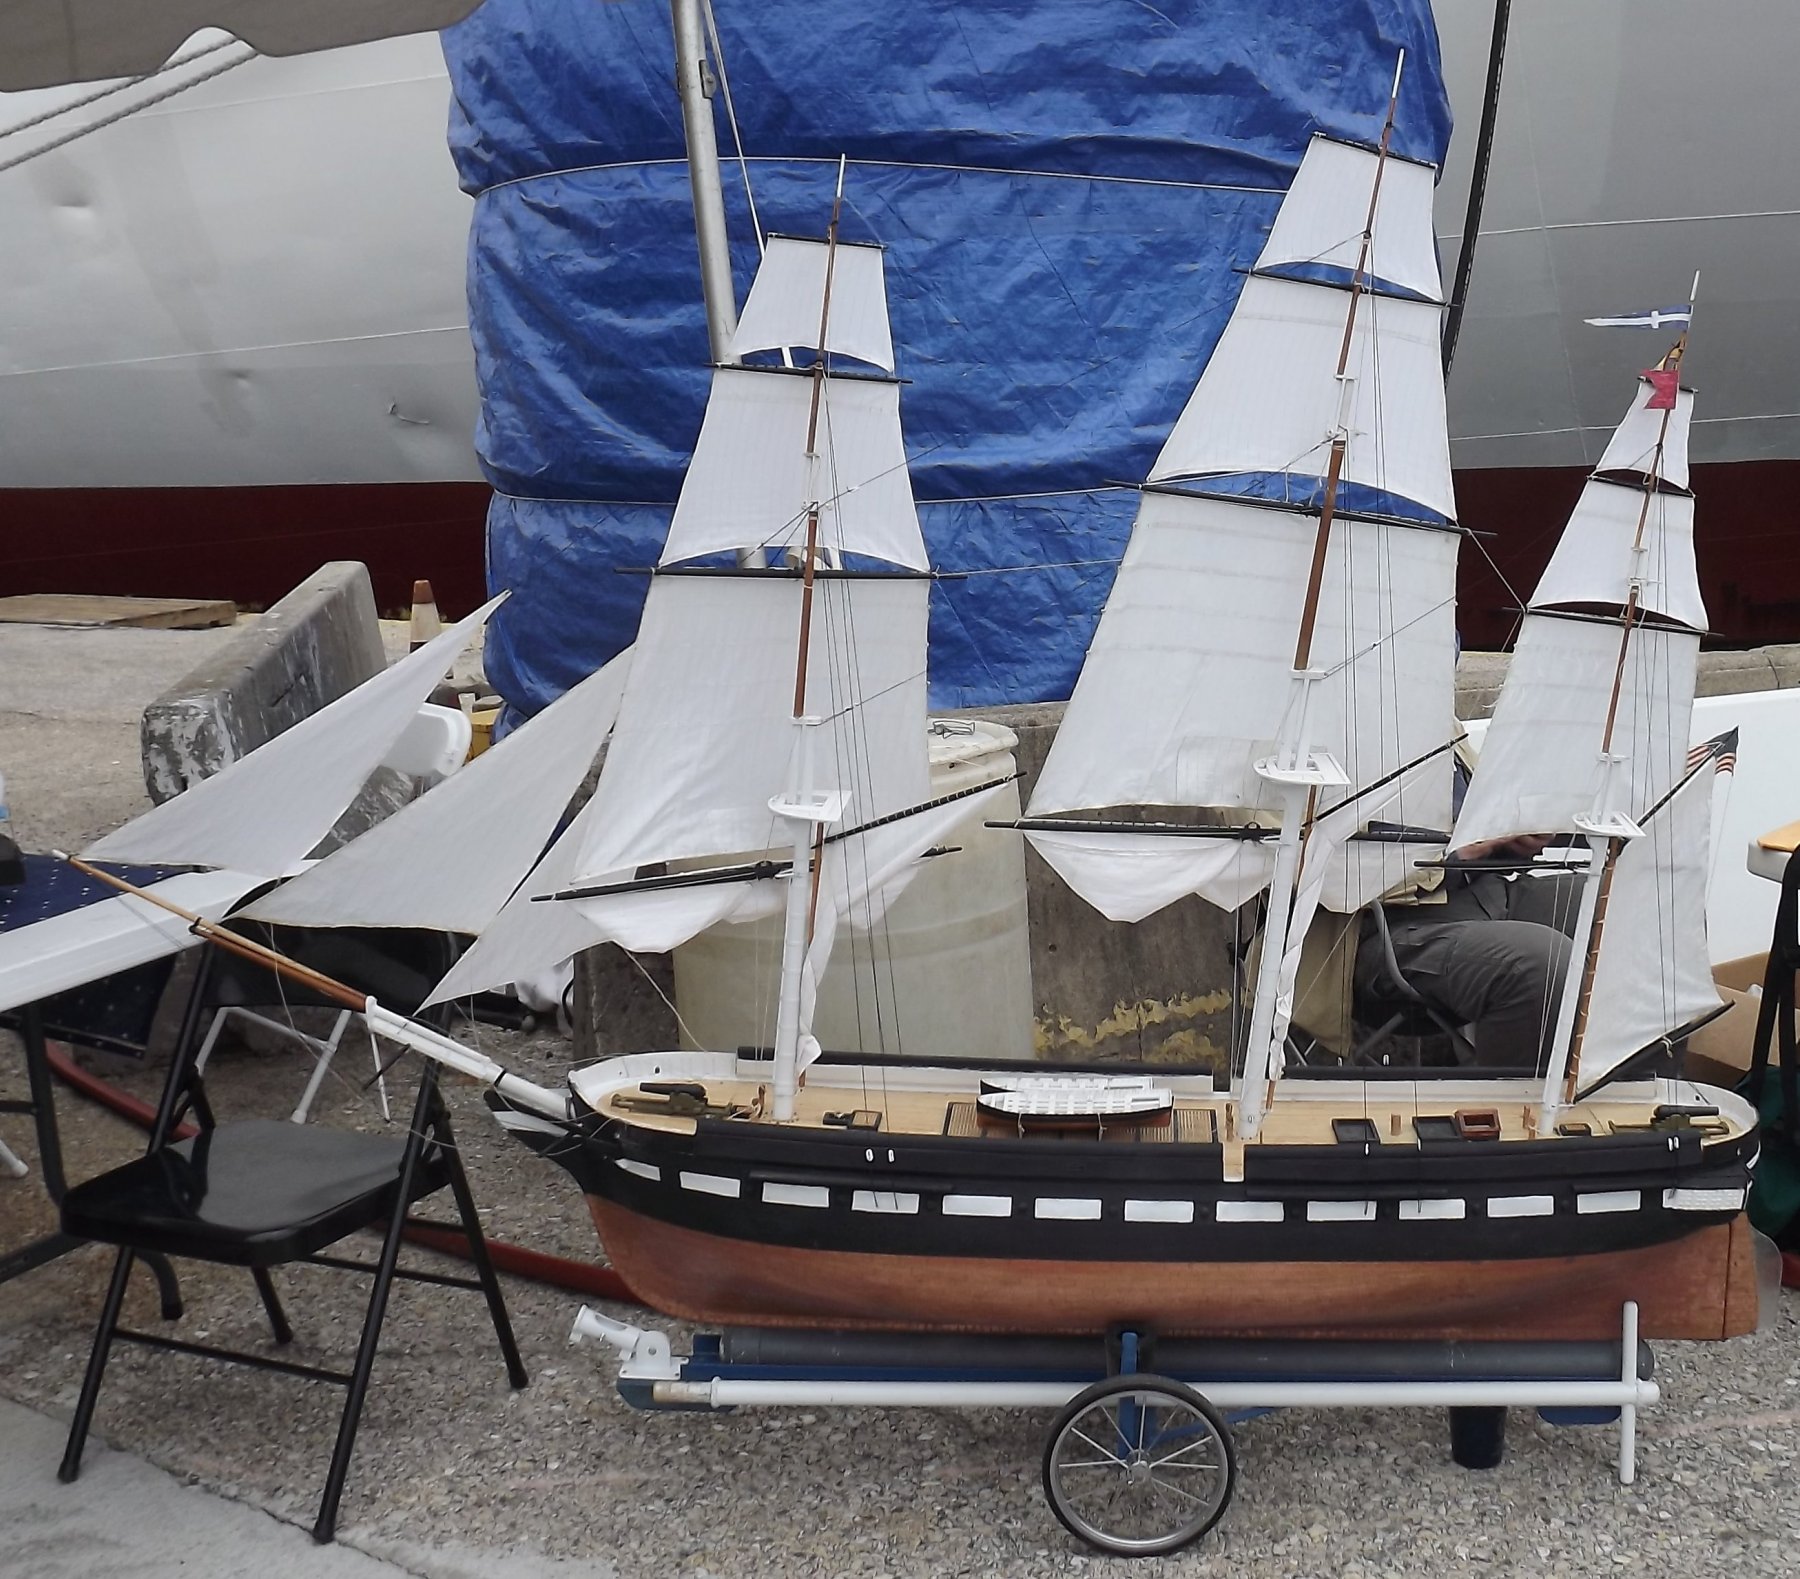
The cathead won't haul the clew forward enough. The reconstructed vessel has stumpy little boomkins a good 10 feet forward of the catheads, and long enough to require a couple of stays. I've been making reenactor stuff, mostly tent pins, instead of working on models. When I took a break to work on boats it was on my 16 footer that I hadn't sailed since '09. Constellation's gonna sail soon though. She still jury-rigged from May, I just have to reeve her braces and make a new handle for her cart, the old closet pole broke, twice.

- 648 replies
-
- 2
-
-
- niagara
- model shipways
- (and 1 more)
-
It's a bumpkin, boomkin, or some variation of that depending on where you're from. Pretty much all vessels with a square fores'l will have boomkins forward, and sometime on the quarters aft as well, for the main braces and sheets. The tack will run to a block on the boomkin the up to a pin, cleat, or post near the knightheads, or thereabouts. The point is to haul the windward clew of the sail forward on the wind (close-hauled), which is what the yards do on the sails above the course.
- 648 replies
-
- 3
-
-
- niagara
- model shipways
- (and 1 more)
-
A couple of oldies
-
I think it was just a credit card ad
-
We just call them "sticks." "Sea was so rough it nearly rolled her sticks out of her!"
- 3,618 replies
-
- 3
-
-
- young america
- clipper
- (and 1 more)
-
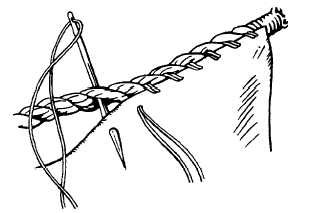
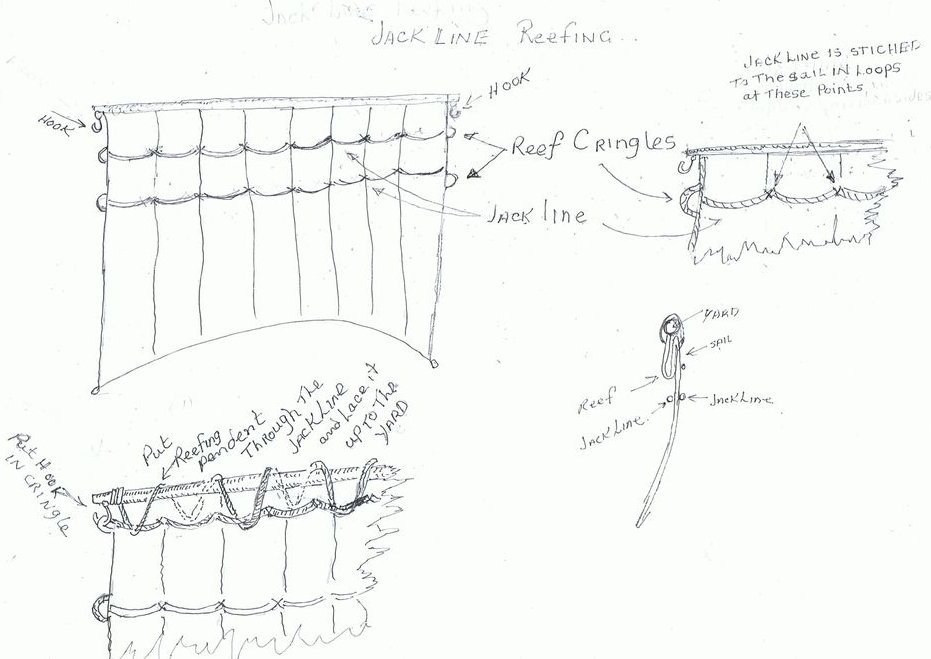
Here's a Jimmy James sketch of Jack-Line reefing, some call French Reefing. It's a method used on real ships around the 1840's or so and can be seen in photos as late as the 1920's. I didn't install such a set-up as I figure that if it's blowing too hard for tops'ls, it's blowing too hard to sail. I have nothing to prove A line is attached across the sail, typically at each reef point, making retro-fitting a sail easier without altering anything. On a model you could use line that matched the sail's color to make it less visible, and put in regular reef-points for show. The cringles are hooked to hold the sail up and out (think reefing tackle) and a jack-line is passed through the loops from front, over the yard to the back, back over the yard to the front and so on across the sail. The jack-line's tied to the yard at either end. You can CA some of the end of the jack-line to make a sort of needle to help thread it. It's a LOT simpler and easier to do and undo on a model than tying far too many reef-points than any human mind could endure.
-
Congratulations Timmo! She's beautiful. Those gusts feel like they're deliberately messing with you, don't they. Did you manage any video at all? About those gusts... I reverted to only controlling the tops'l yards, cutting out direct control of the course yards. I'll have working bunts and clews on the courses to brail them up (after pulling the wire from the sleeve at the foot), and the t'gallants and royals will be removable, yard and all. I'd make that stays'l brailable if I were setting any. I have two tris'ls, or spencers on gaffs that brail up in lieu of stays'ls that may or may not get set if the air's very light, but their sheets aren't controlled. The trick is not only having options in sail configurations, but options you can implement at the water's edge.
-
Welcome neighbor, well, relative to some folks here, we live next door.
-
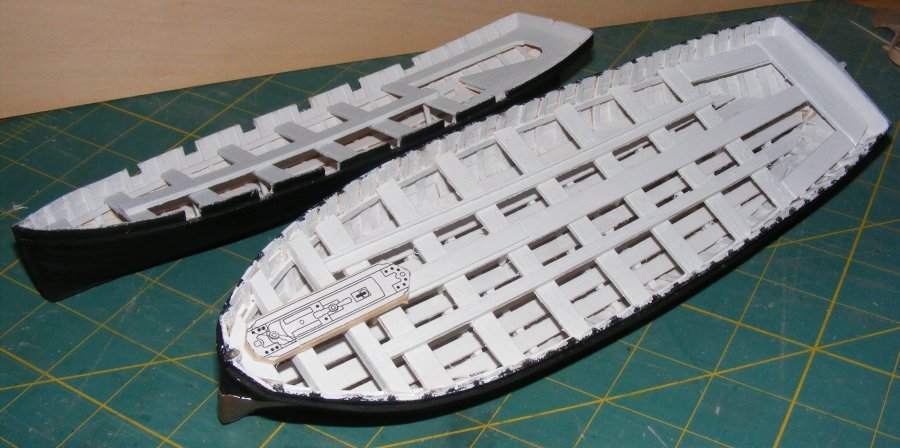
I have one of these to do in 1:36 scale yet, for Constellation's launch. I was thinking of doing it in styrene, I tend to not burn my fingers so much working in plastic.
-
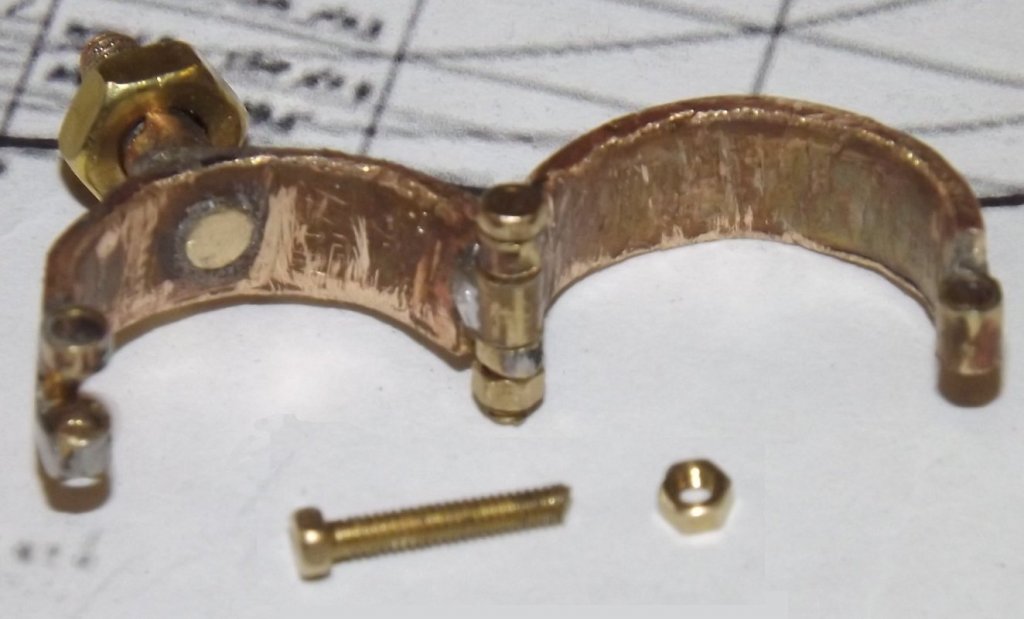
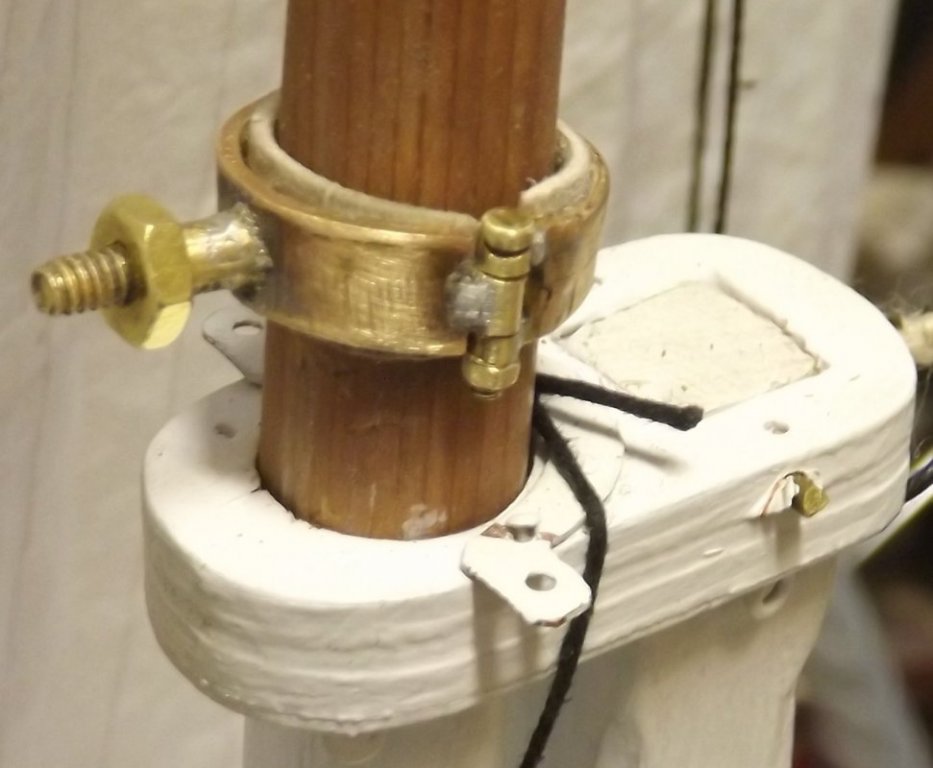
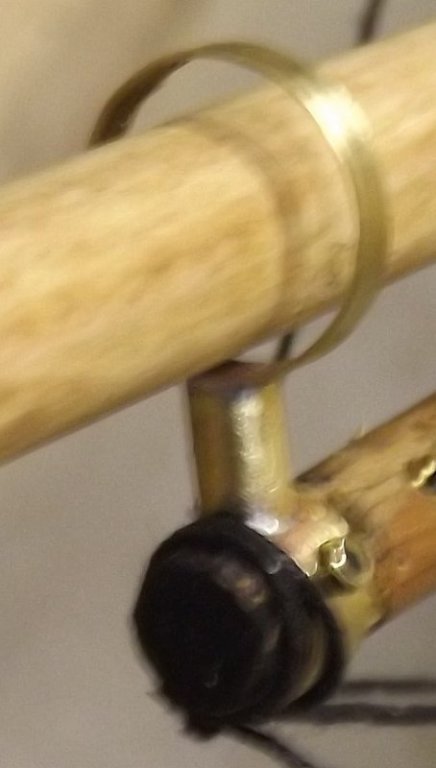
Made the fore tops'l yard parrel, and feeling cockey with my soldering, a new wythe.
- 553 replies
-
- 4
-
-
- sloop of war
- constellation
- (and 3 more)
-
Rigging Instructions 1/96 Revell Constitution
JerryTodd replied to kruginmi's topic in Masting, rigging and sails
I've had 2 Constitutions and 2 United States kits since 1971 and have never seen the more "verbose" version of the rigging instructions. They must be newer versions.