hexnut
-
Posts
406 -
Joined
-
Last visited
Content Type
Profiles
Forums
Gallery
Events
Everything posted by hexnut
-
That's looking great, Dee_Dee. Love the wood contrast--you definitely took this humble little workboat upscale. Are you planning to add the sliding covers for the ports? I think it would be a great detail and it looks like you have space aft of the cutouts to park the doors in the open position...
-
Very nice. Depending on what you want to use the cad for, you might want to: 1) extend the frame station sections beyond the rails so that they are a consistent height before lofting, then chop off at the desired rail profile. 2) get buttock and water lines faired and attached to the station lines, then use those to control the loft surfaces. Or, if you just want to use the model to make nice frames and hand fair them once in place, what you already have is perfect and ignore everything that I just said...
-
Looks really good. Do scented candles come in "Breadfruit?"
- 625 replies
-
- 2
-

-
- bounty launch
- model shipways
- (and 1 more)
-
Great advice, I wish that I didn't have to find out the hard way. Years ago we took down an apple tree in my Dad's yard, quartered the pieces, but didn't turn it into planks, it is beautiful wood, but checked badly. Later took down some cedar, rough-planked it and it dried wonderfully. Live and learn--slowly...
-
When did this happen?
hexnut replied to Q A's Revenge's topic in Painting, finishing and weathering products and techniques
They do sell both the 23ml and the "mini" 10ml http://www.tamiya.com/english/products/list/acrylic_1.htm However, it appears that U.K. supplier The Hobby Company LTD. carries only the "mini" versions. A year or two ago, The U.S. state of California changed its labeling laws for "hazardous materials", Tamiya was one of the companies that had to pull product from shelves and restock w/ new labels. (notice how much more dangerous your new label is than your old label ) They obviously lost a lot of money in the process, and prices were consequently raised, probably to the point that some felt it uneconomical to carry the larger sizes... -
I've had a small Delta desktop combo long before I thought about making a model boat, and I've found it to be immensely useful. The beds are reasonably flat and with some reasonably frequent checking w/square and bench blocks, the disk makes a nice truing surface. It is also useful as a sanding surface when turned off for more delicate work. The narrow belt is great for roughing out inside radii. As far as the one power tool, I don't know if it counts (it's got a battery) but I use my digital calipers constantly...
-
http://modelshipworld.com/index.php?/topic/1910-tagua-nuts-for-carving/#entry44317 A few of us did some playing with them, a discussion in the above thread. It is a pretty durable material.
-
Could always just rename it: „Nuestra Señora de la Concepción y de las Ánimas“ and carry on? Still a brilliant model irregardless...
-
For white paint over plastic surfaces, my favorite is Tamiya white primer. It comes in spray cans, so masking is required, but it controls nicely and goes on w/ a great finish. (especially if warmed in a small pot of hot--not boiling-- water beforehand) I usually glue and putty the hull halves and paint everything with Tamiya gray so I can see the details and what needs correcting. (black plastic is tough to see detail.) Another coat of gray to cover contrasting colors in putty, detail sanding, scribing,etc., then 2 fine coats of white. For the Connie, you can then just mask over the white stripe and spray the rest in black. Probably all you need to do, but a finish coat w/ Tamiya semi-gloss clear would tie it all together...
- 47 replies
-
- 2
-
-
- constitution
- revell
- (and 1 more)
-
Really clean, beautiful job, not surprising after seeing the level of fit and finish on your 1:1 boat! I can't wait to see what you do with the Pinky schooner.
-
Any comment I added aside from: "Wonderful" would be like a kindergarten child talking about a doctoral dissertation. How much time from when you first started plans to completion?
-
Thanks, Timo! Hopefully there will be some progress at some point... BTW, what is the rig in your avatar? I've never seen it before-- it's almost like a backwards yawl with a lot of rake, or a Mulleta with spritsails...
- 86 replies
-
- 1
-
-
- muscongus bay lobster smack
- Midwest Products
- (and 1 more)
-
Looking Geat! One tip about superglue--that I guess you don't need, as you've already done a great job on the hull-- is to use accelerator with it, sticks much better to wood. (Zipkick is one brand) It will bond instantly, so good pre-positioning is key. Another trick for joints needing extra strength is to add CA glue (thin works best) over a fillet of baking soda. Again, a bit of caution is required, as it yeilds a nice little exothermic reaction, so fingers out of the way...(ask me how I know...)
-
Looking great, Dee_Dee, are you going to show any framing in the cockpit, or are you going to present it as a double-planked hull? (many later friendships were planked on the inside as well, so there is precedent.) Did you find any dimensions for the fish well hatches in your research?
-
New lid looks great. That is good news--if Remco did your graphics, they are almost by definition, superb. White is indeed a tough color for decals, basically 3 options: 1) use white decal film, match background color as close as possible and trim very carefully. (I have done this successfully, but it can be time-consuming) 2) find someone with an old ALPS printer or silkscreen to do a custom run.($$) 3) get I.N.T.'s made (rub-on transfers, also can get expensive.) Good luck on the bow draft numbers--the good thing about no research sources, is that artistic license then prevails...
-
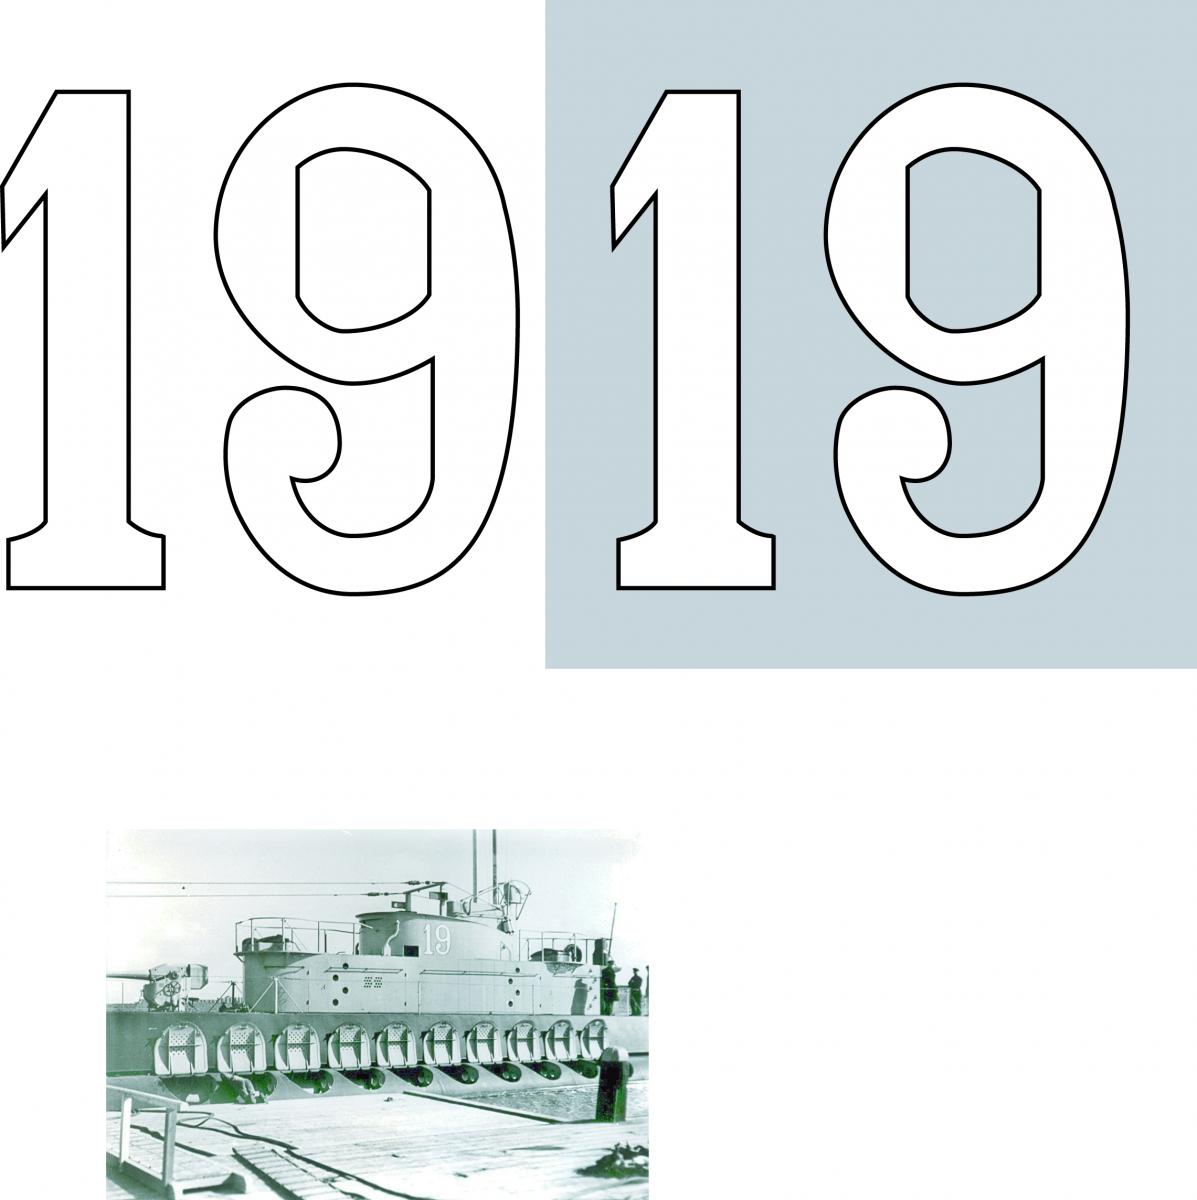
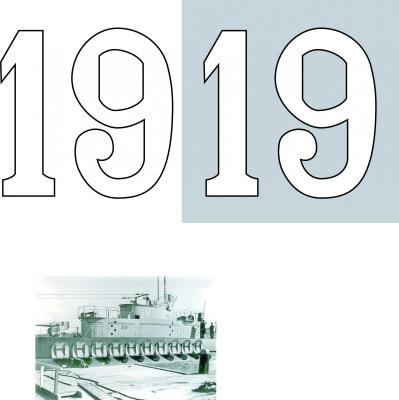
I have been following this build avidly, although I haven't commented so far. (not much to add, except "fantastic!") Earlier you had mentioned making decals--I don't know If you need graphics or have already made them, but I whipped up the "19" based on the conning tower shot--If you're interested, I can send you any size or resolution you want, or if you have autocad or a graphics software program I can send you compatible files...
-
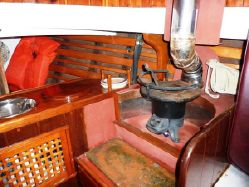
Thanks for the photos, Dee_Dee, that interior mast shot in the Friendship was exactly what I was looking for. I also love the stove. Although I'm thinking of installing one like this: I think on my boat, I am going to give it shrouds. I know Chappelle said there weren't any, but I keep seeing pictures that have them, including the ones they made in the apprentice program. The good thing about these boats is that there are as many variations as there were people who used them, as long as we make reasonably logical decisions, we should be "in the ballpark" historically.
- 86 replies
-
- 3
-
-
- muscongus bay lobster smack
- Midwest Products
- (and 1 more)
-
Thanks Dee_Dee, I have the 'apprentice' article, but I hadn't seen the photobucket album before--nice shots. I think I have a good approach to the centerboard trunk, it will just take a while to execute at my present (glacial) pace. I have been going back and forth about a square or round mast base, I just put the tapered round on it so I could get the rake correct. I swore that I had a decent photo of a Friendship interior with a square mast in it, but I can't find it. Do you have any "square step" photos?
- 86 replies
-
- 1
-
-
- muscongus bay lobster smack
- Midwest Products
- (and 1 more)
-
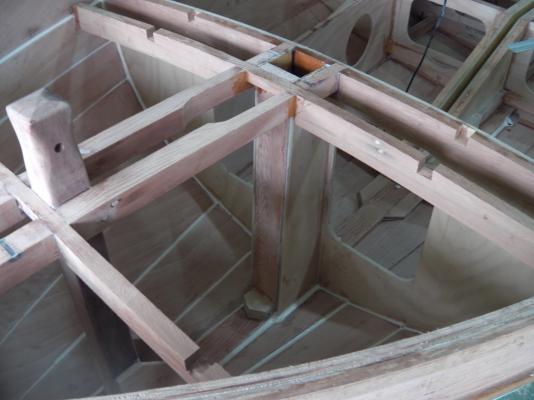
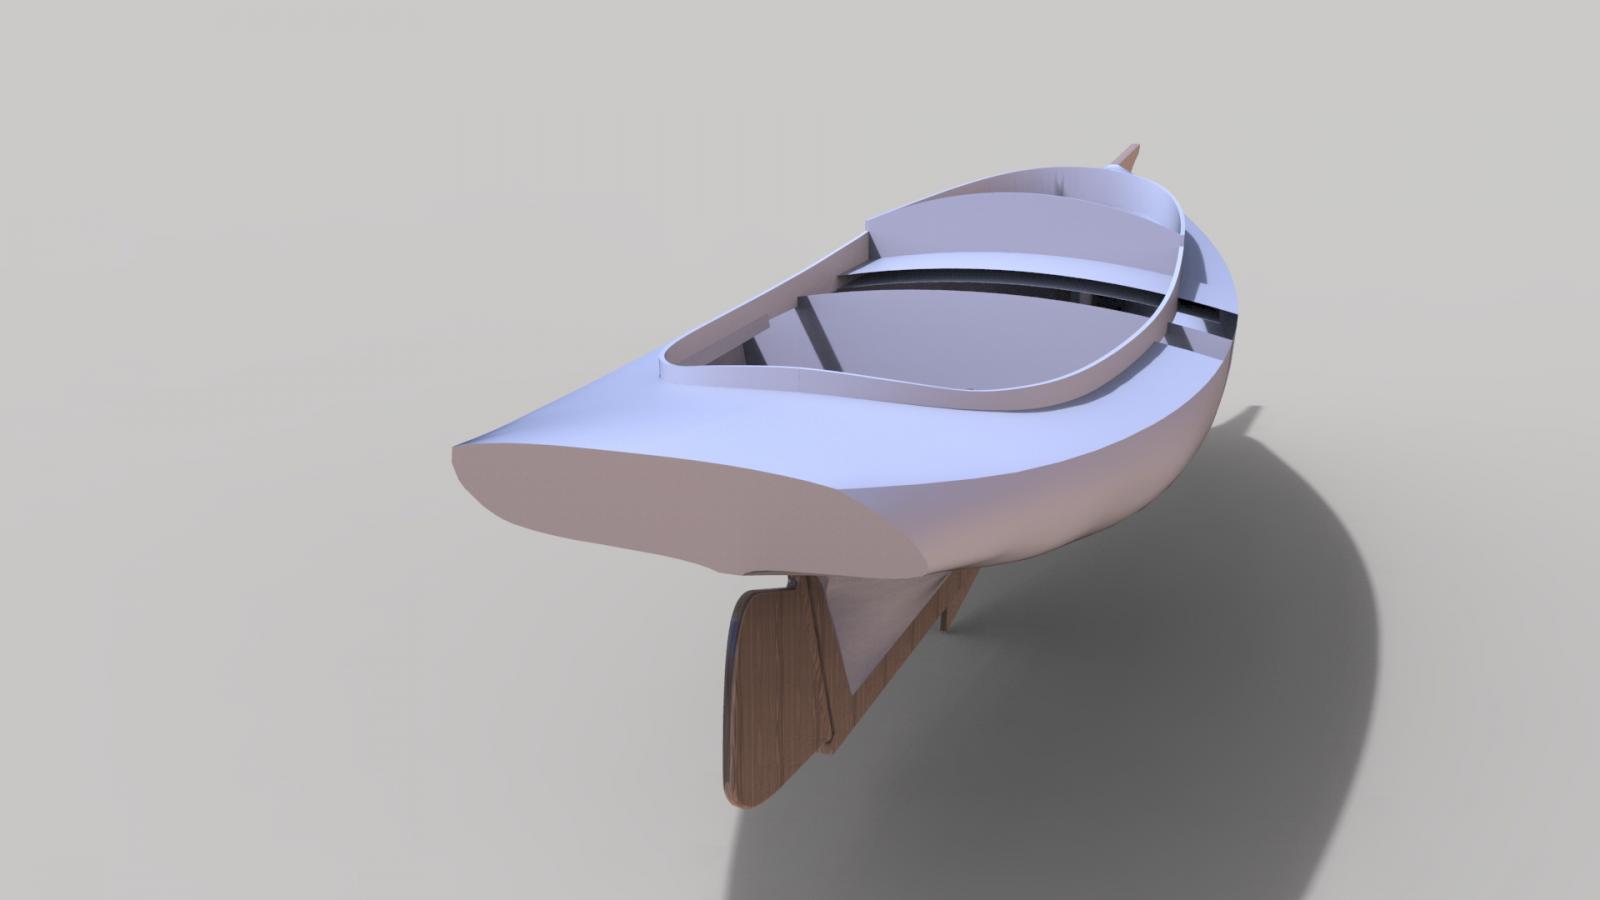
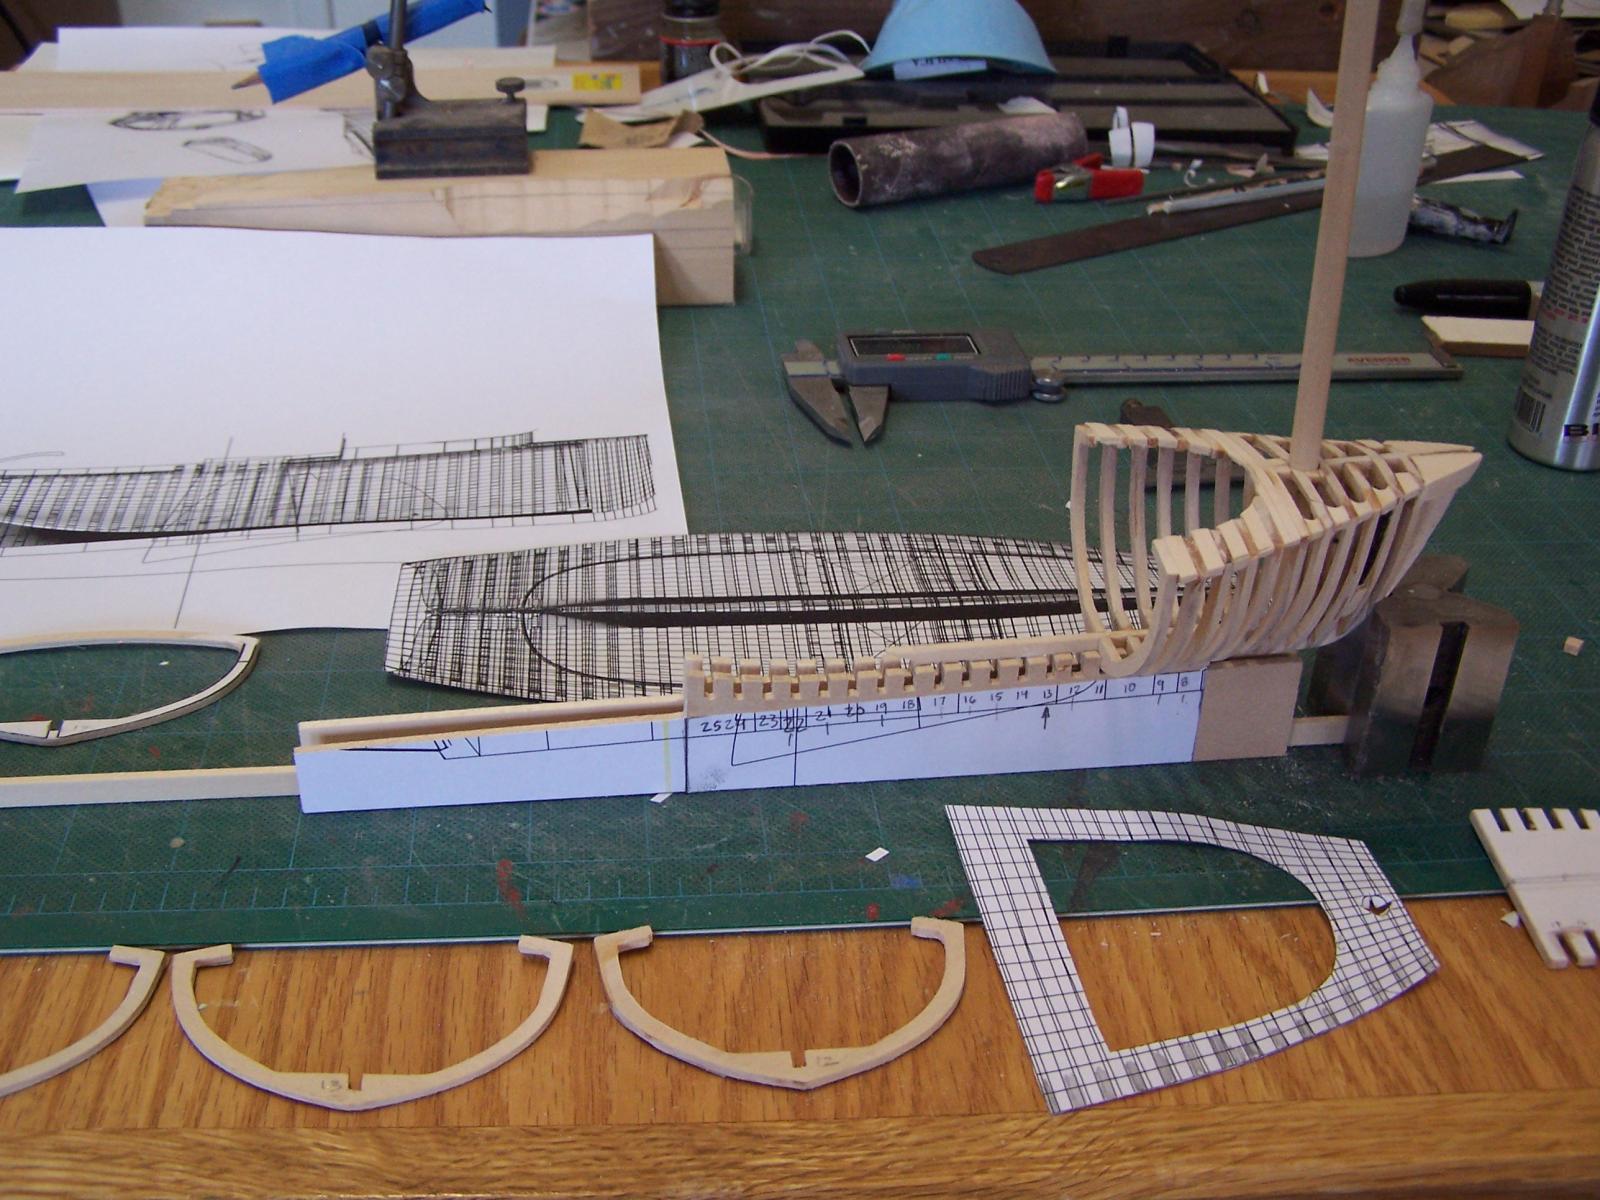
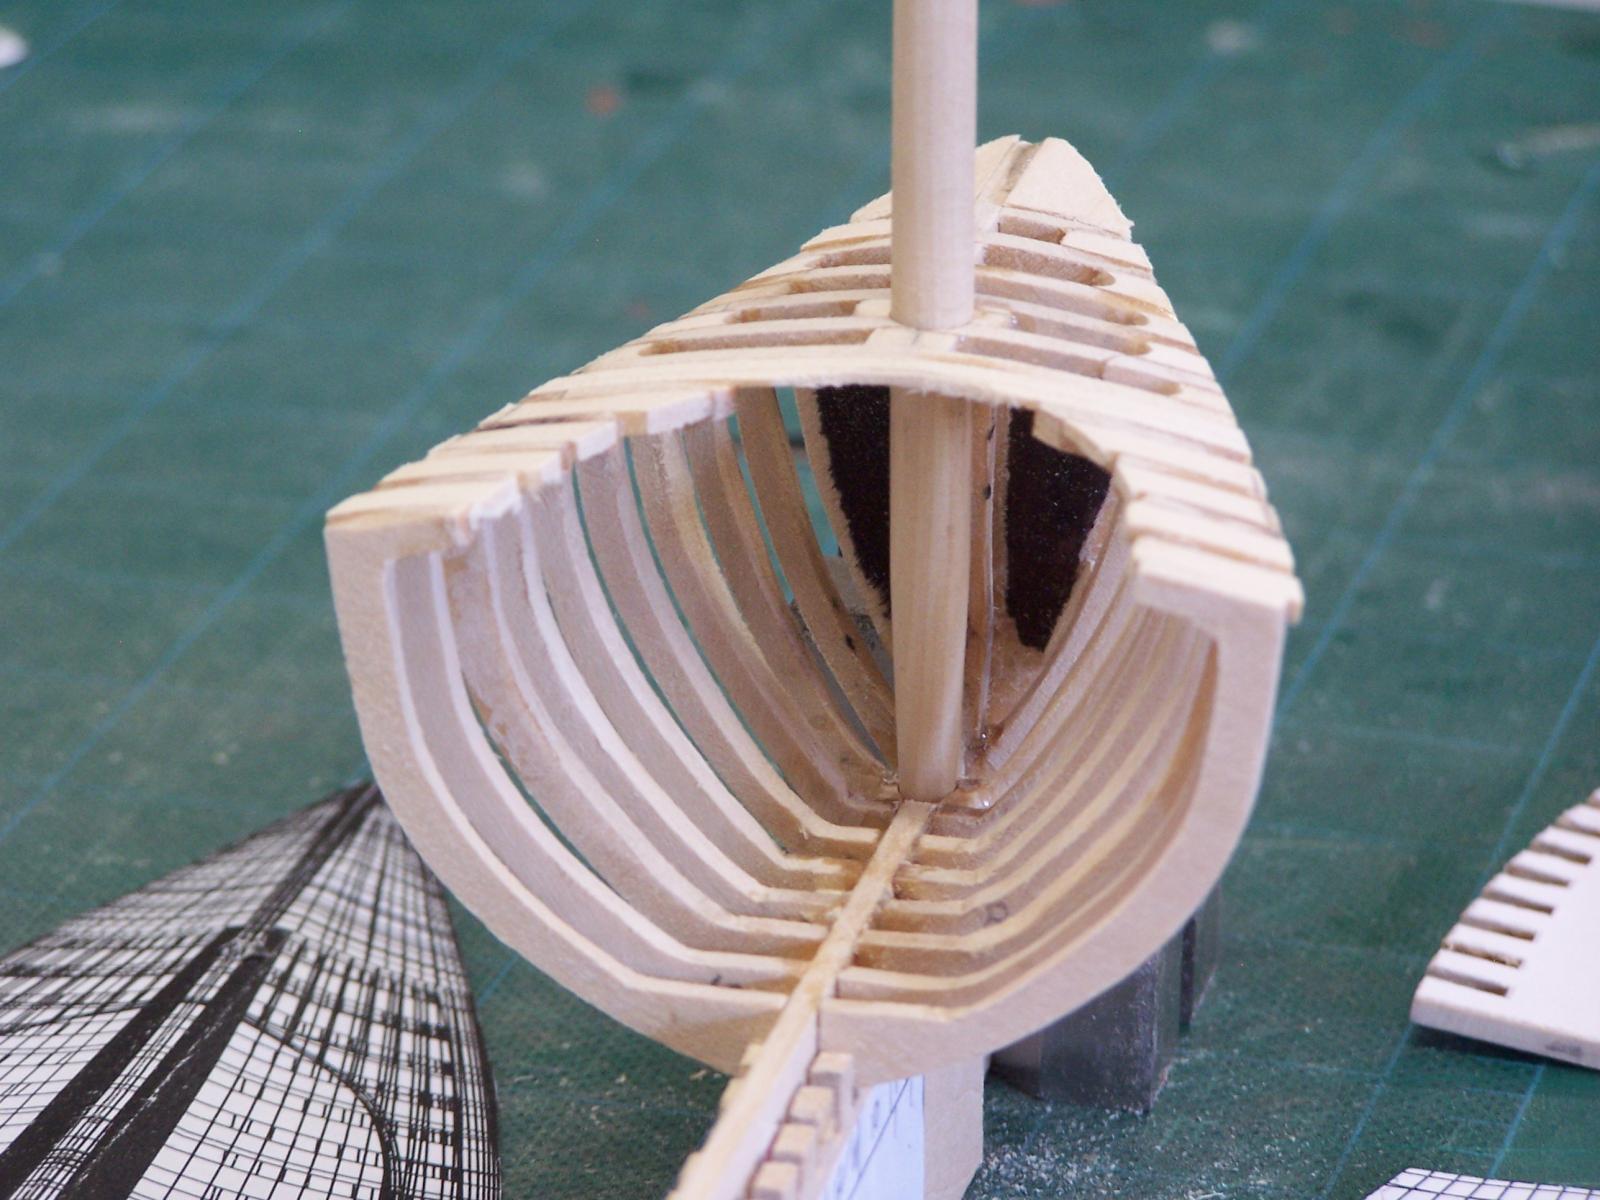
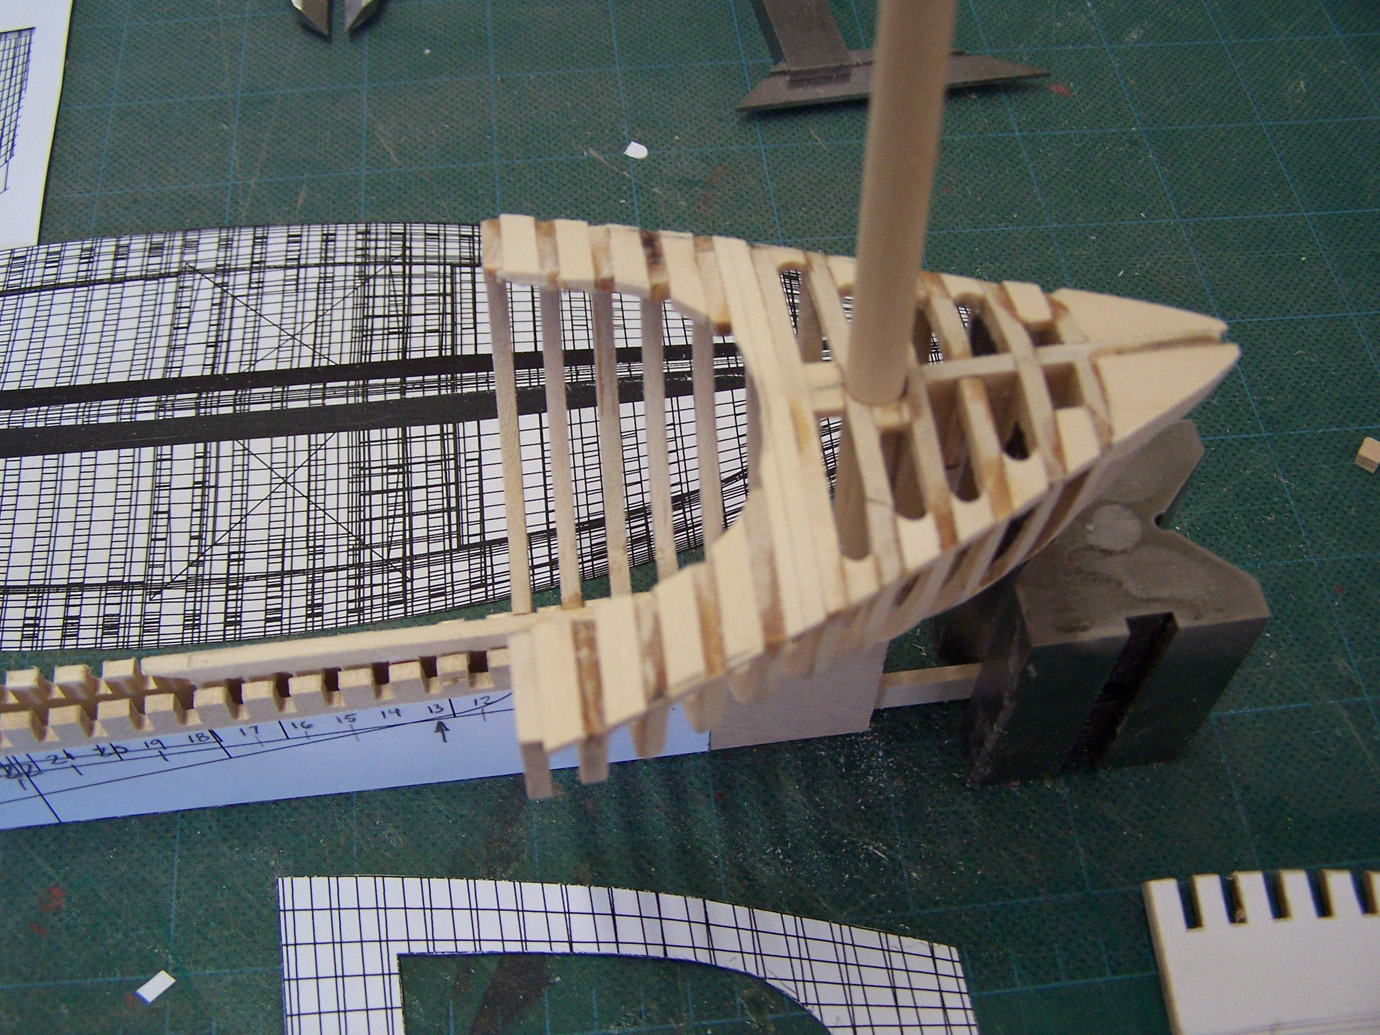
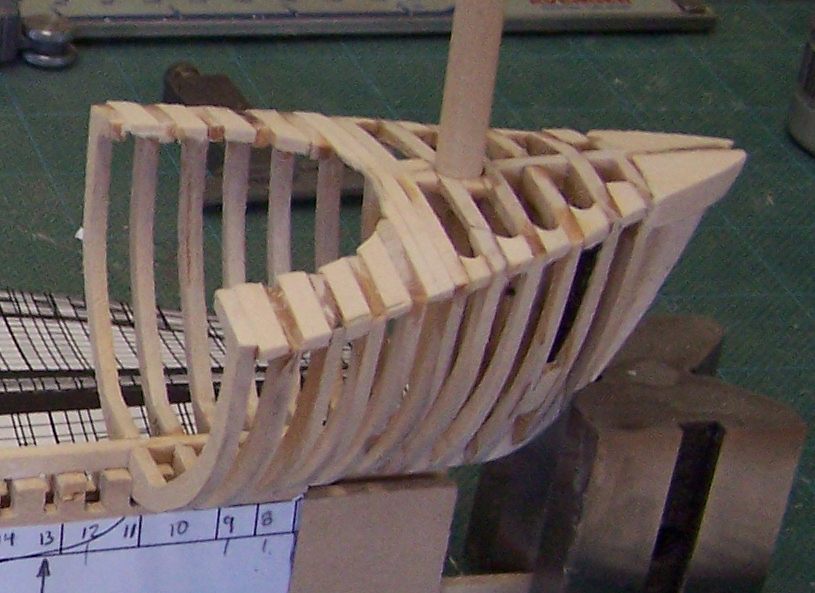
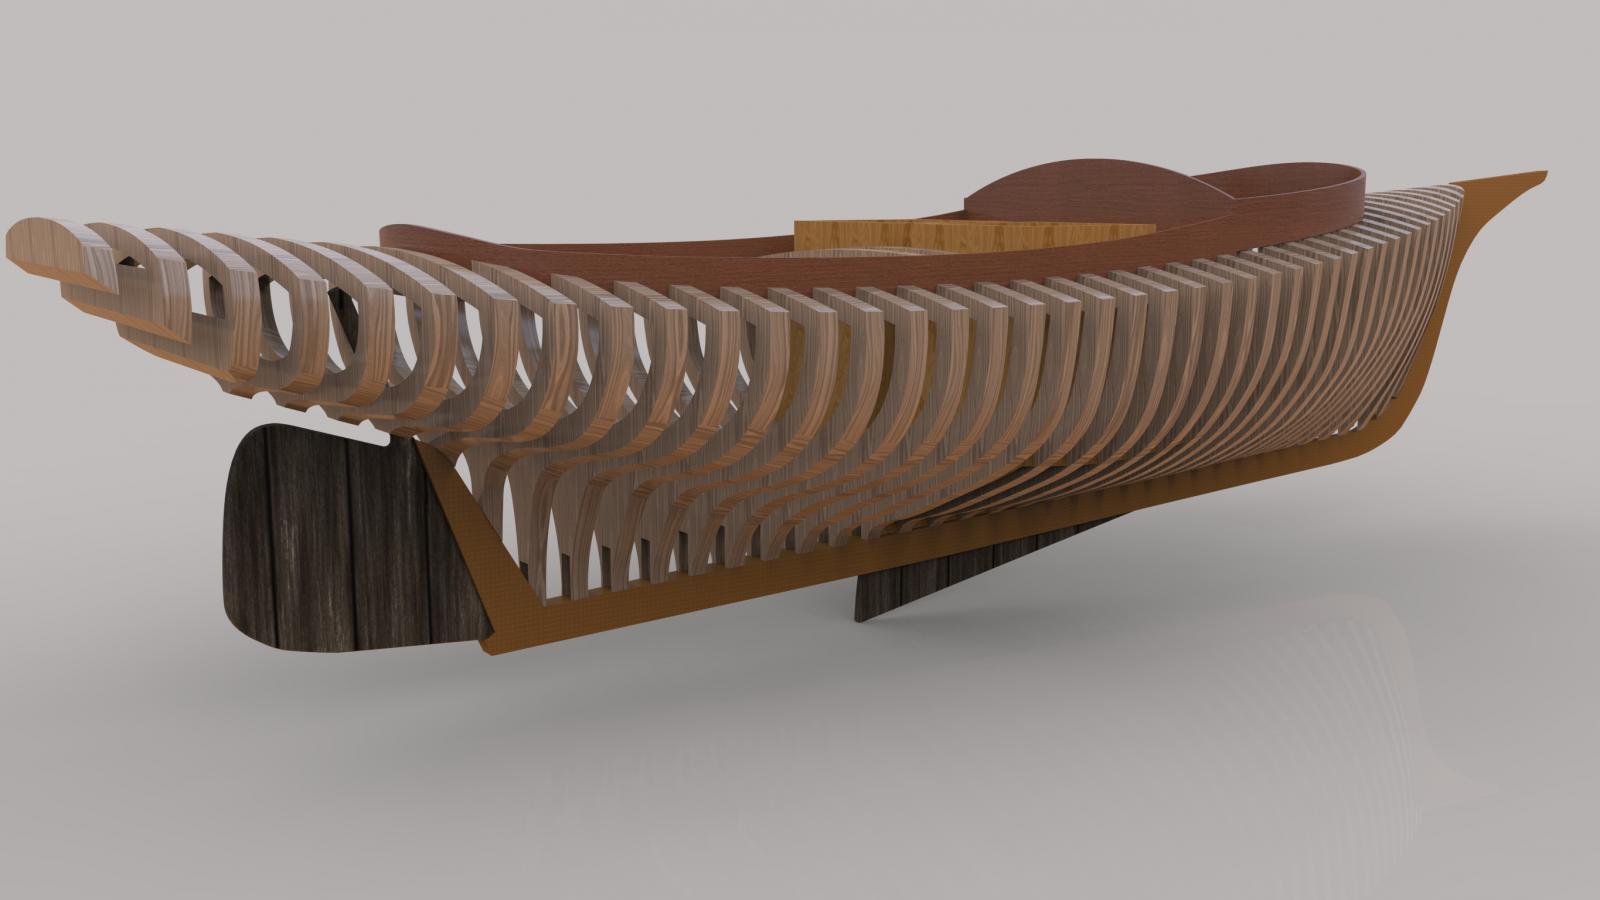
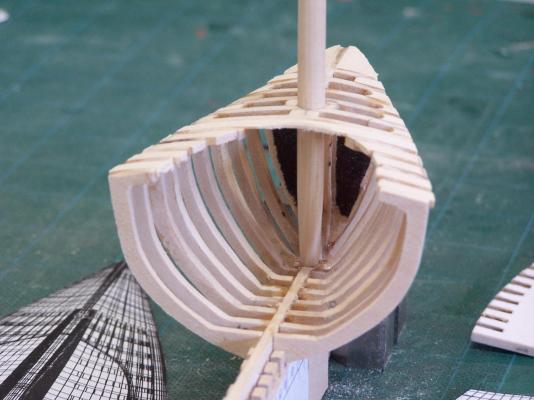
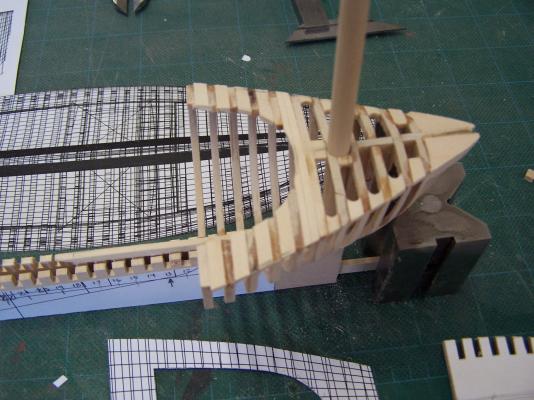
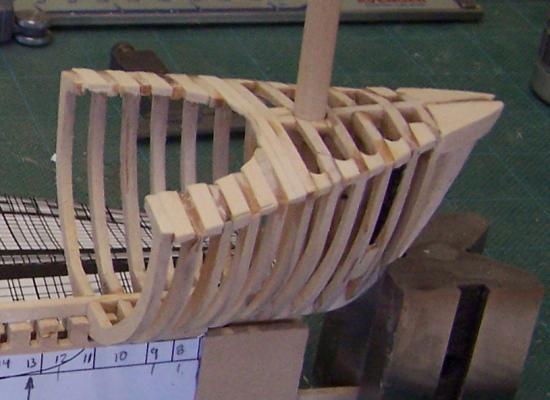
Thanks for the comments Dee_Dee, the pic may be a bit misleading, as it just shows the ribs. Here is a picture with "skin" on (including transom) The camber may also look a bit exaggerated w/out planking on the sides, although my personal theory is it was a bit more than 2" over the 7' beam. One of the things that led me to start making parts was that I felt that the stock kit didn't provide adequate camber. In all truth, I won't really know until I have parts put together, so I did make the ribs a bit thick on top to give me room to knock the camber radius down if I need to. I am REALLY looking forward to seeing what you found out about the fish wells, as I have drawn them up in CAD several times now and I'm still not really happy with what I've come up with. In other news, even though I have had little time to work on the boat, I reached the "If I don't glue something together I'm gonna go nuts" stage, so here's a section of the bow made from actual bits of wood: It is only "rough-faired" at the moment, as I want to leave myself room to fair as the rest of the hull takes shape.


- 86 replies
-
- 6
-
-
- muscongus bay lobster smack
- Midwest Products
- (and 1 more)
-
The Dutch Boeier De Sperwer- The 'James Bond Yacht'
hexnut replied to Salty Sea Dog's topic in Nautical/Naval History
This is very cool. Looks like it will be a great excuse to crank up all of those luthier skills! -
I've been watching this process with great interest, as you mass-produce hulls, great work! I just can't help but wonder, since it's a holiday theme, are you going to rename them Goldie, Frankie and Murray?
-
I'm really glad to see this build back up and running. Incidentally, my favorite source for small-diameter wire is "HO" scale slot car armatures. (any small wound DC motor will do.) One will last a while...
-
Your build looks very interesting, with some nice detail work. Do you have more pictures? Thank you!
-
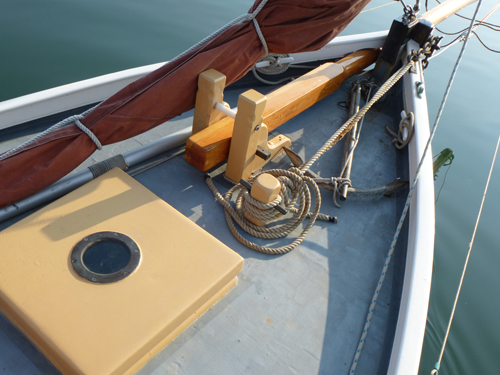
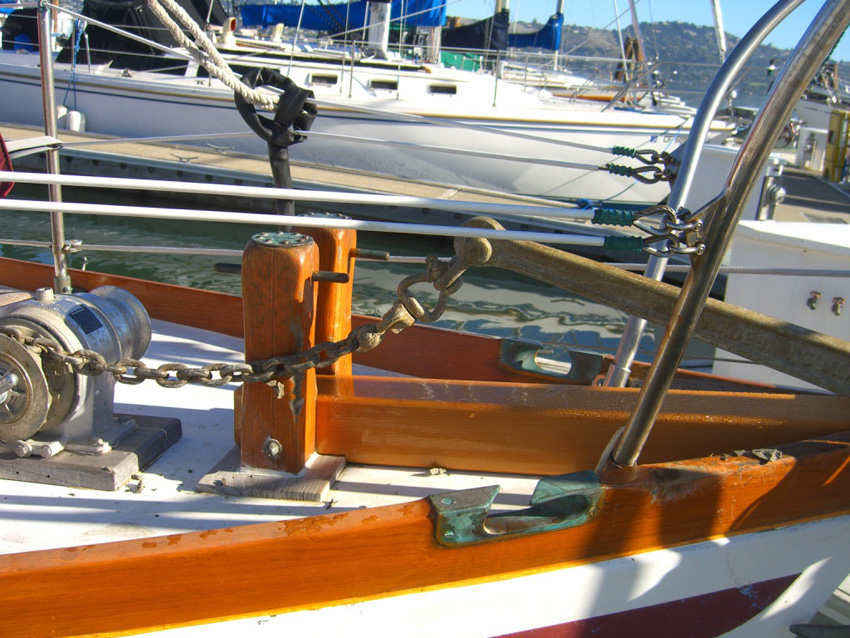
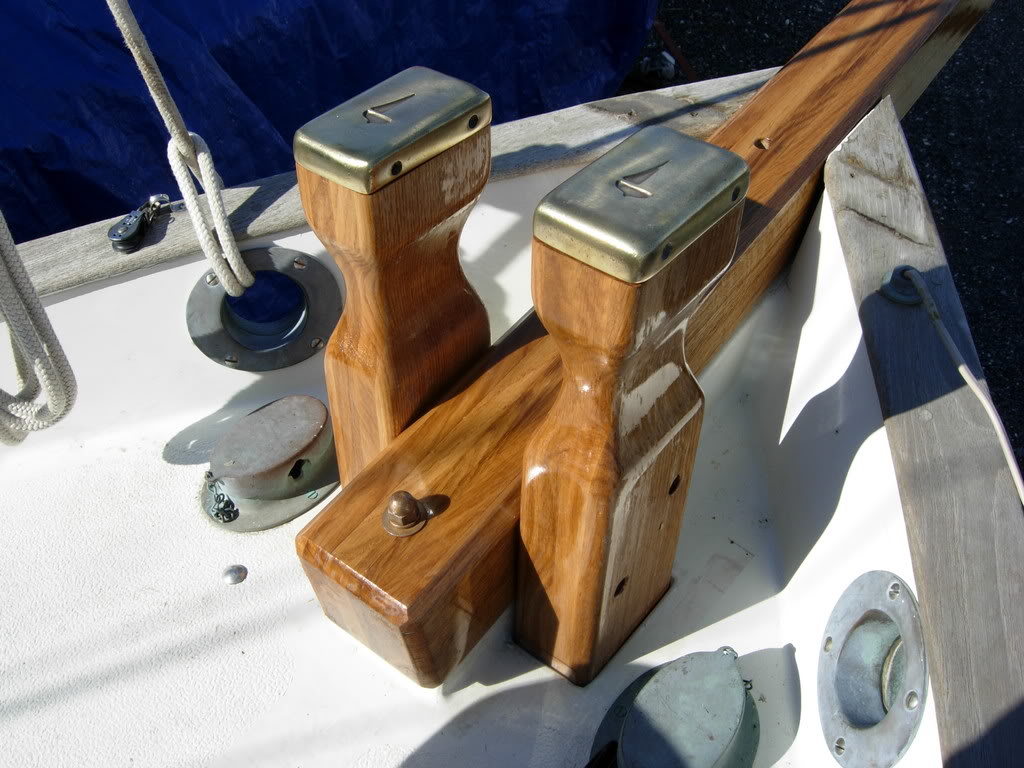
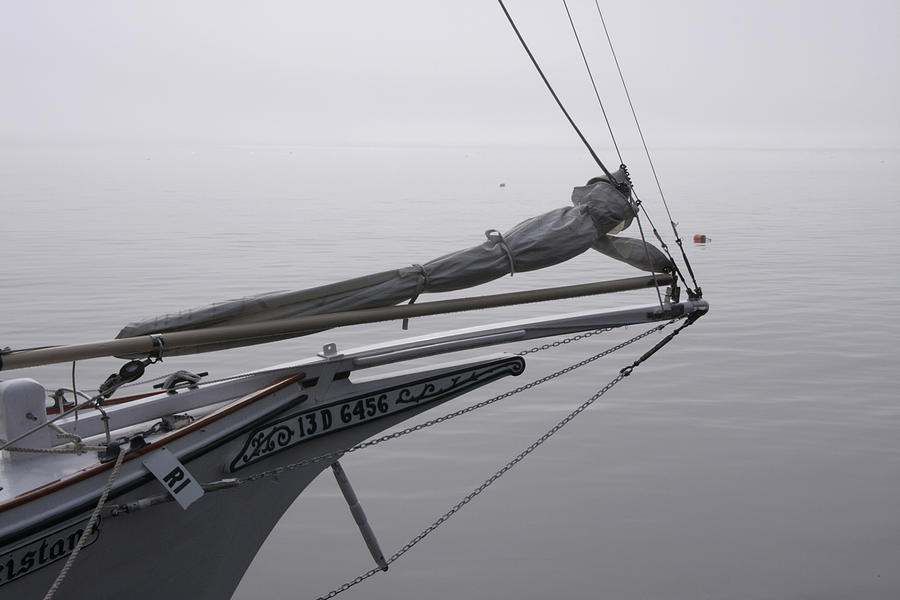
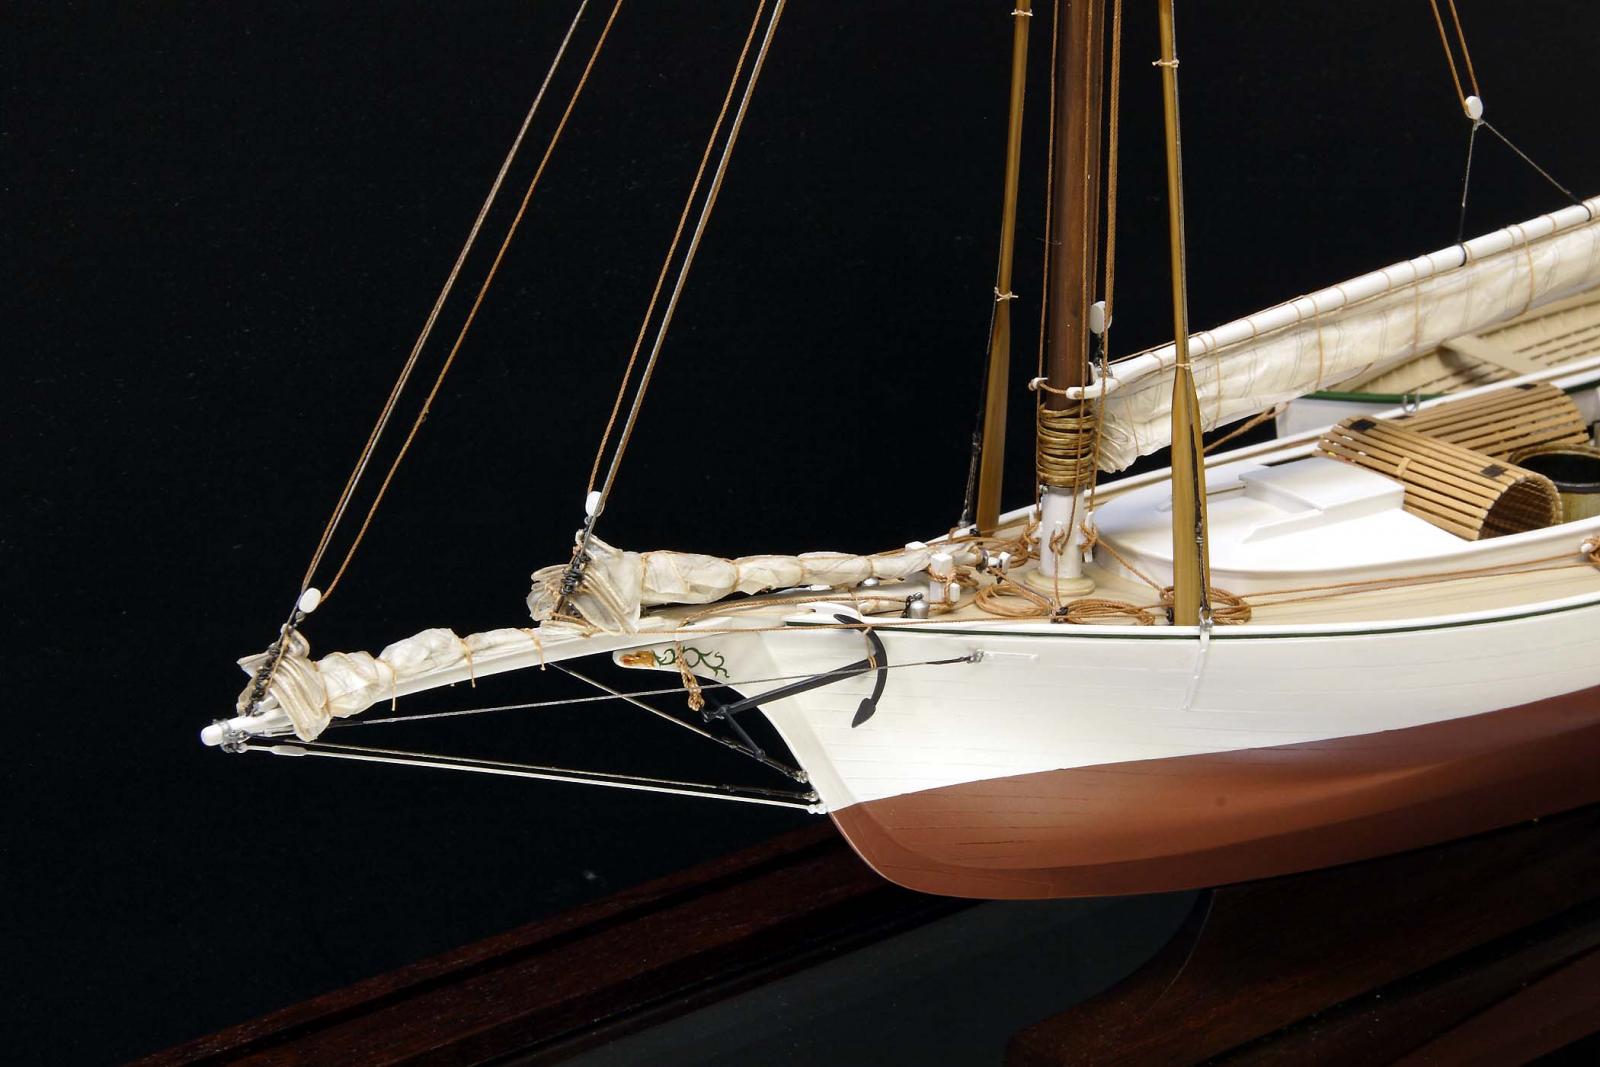
Here's a few... A lot of these boats seem to have cranked the bobstays to the point of giving the bowsprit a "banana" shape, so the samson post needs to do a good job of preventing the bowsprit from moving back along the deck. Top pic looks like an English Cutter w/ offset bowsprit, just for comparison purposes. Alot of British workboats seem to pivot the bowsprit on the post but that feature seems more rare among American boats...The last photo is of an amazing Eric Ronnberg jr. model of a Friendship sloop called little Hattie--his models are usually better detailed than most real sailing craft...