DavidG Posted February 18, 2020 Author #31 Posted February 18, 2020 chainplates next. I used the kit channel parts, reinforced by pins, painted black. The kit offers an easy solution for the chainplates by the use of wire, hooked into a pin, the issue of having the gunports in the way is bypassed by simply omitting the problematic ones. As much I wanted to make it a little bit more correct, there is no solution for the setting the correct angle due to the placement of the ports above and below. That's why I settled on the perpendicular arrangement, when it was possible (but had to make some compromise on the main mast). I used 5mm deadeyes, stropped by wire, soldered the links and installed the lower links, which are from my leftover parts box. These are fastened by two nails, cut to length and glued in. The kit supplies nice 3mm boxwood deadeyes, which I will use on the mast tops. Saburo, GrandpaPhil, american and 1 other 4 Past builds: Prins Willem, Amati Coca Current Build: Occre Diana
DavidG Posted February 25, 2020 Author #32 Posted February 25, 2020 getting close to finishing the work on the hull, it was time to think on the boats. I was not a big fan of the supplied castings (left one). It is not excluded, they could be finished to a reasonable standard, but it would involve adjust the hull shape, plank it, sand away the inner frames, make a capping rail to hide the excess wall thickness etc. By the time it requires, I can make a better one, so chose to replace pretty early. Back in the years (~2010) I found the Caldercraft resin kits are the best ones out there from the rather limited selection (middle one). Good hull shape, sufficient detail, and decided to build one. This one is still unfinished, as it had to be painted, and I realized it wouldn't look right on a natural wood model. I might use it for some future project, but put it aside for now. Finally I found a Master Korabel 95mm boat kit, which is just the right size, color and detail (right one). The kit features some sophisticated engineering and hyper precise laser cut parts, which still didn't prevent me to misunderstand the assembly sequence and glued the frames to the plywood core, expected to be removed later. At the end I had to grind away the plywood plug, but surprisingly the boat itself remained intact and I was able to finish it. The precut planking makes building very convenient, my only concern is the visible plank joints due to burned edges - it is a matter of taste, I like my planking to be smooth. The boats fits to the model pretty well - which also means, I covered the last visible parts of the gun deck There is not much work left on the hull. I have to make some cosmetic improvements, install some cleats (yet to make them) and start rigging. Saburo, Old Collingwood, GrandpaPhil and 2 others 5 Past builds: Prins Willem, Amati Coca Current Build: Occre Diana
DavidG Posted February 27, 2020 Author #33 Posted February 27, 2020 the build log catches up to the present. As the hull is almost ready, I started to do some preparation for rigging. I still don't know which rigging plan I will use, I have several sources as the Petersen book, Swan class book, kit instruction, other build logs of frigates, etc. I'm not going for historical accuracy (especially for this ship, which is not specific to any source) but see it as a learning opportunity, and most probably I will investigate each feature separately during the work. I rigged ship models before, but now I will try to advance the quality of my work. As a start, I decided to use quality rigging supplies; I was able to find a local source for high quality rigging thread, and purchased Master Korabel and Syren blocks. I also try my hand at serving lines, which I haven't done before, I will use the Syren tool for this. This post about is my experiments with serving shrouds. The mizzen mast has the least number of them, let's start with these. According to sources, the middle 1/4 of the shroud must be served. I thought it's easy: tried to measure the length of the shroud, served it with thin line then rigged the deadeyes just to see, my initial measurement was way off, and the end of the serving on the pairs was not paralel. I need to find a way to establish the proper length of the shroud before serving, so I set them up temporarily, and used wire spacers to rig the deadeyes at both end (I made a throat seizing for this). Having the - hopefully - proper length, I can measure the middle 1/4, and mark it with masking tape: then it can go to the serving tool. I had to recognize, now having the deadeyes at both ends, I can no longer fit the thread through the rods and had to insert dowels to the inside of the gears. This is fiddly job, but allowed me to drive the serving tool with a handheld screwdriver, as a 5 mm hexagonal head perfectly fits to the inside of the axles. This tool is pretty slow, maybe the same speed an experienced user achieves by hand, but provides uniform speed. Being a beginner in this trade, I'm not completely satisfied with the quality if my serving yet. For the most part it is very smooth and even, but I have issues at the start, where the line simply doesn't want to lay evenly. Unfortunately this is the most visible part of the serving. I have to experiment more with the proper angle or speed - nevertheless, there are several shroud pairs ahead of me to gain experience. This is the current state of the experiments. I will rig the seizings above the deadeyes first, then check on the model how it came out. I see this whole process is a bit complicated vs the way I rigged shrouds in the past (without serving). I'm open to any better idea. GrandpaPhil, american, DaveBaxt and 1 other 4 Past builds: Prins Willem, Amati Coca Current Build: Occre Diana
DavidG Posted April 20, 2020 Author #34 Posted April 20, 2020 slowly the model is getting to the rigging stage. I will use it as a learning opportunity, and try out new things I haven't done before. Like serving lines (I'm getting better in it..) and making a rigging plan. The kit instruction is not much a of help, and decided I'm not going to use it (except for tracking belaying points maybe), the books of L.Peterson and Mr. Antscherl are here to help. I also recognize, the construction of my model has limitations, like the rather small scale, the initial kit design, and my modifications, which were or were not properly planned. Building without a set of plans is a new experience anyway, so let's try. Some last pieces to be fitted to the deck before it's too late, here a railing fitted front of the main mast. I also took out the bits made by the kit plan and replaced them. I rigged the mizzen shrouds first, to establish my working sequence, followed by the ones on the main mast. This time I installed burton pendants, although only one pair, due to lack of space. Lack of space became appearent by counting of deadeyes - when installing the channels, I reduced their number to be able to install proper links below, now I have to live with single backstays instead of two pairs per side. Preparing to making the stays, I installed the mizzen stay collar. I made these following the Swan books, eyes on both ends, held together by a lashing (the picture is of the fore preventer stay, but works the same logic) And installed on the mast. The lashing is less than tidy, and if I gain some more experience doing them maybe replace it. Before I start the fore shrouds, wanted to make some progress with the bowsprit. I had a lot of issues with it, partly coming from the longer than expected head rails but also because the kit is designed with a different rigging scheme in mind which I plan to execute. The picture below is it's current state - I wanted to install the wooldings , but they have to go. I need to make space for the bobstay collar to clear the figurehead, even I will make the bowsprit longer by 3 cm. The bees and cap to be painted black later. Next tasks to come: - bowsprit collars (6) - main stay collar (kit shows this rigged to the bowsprit, but sources indicate it passes a hole in the head) - bowsprit rigging (bobstays, bs shoruds) - fore shrouds - then all the stays (5). After it, I can move to the topmasts. I'm sure it will take a while.. Saburo, GrandpaPhil, JpR62 and 2 others 5 Past builds: Prins Willem, Amati Coca Current Build: Occre Diana
DavidG Posted August 3, 2020 Author #36 Posted August 3, 2020 I had some progress in the last 3 months. I'm not a fast builder, but try to get some work done each day, even it sometimes to try a knot or two. After finished the rather straightforward (but lengthy) exercise of setting the lower shrouds, I started work on the lower stays. I concluded, the kit rigging plan is not any help at all- while I know nothing about the Spanish practice, some of the features shown are rather dubious (tying off topmast shrouds on the middle of masts, rigging fore stays with blocks, ect). For rigging lower stays I had more confidence, so started with these. The mouse was made on the lathe from dowel, the drill bit makes a good job the prevent the rather small part from braking. I gave a short thought to wave or serve the mouse but dropped the idea and simply painted it. This is the first one, installed on the mizzen mast. main mast: I chose to rig the main stay collar through a hole drilled to the head. Still don't know, what is proper way of tying off the lashing between the hearts. The example above is the most pleasing for my eye, and probably will use this form (v1), but I saw the lashing finished similar to a deadeye, tied off around the shroud above the heart (v2) and also tied off on itself, but only around the upper lashing lines, ie not holding the upper and lower lines together (v3). Any thoughts on this is appreciated, as I still haven't decided and most of the lanyards only temporarily rigged. catopower, Saburo, DaveBaxt and 1 other 4 Past builds: Prins Willem, Amati Coca Current Build: Occre Diana
DavidG Posted August 3, 2020 Author #37 Posted August 3, 2020 Having the lower stays done, I started to work on the bowsprit. Despite of there are reliable sources how to do it, I struggled a lot in this area. Given the dimensions of the head and the length of the bowsprit, the lines simply doesn't fit. The first issue is the bowsprit itself, I had to make it longer than the plan to fit the required fittings (and still had to remove the woolding behind the bees) and keep the lines away from bow rails. Then came the question of the figurehead. The kit supplied a nice one, with the small issue it doesn't really fit. The rigging plan bypasses this by leaving the bobstays slack to make space for the figure. My attempts to modify the figurehead or the whole arrangement of the bow were less than successful, moreover I accidentally dropped the poor figure casting broking her arms, to arrive to the conclusion I will have no figurehead on the model. Things got much easier to manage then. First, made the required collars for the bobstays, bowsprit shrouds and fore stays. Also cut two open hearts (the closed ones are from Vanguard Models).. Then set up the lines. The bowsprit shrouds and the bobstays along with all collars are served, it is also visible, how little space left for the figurehead. The bowsprit shrouds have a thimble holding a hook on the other end, attached to an eyebolt. I plan to add another pair of them, as shown in Petersson's book. Ryland Craze, DaveBaxt and catopower 3 Past builds: Prins Willem, Amati Coca Current Build: Occre Diana
DavidG Posted August 3, 2020 Author #38 Posted August 3, 2020 Before moving to the topmasts, some tasks were due around the mast tops. First is to install the catharpins and futtock shrouds on the main and fore masts. I used 1x1 mm wooden strips for the futtock poles, in retrospect they are a bit on the thick side, next time I may try to use thread instead. The futtock shrouds take a turn around the pole and secured by two seizings below. The hooks on their upper end are made from modified eyebolts (these are the small Amati copper ones), then darkened by heating them and dipped in oil. Then made the slings and the strops for the jeer blocks. The latter should have double strops, but I wasn't able to fi them to the blocks. Finally rigged them to the mast top. Dave_E, Ryland Craze and catopower 3 Past builds: Prins Willem, Amati Coca Current Build: Occre Diana
DavidG Posted August 3, 2020 Author #39 Posted August 3, 2020 In the meantime, I started to tie ratlines. It is made by clove hitches, using size 50 Corona cotton thread Currently I'm setting up the topmast shrouds, the next milestone will be the completion of the topmast stays. Here is an overall view of the model in it's current state: Ryland Craze, BenD, Dave_E and 5 others 8 Past builds: Prins Willem, Amati Coca Current Build: Occre Diana
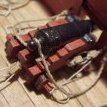
DavidG Posted October 21, 2020 Author #40 Posted October 21, 2020 I made some progress in the recent months, actually finished all the ratlines. They add a lot to the look of the ship. Actually it wasn't too bad. On average I tied 7-8 lines per day, but sometimes I really got into it and finished a whole section in a day. Here are some pictures of the current progress. the topmast stays are already on, but not finally tensioned. I started to work on the topgallant masts, which is the next task on hand. Finally a picture of the rigging thread collection I use, purchased from a local source. bruce d, ccoyle, ObviousNewbie and 4 others 7 Past builds: Prins Willem, Amati Coca Current Build: Occre Diana
AndreiCV Posted December 19, 2020 #41 Posted December 19, 2020 Добрый день. Очень приятно встретить строителя фрегата Диана. Меня зовут Андрей. Я тоже купил этот набор для постройки и на данный момент остановился на разметке чистовой обшивки корпуса. Вы не против общения по строительству модели? Хотел выложить свое фото, но не знаю, как это сделать на этом форуме ... Translation courtesy of Google: Good afternoon. It is very nice to meet the builder of the frigate Diana. My name is Andrew. I also bought this kit for construction and at the moment stopped at the layout of the finished casing. Are you not against communicating to build a model? I wanted to post my photo, but I do not know how to do it on this forum ...
DavidG Posted December 21, 2020 Author #42 Posted December 21, 2020 Hi Andrei, welcome to MSW and thanks for looking into my log. I'm happy to discuss your Diana build. The best way is to set up a build log of your own, simply by clicking the "Start new topic" button in the build log section. selecting the "choose files" option below your post, will allow you to upload pictures, which you can insert to your post with the "+" sign: Dave_E 1 Past builds: Prins Willem, Amati Coca Current Build: Occre Diana
AndreiCV Posted December 23, 2020 #43 Posted December 23, 2020 Добрый день. Пока не особо разобрался с Вашим сайтом, да еще переводчик интересно переводит)). На данный момент моя модель выглядит вот так, смотрите фото. Пока есть проблема в разметке чистовой обшивки, хочу чтобы разметка не попала сзади на корме в пол окна. А Вы почему не захотели делать гвоздевание палубы?) Я правда сам долго настраивался на этот подвиг, но сделал и не пожалел)). bruce d, Wahka_est and Saburo 3
DavidG Posted January 5, 2021 Author #44 Posted January 5, 2021 very nice planking, Andrey. If you set up your build log, all members can follow your progress and you can get advice on building. Saburo 1 Past builds: Prins Willem, Amati Coca Current Build: Occre Diana
DavidG Posted January 5, 2021 Author #45 Posted January 5, 2021 A year ago I had a plan to finish the model in 2020, which goal certainly wasn't met. Now it's time to make another public commitment, to finish it this year, 14 years after I started At least, I was able to install the topgallants and finish all standing rigging, also made the yards for the mizzen mast. The lines are not tied off, I'm sure they need adjustment later, especially when rigging the braces. Below is a picture of the current state, with standing rigging done: bruce d, allanyed, Wahka_est and 5 others 8 Past builds: Prins Willem, Amati Coca Current Build: Occre Diana
DavidG Posted January 17, 2022 Author #46 Posted January 17, 2022 (edited) poor Diana was neglected for most of last year, but recently started to work again, as I really want to finish it and move on. this build will celebrate the 15th birthday this year. A major dusting was due, also had to examine the model and my notes to plan for the next steps. Finally made some running rigging lines starting with the mizzen, which is now mostly finished. After a few weeks I got into practice again. Currently work on the main yard, after spraying with black primer, the truss pendants are being test fitted. In the foreground the jeer blocks are being made. The current stage of the build: thanks for looking in. Edited January 17, 2022 by DavidG ccoyle, ObviousNewbie, robdurant and 2 others 5 Past builds: Prins Willem, Amati Coca Current Build: Occre Diana
robdurant Posted January 17, 2022 #47 Posted January 17, 2022 She's looking very smart. Thanks for posting the progress. That yard looks very neat with its various cross sections (circular and octagonal) along its length. DavidG 1 Current build(s): Plymouth Ketch-Rigged Trawler "Erycina" (Vanguard Models, 1:64) Paused on the lofting floor: HMS Bristol Portland class 50-Gun Ship (Scratch build, 1:64) Paused builds: Barque "Stefano" (MarisStella, 1:63) / Trawler "Nordkap" (Billings Boats, 1:50) / HMS Triton 28 gun frigate cross section (1:64) / F138, HMS Rapid Type 15 Fast Anti-Submarine Frigate (based on above Deans Marine hull, semi-scratch, 1:96) / HMS Mercury (1779) (Shipyard Models, Paper, 1:96) Previous builds: ἈΘΗΝΑ (Athena) (6th Century B.C.) Greek Bireme (Dusek, 1:72) / Zulu "Lady Isabella" (Vanguard Models, 1:64) / HMS Ethalion (1797) from HMS Diana (Caldercraft, 1:64) / HM Cutter Sherbourne (Caldercraft, 1:64) / Completed partially built Royal Yacht Caroline (Panart, 1:47) / HM Schooner Pickle (Caldercraft, 1:64) / M32, HMS Cottesmore MCMV (Sirmar / Fleetscale, Semi-scratch, 1:48) / D98, HMS York, Type 42 Destroyer (Dragon with White Ensign Photoetch, 1:700) / K166, HMCS Snowberry Flower Class Corvette (Revell, 1:72) / R97, HMS Grenville Fleet Destroyer (Deans Marine, 1:96)
DaveBaxt Posted January 17, 2022 #48 Posted January 17, 2022 Some great looking rigging work and I like your mouse on your stays. and well done with your the rest of your build of the Diana. I have been considering building the Diana for a while so its great to see another blog of a excellent build of this ship. I am looking forward to your continued progress. Best regards Dave DavidG 1 Completed St Canute Billings Dec 2020 Completed HMS Bounty Amati May 2021 Finished Currently building HM Bark Endeavour
DavidG Posted February 1, 2022 Author #49 Posted February 1, 2022 yard making continues, I'm getting faster with them. here is the finished main yard, with all fittings installed. The setup for the stunsail booms are probably wrong for the era, sources indicate the iron should attach to the end of the yard, but I already made the yards for the mizzen by the kit plans and decided to go for consistency. there are several lines in the middle: jeer blocks, held together by a lashing (I still have to figure out, how to make acceptable lashings), jeers, truss pendants and the sling. some plans show the jeers are tied to the blocks, but Peterson shows them attached to the yards, woven over themselves. I found it nice looking and chose to do this way. ObviousNewbie 1 Past builds: Prins Willem, Amati Coca Current Build: Occre Diana
DavidG Posted February 11, 2022 Author #50 Posted February 11, 2022 (edited) I try to improve the process of making yards. this is my current process making them. I start with square stock, in this case 6mm for the main topsail yard. The most important step is to prime it with white before doing anything (they will be painted black later). This simple step vastly improved the octagonal shaping, now I can actually see what I do. The white background makes the marking clear, and provides good feedback how much wood to plane or carve away. The picture below shows the yard after shaping, the central white lines are remains of the primer. I intentionally leave the octagonal stems at the ends. These act as guides to define the centerline of the planes along the length, and with the help of a thread I can place the stirrups lined up properly (stirrups are copper eyelets in this case, as I failed several times to make proper thread versions with uniform length and having them straight). Then I make the blocks to add, this tool is a new acquisition after not finding Quadhands locally, but basically the same and works great. The required blocks and lines (blocks for the topgallant sheets, clueline blocks, footropes and cluelines). I pull the eyes tight after placing them on the yard and fix with diluted glue. The parrels are made next. I ordered Caldercraft etched parrel ribs in the hope of being more scale (ie smaller) than kit provided ones, but actually they are the same size. They have a cleaner look though so I used them, but made them thicker by gluing them in pairs, as the etched part looked pretty thin. I had the same experience with beads, what I bought in a hobby store was the same size than the kit ones (€0,5 for ~300 of them) , but at least I was able to select similar sized ones. Ethced ribs, paired ones and kit supplied parts: After painting them, I made the parrel with served lines, eyes in the end and a lashing attached. This matches my sources, but the use of served line proved to be a mistake as the thickness made the installation around the mast very difficult due to their stiffness (despite having them wet). Finally cut the stems, painted and varnished the yard and added the fittings. The stunsail boom irons are simulated by paper strips and held in place by brass wire. They are placed 45' forward on the top. Edited February 11, 2022 by DavidG ccoyle and ObviousNewbie 2 Past builds: Prins Willem, Amati Coca Current Build: Occre Diana
DavidG Posted March 31, 2022 Author #51 Posted March 31, 2022 time for an update, I try to do something on the model each day, even very small steps move things forward. With persistent work, I made a total mess of rigging lines over the weeks. then started to tie off the lines, which I'm currently doing. this picture shows the rigging around the fore yard, a significant departure from the kit instructions. I followed the Peterson book to make jeers, sling, lashings, etc. An unexpected side effect, the belaying points prepared by the kit instructions doesn't match, and I have to redo several of them. I tried myself to make a nave line, I never rigged before. It's hard to notice between the other lines, but this one is attached to the trusses, and holds them from above, through a block under the mast top. It's a tricky bit of rigging to run freely between the catharpins and install it on the right side of the main topmast stay (first I made it wrong and had to remove the block from the stay, as I didn't want to disassemble the trusses) the stern area also taking shape. I knocked off the guy pendants so many times, I just left them unrigged for now. finally an overall picture of the model as of now: There is some belaying left, a week of work in my pace, then I move to the bow section. ObviousNewbie, robdurant, Theodosius and 6 others 9 Past builds: Prins Willem, Amati Coca Current Build: Occre Diana
DaveBaxt Posted March 31, 2022 #52 Posted March 31, 2022 Terrifc looking Diana and some excelent workmanship. I hope I can acheive something half as good, when I eventually get started. I plan to do another blog so hopefully I will get some help. Just wondering what are your thoughts on Caldercraft in general and would you build another one by them? Completed St Canute Billings Dec 2020 Completed HMS Bounty Amati May 2021 Finished Currently building HM Bark Endeavour
DavidG Posted April 1, 2022 Author #53 Posted April 1, 2022 thank you Dave for your words. The kit I'm building is from Occre, not Caldercraft. Overall the hull is pretty solid and goes together well. The materials are not first class, but they are OK for the price of the kit. The kit falls short on detailing and fittings, most of my activities revolve around putting this right (or at least improve them some). For me it's not an issue as I feel like doing some actual modeling. A modeler looking for an accurate scale model to be built from the box may find it lacking. While I never built a Caldercraft kit, from what I see they are on a next level of accuracy, they also provide a bigger challenge to the builder. The Caldercraft Diana is a different ship (a British one), I saw wonderful finished models of it. ccoyle 1 Past builds: Prins Willem, Amati Coca Current Build: Occre Diana
Dave_E Posted April 1, 2022 #54 Posted April 1, 2022 (edited) Your photography is outstanding! I’ve got you build on “speed dial” because your documentation and photography for the rigging is so crazy beautiful and will help me as I attempt my first rigging. Thank you! 👍😀 Edited April 1, 2022 by Dave_E Dave Current builds: Rattlesnake Completed builds: Lady Nelson On the shelf: NRG Half Hull Project, Various metal, plastic and paper models
DavidG Posted April 25, 2022 Author #55 Posted April 25, 2022 in the recent weeks I added most of the rigging to the main mast, and started to permanently belay the lines. This is the point where my lack of forward planning make some problems, I did not use the kit rigging plan, but neither installed the belaying points from the Petersson book. So I have to do it having a lot of rigging already attached, making some tasks unnecessarily difficult. I had to work around several lines to attach the shroud cleats for the topgallant lifts. Then I moved to the bow section, and made the spritsail yard. Coming to the end of the yard making, I learned to install properly sized clueline blocks; better late then never. This is something I recognized too late, these blocks are small, and I have to live with the bit oversized ones on the other yards. From the upper outside, there are lines for the standing lifts, thimbles for the jibboom guys. Apart from the footropes, cluelines and their blocks from below. The spritsal yard in place. Held in place by a sling, and halyard. Then started to add the fittings to the bowsprit cap, the standing lifts first, they should have thimbles but I omitted them as the ones I have looked out of scale for me. Looking the picture, the port side lashing needs replacement - by eye it wasn't so bad. Bowsprit horses rigged next, from the cap to the timberheads. These lines hold the netting, used for storing the staysail - it was a fun feature to add, while I choose to use tulle instead weaving the lines. Dave_E, ccoyle, GrandpaPhil and 4 others 7 Past builds: Prins Willem, Amati Coca Current Build: Occre Diana
DavidG Posted May 24, 2022 Author #56 Posted May 24, 2022 making a saddle for the bowsprit While stepping the masts, I realized the kit didn't supply enough mast foot rings. I used the Occre parts order service from their website which worked very well, and shortly I was sent a whole bunch of the rings, left with several spares. These are actually pretty nice parts, made of boxwood. This came to my mind while thinking on the saddle, and fortunately the size was just right. I split the rings, drilled on the mill and installed on the mast. Oldsalt1950, clearway, GrandpaPhil and 5 others 8 Past builds: Prins Willem, Amati Coca Current Build: Occre Diana
clearway Posted May 24, 2022 #57 Posted May 24, 2022 nice work- can be fun and frustrating upgrading the occre kits😁 Keith DavidG and Dave_E 2
DavidG Posted May 31, 2022 Author #58 Posted May 31, 2022 being a bit tired of the rigging, I wanted do something with wood, so decided to make the gunport doors. These will replace the metal ones of the kit. They are 11mm square, made of 2 layers, laid perpendicular. The outer part matches the kit planking, inner part is 1mm walnut strip. Inner face to be painted red. The problem is, there is already a lot of red on the ship (inner bulwarks, guns, etc) painted 10+ years ago, and the wood stain I used is no longer available. By testing different paints, I found one called "glistening blood" in a set I use for miniature painting, which matches the color quite well. On the paper, the color is quite realistic.. clearway, GrandpaPhil and Dave_E 3 Past builds: Prins Willem, Amati Coca Current Build: Occre Diana

Recommended Posts
Create an account or sign in to comment
You need to be a member in order to leave a comment
Create an account
Sign up for a new account in our community. It's easy!
Register a new accountSign in
Already have an account? Sign in here.
Sign In Now