Jump to content

Recommended Posts

US and Australia might be apples vs oranges but here in the US we have a company named Harbor Freight that sells all sorts of low priced tools.  They sell a two wheeled dolly of the type used by movers for about $45.  Unlike some of their offerings these are of decent quality and would be perfect for moving your lead ballast.


Roger

Link to comment
Share on other sites

3 hours ago, Richard Dunn said:

I don't blink at $500

I do all right as well even though I am retired but old habits die hard and you can be certain that $500 would stop me from blinking as well if there was a less expensive option. Must be all that Scotch in my heritage............ Or is that Scotch 🥃 in my blood?:unsure:


I didn't think of the one way part Mark. 

Lou


Build logs: Colonial sloop Providence 1/48th scale kit bashed from AL Independence

Currant builds:

Constructo Brigantine Sentinel (Union) (On hold)

Minicraft 1/350 Titanic (For the Admiral)

1/350 Heavy Cruiser USS Houston (Resin)

Currant research/scratchbuild:

Schooner USS Lanikai/Hermes

Non ship build log:

1/35th UH-1H Huey


Link to comment
Share on other sites

11 hours ago, lmagna said:

Must be all that Scotch in my heritage

Lou


You are walking a tight rope. Scotch is indeed a drink and Scot is a person. They get very touchy about the distinction north of the boarder. On the other hand you may indeed have a lot of scotch in your ancestry - I remember all of those western bar scenes.

Keith


Current Build:-

Cangarda (Steam Yacht) - Scale 1:24


Previous Builds:-


Schooner Germania (Nova) - Scale 1:36

https://modelshipworld.com/topic/19848-schooner-germania-nova-by-keithaug-scale-136-1908-2011/

Schooner Altair by KeithAug - Scale 1:32 - 1931

http://modelshipworld.com/index.php/topic/12515-schooner-altair-by-keithaug-scale-132-1931/?p=378702

J Class Endeavour by KeithAug - Amati - Scale 1:35 - 1989 after restoration.

http://modelshipworld.com/index.php/topic/10752-j-class-endeavour-by-keithaug-amati-scale-135-1989-after-restoration/?p=325029


Other Topics

Nautical Adventures

http://modelshipworld.com/index.php/topic/13727-nautical-adventures/?p=422846


Link to comment
Share on other sites

I blink at a fiver... but still spend whatever it takes on this game, since whatever it's going on is obviously going to make everything so much easier and better. 

Current builds:

1) HMS Victory 1:100 (Heller)

https://modelshipworld.com/topic/23247-hms-victory-by-kevin-the-lubber-heller-1100-plastic-with-3d-printed-additions/


2) Bluenose II 1:100 (Billing) - paused, not in the mood

https://modelshipworld.com/topic/30694-billing-bluenose-ii-1100-no600-by-kevin-the-lubber/


3) Cutty Sark 1:96 Revell

https://modelshipworld.com/topic/30964-cutty-sark-by-kevin-the-lubber-revell-196


Stash:

Revell Cutty Sark 1/96 (a spare for later)

Revell Beagle 1/96 (unlikely to ever get built!)

Revell Kearsage 1/96 (can't wait to get started on this)

Revell Constitution 1/96


If at first you don't succeed, buy some more tools.

Link to comment
Share on other sites

Some updates from yesterday.
I always get excited when the bilge Keel and Bow Bulwark go on, it seems to define the hull in my eyes.

200941376_DSCN9137copy.thumb.jpg.50fa199f6a0b1d95edef881a5ee8a5d7.jpg

929283884_DSCN9138copy.thumb.jpg.dc88c5aba98a4993bad1ae18df8c61a0.jpg

2049176969_DSCN9139copy.thumb.jpg.2624509bf74b87ffdfa59e9e3ee7c652.jpg

The Bow rudder frame is laminated from 9 layers of .5mm ply, so VERY strong and rigid, next to it the radiused back wall of rudder space. now to cut the fore foot off the hull and build the rudder.

1602789807_DSCN9141copy.thumb.jpg.4950278ad0c6d330f000c3817c97a139.jpg

Link to comment
Share on other sites

I’ve never seen a bow rudder before, will be interested so see it when it’s done. You’re right about the bow line, very elegant.

Current builds:

1) HMS Victory 1:100 (Heller)

https://modelshipworld.com/topic/23247-hms-victory-by-kevin-the-lubber-heller-1100-plastic-with-3d-printed-additions/


2) Bluenose II 1:100 (Billing) - paused, not in the mood

https://modelshipworld.com/topic/30694-billing-bluenose-ii-1100-no600-by-kevin-the-lubber/


3) Cutty Sark 1:96 Revell

https://modelshipworld.com/topic/30964-cutty-sark-by-kevin-the-lubber-revell-196


Stash:

Revell Cutty Sark 1/96 (a spare for later)

Revell Beagle 1/96 (unlikely to ever get built!)

Revell Kearsage 1/96 (can't wait to get started on this)

Revell Constitution 1/96


If at first you don't succeed, buy some more tools.

Link to comment
Share on other sites

Yeah its not that uncommon in that period.
Here is the plan.

1356033935_Bowrudder.thumb.JPG.cc5b6fa240c3df208f95c7beaf15ae83.JPG

Also this plan is HUGE its 5 m long in reality and one of the hardest to read due to its condition, I had to restore it, I can read it but it was a challenge, you can see why the model is so accurate when you have all the units construction plans like this.

261126028_Foreendframing.thumb.JPG.edda6e5db1df4c893c66a767507d8398.JPG

A close-up, I left this large so you can save it and look at detail, not all model builders have seen plans like this for real.

1775434031_TEVWahineForeEndFraming.thumb.jpg.6b6bef9b25ffae3b547dbb19cd37a5c7.jpg


Edited by Richard Dunn
Link to comment
Share on other sites

6 hours ago, KeithAug said:

Scot is a person

Hi Keith

While I was aware of that, it didn't seem to quite fit into the intended joke for some reason. Maybe it is just me.


In fact the truth of the matter is that Some of my ancestors came from Scotland in the late 1800s (Crook clan) and according to  Ancestry.com I am 46% Scotland, and 28% England & Northwestern Europe. That makes me more Northwestern European than my wife who's maiden name is of fairly recent English decent.

Edited by lmagna

Lou


Build logs: Colonial sloop Providence 1/48th scale kit bashed from AL Independence

Currant builds:

Constructo Brigantine Sentinel (Union) (On hold)

Minicraft 1/350 Titanic (For the Admiral)

1/350 Heavy Cruiser USS Houston (Resin)

Currant research/scratchbuild:

Schooner USS Lanikai/Hermes

Non ship build log:

1/35th UH-1H Huey


Link to comment
Share on other sites

56 minutes ago, Roger Pellett said:

It appears that when built she had a bow rudder plus 

a bow thruster.  Why both?  Here on the Great Lakes our 1000ft ore carriers navigate our very small harbors with just bow thrusters and sometimes stern thrusters.  They don’t require tugs.


Roge

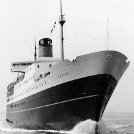
She had both Bow and Stern  thrusters, plus bow rudder, I never asked about it but I assume due to the very windy nature of her home port and very dangerous water she operated on.
I do know the bow rudder was virtually never used.

Her replacement the TEV Rangatira was built with 2 bow thrusters and no Bow rudder.

Edited by Richard Dunn
Link to comment
Share on other sites

In response to Roger Pellet's query: Wahine operated a regular service out of Wellington on the southern end of North Island, New Zealand.  The entrance to the harbour is directly open to the south and very exposed. A southerly buster can raise massive swells which are made worse by the funnel shape of the entrance, making steering an inbound ship extremely difficult.  I recommend reading accounts of the loss of the ship to get a real feel for the needs behind bow rudder and a thruster, other than for berthing assistance. 

Link to comment
Share on other sites

This is a very short video about it, there are lots, but this sums it up as well as any, I have been interested in this ship my whole life and a friend of mine who was the captains Godson had an awesome website about it but it’s been removed as he Passed away a few years ago, I am trying to get the national archives to put it back up.
But to sum it up the ship was approaching Wellington Harbour entrance in storm conditions  which is fairly normal and was in a following sea with 7m waves and about 60-70-knots and heavy rain, as she entered the harbour entrance at 6.00am where you can’t turn due to rocks either side, at that exact moment  2 cyclones merged into a super cell right at the spot and with 275km winds she stated to lose steerage, she was going port to starboard 15 degrees off centre and at a point started to go to port even with the rudders hard to starboard.
The sea had complete control of the vessel and the waves were 30m high, there are photos of them taken from ship and they are monstrous in size and the tops just being blown off the top like a horizontal white sheet of foam
At this point she was pooped by a freak wave and broached to Starboard, as she righted she was side on to wind and sea, the conditions had dropped to zero visibility and the radar by this point failed due to water in the unit.
The master made a bunch of movements by pure feeling  which resulted in the ship successfully being turned almost back out but she was caught by another big wave and dropped on the reef tearing off one of her props and pushing one of the rudders into the hull, she dragged on the reef for a good hour and was extensively flooded, her draft increased  7 feet in this time and she lost all motive power as the engine room was one of the many compartments flooded. She ultimately got her anchors down and floated up the harbour, She was starting to list and roll from the free surface effect of water that was getting on her vehicle deck from the drains that were allowing the water below to come up on deck and could not be stopped, and she ultimately capsized about 1.00pm after all were off the ship, all those that perished did so in the water and on the rocks of the coast in mountainous surf.
If you watch the video you can see the unmistakable rolling caused by free surface on the deck.
This is super brief but it sums it up.


Edited by Richard Dunn
Link to comment
Share on other sites

Yes - I saw a very good video (with survivor interviews) several years ago. If my recollection serves me well (which isn't always the case) she could have arrived early but choose to delay entry to "arrive on time". Am I fantasising???

Keith


Current Build:-

Cangarda (Steam Yacht) - Scale 1:24


Previous Builds:-


Schooner Germania (Nova) - Scale 1:36

https://modelshipworld.com/topic/19848-schooner-germania-nova-by-keithaug-scale-136-1908-2011/

Schooner Altair by KeithAug - Scale 1:32 - 1931

http://modelshipworld.com/index.php/topic/12515-schooner-altair-by-keithaug-scale-132-1931/?p=378702

J Class Endeavour by KeithAug - Amati - Scale 1:35 - 1989 after restoration.

http://modelshipworld.com/index.php/topic/10752-j-class-endeavour-by-keithaug-amati-scale-135-1989-after-restoration/?p=325029


Other Topics

Nautical Adventures

http://modelshipworld.com/index.php/topic/13727-nautical-adventures/?p=422846


Link to comment
Share on other sites

I glued the Bow Bulwark on today after 2 days of fitting and 3 templates to get the thing to sit right, in the end I made spreaders to tack on deck at stay positions to hold the spread/flare, the part is not a continuation of hull but flares out ever so slightly more and its a very integral part of her forward beauty so needed to do it justice, anyway here it is glued on and the top 7" Bulb plate capping taped in place, I will glue this tomorrow so the Bulwark is far less prone to damage being only .5mm ply and all.
also you can clearly see the 1mm Bulwark Stay locations in the deck plates, all in all it should be strong enough.

132830244_DSCN9142copy.thumb.jpg.15f2348412fd017b212766823abb6933.jpg

A cropped shot of how it will look... hopefully

stays.thumb.jpg.d603fc23b15ce92f013cb75938ee0599.jpg

1959315598_DSCN9154copy.thumb.jpg.b5fd514f9b38efbad6a7bc6cde7e4dcb.jpg

146486919_DSCN9143copy.thumb.jpg.265720bbf6f3038601ecc8d9e9411230.jpg
I have also fitted aligned and glued the bow rudder into place with the bearings installed, all that needs to be done is the spaces in the rudder filled with balsa and the frame shaped to suit the bulbous bow forms by following of the frames of the rudder itself as the webs are taken off the bow rudder plan I posted earlier.
556661648_DSCN9144copy.thumb.jpg.d7a058c4c55f8eb595b6704d33079734.jpg

2095766657_DSCN9151copy.thumb.jpg.8a03b4941b8639aa48b5865667894362.jpg

1972225716_DSCN9152copy.thumb.jpg.149d23cf65eb2dd25755665e44365123.jpg

912510308_DSCN9153copy.thumb.jpg.c8622fb89bcddf211ae593c845c23b27.jpg
The internal bearing at the tiller arm, it was planned for well in advance when cutting planks for hull.

1215932080_DSCN9145copy.thumb.jpg.795cd1bbbe6b41bce564b347601a6796.jpg

And finally I have machined the engine mounts and am ready to assemble and carefully glass these into place.

2130619455_DSCN9147copy.thumb.jpg.054efd6be17a409ed5c2e9bfa5f3706d.jpg

The motors are bolted down  into cradle by upper frames seen below.

1955498209_DSCN9148copy.thumb.jpg.17834427bab62e75b5d9246f626c43b1.jpg

267296682_DSCN9146copy.thumb.jpg.fd1df9a30186f34b5ab16b177238c413.jpg


DSCN9150 copy.jpg

DSCN9149 copy.jpg

Edited by Richard Dunn
Link to comment
Share on other sites

On 6/14/2022 at 10:43 PM, yvesvidal said:

It must have been heart wreaking to cut that nicely shaped bulb at the bow, to install the front rudder....

It was always going to be, that's why I never refined it. I shaped it so the areas adjacent all come into that area nicely and I don't get a sudden change in the fairness of the surface.
The plating is coming along nicely, these shots should give an idea of how its going to look, the distortion is subtle but there.

The ones that look like they are lifting are taped on as placeholders

730012431_DSCN9158copy.thumb.jpg.4ff0624c4cb9d37e3a3c06a9231b02a1.jpg

If you look at the bow area above in the shiny bit you can see the ripples..

183504552_DSCN9156copy.thumb.jpg.1e73f750702b199a5b428ce578e77d0e.jpg

Edited by Richard Dunn
Link to comment
Share on other sites

More plating, Port side getting close to completion.
Today as the sun was going down through the door in the background the light hit the hull and wow the effect is there alright.
Tomorrow night I will try to photograph it. its been hard work to plate like this but well worth it!.

279400133_DSCN9164copy.thumb.jpg.ec5fee9dd00fb1766cd259f965193bfc.jpg

1235814806_DSCN9162copy.thumb.jpg.9f686198c9657cfa3fece3f8c44fab8f.jpg

The arrow below delineates the extent of the double riveted seam forward, from that point forward it's a single row.
The holes down low are the Fuel Oil Scuppers.

1733670295_DSCN9163copy.thumb.jpg.96b79d61448dee130a28c30afd1d31db.jpg

Link to comment
Share on other sites

Some updates to the upper structure being plated.
The bridge is going to a nightmare due to the complex curves and shapes. The front panels here are oversize so ignore windows not lining up.

1850516551_DSCN9165copy.thumb.jpg.bd3c6a455683700e87859cb24da96dee.jpg
The underneath has complex framing and vent trunks to build.

1109538217_DSCN9166copy.thumb.jpg.89c1857ee81896c24fd8f4af2da154c1.jpg

The bridge roof can't be installed for a while as I have to fitout the wheelhouse first, another big problem as the roof helps hold the form.

1535851193_DSCN9167copy.thumb.jpg.32cef37e594a67ddf19cf622be41f0a3.jpg
Next the fan rooms being done, plating on roof ready for weld seams and the upstand is clearly seen, it is quite strong luckily.

1231884104_DSCN9168copy.thumb.jpg.87daae6541644e18d07e4e10af386ebd.jpg

373338743_DSCN9169copy.thumb.jpg.8bdcbdc1adc31aad9d04eaebdd45242f.jpg

And finally the plating in the aft mooring decks and around stern door.

The slots for Bulwark stays and stiffeners can be seen as well as the slots to locate the stair wall near forward end.

1245042570_DSCN9170copy.thumb.jpg.45d8be6f672167dba8ceaaa9eb98de02.jpg

Stern door, the square holes above door is for the stern door hinges.
I am happy I pre primed though as the blow back painting into internal corners would be horrible and give a grainy finish.

1160493549_DSCN9171copy.thumb.jpg.7a4635fa9485b9e7dbb617e6e90be9b5.jpg

Edited by Richard Dunn
Link to comment
Share on other sites

Hi Richard,

I came across your build rather late and am impressed of your modeling technique from the start to the state in progress. She will be a beauty and a highlight on MSW scratchbuilds. With ref. to the rivets, why did`nt you ponce them to the plating you are using, did you try it.....


Nils

Current builds

-Lightship Elbe 1

Completed

- Steamship Ergenstrasse ex Laker Corsicana 1918- scale 1:87 scratchbuild

"Zeesboot"  heritage wooden fishing small craft around 1870, POB  clinker scratch build scale 1:24

Pilot Schooner # 5 ELBE  ex Wanderbird, scale 1:50 scratchbuild

Mississippi Sterwheelsteamer built as christmapresent for grandson modified kit build

Chebec "Eagle of Algier" 1753--scale 1:48-POB-(scratchbuild) 

"SS Kaiser Wilhelm der Grosse" four stacker passenger liner of 1897, blue ribbond awarded, 1:144 (scratchbuild)
"HMS Pegasus" , 16 gun sloop, Swan-Class 1776-1777 scale 1:64 from Amati plan 

-"Pamir" 4-mast barque, P-liner, 1:96  (scratchbuild)

-"Gorch Fock 2" German Navy cadet training 3-mast barque, 1:95 (scratchbuild) 

"Heinrich Kayser" heritage Merchant Steamship, 1:96 (scratchbuild)  original was my grandfathers ship

-"Bohuslän" , heritage ,live Swedish museum passenger steamer (Billings kit), 1:50 

"Lorbas", river tug, steam driven for RC, fictive design (scratchbuild), scale appr. 1:32

under restoration / restoration finished 

"Hjejlen" steam paddlewheeler, 1861, Billings Boats rare old kit, scale 1:50

Link to comment
Share on other sites

13 hours ago, Mirabell61 said:

With ref. to the rivets, why did`nt you ponce them to the plating you are using, did you try it.....

The plating is .5mm 3ply and you can't pounce Ply also I want resin rivets with shanks as they have to actually be glued in to hold the promenade screen in place.
The reason for ply over styrene plating has already been discussed in a previous page somewhere. 

Edited by Richard Dunn
Link to comment
Share on other sites

At the size you are working is there a chance that there is a finishing brad or nail that would fit the need?

Lou


Build logs: Colonial sloop Providence 1/48th scale kit bashed from AL Independence

Currant builds:

Constructo Brigantine Sentinel (Union) (On hold)

Minicraft 1/350 Titanic (For the Admiral)

1/350 Heavy Cruiser USS Houston (Resin)

Currant research/scratchbuild:

Schooner USS Lanikai/Hermes

Non ship build log:

1/35th UH-1H Huey


Link to comment
Share on other sites

15 hours ago, lmagna said:

At the size you are working is there a chance that there is a finishing brad or nail that would fit the need?

Yes Lou,

I actually tried to find some round head brass pins of the right size but I had no luck.
If anyone does know here are the sizes and quantities.

The other problem of course is the head dia is the important size and not the one they give, normally they give the shaft of brads and don't even say what the head dia is.


1.4mm head dia  x  3750

1.2mm head dia  x   3750

I still have not heard from that other mob, not great service at all, glad I checked before paying for them online.

Edited by Richard Dunn
Link to comment
Share on other sites

Join the conversation

You can post now and register later. If you have an account, sign in now to post with your account.

Guest
Reply to this topic...

×   Pasted as rich text.   Paste as plain text instead

  Only 75 emoji are allowed.

×   Your link has been automatically embedded.   Display as a link instead

×   Your previous content has been restored.   Clear editor

×   You cannot paste images directly. Upload or insert images from URL.

  • Recently Browsing   0 members

    • No registered users viewing this page.
×
×
  • Create New...