Search the Community
Showing results for tags 'master korabel'.
-
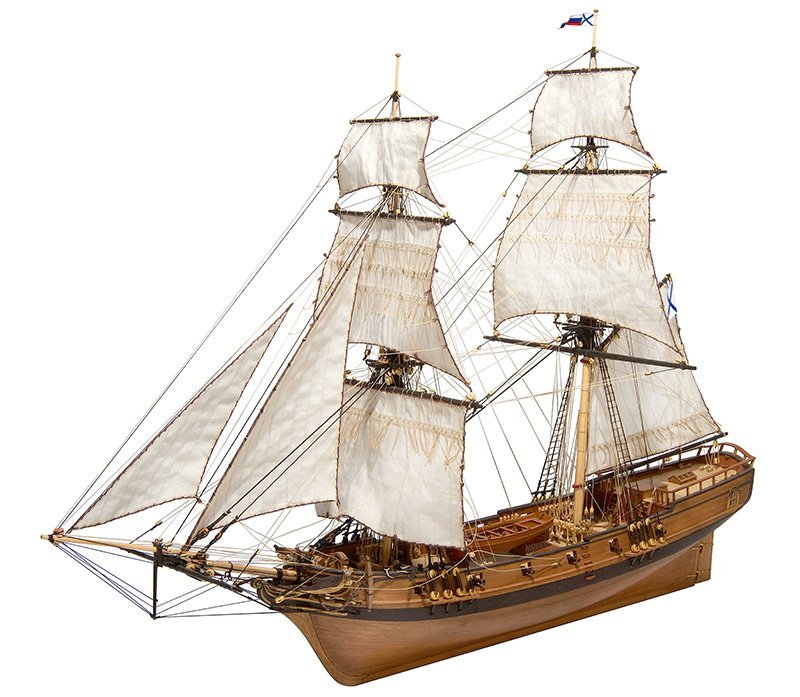
 Introduction Welcome to my build log for Master Korabel's Phoenix (styled on the box as 'Brigantine Phoenix'). Photo courtesy of Master Korabel I'll start this log off by sharing a brief history of the ship, my reasons for choosing this particular kit, and some thoughts about how I'd like the model to look like when she's finished. This is Master Korabel's description of the ship (edited): "Cruiser Vessel 12 gun brigantine 'Phoenix' became part of the Black Sea Fleet in 1787. The crew included 52 people. It participated in the war with Turkey in 1787-1791. In 1788, as part of the squadron of Rear Admiral Count M.I. Voinovich, it went to sea in search of the enemy and took part in the battle near the island of Fidonisi. In 1789, as part of the detachments and squadrons, repeatedly went to sea in search of Turkish ships. It then participated in the war with France, 1798-1800, where it was used as a transport ship. In November 1798, this ship went to Sebastapol to Corfu with the provisions of the squadron of Vice Admiral F.F. Ushakov." There are several build logs for this kit already resident on MSW, which you can find listed here; at least two have been finished. I chose to add mine to this group for the following reasons: I like the subject -- that's always important when embarking on a build that may take several years to complete. Having built their cannon-armed yawl ('Canon Jolle'), I really like Master Korabel's kits. Their materials and plans are very good (with a few exceptions, which I will note in an ensuing post). One feature that I particularly appreciate is the laser-cut planking, which eliminates the need for spiling, a chore I do not enjoy. At 1/72 scale, the finished model will not be overly large, an important consideration in my household. Plus, that's the same scale as for the yawl, and it is also a common scale for card model sailing subjects. And finally, this kit will be my attempt to build the model that HMS Fly was supposed to be -- my one effort to pull off a nice-looking, square-rigged ship before retreating back into the shadowy world of building card airplanes. There's still plenty of time, of course, to decide on how I'd like the model to be finished, and I have done a lot of browsing online to see how others have finished theirs. Most builders opt to have leave their models largely unpainted, and that is certainly an option thanks to Master Korabel's use of very nice woods in their kits. However, one finished Phoenix has singularly caught my attention: I wish I could give the builder of this model the credit he deserves, but shortly after I found this photo, the website on which it was hosted disappeared, which is a shame, because there were more photos of this beautiful model that I would have liked to use for reference. The thing that really strikes me about this model is that despite what one might think at first glance, the model's hull is not coppered. Nope, that's just the natural tone of the walnut veneer used in the kit. It's like the best of both worlds -- both a fantastic paint job and some lovely bare wood. Anyways, that'll do for an introduction. In my next post, we'll take a look at an unboxing.
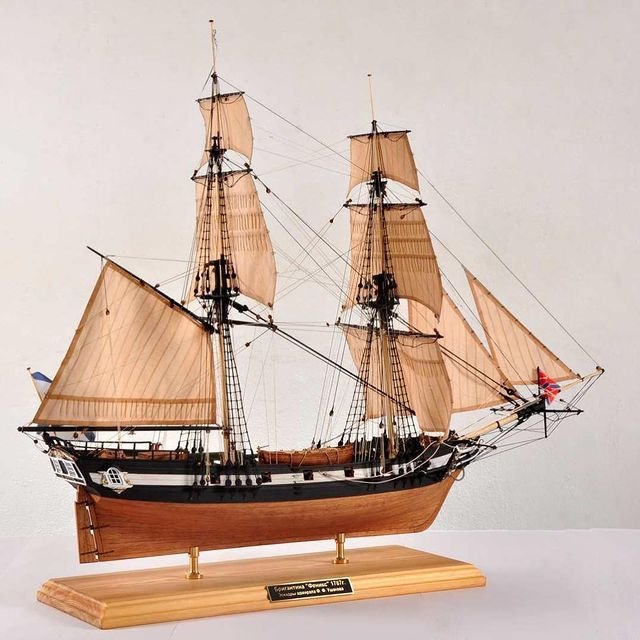
-
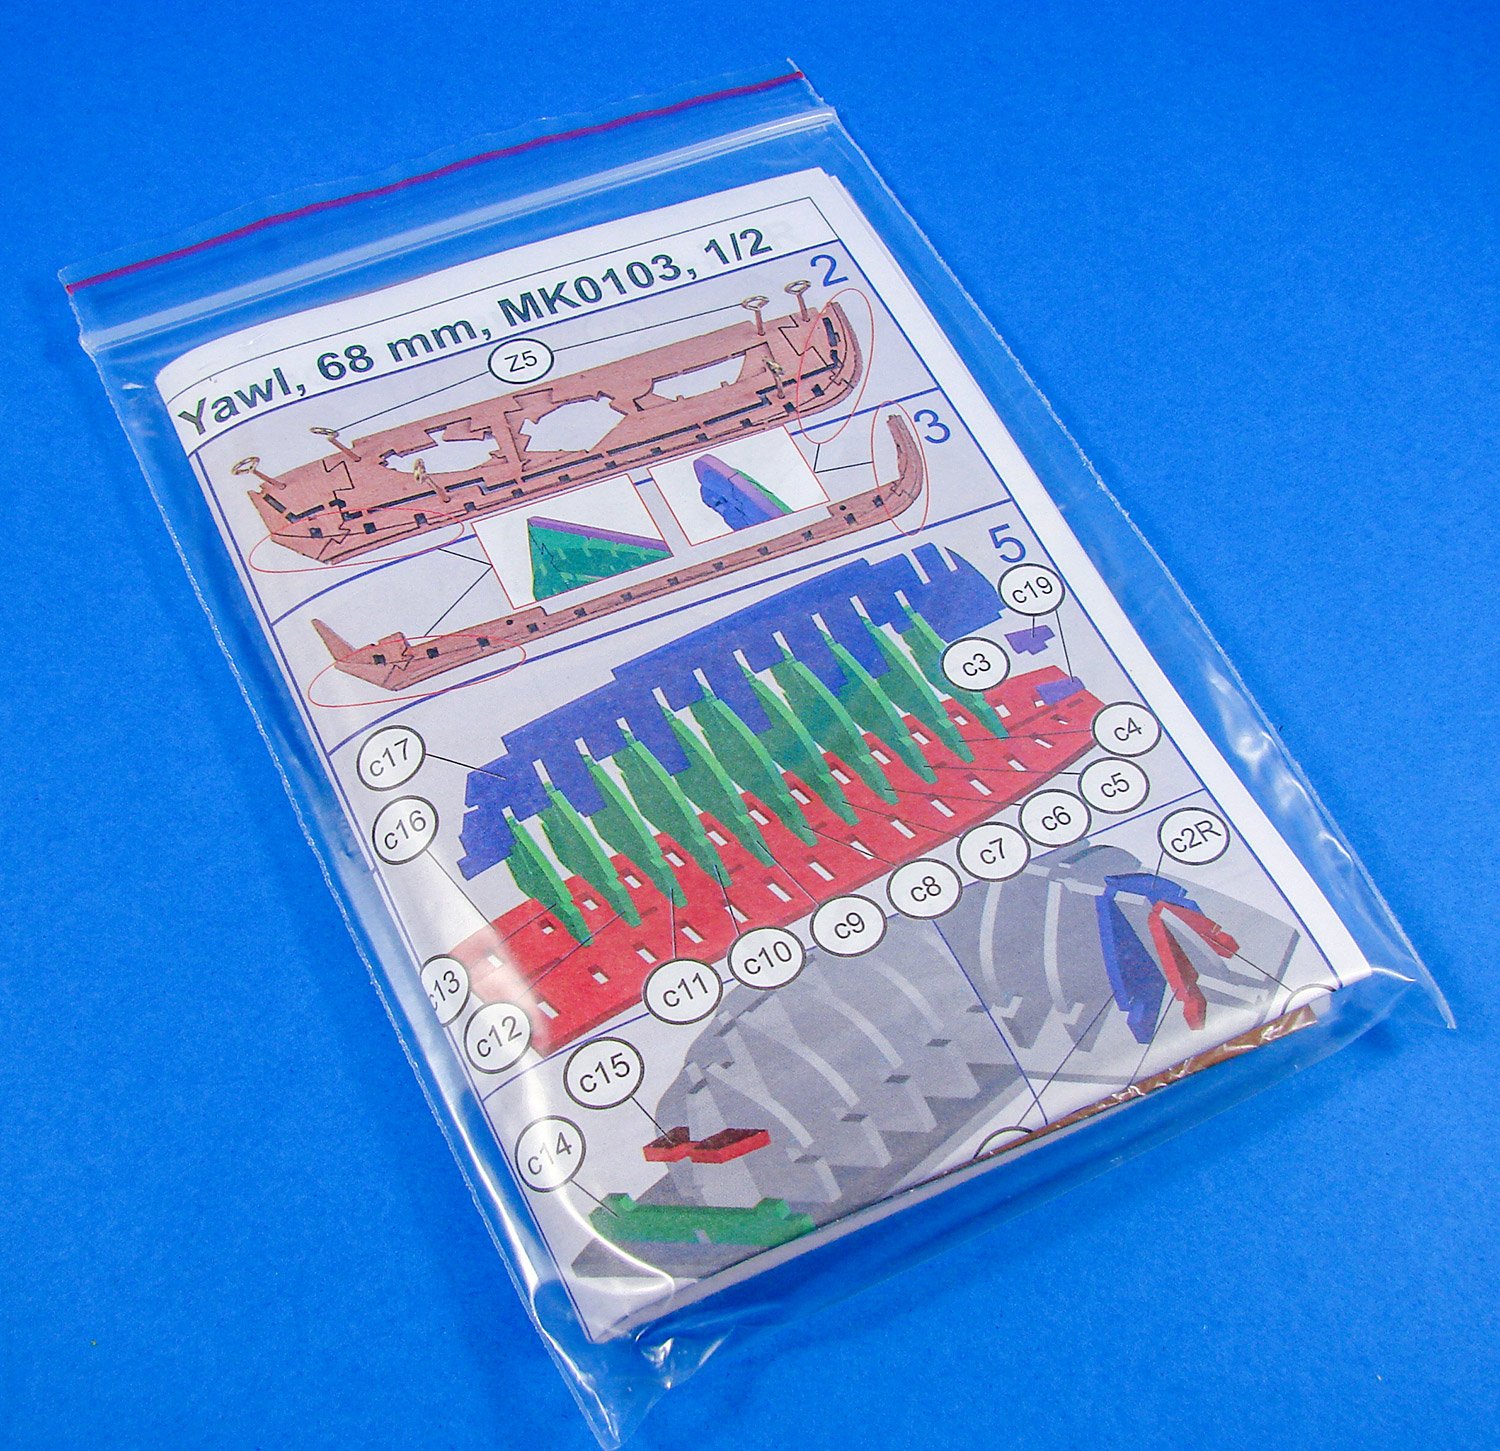
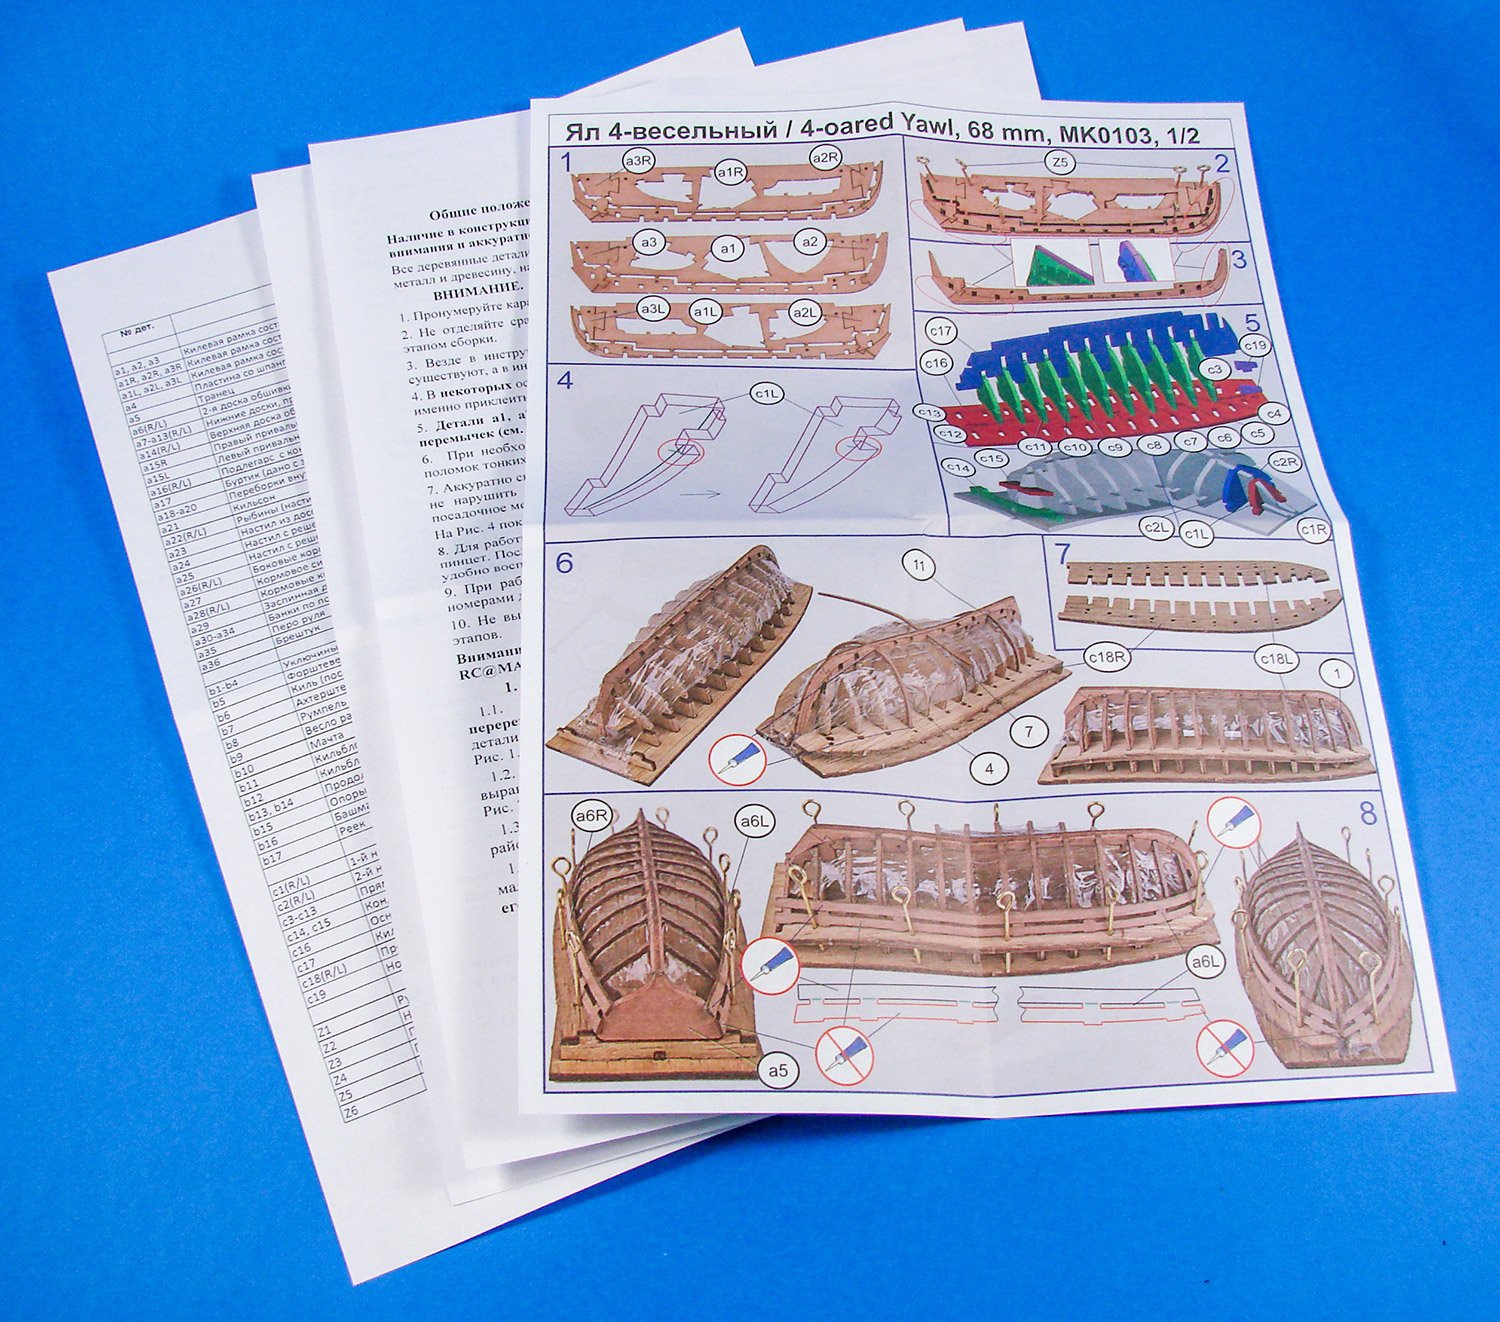
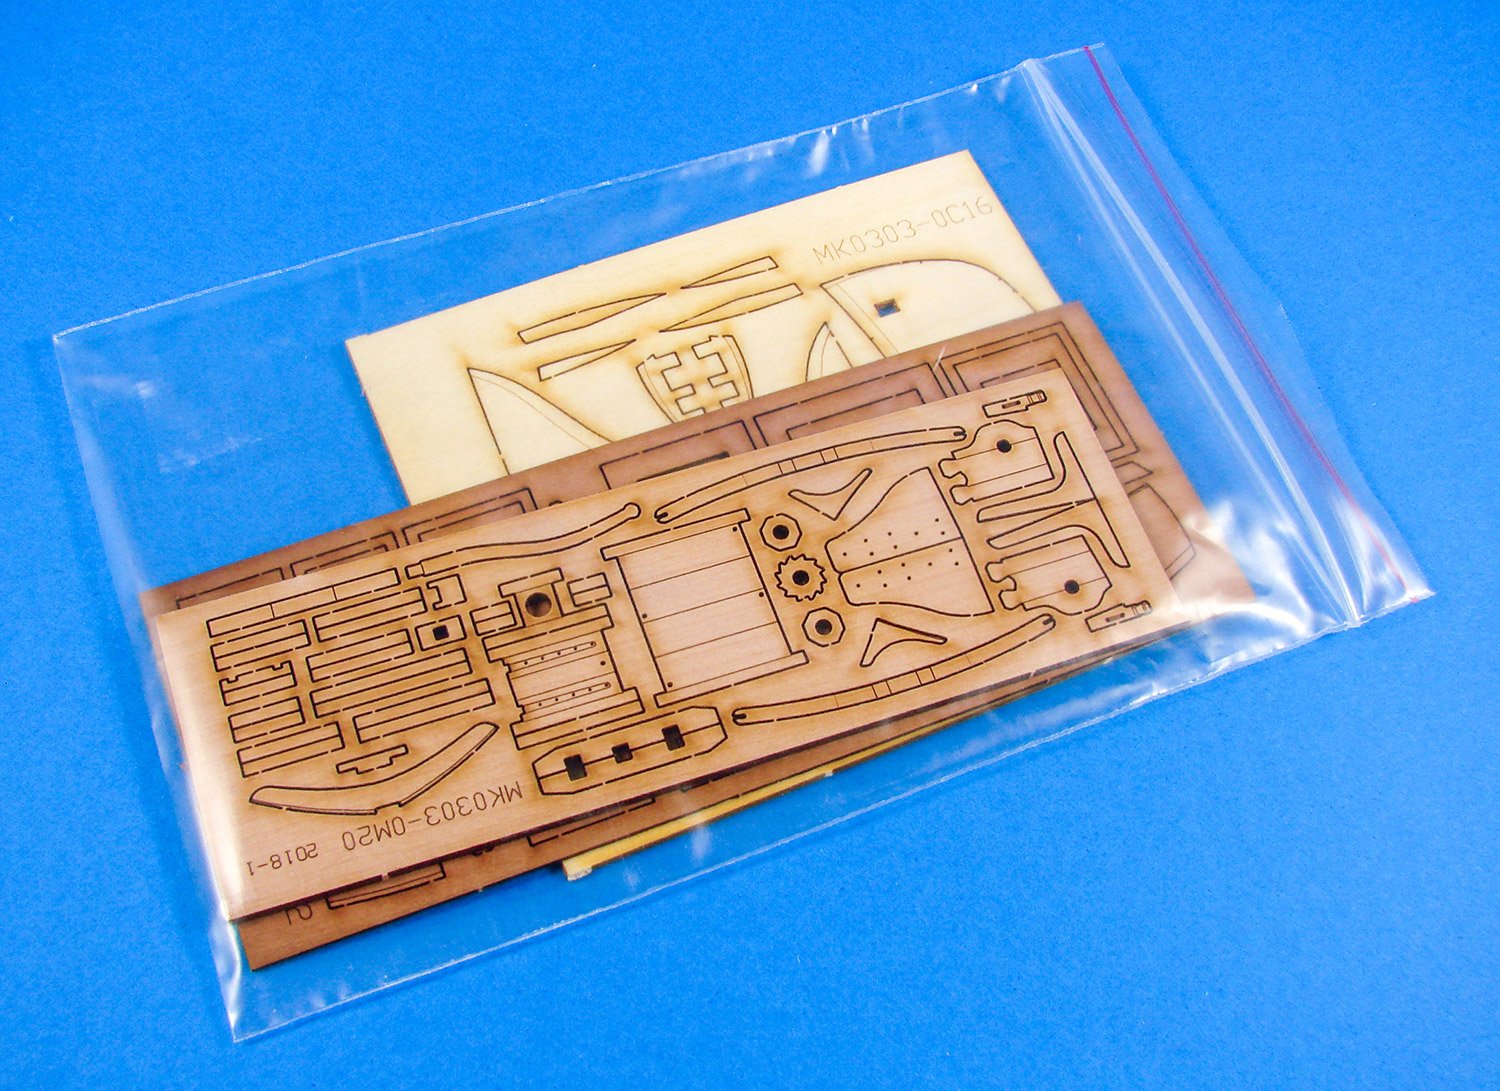
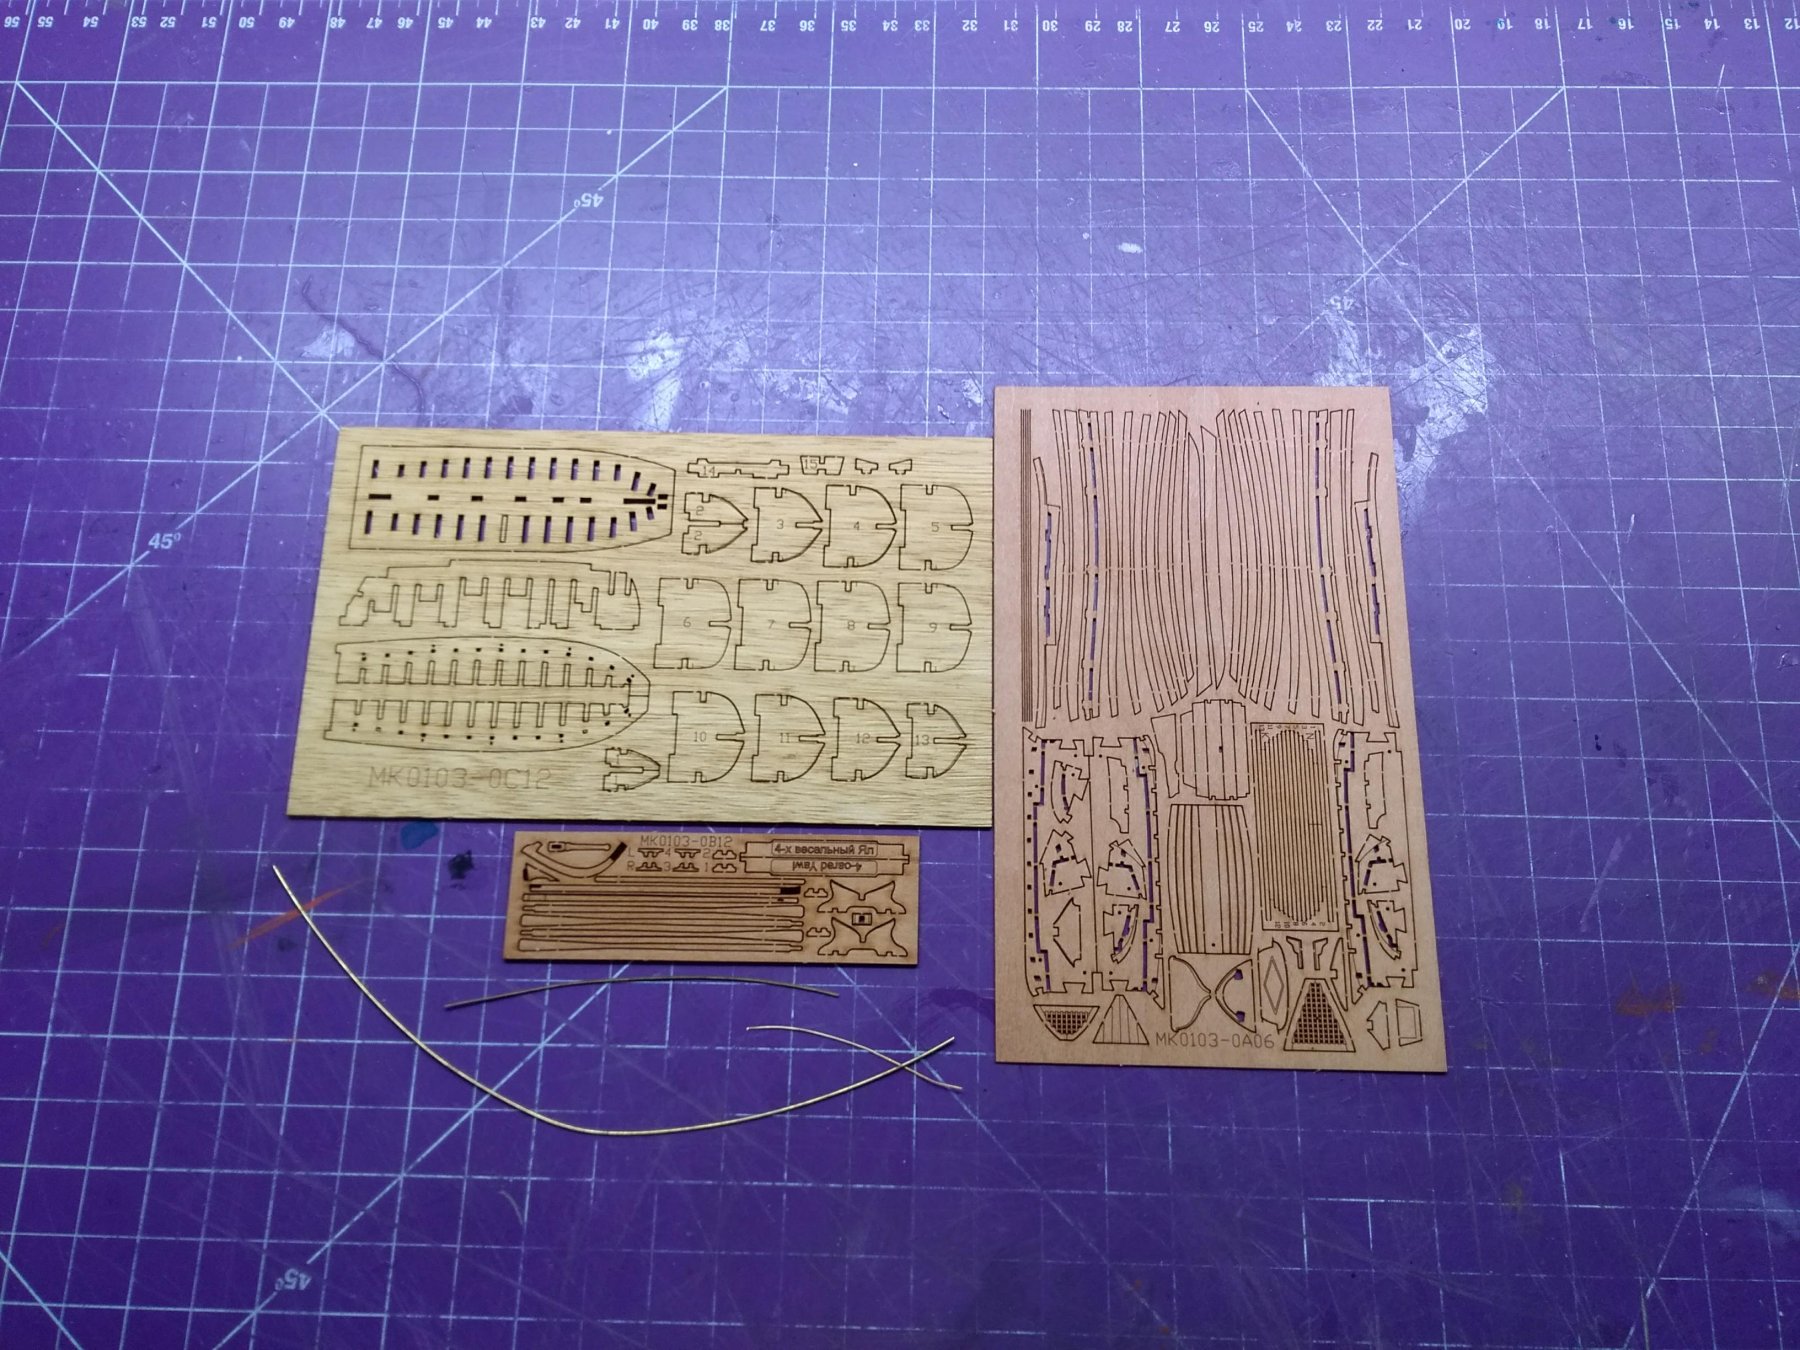
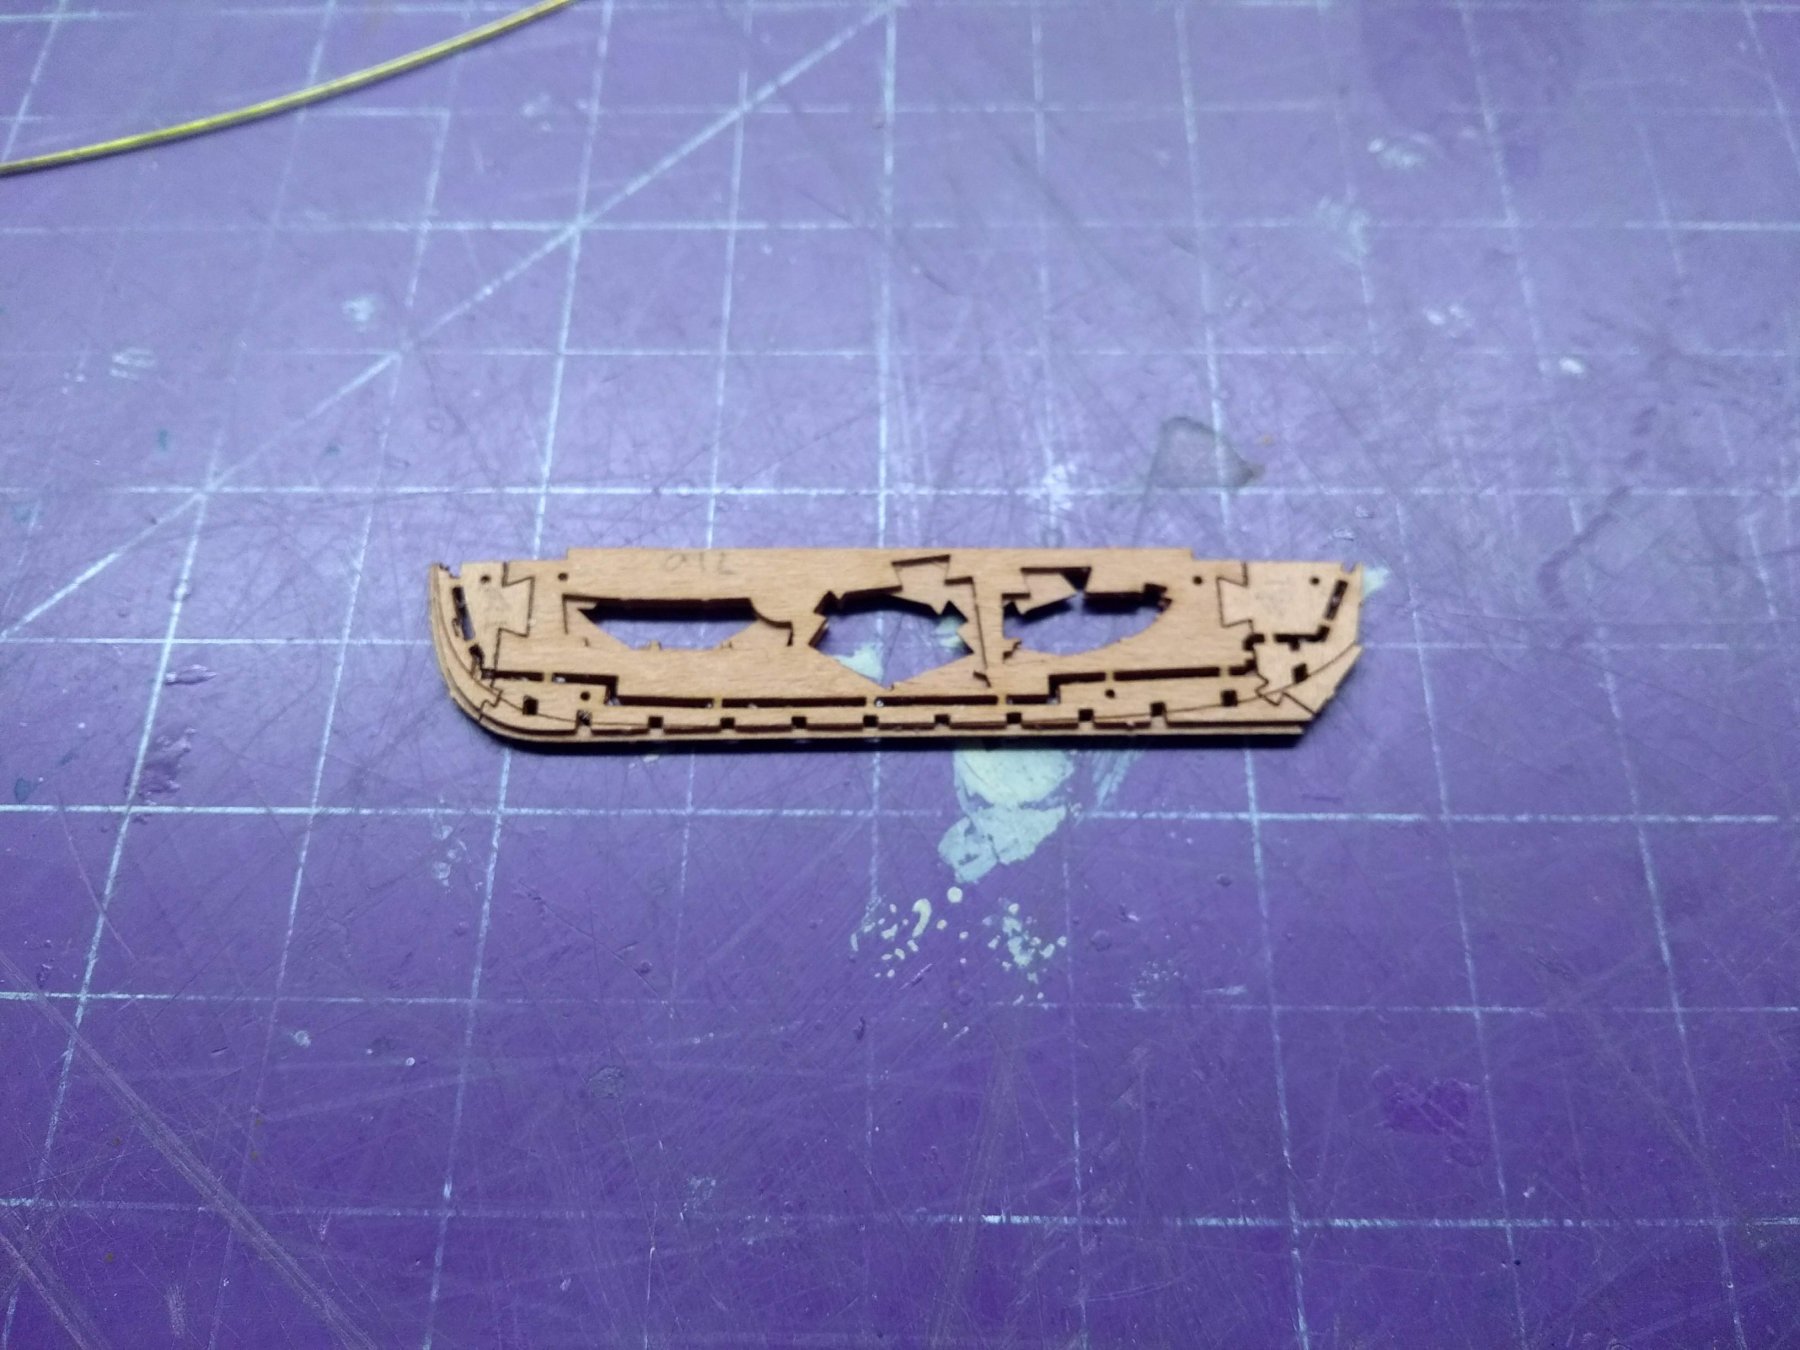
 I have been wanting to try one of Master Korabel’s kits after reading about them on this site. I finally purchase the small gun boat and added the pre made sails. I am very impressed with the quality of the kit and the detailed instructions. The English is a bit strange but that is probably because it was translated from Russian; or maybe just written be a non native English speaker. Anyway, they are very clear, detailed and precise. The instructions seem to anticipate where one might go wrong and caution you. The picture shows the box contents and the first sub-assembly before gluing.
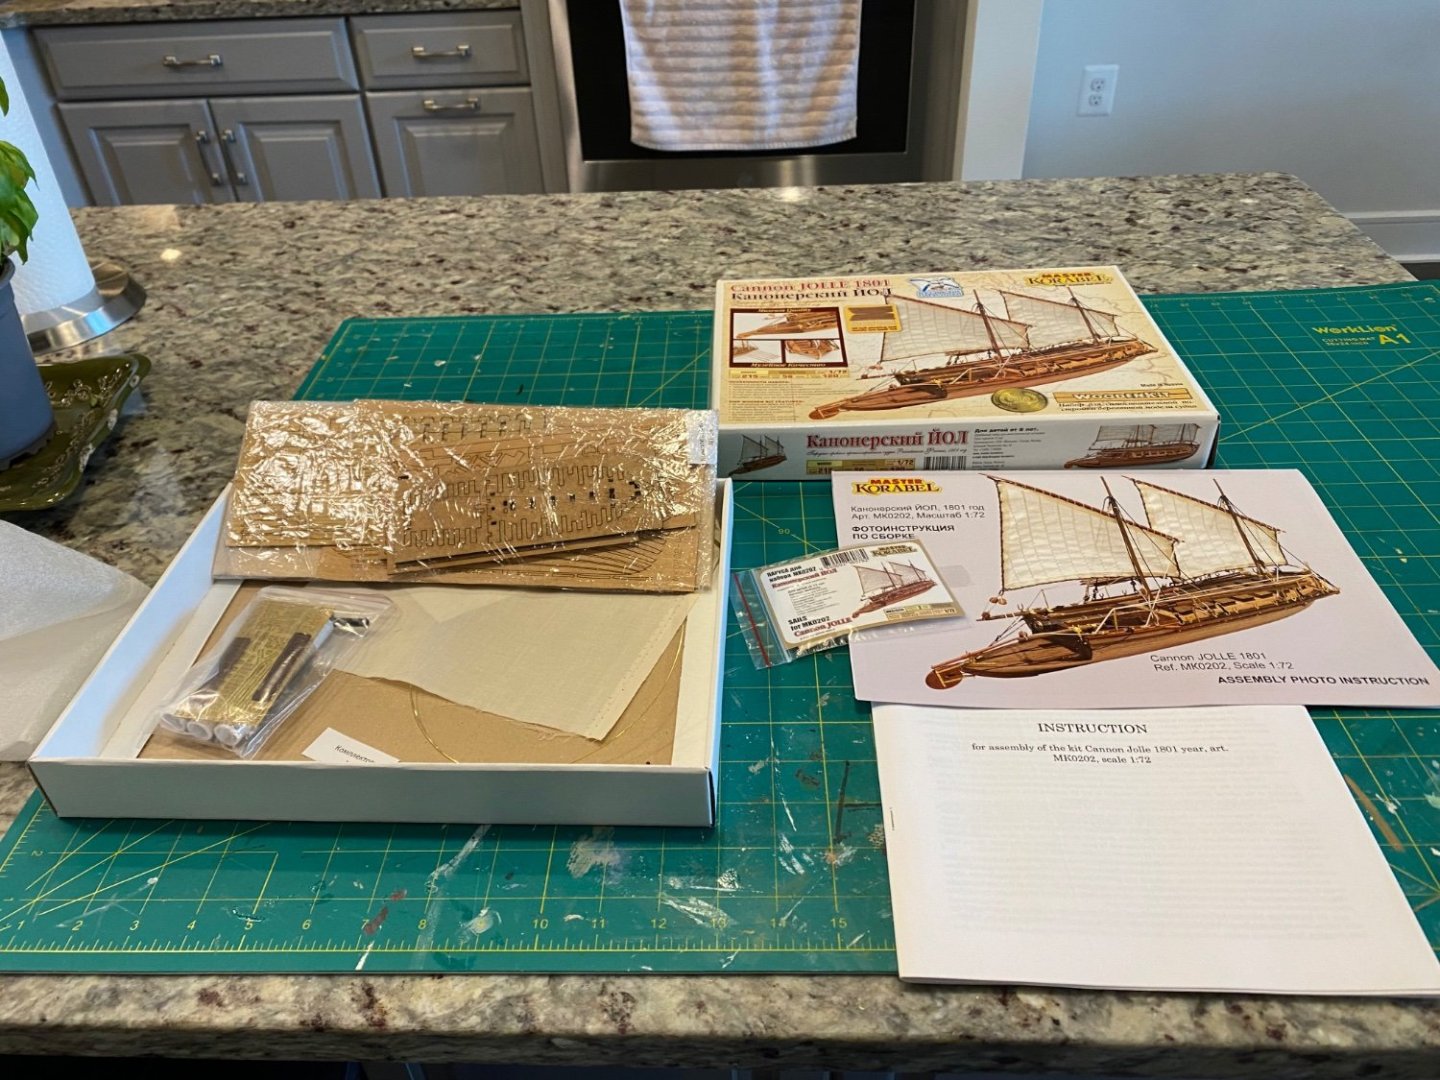
- 42 replies
-
- 7
-

-
- Cannon Jolle
- Master Korabel
- (and 1 more)
-
 Start my first buildlog on this site.


-
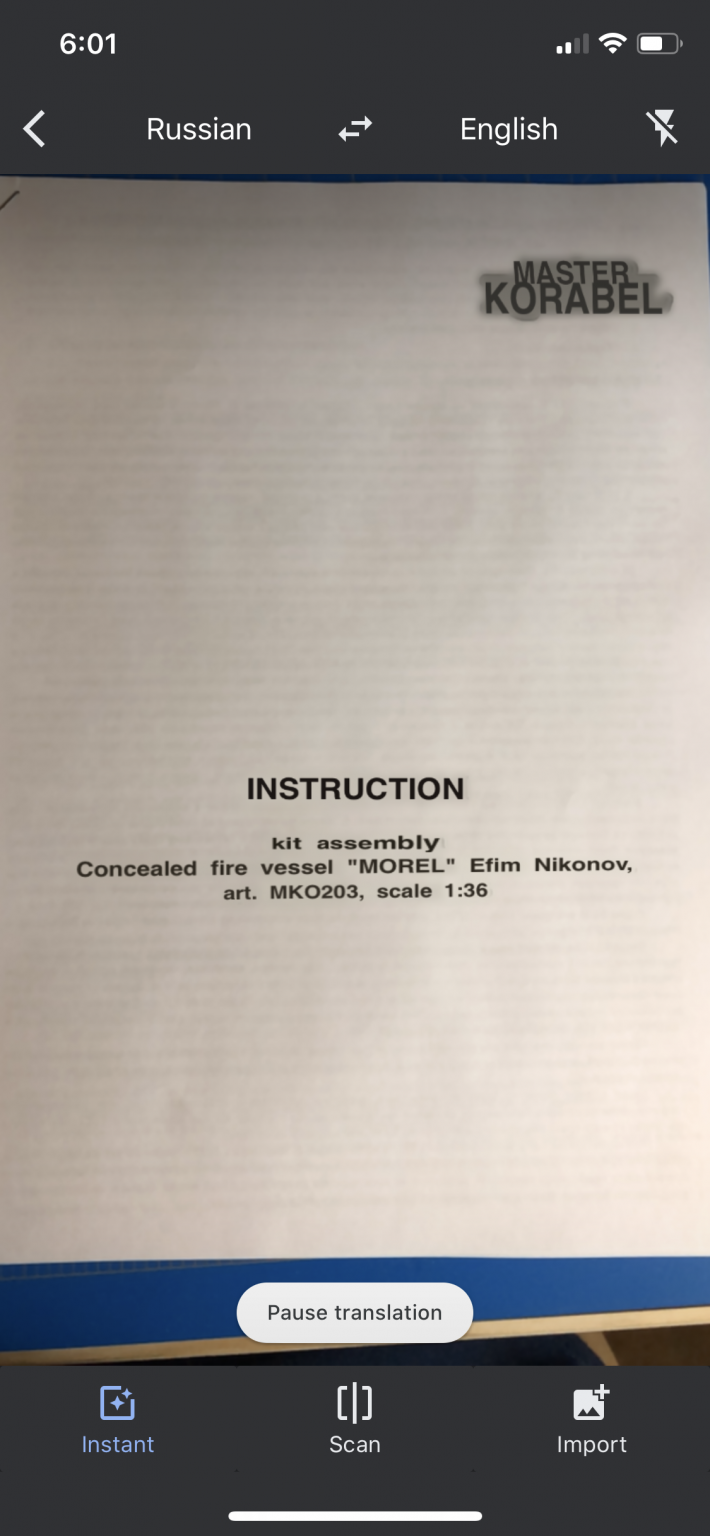
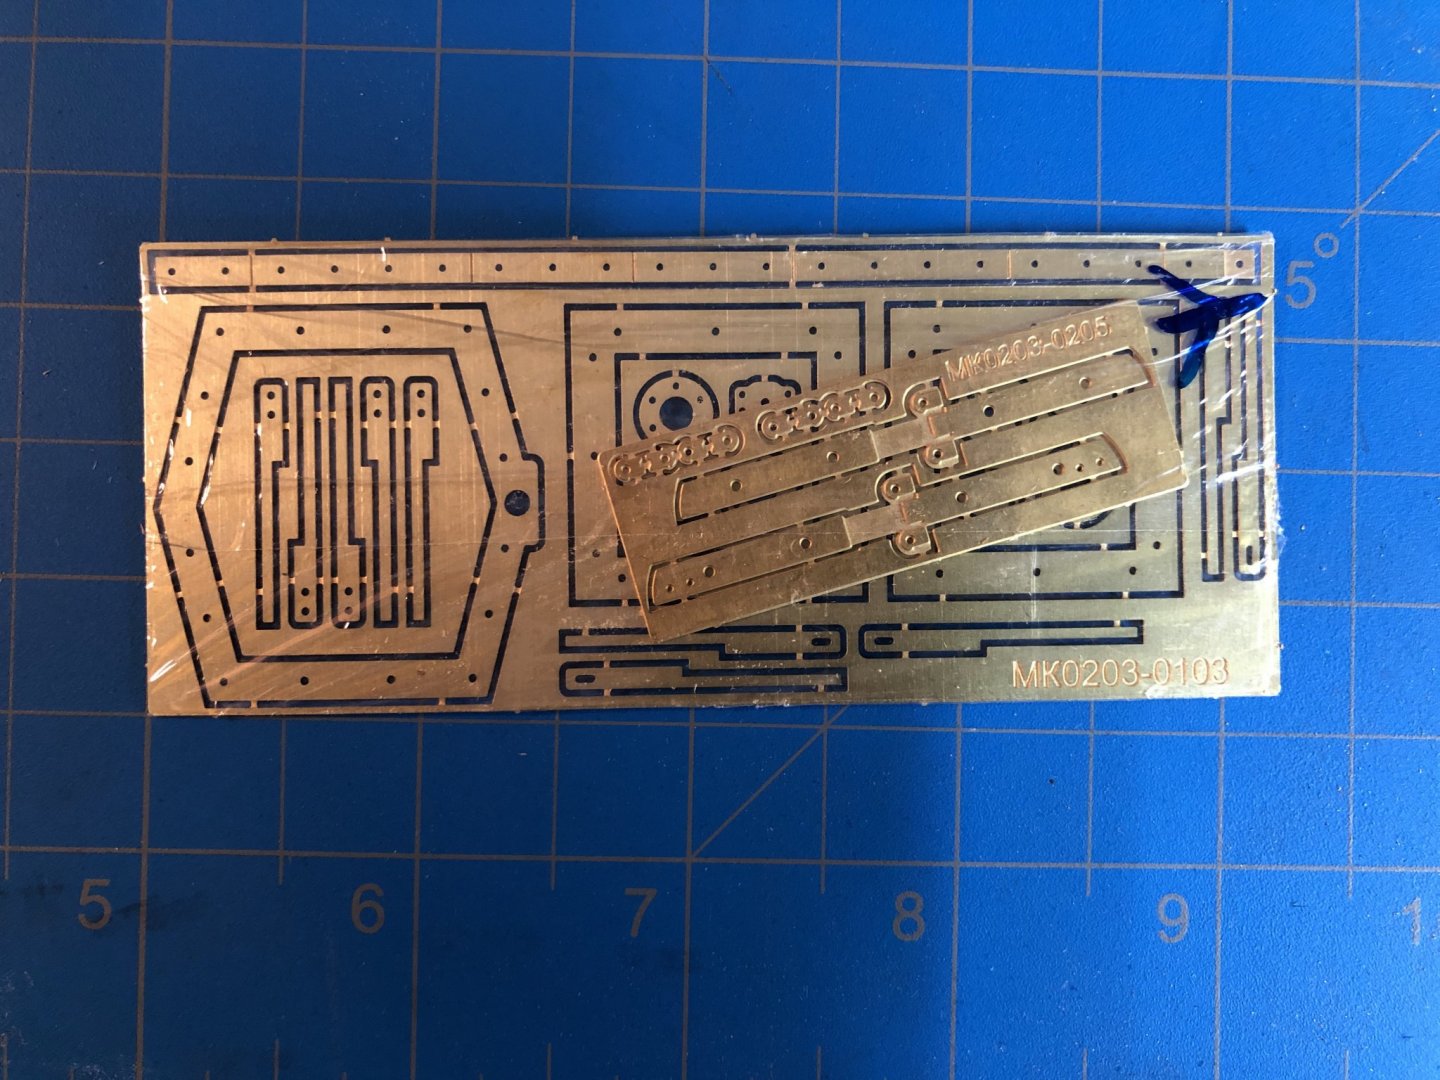
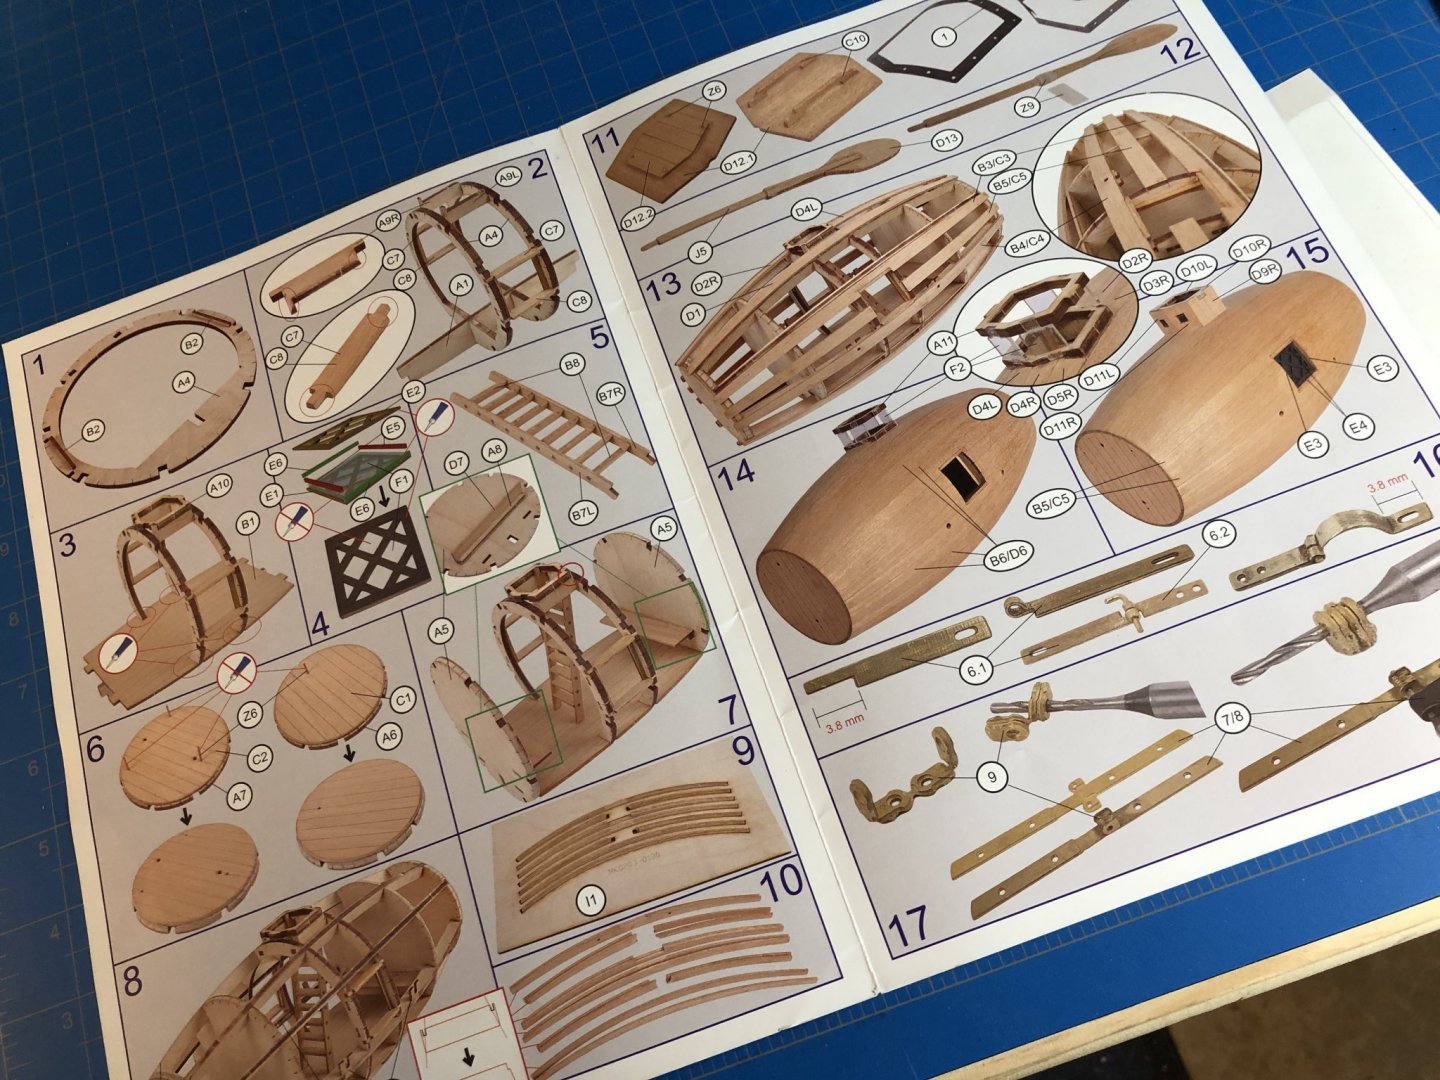
 Alas, I am currently away from the Granado build at the "Roanoke Island Shipyard" on the coast (sigh), so I have established a mini-secondary-shipyard to occupy my free time and irritate the Admiral. Because of the limited resources available at this inland location, I have elected to build the little wooden submarine "Morel". It is a kit made in Russia, but I had purchased it before Russia's/Putin's egregious land grab in the Ukraine had begun. Regardless of its origin and global politics, it appears to be a nice simple kit that will be a lot easier to build and less time-consuming to finish than the Granado build. There are also lots of good build logs out there for me to benefit from (e.g., Secret Vessel "Morel" by John Gummersall - FINISHED - Master Korabel - Scale 1:36). Because of the existing and outstanding build logs already out there, this one will be abbreviated at best, so please forgive my abruptly jumping in with both feet and a photograph of the build and a beer already in progress:
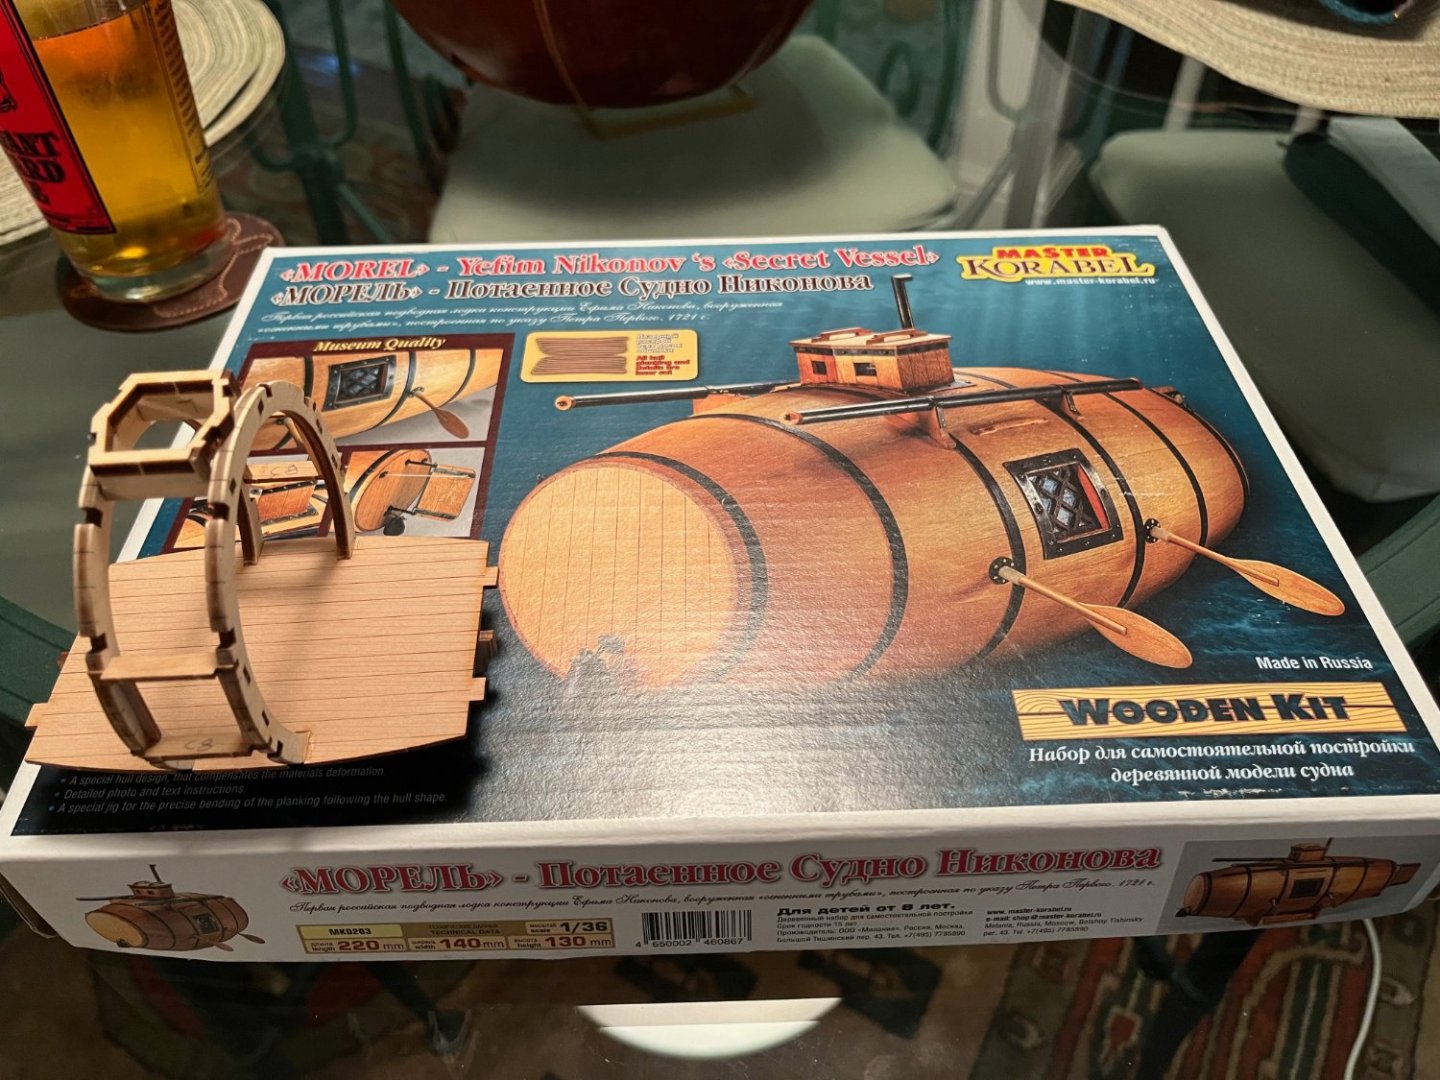
- 68 replies
-
- 7
-
-

-
- Morel
- Master Korabel
- (and 1 more)
-
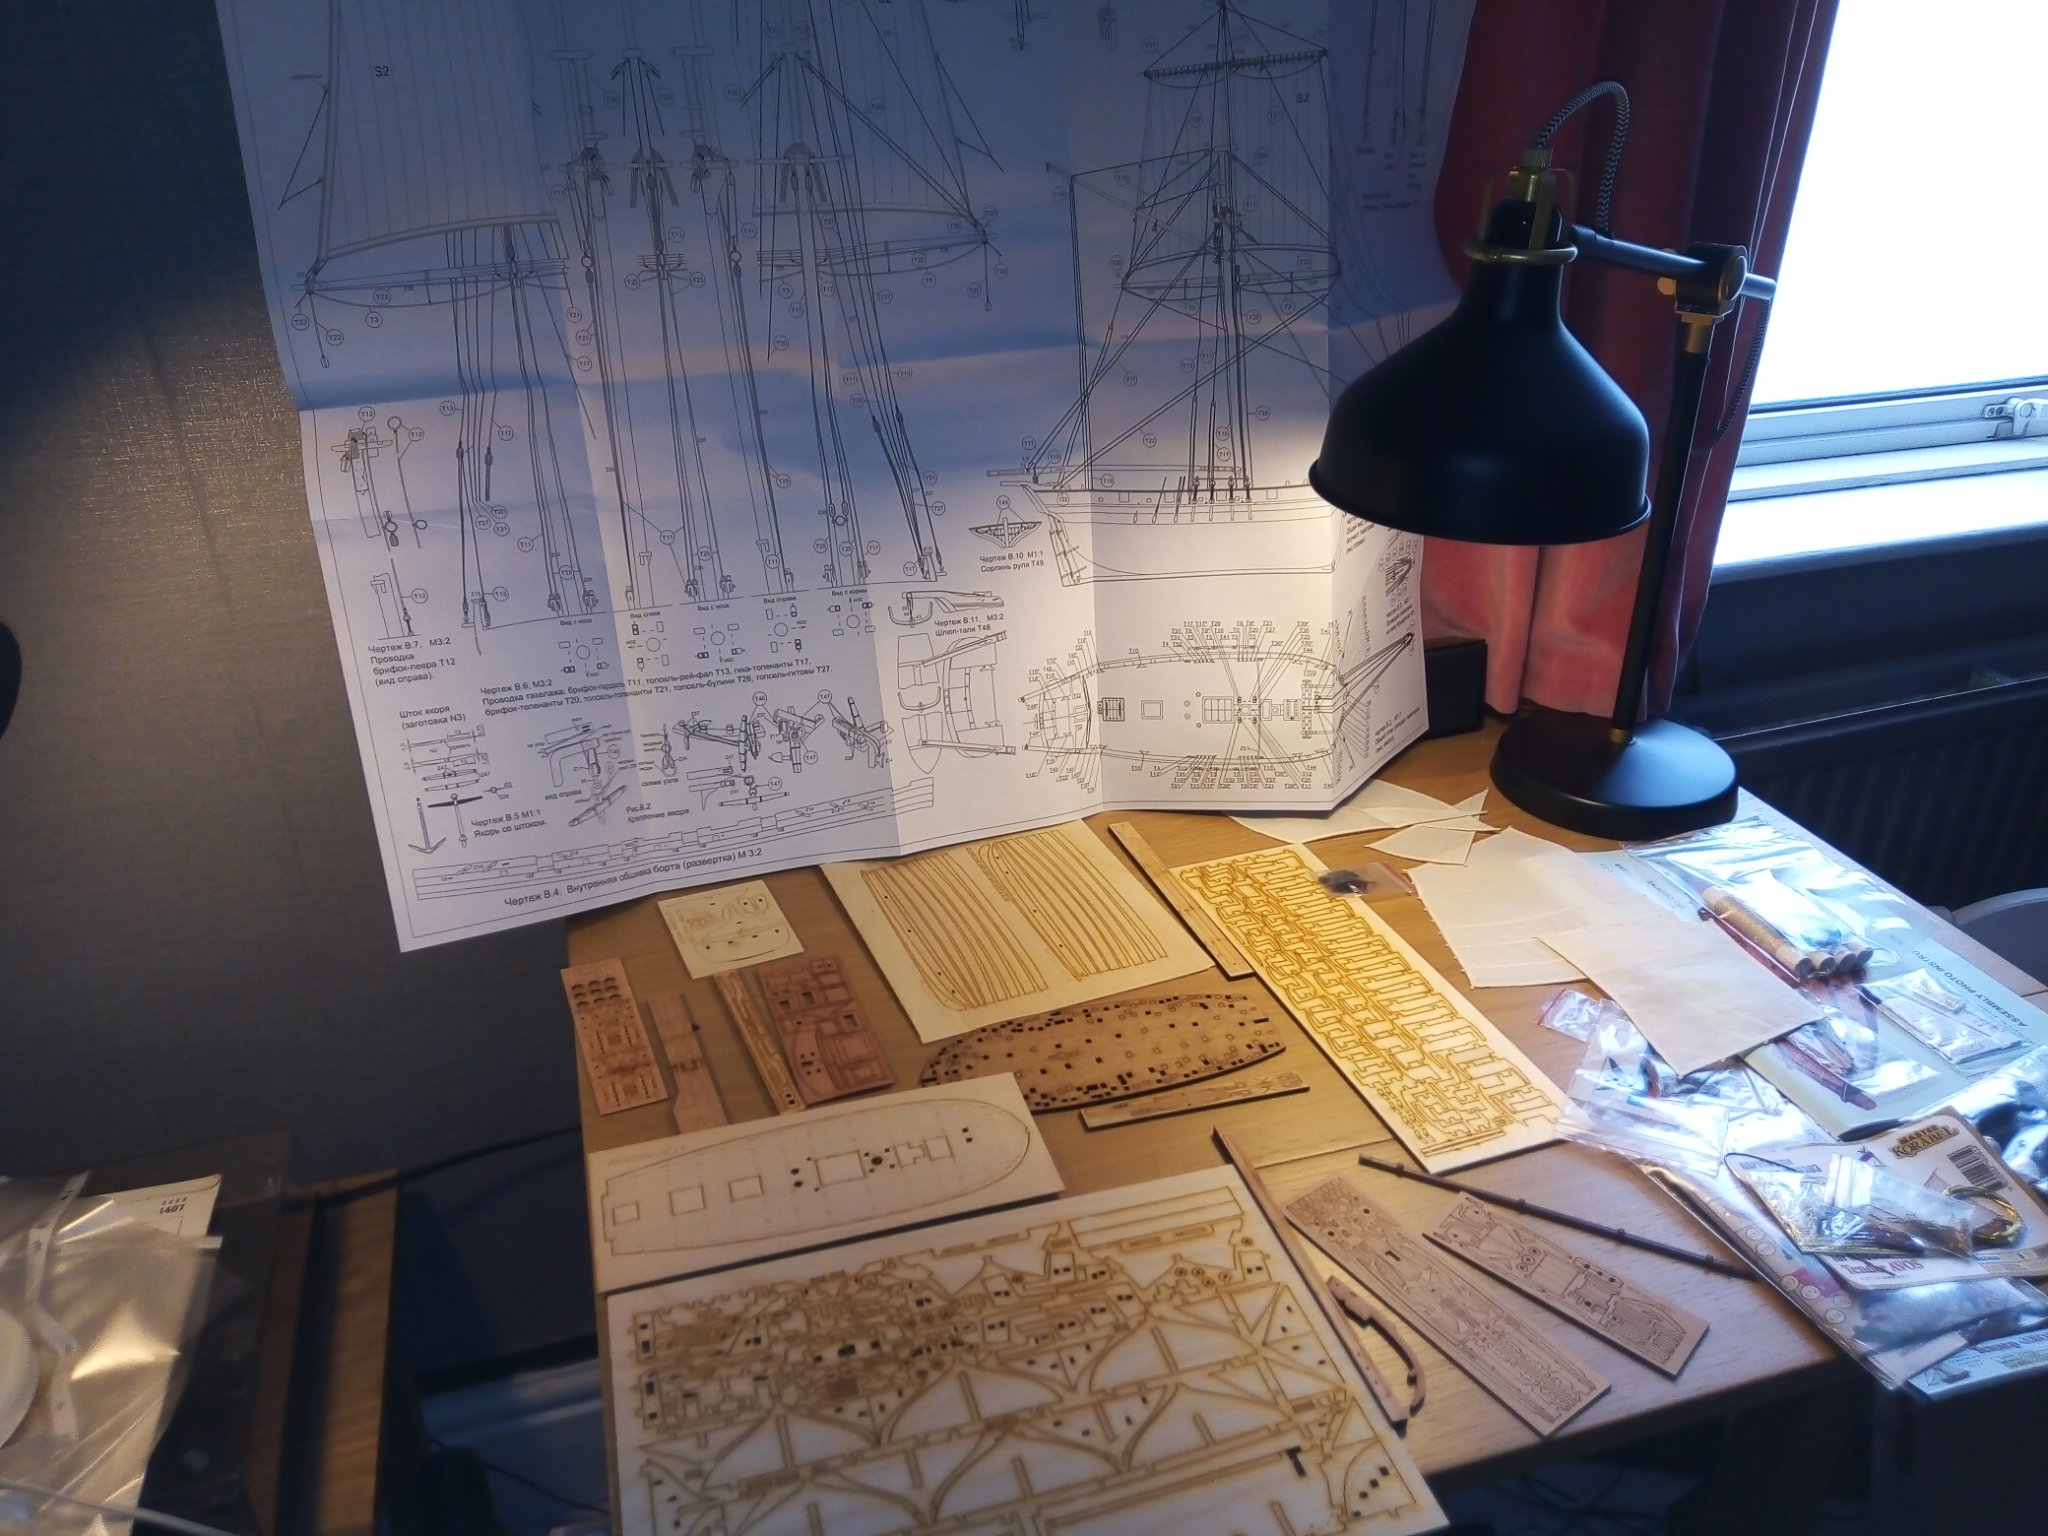
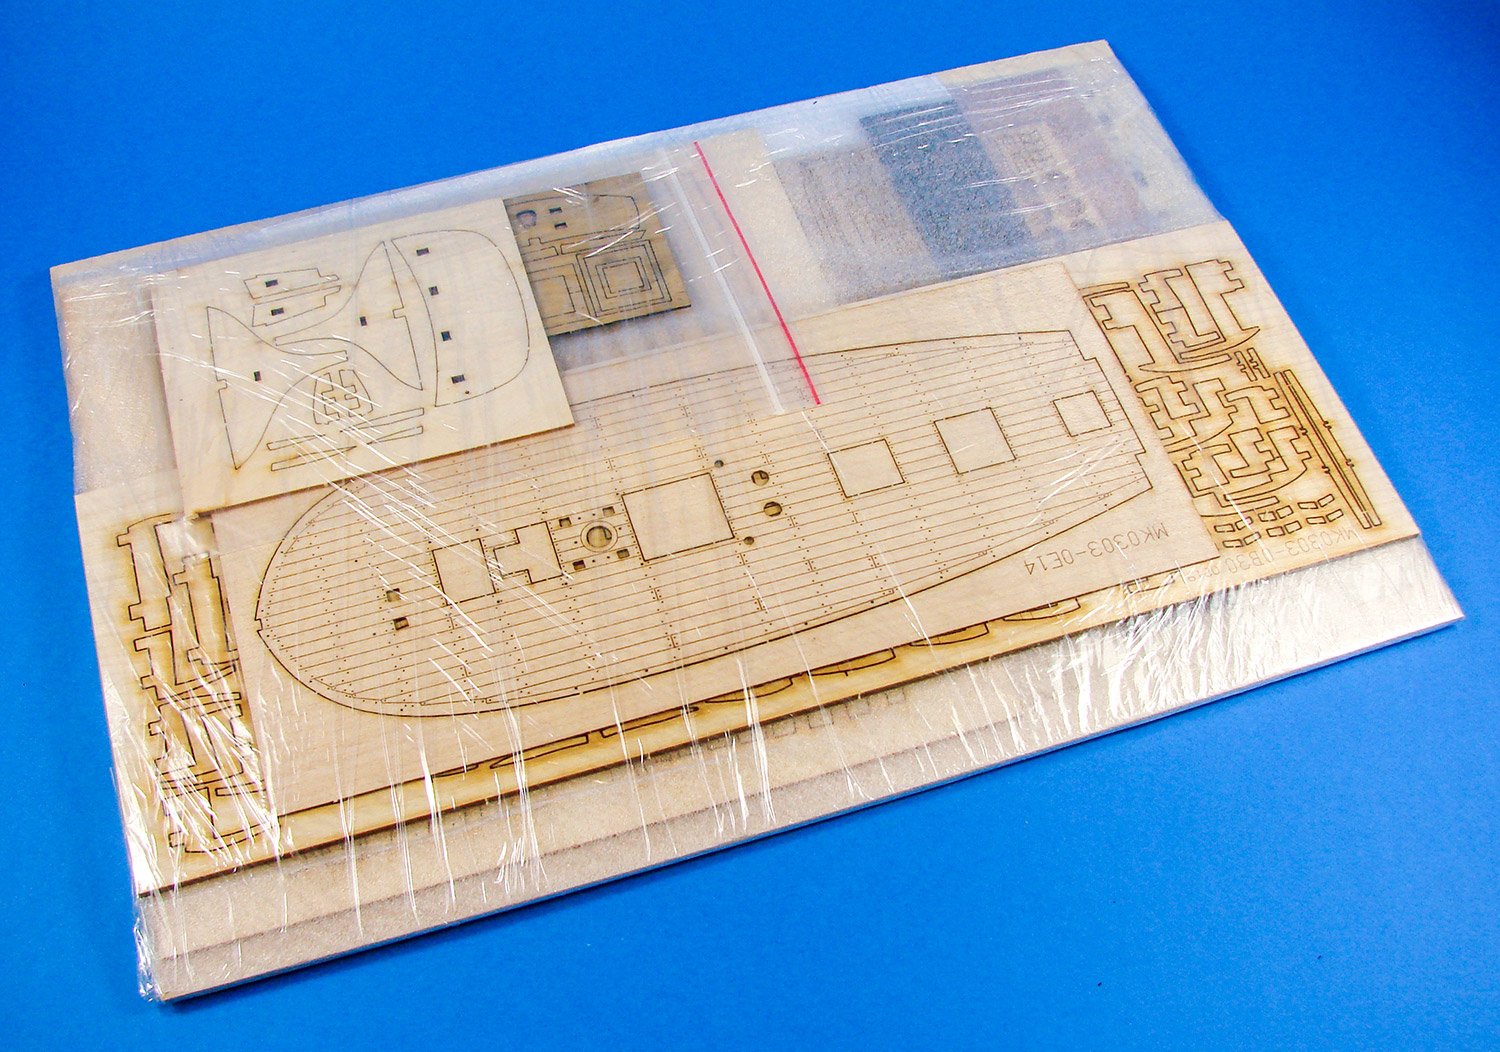
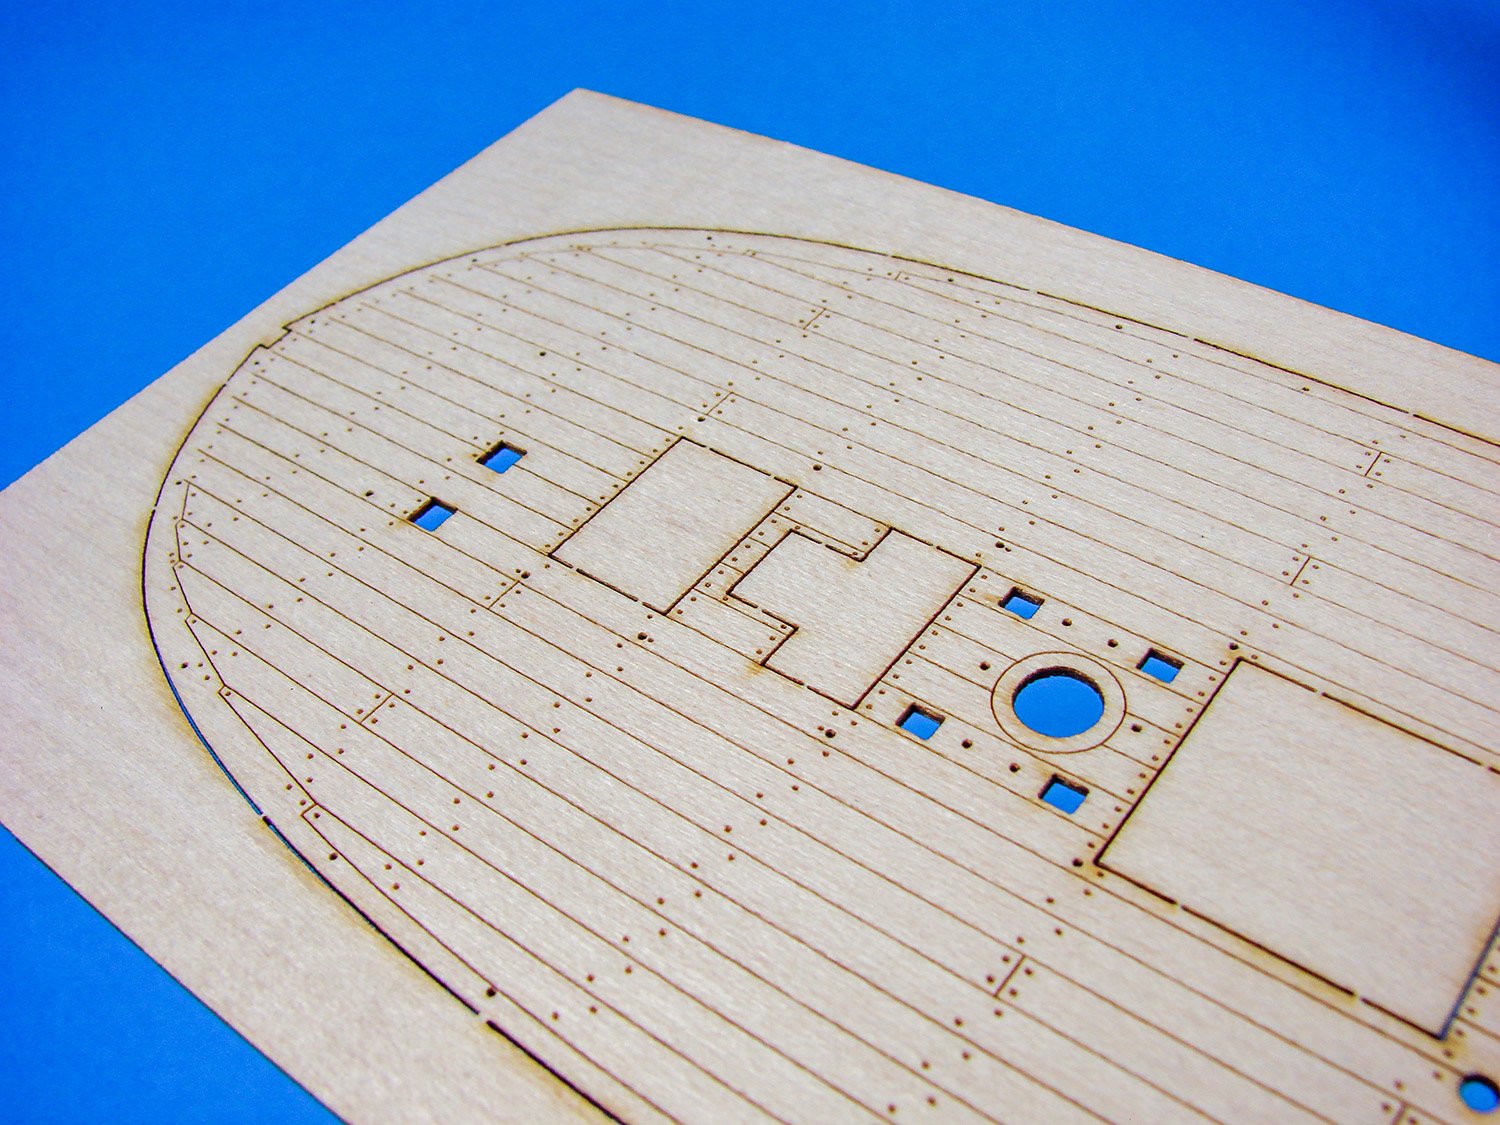
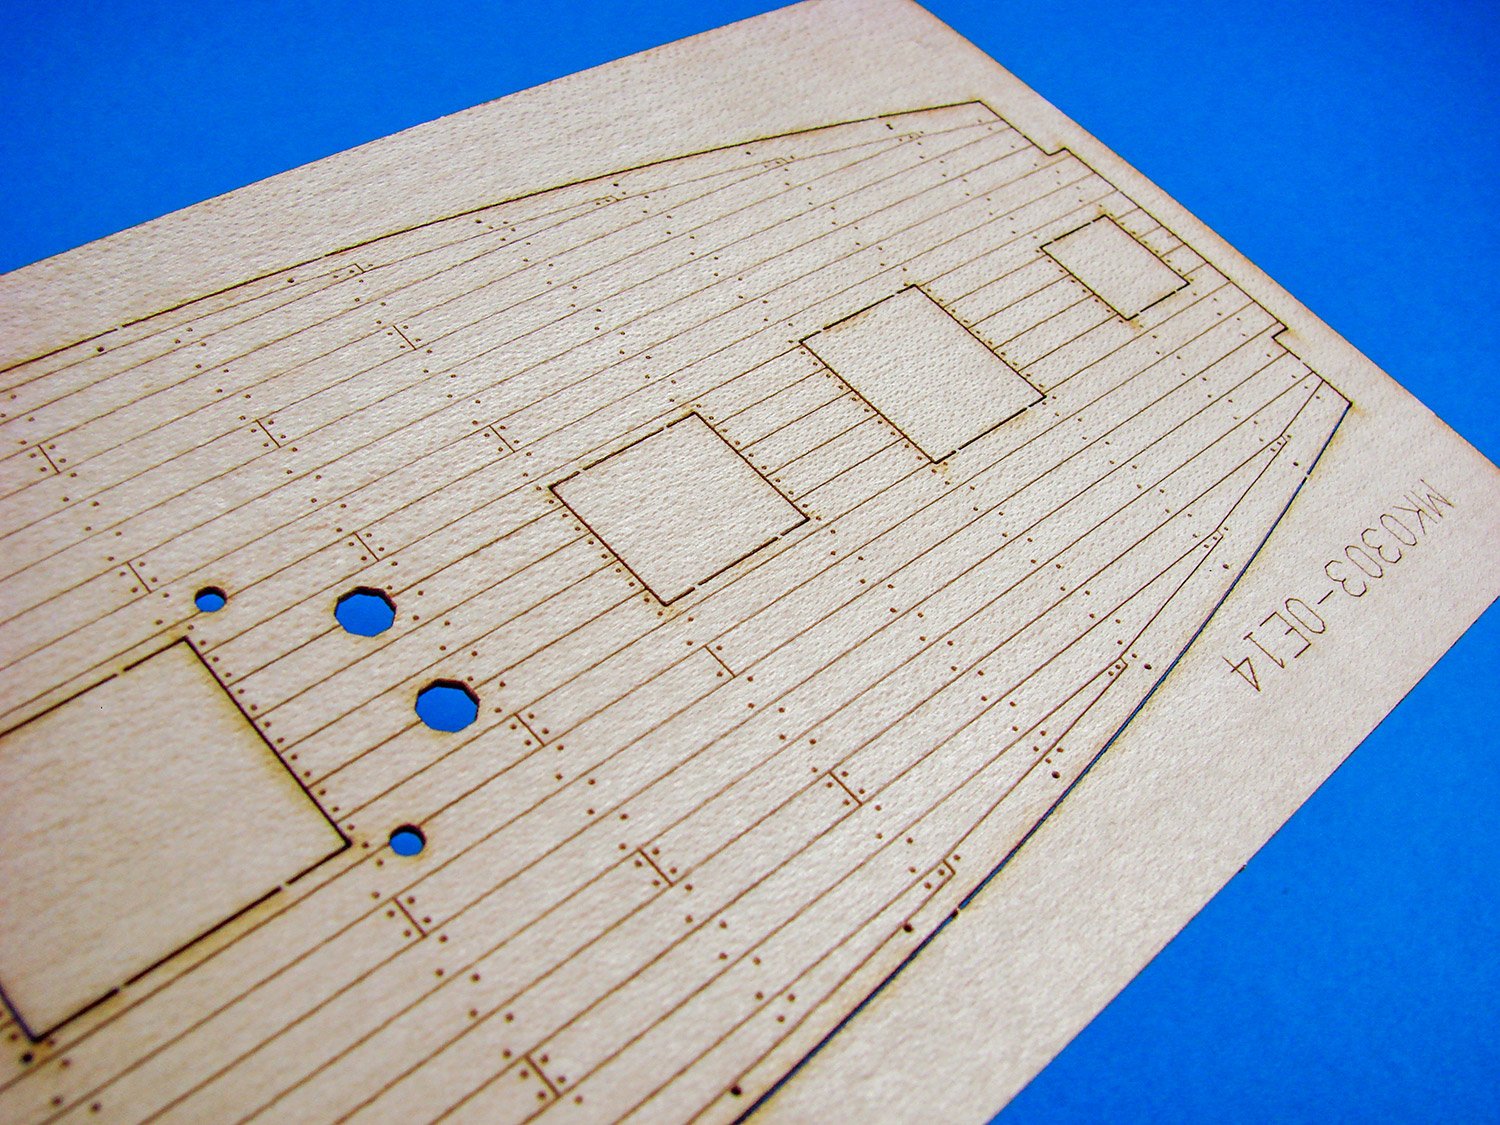
 Just completed the Philadelphia Gun Boat. Took me just about 1 year at the speed I build, so I wanted to take on a simpler build, or what I call a "quick win". At least I hope it will be a "quick win". Then again it all depends on what you call "quick". This build will be one of those painfully slow logs. I work on models in my spare time, so please bare with me as this will be a slow log. I will start right out and say I am somewhat new to ship building and not an expert builder by any means. Maybe average at best but I enjoy the builds and have fun along the way. With that in mind I will start the process I have always been interested the the Secret Vessel "Morel". It seemed like such a quirky fun model - A wooden submarine ? I read a few other build logs and they builder seemed to have a lot of fun with the build so I thought I would give it a shot. Starting with the box contents,,,, Korabel must have some very precise laser cutters as some of the are really small. Seems like pretty good picture diagrams of the build In addition there is an 8 page pamphlet that contains instructions, part numbers, and depicts part locations on each wooden sheet. Seems very clear.
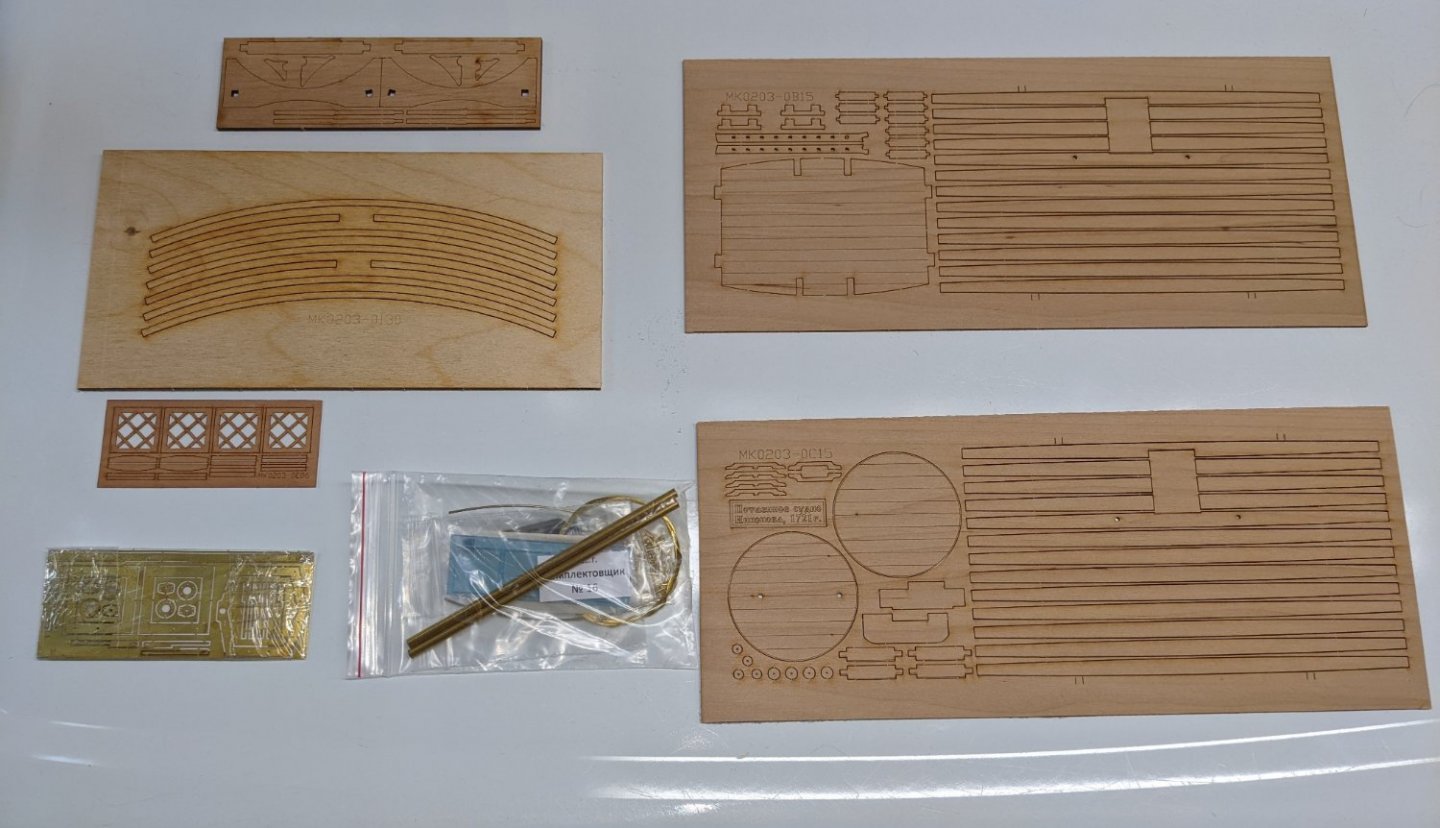


- 36 replies
-
- 5
-
-
- Morel
- master korabel
- (and 1 more)
-
 Hi everyone, I'm a newbie builder who just started this addictive activity of model building during the pandemic. I've built the model shipways dory and longboat. I'm about to finish the Vanguard Fifie. I wanted to build something with more challenging rigging and I love the look of a schooner. So here I go....


-
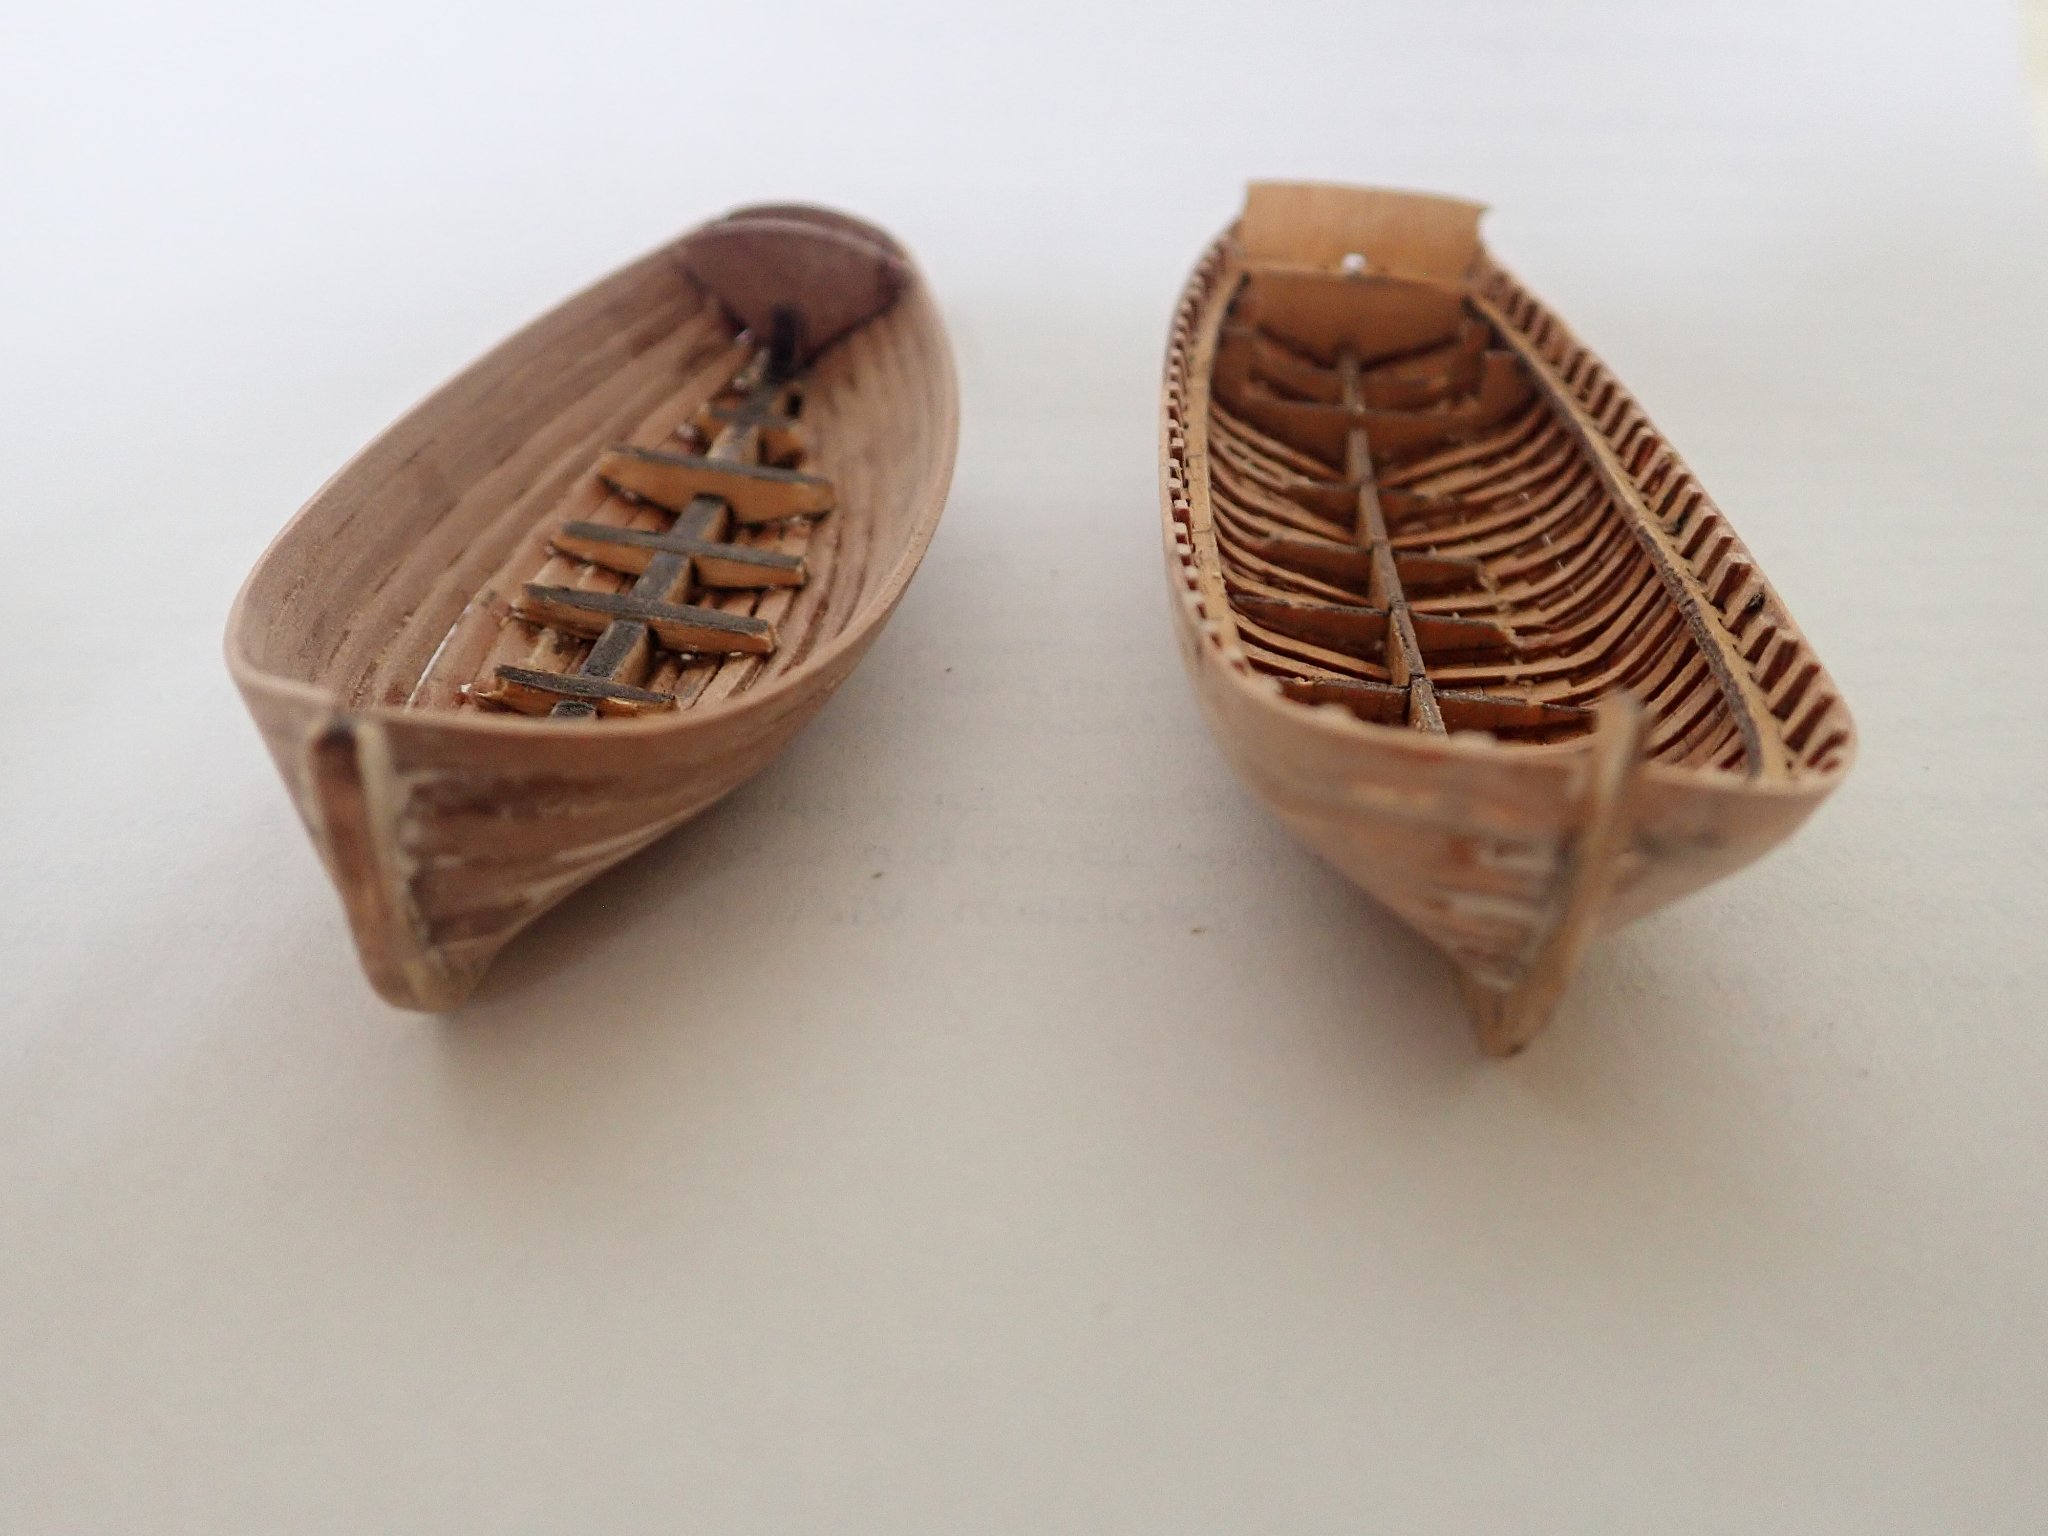
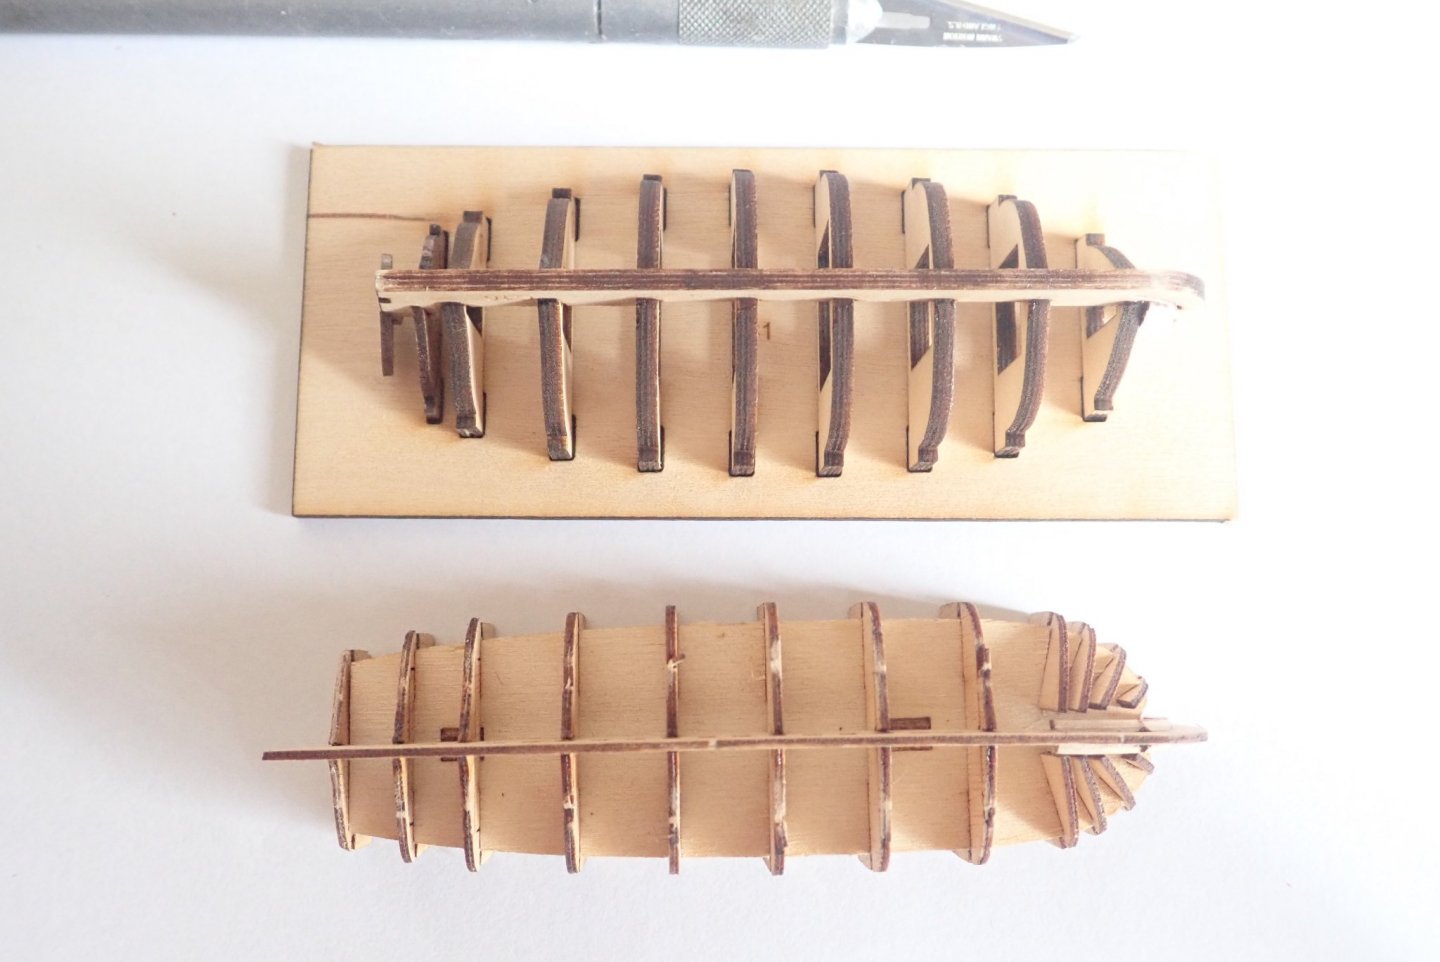
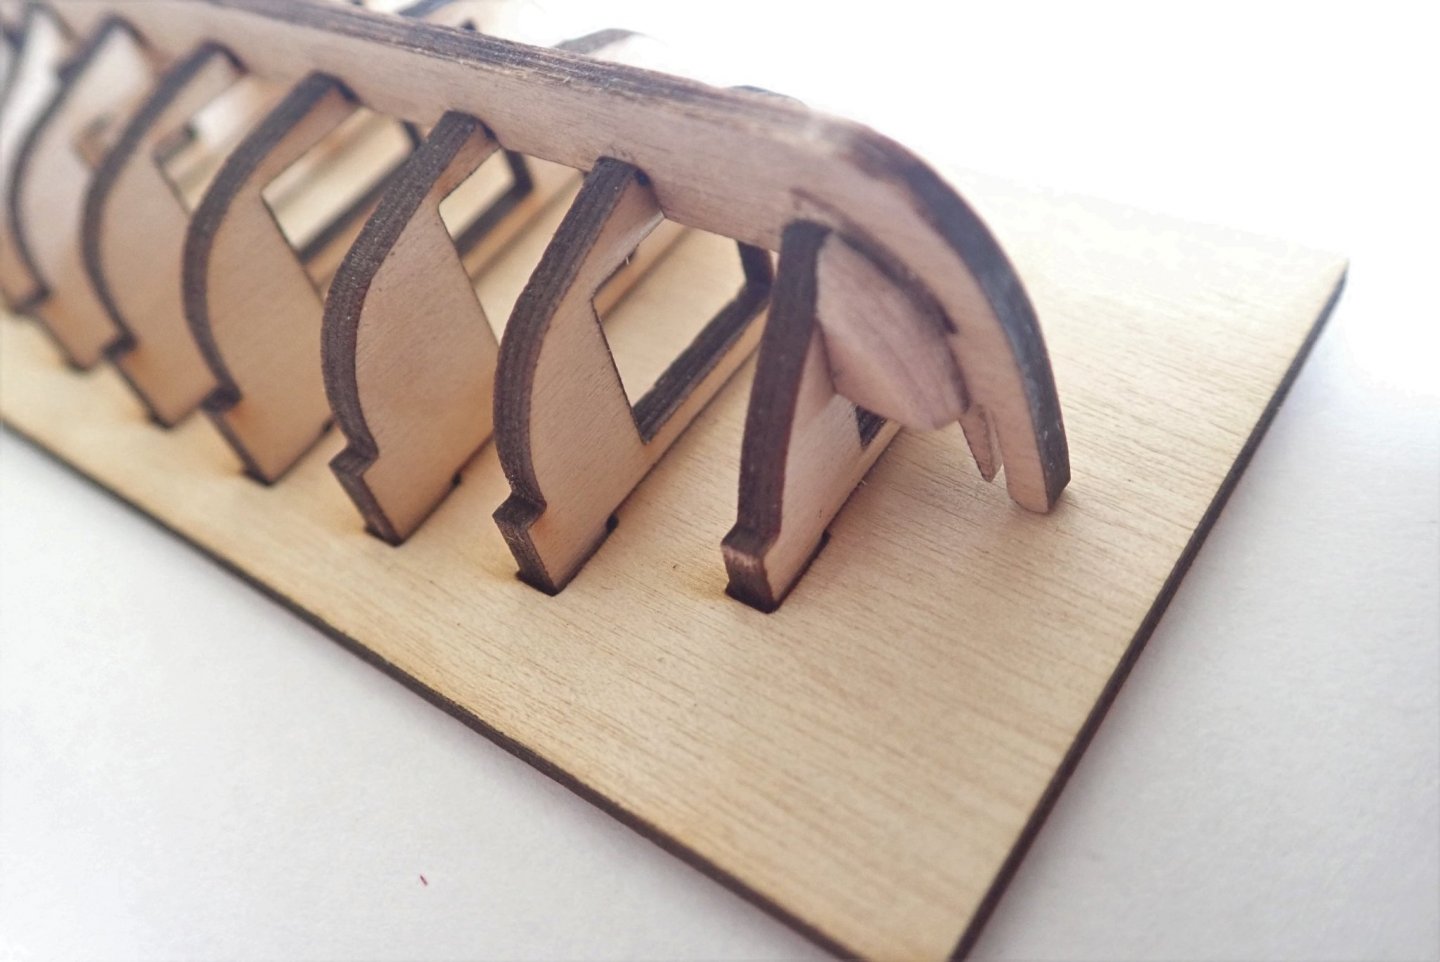
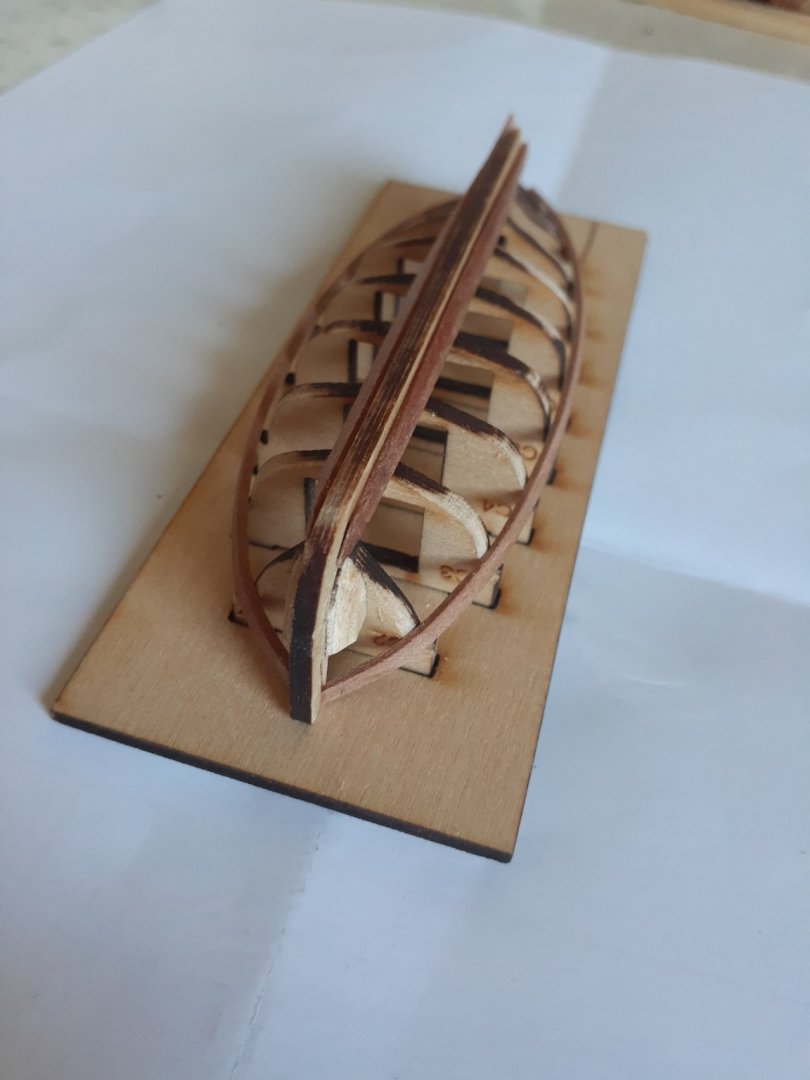
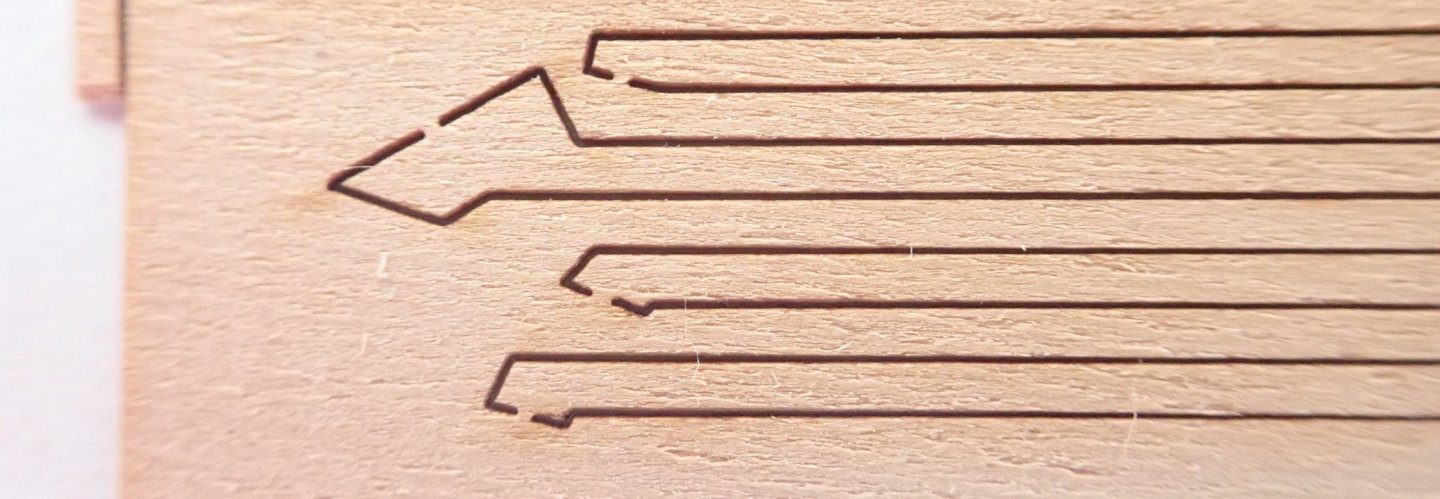
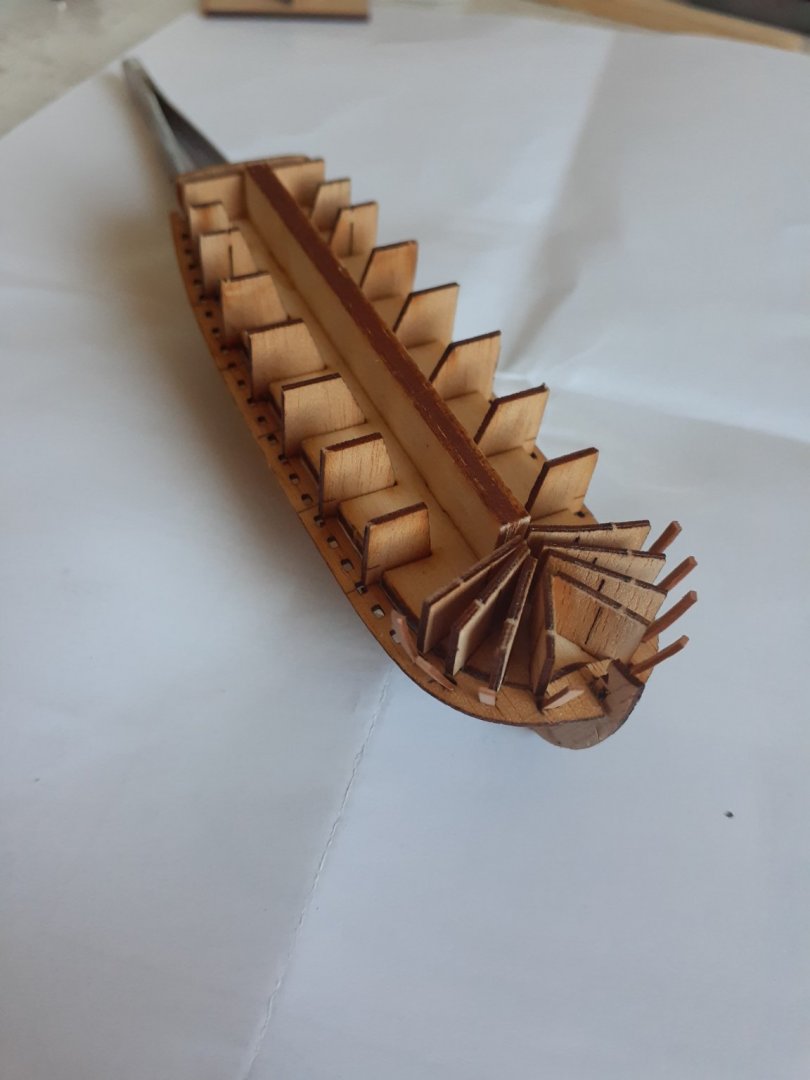
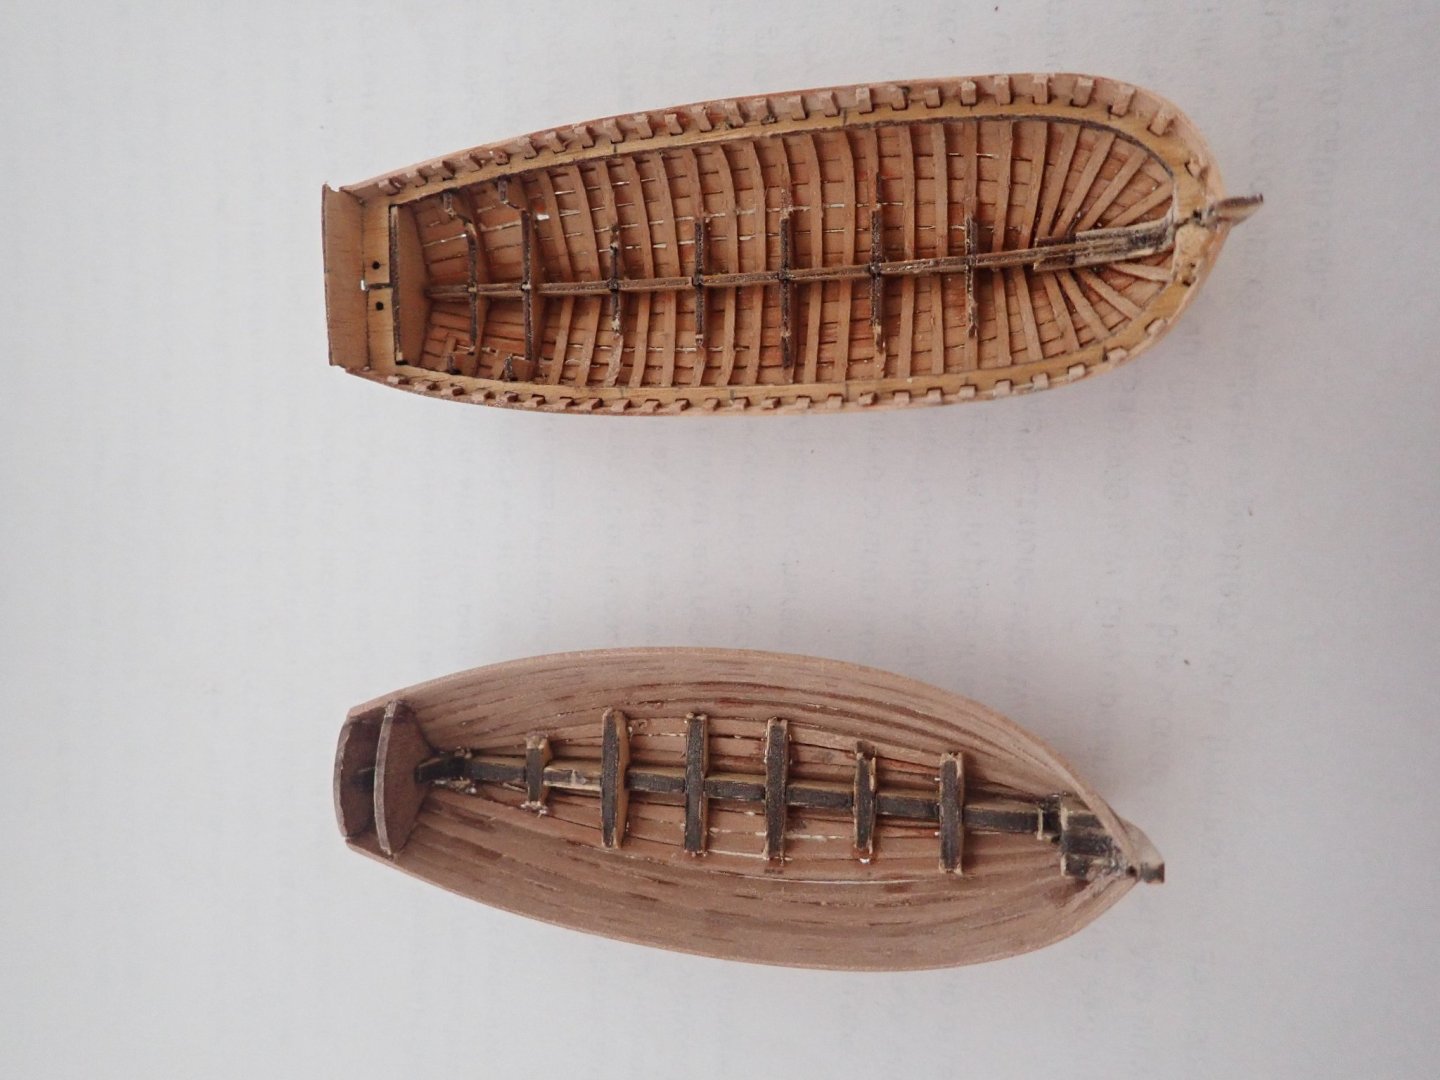
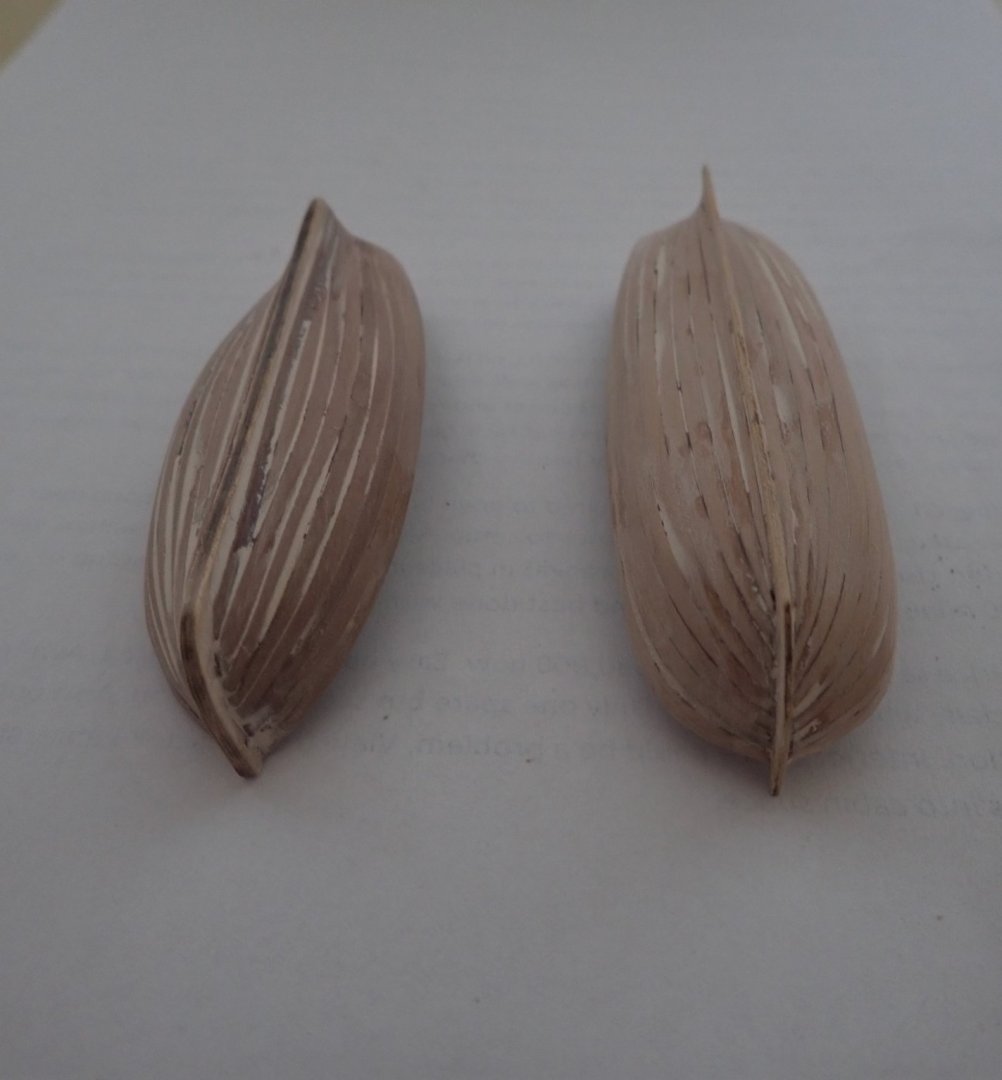
 Many months ago, I ordered the Master Korabel (MK) kit, but pandemic struck and delivery was delayed. Meanwhile, Chris (Vanguard Models, VM) released his cutter as a standalone kit, so I also ordered this. Both kits arrived within a week or so of each other, so I thought that I would do a comparison build log rather than two separate logs. The log lacks a little as I somehow managed to lose some photos and couldn’t recover them. Although the VM model is to a scale of 1:64 while the MK one is 1:72, I think they are close enough to stand comparisons. I have put this build log into the 1751-1800 time slot, as is my Pegasus build, though the boats could easily belong to other periods. The two kits. The VM is on the left and has two laser cut sheets, a sheet of PE and a bundle of 1x2mm pearwood strips. Instructions need to be downloaded from the VM website. When the kit contents are compared to the instructions, it seems that something is missing. There are only 1x2mm strips in the kit yet the instructions mention 1x3mm strips in a few places. I checked this with Chris and he told me that he re-considered the 1x3mm strips as he thought that they were over-scale and replaced them with 1x2mm. The MK kit contains only seven laser cut sheets of various thicknesses - no PE. Instructions are included - a sheet of photos at various construction stages, a sheet showing all the laser cut pieces with each identified, and a double sided sheet of written instructions in English, though the terminology takes a bit of getting used to. Both kits start out the same - make up the jigs which are used until planking is complete. The keels with the VM one on top. The MK one has small slots along it through which ribs are inserted, and has small fairing blocks glued at the stem. These have laser etch marks to show how much bevelling is required before gluing in place. The two jigs, the VM one on the top. Formers are glued to the keel, and the formers in both kits are partly cut to allow removal from the shell of the boat once planking is finished. Fairing blocks are in place at the stem of the VM model. The VM kit is relatively simple, and planking starts immediately. I started by gluing in place the garboard strake, then continued as per the instructions. Tapering of the strips is required, I did this by eye, and finished up by only needing one stealer strip next to the garboard strake. The MK kit requires you to glue ribs in place first, with the first four at the bow being pre-cut to allow them to fit together. The first four glued in place. There is a horizontal former (I guess you’d call it) slotted to let the ribs be fed through it, then through the keel slots and back up the other side. A few minutes soaking allowed this to happen relatively easily. With care no breakages should occur. The next set of ribs are positioned over the formers glued to the keel, and can be carefully glued to the very bottom of the formers, but not the tops. The dark lines on the formers show where they will be broken to allow the tops to be removed later Once those ribs are in place, planking starts. All the planks in the MK kit are laser cut and spiled. Once planking is complete, the shells are carefully removed from the jigs and the formers broken away. At this time the remainder of the ribs in the MK kit are fitted. MK boat on the top. VM's cutter on the left and the MK boat on the right. As I intend to paint both boats, putty was liberally applied to the hulls to cover the places where adjacent planks didn’t quite meet (ie the gaps). The VM boat is on the left. Next will be the interiors. Cheers.
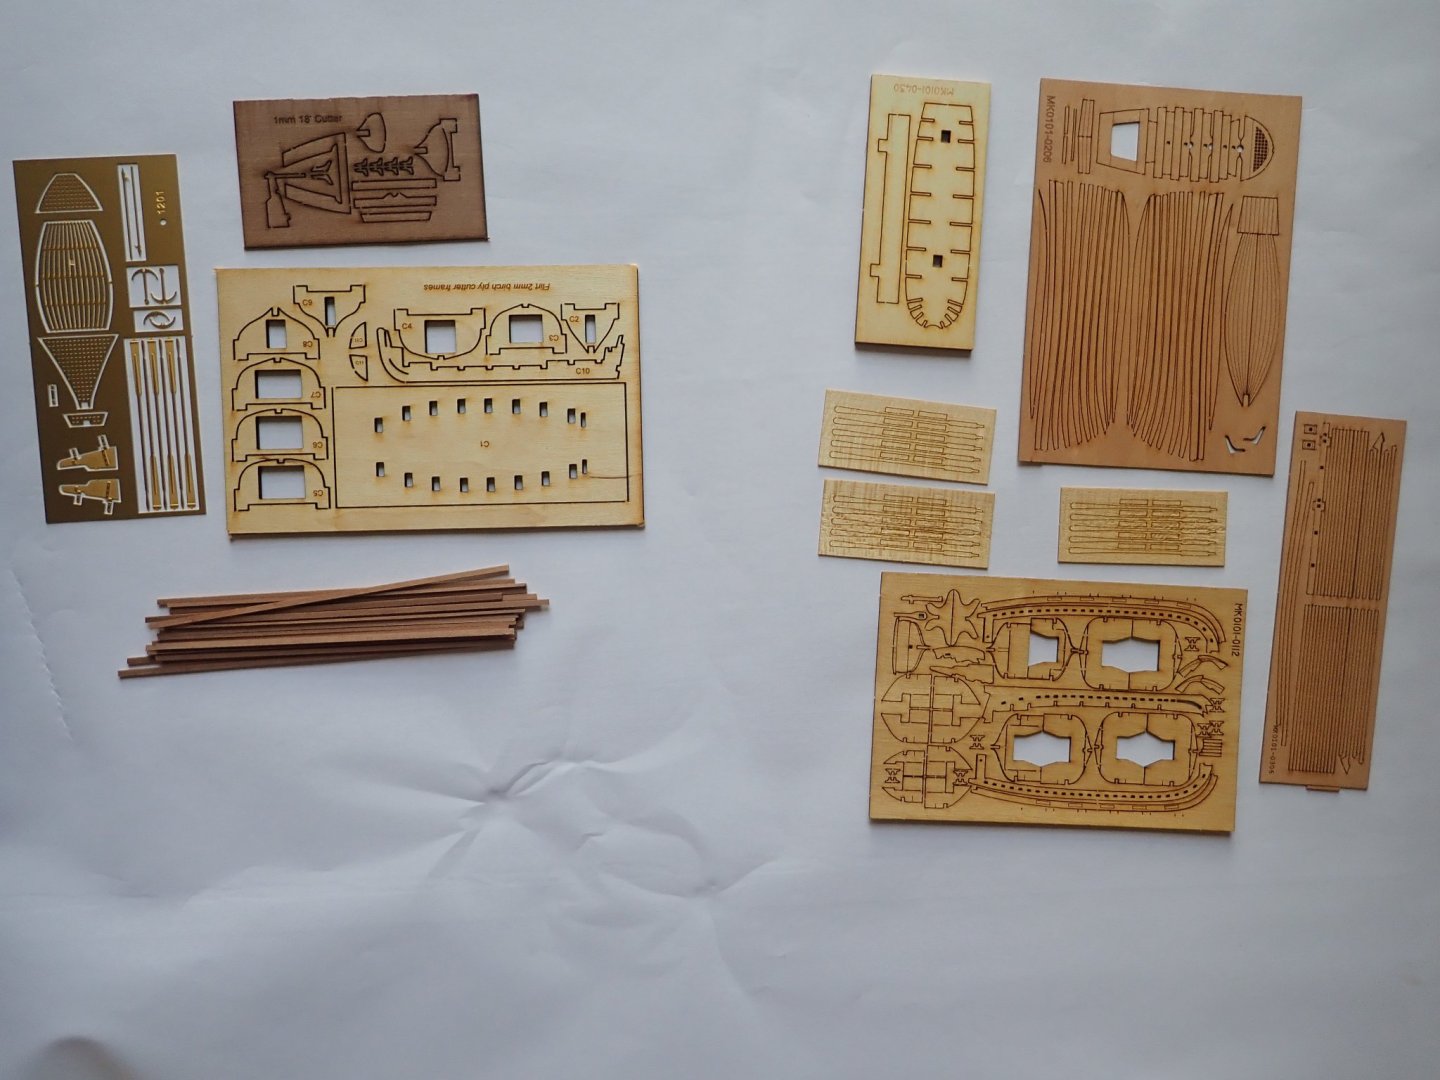


- 6 replies
-
- 6
-
-
- master korabel
- Finished
- (and 2 more)
-
 Here is a brief build log of this beautiful kit, which I began in late September - I'm now (4 December) approaching the rigging and sails, so on the home stretch. When finished, I'll put some pictures in the Gallery. There's plenty of excellent material in the Forum about this kit, so I won't go into too much detail - just to say what a marvel of miniature accuracy the laser cutting and photo etching of the parts are. Here are a few images of the early stages...
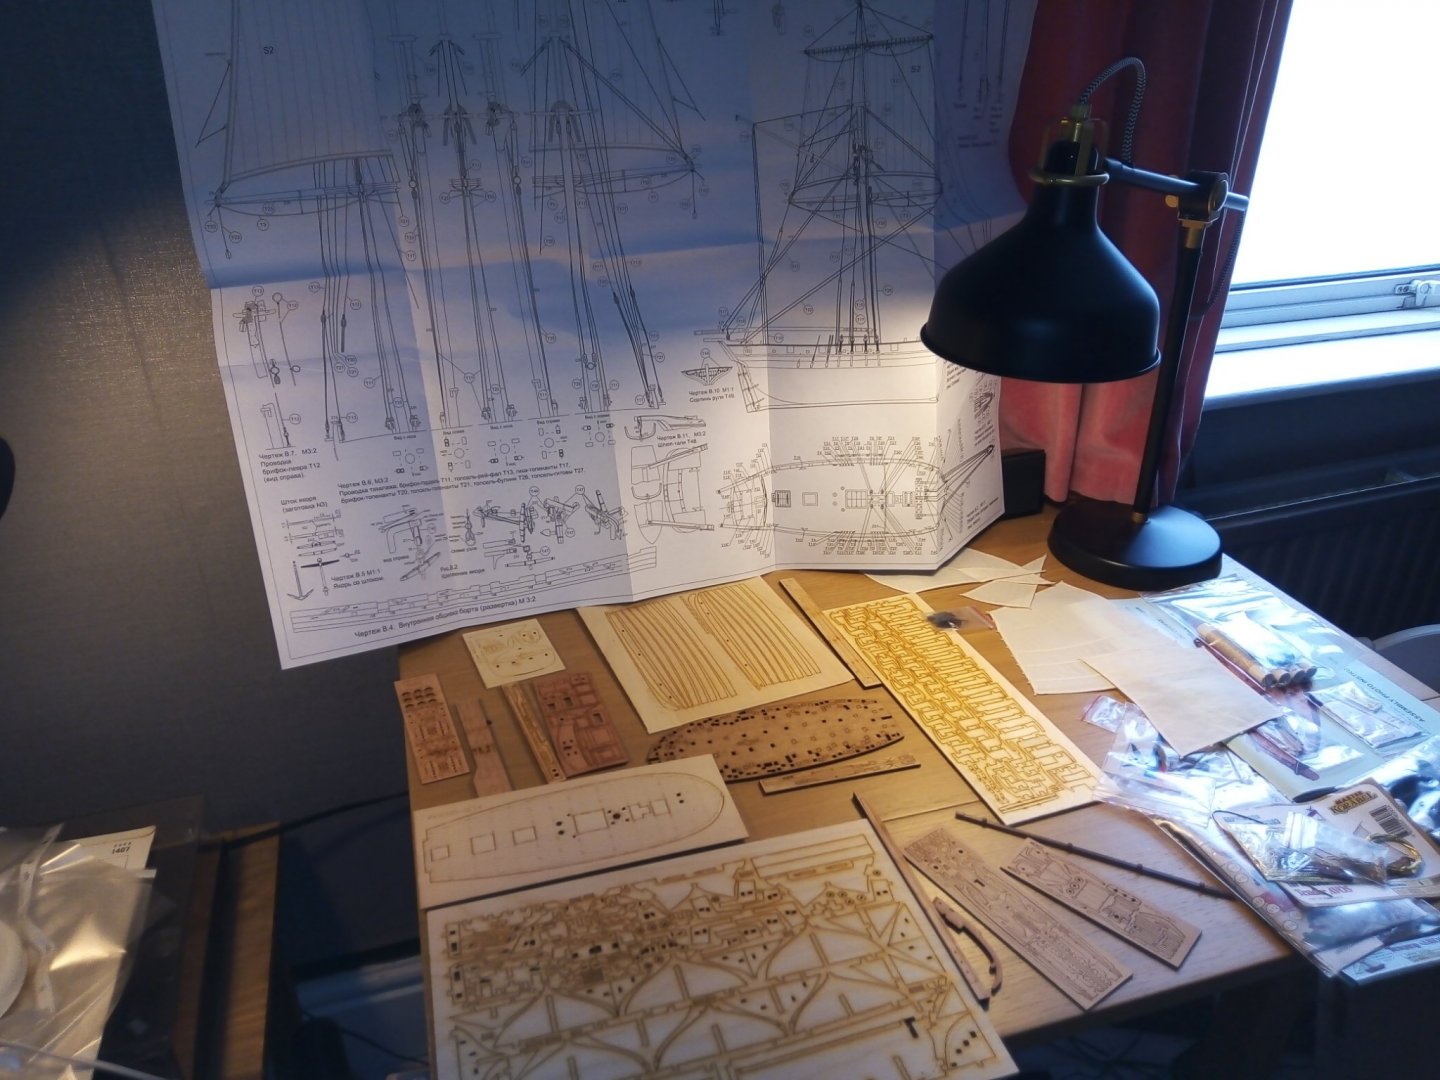

-
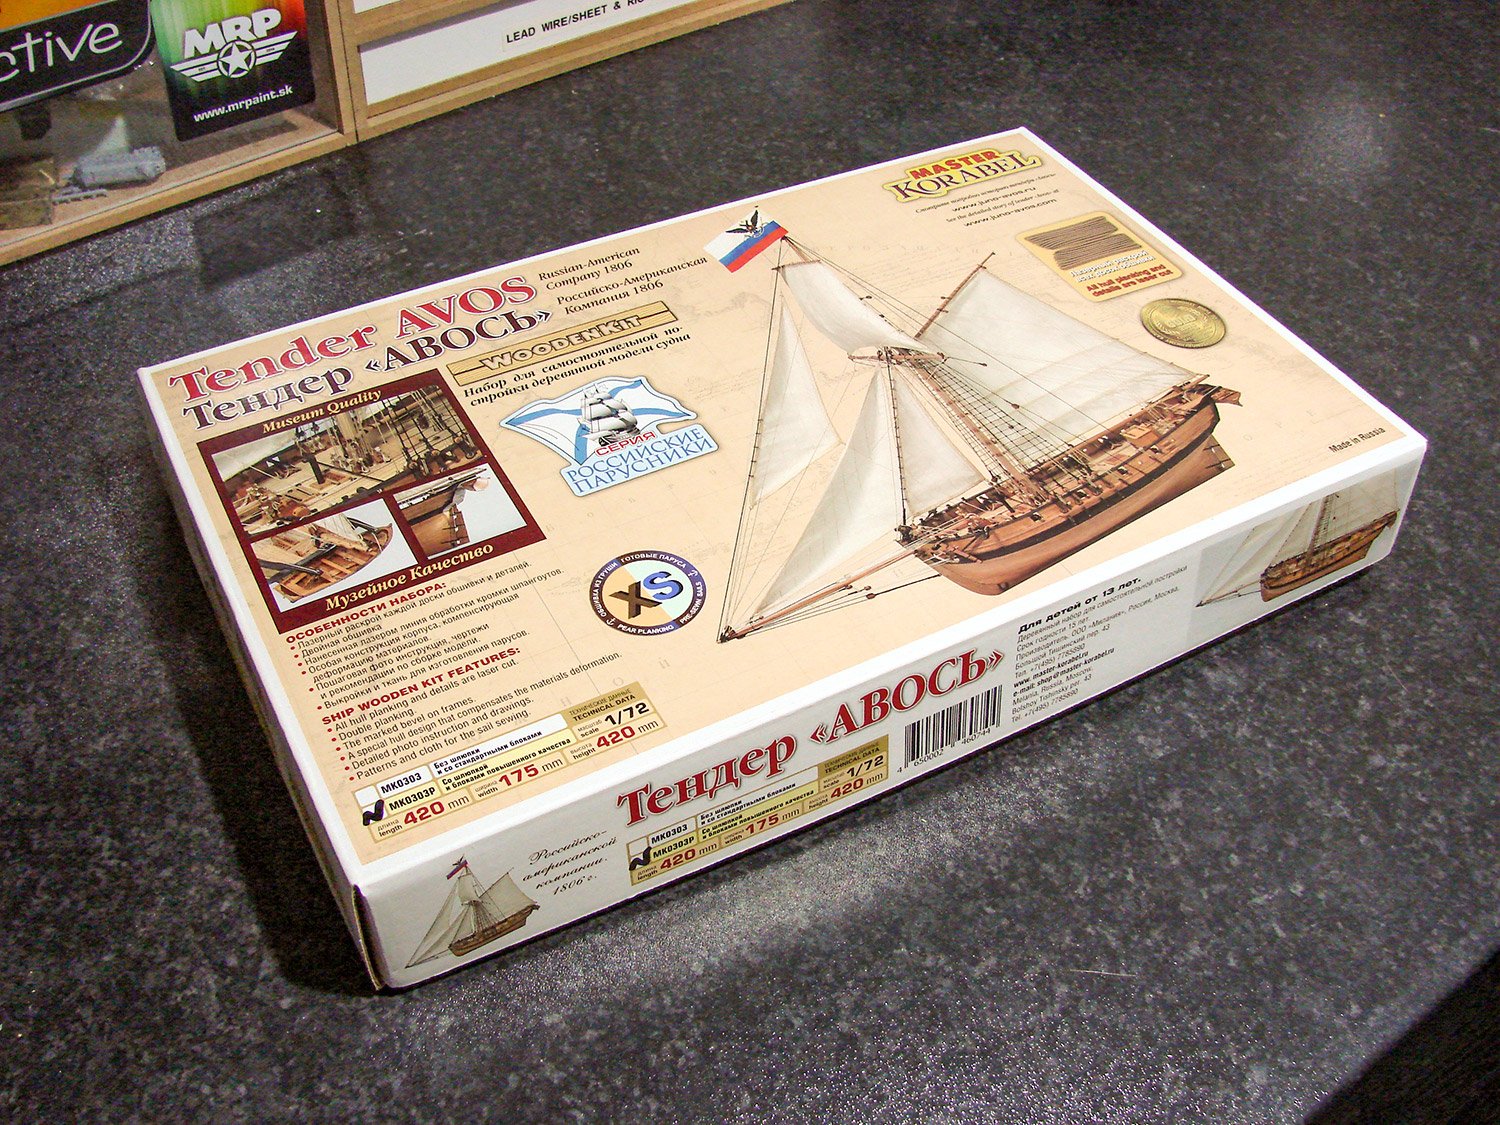
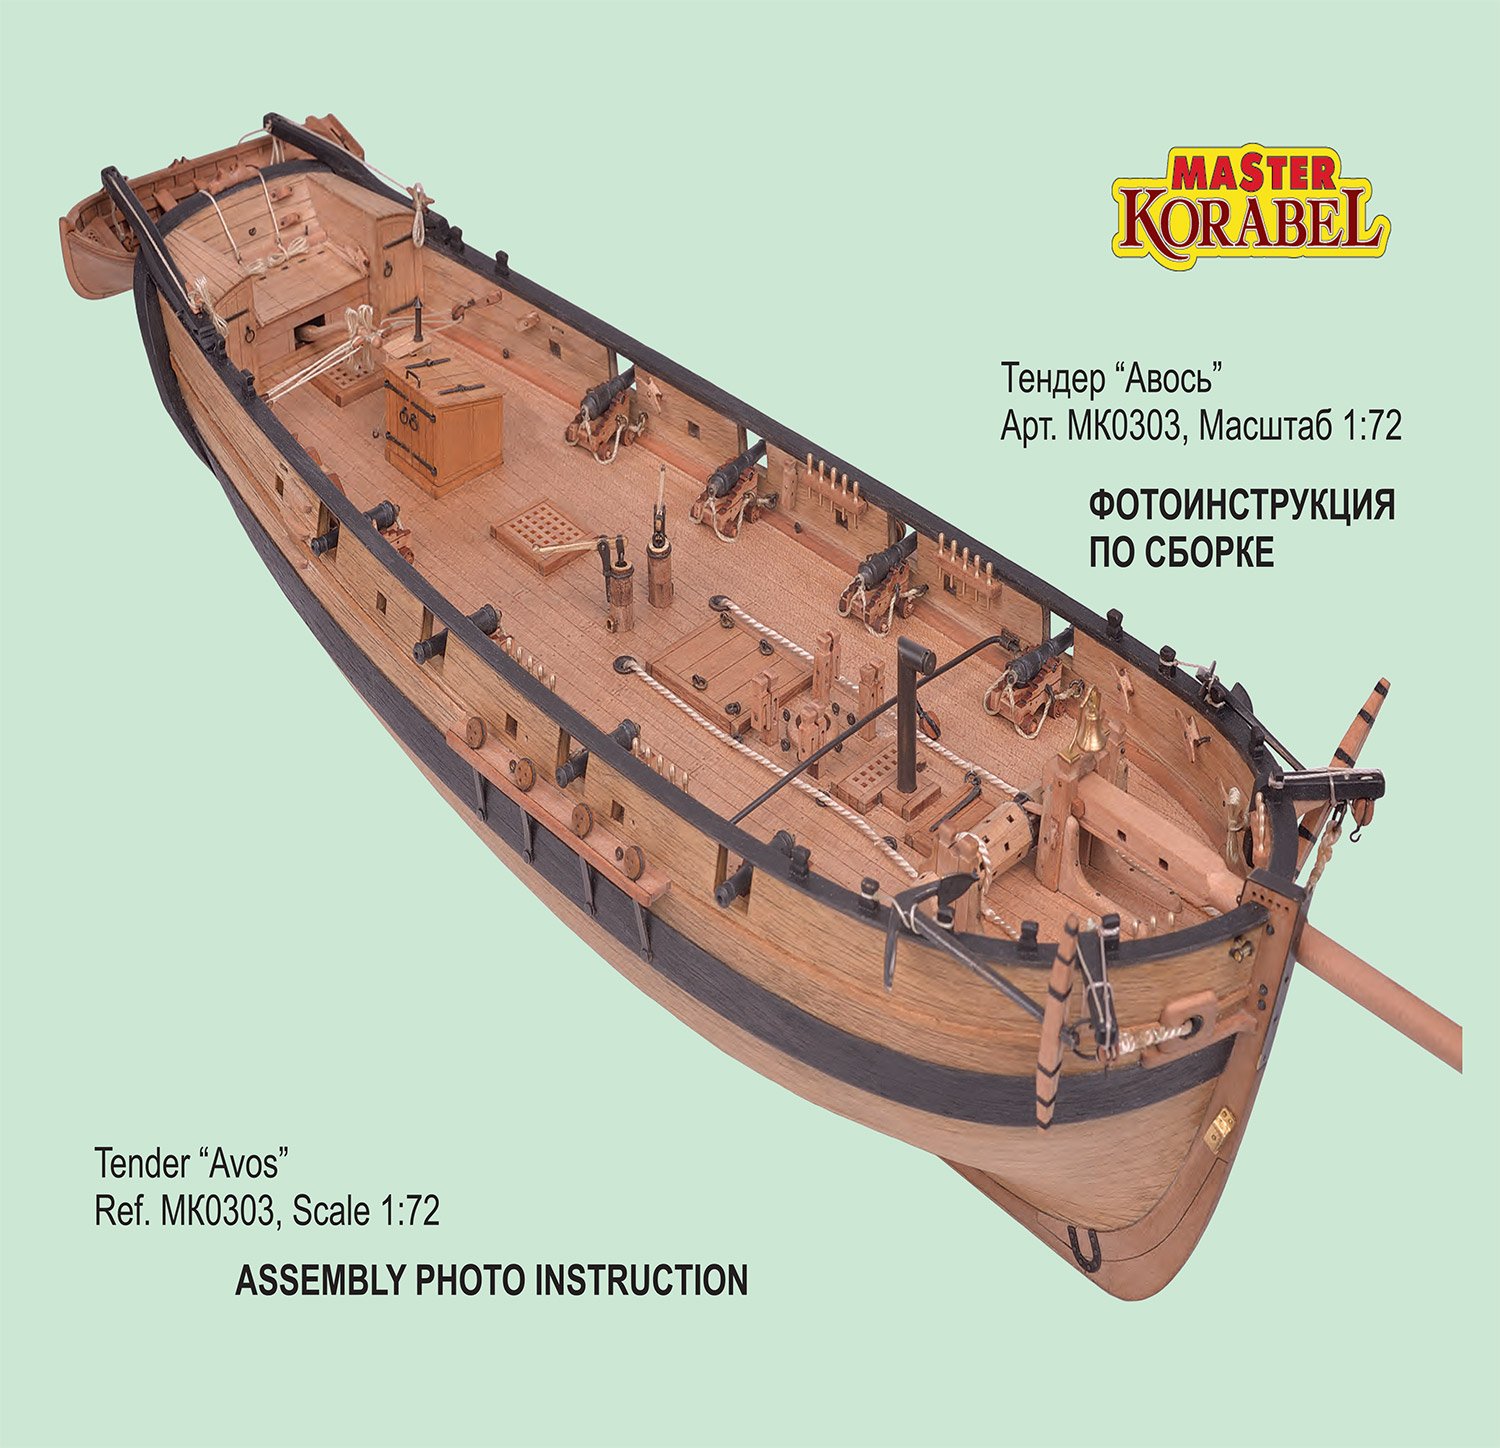
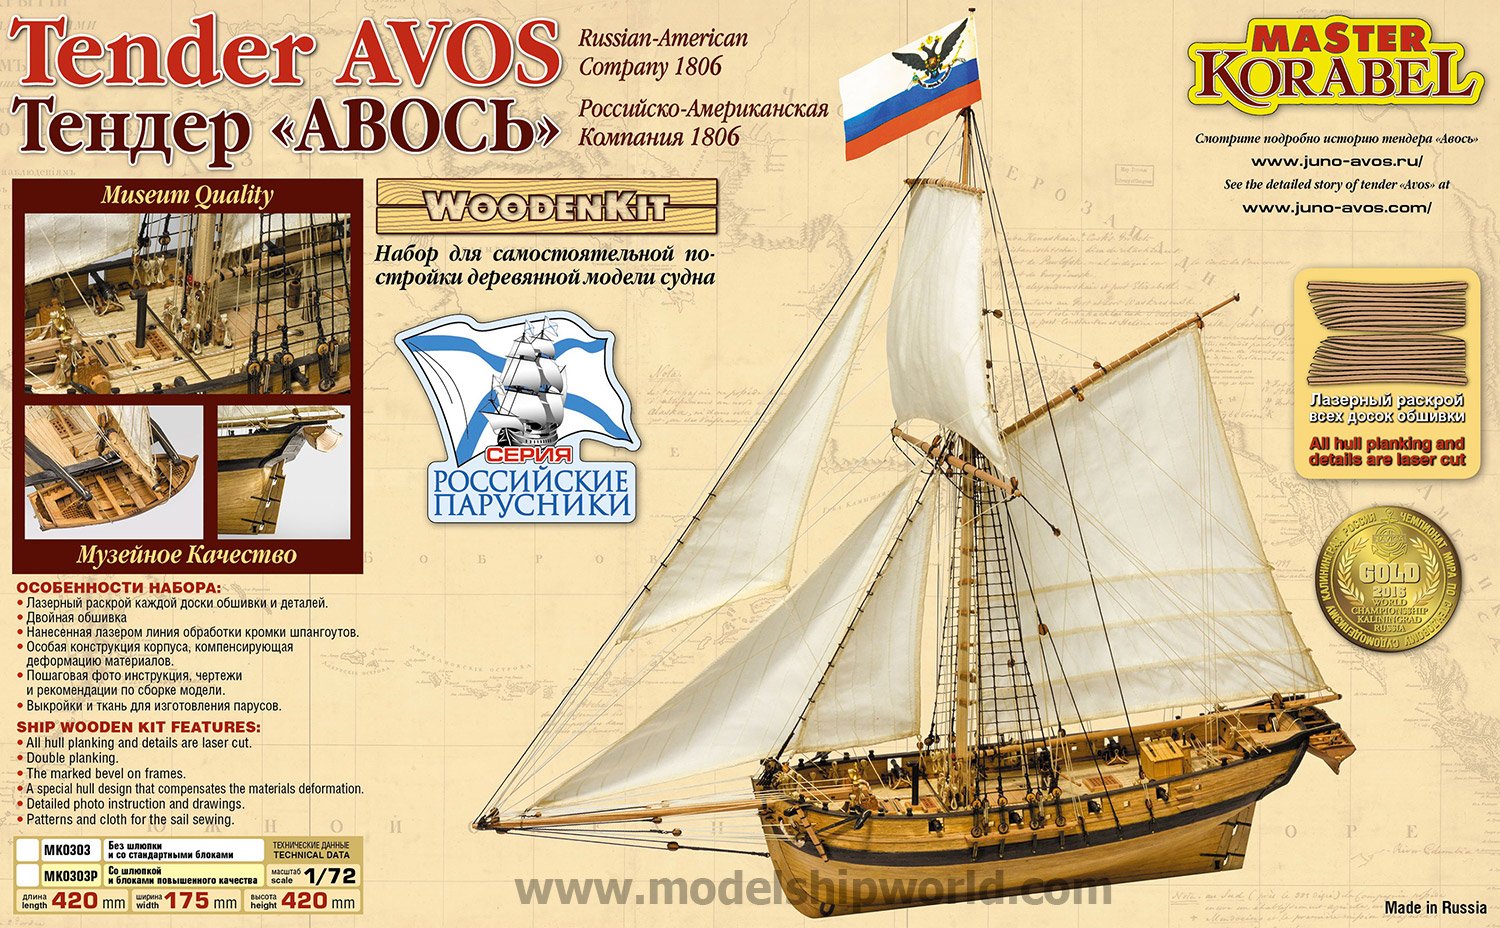
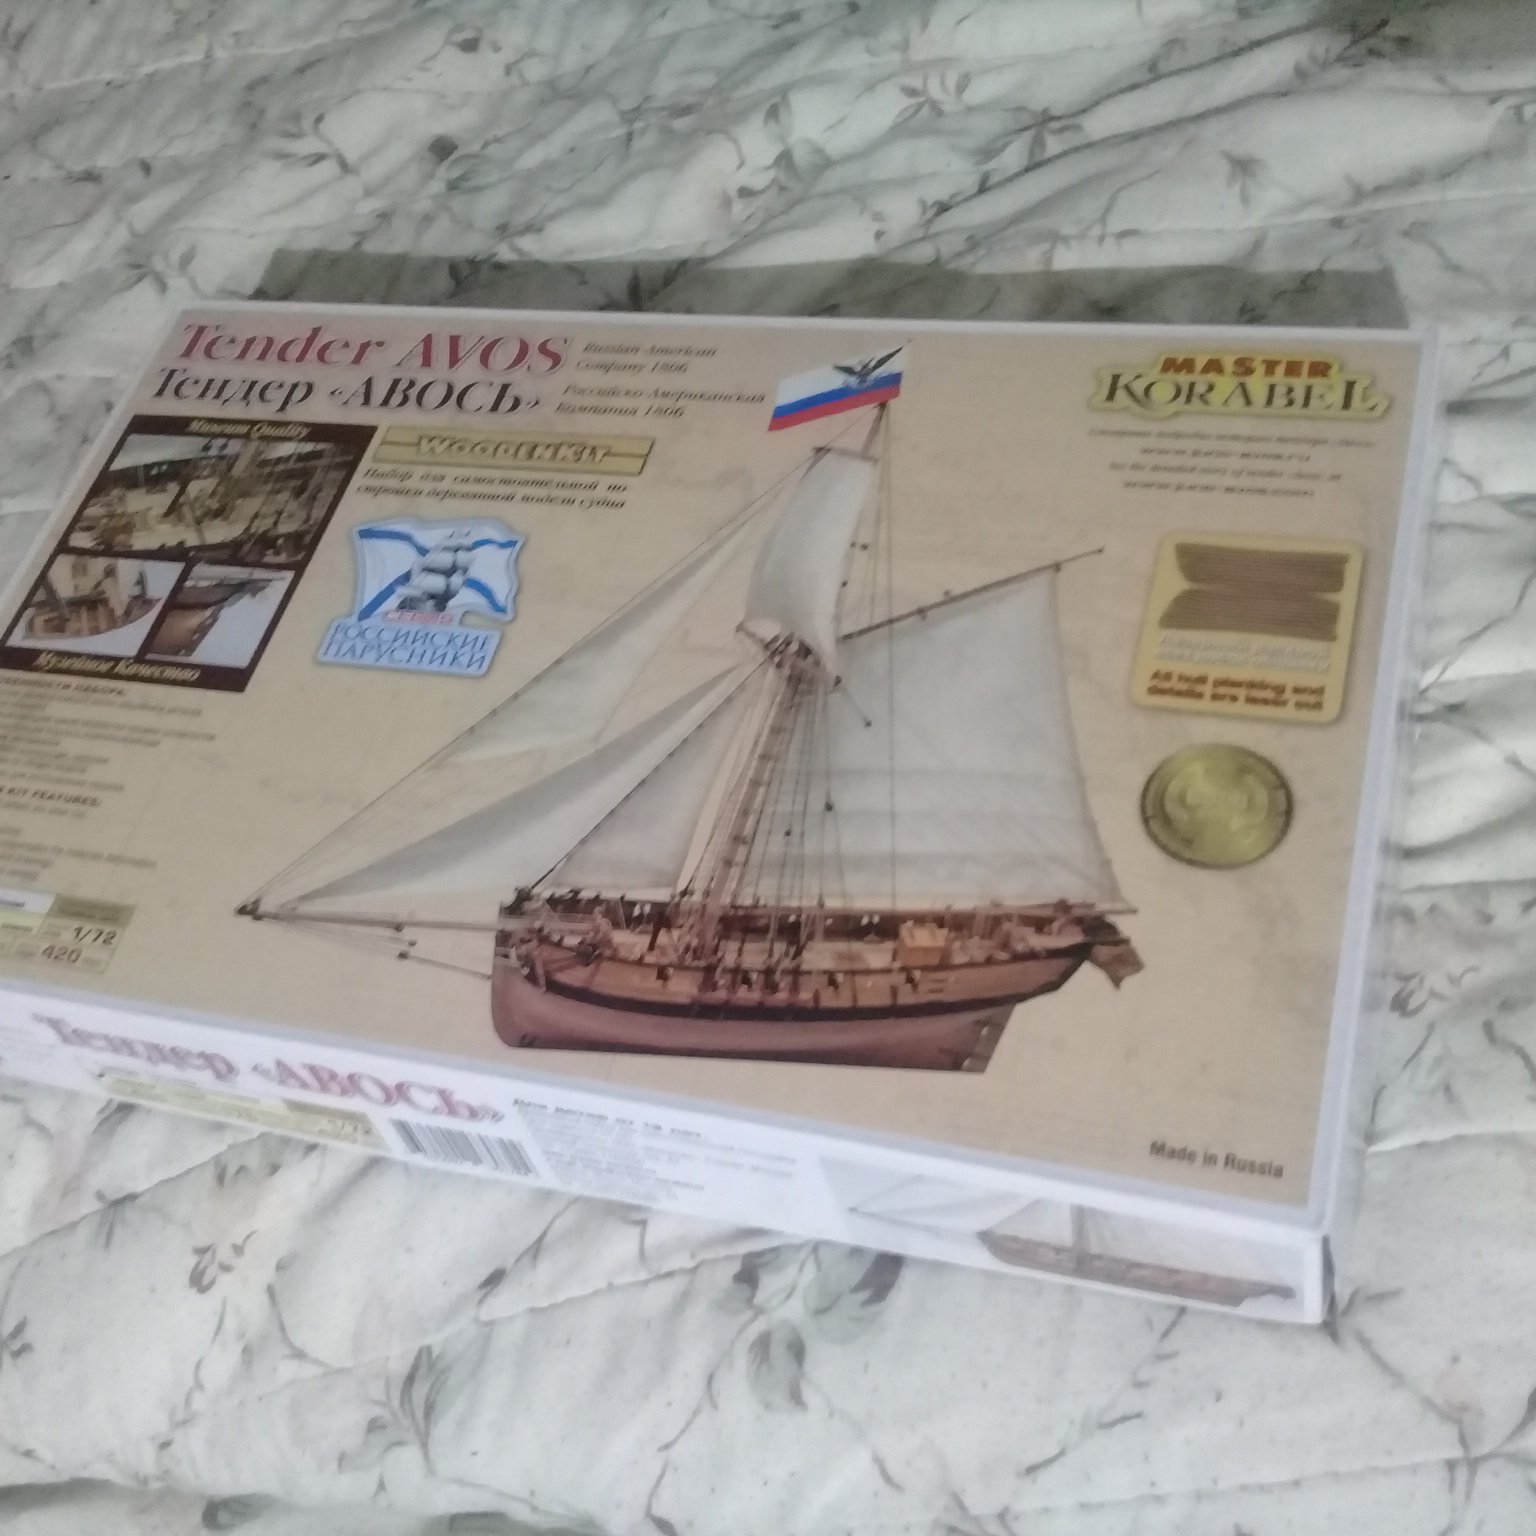
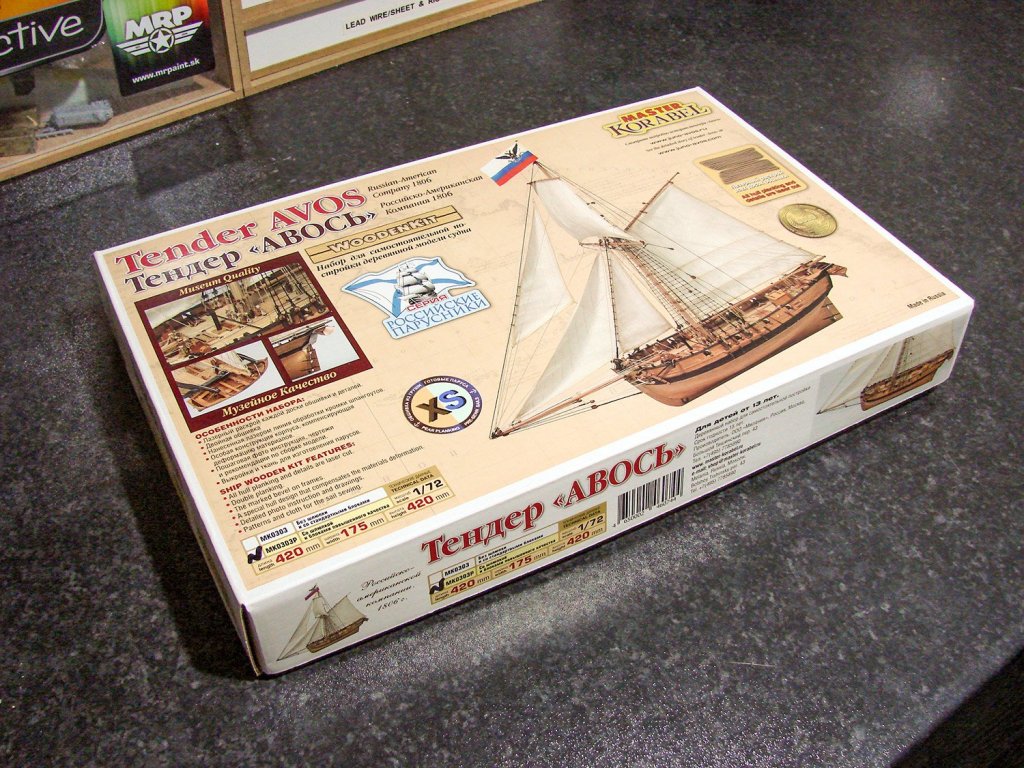
 I decided to take a break from the HMS Snake and do something more straight forward with no kit bashing. I initially bought the Falconet kit 9th century Viking ship but I plowed through that in less than a month. I have been wanting to buy the Avos since it came out so I decided this would be a good time. By the time my Avos is done Chris Watton might have finished developing the HMS Sphinx and My Snake will never get finished. 😆 I just post a picture of the box for now, I don't plan on covering all the contents in the box as there is a thorough review buy James H.
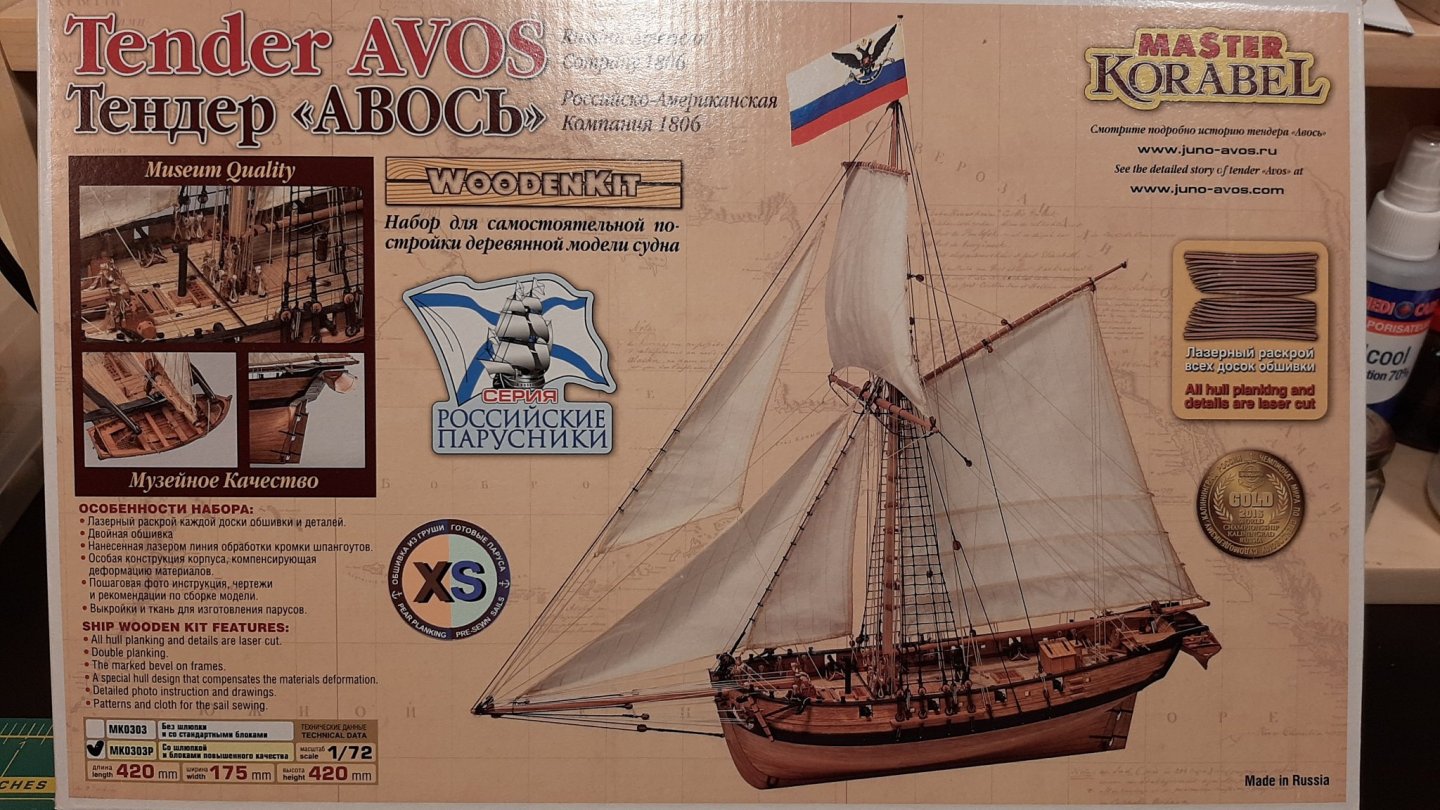
-
 Jumping right into an unusual one. I saw a previous build and scooped this kit up immediately. I need a break from rigging as well.
-
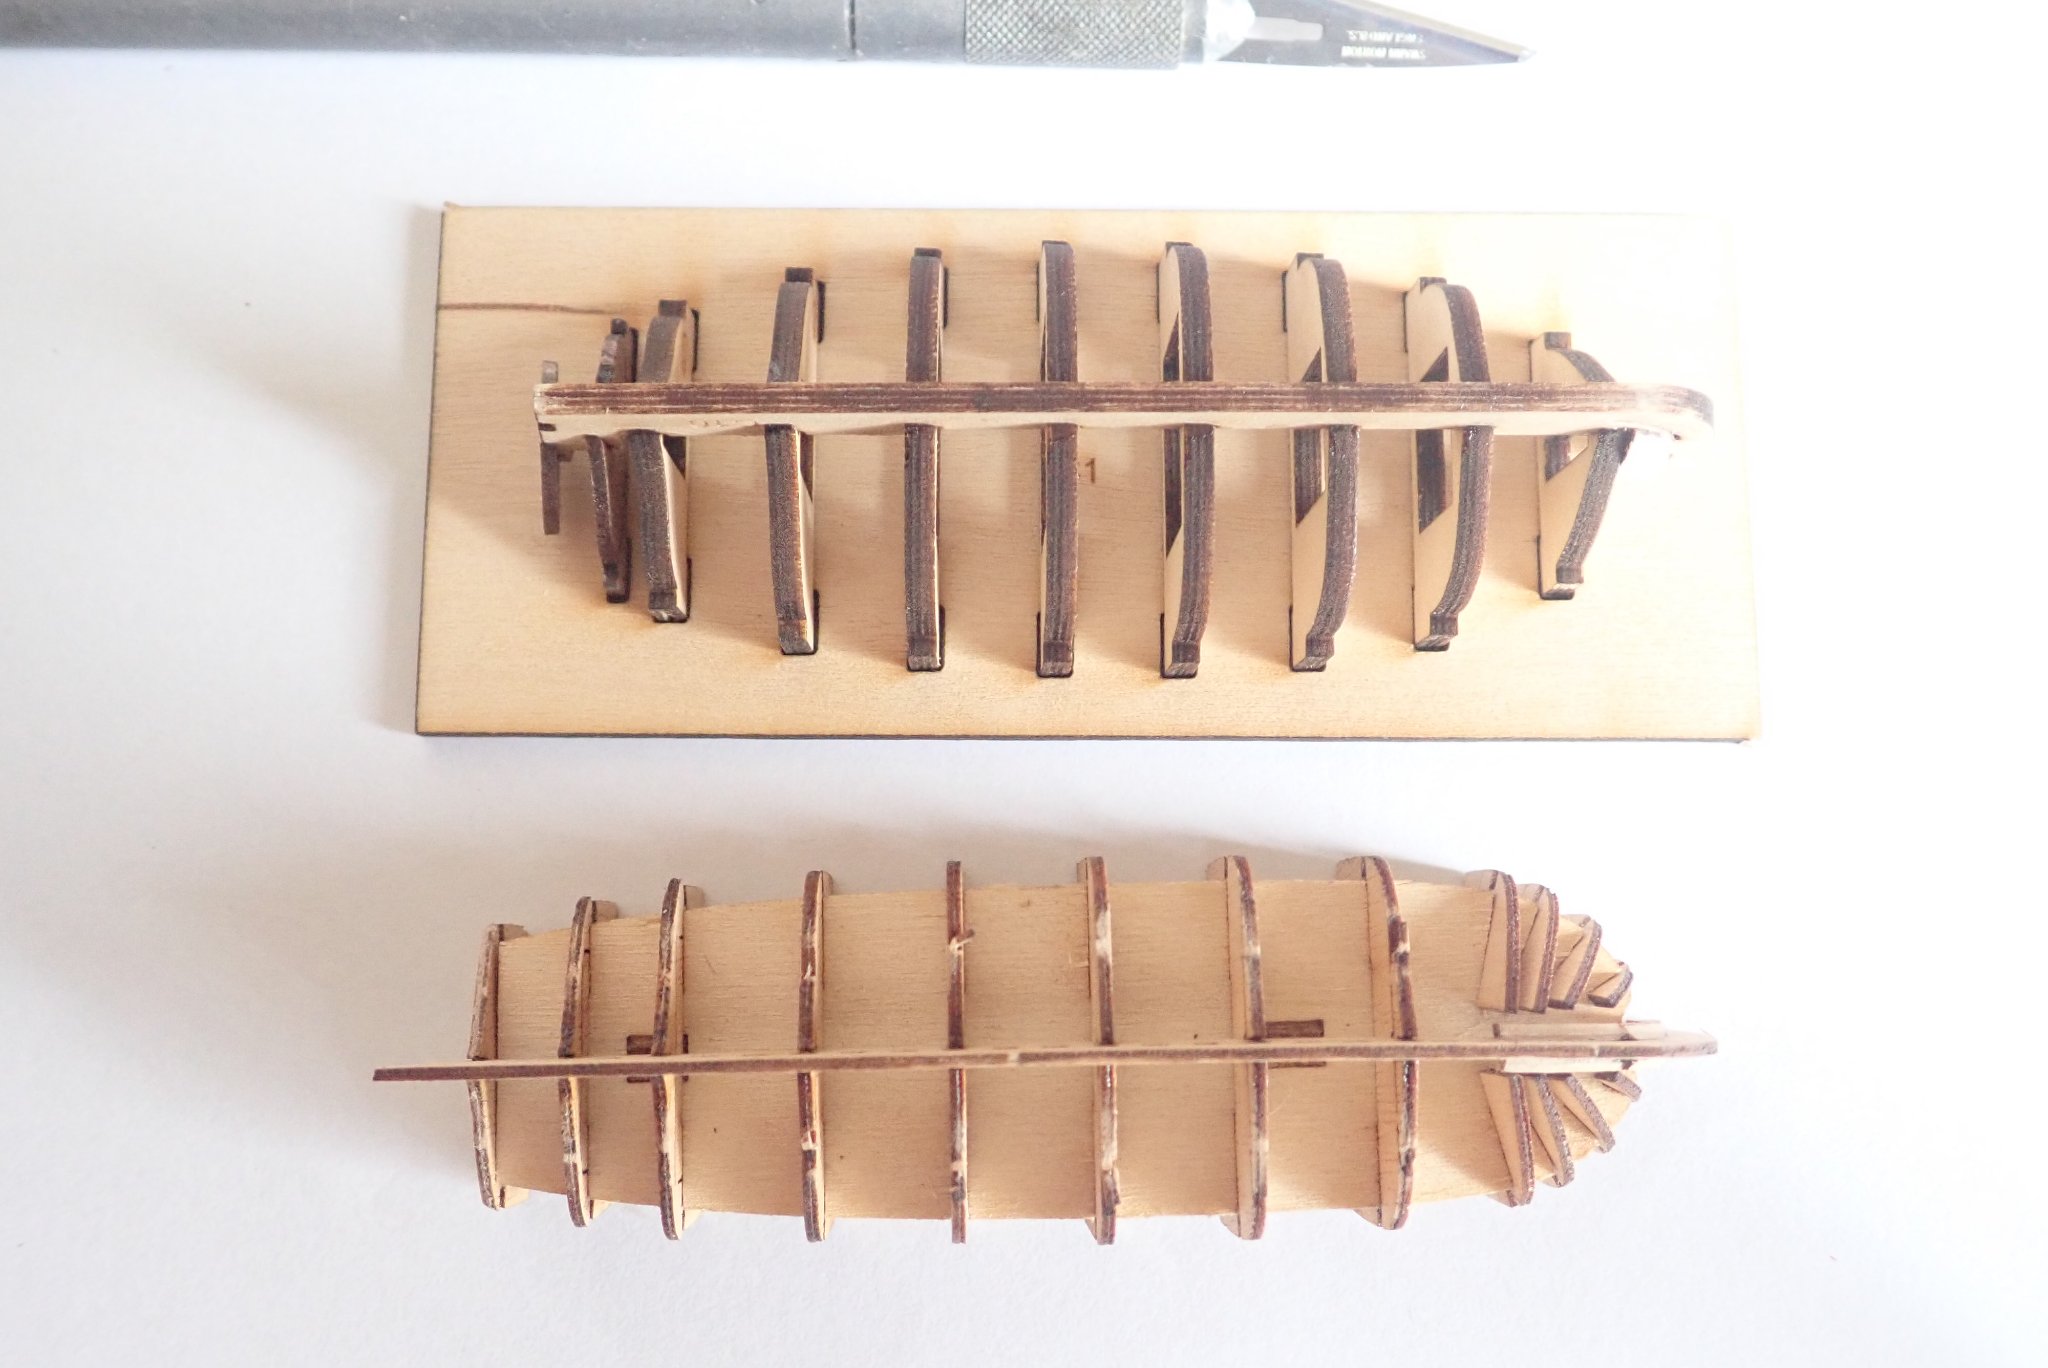
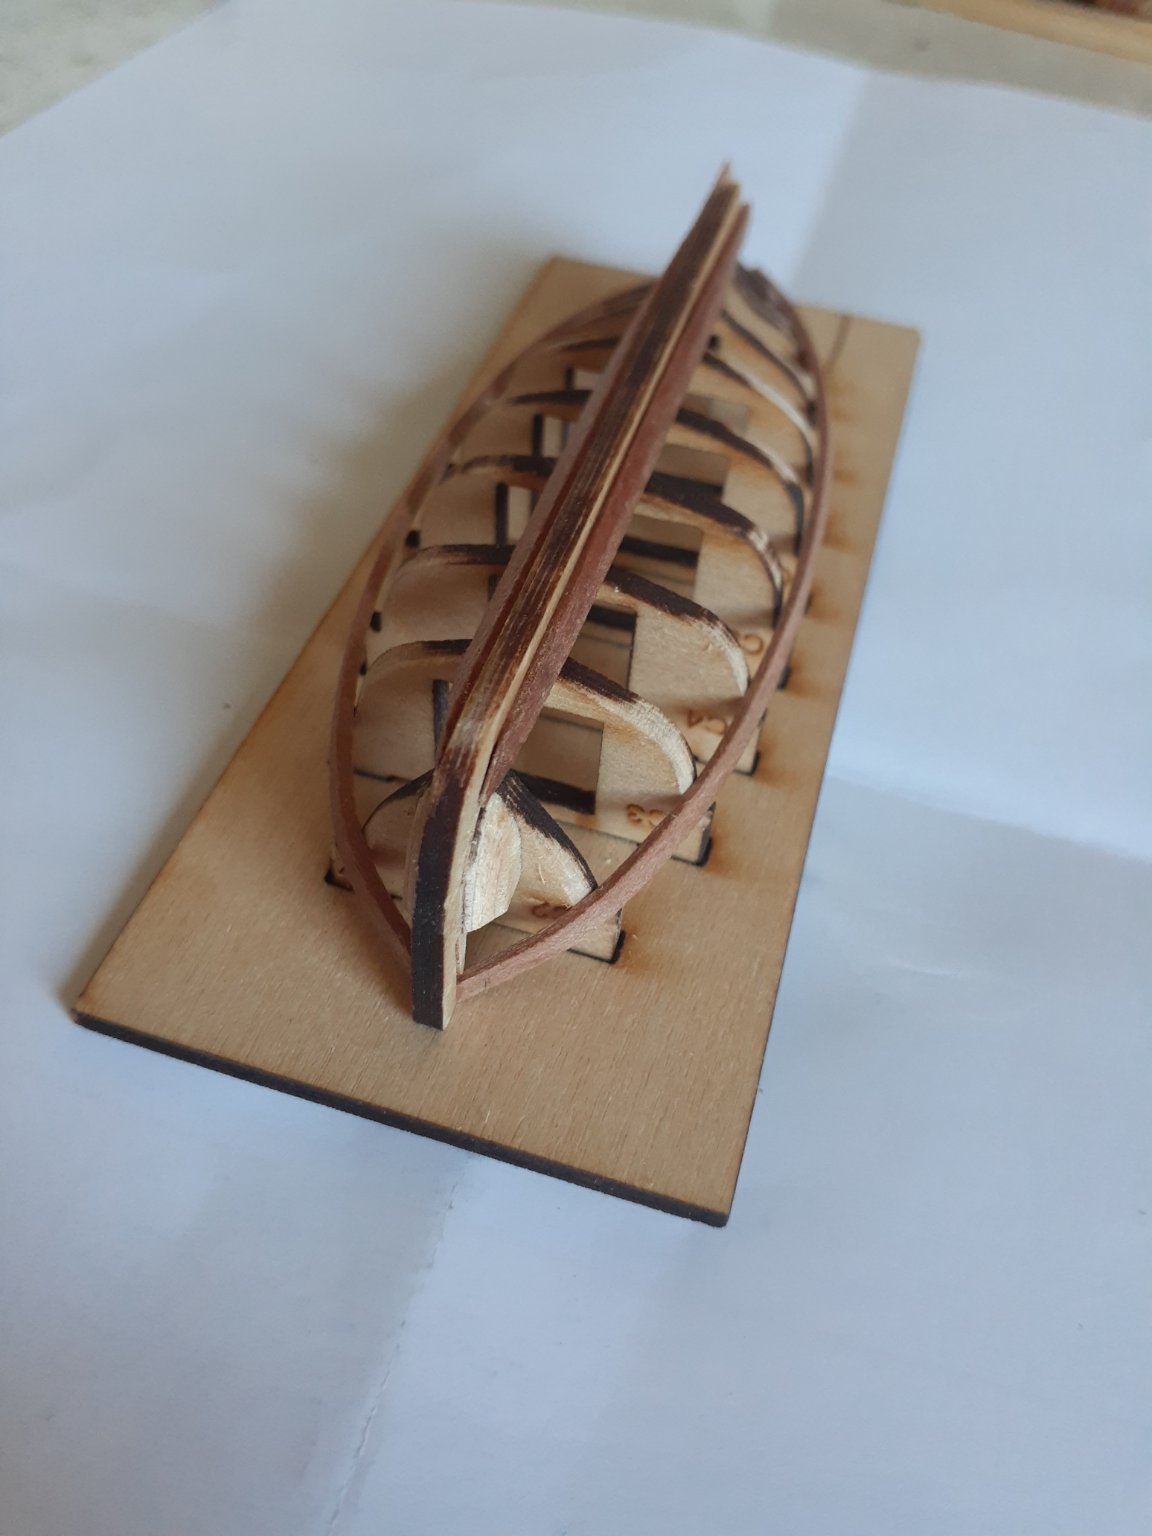
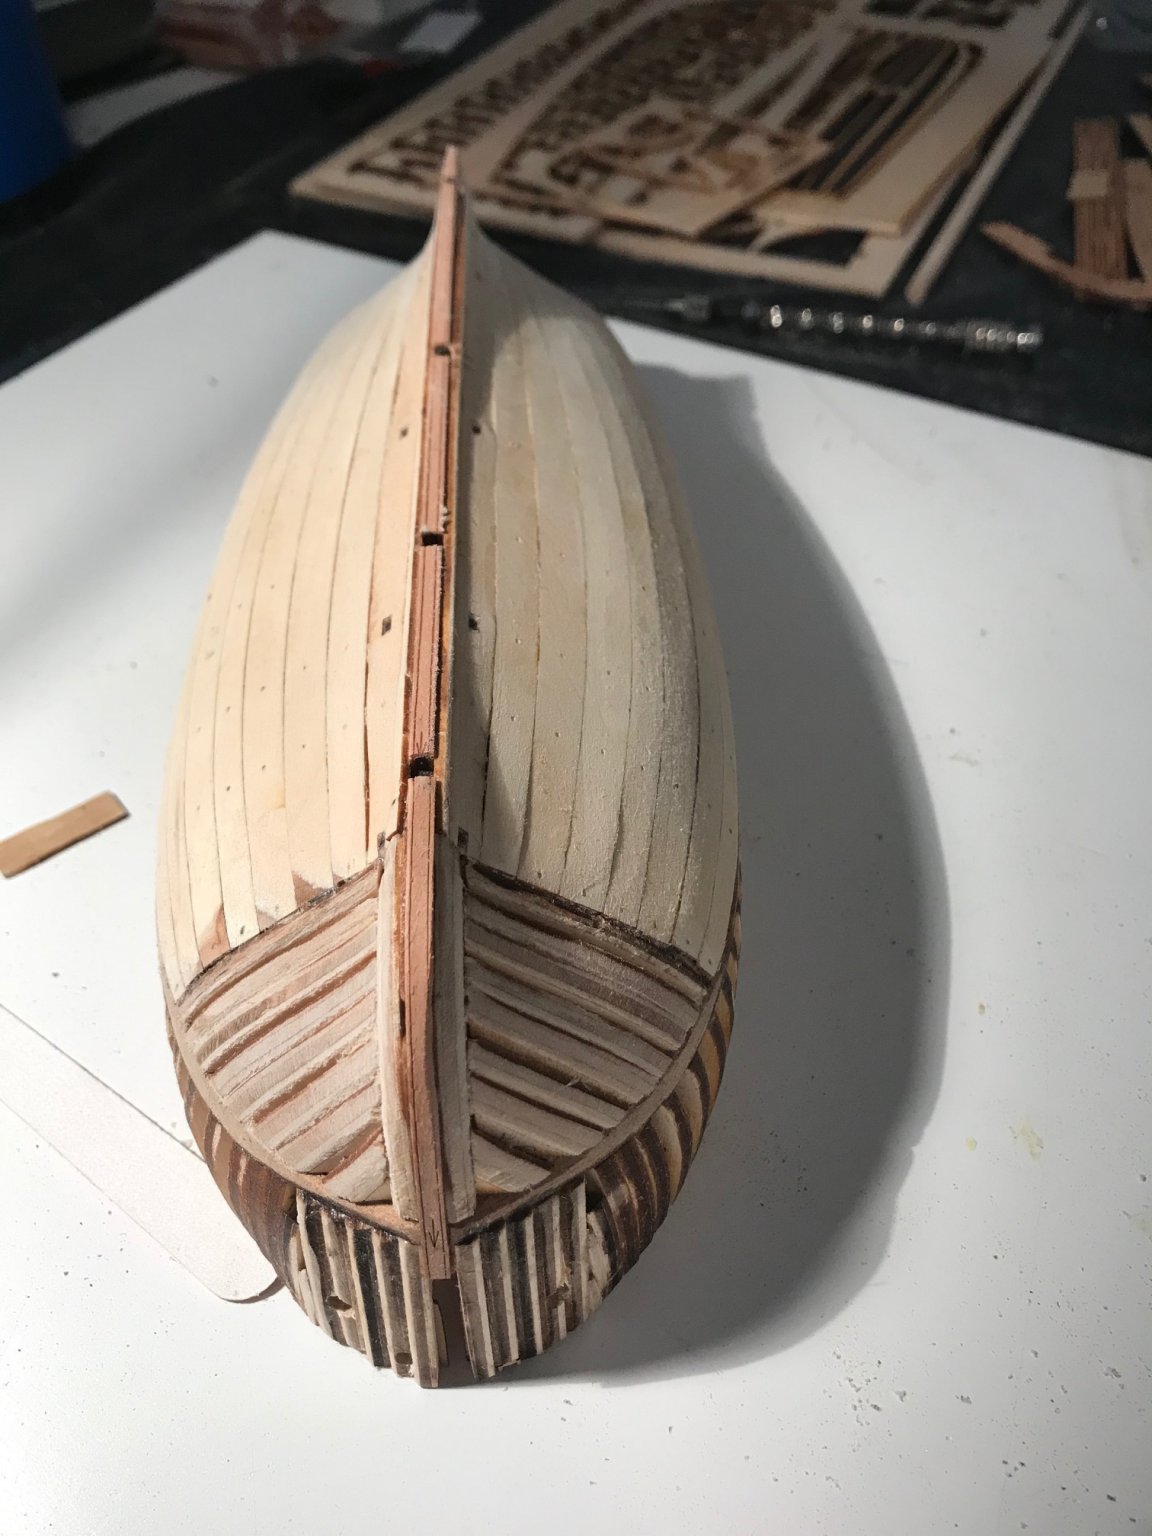
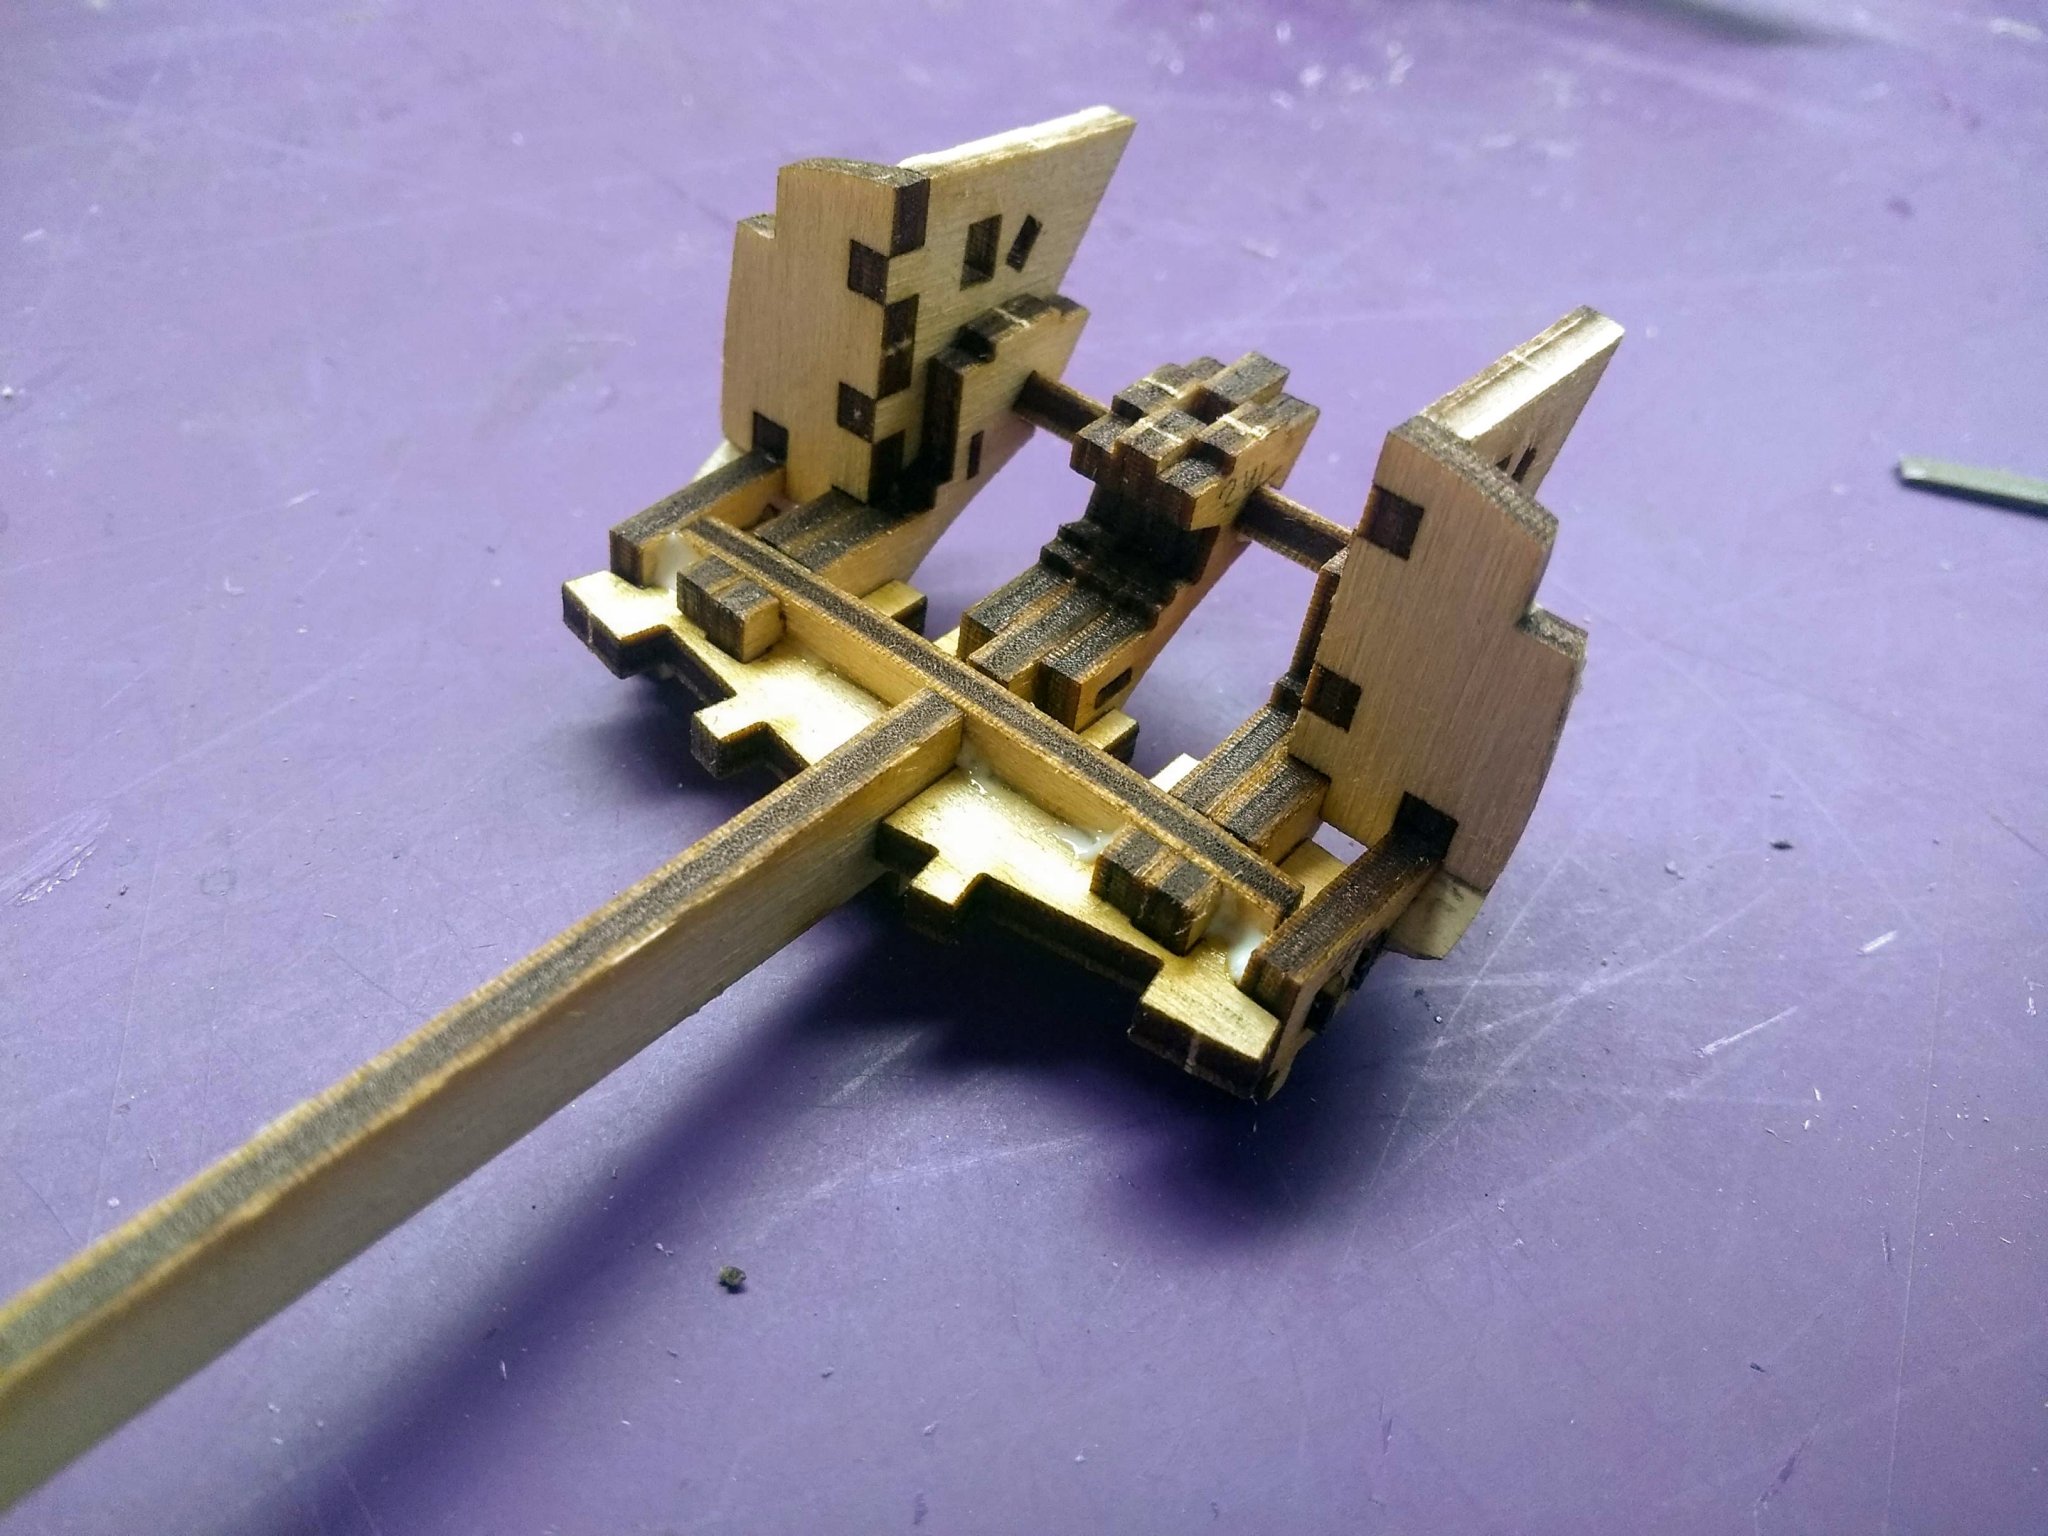
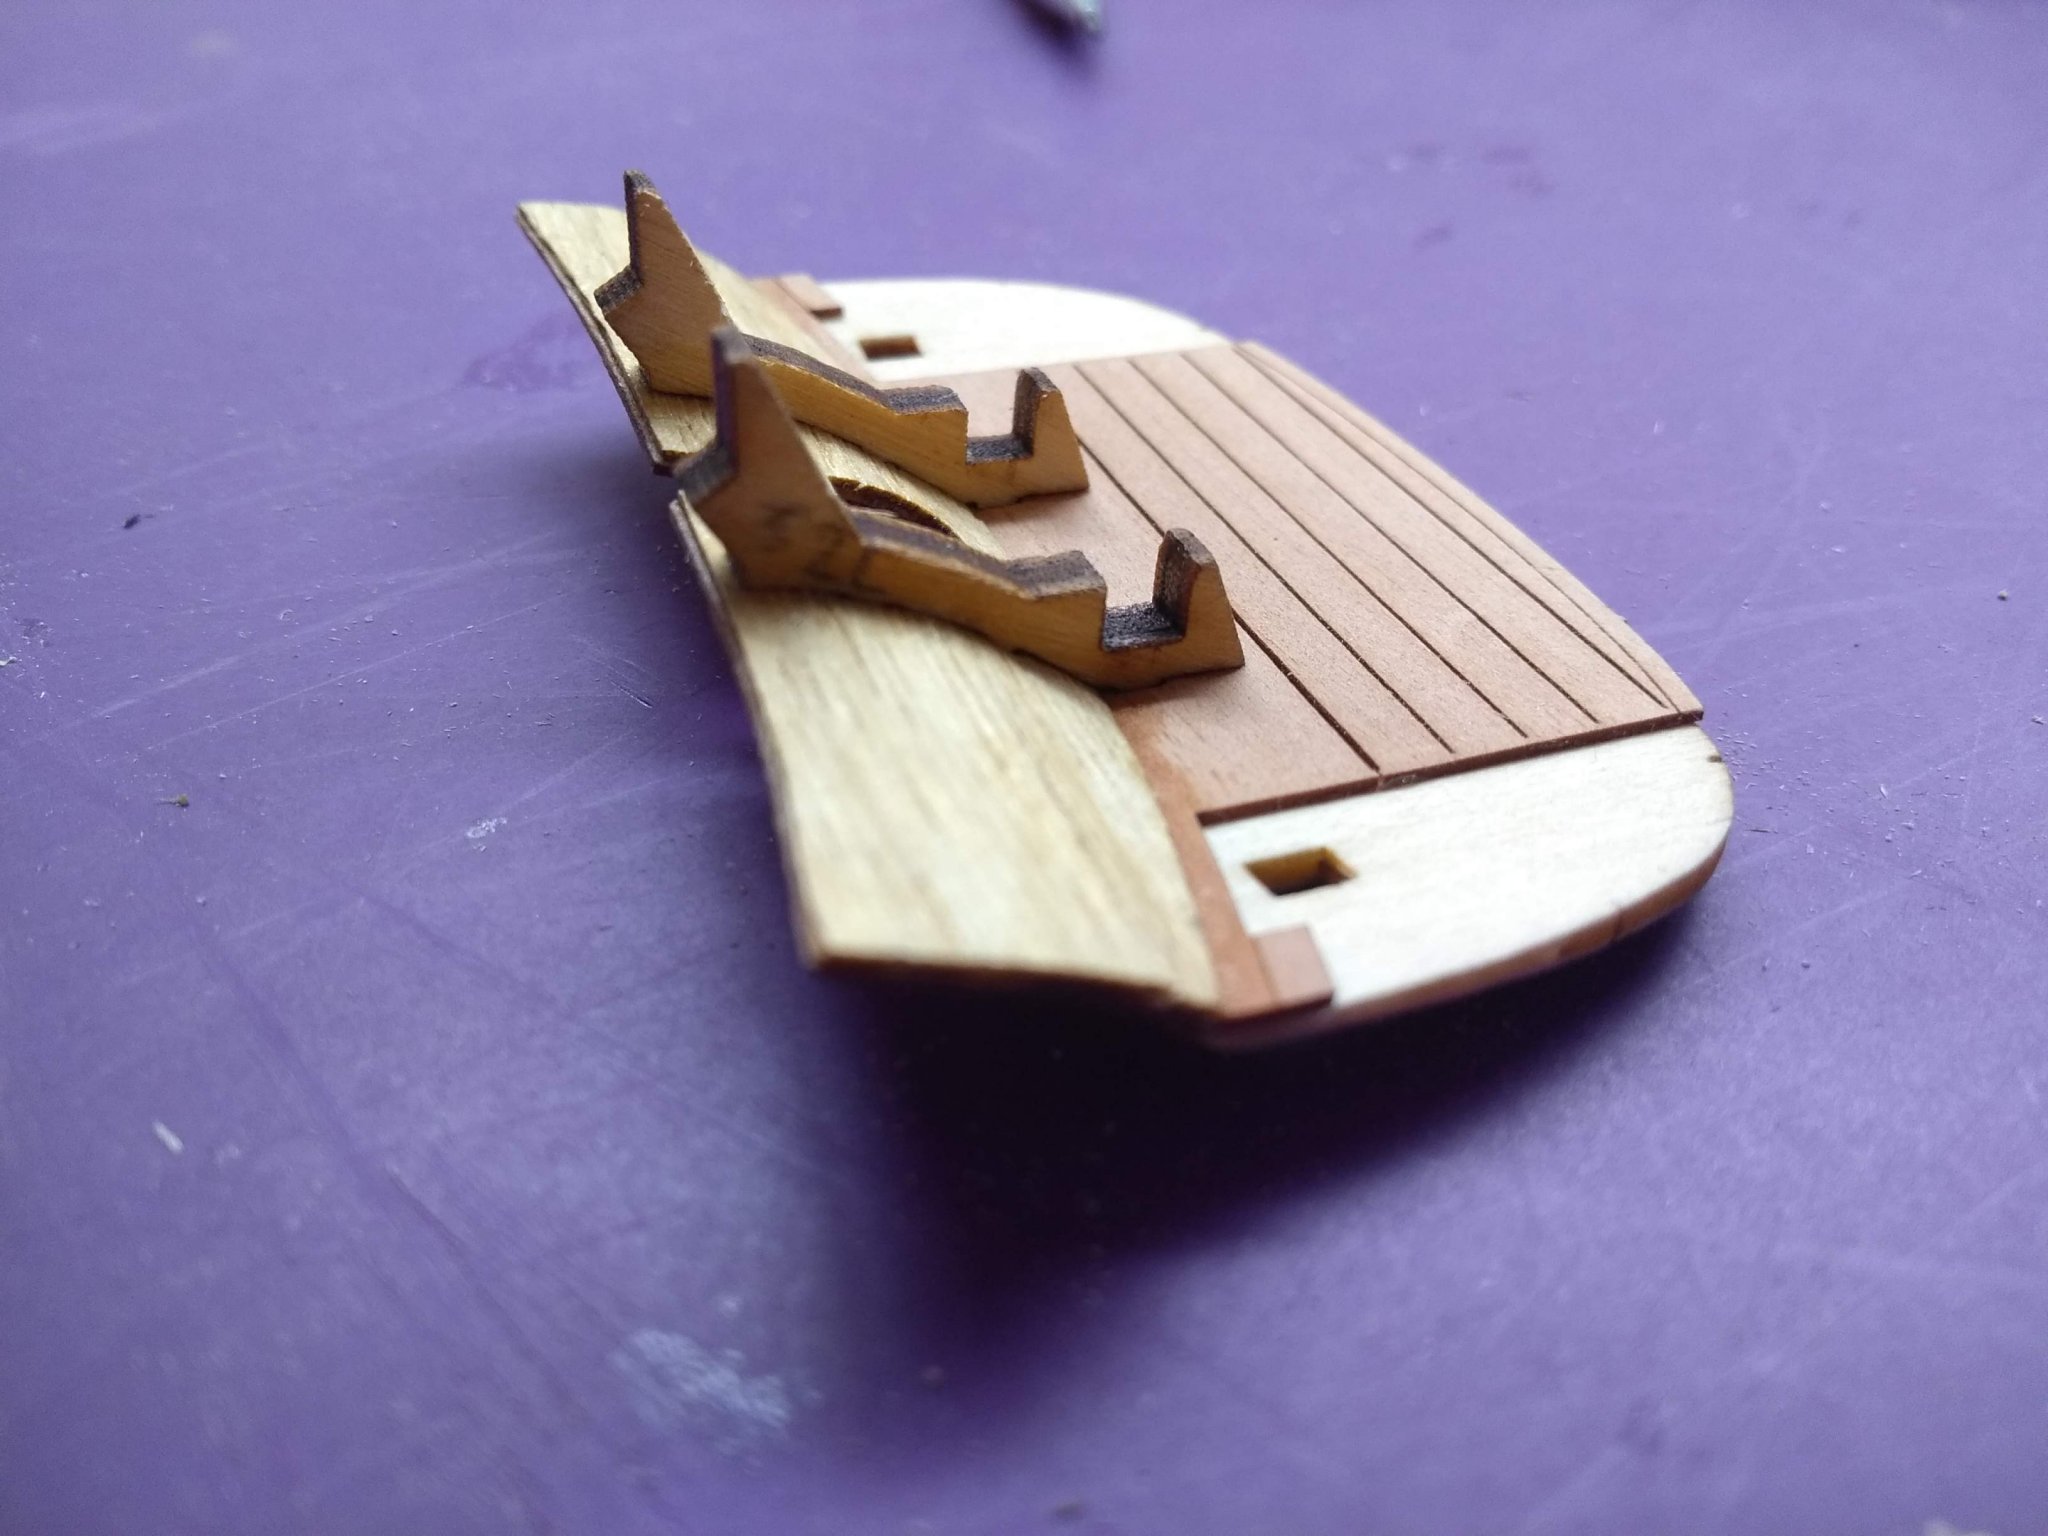
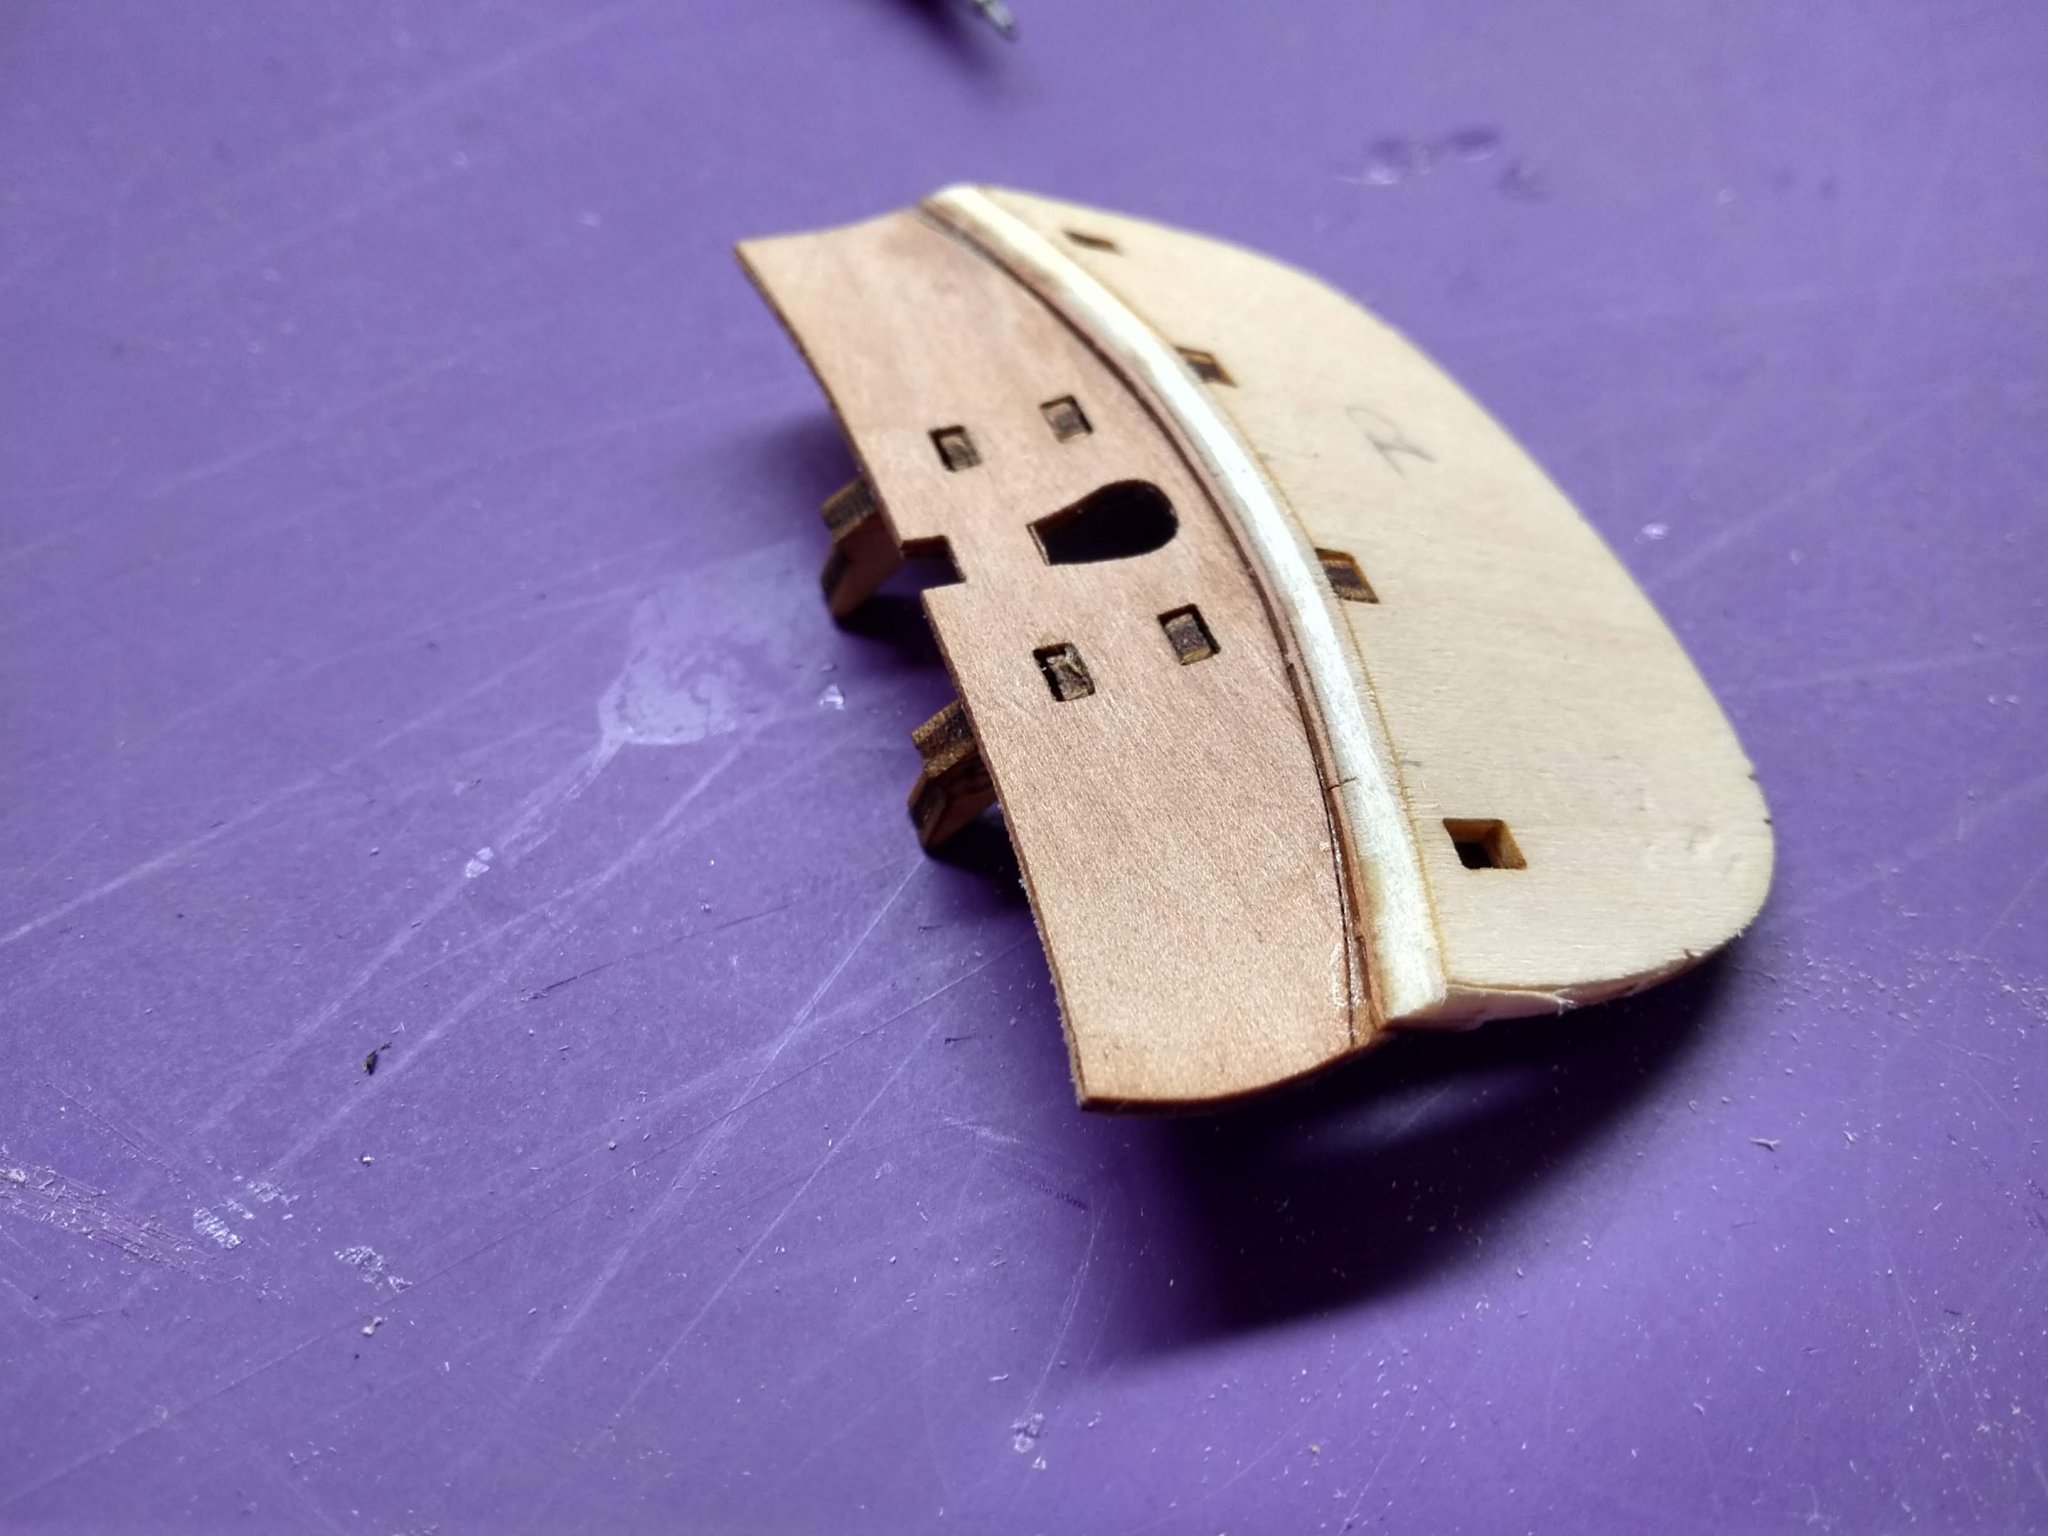
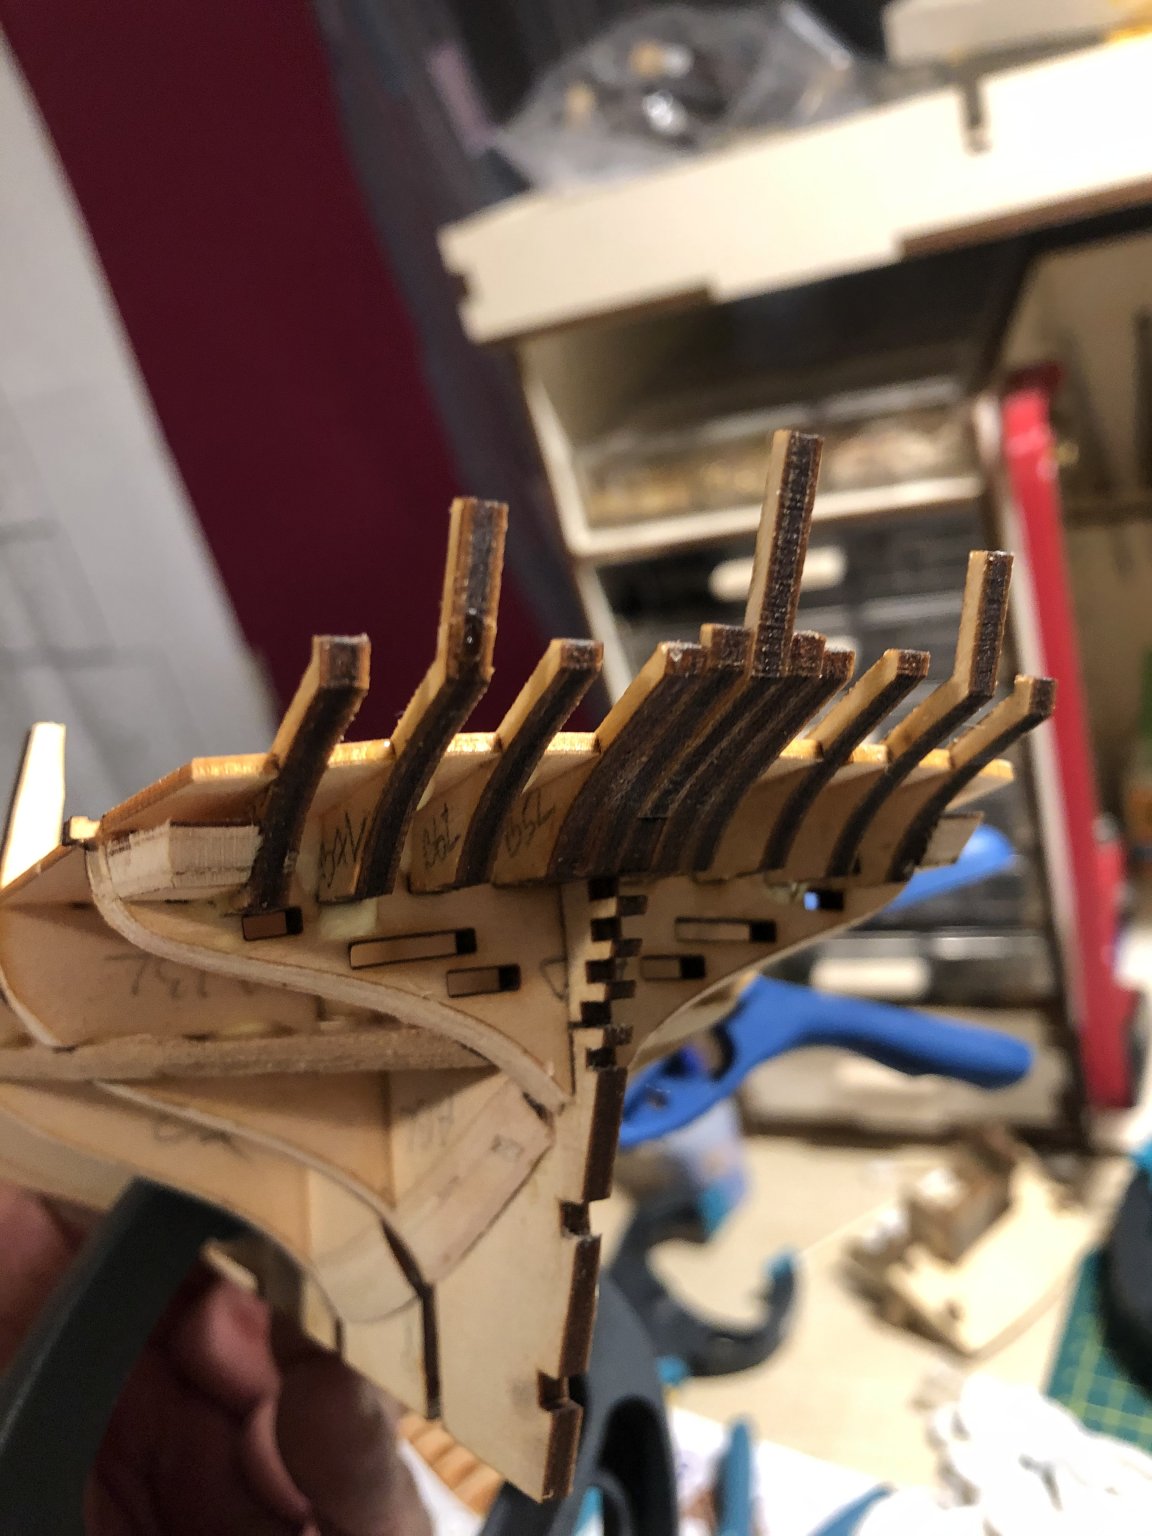
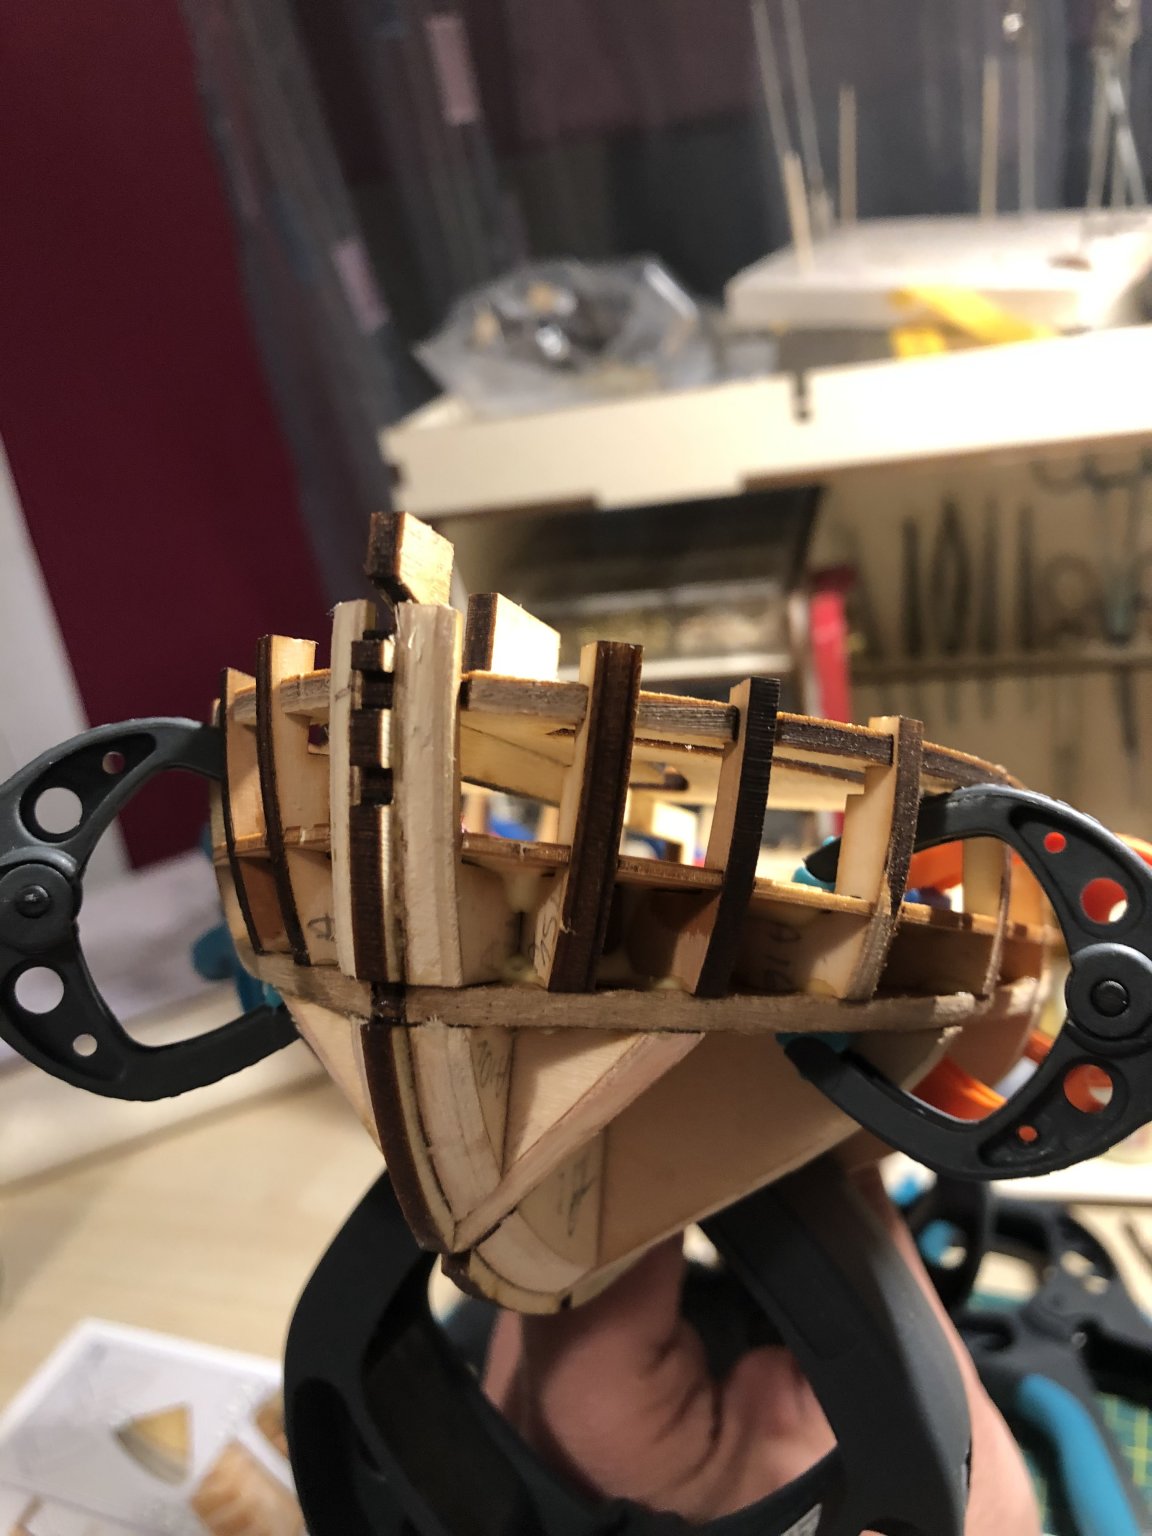
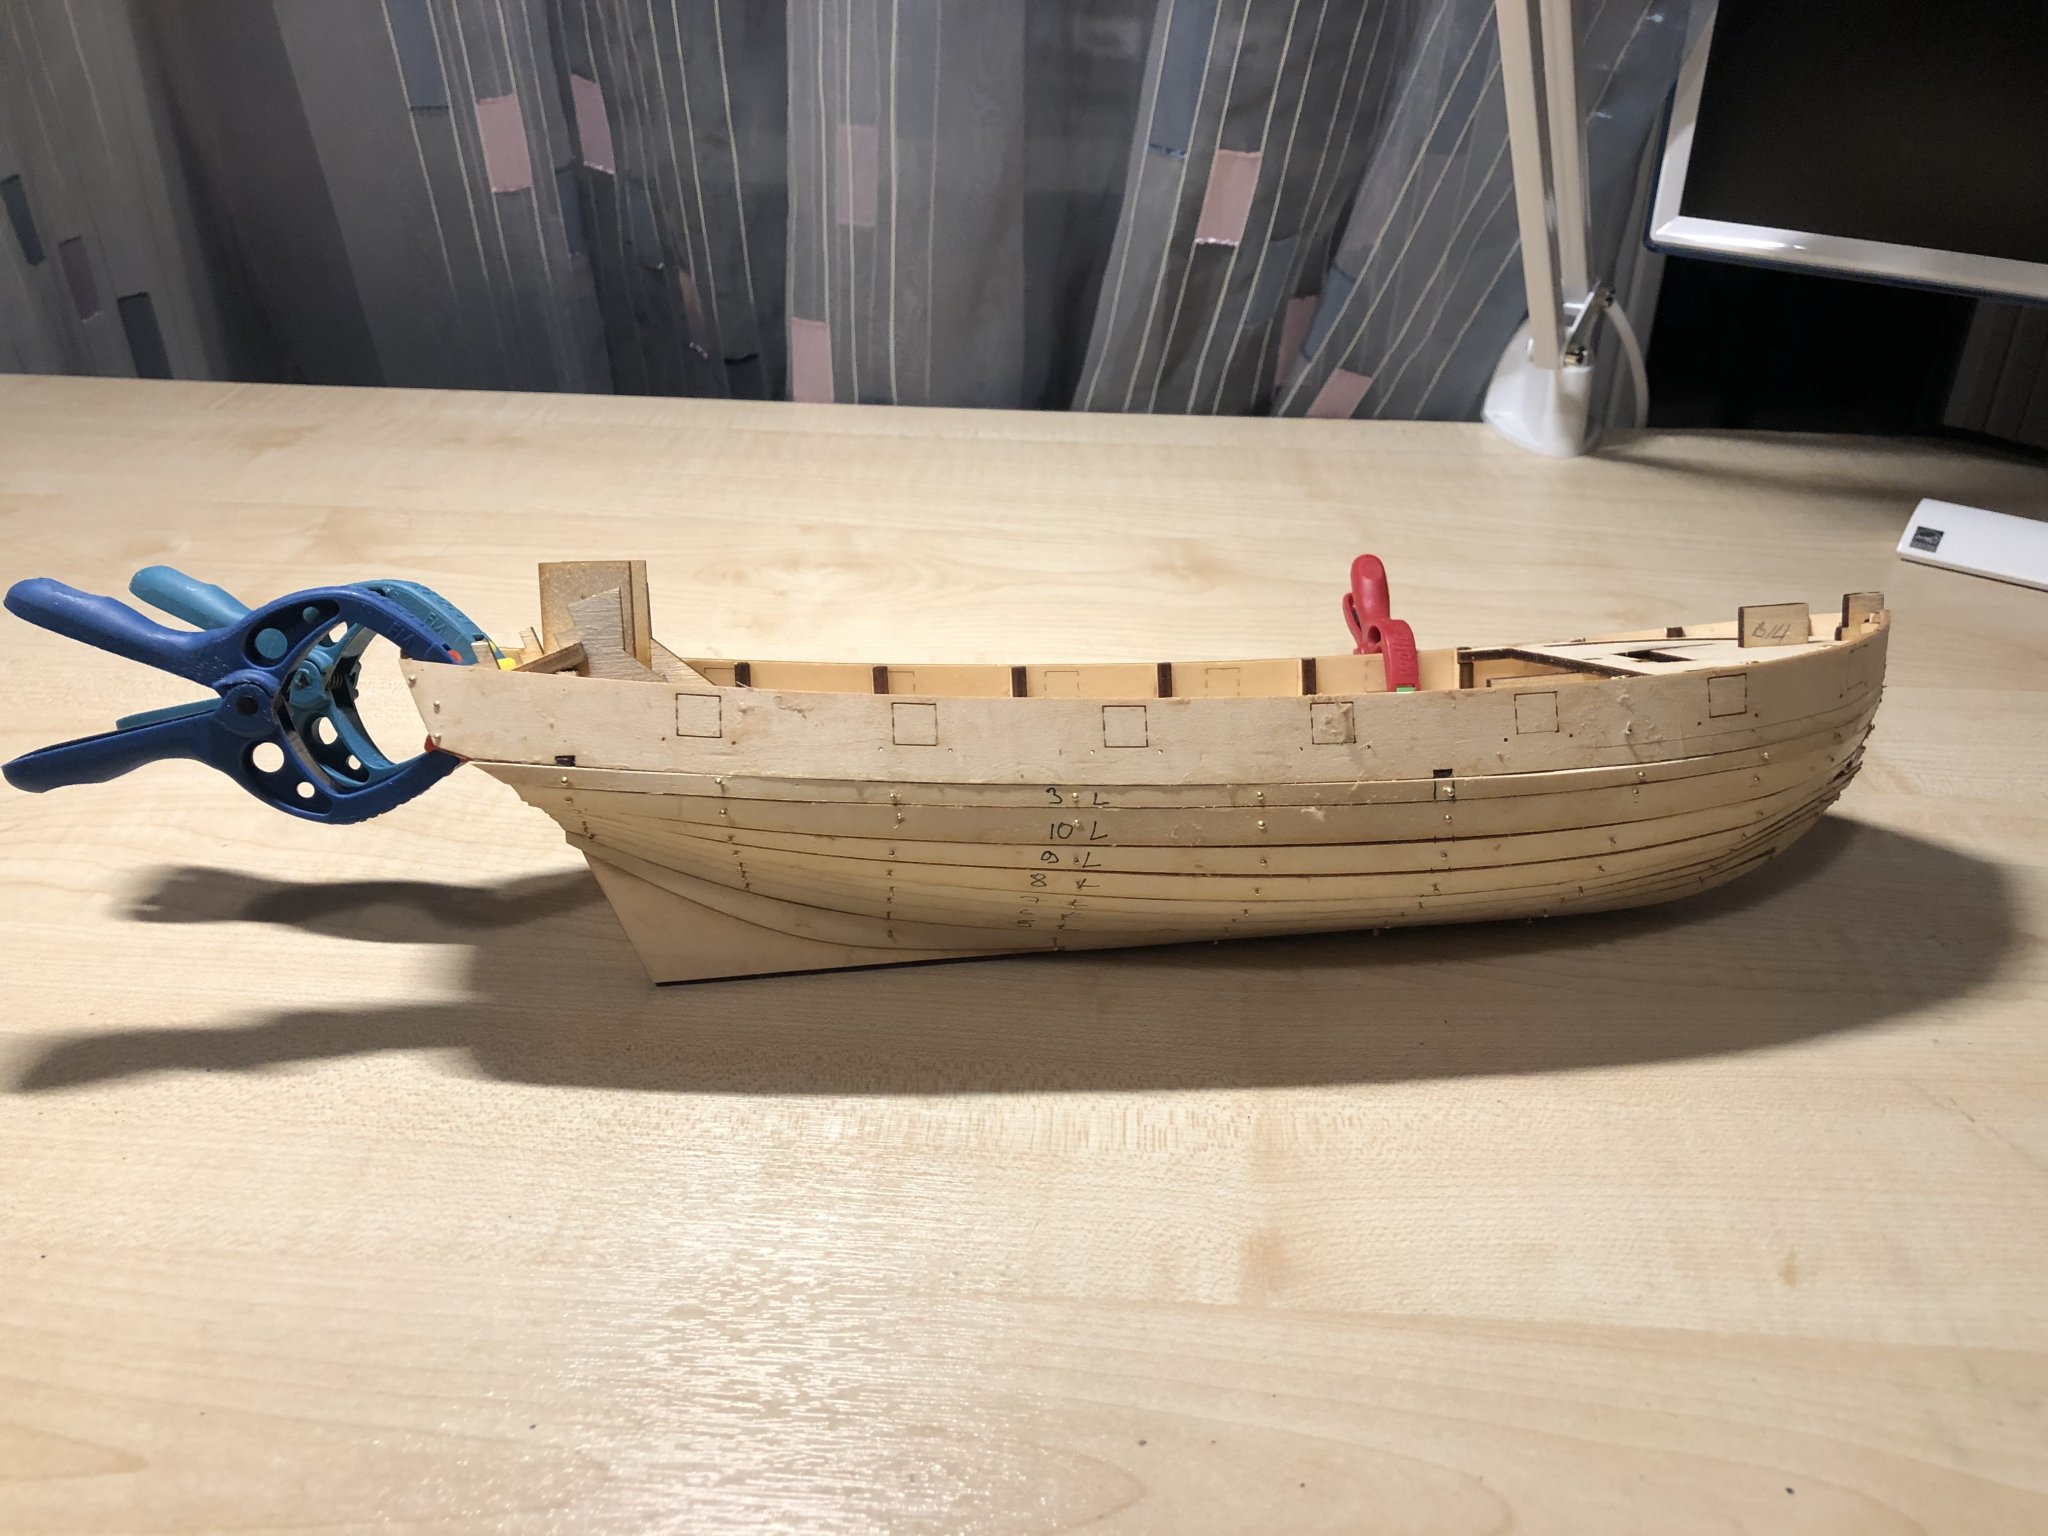
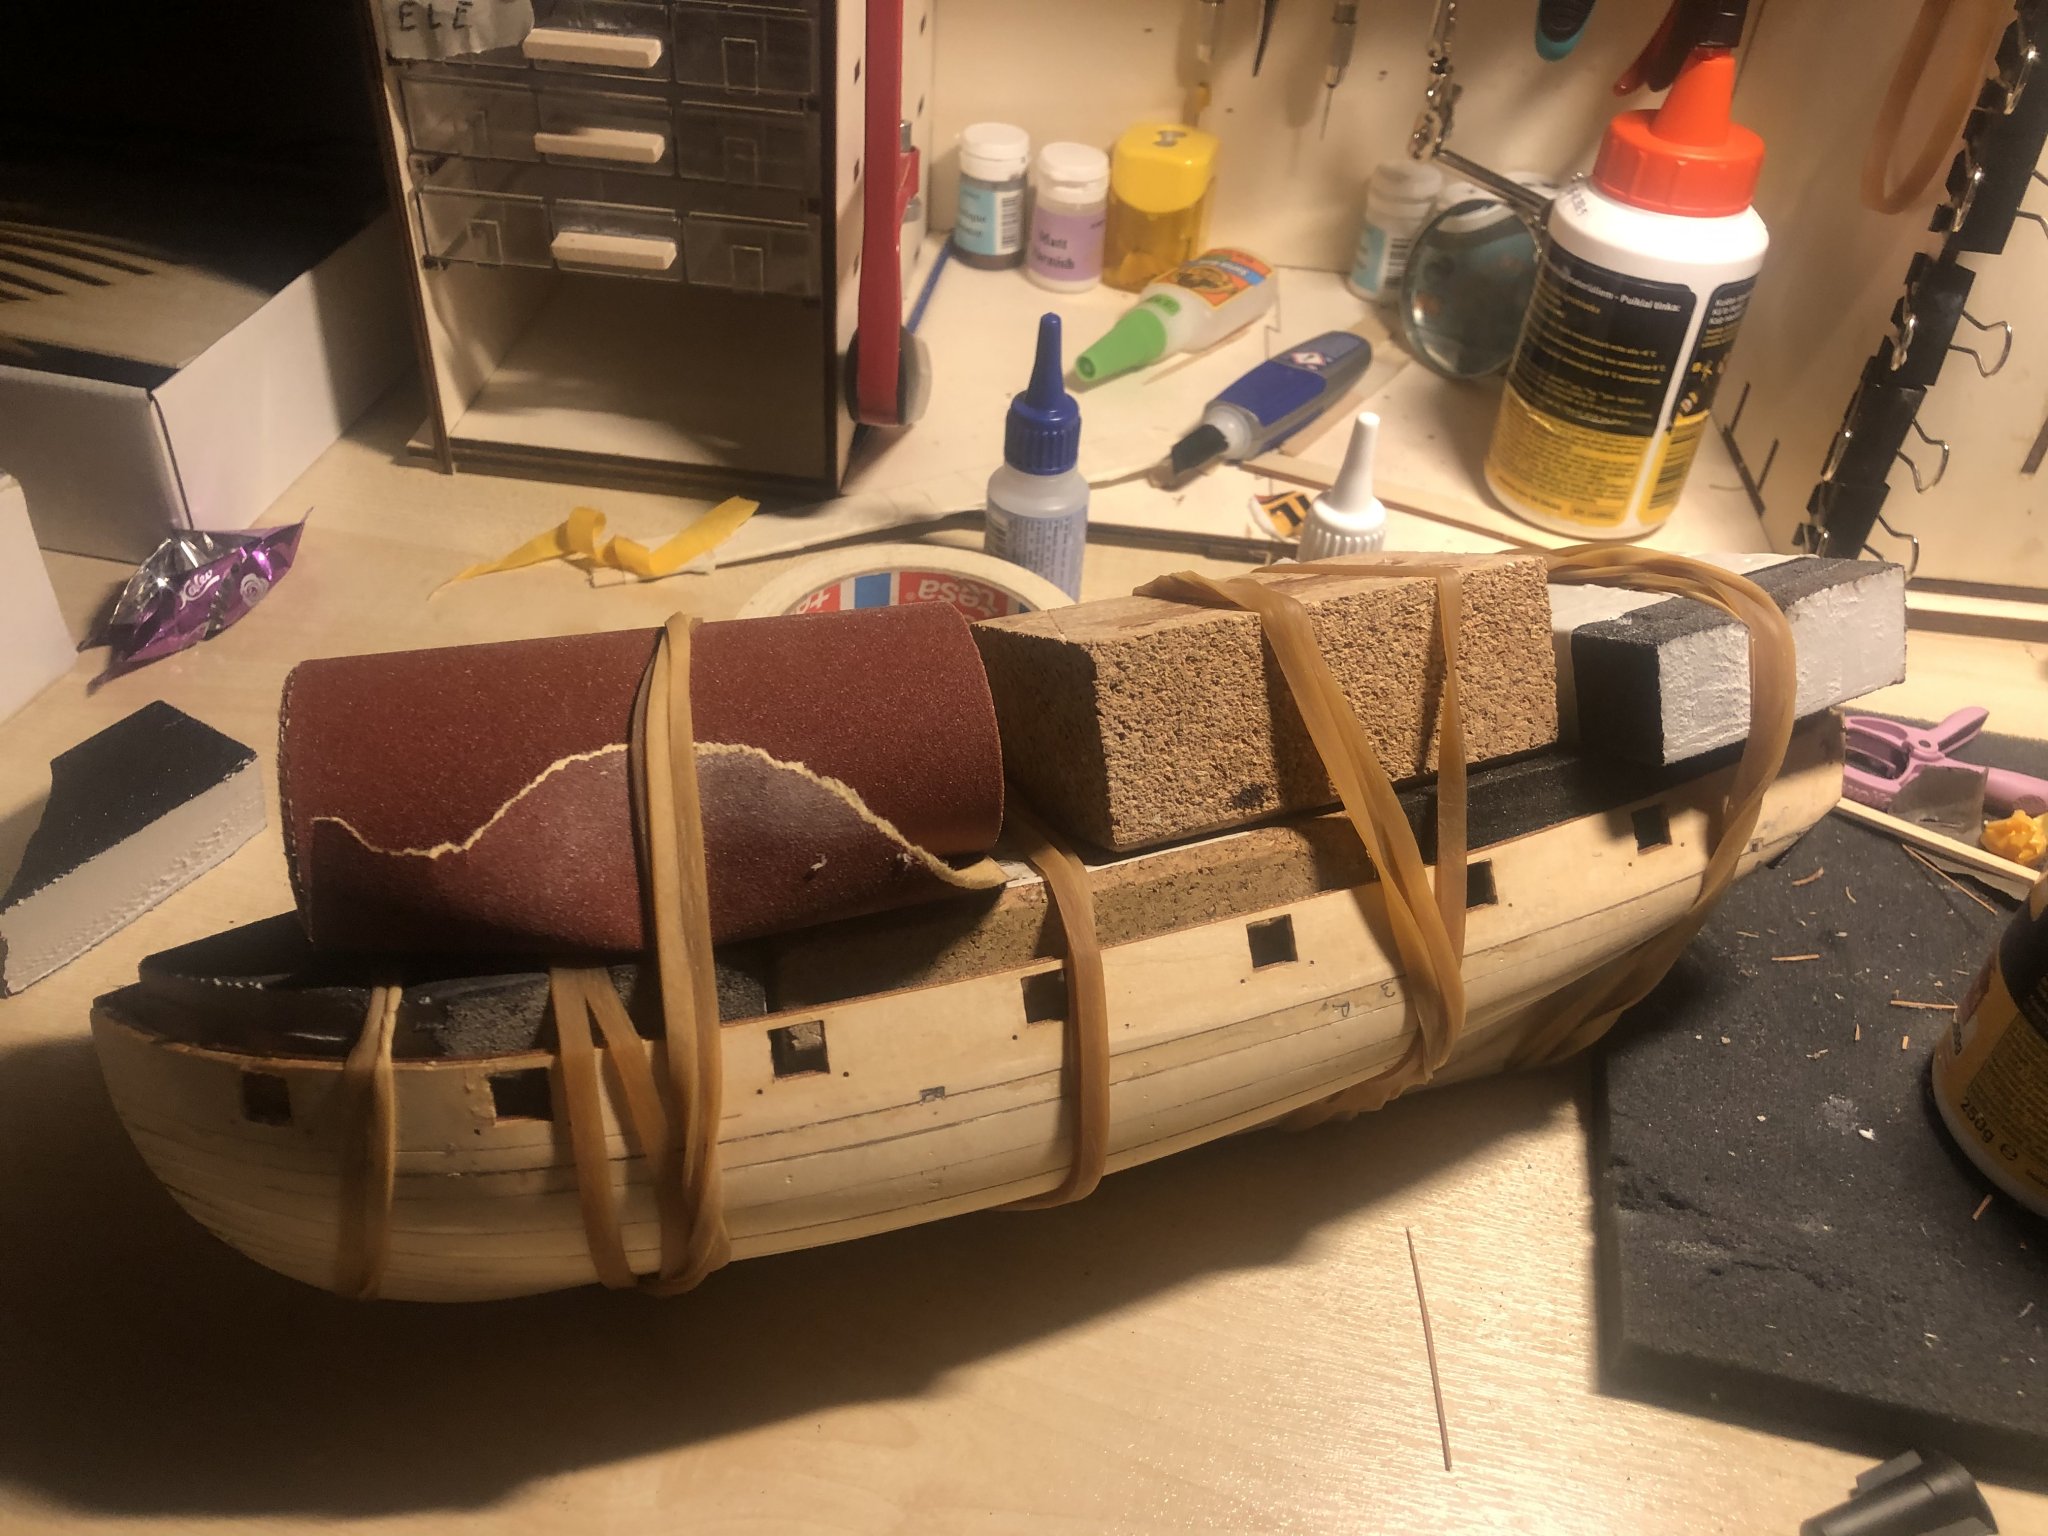
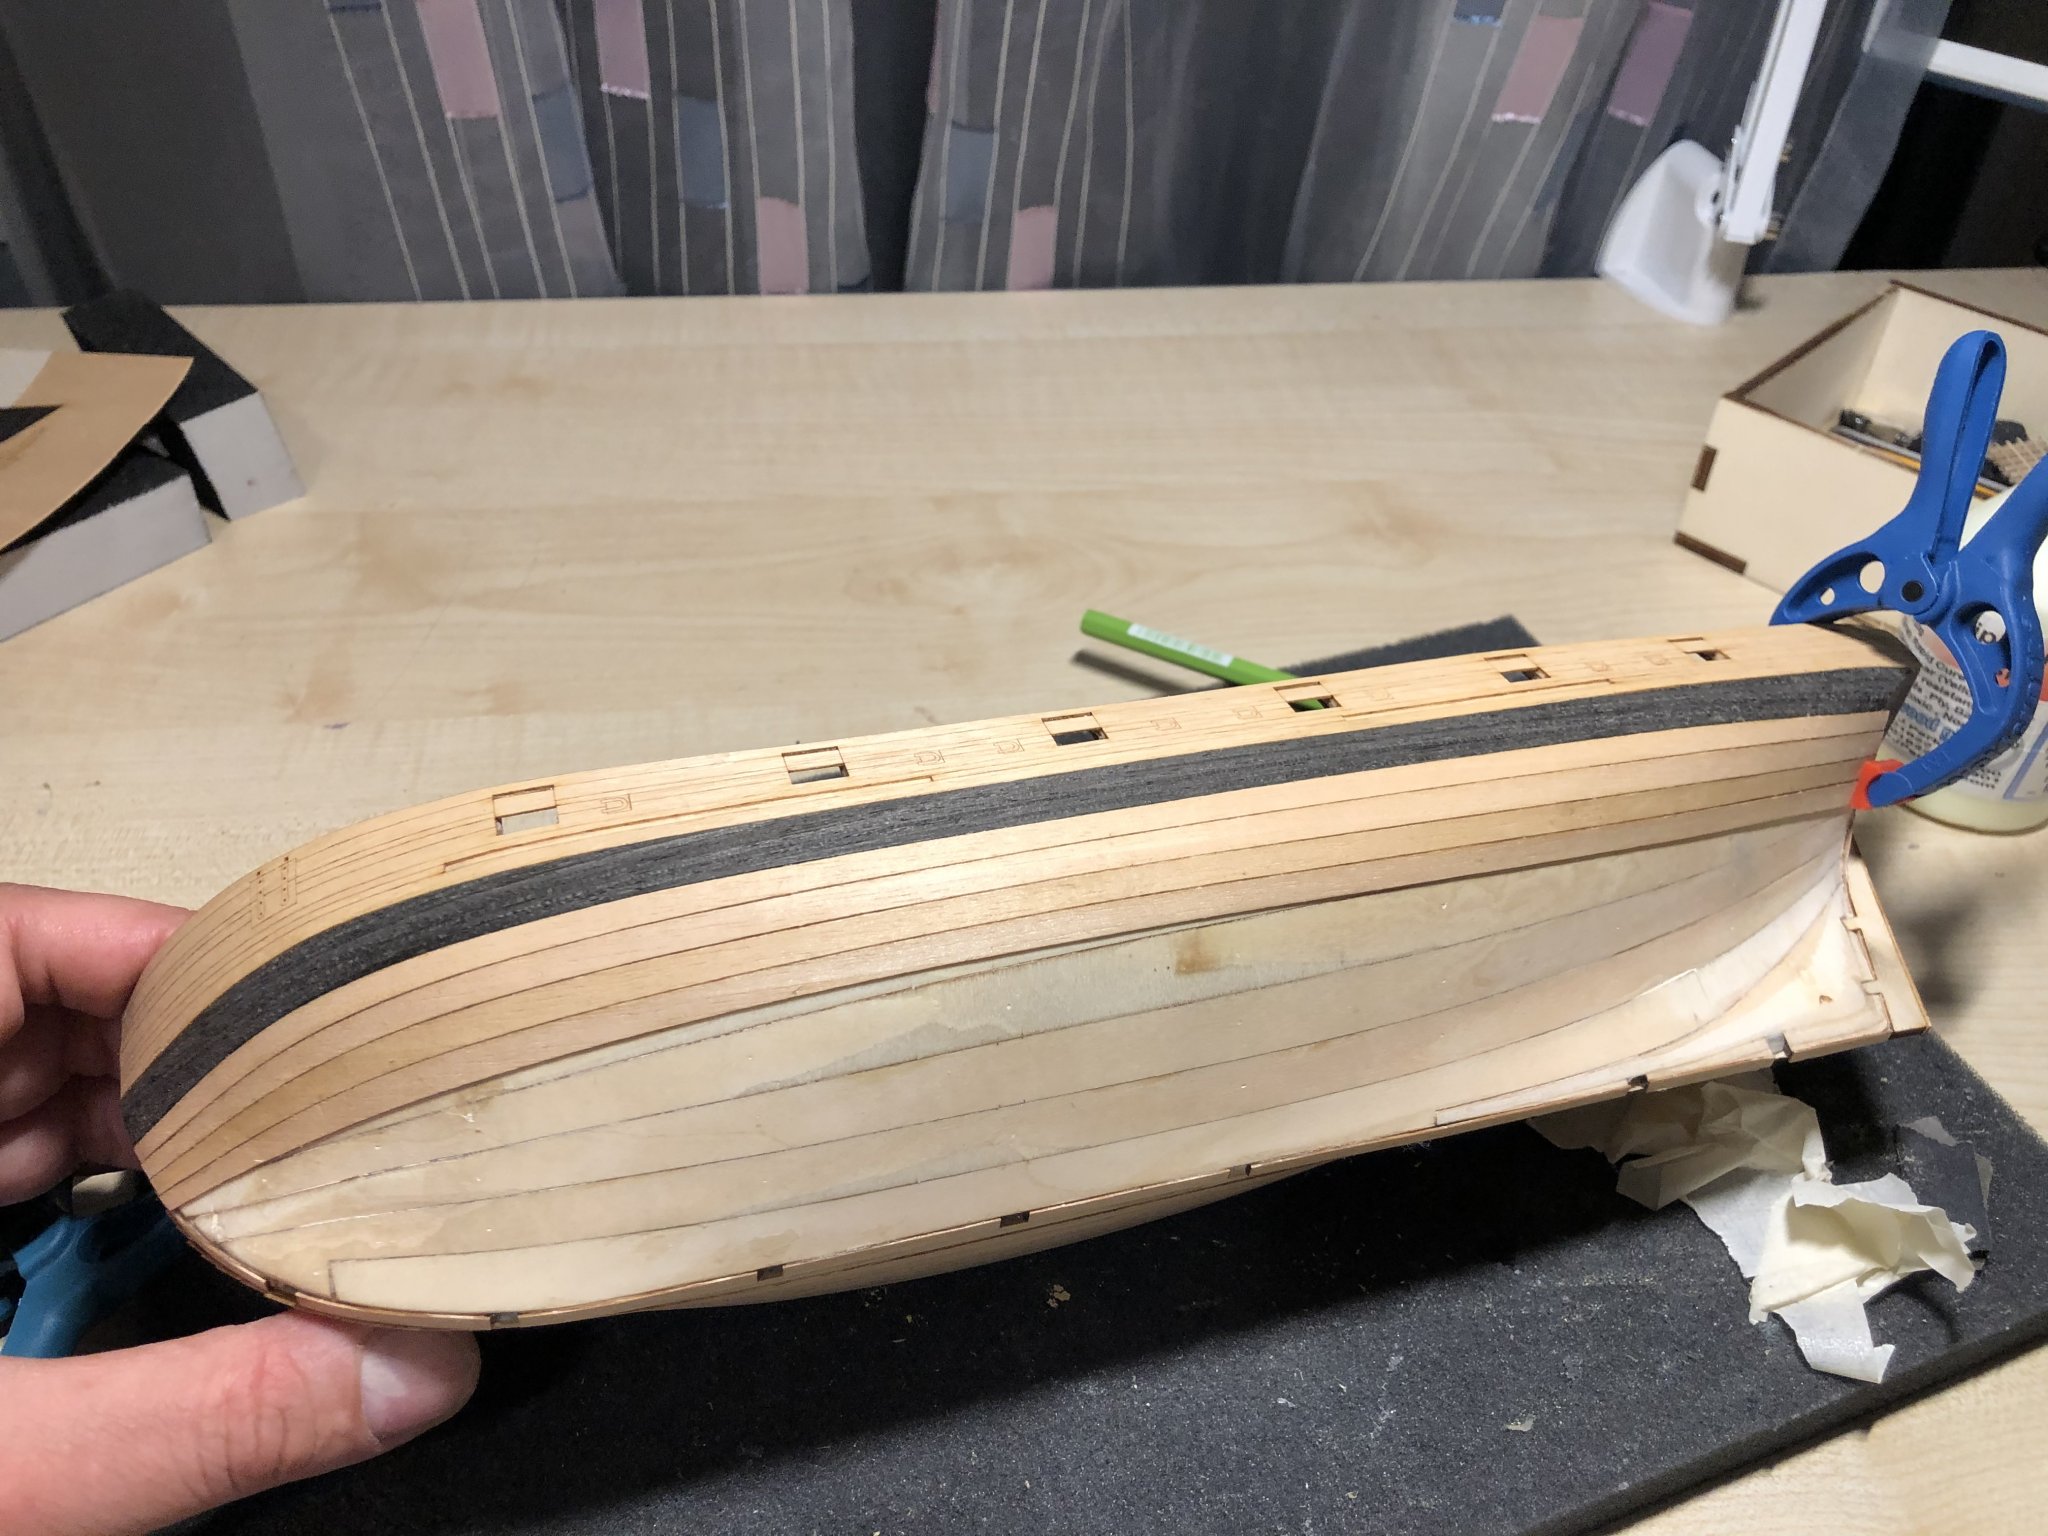
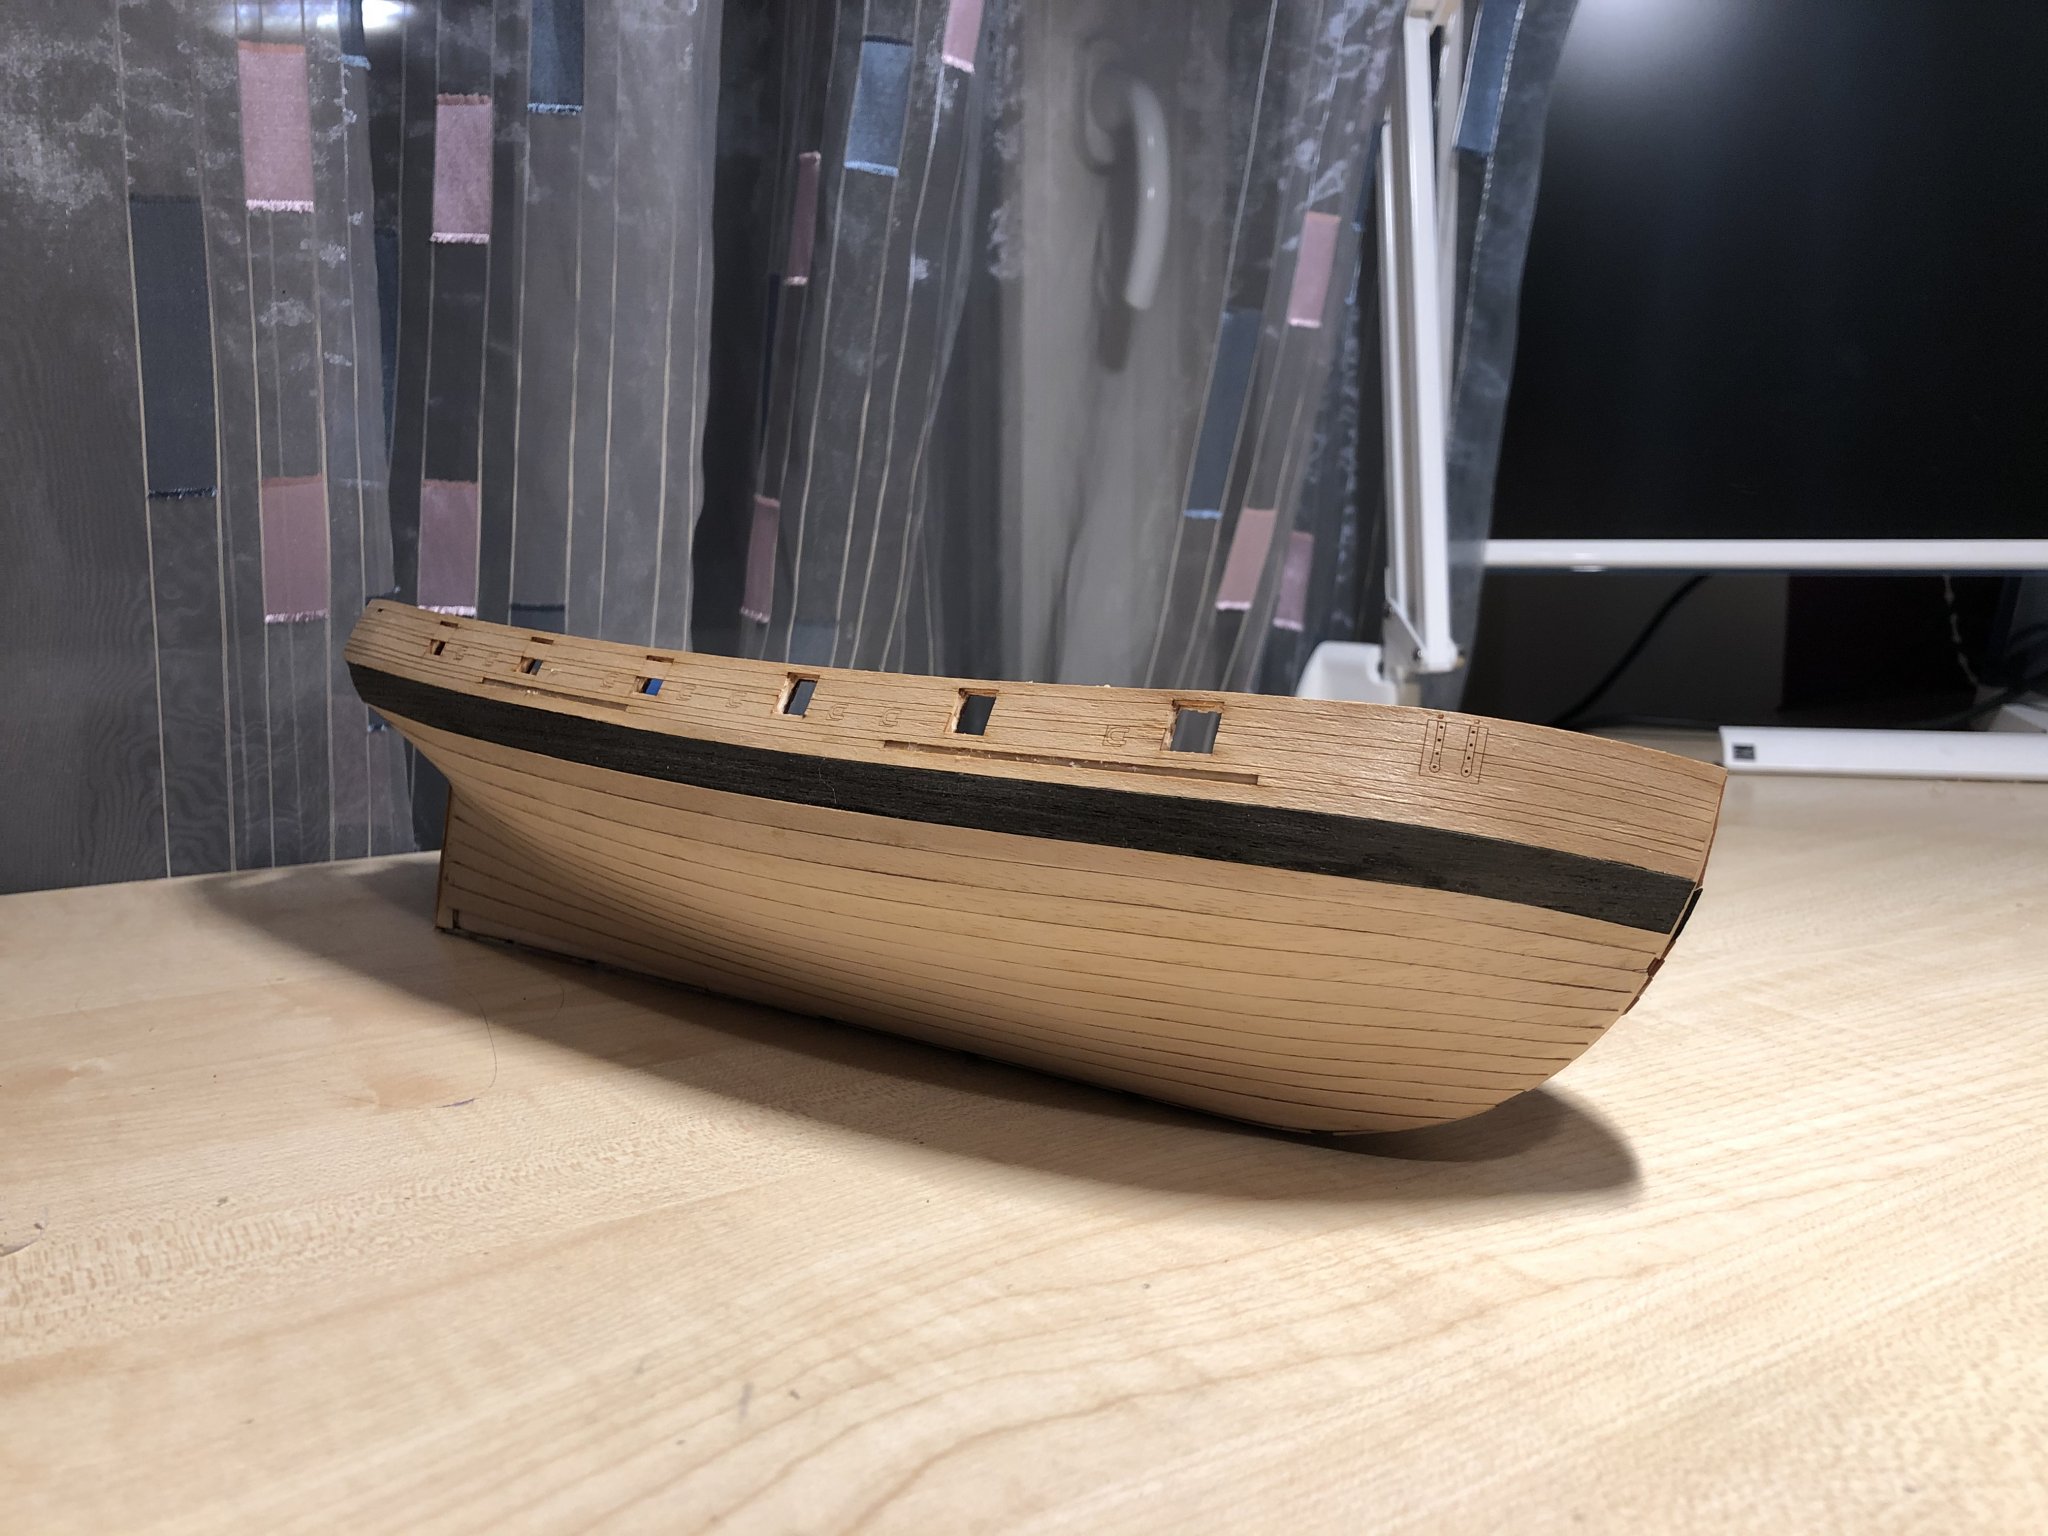
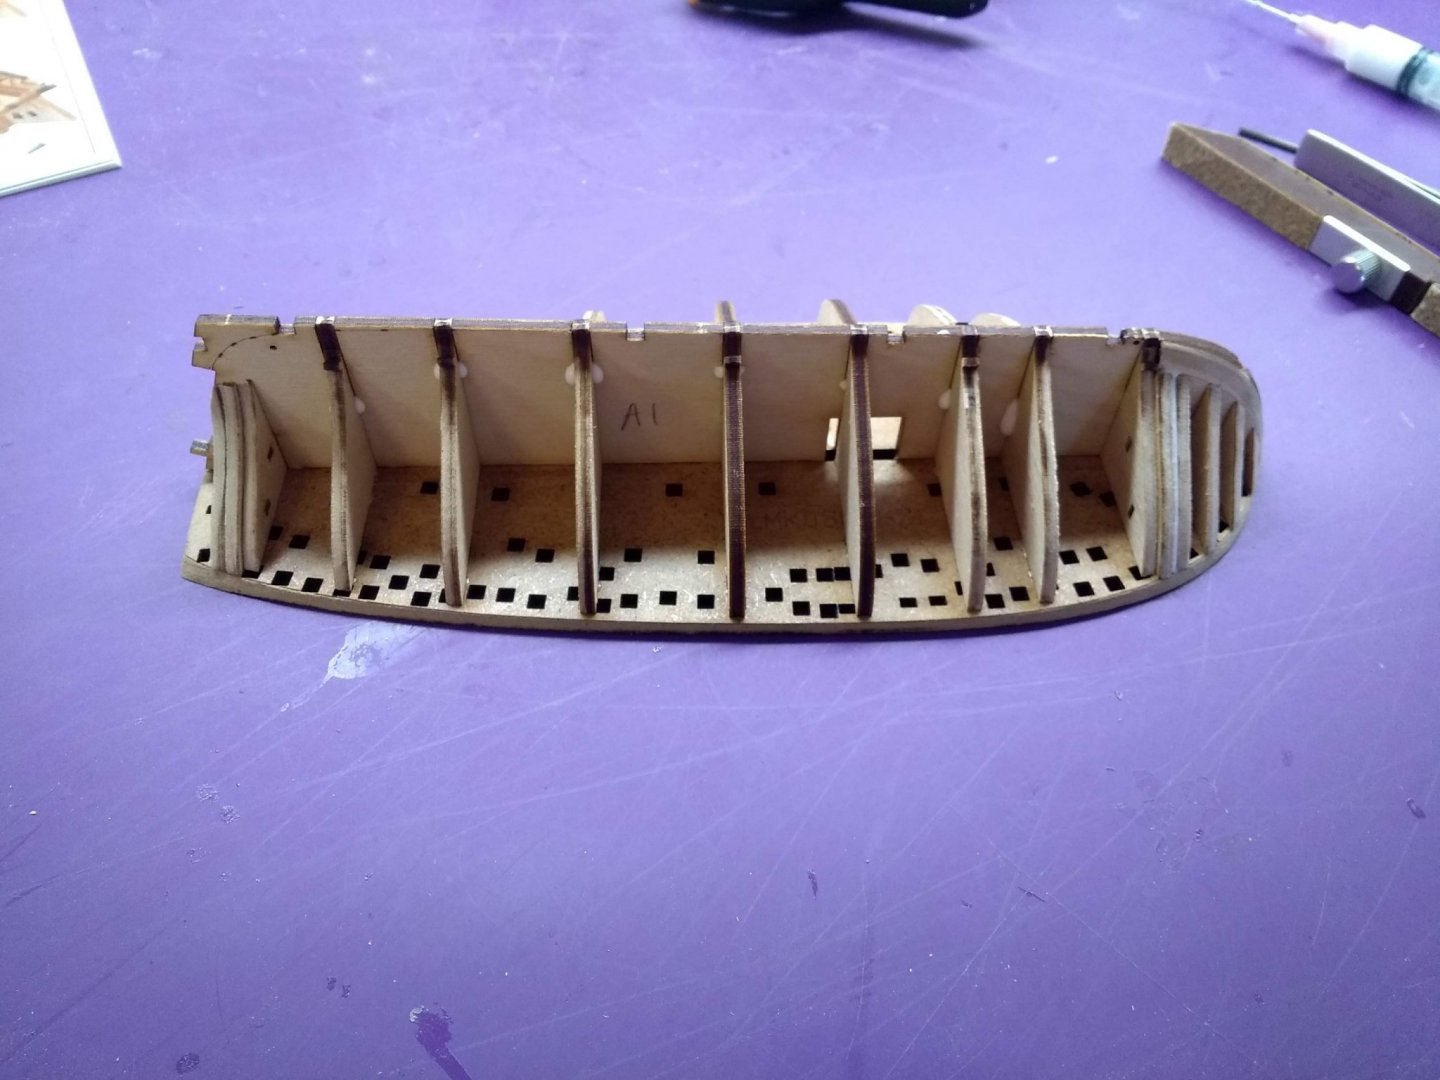
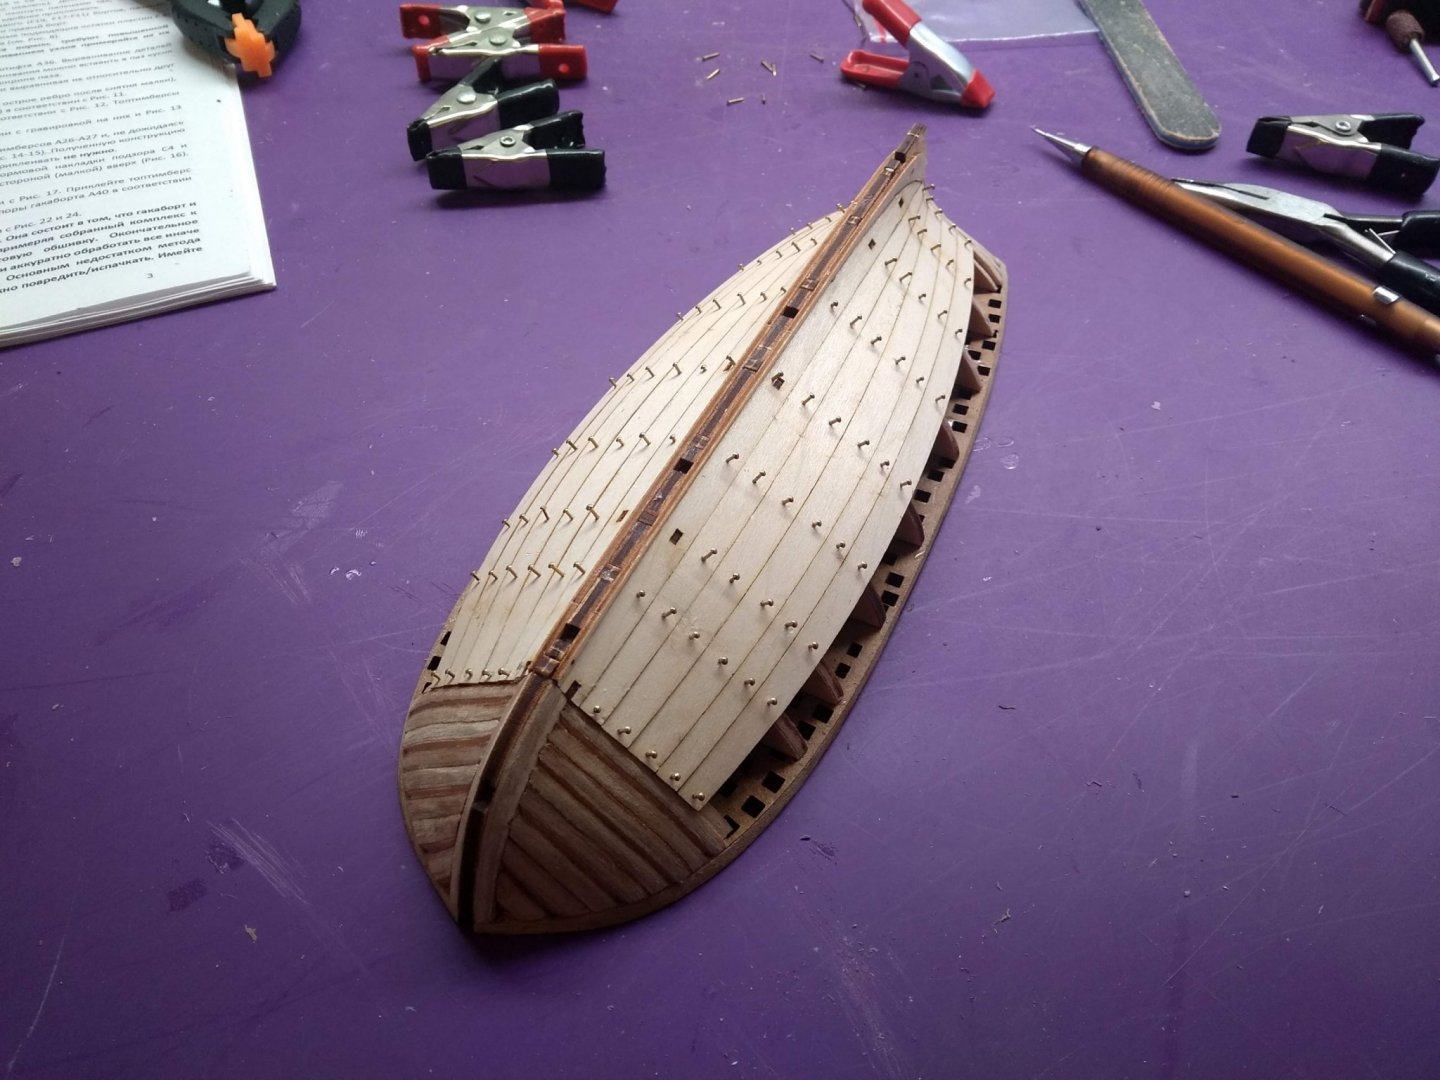
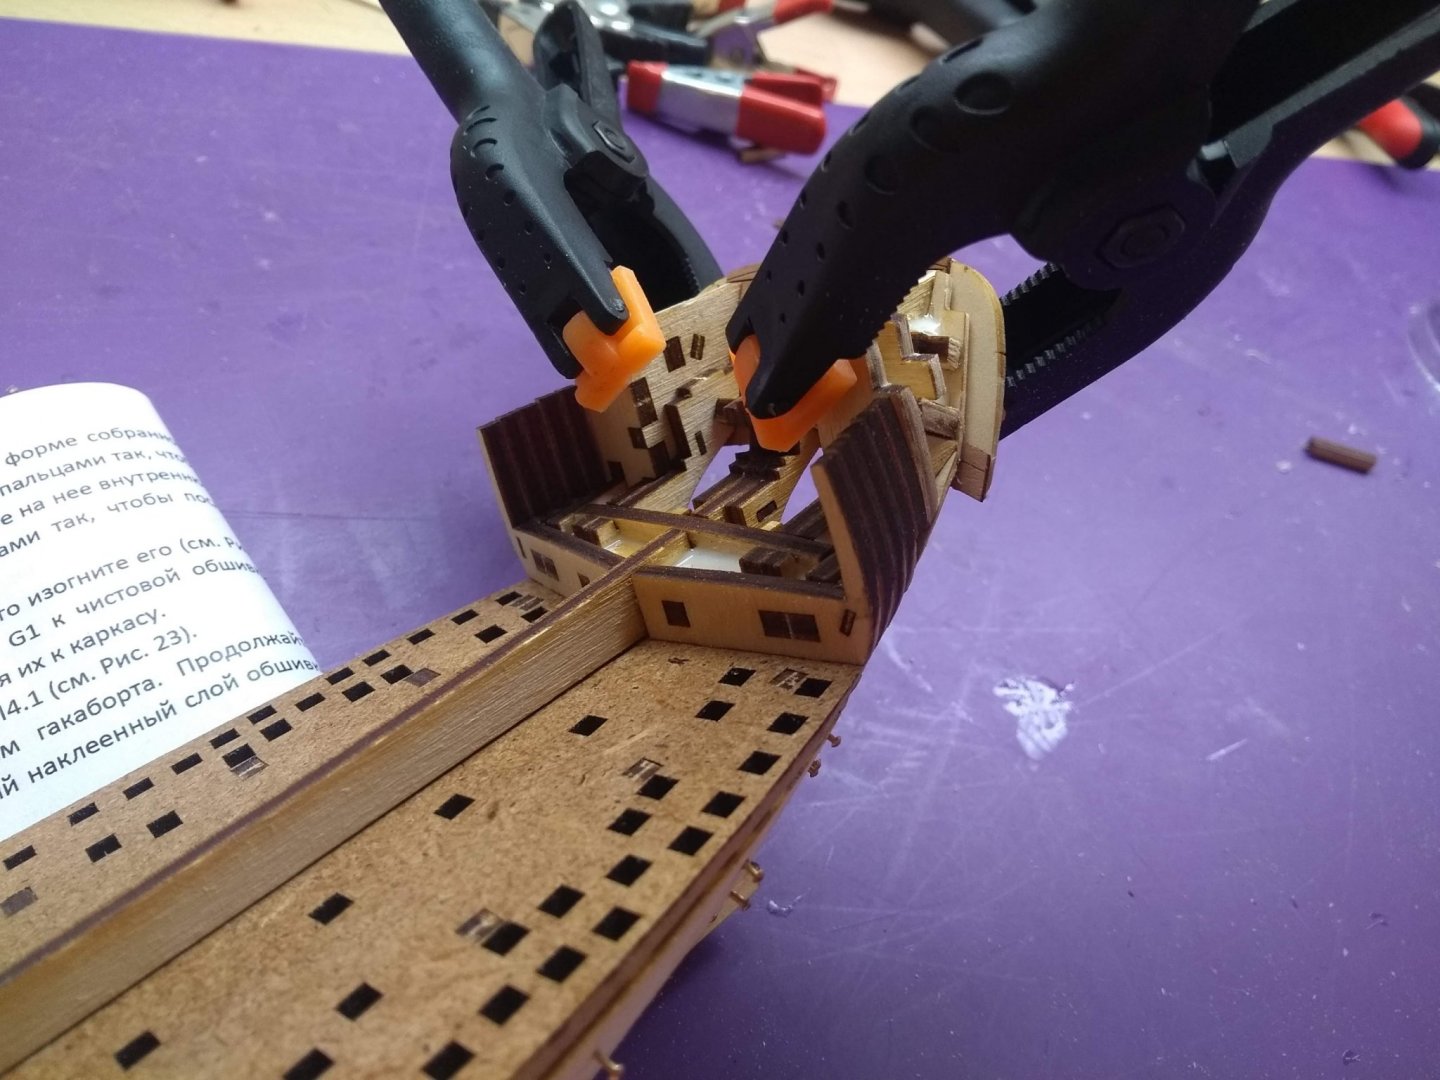
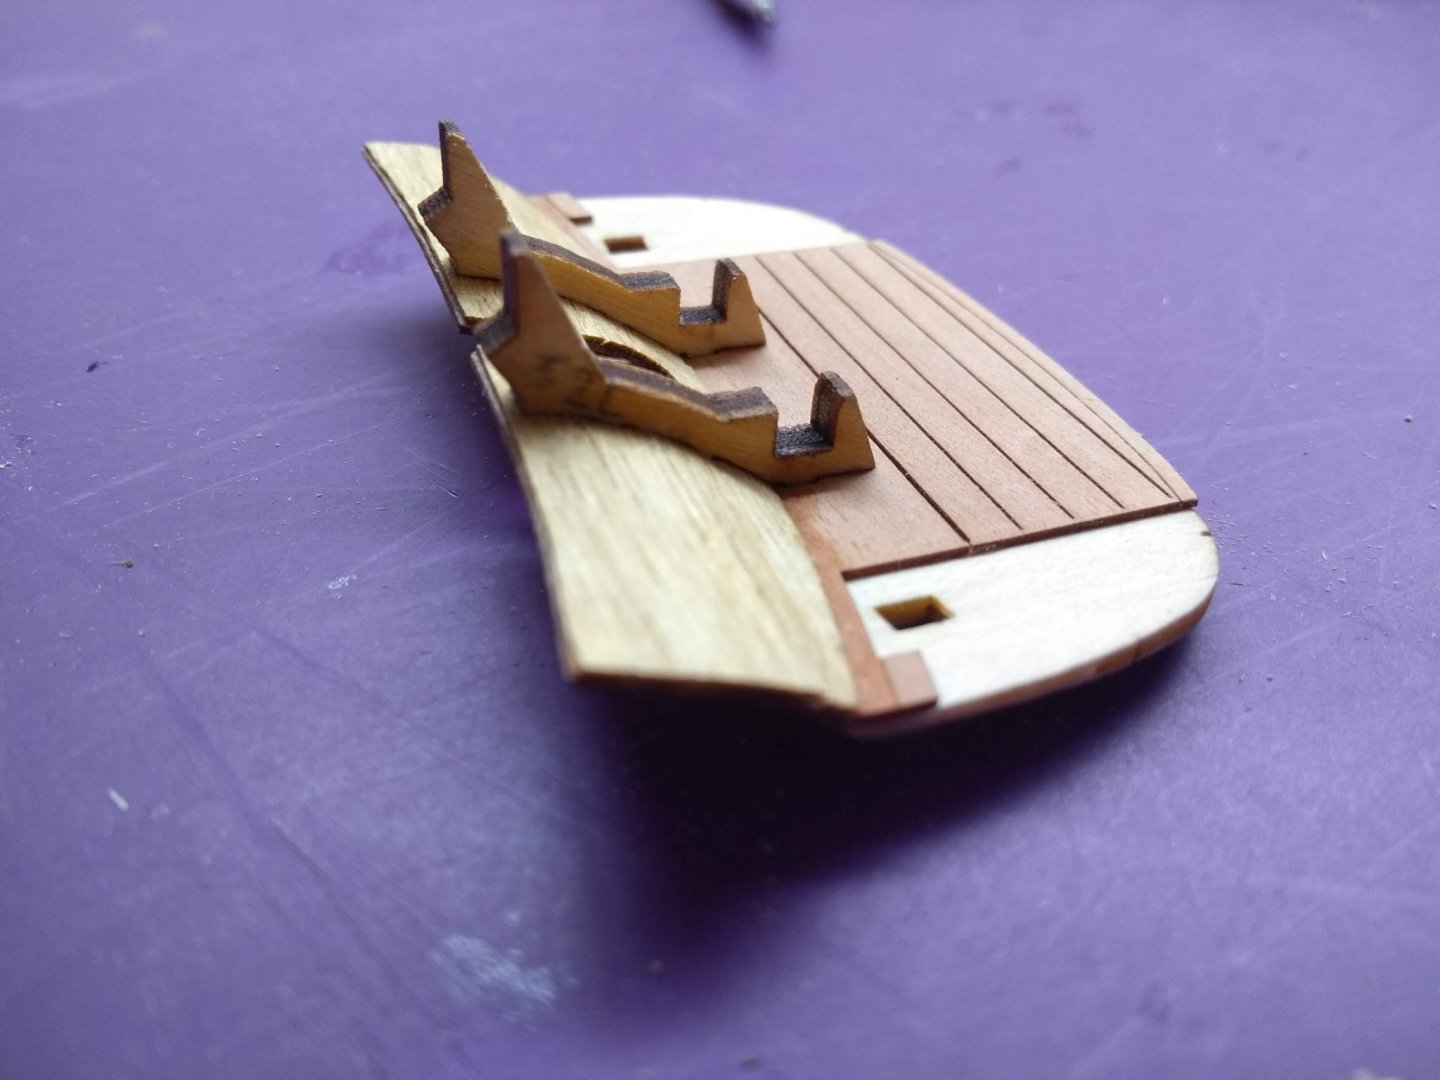
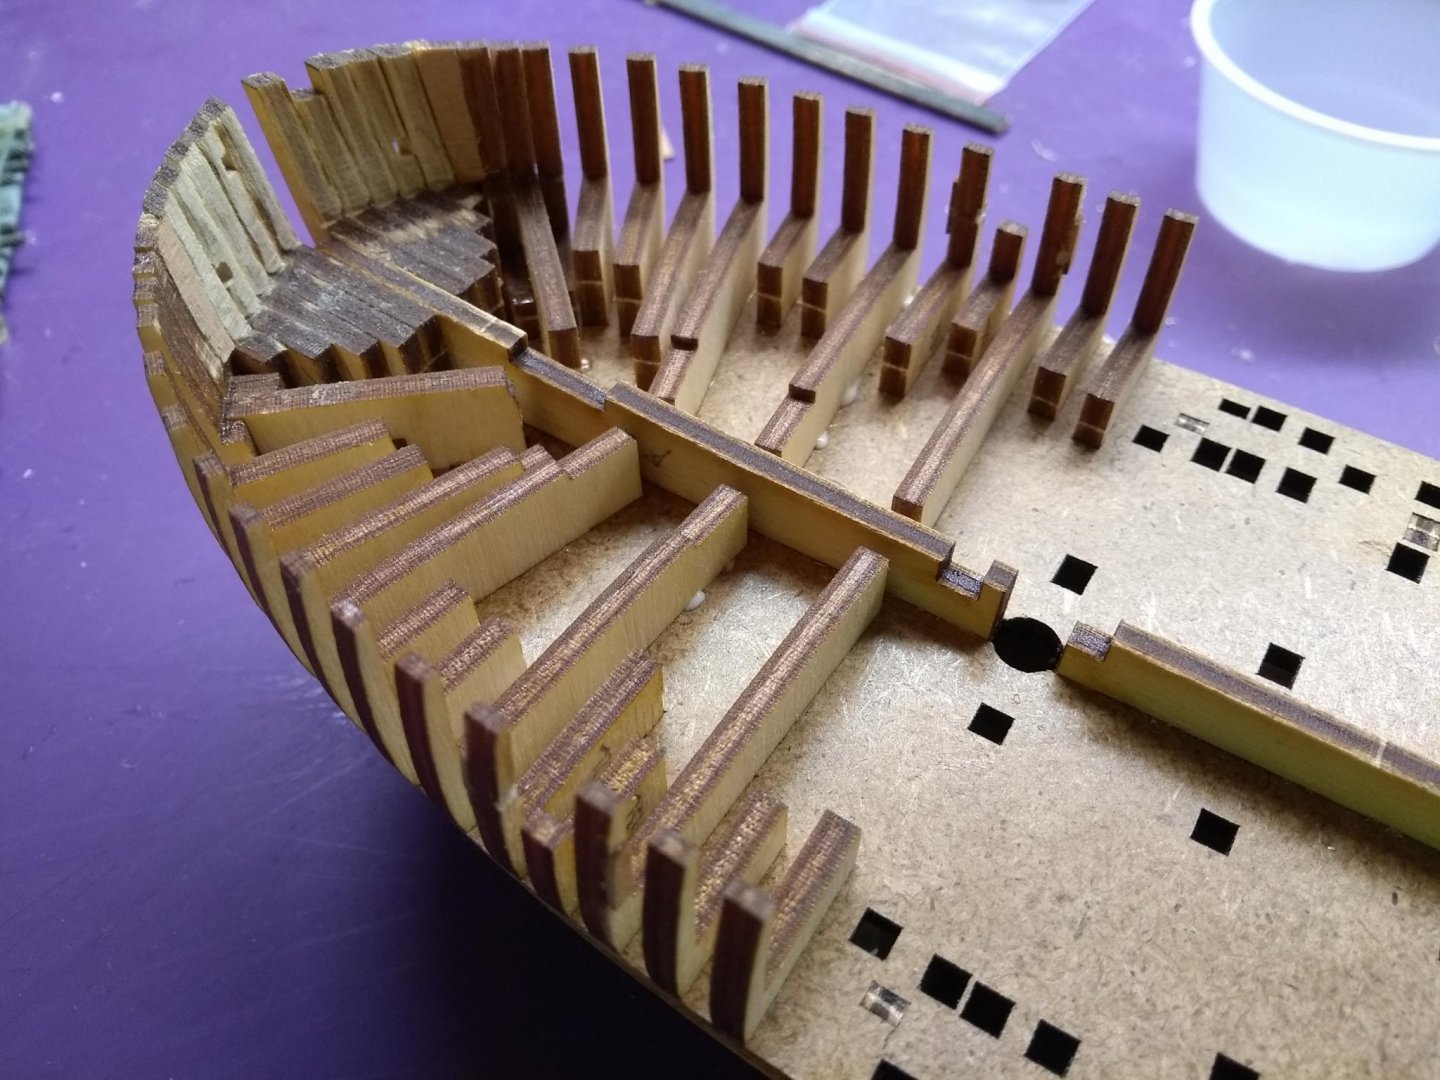
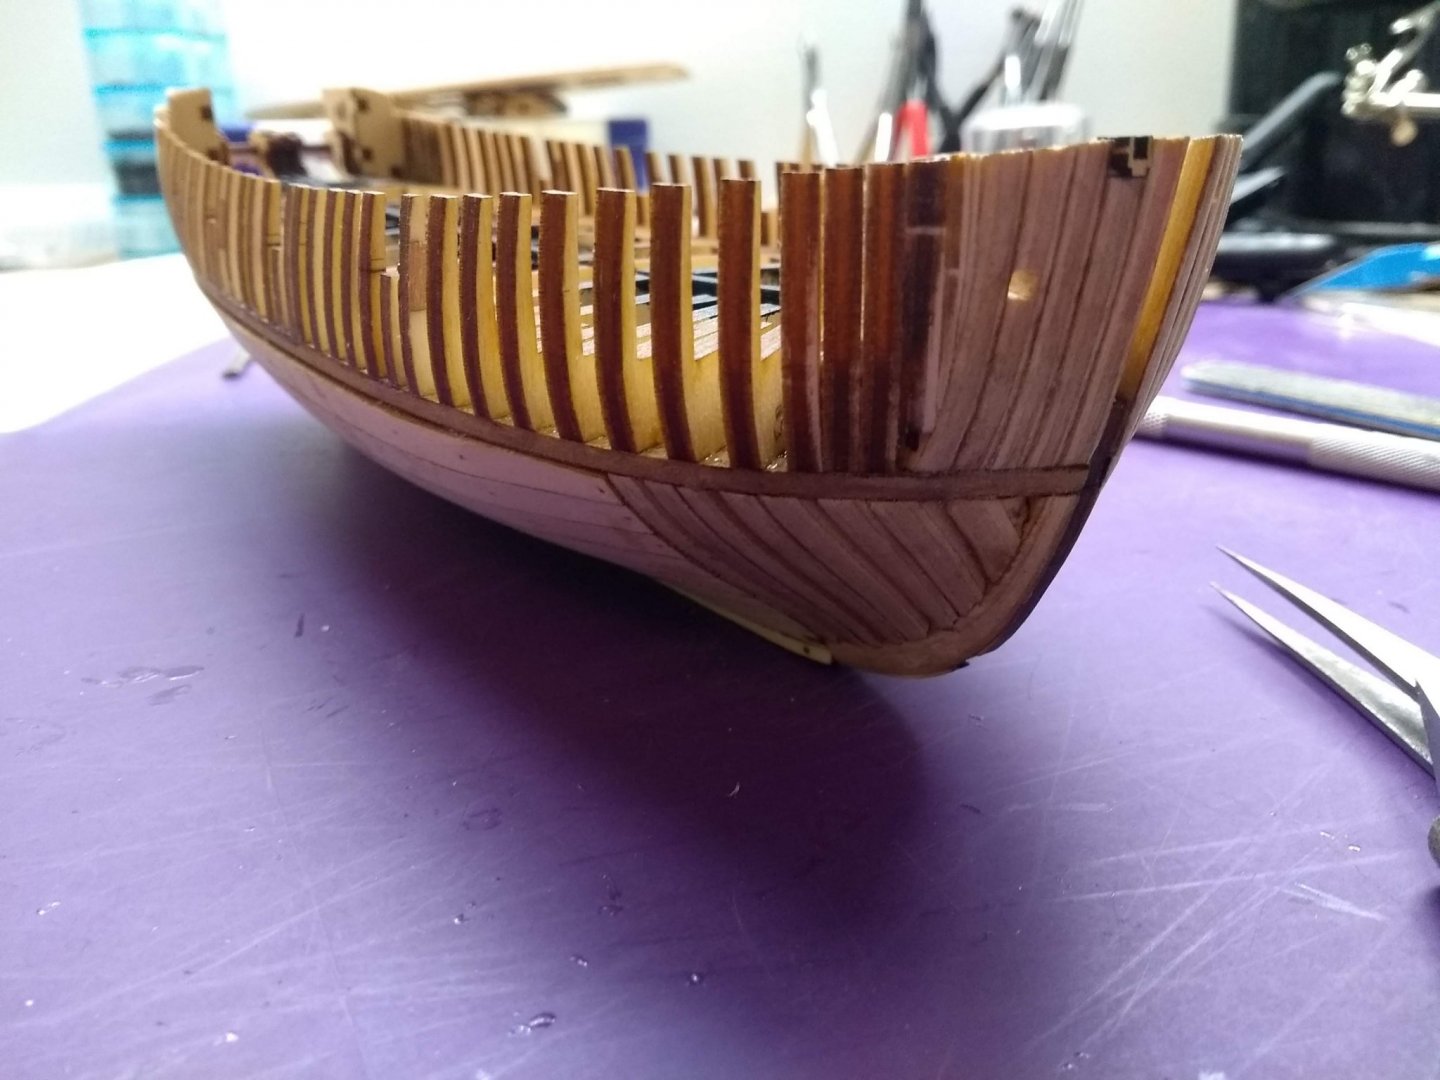
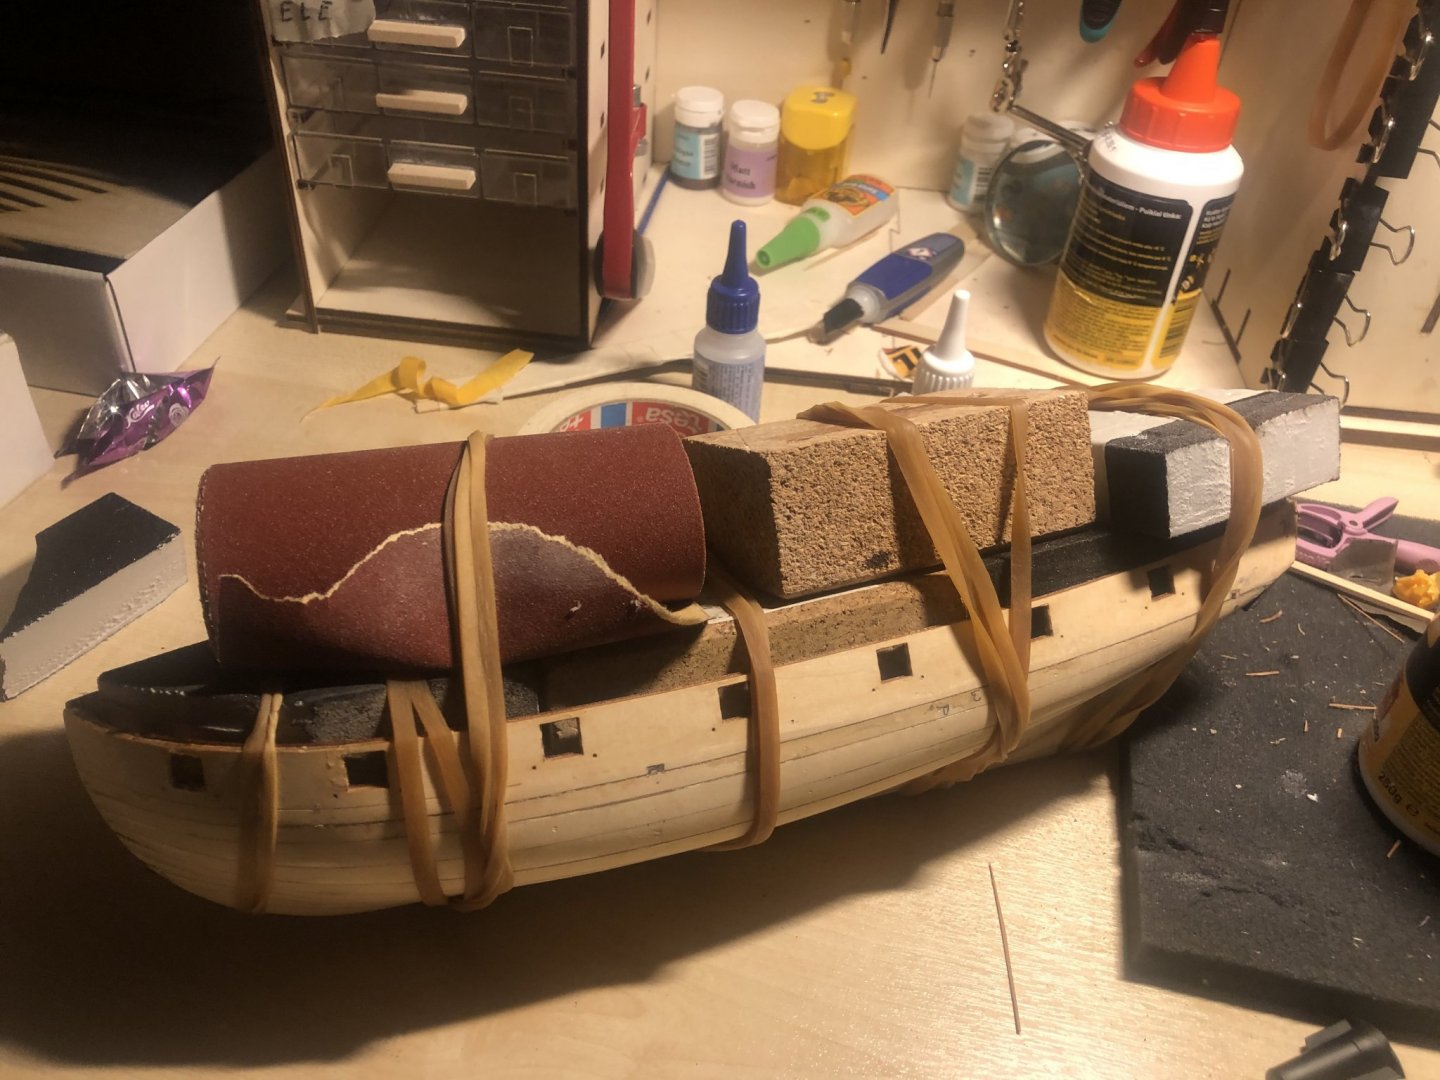
 This is my second build. The first was Albatros by Occre. 1. The reason I bought this ship was that I was intrigued after reading the review in MSW. It looked very small and rather difficult but I decided to live dangerously. The version I bought included the (sewn) sails but not the simulated nails on the veneer planking 2. I will organize my log by categorizing it into "phases"; these just follow my own "intuitive" sense of what groups of steps constitute a phase. Phase 1: Assembling the hull and first planking. The frames go into the main plate. I think the design here is brilliant. By telling us how much to bevel (through the use of lines drawn into the frames) and by placing asymmetrical notches in the main plate for the frames to attach, the design makes it much easier to avoid errors and the curvature is near perfect right from the start. And the resulting hull is really solid. Also I learnt from my mistakes only to use PVA glue in this phase. My small rotary Dremel was really helpful. The design of the first planking is also amazingly impressive. By building the curvature into the planks, by cutting it to the exact size, by placing notches in the frames for the first planks and finally by the use of holes for "temporary" nailing, the builders have thought through the process in a clever, thoughtful and user-friendly manner. Here are 2 pics, for this Phase, one for the framing and the second for the planking. Phase 2: Assembling the Stern frame, including upper keel frame, latrine etc. This is a very tricky phase and I made near-fatal errors at a couple of points. There are a lot of steps and one has to be really patient with dry fitting and not rushing to glue stuff without checking and rechecking. And, oh yes, numbering the pieces on both sides before cutting them from the plates is a must. And make sure you bevel on the side with the marked lines and attach the pieces with the bevel facing the direction specified. One error I made was following the direction to "wet" some pieces for 5 minutes per instruction manual before "hand curving" the piece to the desired shape. I had warned me against this but went ahead anyway. It worked for the pieces from the C plate (C1) but piece G1 ended up with a sharp curve after wetting and in addition the wood came apart in the middle (not split but the plywood just separated). On hindsight I should have either wet it for only a minute or so or used a clothe's iron. I think as the curvature is minimal one can get by without any help, just gluing it on with a clamp. But I glued the pieces and recurved it using clamps and it ended up fine. The second error was in step #24 when the pieces C1/H2 are attached to the rest of the stern assembly. Make sure you use this pic in the manual to guide you. I didn't insert it as far into the stern assembly as I should have. An hour later I found the error and luckily the glue had not fully set so I redid this step. See pic for end result. https://modelshipworld.com/clubs/?f1[0]=0 Phase 3: Adding the "ribs" i.e. the approximately 70 pieces that are glued to deck and are the basis for veneer planking etc. This phase looks simple but turned out to be trickier than I expected. As always it is a good idea to pencil in part#s before removing from the plate; also follow instructions re: penciling in lines connecting laser marks on BOTH sides of 16 of the ribs (8 on left, 8 on right--#s are B12,14,19,21,25,27,31,33)) ; you will also notice a laser engraved mark on one side of each of these 16 ribs; these are used later along with the pencilled on the same side to align ports inserts and finishing planking). On the non-engraved side, you have to place a notch where you drew a pencilled line in 8 places on each side (ie 8 on port, 8 on starboard). It is really important to look at pic #45 and realize that the notches are placed on the bow side of some of the ribs, and on the stern sides of some of the ribs. The notches are used to create holes that hold pins that then get used later (not sure how yet!) Phase 4: Deck Preparation. Again, a few major errors but with some helpful advice salvaged!....The tricky part here is installing the coamings on top and the coamings supports from below. These are used to support the deck furniture. I made the mistake of removing the inserts from the coamings; as a result when trying to sand and fit them into the holes, they would split; and I couldn't lower them to the .4 mm height below deck either as they would also split there, if they hadn't already; so I ended up patching them and gluing them flush with the deck, figuring that even if the furniture/fixture wasn't recessed below deck level, it would be ok--best I could do! Phase 5: Gluing Deck Also, on the reverse side of deck, be really really careful in gluing supports, bollards, etc to recognize that you need to be near-exact in their placement as they fit into notches in the keel below and if you are off by more than a tiny amount the deck will not be flush. Despite dry-fitting deck, I made this mistake, had to remove after gluing the deck (luckily I caught error in time) and redid everything after trimming some of the supports and the upper keel and rib supports as well. Phase 6: Gluing Inner Bulwark finishing Planking and Sanding: The Inner bulwark planking went well, with a few twists: a. I had to trim a little (<1mm) off the stern end on both side to fit the plank. I used the gunport cuts in the wood to align everything and that worked well..I was relieved that the tiny holes drilled in the prior step at each gunport all lined up with the pins set in the holes etc..Dont immerse plank in water..just dab a little wet cloth at the bow end for 10-15 seconds to help shape the plank to the hull. b. The drilling of the 3 holes in forelugs (actually just a redrilling) thru the plank split the plank in one place and I had to reglue the split part. looks ok but could have been much worse c The instructions on drilling holes #4.1 in the bulwark planking (2 on each side thru the sheaves/slits toward the stern end) are not really clear....u have to drill from the inside/deck side out thru the small slits/sheaves (<1mm bit) d...Finally, u have to sand the top of bulwark/plank using a sanding block across both sides to help even out the tops of the plank with the bulwarks Sanding is tedious. I used Durasand sticks ---worked much better than using paper directly or the cheap sticks I got thru Amazon. Not sure it is as good as it should be but I am ok with it. see pic. QUESTIONS:I decided that from time to time I'd stop and ask for advice on topics that I think of as I am building...here are the ones I have fro this week: 1. I have drill bits from 40 yrs ago.....how do I decide whether they are good or should be thrown out? 2. The engraving on sizes has worn out...how do I check the size? 3. Should I buy a set of good quality US made bits? any brand recommendations? 4. Should I buy metric or inch-based? Both? 5. In addition to #3 should I keep multiple backup cheap small bits?...looks like the pros go thru a lot of them. Phase 7: Second Planking Again, the design is so good....the strip fit near perfectly. I did not need the last plank near the keel except for a sliver on one side....the black veneer for the decorations is a nice touch. And even though I had screwed up by gluing the "counter" well before I should have, the fit between the counter and the planking was "acceptable"--not in the the class of Peta but not bad for a second build Phase 8...Waterways etc This part is tricky but is going well.....Can any one advise me on how one precisely measures the small segments where the waterways go? I can never get the piece to fit just right Thanks for the recommendations re: drill bits/calipers; will order at Amazon today. Another question: I had ordered some clamps from Amazon a while back and am quite disappointed in the quality; they are plastic and despite very little use they are either breaking or malfunctioning. Can anyone recommend a good metal+plastic combo clamp? Also when they say 1 " or 2" etc , do they mean how wide the camp can open up?
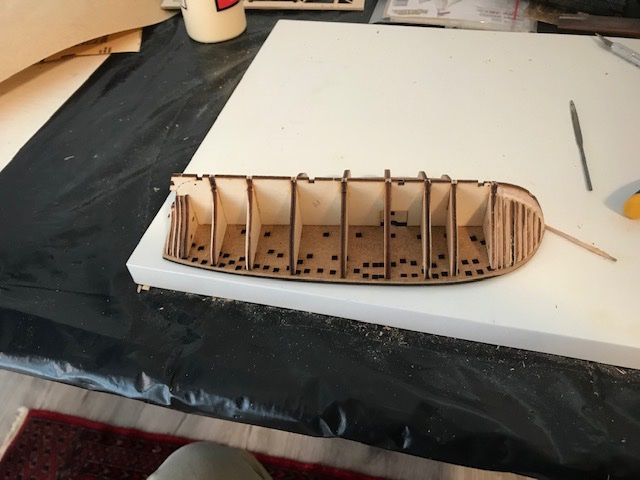


-
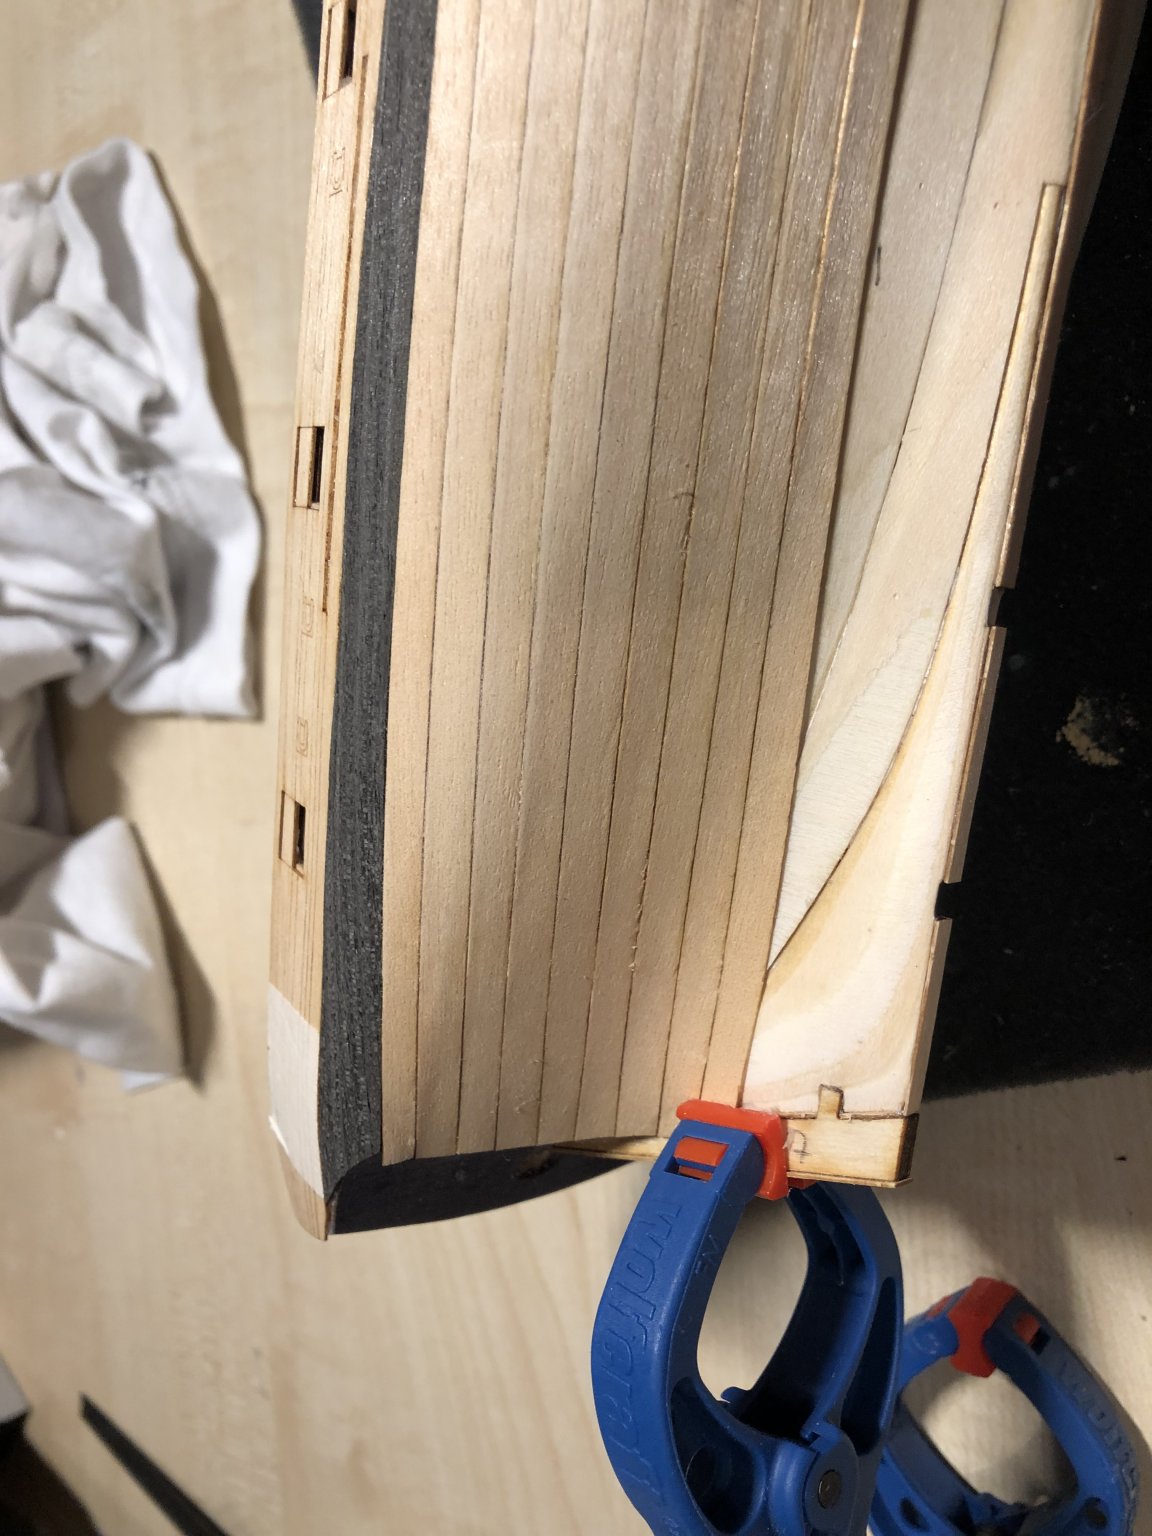
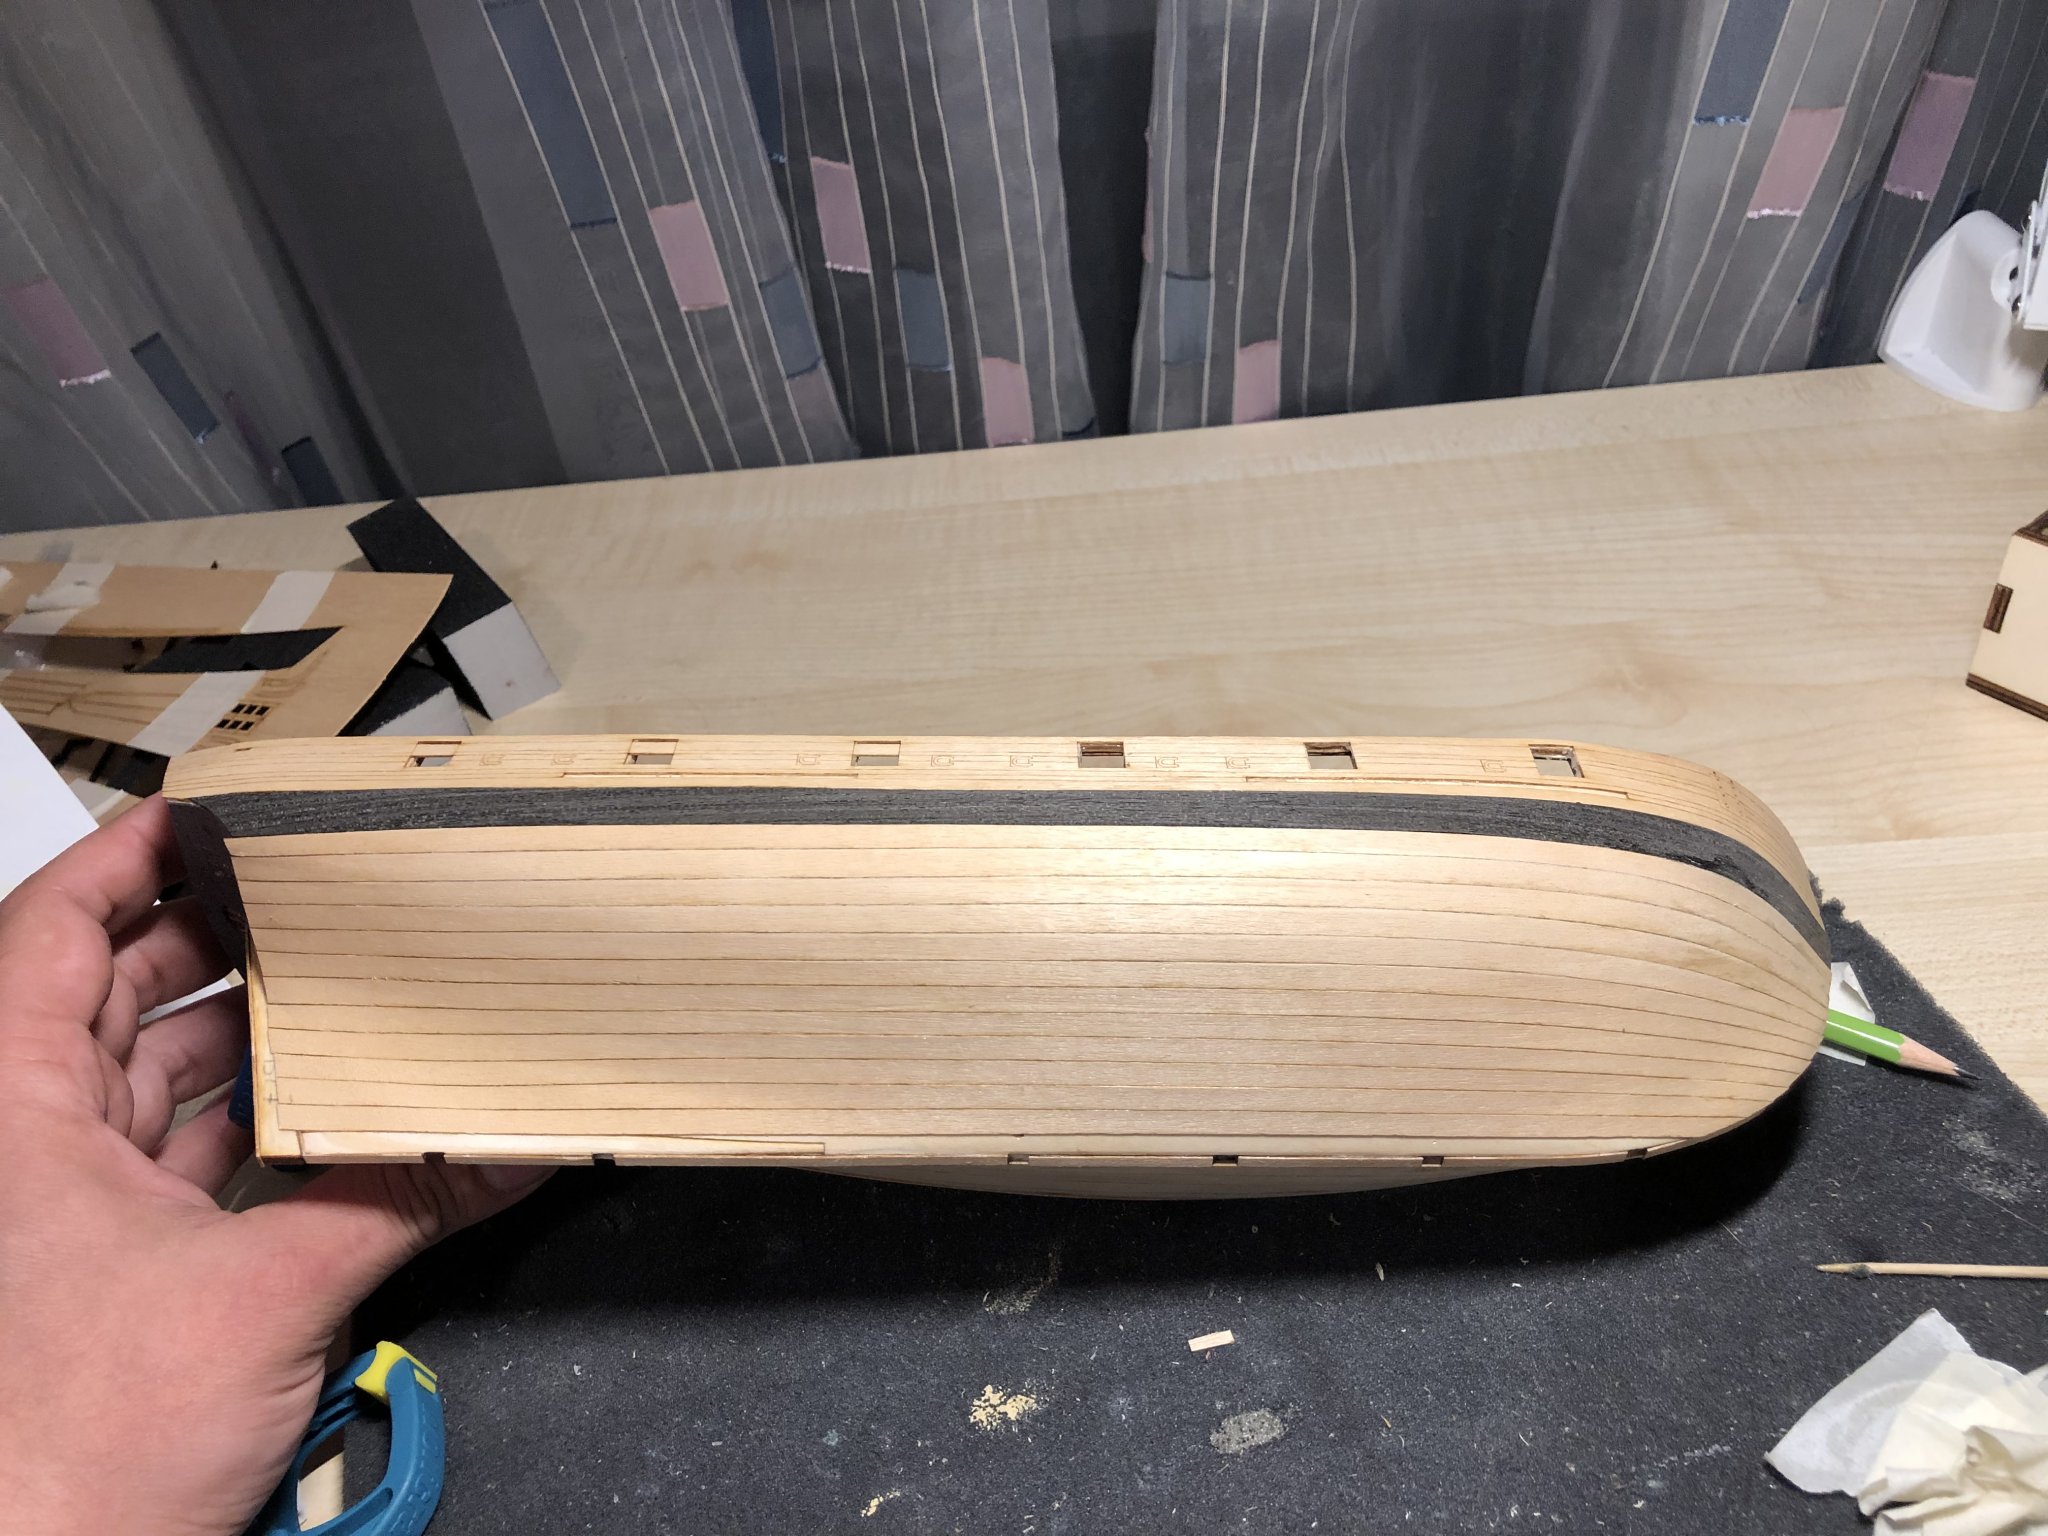
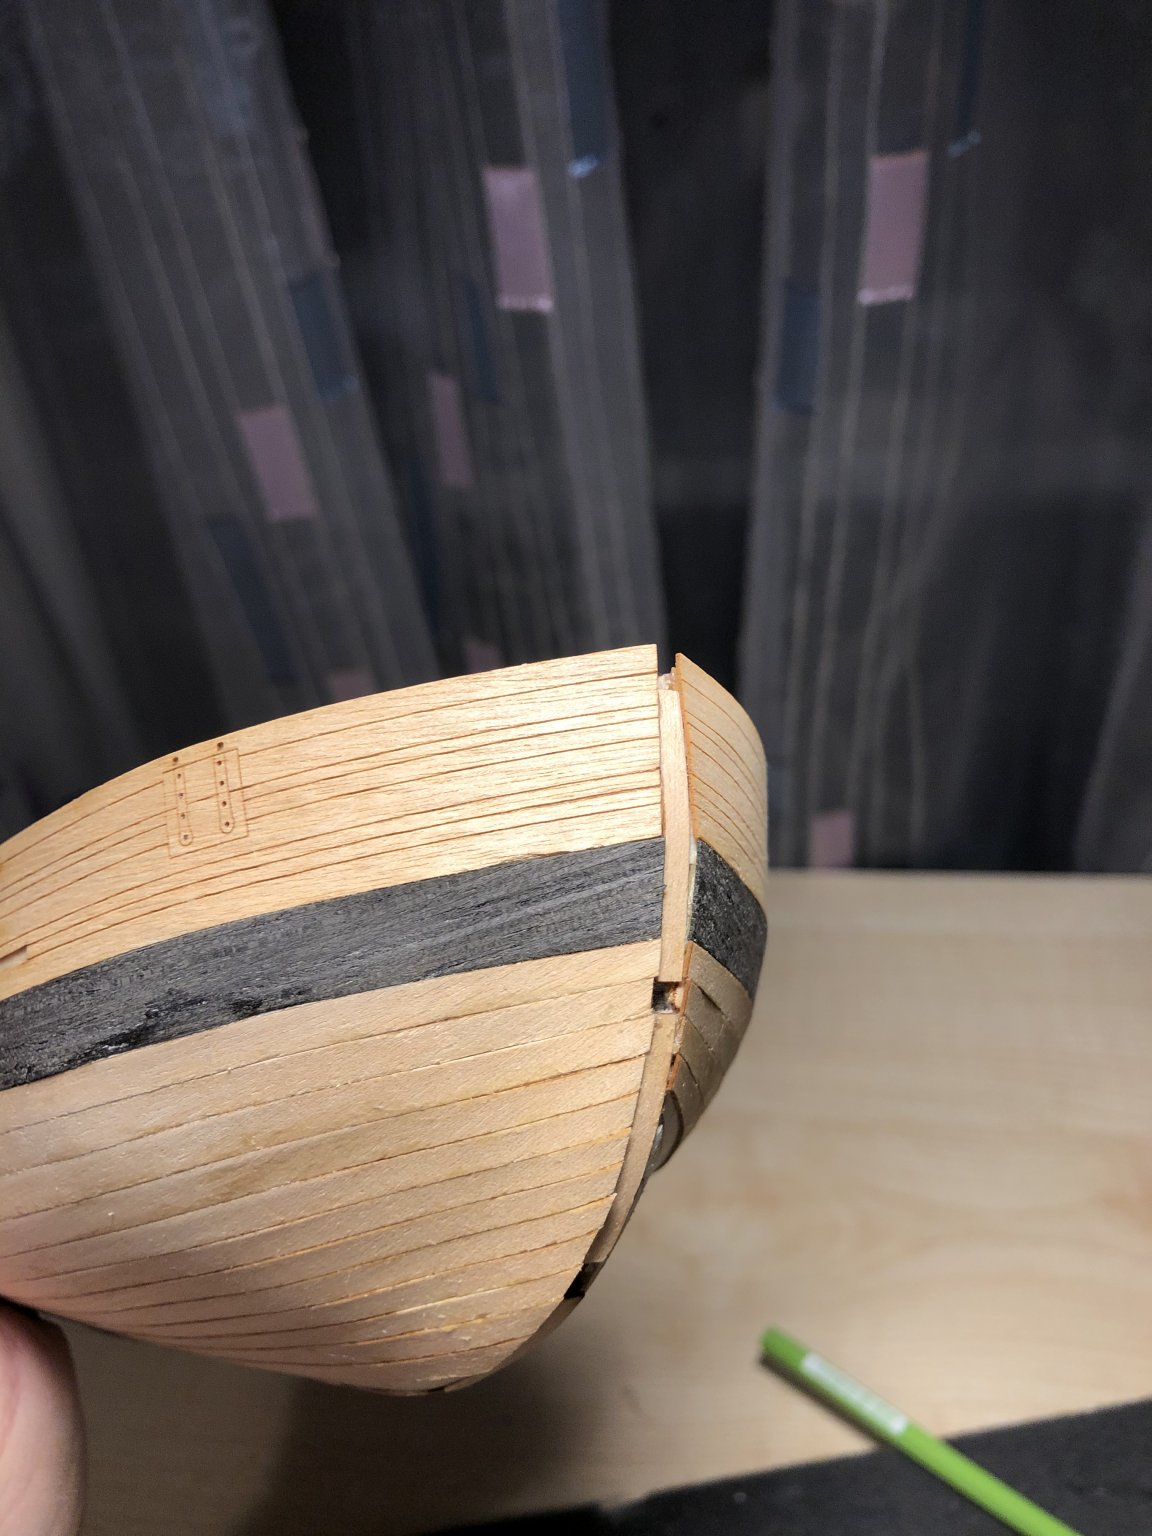
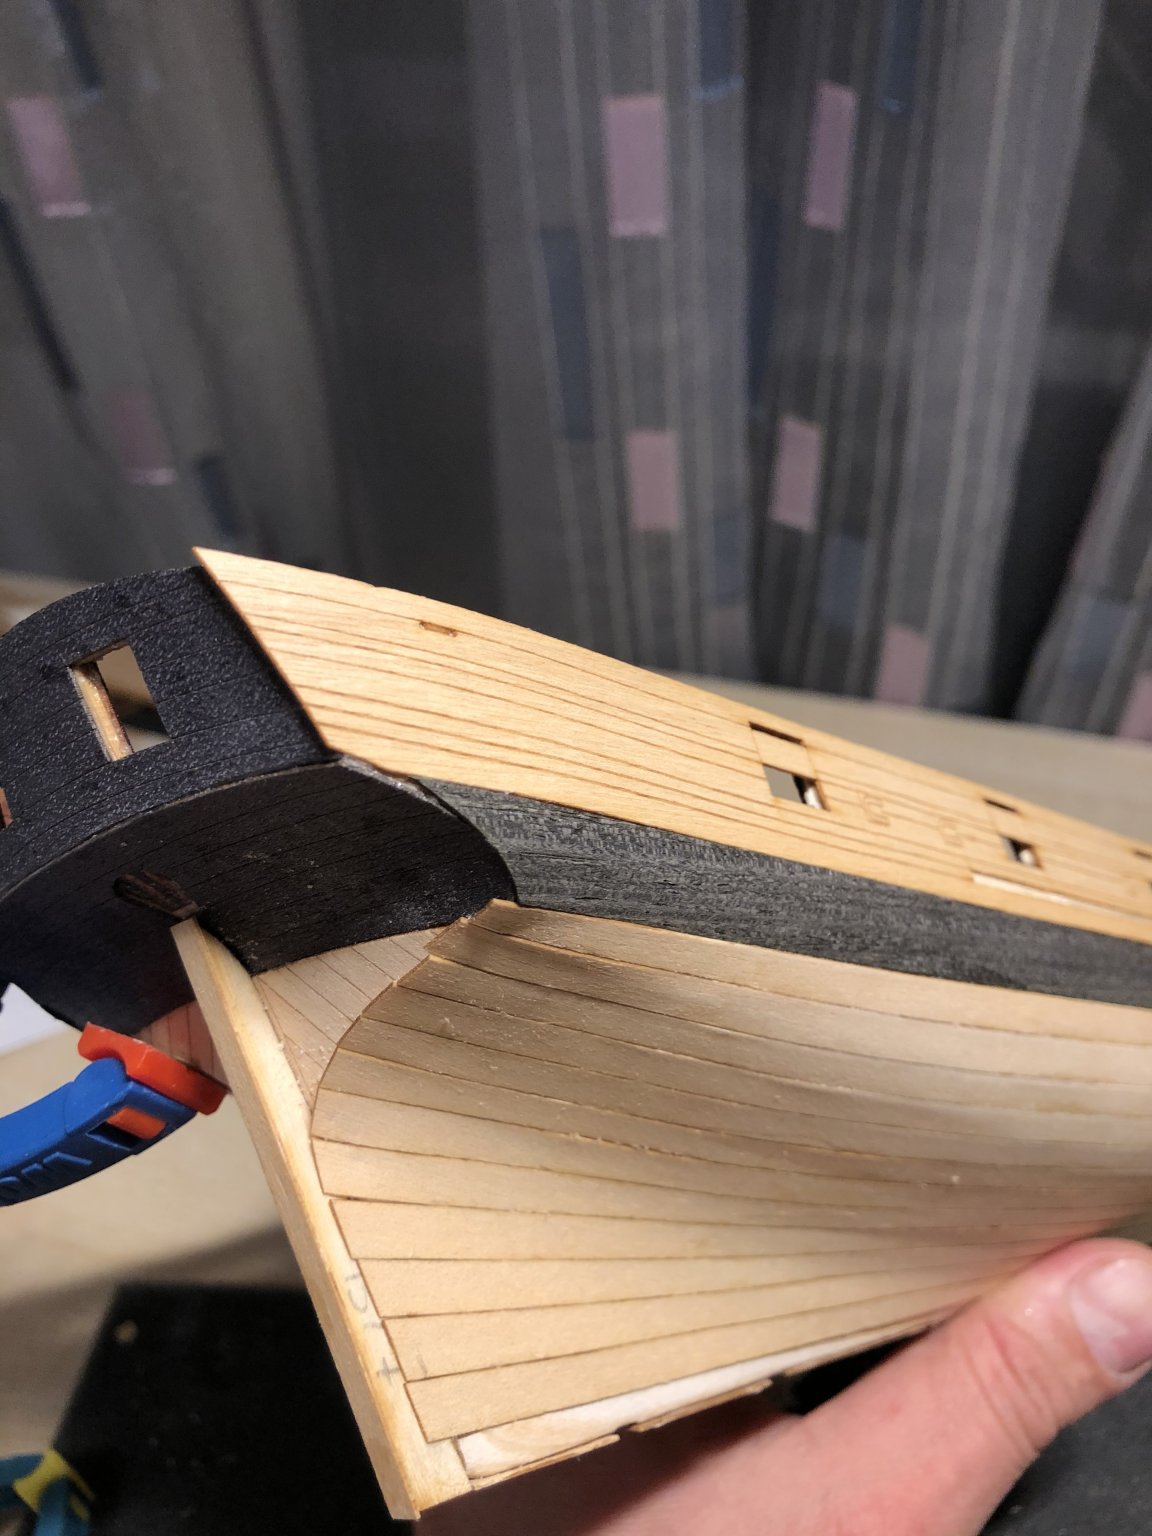
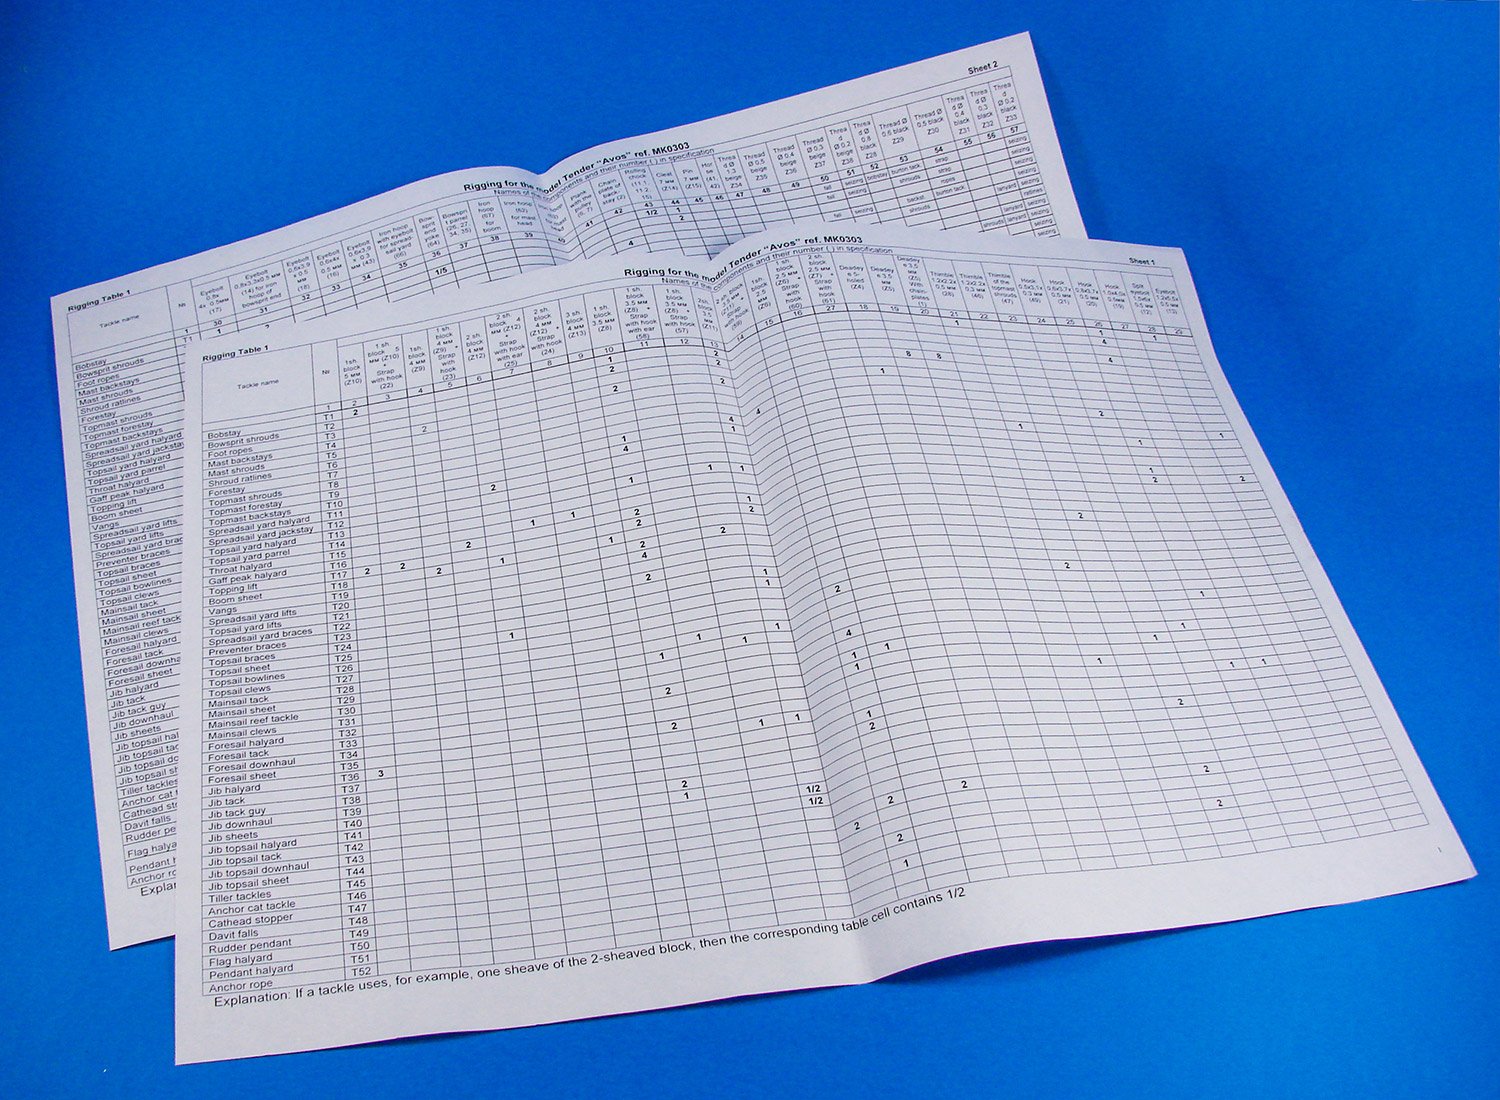
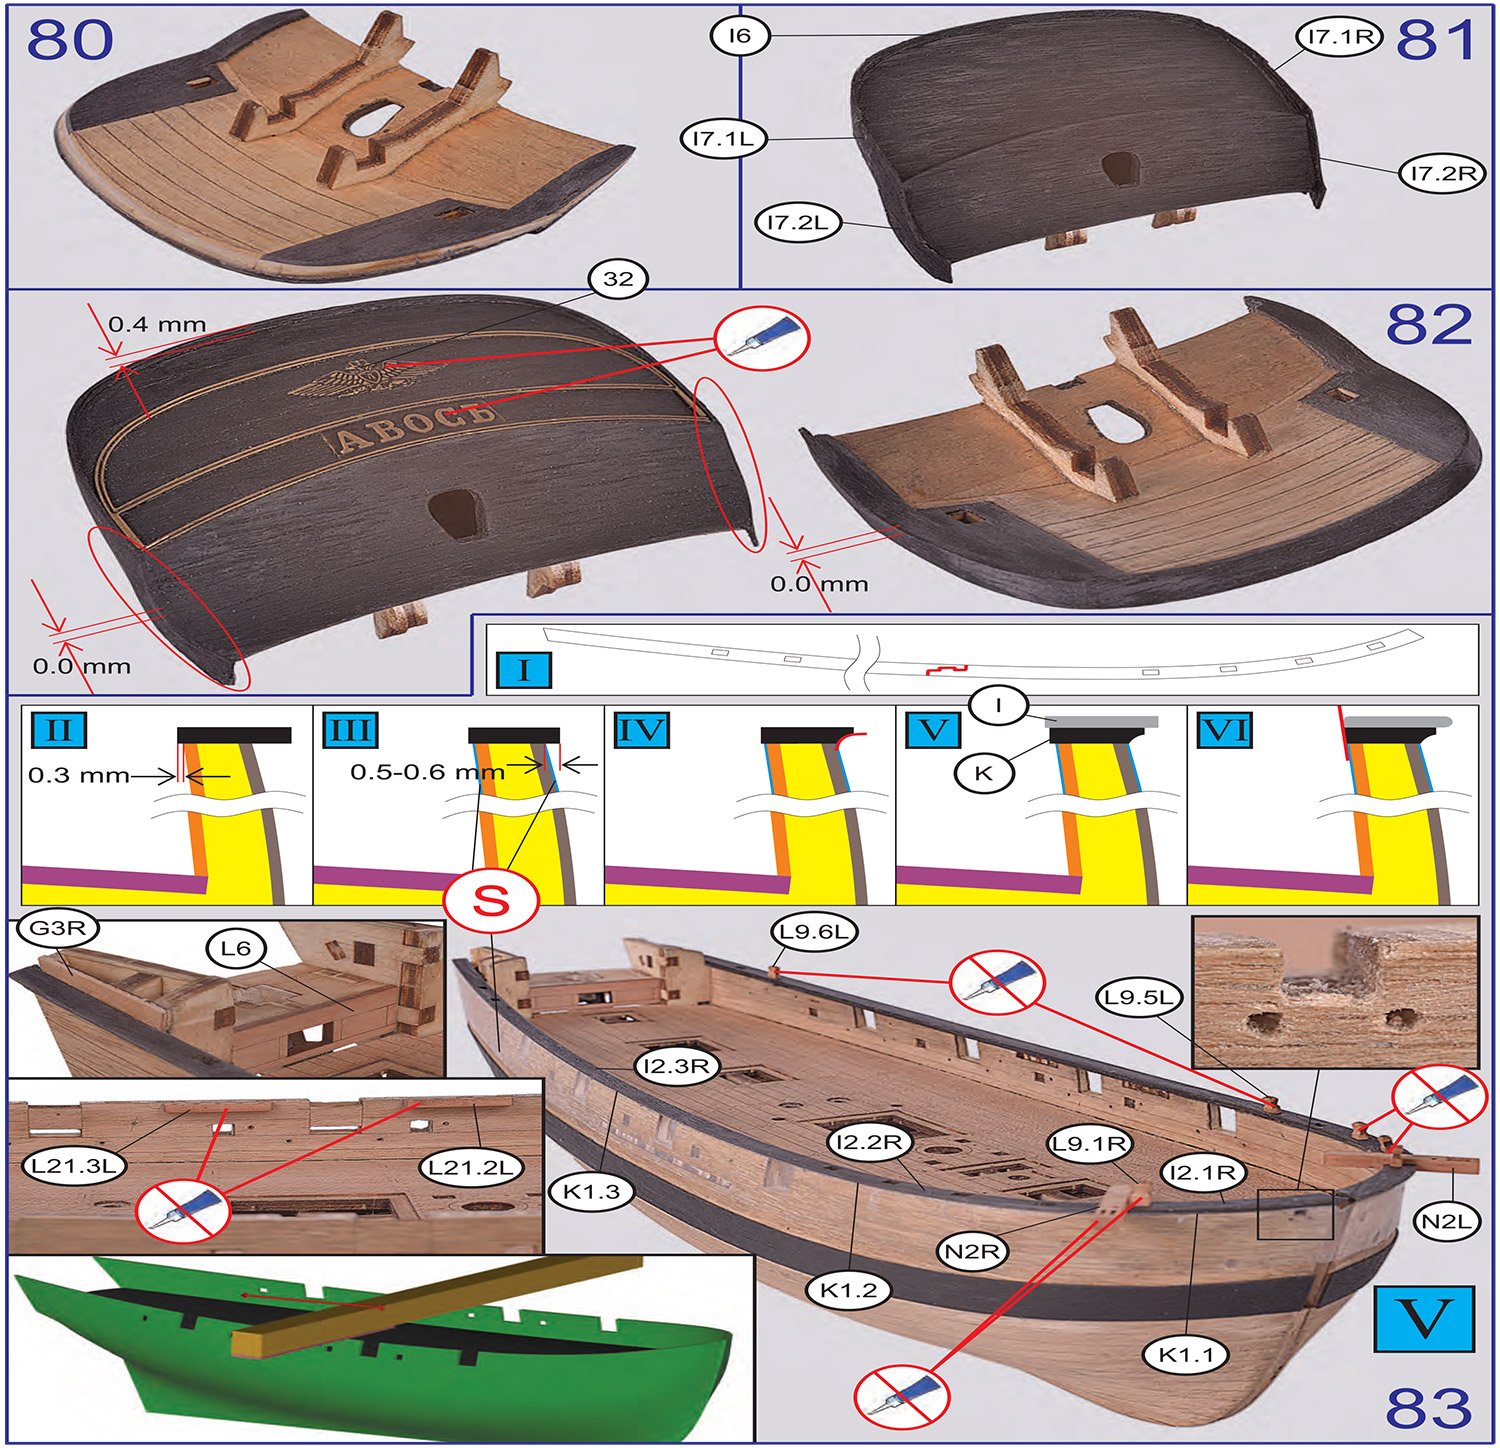
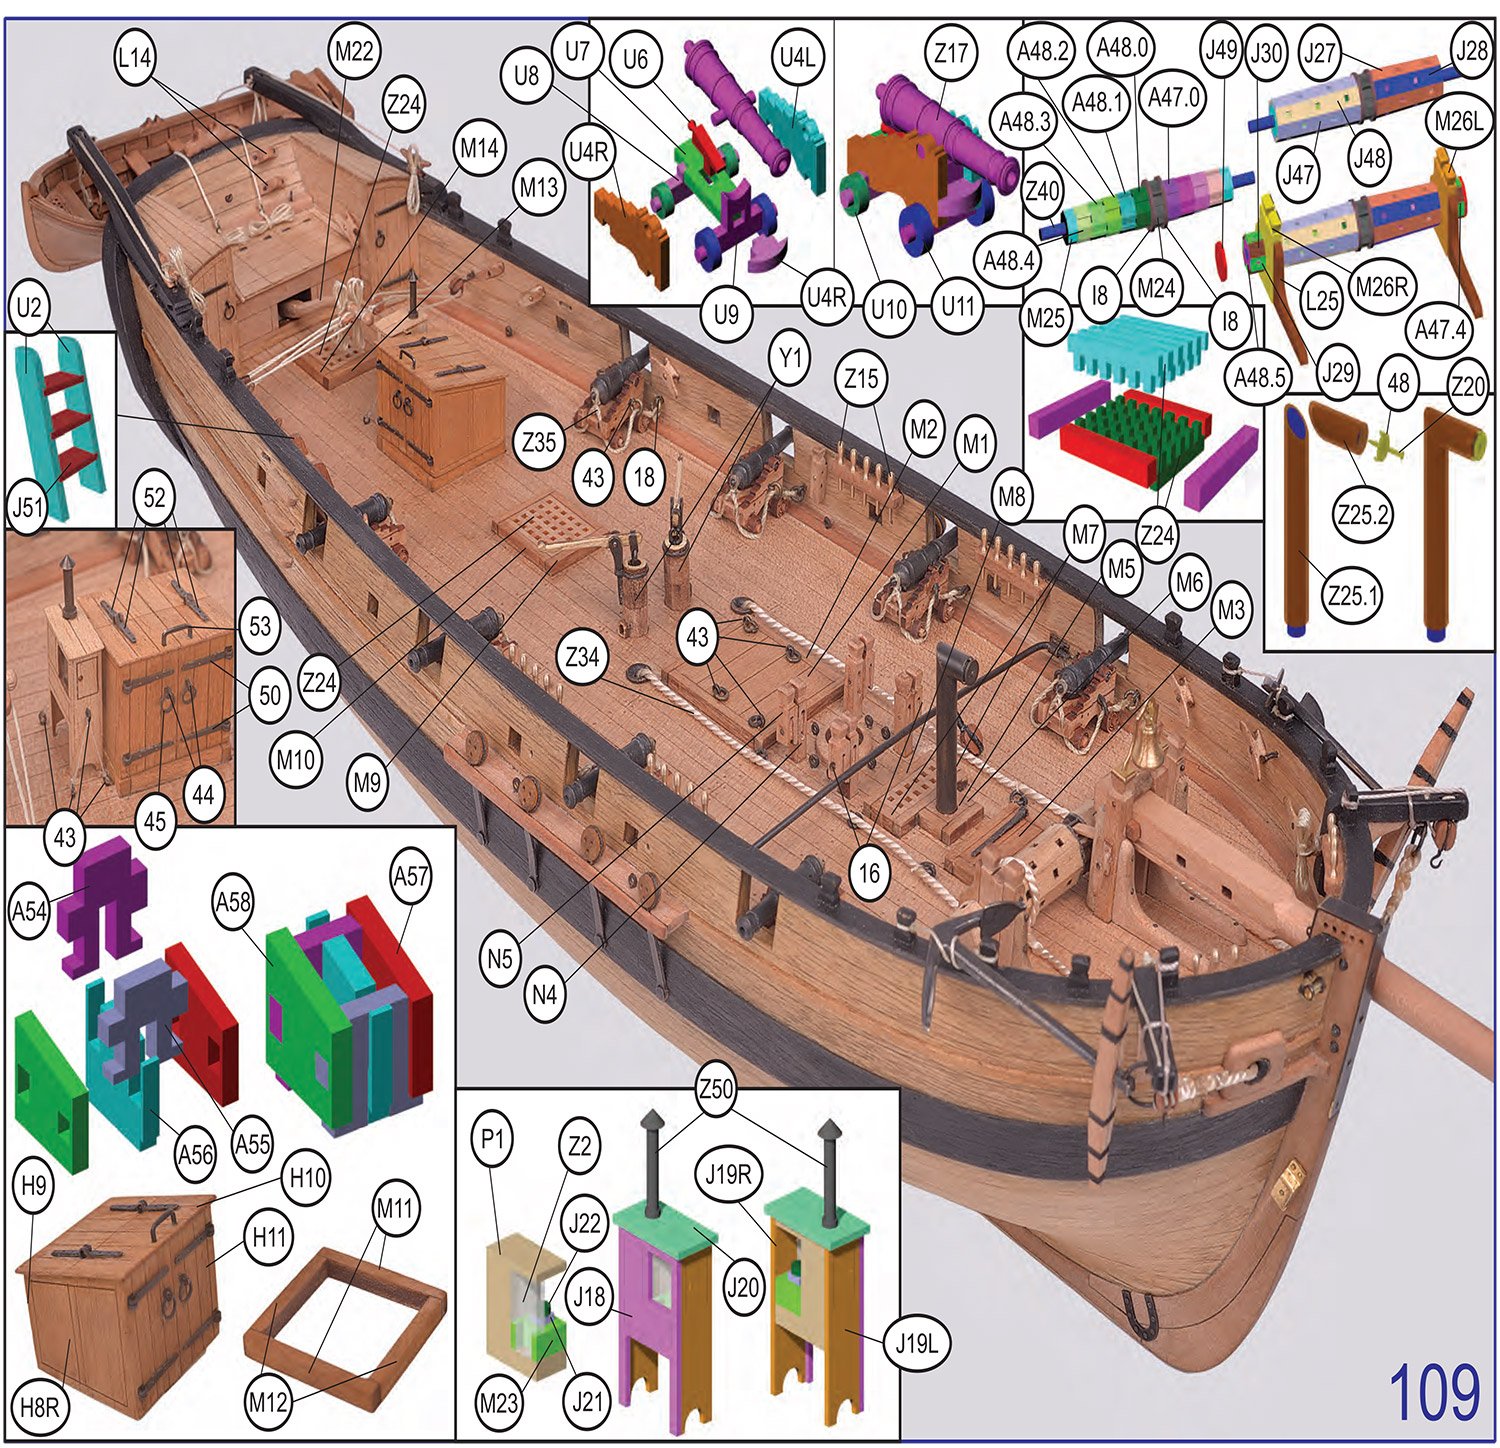
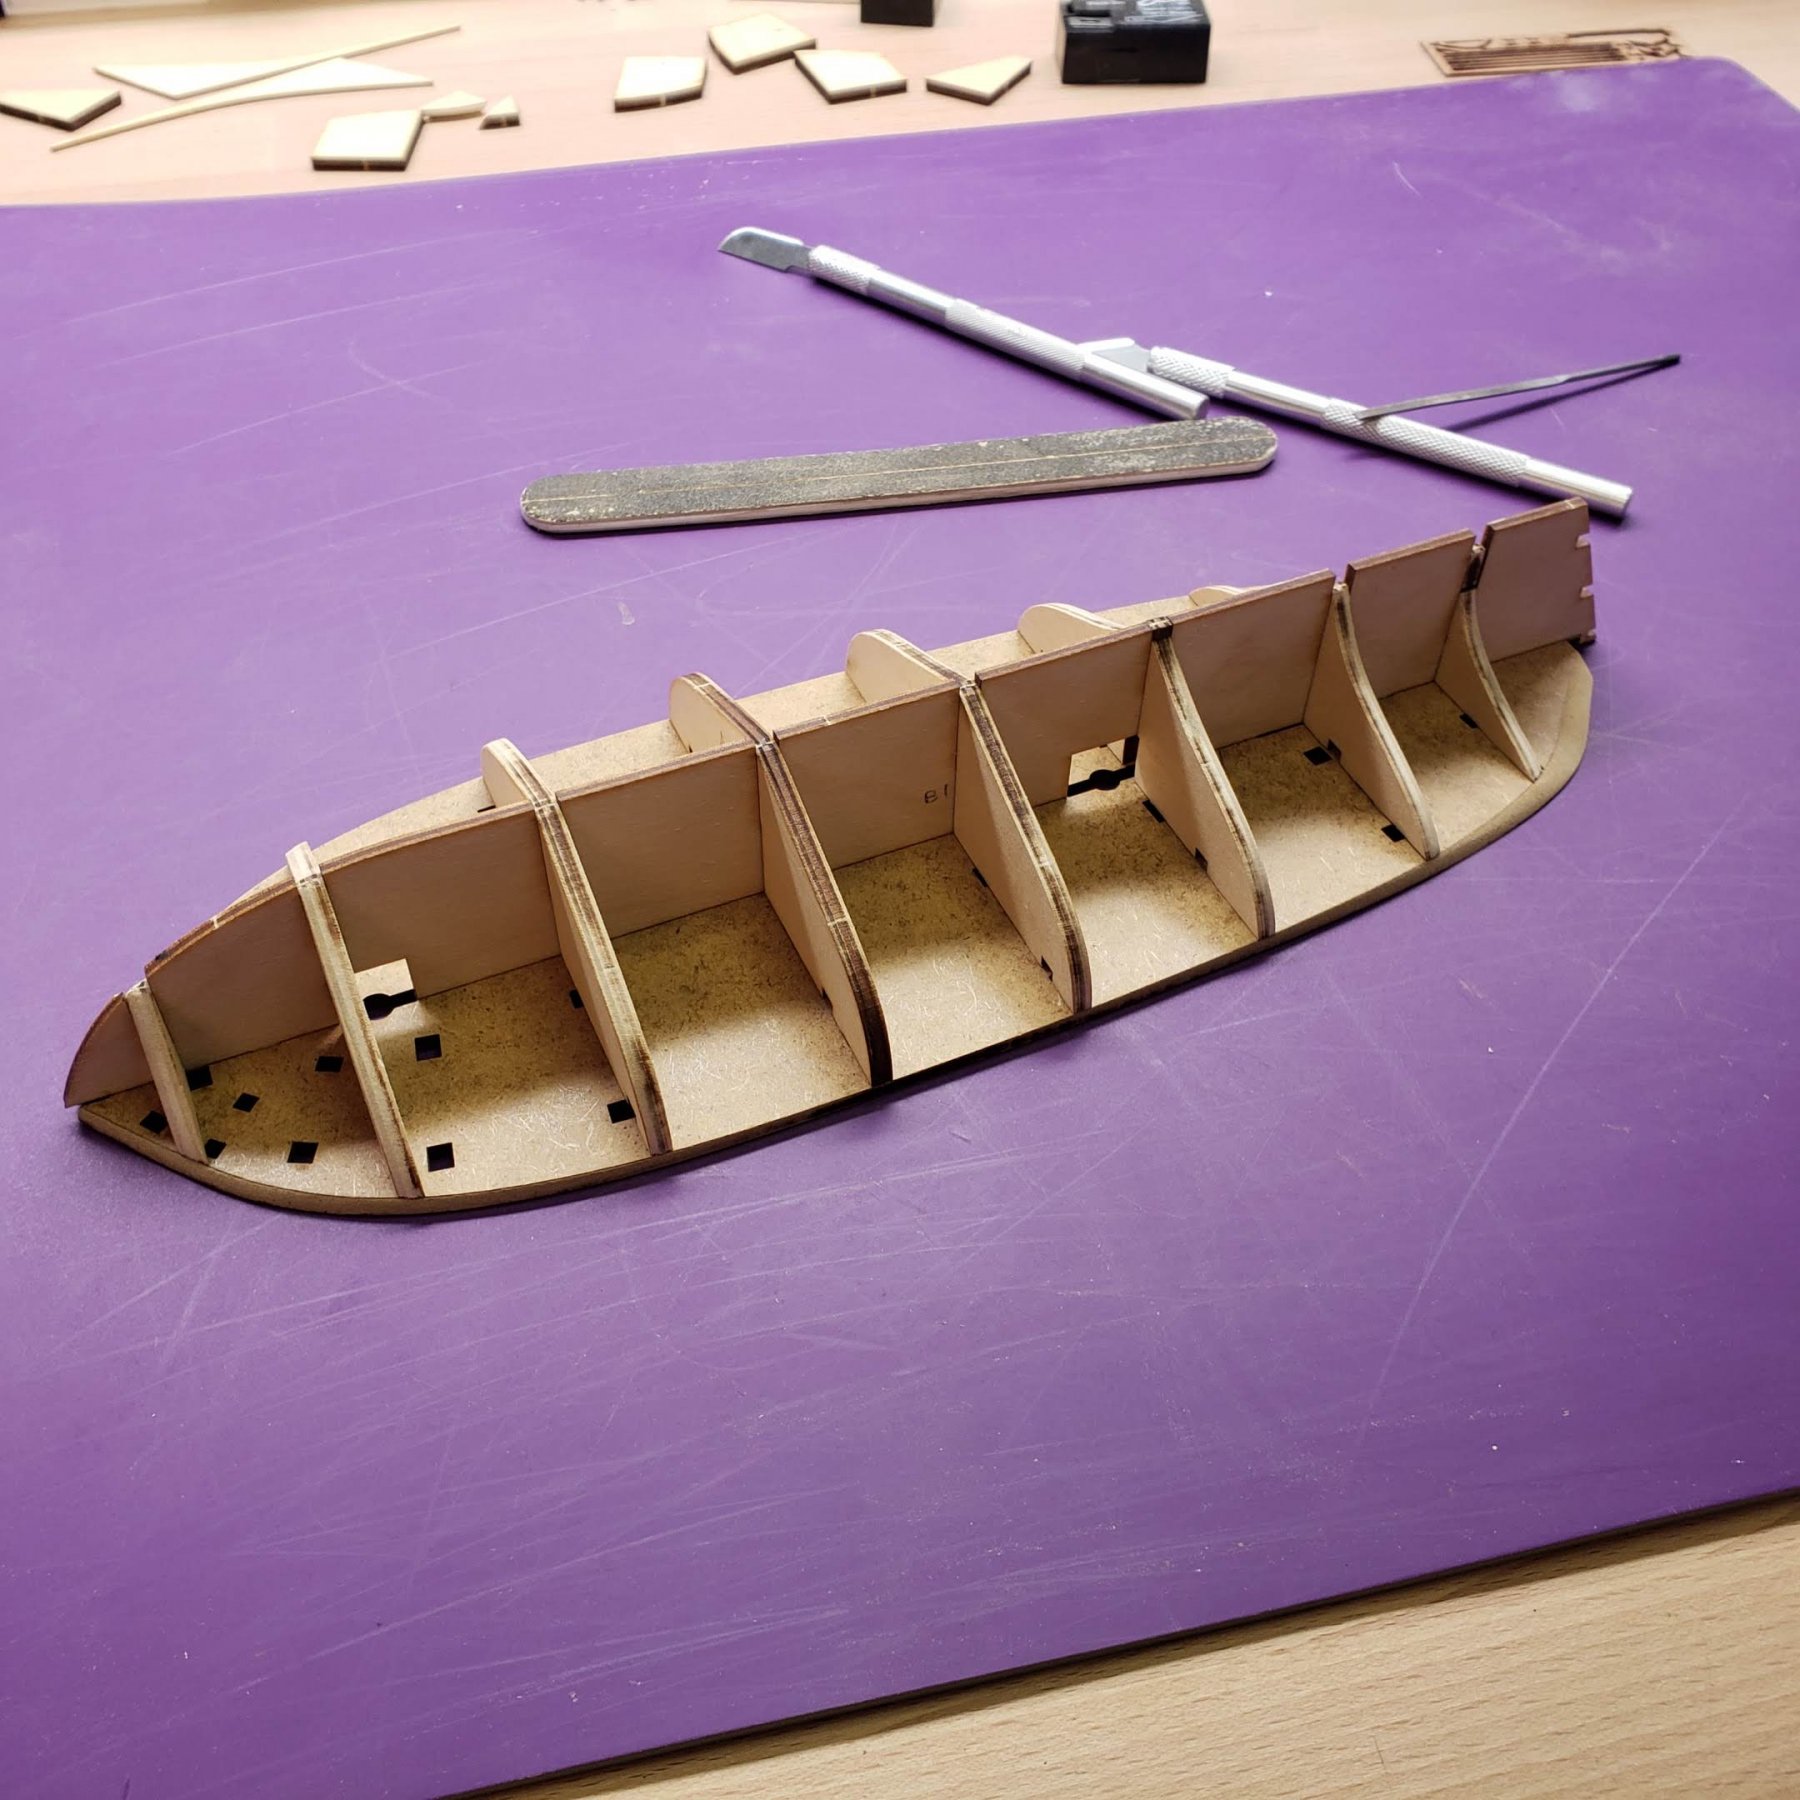
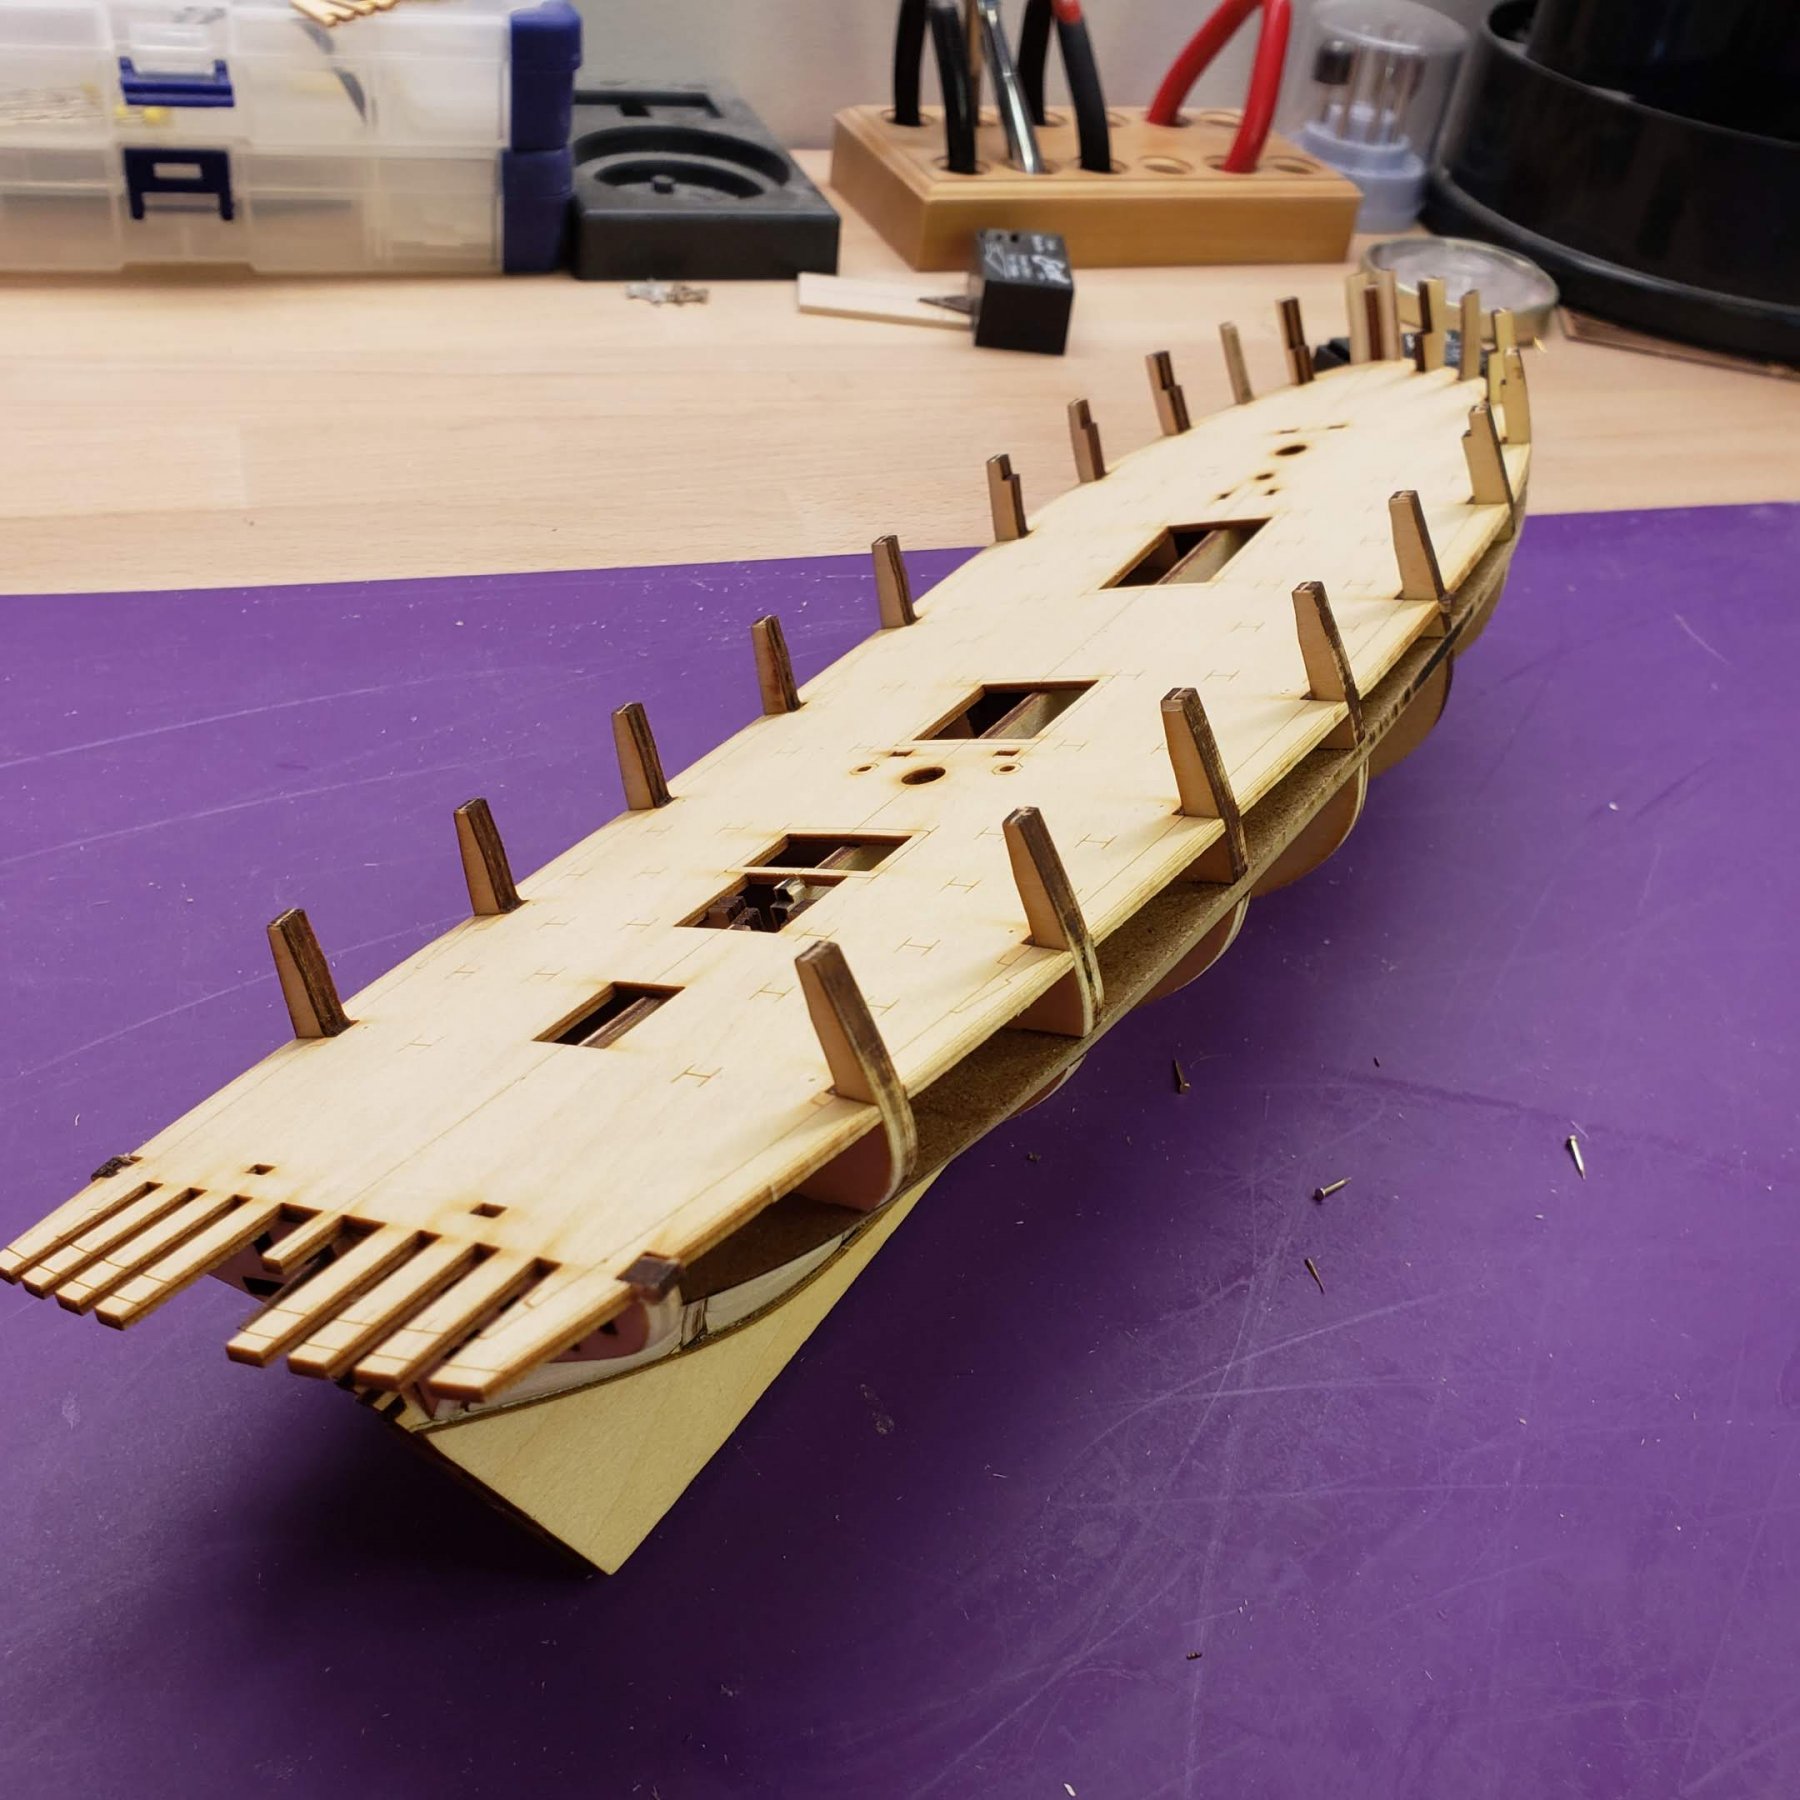
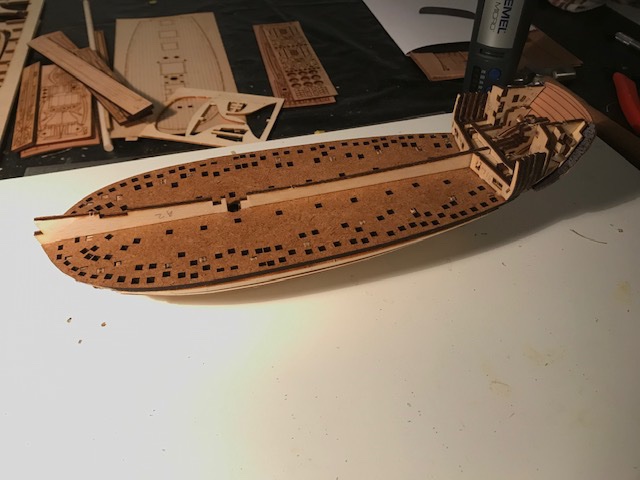
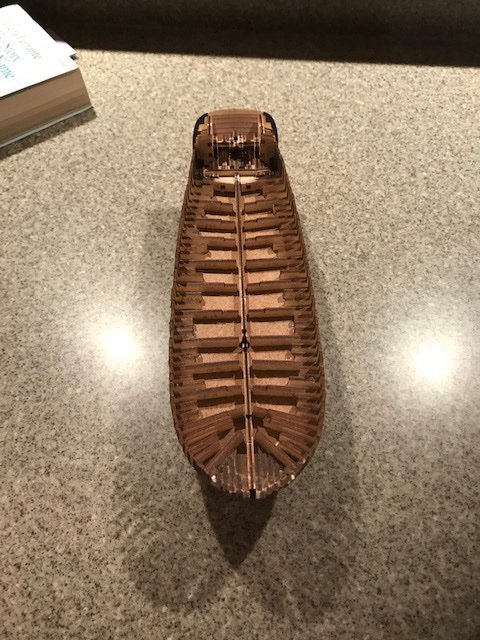
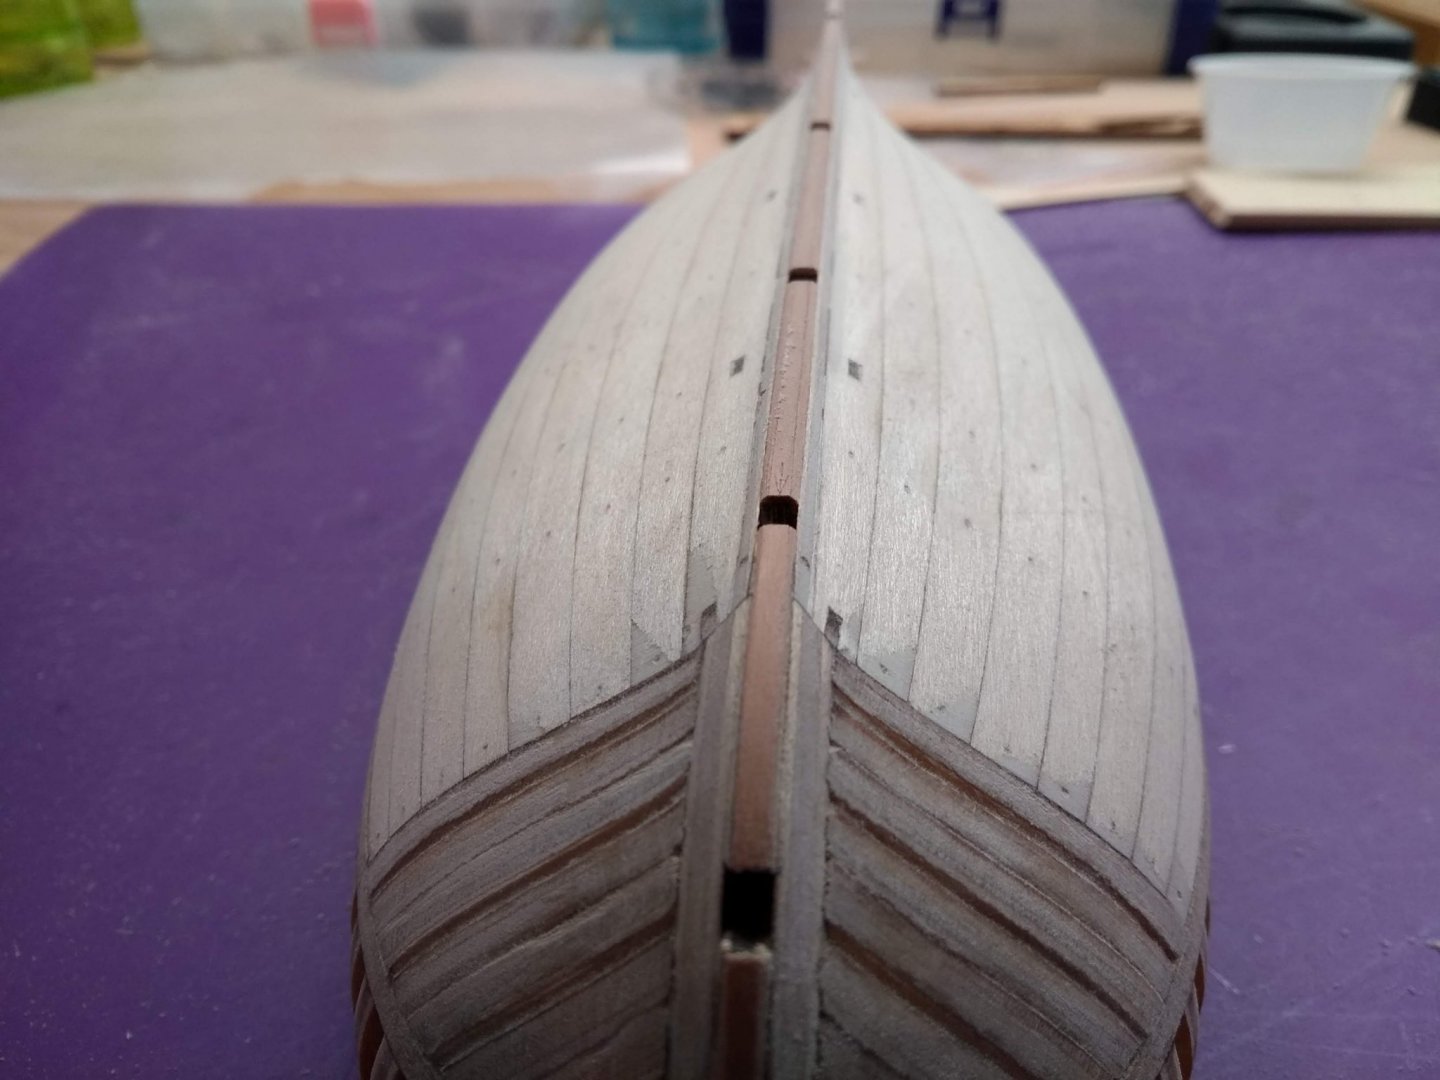
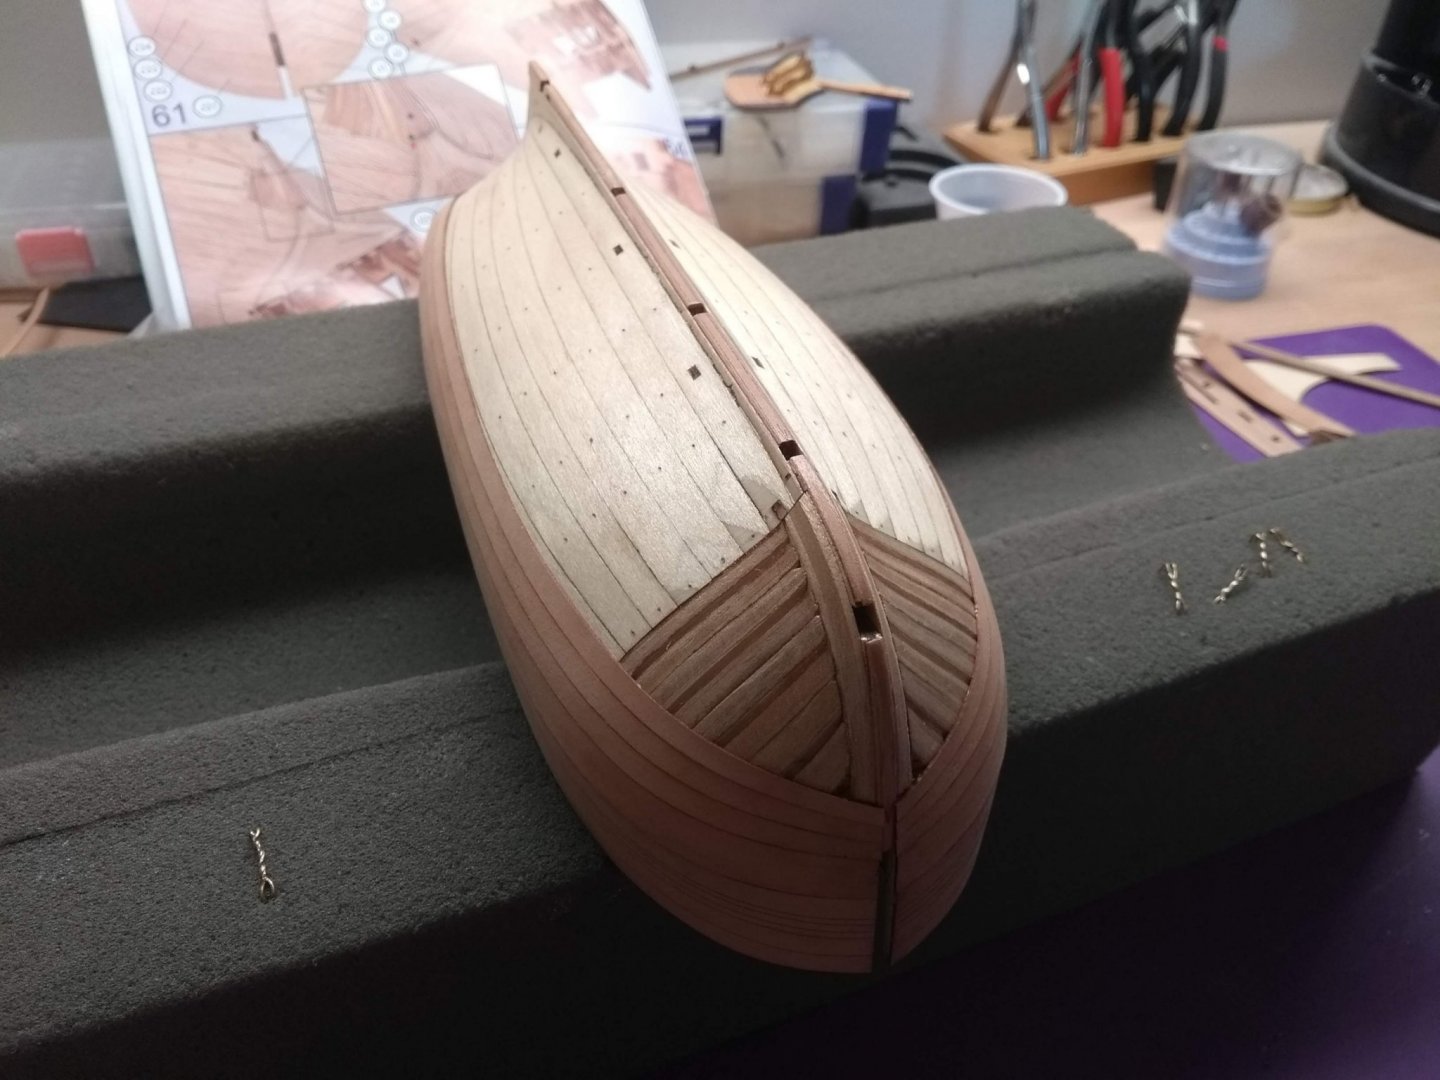
 I started this build some time in May and currently I'm in the process of shaping yards. I'll be posting pictures and comment starting with the very beginning and hopefully I'll catch up to the build's current state. This is the model of Russian tender named "Avos". As far as I know this word only exists in Russian language and describes a world view when you don't know the outcome but hope for the best, citing Wikipedia: The Russian avos' (Russian: русское авось) describes a philosophy of behavior, or attitude, of a person who ignores possible problems or hassles and, at the same time, expects or hopes for no negative results or consequences. It is an attitude that treats life as unpredictable and holds that the best one can do is count on luck. This ship is well know in Russia because of "Juno and Avos" rock opera that was performed for the first time in 1981. It tells the story of a tragic love between Russian explorer Nikolai Rezanov and a daughter of the governor of Spanish California. "Avos" was a tender built in Novoarkhangelsk (present Sitka, Alaska) in Russian America in 1806. She was manned by a crew of 12 and was a part of an expedition to California headed by explorer Nikolai Rezanov that consisted of two ships, brigantine "Juno" and tender "Avos". They arrived in California in the same year, to get provisioning for starving Russian settlements in Alaska. During his stay in San Francisco, Rezanov met a 15-year old daughter of a Spanish governor Maria de la Concepcion Arguello. Maria fell in love with Rezanov and they got engaged. Unfortunately they could not get married because she was a Catholic and he belonged to the Eastern Orthodox Church. Rezanov had to obtain the Russian Emperor's permission to marry Maria. Promptly, he sailed back to Alaska and then to Okhotsk. From there he had to cross all of Russia east to west on horseback to get to St Petersburg. During this perilous trip he fell ill and died in Krasnoyarsk in 1807 at the age of 43. Maria did not believe the news of his death until 1842 when Sir George Simpson gave her a detailed account of Rezanov's death. She took a vow of silence and lived in a monastery in Monterey, California until her death in 1857. I was really excited about building a ship with such rich history. The kit is of the same great quality as all Master Korabel kits. Without further ado, here are my steps: 1. As always the first step is setting up the "skeleton" framework for planks. This kit is a plank-on-bulkhead type with two layers of planks. The interesting detail in this kit is that the whole frame is split horizontally by an HDF plate into two separate parts - top and bottom. First all bottom bulkhead and the center keel were installed into the HDF plate (which has asymetric notches so you'd never be able to mix up left and right bulkheads): 2. After all bulkheads were installed, I planked the first layer of the lower portion of the hull: 3. Next the upper section of the center keel need to be assembled along with the stern: 4. What I found really interesting about this build was that counter and taffrail were not glued to the stern. They were supposed to be shaped and assembled separately. Overal the counter and taffrail turned out to be the most difficult parts of the whole build. The first layer of counter split when I bent it, so I had to carefully reglue the sheet... 5. After that I went back to building up the bulkheads for the section of the hull above the HDF plate: 6. Once all bulkheads were installed (there were a lot of them!) the deck was glued. What I found interesting was that there was no subdeck on this model. The deck is a single sheet of maple veneer that is glued directly to the bulkheads. The inner bulwark installation was a breeze thanks to the guiding pins that were inserted into holes for gun tackles: 7. After the deck and the inner bulwarks were installed the hull was faired and planking began. Again, as with other Master Korabel kits it is a lot easier to plank using hot iron technique! (https://craftysailor.com/blogs/articles/planking-with-hot-iron😞


- 30 replies
-
- 7
-
-
- master korabel
- avos
- (and 1 more)
-
 Hello all, I have built balsa RC model airplanes before, but this is my first boat build. Also have an interest in scale armor and prefer 1:72, hence the fascination with tiny boats. Big thanks to "etsinko" for the similar inspirational build log and the genius who came up with the "quick find indexes" idea. Now on to the build. Kit ordered via Ebay on March 30, 2020. It probably got stuck somewhere due to the COVID-19 situation, but I was surprised last week when it finally showed up at my doorstep on May 5, 2020.
-
 Hi Decided to open a new blog for 3rd ongoing build-i hope no hard feelings from oldtimers as newbie hasnt finished any but allready has 3rd ongoing plus pile waiting to be started. As my Cruiser and Terror are waiting for parts i started MK Polotsk that was waiting for its time, guess that time arrived. My Polotsk is Plus version with pearwood planking. I chose MK Polotsk due to really positive feedback regarding laser cut part and instructions as it goes together like Lego cause allmost everything is laser cut and requires little or no sanding. I have to admit during the build hours i have smile on my face and im truly impressed about the engineering work behind it. Some points; 1) Hull has building template with a lot of holes. Everything fits there nicely. 2) Bulkwark have markings where to sand a after putting it together little extra sanding was needed. 3) All planking os laser cut and fits perfectly. 2nd planking is oearwood and black is ebony. 4) Deck planks (from one piece) and waterways are precut but needed adjustment to fit perfectly. 5) Level of detail is really high but it will also make the parts really fragilr and easy to break. I had an accident also where i dropped the boat during sanding and i lt fell on stern gunport bulkwark corner. A lot of glue and clamps was used to het it into near shape. Therefore i have some deciations with mesaurements in that part. Nothing that eye will really catch if you dont know to look for it. Below you can see progress. I have basicly finished planking on one side-last plank needs to be adjusted according to keel. For 2nd planking i started with pva and ca but wasnt happy with result as edges were rounded up. It came to my mind that i had alplic rapid glue from Cronwall. Didnt use that before vause it had yellow look. This time i took the risk. I have to say best glue so far. Graps quick and you have enough time for adjustments. This means you can plank as much as you want. For last i have to say that detail of the ship is super-laser has done its job! Only real issue is that it ahould be bigger. I will definitely run into problems with smaller details but will try to keep the quality up. Defenitely will order more kits from Master Korabel, probably Phoenix and others that they have on line dor future years.


-
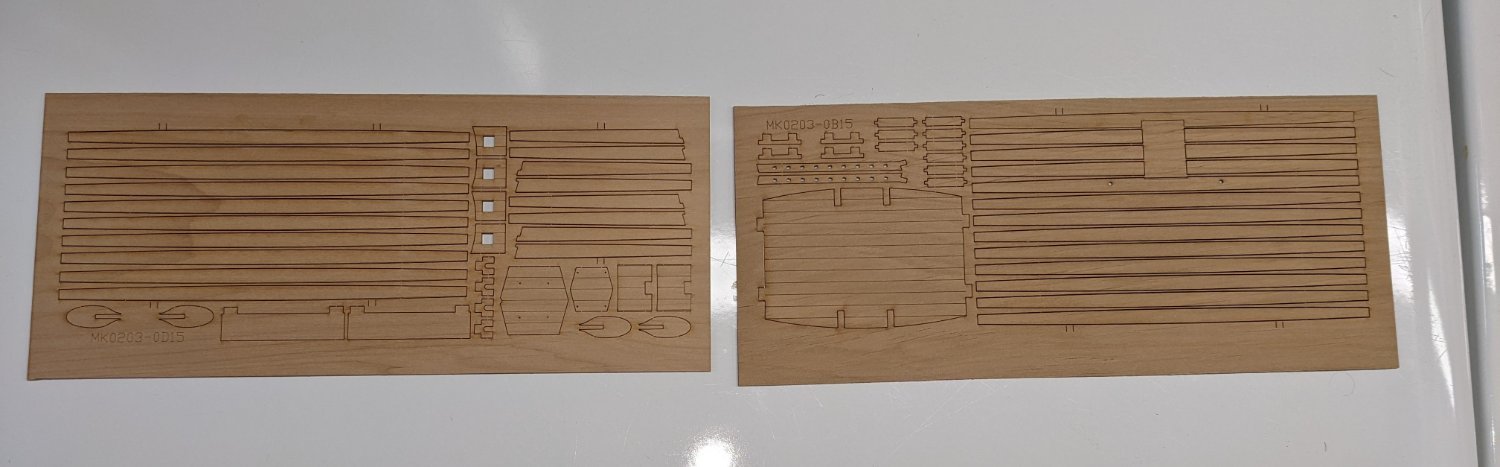
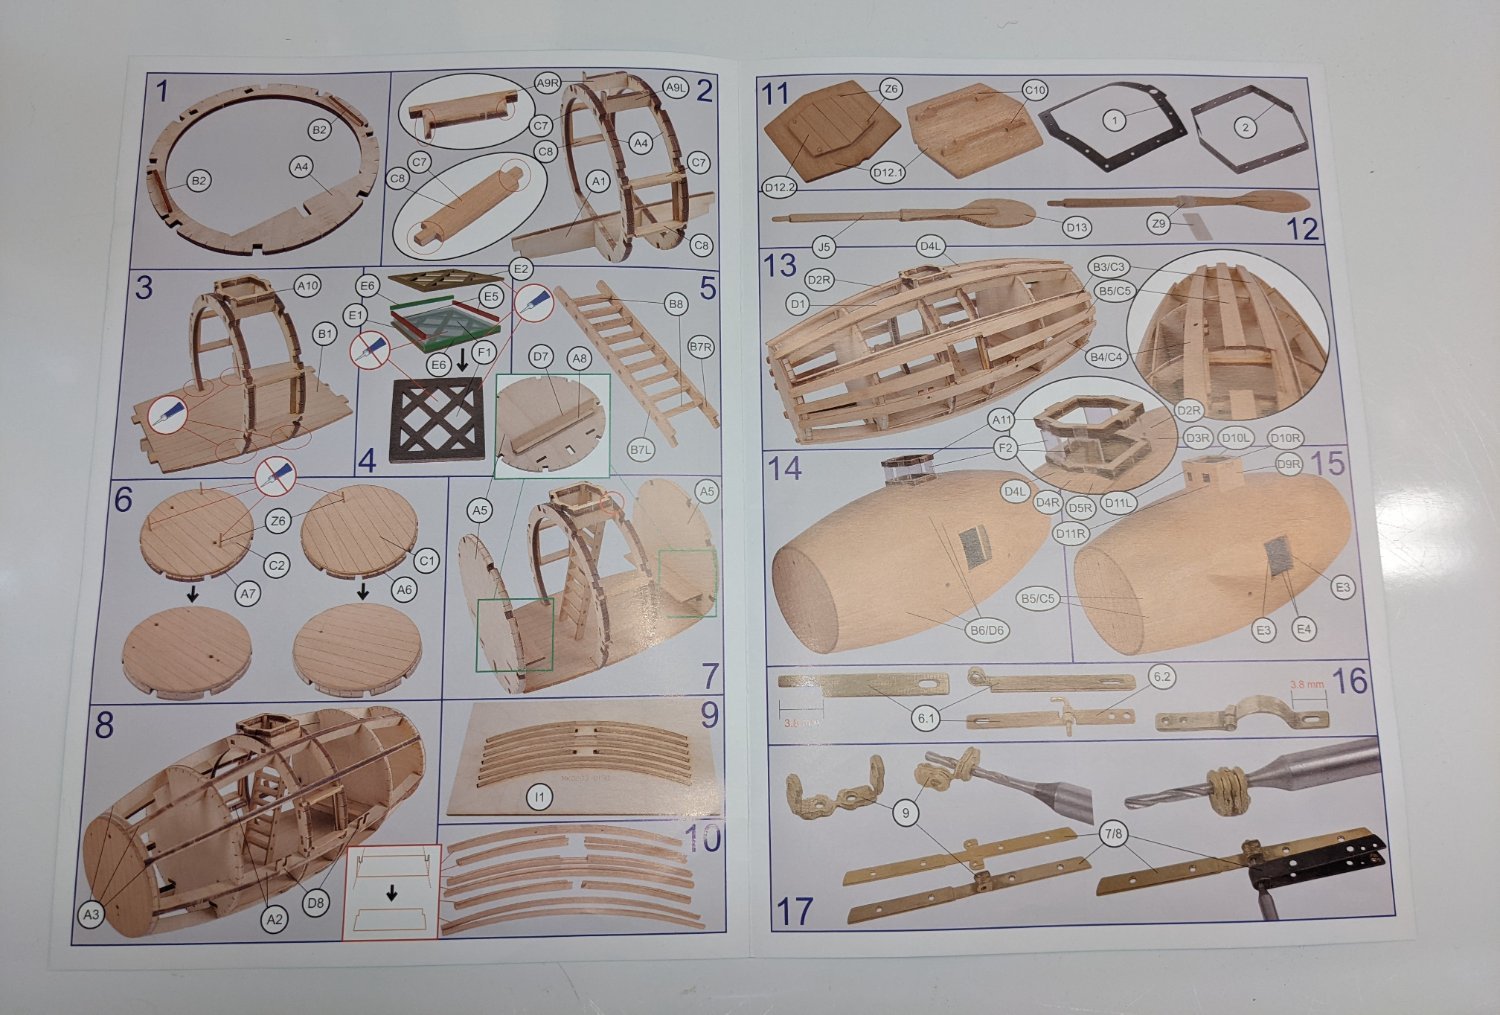
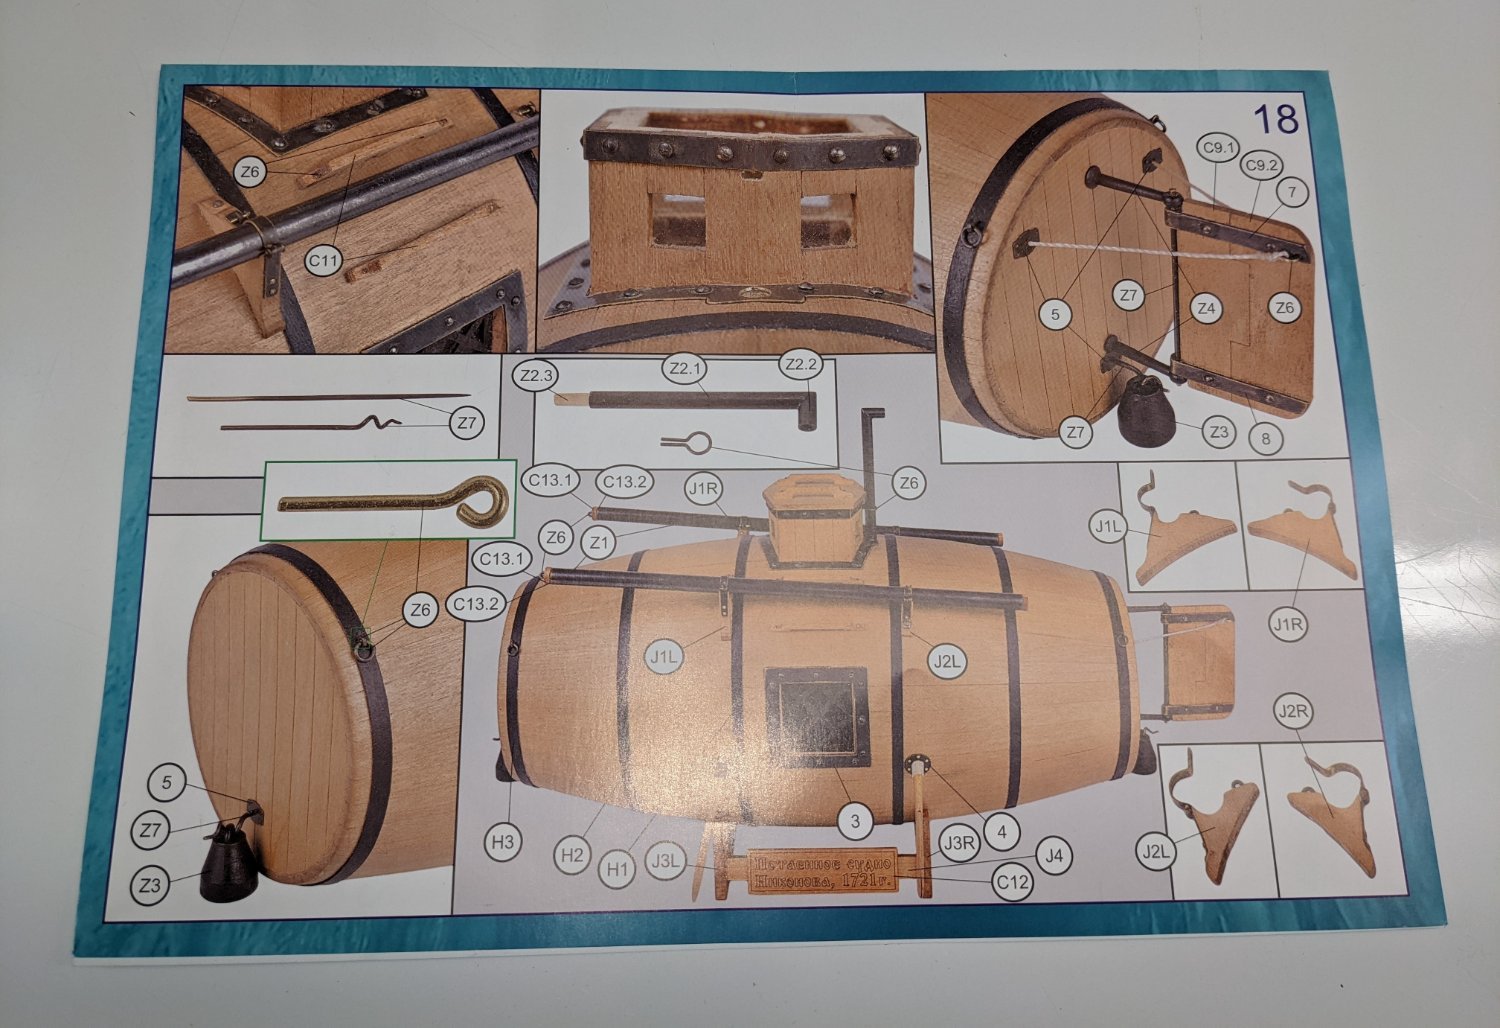
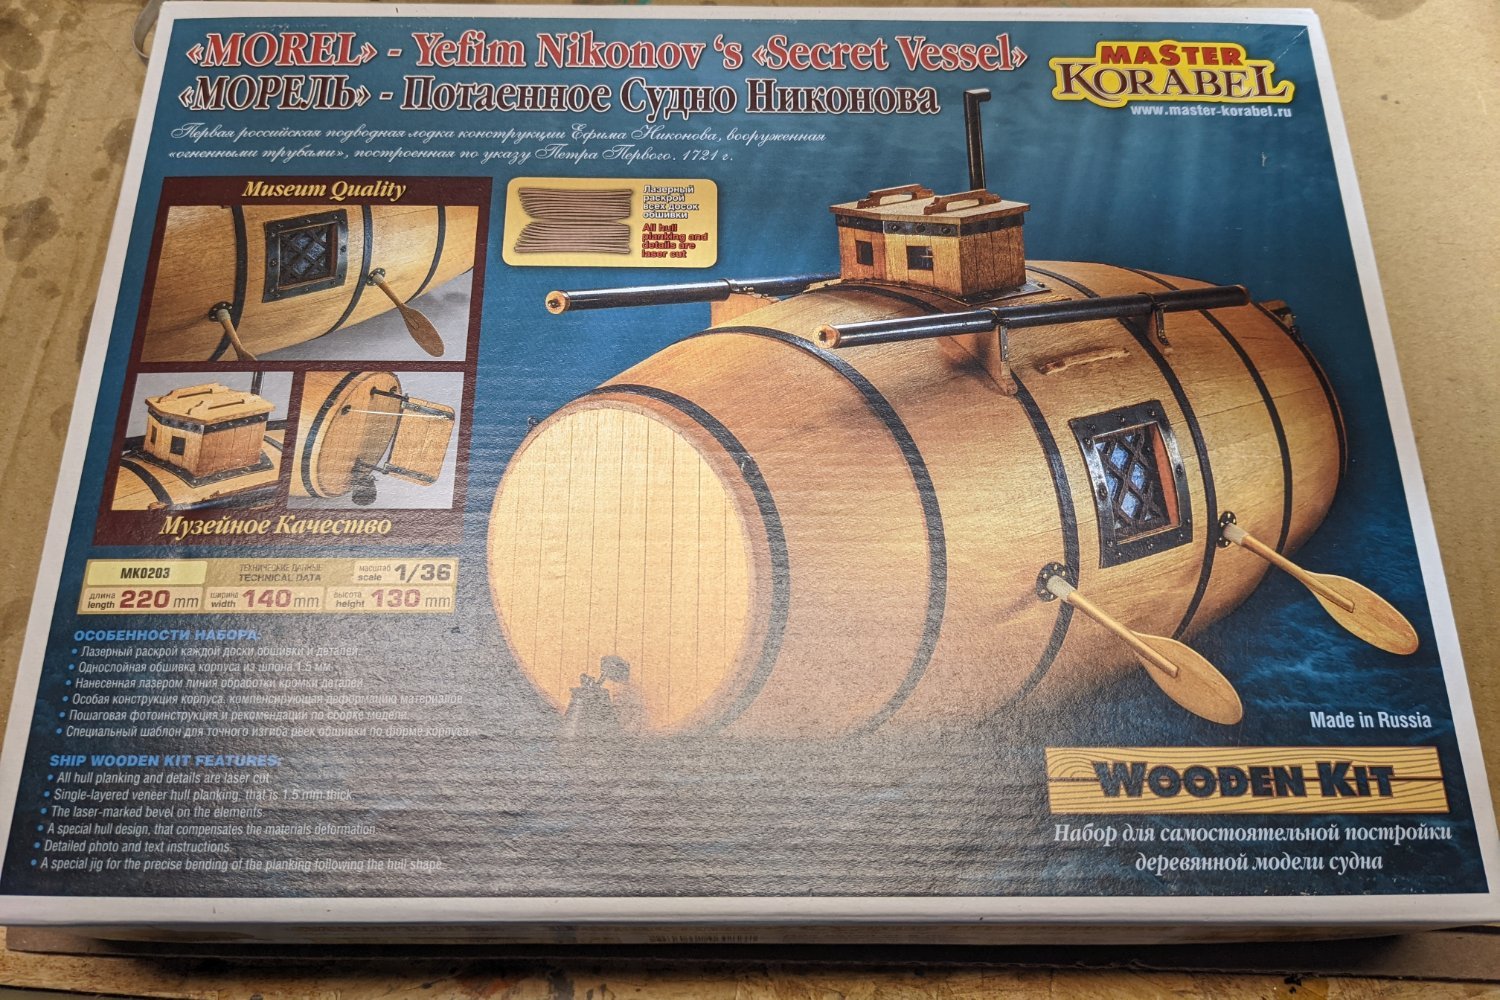
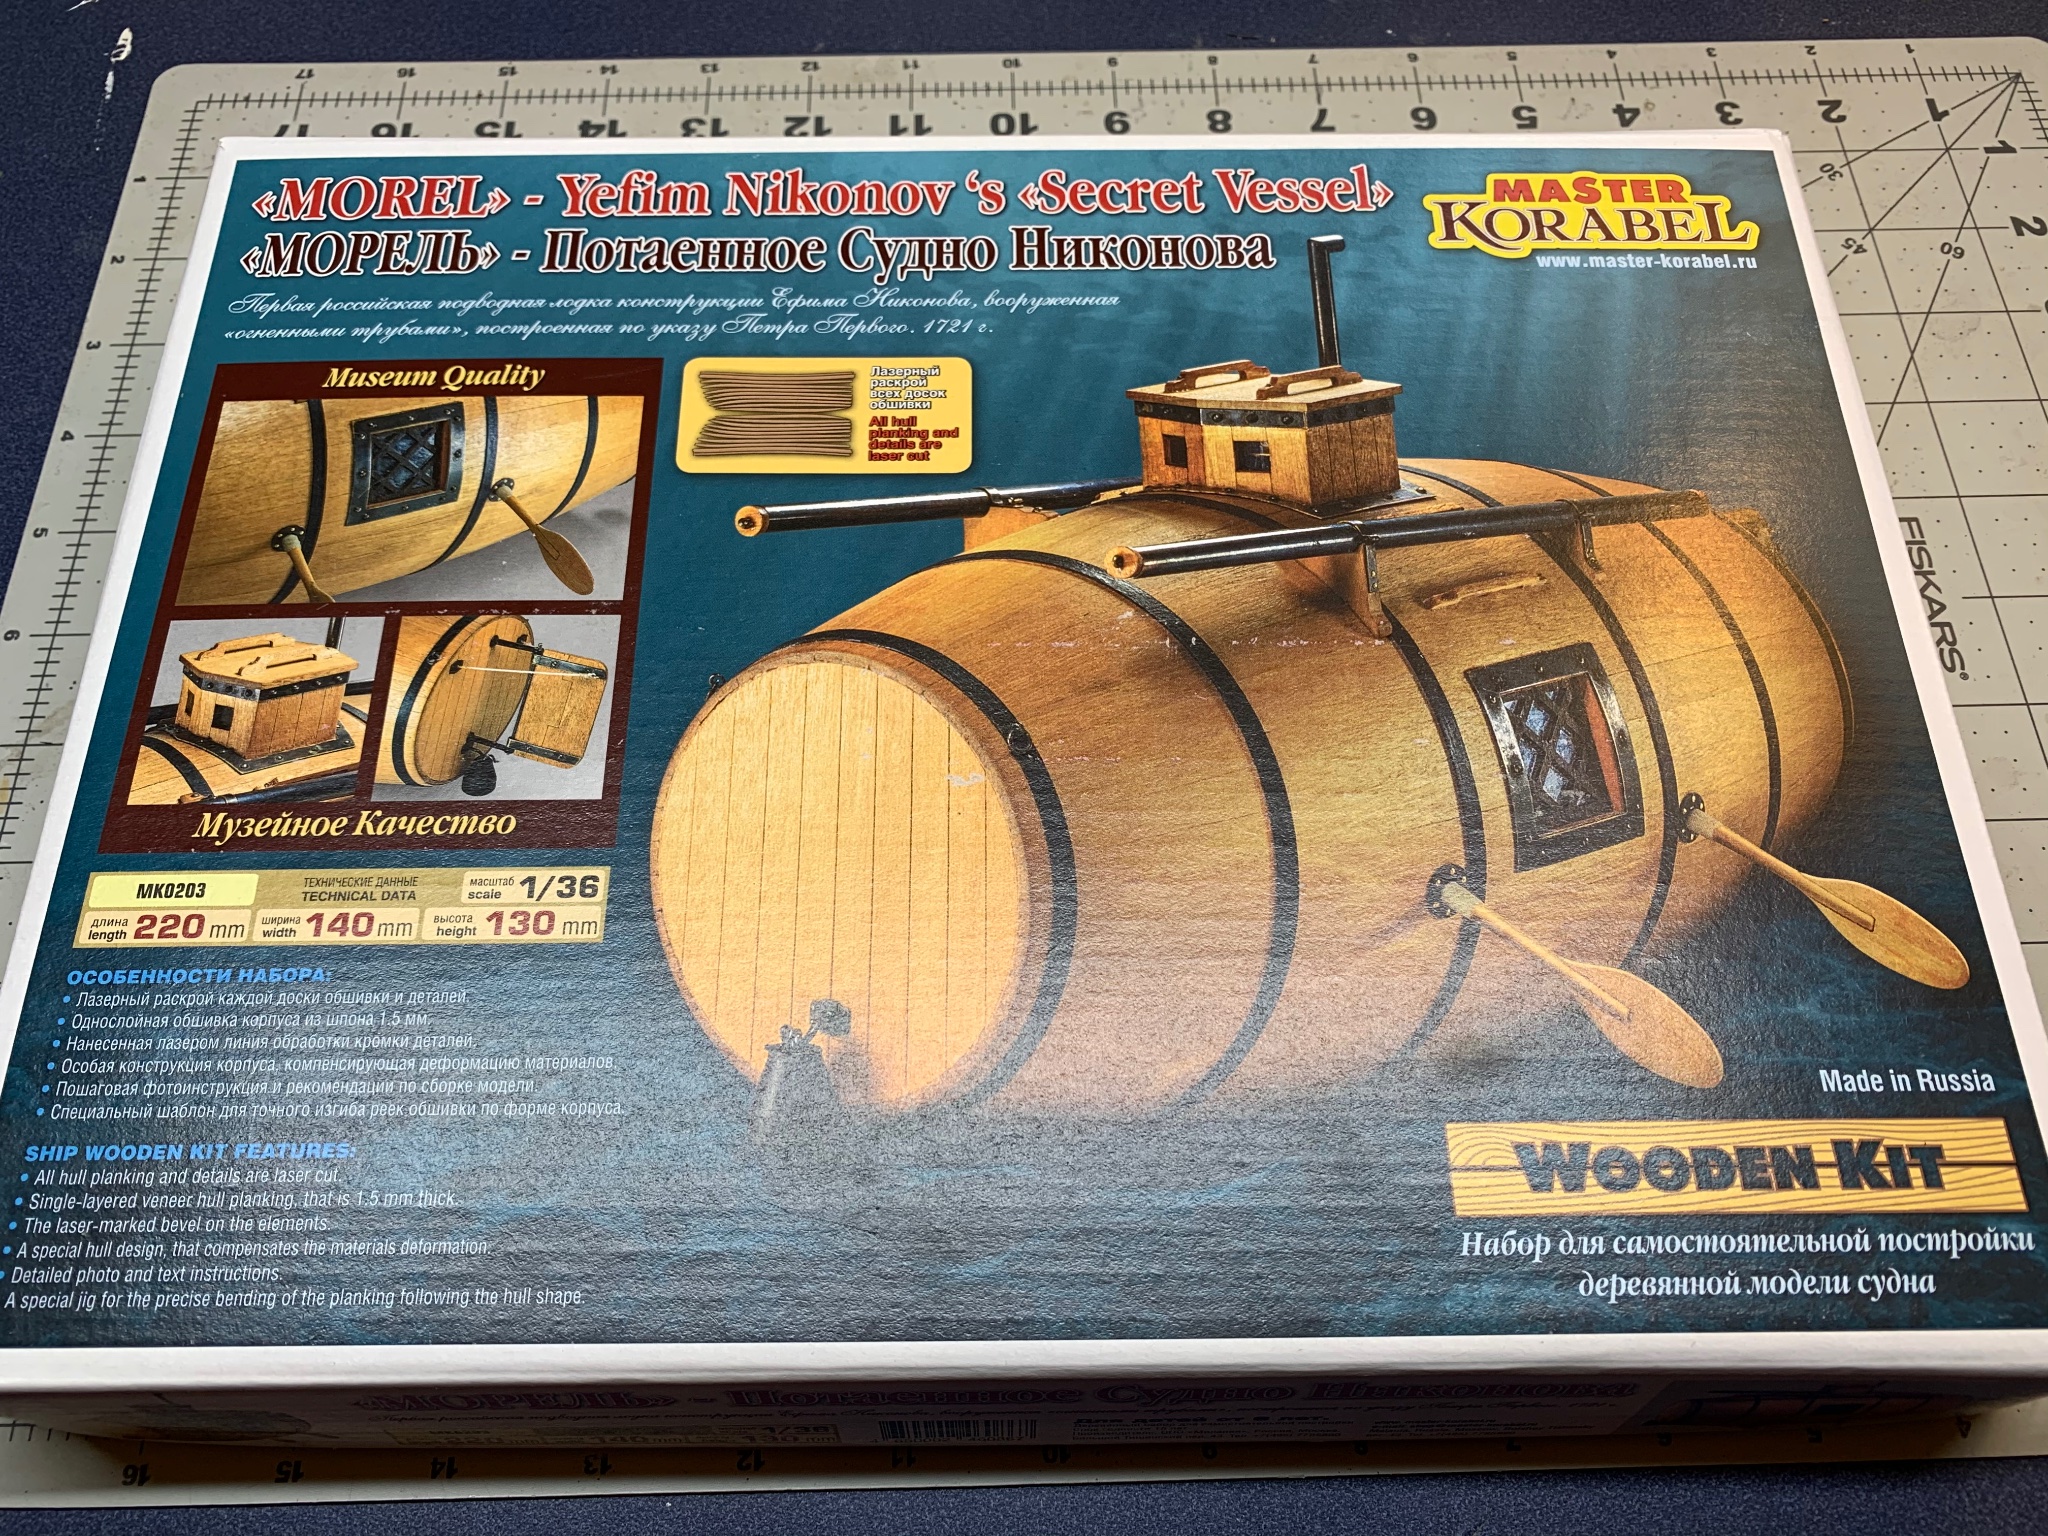
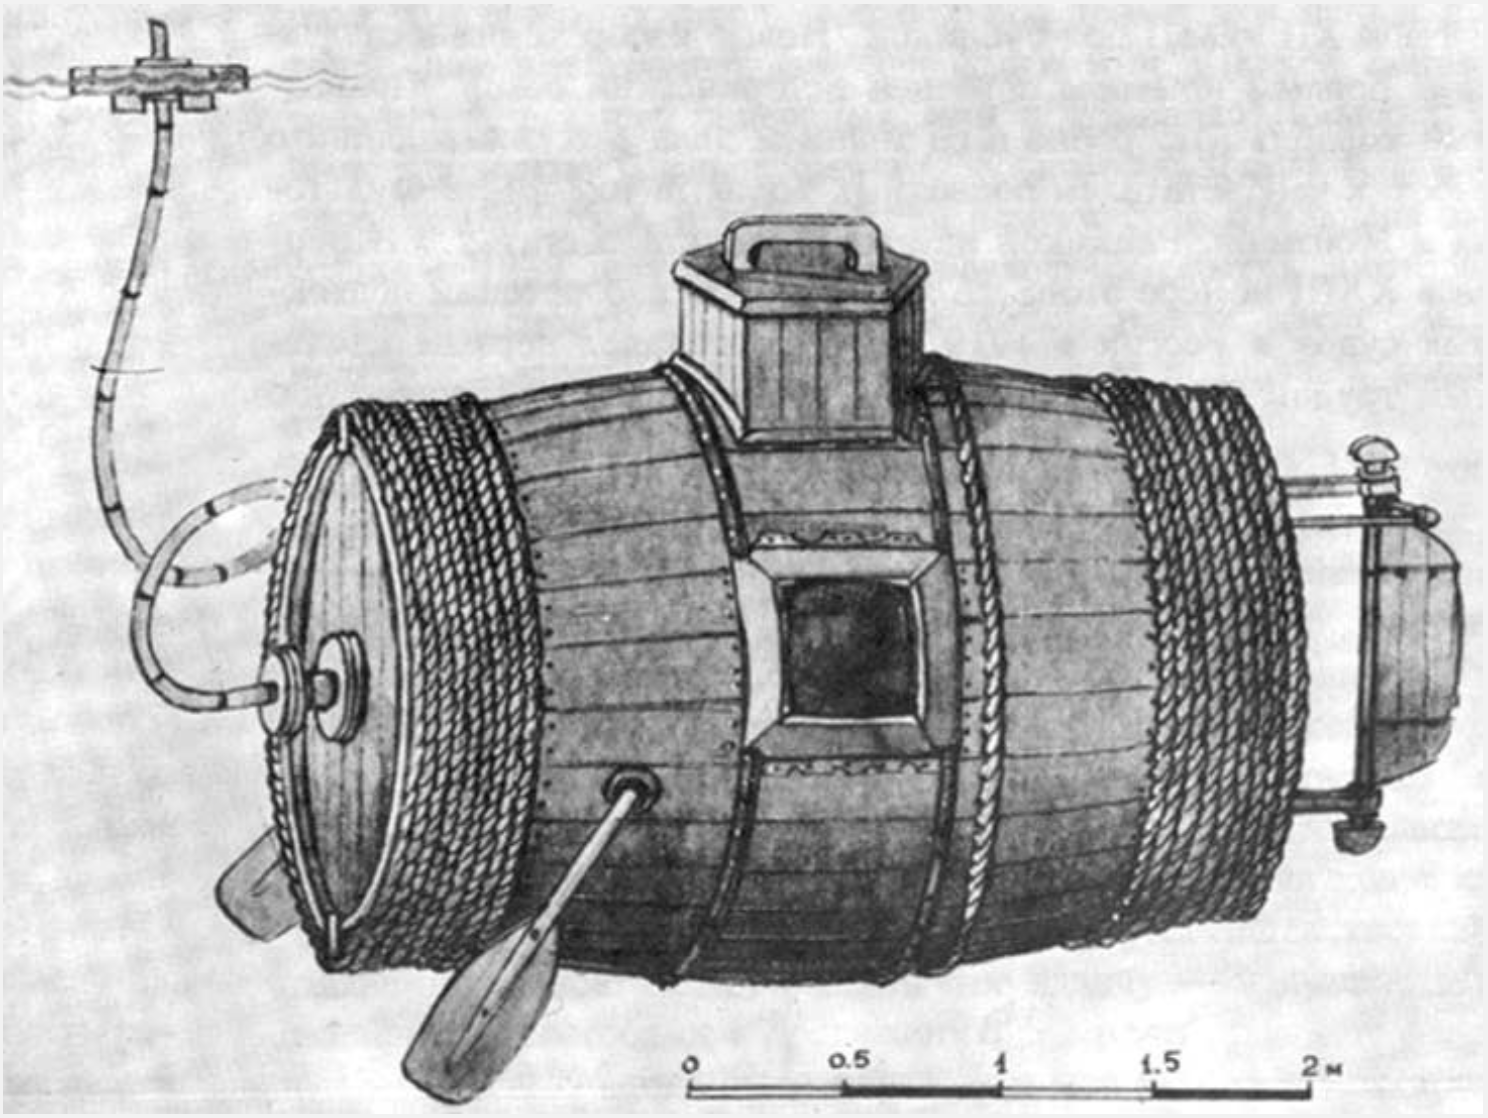
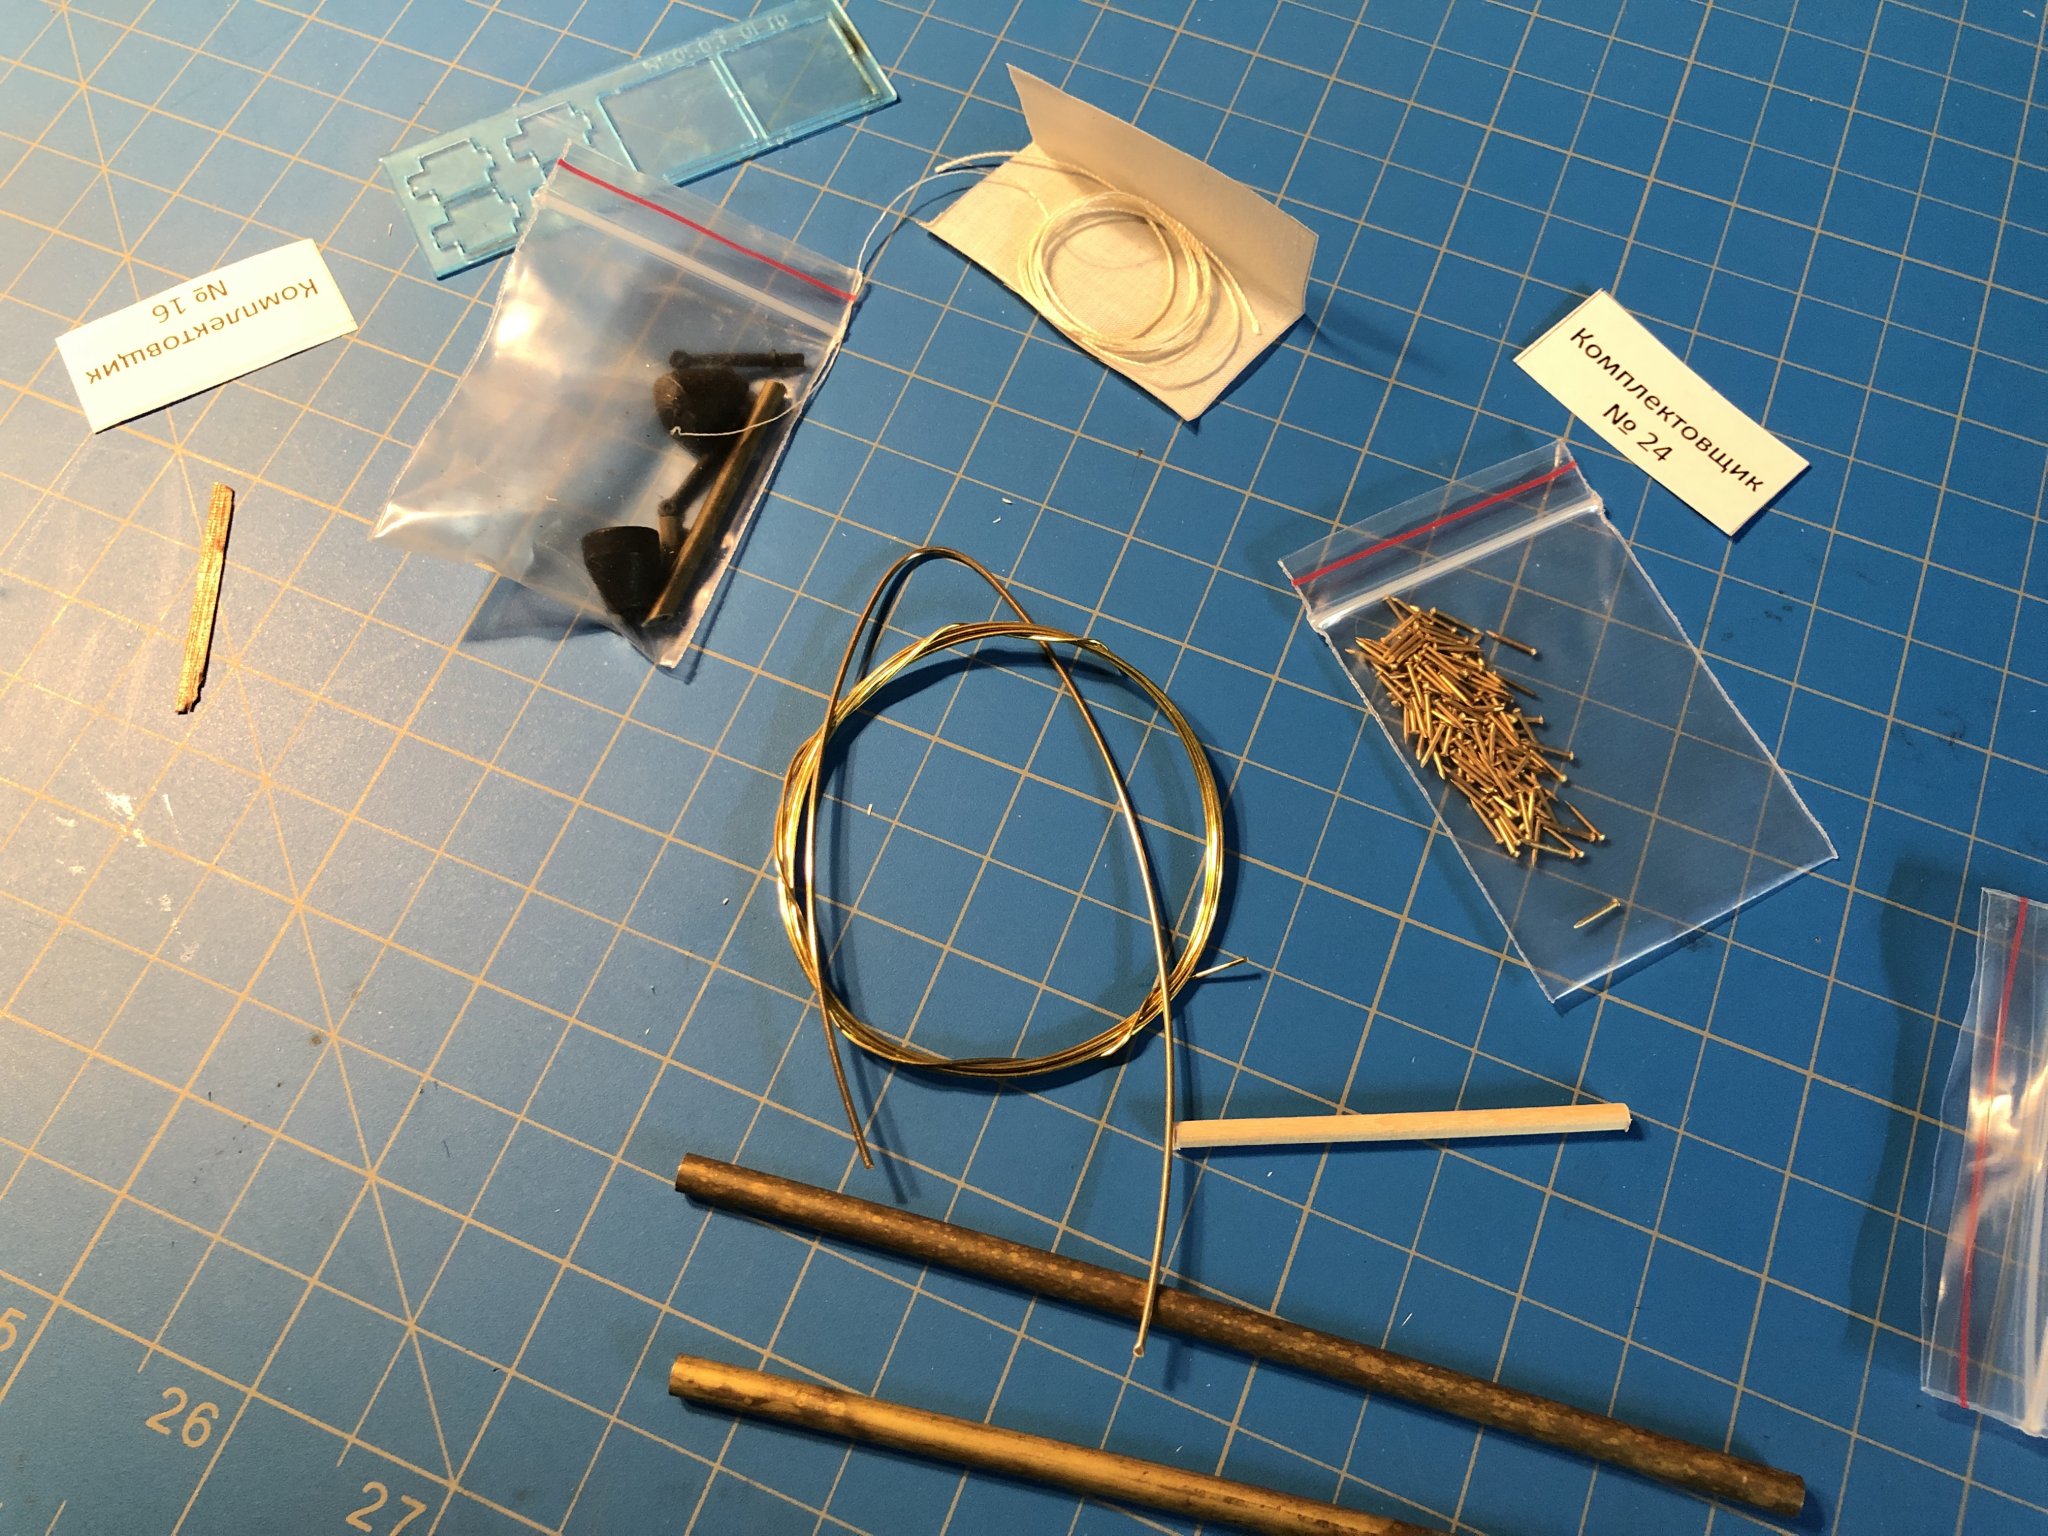
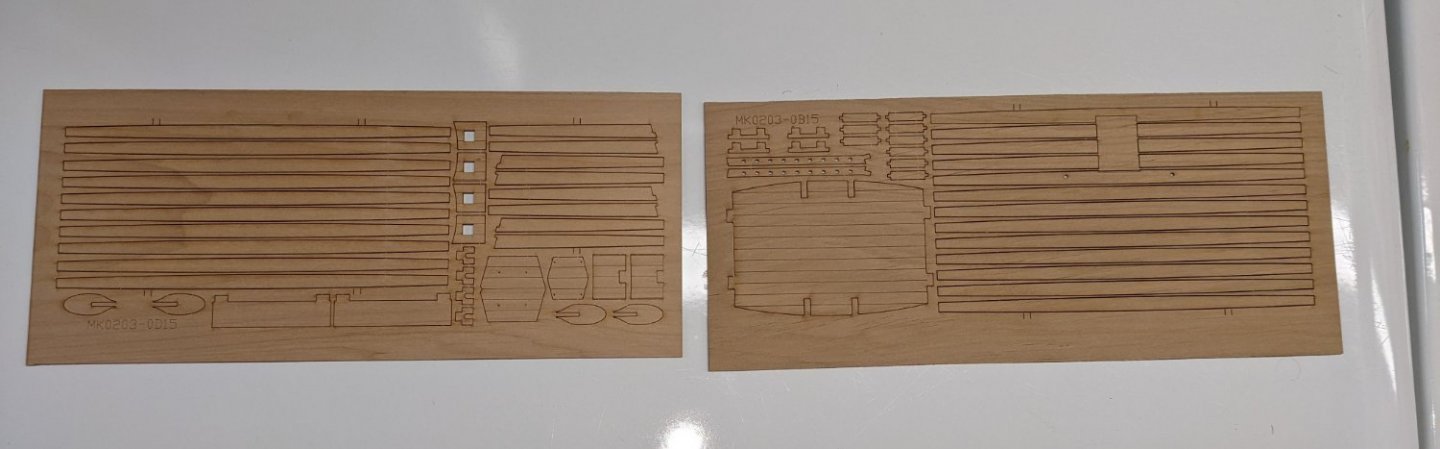
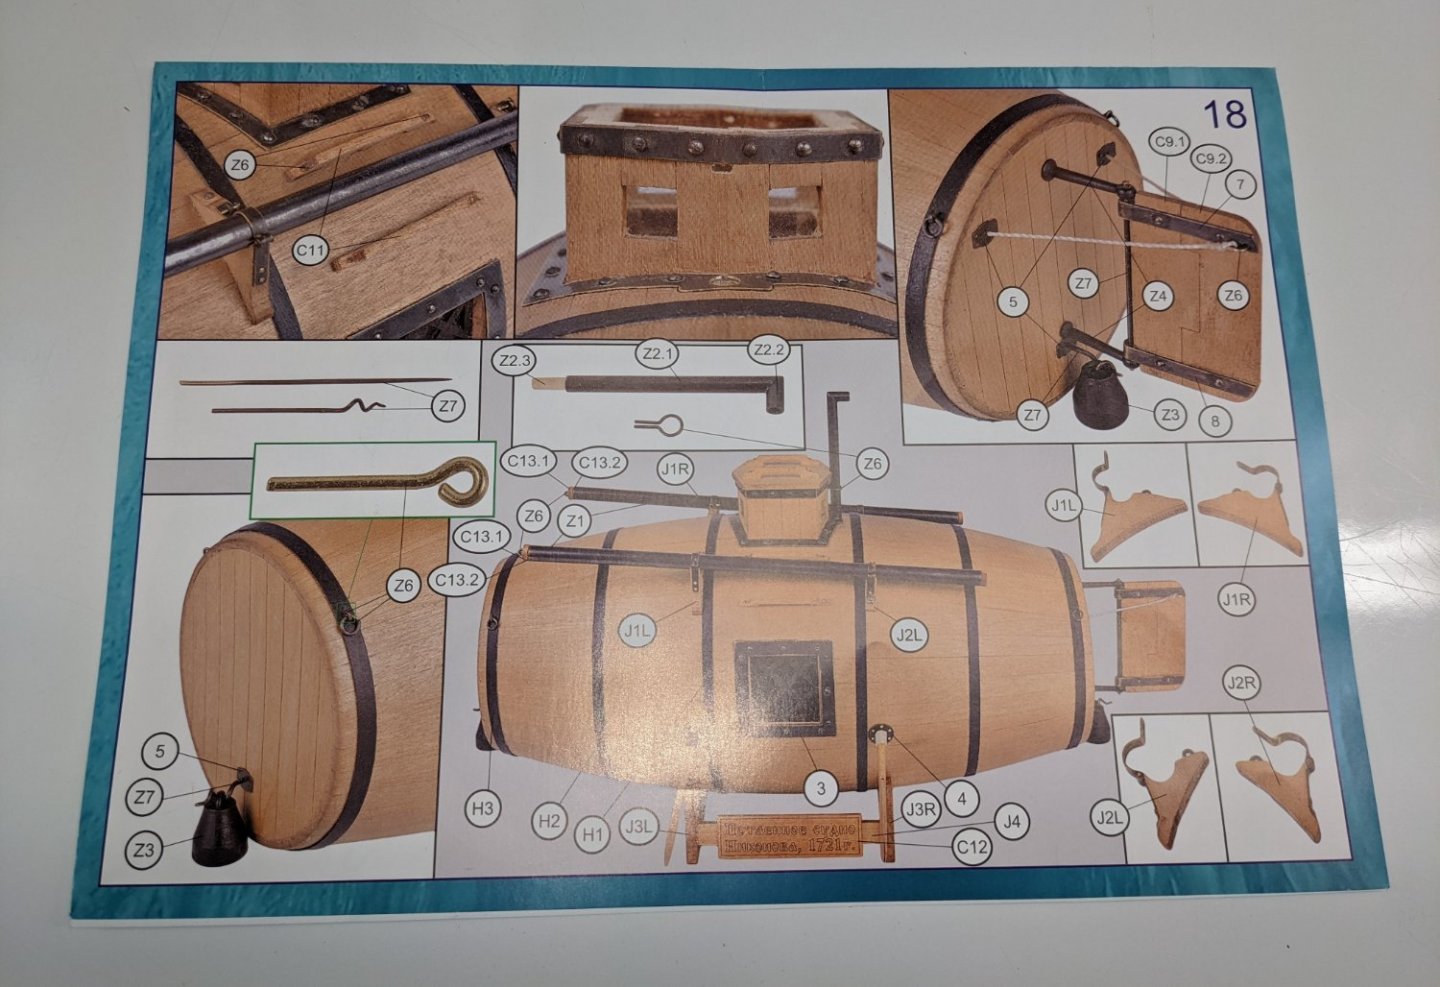
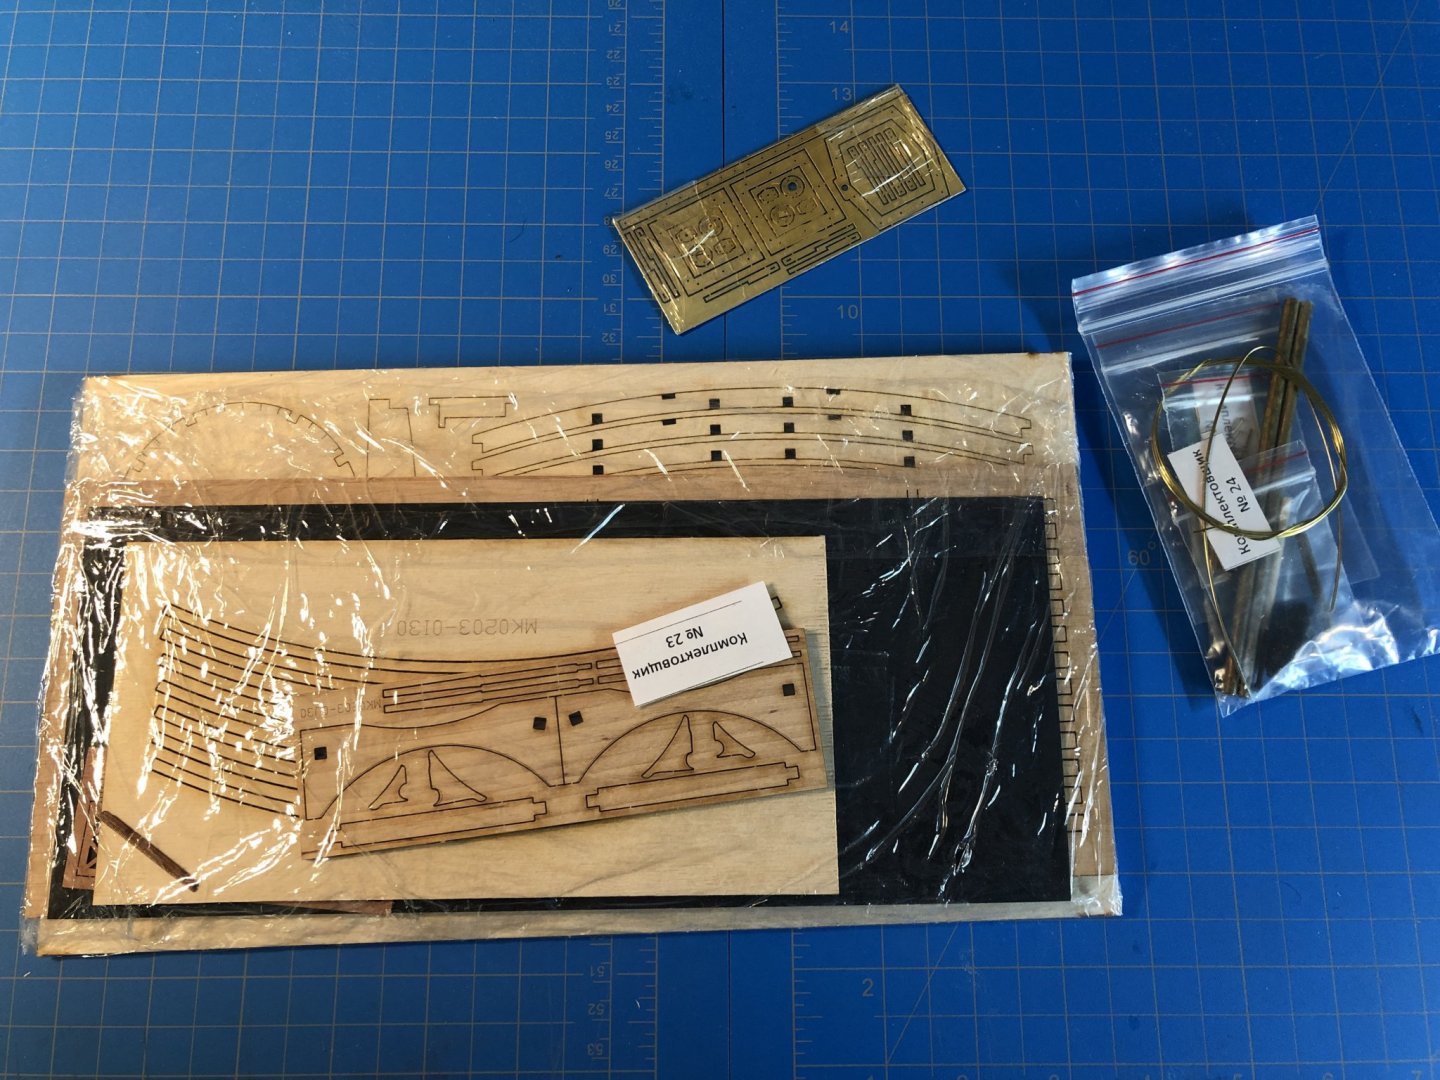
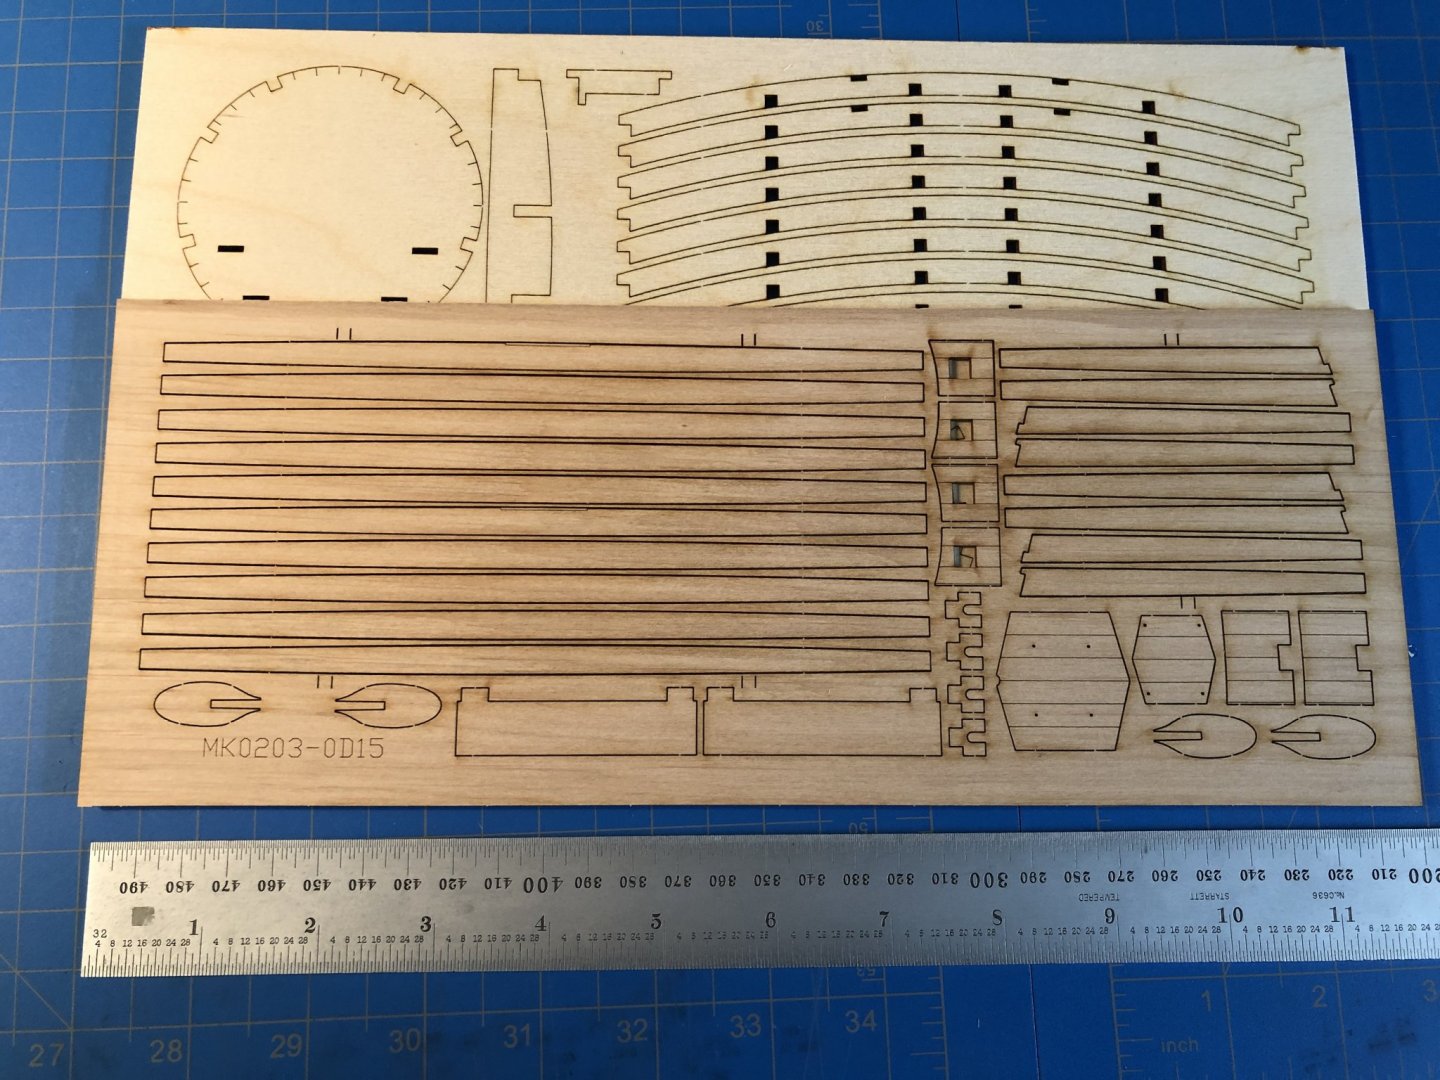
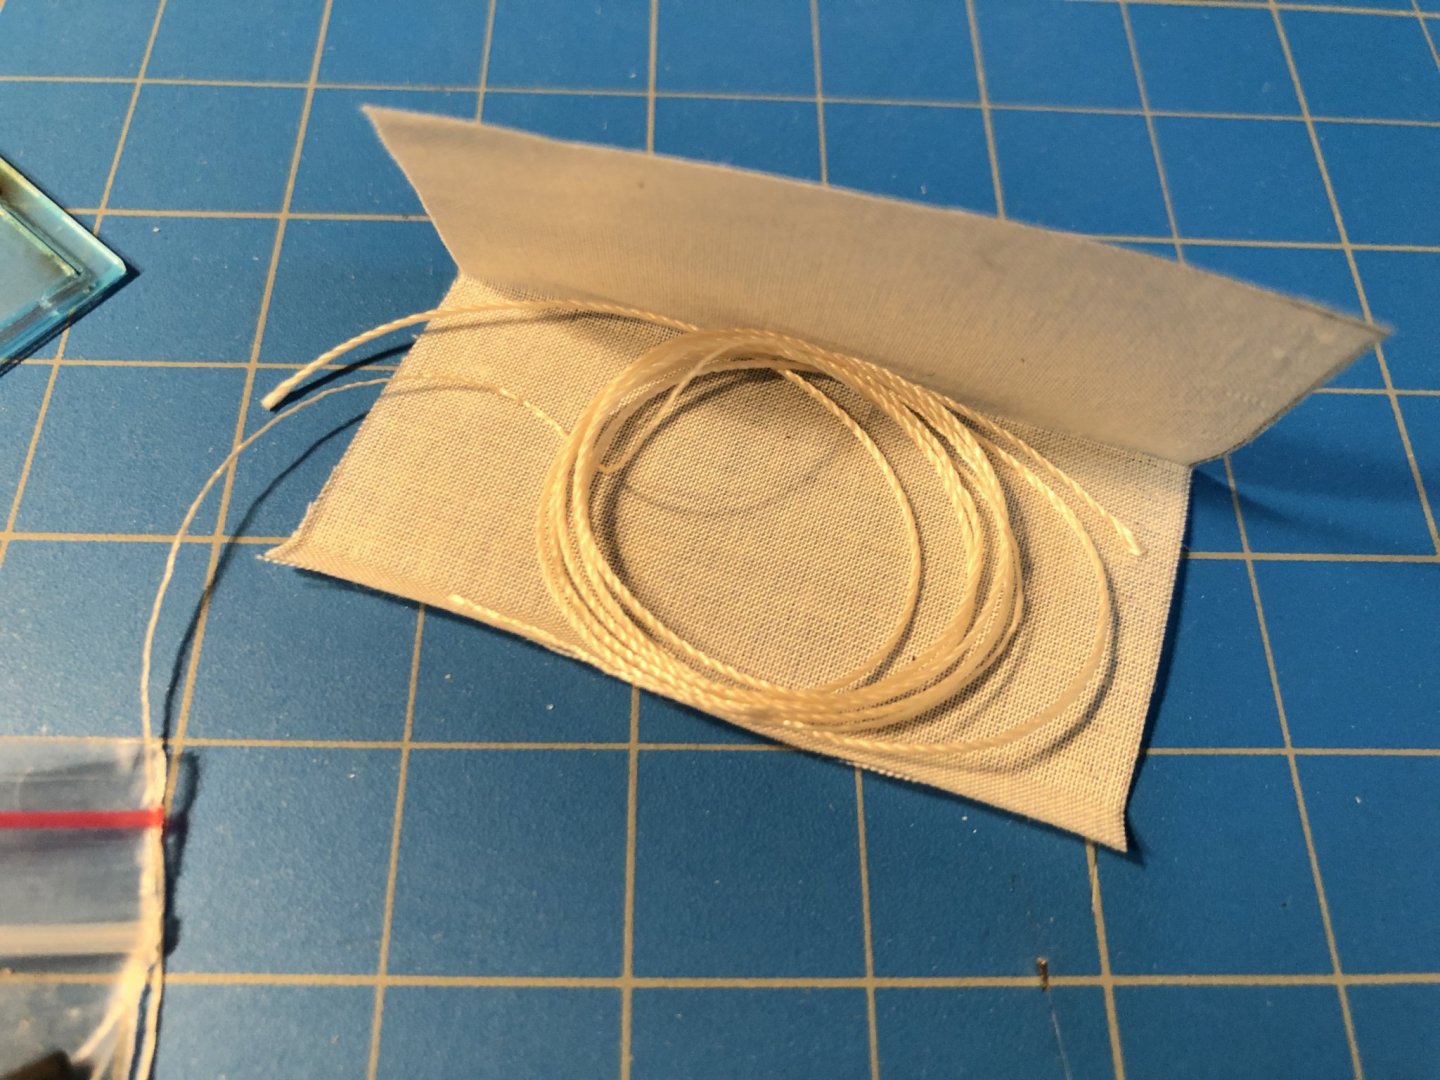
 This project captured my imagination the minute I first saw it. It took some time to get my hands on it, as apparently Master Korabel released in Russian prior to developing and releasing and English version. I was in touch with them, who then put me in touch with Egor Tsinko at Crafty Sailor who after some weeks finally emailed me to let me know he received the kits in stock. I ordered mine immediately at a little over $100 with shipping, and received it in less than 5 days. On the whole, Im very pleased with the transaction and looking forward to the build, especially now that Im holed up in COVID quarantine and my other project is in a holding pattern as I await kit upgrades and tools from various vendors. This is marketed as a beginner kit, and on the surface appears to be aptly described. Its not a large model, and seems quite doable in a few weeks to a months time. Just looking at it, I would rate it somewhere just north of a Midwest small boat project on the complexity scale. The history of the vessel is included in the documents that came with the kit, and after a quick read are roughly as accurate/dubious as any history you typically find with a kit. Im hoping to update this log with more of my own research as time allows. There are some interesting links out there, but Ive not done anything as in-depth as I typically do for such things. This really is just a fun, quick build for me. Something to just enjoy... For those interested go here for a quick read. The kit itself is well made, and with an cursory inspection only found a few bits that I think might need replacement or upgrading. It was well packaged for the long trip from Russia, and seems overall to be a quality kit. The provided line for instance is a nylon, which Ill likely replace for sure, but otherwise the metal bits are all quality. There does seem to be a bit of a limited allotment for error, so knowing myself Ill likely need to source some additional materials to cover mistake. The instructions are really great "looking." Provided in separate English and Russian pamphlets. Ive not read through them completely, but on the surface the pictorial version and narrative format both seem thorough and well translated. Not like other foreign kits *cough* Mamoli *cough* that are mostly unintelligible in my experience. I even road tested a digital translator and found it both a novelty, but also pretty accurate. Below is a screenshot from the Google Translate app, which does a real-time overlay of the English over the Russian: In any case, I look forward to building this little kit in the next few weeks just as soon as I have more time to read and look over the instructions in a bit more detail. Now that its bedtime, Ill put my little ones to sleep with a weird tale of a bizarre 18th century Russian Carpenter and his wine barrel submarine!
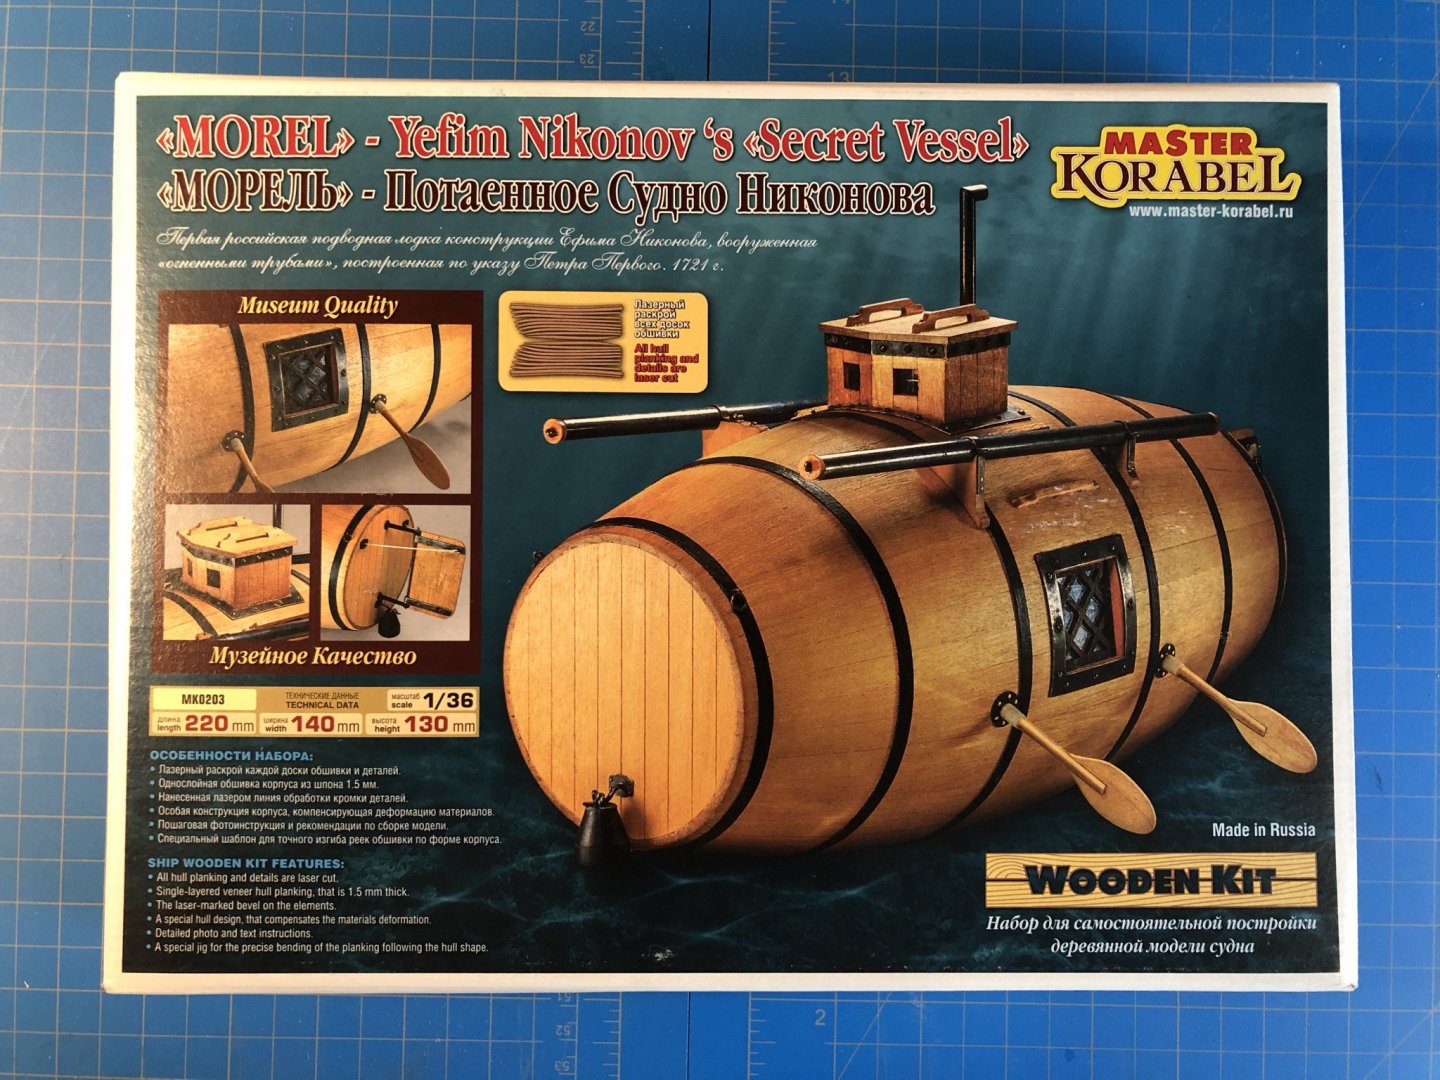


- 77 replies
-
- 16
-
-
- morel
- master korabel
- (and 1 more)
-
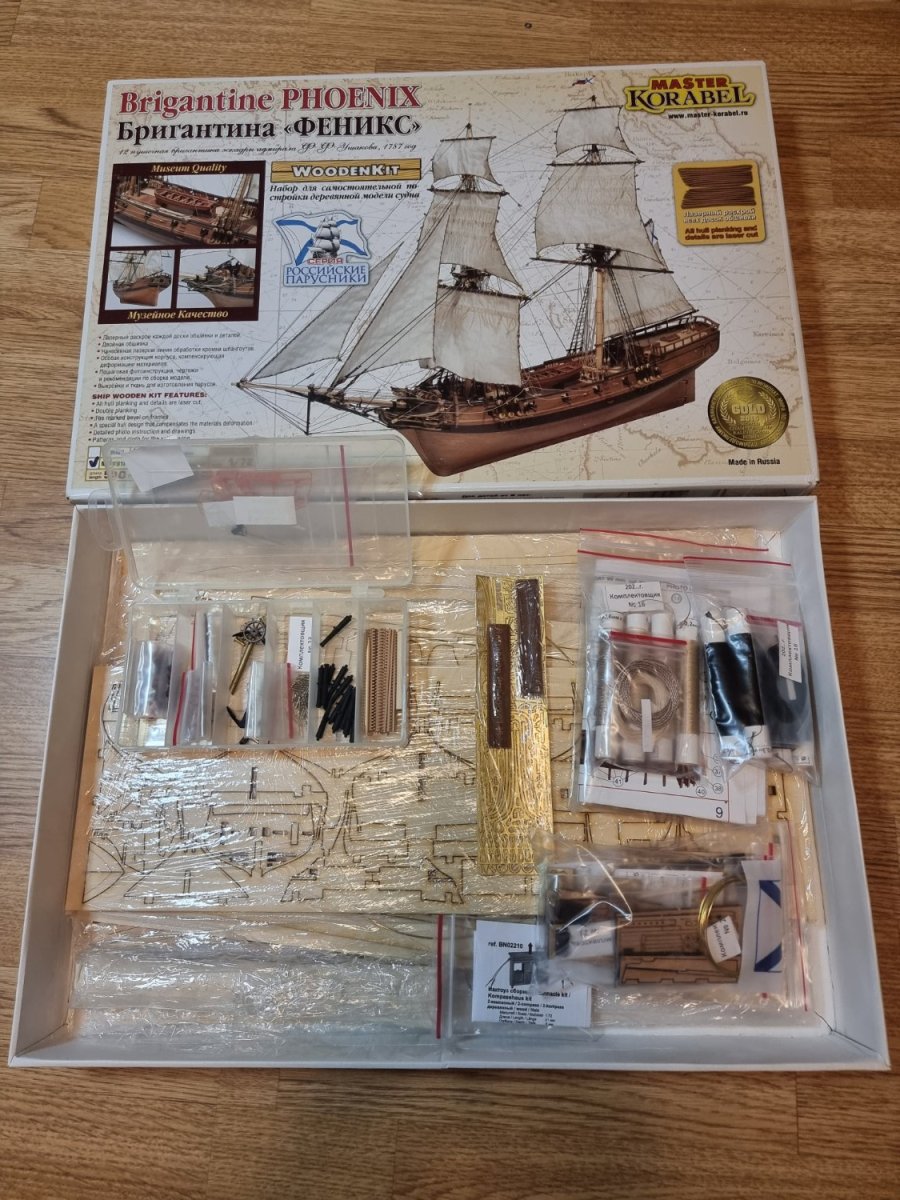
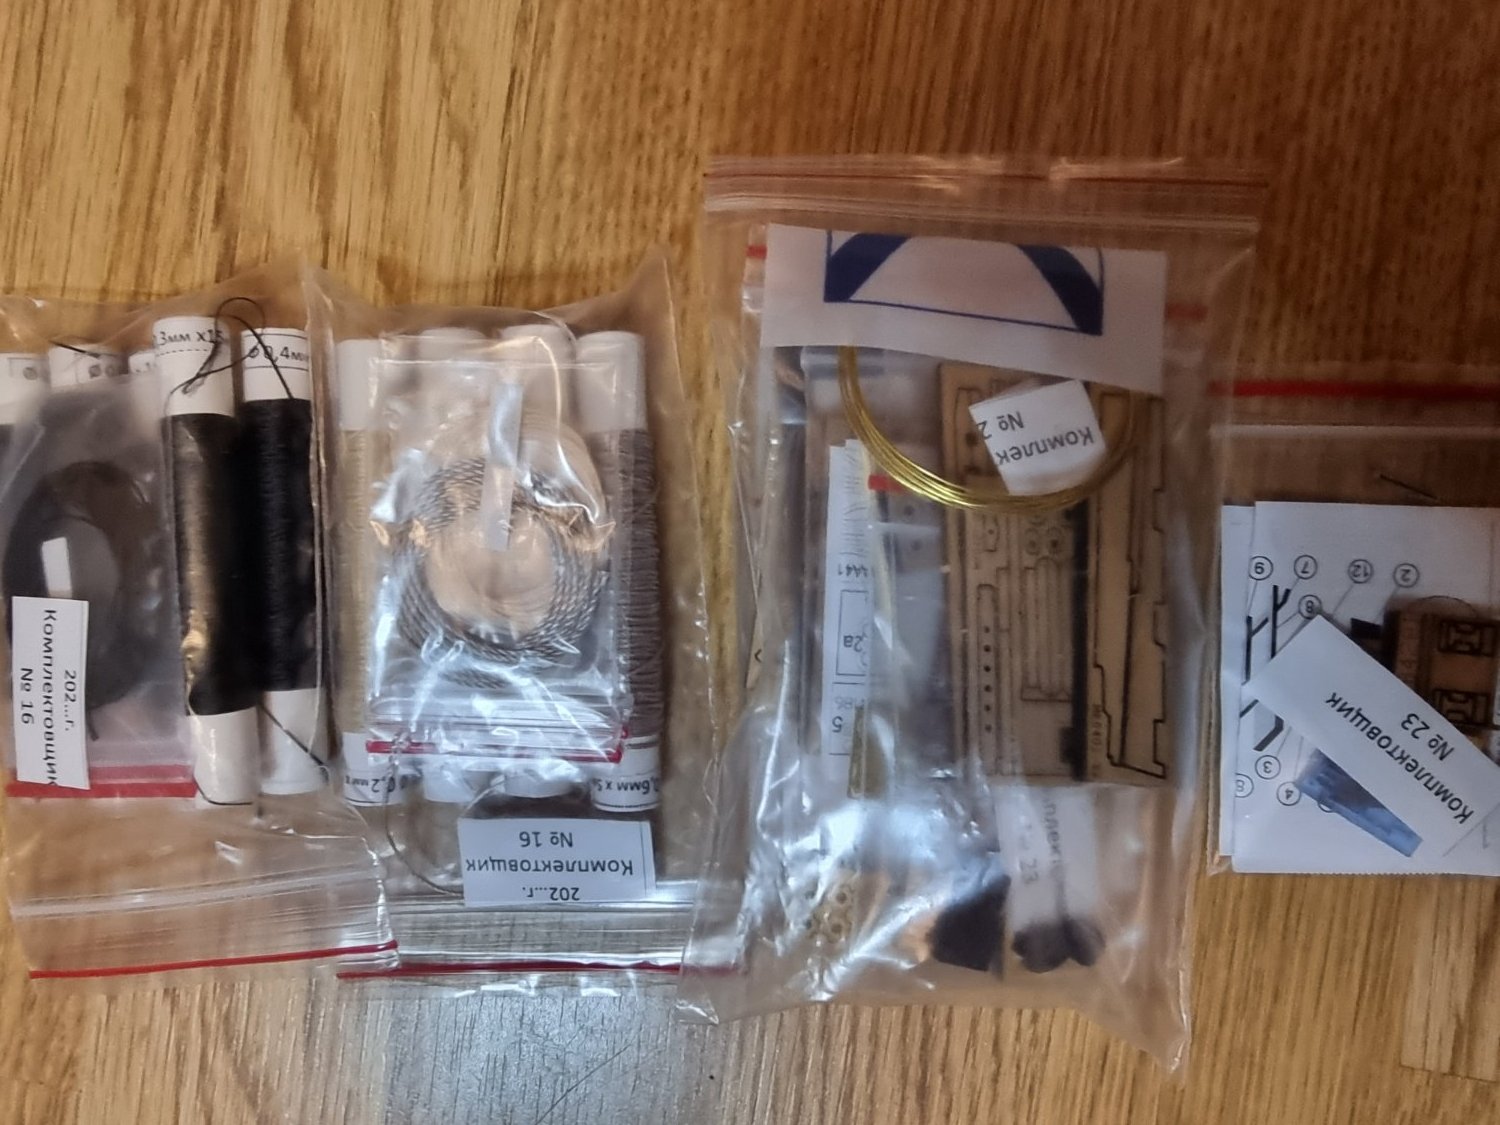
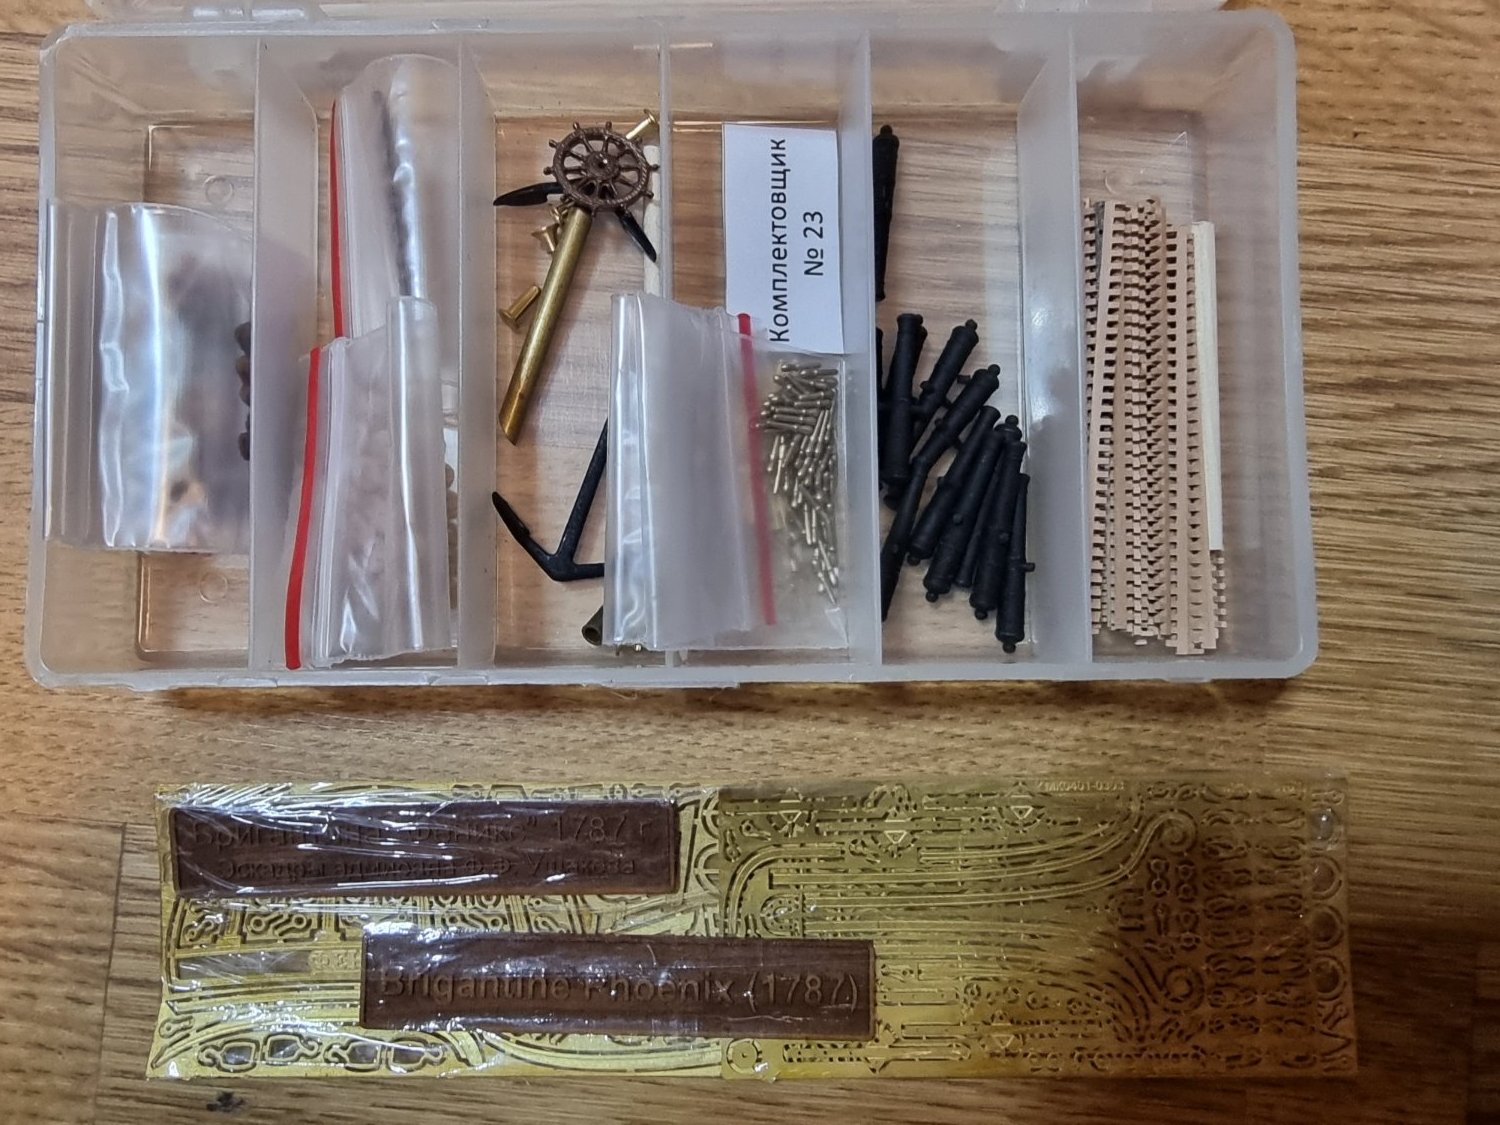
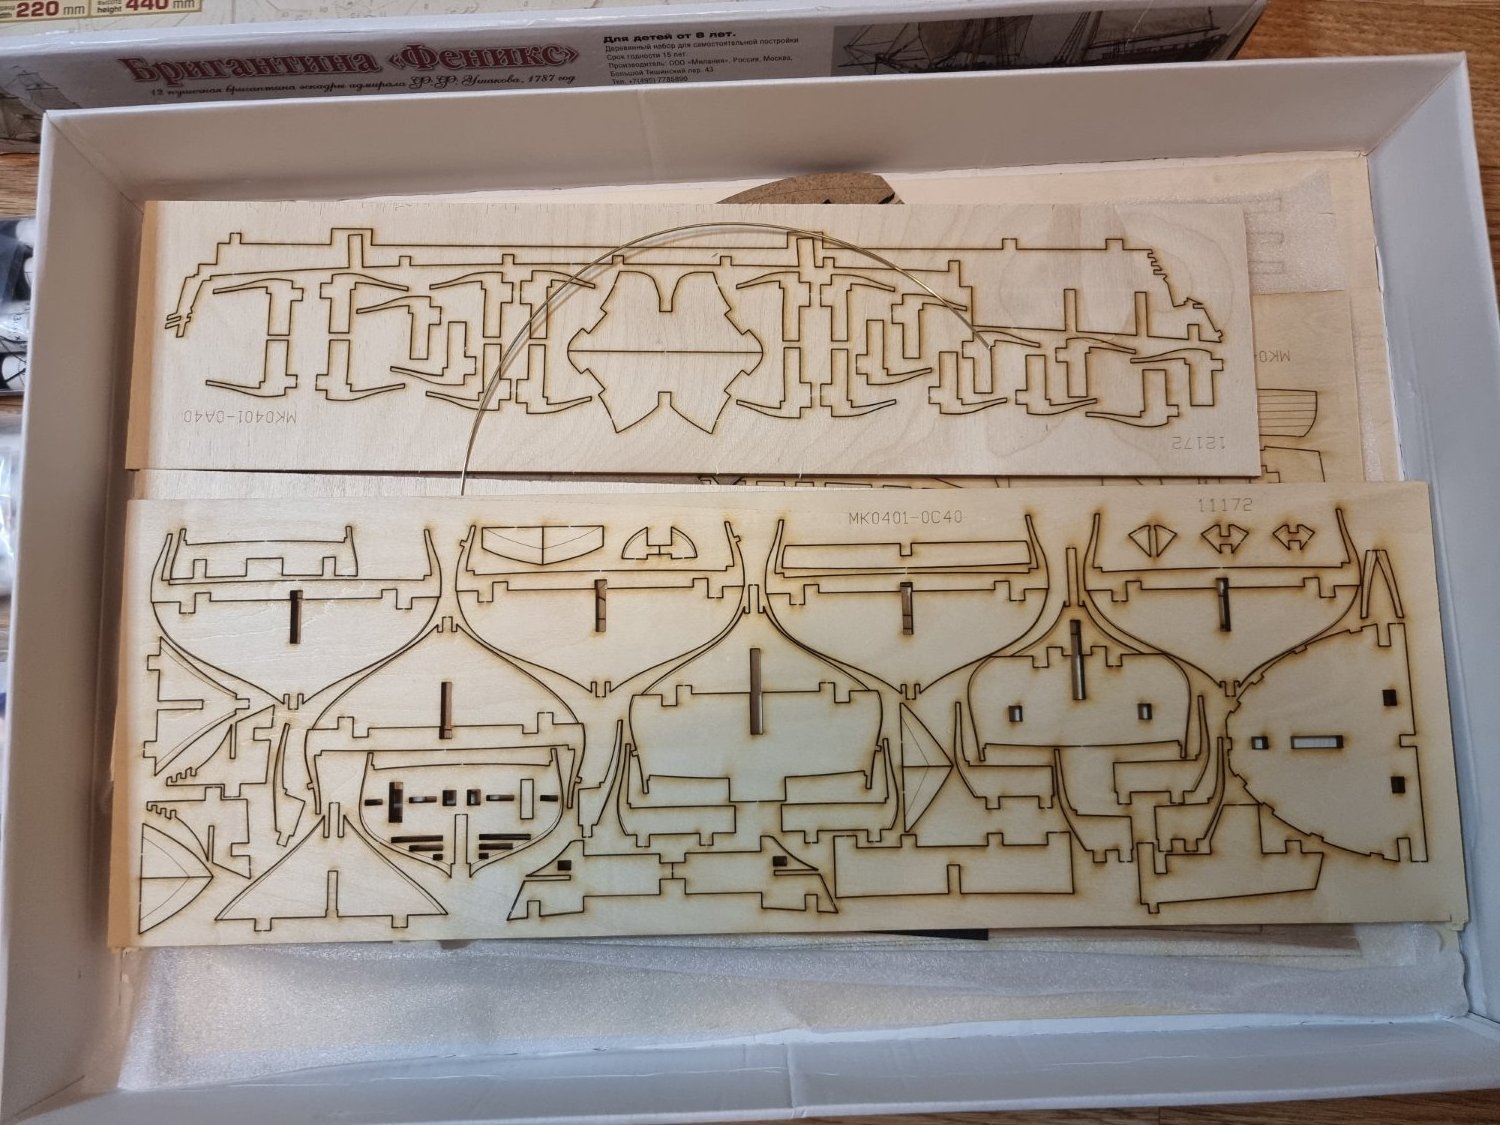
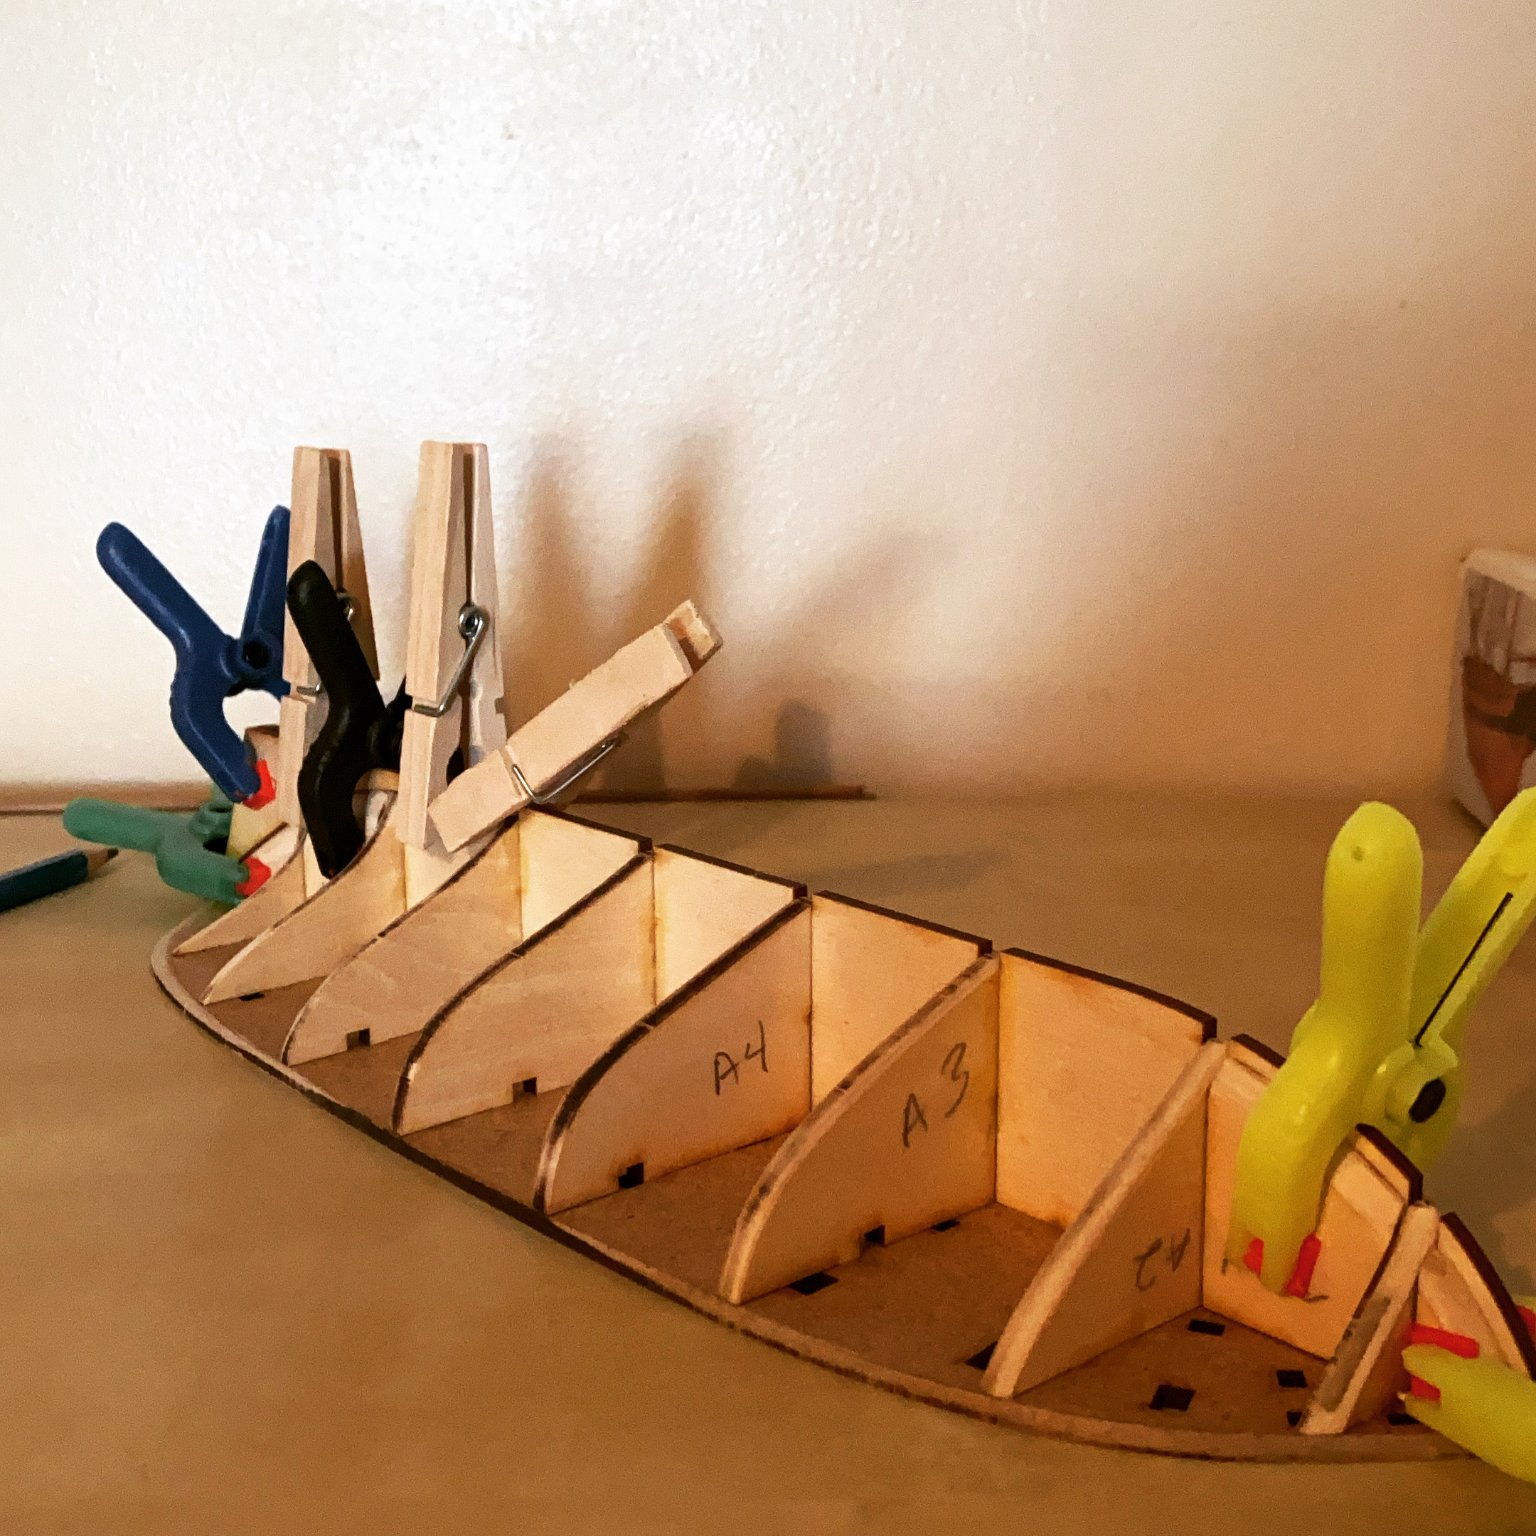
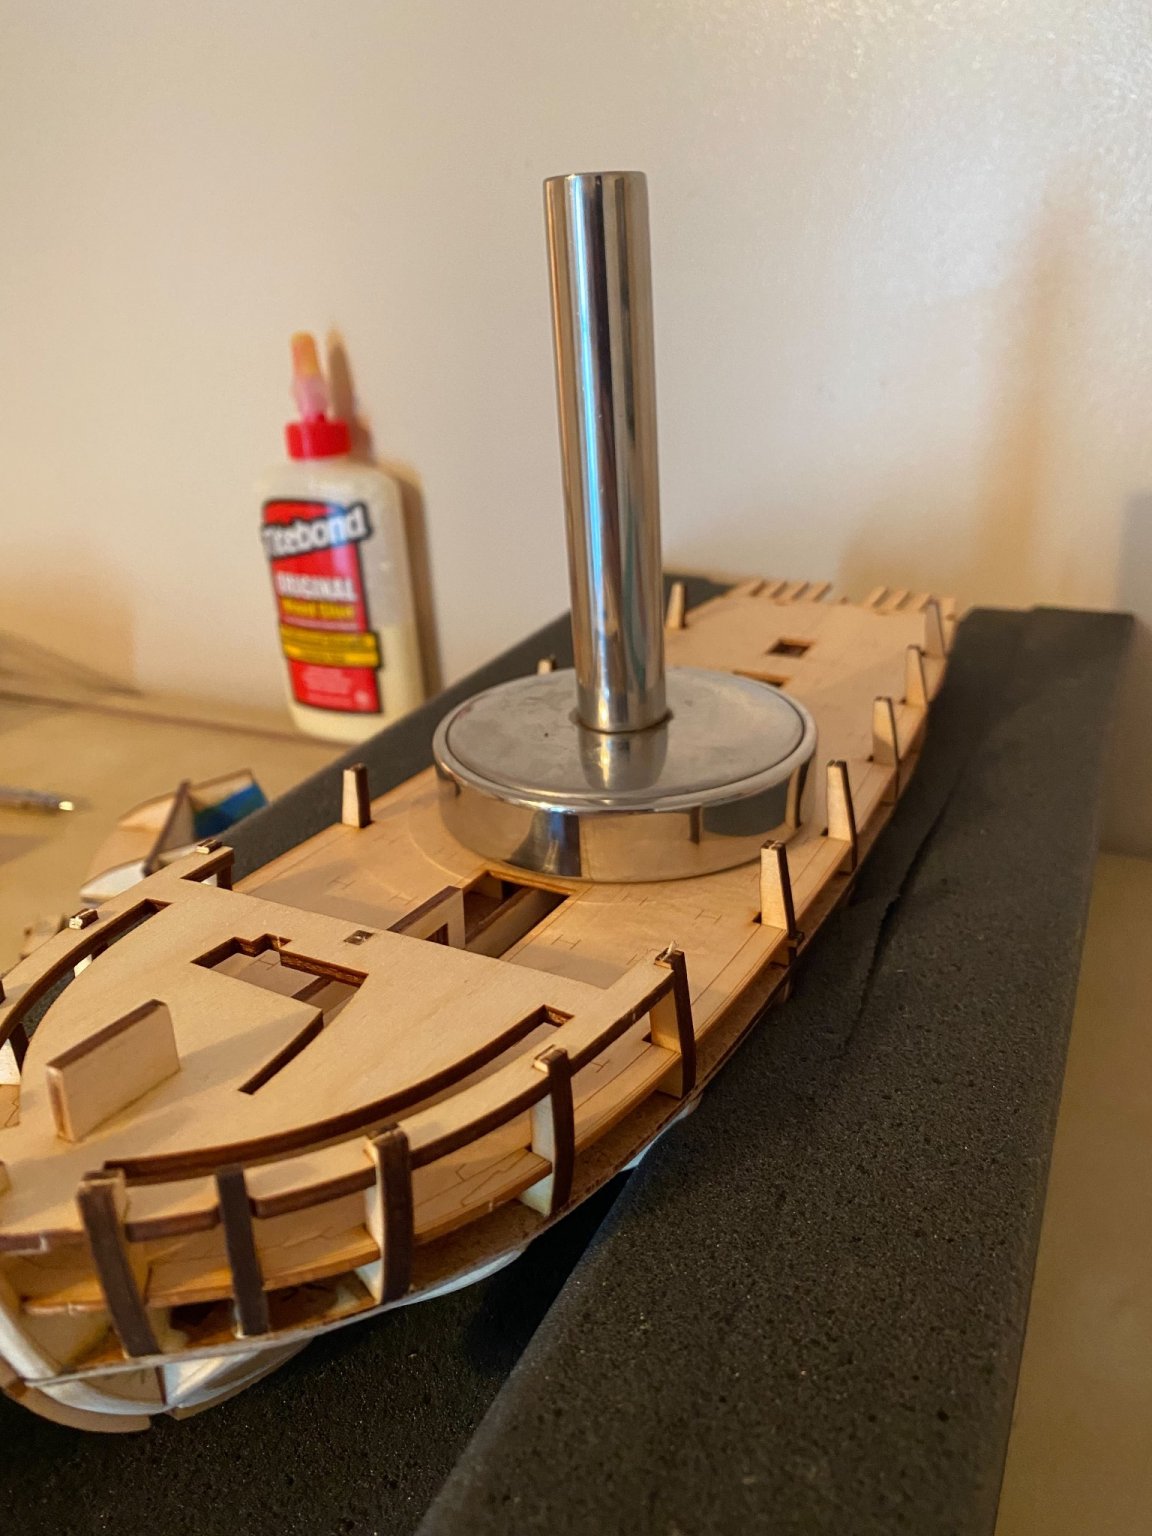
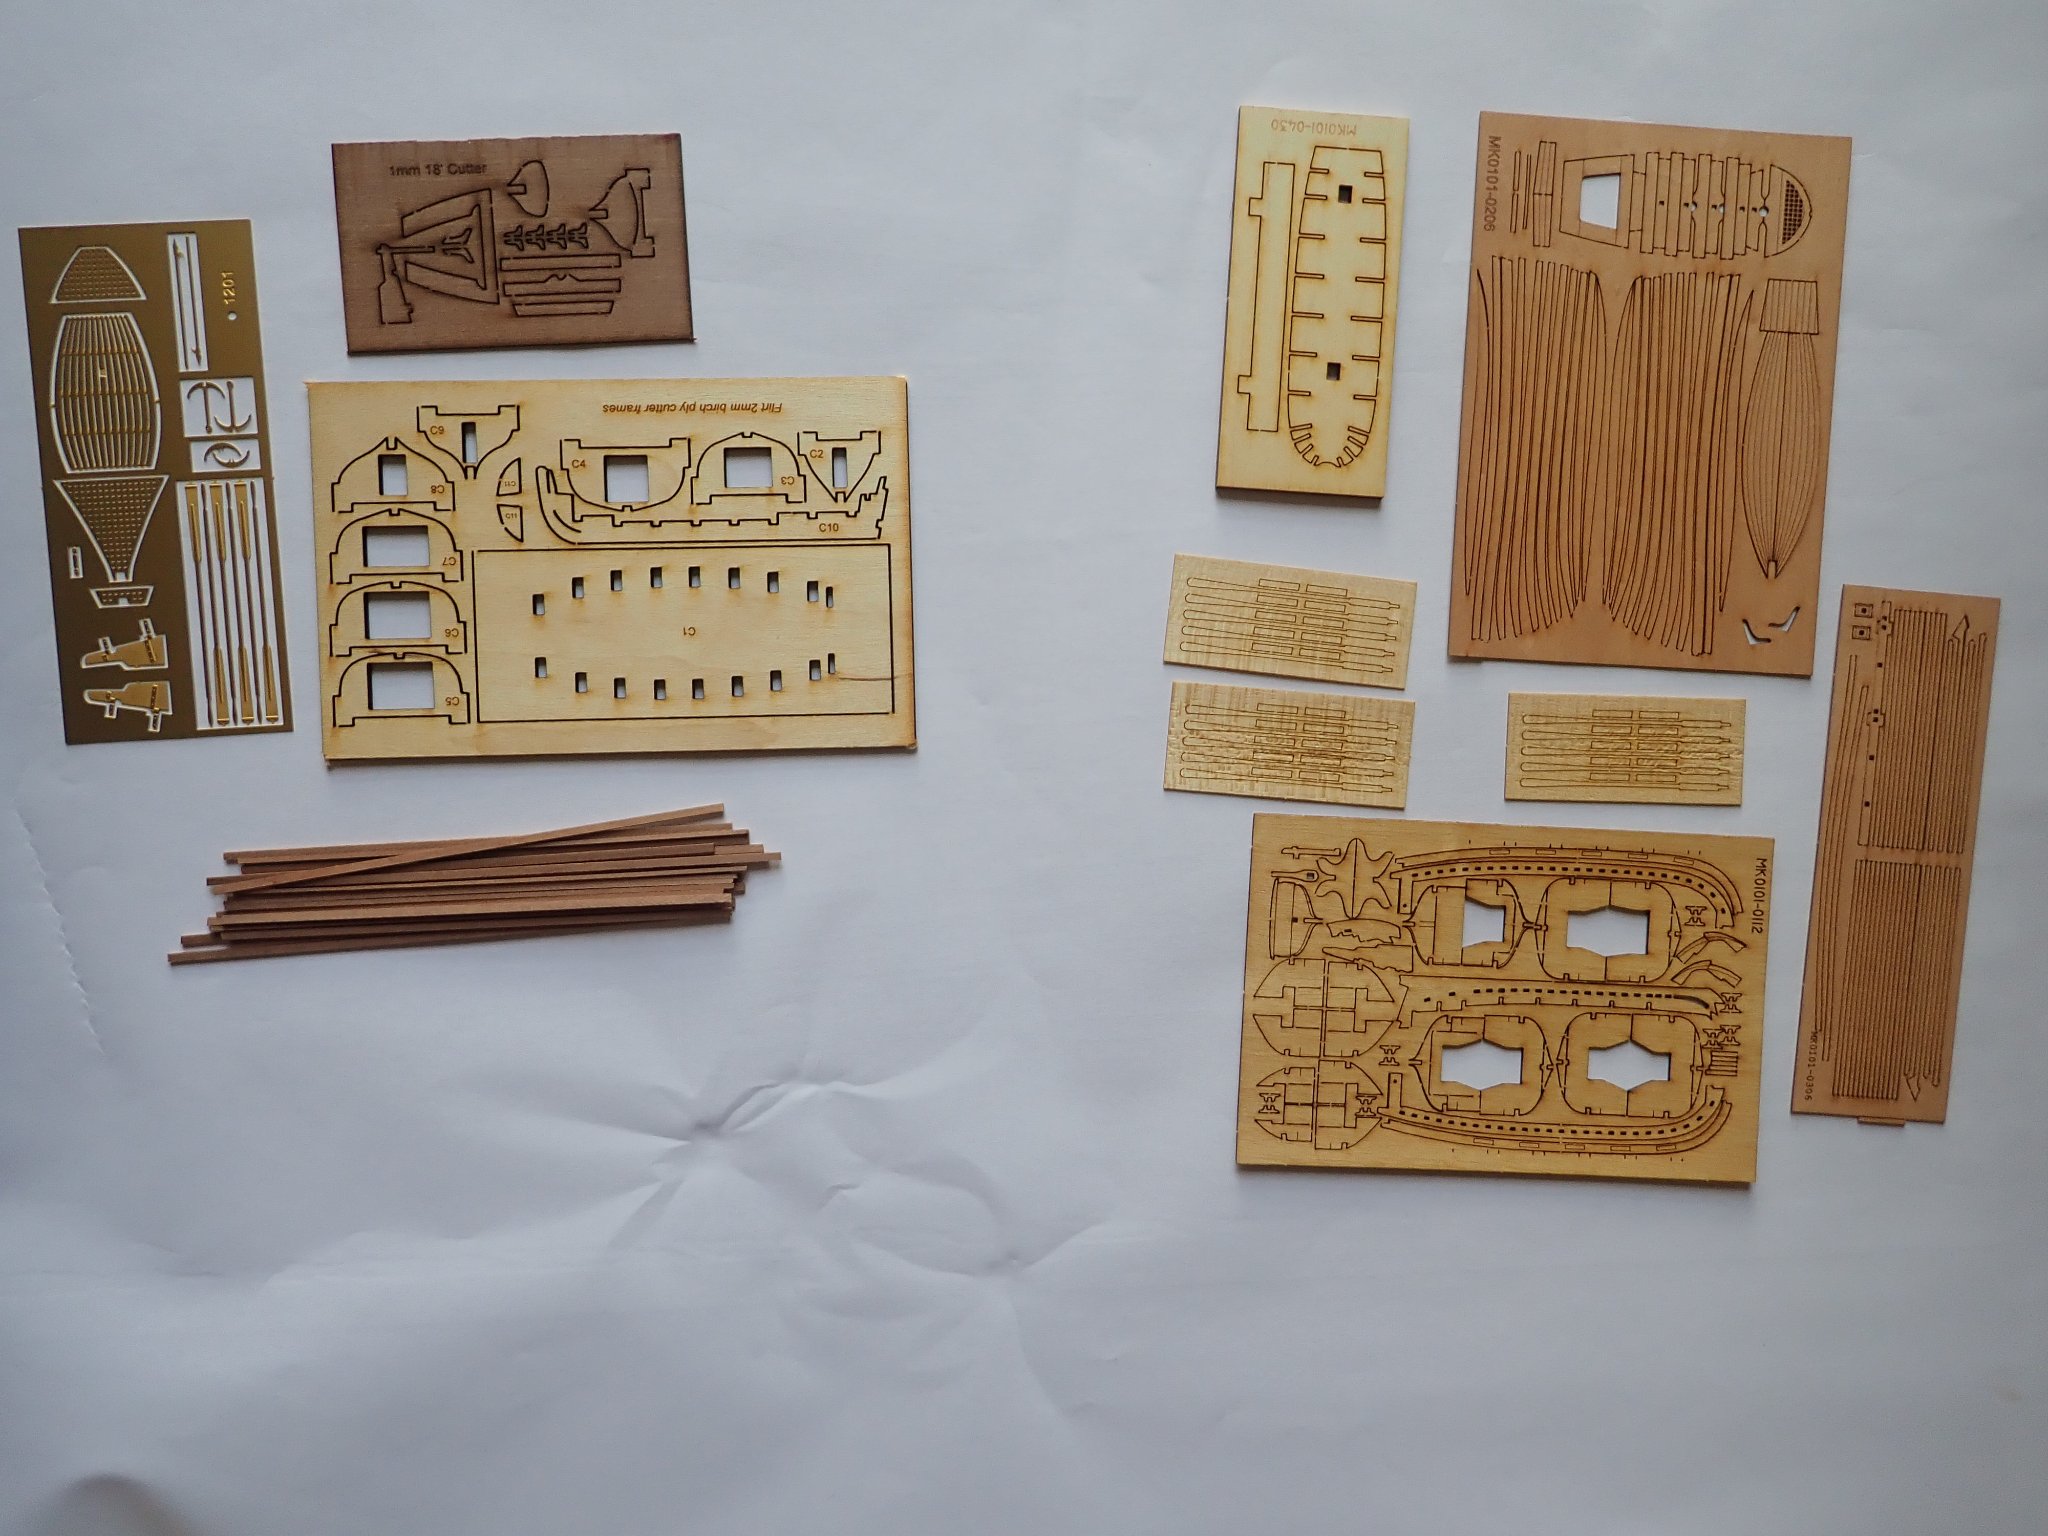
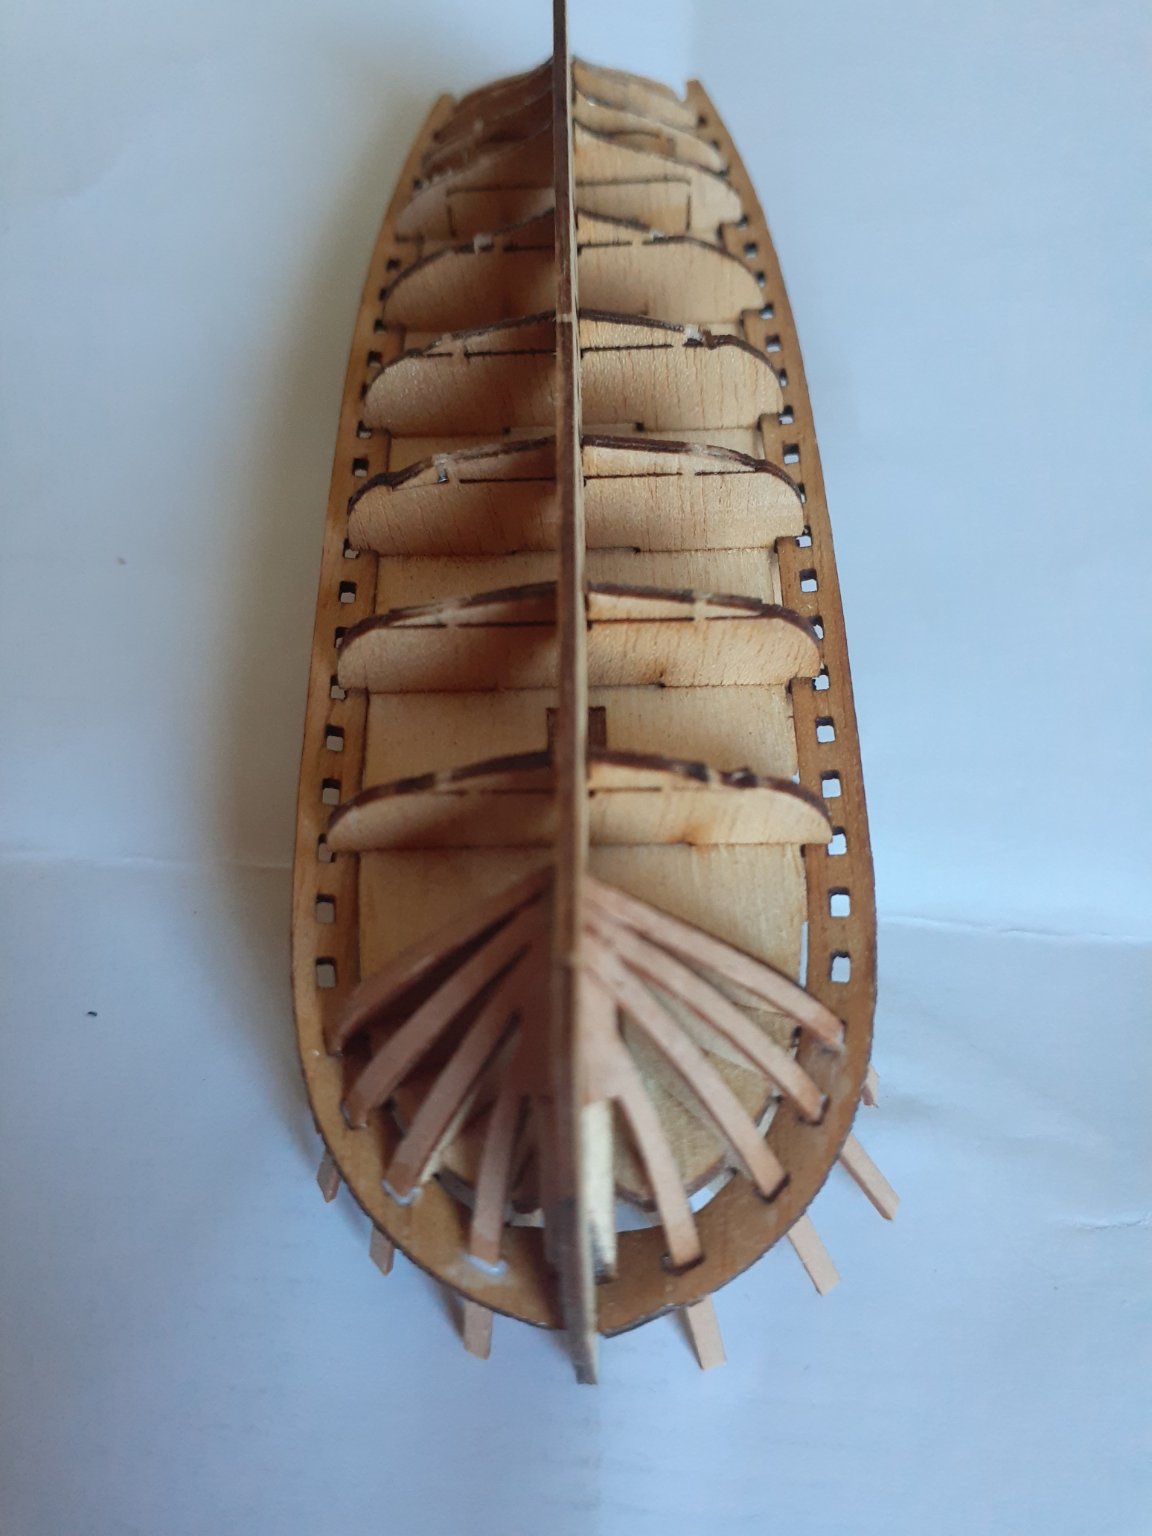
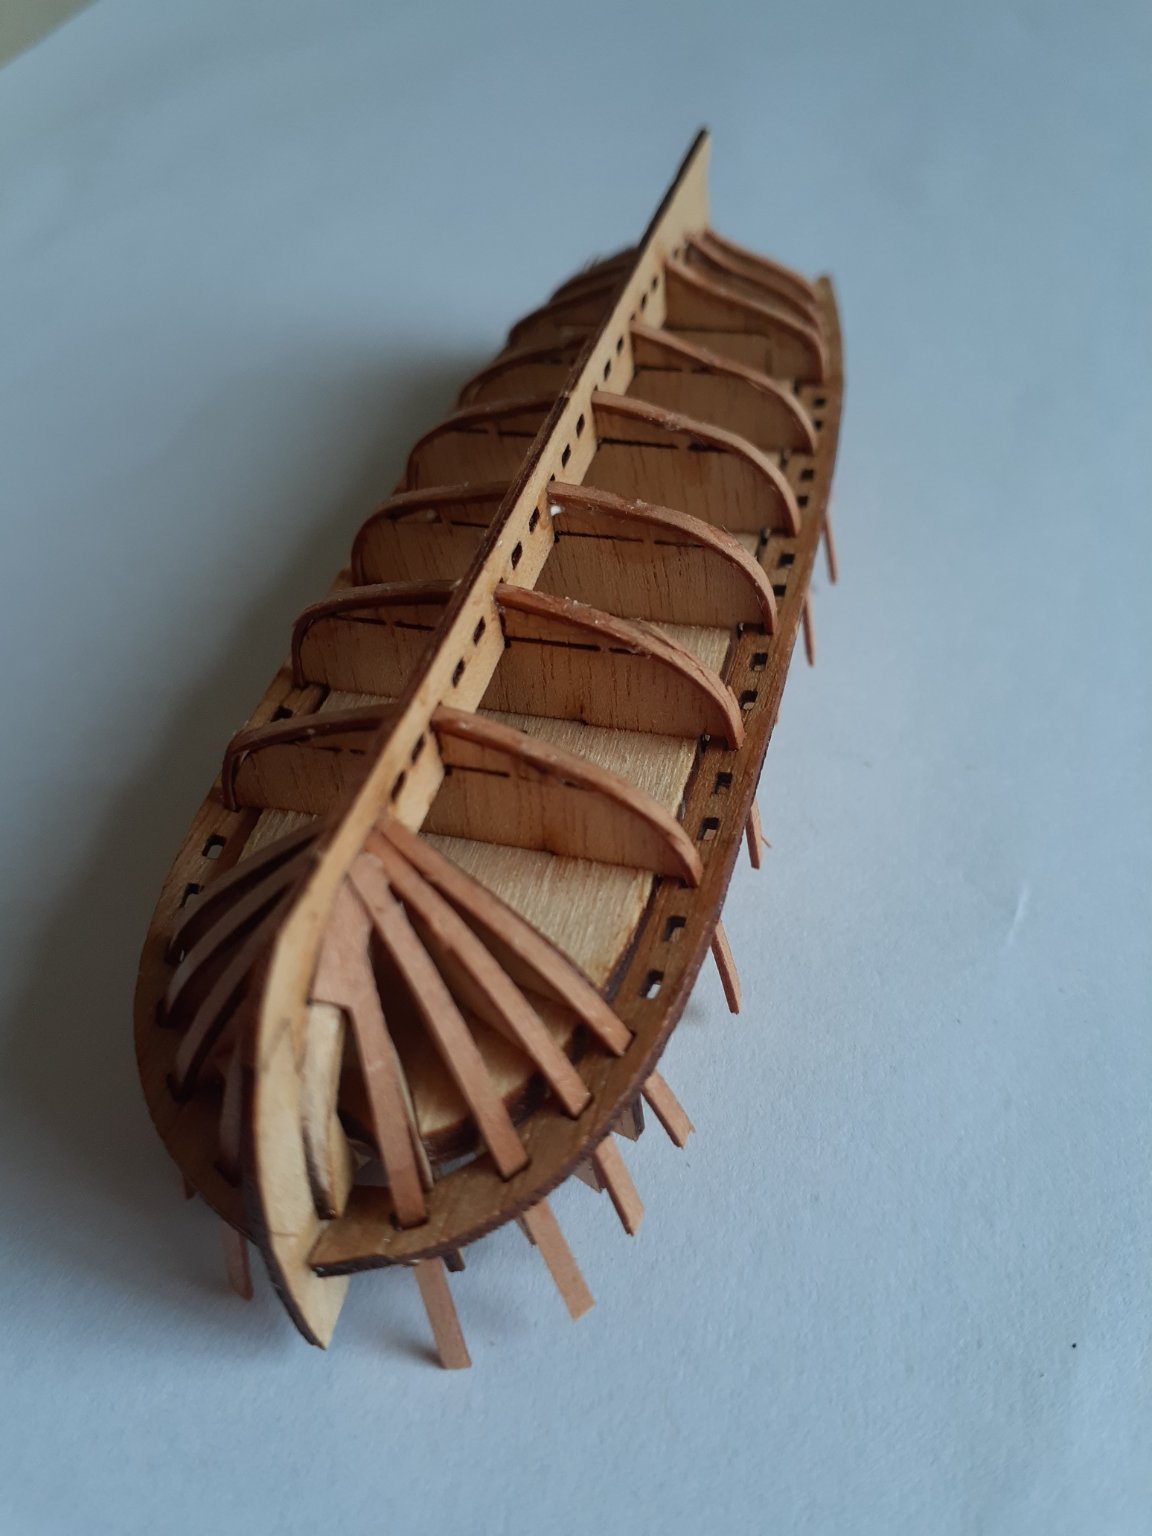
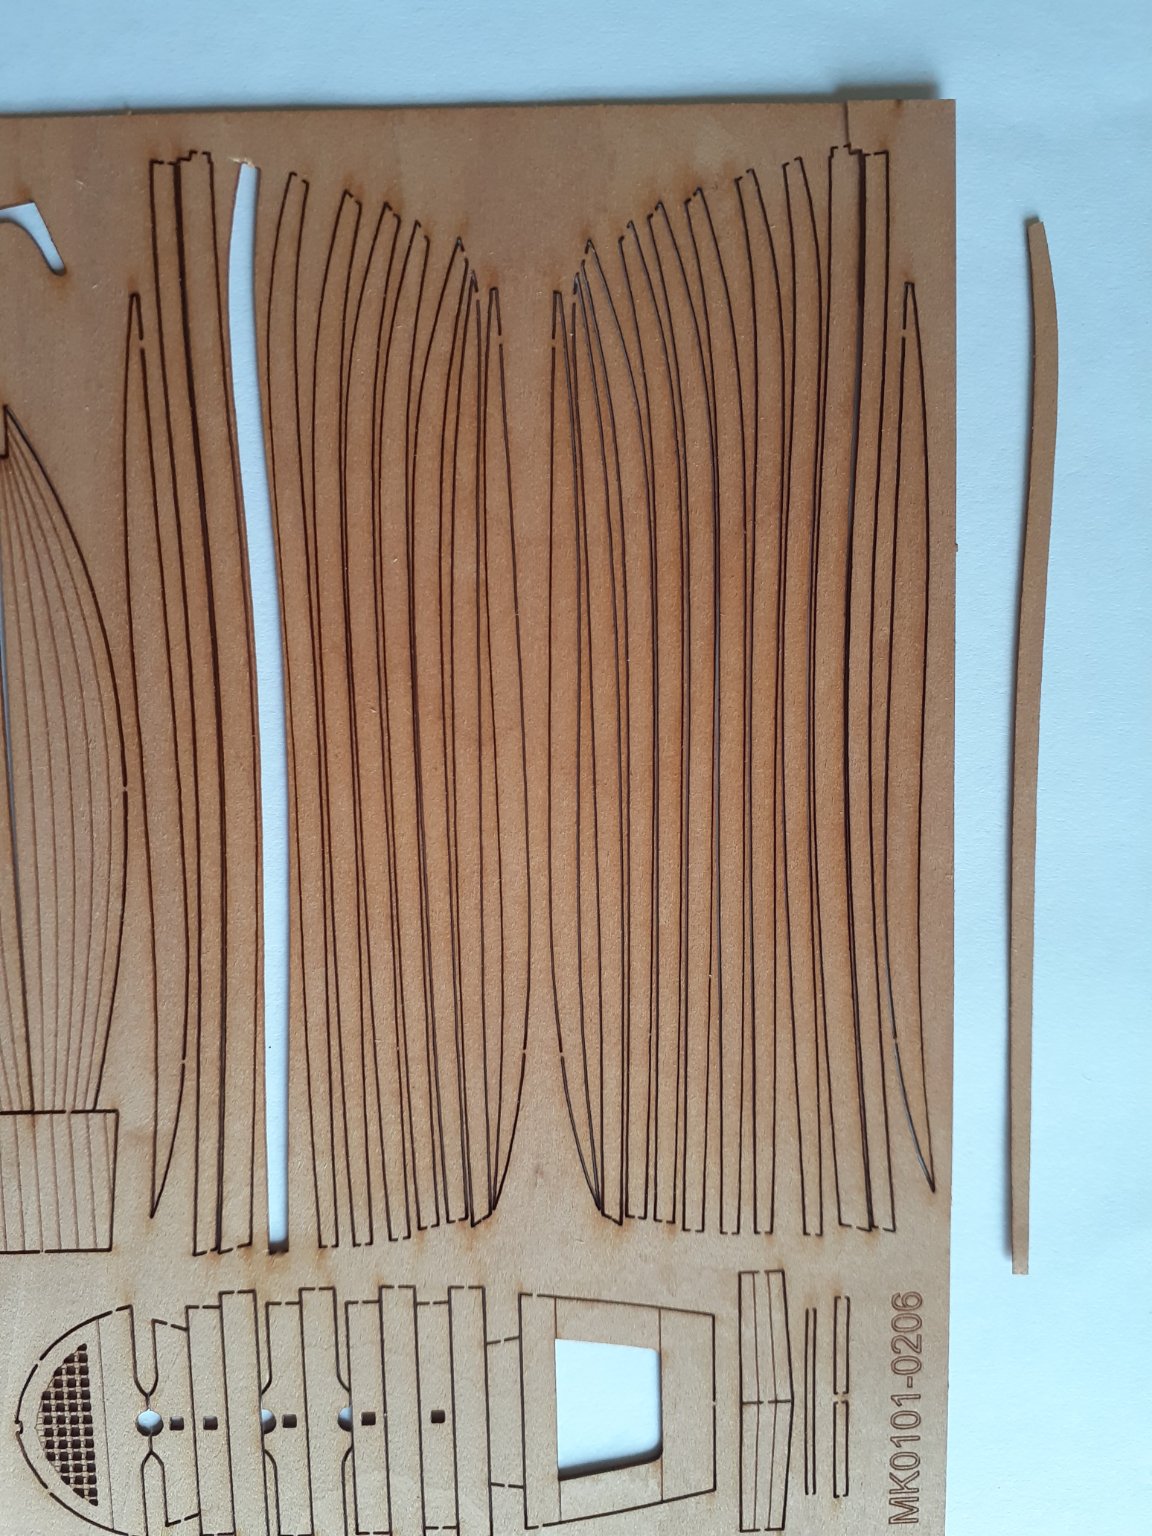
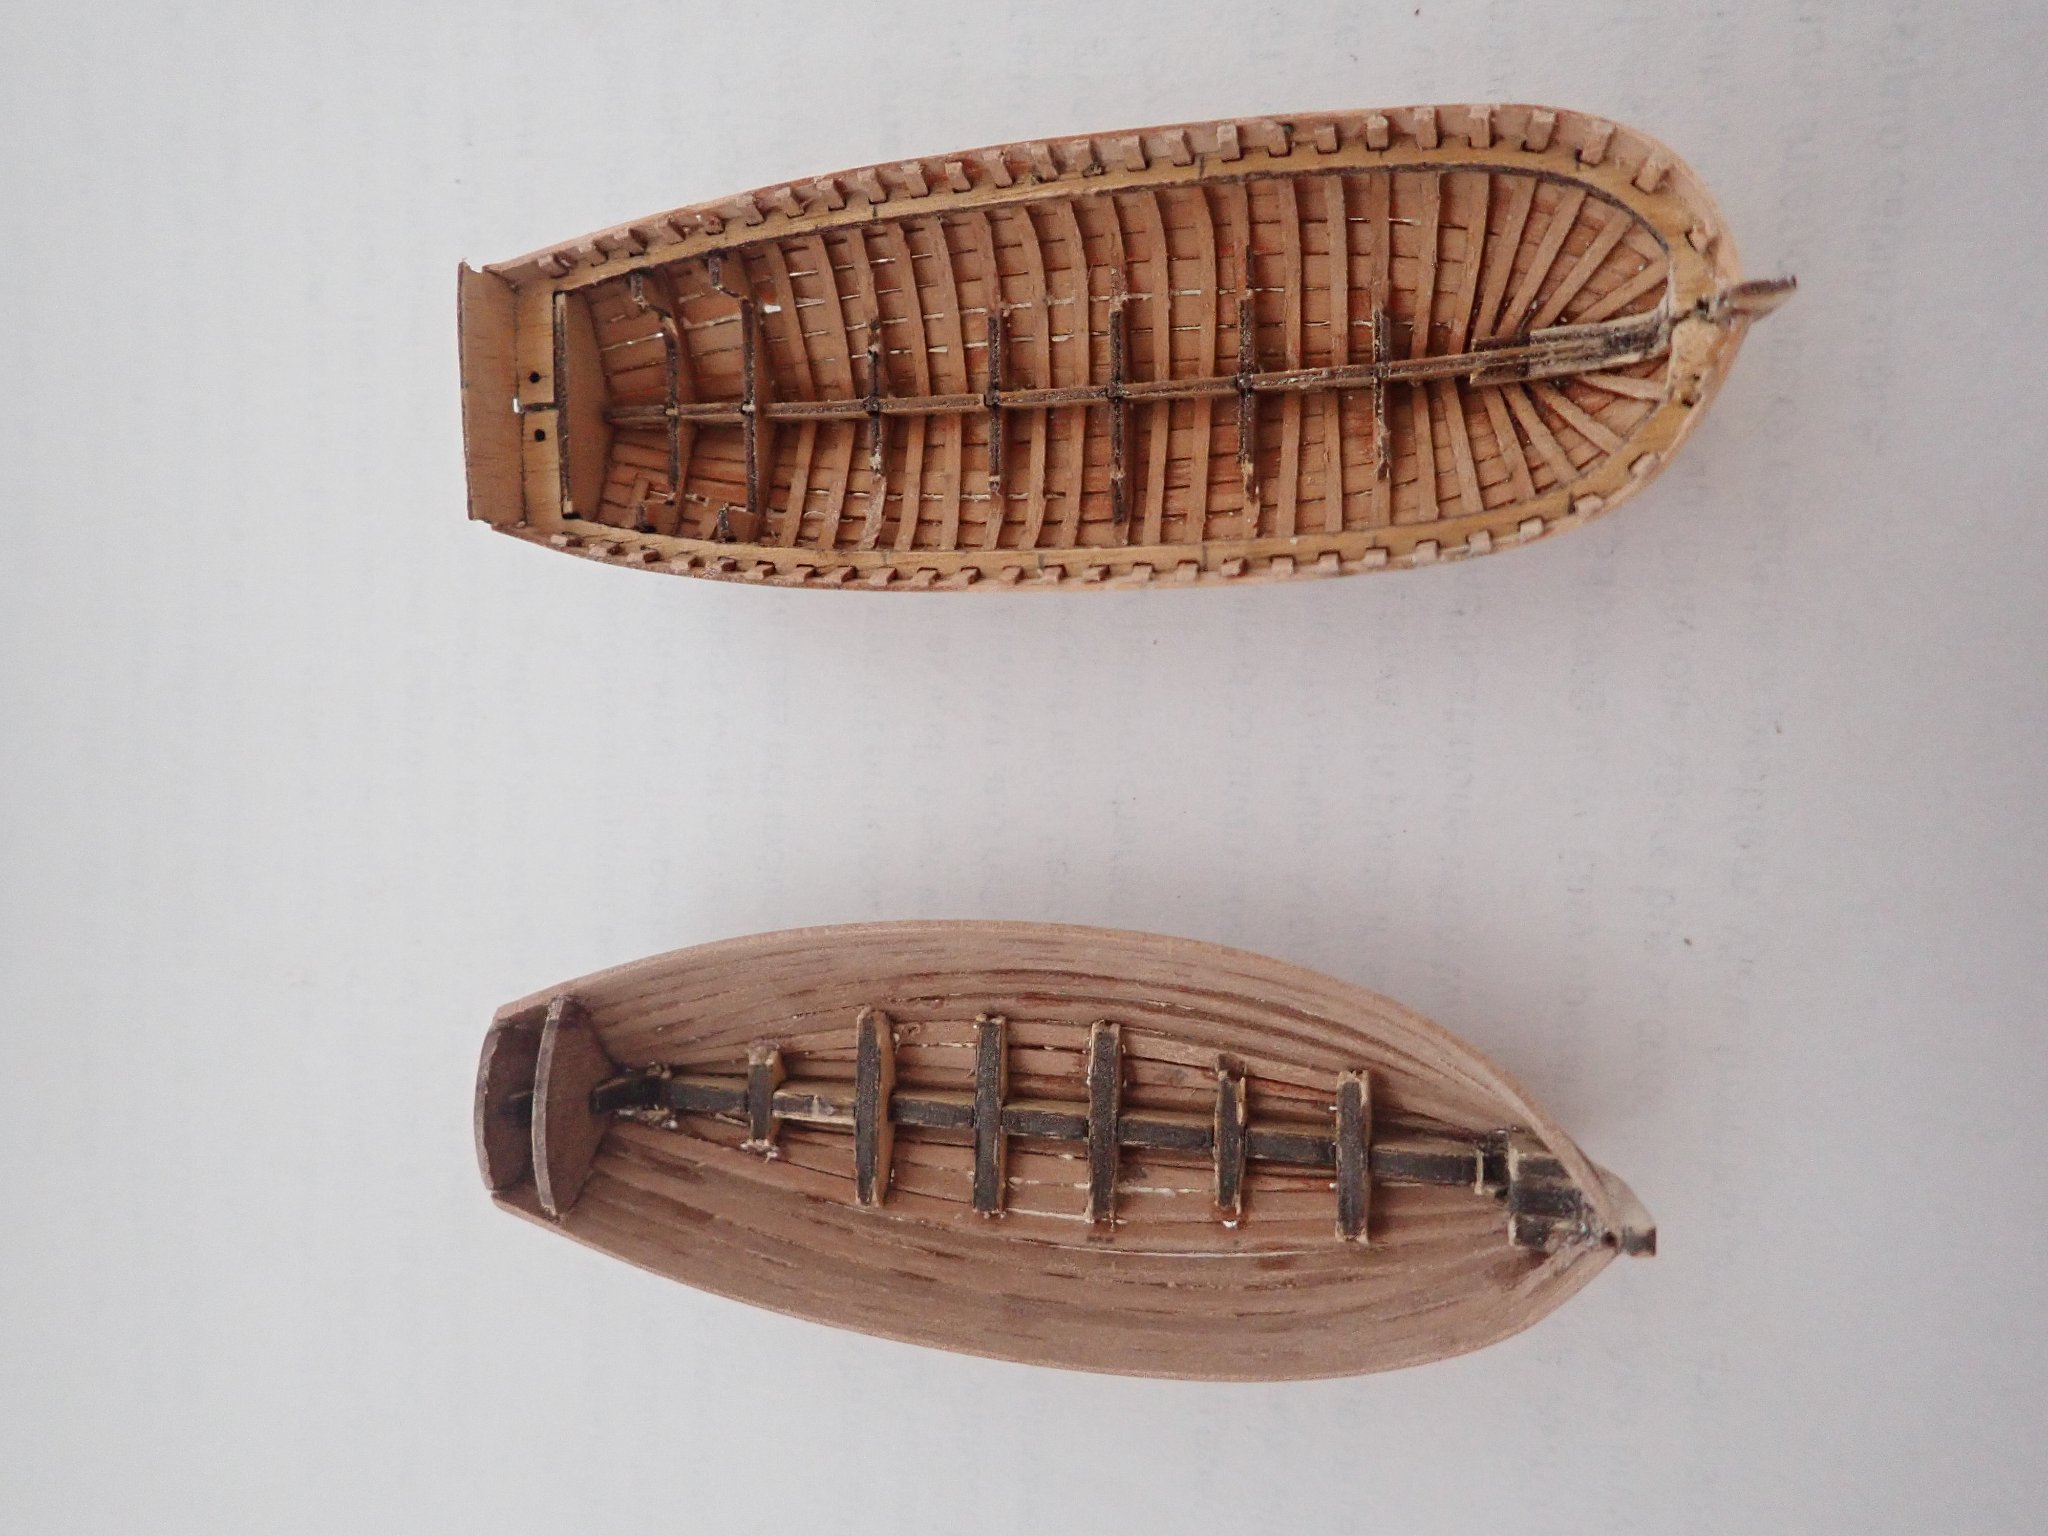
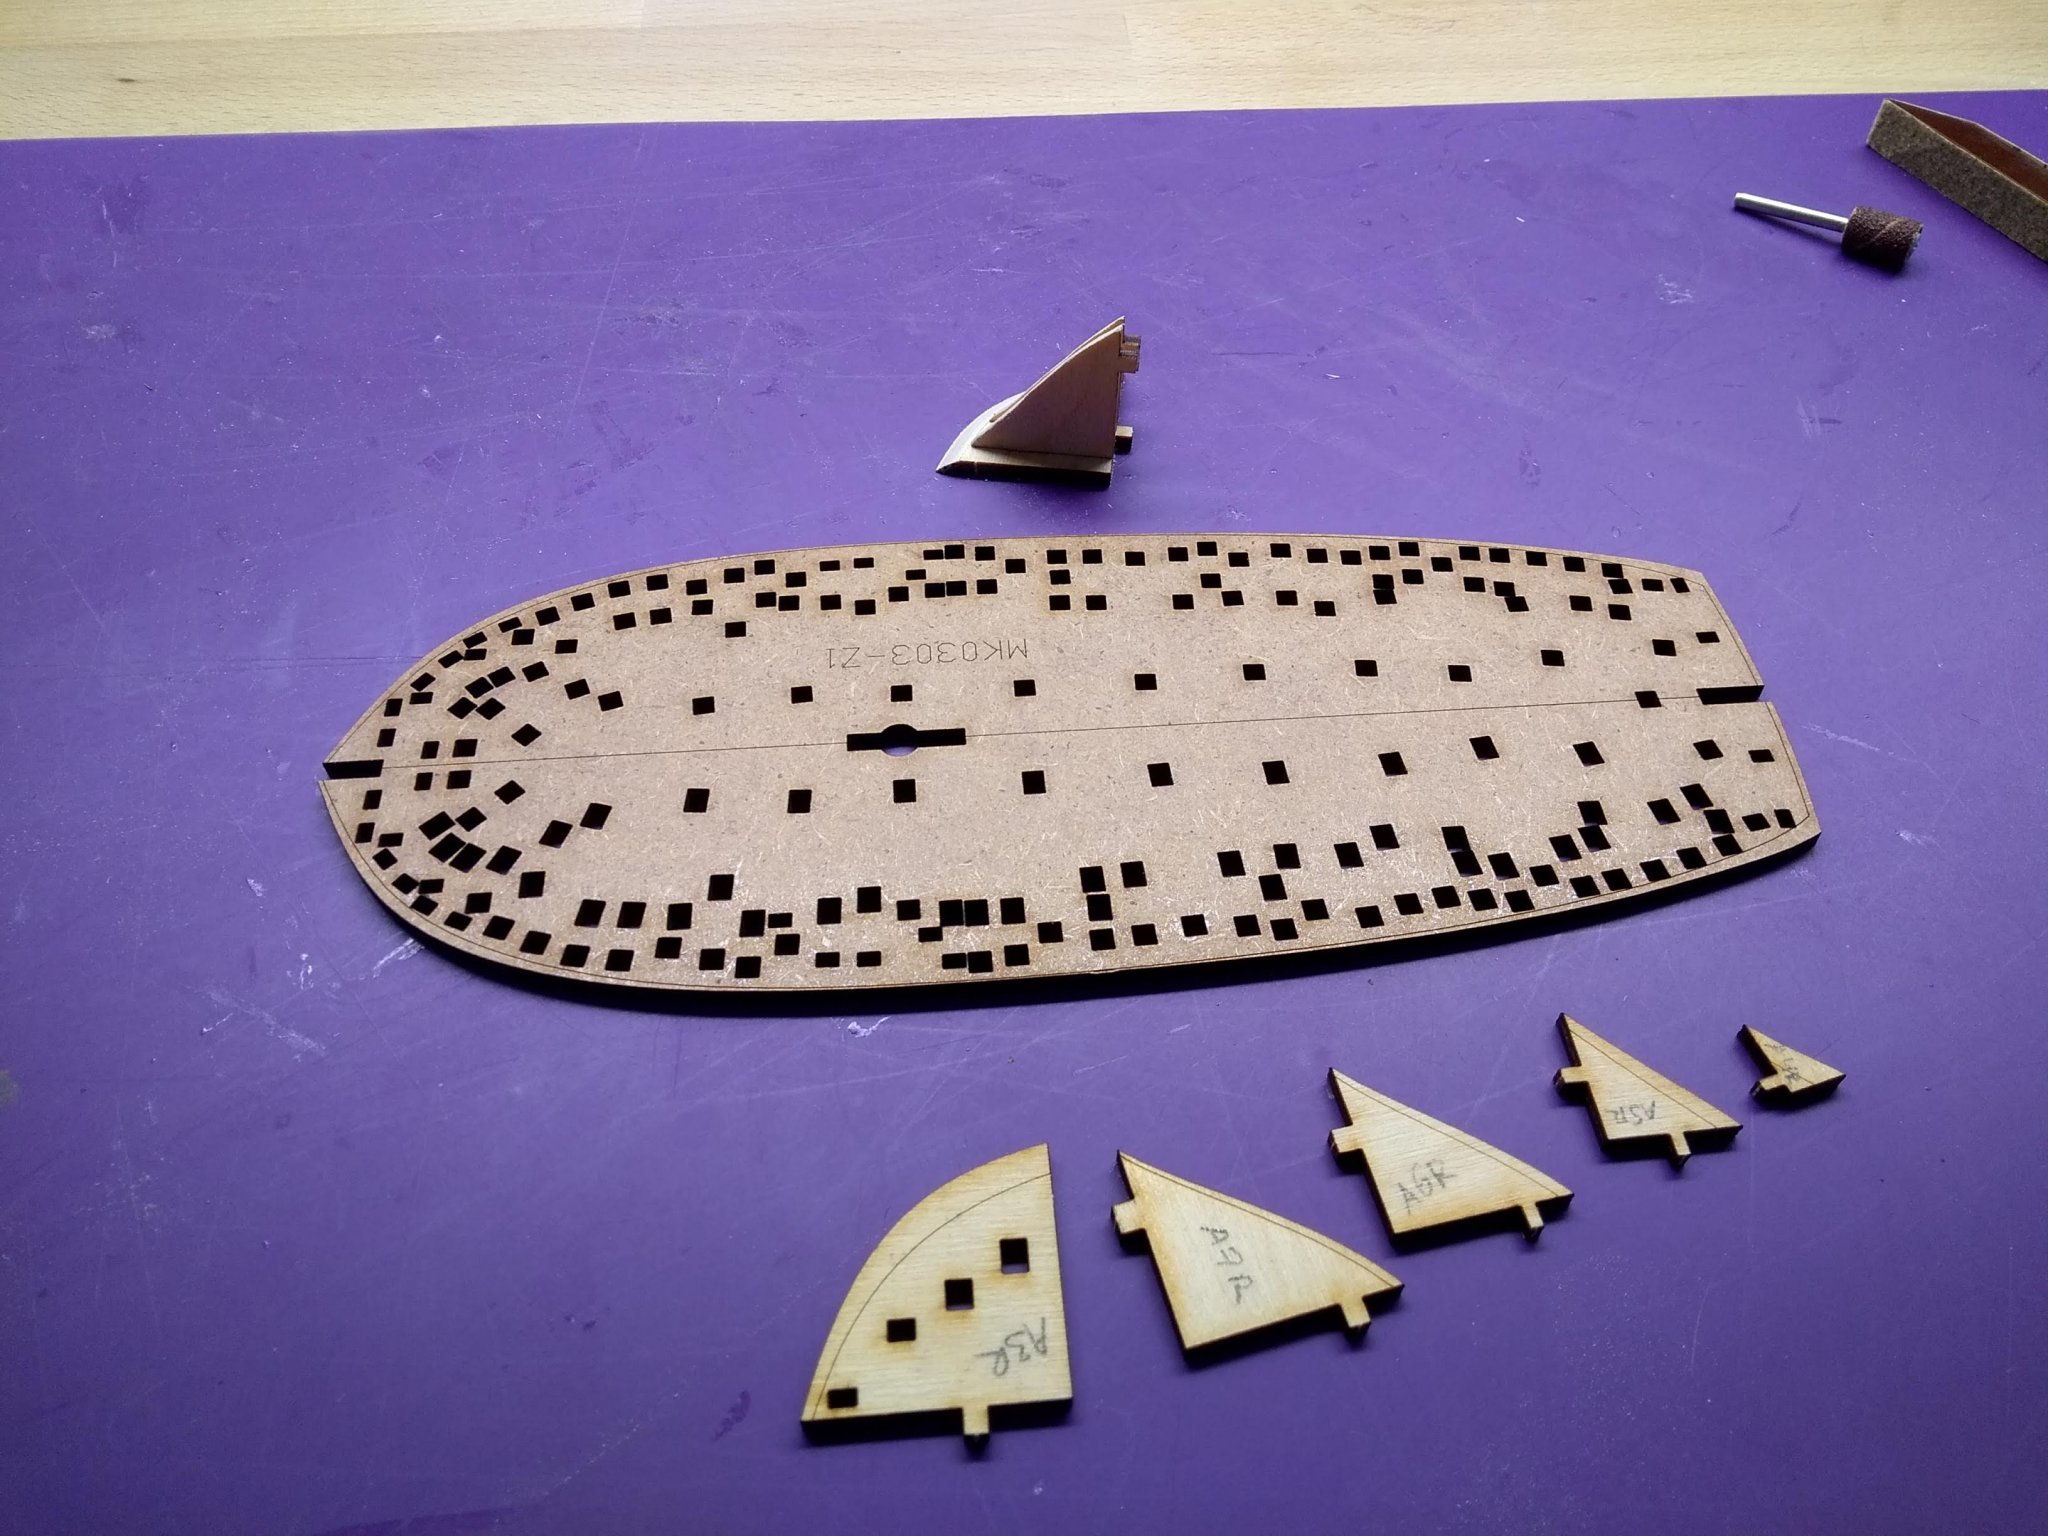
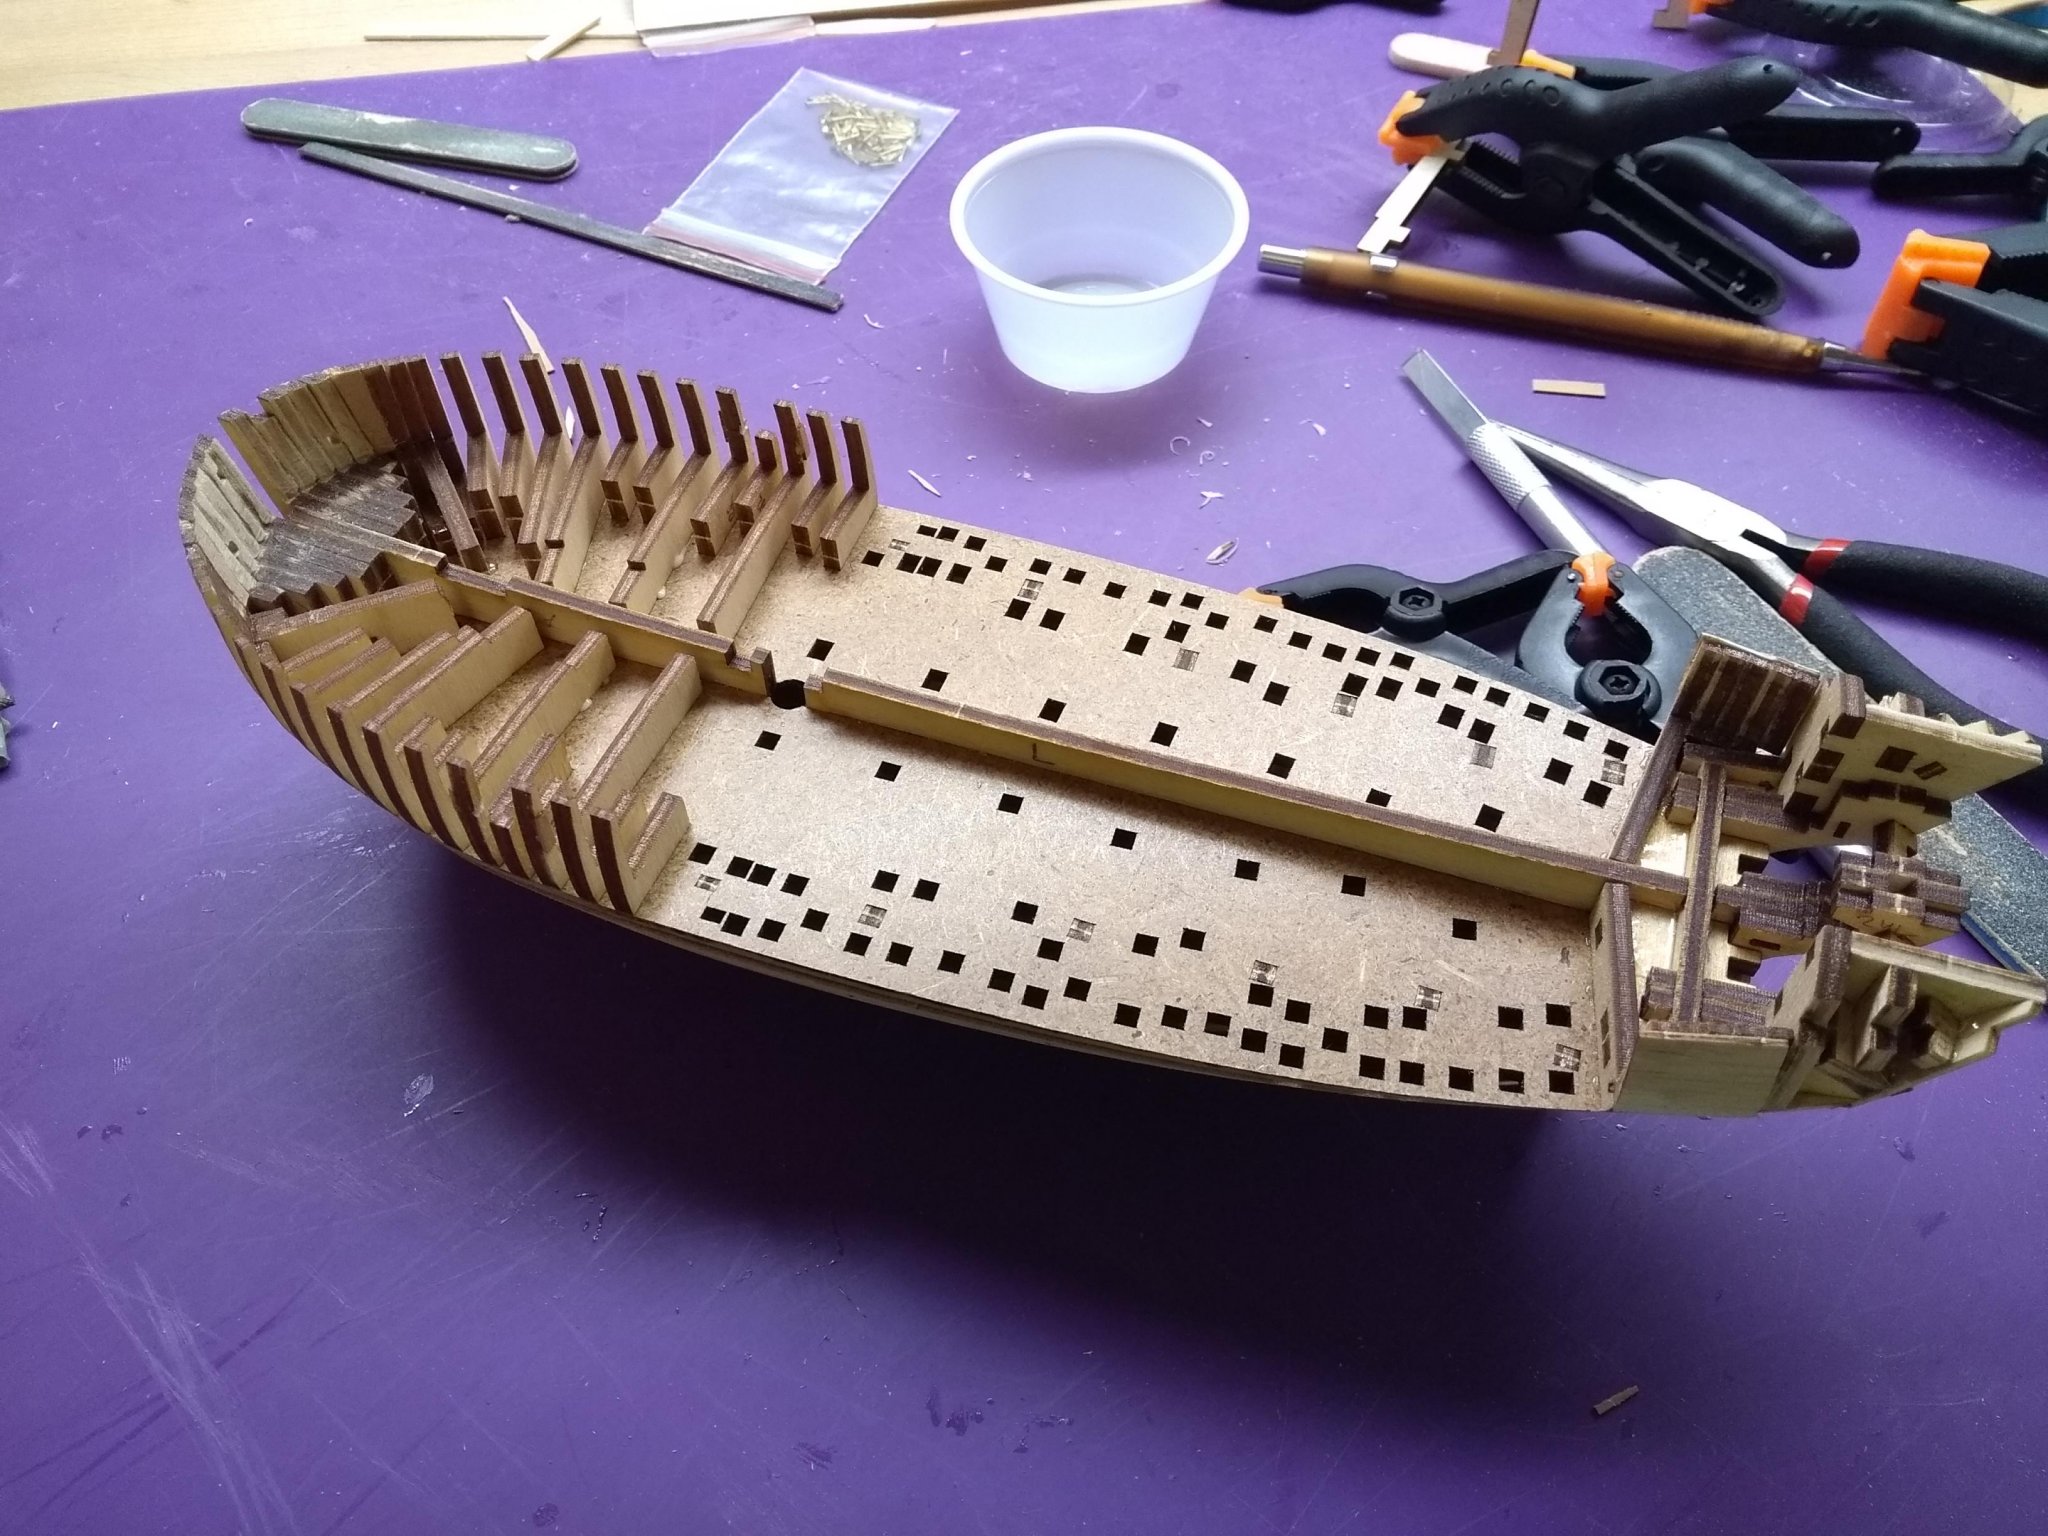
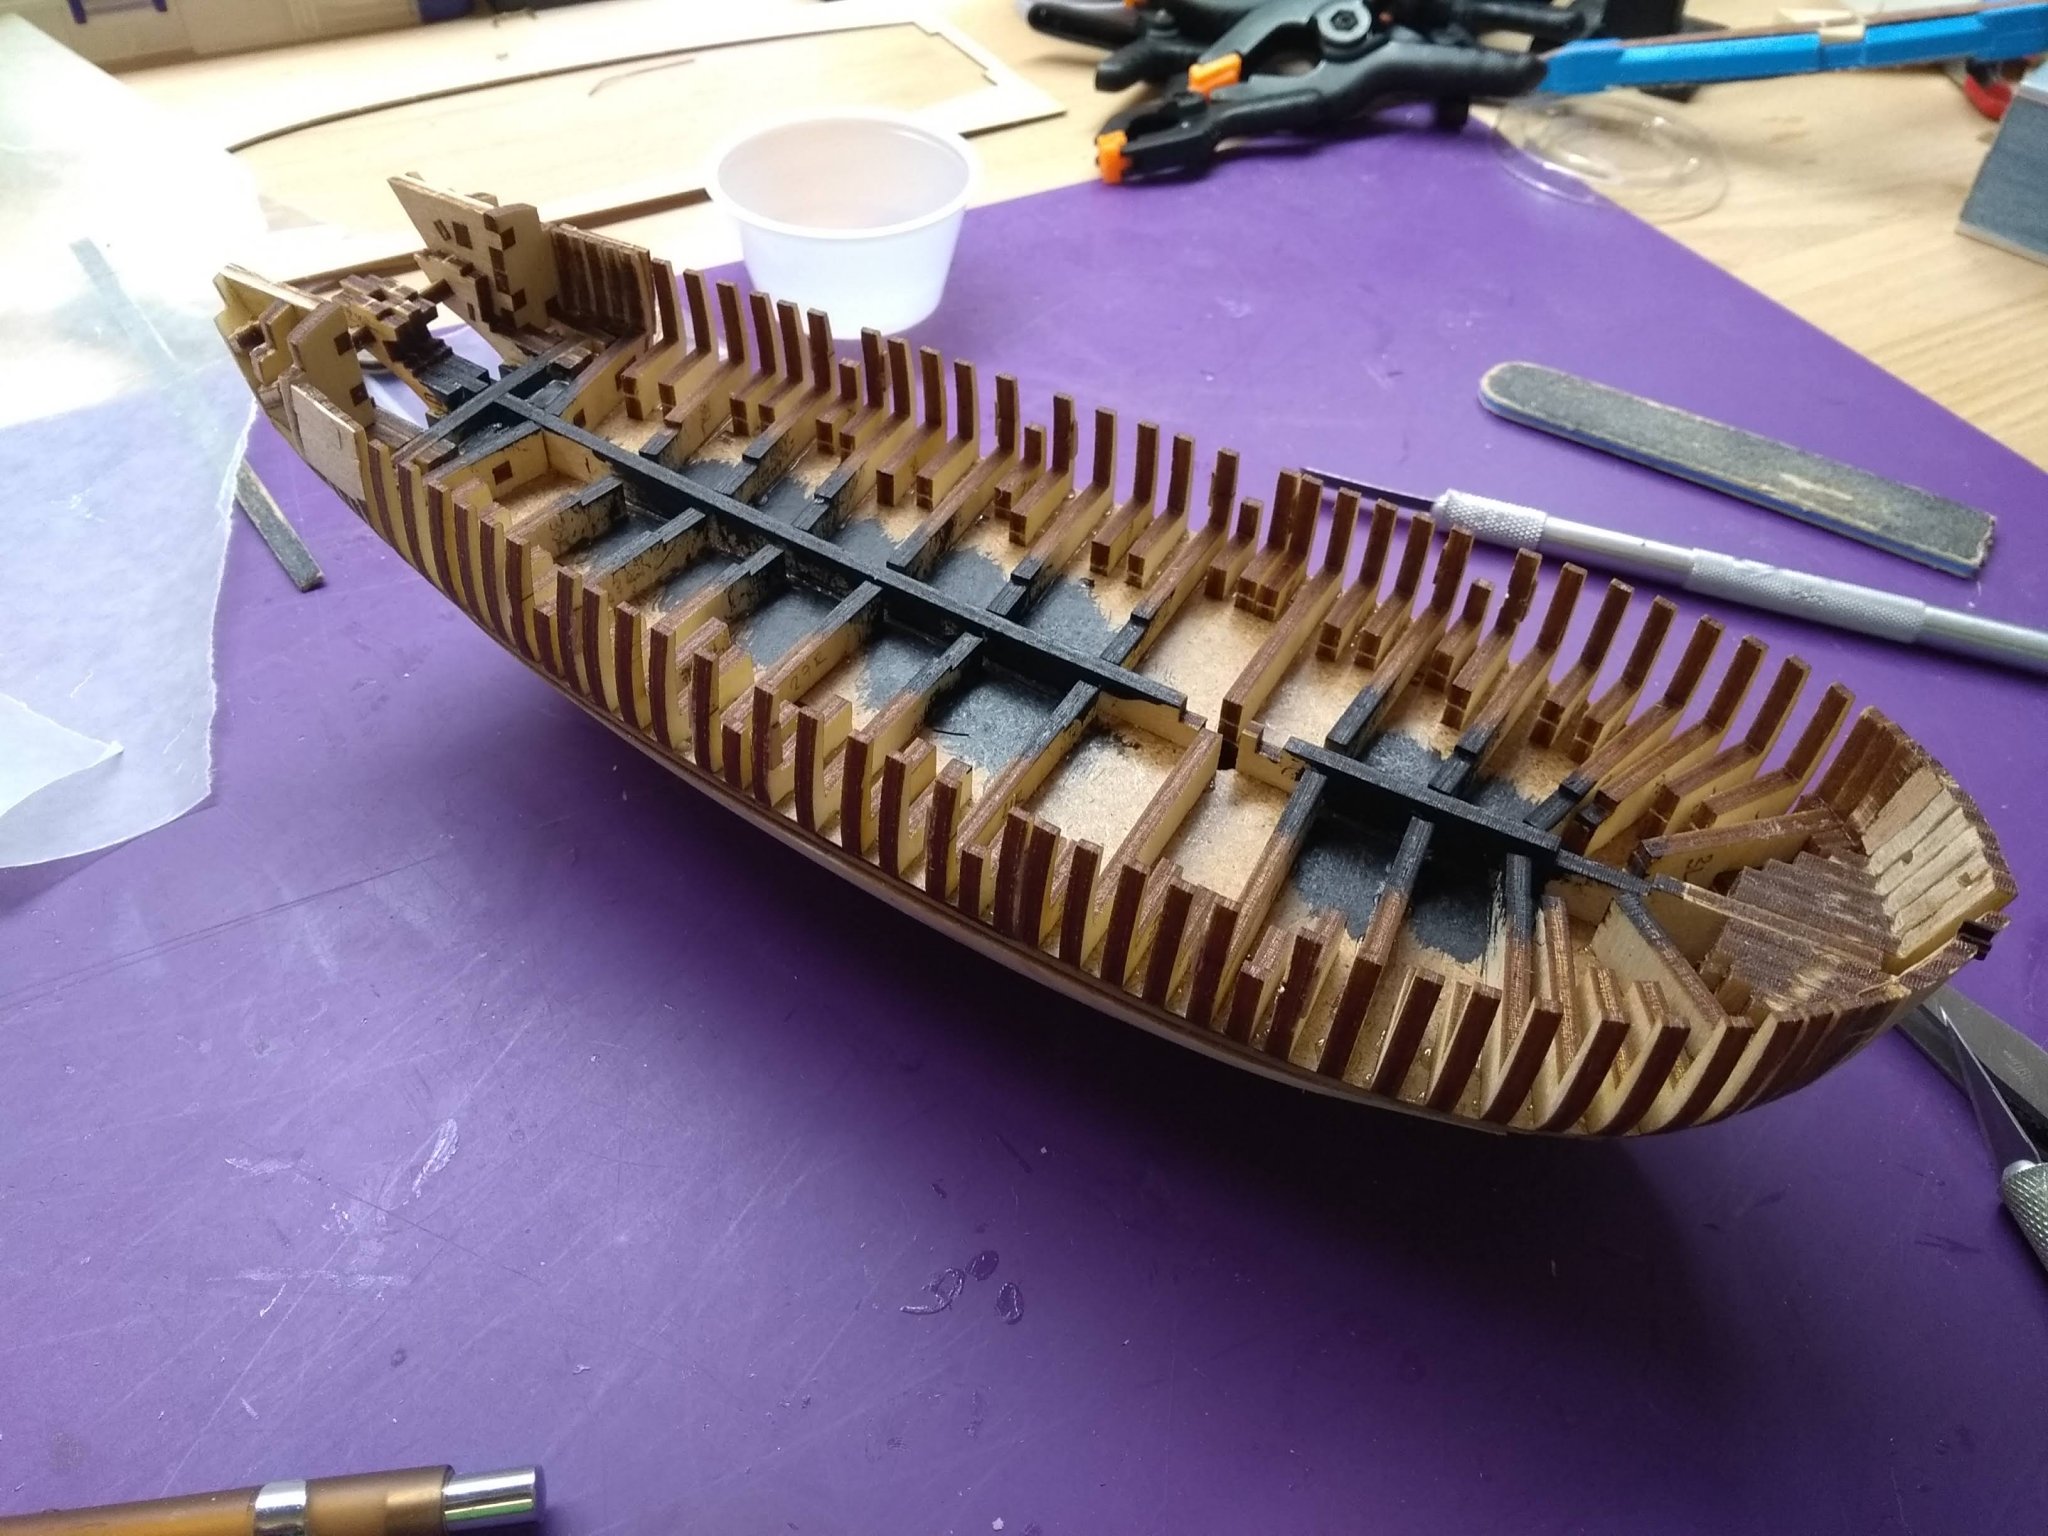
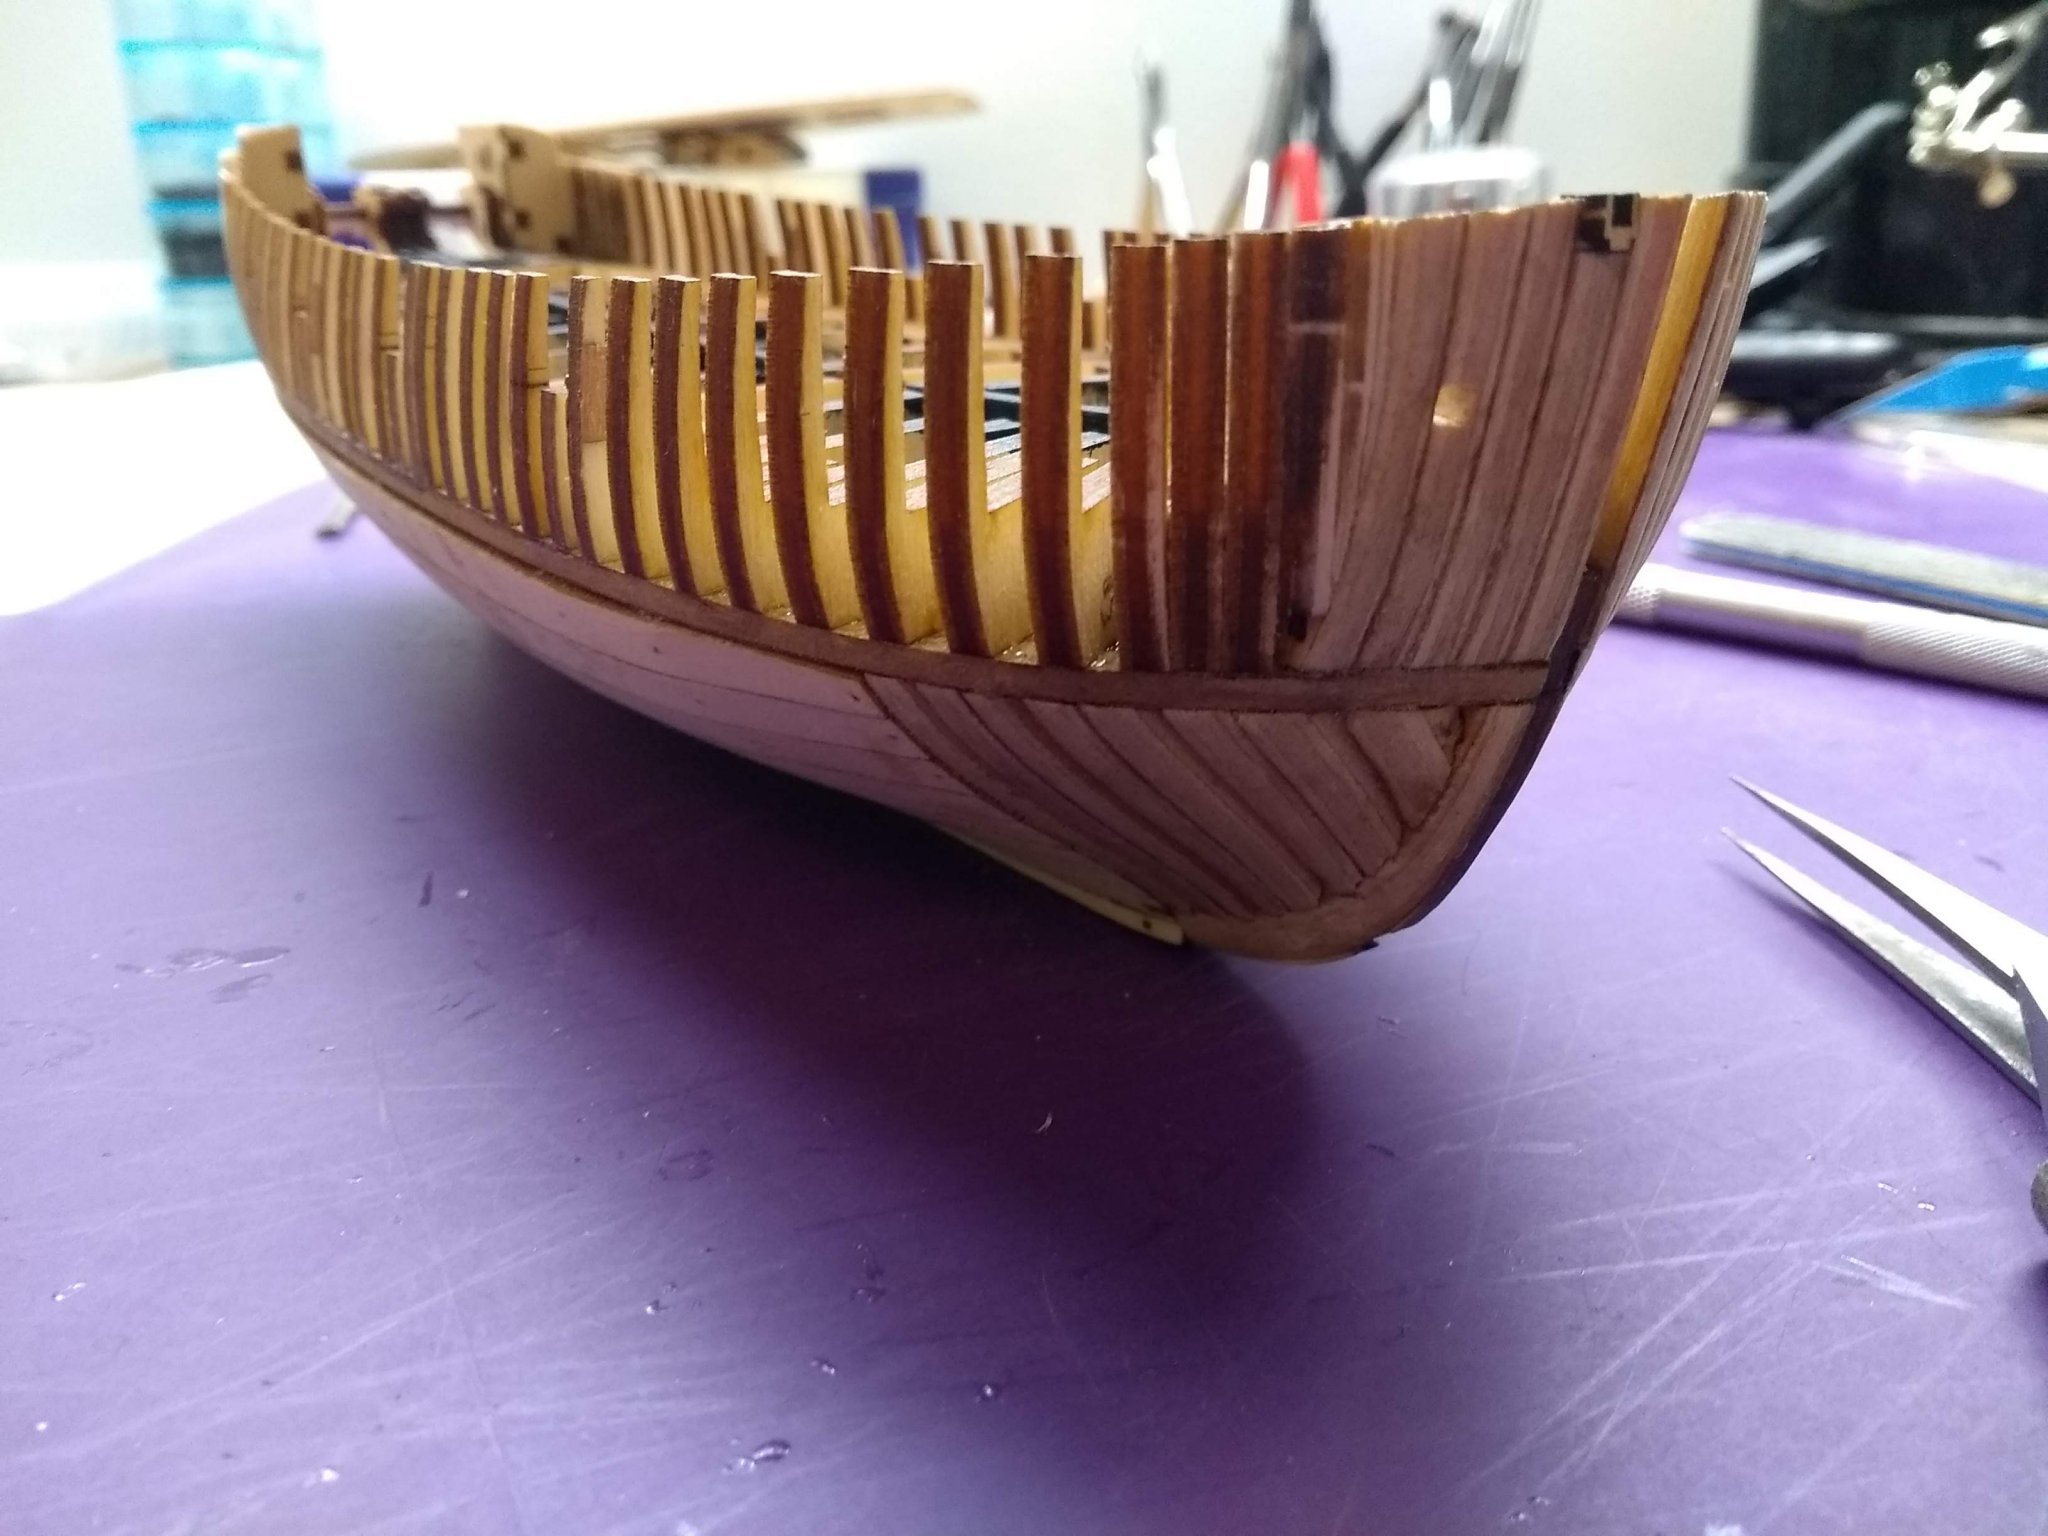
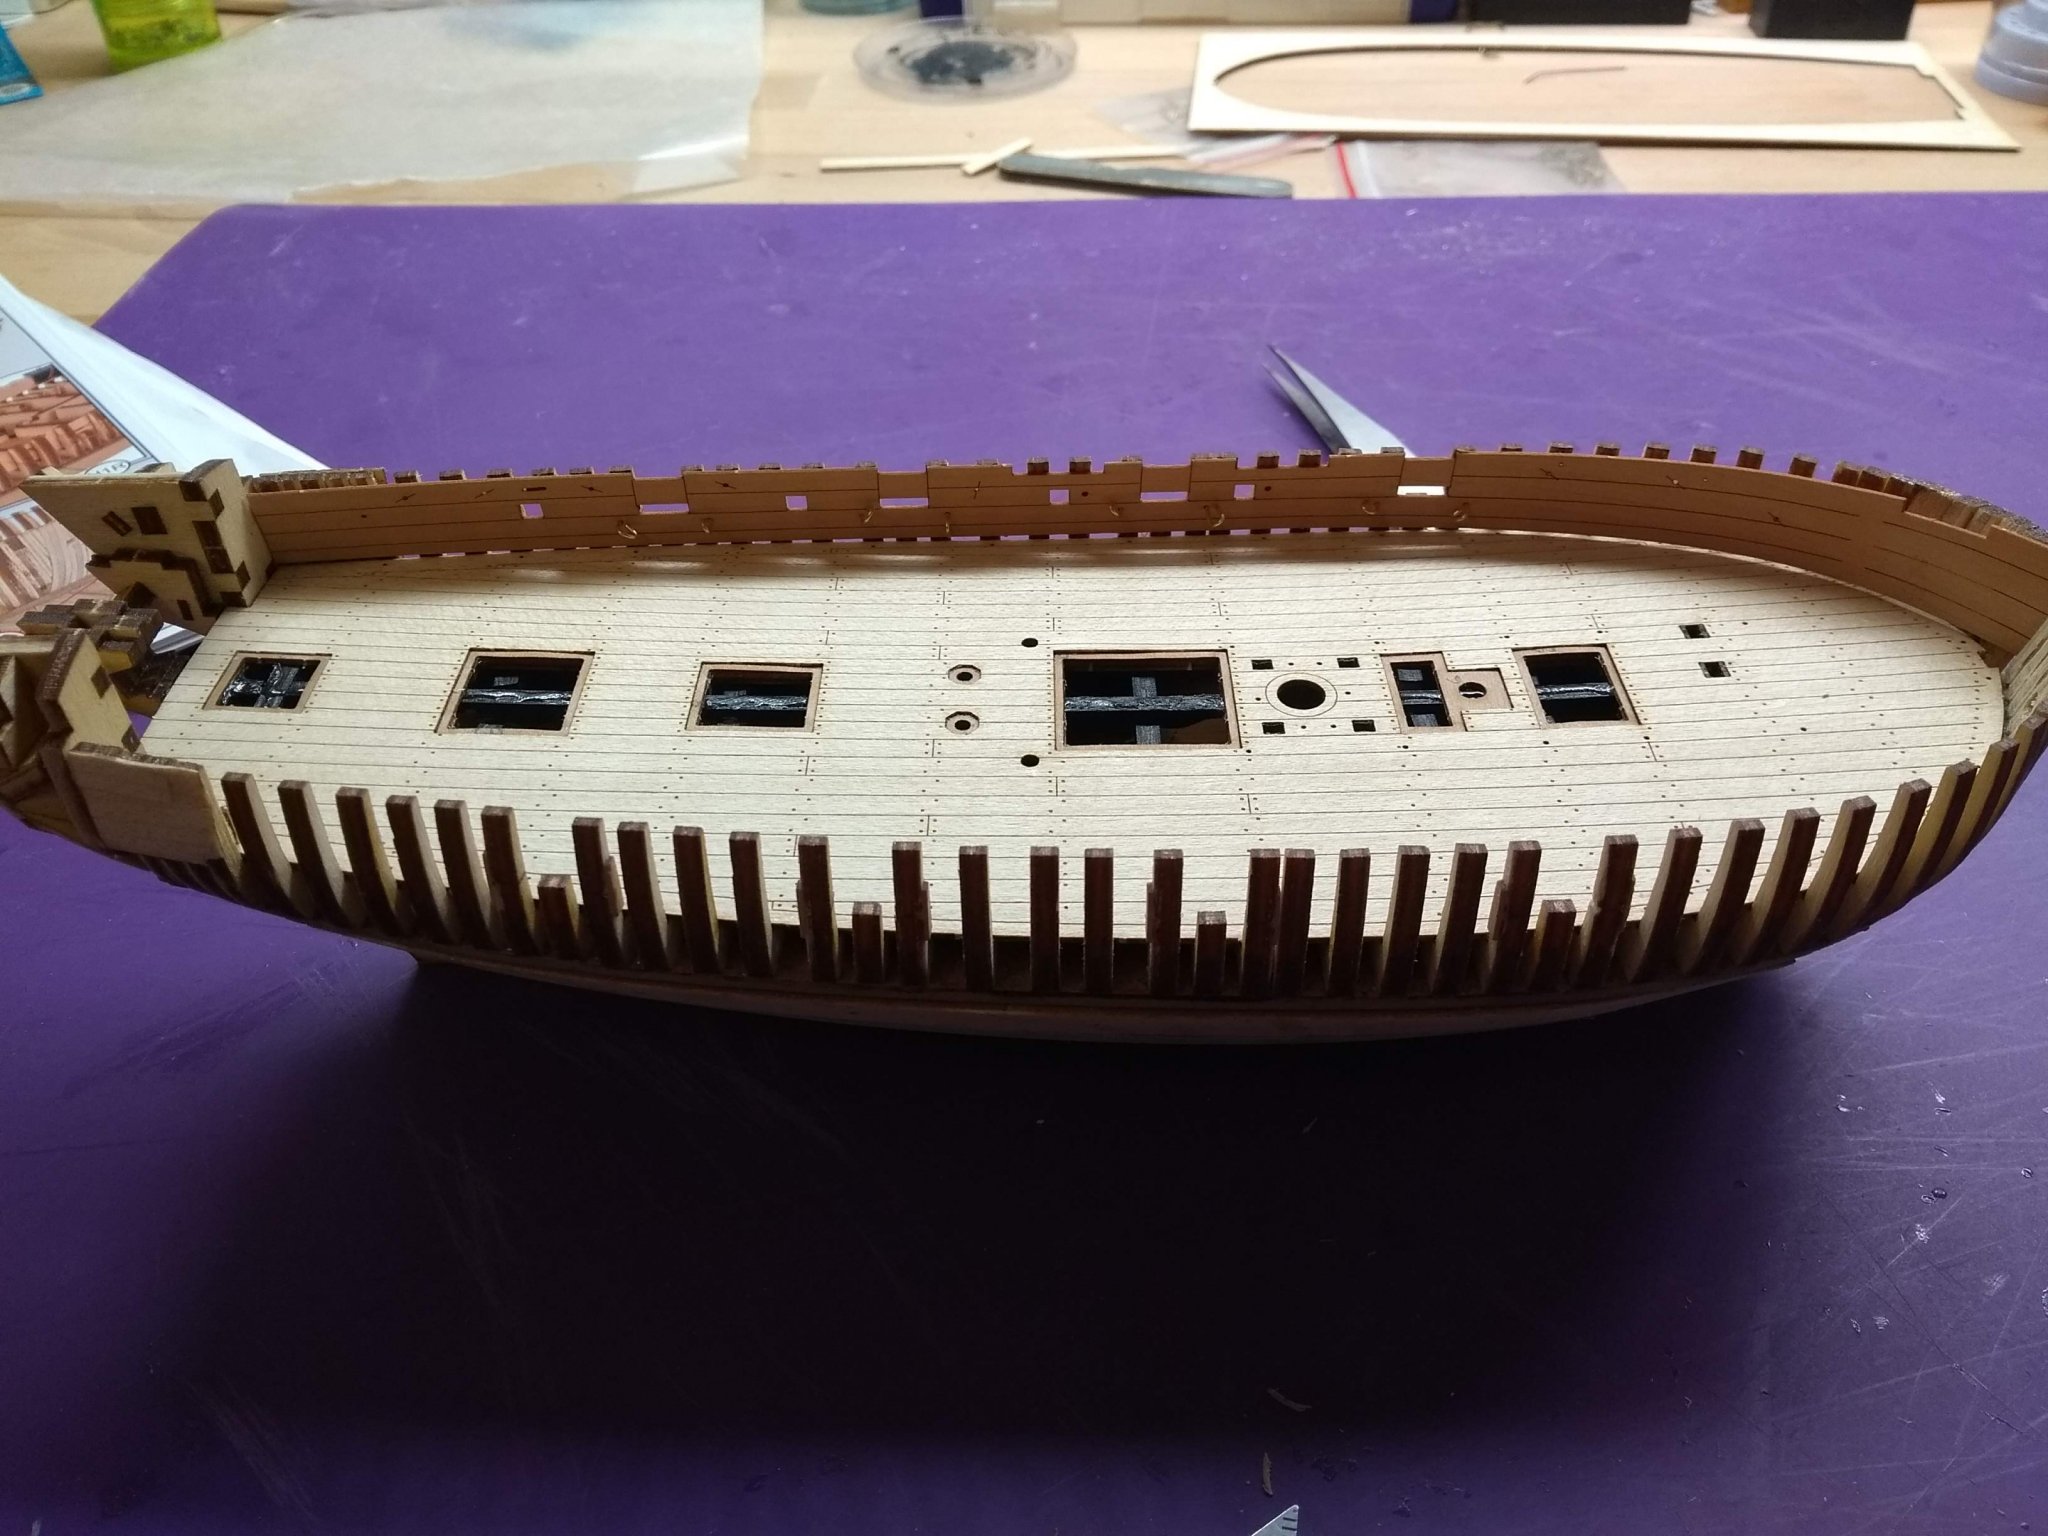
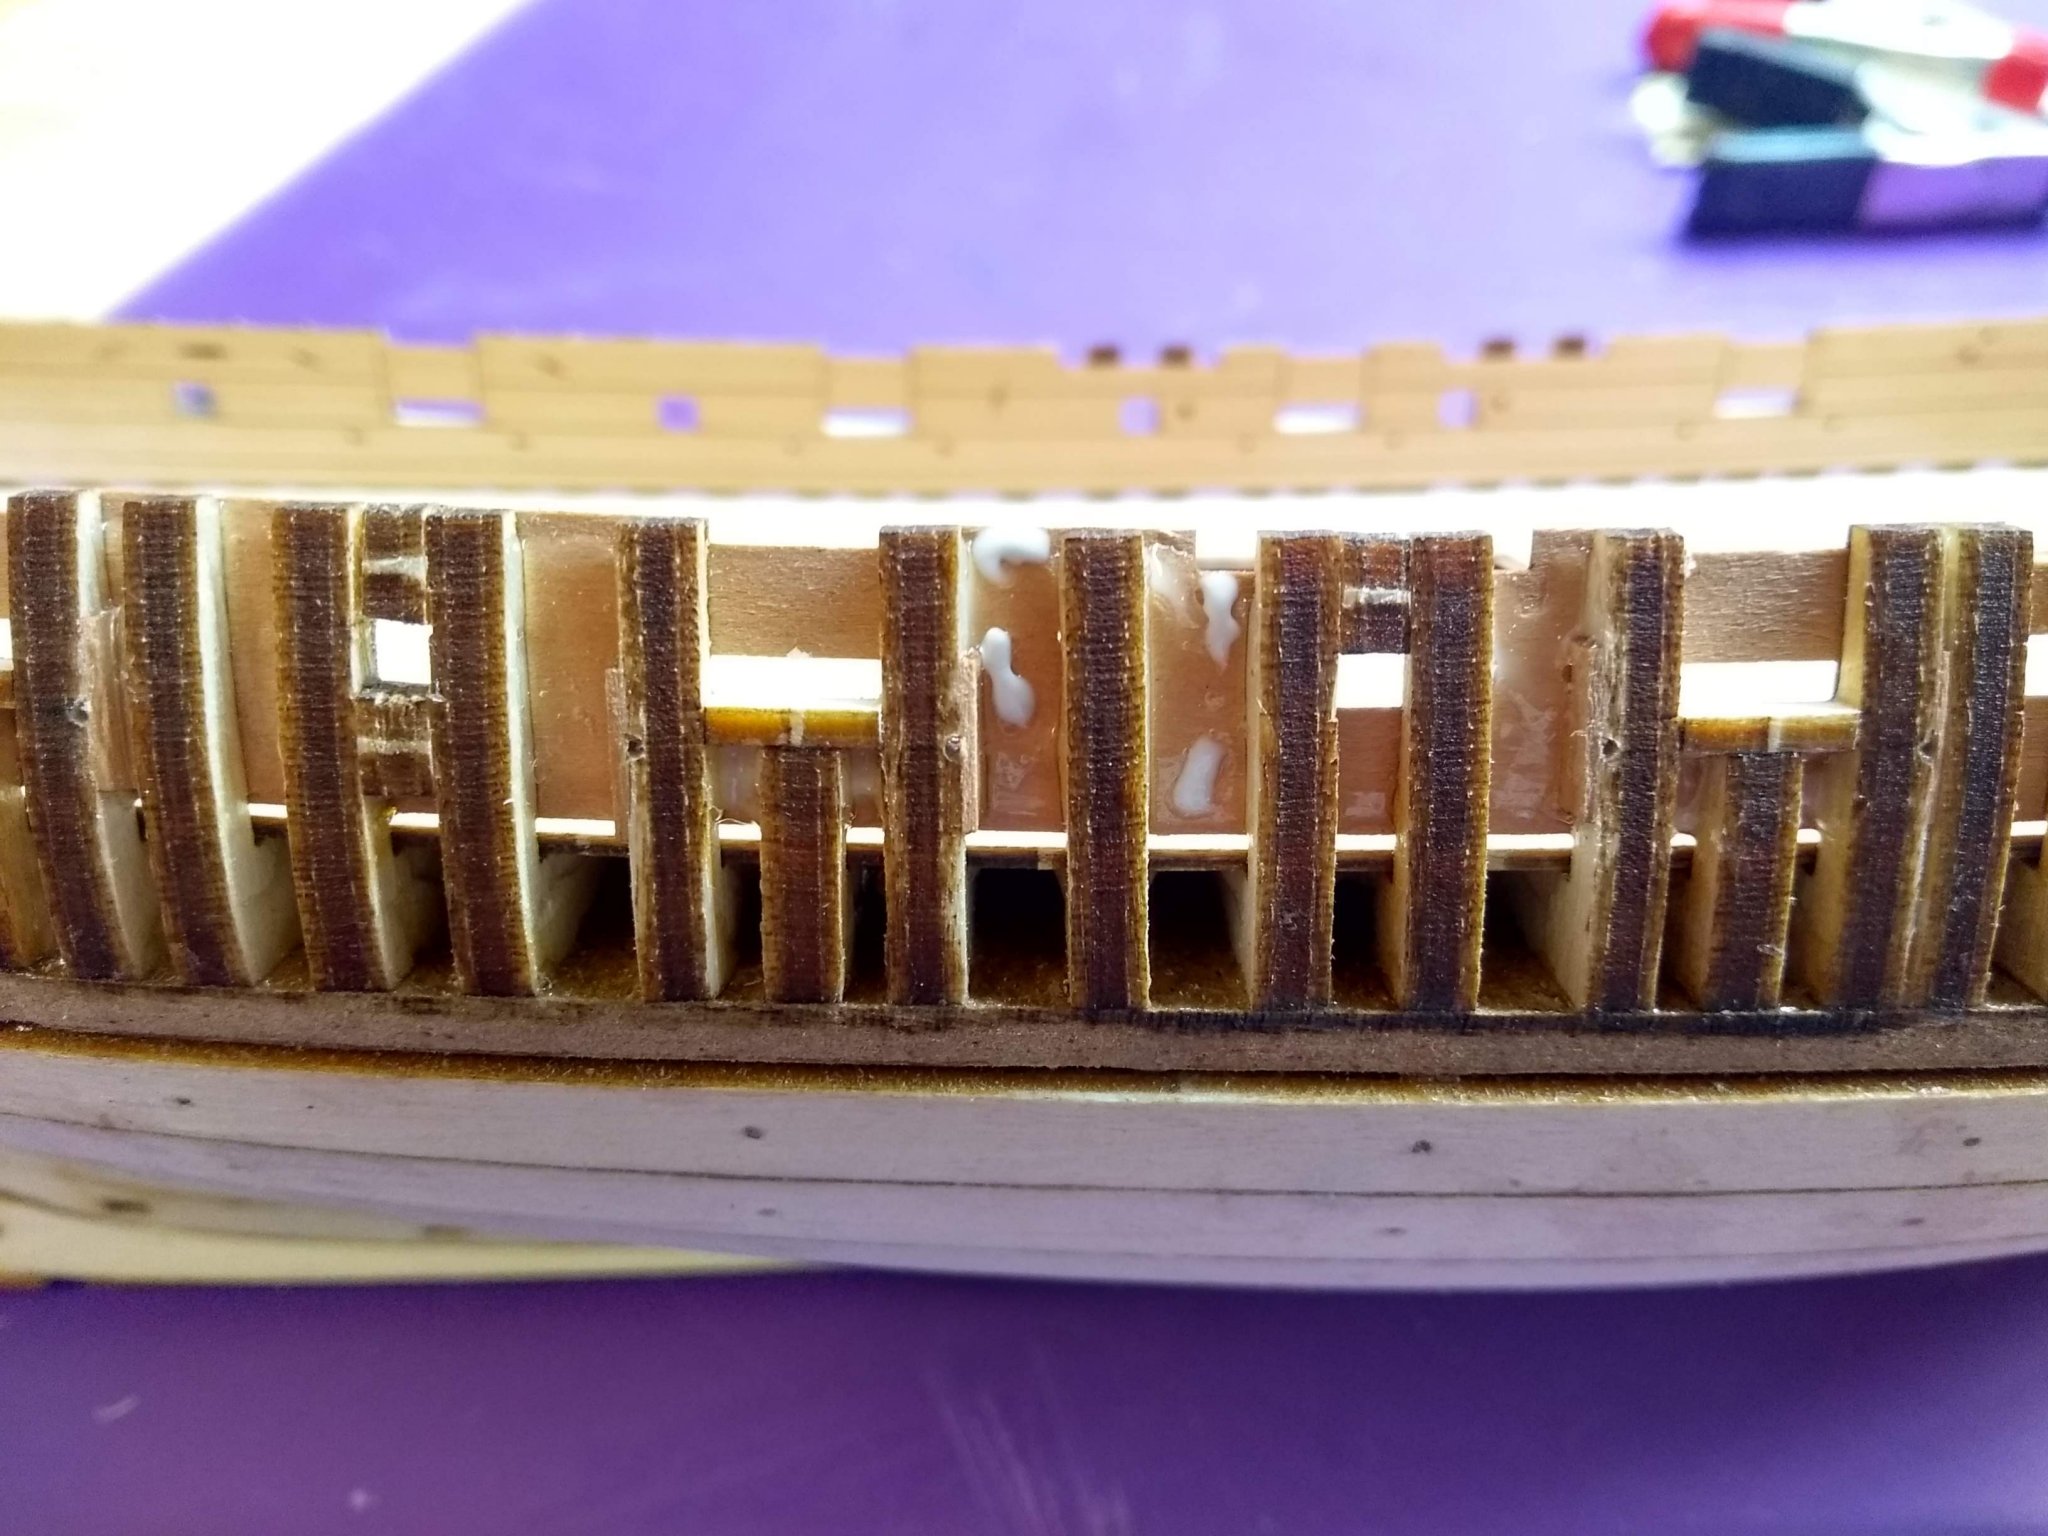
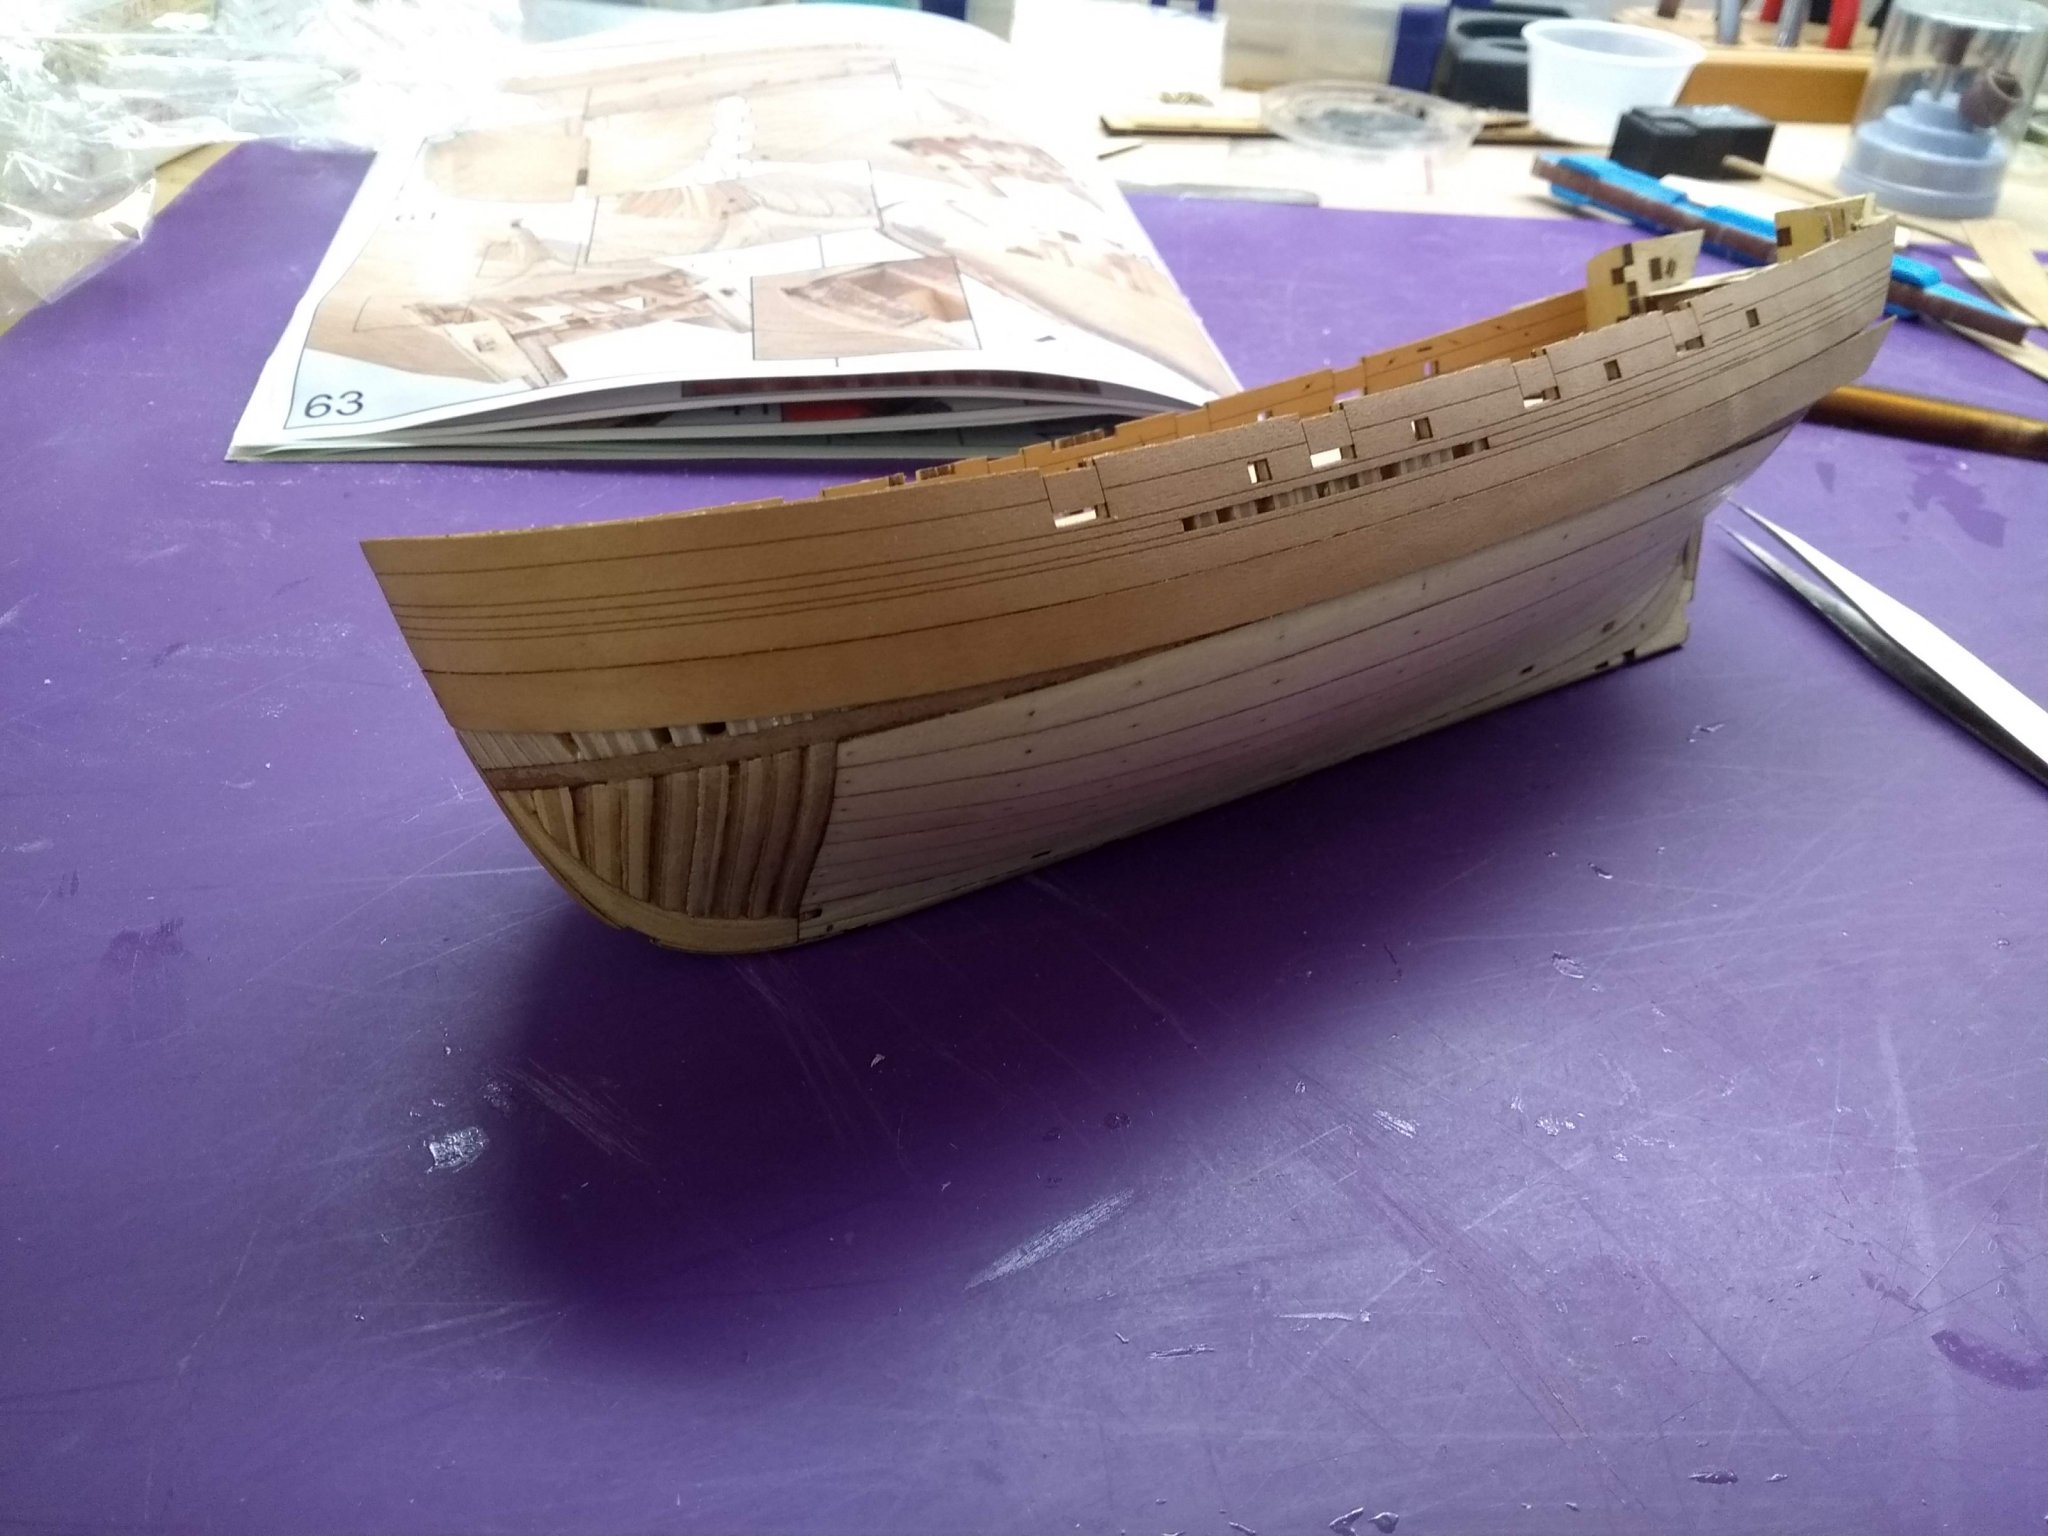
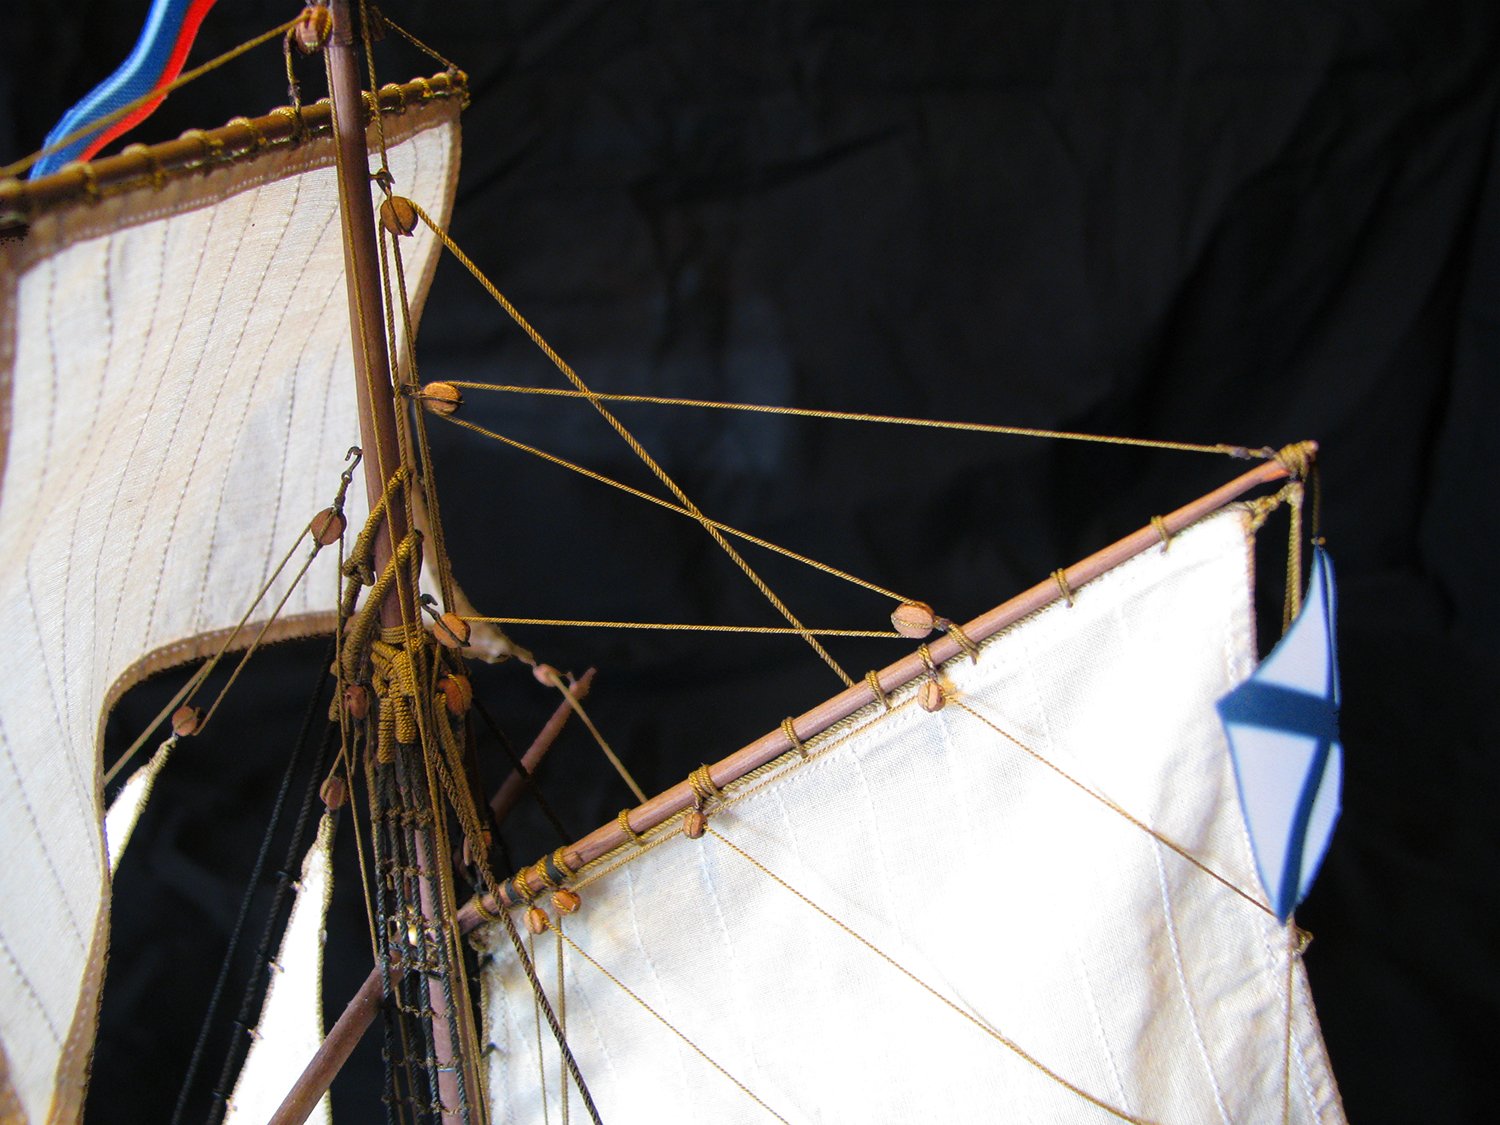
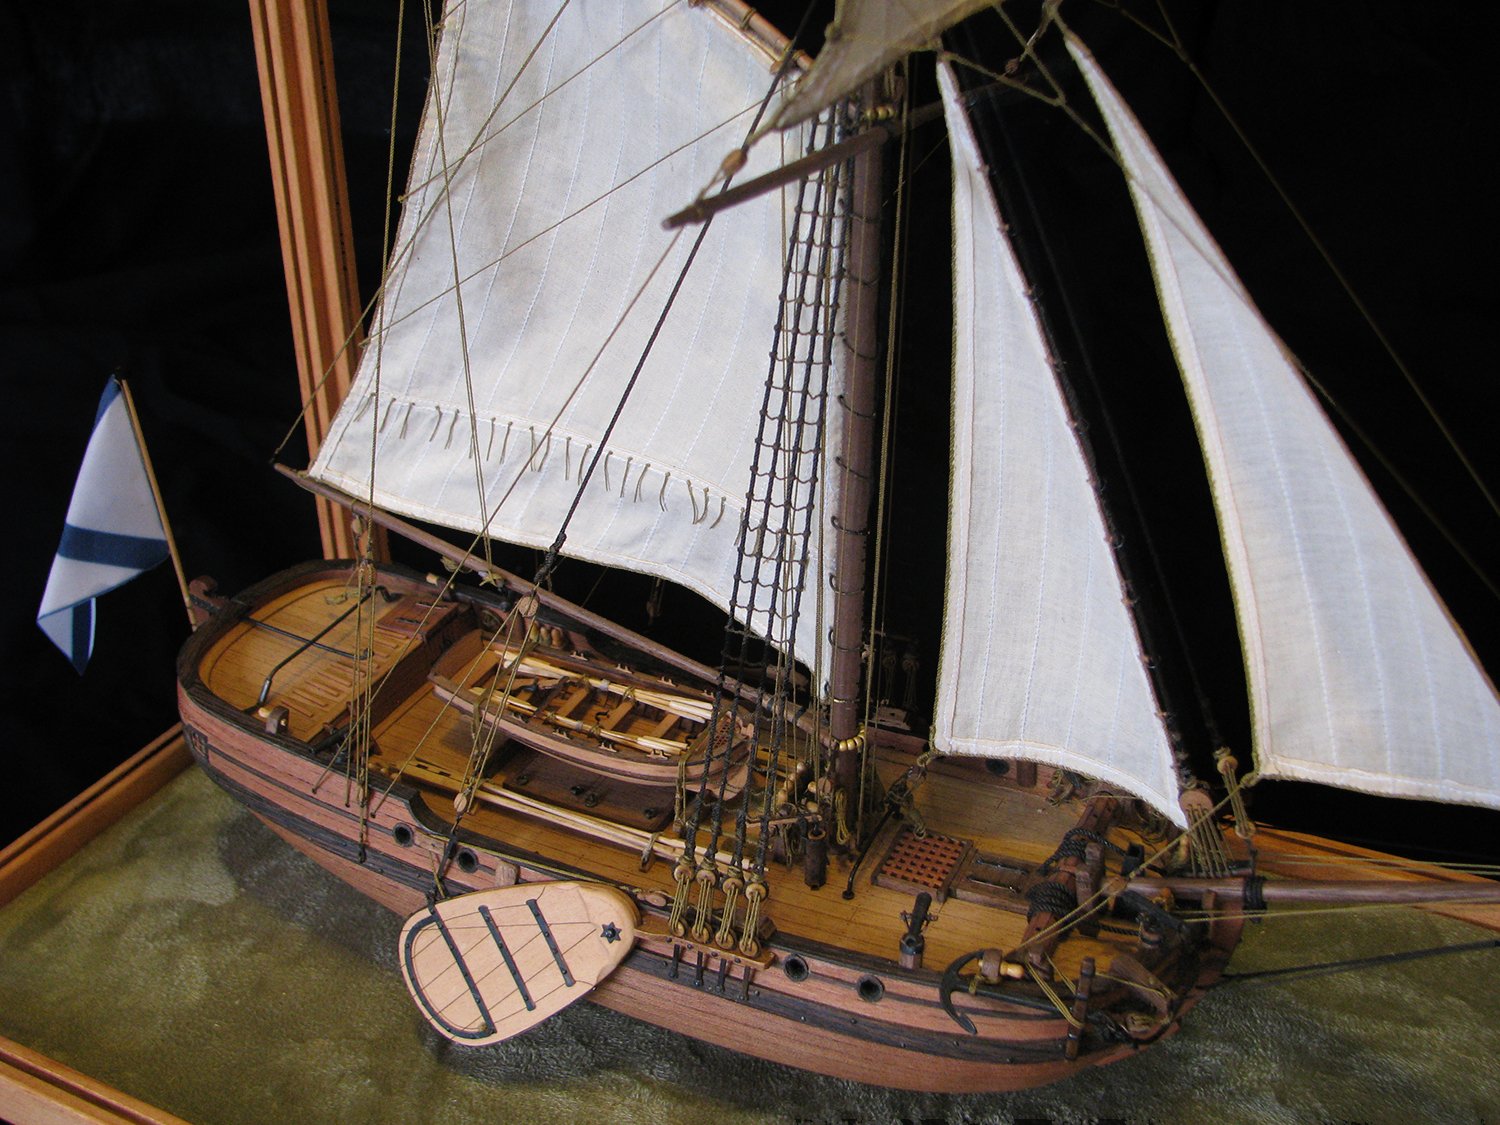
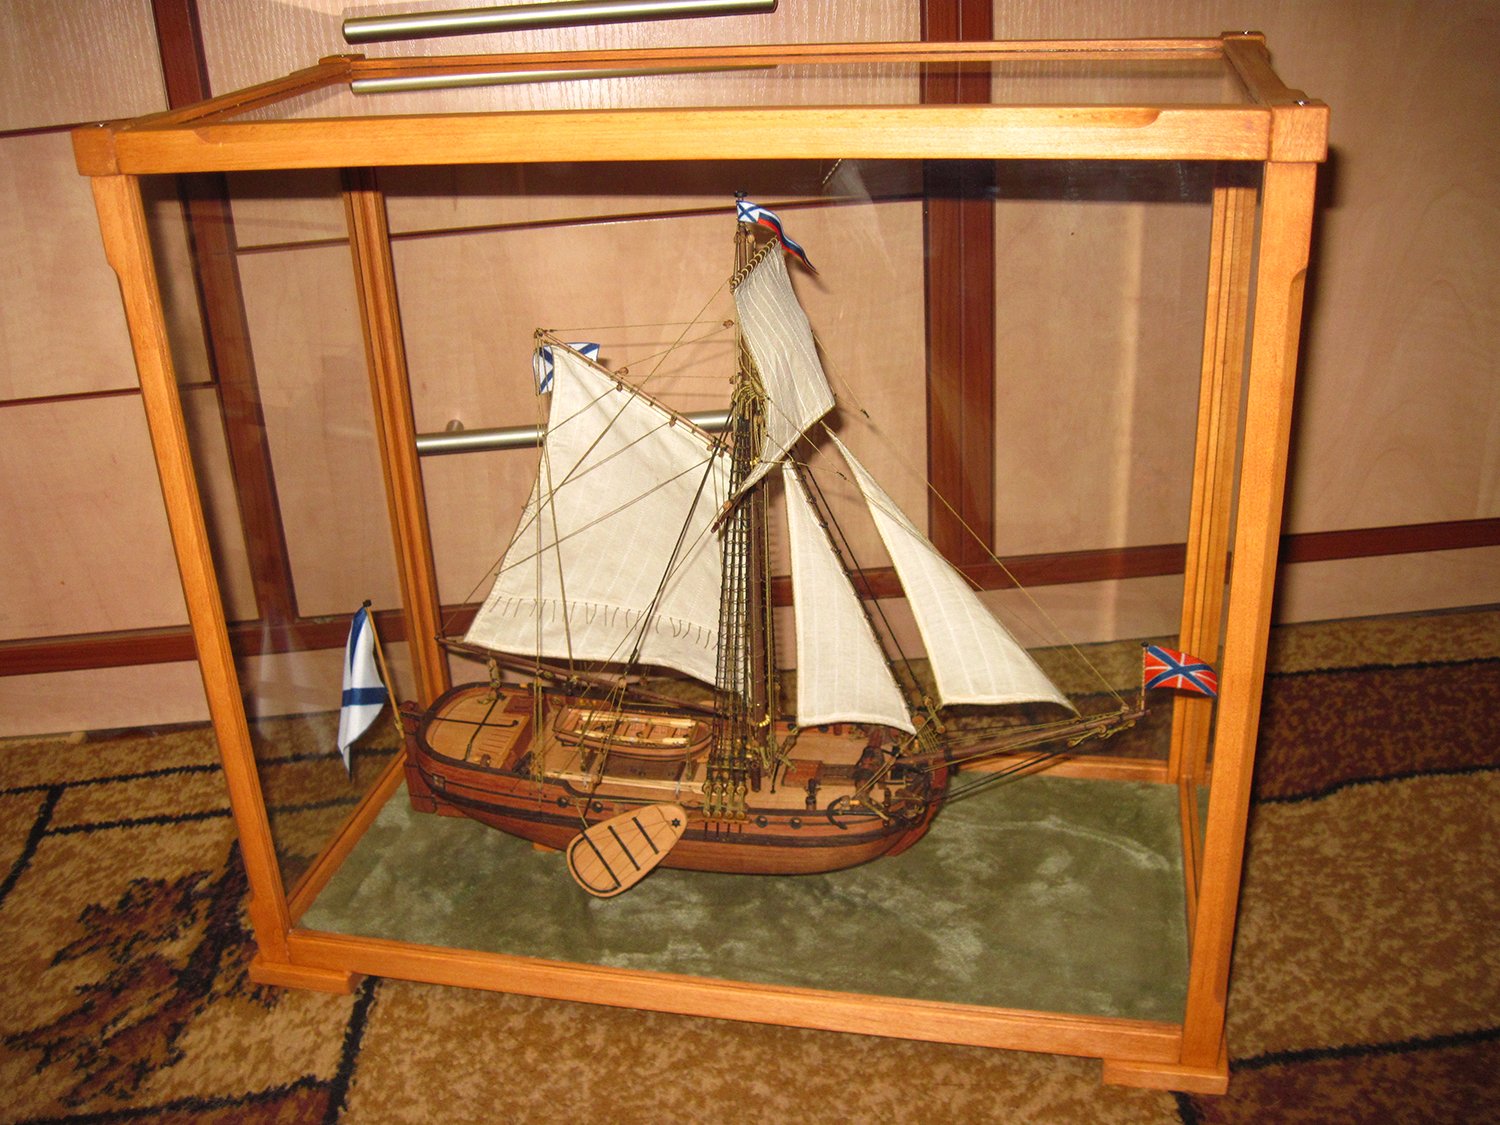
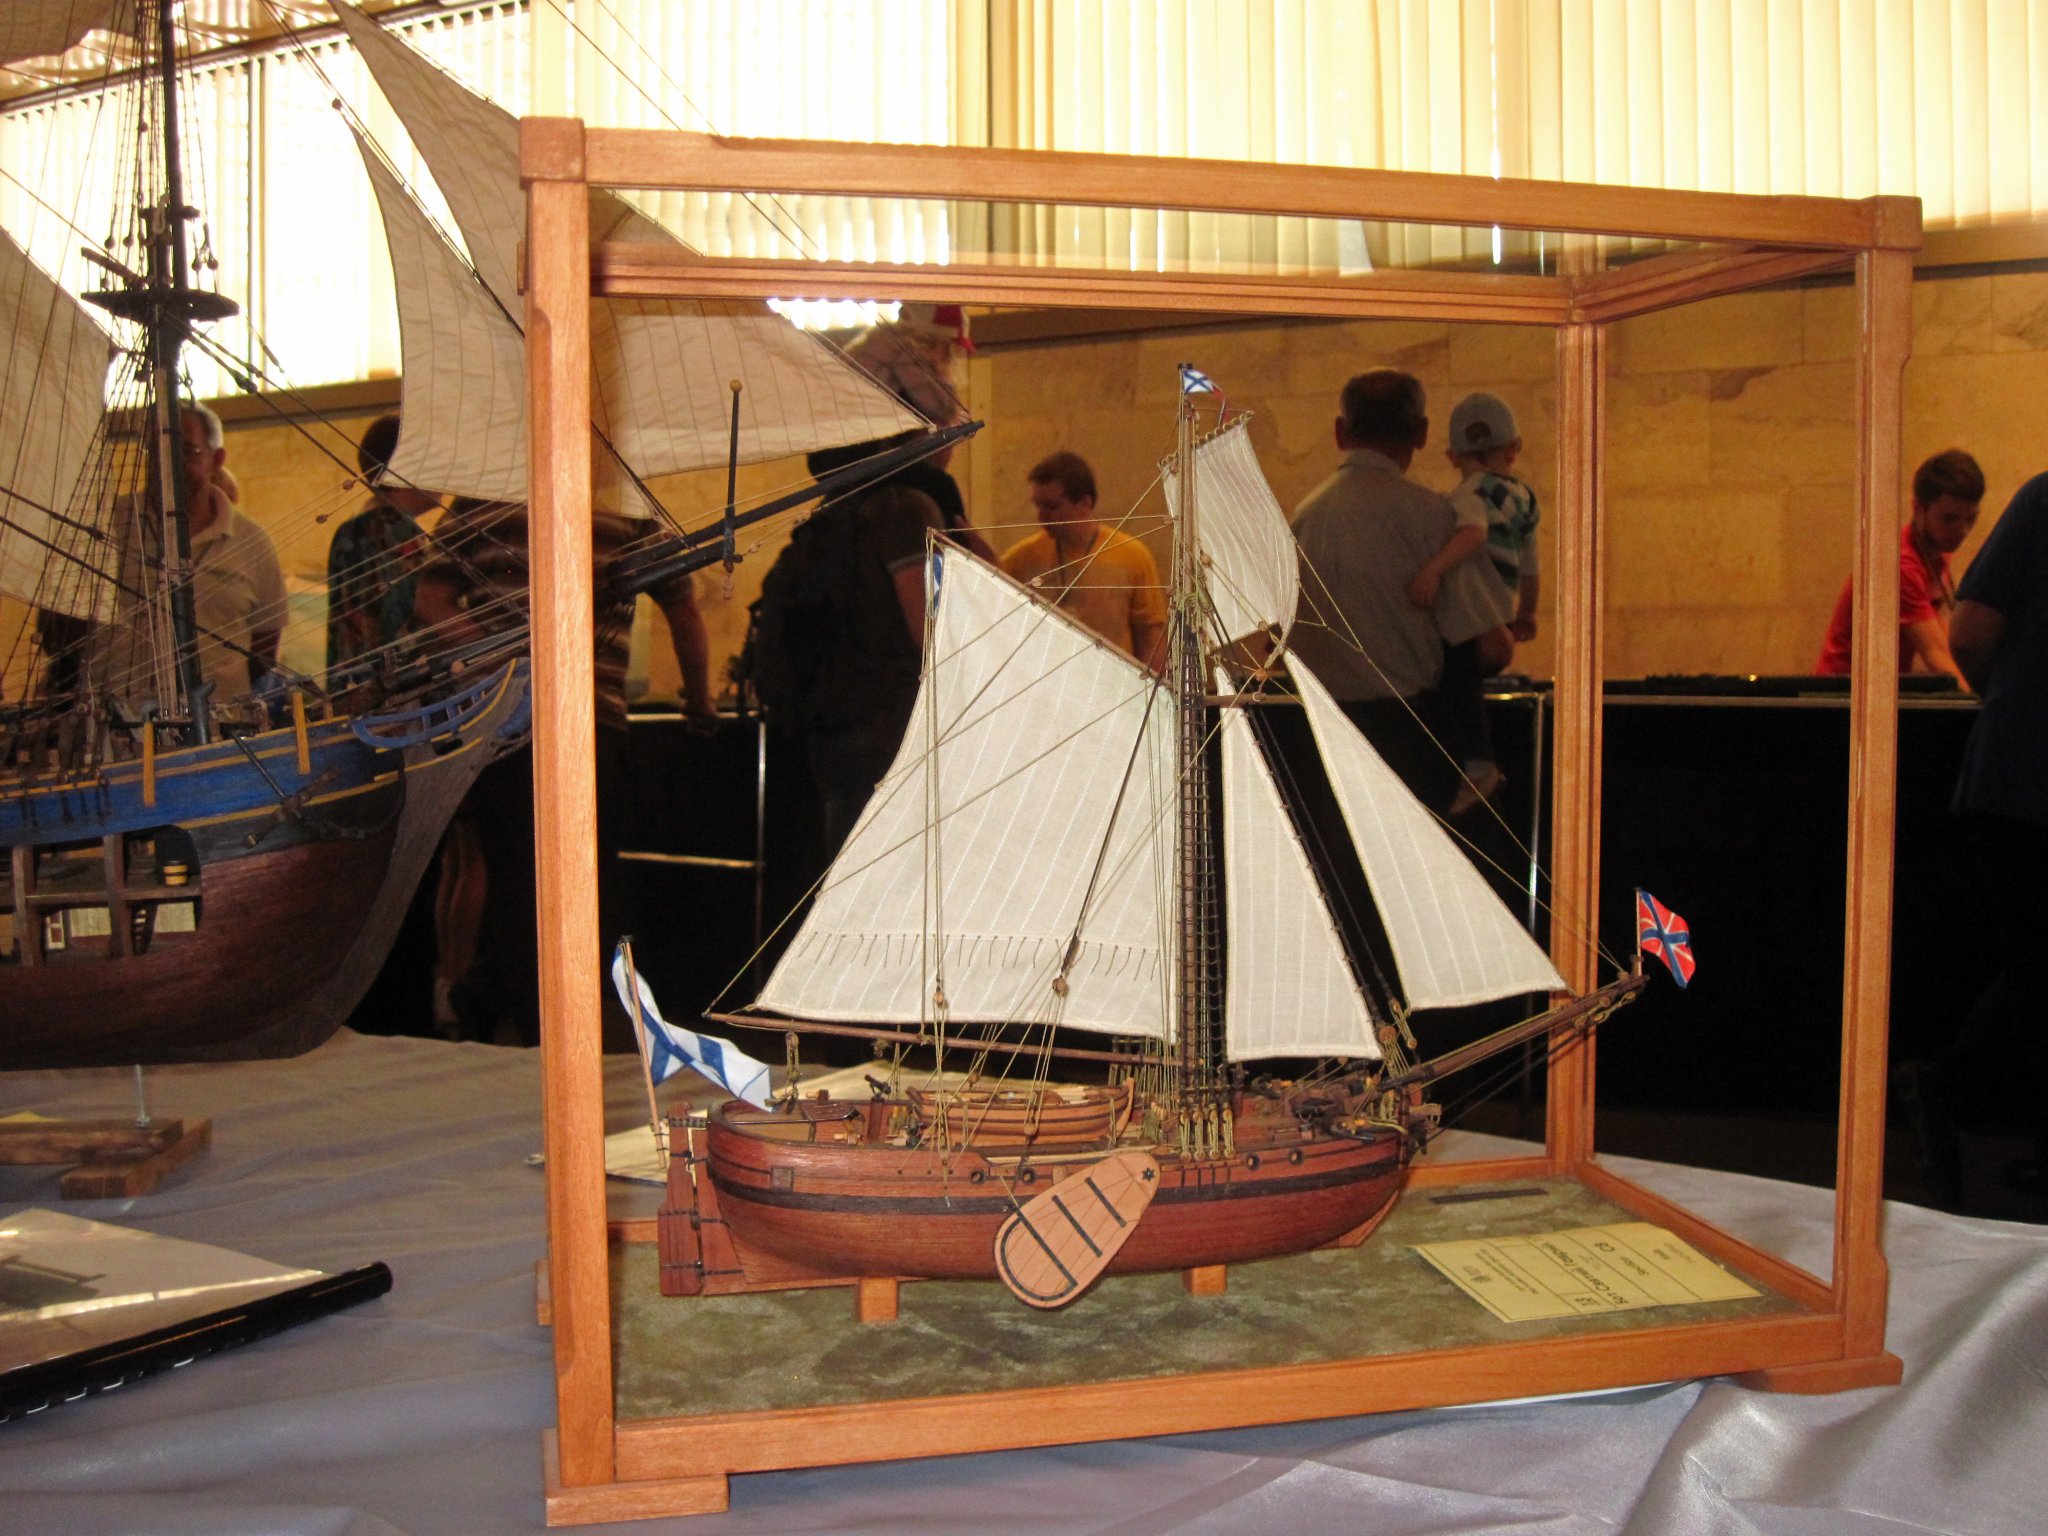
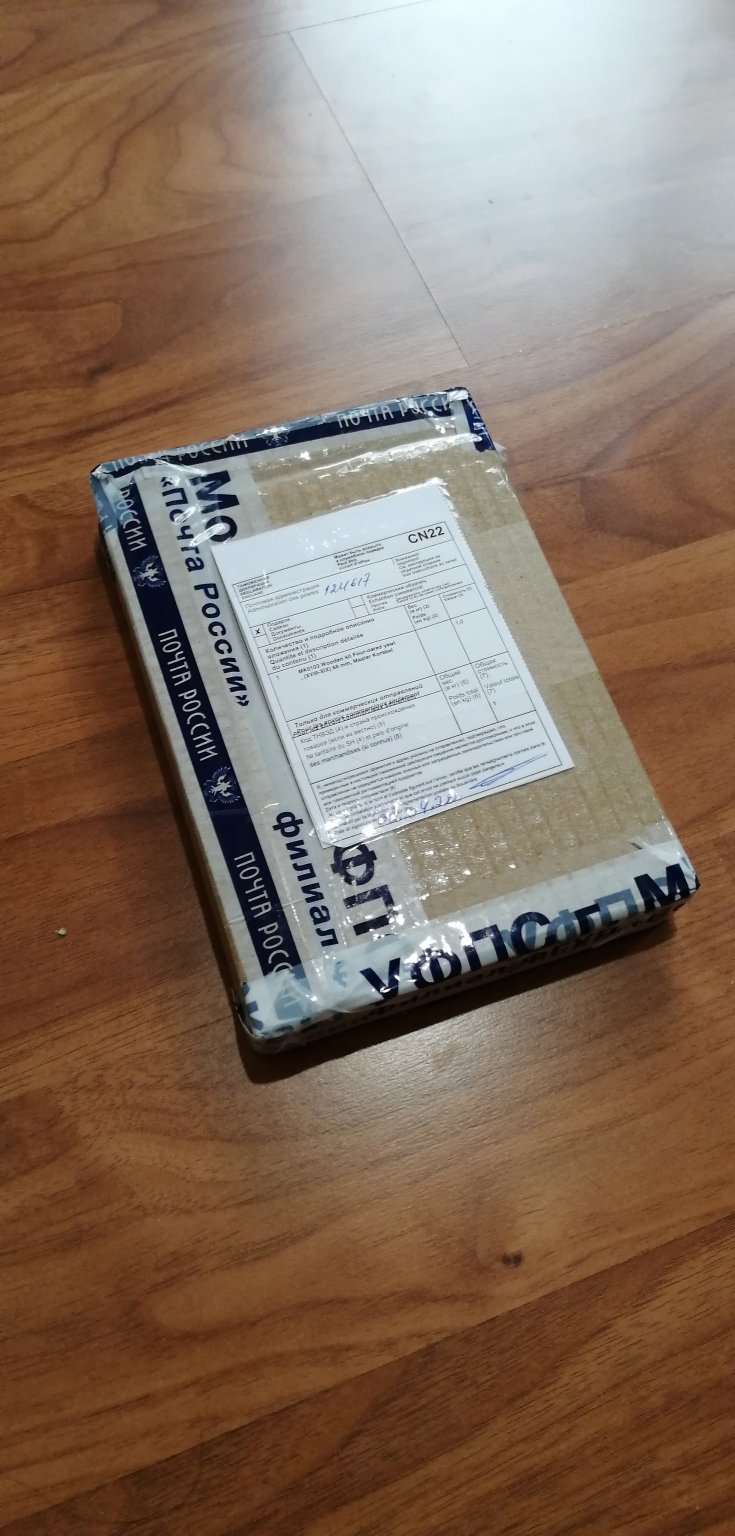
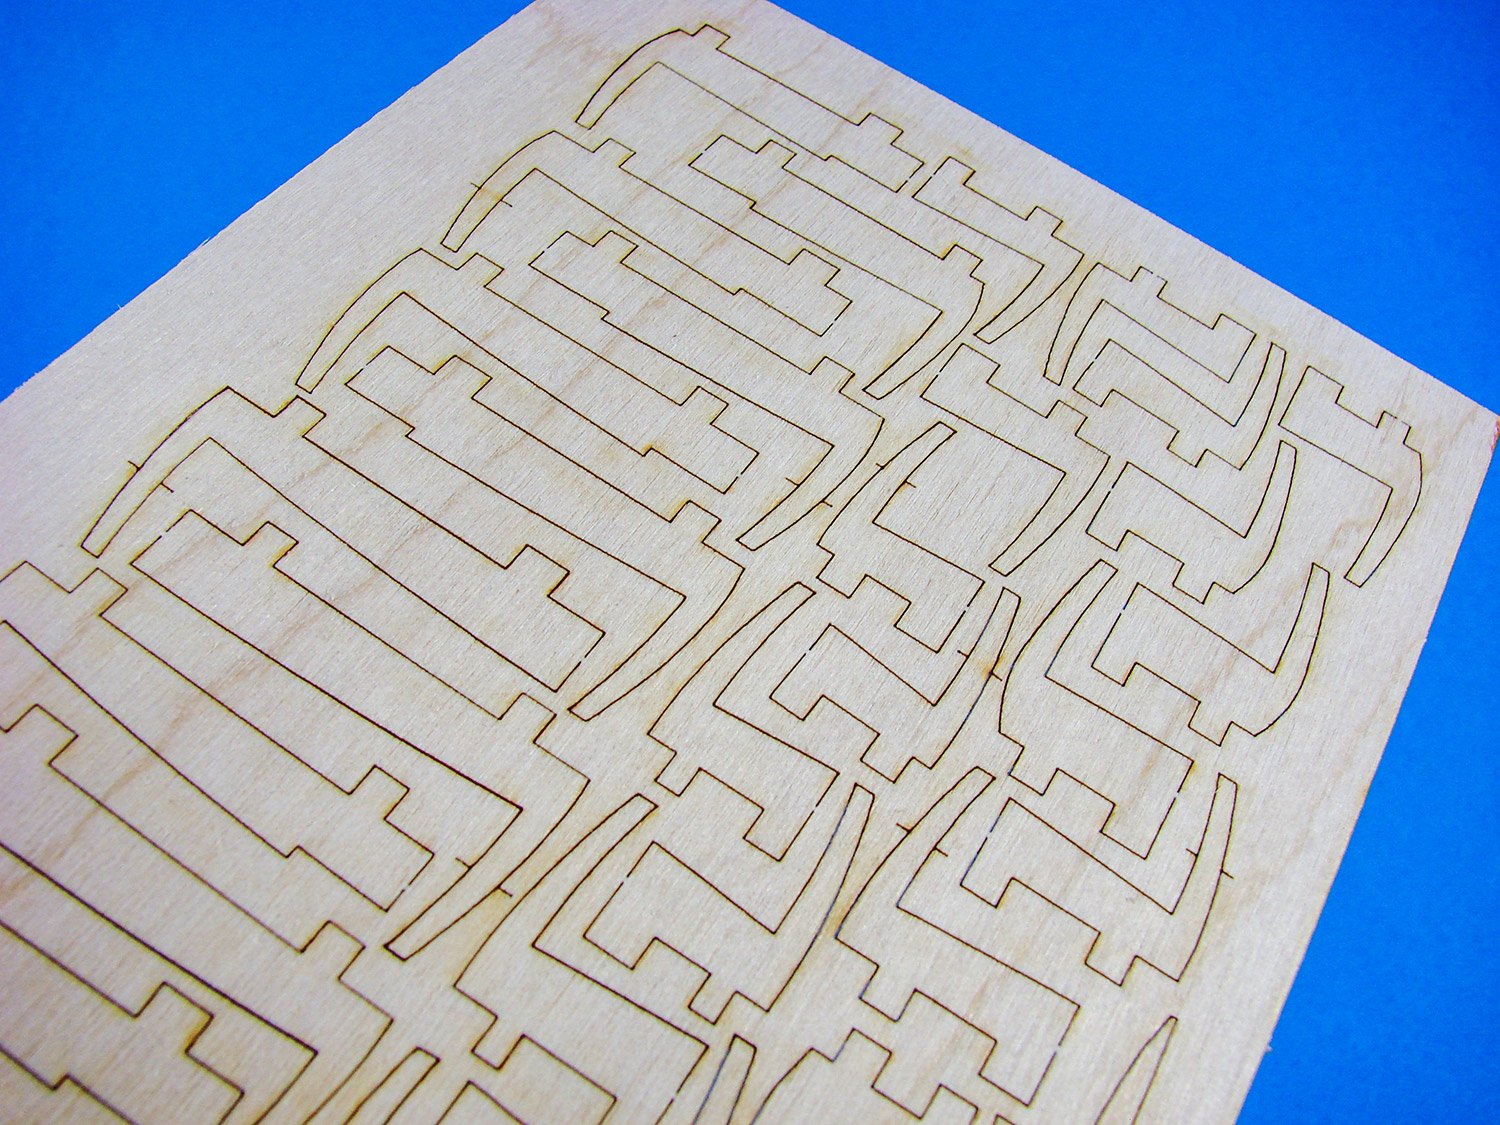
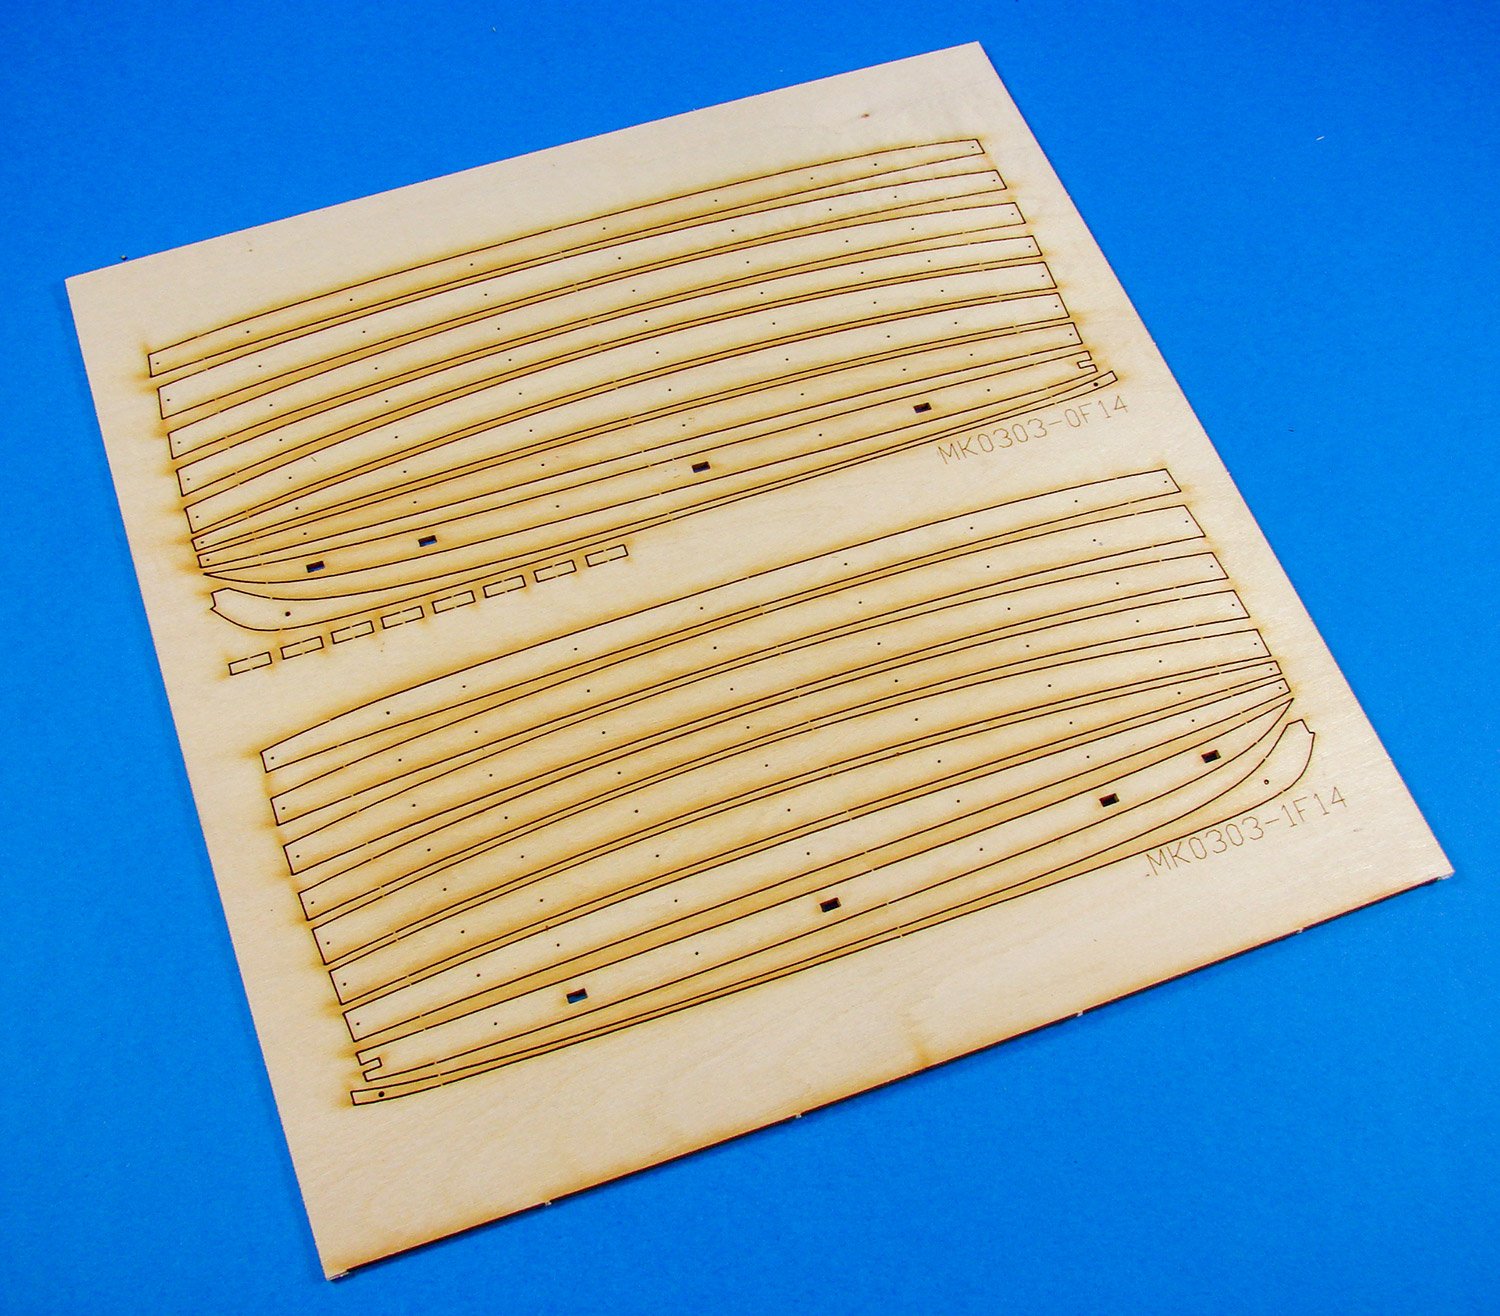
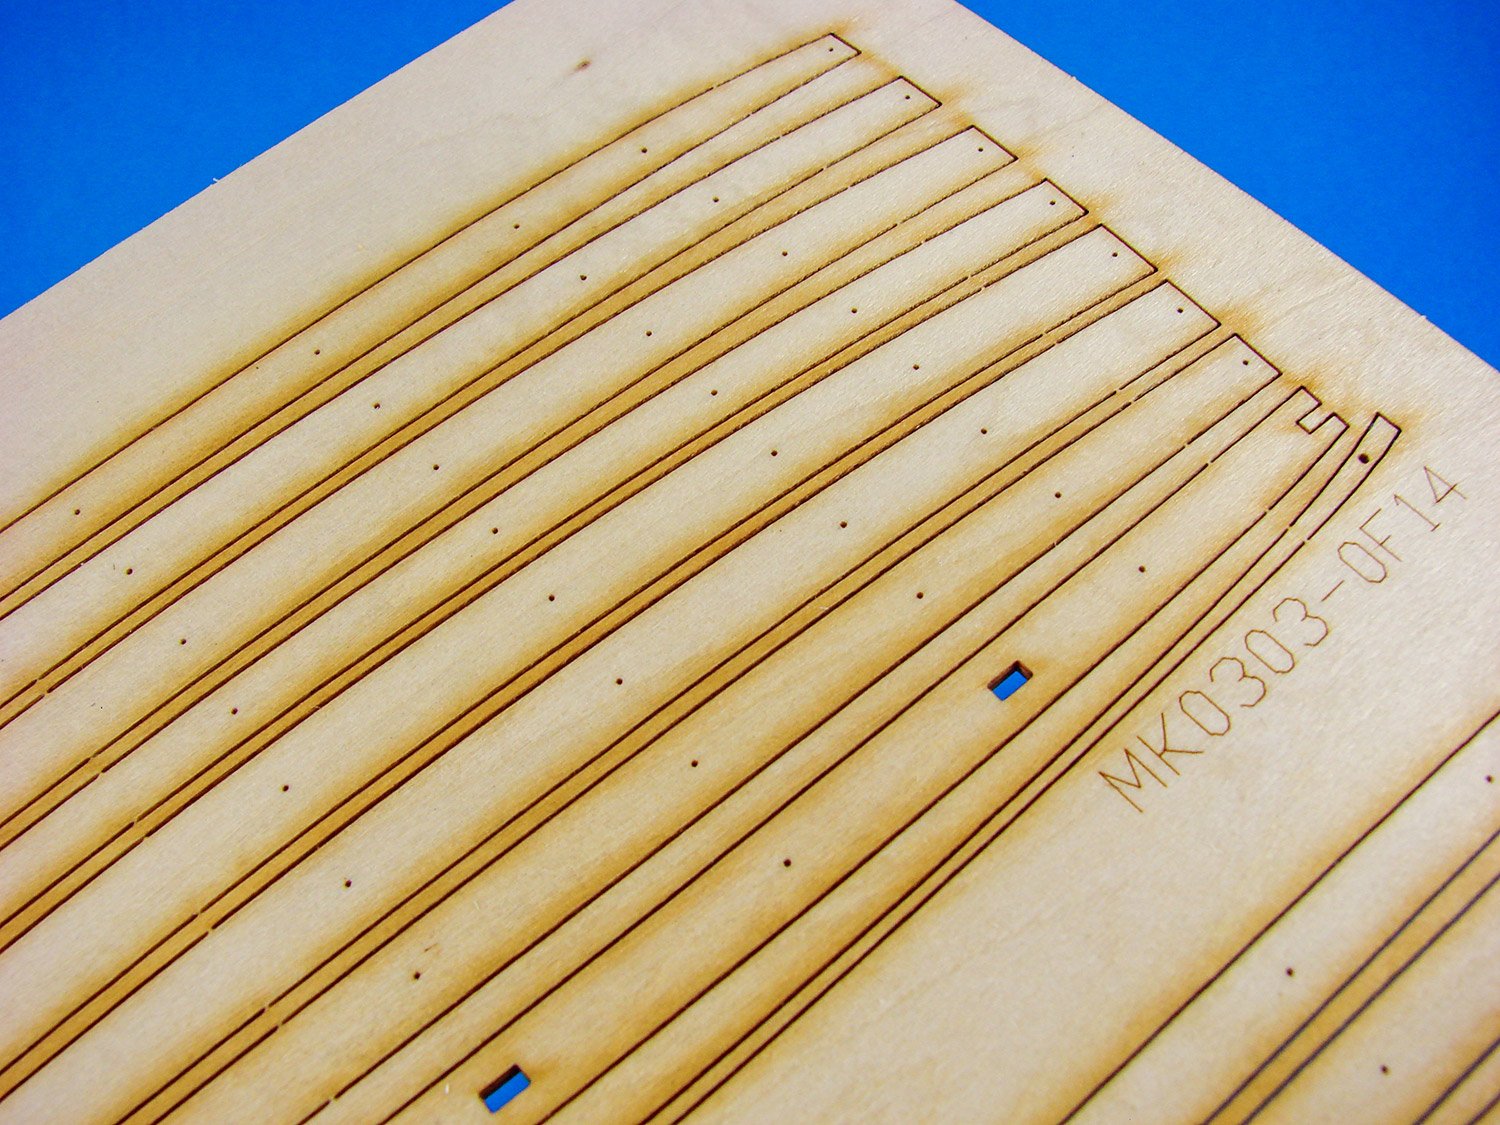
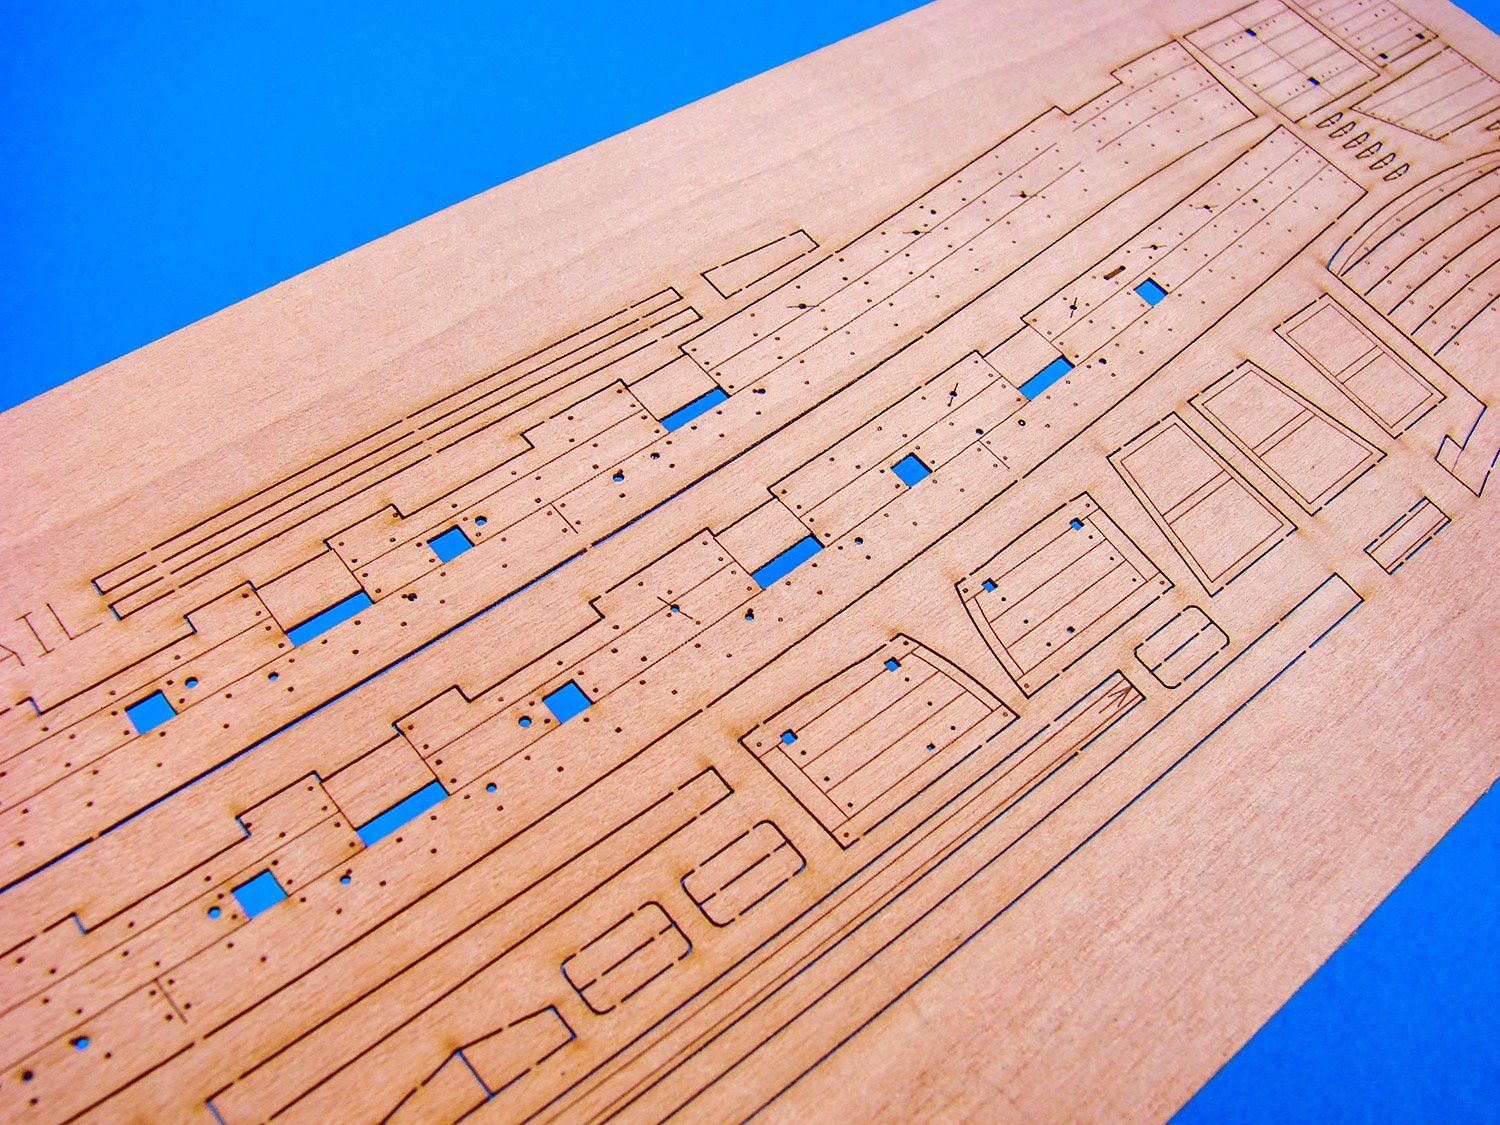
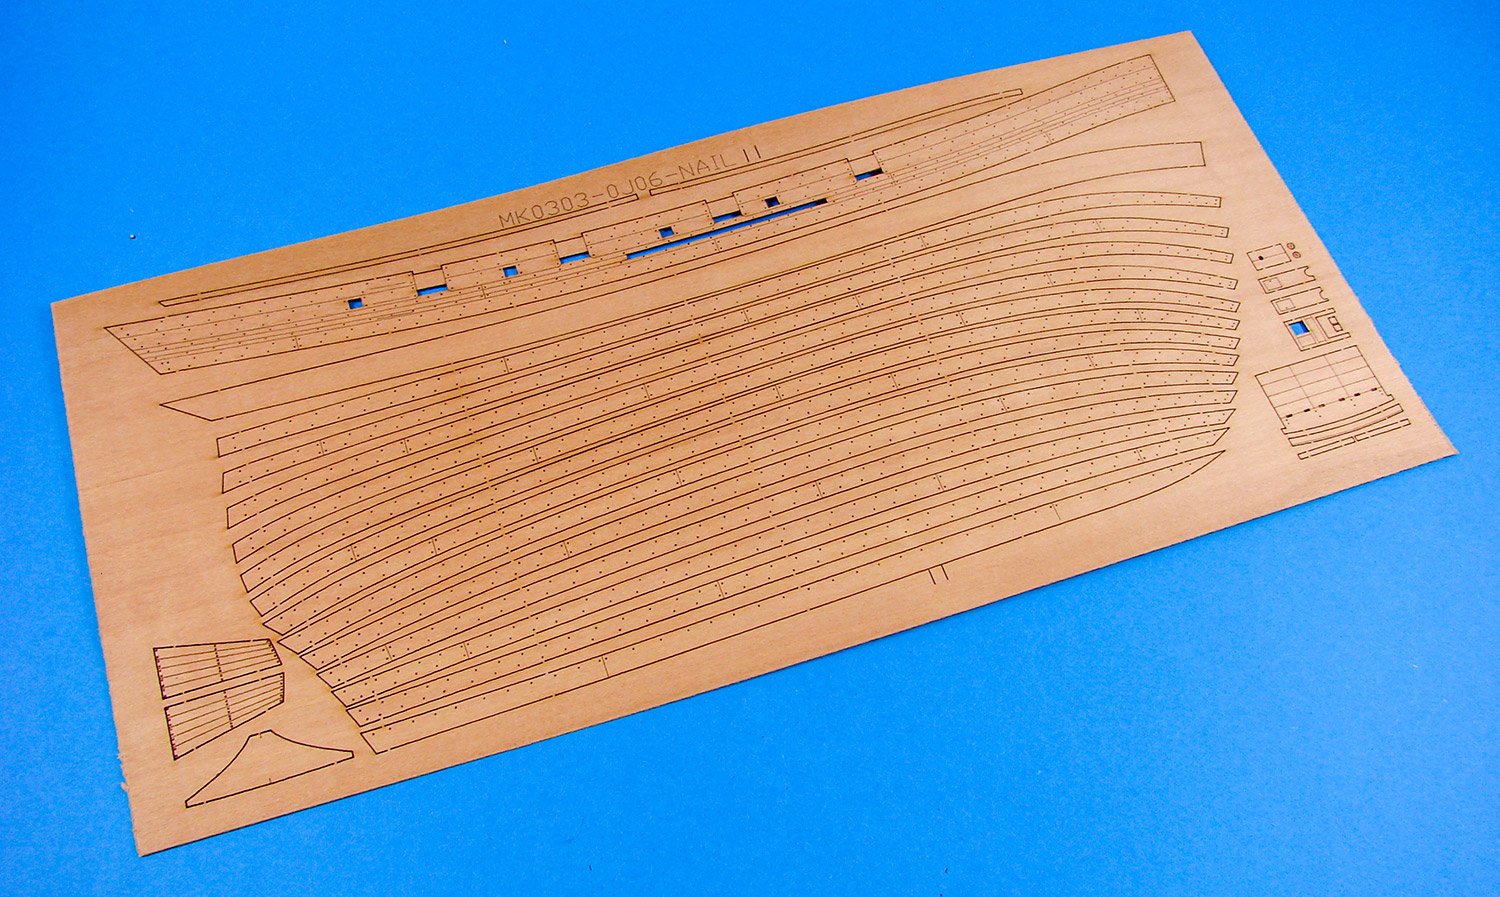
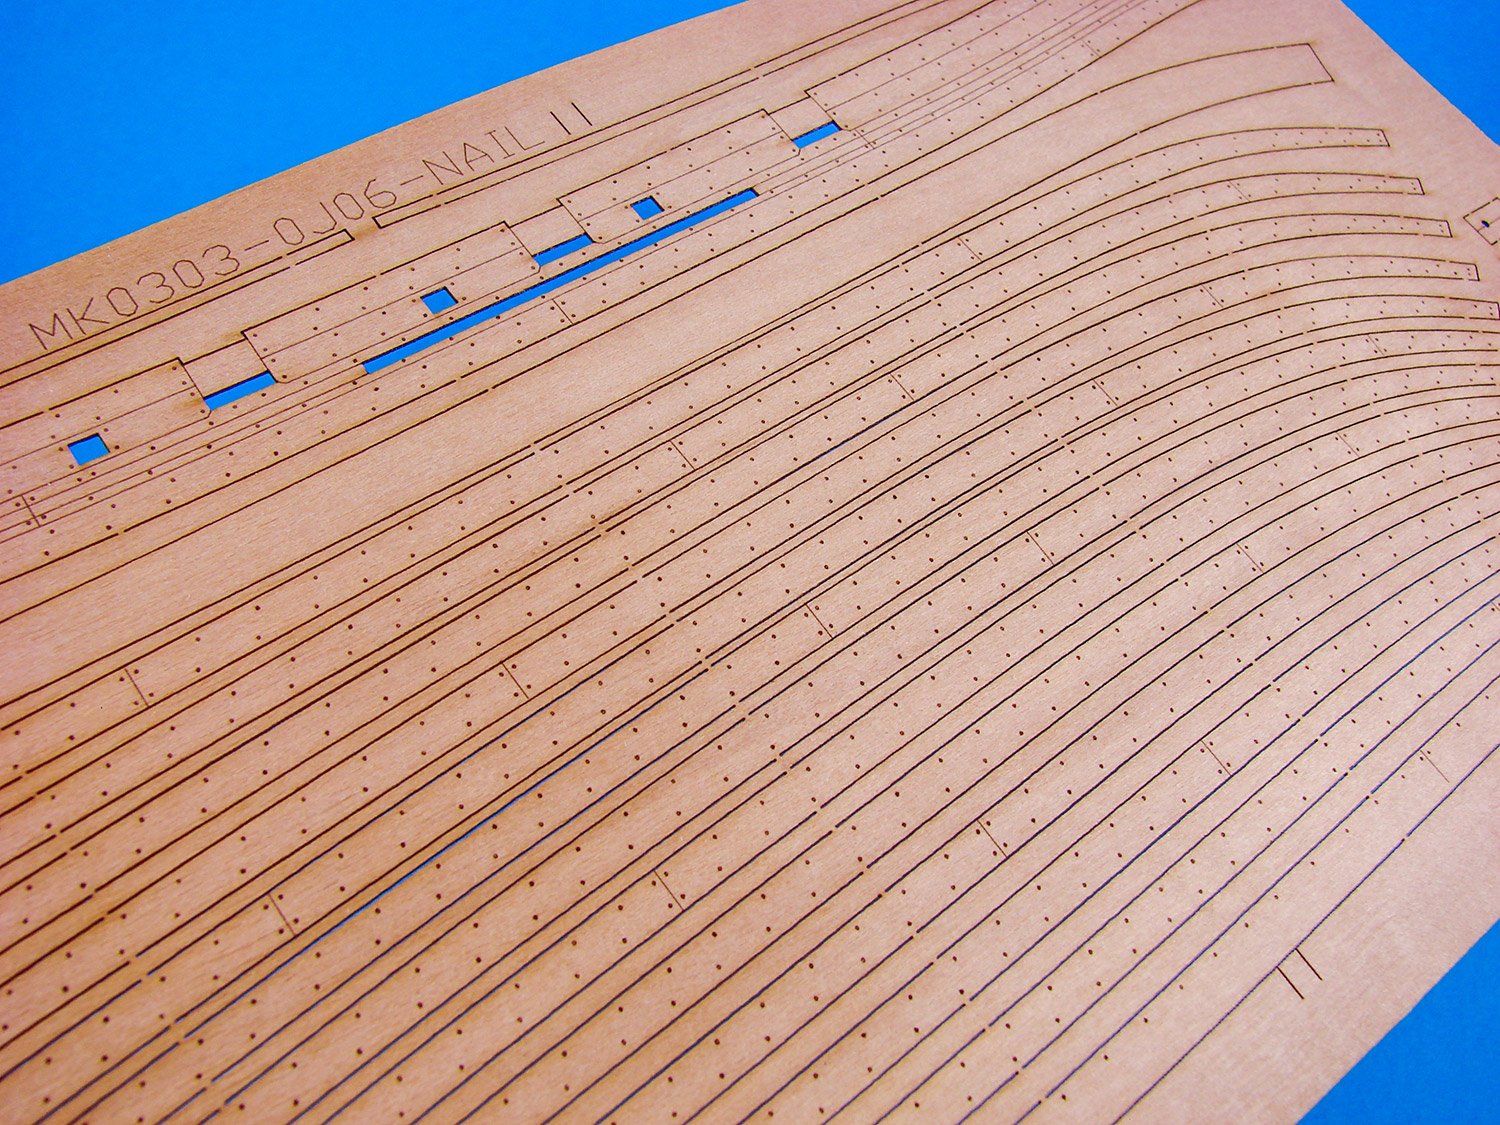
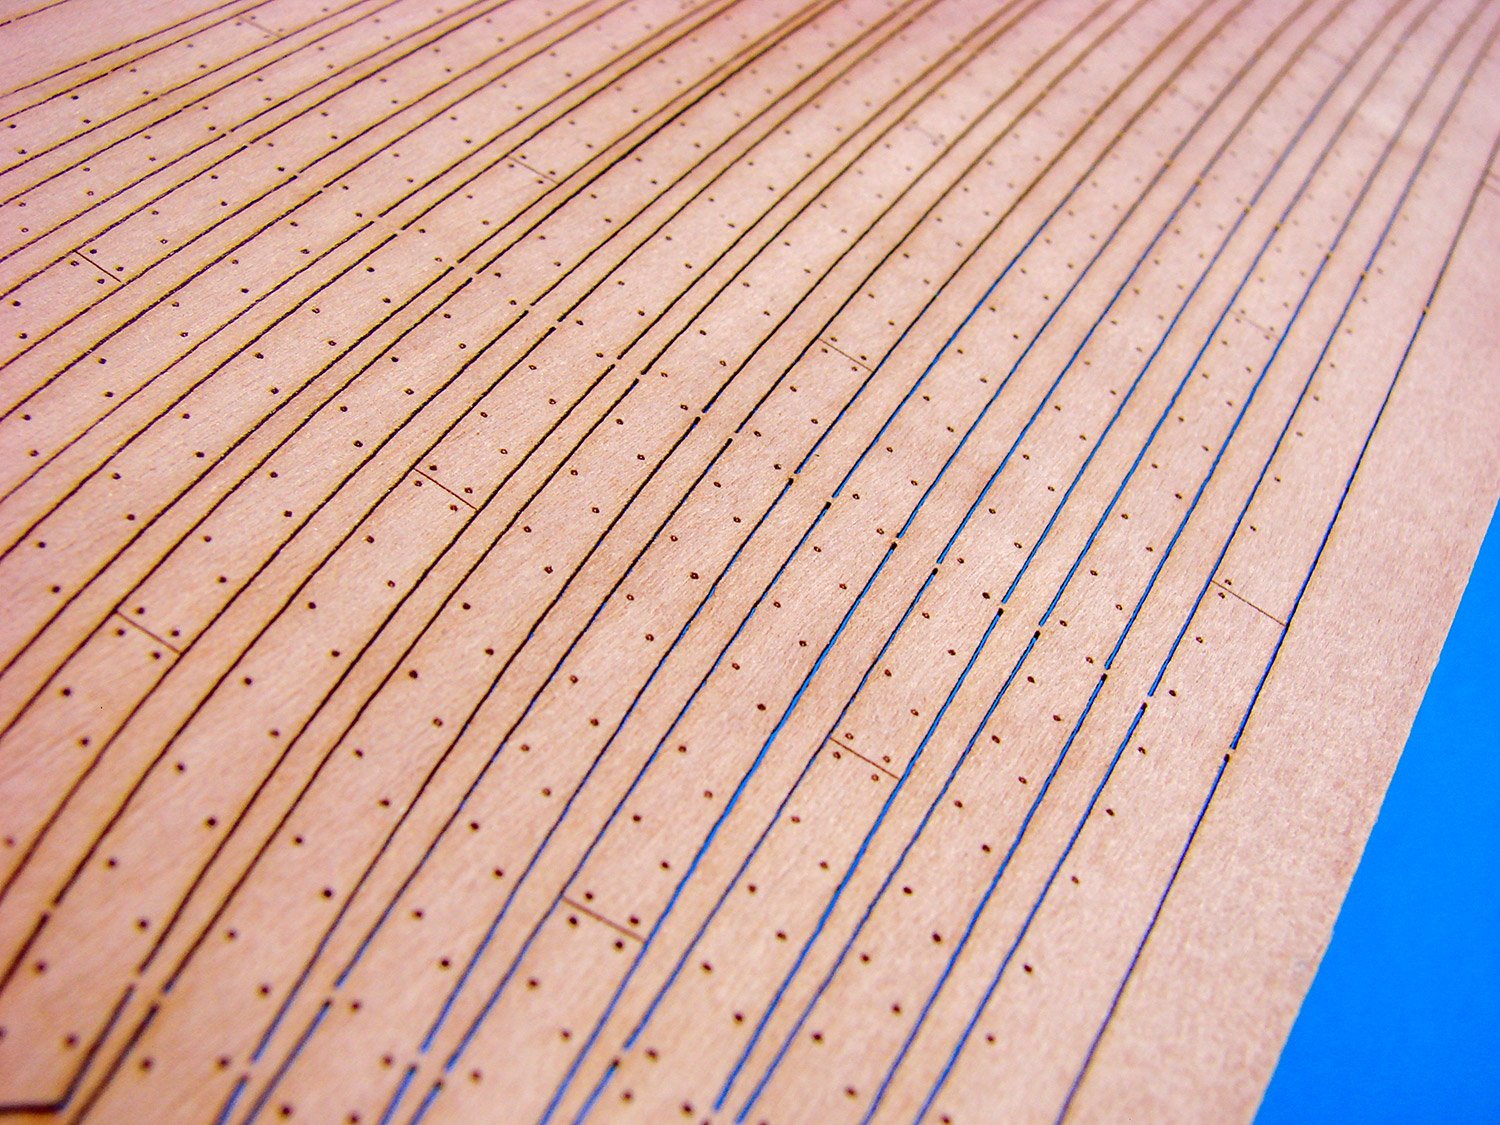
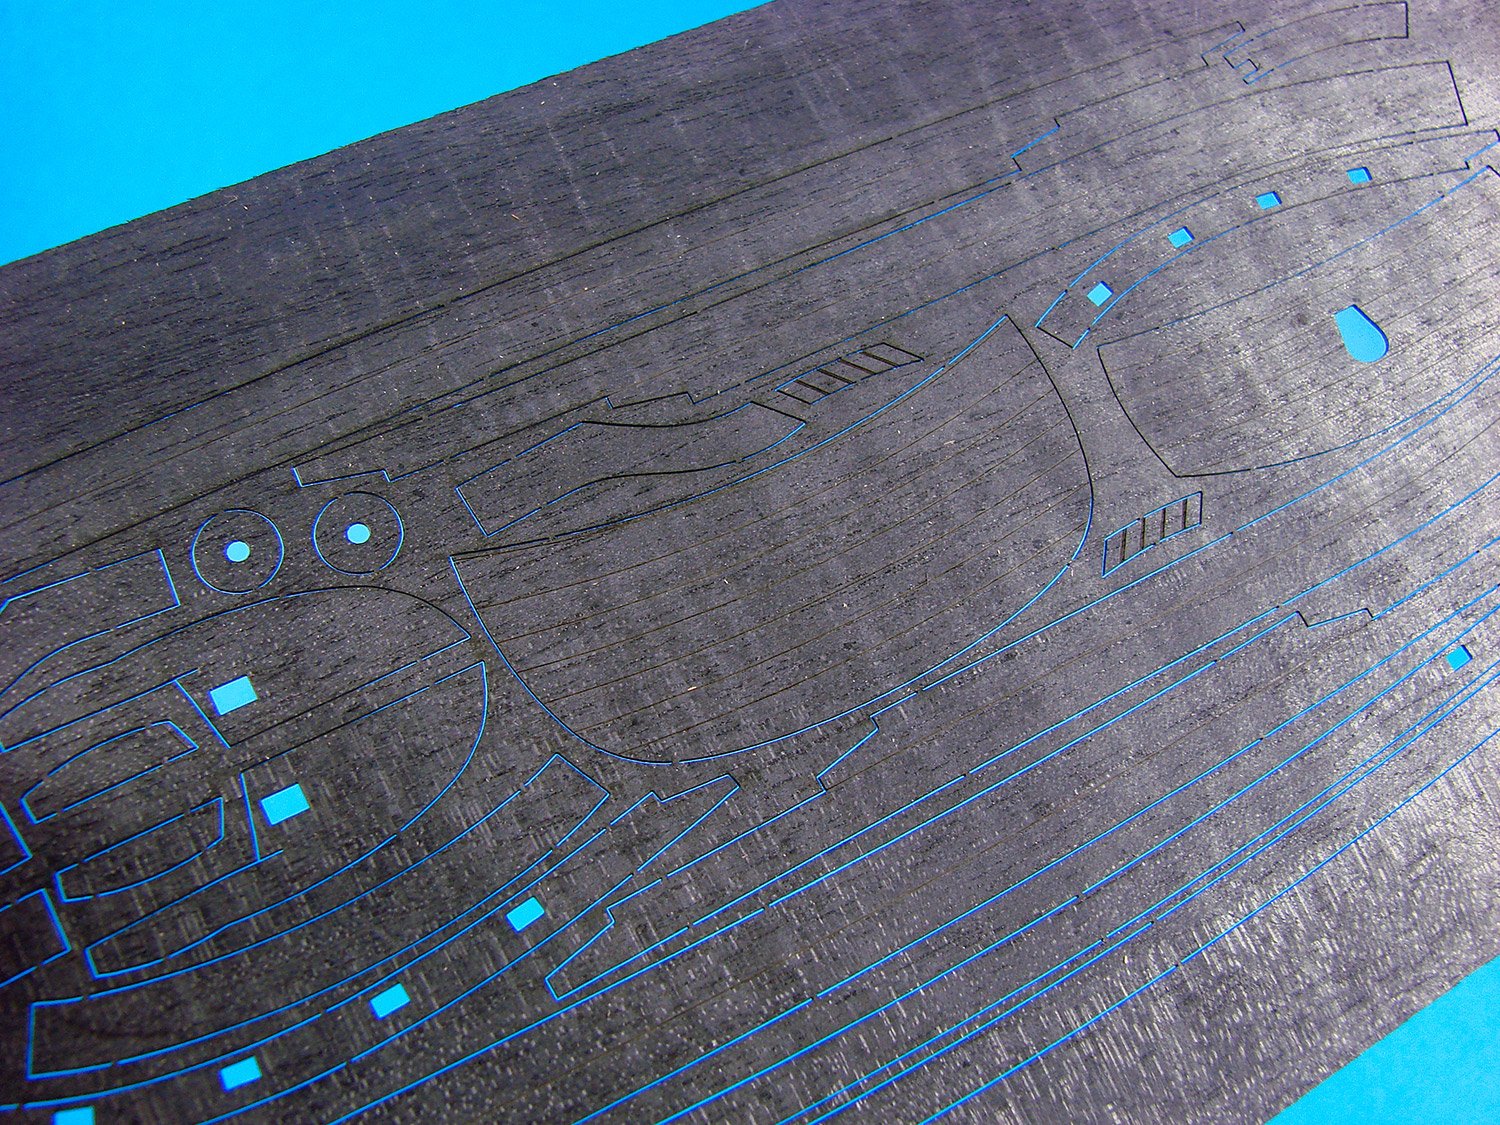
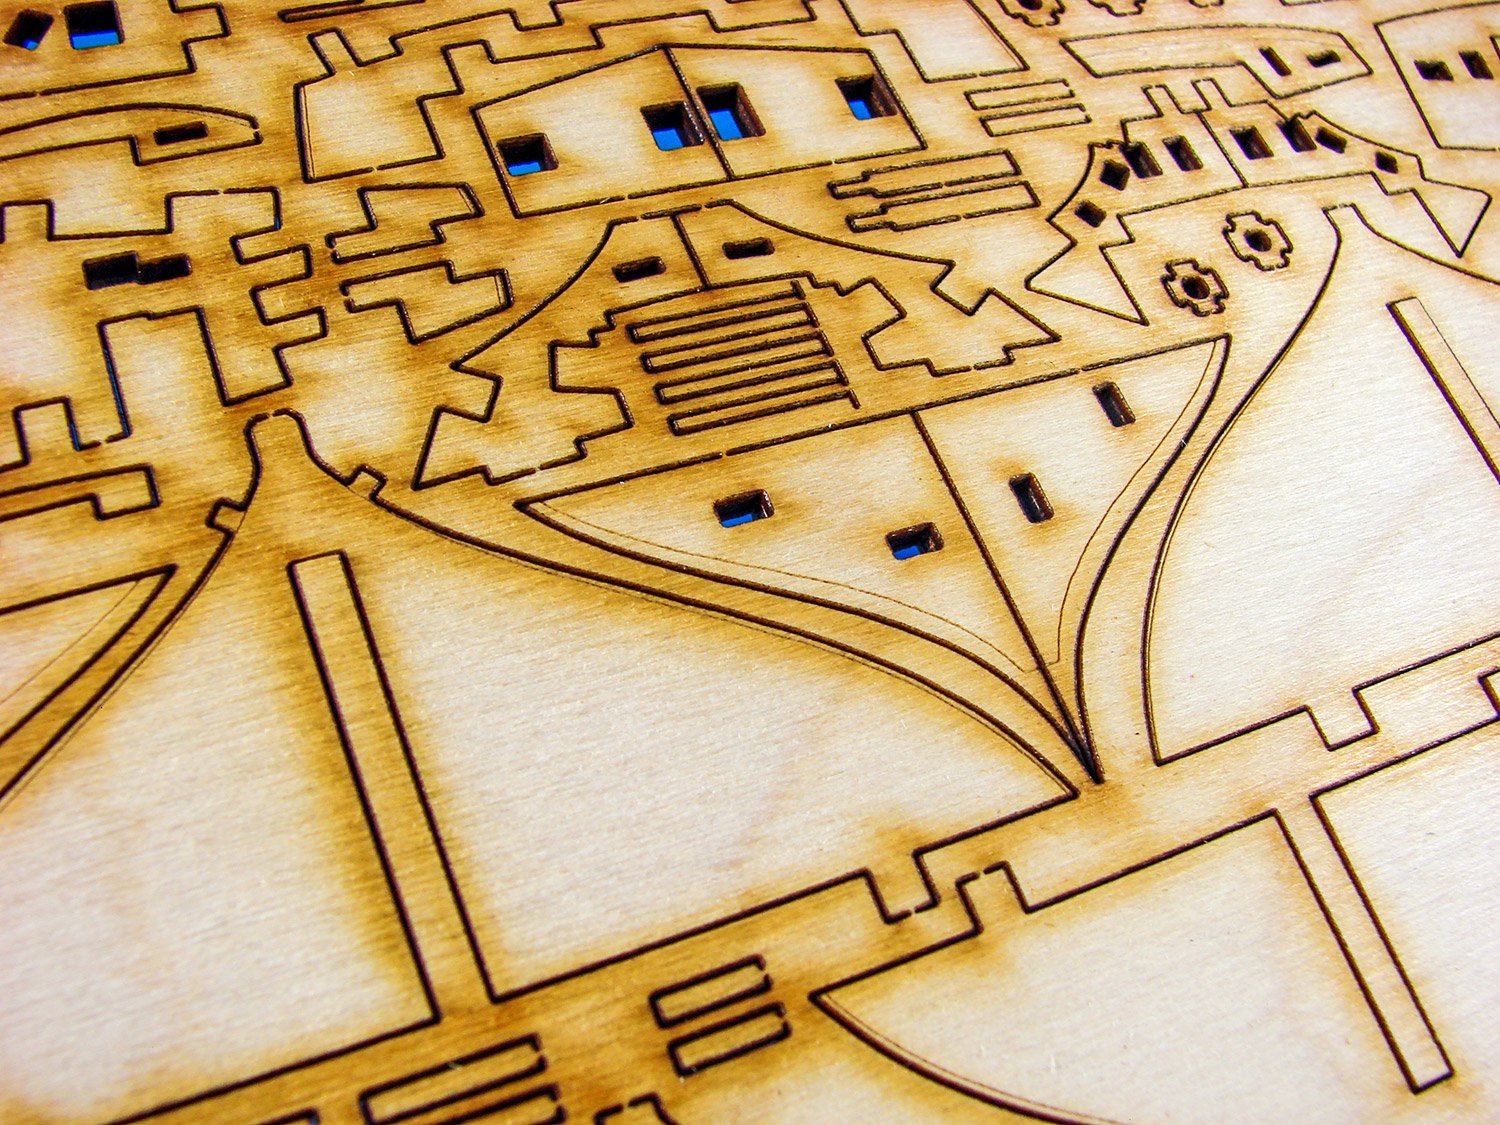
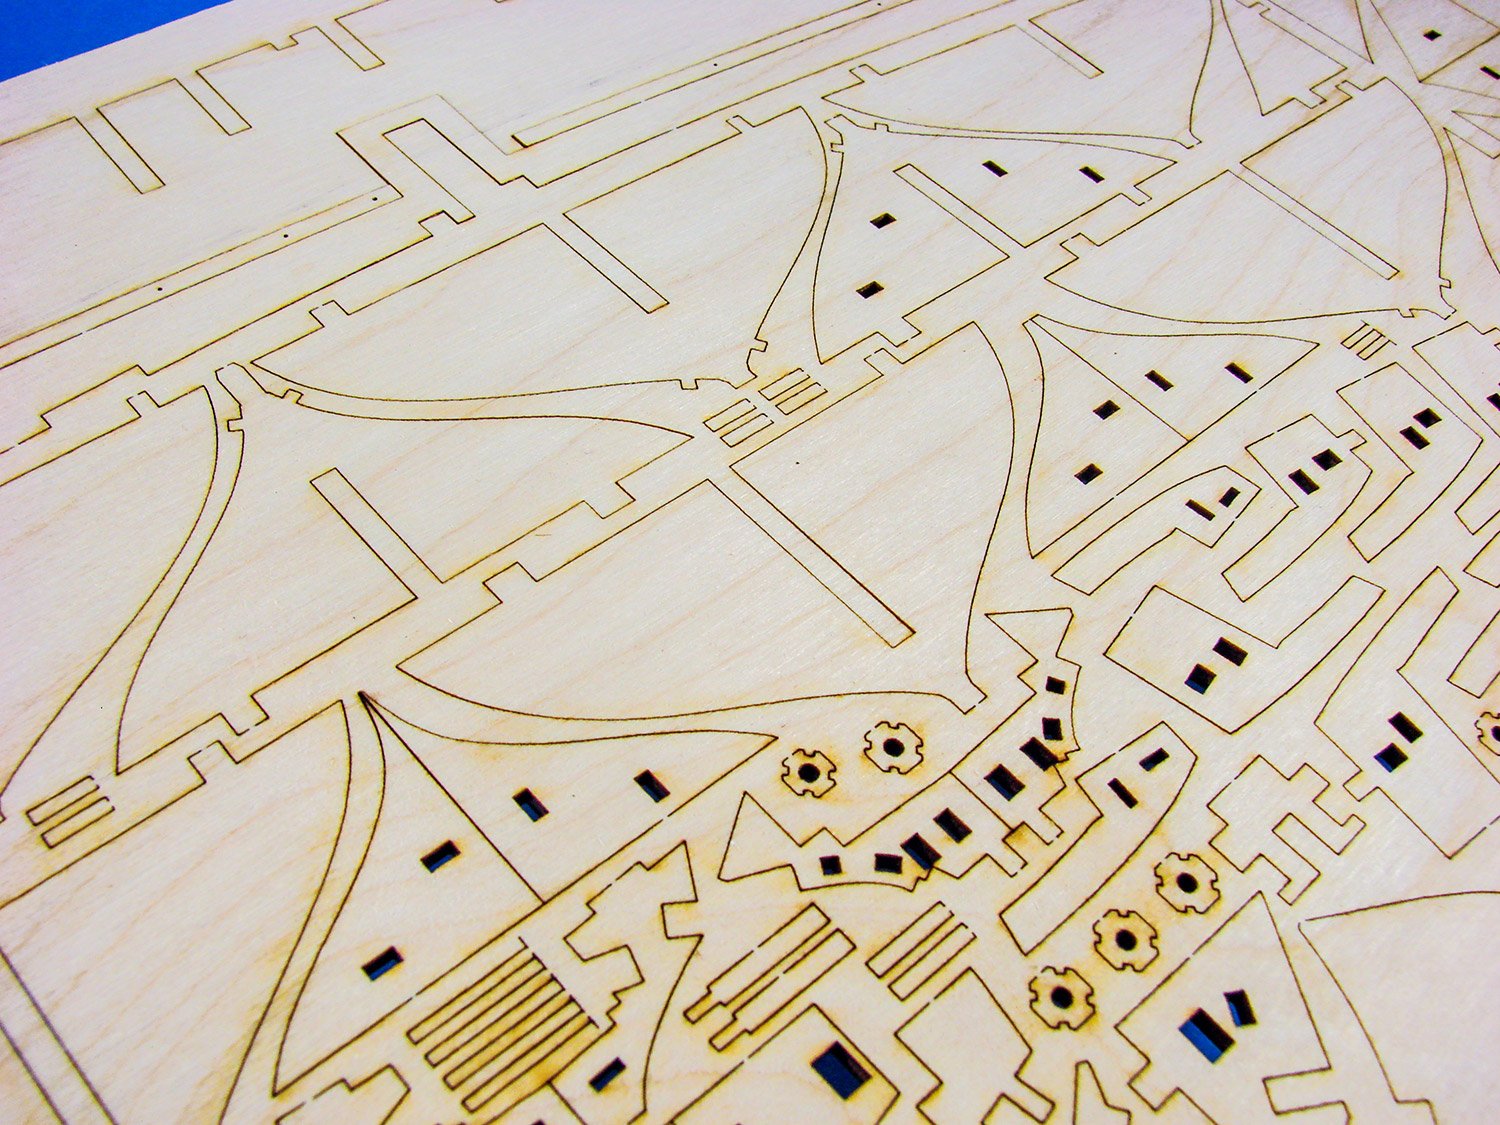
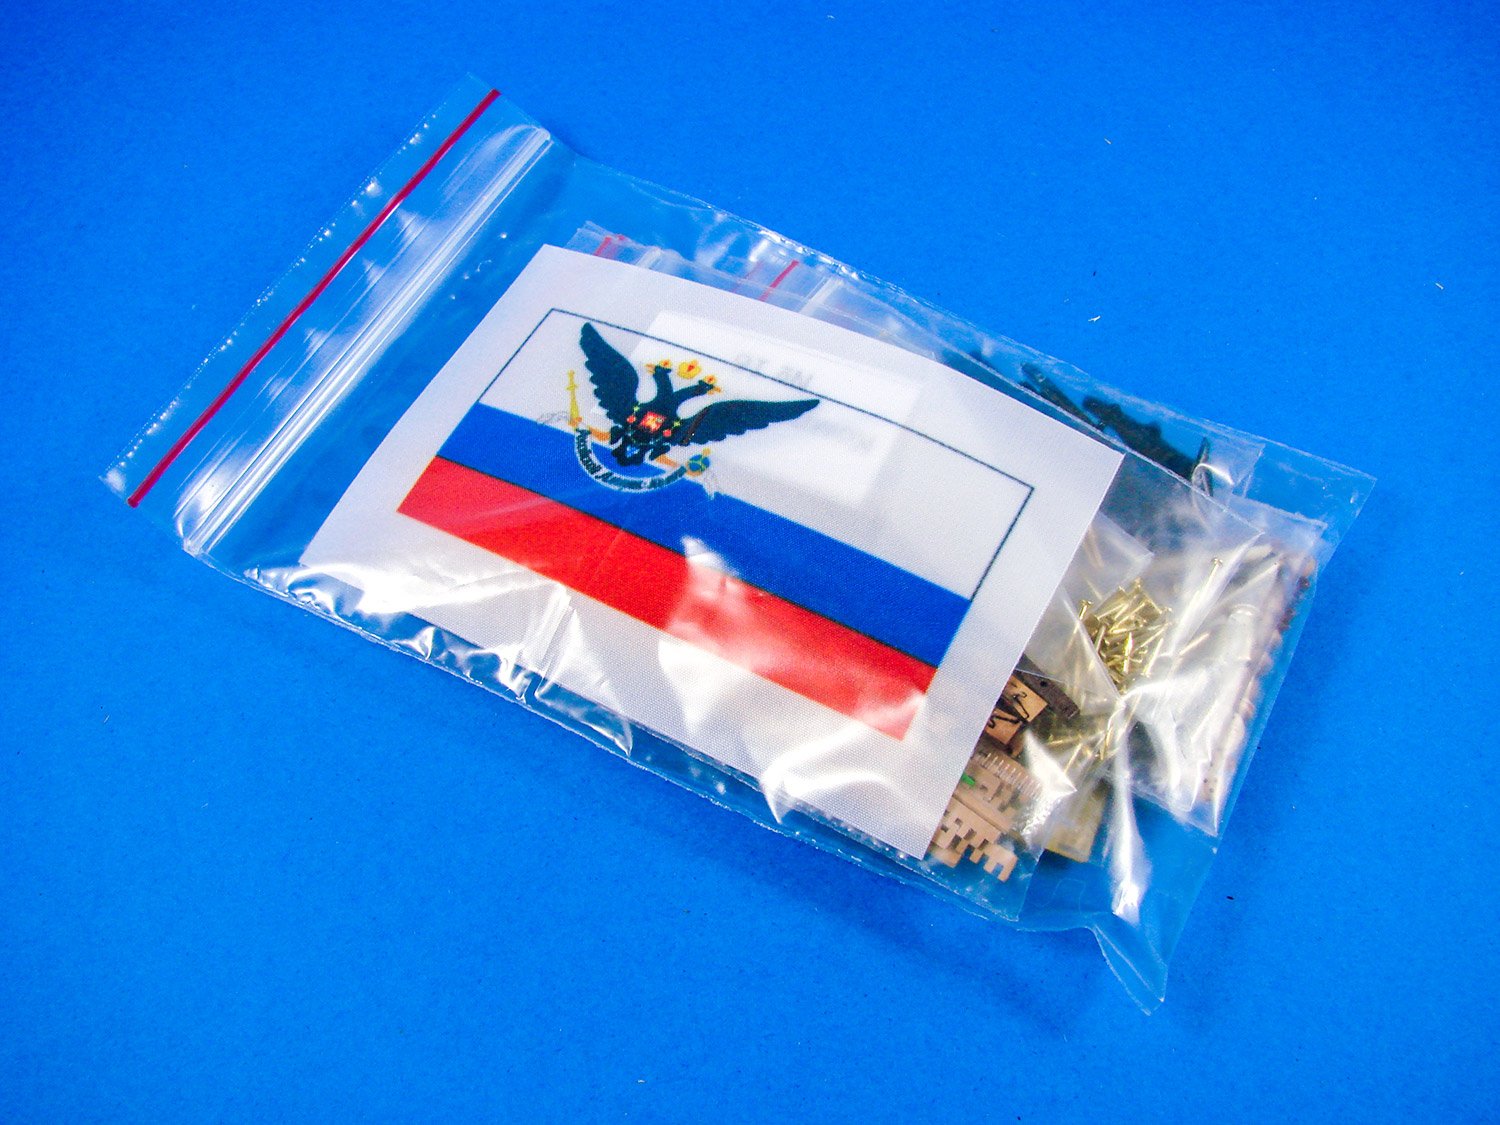
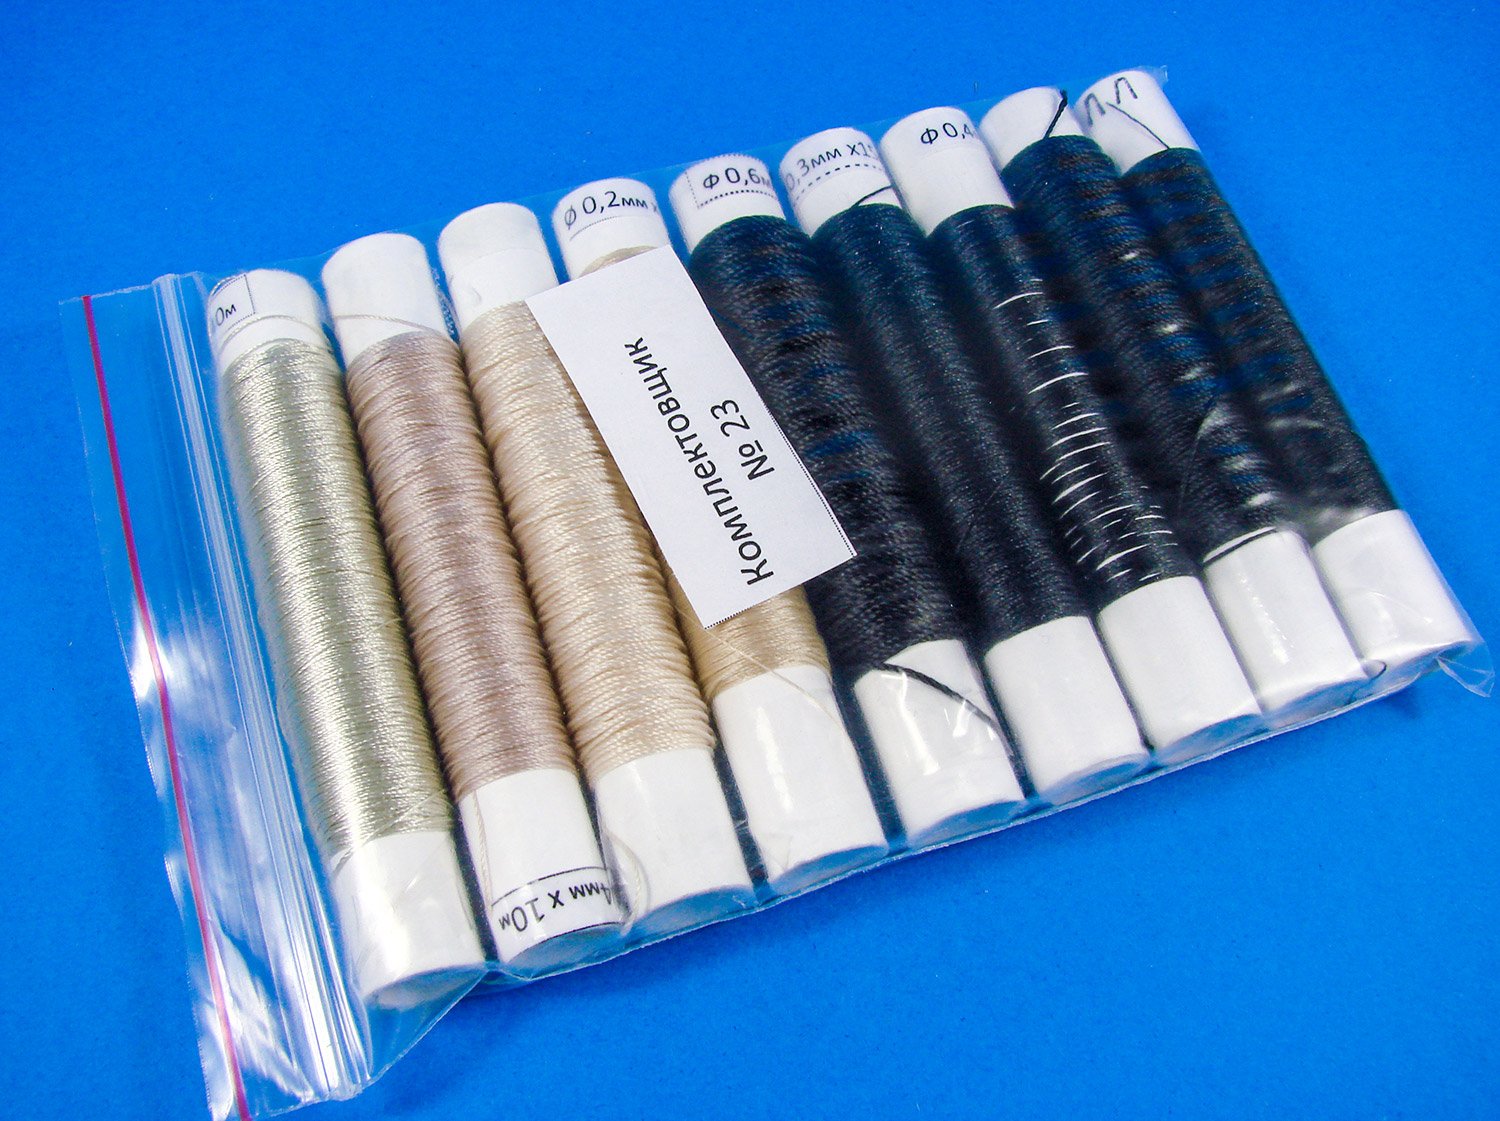
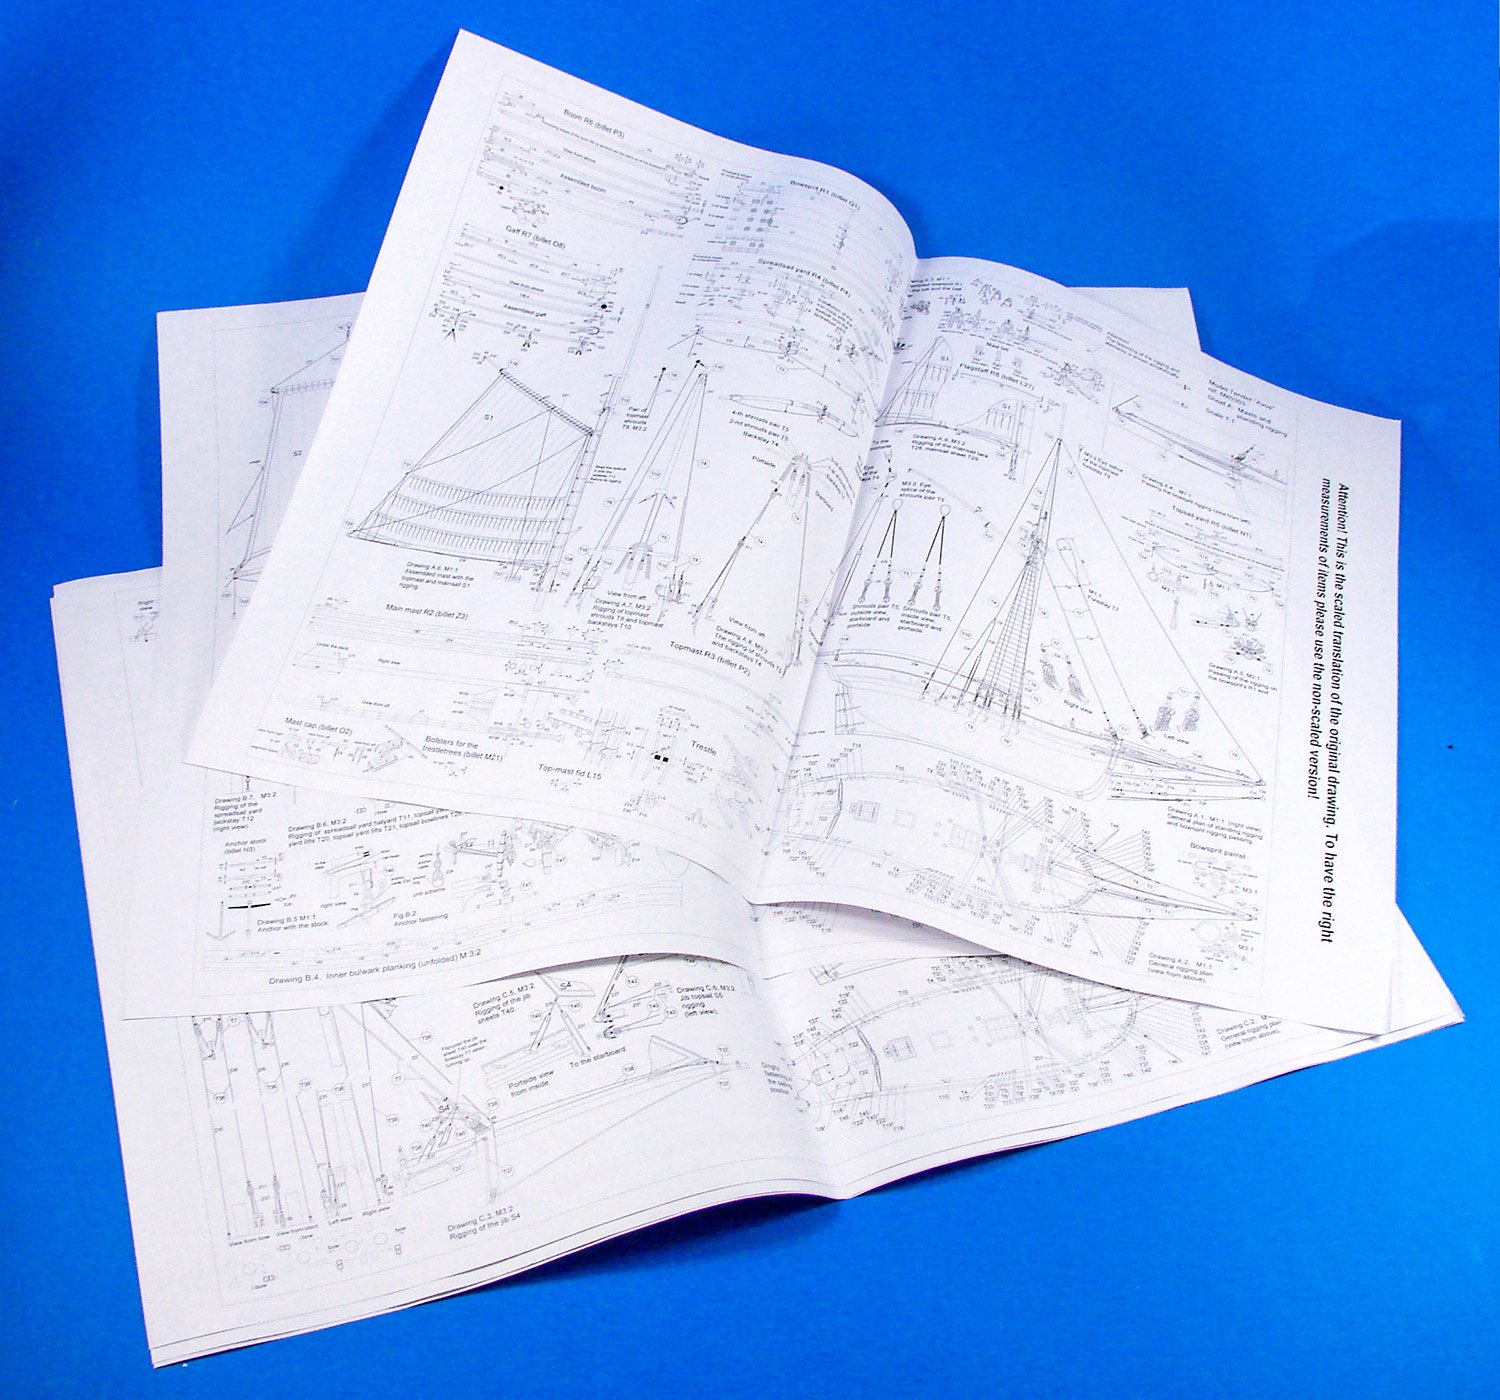
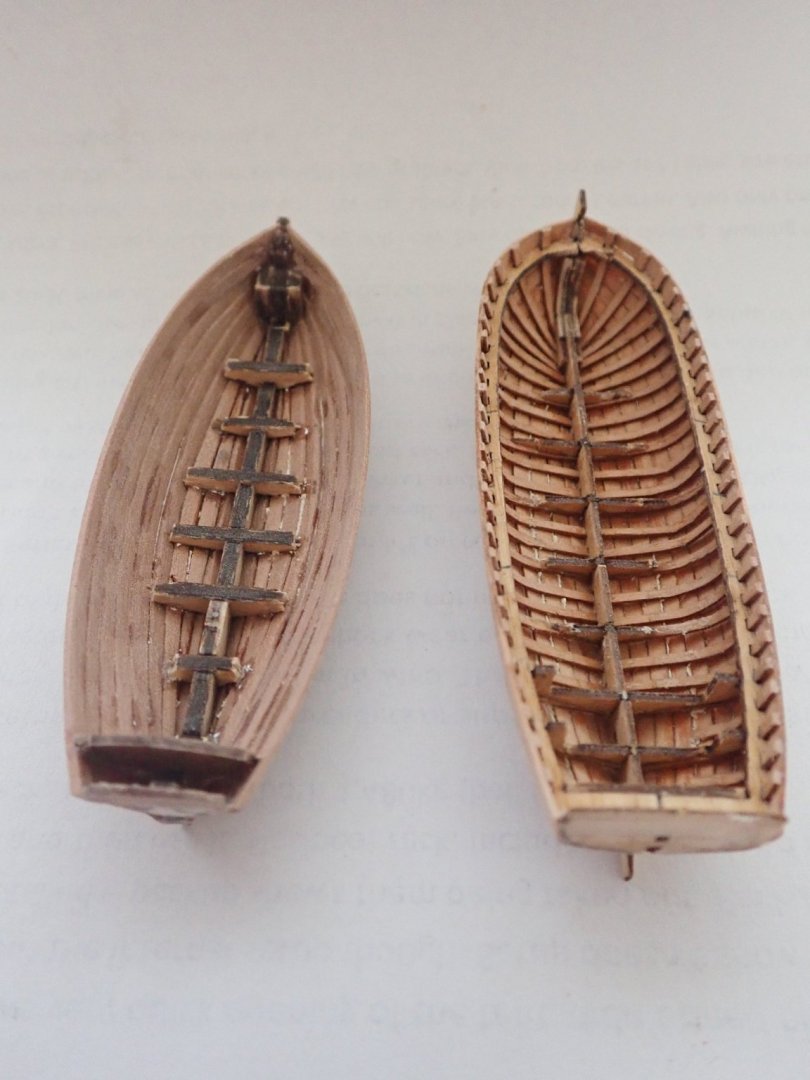
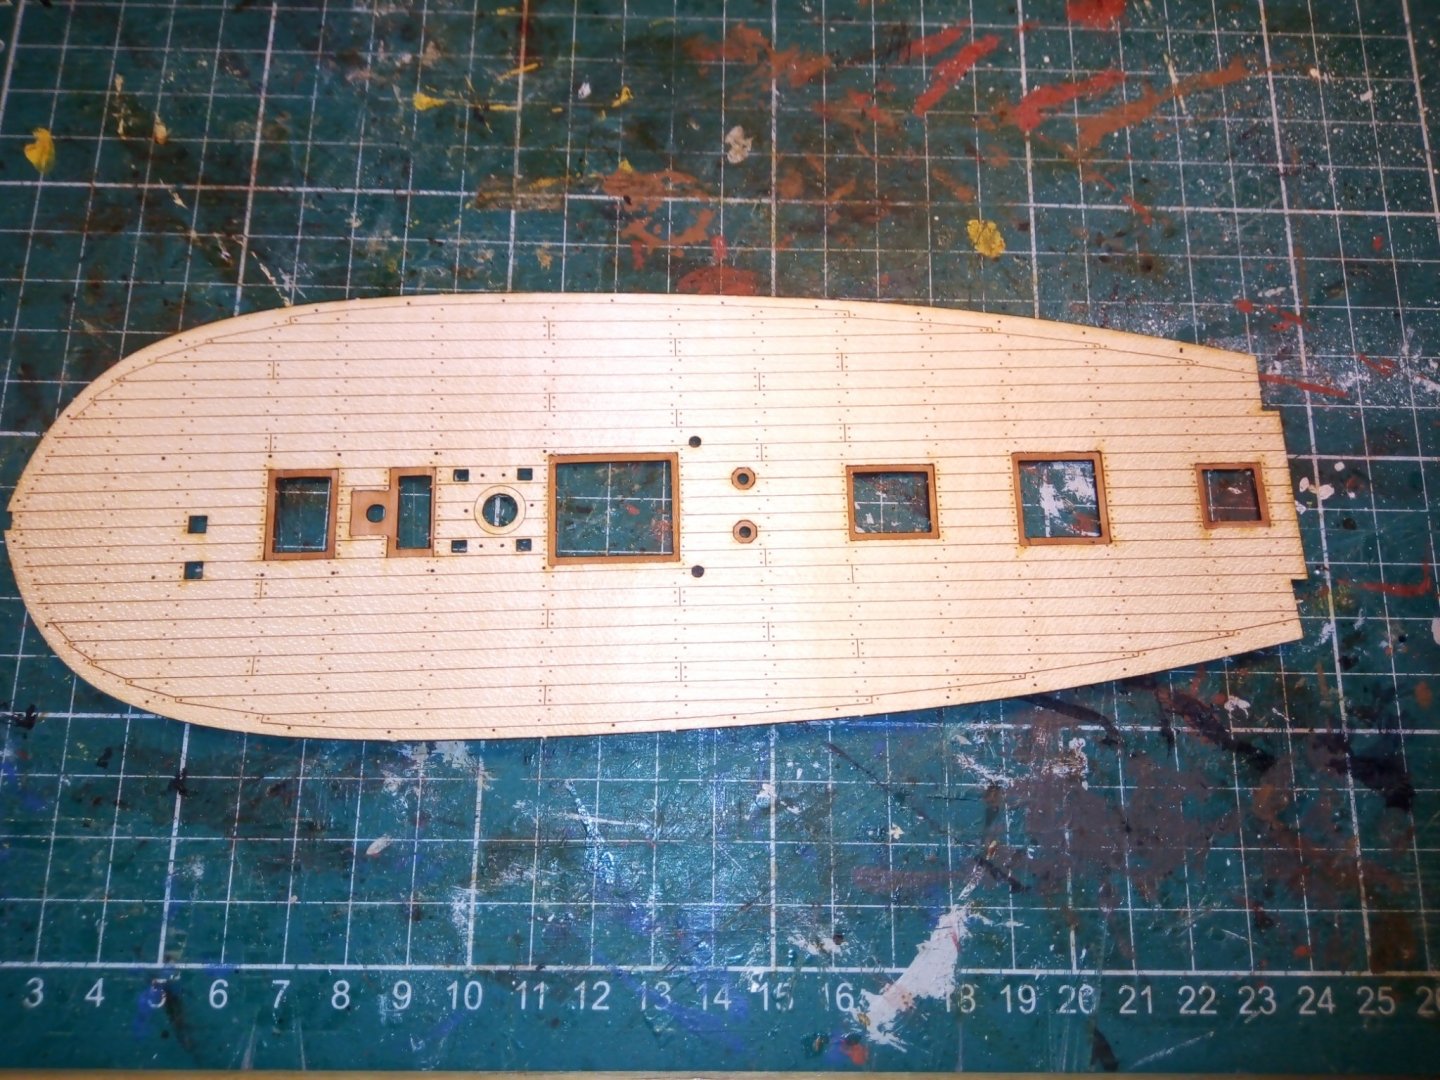
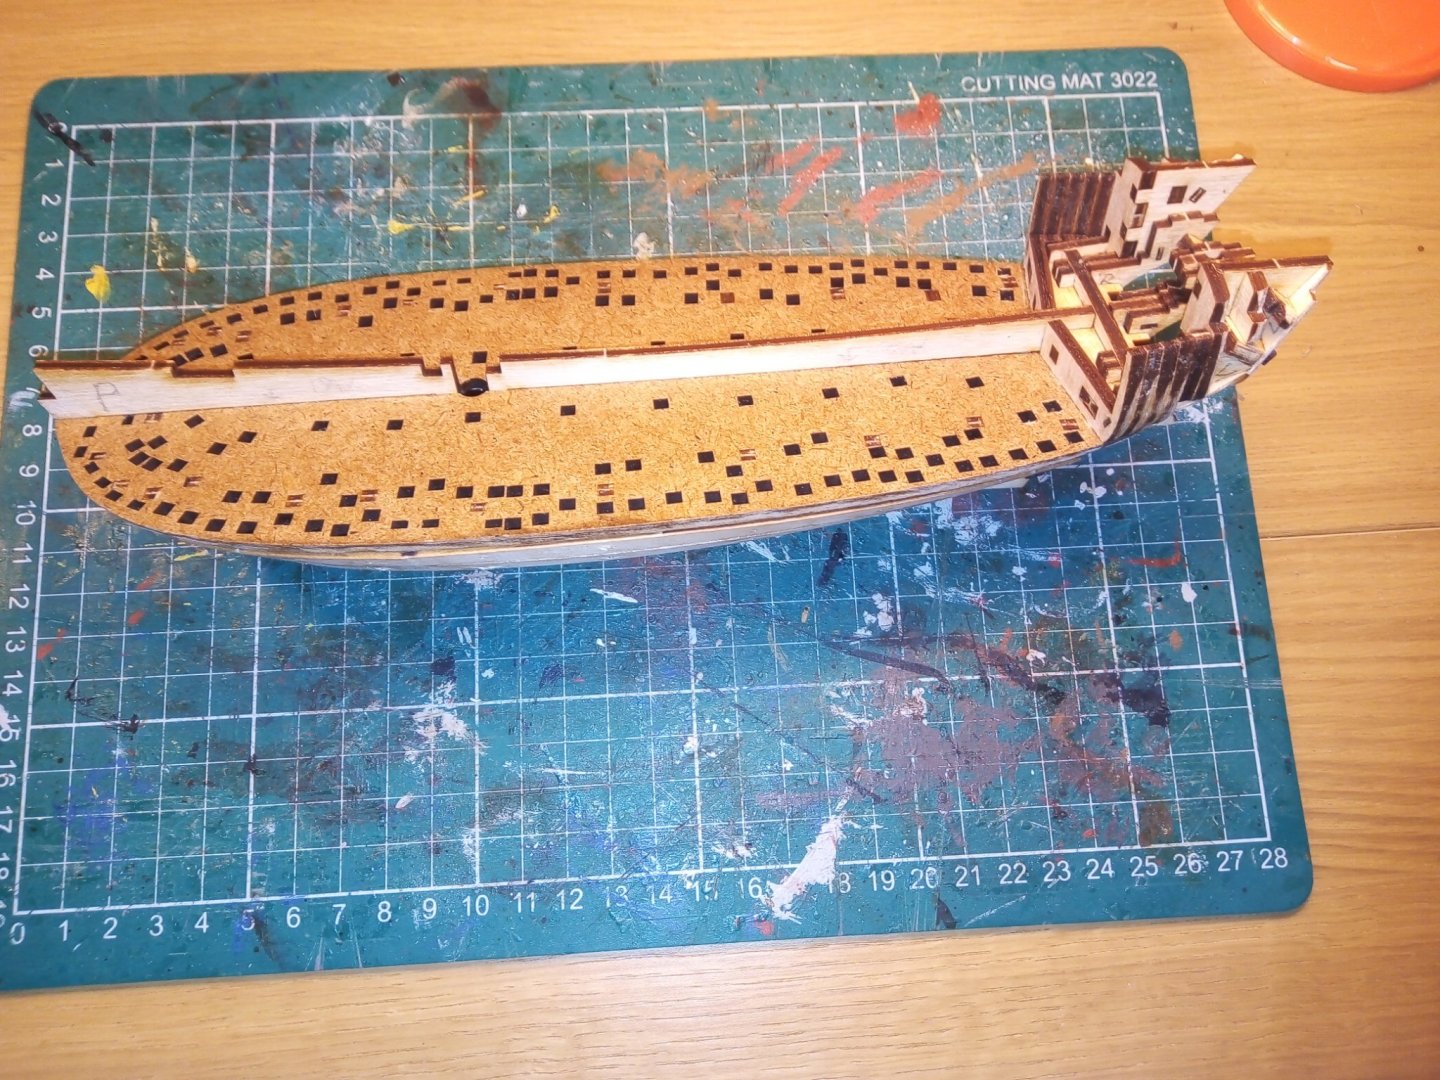
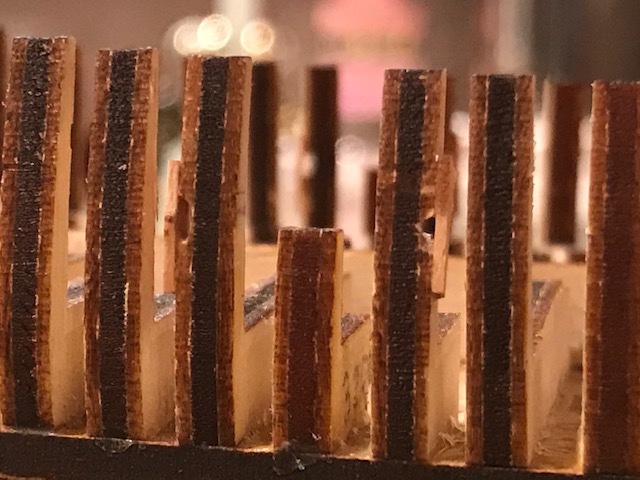
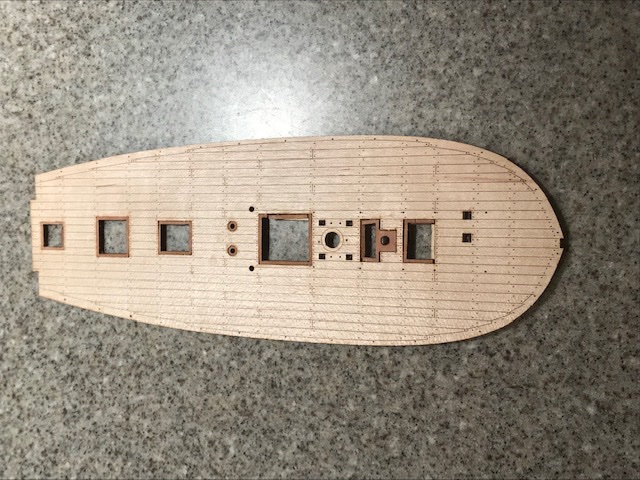
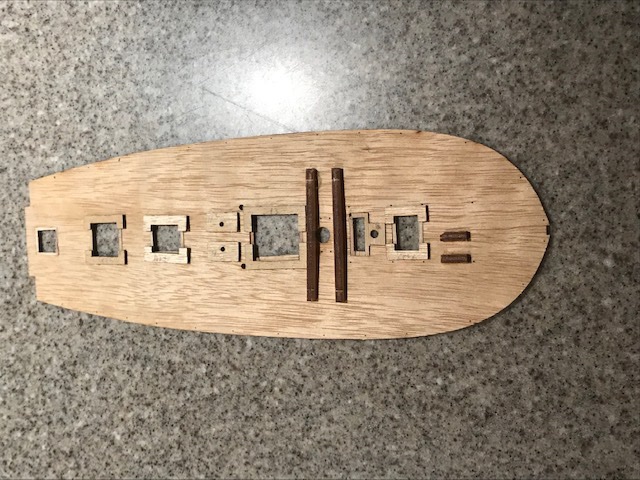
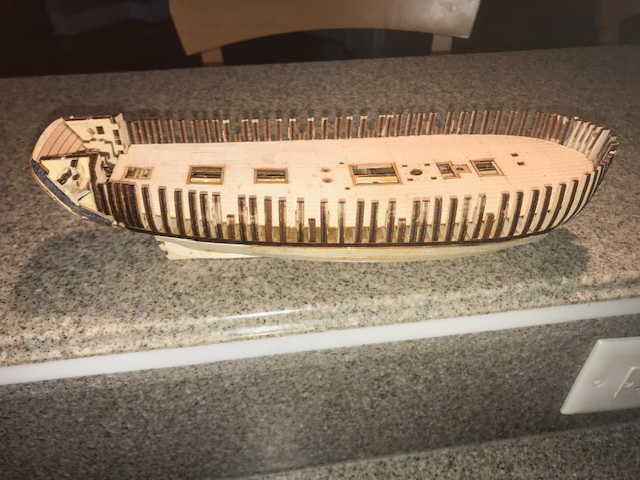
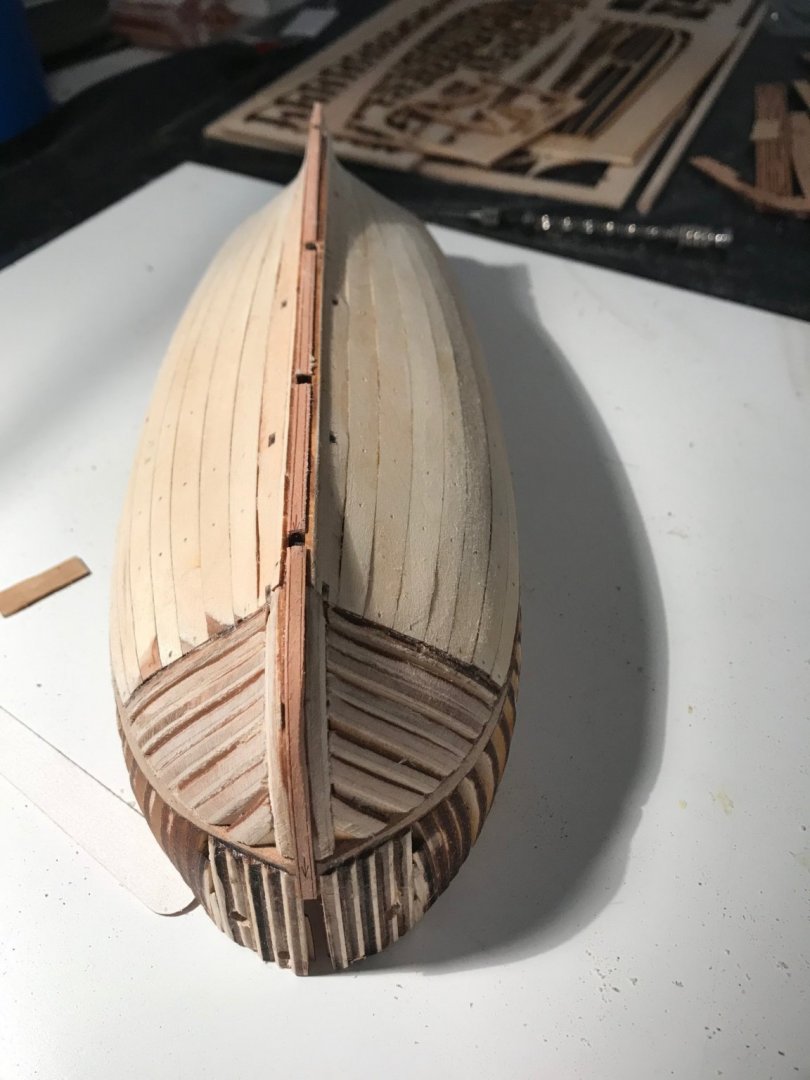
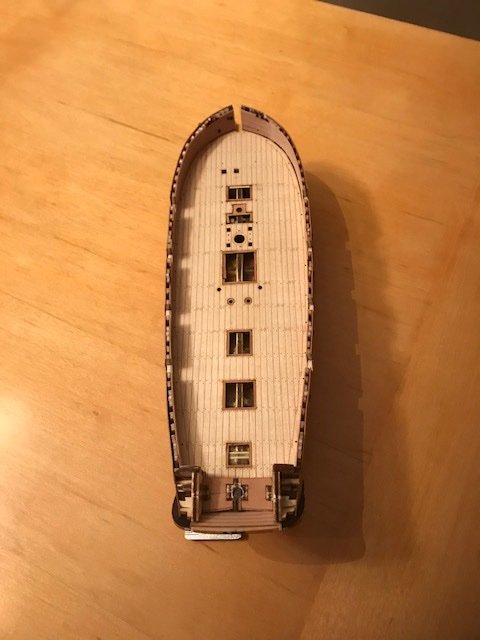
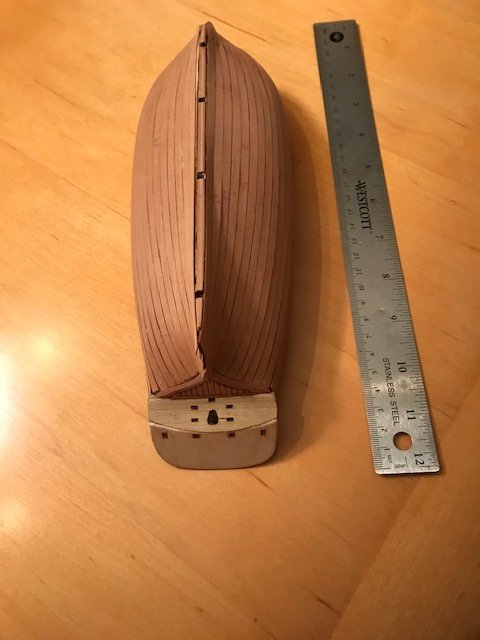
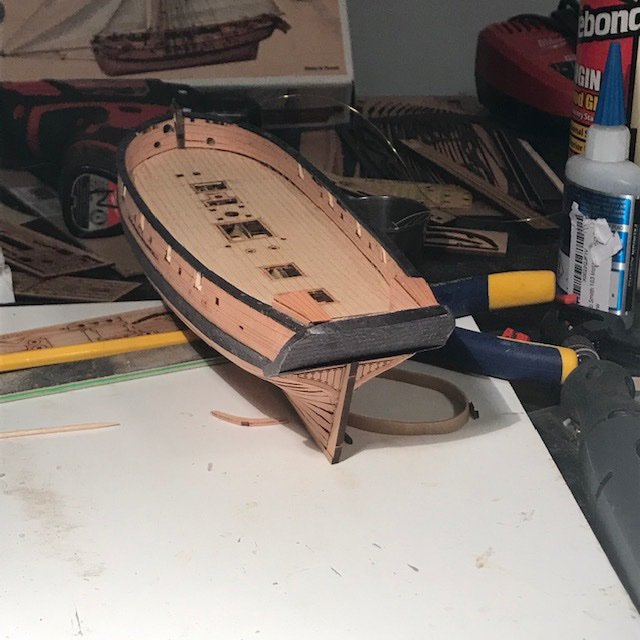
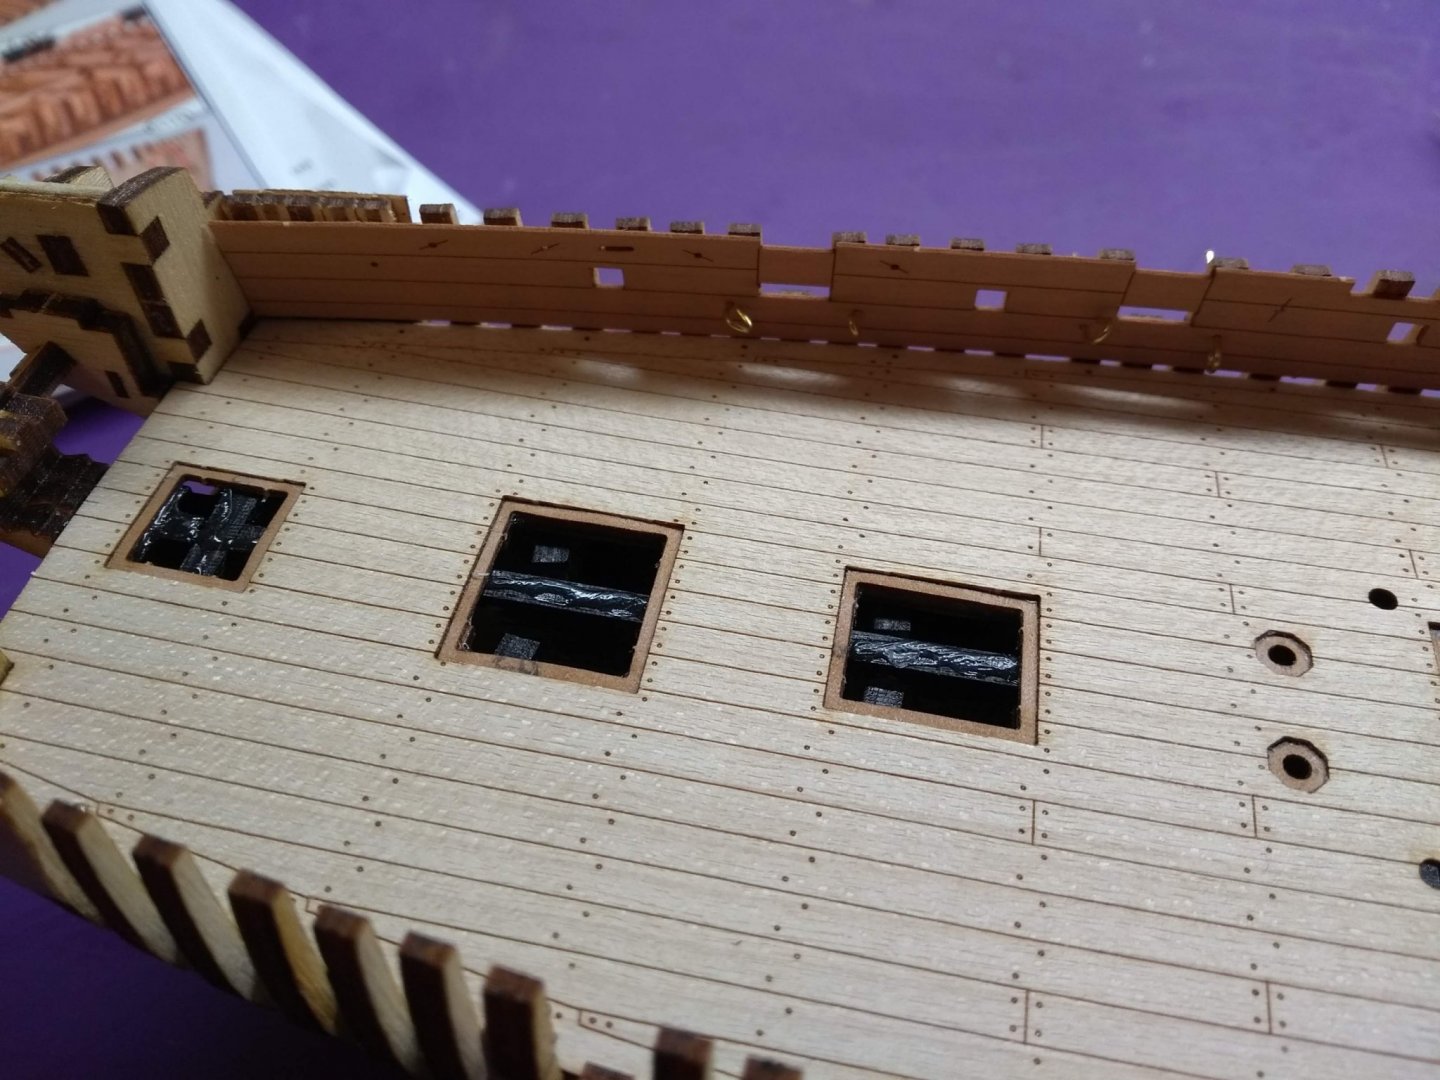
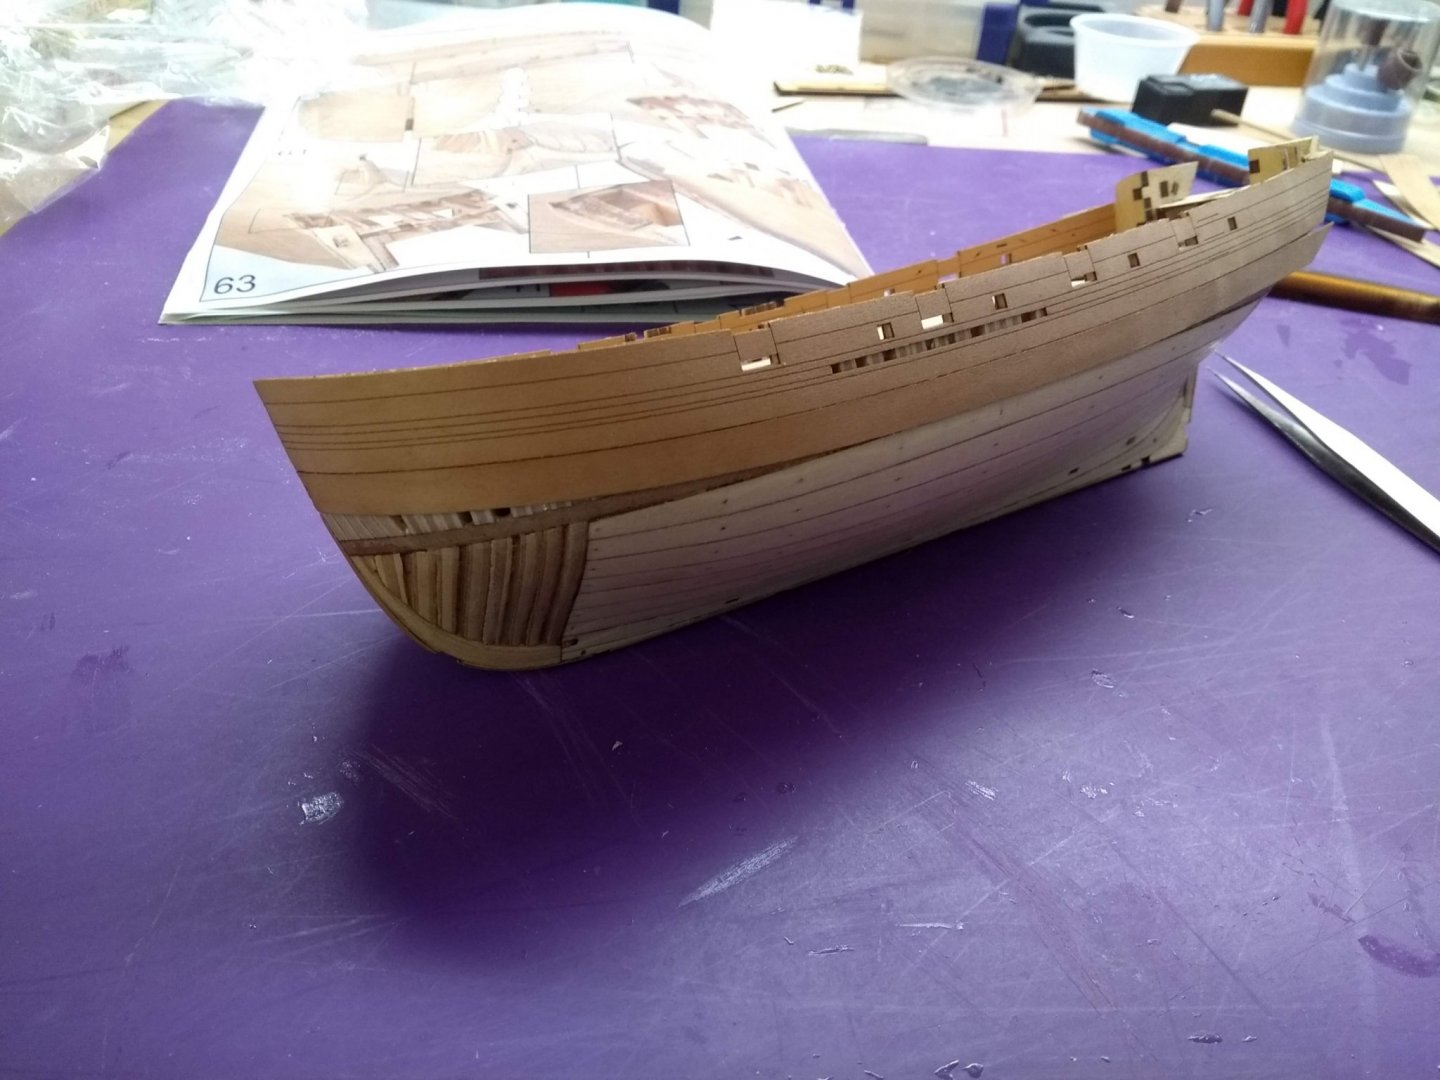
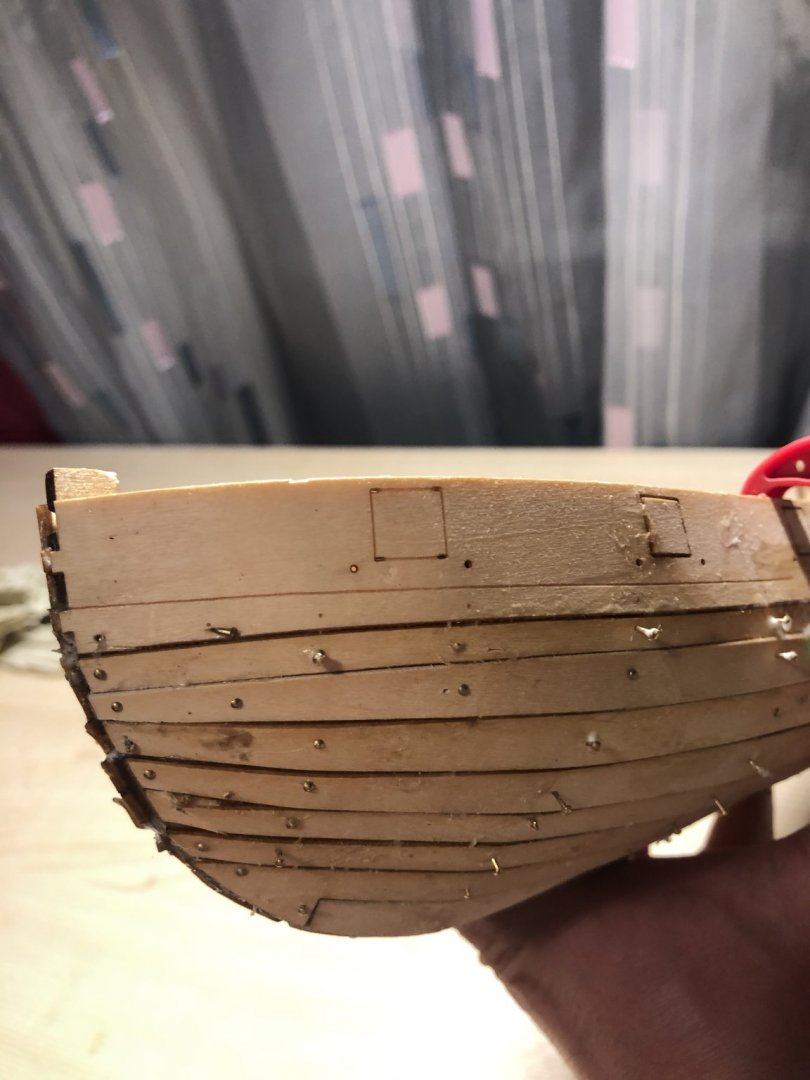
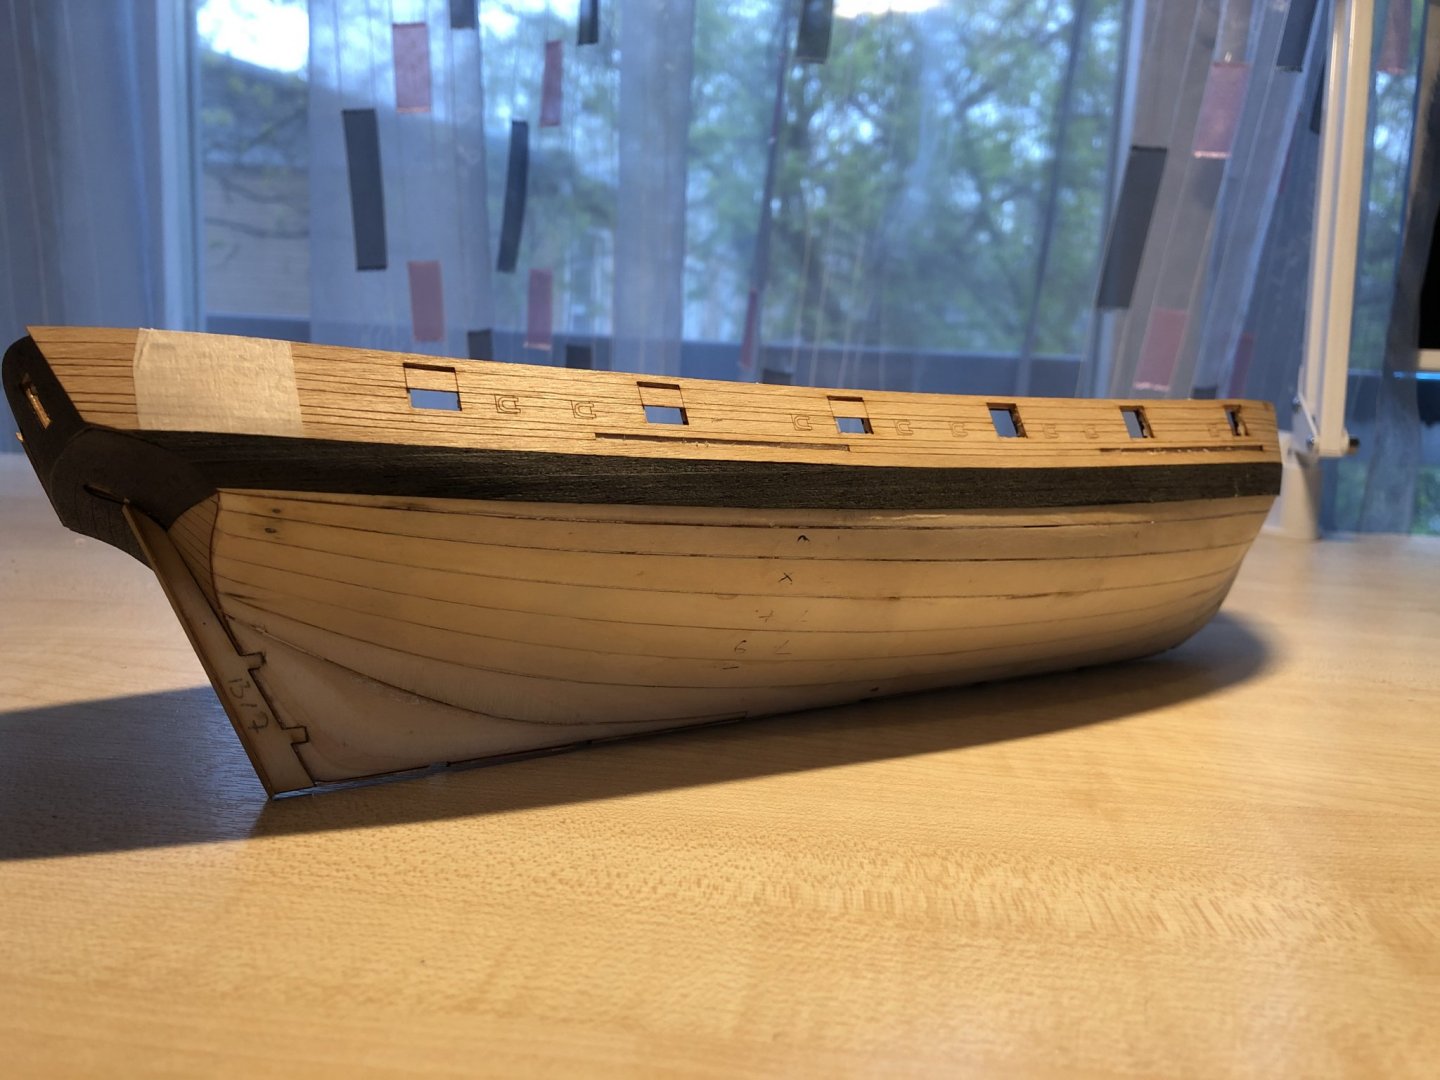
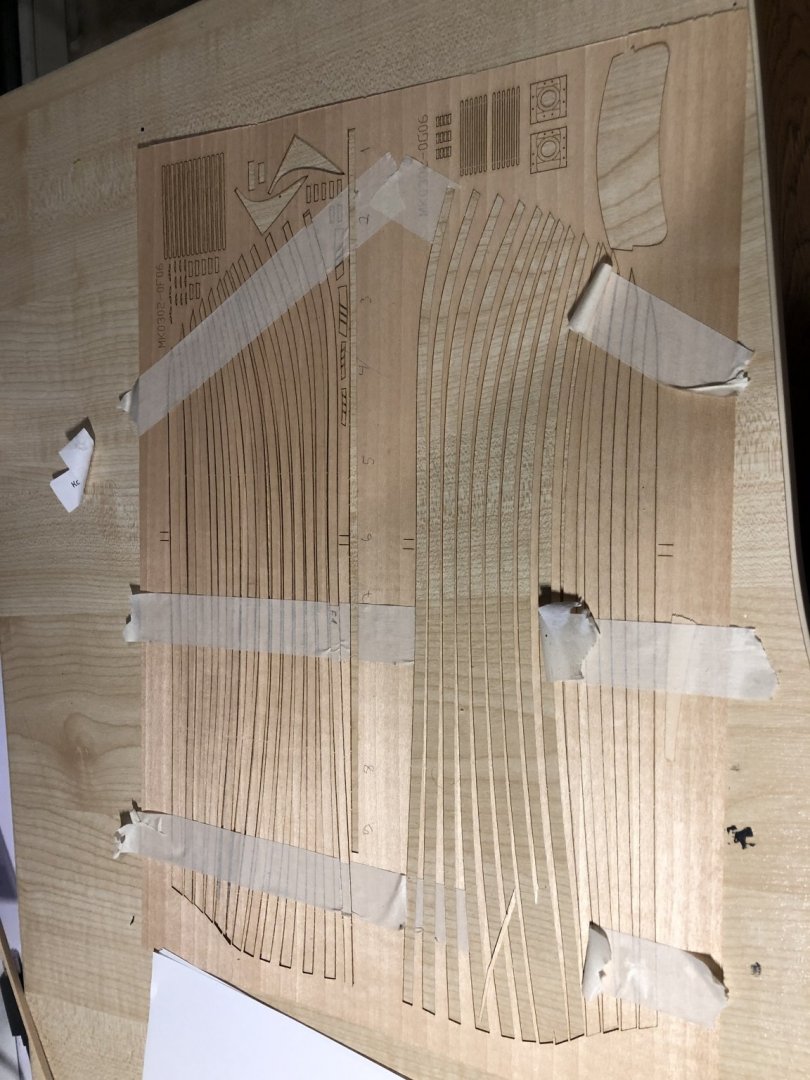
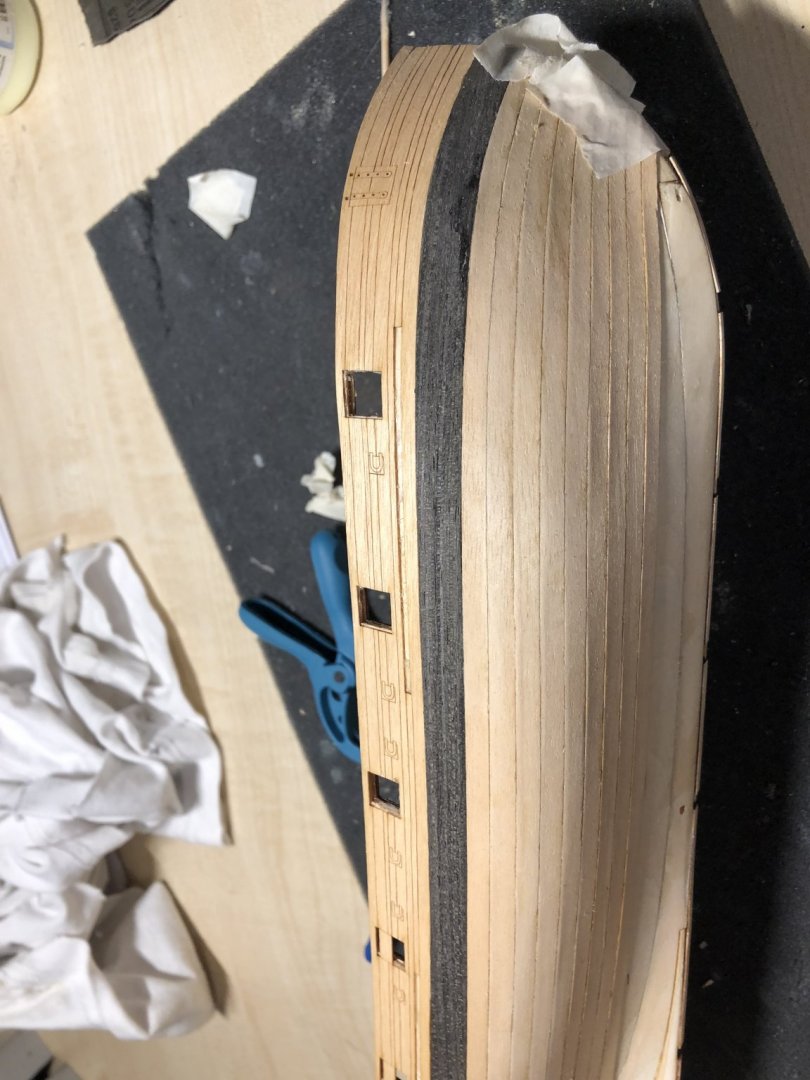
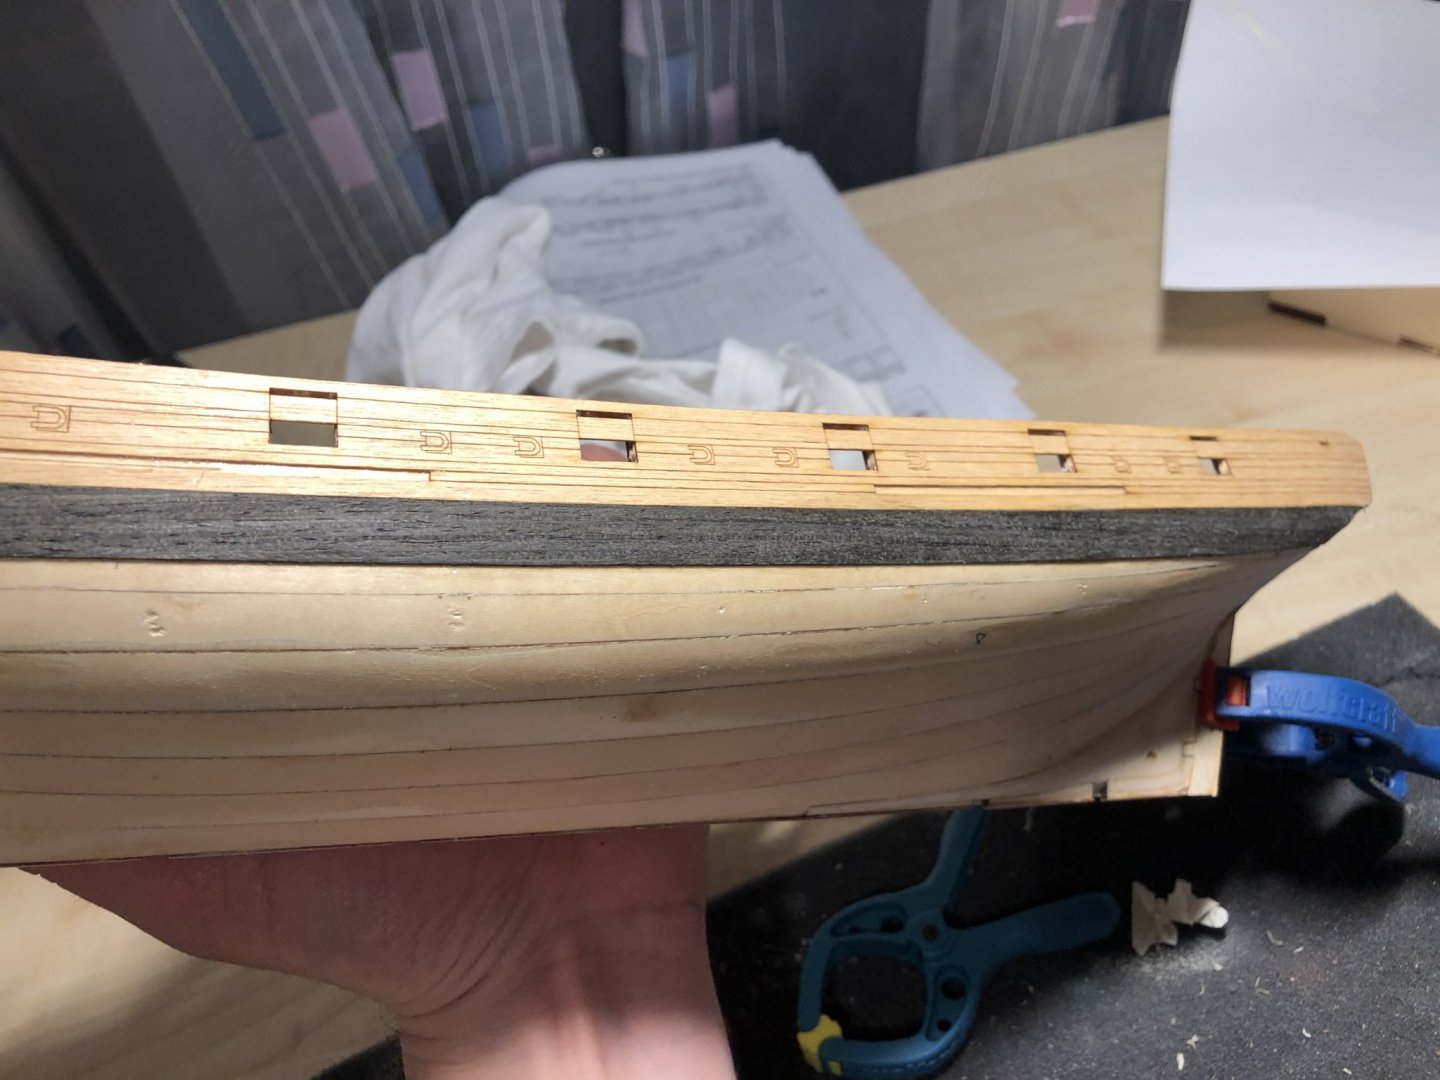
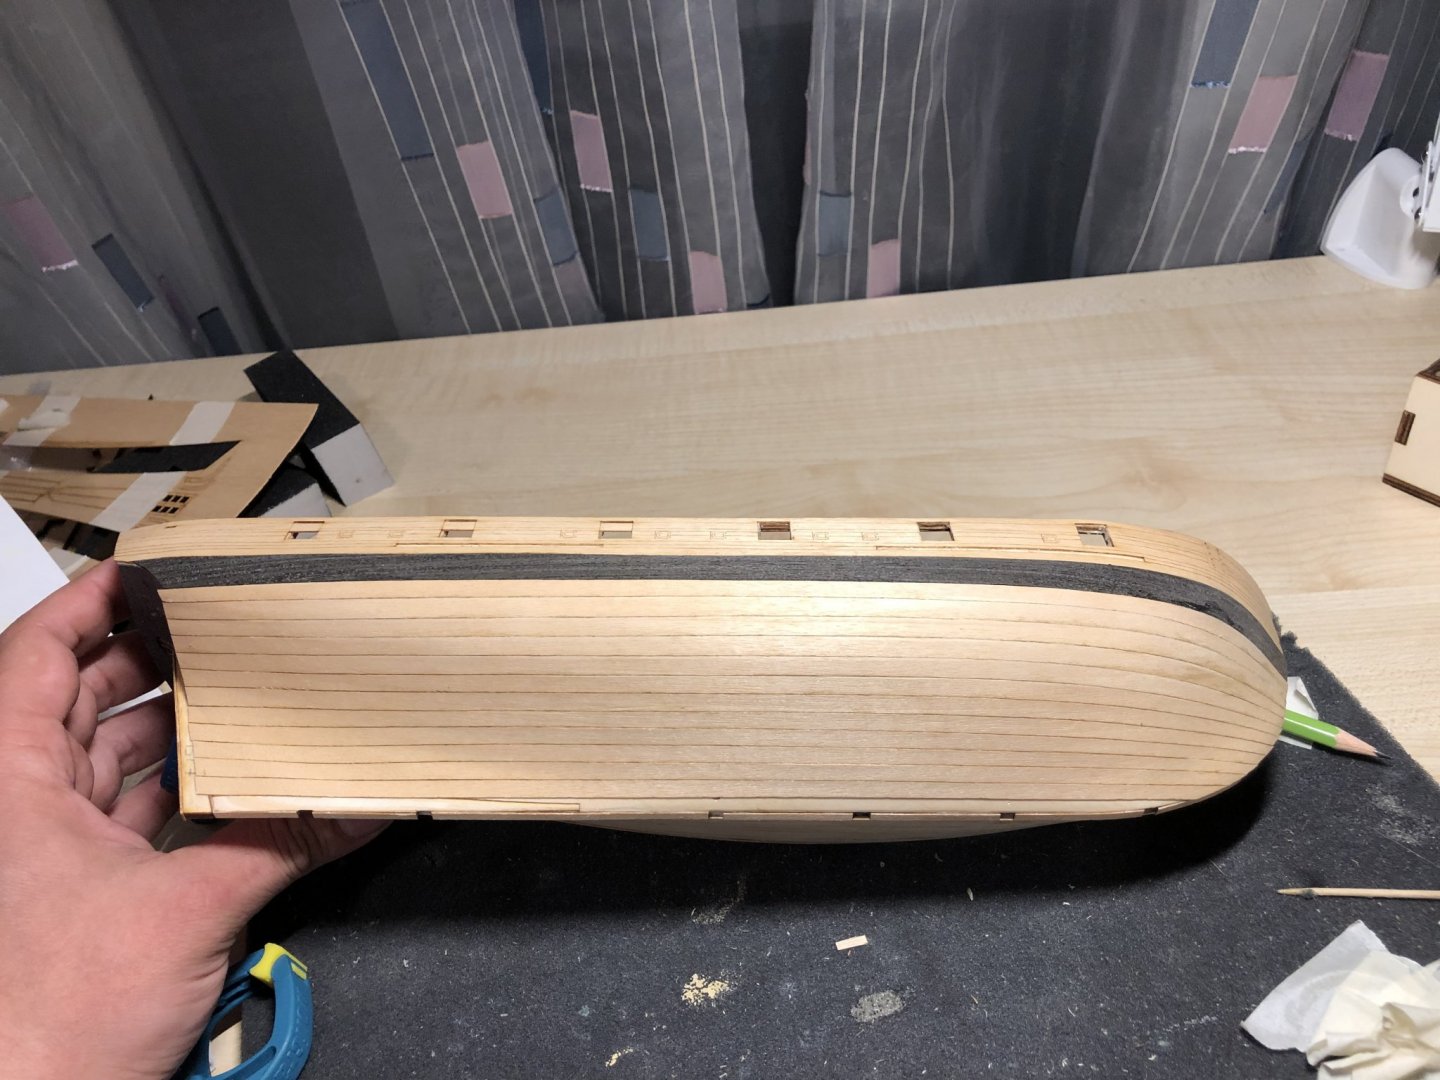
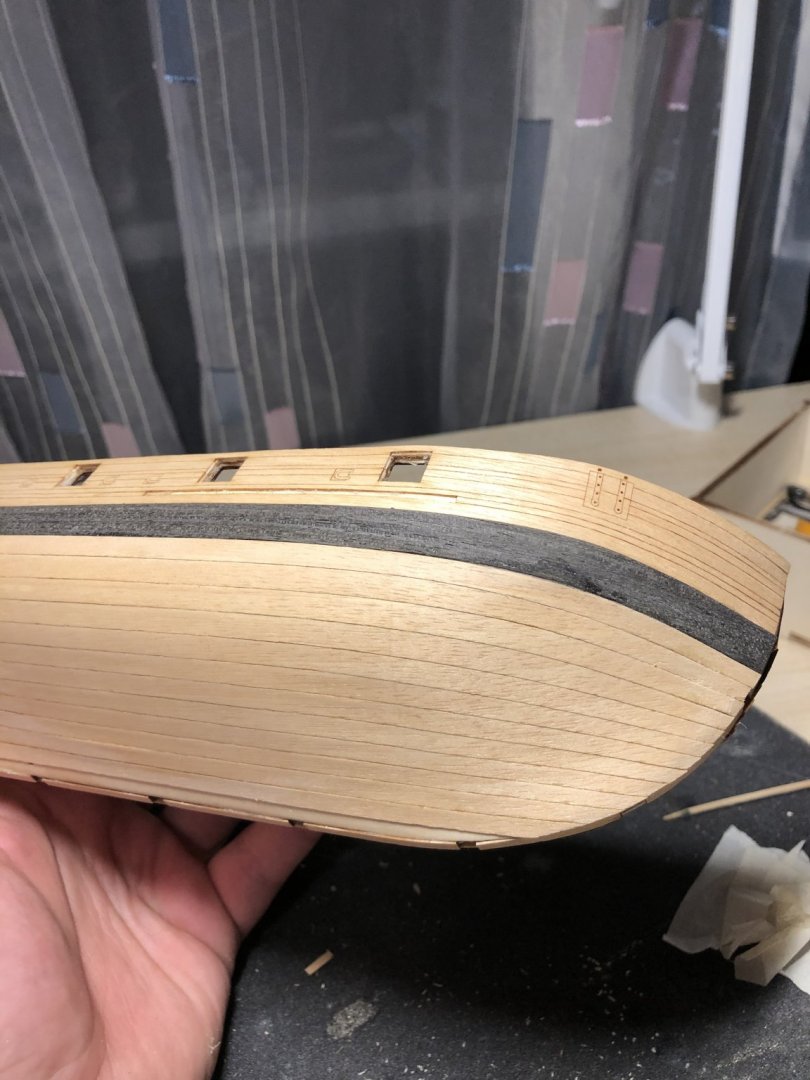
 It is time to start a new build log. This time it was a close race between brigantine Phoenix and USS Syren. Since Phoenix kit has all laser cut parts, including planks, i was curious to see how this approach fits into hard-core, make-my-own planks state of mind... So, let see... This is a wooden model kit of the 12-gun brigantine "Phoenix" - cruising ship with a sailing arsenal of the brigantine, part of Black Sea Fleet of the Russian Empire. St. Andrew's flag Russia Ship class and type Cruising ship Type of sailing equipment brigantine Organization Black Sea Fleet Commissioned since 1787 in Russia Removed from the fleet Autumn 1803 Length between perpendiculars 24.4 m Mid- width width 7.3 m Draft 2.9 m Mover sail Crew 52 Total number of guns 12 guns Service history (obtained from Internet sources). A Greek built 12-gun brigantine Phoenix became a part of the Russian Black Sea fleet in 1787. With a war with Ottoman Empire pending, large number of Greek Corsair ships were purchased to strengthen the young Russian Black Sea fleet, in many cases the Greek crews were also hired into Russian service. Such ships were officially classified as “cruising ships” in Russian navy lists. The ship’s first war was the Russian-Turkish war of 1787-1791. In the summer of 1788, the ship under the command of warrant officer Georgy Nikiforovich Benardaki, as part of Rear-Admiral's squadron Count M. I. Voinovich , went to sea in search of the enemy. On July 3, 1788, the brigantine participated in the first naval battle of the Russian-Turkish war of 1787-1791 near Fidonisi between the fleets of Russia and the Ottoman Empire. In 1789, as part of squads and squadrons, she repeatedly went to sea to search for Turkish ships. In April 1790, the ship delivered supplies and materials from Kherson to Sevastopol. In May 1790, with the squadron of Rear Admiral F. F. Ushakov, along with other cruiser ships, searched for Turkish ships, participated in the blockade of Anapa, in the battle near the Kerch Strait (was in reserve). In August 1790, in a battle near the island of Tendra, captured 10 Turkish cannon brigantine. In October, the captured Turkish ships escorted to the Dnieper Liman to Ochakov. In November, together with the cruising ship “Clement Pope of Rome” was sent to cruise to the Rumelian coast in the Varna region - m. Kaliakria. They took two Turkish vessels Sakaleva and Tumbaz (captured flooded) from Varna, then returned to Sevastopol and brought the captured vessel Sakaleva there. In April 1791, ships again went to search for Turkish ships to the shores of Tavrida, and then to the Anatolian coast - from Sinop to Constantinople. April 1 sunk two Turkish vessels. In July, the ship in the squadron F. F. Ushakov went to sea. July 31, participated in the battle at Cape Kaliakria. In 1794, the Phoenix under the command of midshipman S. A. Belisarius with a squadron was on a practical voyage in the Black Sea, and in 1795-1797 in the Black and Azov Seas. In the war with France of 1798–1800, the ship under the command of Lieutenant L. F. Morskoi was used as a transport ship. In November 1798, the ship arrived from Sevastopol to Corfu with provisions for the squadron of Vice-Admiral F. F. Ushakov. In December 1798, FF Ushakov's demands to Ibrahim Pasha delivered to Avpona to send Turkish troops to storm Corfu, blocking the fortress. At the beginning of 1799 the ship was with a squadron at Corfu, escorting transport ships with captured Frenchmen, entered Messina and arrived in Toulon. In 1801 and 1802 the brigantine sailed between the ports of the Black Sea. In 1803, the ship was under the command of Lieutenant S. S. Karachinsky with the Nikolaev Nort, dismantled after 1803 in Nikolaev. Cruise Ship Commanders: G. N. Benardaki (1788–1791); S. A. Belisarius (1794-1798); LF Morskoy (1797-1802) [2] ; S. S. Karachinskaya (1803) [3] . Literature: Chernyshev A. А. Russian sailing fleet. Directory. - M .: Military Publishing, 2002. - T. 2. - 480 p. - (Ships and vessels of the Russian fleet). - 5000 copies - ISBN 5-203-01789-1 . Veselago F. F. The General Maritime List from the base of the fleet until 1917. - SPb. : Printing house of V. Demakova, 1890. - V. IV / The reign of Catherine II. K - S. - S. 31, 398. - 712 p. - (Military history library). A. B. Shirokorad. 200 Years of the Sailing Fleet of Russia / Ed. A. B. Vasiliev. - 2nd ed. - M .: “Veche”, 2007. - 448 p. - ISBN 978-5-9533-1517-3 . Model details: Scale 1:72. Assembled dimensions are (LxWxH) 23.25" x 8.5" x 17.25" (590mm x 220mm x 440mm ). All wooden parts are laser cut to simplify assembly. Hull design compensates for material deformations. Double plank-on-bulkhead hull. Final hull planks are made of anigre veneer. Historically accurate cast cannons with Russian Imperial crests. Laser etched deck made of maple veneer. High quality pearwood blocks. Multitude of highly detailed brass parts. Sail plans and cloth for sewing the sails. Silk screen flags. Different diameters of black and tan threads for standing and running rigging. Ship stand with two nameplates, one in English and one in Russian Binnacle. Ship's boat MK0101 is included. Ship plans (four large sheets) and translated plans in English. Assembly instructions in English. Made in Russia by Master Korabel Happy modeling.
- 275 replies
-
- 6
-
-
- phoenix
- master korabel
- (and 1 more)
-
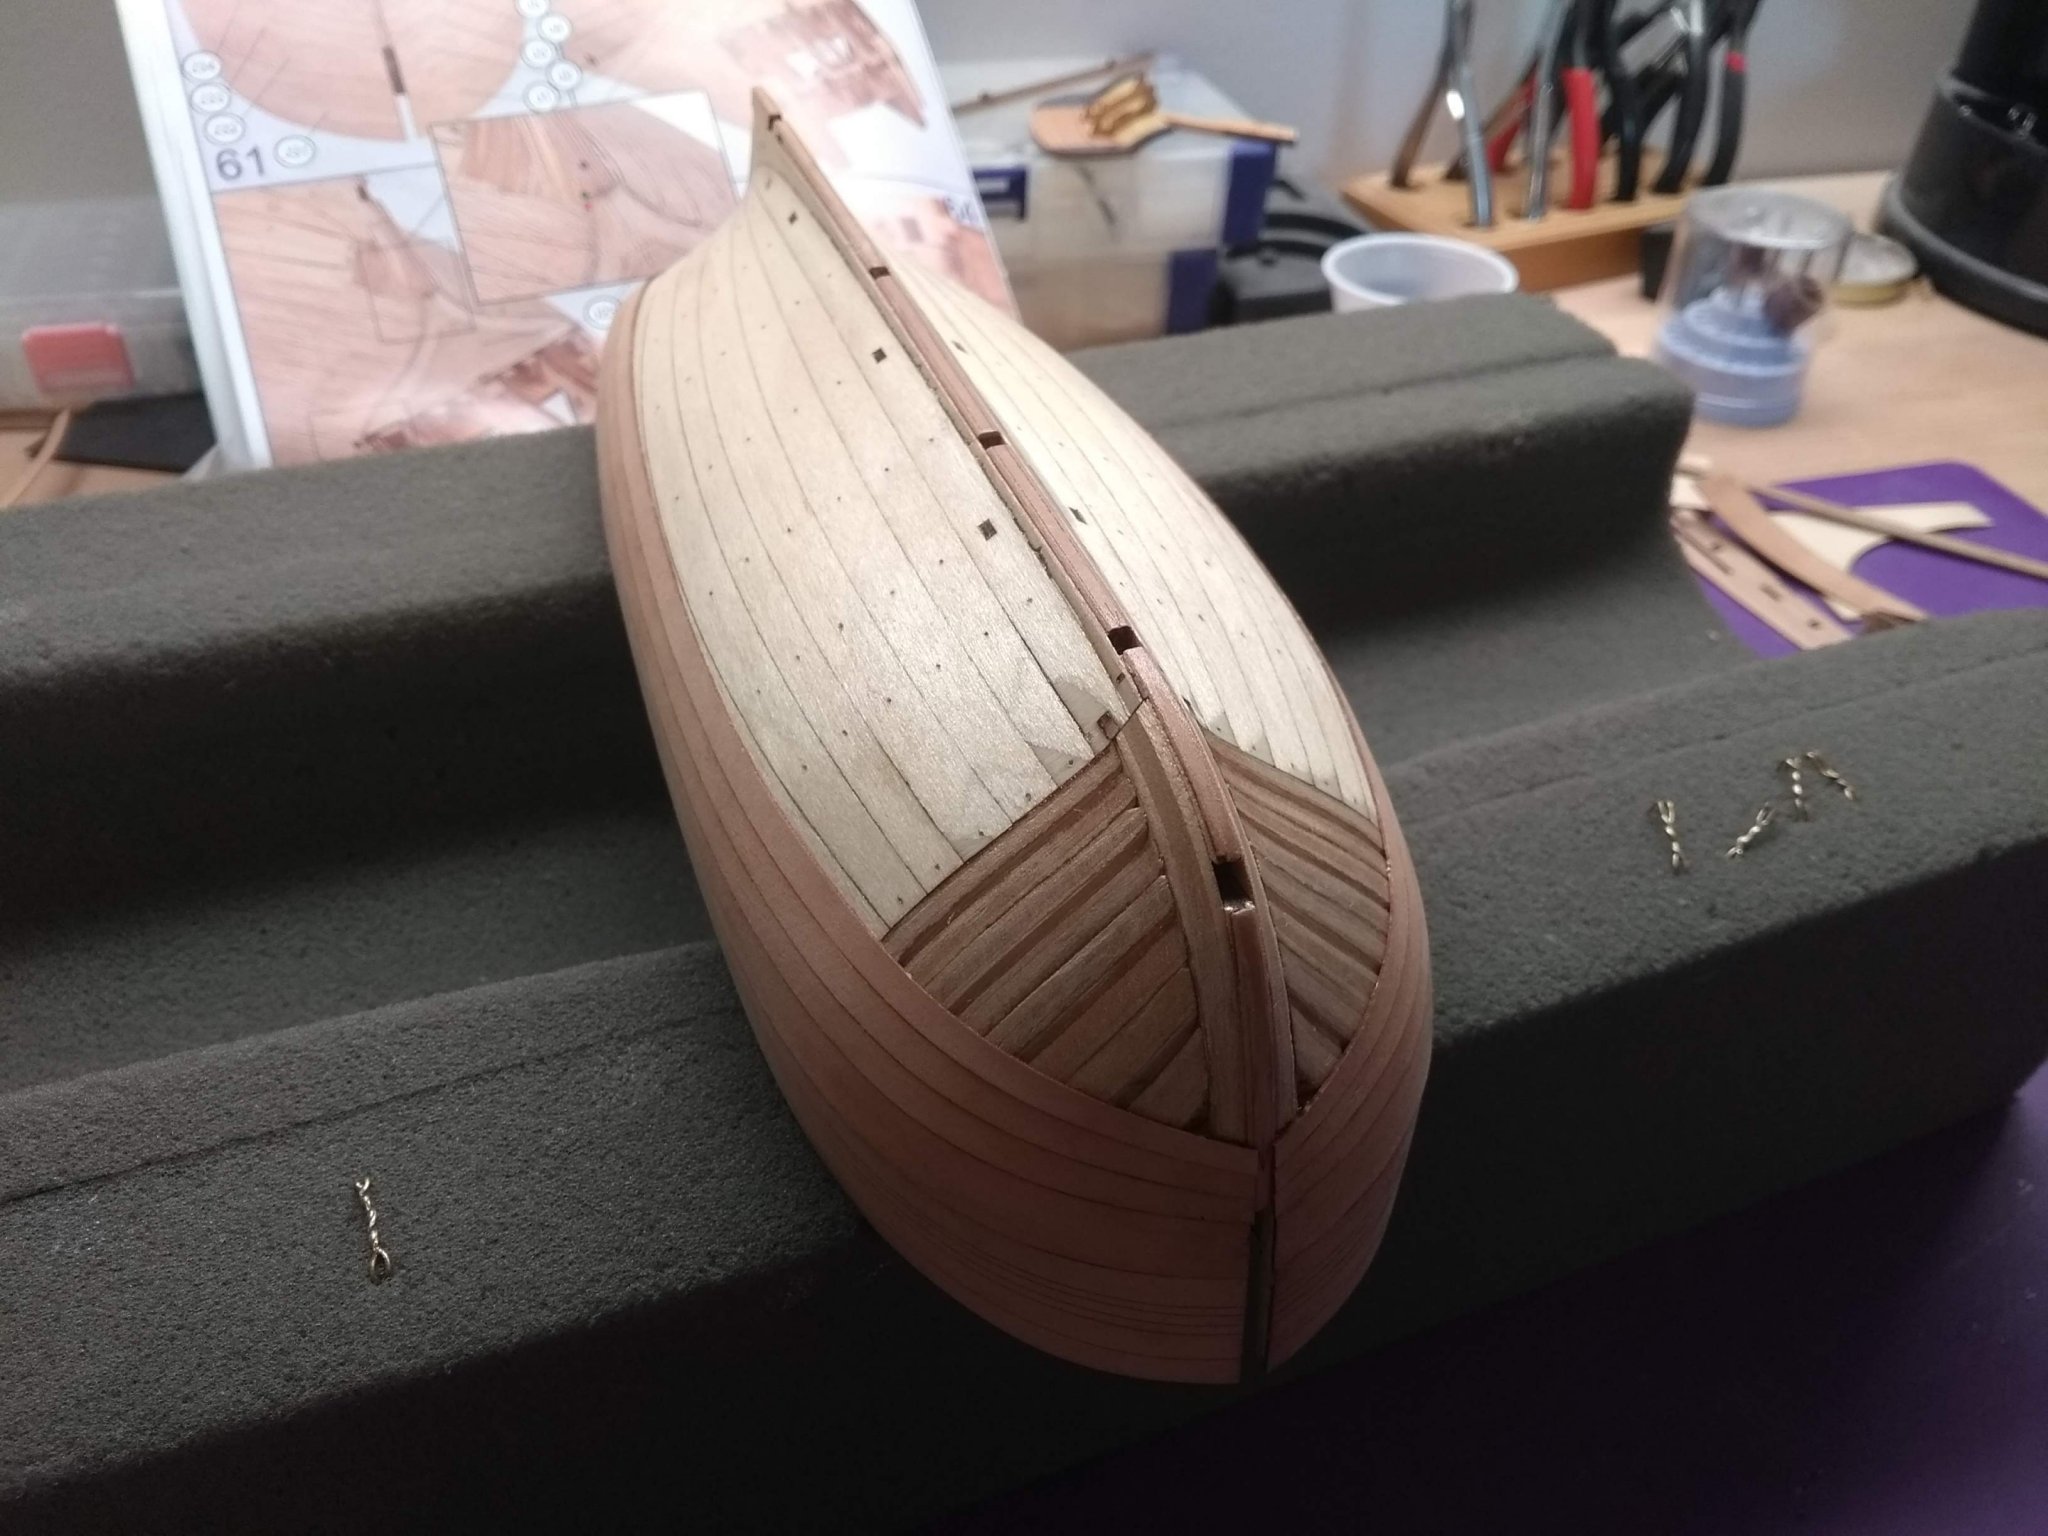
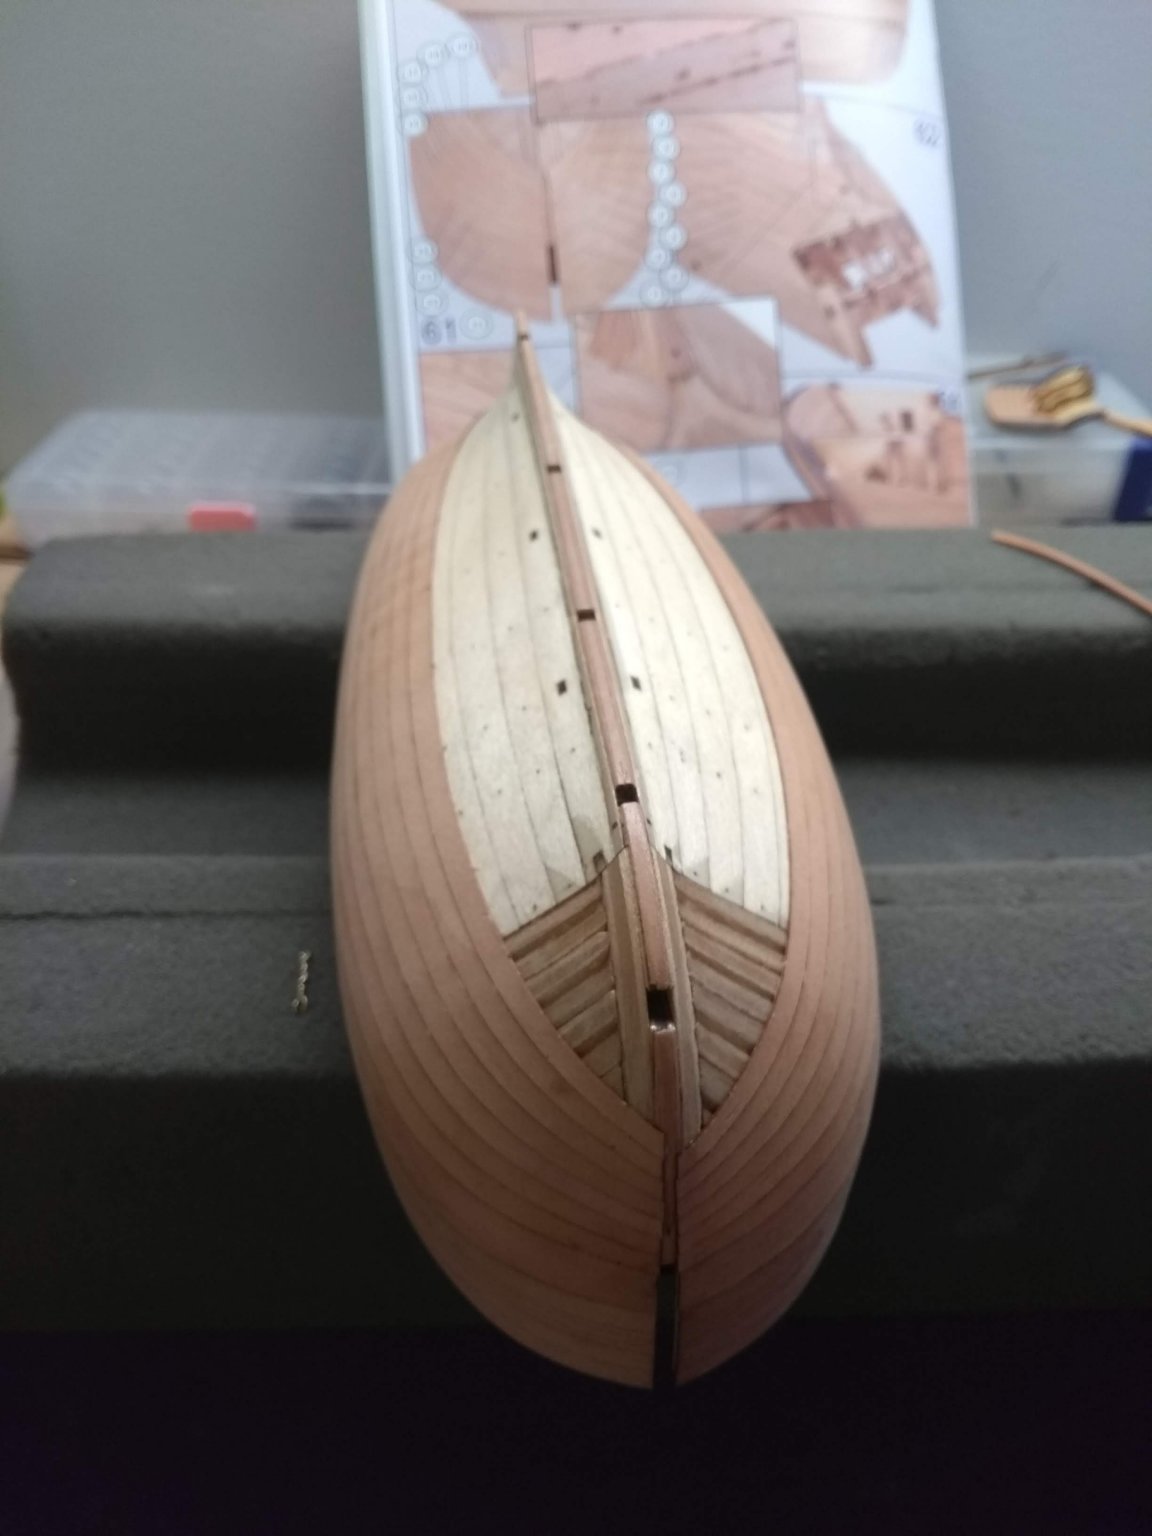
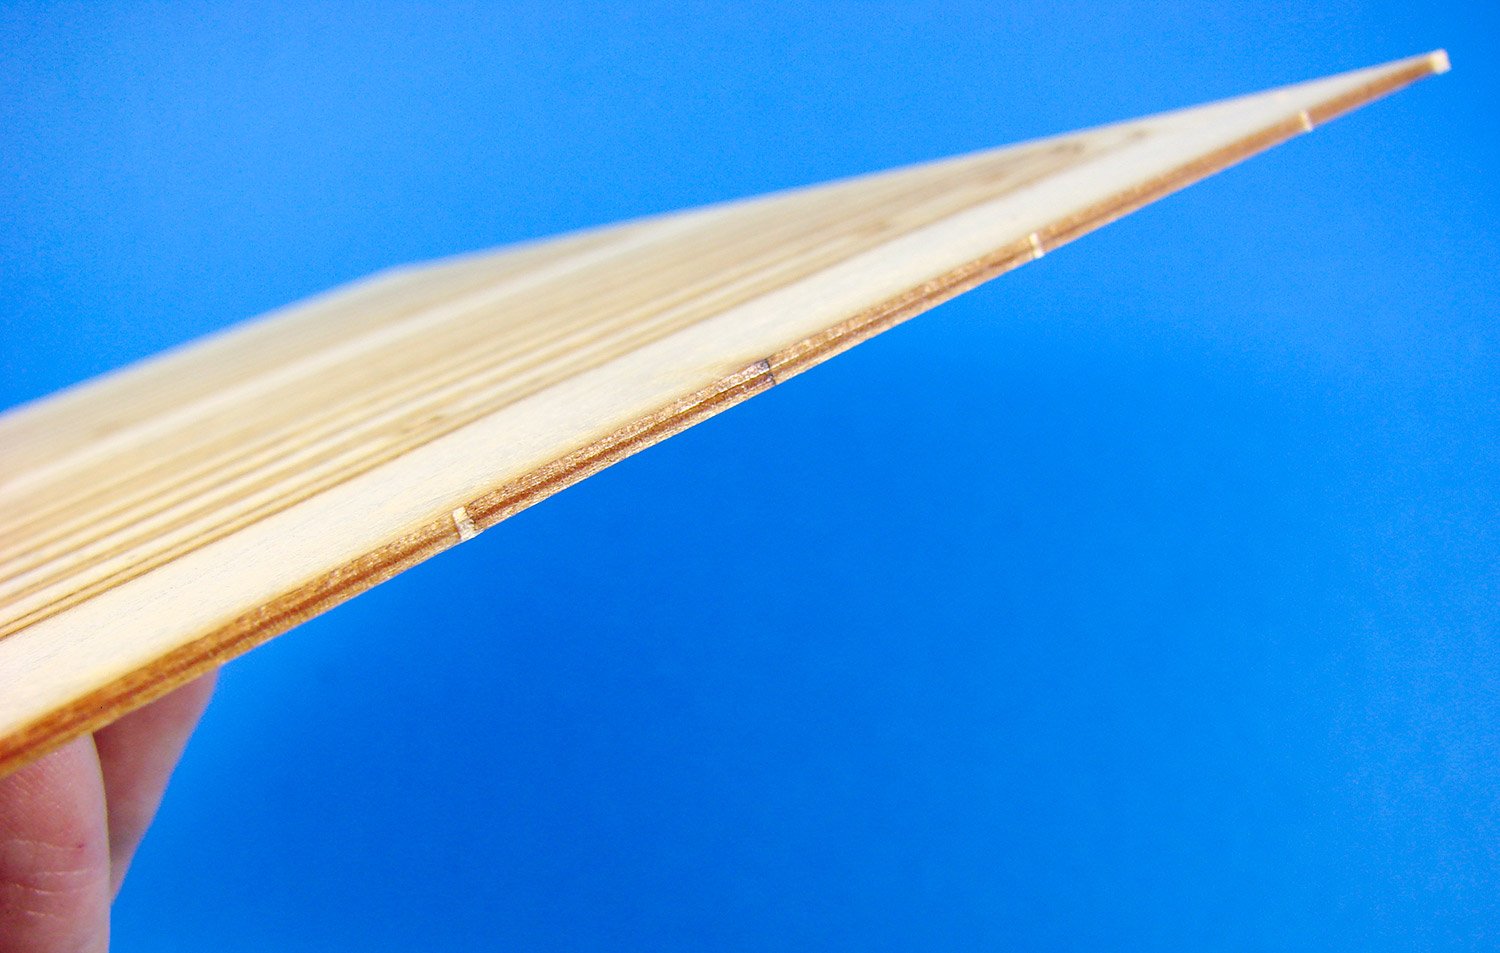
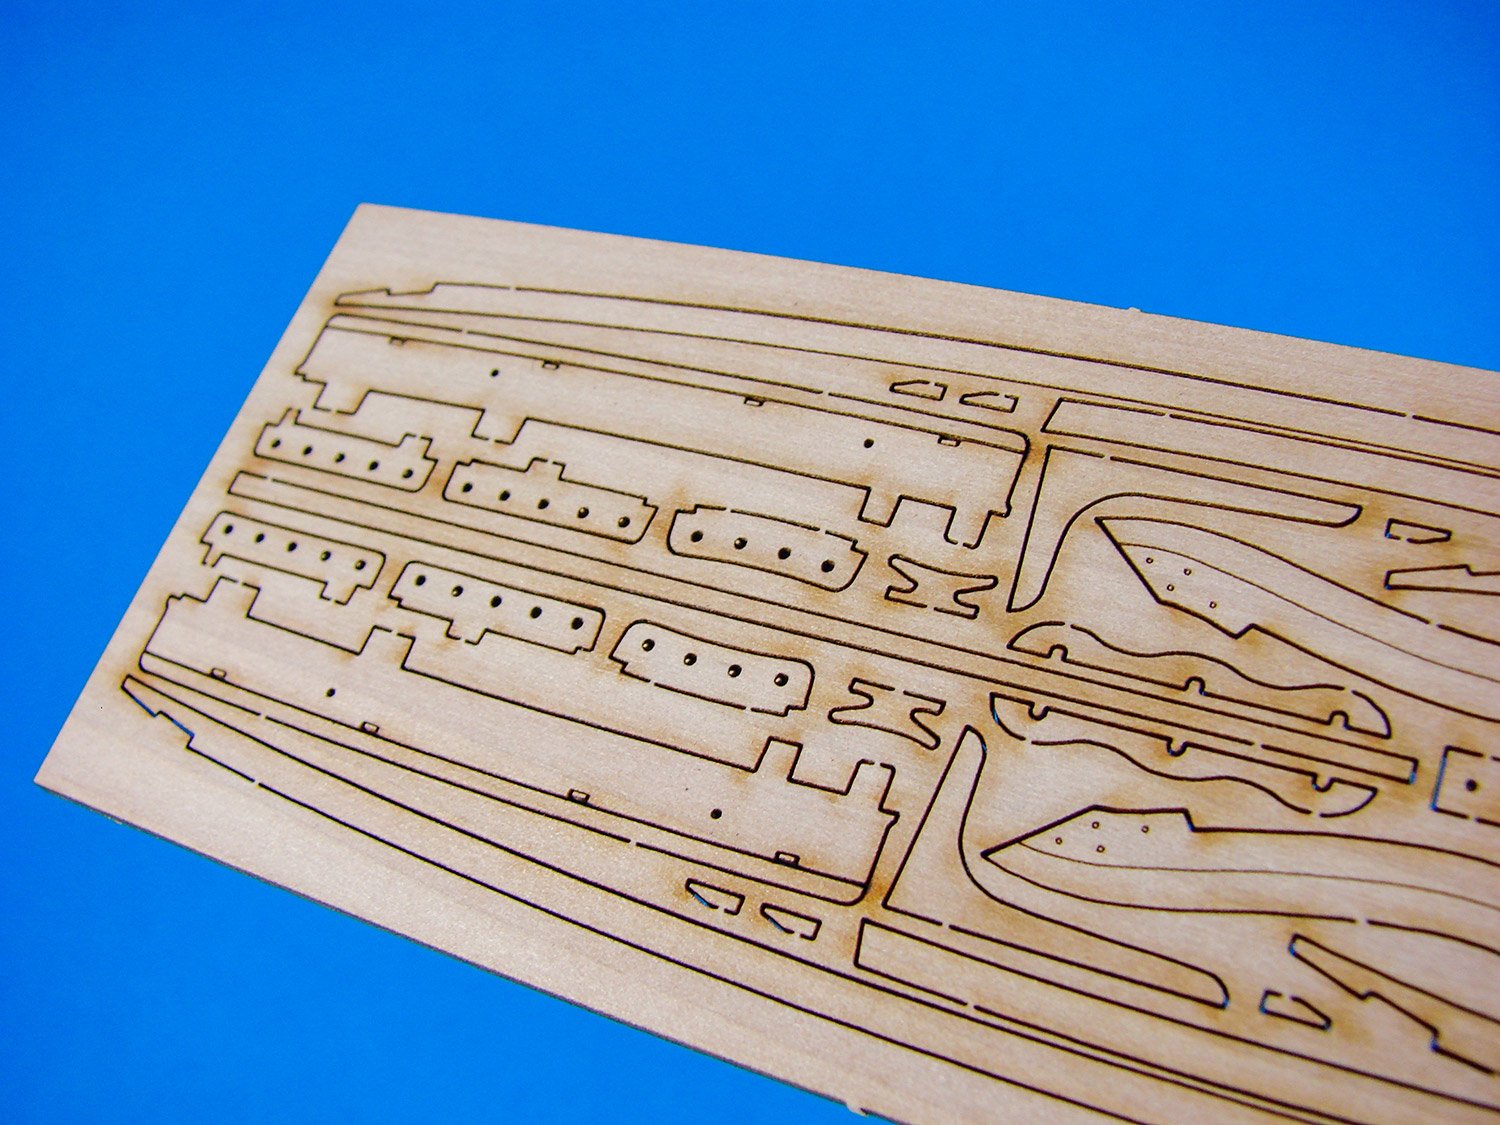
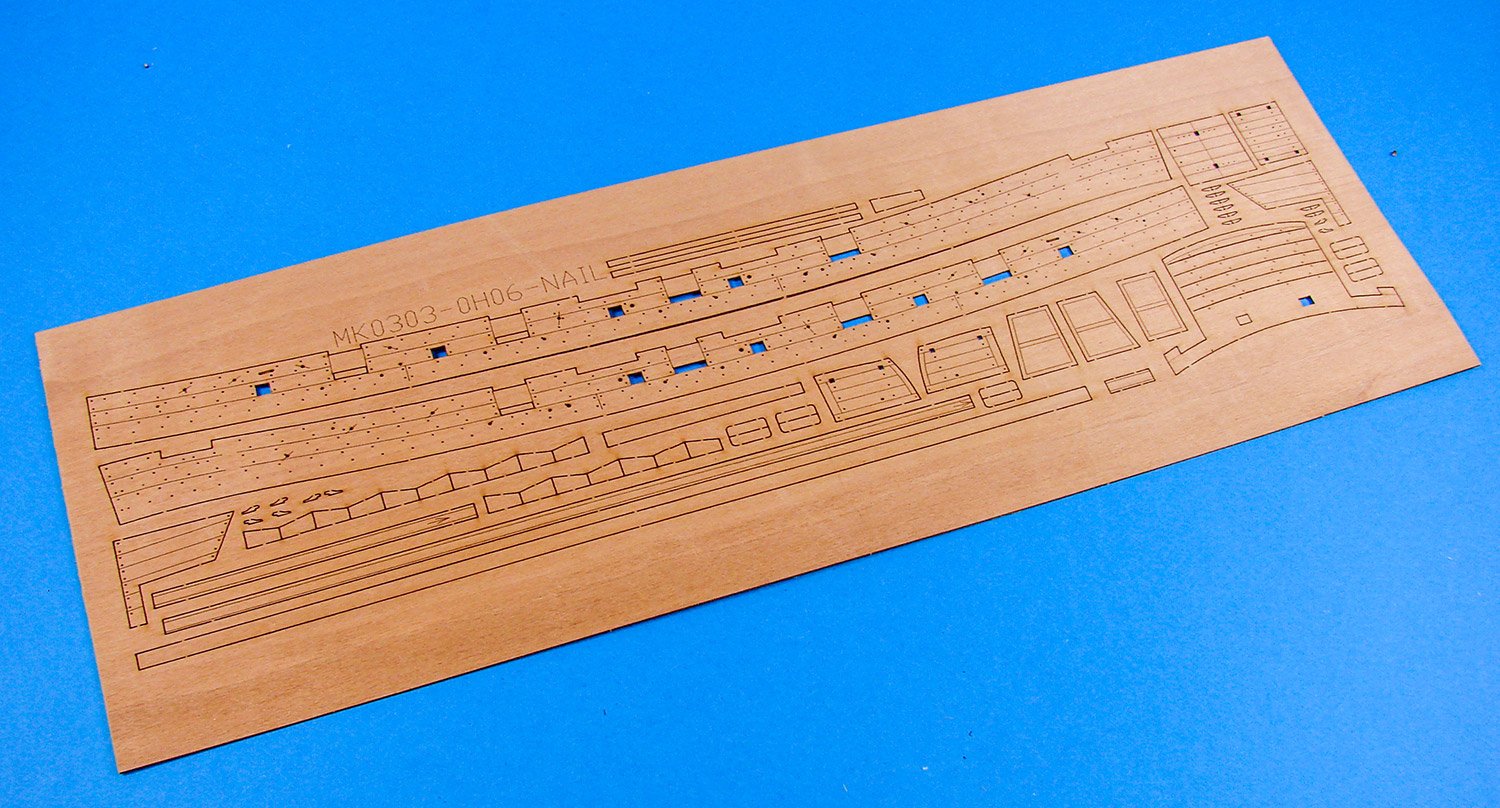
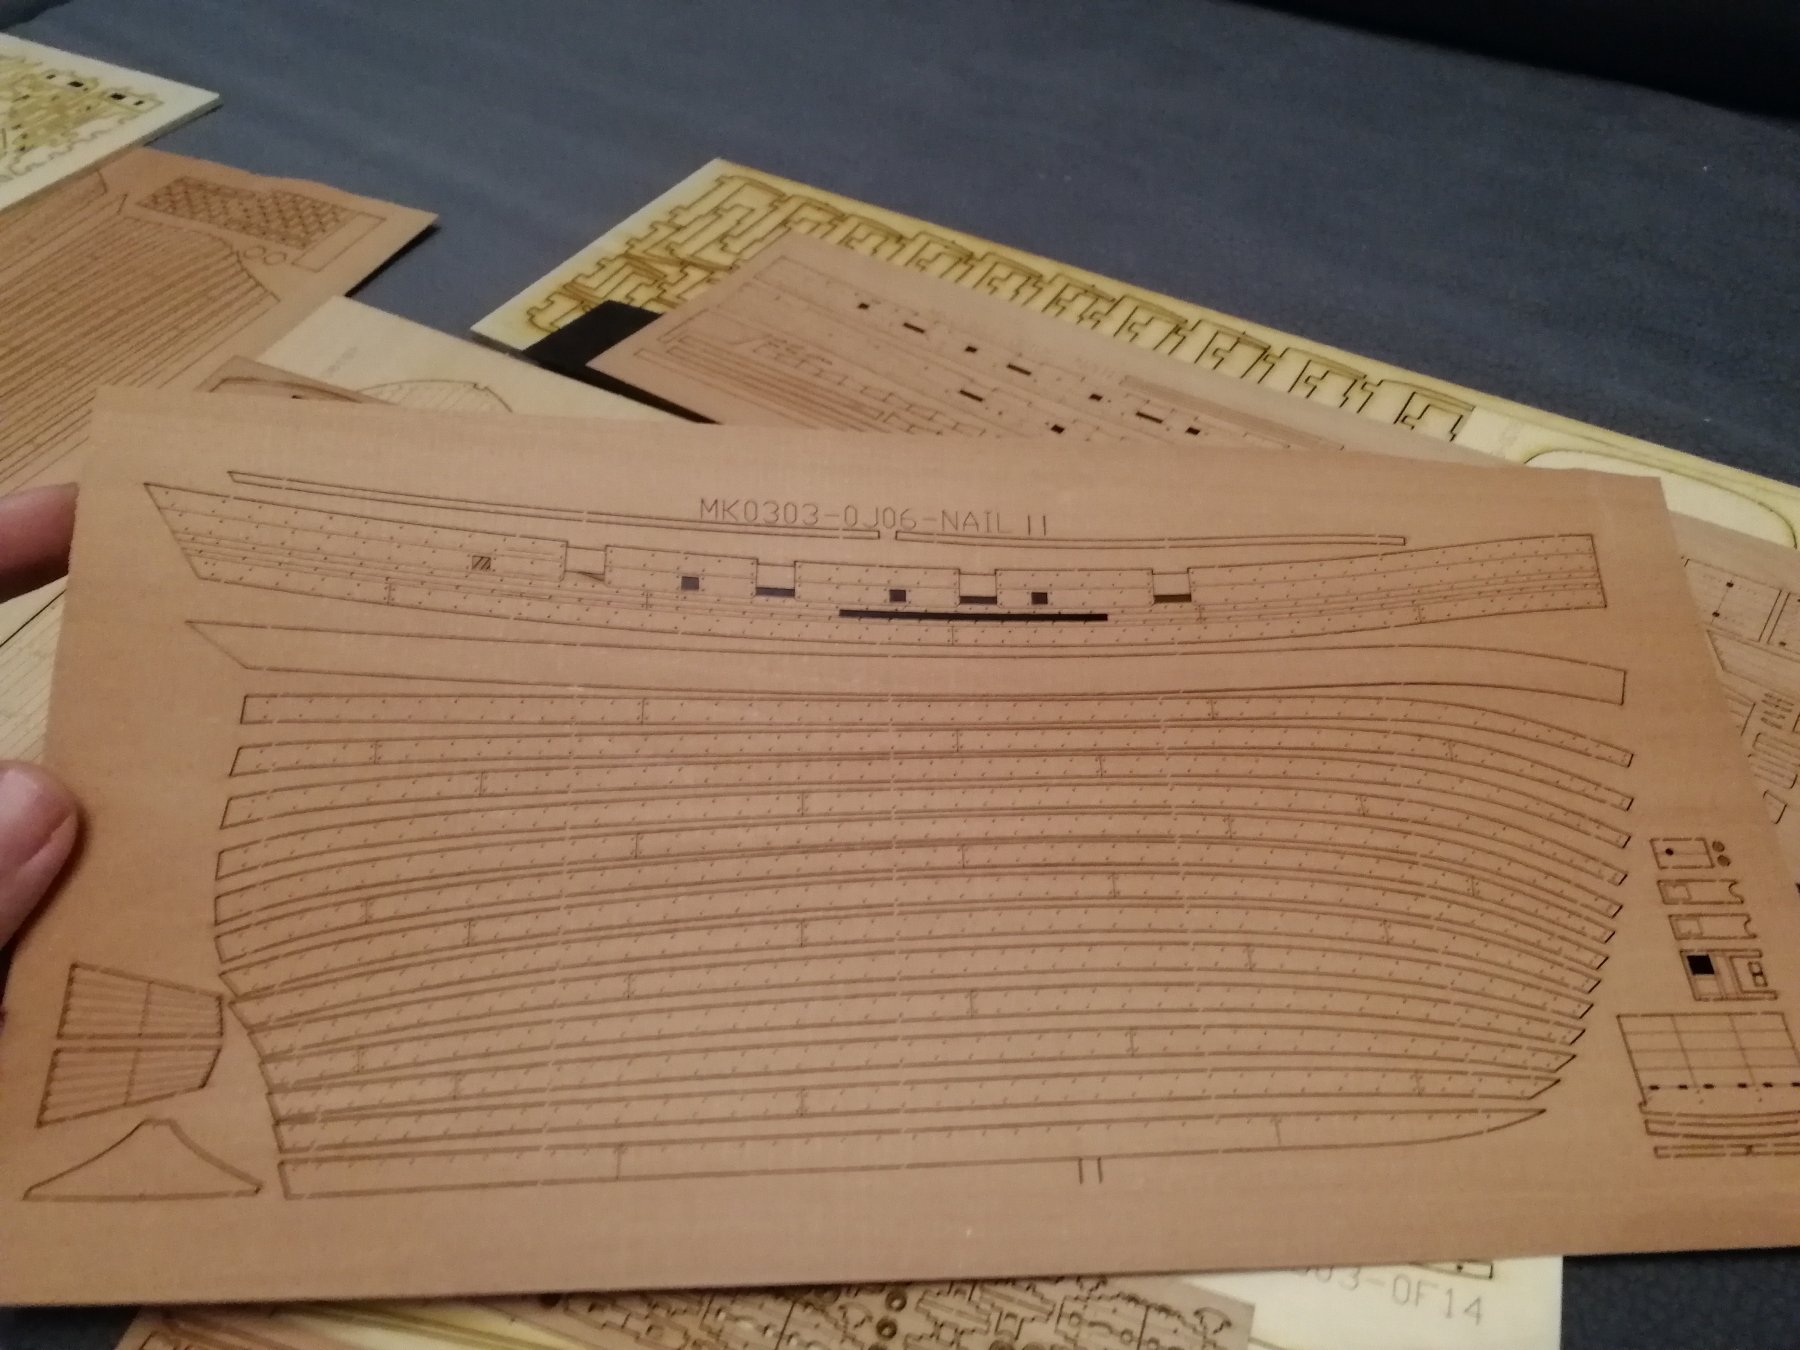
 Hi crew, I've had to be a little mercurial when it comes to how I'll spend the next months before I build a test (another!) of Amati's forthcoming 1:64 H.M.S. Victory so I can do the photos for the construction manual, so I was originally going to bash away at my Panart deck section. I was then going to plank the Caldercraft 1:80 Mary Rose I've had for around 15years. In the end, I decided the best way to spend that time was on Master Korabel's diminutive but gorgeous 1:72 Tender Avos, reviewed HERE and soon to be available from Vanguard Models in the UK. I've been watching this beautiful build of this model by Peta_V, on Model Ship World, and the kit I have is the same XS/Exclusive version. My plan is to do as much work as I can until Amati's parts land, sometime in October. Master Korabel's kit really is gorgeous, superbly presented and manufactured, and has some innovative design features that are there to make things as trouble-free as possible. The box is fairly small, but it pretty heavy. Planking is also laser-cut and etched with plank and nail detail. Everything starts with the flat deck-shaped component into which all the other elements plug. Work starts on Saturday, and until then, I'll be studying the plans and watching Peta_V's build even more!
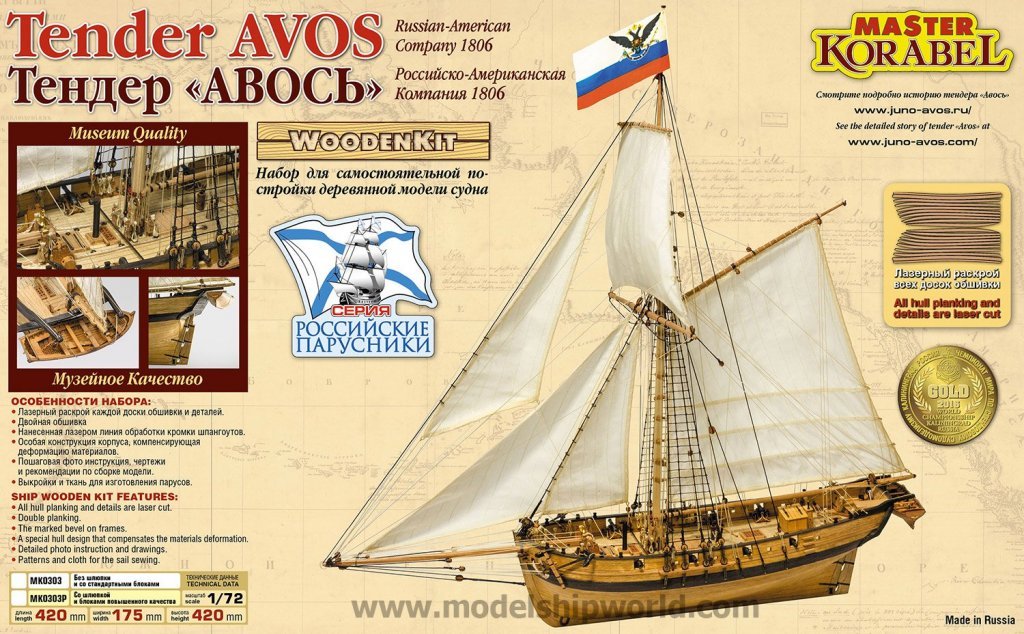
- 30 replies
-
- 13
-
-
- master korabel
- avos
- (and 1 more)
-
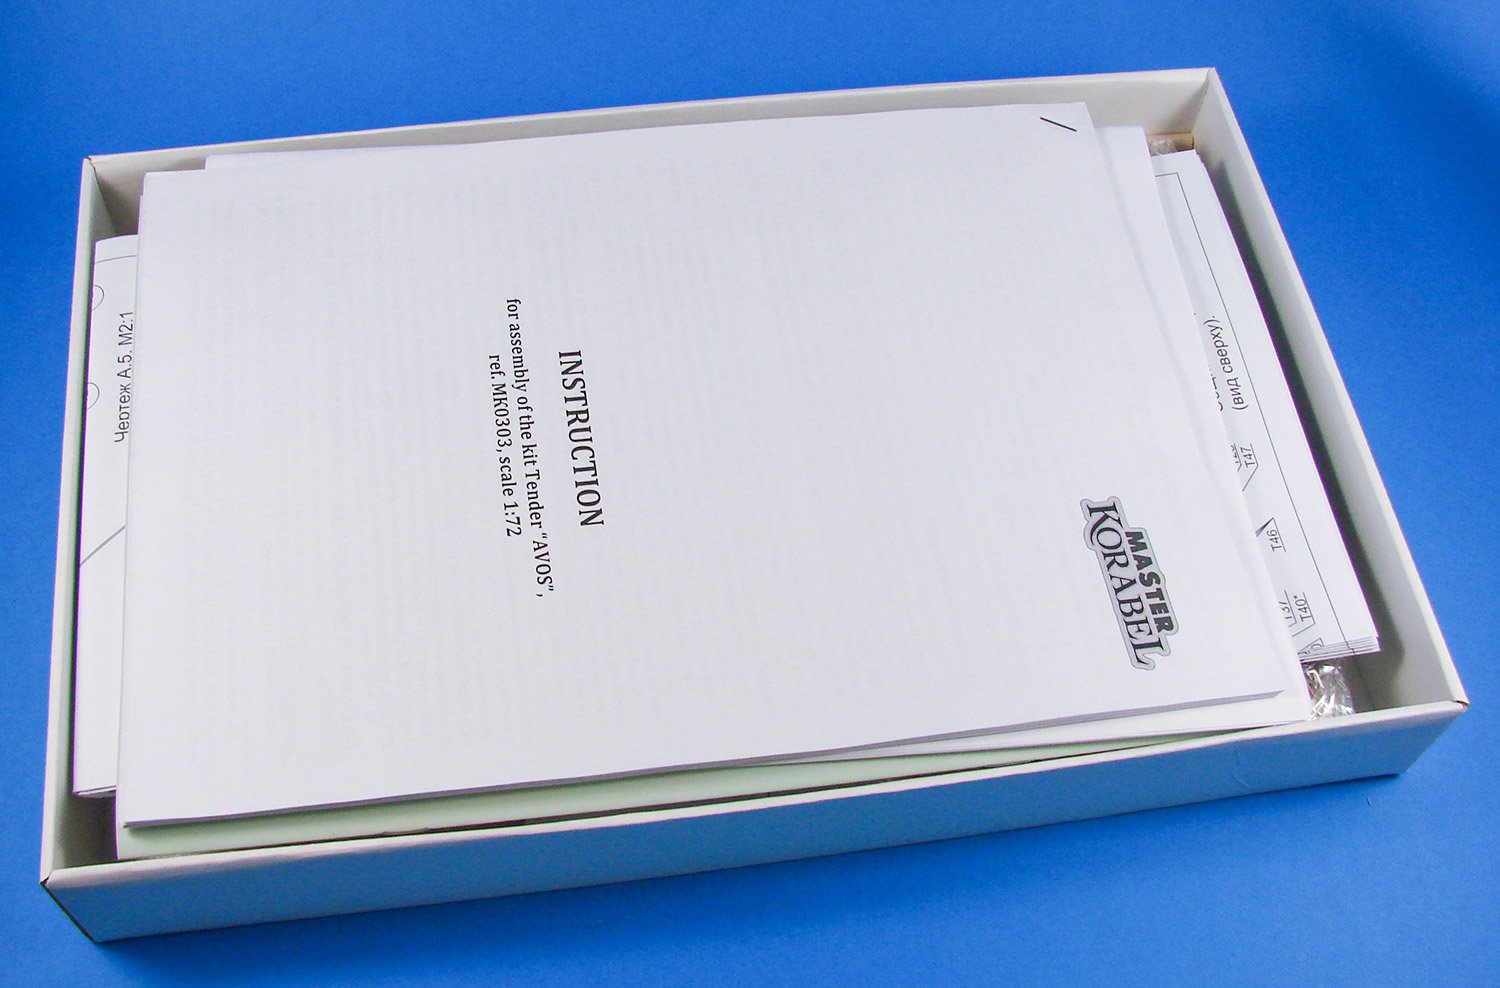
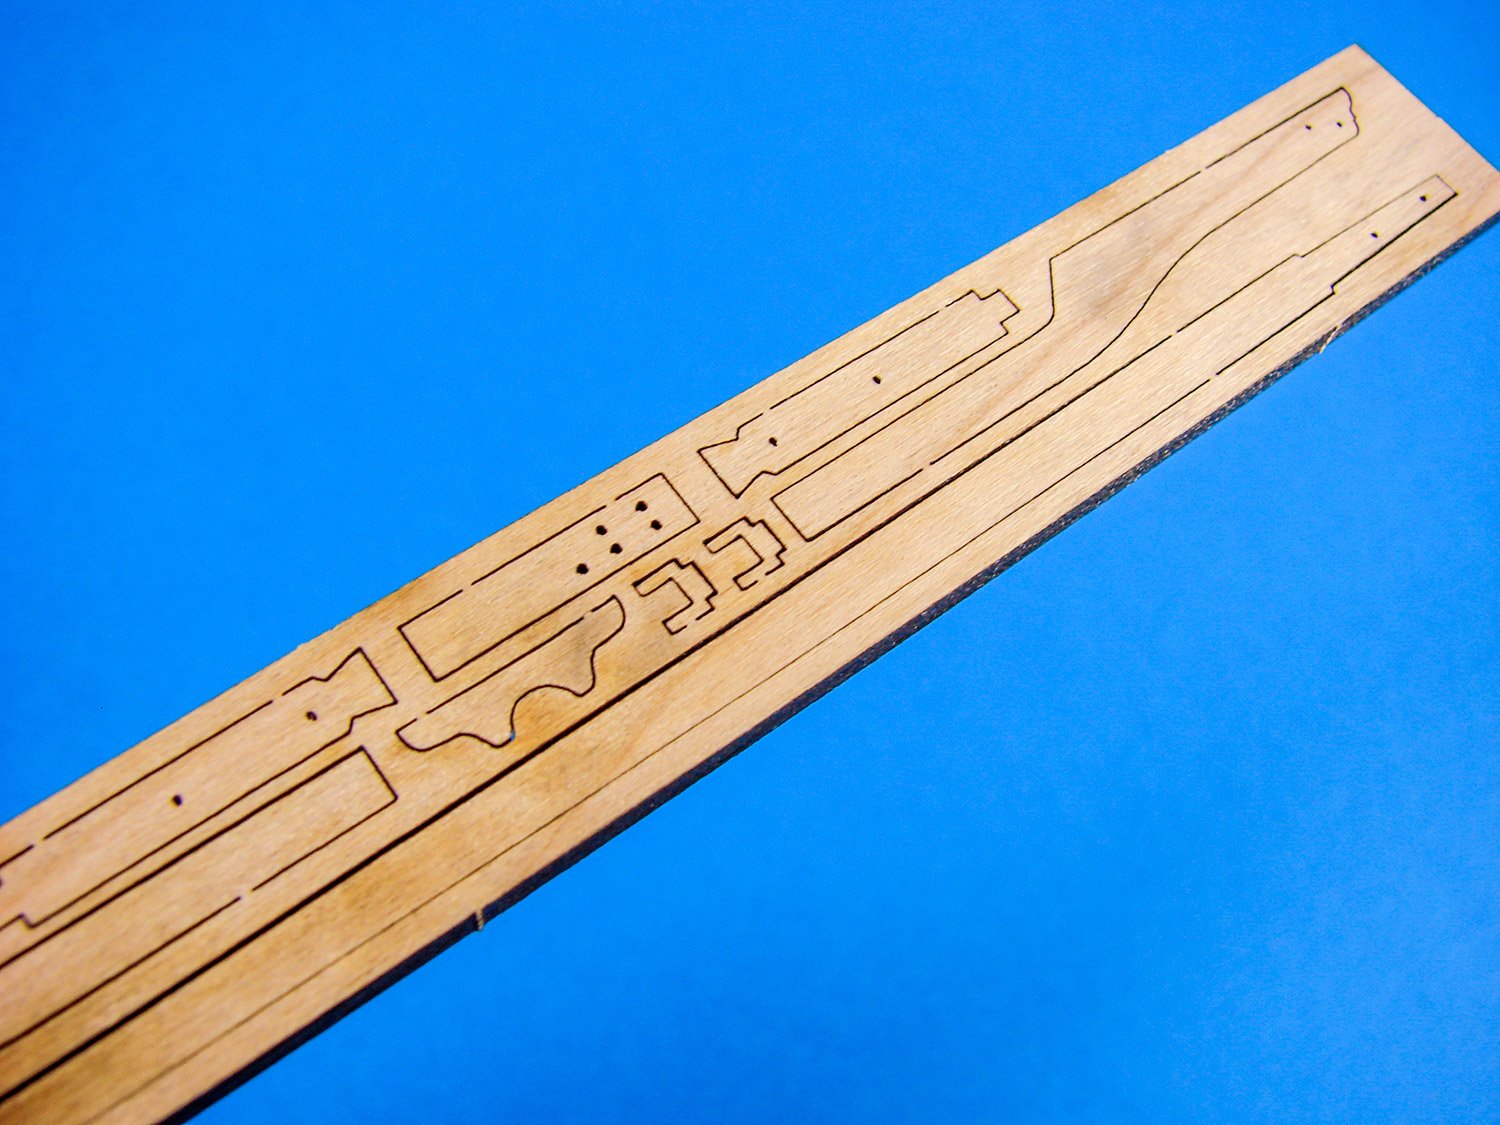
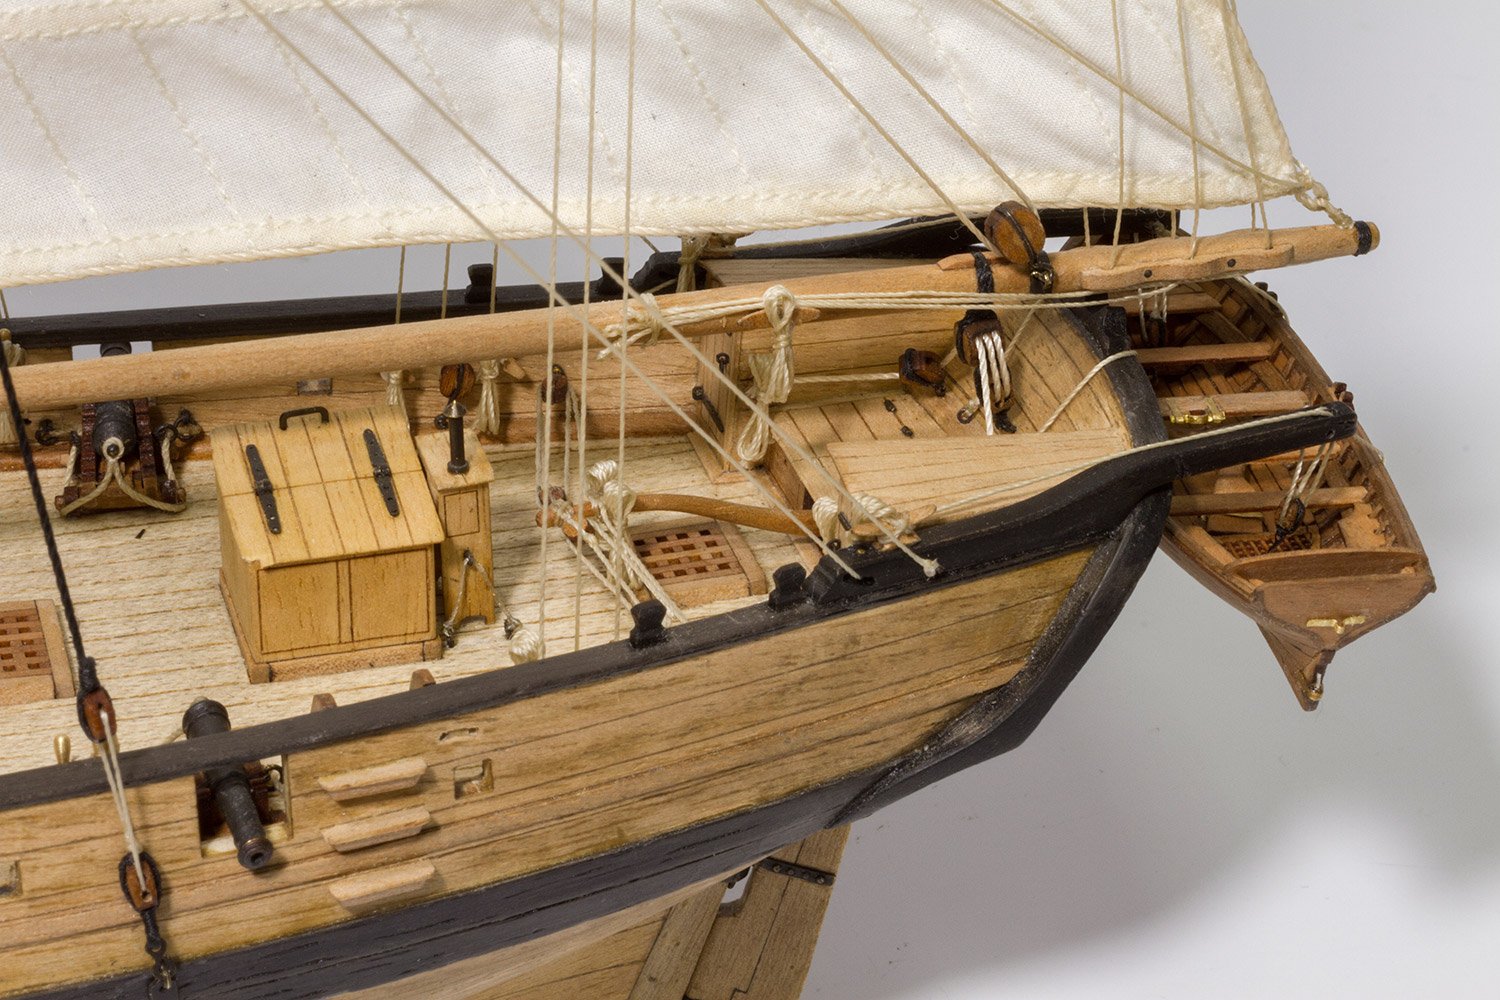
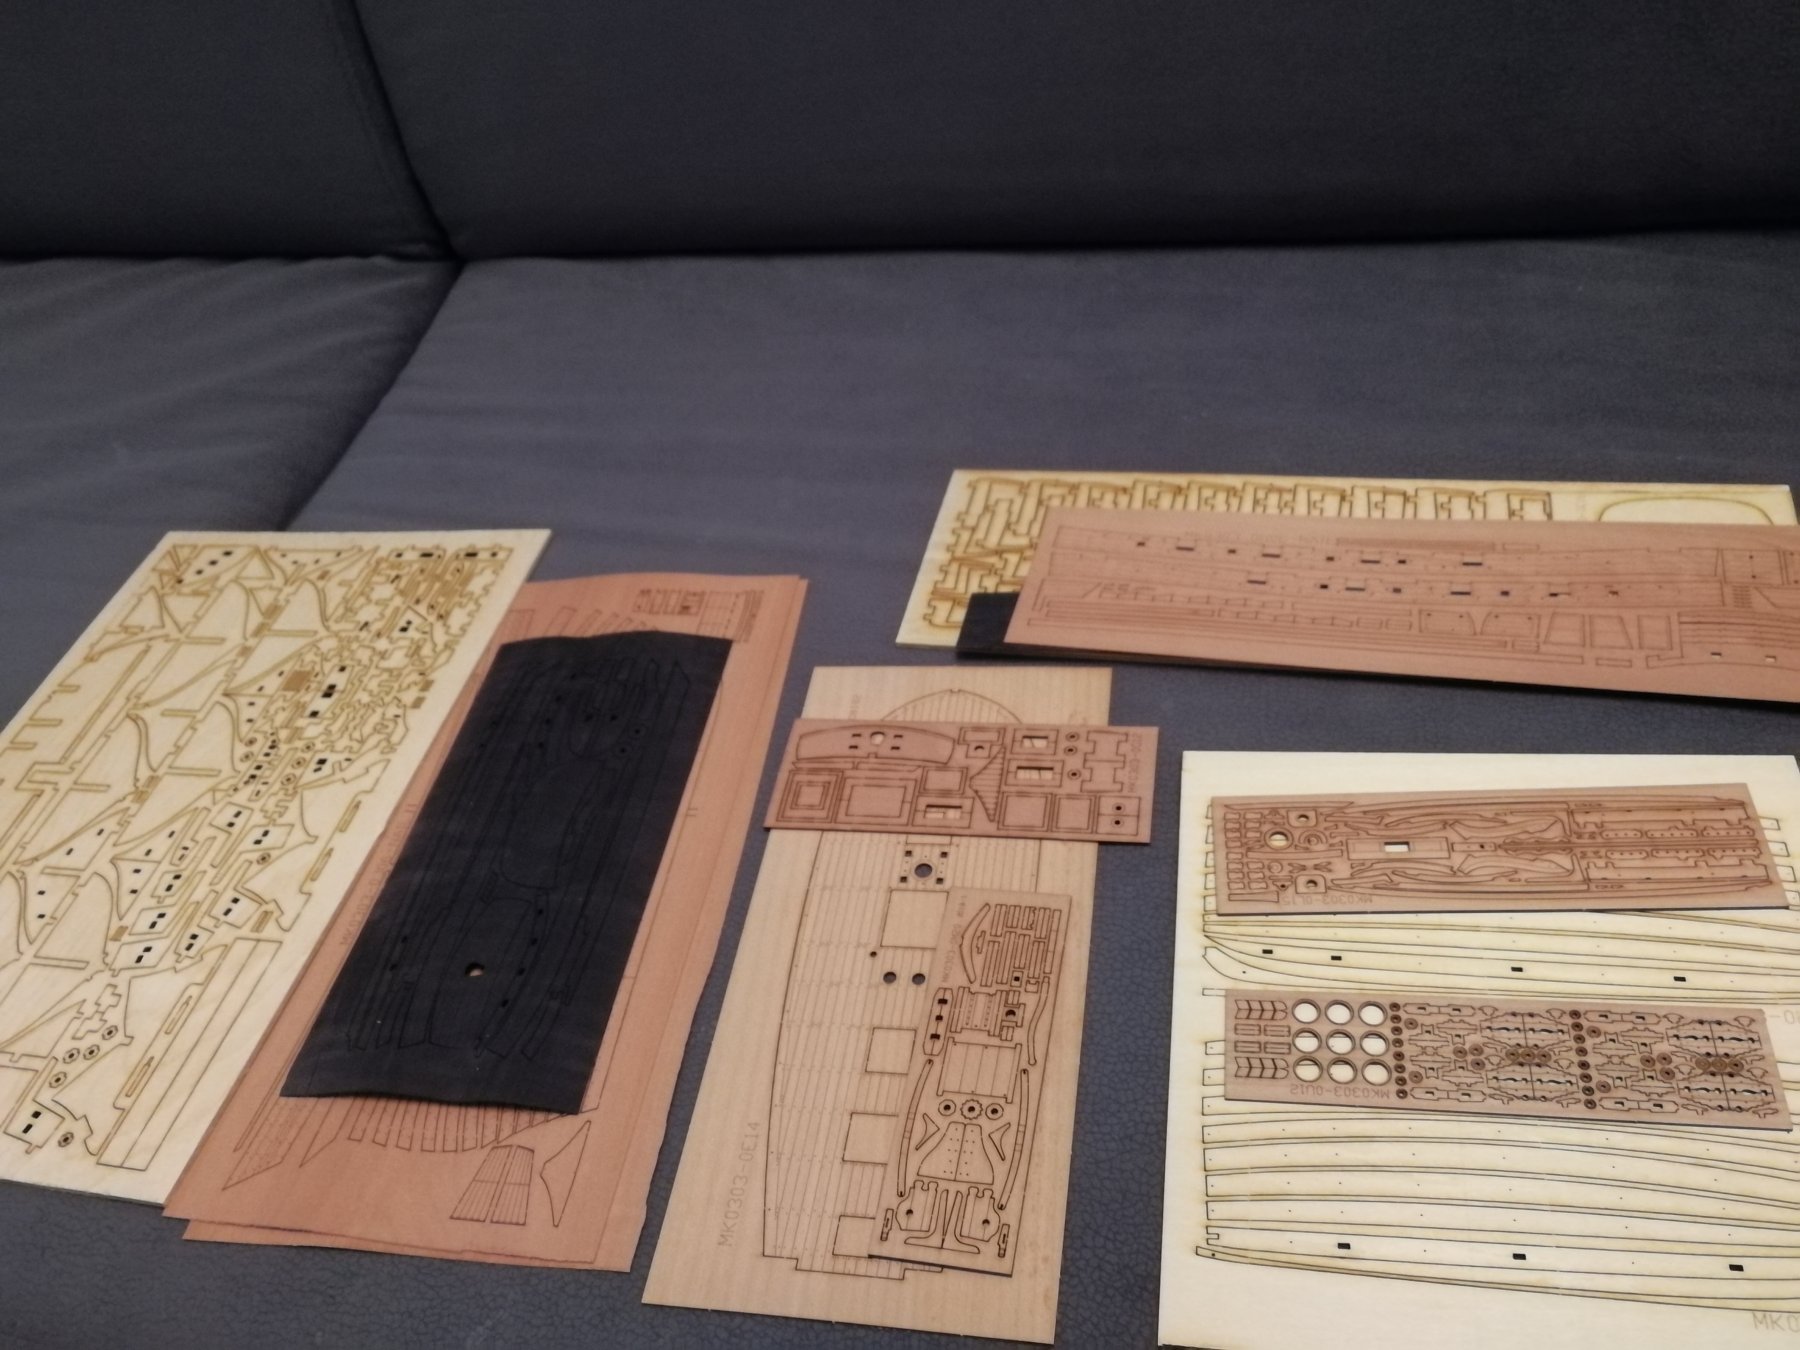
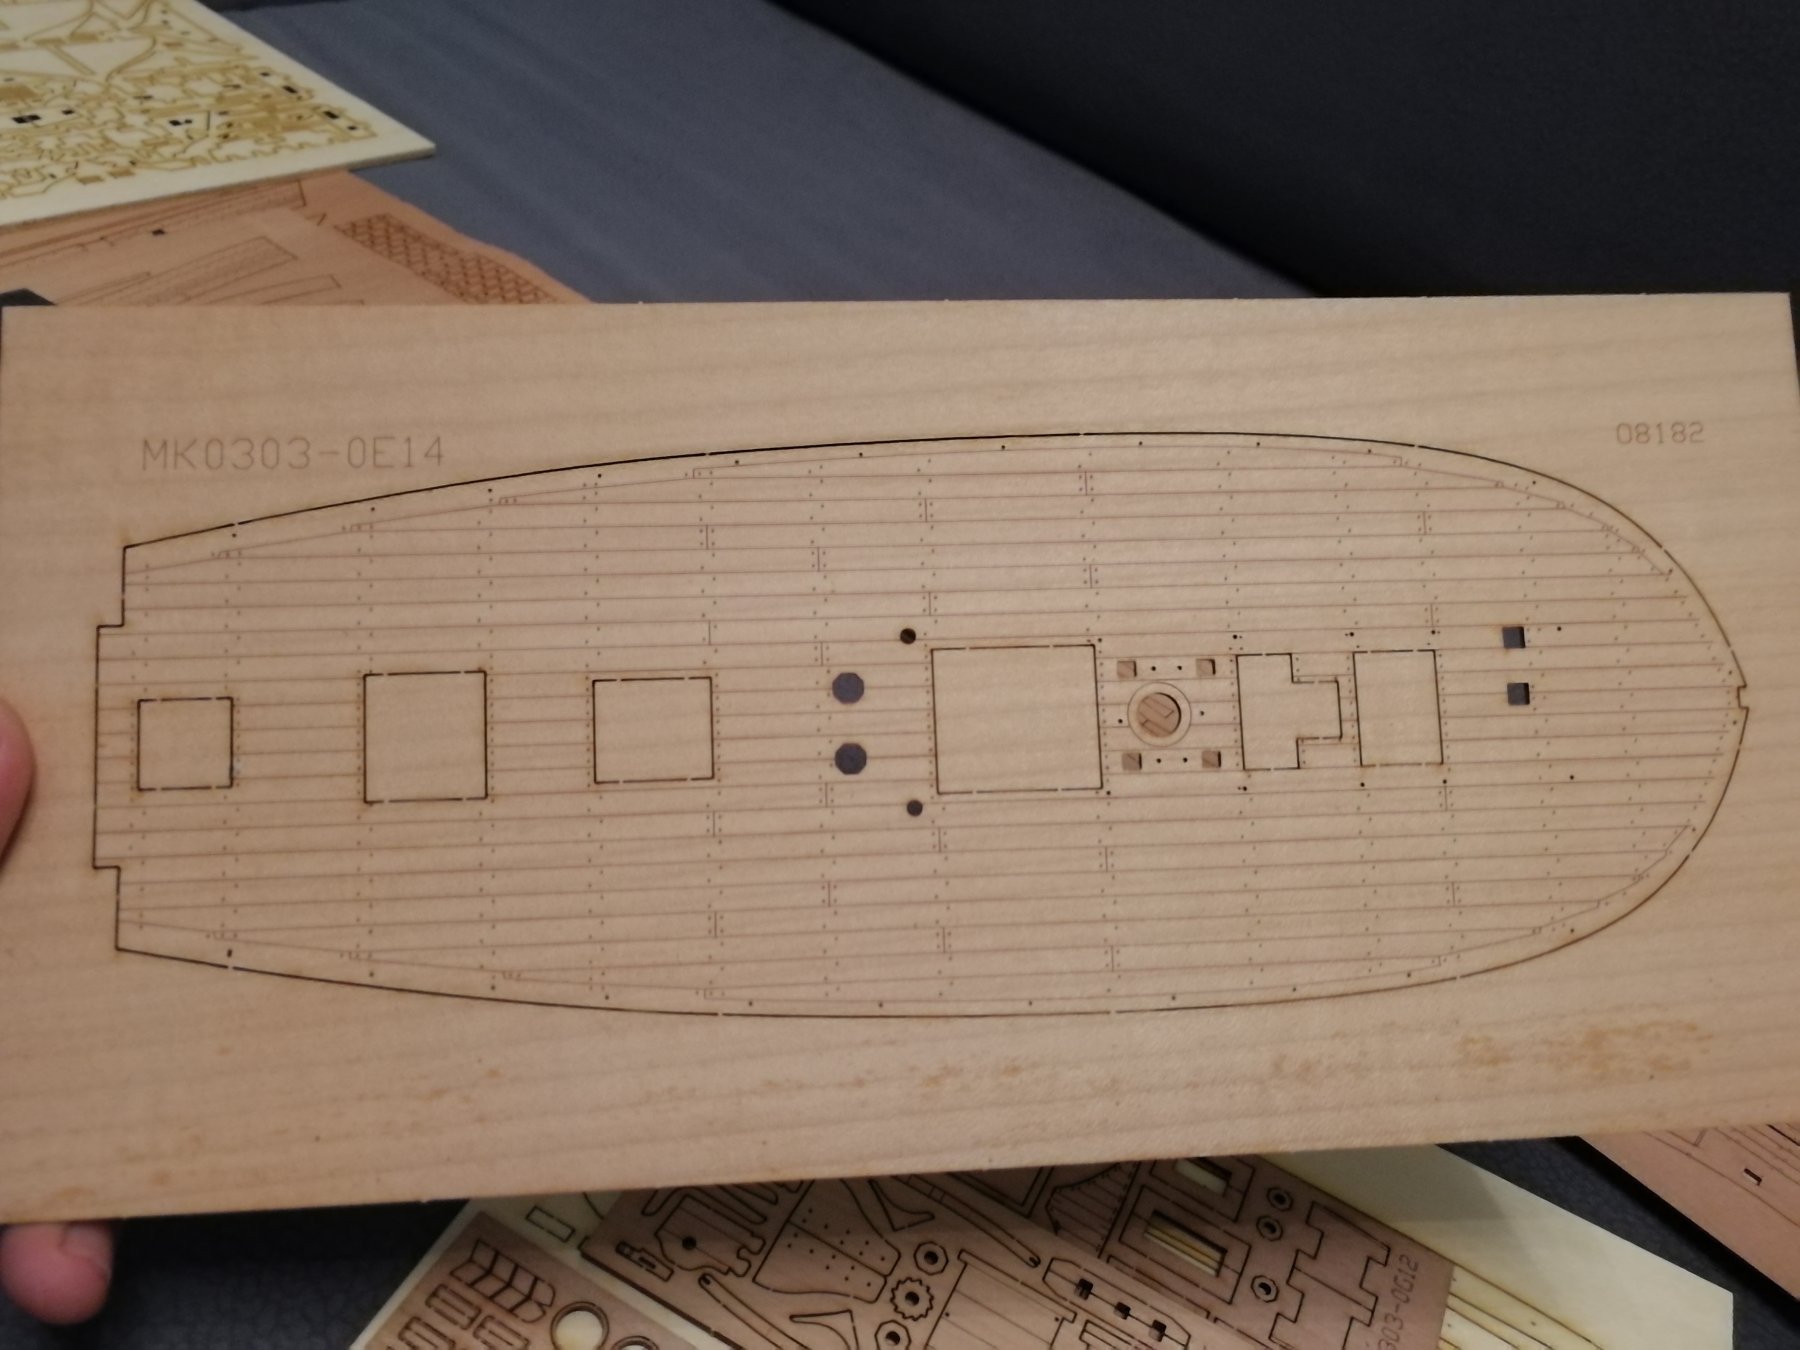
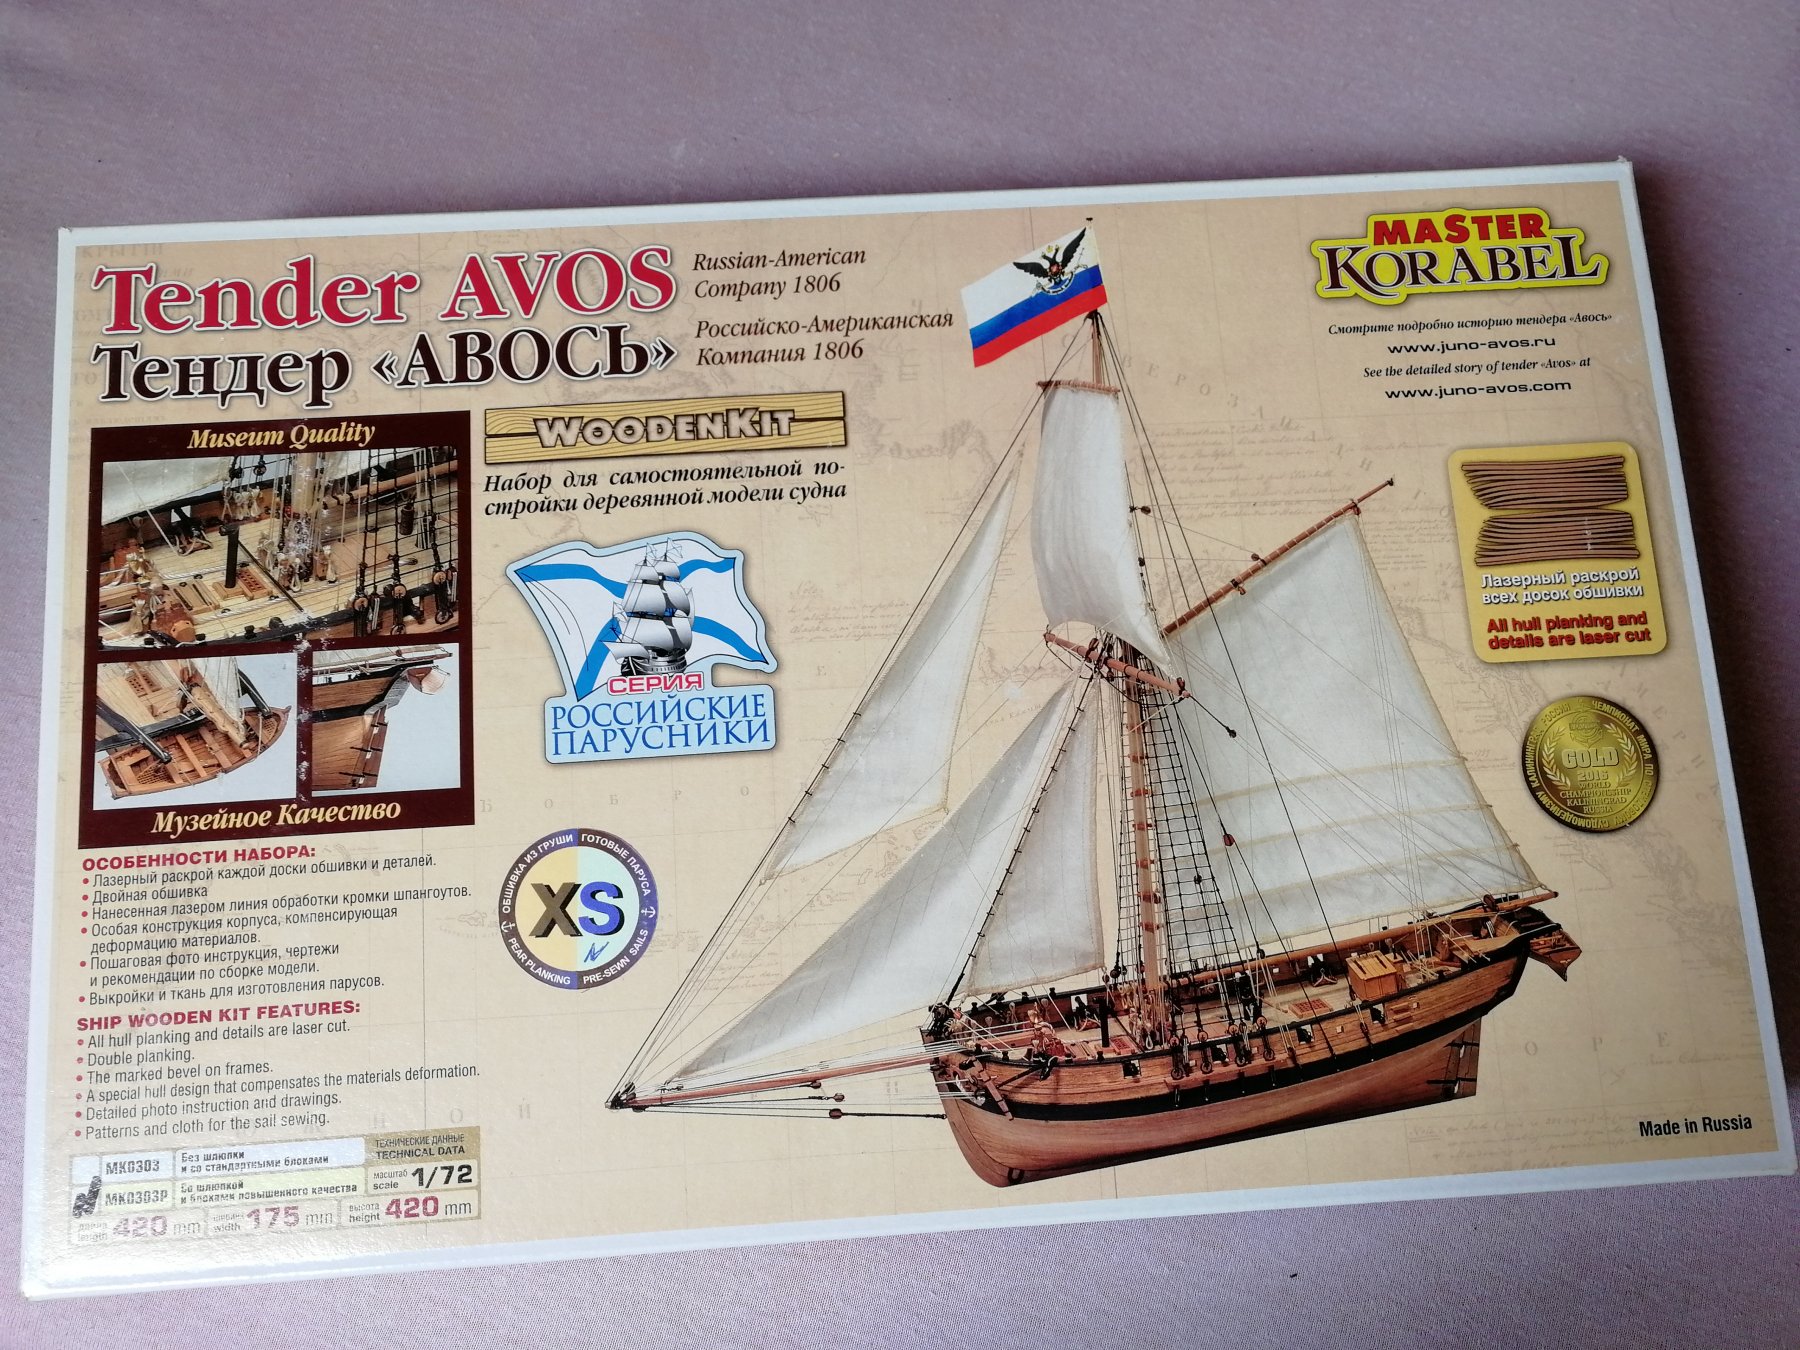
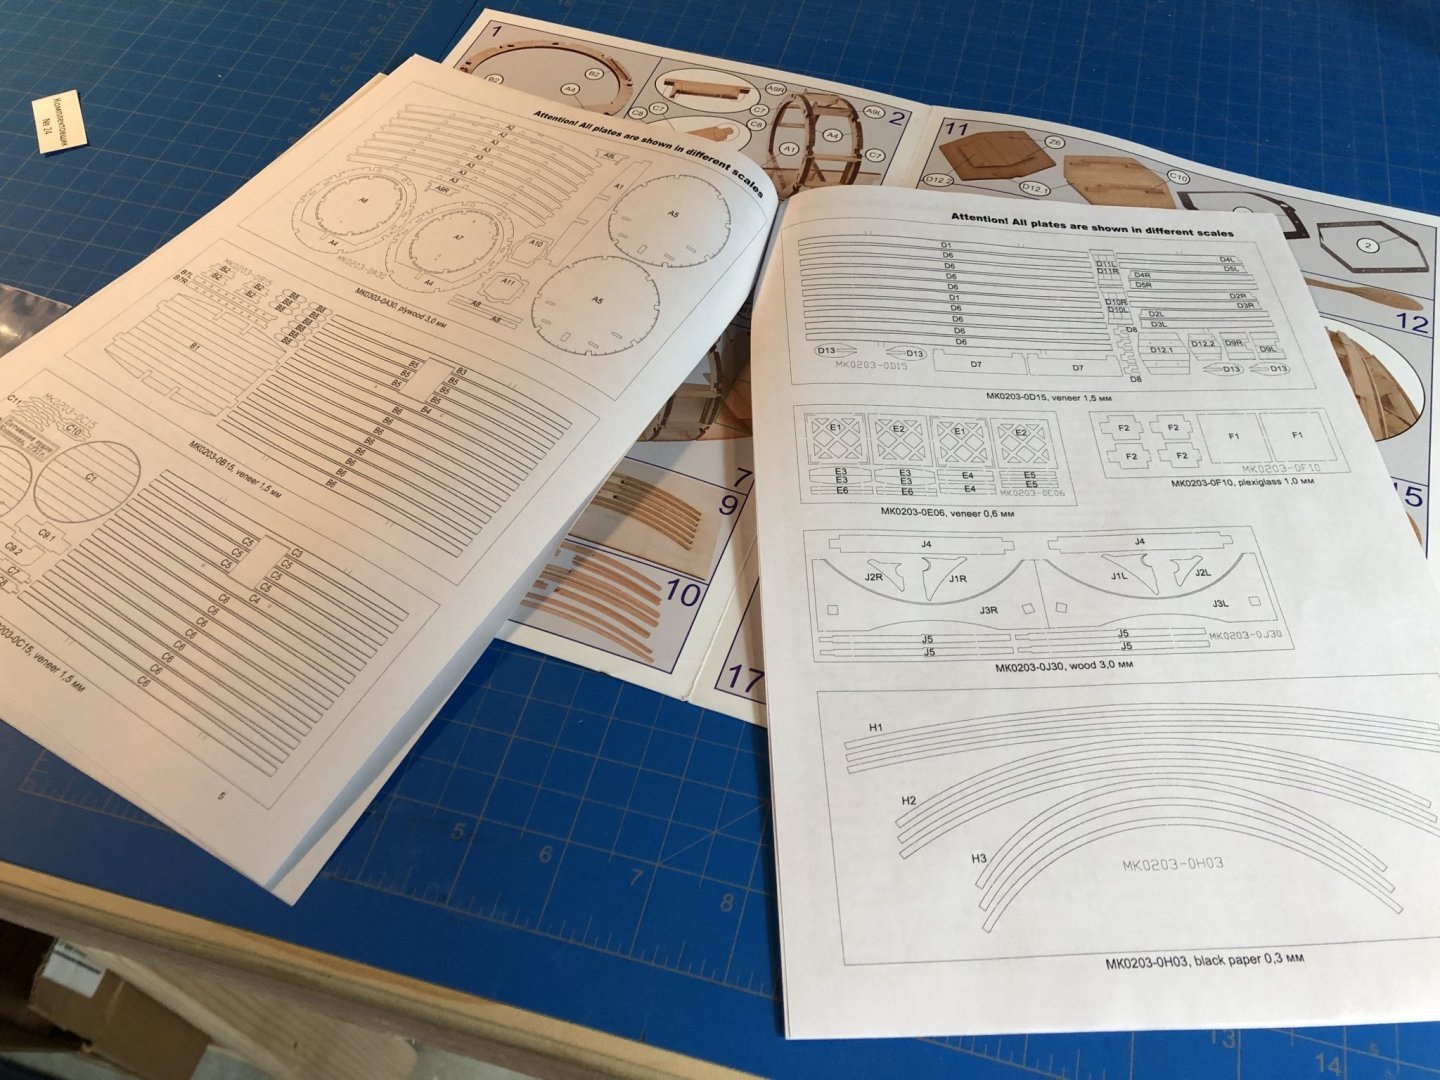
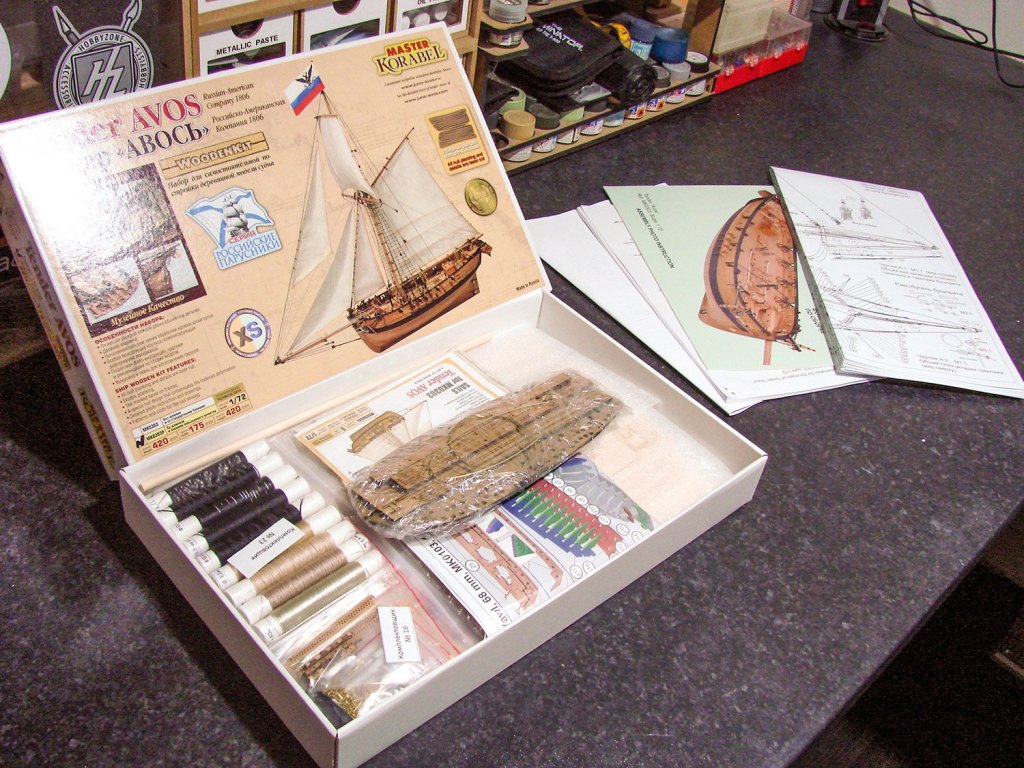
kit review 1:72 Tender ‘Avos’ (XS Edition) - Master Korabel
James H posted a topic in REVIEWS: Model kits
1:72 Tender ‘Avos’ (XS Edition) Master Korabel Catalogue # MK0303PSN Available from G.K. Modellbau for €225.00 "Avos" was an eight-gun tender which in was built in 1806 in Novo-Arkhangelsk, Russian America (now Sitka, Alaska). With a crew of 12 men, Avos was part of an expedition under the direction of Nikolai Rezanov. During the voyage along the Aleutian ridge to the port of St. Peter and Paul, the crew survived many storms, forcing them to stop at Fox islands for repair, and also save a mysterious “native” from the Attu island. To secure the Kuril Islands and Sakhalin, bring the local natives under Russian allegiance, and to force Japan to conclude trading relations with Russia, in 1807 the ships “Avos” and “Juno” conducted many military raids along the Kuril Islands coast. Here they raided the illegal Japanese settlements, which were originally those belonging to the previously banished Russian settlers. During the expedition, the tender “Avos”, using its 4-oared yawl, conducted many boardings of Japanese ships and several landing operations. Each time they forced large numbers of Japanese to flee, whilst burning and sinking their ships as scare tactics. During the 1808 shipping season, the tender “Avos”, under command of Lieutenant Sukin, was shipping goods to America. On 11th of October 1808, while sailing from Kadiak to Novo-Arkhangelsk, “Avos” was wrecked during a storm, near the coast of Chichagov island, near the Alexander archipelago. The kit We’ve been fortunate enough to watch the development of this kit unfold here on MSW, plus we also have a gallery for the completed model. The kit itself was released last year and has been available with instructions written in Russian, as befits the manufacturer. Now though, the kit has been issued with English instructions and is available for sale via various retailers. I have linked German website G.K. Modellbau at the top of this article as one such outlet to buy this kit. Offered in 1:72 scale, the completed length of the model is 420mm, with a beam of 175mm. The height is also a tidy 420mm, so the result will be a beautifully compact and highly detailed model that won’t take up too much of your bench space. First of all, there are numerous variants of this kit, with differing prices, aimed at giving the modeller exactly what he/she wants to work with. The options are as follows: Standard kit- MK0303P Pear - MK0303PX (no nails) Pear with nails - MK0303PXN Pear with nails and sails - MK0303PSN The kit we have been sent for review here is the XS release, which has the pear planking with laser-engraved nails, and a complete set of sails. Avos is supplied in a very attractive and yet relatively small box with nice, glossy artwork featuring images of the finished vessel, and details showing the pre-spiled planking that is included as standard. Other features are listed, such as the double-planked hull, laser-etched bevel marks on bulkheads etc. One thing that struck me about the box is the weight of it. It’s actually quite heavy and there’s certainly nothing left to rattle about inside it. Lifting the lid reveals a whole swathe of paperwork, in the form of plans, manual, inventory sheet, English instruction sheet to use in conjunction with the manual, and also the inclusion of the original inventory and instructions in Russian. These were put aside as I have no need for them. Kit contents are very neatly presented within. Parts are either supplied in bags, and/or wrapped in clear clingfilm or thin foam sheet. The only part not wrapped is the single length of dowel that sits at the edge of the box. It is also noted that Master Korabel’s earlier release of the 4-oared Yawl is included as this hangs from the behind the ship’s transom. This little 68mm long vessel is a kit in its own right, and we’ll look at it soon. The first pack of contents that I look at includes the hidden deck around which the model itself is constructed. This pack of parts is neatly wrapped in clingfilm, and there is an identifying number slip in the pack. As you can see from the image, Avos is quite small, but of a size which I imagine will make it quite tactile and also a nice side project if you want some respite from a larger vessel. Unwrapping everything, I’m of course drawn to the largest component which is what I call the hidden under-deck. This deck-shaped item is laser cut to shape and is of course deck-shaped, with it being a slice from a little lower than the actual deck part. Made from a form of MDF, you can’t help but notice all the square holes which are cut into it. This is the key to Master Korabel’s kit engineering and provides the key positions for all frames and bulkheads, both below and above this part. It’s almost like the Lego equivalent of kit building at this point, in the very loosest of terms. A series of parts are also included in this wrap, spread across five small pieces of timber. Lastly, a couple of lengths of brass wire are found here, in two different gauges. Now we come to the 4-oared Yawl which is also available as a separate item. This mini kit is presented in a clear zip-lock wallet with a set of colour-printed instructions which follow the Avos format, and other illustrations and inventories. Master Korabel have produced the main parts for this from a sheet of very thin, laser-cut pearwood. Despite how thin this is, the laser has made a surprisingly small amount of scorch when cutting. Looking at the parts, you’ll see that a complete set of pre-spiled planks are supplied, saving the modeller a whole load of time and enabling an accurate and authentic appearance to this little gem. You’ll find pretty much all the constructiona parts here except for the oars and keel parts which are on a separate pearwood sheet, along with a nice display stand for the model…should you not wish to hang it from the transom of Avos. Again, we are also supplied with some brass wire and shim for such things as hanging the rudder and making the mast clamp etc. The whole yawl is built upon a jig which comes on a separate sheet of ply. None of these jig elements will become a part of the finished model, so everything will be in pear. That will certainly complement the pear exterior of the Avos hull, if you purchase that option. Once assembled, the jog is then covered with clingfilm and the multipart inner keel is inserted, followed by the ribs and then the pre-shaped planks. This is then removed from the jig and fitted out. The results are very impressive, as can be seen here. To find the English language version of the Yawl instructions, these are located at the end of the text instructions for the main Avos vessel. Wrapped in both clingfilm and thin foam sheet, the remainder of the timber sheets are located at the very bottom of the box. Now we can see the actual deck which sits atop a series of frames that raise it from the hidden under-deck and form the actual ship frames onto which you will plank the hull. No deck planking to be done though as this part is entirely laser-etched, and it looks VERY good! Note also the etched treenails. If you’re concerned about too much uniformity, you can also mask this in several stages and apply a finishing varnish in two or three slightly varying colours. That would look quite impressive. Of course, the laser reproduction planks are shown to notch into the edge plank, as they would. Various cut-outs are included for deck fittings and main mast. A plywood sheet contains all of the frame elements that plug into the upper side of the hidden under-deck part. None of these parts have numbers, and they need to be checked against the drawings which show the sheets and their respective numbered parts. There is more scorching on the cut side, as is to be expected, but remember, all of the frames will be hidden anyway. Another zip-lock bag holds a small number of sheets comprising ply and pearwood. Note the ply sheet holds thee stern frames, and that these are engraved so you can accurately bevel them. Transom parts are also included here. Here we have a sheet of wood, one of 2mm and one of 1.2mm. On the 2mm sheet, you’ll be able to identify hatches, breasthooks, knees, bibs, trestletrees, rudder tiller etc. The 1.2mm sheet contains parts such as transom finishing plate, pump supports, various coamings. Etch and cutting quality is first rate. This model is of course double-planked. The first layer is manufactured in 1.4mm plywood and these are laser-cut as pre-shaped components. You’ll also note the etched dots which line up with the frames and are to be used for nailing positions. The garboard plank also has locating holes which align with the formers to ensure absolute placement, and then of course, all other planks after it should be perfectly positioned. Three more timber sheets are now supplied. These are in regular timber, 1.5mm ply and 1.2mm stained black ply. A quick glance across these will easily identify the cannon carriages, bulwark rails, mast hoops, channels, bowsprit parts, yardarm cleats, windlass knees, etc. One thing to mention here is that the black stained ply is actually quite a dense colour, and not as grainy as my photography makes it out. If you have any concerns, you can always mask and paint the parts black anyway, but it shouldn’t be necessary. Now we come to our first sheet of thin pearwood planking, but this time, for the inner bulwarks. These are provided as single port/starboard items, with the actual planking runs and nails laser etched into the surface. This thin 0.6mm timber also provides parts for taffrail inner planking, toilet/latrine doors, rudder lap plate, false keel etc. We now see more of that lovely coloured pearwood with these next two sheets which contain mirrored sets of planks for port and starboard hull sides. As with the inner bulwark, these are also engraved with nail holes, plus the plank lengths. They are also all pre-spiled and ready to fit directly to the hull. Of course, outer bulwarks are supplied as per the inner ones. Other parts on these sheets include latrine roof, transom lap, compass case, aft chest parts, windlass barrel etc. We still aren’t done with black plywood yet as this 0.6mm sheet testifies to. Here, you will find things such as wales, bulwark rails, taffrail finishing planks, plus numerous other elements. Our last sheet of timber is this sheet of 3mm ply. It’s also the largest sheet in the Avos kit. A lot of the element here are quite obvious, such as the bevel-engraved lower hull bulkheads and keel frame. There are a good number of other parts here that pertain to various other structures, such as the stern, and these are designed to lock into each other and then into the false under-deck as per the rest of the various structure frames. It’s also good to see that we are also supplied with a stand onto which to mount our finished model. Coming away from the sheet timber materials, we now come to the packets which contain various deck fittings and other detail parts. These tend to be sorted into bags of differing components. The blocks and deadeyes look to be of exceptional quality with nothing mis-made as I’ve seen in some previous model ship kits. In 1:72, the cannon are tiny, but they look really great! Two metal anchors are also supplied. A whitish powder exists on the anchors, but this is easily wiped away with a damp cloth. Here we have some brass plank pins for the hull first planking, and a small kit which contains parts for the two deck bilge pumps. Two photo-etch frets are included in this release, of 0.3mm and 0.5mm thickness, respectively. Various items such as chain plates, mast details, ships bell mounting, latrine door fittings, rudder metalwork, block hooks and transom details are to be found here. There’s quite a lot of PE to attach and all of it is superbly made. I deal with photo-etch a lot for my magazine work, and I know this to be high quality and with reasonably small tags holding things in place. A fine razor saw would be ideal for removing parts, followed by clean-up with a jeweller’s file. Two name plates are included for the display base; a brass one in Russian and an English one made from a small piece of laser-engraved pearwood. A last packet of parts includes items to build the deck gratings and cleats. There’s also a toothpick in a little sleeve. One end is green, and I presume this is for applying small quantities of PVA or superglue during assembly. A screen-printed flag is included. Of course, we need some cord to rig this model and nine spools of this are included in various colours. Cord quality is high with no fuzziness. This particular version of the Avos kit contains a full set of sails. There are five linen-coloured sails, all cut to size, sewn and fitted with bolt ropes. These really are excellent. Master Korabel also sells this set separately, in case you purchased one version that didn’t have them, and you decided you did want sails after all! A set of three large plan sheets are included with this release, although the annotation is in Russian. However, three smaller sheets have English labelling and will provide all you need to reference your build. This allows you to use the larger drawings still, but you have the translations on the smaller sheets. A complete rigging inventory is also included. The instructions for Avos are driven by photo-led manual with each step of hull construction clearly shown with all parts clearly referenced. Some CAD illustration accompanies these photos, fully clarifying any areas you may be unsure about. The photo instructions are designed to be used in conjunction with a set of printed instructions. Together, these should make Avos assembly as straightforward as is possible to get. A whole series of drawings are also included in this publication, showing the various rigging and seizing details that you’ll need. This is a very nice touch. Conclusion This is my first time with a Master Korabel kit, and I very much like their entire approach, from packaging, through to kit design, timber quality, instructions and plans etc. It’s very much a quality product and you can tell that the company have taken real pride in their product. Being able to buy different options to suit your wallet or approach, is also a nice idea. When finished, Avos isn’t a big model, but she is thoroughly detailed with quality parts. Some contemporary European manufacturers could learn a thing or two from this Russian manufacturer. Highly recommended! My sincere thanks to Master Korabel for the review sample seen in this article. Master Korabel has distributors in the USA, Canada, Australia, Europe and is now looking for partners in England. PHOTOS OF FINISHED MODEL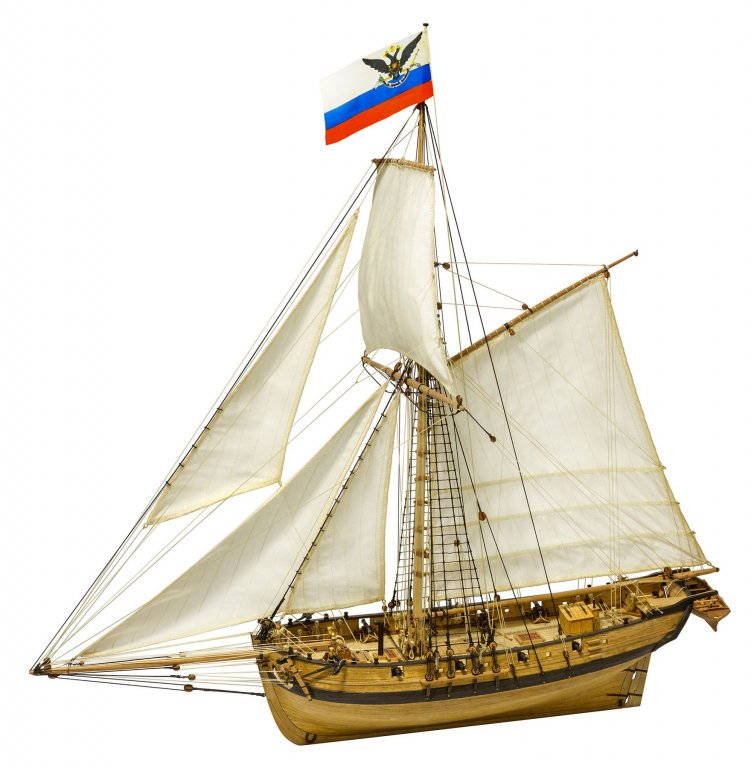
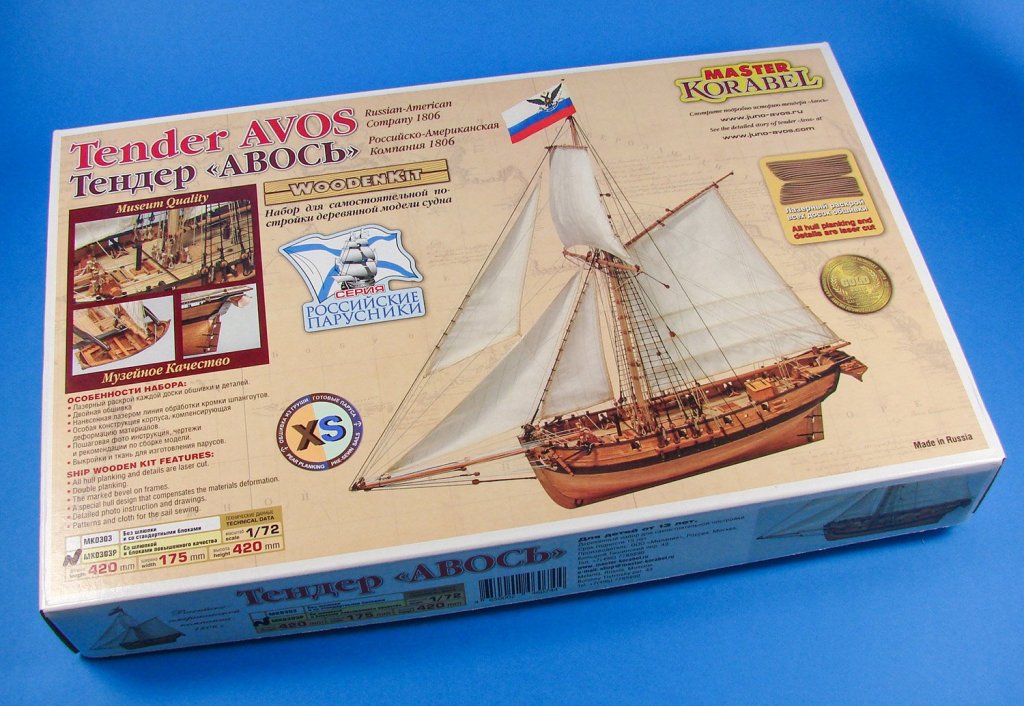

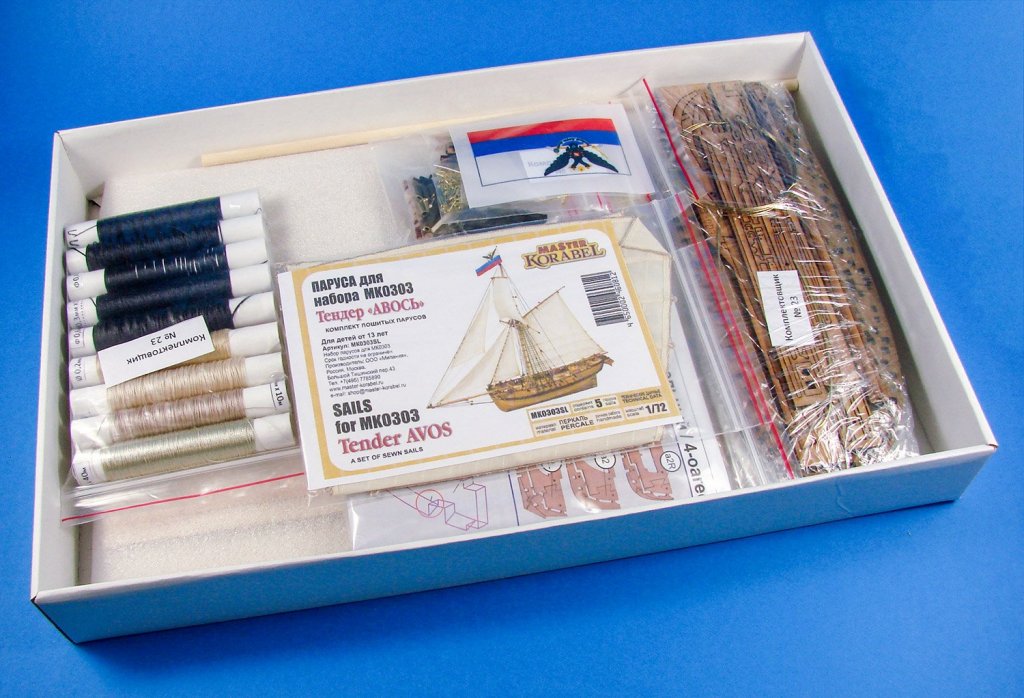
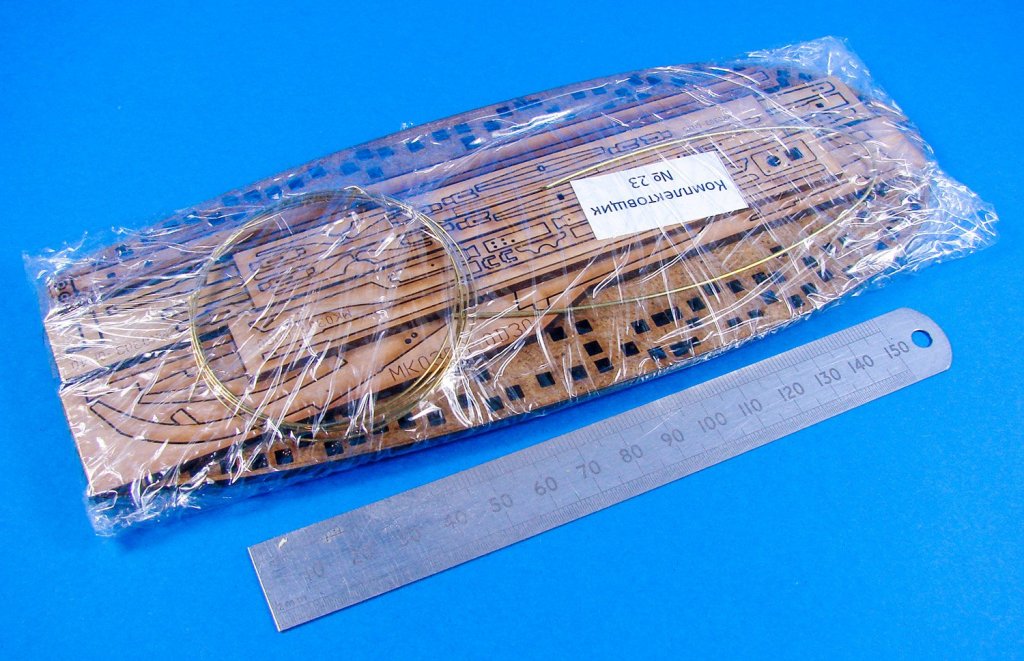

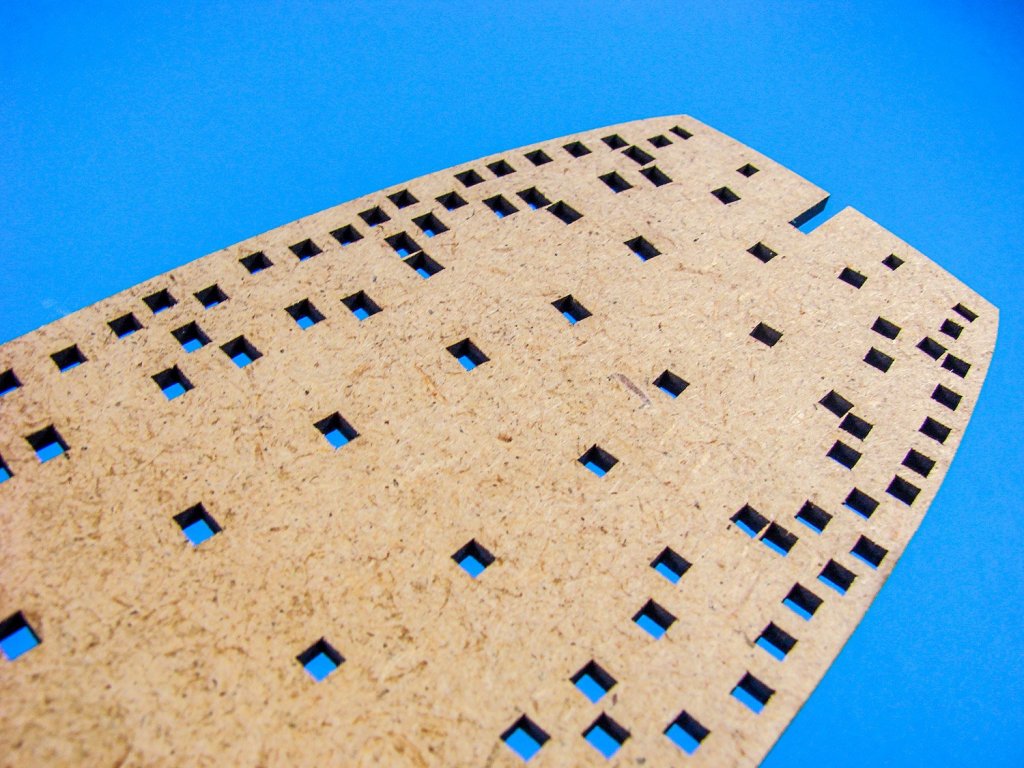
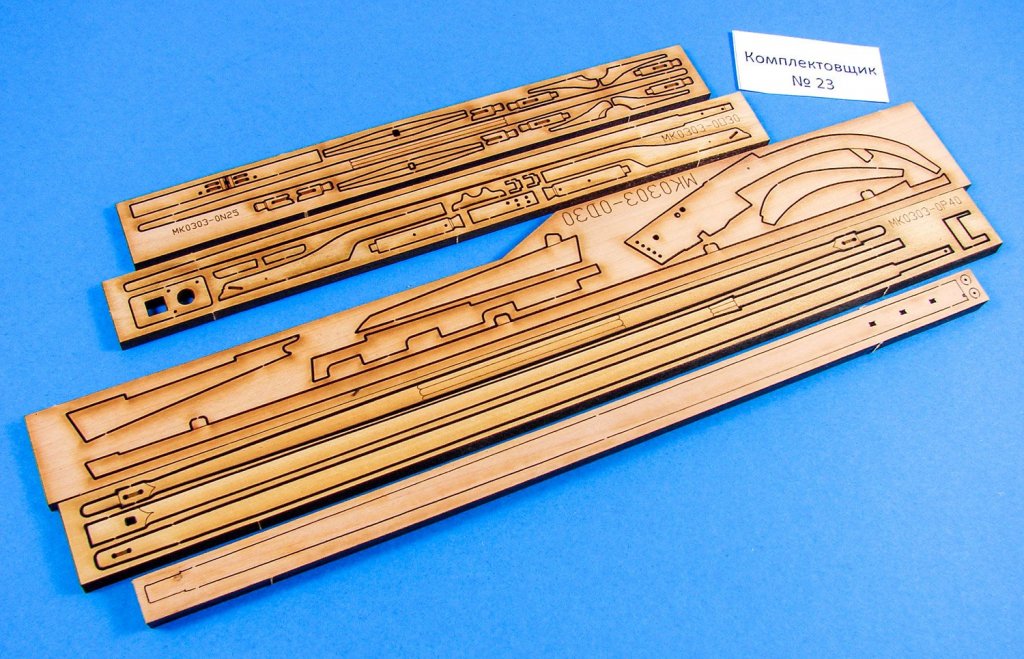
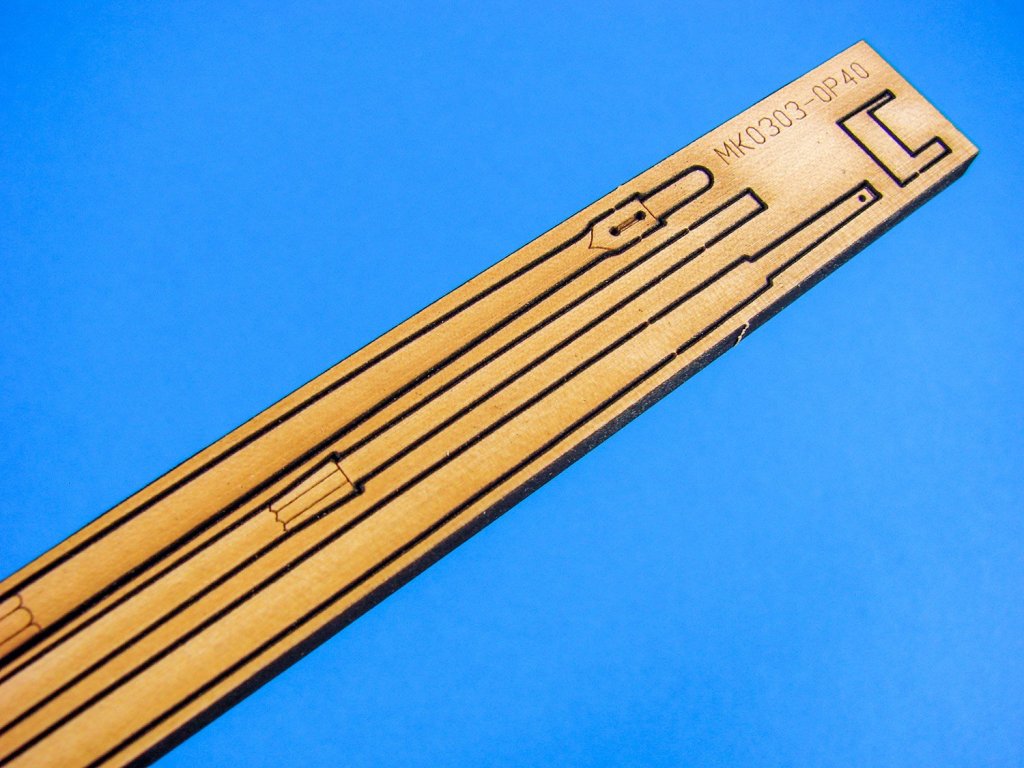
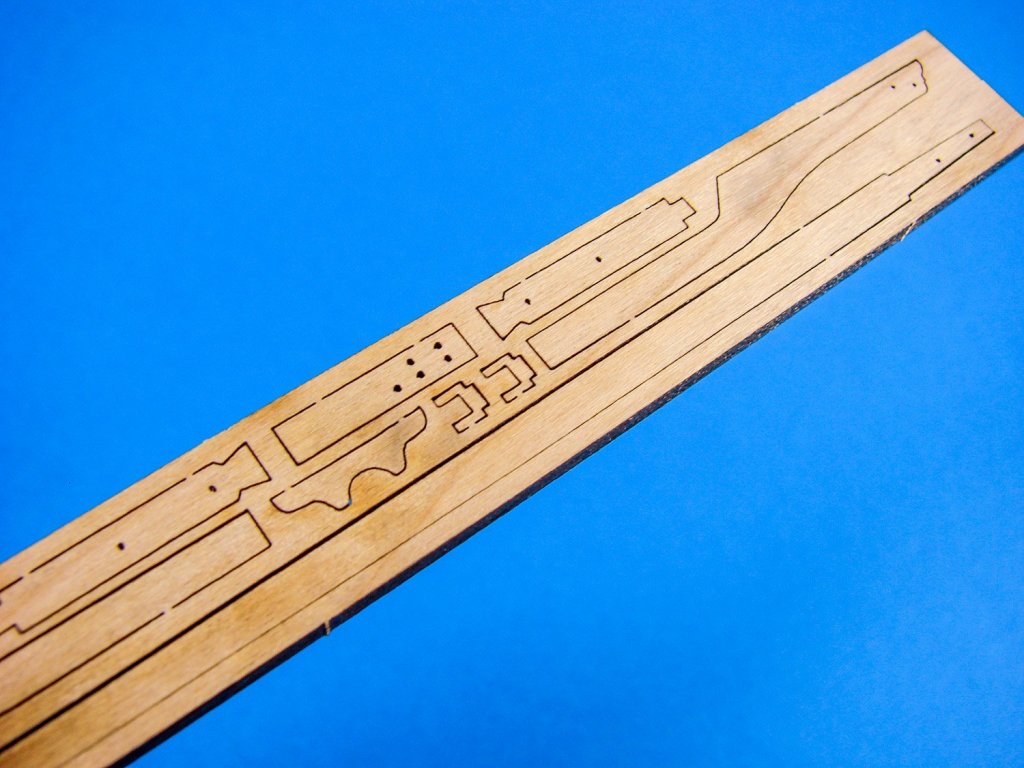

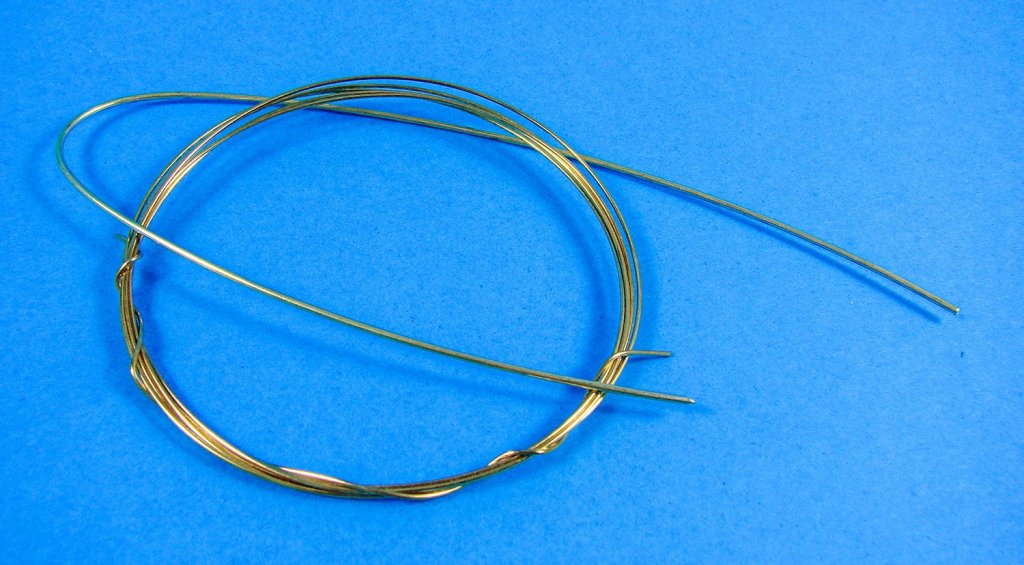


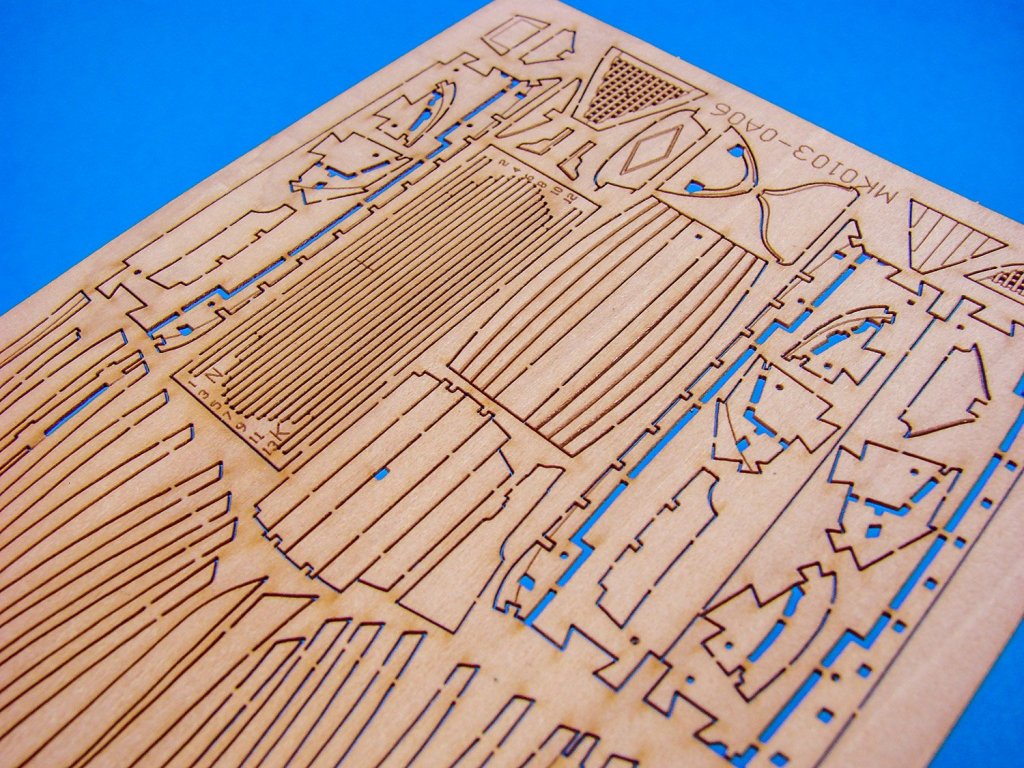
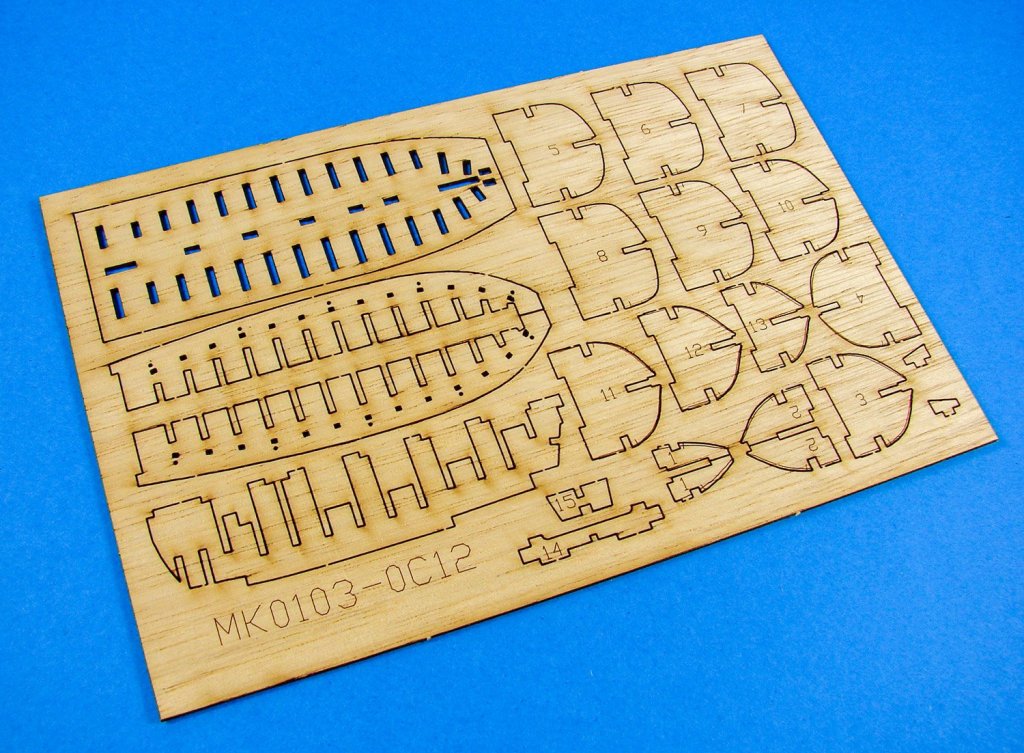
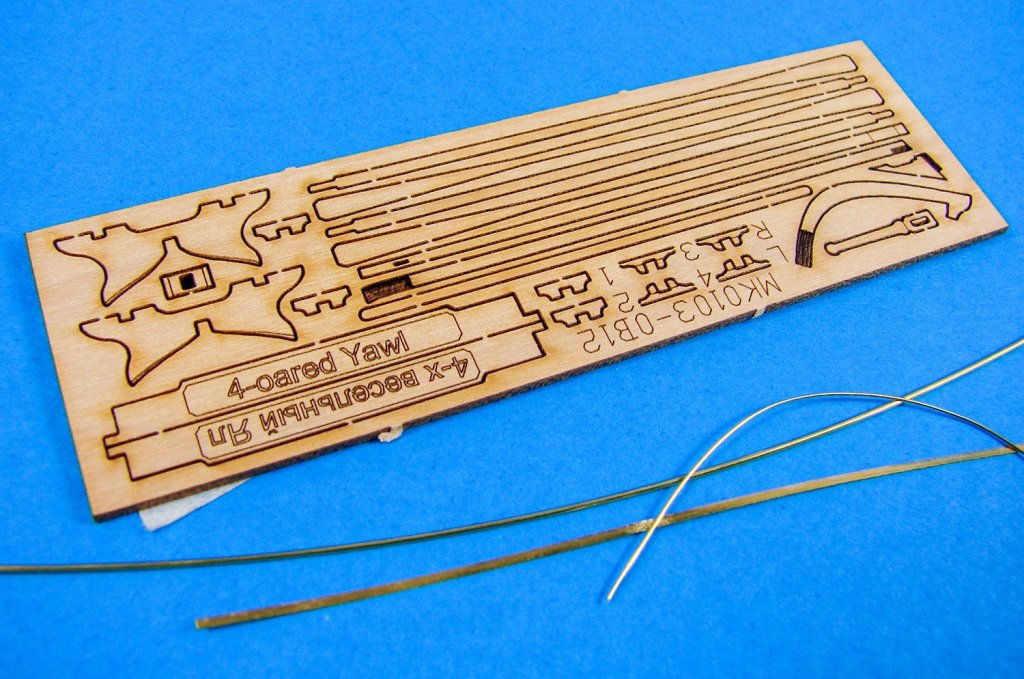


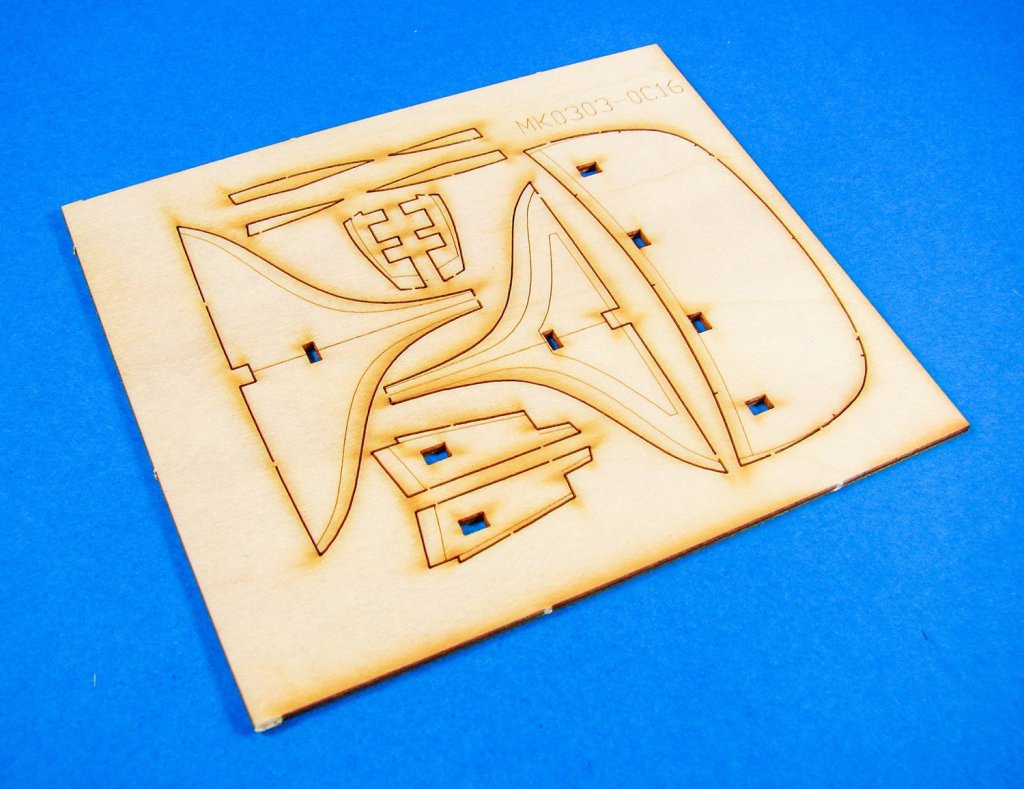
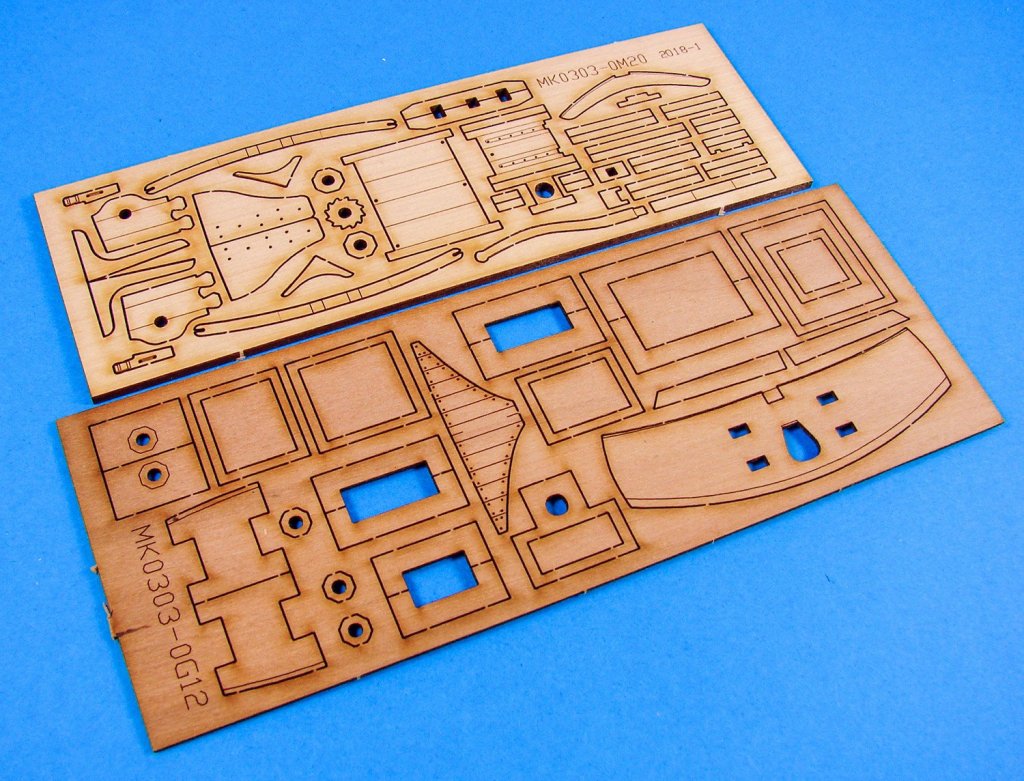
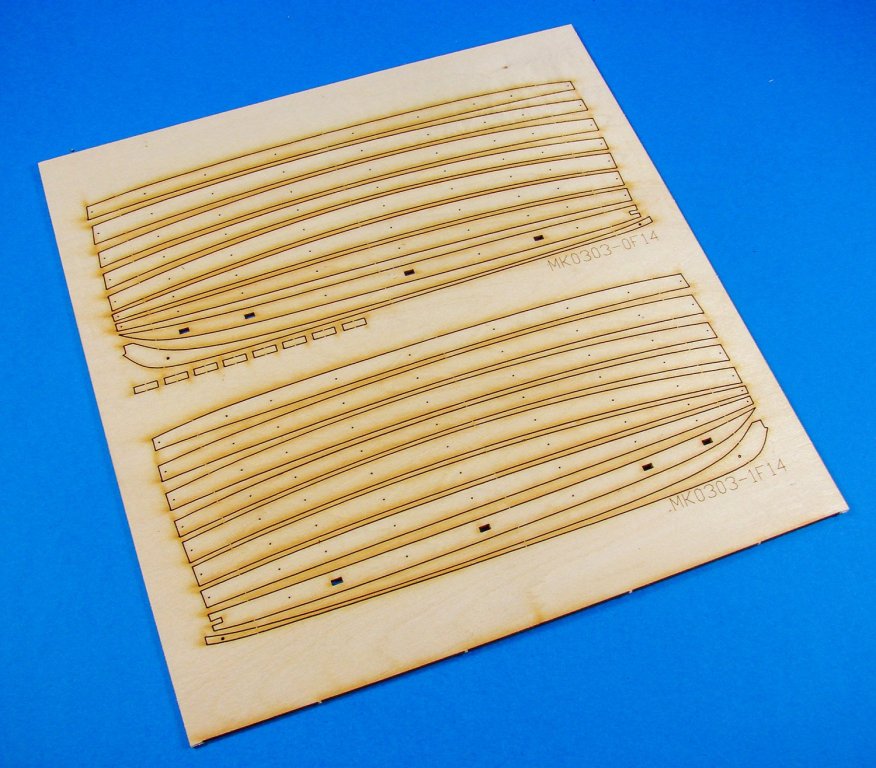


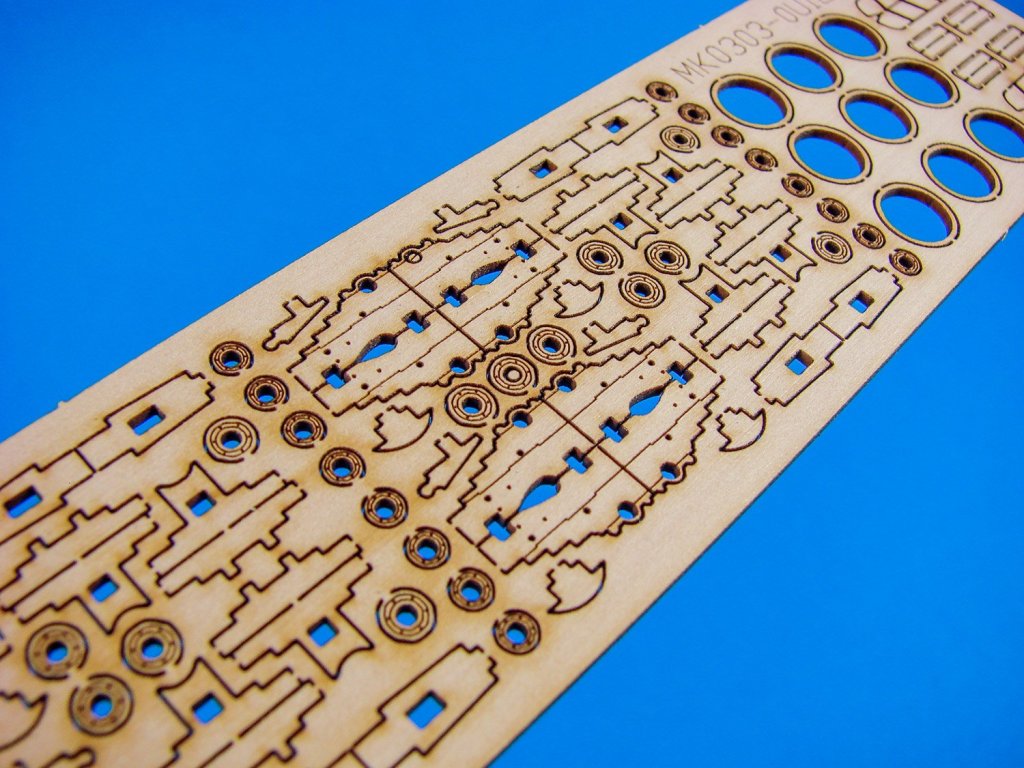


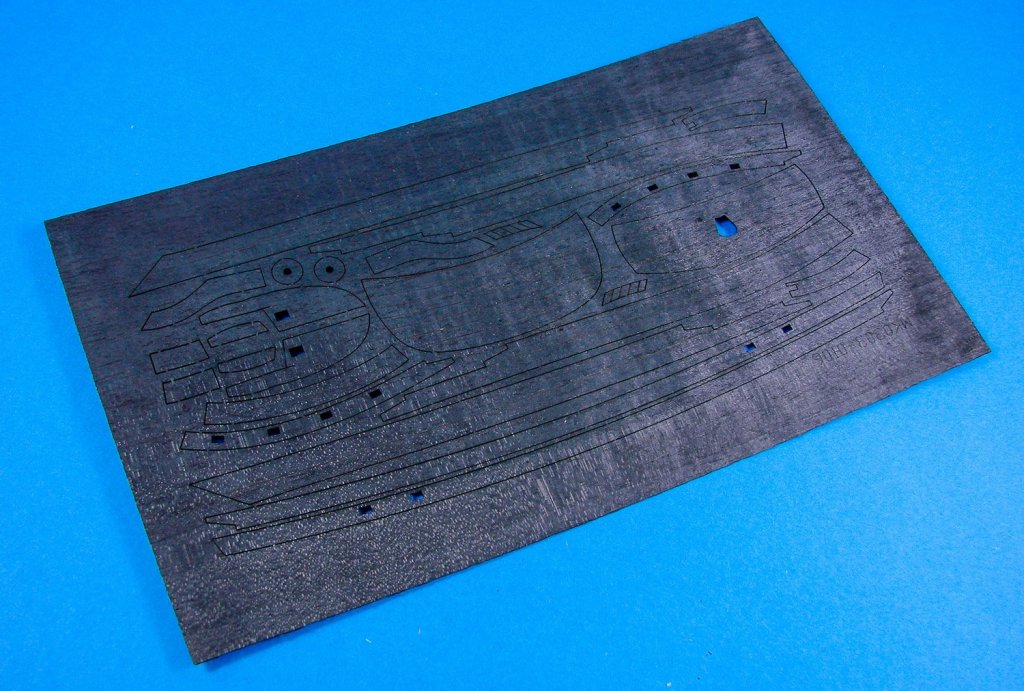

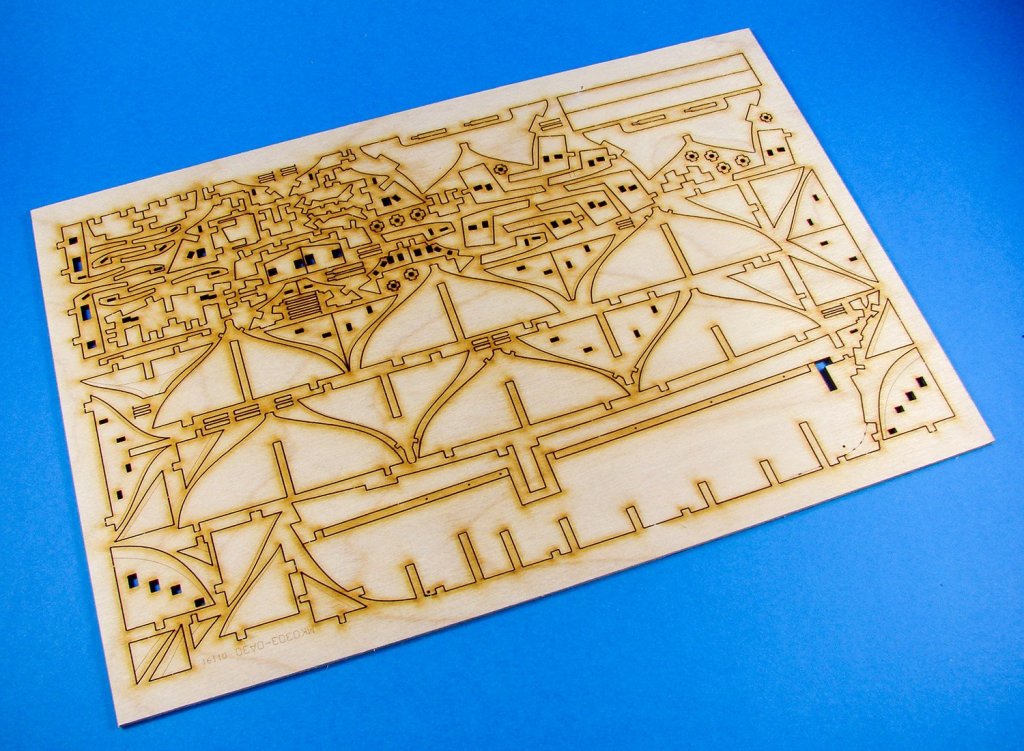

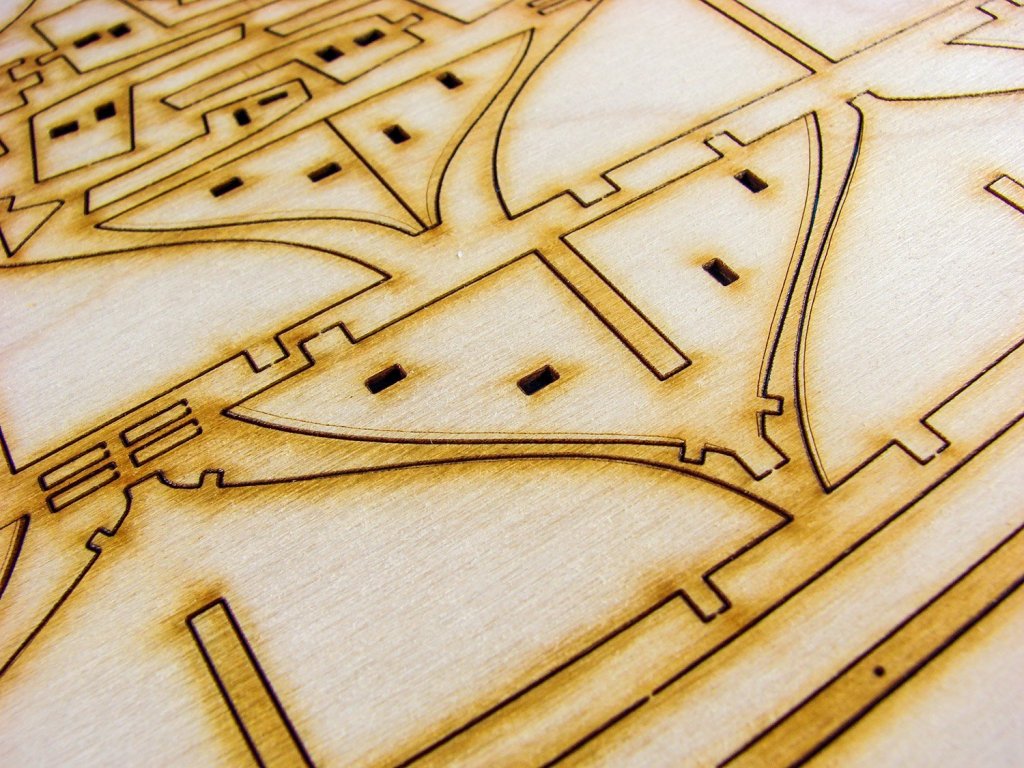
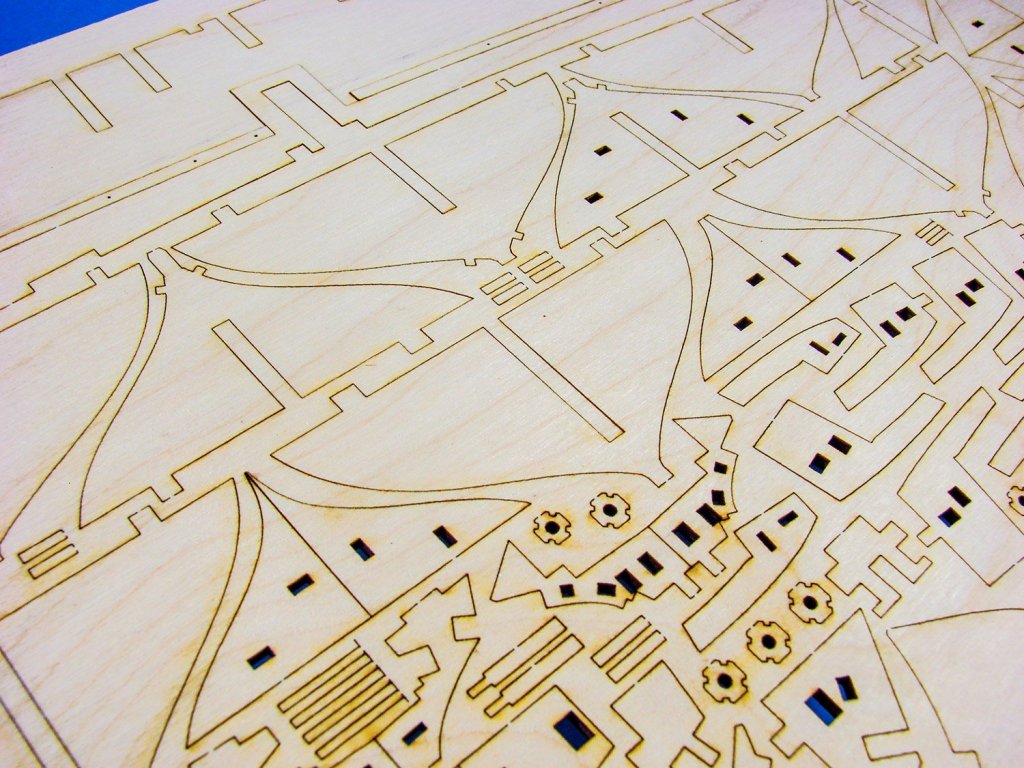
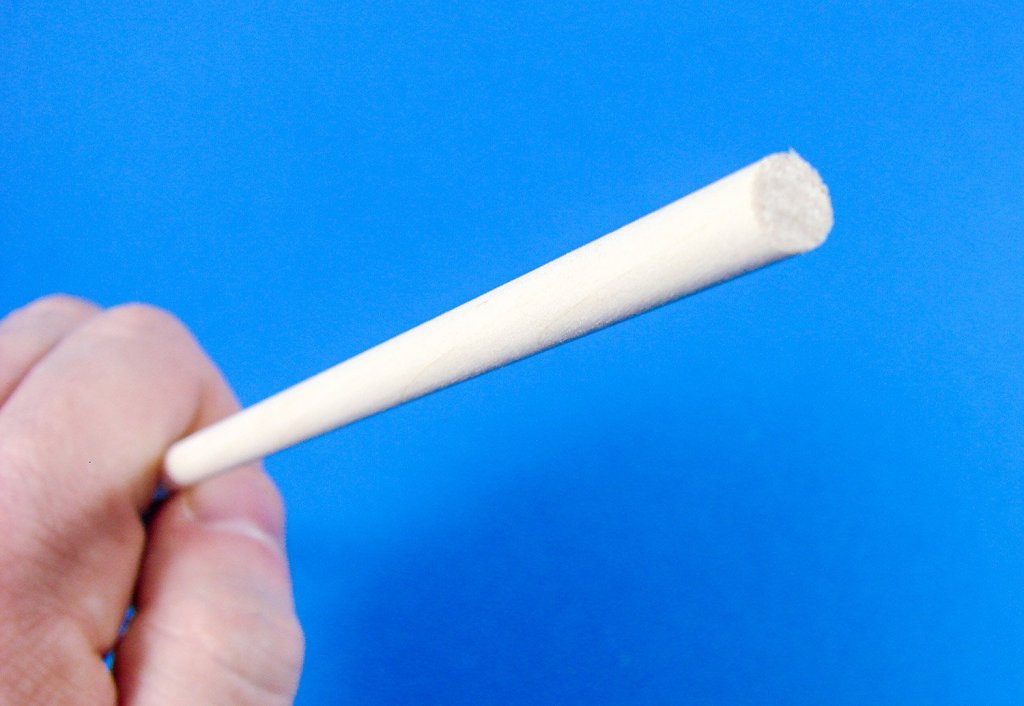

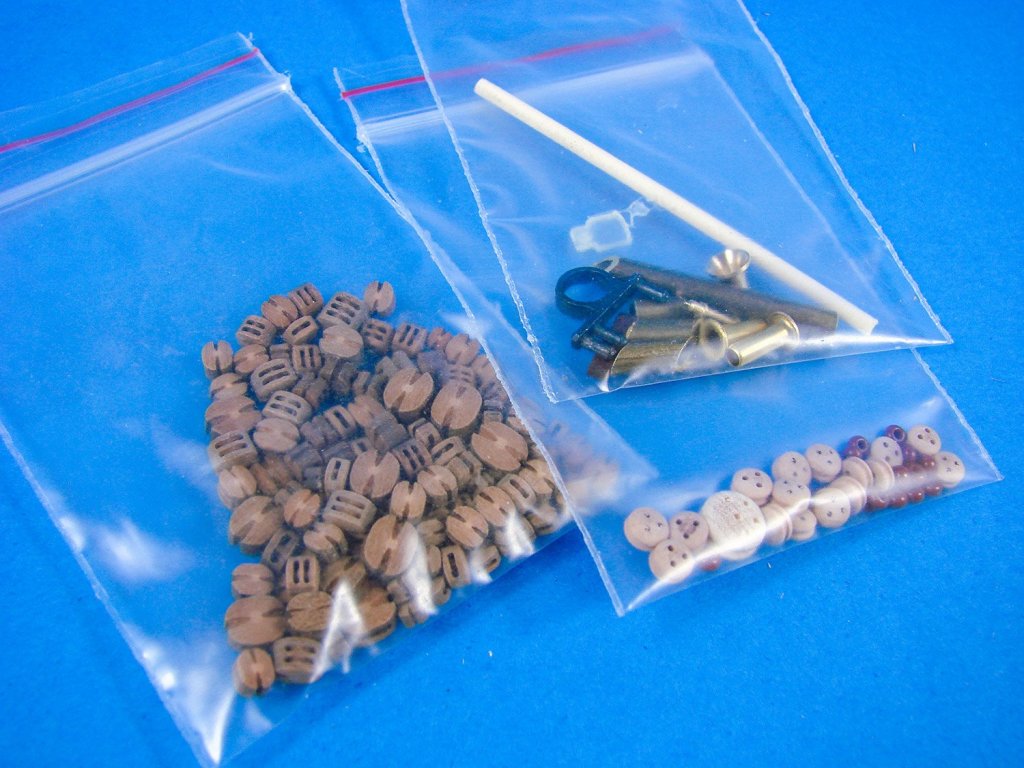

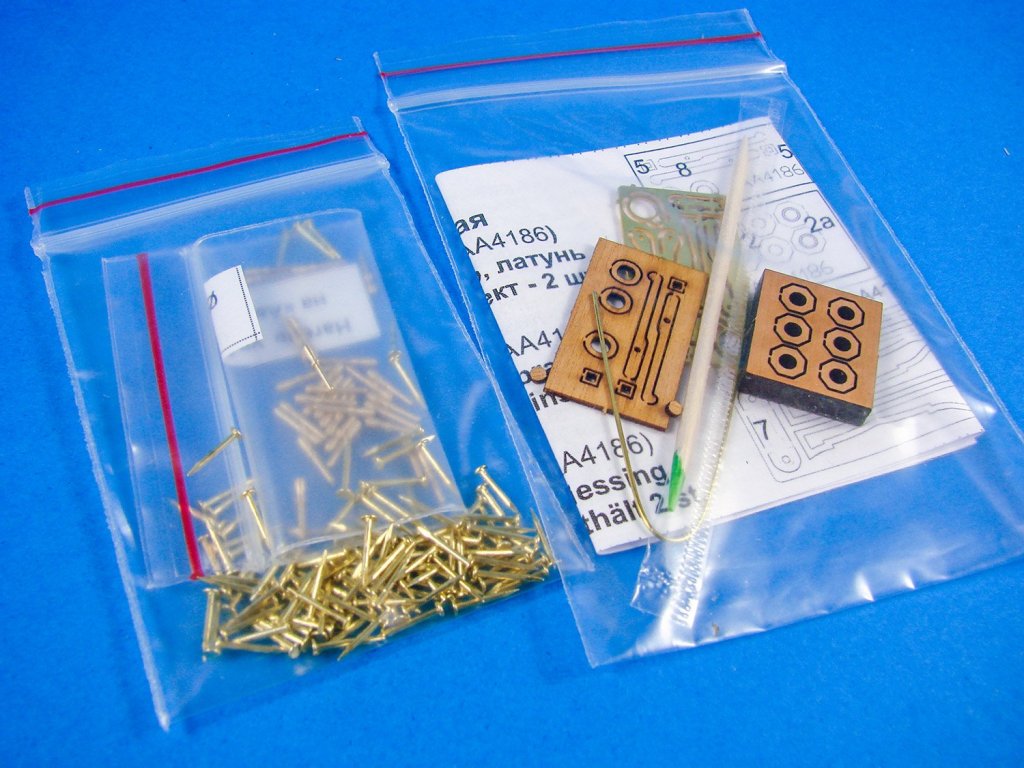
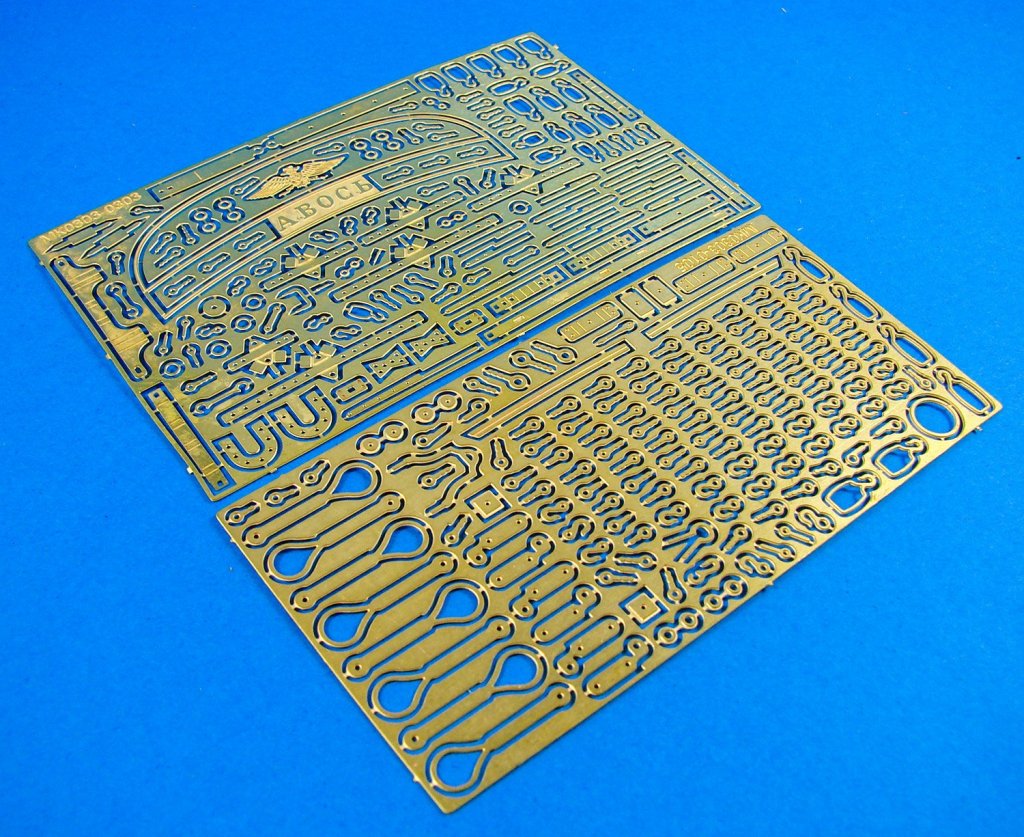
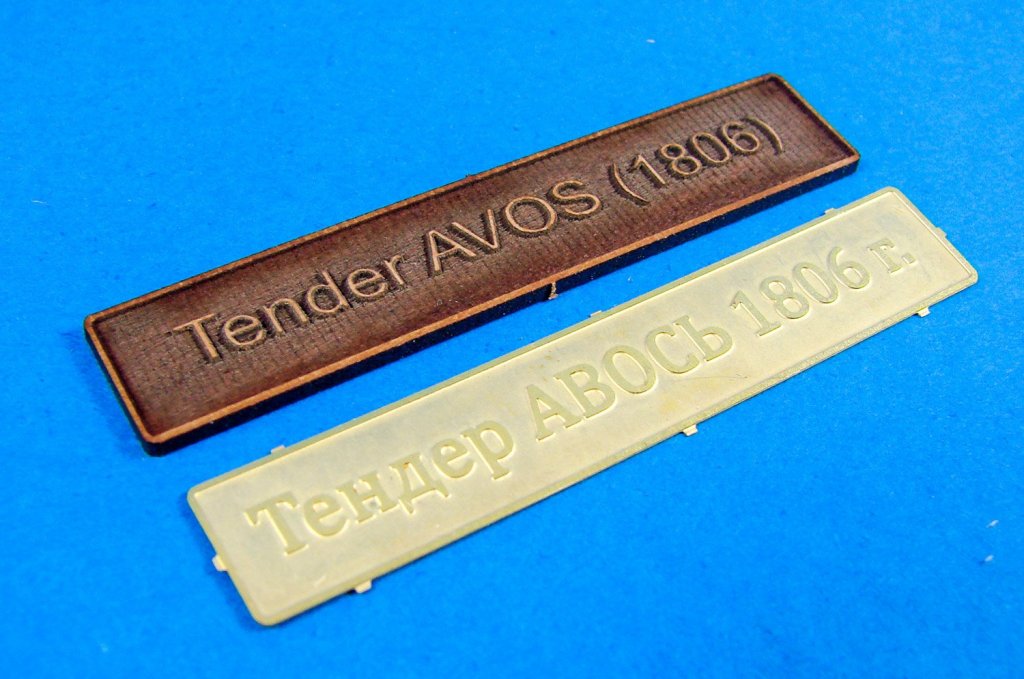
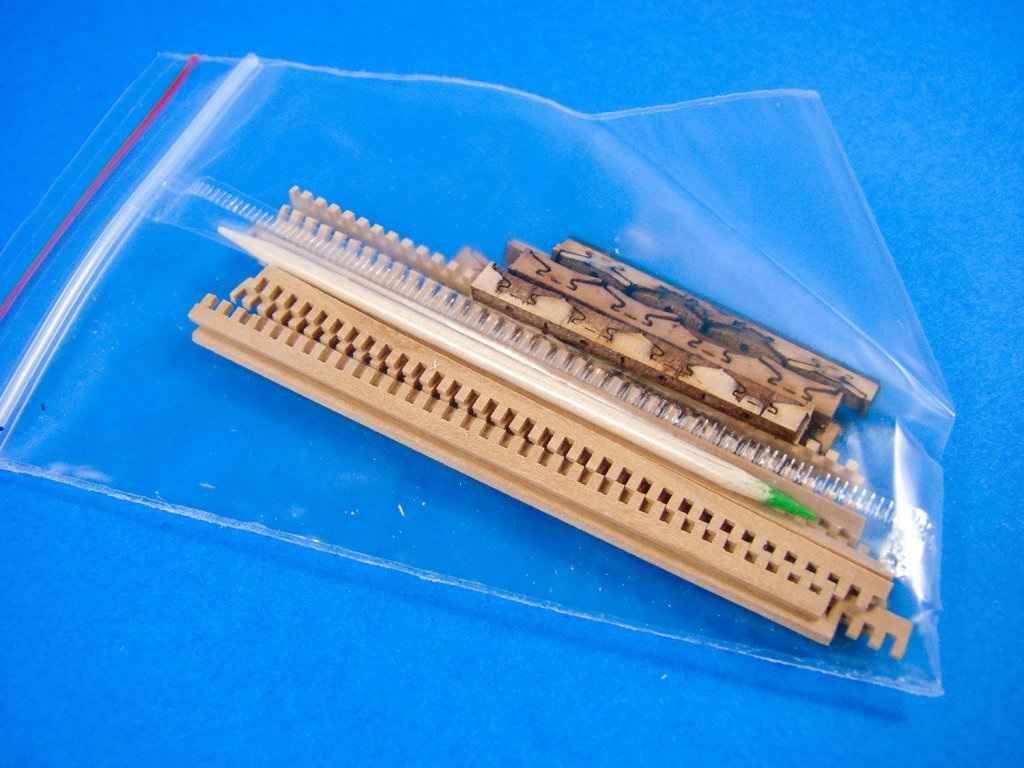


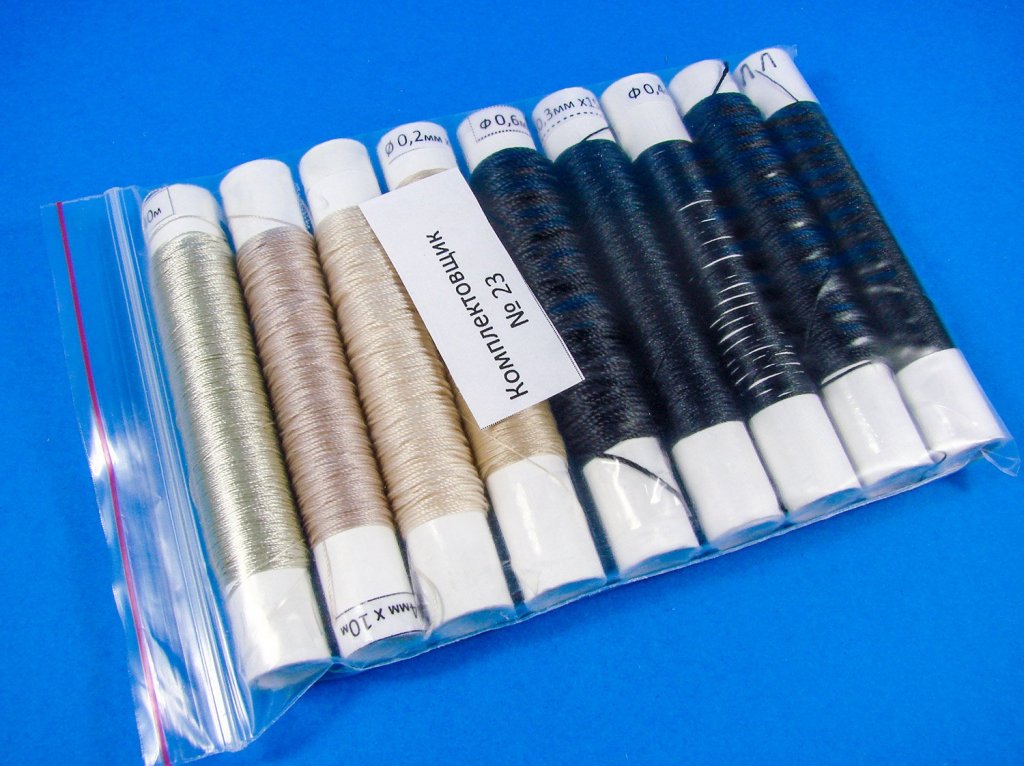

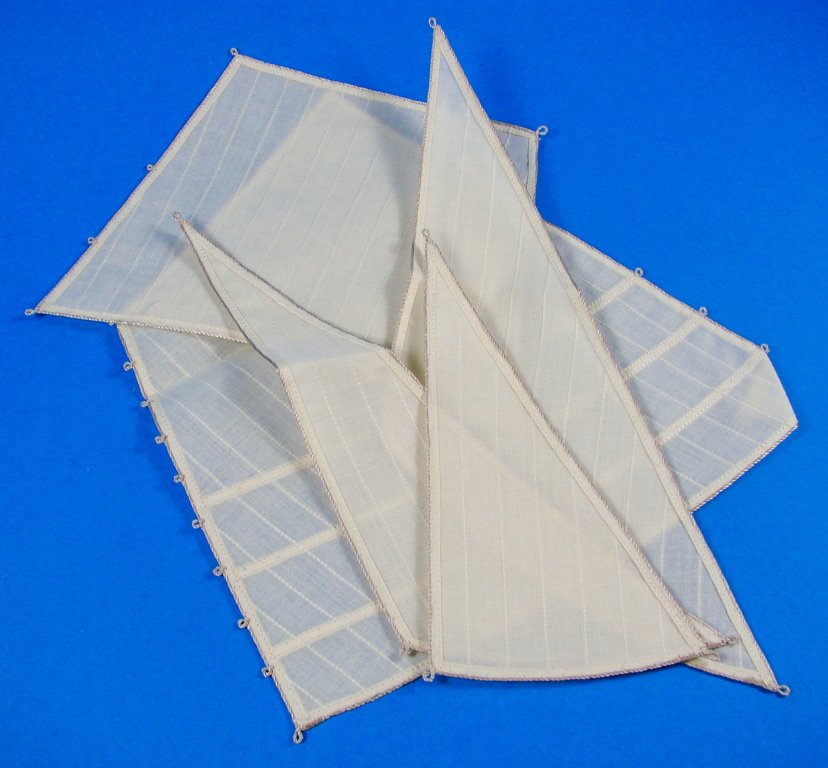

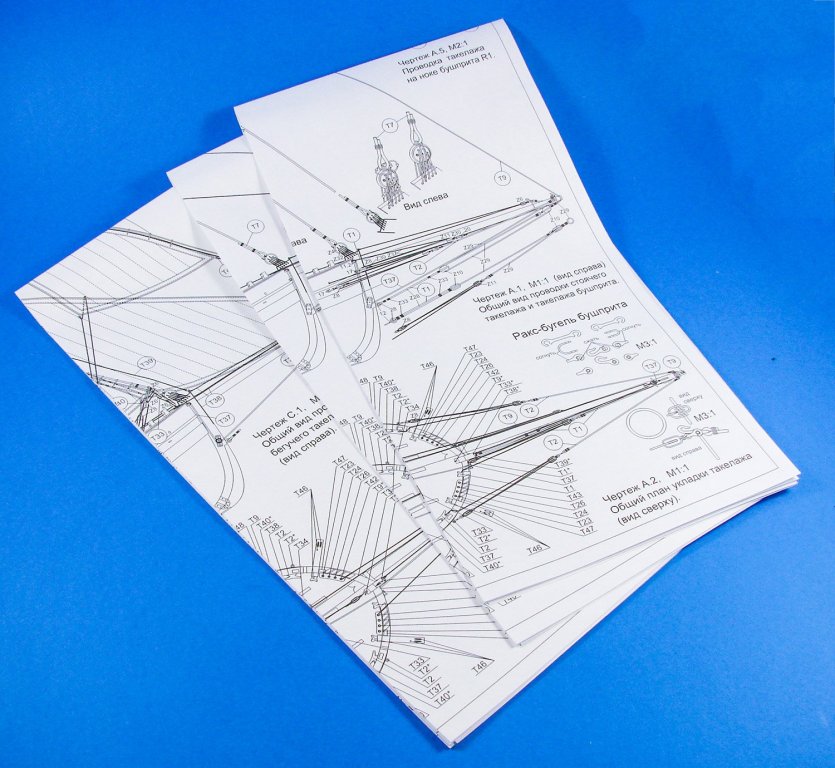

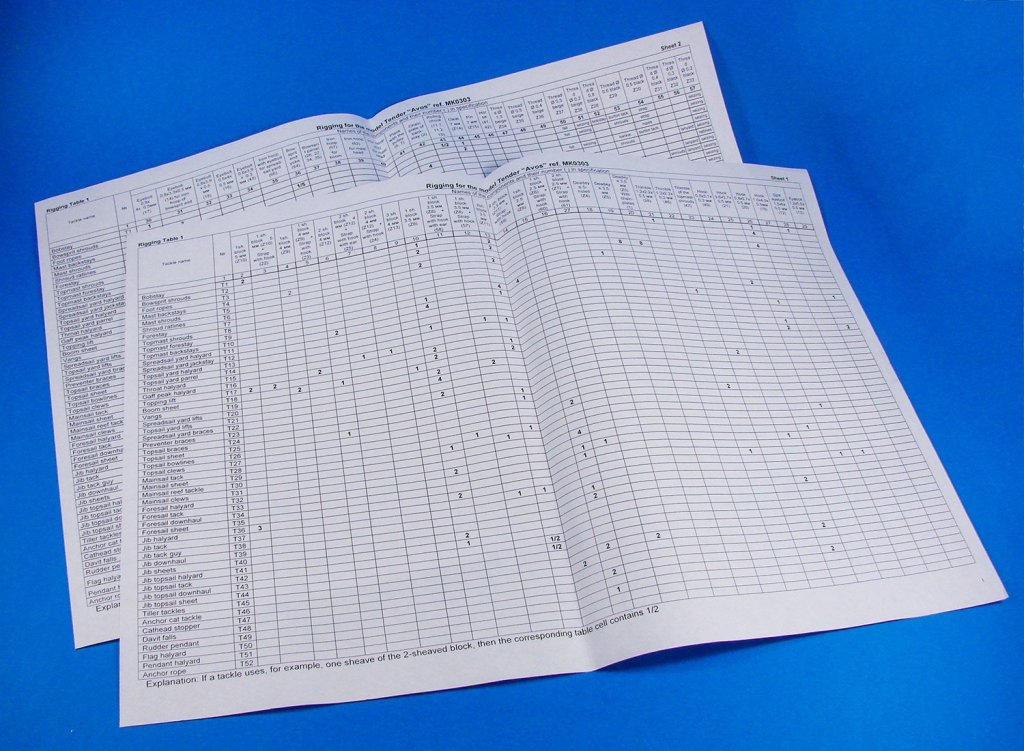
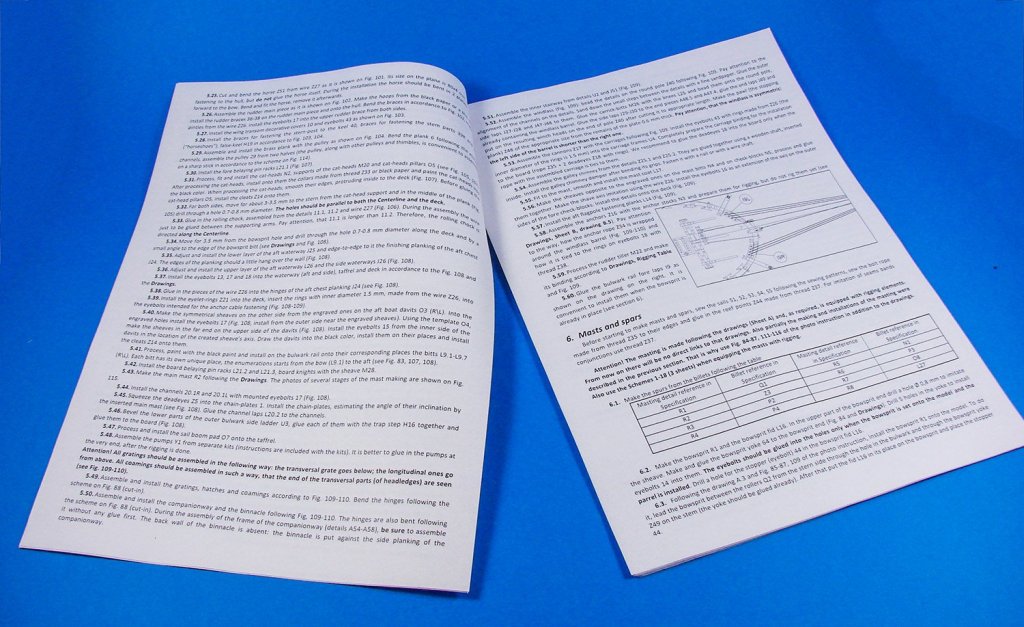
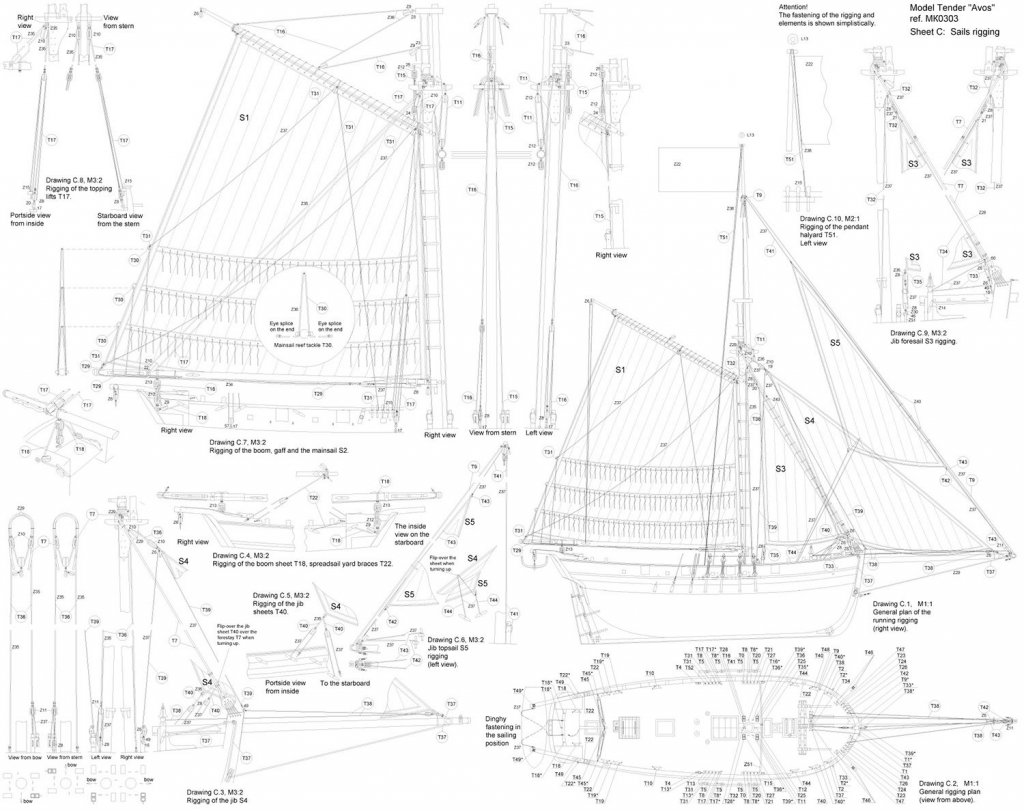
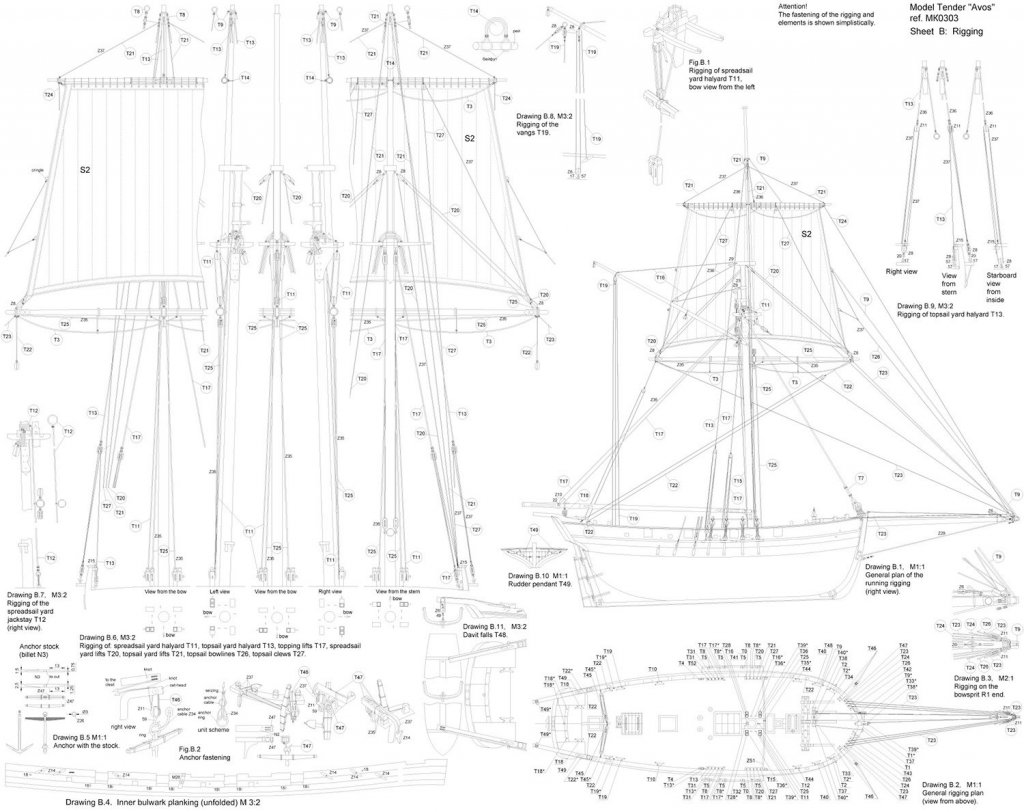
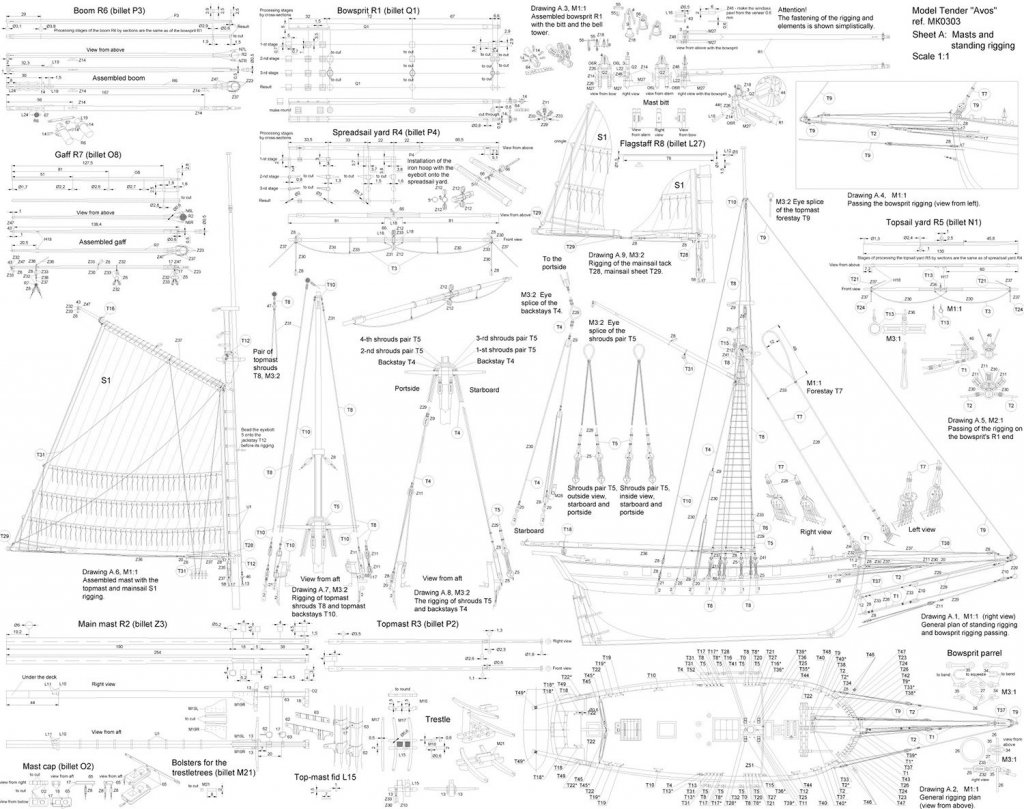

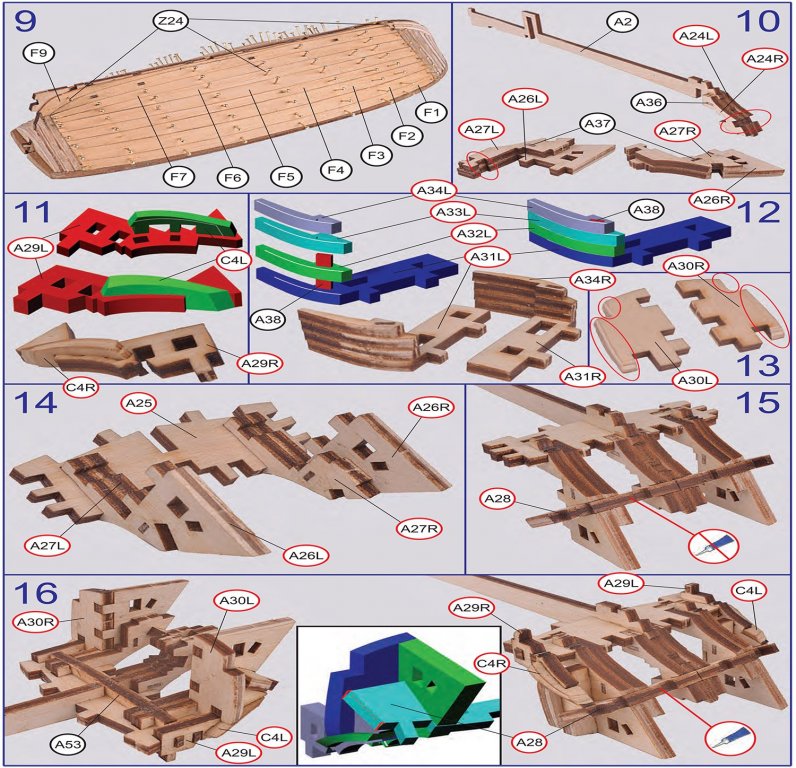
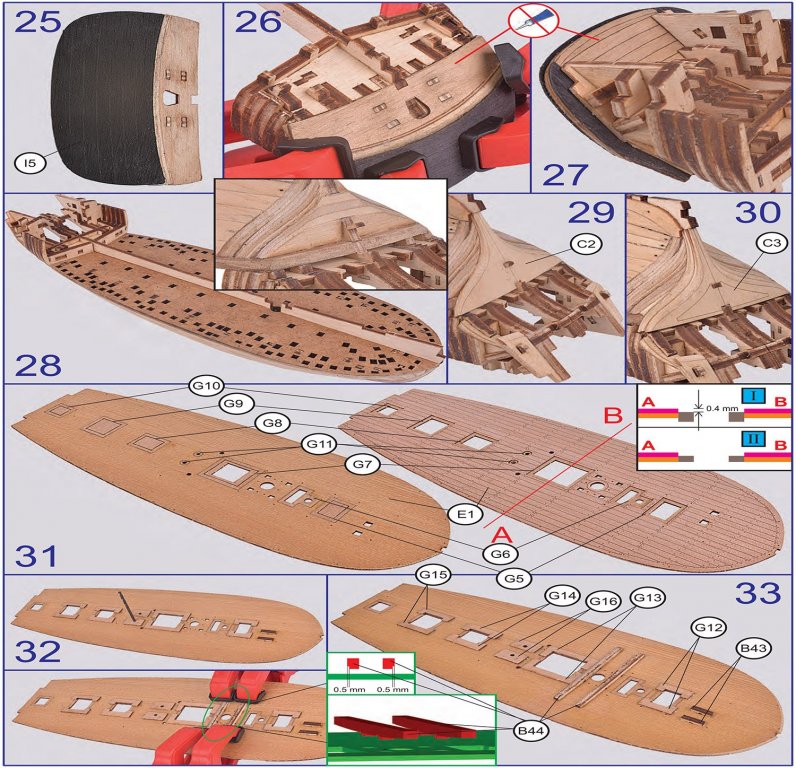
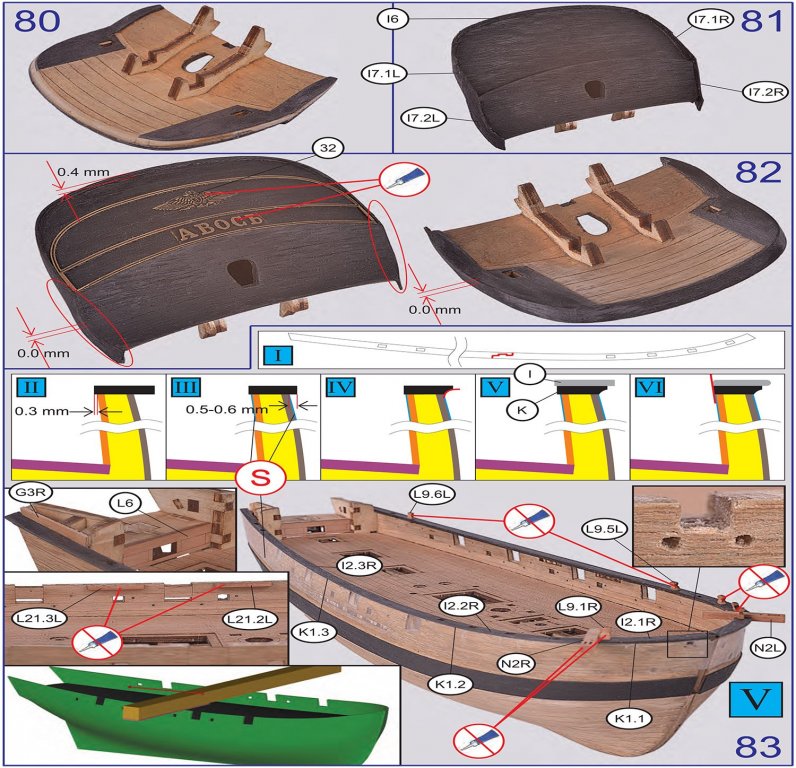
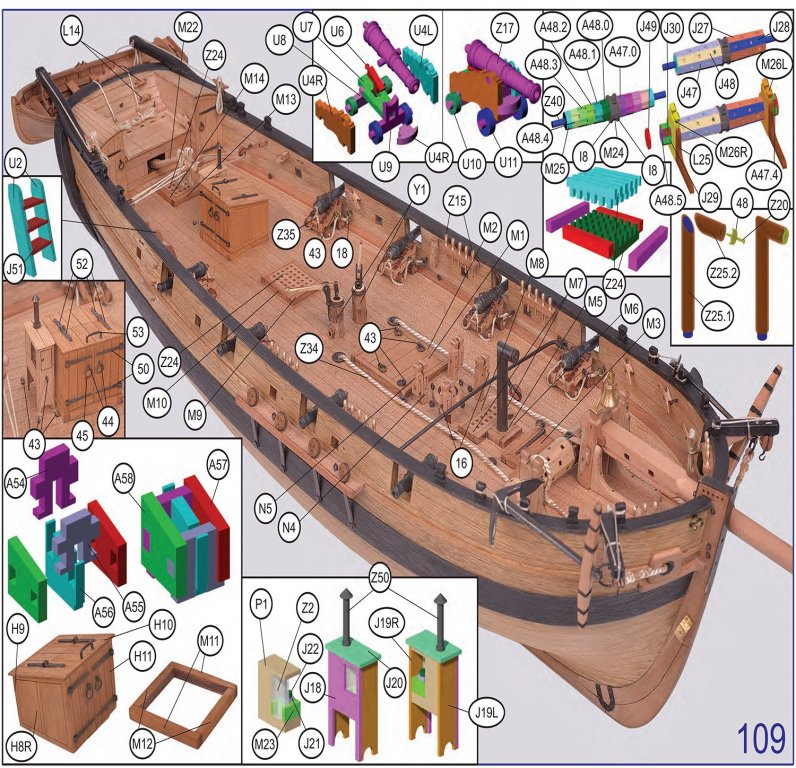

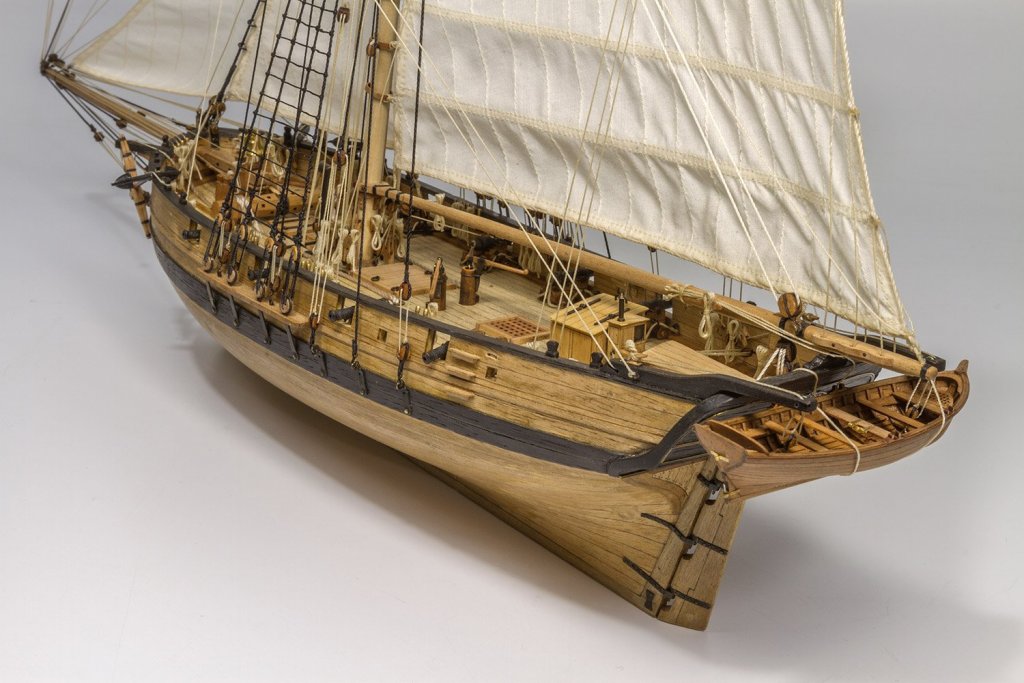
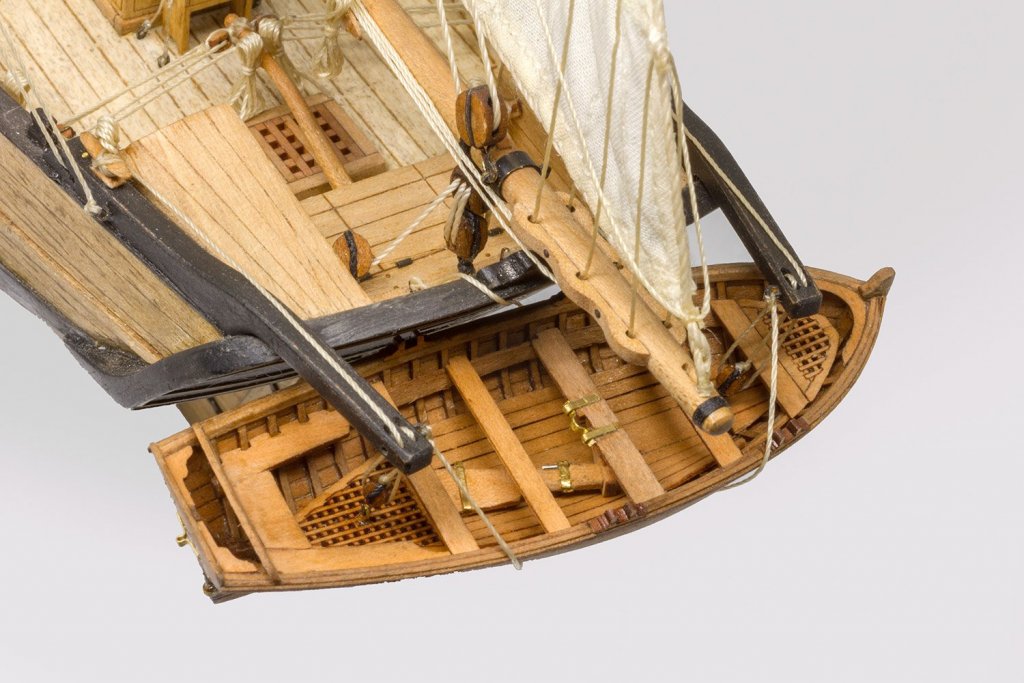

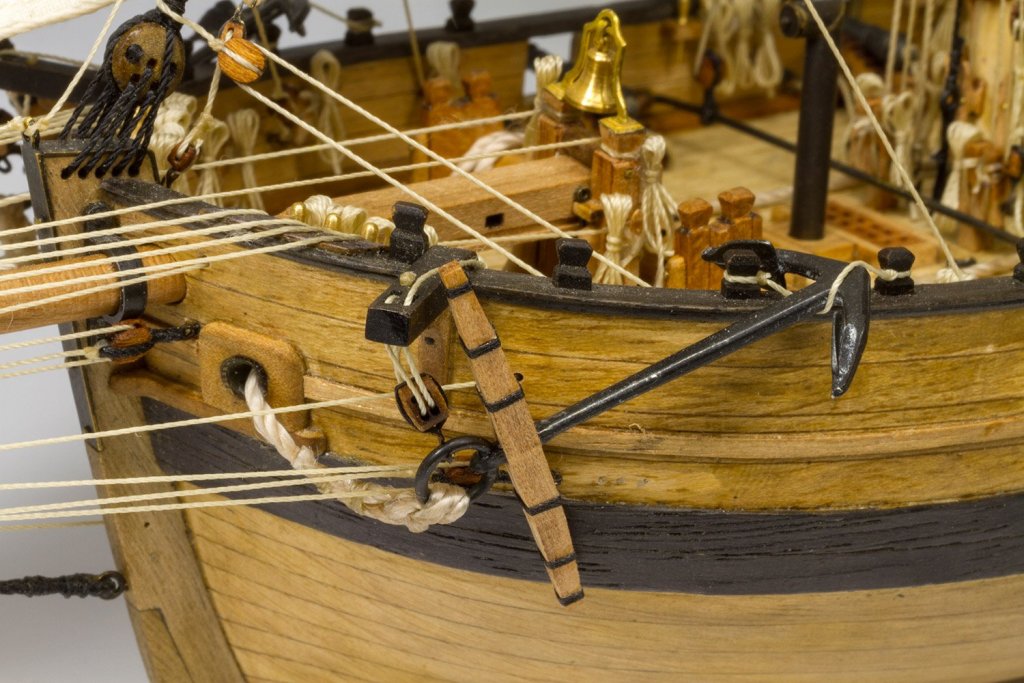
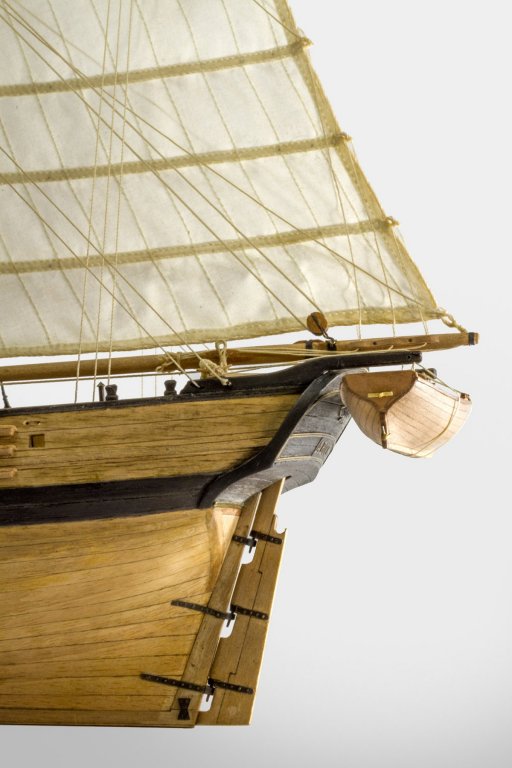
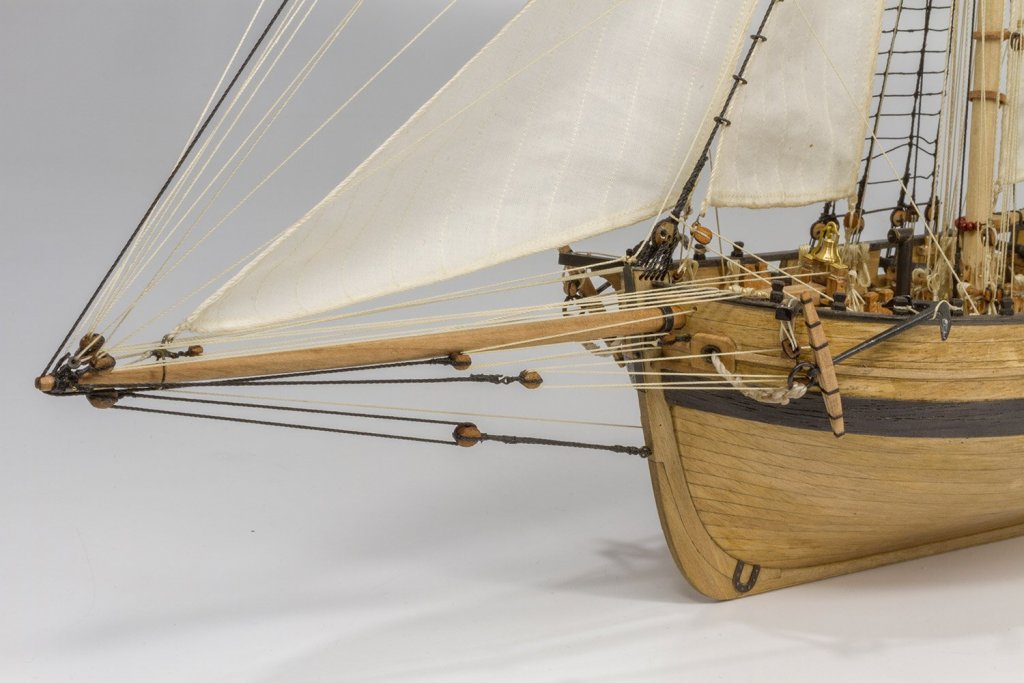
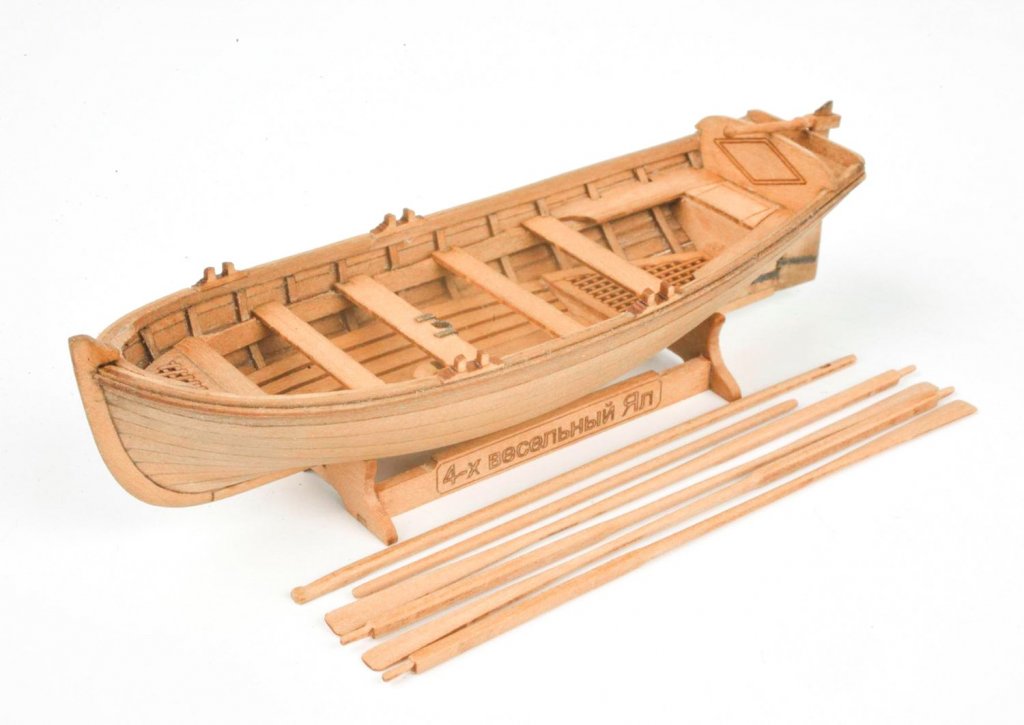
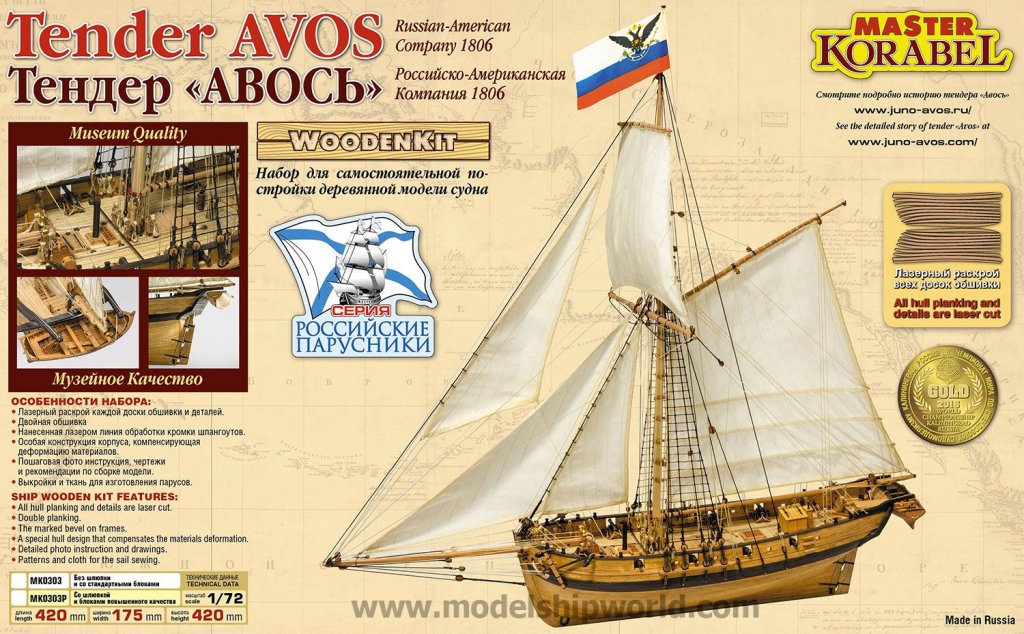
-
 Today I received the AVOS kit. It is the best version executed in pear. The wood looks fantastic and the laser cutting is So detailed. I am very excited about it. Not sure when I start with the build as I have still plenty of work on rigging my Royal Caroline but this could be escape from the ropes. It will be fun but also chalenge I guess. At this scale everything is so small!
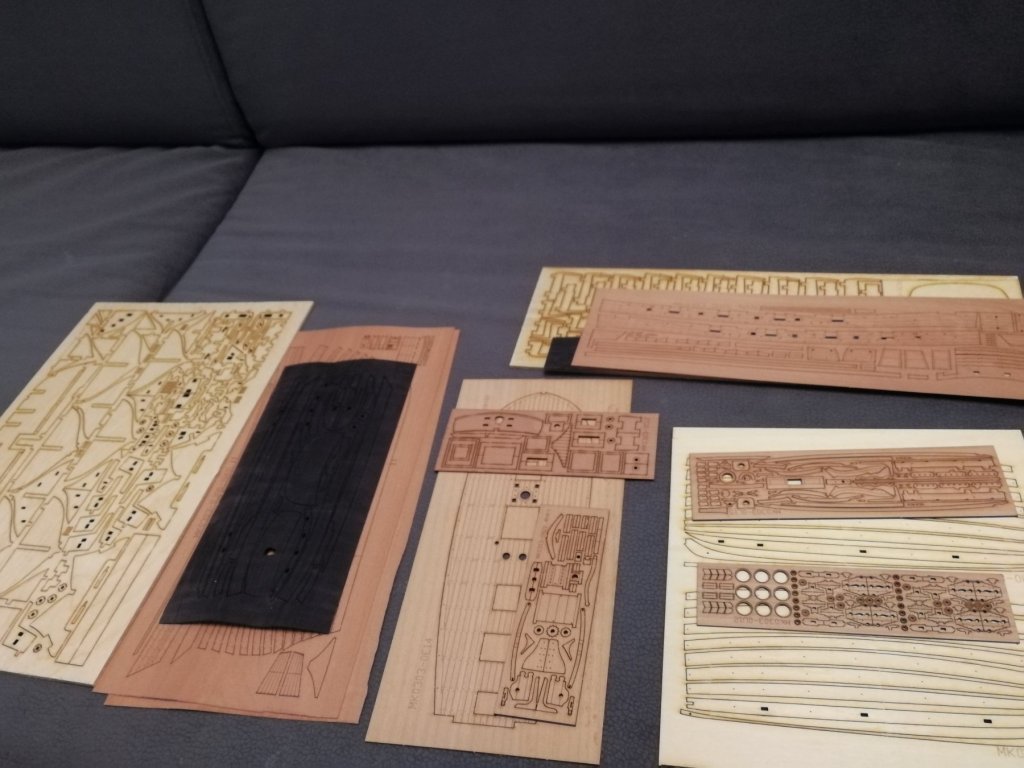
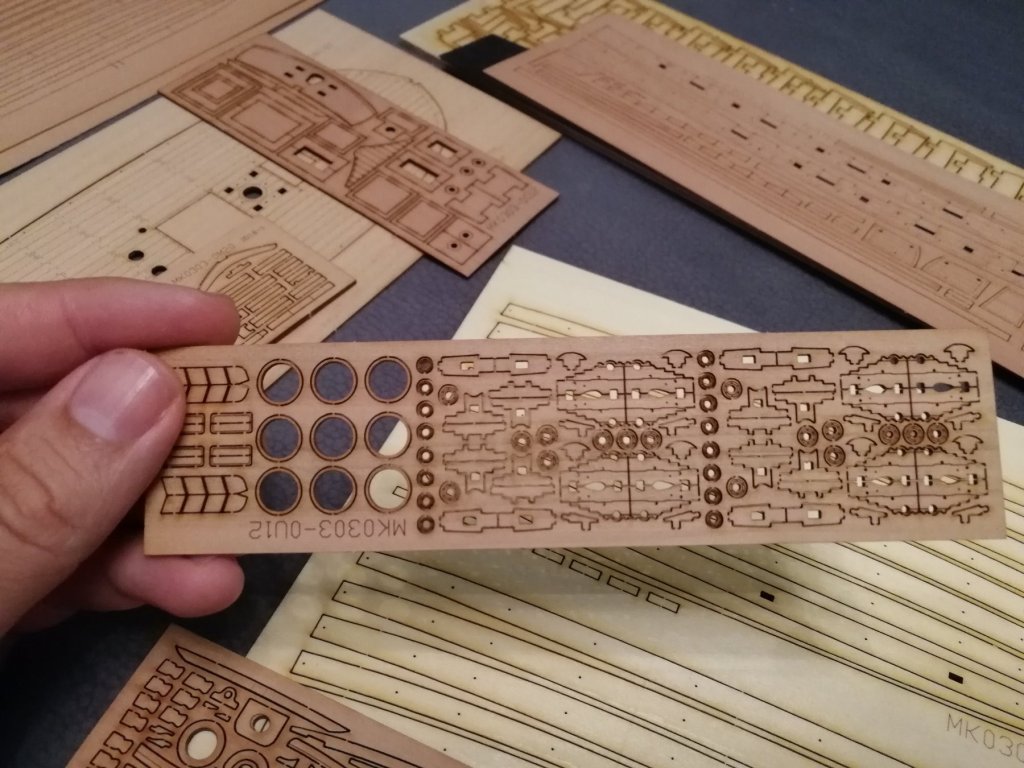


- 315 replies
-
- 18
-
-
- master korabel
- avos
- (and 1 more)
-
 It is a Swedish type gunboat of 1801 The Master Korabel Kit is 1:72 scale. I'm not going to show you the presentation of the kit out of the box, there are on this forum several topics which already show all this in details ... As I have already completed this build, I simply show you some steps of the construction or the personal choices on the painting or the presentation medium. And of course, most importantly, the final pictures of the completed model! 😃 I chose to do a weathered model. A boat a little old, used on his paintings and the hull, moored to a quay also a little old and wooden as at the time ... 😉
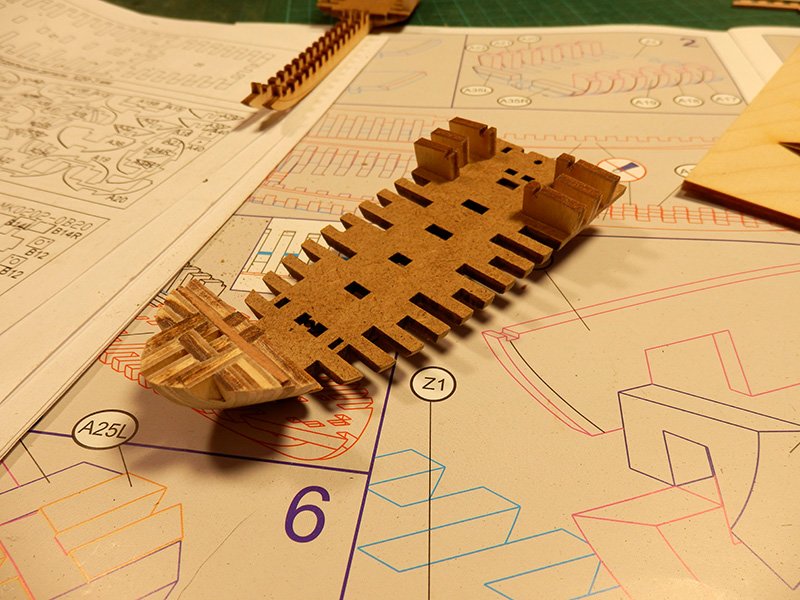
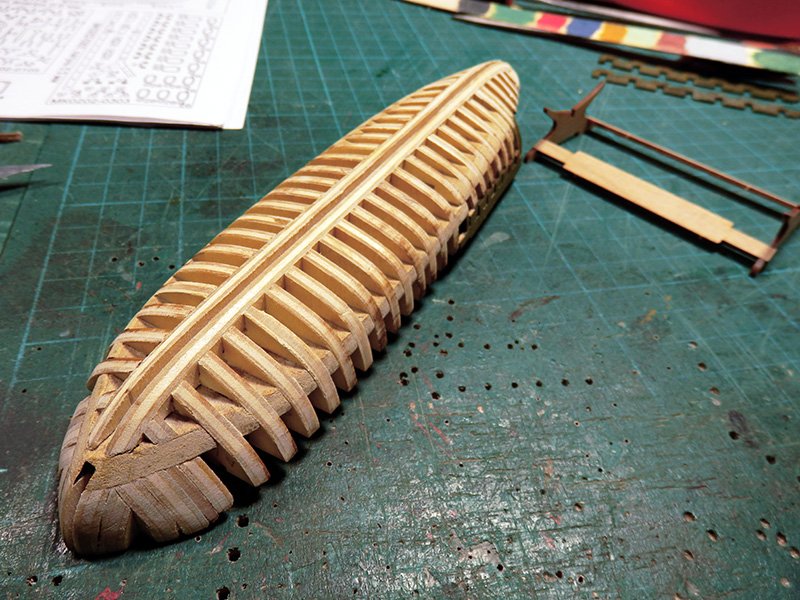
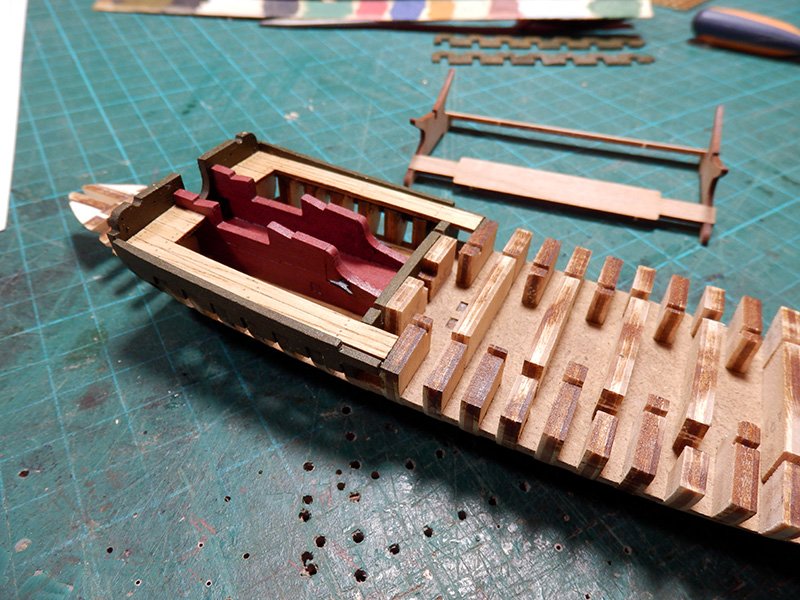
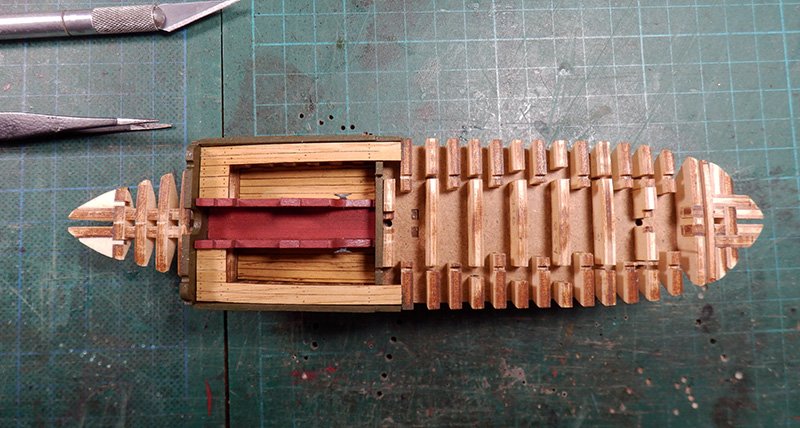
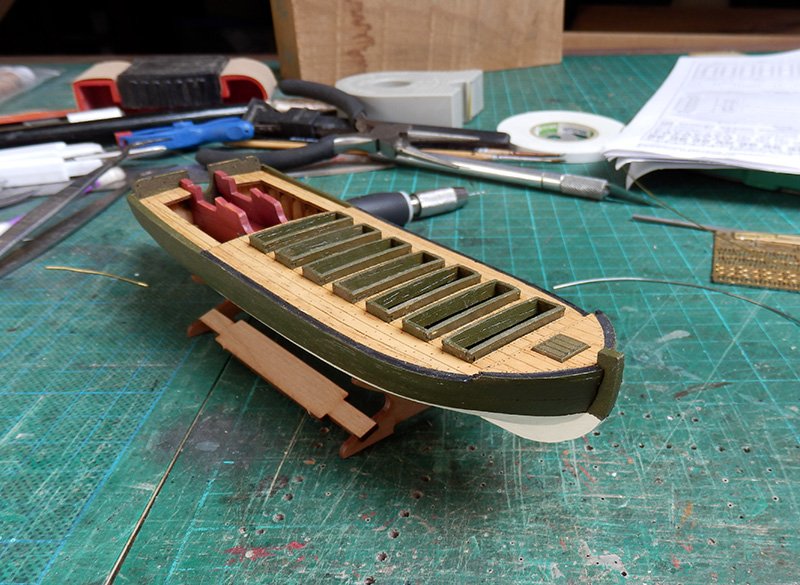
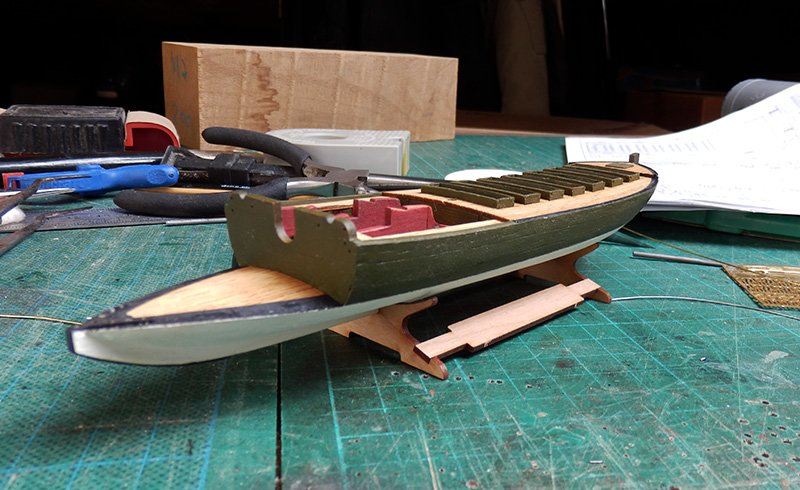

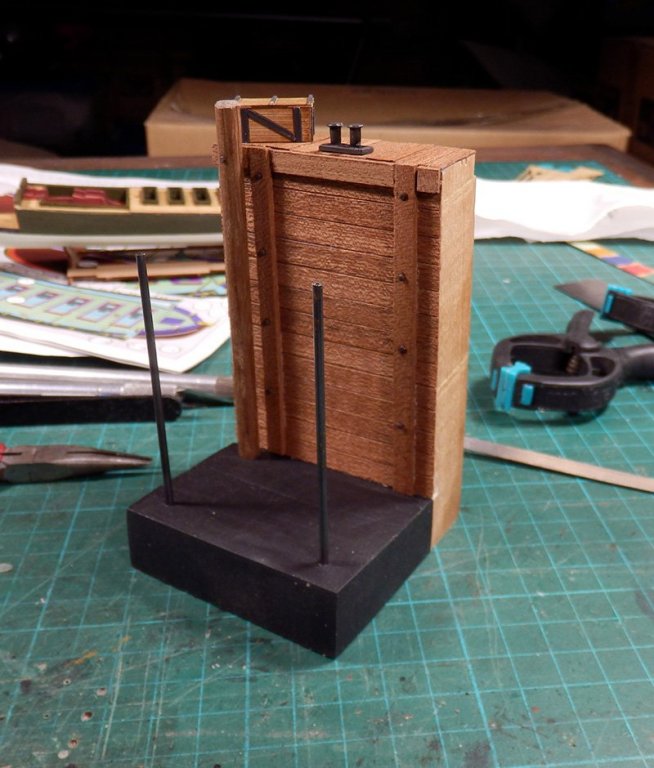
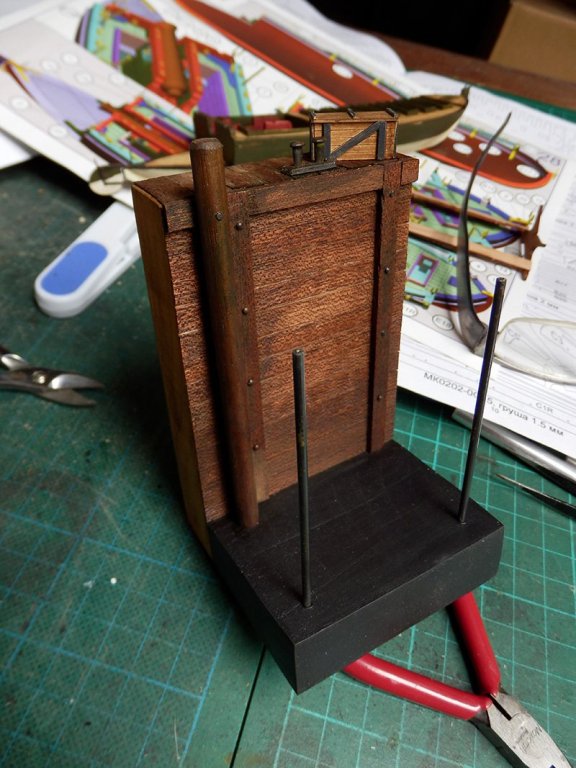
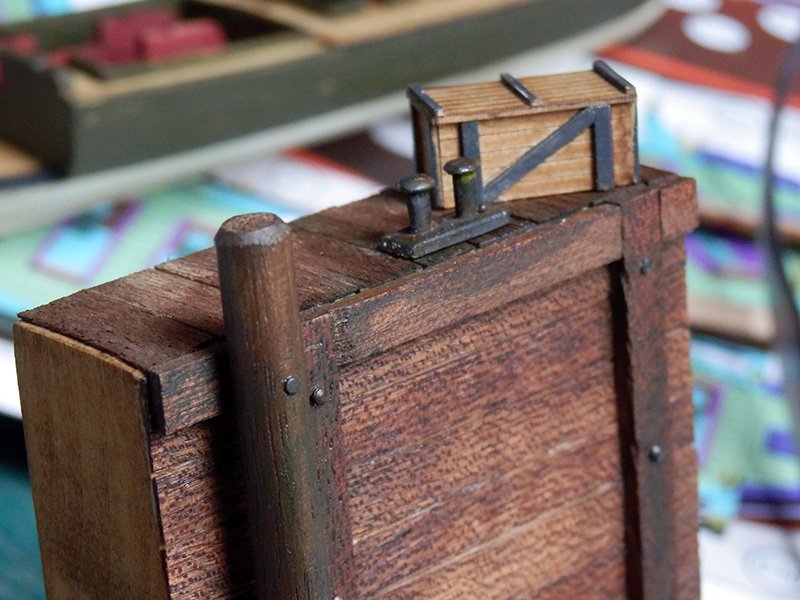
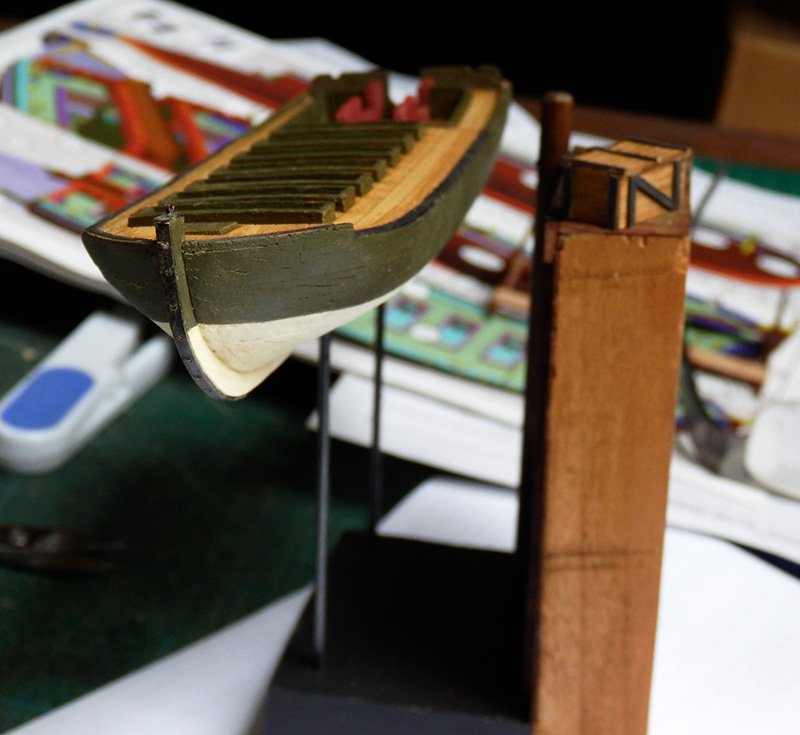
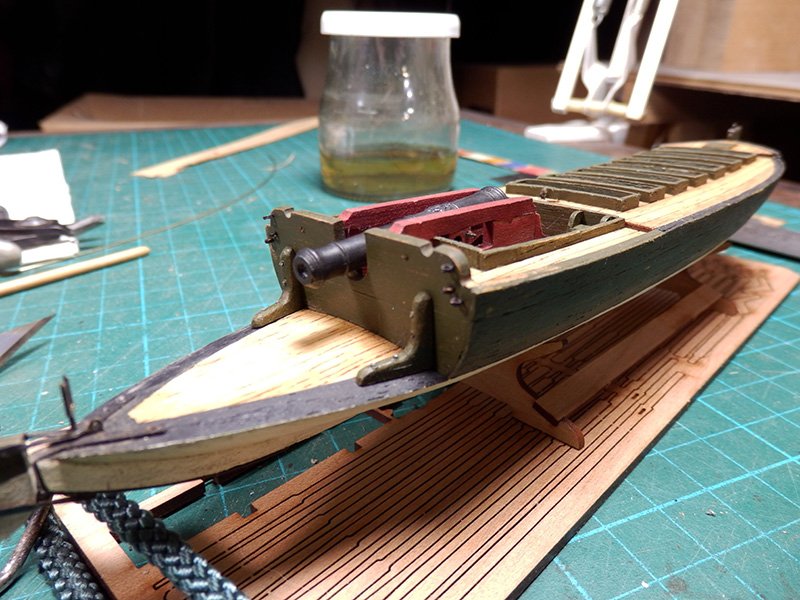
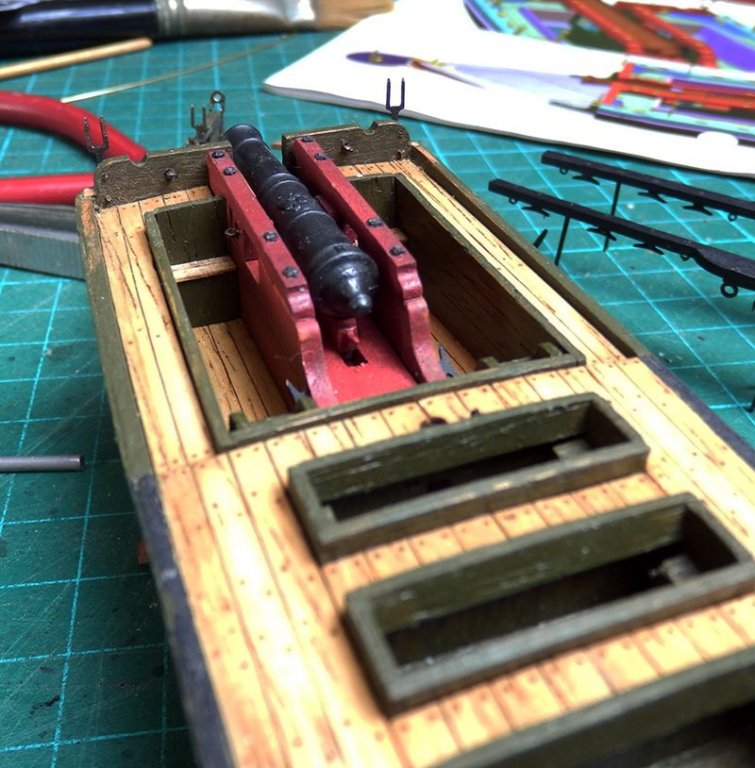
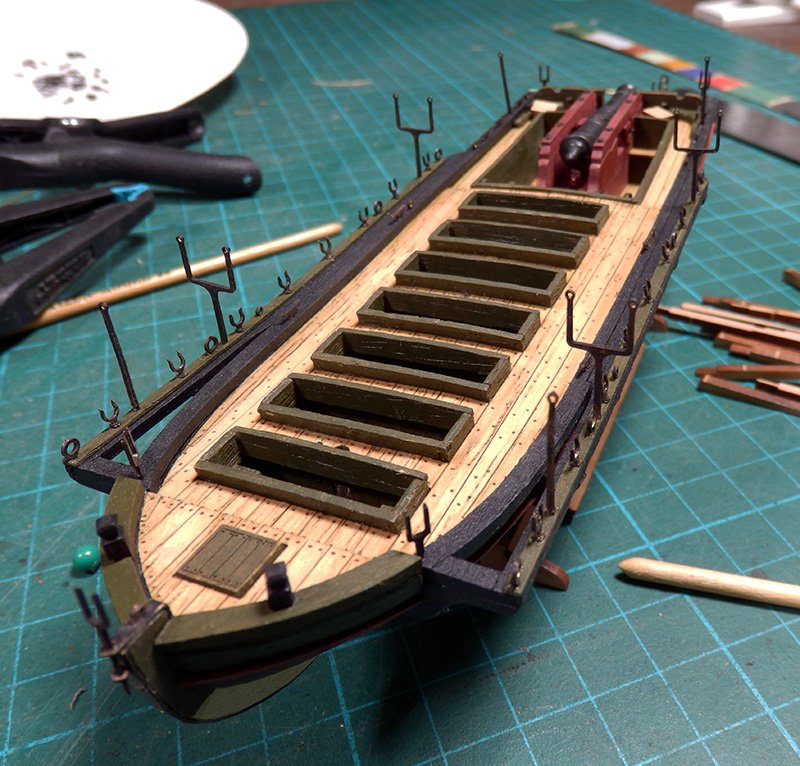

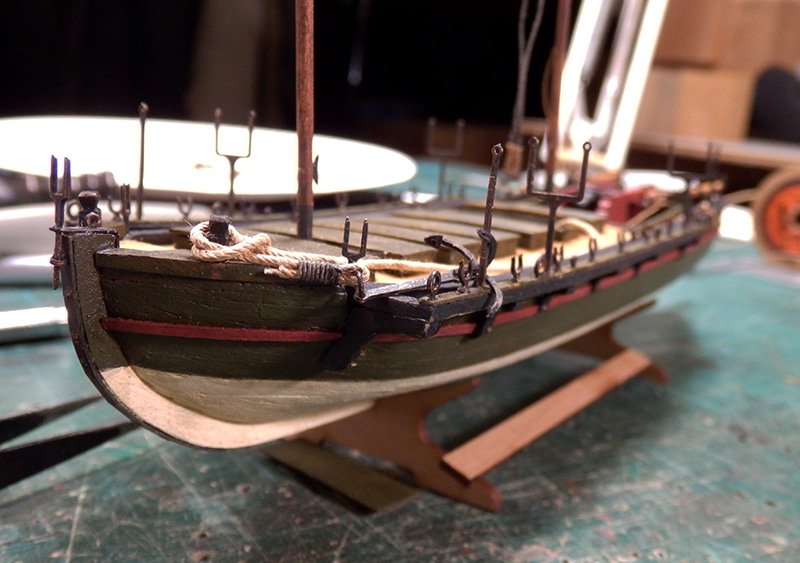
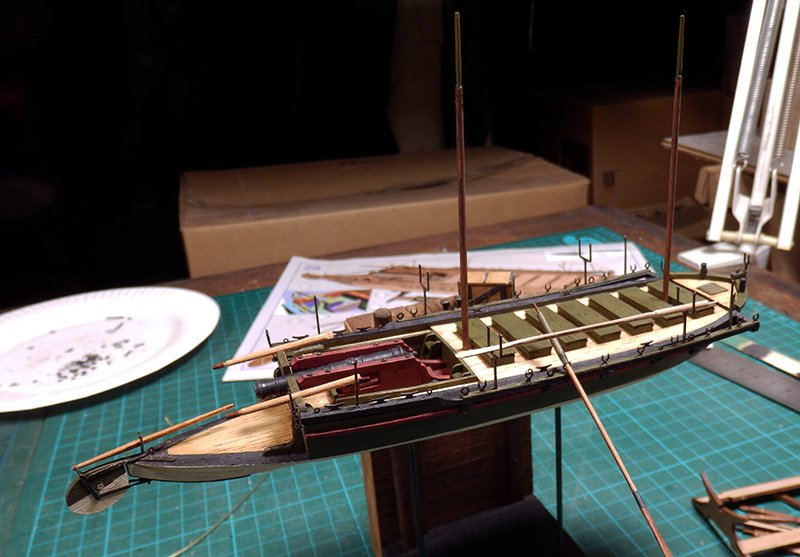
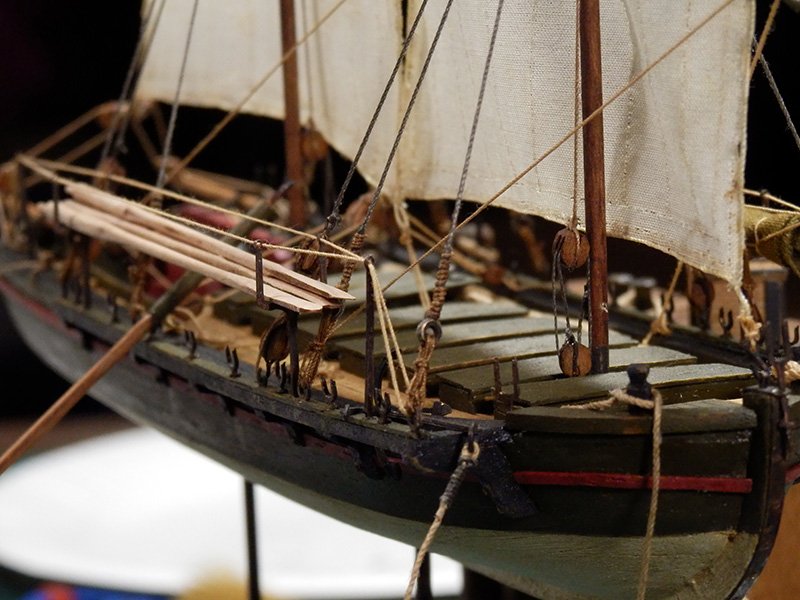
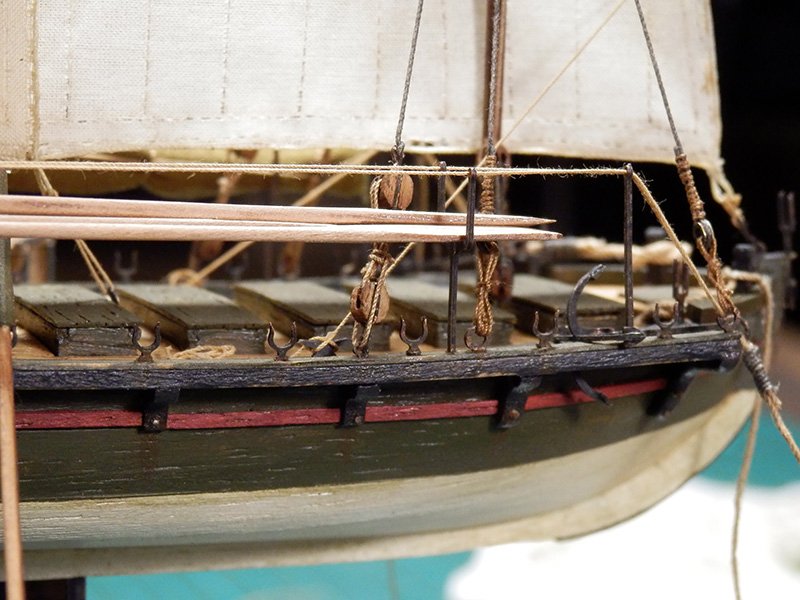
- 2 replies
-
- 2
-
-
- cannon jolle
- master korabel
- (and 1 more)
-
 Hello Here I will show my build and I hope I have enough patience. I think this kit is not yet sold on USA.
-
Hello everybody, Some time ago I started building Master Korabel Schooner Polotsk kit but I was too lazy/busy to start a build log here. Finally I decided to go ahead and do it. I'll be posting more often until this build log catches up with the build's current state. I have been precisely following the instructions during the process so far and it has been a smooth ride. 1. I started with assembly of the ship's frame. The desing of this kit's frame is very interesting, it has a HDF plate that splits the frame horizontally. This ensures that all bulkheads and the center keel are perfectly straight and perpendicular to each other: 2. All parts have laser cut notches so it was really easy to bevel them: 3. This is how the frame looks like with all lower bulkheads installed: 4. Finally upper bulkheads and the false deck are installed. Note how the deck overhangs in the stern and how thick the timbers are (these will be cut off later):
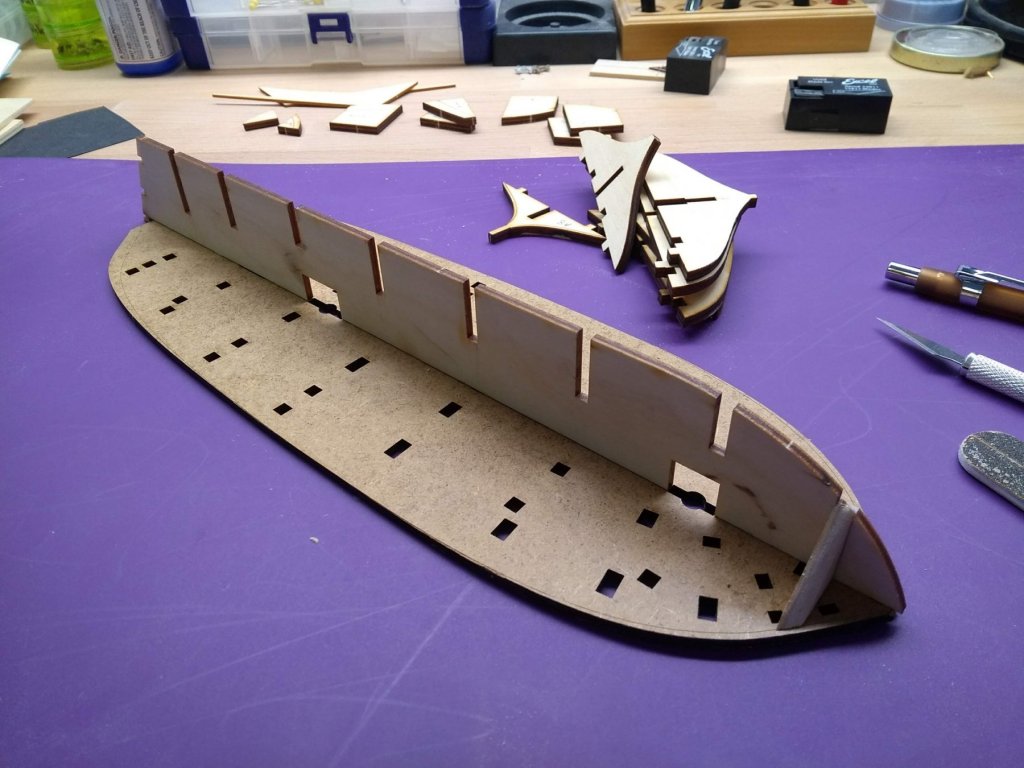

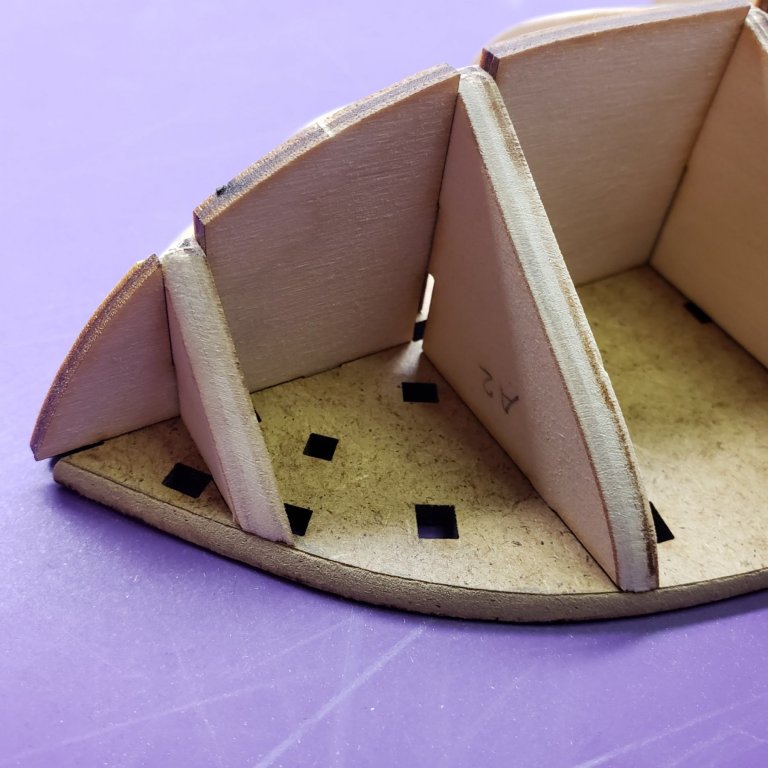


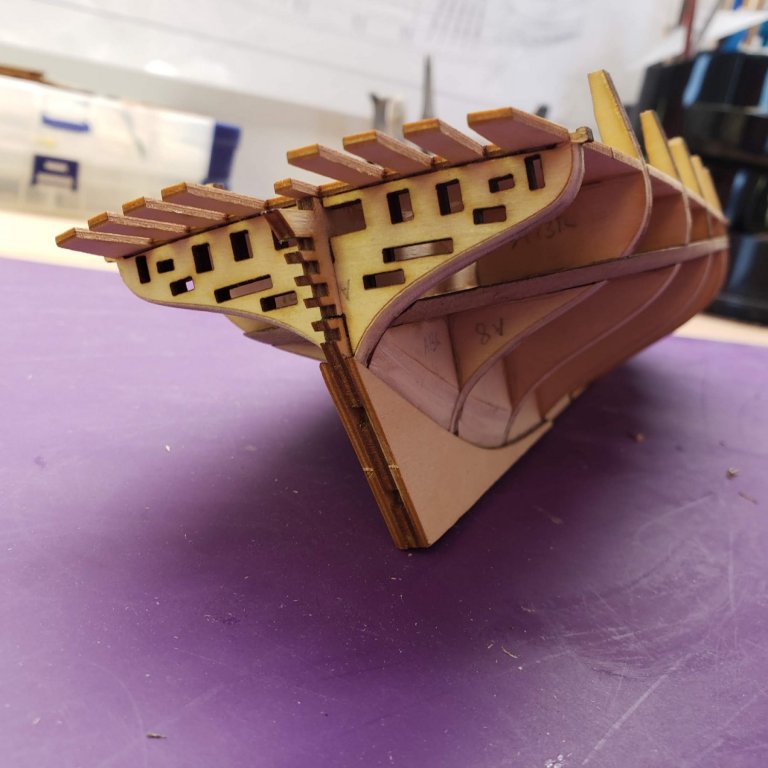

- 40 replies
-
- 7
-
-
- finished
- master korabel
- (and 2 more)
-
Hello, all! Welcome to my to-be-much-abbreviated build log for the Master Korabel "cannon jolle" (gunboat) kit. I say "abbreviated" because Jim Rogers already did a fine build log for this kit, which you can see here. You can also read my initial review of the kit in the reviews section of the forum. Part of my reason for choosing this kit is to show members that yes, I do actually build ship models on occasion! Here's a couple of shots of the very early stages of construction, only a few hours' worth really. So far I have not had any issues apart from being a little confused by the instructions once or twice. This is only to be expected in instructions that are translated from Russian, so no big deal. Having patience and thinking thoroughly through the process has spared me any missteps to this point. As you can see, the hull substructure has A LOT of pieces. It all fits together very nicely but snugly and locks up tightly once glued. The finished model will really be quite small, as the hull is only about as long as my hand. That's all for now!

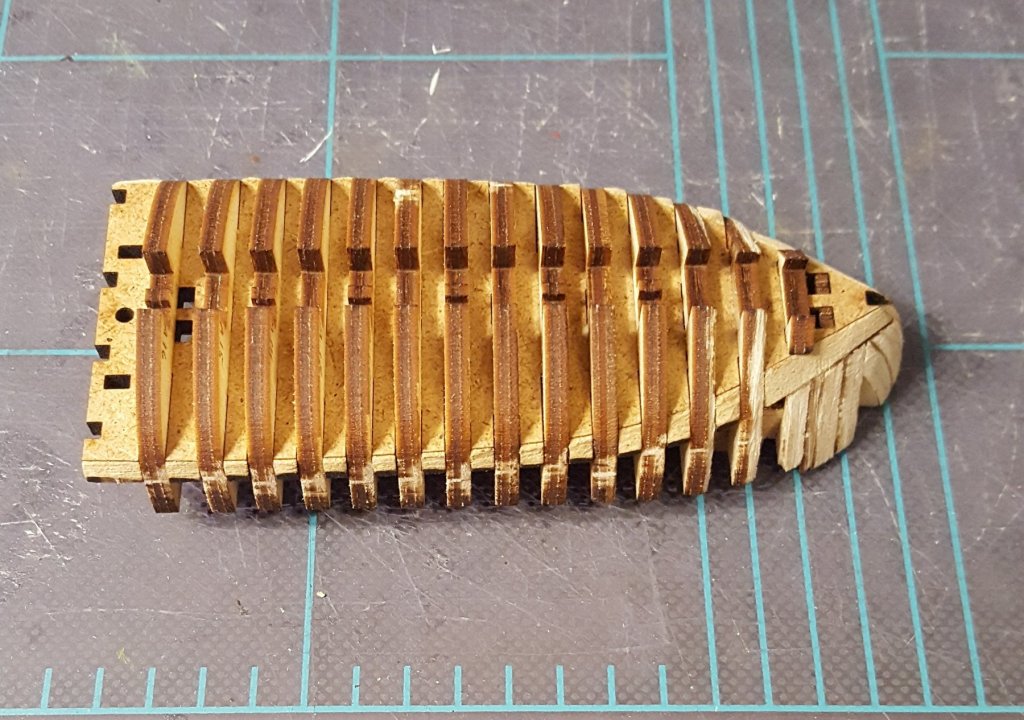
- 116 replies
-
- 21
-
-
Hello everybody, this is a tiny build log that covers the assembly of the latest Master Korabel 1:72 lifeboat. I have never built this boat so, most likely, I'll make a few mistakes on the way but I hope those won't be fatal and I'll be able to fix them. The first thing I noticed is that Master Korabel used a new technique for this model - the jig is not a part of the model as it was with the previous MK boats. It is more like a "building berth", a completely separate entity. The kit itself consists of 2 pearwood billets and 1 plywood billet: All boat parts are made of pearwood, while the jig is made of plywood. This is an upgrade compared to the previous MK boats, where parts of the plywood jig were incorporated into the final model. 1. The boat's center keel is made of three pearwood veneer layers. I simply cut them out and glued together as per instructions: 2. After that I assembled the jig. So far this was the most difficult part for me - the plywood is very fragile and crumbles easily, especially in the areas of the fore and aft bulkheads that need to be beveled. To prevent this problem I covered edges of the bulkheads with thin CA glue and waited for a few seconds until the edges turned into plastic. After that I beveled them without any problems. Another woe was inserting the center longitudal element into the bullkheads. It was a very tight fit and when I tried to file the notches a little bit the part started crumbling apart. Again, I generously covered both of its sides with CA glue and waited until it dried. Only then I was able to file the notches without destroying the whole piece: Here is another thing which I found was not too clear in the instructions. The bulkheads have notches that are installed into the bottom flat piece and these notches have slightly different lengths. This is done so that the bulkheads are oriented properly:
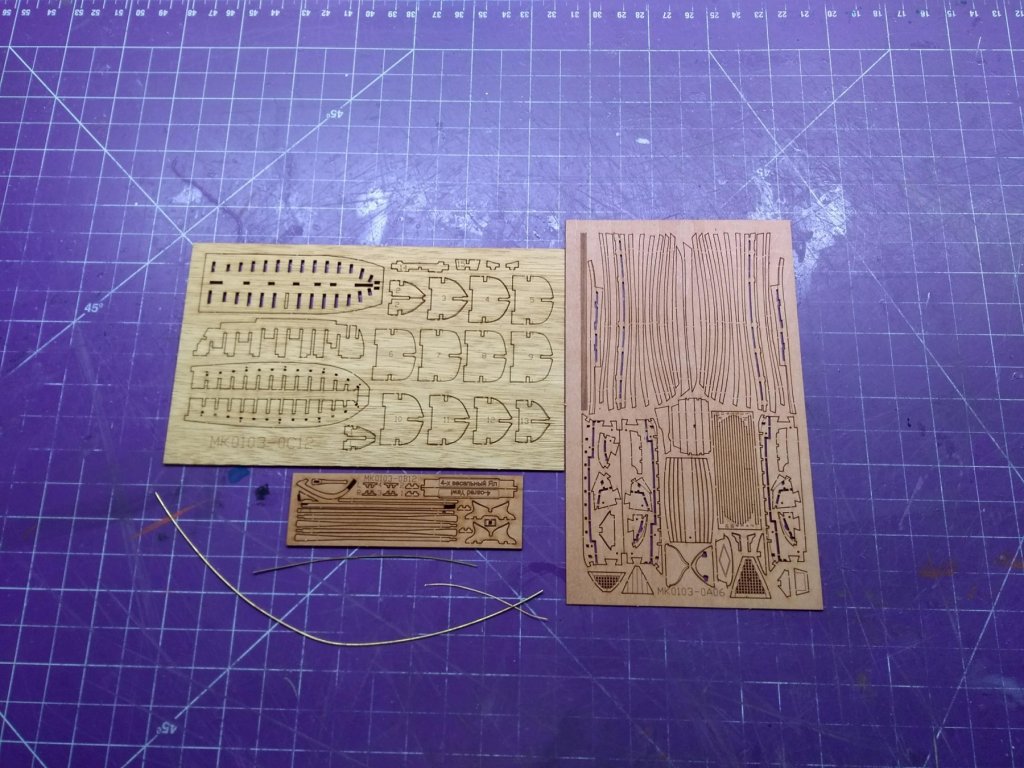
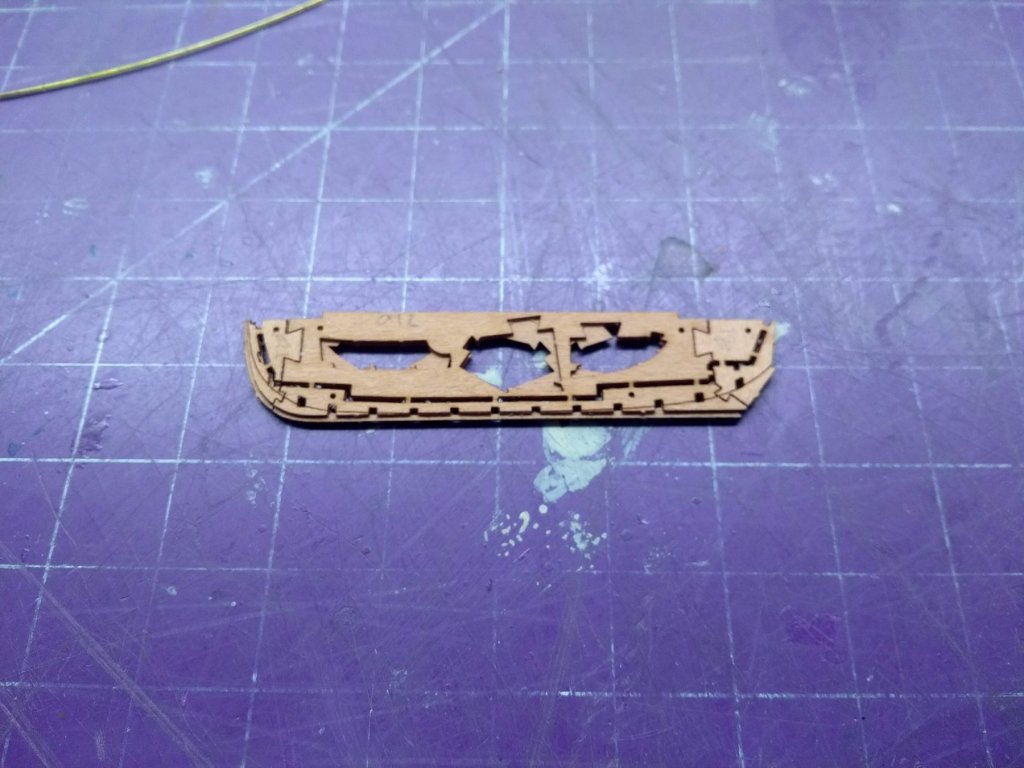
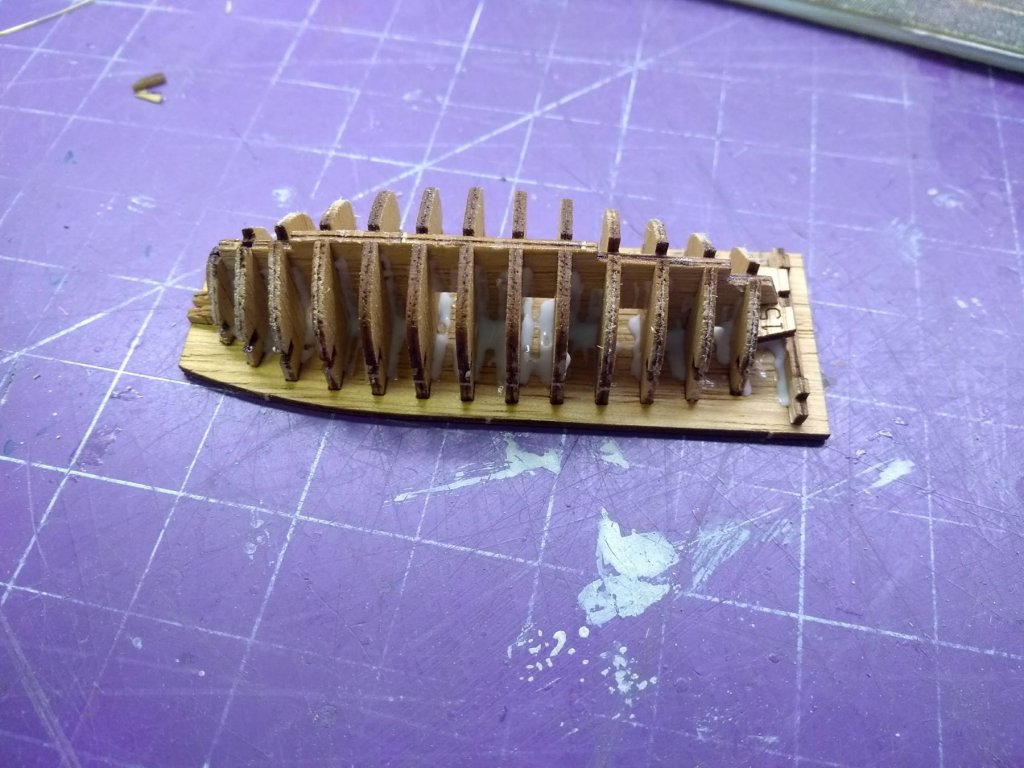

- 7 replies
-
- 3
-
-
- lifeboat
- master korabel
- (and 1 more)