Search the Community
Showing results for tags 'sergal'.
-
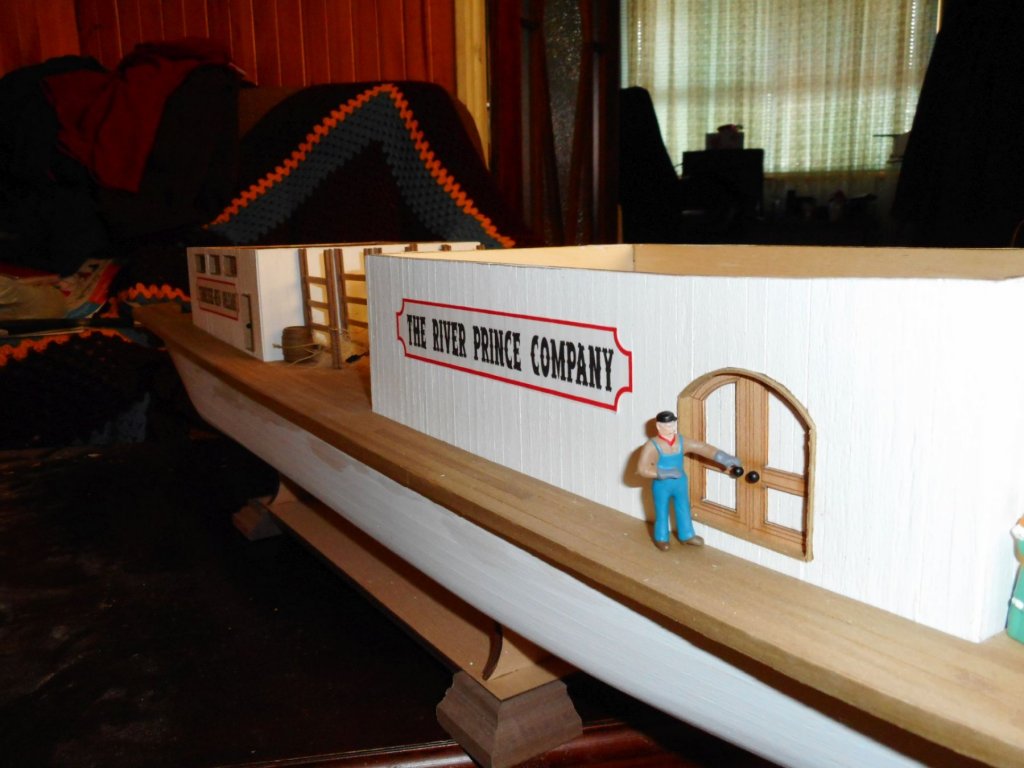
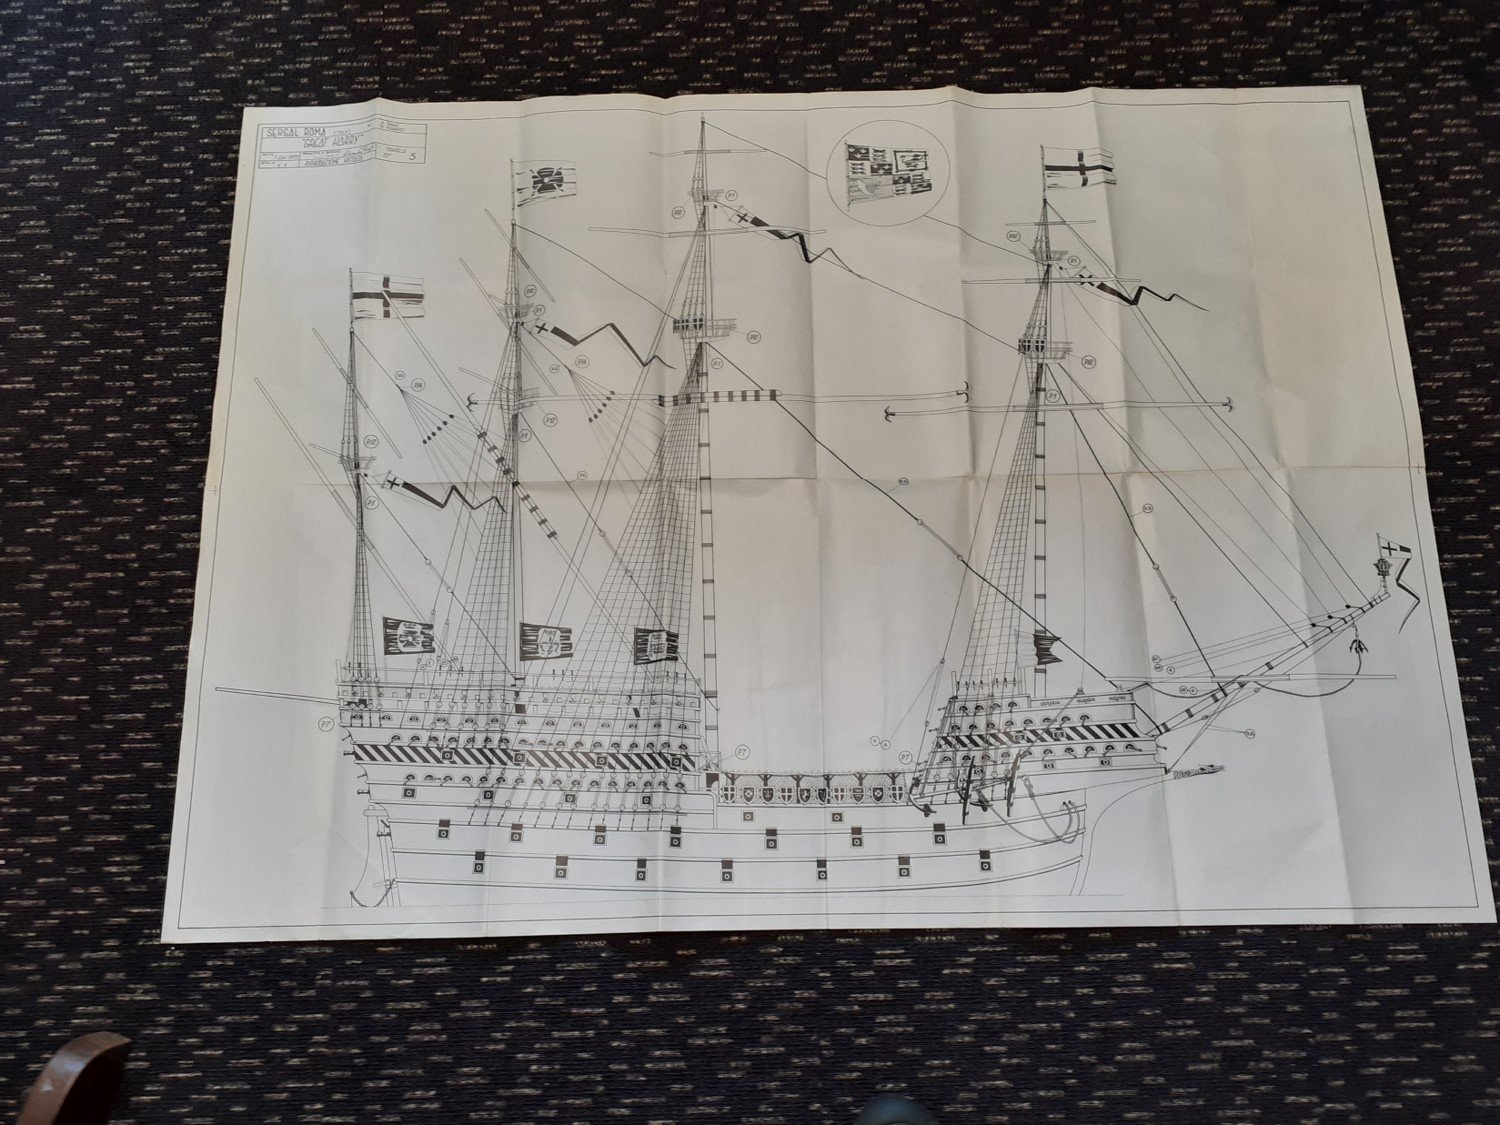
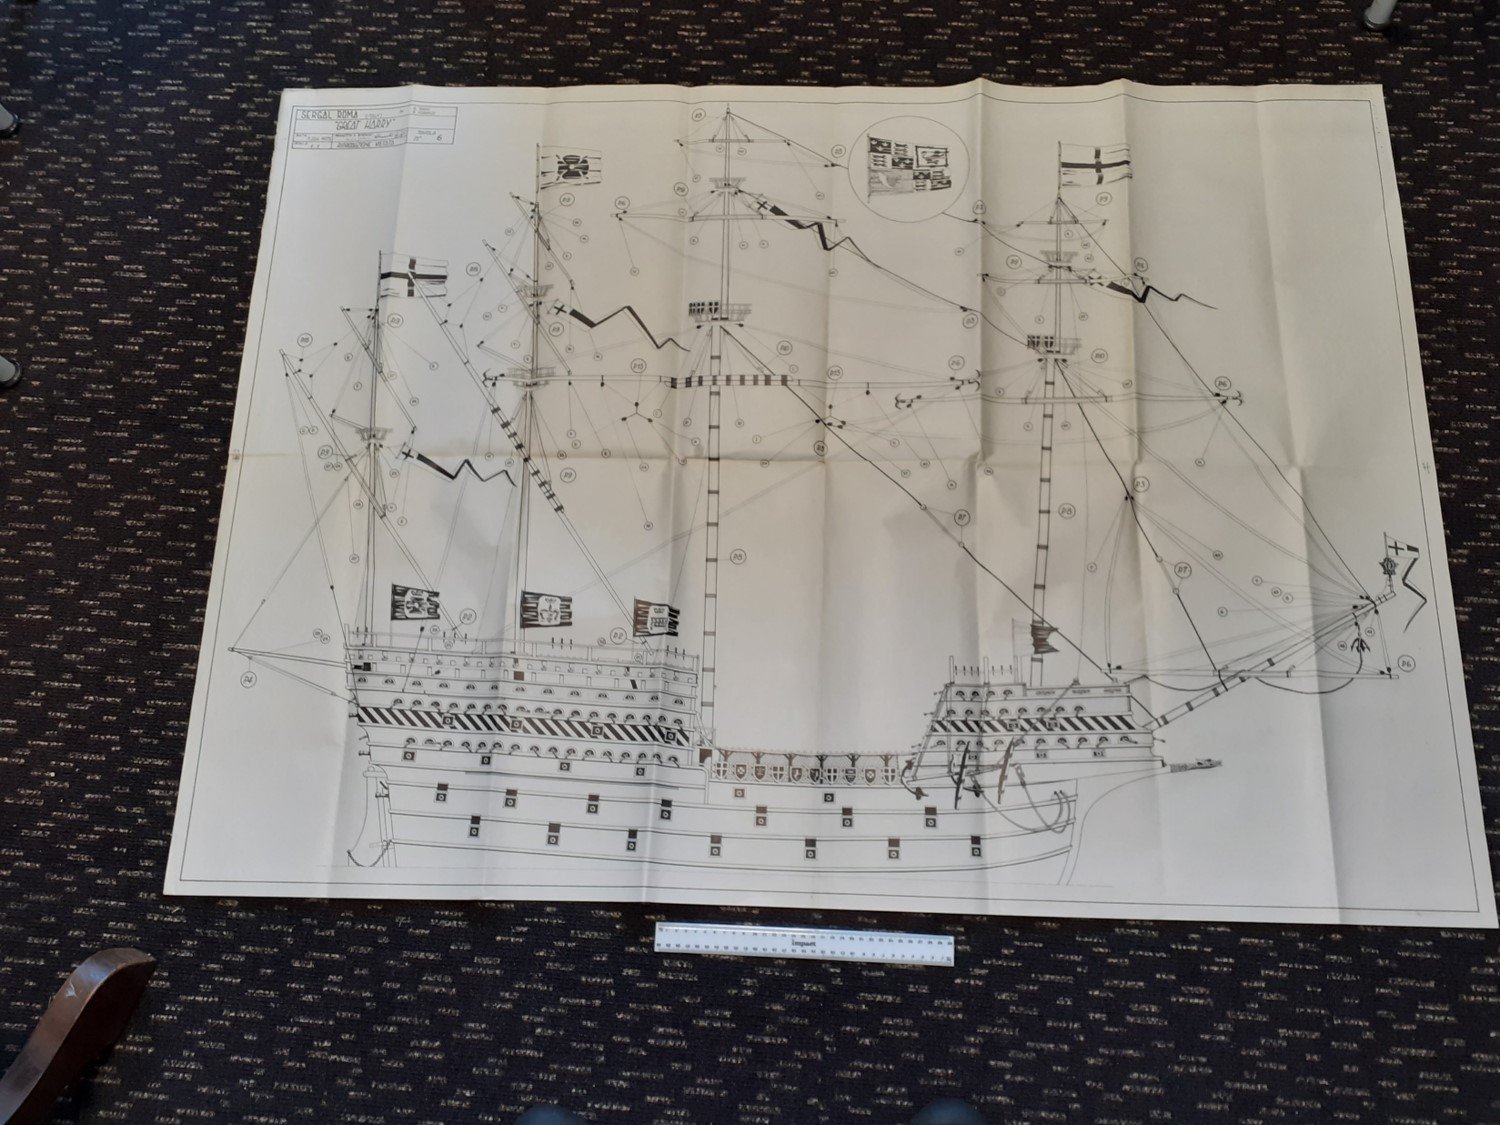
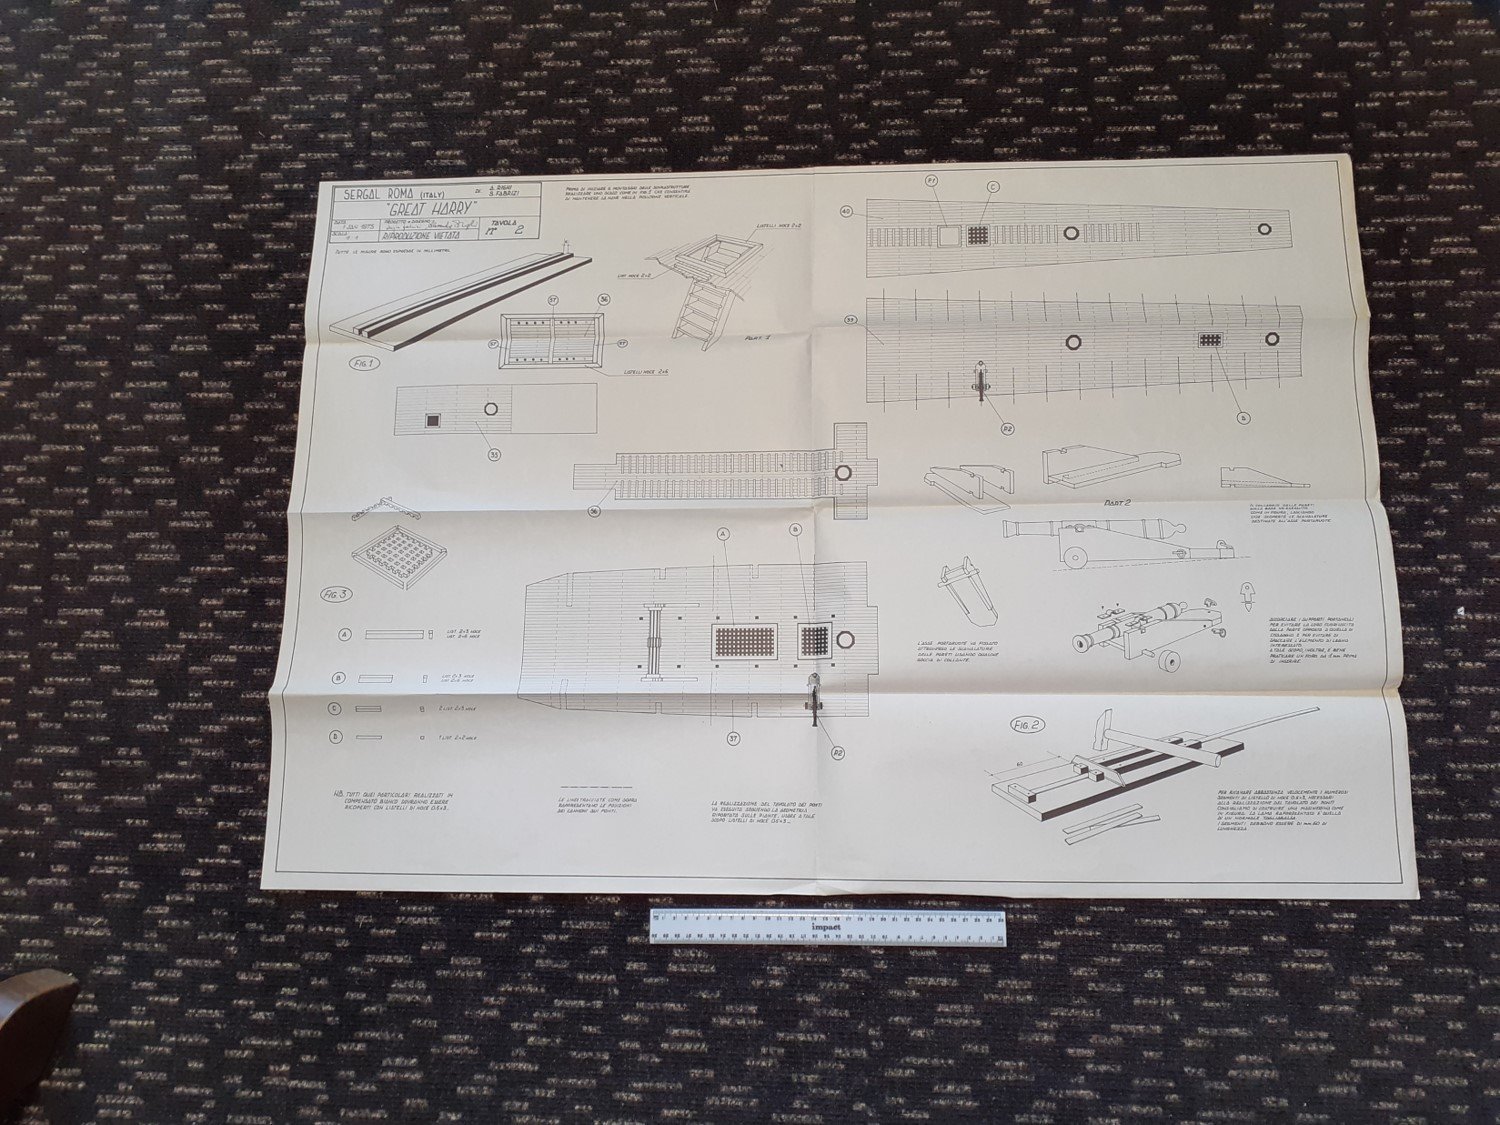
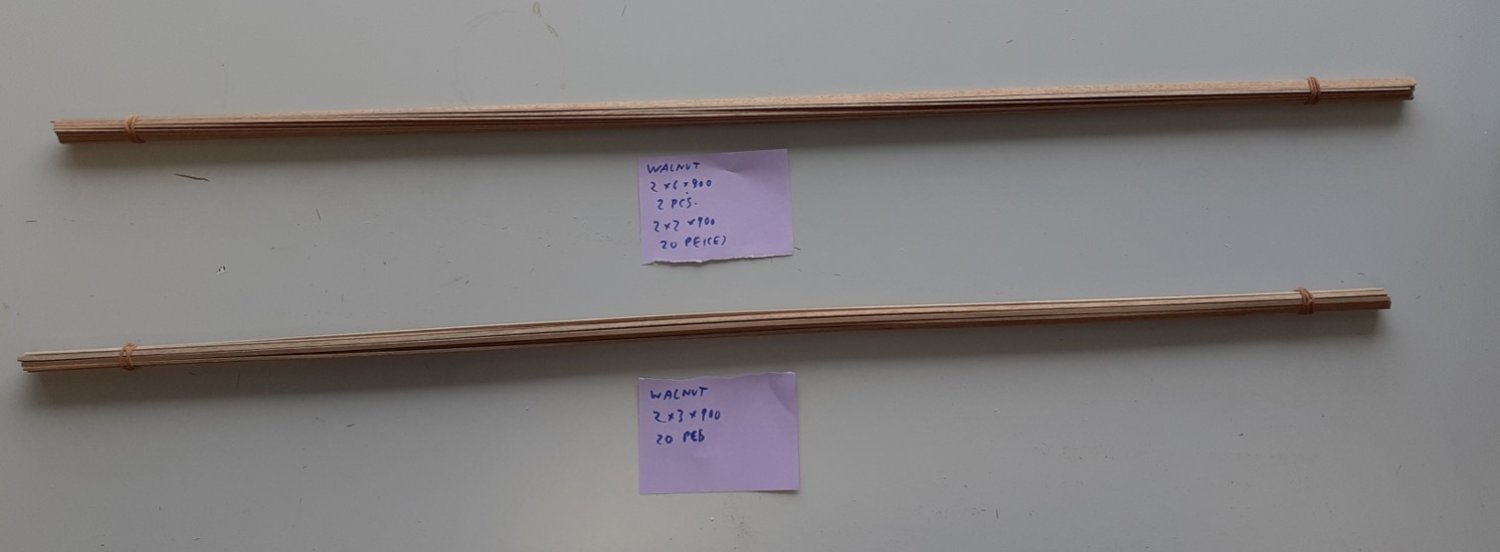
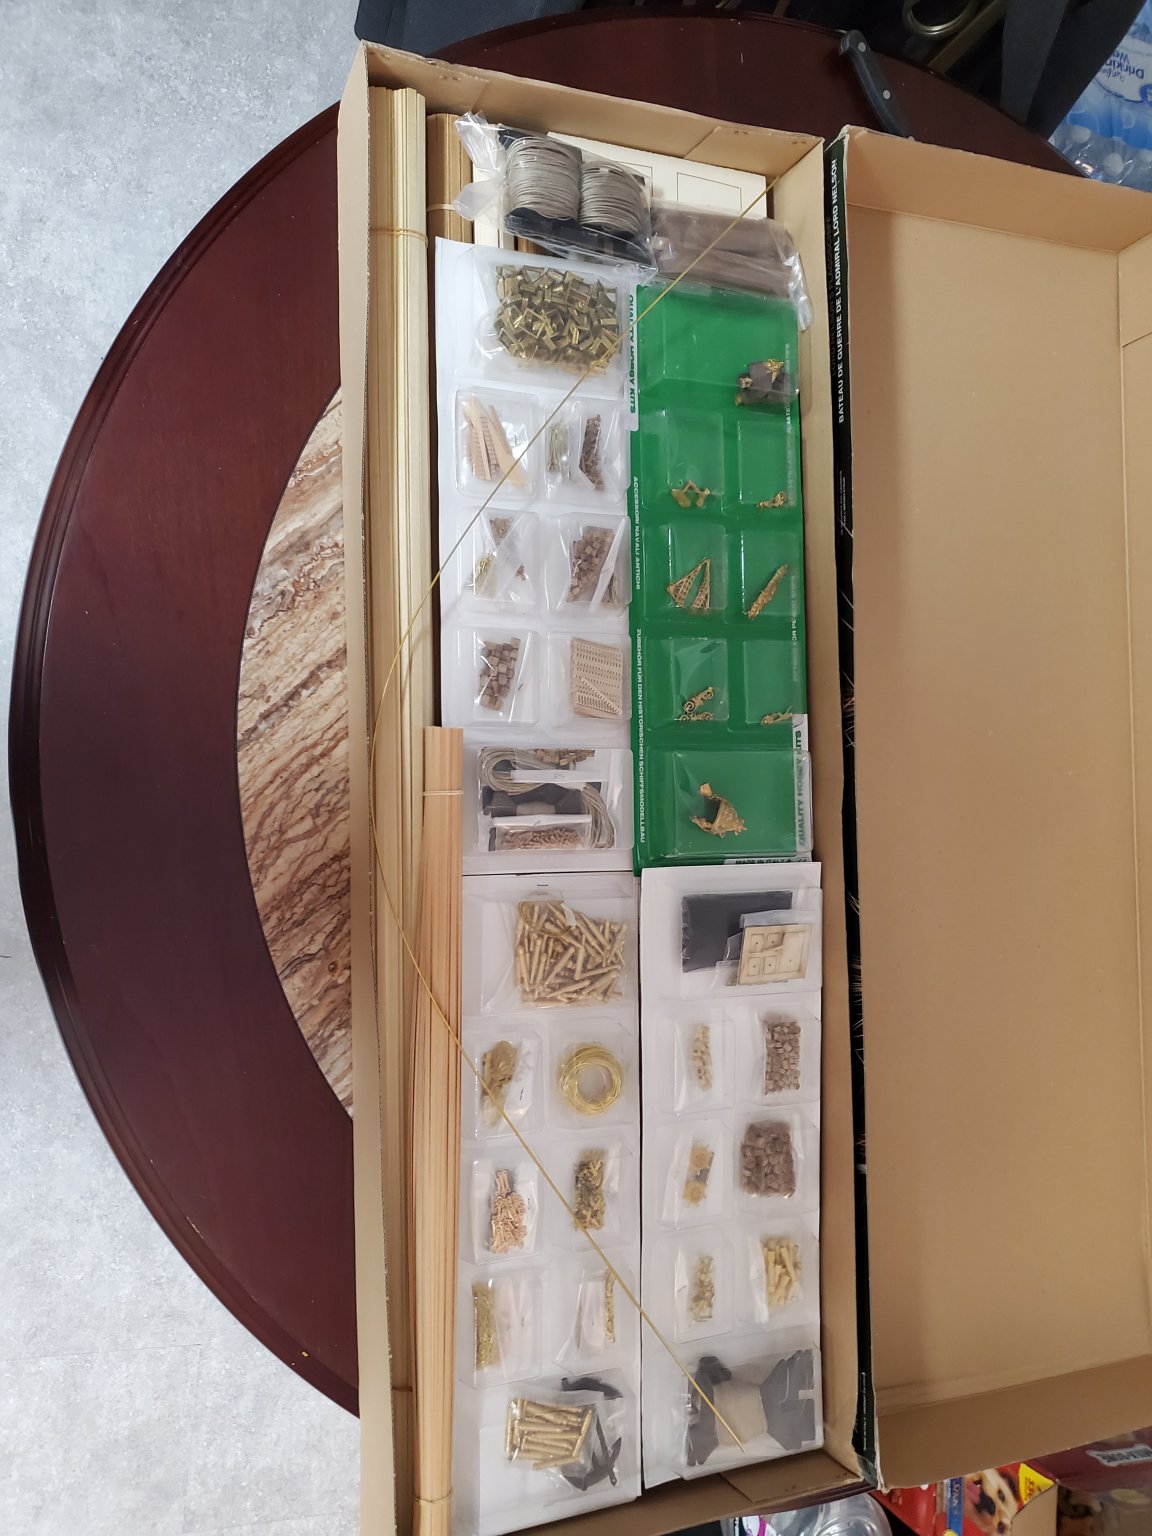
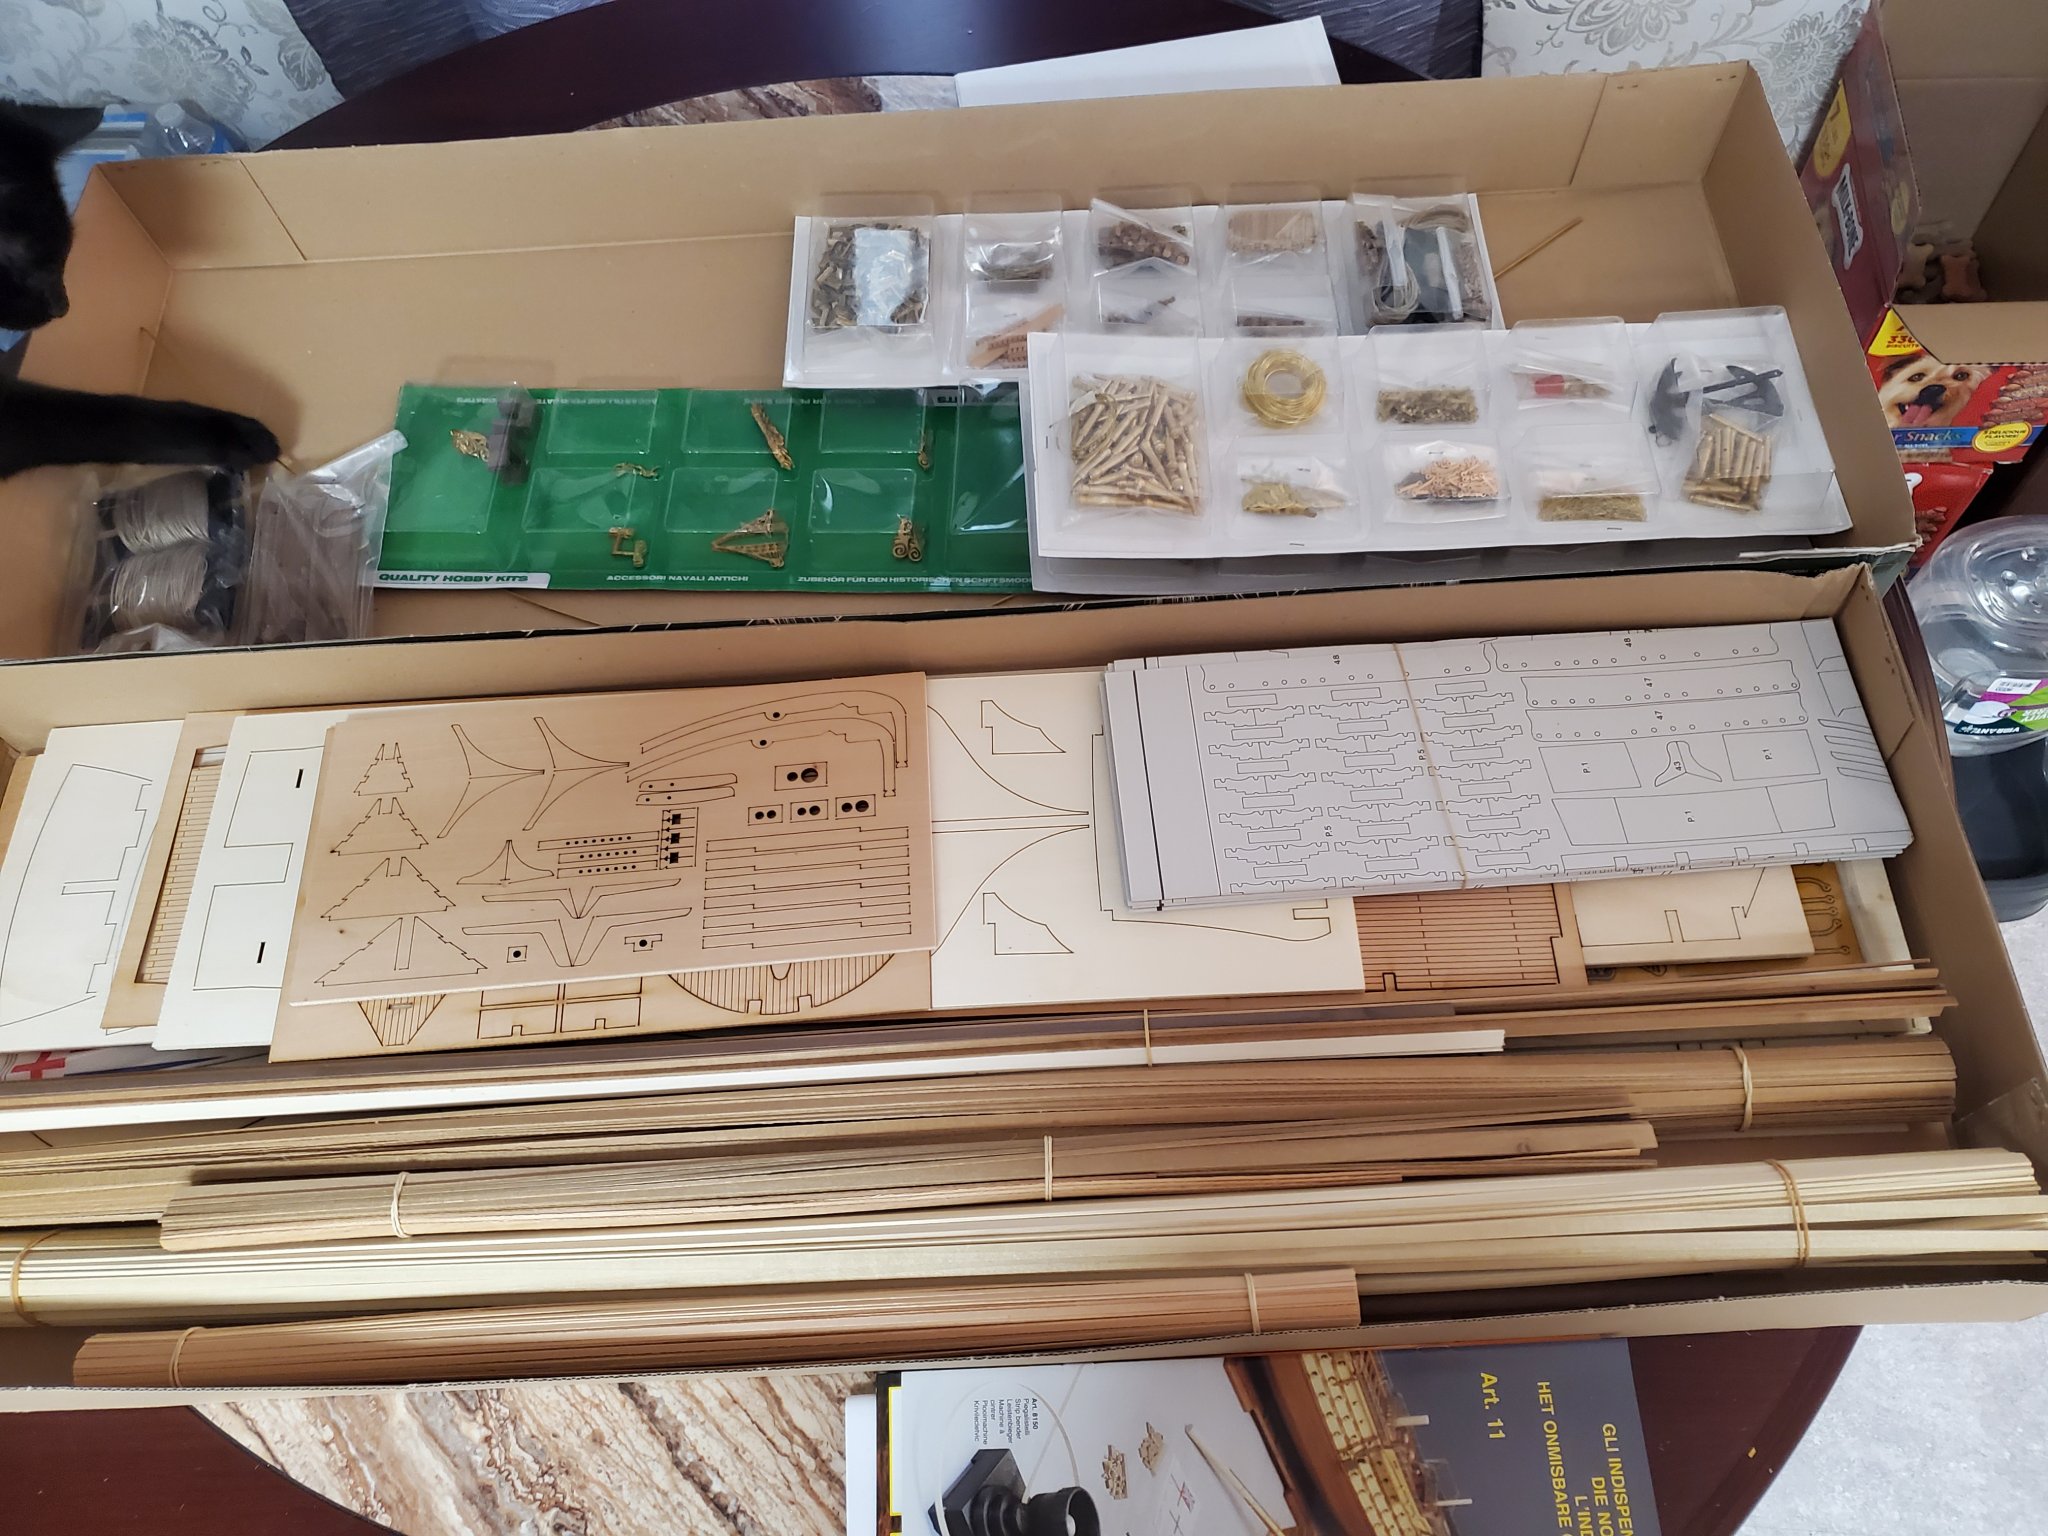
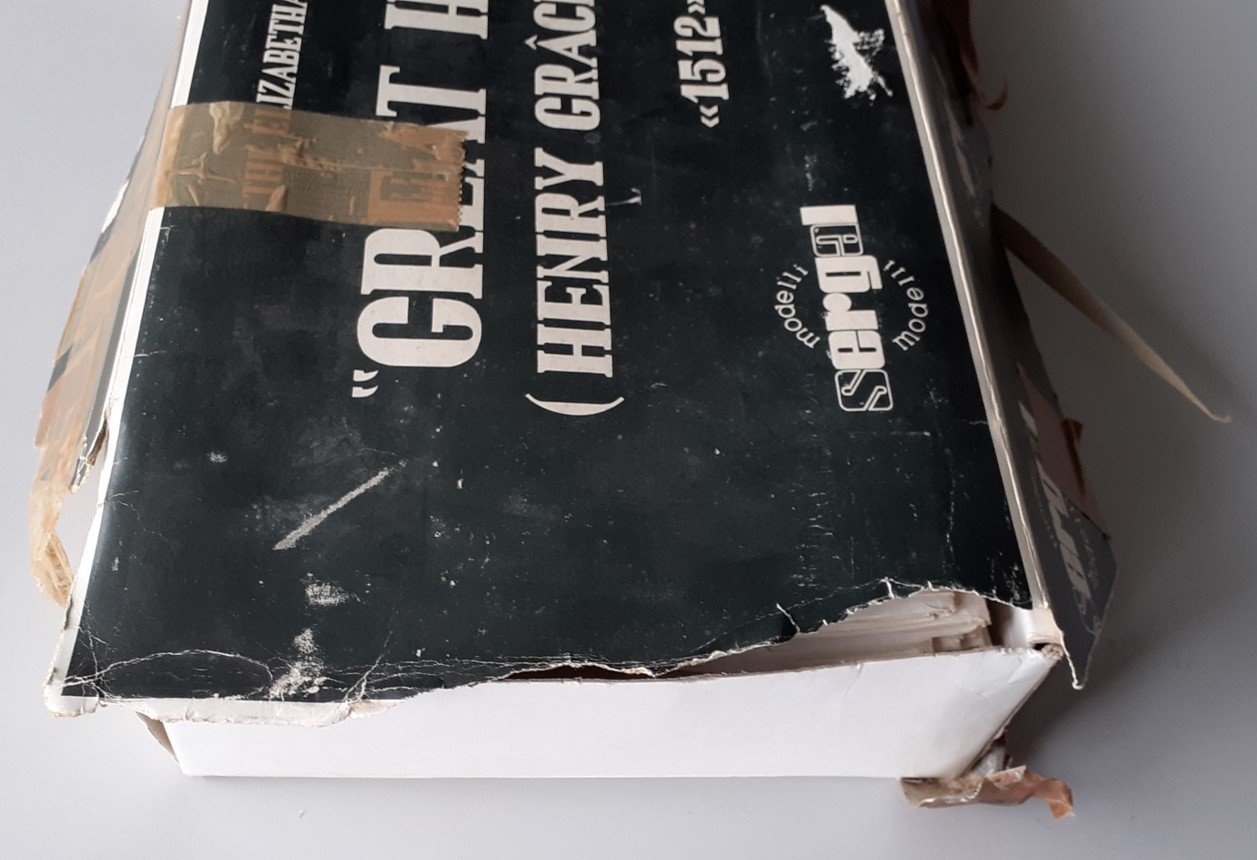
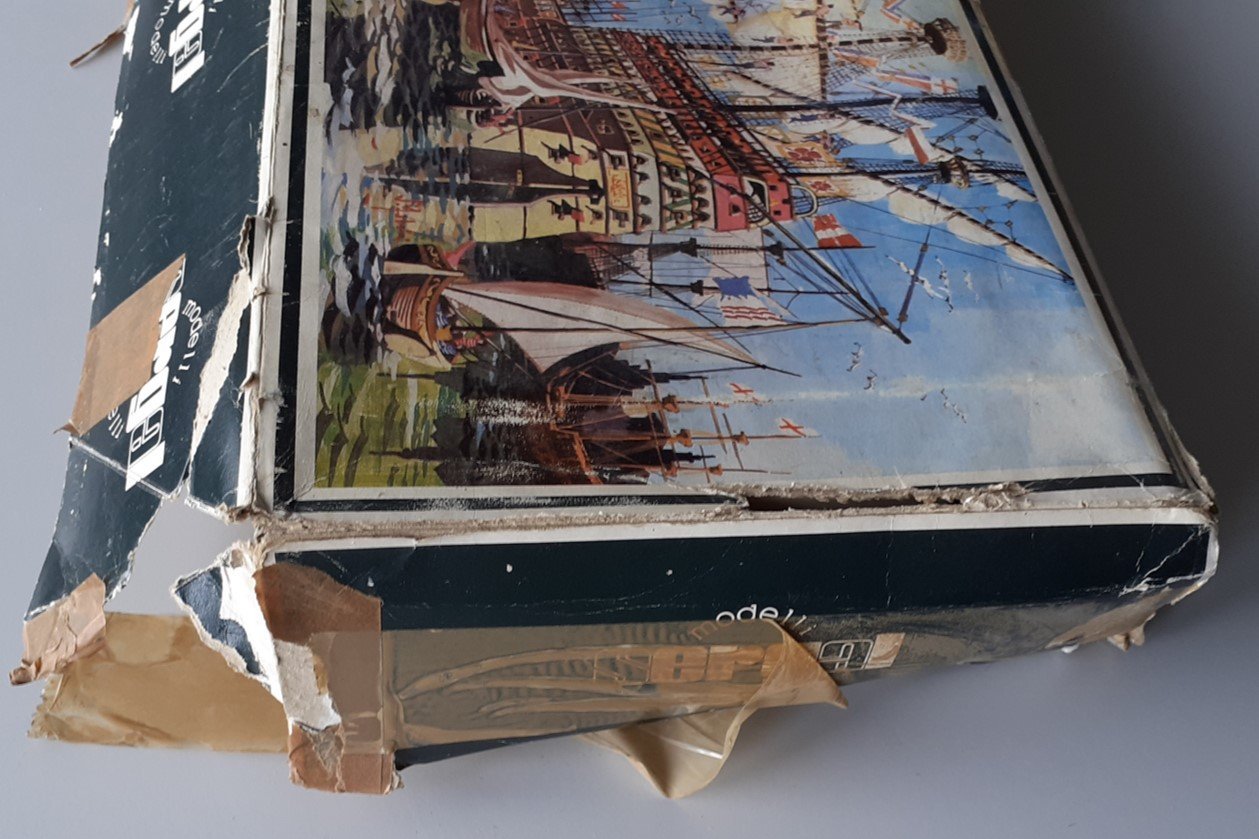
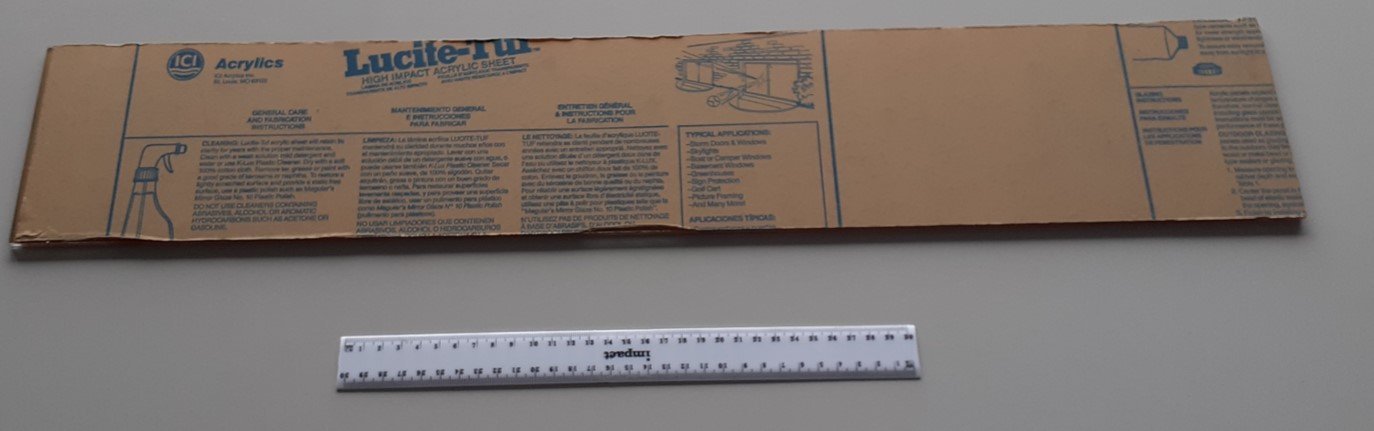
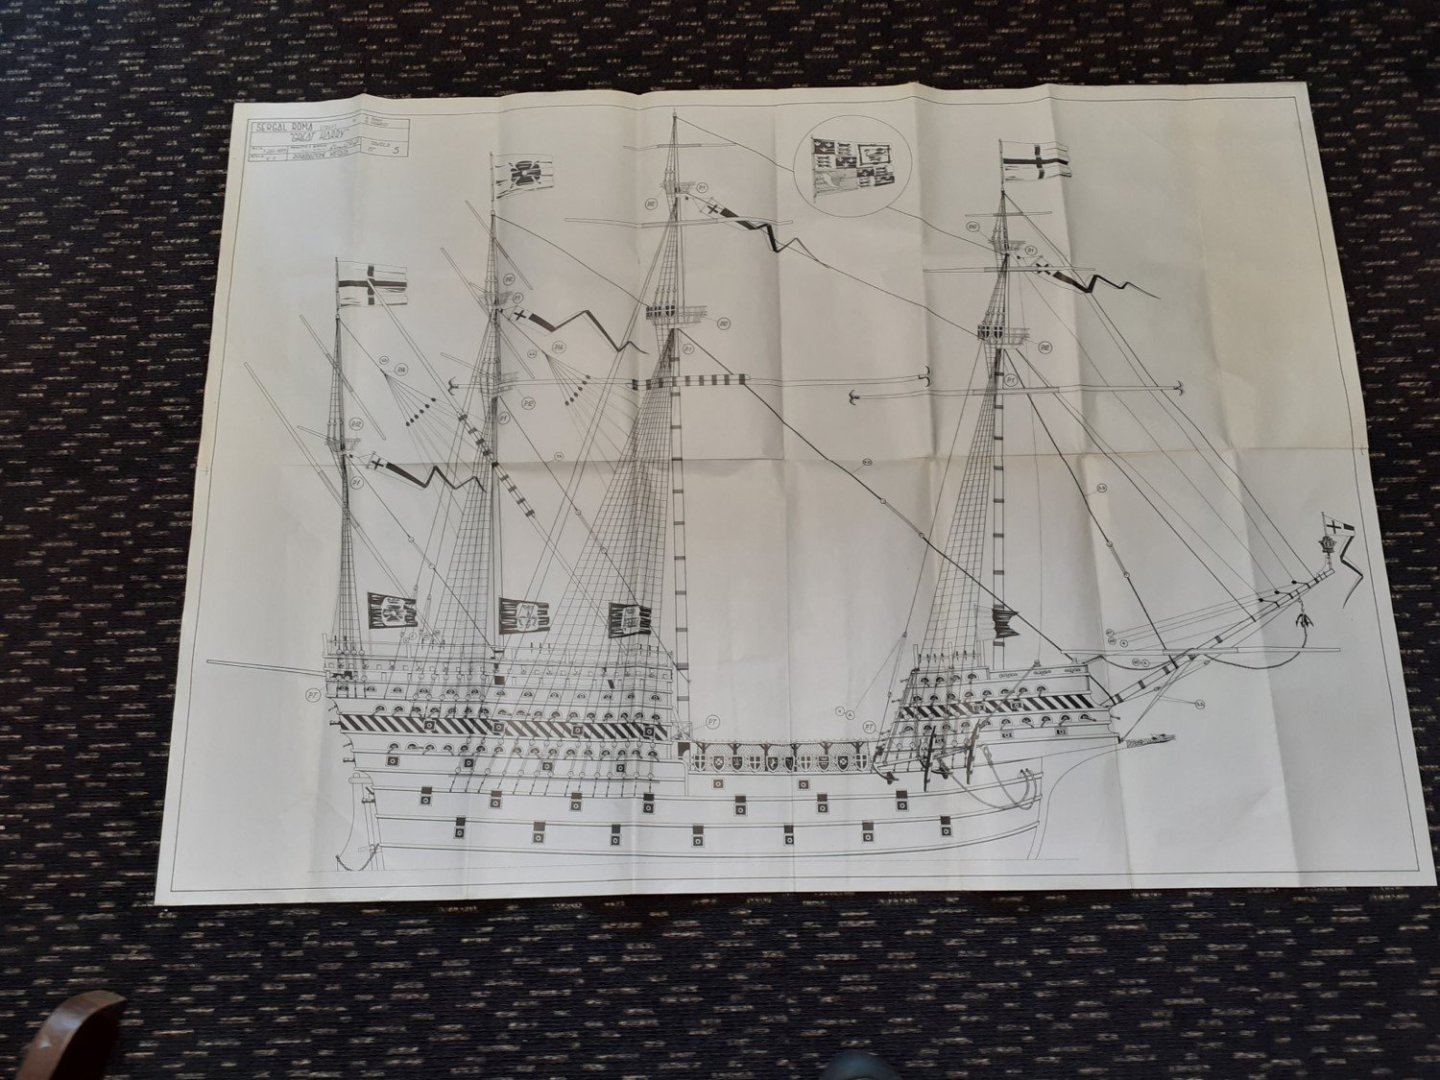
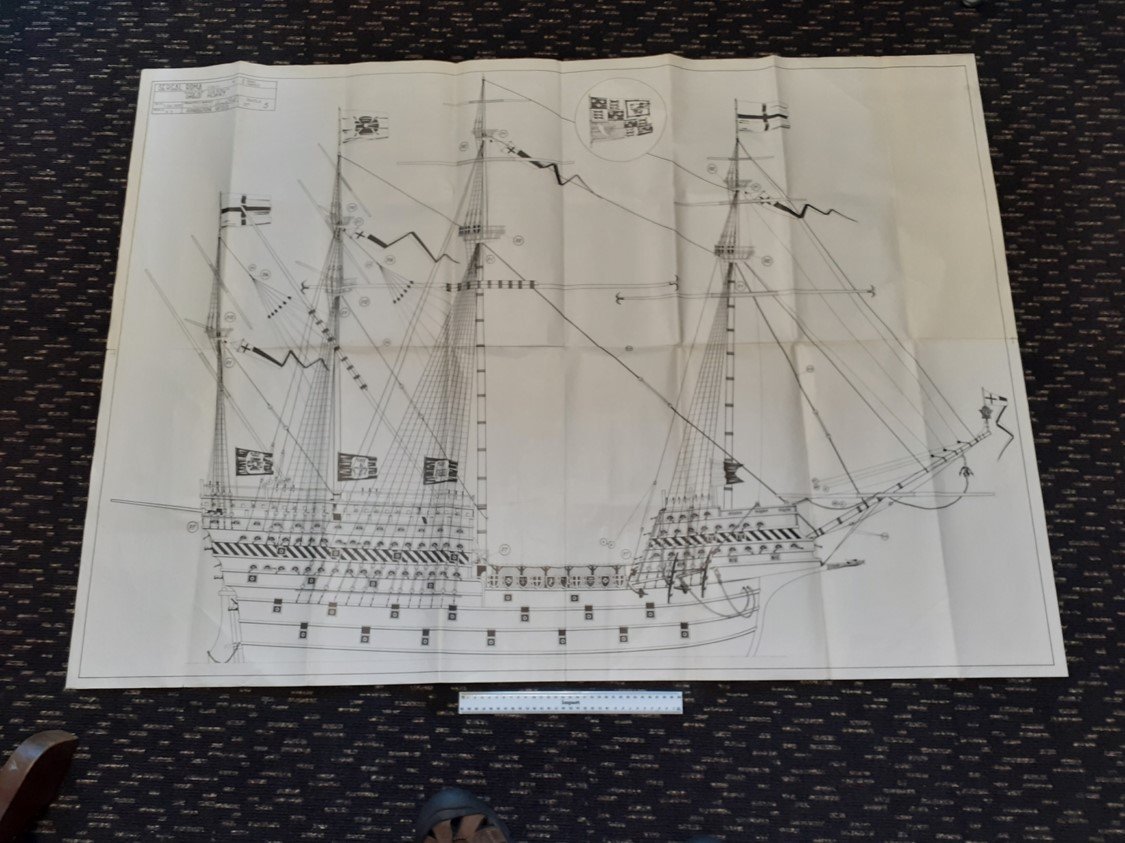
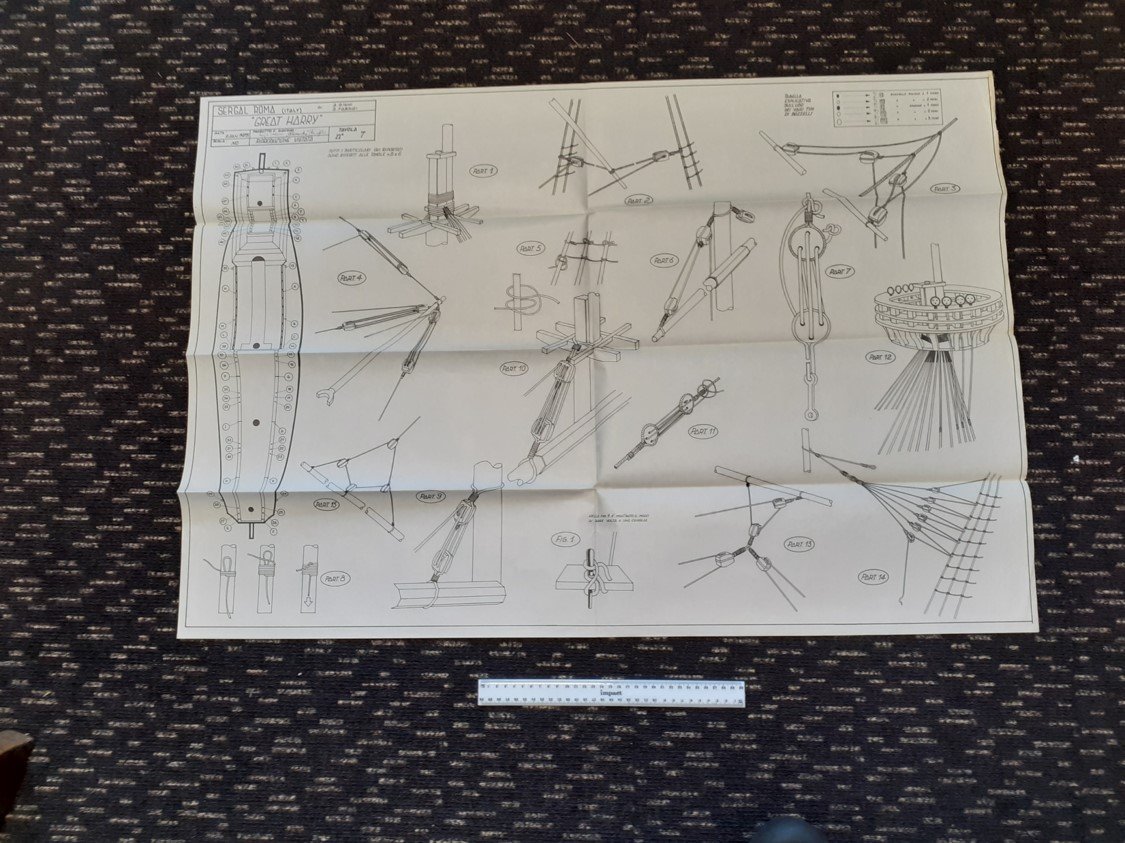
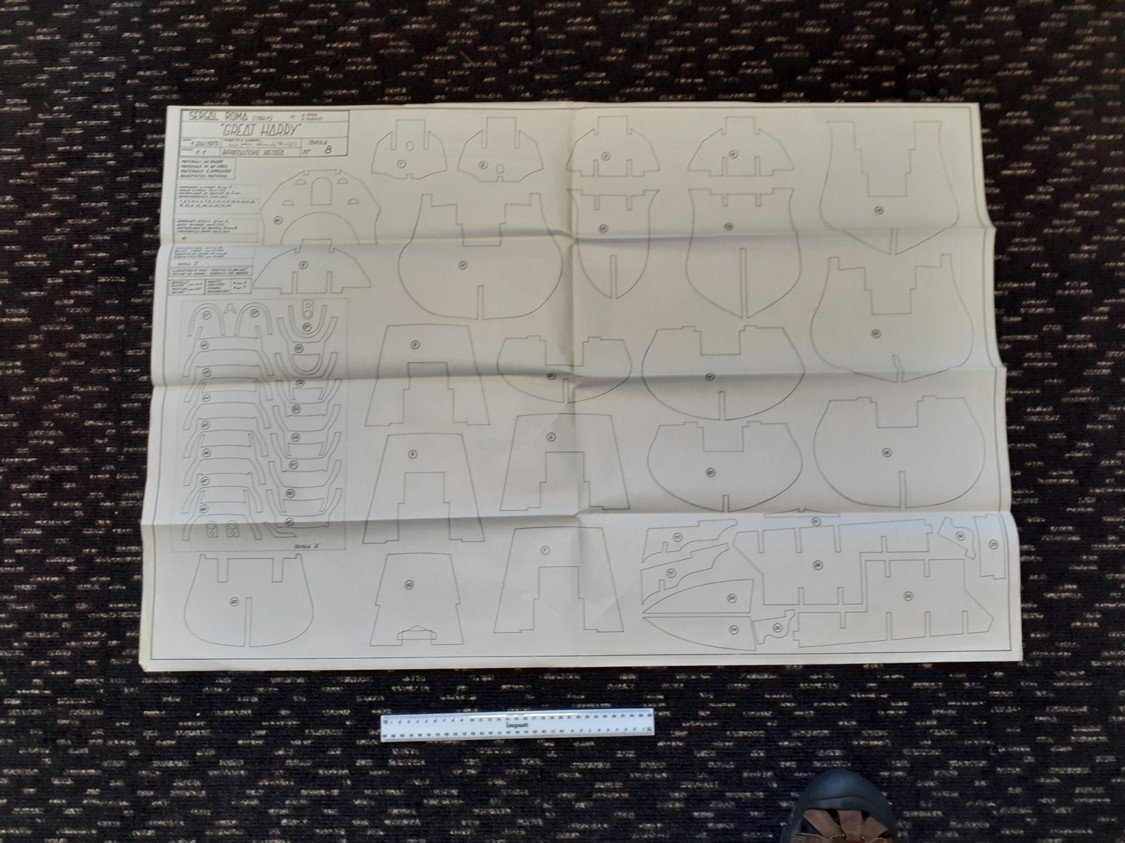
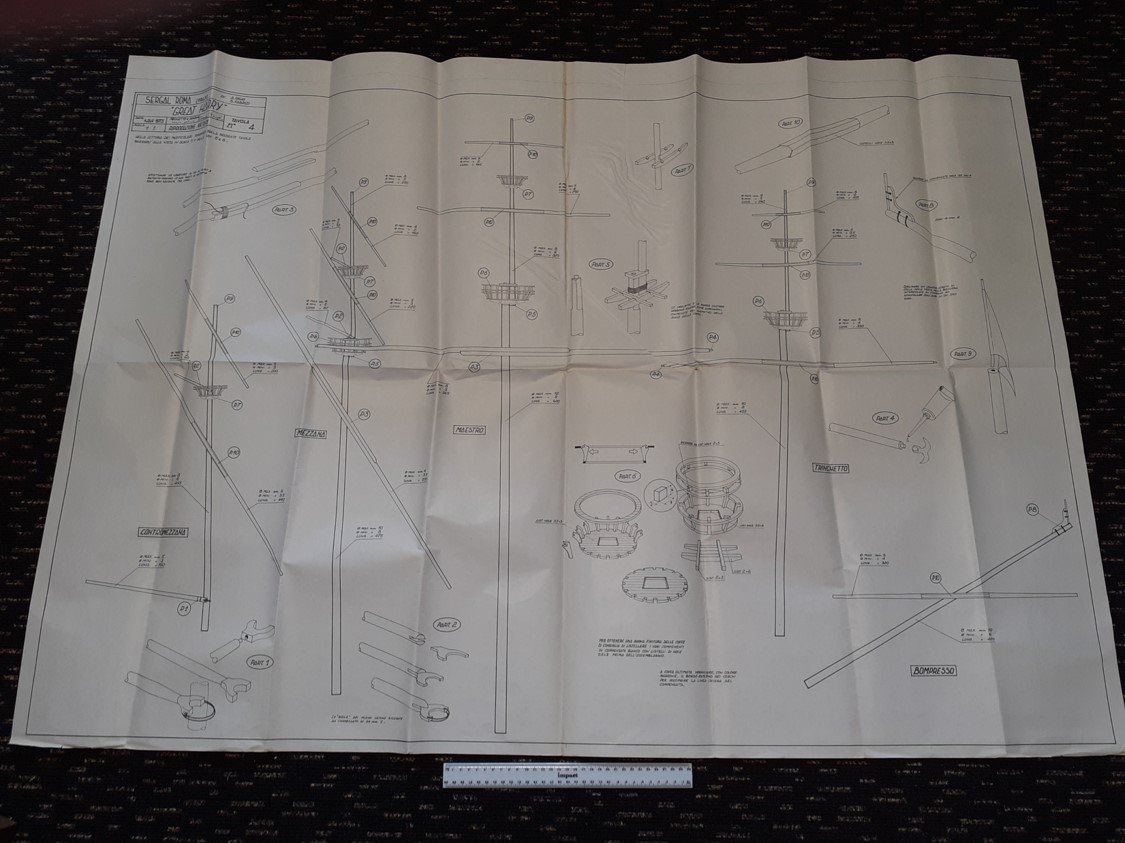
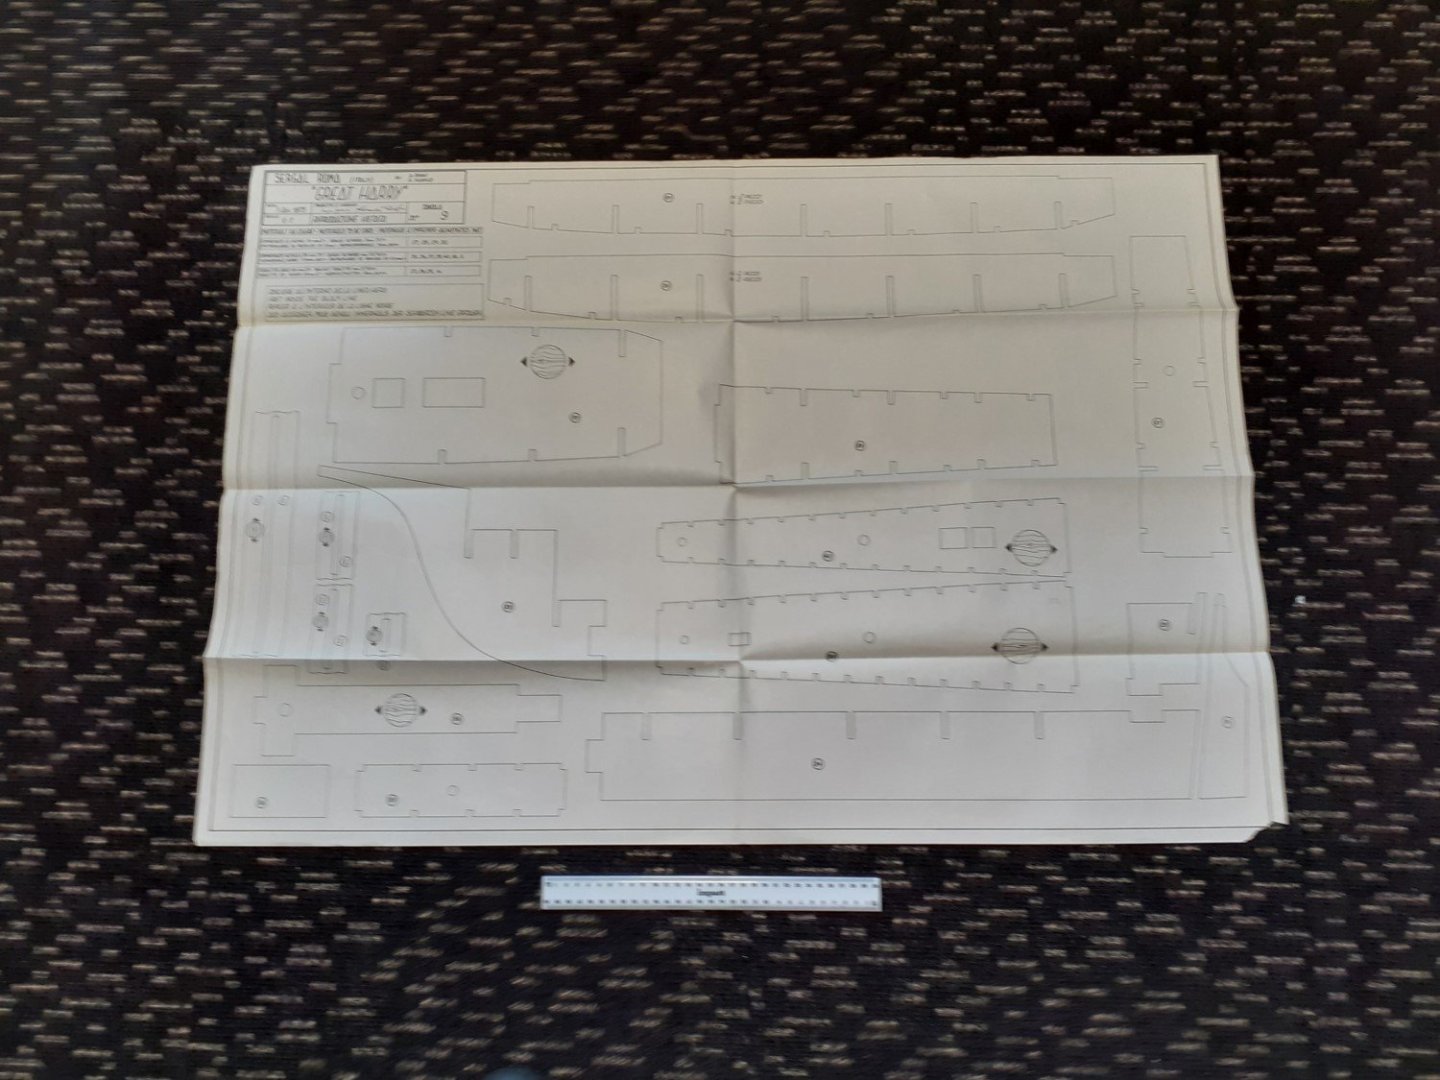
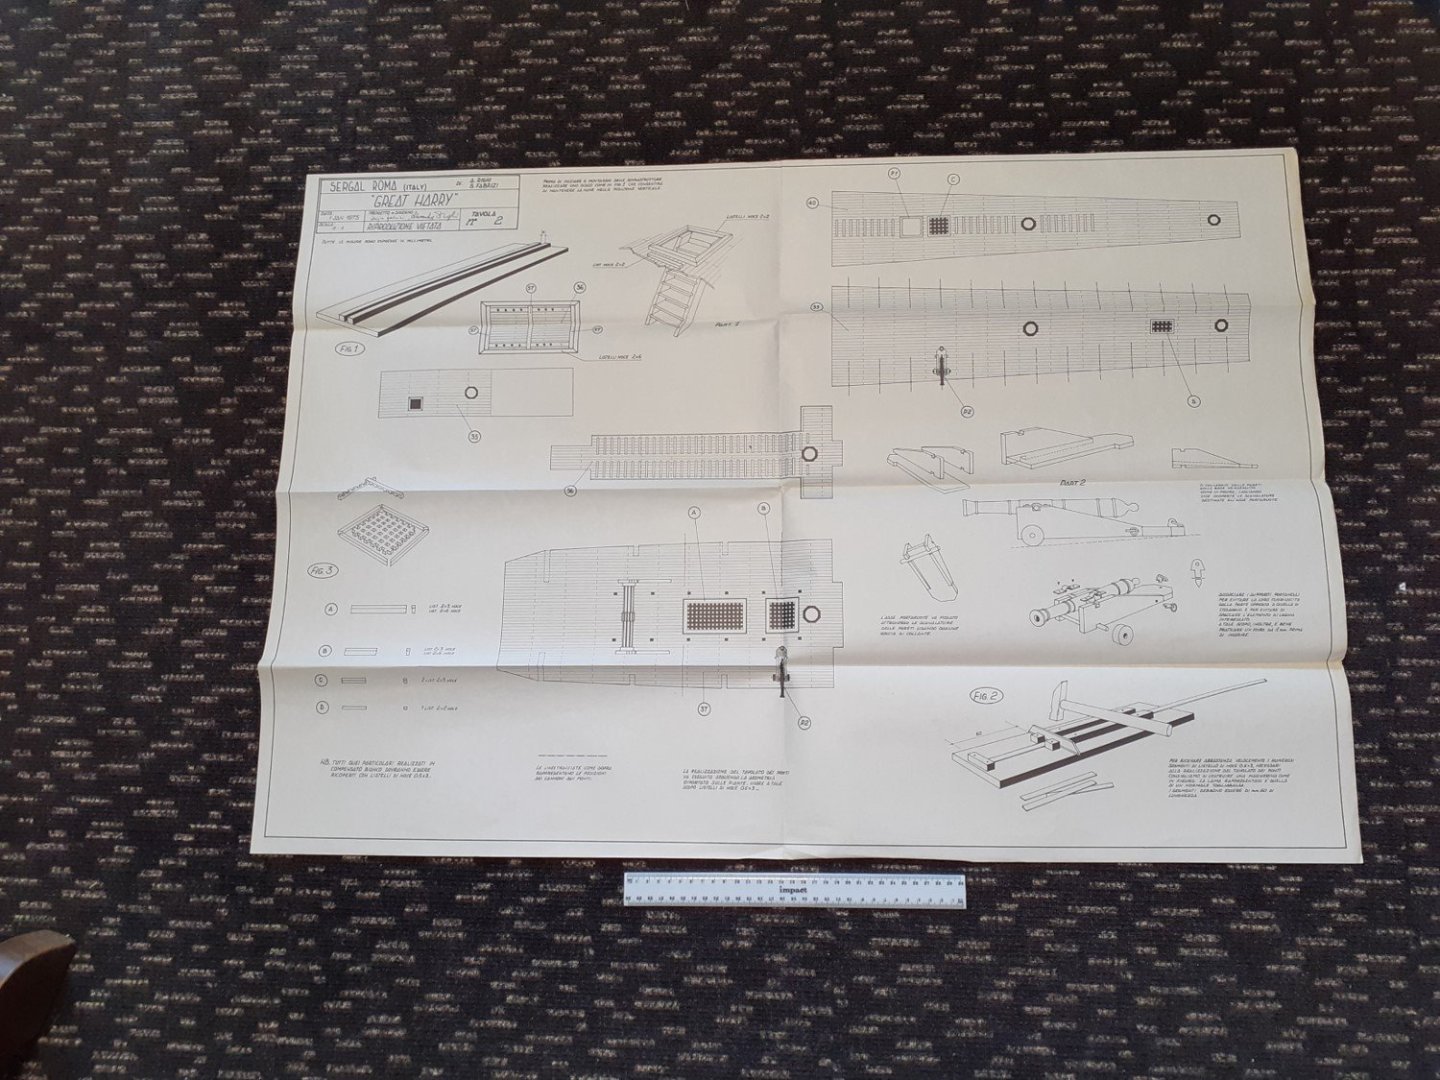
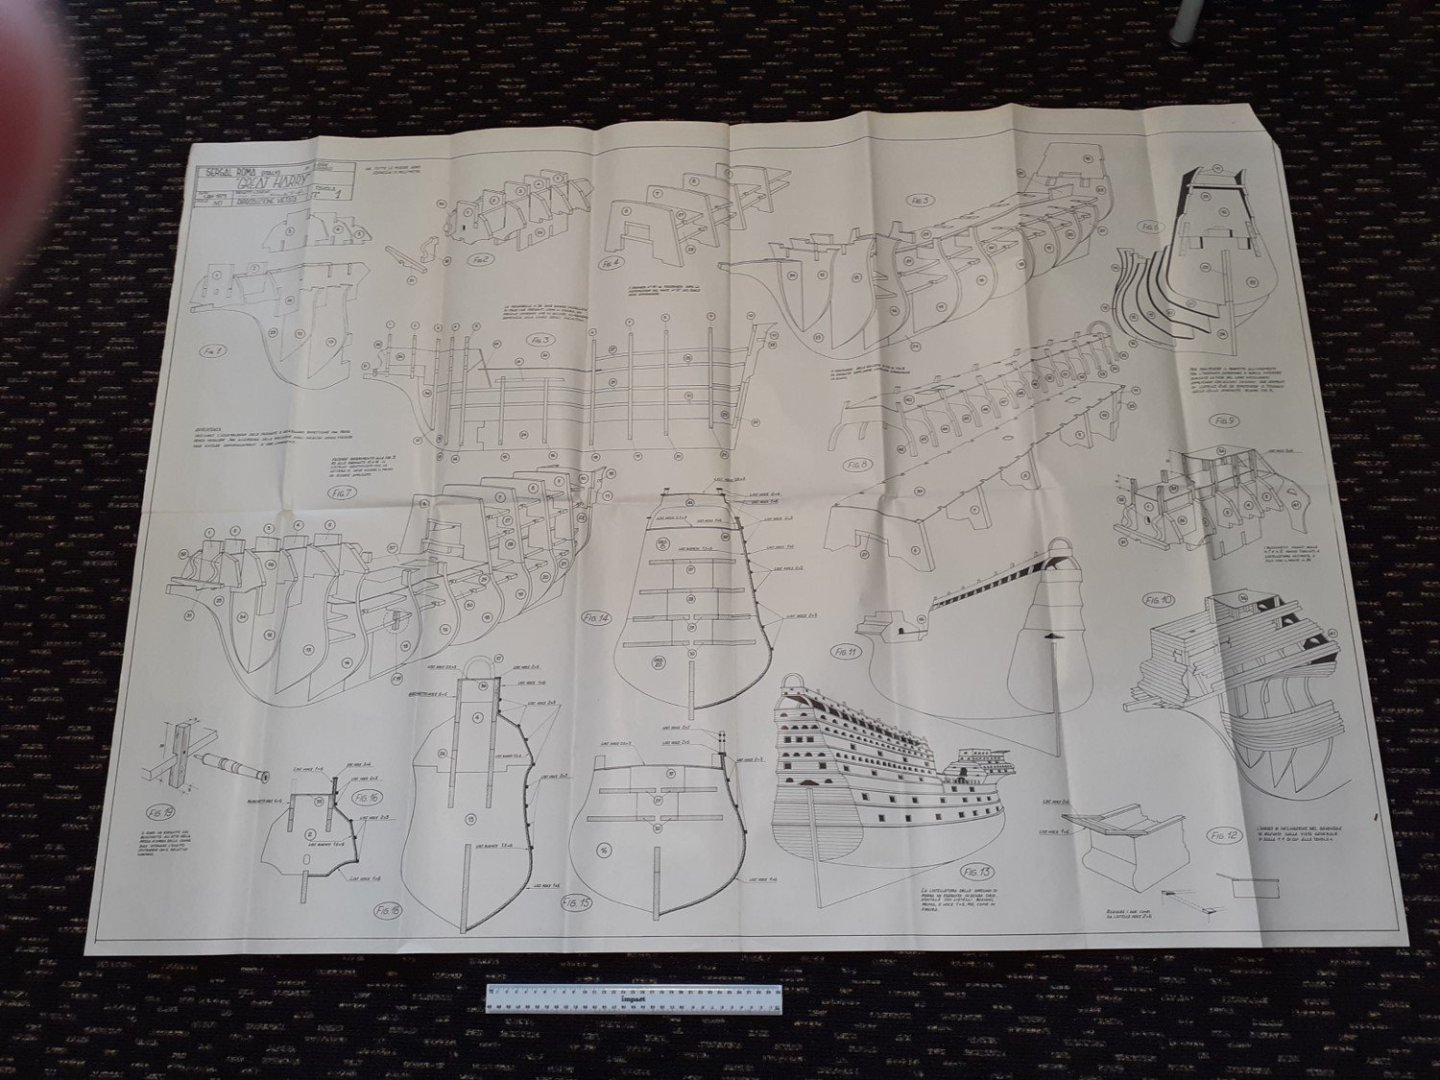
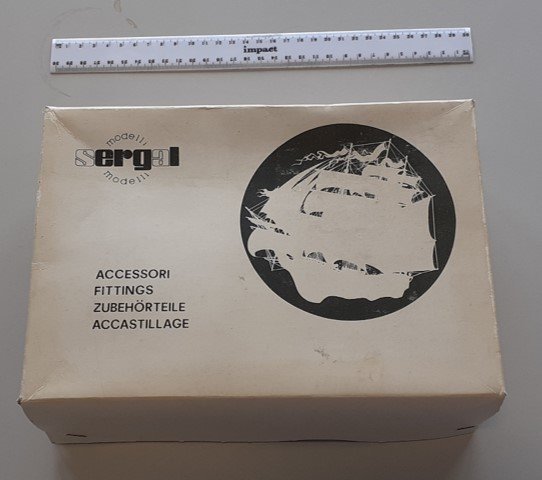
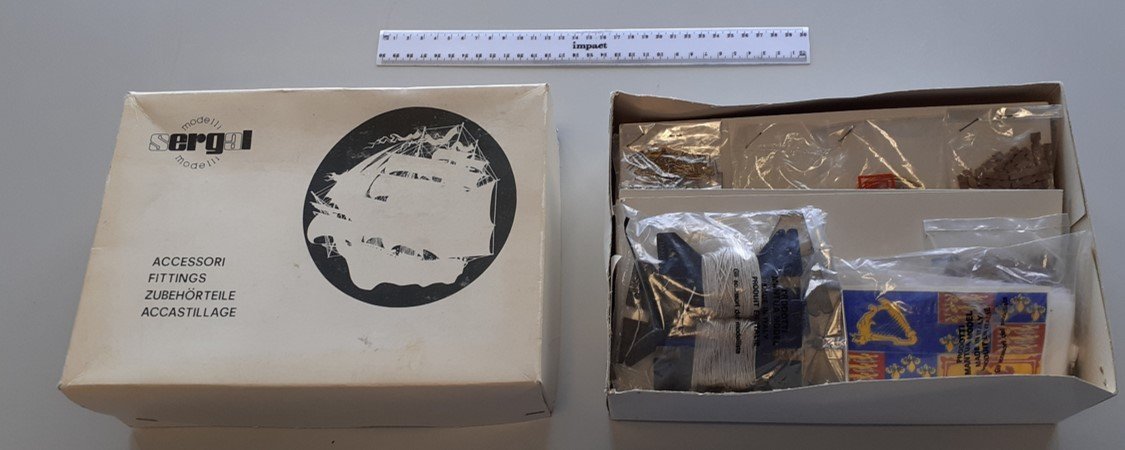
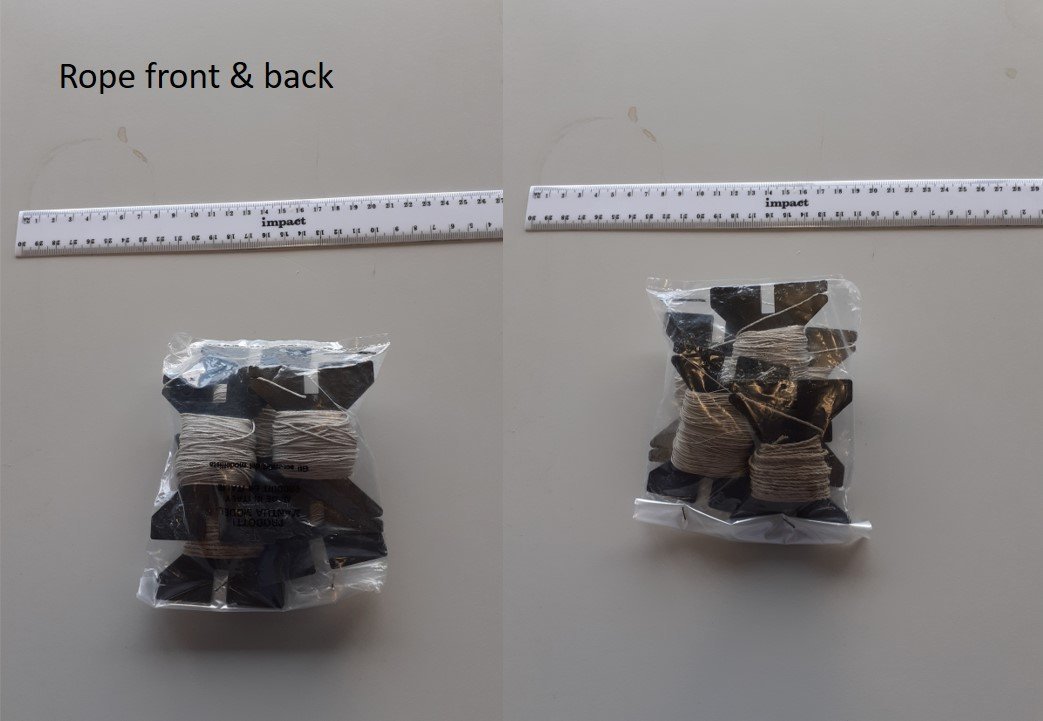
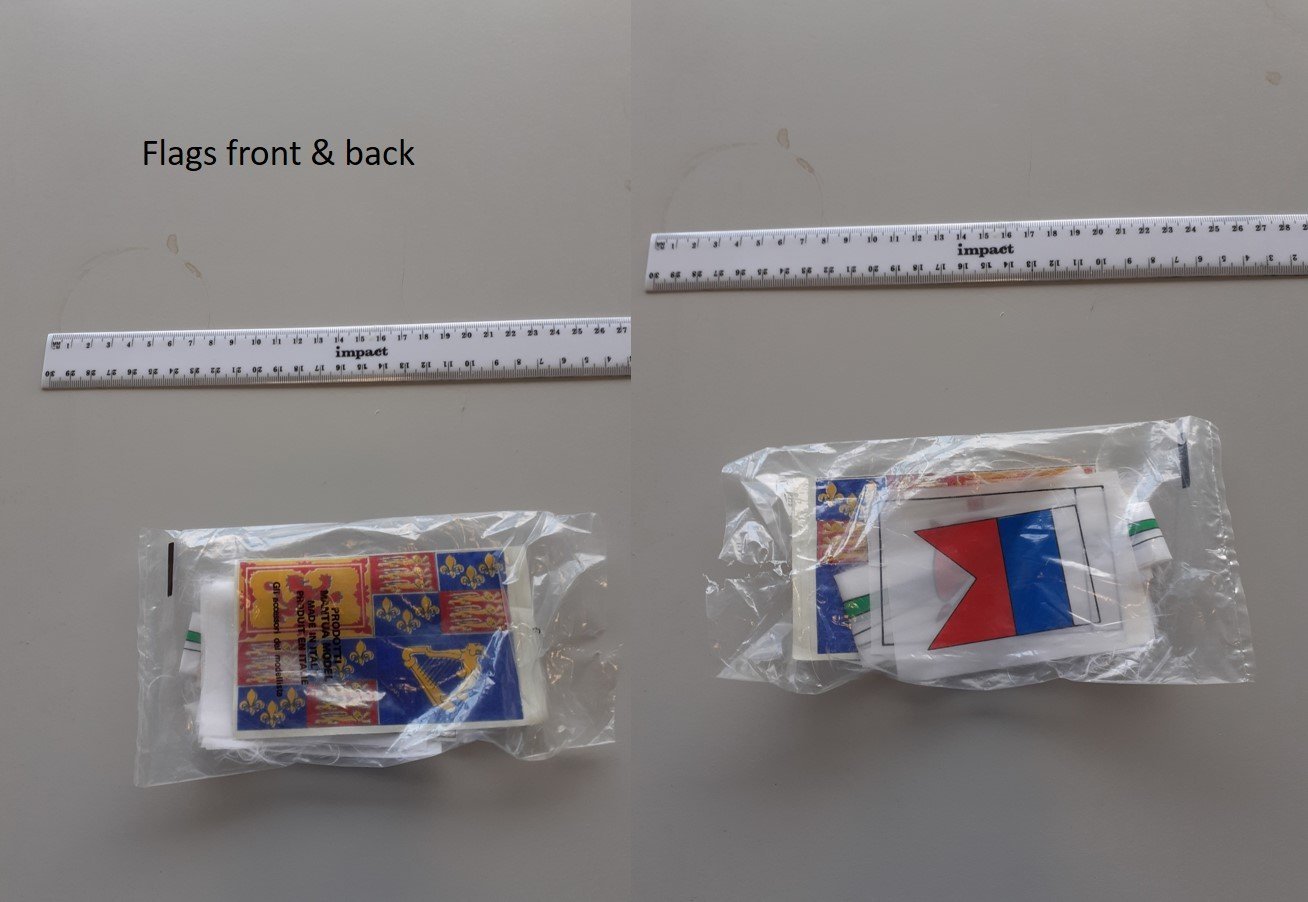
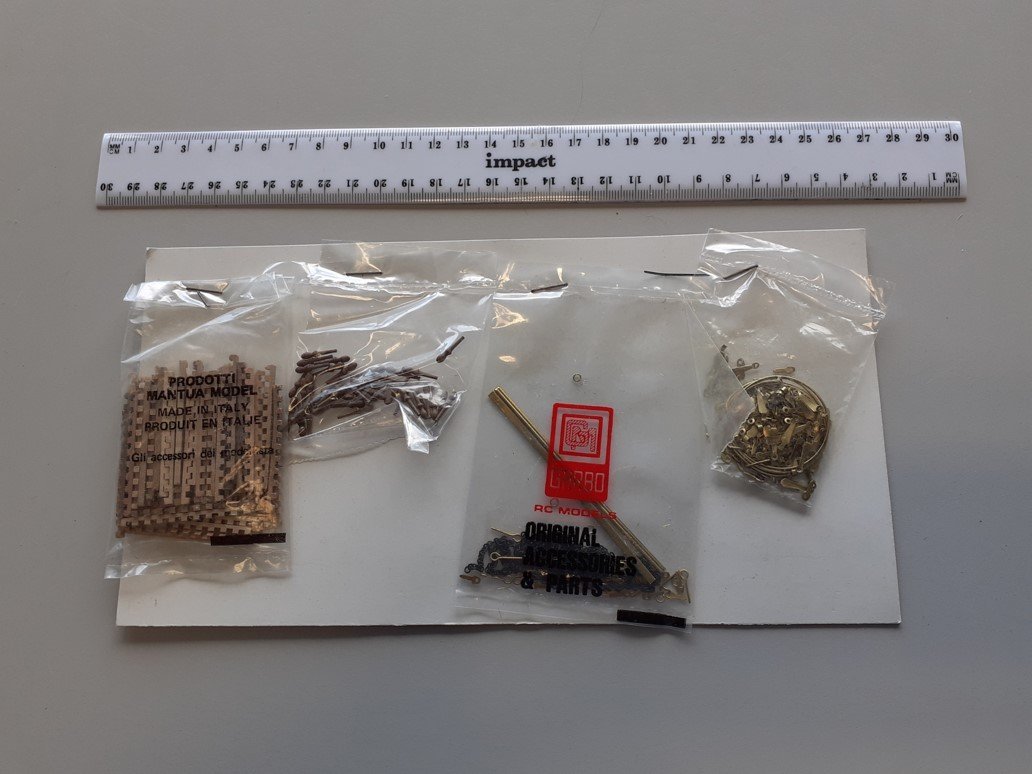
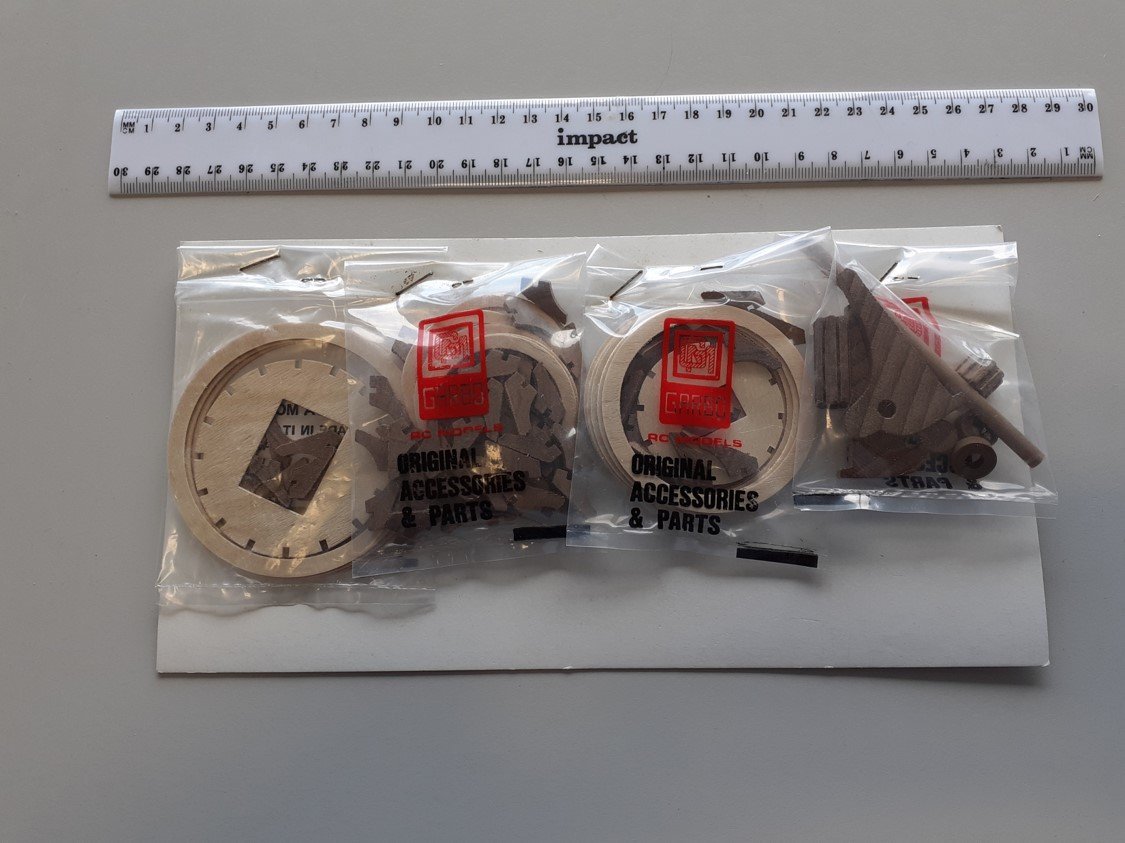
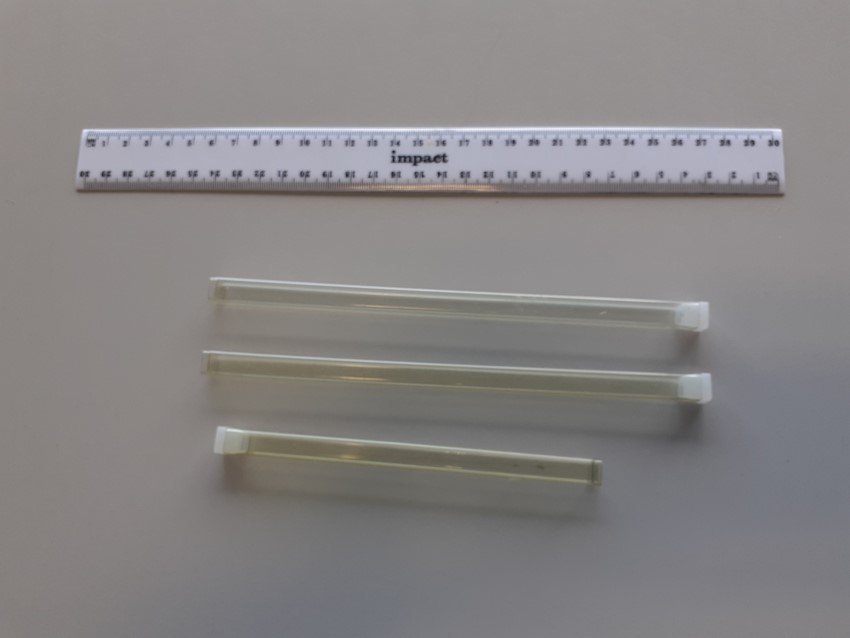
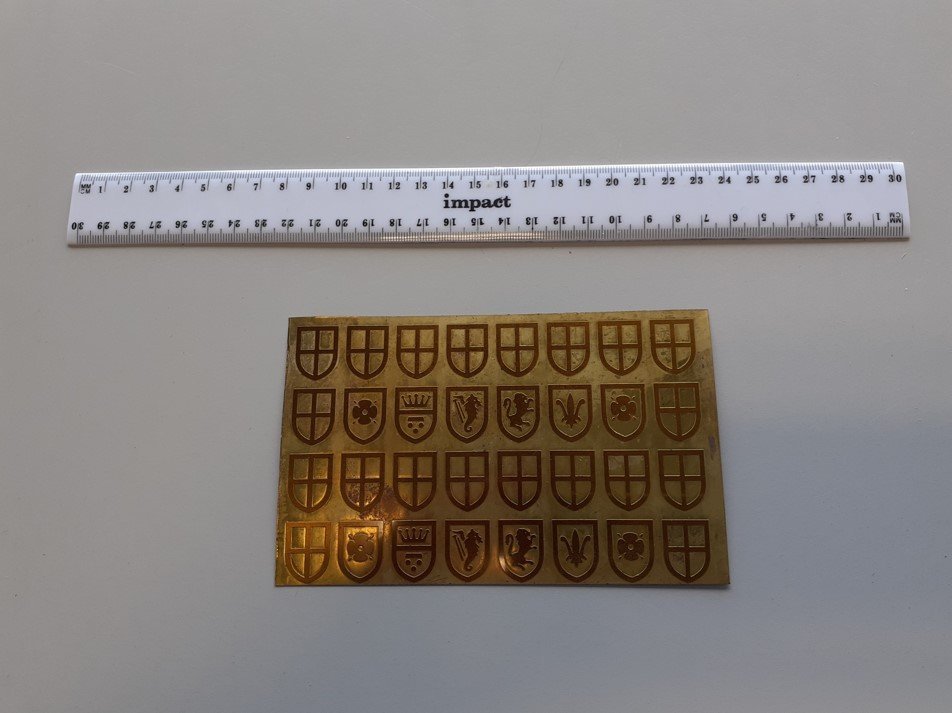
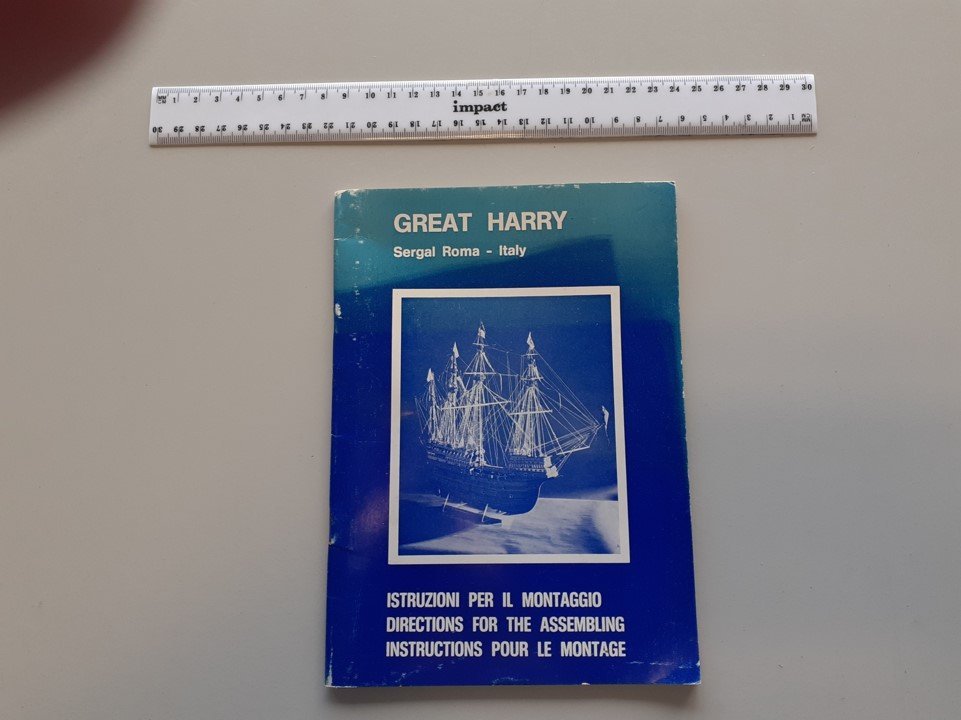
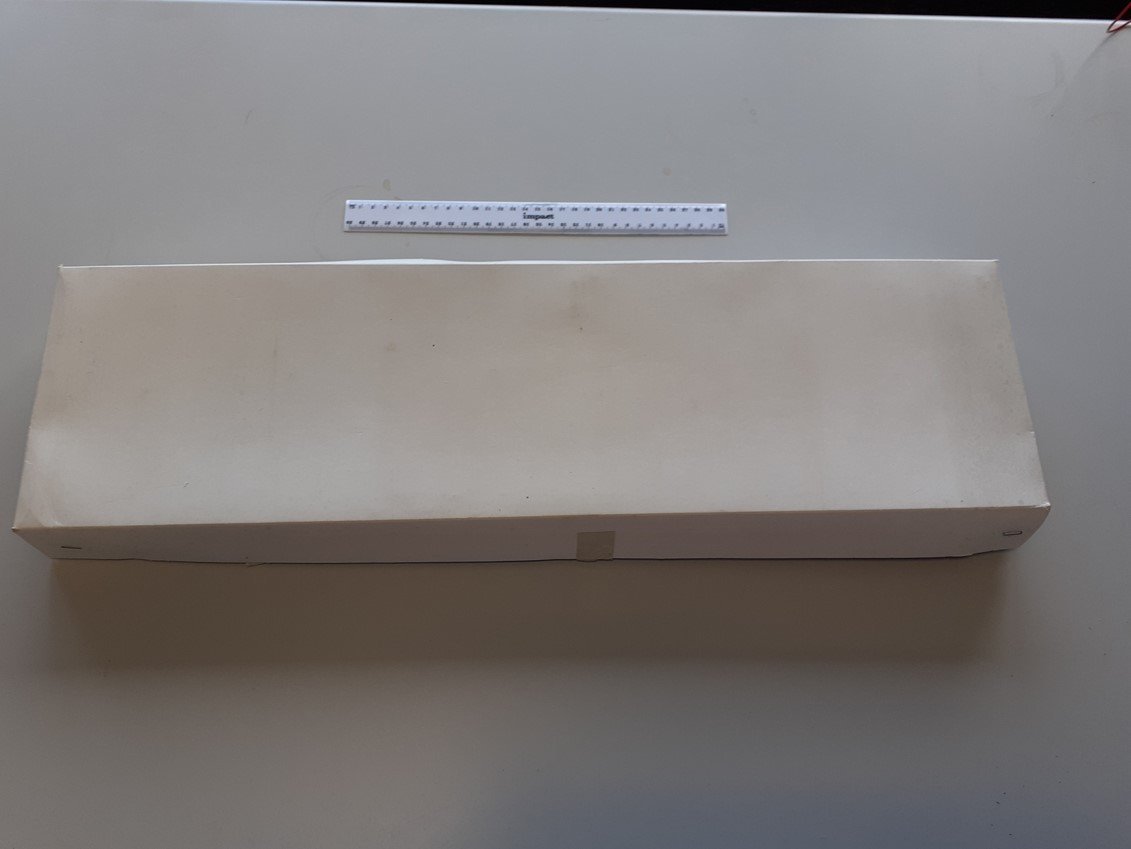
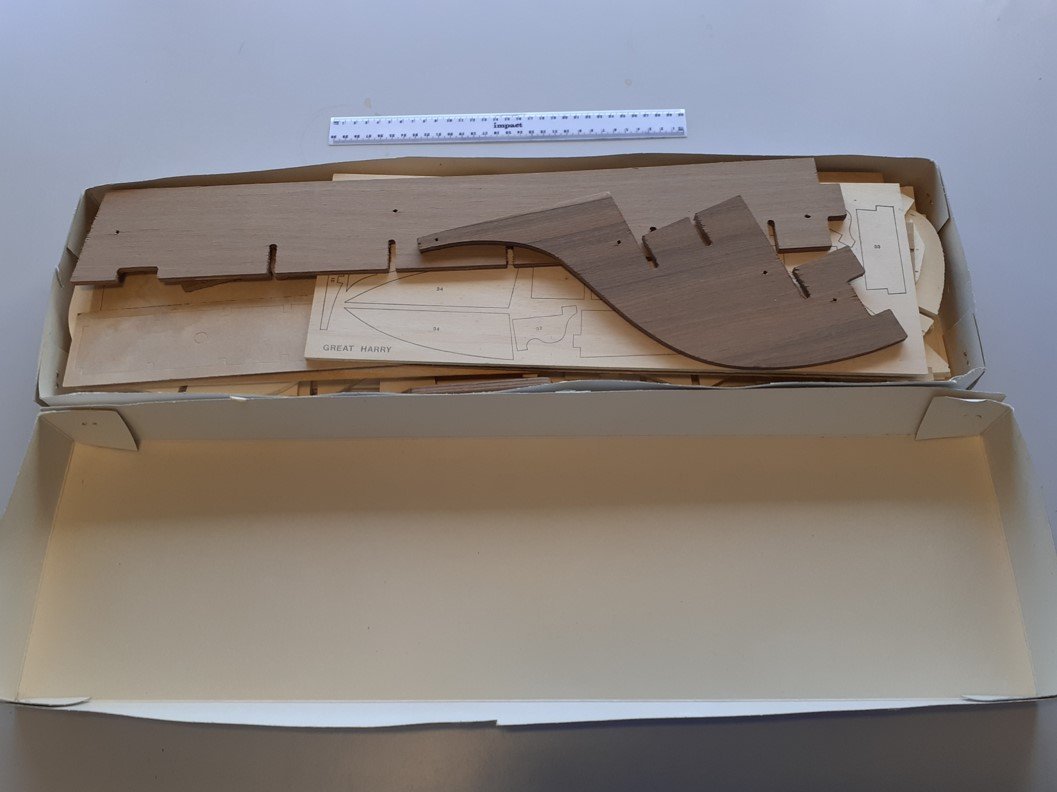
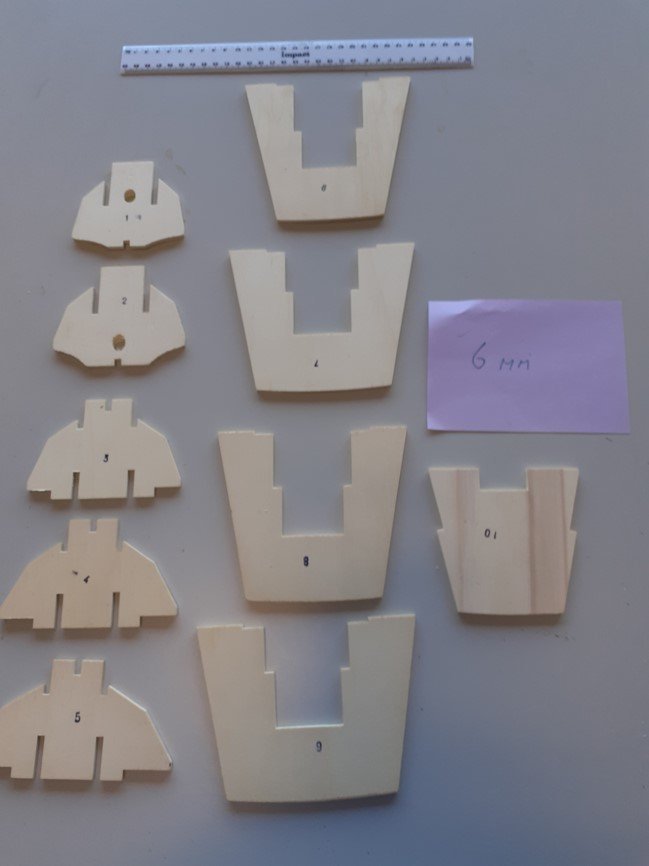
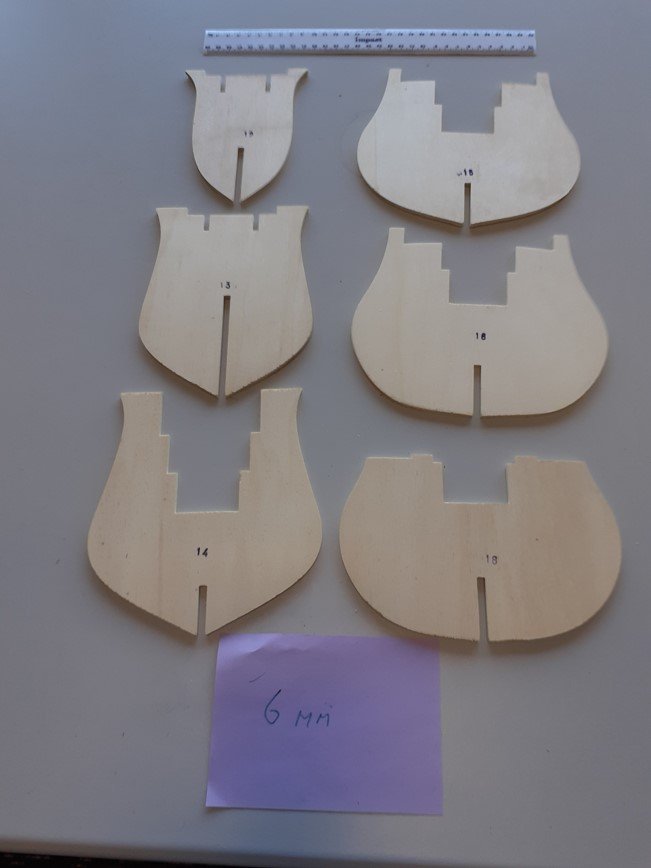
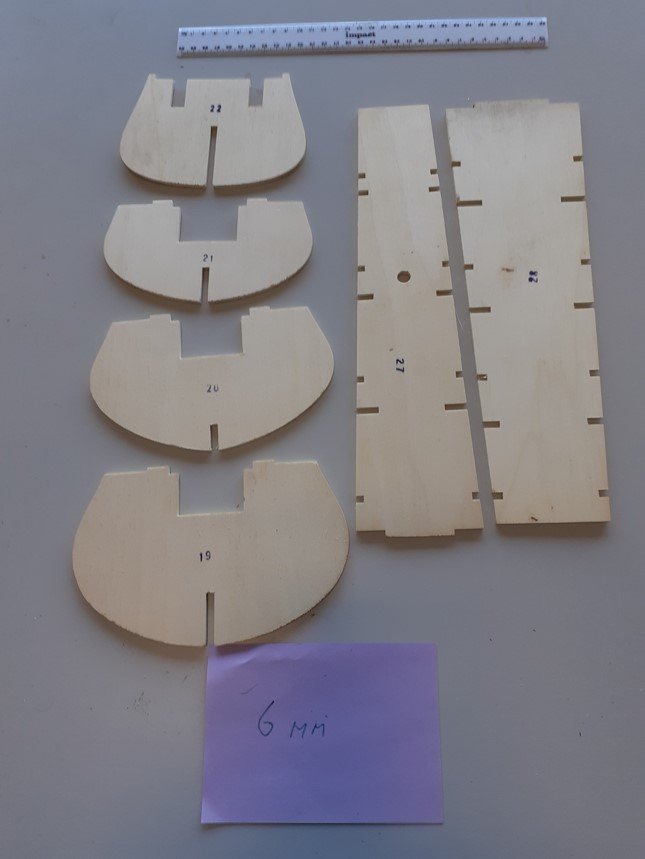
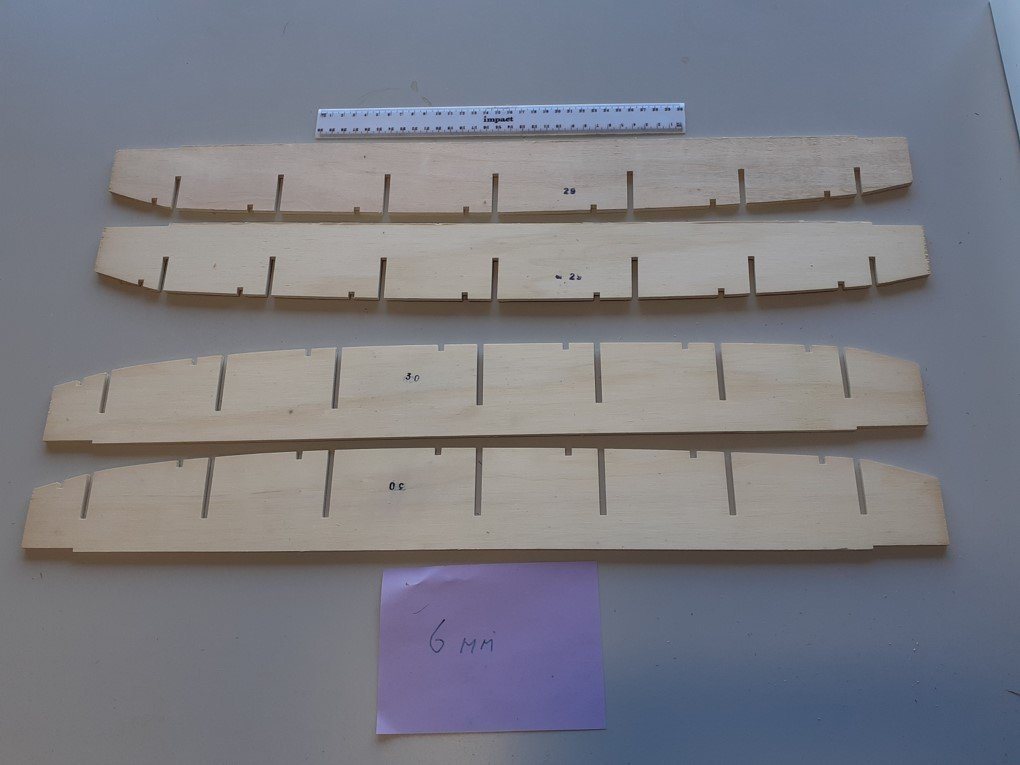
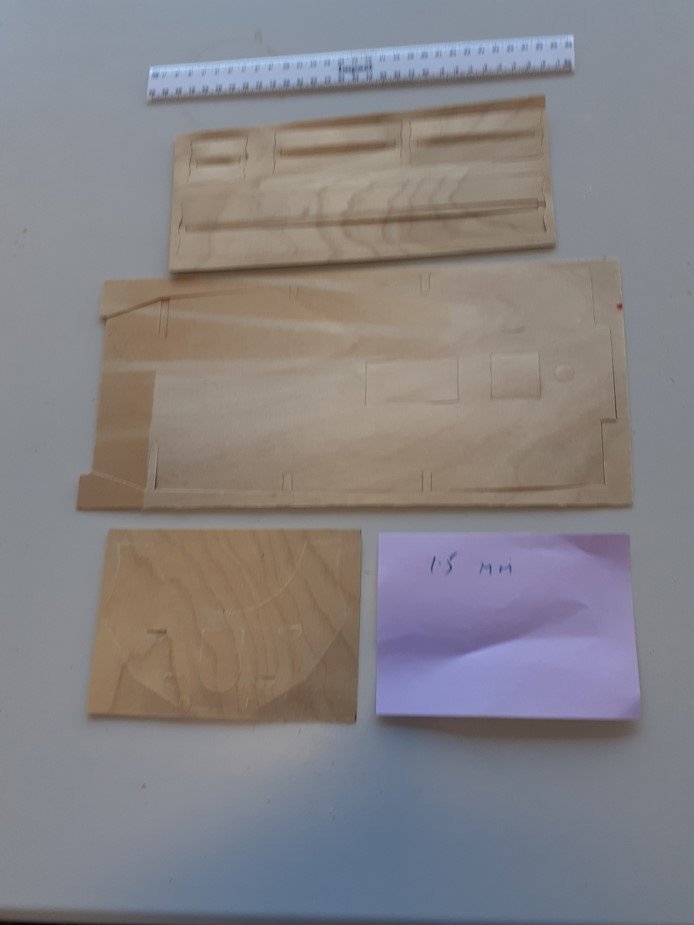
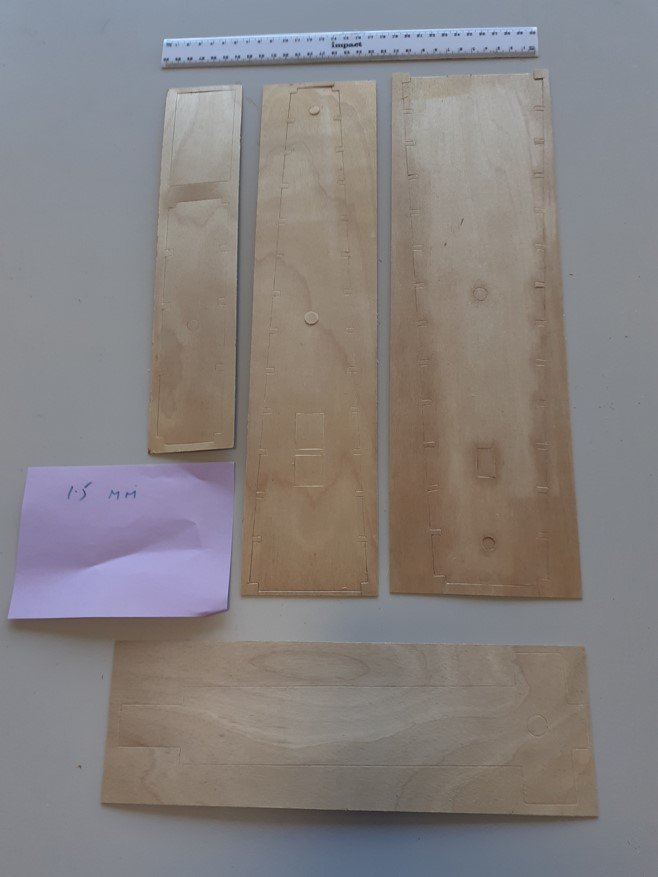
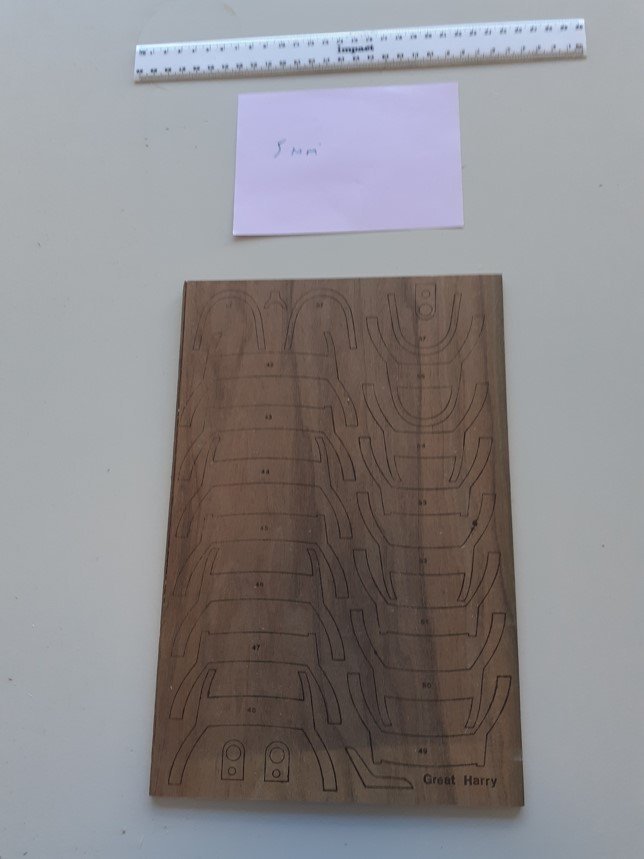
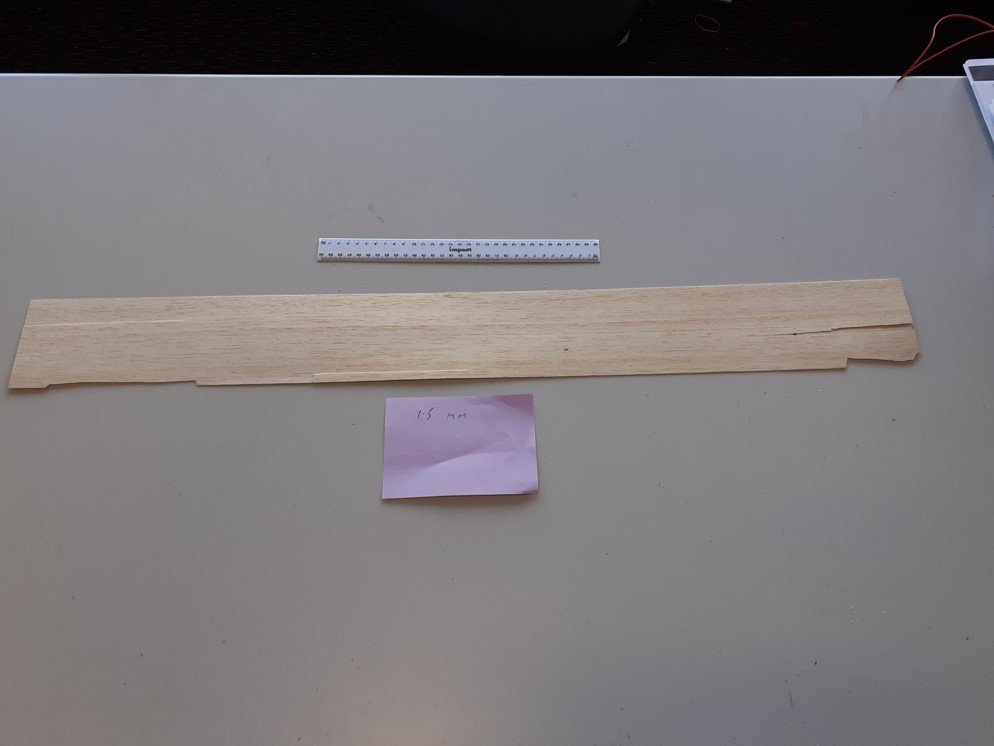
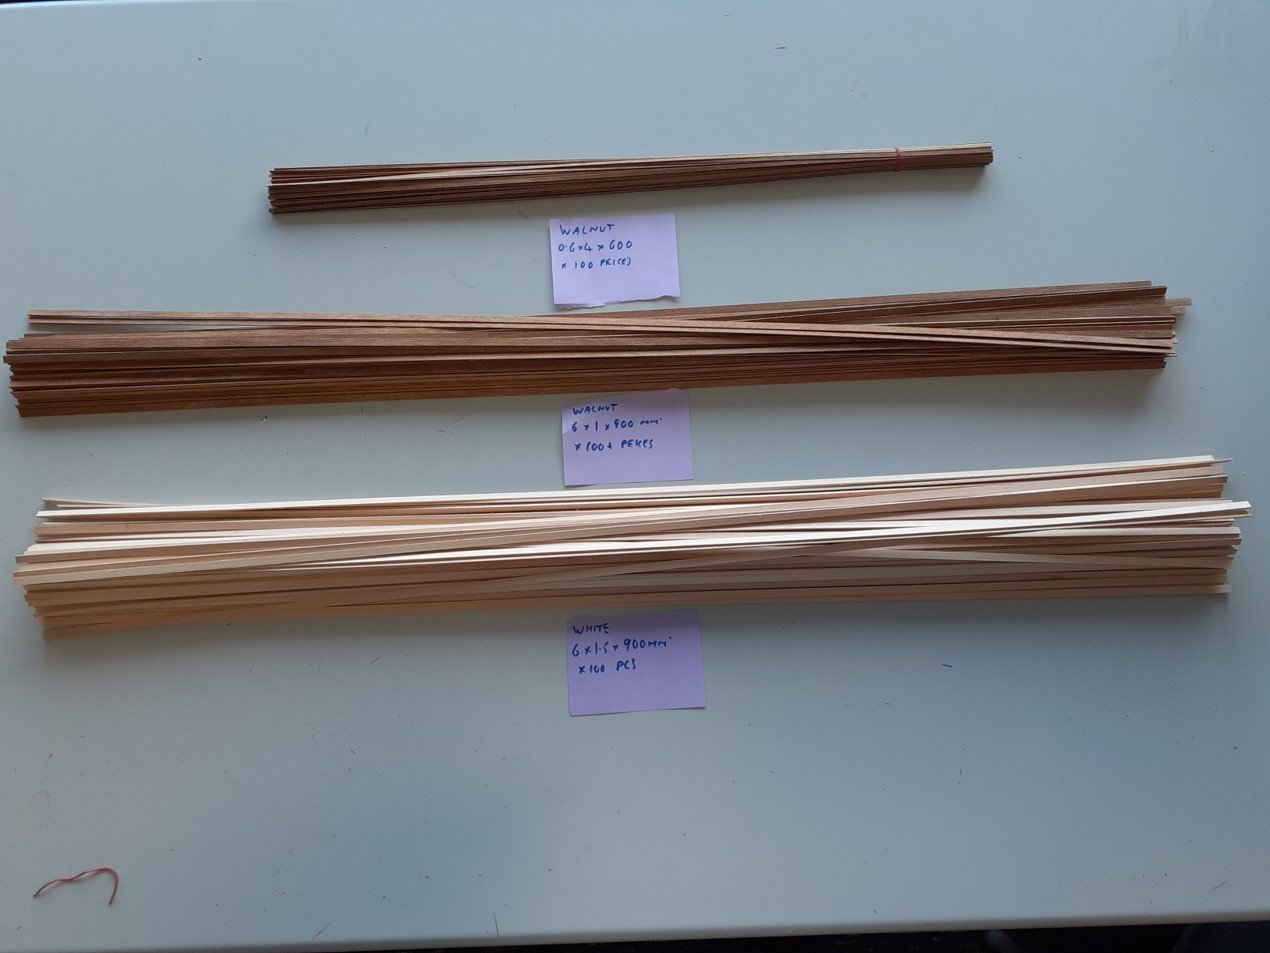
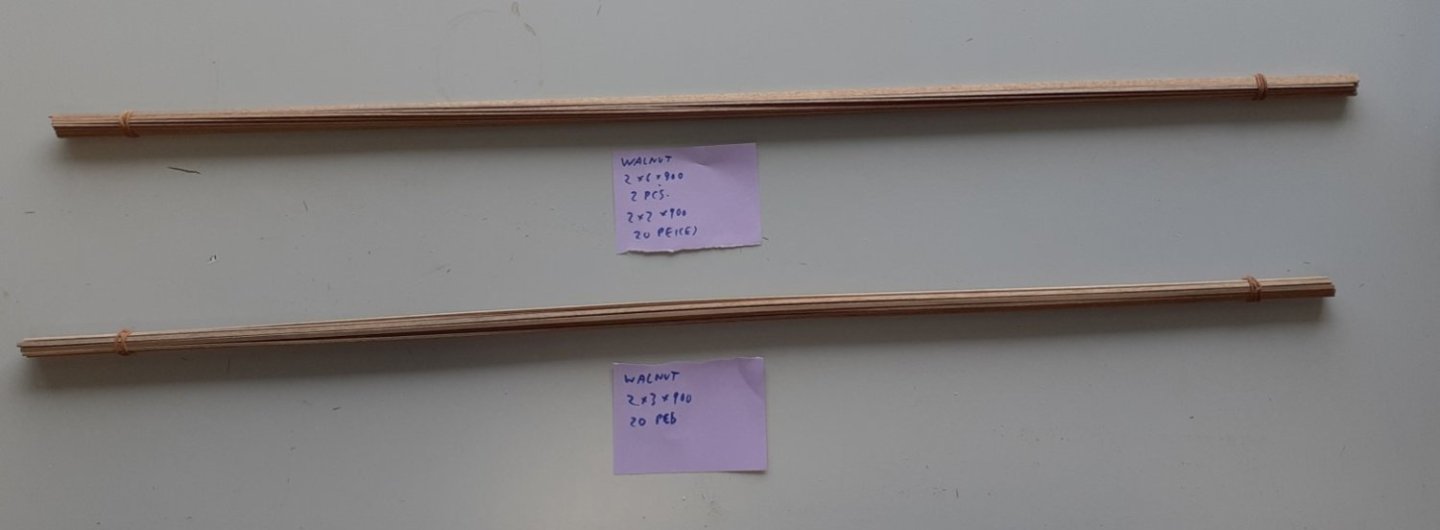
 Hi, The subject of this posting is the large scale (1:50-1:64) Sergal model of the Great Harry/Henry Grace a Dieu. This example appeared at a local auction house in Dunedin New Zealand. I paid about 45USD for it. As it dates to 1975 or thereabouts I may well be its third or fourth custodian. The photo shows the state that it is in. The box is wrecked, but the kit itself appears to be complete and undamaged, bar the castings and the large colour poster of the completed model, which are entirely missing. I posted some information about this in my new member’s introduction post (Hello from New Zealand). I said that my intention was not to build this large and rare model, but to restore it so that it was capable of surviving in my own (or somebody else’s) stash until it could be built. This build thread is thus a project that will return the kit to as close as is possible to its ‘as sold’ condition. So it’s a bit different. The response by members to this idea on the new member’s page was that the model was more incomplete than I imagined. Maybe it is, so I am going to start by posting a very long series of photos that represent a complete record the kit and its ‘unboxing’. This may serve to see if the dream is real or I am wasting my time. The box was absolutely full and the photos run to 44 images. The two internal parts boxes are shown closed, then open and then their contents item by item. The plank bundles were packed separately with elastic bands. In the photos they have notes next to them indicating plank dimensions and numbers. All comment is thus very welcome. Particularly if any members have any idea what was in the three mysterious (and empty) plastic tubes that came with the model! 44 photos follow:
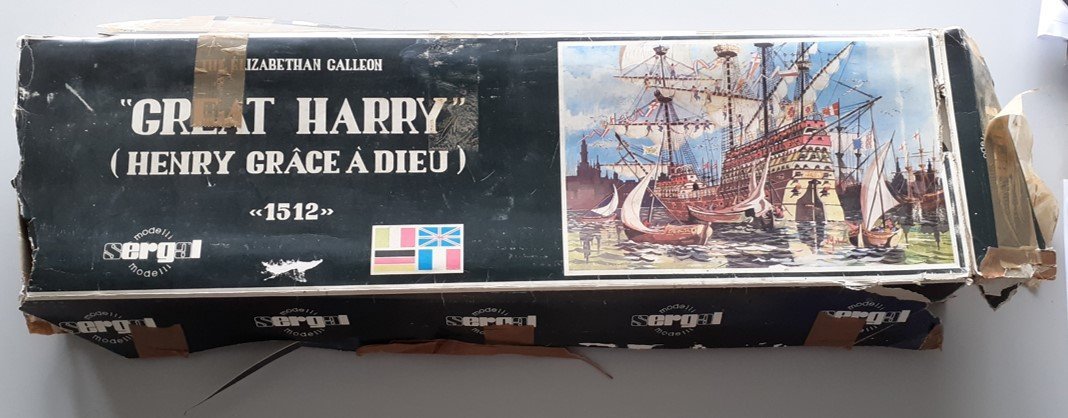


- 4 replies
-
- 7
-

-
- Great Harry
- Henry Grace a Dieu
- (and 2 more)
-
 Hi all, After some time into the build i decided to create a build log of my progress on the sergal cutty sark 1:78. This is the first wooden ship model i am building, so everything is new to me and this forum was and is a blessing to me to learn all the tips and tricks of building ship models. The sergal kit comes with very little instructions, only about 4 pages of text without pictures, and a lot of real size plans. Not ideal for a beginner like me so im getting the "know how" else where. I also bought the Campbell drawings of the real ship, which help me to add detail. I started this kit in 2015, but after planking one side of the ship it stayed untouched on my shelf for about 6 years. Suddely i felt an urge to continue the build, and i did not stop since. Its going very slowly due to working a full time job. SO hope you enjoy this build log, and im looking forward learning from all of you fellow ship builders.
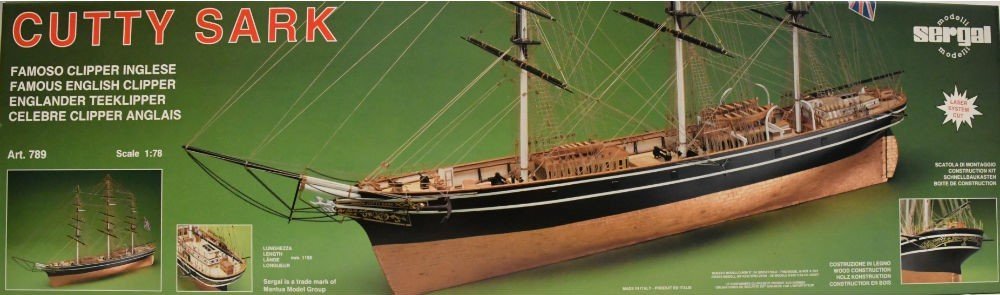
- 15 replies
-
- 2
-
-
- Cutty Sark
- Sergal
- (and 1 more)
-
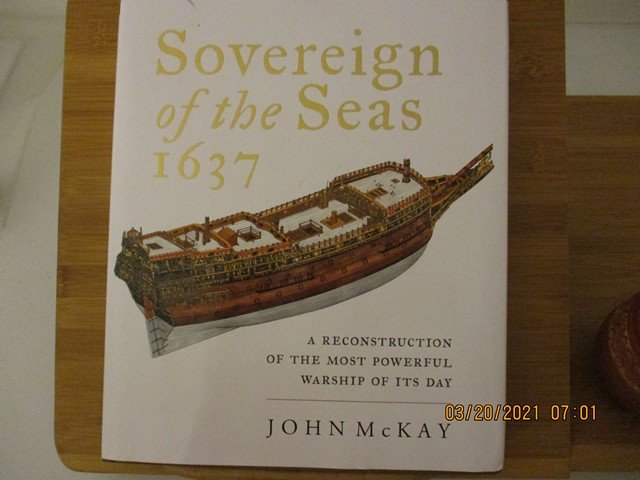
 I have had this kit for two years - time to start. Got the John McKay book from UK this week. To bad - the casting quality... Reading the log from Michael
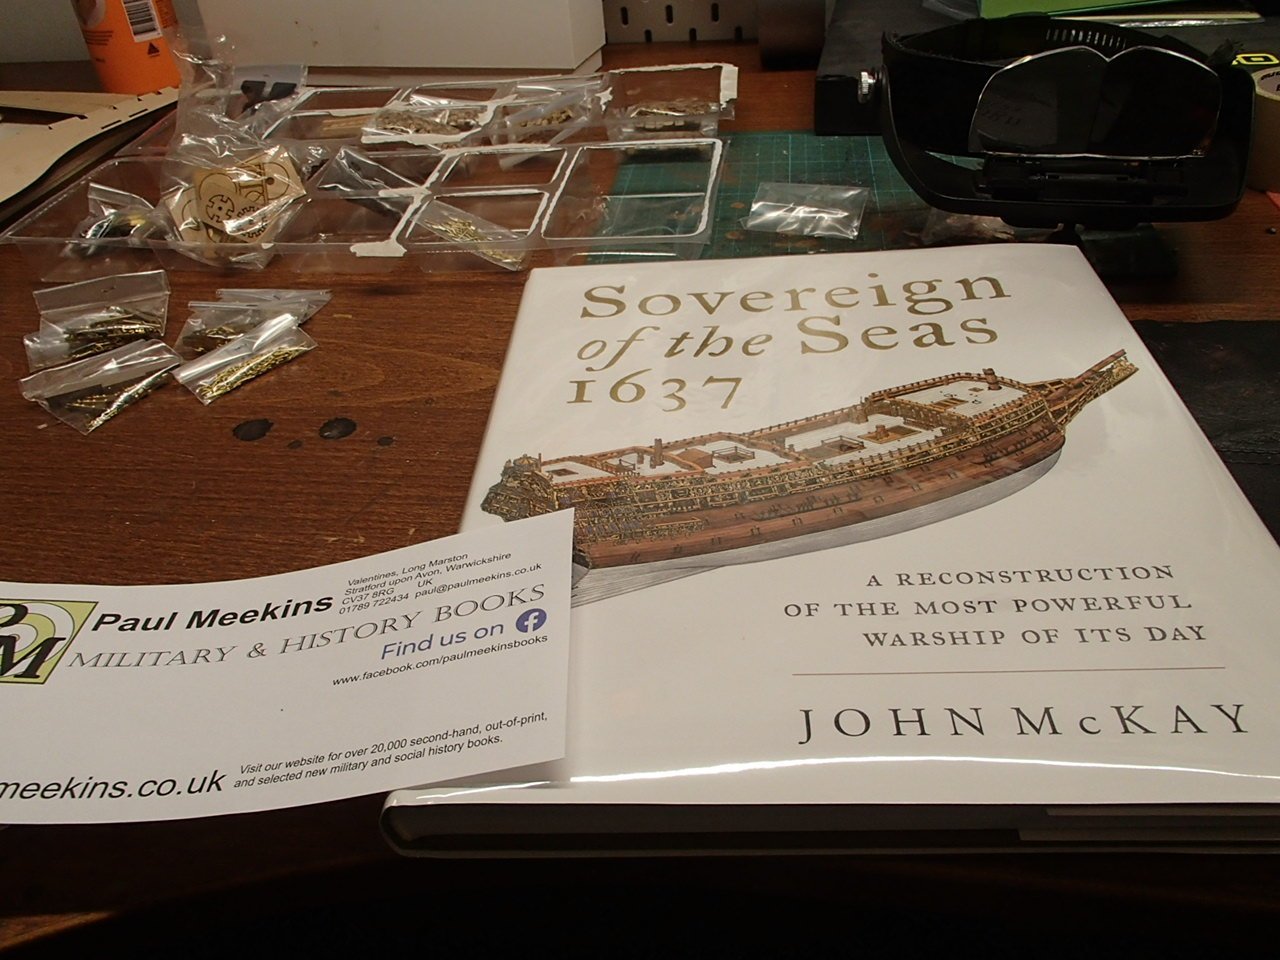
-
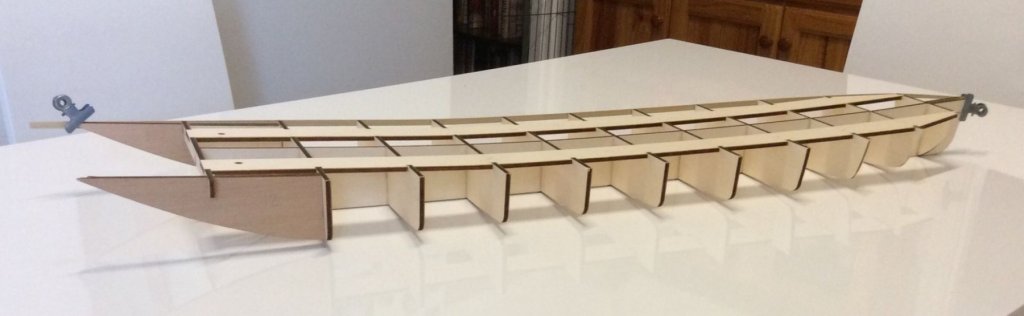
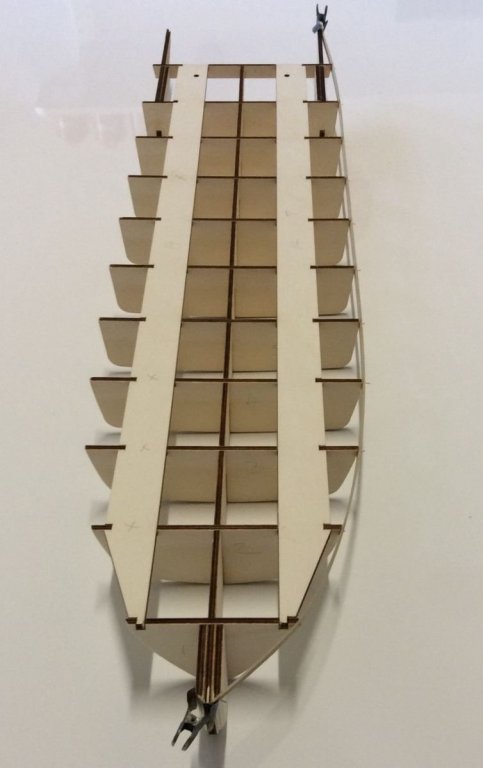
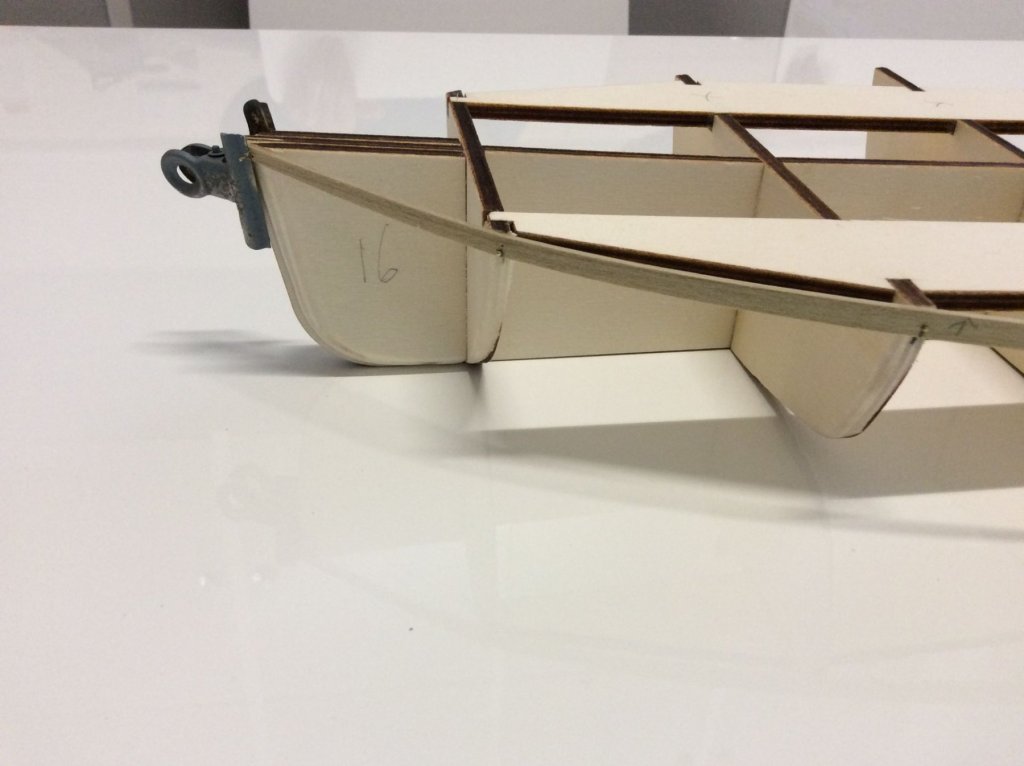
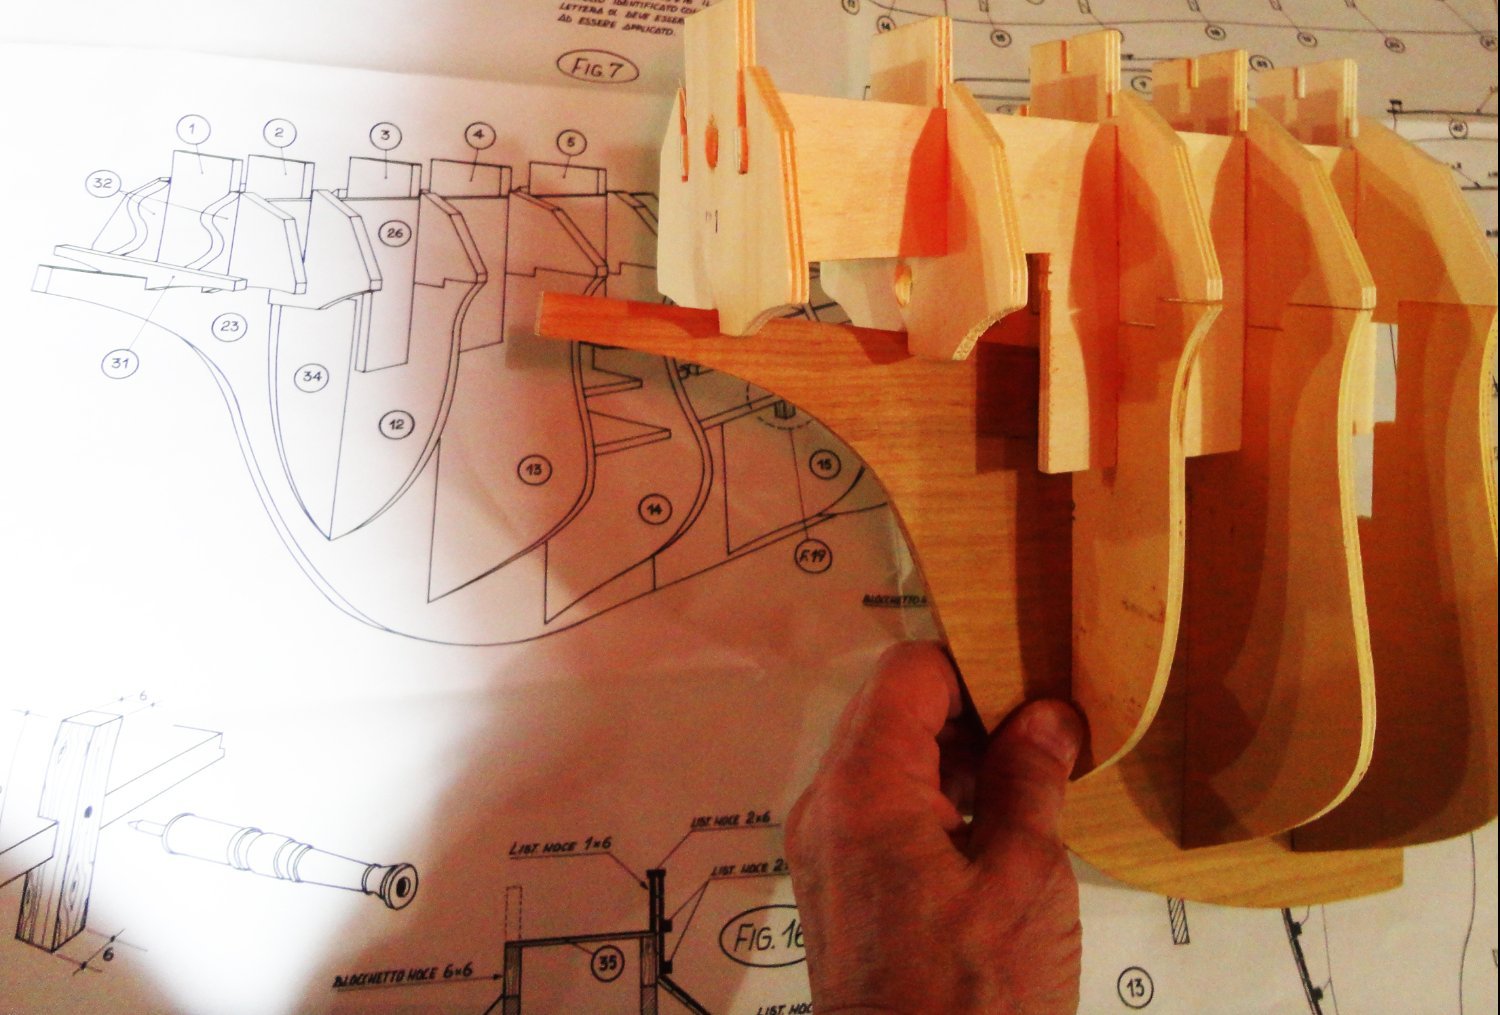
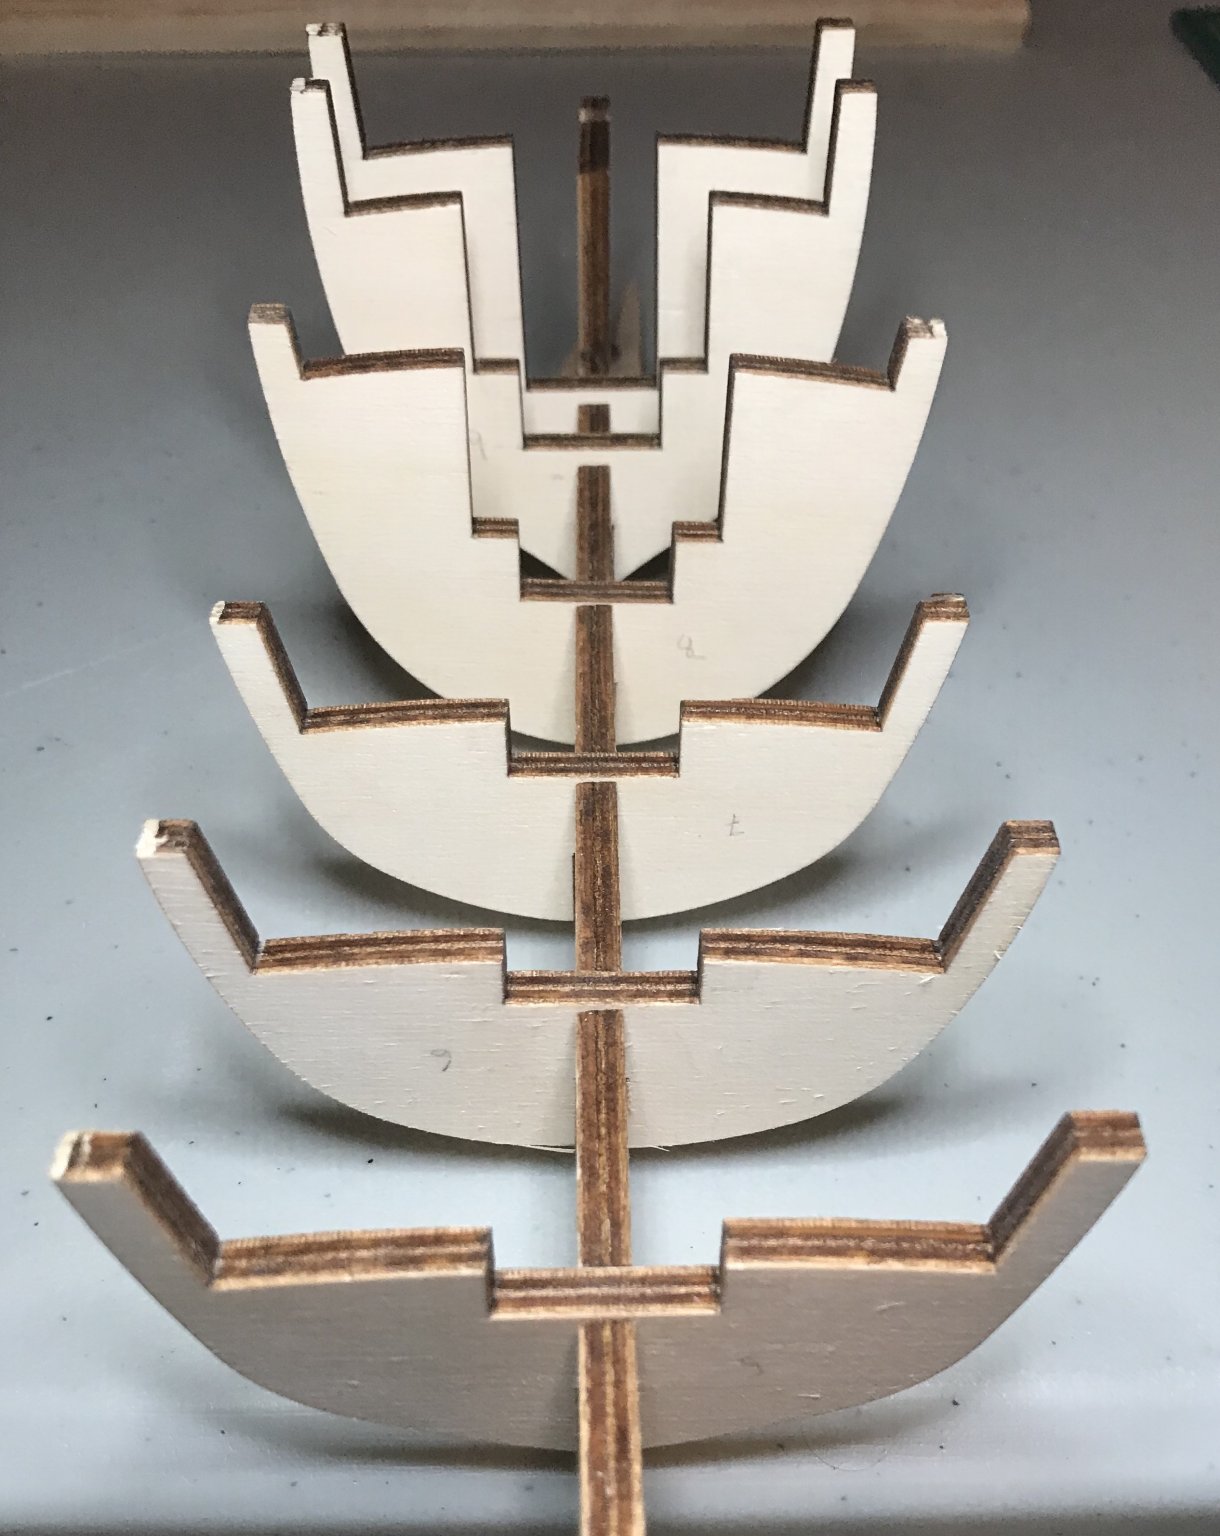
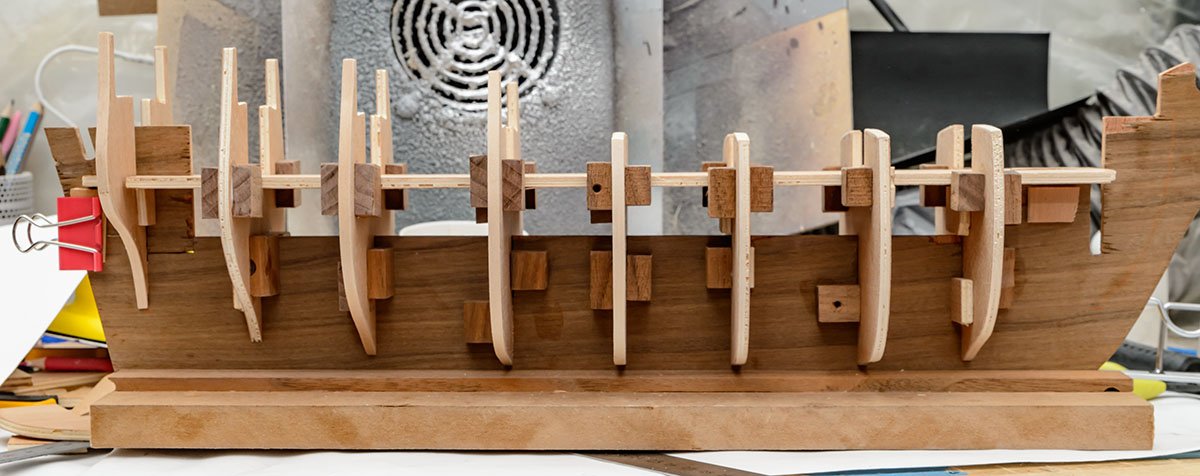
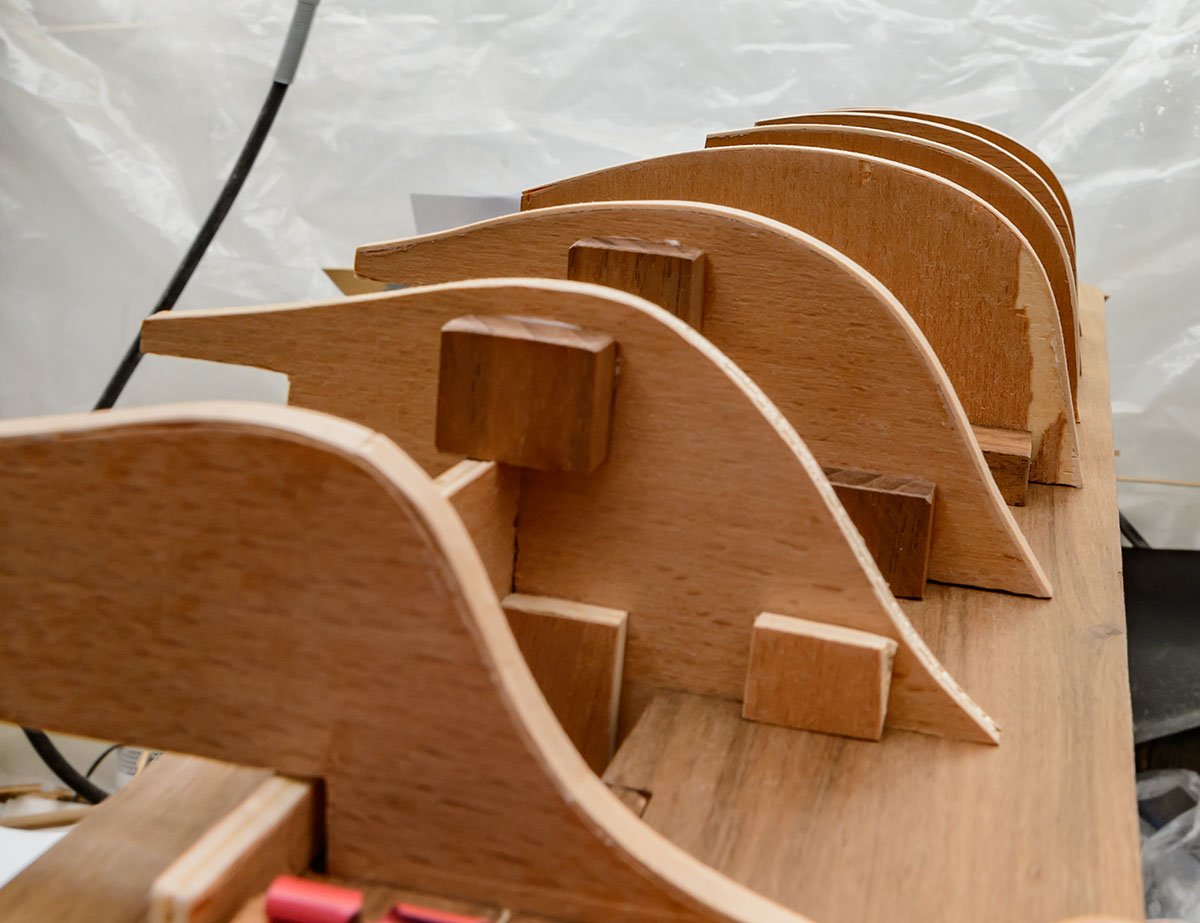
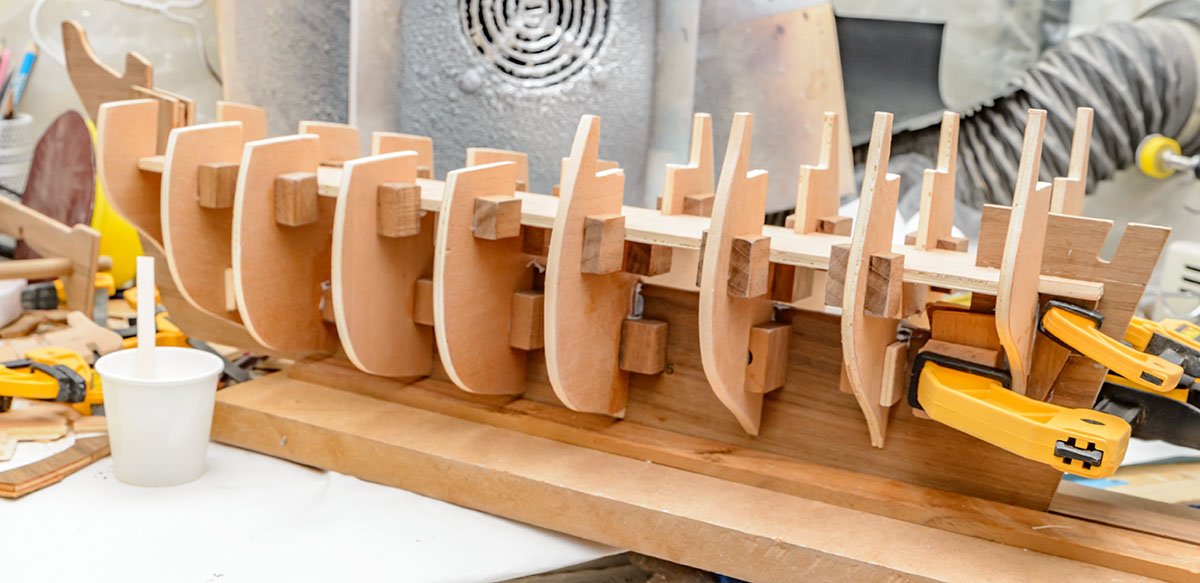
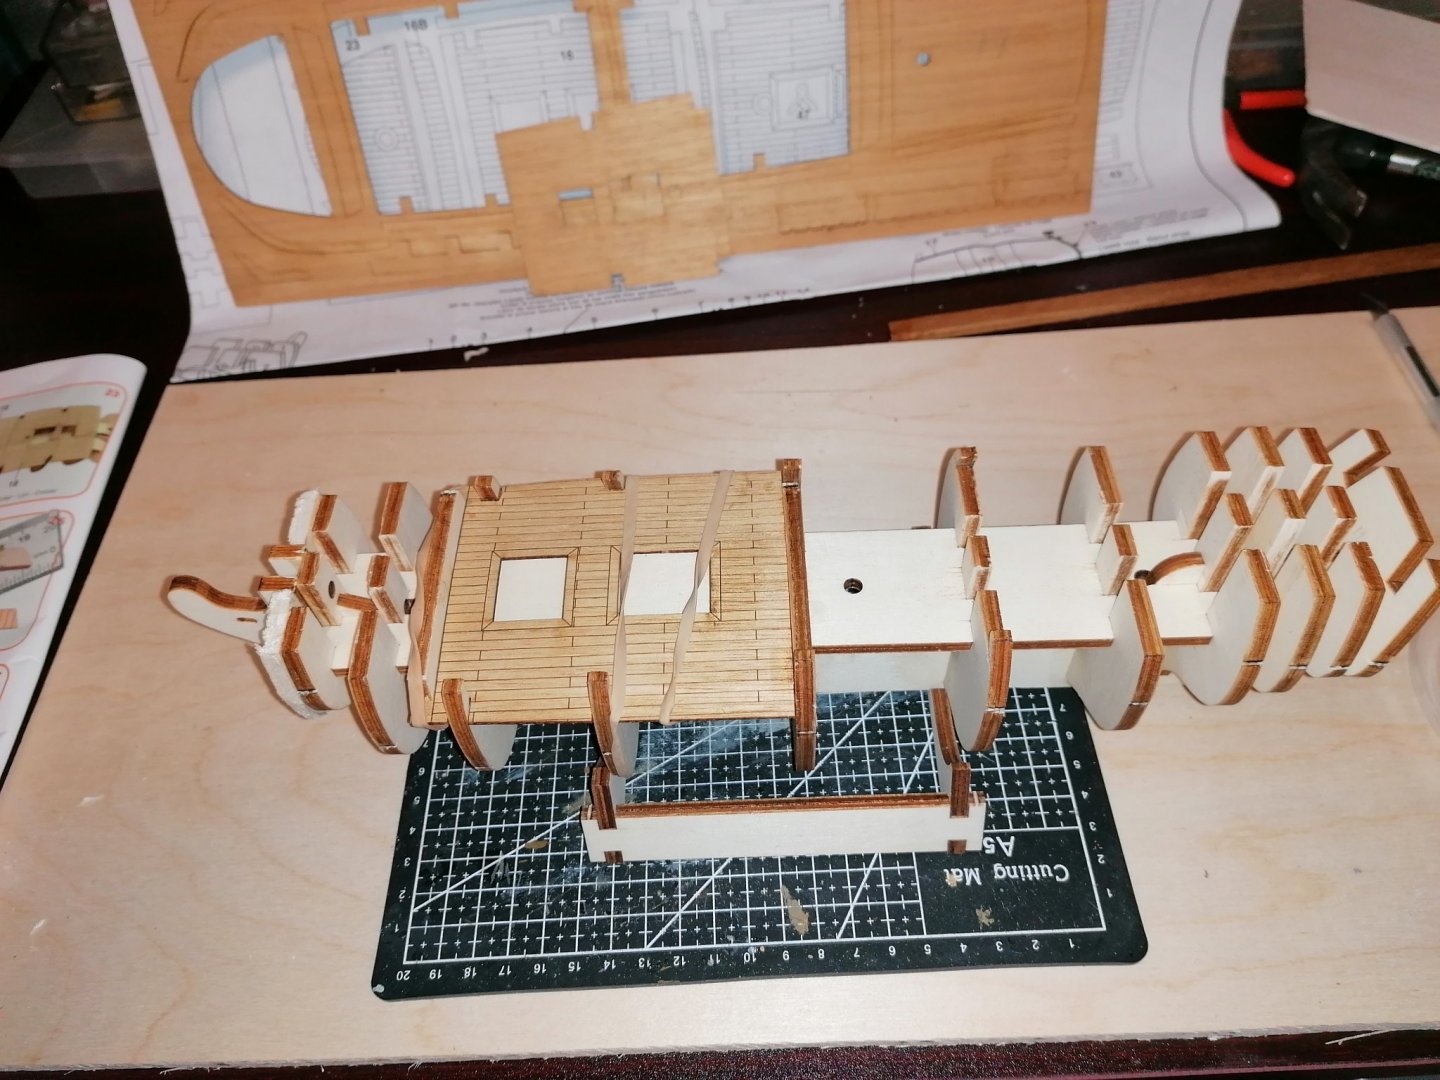
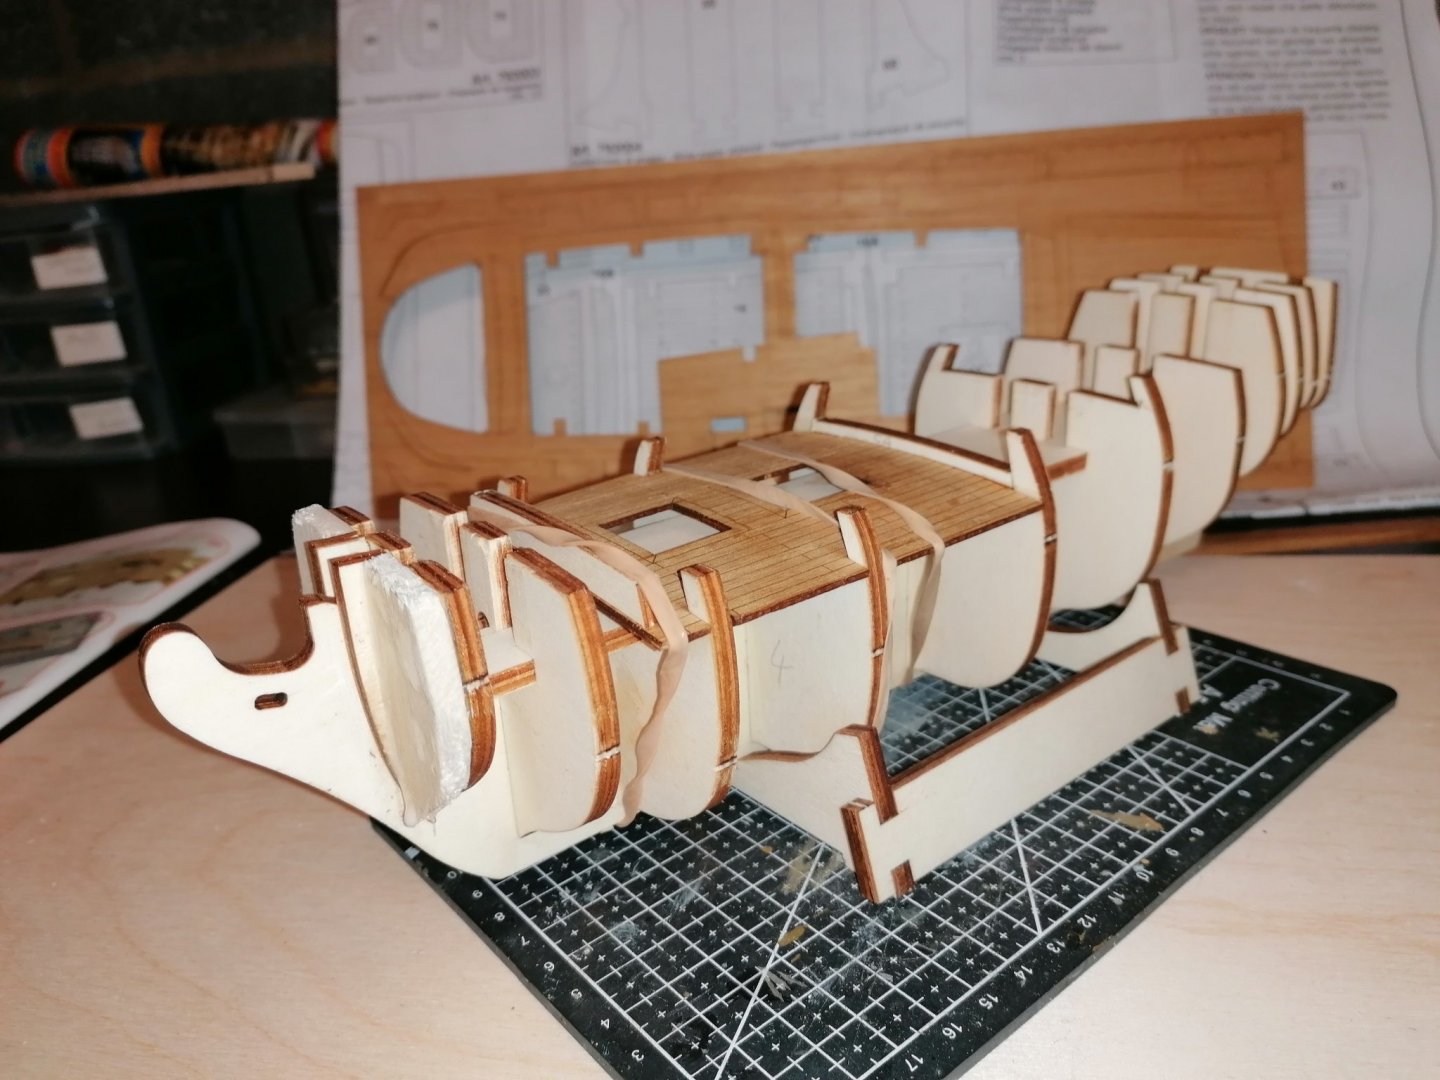
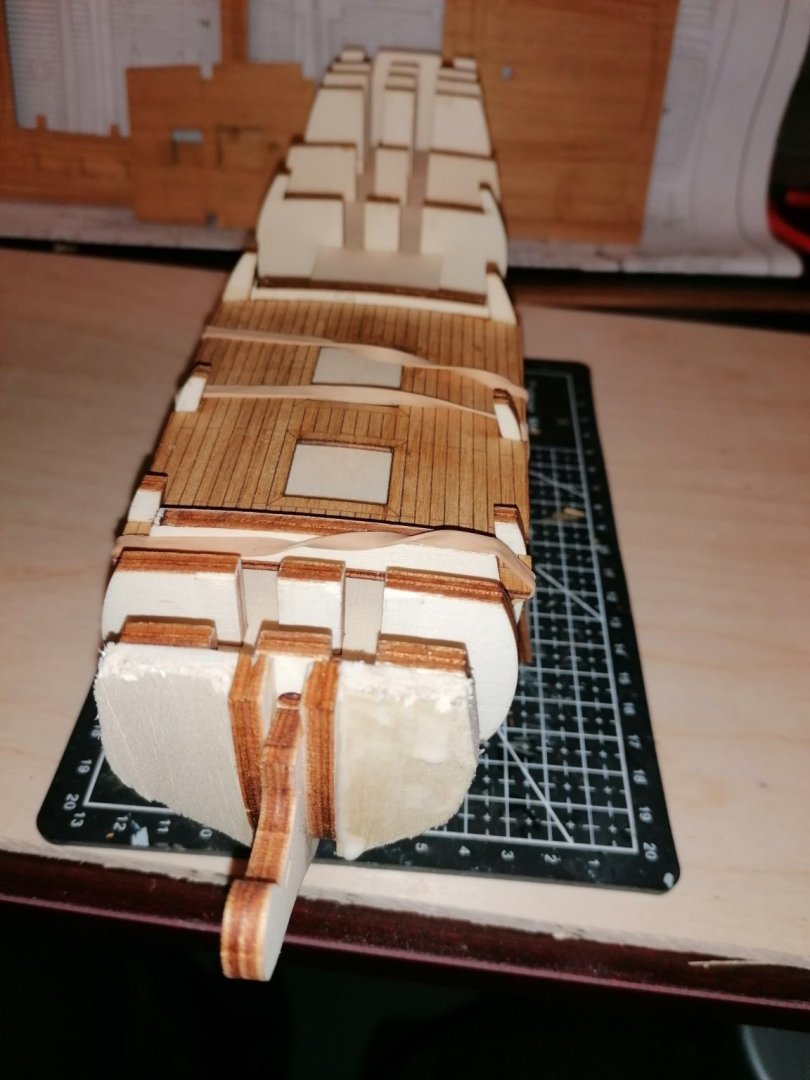
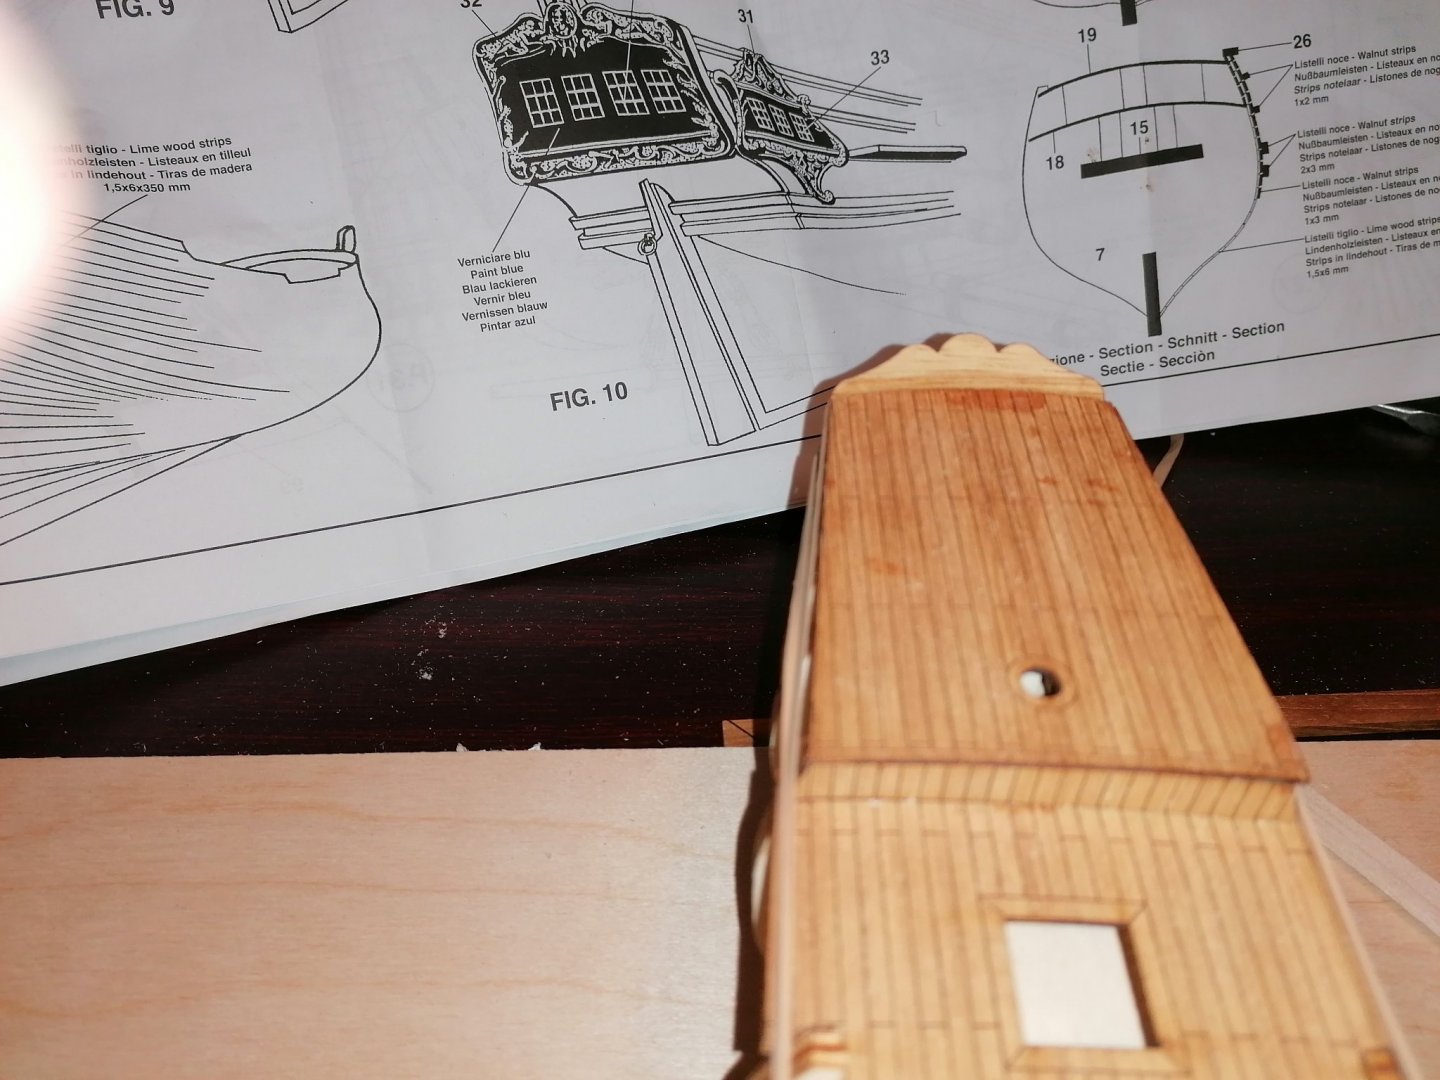
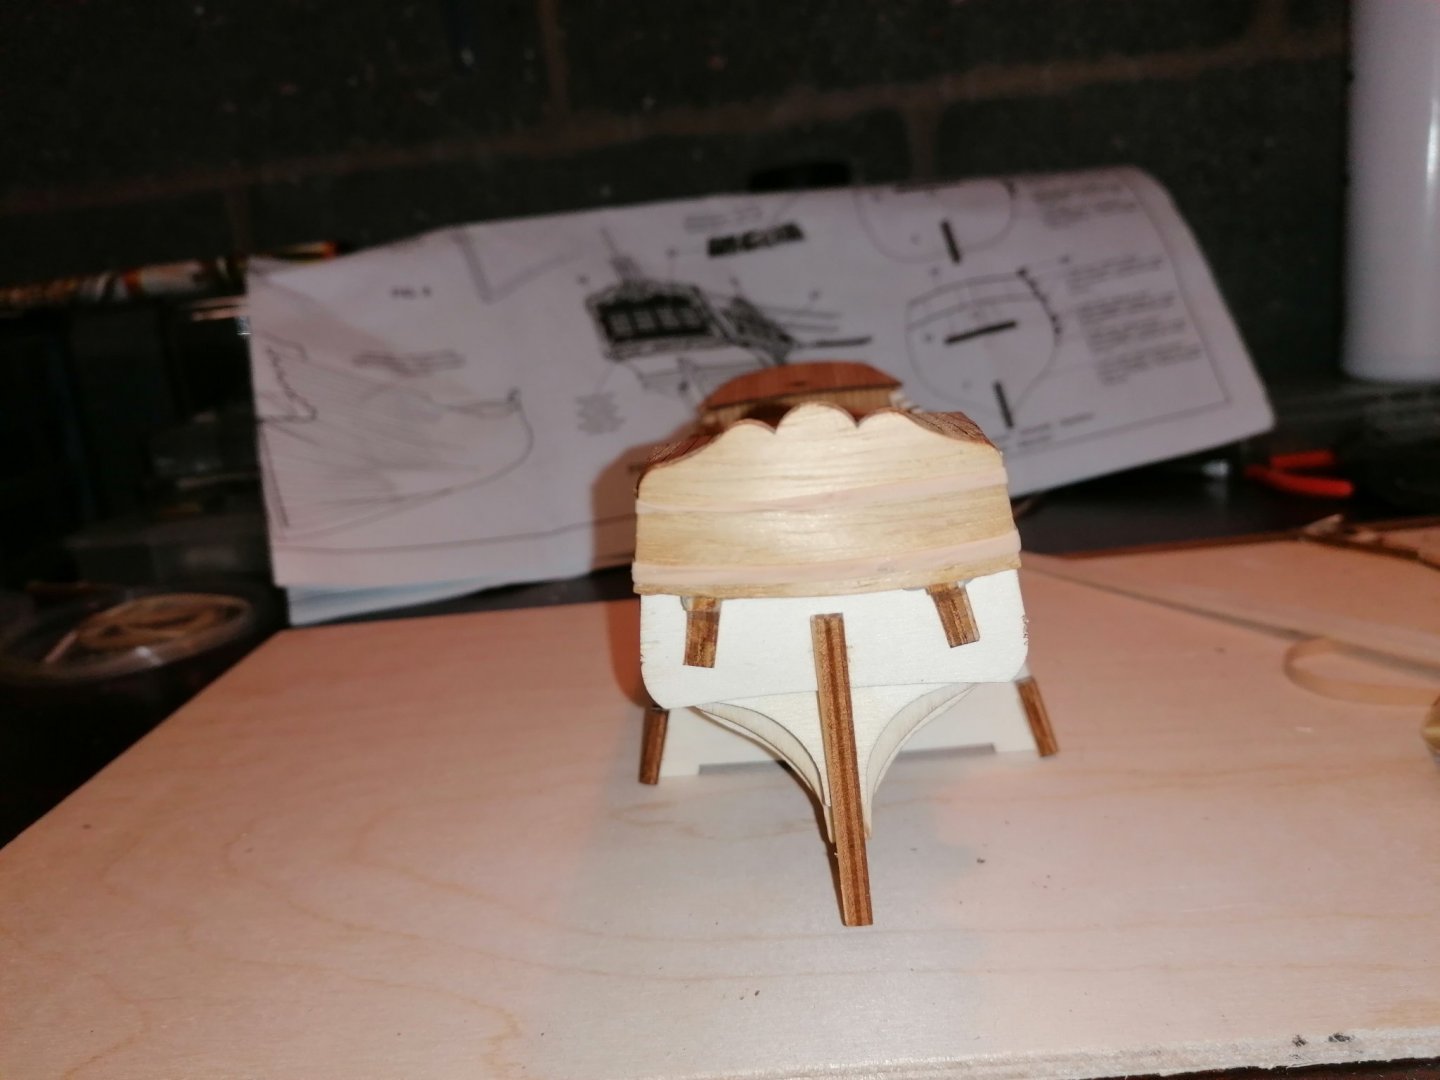
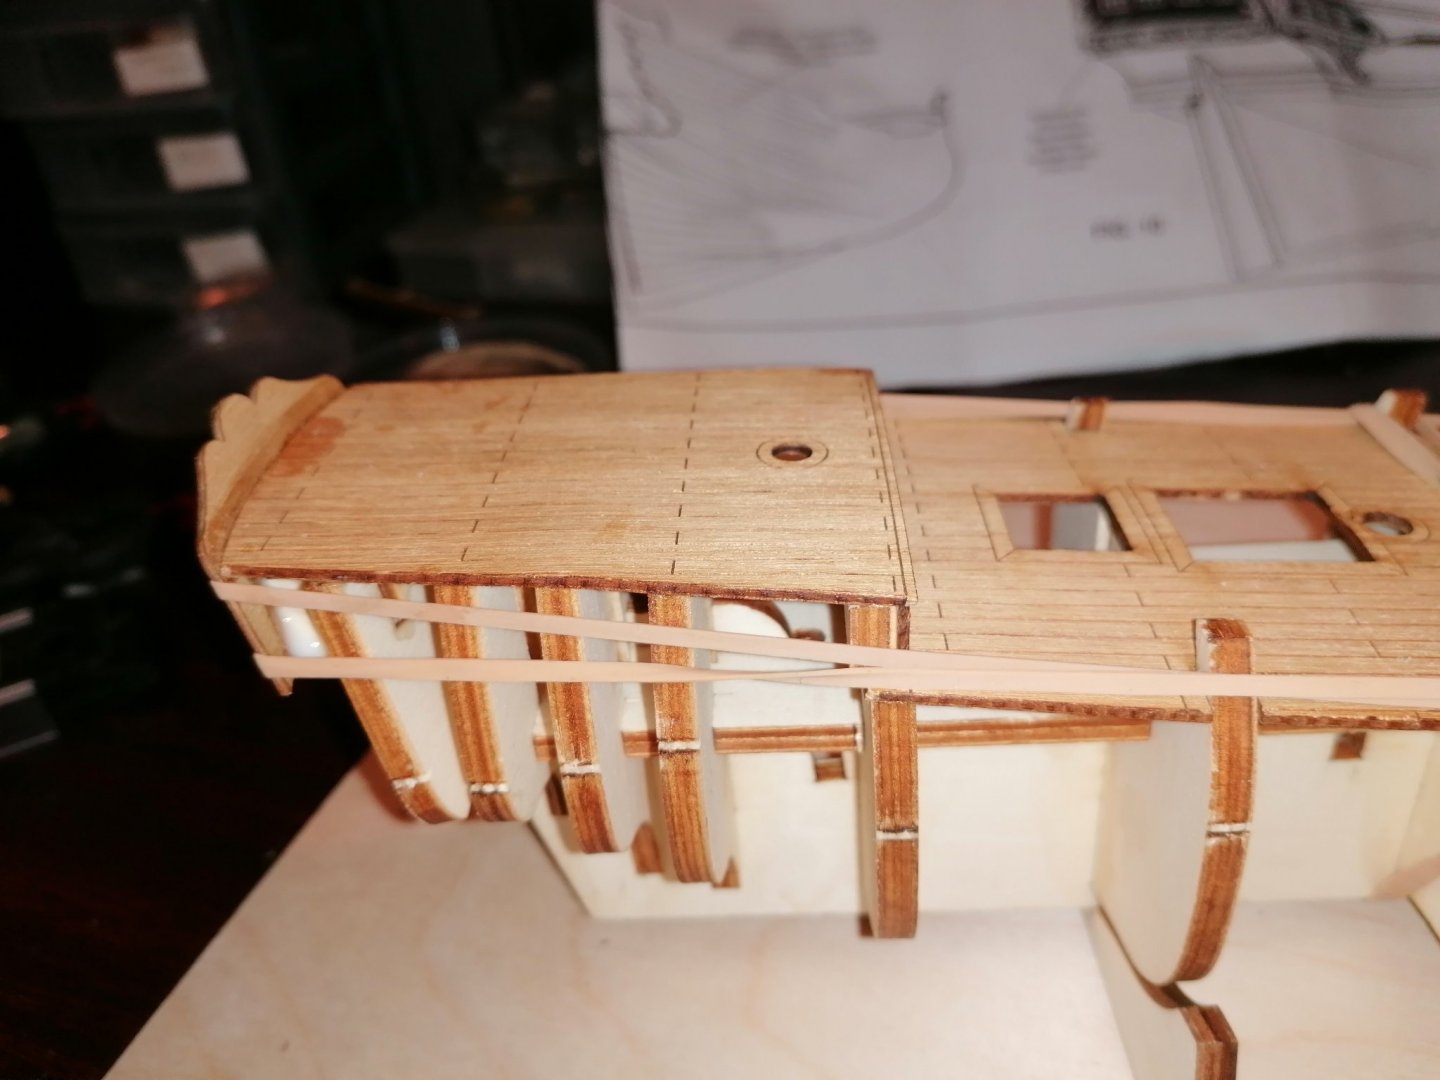
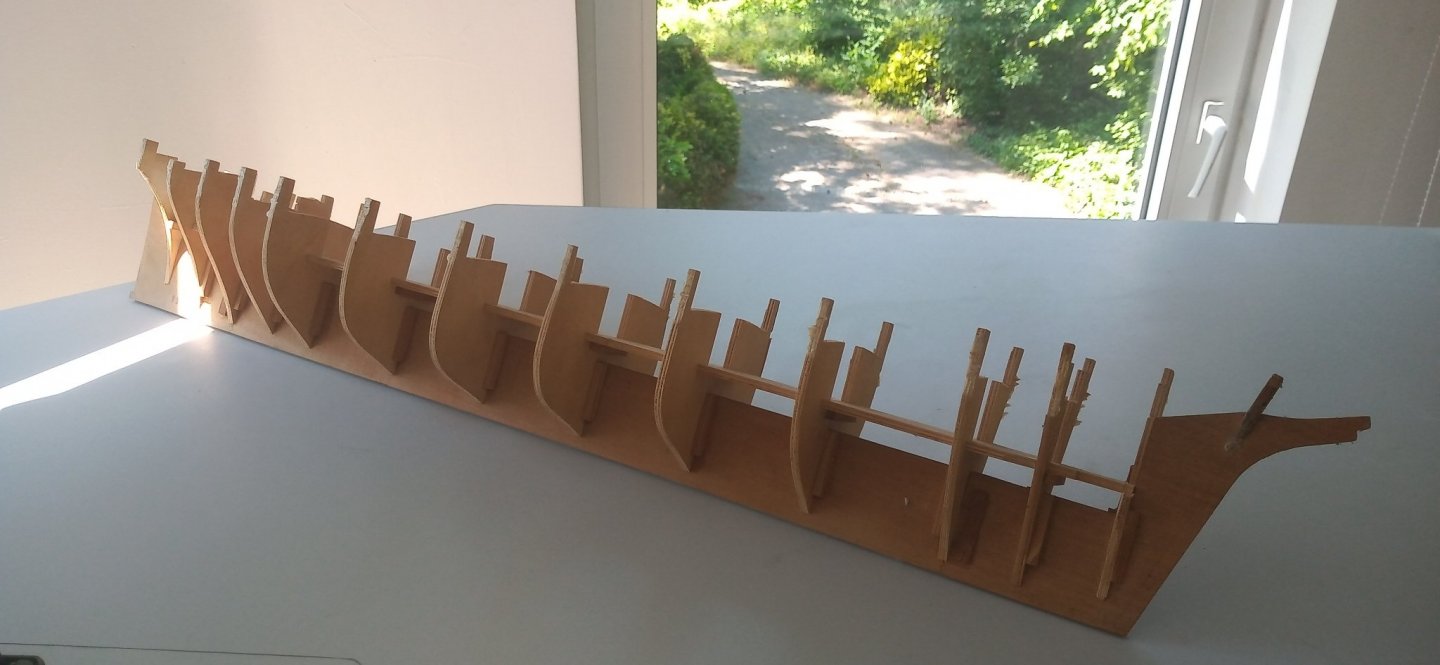
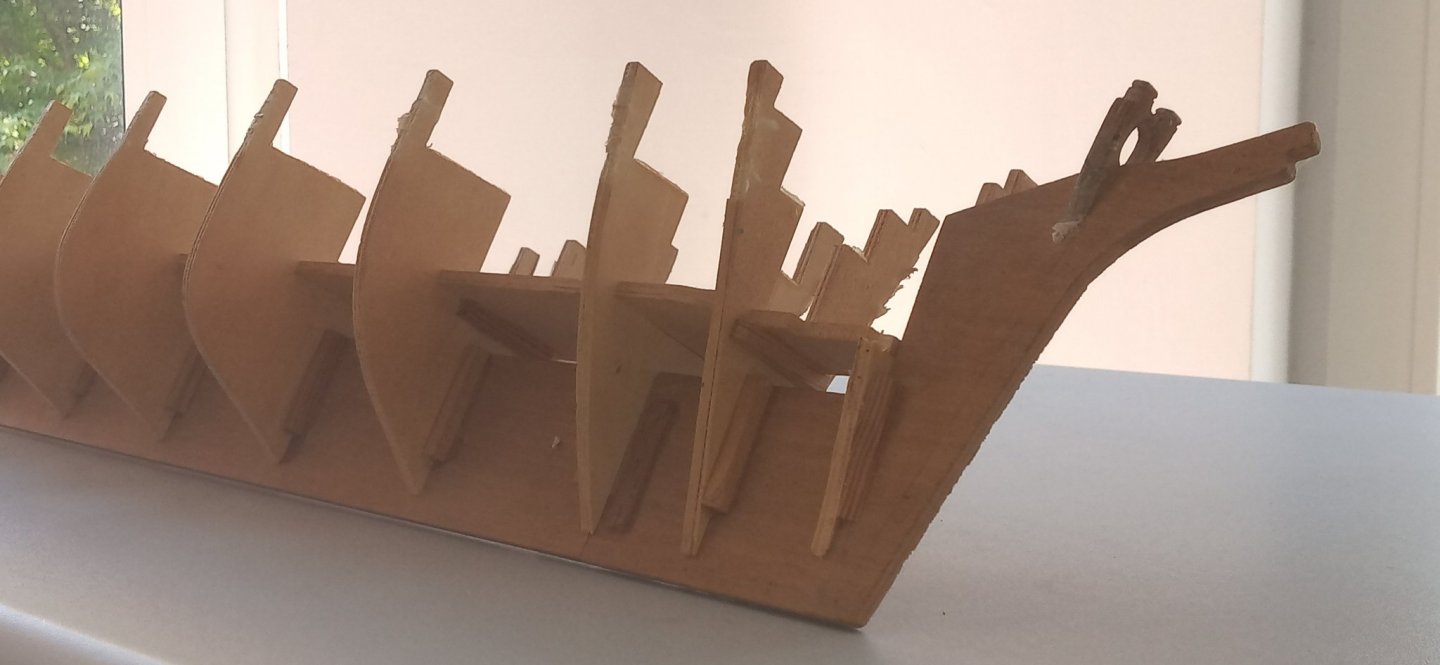
 Ahoy, lovers of 16th to early 17th c. ships ! My review of the massive vintage Sergal kit designed in 1975 can be found elsewhere in the forum, and I won't re-hash much if anything covered there (in the review section) ... in fact, the kit review nearly 'morphed' into a build log (never my intent) - so I was bound to eventually do a build after finishing the Vasa log - or so I thought. So in taking a break form the Swedish ship, I started accumulating pictures of a re-design of the Great Henry's framing ... and as the photos mounted I realized that a 'backlog' was accumulating, and would make for a lot of work sorting and getting any future log started. Well, we're used to many logs taking years to complete, and I'll most likely hop back and forth between the two and add occasional additions to both logs as stuff gets done. The full name of this ship is Henry Grace a Deiu (HGaD), and there is a great build of her at 1:200 already completed in the forum. It was a larger and more heavily armed version of the Mary Rose (MR), built in response to the Scottish leviathan Great Michael. There are several reference books on these ships, so I won't go into that here. Having a substantial section of the Mary Rose recovered and on display in England provides a wealth of information not just on the hull lines and construction methods, but this information can be used for the Great Henry (or Great Harry - GH either way) - as well as to correct what are perceived today as inaccuracies with the vintage Sergal kit. 'Hard to figure the thinking in marketing a limited release of a premium, large-scale kit back then, - and they might have done better with with a more manageable version, as the development and tooling could have been amortized over a higher production volume (ergo lowering the price point). The Anthony Roll was known back then, so the somewhat fanciful configuration of the fore and stern castles is amusing. The kit, as issued, is high quality and the framing parts fit well with a minimum of fussing. But we'll see what i have to do to get a more modest sized model conforming much better to what is now known from the MR. Below is a portion of the kit framing to give you an idea of the size.
- 41 replies
-
- 4
-
-
- Great Henry
- Henry Grace a Dieu
- (and 1 more)
-
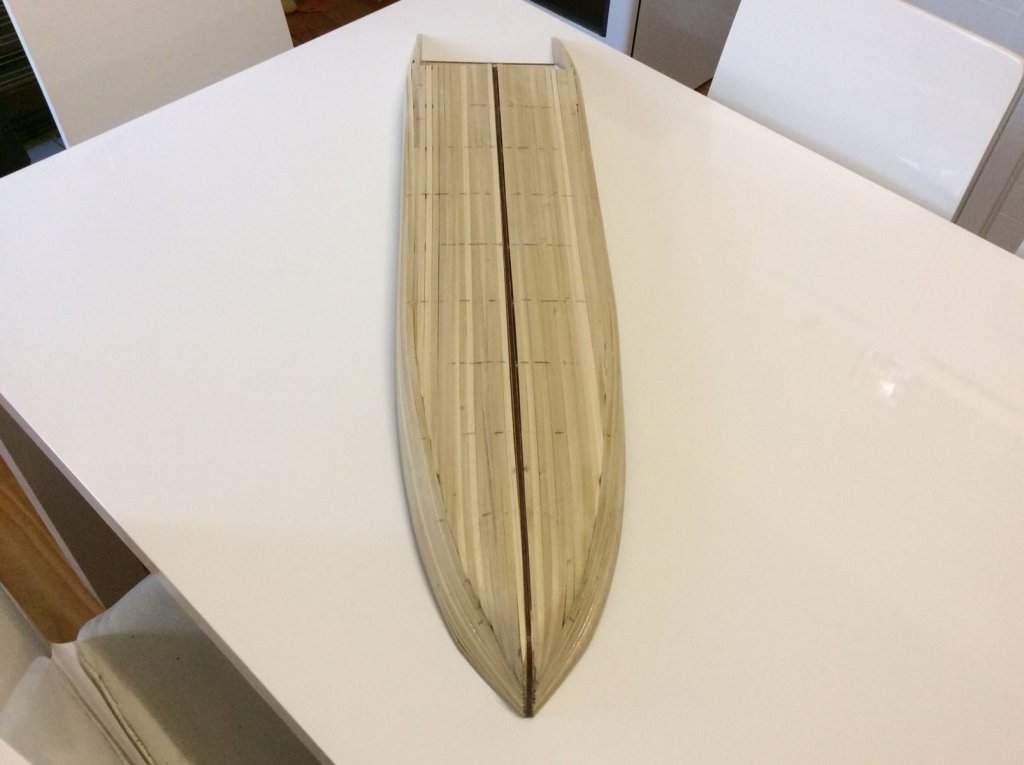
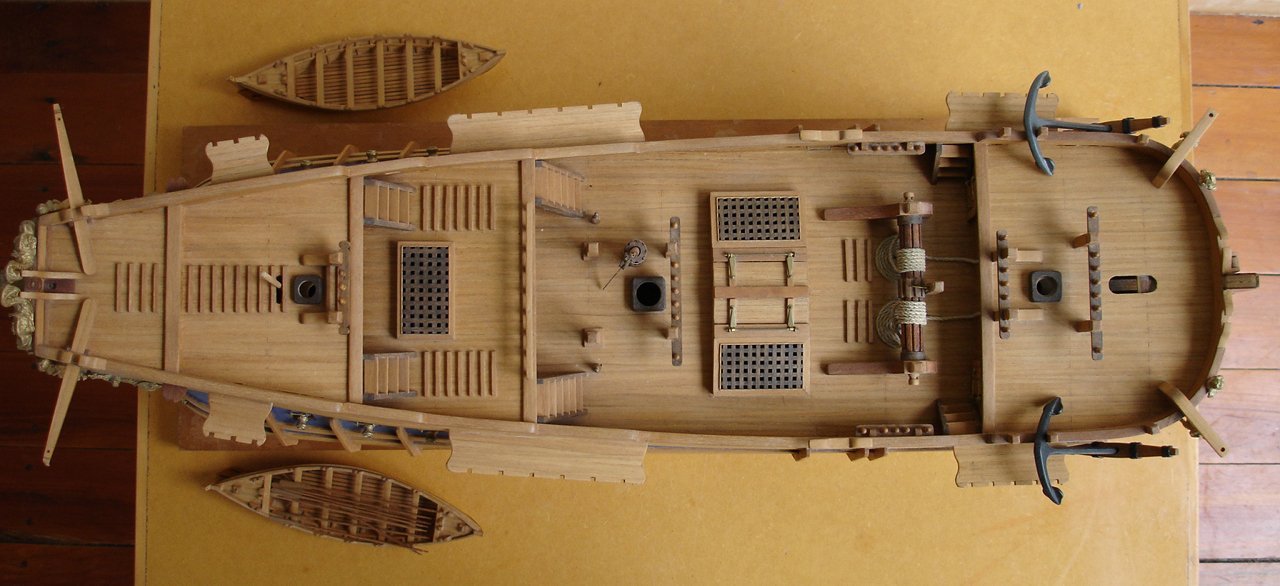
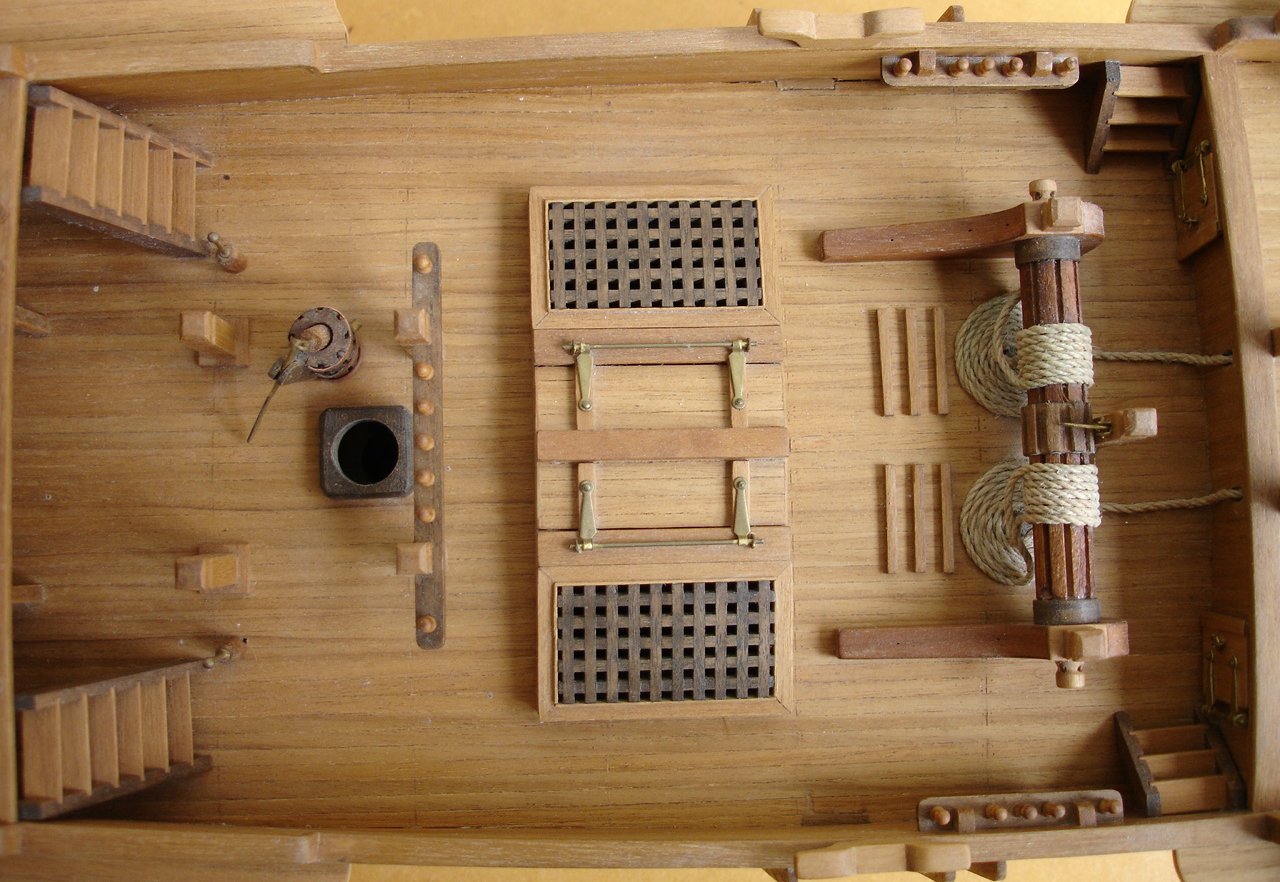
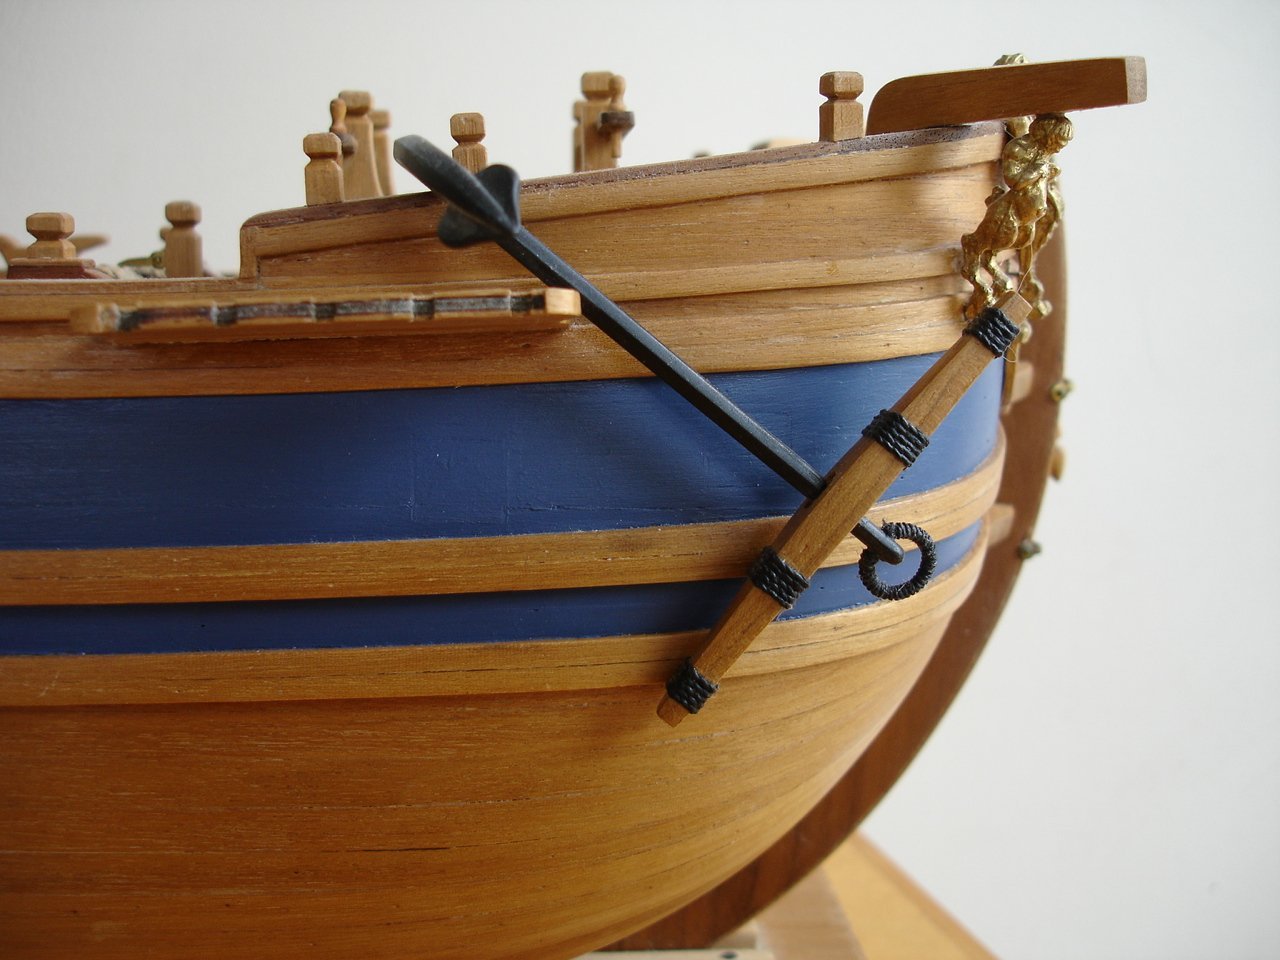
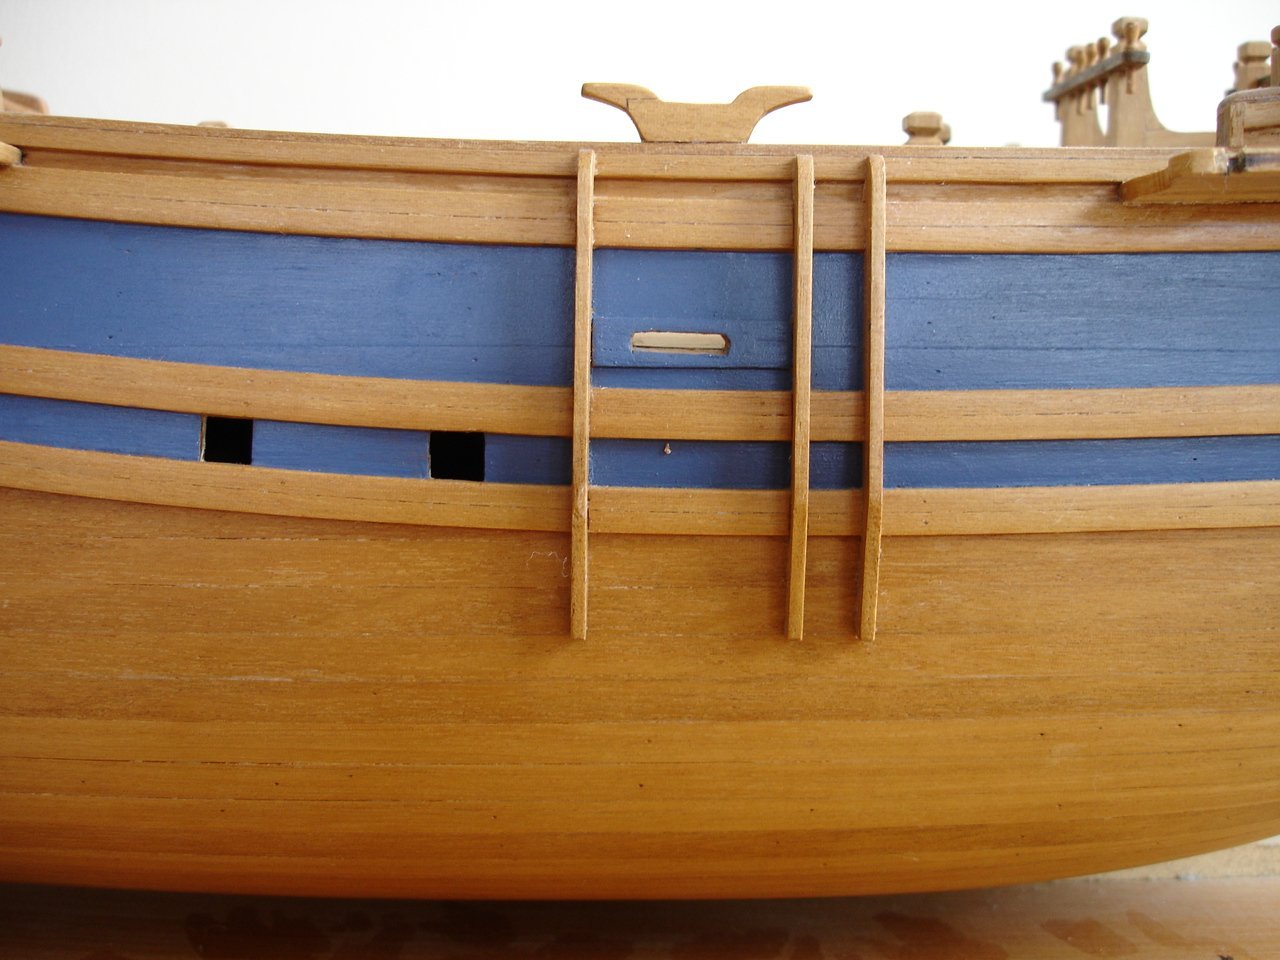
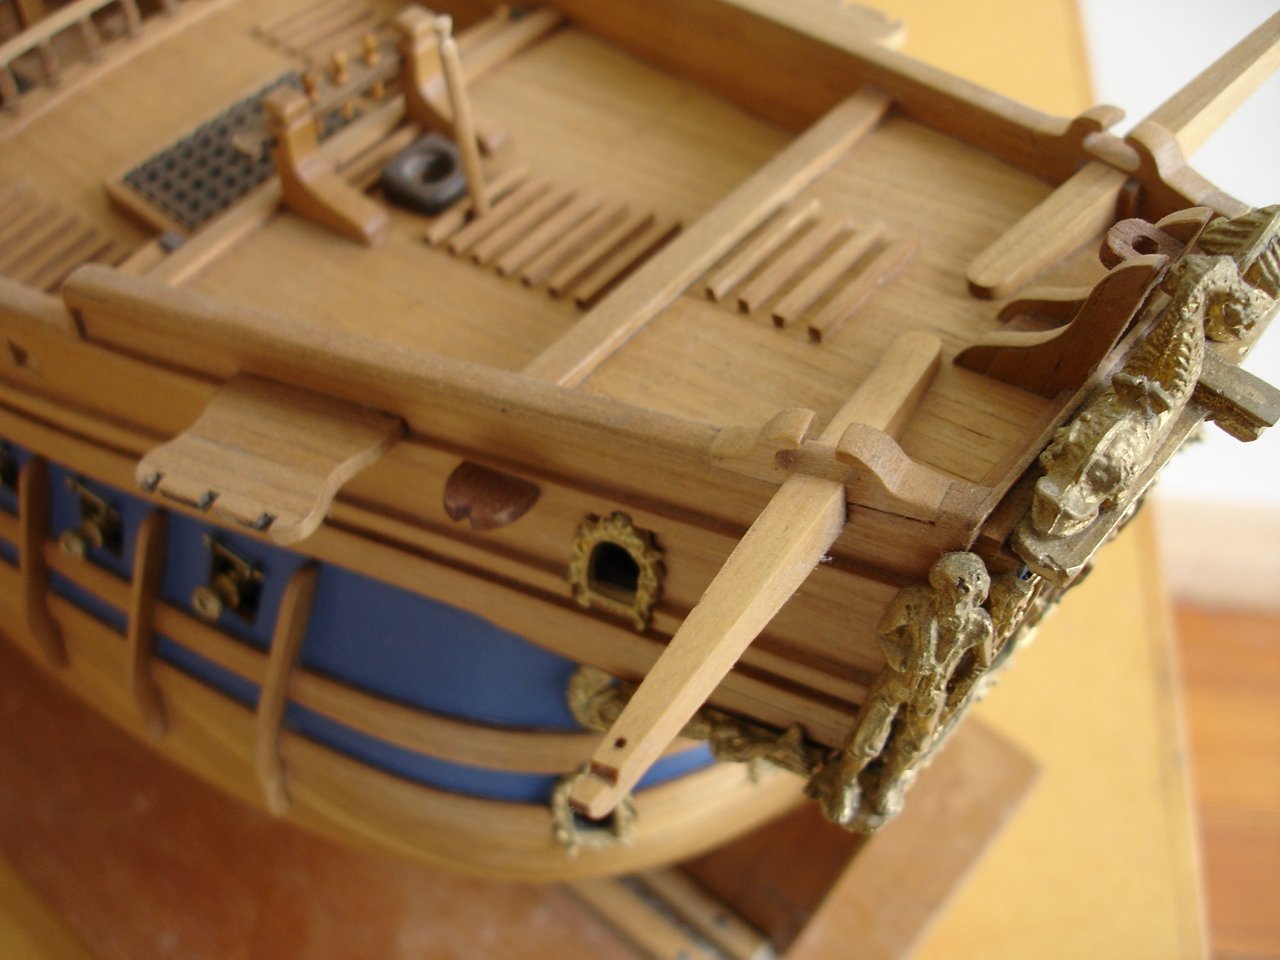
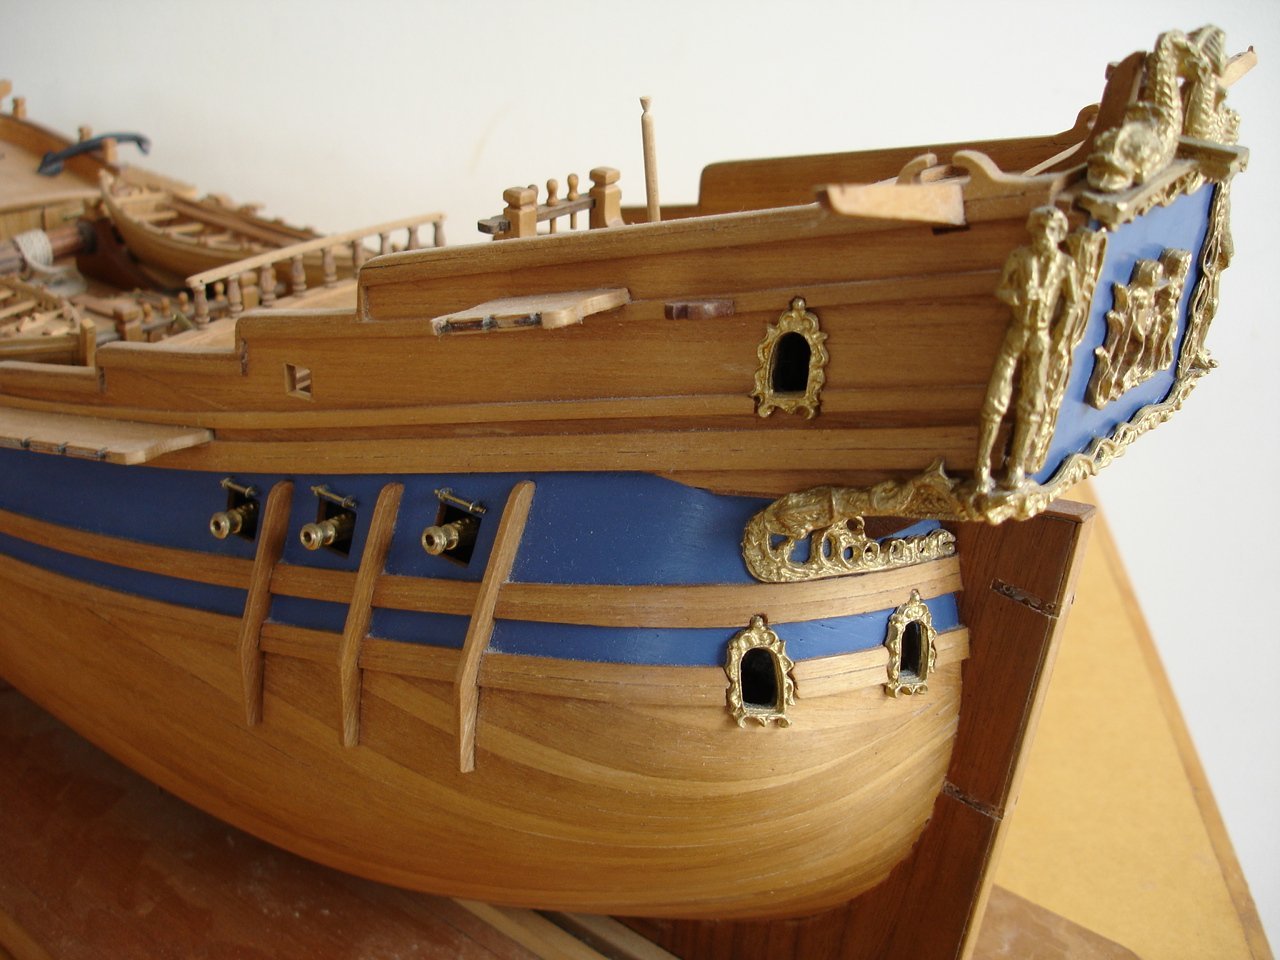
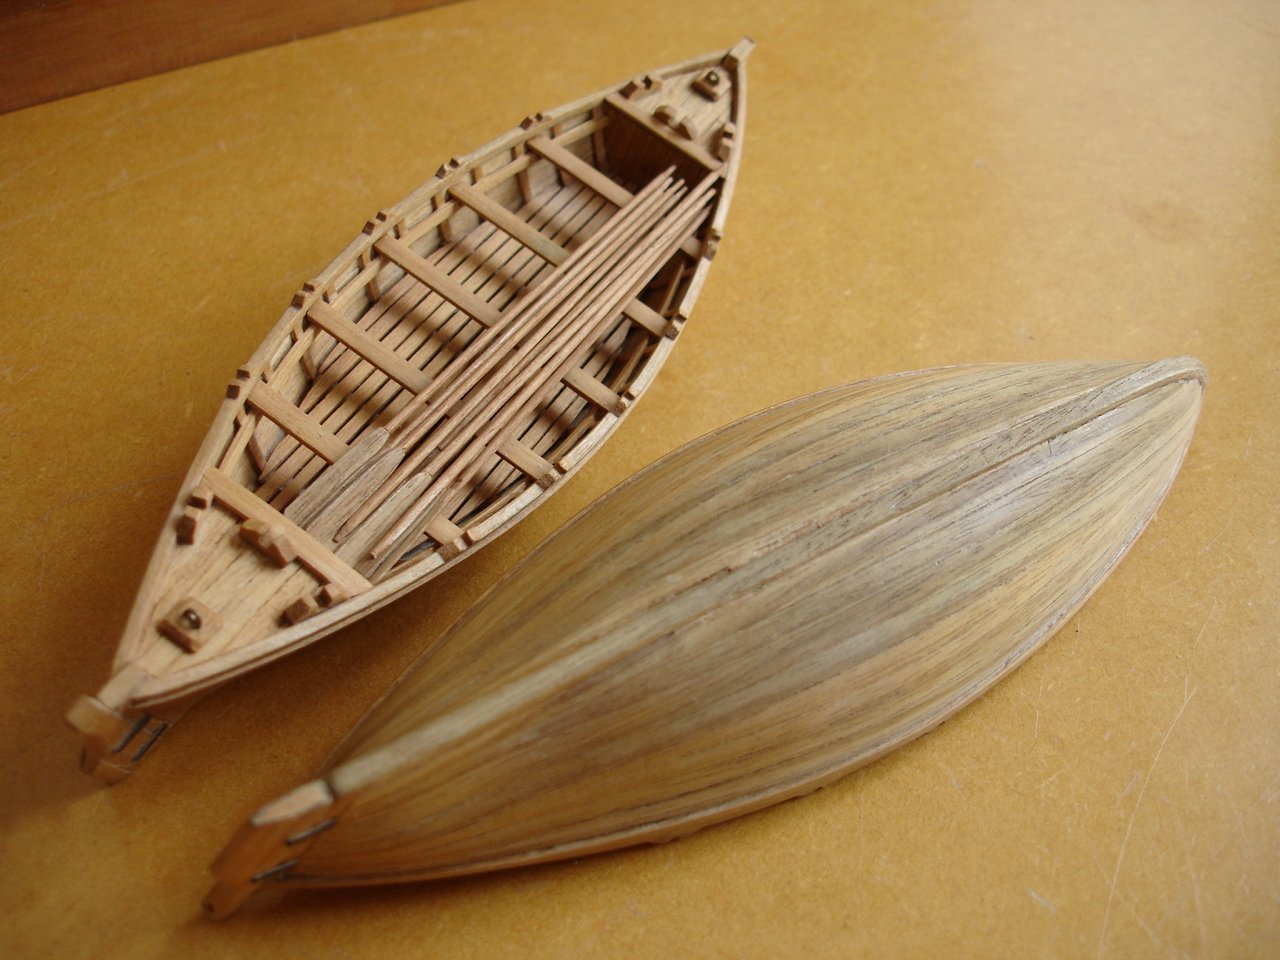
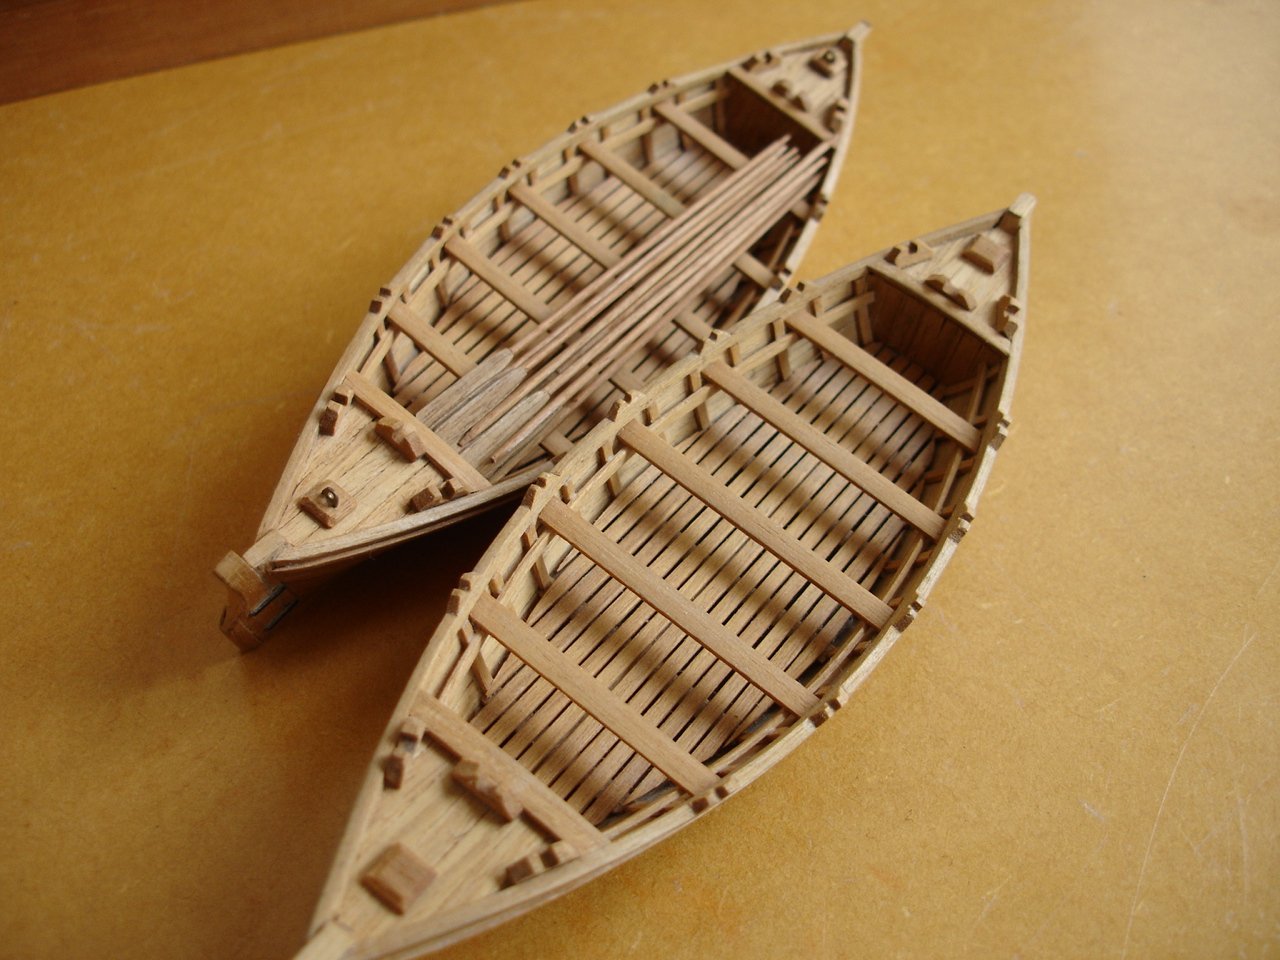
 Hi I added this kit to my profile but have just found the photos. This was my first wooden ship build and indicates my naivety. I wasn't on a forum then but took on a vicious hull shape for planking with a blunt bow and blunt stern. I had no idea what I was doing and that shows - planks spiking up to thin points. The kit interested me as it was, more or less, equivalent to the two fluyt's that Abel Tasman sailed to New Zealand in 1642 - Heemskerck and Zeehaen which fascinated me. I suspect the original ships were more extreme in shape. I holiday in Abel Tasman National Park every summer - do not miss this place if you come to New Zealand! The fluyts are intriguing too. Their strange shape came into part because taxation in the Netherlands back then was based on deck area. So, they had bulbous hulls, for freight, and very small upper decks. Tax avoidance in the 17th century! Tasman came into Golden Bay and was confronted by Maori warriors in waka (canoes) and several of his crew were killed. Tasman named it 'Murderers Bay' (now called 'Golden Bay') and they never touched the shore. By then they were in trouble anyway with rotten rigging, dwindling supplies and in fear of the locals. Tasman beat a track back to Batavia but, on his return to the Netherlands, his mission was deemed to be a complete failure. That's tough given what he and his crew had been through. Interestingly they have recently detected the launching platforms for the waka in Golden Bay and these are the now considered to be the oldest surviving structures in New Zealand. And, of course, Tasman gave his European name to 'Neuw Zeeland'. We see it here both ways - New Zealand and Aotearoa. If you are interested in this subject, I can definitely recommend 'The Merchant of Zeehaen - Isaac Gilesmans and the voyages of Abel Tasman' by Grahame Anderson. I also recommend a novel, 'Tasman's Lay' by Peter Hawes, which really plants in you in the utter hell hole of 17th century ship board life - towing the last of their meat behind the stern to rid it of worms and weevils as they head north out of Murderers Bay... I don't know if this kit is still available but it was quite good. But, in hindsight, all the parts are over scaled and it is far from being a beginners kit - the bow and stern are just evil. It did provide the challenge of triple planking the two whale boats! My efforts back then seem very clumsy and ill-informed. However the hull, as far as I finished it, and the wee whale boats have found a proud shelf in our living room for better or worse. I have no intention of taking it any further but it stands as a model...of some sort anyway. Photos from way back when - 2005. That's all for this mini log. Cheers, A
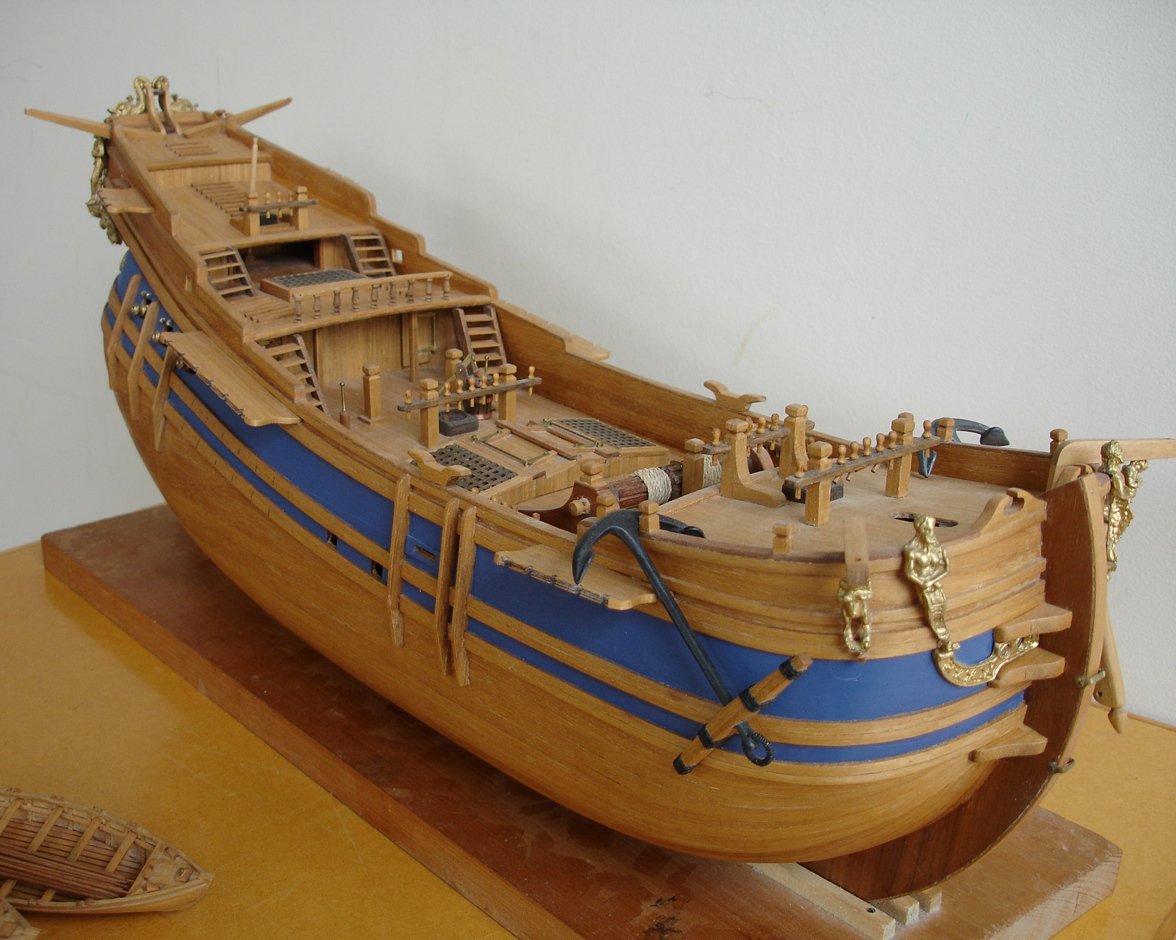


-
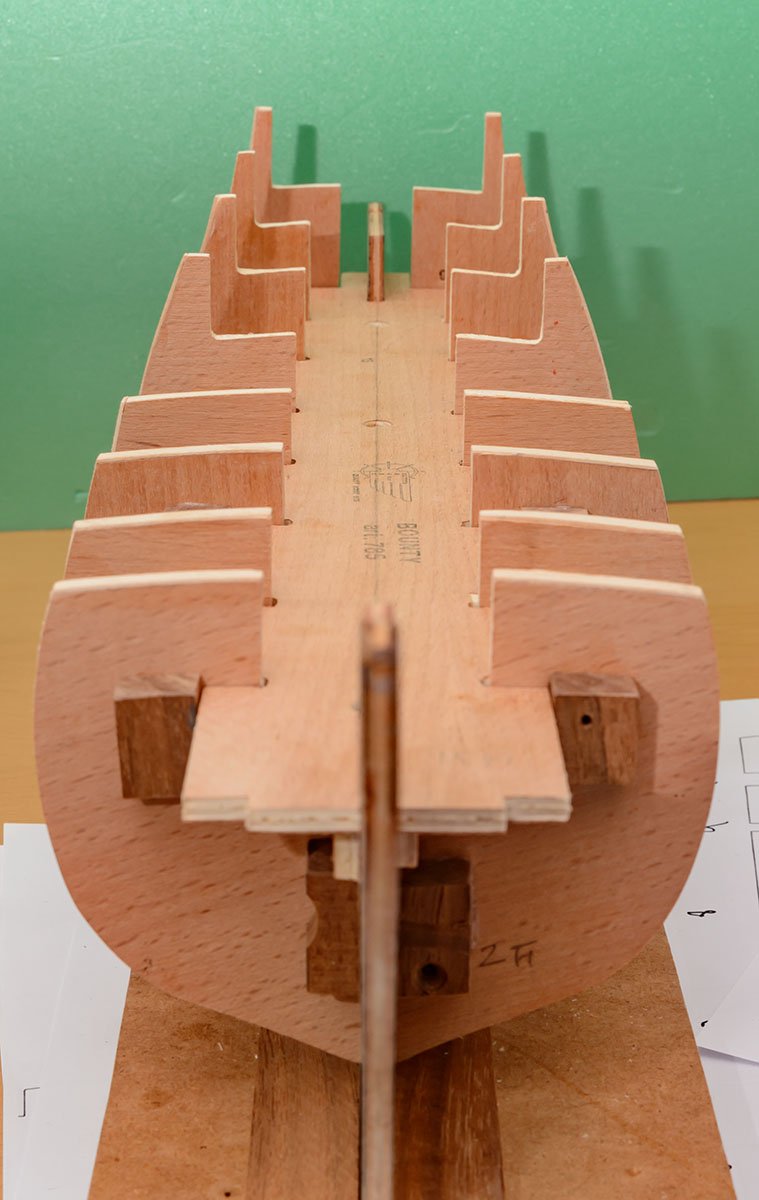
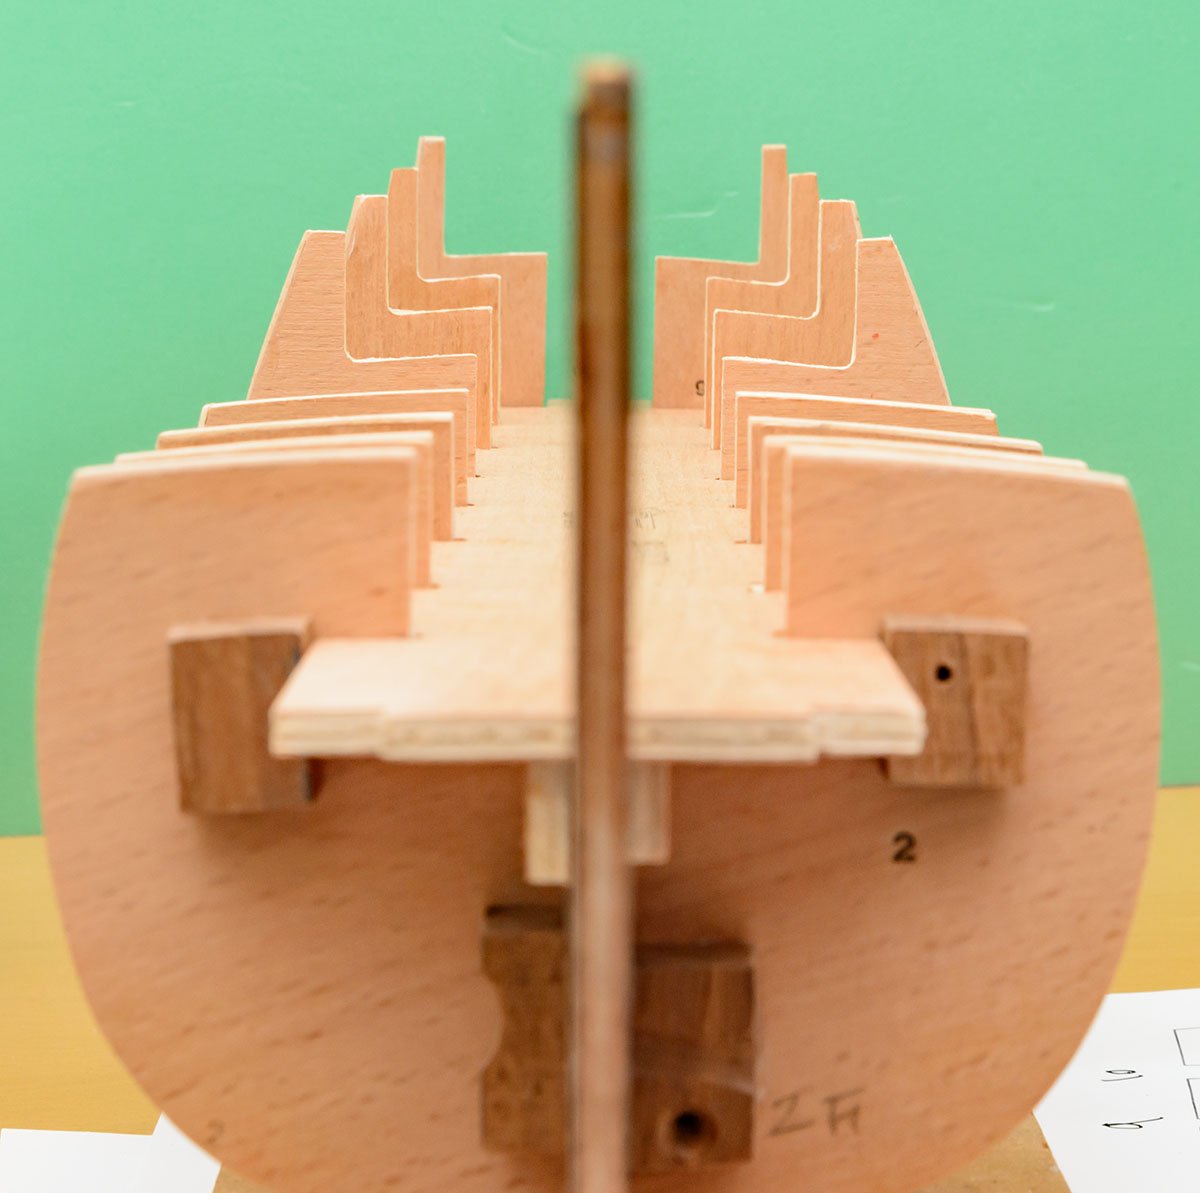
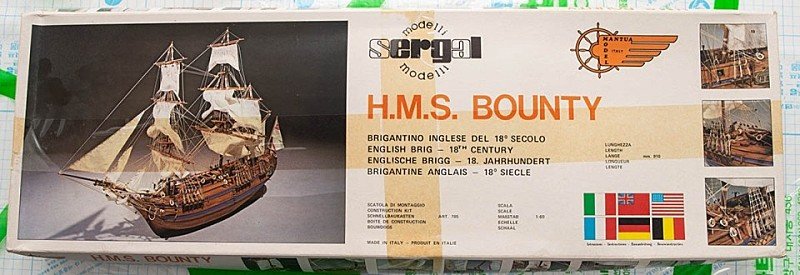
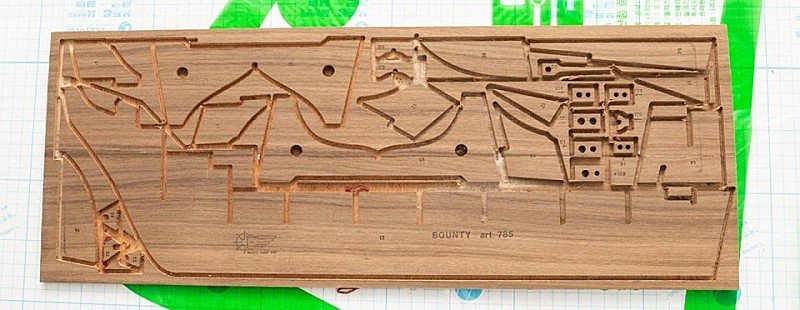
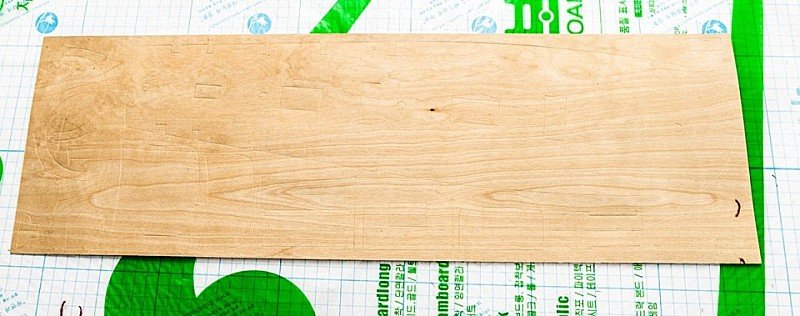
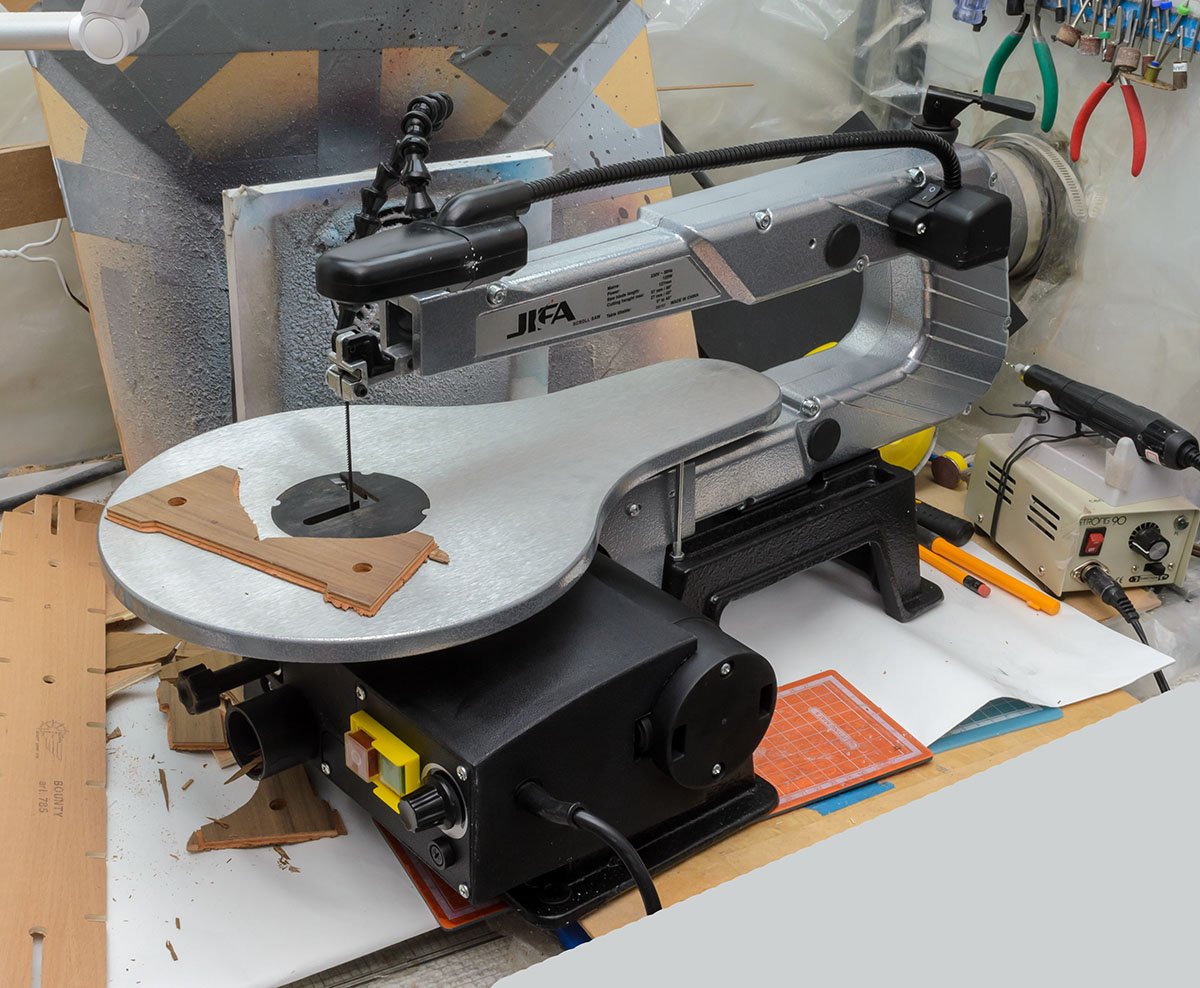
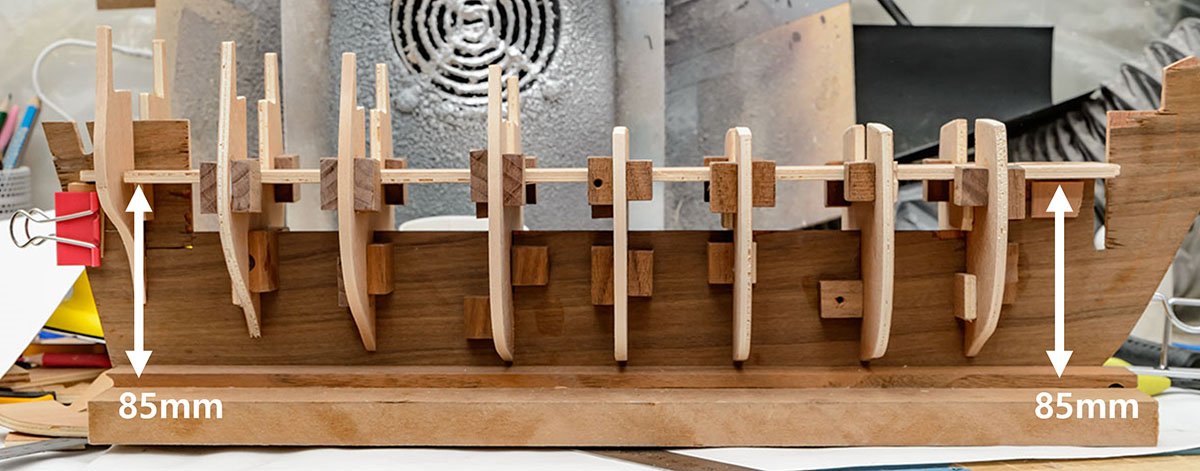
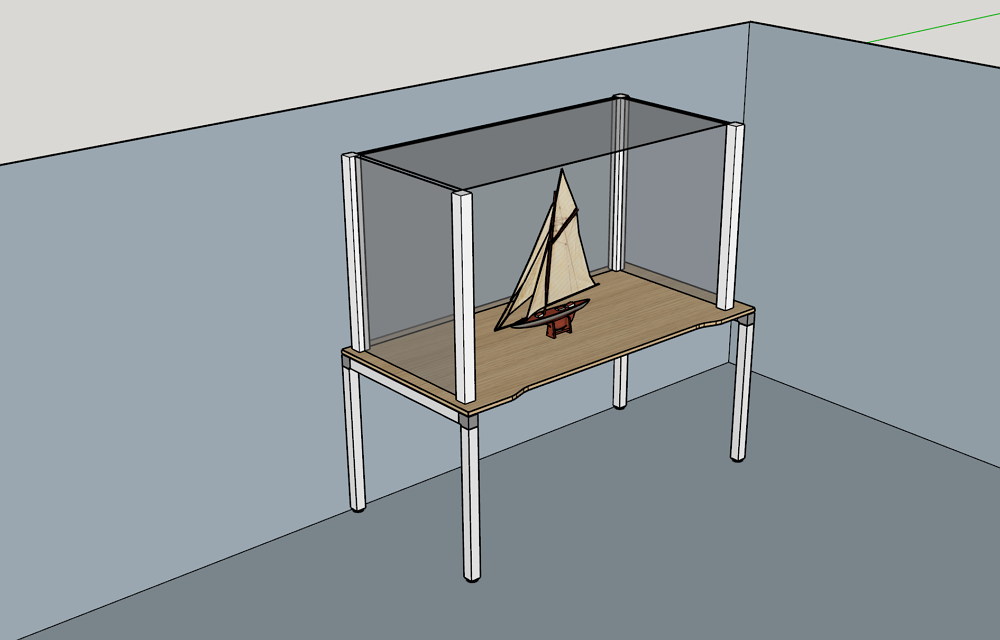
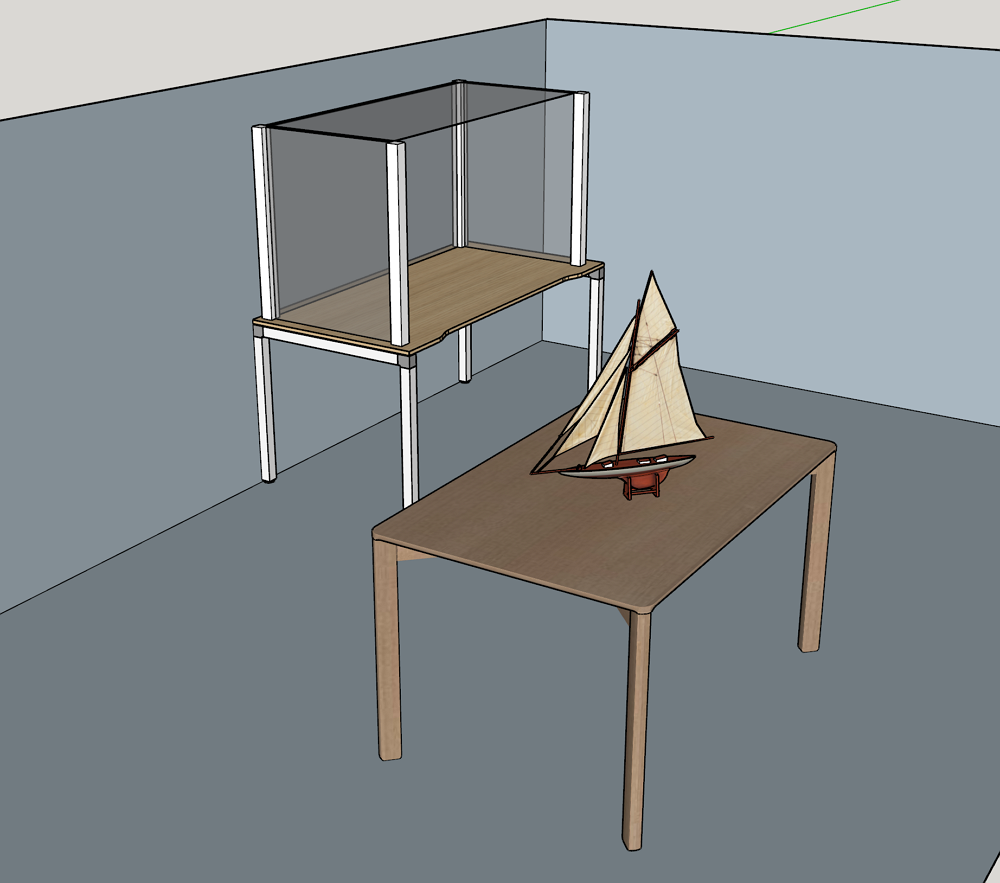
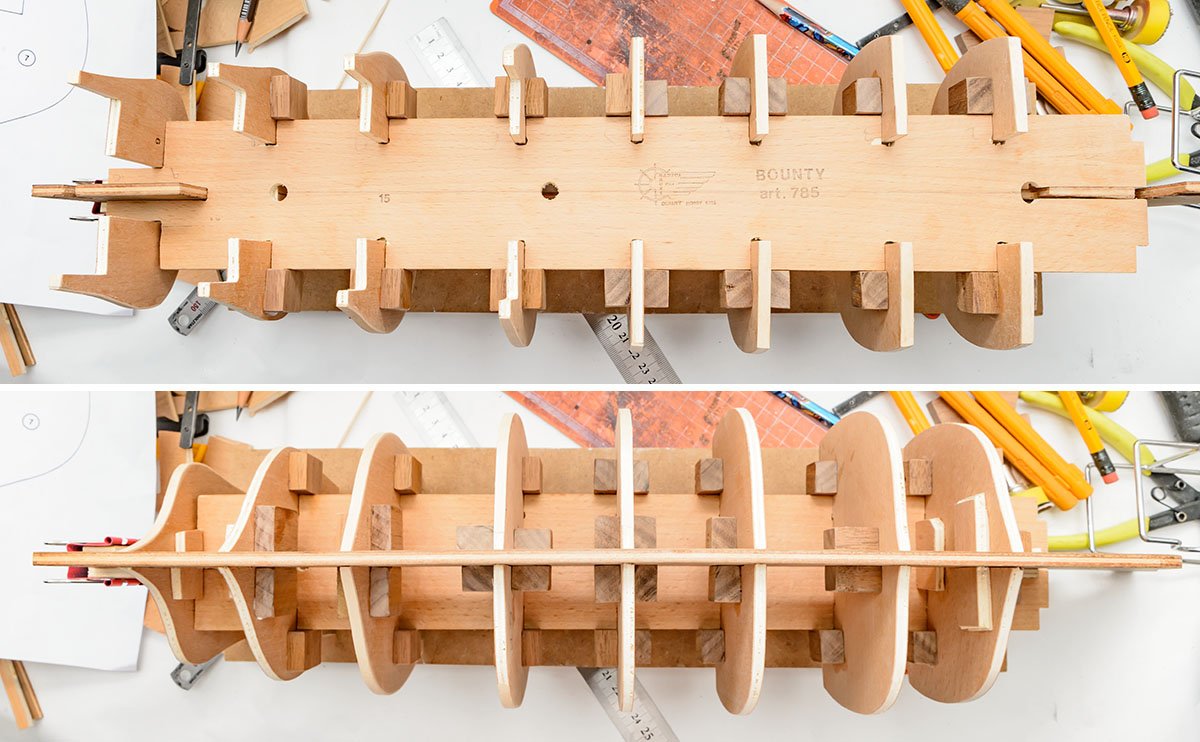
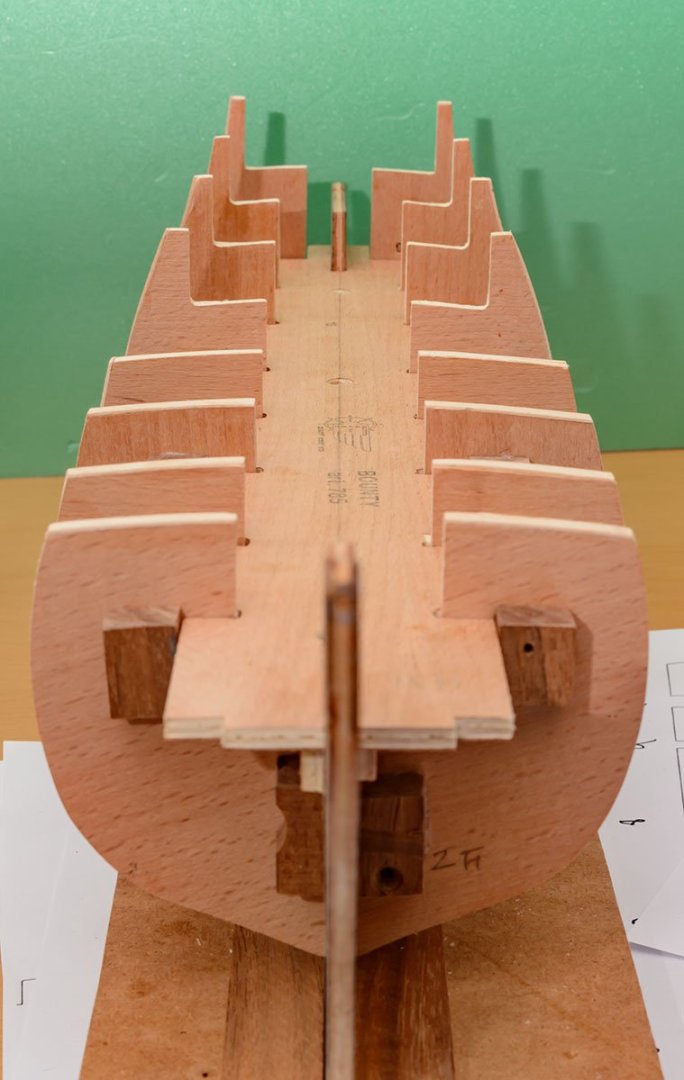
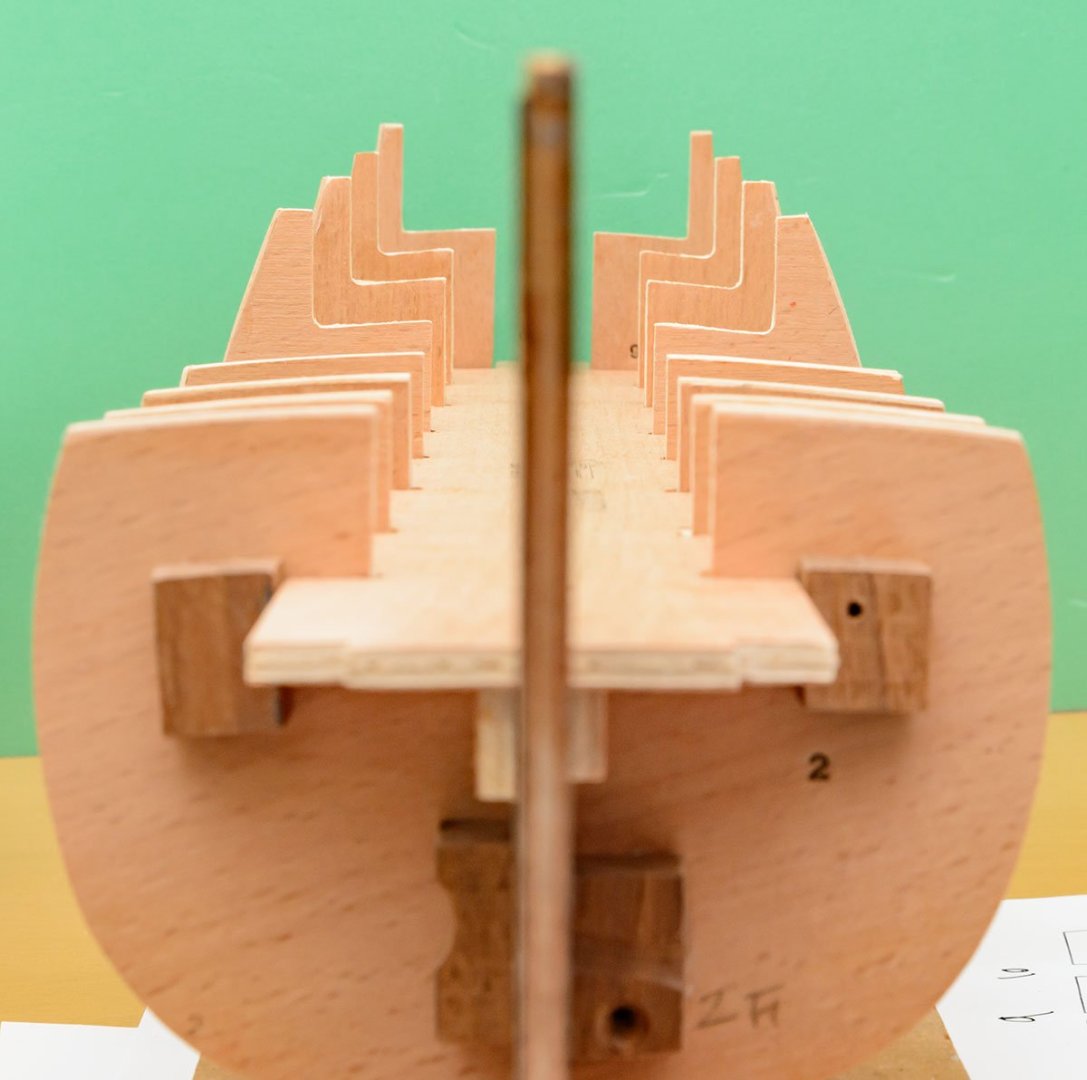
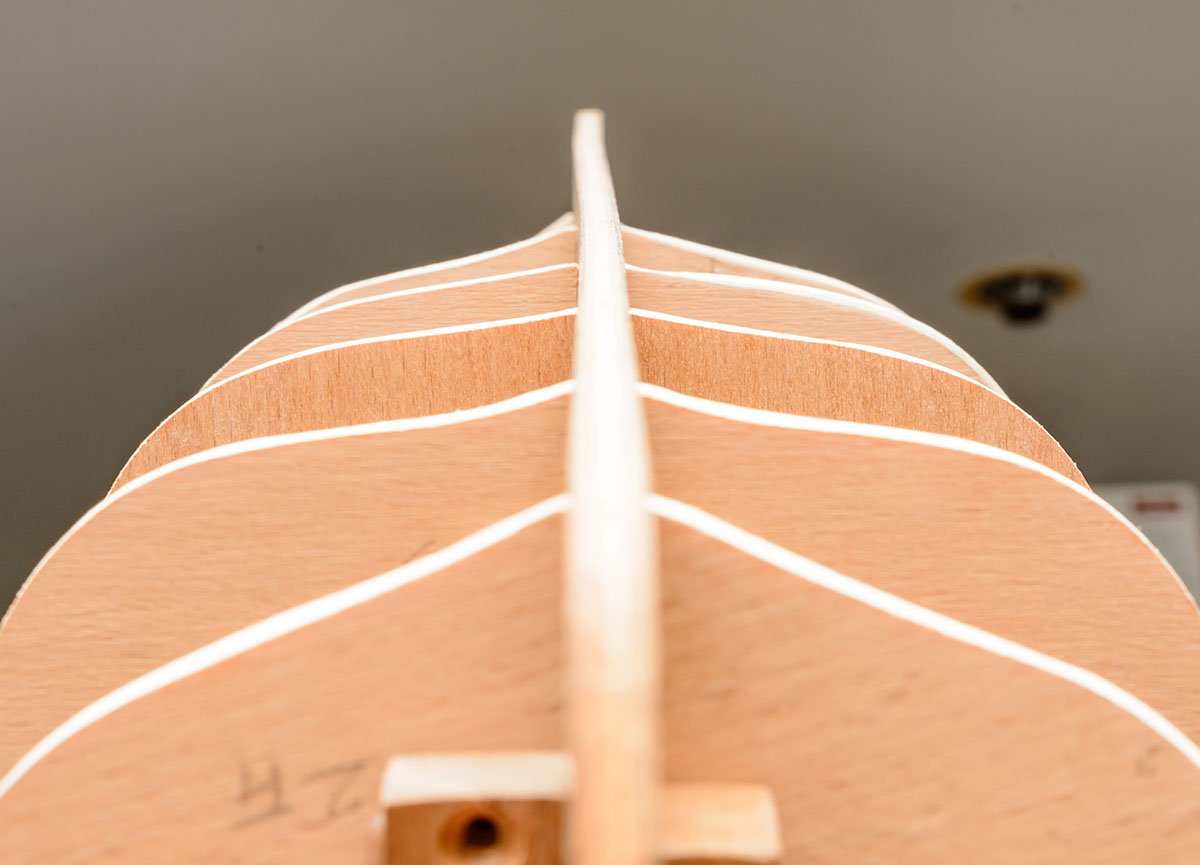
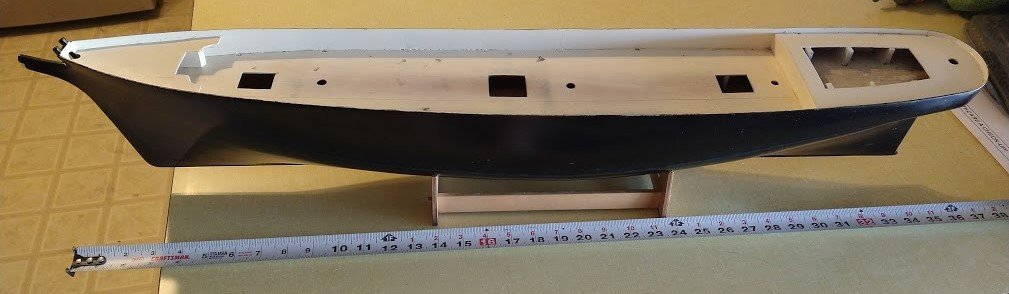
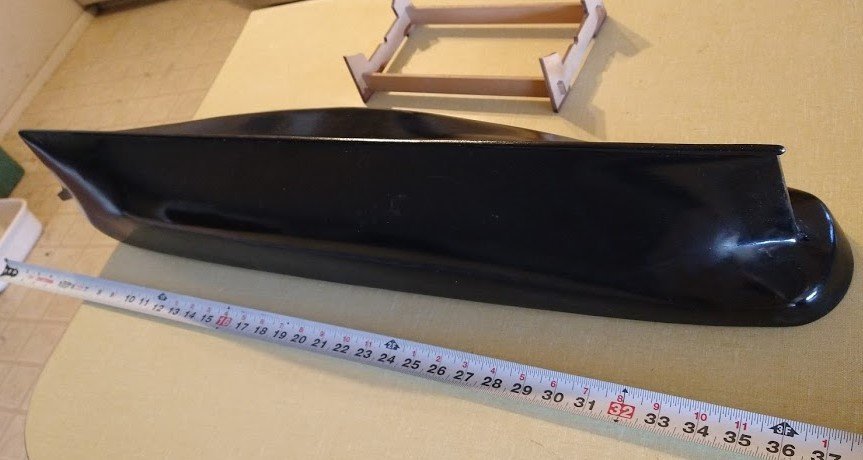
 Hello, This kit is my last project of the year. This is one of the under $100 kits I purchased on Ebay a few years ago. According to the plans, the kit was designed in 1973, and parts weren't cut by laser. It led me to sawing hell, and made me buy a scroll saw ASAP. I really respect senior wooden ship modelers who didn't use any machines in the 1970s. The experience was so horrible that I won't buy any classic kits again... Not all the problems are solved yet. every part is incorrect due to inaccurate CNC cutting. The center line and mast holes of the decks aren't exceptions. Some sections are difficult to assemble, and most parts, including the frames, don't have specific guidelines, such as distance from the lower keel. They would be enough reason for a member who was a new builder to give up the recent laser cut version of this kit. I didn't stop becaused I knew how to deal with it. I fixed every frame using part plans. I set some guidelines, which weren't in the plan or instructions of the kit. By the way, I guess the proper height of the lower deck may be 85.7mm (or 3.375 inches). I purchased the Amati Bounty 1/60 plan a year ago for scratch build. The Amati's plan is much better than Mantua's in every respects, and gives all the hints for planking that weren't in this kit. In addition, Amati's plan is more similar to the AOTS reference book. If you are newcomer who wants to build a Bounty, I highly recommend Amati kits. There have been some more improvements since the last project. I expanded my workshop to measure and check every aspect of the ship. When I measured planks on the old workbench, I had to carry the ship and measure it by hand. I added a broad table. Now I can measure every height and position of each plank. Finally, I attached walnut blocks to every frame. The frames are not glued until I set them in the proper position, and the walnut blocks forced the frames to the last position I set when I checked and assembled the frames hundreds times. This is it. All the frames are almost perfectly fitted and symmetical. Each frame has an error of less than 0.50mm. This is my best result ever. The keel was bent before I started, but it was stretched as I set each frame properly. At least the paper plans didn't lie. The error of the keel is also less than 0.50mm, which can be easily removed by sanding. With satisfying results, I glued the frames. I'm ready for hull fairing. 😎
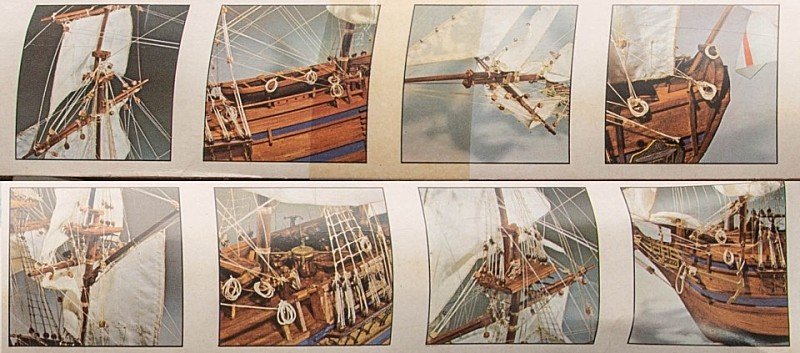


-
 Hi, I’m a new member to this forum and this is my first attempt at wooden ship building. I have some experience with plastic model before (airplane, tank, car) but never dare to attempt a ship build before. The rigging (even for modern ship) scares me away. Yet I’ve always been a ship fan especially those sailing ships. Years ago I visited the San Diego maritime museum where they displayed lots of ship models and wished I could work on one. Well, after searching on the internet, I came across a lot of scratch builds or kits that required wood working skill, which is way out of my league. So I gave up on making one myself - If I came across this forum then, a different outcome would have taken place About a month ago, I came upon a wooden ship built log by chance and it sparked my interest again. With some modeling experience on my belt, I thought I could give it another try. Not knowing where to buy wooden ship kit, I searched on ebay and craiglist and came across a half built HMS Victory, a perfect chance to get my feet wet. The hull and deck have been built though there are evidences that it was damaged from a fall (dented hull, etc). It was offered for what I thought a great deal so I drove 2hrs to pick it up, and here I am. in an effort to find info on the ship, I came to this forum, stared my new member into and my first half build log. I got warm welcome from several members, and they helped me identify the manufacturer of my model. Here are the pictures of the ship when it came to my home. My plan is to clean up the damages, verify the available parts and decide how to proceed without a manual. Some of you will say that this is no project for a beginner and I’m well aware of that. My goal is to being persistent and start learning to get this done. It might take awhile due to life obligations , but the ship is in a place where I can work on it whenever I got time, so that’s a good start IMO.
-
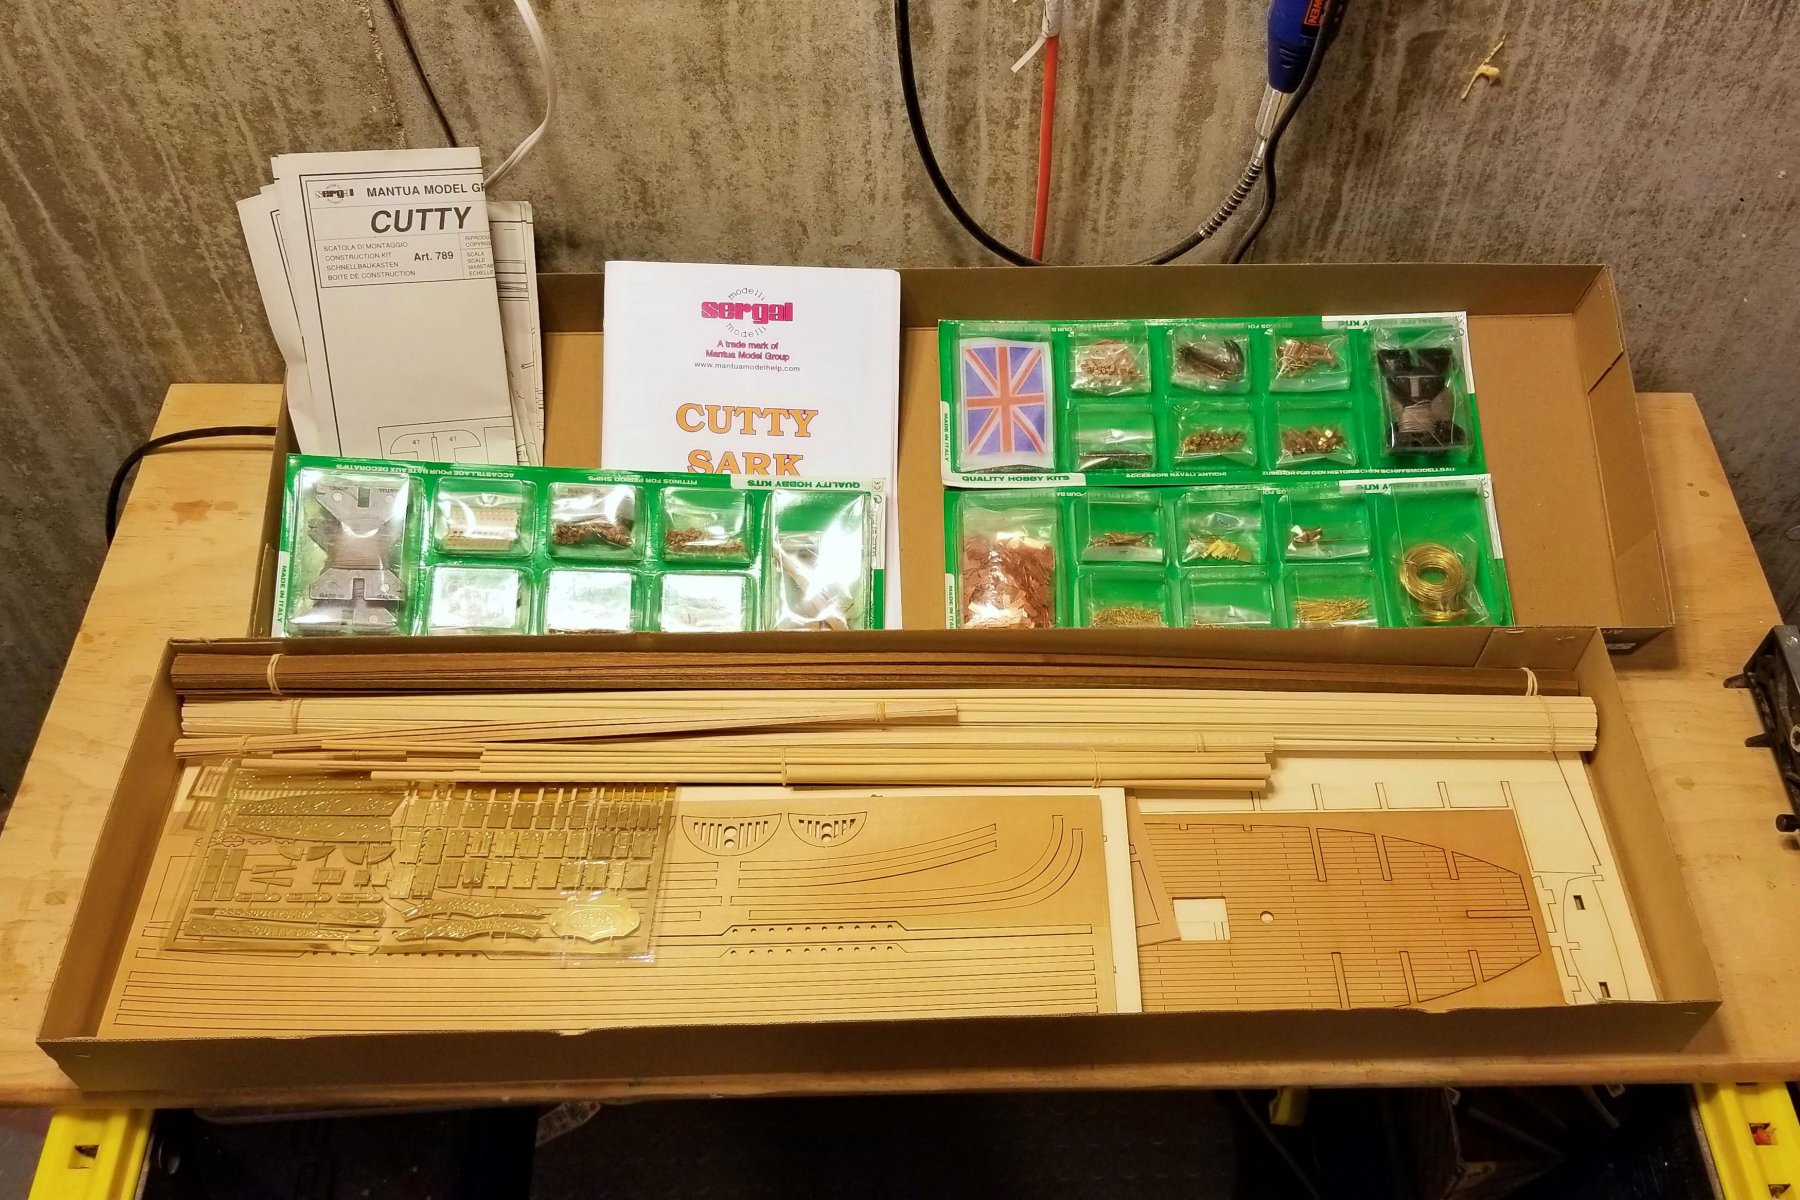
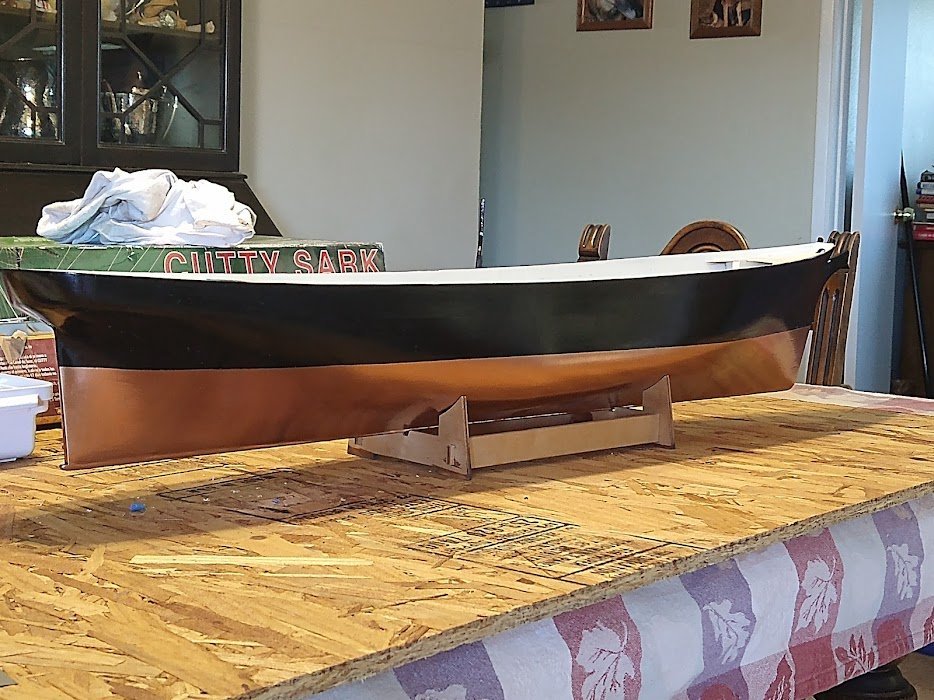
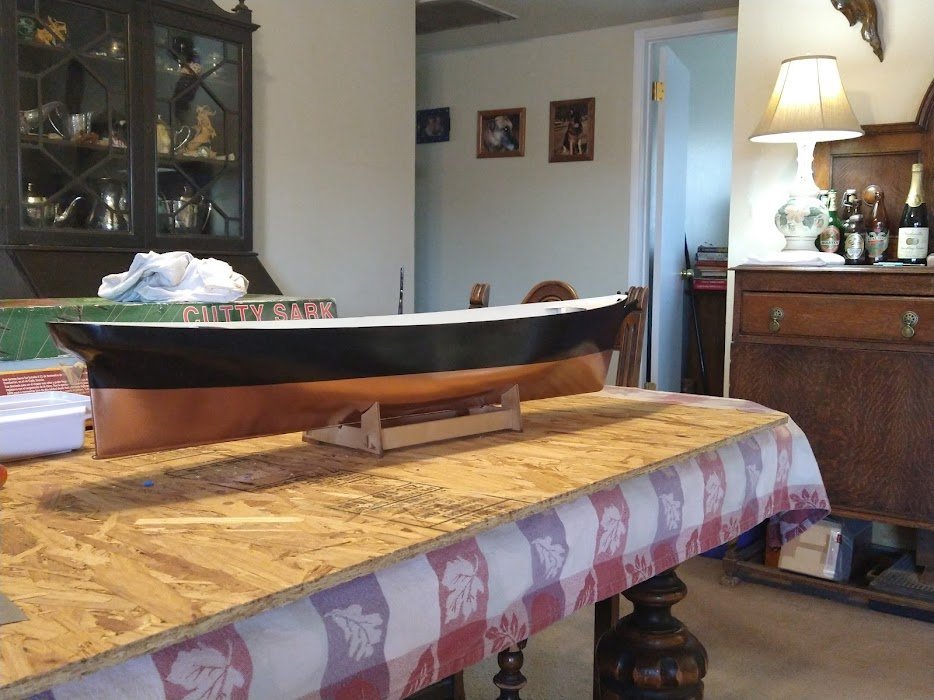
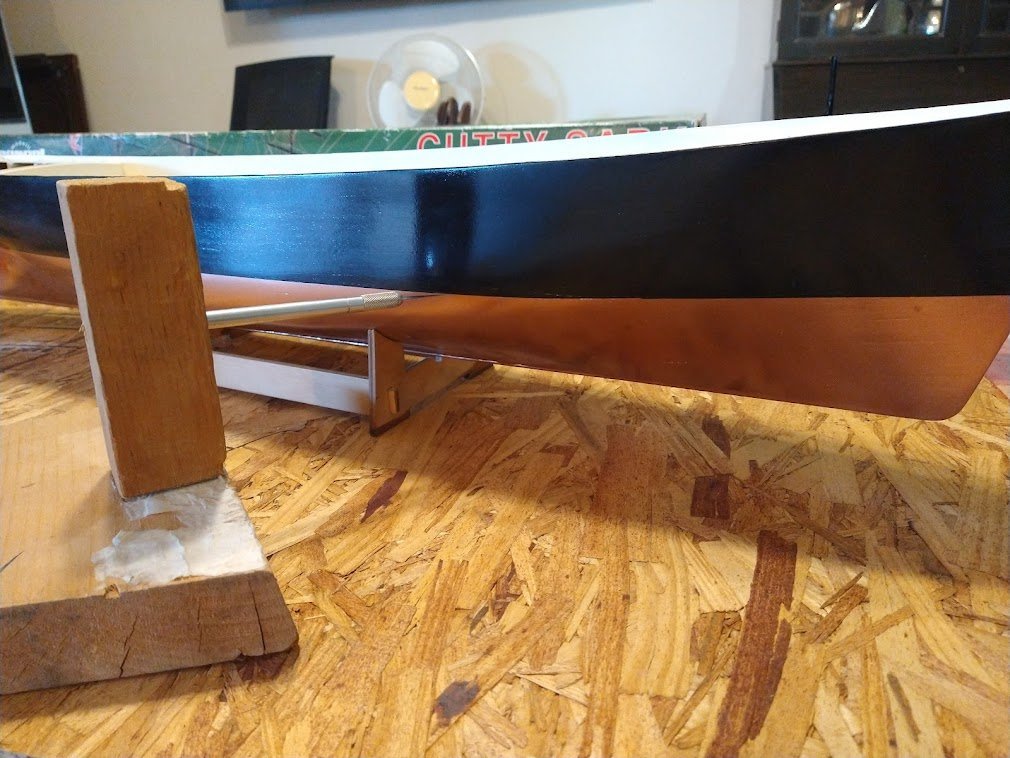
 Ok, This is my Build Log. First a bit of history as the images to be posted begins with my 4th build of this ship. I have loved building Model ships ever since I was a kid (a very, VERY long time ago). My first was a half hull Cutty Sark that was placed on a plaque and then wall mounted, I was in 7th and 8th grades for this one.. My next attempt was when I was in High School, a 'Revell' Plastic Cutty Sark Model that went very well, but didn't hold up well over the years and is now gone forever. No picture that I can find of that one. My 3rd attempt is the 1:78 Cutty Sark wood planked ship by 'ARKIT'. I started it back in 1988 while in the U.S. Navy, but when they shipped my model home when I discharged, it was destroyed. So attempt 4 (and current) is a 1:78 Wood 'Sergal' model of the Cutty Sark. I have Been working on mine for a while, I laid down the keel On this latest attempt in 1993, assembling and planking the Hull. I got the hull sanded and painted. But when it came to mark the copper plating line, I took a loooong break from it as I was afraid I didn't have the skills then. (that was 29 years ago). This is where I stopped for this long 29 year hiatus: In between these years I have been honing my wood working skills better. Here are some examples: Now it's 2022 and I have a renewed desire to get back at it. I designed a jig to cut the line to mark the top of the copper plating line. I then Taped off the upper part of the hull right down to the line I scribed. I then painted the lower part a copper color. You see, I have seen other models that have been plated but the plates are next to impossible to get them perfectly in place without tiny gaps. These gaps I saw had shown with the black paint showing through where the plating was not as close as it could have been. Hence, I painted the under side copper so any gaps would be invisible. I'm now at that point where I need to glue on the hundreds of plates to the hull. Which brings me up to date with the newest pictures: If any are wondering why I painted the hull copper first, I have a good reason. I have been looking around at other folks that built this ship and notice that the copper plates were not applied perfectly and the black under coating of the hull was showing through. So I wanted to make sure that didn't happen here, So I painted it the same color as the hull plates, so If they don't go on perfectly, the seams are still hidden.

- 39 replies
-
- 4
-
-
- cutty sark
- sergal
- (and 1 more)
-
 Hello, I stumbled across this forum looking for advice for my first model ship and boy did I spent time coming across interesting topic after topic...So I thought I'd give something back and start a build log. I started this model a while ago but wanted to make some progress first before starting the log. Just in case I wouldn't go through with it... I'm from Berlin/Germany so excuse my english. I'll do my best. However I expect to struggle especially with the naval vocabulary. I actually got the exact same kit when I was a child. I was about twelve years old I think and in over my head. I don't even know anymore who spent that much money to give me that present and then left me alone to deal with it. I managed to plank have the hull, then went out of wooden walnut strips, because most of them broke while I tried to glue them to the ribs. It looked awful. So I left it to the dust. It gnawed at me over the years that I couldn’t finish it back then. So last year, 22 years later, I bought another kit and started looking over the kit’s contents and the build plan. What a mess – hence the search for advice and my arrival at this forum. It is my first model. I like working with wood however. I have built two skin-on-frame kayaks, several sheds and play huts as well as pieces of furniture. However, nothing as delicate as a 1:124 model. I can handle criticism and suggestions for improvement. I really want it to look good, so please don’t sugarcoat it when you stumble across some mistakes I make just because I’m a beginner. Long story short: here’s my build log:
- 12 replies
-
- 1
-
-
- Thermopylae
- Sergal
- (and 2 more)
-
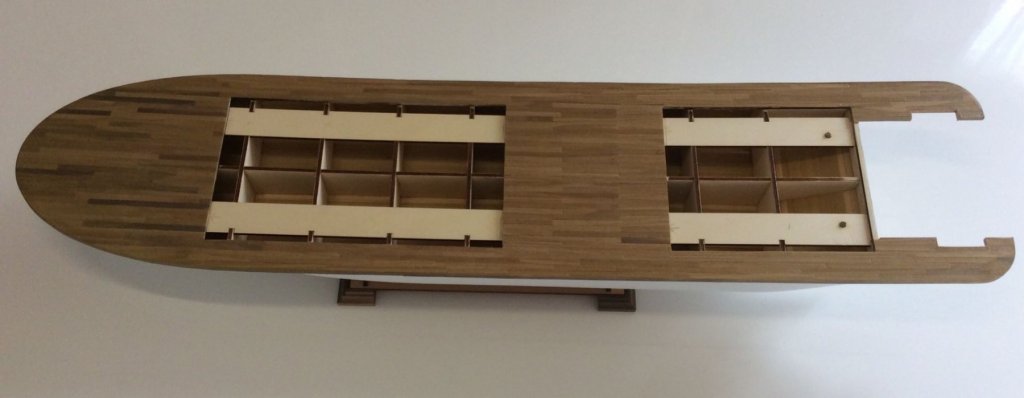
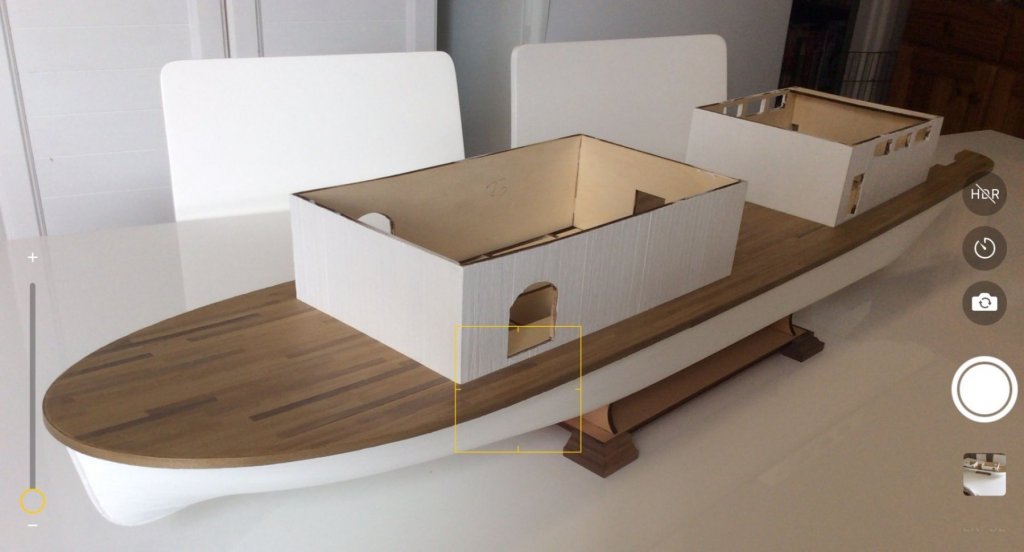
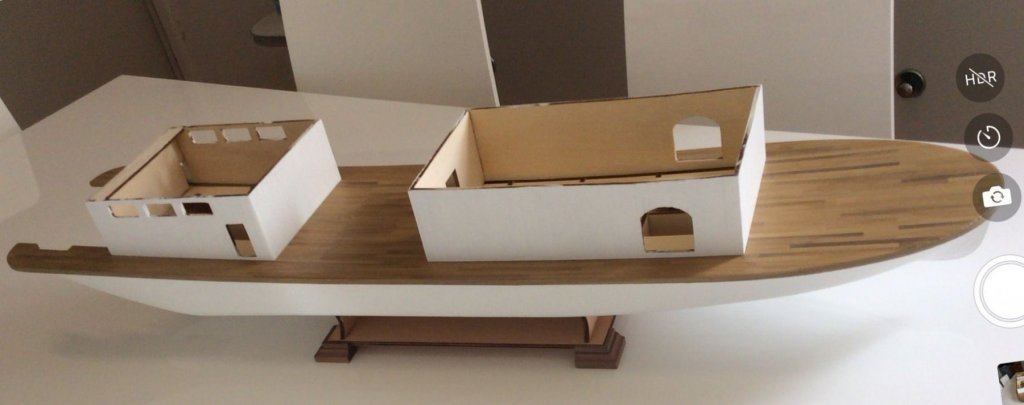
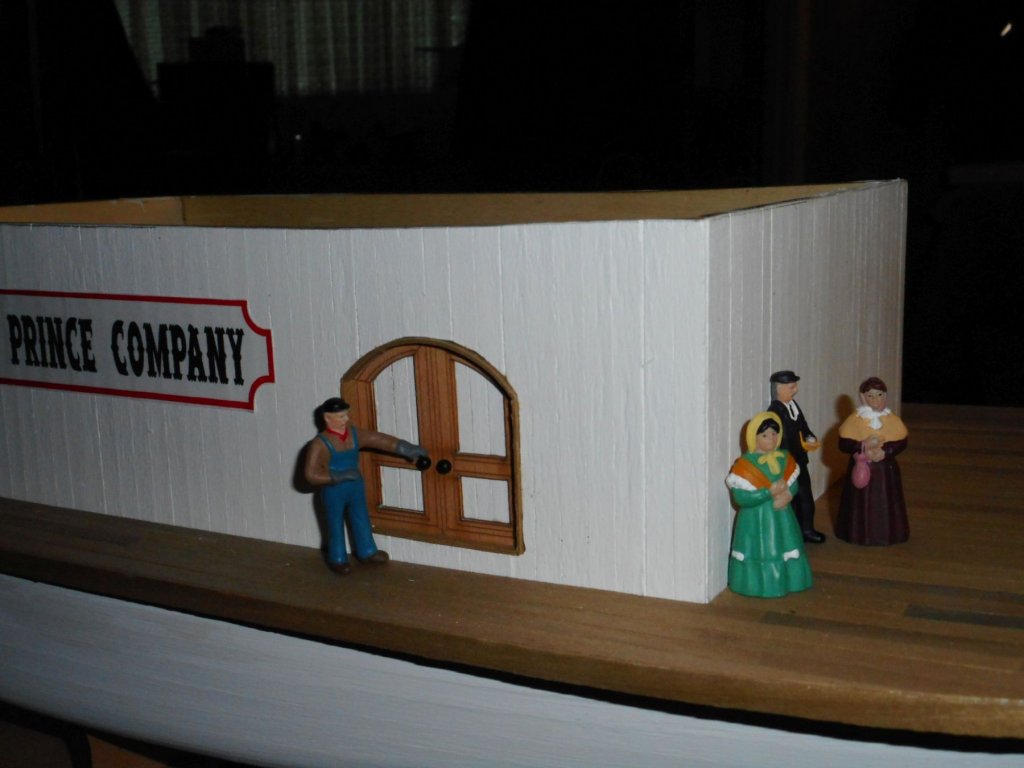
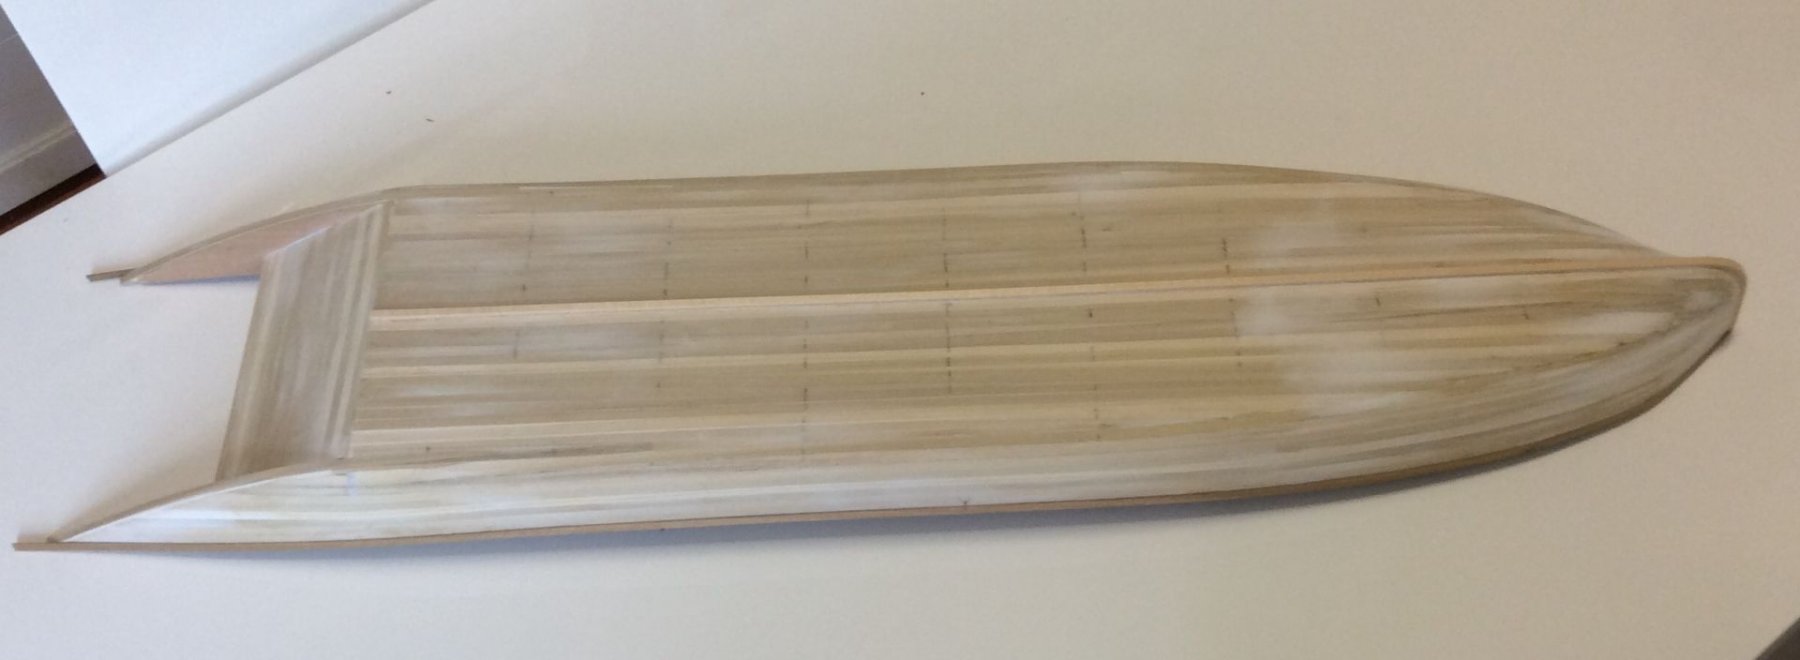
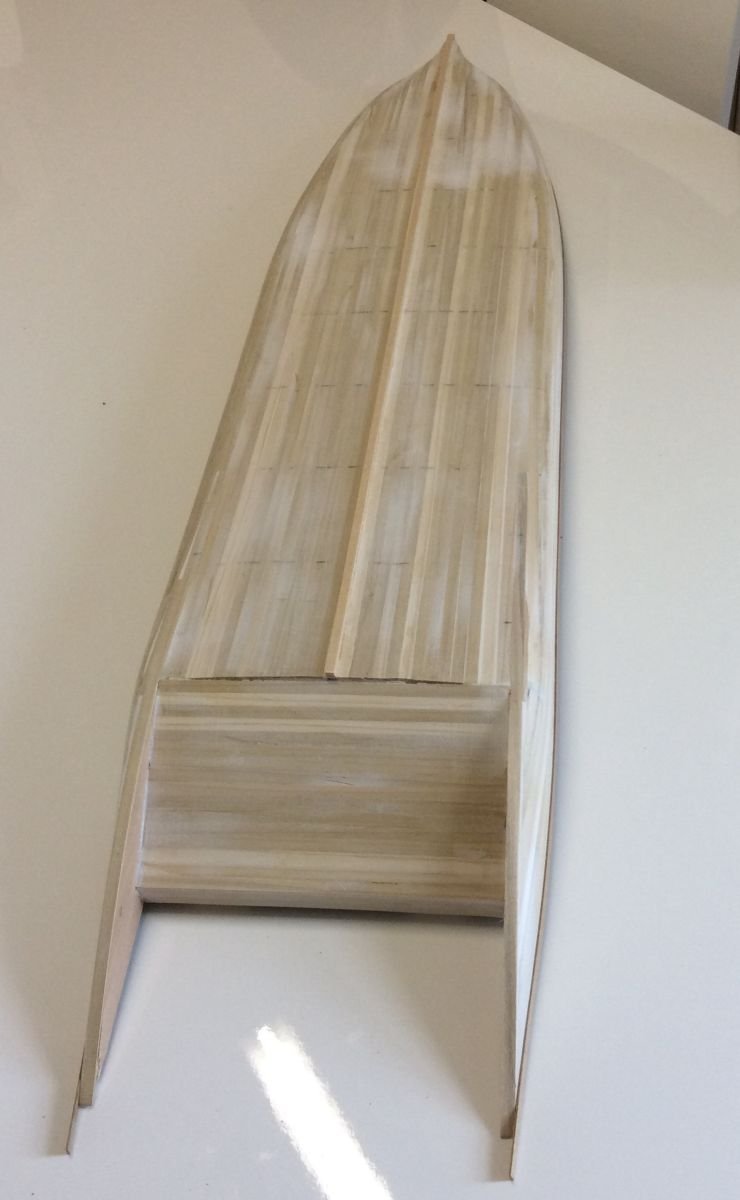
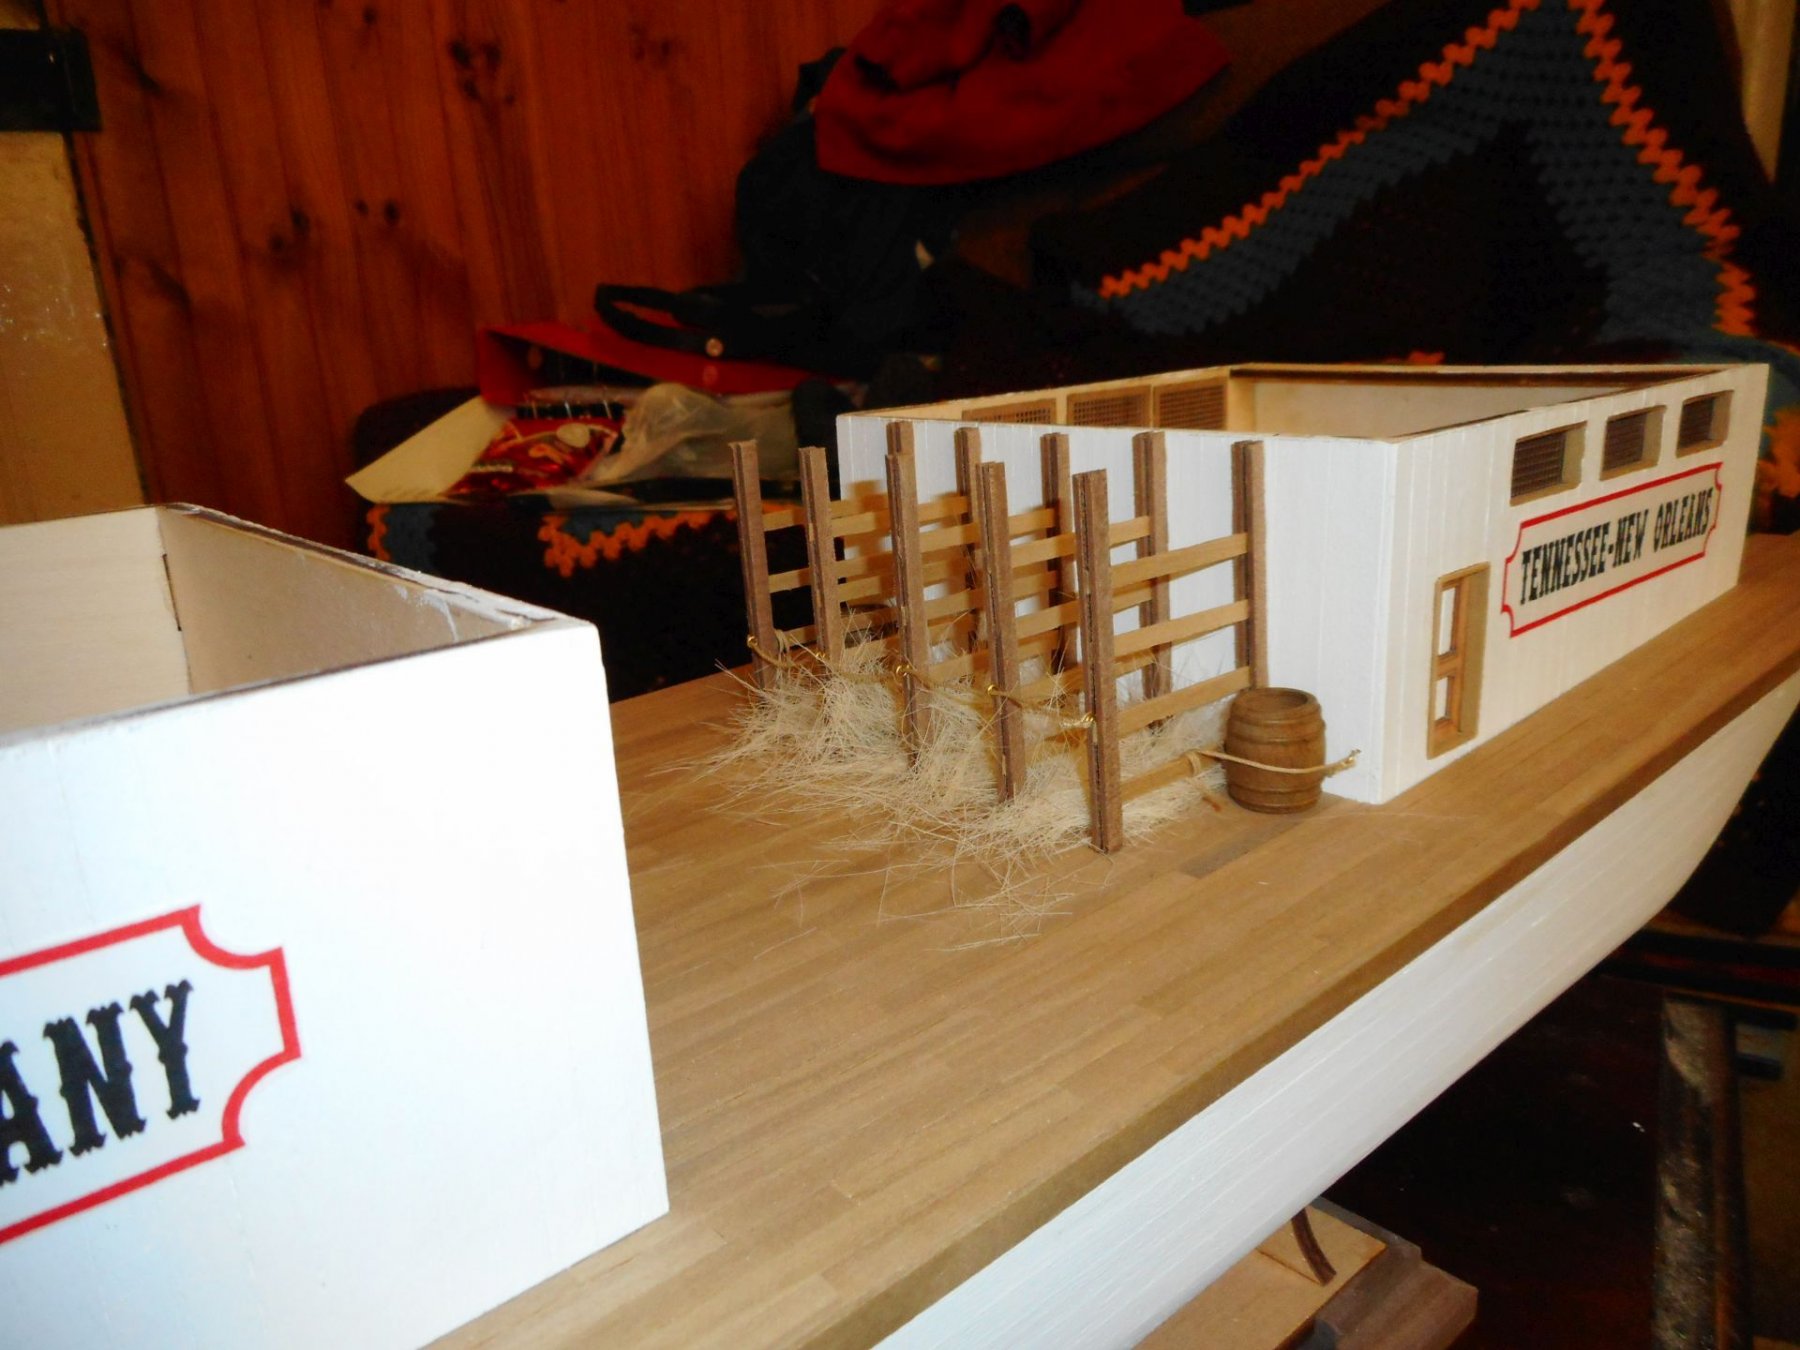
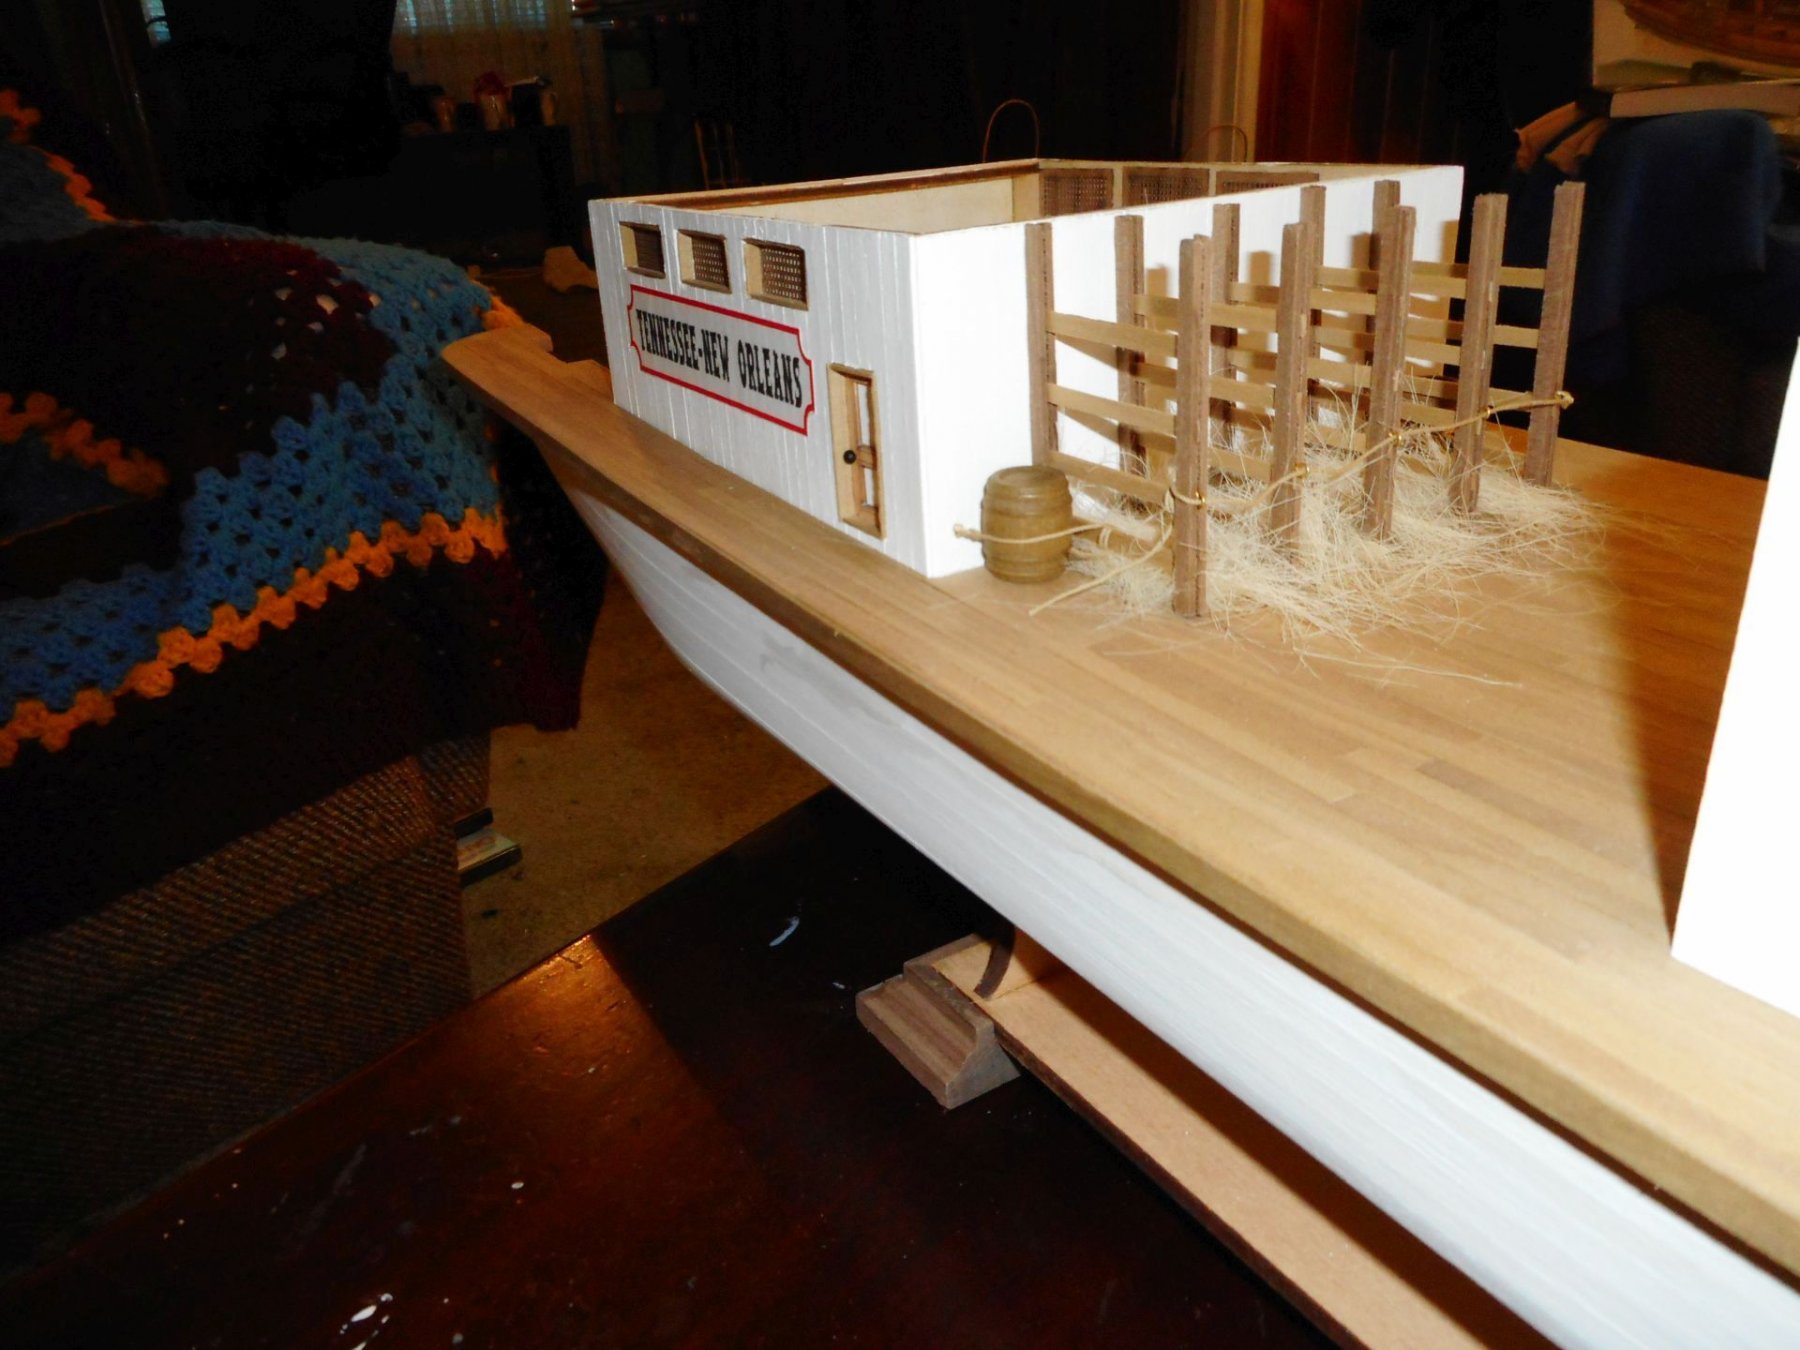
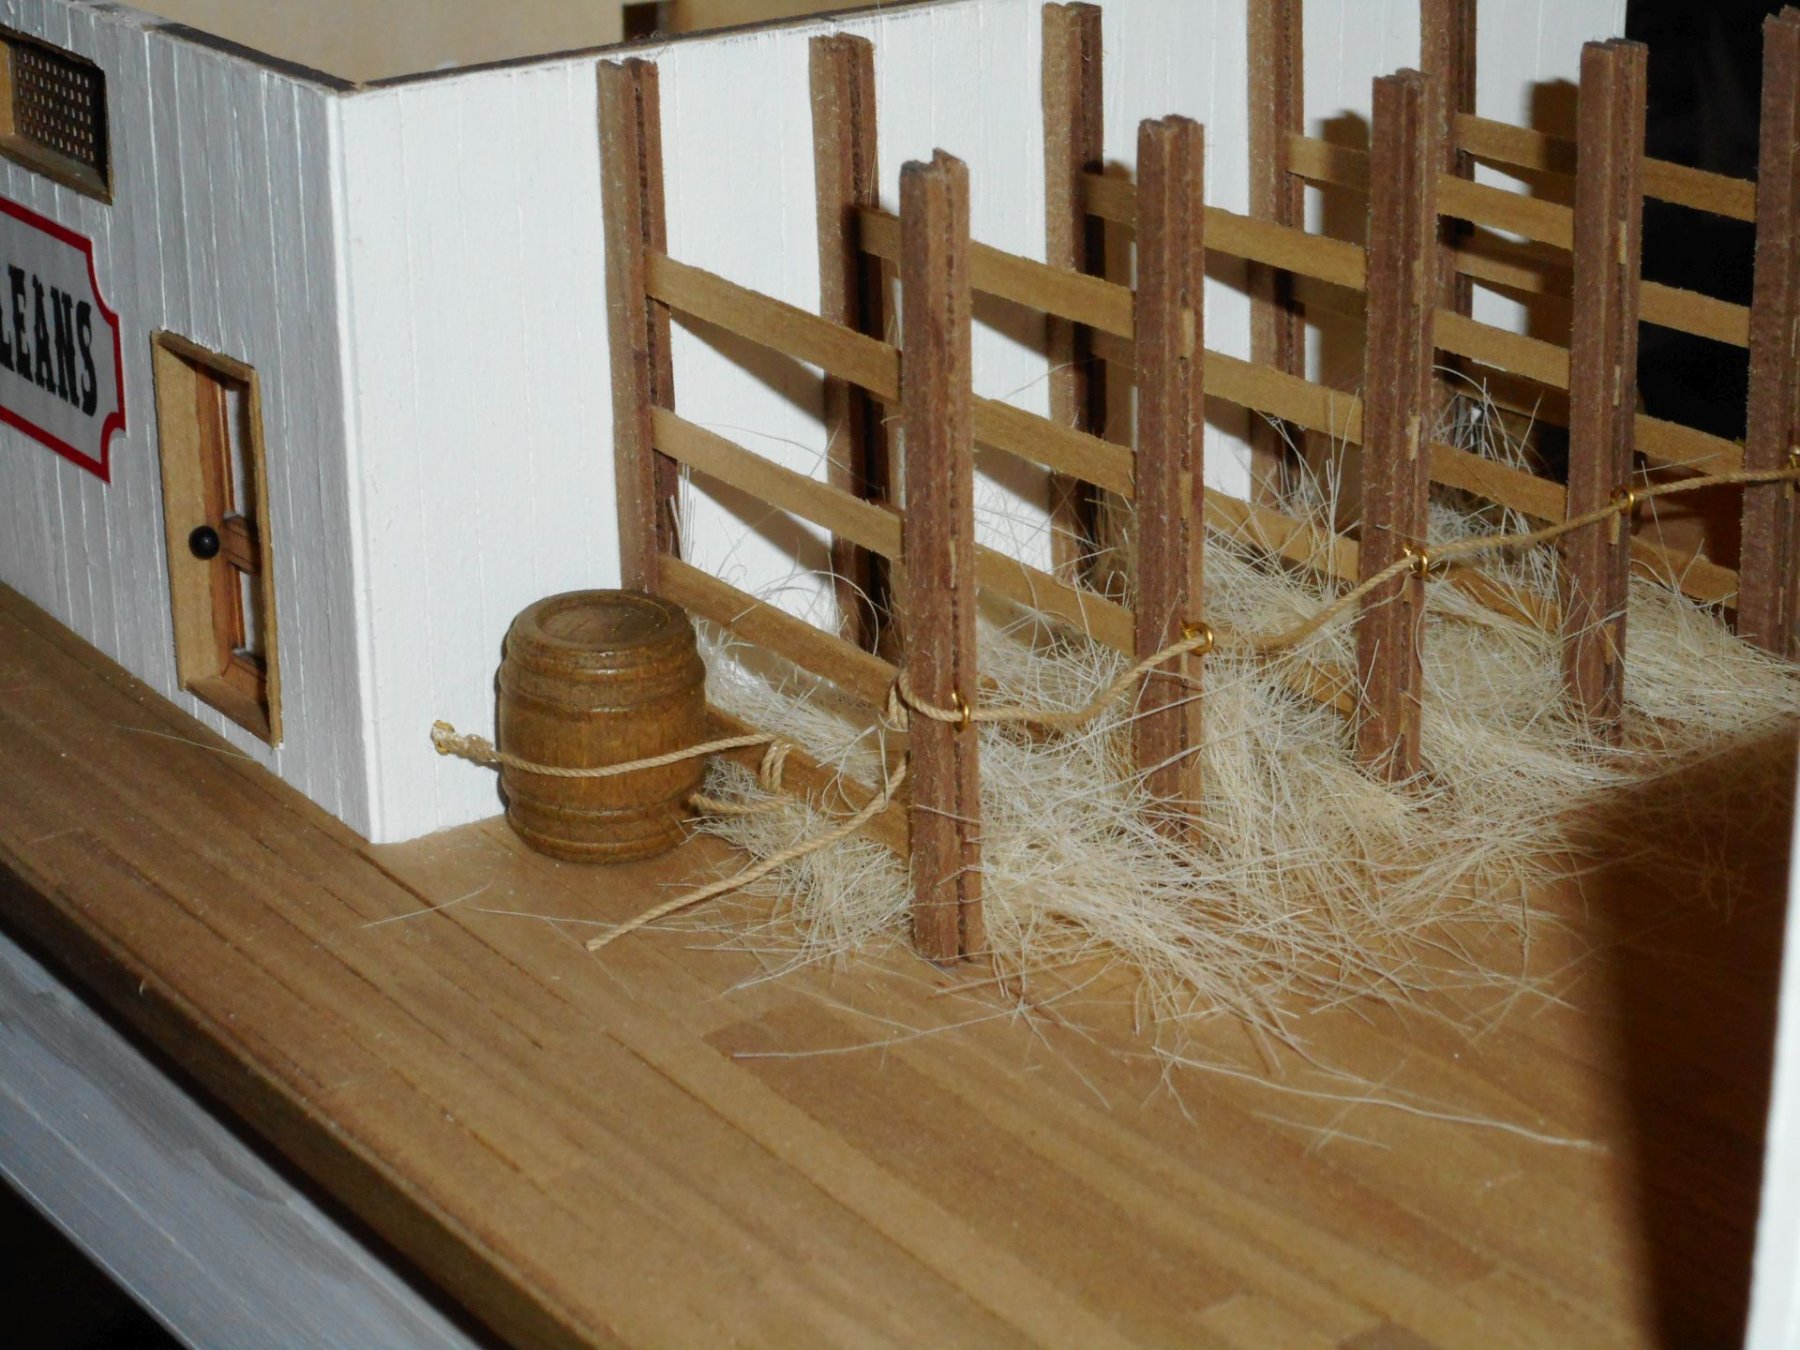
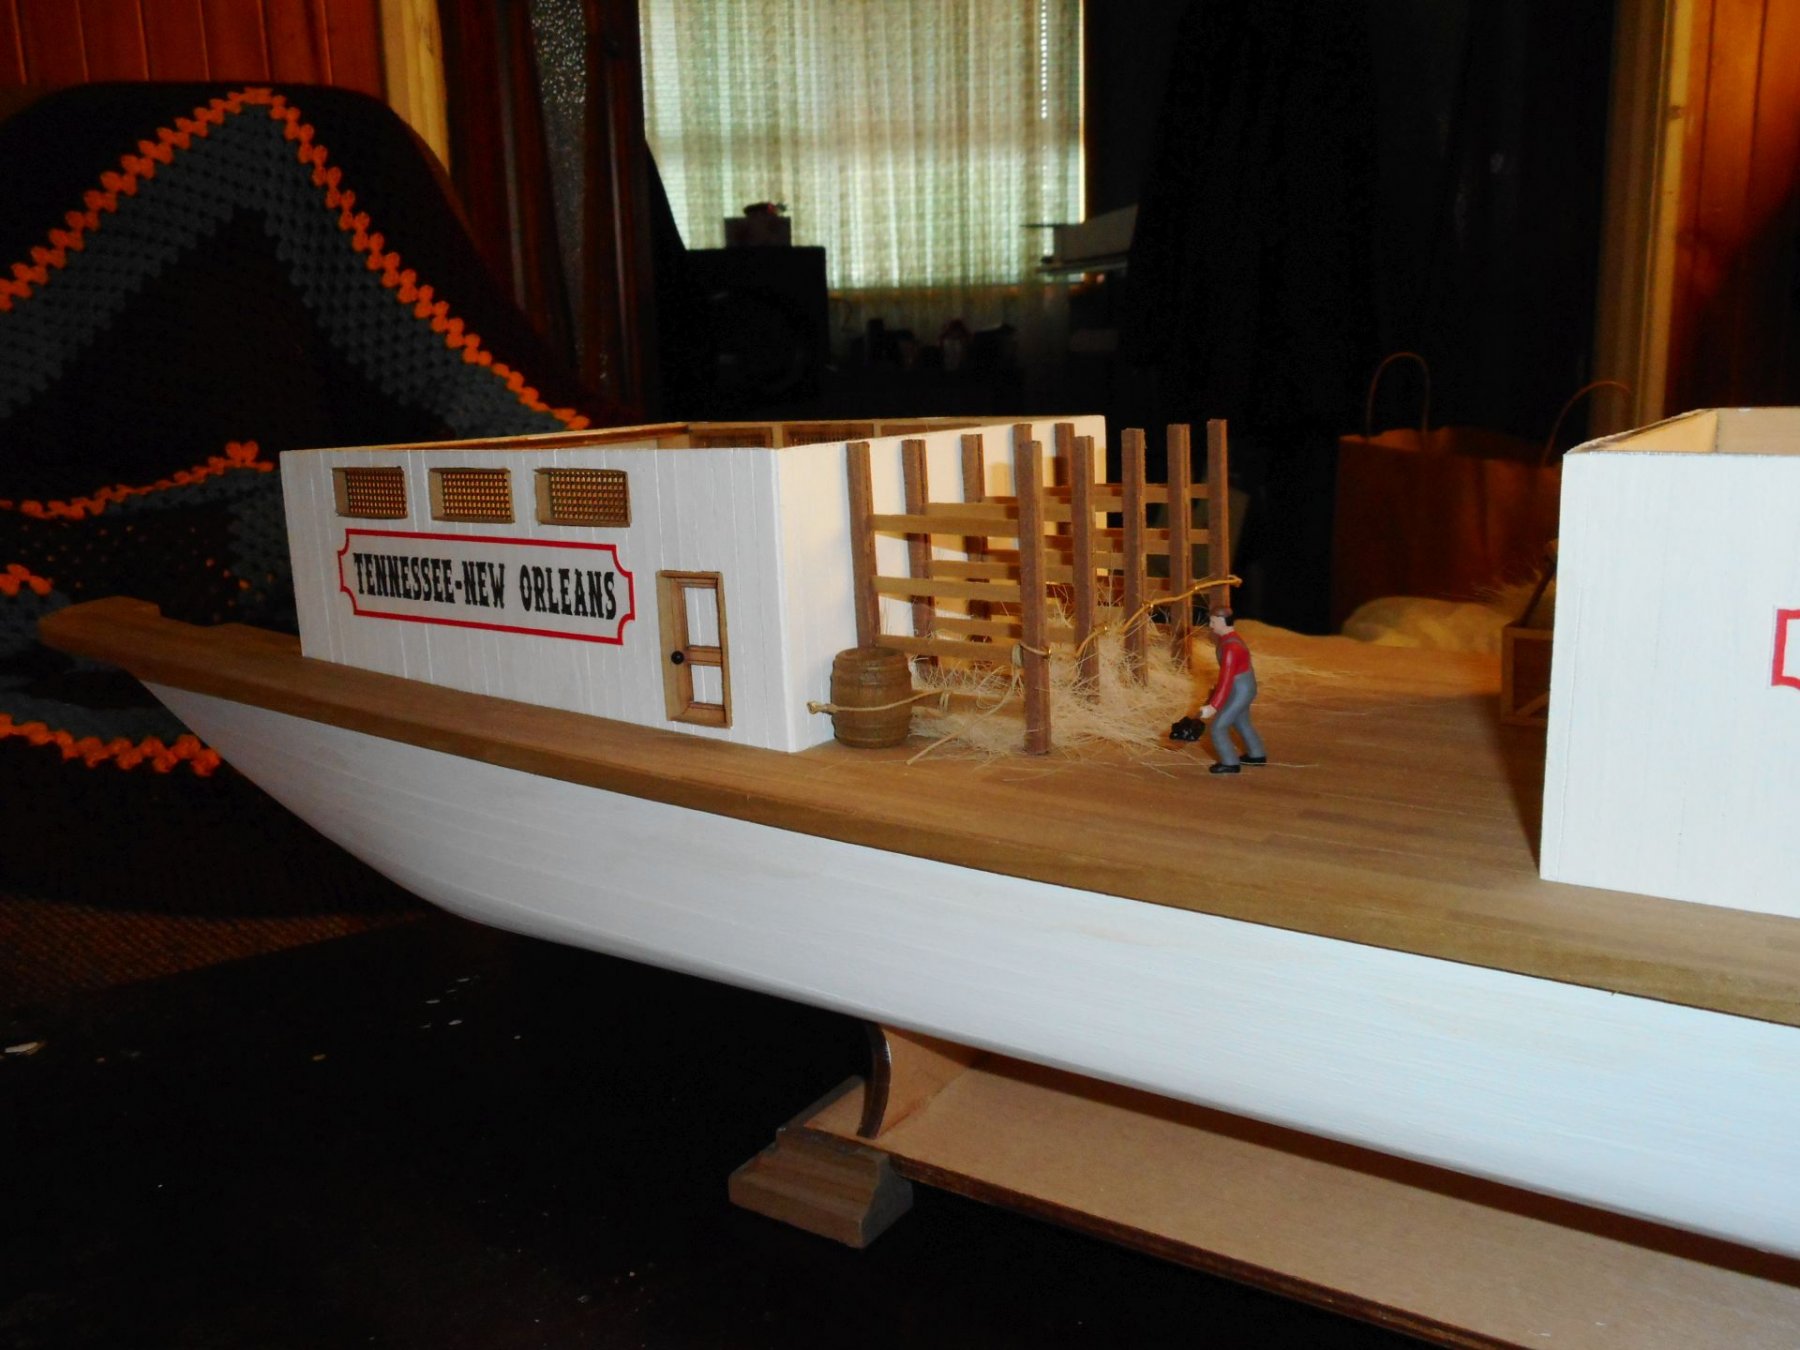
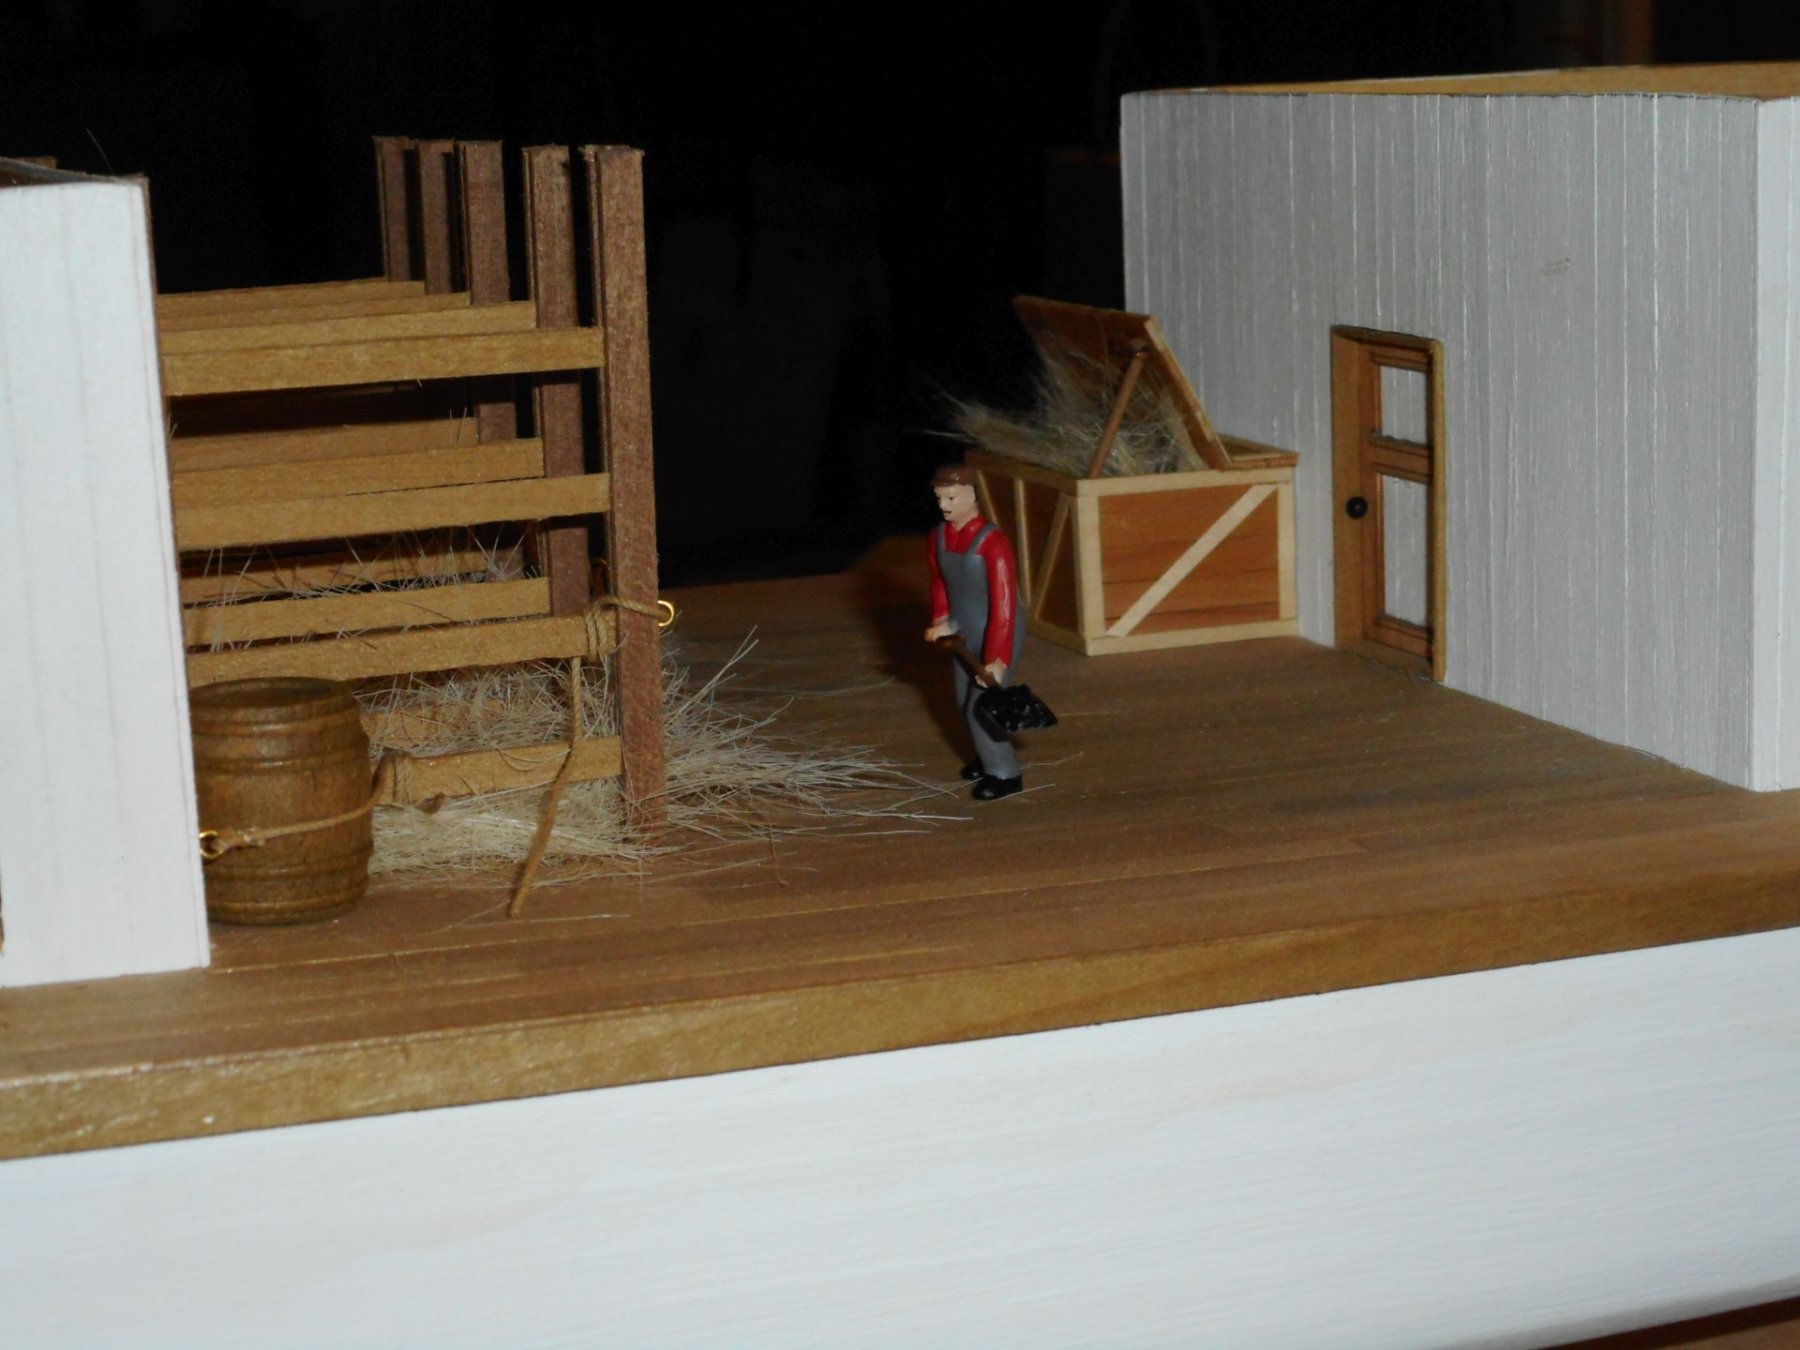
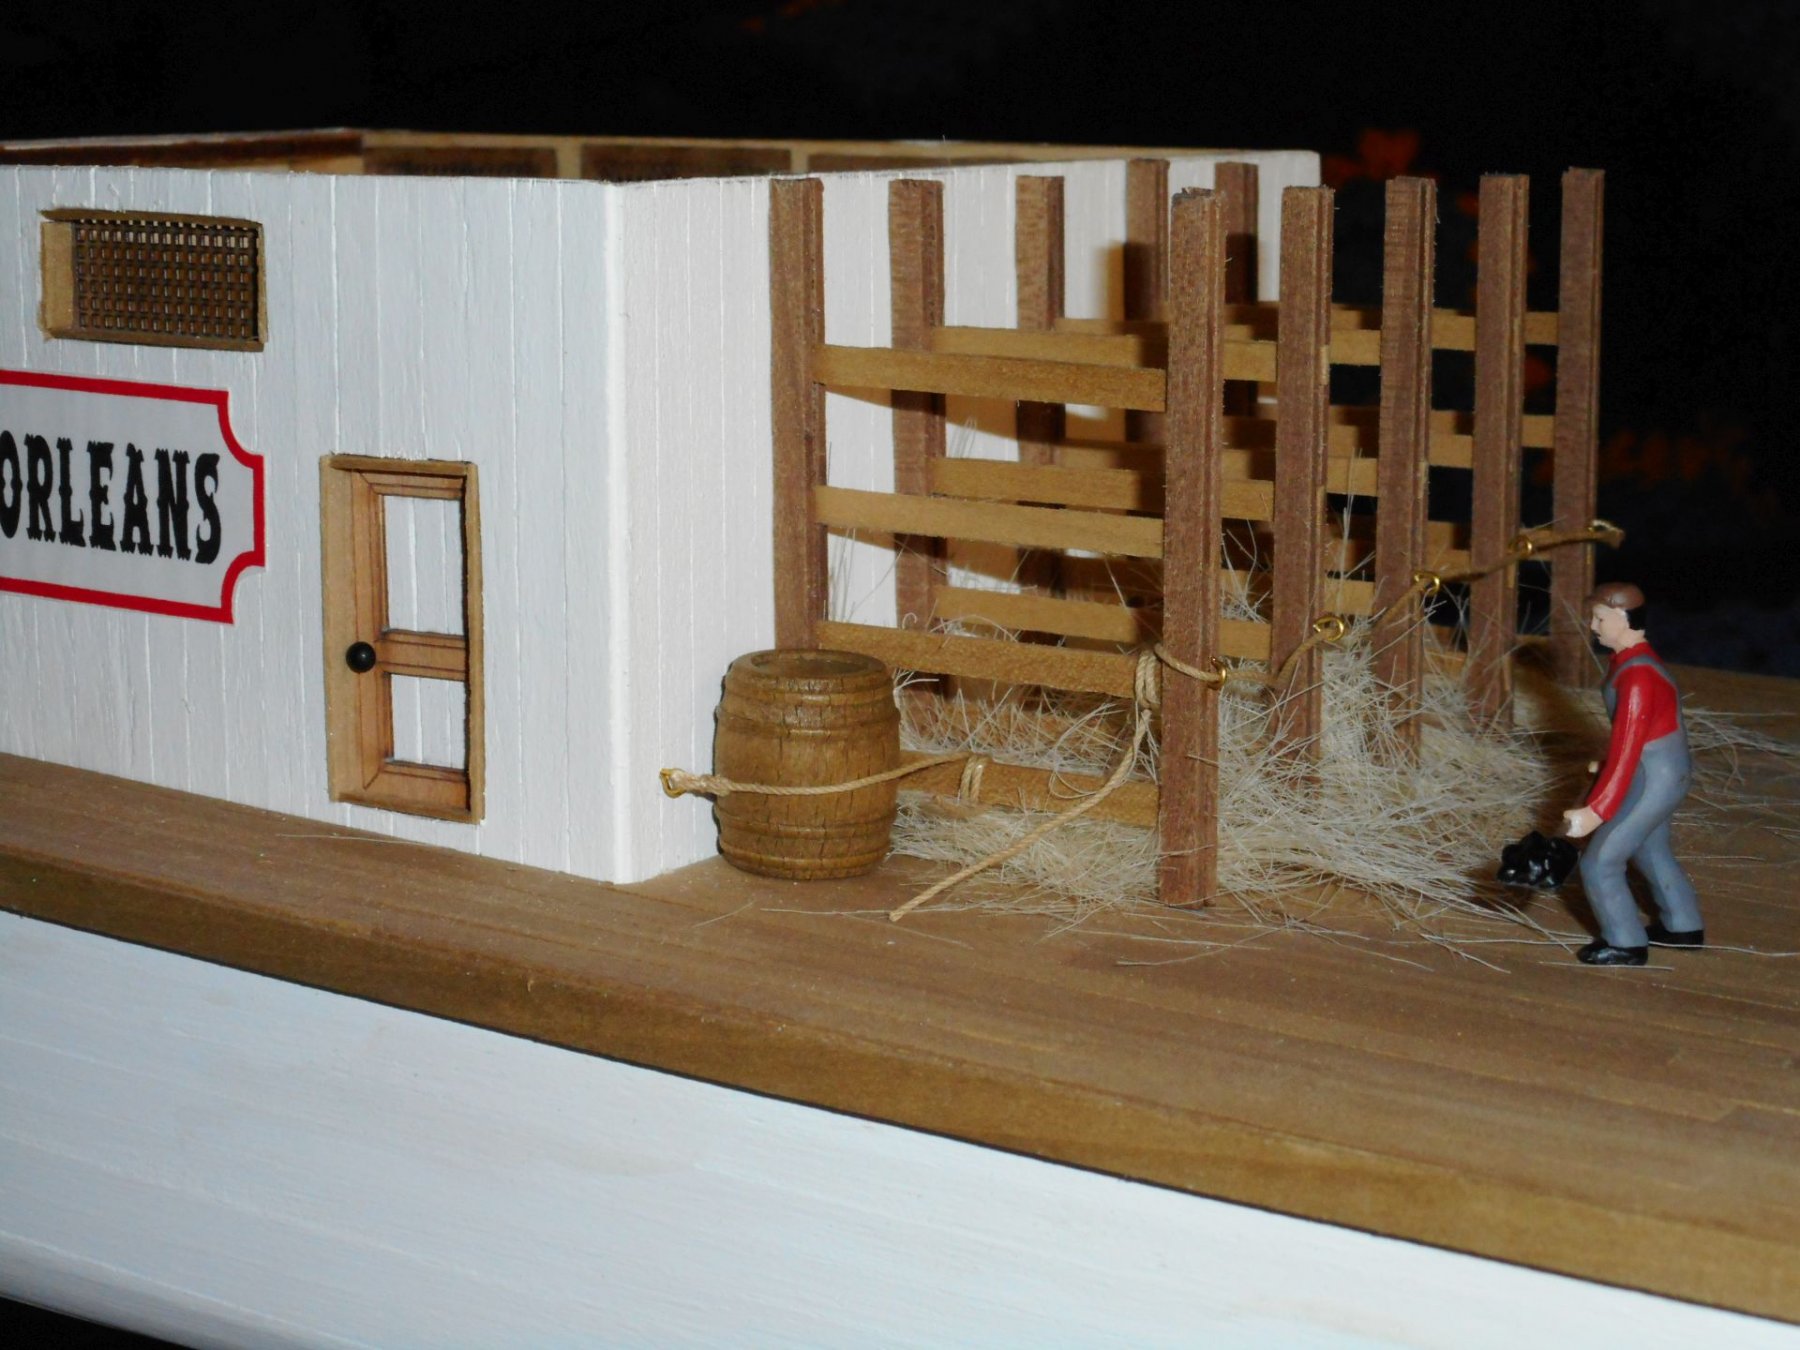
 this build log was started as a continuation of my San Francisco II as I hadn't thought of creating a new subject. I will see if I can move the first part of the post from there over the next few days. I also haven't been able to figure out how to add to my post so in the past I simply replied to it and added the info. I shall be adding more later. Here are a few photos of the progress so far.
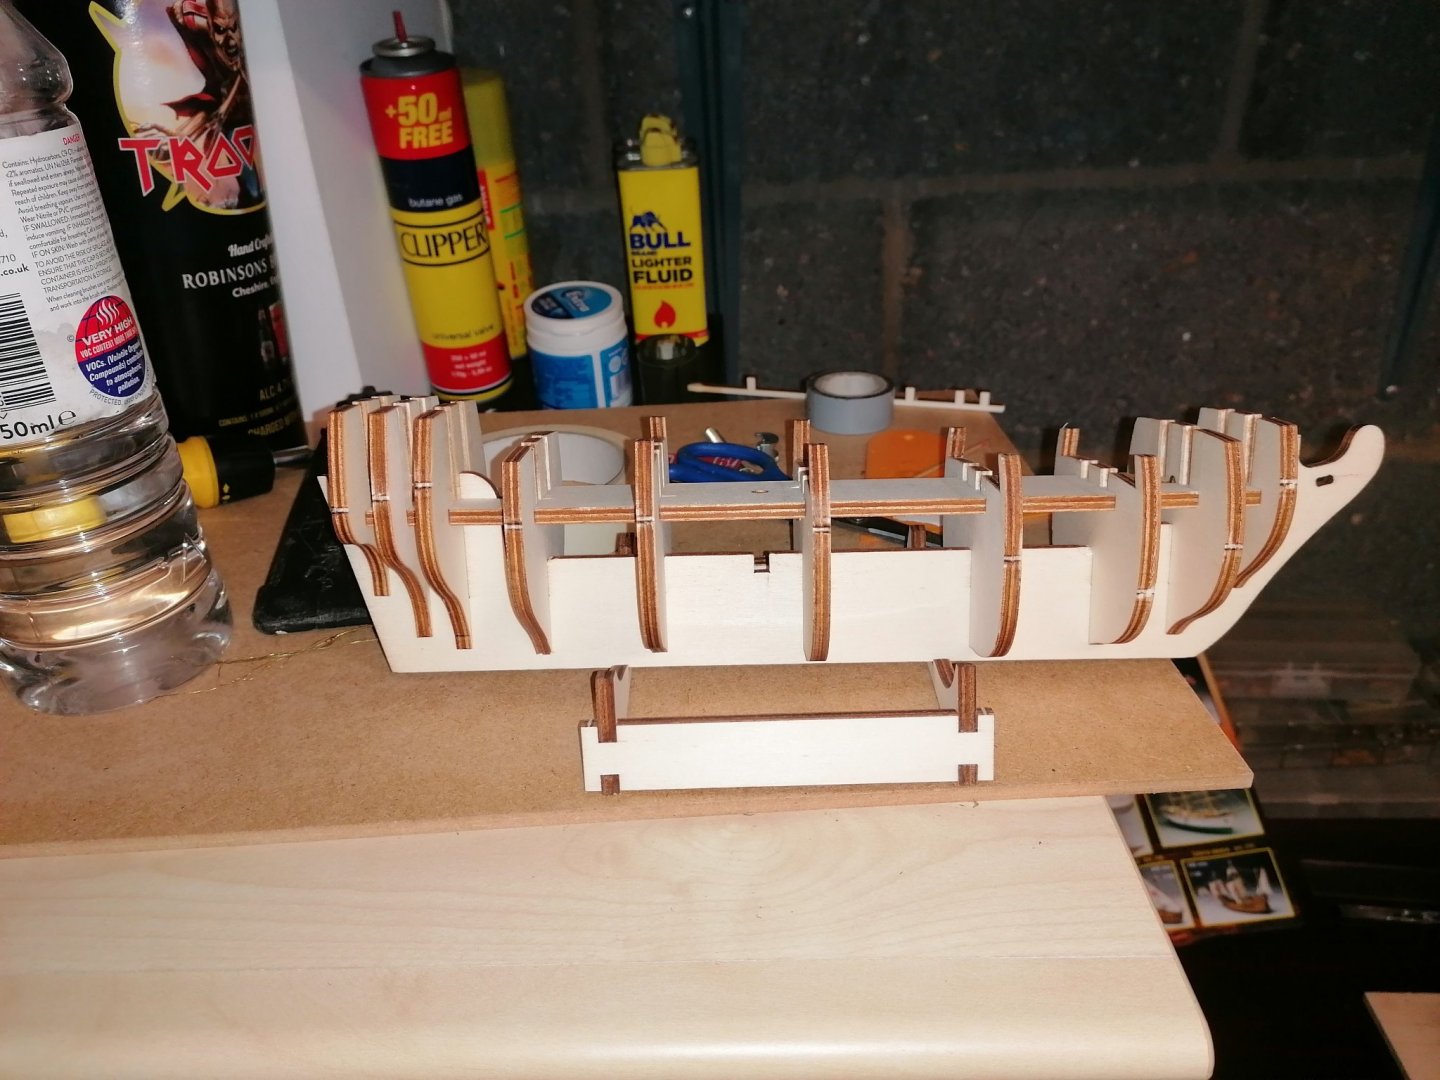


-
 Yes, another Cutty Sark build log. 😉 I have been lurking on this wonderful site for some 2 months and I cannot but start a build log myself about the beloved Cutty Sark. Let me first introduce myself. I am living in Belgium, so English is not my mother tongue, forgive me therefore my mistakes in English. As a youngster I started building plastic planes, the Cutty Sark and Saturnus V rocket, but also gliders (Kleine UHU from Graupner, Piviere from Aeromodelli and a glider based on my dad’s plans) and a motorplane (Taxi from Graupner) in balsa wood. A sailing boat (Collie) and a motorcruiser (Nautic – both from Graupner) completed the collection. At a later stage I built a tugboat (Oceanic from Revell) and started on a pusher boat Thyssen II from Graupner. While at sea, I built the Harvey 1847 (from Artesania Latina) and Bluenose II (from Billing Boats) with little tools. Children, chores and other hobbies kept me away from modelling. Now as a retiree, I have more time but also more hobbies, but modelism is becoming more and more important in my daily life. So I started by renovating my Collie, as well as my Kleine UHU and completed the Thyssen II. Going out and flying/sailing with my models will be for after the pandemic and in the meantime I dusted off my Cutty Sark from Sergal. Renovating Harvey and Bluenose II will help me in improving my skills. I bought several books about the CS as well as general books on POB modelling. I also discovered Modelshipworld and now I cannot wait any longer to get started – or continue as only the bulkheads have been placed on the keel. As I aim for a very detailed ship and will be consulting Longridge book, comparing with the Campbell plans, I allow myself a 10 years building time frame. Leo
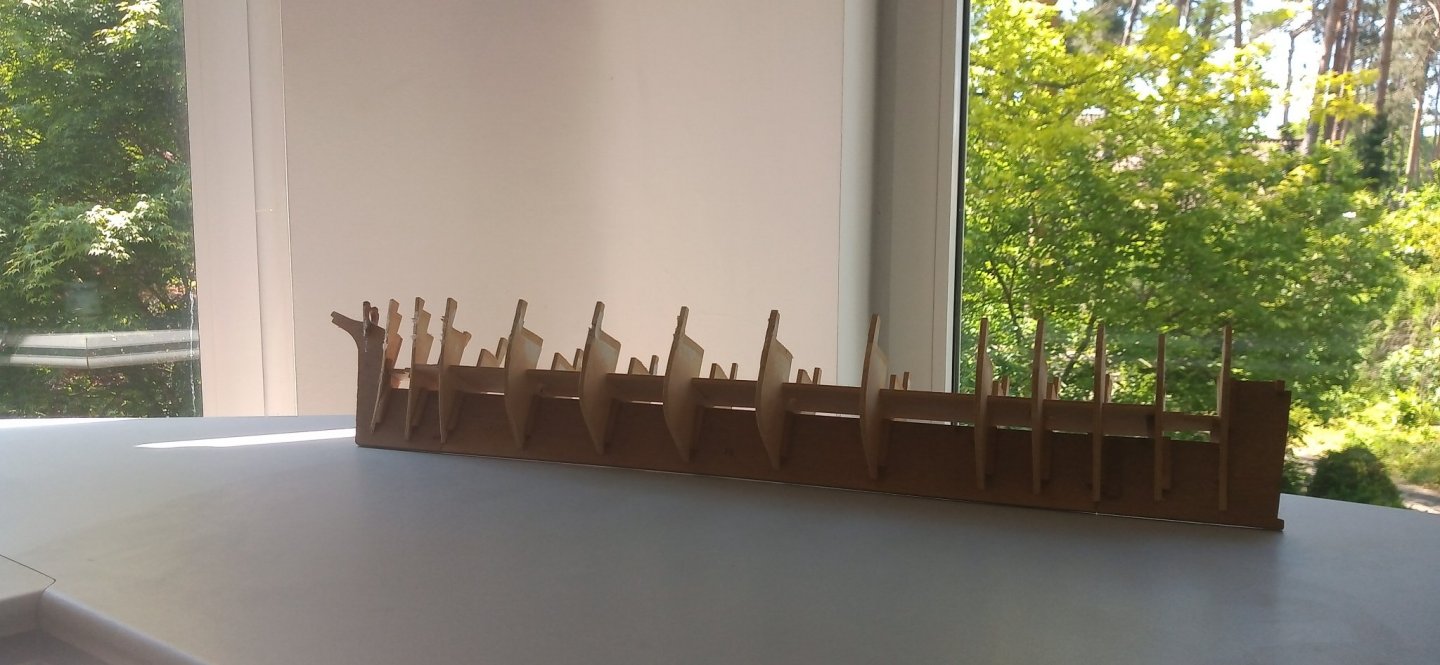
- 35 replies
-
- 2
-
-
- Cutty Sark
- sergal
- (and 1 more)
-
 Just to start my build log. Nothing to post yet!!!
.JPG.fedf81f8ddf5dd027c3a9e420c33dd83.JPG)
- 35 replies
-
- 5
-
-
- Mantua
- Sovereign of the Seas
- (and 1 more)
-
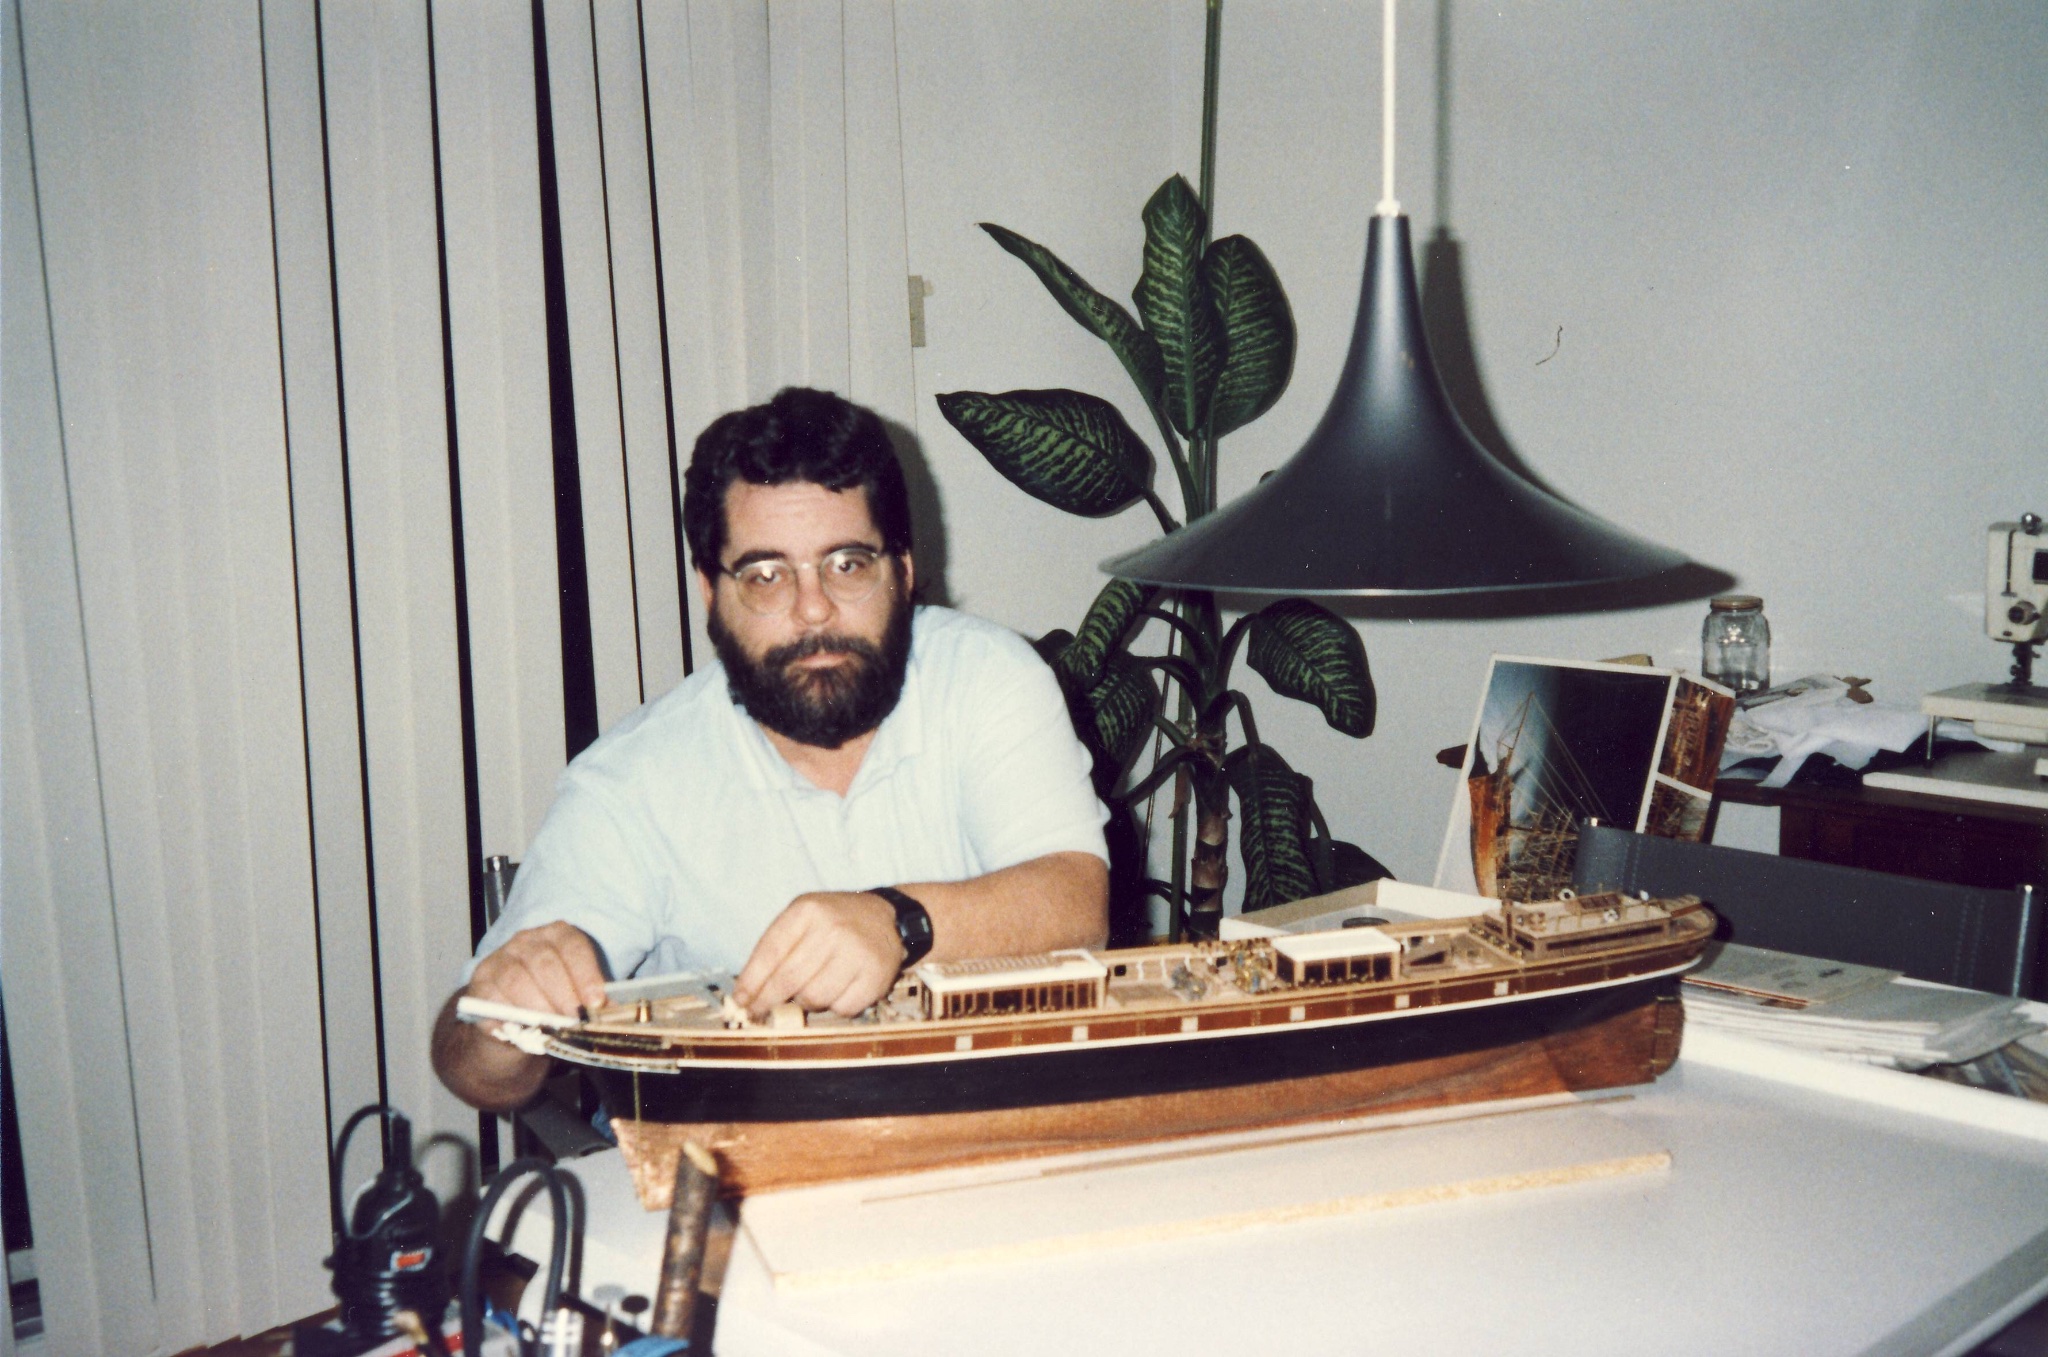
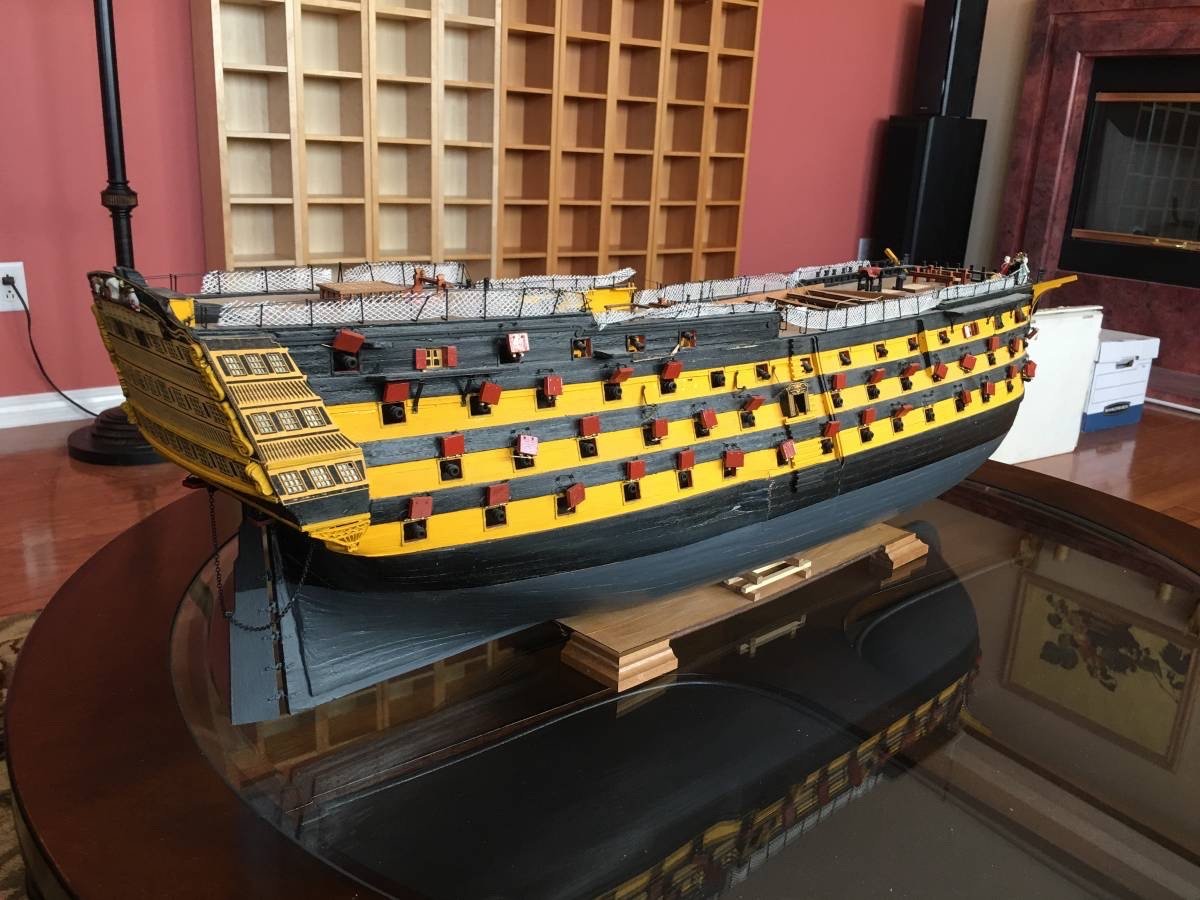
 I built the model a few years ago in 1985, visited the real thing in 1997 & in 2012. My daughter did the painting.


-
- 3
-
-
- Cutty Sark
- Sergal
- (and 2 more)
-
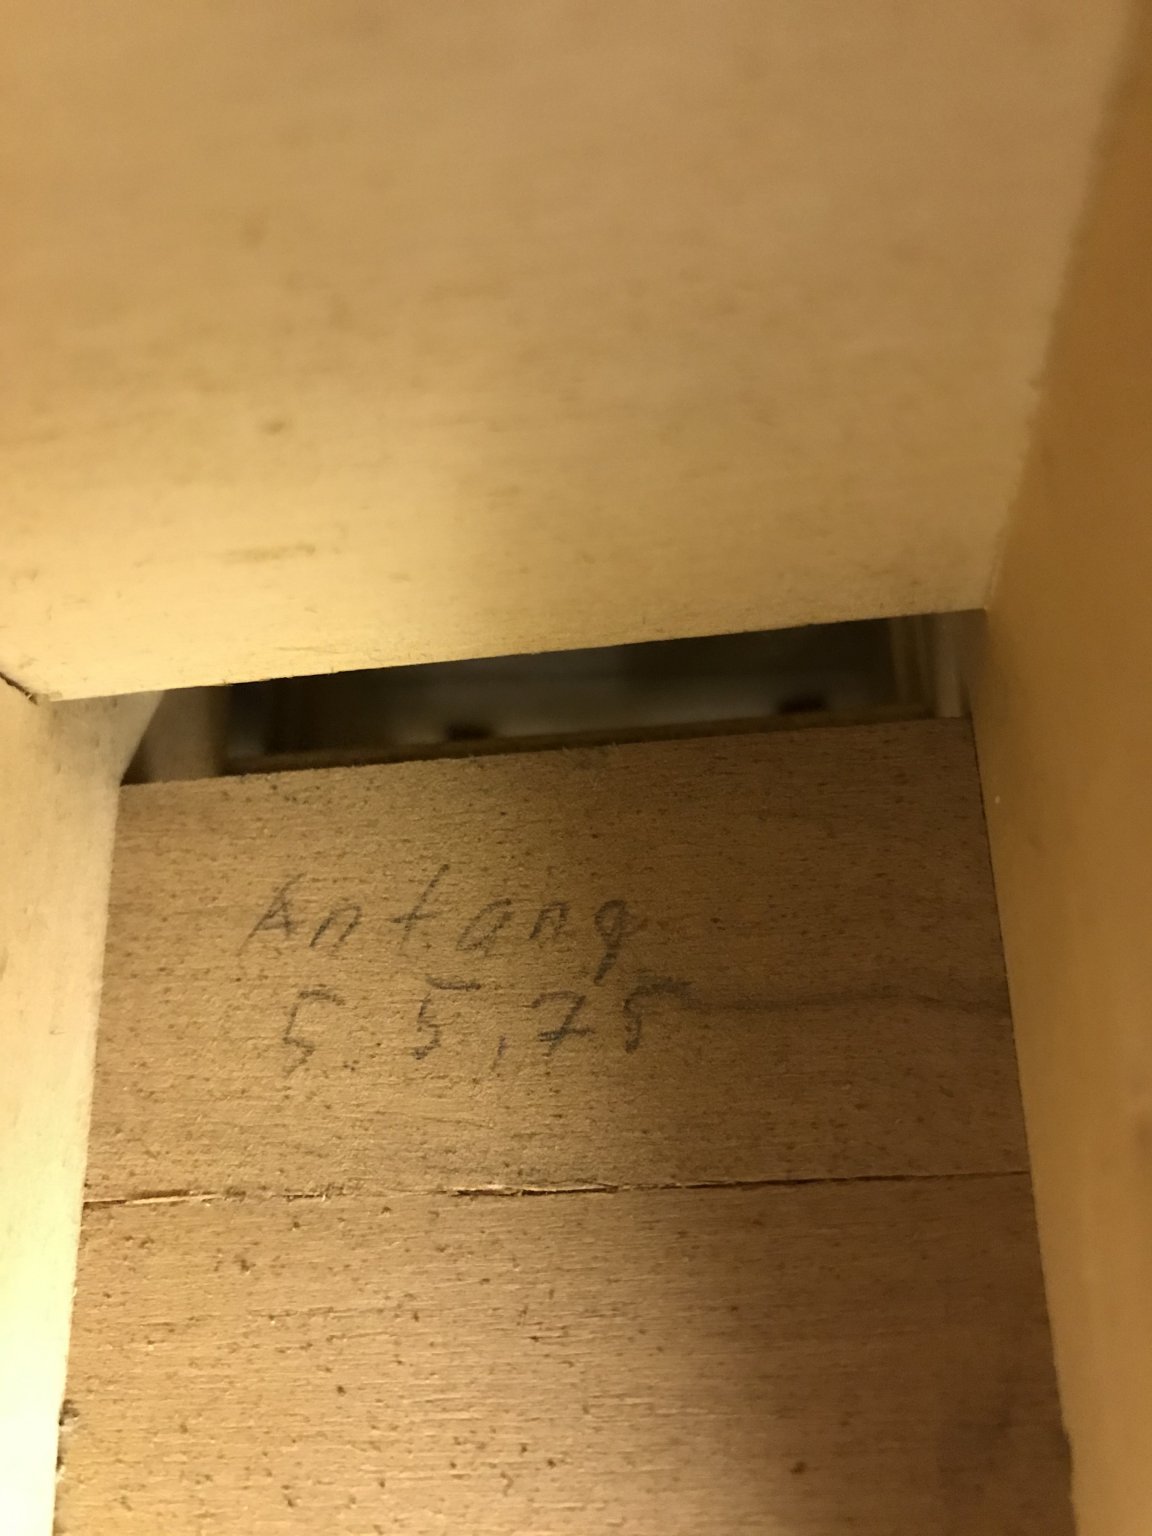
 I started to build this ship in 1975. But after a short time i´m boring so i went to build a little easier ship The Golden Star and a middle cut from the HMS Victory now after a long long Time i put my beginning again to the shipyard and hope i can finish it with your help.
-
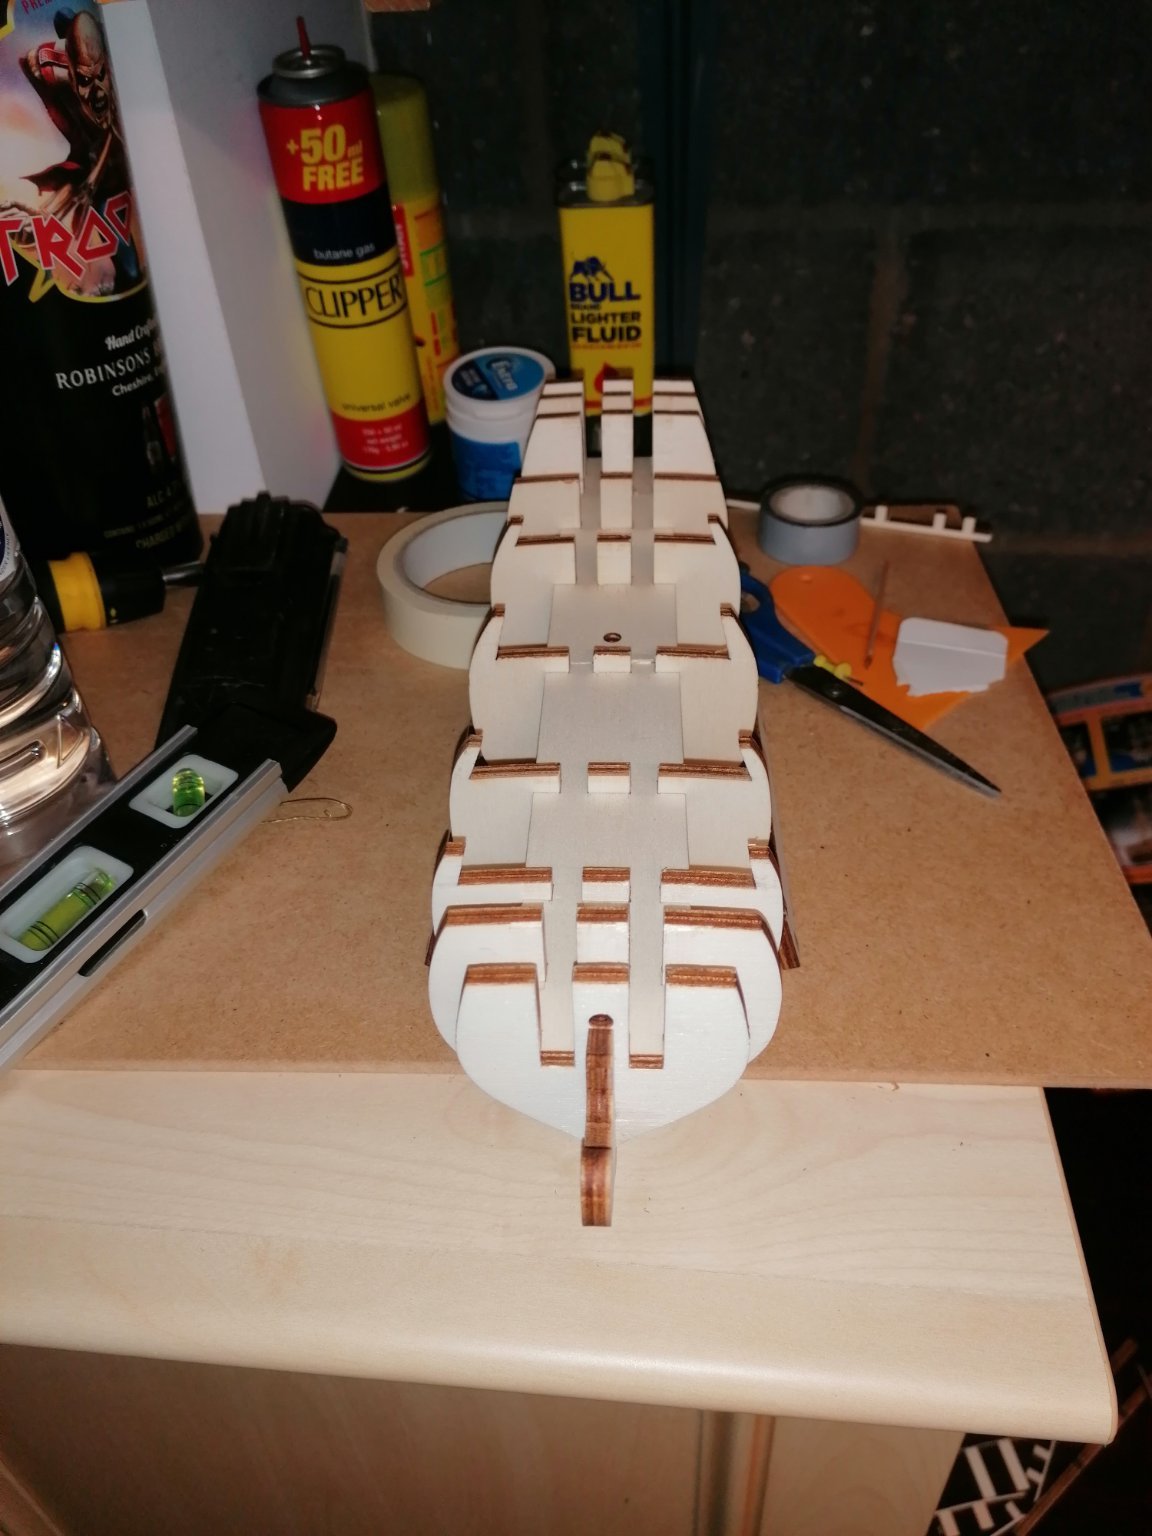
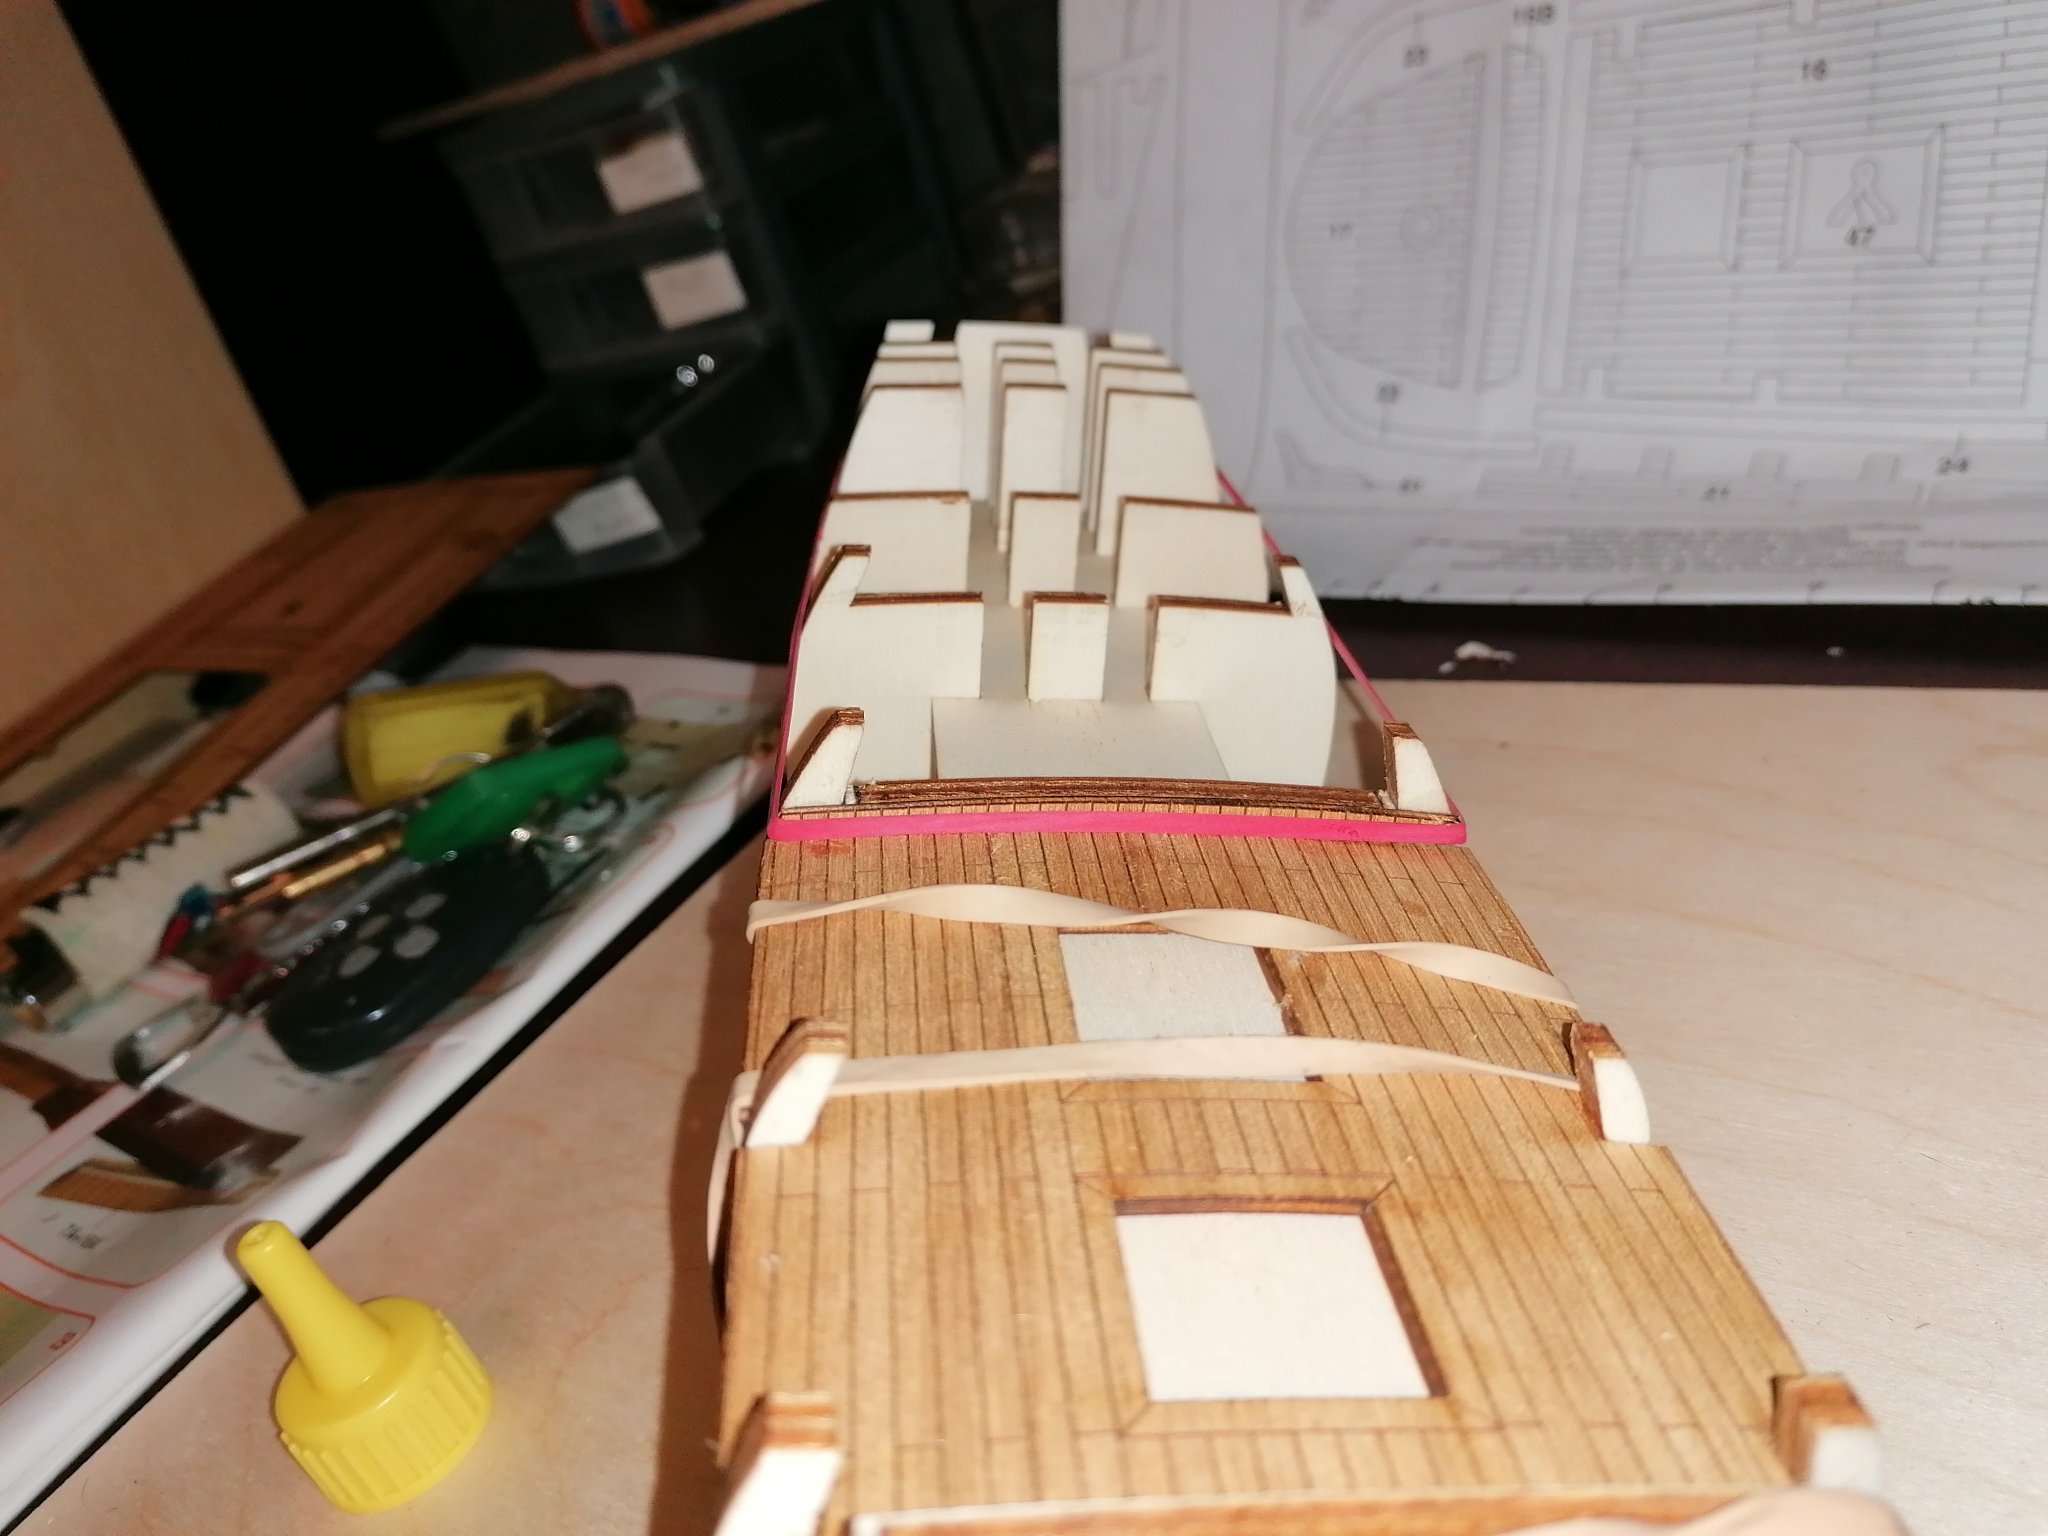
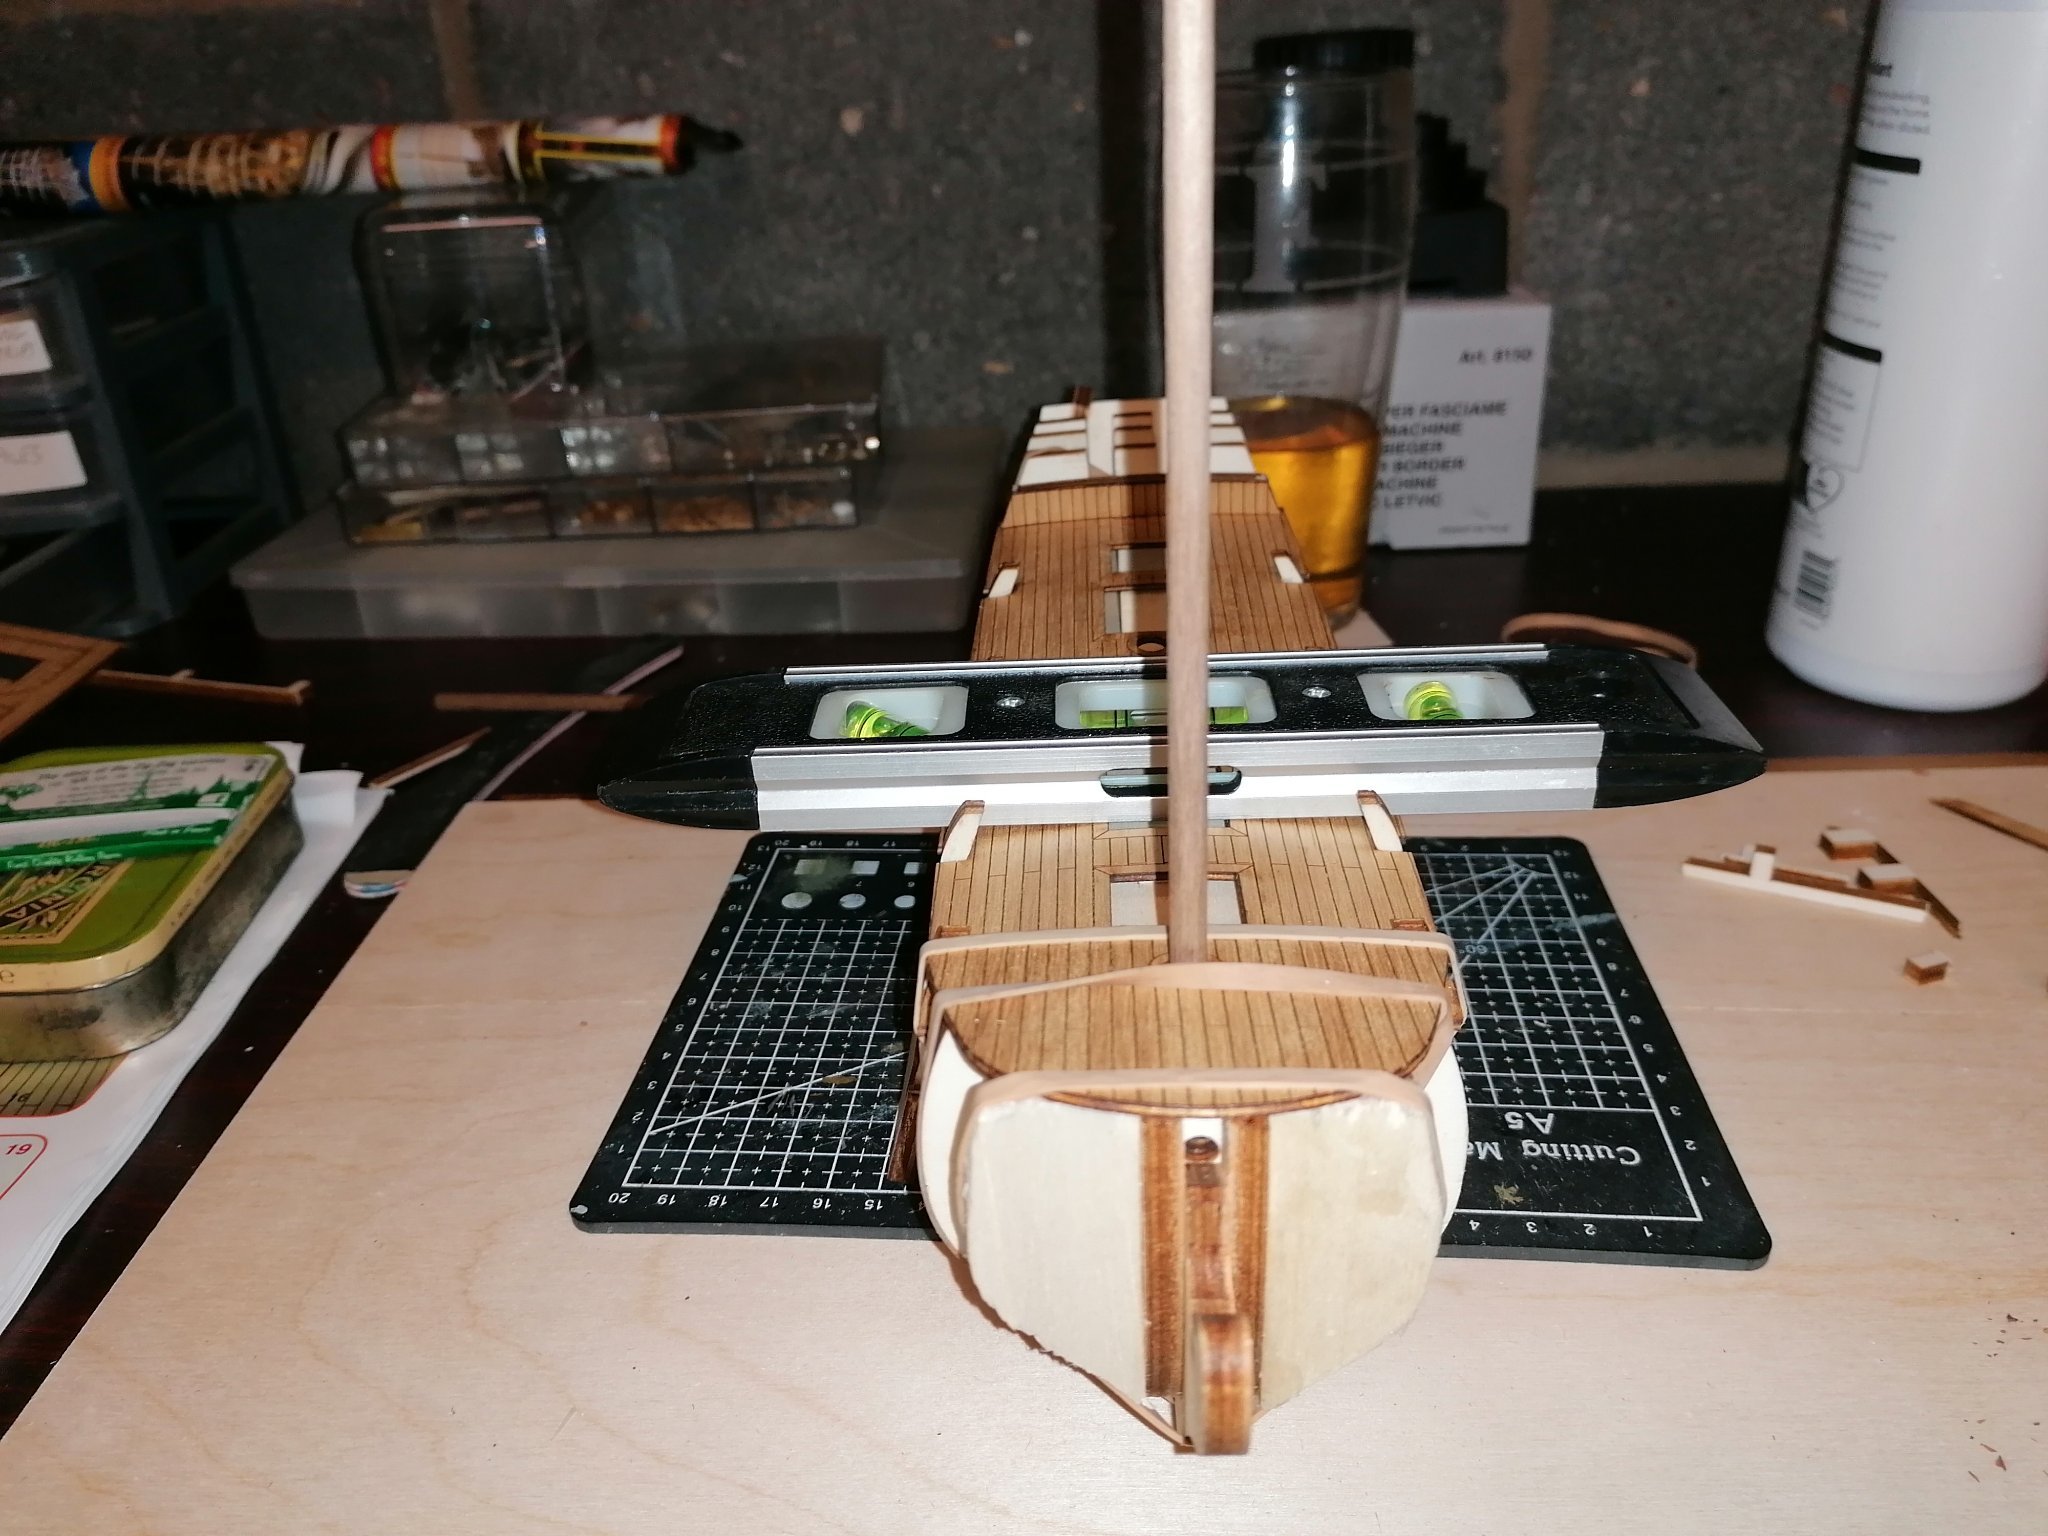
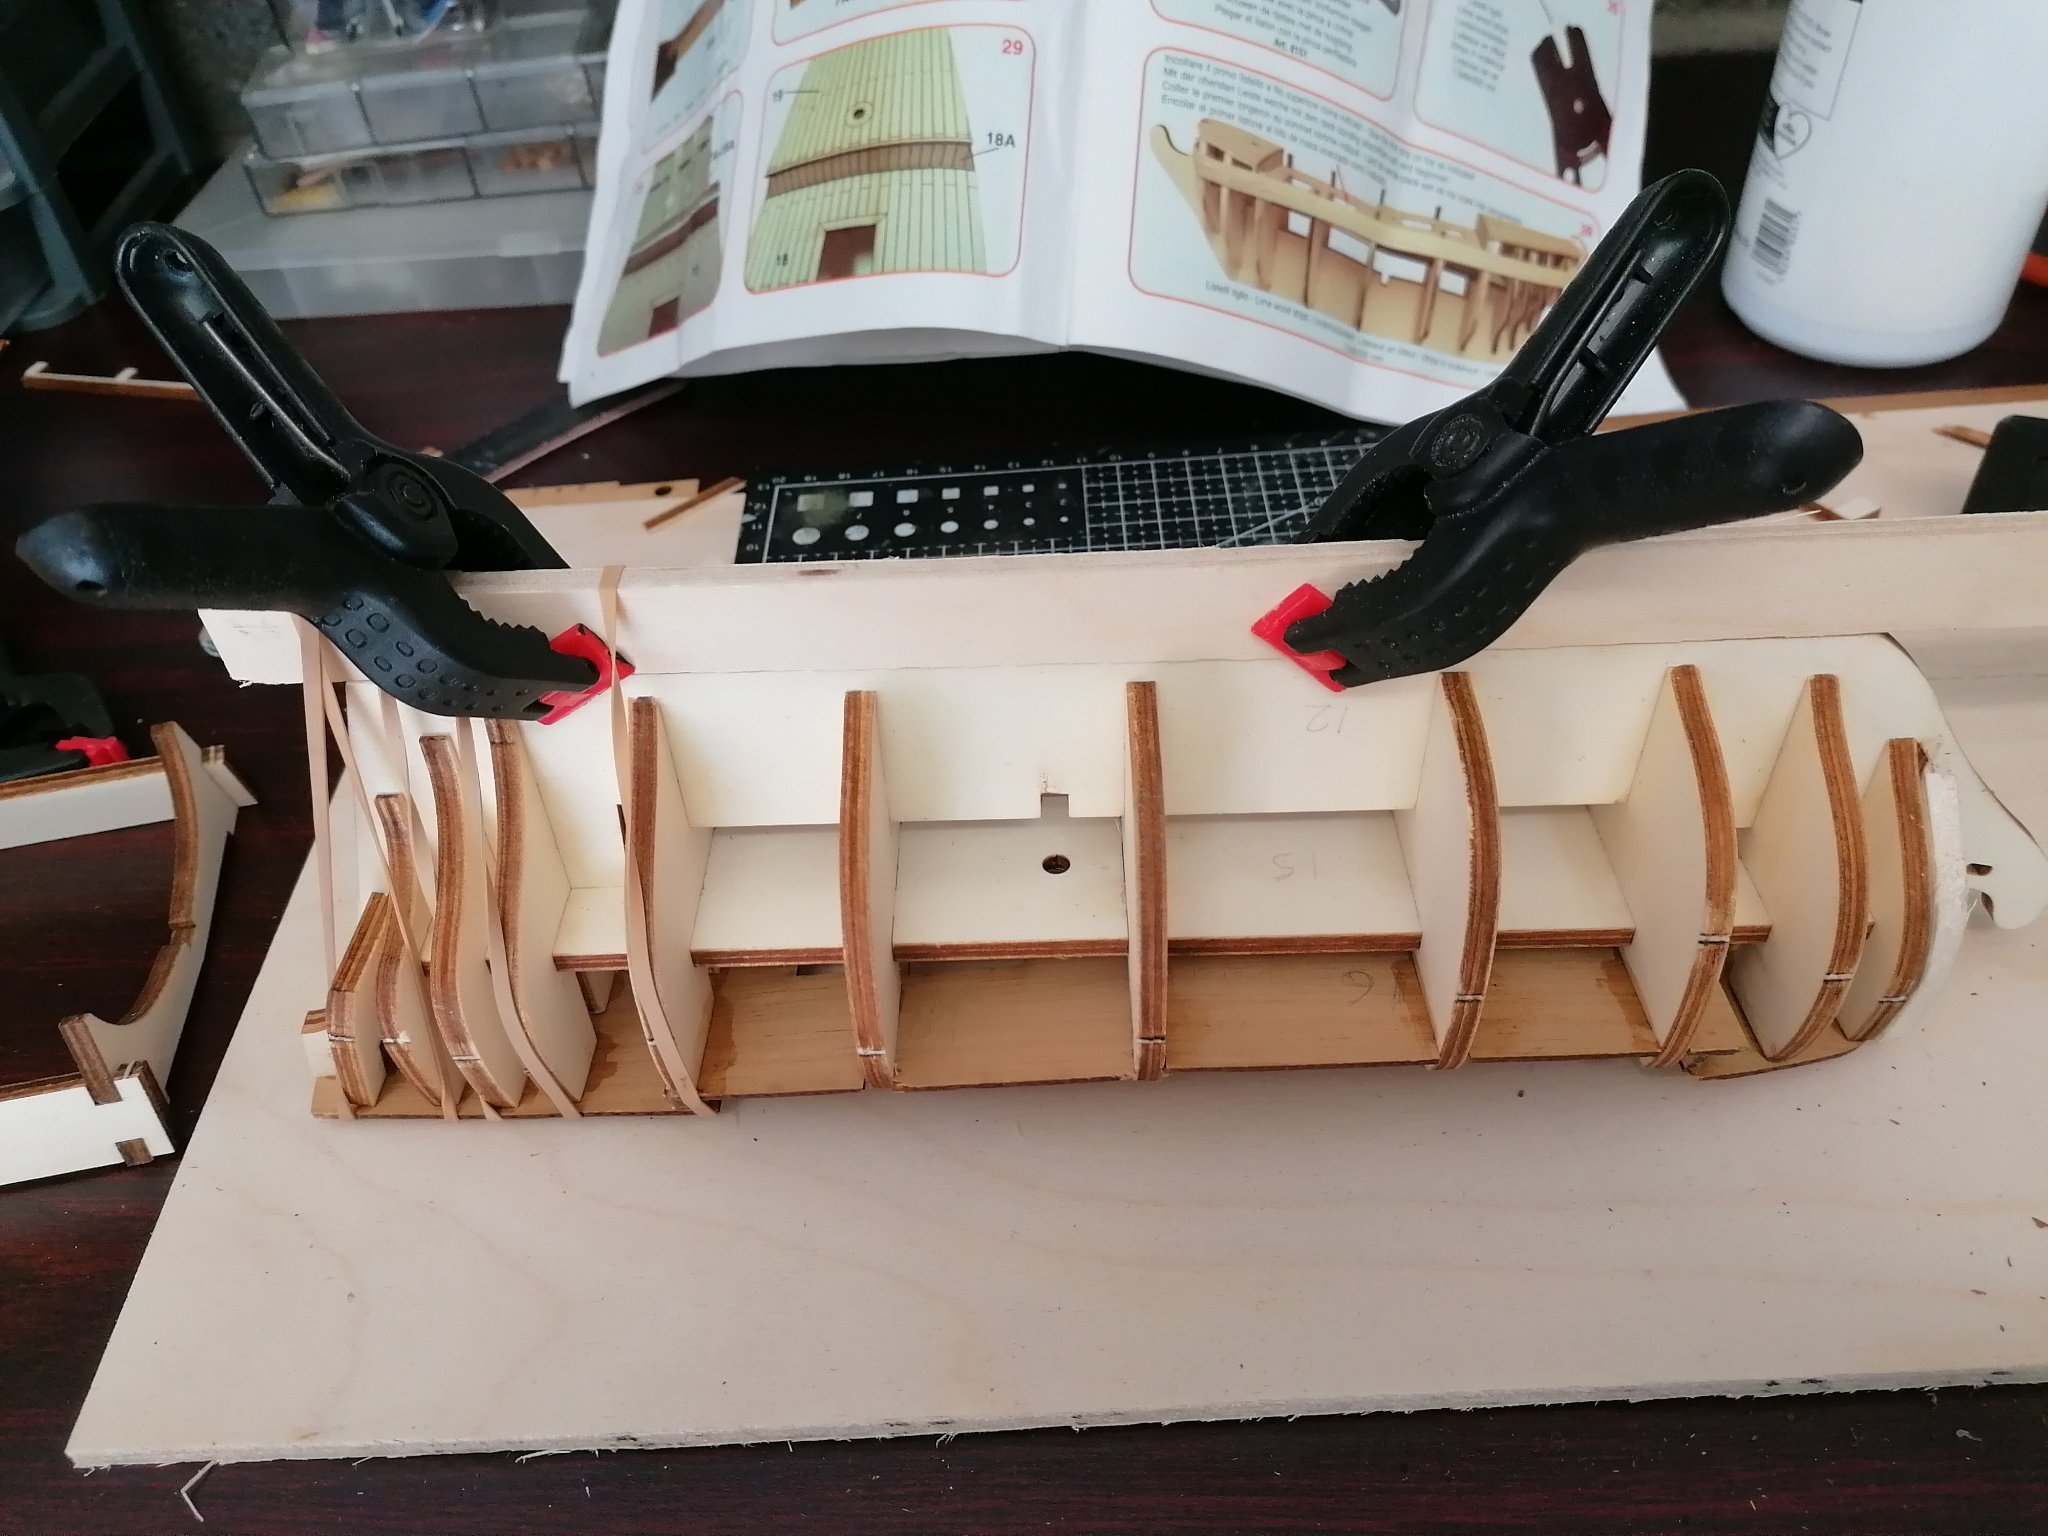
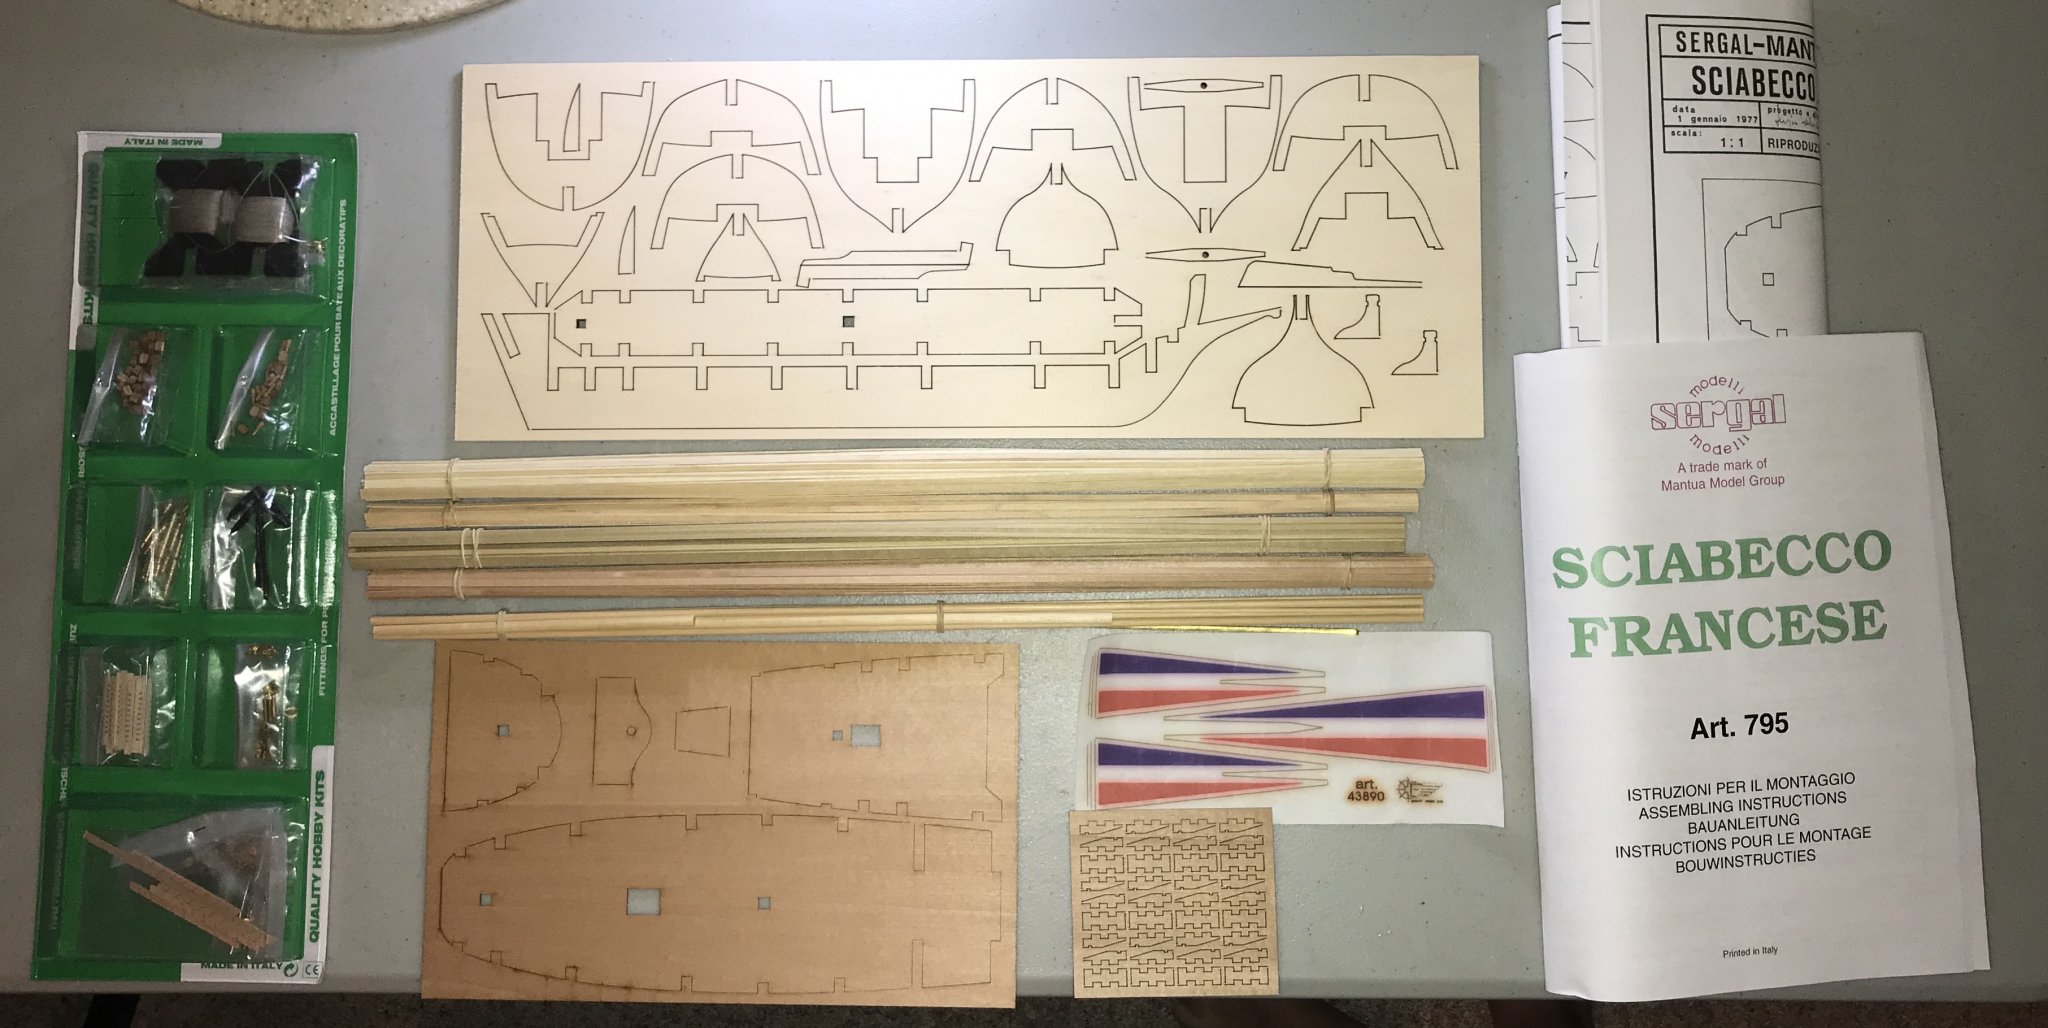
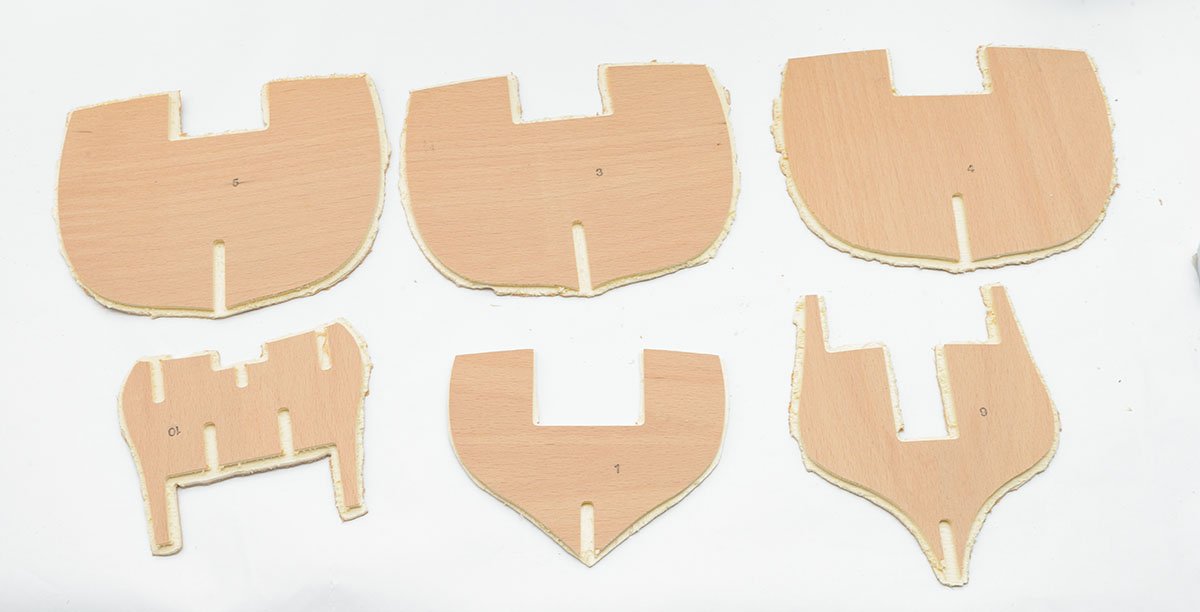
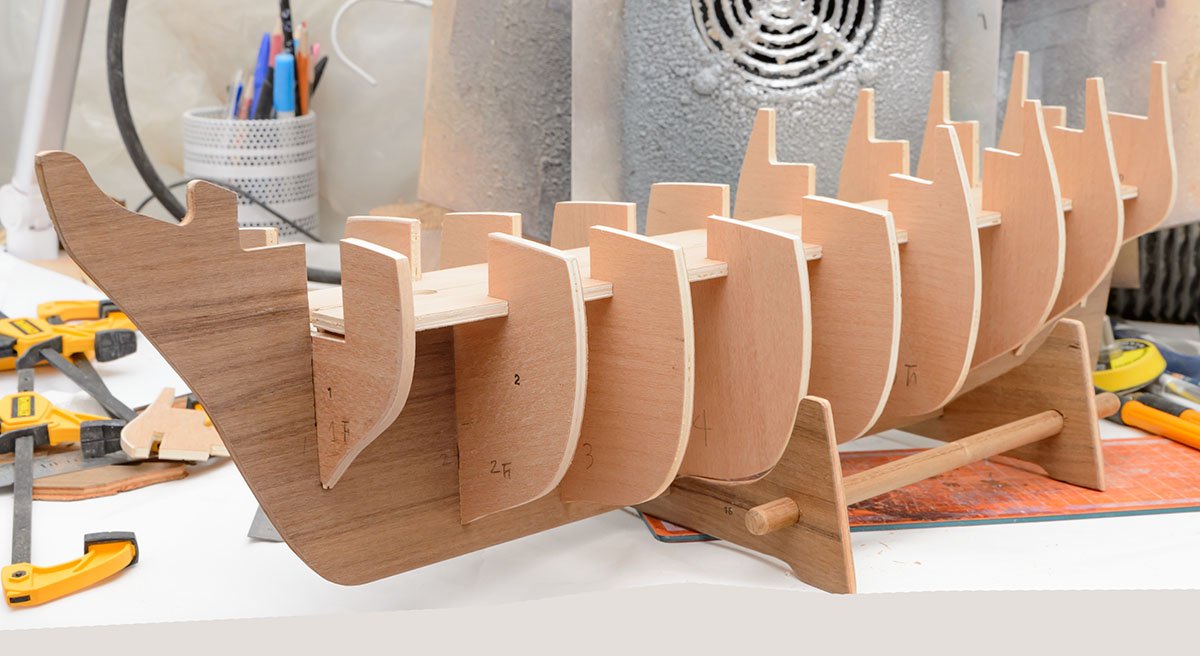
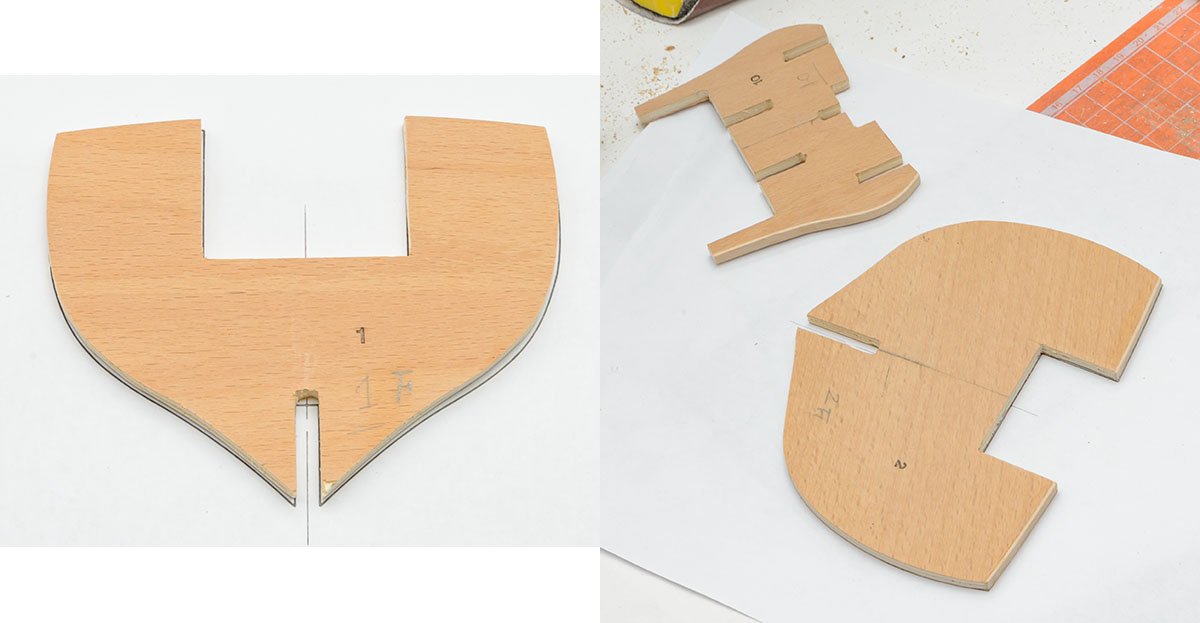
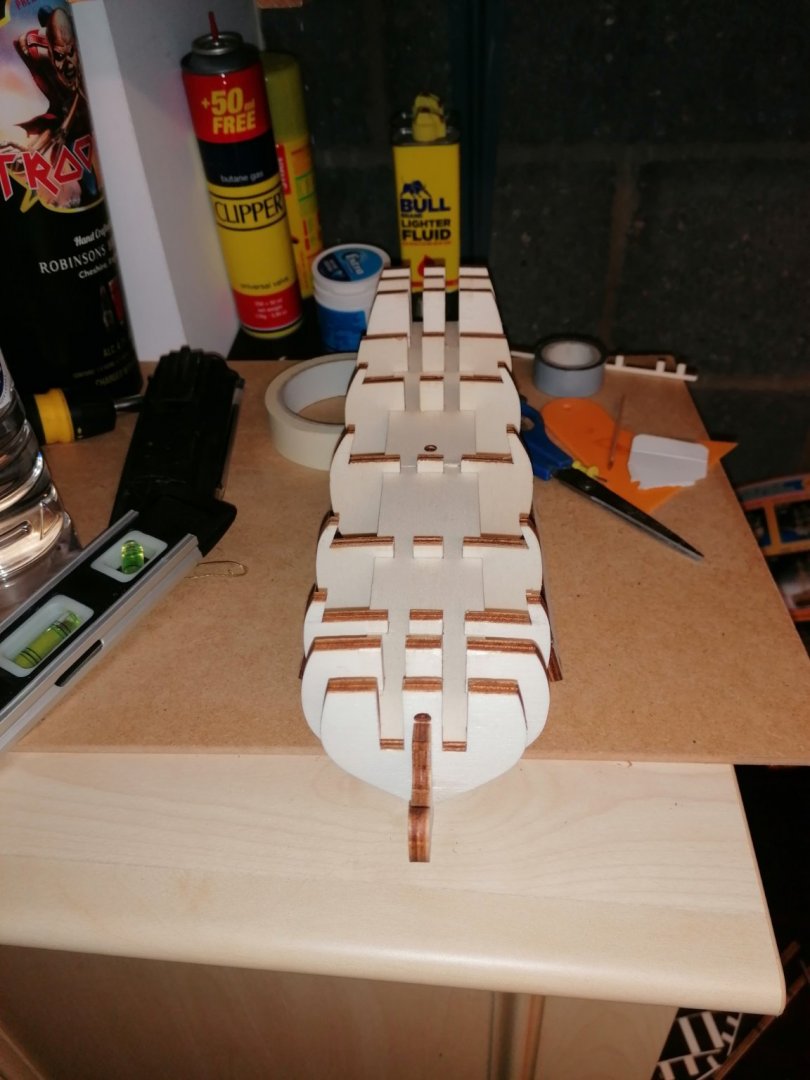
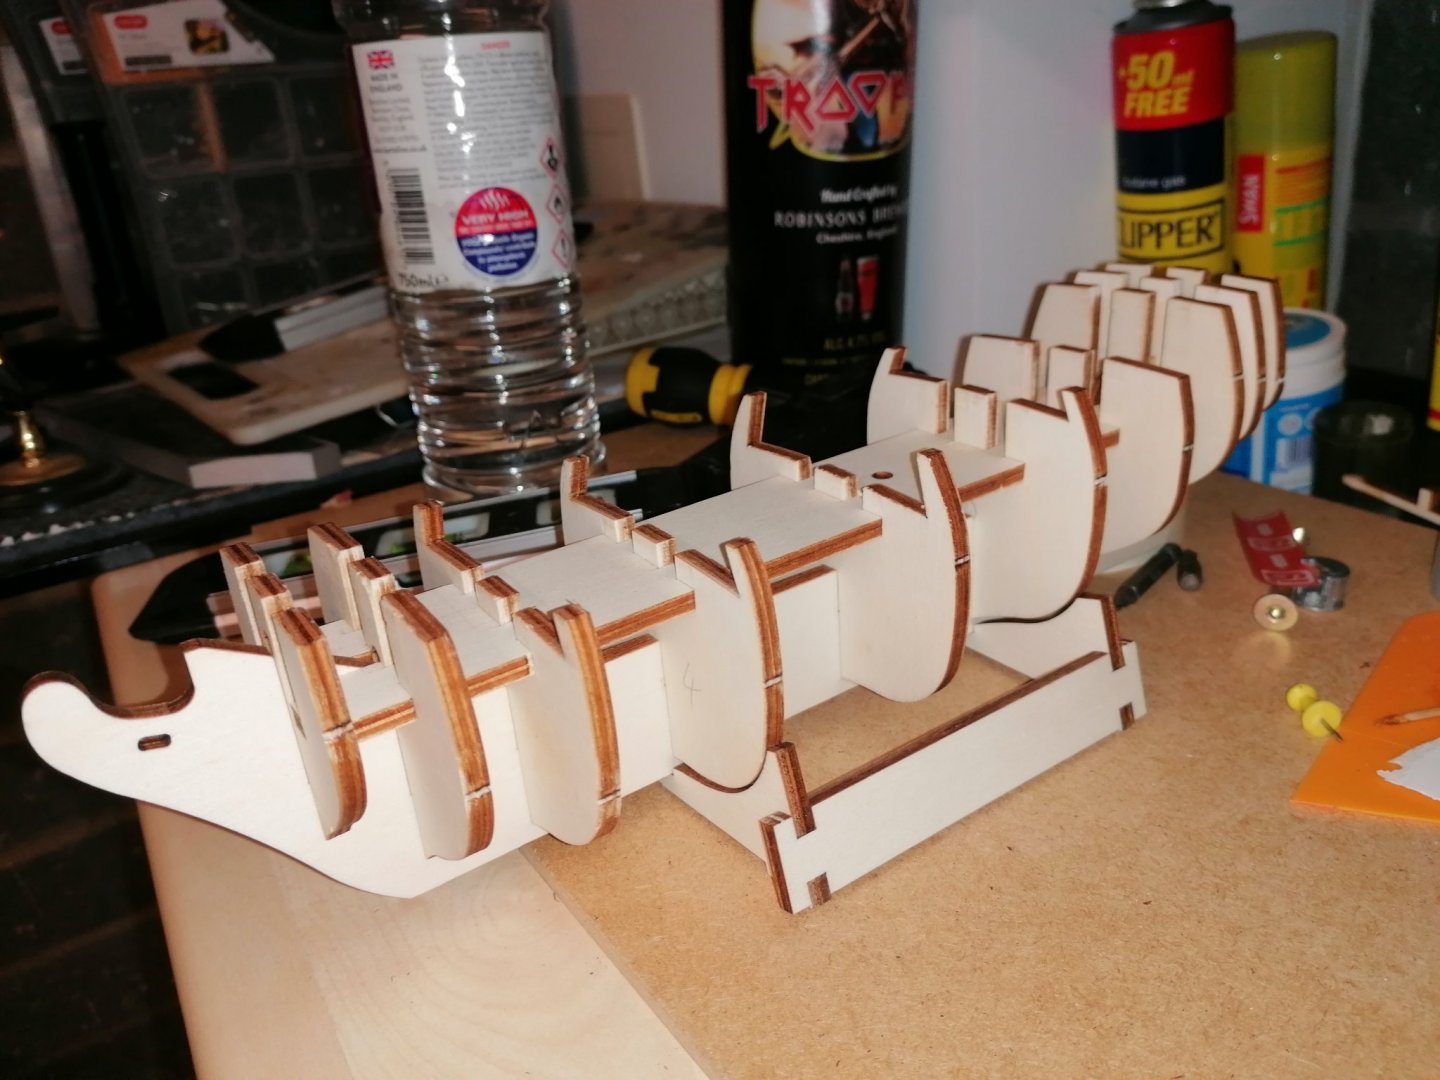
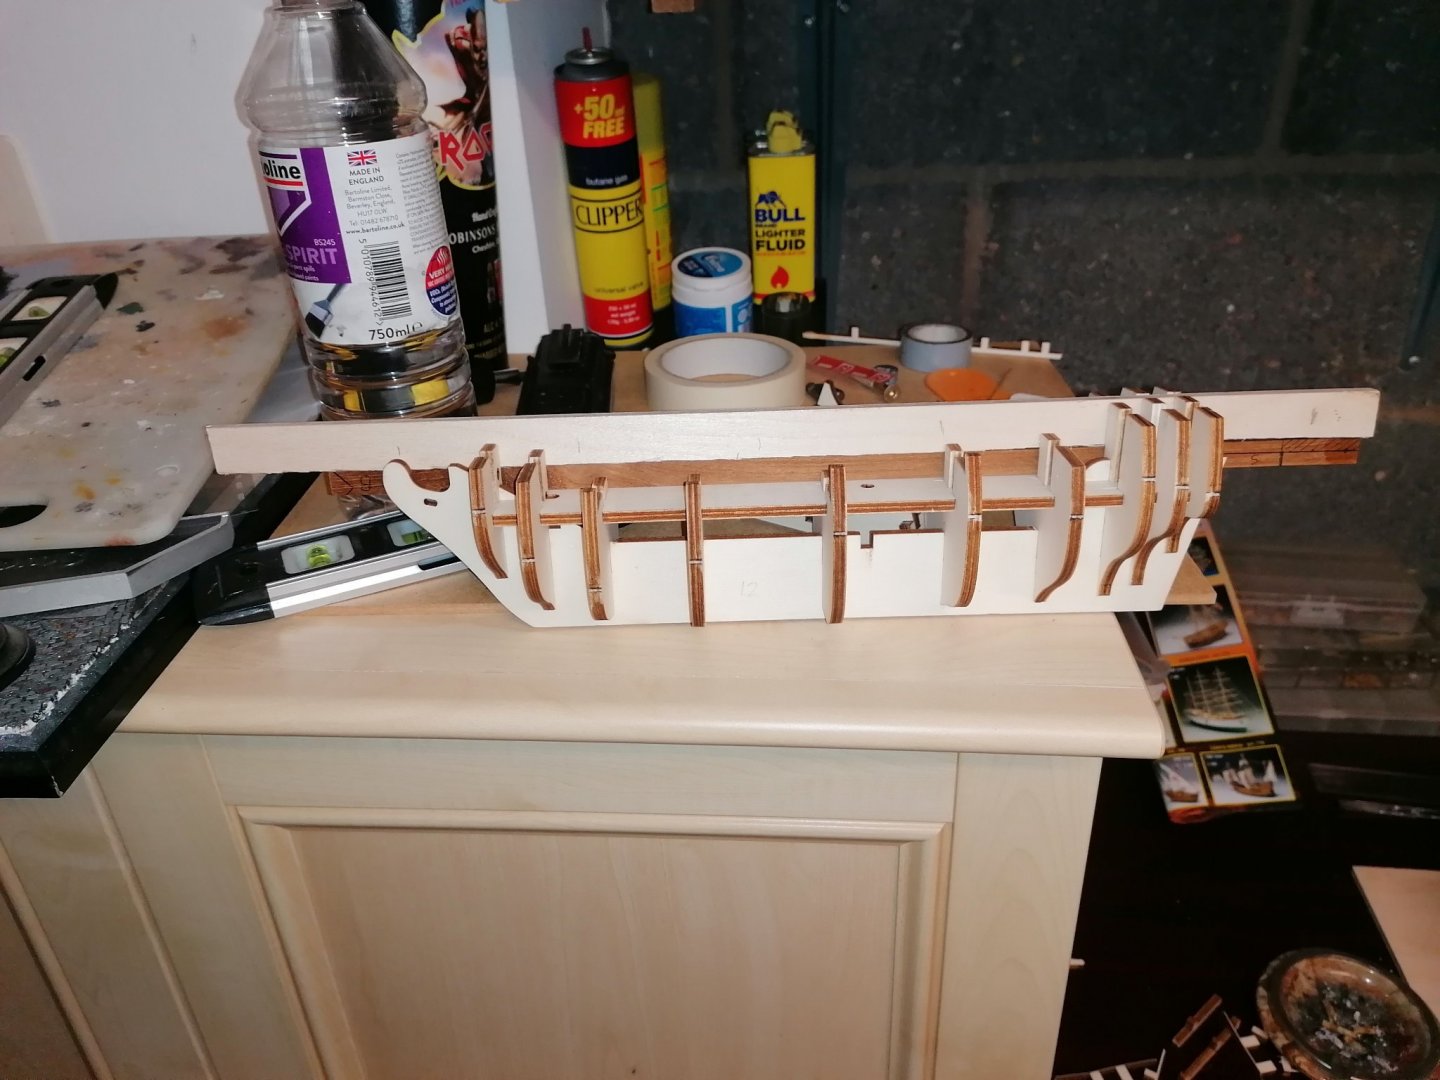
 Finally saved up enough to order my fourth kit! After three reasonably successful builds of beginner kits by Artesania Latina, I'm stepping up to an advanced beginner kit from Sergal (a brand made by Mantua Models). The kit seems to be sold under both its Italian and English titles, respectively, Sciabecco francese and French Xebec. While xebecs were used by other countries' navies earlier, the French didn't adopt them until relatively late in the reign of Louis XV, in the 1750s and 1760s. The French navy continued to use them through the Napoleonic wars, though they were mostly phased out at that point. (Apparently some worked coast guard duty into the 1840s.) Here's the traditional unboxing photo. Four bundles of 500mm planks and dowels, three sheets of laser-cut parts, a sheet of pennants, lots of hardware, the assembly instructions booklet, and some rather generously sized schematics. Although the assembly instructions are pretty limited, they also include a section on planking the hull that is very detailed and well illustrated. I don't have much perspective, but the wood doesn't seem to be of the same quality as the Artesania Latina kits that I did. That might be just the perception of an amateur talking, or maybe it's just that the wood was less well sanded at the factory. The 5mm plywood is definitely sturdy though! The biggest concern for me so far is that the keel, false deck, and decks have curves to them. Right now, I have the keel and false deck resting under damp paper towels and some heavy weights. Hopefully they'll be straighter tomorrow. Today I began dry fitting the keel and bulwarks. I've learned a lot from my prior kits and so am doing better this time. The bulwarks fit well to the keel, straight out of the box. I sanded the laser char off one of them, but then it fit so loosely that it rocked back and forth in its slot on the keel. Now I'm only sanding off the char as needed to improve how the false deck and decks fit. Although the bulwarks fit well, the slots weren't deep enough. The photo shows bulwarks #5–10. You'll note that #9 and 10 (the two furthest away) are sticking up above the keel by about 2 or 3mm, which is about how high they all sat. When I took the photo, I noticed that #6 and 7 were still up a bit too high, too, so I gave them a bit more love. At this point, the bulwarks that support the false deck (#3–10) are fitted. The false deck slides into its space well, except that its slight curve prevents it from resting flat. Next step is to dry fit the main deck (which needs some filing in order to fit onto the bulwarks) and then to work on the foredeck and the bulwarks (#1–3) that support it.

- 79 replies
-
- 4
-
-
- sergal
- sciabecco francese
- (and 1 more)
-
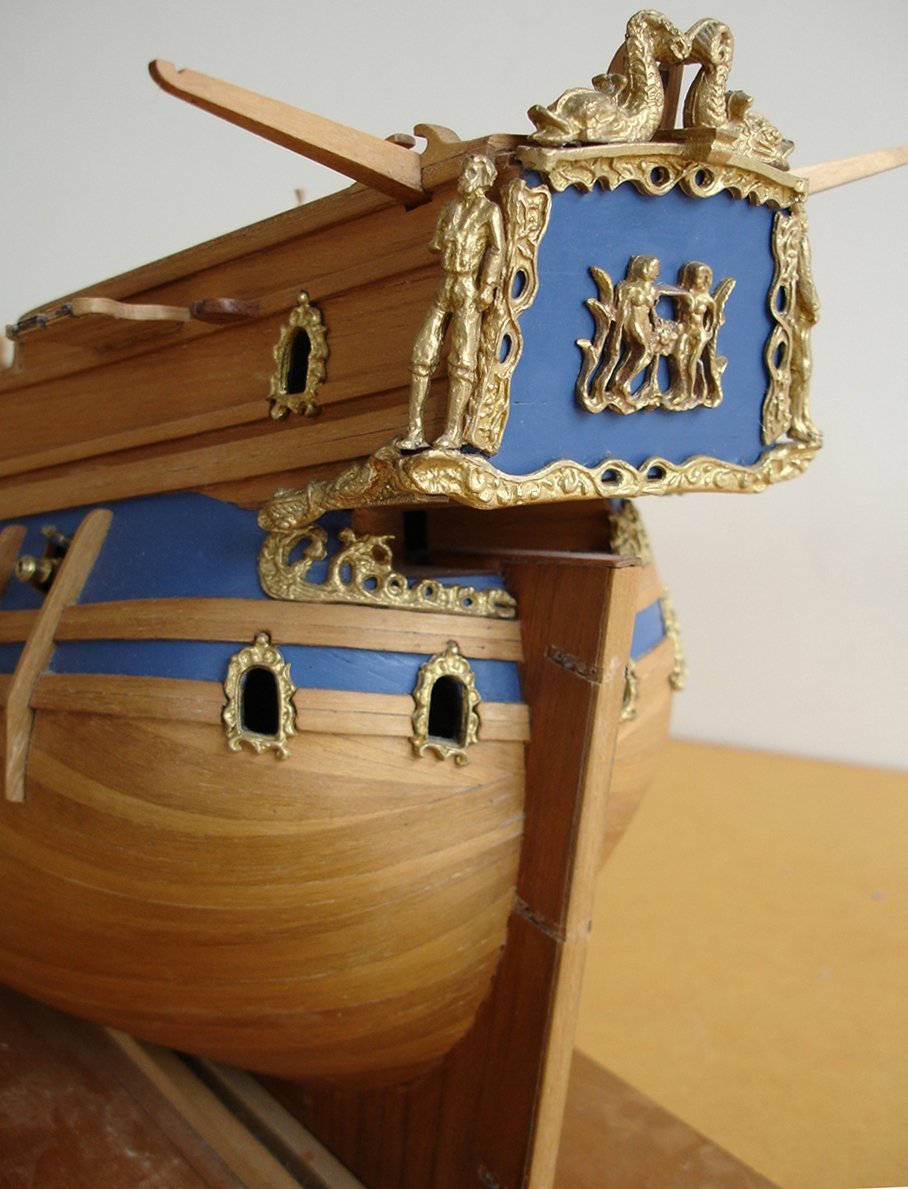
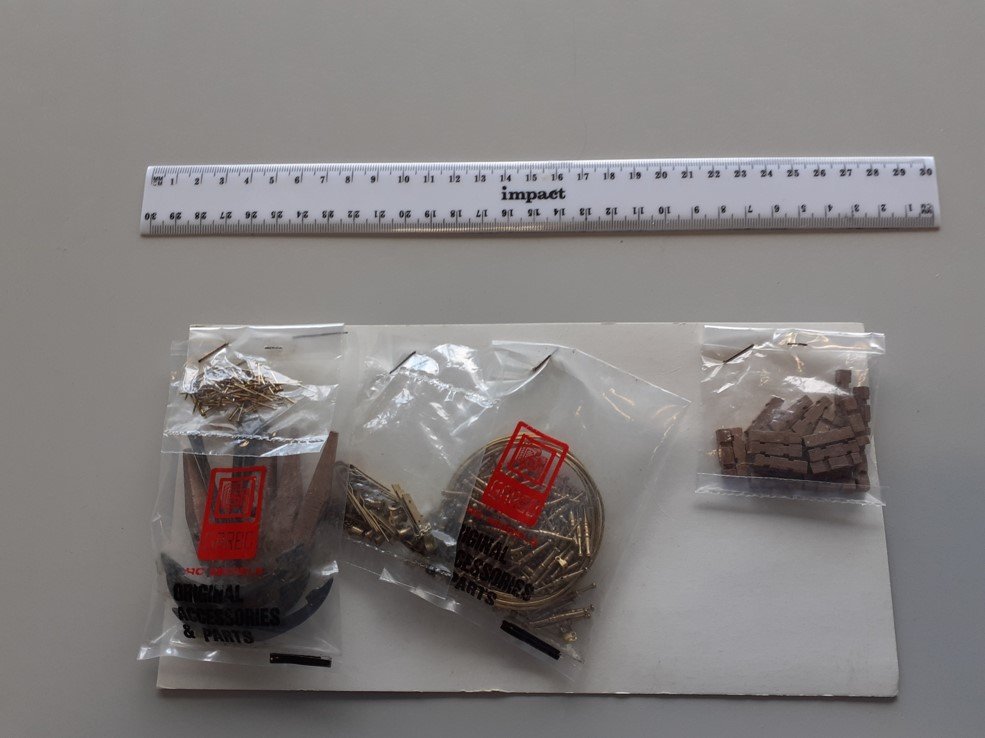
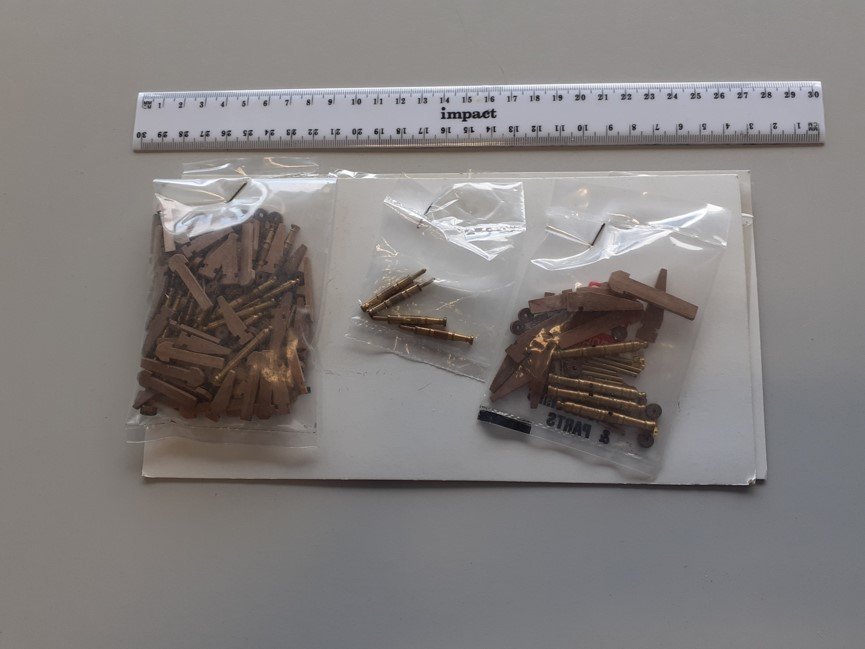
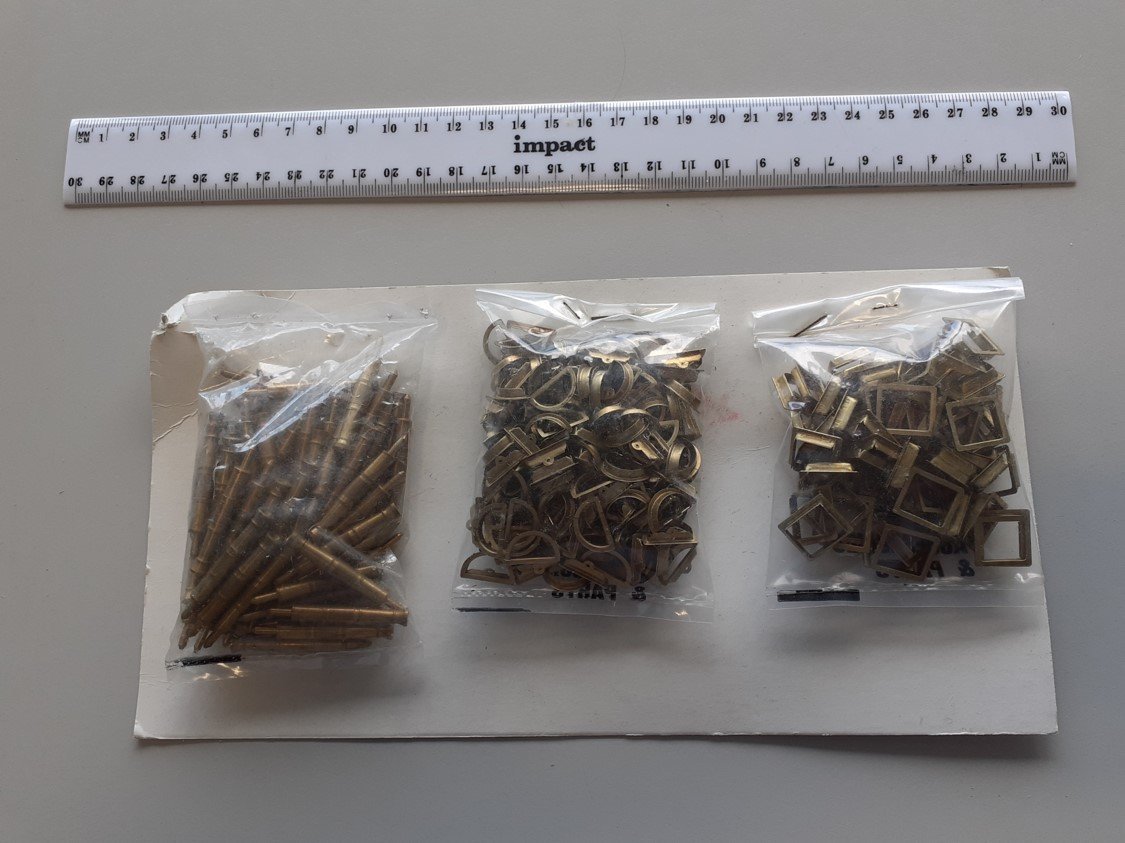
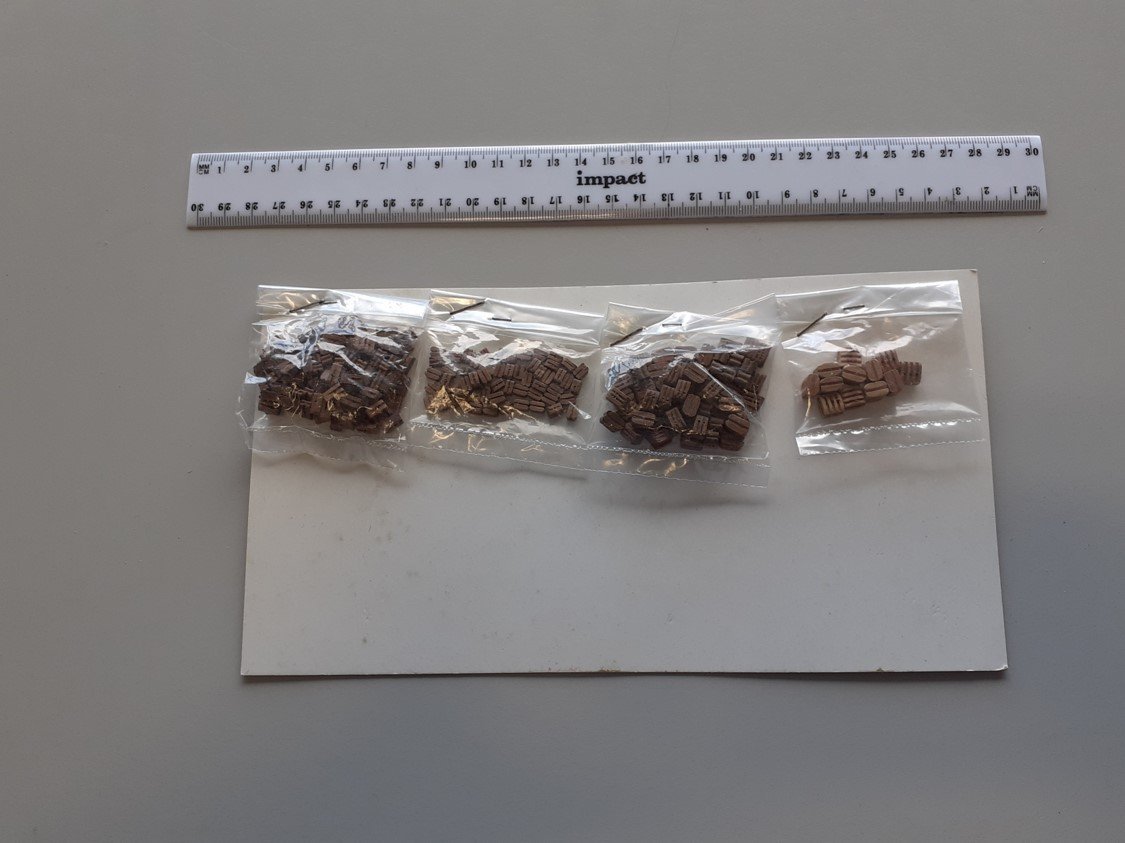
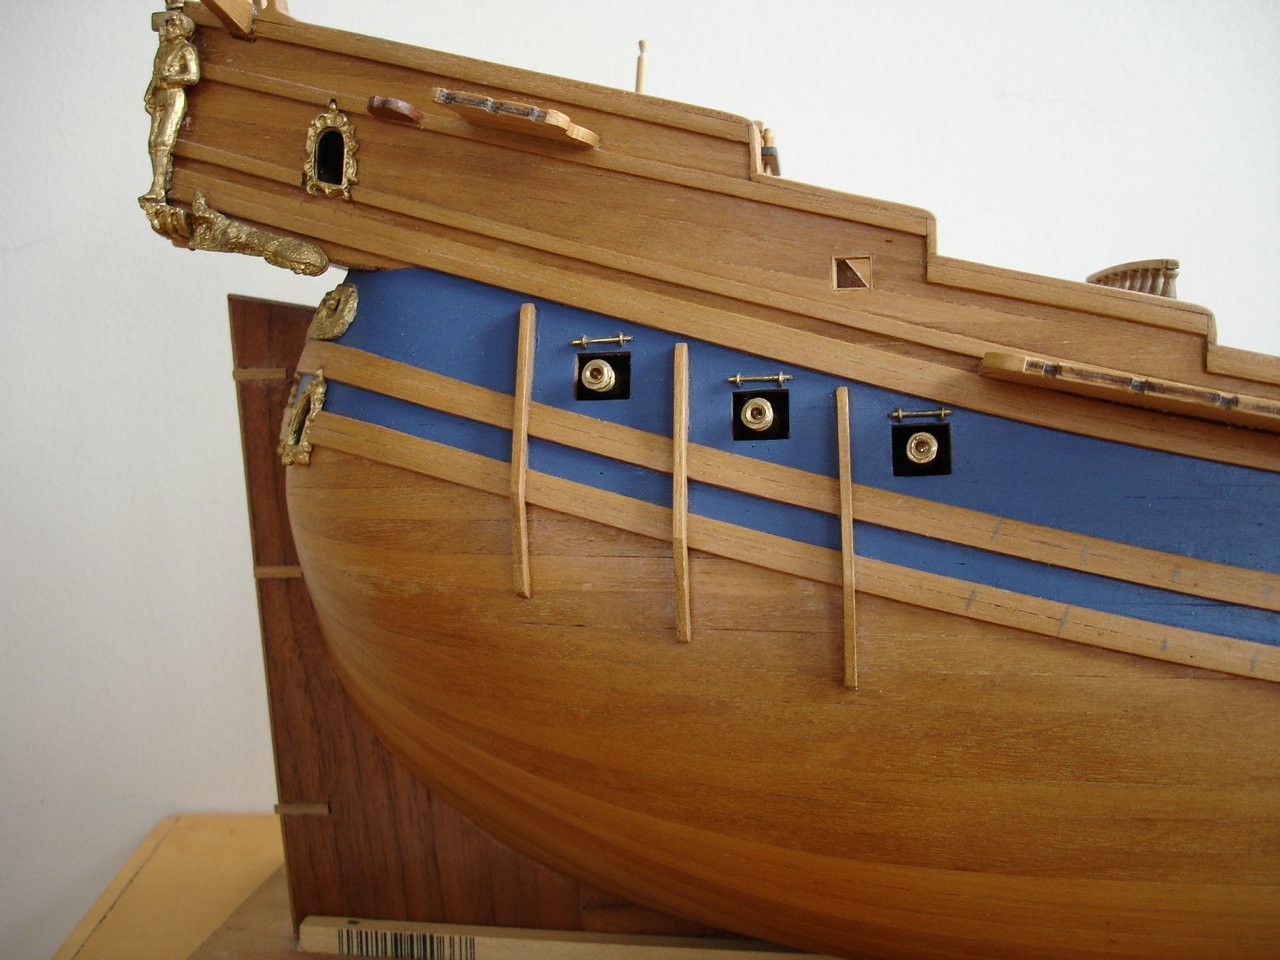
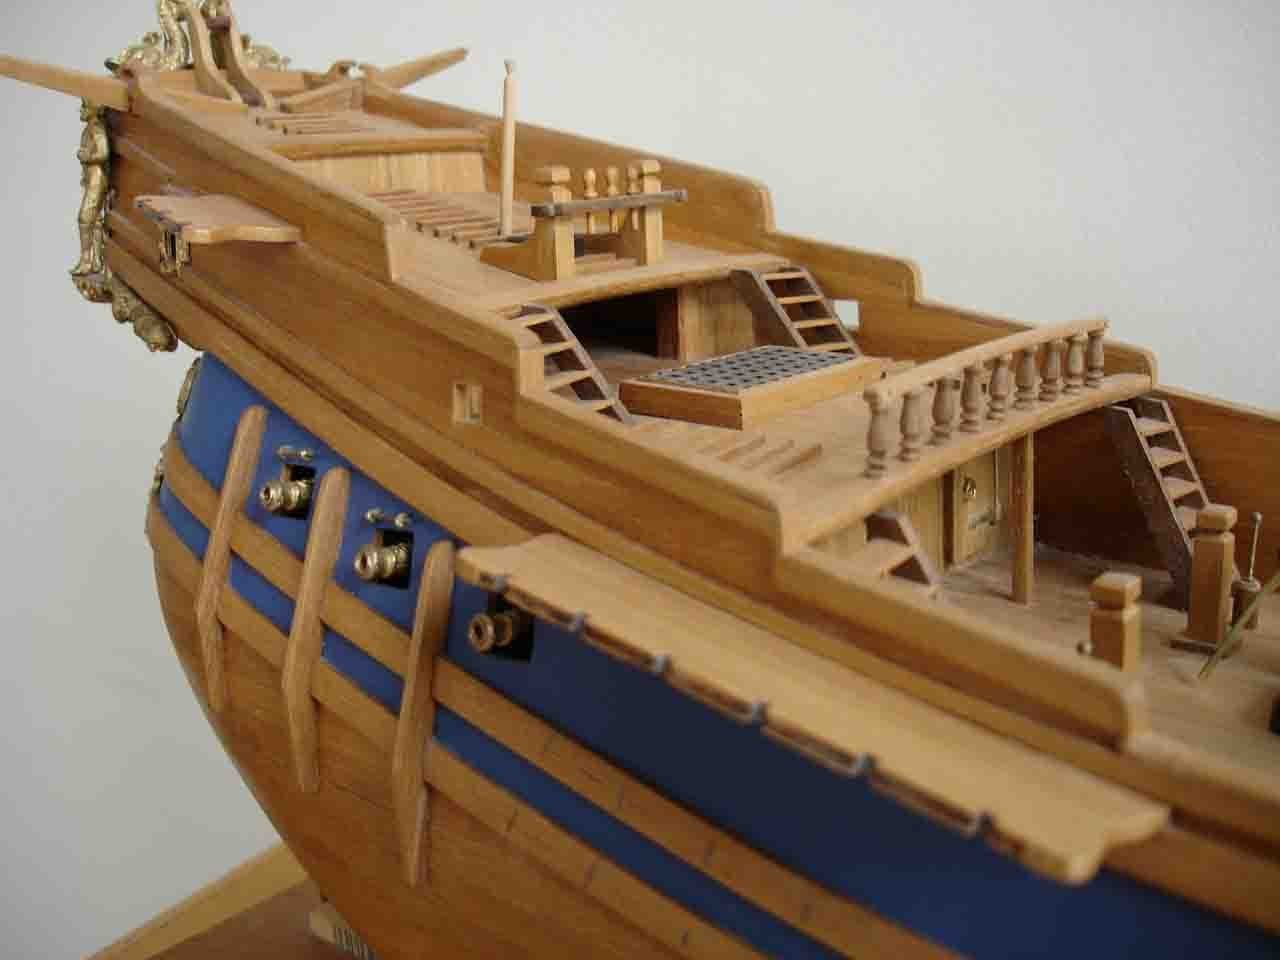
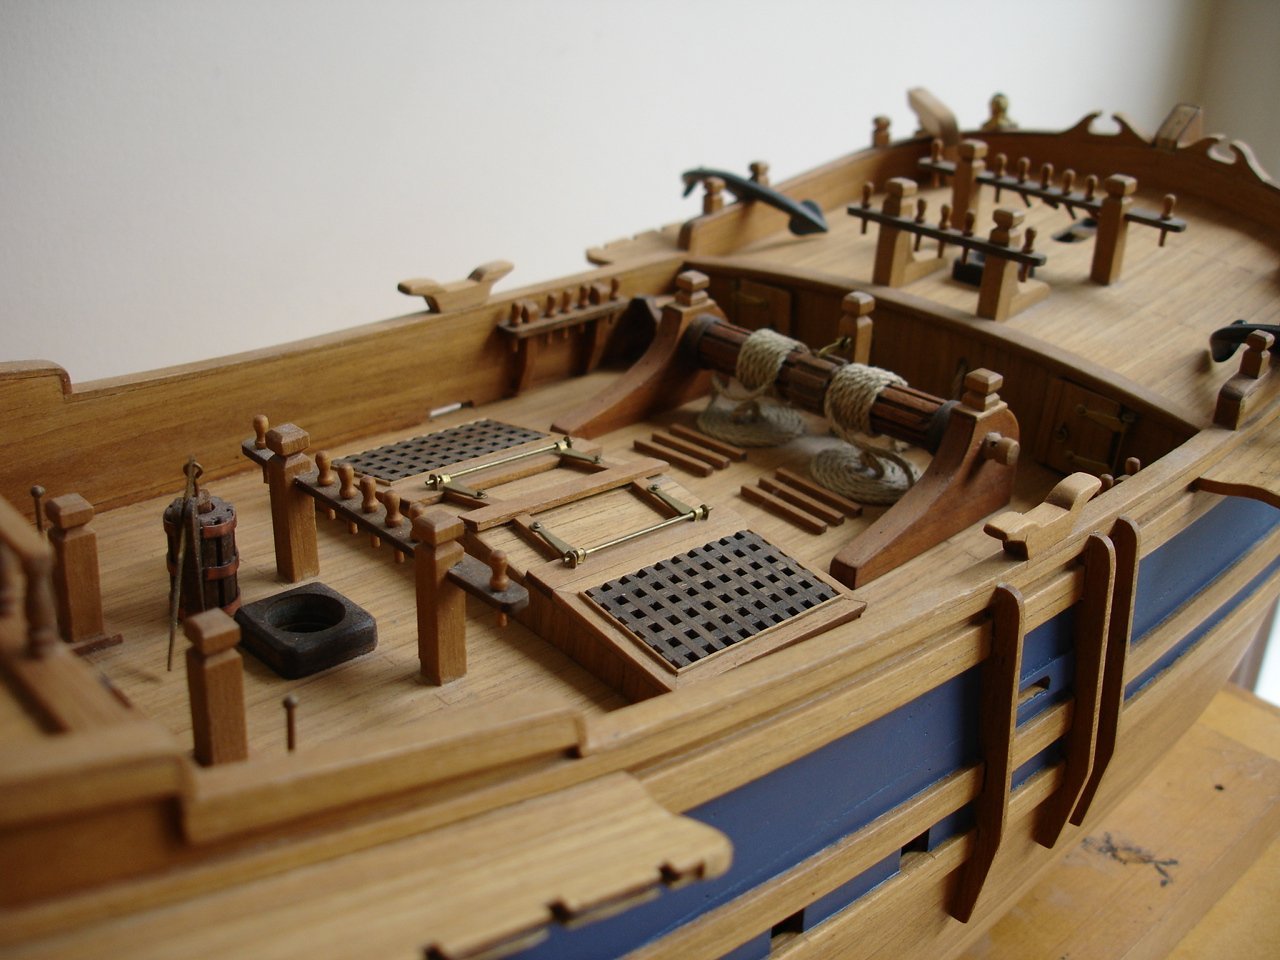
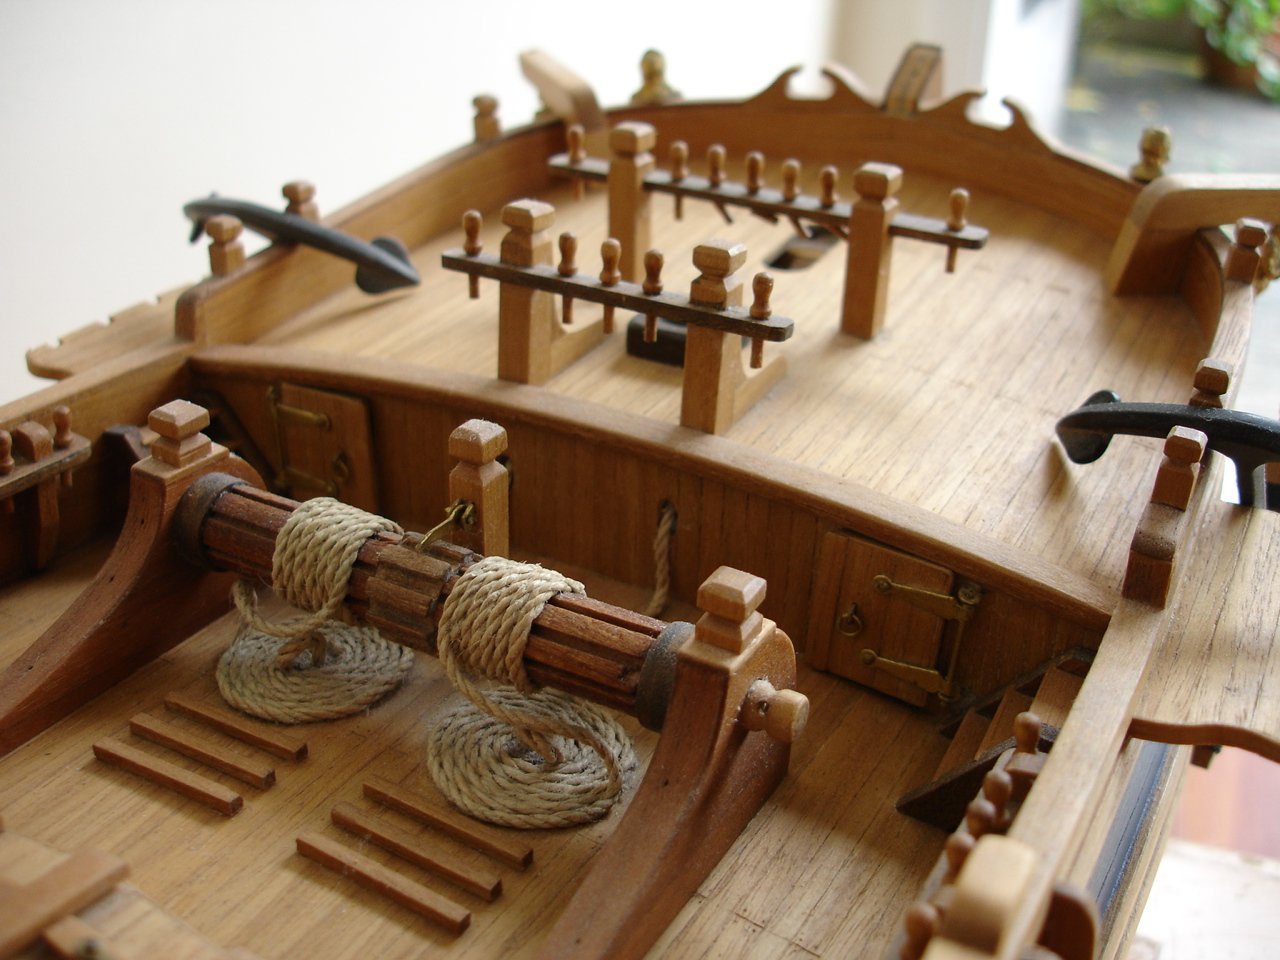
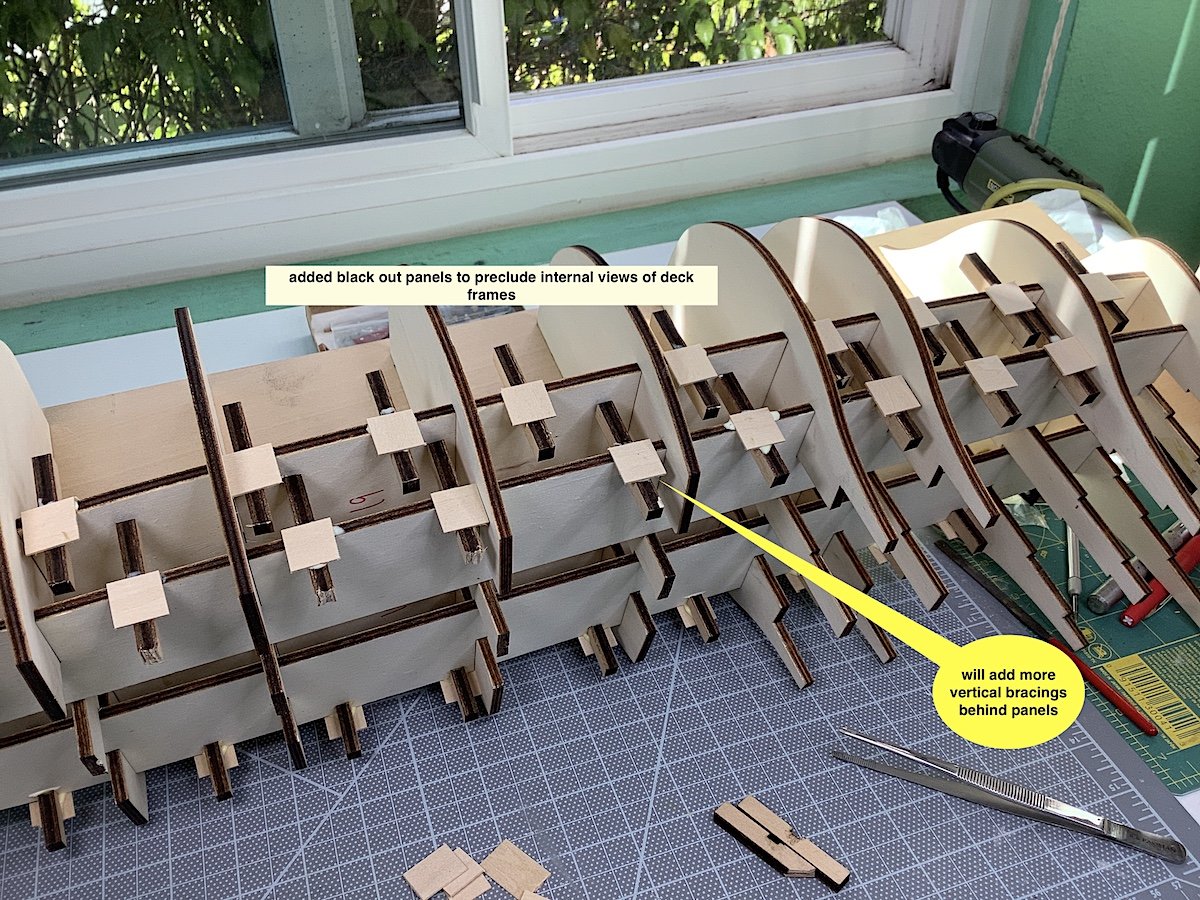
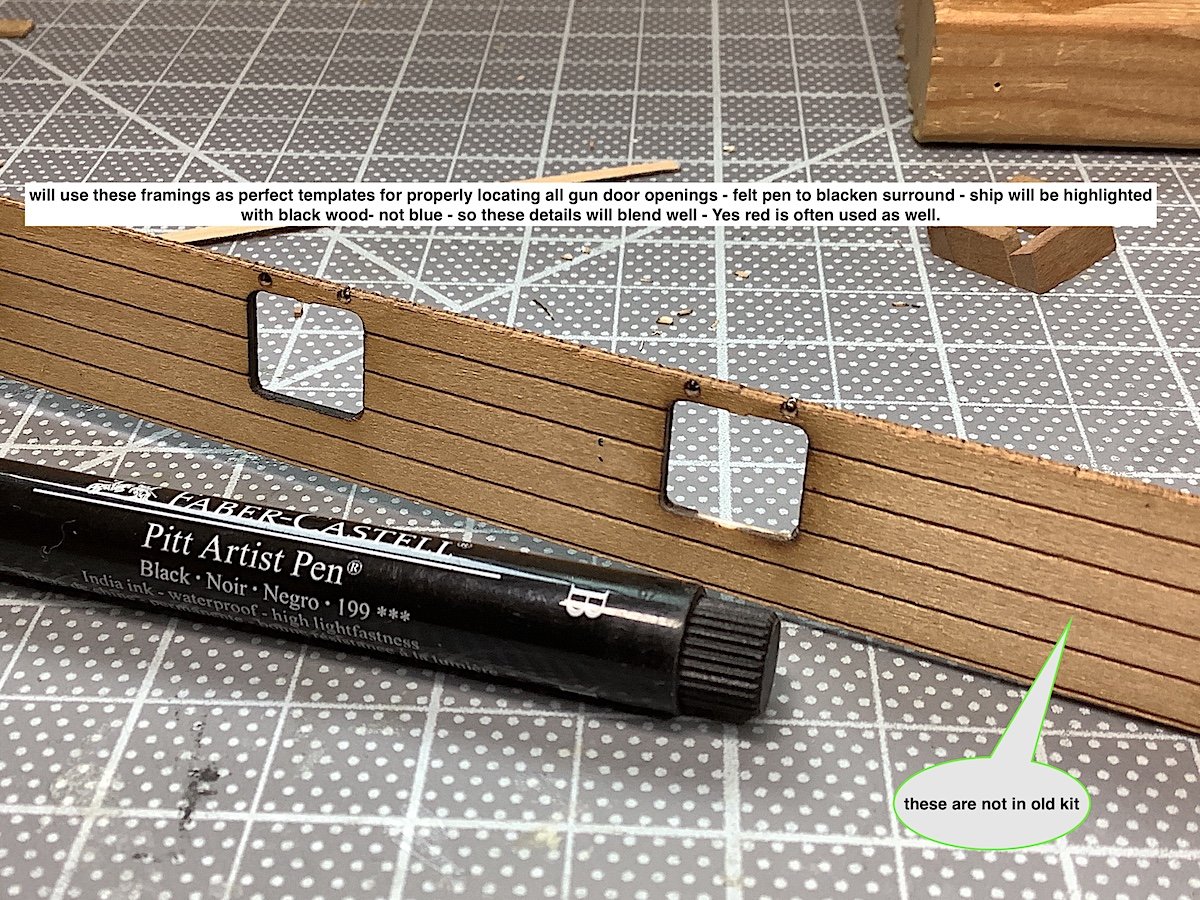
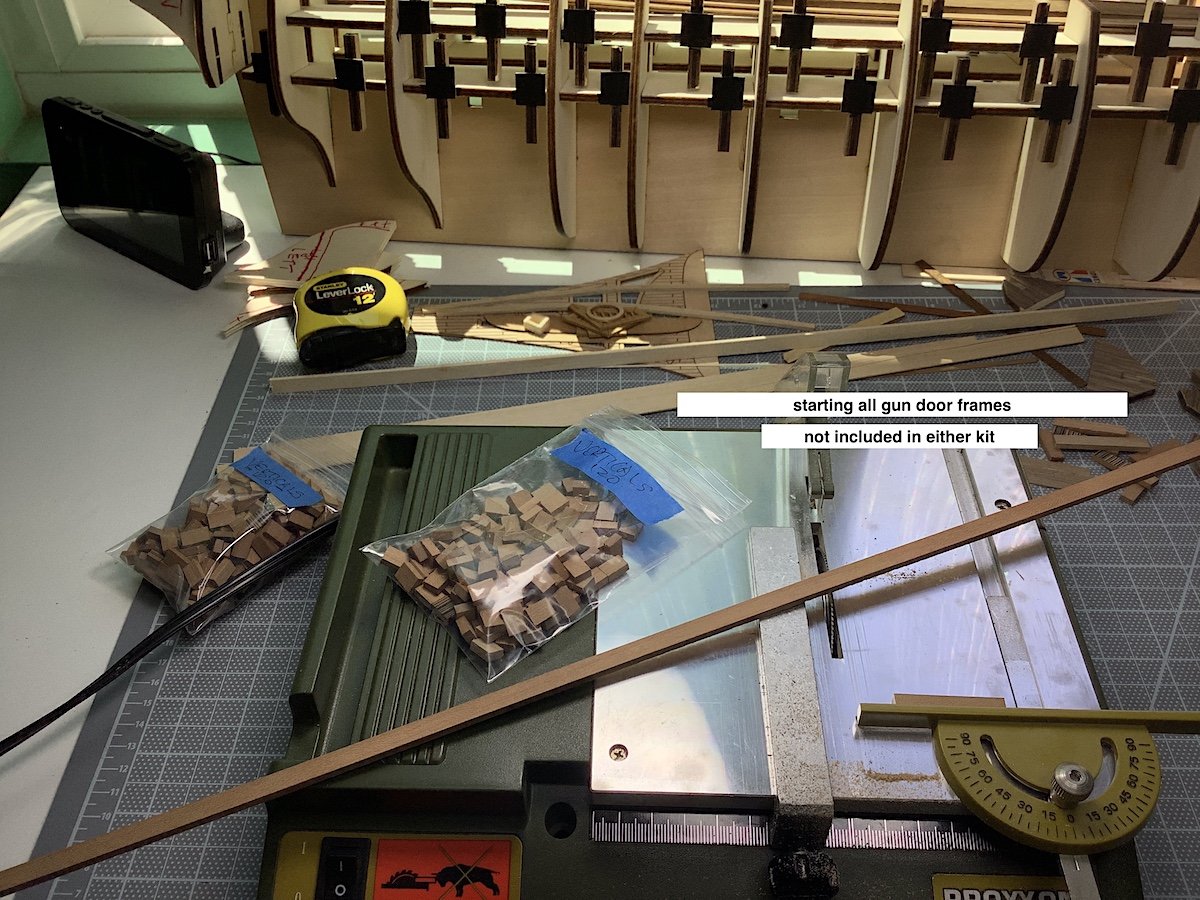
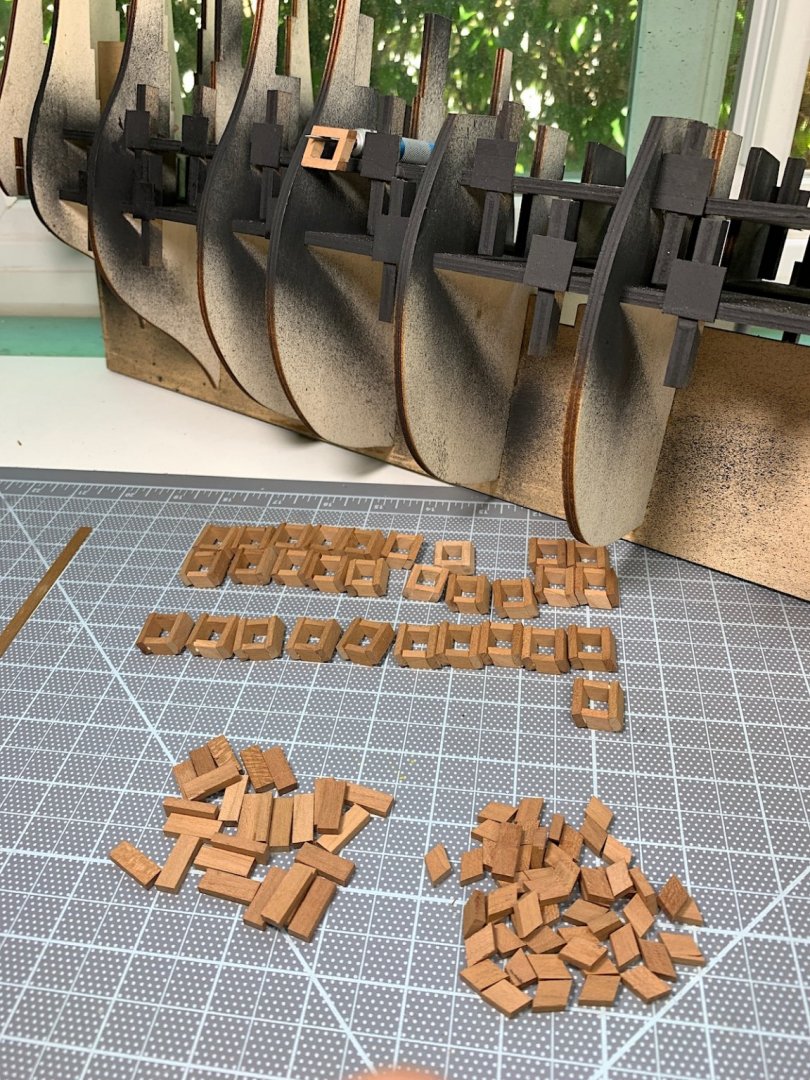
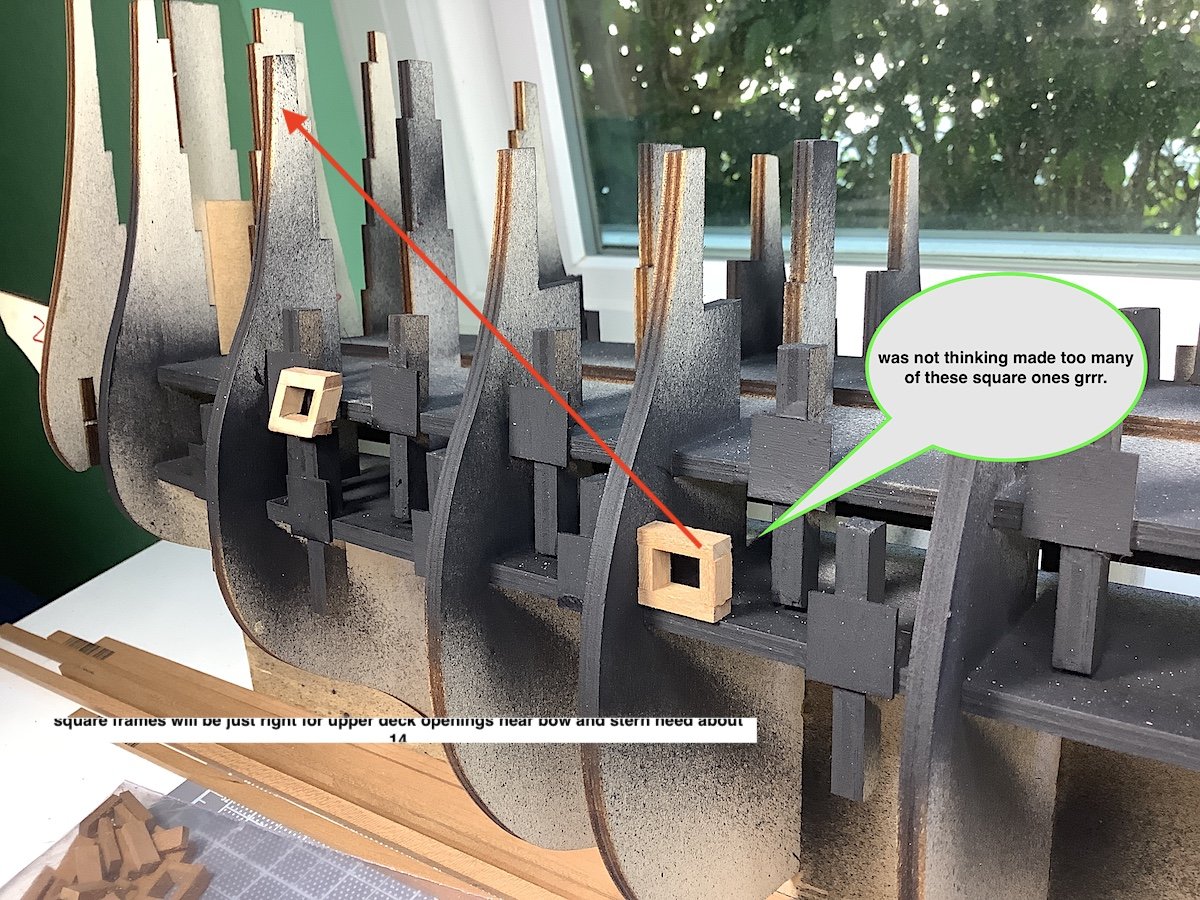
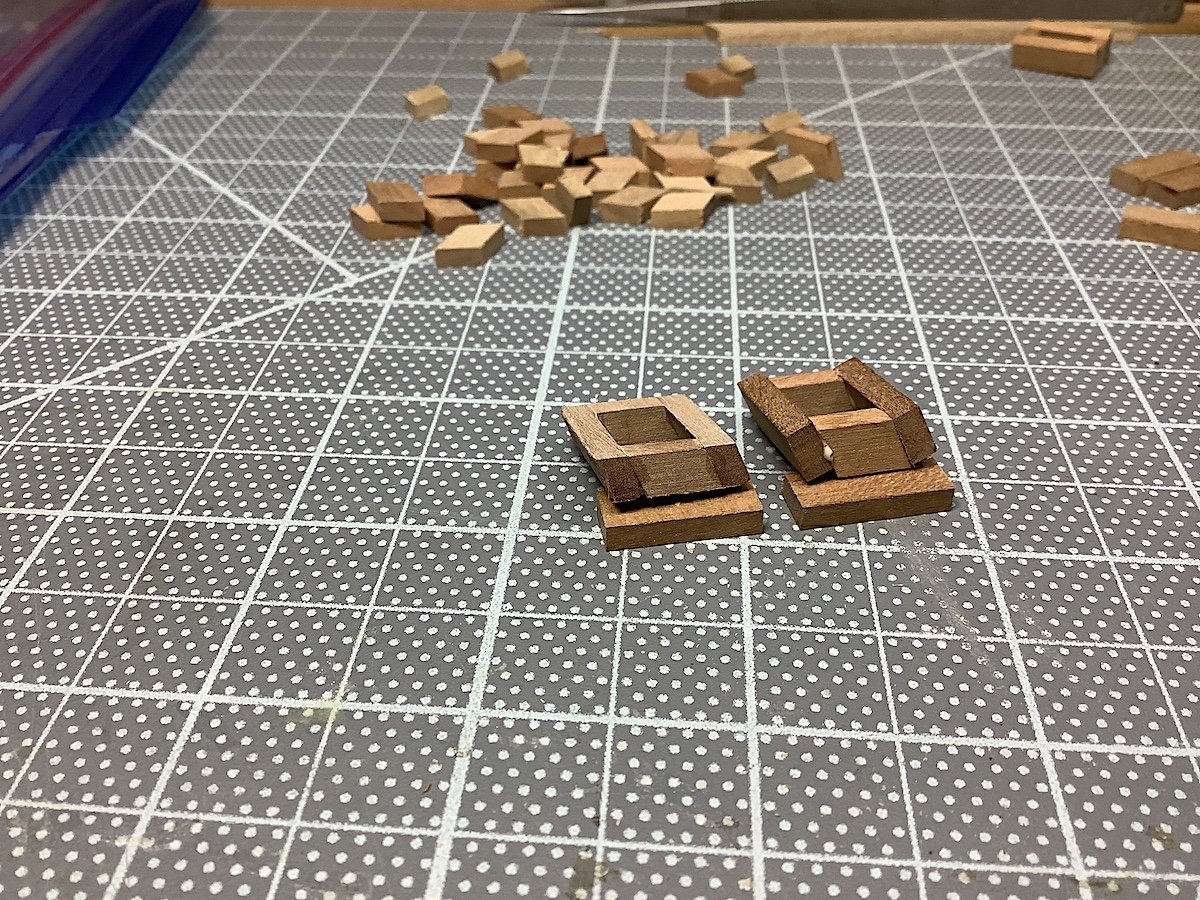
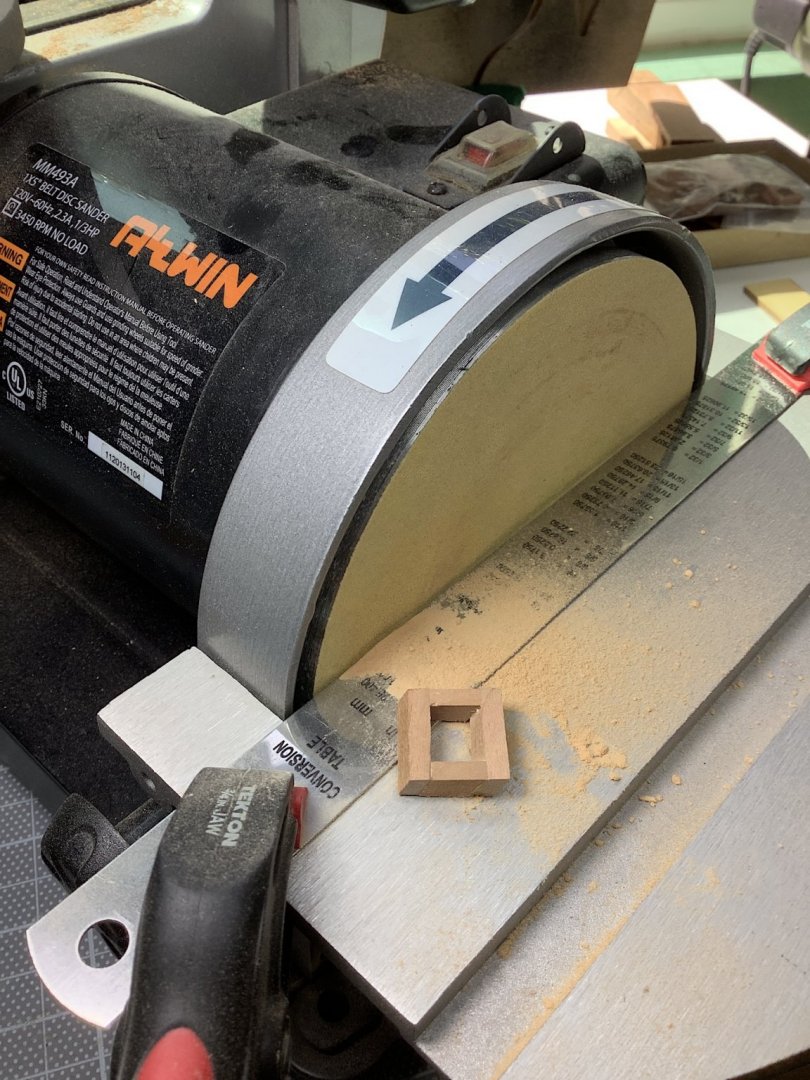
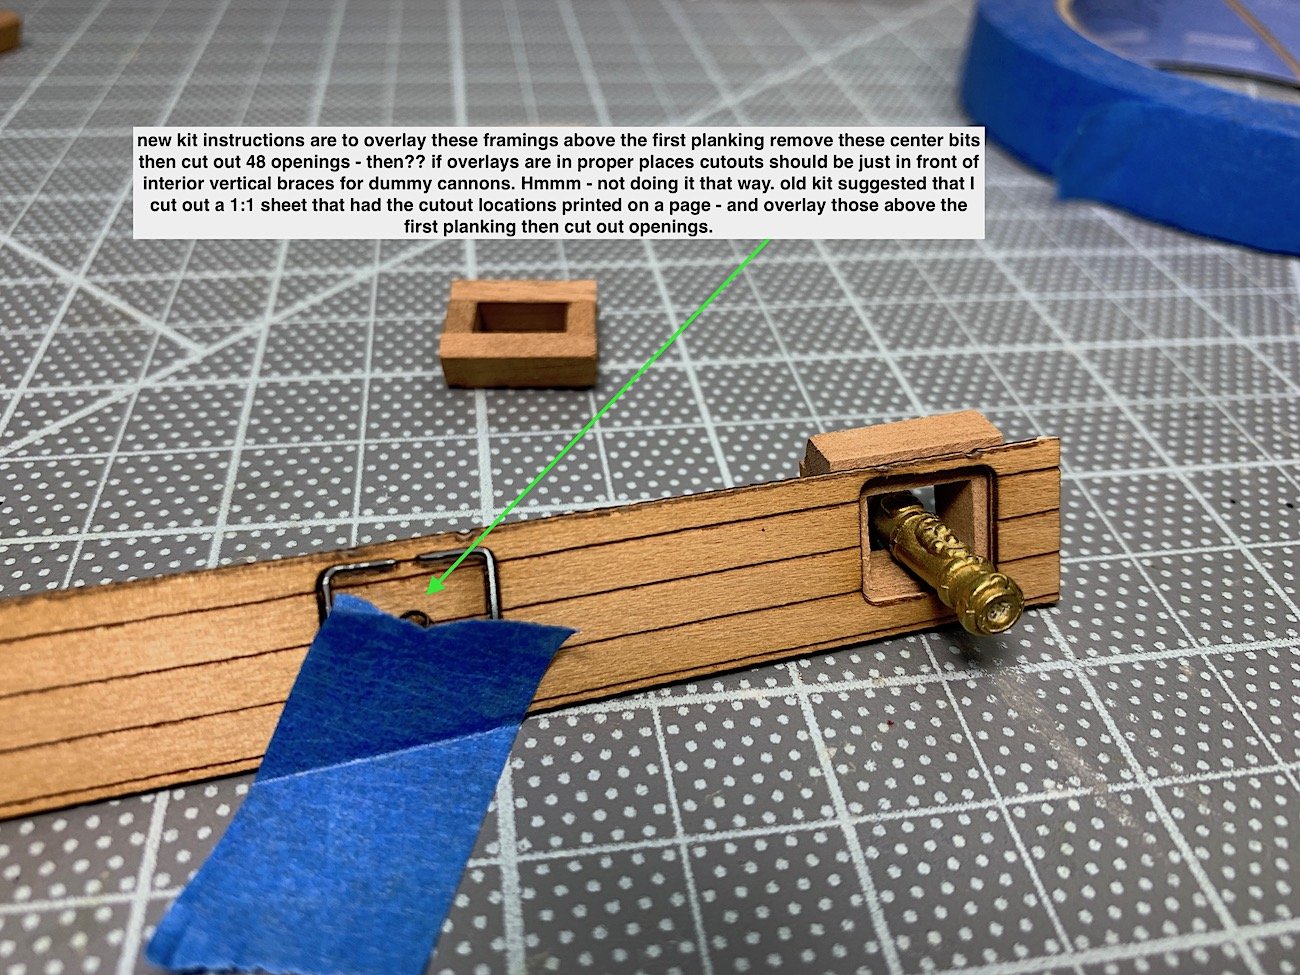
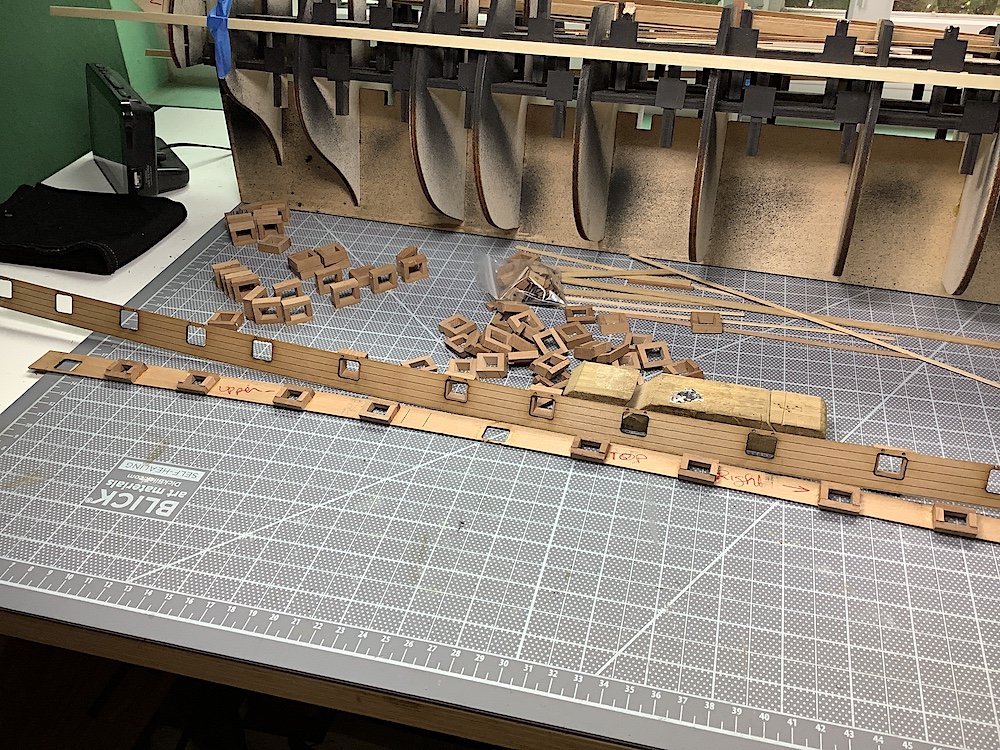
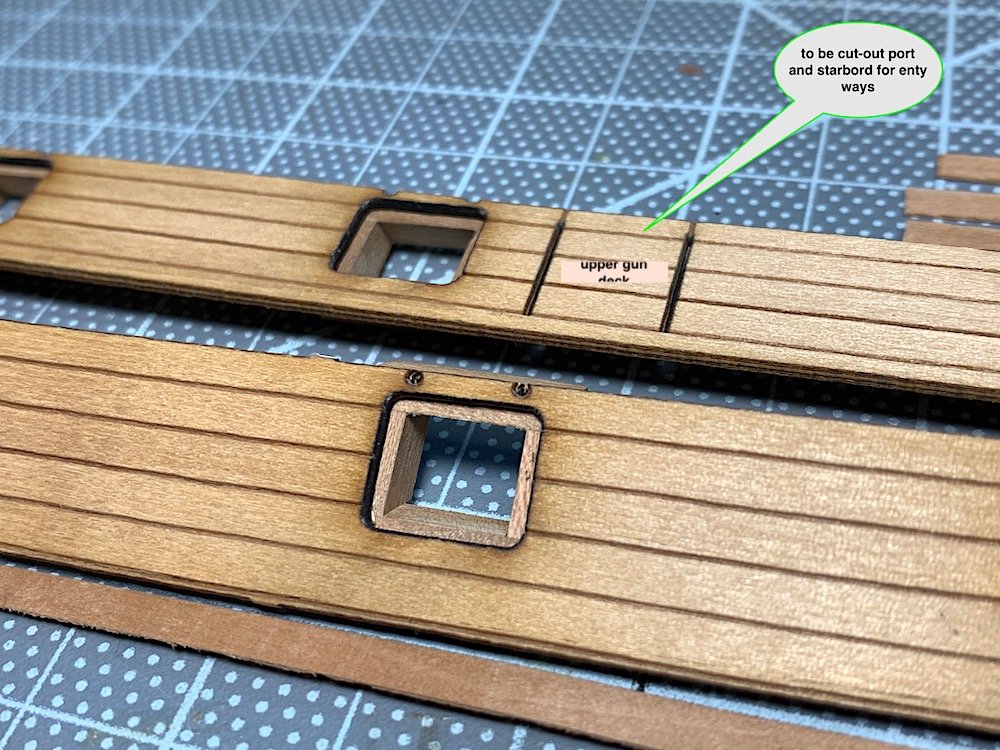
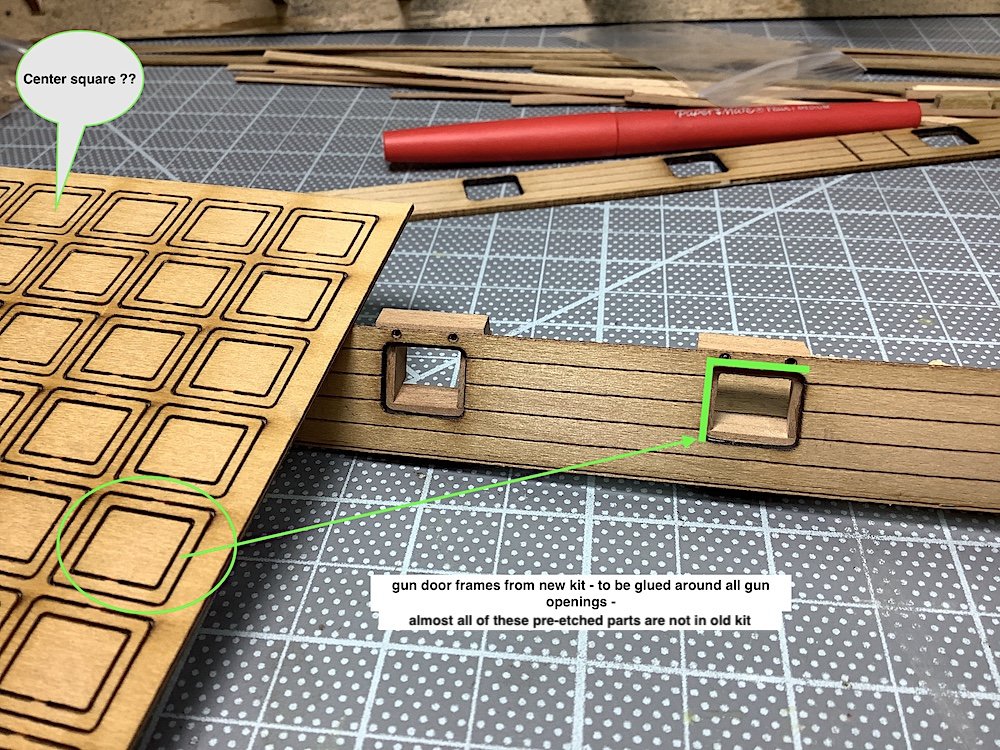
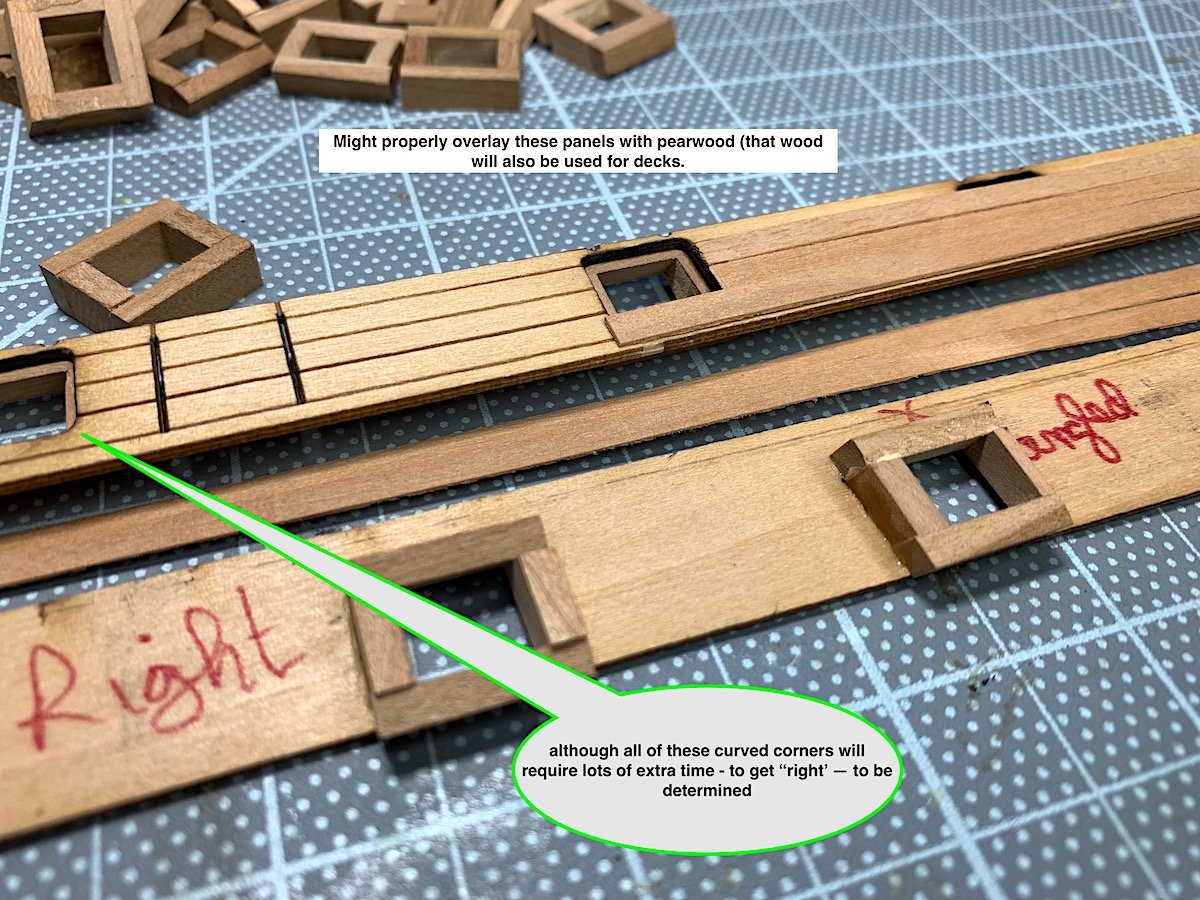
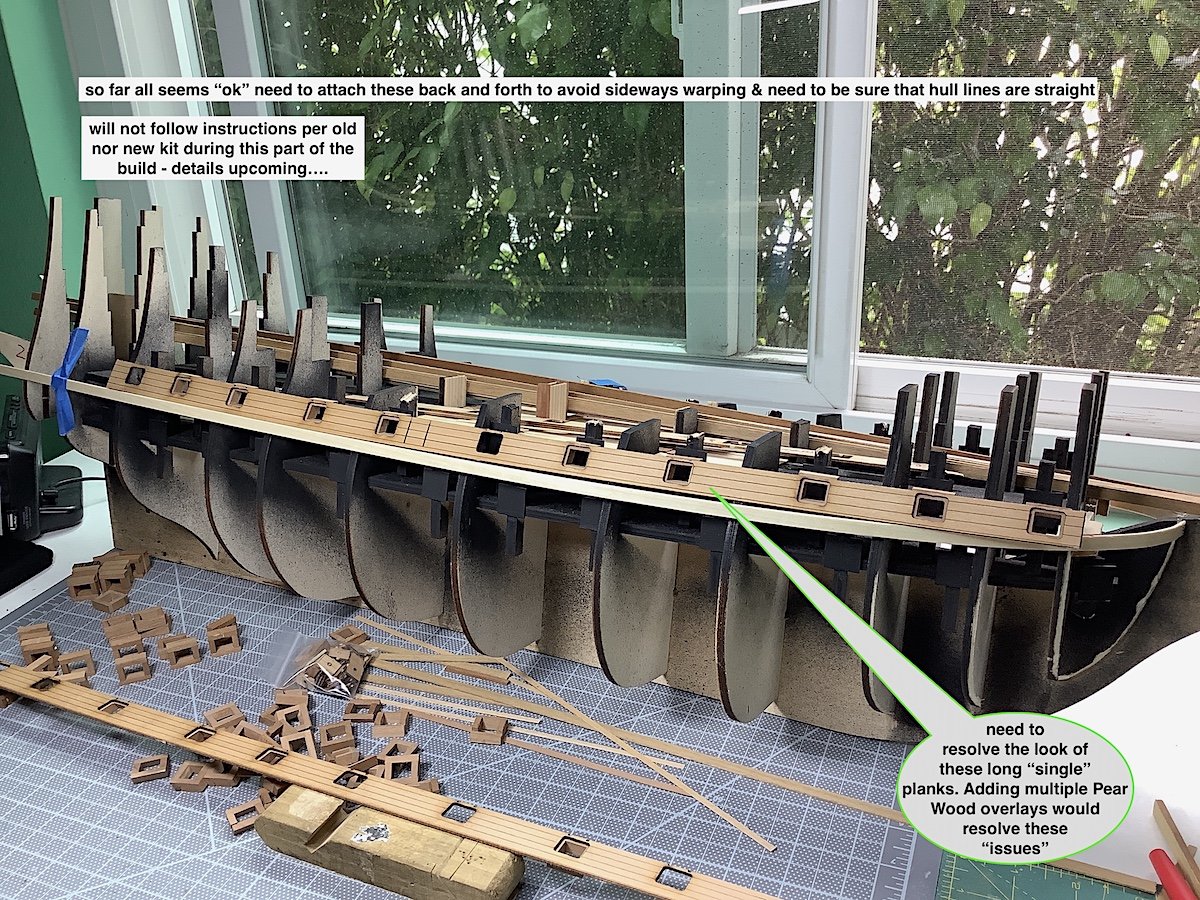
 Hi Mates. I have wanted to build this kit for a long time, I will also attempt to super detail this project beyond the “out of the box” kit – as excellent as it is. I have “bashed" my two last builds – enjoy the challenges of added detailing -- I have the McKay book that is filled with many line drawings and images; it will be an excellent guide. Along with incorporating great ideas seen in other build logs of this ship here at MSW. I recently acquired a 1980s “new in box” kit from a member who had one available. He contacted me after I had made a request for one here at MSW. That specific vintage kit was of interest to me because the 650+ included decorative bits were all cast in solid bronze (that number includes cannons). The current kit is supplied with 650+ white metal bits that have been electroplated, and apparently, from what I’ve been told, may result in some lost of casting details?? (TBD) – many other advantages are certainly in the current kit’s box as well, and not part of the 1980s box contents. Given that this ship’s beauty, for-all-intent-and-purposes, was because of its 600+ ornamentations I got intrigued with the idea of solid bronze castings; luckily found one (Big thanks Jay L) That said, instructions were really non-existent, included lumber still looked very good, other included kit’s amenities were, well from three decades ago. Bronze sculptures were, for me, the prize….as well as the 1:1 plan sheets (nice) only in Italian. Jay's kit did not have a single super tiny missing bronze ornament – all were mixed up in 15 or so zip lock baggies – took hours to go through them all –haha. all other parts were 100% there as well. Moving forward two weeks – a large heavy UPS box arrived at my door hmm? – Turns out that I was gifted, for Father’s Day, with the current Sergal #787. So best of both kits will be blended into this single project. My family did not know that I had already purchased a much earlier edition. The current kit certainly has its many advantages, but the earlier kit shines in many ways as well, many of which will become part of this project. I will balance this log with some, as needed, comparisons between the old and new kit versions – No criticisms of either just occasional comparisons. That said, this log will focus on the build as it goes forward. I am lucky to have the best of both available for this project. PS: I have listed this log as a 1637 ship – I know that she was around for many decades after, and that her stern ornamentation (provided in both kits) is more reflective of a much later example. But for builders 1637 is the “agreed to” year. First log entry with some notes. – will also (thankfully for you) keep the writing to a minimum going forward. Thanks for looking in, and if you are interested Welcome to the shipyard. Regards,
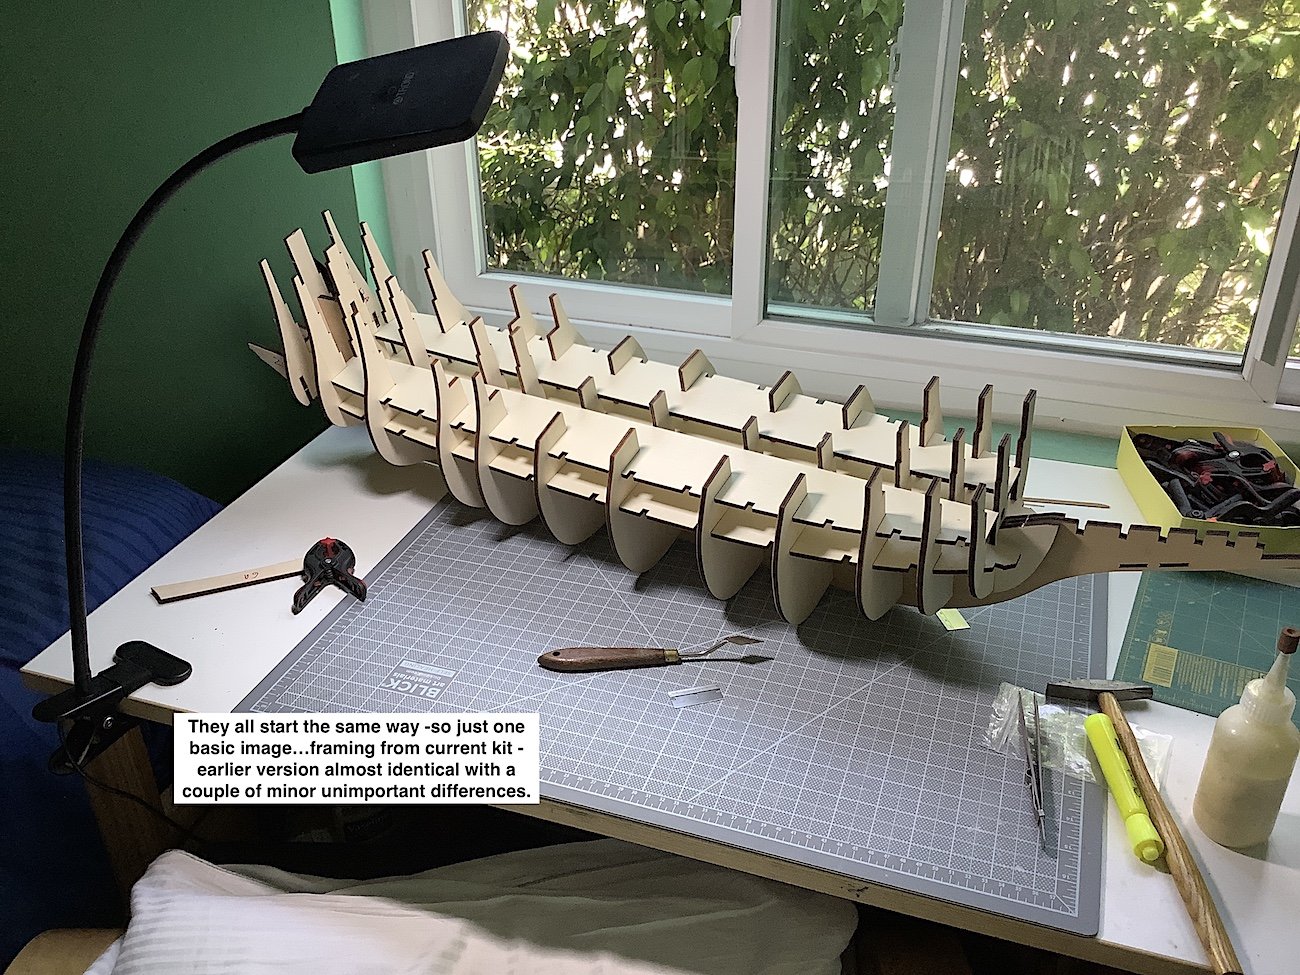
-
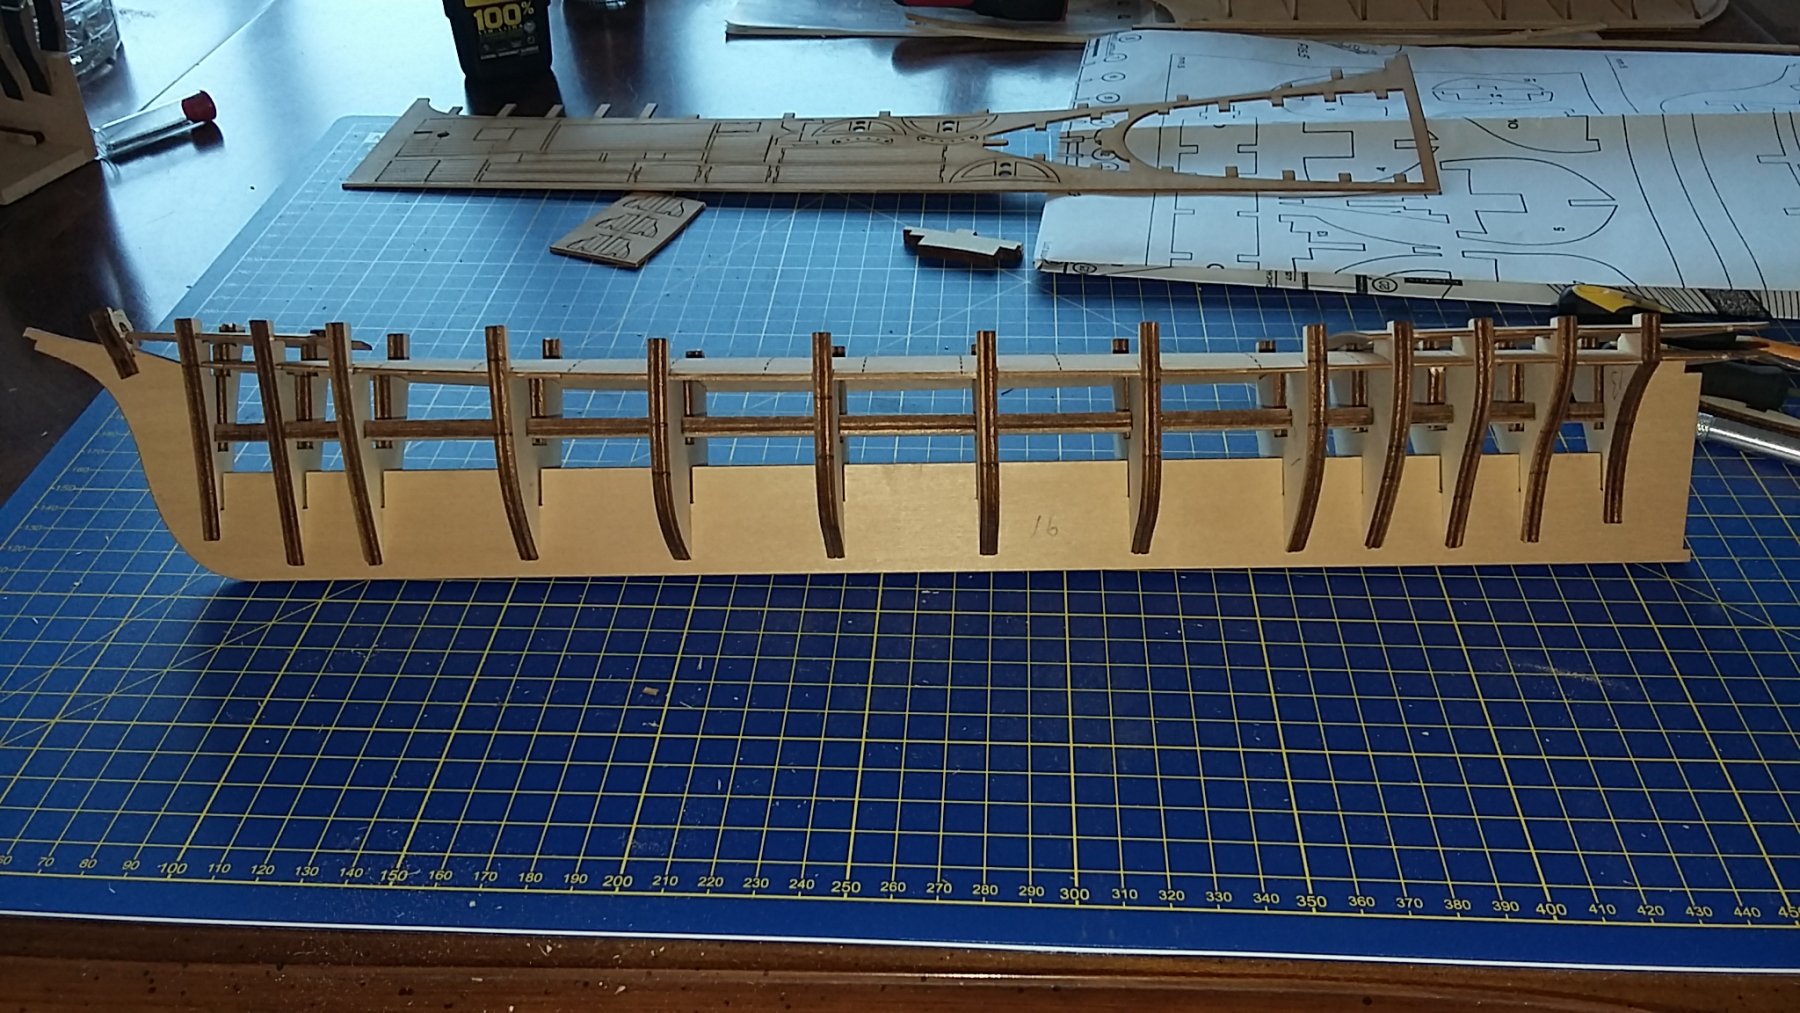
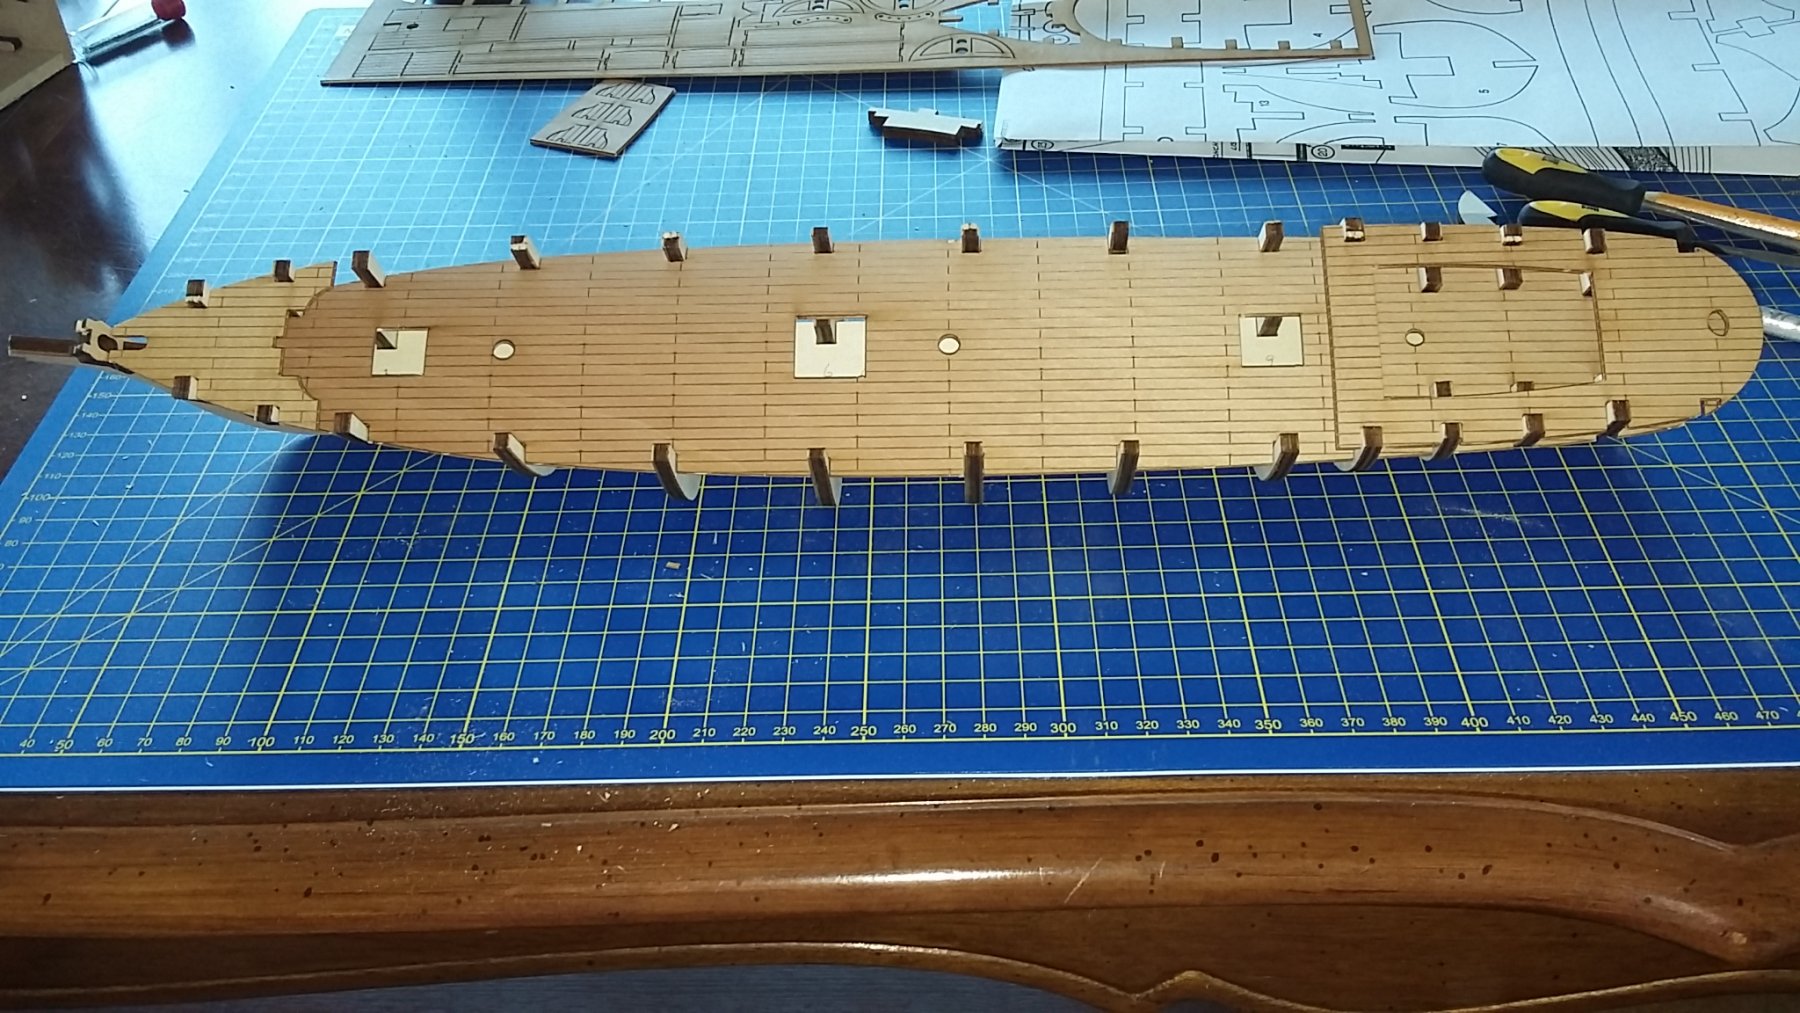
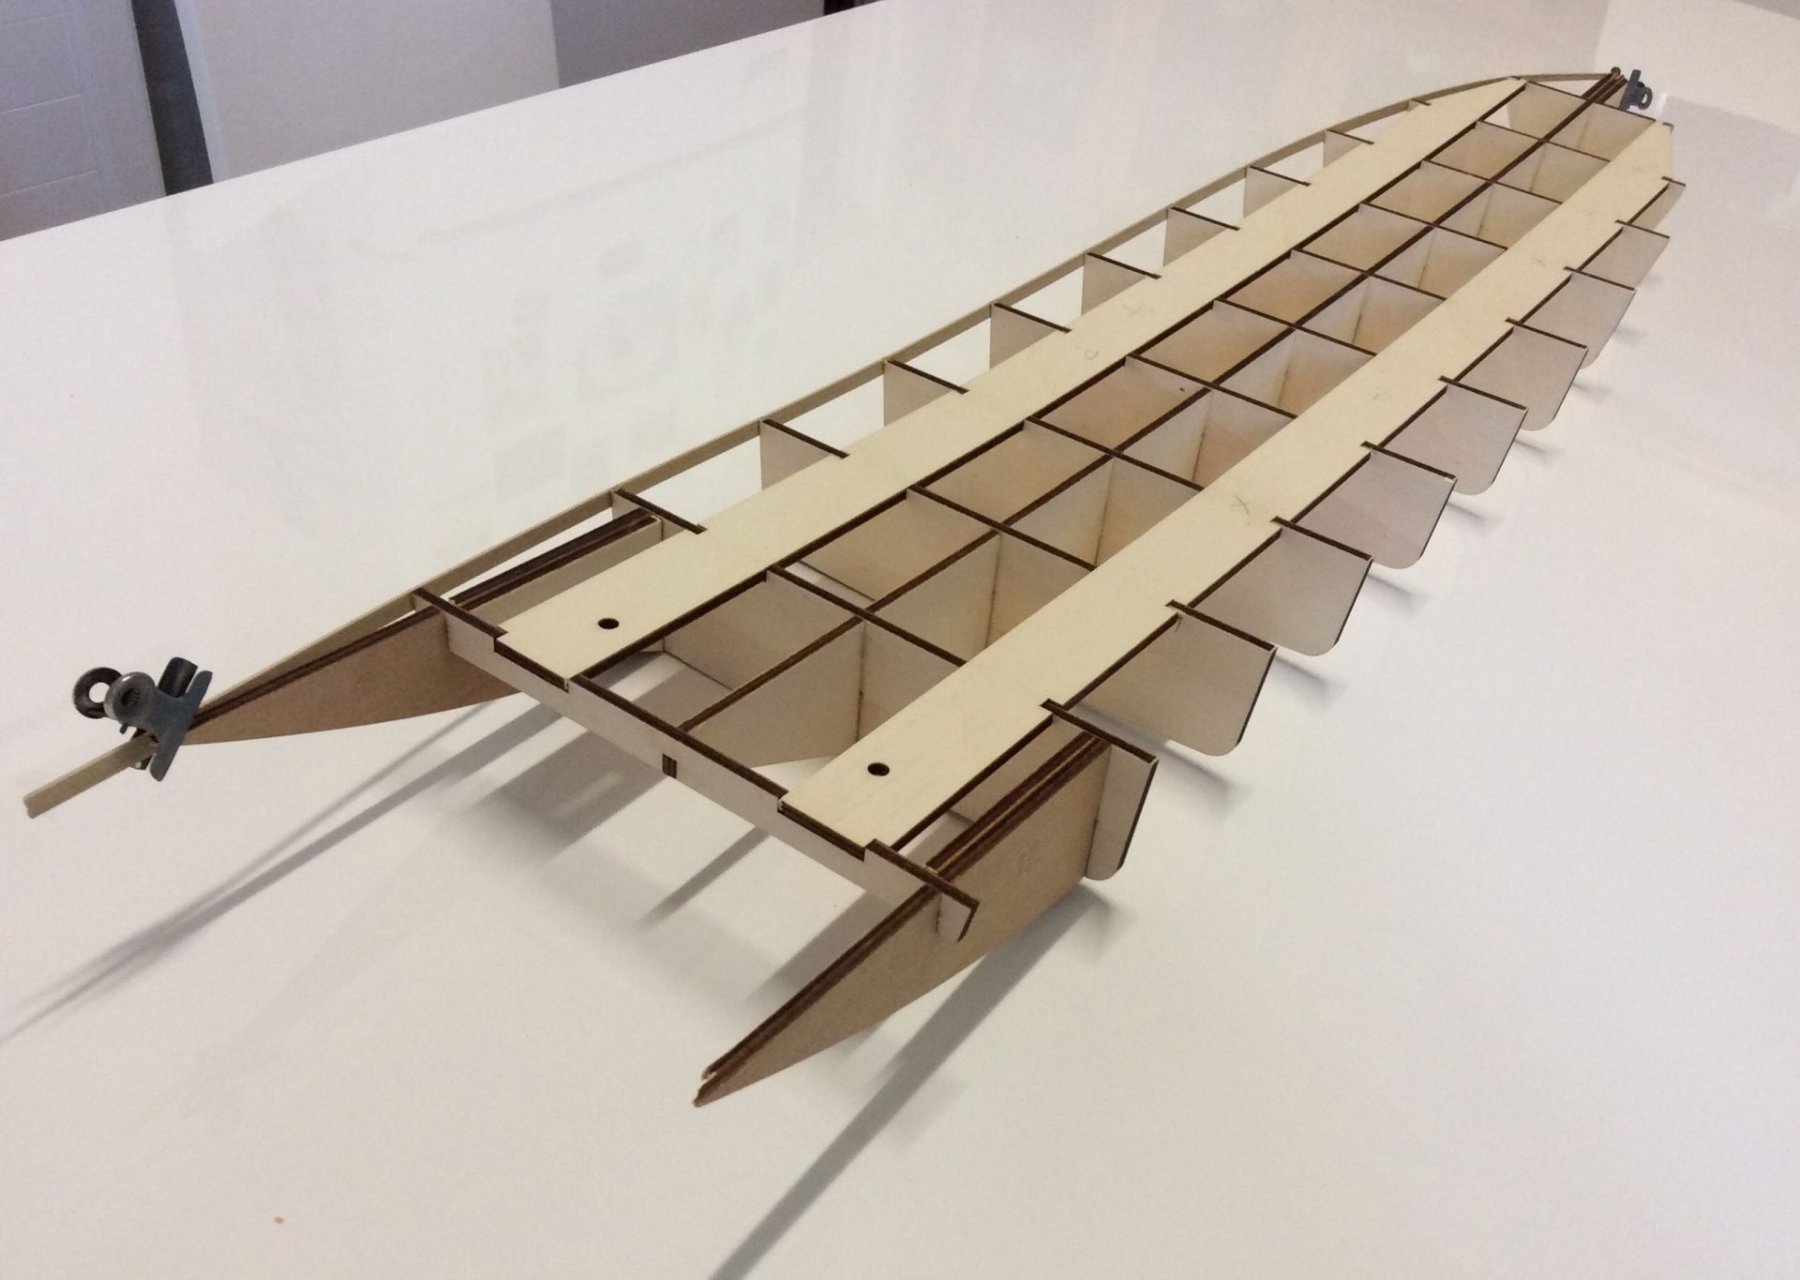
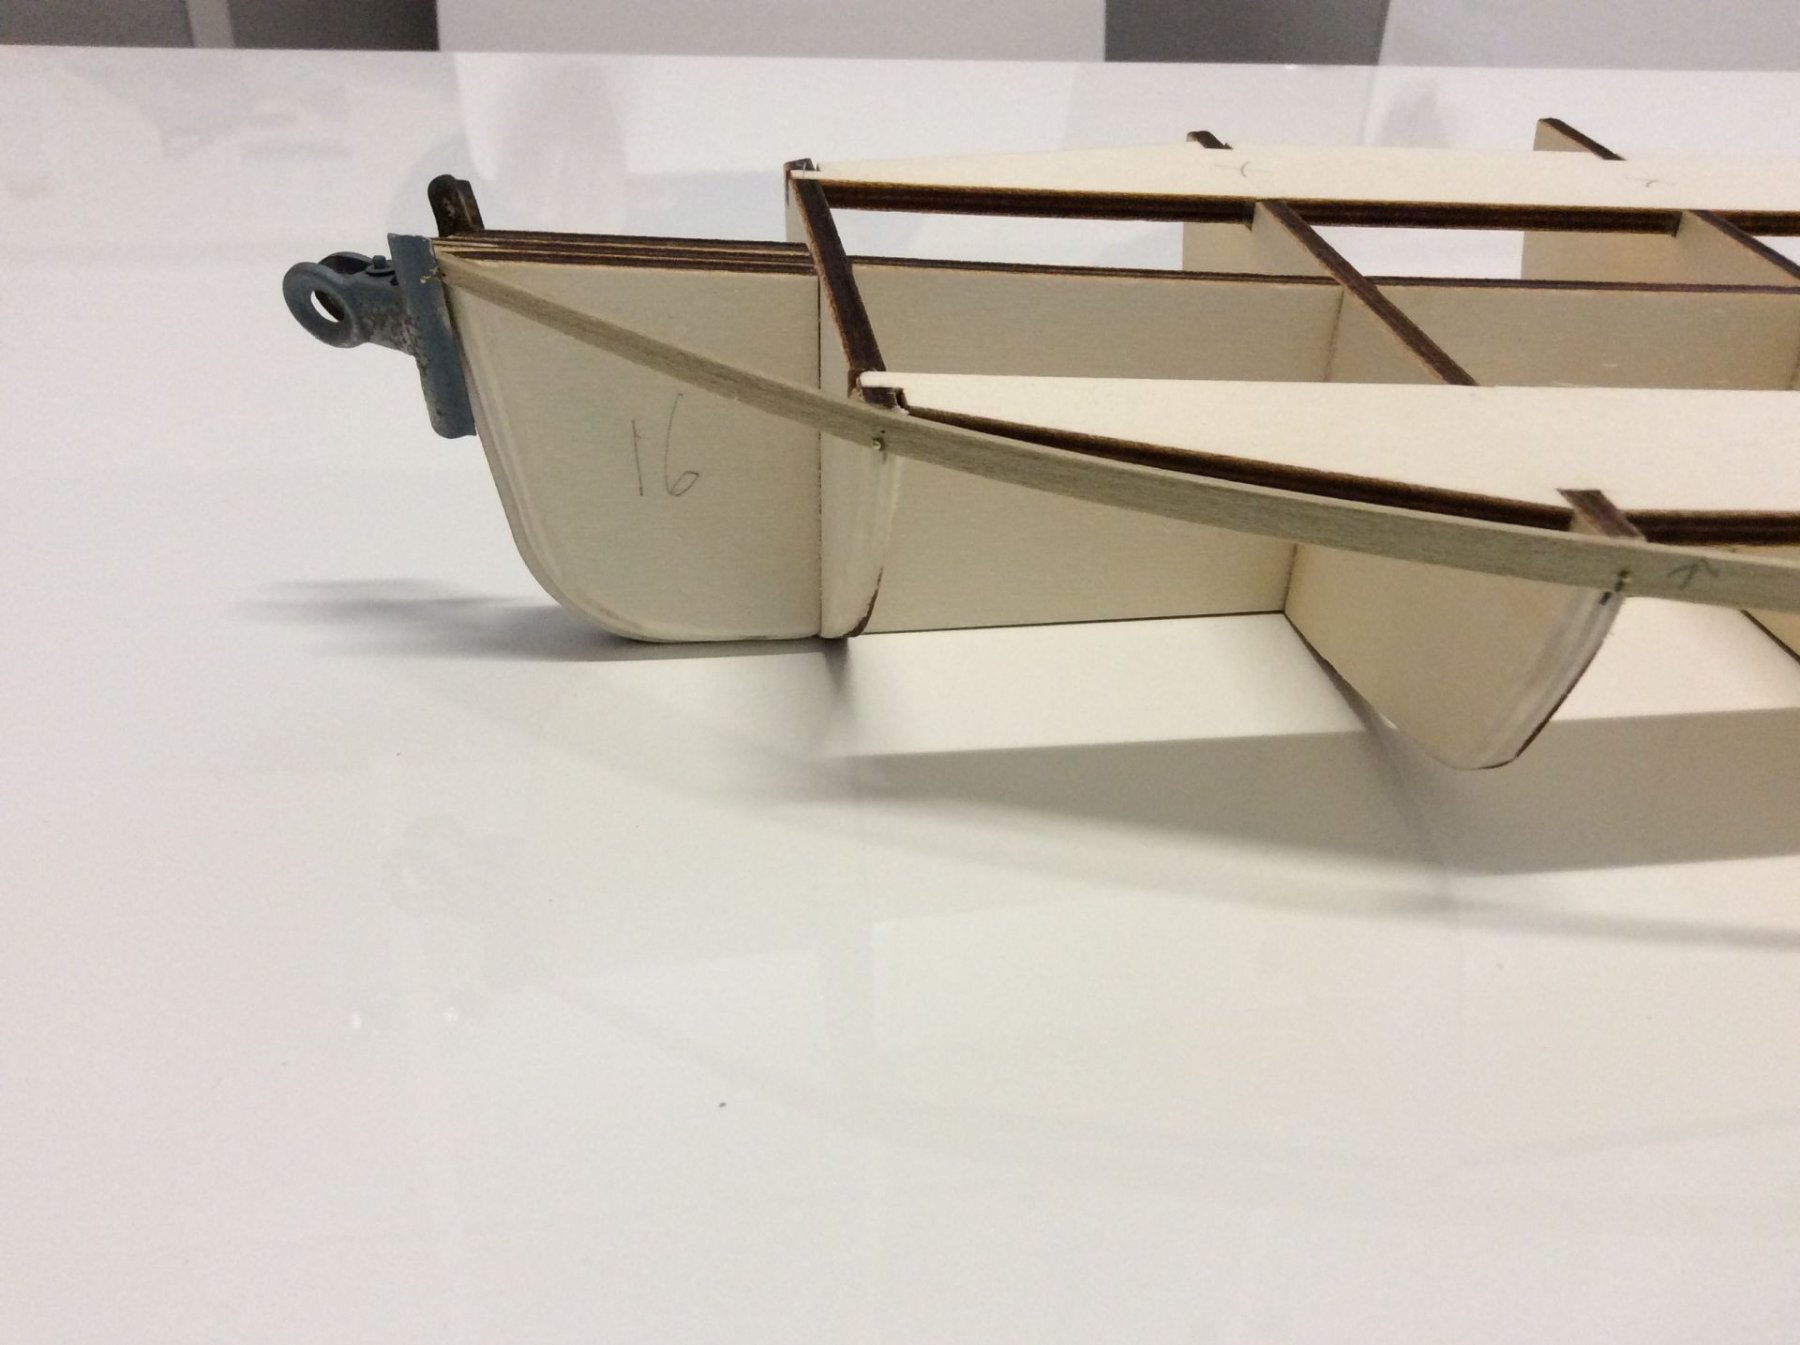
 Greetings MSW I am new to the forum and to model ship building. During the corona-staycation I decided to give model ship builing a go to kill some time. I started off with the Brittania by mini mamoli. This is a pre-build hull kit so it wasn’t really challenging but I had a lot of fun building/assembling it and therefore decided to learn more about the hobby. When searching online for building logs etc, it didn’t take me long before I ended up on msw, where I found all the information (and a lot more) that I needed. After the Brittania was finished, I ordered the whaling sloop by Artesania Latina because I read somewhere on the forum that this is a good kit to build up some experience and so I decided to give it a go. It took me about two weeks to finish this model and in hindsight I can say I enjoyed the build, but it wasn’t that more challenging than the Brittatnia. I did however “plank” a “hull” for the first time. Then I went looking for the next kit. With all my newly acquired experience (lol), I decided it was time to tackle something more elaborate. I searched online in the “2” (novice/intermediate) category and found my next build, the topic of this build log, the Racehorse by Sergal. I chose this kit/ship for it’s looks and also because the kit is not that expensive and so failure wouldn’t be too costly. I started this build about three weeks ago. I was not planning on making a building log, but since the building logs of others on this forum helped me so well, I decided to make one anyway. None of you masterbuilders will ever learn anything from me, but I hope to help other beginners out and maybe pull some over the line in having a go at this hobby. I am making lots of mistakes and for now my work looks sloppy-ish, but most important of all, I am having fun! I know I will get better at it. We all have to start somewhere. After reading a few reviews of this kit I learned that the model wasn’t based on an actual ship, but a chimera from Sergal. But I do not mind that all, on the contrary, it only gives me more “artistic-liberty” to make my own interpretation of a bomb sketch. For this model I will mainly be focussing on the building process and tyring out different things anyway rather than making a historically correct ship. That’s something for later models. Tldr; - novice - 2 previous builds (Mini Mamoli Brittania and Artesania Latina Whaling Sloop) - having lots of fun - build log : Sergal Racehorse…
-
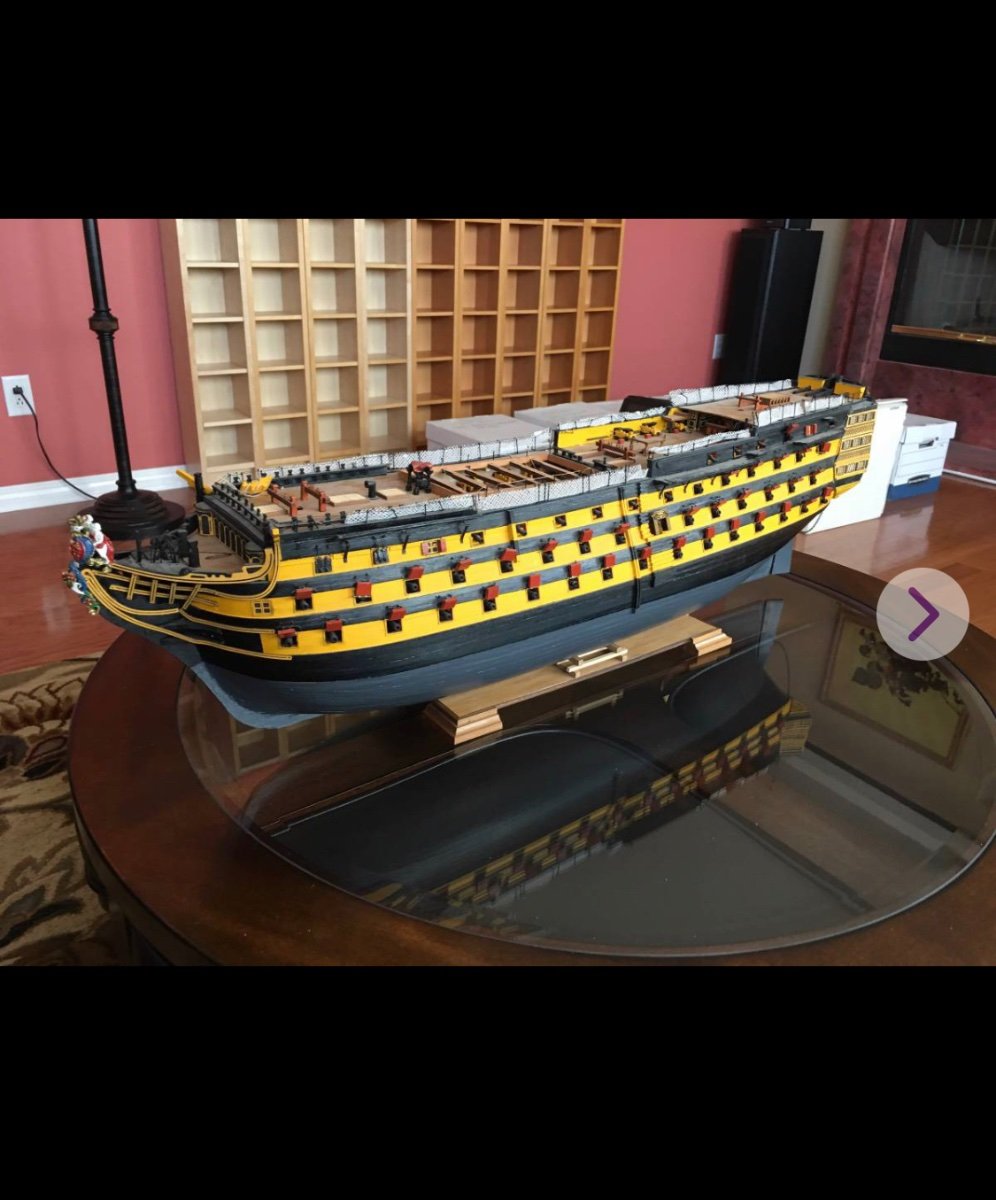
 Welcome to my new build log of the HMS Victory. This journey has a special meaning for me. All my life I wanted to build a ship. Not just any ship, but a highly detailed model, but as with most things life gets in the way. I built many models as a kid and teenager, but nothing like this. I grew up, went to school, got a degree in electronics, then became an engineer, worked at many trades, became a master machinist, a tool and die maker, traveled the US, Canada, and Mexico as an engineer for a CNC machine tool manufacturer. My lifelong hobby was wood working. I retired at age 48 due to medical issues. Now, at 68, I am working on goals on my bucket list. I desire to build this ship while I still can. I don't know what time is left .... one year .... 5 ... 20, it's unsure, but I have life threatening issues along with other issues. Enough about me, now let's build a ship. I recieved the Mantua Sergal 782 kit of the HMS Victory this morning. This was not the kit I wanted. I wanted the Billings Boats kit, but due to the difficult times now with this virus they are closed temporarily and my order could not be filled. The distributor was very helpful in getting this kit to me as a substitute. My reason for wanting the Billings was it provided the basics at a good price and I could replace the lesser quality parts with aftermarket and make the ship better detailed. I will be doing the same thing with this kit. I did have to pay an extra $72 for this kit. The Billings was $397. I have been studying McKay's book , The 100 Gun Ship, and finding sources for upgrades while waiting 2 months for the kit to arrive. I figure another $300 in aftermarket pieces will accomplish my goal, still being less than the Caldercraft kit.. and hopefully better. Mark Frazier
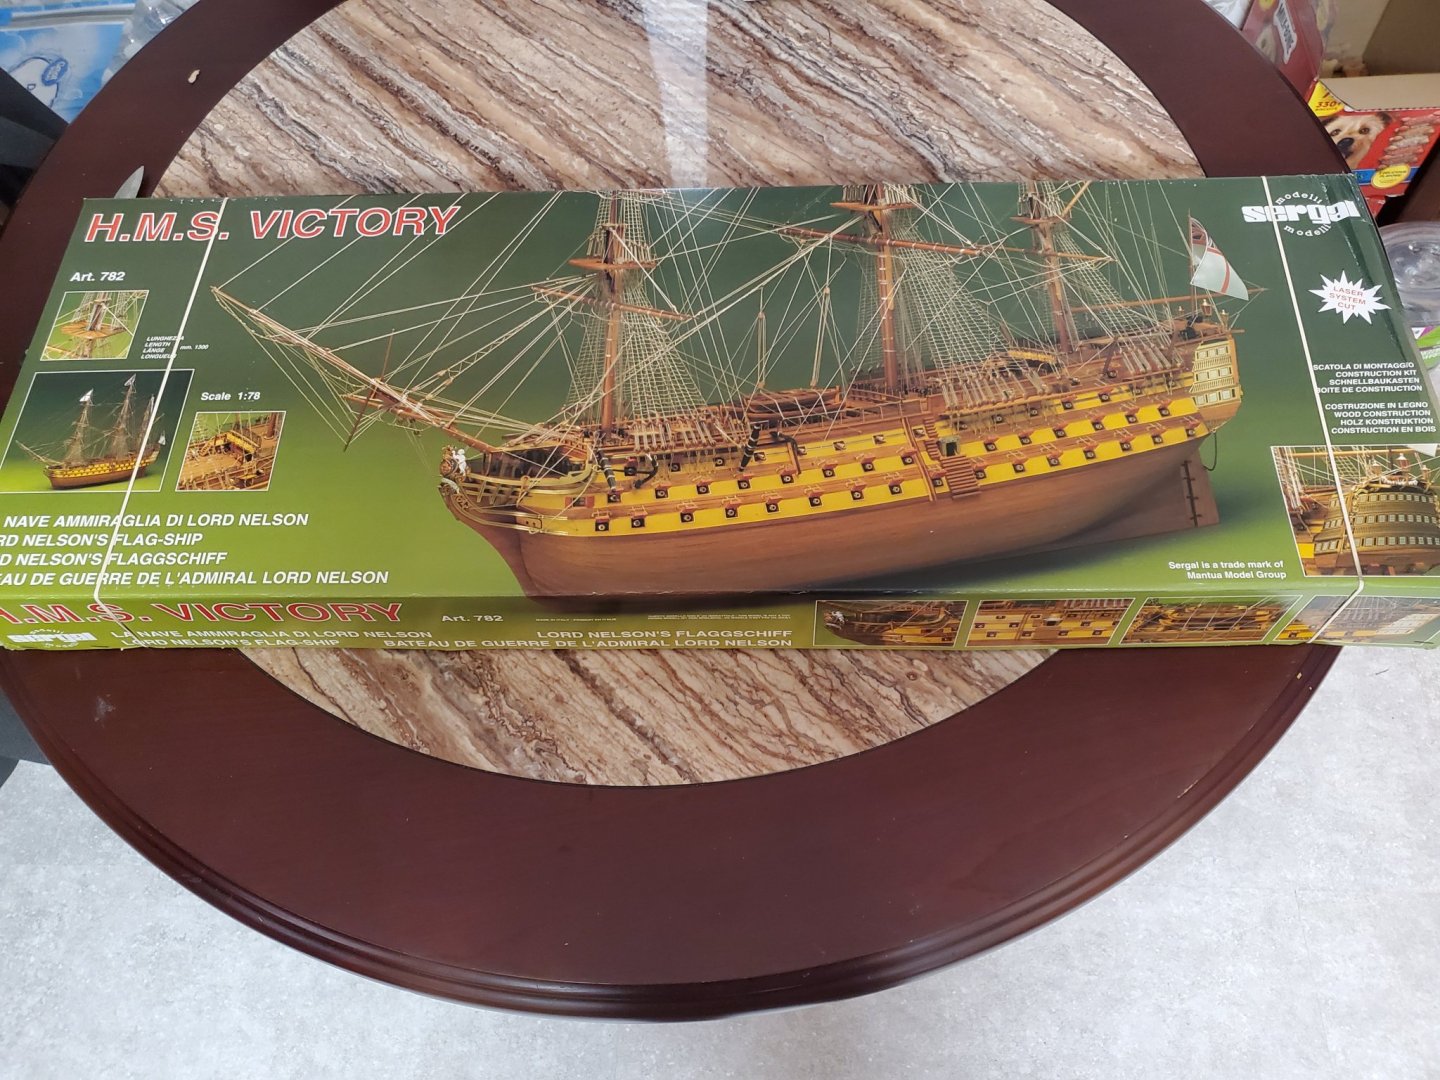


-
 Beginning a new one after a short break. Here's the "what's in the box" picture. This is my first Mantua kit, and I'll be interested to see differences from other kit makers. One thing I've noticed is that plans are printed on both sides of the paper, which may turn out to be cumbersome (vs. just posting them up on the wall). Regards, David
- 133 replies
-
- 3
-
-
- cutty sark
- mantua
- (and 3 more)
-
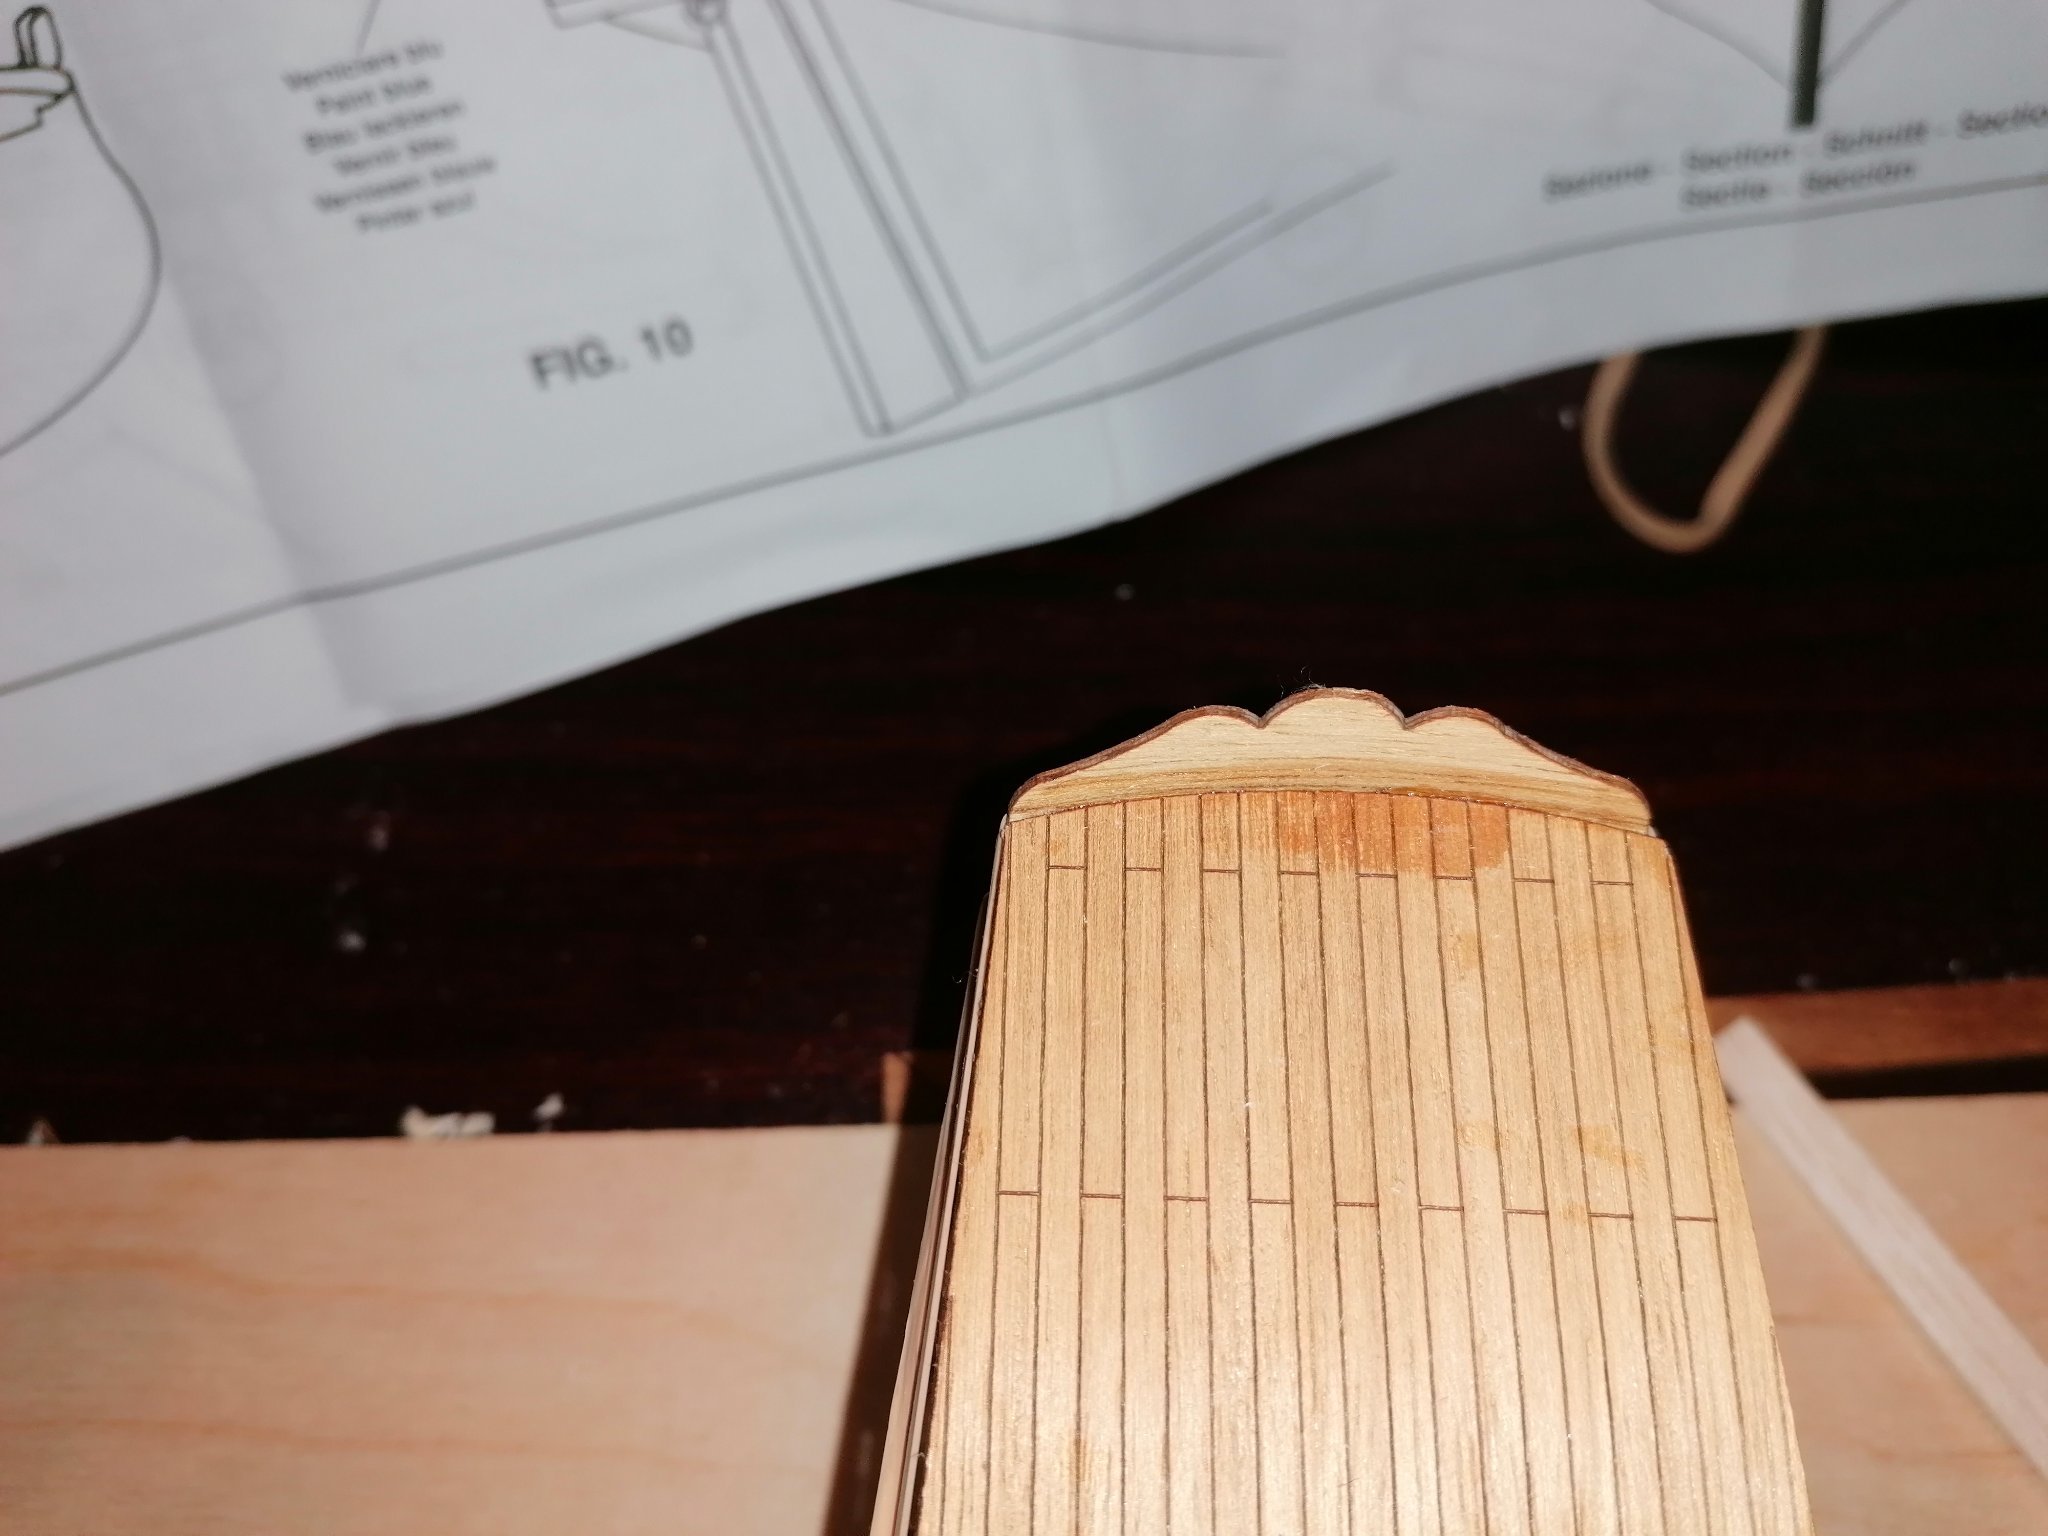
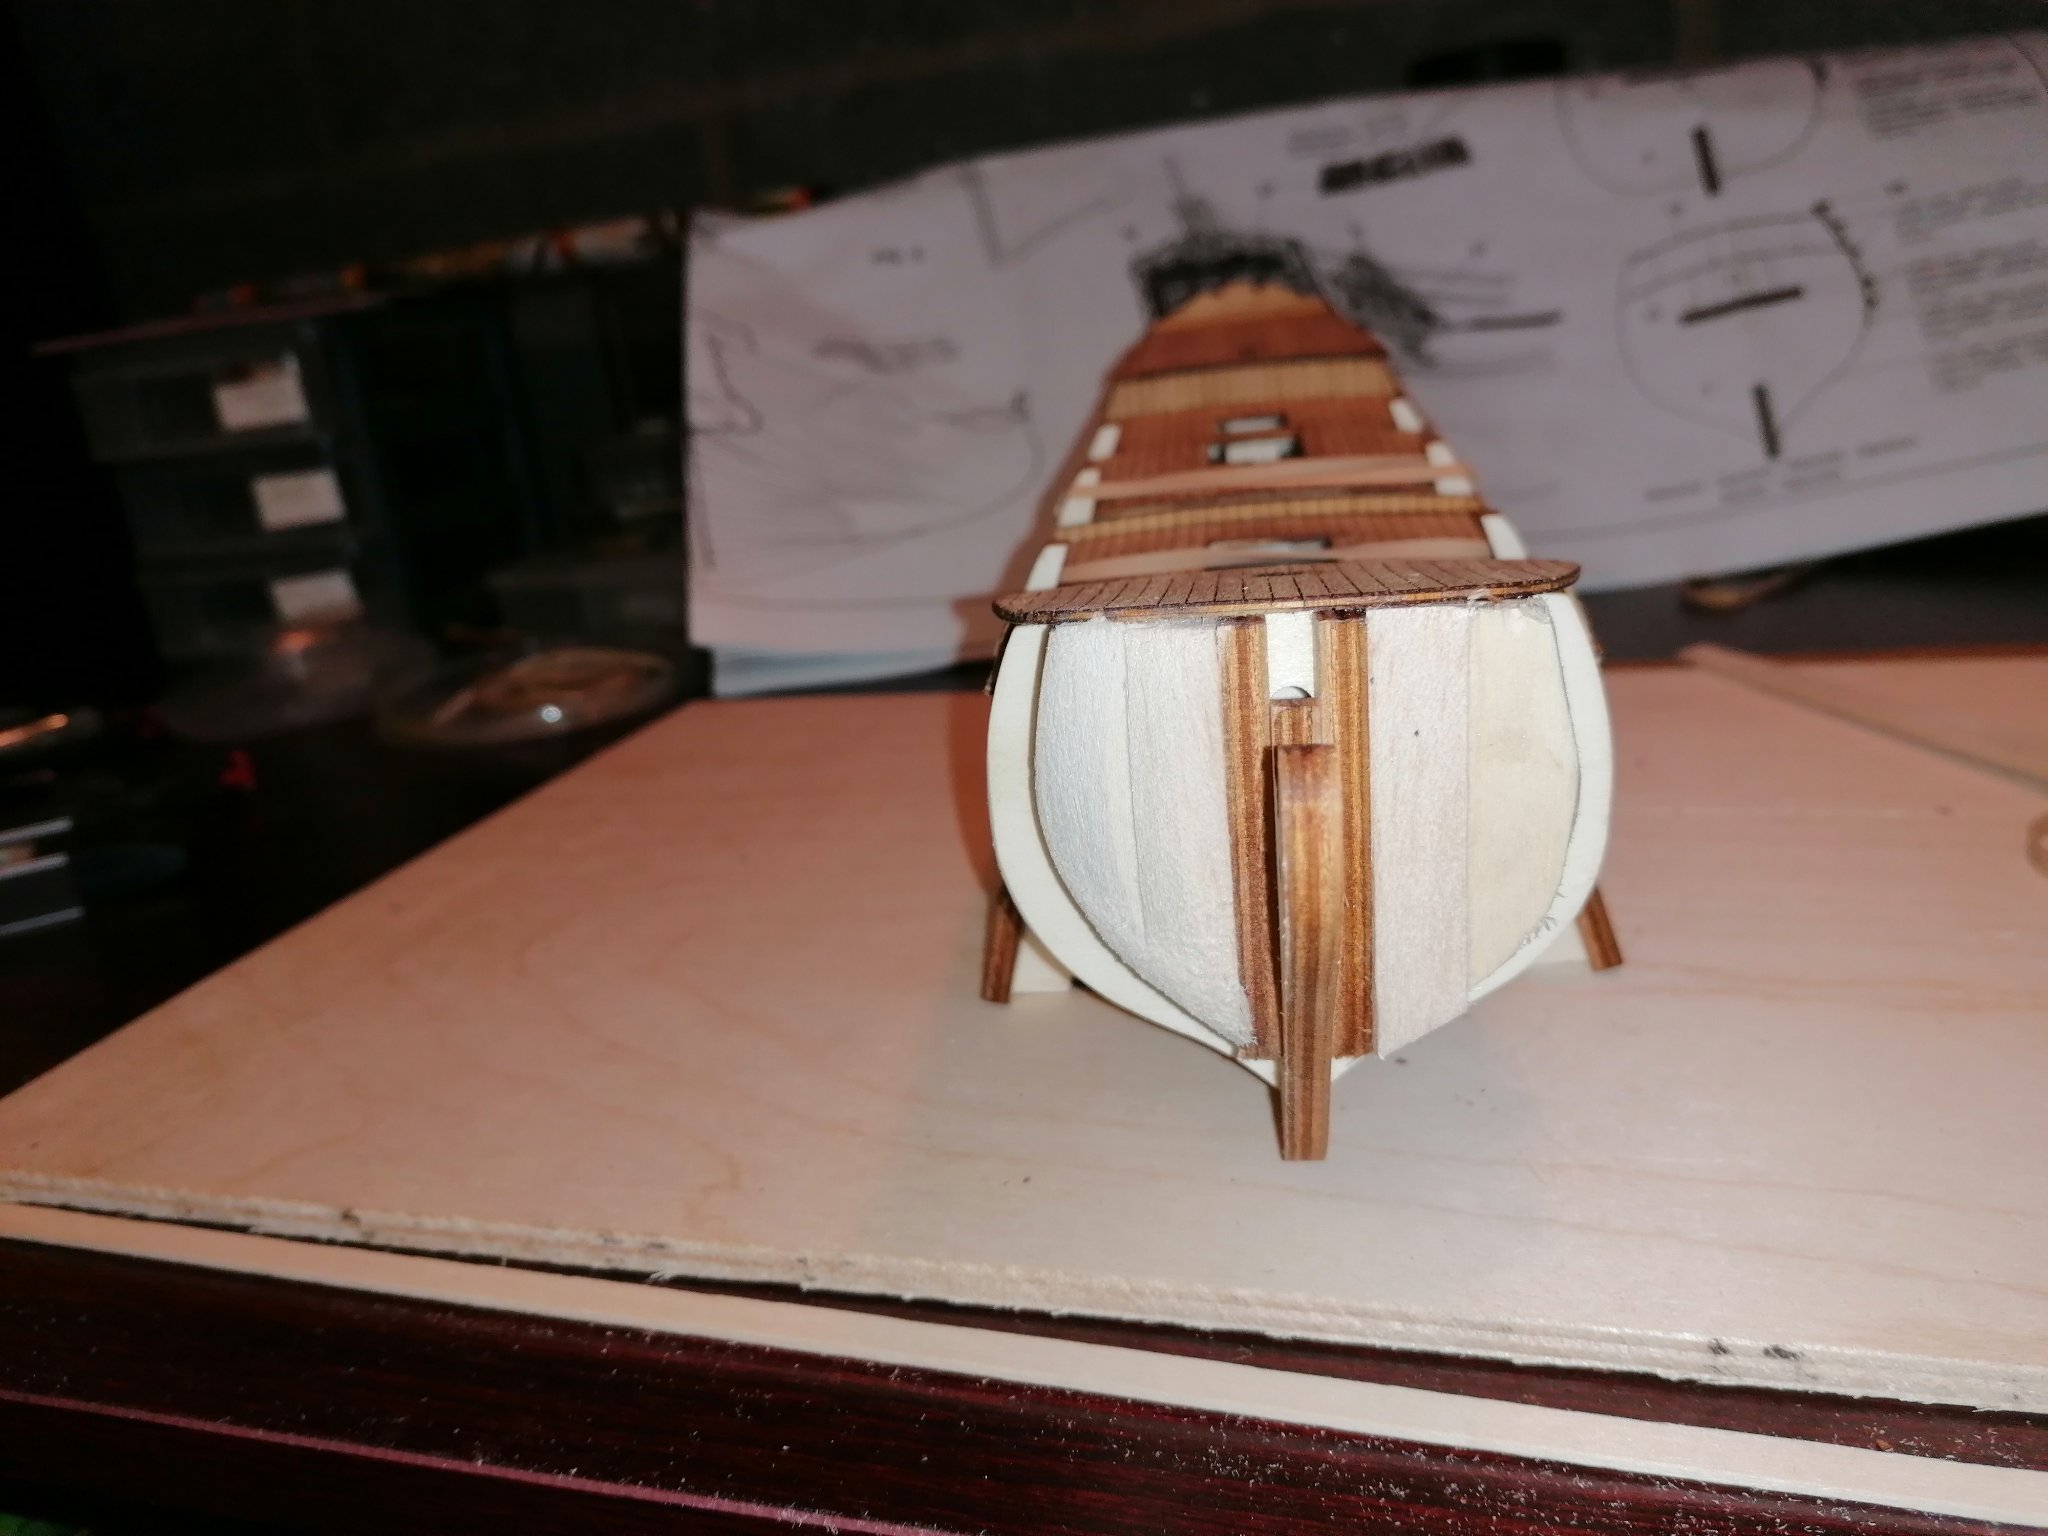
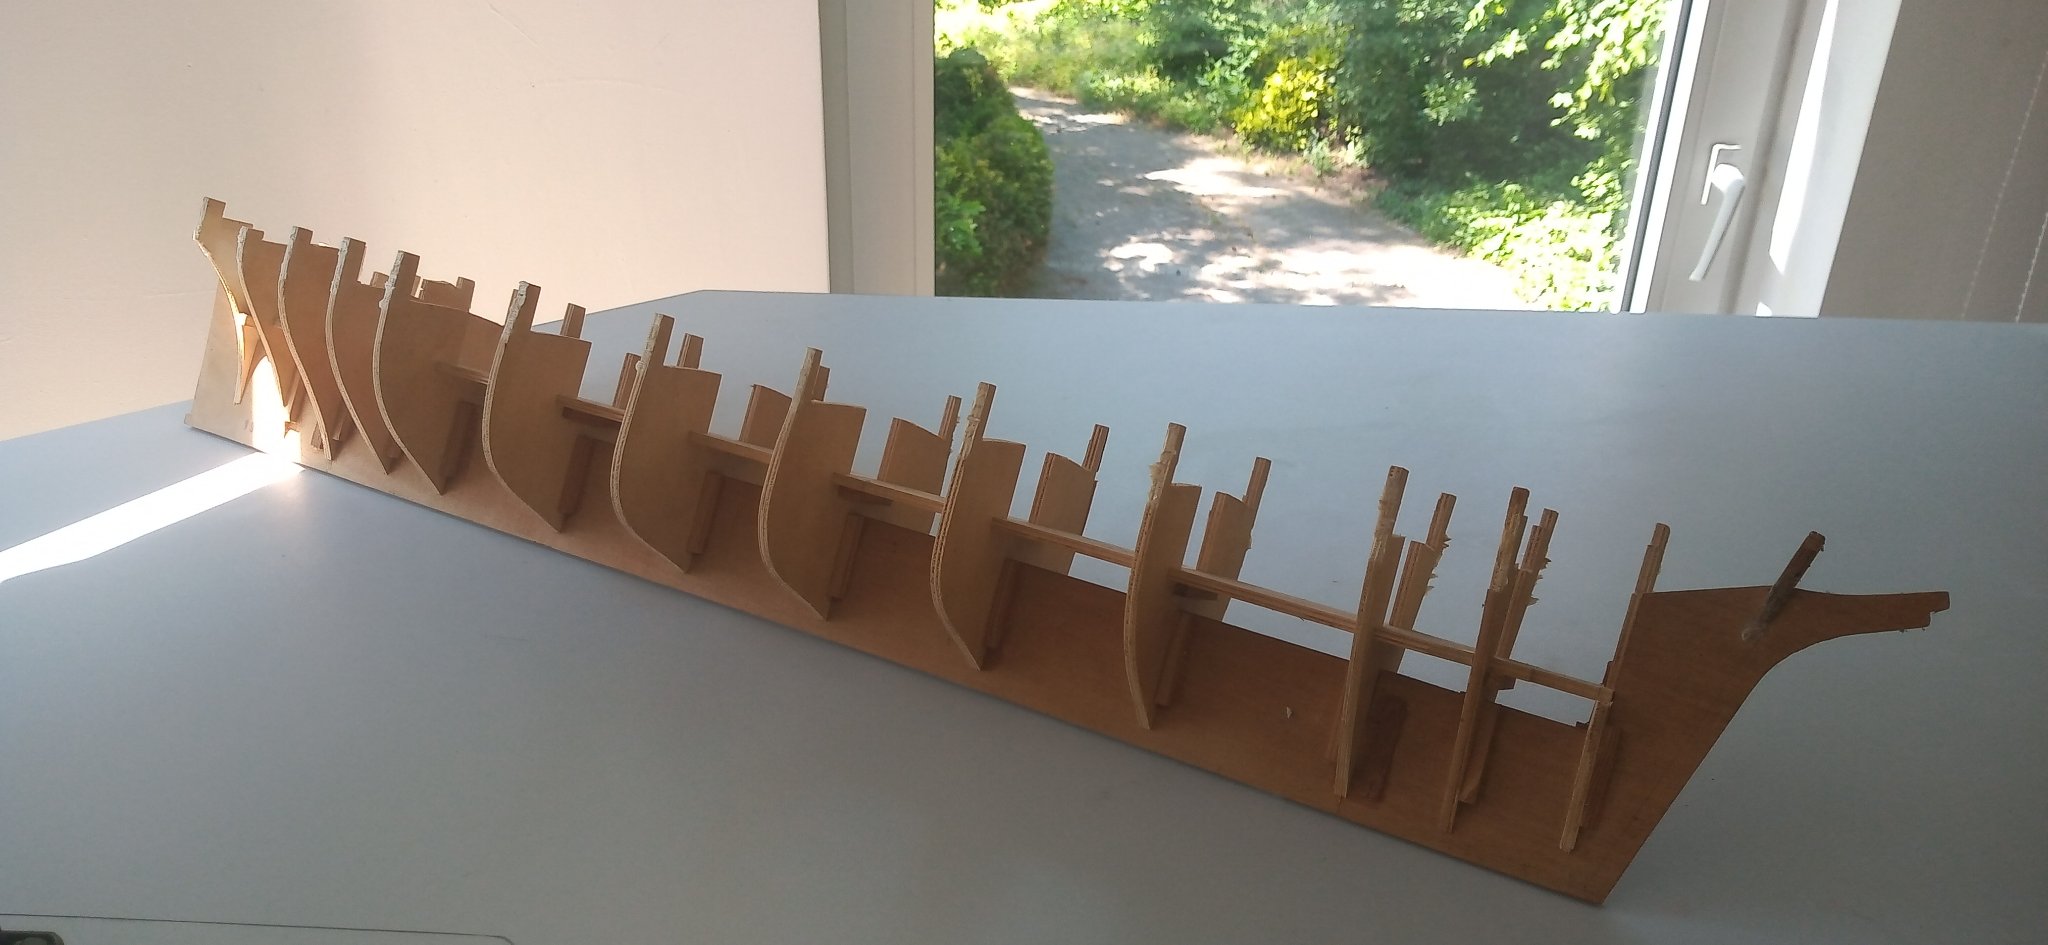
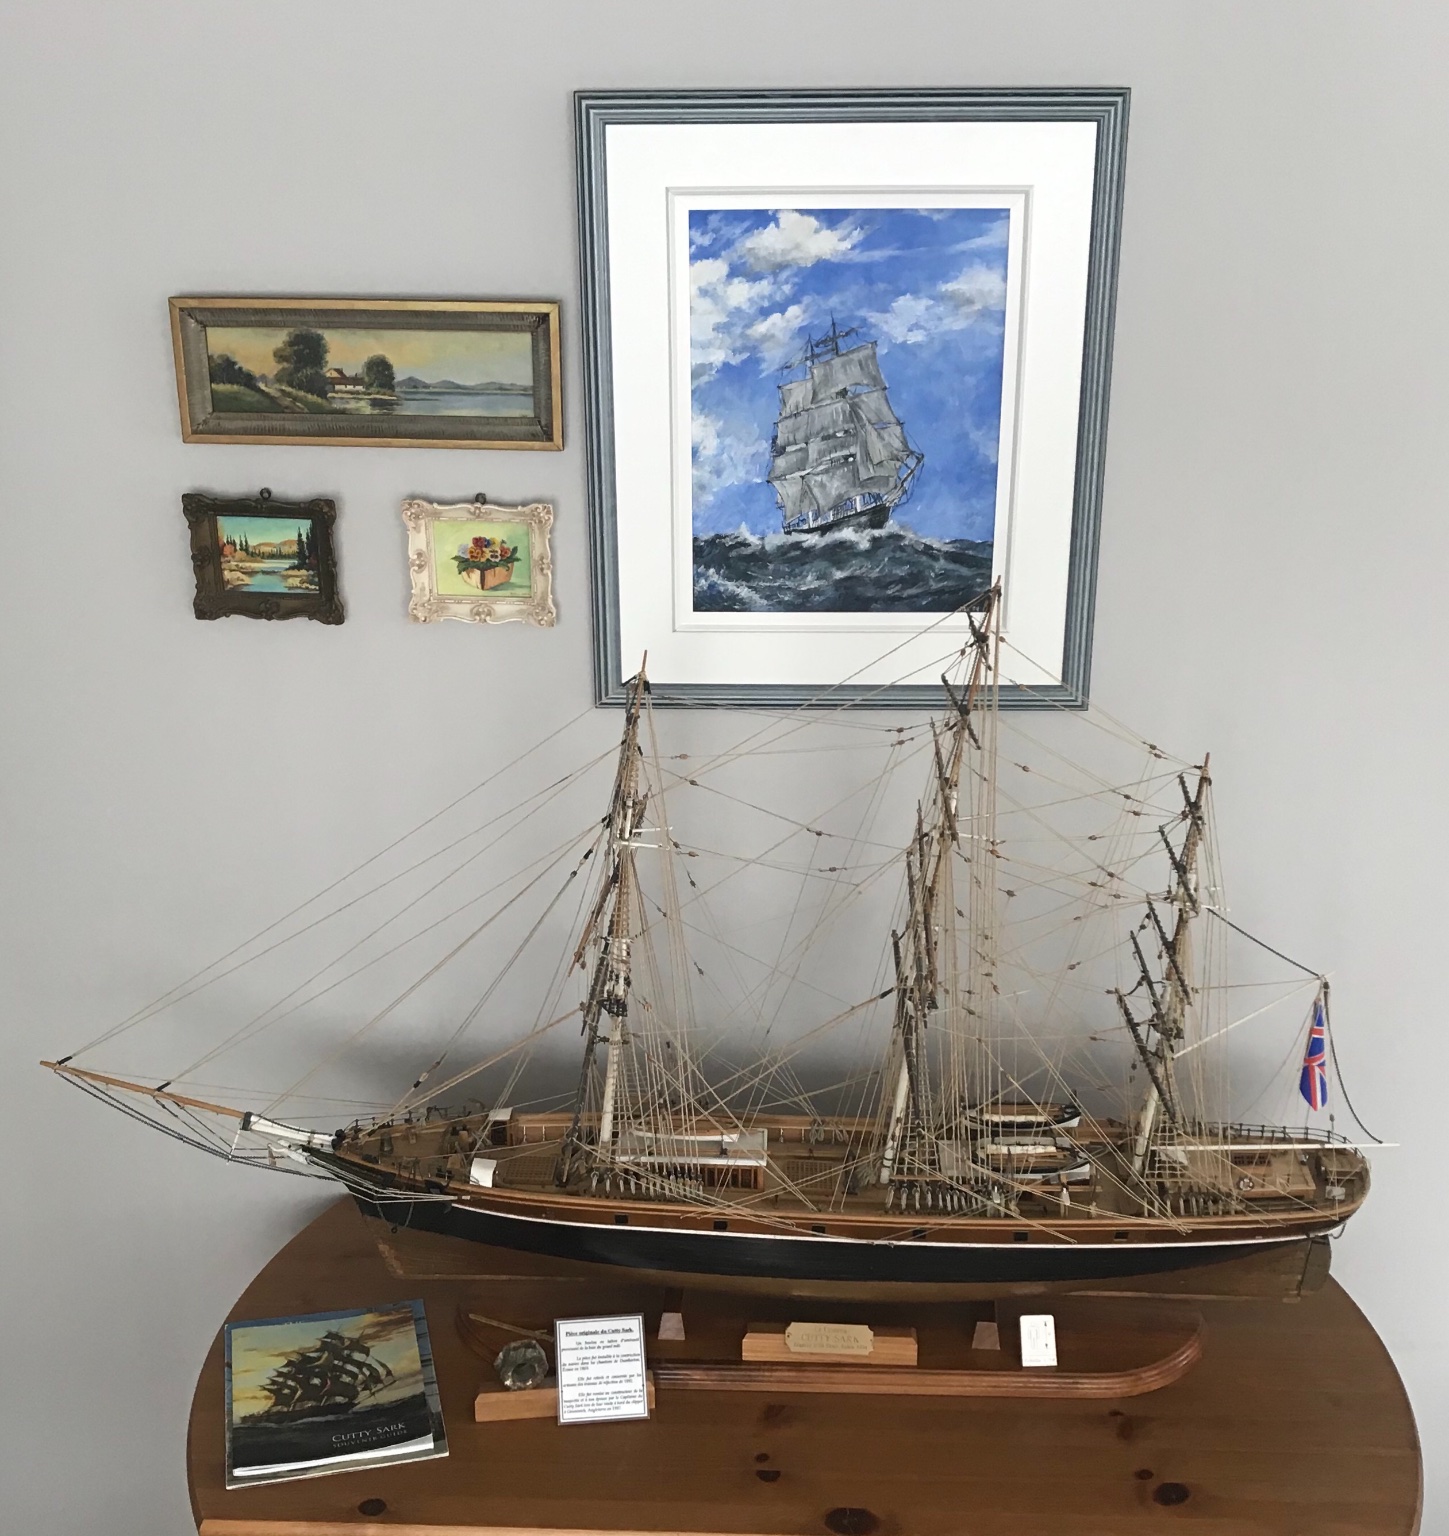
 This will be my second build log since joining as a member in November 2018. I started building the Cutty Sark by Mantua Sergal on September 1st. Now, in late November, I have pretty much wrapped up all of the hull and deck work and am starting to work on the masts and (gasp) the daunting rigging. I’ll try to do better with my pictures. I read the build log by keelhauled, posted back in March 2013, and his overview of the Mantua Sergal Cutty Sark kit is so perfect that I’m going to borrow (plagiarize) a good bit of it and include it here. I hope keelhauled won’t be offended. His work was too masterful to ignore. KIT OVERVIEW Manufacturer: Mantua (Sergal), Italy Model: MA 789 (Art 789) Dimensions: Length 45” (1150mm) Height 26” Scale: 1:78 Purchased: 2018 Price: $549 USD (2018) Construction: Double Plank on Bulkhead: Limewood inner, Walnut outer Fittings: Brass, copper, bronze, copper plates, walnut dead eyes and blocks, copper sheet with ornamentation and deck siding, bronze figurehead, grey cotton rigging line in various sizes, silk flag. Instructions: Booklet with translations into English, Italian, French, and German. In my opinion the translations are similar to what Japanese instructions in the 1950s used to look like. Not very clear and only marginally useful. Plans: Four very large two sided sheets – Eight plans total . 1:1 sheets for the deck, side, standing, and running rigging. Other sheets detail building steps. The parts are generally high quality but in at least three instances I felt I could improve on the stuff they included. I’ll detail my deviations from what Sergal Provided as I go along. As for reference materials I haven’t yet checked out the books and sources that keelhauled included in his build log, but can certainly recommend a book which has become sort of a bible for me re the building of rigged ships in general. Mastini, Frank. Ship Modeling Simplified: Tips and Techniques for Model Construction from Kits . McGraw-Hill Education. (I have the Kindle edition which allows me to check things on the fly while out in the shop). KEEL & HULL CONSTRUCTION I’ve read a lot about various methods for checking the alignment of keel and bulkhead and deck components – and certainly about all of the after-market products that supposedly make this a breeze -- but the laser cut parts in this kit slipped together so easily and precisely that I didn’t waste a lot of time agonizing over that. Instead of an after-market vise to clamp the keel I used the large end vise on my workbench to keep things stable while I assembled the parts. Many years ago I built a plank-on-bulkhead version of the Vasa (a Billings model), and even though it didn’t turn out very well I learned about soaking & bending planks, and using small pins/nails to hold them in place while the glue was drying. That was a single layer planking job, and I think that the double planking of the Cutty Sark is much better for obtaining a smooth finish on the hull. It was during the application of the second layer of planks that I began taking pictures of my work. I got pretty cocky at that point, figuring that if I could do a nice planking job like this that this build was going to be a lot easier than I expected. So, after lots of sanding and filling and smoothing I proceeded to spray paint the hull with matte black paint as directed. This what the hull looked like when I finished -- but not until I had stripped, sanded and repainted the dang thing 2-3 times. I tend to work too fast on almost everything, and this was a really good message that I needed to slow waaay down. DECKING Applying the main decking material (which may or may not have been maple) was tedious but ultimately very satisfying. The directions suggested painting the decks with a nice varnish when they were done, and I used a satin finish spar urethane. I smoothed the work with 0000 steel wool between coats and after the final coat. The directions actually suggested that I start applying the gazillion copper plates to the lower hull before doing the deck work above, but I was a bit discomforted at the way the black matte paint I had applied to the hull was prone to showing fingerprints, so I decided to put that chore off. My disappointment with some of the model’s instructions started at that point. Ultimately, once I got the hull finish smooth I painted over the matte black with spar urethane, then restored the matte finish by carefully rubbing it out with 0000 steel wool. The final result looks great, but it required a lot of fussiness to get there. COPPER PLATING I found this chore to be a nightmare. If each little plate wasn’t perfectly aligned with the waterline or the surrounding plates it looked really crappy. Avoiding getting glue on the plates was very difficult too, and even when a line of plates was firmly glued on there was a tendency for some of the plates to bow out a bit, and some even popped off while I was working. Worst of all, when it came to tapering the plates I had no clue re how to do that. Tapering or trimming stiff little 1:78 scale copper plates with scissors or a small grinder just was an untenable answer. I suspect that anyone who has installed copper plating to a model of this scale will probably be nodding with understanding. In desperation I went hunting for advice online, and that's how I discovered Model Ship World and its fantastic group of members who can provide great advice on any phase of model ship building. I found the answer for my copper plating problems with a fellow that had ditched the little plates in favor of copper electrical tape. Sheer genius. I got some of that tape, stripped the lower hull of copper plates (for the second time) and applied it. Using an Xacto knife I carefully added slits to emulate the plates, and it worked great. I had to forego the rivets on the copper plates that were provided, but on a 1:78 scale ship it was no great loss. After I had the tape applied I finished up the lower hull with two coats of satin finish spar urethane for protection and enhanced bonding. I didn’t take specific pictures to document all of the above, but the one below should give you a rough idea about the results. DECK WORK Now let’s get on to another gripe I have with this model. Beautiful brass hull decorations are provided, as well as a whole sheet of doors and decorations for the deck crew quarters and hatches. The directions tell you to spray paint these bits with either black or white paint and then, when dry, to lightly rub the raised surfaces with a 600 grade emery cloth to (theoretically) rub away the paint on the raised surfaces and leave a decoration or component with a bright brass accent surrounding the colors. As it turns out, rubbing the paint, even very gently, results in you removing the very thin brass plating and exposing the copper underlayment. It just ruins the piece. I was beside myself, because there was so much of this work to be done. I had to finish the hull decorations with a very fine brush and some gold flake model paint. Looks OK, but they would be better with a real brass finish. The initial work on the deck housings and other deck components started with the stern deck house. Here is a picture showing a partially completed deck house, along with the various decorative brass pieces that are to be attached. I didn’t even think of spray painting and rubbing – I once again wielded the smallest brush I could find and filled in the sunken areas by hand. Yeah, I know they look OK in this picture, but I was not happy with them. Here is a picture showing the stern deck house completed and installed. The brass stanchions and railings came out nicely. Note also the rudder control housing and the ship’s wheel. BOWSPRIT Before tackling the other deck accouterments I went to work on the preliminary assembly and installation of the bowsprit and the hawse supports. Also note the two small lavatories (er, outhouses) on the main deck and the bits on the bench that ultimately became the two cargo hatches. Work on the rest of the deck structures went pretty well, and I think the various components look very nice. Shown below: one of the main hatches, a windlass, belaying pin holders and a very nice bilge pump assembly. The decorative panels and doors on the crew quarters shown in these photos require some better explanation – because I think I managed to solve the hand-painting of brass pieces problem in a rather unique and satisfying (to me) fashion. After carefully measuring the surfaces to be covered by the brass panels, I turned to an old friend – PowerPoint – and designed similar decoration panels for the crew quarters. It’s easy to size things in PowerPoint, and it also has the capability for dragging in colors from photographs. I took a picture of one of the brass pieces and used it to make the designed panels really look authentic. Here’s the brass picture and the designs I worked up to replace all of the brass work on the whole deck. I printed the page above on glossy photo paper on my ink jet printer, trimmed everything with scissors and glued them each in place with Goop rubber cement. Authentic? Maybe not, but a satisfying solution for me that I think looks way better than the glue-on brass pieces provided. Note the comments about properly orienting the crew cabin doors to account for wind direction. I got that tip from Mancini’s great book. It seems counter-intuitive, but the wind comes from behind on a sailing vessel, and doors that open the wrong way can be ripped right out of a seaman’s hands. LIFE BOATS So, I went on feeling my way through the rest of the deck details, and that finally included building and mounting the lifeboats. They are also plank on-bulkhead construction, and were fun to make. Laser-cut wooden parts are a huge improvement in model boats since the last ones I built years ago. Here are some other pictures of deck construction ... … and on to adding support chains to the bowsprit and installing the anchors. Yeah, I know the figurehead is supposed to be white, but I like the bronze color better. MASTS & YARDS For the past two weeks I’ve been working on the masts. Here is a shot of what I’ve done so far. See if you can detect the problems I’ve had that are going to lead me to start all over again next week. Note the completed and installed life boats that came out quite nicely. The masts themselves are pretty much OK. But the yards are a disaster in my eyes. Shaping them and gluing them together was not bad, but the attachments of the lower yards to each of the masts is “amateur hour”, and the rope supports that sailors stand on to work on the sails are all grossly out of scale. Also, I used the spar urethane on the masts and yards, which are supposed to be matte black, and it just came out way too shiny. No good. Last but not least, when trying to drill holes in the yards it is almost impossible to keep one’s drill bit from wandering off-center. Bad, bad, bad. DRILL PRESS FOR ROTARY TOOLS To solve the hole drilling problem I’ve ordered a drill press assembly for the Dremel, along with a machinist’s vise to hold even the skinniest of dowels firmly while I drill. I found all kinds of cheapo attachments like that ($30-$40), but somewhere I ran across a link to a review of a small company in CA that produces what appear to be real high-end accessory attachments for rotary tools. https://www.evilmadscientist.com/2013/drillpressplus/ If you’re interested in accuracy, and you aren’t totally constrained by costs, you might want to take a look at this guy’s work. Some really neat ideas for the small home machine shop, all powered by rotary tools. http://vanda-layindustries.com/html/drill_press_plus.html I am looking forward to taking delivery of my new drill press station next week. I’ll let you know if it’s as good as it looks. "He who dies with the most tools wins." So ends my rather lengthy narrative re stage one of my Cutty Sark build. From this point on I’ll try to do a much better job with photos and update my progress as I go -- and maybe not be so wordy. I’ve already gotten several responses to my previous posts from model shipmakers around the world. Really neat. I hope to continue tapping into this fine group -- not for approval of my work, but for suggestions re how I can do everything better. Phase 2 coming soon. Tom in NC November, 2018
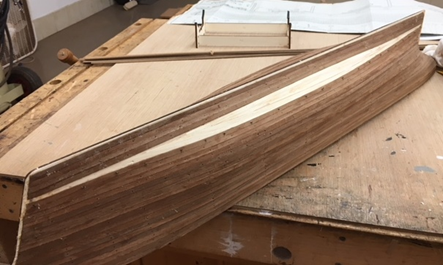
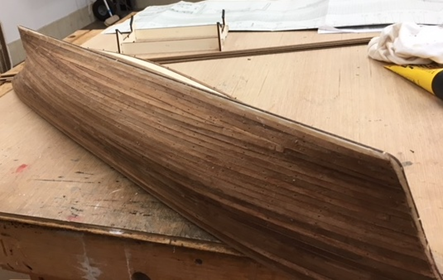
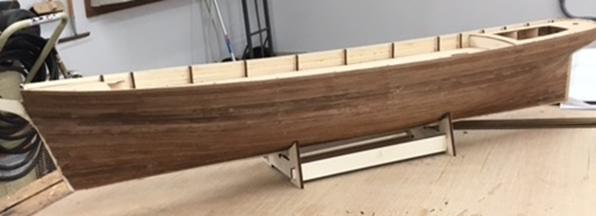
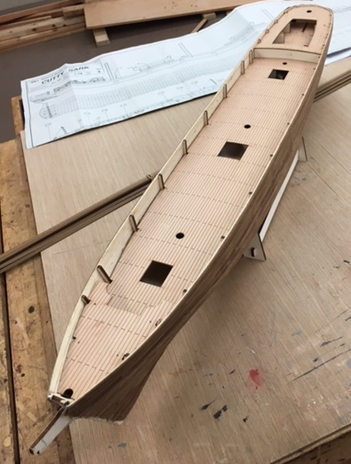
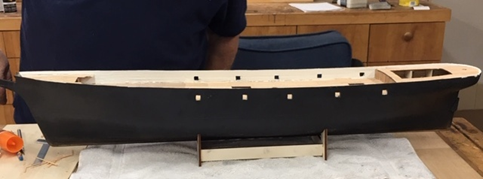
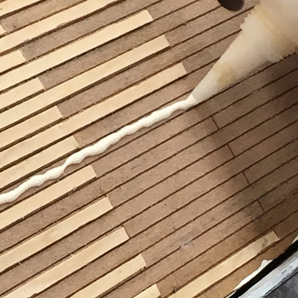
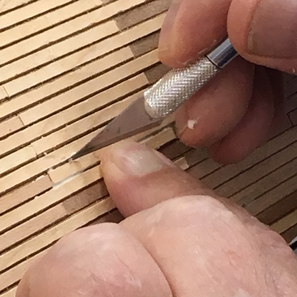
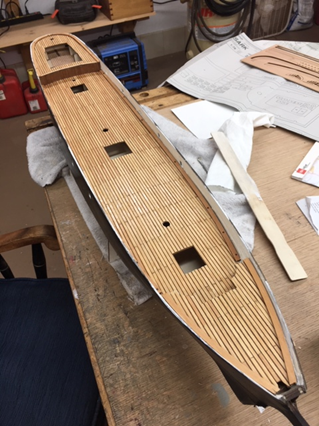

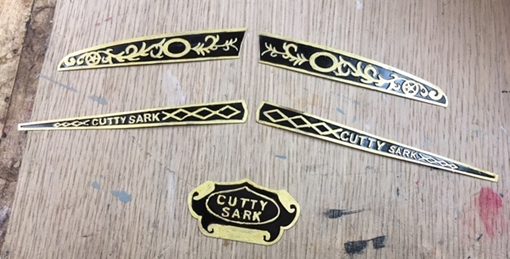

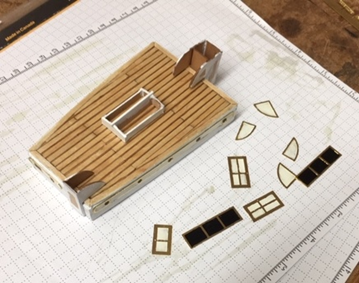
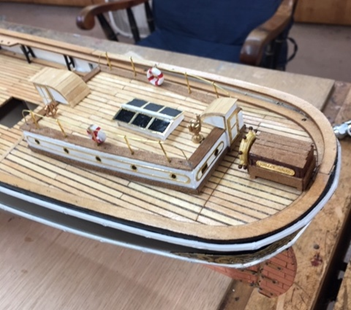
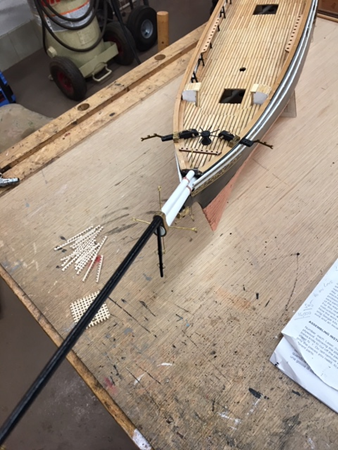
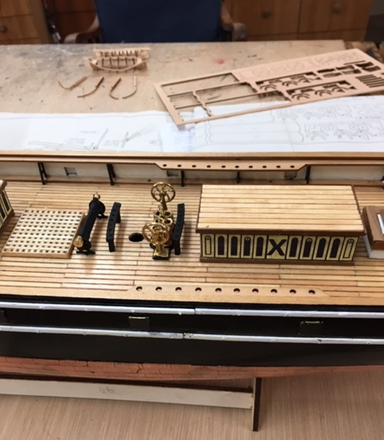
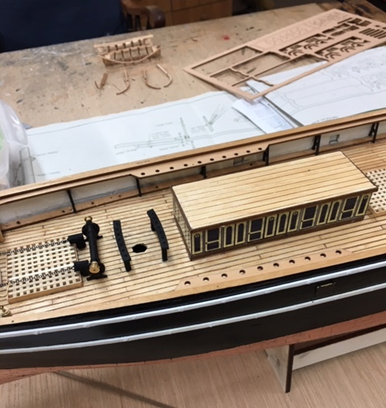

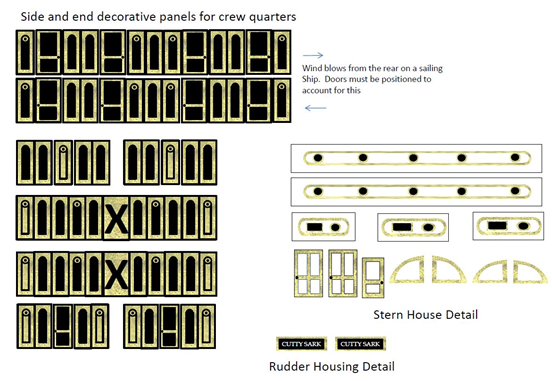
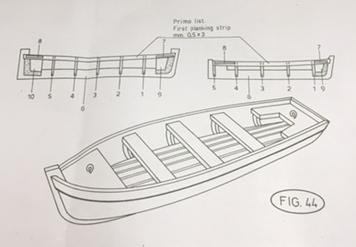
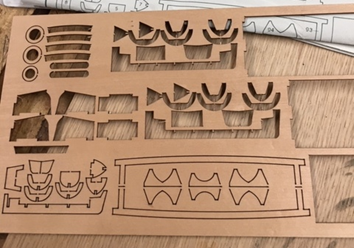
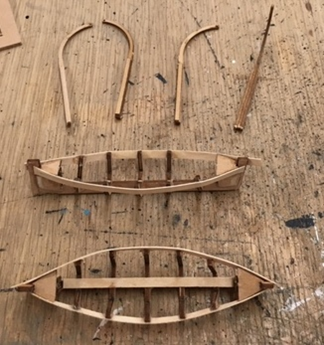
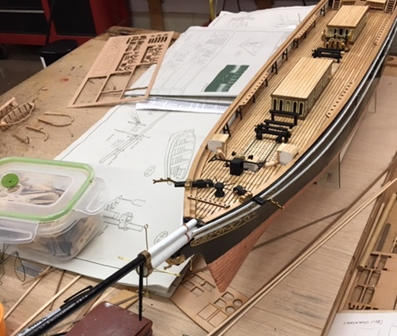
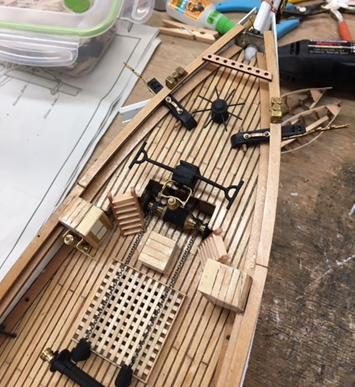
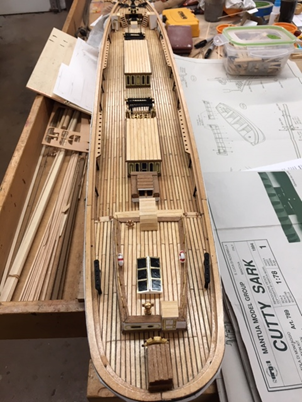
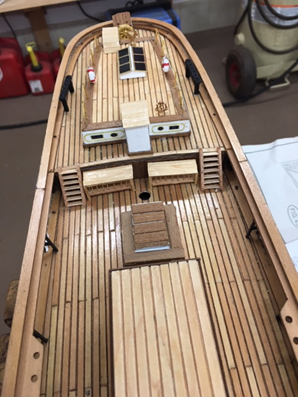
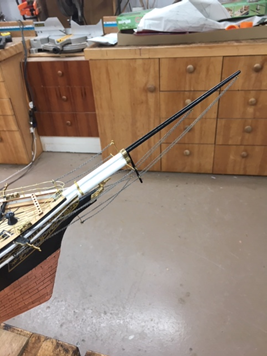
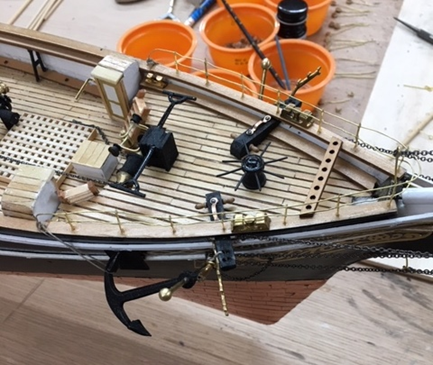
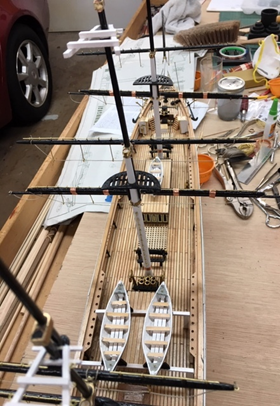
- 14 replies
-
- 6
-
-
- cutty sark
- mantua
- (and 3 more)
-
Greetings, I'm from Hungary, and until now, I built mainly WW2 ships and planes from plastic kits. Now I decided to build a tall ship, and I ended up with two kits, but I can't decide which to buy. One is the 1/96 plastic model of the Cutty Sark from Revell (Nr. 5422), and the other one is from wood, the 1/124 Thermopylae model of Sergal. Which of do you recommend to a beginner in sailing ships, and why? If you know alternatives for a maximum of €80-100, in the category of XIX. century ships, I would appreciate it too. Thanks in advance.
-
 Hi! I am a newbee from sweden. I started to build wood model ships in the beginning of this year (2018) because I wanted a hobby. I used to build plastic models in my youth but I was never good at it, I didn't have the patience required. But this time... So I started to build 2 (3) ships. The first was not good the second was better and the third was a disaster so that I had to put aside for a while. But the fourth, Thermopylae, started pretty good. Then I discovered that it was way out of my league but giving up is not an option. So all beginners can follow this log and hopefully not make my mistakes. There are quite a few . I found a absoultely fantastic build log at the internet and contacted he who had it and he "adopted" me and gives me advice and help via e-mail and it´s worth eveything to mee. I'm sorry I don't have thar many pictures from the start but I can describe trhe mistakes I made and had to correct. I guess I started to build this 2018-05-01 and today is 2018-08-03. I started with dryfit of the decks and frames. I had to sand the decks a bit and when I was happy I started to glue the frames puting the the deck on between every frame so it would hold them in place. P.S. I hope my english isn't to bad but I think I can make myself understood even if I spell something wrong and use the wrong word sometimes. To be continued........
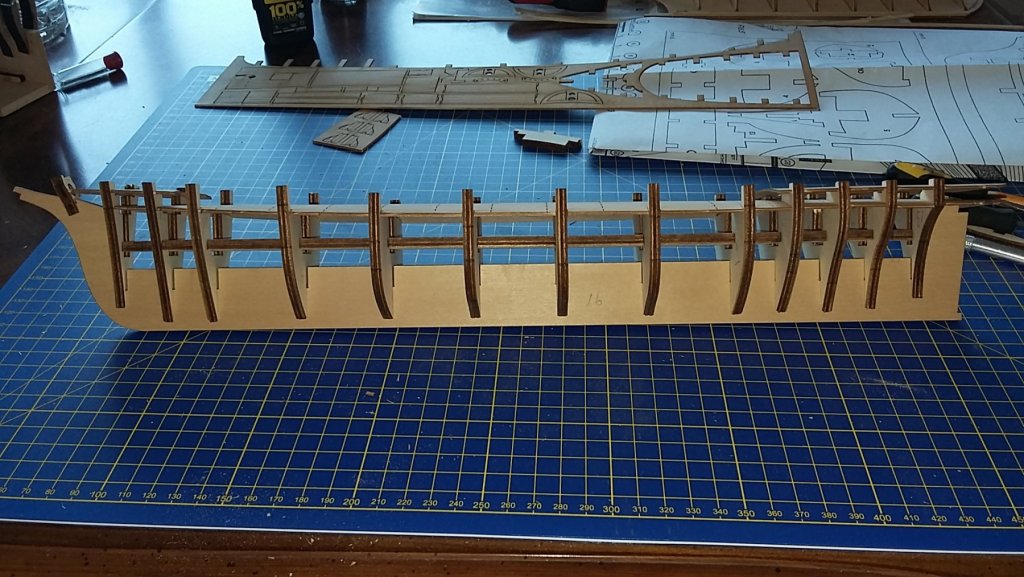
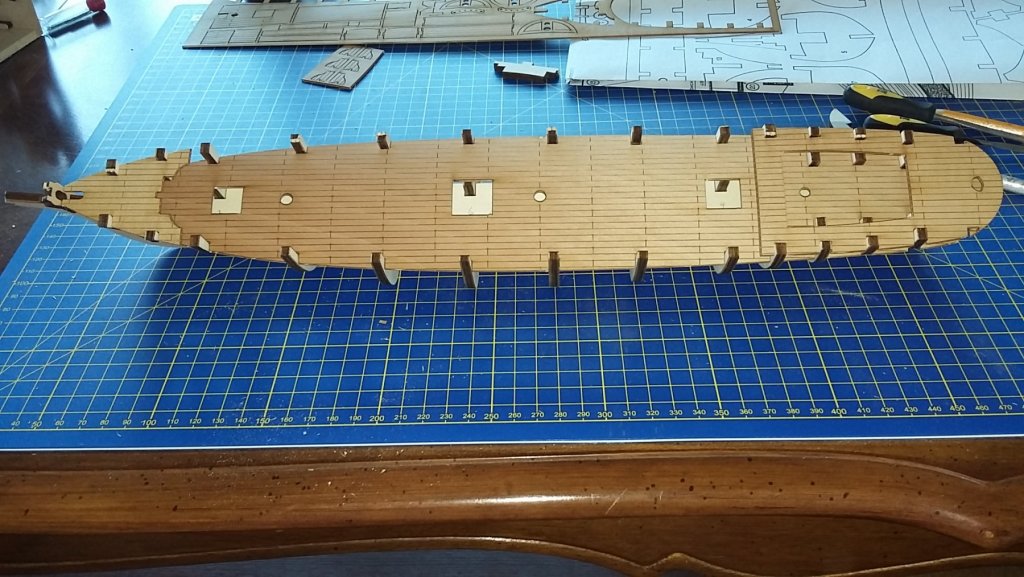
- 105 replies
-
- 4
-
-
- thermopylae
- sergal
- (and 2 more)
-
 So this is to be my first attempt at building a ship. I have not done anything like this before so the whole thing will be quite a learning experience i think! I have not started building yet (hopefully that will come this evening when the children are in bed) - but have spent some time staring at the instructions and *think* i get the general idea (time will tell). Anyway, this is what I have - so if you see some critical piece of equipment missing from the image please shout! (note - i do have glue - vitalbond aliphatic wood glue) but that did not make it into the photo!
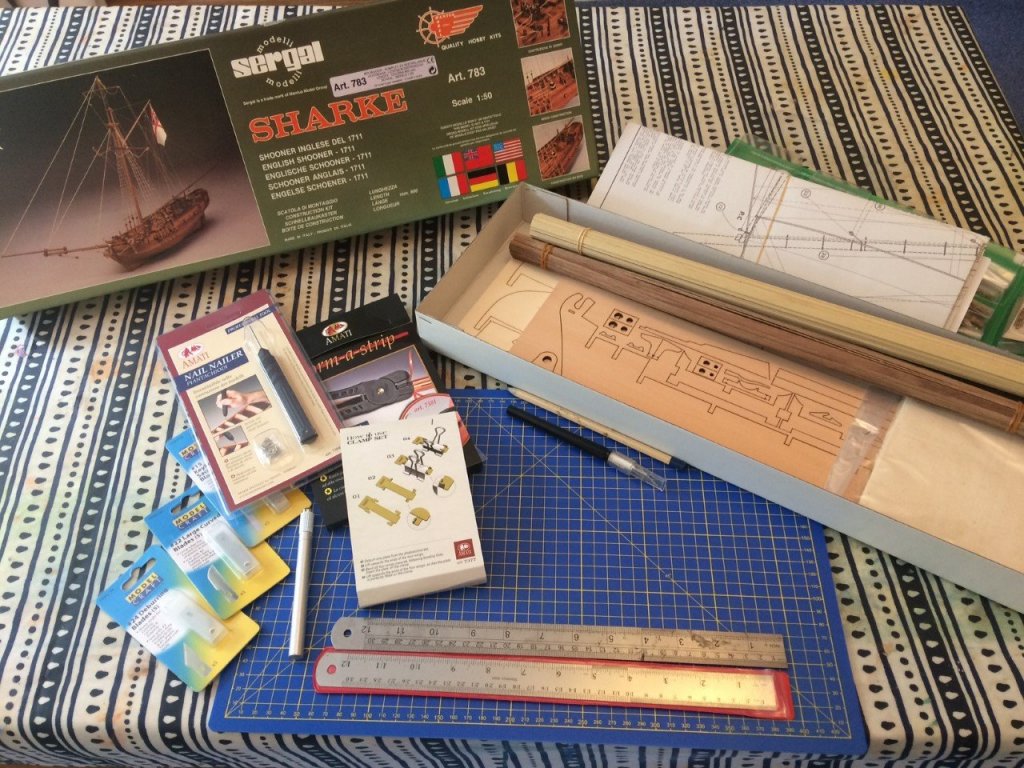
-
Hi. I have been offered this kit for around 460 dollars. My questions is if this is a good kit? Or is the newer version by mantua better? In one of the photos it also lools like some of the fittings is missing. Can anyone who have seen this kit give some info on it?
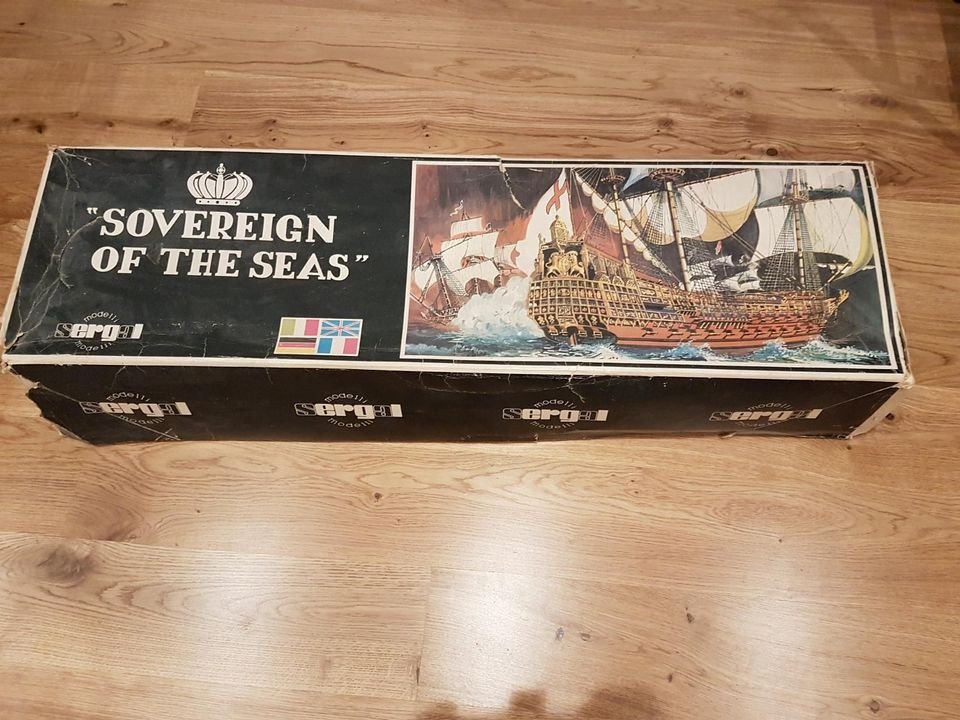
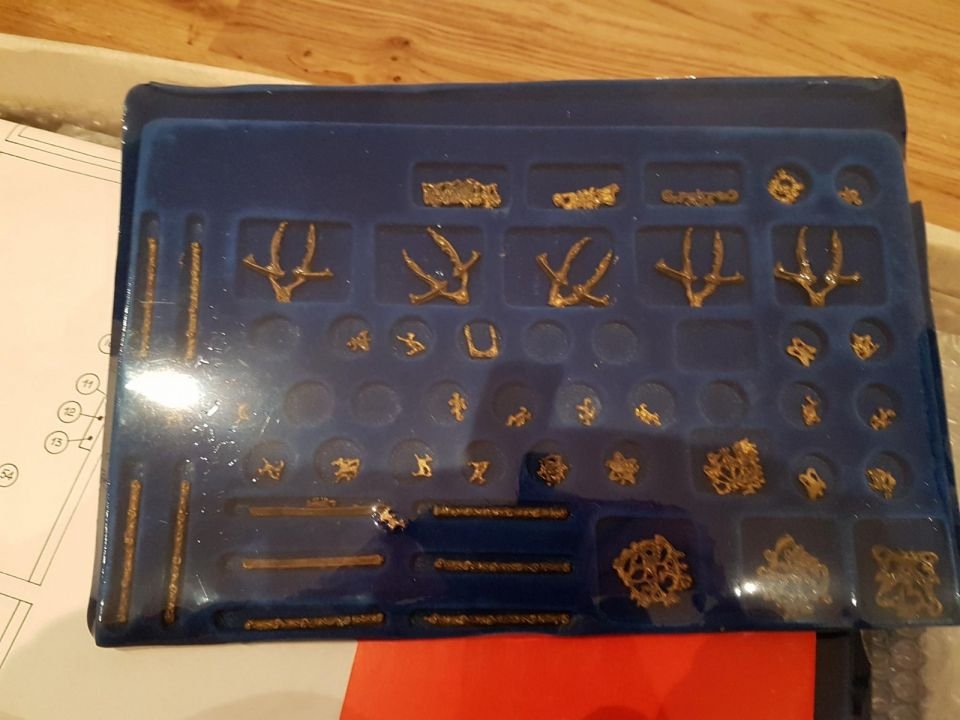
-
 Possibly a bit late to start a log, but what the heck! Being an old steel boat sailor myself I never thought I could fall in love with any other type of craft. I was wrong! When I saw Charles's build log of this vessel I literally fell in love with this type of craft. Since then I have tried to learn as much about them as I possibly can. Kurt and Cathead have provided a wealth of information, and for that I am truly grateful. Previous to starting this model my main understanding of this type of vessel came from multiple viewings of the Jodie Foster ( best actress ever) film, Maverick. Obviously I had a lot to learn! The thing I learnt very quickly was that this particular model was not a very true, or accurate depiction of the type of craft of the day. Spewing, as Jodie would look fine on mine! Anyway, so given it is a bit of a fantasy boat, I intend to try to glam mine up a bit (as would befit Jodie). There are a few gaps between pic updates, but since Santa deemed I had been extra good this past year I was presented with a cool new digital camera! So once I get to master it a bit better I hope the updates will be more frequent. Anyway here is where I am at the moment.