usedtosail
-
Posts
2,421 -
Joined
-
Last visited
Content Type
Profiles
Forums
Gallery
Events
Everything posted by usedtosail
-
 Thanks Patrick. I do plan to make a hole myself. I have been searching through photos of the replica but none of them show that area clearly. They all seem to be dark in that area. Maybe time to dust off my image processing skills and see if I can enhance one of those photos to see it.
 -
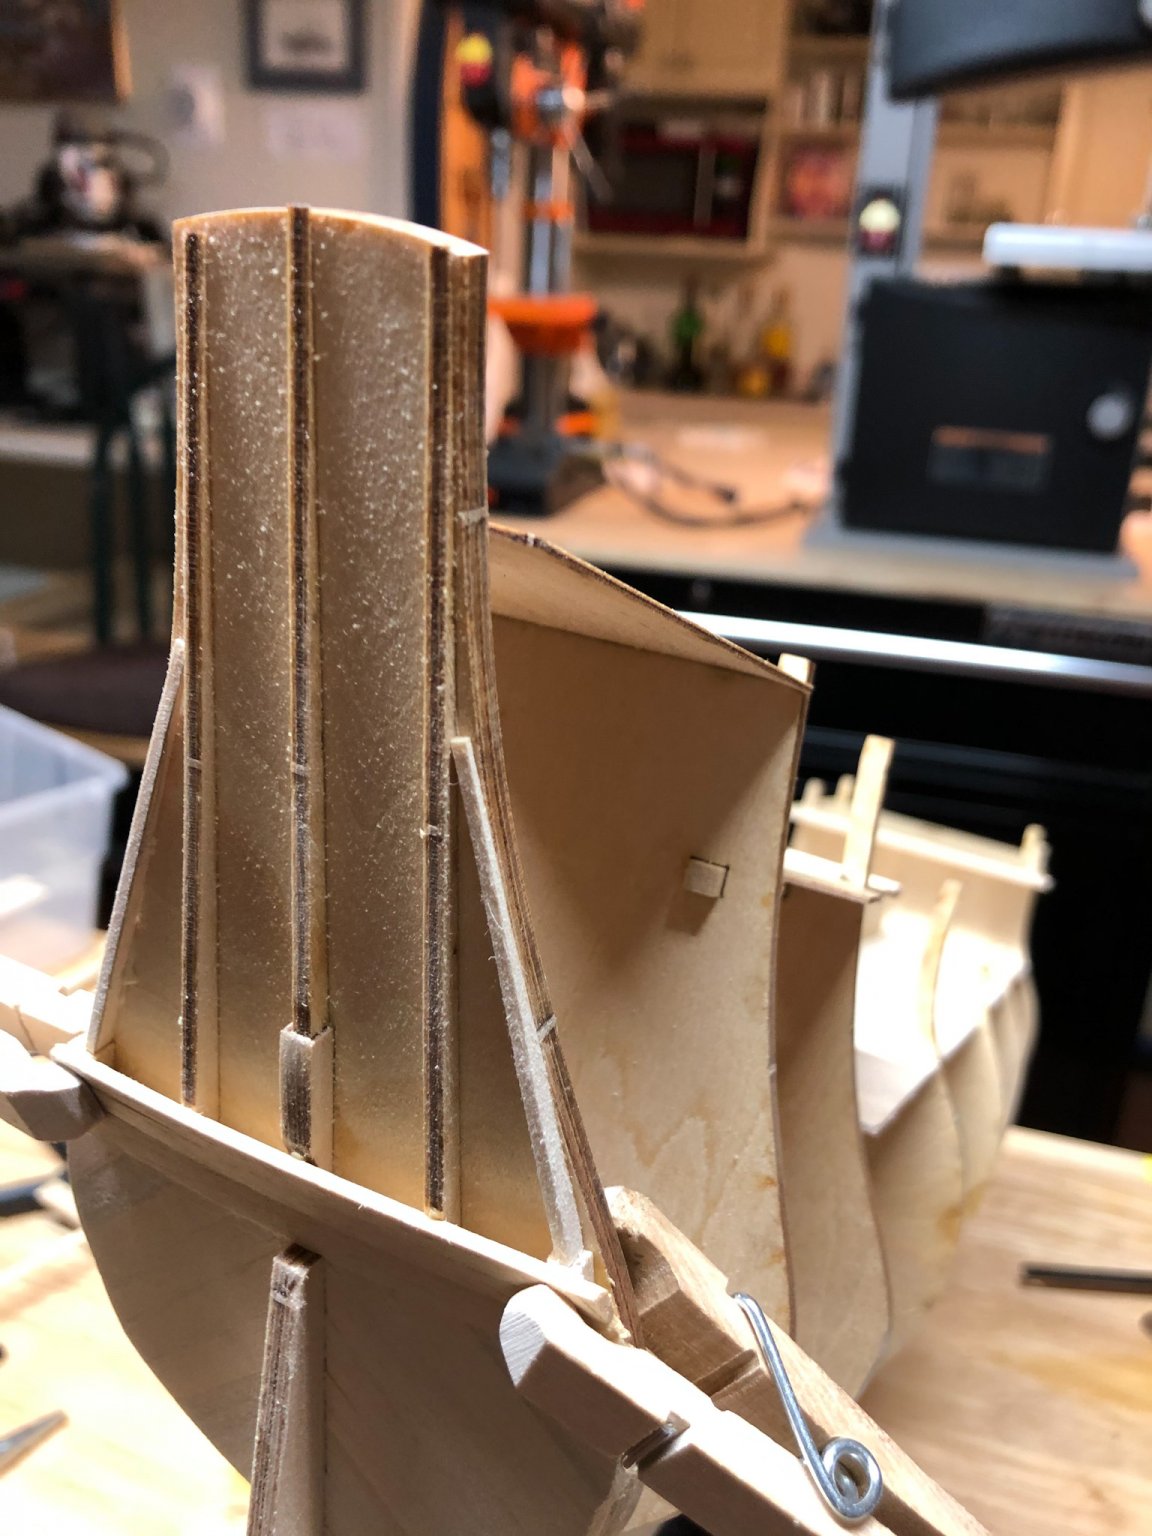
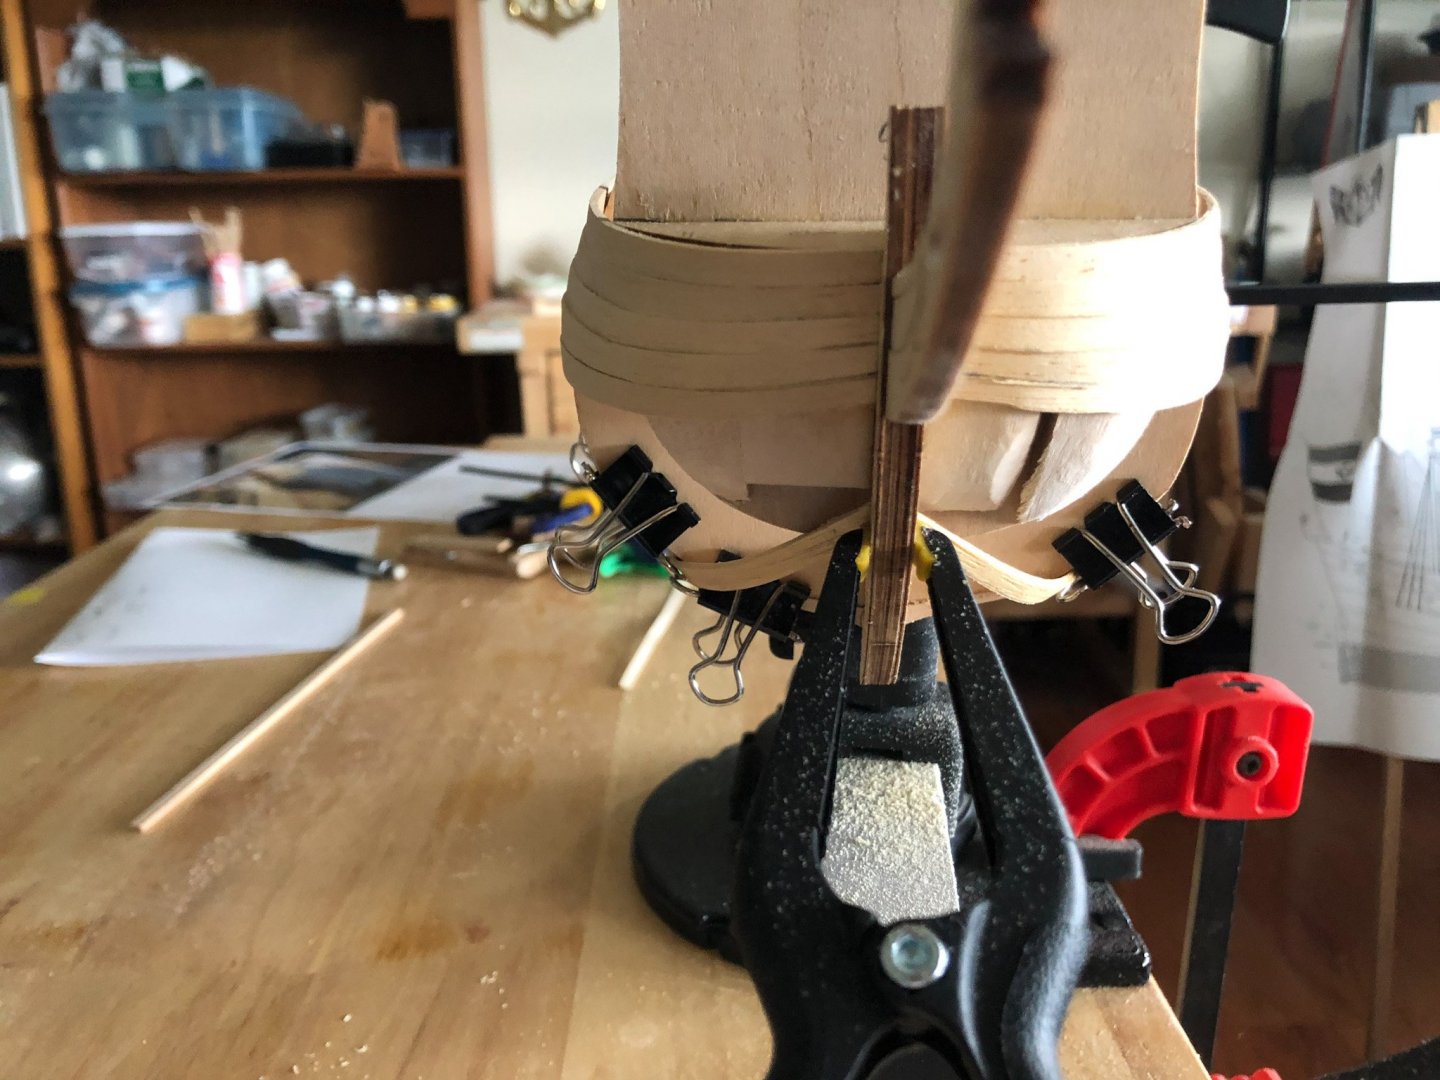
I experimented with spieling the plank that goes above the one in the picture in the previous post and was able to get a good fit around the bow. The rest of it is pretty straight but does change width a lot due to the edge bending of the planks above it. I have also been trying to figure out where the bow sprit goes into the hull. Most of the pictures I can find are of the Corel kit which shows the bow sprit going through the little front deck, but the angle on the stem of this kit has it going through the front bulkhead, which is what the only other Billings kit pictures I can find did. There is just so much of this kit that has no instruction or plans, like the bow sprit installation and the rudder. There is a piece of wood on top of the rudder that goes into the hull but does it go through a slot or a round hole? Questions like that are keeping me up at night.
- 135 replies
-
- 1
-

-
- billing boats
- half moon
- (and 1 more)
-
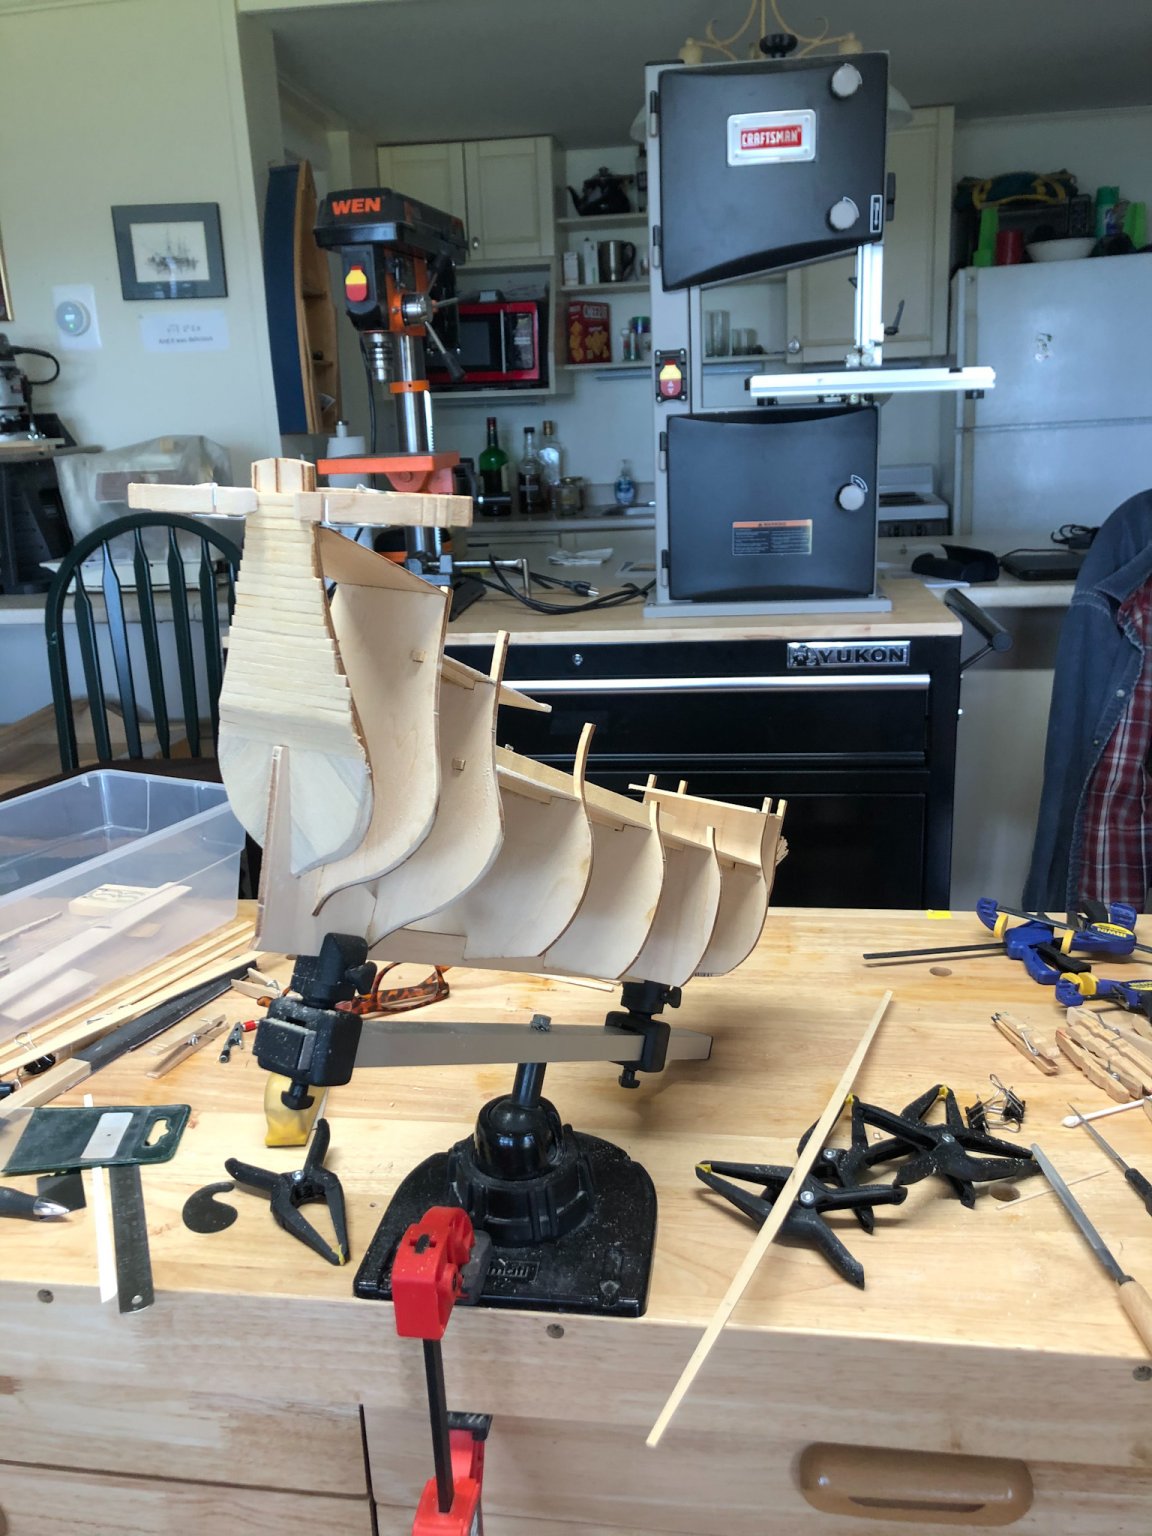
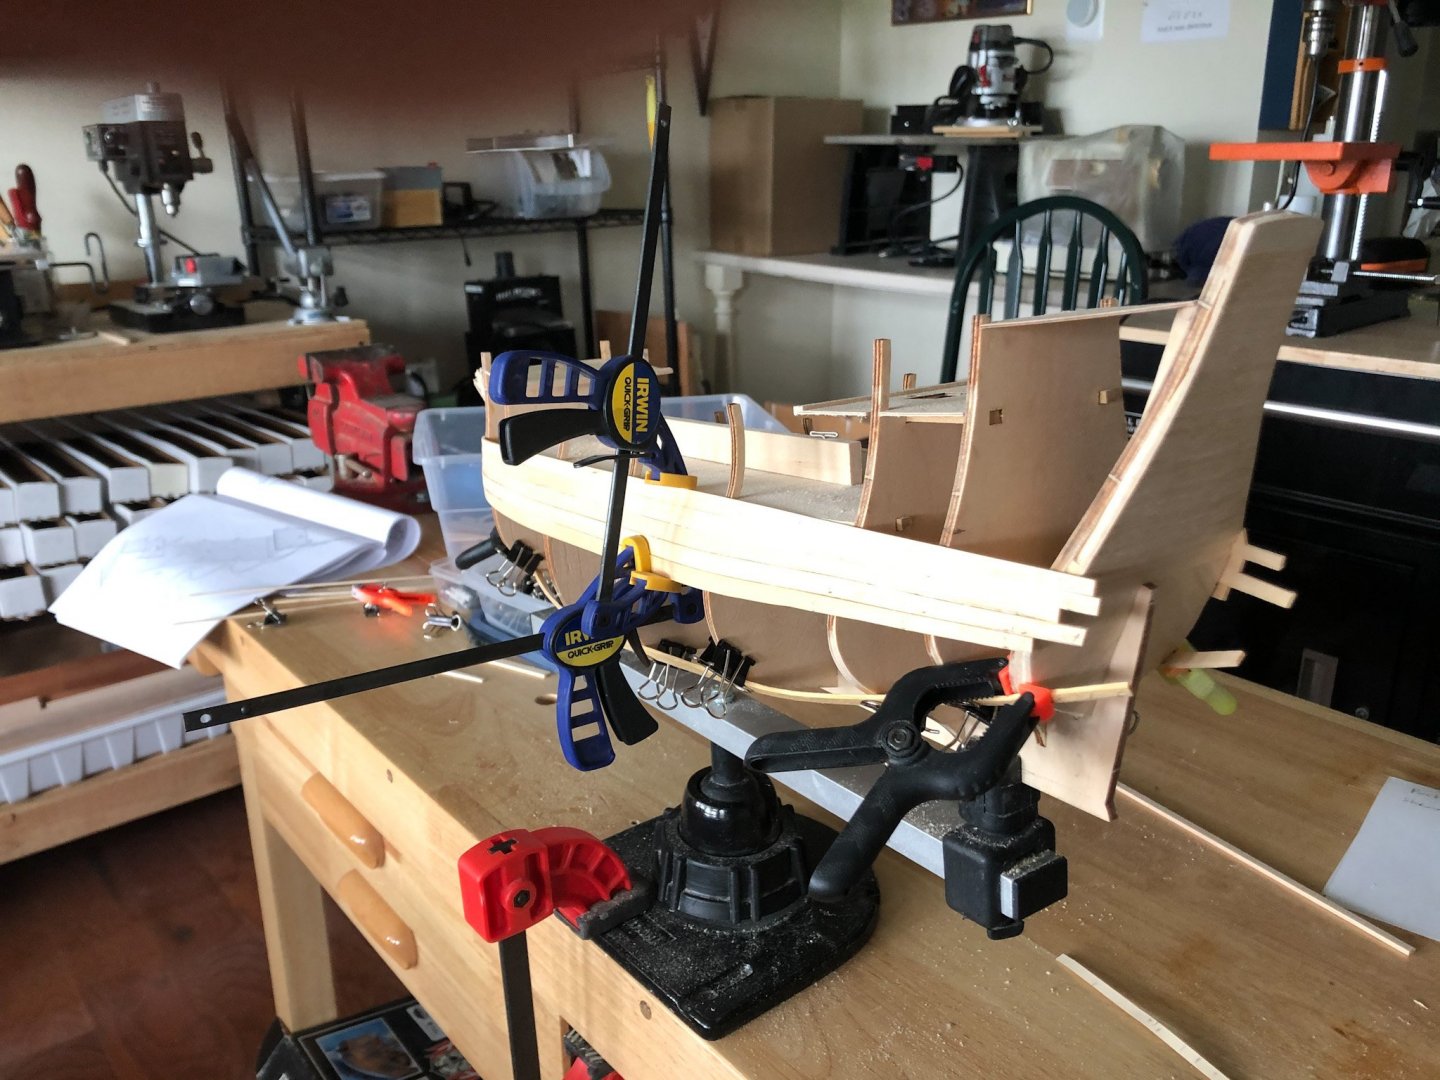
Thanks Halfdan. More bulkheads would be nice. Well I had to put on the brakes yesterday and reassess this planking job. The planks at the bow were not laying flat as l planked down and the edge bending was becoming way too severe. I removed two planks on the starboard side then just bent a plank with the bow curve and clamped it where it wanted to lay flat. I will have to plank around this one with some drop and added planks and maybe some spieled ones too. I am going to work on just the starboard side for now to see if I can get it planked without crazy plank bends. This morning I added another plank on the starboard side again letting it go where it wanted to. I guess this is the Zen method of planking. I am happier with these two planks and I think filling in between them will be a lot better. We shall see...
- 135 replies
-
- 8
-
-
- billing boats
- half moon
- (and 1 more)
-
Agreed, stunning!
-
That is looking really good.
-
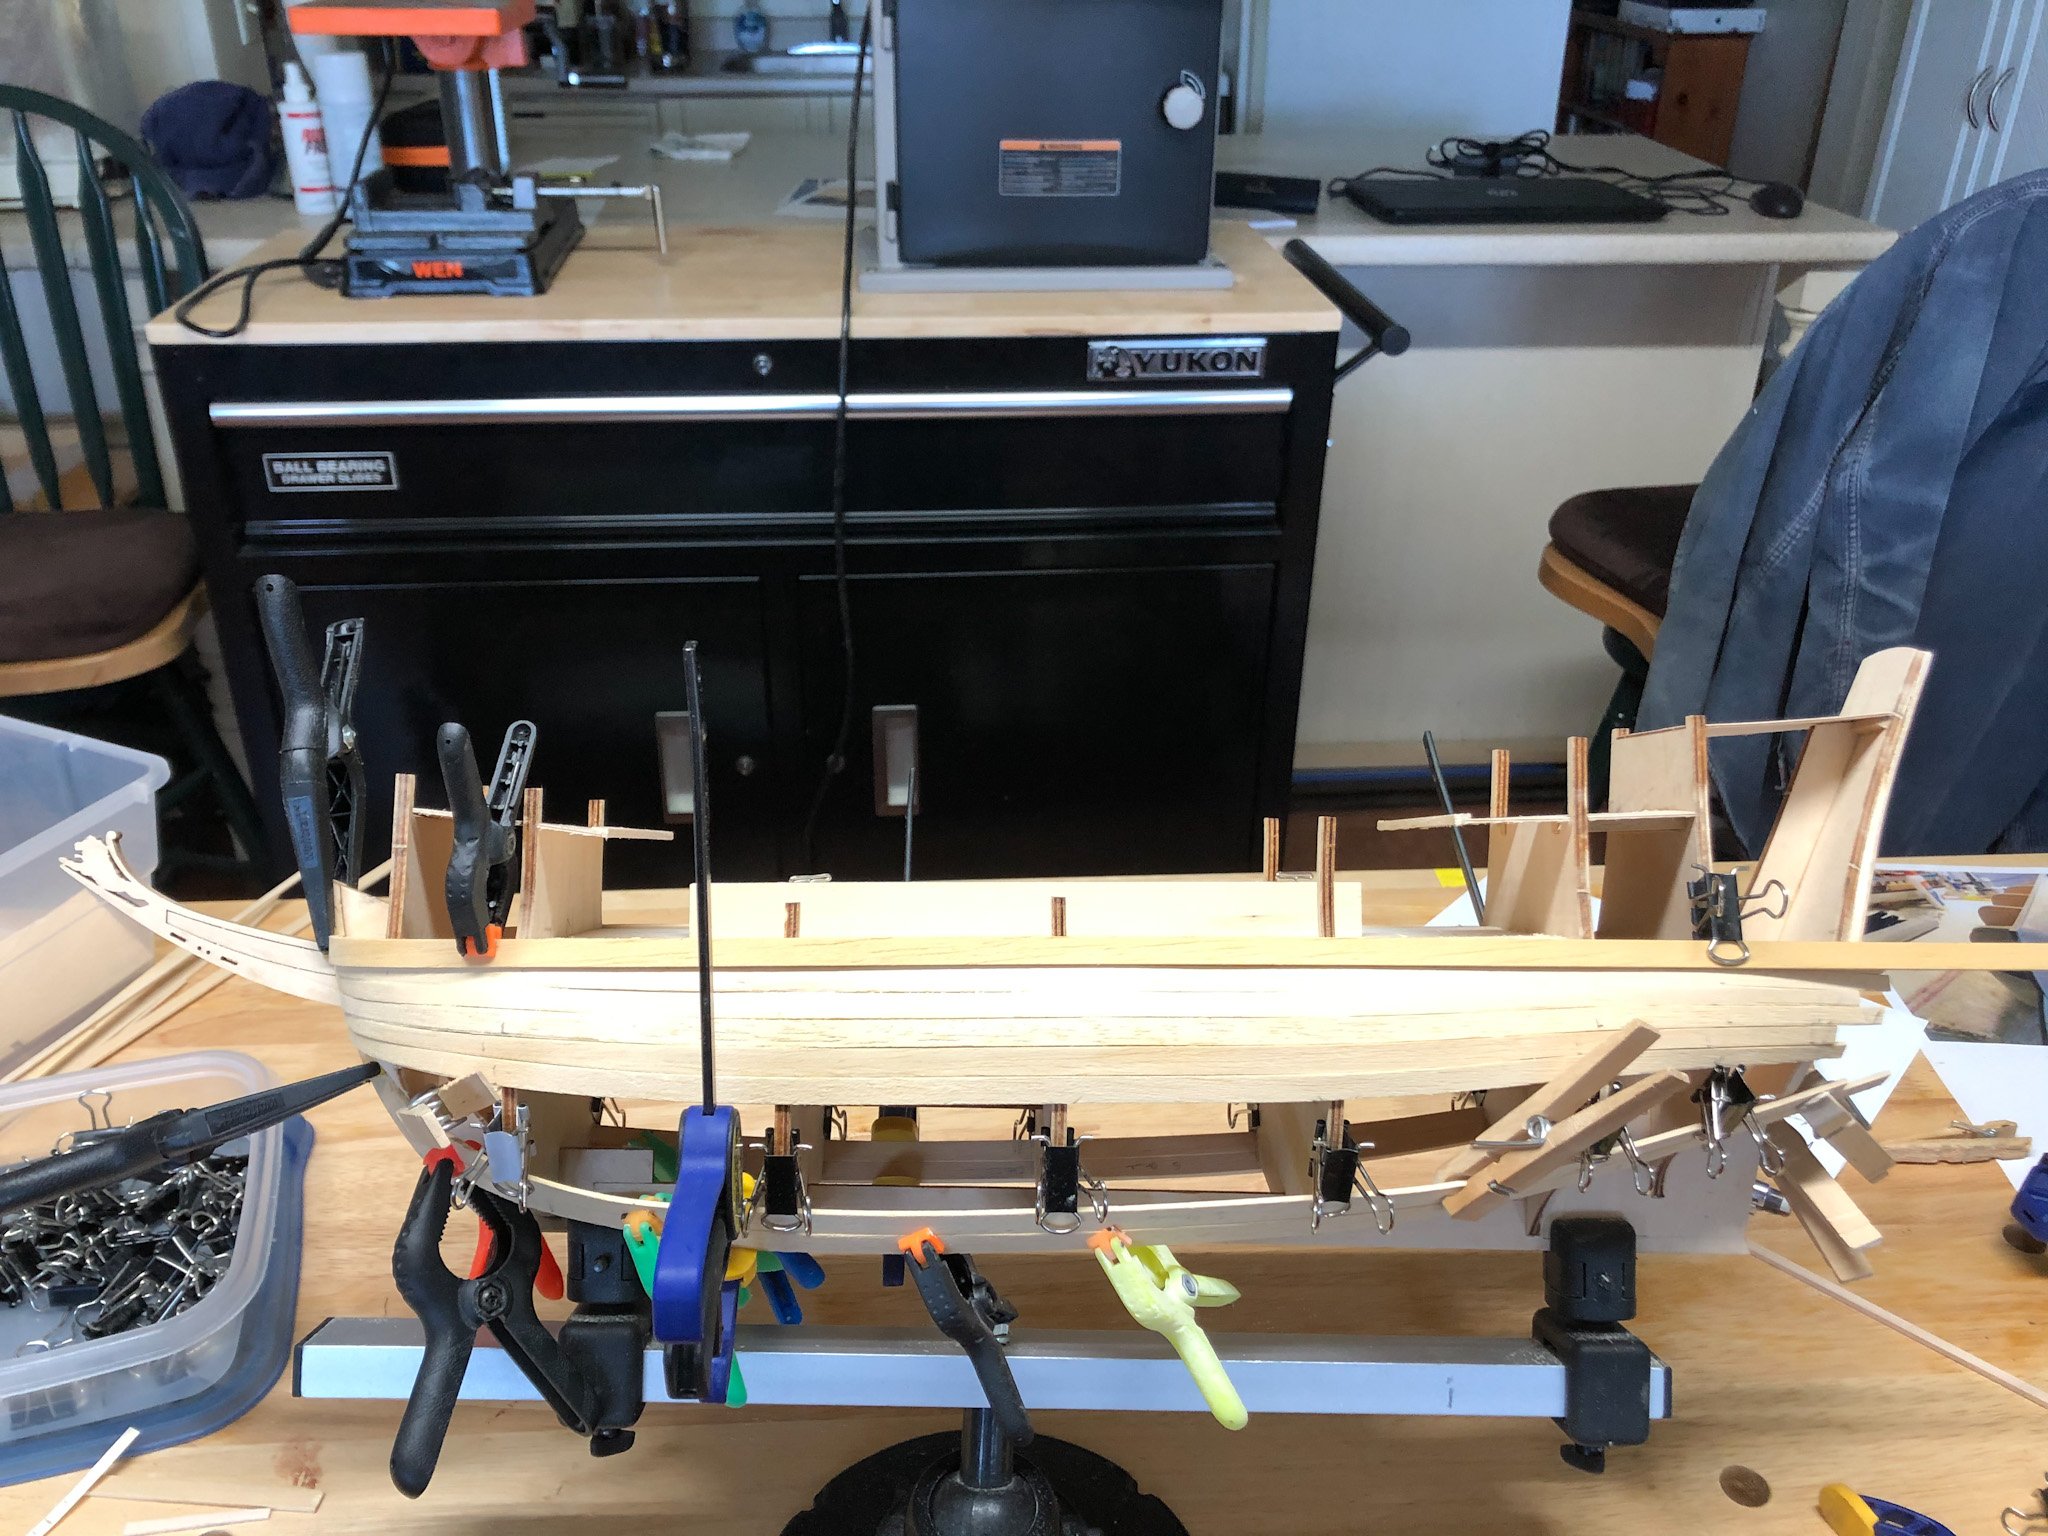
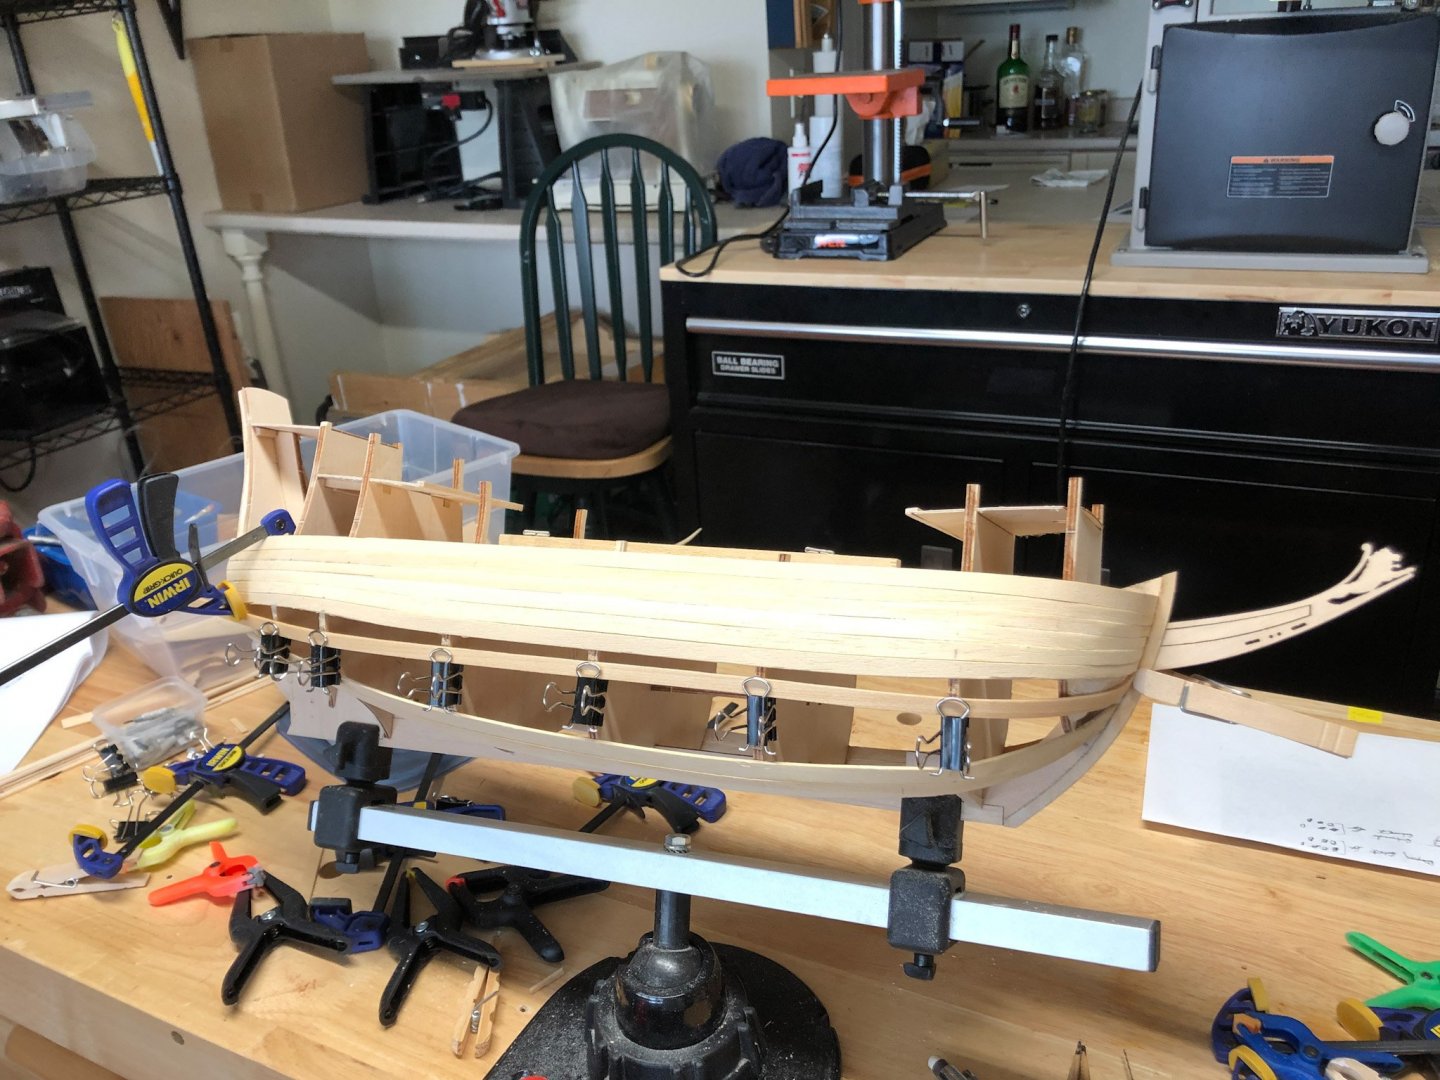
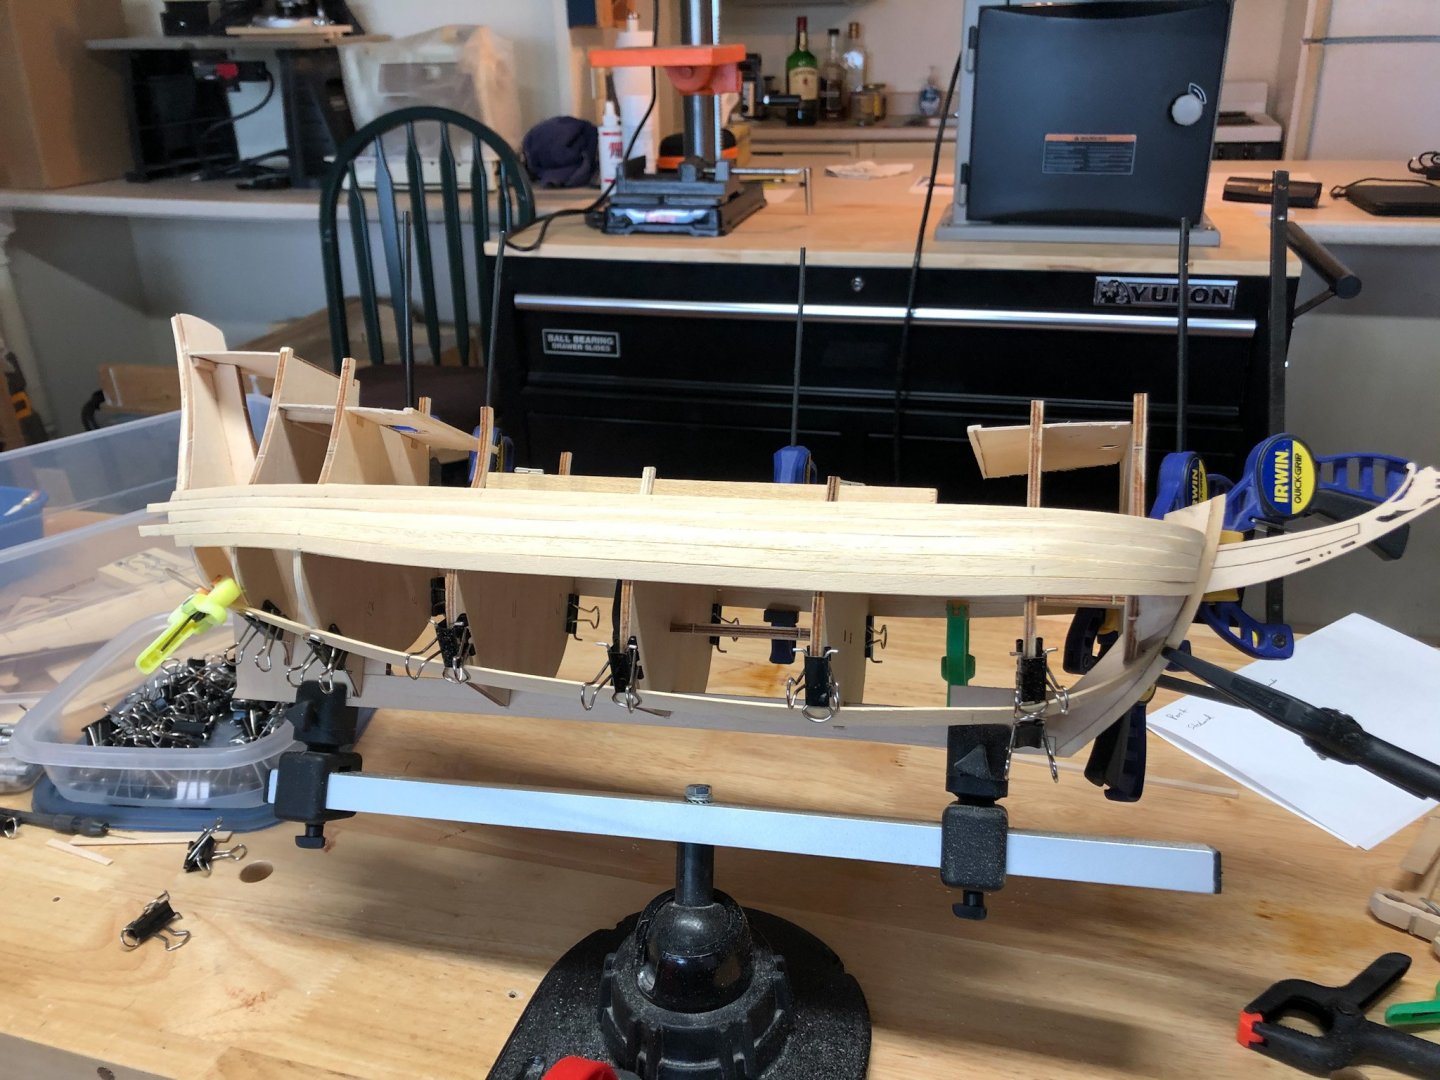
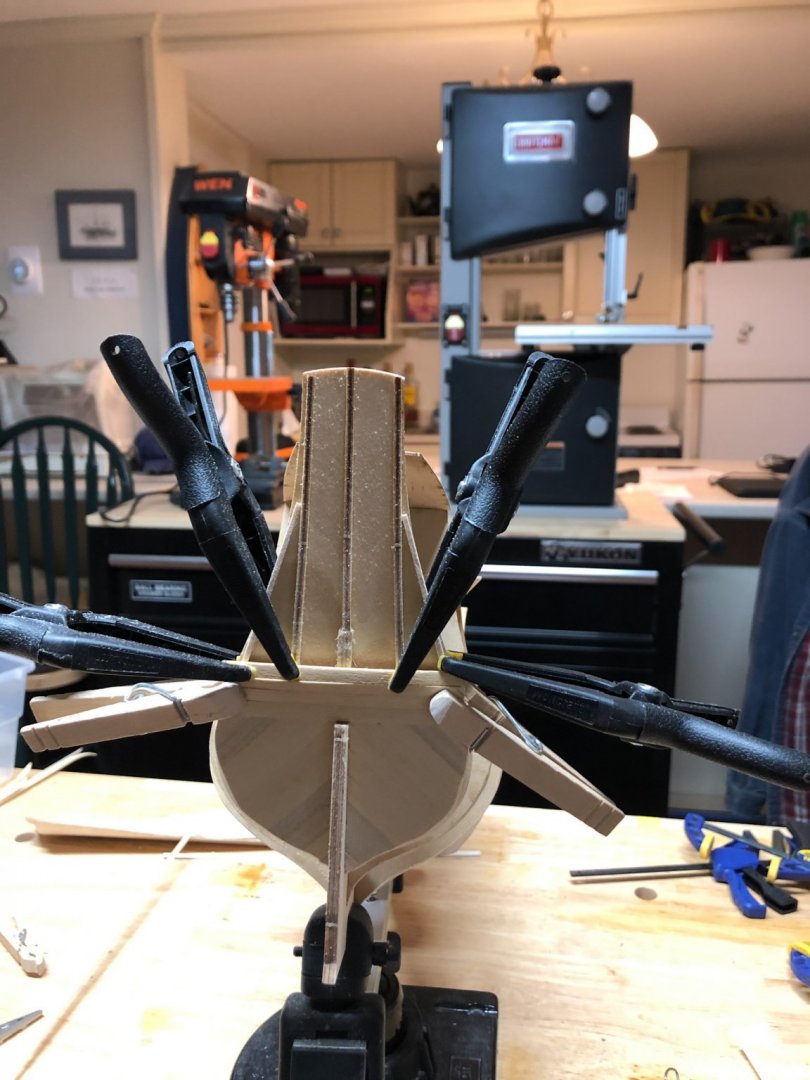
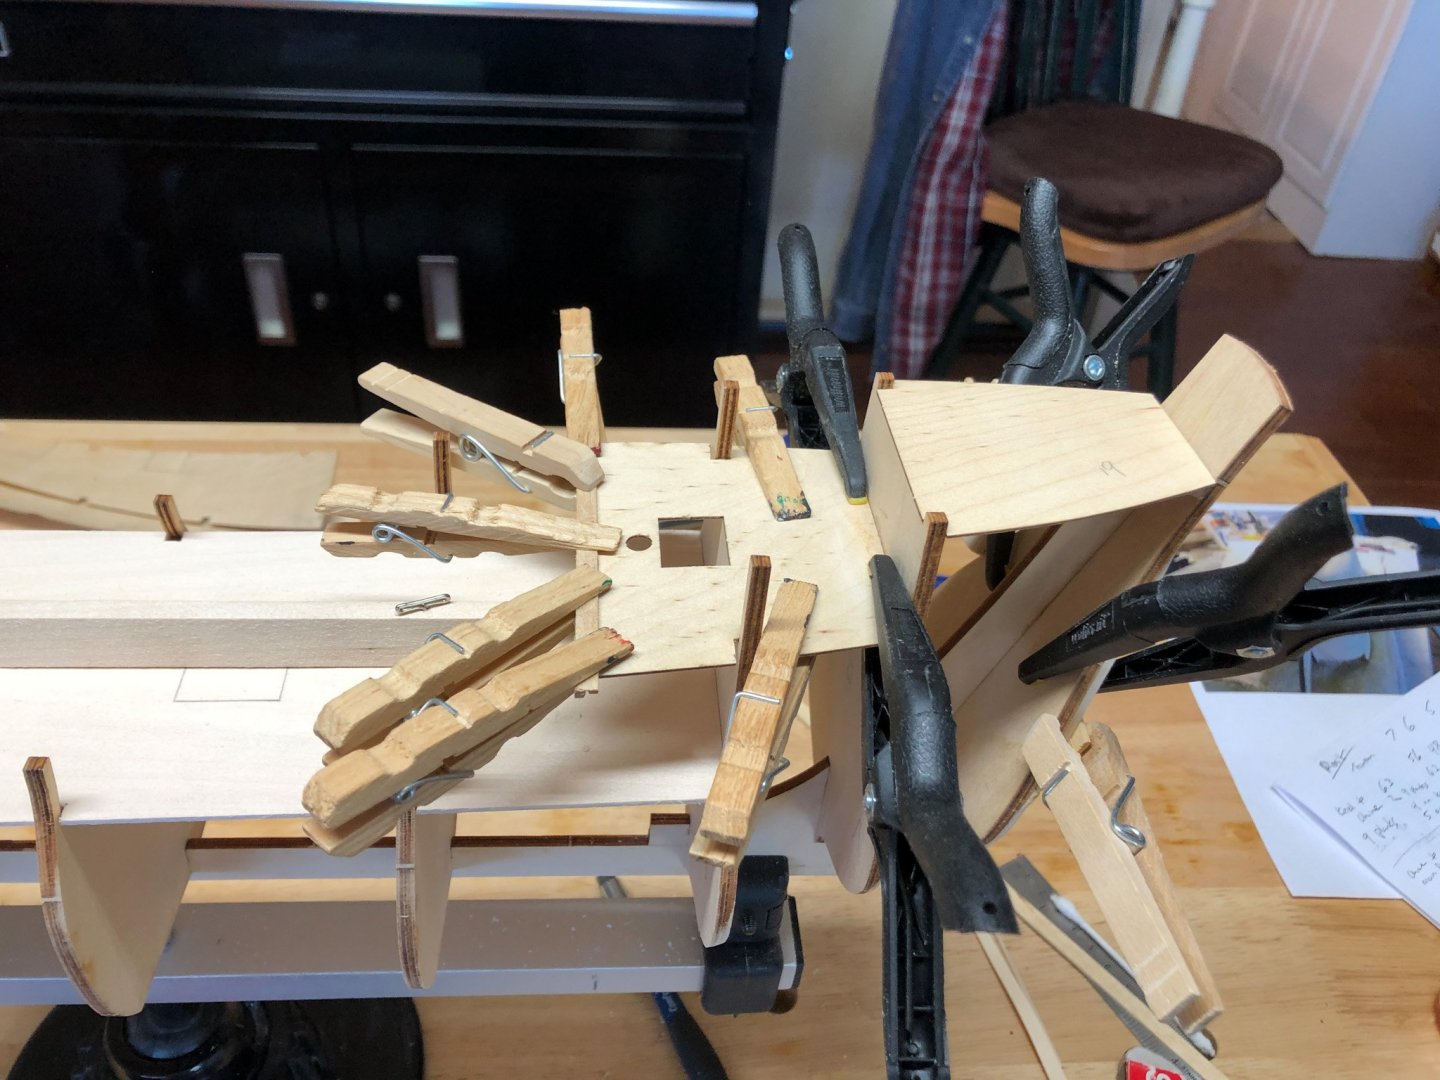
Planking continues. I have added planks down from the rail and up from the chine. The bow area is still the most difficult to get right with some edge bending required to keep the clinkering effect down. So far I am pleased with the results. There are two planks above the main deck level that wrap around the bow. Since there are no supports in the bow for these I soaked two full width planks and wrapped them around the planks at the main deck level to shape them. After they dried I glued them to those planks. They fit really well so I am happy. The second plank will be slightly less in height so I need to rip some plank stock for them.


- 135 replies
-
- 6
-
-
- billing boats
- half moon
- (and 1 more)
-
Well said Vane. That has been exactly my experience.
-
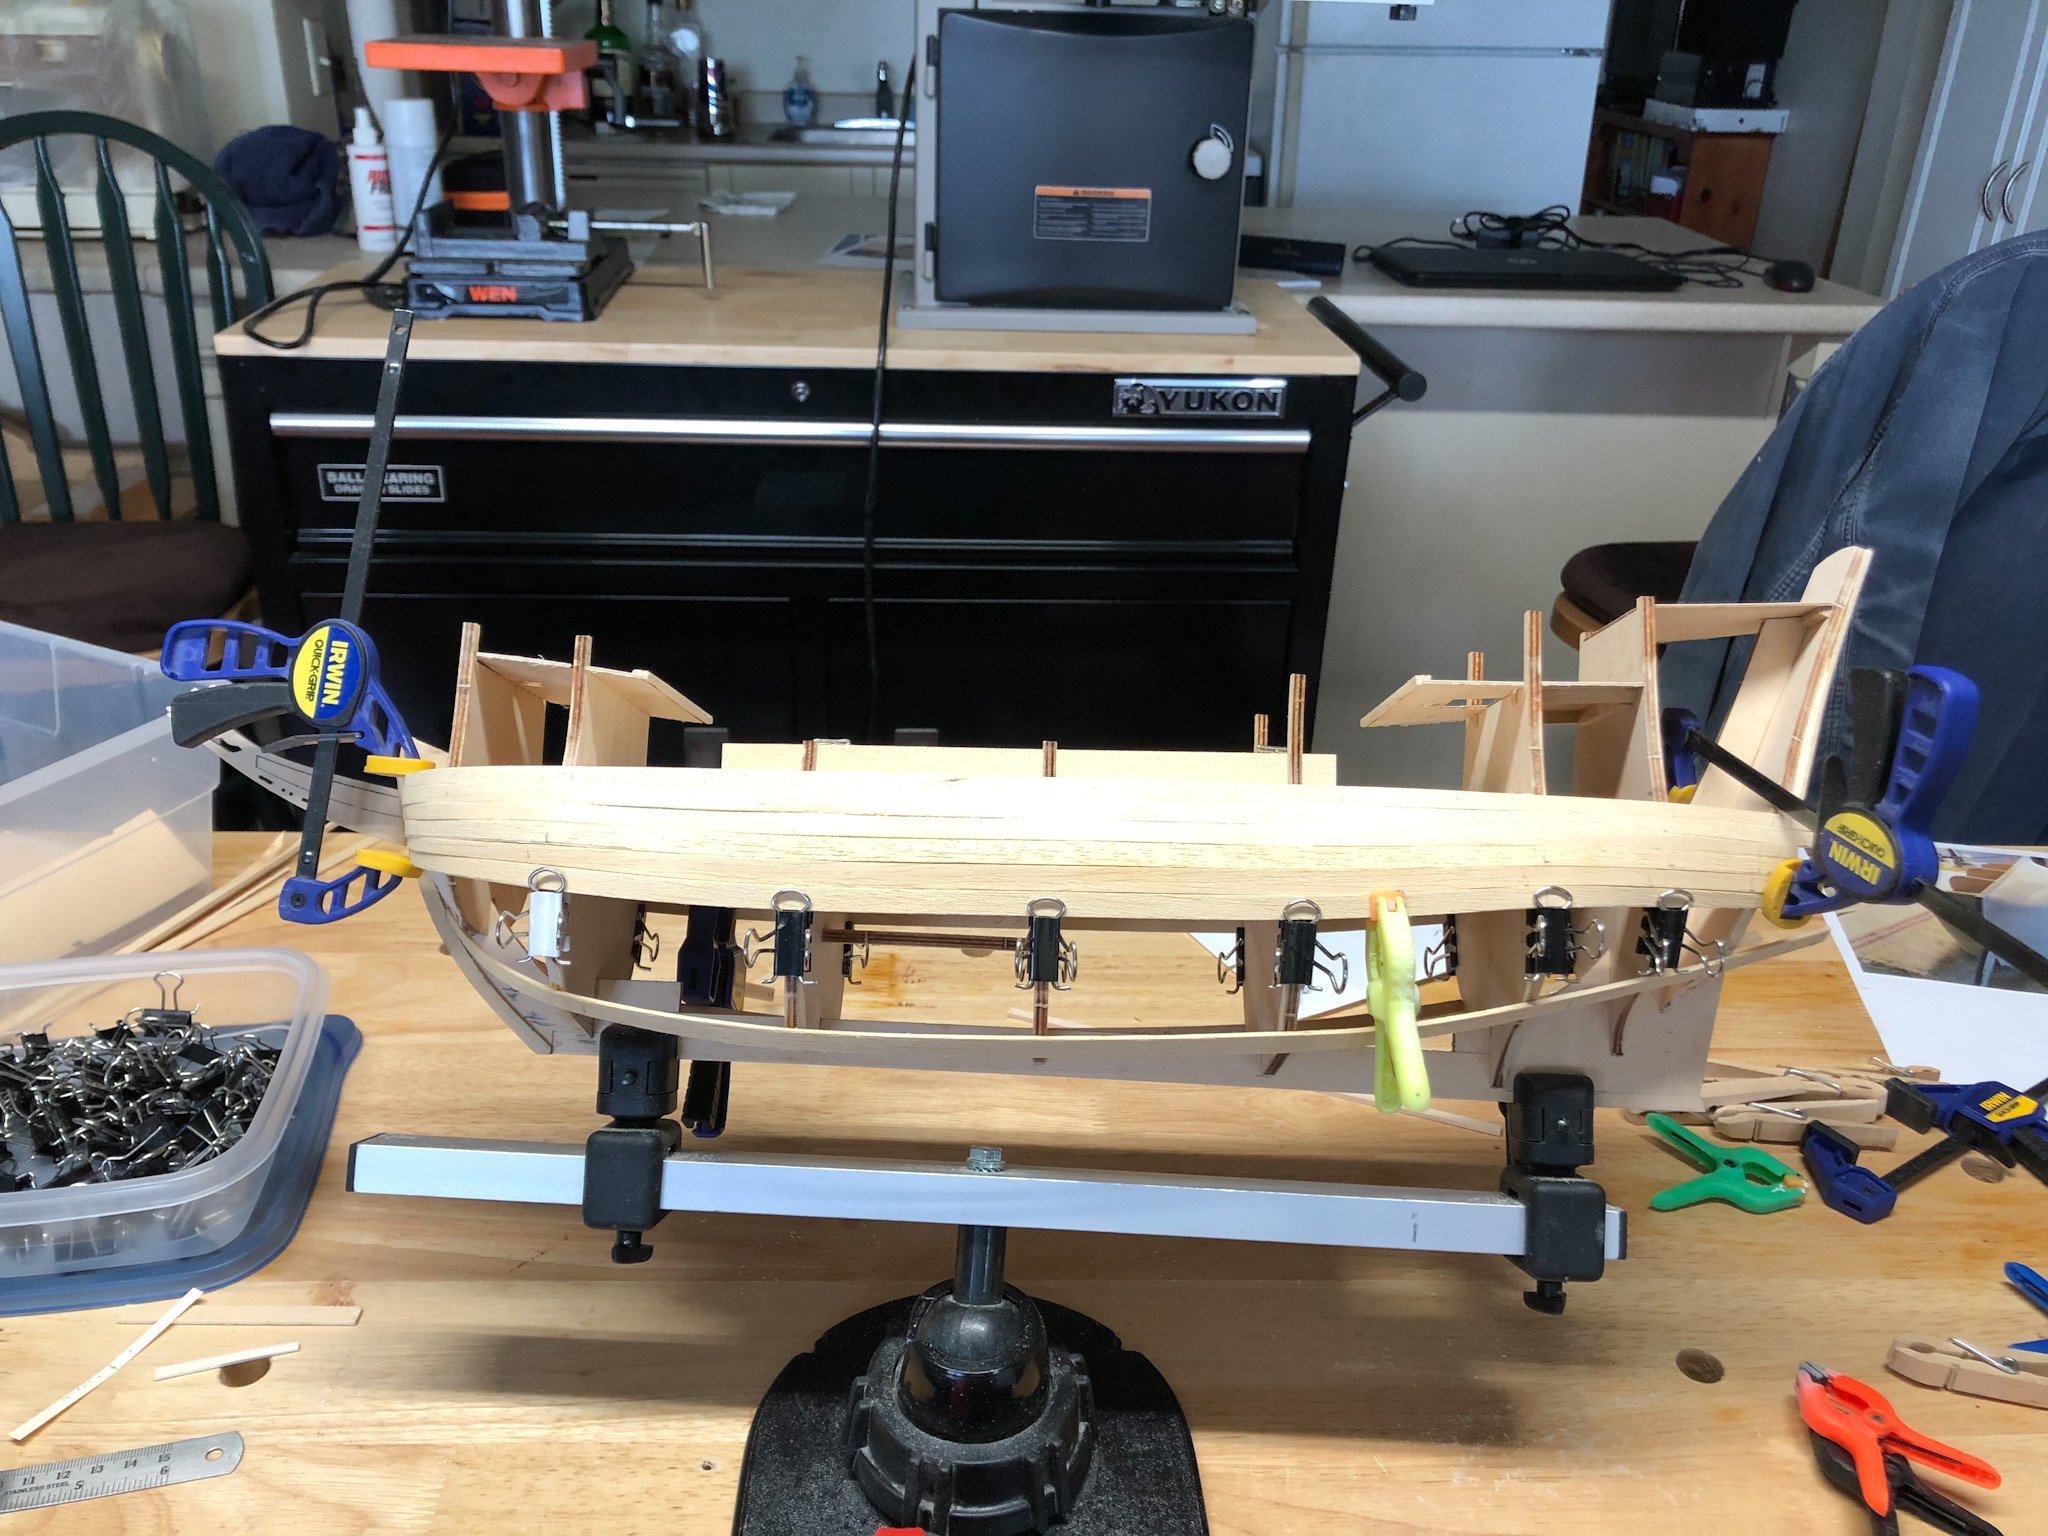
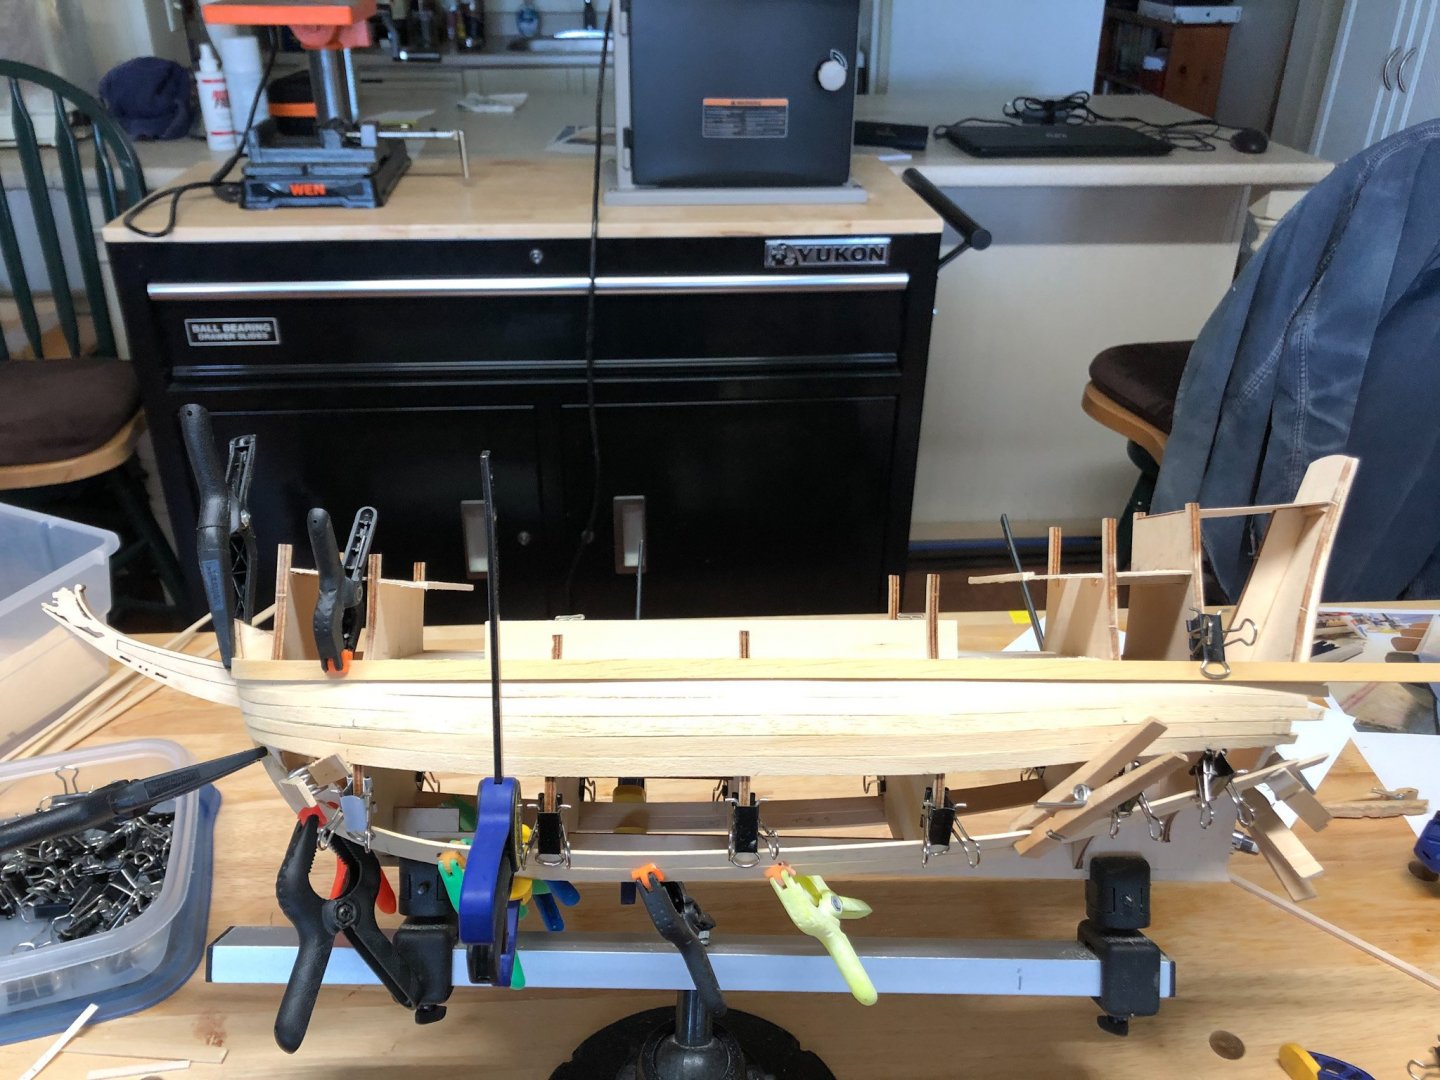
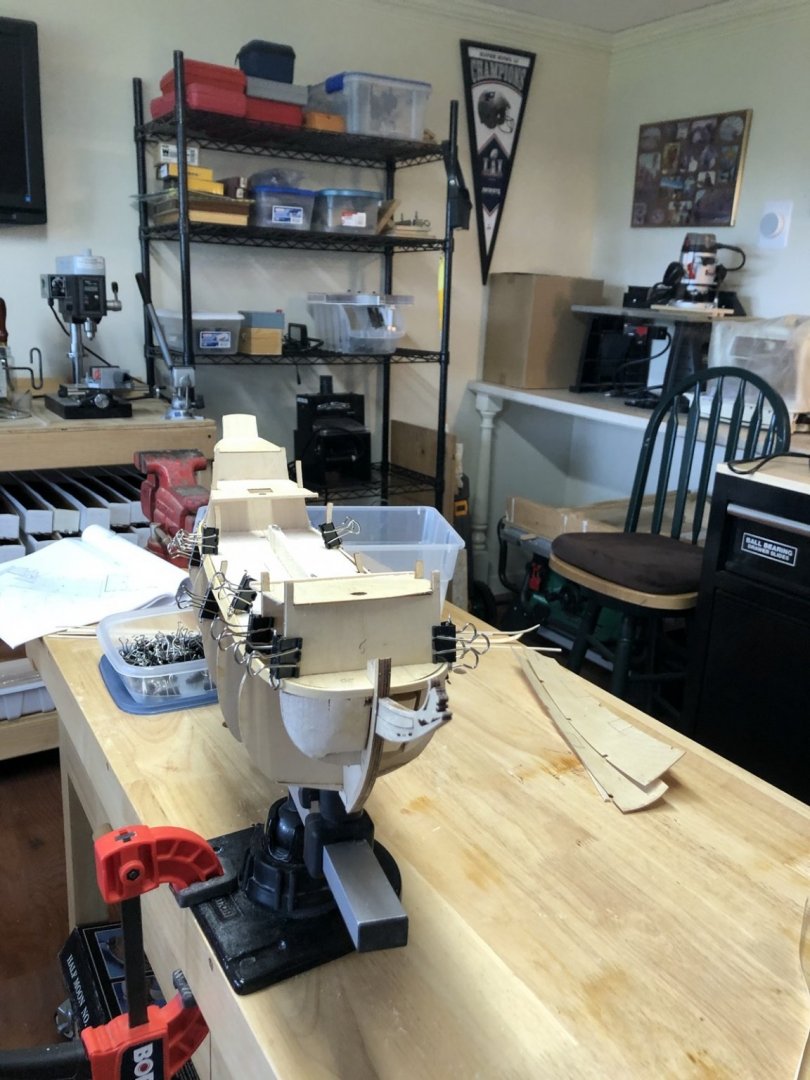
I have been adding more planks on each side down from the main deck. After adding five planks on each side I bent the planks that run along the chine. I did this to see how these planks would fit and also to remeasure the remaining space for the planks between. They line up nicely at the bow and the stern. After gluing these on I will redo the planking plan for the gap and probably plank both up and down to fill the gap.
- 135 replies
-
- 7
-
-
- billing boats
- half moon
- (and 1 more)
-
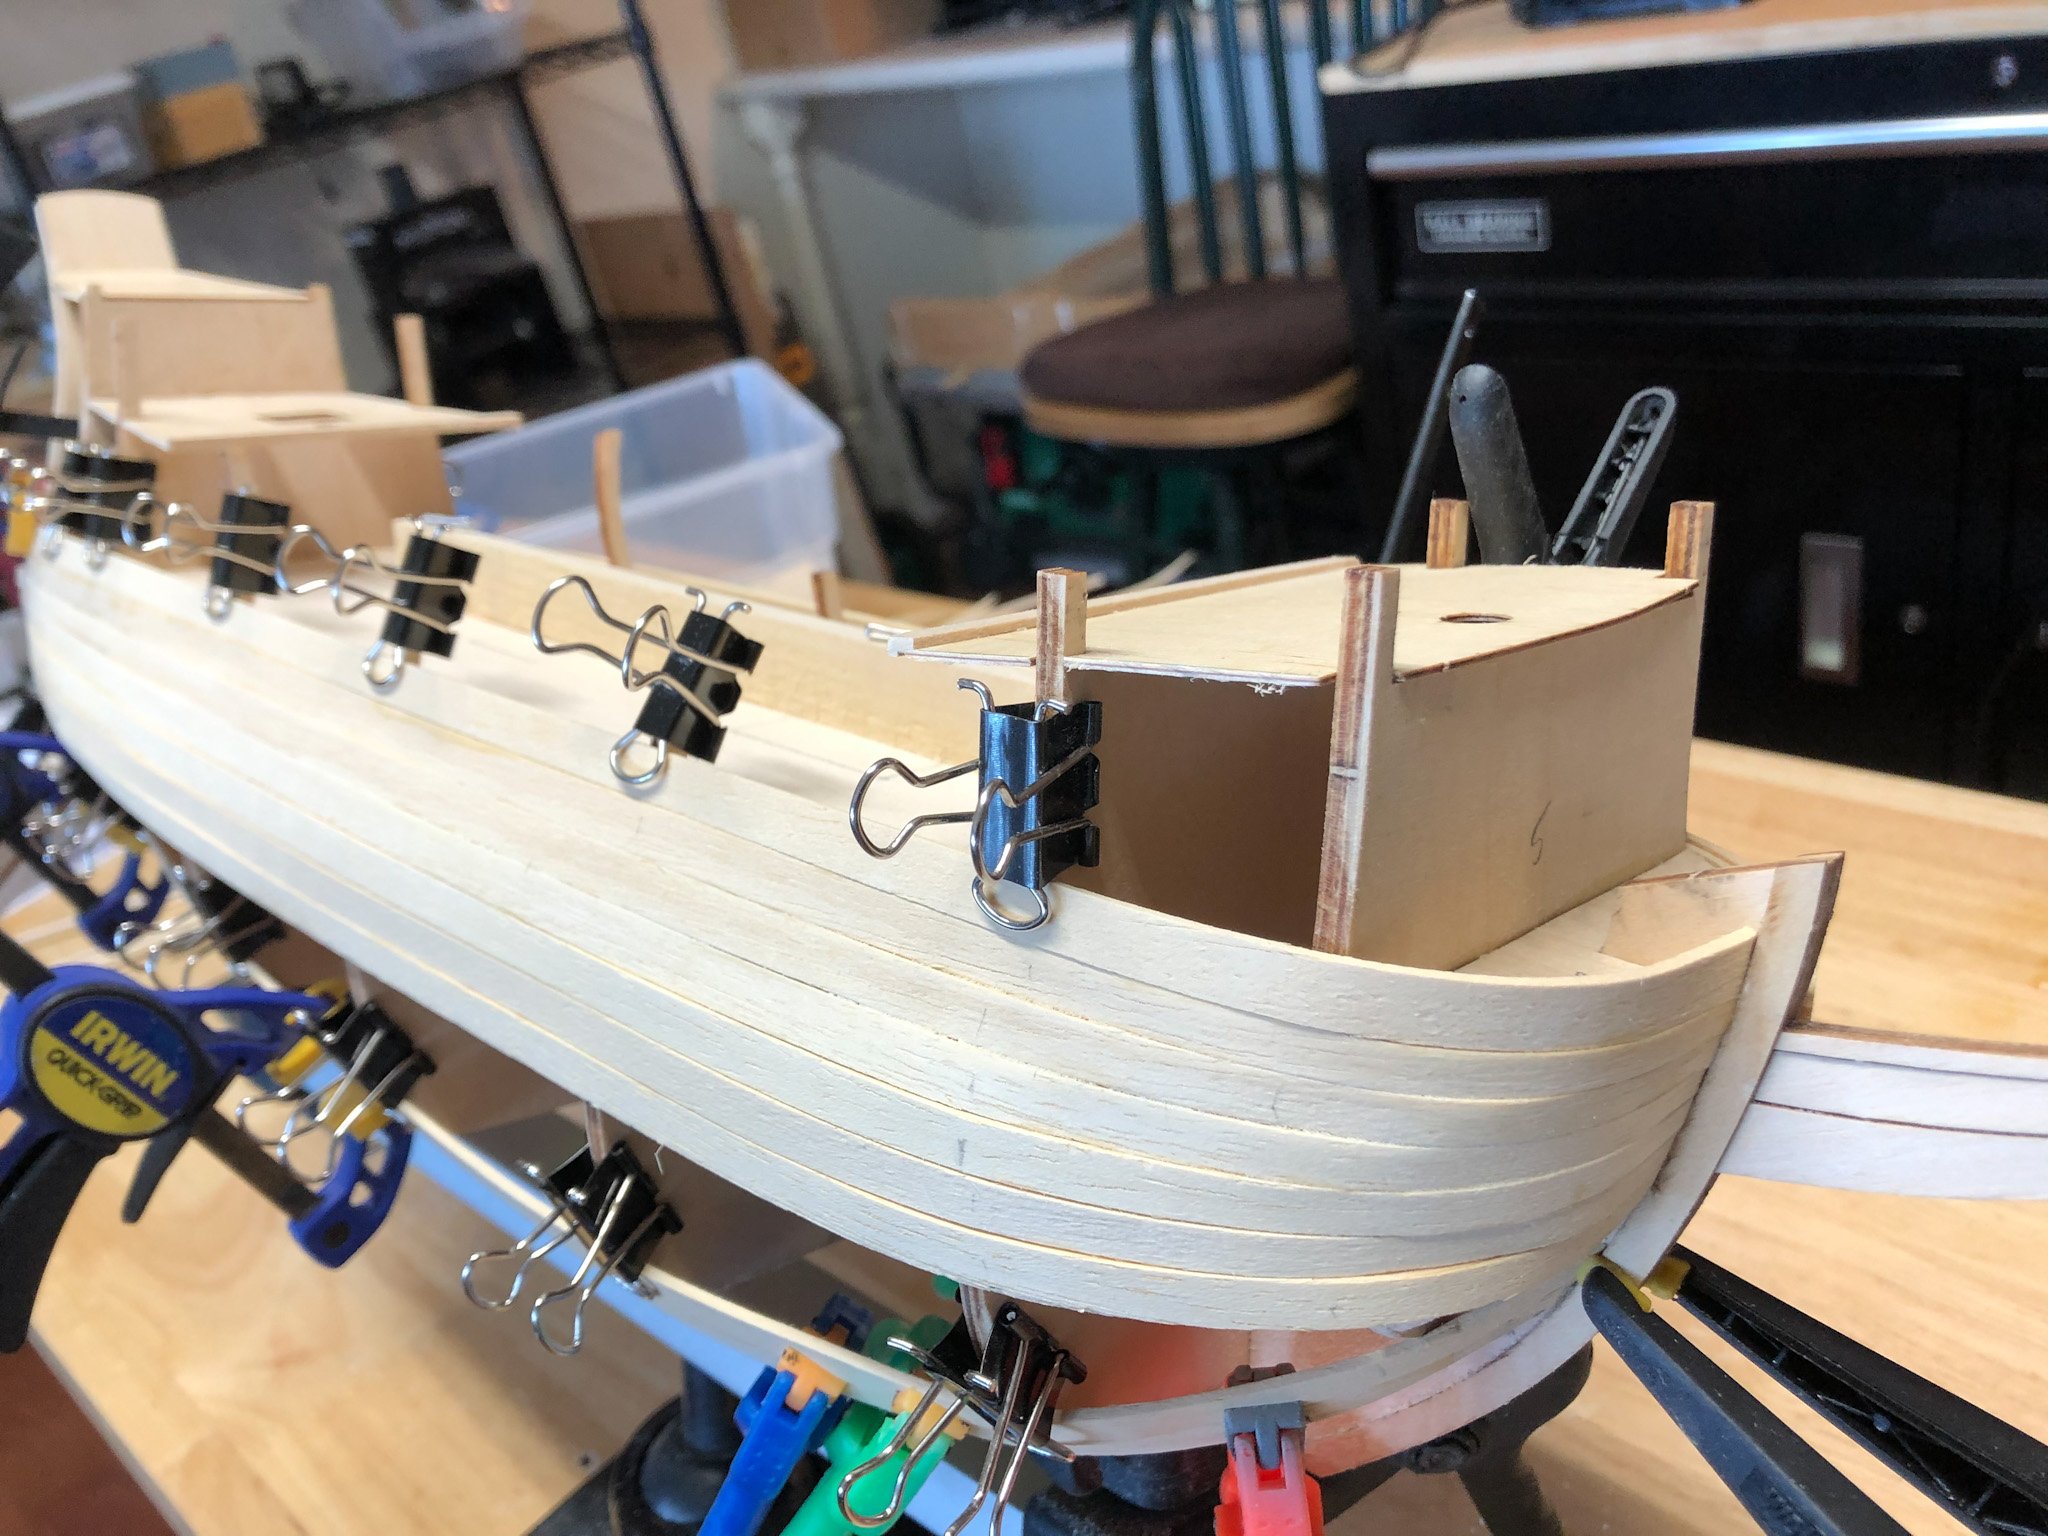
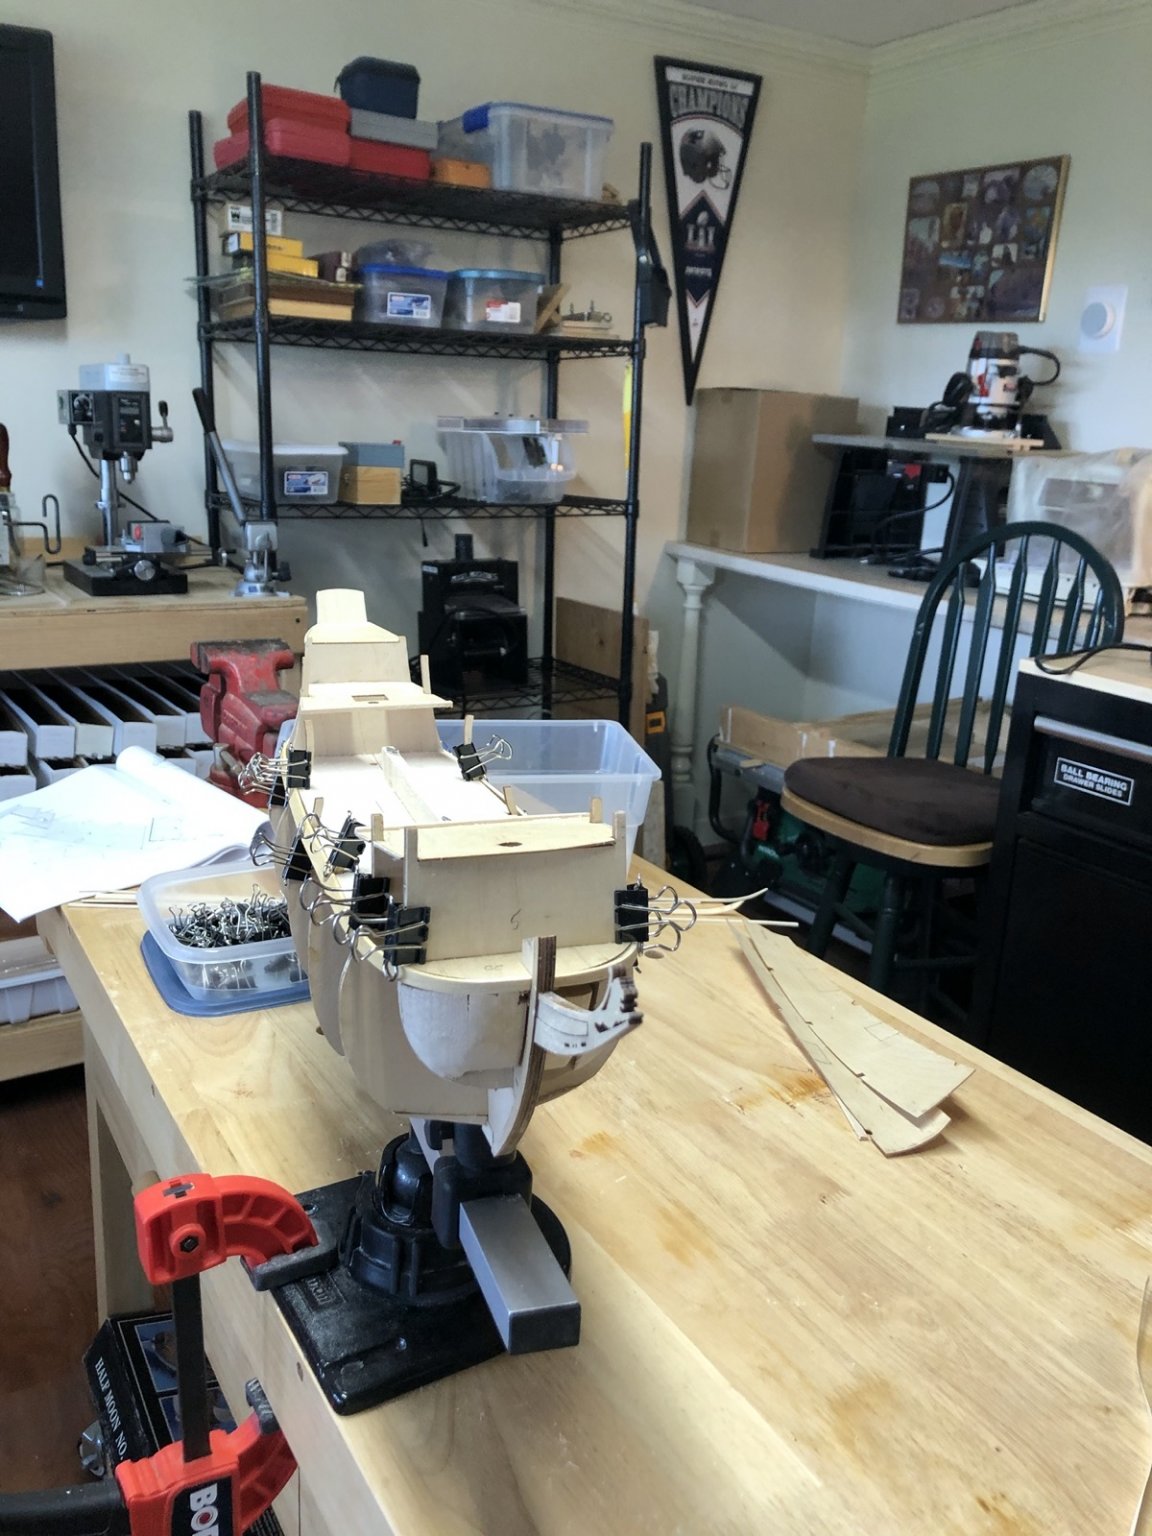
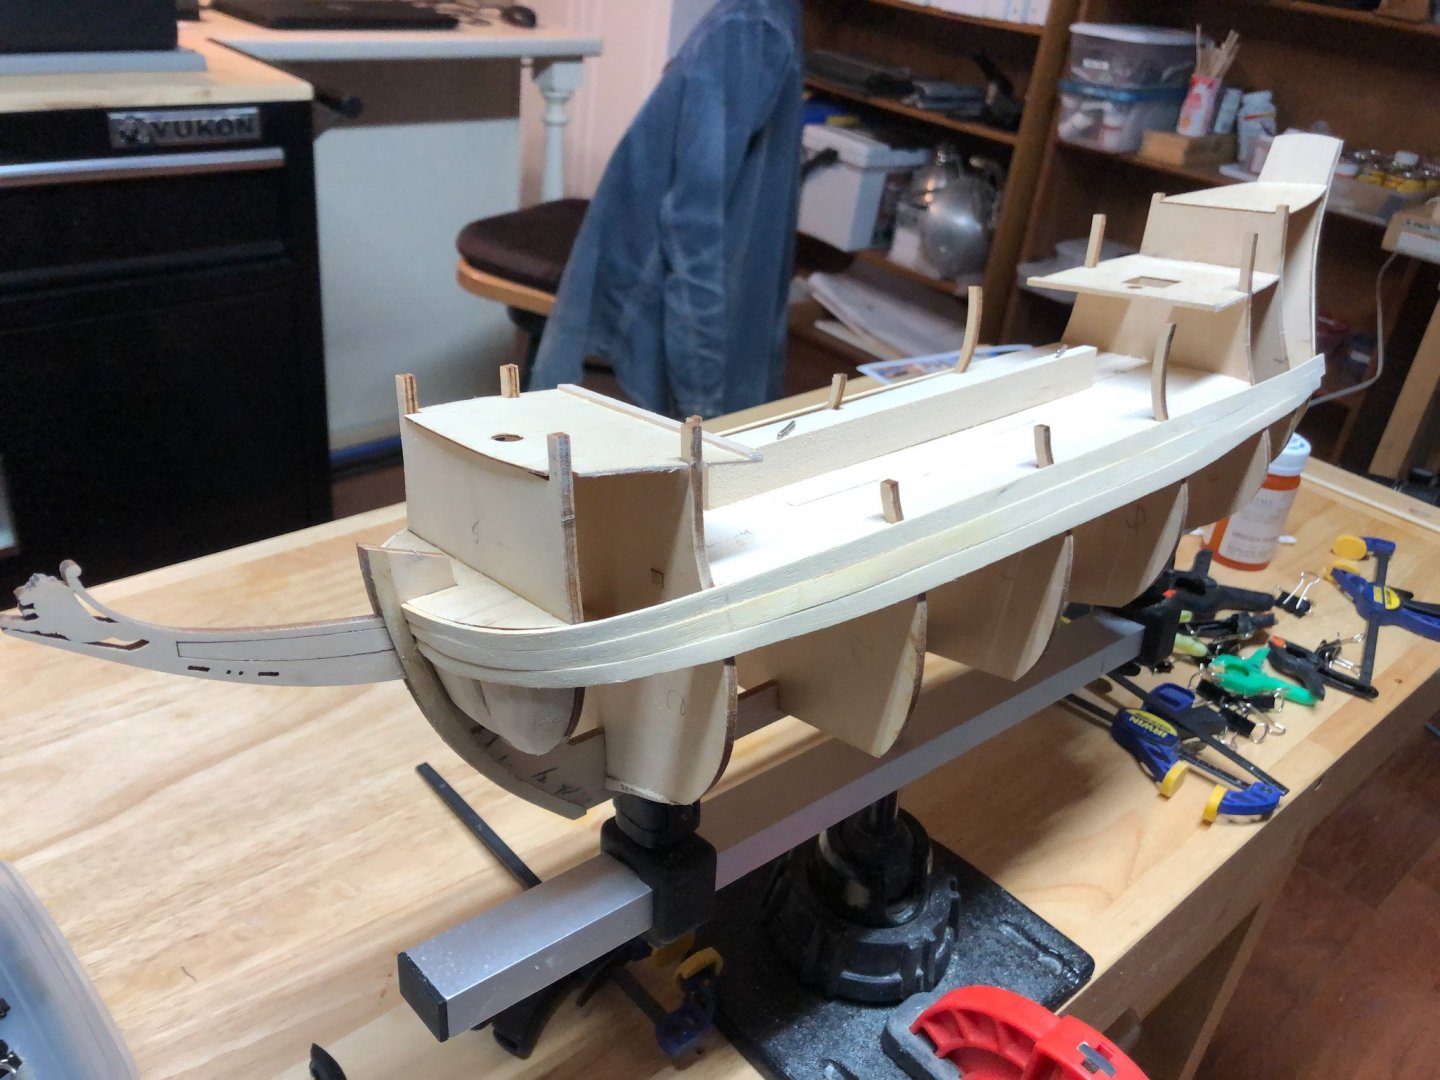
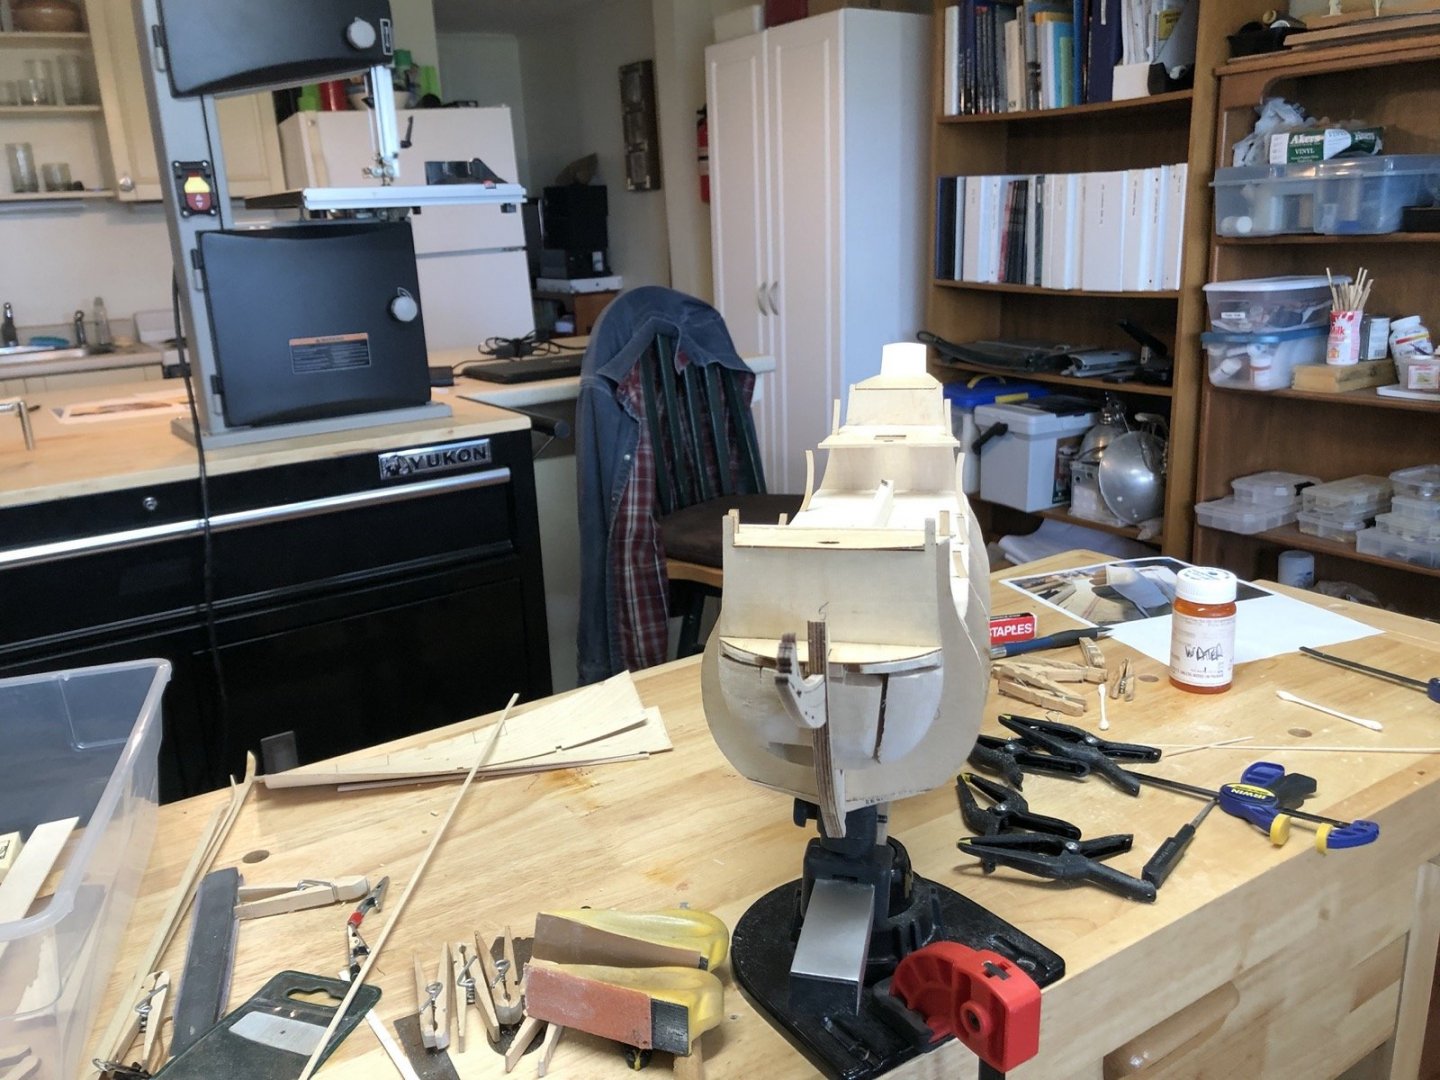
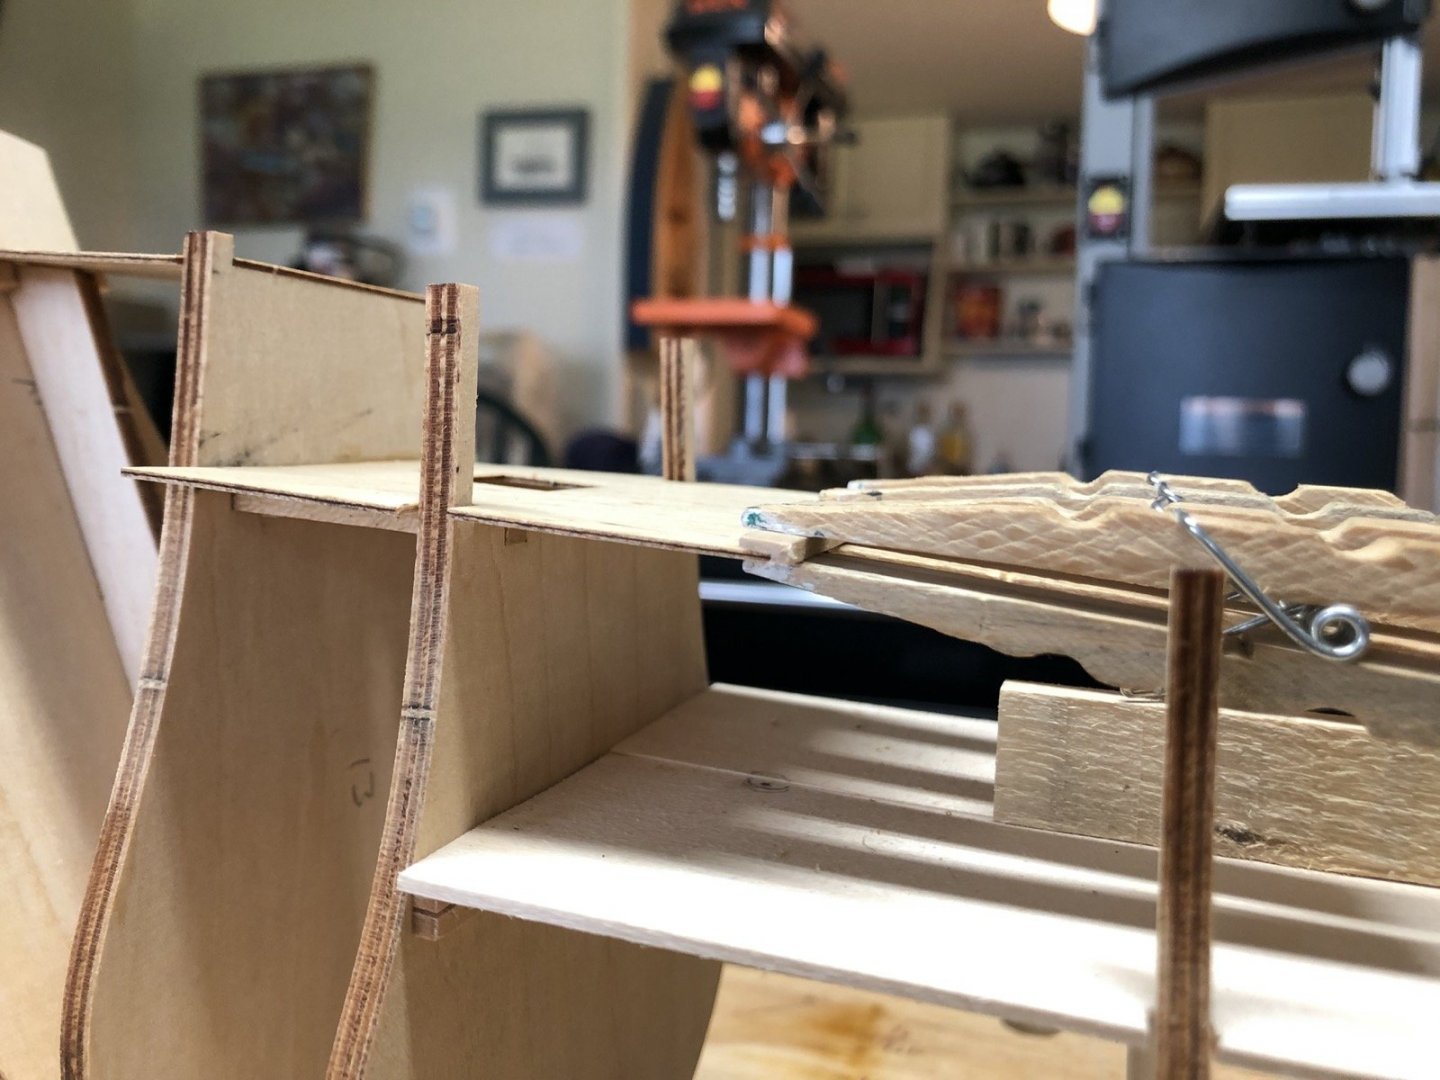
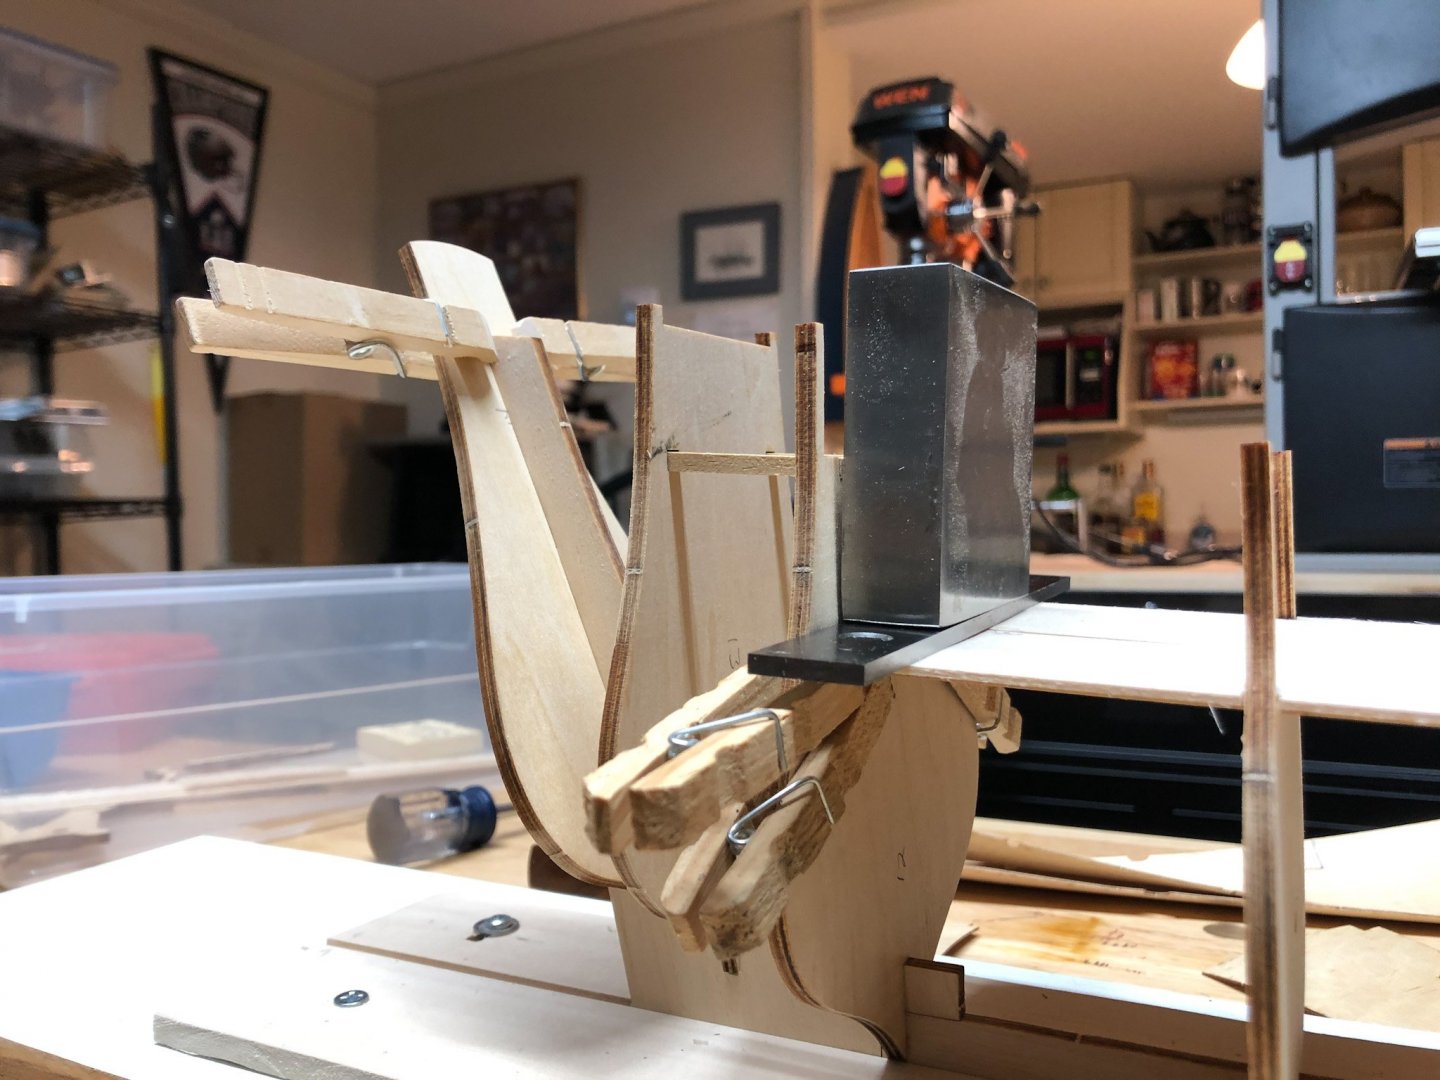
I finished planking the transom and sanded the ends flush with the transom piece. The hull planks will overlap and hide these ends. I decided to add some filler blocks between the stem and the first bulkhead to help with shaping the planks where they bend severely and to give me a larger gluing surface. I used some chunks of basswood for the fillers. They look ugly in the picture but they are faired. I then soaked and bent the first plank along the main deck on the port side. It is clamped onto the bulkheads to dry. I then did the same on the starboard side. I have 12 planks to add on each side down to the chine, then 9 planks from the chine to the keel, so this will take a while.

- 135 replies
-
- 6
-
-
- billing boats
- half moon
- (and 1 more)
-
I have mostly been adding the planks on the transom and I am almost finished. I faired the upper decks and some of the transom and have prepared the first hull plank.

- 135 replies
-
- 9
-
-
- billing boats
- half moon
- (and 1 more)
-
I started adding the planks on the upper transom. Before I did though I wanted to do something about the loose plank ends at the curve of the transom. I cut two edges and glued them in behind the plank ends, then used the laser sheet as a template to cut two more supports for the upper transom. I then started adding the rest of the transom planks. It was at this point I realized I had glued one of the deck pieces on backwards. The slots for the bukwark extensions happen to be right in the middle of this piece so it fits either way. I was able to carefully remove it with alcohol and remove the end plank which was now on the wrong side. I had to make a new longer end piece but luckily the saw was still set up for it. I glued it back in the right way and added the end plank so it's all good now. After I finish the transom planking I will start the hull planking.

- 135 replies
-
- 8
-
-
- billing boats
- half moon
- (and 1 more)
-
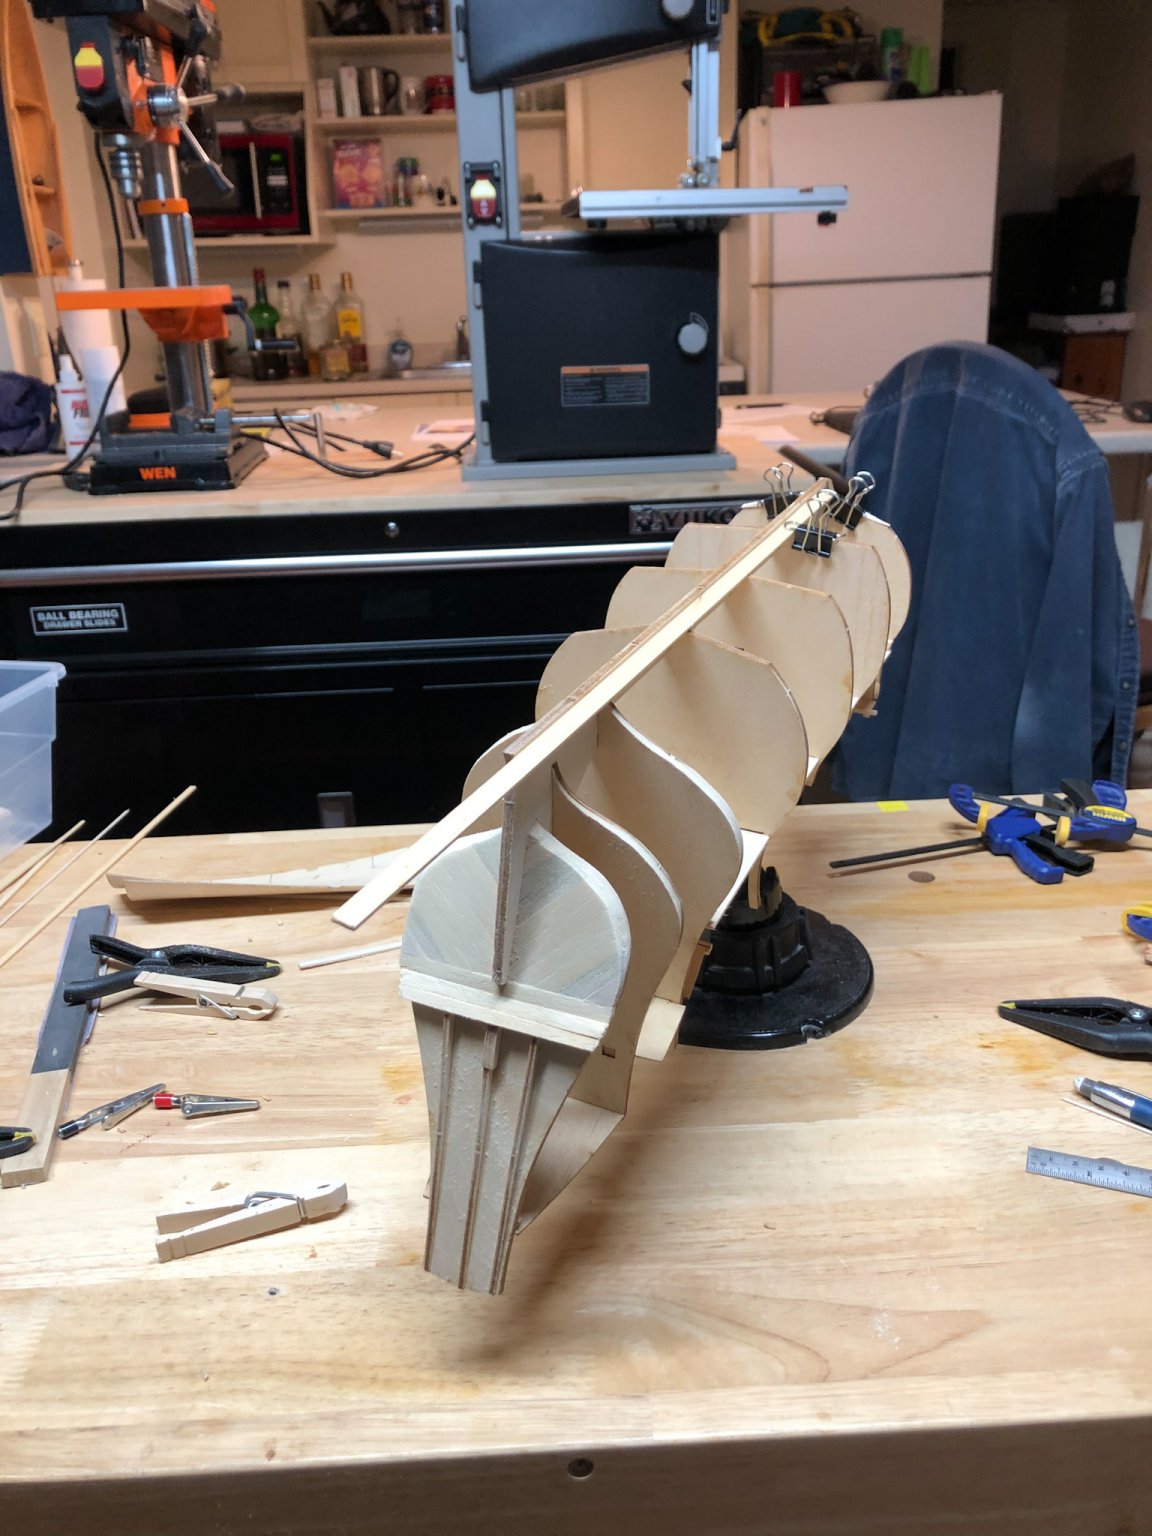
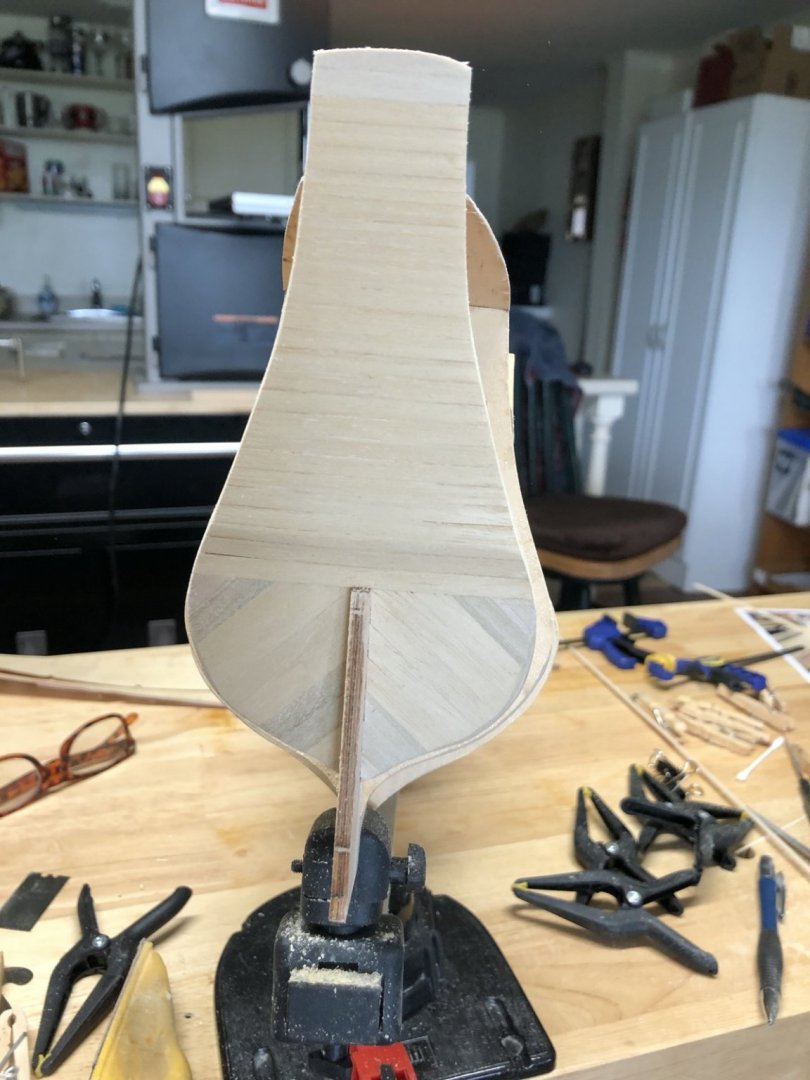
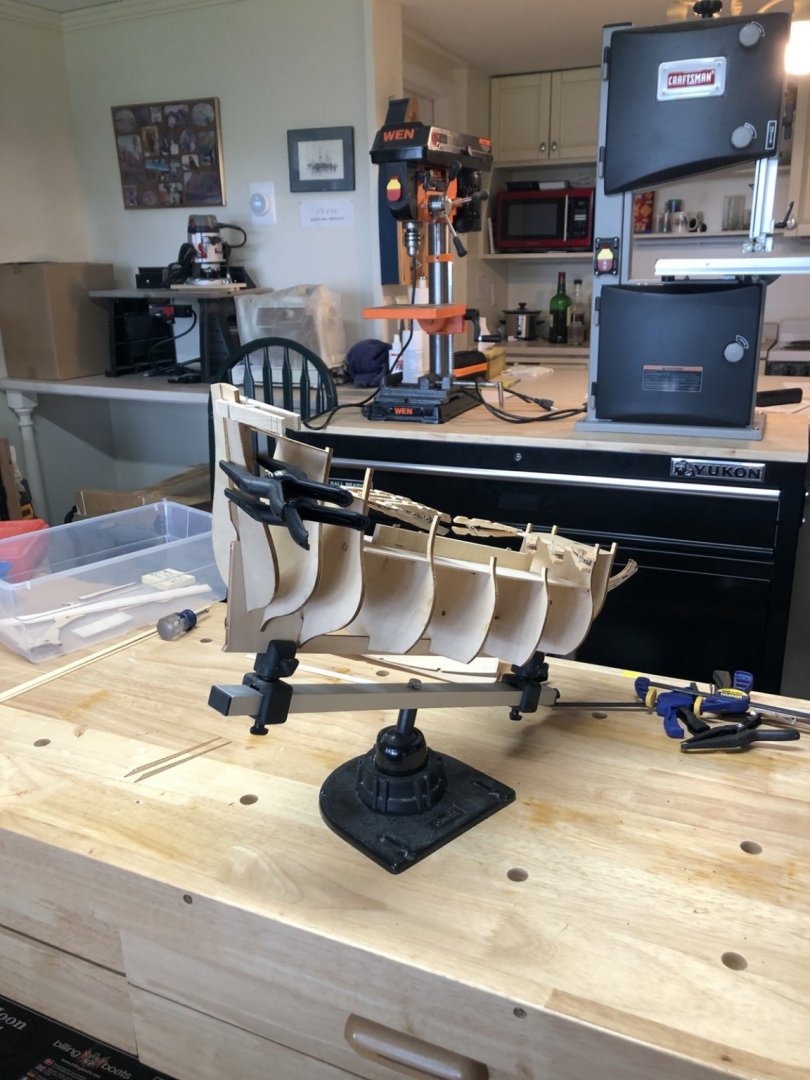
Thanks Patrick. I finished the diagonal planking on the lower transom and have it a preliminary sanding and scraping. I also faired the lower sections of the aft bulkheads. I have also been planning the planking along the keel in the bow which has been a bit puzzling. I have a plan now so I am feeling better about it. You can see the garboard plank that I have been experimenting with. It curves up pretty sharply at the bow. I need to fair the fore bulkheads now.

- 135 replies
-
- 4
-
-
- billing boats
- half moon
- (and 1 more)
-
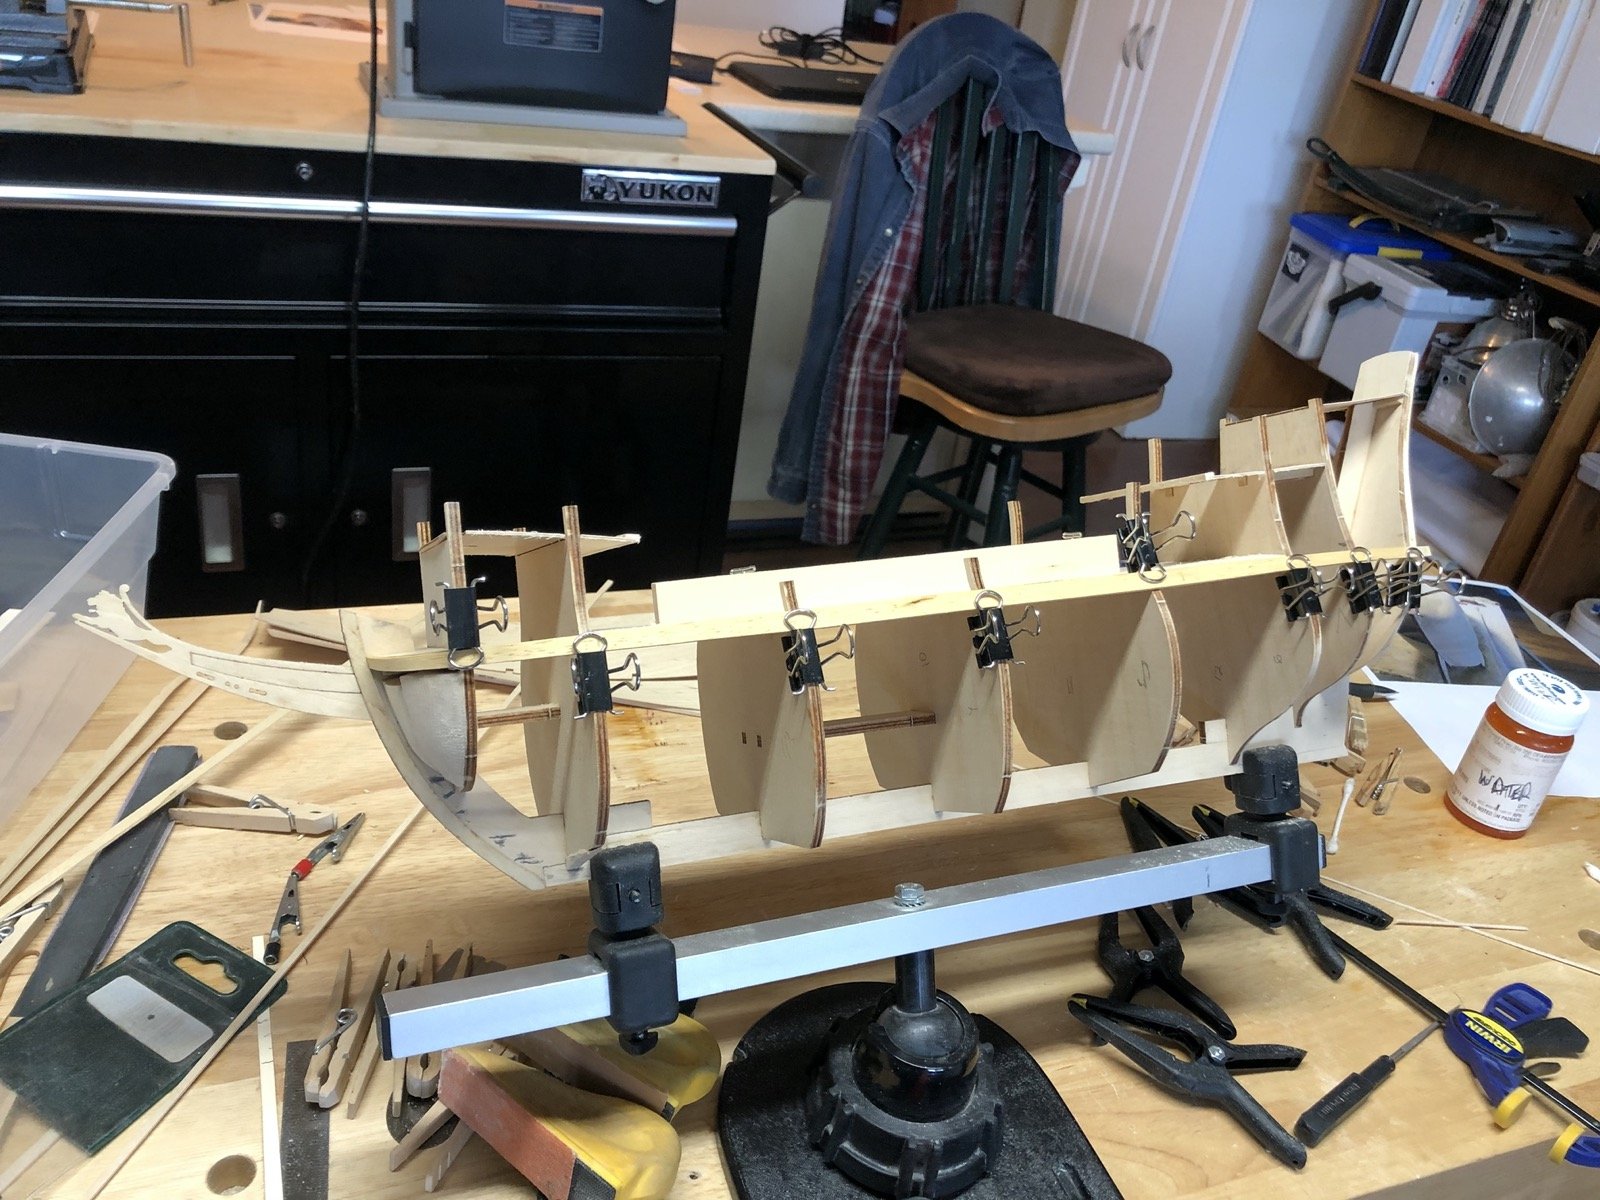
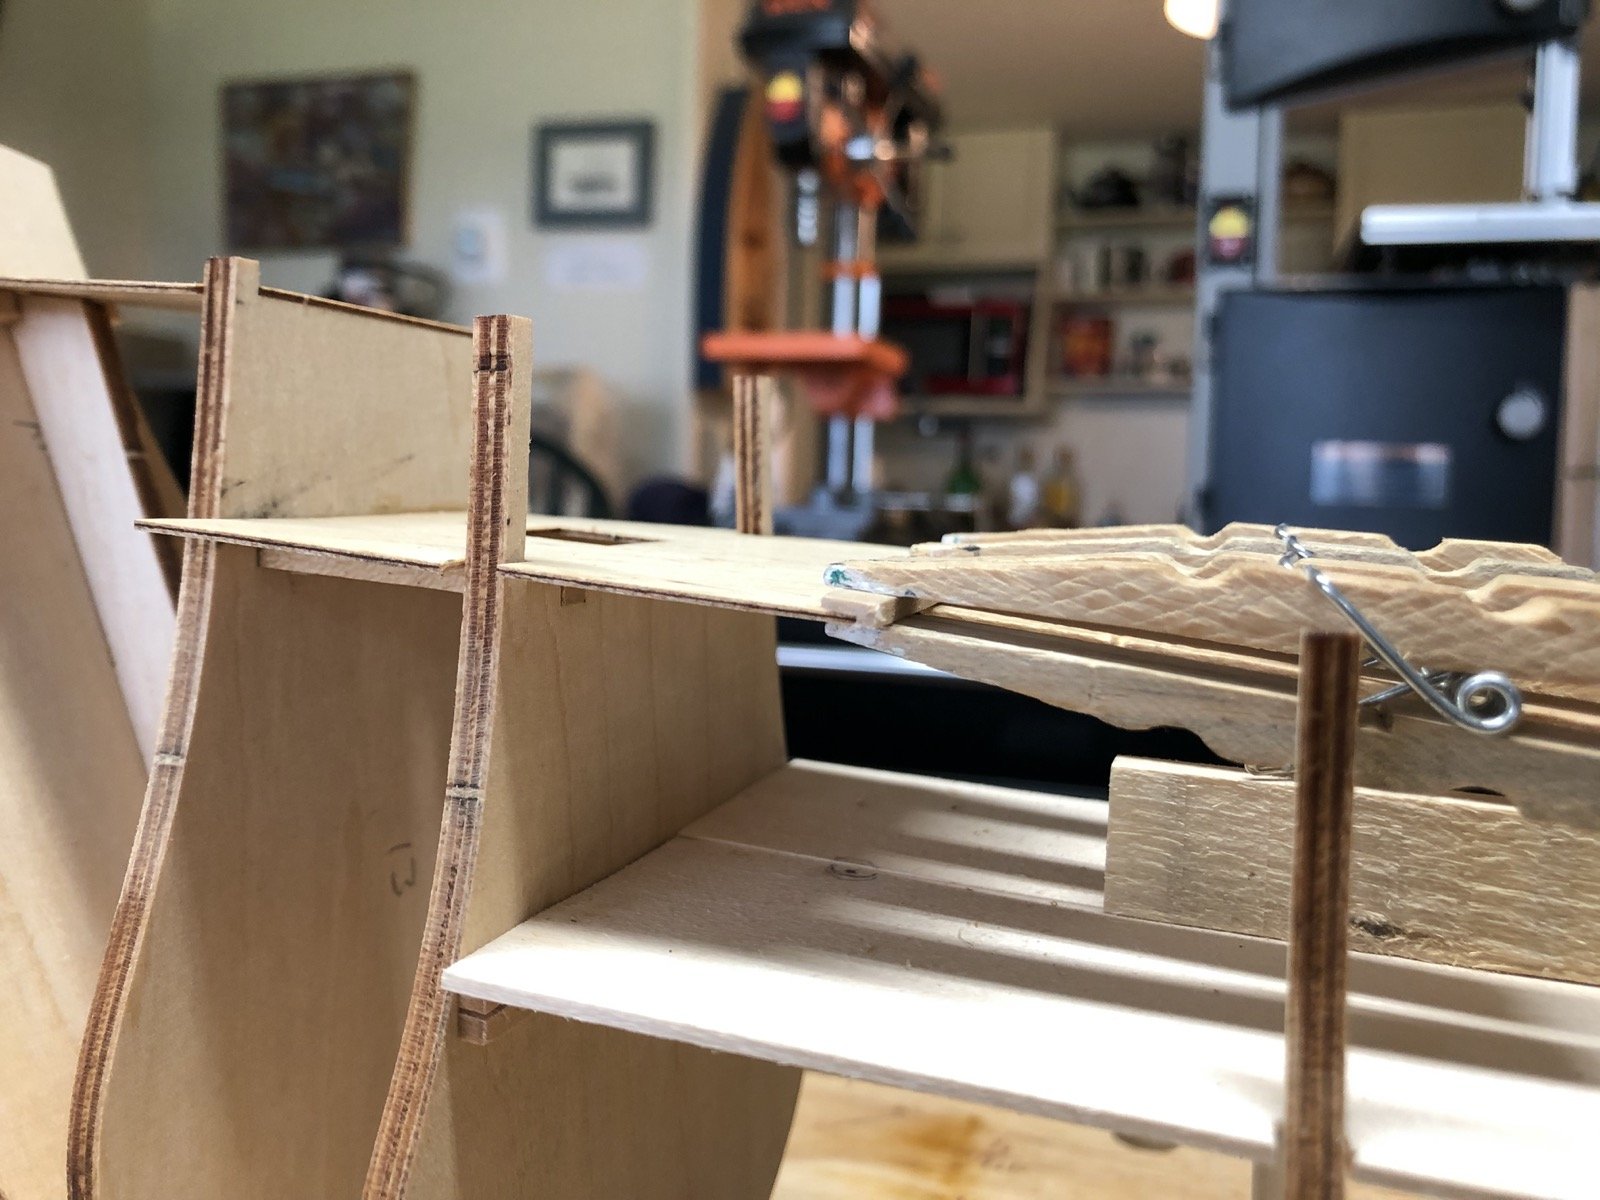
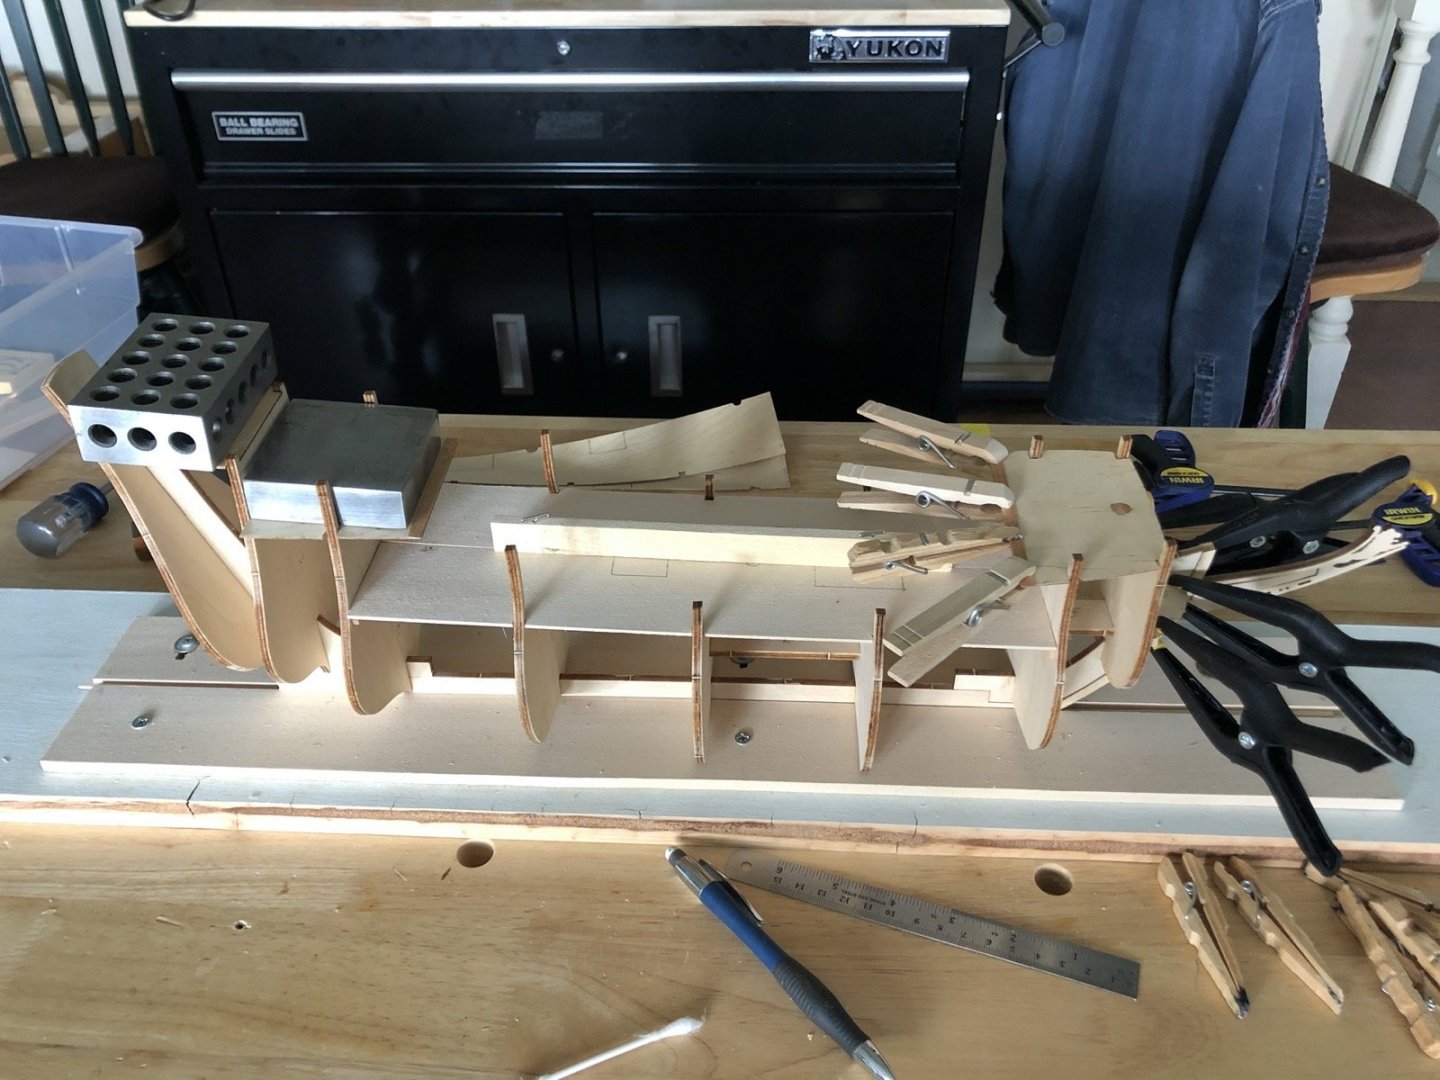
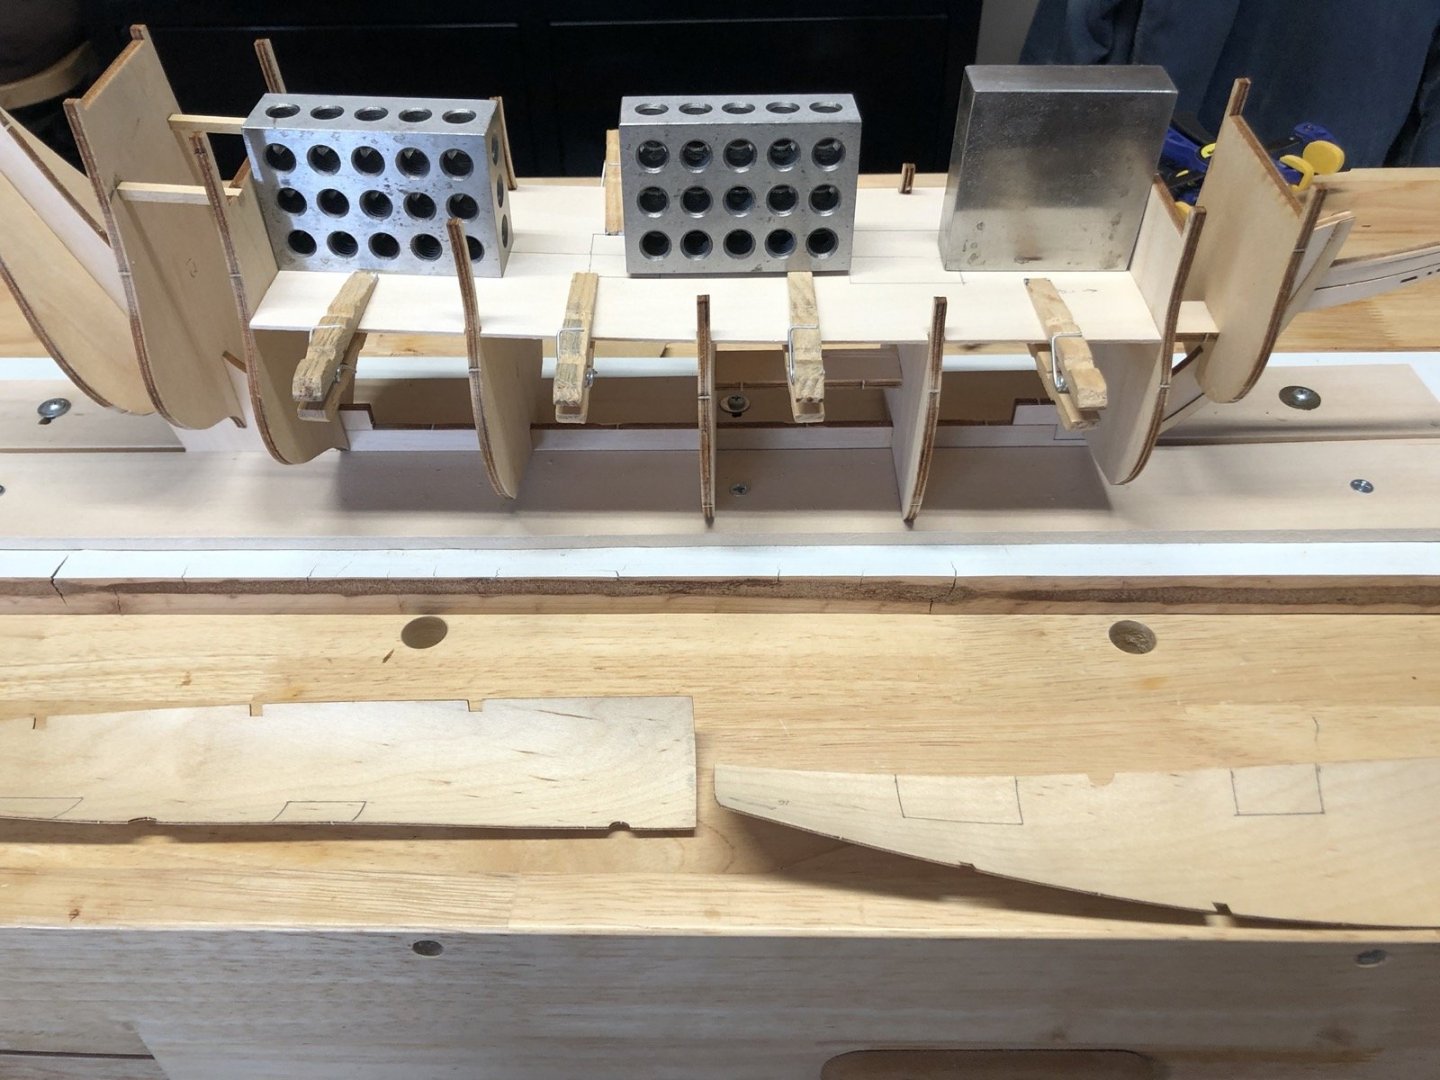
I finished adding all the support pieces then glued the rest of the deck pieces in. I also pinned a strip of wood to the main deck so I can hold the hull upside down in the Keel Klamper later when I plank the hull. I really don't like the wood supplied for planking the decks as it is less than 1mm thick. I know I would have trouble planking with that so I am going to use 3/32" x 1/16" basswood strips instead. This will add more support to the decks and will be easier to sand without worrying about sanding through the planks. I cut a 1/32" rabbet into a strip of 3/32" x 3/16" basswood on the table saw, then glued pieces of this onto the ends of the two overhanging decks. These will make sure the ends of the decks are flat and also hide the edges of the plywood deck pieces. I put the hull into the Keel Klamper and started adding the transom support pieces, getting ready to plank the transom. The planks provided for this are thick enough that I feel OK using them.
- 135 replies
-
- 6
-
-
- billing boats
- half moon
- (and 1 more)
-
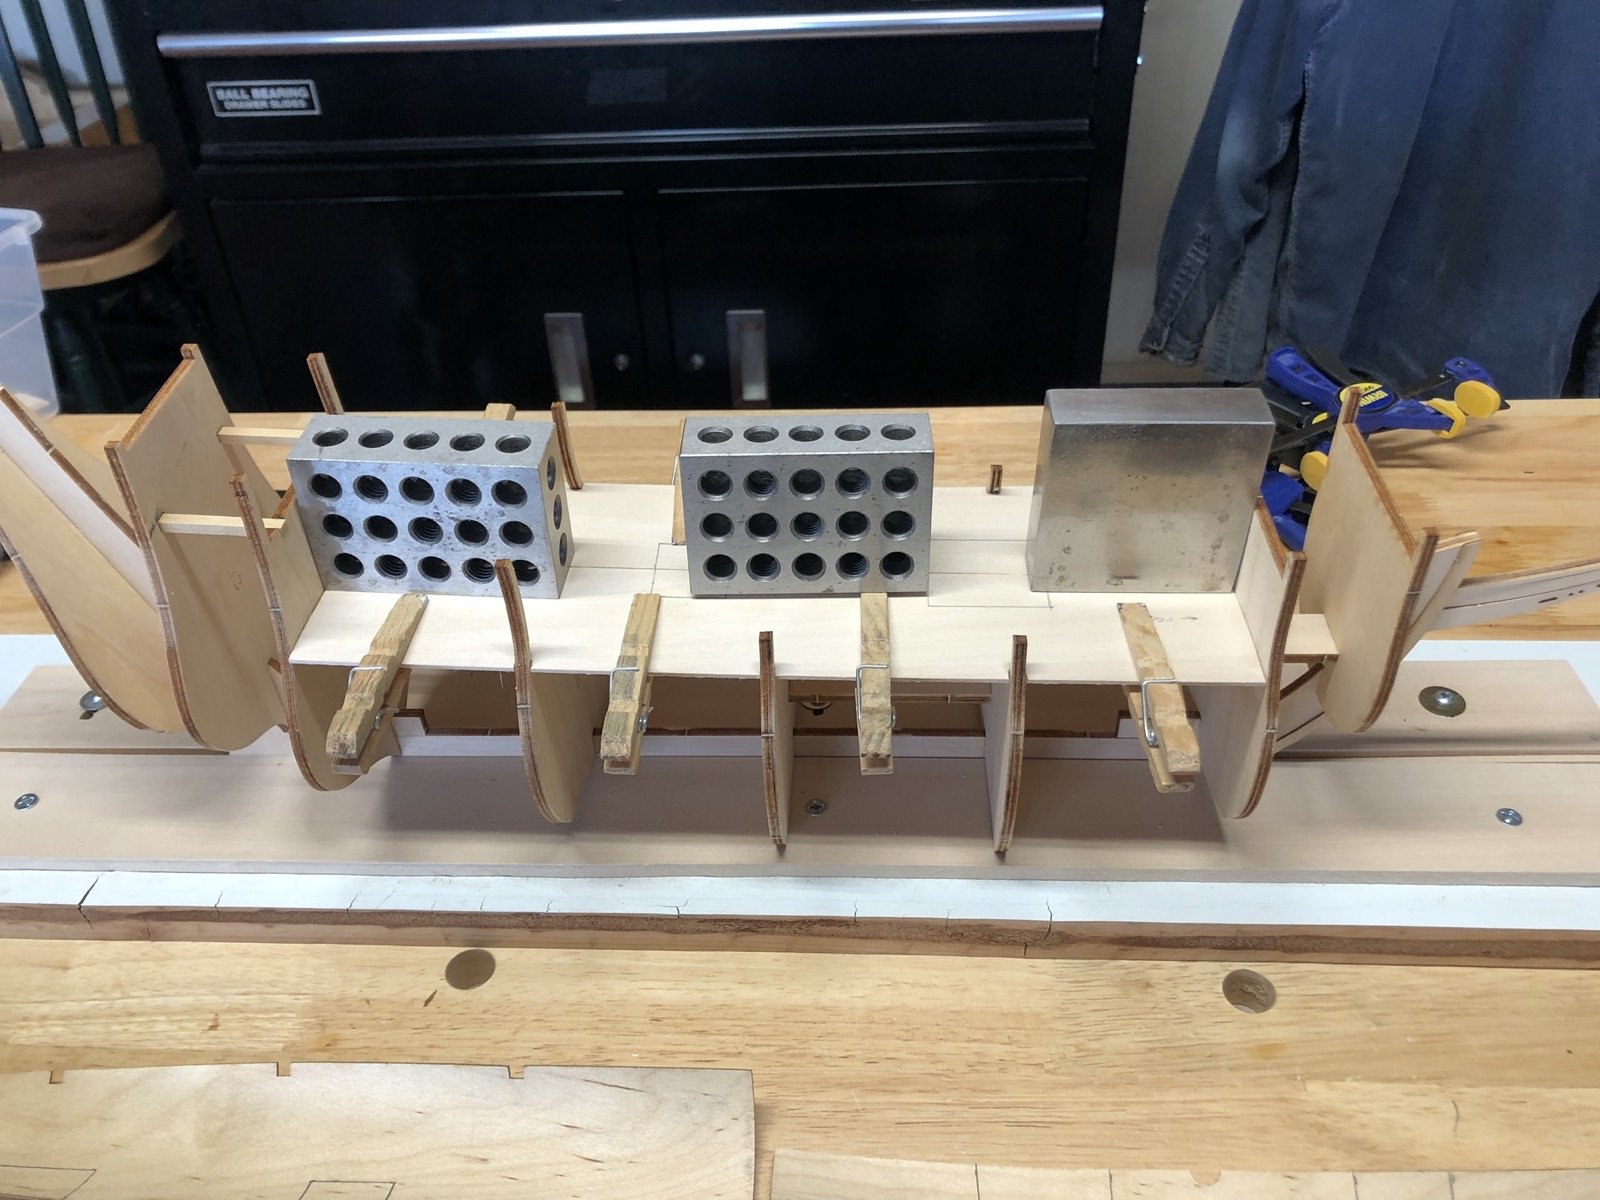
Thanks Steven and Jeff. Those pieces weren't as bad as that out of the box but in trying to flatten them they got worse, mainly because I soaked them first. I like the new pieces better because they are a little thicker and provide more stability to the frames. I have started adding support pieces on the bulkheads to better support all the deck pieces.
- 135 replies
-
- 6
-
-
- billing boats
- half moon
- (and 1 more)
-
The NRG has a planking project that you can get. There is a great build log here to go along with it.
- 36 replies
-
- 2
-
-
- chris-craft 1956 capri
- dumas
- (and 2 more)
-
My attempt to straighten the deck pieces just made them worse so I made new ones from some 1/16" basswood sheet and glued them in. They are actually wider than the bulkheads at each end, as were the original pieces, so they will need to be sanded back during the fairing process. I think I can still use the other deck pieces but if not I'll do the same for them.

- 135 replies
-
- 7
-
-
- billing boats
- half moon
- (and 1 more)
-
I like that solution. A bit more work but much more controllable.
-
I forgot to mention why I am building this kit. Even though I have lived in the Boston area most of my adult life, I was born in the New York City area. I built the Constitution because it is such an icon in the area, so I thought to build the Half Moon as it was the ship that Henry Hudson used to explore what is now New York. My next build will most likely be tied to New Hampshire, which is where I live now. The instructions for this kit are horrible. It is lucky that I have build logs like Popeye's to use because otherwise I would be stumped on many steps. I have glued the bulkheads to the keel and added the support pieces to give them some strength. The next step is to add the deck pieces but they are all warped, so I soaked them in water for about 15 minutes then placed them under some flat boards with weights on top. We will see how they come out.
- 135 replies
-
- 3
-
-
- billing boats
- half moon
- (and 1 more)
-
Thank you maturin. I can only hope. I test fit the bulkheads to the keel and they all fit very well without any sanding of the slots. I marked the bottoms of each bulkhead on each side of the keel to use to mark off a rabbet but I haven't decided if I will carve one yet. I was very confused about how the planking would go along the keel but Popeye's build log has some excellent pictures of how he did it so I am good to go now. Thanks Popeye!

- 135 replies
-
- 5
-
-
- billing boats
- half moon
- (and 1 more)
-
I started by cleaning up the keel pieces and bulkheads, then I glued the keel pieces together using a magnetic board to hold them together.

- 135 replies
-
- 6
-
-
- billing boats
- half moon
- (and 1 more)
-
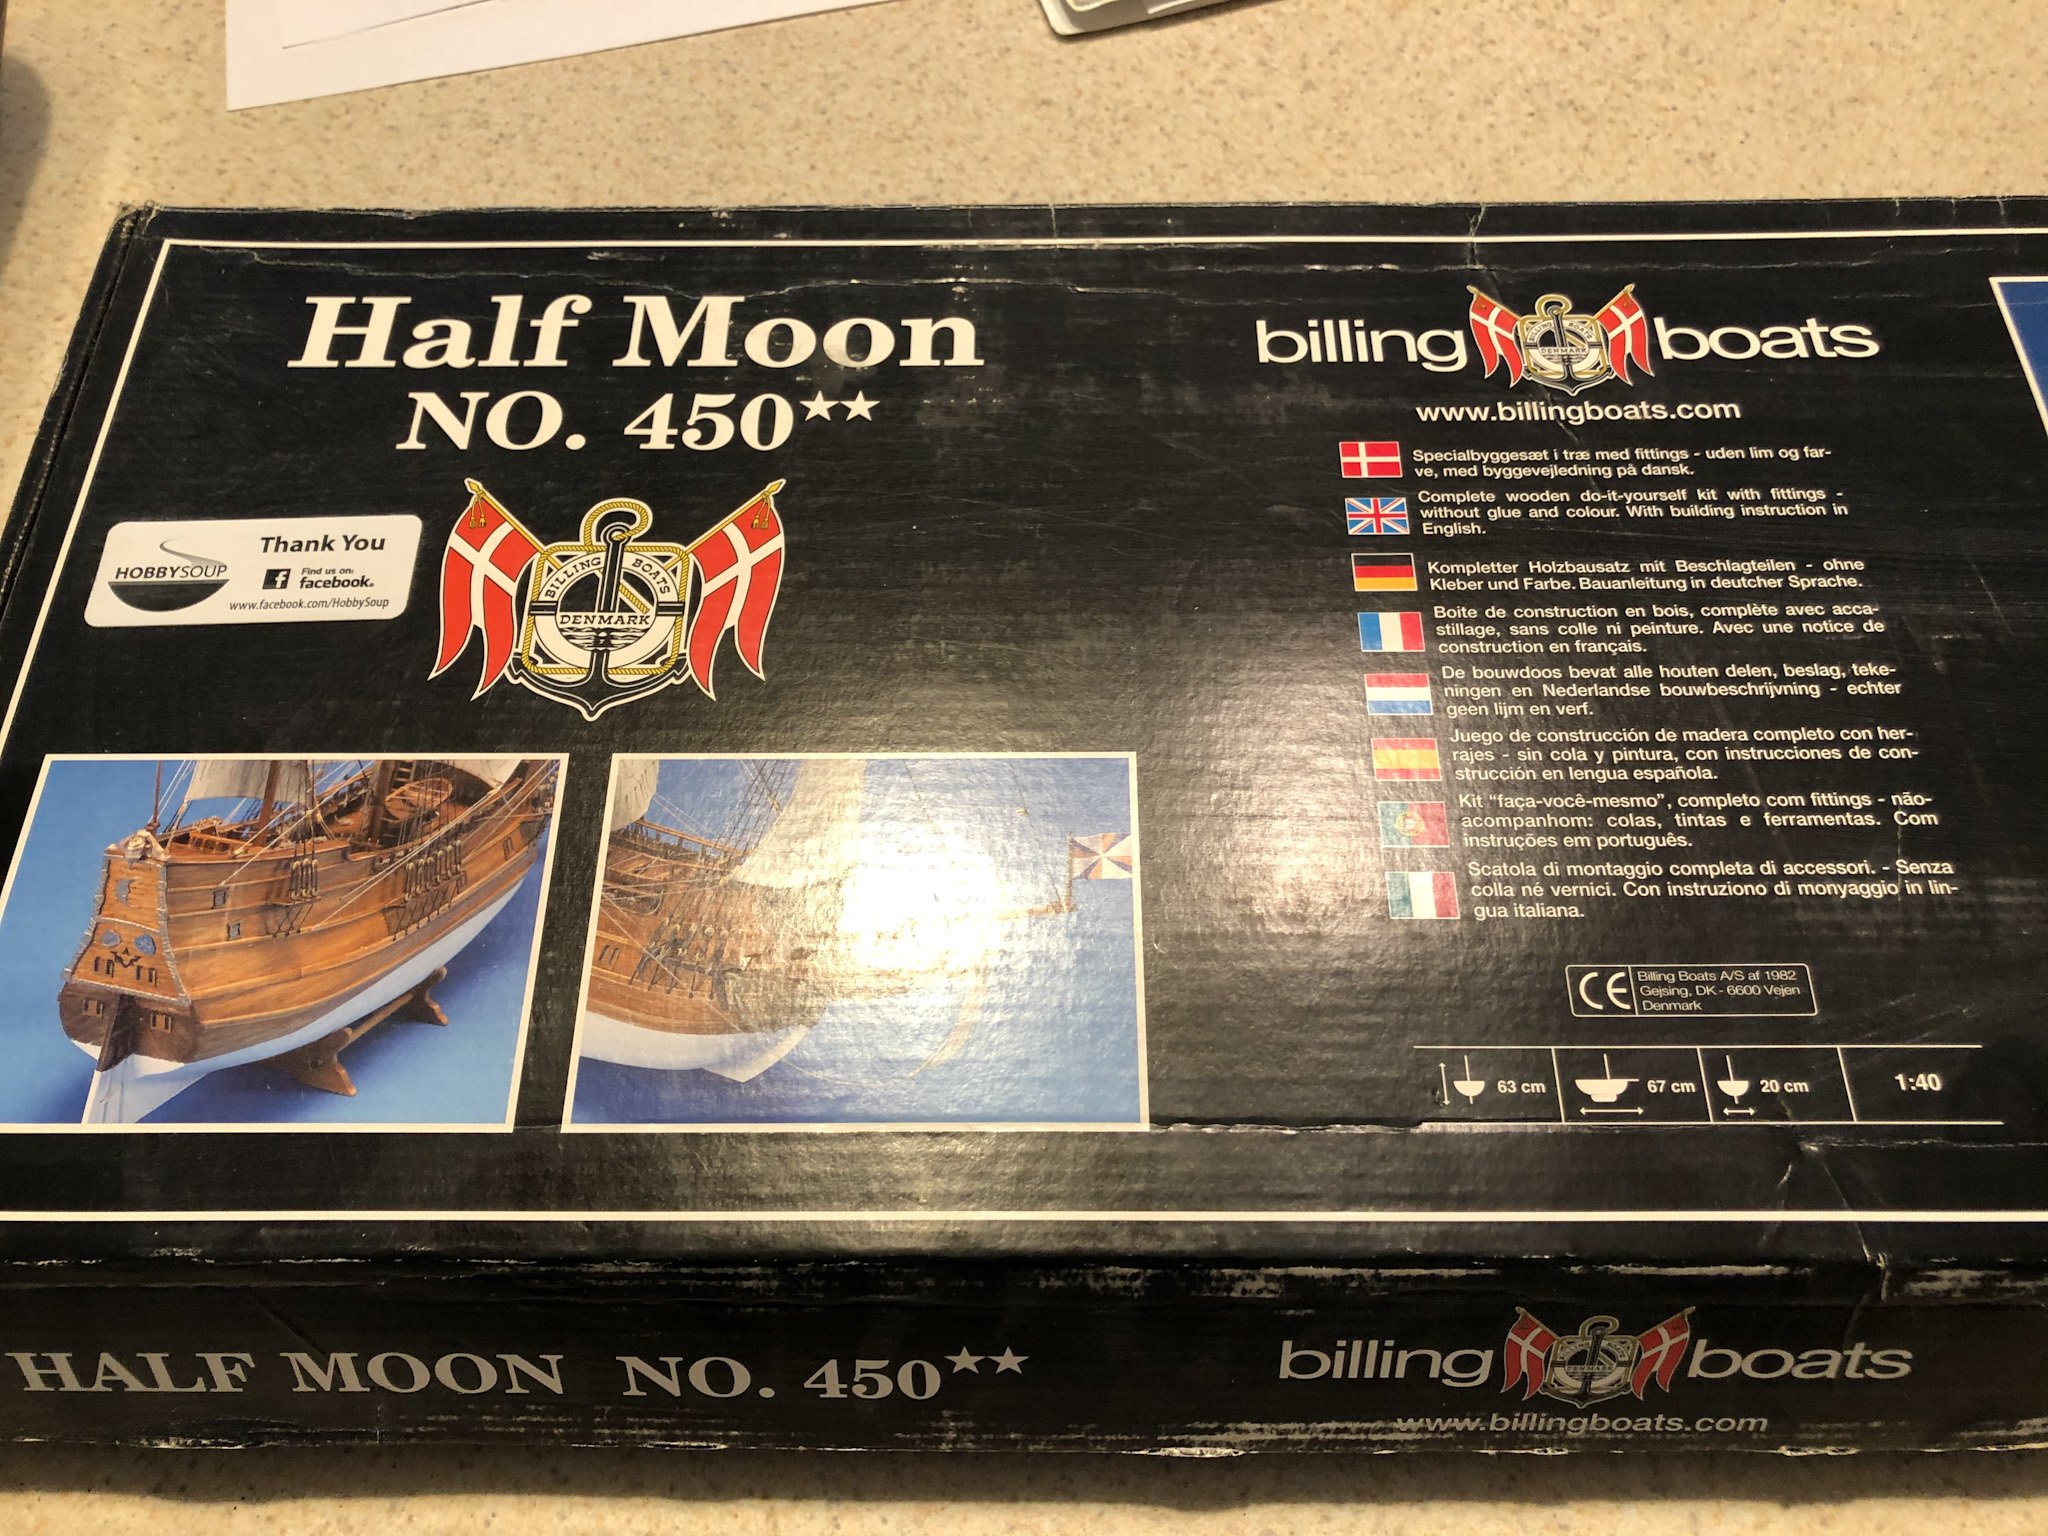
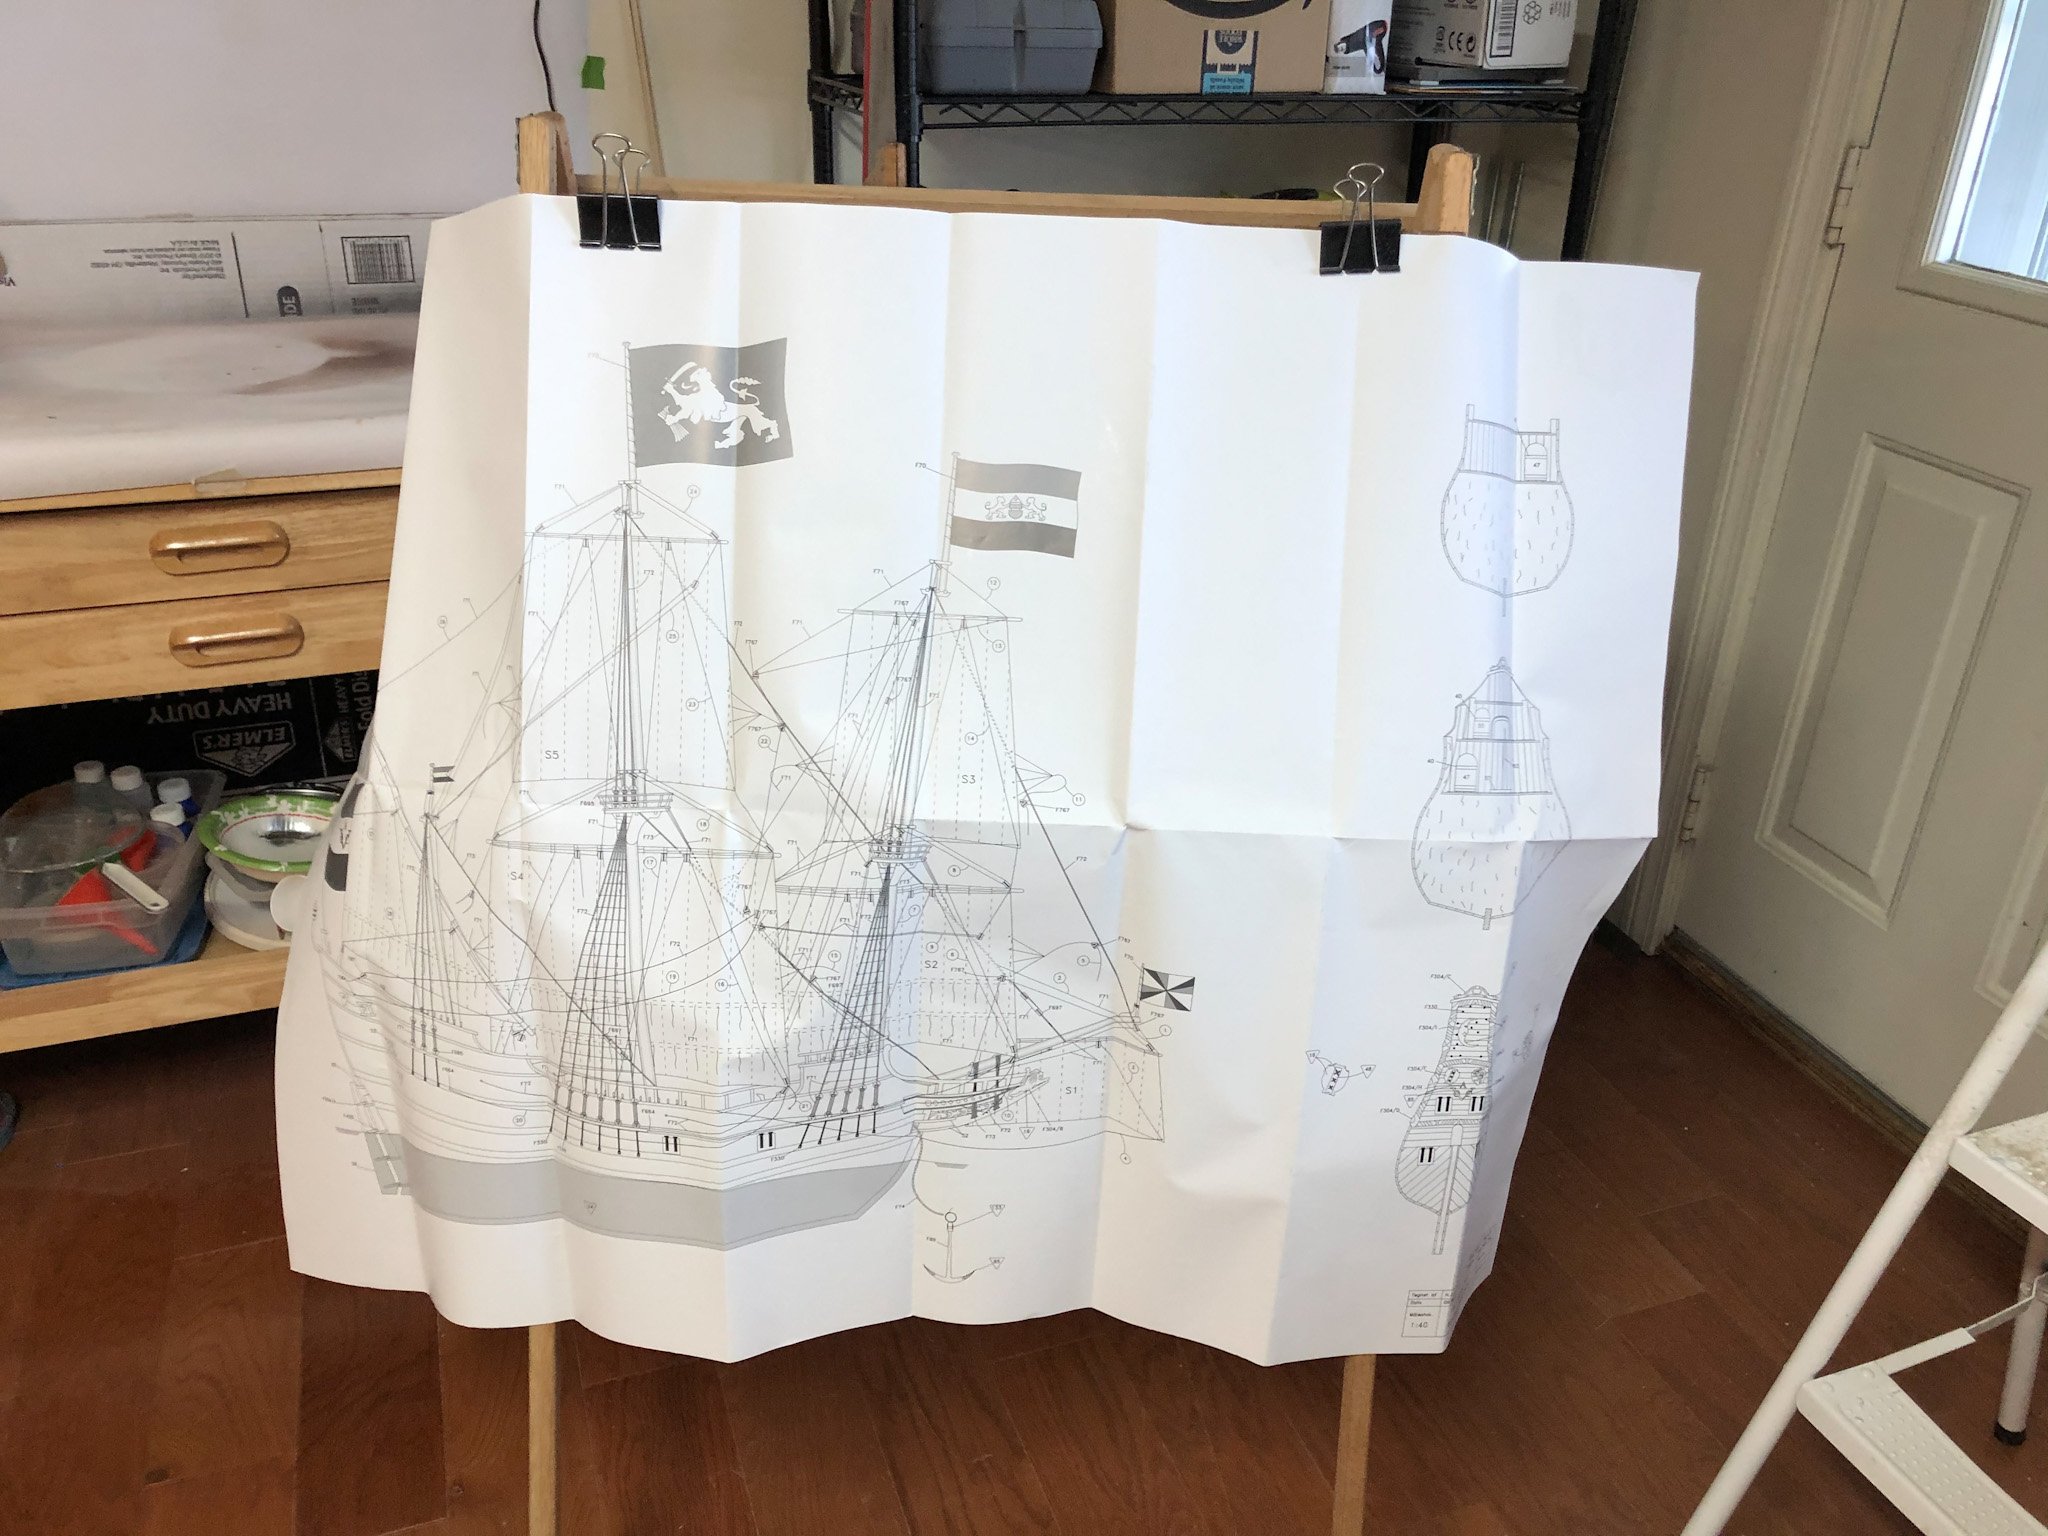
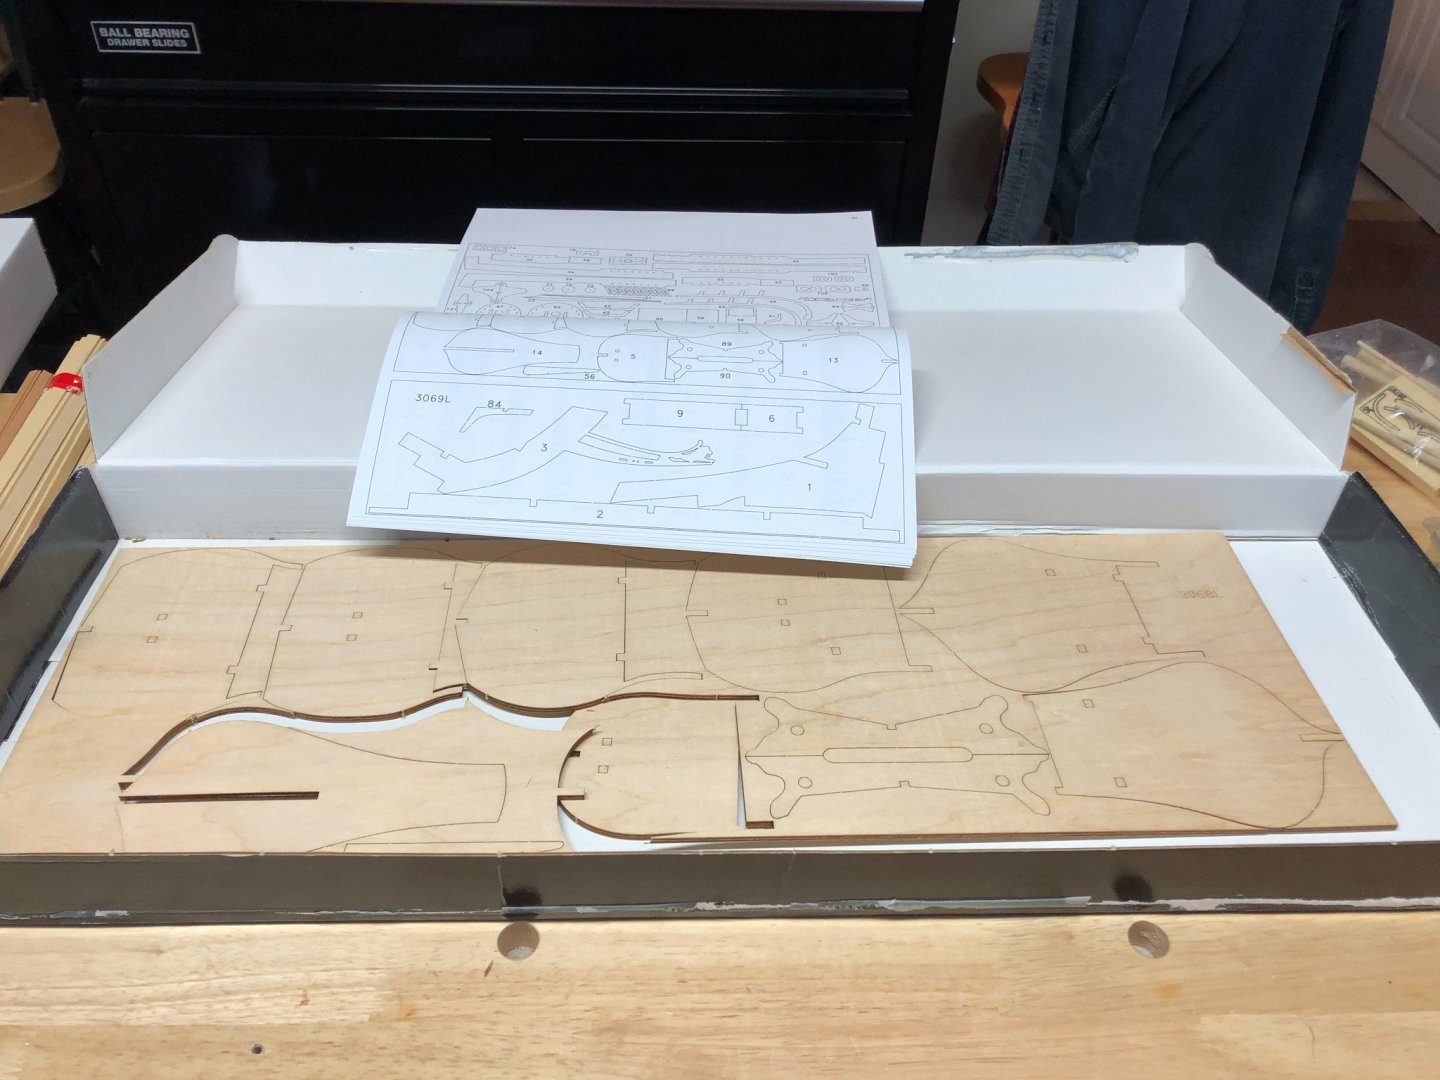
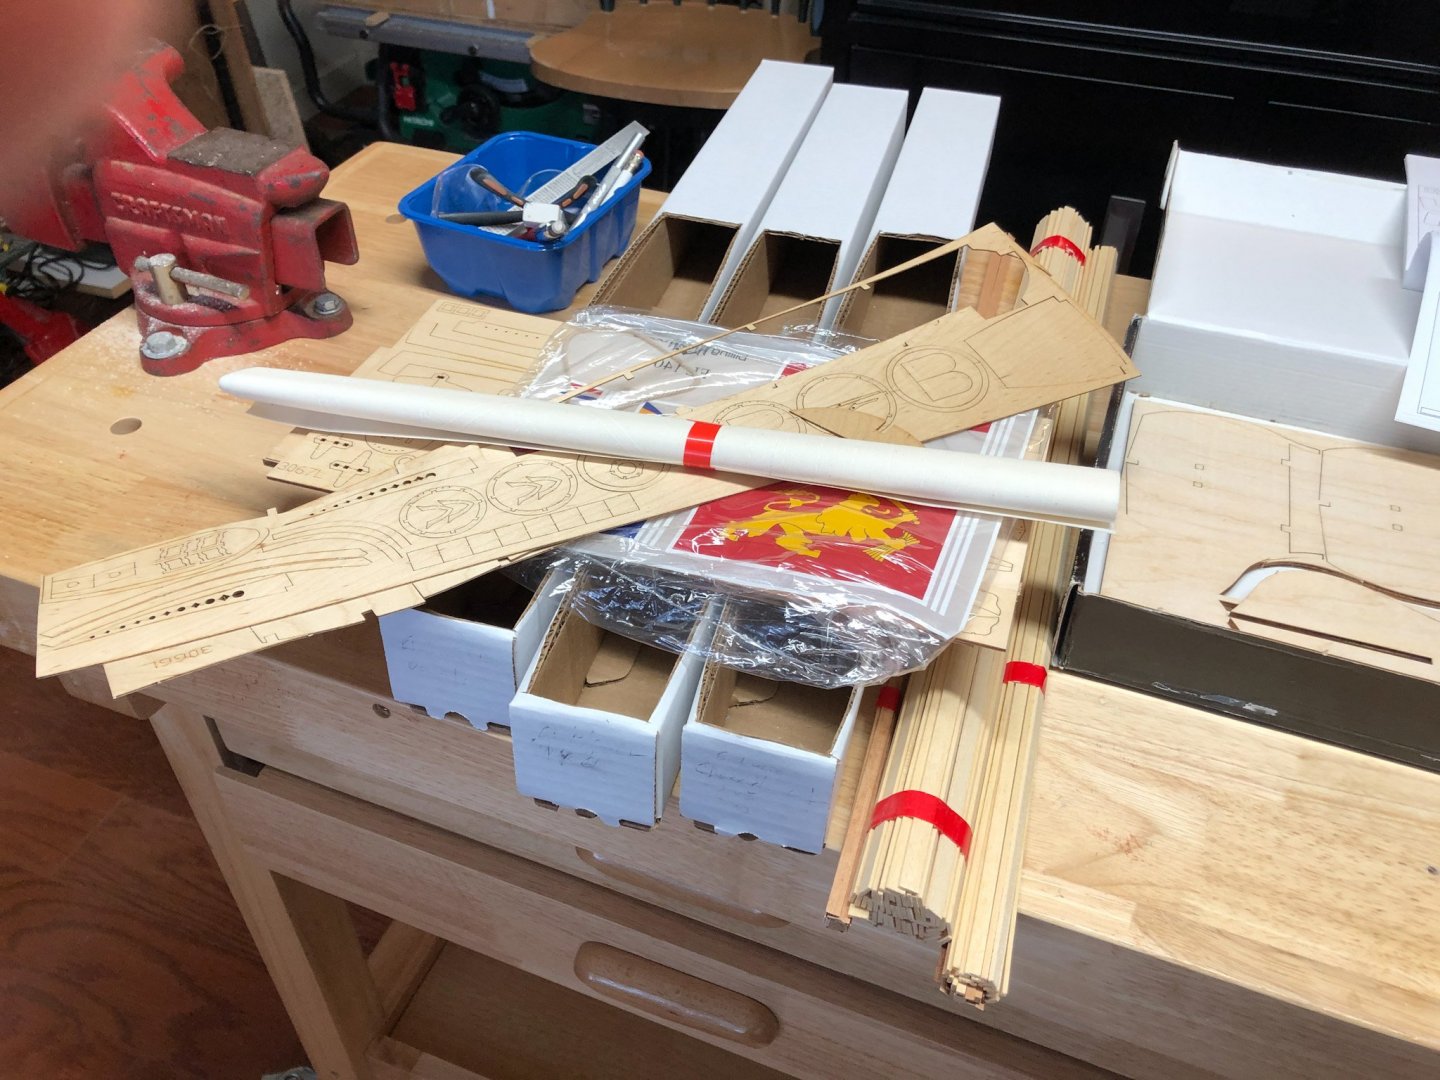
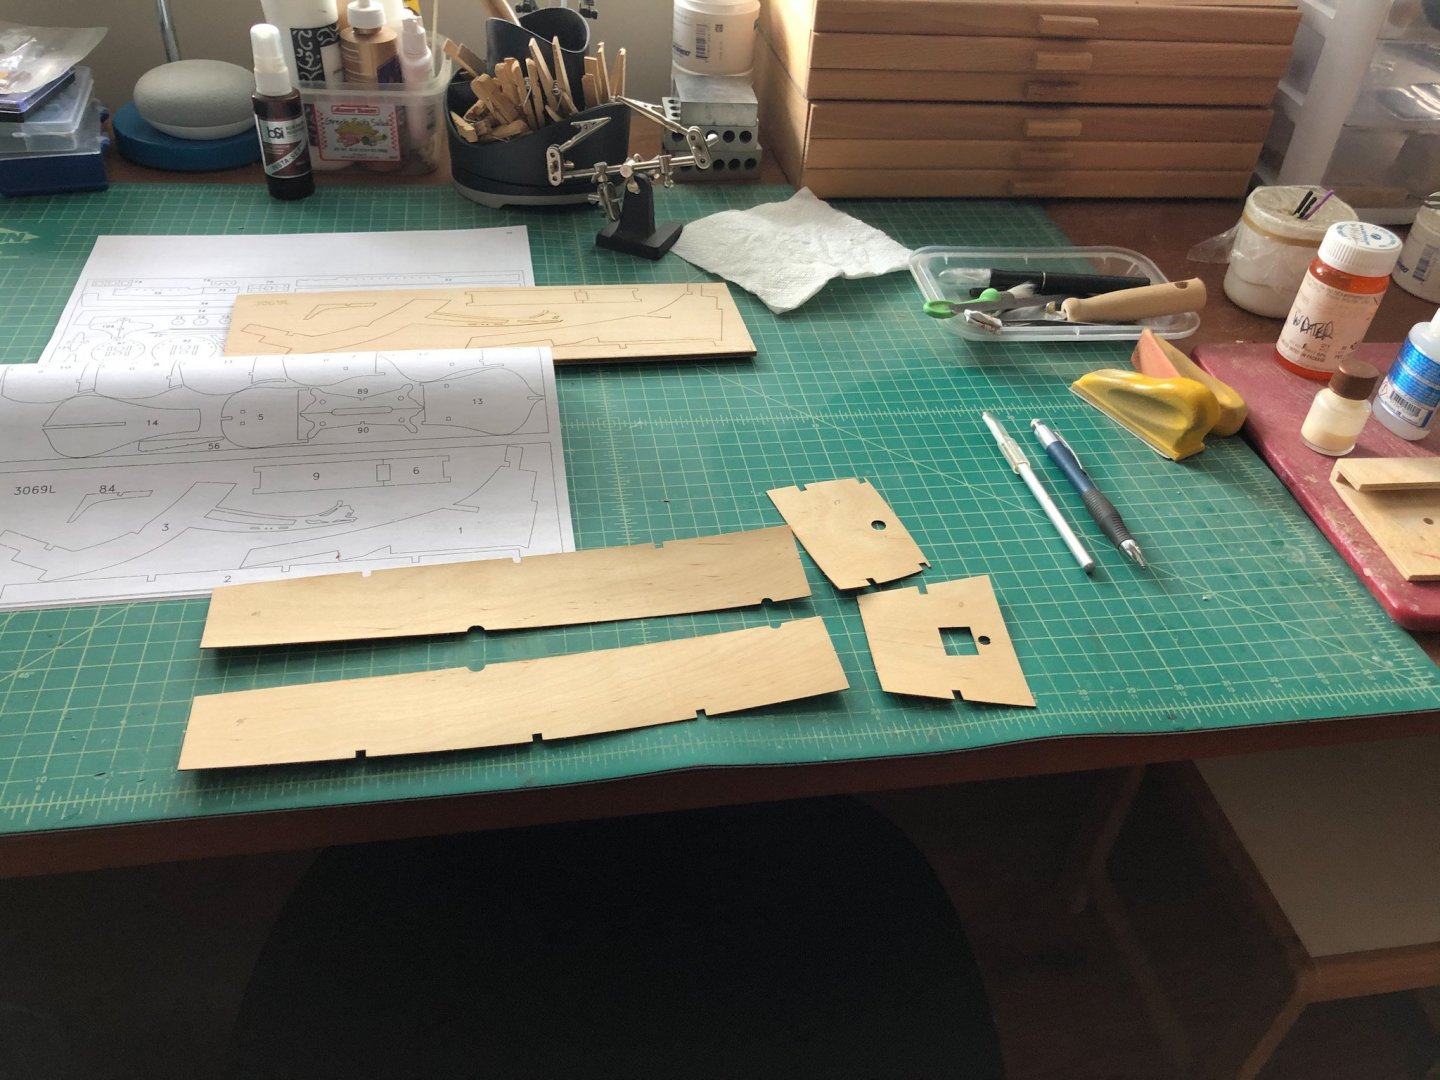
I bought this kit many years ago and it is now at the top of the pile - actually it is the last kit in the pile for now. Here are some pictures of the box and contents. The wood looks OK as do the larger laser sheets. The thin sheets are a bit warped so I may have to remake some pieces. There is just one two-sided plan sheet but it is a real plan and not an isometric view. There are some plastic trim pieces that I am not thrilled about but I'll deal with them when the time comes.


- 135 replies
-
- 8
-
-
- billing boats
- half moon
- (and 1 more)
-
Thanks Cleat. It is the same copper tape supplied in Model Expo kits for copper plating hulls. You can also get it at stained glass shops as it is used to wrap around glass pieces so they can be soldered together. Amazon has it too as Copper Foil tape.
-
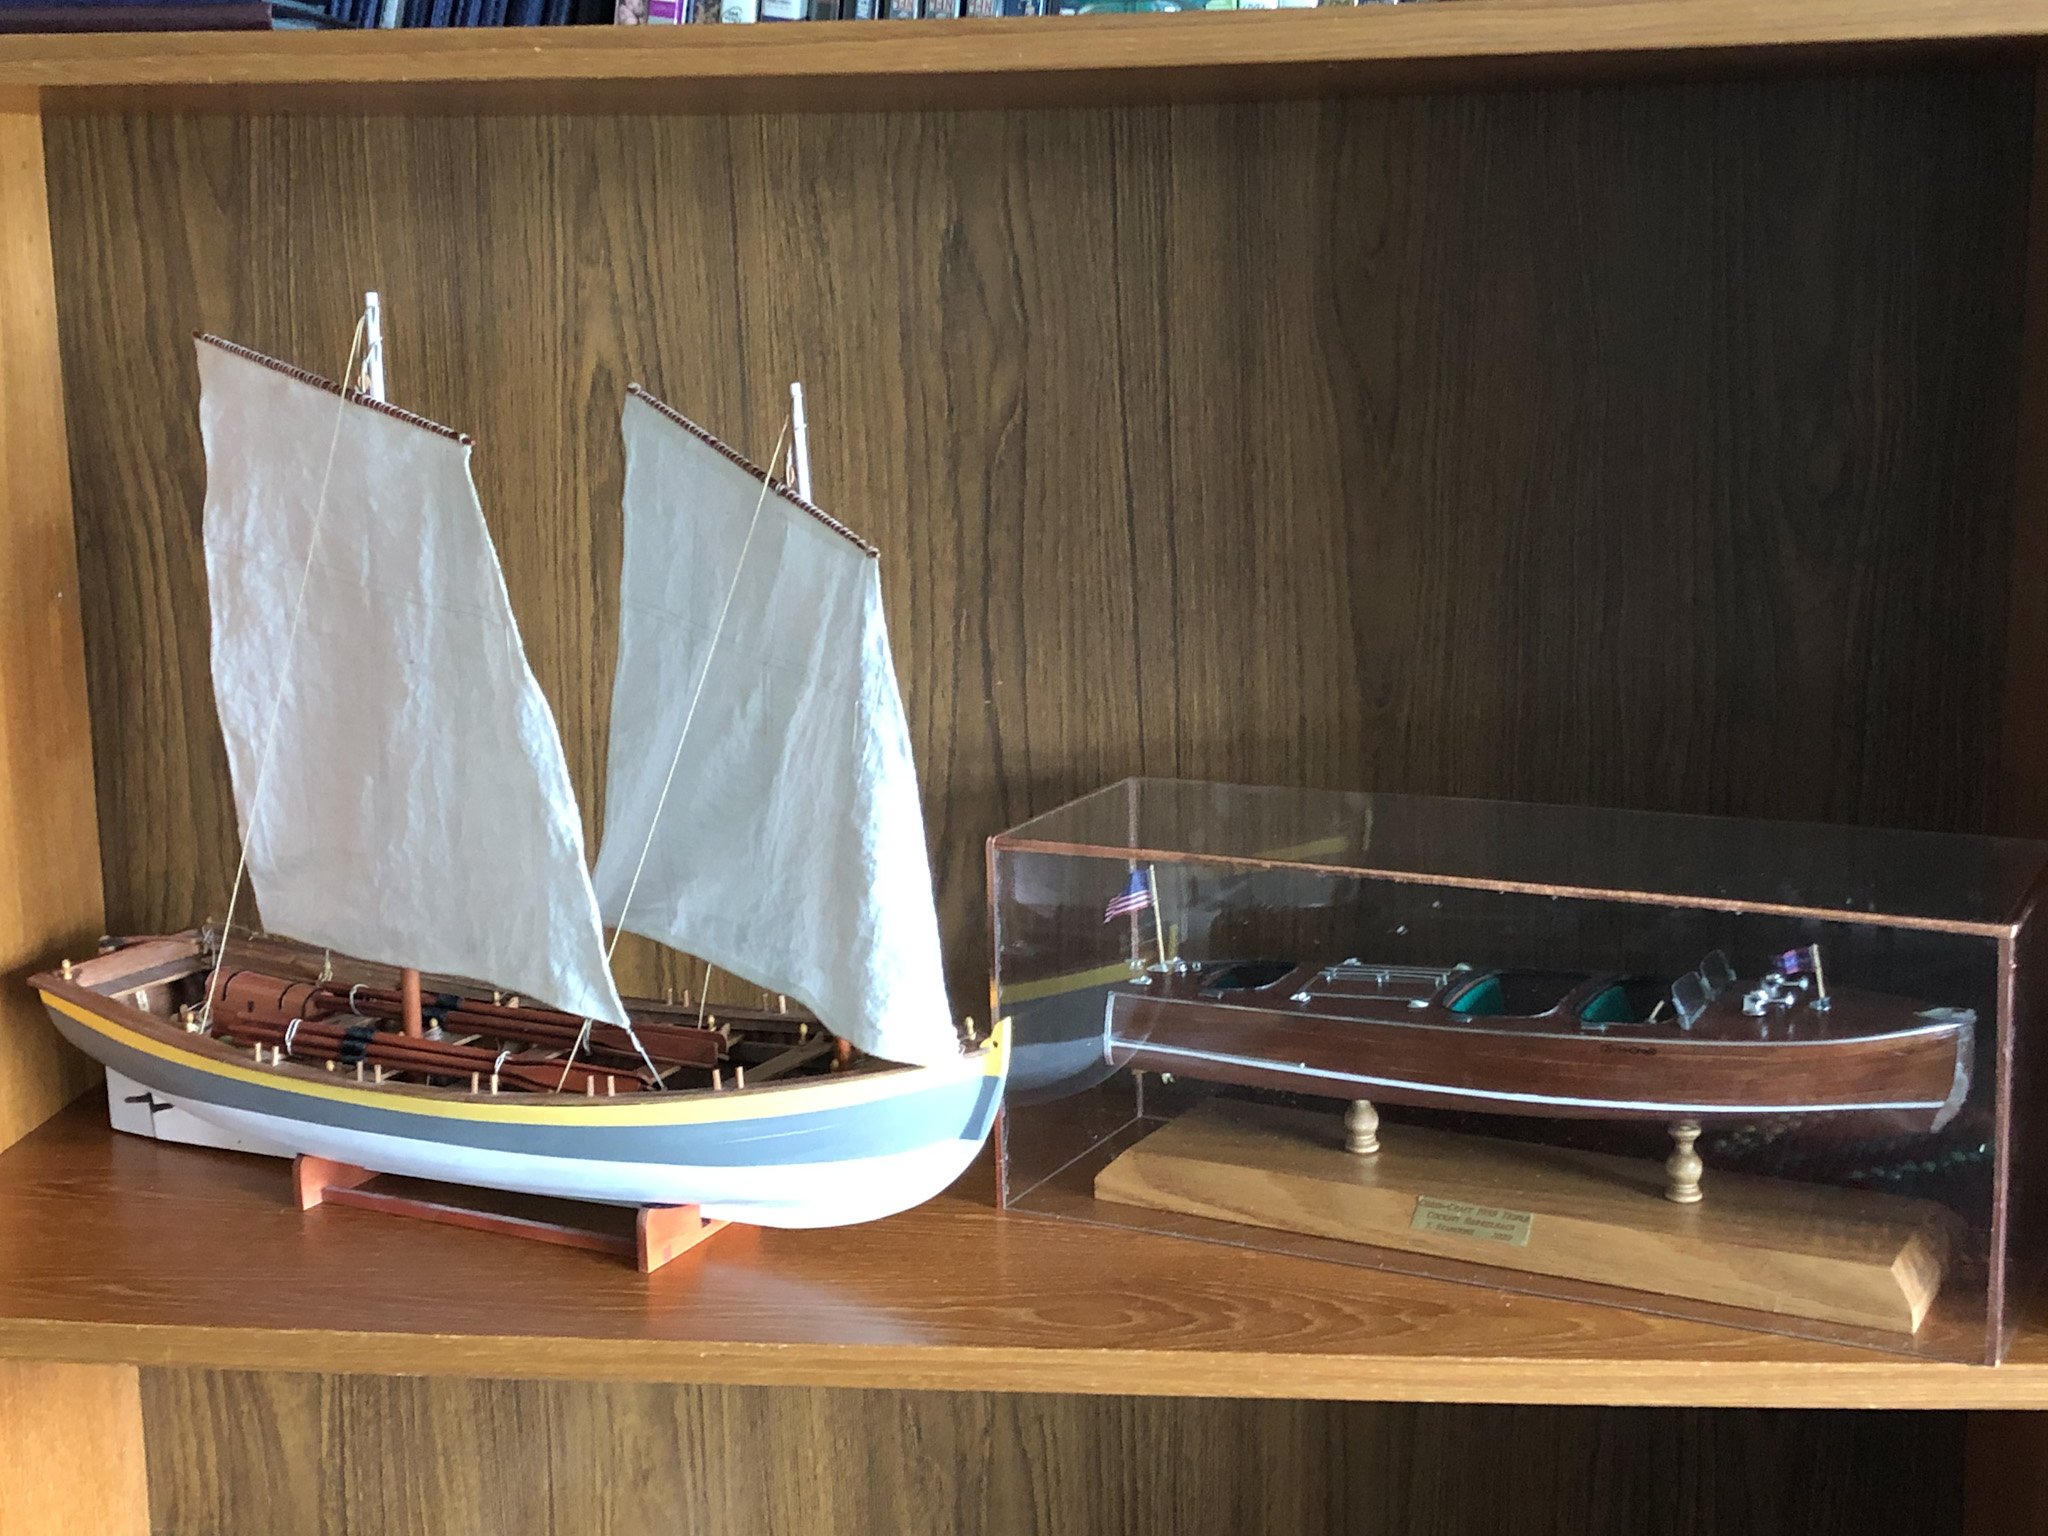
Just a quick little update. I really didn't like the edges of the Plexiglas case so I took some copper tape and wrapped it around the edges. I think it looks much better.

-
The launch is all back together. It was fun restoring it but I hope I won't need to again.

- 153 replies
-
- 4
-
-
- model shipways
- bounty launch
- (and 1 more)