-
Posts
2,421 -
Joined
-
Last visited
Content Type
Profiles
Forums
Gallery
Events
Everything posted by usedtosail
-
Thanks Popeye, Dave and K. I just followed the planking as shown on the plans, which showed the tapering. I ended up going with the clew lines tied to the lower yards, so I finished installing the fore and main sheets and tacks. I added all of the rope coils to the belaying pins and cleats for the new lines, which was a bit challenging around the main mast because of all of the lines there. For the large cleats, I just added rope coils to the deck after gluing the loose ends of the actual lines to the deck. I am now in the process of adding the details and rigging to the quarter davits. I lashed the davit rails to the davits using the lashing shown on the plans. I also made brackets from brass strip to hold the davits up, and blackened them. I am going to wait until the davits are rigged before adding them, as I am not sure of the exact angle yet, which changes the size needed. I am also not sure the best way to attach them, as I think if I just glue them on they will come off easily if the davit its moved. I may just wait until I am ready to put the model in the case before adding them. I have been stropping the blocks needed for all of the davit rigging and will be adding the lines to the model next.
- 1,354 replies
-
- constitution
- model shipways
-
(and 1 more)
Tagged with:
-
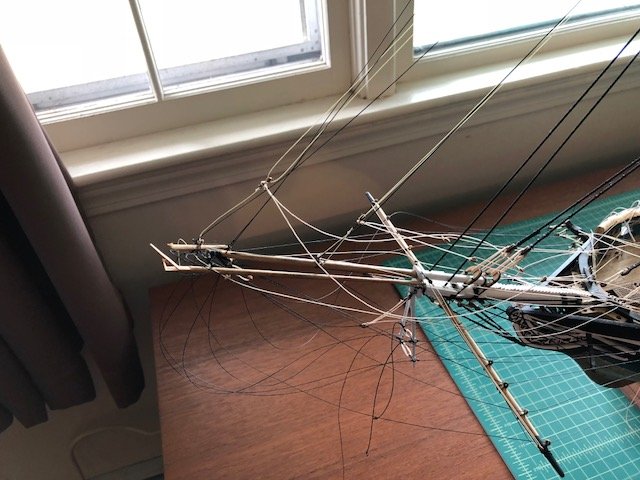
I finished adding rope coils for all the running rigging that has been installed to date. It was more trouble making them consistently then getting them in place on the belaying pins. Those long tweezers I bought last Spring really helped a lot. I had made all the ropes for the fore and main sheets and tacks in the old shop, but I had to strop blocks with hooks and loops for them. I then added the sheets and tacks to the model. Since I am not adding sails, my plan was to hook the sheet and tack blocks to the clew line blocks hanging from the main and fore yards. When I did this, the sheets were right up against the shrouds which did not look good at all. I had a couple of options at this point. One was to leave the sheets and tacks off, but since I had already made them I didn't want to do that. The instructions pretty much say to do that if no sails are attached. They also suggest attaching the clew blocks to the reef tackle blocks, which would support he clew lines along the yards. Well, I had not added reef tackle mostly since I did not have enough belaying pins for them. But this gave another idea, which is shown here dry fitted: It is hard to see in these images as it is hard to focus on individual lines, but what I did was support the clew lines further out on the yards using a simple loop of line around a jack stay stanchion. This moves the clew line block out so that the sheets and tacks are away from the shrouds and other lines close to the hull. I doubt this would have been done on the real ship, but I am only doing it for display purposes. If this is really a bad idea, please let me know and I'll try something else or leave the sheets and tacks off. Thanks. I am also installing the quarter davits which I had made a while ago. I glued the two support pieces to a piece of wire that is through them and the davit. I was able to glue them and the davit is still able to rotate in the supports. I then glued the supports to the mizzen channel and hull sides. I have the upper bracket pieces to glue on next. As you can see in this picture, the main braces and sheet get in the way of the davits rotating up and down, especially the braces. I don't know how they dealt with that on the real ship. Maybe they loosened the braces when lowering the boats on these davits? Anyway I think I can get them installed around the lines, especially since I am not putting boats on them. Thanks for looking in. The list of things to do is getting pretty short now so maybe I can finish her this calendar year - not that I am in any hurry though. I will probably have to wait until the Spring to make the case although I might be able to build some of it over the Winter. We shall see...
- 1,354 replies
-
- constitution
- model shipways
-
(and 1 more)
Tagged with:
-
Thanks Kurt. I know I have seen them on other models but I don't remember which ones. Not too many have modeled the gun deck. There are a few build logs that are in the process of doing it, so they will probably add them as well.
- 1,354 replies
-
- constitution
- model shipways
-
(and 1 more)
Tagged with:
-
You got that right, Dave. Good luck with the new project.
- 1,354 replies
-
- constitution
- model shipways
-
(and 1 more)
Tagged with:
-
That's a great project Dave. I am sorry you are on hold with the Connie, but this looks like a good diversion. Good luck with it.
- 742 replies
-
- constitution
- frigate
-
(and 1 more)
Tagged with:
-
Another idea Steven would be to glue up four pieces of wood using wood glue, shape them like you did the solid piece, then soak them in Isopropyl Alcohol to separate them. Hopefully the pieces you already made can be cleaned up to your satisfaction, though.
-
Maturin, Thanks, and I am glad you are still at it and you were able to get the cannons at the set price. I hope your health issues are in the past too. Dave, I'm intrigued on your new project. Please elaborate. Ronald, there are only two cannons on the spar deck, which have carriages with wheels. The rest are carronades, which have shorter, thicker barrels and ride on sleds that have two small wheels underneath them and are attached to the bulwarks at the other end. You can see these in pictures of the current Constitution to get a better idea what they look like, although the current ones are a bit different than what was on the ship in the 1800's, which is what I modeled.
- 1,354 replies
-
- constitution
- model shipways
-
(and 1 more)
Tagged with:
-
Thanks Ronald. The kit came with complete cannons and carronades for the spar deck, but only dummy cannon barrels for the gun deck. These go into box structures to simulate the guns on the gun deck. I added a portion of the gun deck that shows through the open waist of the spar deck, so the extra cannons were for this portion of the gun deck, so I could show complete rigged cannons on the gun deck. I bought the whole set from Model Expo, which were more than I needed, but it was still cheaper than buying the exact number of individual cannon sets that I needed. The last time I looked, it appeared that ME no longer sells the cannons as a set, though, but you can get them as individual kits.
- 1,354 replies
-
- constitution
- model shipways
-
(and 1 more)
Tagged with:
-
Braces are all done now. At this point I want to make and install as many of the rope coils as I can, before adding the main sheets and tacks, which will limit access to the pin rails. I modified the way I make rope coils after I saw how Ed T. is doing his for the Young America. I use a 3 pin jig to make each coil, loop the line around the two pins, then make a hitch under the coil to hold the loops together. I then make another hitch, looping that one over the pin on the top of the jig, so when I pull it tight and fix the hitches with glue, it all holds together. I have added these to the port pin rails, and have started making the coils for the starboard side.
- 1,354 replies
-
- constitution
- model shipways
-
(and 1 more)
Tagged with:
-
Ozark, scratch building is where I would like to end up but I think I have a ways to get there. all of the repairs are completed and I am making progress on the braces. I have the fore and main lower yard braces in place and have started on the crossjack yard and topsail yard braces.
- 1,354 replies
-
- constitution
- model shipways
-
(and 1 more)
Tagged with:
-
Just stunning Dan. The display case finishes the model beautifully. Great job!
- 287 replies
-
- michelangelo
- ocean liner
-
(and 1 more)
Tagged with:
-
Thanks Popeye. Ozark, I made the flying jib boom from a piece of 1/8" dowel that came with the kit. Some of the dowels in the kit were warped, which I replaced with new dowels that I bought online. To make the boom, I first drilled two holes to simulate the sieve in the forward end. I then used a small hand plane to taper the dowel towards the ends, then chucked the dowel into my Sherline lathe and used sandpaper to round then out again. I used a small file with the dowel in the lathe to make the shoulder on the forward end, then a small chisel to connect the two holes to finish simulating the sieve. You could also chuck the dowel in a hand drill if you don't have a lathe.
- 1,354 replies
-
- constitution
- model shipways
-
(and 1 more)
Tagged with:
-
Thanks Rob, and for the likes. I am back in business and it feels great to be back at it. I started by making a new flying jib boom - well really one ad a half as the first one broke when I was half way done. I then carefully undid the rigging from the broken flying jib boom to see if I can salvage any of the lines that are looped over the end of the fjb. A few of the seizings had come undone due to the pressure on the old part, so had to remake the inner martingale stays and the sprit yard parrel. I also had to cut the flying jib stay, as it ran through the sieve on the end of the fjb. I added a new line for it around the fore mast and put the seizings on in place, which is always fun when you are wrapping thread five feet off the floor. I put the flying jib boom in place, after adding the traveler and lines with loops on the end. A few of the lines need to be replaced to get the tension right but the rest look OK. I added a pin to the inner end of the fjb which goes into a hole in the bowsprit cap, and glued the fjb to the cap. A few more lines to fix up here and then I can start on the braces. It looks like I will be starting back to work part time next week but will still have a lot more time in the shop then I did when I worked full time.
- 1,354 replies
-
- constitution
- model shipways
-
(and 1 more)
Tagged with:
-
Dave, I am glad you came through the storm OK. And your bowsprit rigging is excellent.
- 742 replies
-
- constitution
- frigate
-
(and 1 more)
Tagged with:
-
Greg, I used .015 x .040 styrene strips. Thanks for the condolences guys. The shop is all set up and I am making the new flying job boom this afternoon.
- 1,354 replies
-
- constitution
- model shipways
-
(and 1 more)
Tagged with:
-
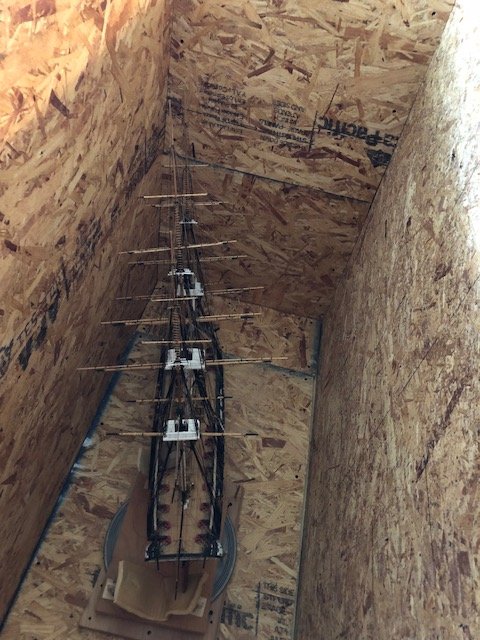
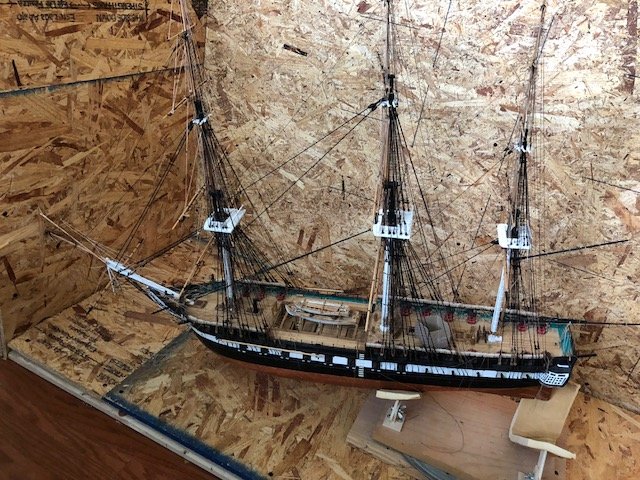
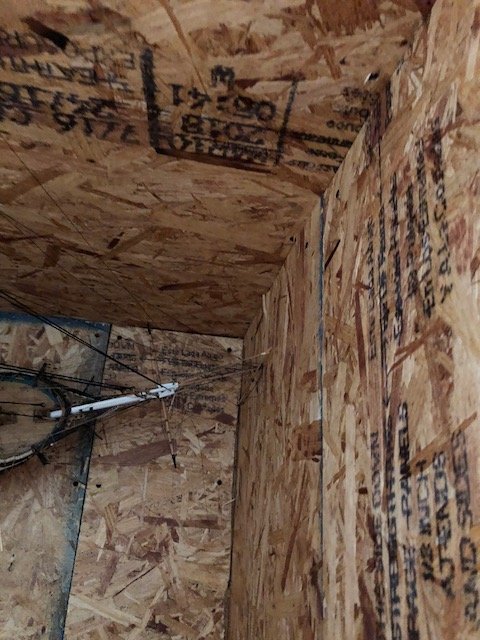
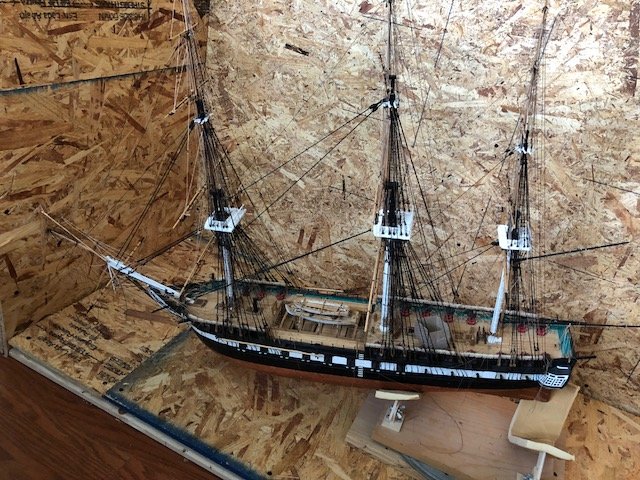
Thanks guys. The wine is just there temporarily, but there is a bottle of Tequila behind it that is staying, for after hours only.😋 So I unpacked enough stuff so that I could uncrate the Connie. I took the top off first and when I looked inside I saw this...😲 As I feared the model slipped out of the cradle during one of the moves, since I had not tied it down. After taking it out of the crate and giving it a good examination, the only damage was the flying jib boom, which is snapped. Not too big a deal but I will have to do some re-rigging after replacing it. I was happy to see the dolphin striker was still in one piece and none of the yards were messed up. So, once the shop is into shape, I will make a new flying jib boom and replace the rigging for it. I did manage to get more unpacked last night, so I am getting there. Now back to unpacking...
- 1,354 replies
-
- constitution
- model shipways
-
(and 1 more)
Tagged with:
-
- 1,354 replies
-
- constitution
- model shipways
-
(and 1 more)
Tagged with:
-
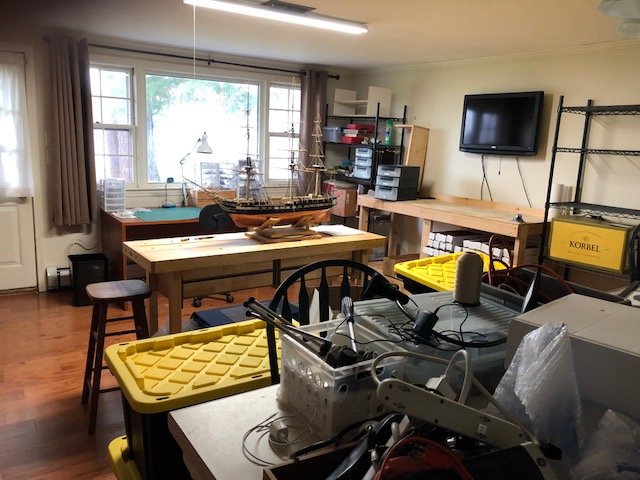
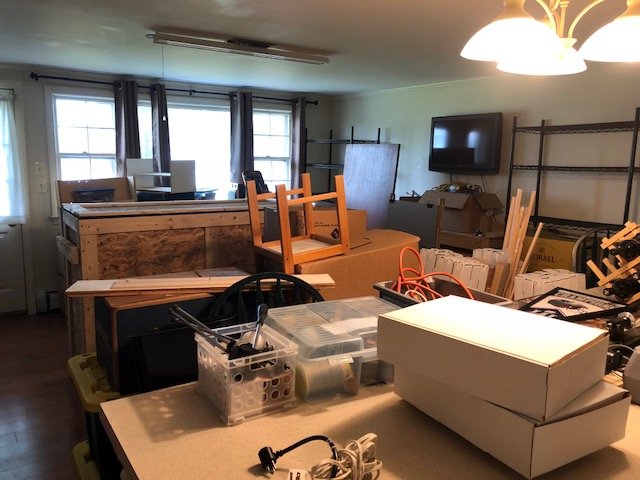
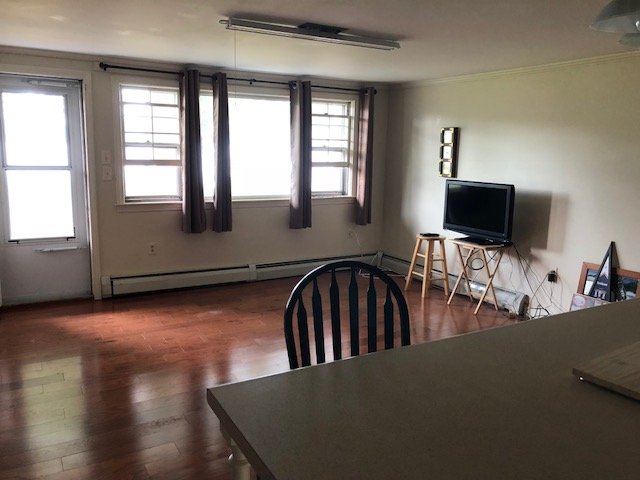
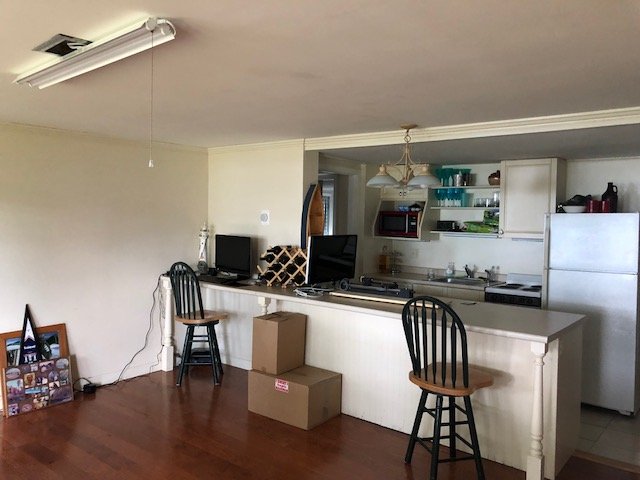
We are getting close to being back into the new shop. Here are a couple of pictures of the space as it looks today. The shop light is installed and the TV will be mounted on the wall tomorrow. The workbenches and other stuff will be coming out of storage on Monday, as will the crate holding the Connie. I'll have pictures next week of uncrating her. I hope there won't be too much damage to address, if any. The kitchen area is left over from when this space was a summer rental. The fridge is now a beer fridge and the sink will be useful in the shop. Plus, there is storage space in the cabinets. Although we thought we were retiring, my wife found a part time Kindergarten aid job 1/2 a mile from here, so she is back to work a few hours a day. When I left my job they asked if I would be willing to work part time from here, so I will be contacting them in a week or so, after I took the summer off. Semi-retirement still feels pretty good.
- 1,354 replies
-
- constitution
- model shipways
-
(and 1 more)
Tagged with:
-
Sorry to hear about your health issues Dave, but the rigging is coming along nicely. Yes, threading those eyebolts was a bit sporting, as they say.
- 742 replies
-
- constitution
- frigate
-
(and 1 more)
Tagged with:
About us
Modelshipworld - Advancing Ship Modeling through Research
SSL Secured
Your security is important for us so this Website is SSL-Secured
NRG Mailing Address
Nautical Research Guild
237 South Lincoln Street
Westmont IL, 60559-1917
Model Ship World ® and the MSW logo are Registered Trademarks, and belong to the Nautical Research Guild (United States Patent and Trademark Office: No. 6,929,264 & No. 6,929,274, registered Dec. 20, 2022)
Helpful Links
About the NRG
If you enjoy building ship models that are historically accurate as well as beautiful, then The Nautical Research Guild (NRG) is just right for you.
The Guild is a non-profit educational organization whose mission is to “Advance Ship Modeling Through Research”. We provide support to our members in their efforts to raise the quality of their model ships.
The Nautical Research Guild has published our world-renowned quarterly magazine, The Nautical Research Journal, since 1955. The pages of the Journal are full of articles by accomplished ship modelers who show you how they create those exquisite details on their models, and by maritime historians who show you the correct details to build. The Journal is available in both print and digital editions. Go to the NRG web site (www.thenrg.org) to download a complimentary digital copy of the Journal. The NRG also publishes plan sets, books and compilations of back issues of the Journal and the former Ships in Scale and Model Ship Builder magazines.


