usedtosail
-
Posts
2,421 -
Joined
-
Last visited
Content Type
Profiles
Forums
Gallery
Events
Everything posted by usedtosail
-
 Thanks guys. Rich - I have been following your log, so I saw your cradle too. This is the first one I have made from scratch, but I had bought the contour gauge last year to prepare for it. When I read about you using wire, I was going to suggest it, but Augie beat me to it. I really like your plastic one, however, as the one I bought is metal, which is why I didn't want to wait until the hull was coppered to use it. I think your cradle is sweet too.
- 1,354 replies
-
- 2
-

-
- constitution
- model shipways
- (and 1 more)
-
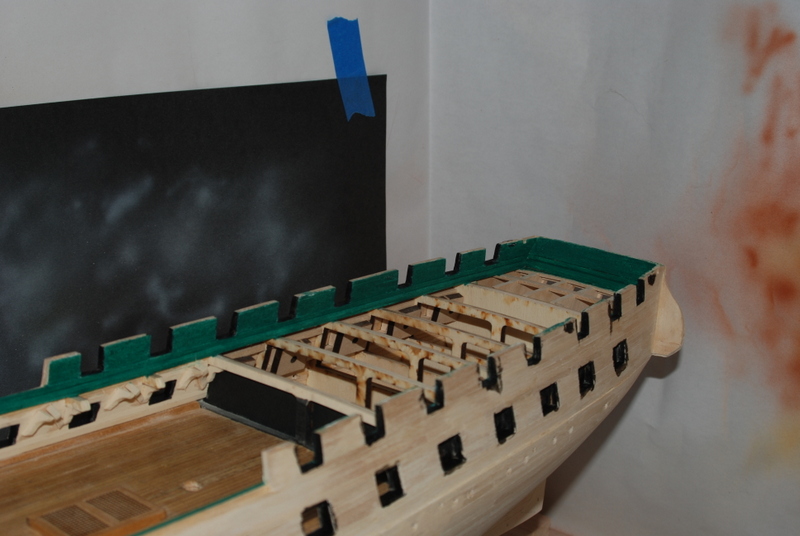
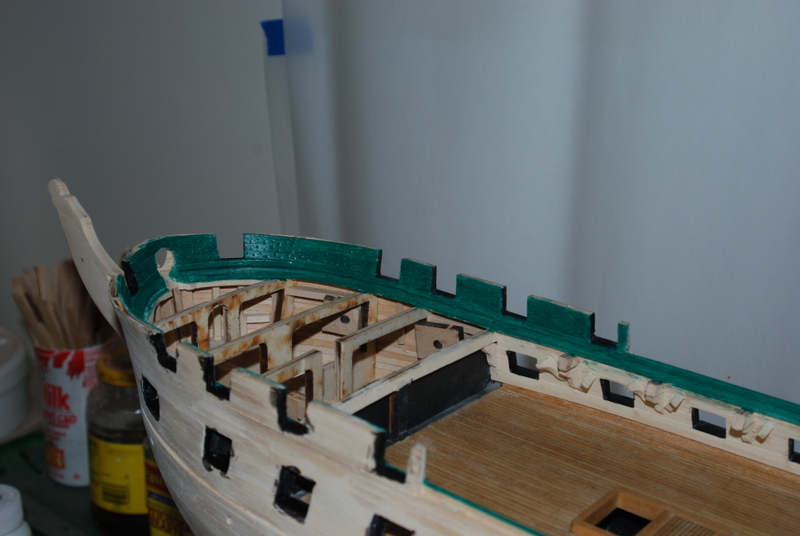
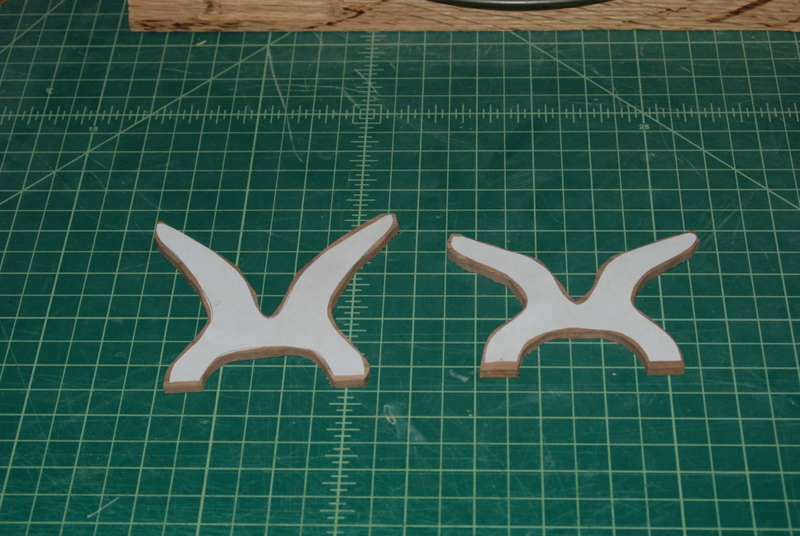
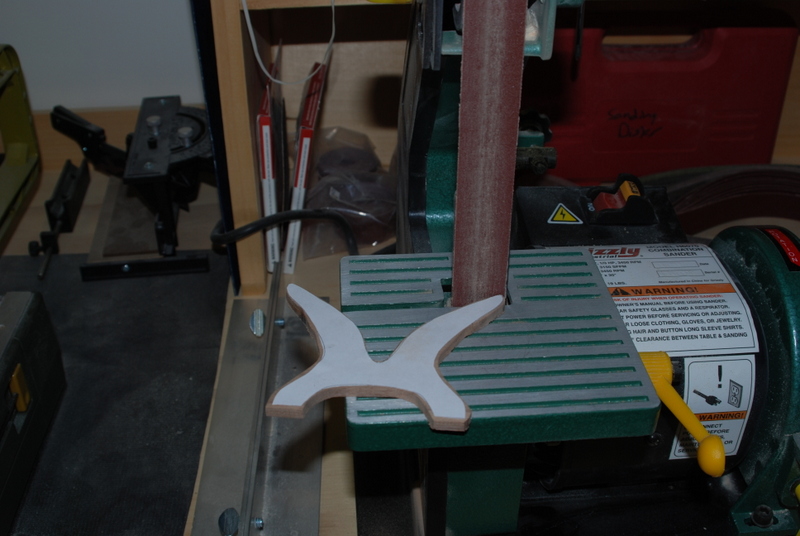
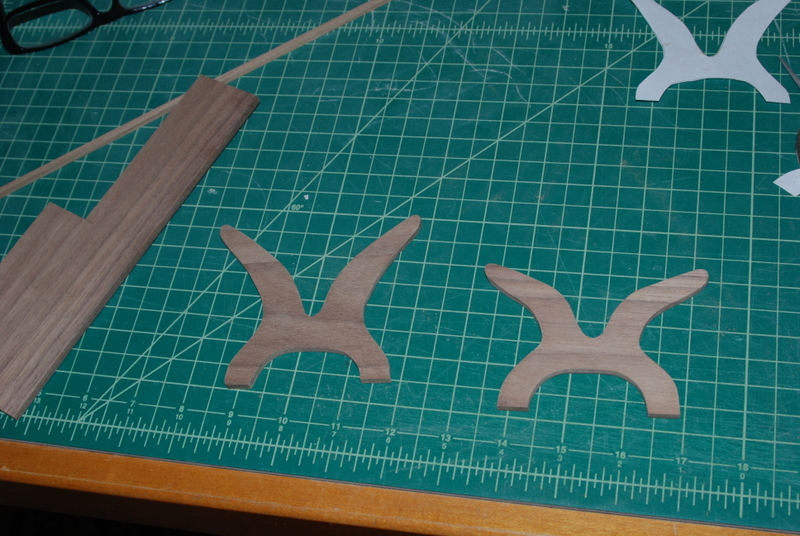
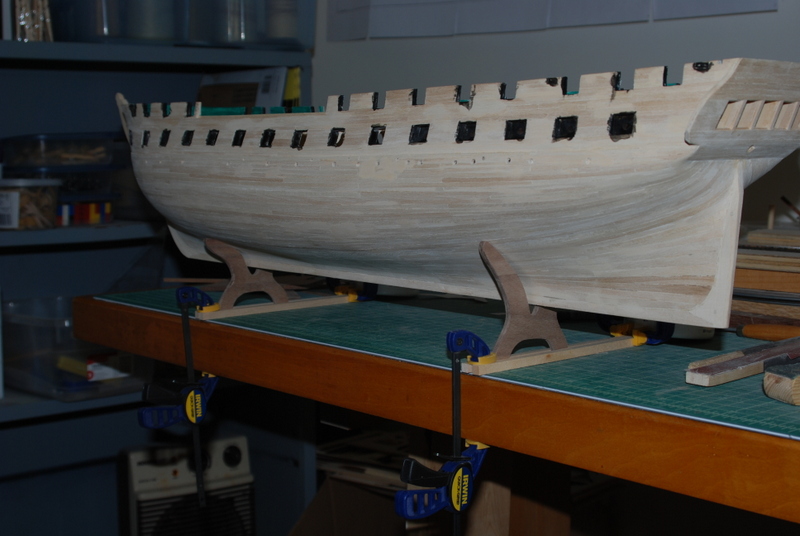
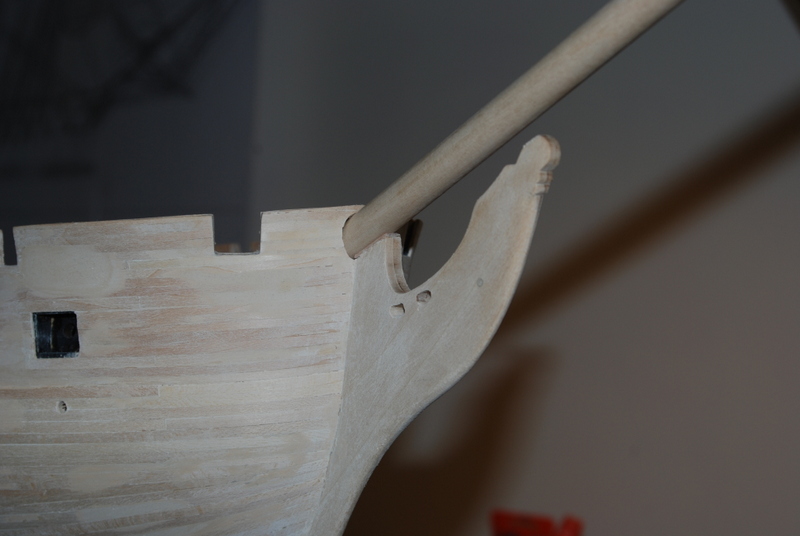
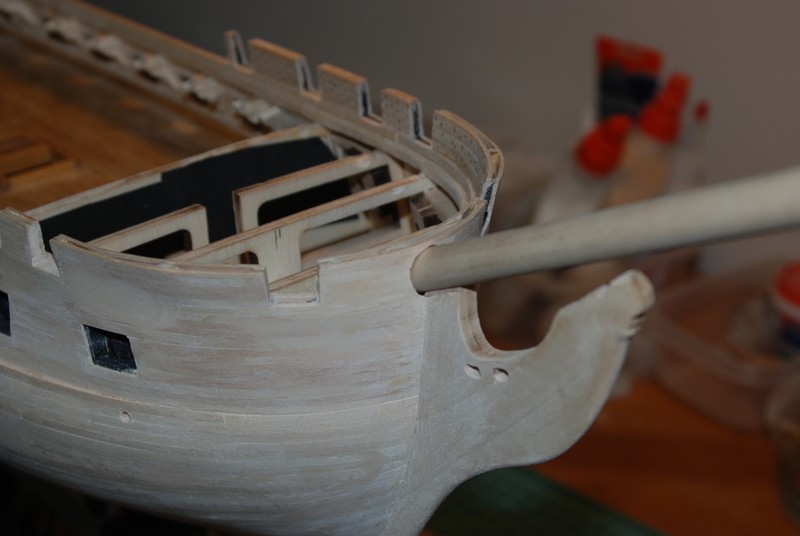
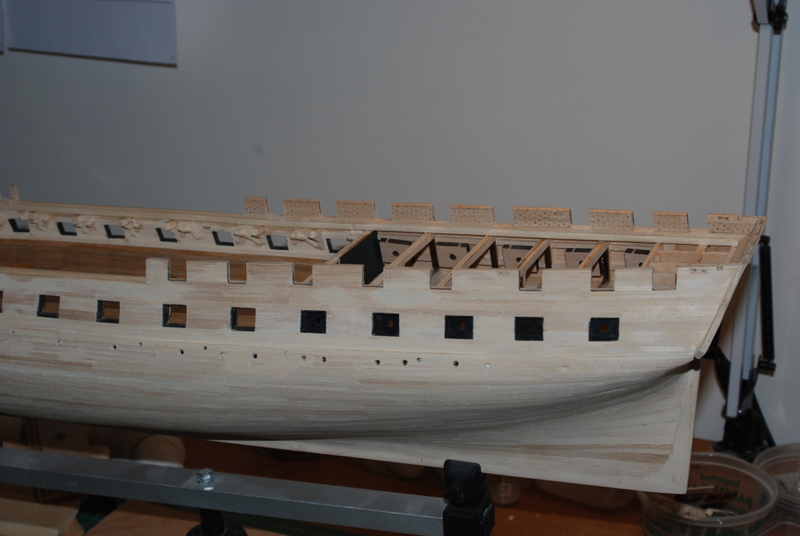
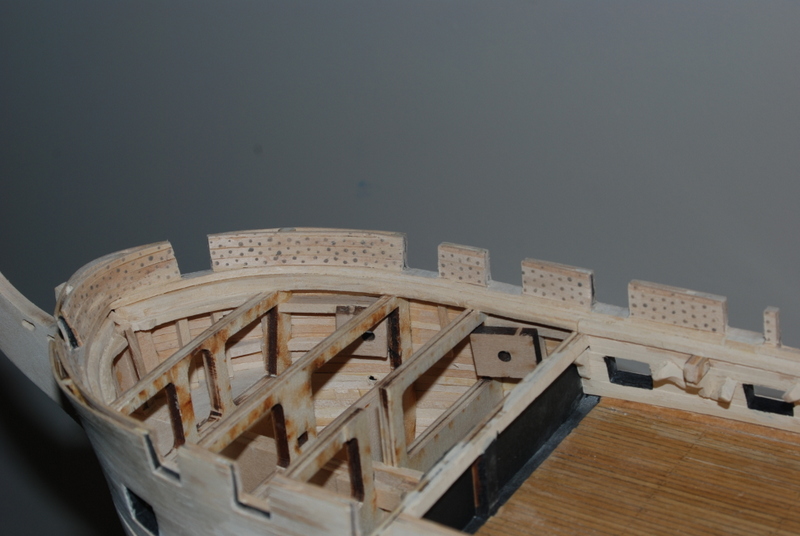
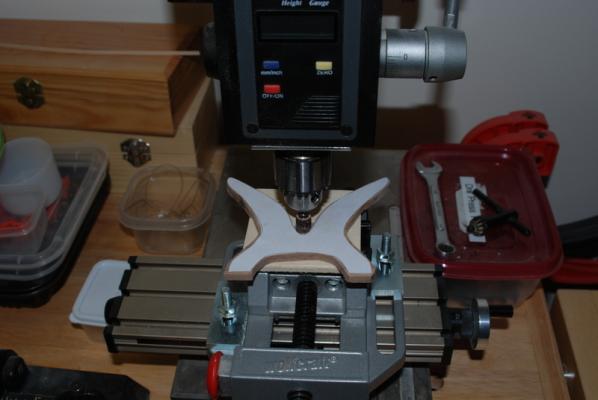
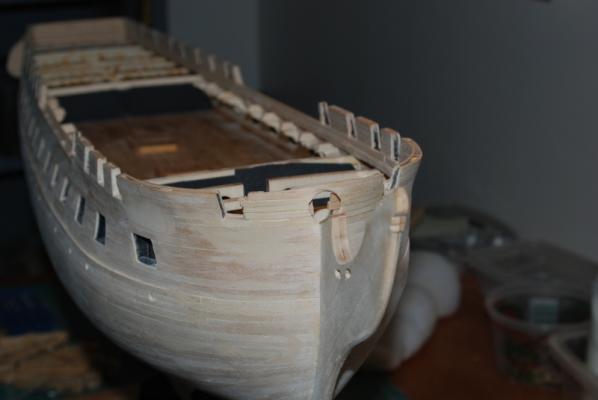
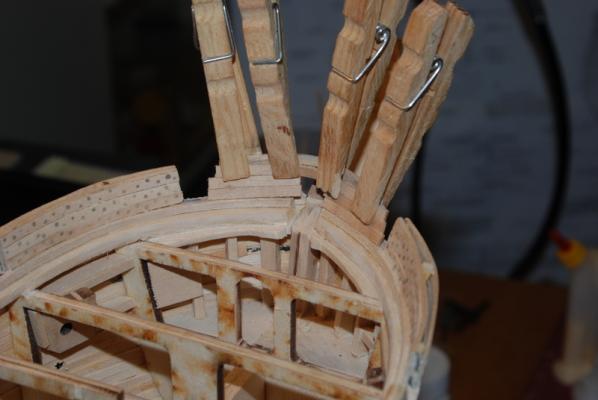
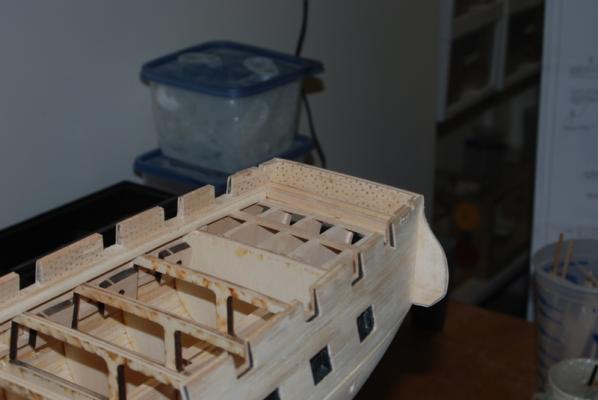
Thanks Patrick, Tim, and George, and for the likes. I finished painting the inner bulwarks. This is five coats of thinned blue/green paint. After these pictures were taken, I touched up the black paint in the spar deck gun ports and the off white paint on the gun deck bulwarks where I slipped with the brush slightly when painting the green. The simulated rivet heads just show under the paint, which I like. Between painting sessions, I made up the rest of the tackles for the gun deck cannons. I also figured it was a good time to make the cradle so I could test the supports before the copper plating was installed. I used a contour gauge to get the shape of the hull at two points, then transferred those shapes to paper and scanned it into a drawing program. I developed the shape of the supports in the drawing program, doing one side then flipping it over to get the other side, so they would be symmetrical. I printed them out on paper and cut them out to test fit on the hull, thinking I might need to make some adjustments. But, they fit really well, so I tacked the shapes to a piece of 1/4" thick walnut and cut them out roughly on the scroll saw. I then used the 1" belt sander and the drill press with a Dremel sanding drum to get down to the final shapes: I then hand sanded the edges and the faces. the walnut tended to have chips along the edges, so I used the Dremel tool with a sanding drum to sand a bevel into the edges to remove the chips. I clamped the supports between two wood strips on the workbench to test fit the supports to the hull: I'll have more pictures of the assembled cradle later. I am now going to make the wood strips that fit across the outside of the hull across the open waist.


- 1,354 replies
-
- 10
-
-
- constitution
- model shipways
- (and 1 more)
-
Those are some great shots of the interior Nigel.
-
HALF MOON by jct - FINISHED - Corel
usedtosail replied to jct's topic in - Kit build logs for subjects built from 1501 - 1750
Looks terrific John. I will certainly be referring back to this wonderful log when I start my Half Moon build in a year or two. -
Sal, that is a nice planking plan. I use something similar though it is not as visually appealing as yours. Your planking looks great too.
-
Looks great, Pat. I have two of those destructors in the house and so far they have been really good.
-
Wow, I just realized that I am starting the second year of this build today. Where does the time go?
- 1,354 replies
-
- 1
-
-
- constitution
- model shipways
- (and 1 more)
-
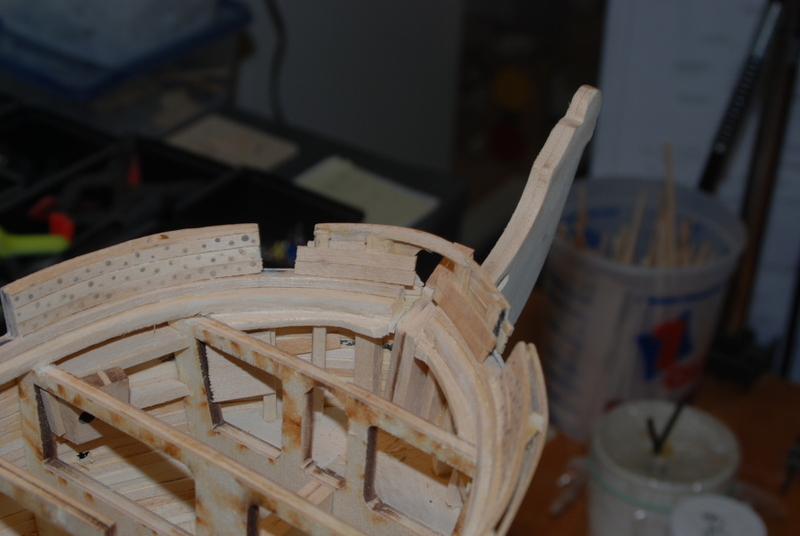
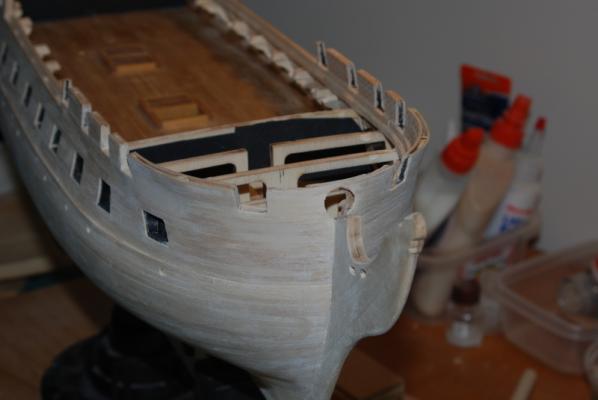
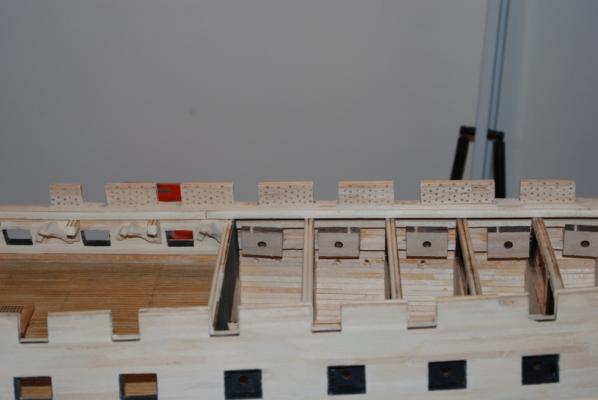
I got to spend some time in the shipyard this weekend, so was able to fix up the area around the bowsprit hole. The outer hull planking was pretty straight forward and I cut the plank sections to fit around the bowsprit. Here they are before sanding: And here is the bow after sanding: On the inside, I decided to take the bowsprit out and plank over the edges of the hole, then file the hole out later. Here are the four planks that are cut by the bowsprit: The next plank up is partially cut by the bowsprit, so I added it as a full plank to be filed later. None of these planks are glued in yet, as I still have to add the rivet heads to them after they are bent: I added the rivet heads and glued these planks in, then used a rat tail file to enlarge the hole, filing slowly and easily so as not to dislodge the plank ends. I then bent the top plank which is a narrow plank, added the rivet heads, glued it in, then sanded it down to make it flush with the rest of the bulkhead: And here is the inner bow with the bowsprit dry fit: And the outer bow with the bowsprit: I will add a little filler around the outer hole when the bowsprit is permanently added much later. You may also see a small piece of wood on the stem, which is there to fill a gap between the bowsprit and the stem. I sanded out the sides of the two openings to the head, then gave all the spar deck gun ports a final sanding with a square sanding stick and some fine sandpaper. I used a tack cloth to clean out the gun ports, than painted the insides of them black. I also touched up the black paint around the gun deck gun ports, especially the insides of the rabbets. I will now mix up the green paint for the inner bulwarks. I mixed up a batch last night but it looked too green this morning.


- 1,354 replies
-
- 8
-
-
- constitution
- model shipways
- (and 1 more)
-
Andy, that is a great way to display both models.
-
Thanks Guys. Tim, you are exactly right. If I were build this again, I would put supports across the bow and especially between bulkheads A and B, to get those curves better.
- 1,354 replies
-
- 1
-
-
- constitution
- model shipways
- (and 1 more)
-
Thanks guys. I think part of the problem, besides my inability, was that the planks are not supported right at the bow, so there was a lot of flex in them while drilling. The outside planks were also very thin from sanding, kind of like an eggshell.
- 1,354 replies
-
- 1
-
-
- constitution
- model shipways
- (and 1 more)
-
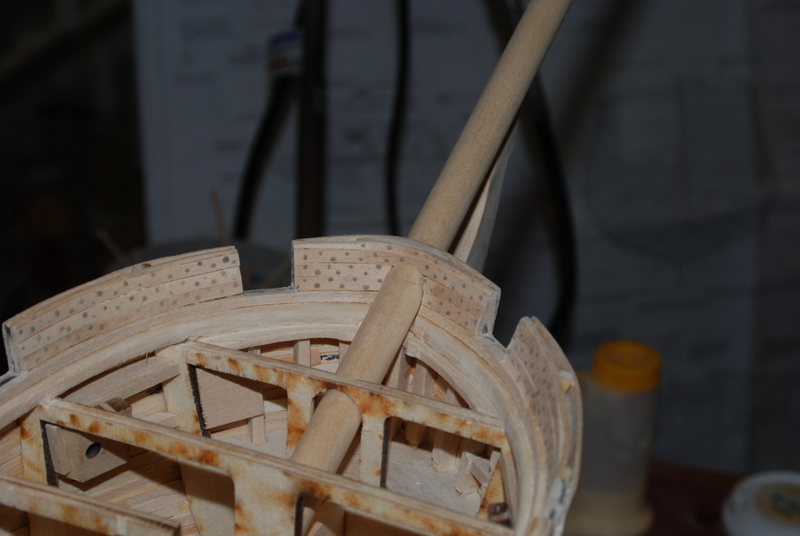
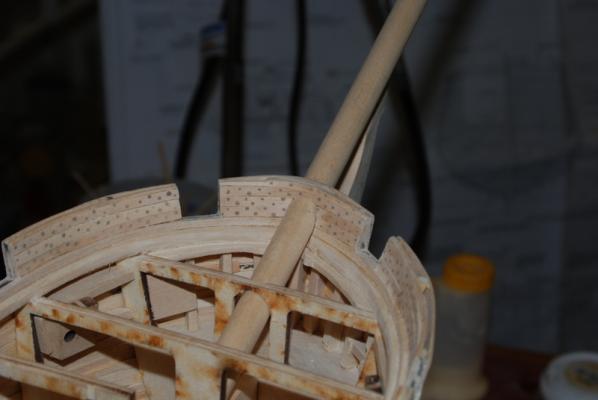
I finished cleaning up all the spar deck gun ports: I then drilled the hole for the bowsprit in the bow. I got a little carried away though The outer plank ends were a bit splintered so, I took them off and will replank there to plank around the bowsprit. I cut the tenon into the end of the dowel that will become the bowsprit so it is centered correctly and I can take it in and out and get it back to the same place. I took the inside planks off because they were not bent enough in the center and the bulwark was too thick at the bow. I will bend new plank sections there, again cut around the bowsprit, then add the rivet heads before gluing them in. it will be a little slow because I can only do one plank at a time on each side. In the mean time, I want to clean up the spar deck waterways and sheer plank a bit, as they are rough in spots, especially around the curve of the bow. Then I will paint the insides of the spar deck gun ports black, then mix up some green paint for the inside bulwarks and paint them. Luckily I have a few days off from work, so maybe this will all get done by early next week.


- 1,354 replies
-
- 9
-
-
- constitution
- model shipways
- (and 1 more)
-
Fletch, I am glad to see you are going with a five window configuration. I like your logic. I did it to match the Corne painting, but it also meant I could use the supplied transom extensions, with a little modification. I don't feel so alone now.
-
Wow. First human hair, now bird poop. You are indeed a master. I love it. Have a happy new year Captain. (I guess it is already 2015 where you are)
- 625 replies
-
- 3
-
-
- bounty launch
- model shipways
- (and 1 more)
-
That's a really nice spreadsheet, Captain. It will be a big help to those building the Bounty Launch model.
-
Really nice Bill. Have fun with the boats, table and case.
- 335 replies
-
- 2
-
-
- Constitution
- Mamoli
- (and 3 more)
-
Looks great so far Fletch. I can't wait to see your full gun deck and your take on the stern.
-
Thanks George. I used the tip of a toothpick, which I blunted a bit. I had to keep wiping built up glue off the tip as I went, or the dots would get bigger.
- 1,354 replies
-
- 1
-
-
- constitution
- model shipways
- (and 1 more)
-
Thanks Captain and Patrick and the likes. Patrick, I agree that the rivet detail really adds to the model. The other builds I have seen on this site that have added it really blow me away. I had to add it too.
-
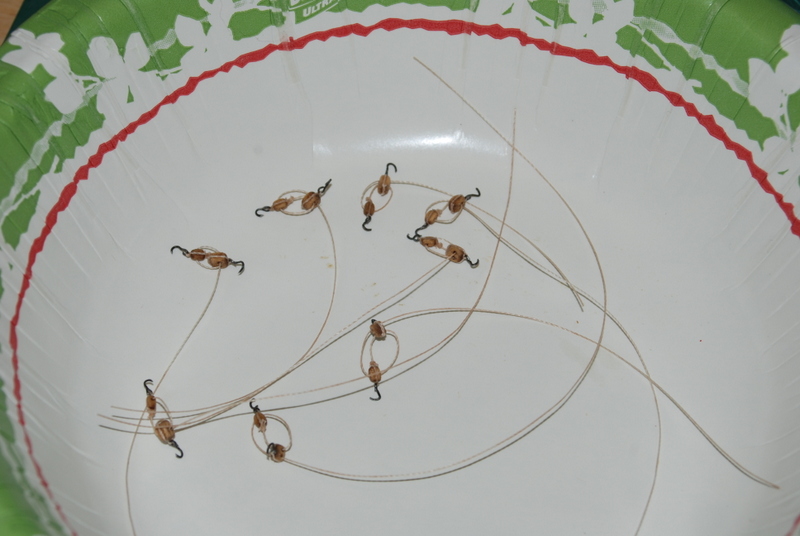
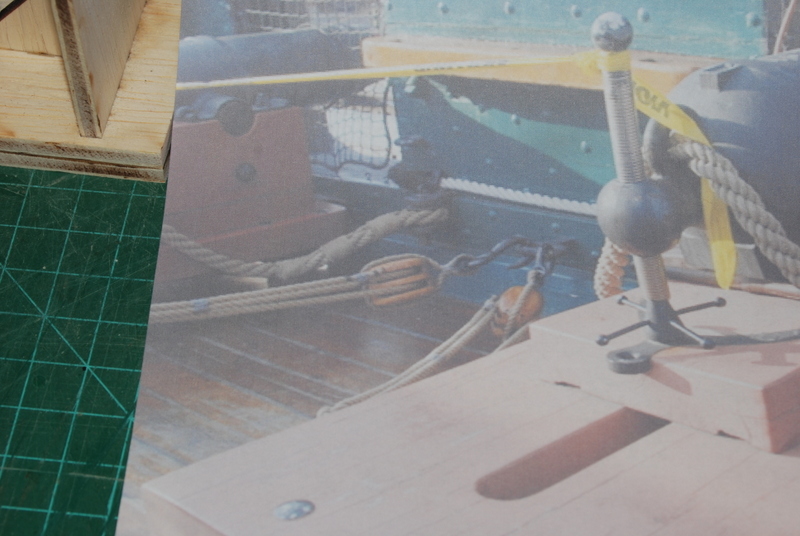
I finished replacing the inner bulwark planking with the glue drop riveted planks. I sanded the spar deck gun ports on the starboard side so they were square. I used a sanding stick for the sides, but this time I did not sand all the way to the bottom of the gun ports. I cleaned up the bottom of the sides with a riffler file that did not have teeth on the sides, so I didn't sand into the sill like I did the first time. I then finished the interior of the gun ports with a smooth emery stick. I also used the sanding stick to get the tops of the bulwarks flat. I still have to do this on the port side, but that will have to wait a few days. Here is how they came out: While planking the bulwarks, I had some time waiting for the glue to dry, so I made up some of the gun tackles for the gun deck cannons. I had cleaned up the blocks and made some hooks, so I wanted to put them together to see how they would look and to gauge the size against the gun carriages. Here is a shot of the tackles: I used this picture from the present Constitution as a guide: At first I thought the hooks might be too big, but they are about the same length as the small blocks, which is about right. Also, they are about as small as I can make them. The length should be OK too, as long as I put the eyebolts in the bulwarks in the middle between the gun ports, as the current Conny has them. Have a very merry Christmas everyone.


- 1,354 replies
-
- 7
-
-
- constitution
- model shipways
- (and 1 more)
-
Happy Holidays, Ed. I am hoping to get something with your name on it under the tree tomorrow. I left enough hints, I think.
- 3,618 replies
-
- 2
-
-
- young america
- clipper
- (and 1 more)
-
Sounds like a good plan, Pops. It will look great that way.
-
Or is the rudder shipped but the tiller is unshipped? To me it looks like the top of the rudder is between the crane extensions, but the tiller is not there. Either way will work, though.
-
mini drill chuck for those small drill bits
usedtosail replied to AON's topic in Modeling tools and Workshop Equipment
I use this one from Model Expo: http://www.modelexpo-online.com/product.asp?ITEMNO=EN409C It takes a bit of fiddling to get those small drill bits centered in the chuck, but after that it works pretty well.