HOLIDAY DONATION DRIVE - SUPPORT MSW - DO YOUR PART TO KEEP THIS GREAT FORUM GOING! (Only 72 donations so far out of 49,000 members - Can we at least get 100? C'mon guys!)
×
.JPG.ca33079f5815b861e67b9c2cccd37982.JPG)

Blue Ensign
-
Posts
4,564 -
Joined
-
Last visited
Content Type
Profiles
Forums
Gallery
Events
Everything posted by Blue Ensign
-
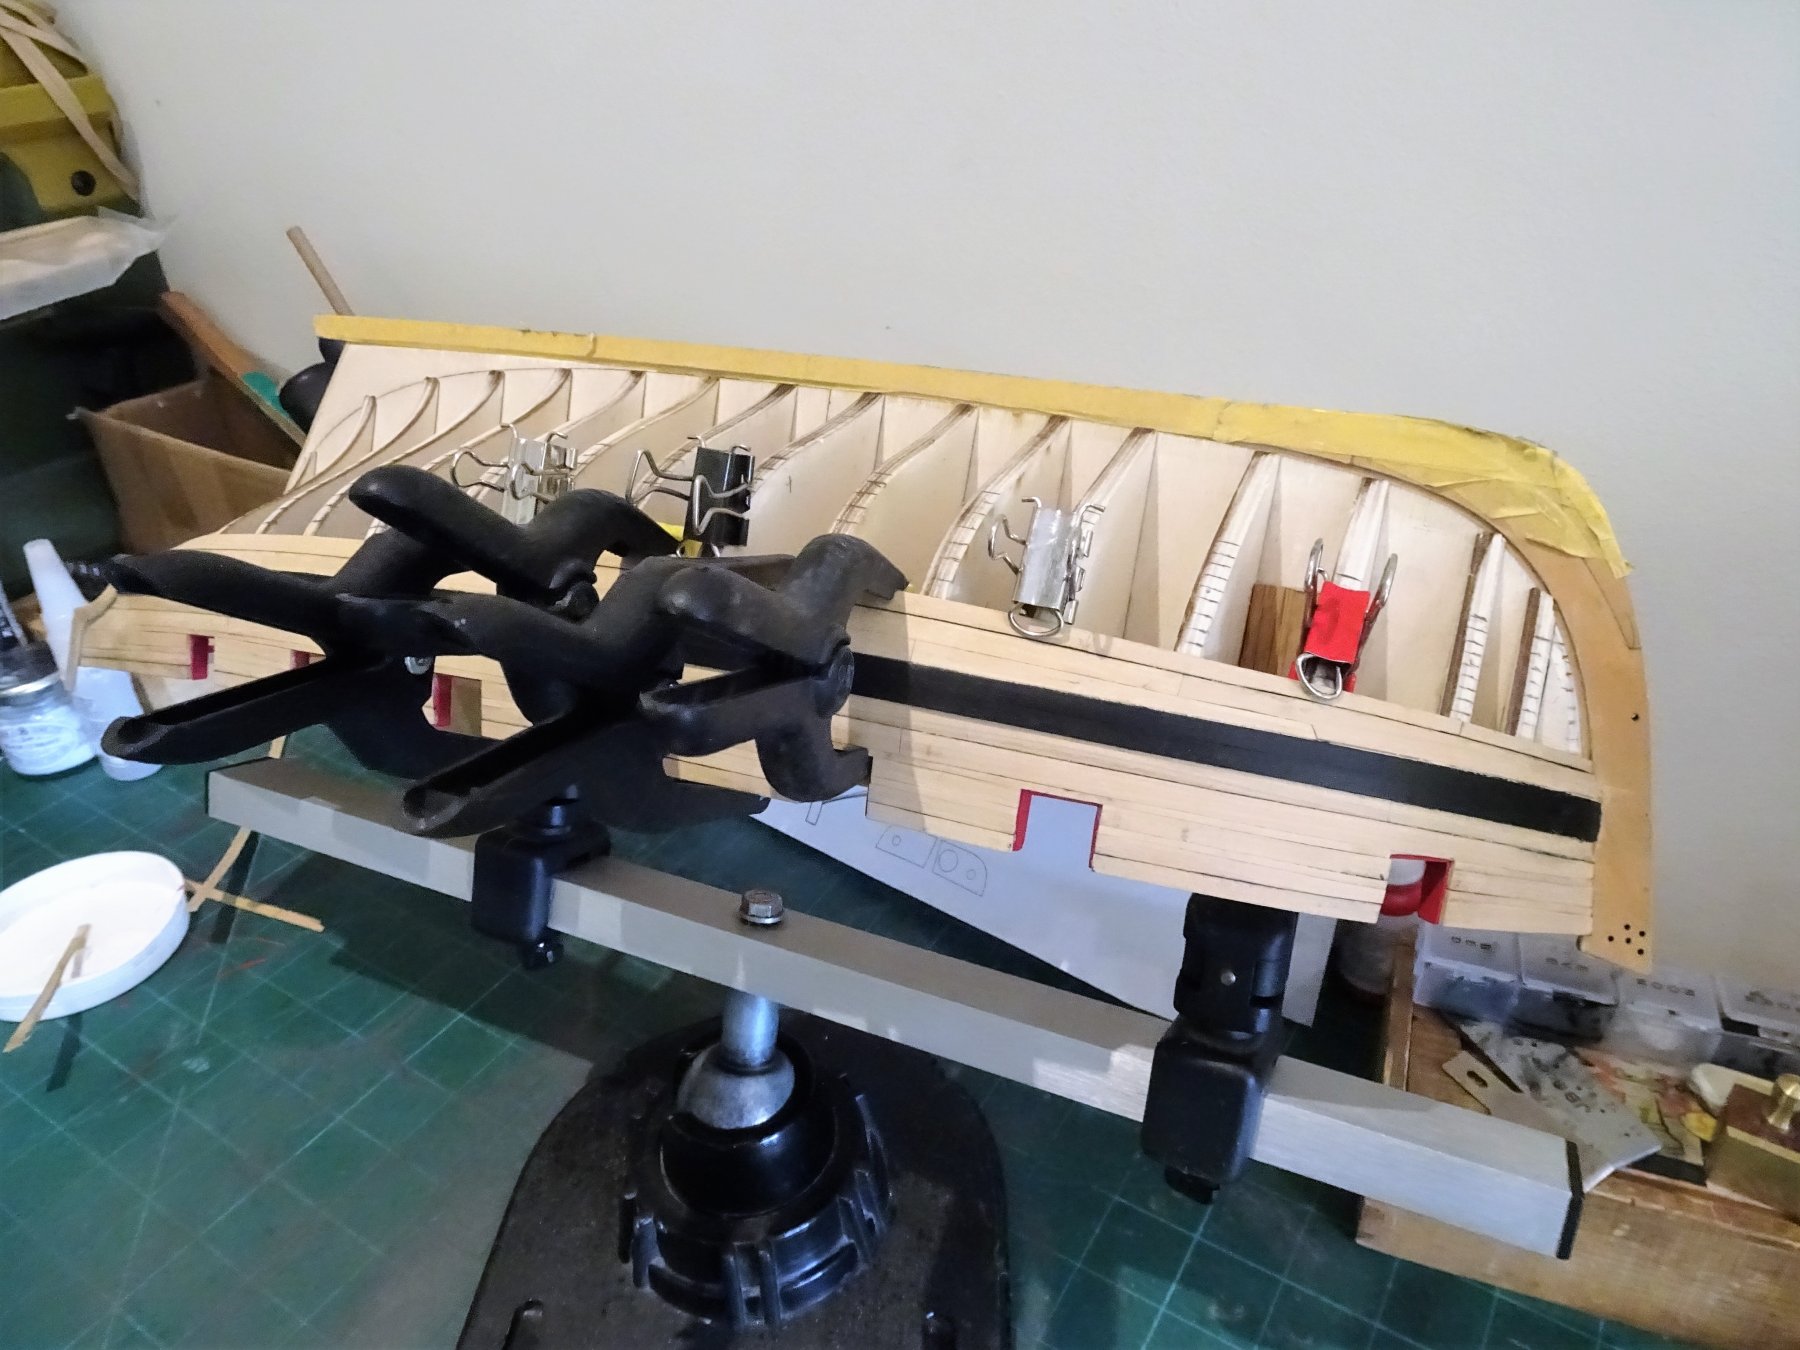
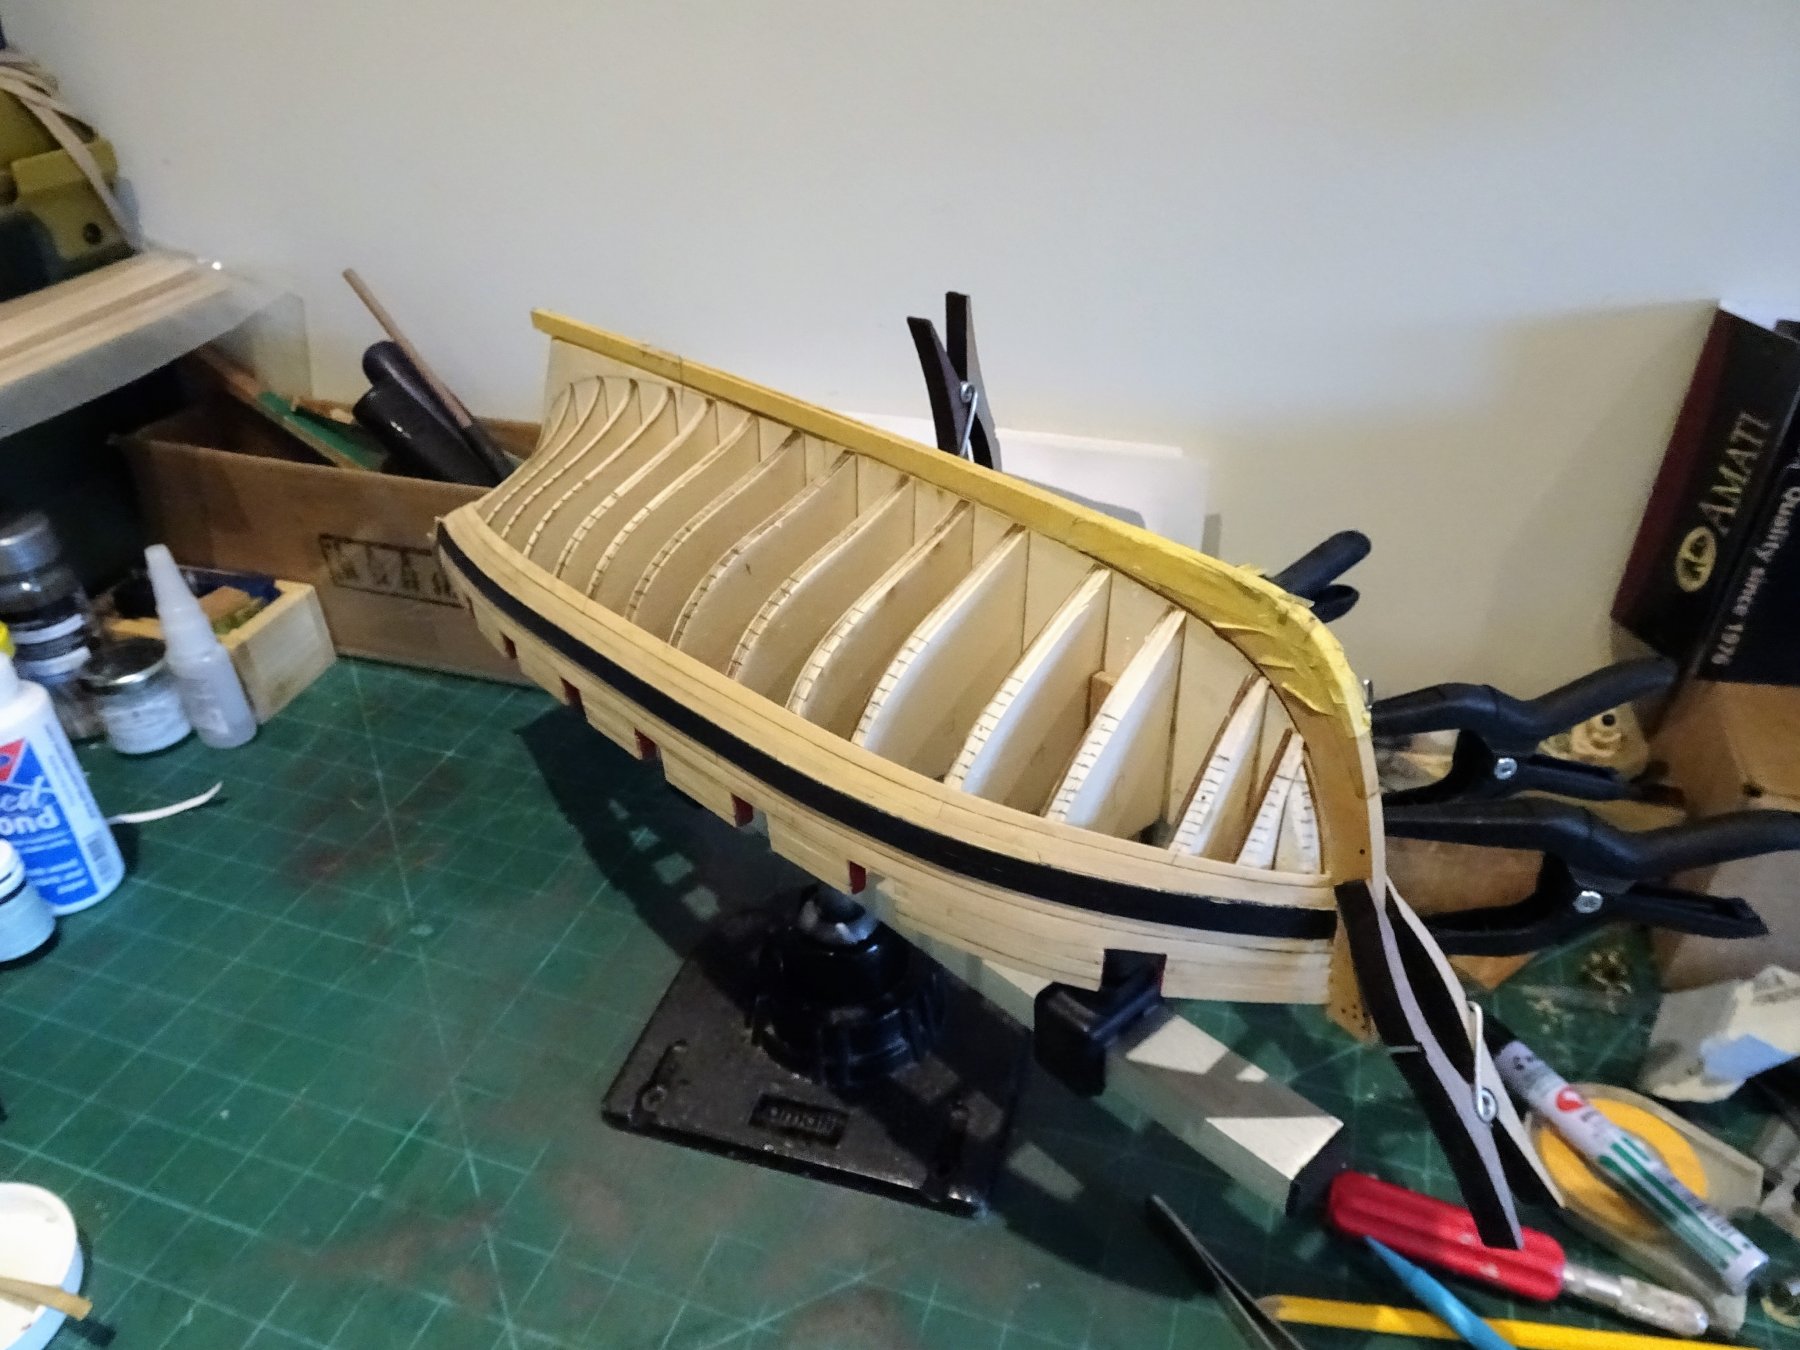
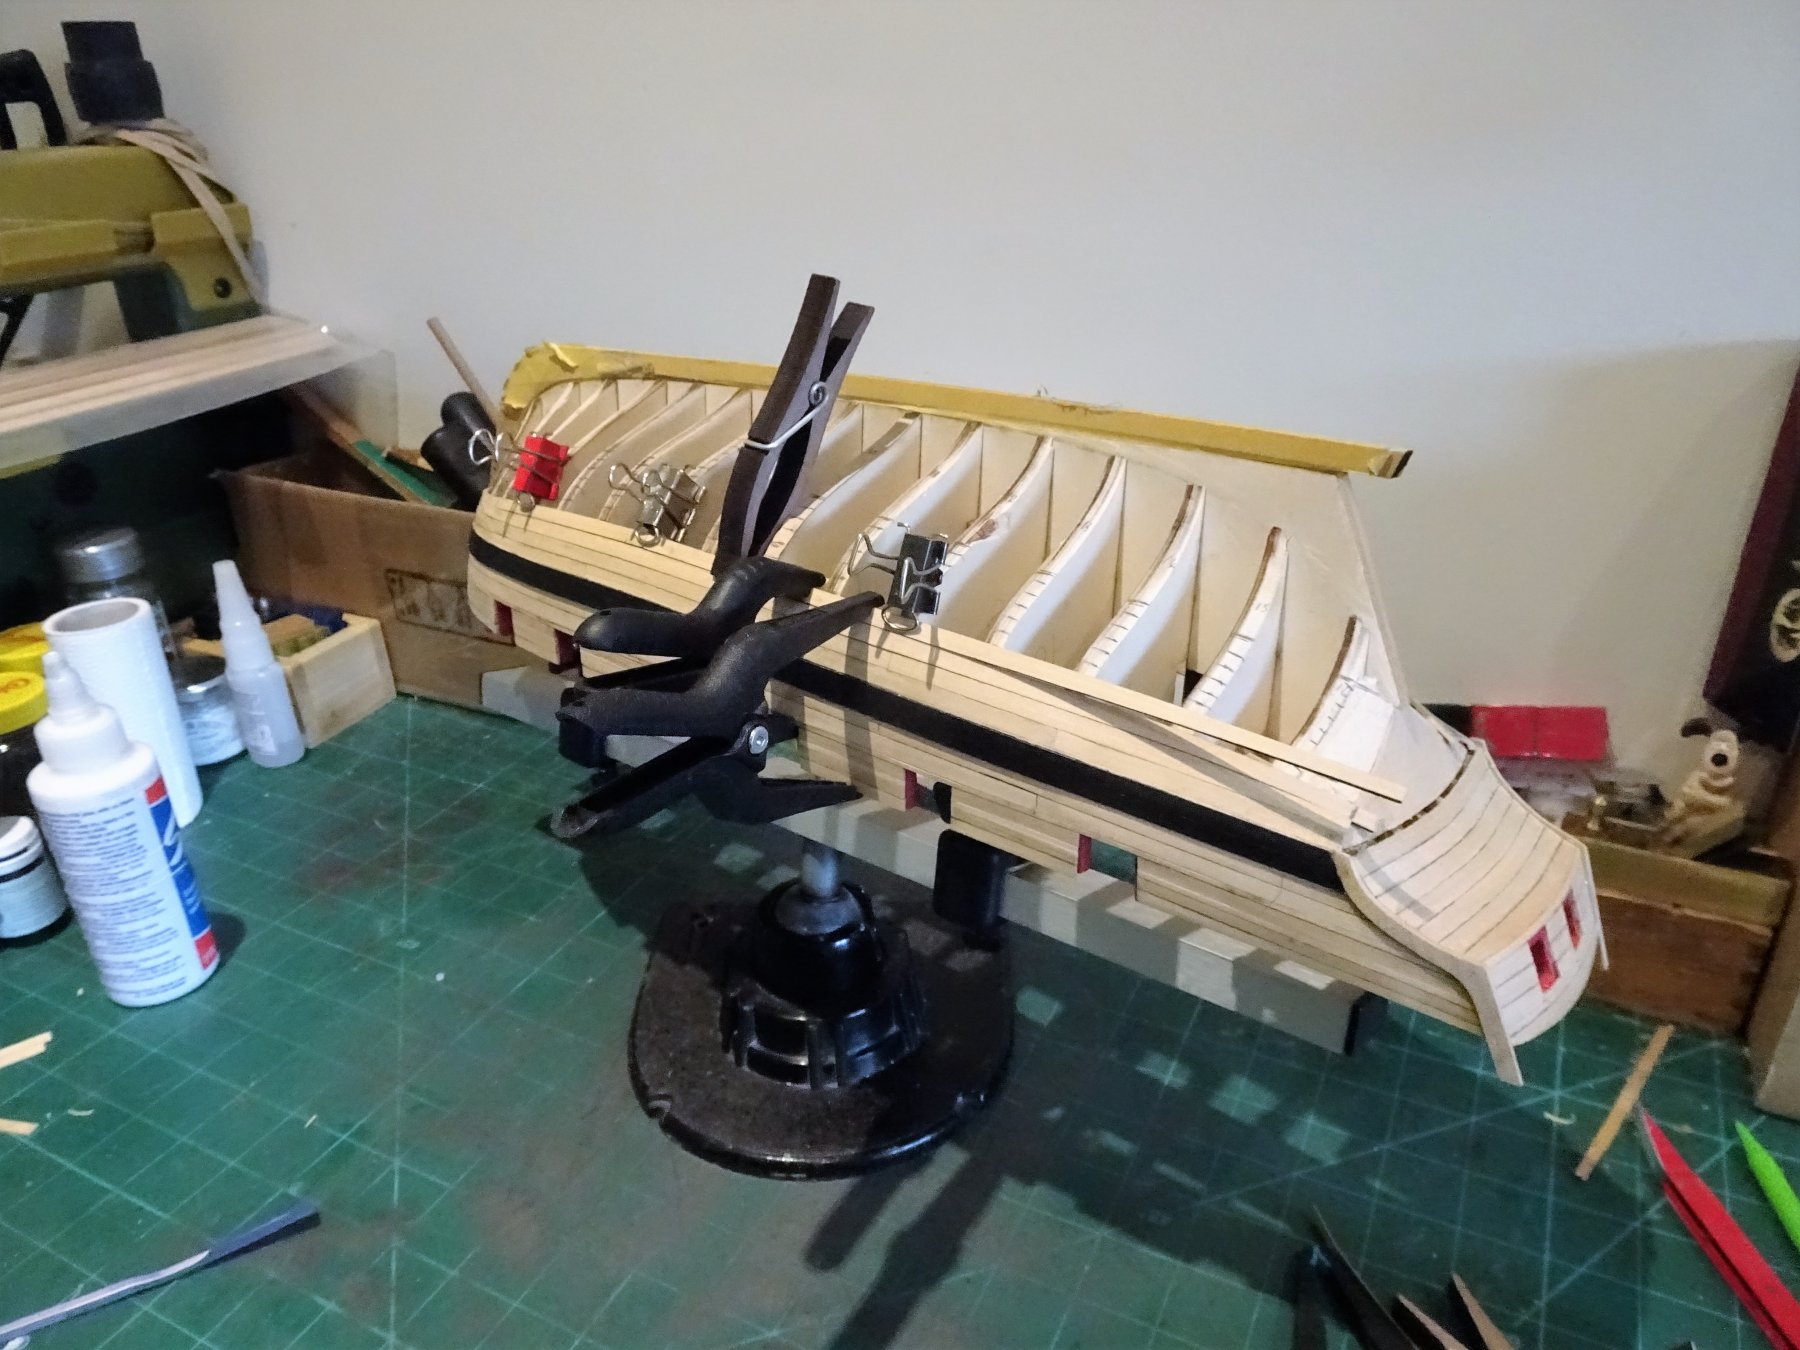
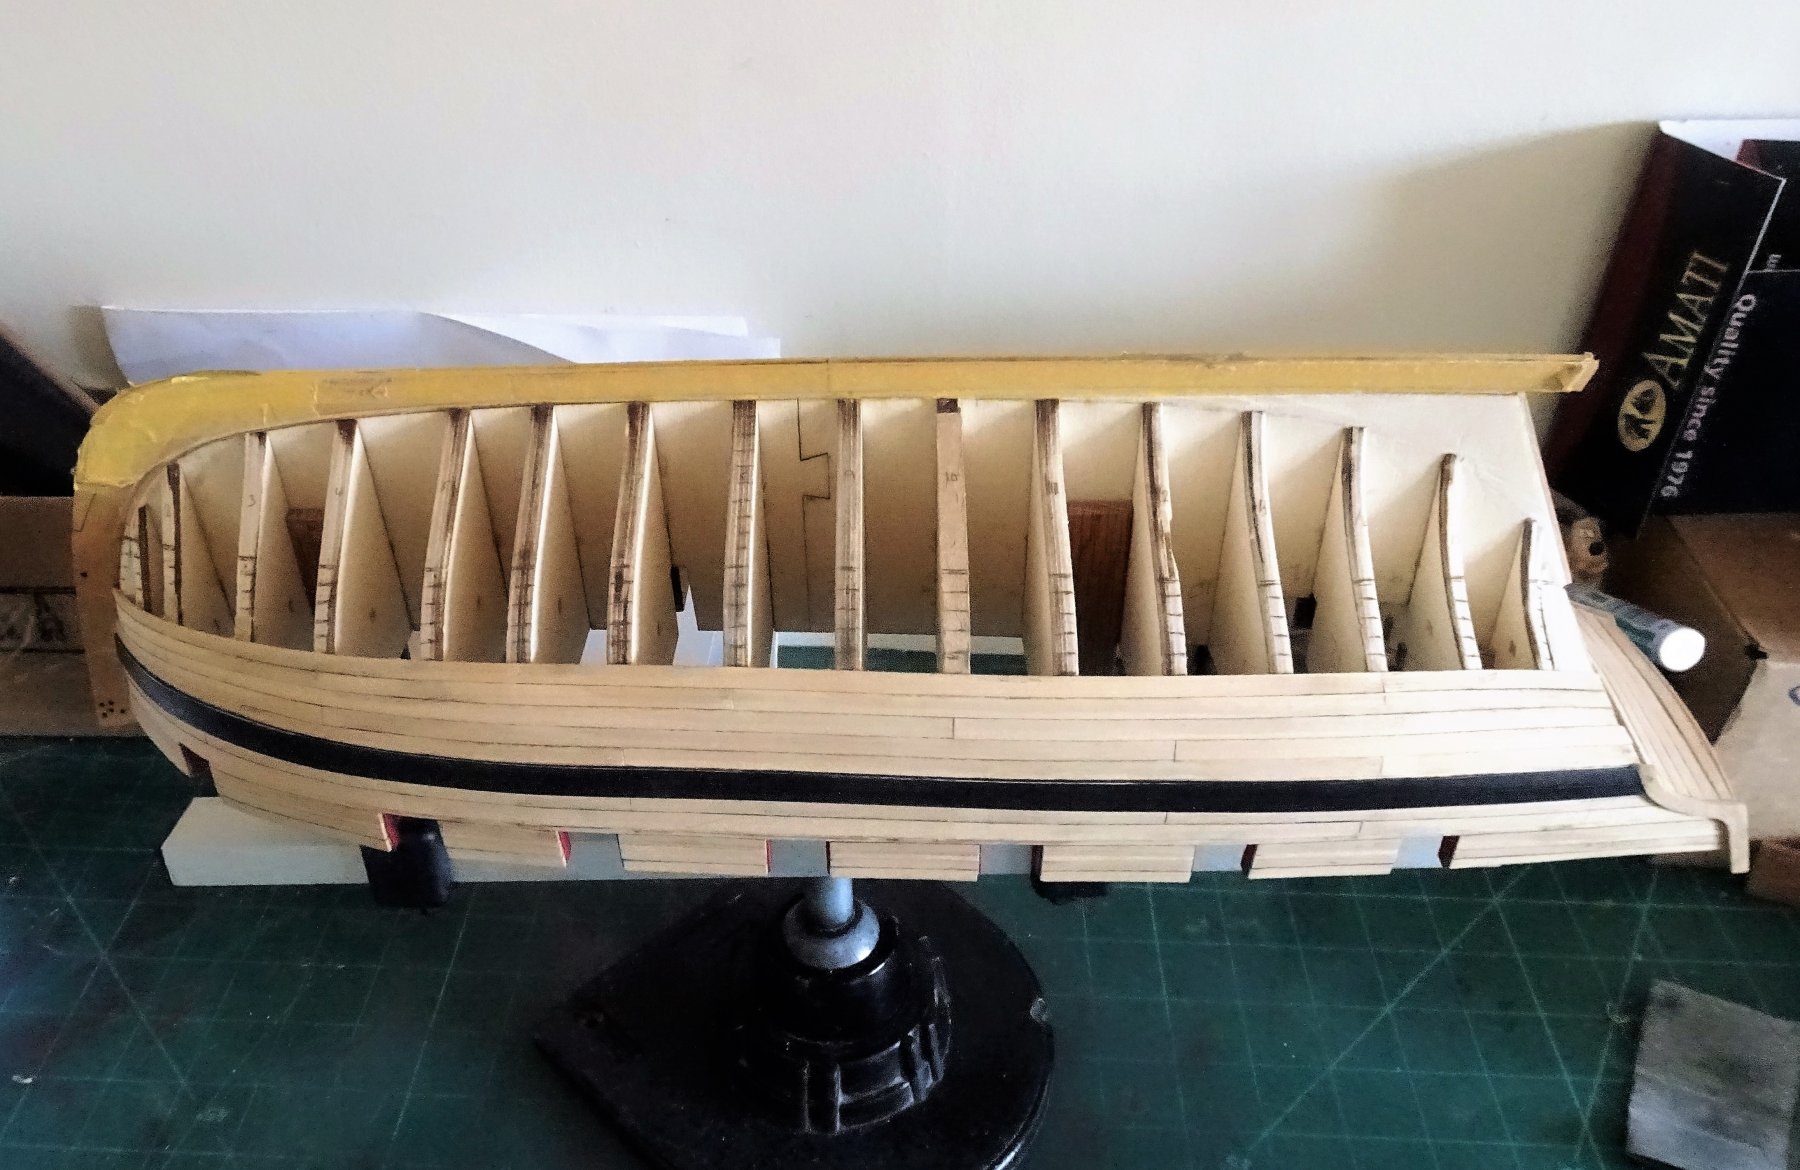
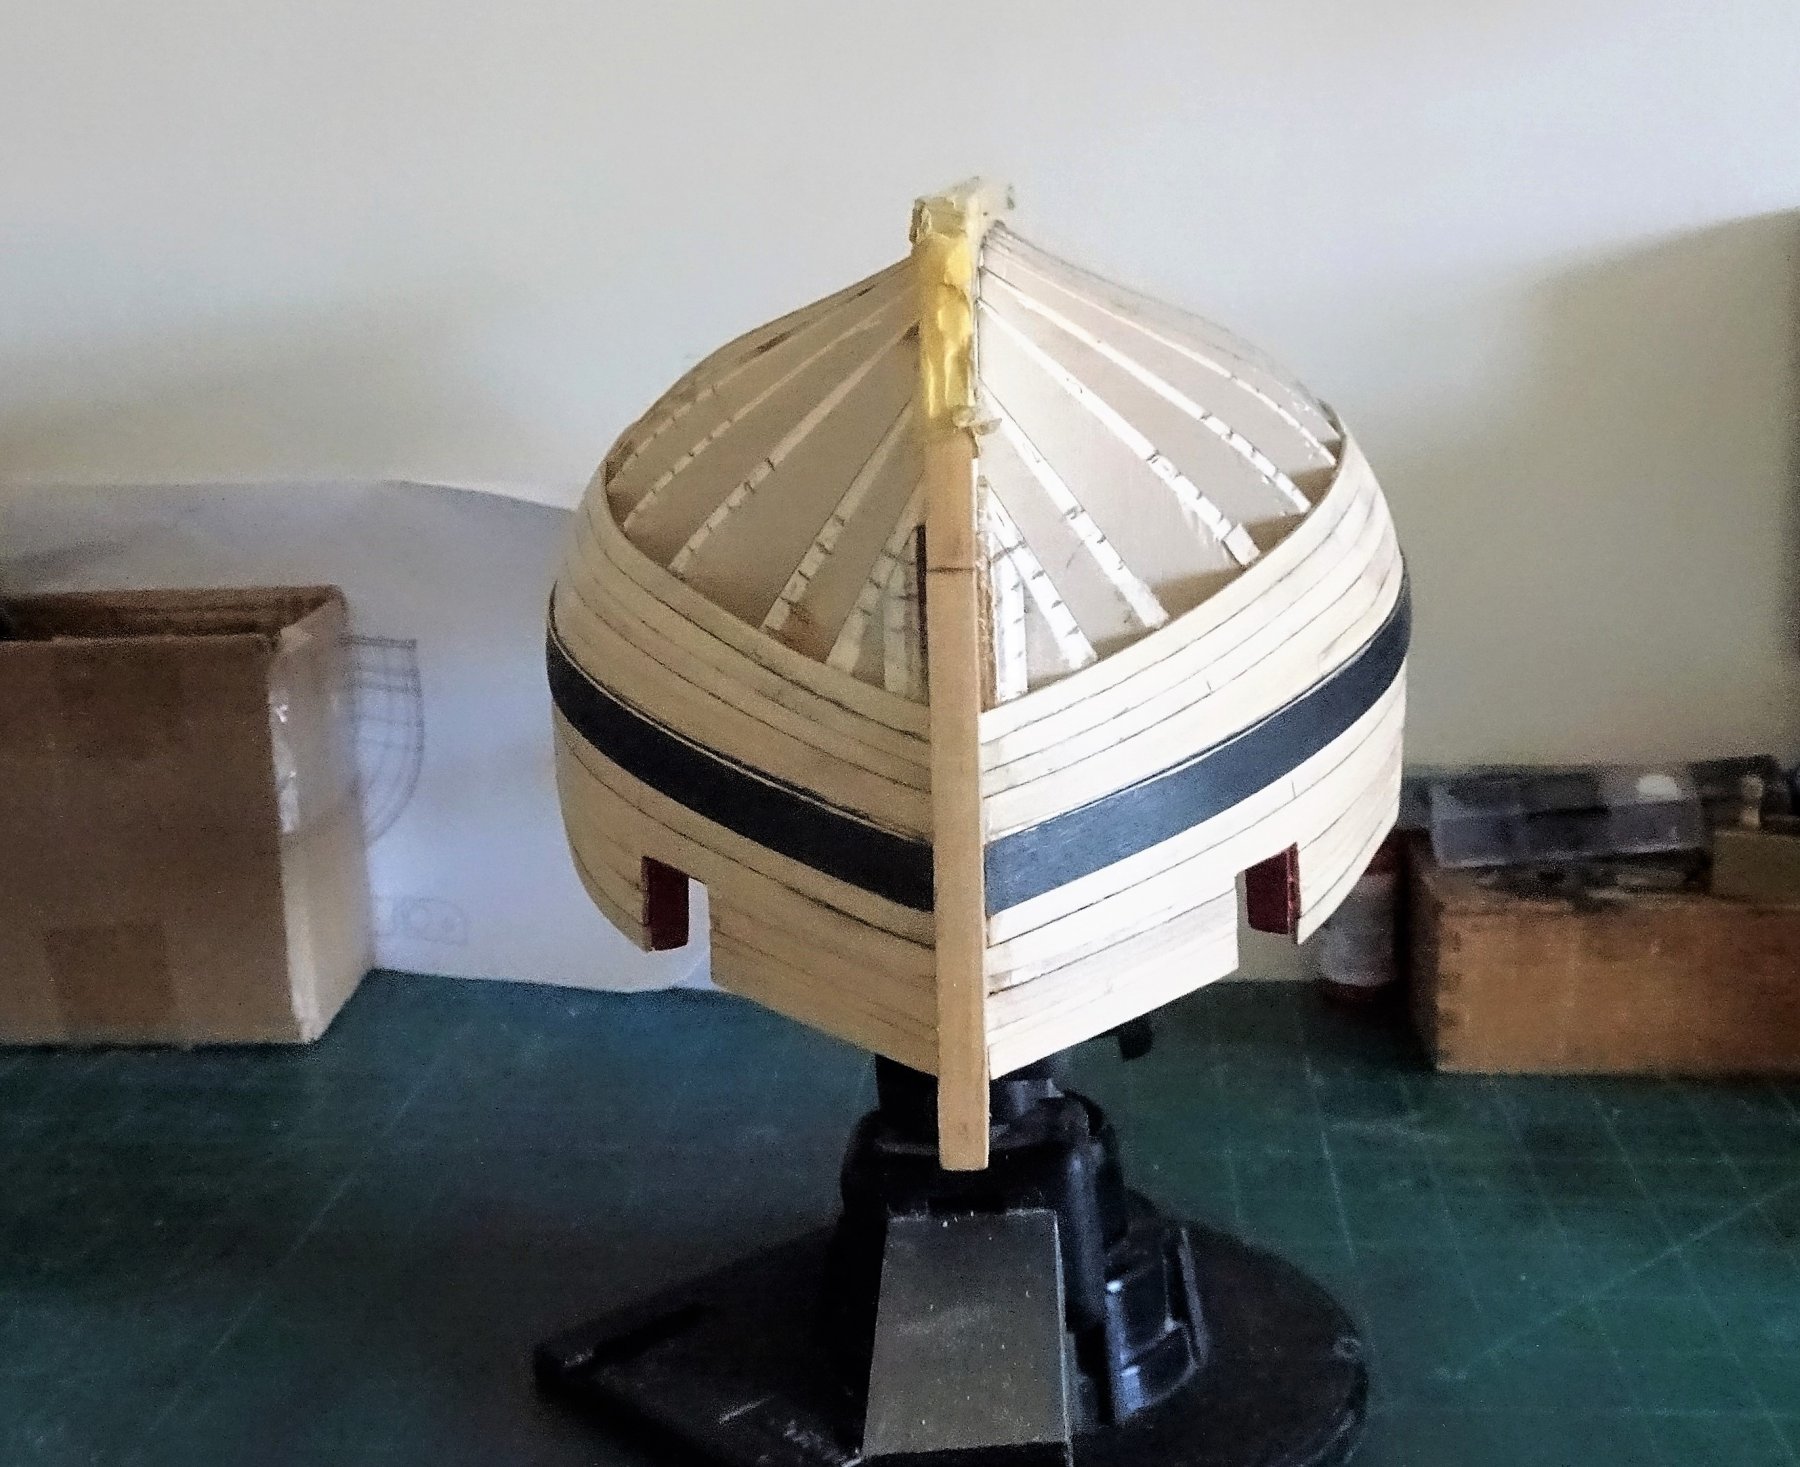
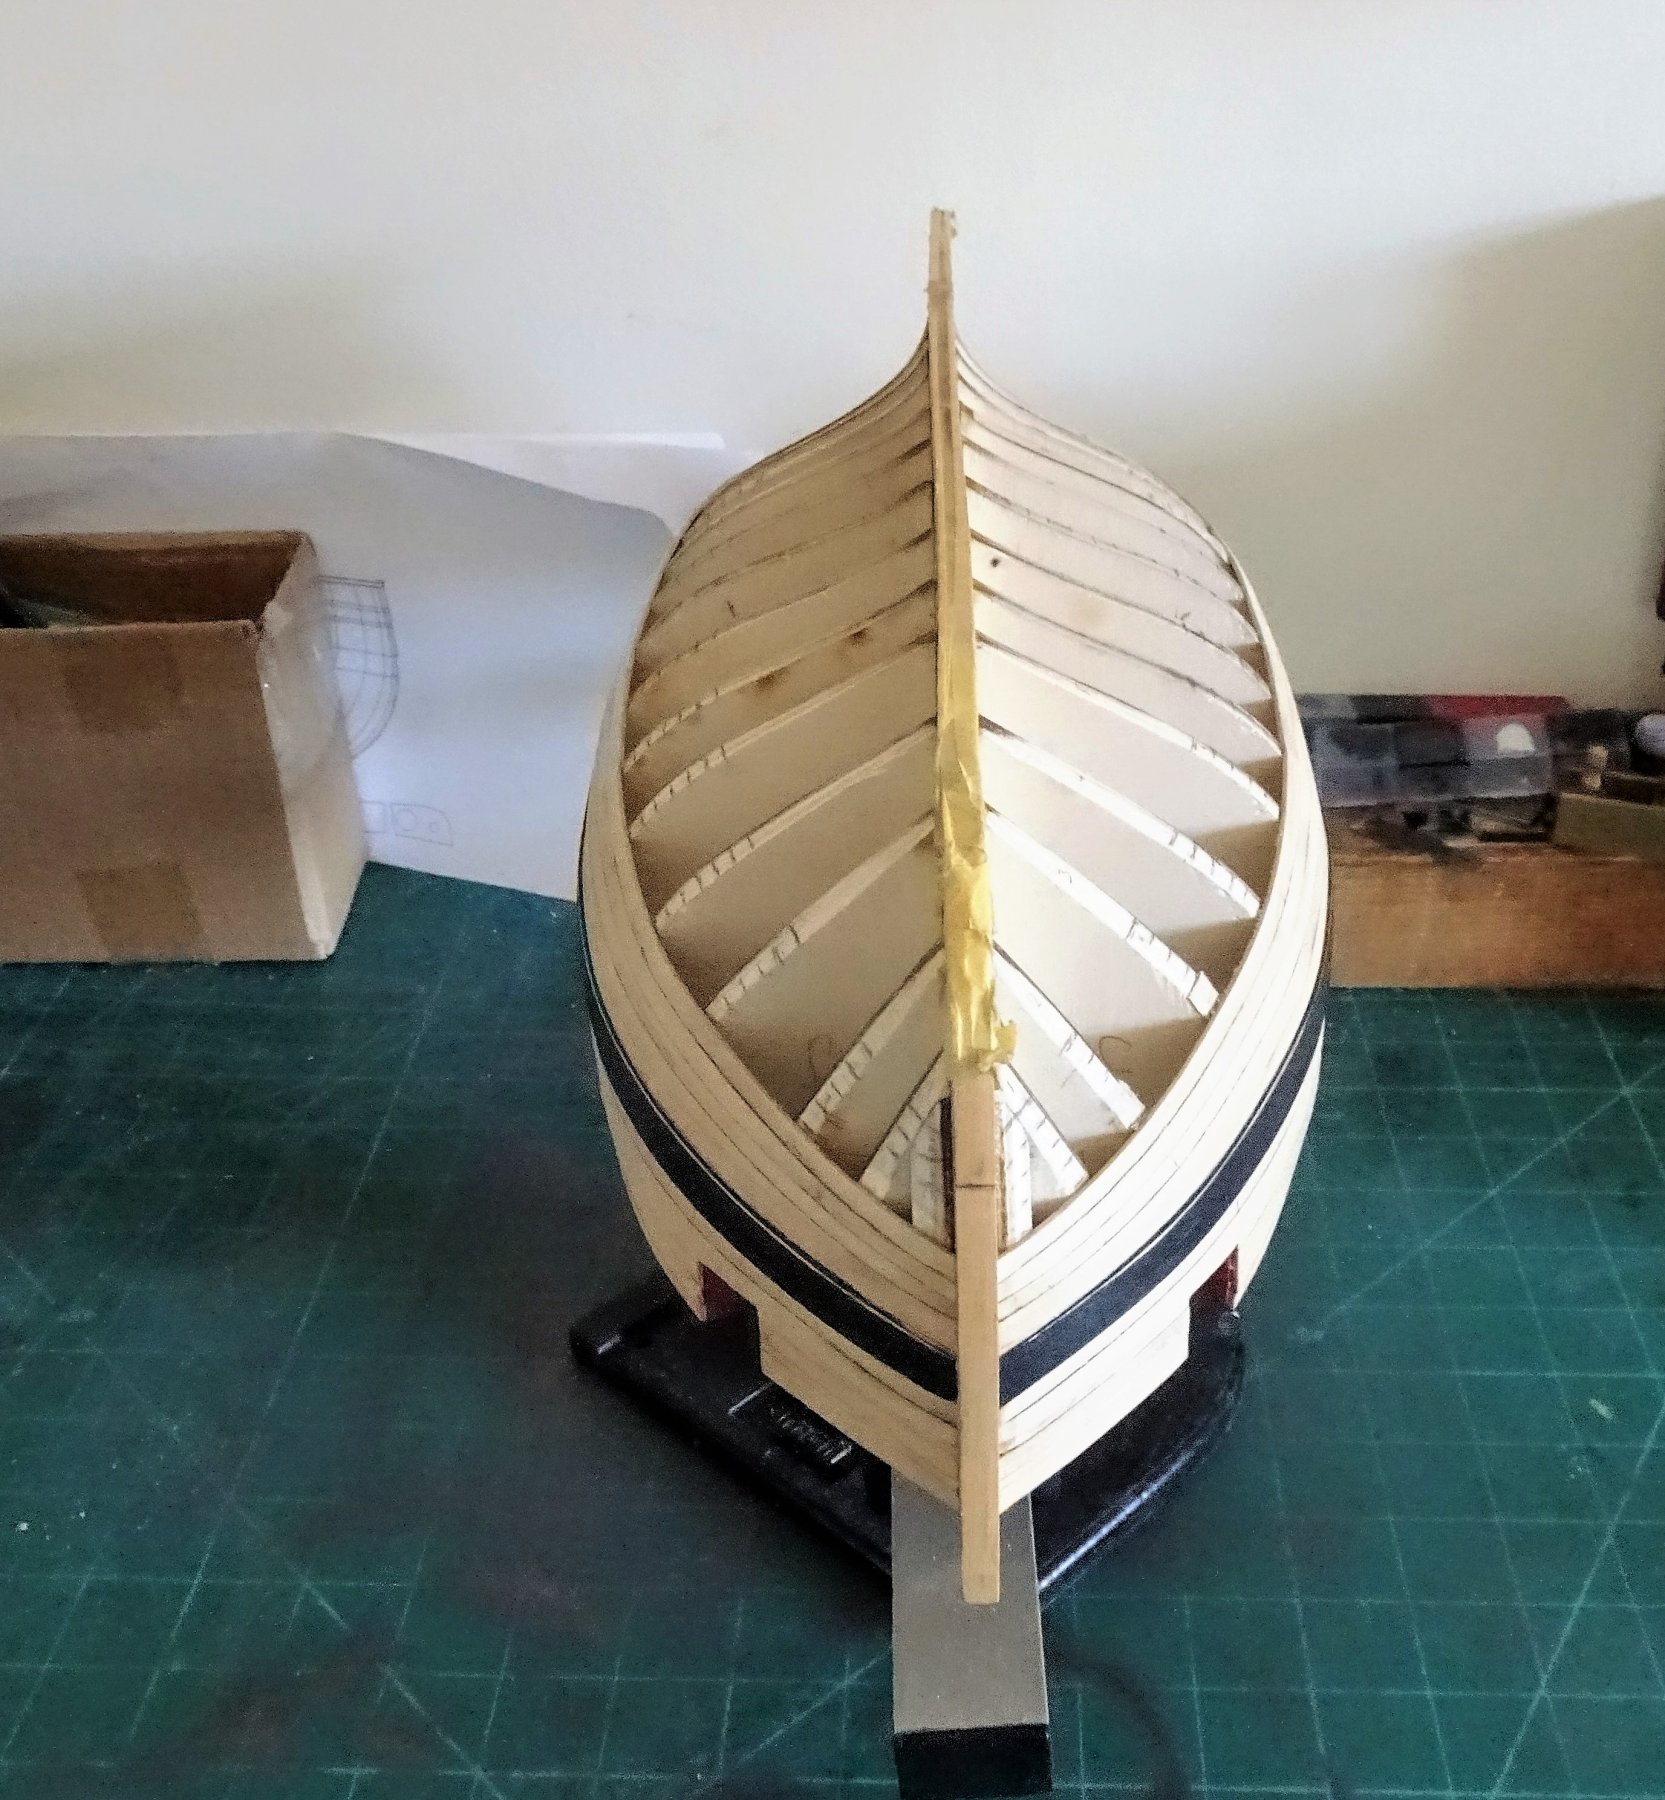
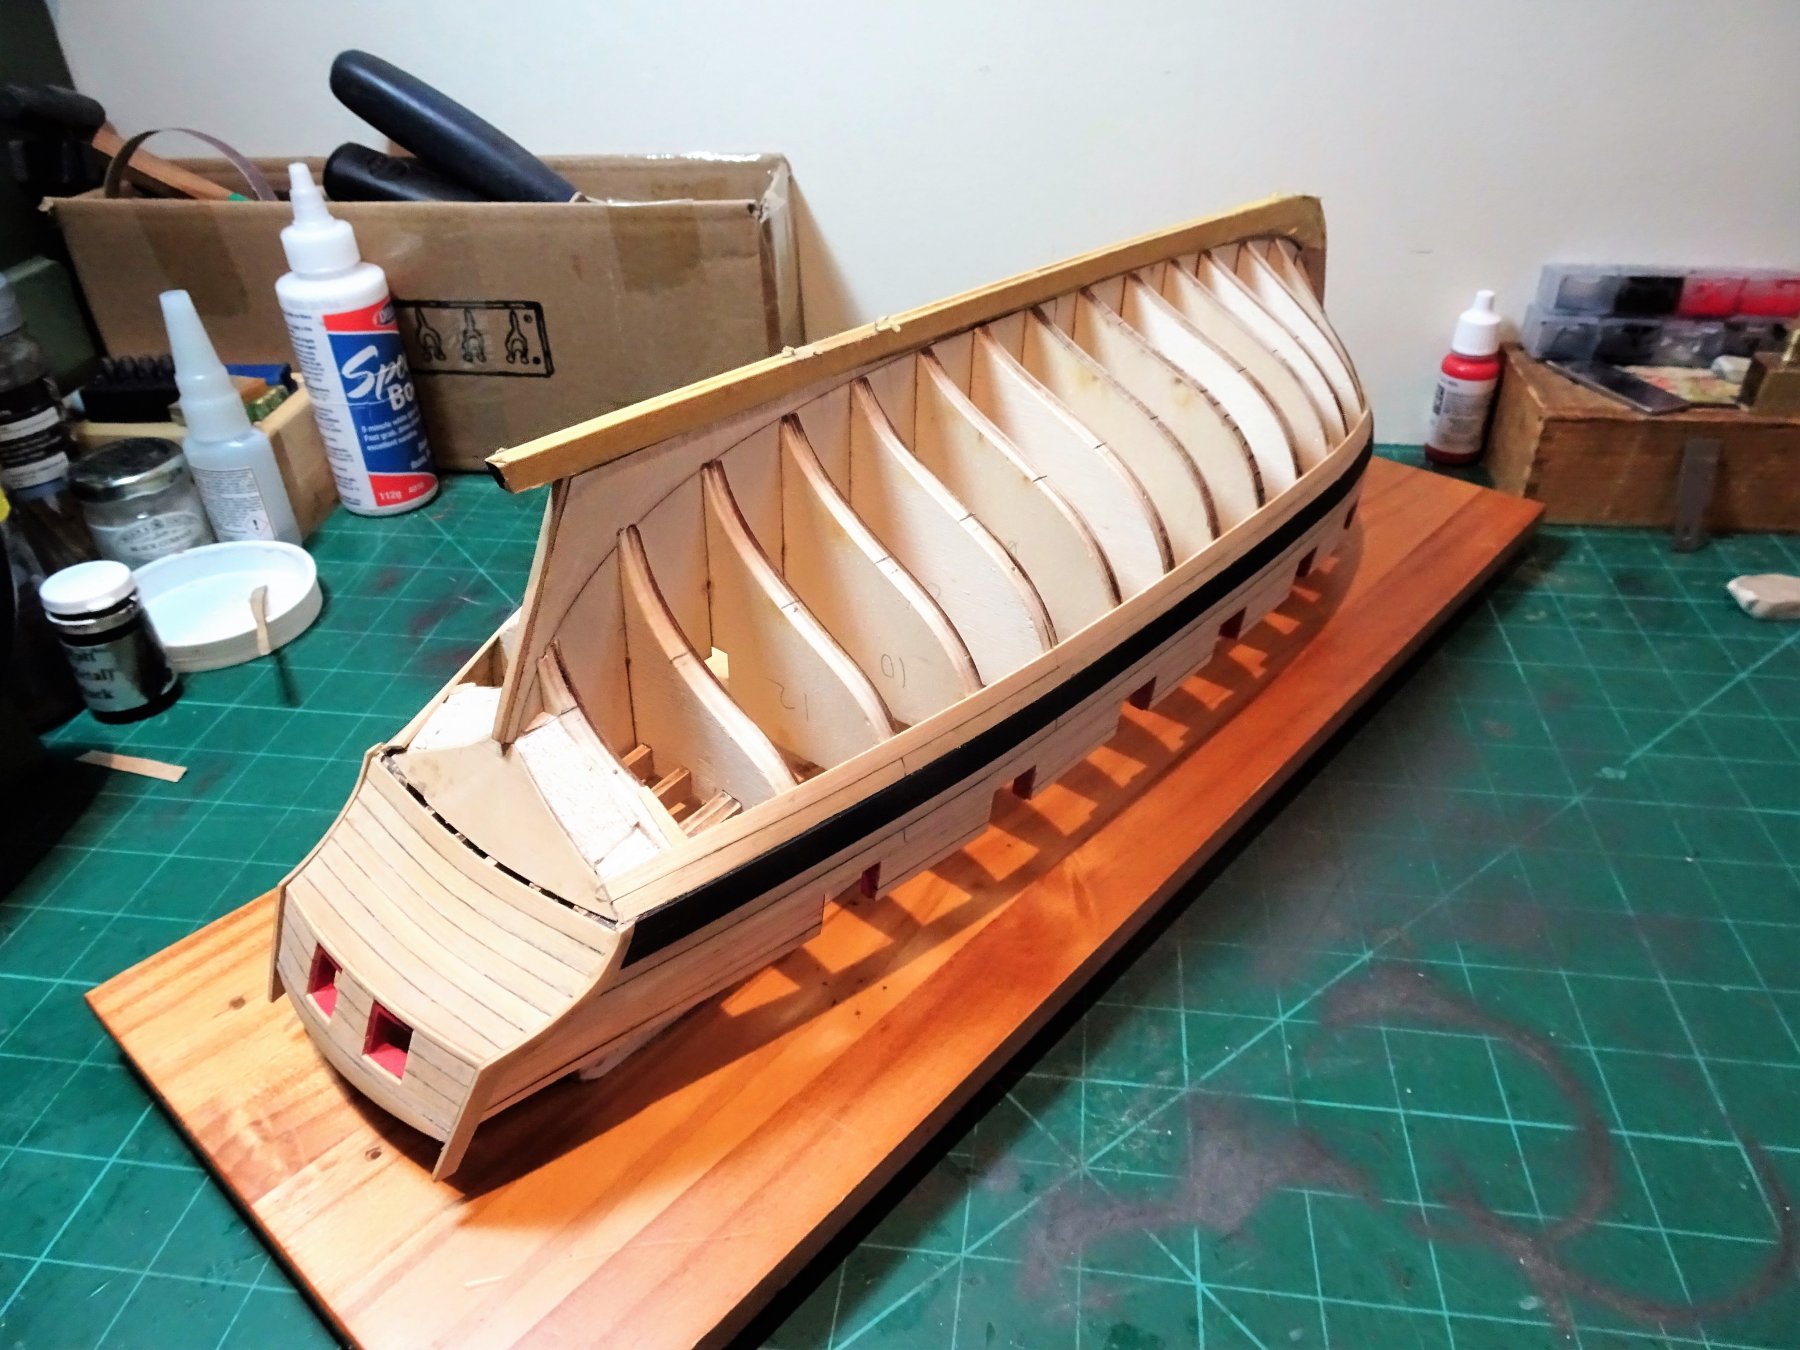
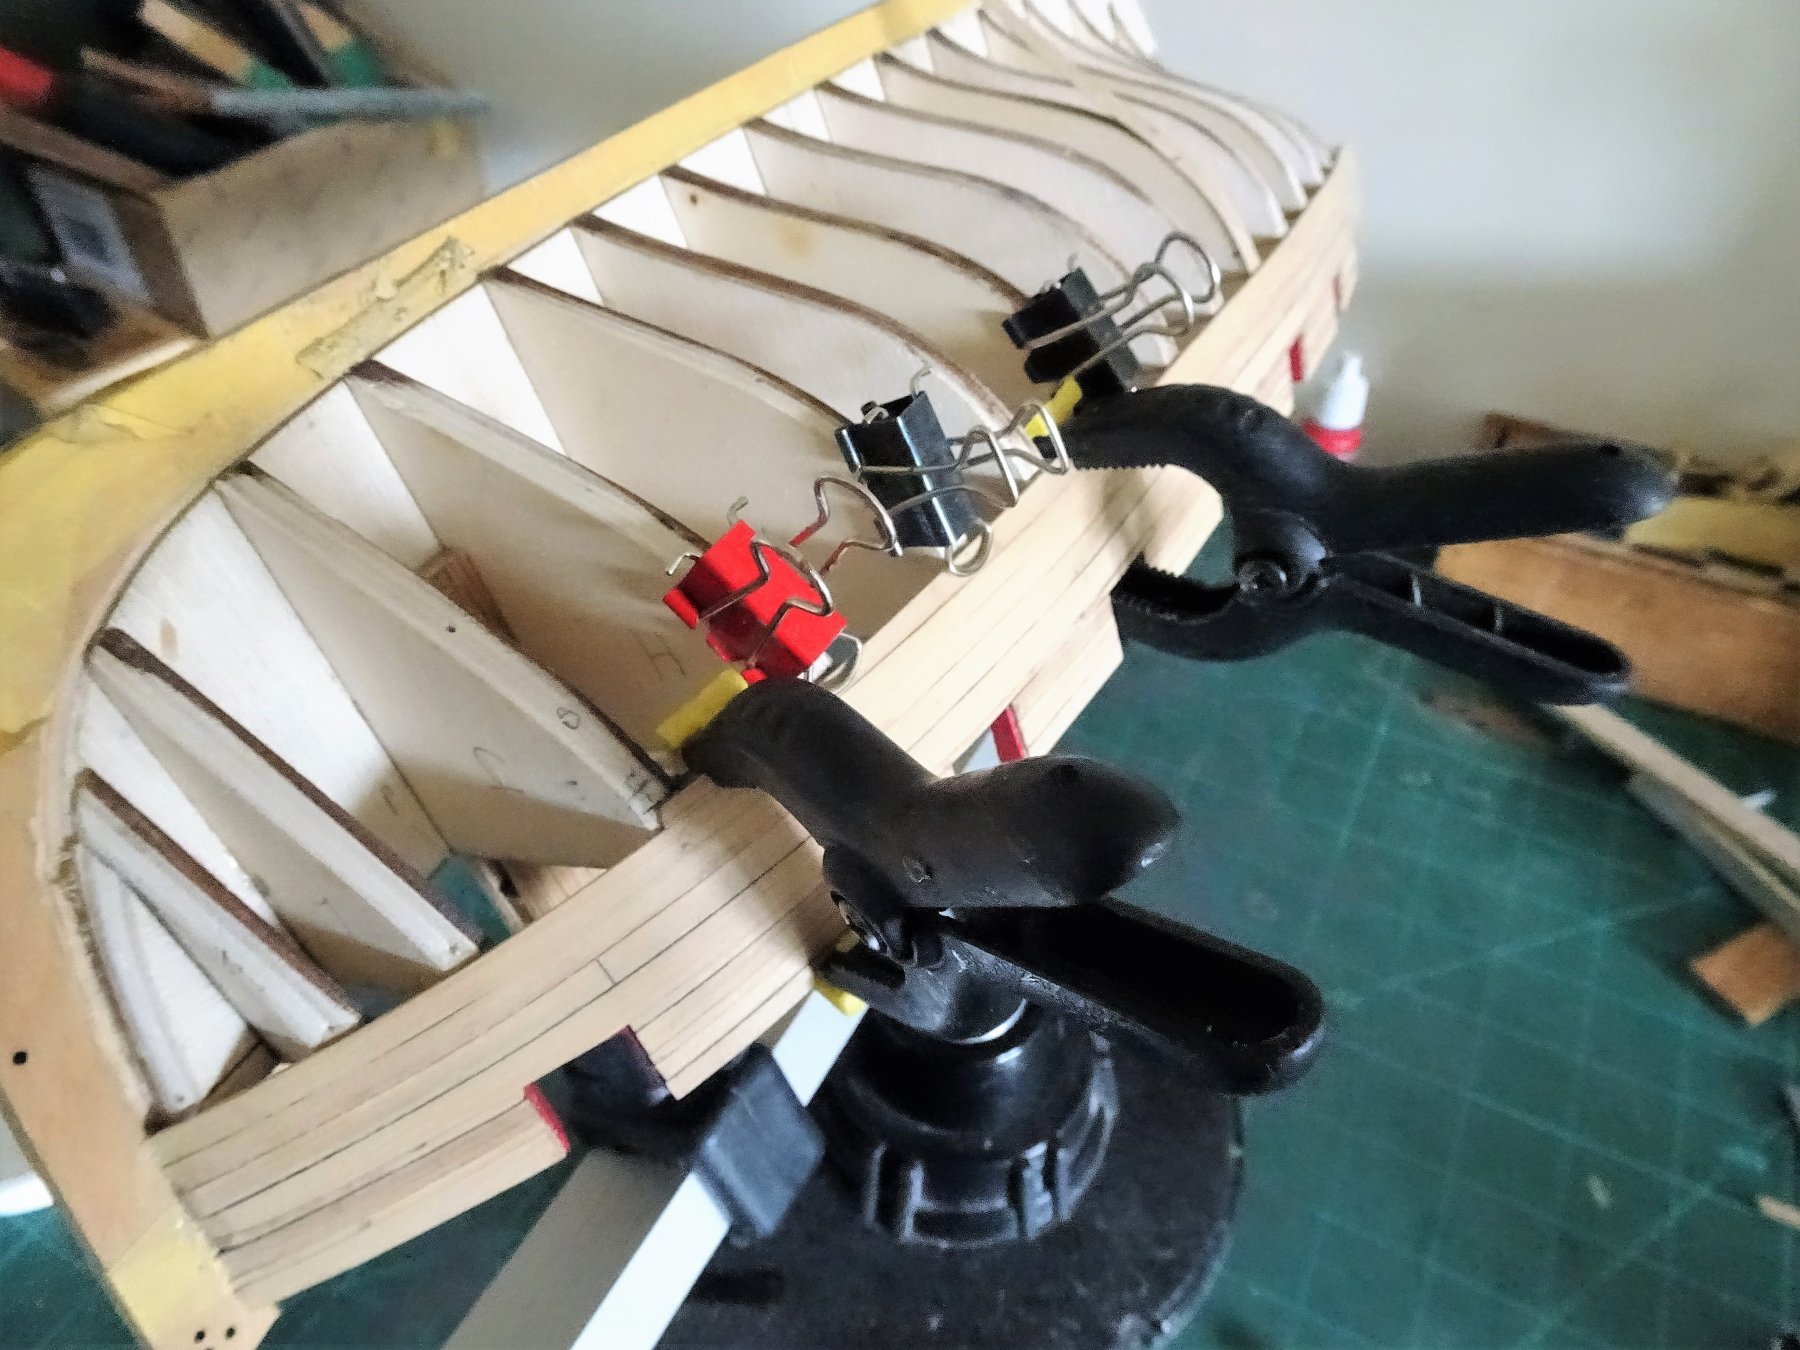
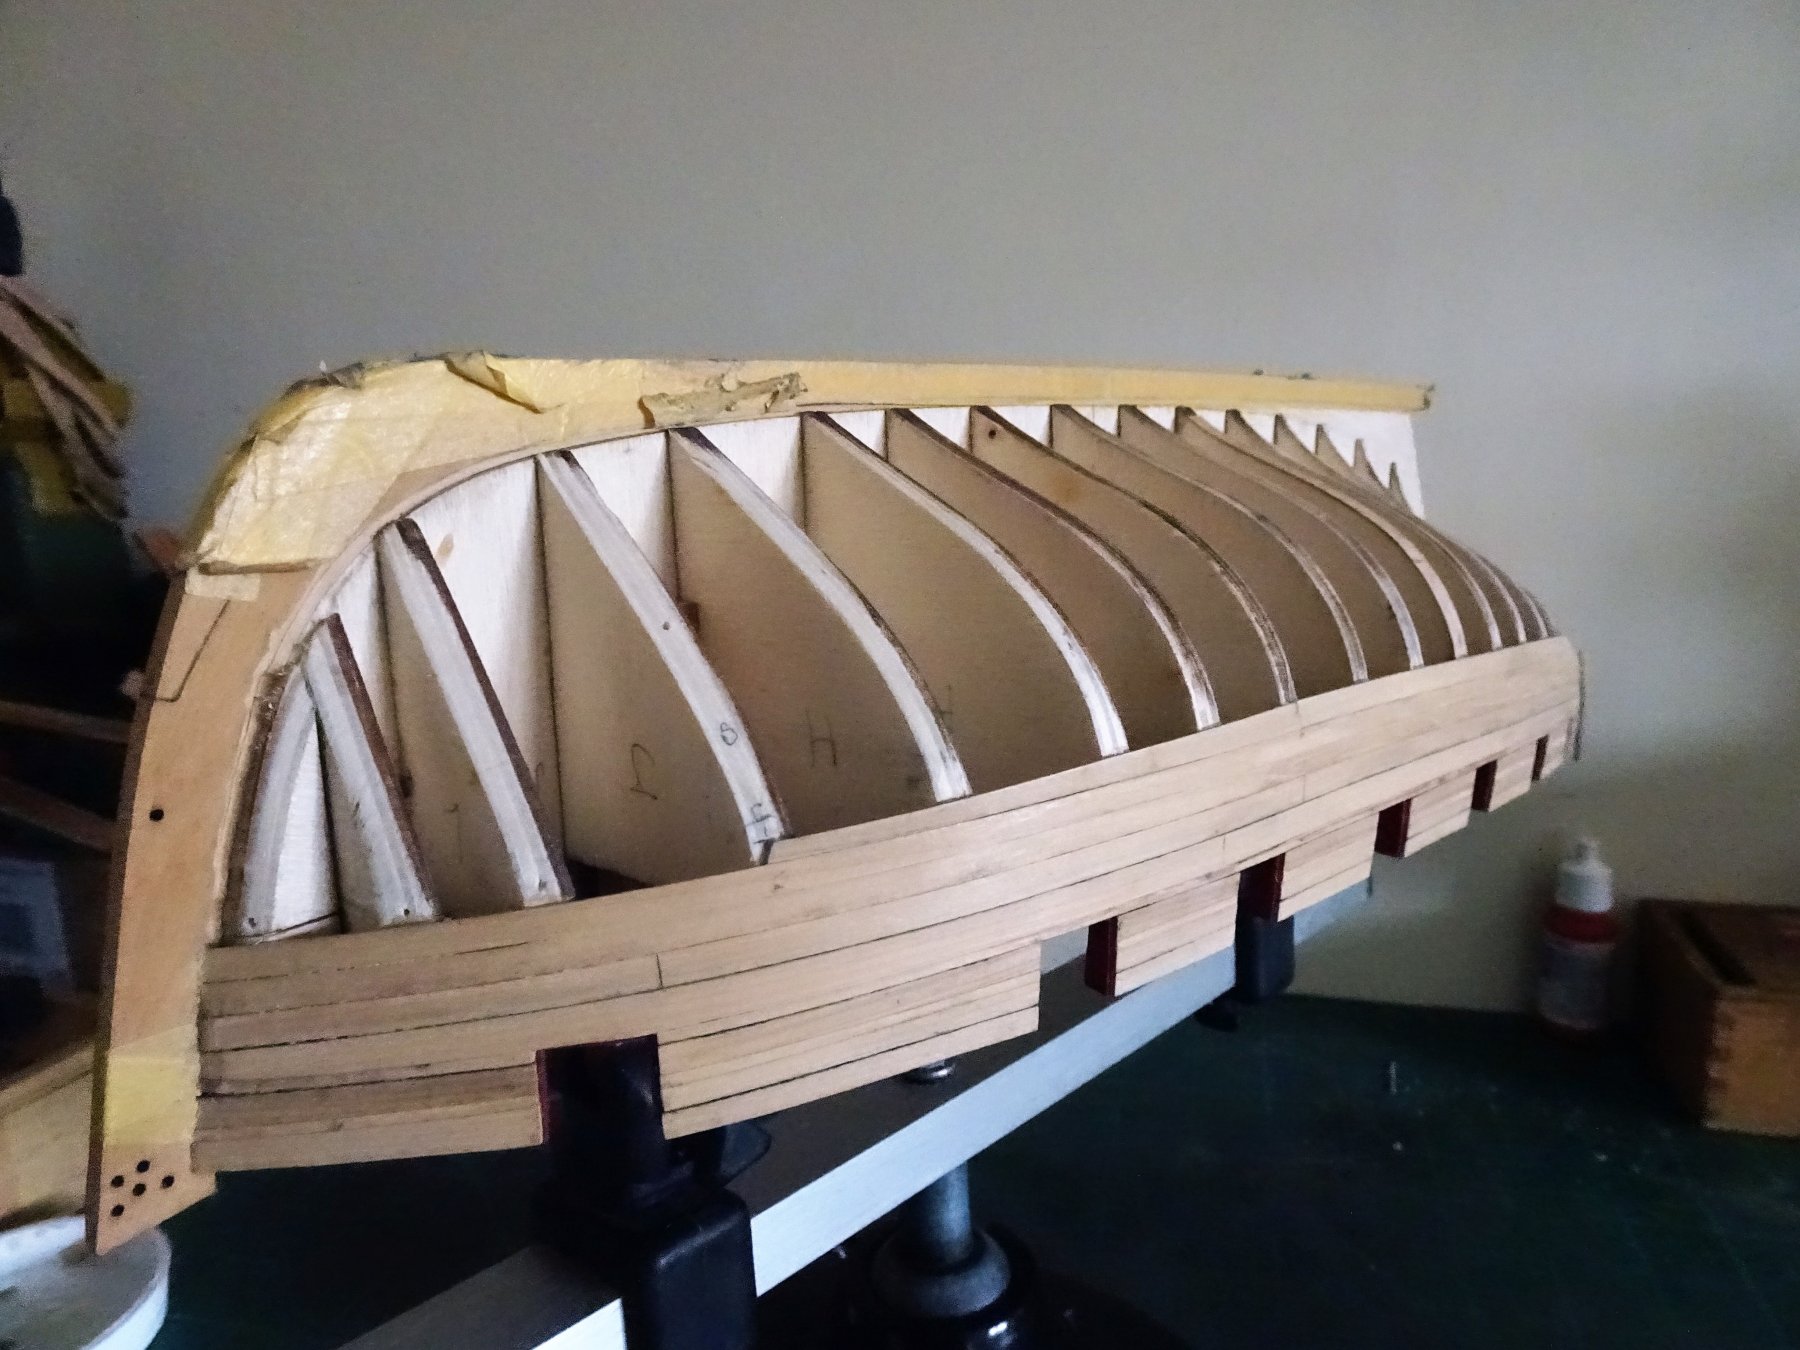
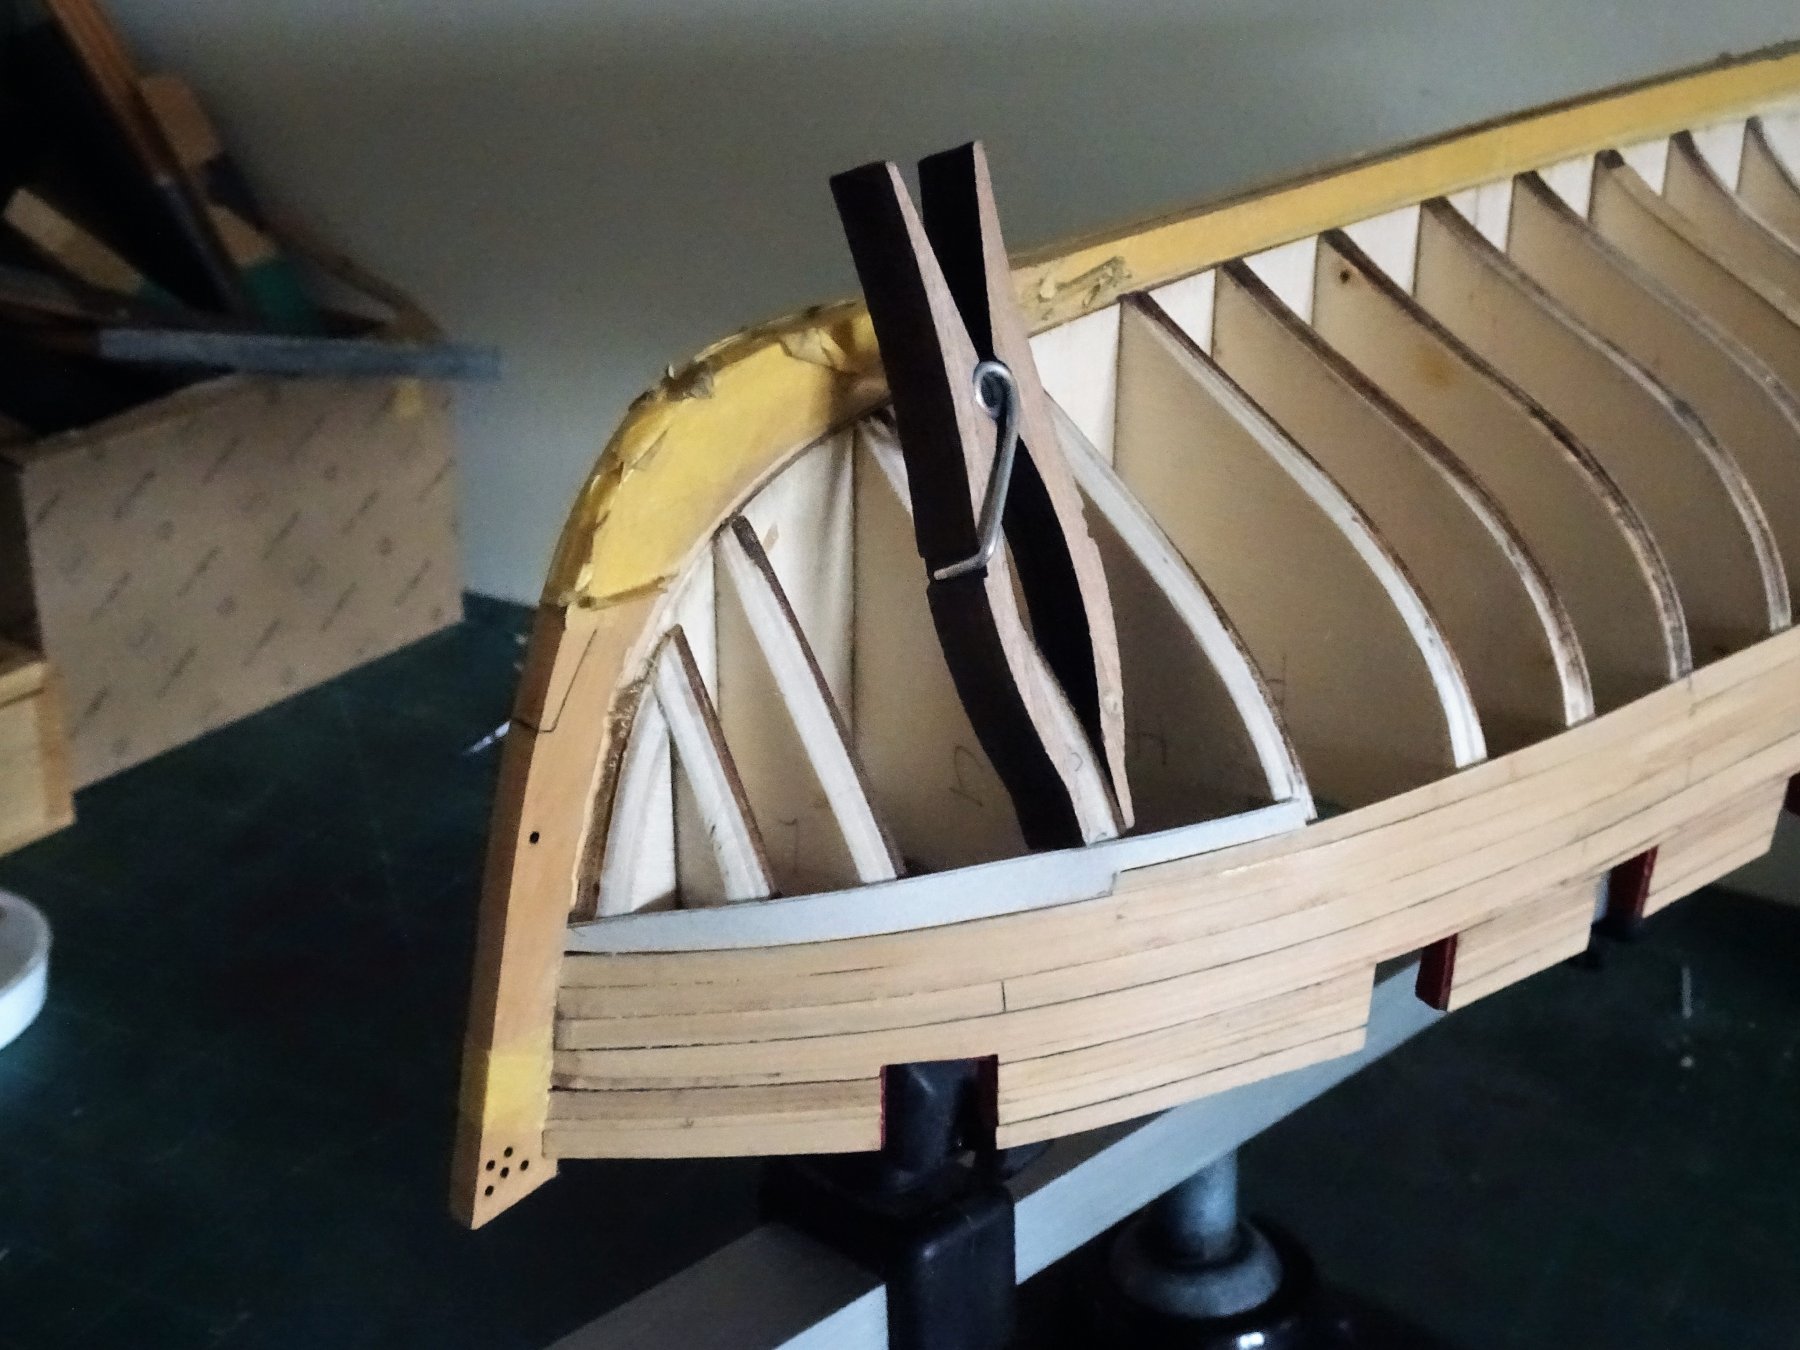
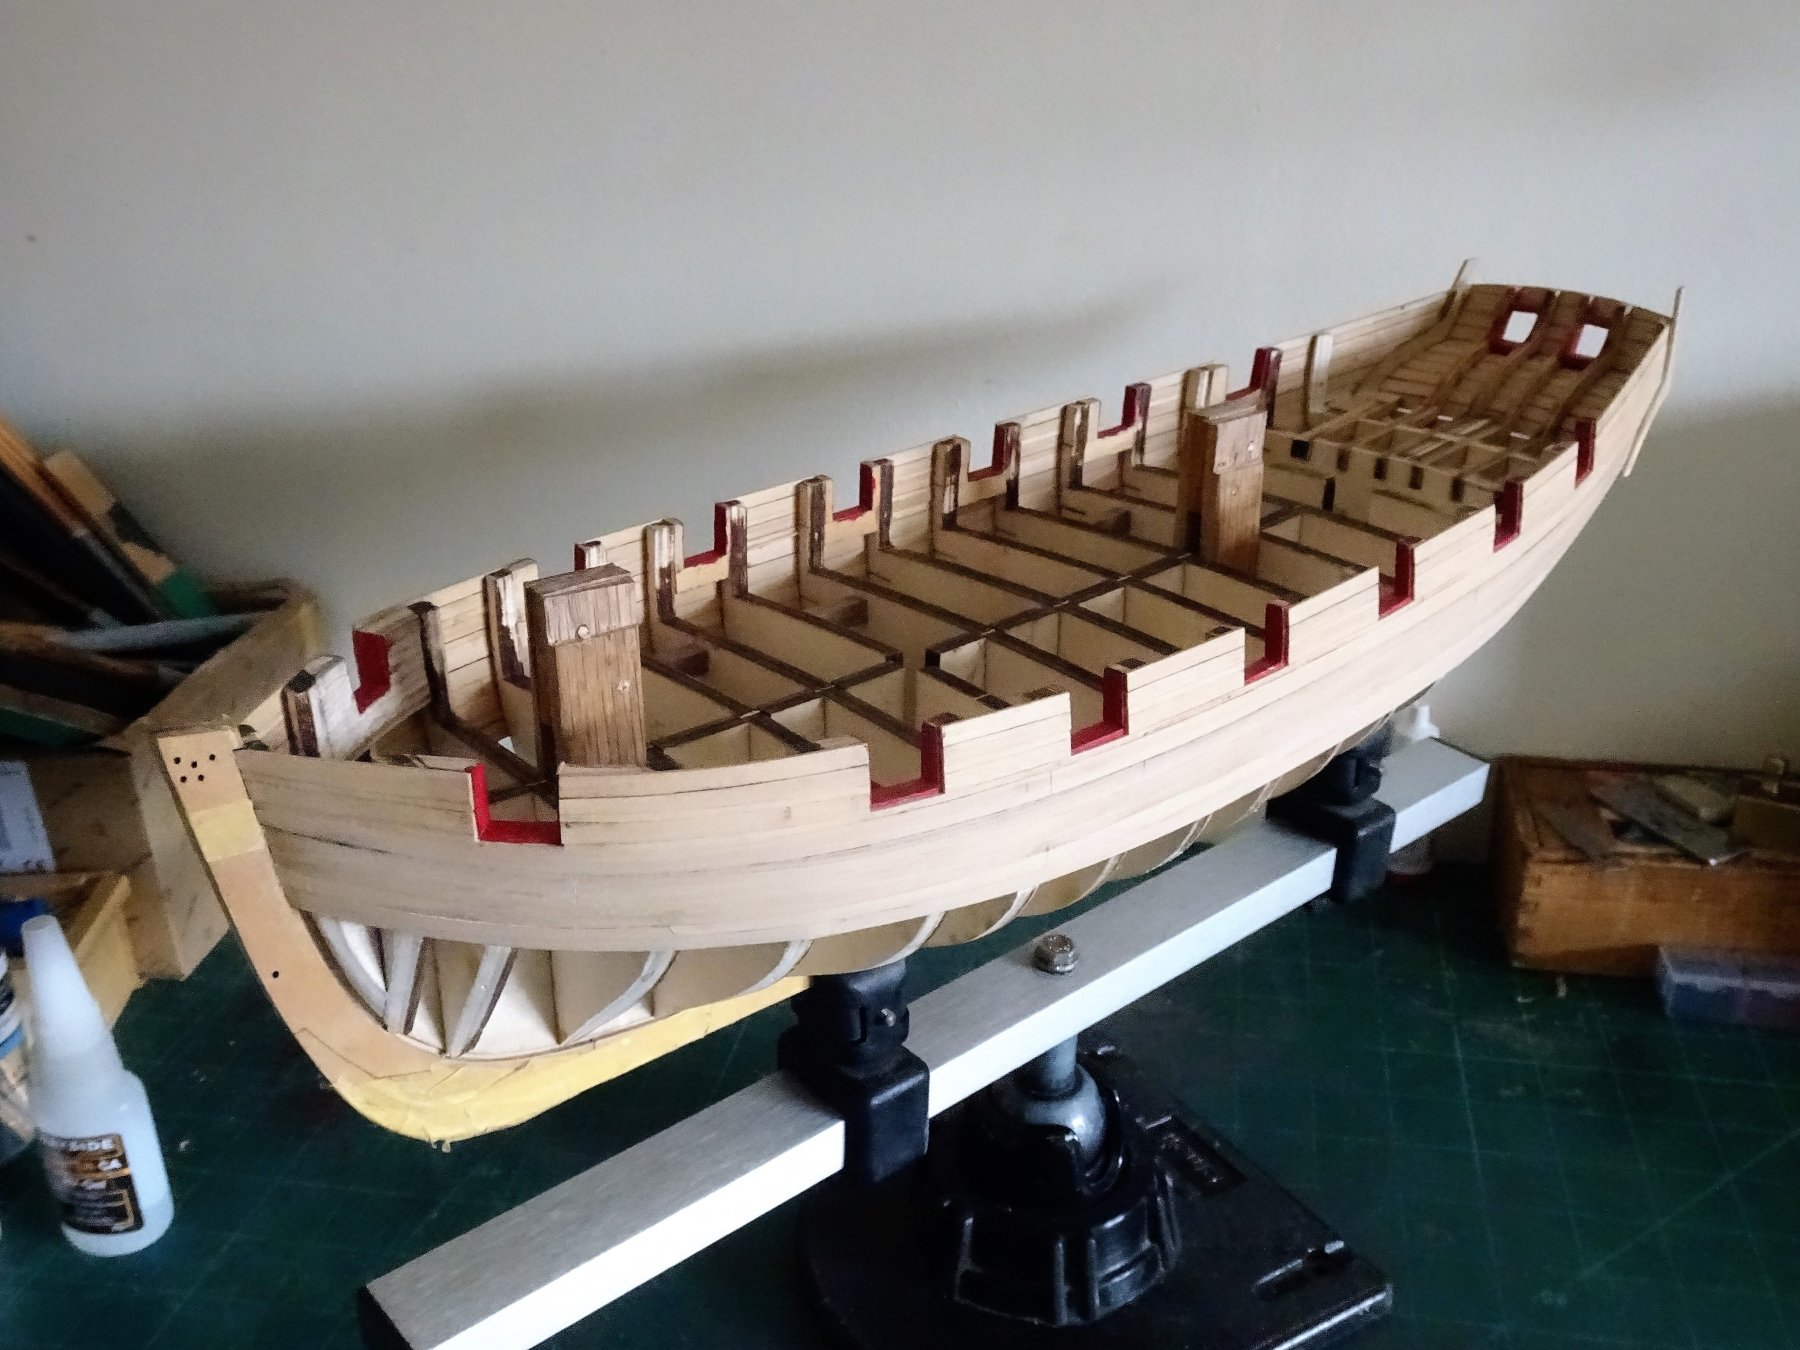
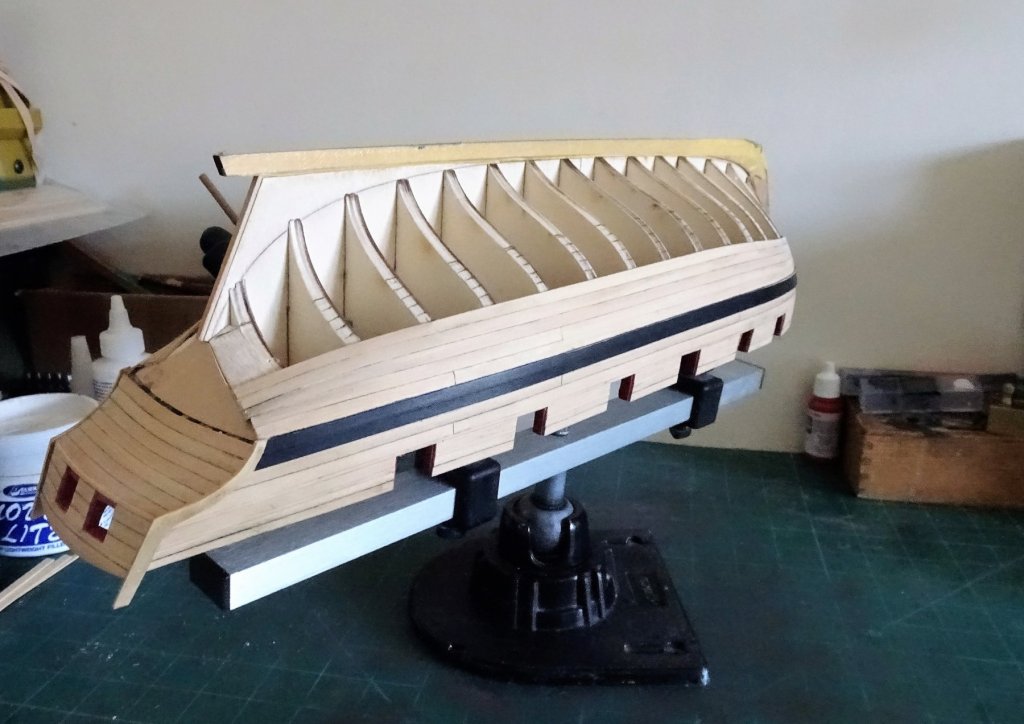
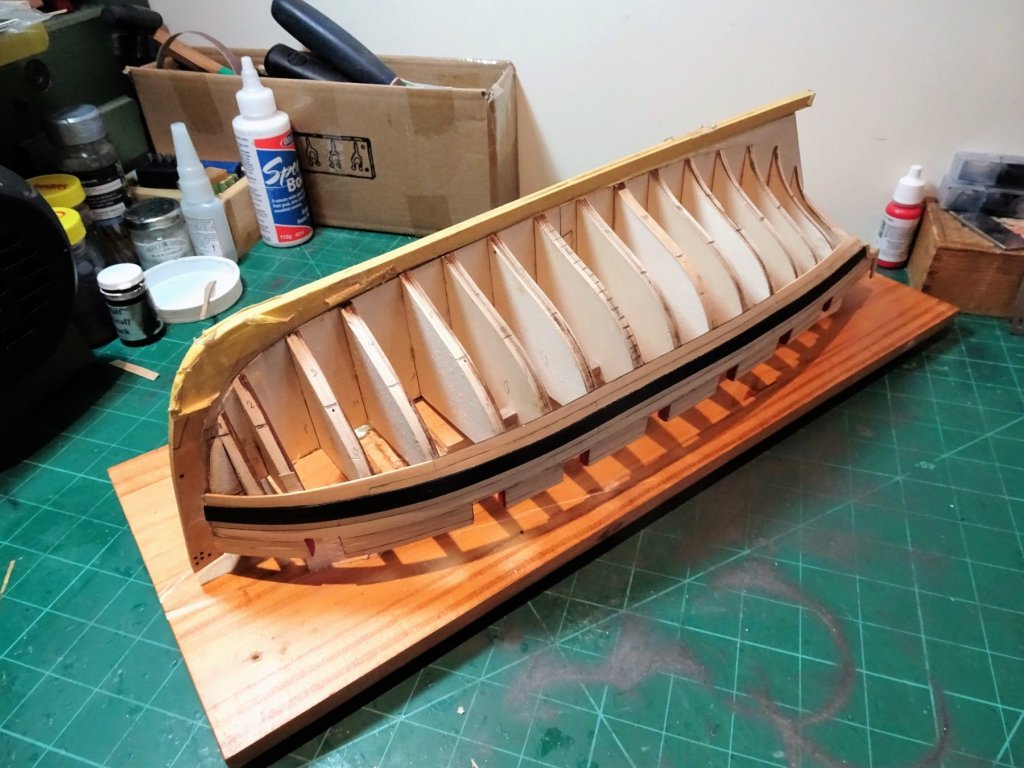
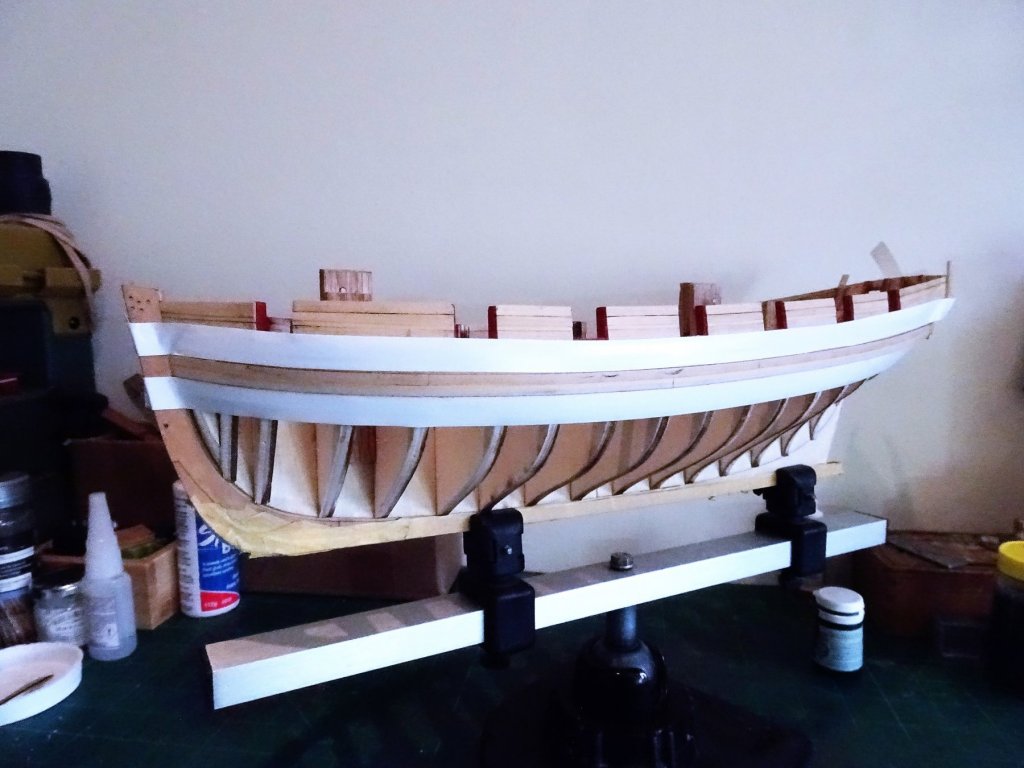
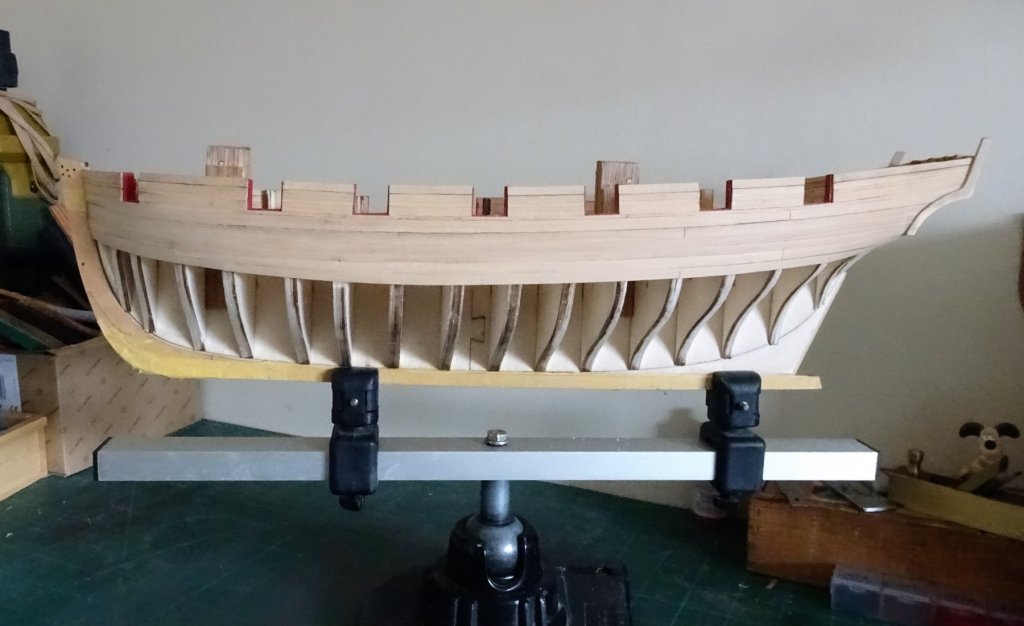
 Thank you Chuck and Rusty. Post 25 Planking the first belt Chuck has set out the approach clearly in Chapter four and I hope to follow his example. I have tick marked each bulkhead for the first belt and tentatively prepared the first strake below the Drop plank. There is a fair bit to think about, marking the plank for the taper, remembering to mark the butt joints at the correct place, bevelling the plank before fitting, and marking the 'tar' line on the edge. 8016 The first plank below the Drop Plank is very short with a butt joint below the first port. I prepared a longer plank to include the second butt joint which is just forward of the third port from aft. The first butt joint was scribed, which allowed me to get a continuous run and more easily form the required lateral curve into the stem rabbet. 8015 The third plank running to the stern was fitted separately and required a little twist where it runs into the counter. 8038 Port side strake completed. 8037 I run planks port and starboard alternatively to monitor the match, and place an even stress on the hull. 8040 Once the plank is shaped a dry fit is required to mark the butt joints, which are then cut. The method indicated by Chuck really does take the guess work out of planking, which is not necessarily the same as saying I can match his peerless work. 8105 Five strakes completed below the wale, photo'd here in their unrefined state with only glue stains scraped away. 8108 8113 8114 8115 8116 I will now continue to finish the first belt. From this point onwards clamping the planks to the bulkheads gets a tad more tricky as they start to follow the round of the hull towards the keel. B.E. 19/04/2018


- 574 replies
-
- 24
-

-
- cheerful
- Syren Ship Model Company
- (and 1 more)
-
Hi Peter, a Caldercraft kit is a good choice to start with, I re-started my 'timber' ship building activity with their 'Pickle'. ps; when you refer to native speaker do you mean English or Yorkshire? English is easy, Yorkshire a little more tricky thaa knaws. B.E.
-
A lovely post Barbara and kudos to your Dad, that is a very fine model. You may already have the book The Masting and Rigging of English Ships of War 1625-1860 by James Lees, but there is a good section on sail making and dimensions in that book. B.E.
-
Cheers Guys, Post 24 The first planking Belt - Preparation I intend to follow Chuck's methods as closely as I can from this point on. So it's tick strips and pinstripe tape to try and get somewhere, anywhere, close to Chuck's example. Eight additional 3/16" wide strips required for this first belt at the centre. Simple enough to determine the limit of the eight strakes below those already fitted at the centre bulkhead using the tick strip. 7782 The stern position at the square tuck is easy to see. 7784 Counting down on the plan the first belt seems to terminate around the stem scarph joint at the bow. 7780 A tricky business getting the tape on, bally stuff was very reluctant to stay put and getting a nice run of tape along the hull took some time. 7777 Hopefully I've got it right. 7786 With the reference stations marked it's onto the tedious business of making up the tick strips for the rest of the bulkheads. 7789 For this job Cheerful is transferred to its low support base, easier on the arms and the eyes. B.E. 11/04/2018


- 574 replies
-
- 16
-
-
- cheerful
- Syren Ship Model Company
- (and 1 more)
-
Not really apparent on the photo's Doug A tip for the future, I don't tend to tie off the deadeye lanyards too soon in the build so that I can come back and tweak the shroud tension after I've completed the standing rigging but before I fit the ratlines. If it really is a bother you could re-do the deadeye lanyards or one cheat you can try for slack shrouds is to attach a line around the upper end beneath the tops, and bowse them in a little; but as you have fitted the futtocks this may slacken them off, requiring them to be re-done. Sometimes these things loom larger in the eye of the builder than the observer. B.E.
-
The shrouds and futtocks look good to my eye from the photo's Doug, what aren't you happy about? B.E.
-
That's so much better David, and quickly achieved, you should now be able to complete a good base for the second planking. Glad it all worked out. B.E.
- 126 replies
-
- 6
-
-
- fly
- victory models
- (and 1 more)
-
She's looking very smart OC, lovely finish on both hull and inboard works. B.E.
- 455 replies
-
- 3
-
-
- slightly modified
- greyhound
- (and 1 more)
-
David, the basic Fly and Pegasus hulls are the same, it's only in the detailing that the kits differ. There is quite a steep but graceful curve of the stern timbers running up to the counter and this is all down to fairing. There should not be a sharp break of the timbers at the last but one bulkhead. From what I see the angle you have is just too sharp to achieve a decent result and I can't see how sanding and filling are going to resolve this issue. I would be tempted to cut back the planking at the fourth bulkhead from aft, and re-fair the bulkheads running up the stern counter. Without a reasonable base on which to apply the second planking, problems down the road are going to be encountered. Regards, B.E.
- 126 replies
-
- 5
-
-
- fly
- victory models
- (and 1 more)
-
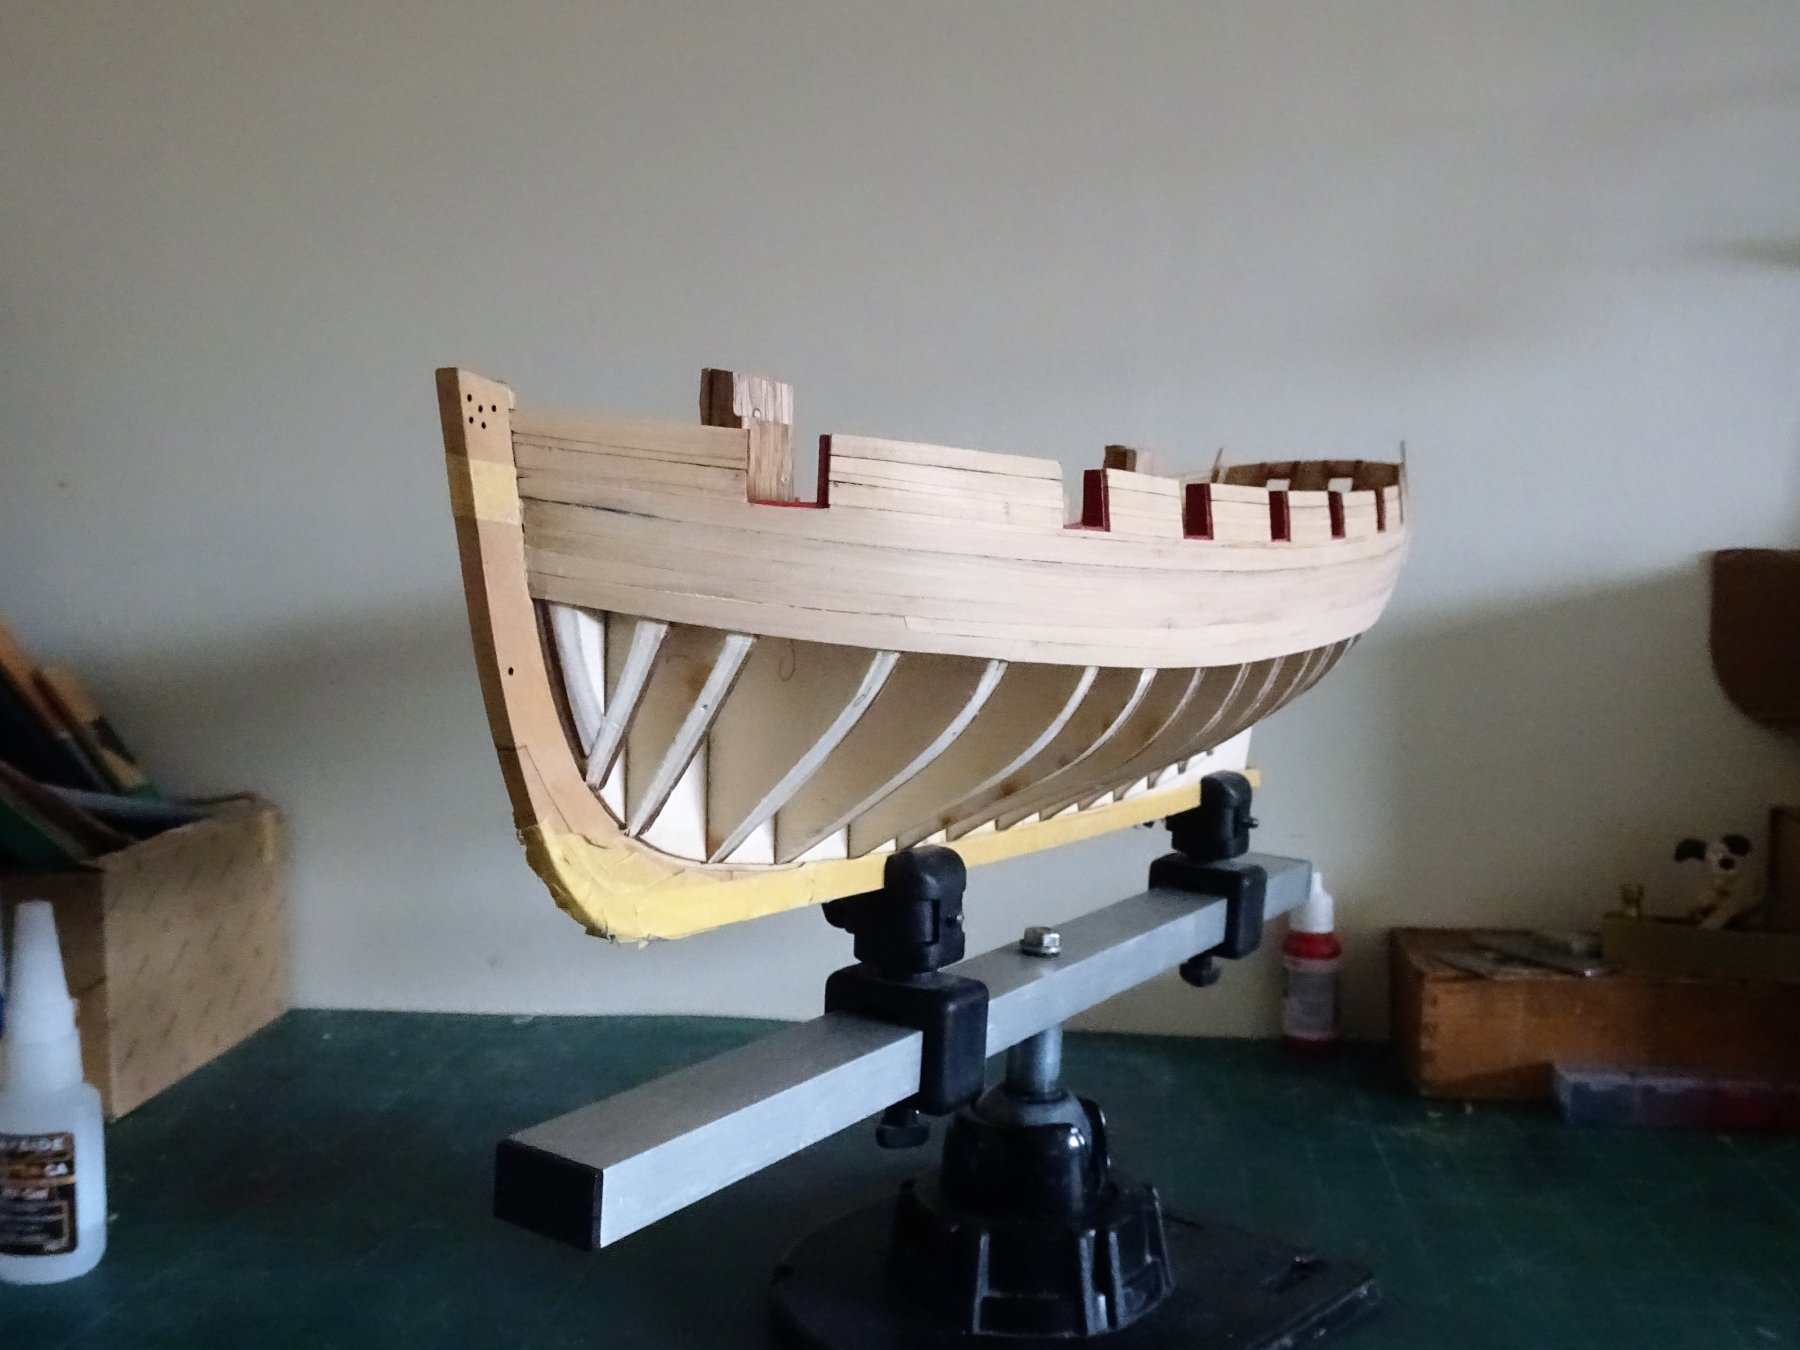
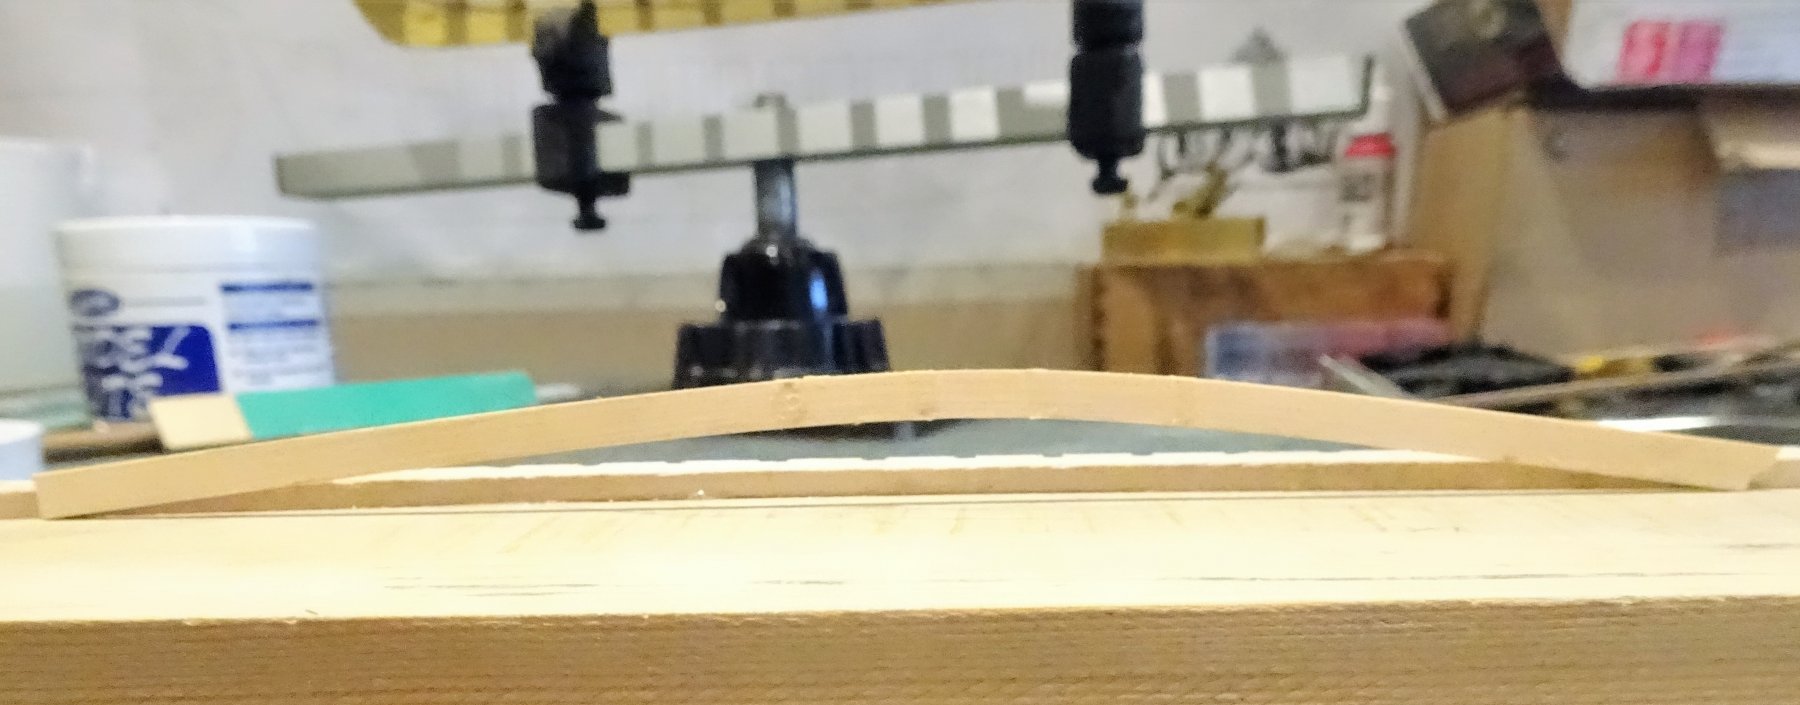
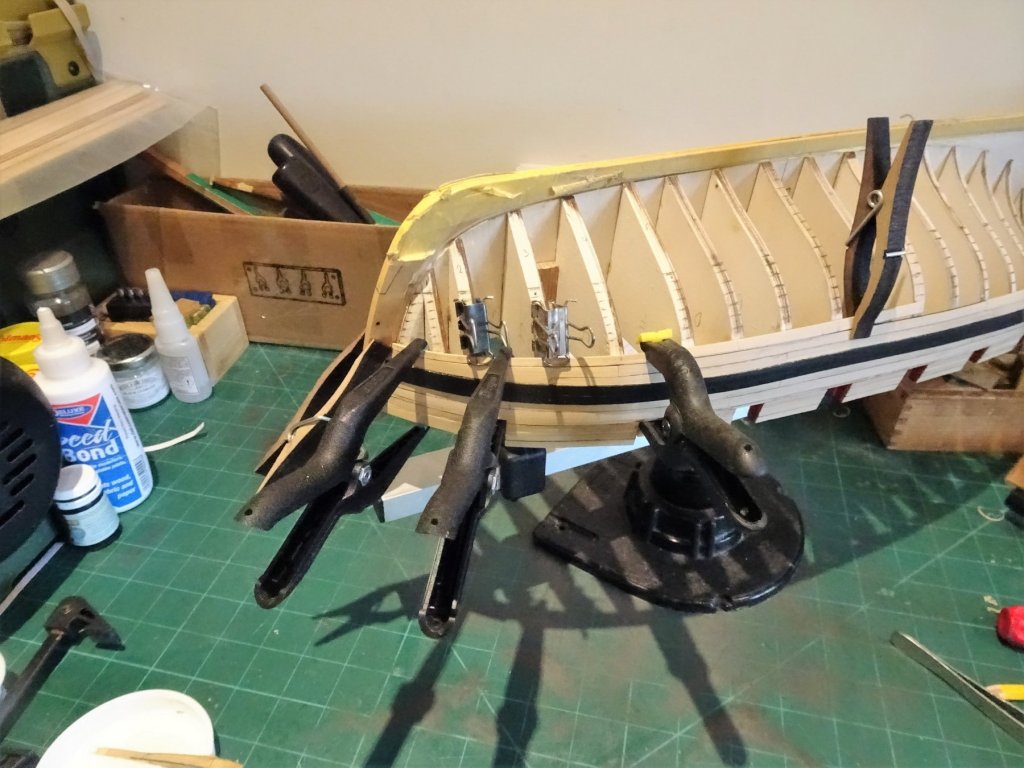
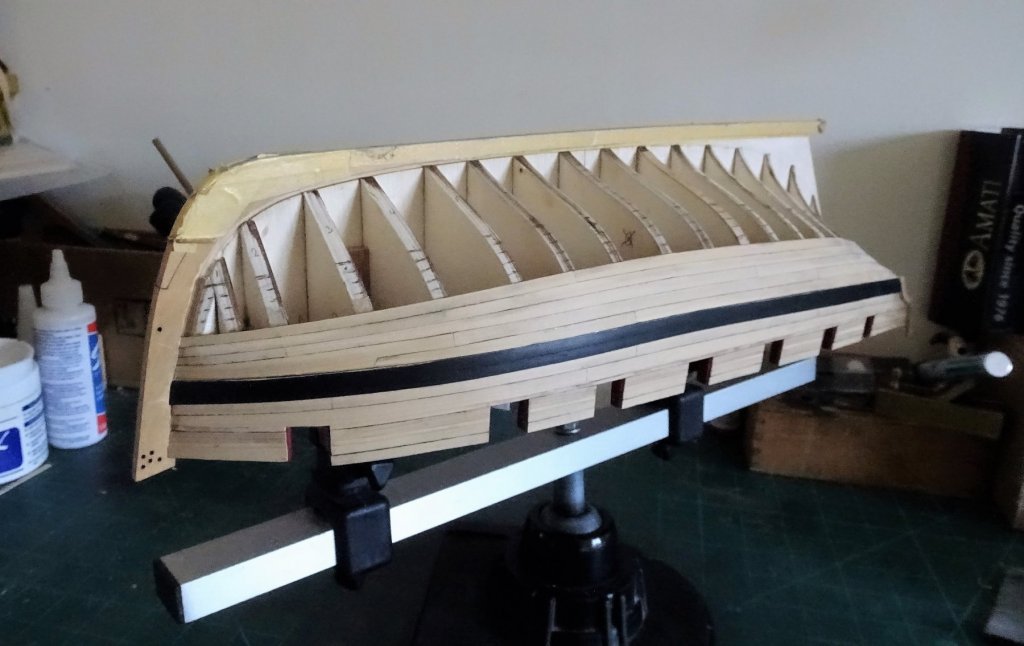
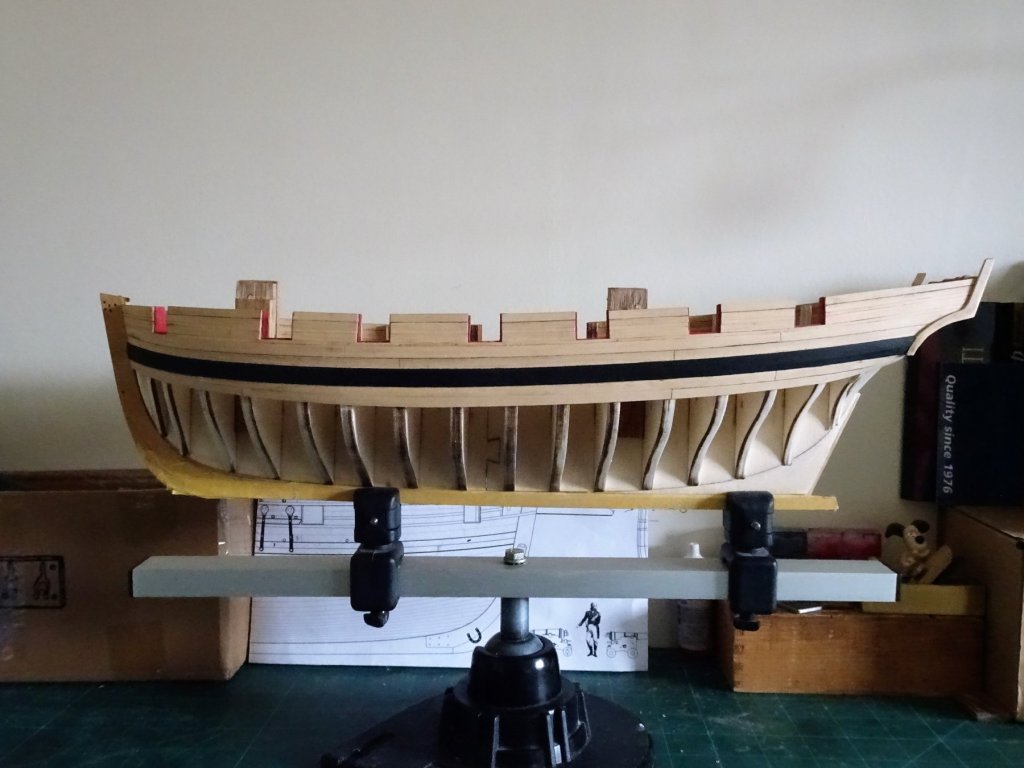
Thank you Jason, and thanks for your apology Kurt, I also think you should start your own log that we can all engage with, but don't fret about it. on with the build..... Post 23 Fixing the Wales For this 1/32" x 5/32" strips are used. 7703 Not too onerous to fit as clamping is fairly easy along the hull. 7705 Before they are fitted I painted the top edge of the upper wale strip and bottom edge of the lower strip where they will meet the Boxwood finish. I decided to fit the wale strips in one length gluing progressively along the hull. This I felt allowed me to maintain a better natural curve to the upper wale strip, and as they stand proud of the hull marking the butt joints with a micro saw blade was fairly easy. Once fixed the forward 1" of the wale was sanded, scraped, and pared down to almost nothing where it meets the stem. 7708 Cleaned up I then applied three coats of thinned paint; I won't complete the painting until the rest of the hull has been planked. I decided to use Caldercraft Admiralty 'Metal Black' water- based paint, which is less shiny than their 'Dull black' version. 7722 7725 7726 7727 A period of general cleaning up now follows, and some revision and preparation before I continue with the planking. B.E. 07/04/2018


- 574 replies
-
- 26
-
-
- cheerful
- Syren Ship Model Company
- (and 1 more)
-
Always a good idea not to act too quickly Kurt. B.E.
- 574 replies
-
- 1
-
-
- cheerful
- Syren Ship Model Company
- (and 1 more)
-
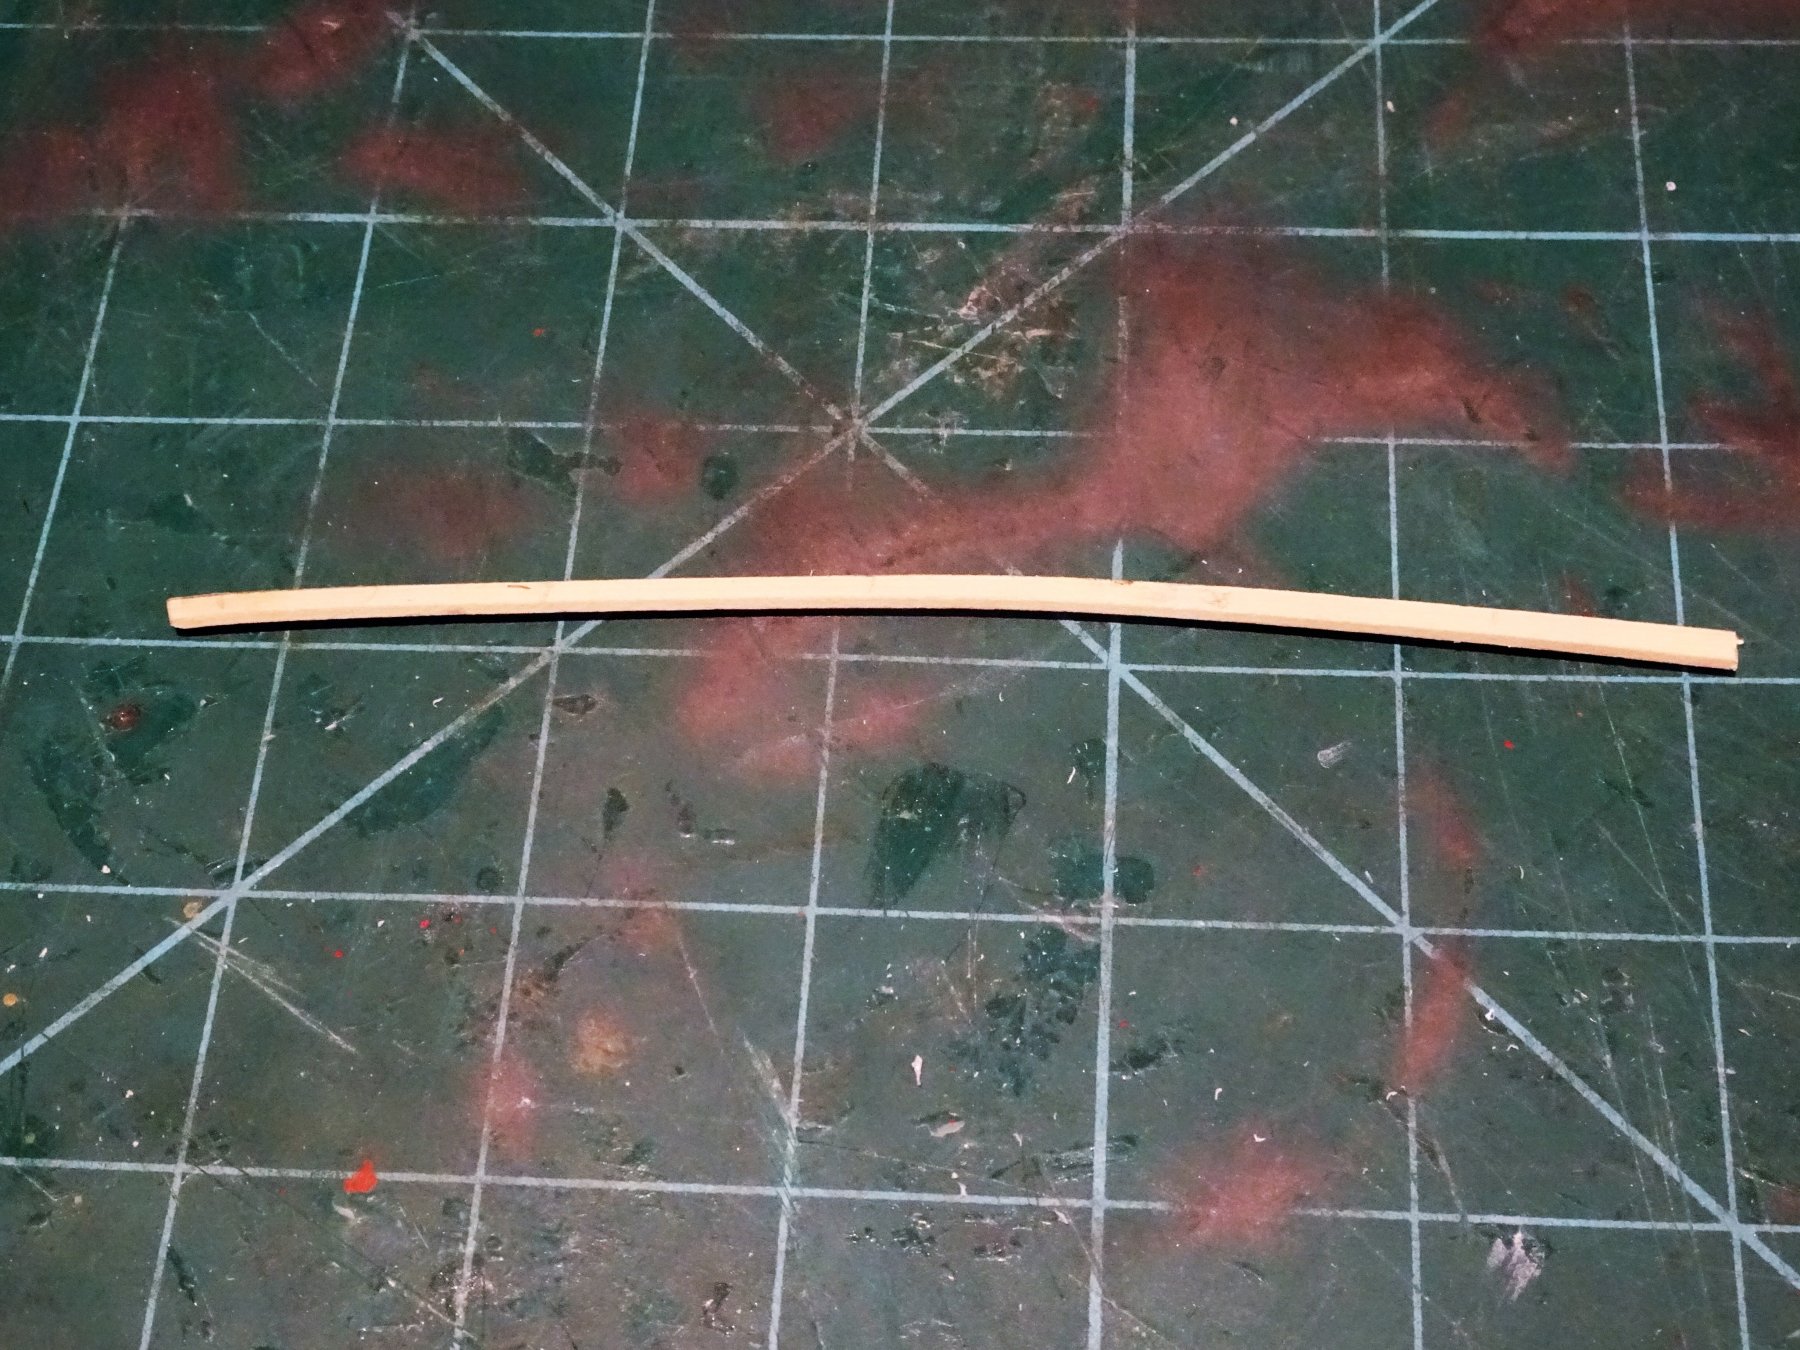
Thanks Kurt, putting the twist in the last plank section for the tuck was the least of the problems. Just wet the plank, fixed one end in a vice, applied the twist using pliers, and applied heat from a hairdryer. Took a few seconds only to impart the required twist. ps, just remember to twist the plank the right way. B.E.
- 574 replies
-
- 5
-
-
- cheerful
- Syren Ship Model Company
- (and 1 more)
-
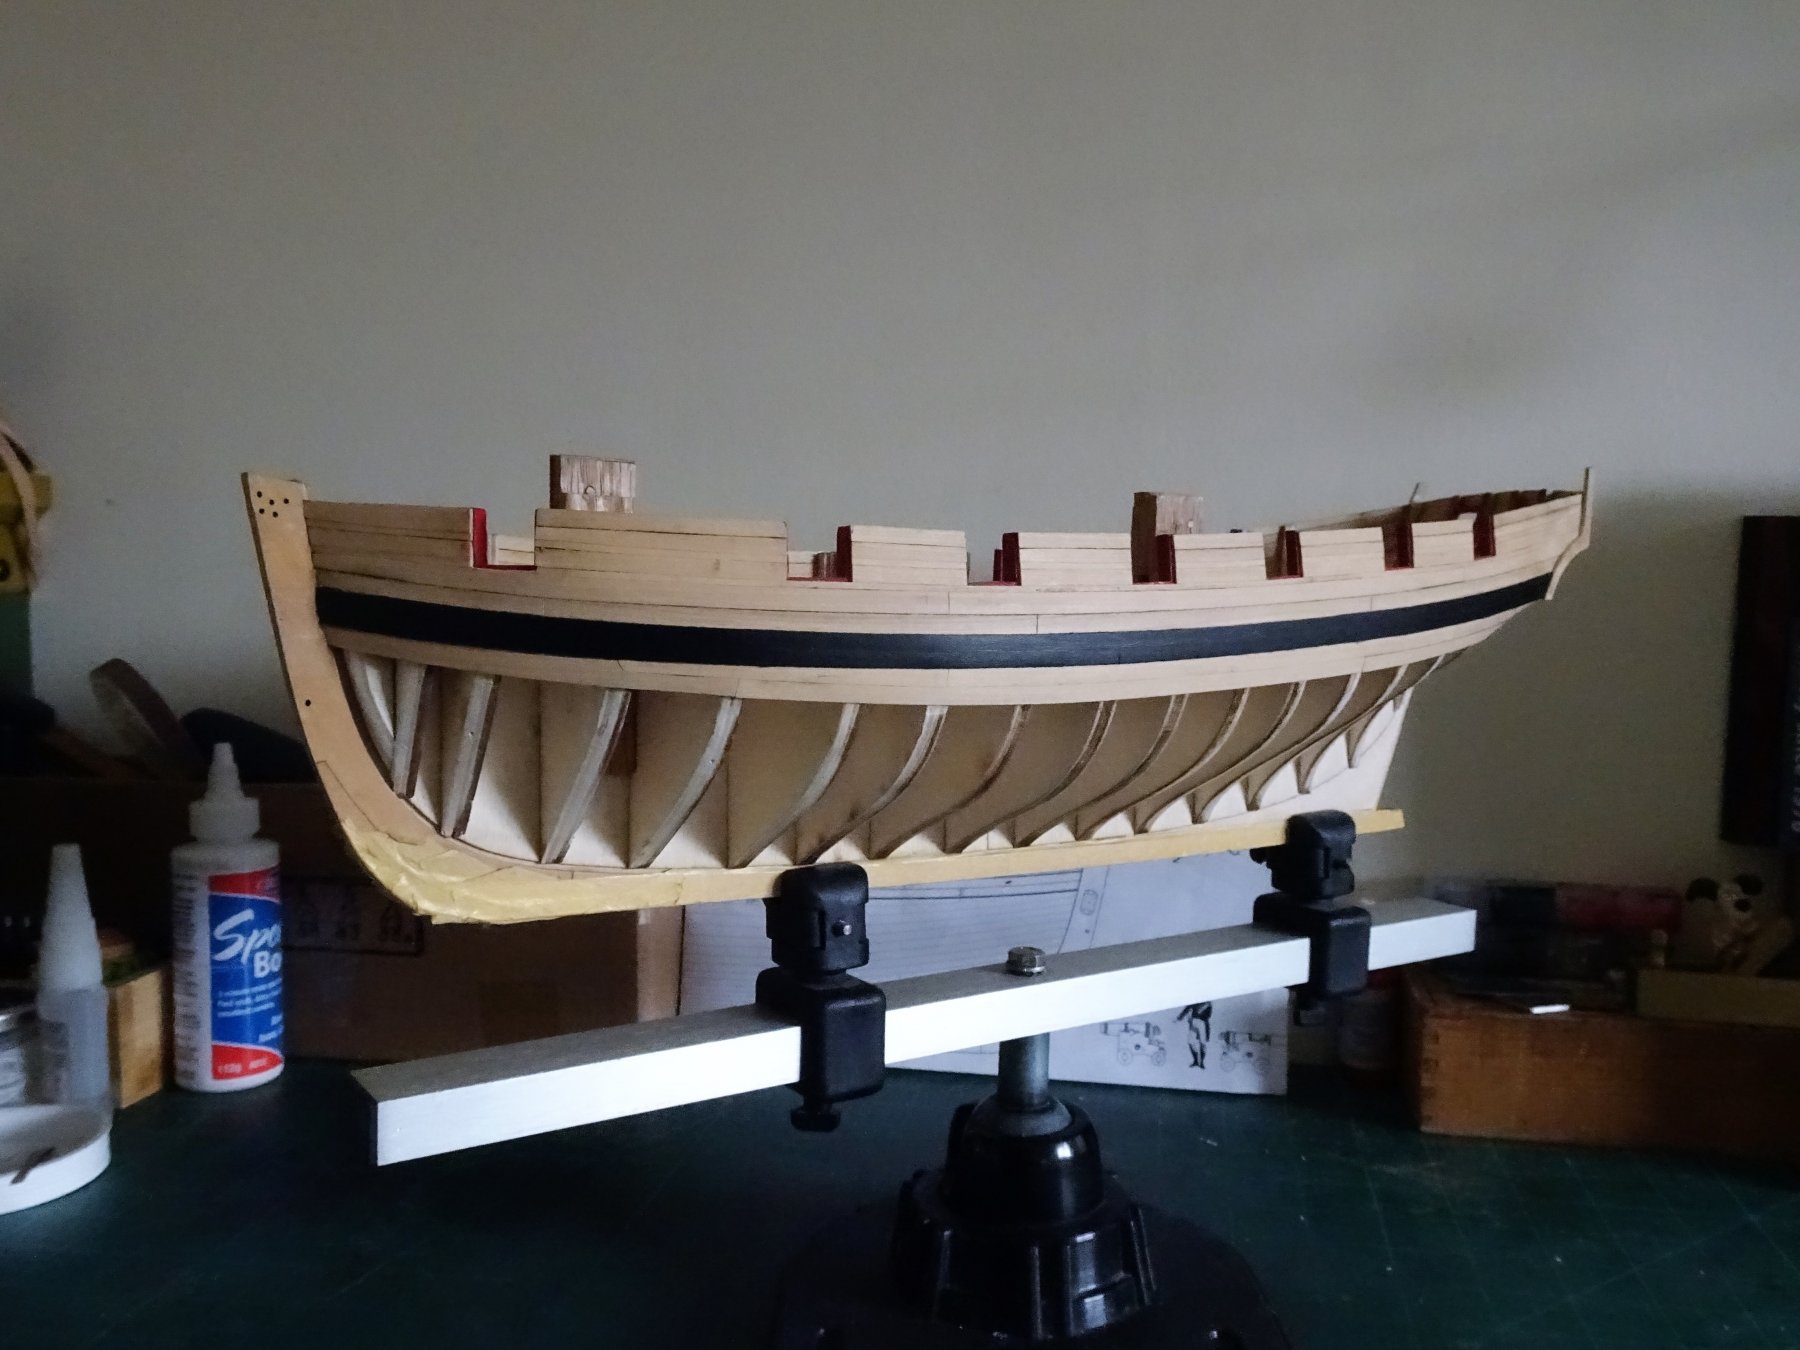
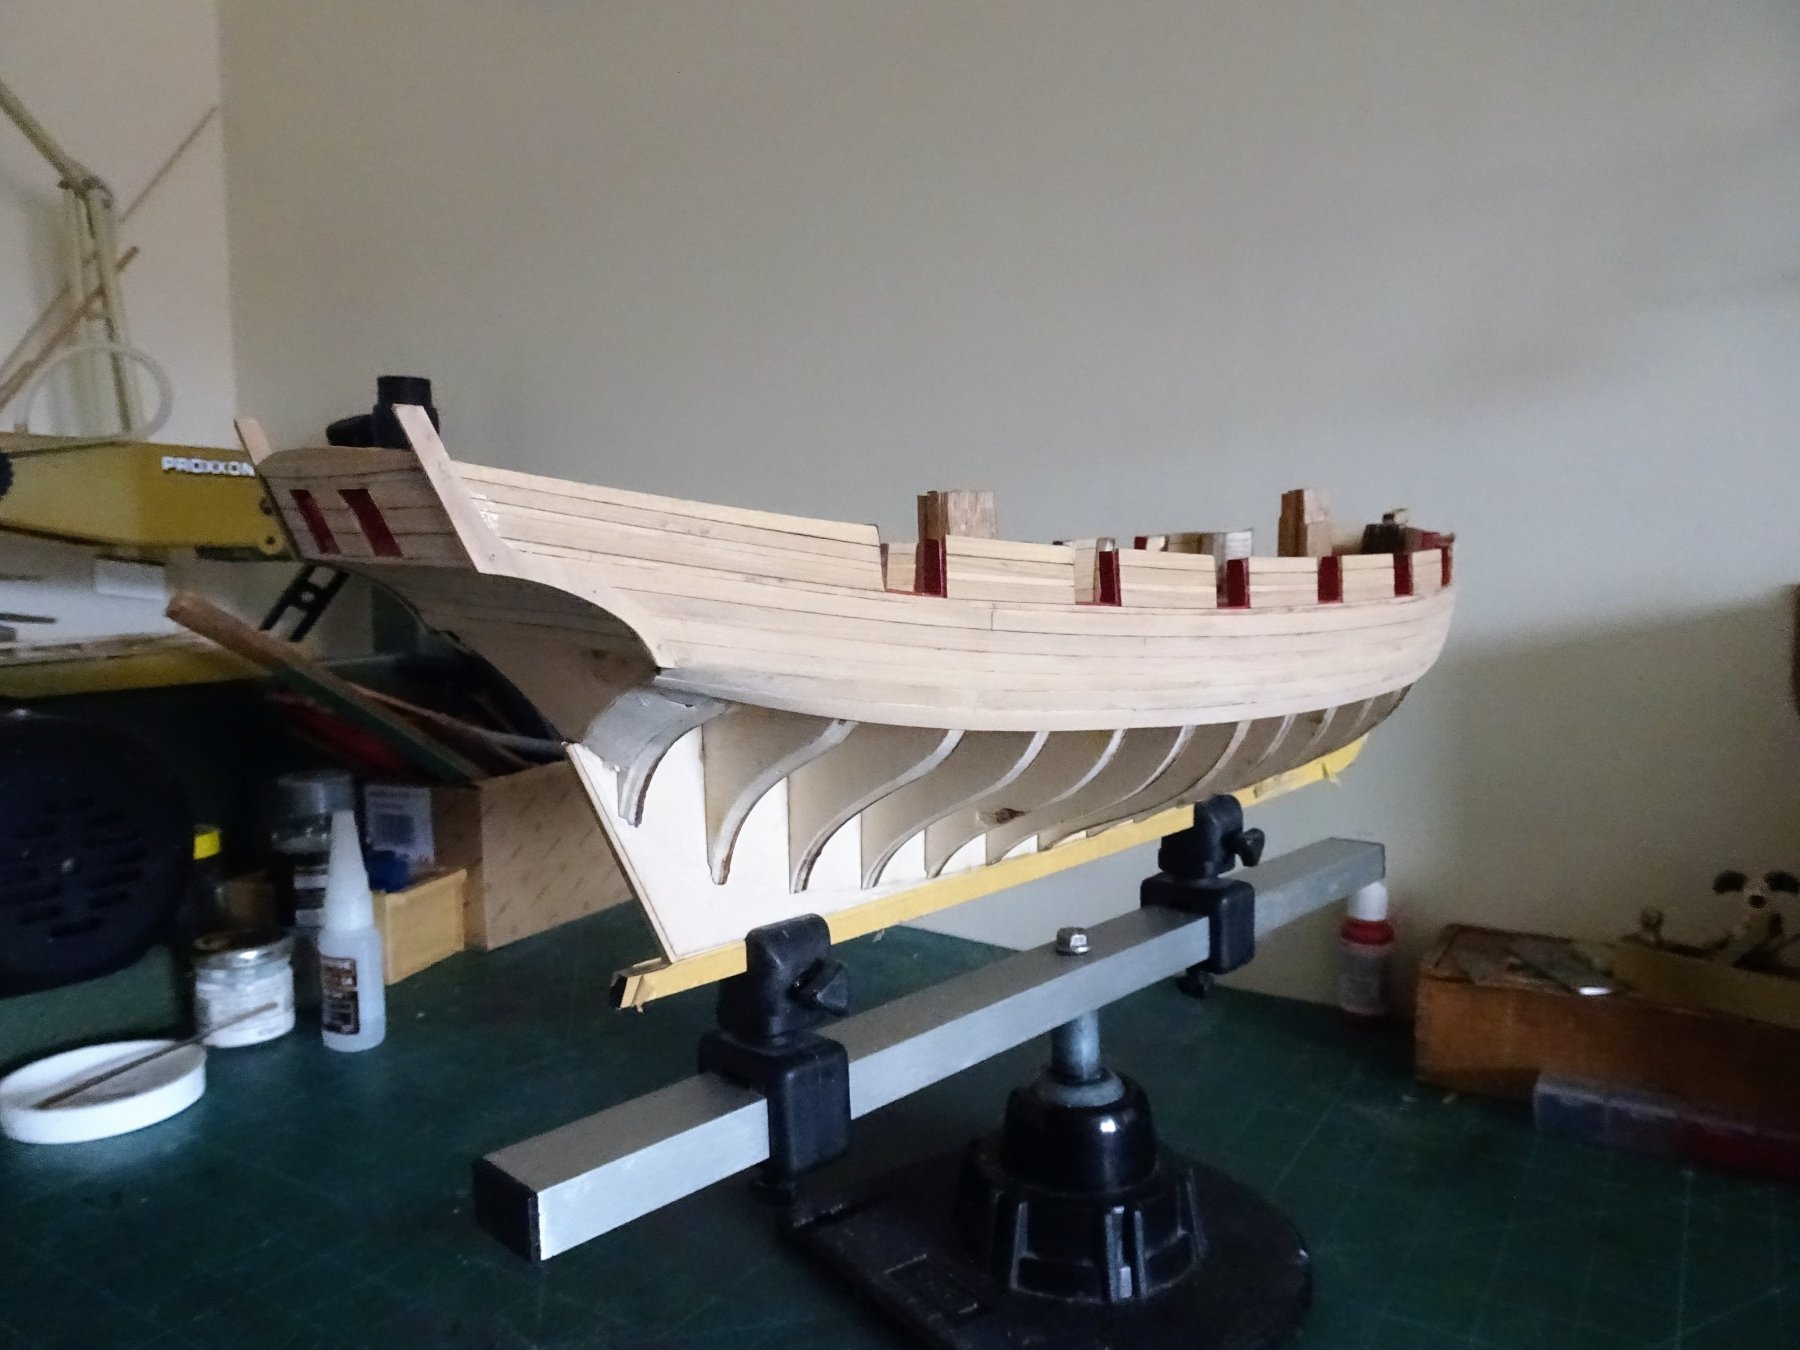
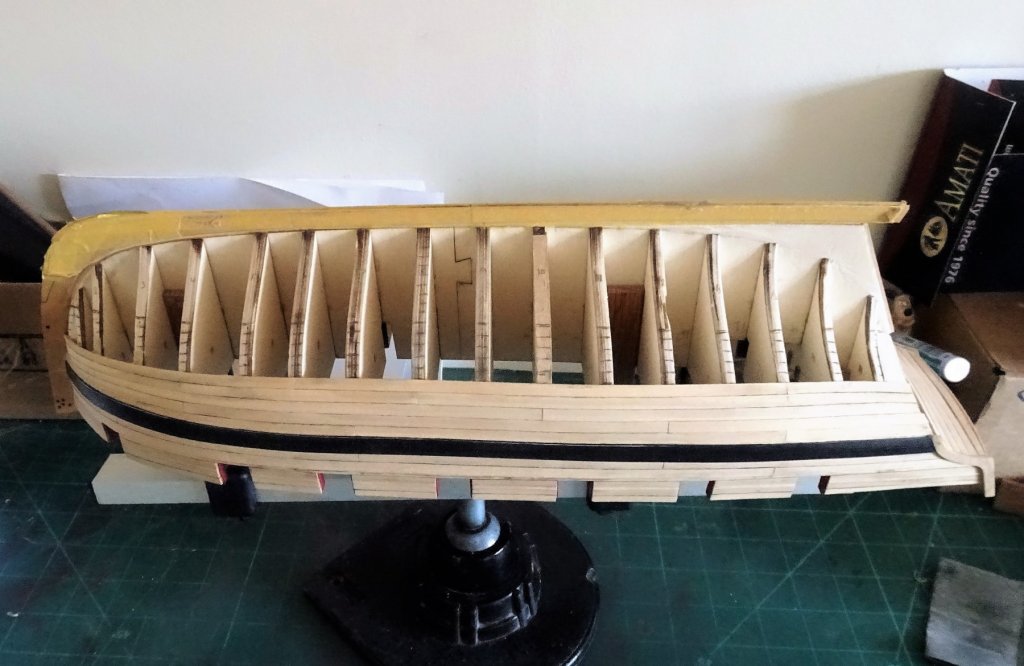
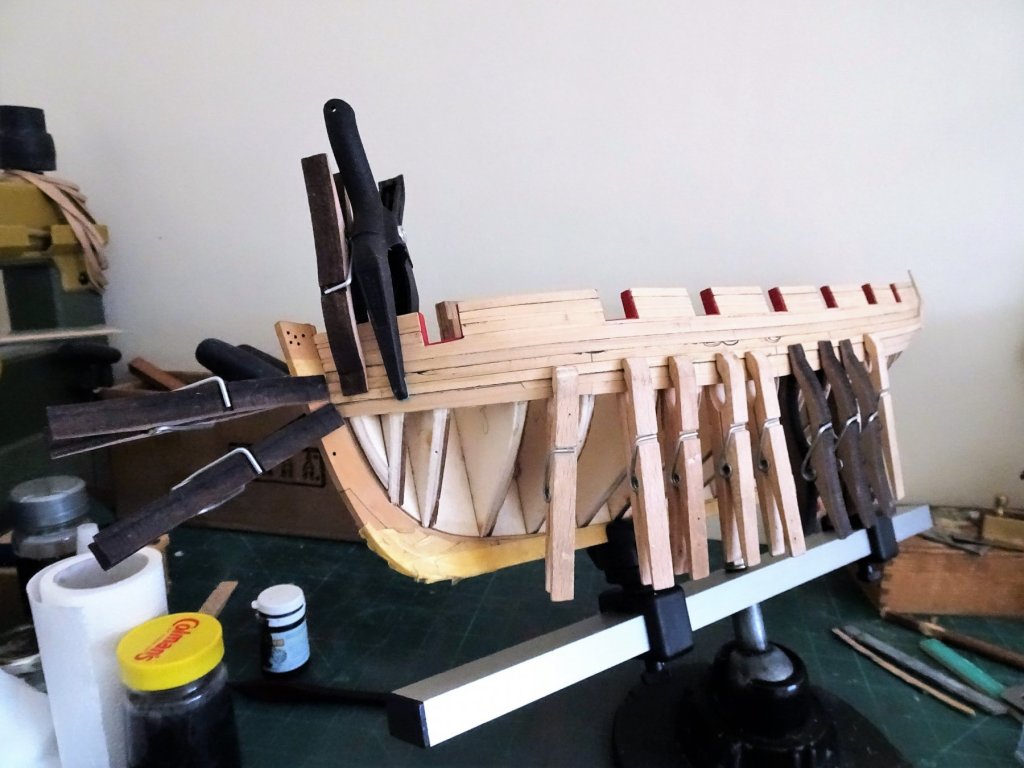
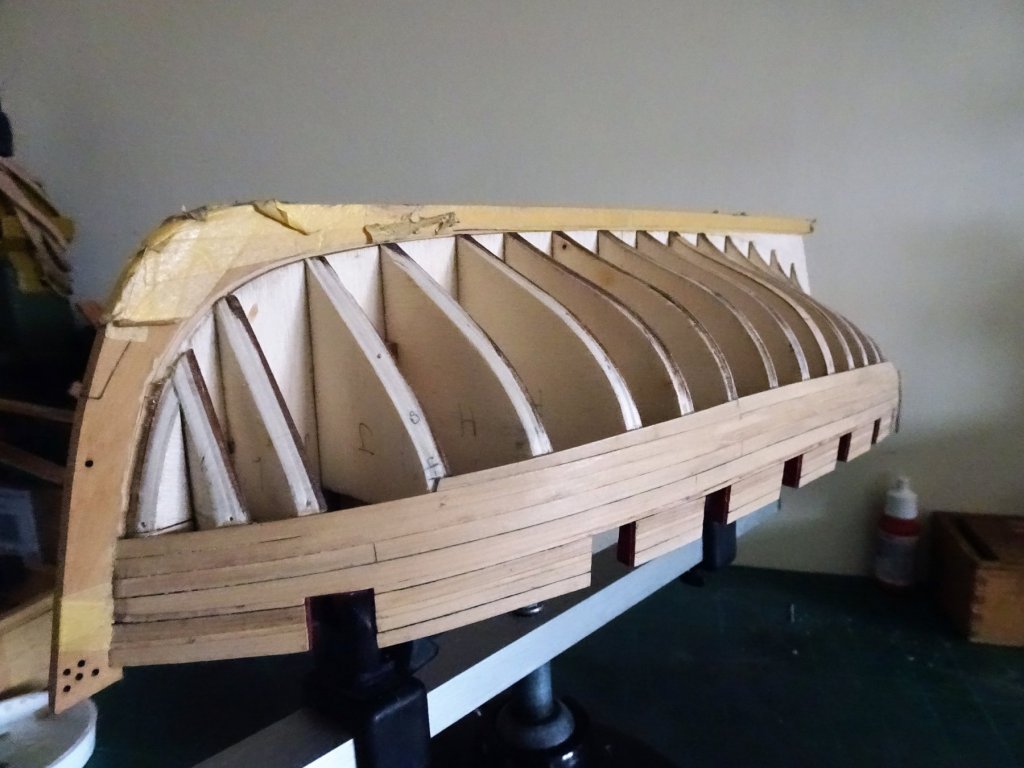
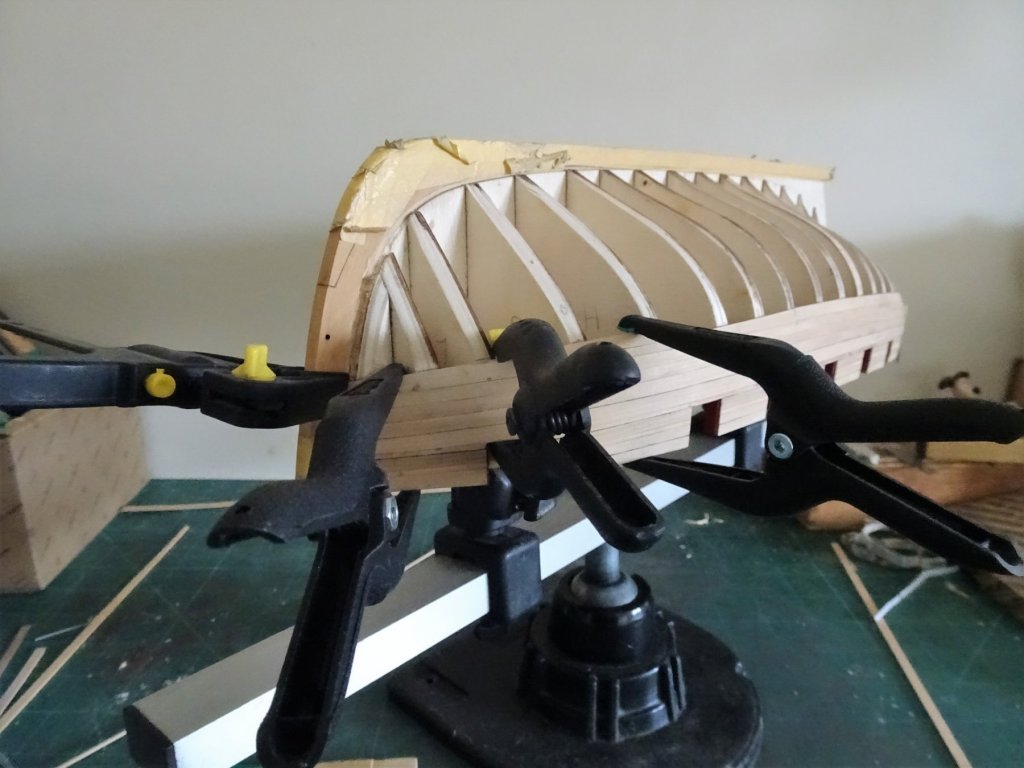
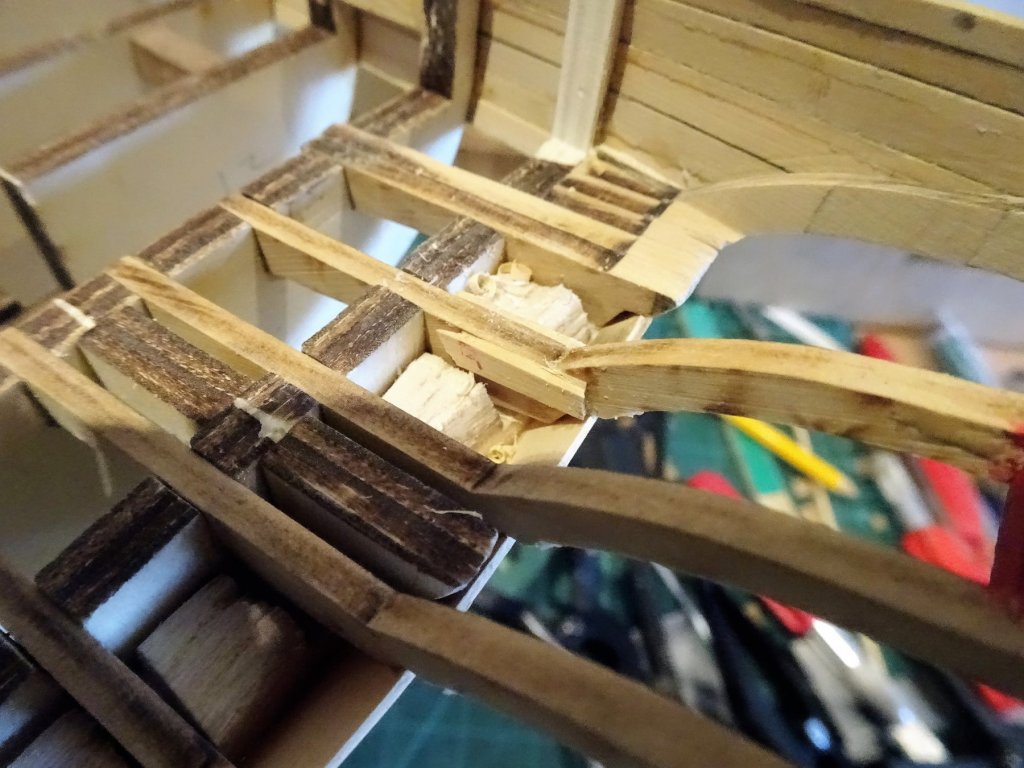
Post 22 Strakes below the Wale Before I apply the second Wale layer I intend to fit the drop planks and first two planking layers. I start with the first plank below the wale (3/16" x 3/64") which terminates at b/h J. and meets the Drop plank that will run to the stem. 7313 Following advice from Kurt, Dave, and Erik I have decided to run the planks at scale lengths and this first section runs between b/hds J and B, the next section between B and 12, and a final short strip to termination at the Square Tuck piece. This last piece has some twist in it to follow the curvature of the hull. 7423 With the first strake fitted I can move onto the Drop Plank. 7429 The last of several card templates to form the Drop plank. From the plan the forward end tapers to 3/32" and the aft end where it adjoins the second strake below the wale 5/32". The drop plank was cut from 1/16" sheet and using a jig sanded down close to 3/64". It is then a case of sand and tweak, tweak and sand to get the bally thing to fit. 7436 I stuck at it long enough to get thro' several card templates and three Boxwood versions before I got one that I could live with, which is not necessarily the standard some of my more adept colleagues could live with. 7606 7603 7599 7594 At last after seven days toil the first two strakes below the Wales are completed, altho' in need of some serious cleaning up. I will now move on to the second layer Wales. B.E. 04/04/2018


- 574 replies
-
- 20
-
-
- cheerful
- Syren Ship Model Company
- (and 1 more)
-
Thanks Dave and Erik for your input, looks like scale planking is the way to go. @ Erik - I'm not sure that I can get anywhere close to your excellent planking, but I do appreciate your series of photo's showing how you approached the subject. I will try and follow your good advice and fine example. PS: I have printed out your post above and pinned it to my bench to try and keep me on track. Regards, B.E.
- 574 replies
-
- 4
-
-
- cheerful
- Syren Ship Model Company
- (and 1 more)
-
Welcome to the Swan Club David, after your superb Revenge build I don’t think Fly will present you with too many problems, enjoy this pretty little Sloop. B.E.
- 126 replies
-
- 2
-
-
- fly
- victory models
- (and 1 more)
-
Hi Kurt I couldn't quite see from the photo's posted in other logs whether the individual plank method had been used as all the photo's seemed to show completed strakes. Did most other builders of Cheerful use the separate plank method? You got me thinking about control of long lengths re tight joints so I think I will at least do the first strake on this basis and see how it goes. It is fronted by the drop plank anyway. Thanks OC, it is early days yet and the jury is still out on whether a thing of beauty will be created, I certainly hope so. B.E.
- 574 replies
-
- 2
-
-
- cheerful
- Syren Ship Model Company
- (and 1 more)
-
Those mouldings look just fine Steve, well done. B.E.
- 190 replies
-
- 1
-
-
- pinnace
- model shipways
- (and 1 more)
-
Thanks Bob and Kurt, and to those who have given me 'likes' I'm also going to fit the two strakes and drop plank below the wale before I add the second wale layer. I don't think you will have trouble clamping the wales Kurt as clamps fit easily between the bulkheads to hold them in place. I suspect holding the planks below the wales may present a greater problem. I will fit the plank immediately below the wale (the one that stops at b/h J); as Chuck mentions this tapers from b/h B to 5/64", to meet the drop plank, but otherwise remains at the full width of 3/16". I intend to mostly fit the strakes in full lengths and mark the butt joints once dry fitted. B.E.
- 574 replies
-
- 5
-
-
- cheerful
- Syren Ship Model Company
- (and 1 more)
-
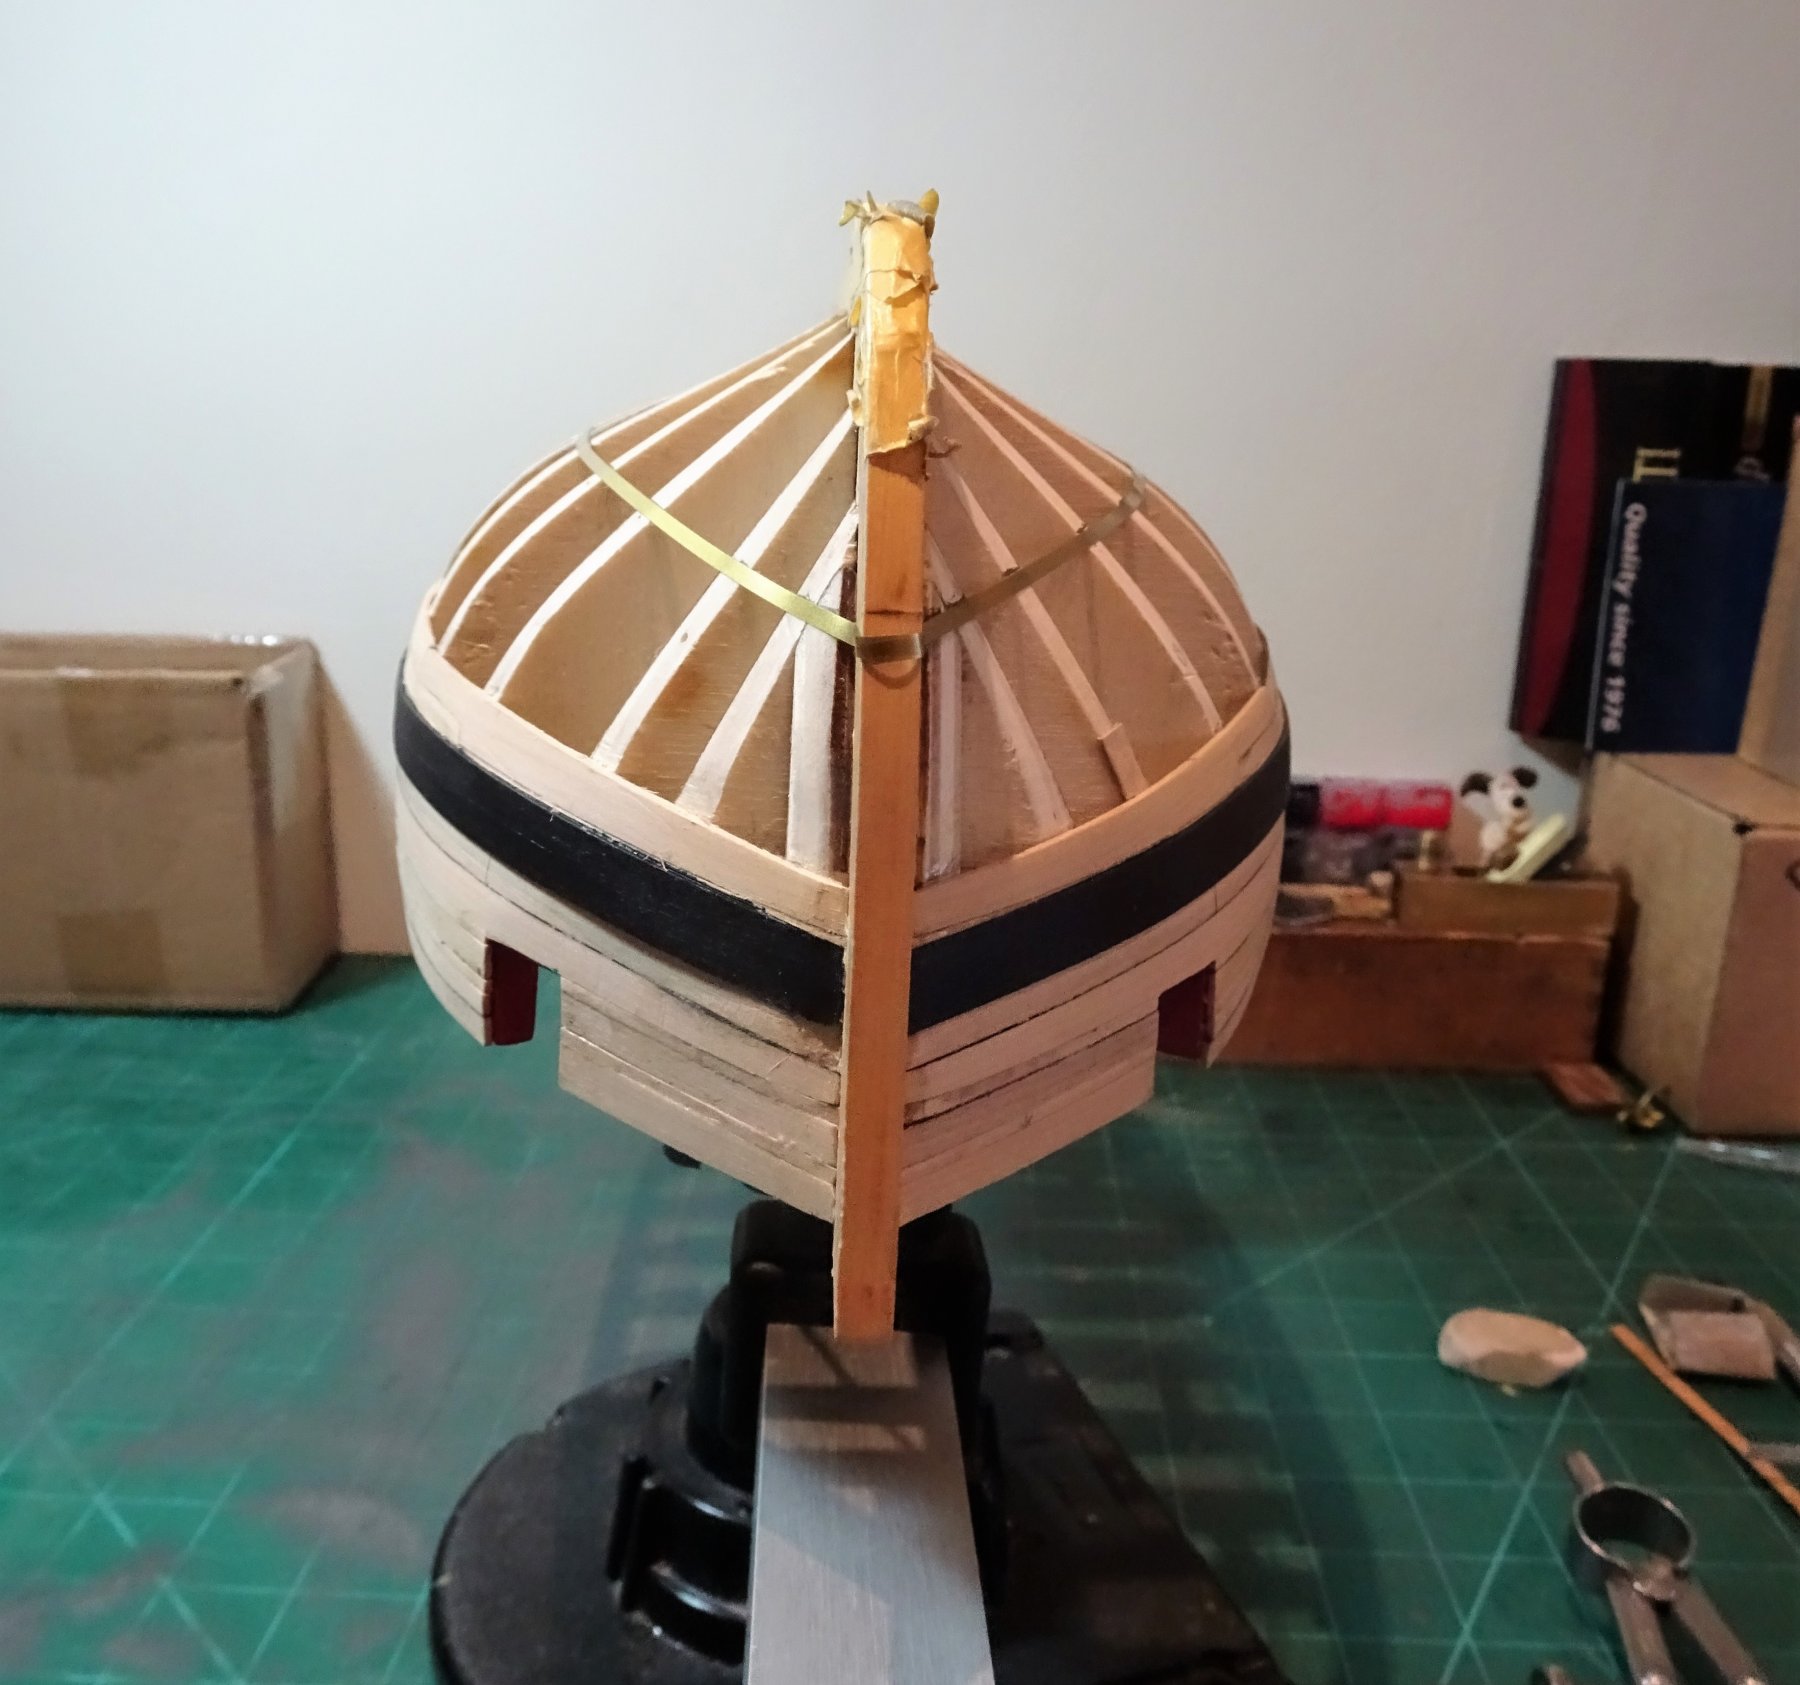
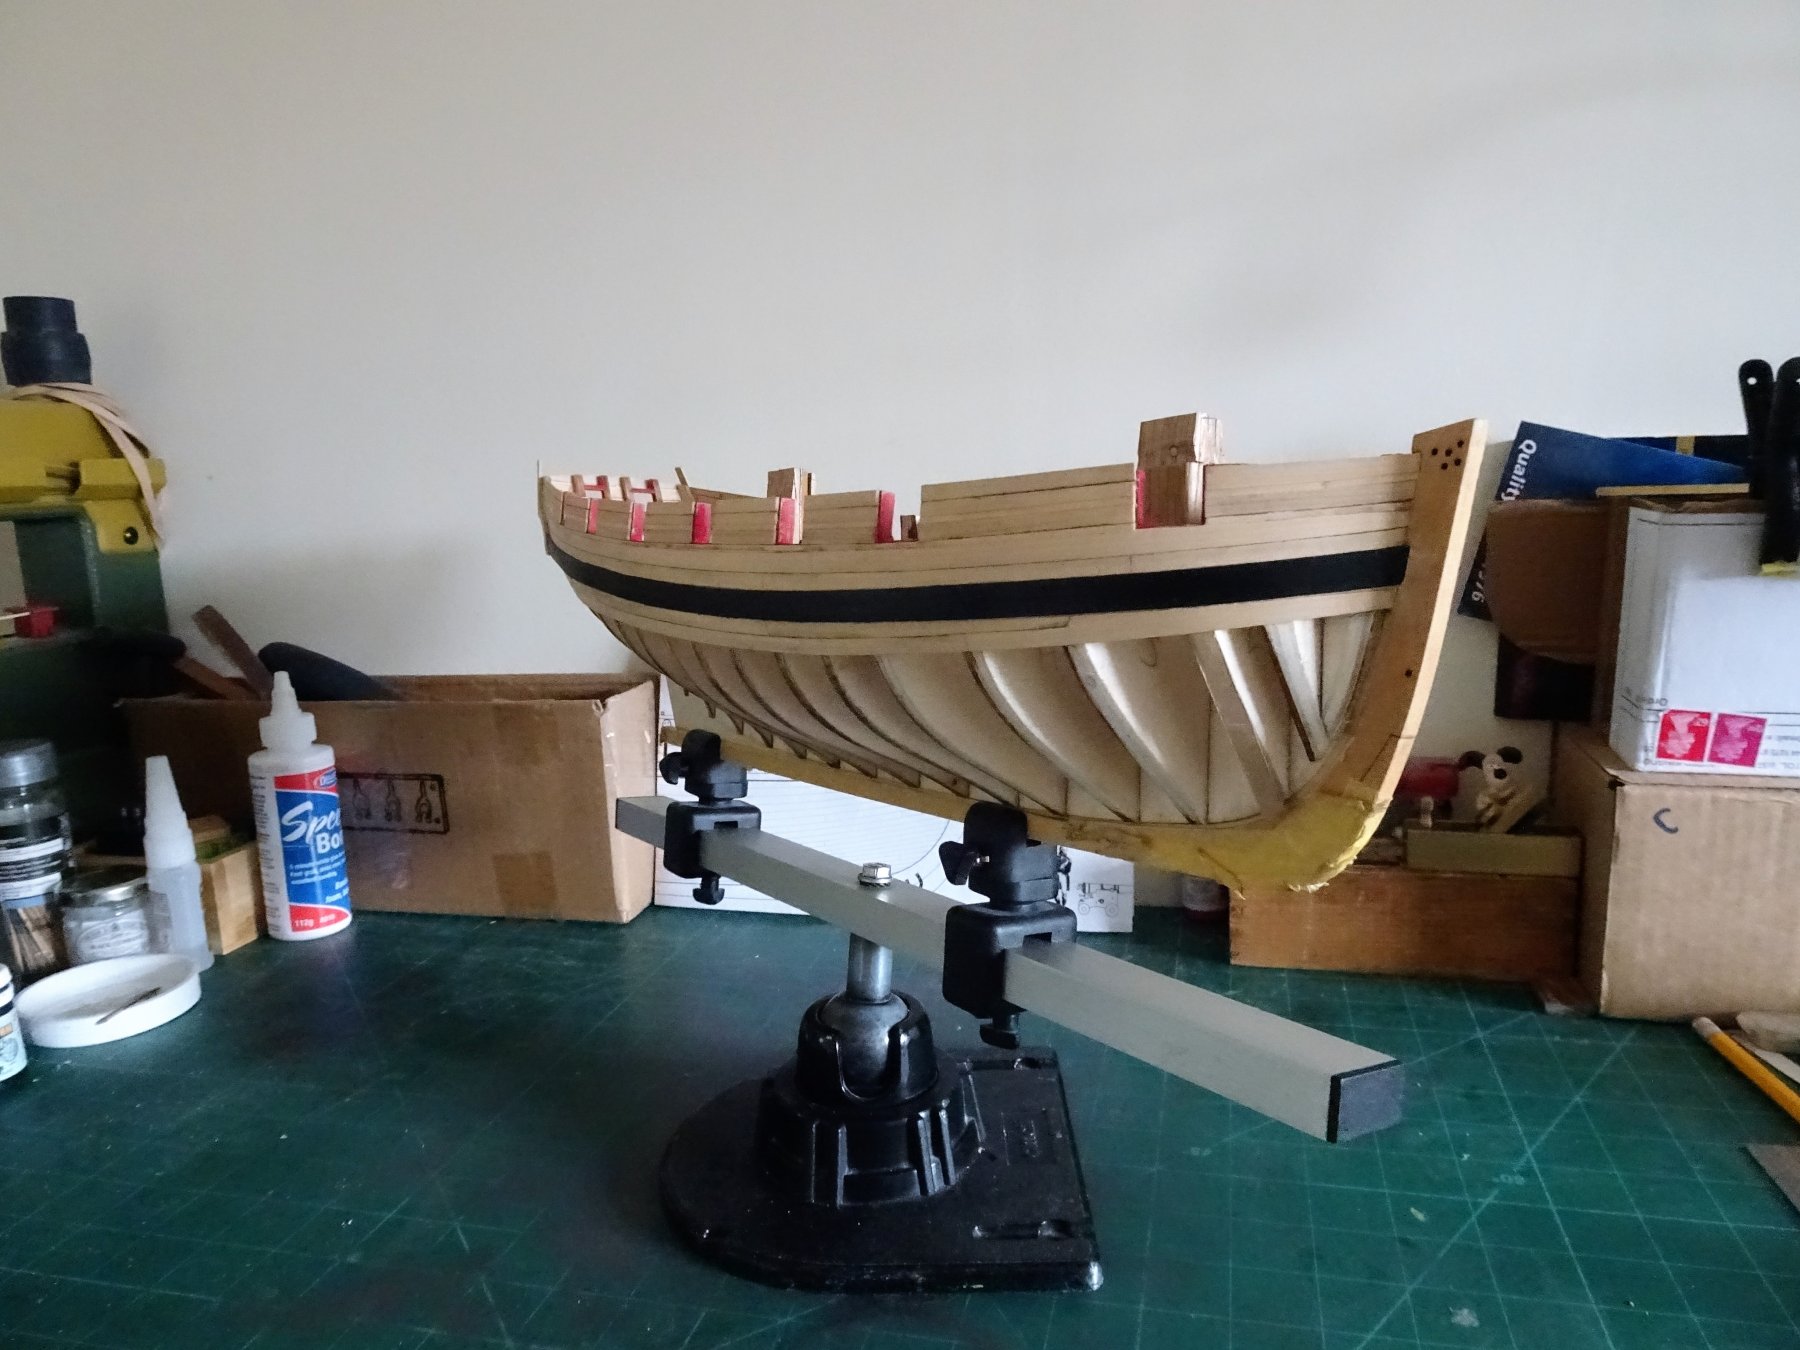
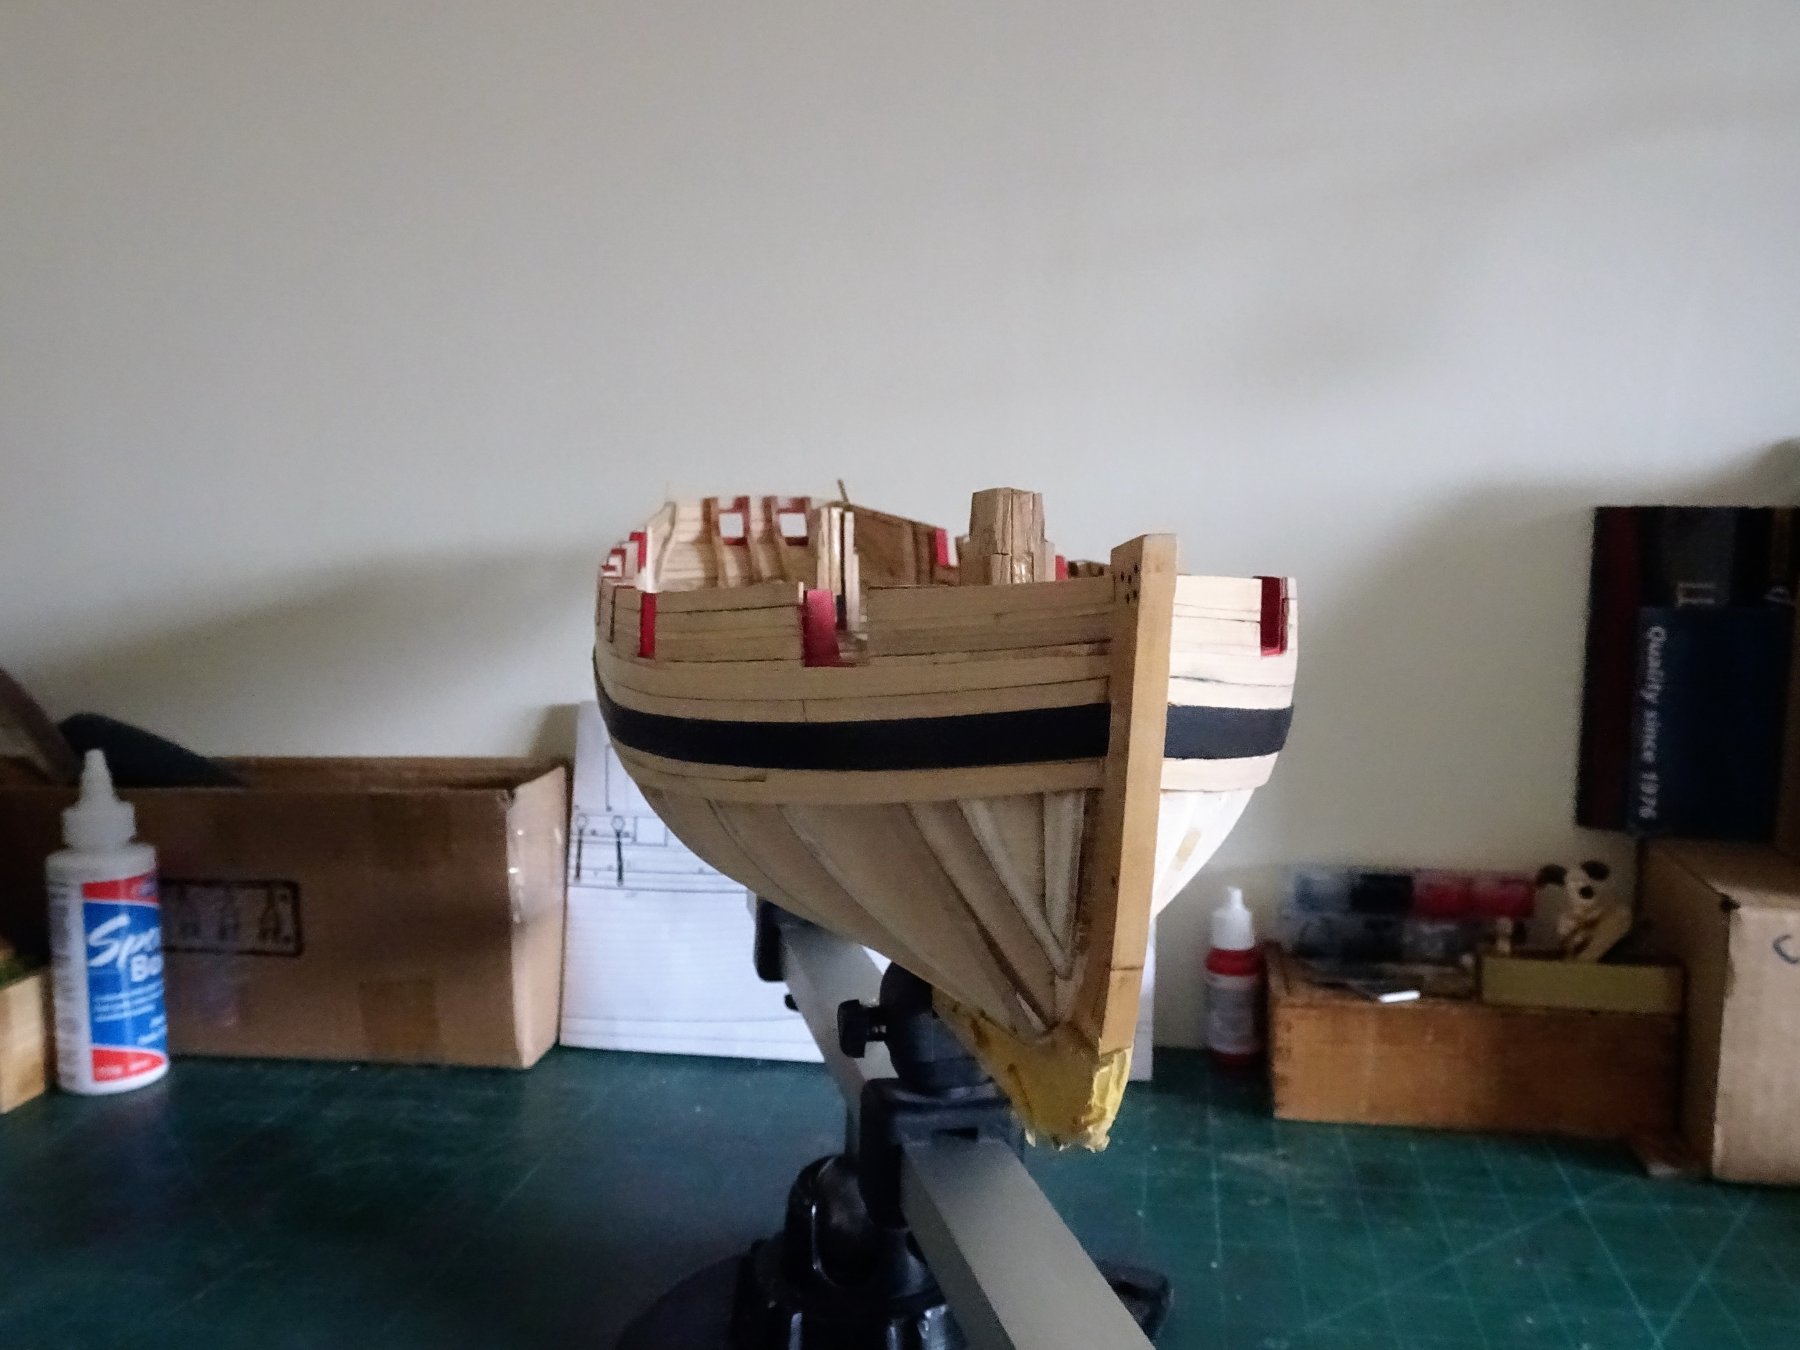
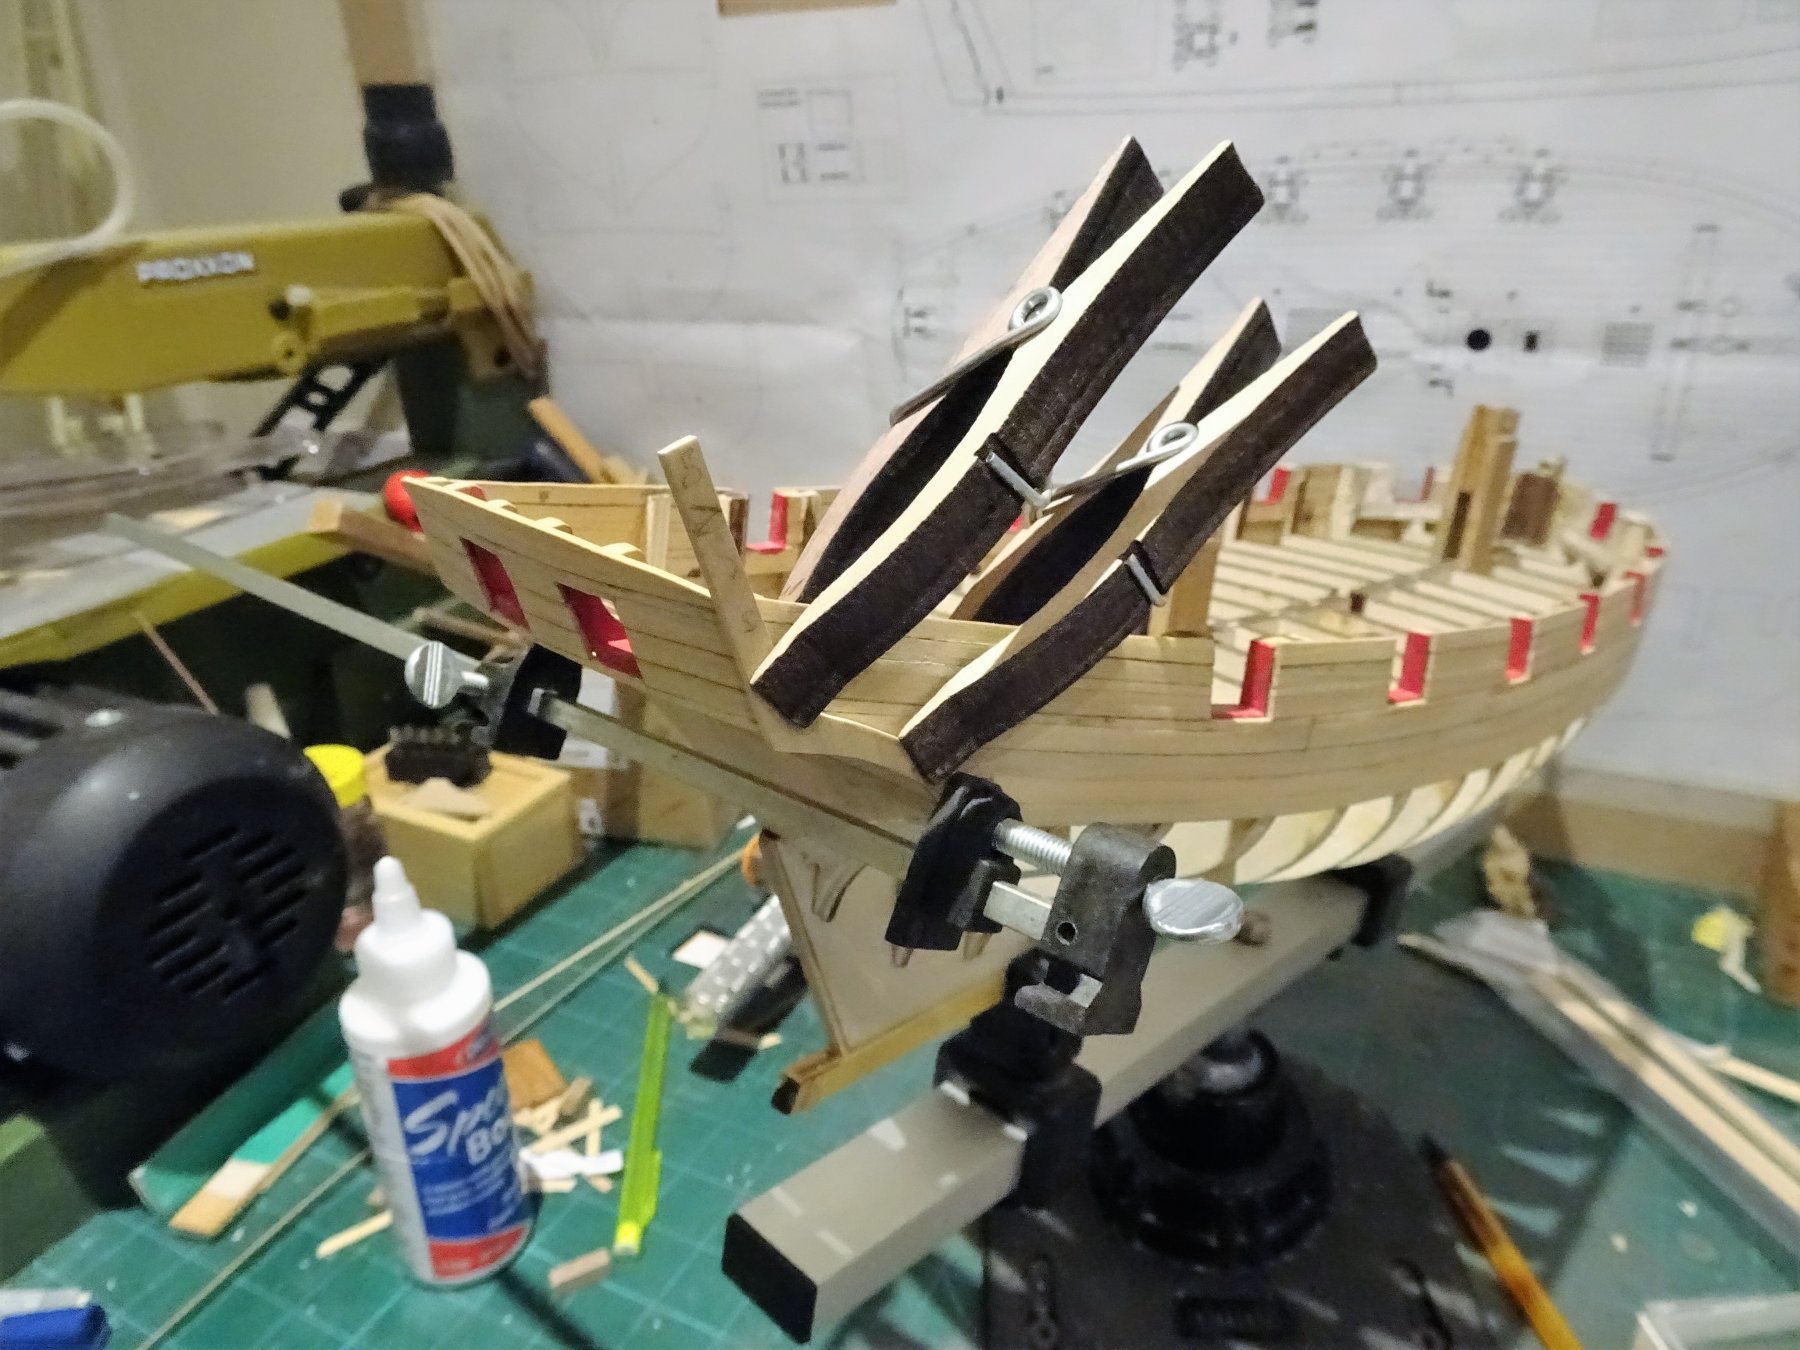
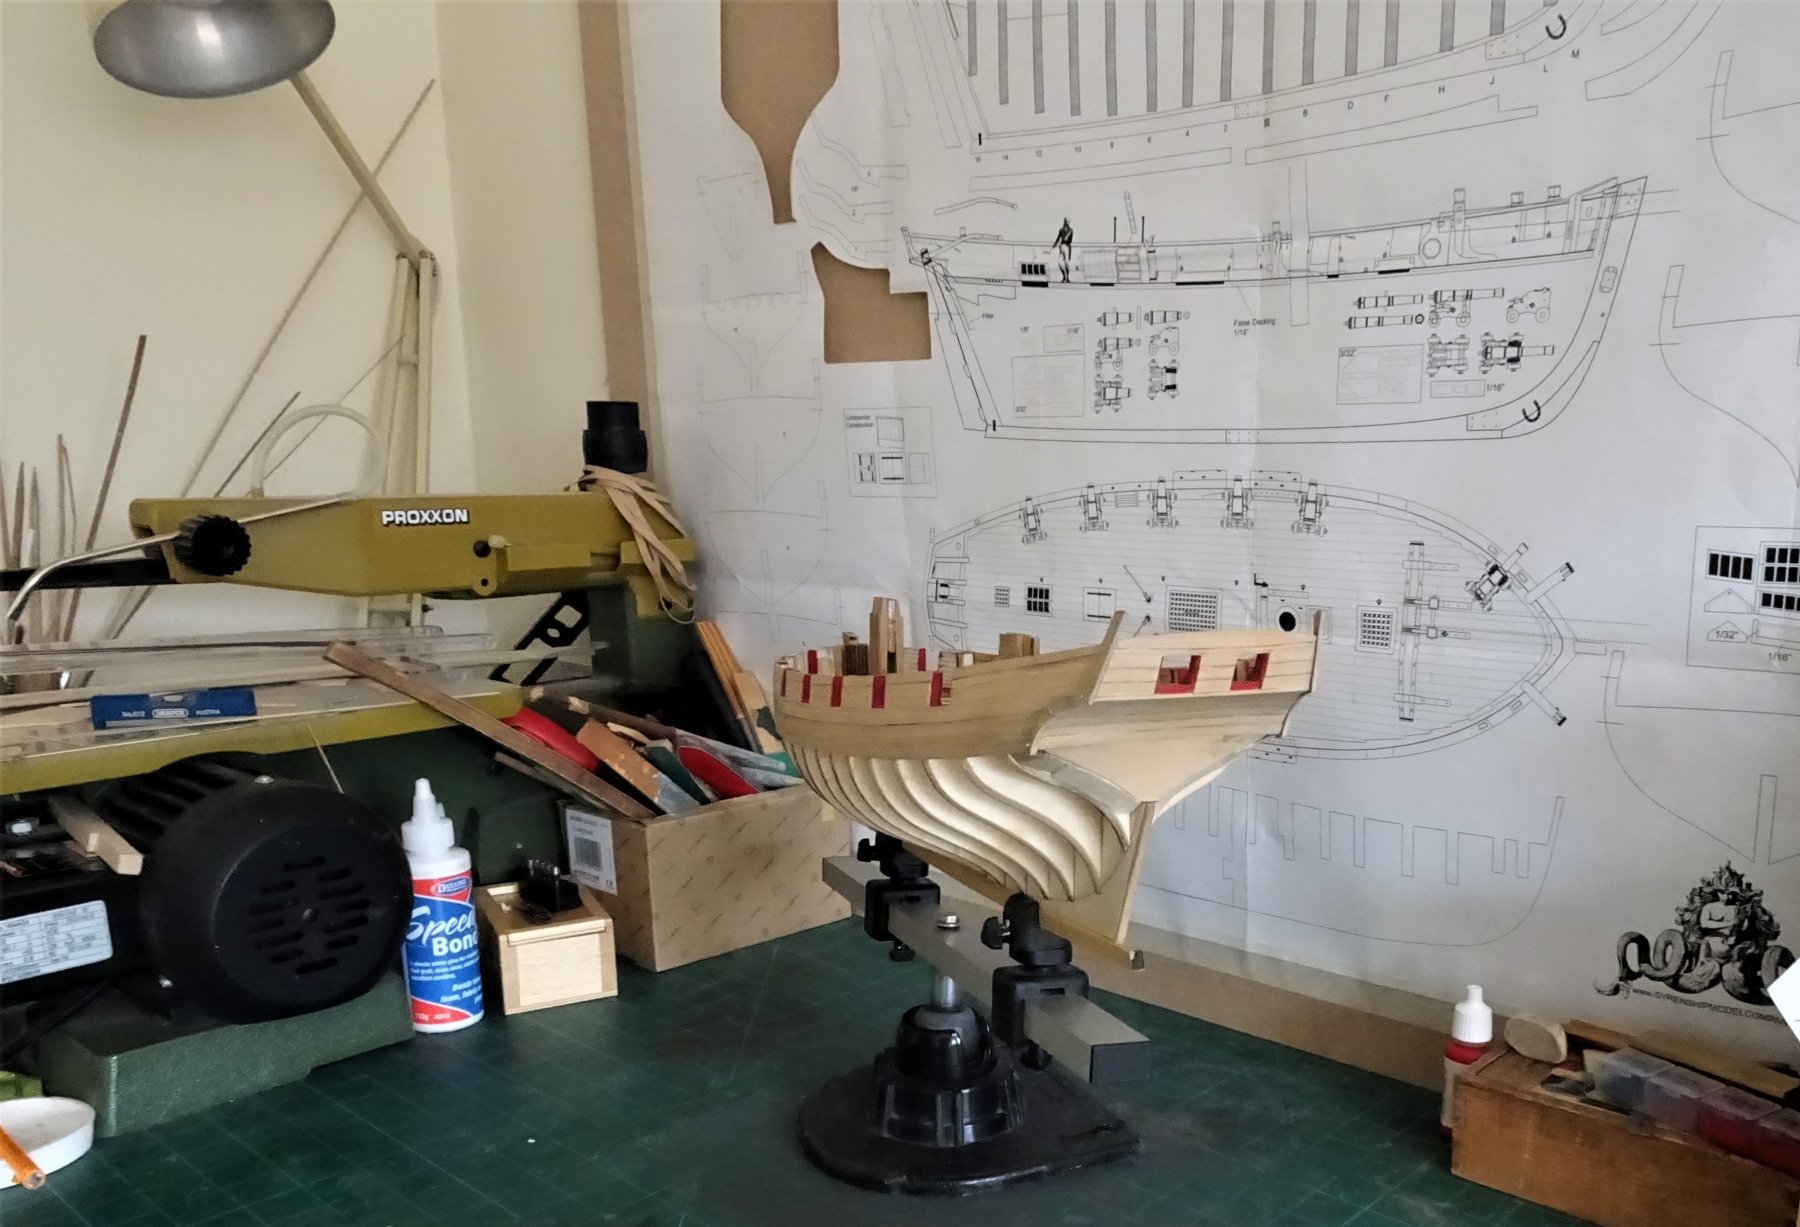
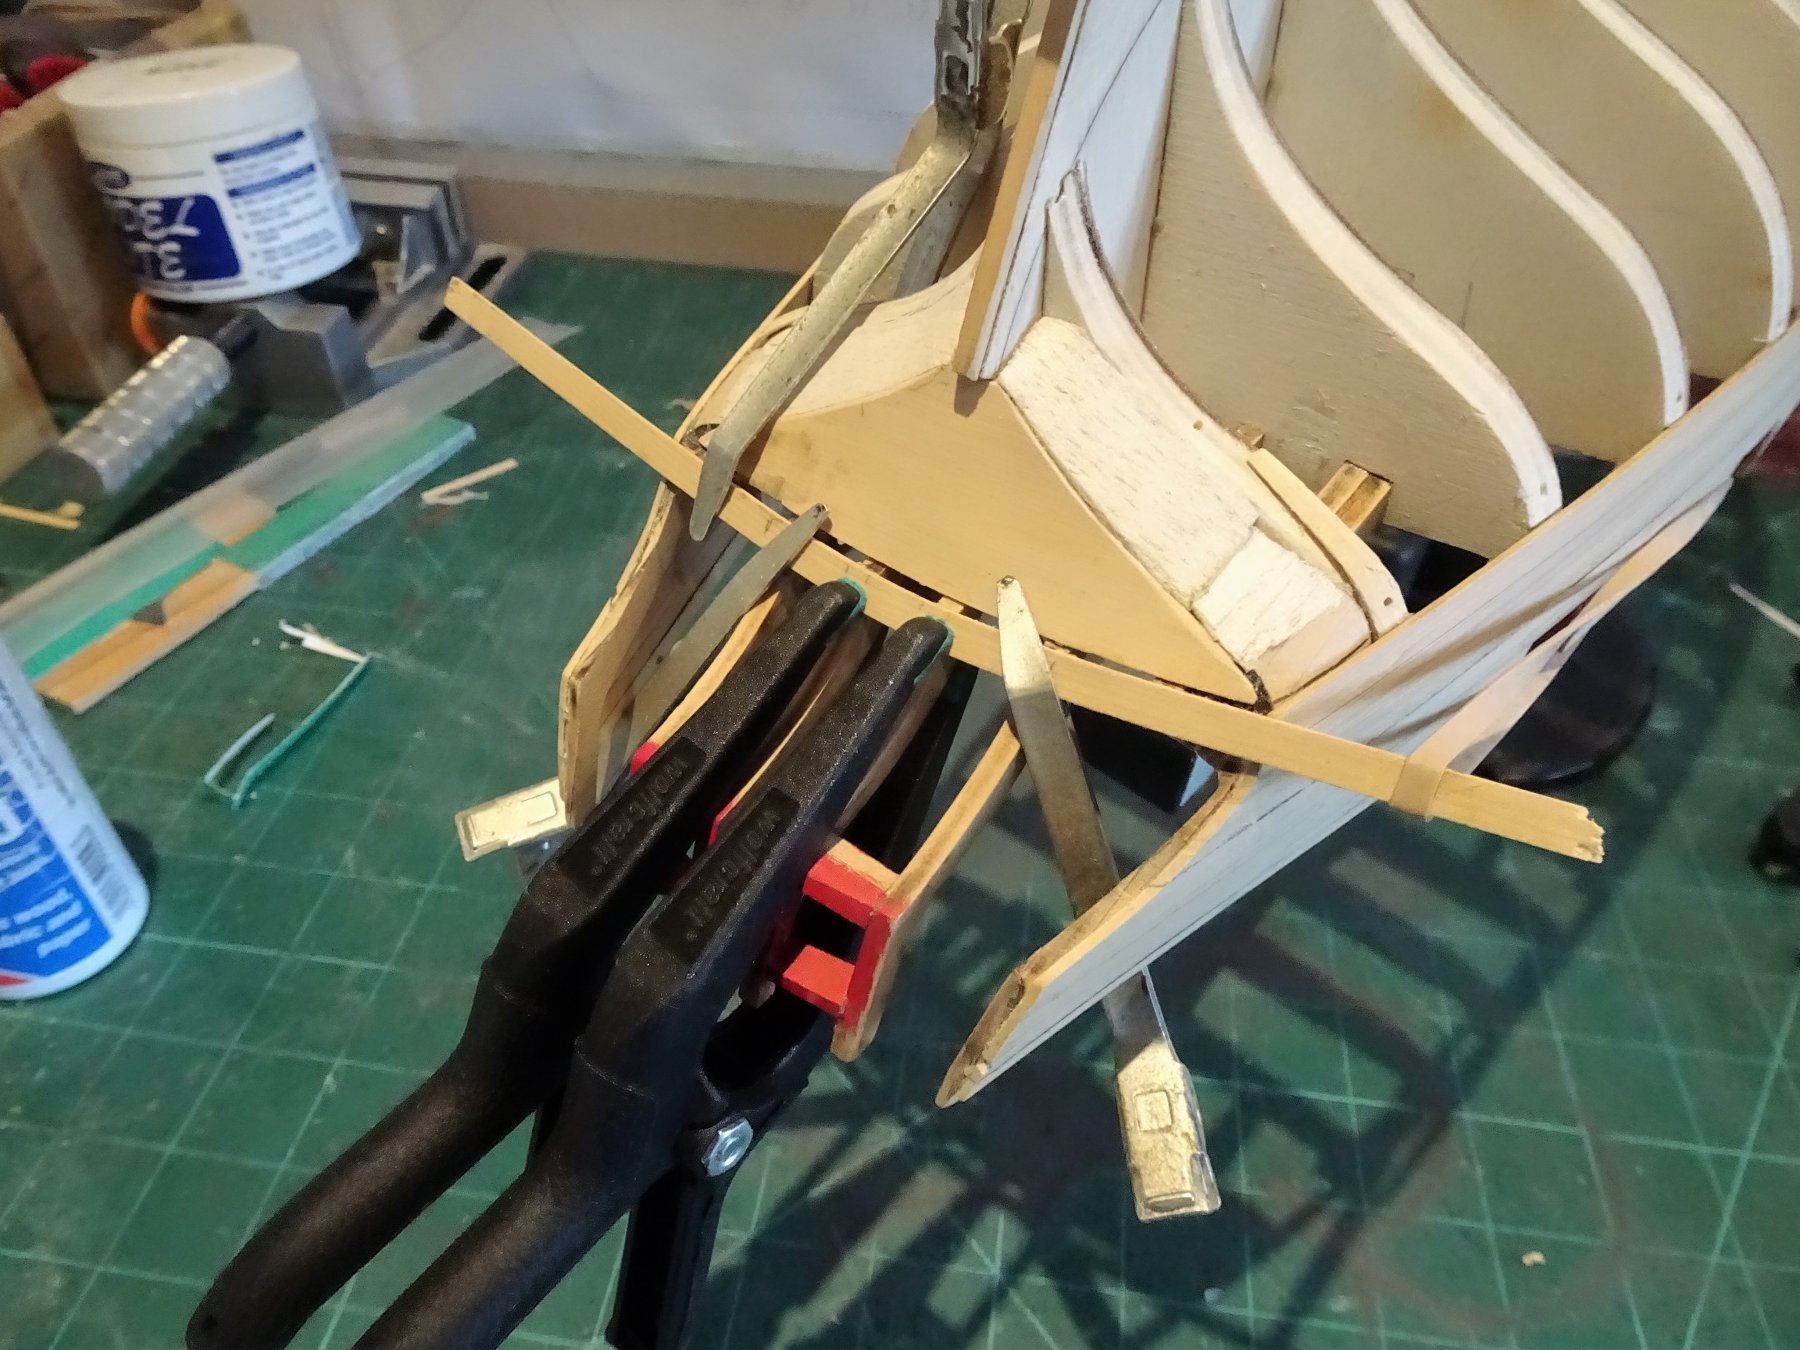
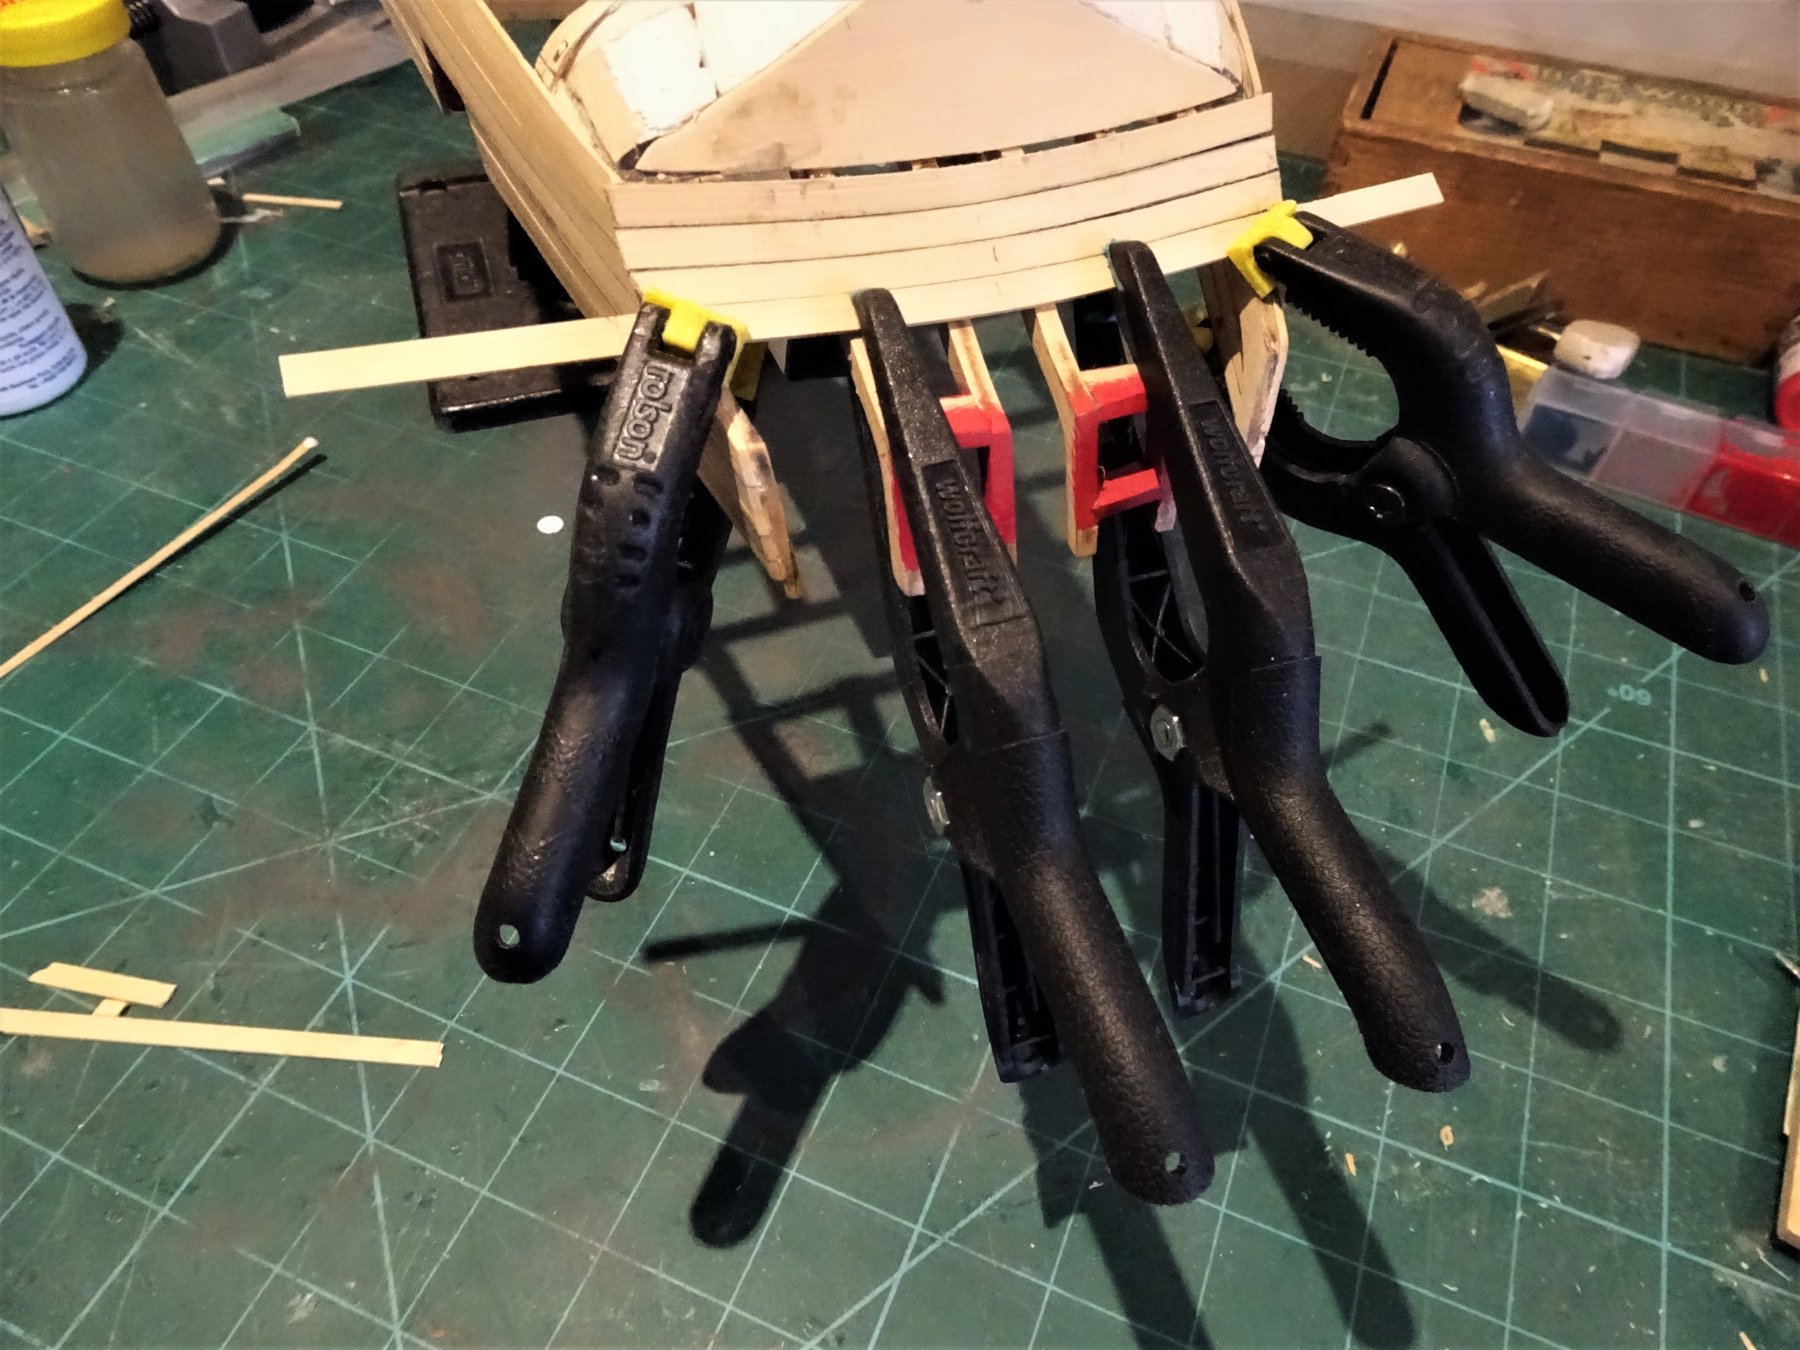
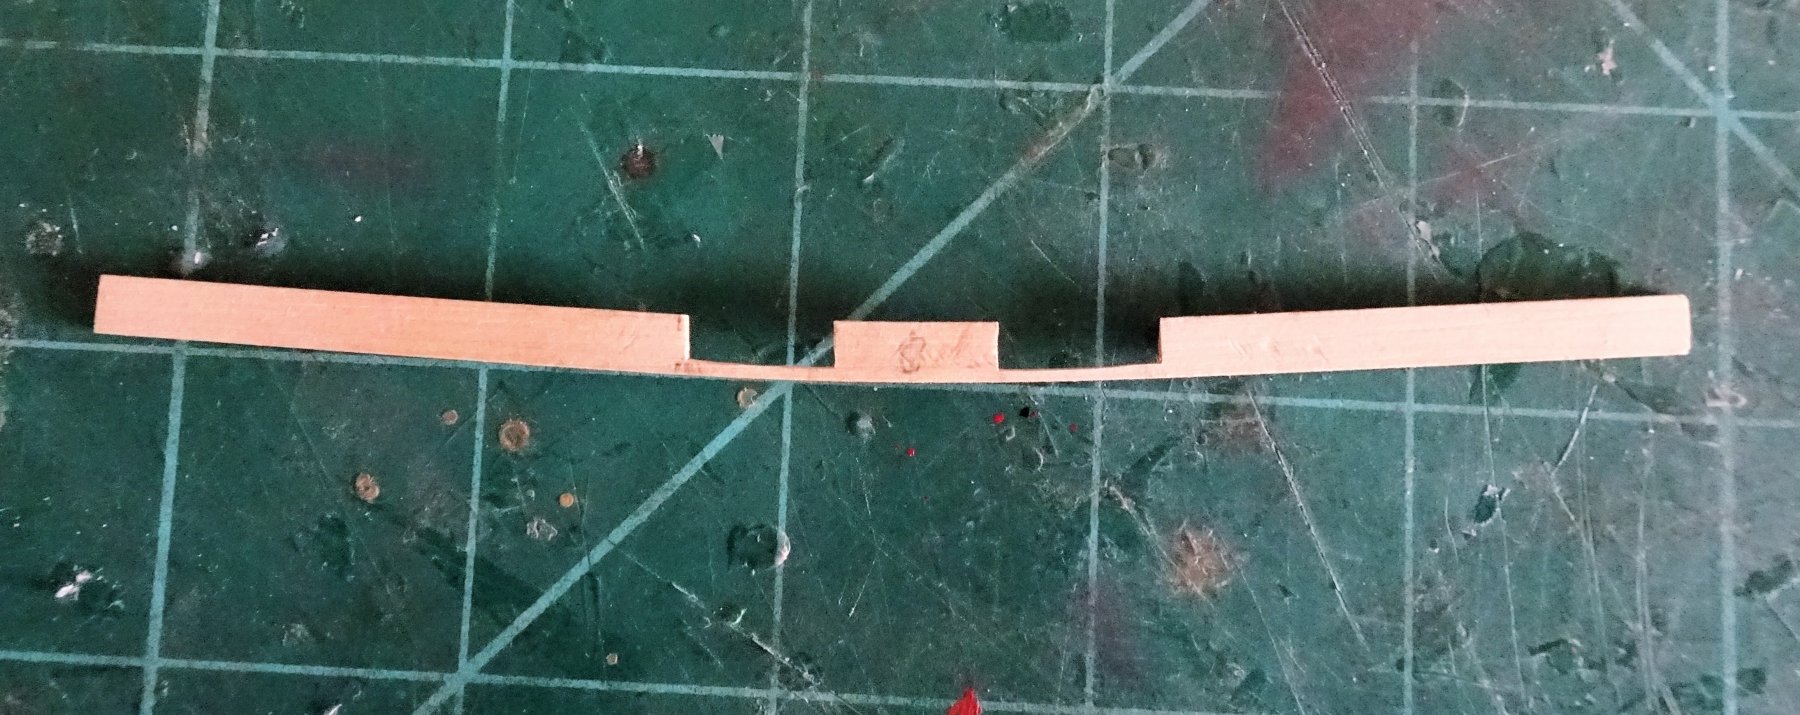
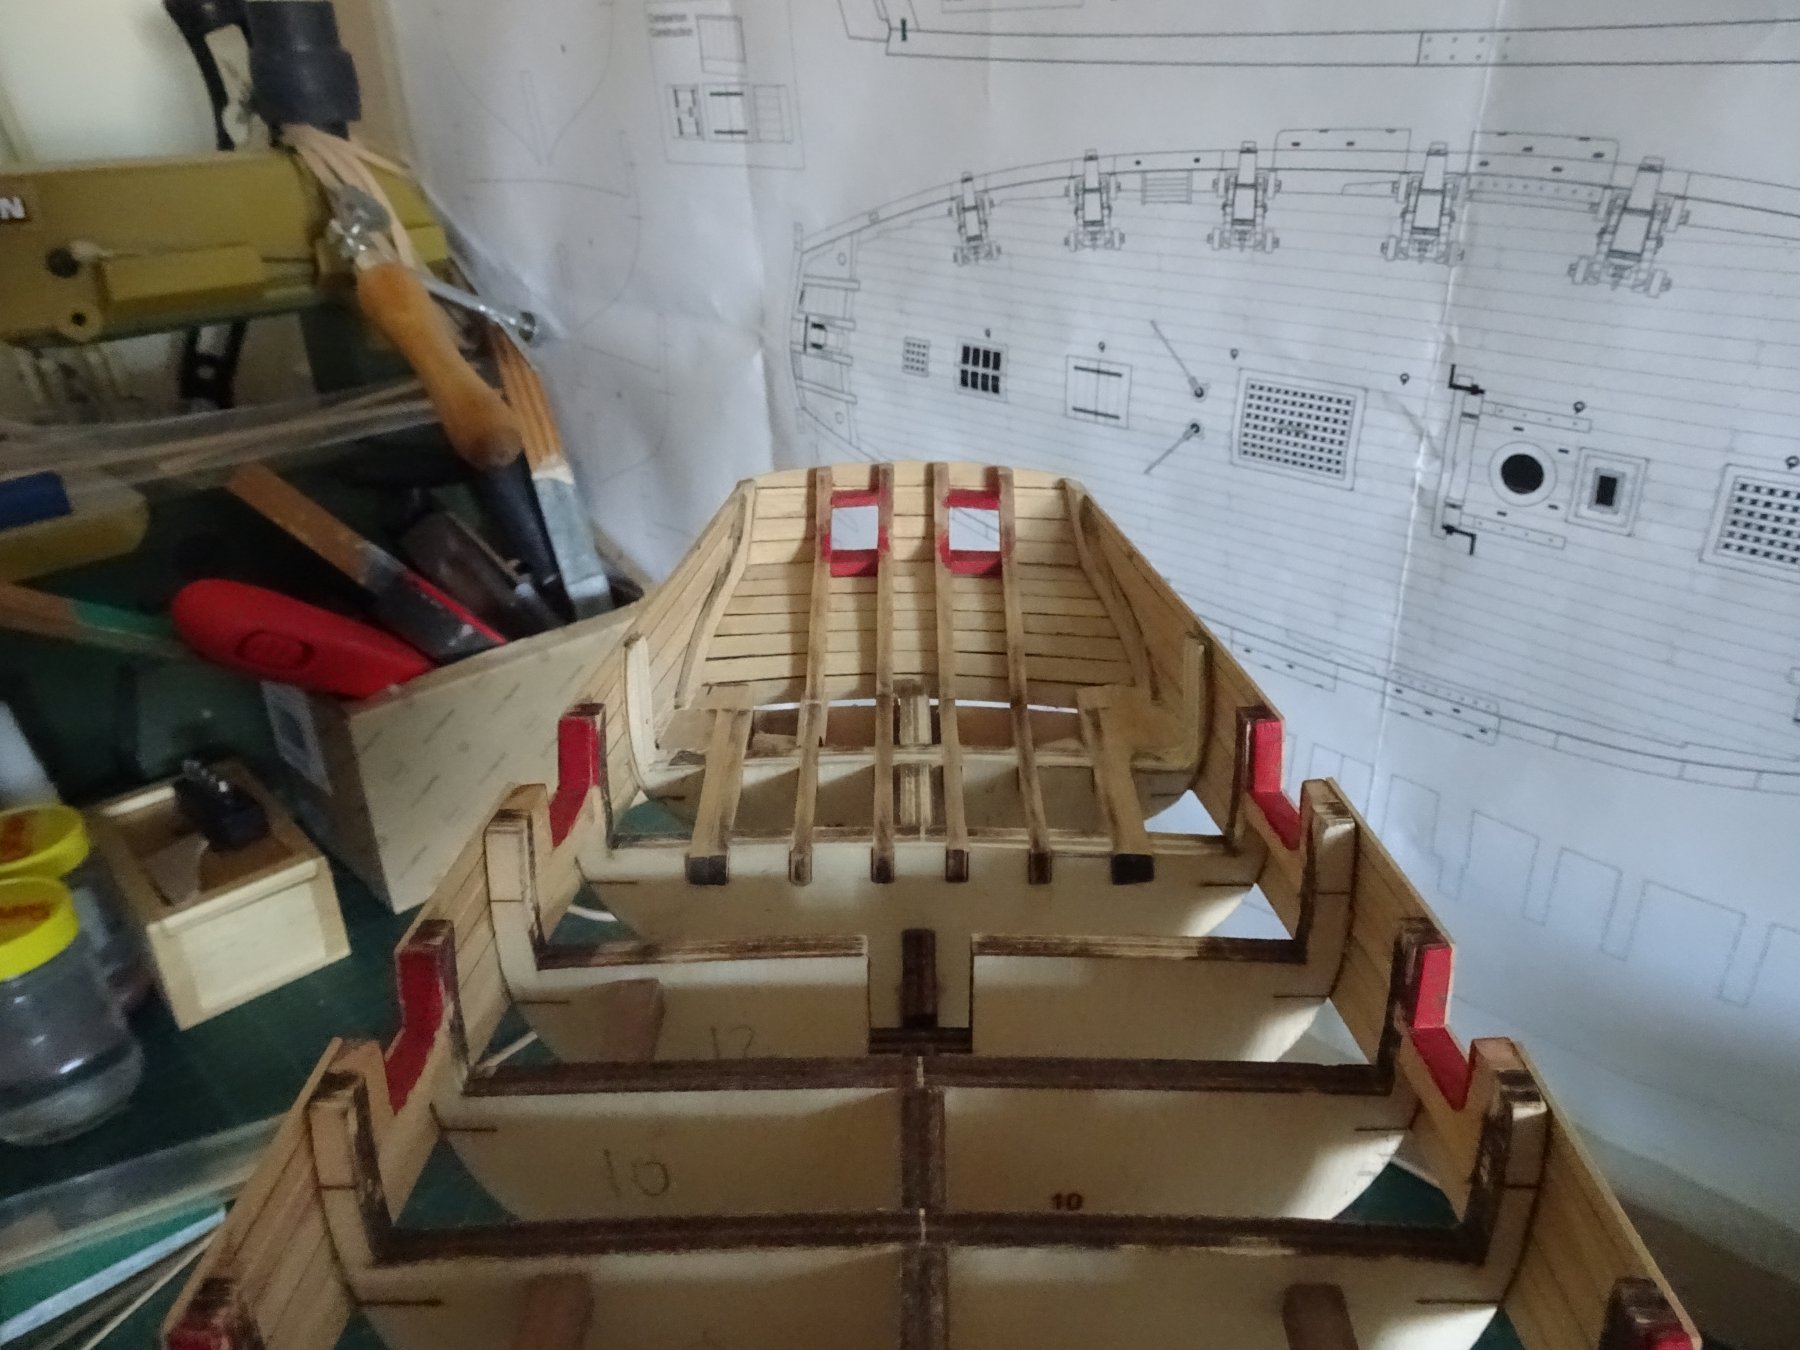
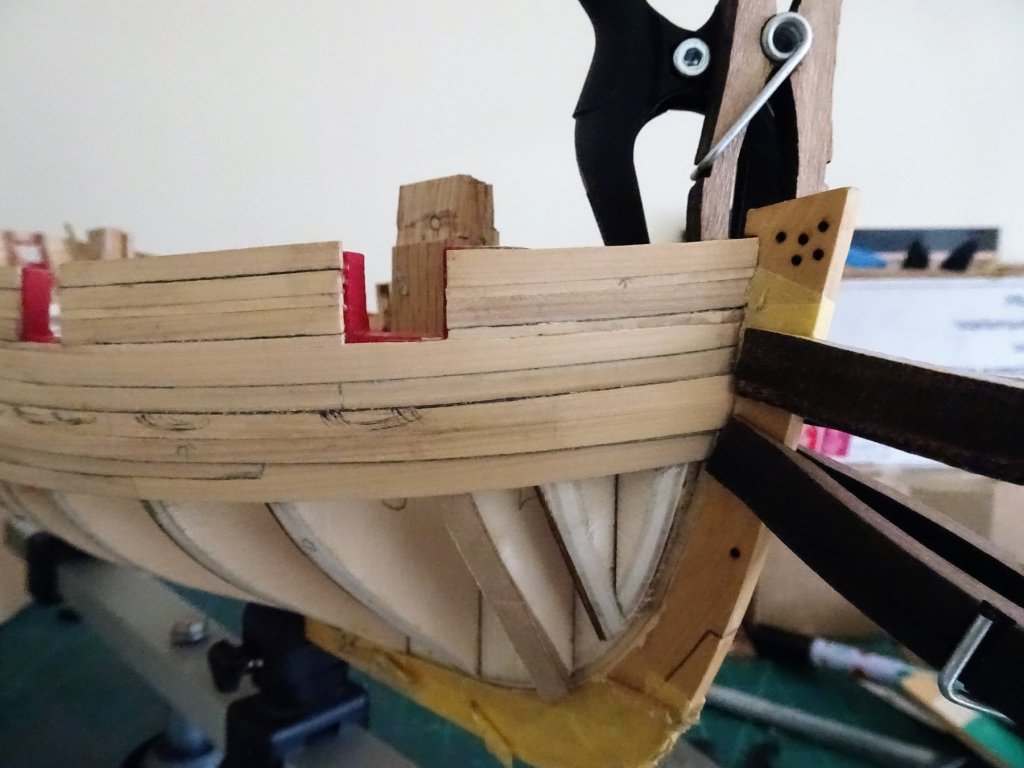
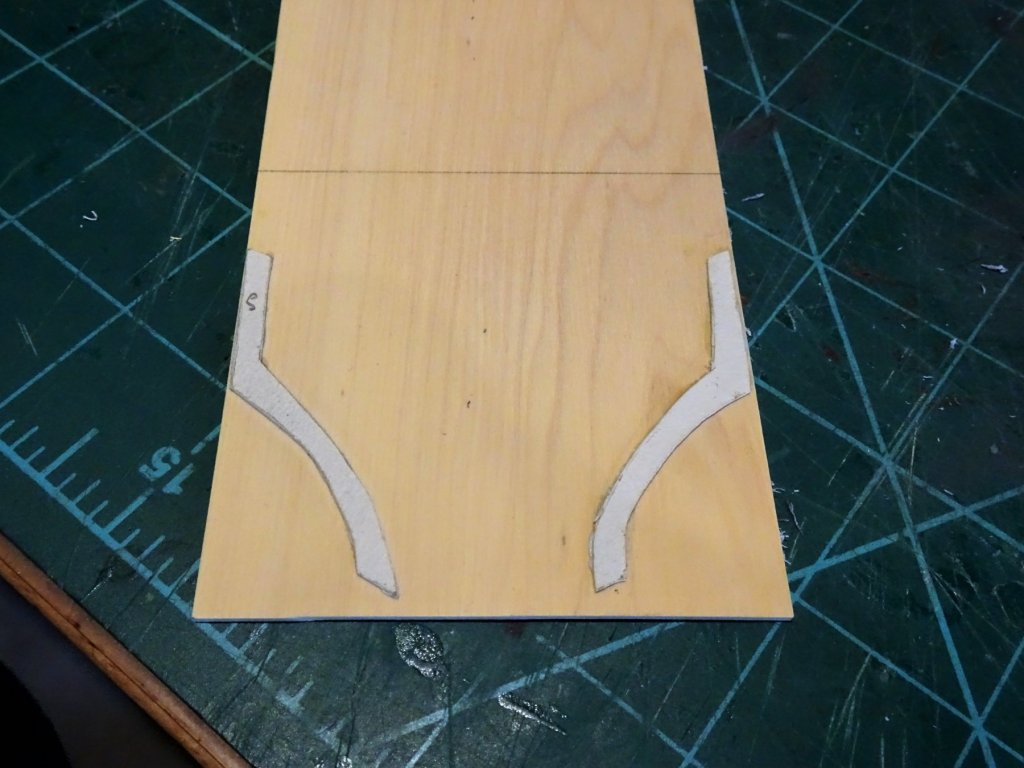
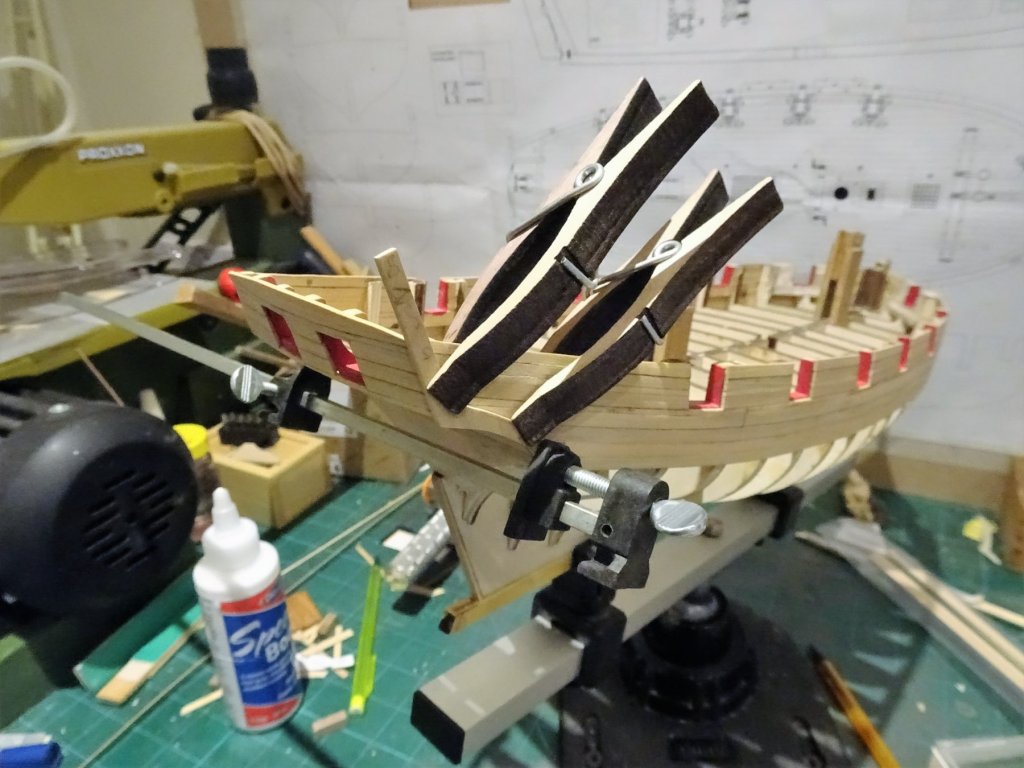
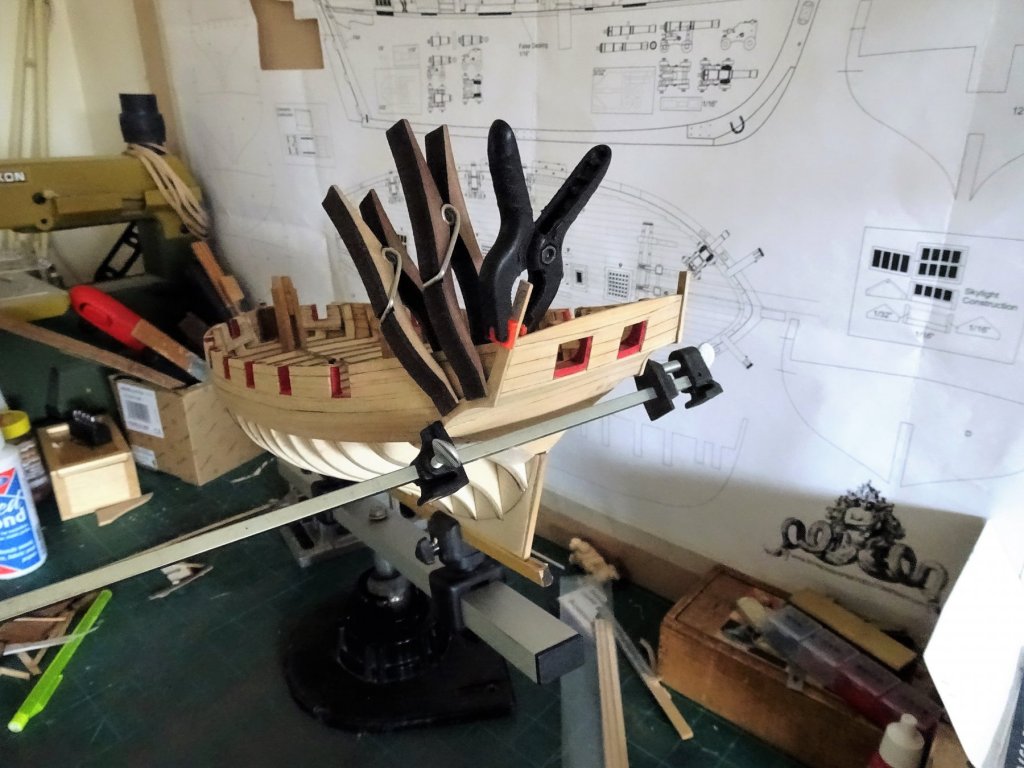
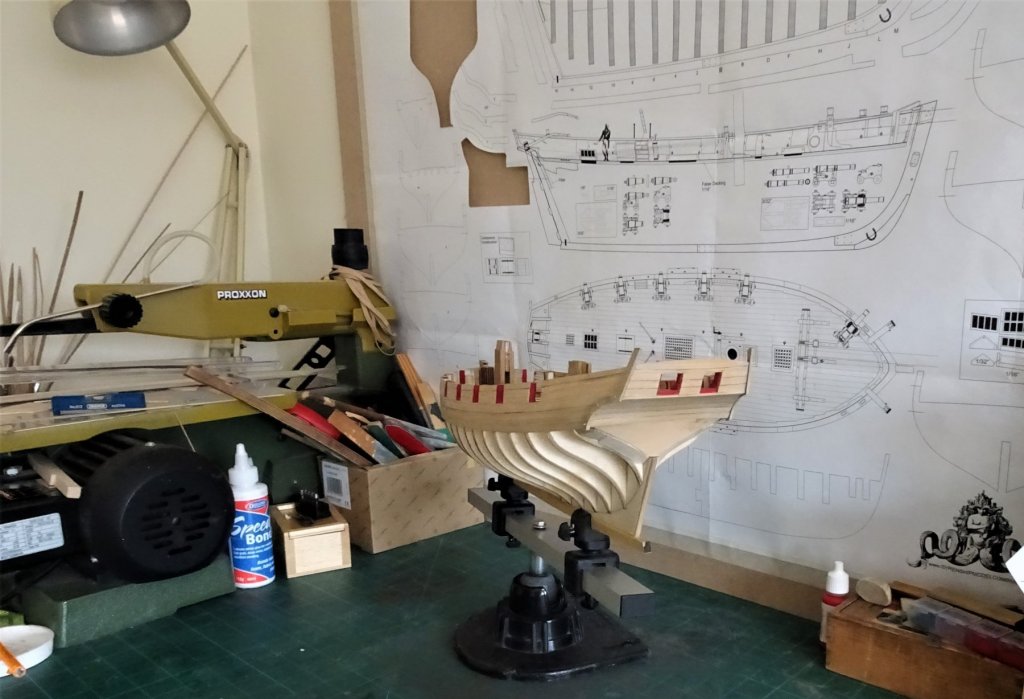
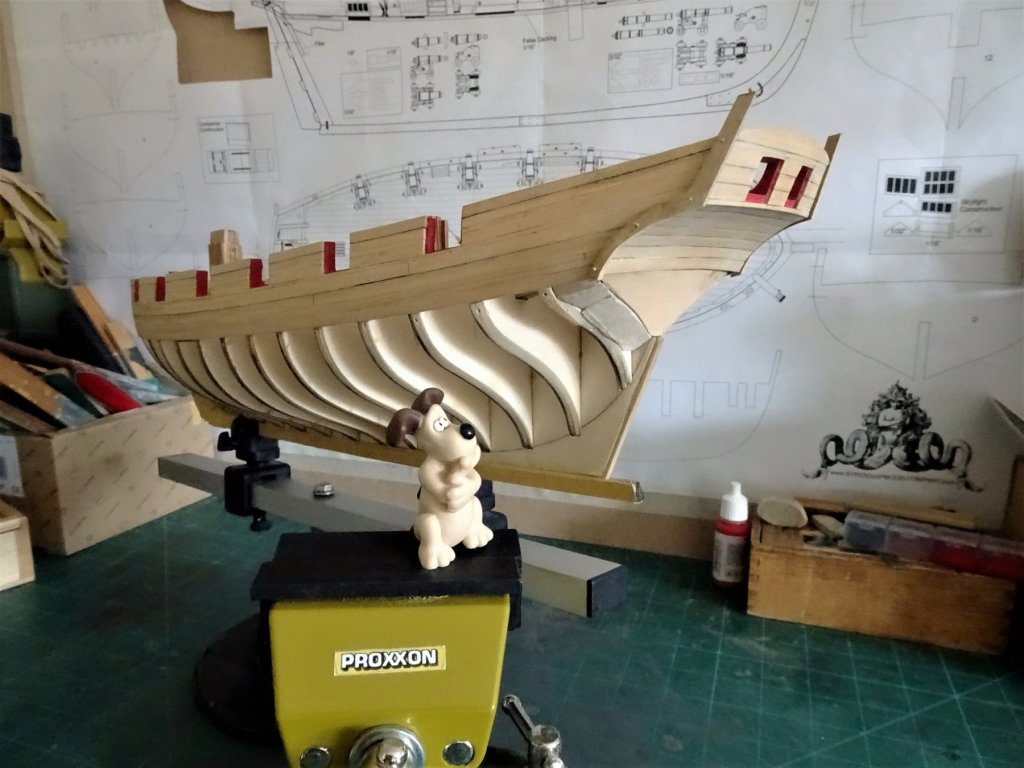
Post 21 Fashion Pieces. 7236 I followed Chuck's method of tracing the outline onto card to form a template of the Fashion pieces. 7243 Even so I found they needed some tweaking to fit the actual profile on the model, and a little water/heat bending around a shallow curve to match the contour of the hull. 7246 Bamboo tree nails were used to further secure the Fashion pieces. 7247 The instructions call for the back edge of the fashion piece to overhang the transom by 1/32" (0.8mm) I used a short length of the second layer wale planking as a guide. 7252 Completed bar the sanding 7254 So what d'ye think Gromit? ........Movin' on B.E. 28/03/2018

- 574 replies
-
- 27
-
-
- cheerful
- Syren Ship Model Company
- (and 1 more)
-
Cheers Kurt and Dave, I think I will follow suit and line between the bulkheads, I wasn’t looking forward to thinning down those bulkhead extensions and having a firm line to work to makes good sense. 🙂 B.E.
- 574 replies
-
- 2
-
-
- cheerful
- Syren Ship Model Company
- (and 1 more)
-
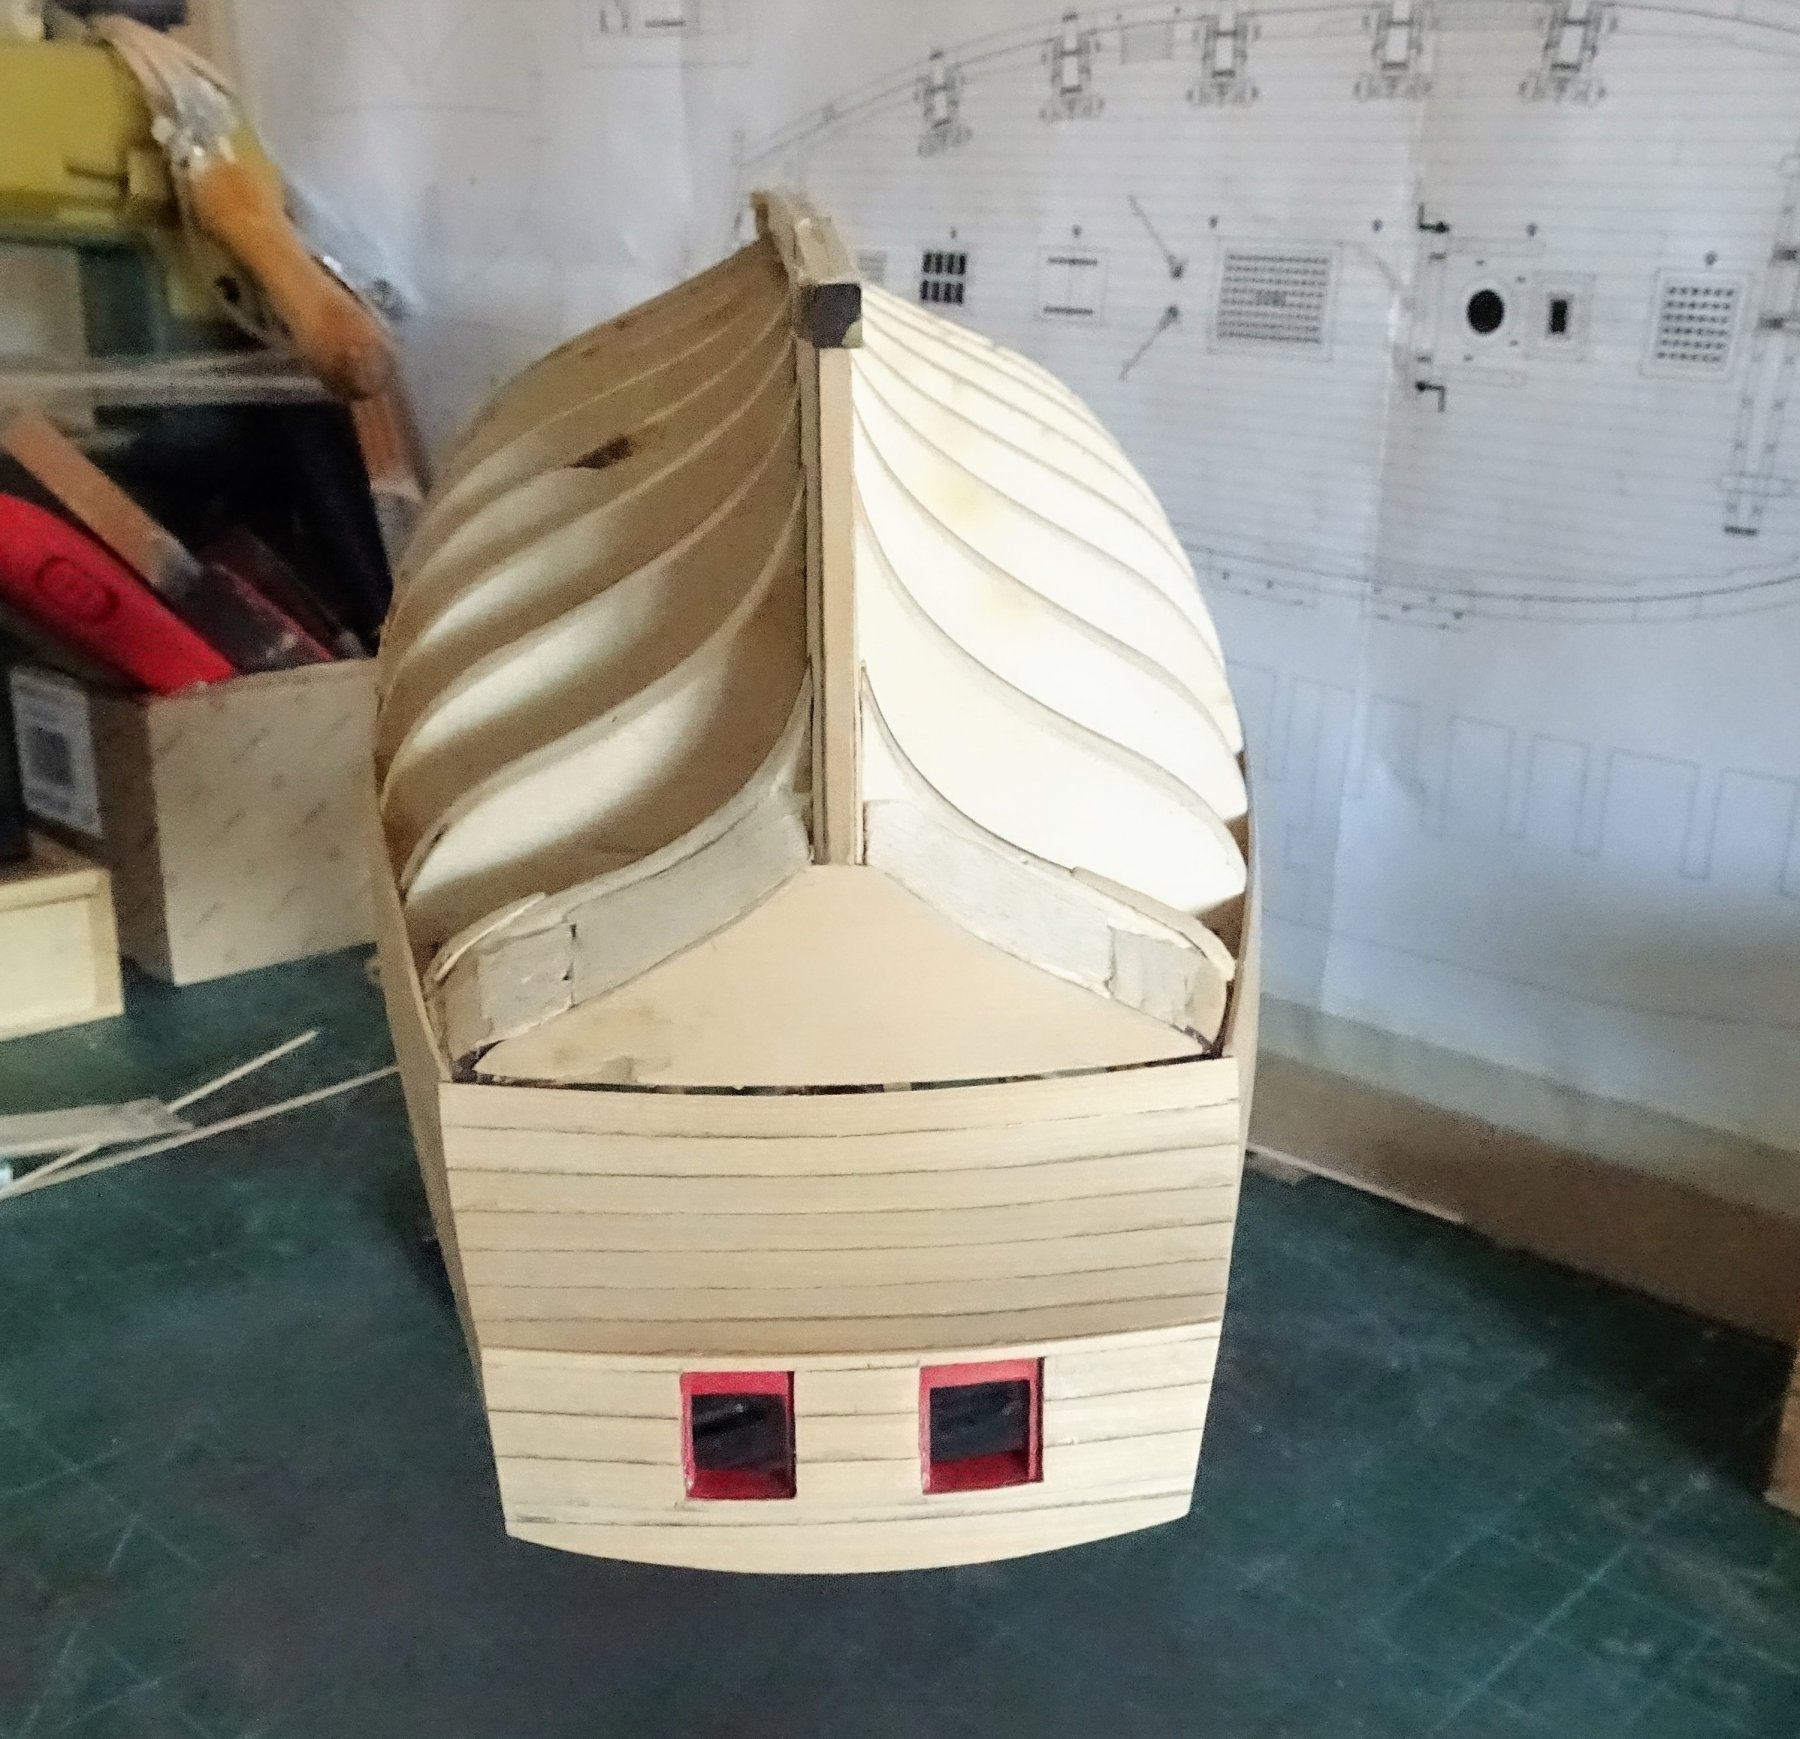
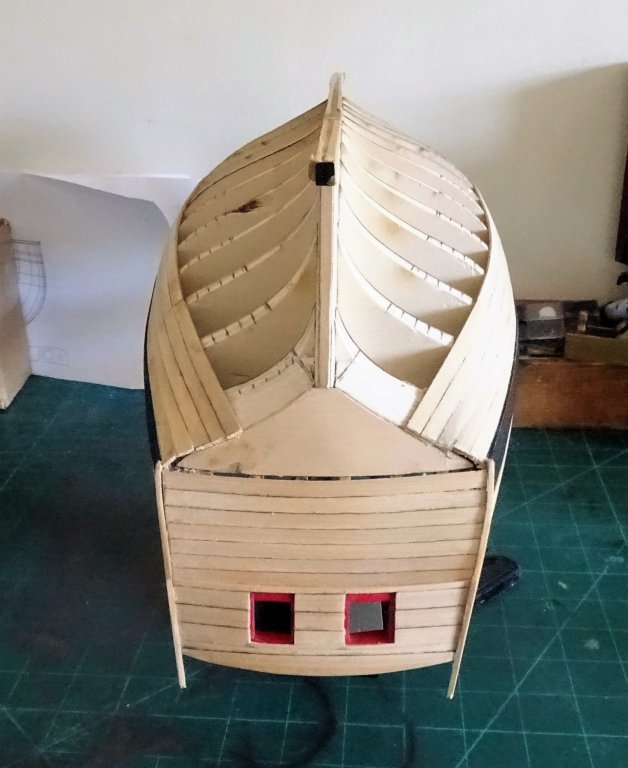
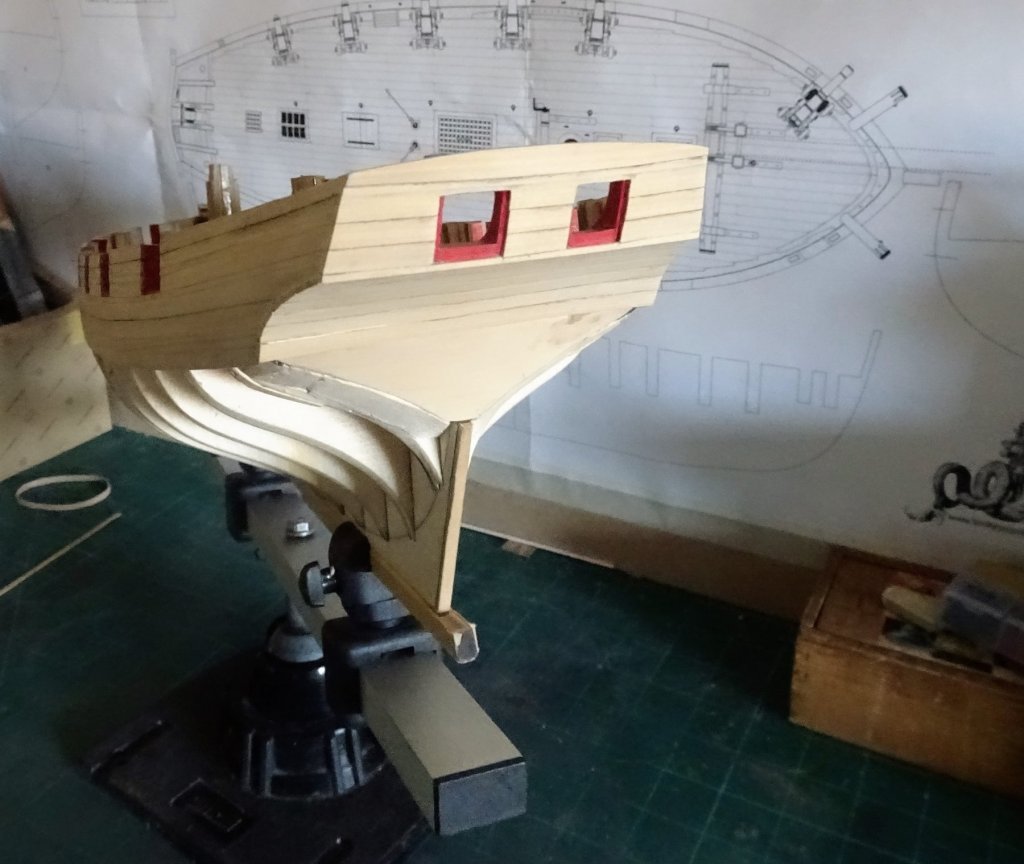
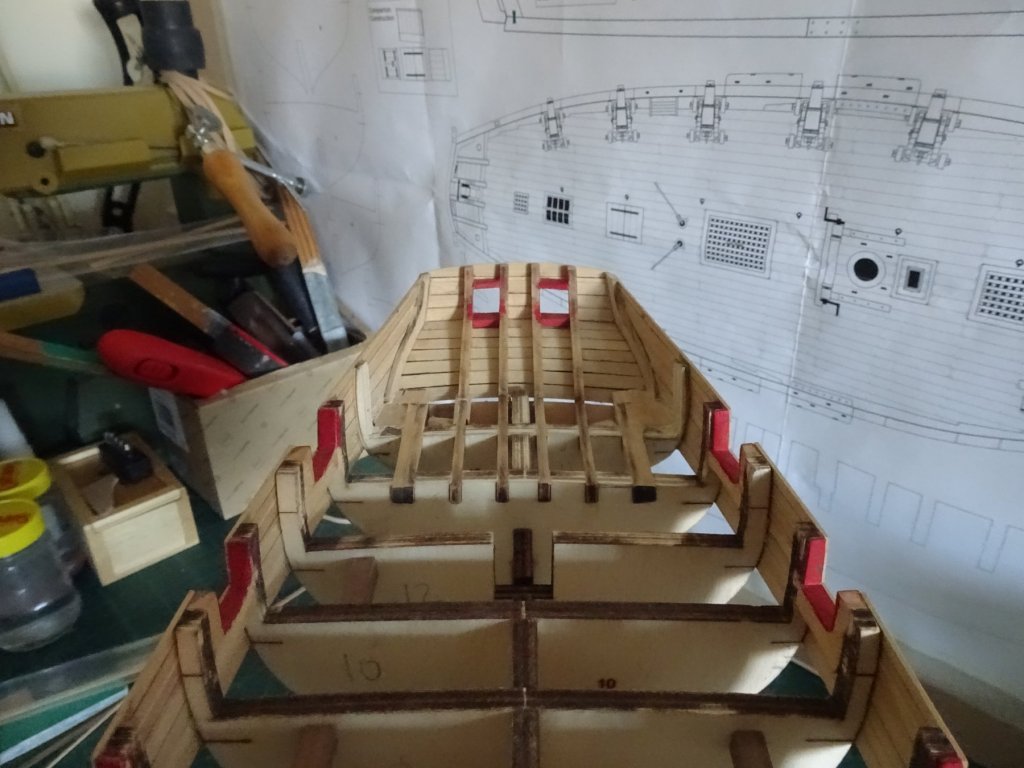
Post 20 Planking the stern 6860 Starting with the lowest counter plank (3/16th" strip) water/heat was used to form the quite pronounced curve required. 6916 I found holding this first plank in place whilst gluing quite tricky, and an early stage set back occurred when a spring clamp flew off and snapped one of the inner stern frames. 6913 No too difficult to repair with braces added either side of the break, but an unsettling moment nonetheless. 6917 Once the first plank is fixed the following planks go on without too much trouble, totalling seven strakes up to the break with the transom. The final plank below the transom required a slightly greater width, I used 7/32" which was then sanded down to suit, and the 1/16" moulding strip attached. The Transom Planking the transom should take four strakes, I shaped the first two planks insitu to get the curve, and then sectioned them to fit between the ports. 6925 The third plank has to be rebated to fit over the ports, a job done slowly using a scalpel. 7145 For reasons I can't fathom even a 7/32" plank was a fraction short to reach the top of the central stern frames so it was necessary to add a 1/16" strip above the third plank. 7142 Hmmn, seem to have too much sill showing at the bottom of ports, will leave it for the present but may need to infill with a narrow strip. 7143 At this point I also started to define the camber aft of the last bulkhead. All still looking a bit rough at present, but I'll move onto the fashion pieces before I clean things up. B.E. 25/03/2018


- 574 replies
-
- 19
-
-
- cheerful
- Syren Ship Model Company
- (and 1 more)
-
What a journey you have been on Michael, and what a stunning result. Your log has always been informative and represents a valuable guide for others who embark on this build. A great display location to enjoy views from all sides, many congratulations. Regards, B.E.
-
She does look absolutely splendid Christian, I've always liked the toning of her colour scheme. I agree that she does deserve a less utilitarian display stand; I've always favoured a keel block arrangement incorporating a pair of fine cradles, but the there are many options. Regards, B.E.
-
Altho' I think models look nicer without a case, I would certainly encase her Christian. There's too much rigging and intricacy to keep her properly clean, and it would be an increasingly tiresome task to do so with more dust left in the difficult places to access each time. To reduce the impact of a case I favour a plexiglass cover without framing, but I suppose it depends on the sort of setting you are thinking about. The one issue with a clear plexiglass cover is setting it over the model without catching the spar extremities, and it is certainly a two person job. Look forward to seeing her in her final setting. B.E.