
.JPG.ca33079f5815b861e67b9c2cccd37982.JPG)

Blue Ensign
-
Posts
4,536 -
Joined
-
Last visited
Content Type
Profiles
Forums
Gallery
Events
Posts posted by Blue Ensign
-
-
-
-
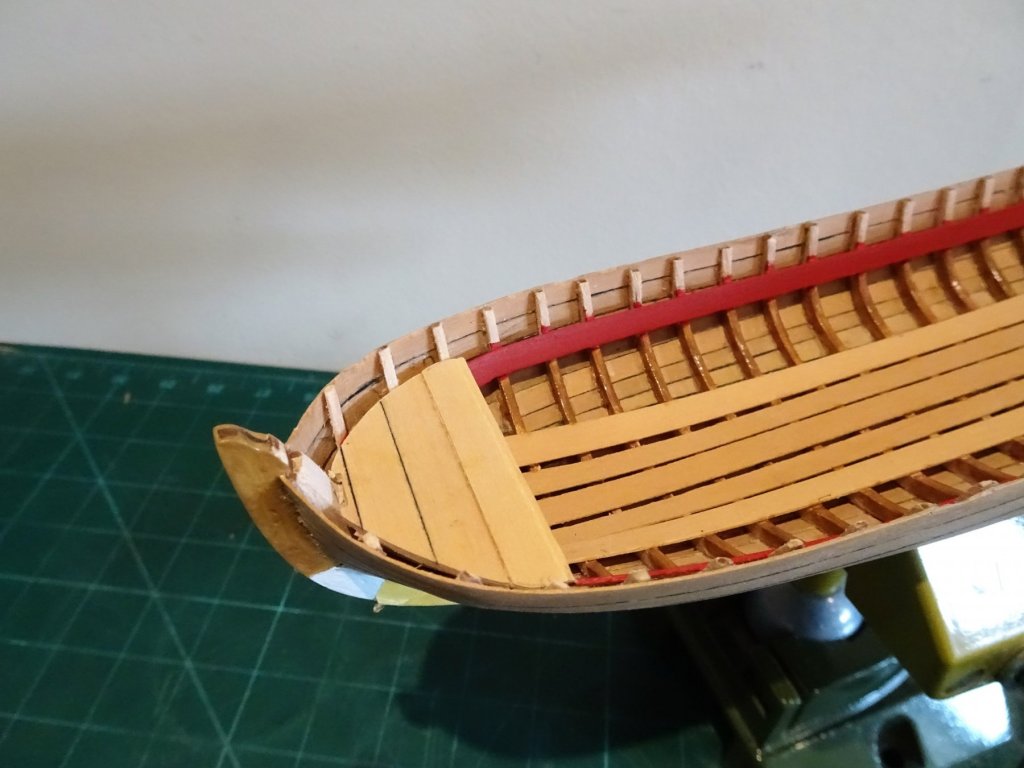
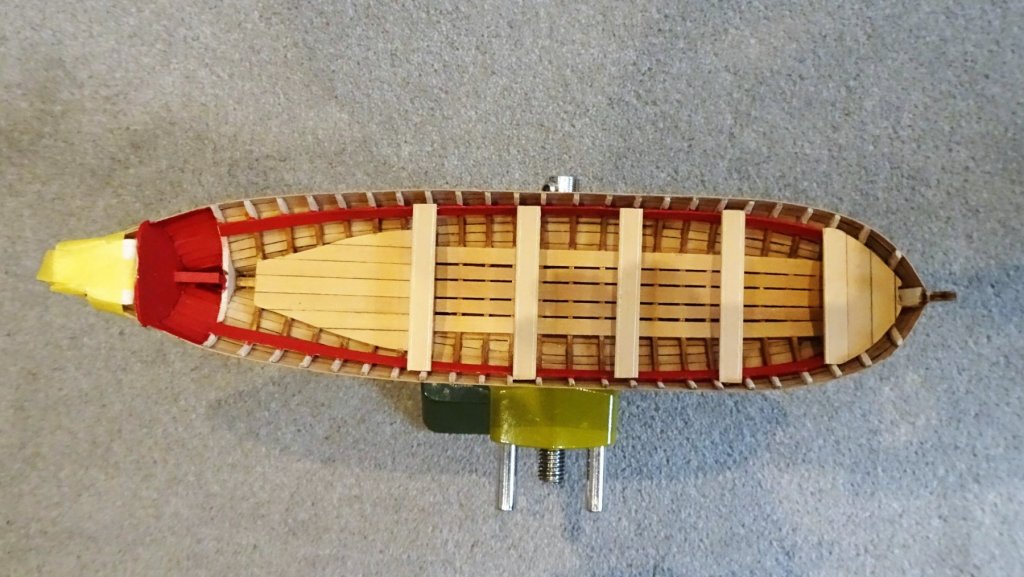
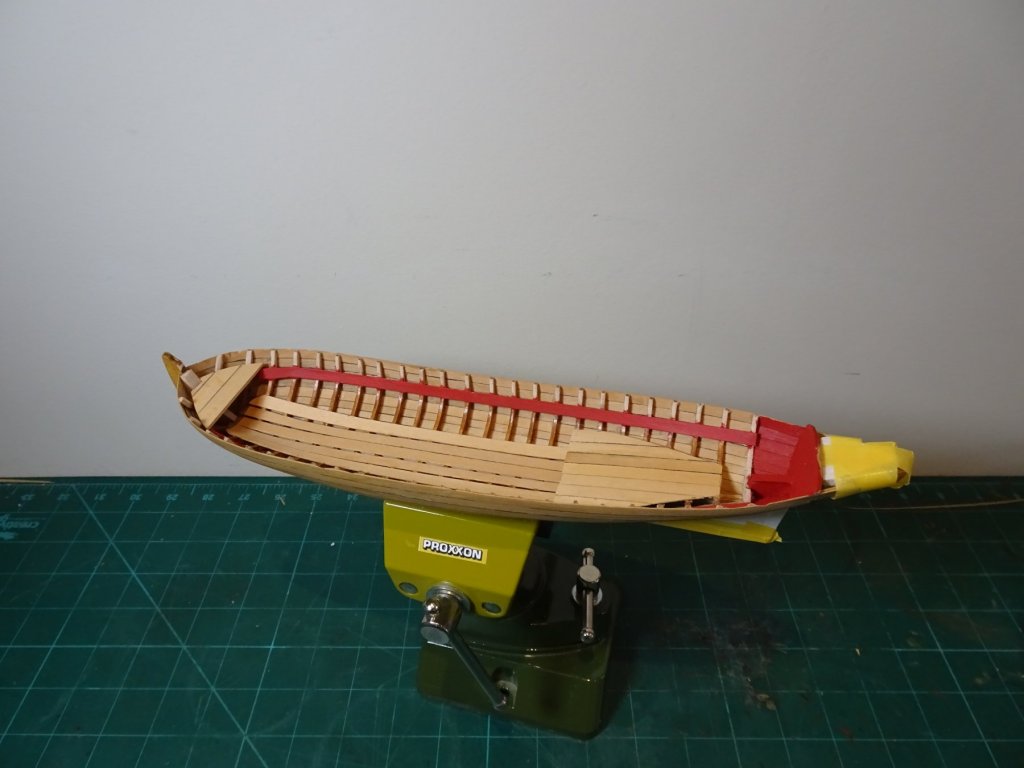
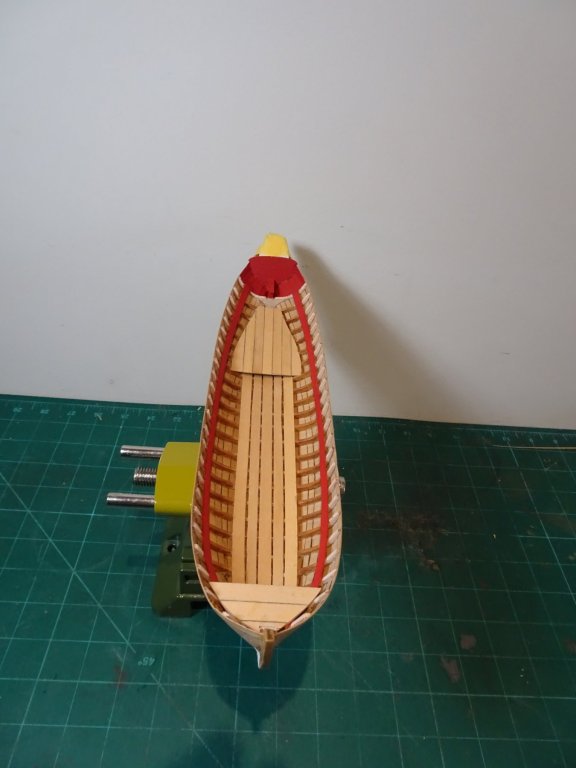
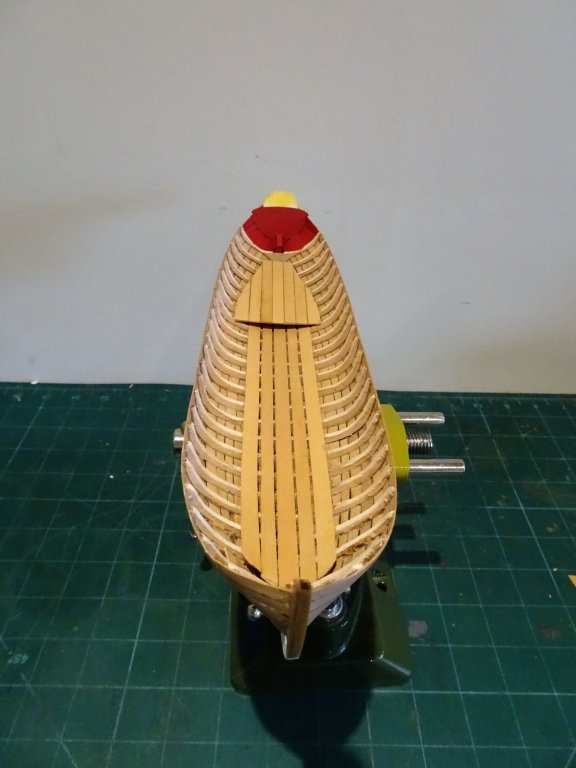
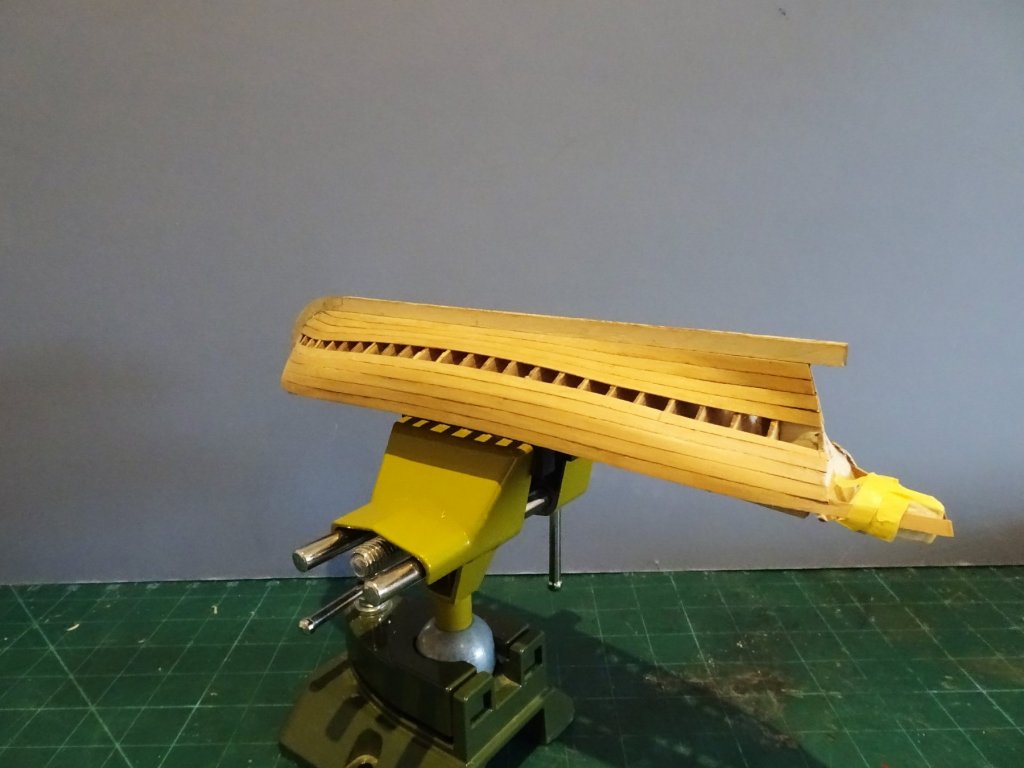
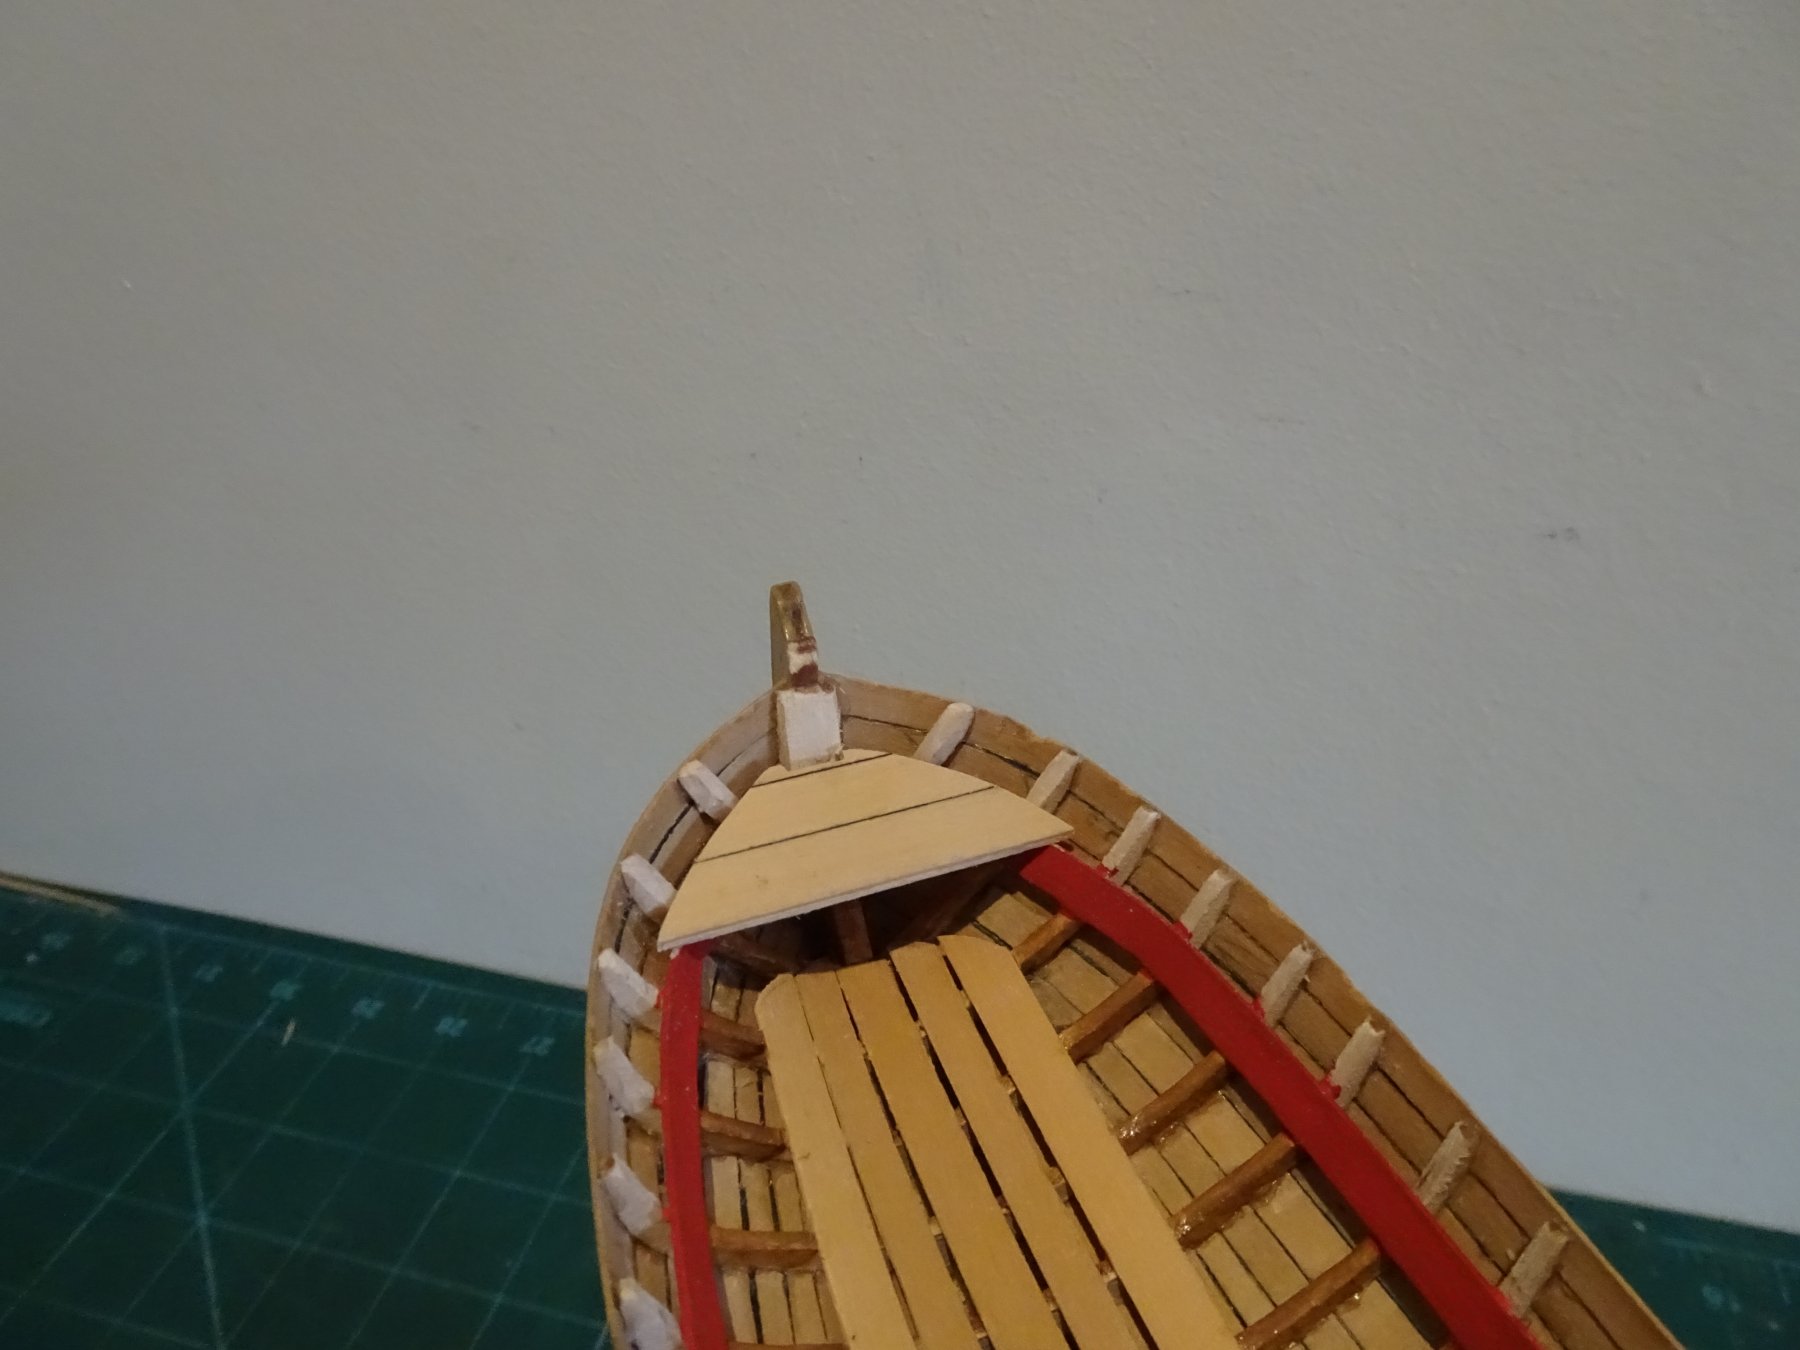
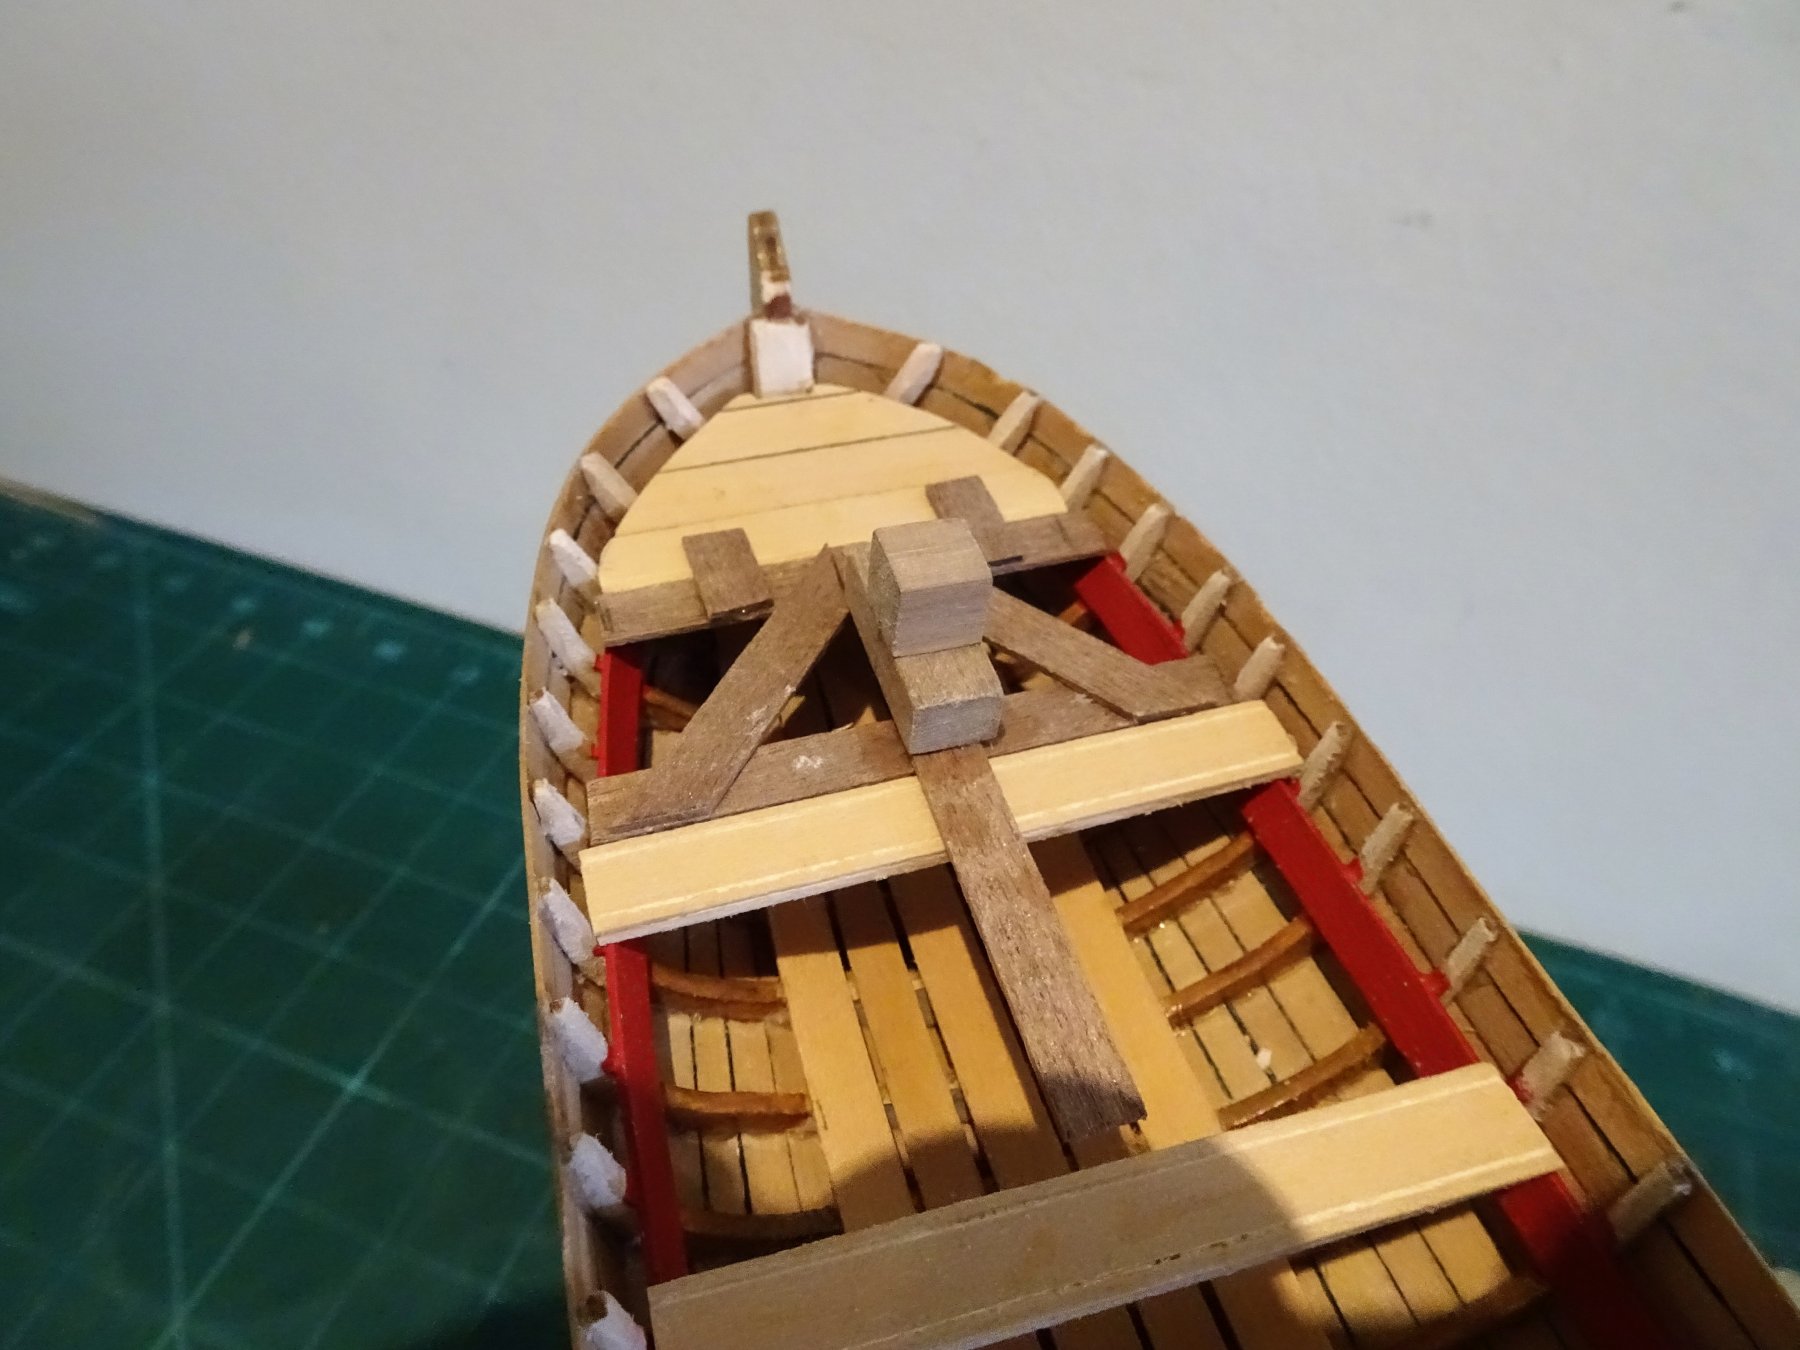
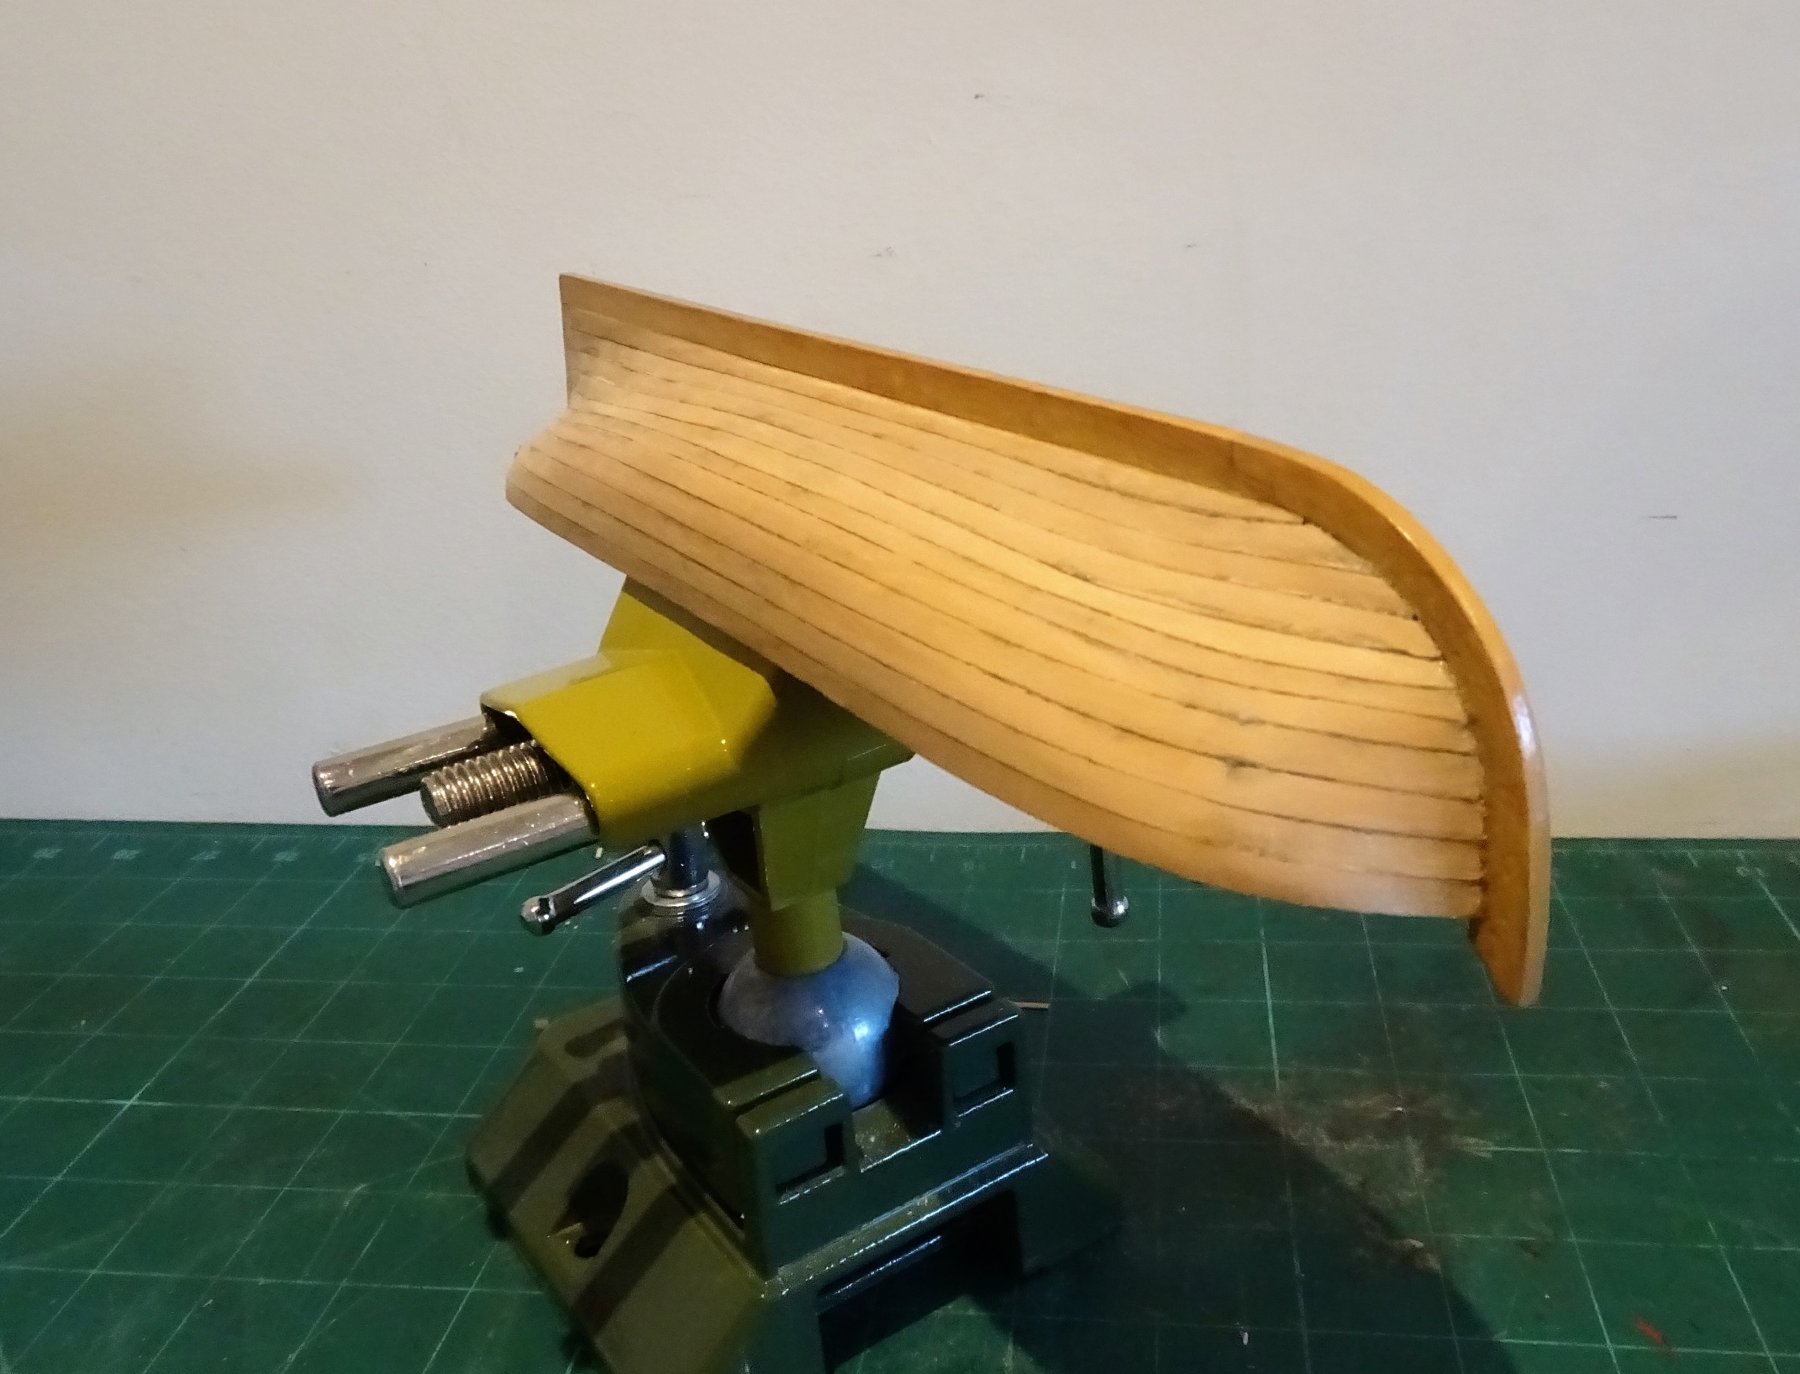
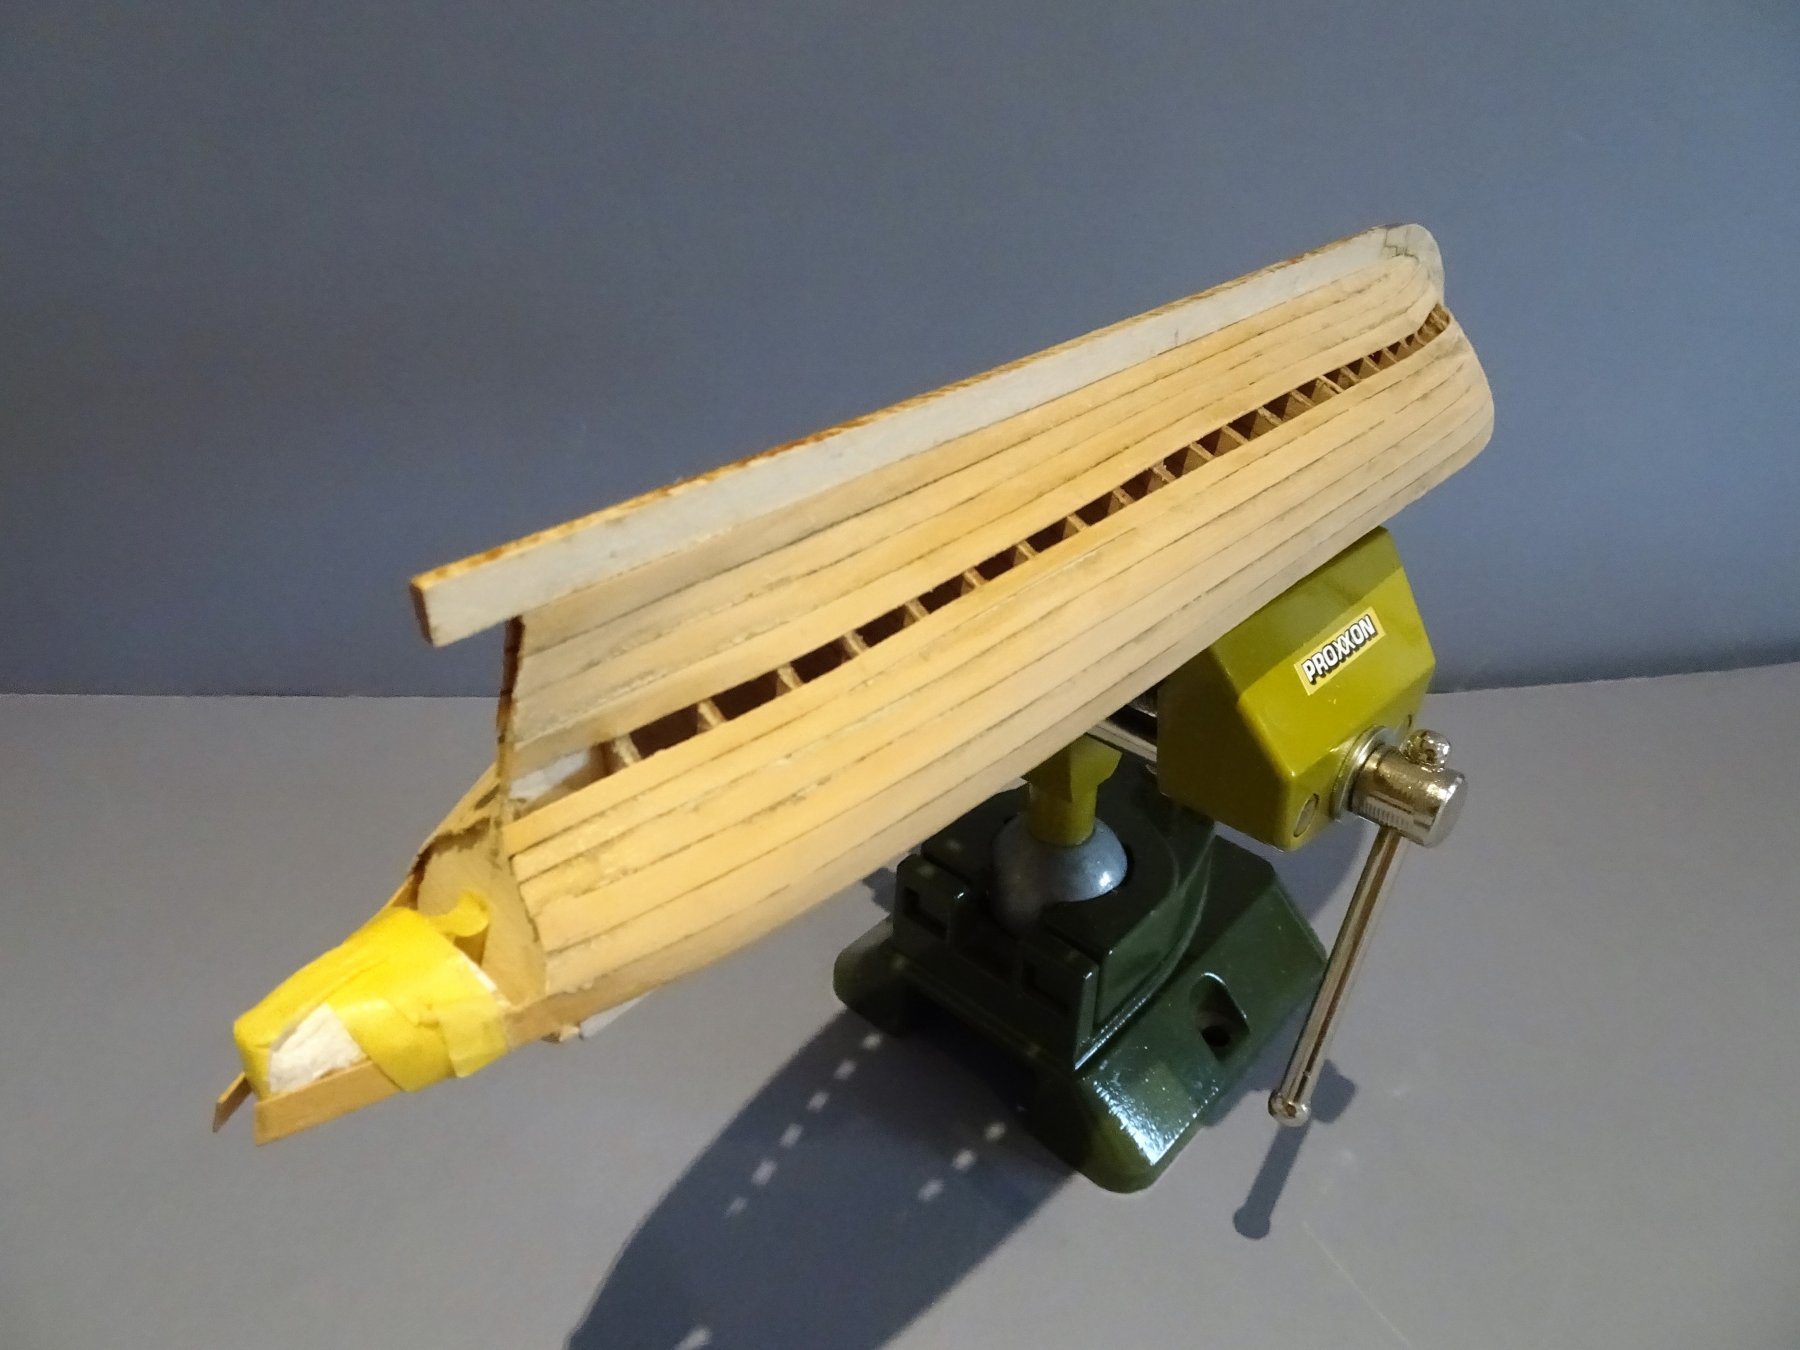
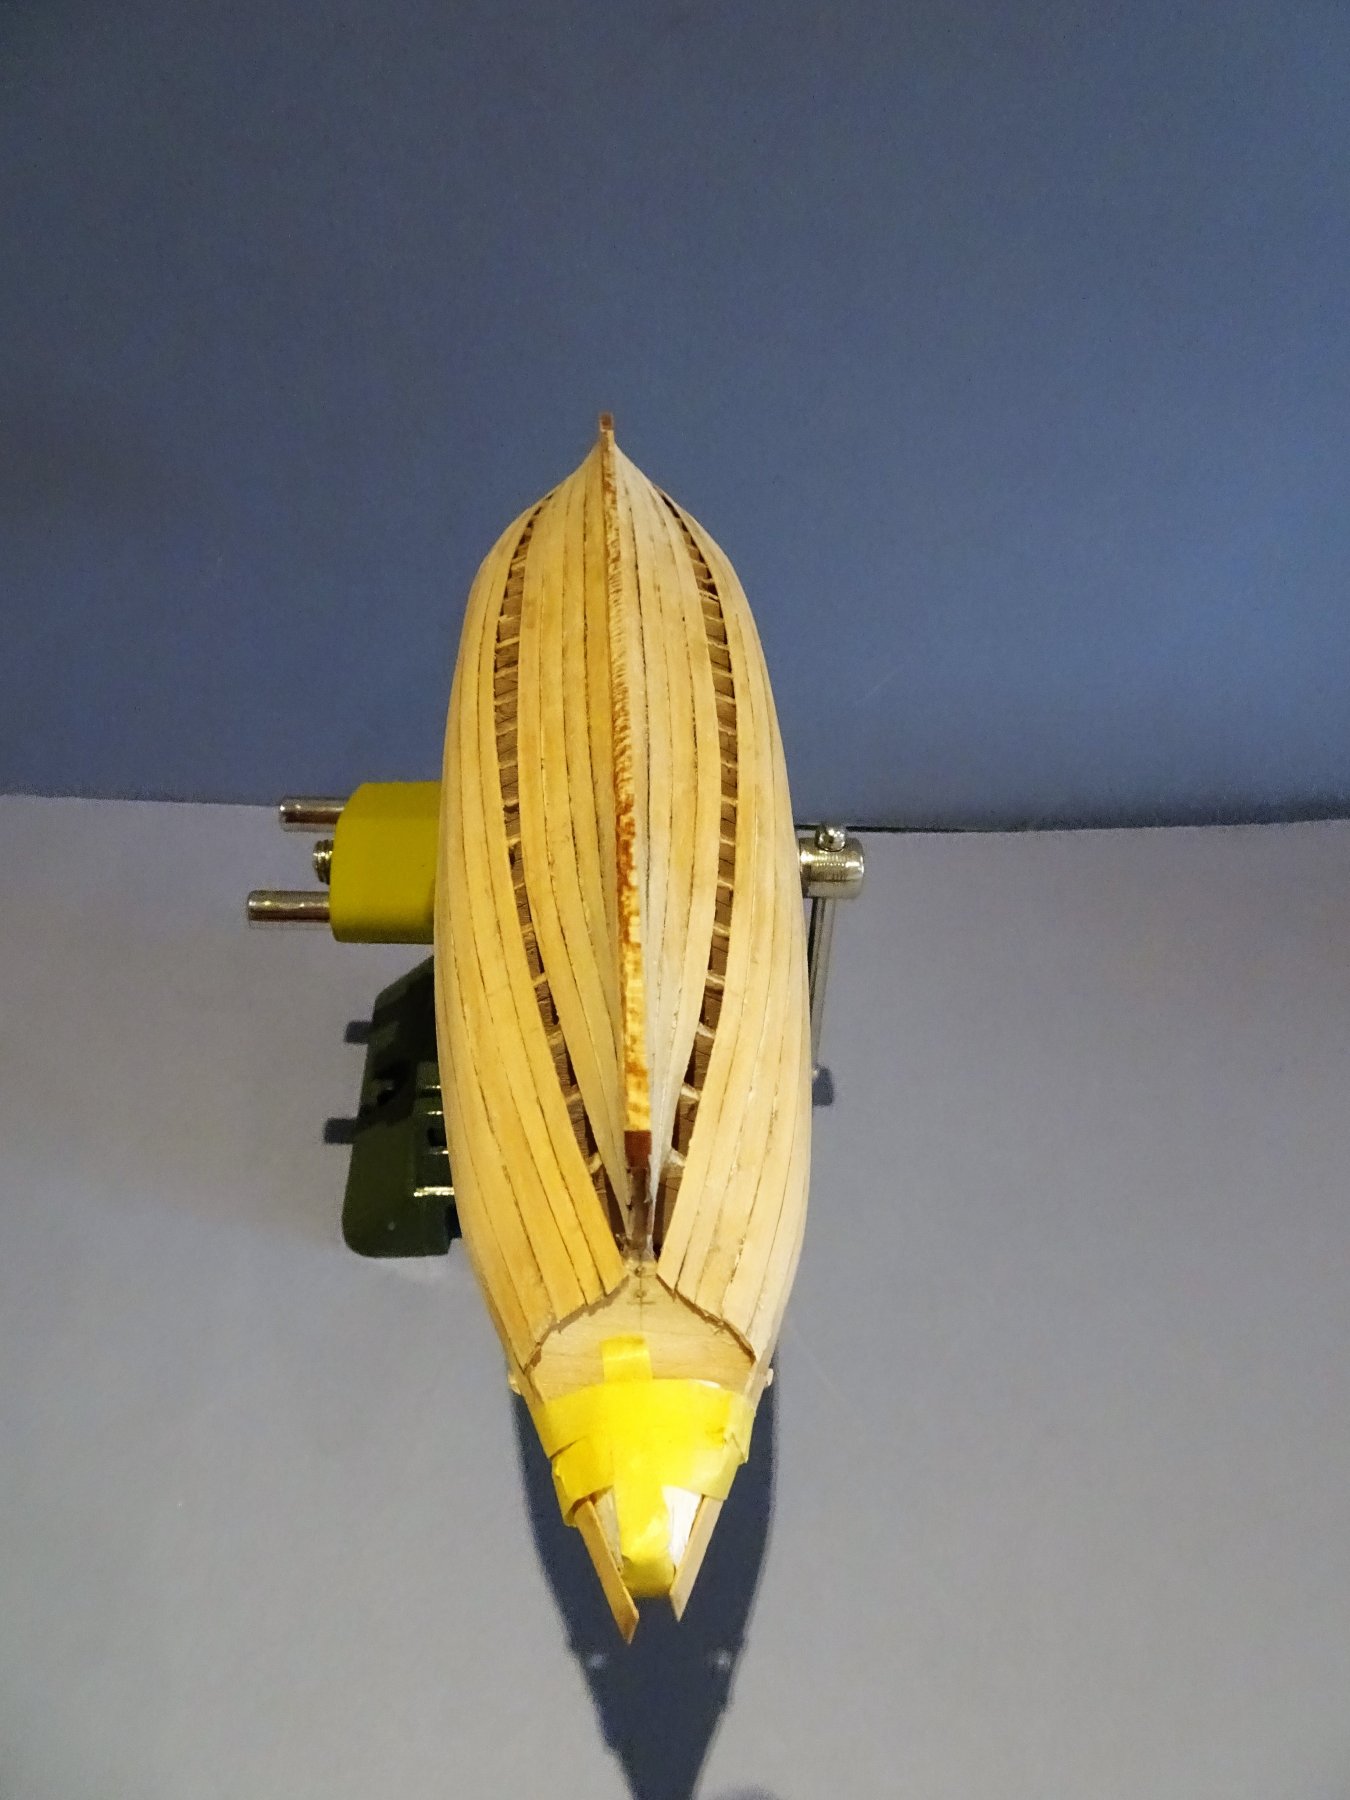
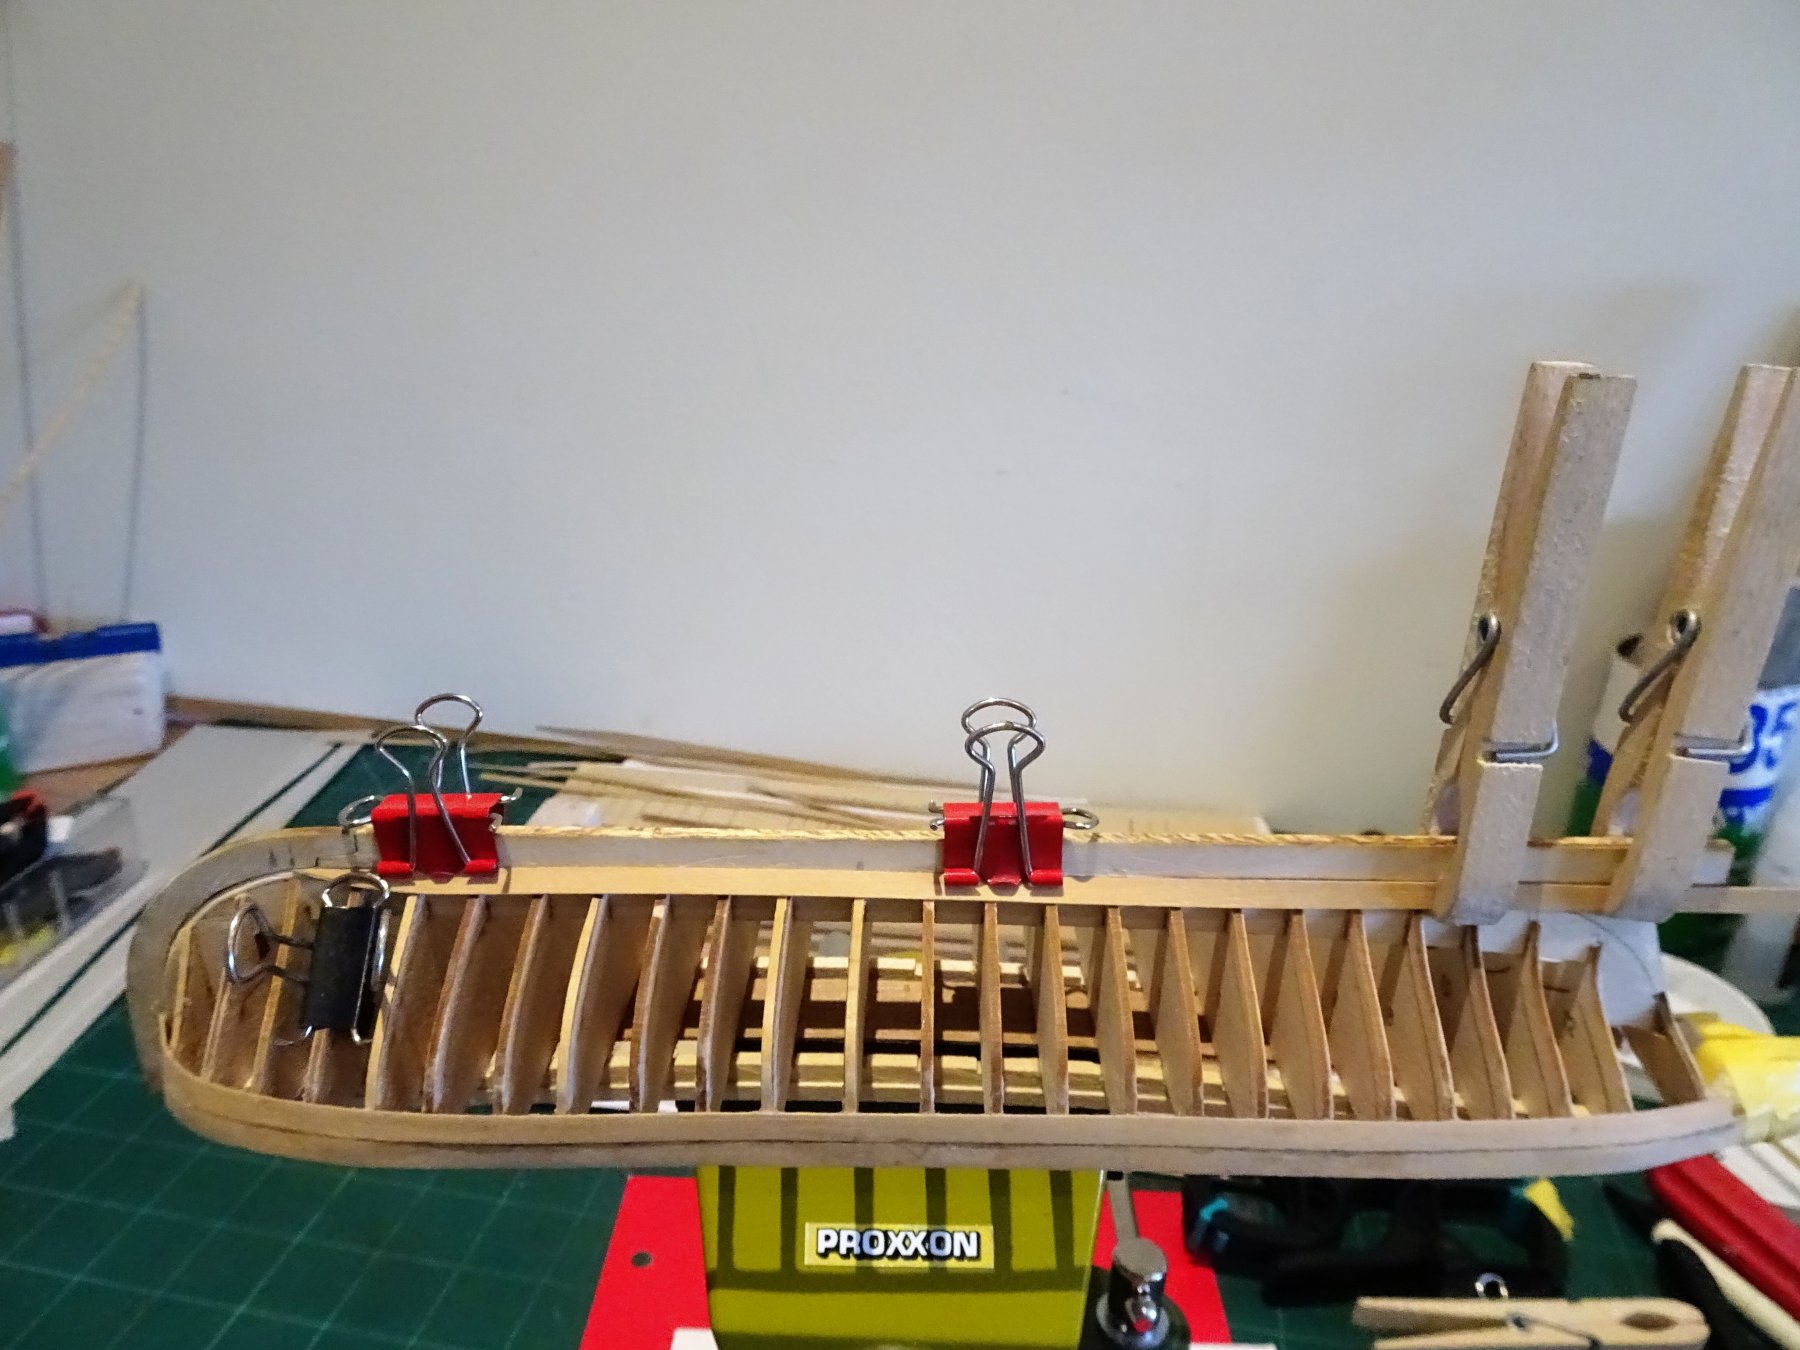
Sizing the small Fore-deck made me scratch my head a little, it is relevant because it will govern the positions of the other thwarts and according to the plan should result in the fifth thwart sitting just over the forward edge of the aft platform.

9657
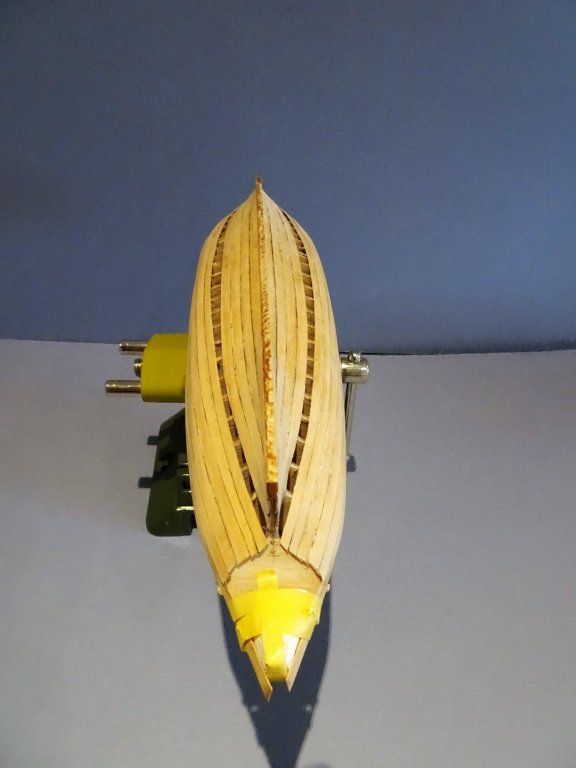
I notched my Foredeck to fit around the much reduced false keel at the bow which runs up to the stem, and extends just short of halfway between the second and third frames.
9658
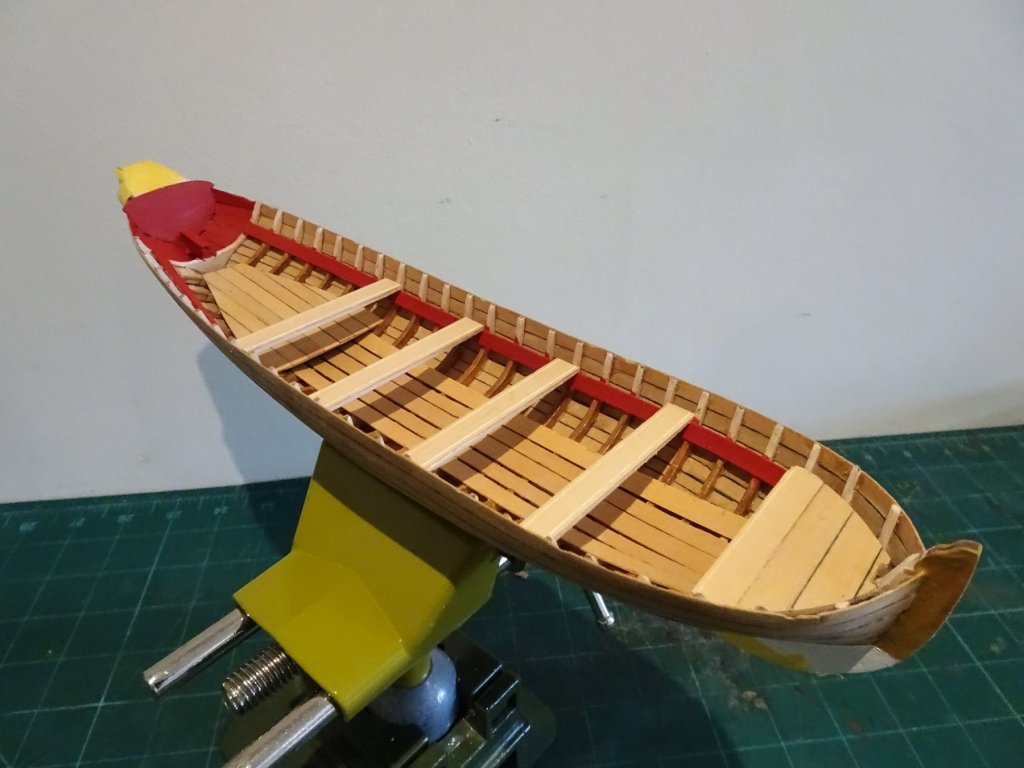
The first of the Thwarts butts against this Foredeck.
For the Thwarts I used the provided Limewood, veneered with 0.7mm Boxwood strip and the overall thickness then reduced to size.

9661
I also made a spacer jig similar to that used by Mike4B in his build.
I would suggest that this is a useful item to ensure correct spacing of the Thwarts.
9665
9664
9663
9666
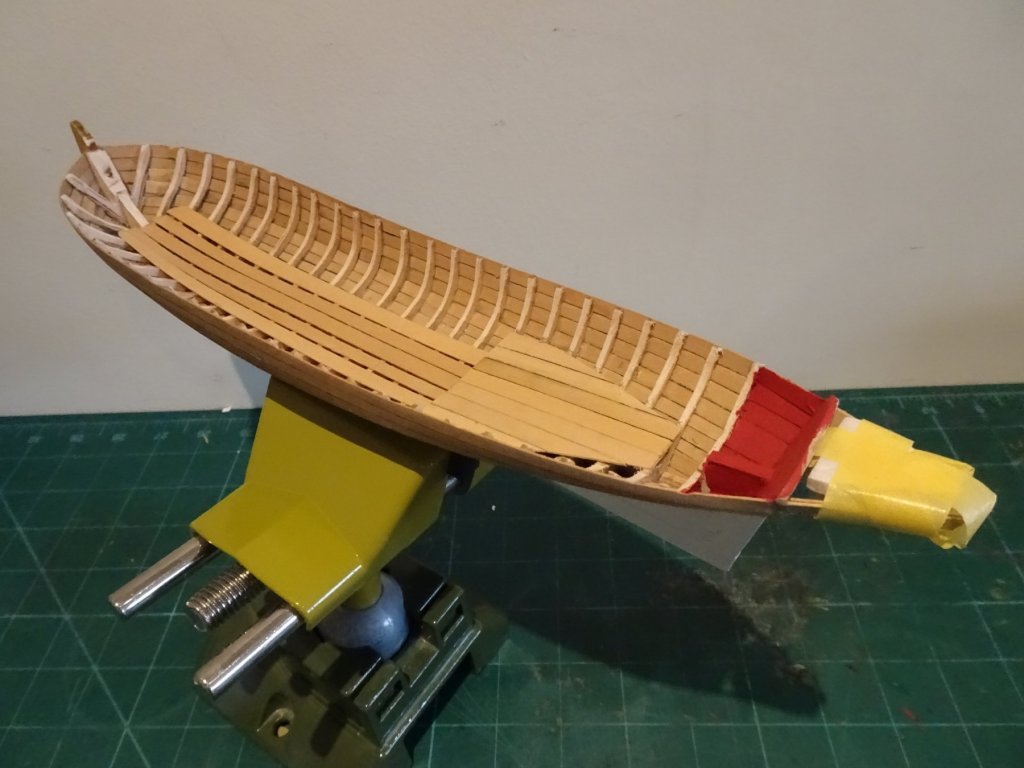
The Thwarts apart from the first one are not yet fixed, I will do that once the seat back has been installed and a little interior fettlin' is completed.
B.E.
-
Thank you Martin, Mike, and Bob, and for the 'likes'
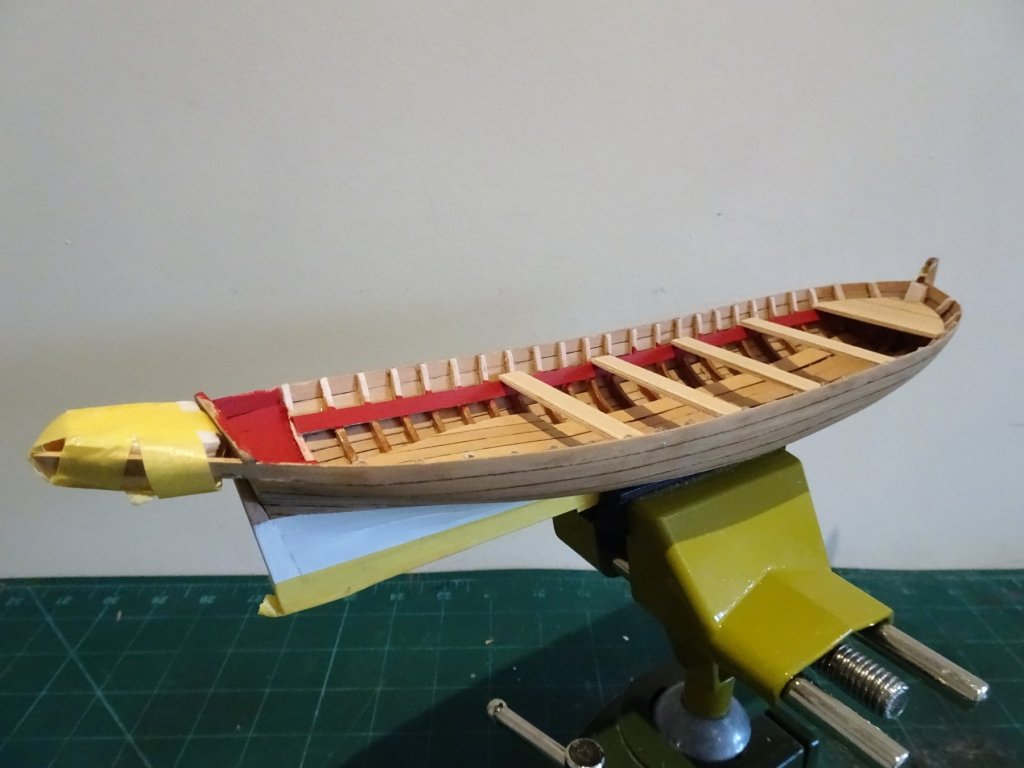
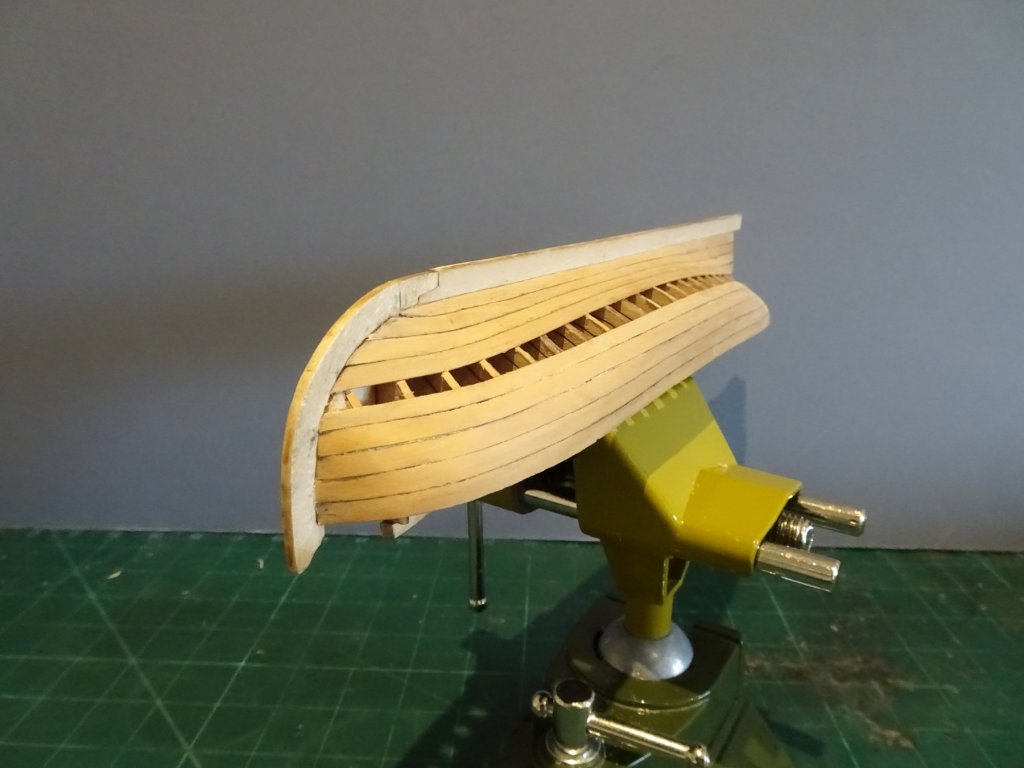
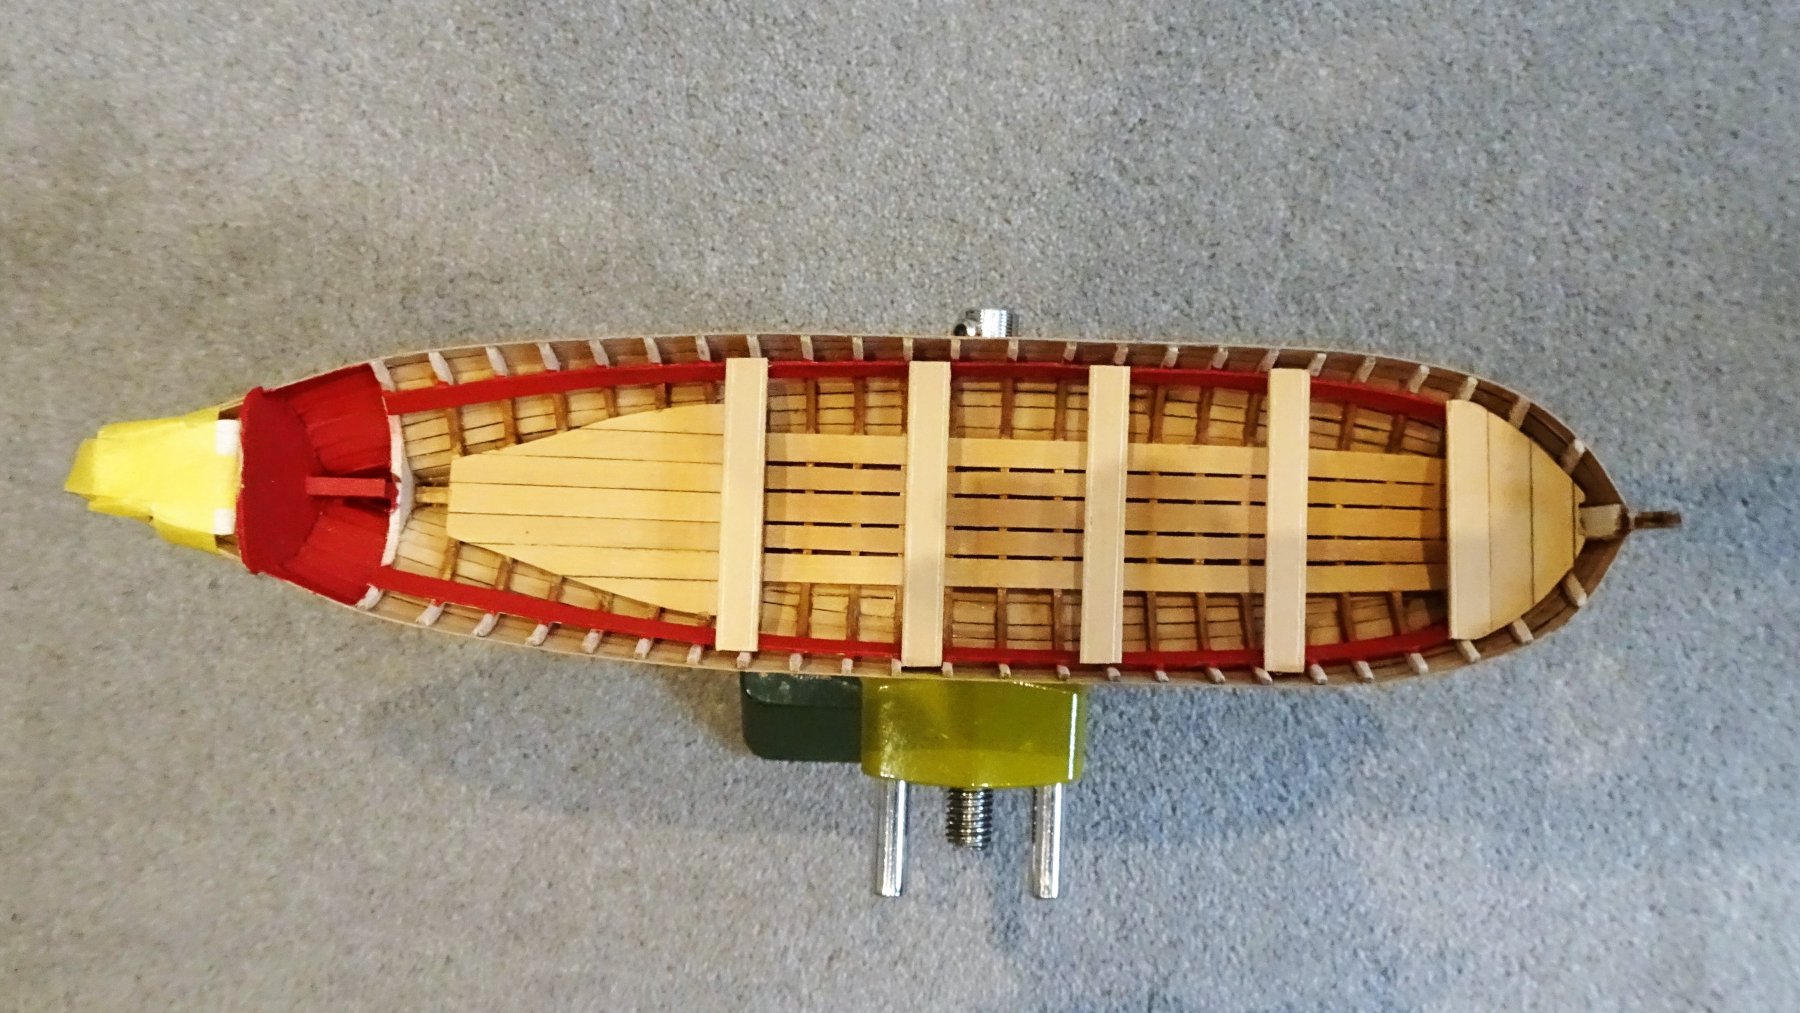
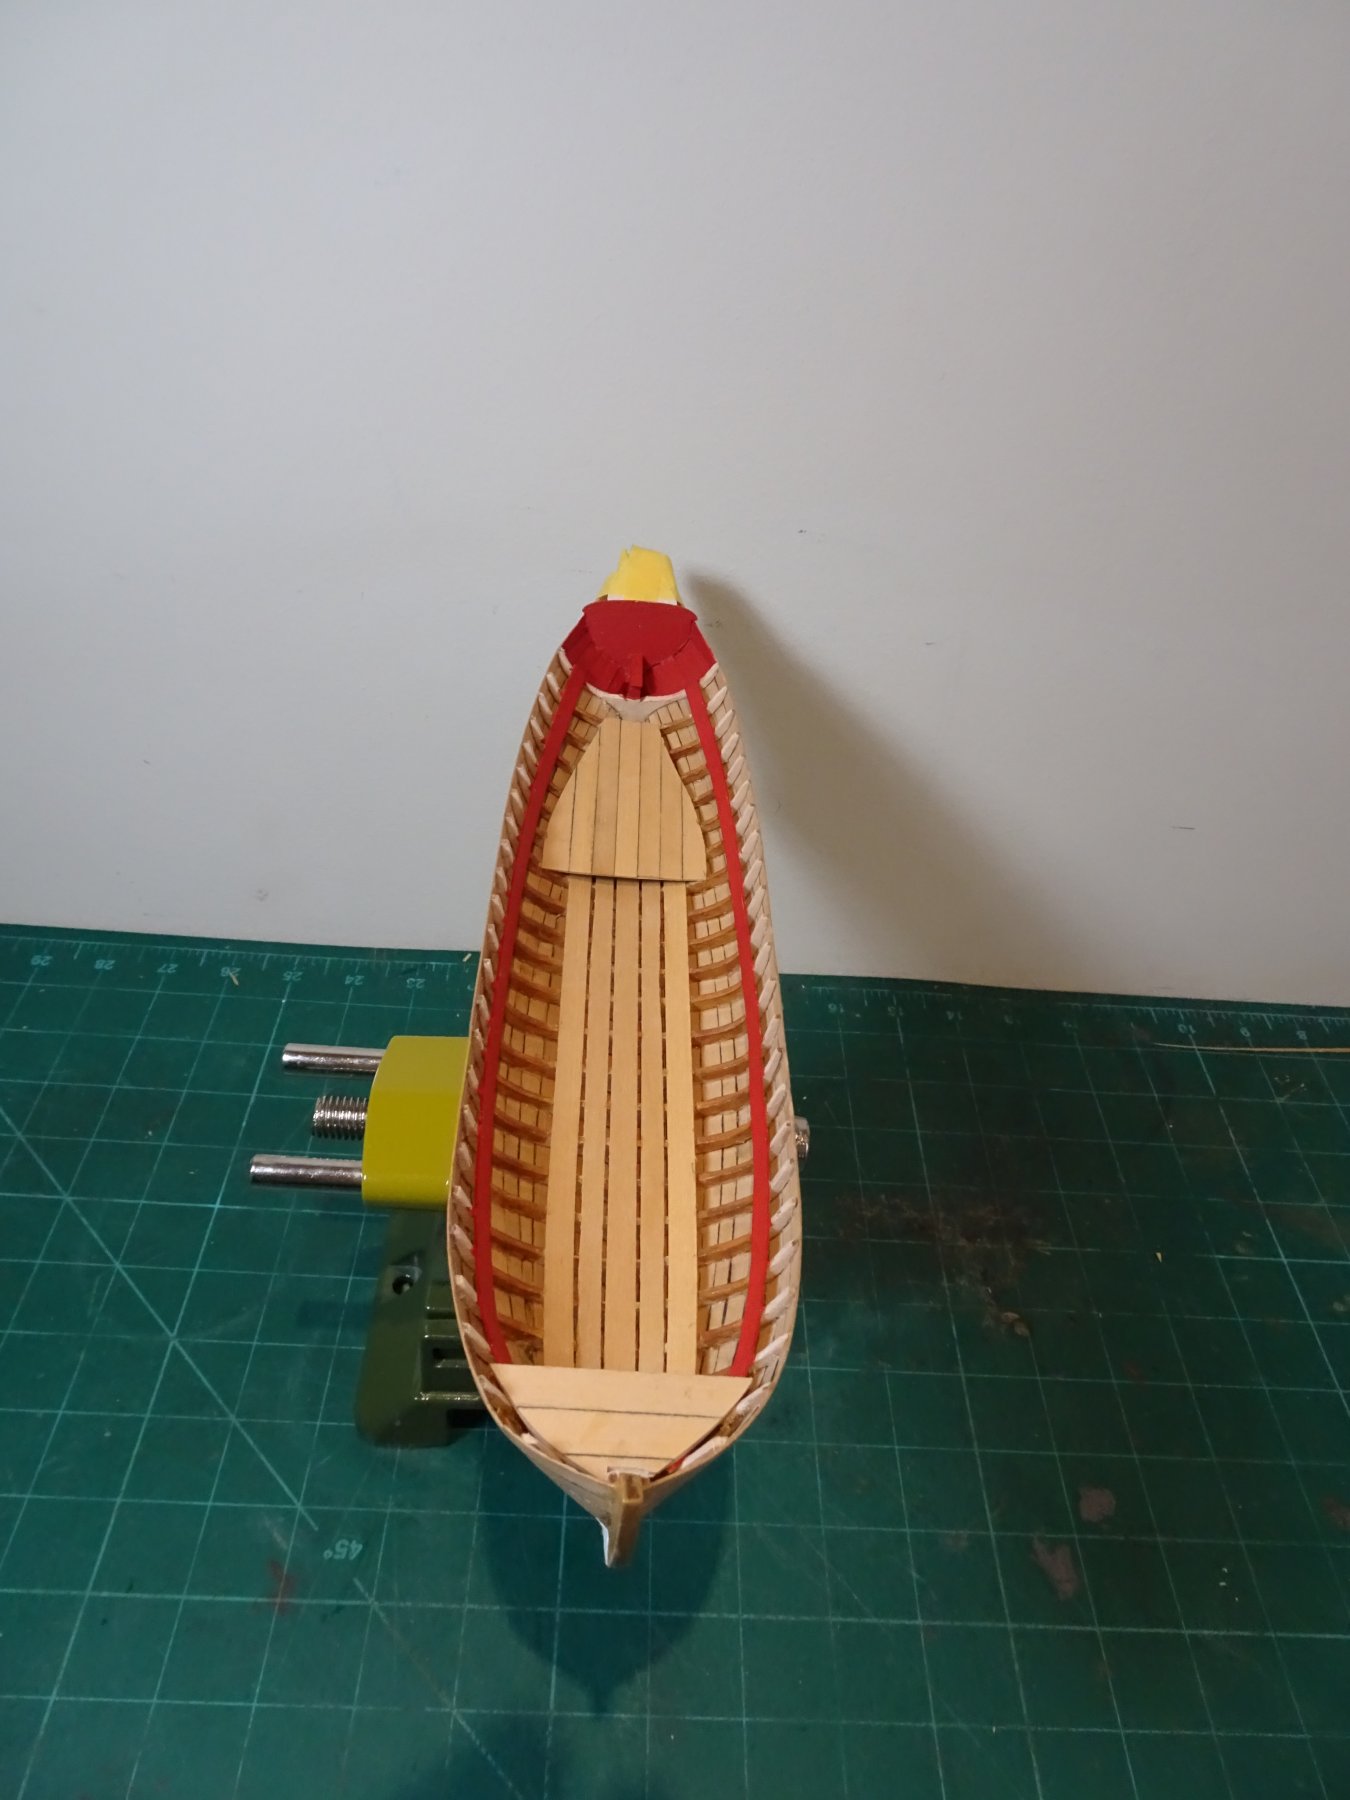
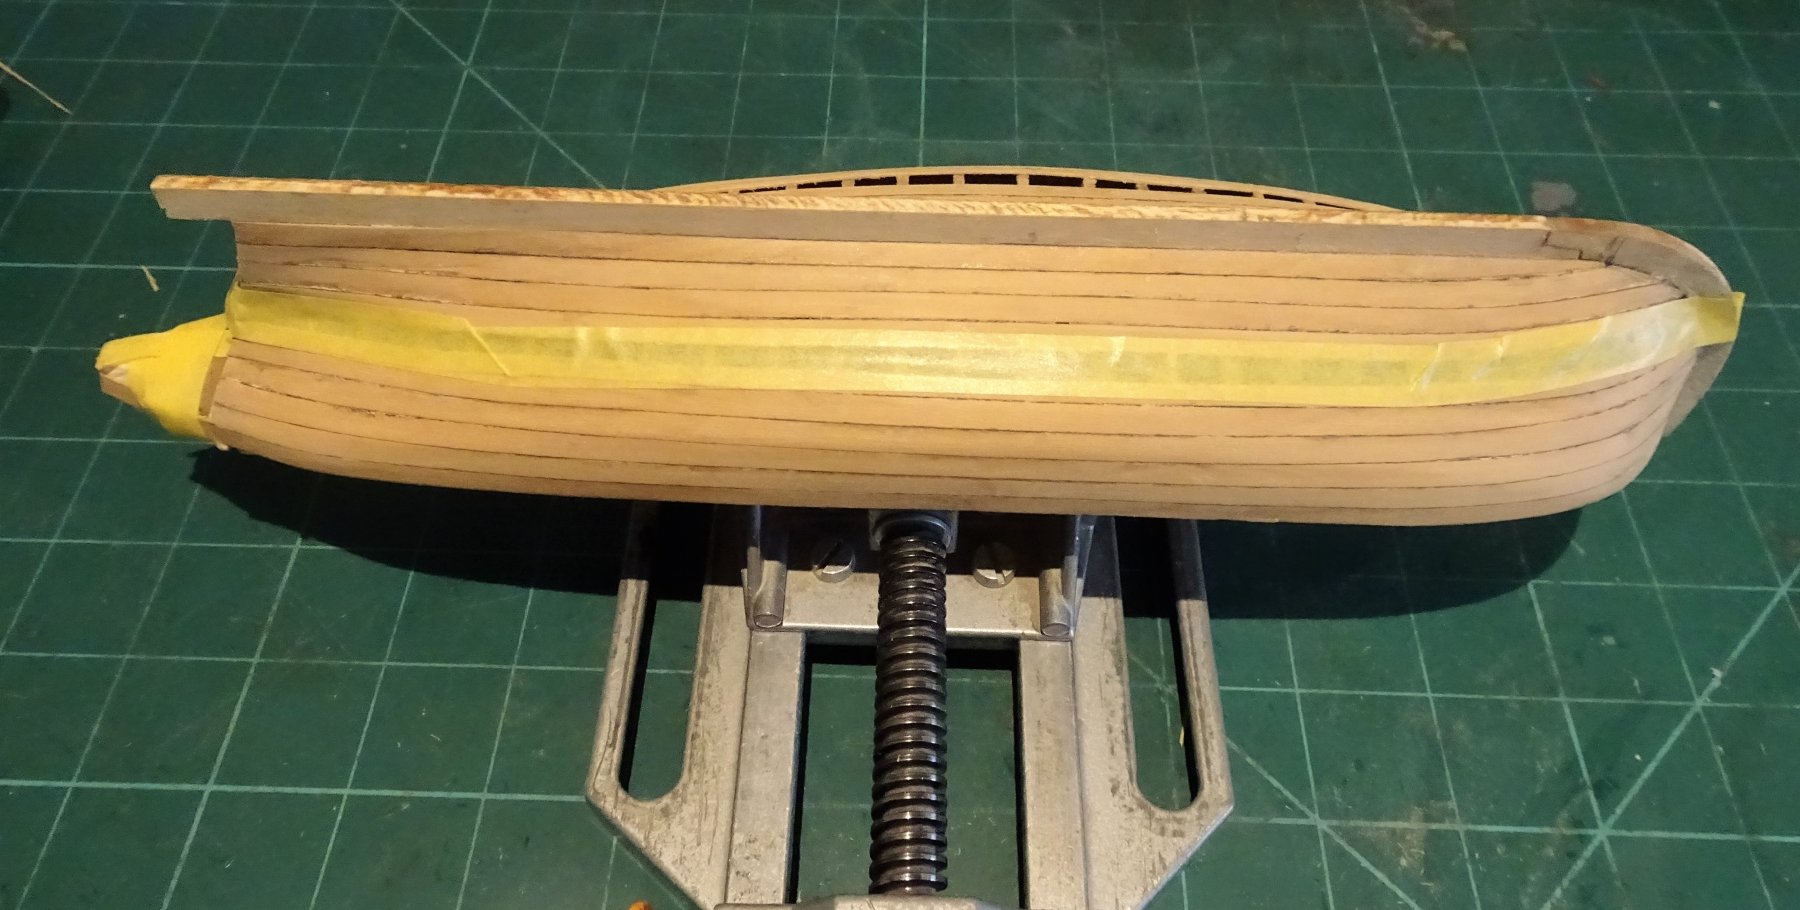
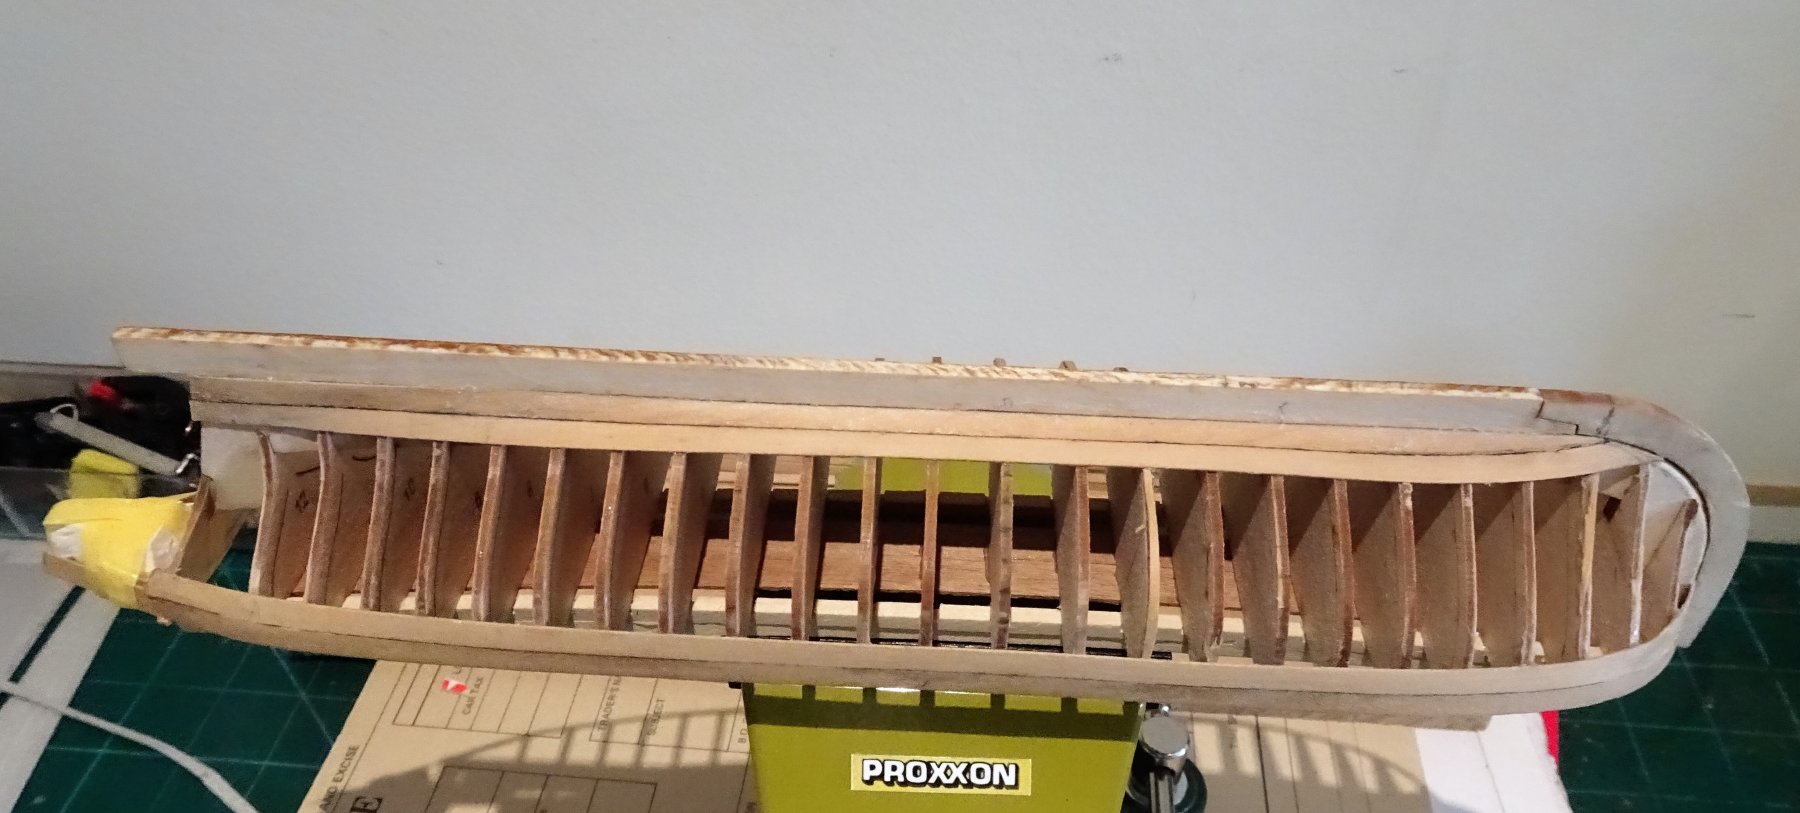
For the Risers I have used the kit provided Limewood, basically because it is to be painted and will take the bends fairly easily to follow the sheer of the boat.
I had retained the bulkhead stiffening strips from earlier in the build and as these follow the sheer line, I pressed them into further service as a template for the Risers.

9567
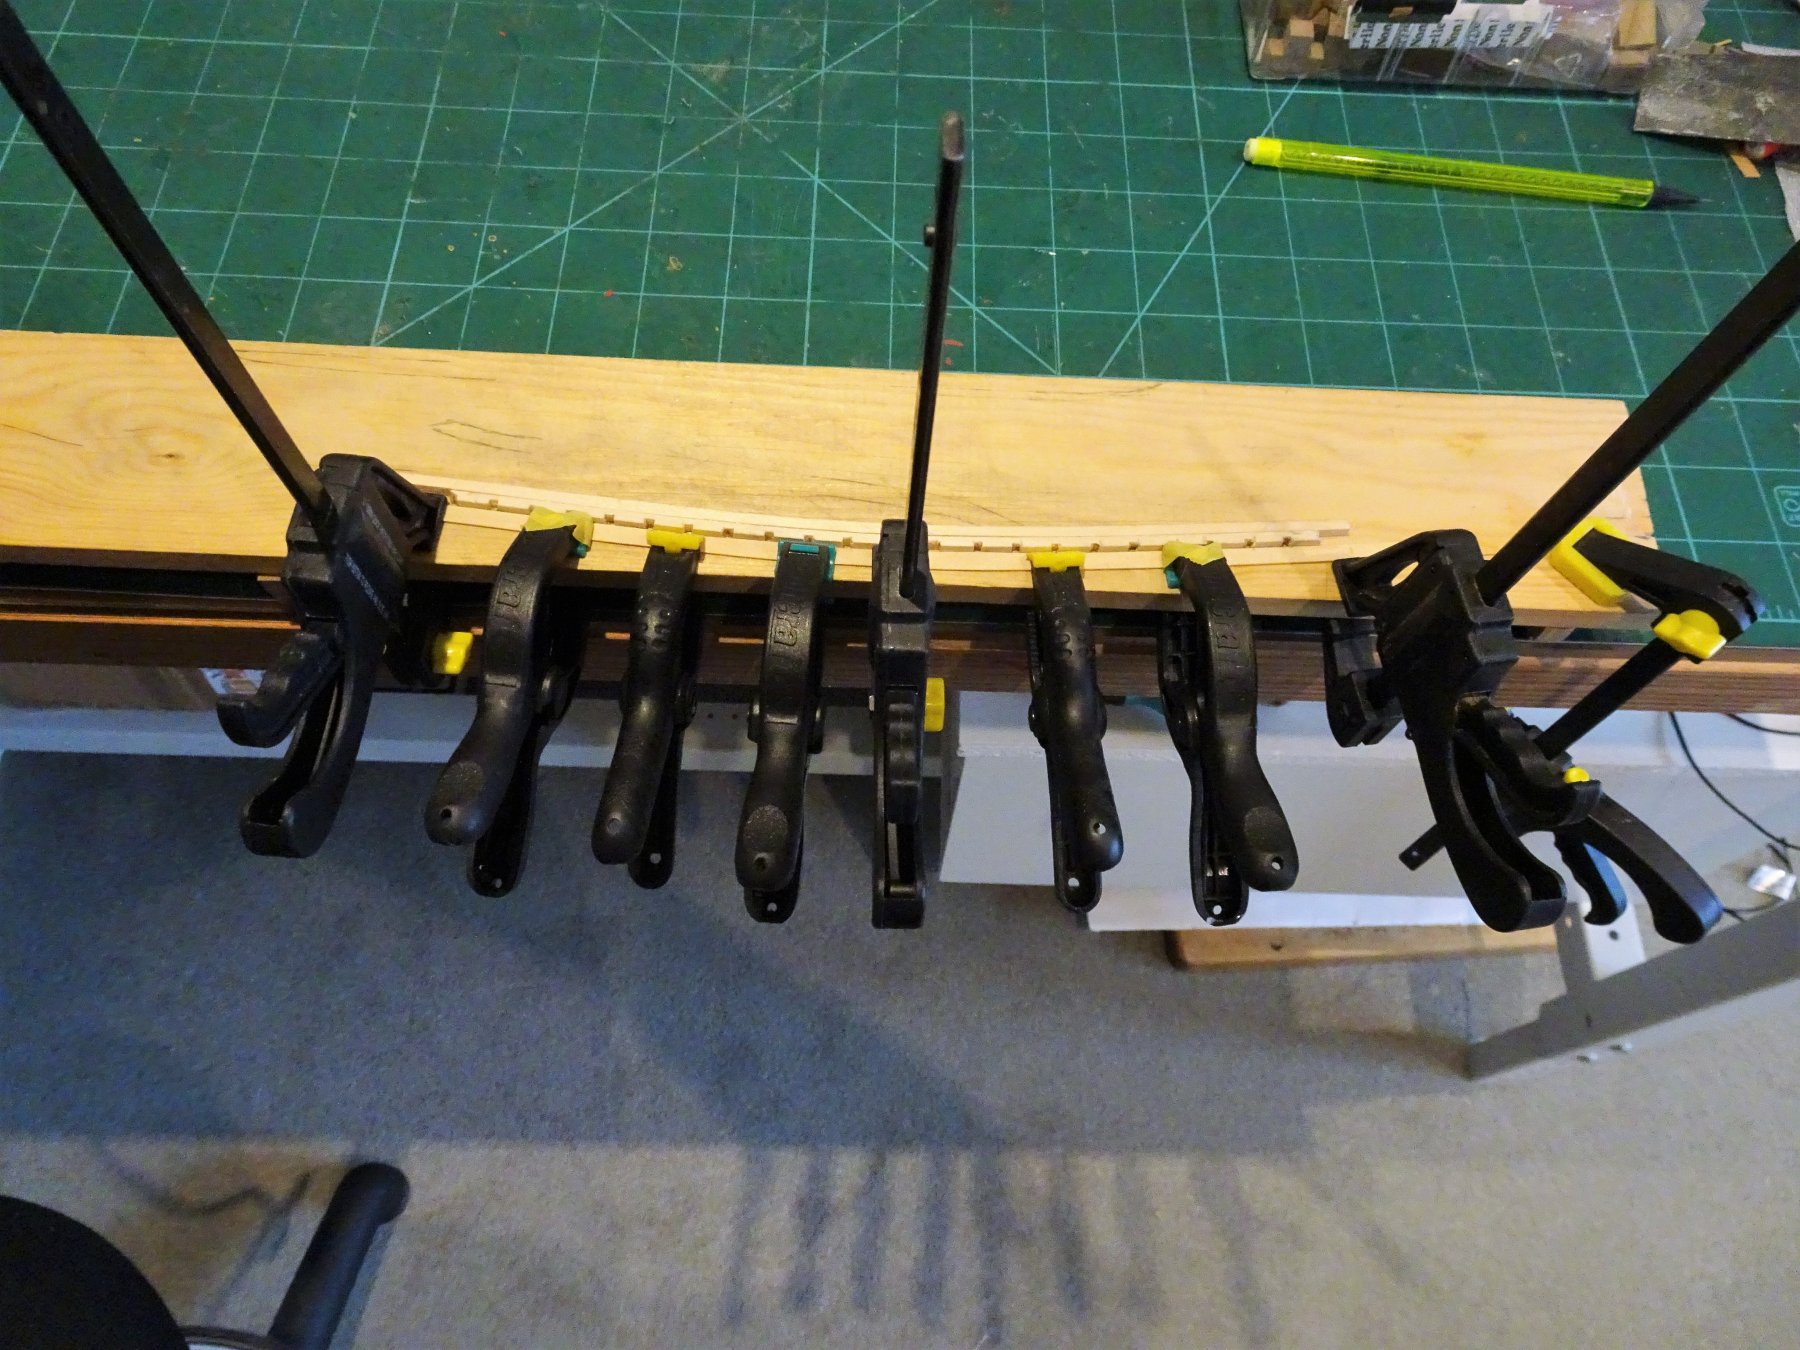
Not too difficult to achieve the sheer curve using wet and heat, but there is a downward turn around the first two frames at the bow which is a little trickier to achieve.
According to the plan the top of the Risers are 8.5mm below the frame tops. I used a marked stick to check the levels as I fitted the risers.
9571
With one side fitted the second side was glued so far along the hull and temporary thwarts put into place so the level could be checked before the glue was completely set, so adjustment could be made if necessary, fortunately it wasn't.
Before painting I coated the Risers with sanding sealer to give a smoother surface and reduce the inevitable fuzziness of the Limewood.
9611
The frames below the Risers I varnished to take off the whiteness of the Limewood.
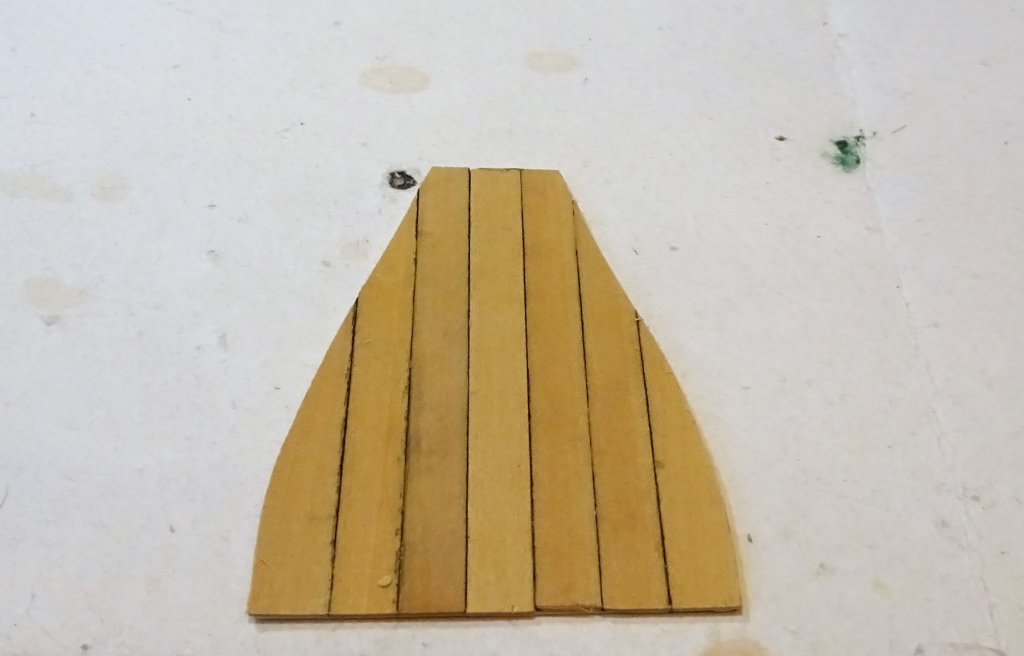
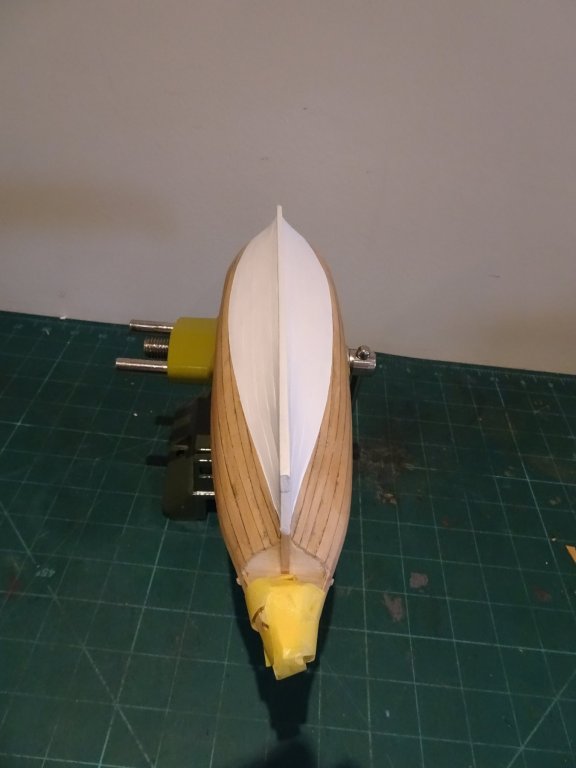
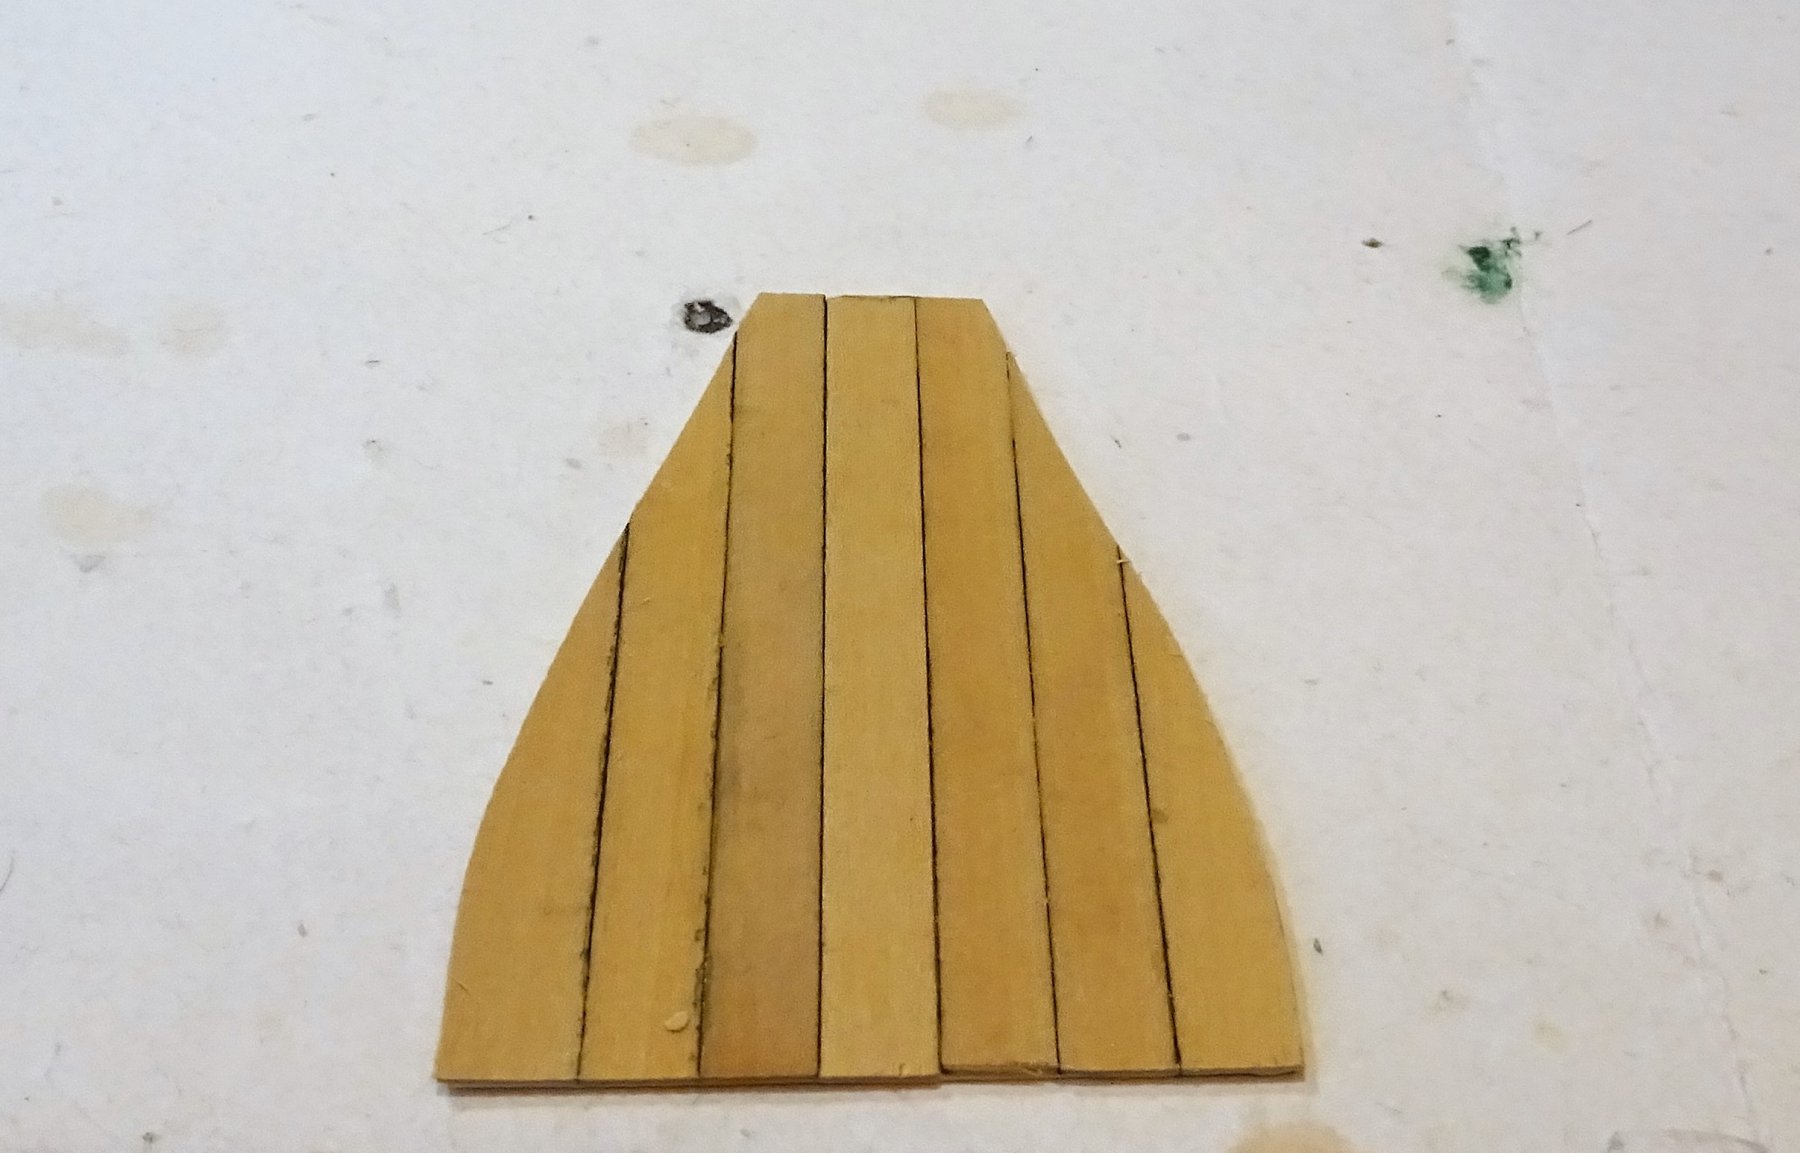
The small fore deck is also being fashioned, 8mm Boxwood strip is used for this.
9610

9606
I am thinking at present that I will leave the Foredeck and Thwarts in the natural Boxwood finish.
B.E.
-
A wonderful achievement Nils, love this model of such a fine subject, your skill and artistry is first Class.
")
B.E.
- Mirabell61, Martin W and mtaylor
-
 3
3
-
Back to my work bench refreshed from enjoying the glorious scenery of North Yorkshire coast along the Cleveland Way.

1538.
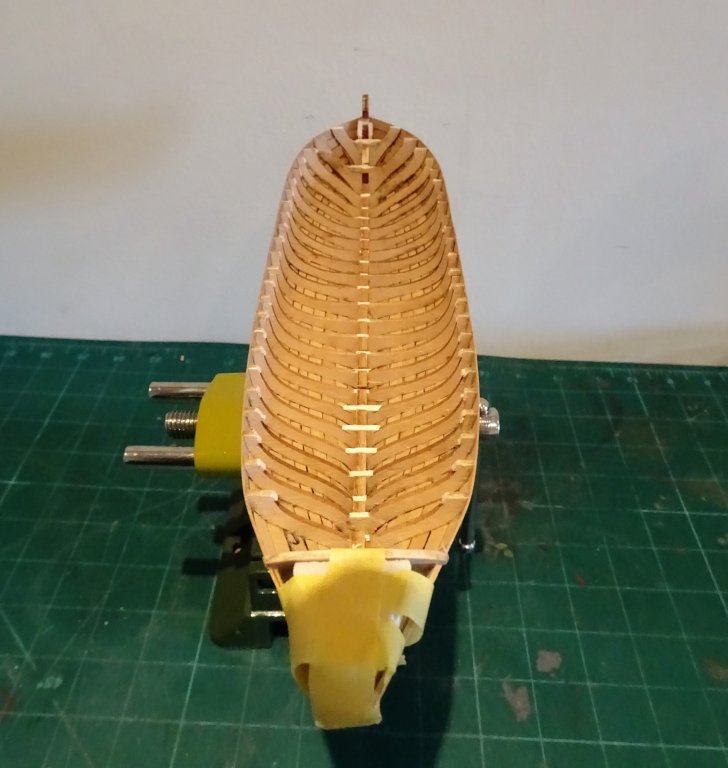
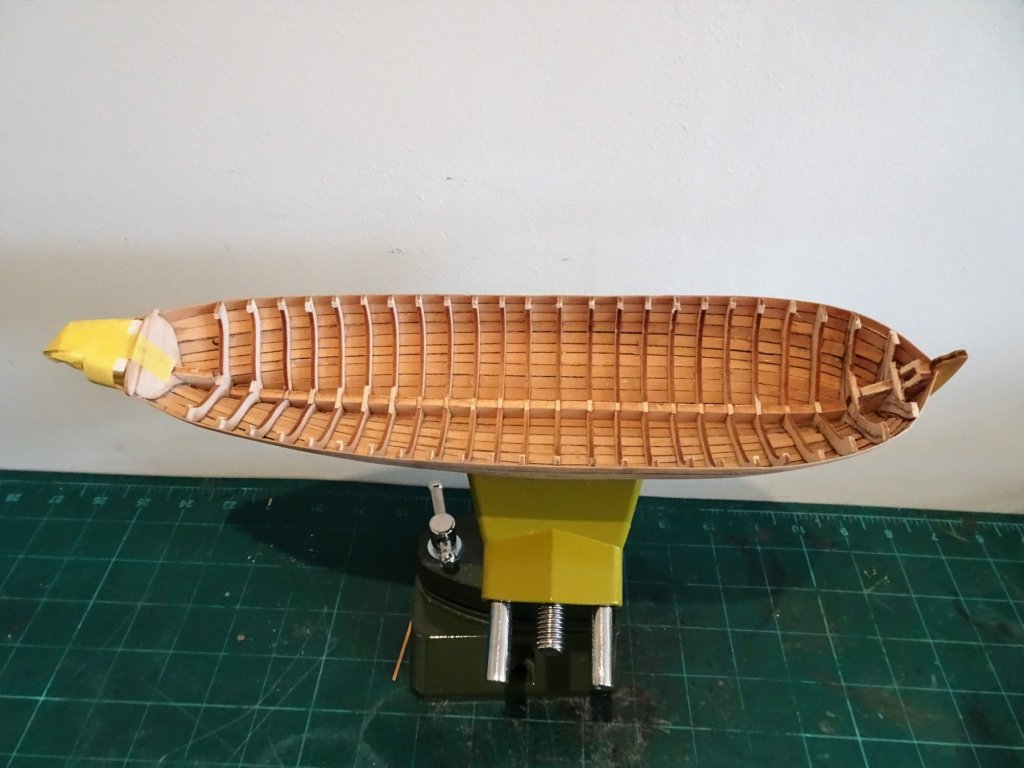
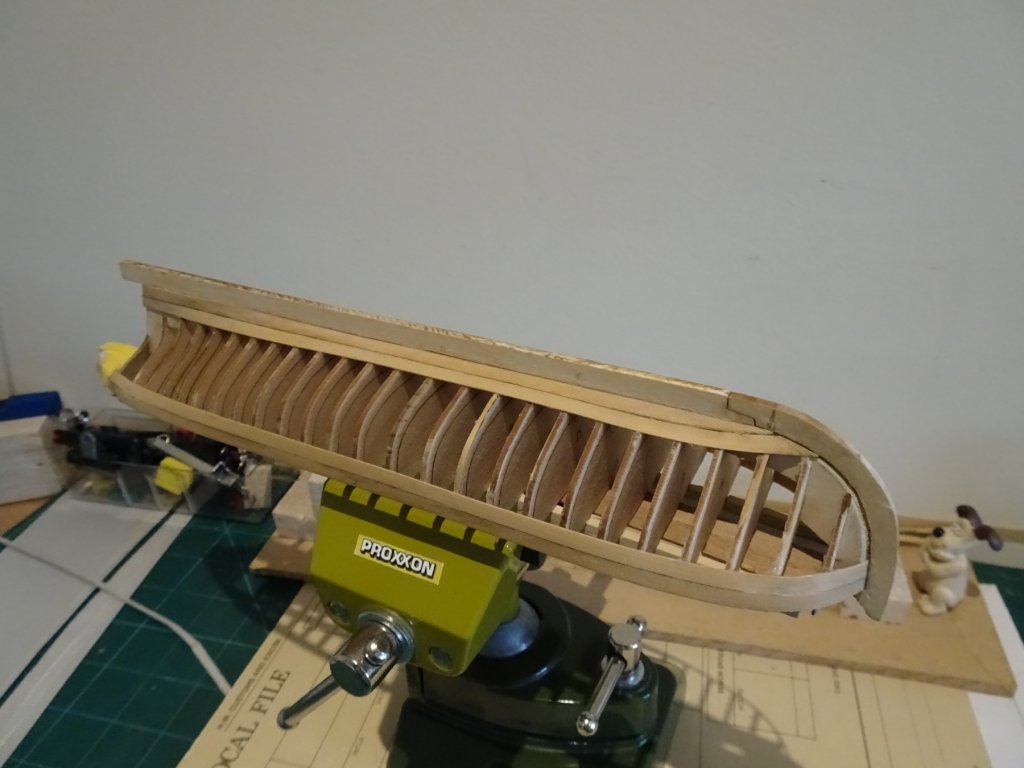
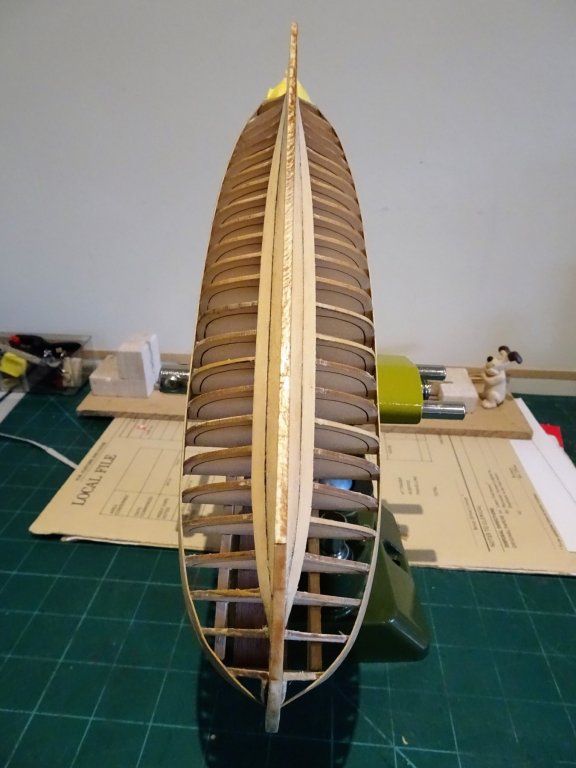
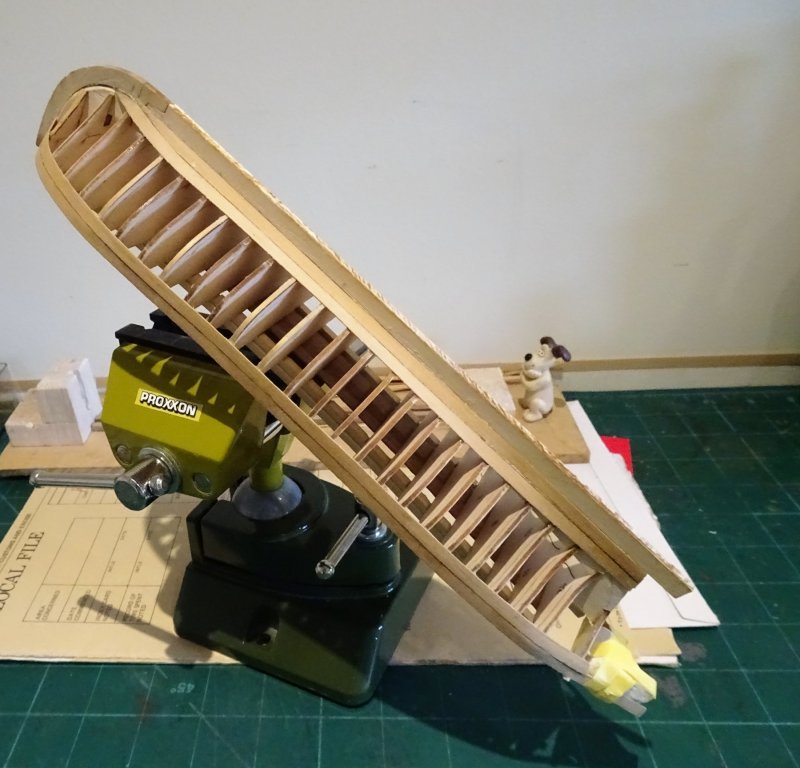
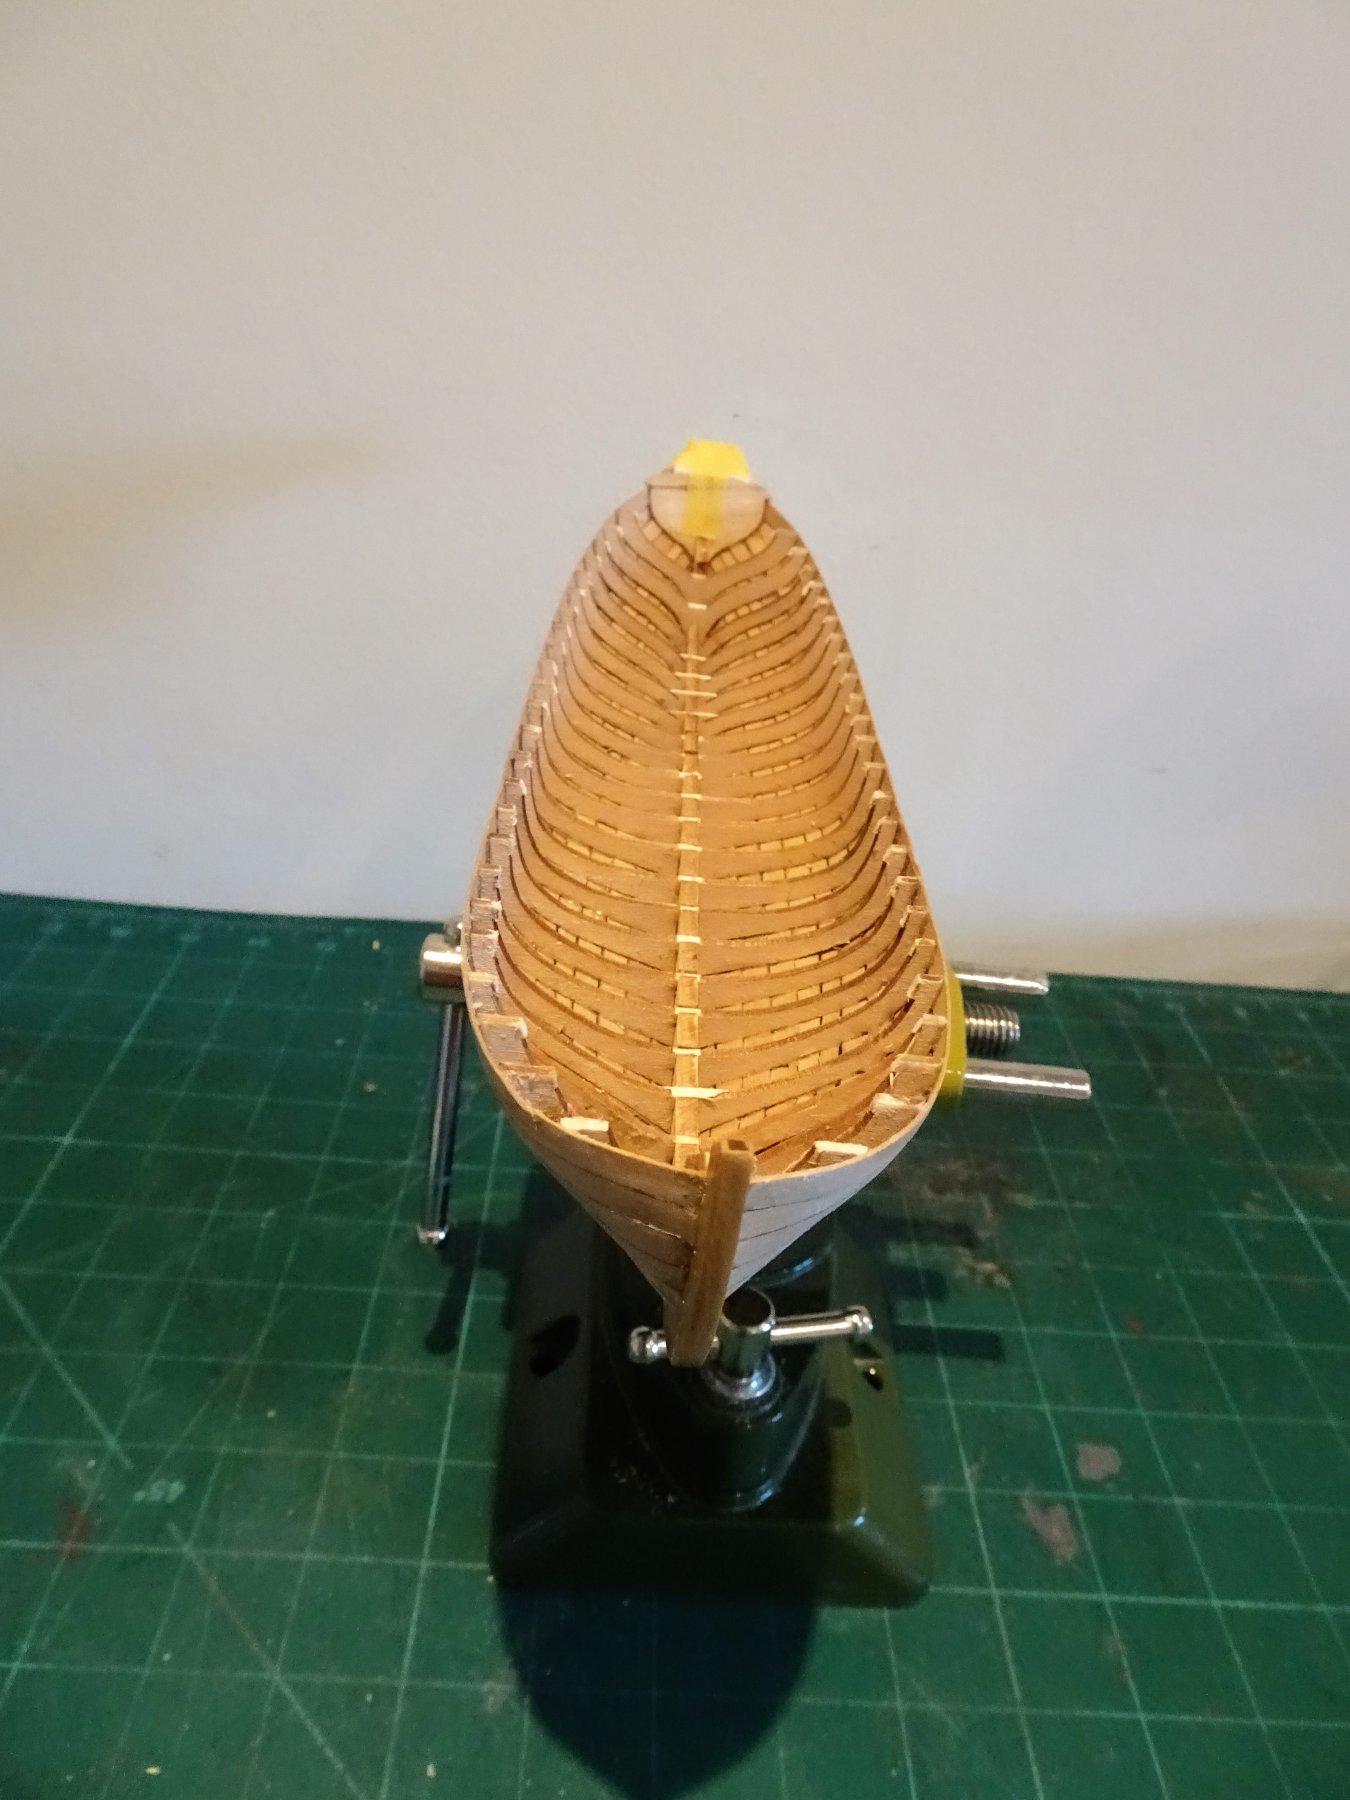
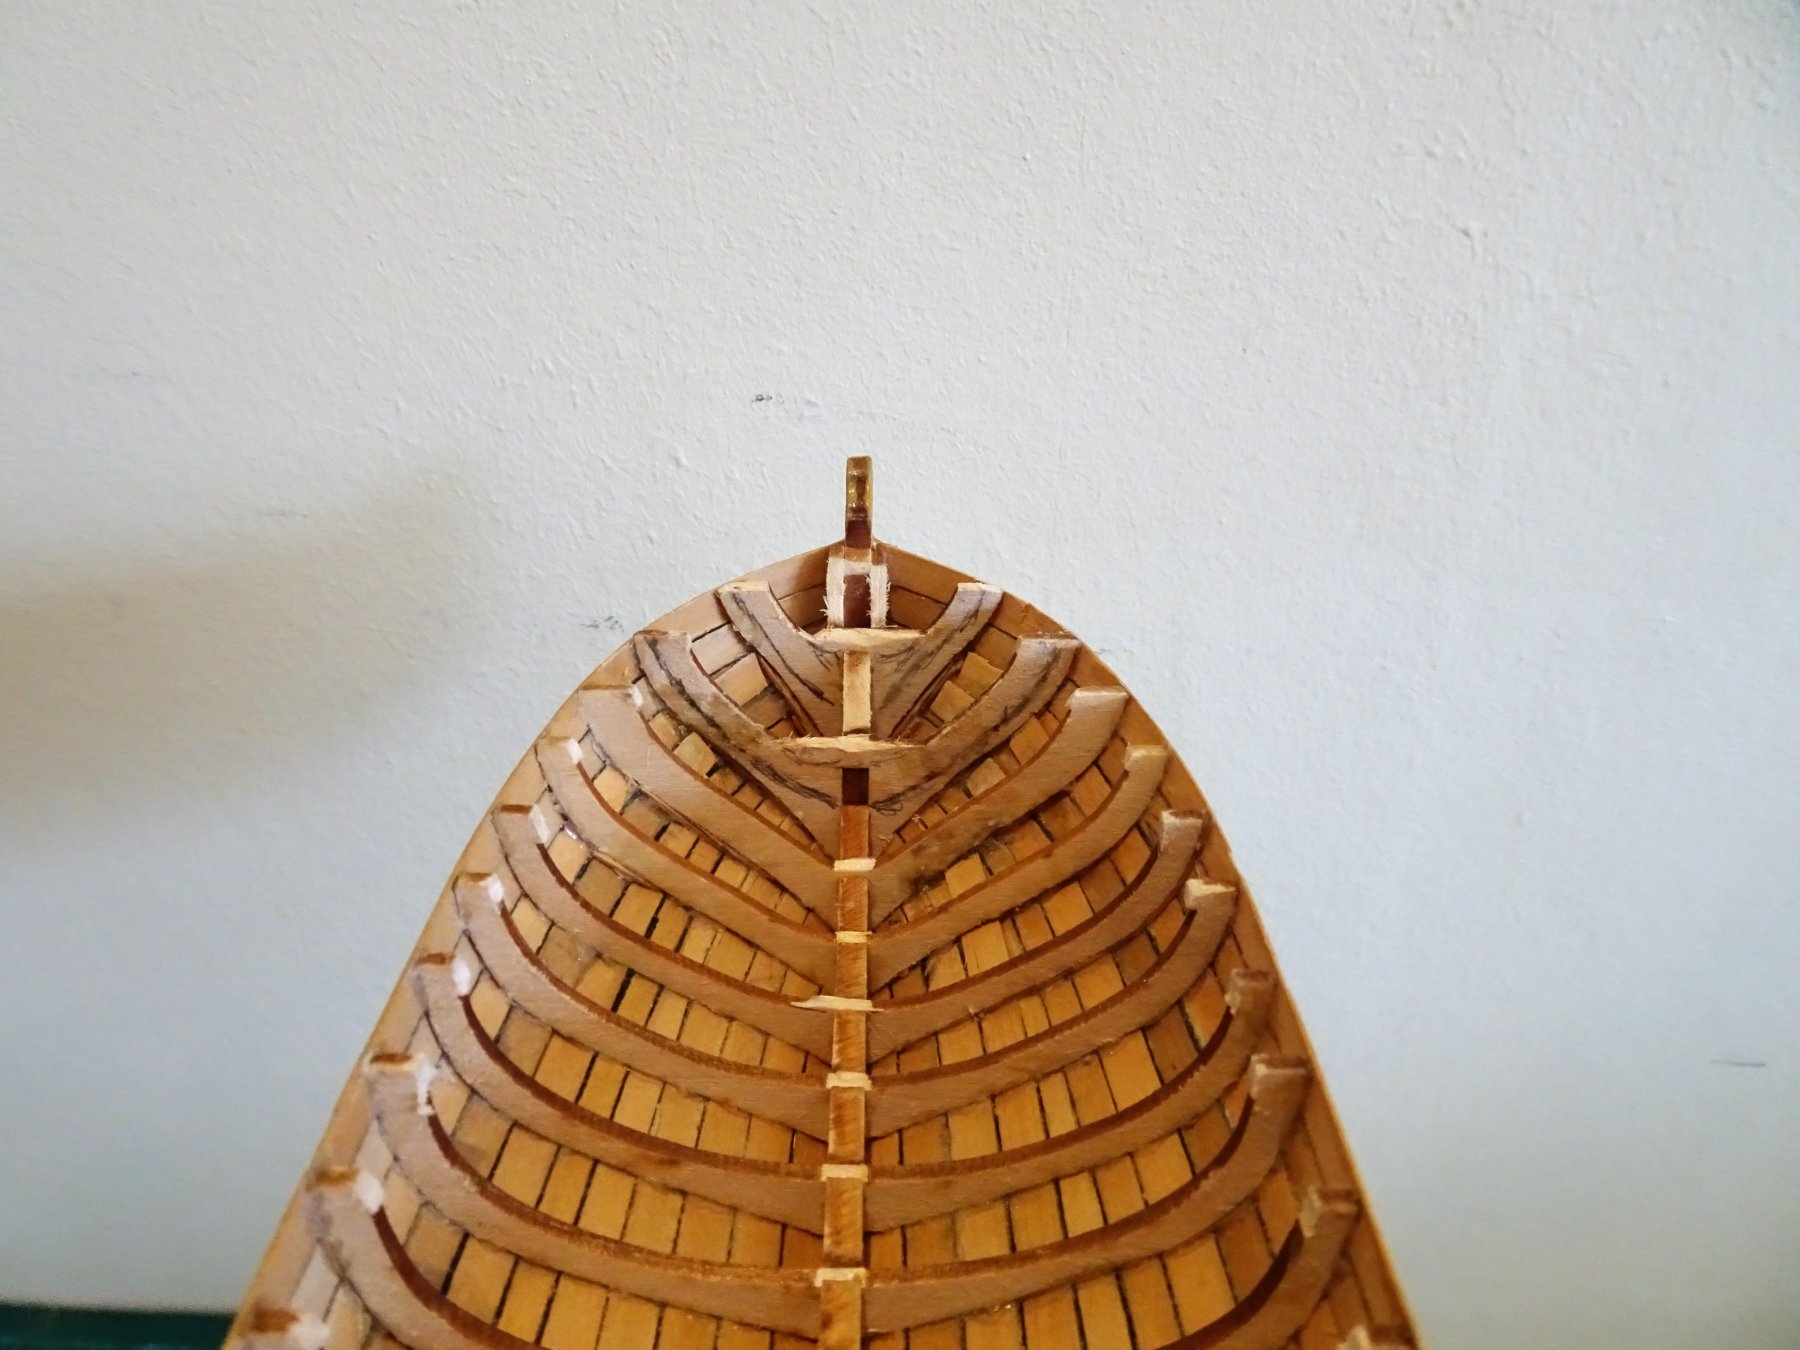
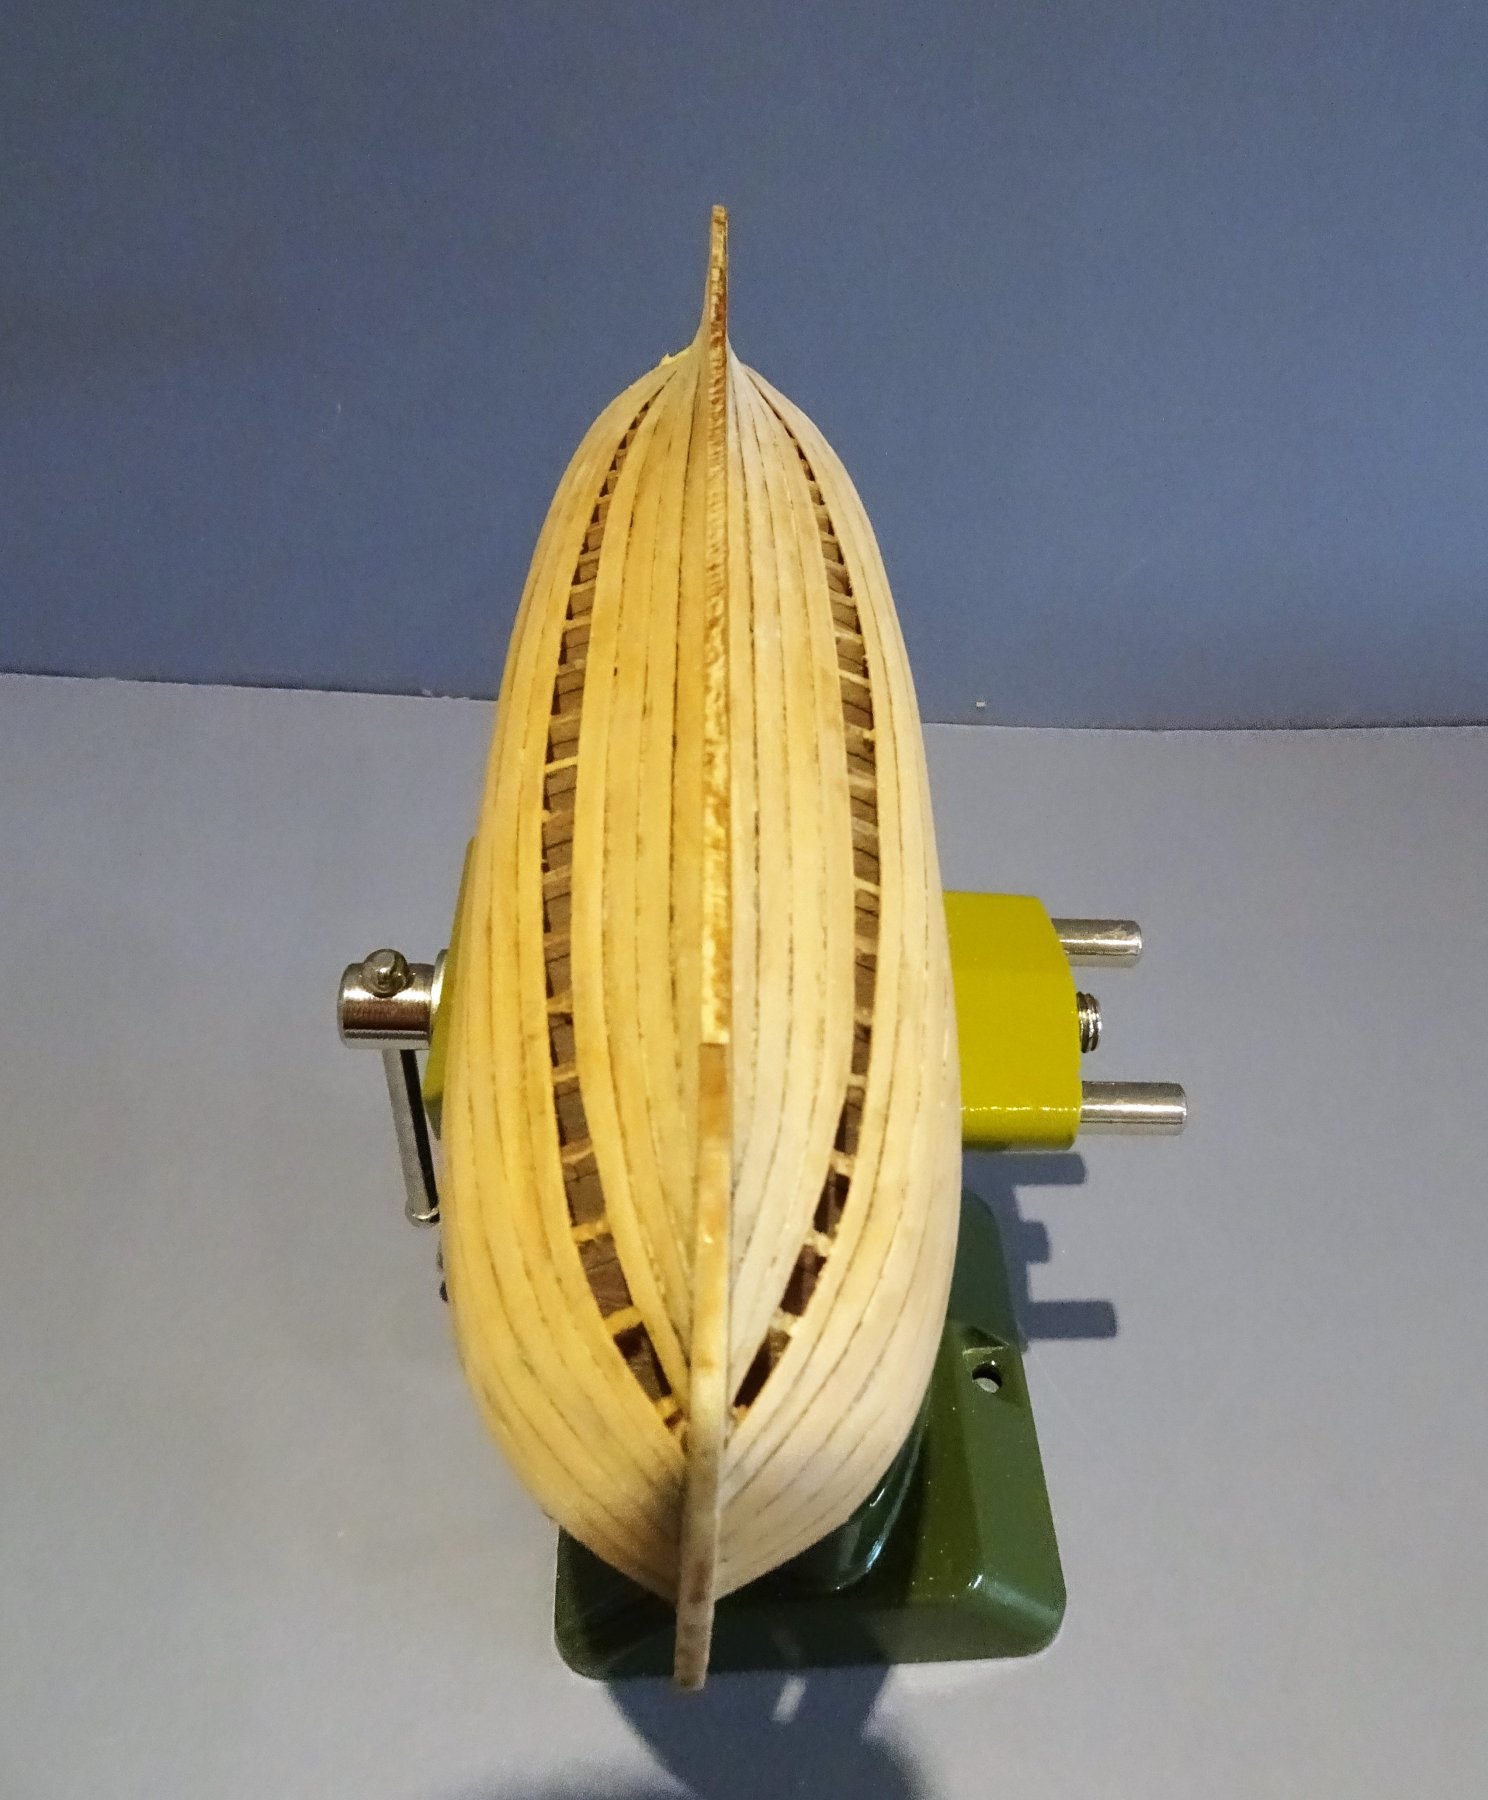
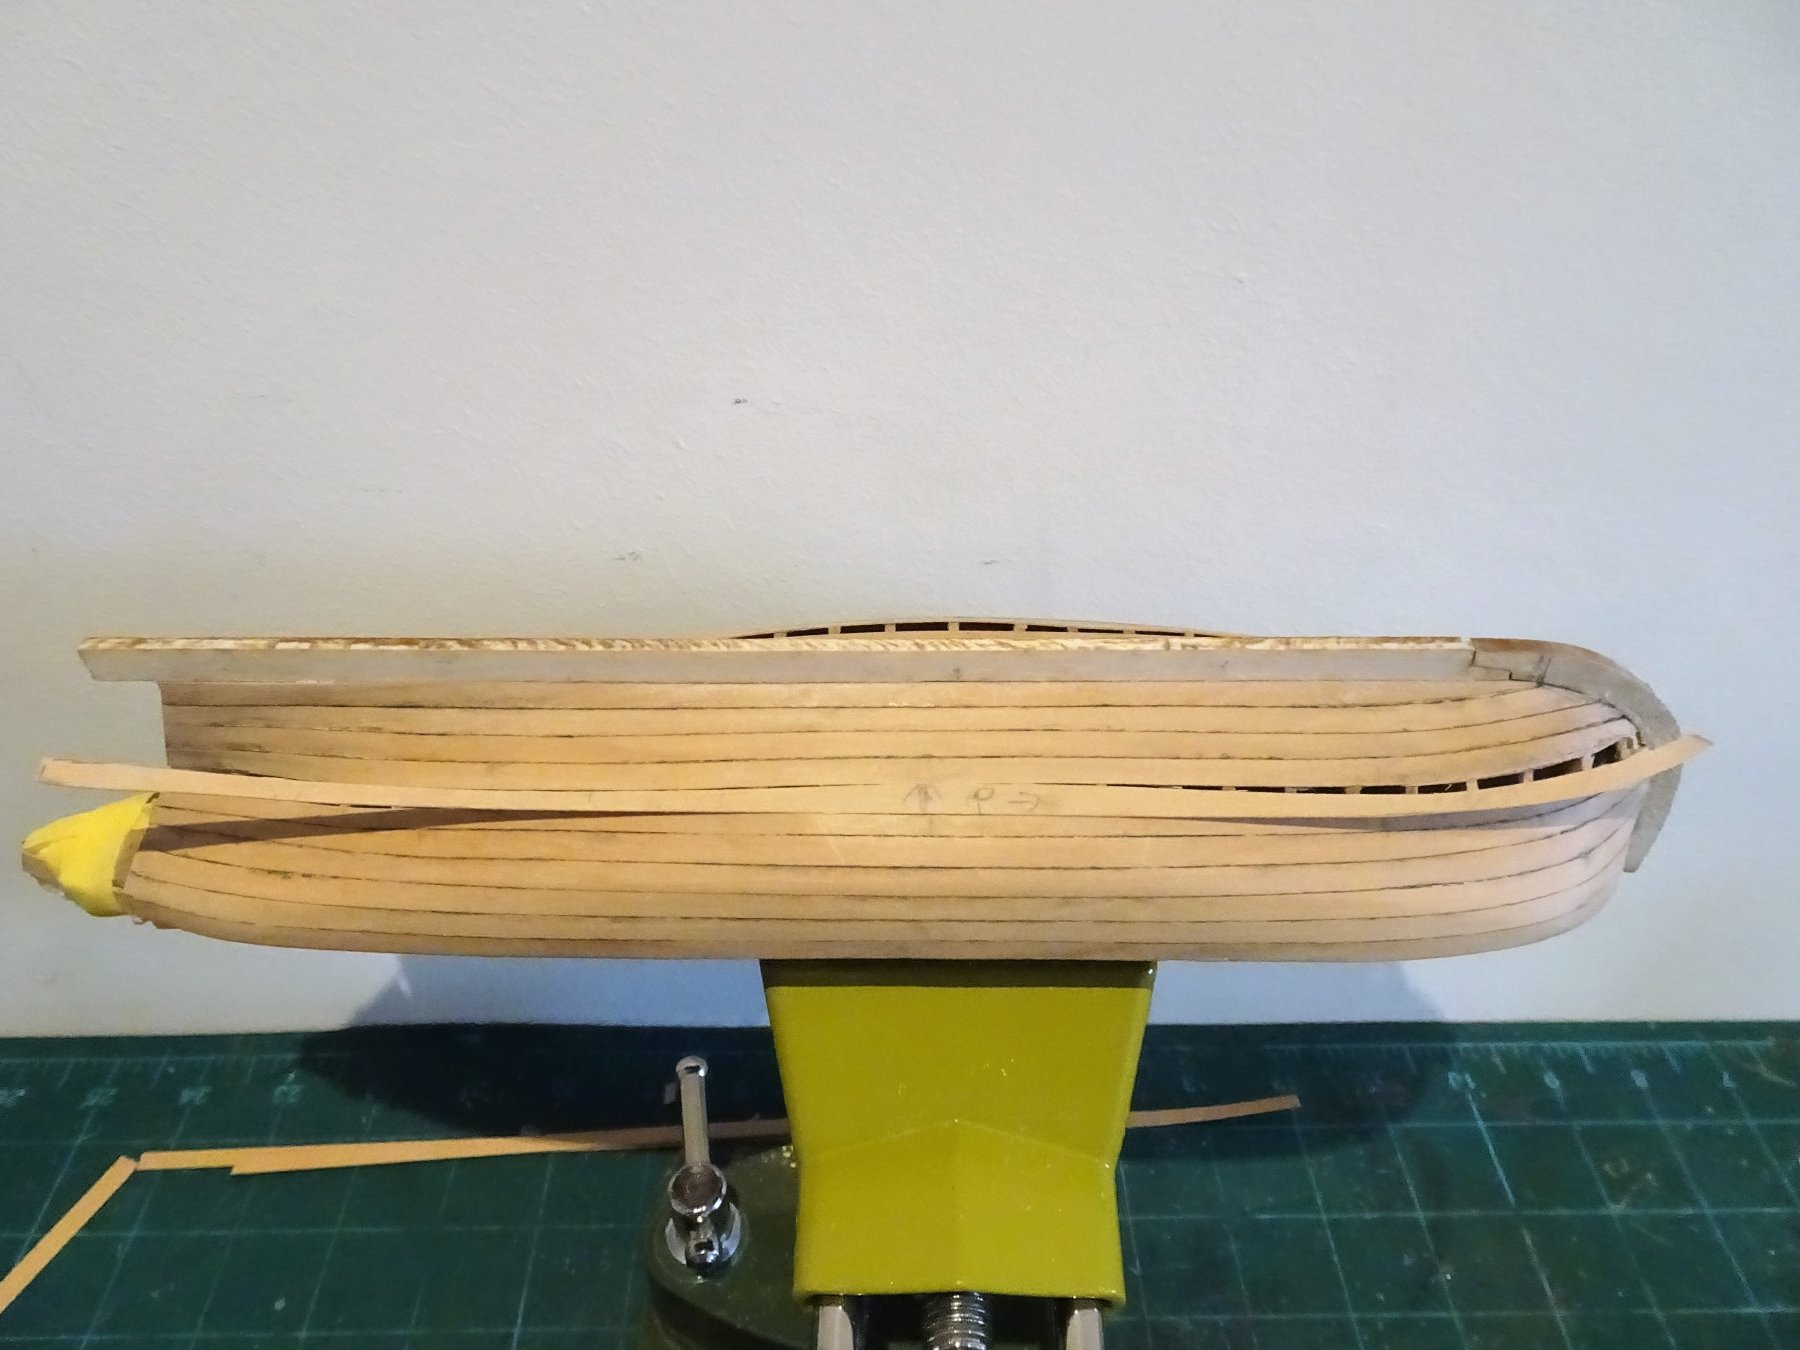
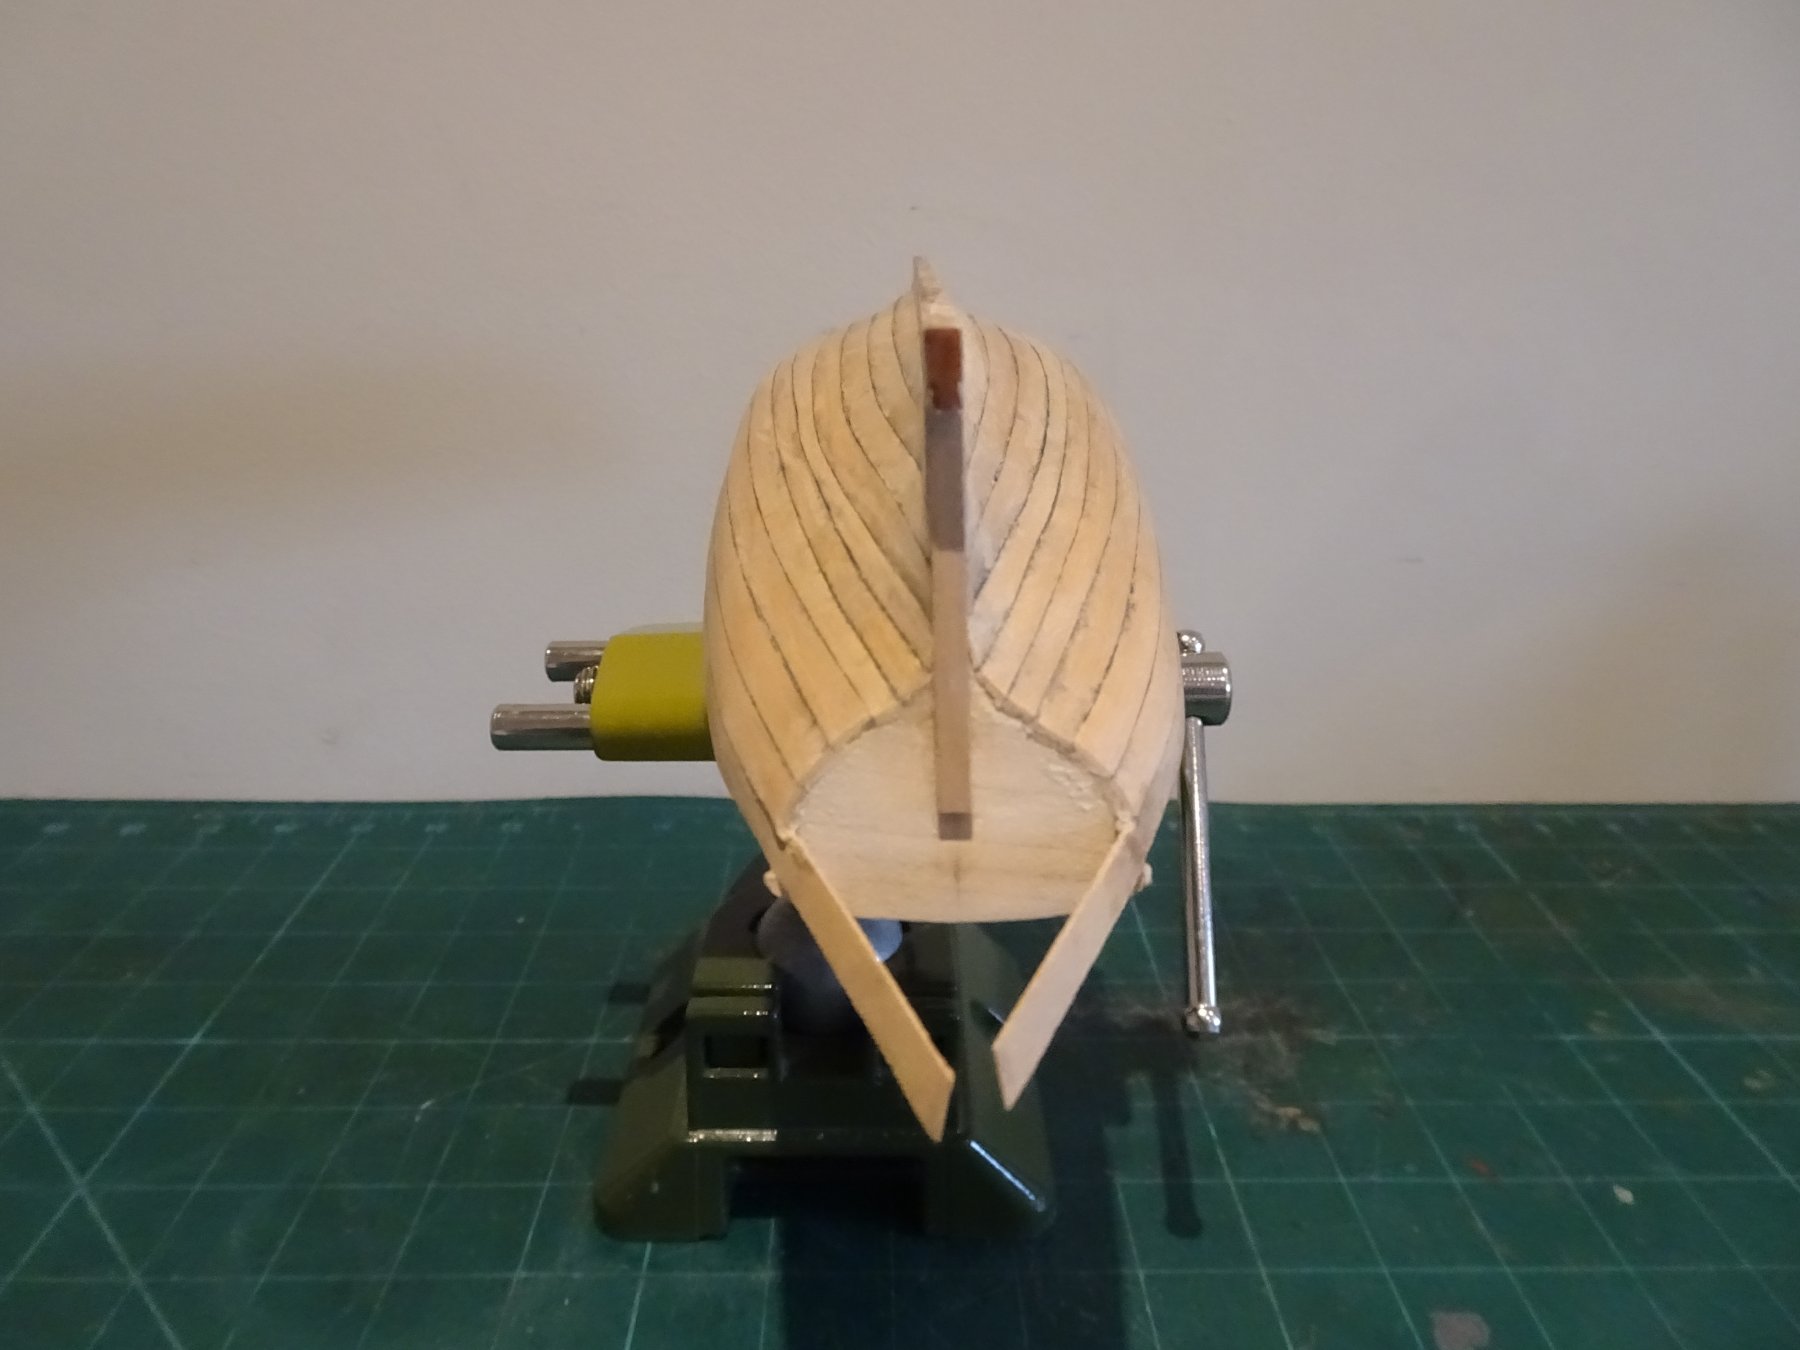
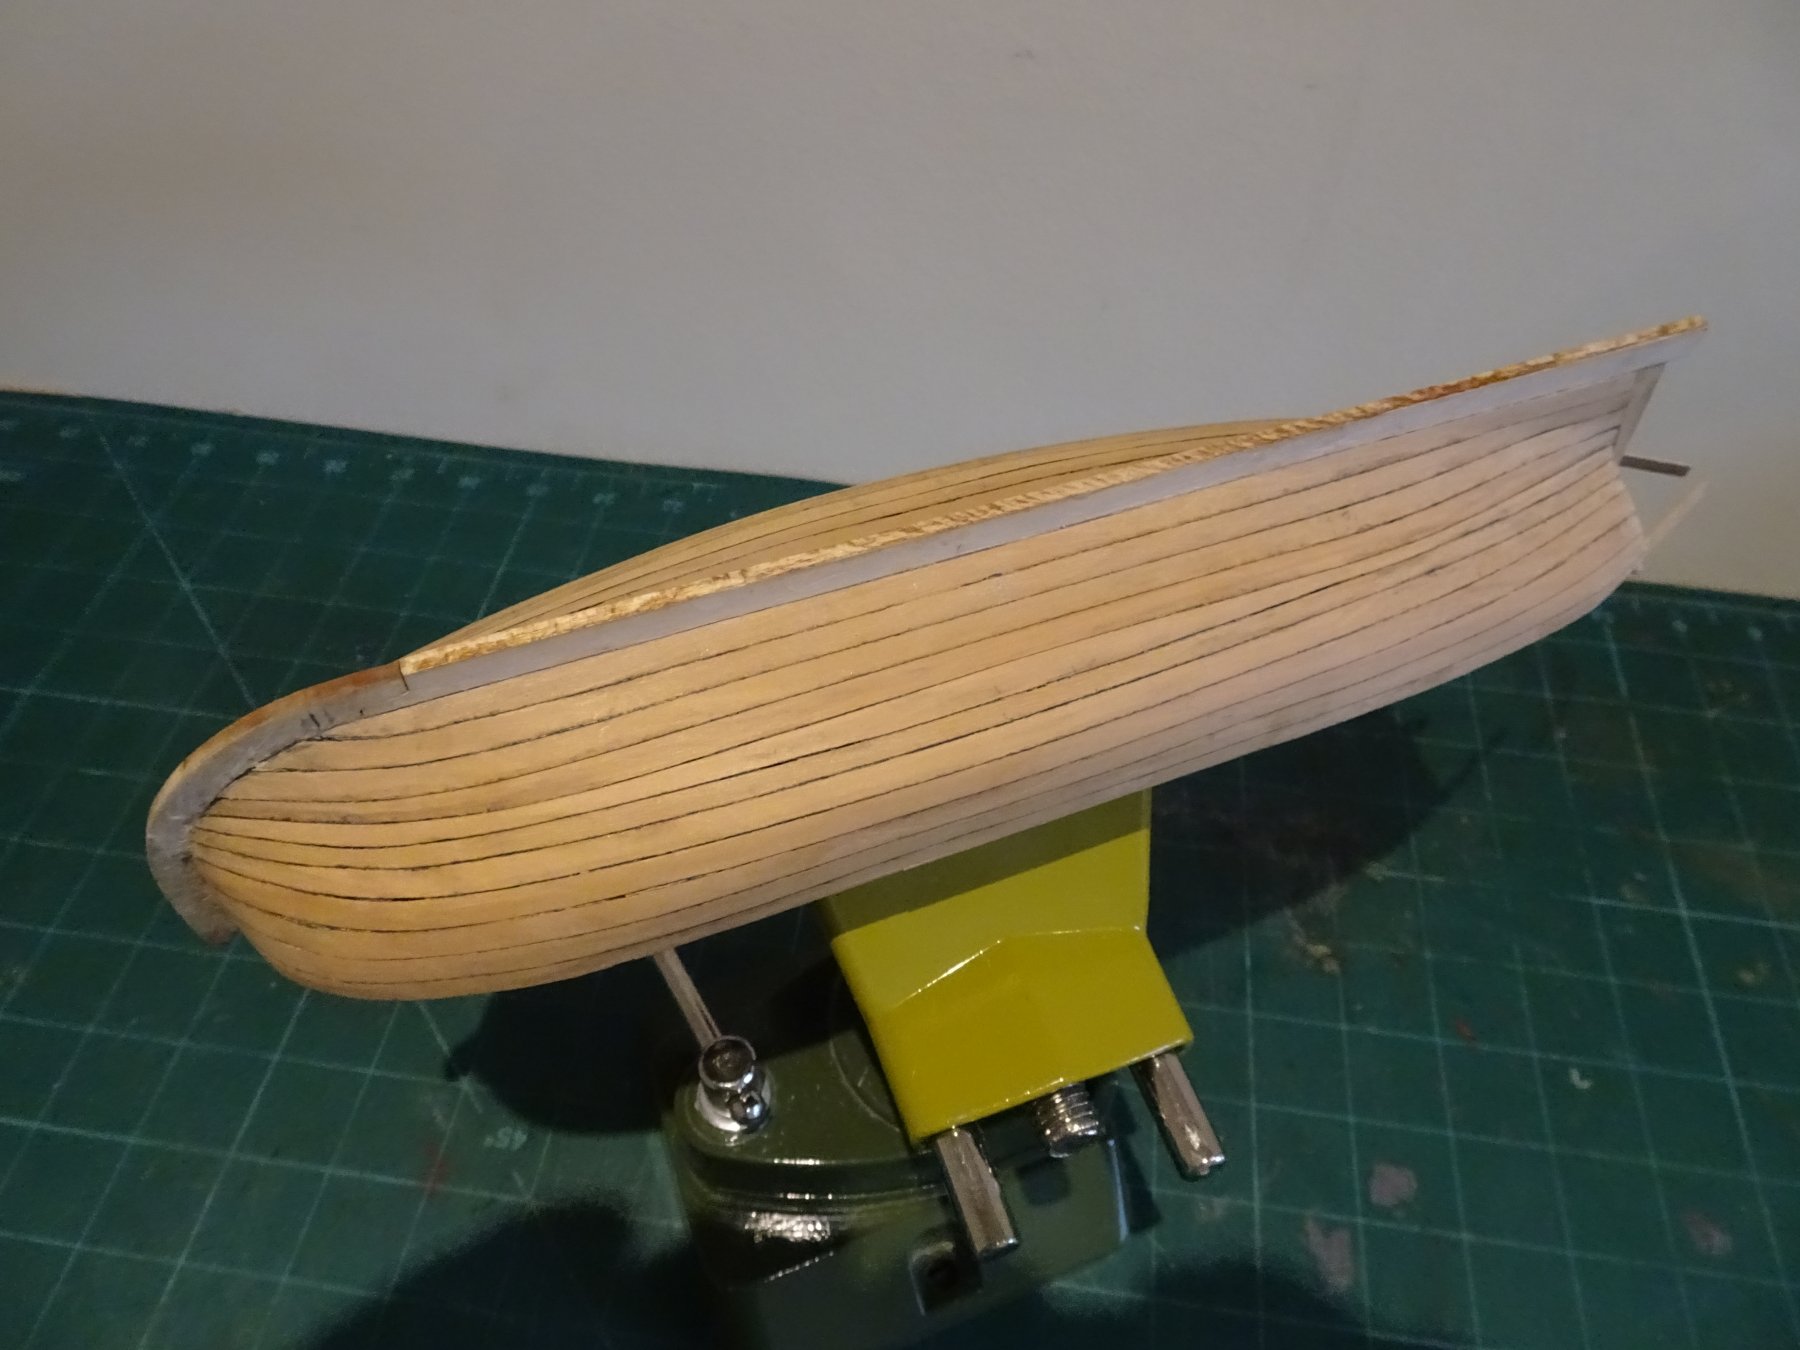
I have now reached the point where I need to fine down the frames before I move on.
9537
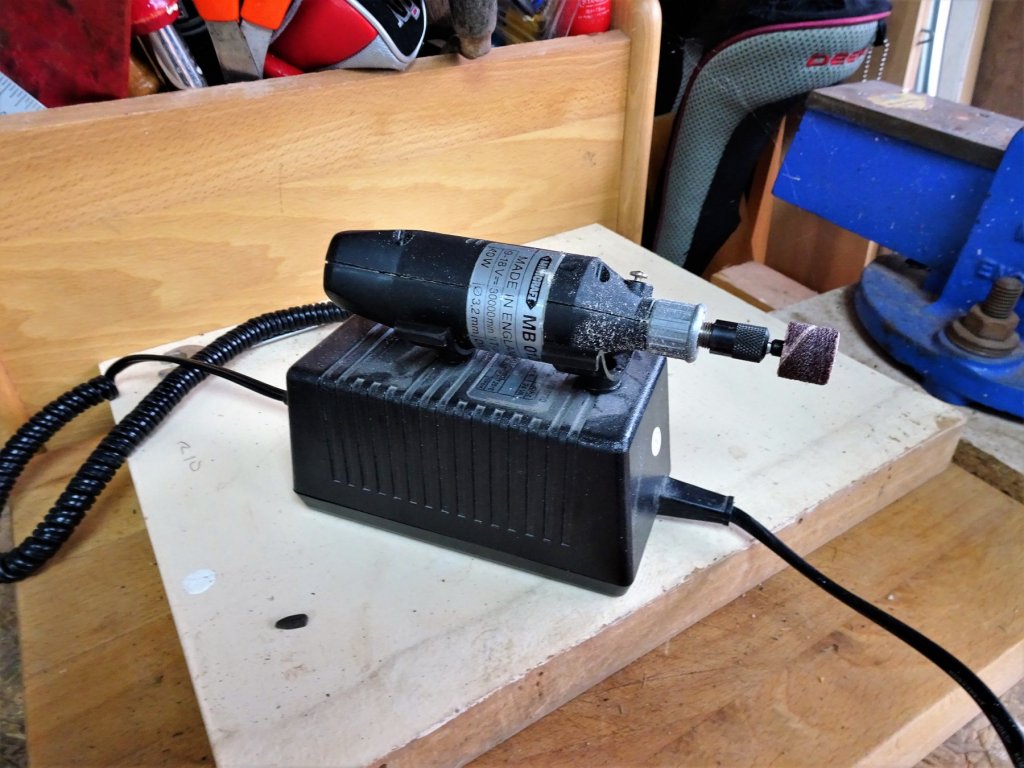
I did the bulk of the fining using my Minicraft drill which considerably reduced the time element of this somewhat tiresome procedure . This small palm sized tool, a sort of mini Dremel, is very good for delicate work in tight places where a little more sanding power is required.
Sanding down the first two frames at the Bow and the false keel proved to be the most awkward and time consuming.
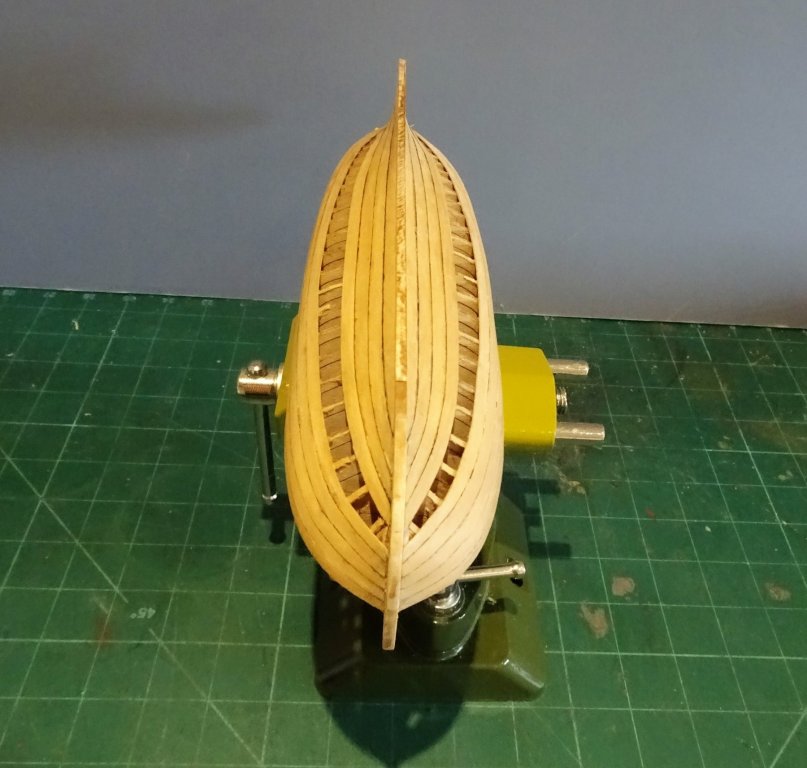
The first internal fittings are the Footwalings. Looking at the plan the central board is 6mm wide. I used 6mm x 0.7mm Boxwood strips. The boards run from 2nd to the 19th frames.
9542
For the aft deck I cut a template from card to get the fit and planked over this with Boxwood strip.
This also seemed an opportune time to get some paint on the interior in the helmsman area before the cockpit seat is added which will restrict access somewhat.
9553
9556
For the shade of Red for the interior decoration I thought the 18th c Red Ochre as supplied by Caldercraft a little too dull, so I made a mix using Humbrol No 60 (a little too bright), with the Caldercraft Ochre in the proportion of 25% Ochre and 75% Humbrol 60.
This has brightened the shade without making it too modern looking.
I have also critically reviewed the deficiencies in my lower planking of the hull and made the decision to paint below the waterline which will allow me to address some of the issues and hopefully reach a finish I can live with.
9548

9551

9544
Still some fettlin' and fiddling to do with the finish, but up next fitting the Risers.
B.E.
-
Nicely done Steve, I had to engage in a little shimming too.
B.E.
- Tigersteve and Elijah
-
2
-
Nice job on the Gangboards Martin, but I'm still a little unsure about the support post.
There is a Newel Post that will sit directly above your post to support the Gangway hand rail, and before I made a final decision I think I would fit that first to make sure that the combination didn't look too heavy or awkward.
if I had to come down one side or the other my inclination would be to leave the post off.
ps: beautiful white tails, but how do you keep them out of your garden.
Regards,
B.E.
-
So the process of cleaning up the hull progresses, any slight hairline gaps between the planks are painted with diluted pva, sprinkled with boxwood dust, and smoothed in followed by immediate cleaning off of the excess.
Had my planking skills been better all this of course would have been unnecessary.

One of the things that has been on my mind is toning in the Limewood keel and stem to match the Boxwood planking.

9034
Firstly these areas were fine sanded and coated with a sanding sealer, this will present a surface on which to paint a colour matched varnish to compliment the planking.
This is also an opportune time to remove the bracing strips that supported the bulkheads during the fairing process, and which provided an anchor for spring clips during planking.
8920
It was a fairly painless exercise to remove the bulkhead centres, and all the frames held firm.
Chuck recommends using a needle file to cut thro' the bulkhead tabs but I have found a very fine etched scalpel saw does the job for me.

8918
These little saws come in very handy
https://www.air-craft.net/acatalog/Photo-Etched-Saw-Blades-Set-2.html#SID=77

9037
9039
The process of fining down the frames can now begin.
Not quite clear to me at the moment how to approach the thinning down of the first two frames at the Bow. The angles look far steeper on my build than appear in the kit instruction photo's (p9)

9052
I have also had to add interior strips of boxwood in the bow area as the planking was getting a little too thin in this area.

9051
Not too much of a problem in reality as the small Fore deck will cover this divergence from the shipwrights art.
So the build will progress, but without I have to say much enthusiasm at present.
Still off to North Yorkshire soon, and a break from the frustrations of this project.

B.E.
-
That looks good Steve👍
B. E.
-
-
Nicely done Jason, I agree with Pat, it looks good to my eye, leave well alone now.
B.E.
- mtaylor, mobbsie and Beef Wellington
-
3
-
-
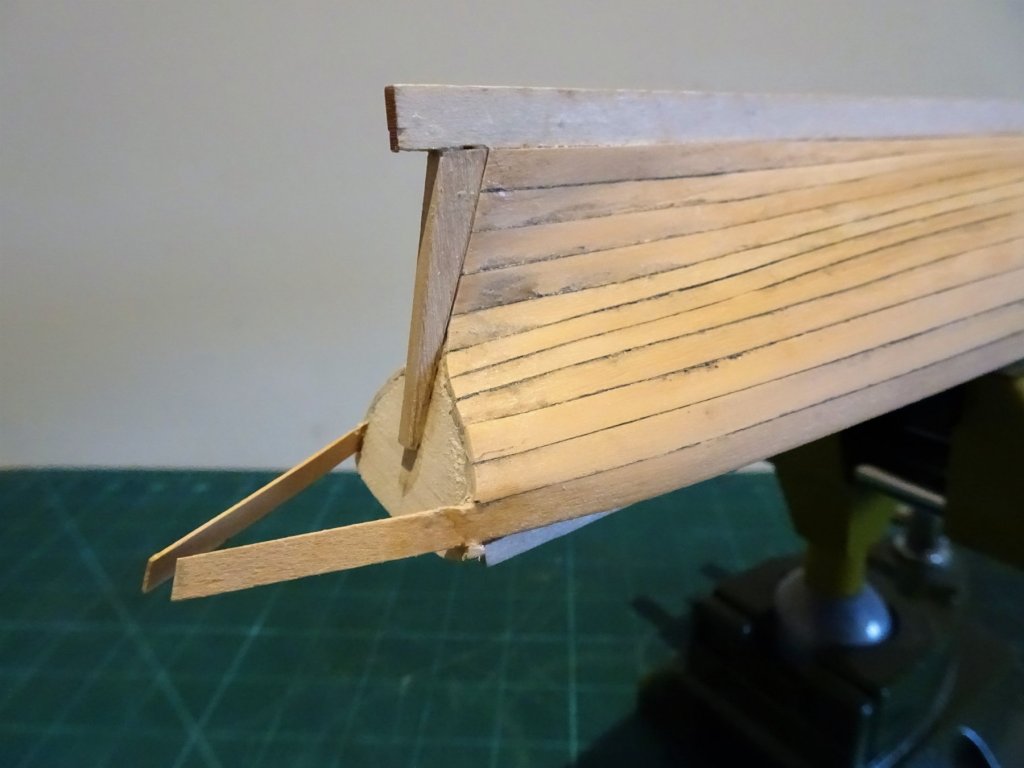
Gromit was right to question the remaining space to take two strakes.
It proved to be too tight to take two reasonably tapered planks; one to be the sixth plank from the top, and one spiled plank running just below the curve of the hull to complete the planking.
My approach was to perform an insitu taper to the uppermost lower plank (fourth from keel) to equalise the necessary taper at the bow.

8886
Here the sixth strakes are fitted, leaving just the final spiled strake to be fitted.

8891
8892
This is a very interesting shape but at the bow and stern the widths are not out of kilter with the other planks. Most of the length is otherwise obscured by the curve of the hull.

8897
To get the spiled shape I stick Tamiya tape over the space and cut the shape out with a scalpel.
This is then applied to a strip which is then wetted and cut out allowing a margin for fitting.
8900
The rather contorted shape of the final plank.
It is all then down to sanding the edge to fit; I start with the widest section, mark the position on both the plank and the planks above and below it, and by degrees fine tune the edges to fit in the gap.

8898
This is not difficult but takes time with constant fit checking.
For this last strip both edges are lined to reflect the caulking.
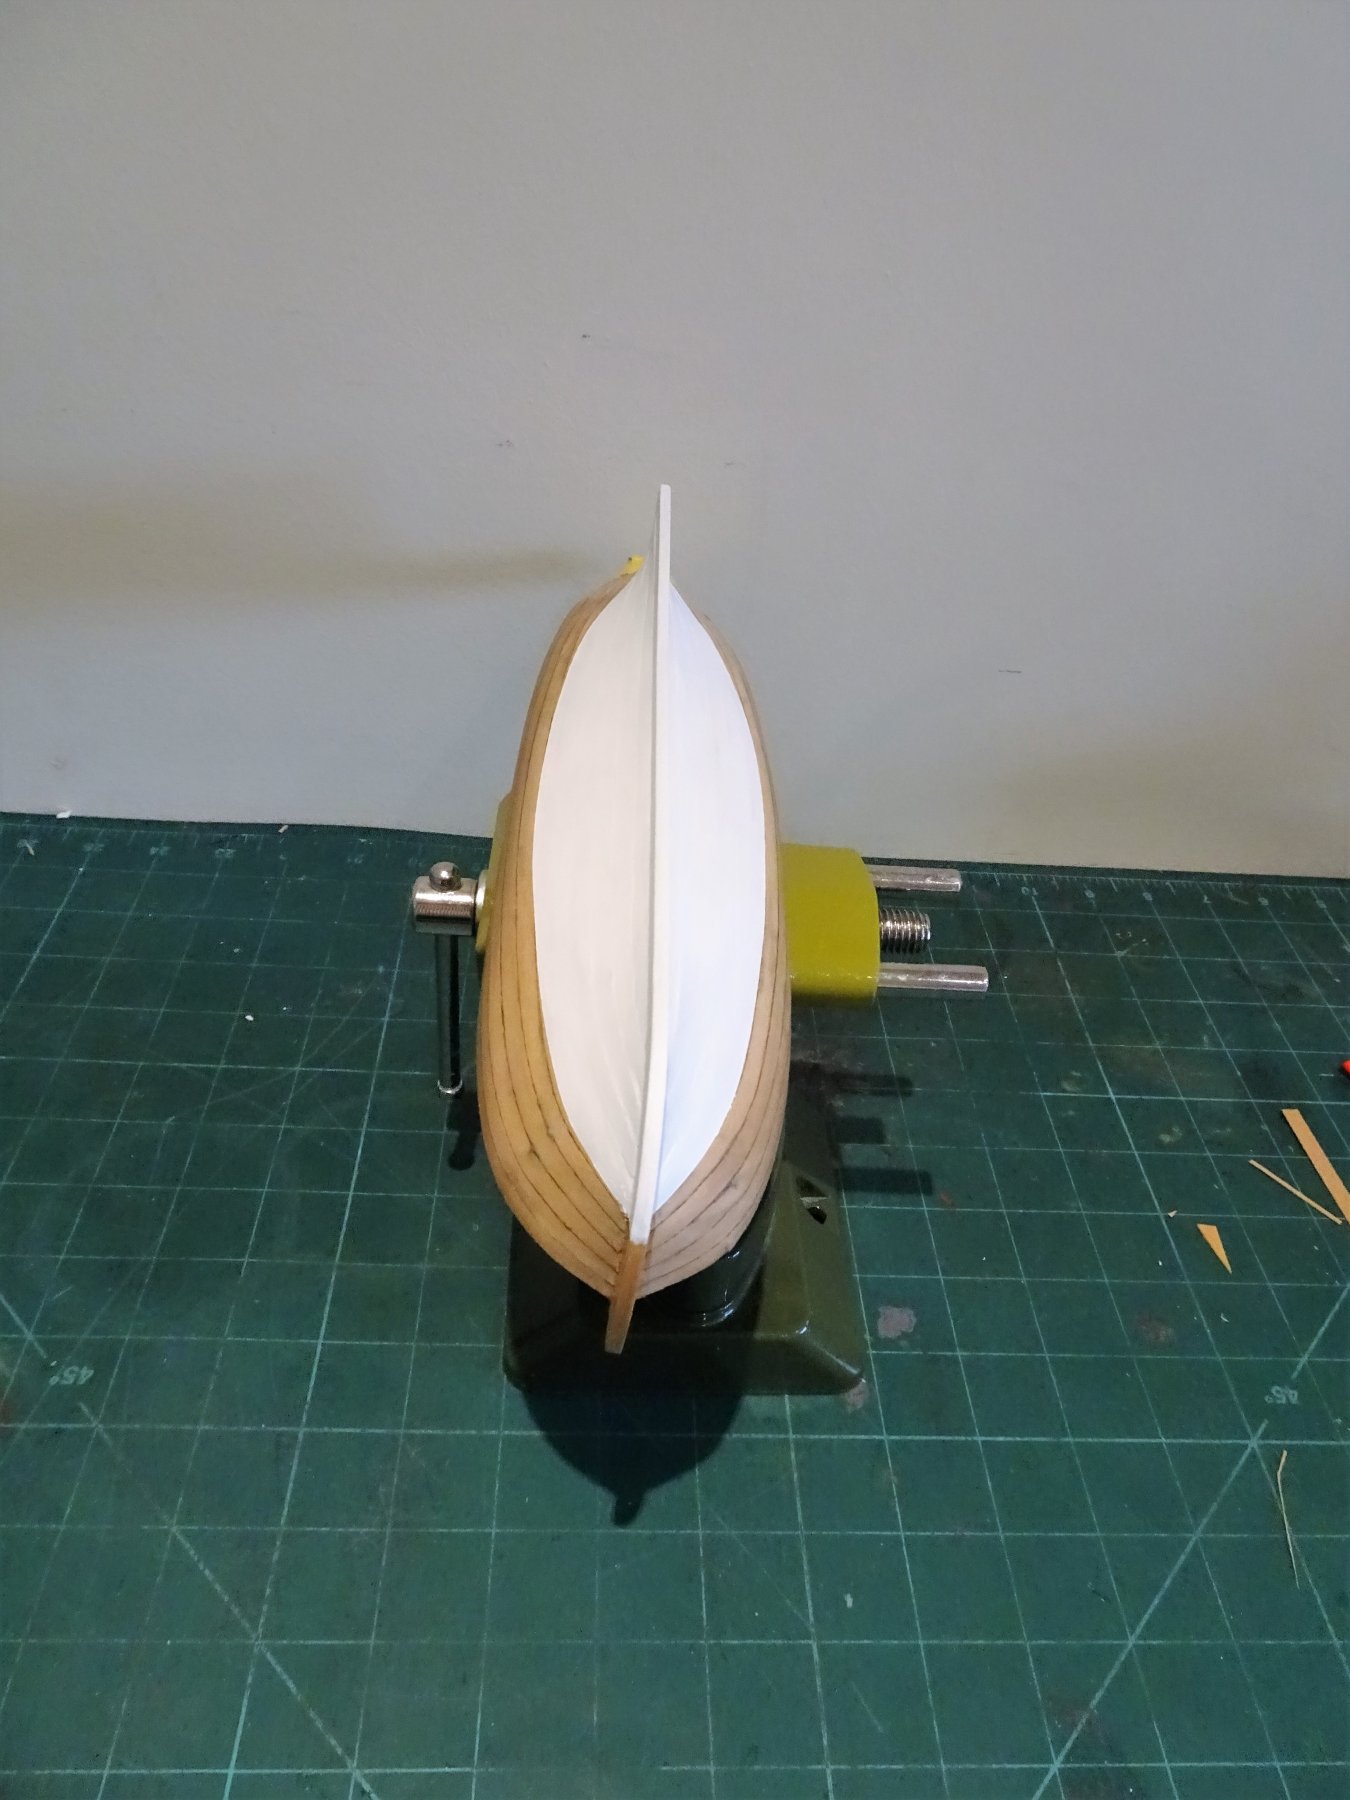
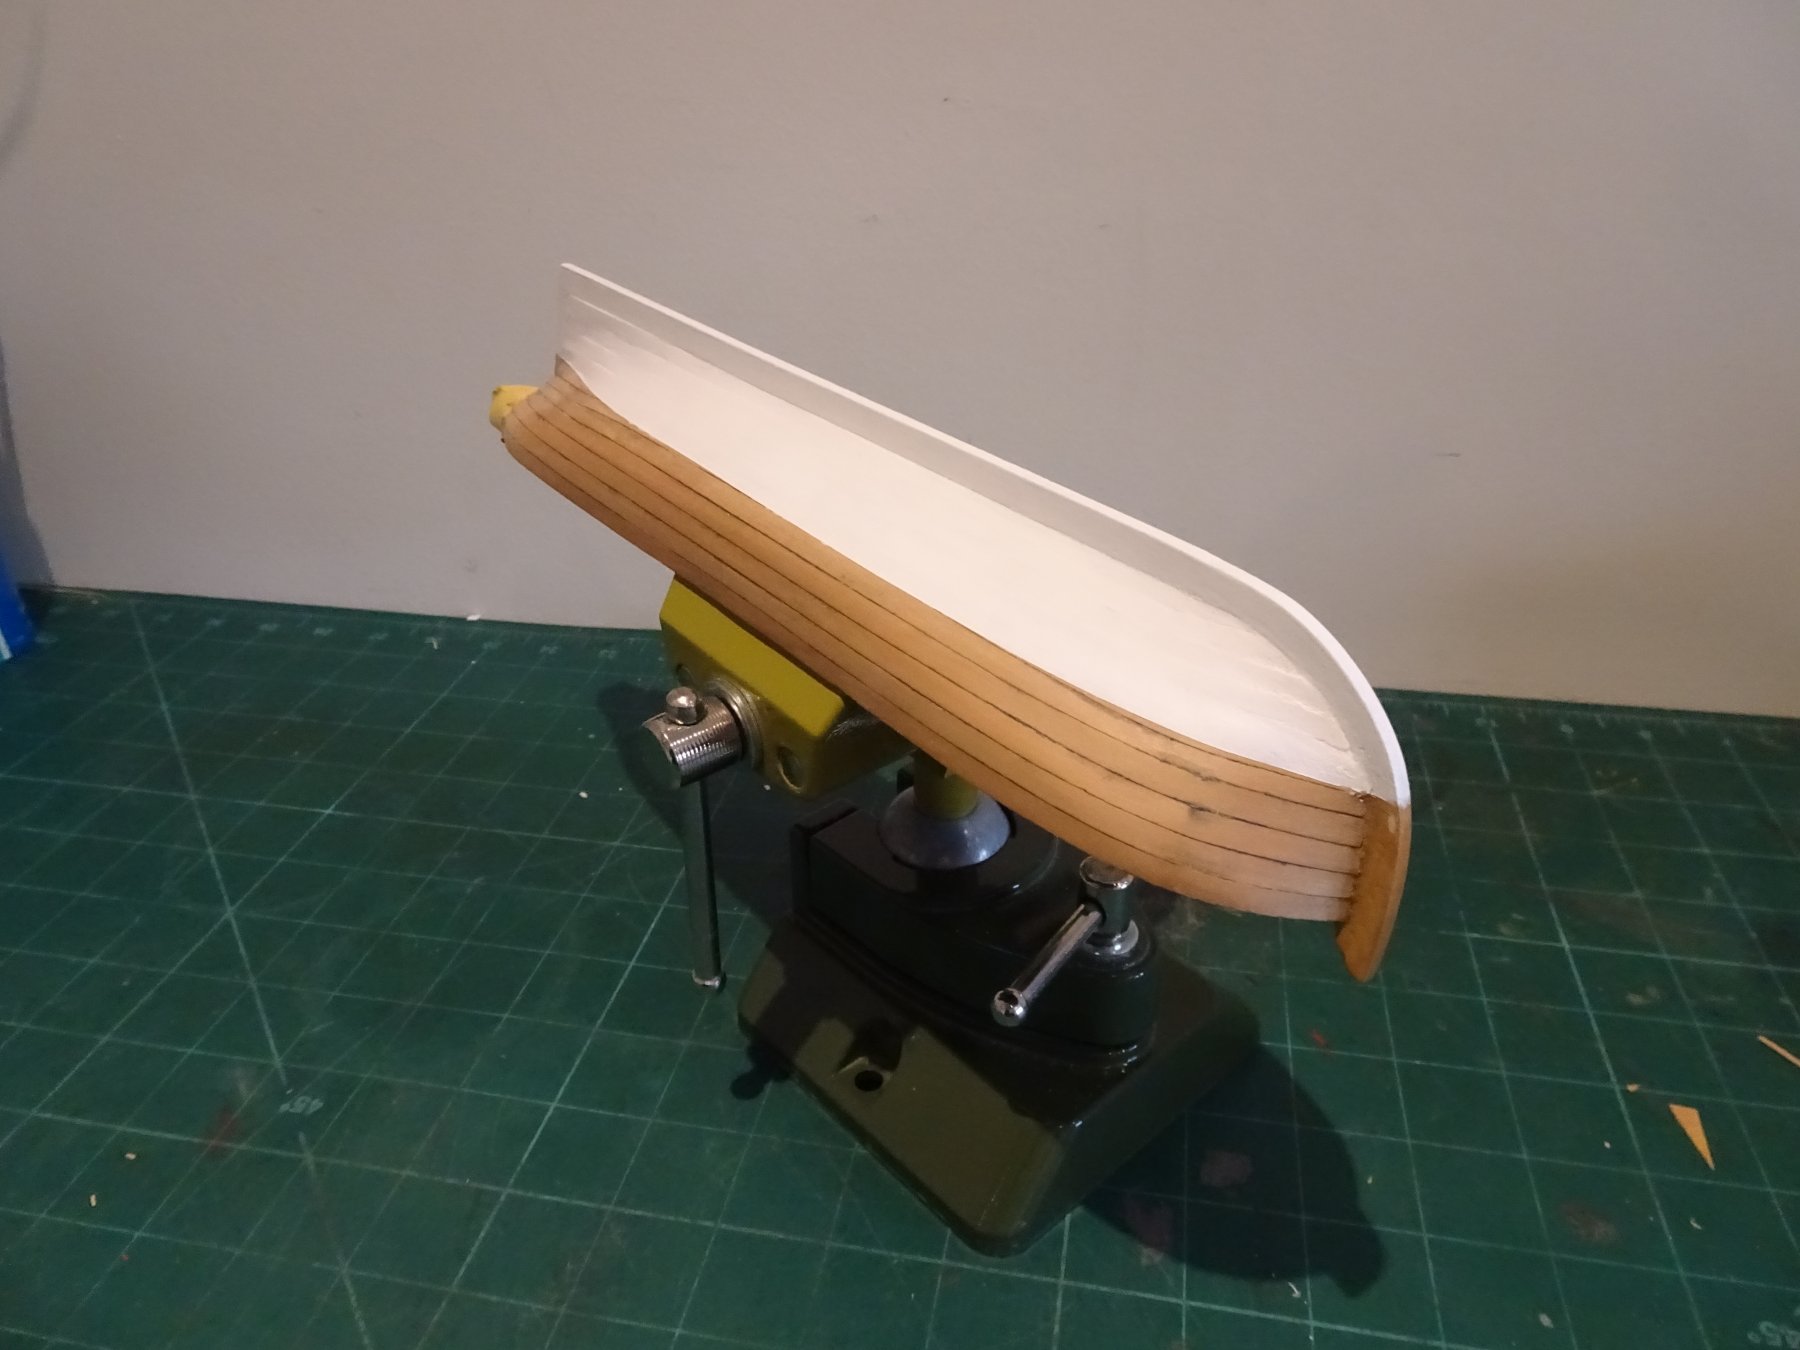
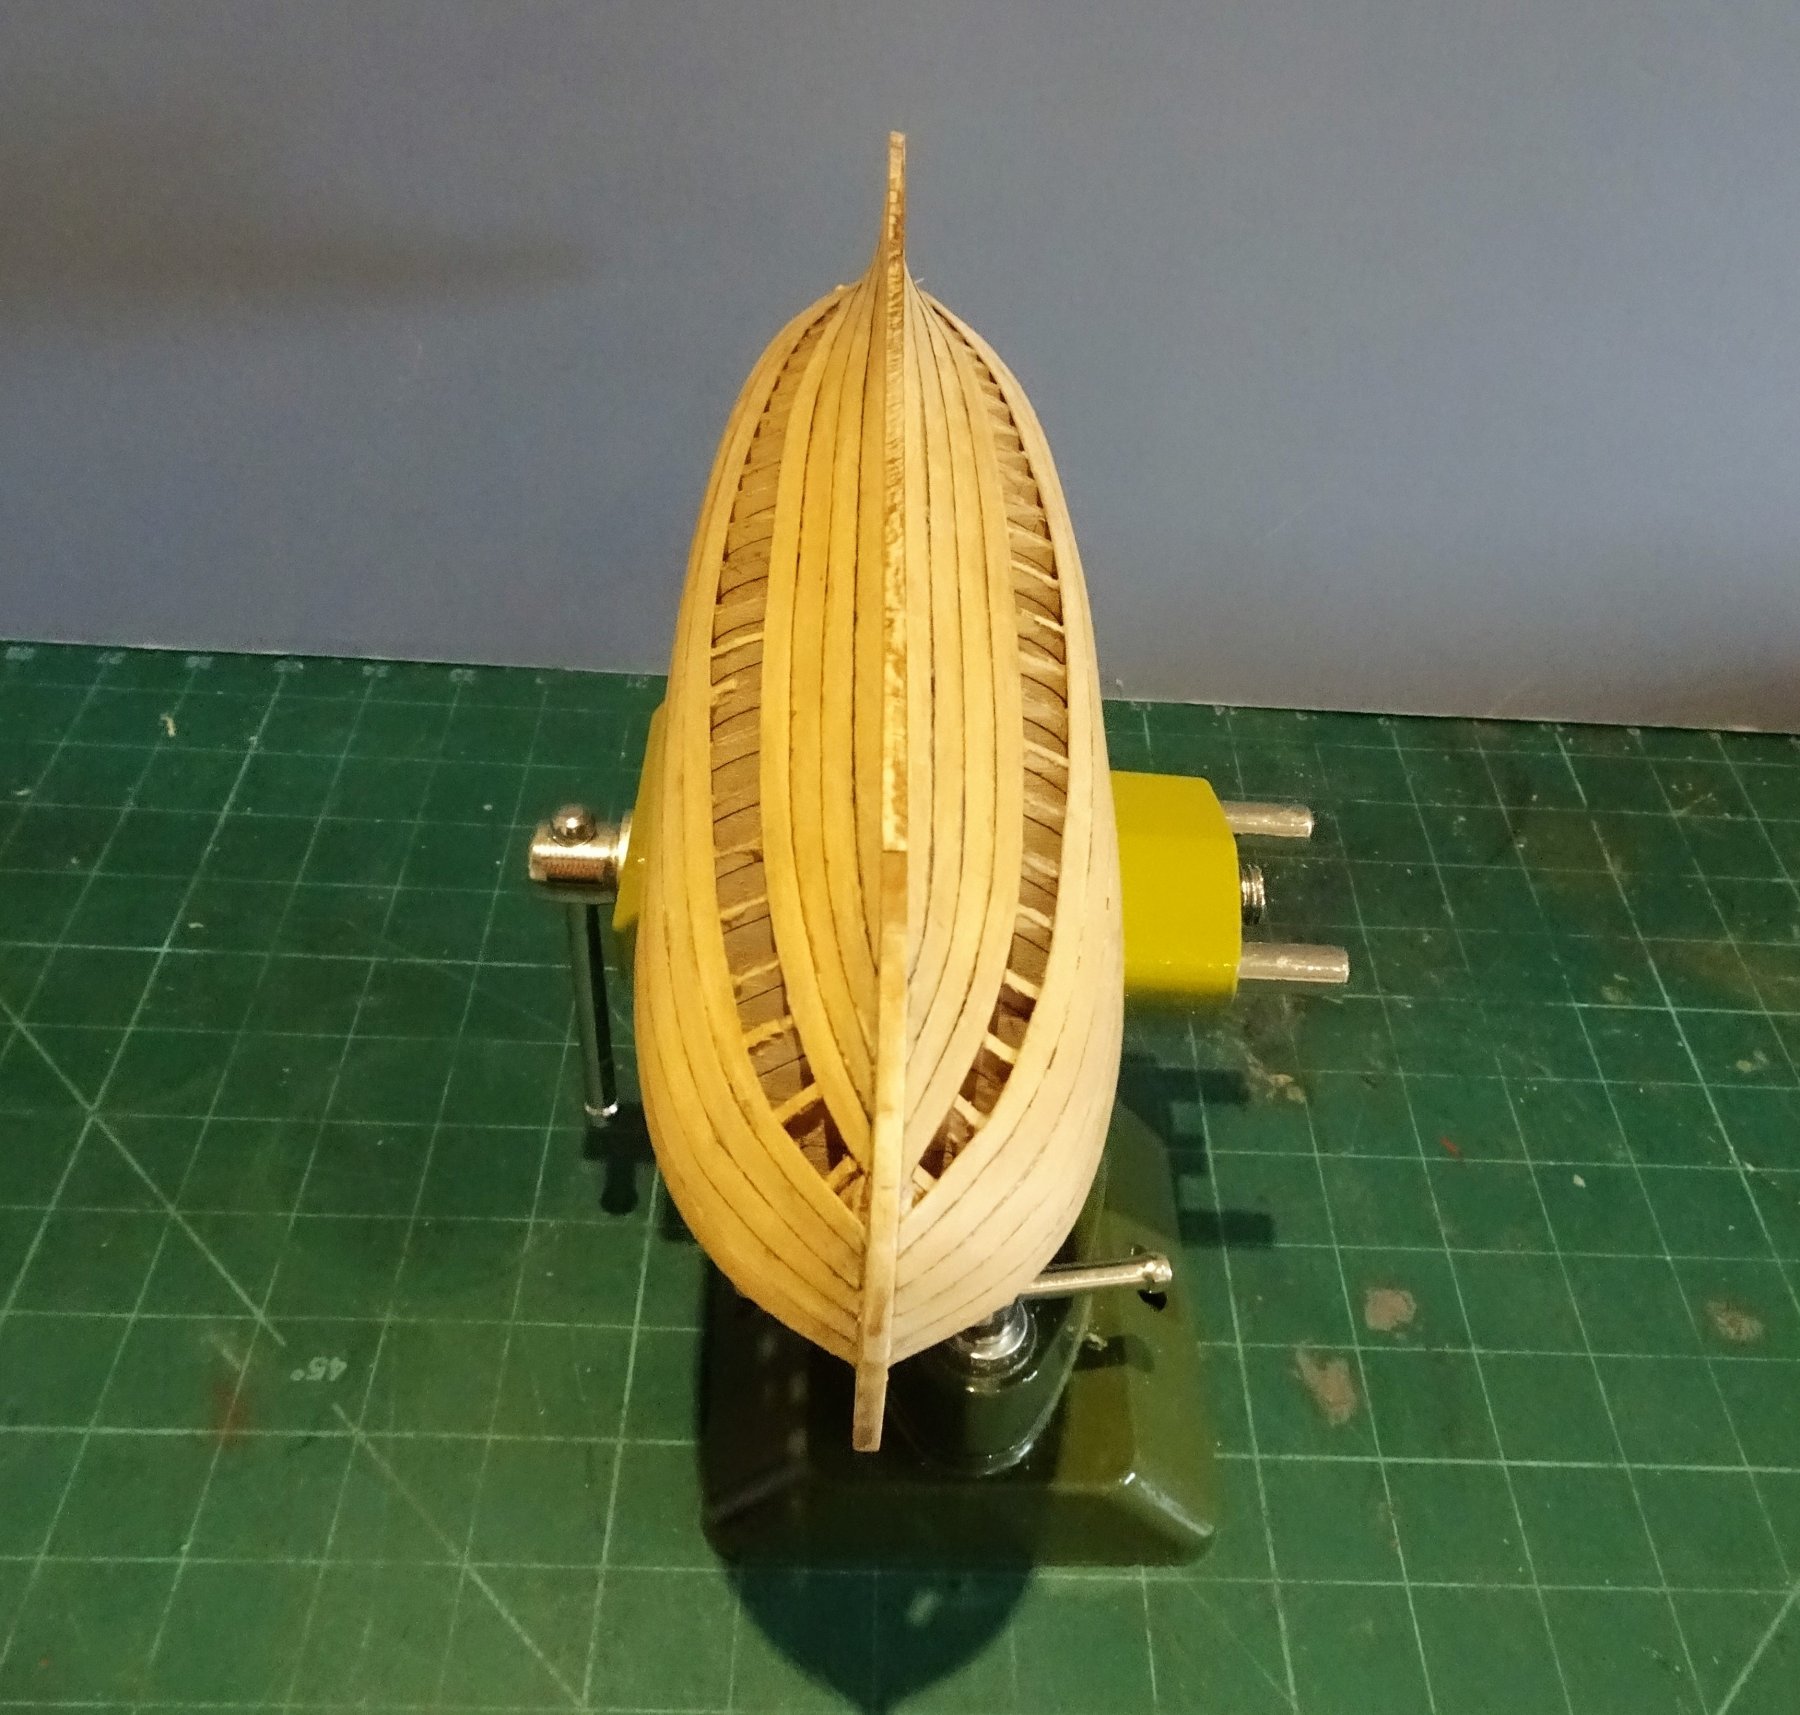
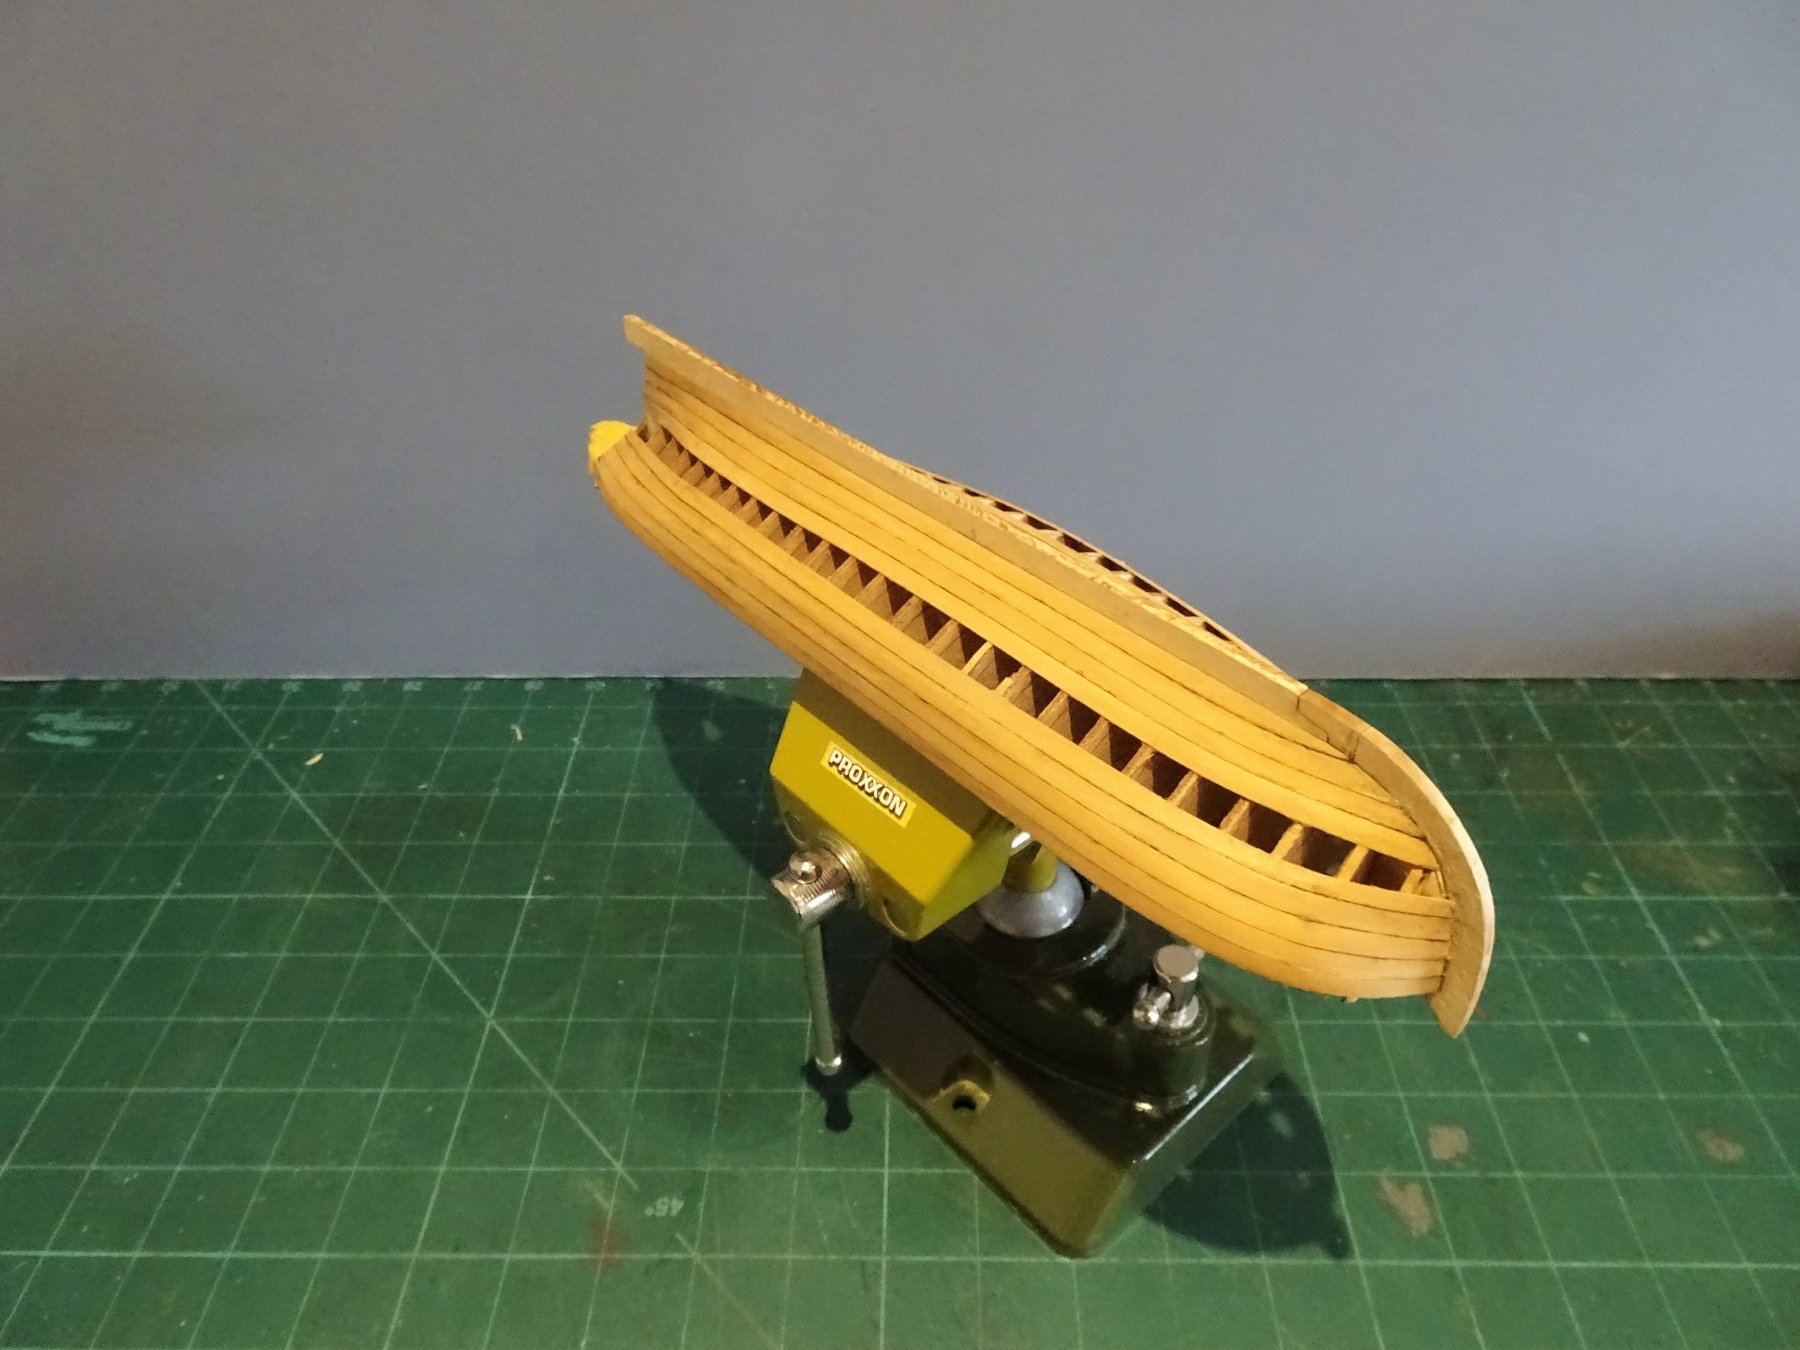
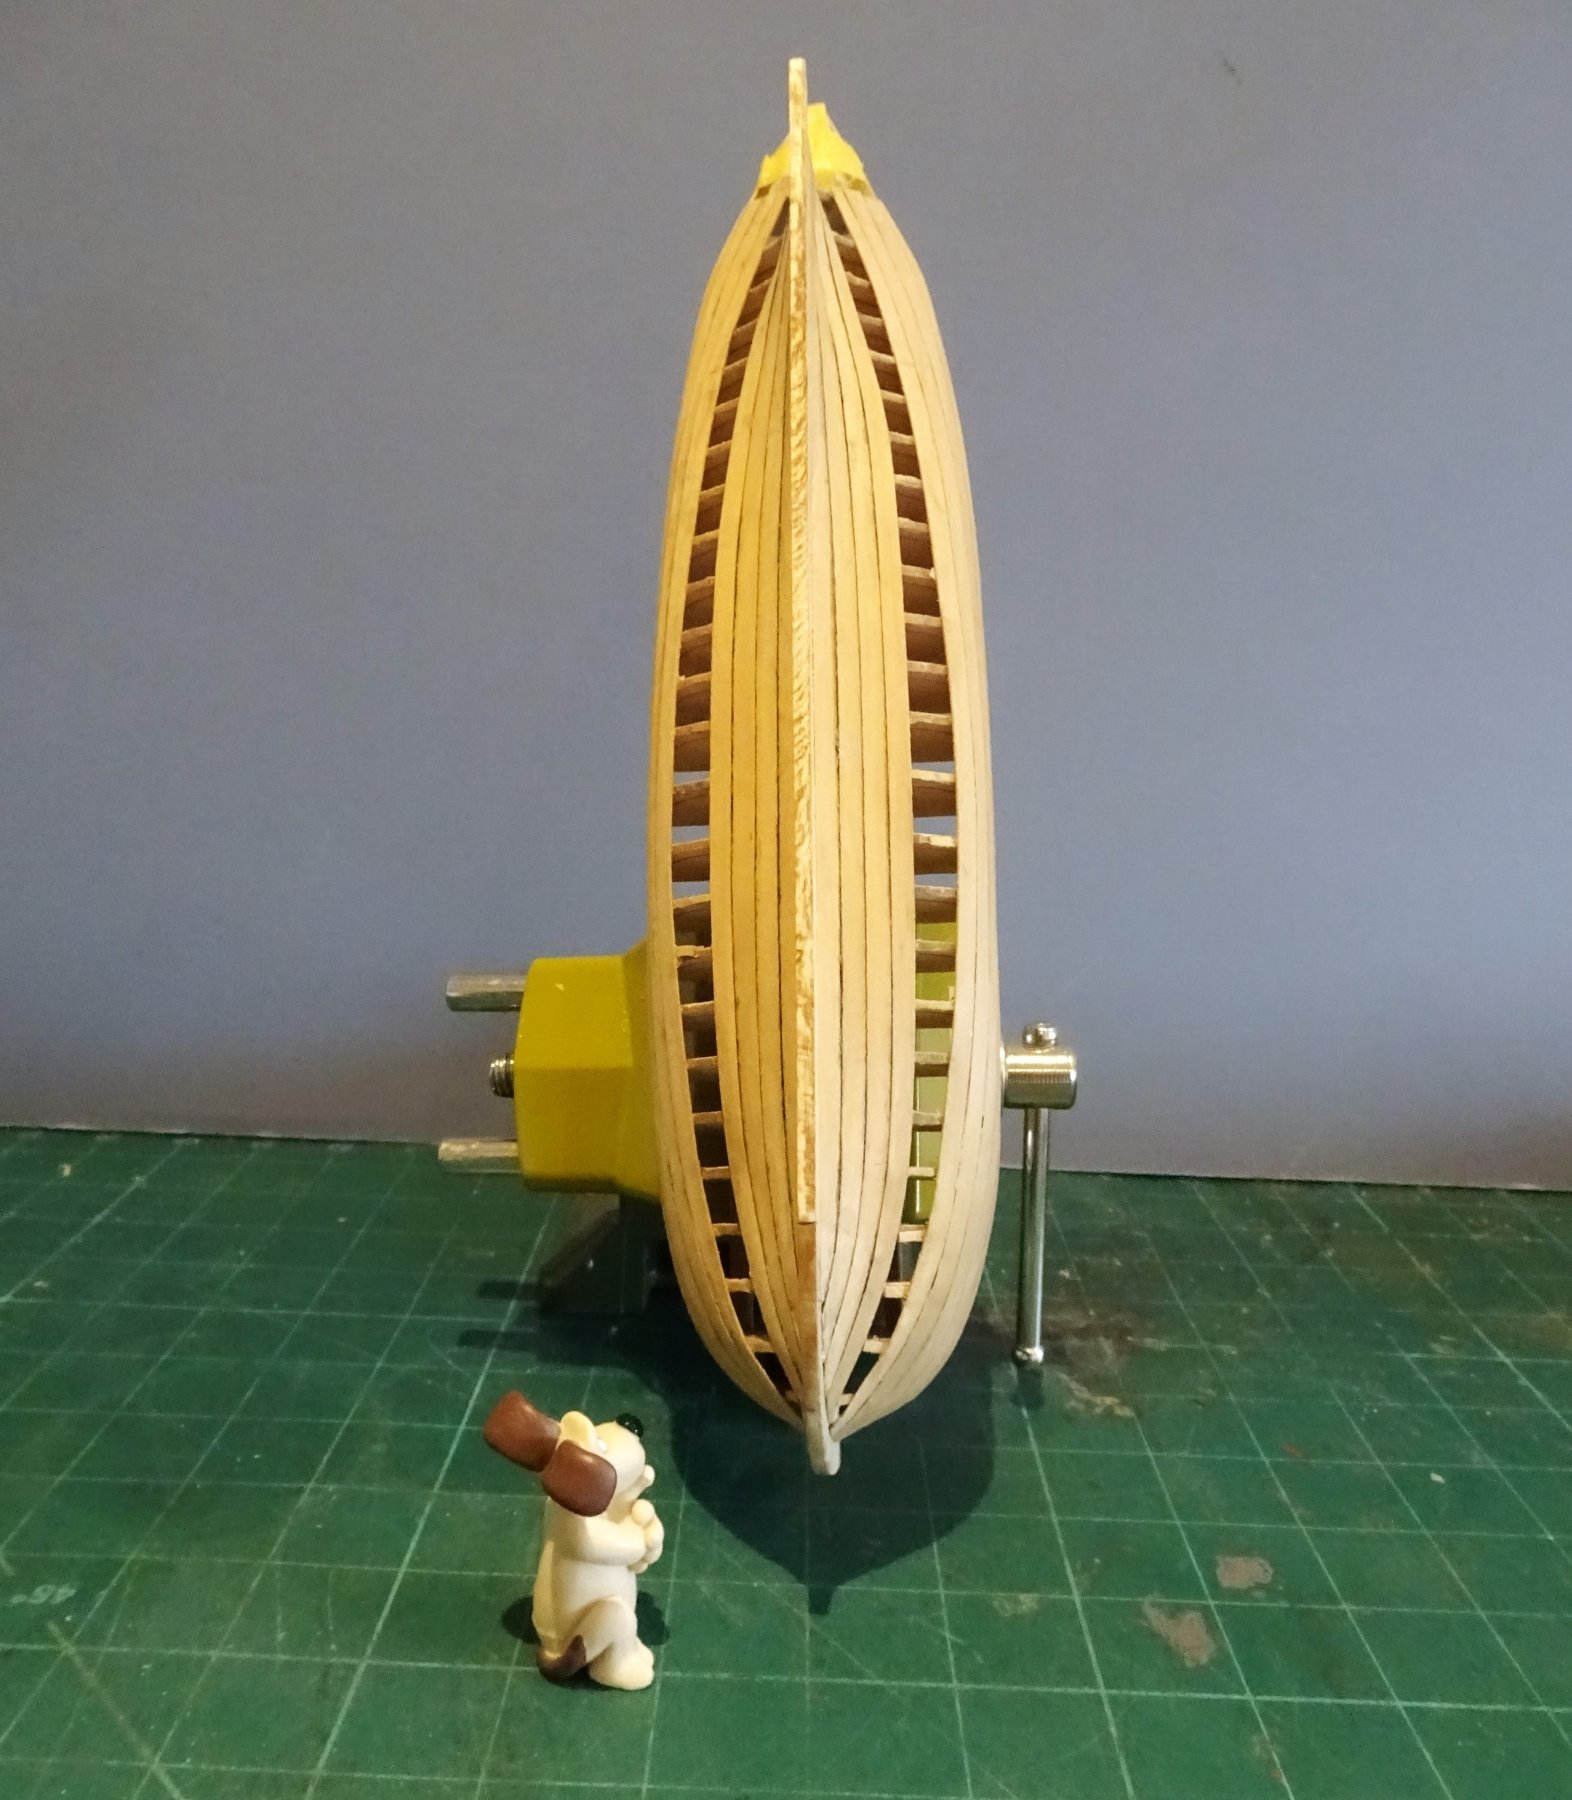
So here's the hull complete but without the very necessary fettlin' that will be required.
8904

8908

8913
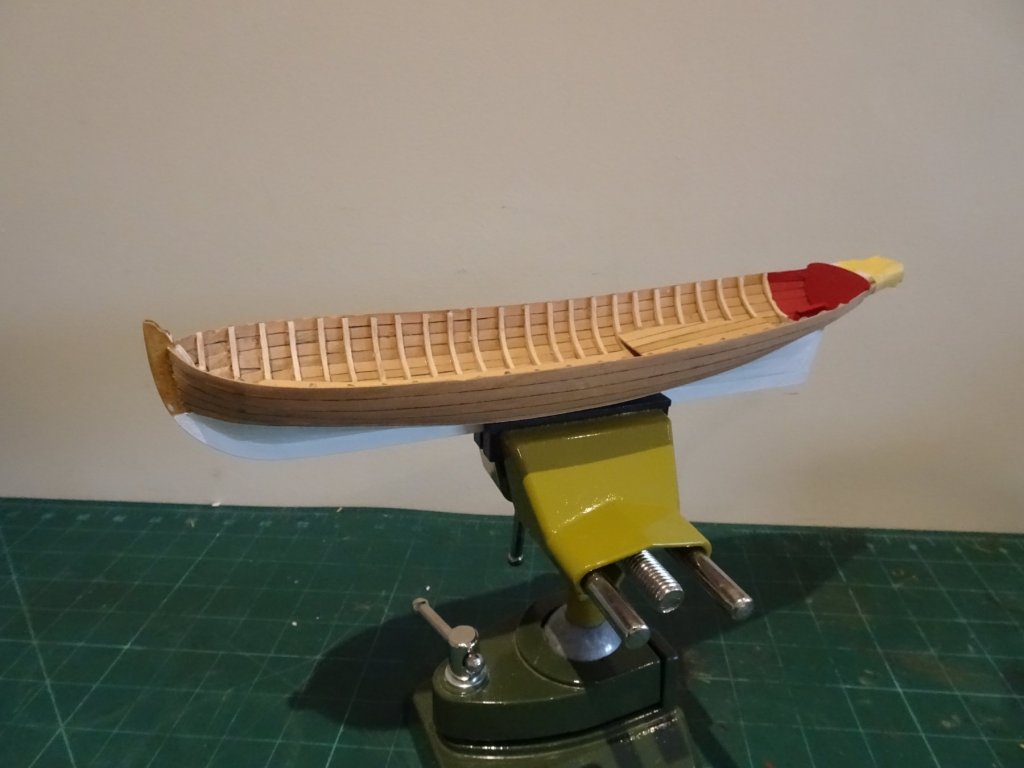
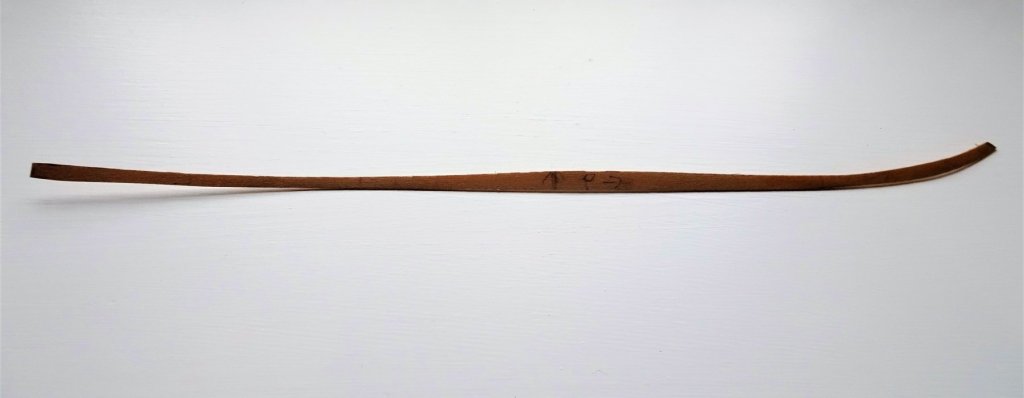
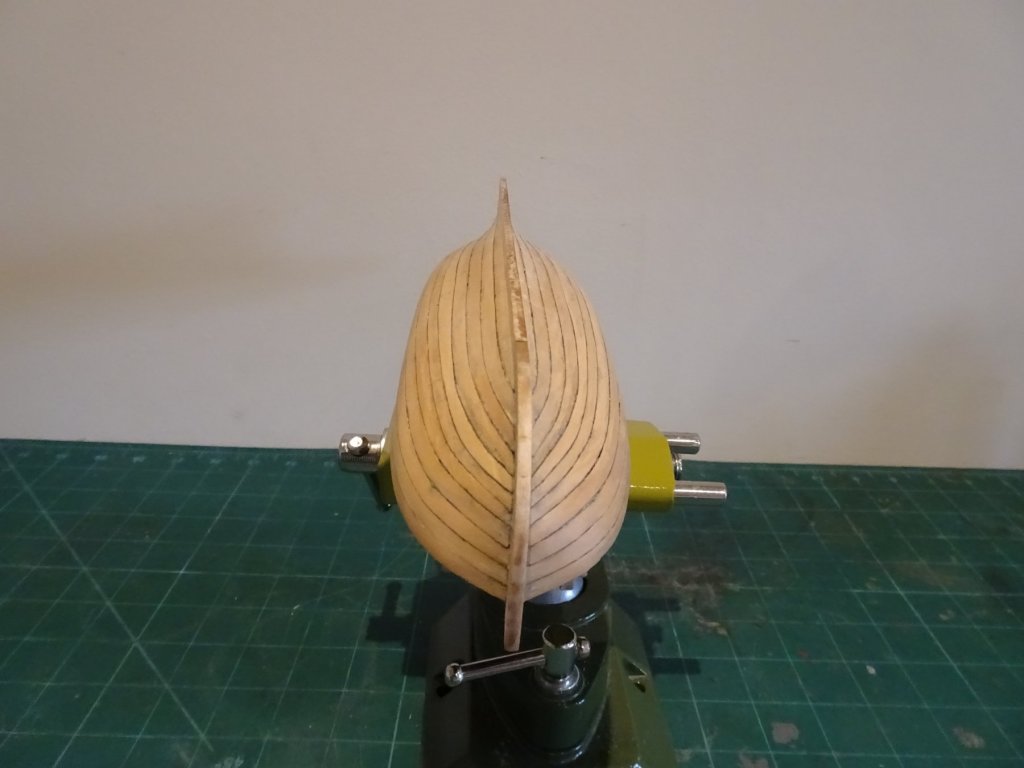
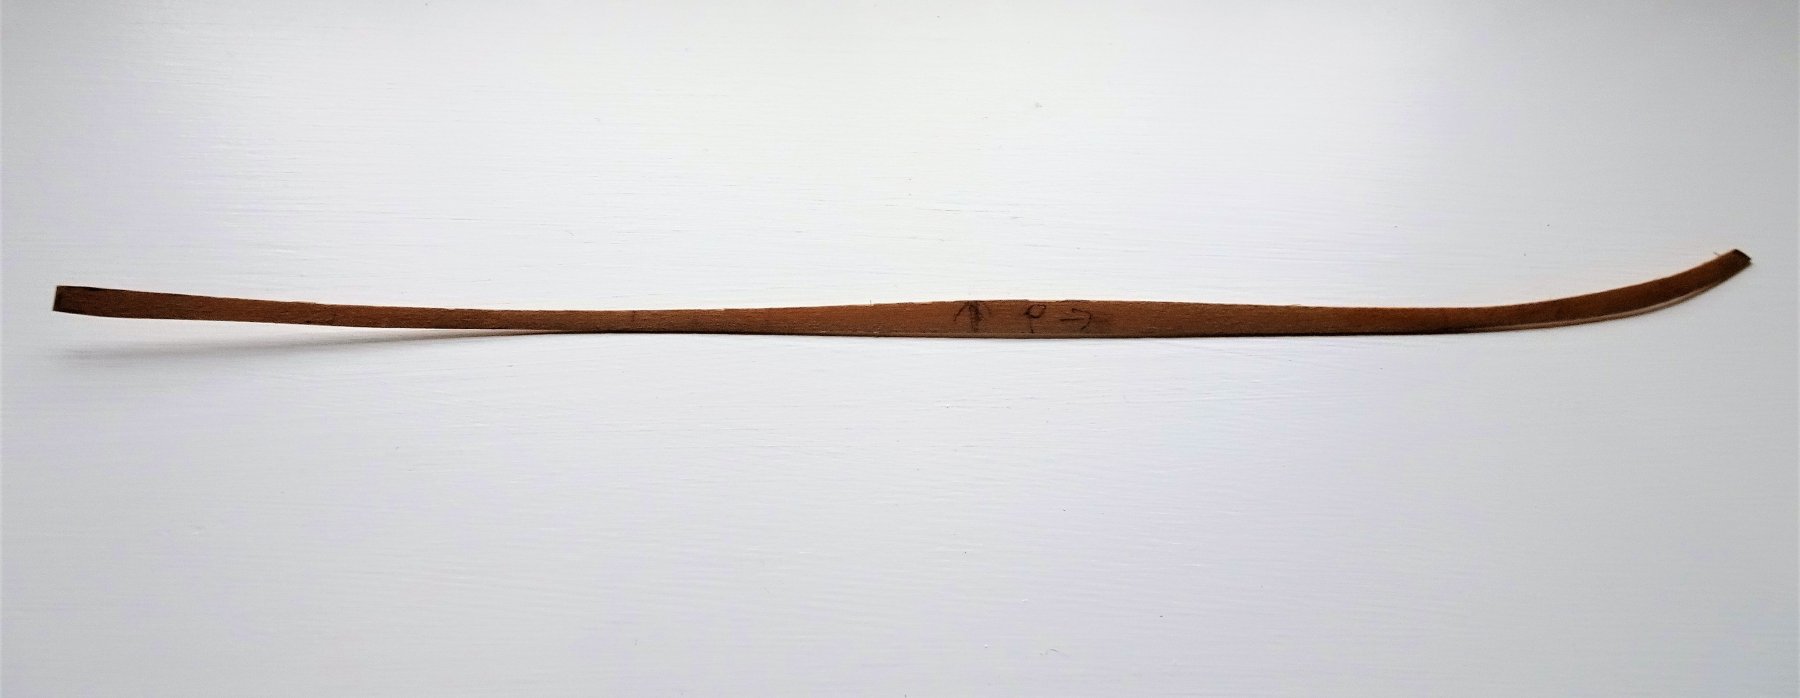
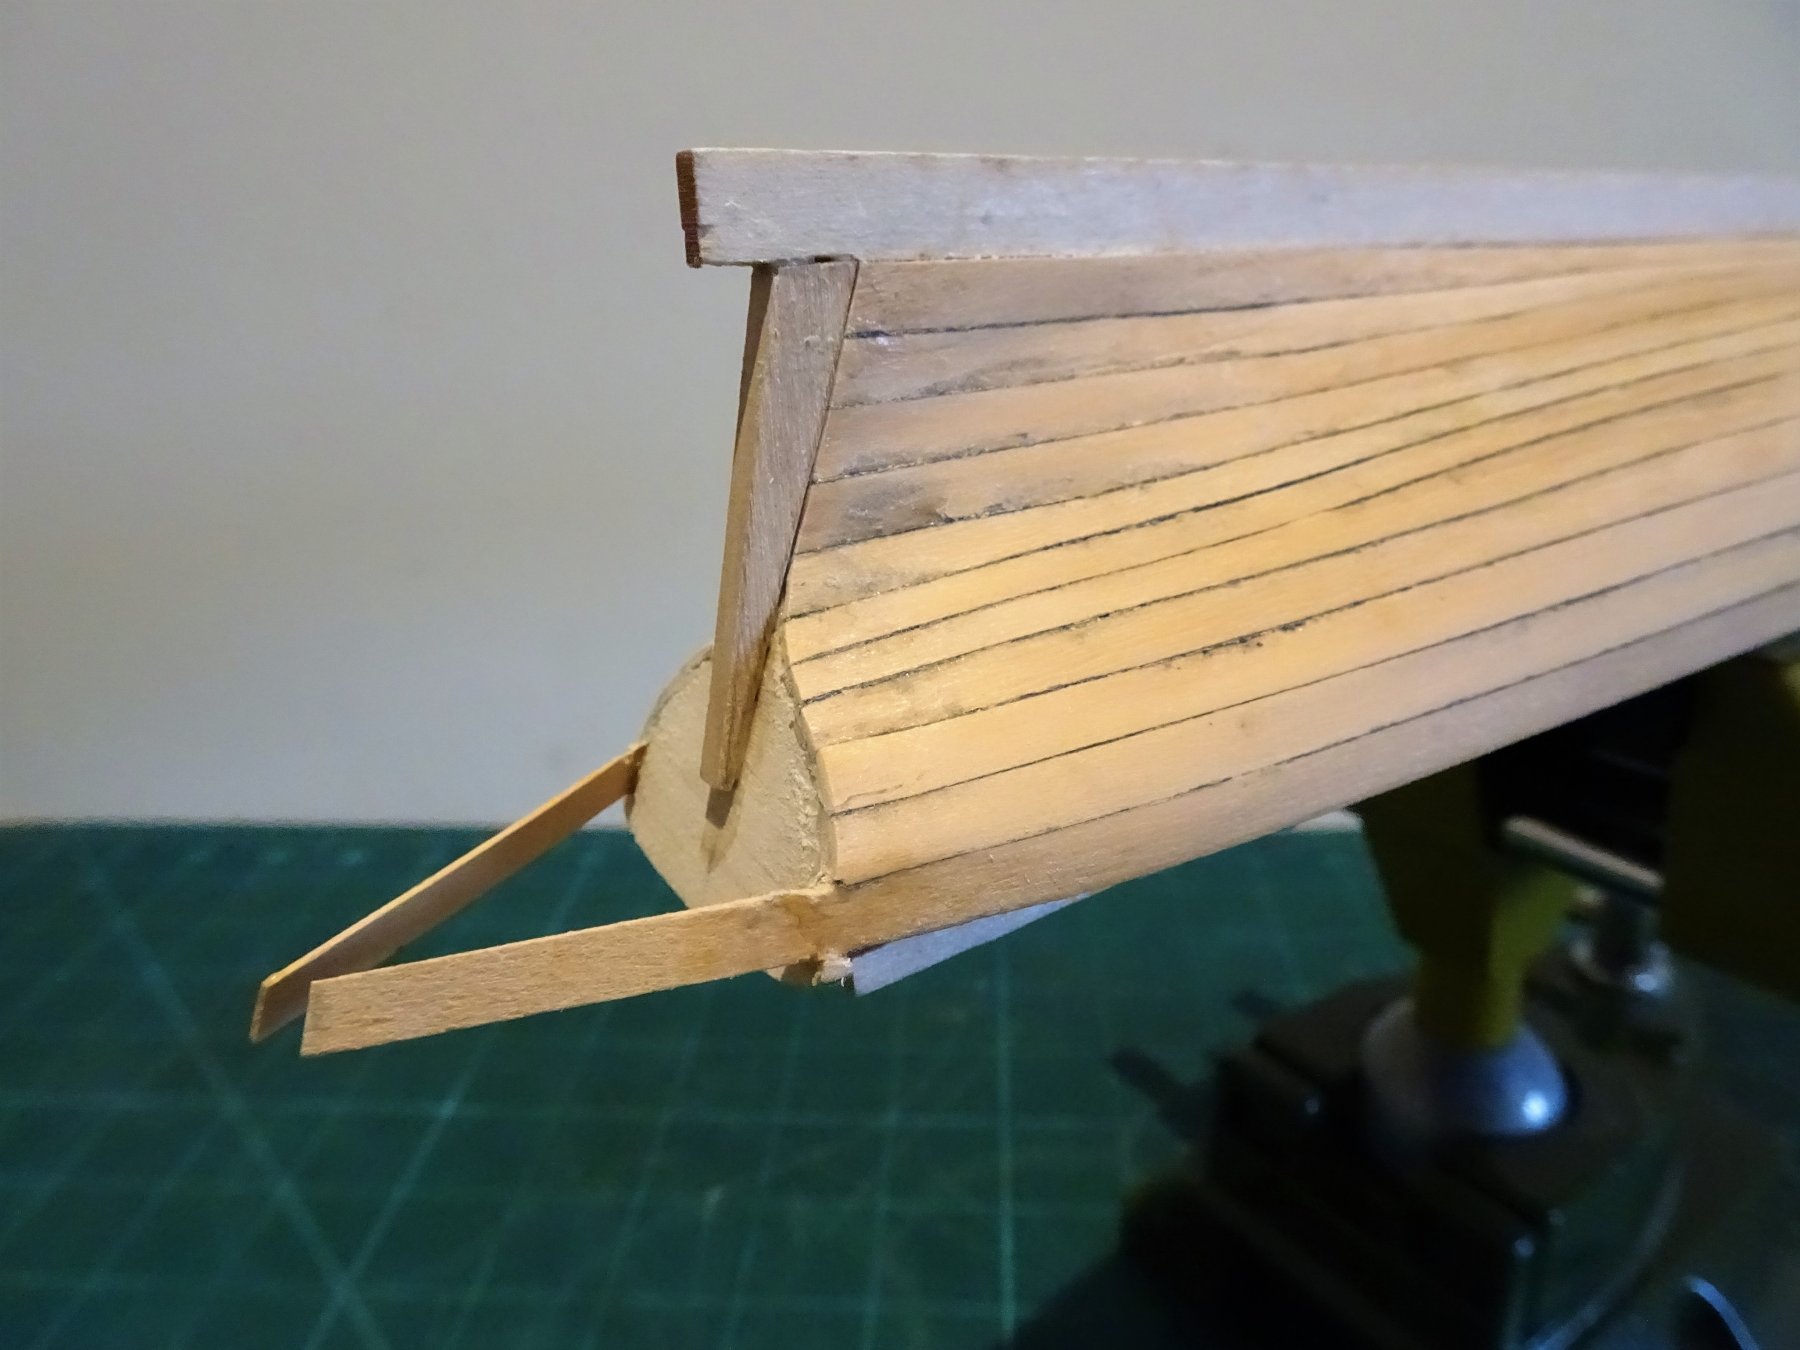
At this point I also added the stern post, but I replaced the provided kit part with a Boxwood version.
8915
Once again one of the annoying little sheer plank extensions snapped off during handling, I have glued it back on but I think I will add a back-up strip behind it to make it more robust.
If that fails, the bally things will be removed permanently.
Time now for tidying up, scraping the hull, and 're-caulking' where necessary.
Can't say I'm entirely happy with the way things have gone thus far but work will proceed.
B.E.
-
Looking good Doug, colour scheme works very well. These Swans surely do make attractive models.
B.E.
- Old Collingwood and Martin W
-
2
-
Beautiful work Jason, the headworks shots so clearly show the purity of your work.
A wonderful build.
B.E.
- mtaylor and Beef Wellington
-
2
-
Cheers Guys,
Hi Steve, I found the sheer plank the easiest one to fit and I followed the photo's on page 6 of the Instruction manual.
A fairly gentle edge curve is required, followed by the bend to take the tension out of the curve into the stem.
After that it all got increasingly more testy.
")
B.E.
- Justin P., Tigersteve, mtaylor and 2 others
-
5
-
Cheers Martin, you're my sort of guy.
Thank you Alistair, you're welcome to visit any time you're in the UK.
Your Fly is too good to languish in 'ordinary' I look forward to a re-start of work.
Good to hear from you again,
Regards,
M.
- Ryland Craze, Martin W and hollowneck
-
3
-
Oh dear it seems like one step forward and three steps back with this build.
Having fitted four strakes each side along the bottom, something didn't look right, there was a creeping mismatch at the fore end between Port and Starboard so the strakes on the starboard side including the garboard plank were taken off and re-done.
8873
Balance restored.
Using pva allows this re-work without too much effort and importantly without damaging the frames. A slight wetting and easing with a scalpel blade and off they pop. Certainly would not have been so easy had I used c.a.
The first four strakes from the top sheerline are untapered.
8872
...but the fifth required a degree of taper both forward and aft to allow for the fit of the remaining strakes. There was also edge bending required.

8874
8870

8879
Something amiss Gromit?
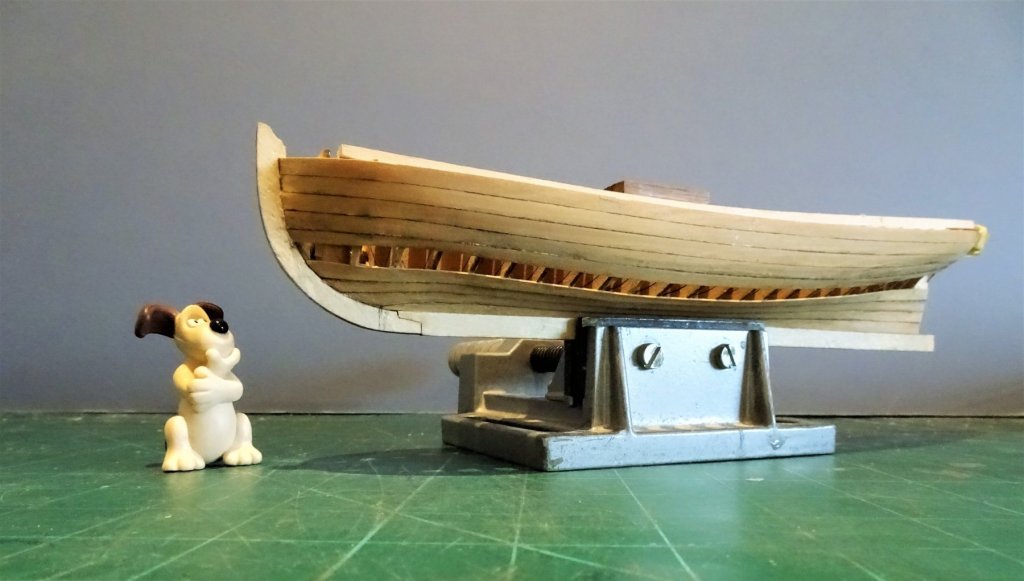
8880
What's that you say Gromit, is there enough room for two remaining strakes?
We'll see Gromit, we'll see.
One thing I wish I had done with this build at the outset was to replace the Lime/Basswood keel and stem with Boxwood. It really is a poor wood for this purpose where clean and sharp edges are desirable.
It will take careful sanding to remove the scuffs and marks, followed by application of sanding sealer to preserve the surface.
Am I happy with progress thus far, the jury is still out on that one, finding this a very tricky build; I'll see how I feel once the planking and a sanding finish has been applied.
B.E.
-
Nice sharp work on the Gangboards and brackets Martin, not too sure about a support post for the Gangway, - aesthetics over practicality, hmmn, I'll await developments.
I believe I got around the problem by having one bracket that supported both the Gangway end and the gangplanks end that finished beneath it.
I wouldn't sweat it tho' once everything else is in place, you'll be hard placed to see anything of the fine detail.
B.E.
-
Looking all very shipshape Steve, mine's starting to look a little shop soiled now
Do you intend to fit a jig so that you can work on her inverted?
B.E.
- Tigersteve, Nirvana and Elijah
-
3
-
Cheers Guys, 😊
Hi Christan, unfortunately this is single planking with much fining down of the frames internally once the planking is completed. Not much room to hide things on this build.
Surely does concentrate the mind knowing that you don't have a second bite of the cherry with second planking, or a third with coppering. 😬
B.E.
-
The Garboard planks are now fitted.
8515
8516
For these I used straight strip shaped by reference to how Chuck's build appeared to look in his photo's with the end just extending beyond the scarf joint in the keel.
This has to be done in conjunction with the one above it, before it can be glued into place.
8513
Working the strake above the Garboard.
A fair bit of fiddling about here.

8518
There is a severe curve at the bow end to go around the Garboard and fit into the rabbet at the stem.
This was formed from around the centre of a much longer piece of strip, to get the necessary curve.

8526
Once I was happy the two planks would match, the Garboard was glued into place.
8533
Port side bottom strakes fitted. The second strake is also full size without any tapering.
I think I've achieved the objective of keeping the second plank from creeping upwards at the stem.
8534

8529
Only wet and dry heat was used to form the shapes.

8532
The stern section of the strakes also untapered was problem free in fitting.
8537
I now need to work out the required tapers for the intervening planks. I will then work from both top and bottom.
B.E.
- Fright, Jack12477, CaptainSteve and 16 others
-
19
-
Great progress Christian, she is looking splendid. 😊
B.E.
- Barbossa, mort stoll and mtaylor
-
3


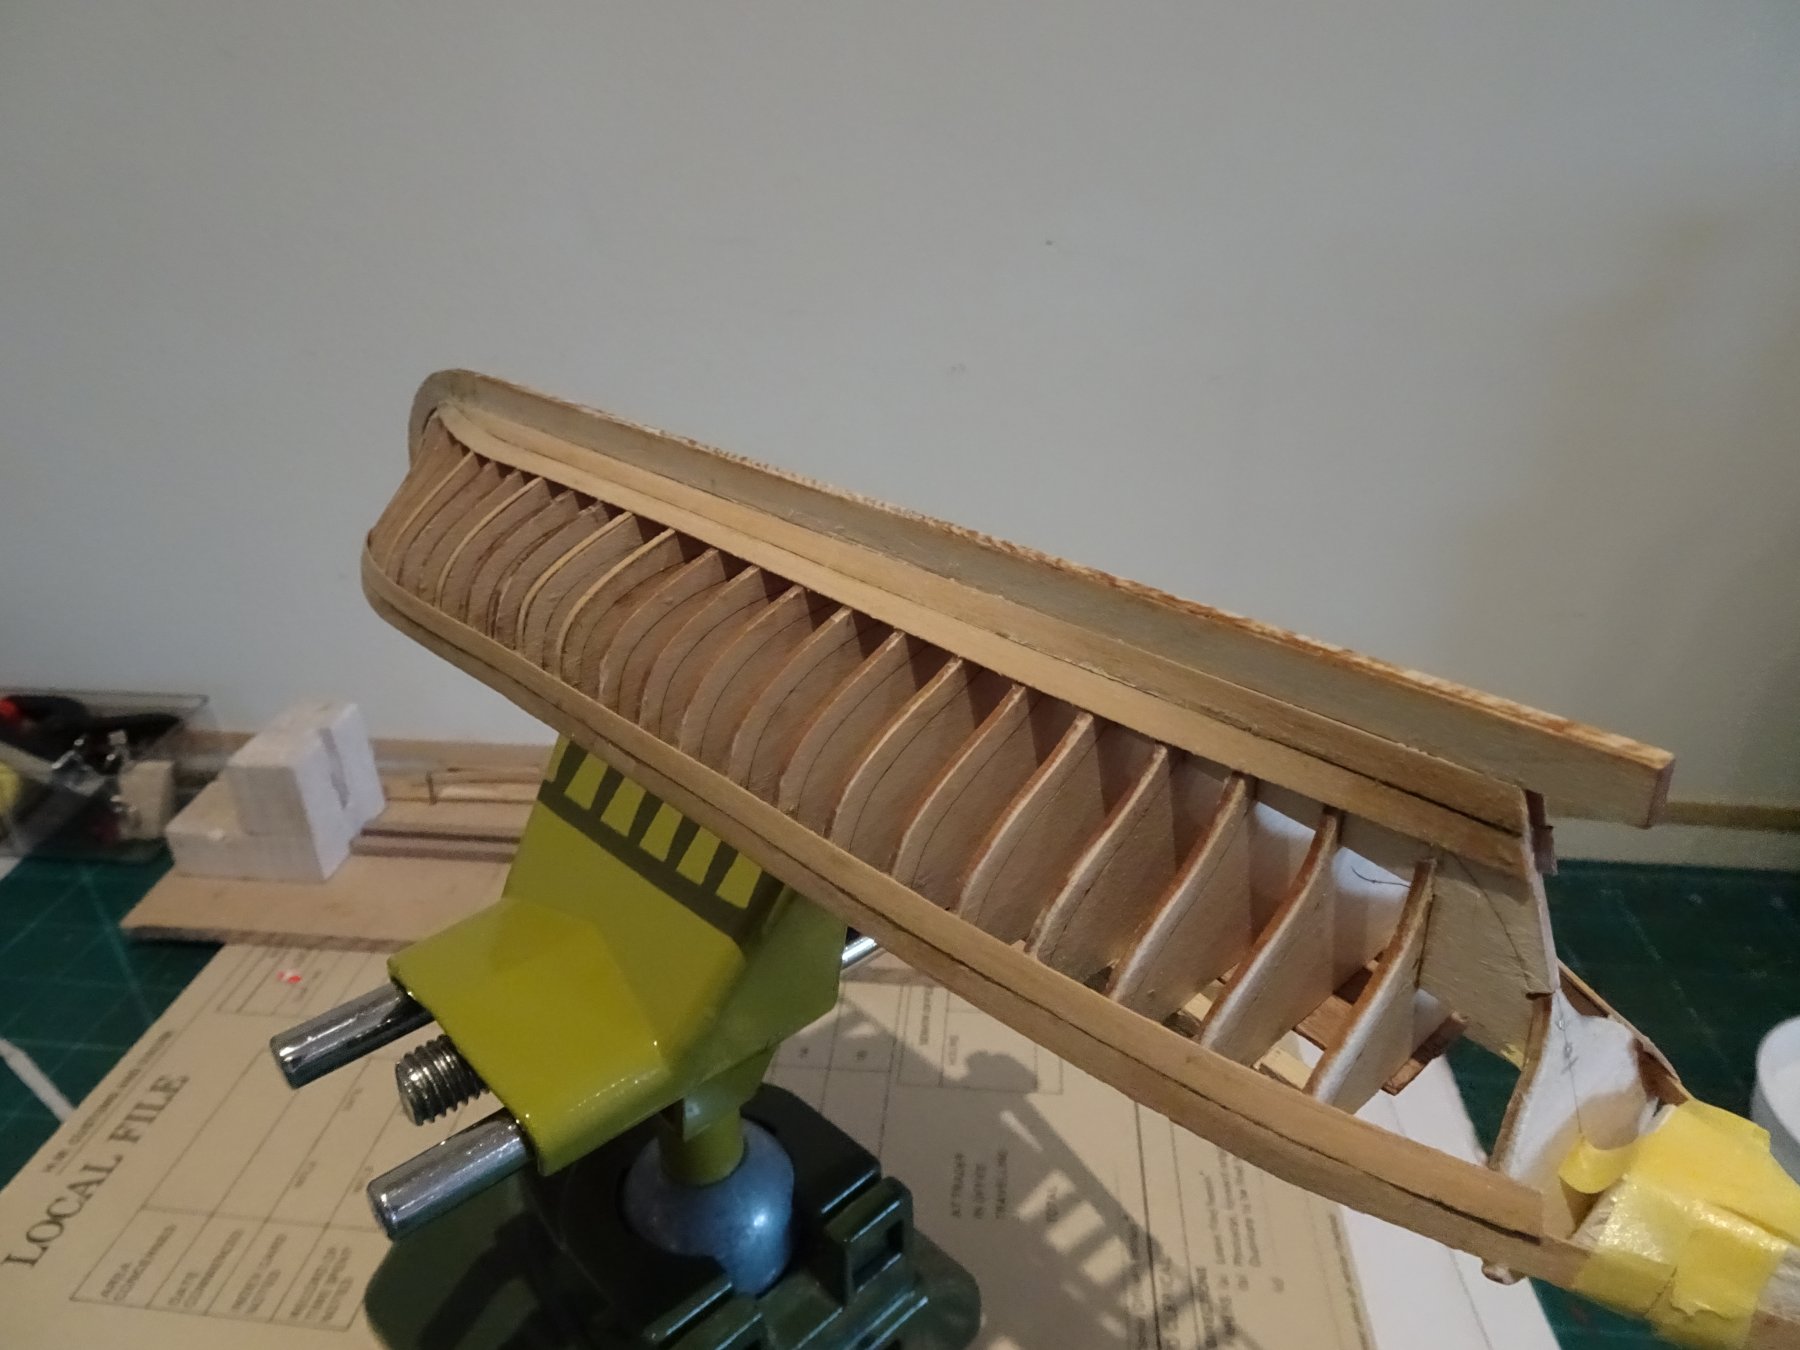

18TH c. English Pinnace by Blue Ensign - FINISHED - Model Shipways - 1:24 scale
in - Kit build logs for subjects built from 1751 - 1800
Posted
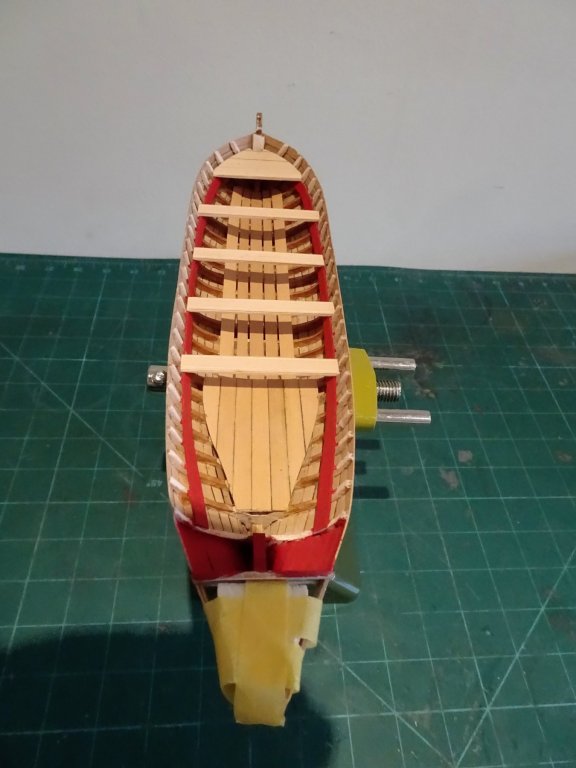
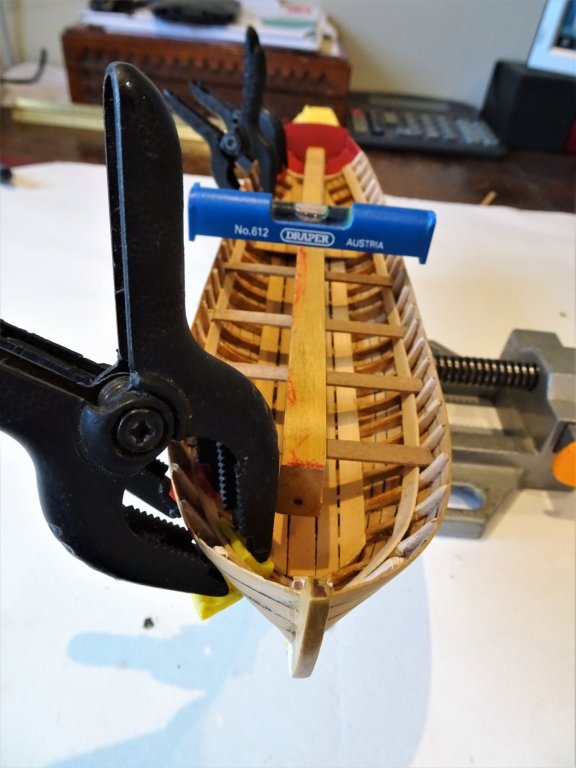
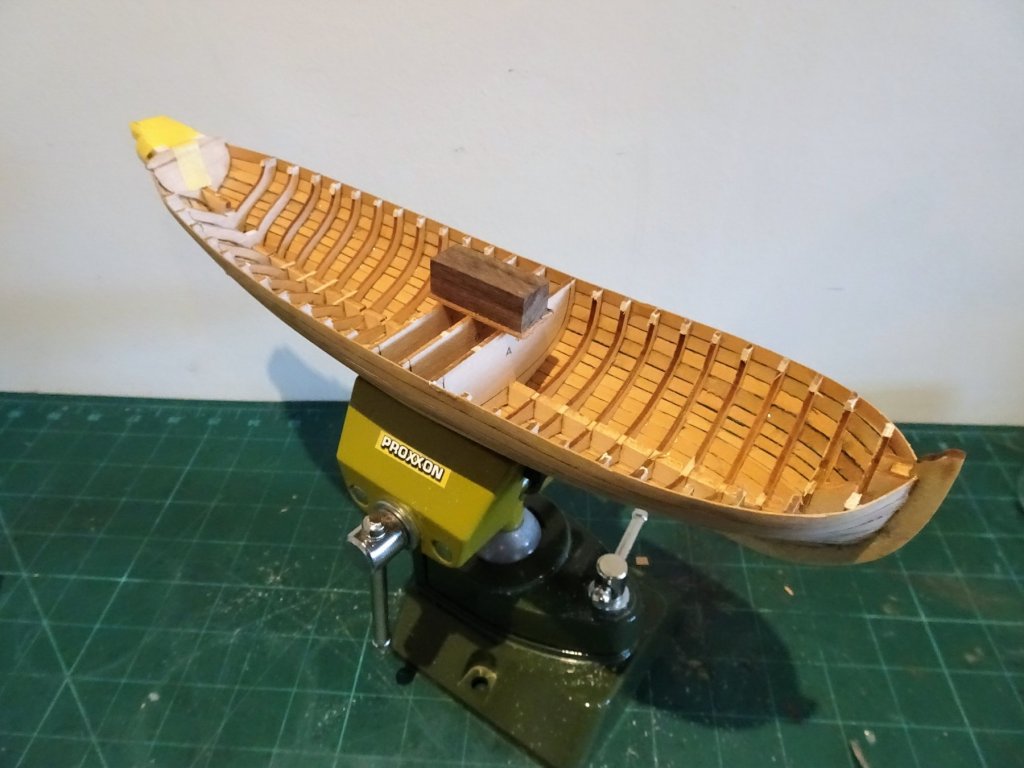
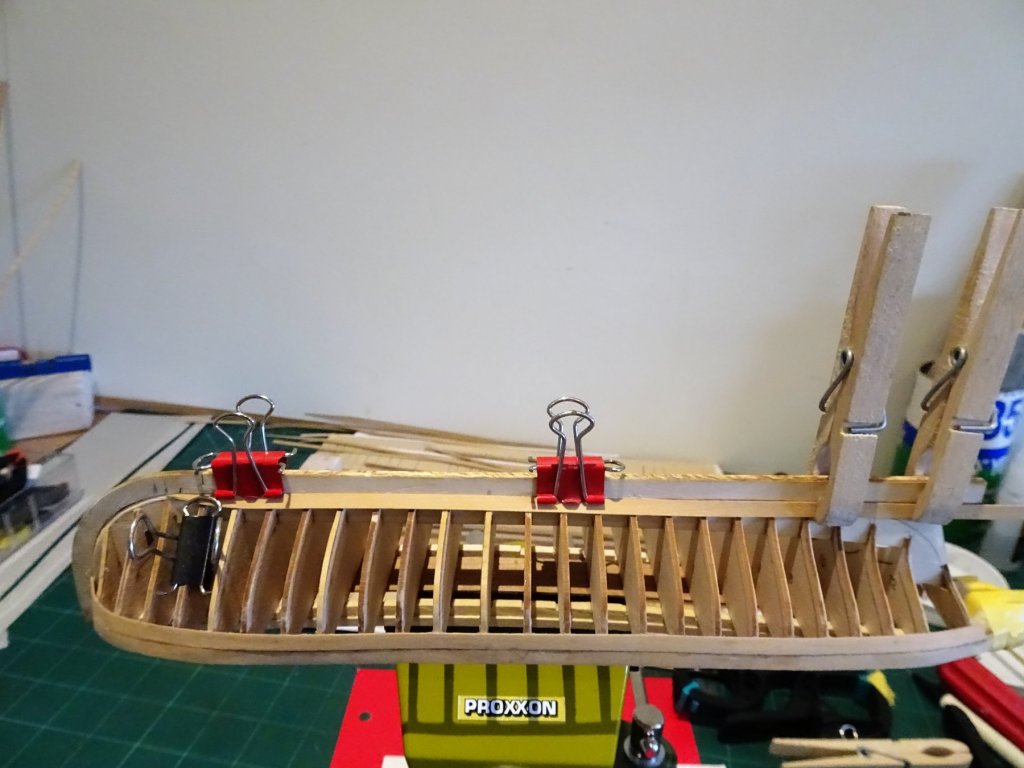
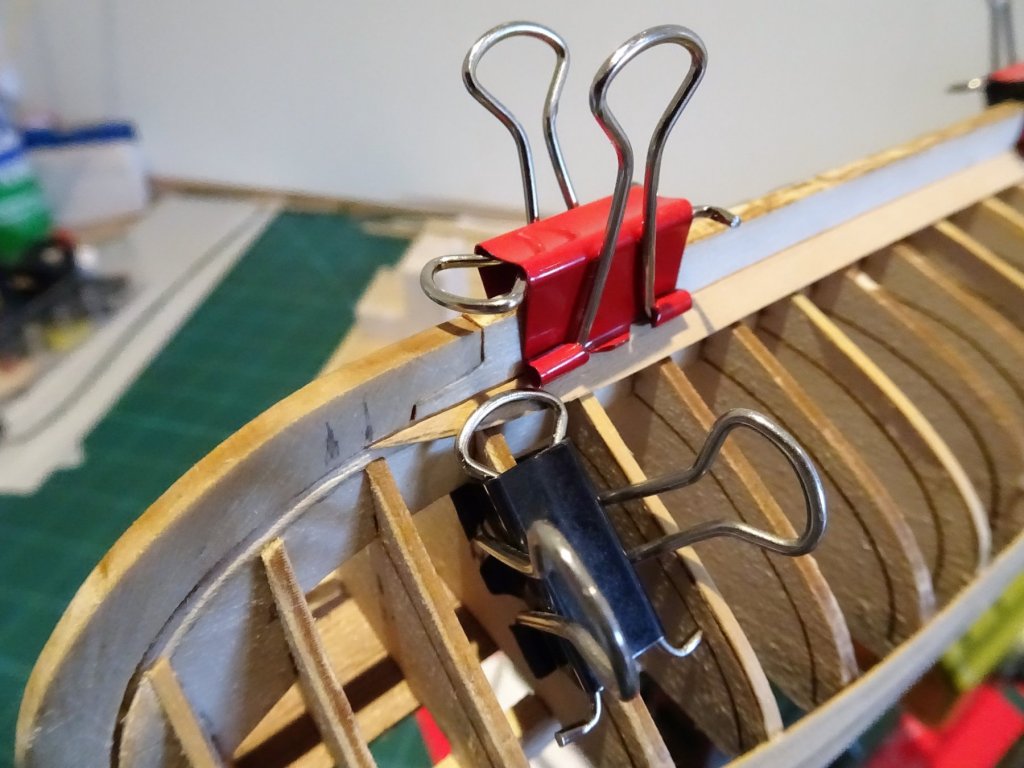
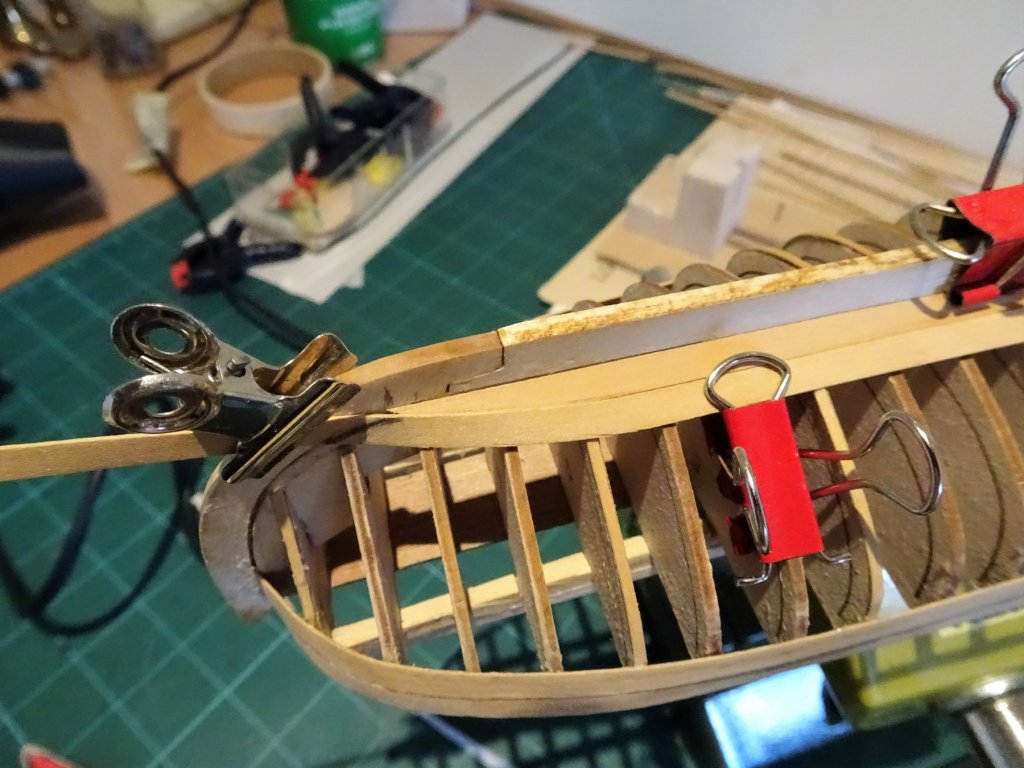
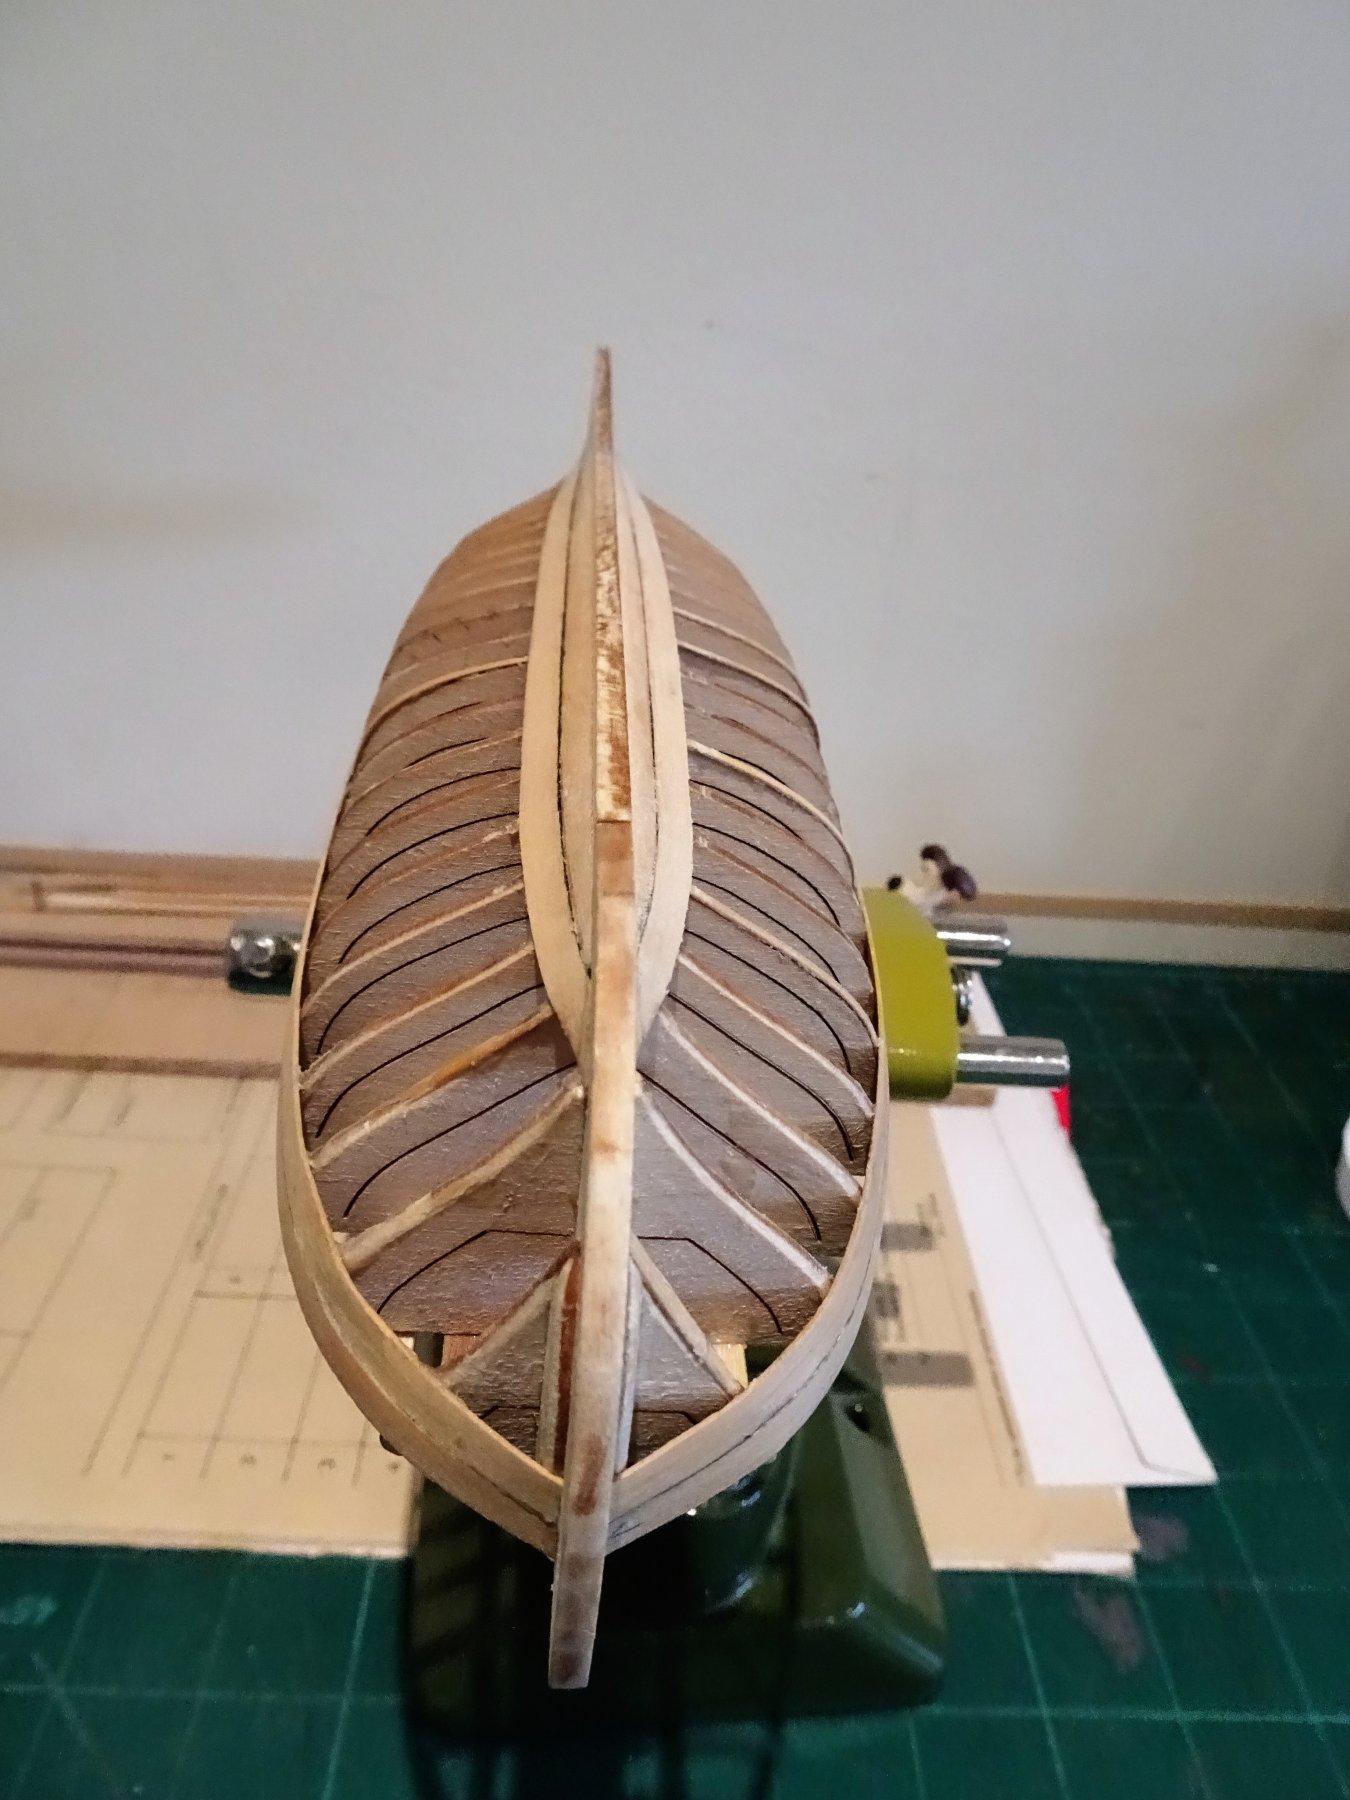
The seatback.
For the past couple of days I have been fiddling with the seatback.
The kit provided piece is effectively a blank that needs to be shaped to fit the internal curves of the hull allowing for the Risers.
9704
This is trial and error using card templates taken from the blank, I made several copies and it took three to get the contours to fit reasonably.
I thought I would have a go at creating a panel effect on the seatback. This was done by fitting Boxwood strip around the back and over the top and then thinning down the back thickness to compensate.
9713
9712
9710
9709
I think I like the panel effect, nothing fixed as yet, but the seatback will need to be fixed to progress to the thwarts and side benches.
B.E.