.JPG.ca33079f5815b861e67b9c2cccd37982.JPG)

Blue Ensign
-
Posts
4,572 -
Joined
-
Last visited
Content Type
Profiles
Forums
Gallery
Events
Everything posted by Blue Ensign
-
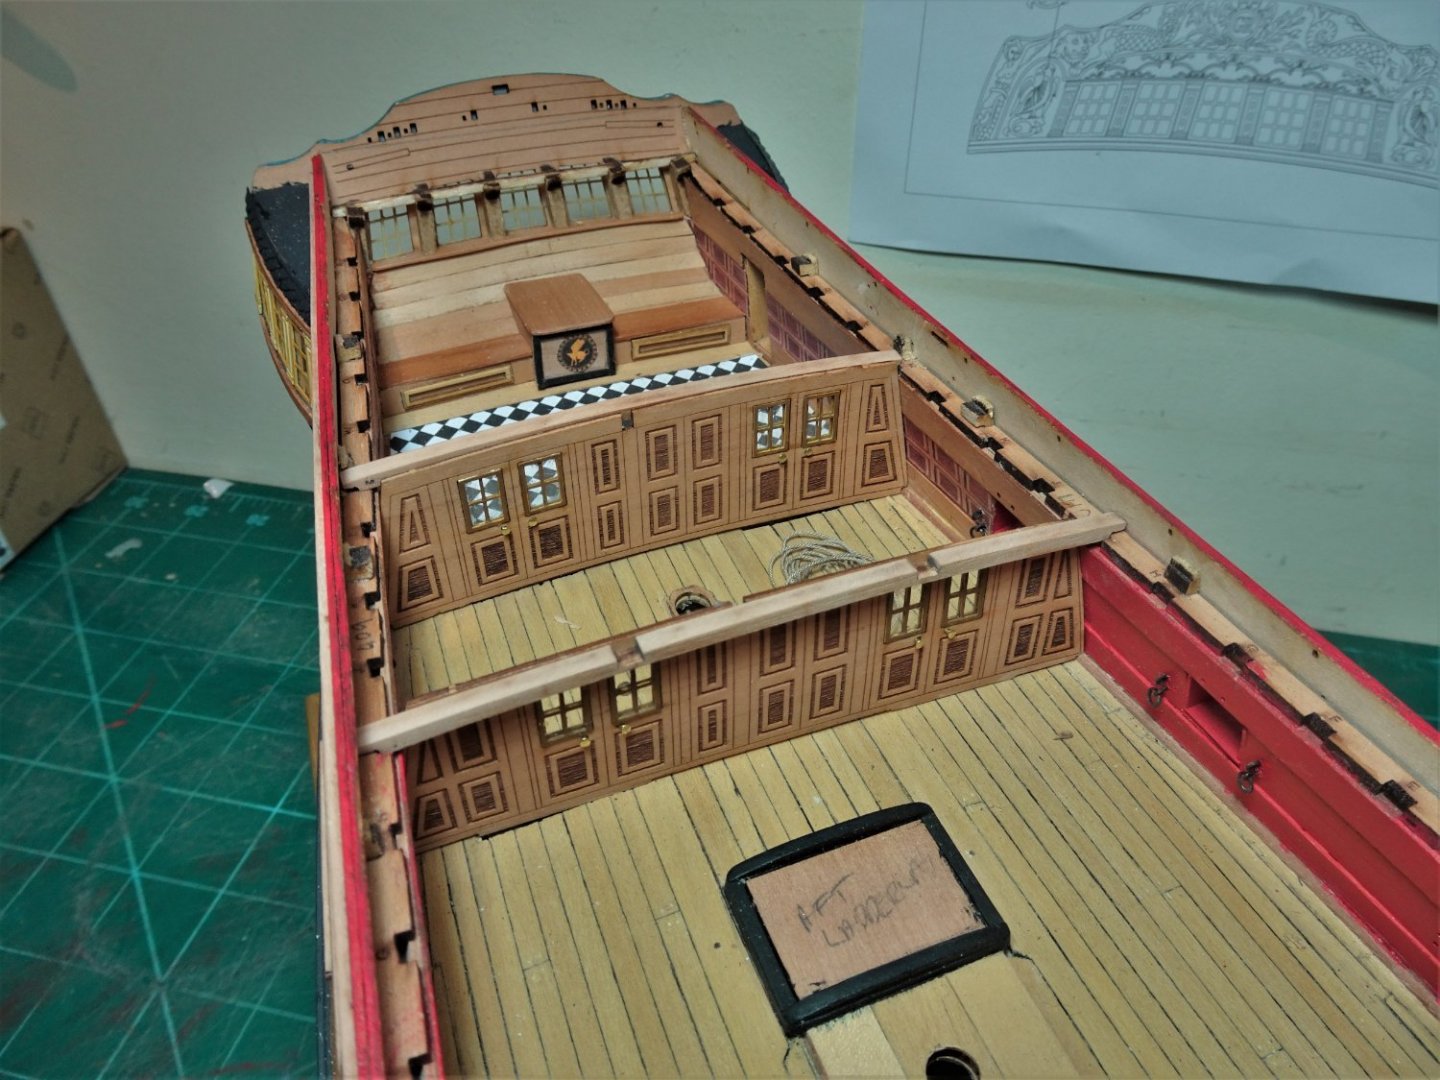
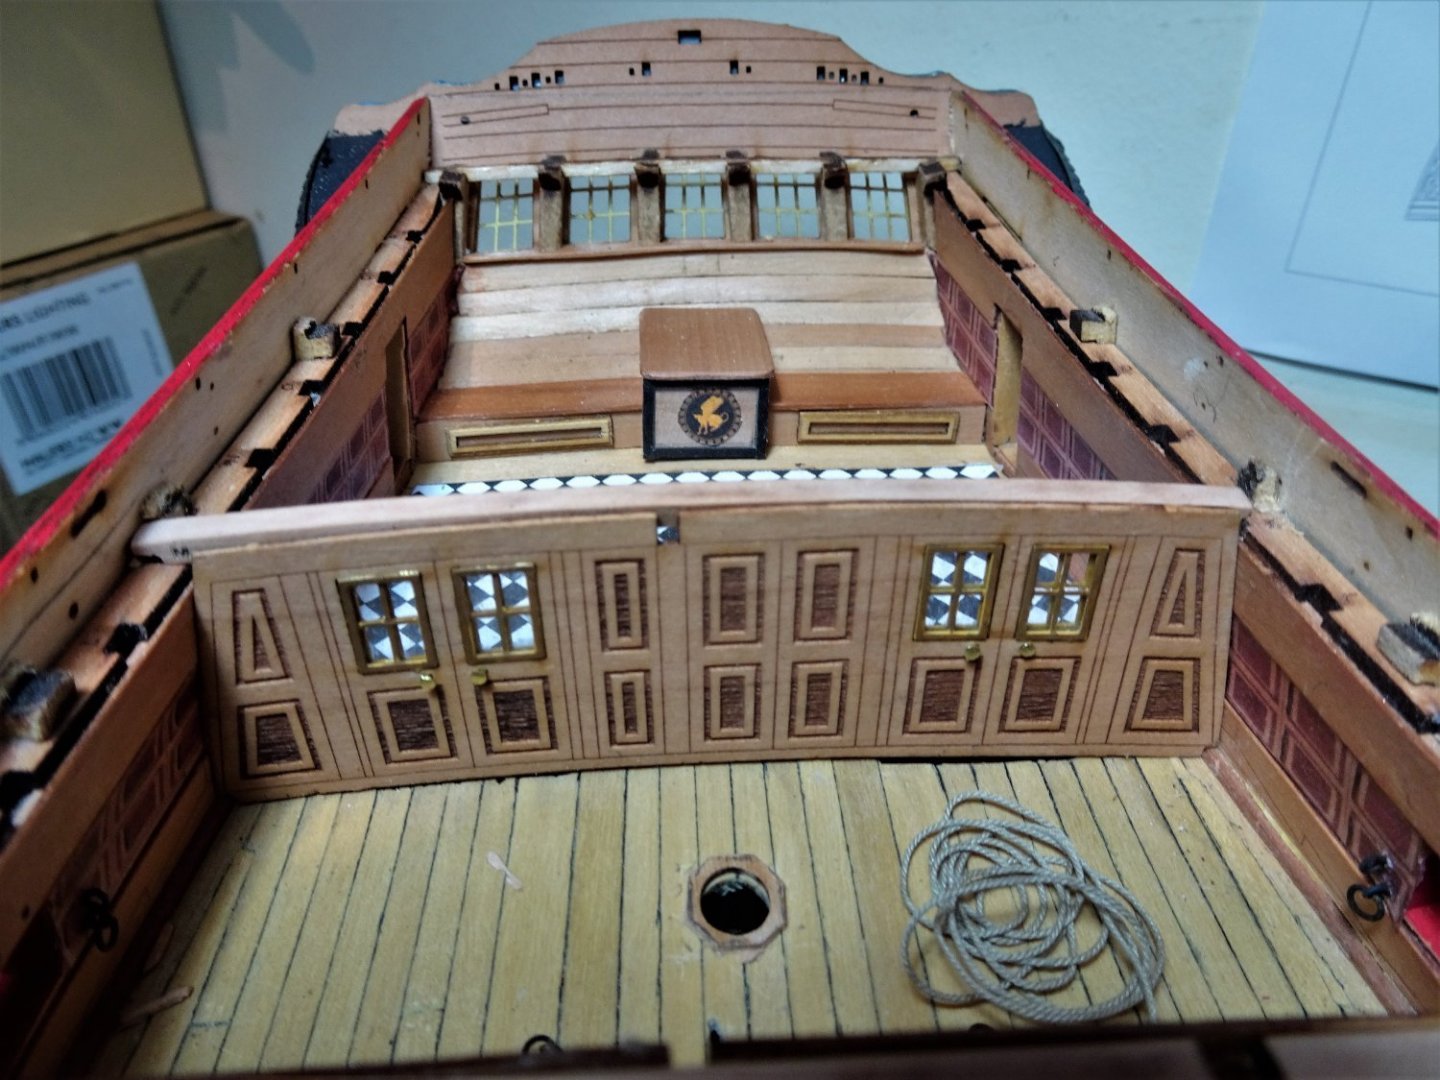
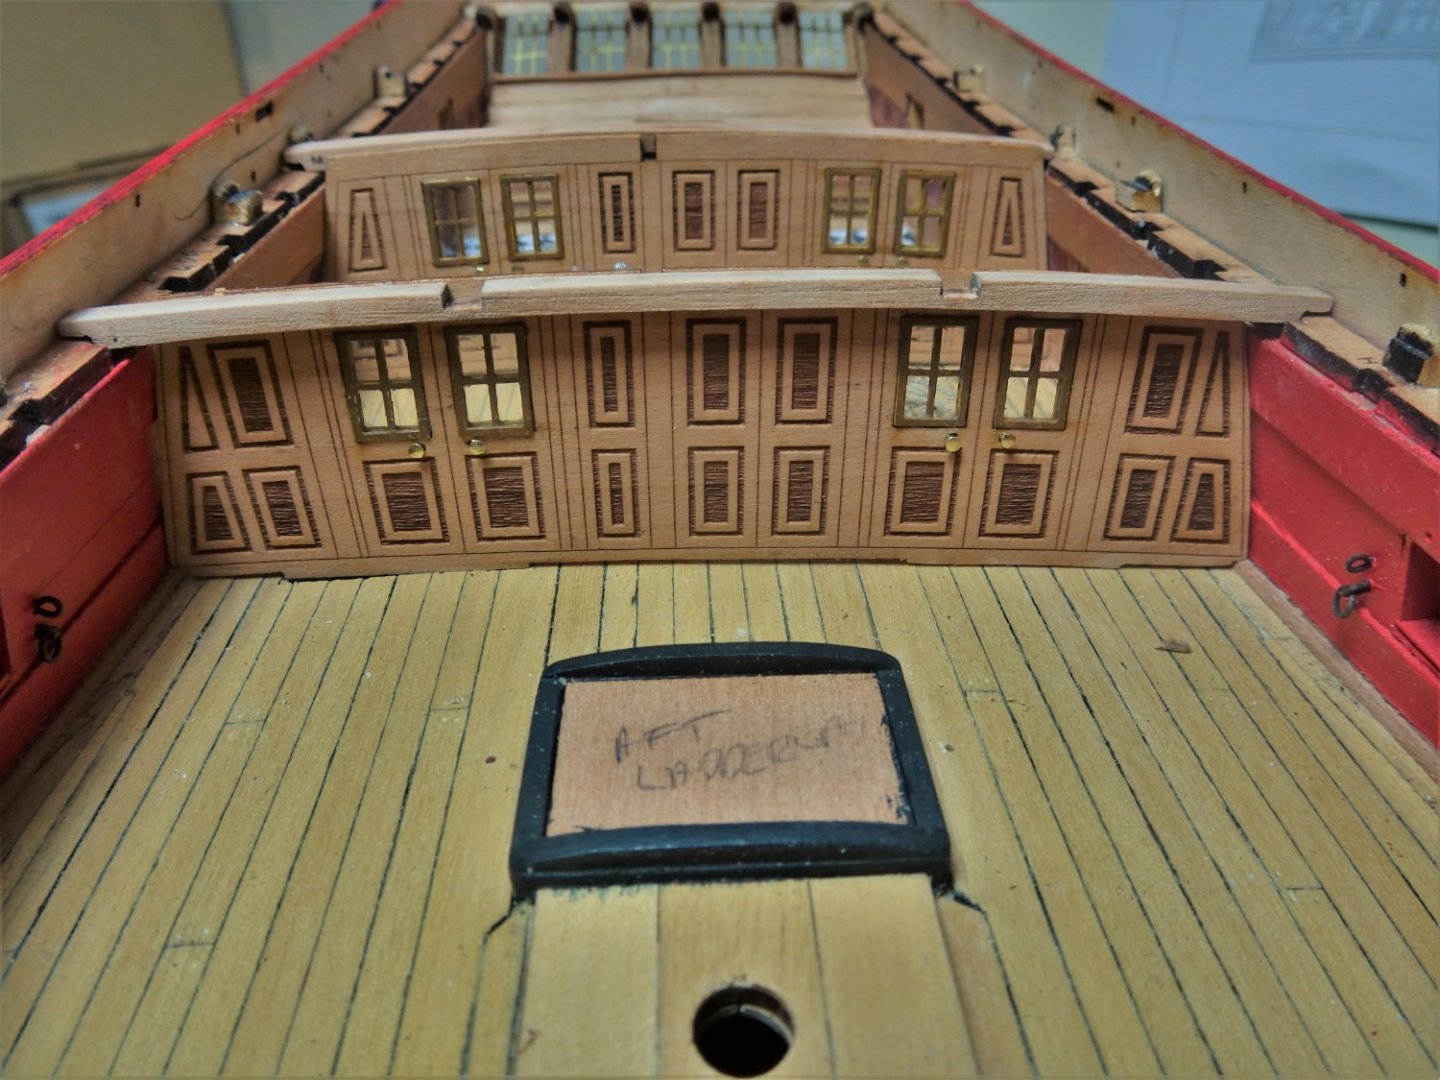
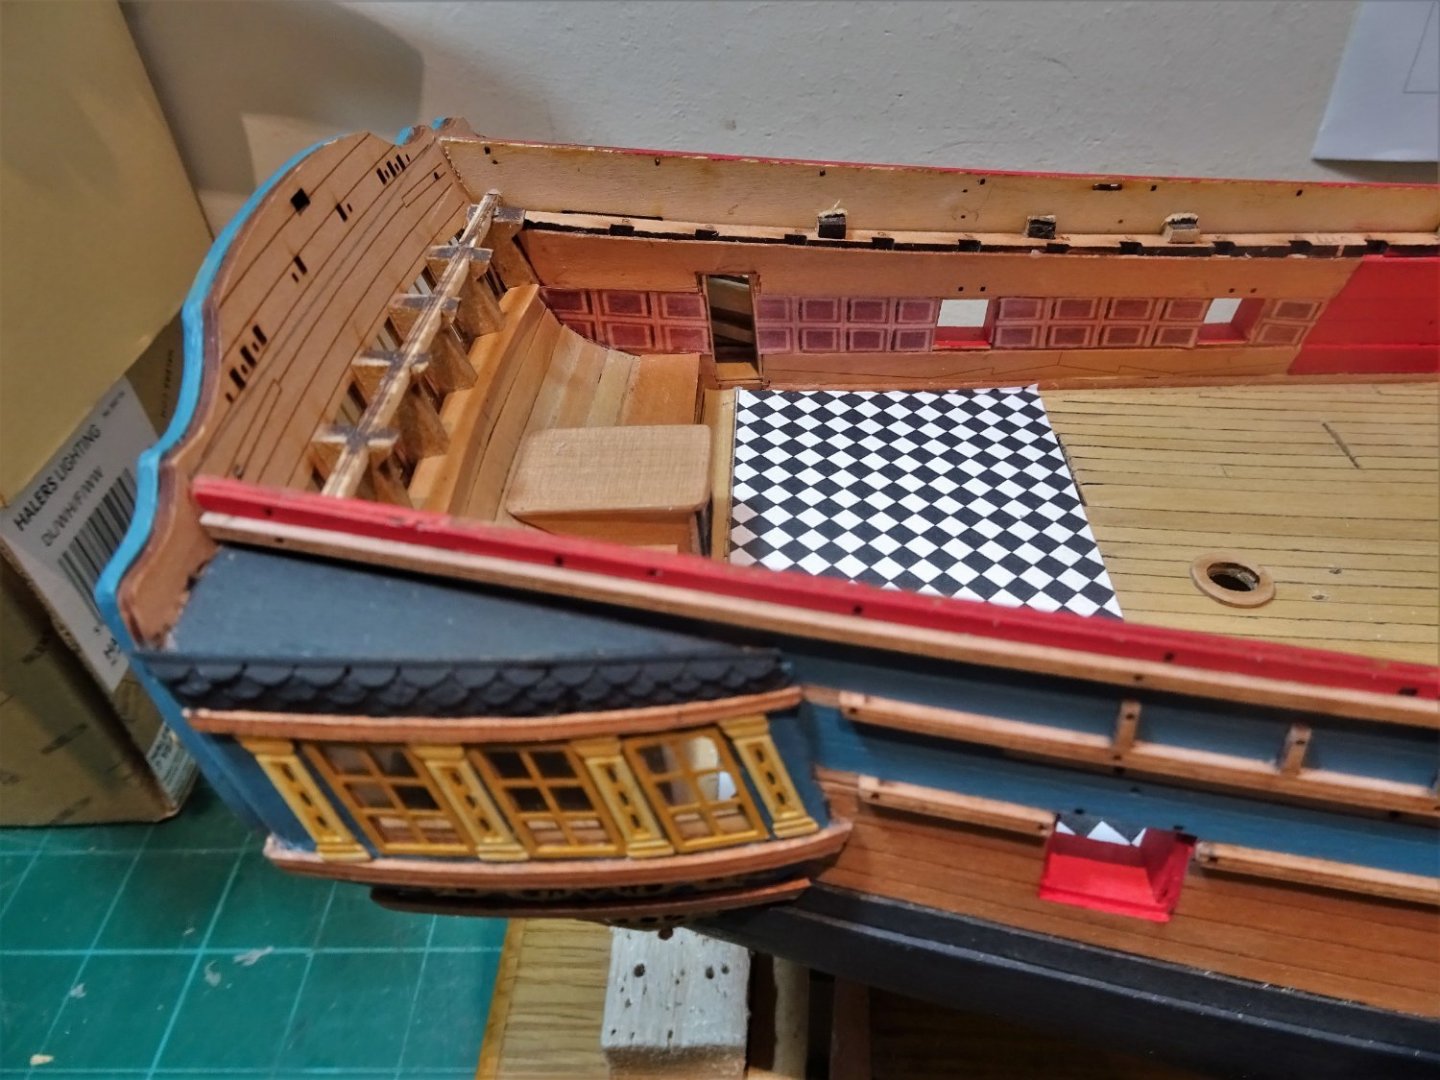
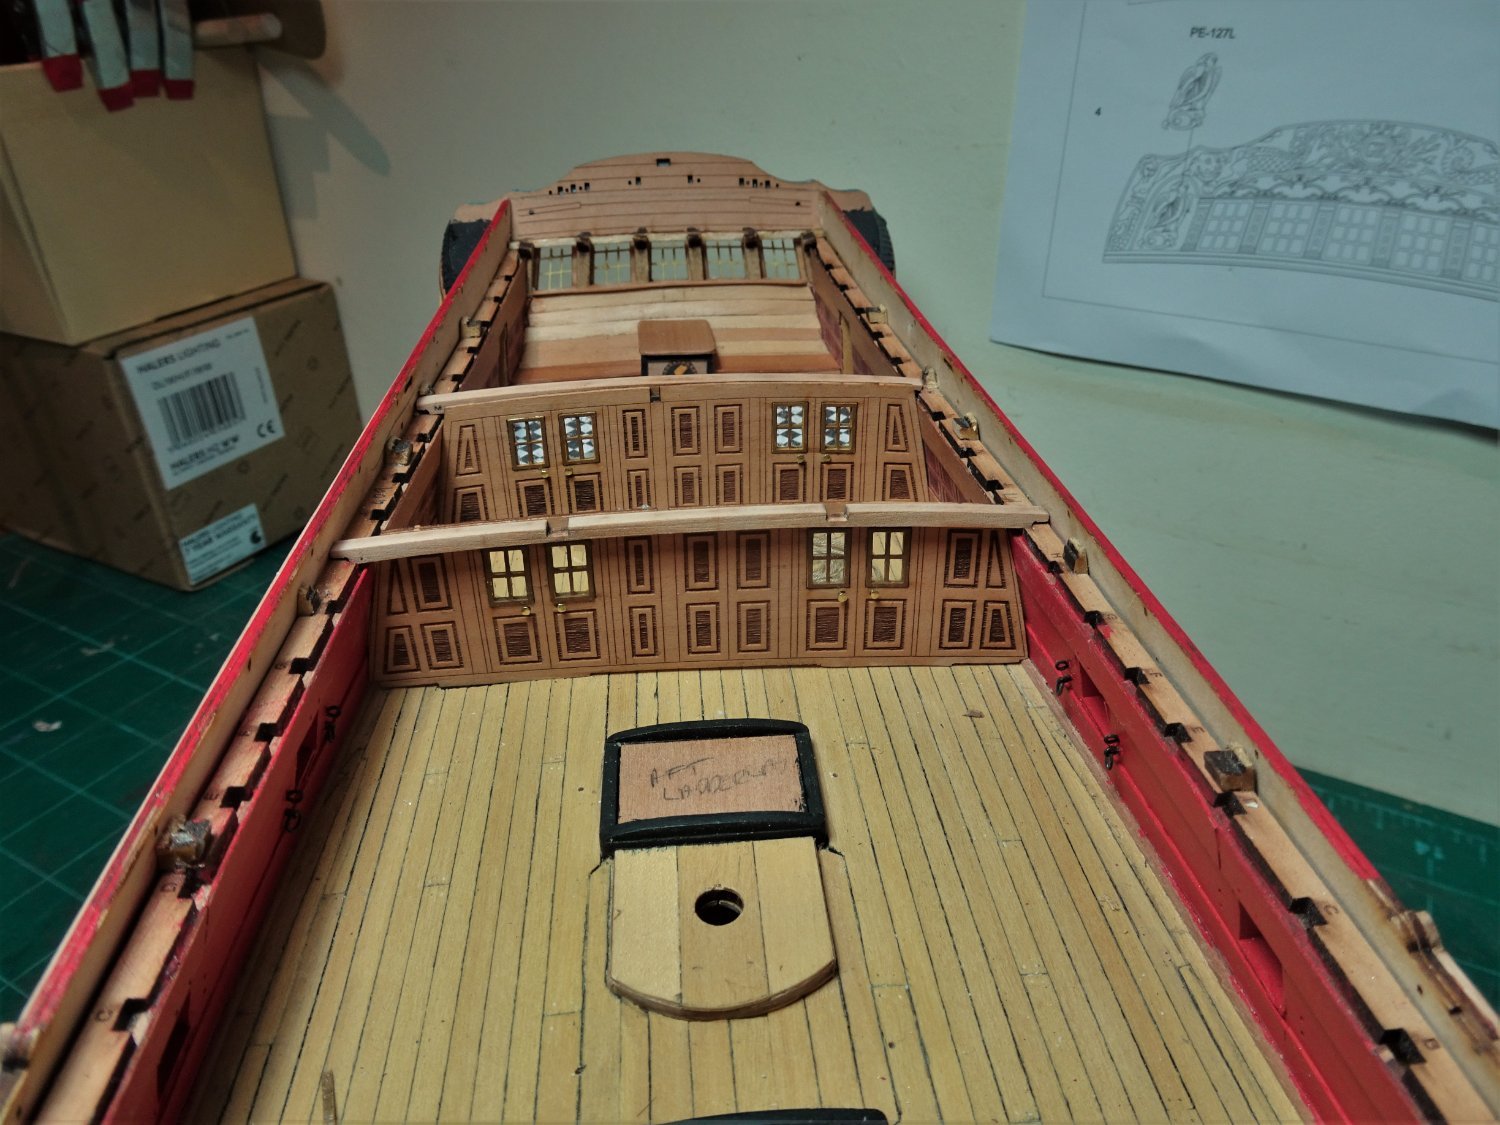
 Thanks for looking in Johann. 👍 Post Eighty -three Preparing the Bulkheads I have decided to orient the doors for aft opening in accordance with the kit arrangement, which means that the hinges will be on the aft sides of the door for both Bulkheads. I wasn’t keen on the kit ring type handles and replaced those with round knobs fashioned from Brass nails. The glazing went in without trouble and was cleaned post fitting using dampened cotton buds. The frames were painted Vallejo Flat Earth and put in place using pin-point spots of acrylic varnish. 5718(2) This is slow work if smearing the glazing is to be avoided, and inevitably some minor touch ups of the framing is required. I fitted the forward facing frames first to get them to sit flush with the panelling, the aft ones stand a little proud of the panelling. 5725(2) It is very tricky getting 0.5mm clear gazing plus 0.8mm of framing to sit centrally in the panelling, but the forward ones are more important than the aft set. 5724(2) – screens in place looking fwd. I went with the kit provided hinges as there was not enough room at the top of the door to create the ‘L’ shaped version. 5722- Fore screen – looking aft By the time I had completed the forward screen it had developed a measure of twist which hopefully will be sorted out when fixed against the deck beams. This in itself creates a problem; the kit arrangement whereby the screens fit up to the top of the beams is a simplification, and for an open deck impede the fitting of the Lodging knees. Not so bad for the Fore screen where the beam sits before it, but problematic with the aft screen. 5721 – Aft screen With this arrangement the Lodging knees would sit against the screen which would look a little odd, but I think a work around is possible. 5720 I had thought about constructing my own cabin bulkheads, but the kit versions look fine from normal viewing distance, and this build is all about what will ultimately be seen and from what angle. 5719 I have some pondering to do before I fix the screens permanently in place, not least about the placement of the guns. The blurb doesn’t indicate fixing them at this time but if they are to be dressed with Breeching ropes and other tackle this would prove very tricky if the partitions are in place. B.E. 17/02/22
.thumb.JPG.f5206ae27658d58577787b136842a731.JPG)

.thumb.JPG.b7e8b9c51ff6374d2bf27a6179b1db87.JPG)
.thumb.JPG.129121cae762286905b1771282d7d584.JPG)
- 857 replies
-
- 15
-

-
- Sphinx
- Vanguard Models
- (and 1 more)
-
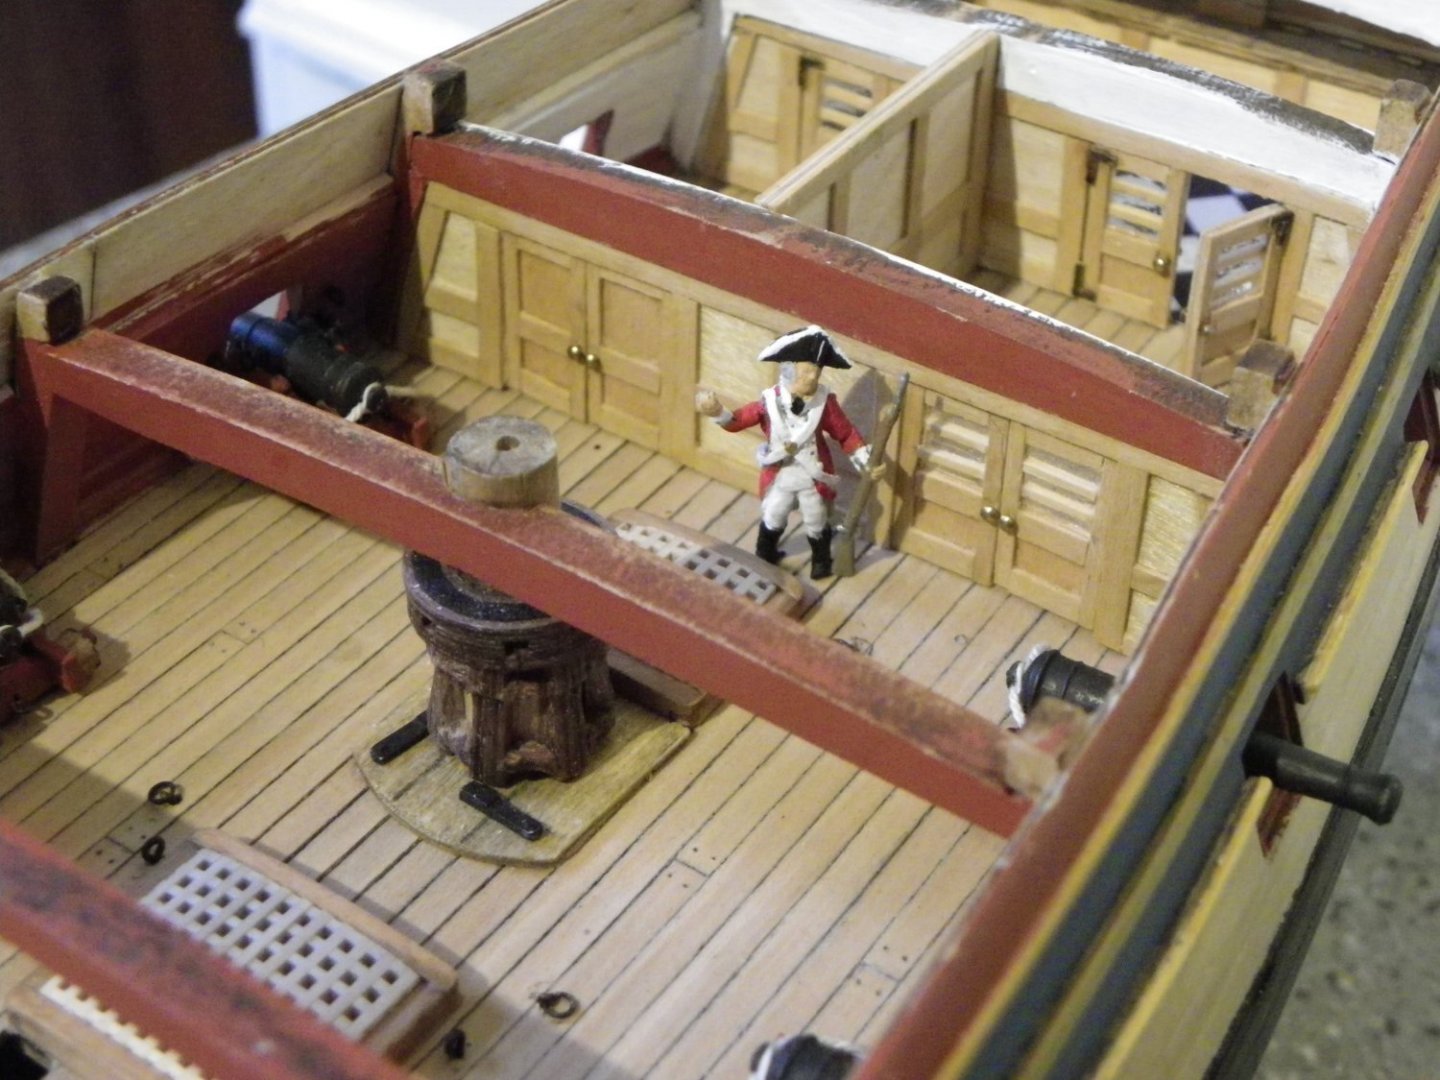
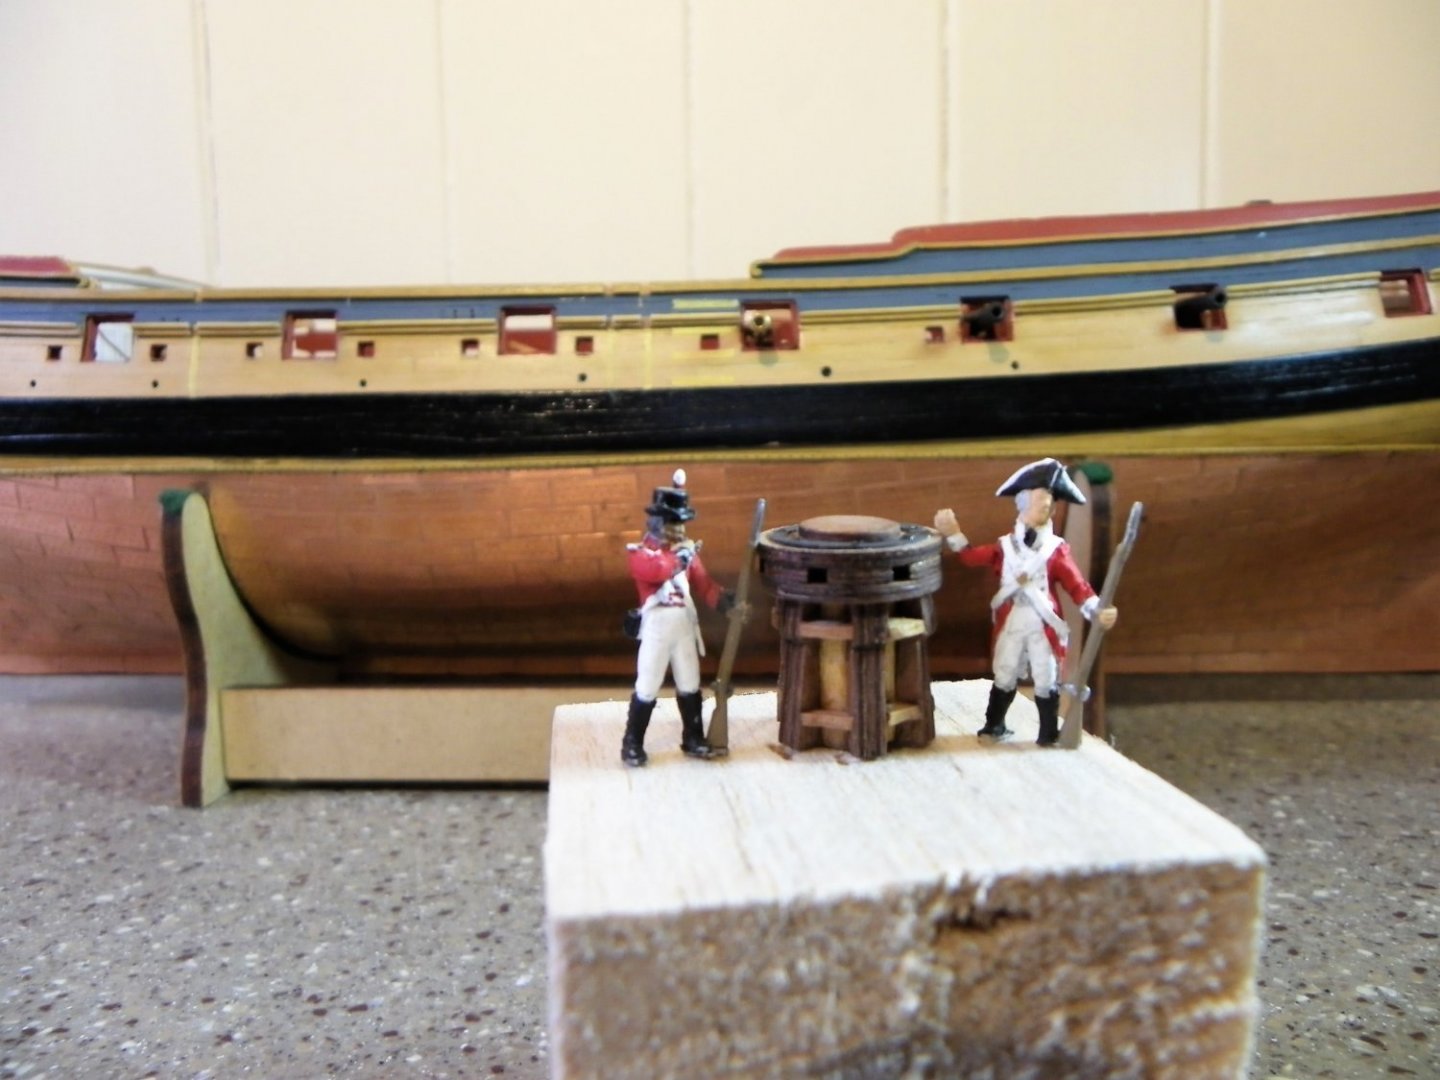
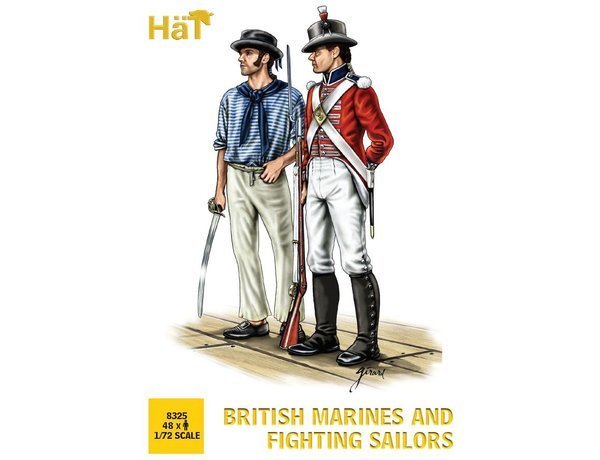
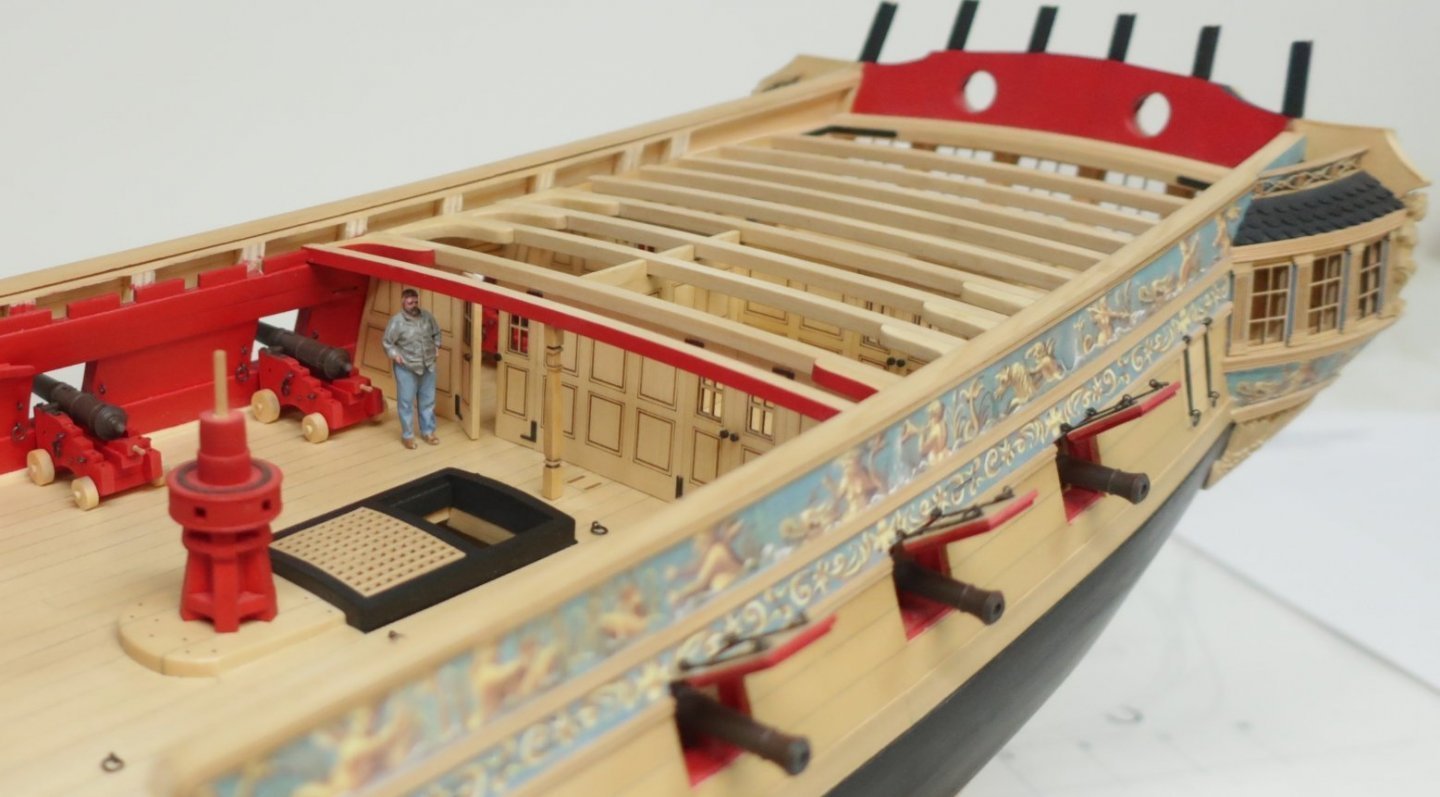
Thank you Starlight. The figures are from a HAT 1/72 scale set, still available I understand. I modified one of the figures to better reflect the uniform of1775 using styrene strip and modelling paste, altho' he doesn't bear too close an inspection. He stands guard on board Pegasus, but is hidden from view. The deck beams are over scale meaning the the bulkhead is a little low, but I just went with the kit arrangement for simplicity. The figure is a little under scale but just about passes muster as a short fellow. Looking at this photo reminds me that I modelled the doorway into the Captain's Bed space with solid doors for privacy, something the Captain of Sphinx does not enjoy. Cheers, B.E.
- 857 replies
-
- 10
-
-

-
- Sphinx
- Vanguard Models
- (and 1 more)
-
She's looking very smart Paul, maybe the photo angle but the rudder gap doesn't catch my eye. Nice progress. B.E.
-
Thanks Chuck, they're not shown on any of the Admiralty plans that I can see, and I believe Chris probably used the drawings in the AOTs book on Pandora as a typical example of a close ship type and period. They are shown as opening aft on both bulkheads. The simplest approach would be to follow that lead given that the fixing points for the hinges have been lasered on that side. I still like the way you have them on Winnie tho'. Regards, B.E.
- 857 replies
-
- 2
-
-
- Sphinx
- Vanguard Models
- (and 1 more)
-
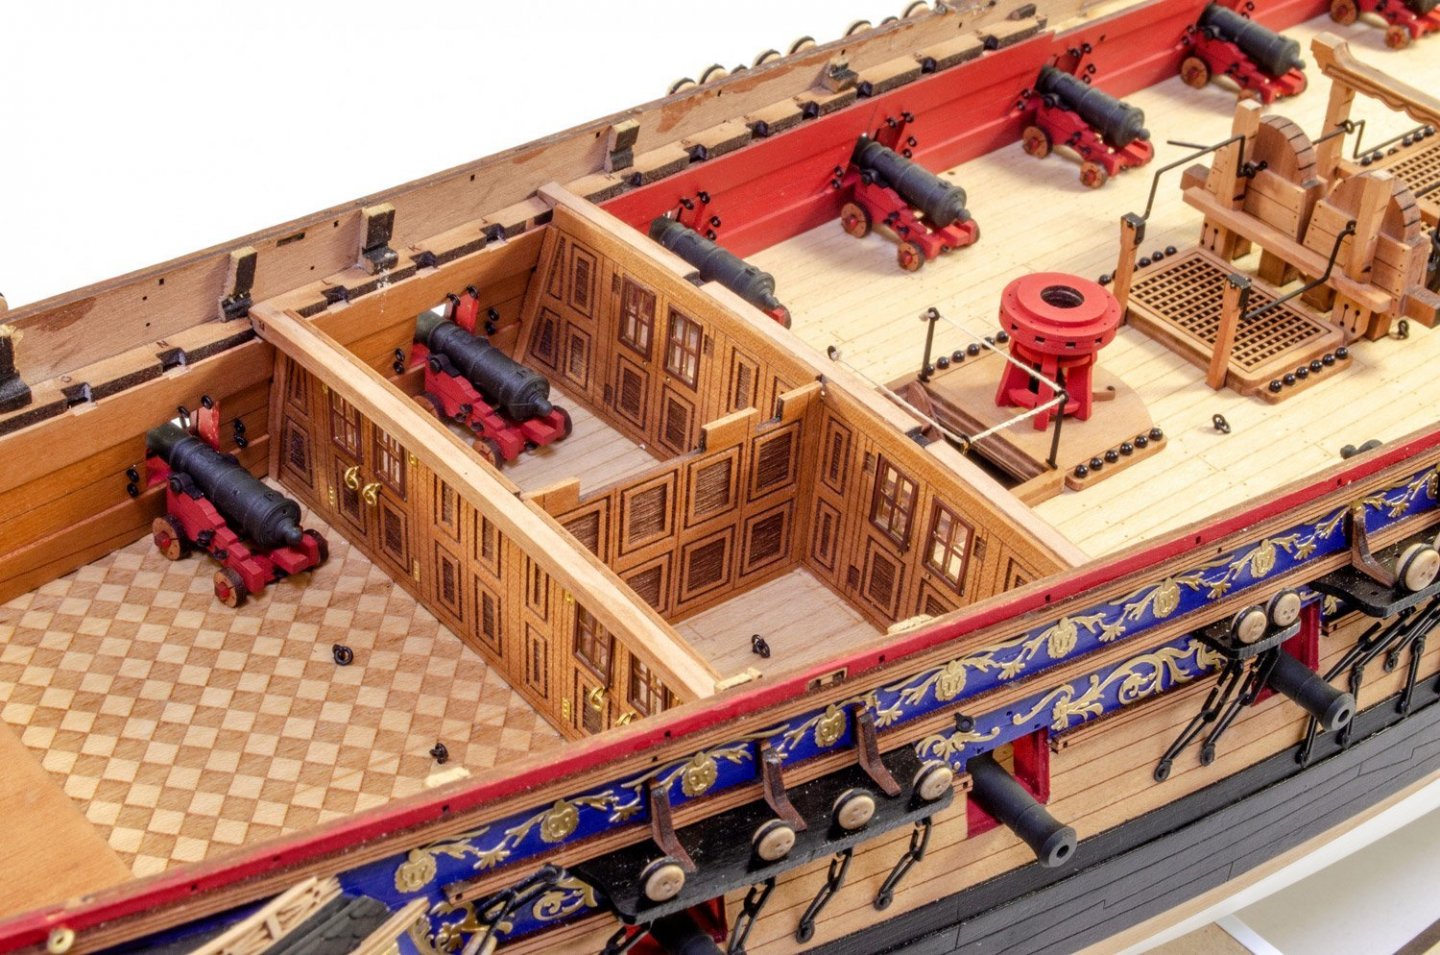
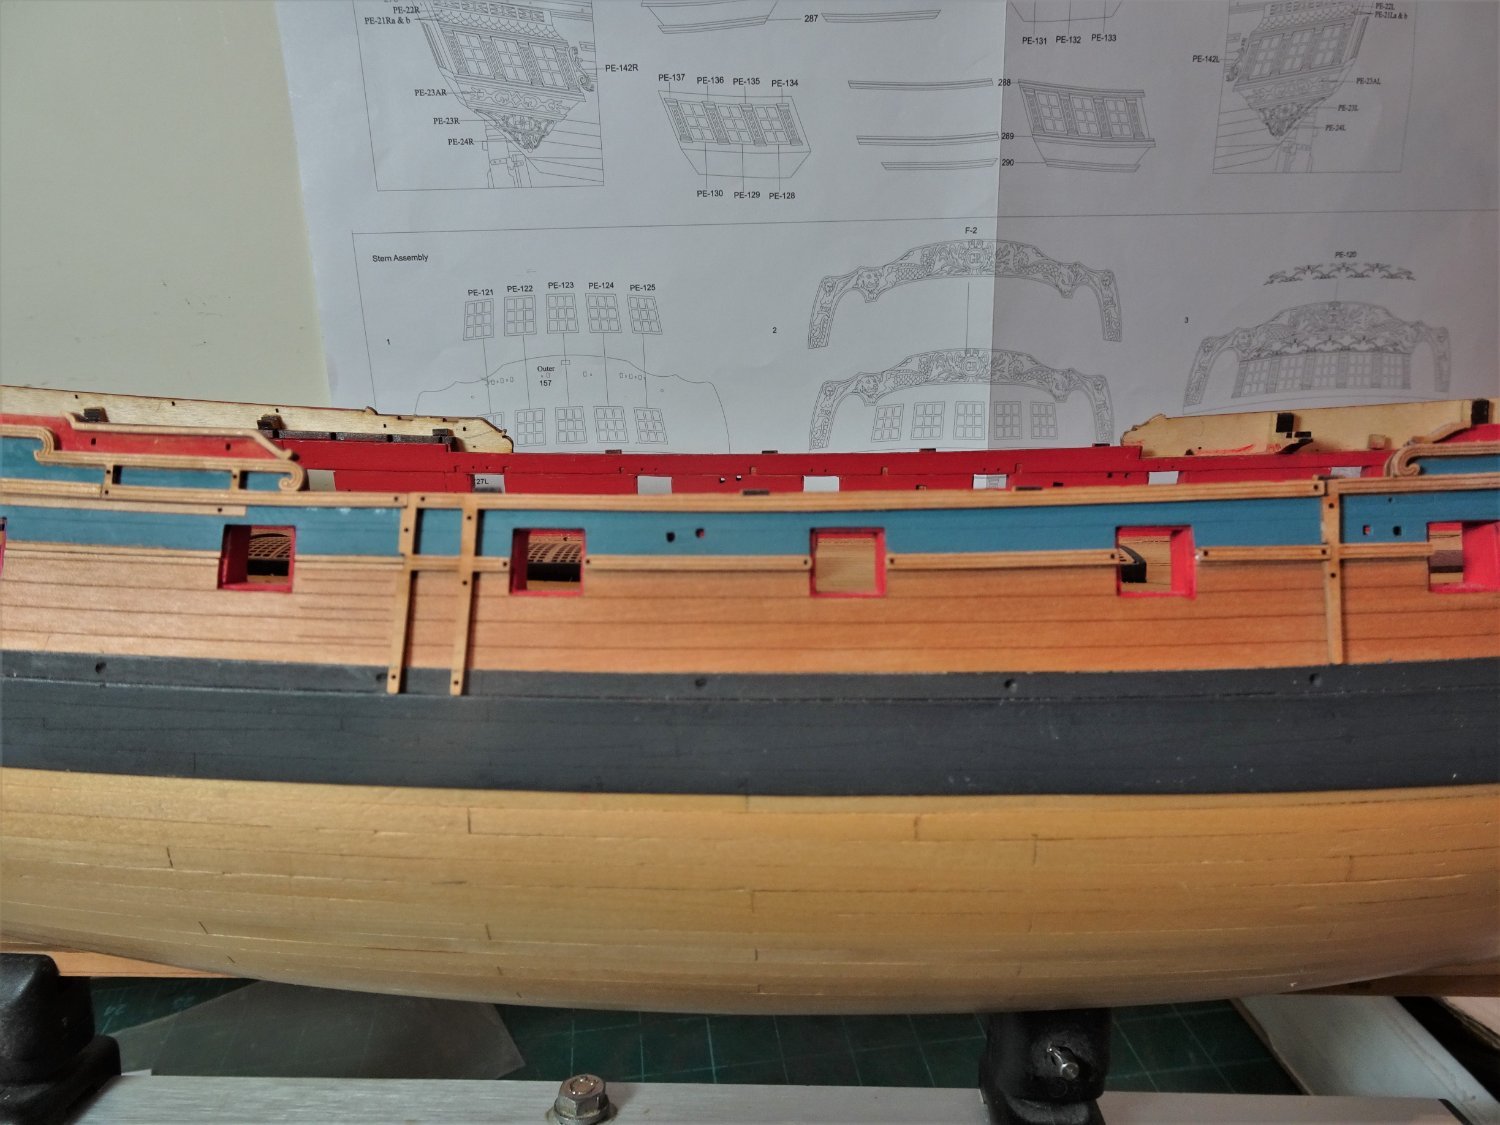
Post Eighty-two Cabin Bulkheads The first major exercise is to assemble the cabin bulkheads, delicate pieces that curl quicker than a British rail sandwich, with one sniff of pva. 5669(2) They will be left clamped flat until fitting time. 5716 Trial fitting the Bulkheads in place, before I add the detail. A bulkhead puzzlement. The aft bulkhead has the hinge patterns on the inner side to reflect inward opening doors, as they are on the forward bulkhead with doors opening inwards into the Captains bed space and Coach. The arrangement is as the prototype build (above) by Jim. Note however, that the scribed hinge patterns on the forward bulkhead are not used. Rather, the hinge etched patterns have been applied to the outer face of the forward pattern (above) indicating outward opening doors. There is only one way these bulkheads fit to take account of the slot for the partition between the Bed Space and Coach. The AotS book on Pandora does show inward opening doors on both sets, but outward opening doors make sense on this first bulkhead given the very restricted space beyond. I note that Chuck has shown this arrangement on his Winnie build, (above) but he also has opening outward doors from the Great Cabin. Note also the ‘L’ shaped hinges common at this time. 5711 As far as the kit is concerned inward opening doors on the forward bulkhead would come up against the guns in the cramped bed and Coach spaces. 5712(2) Unless they were generally secured side onto the bulwark, which they may well have been to give more space. I suppose if the ship was prepared for action, the bulkheads would in any case be removed to work the guns, so perhaps that wasn’t considered an issue. 5710 If Chris’s intention is that the hinges were placed for inward opening doors from fore to aft then the arrangement fits, and it may be that Jim just preferred the look of outward opening doors on the forward bulkhead, as do I. 5714 There is plenty of space to open the doors onto the Quarterdeck without fouling the guns. Such a confusing issue but of minor relevance if the Quarterdeck is to be planked over as such detail will be all but hidden. B.E. 15/02/22
.thumb.JPG.bfc6d87ed40bbbf9d0529e4f9d13b426.JPG)
.thumb.JPG.285663eacf28a9b4ab394b535be66854.JPG)
.thumb.JPG.4ea254ea47304c6dd1cf1e218a3e6b8c.JPG)

- 857 replies
-
- 17
-
-
- Sphinx
- Vanguard Models
- (and 1 more)
-
Thank you Mike, and you should get back to Pegasus.👍 @ Nipper - Chris has very kindly provided the pattern on Plan Sheet 3 Laser cut parts. Just print it out, spray it with some Artists fixative to seal, and cut it to fit. B.E.
- 857 replies
-
- 4
-
-
- Sphinx
- Vanguard Models
- (and 1 more)
-
Thanks Bob and Nipper. @ Nipper, you are correct the Marine is wearing the post 1802 uniform with the short coatee. Prior to this Marine uniforms were similar to line regiment uniforms with long tailed coats and bi-corne hats. As Sphinx was laid up in ordinary for the whole period post introduction of the new uniform, it would not have been seen during her sea career. I did modify the marine standing guard at the great cabin of Pegasus to reflect the period. Cheers B.E.
- 857 replies
-
- 2
-
-
- Sphinx
- Vanguard Models
- (and 1 more)
-
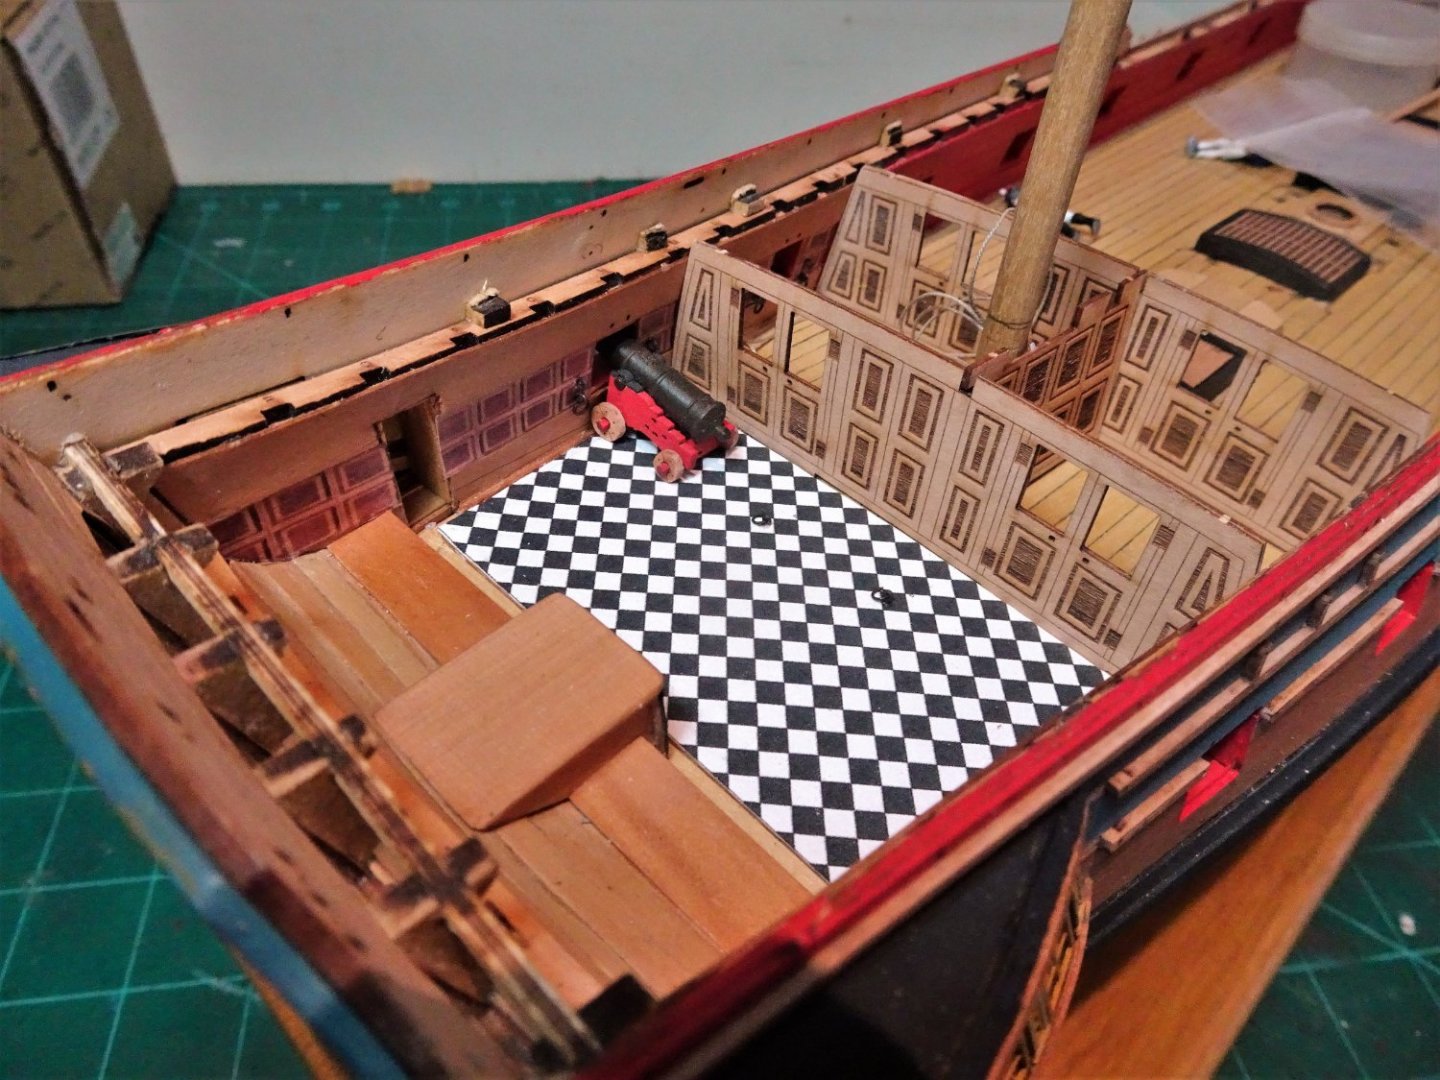
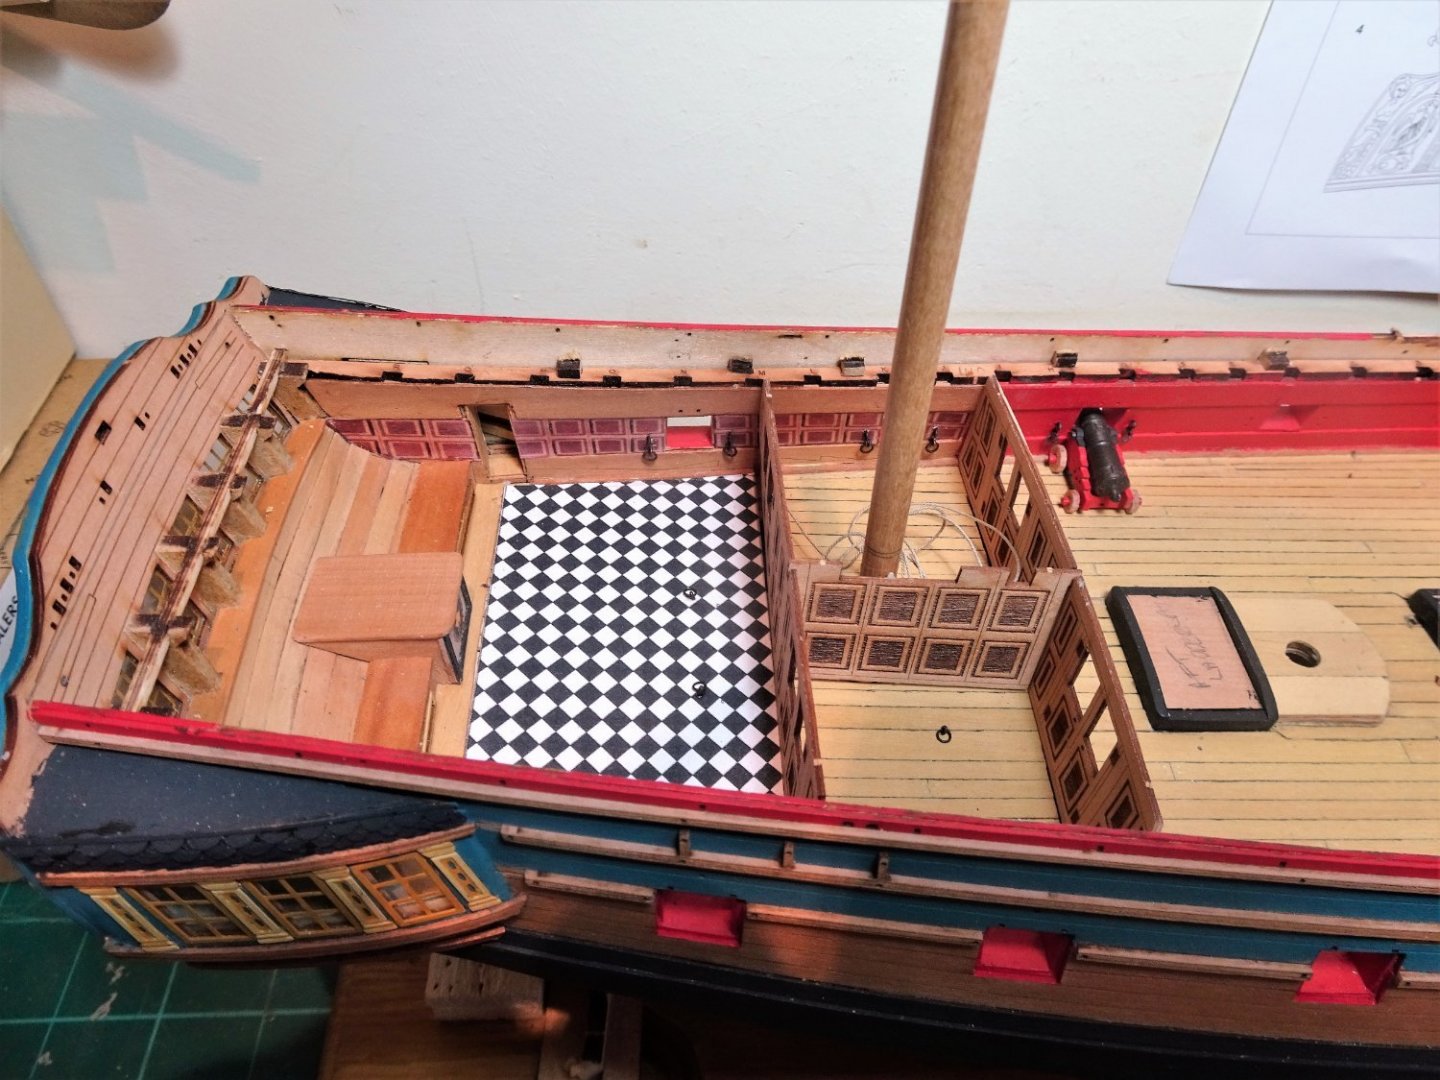
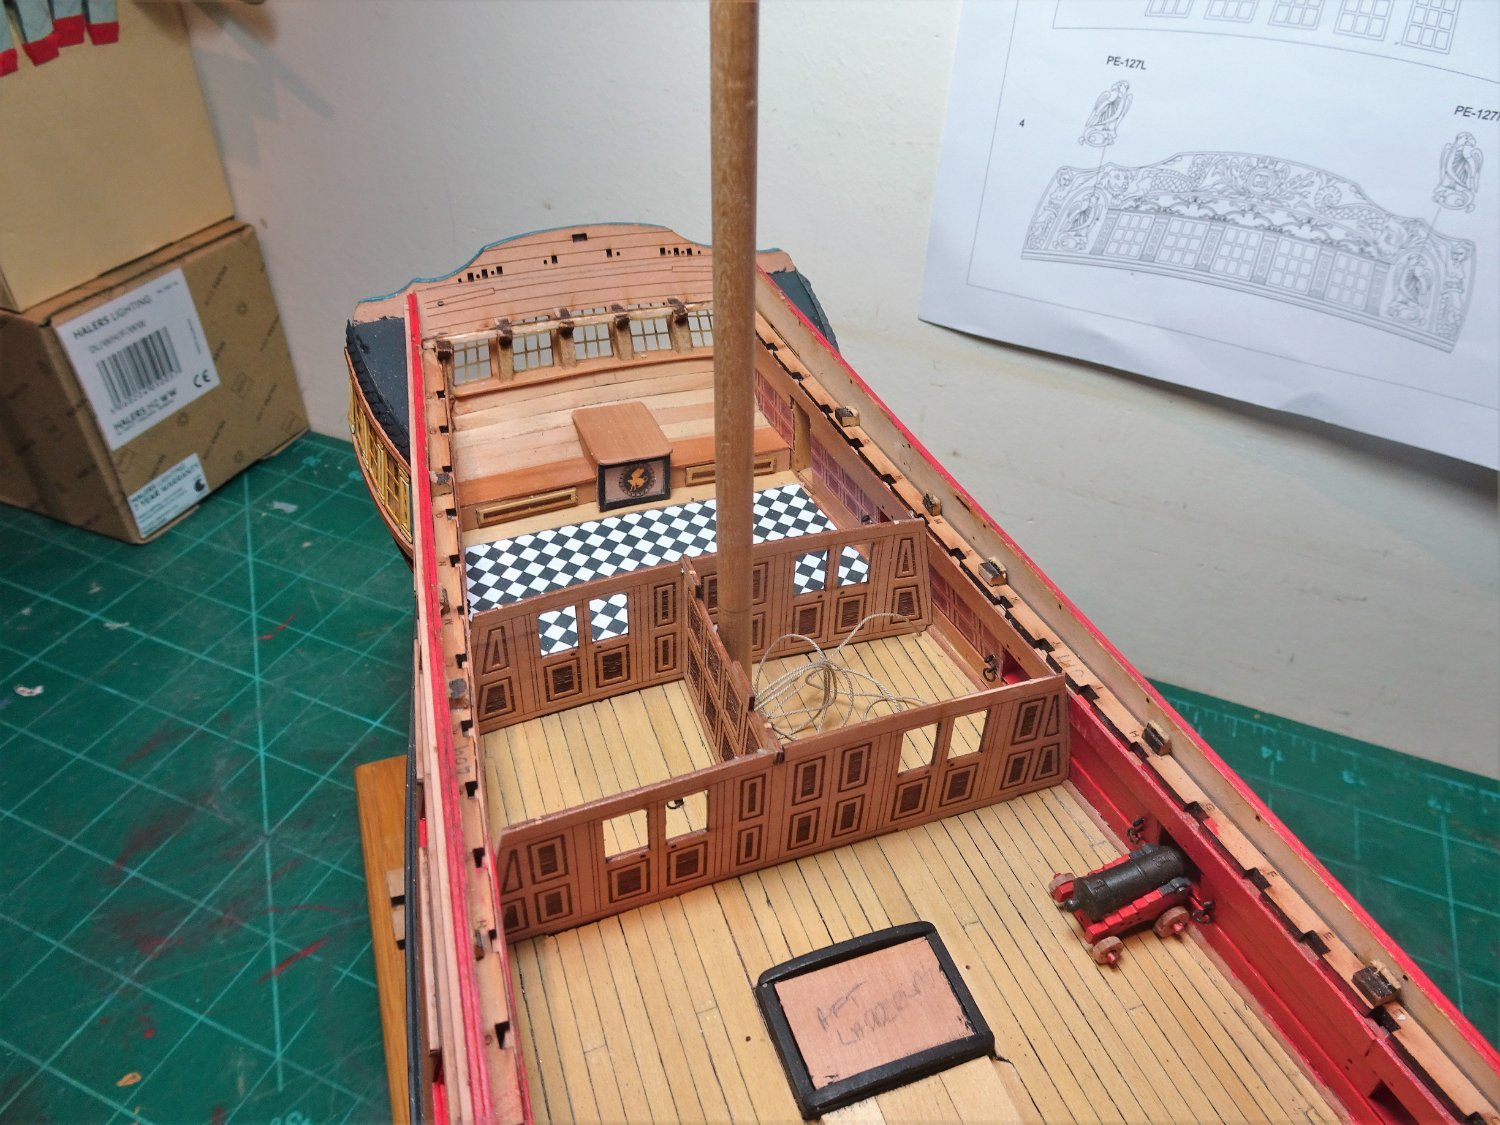
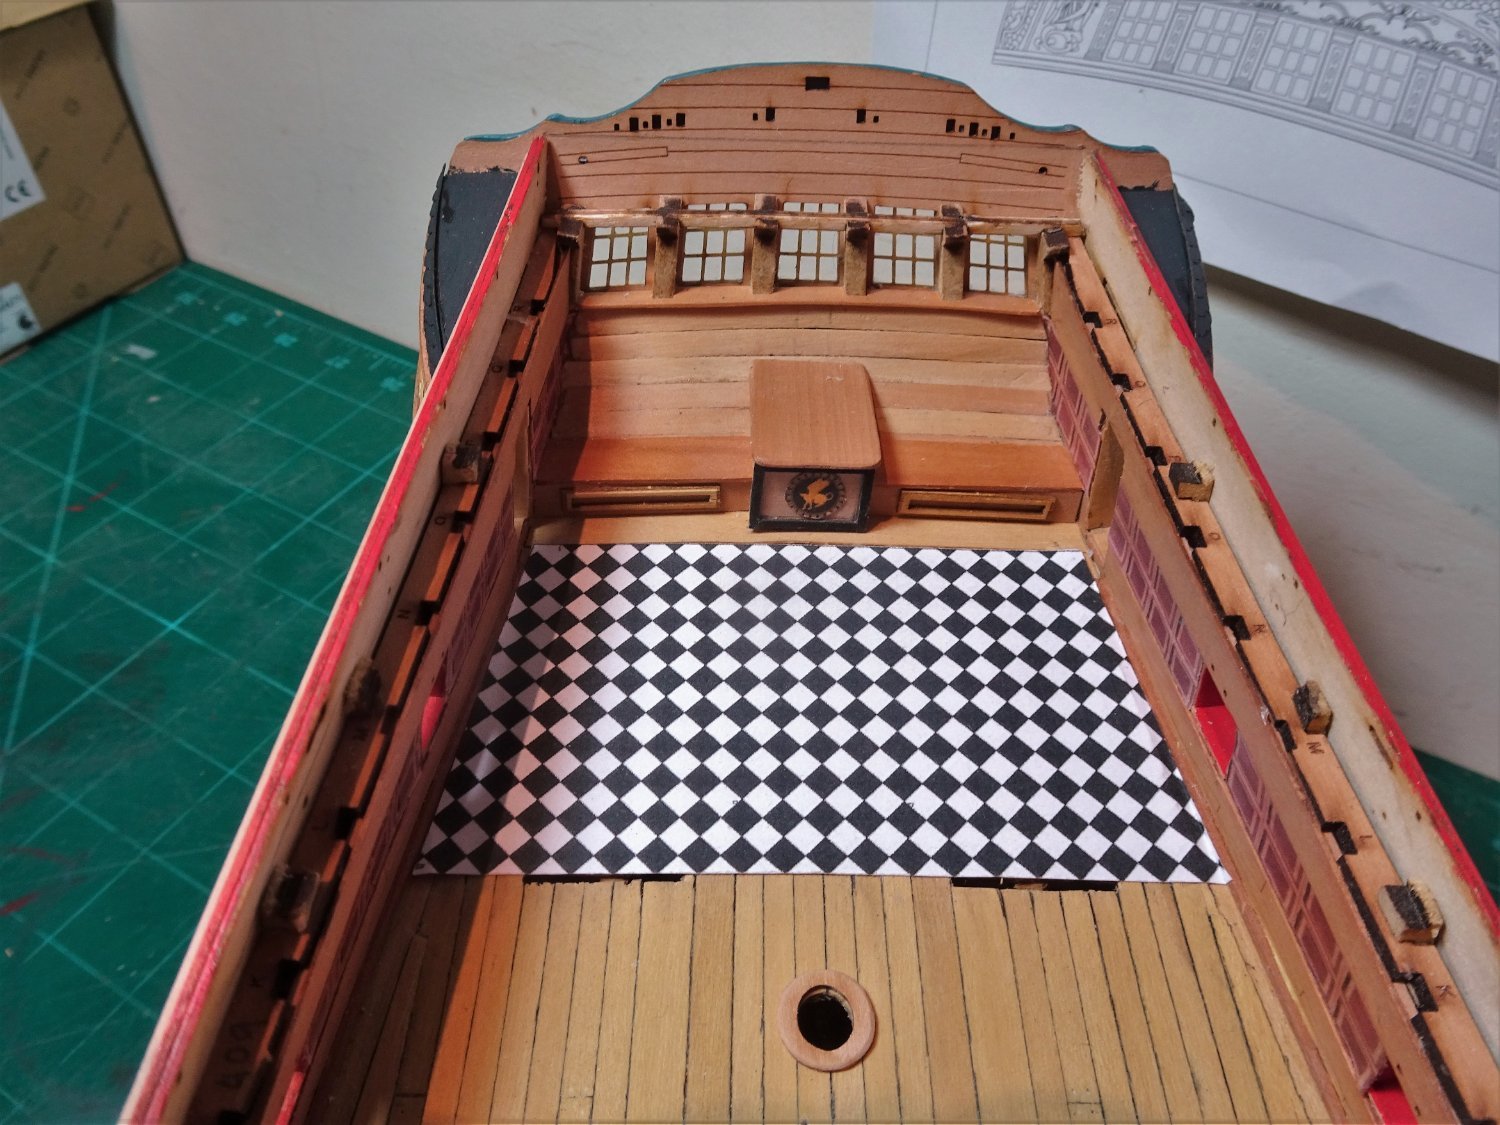
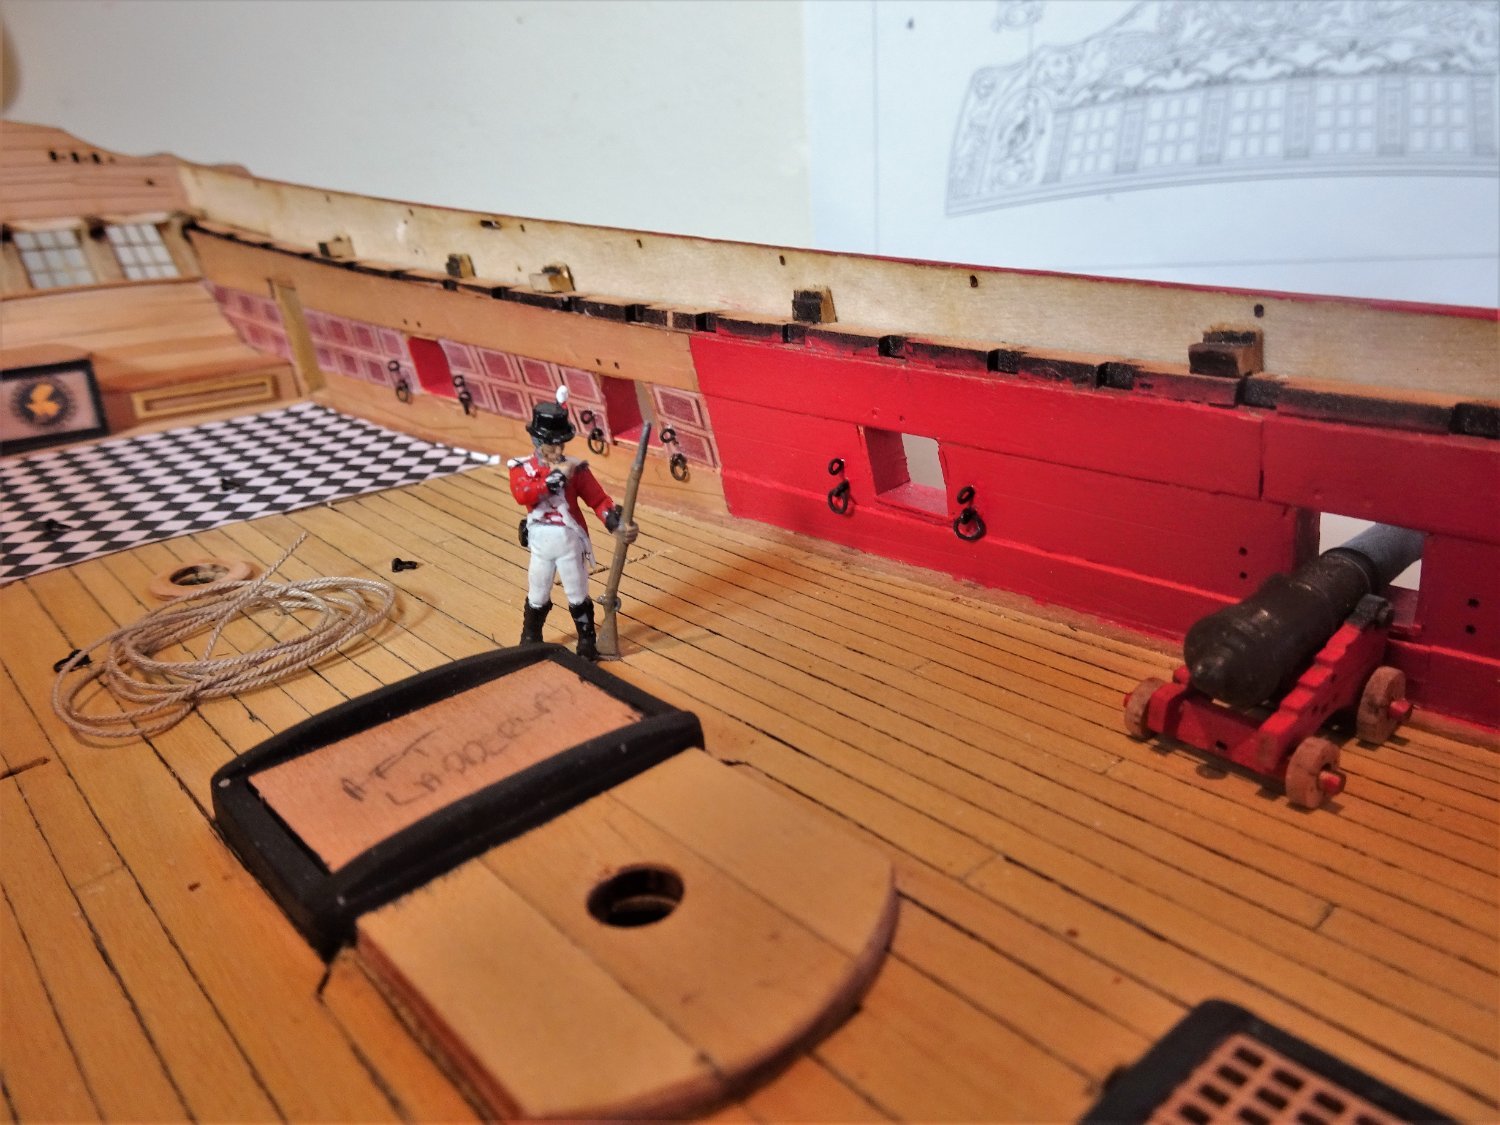
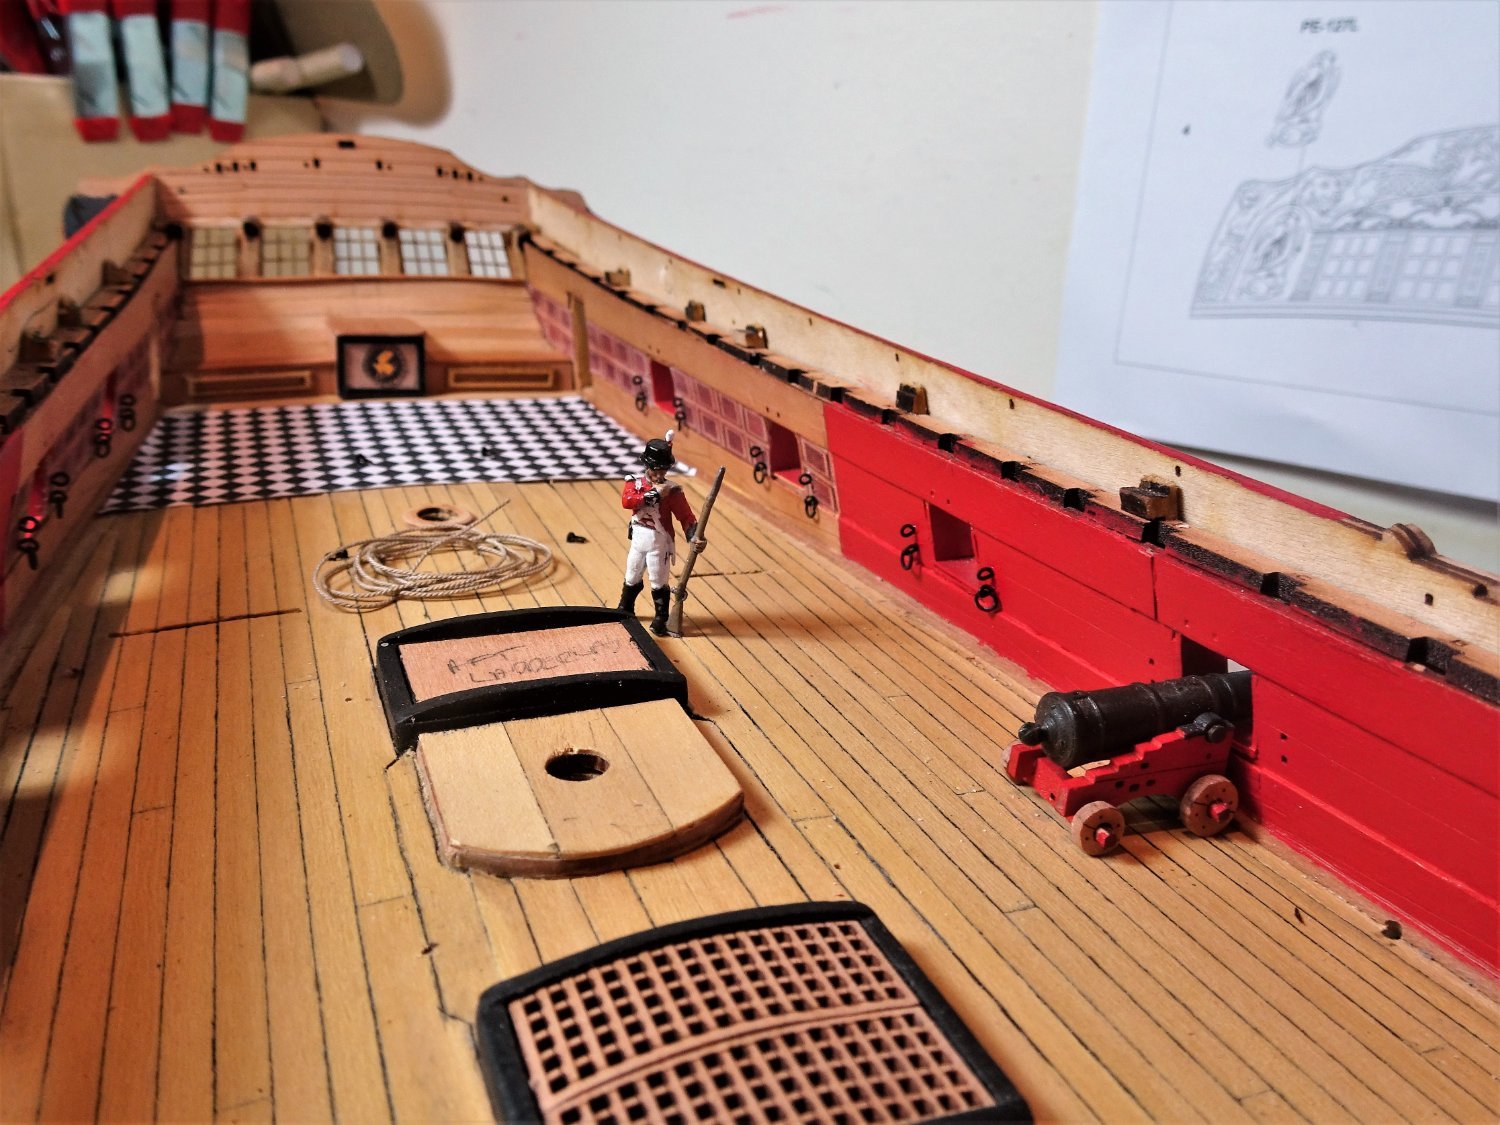
Post Eighty-one Moving aft – moving forward. I have finally decided on the Great Cabin flooring, I am going with the traditional b/w painted sailcloth look. 5681 5673 I think this will have more impact when viewed from above or thro’ the stern lights and ports. A few bits and pieces to attend to, tackle rings in the cabin deck and bolts and rings in the bulwarks. I am not really a fan of the kit provided etched stuff which lacks the round of the iron work. I prefer to use Amati fine eyebolts and rings. Amati 2mm rings (4000/02) 3mm rings (4000/03) Fine eyepins (4703) Deck ring bolts: 2mm rings coupled with fine eyebolts. Bulwark Breeching Ring Bolts: 3mm Rings coupled with fine eyebolts. Bulwark side tackle Eyebolts: Fine eyebolts. I prefer to chemically blacken metal parts if possible. 5709(3) Making up forty ring bolt and eyebolt sets for the bulwark gun tackles is not one of the most exciting tasks, but they are best fitted while the deck access is clear. At least the fixing holes are pre-drilled in the bulwarks. I note that the kit indicates the use of Eyebolts for the bulwark breeching ropes rather than Ring bolts, a simplification perhaps. 5696 At this point the basic preparation for the next stage has been completed. The line on the deck is secured thro’ the tiller lead hole on the Port side in anticipation of rigging the ships wheel. For this I have used 0.45mm Syren line. Not sure at this stage how I will rig the wheel and secure the tiller line on the Starboard side. 🤔 5689 A Marine stands guard to prevent any pilfering of materials, but there is something wrong in this picture, any ideas. Answers on a postcard to PO1 3LS. B.E. 14/02/22


.thumb.JPG.7248c74879747e8c7ae502a7529e94e0.JPG)
- 857 replies
-
- 19
-
-

-
- Sphinx
- Vanguard Models
- (and 1 more)
-
Beautiful work Michael, you surely do work magic on these Heller kits. B.E.
-
Your Topsides planking looks very nice Theo, I’d be very happy with that, well done.👍 B.E.
-
The uprights will be painted, not sure yet whether to leave the cross pieces natural, but no pressure on that decision. B.E.
- 857 replies
-
- 2
-
-
- Sphinx
- Vanguard Models
- (and 1 more)
-
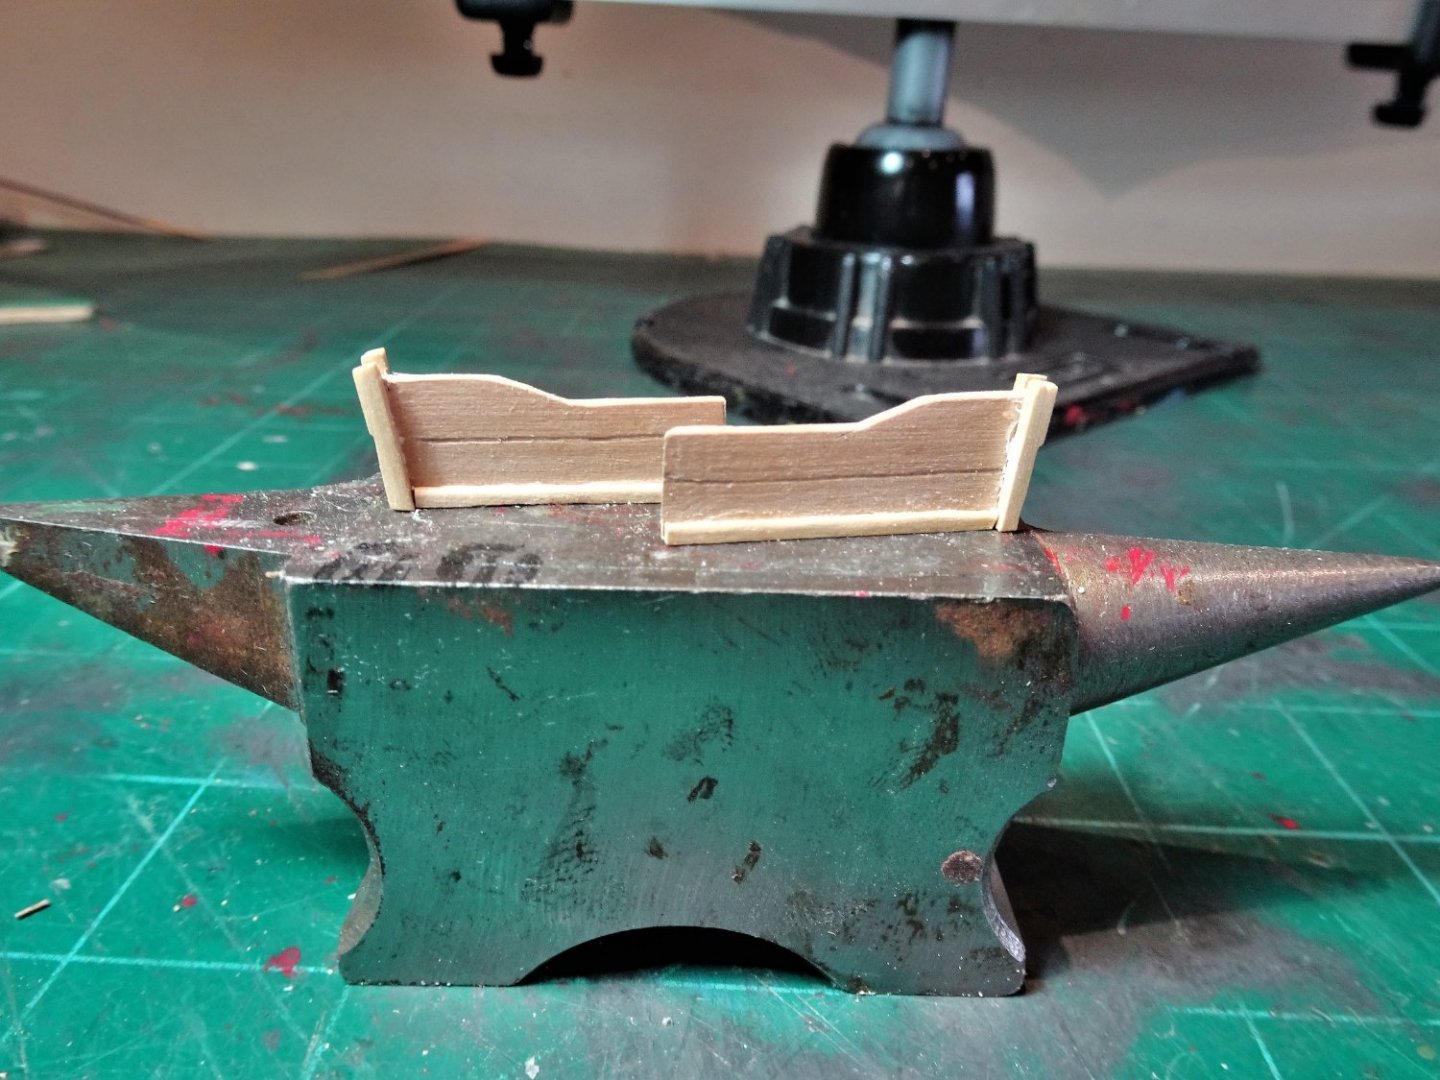
Post Eighty Manger boards. These are an appropriate fitting to add to the model as they will be visible, and besides I just like doing stuff. 5657 A card template is used to get the right proportions. 5666 The boards and cants are made up as one using scrap 1mm Pear. 5668 They need to be worked in conjunction with the Fore Topsail Bitts that sandwich the Bowsprit stop. This effectively means that the bitt posts really need to be attached to the stop sides at this point before any deck beams are put into place. 5658 The Topsail Bitts are glued to the stop using the plan detail, and the Fore Jeer Bitts are used as a height reference. 5660 The relevant deck beams are tried in place to make sure there are no nasty surprises down the way. 5662 Looking at the Bitts it seems to me they could do with a little shaping at the tops if only a simple chamfer. All these pieces will eventually be painted red, but I’ll leave the actual fitting until just before the Foc’sle beams go in. I’ll now continue with the upper deck fittings working from aft forward. B.E. 13/02/22


- 857 replies
-
- 25
-
-
- Sphinx
- Vanguard Models
- (and 1 more)
-
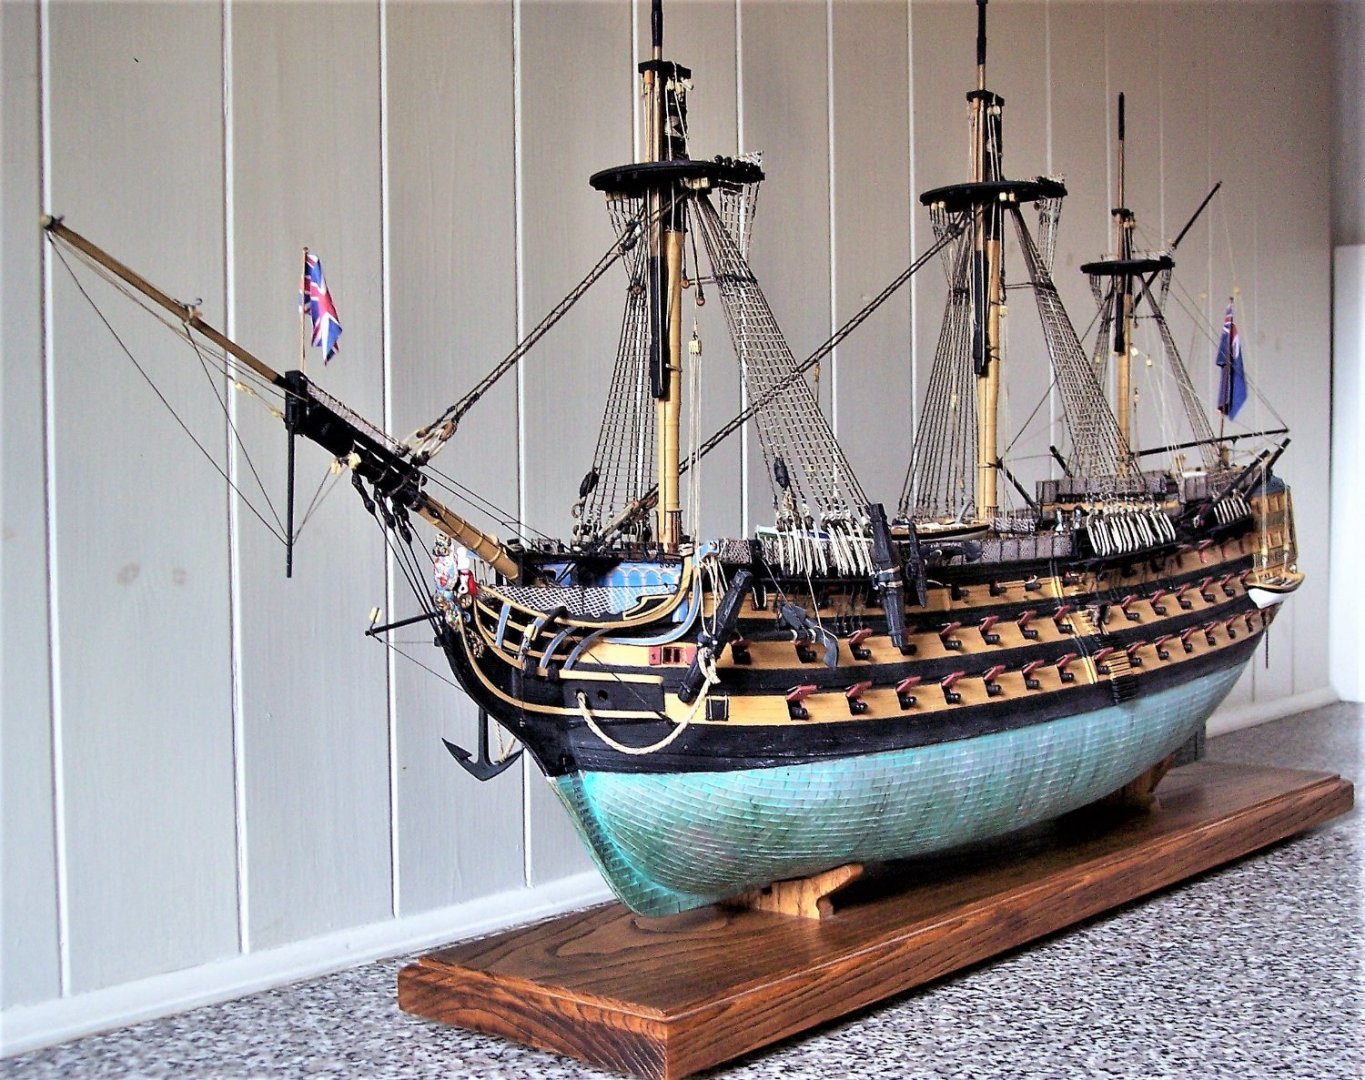
I build restricted rig or unrigged models these days for space reasons, but I do like the look of hull only Navy Board style models. I also like the look of models rigged with lower masts and standing rigging only, but without yards. That said I do have several fully rigged models so my appetite for those is sated. If you are looking for examples, here's a couple I have built in that manner. This Heller Victory built a good few years ago is an example of lower standing rigging only, it represents a significant saving of space. This build of the Syren cutter Cheerful at 1:48 scale was restricted purely for space saving reasons, but I like the look. I wasn't quite done with cutters and I did want to rig one. I chose the Vanguard models 1:64 scale build of Alert. That very long Bowsprit coupled with the yards made for a large case, that I hadn't quite appreciated would be required. Hope this helps to inform your decisions. Regards, B.E.
.thumb.JPG.c030659004f27a743c5710ca409aa083.JPG)
.thumb.JPG.536d3cc1197c2a0e18d9d8cb1ba389ed.JPG)
-
Thank you Paul, if only I could, they will be additionally tricky in my case as I have to include the Cat tail which fixes beneath the Foc'sle deck beams. I'm also trying hard not to think about the cathead supporter with its compound curves flowing seamlessly into the Ekeing rail. Fortunately I'm moving aft shortly and it will be some time before I get back to the sharp end. Cheers, B.E.
- 857 replies
-
- 1
-
-
- Sphinx
- Vanguard Models
- (and 1 more)
-
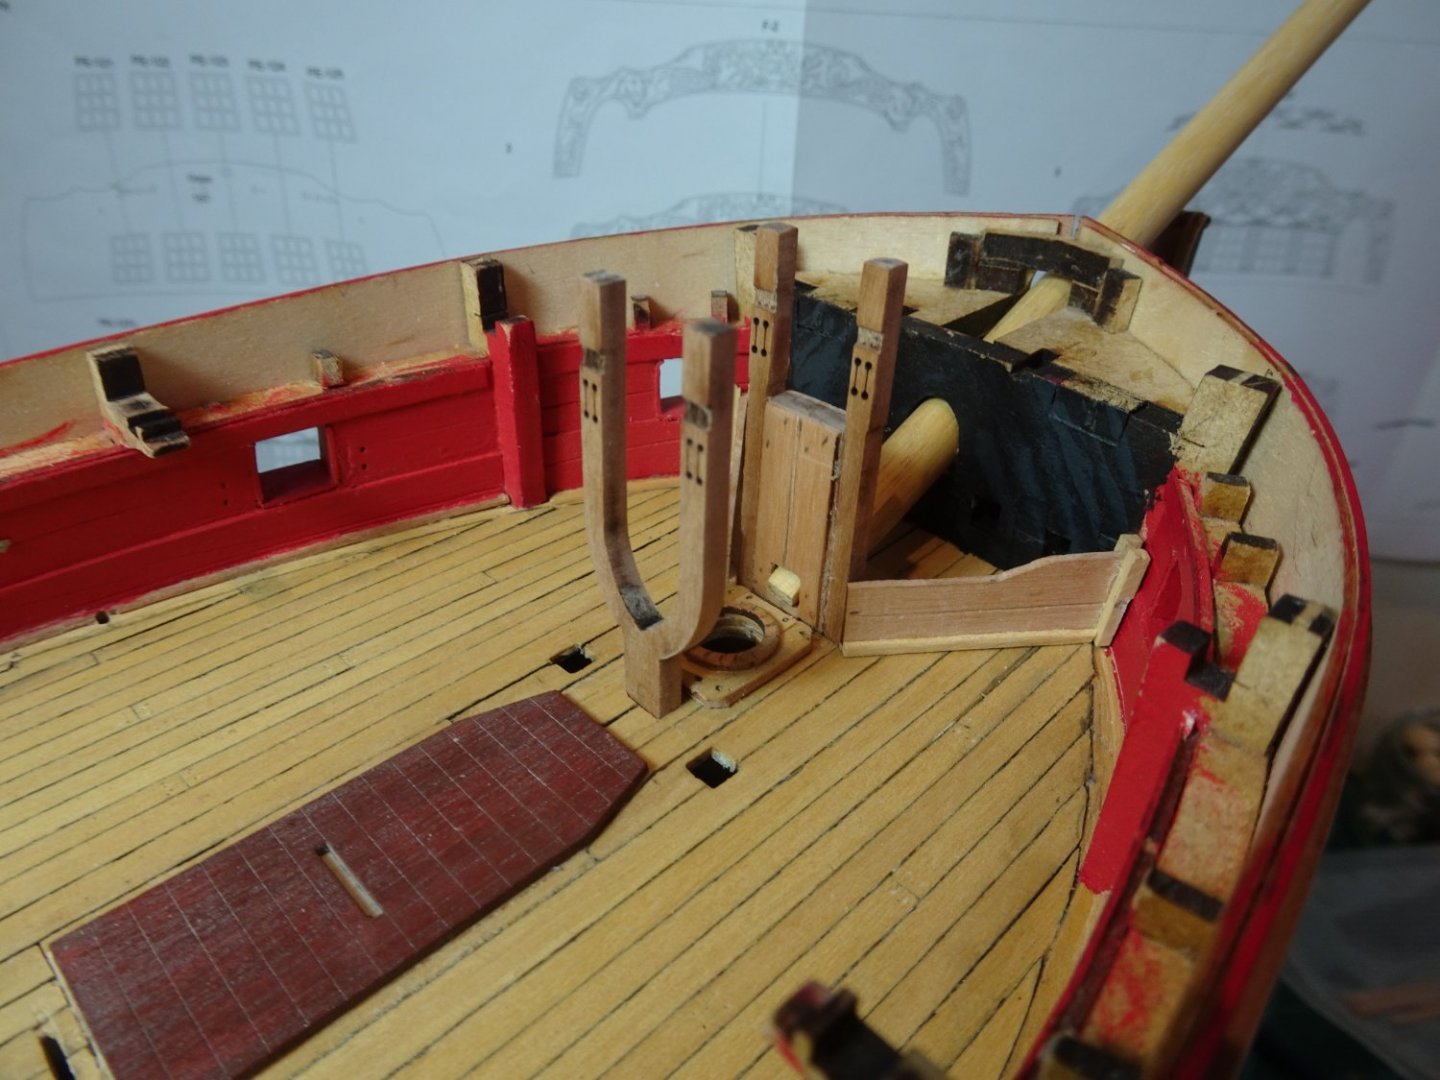
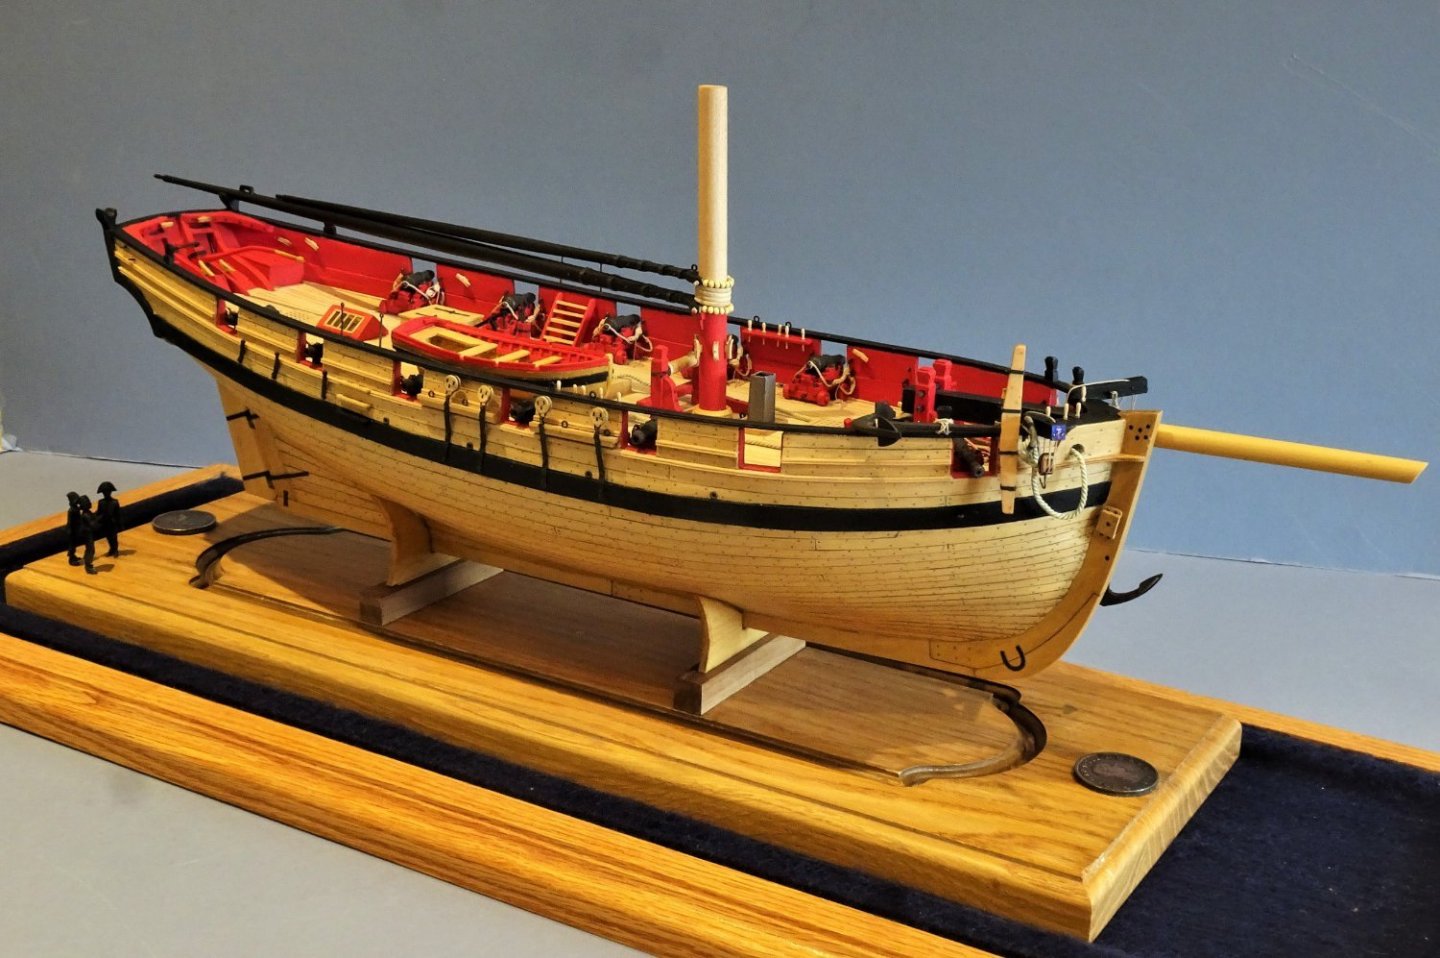
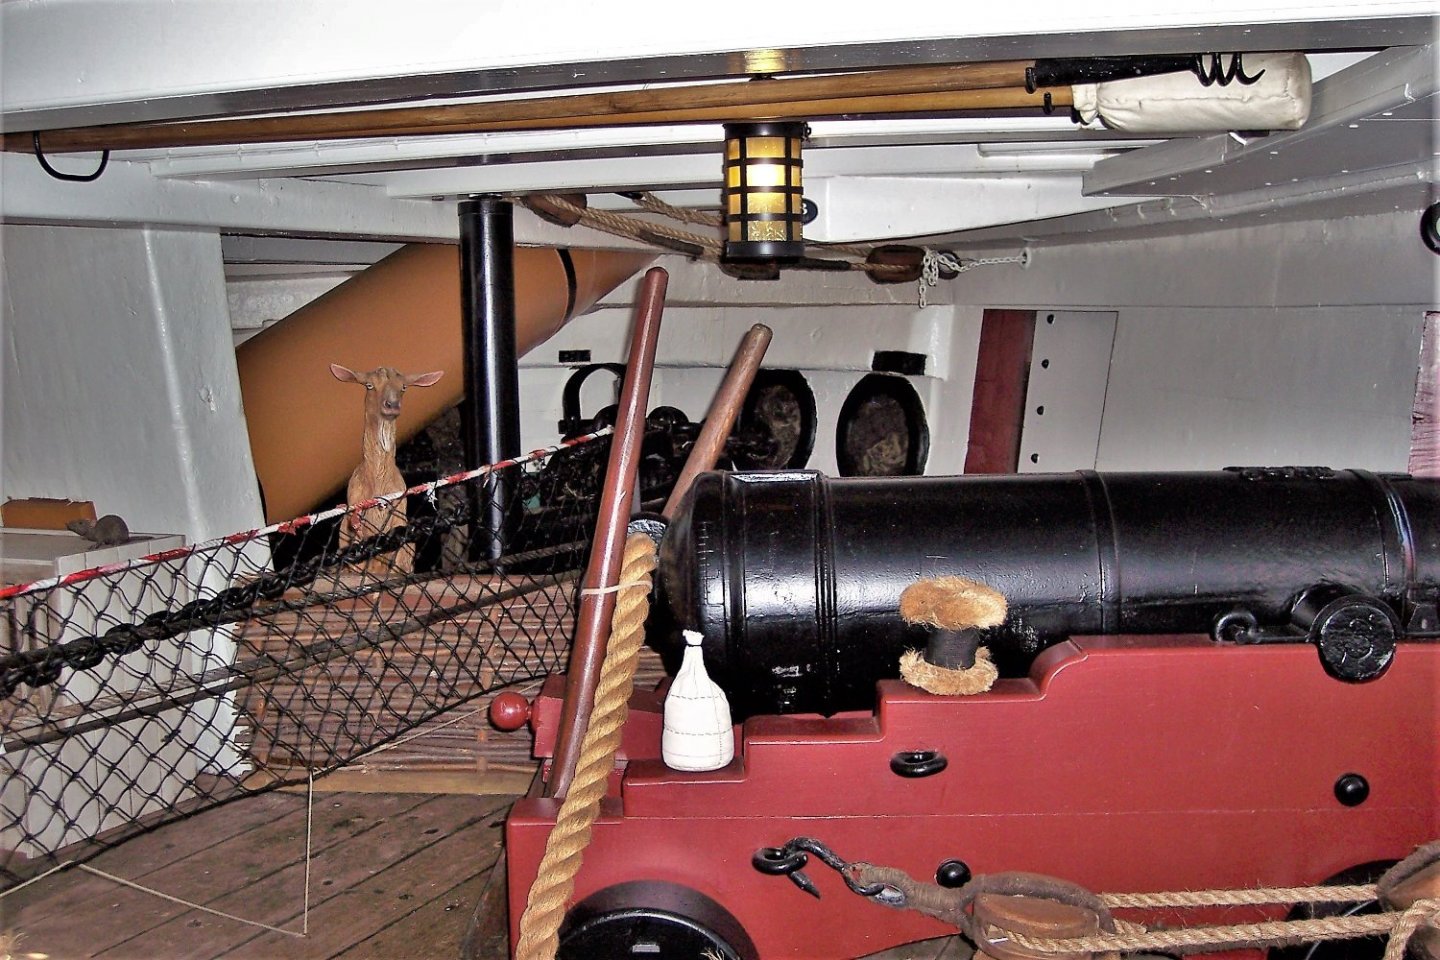
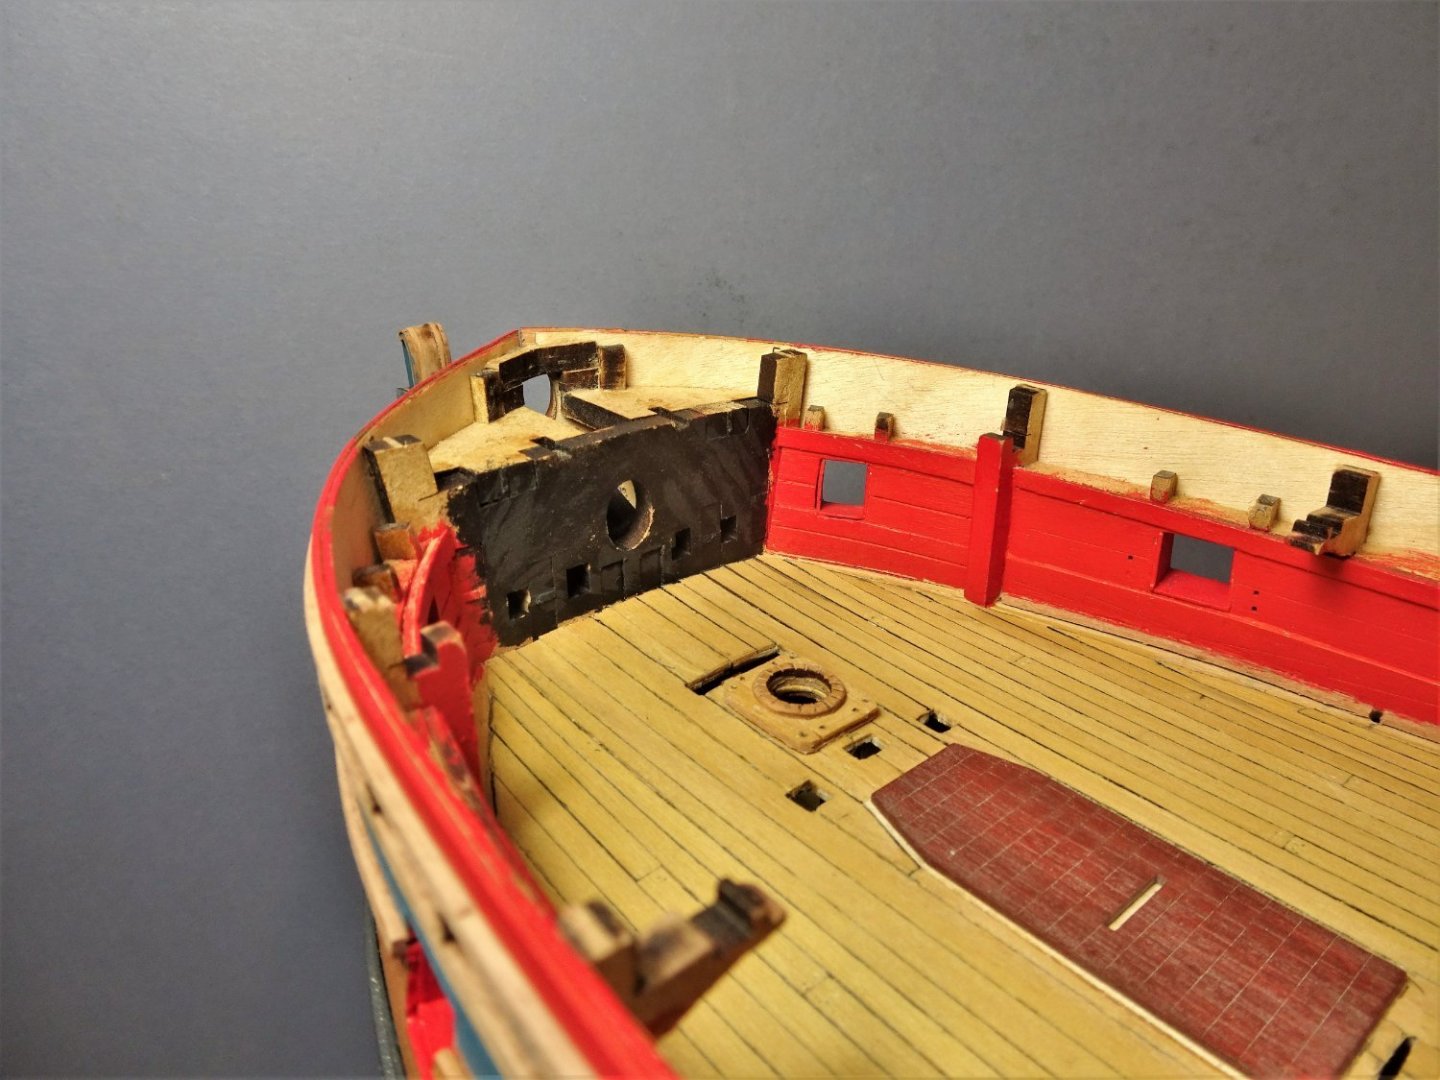
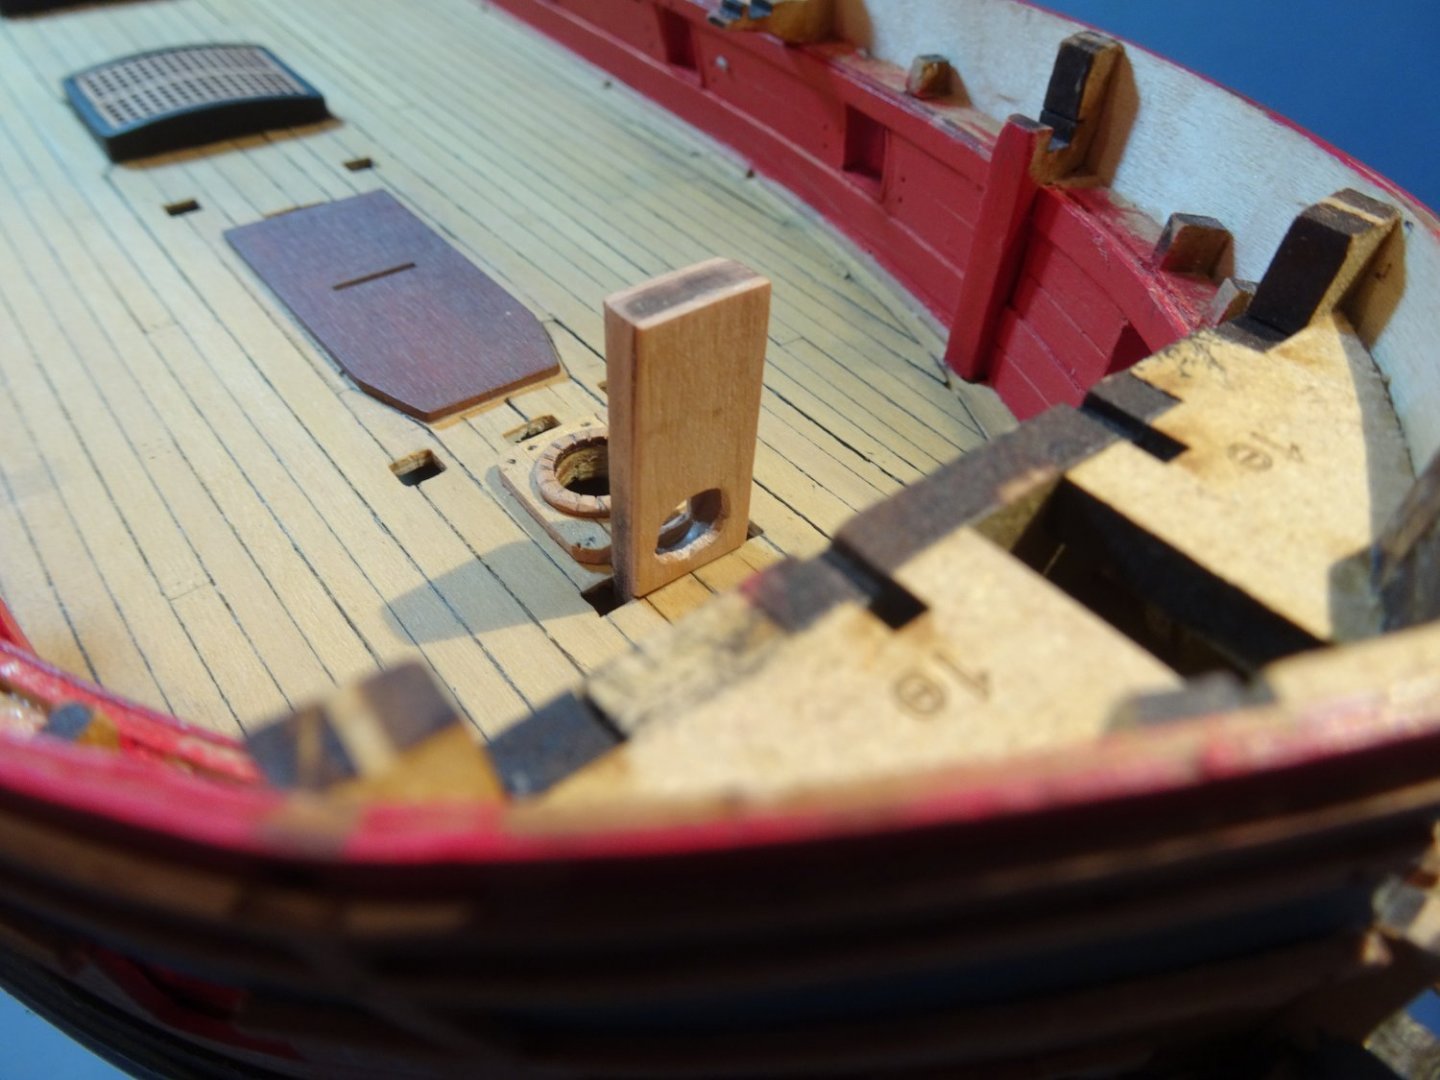
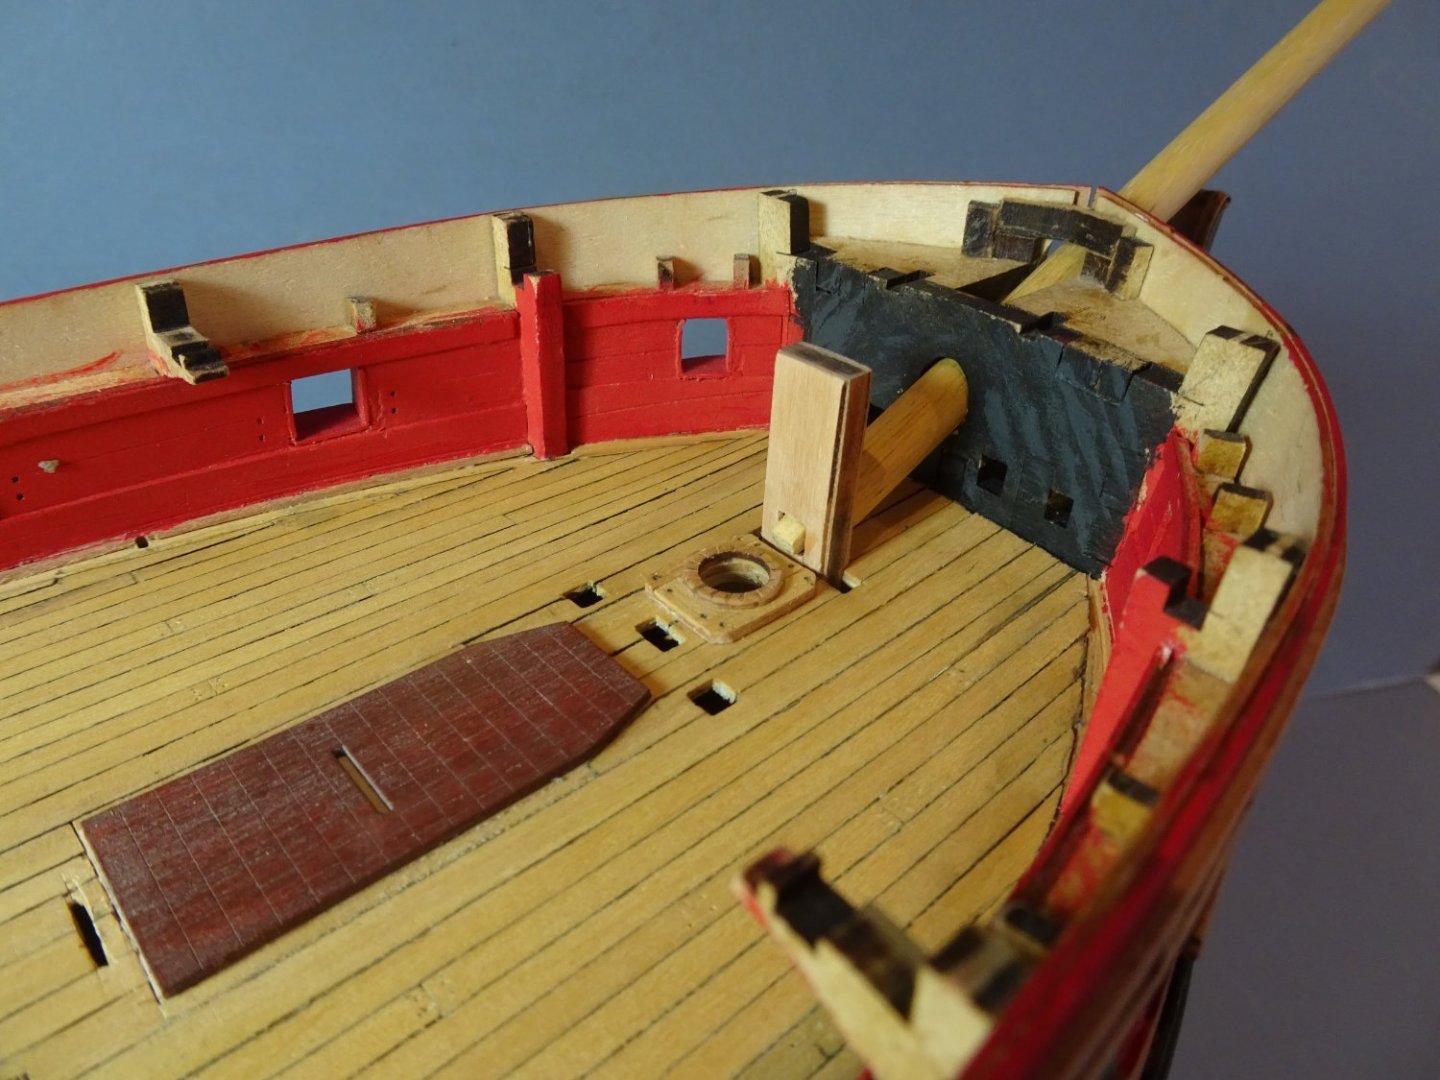
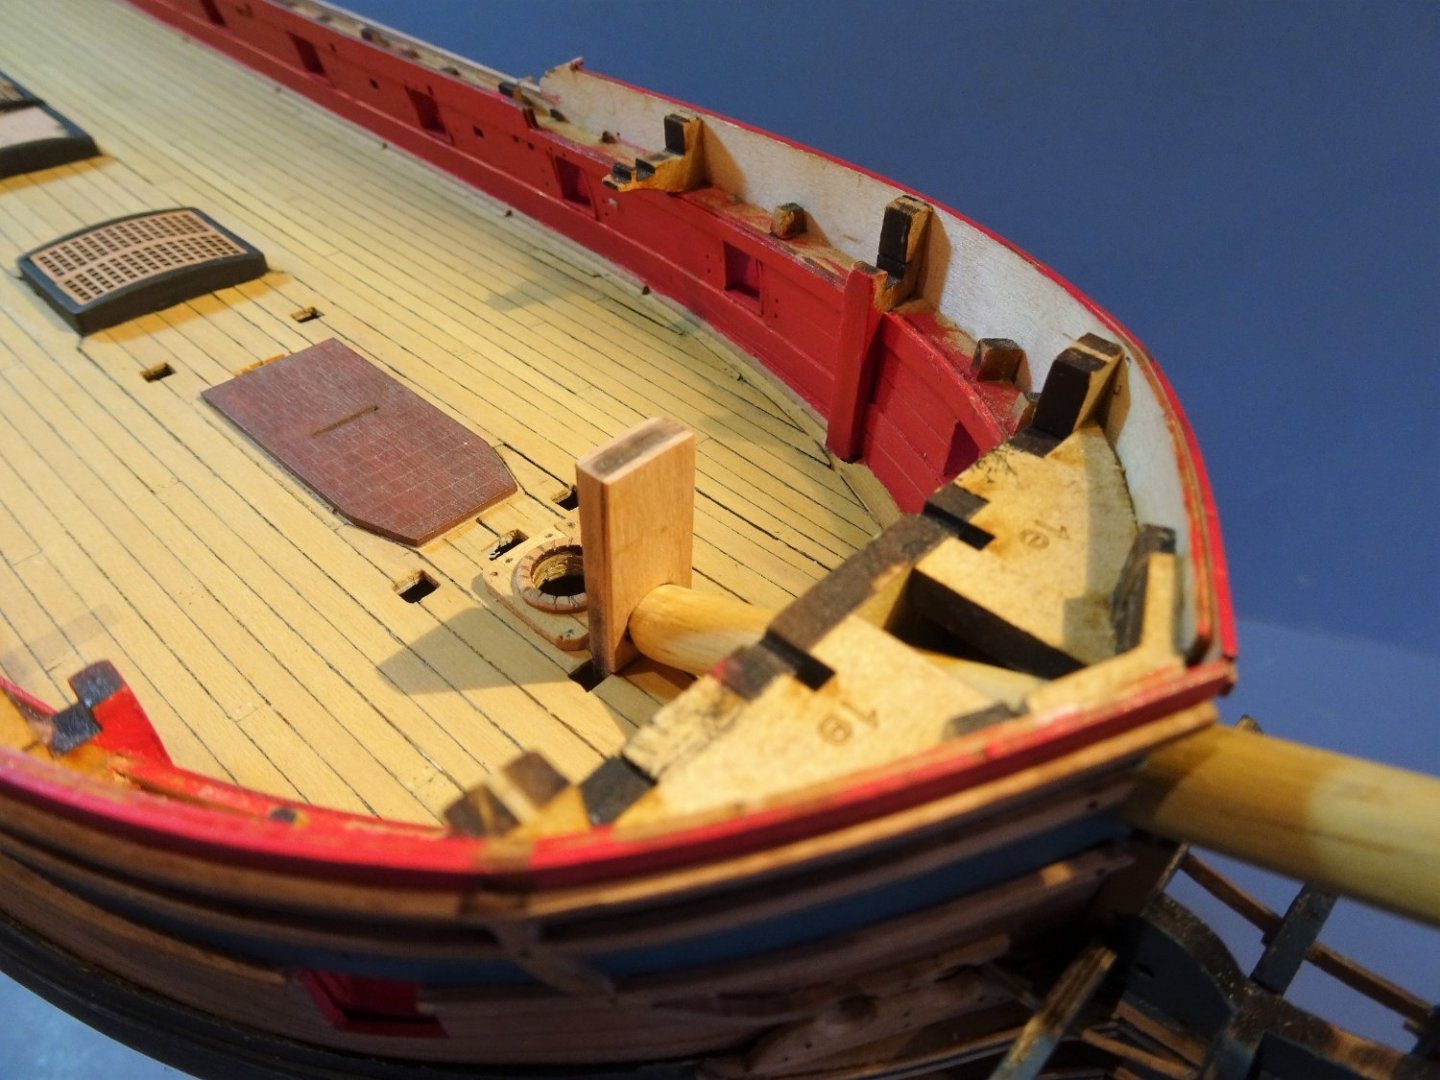
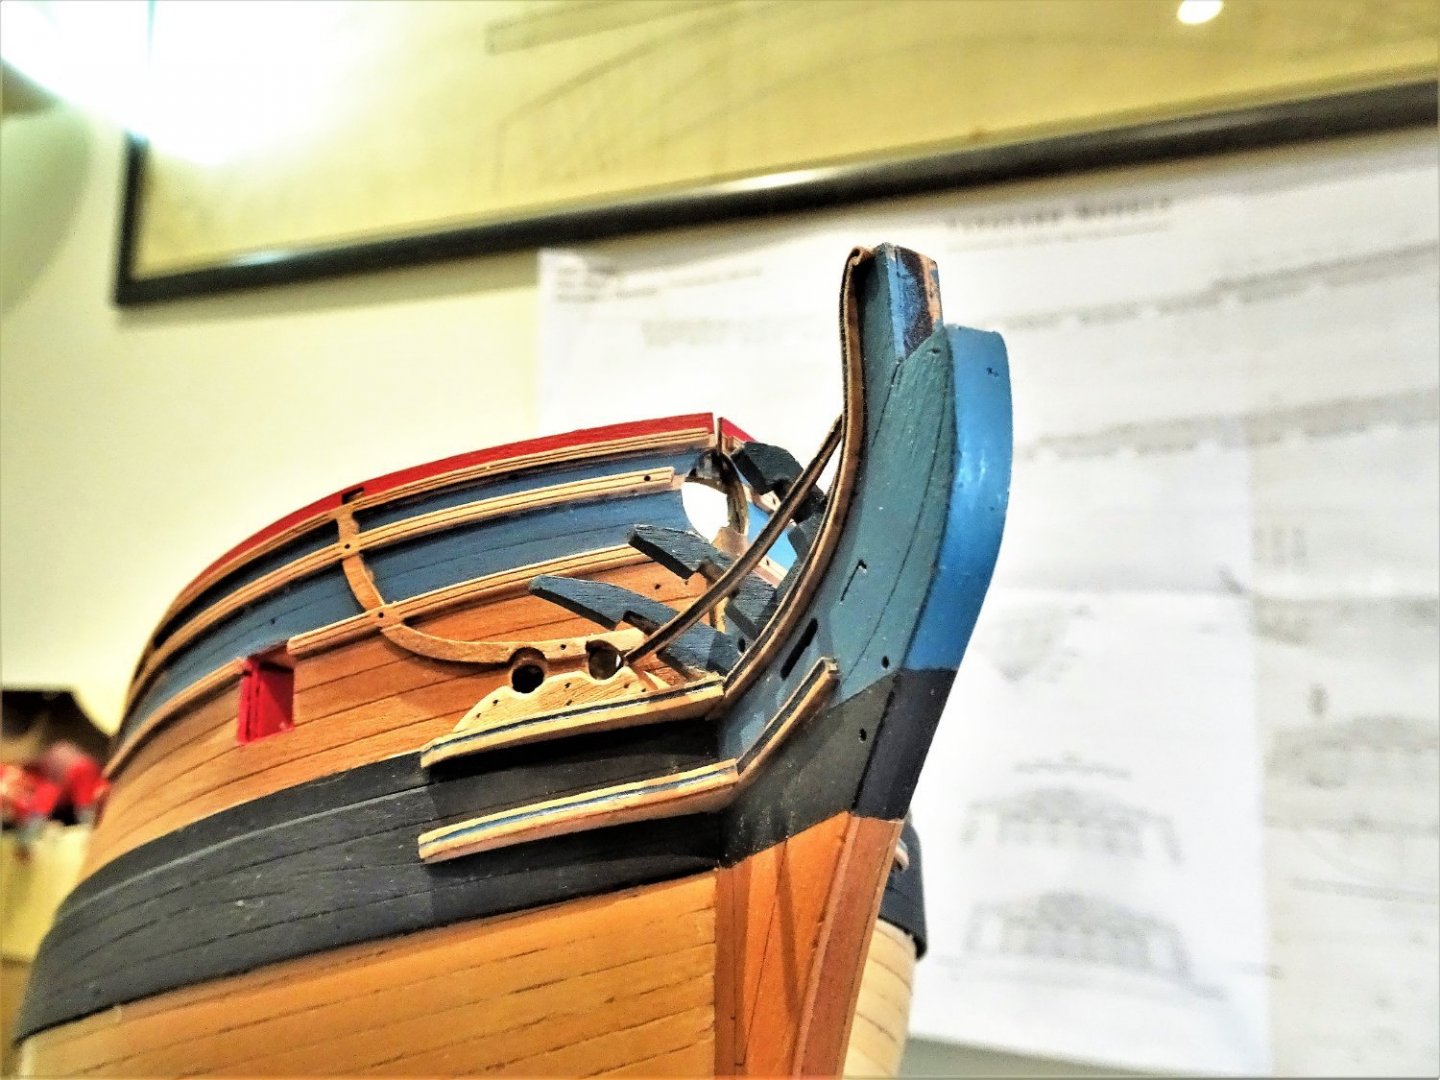
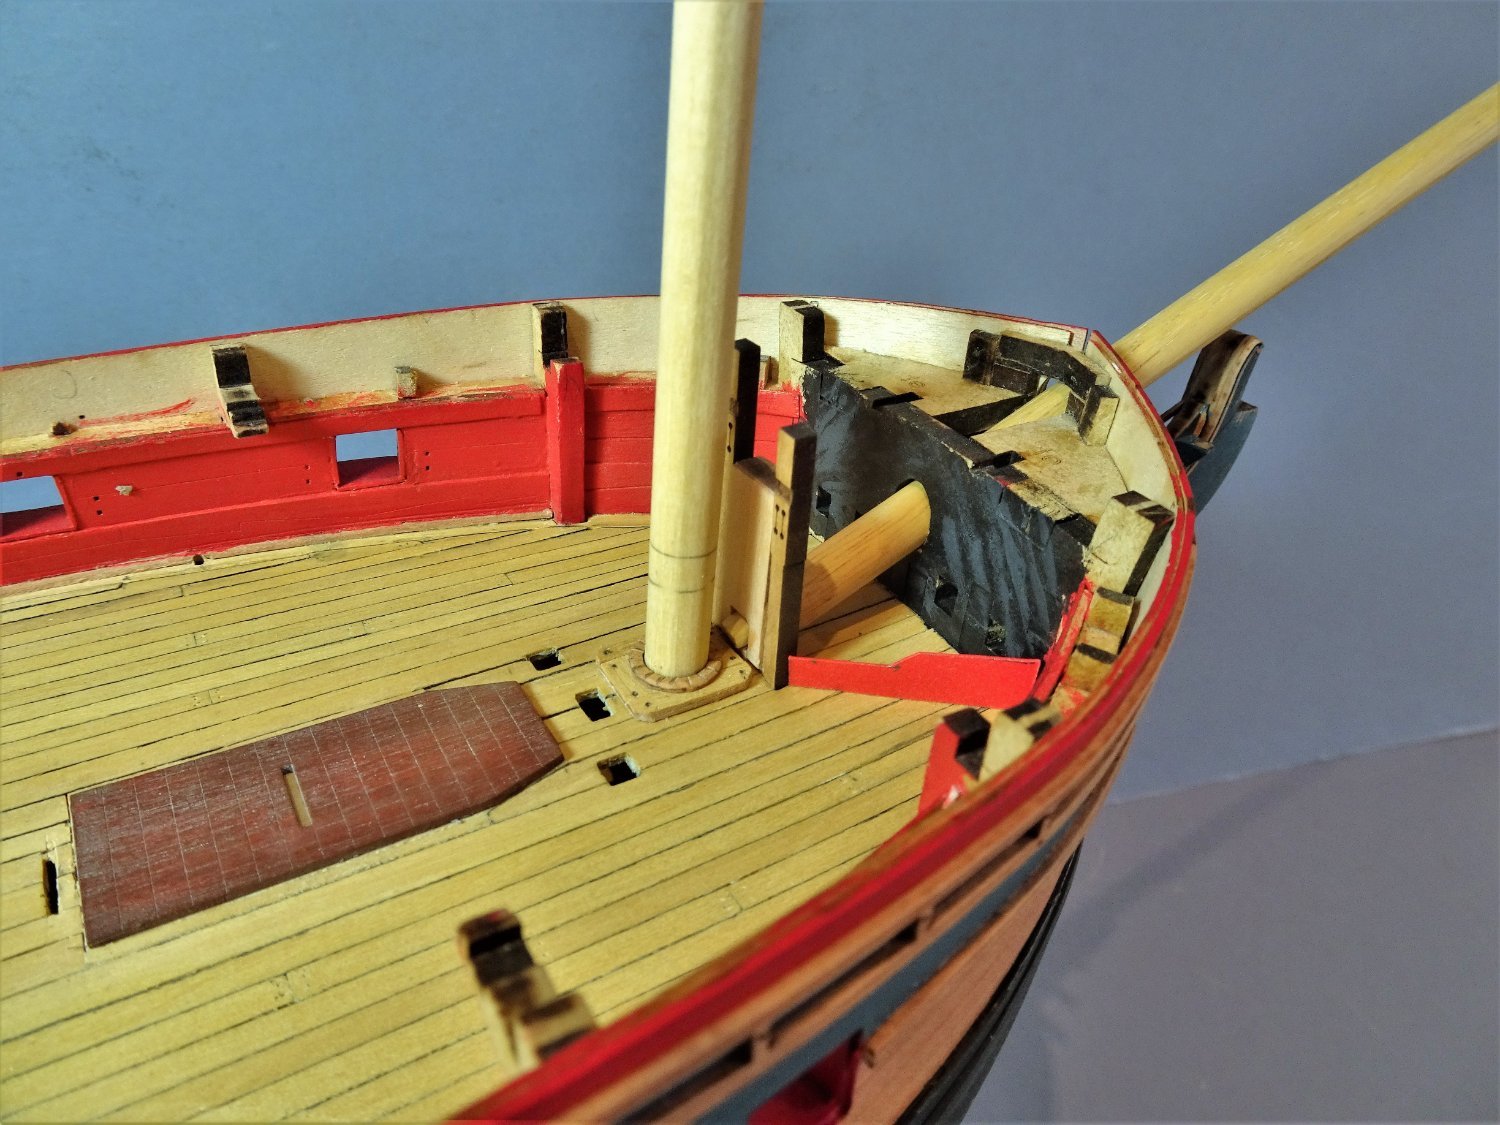
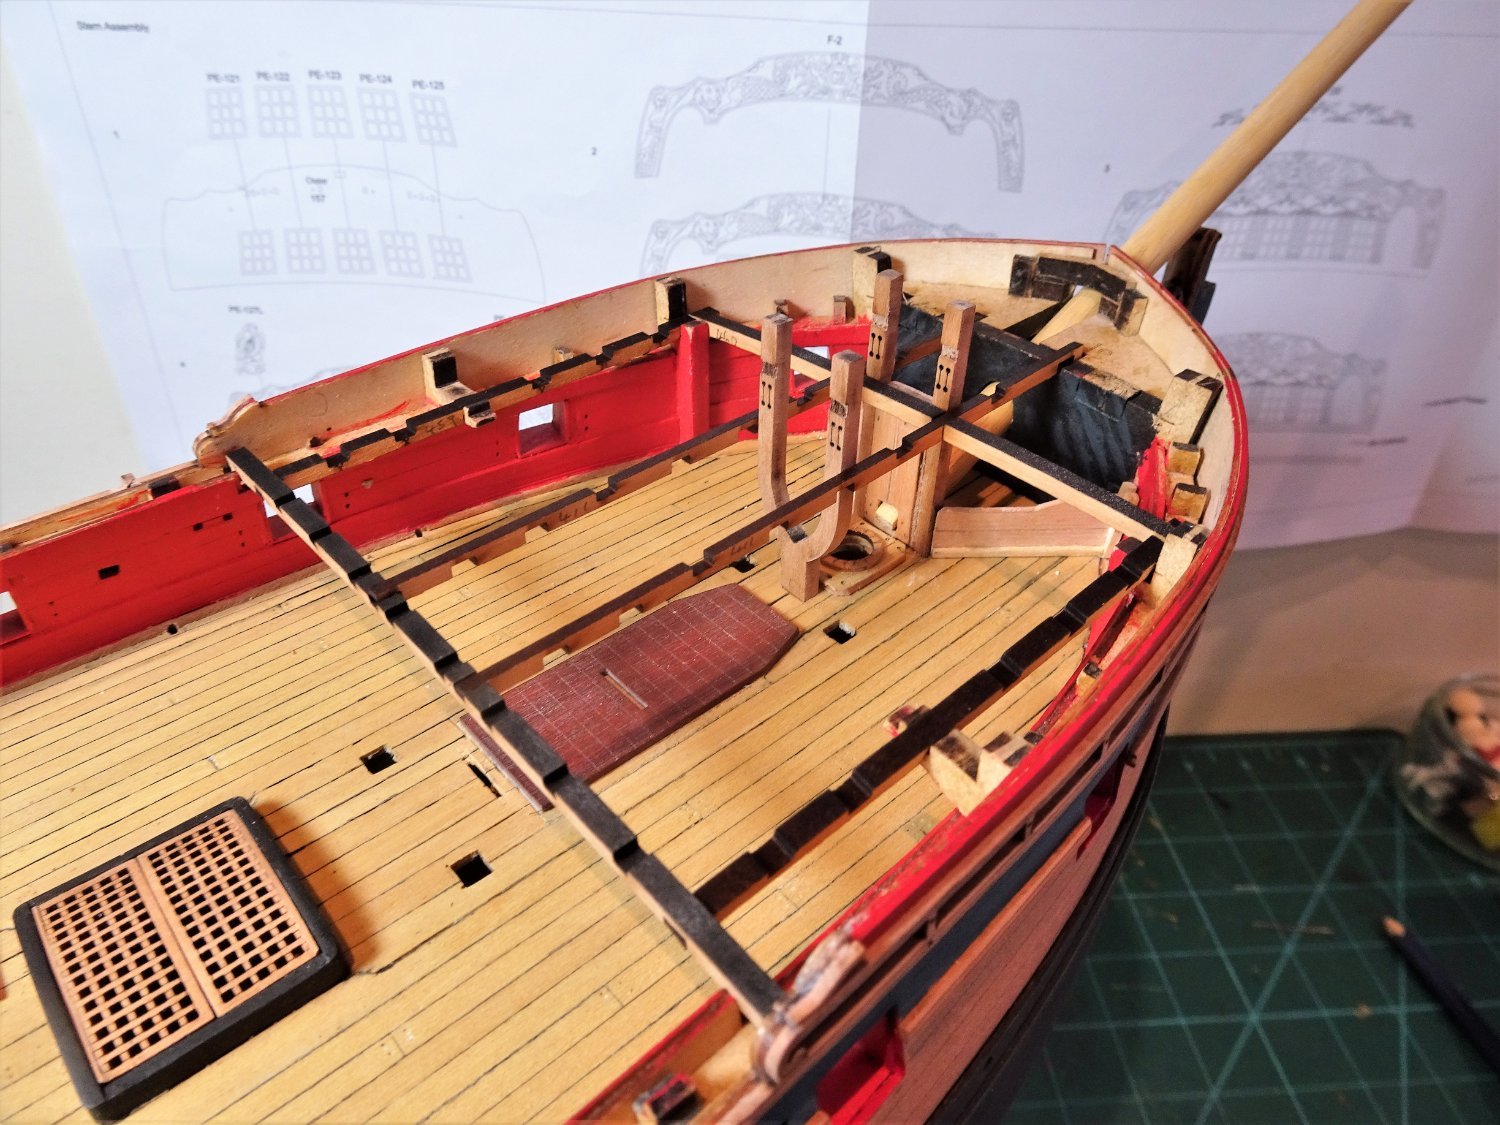
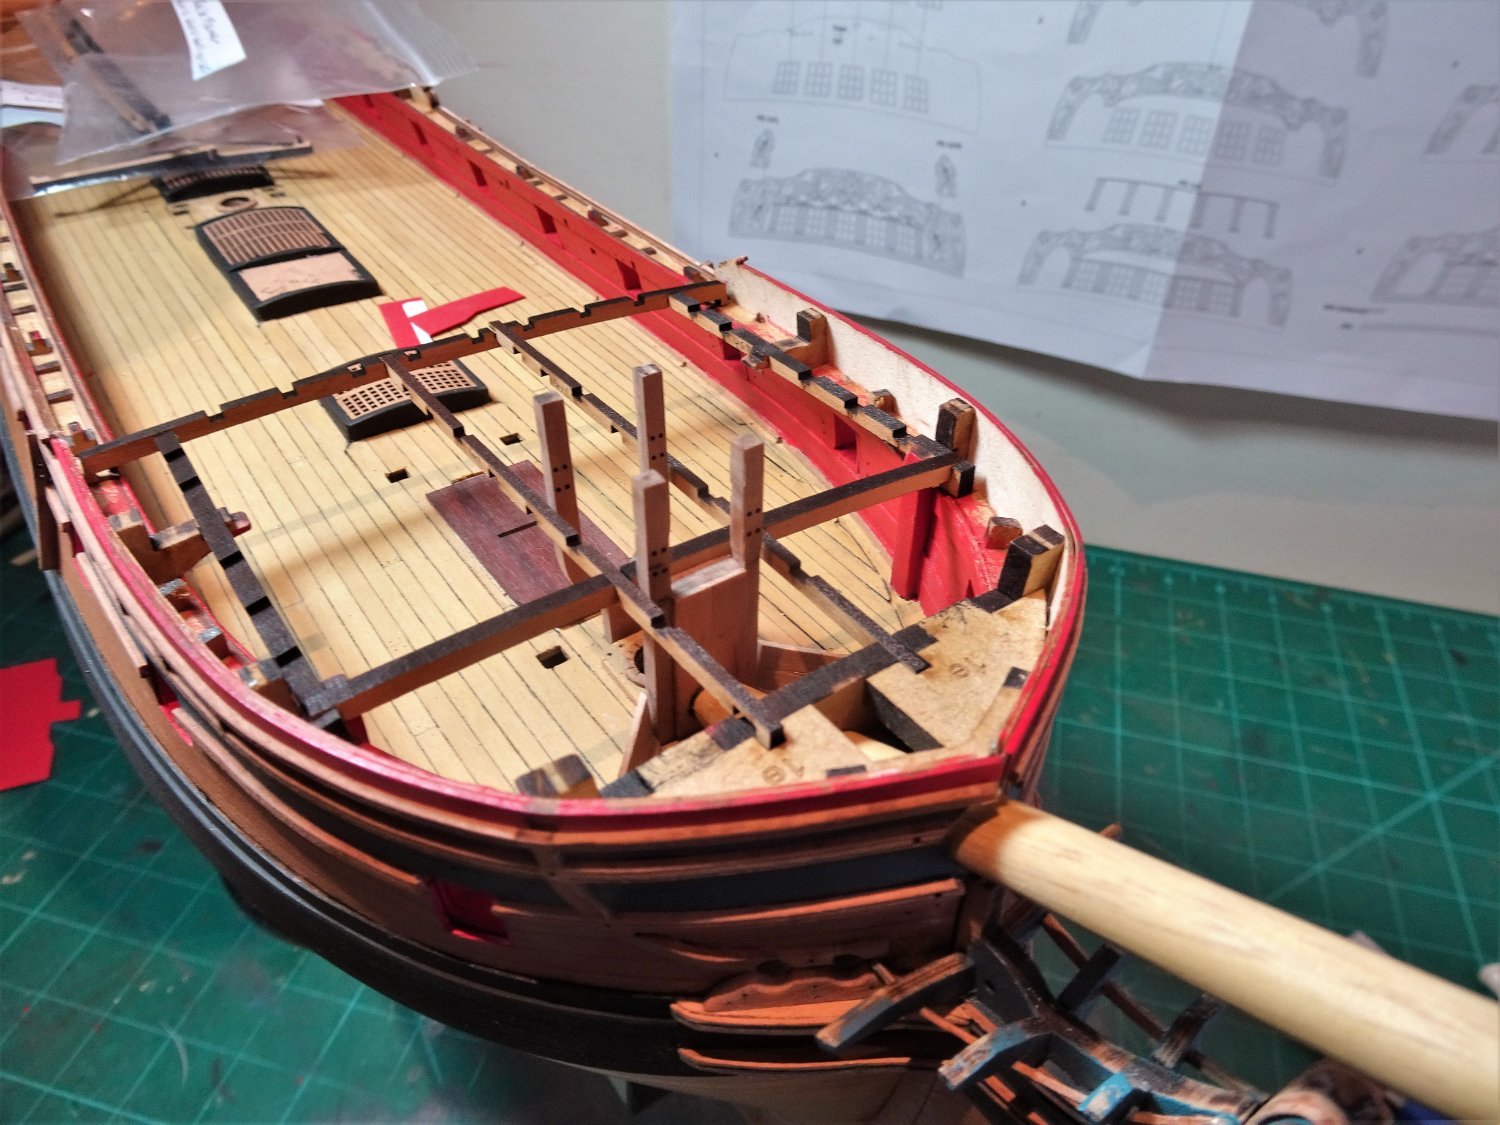
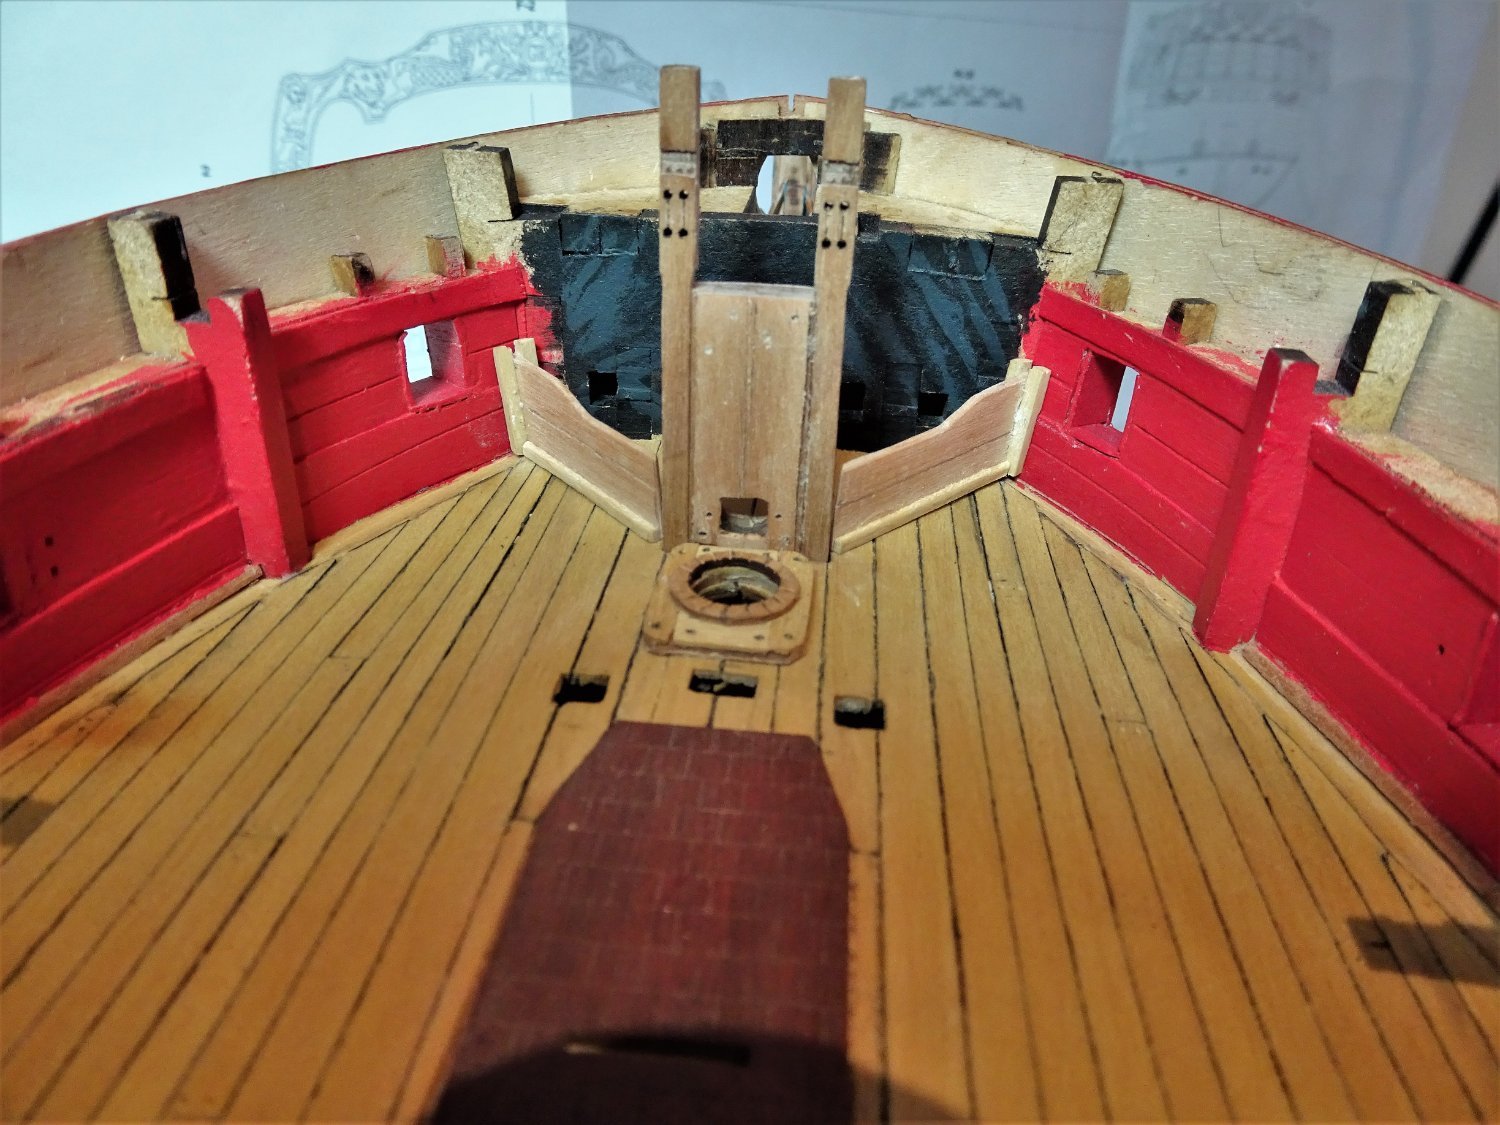
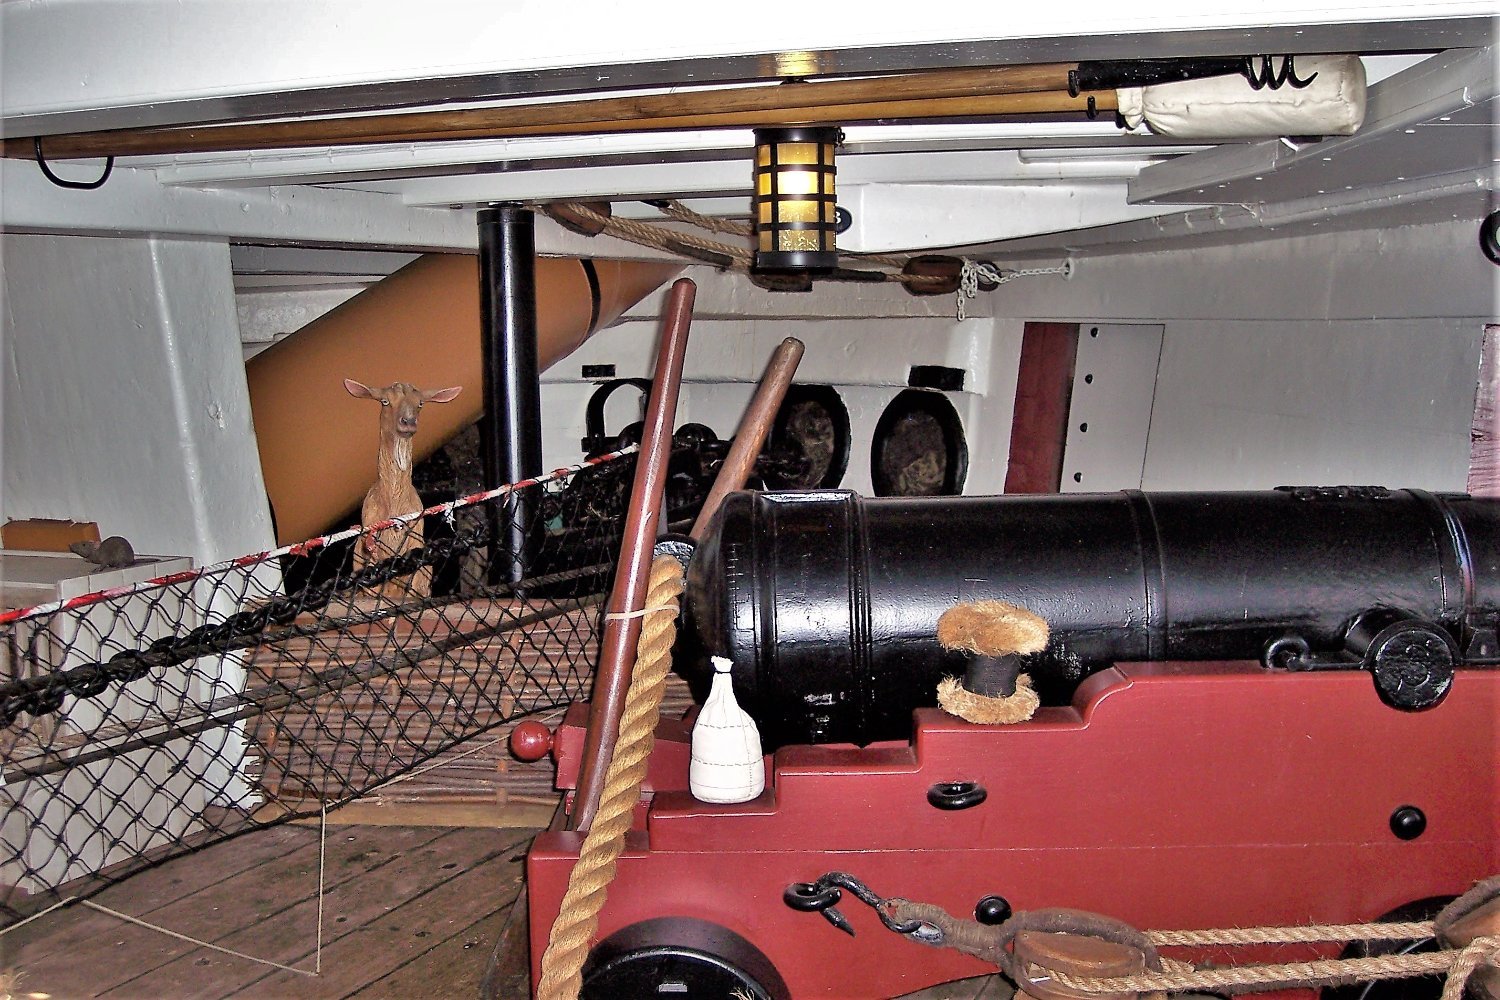
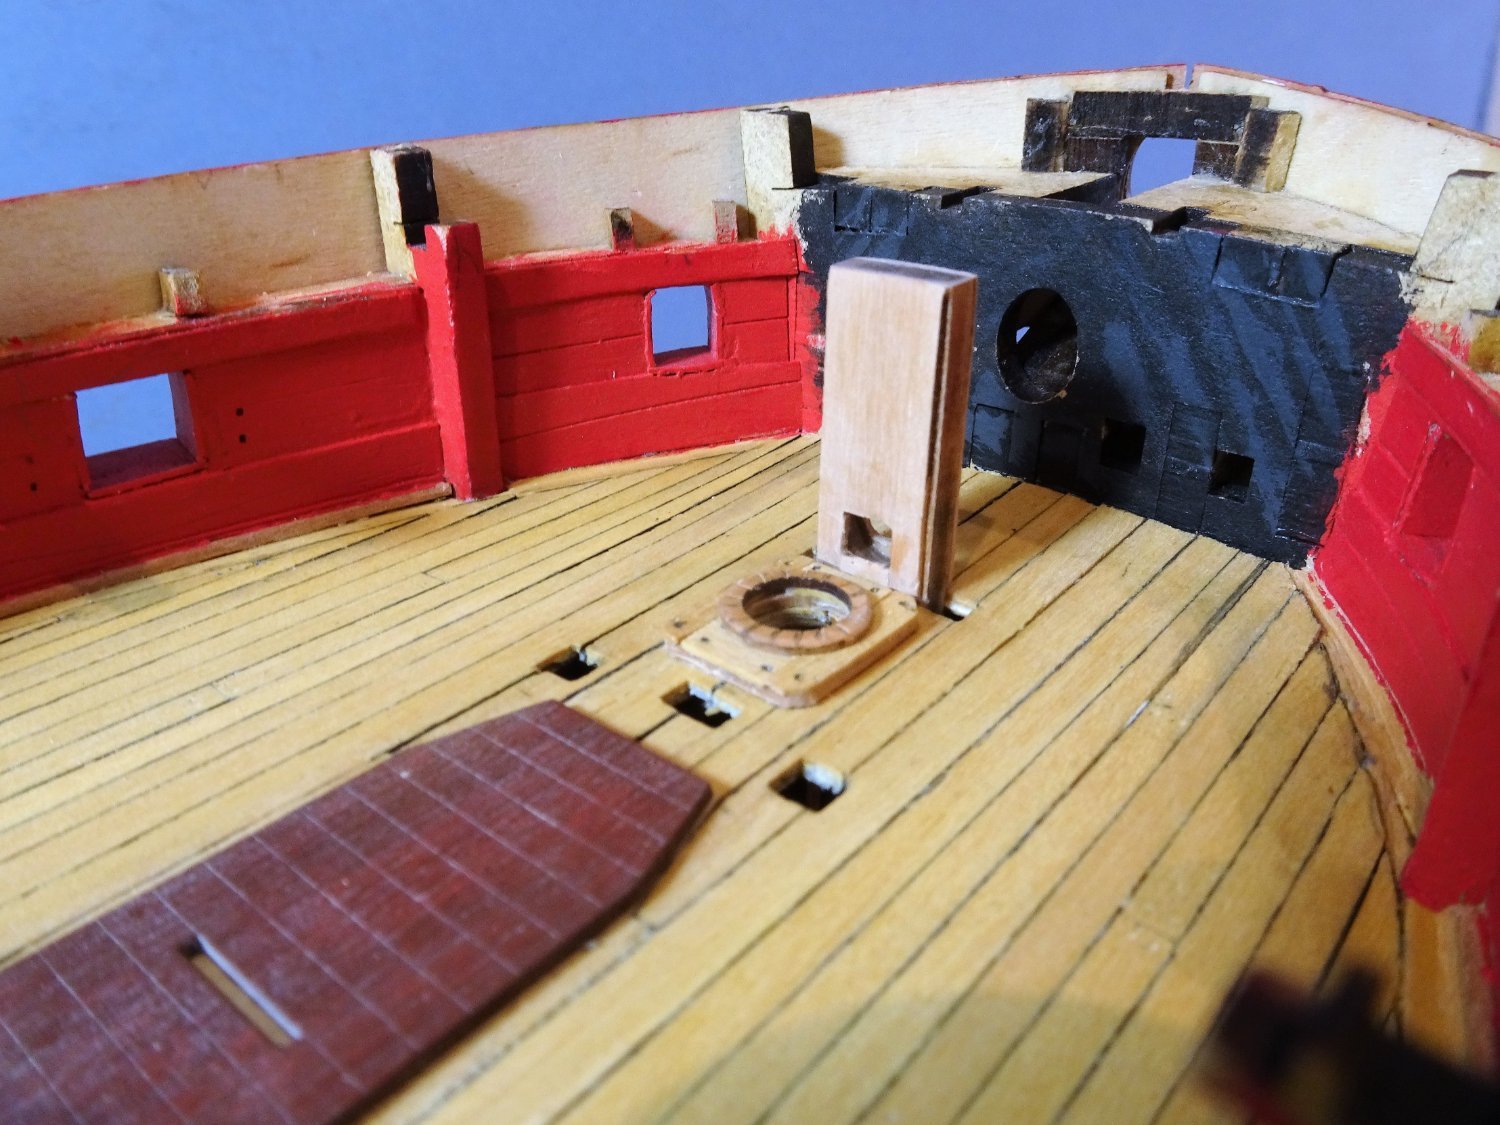
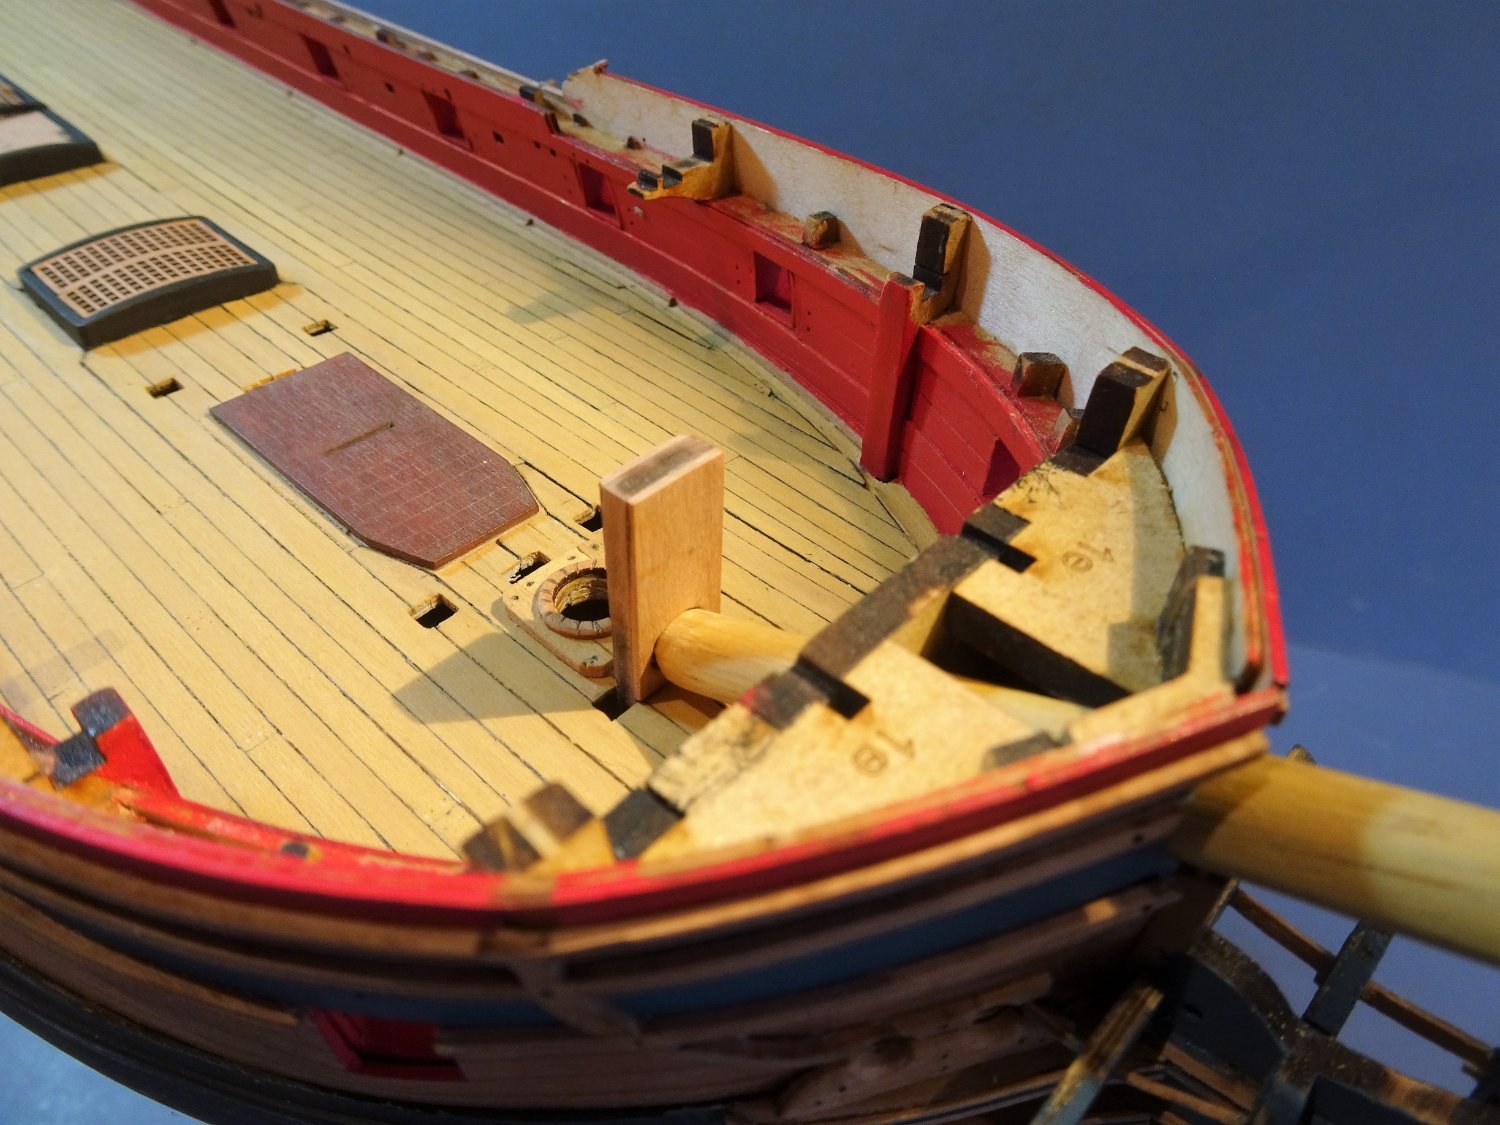
Thank you Nipper, Bob, and Kirby. Post Seventy- nine Fiddling in the Foc’sle The forward end of the internal bow area can’t be authentically represented as it is cut off by the kit bulkhead, a simplification of the kit design. 5647 This is painted black with areas of shading to hopefully give the impression of shadow in any view that may become apparent. The Foc’sle deck will also need to have sufficient planking to mask this area from view. This shot of the wonderful Winnie build by Rusty shows how the very forward end of the Bow should look. I have gone as far as I can with the basic modification by opening up the Bridle port and planking the internal area otherwise left unfinished. One other practical modification is the addition of manger boards running from the Bridle port to the Bowsprit stop. Creation of these has to be done in conjunction with the Bowsprit stop, and the Fore Topsail sheet Bitts against which they fix. The Bowsprit also has to be considered in fitting the Bowsprit stop. 123 This shot of Trincomalee demonstrates the arrangement. The low manger boards can be seen (complete with curious goat) and the square tenon of the Bowsprit. Also of interest is the tackle for the Bridle port lid running beneath the deck beams. In the kit the arrangement the stop is simplified with a hole into which the Bowsprit fits. 5648 The stop is faced with some 0.8mm pear and the tenon mortise cut. 5649 At the forward end the hole is adjusted to take the Bowsprit. This is also a simplification as the tenon mortice only should run thro’ the stop, but the effect should look the same. 5651 The tenon in the heel of the Bowsprit slots into the stop. 5654 From forward. 5652(2) I ensure that the Bowsprit slides smoothly into place with the minimum of effort. This will be visible thro’ the un-planked beams. In my next post I will be looking at Manger Boards. B.E. 12/02/22

.thumb.JPG.ab2deda4d3cd22bd7e5357f9daca241c.JPG)
- 857 replies
-
- 22
-
-
- Sphinx
- Vanguard Models
- (and 1 more)
-
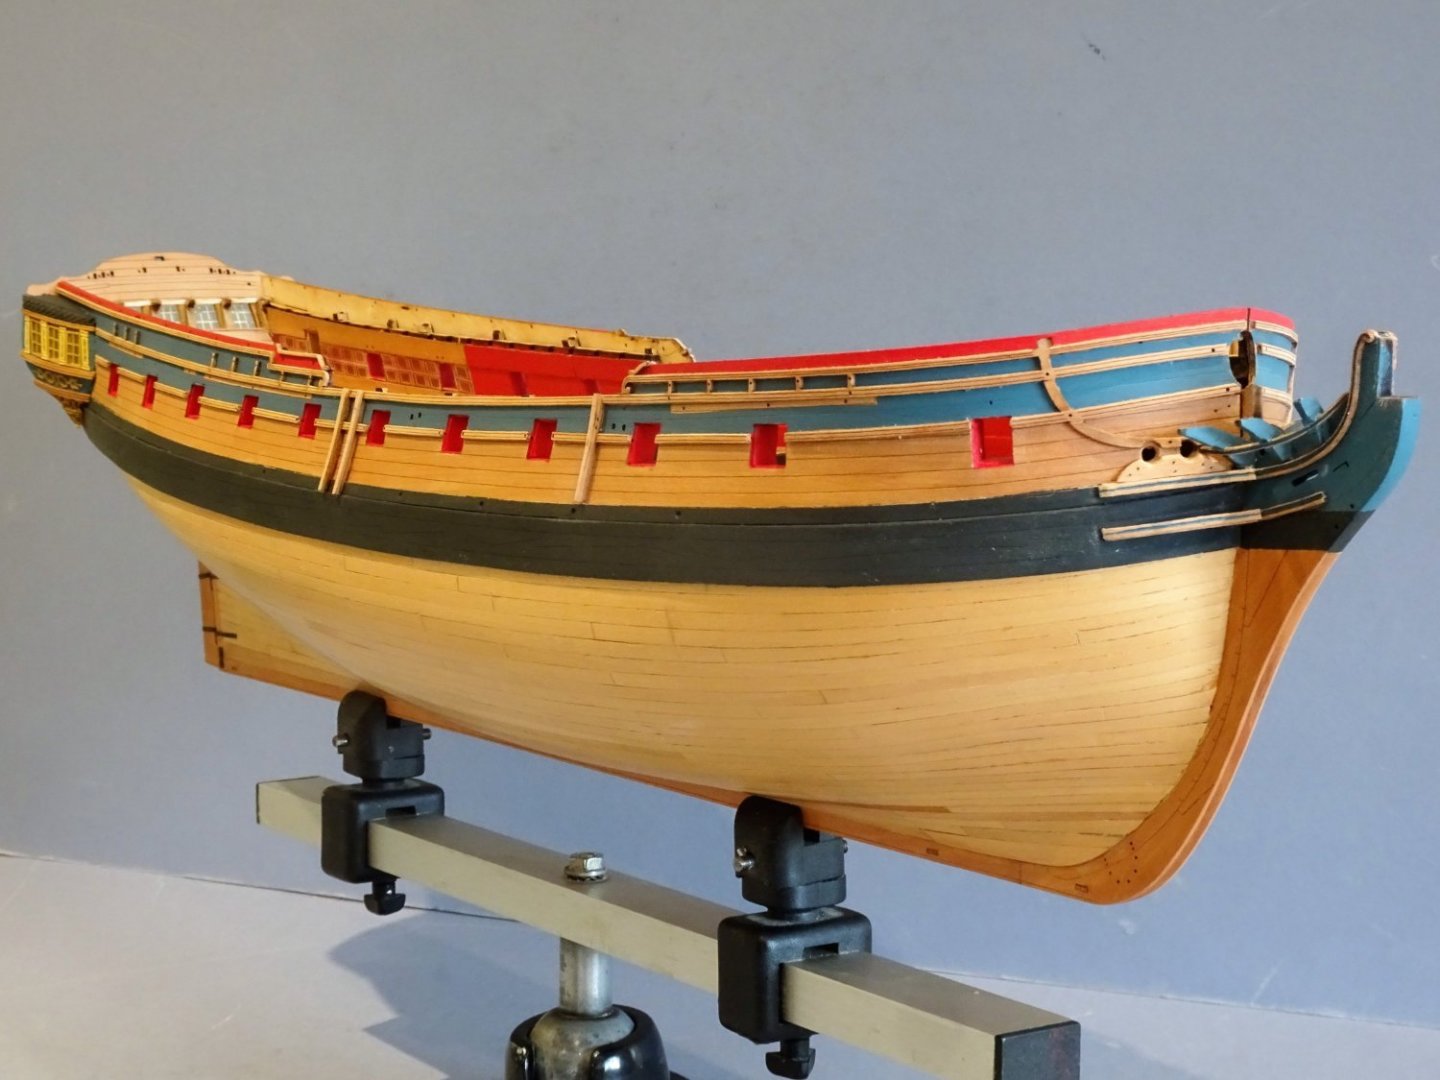
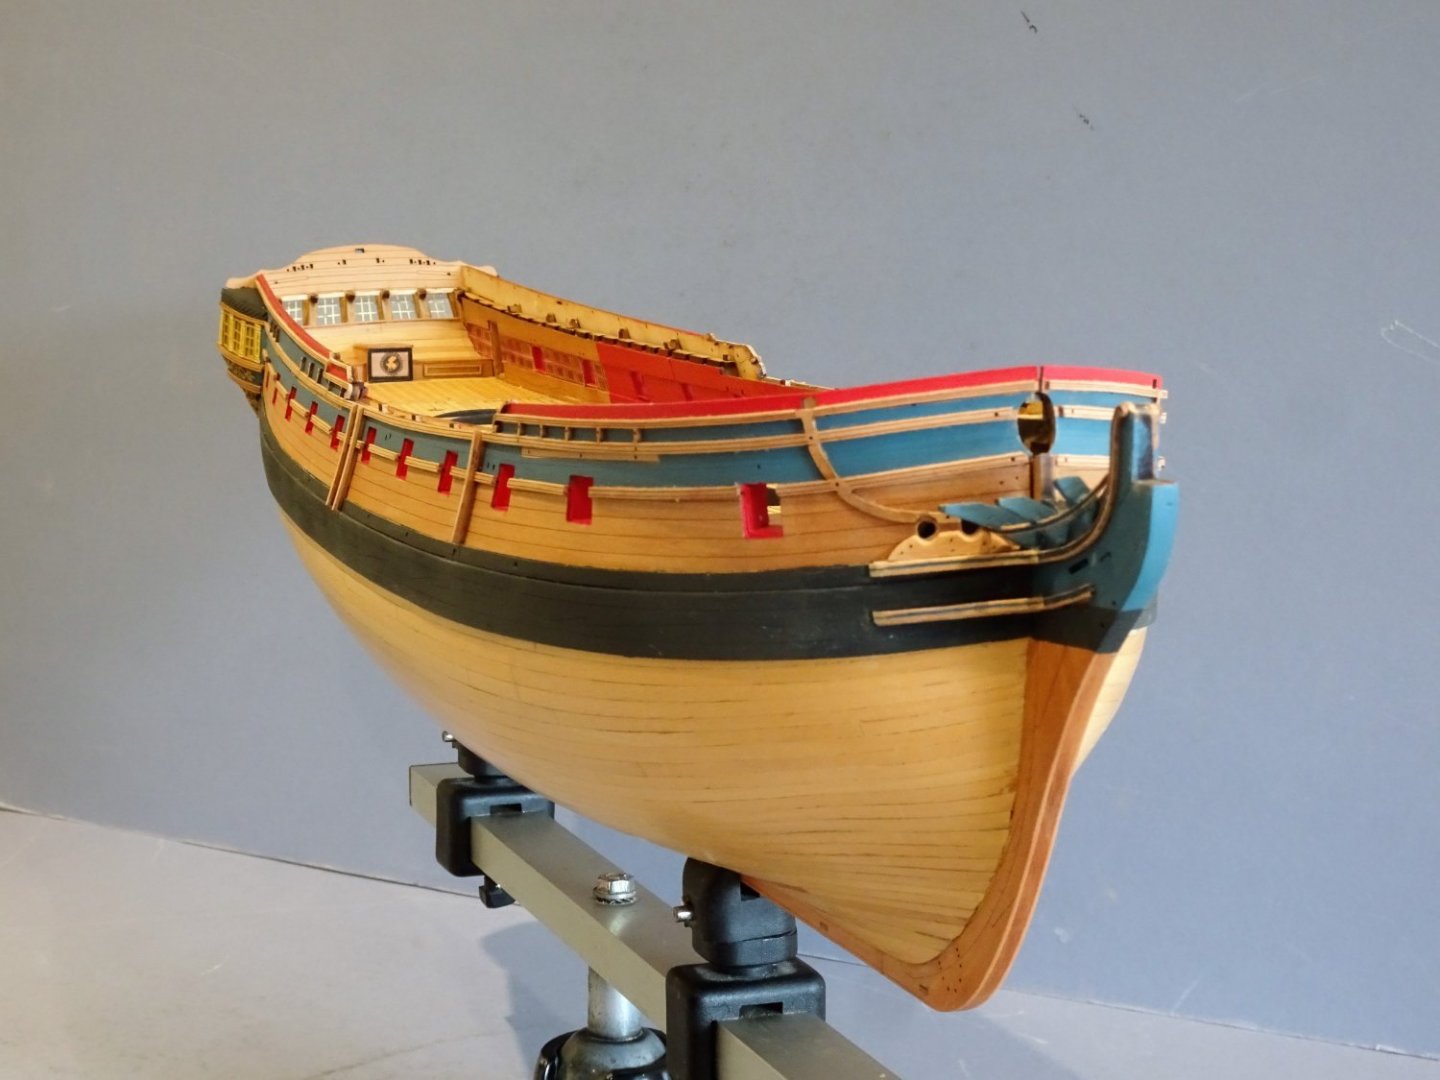
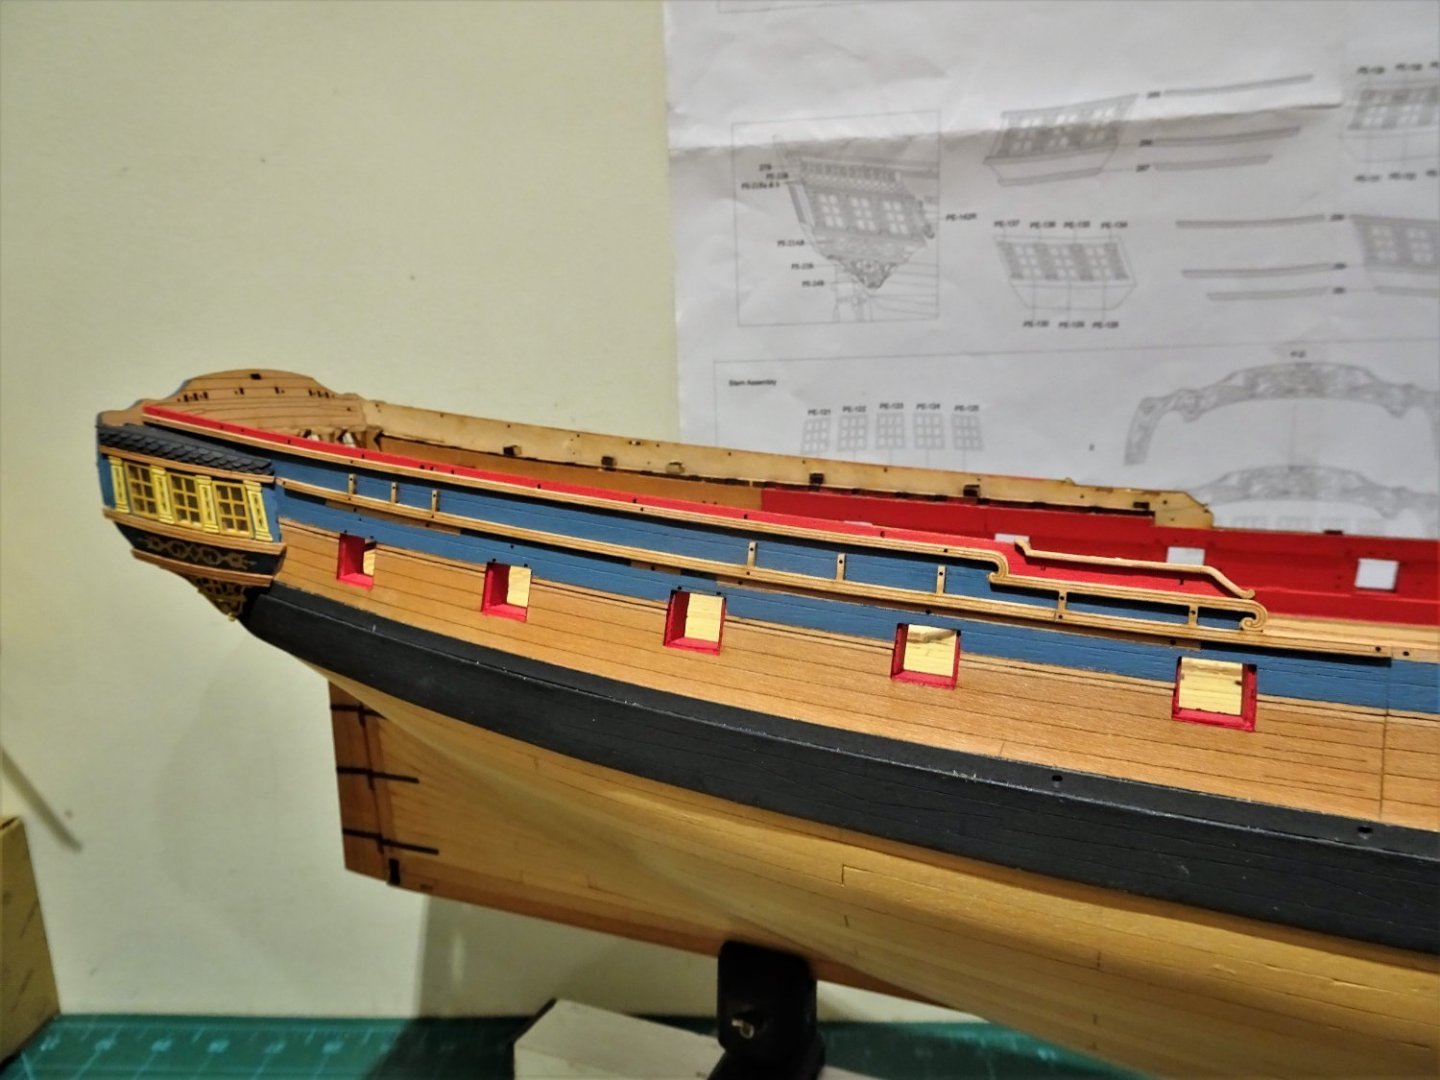
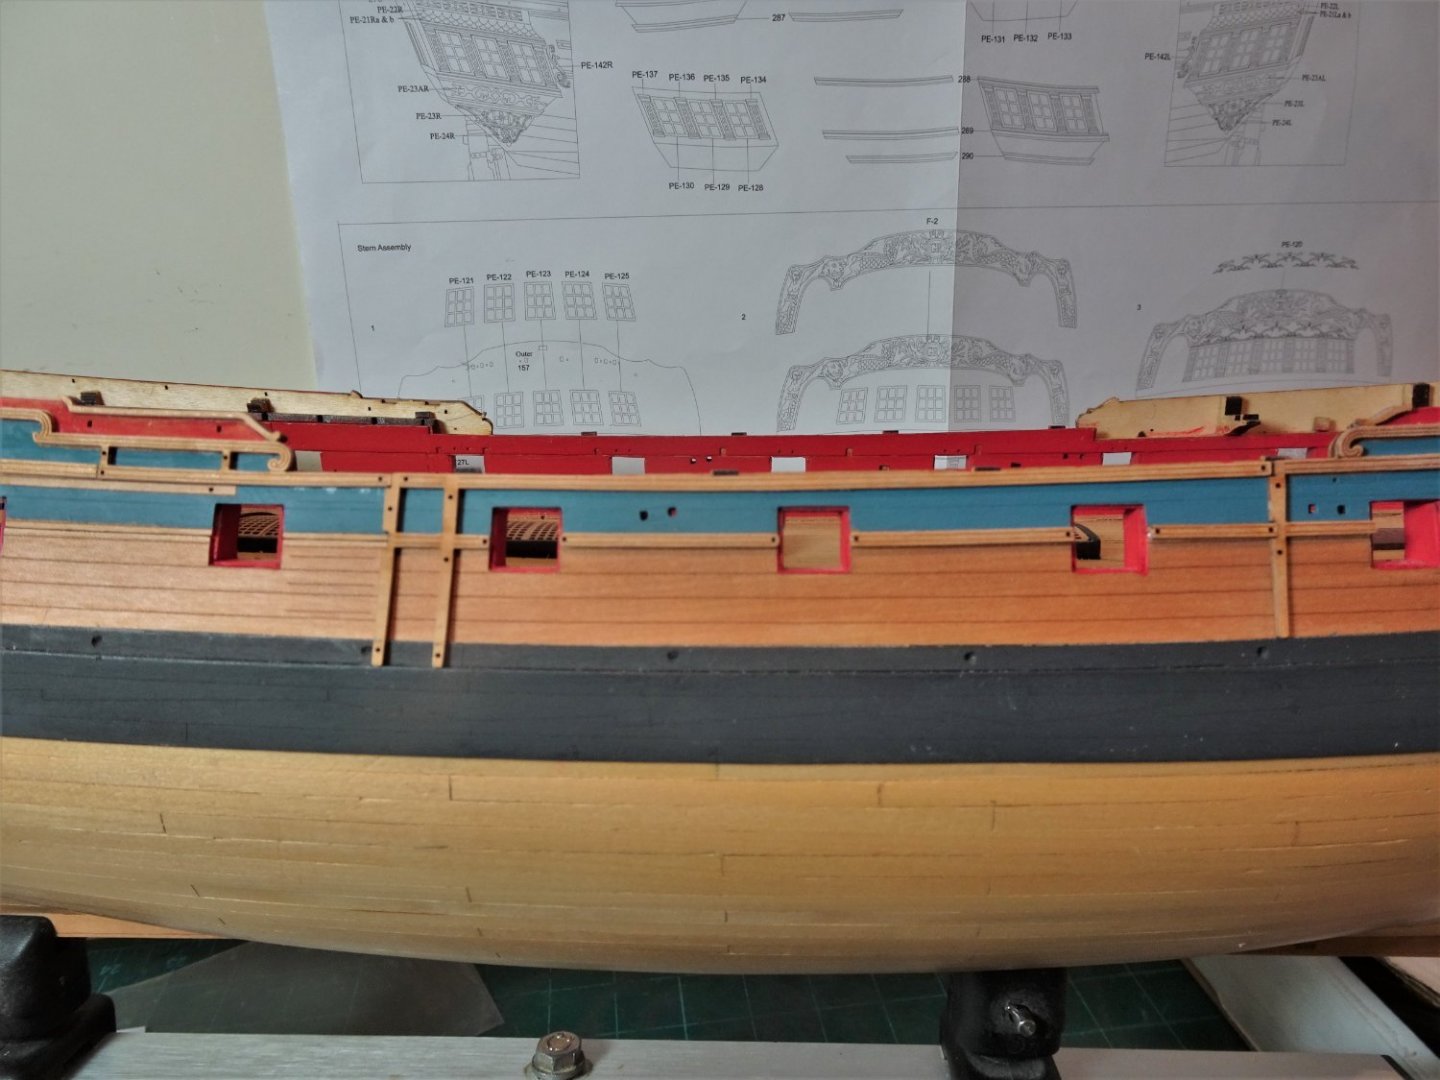
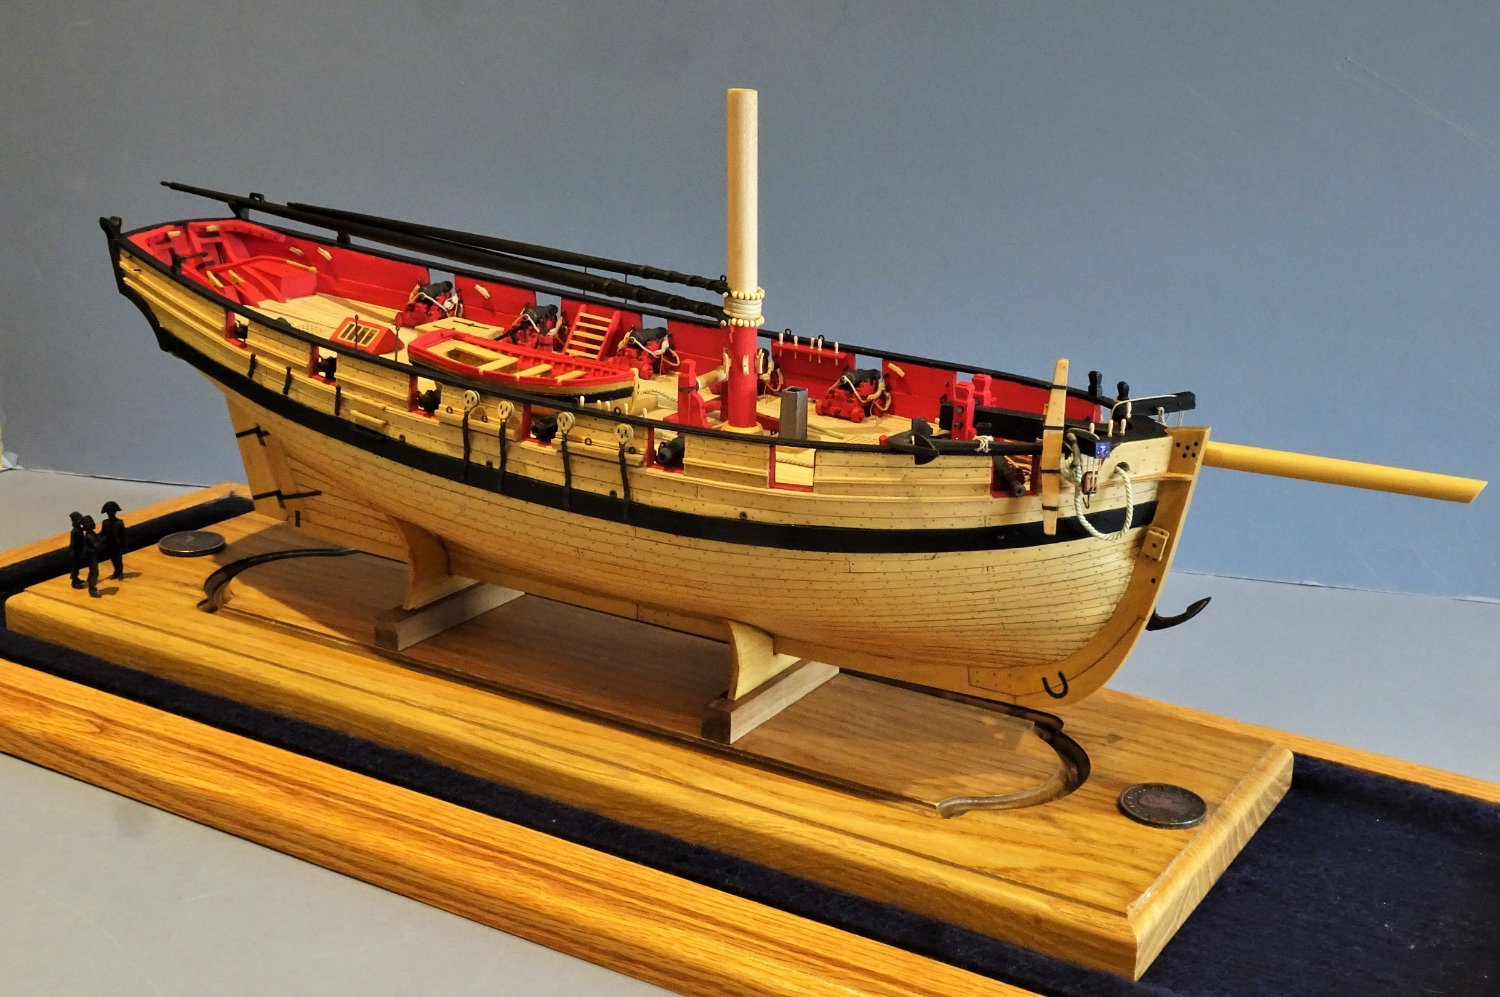
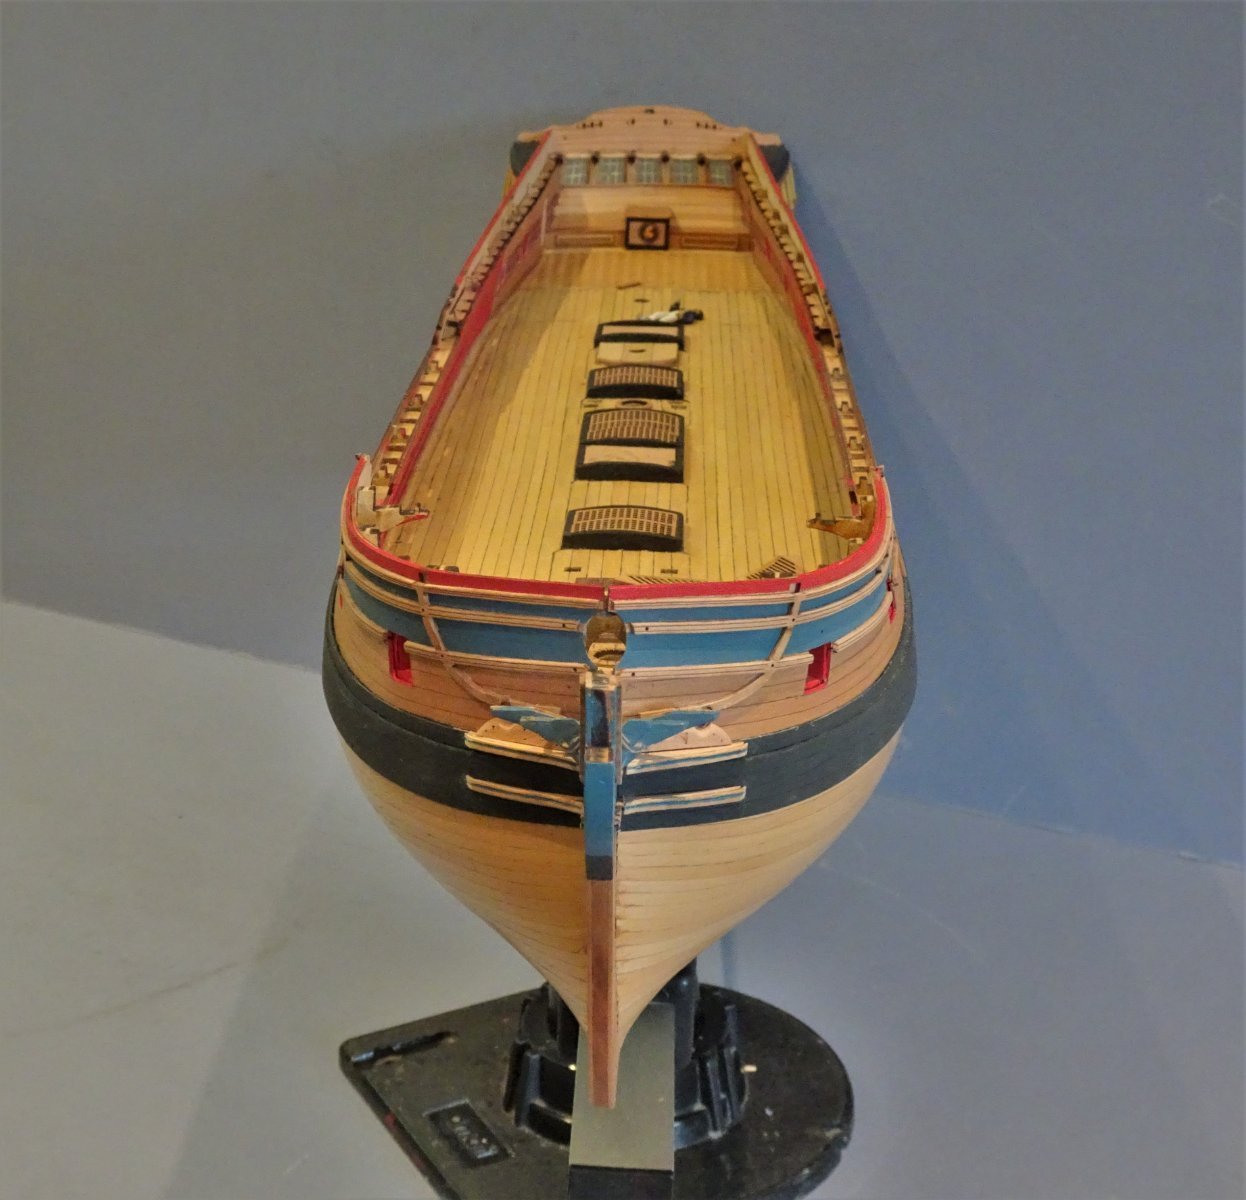
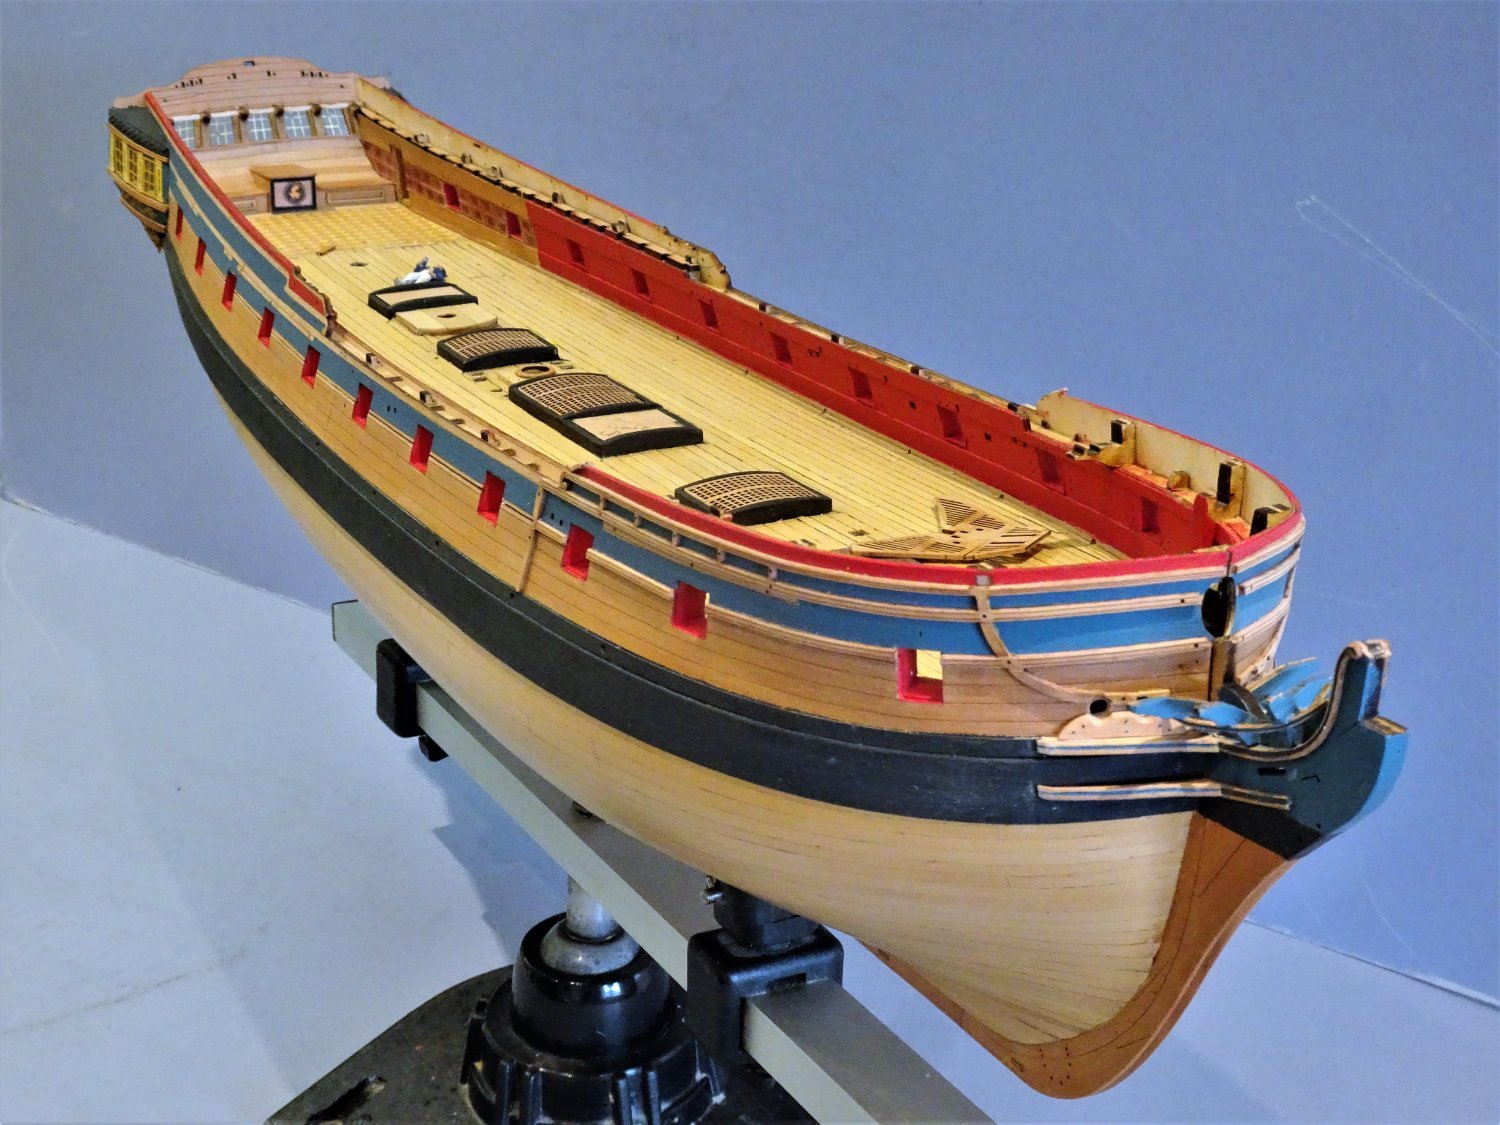
Post Seventy-eight A six month review. It is six months since I started this project, so a few pics to record the state of play. 5644(2) 5640 I just love the shot from this angle displaying her sheer line. 5631(2) 5629(2) 5637(2) 5636 5642(2) I have worked several hours each day on this model over the past six months and with the addition of the facing pieces for the fenders and Chesstrees I am now moving back to the internal fittings. Still a long way to go but now there is no doubt that she is a British Frigate of the Georgian era, and she is slowly gaining the look I'm after. How lucky are we to have such quality products to play with, thank you Chris. B.E. 11/02/22
.thumb.JPG.d67b852dc421813b8ae50ad0b78f9877.JPG)
.thumb.JPG.c1063f9b554dea47dfd5b4990eb1eaca.JPG)

.thumb.JPG.120e33dbcbd512e5cdd213446fb4a2d7.JPG)
.thumb.JPG.43d399aa7a6b13012e5291b78a9cce41.JPG)
- 857 replies
-
- 38
-
-
-
- Sphinx
- Vanguard Models
- (and 1 more)
-
Thanks Derek, rail cleaning worked out ok, you just need to work out a strategy for cutting and holding, and have 'soft' hands. The thought of personal spelling options had crossed my mind.🤔 but enough of this pondering over such matters, time I got back to the build. B.E.
- 857 replies
-
- 2
-
-
- Sphinx
- Vanguard Models
- (and 1 more)
-
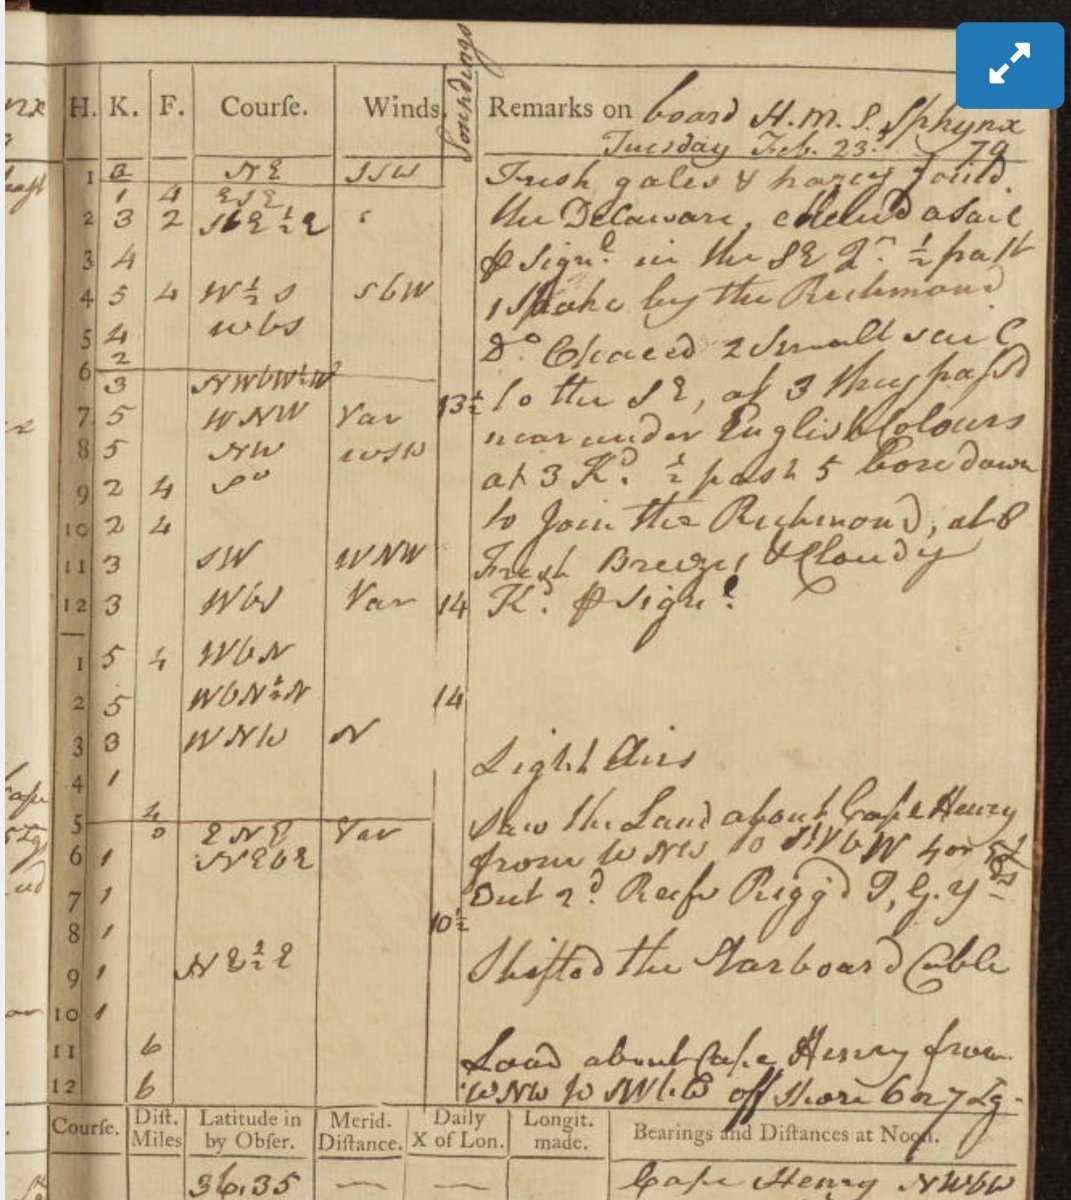
Thanks Nipper, I’ve read through the fifty pages of the log, although reading the handwriting is difficult in parts. Pretty standard stuff really, mostly weather conditions, course taken, a few sighting of sails, and notes when reefs were taken in or the ship worn. Page 25 has a little more interest There are a couple of references to meeting up with other ships, mentions of Richmond (5th rate) and Delaware ex American built prize (6th rate.) and giving chase and shots fired at a Sloop going towards Hampton. I’m sure Capt Kendall would be surprised to know that people like us are taking an interest in what he wrote some 240 years ago. Cheers, B.E.
- 857 replies
-
- 3
-
-
- Sphinx
- Vanguard Models
- (and 1 more)
-
An interesting little snippet Around this time some 243 years ago, at the behest of his Britannic Majesty King George 111, the subject of our model was cruising around Chesapeake Bay looking to interfere with the French or anyone else who may be seeking to disrupt British control of the American colony. While browsing the interweb for all things Sphinx, I came across this, an extract of the Log of Sphinx written by Captain John Kendall. What is interesting is his spelling of the name Sphynx which is at variance to the spelling on the Admiralty plan, (Sphinx) altho’ the same as the spelling on the Joseph Marshall painting of 1775. One would imagine that a Captain would know how to spell his own ships name, so why the variance? Should that beautifully crafted name on the stern be spelt ‘yn’ not ‘in’ John Kendall was in command of Sphinx for only five months, which in one sense is lucky for him as under her next commander Robert Manners Sutton she was out gunned and taken by the French 32 gun Frigate L’Amphitrite. Fortunately she was retaken three months later by the HMS Proserpine a 24 gun frigate of the revised Enterprize Class. Details of the log book can be found here; Logbooks from three British warships in North America, 1778-1780 - Bound Manuscripts - The American Revolution Institute of the Society of the Cincinnati Digital Library Collections (oclc.org) B.E.

- 857 replies
-
- 10
-
-
- Sphinx
- Vanguard Models
- (and 1 more)
-
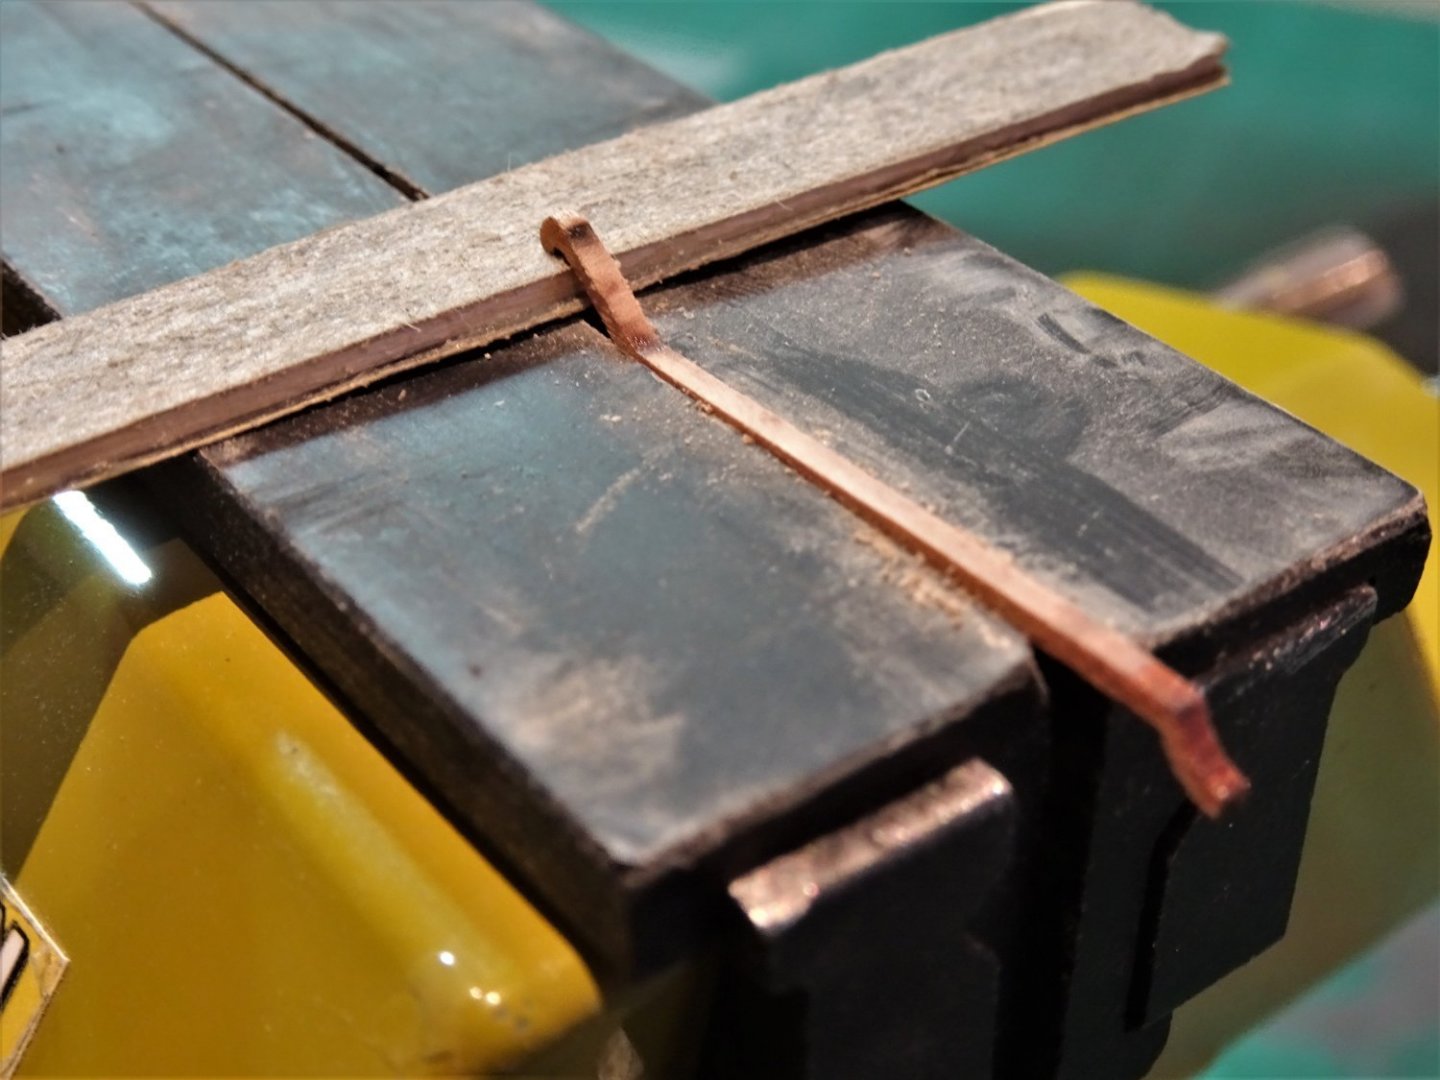
Thank you Glenn (UK) glad you like it. @ Glenn (Texas) - hmmn, translucent Orange Ochre, I'll let that percolate for a while 🤔 😄 Post Seventy-seven Back to the Rail sets. The Sheer Rail patterns comprise three levels of attached delicate rail and volutes. 5615(2) As I look at them they seem to be saying ‘go on, have a go, see if you can clean us up as a set’. You must be joking thinks I, first to go will be the small top moulding attached only by its scroll, followed in short order by the long upper rail just begging to snap in two, and probably in the least convenient place to disguise an unofficial break. So, where to separate these devilish little beggars to achieve success. 5619(2) This was my judgement, divide the rail set into three parts as above. Not out of the woods yet, they still need delicate handling to clean off the Char, and impart a slight round to the forward edges. 5621 The cleaning was done with the sections secured in the rubber grips of the vice. Using bespoke sanding sticks with P320 paper. Nothing was left in a position where it could flex, and in the more delicate areas the minimum of area was exposed while sanding. 5622 The rails in place, I won this skirmish at least. The Sheer and Waist rail sections I think can be cleaned up without separation. The waist rail section has cut outs where it passes across the gun-ports. I think these are best removed before fitting, as the rail ends can be better cleaned up without risk of marking the gun-port linings. Just remember to mark on the back the correct way up taking the sheer into account. 5625 The one other small modification I made in this area was to rebate the back edge of the fenders to fit over the black strake rather than cut the strake. The final part of the mouldings are the six sections of the Waist rail that fit between the fenders and the Quarter Gallery. 5626(2) I again separated these into the individual sections to fit between the ports. It has taken two days of fairly constant work to clean and fit these sections, but I’m pleased with the result, and consider it well worth the effort. B.E. 09/02/22
.thumb.JPG.bed3cdaaa4ac5383796369e00f9b7daa.JPG)
.thumb.JPG.33211bb769067a9c8c79691896d5098d.JPG)
.thumb.JPG.86e47e61ed36434f66d188b400ae80f5.JPG)
- 857 replies
-
- 22
-
-
- Sphinx
- Vanguard Models
- (and 1 more)
-
You're taking the right approach with this one Glenn, by not giving ground on the preparation, or accepting major flaws. I would also do blind feel tests as you go along, the fingers often tell more than the eyes. B.E.
- 476 replies
-
- 6
-
-
-
- sphinx
- vanguard models
- (and 1 more)
-
Those sheave representations in the Breast rail stanchions are way above and beyond at 1:64 I had to go next door to look at my Pegasus to remind myself how small those stanchions are. Great stuff Bug , your detailing is superb.👏 B.E.
- 419 replies
-
- 3
-
-
- Victory Models
- Pegasus
- (and 2 more)
-
Chris knows what's in my heart, I live in hope. I'm sure he will tell you.😀 B.E.
- 29 replies
-
- 2
-
-
- well smack
- Vanguard Models
- (and 2 more)
-
You're getting quite a fleet of these attractive little Fishing boats Jim, every house should have one.(or two, or three.) I got immense pleasure from building Fifie and Zulu, but now I'm holding out for the ultimate, which I'm keeping fingers crossed will come down the line at some point. B.E.
- 29 replies
-
- 3
-
-
- well smack
- Vanguard Models
- (and 2 more)
-
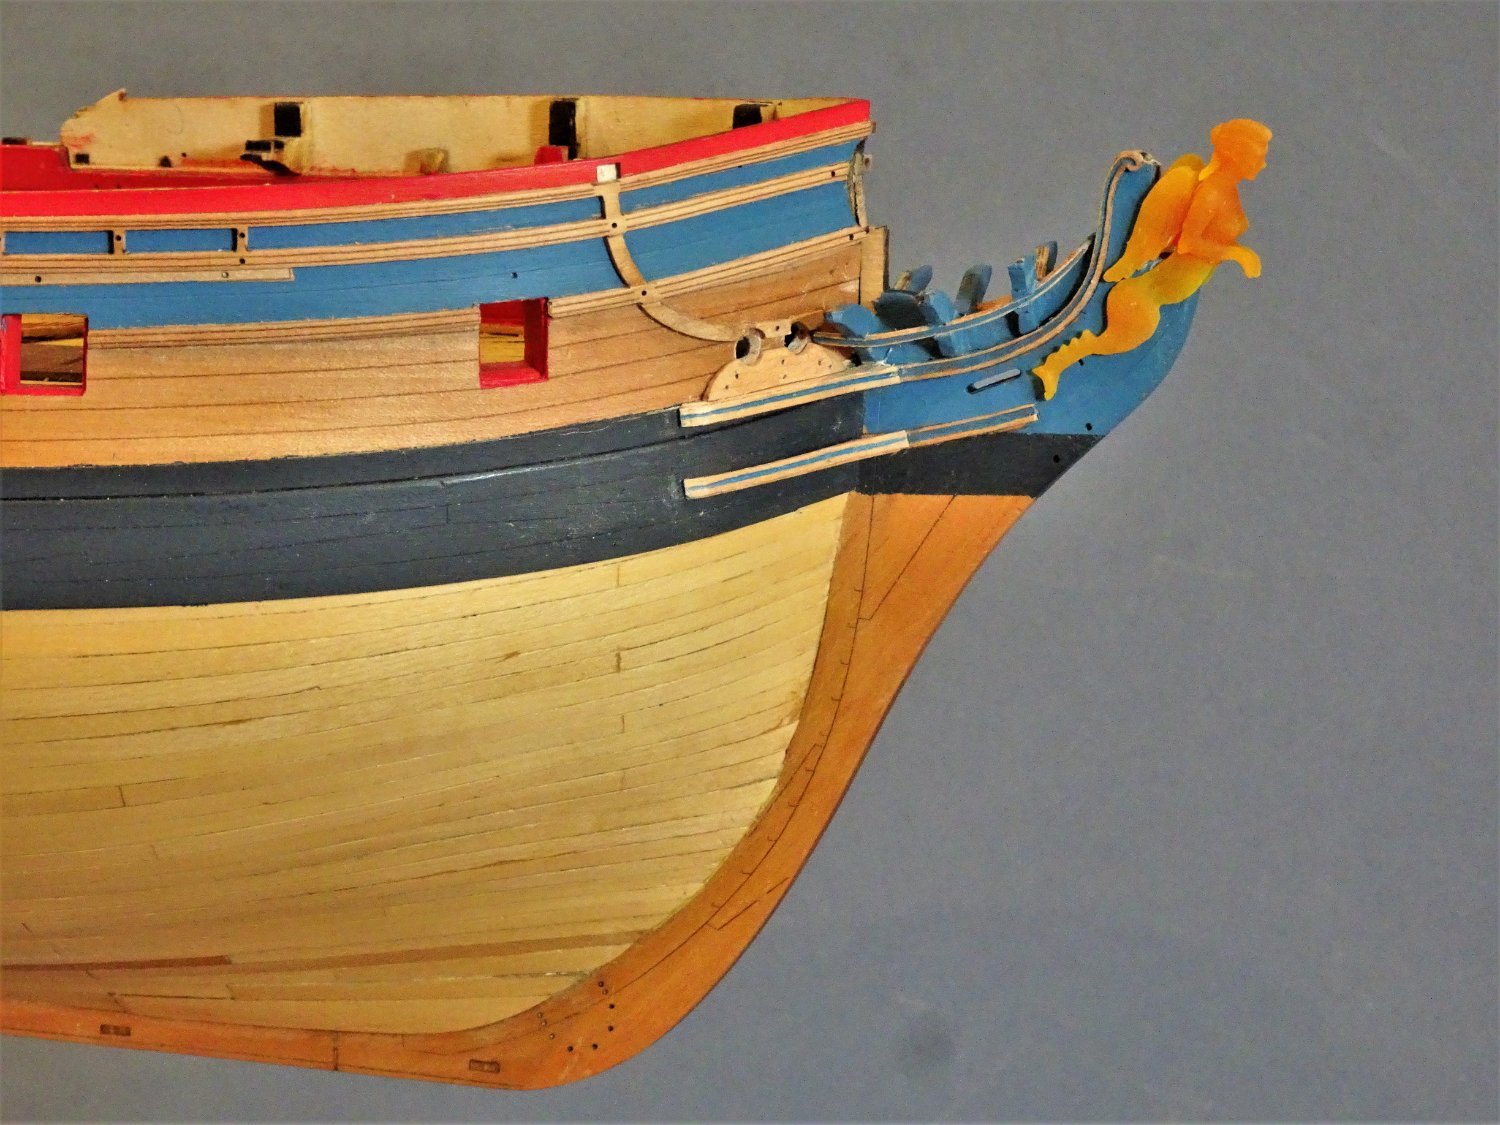
Post Seventy-Six The Headworks – Part Two I re-visited the Bow Cheeks and faced them with some fine 0.8 x 2mm Pear strip, scribed with a profile. Once the strip was scribed it was scraped down from the back side to a thickness of 0.4mm. The lower rail which slots into the notches on the timber heads is next fixed. This is a delicate finely made piece with an elegant sweep up to the head. The timber heads are covered by decorative boards, but even so the notches seem way over large for the rail which is only around 2mm deep, tapering to around 0.5mm. 5543 I imagine Chris has cut them this way to allow plenty of leeway to get the rails in place, but for me this is ugly and will niggle me forever if I let it stand. I won’t have any Bowsprit rigging to detract from the deficiencies in this area. Fitting the Lower rail is a tricky business, and I struggled a long time with it. The inner end is shown to fit against the hull on the inner side of the inner hawse hole. Coupled with the Ekeing rail ending abruptly at the outer side of the inner hawse hole this looks a little awkward and unfinished to me. I extended the Ekeing Rail to cover the inner hawse hole. Back to the Head rails, those large gaps will be apparent from head-on or Three-Quarter viewing points. The simplest approach will be to fit the rails and infill the excess mortise with small Pear blocks. Sanded and painted with the covering boards attached, the issue should hopefully disappear. 5546(2) I say simple but fitting those tiny infills took an afternoon, and repeat visits to my office floor to recover the pieces. 5585 5594(2) The Wash cants below the lower cheeks are yet to be fitted; I’m undecided whether to fit them at all. 5570 5568 At this point in the manual, work is suspended on the head pending completion of the Foc’sle deck and rails and I am happy to follow suit. I will leave the covering boards and completion of the Ekeing rail until I am ready to fit the Cathead and more importantly the Cathead supporter. The tail of this should have an angle that seamlessly fays into the curve of the Ekeing rail. 5606 To conclude I couldn’t resist trying the figure of Sphinx on the head, always useful to pre-check how it relates to the other stuff, decoration, rails, or even the stive of the Bowsprit. I will be using artists oils to paint the figure, and as they take an age to dry I’ll play around with ‘Sphinx’ off model as a change from the main build. B.E. 08/02/22
.thumb.JPG.182c7af1b0d8874096001fc32af14cac.JPG)


.thumb.JPG.5c02e52519191bfb058cbdab8e84bb89.JPG)

- 857 replies
-
- 21
-
-
- Sphinx
- Vanguard Models
- (and 1 more)
.JPG.e241aeaa01fe930e60a3104ed7d55f65.JPG)


.JPG.e2652263e506163b427d20b11a65d665.JPG)
.JPG.2e13c9fe603e4a26f8f75ad190bab41e.JPG)


.JPG.87f9f66453fd75ff535688aa14e2a871.JPG)

.JPG.b53b6f4e0d051346756bf9b2ed0b81ff.JPG)
.JPG.cd04a93fab6255b6967587bc1006e70c.JPG)


.JPG.1d25fbcb6832406fda357152521c8a37.JPG)


.JPG.758abae09dee9caf7cd1c5b0f7741e20.JPG)
.JPG.dbb6b258a1300a0badff3752d9e5ee6d.JPG)


.JPG.a64293ae1a3e6e80c431bc405ca6da25.JPG)
.JPG.2fff7296bd483fc8e309af34b18cc0b9.JPG)
.JPG.d37eb5f902e9d260f6332bb7f40430a8.JPG)


.JPG.132c0c1deeedf0e47c69ce12e0a684c2.JPG)
.JPG.a75e09376a9efc2e65aaaf368a9e40b8.JPG)
.JPG.fda9afd23e8b76ef7761dbe4699ba96a.JPG)
.JPG.8f1a22ea04a559ad7ee56844f03c9d3b.JPG)


.JPG.83bcde3e2a32a5cc21eca5fe703afdd0.JPG)

.JPG.d34b7609028b46996b10b195af7b6fe8.JPG)

.JPG.0dca2b6ee8c51e8a91e5d65b1653e732.JPG)