.JPG.ca33079f5815b861e67b9c2cccd37982.JPG)

Blue Ensign
-
Posts
4,572 -
Joined
-
Last visited
Content Type
Profiles
Forums
Gallery
Events
Everything posted by Blue Ensign
-
 Your hull looks very nice Doug. Looking at the Flirt blurb it looks like there is a drag at the stern, which means the waterline would be lower at the bow. The stand would have been designed to reflect this and bring the waterline level. However, your waterline doesn’t strike my eye as looking odd, and if mounted on level pedestals won’t attract the eye, Cutters in particular are noted for stern drag and on the Alert model the waterline at the bow is markedly lower than at the stern. B.E.
- 102 replies
-
- 1
-

-
- Flirt
- Vanguard Models
- (and 1 more)
-
Fine looking hull, I love the elegance of Viking Long ships, well done.👍 B.E.
-
Nice work on the head rails Bug, I like the curvature you have achieved.👍 B.E.
- 419 replies
-
- 3
-
-
- Victory Models
- Pegasus
- (and 2 more)
-
Thank you, Guys, your comments are much appreciated; I'm very pleased with the way the decoration has turned out and it's good to know that my fellow modellers like my work too. A little aside before I get back to the main event. I like to insert tiny hidden scrolls deep into the hull of models. 5672(2) Three now reside within Sphinx before access becomes more difficult. I don’t know what will happen to my models after I’m gone, I expect they will just end up in someone's attic, be binned, or sold for a fiver on e-bay, but I derive a small amusement from the thought that some years down the line those messages may somehow come to light. Cheers, B.E.
.thumb.JPG.5c29335323001ebafc07528ab9fb2843.JPG)
- 857 replies
-
- 12
-

-
-
- Sphinx
- Vanguard Models
- (and 1 more)
-
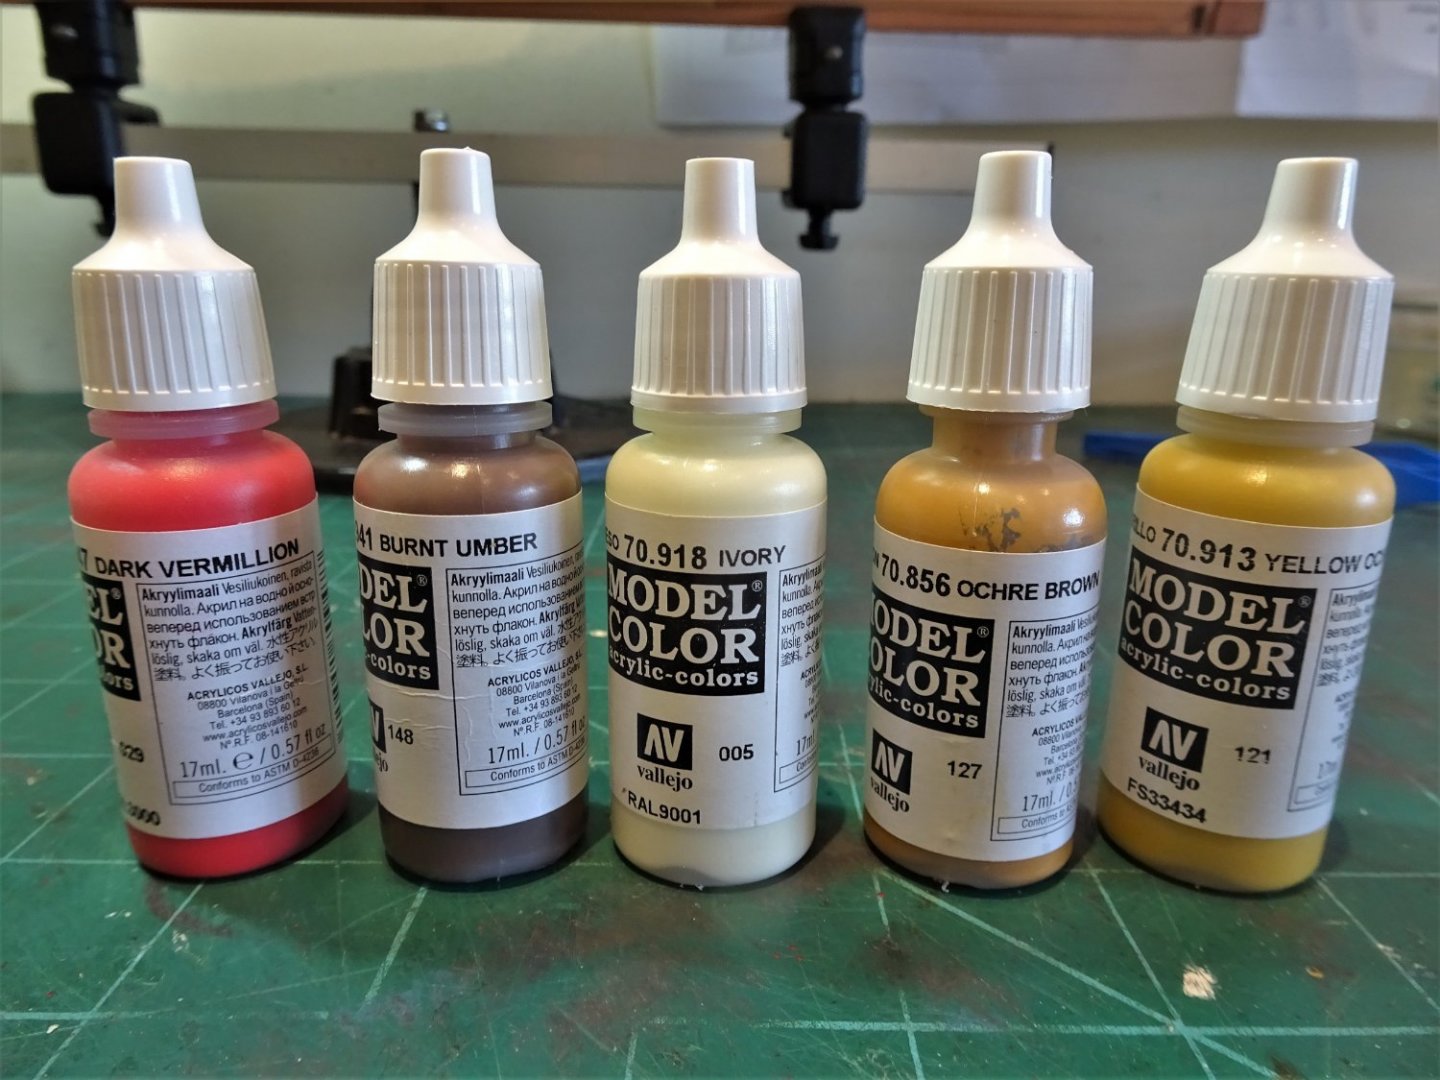
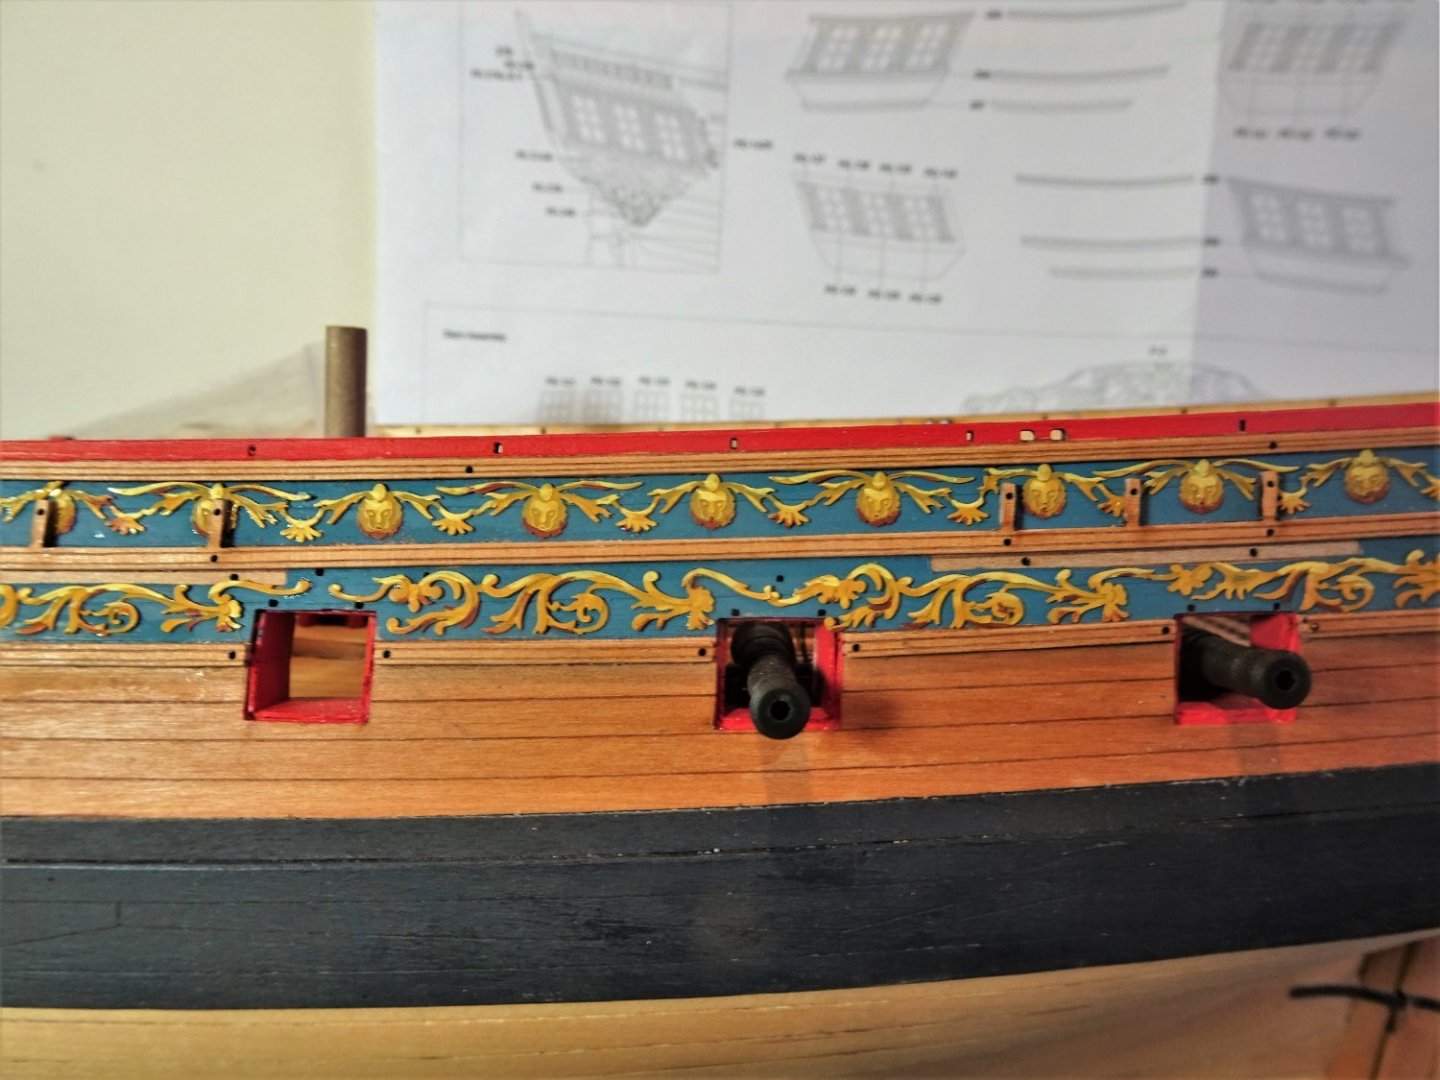
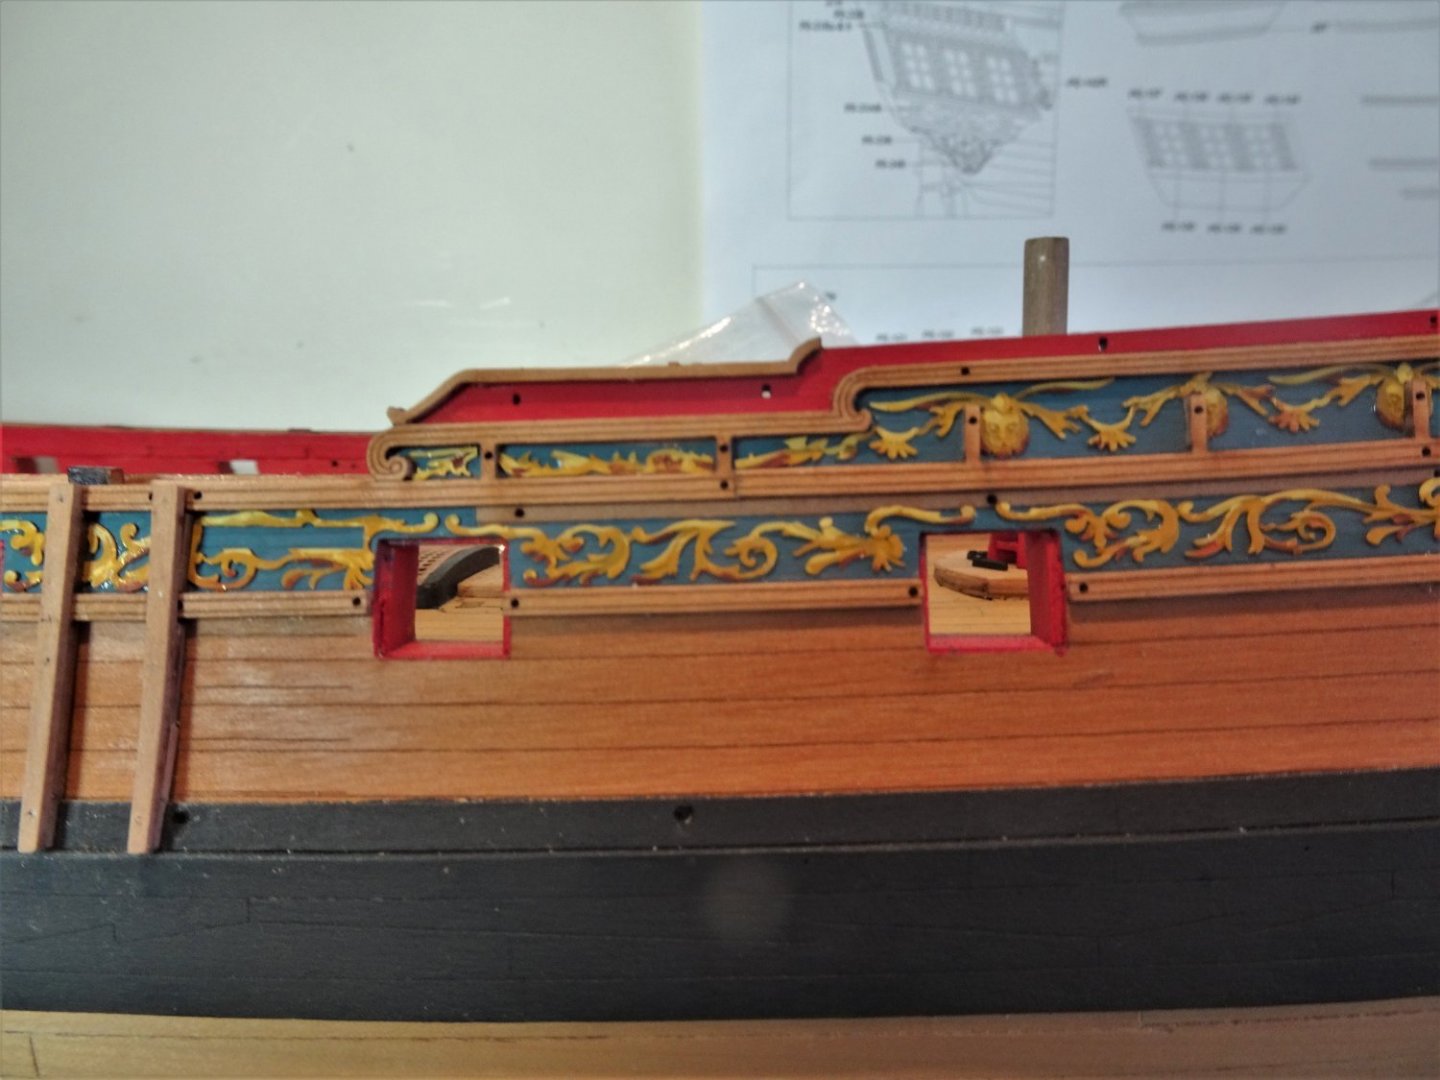
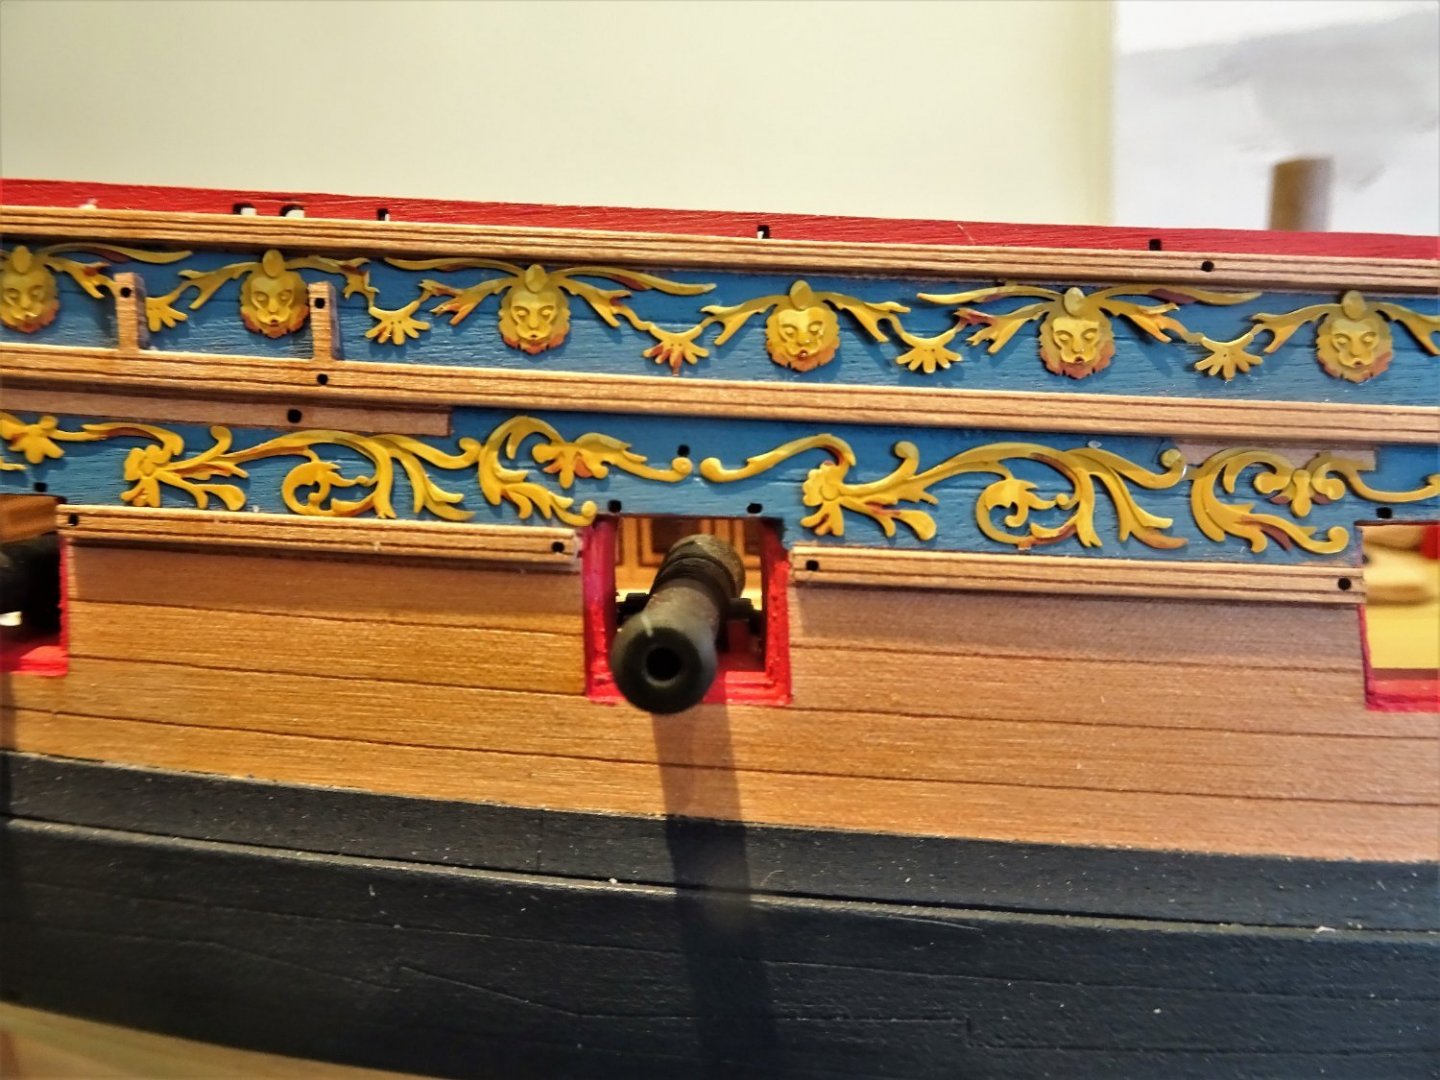
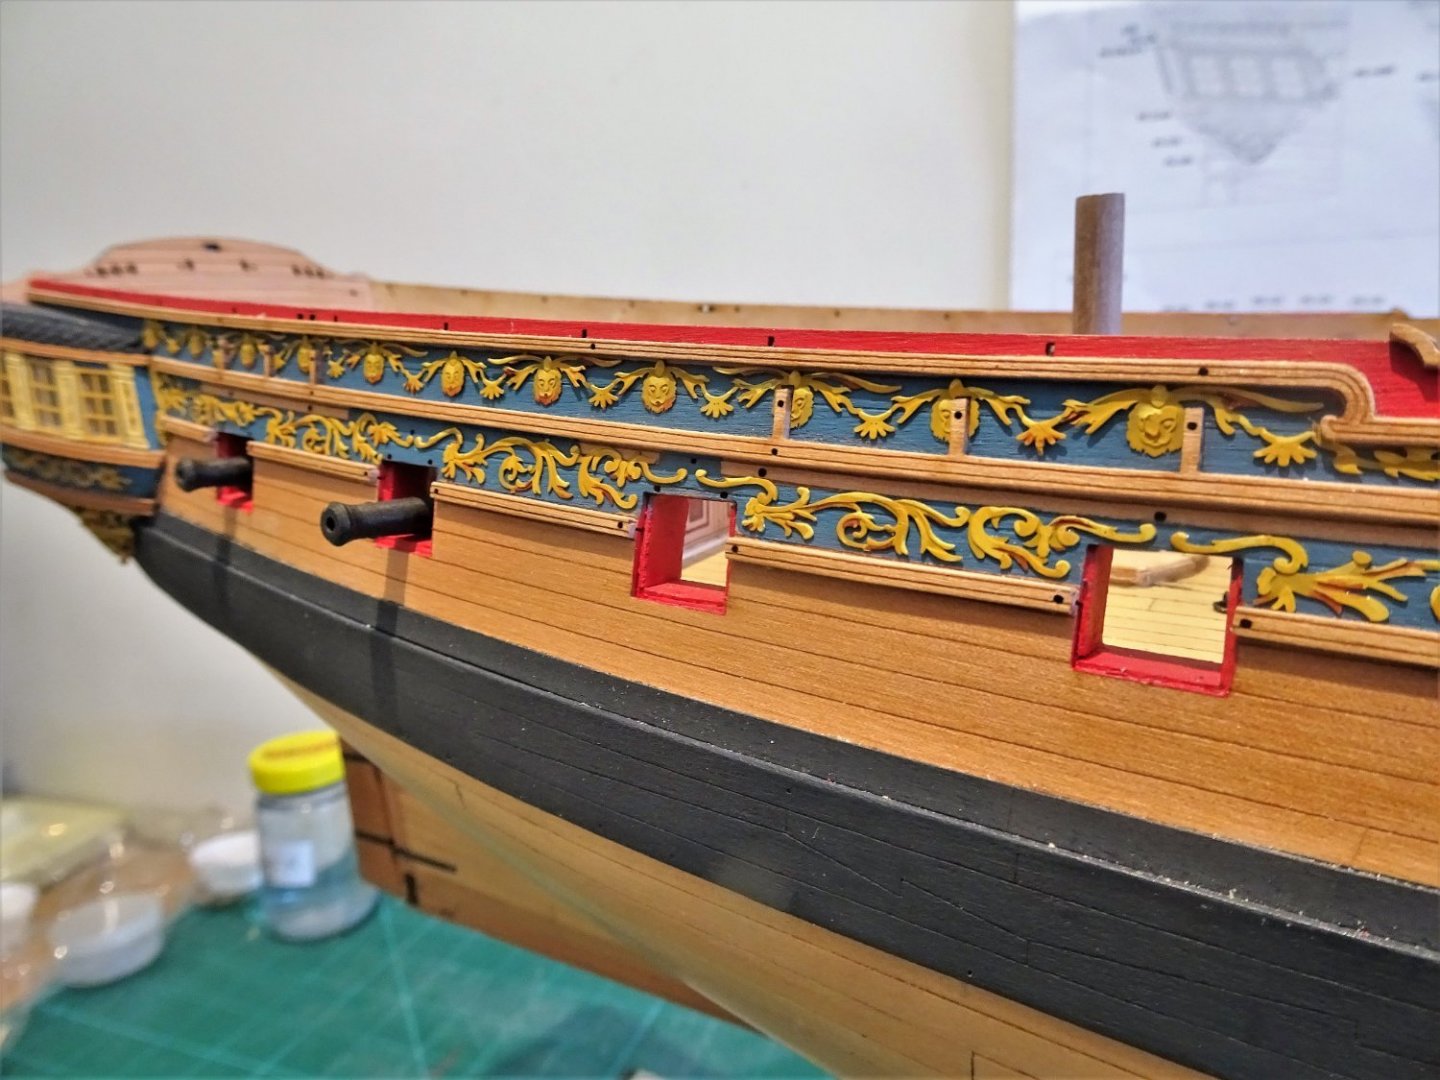
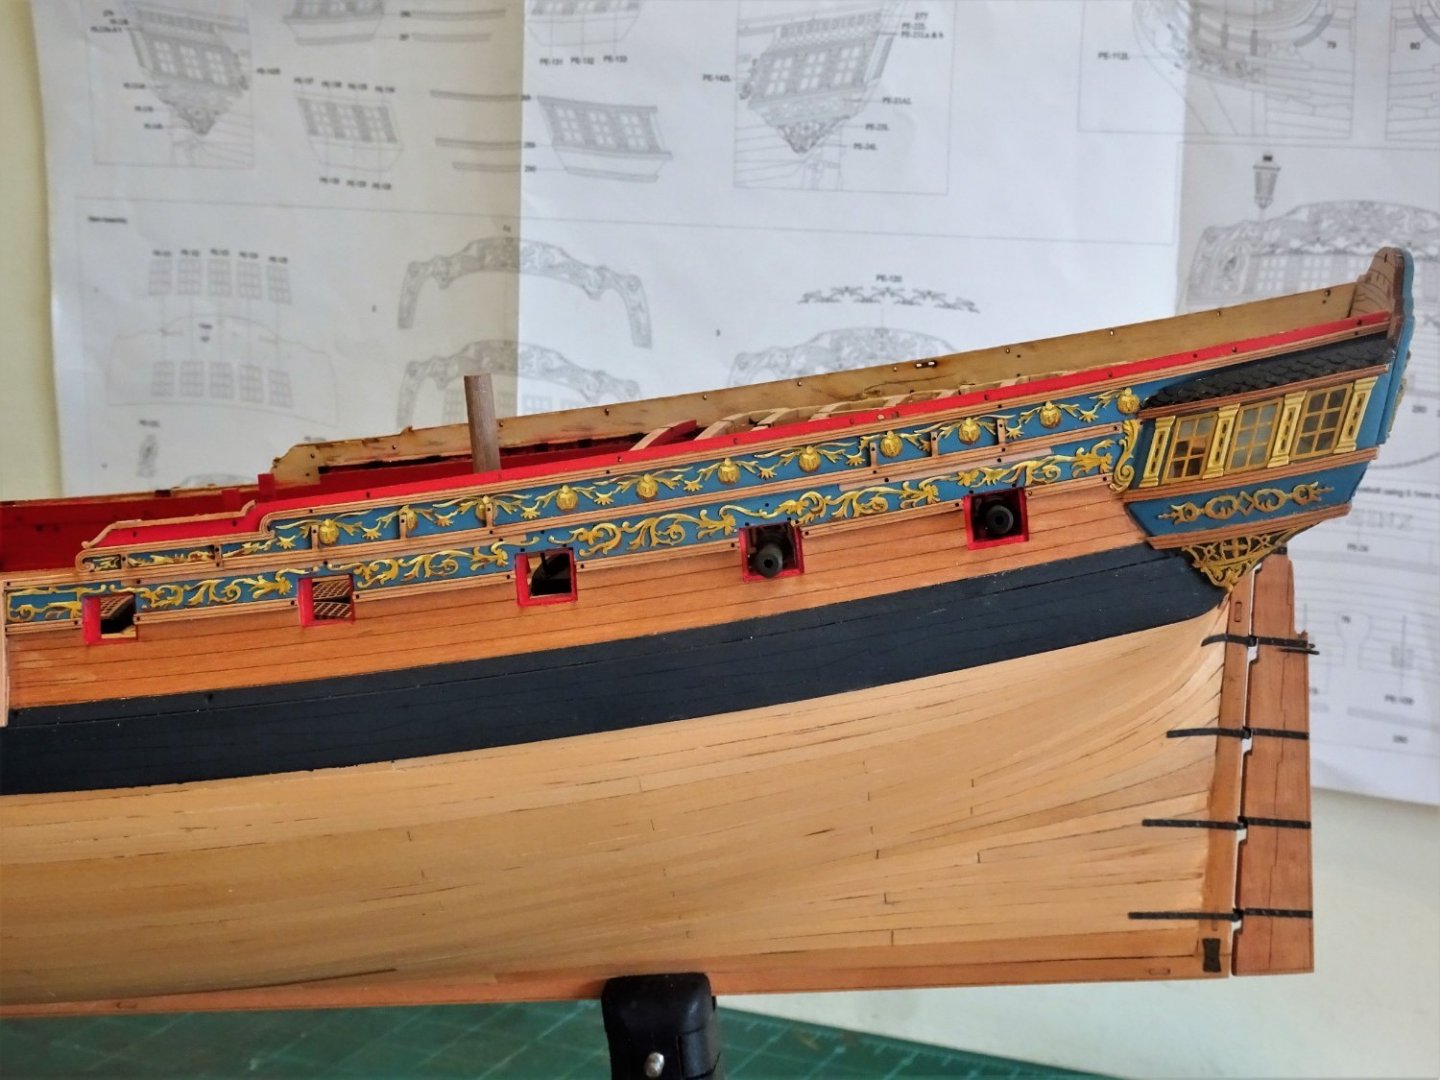
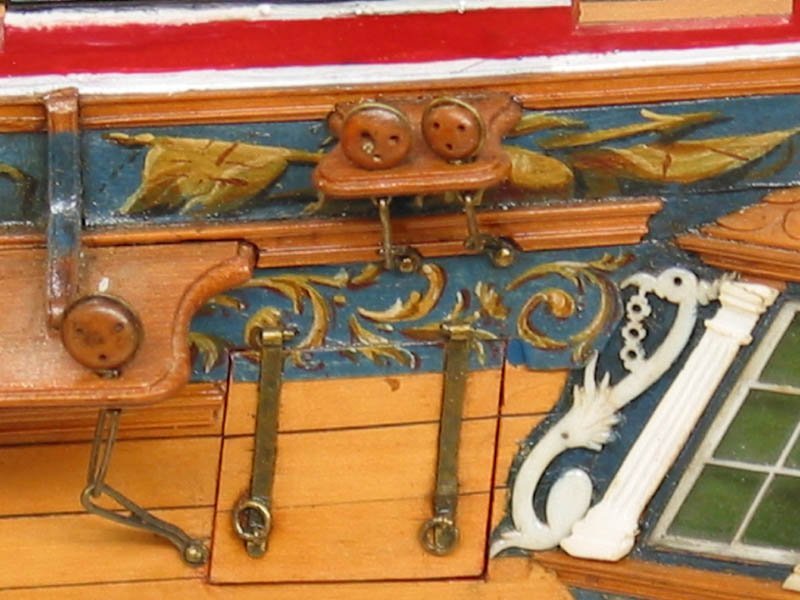
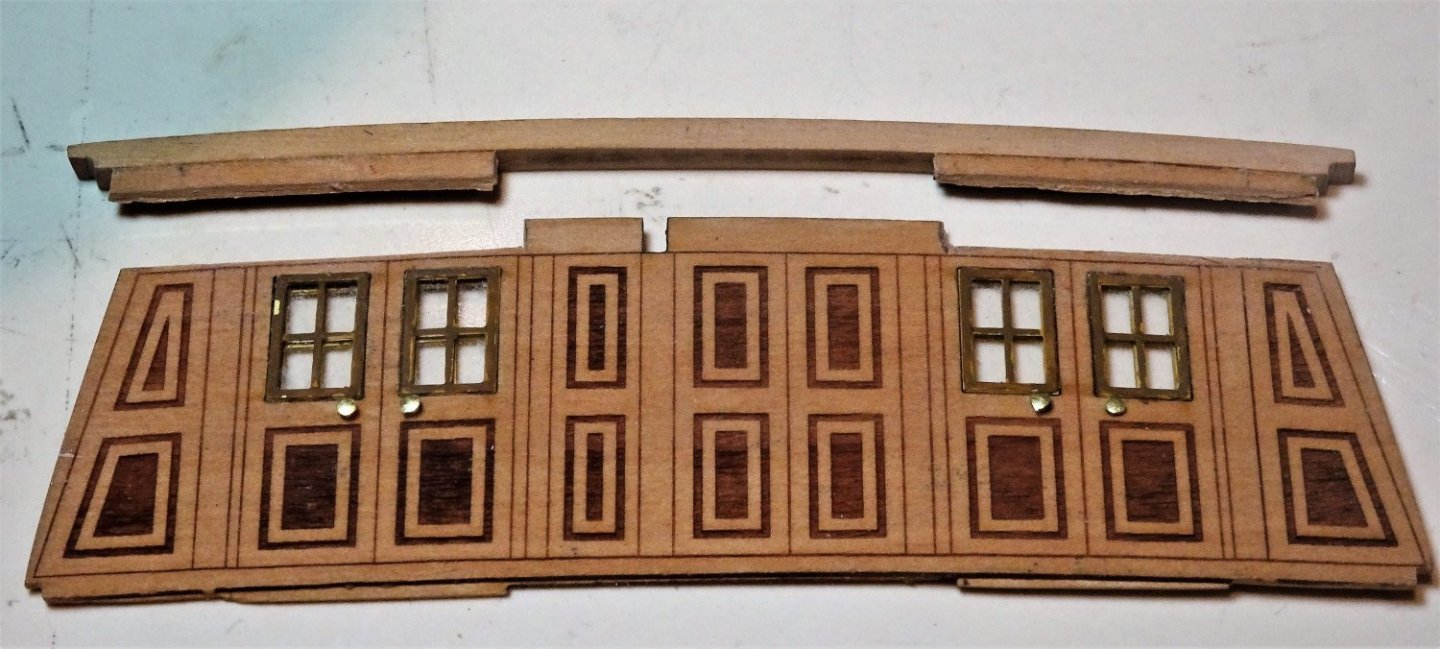
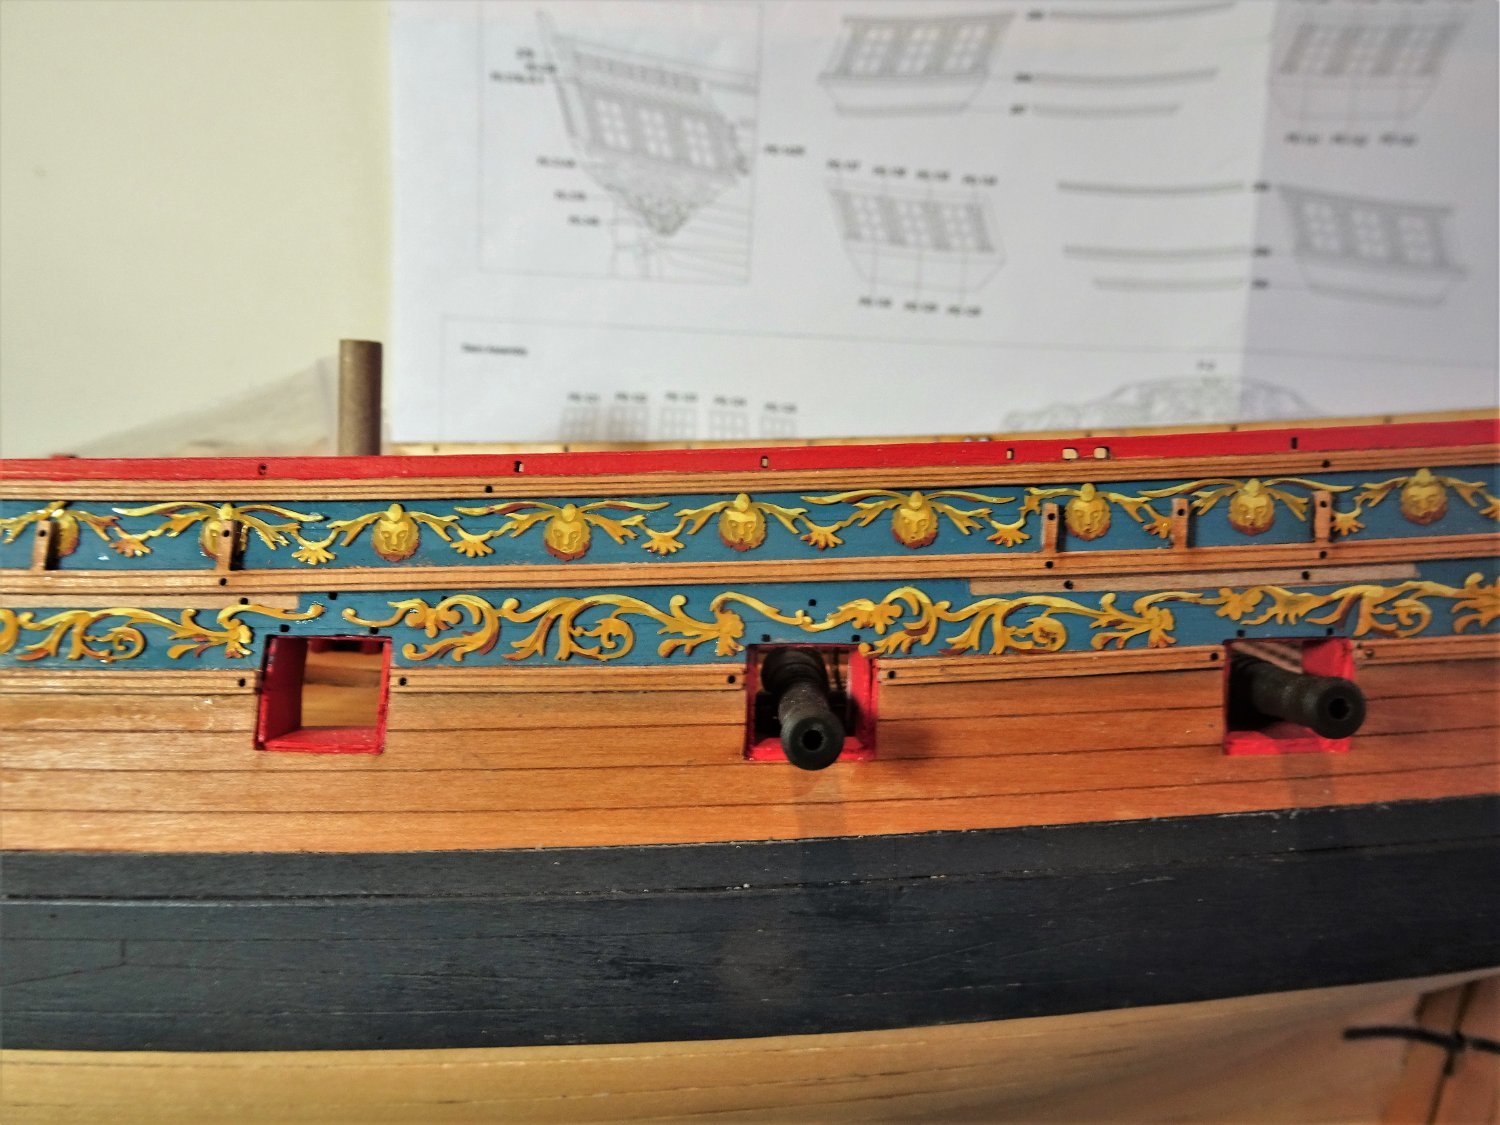
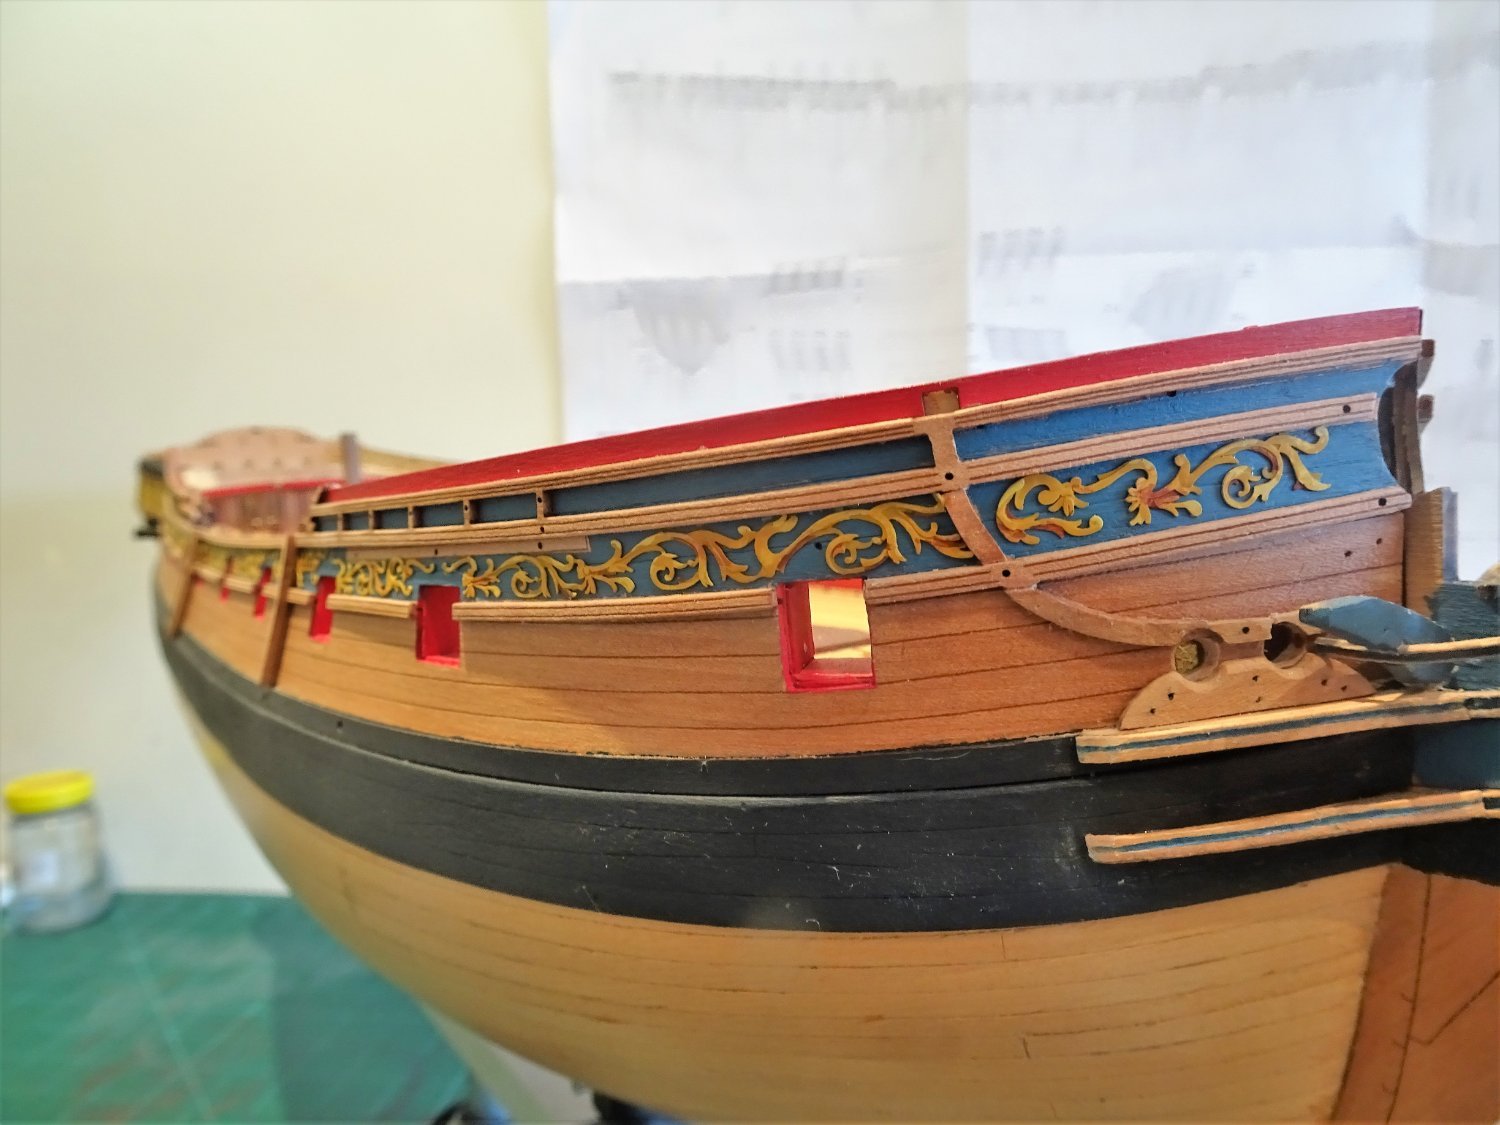
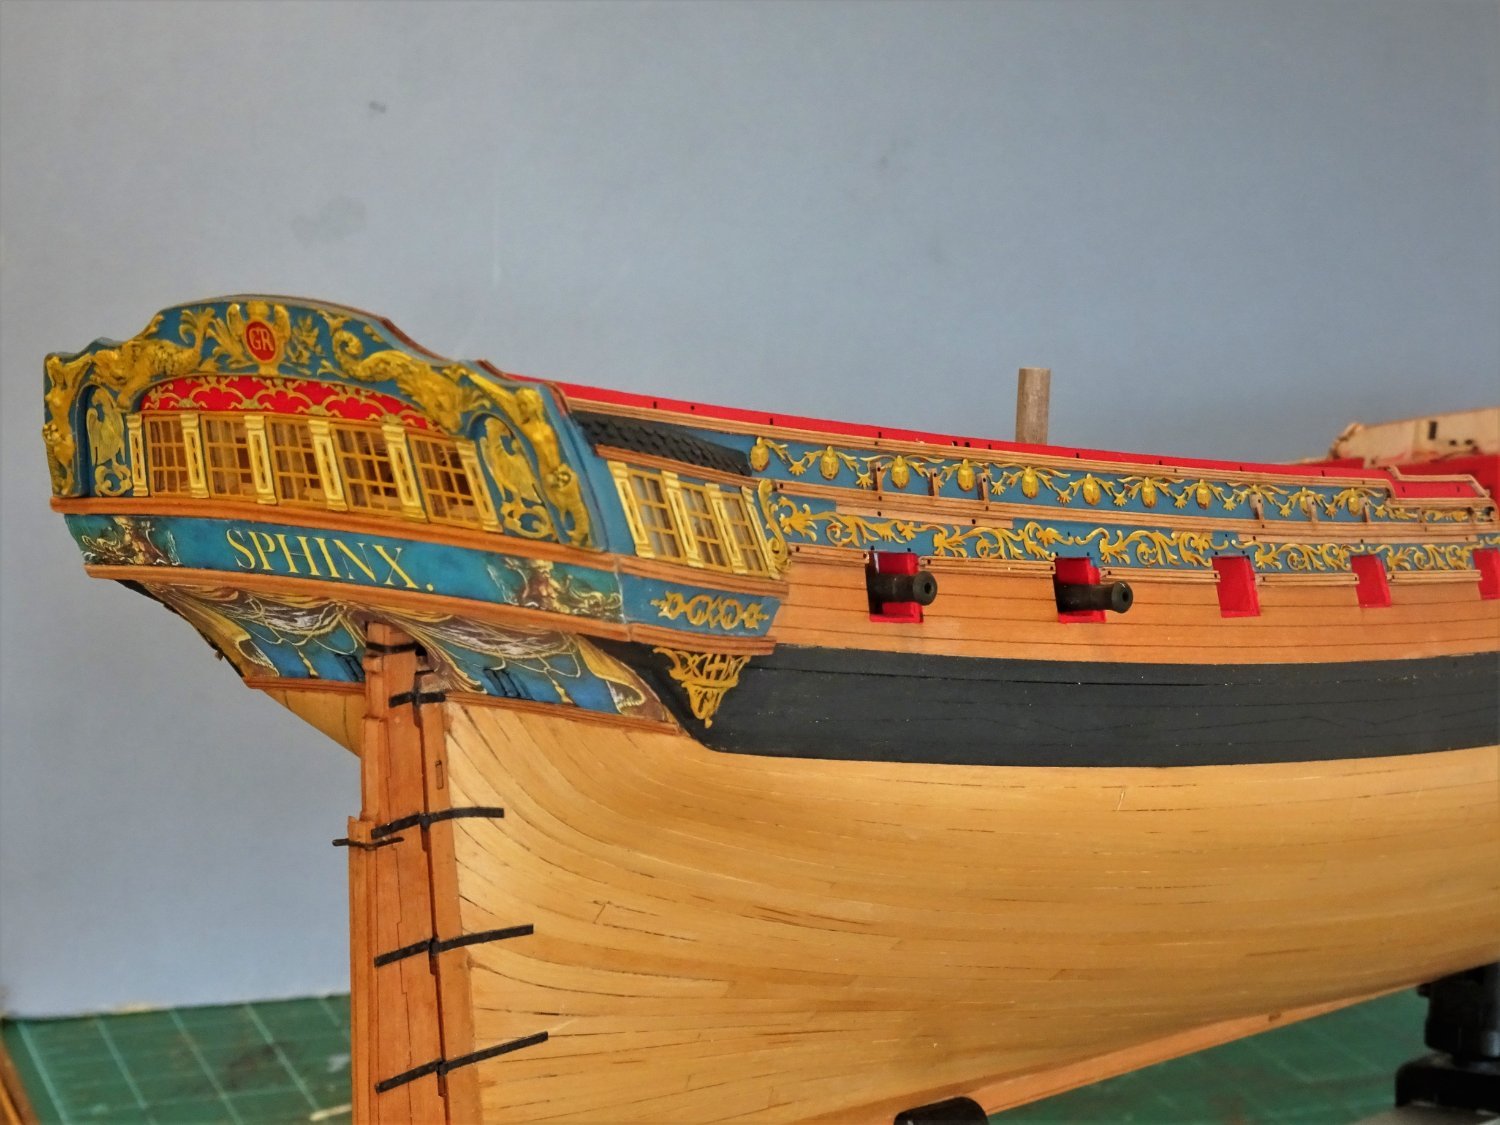
Thank you both, Glenn and Theo. 👍 Post Ninety- one Topsides decoration I have decided to attend to this now as it will probably be easier without having to negotiate guns sticking thro’ the ports. I had a look at using the ‘Winnie’ topside decoration but it proved more tricky to manipulate the design to fit between the rails. As etch decoration goes the kit version is very fine at 0.2mm, finer than the equivalent Pegasus decoration etch. So kit etch it is. My approach to preparation The preliminary preparation will be done on the fret. The etch is gently cleaned both sides with soapy water using an old toothbrush, then rinsed and dried. The design is painted with VMS Metal prep4k primer, followed by a base coat of Vallejo Ochre Brown. The painstaking job of applying highlight and shadow then begins. I will be using Vallejo acrylics throughout. 5957 I applied the highlights (Yellow Ochre /Ivory mix) and the shadows (Dark Vermillion/ Burnt Umber mix) but these will require more work once the design is attached to the hull. I used tiny dots of ca to attach the strips and I must commend Chris both for his design and accuracy in the fit of the strips. 5959 5960 5966 5967 5969 5976 5977 I am not disappointed to have gone with the etch for the Topsides, and am particularly pleased with the way the etch tones in with the ‘painted’ stern and counter decorations, courtesy of Chuck. 5981(2) 5980(2) I am pleased that from normal viewing distance of around 12” and from a broadside aspect, the fine etch does look like it is painted on, which was an unexpected bonus. 5978(2) I will continue to fettle the decoration using macro shots to reveal any flaws that require touching up, but overall it has been a satisfying couple of days. B.E. 04/03/22


.thumb.JPG.a651bdcdad654a3bef23fbbb8e028627.JPG)
.thumb.JPG.872927f3d10d6251da77253419d57a6c.JPG)
.thumb.JPG.e4732816067f78128d77f2be1a213556.JPG)
- 857 replies
-
- 39
-
-

-

-
- Sphinx
- Vanguard Models
- (and 1 more)
-
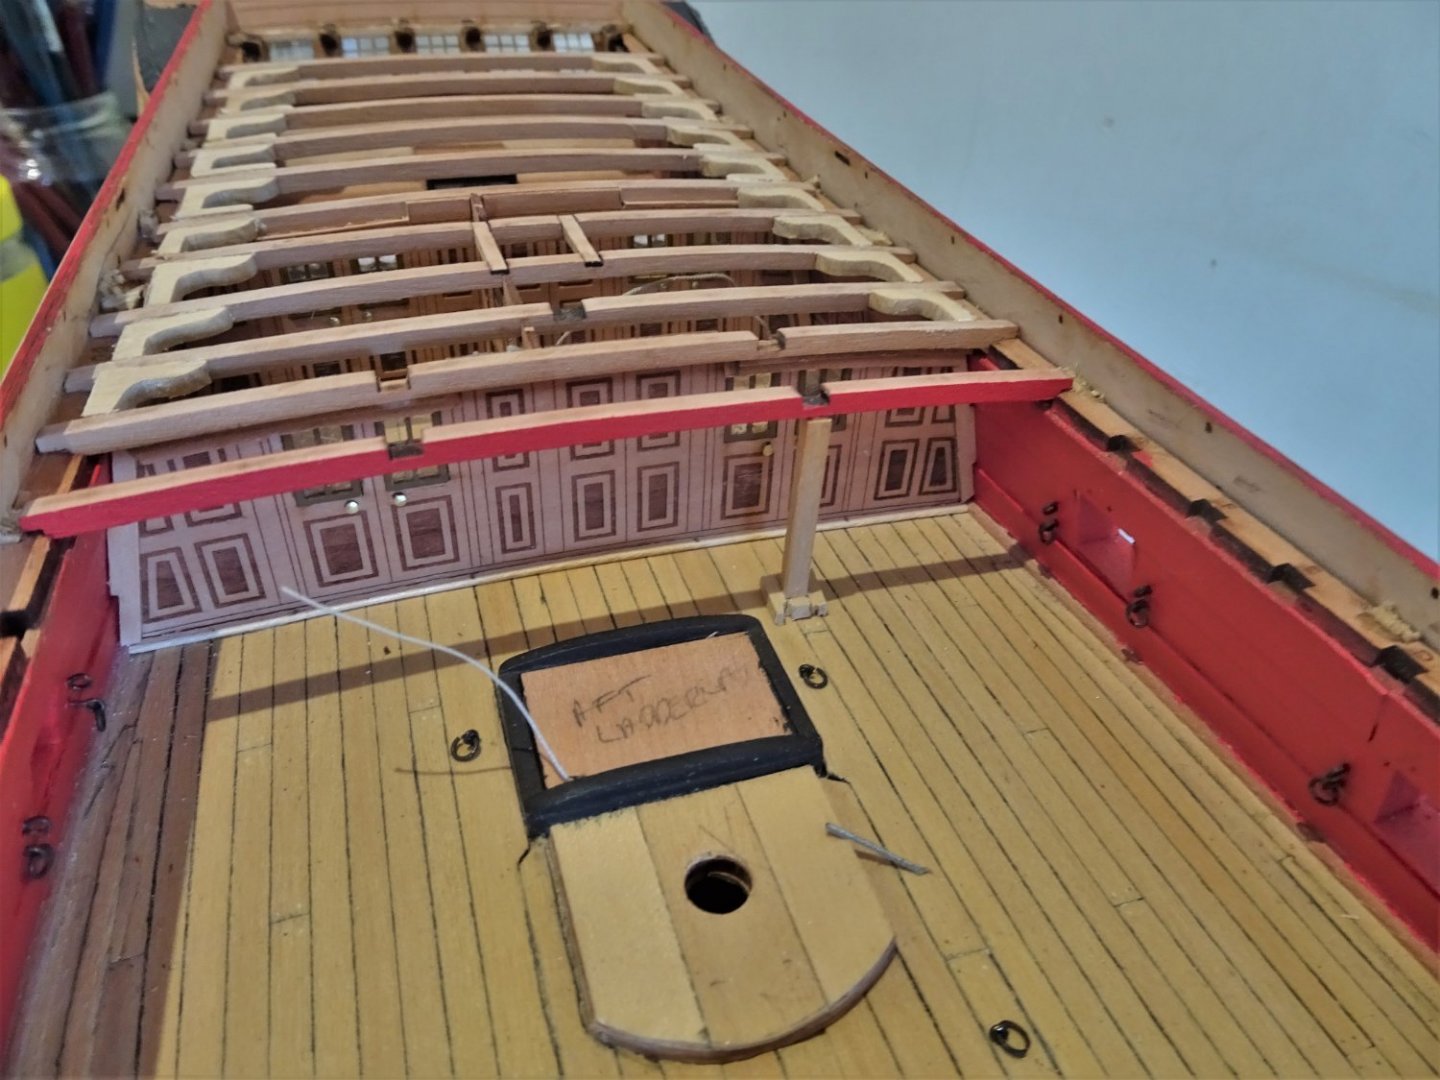
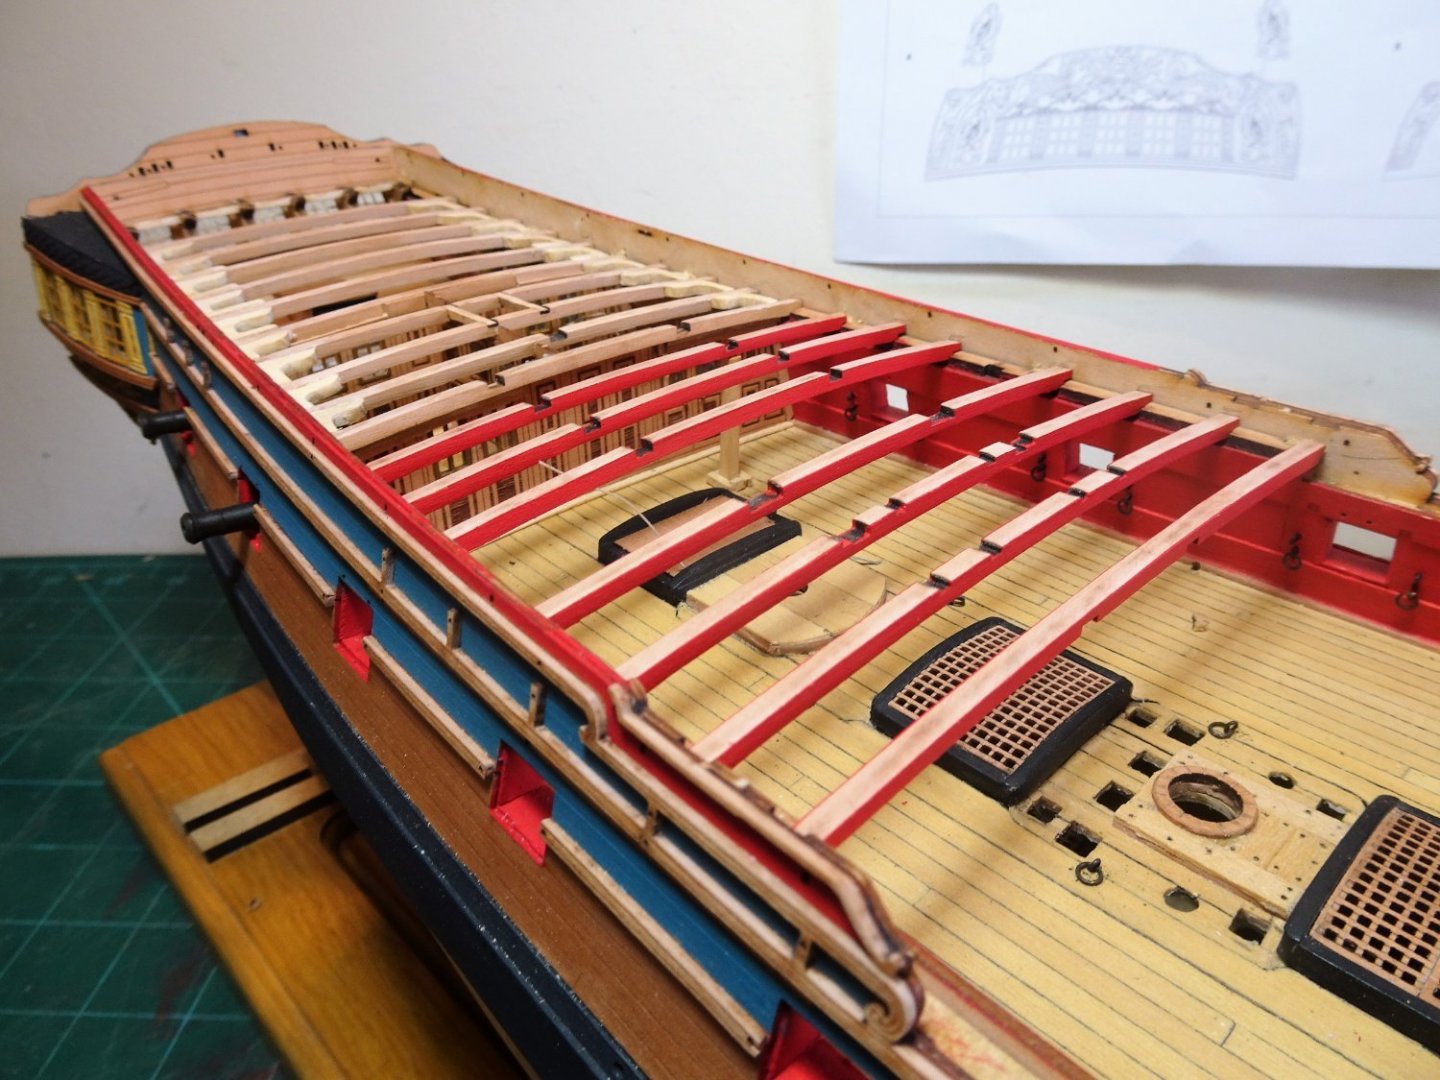
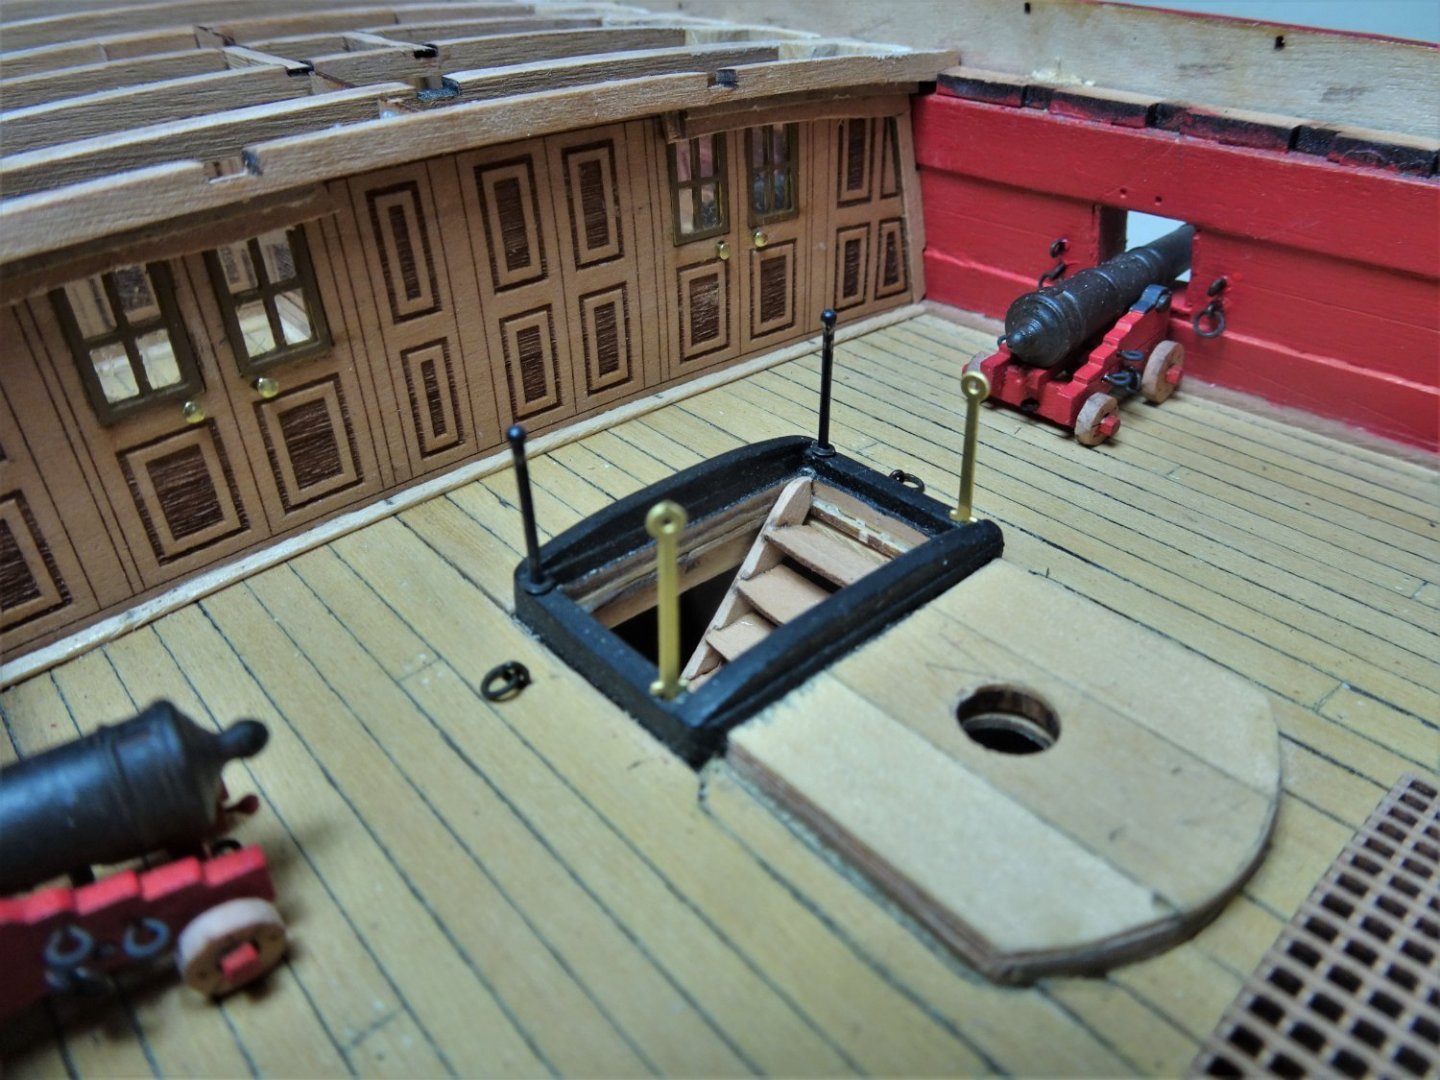
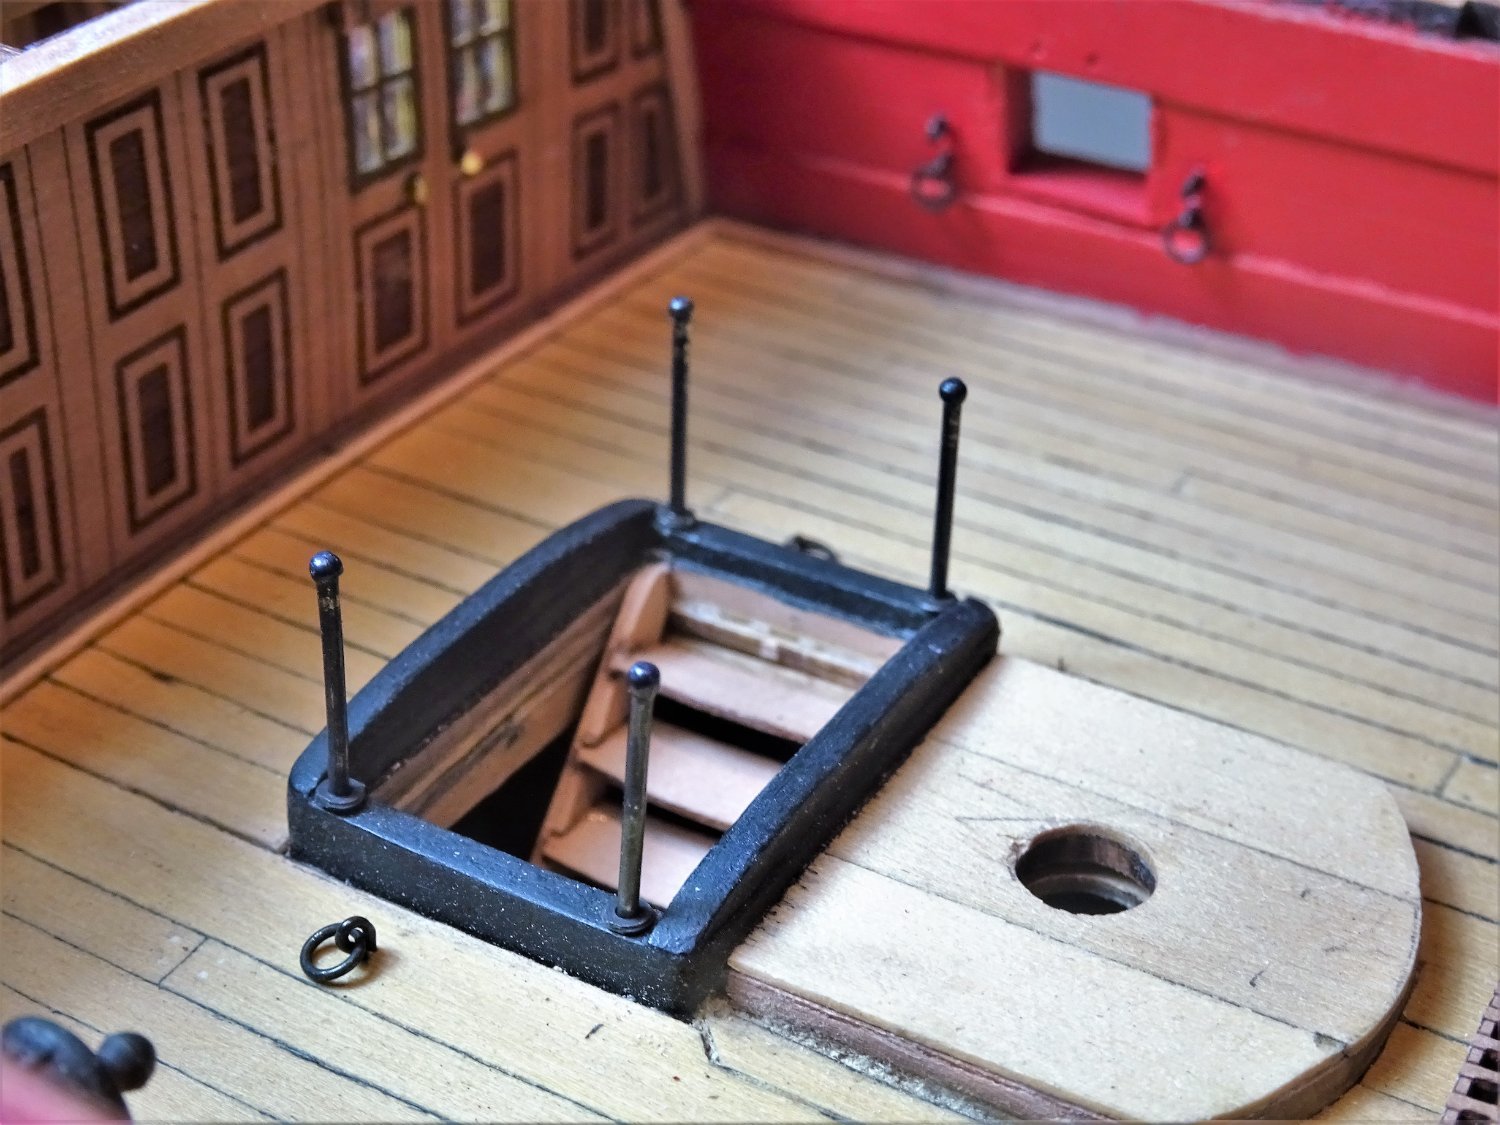
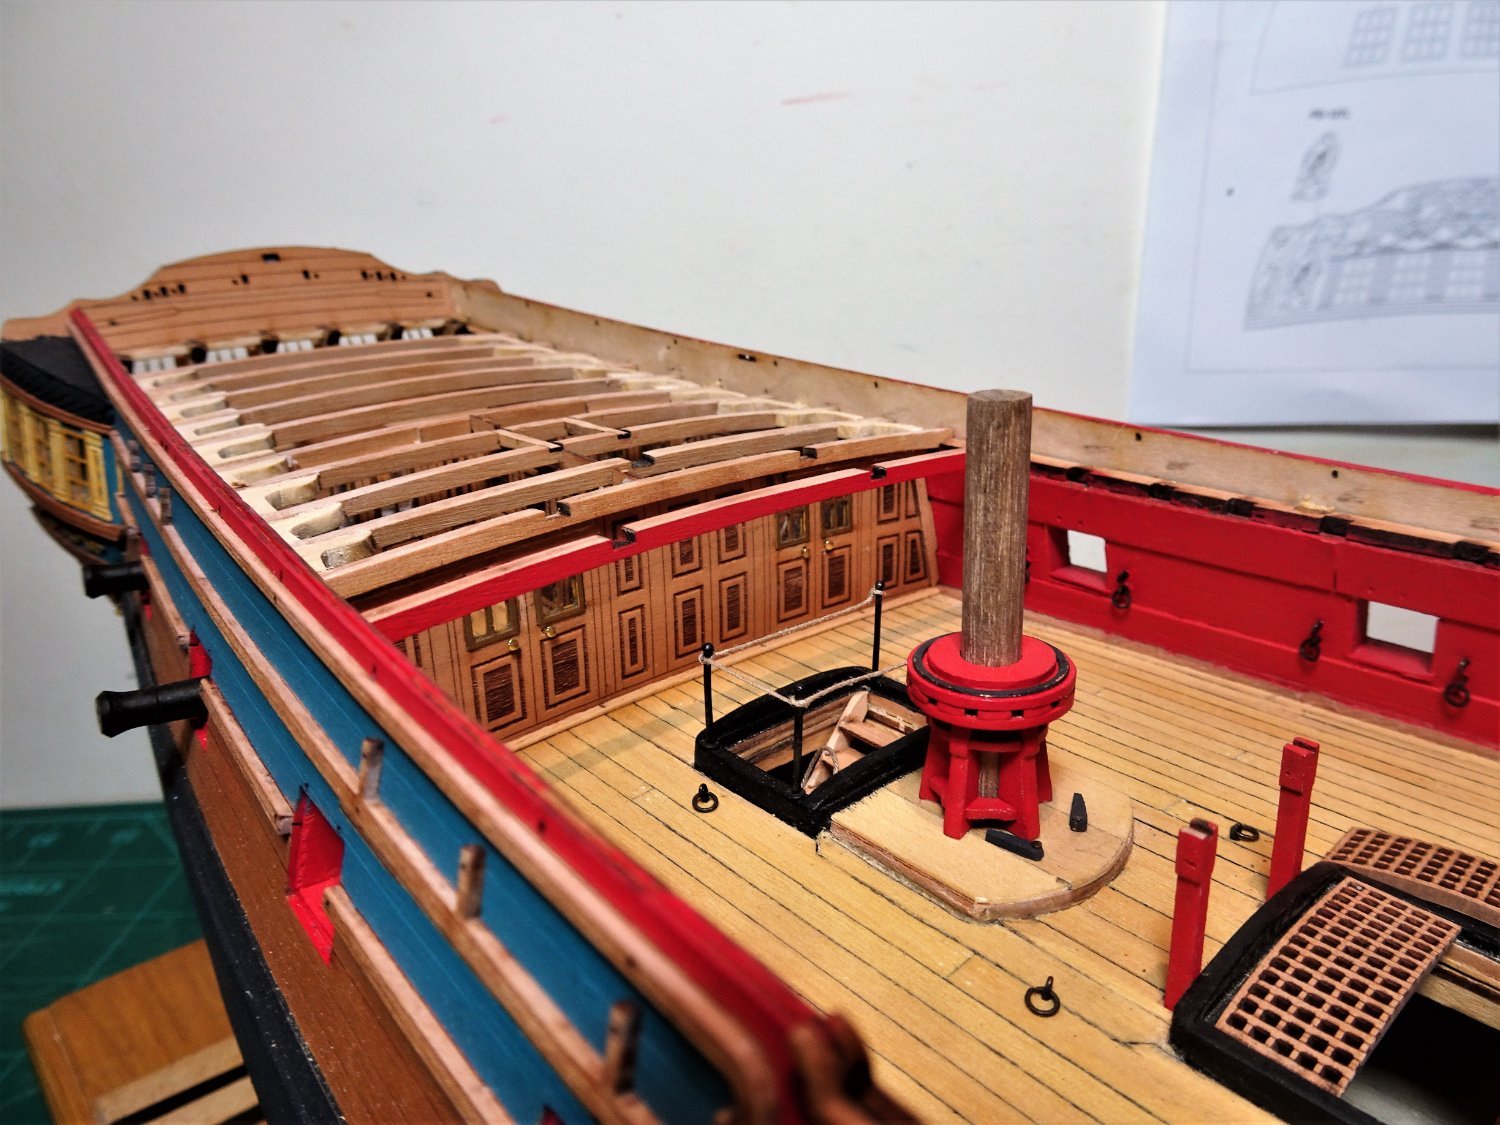
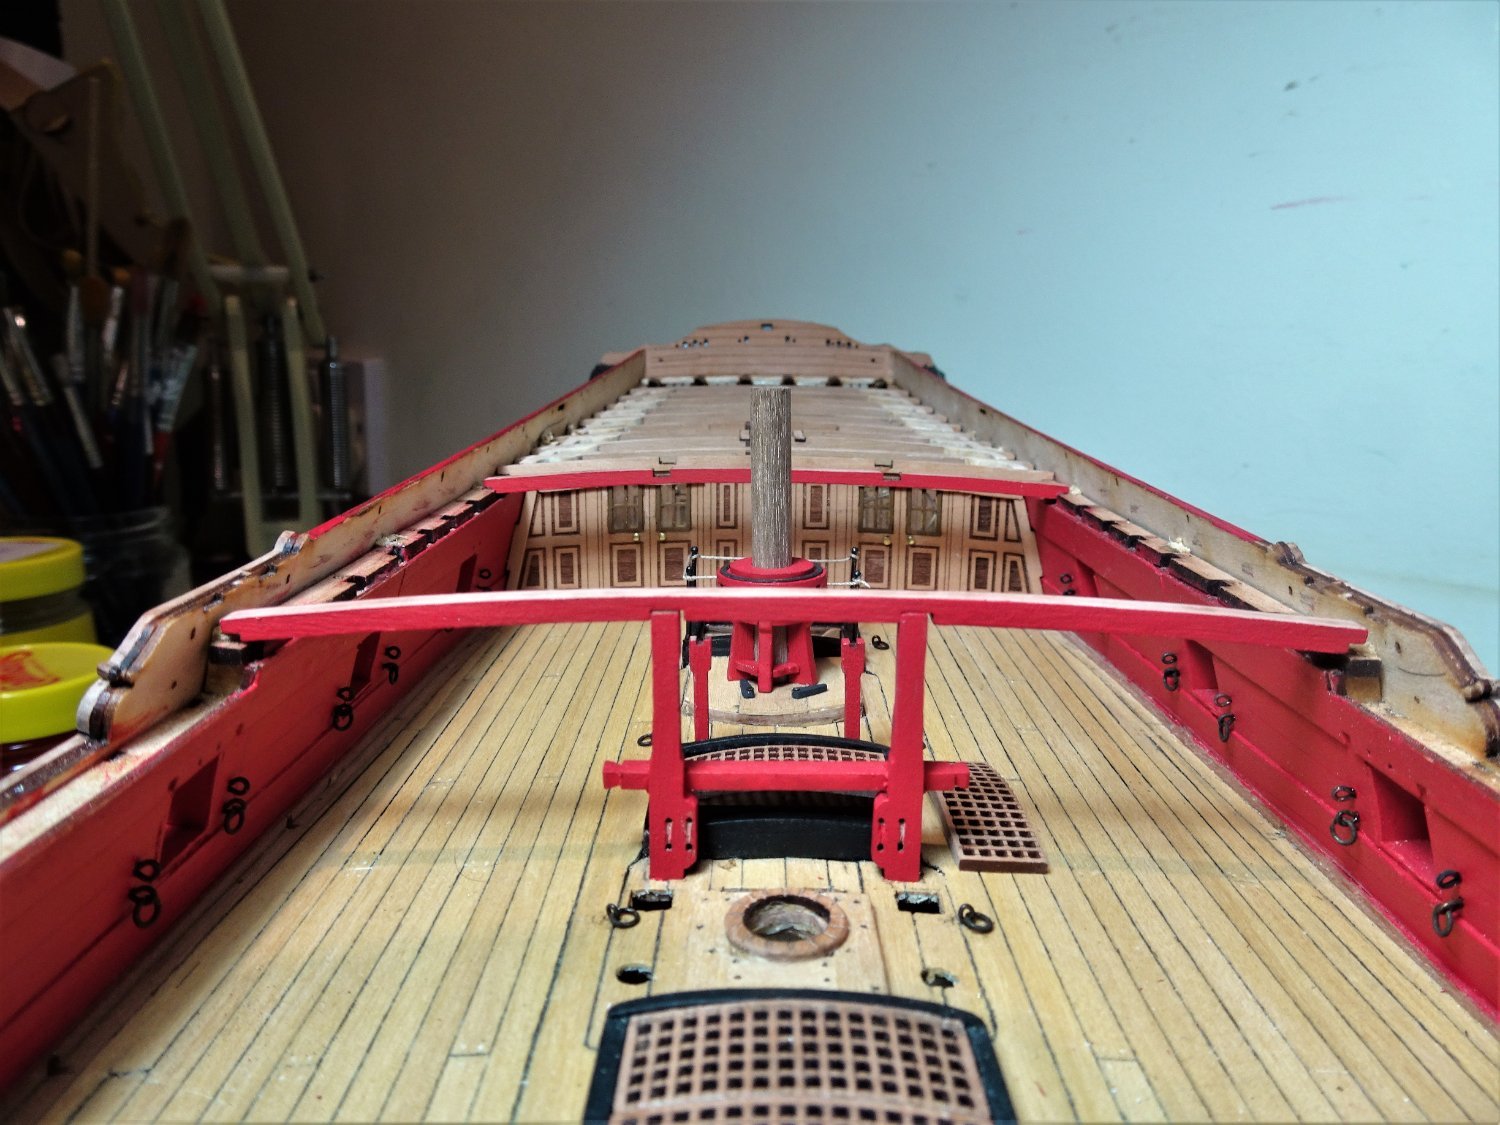
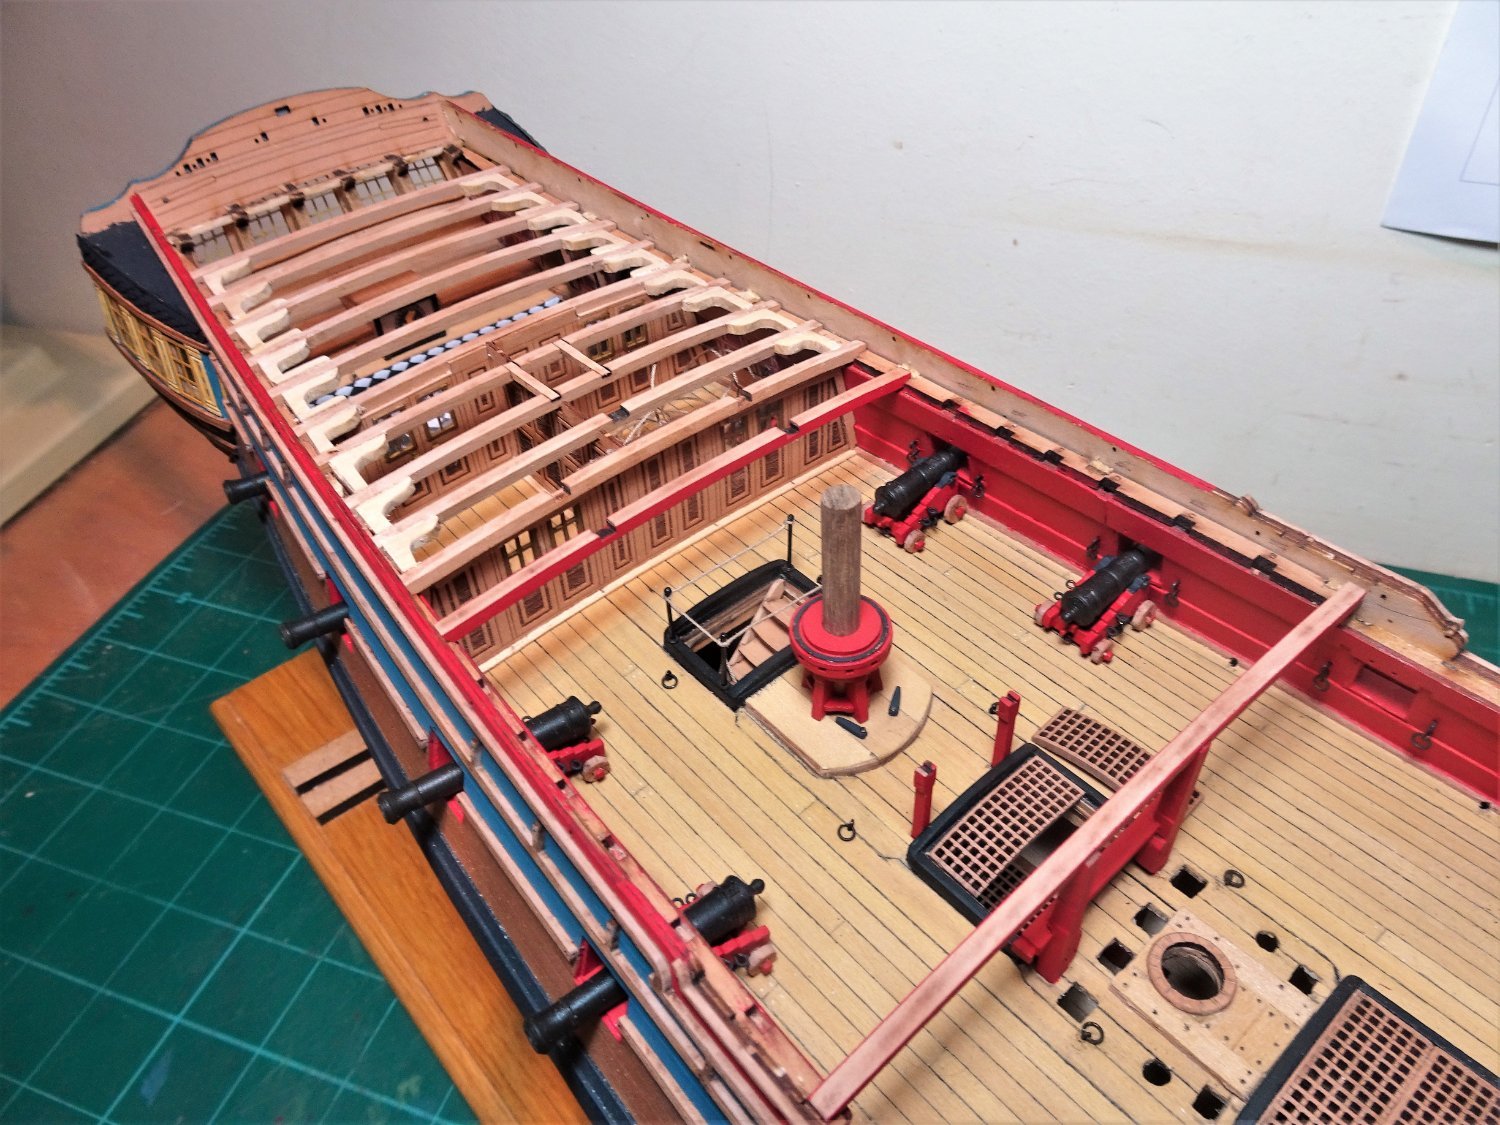
Thank you Yves. Post Ninety More beams and more guns. I firstly need to get all the beams prepped and the guns assembled before things can progress. 5891 The beams are painted red on the fore and aft side which was a traditional practise for the beams forward of the stern cabin areas. Great care has to be taken in removing the char particularly from those beams with notches for the carlings. Too much pressure during sanding without support and they will snap which will make it difficult to maintain the deck camber shape. 5887 I did as a pre-caution have to provide a temporary prop to support beam ‘h’ which appeared to be a little ‘soft’ around the port side carling notch. The remaining four guns below the Qd are prepped. 5913(2) This time I used Windsor & Newton matt spray varnish to seal the surface. 5916(2) Whoever left this ordnance uncovered on the Gun Wharf will spend a week in the bilboes. 5934(2) 5935(2) Another four completed, twelve to go. Safety rails are required for the Aft ladderway In this area removeable iron stanchions would be in place due to the proximity to the Capstan. 5920 The provided etch version do not suit my eye. Again it’s a question of profile. 5928 I made up some replacements. 5938 The Upper deck Capstan is fitted along with the pawls. 5944 And the final action of this stage is to add the aft Chain pump stanchions and the Main Jeer Bitts. I did fettle the cross beam a little at the outer ends. 5952 5951 5956 Time consuming stuff this detailing of fittings. B.E. 03/03/22
.thumb.JPG.5c679d327f1566e78c773dd3d36e5824.JPG)
.thumb.JPG.97501140ee37ecf83e99bc595cae8a87.JPG)

.thumb.JPG.8de17ceed80c0d6675c4cdbfac9b660a.JPG)
.thumb.JPG.d663a709a9b7a1b4e9e84a282d79392e.JPG)


- 857 replies
-
- 24
-
-
-
- Sphinx
- Vanguard Models
- (and 1 more)
-
That bow shot of the headworks looks good, and I like the white paint scheme of the wheel. 👍 As far as the masting is concerned, if you have a variable speed drill you can use it as a proxy lathe and hand sand any taper required, or if you're using square stock the razor plane can be used to gradually round the stick, finished off by hand sanding. I don't imagine the lower masts will be too problematic because little if any taper is required, maybe some flattening for the cheeks. The tricky part will be keeping the masthead which is square in section true. Were I doing it, I would cut around the base of the head using a razor saw 1mm deep, glue a template of the square section on top of the dowel. Pare it down by degrees using a chisel or similar, and finish with sanding sticks, constantly checking the square. The Topmasts are more tricky, having an octagonal heel, square head, and flared hounds. On these I would personally start with square stock, as the rounding and tapering are easier to do, but if you're using round stock then a sharp chisel will be your friend. I would mark off each section using Tamiya tape, and begin with the rounding and tapering section between the heel and hounds. B.E.
-
They look good Bug. 👍 My Capt. Grim looks like an extra from 'Fear the Walking Dead' B.E.
- 419 replies
-
- 5
-
-
-
-
- Victory Models
- Pegasus
- (and 2 more)
-
Time goes so quickly when you're having fun Derek, I really must get out of my garret more. 😄 B.E.
- 857 replies
-
- 1
-
-
- Sphinx
- Vanguard Models
- (and 1 more)
-
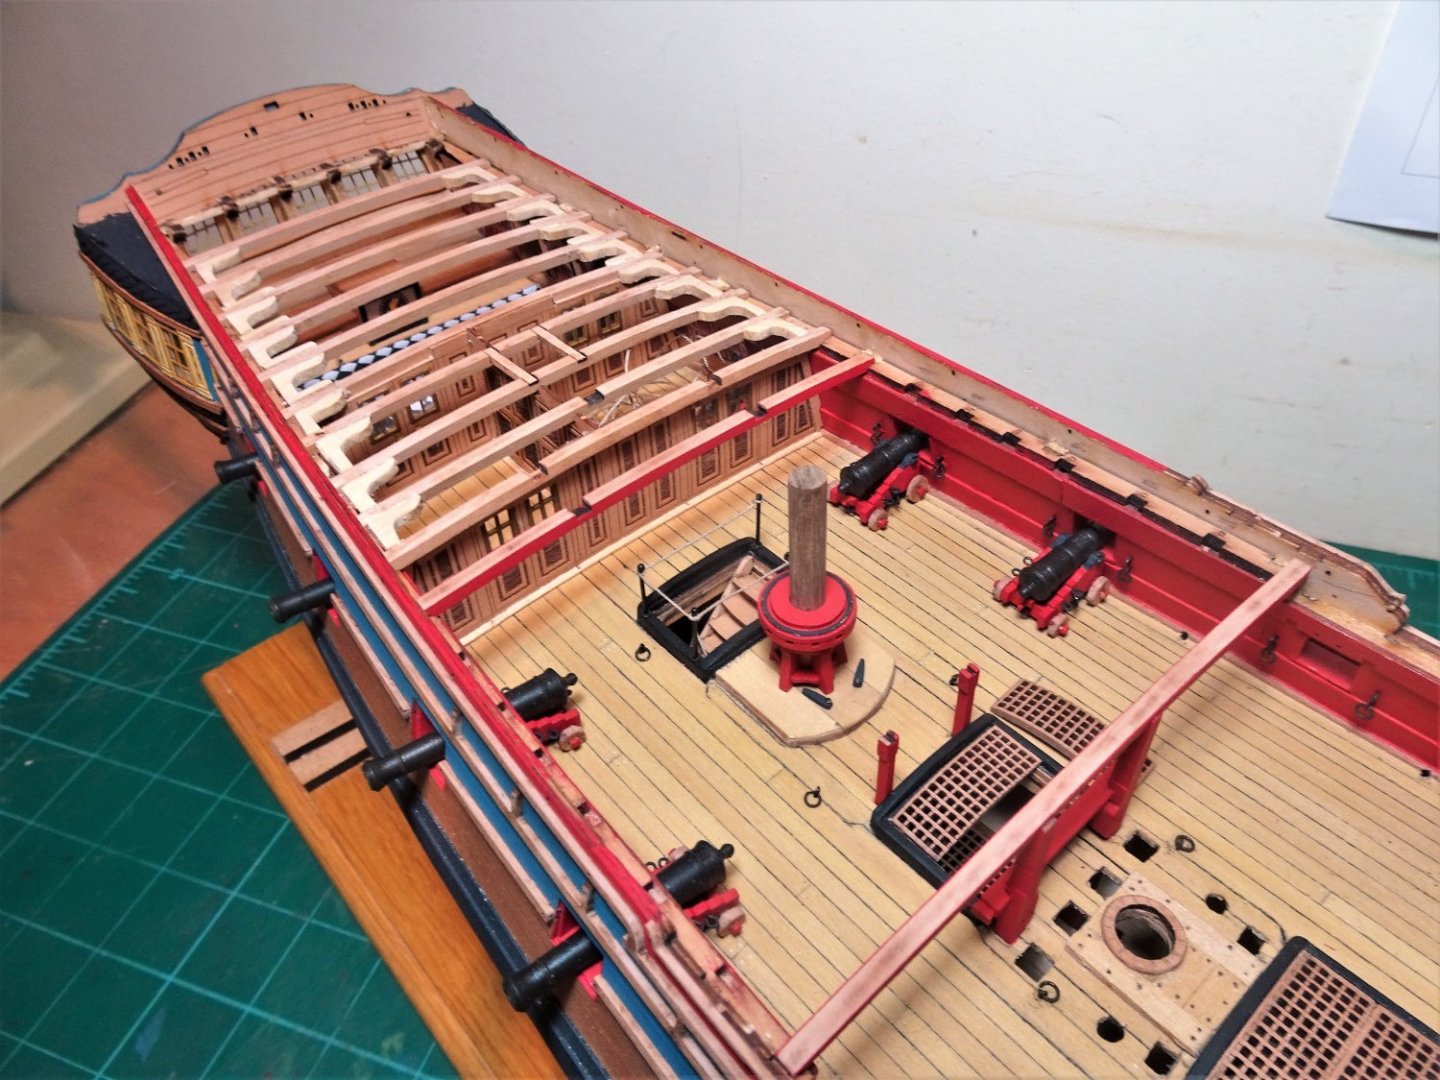
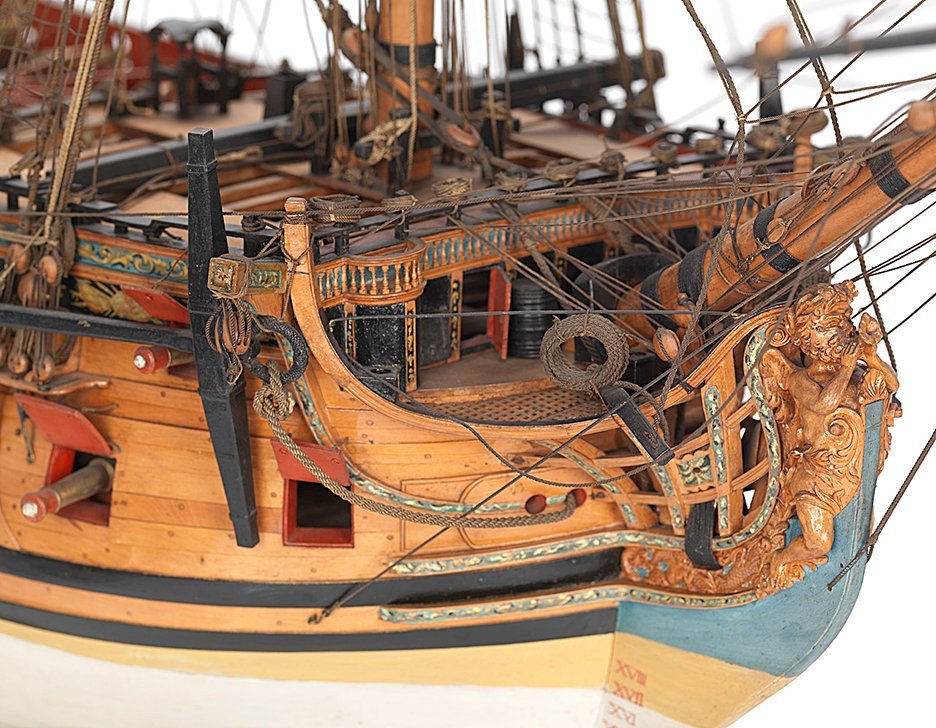
Thanks Mark and Theo. This type of Navy Board style display model was never intended to show the working operation of the ship, merely the features contained and the overall appearance, but it's nice to see some of the constructional detail. I suspect the elaborate decoration was really intended to please the eye of the intended customer (the King) and presumably get financial backing to build the real thing. Post Eighty-nine Hanging Knees and Lodging knees. I have never fitted these to a model previously so it is a new experience for me. I start with the forward Cabin area where only Lodging knees are required. 5876 Hanging knees and Raking Knees are fitted in the Great cabin but they can barely be seen. The kit provided Hanging knees required a little modification to match the Lodging knees, but they weren’t intended for external display. The heads were replaced with Boxwood section. 5877 5874(2) 5881 5880 5879 5884 Another two days work to shape and fit the knees. Moving on to the Break of the Quarterdeck, and four more guns to assemble. B.E. 27/02/22
.thumb.JPG.79447eb2d38b967e70947dbebaf5a875.JPG)


- 857 replies
-
- 19
-
-
-
- Sphinx
- Vanguard Models
- (and 1 more)
-
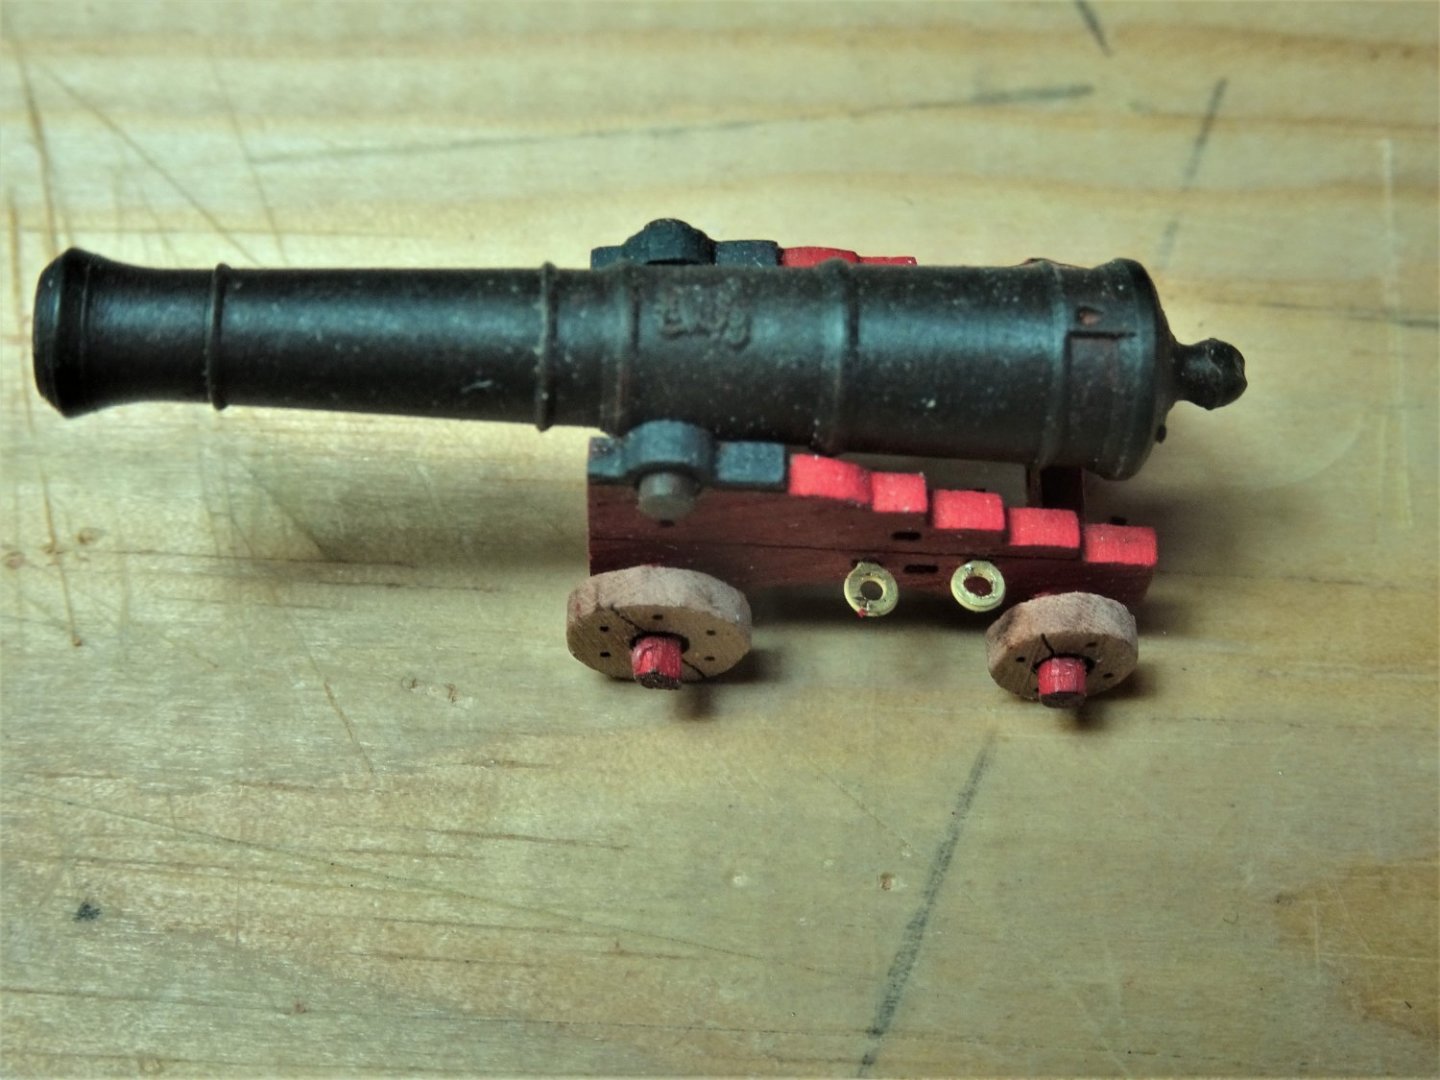
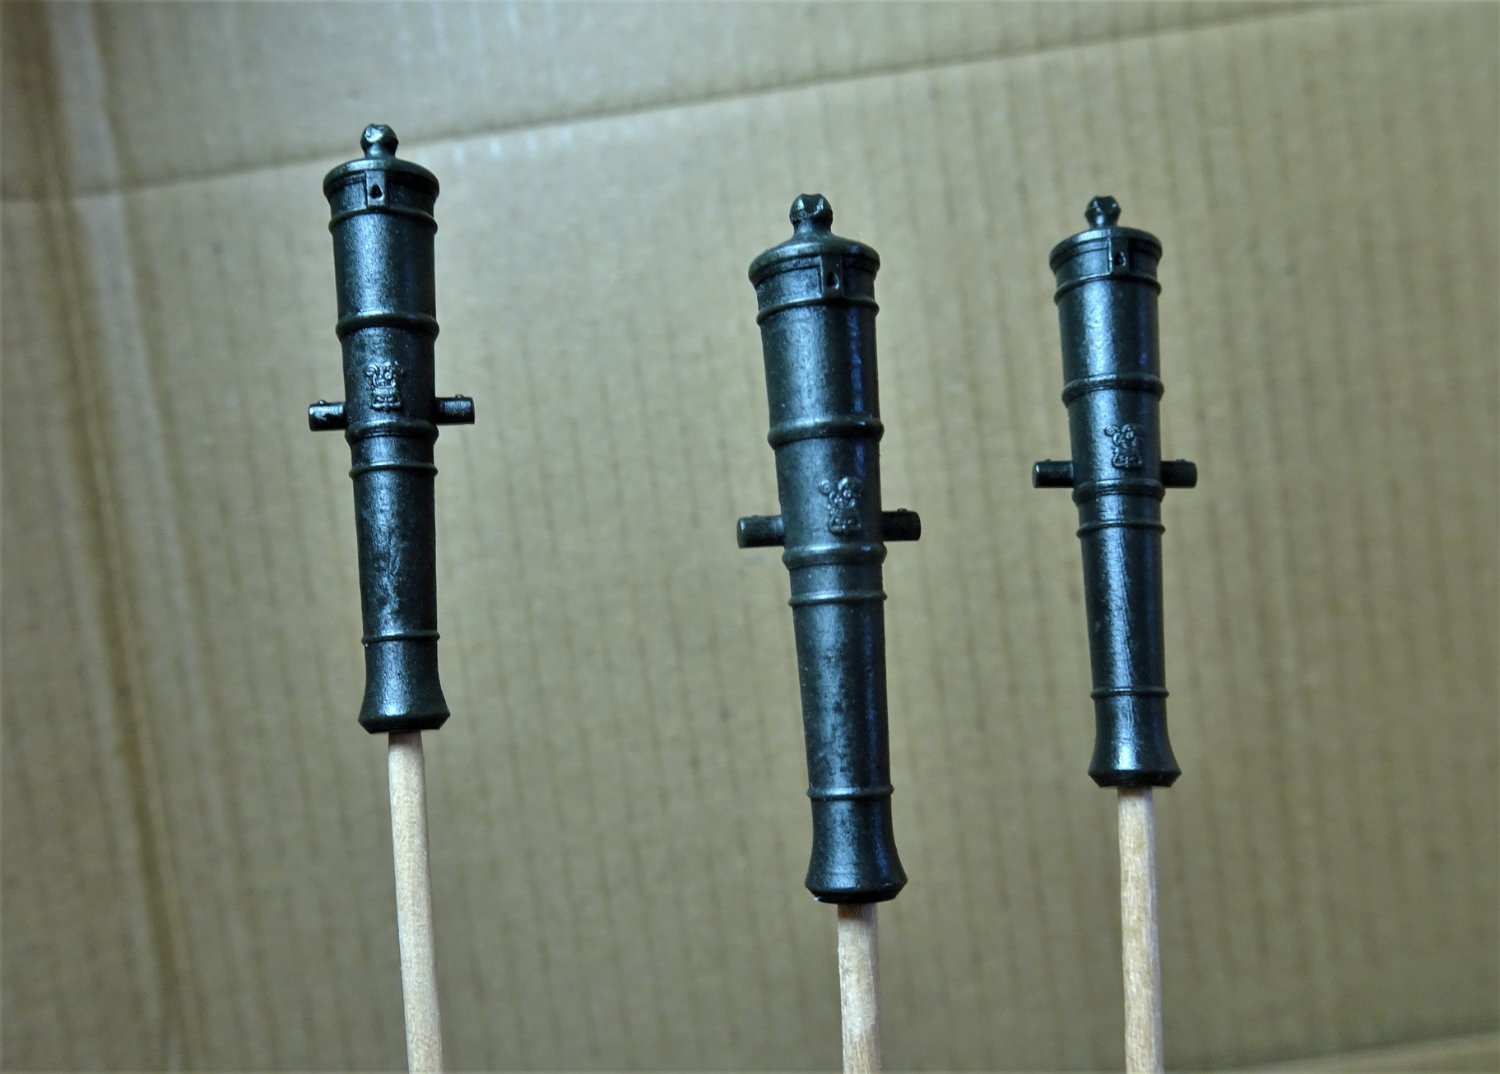
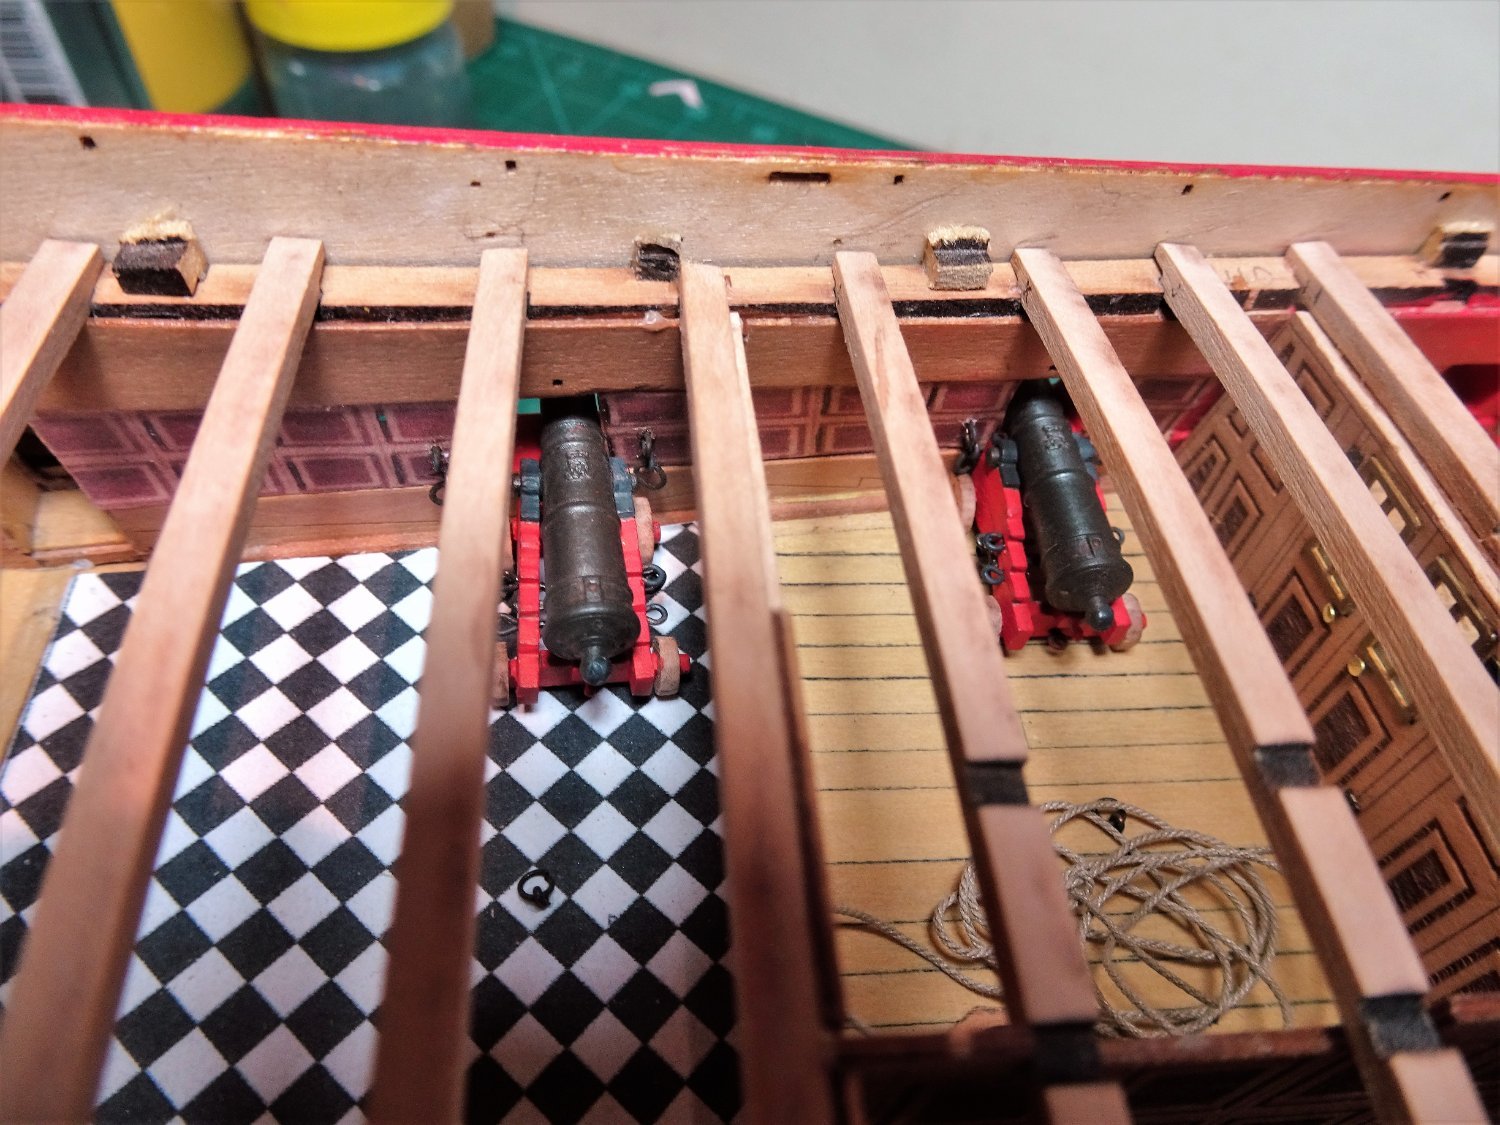
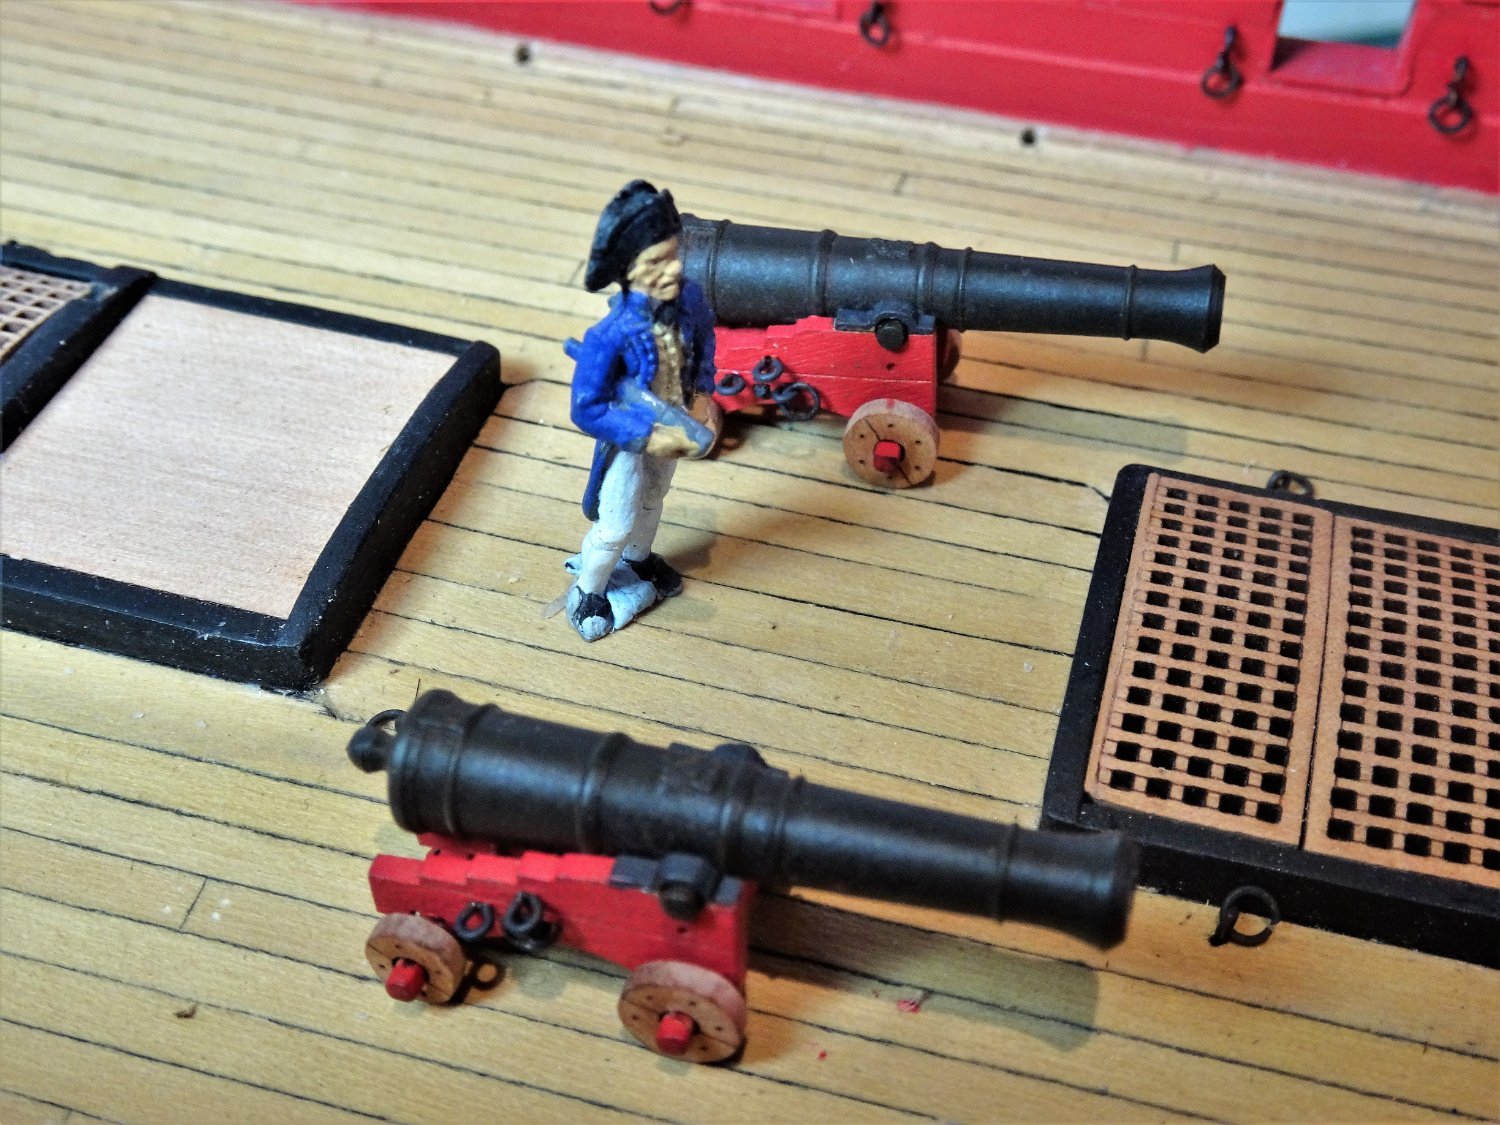
Post Eighty-eight Making up some guns. I last looked at the guns ( Post 30 in October last year) when I partly made one up for gun port alignment purpose. To complete the cabin areas I need to make up four guns which have to go in before the beam and knees can be put into place. This is a multi stage operation that takes some time to complete, two days for three guns in my case. 5836(2) The makings for the guns. 5844(2) I like to make a simple jig to assemble guns to keep things square, and assist my finger fumbling, crude but effective. 5840(2) Only one side is glued in place here, the other bracket will be painted separately before assembly together with the gun. 5849 The barrels are sprayed with fixative prior to weathering. Iron work fittings I am not a fan of the provided etched eyebolts for the brackets. They look clunky to my eye, and the Breeching ring bolt lacks the ring thro’ which the breeching rope passes. 5834 In an attempt to make the loops more scale like, the one on the right has been drilled out using a 1mm drill, but even so still doesn’t please my eye. At full size the loops are ½”ø thick, (0.19mm) and 1½” in the clear (0.59mm) 5872(2) Amati fine eyelets have been used for the loops, and 2mm Amati rings to create the carriage breeching ringbolts. In reality none of this really matters if the kit is to be constructed as is. By the time the decks are in, the gang-boards fitted, and the boats in place, very little will be seen of the guns except the finely cut muzzles outboard of the ports. In one sense a pity, because the fine detail on the gun barrels will be hidden. 5852(2) The final part of the assembly is to add the Quoins, they were glued on and painted in situ. The stem of an Amati eyebolt with a blob of pva formed the handle. 5855(2) This is really small stuff to work on. Reminder to ones self Fishing Boats don’t have bloody guns! 5857 Not yet decided how to secure the guns . 5859 Not much room in the Coach and Bed space once the nine pounders are in place. 5861 Between the beams, so much of all that effort is hidden. 5864 I’m almost tempted to place a couple of guns in a more readily seen position to display Chris’s fine mouldings, altho’ finding a clear position below the skids could also prove tricky. For those who may be interested in fitting the guns and rigging them these are the measurements applicable to 9 pounder guns. The Breeching rope is 4½" circ. equating to 0.56mm ø at scale. I would use Syren 0.63mm line for the purpose. The Breeching ring is 3” in the clear = 1.19mm. The ring thickness is ⅞”ø = 0.34mm at scale. The Amati 2mm rings are close to these dimensions. The loops are ½”ø thick, (0.19mm) and 1½” in the clear (0.59mm) The tackle lines are of 2" circ equating to 0.25mm ø at scale. (I would use 0.1mm ø line for better scale effect.) These figures are taken from The FFM, David Antscherl, and The Arming and Fitting of English ships of War, Brian Lavery. The manual does provide details of blocks and line sizes. If following the manual advice I would go for the larger 0.75mm ø line to provide a nice contrast with the 0.1mm tackle lines. B.E. 23/02/22
.thumb.JPG.c409f72efe5475190de34d9964b6b3a6.JPG)
.thumb.JPG.ecb678687e0c664aa68f1baaa4dbb70d.JPG)
.thumb.JPG.dc7a593f9df7033b5ac0c627244605fb.JPG)

.thumb.JPG.7725366ebf1ffcd410311b92e7f8033c.JPG)
.thumb.JPG.5814a85c6a3979c23b330d83c0f978f3.JPG)


.thumb.JPG.451d93b8f650ac81c1e74b8096ff66c2.JPG)
- 857 replies
-
- 22
-
-
- Sphinx
- Vanguard Models
- (and 1 more)
-
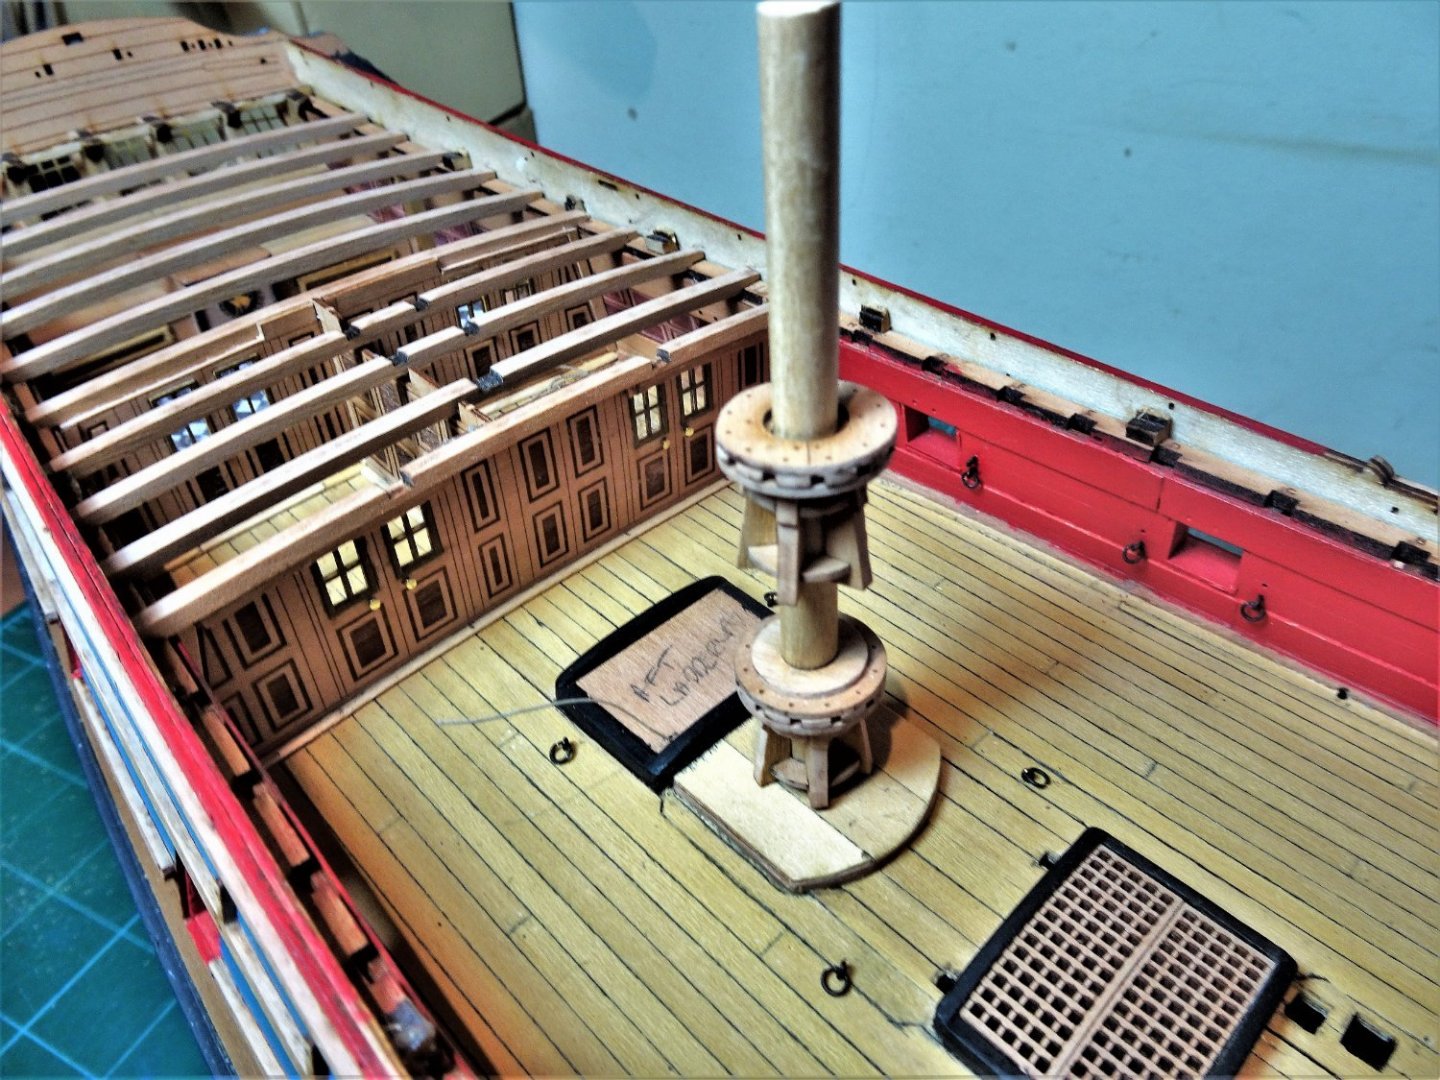
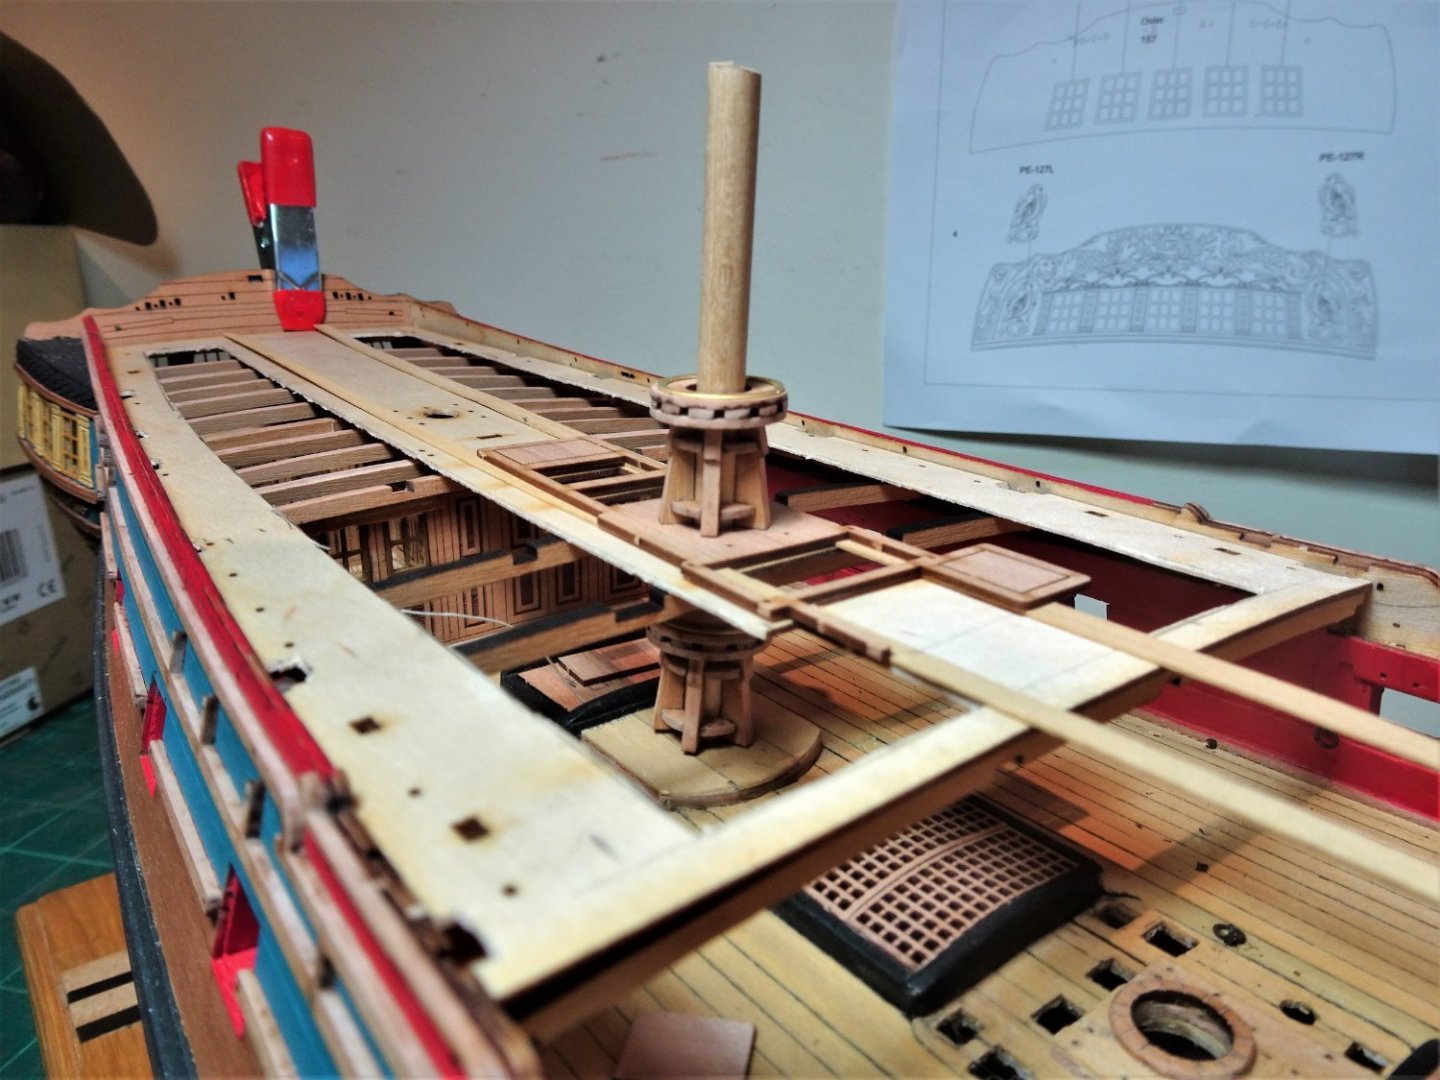
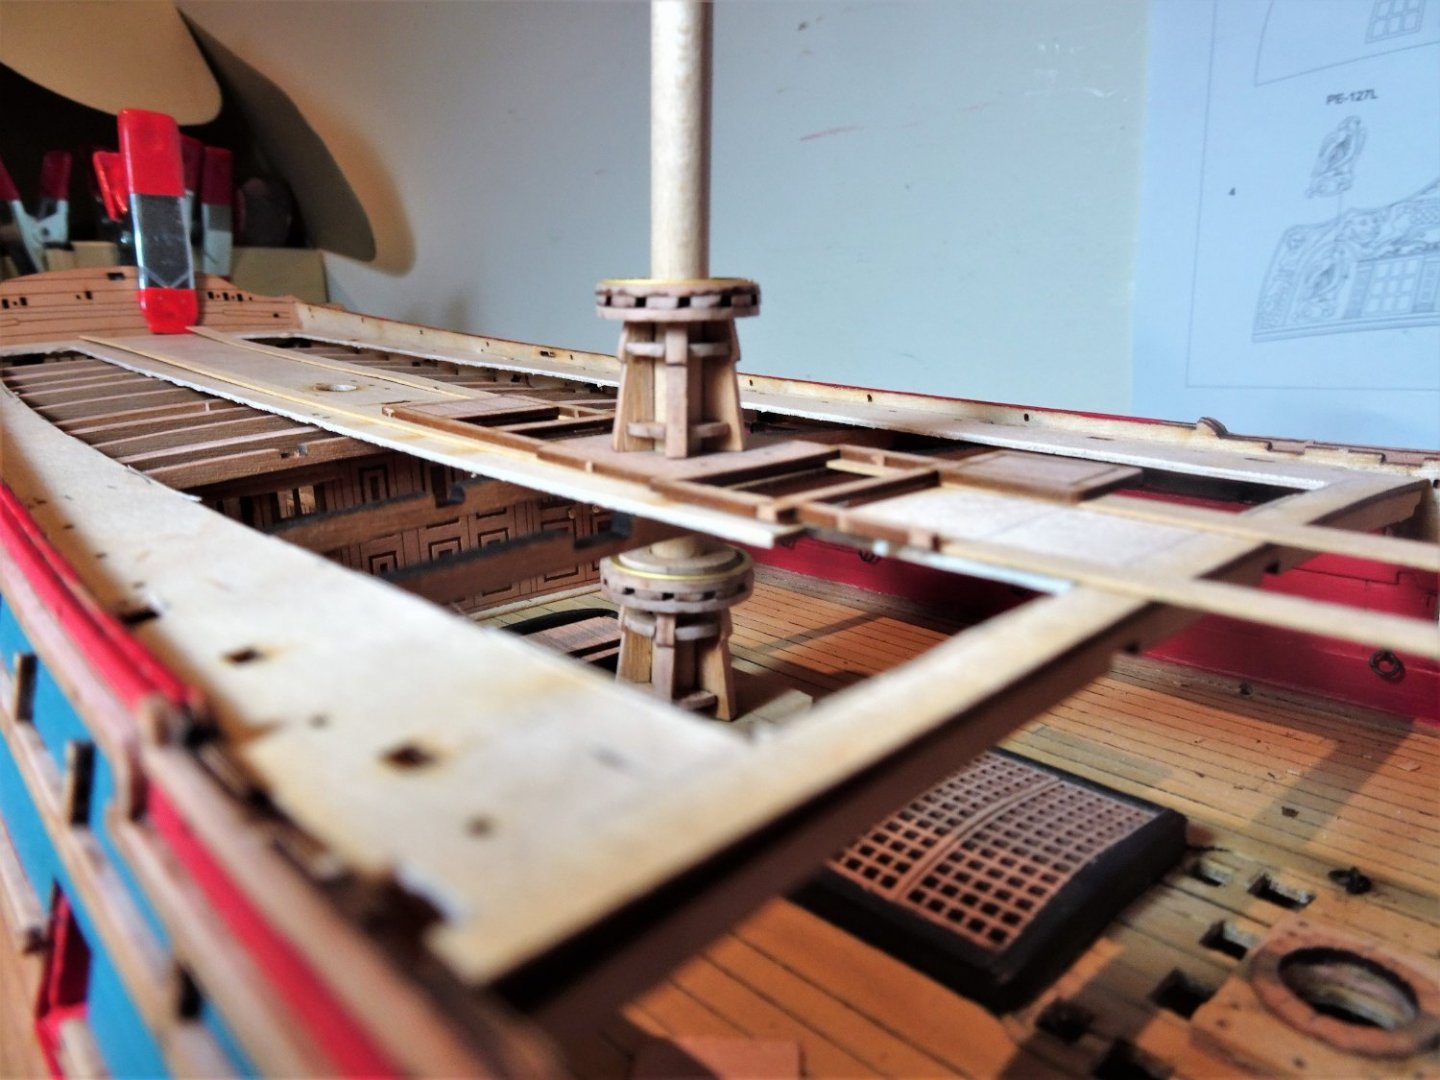
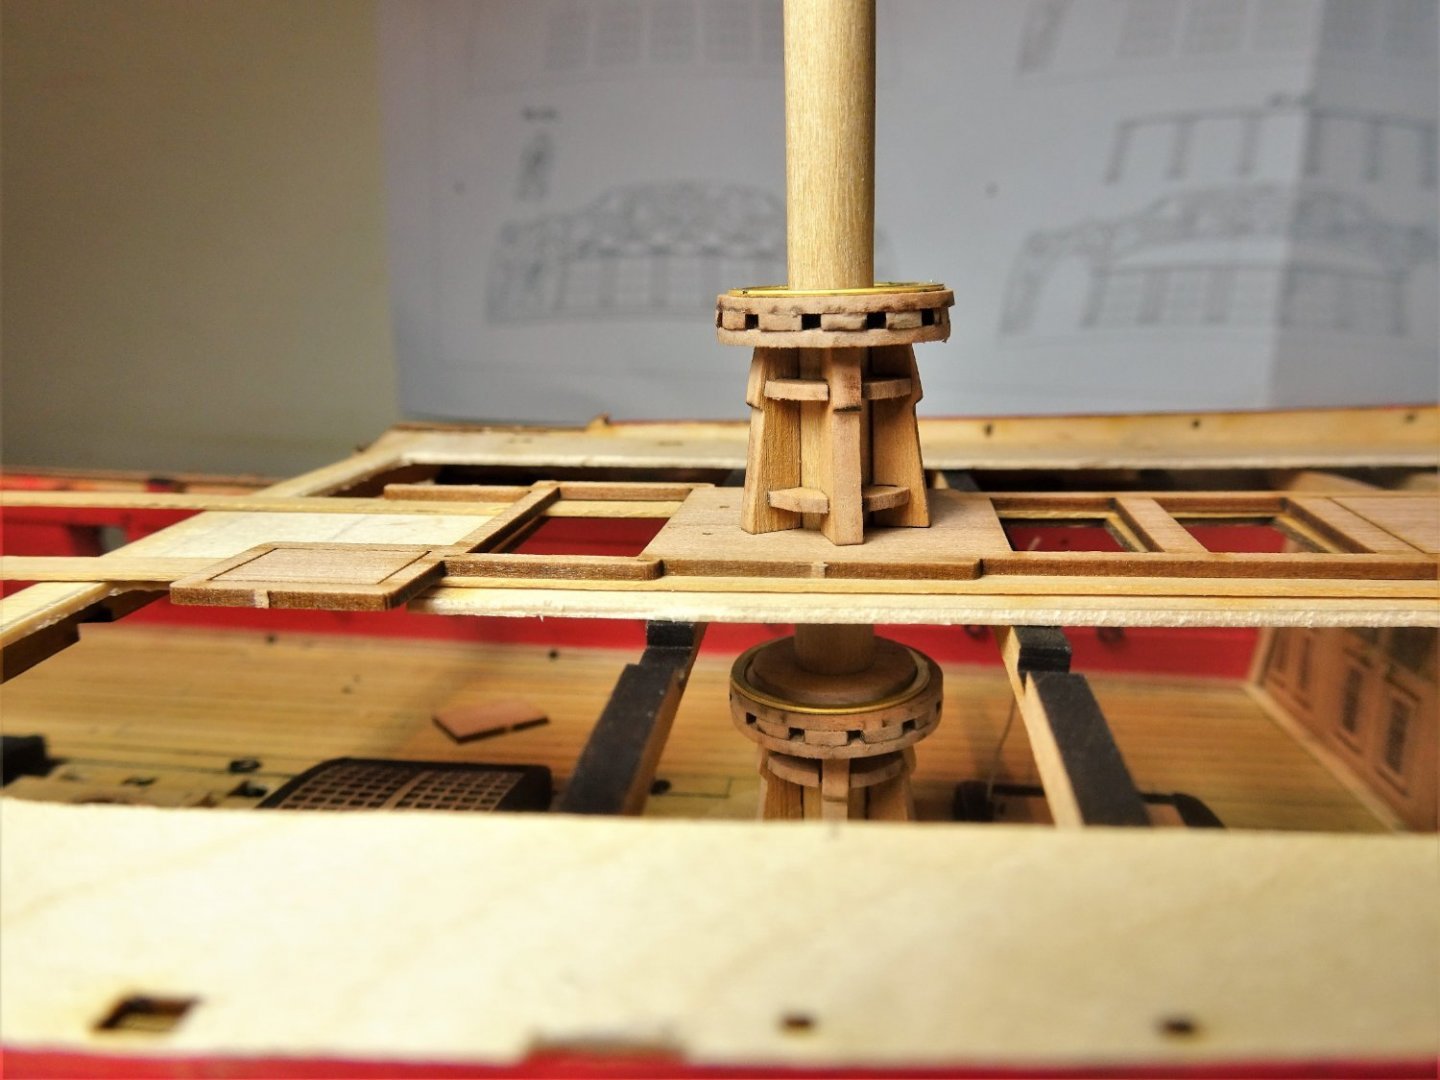
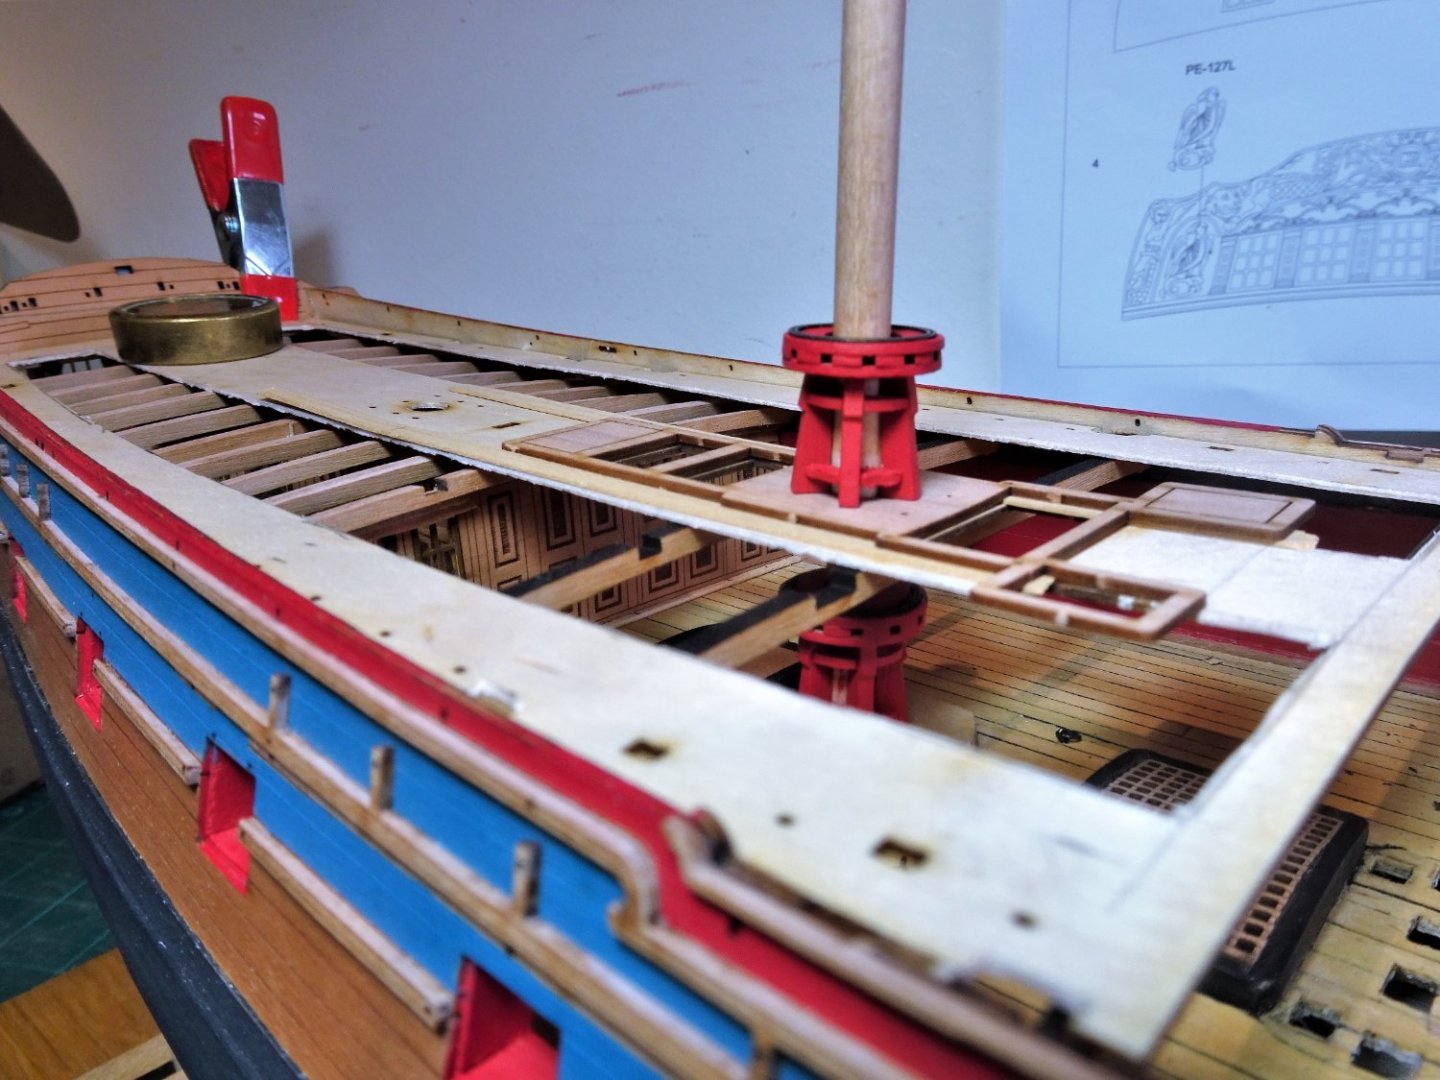
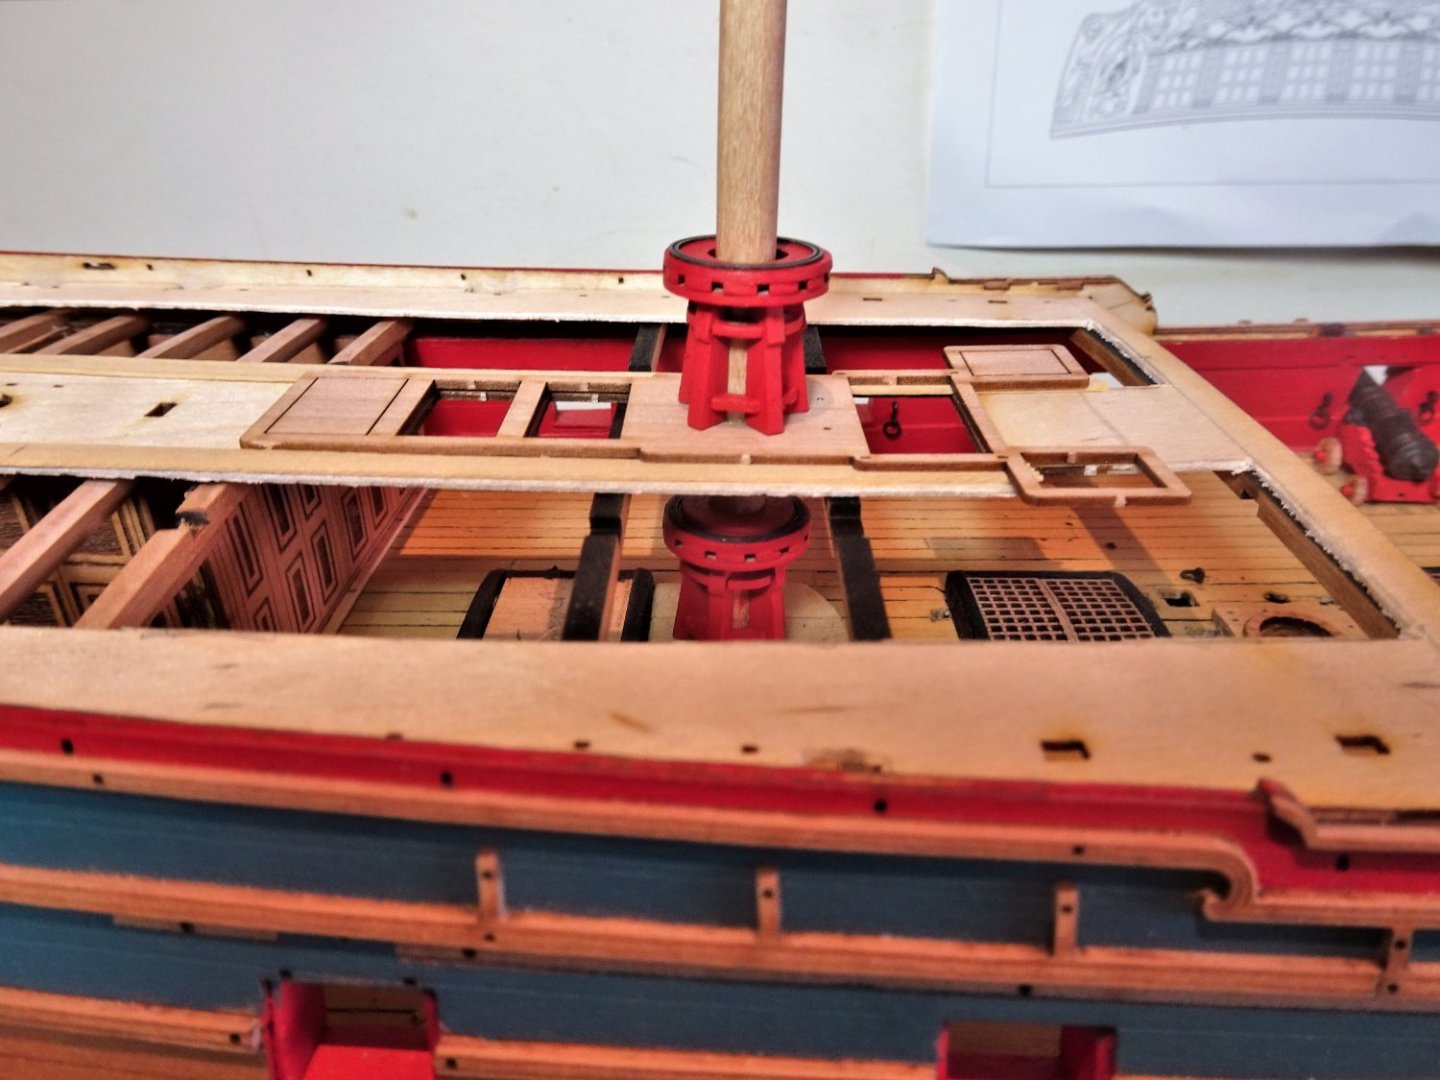
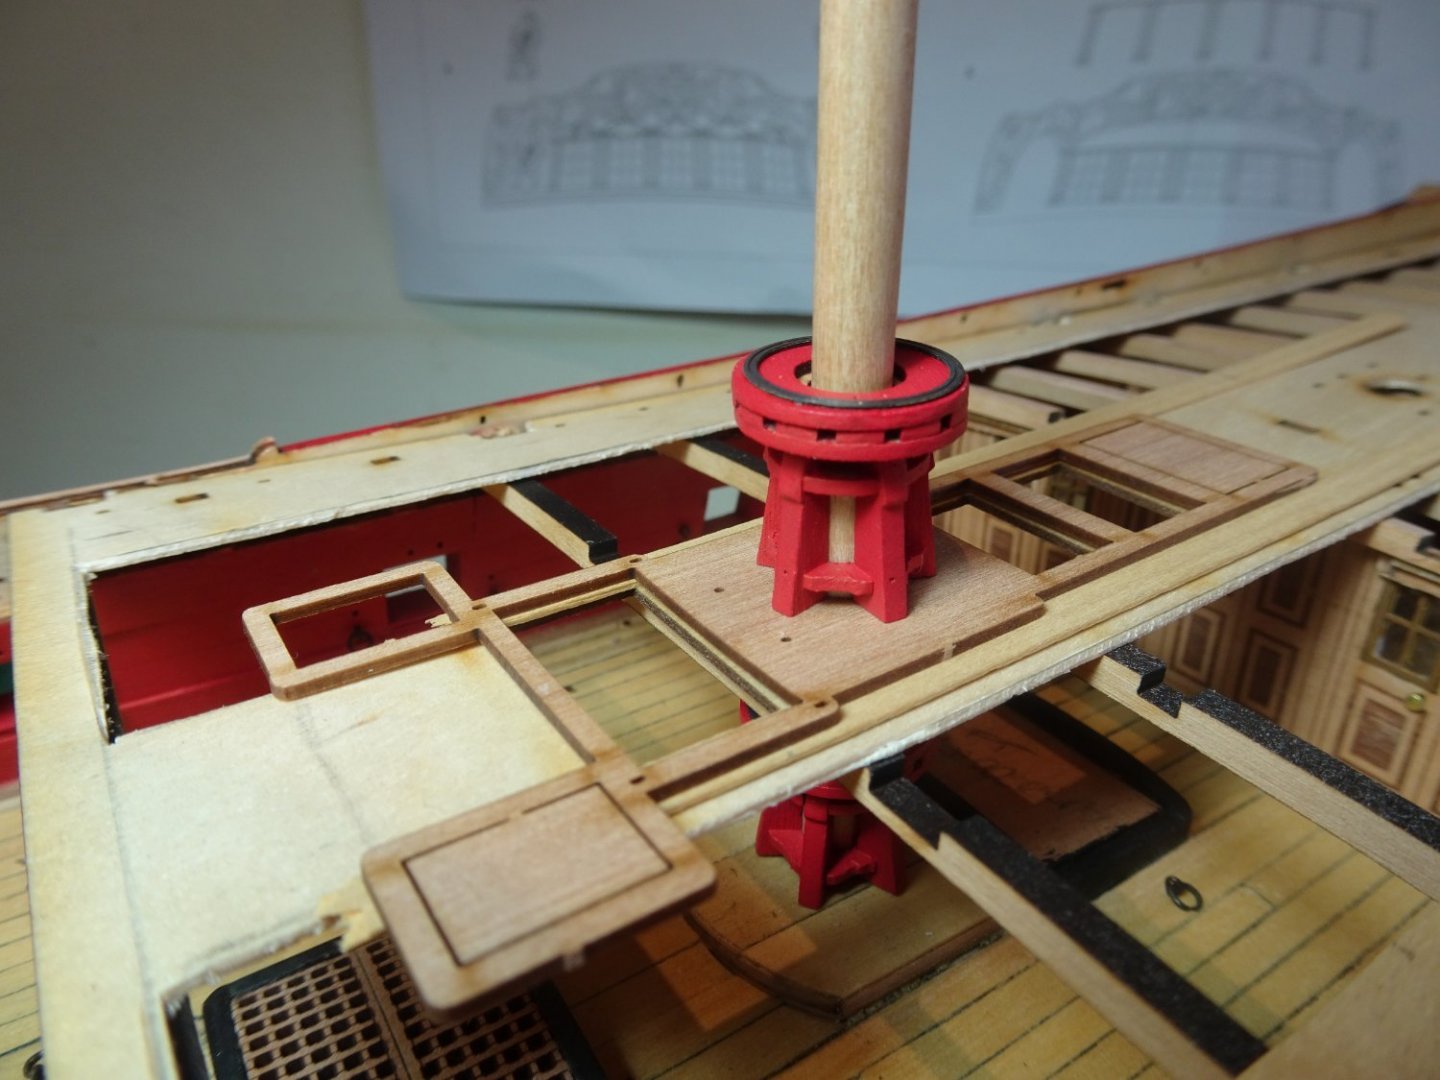
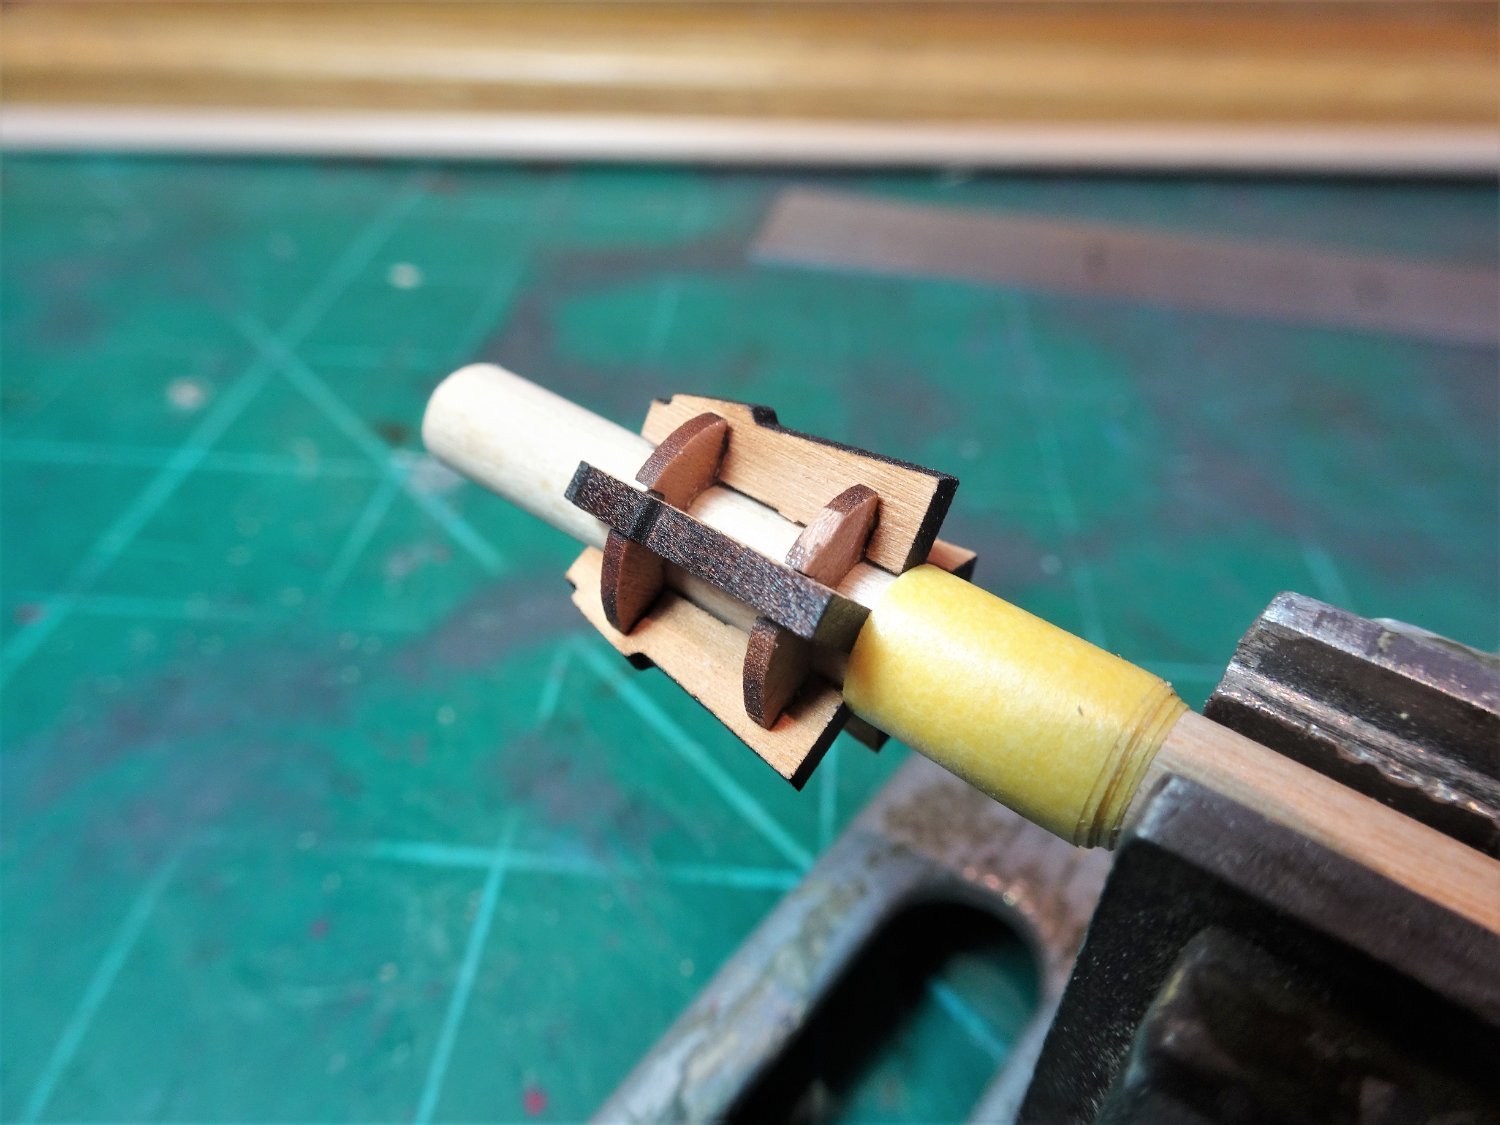
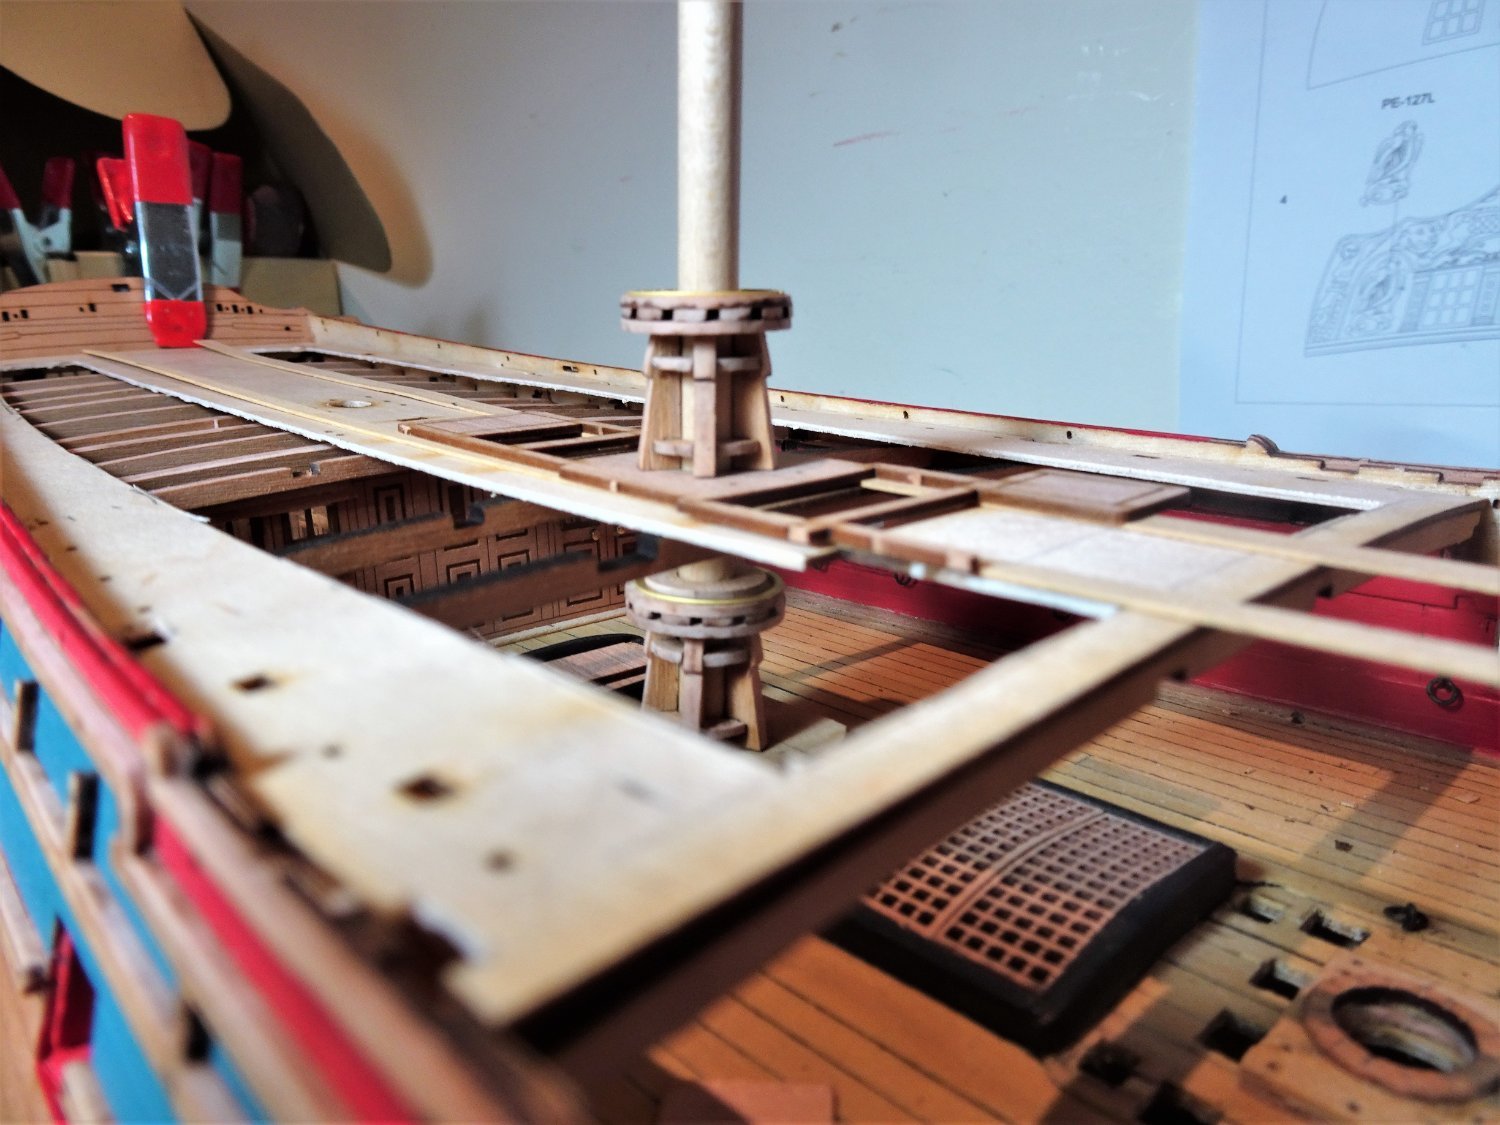
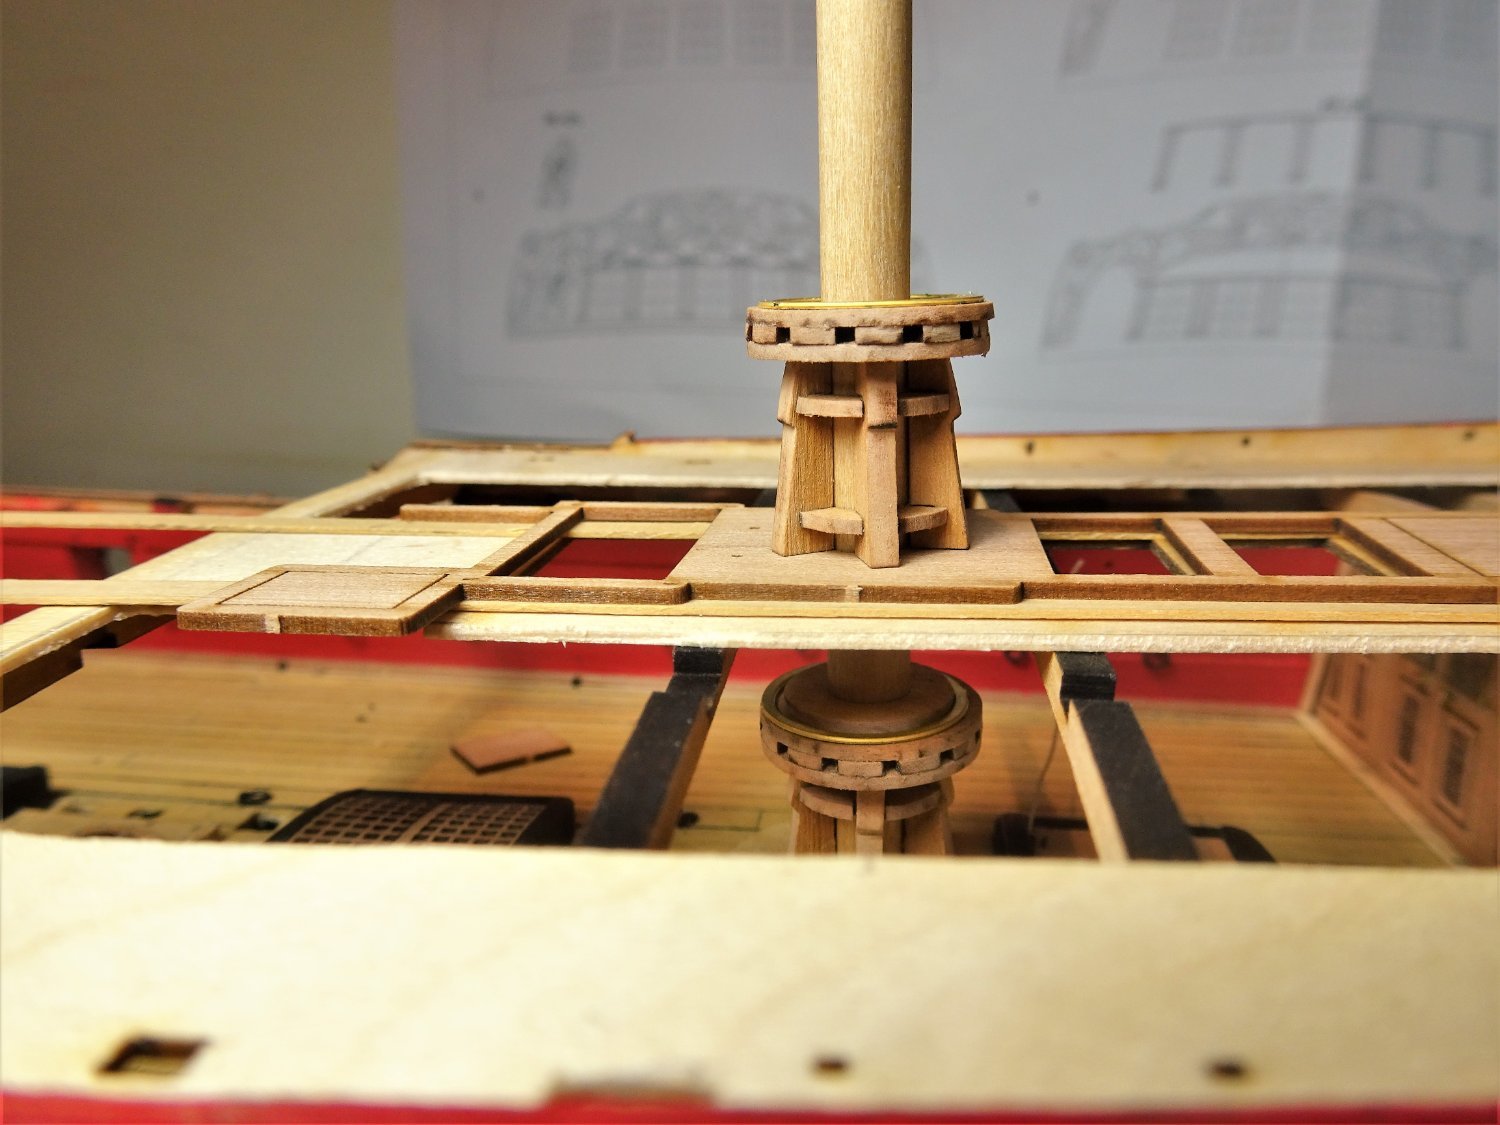
Post Eighty-seven Looking at the Capstans The Upper deck Capstan that sits below the Quarterdeck will be required in the near future. 5785 I build these on a 6mm dowel rod and once the Whelps are in place is the time to remove the char. 5798 They are quite straightforward to assemble, the biggest issue is whether to paint them or leave them bright. Even so, they will stand a little bit of extra detailing. Syren 1:48 scale model Capstan. I do have Chuck’s wonderful little ‘Winnie’ Capstan model as an example. I would at least hope to add the iron reinforcing rings atop the capstan trundle heads. Once assembled I like to move ahead and do a mock-up of how the completed units will look. I would say to any builders new to this sort of kit, don’t just follow the blurb in rote fashion, look ahead and get a feel for how the model hangs together. It is important that parts removed from the frets ahead of their immediate need should be labelled and bagged. 5801 I am keen to see how much of the lower capstan will be seen. 5806 5809 The upper part of the barrel beneath the QD, connecting the two capstans will not be visible, so I won’t bother detailing the iron ribs that feature on the Winnie Capstan. 5816 I found a couple of brass rings in my etch collection that are perfect for the iron reinforcing rings on the Capstans. These will be blackened before fitting. 5820 Seeing them in place the decision is made to paint the capstans Red ochre, to particularly make the lower one stand out. 5822 5828 Not quite finished, the barrels will need to be painted Red, but for the present I’ll set them aside. B.E. 21/02/22
.thumb.JPG.51d02cdef1069b8852fb0a5716470b66.JPG)


- 857 replies
-
- 22
-
-
- Sphinx
- Vanguard Models
- (and 1 more)
-
ain't it the truth 😄 B.E.
-
Both the lower hull and those tricky Quarter galleries look good Glenn. 👍 I don't think you should have any issues when it comes to getting a clean run of moulding rails around the stern and QG’s. B.E.
- 476 replies
-
- 2
-
-
-
- sphinx
- vanguard models
- (and 1 more)
-
Only just come across your build Tim, and what a beautiful Fifie you have produced. We seem to have at least three things in common, a love of ship modelling, a shared birthday, and a fondness for fishing boat detail. Regards, B.E.
-
What a great project Kirby, very nicely done👍 B. E.
-
Coming together very nicely Derek, 👍 B.E.
-
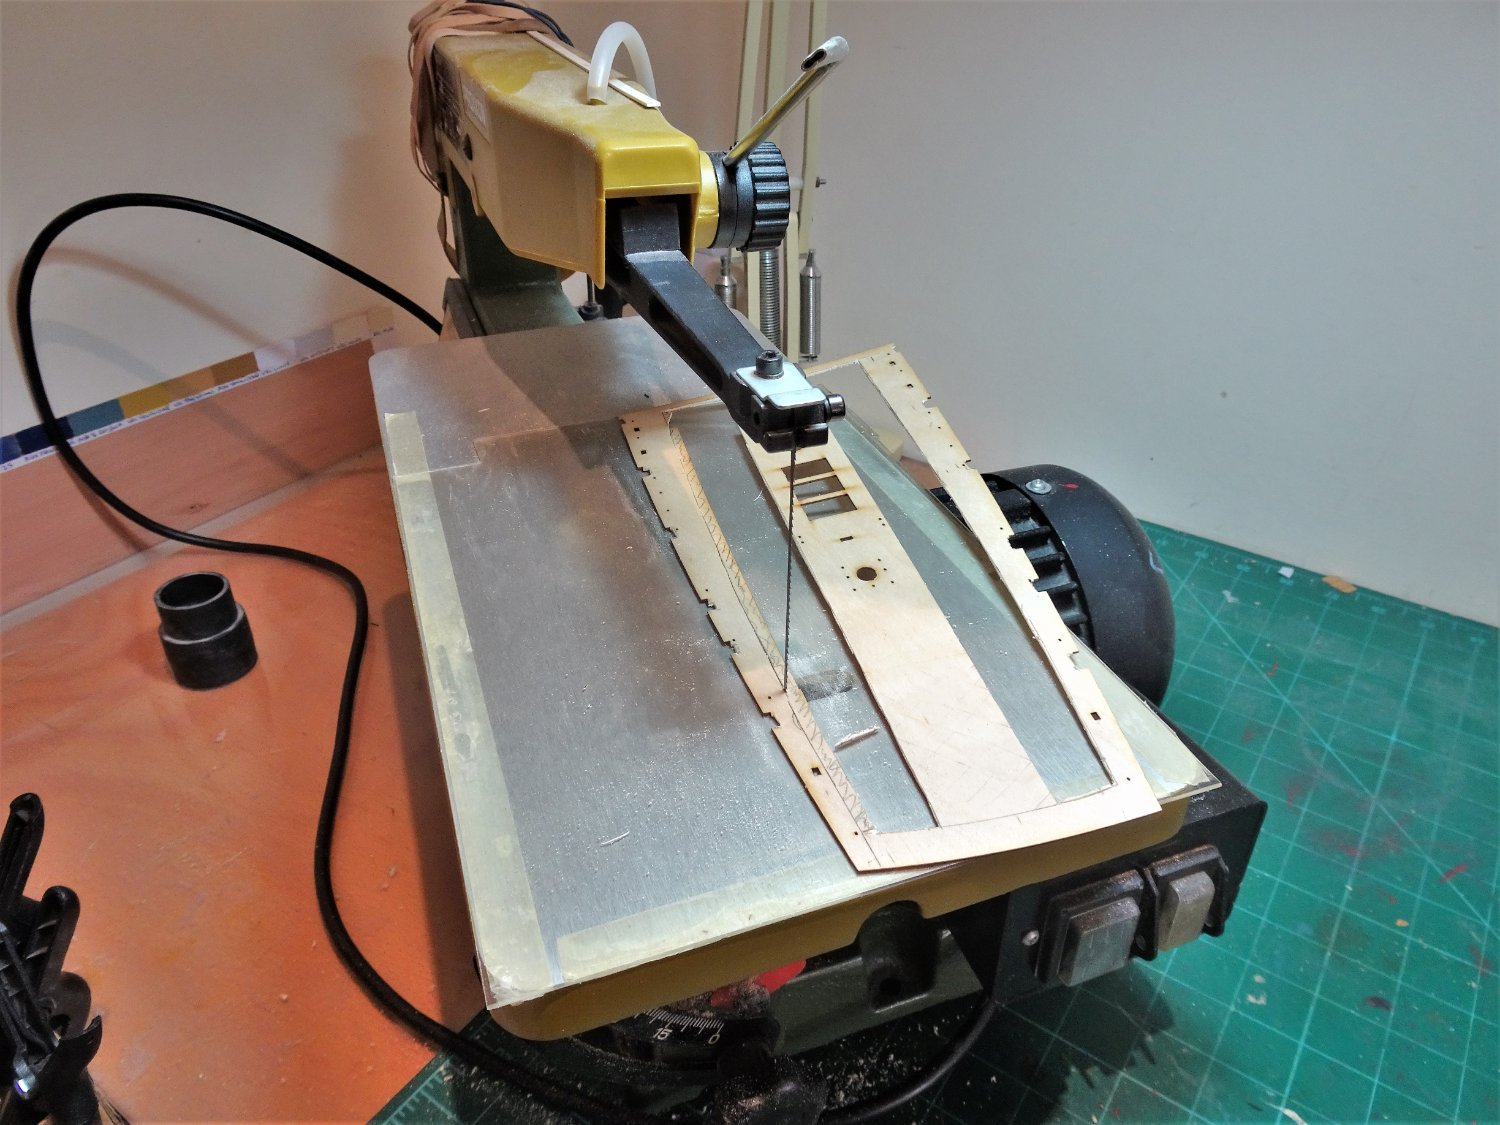
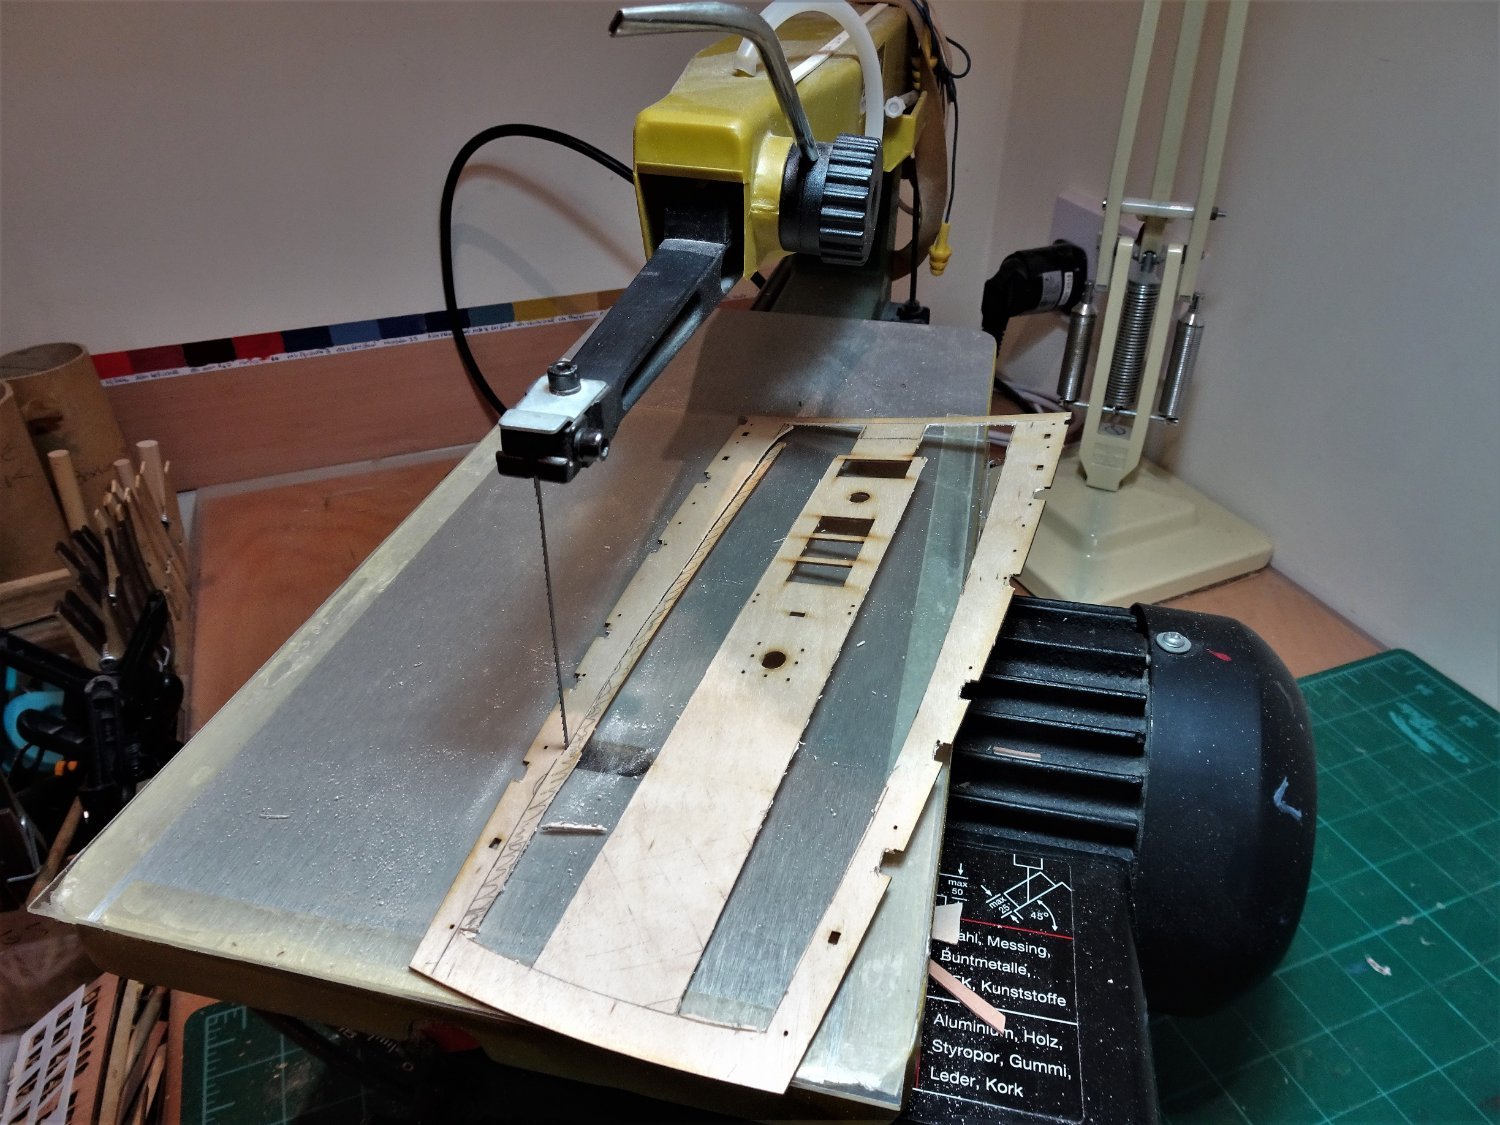
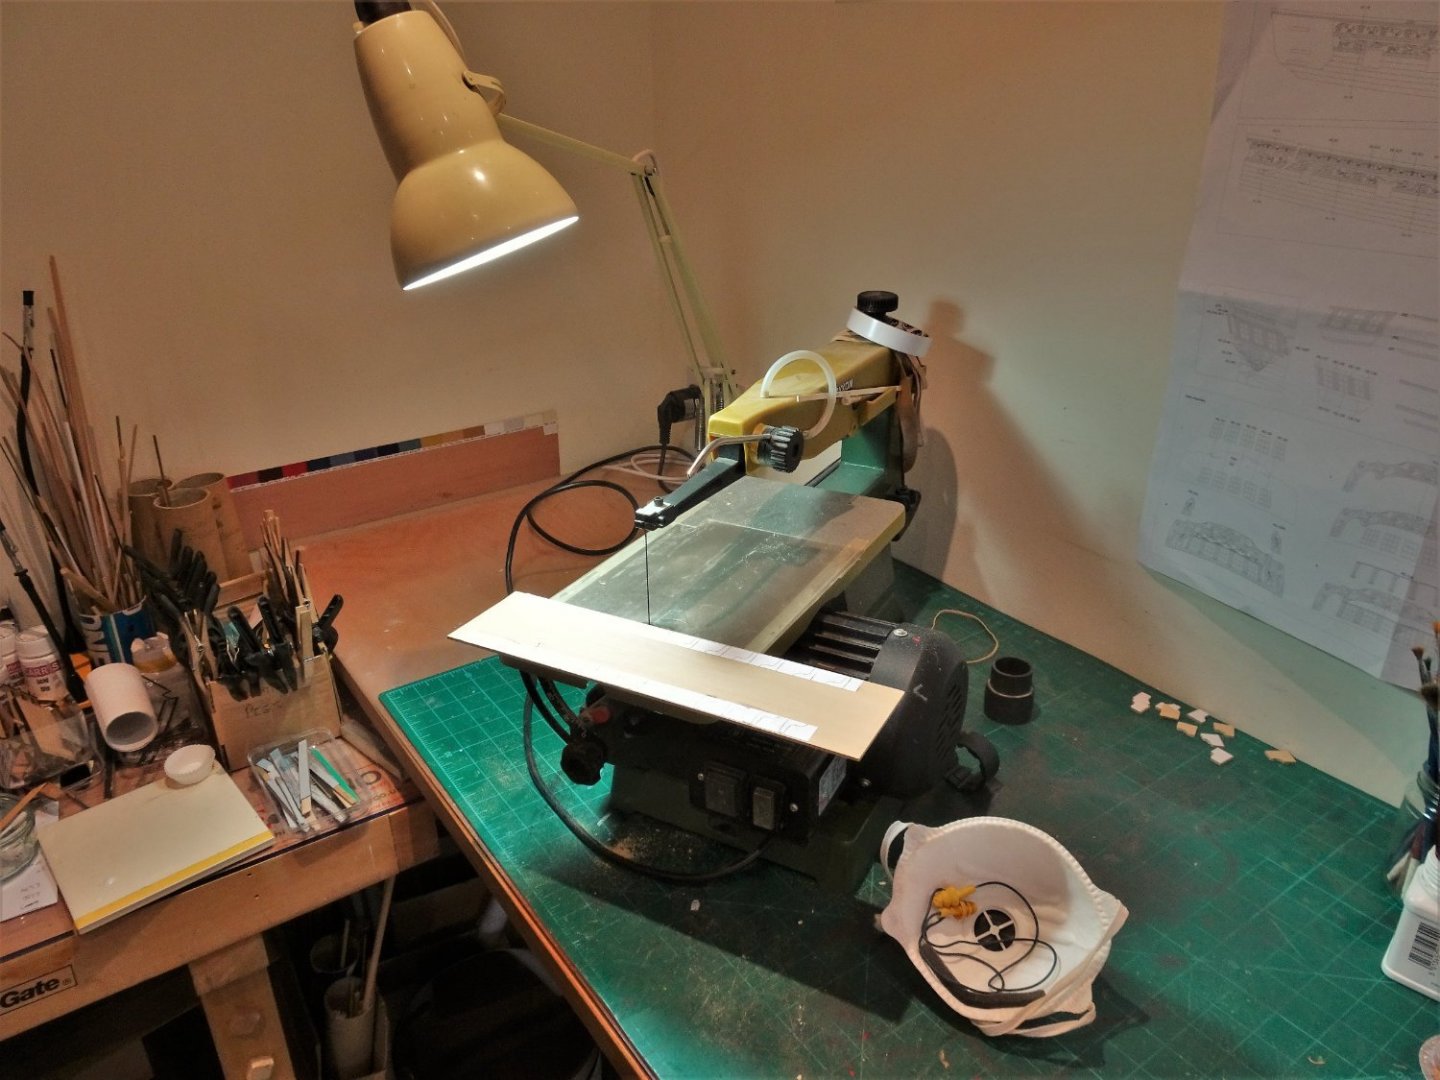
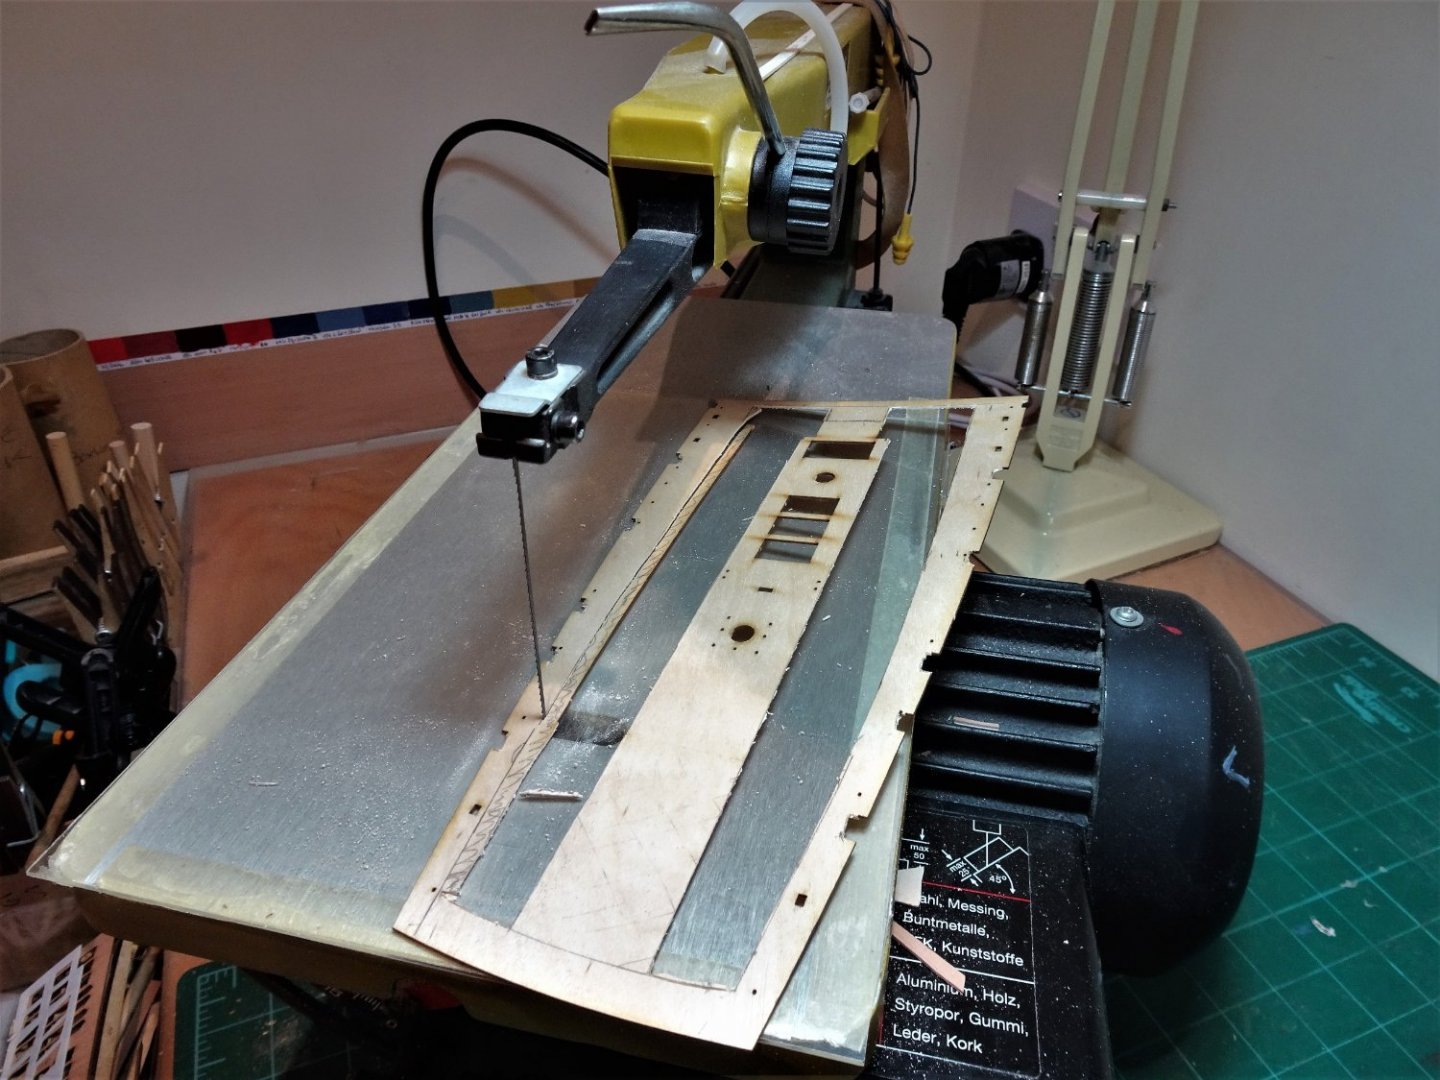
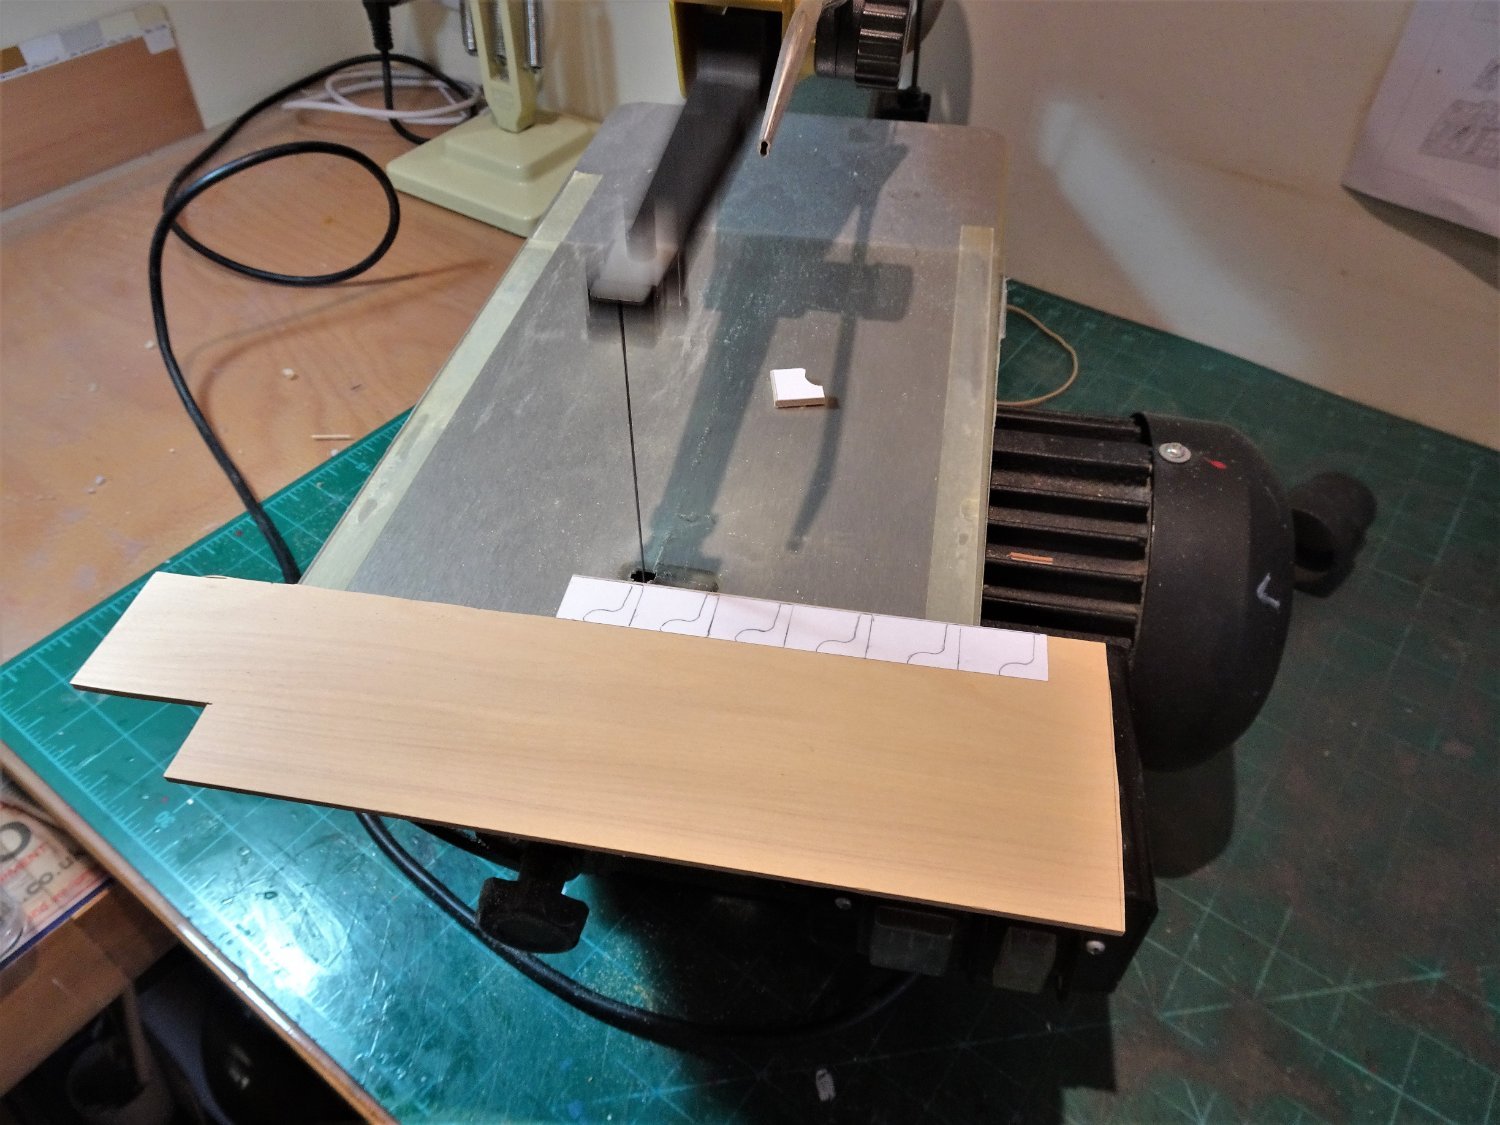
Post Eighty-six Having a Knees up Chris was thoughtful enough to provide optional hanging knees with the kit (Plan11 drawing 7) 5788(2) Beautifully cut, and I’m very relieved not to have to tackle making those. Unfortunately the Lodging Knees are something I will have to tackle myself, What joy! 5790(2) In the absence of any other relevant data I have scaled up the lodging knees from the 1/128 scale drawings in the AotS Pandora book, drew them out by hand, and then onto some 0.8mm Pear for a template. Not the most accurate approach to the job, but my eye will be the final arbiter on the look. The longitudinal side of these knees (that run along the bulwark) vary according to the the space between the beams so I will make them all to the longest side and trim them to suit. There are 34 paired knees to be made, the shape transferred to some Boxwood sheet for cutting on the scroll saw and finishing by hand. 5794 So on a wet and windy Sunday morning, it looks like a good day to spend a couple of hours in the Machine shop. 5791 The Boxwood sheet matches the beam thickness. 5795(2) All done bar the finishing, I shall work them two by two as I move along fitting the beams. B.E. 20/02/22
.thumb.JPG.57db57ef8abea8a27a7fd83932aaa862.JPG)
.thumb.JPG.c0abb7d8e631de76486b1cfcd44d8d6f.JPG)

.thumb.JPG.ec405321432b2236f6c847c0bf58c869.JPG)
- 857 replies
-
- 21
-
-
- Sphinx
- Vanguard Models
- (and 1 more)
-
Well done Ras, a fine looking model and full of interest, love the detail you have included. B.E.
-
I can relate to your 'blue' issues Theo, it takes me ages to decide on a shade, altho' I do tend towards the lighter, slightly dusky pastel tones. These shades on contemporary models are the sort of thing I aim for. Of course the blue may well have faded over the years, but it's still the look I like. It's all very subjective, but I think the paler shades look better on the paler woods, Box and light Pear, and tone in better with the Red Ochres. Of your samples Numbers 4 and 7 appeal the best to me. B.E.
-
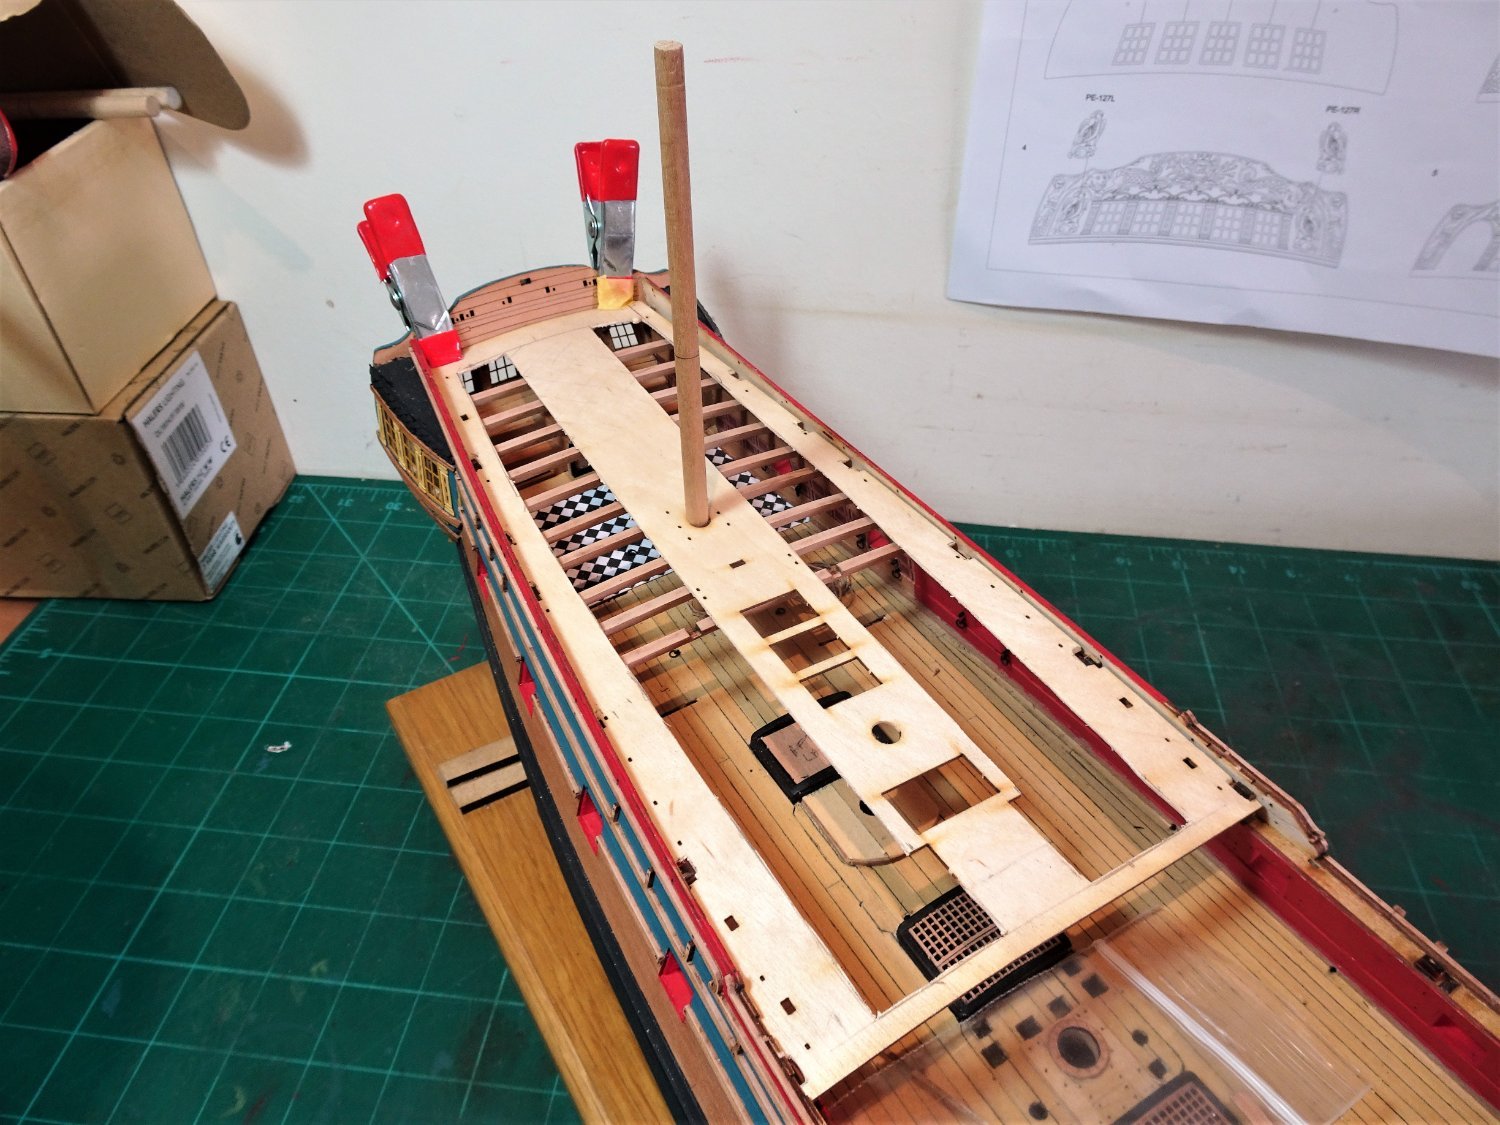
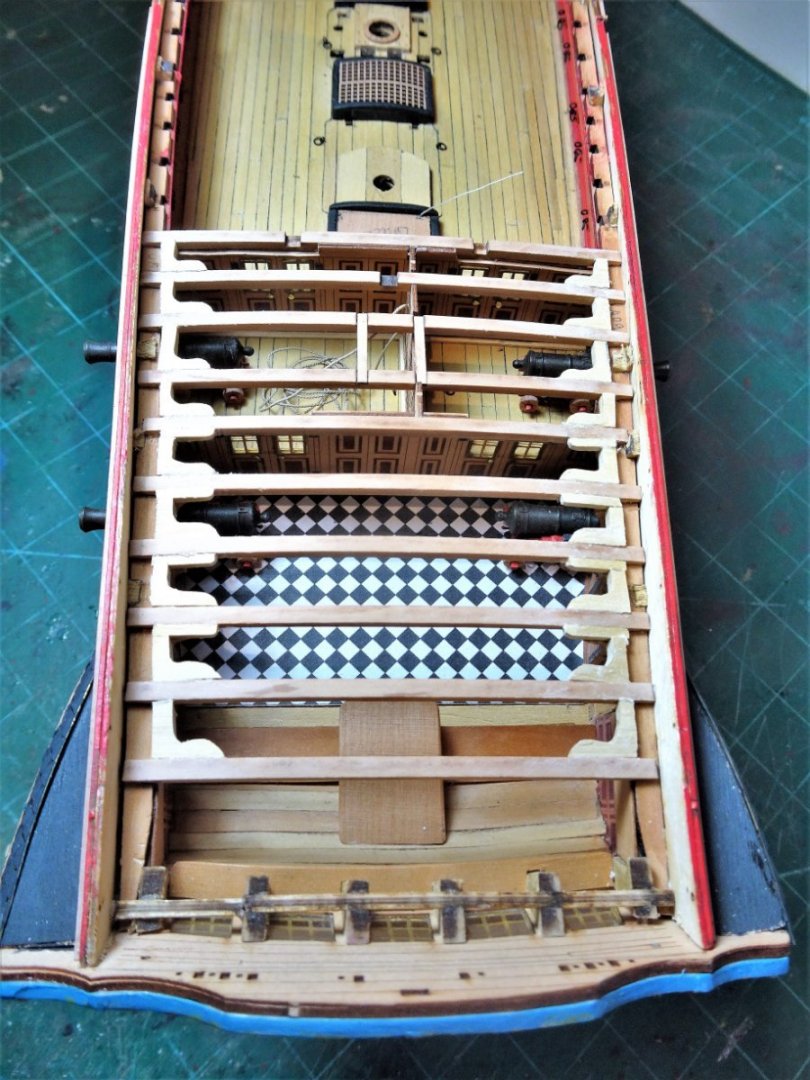
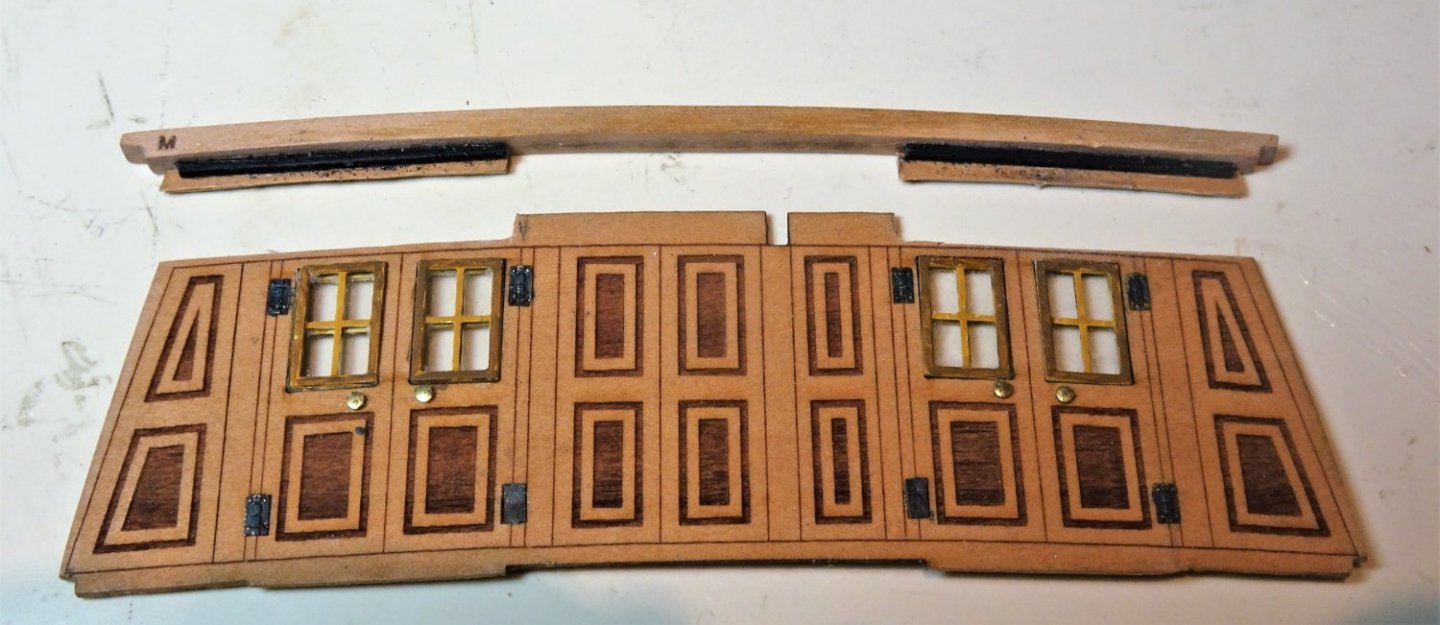
Thanks Theo and Glenn. @ Glenn - I don't intend fitting hanging knees between the cabin partitions, but otherwise I will add them together with the Lodging knees on a beam by beam basis. Post Eighty-five Beams and partitions I start with the aft partition and deck beam. It is necessary to modify the partition by removing a section where it may be seen to encroach onto the beam face and where the Lodging knees would fit. 5744- view from forward. 5746 – view from aft A section either end was removed and replaced below the beam to provide support. This will be hidden from view. Every time these pieces are handled for trial fitting the window frame paintwork is marred, requiring touch-ins. 5748 At deck level, cants are fitted either side of the screen, into which these removable panels were fitted. These also help to support and brace the panels. 5759 The same approach was taken with the Foreward partition. In reality the Bulkheads fitted beneath the beams, the modification is still a compromise but the beam looks better without the bulkhead covering the face. 5757 Finally the partition between the Bed space and Coach was fettled into place. This also has cants either side. 5767 5766 5765 At this point most of the beams are not secured, I will need access to secure the guns. 5783(2) 5779(2) 5780(2) I'm lovin' the look of these scale deck beams, Chris has done a fine design job they really add to the model. Time for a knees up I think. B.E. 19/02/22


.thumb.JPG.49a3618d5da2400c4afebd38fbd28c37.JPG)
.thumb.JPG.ac779e805fc305a7ffcabf0784566410.JPG)
.thumb.JPG.26f7dc3607bd7e163e2e9191e3c09d1f.JPG)
- 857 replies
-
- 26
-
-
- Sphinx
- Vanguard Models
- (and 1 more)
-
You always produce models and logs of such interest Nils, I look forward to seeing this one progress. Regards, B.E.
- 180 replies
-
- 1
-
-
- pilot boat
- Elbe 5
- (and 3 more)
-
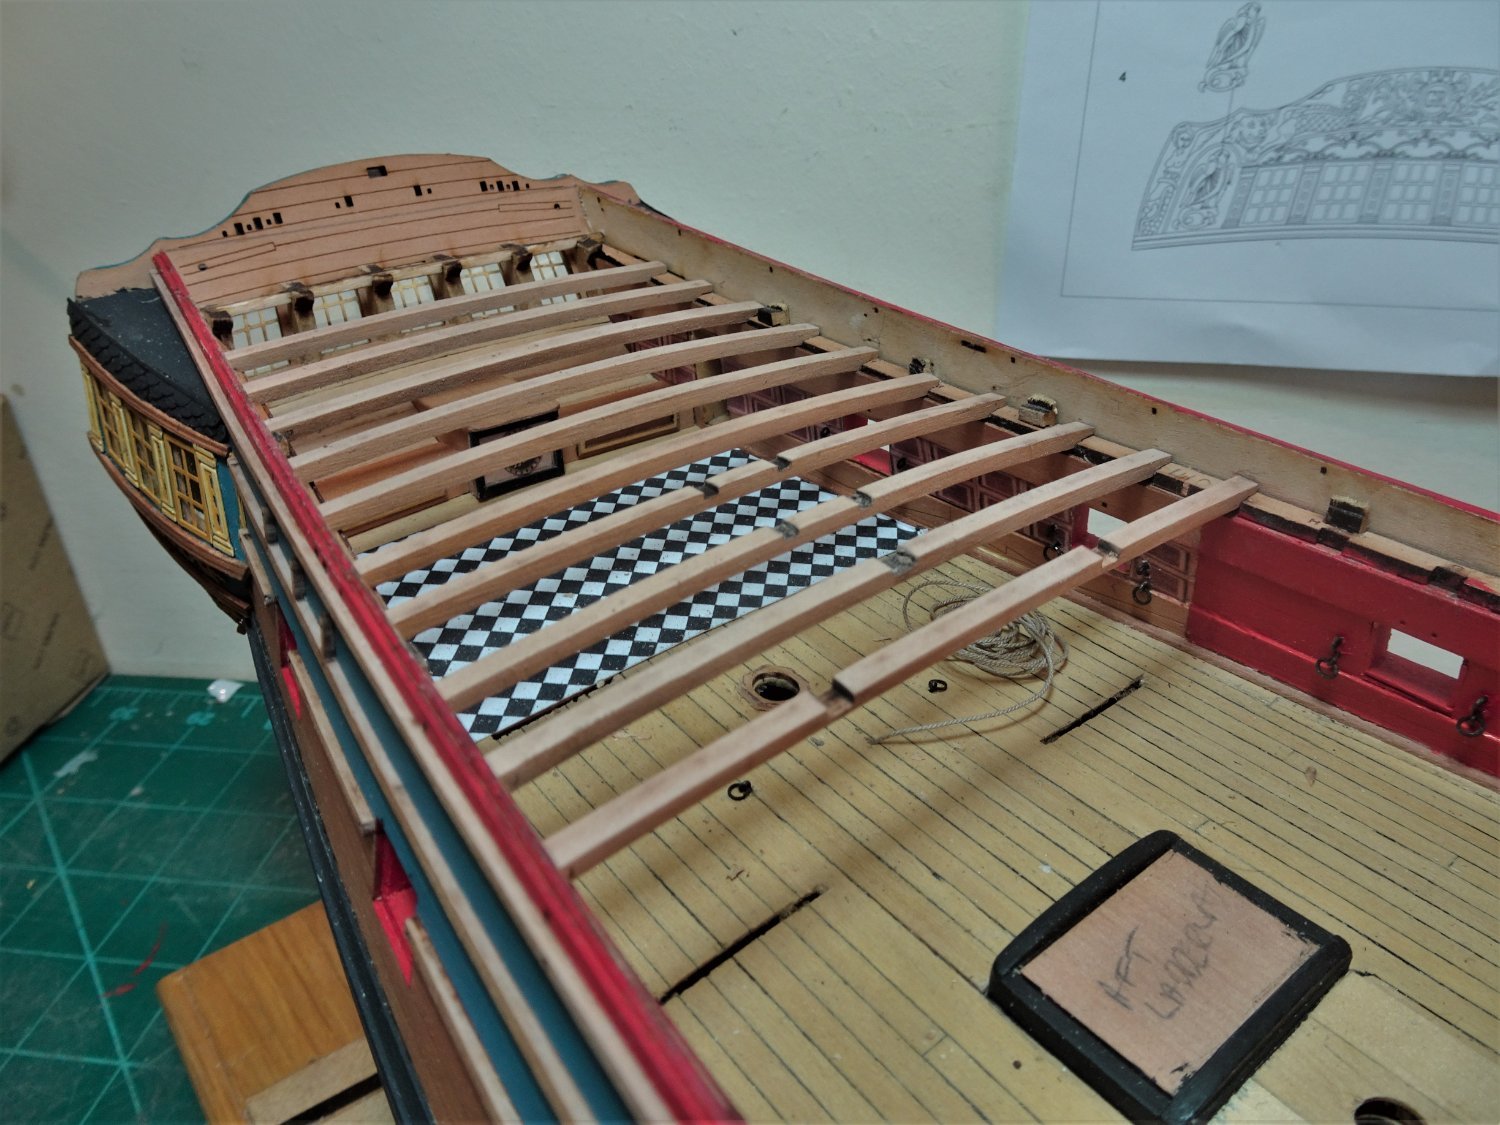
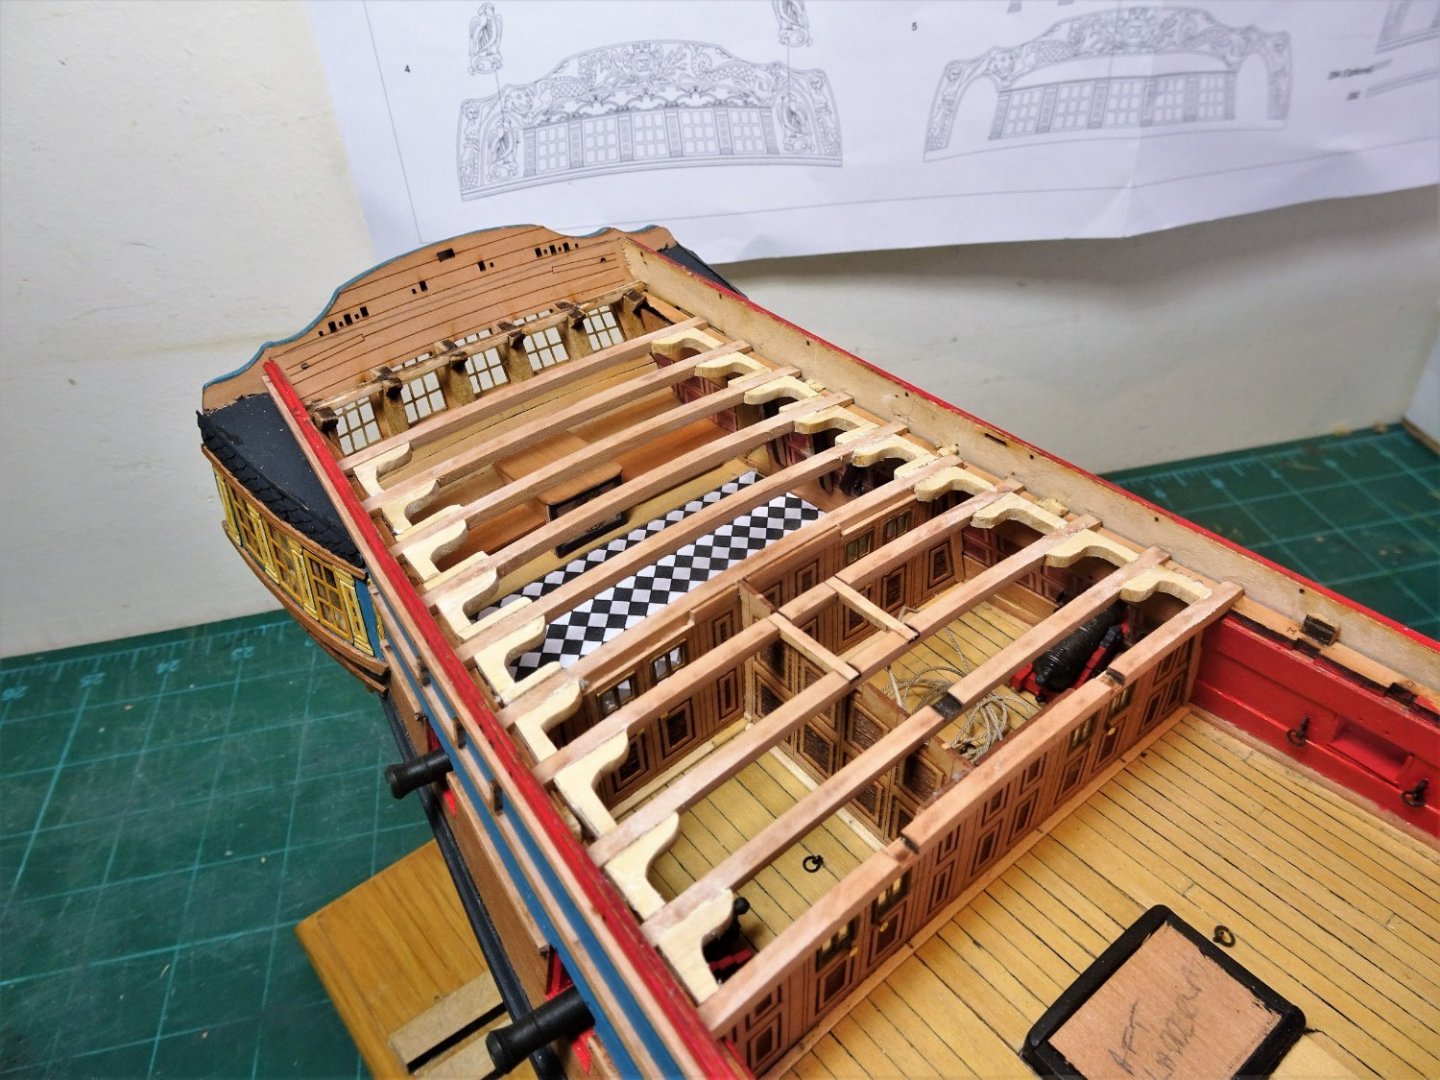
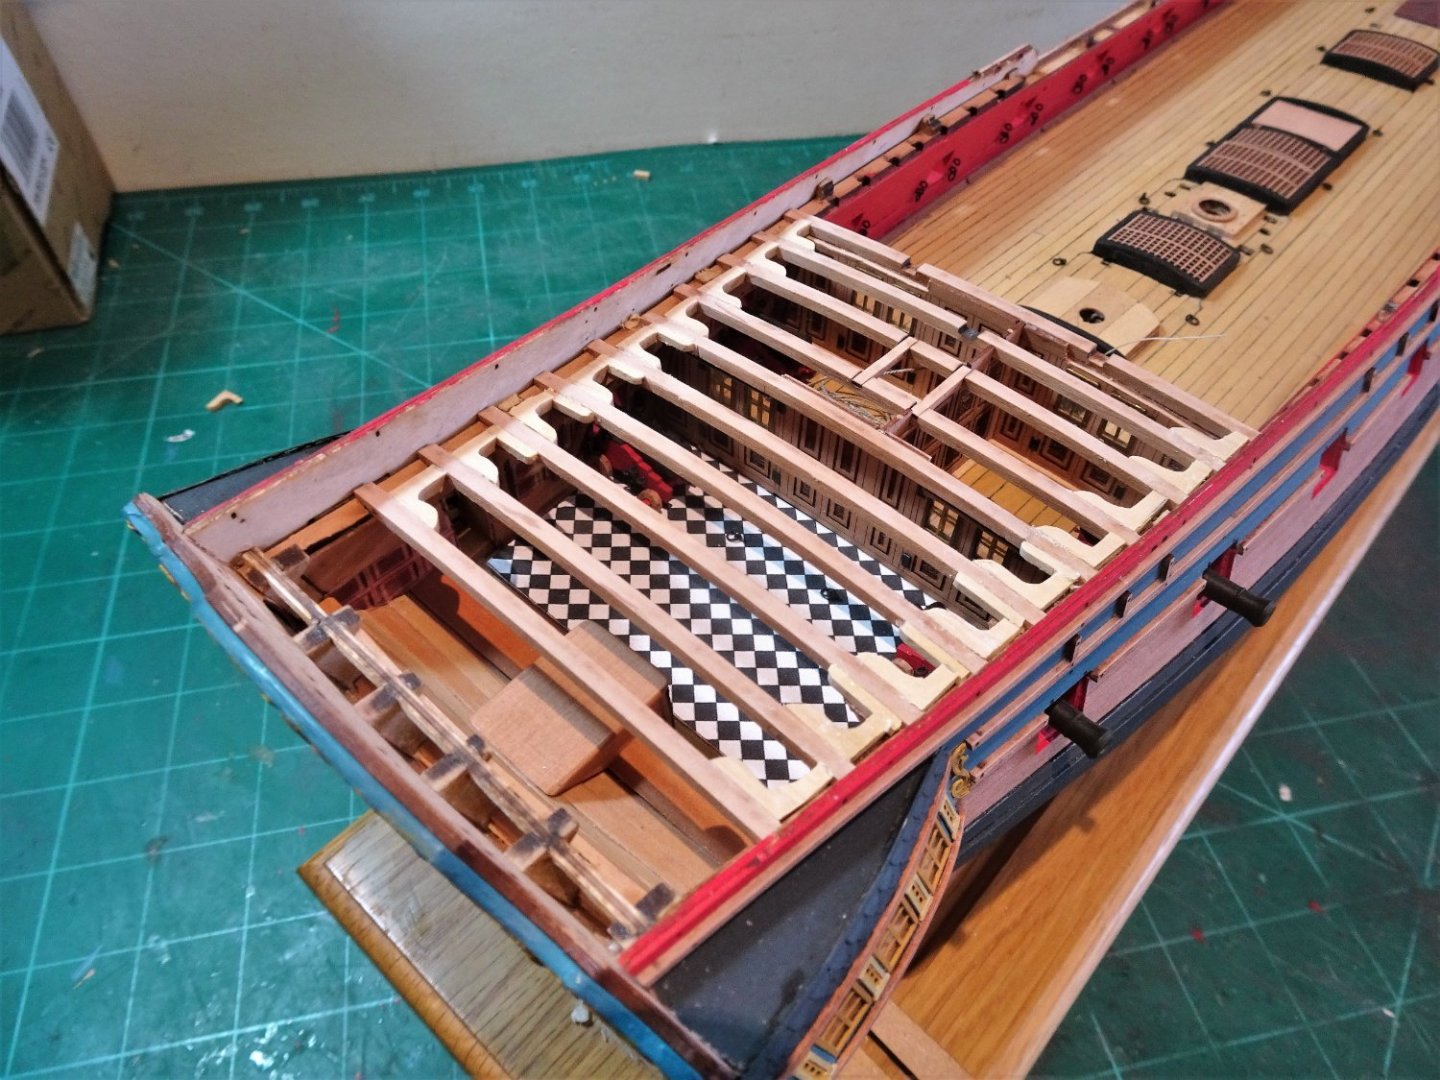
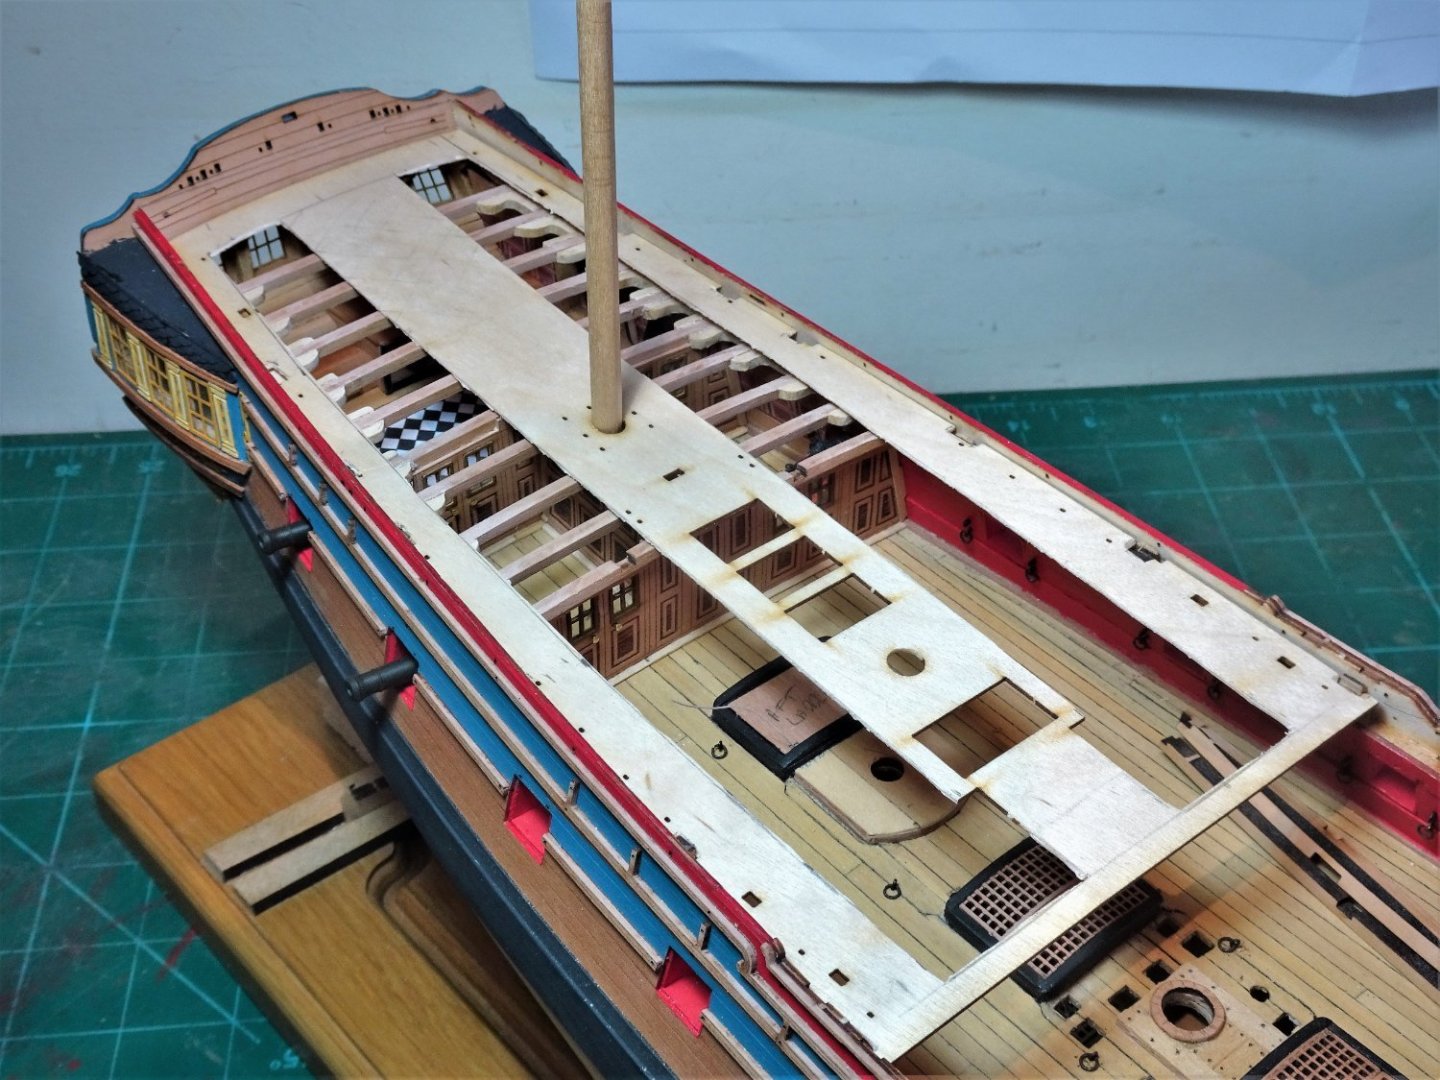
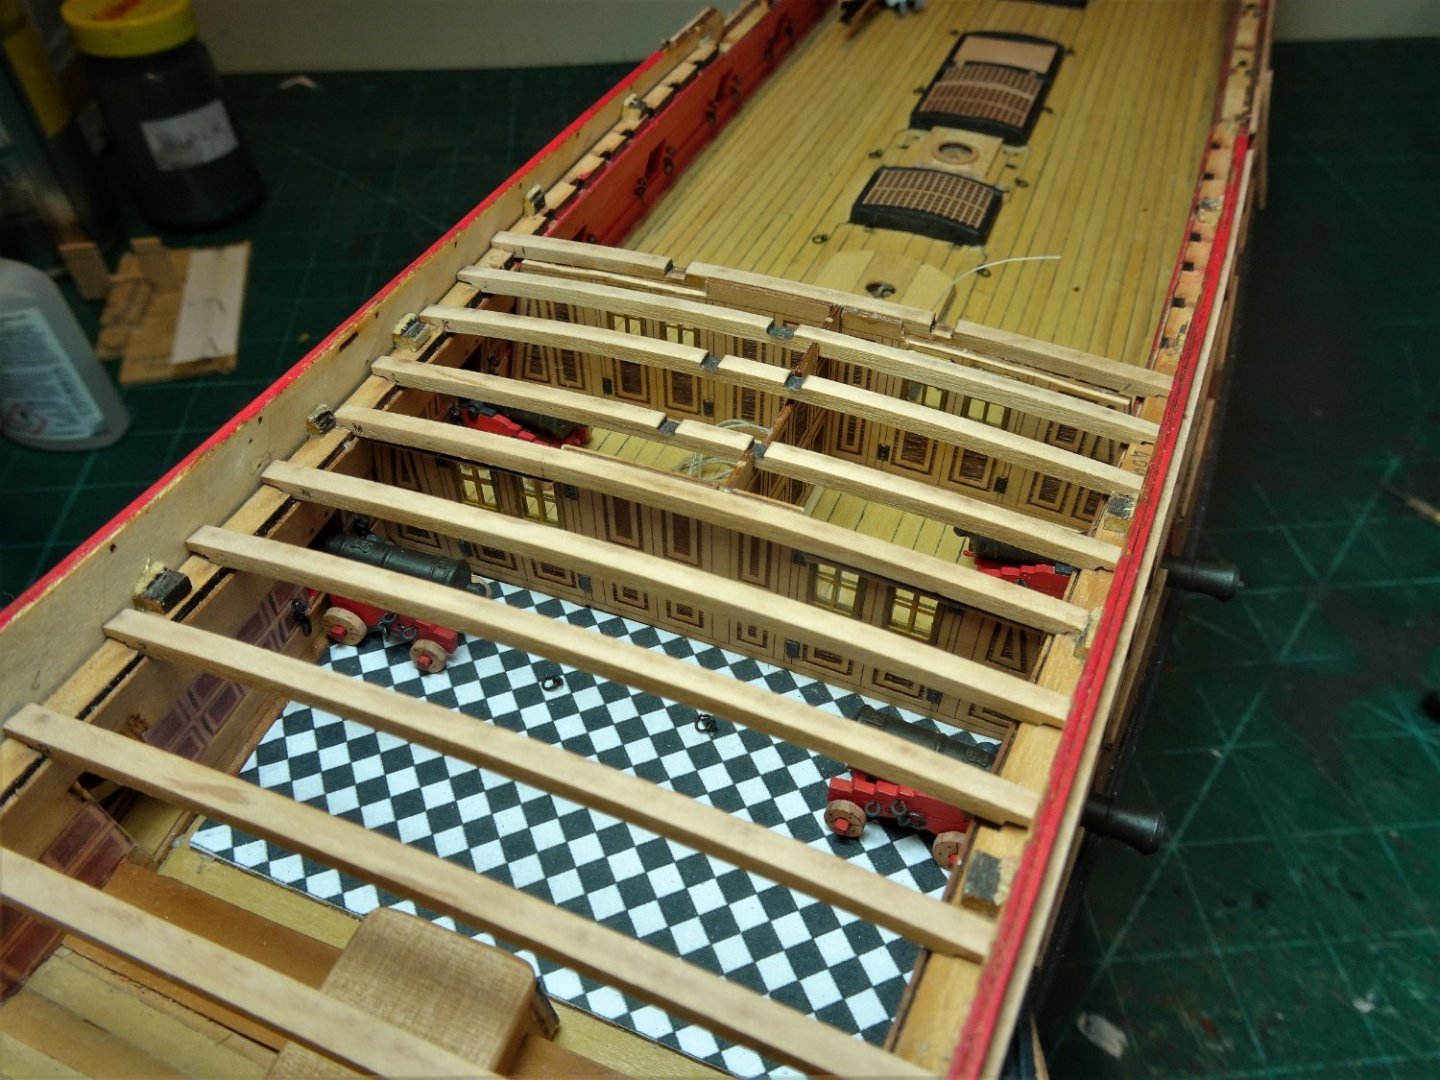
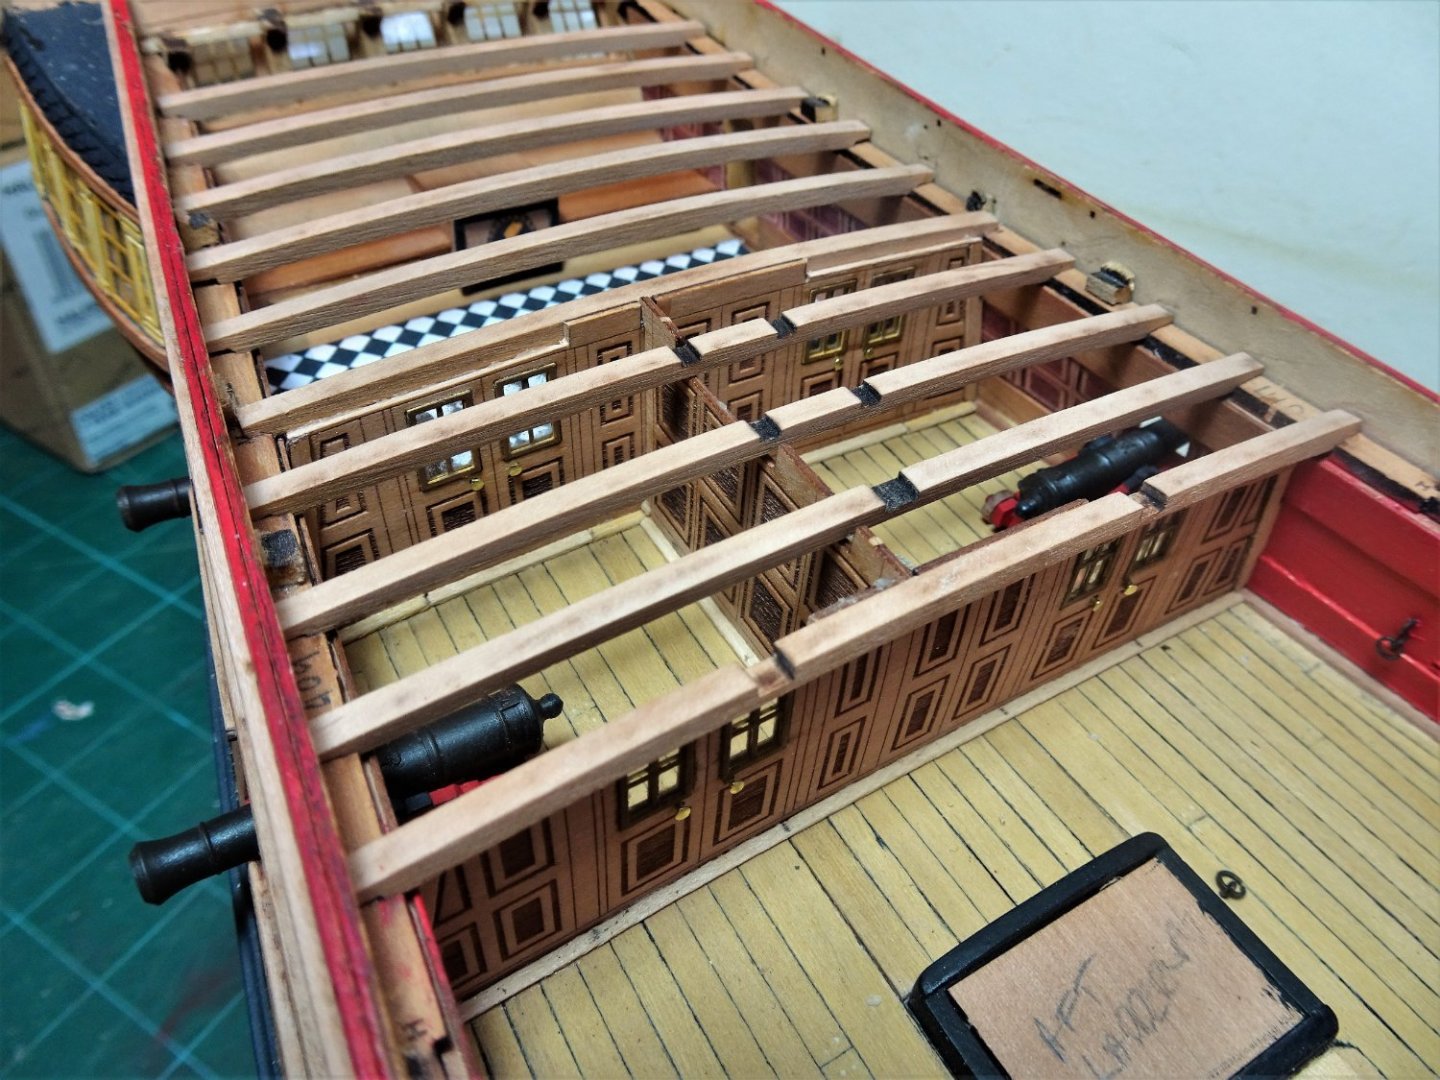
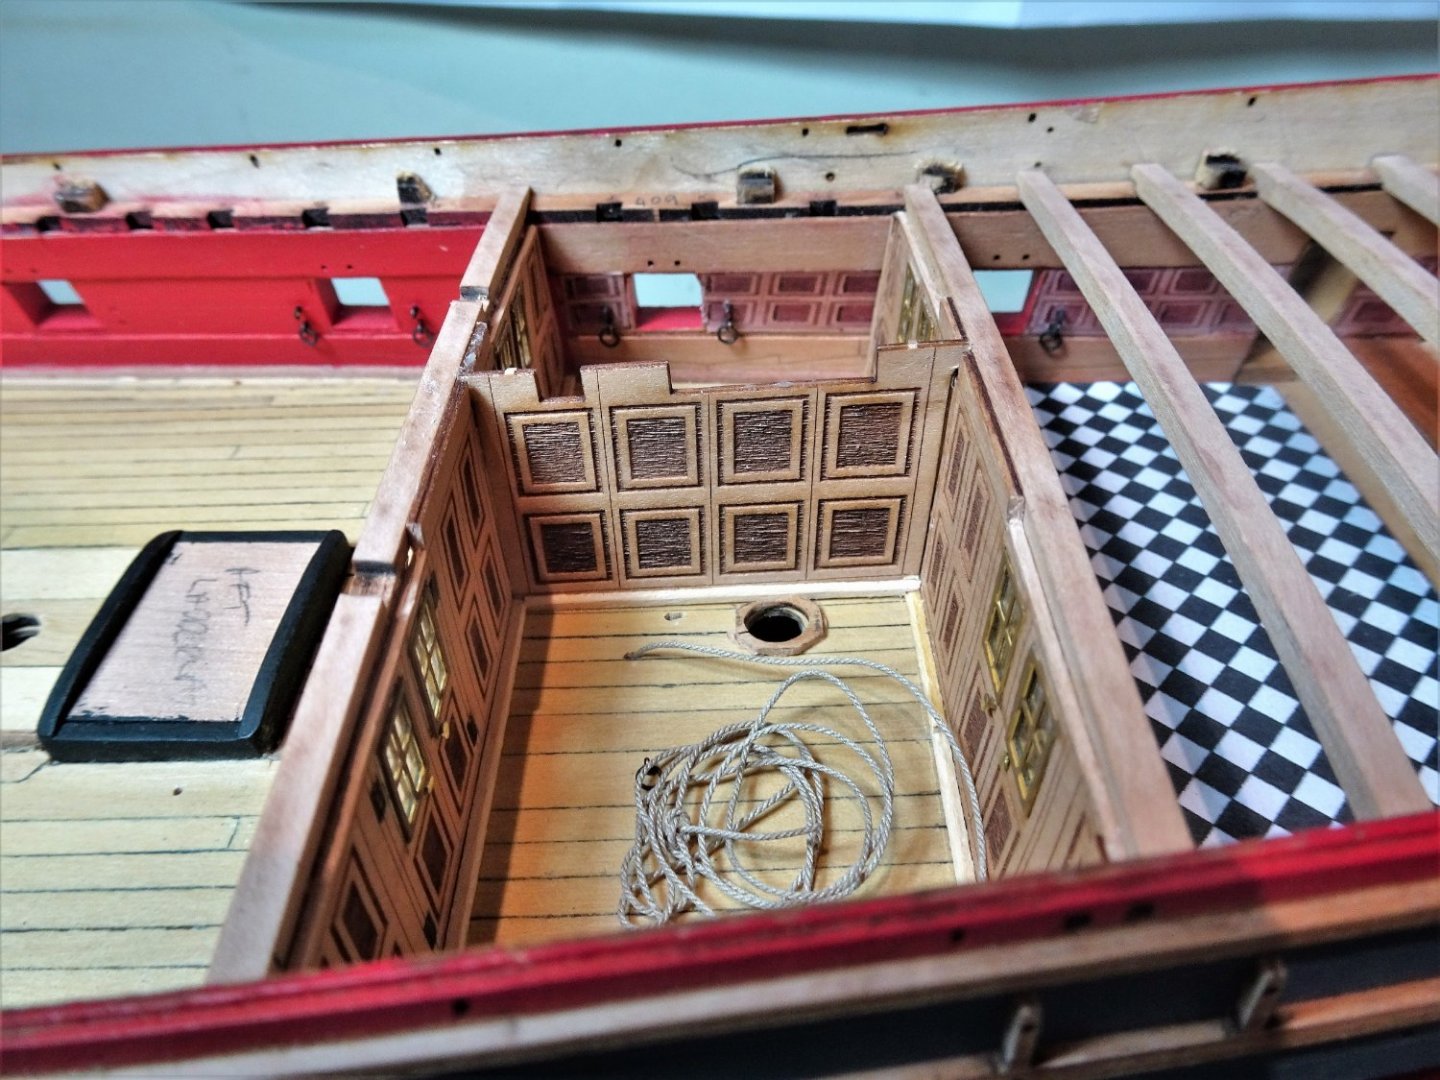
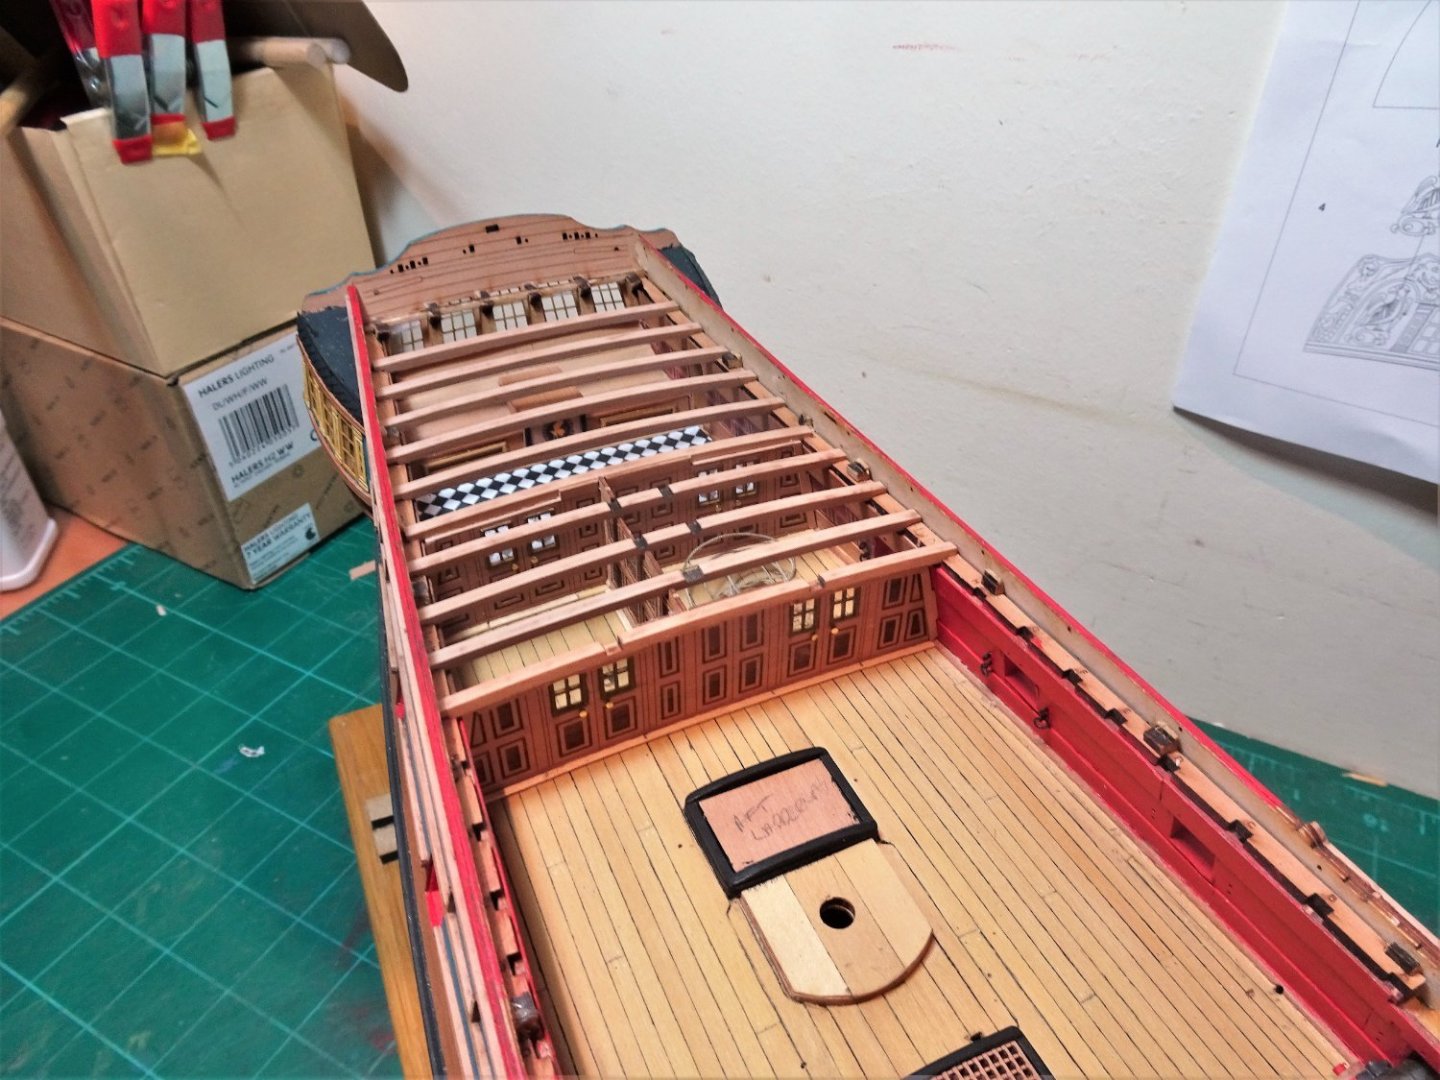
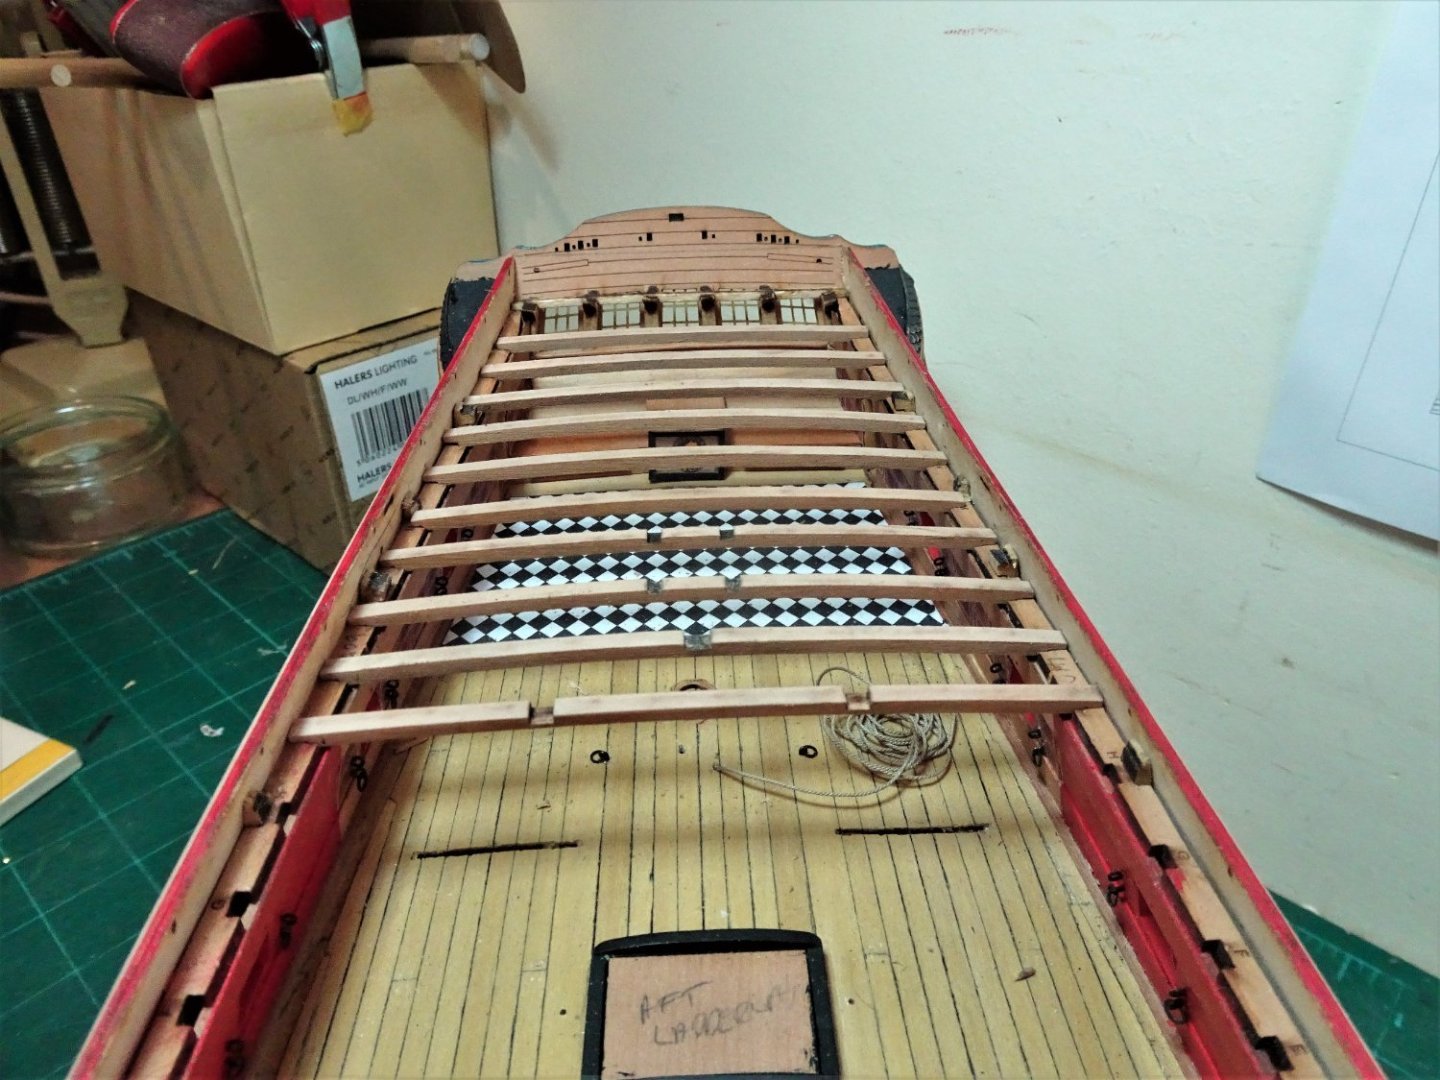
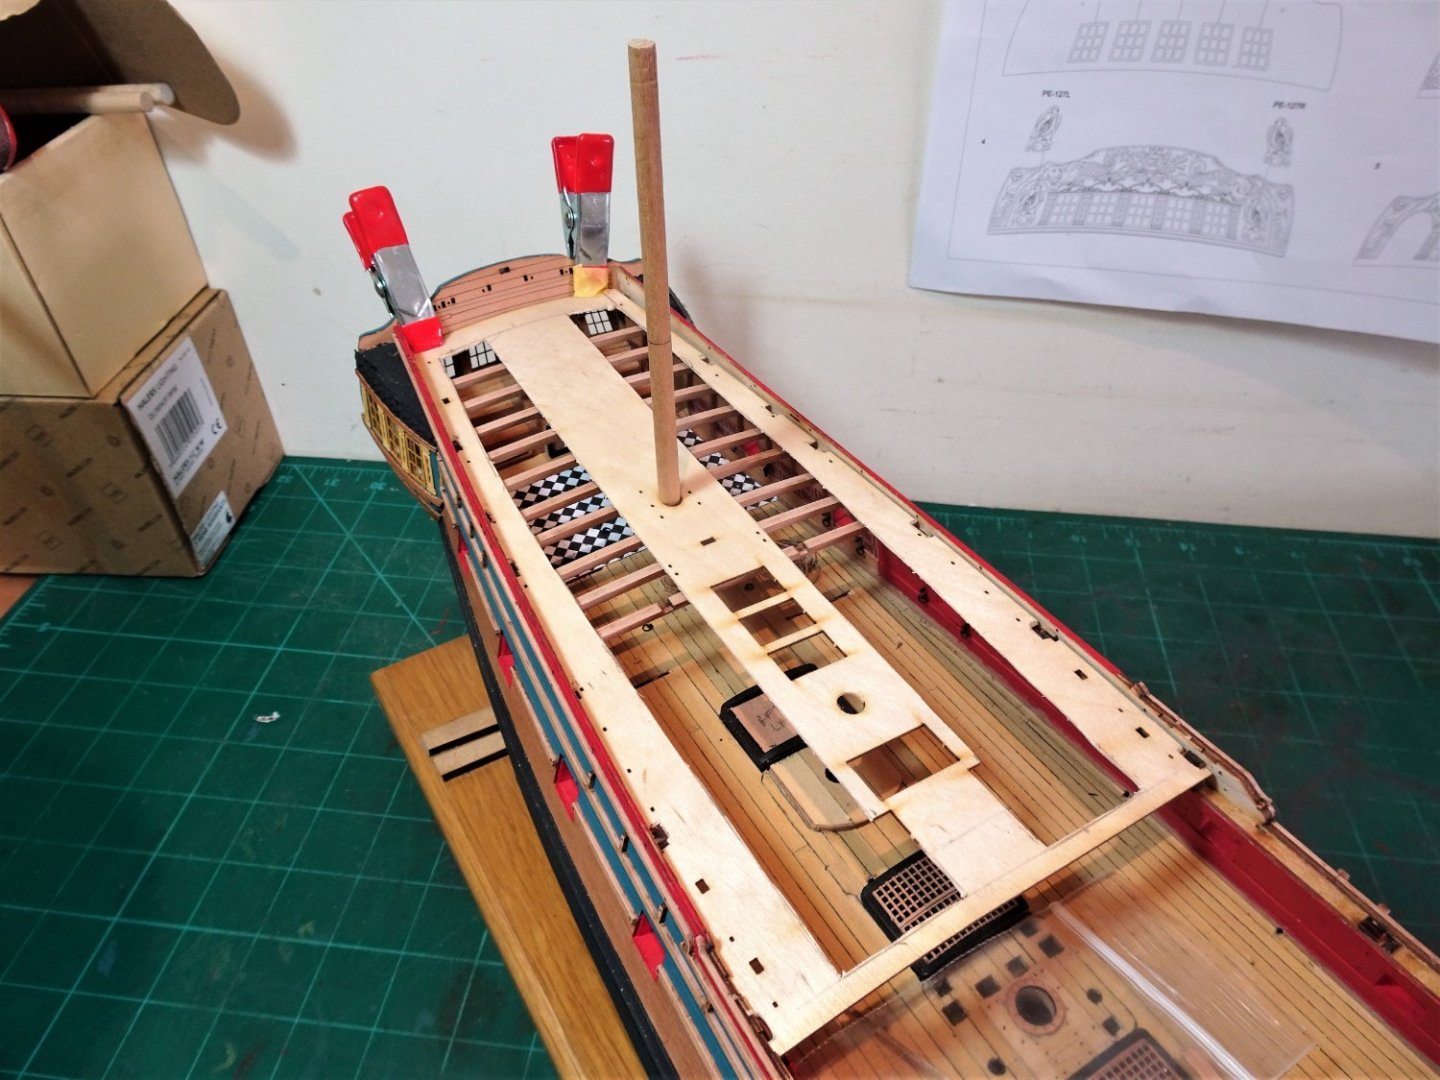
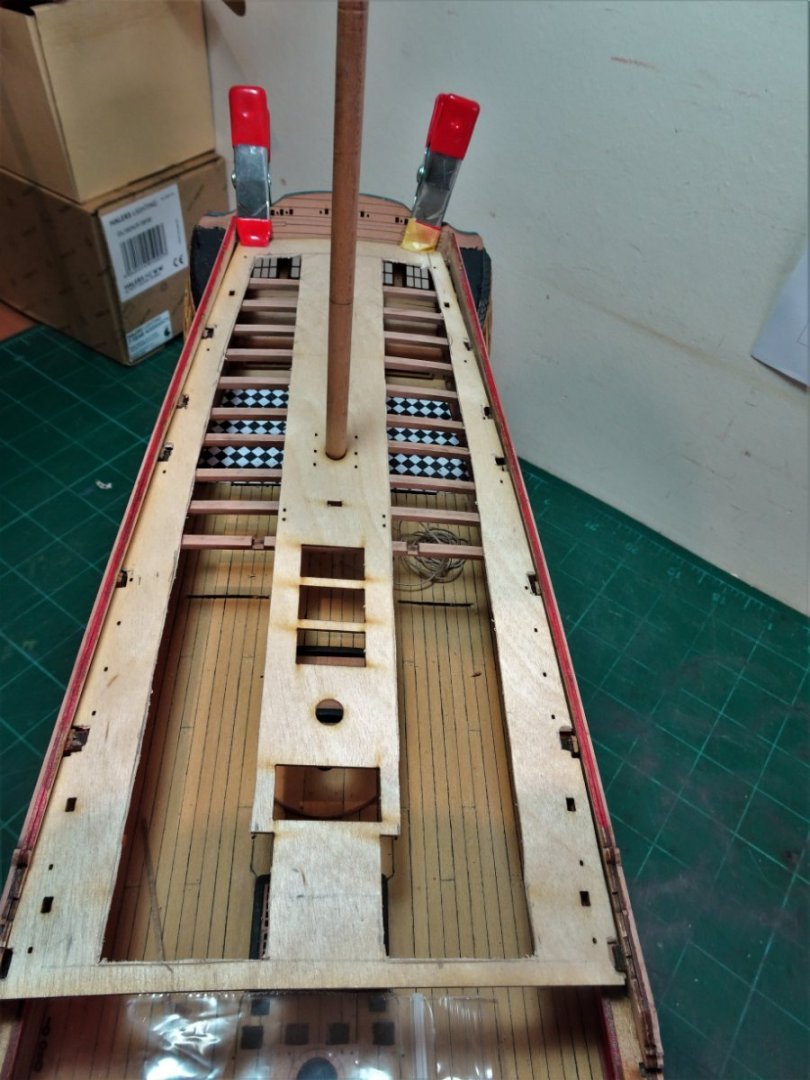
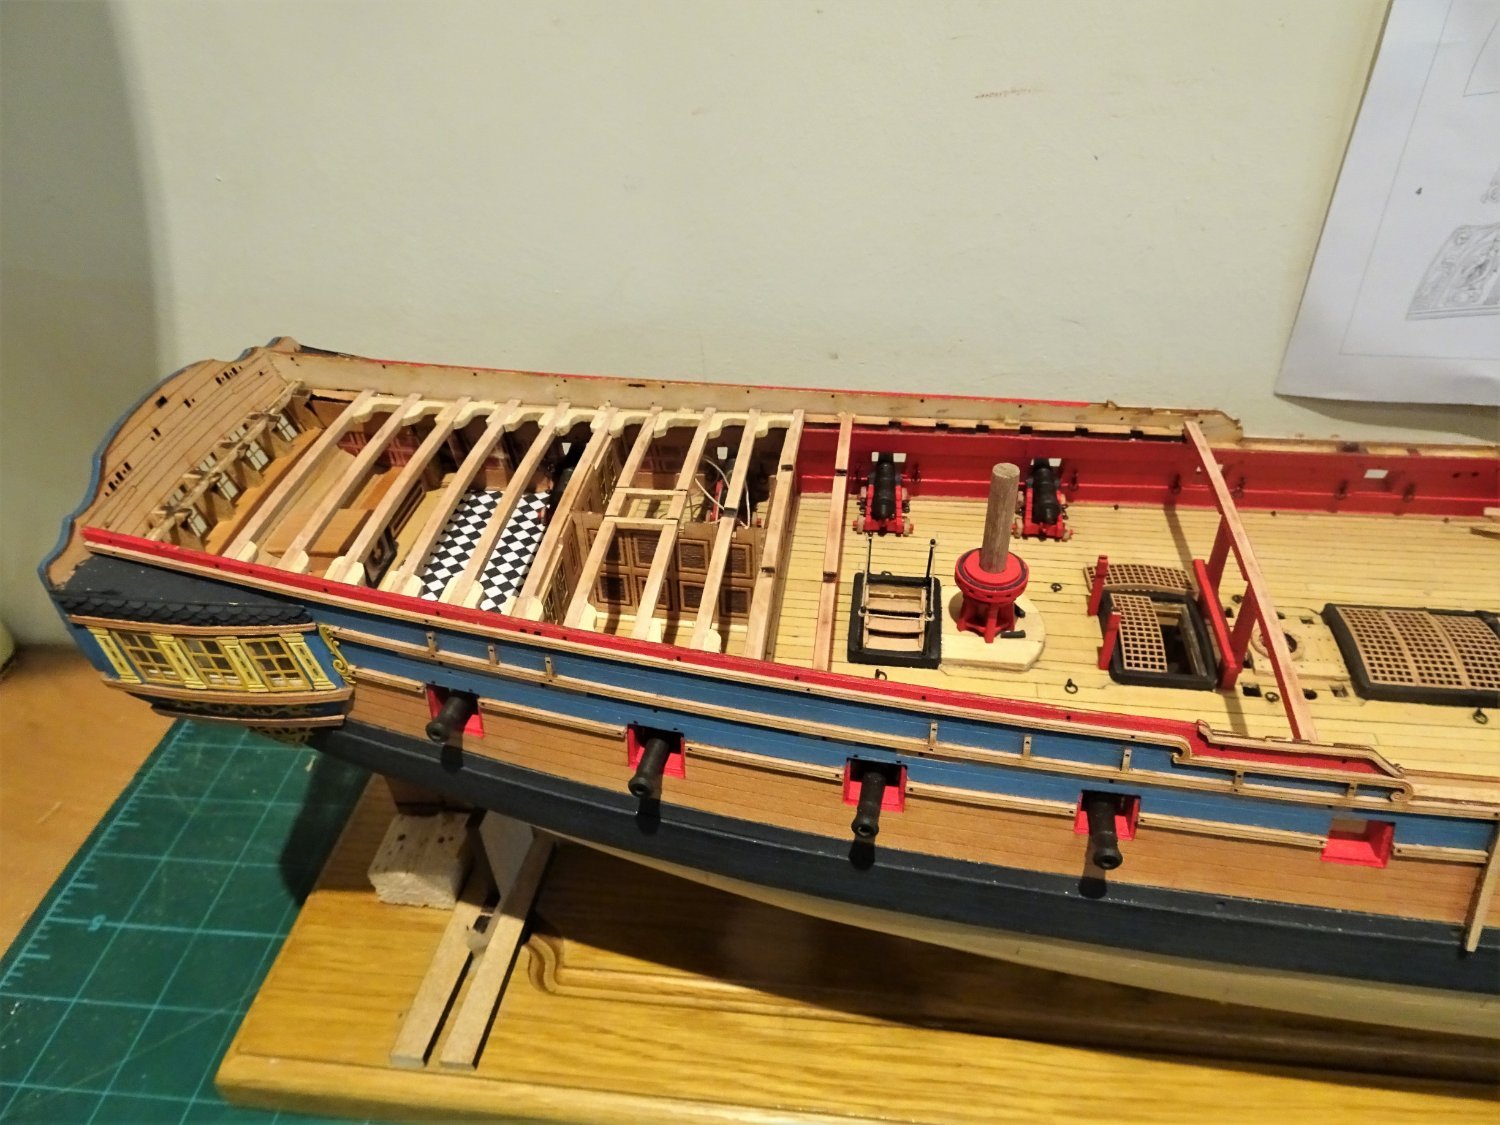
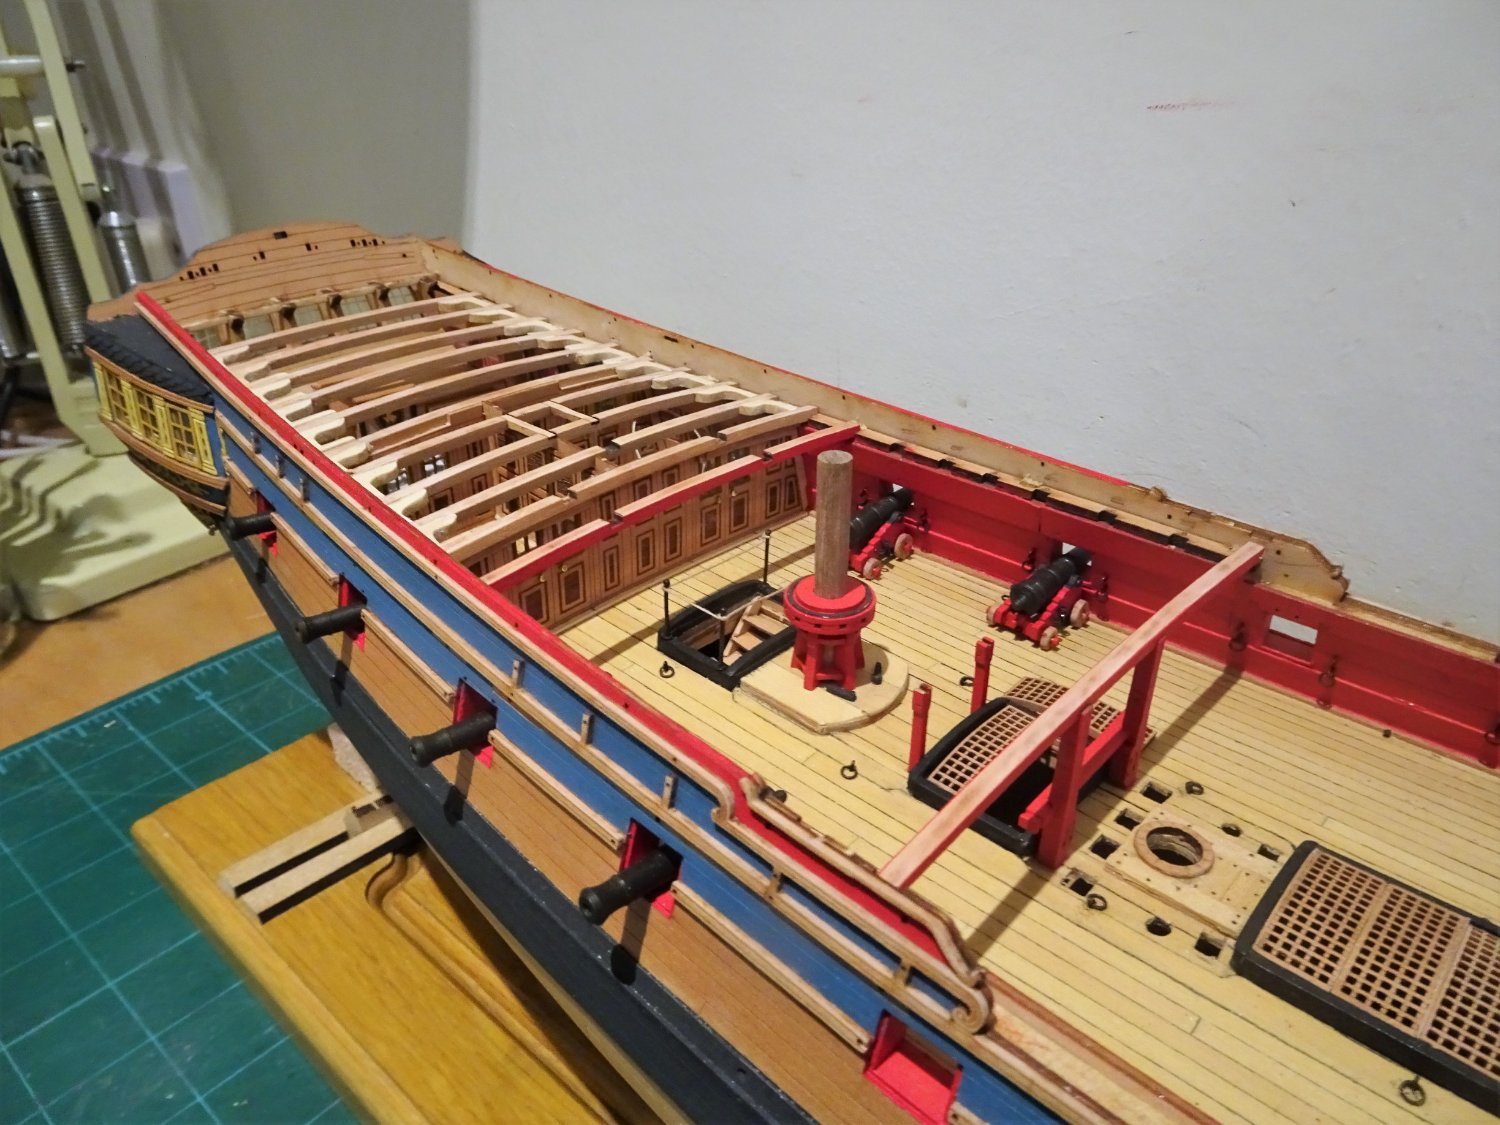
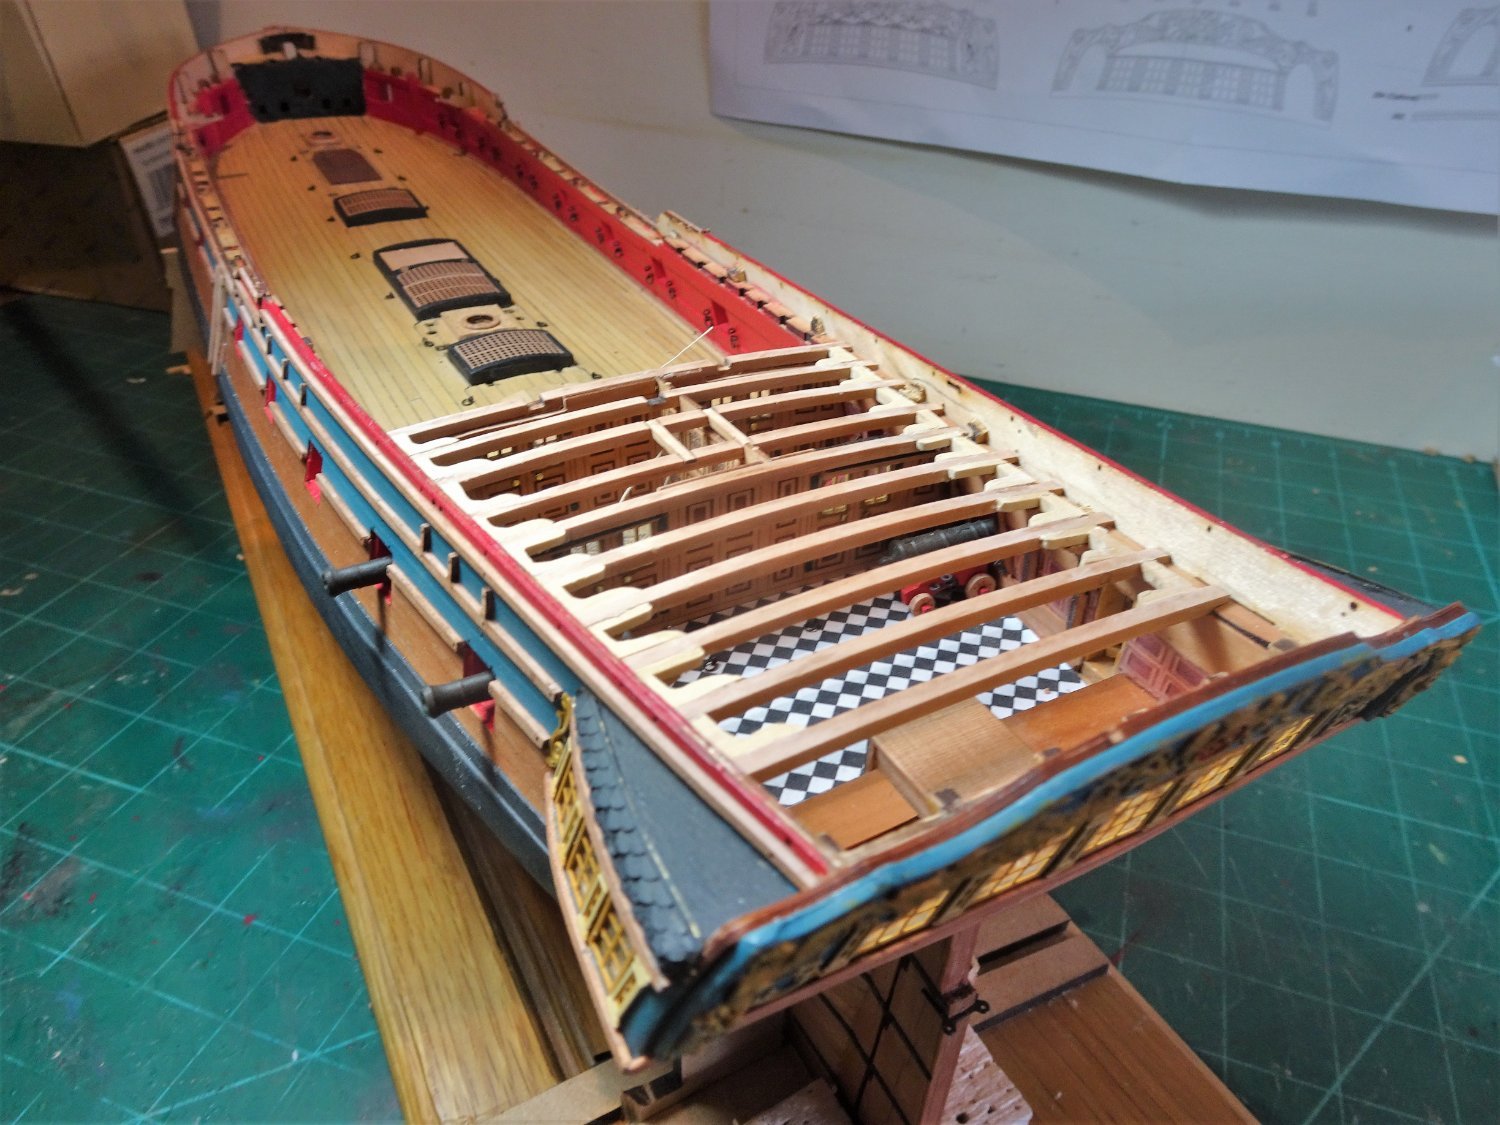
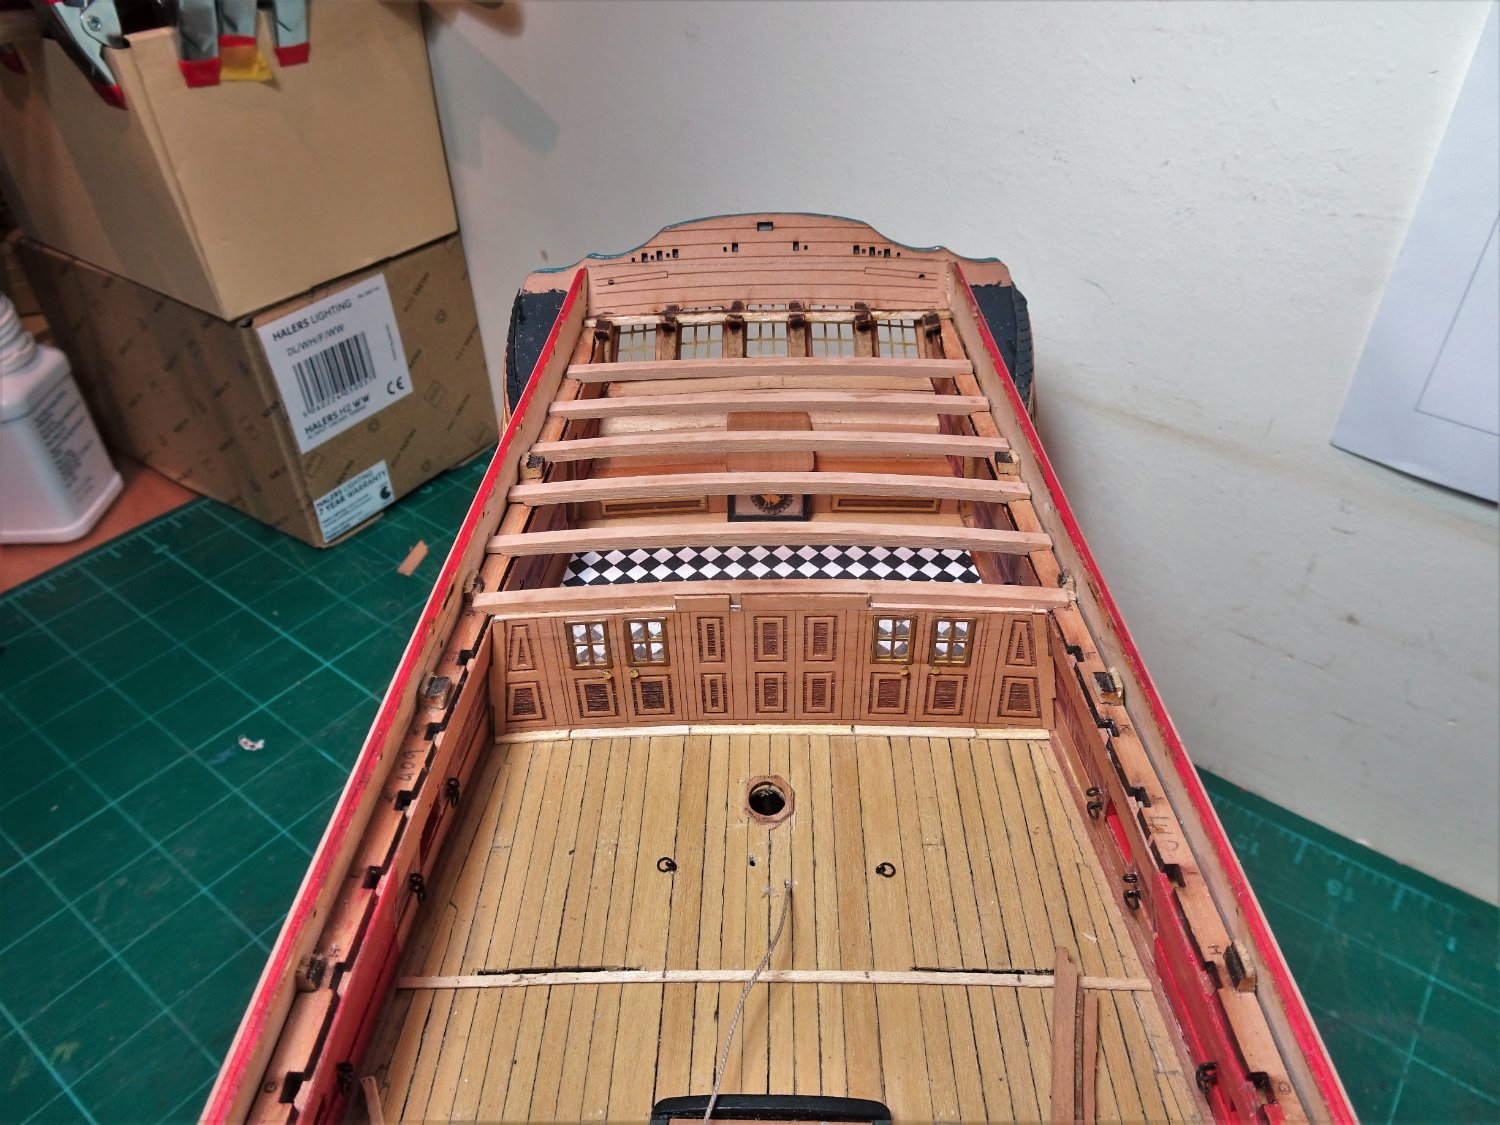
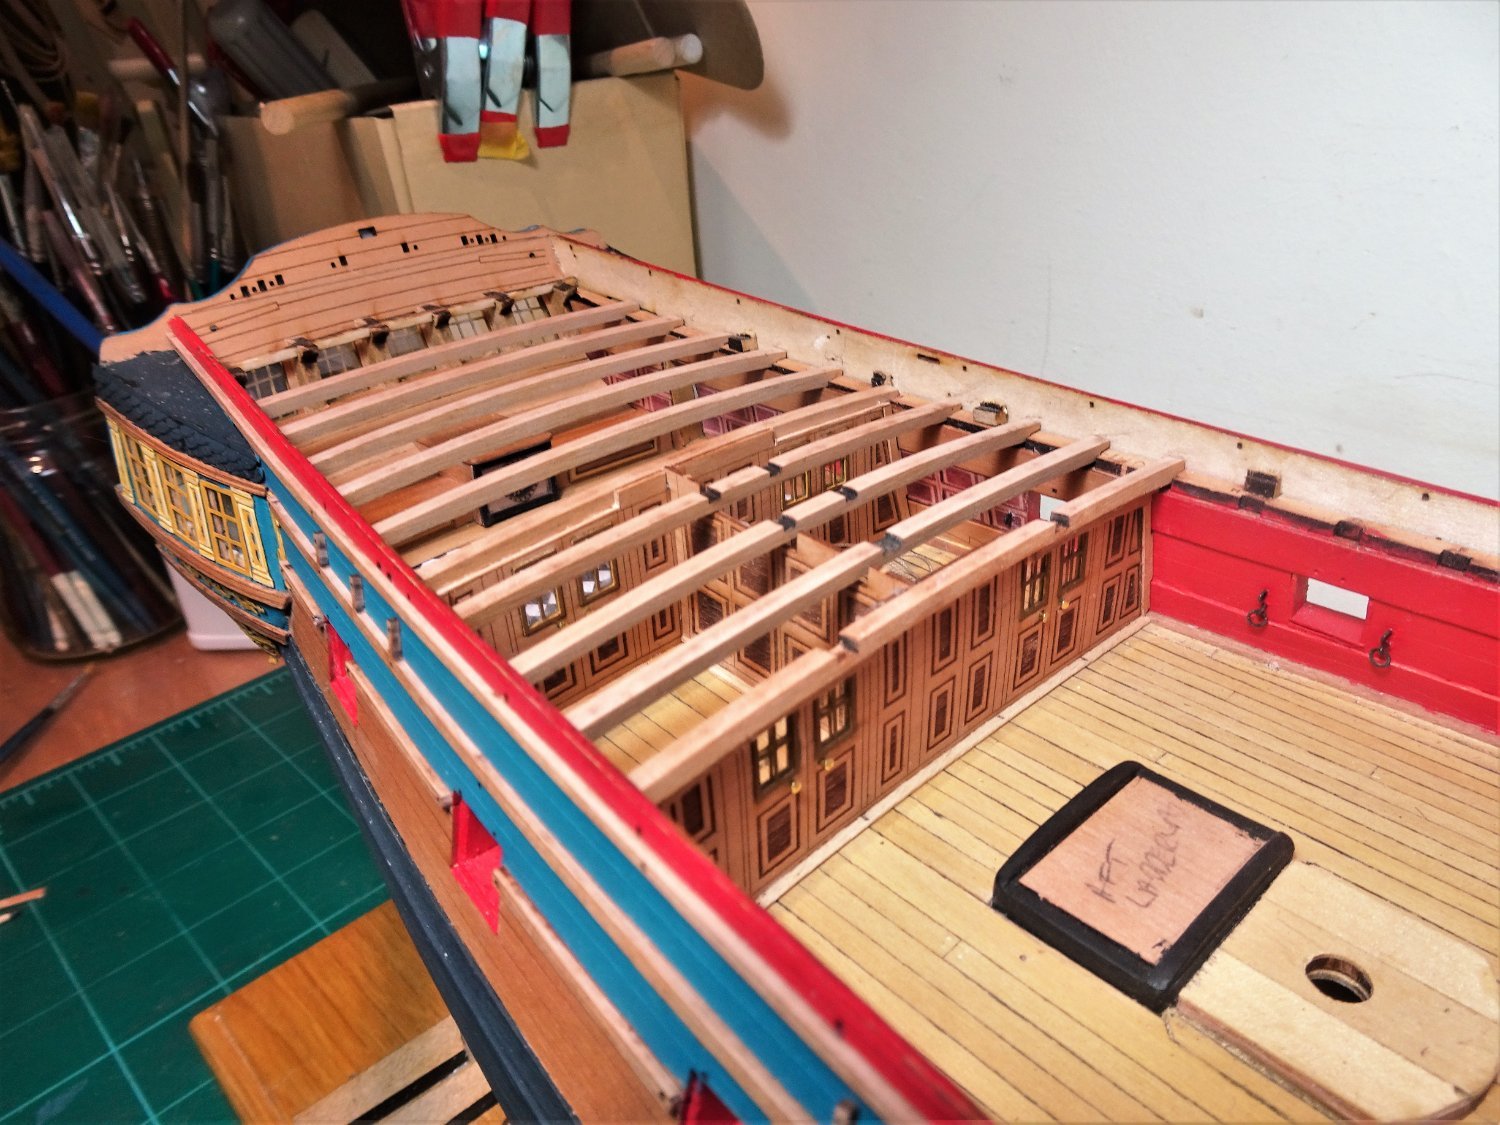
Thank you Thomas and Michael, it's great to receive positive comments from those whose work I also admire.. Post Eighty- four A few steps ahead The Quarterdeck beams aft of of the forward partition have been cleaned up and tried for fit. 5727 One of the great interests for me in going off piste on a kit build is having to think many steps ahead and solving the tricky little problems that may arise. 5728 Of course the danger of going off piste is that you may encounter an avalanche. Back to the machine shop today to chop about the ply underdeck to suit the profile of the un-planked areas. 5729 I have removed far more of the planking area than originally cut to expose the deck below. 5730 With this completed I know what will be on show and what won’t and can work to that purpose. 5731 5736 That looks about right, or will do once the remaining beams are installed to the break of the QD. 5733 I think I made the right decision about using the b/w sailcloth covering in the Great Cabin. 5735 It has so much more impact than the faux parquet flooring of the kit, but it’s all down to what appeals to the individual eye. I have also come to a decision about the guns, they will be fitted but without rigging. The rest of the model is displayed only partly complete, so to rig the guns would seem a little incongruous, and this will accord with contemporary Navy Board style models. On a practical level the guns will not hold up progress and I will be able to assemble and fit them at my leisure. Moving ahead. B.E. 18/02/22


- 857 replies
-
- 24
-
-
-
- Sphinx
- Vanguard Models
- (and 1 more)
-
Do you mean the Preventer plates that are pinned to the hull, Mark? The plans should show the angles more or less. I use a pin vise to drill the holes , pin the lower end first, and then tweak the angle before pinning thro’ the upper hole. B.E.
- 505 replies
-
- 4
-
-
- vanguard models
- Sphinx
- (and 1 more)
-
Love the look of the Admirals barge, better not tho ‘ I need to concentrate on Sphinx, will keep in mind for the future .......... B.E.
.JPG.9c7930872de165f56ddc57e8a1b2299a.JPG)


.JPG.2f781f65389b9045a2739f9a6b882eba.JPG)
.JPG.eb9da47182fbe7782b44e9ffe009a3fc.JPG)
.JPG.cd34517a910c07c98540c09b950f6cbc.JPG)


.JPG.ba8dbb1e8dc7082d0fe47ce59615d7da.JPG)
.JPG.d390ea373b5d5978ef88089a5f8b8557.JPG)

.JPG.7fa9feca793bad689ca2eb0f418ca080.JPG)
.JPG.7194b0c6d7941c9c2ac1755e166e6ffd.JPG)
.JPG.5afeeac5f3a737b8a9290f7c3f7d5241.JPG)


.JPG.feb187aef7ad3779293f341c2d3b6233.JPG)
.JPG.99a8d7753de927f1c5e4c1dff04a9027.JPG)
.JPG.4030ee248e48435b63b4f6b771e7e7df.JPG)
.JPG.3ab1d9037f2fcff0d2c14734adac284a.JPG)
.JPG.2e133733ea309ecac3ce9a52209b1649.JPG)


.JPG.56910c916515c907c35392a27bf9fbbe.JPG)
.JPG.59d5c05881754ace91703e354084d1c0.JPG)


.JPG.f0c3109a98fe23df4c277955a9b1629c.JPG)
.JPG.15995eea538cc3ed951b2c5fc542bdeb.JPG)

.JPG.907507117bb32ec0af158e797c009e40.JPG)


.JPG.b68b5c229adba9044b6ae4c6084003bf.JPG)
.JPG.6383549babe5994825137faaa102a6e3.JPG)
.JPG.8d55330f0dc7d9334048a43555efc1f9.JPG)