.JPG.ca33079f5815b861e67b9c2cccd37982.JPG)

Blue Ensign
-
Posts
4,571 -
Joined
-
Last visited
Content Type
Profiles
Forums
Gallery
Events
Everything posted by Blue Ensign
-
 Unlike the revised Cutter kit the Yawl kit doesn’t have a lower rabbet. Only the first two planks fit into the stem rabbet on the Yawl kit. The others will have to butt up against the stem. With very little to get a purchase to clamp at the bow I think I will have to revert to ca for the bow area across the first two bulkheads and use pva for the rest of the length. I haven’t quite worked out a strategy for the subsequent planks yet. Cheers, B.E.
- 70 replies
-
- 1
-

-
- 22ft Yawl
- Vanguard Models
- (and 2 more)
-
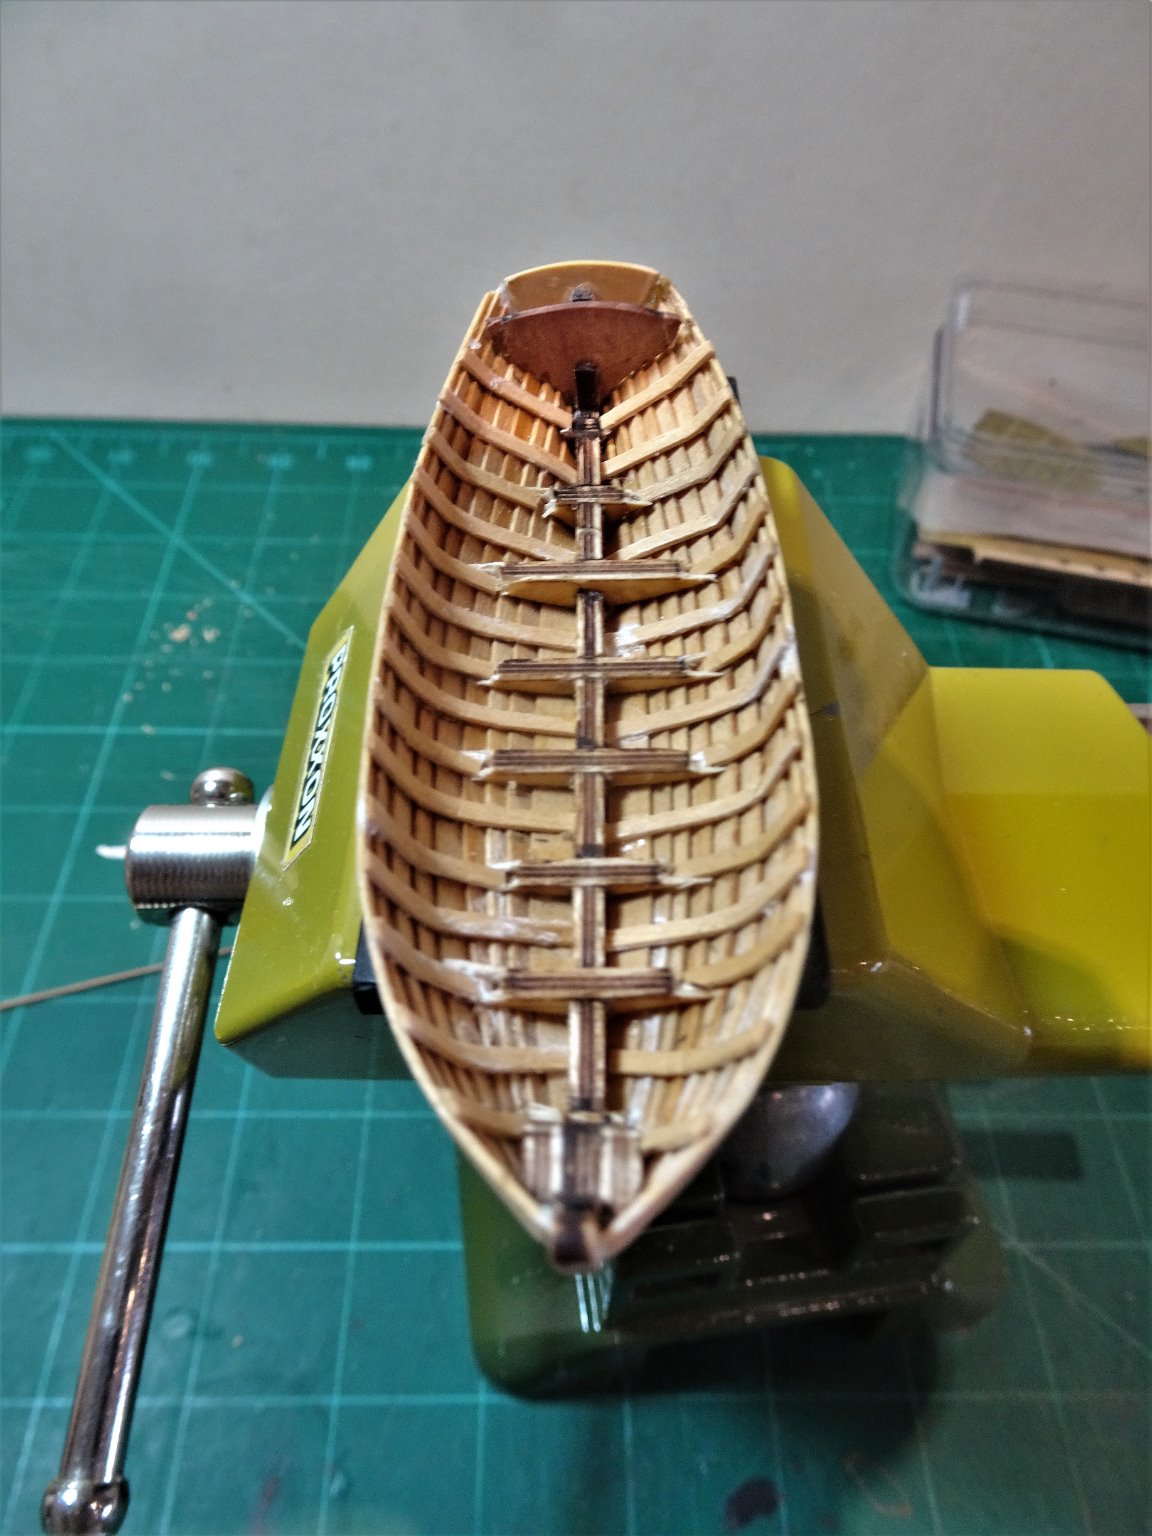
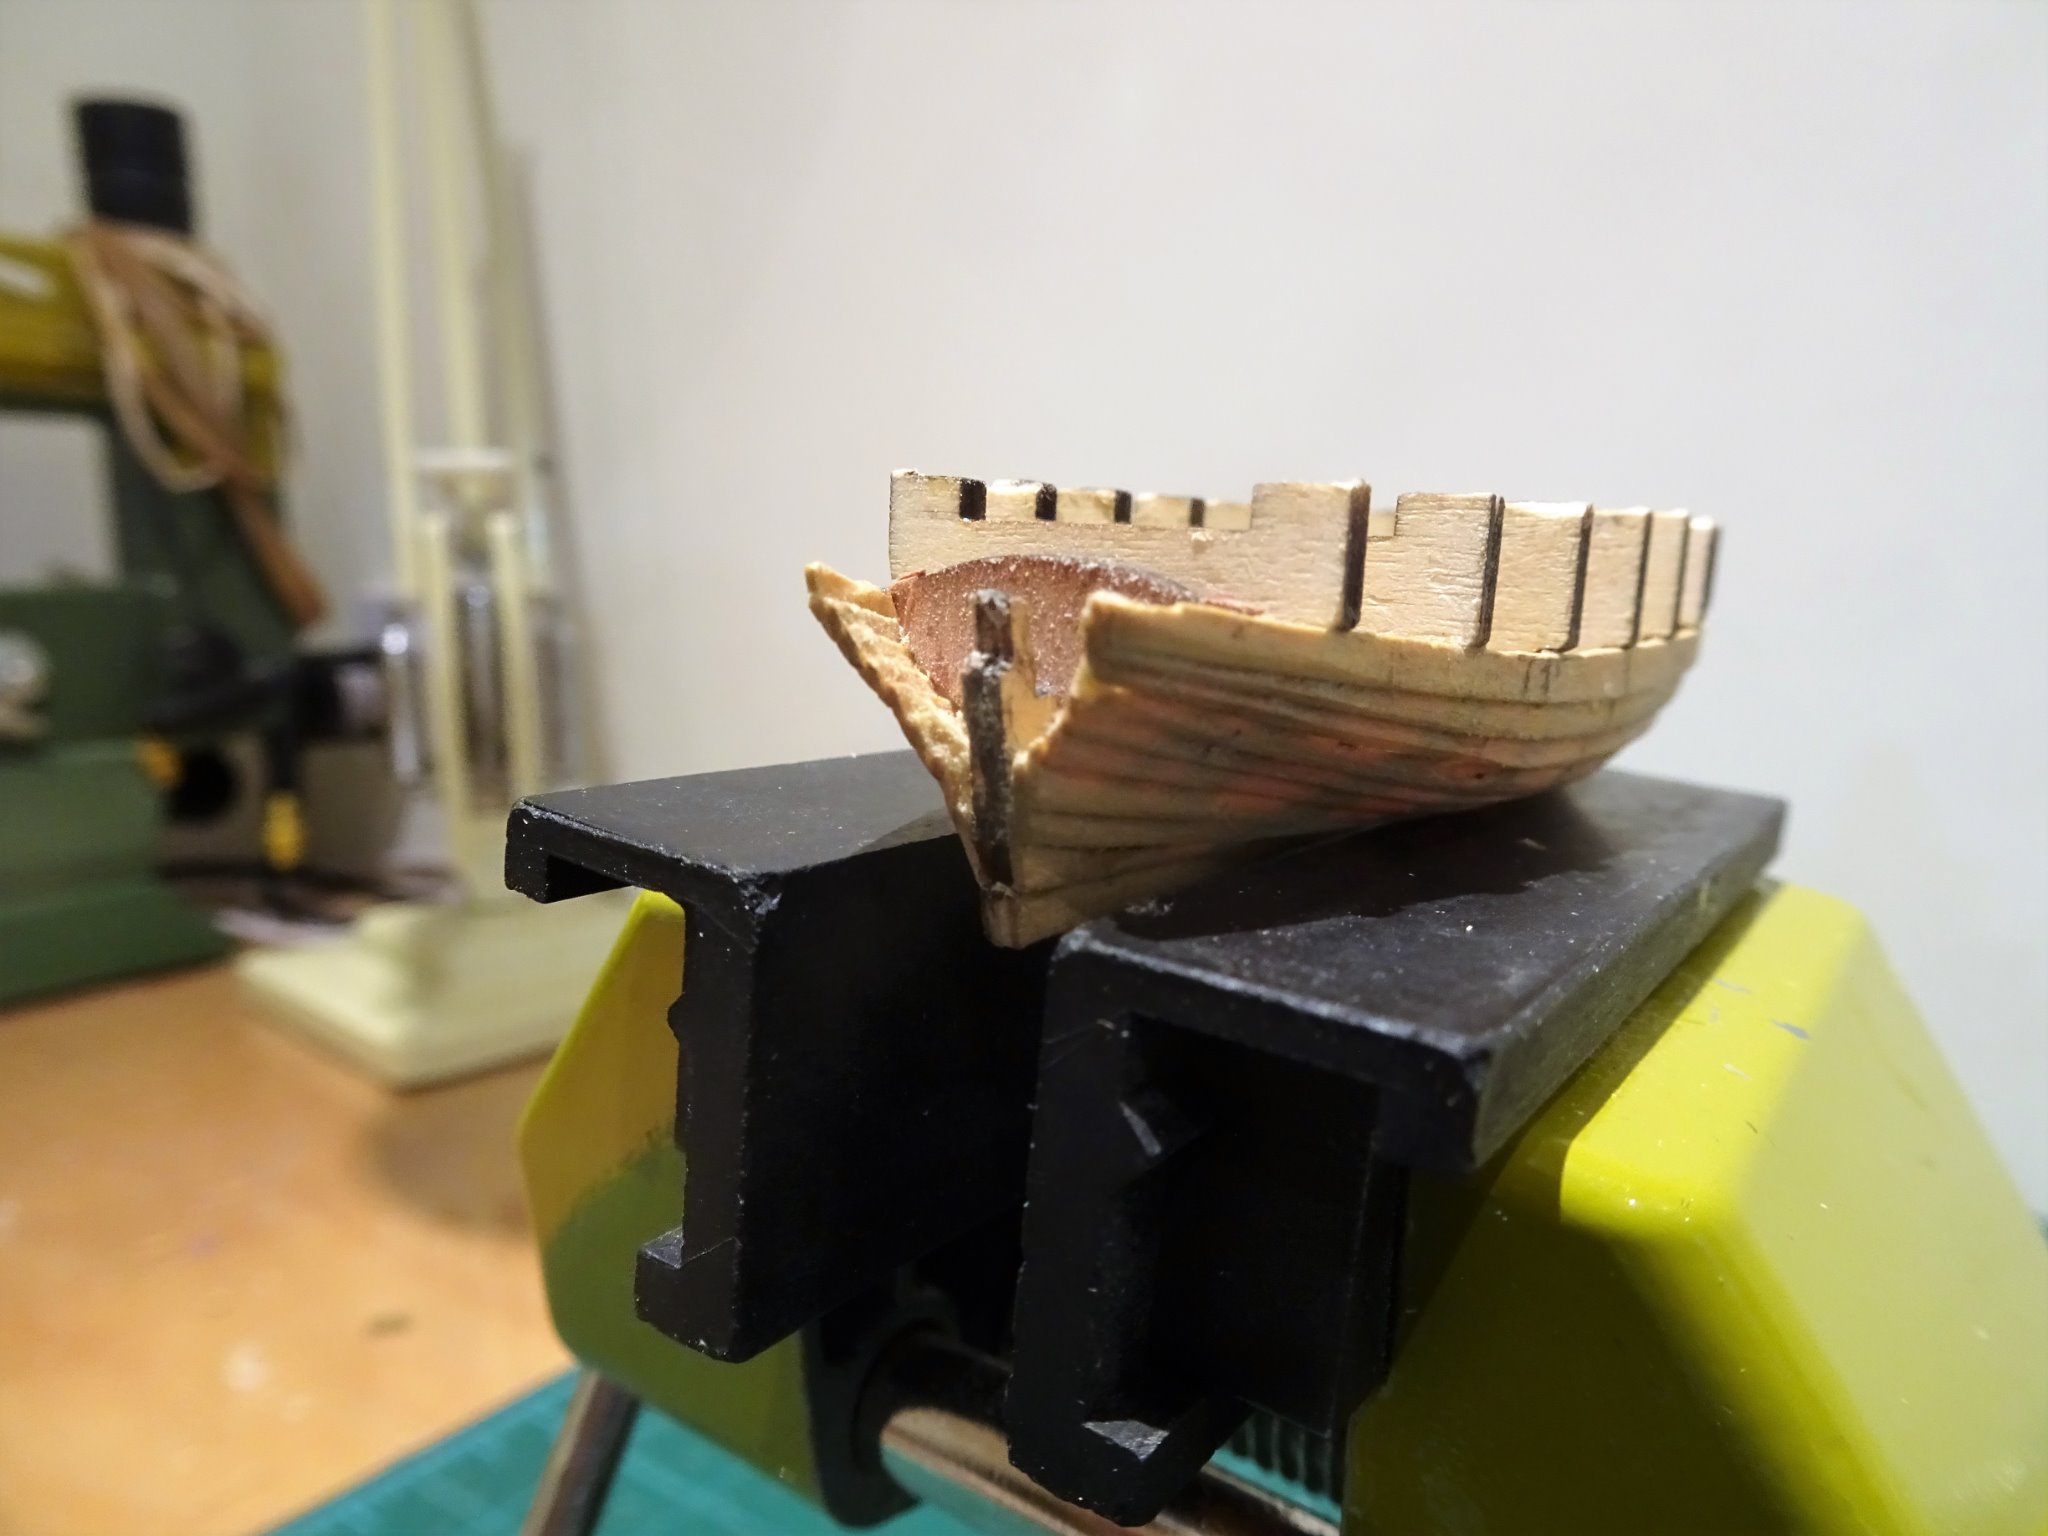
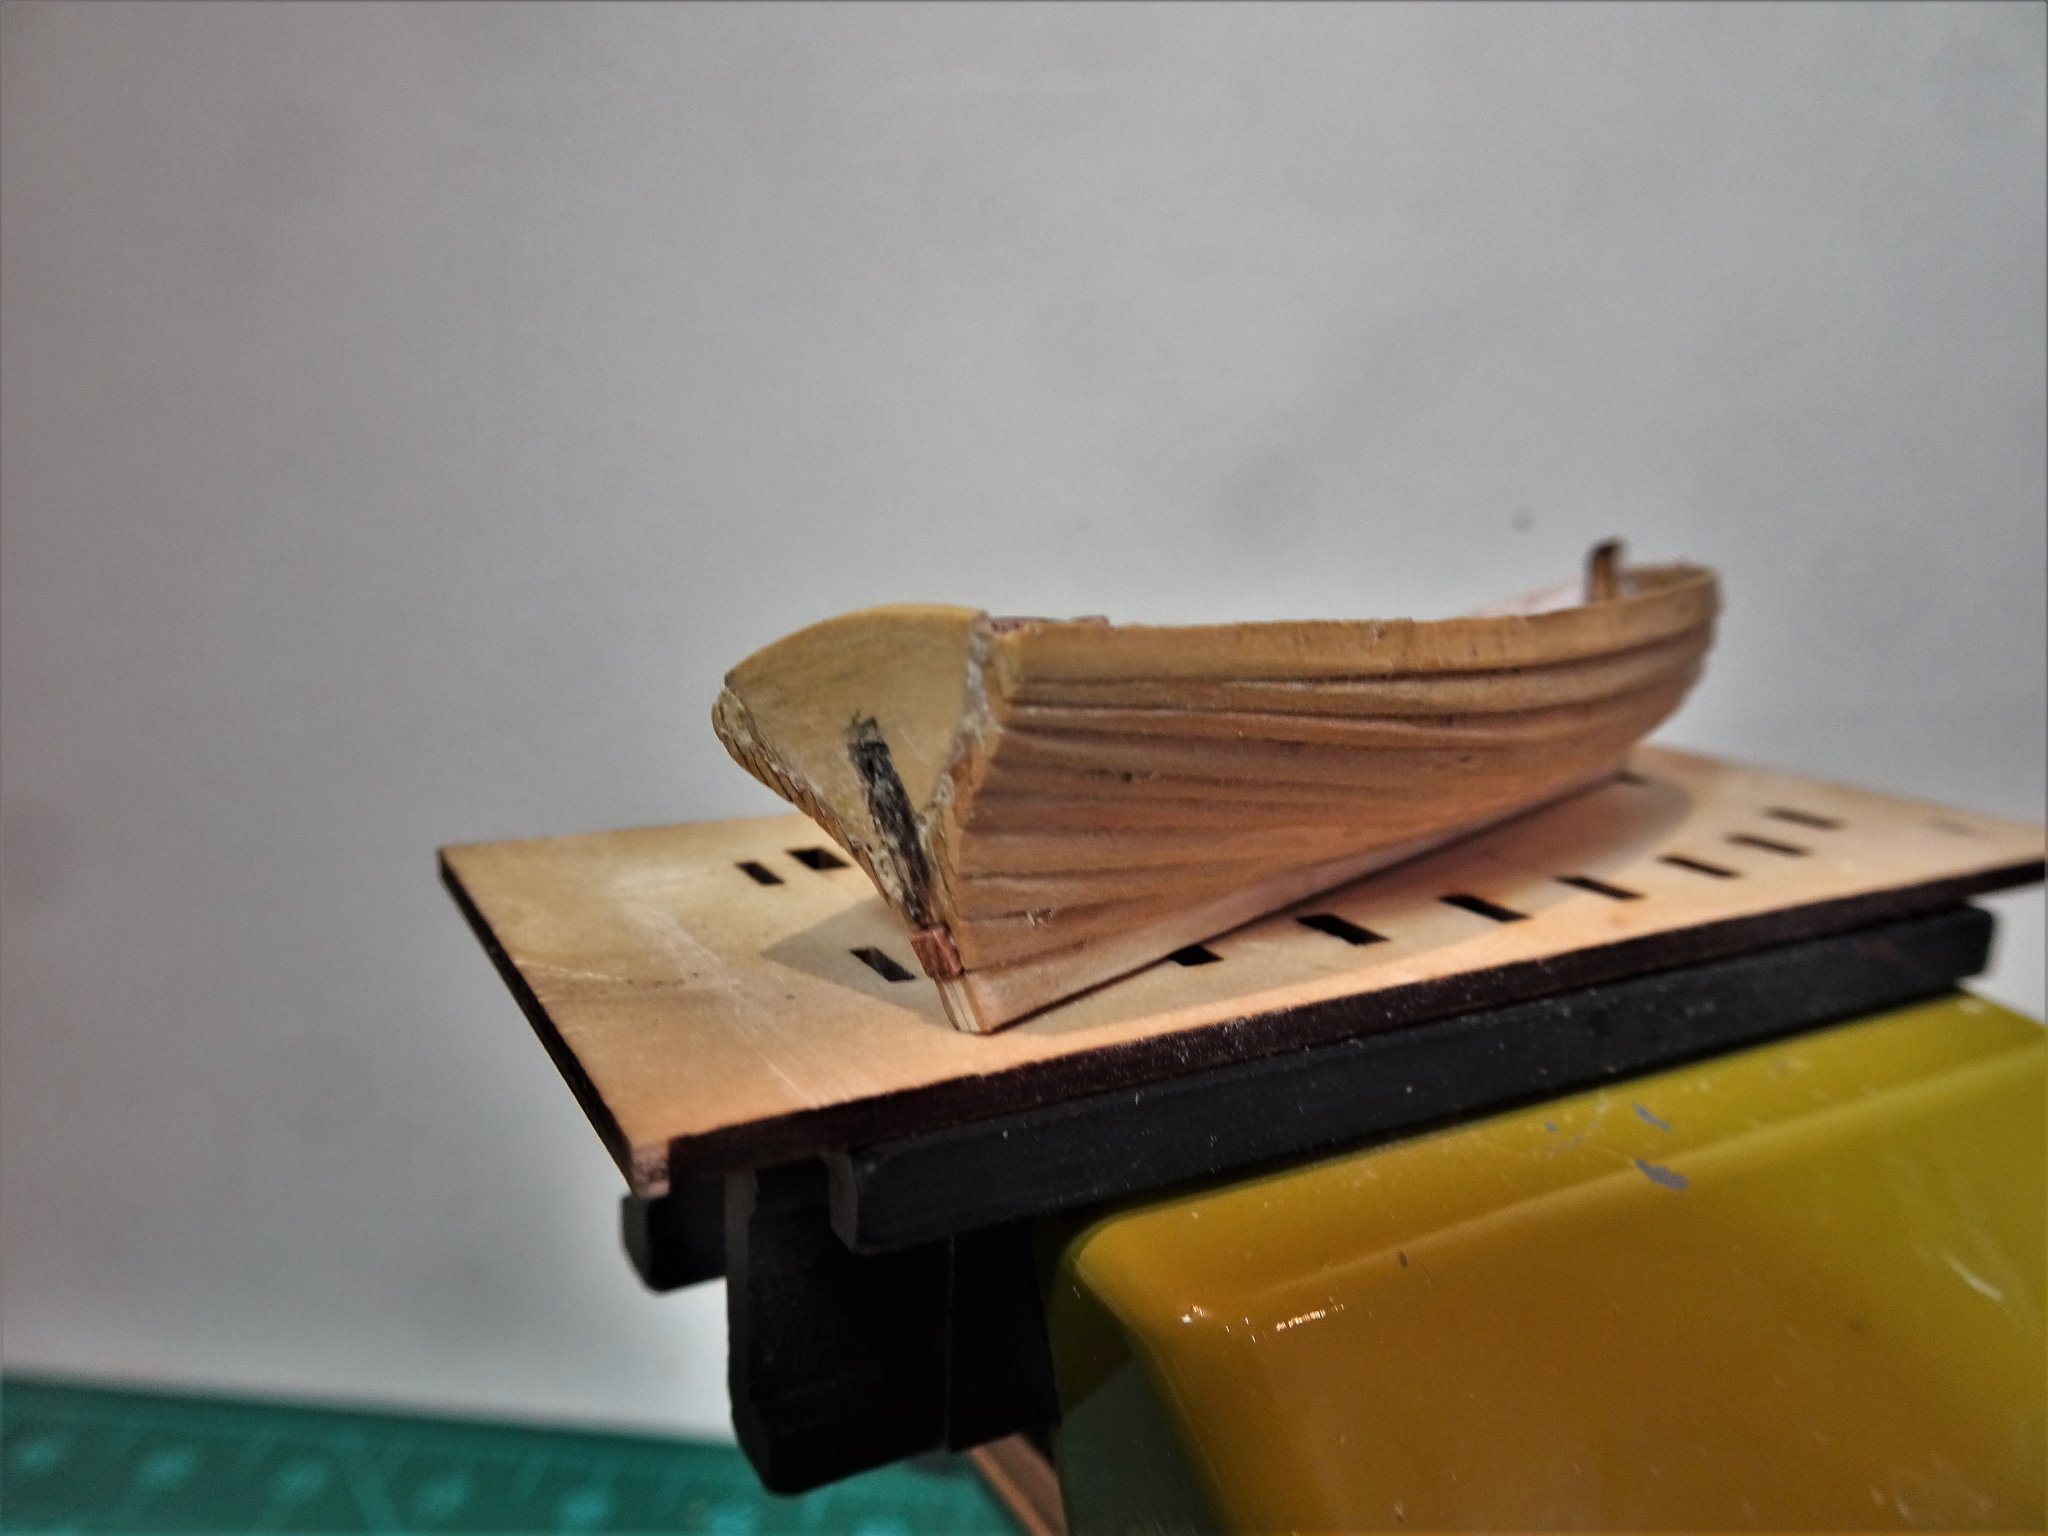
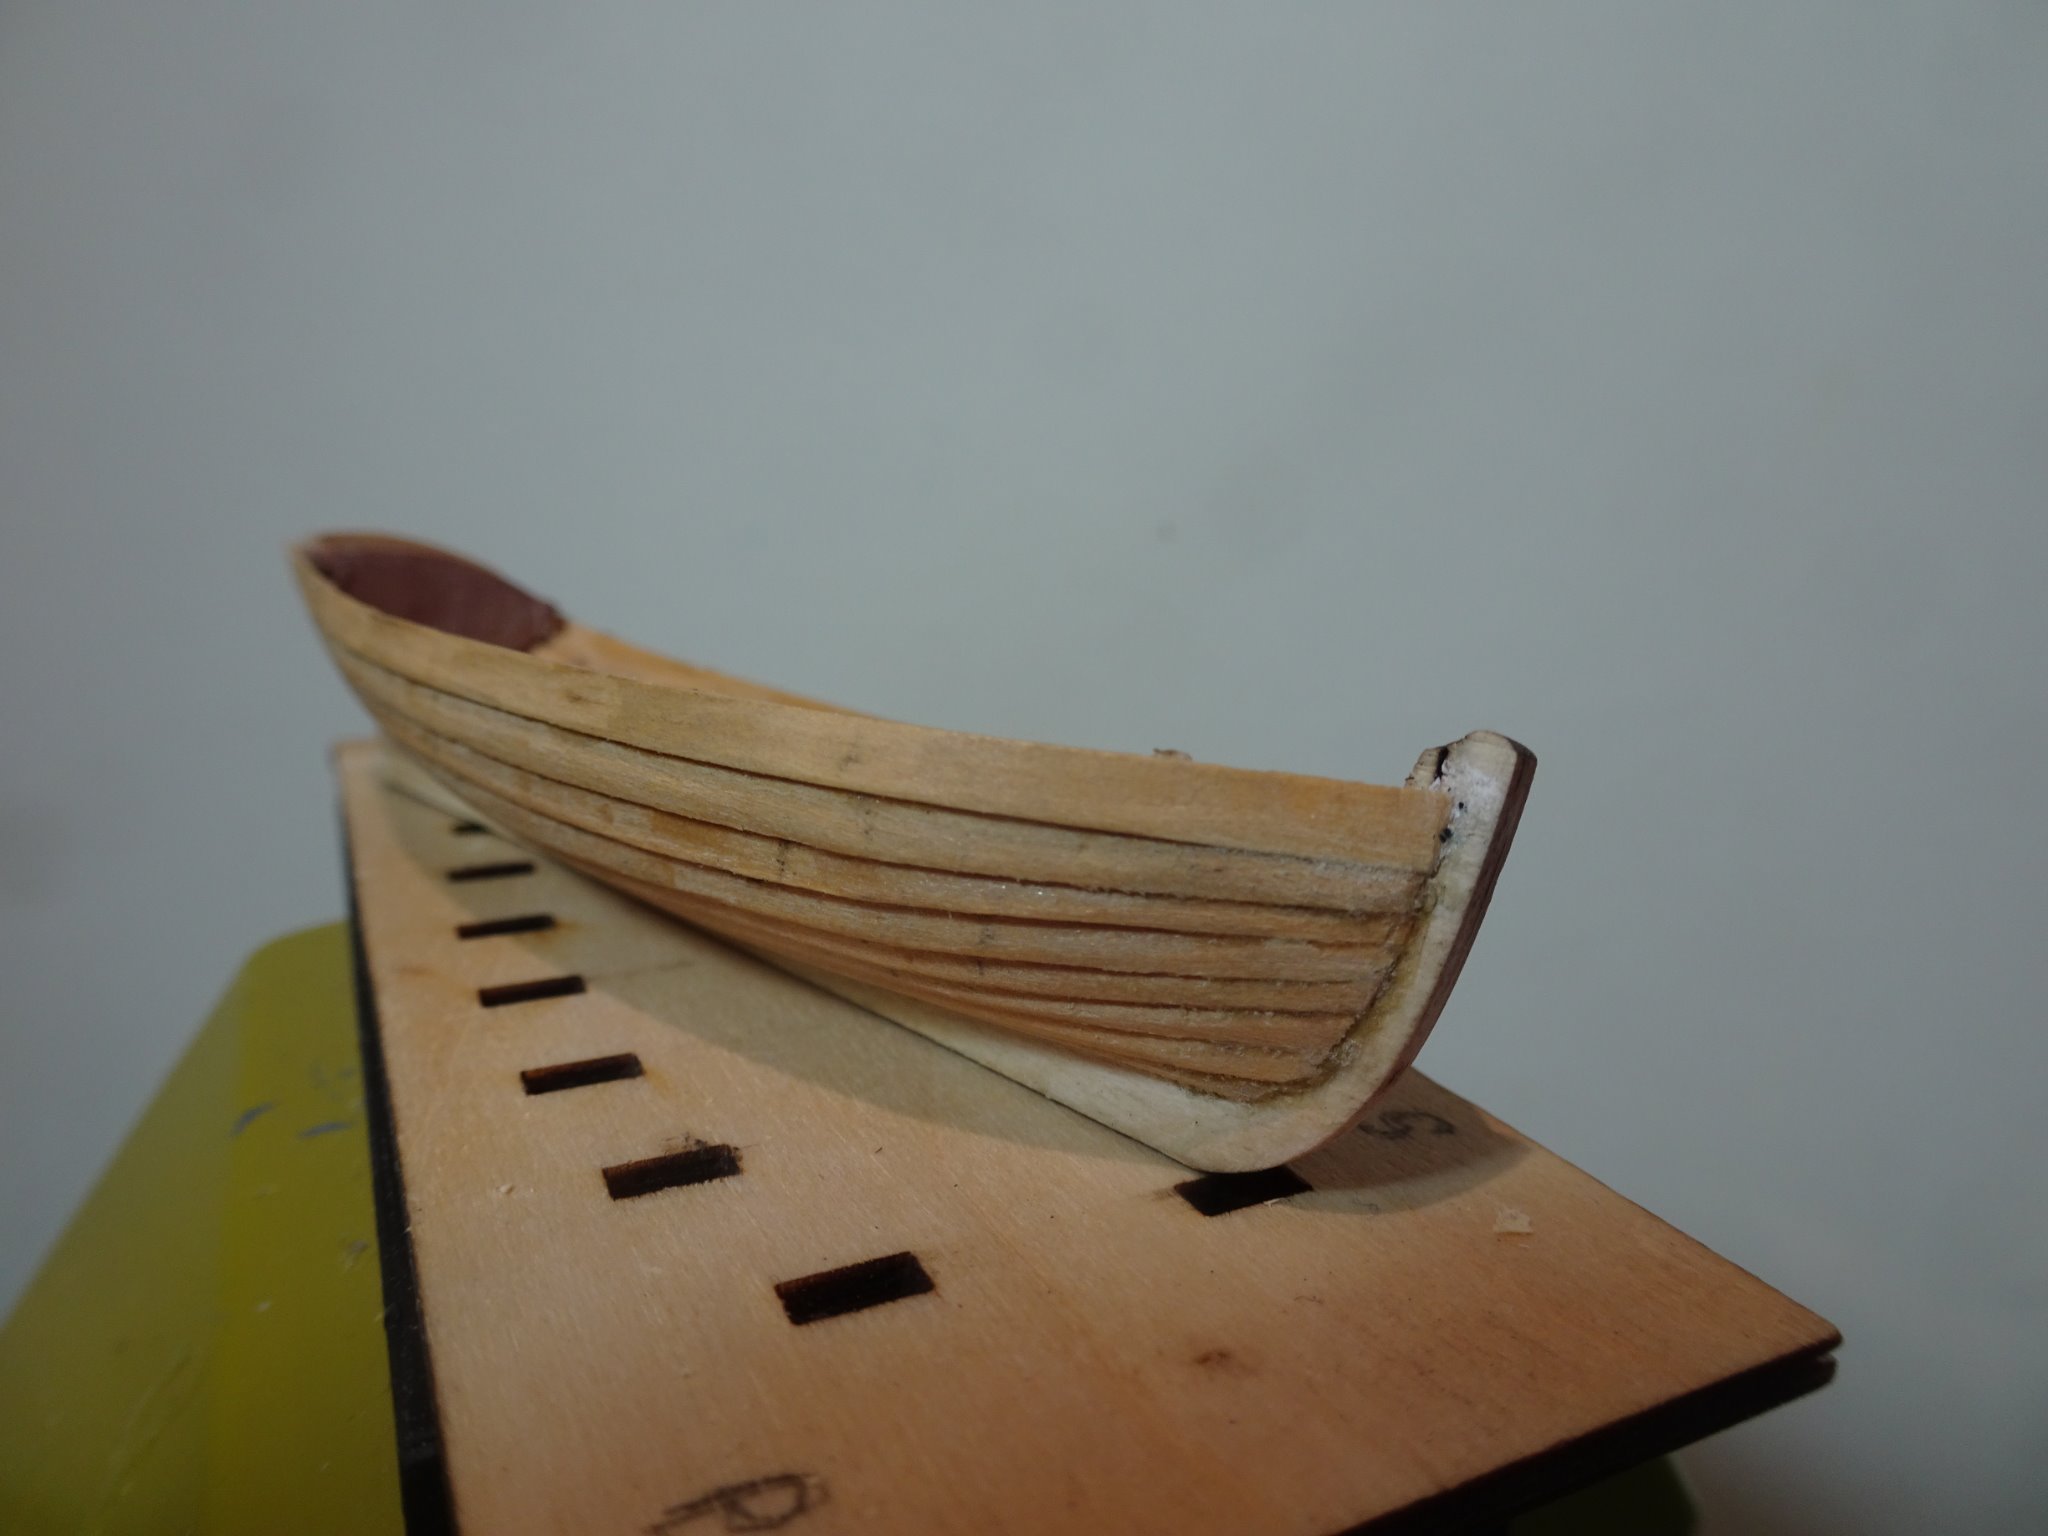
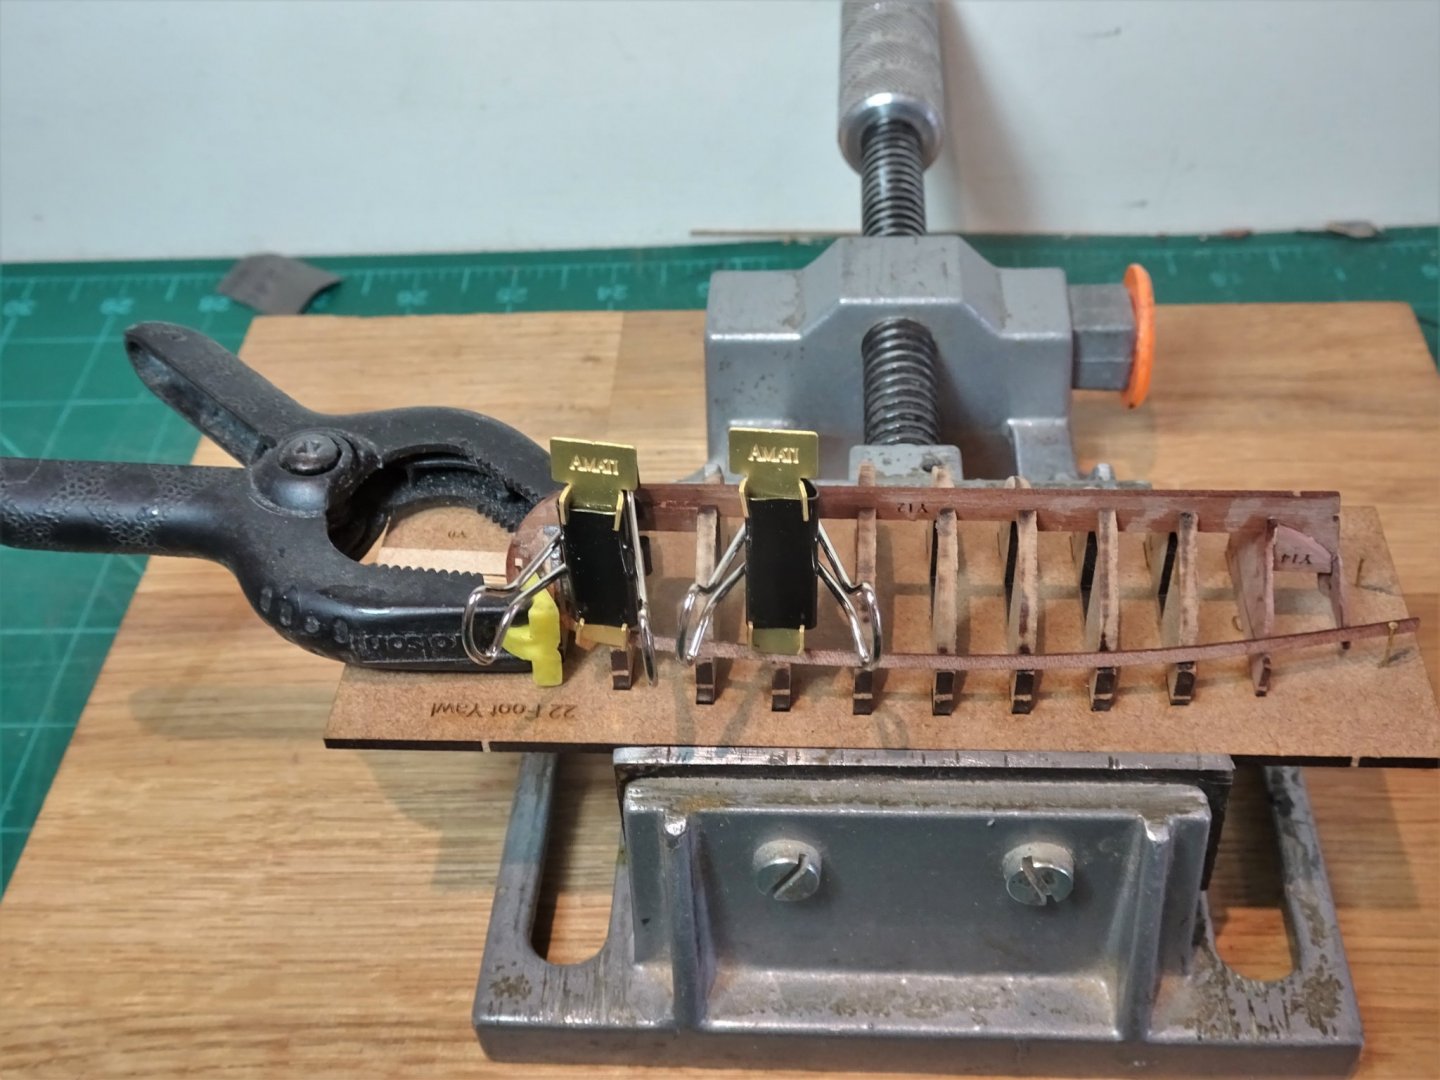
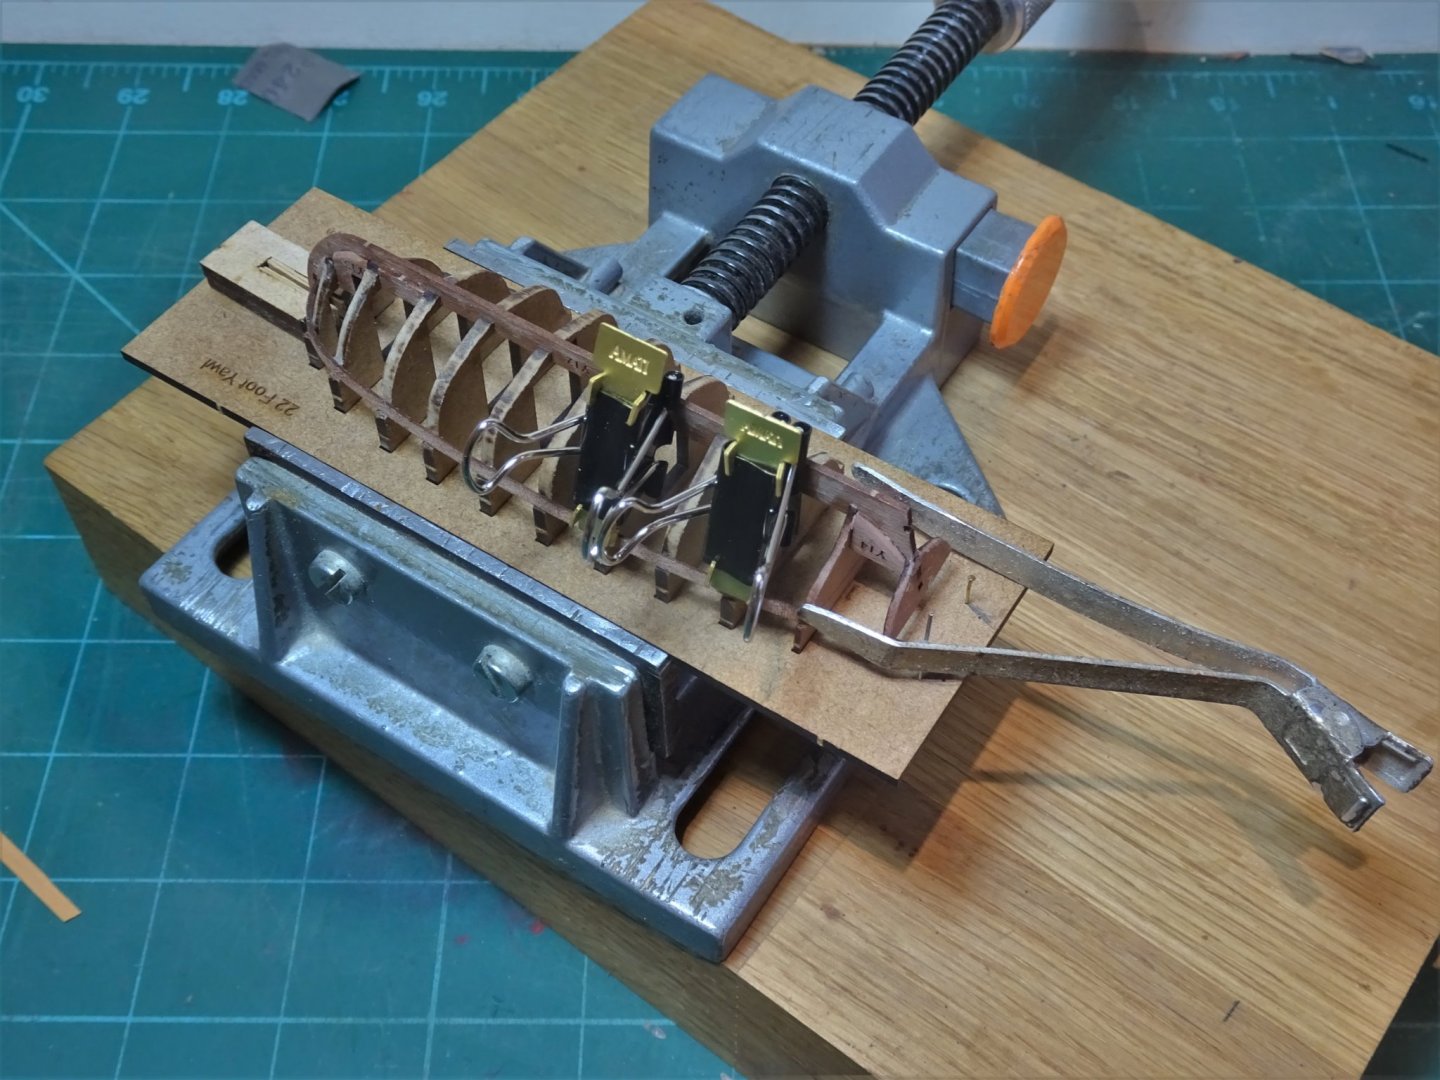
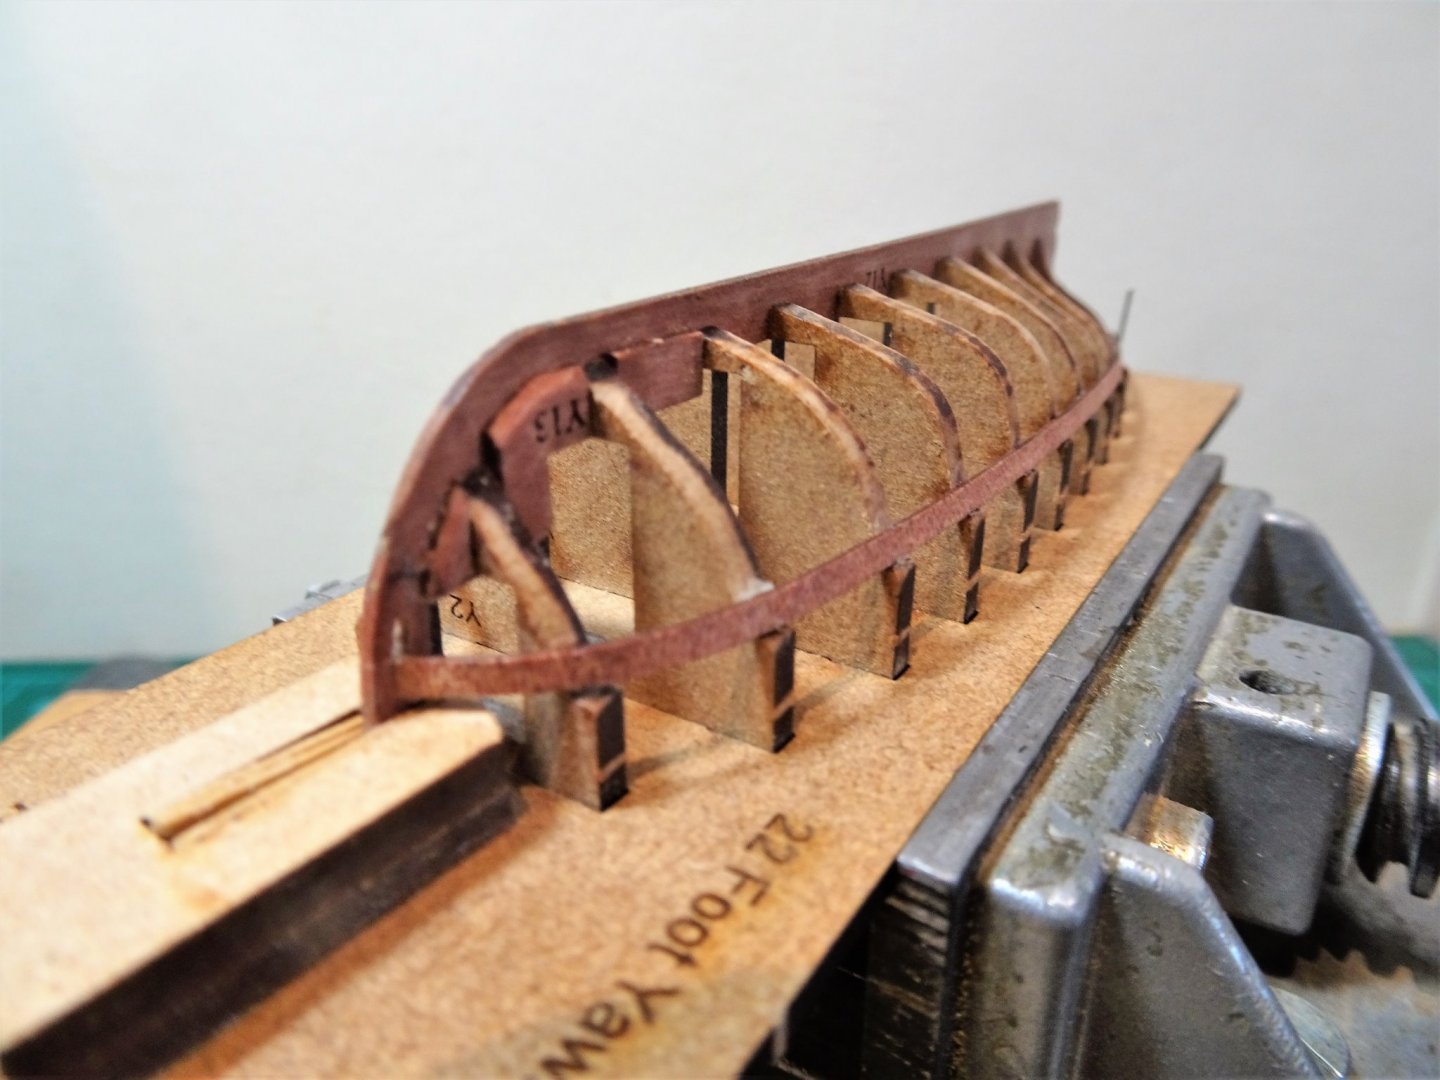
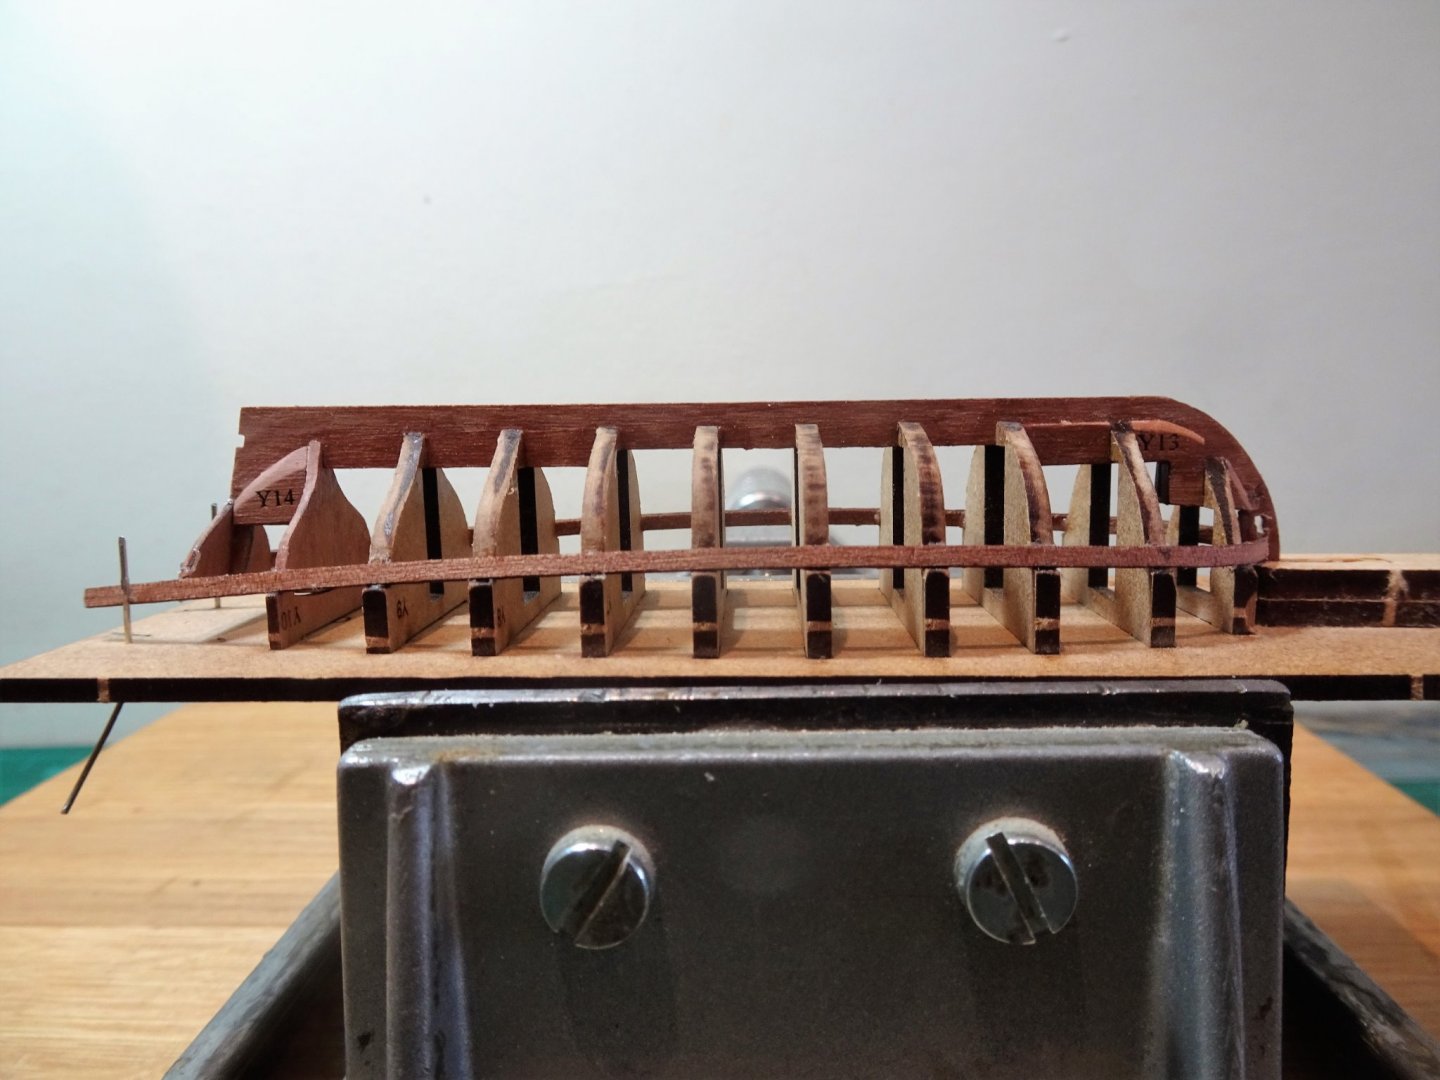
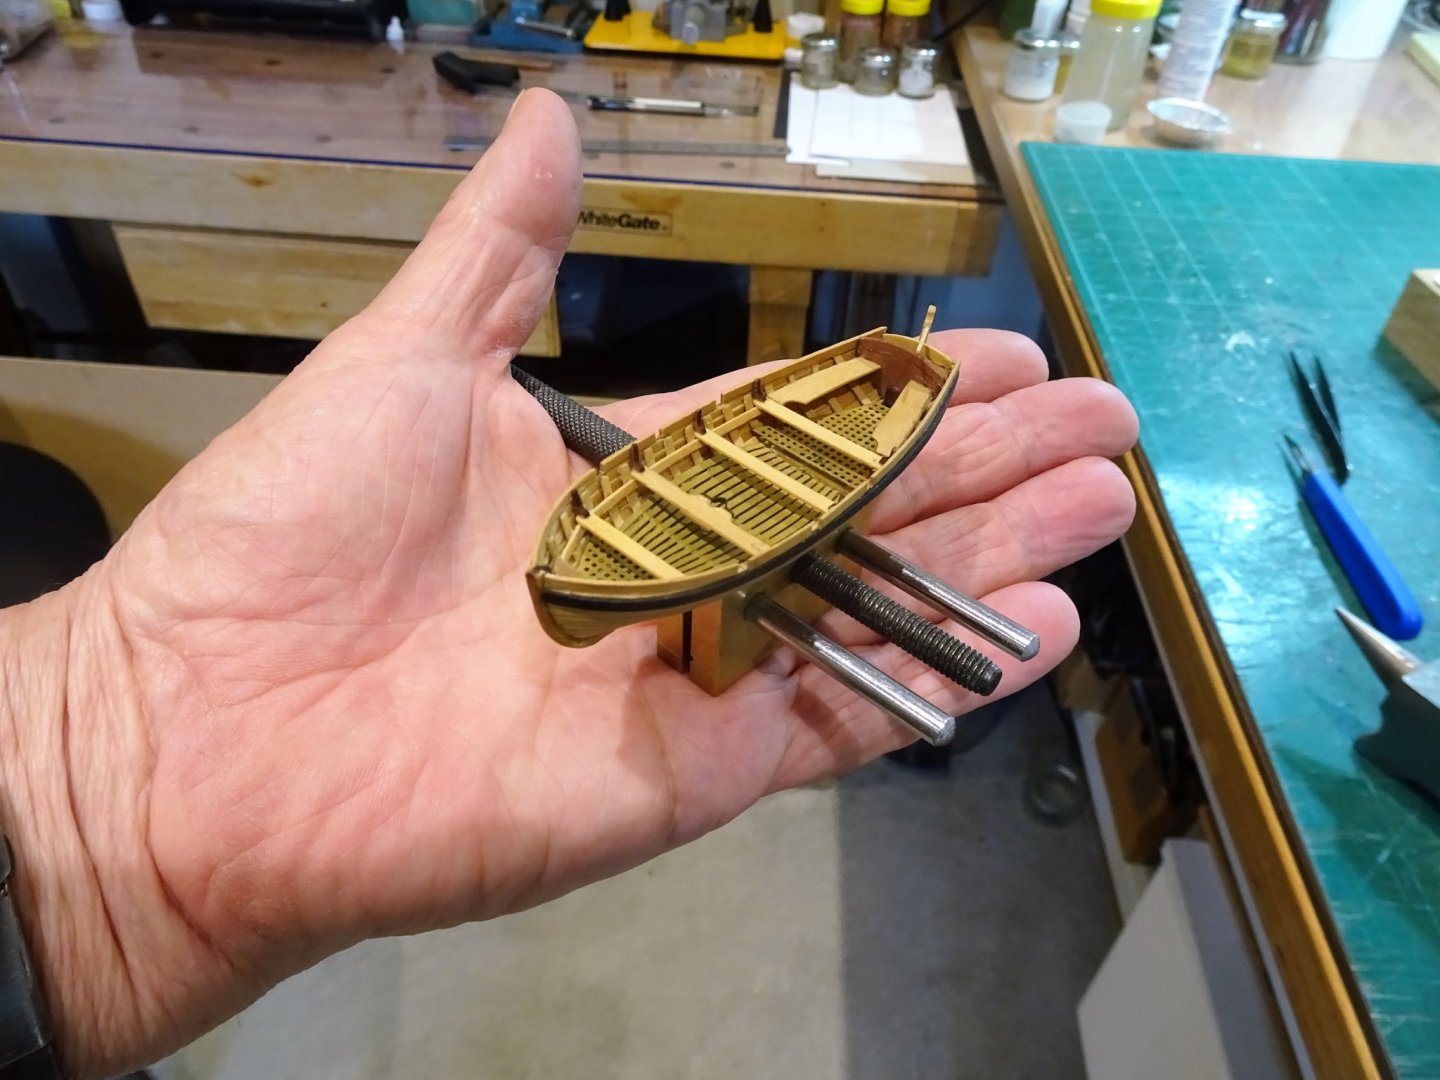
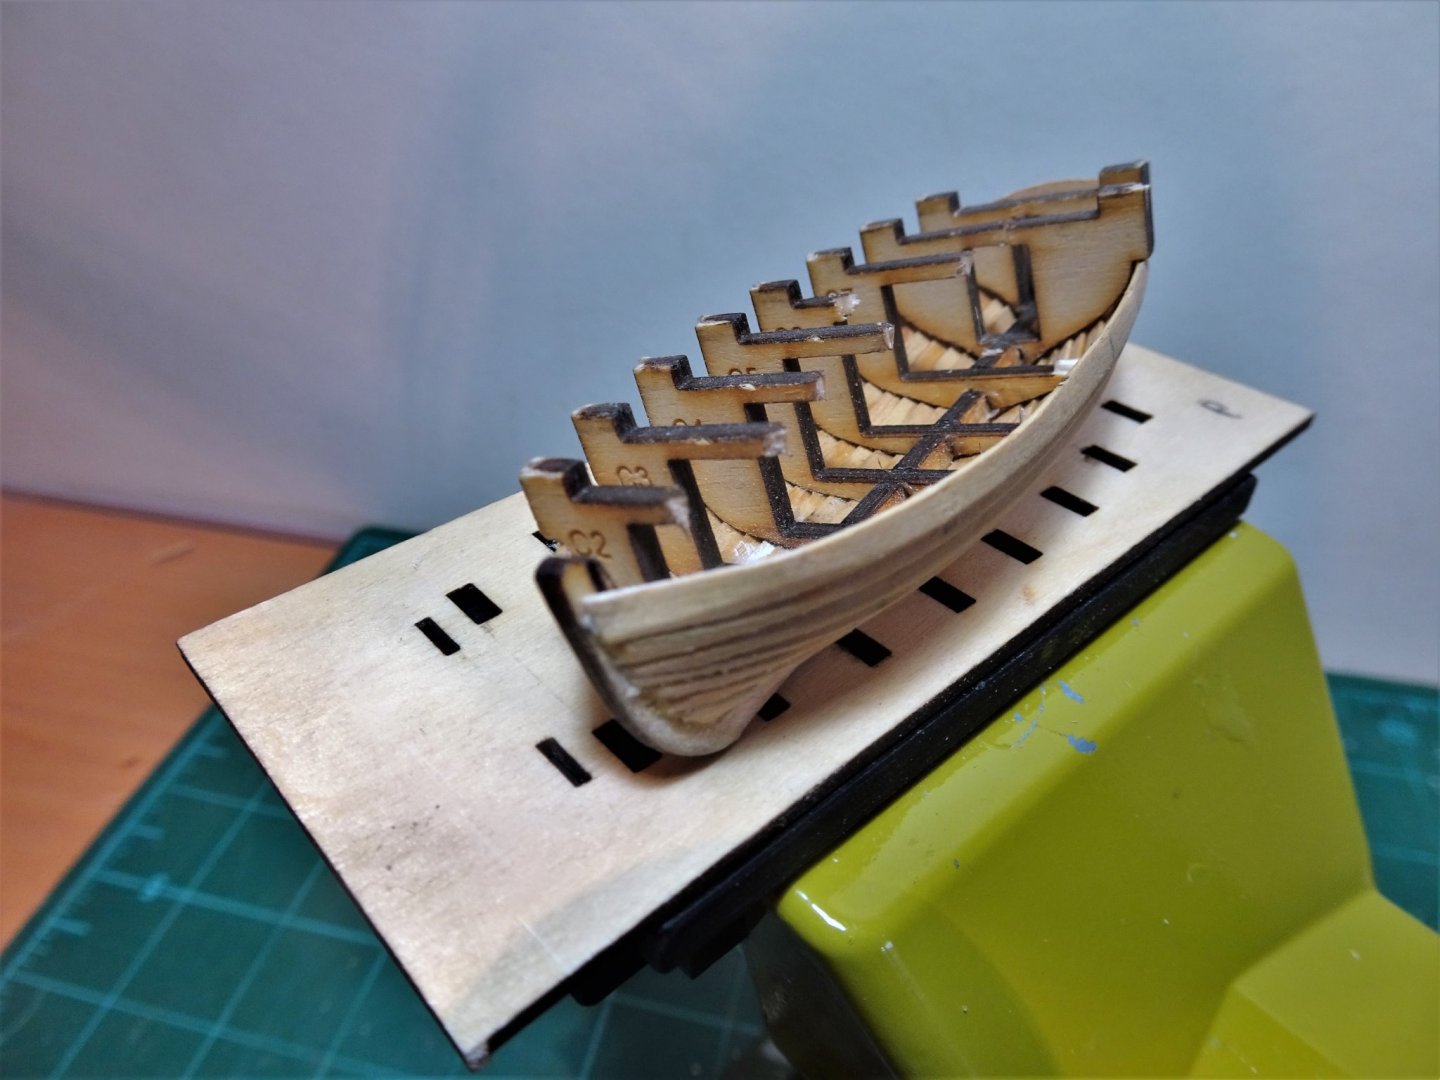
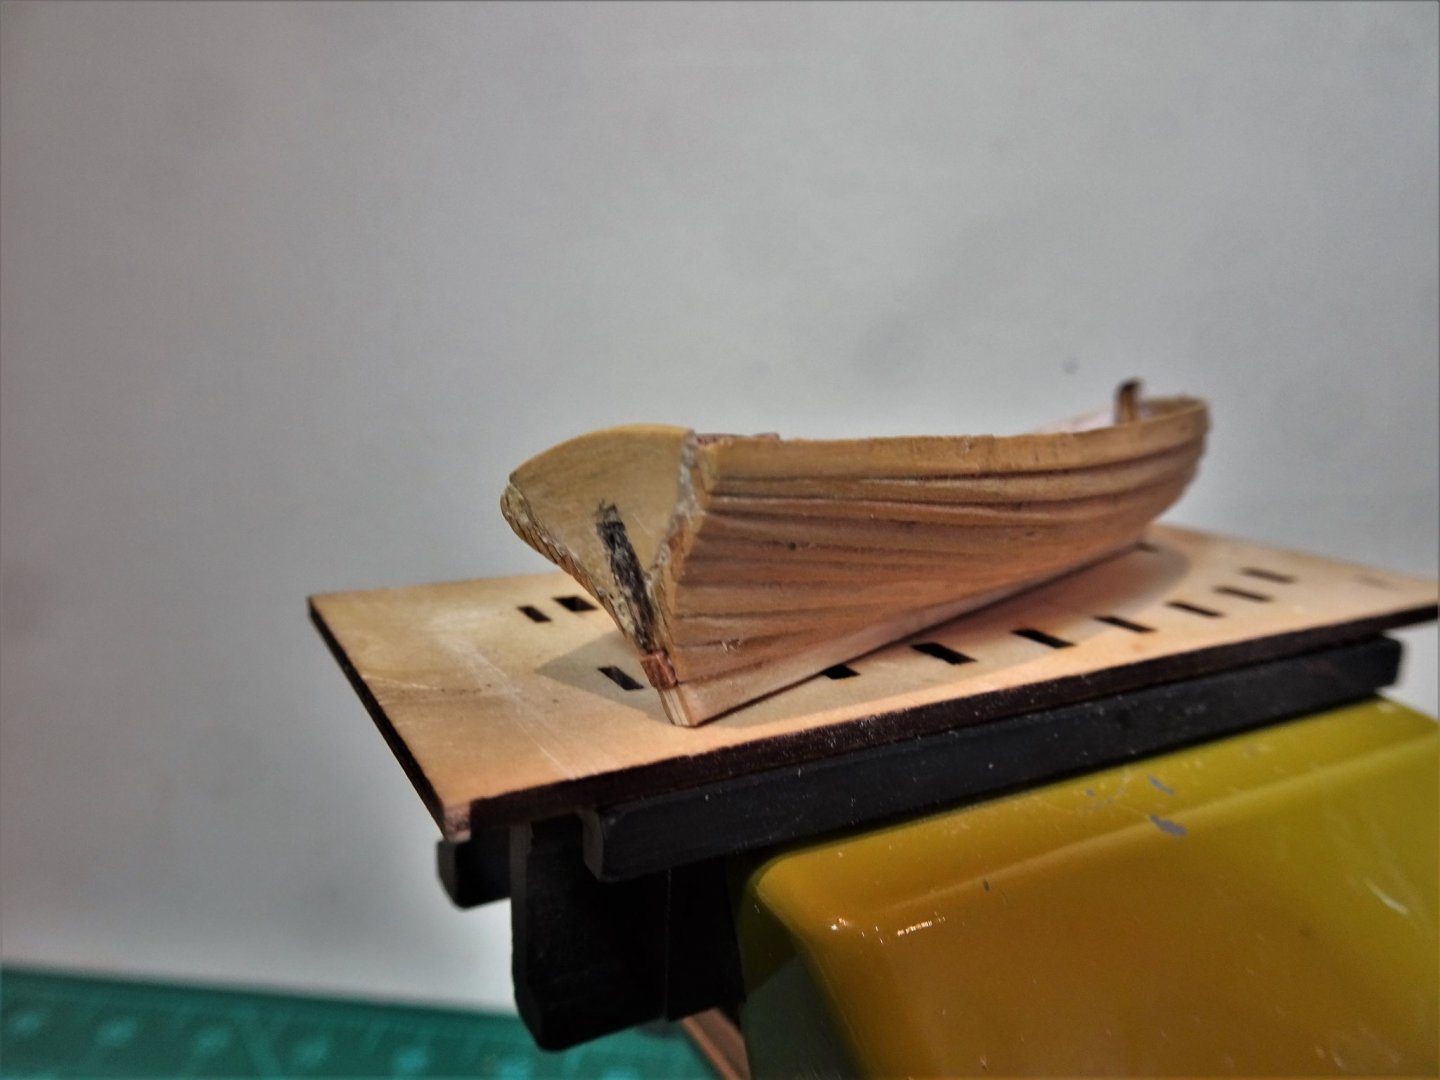
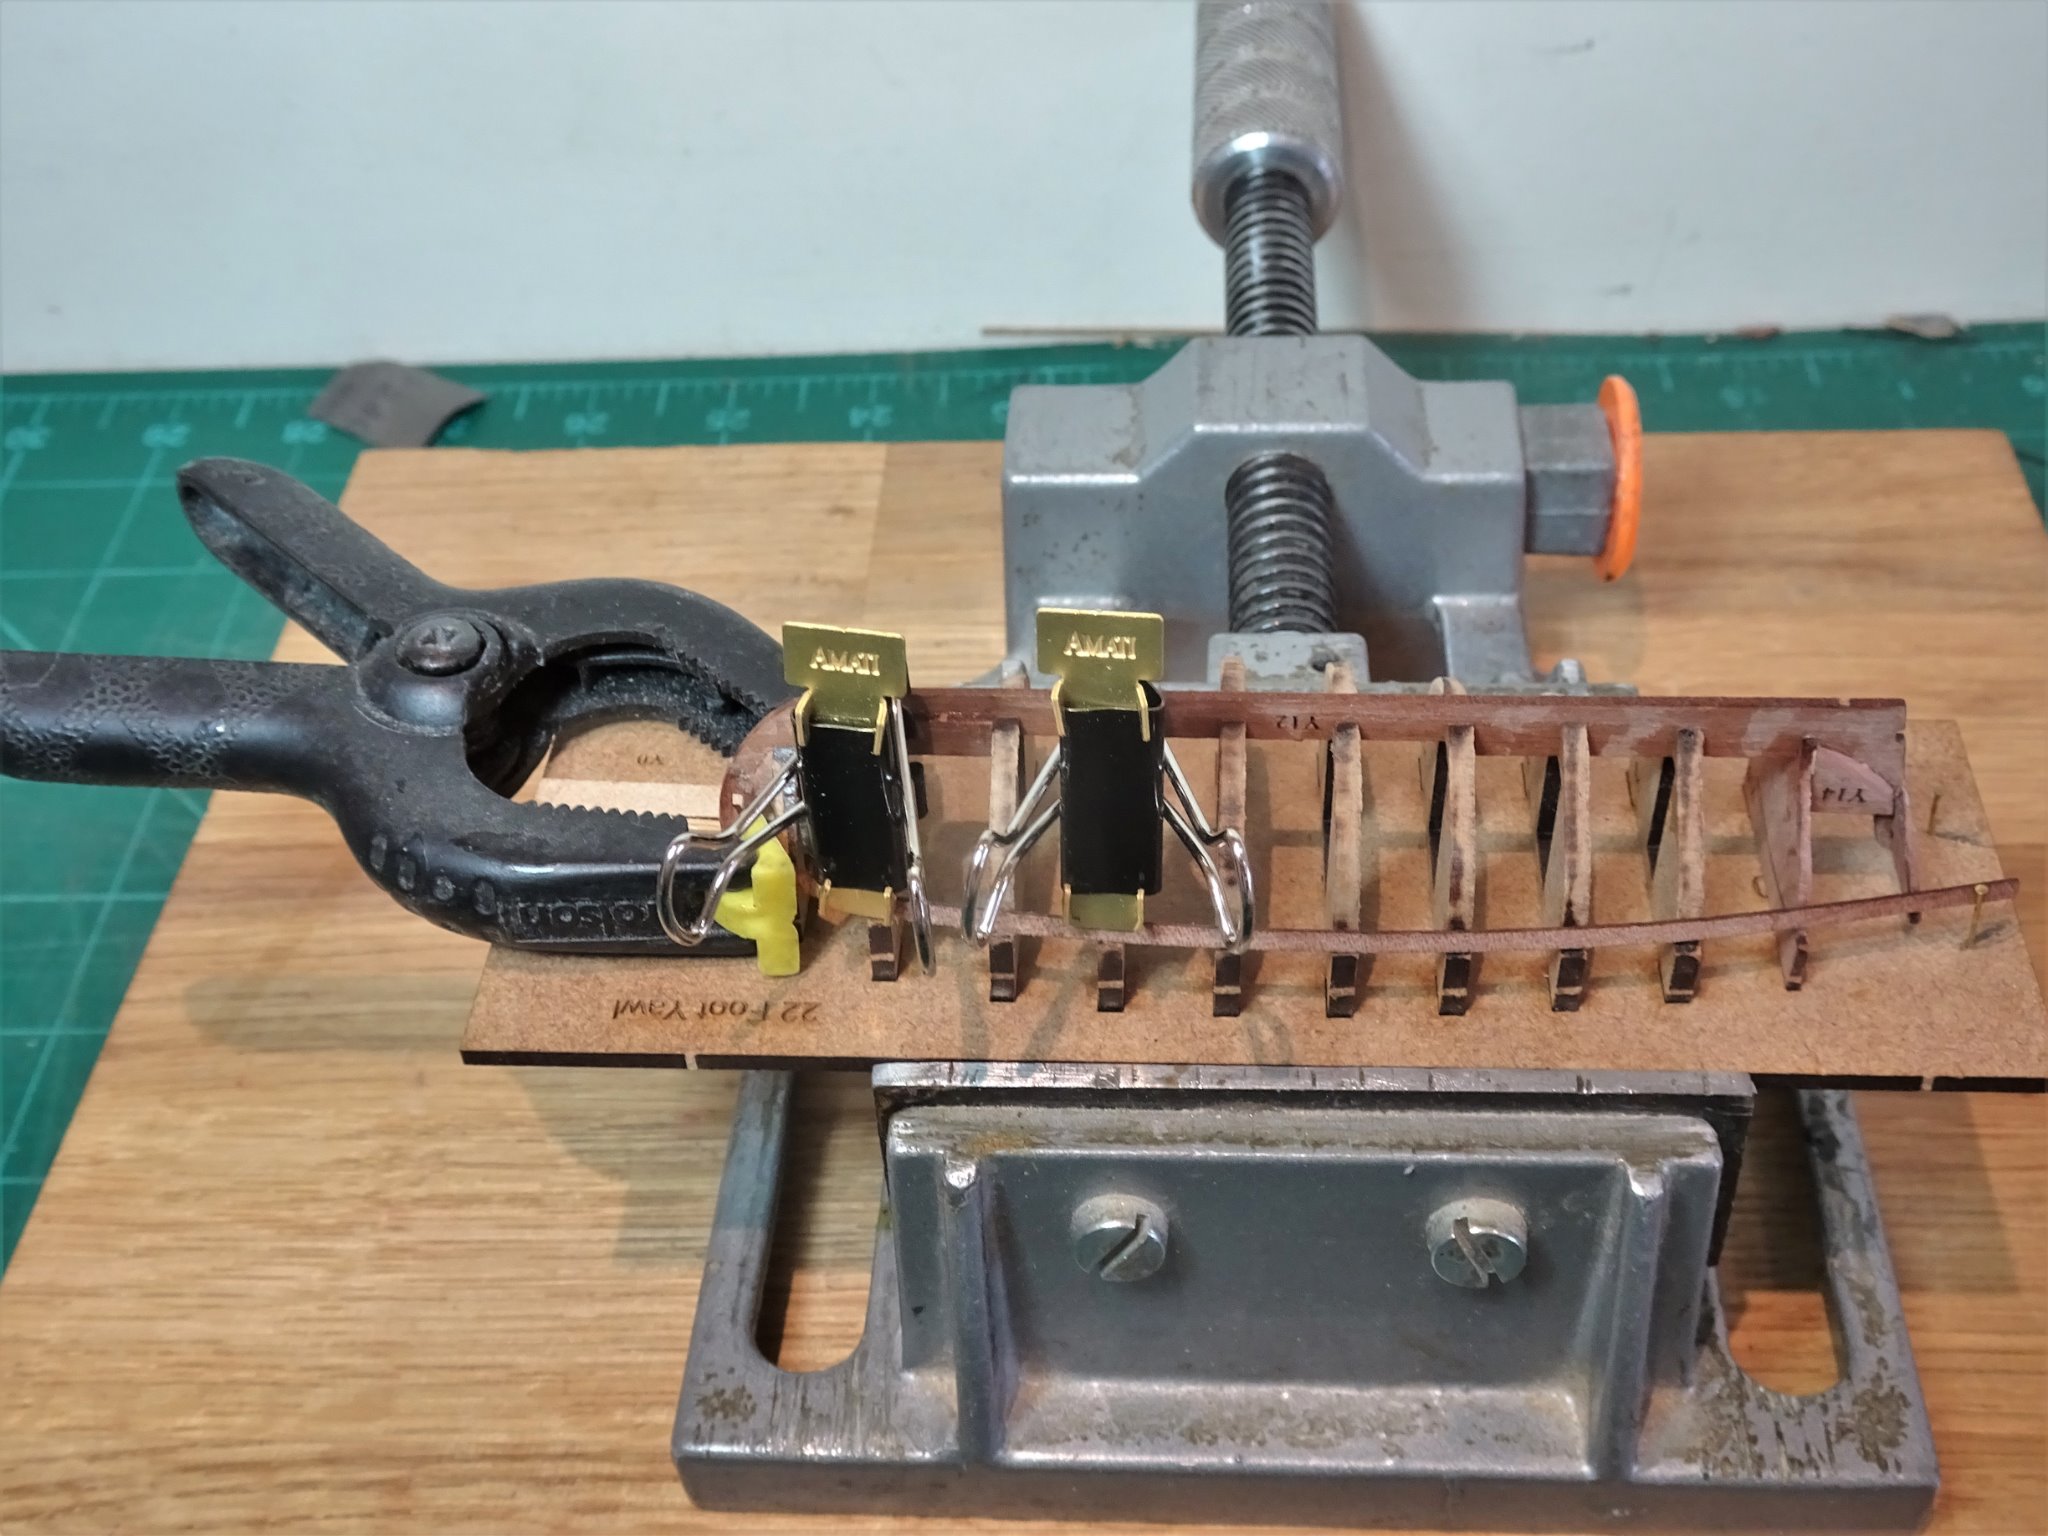
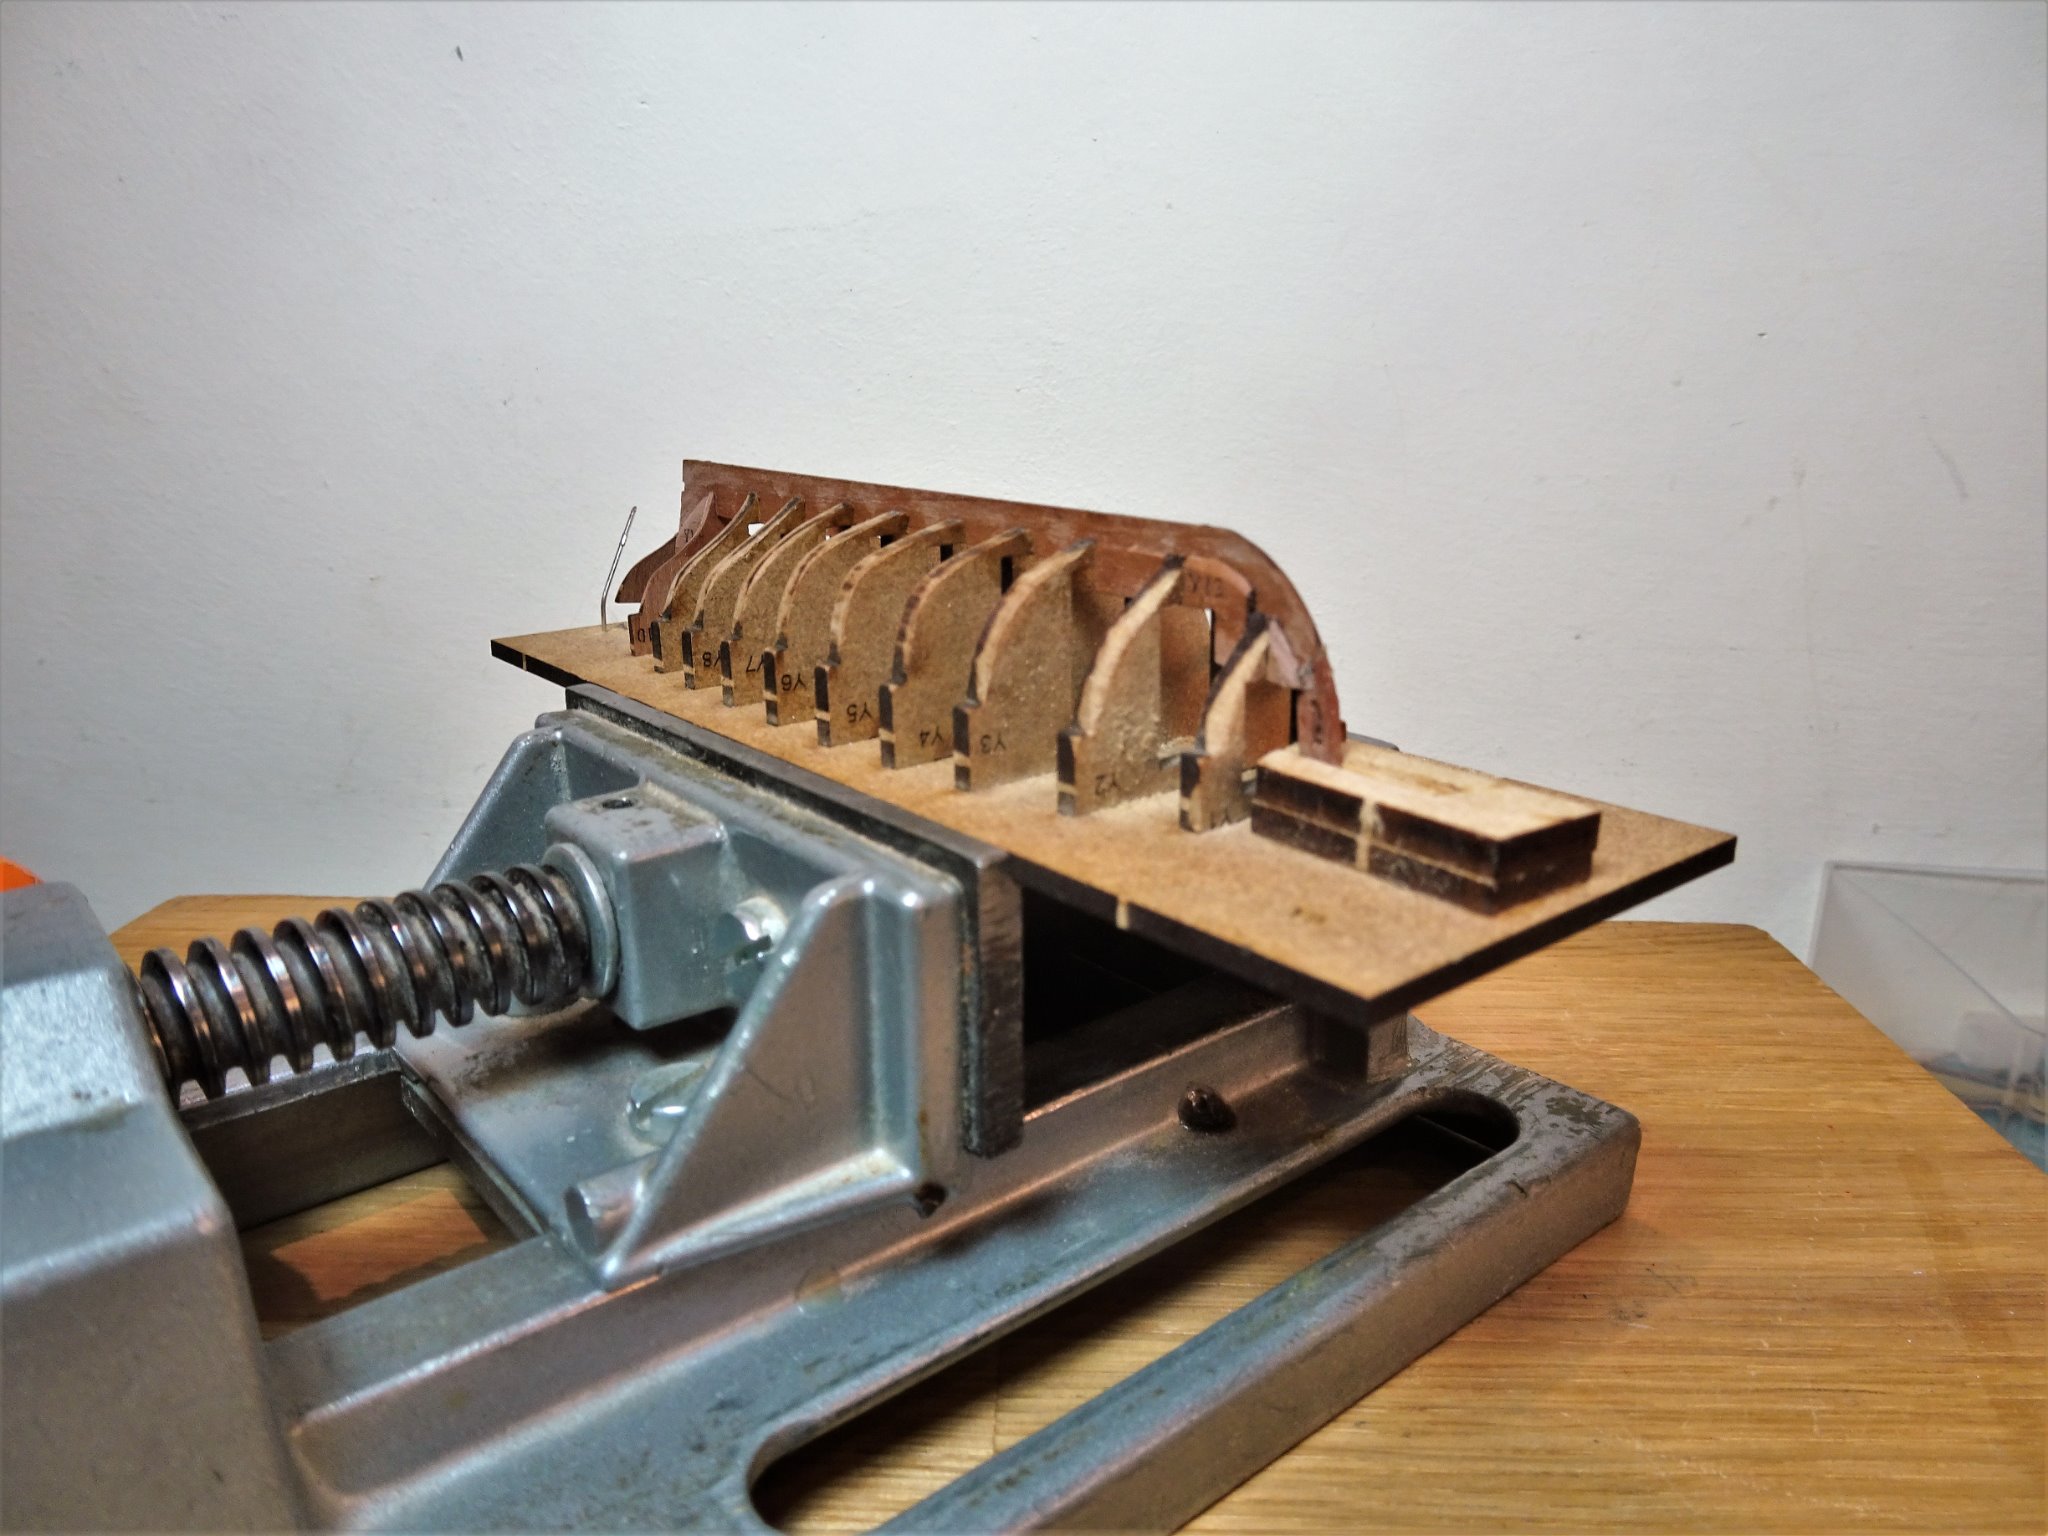
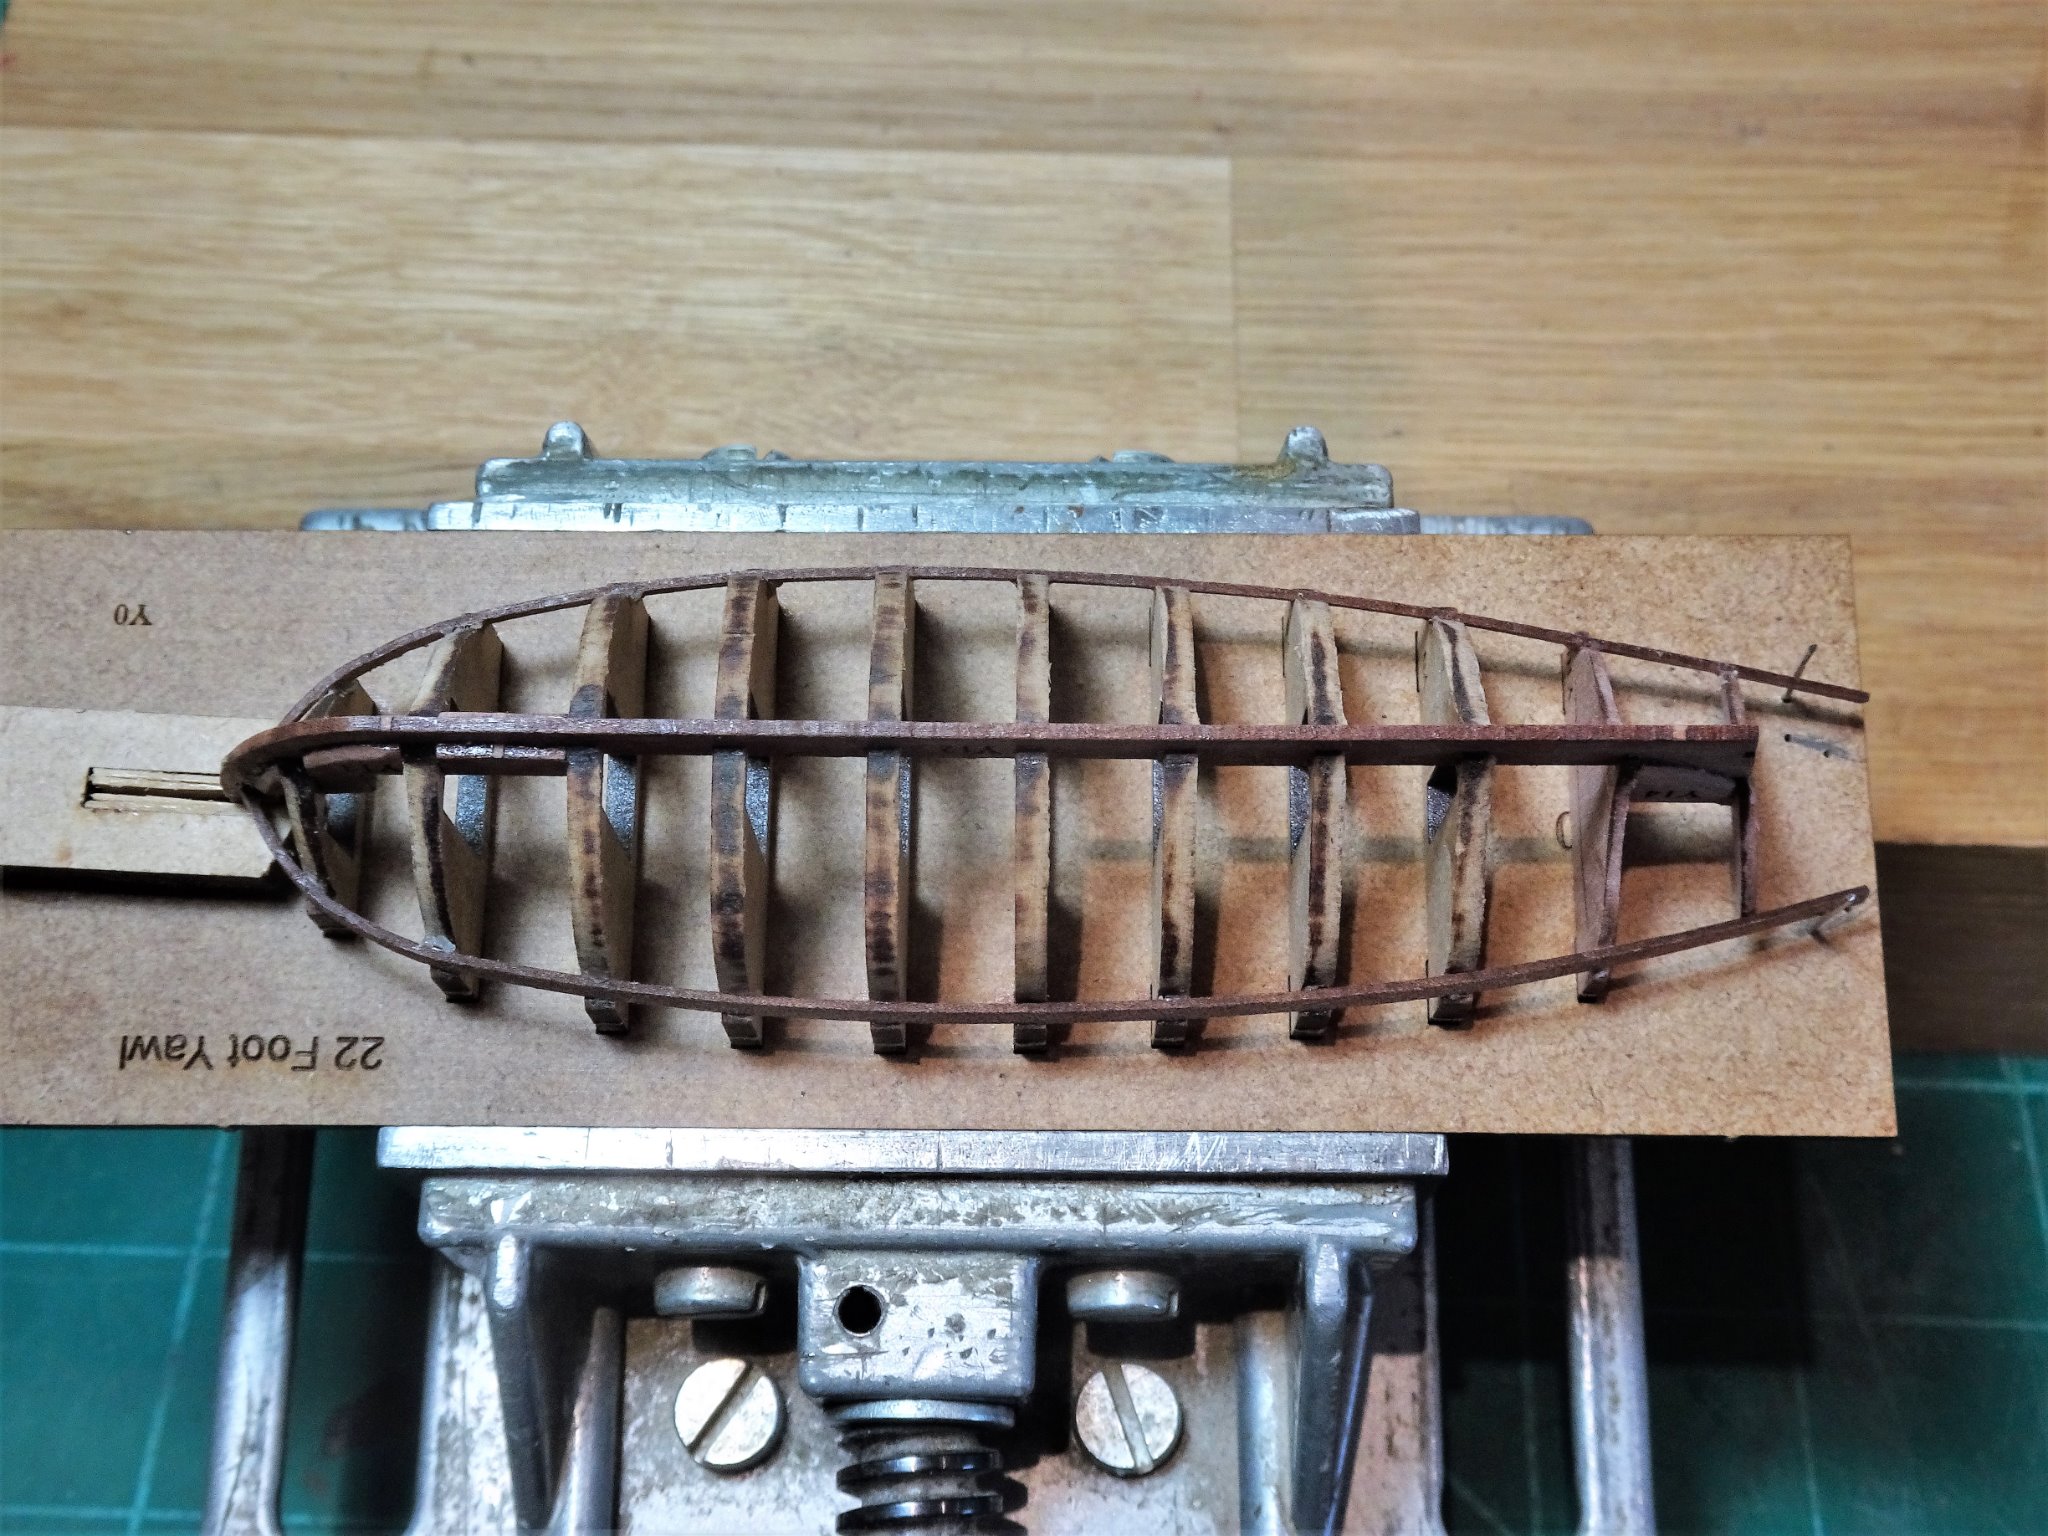
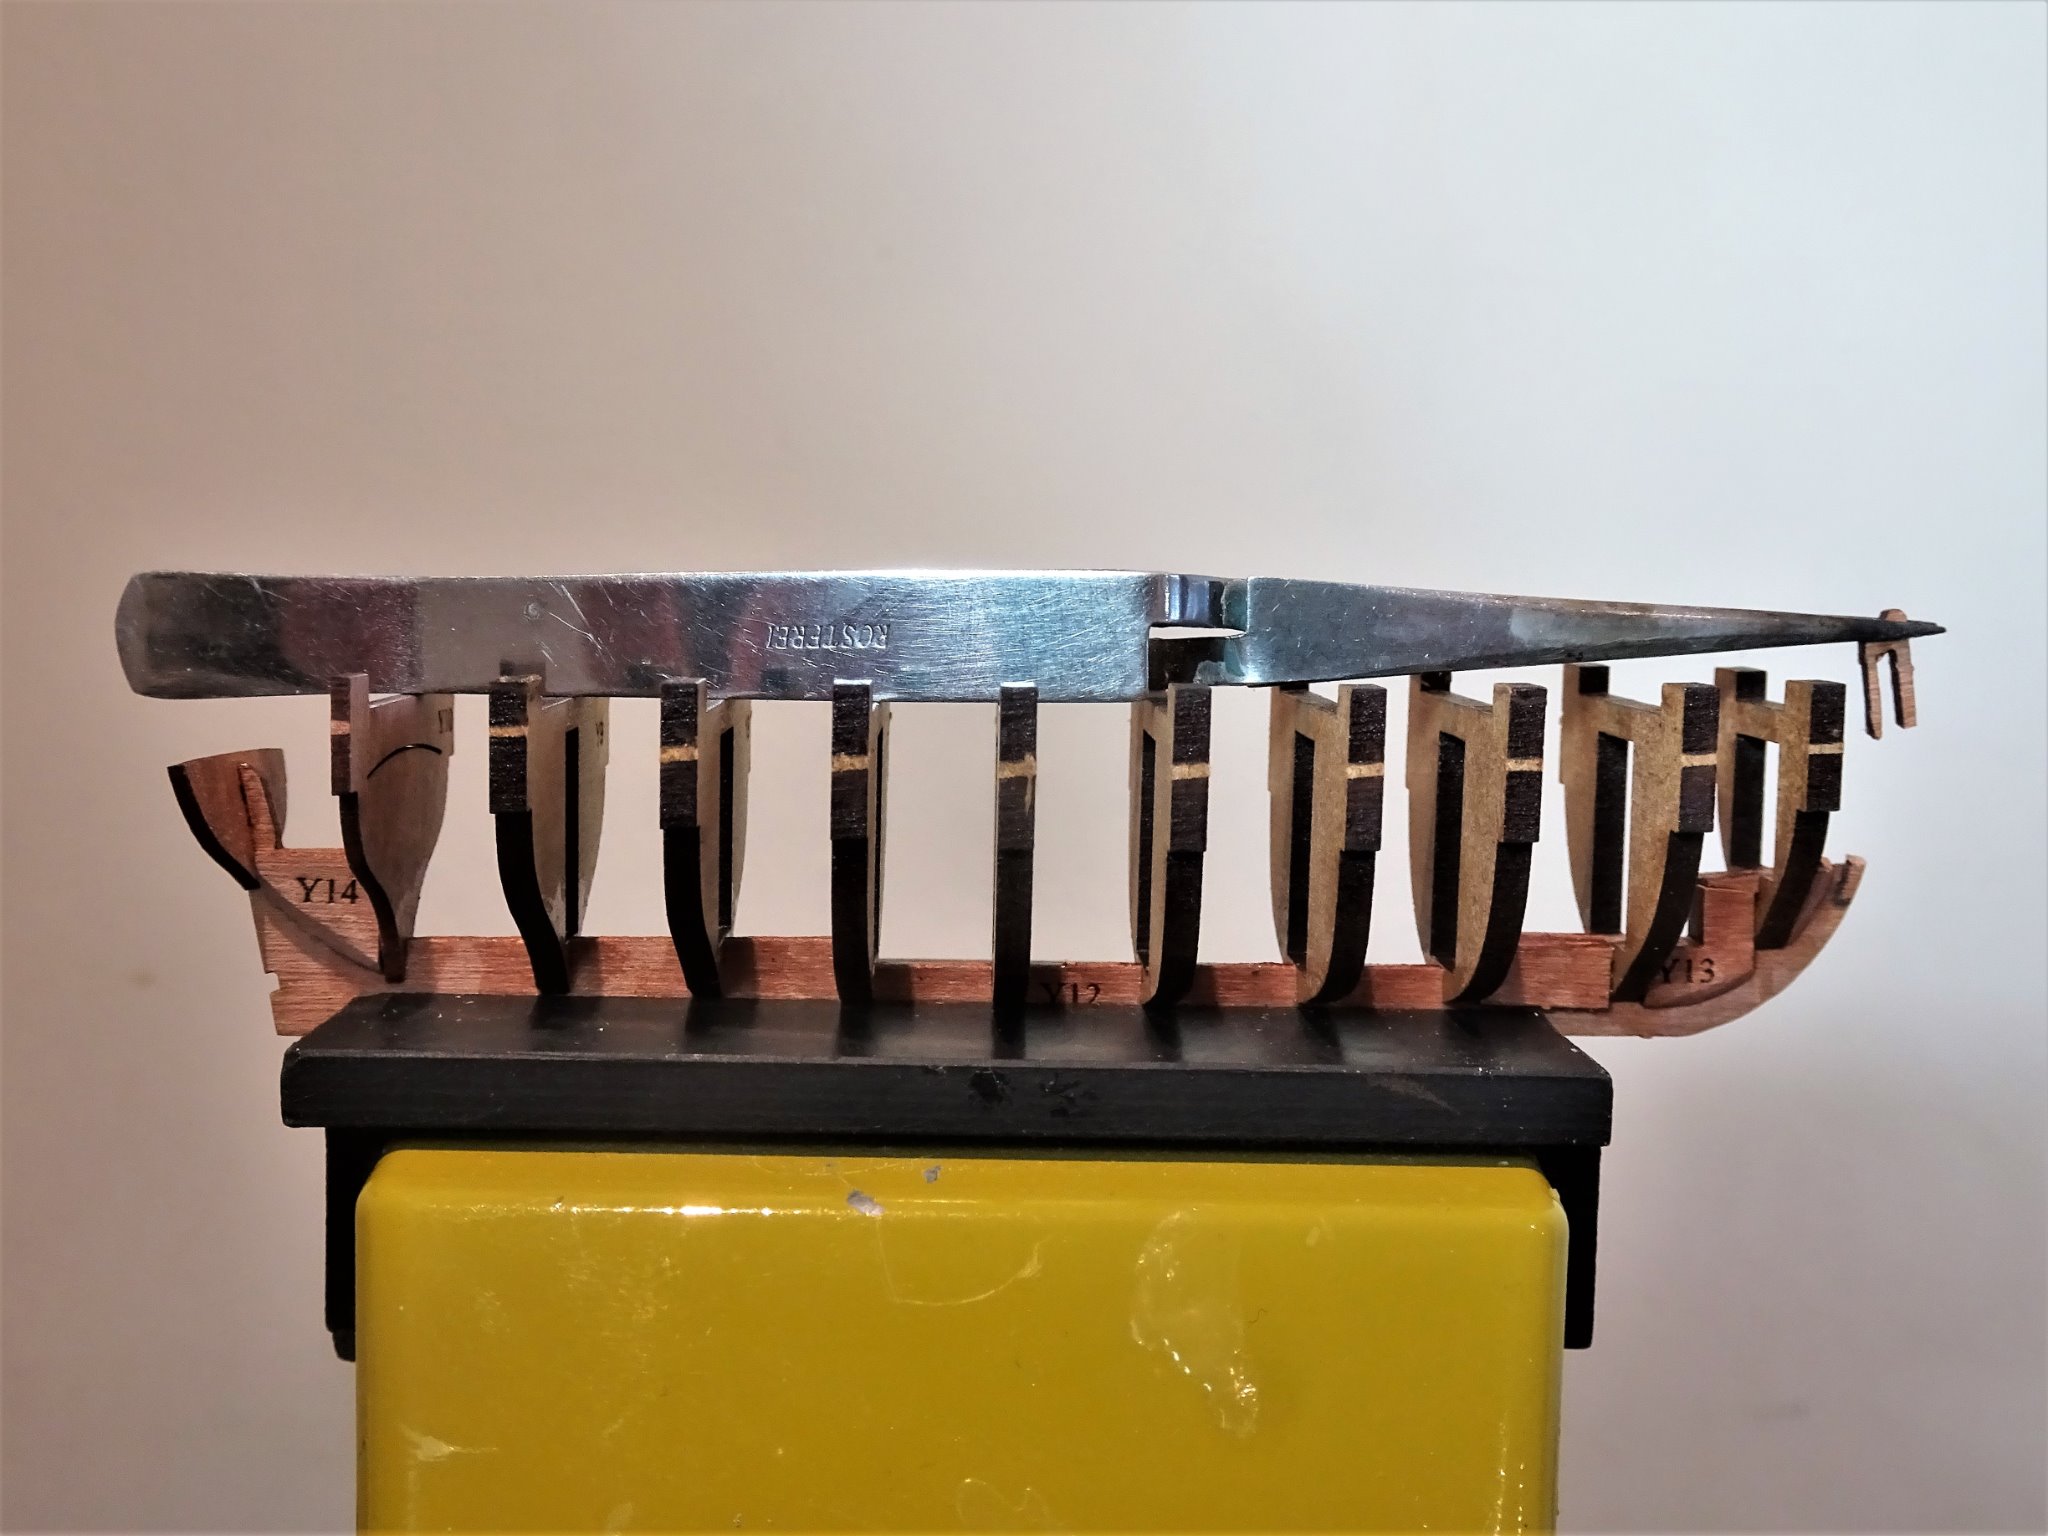
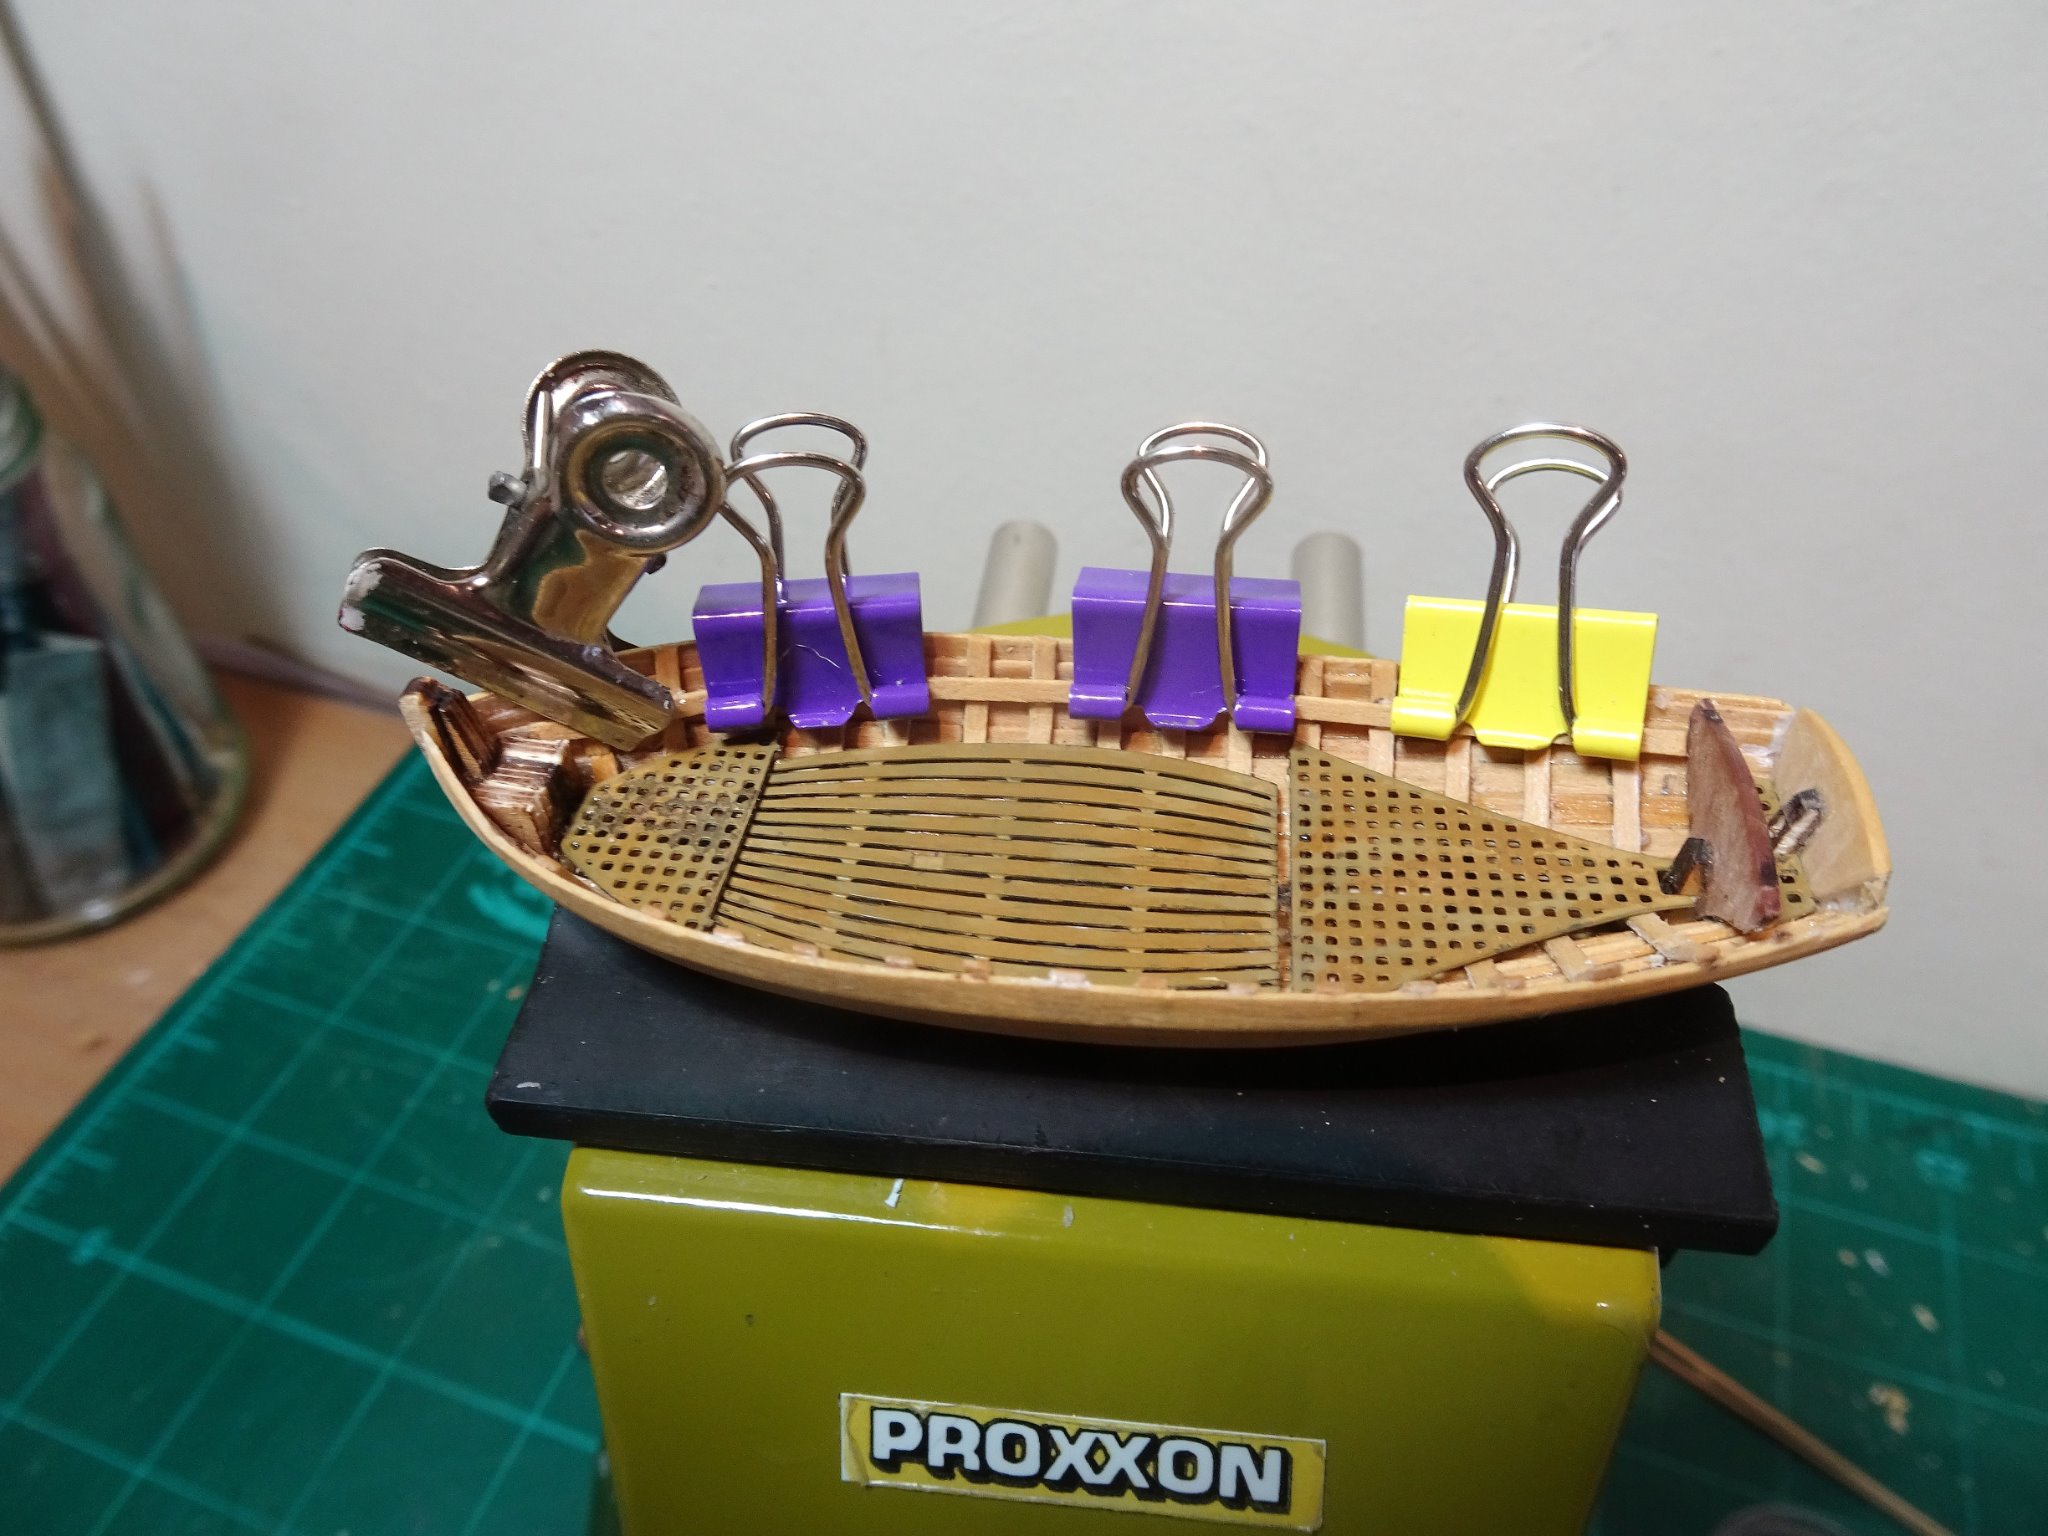
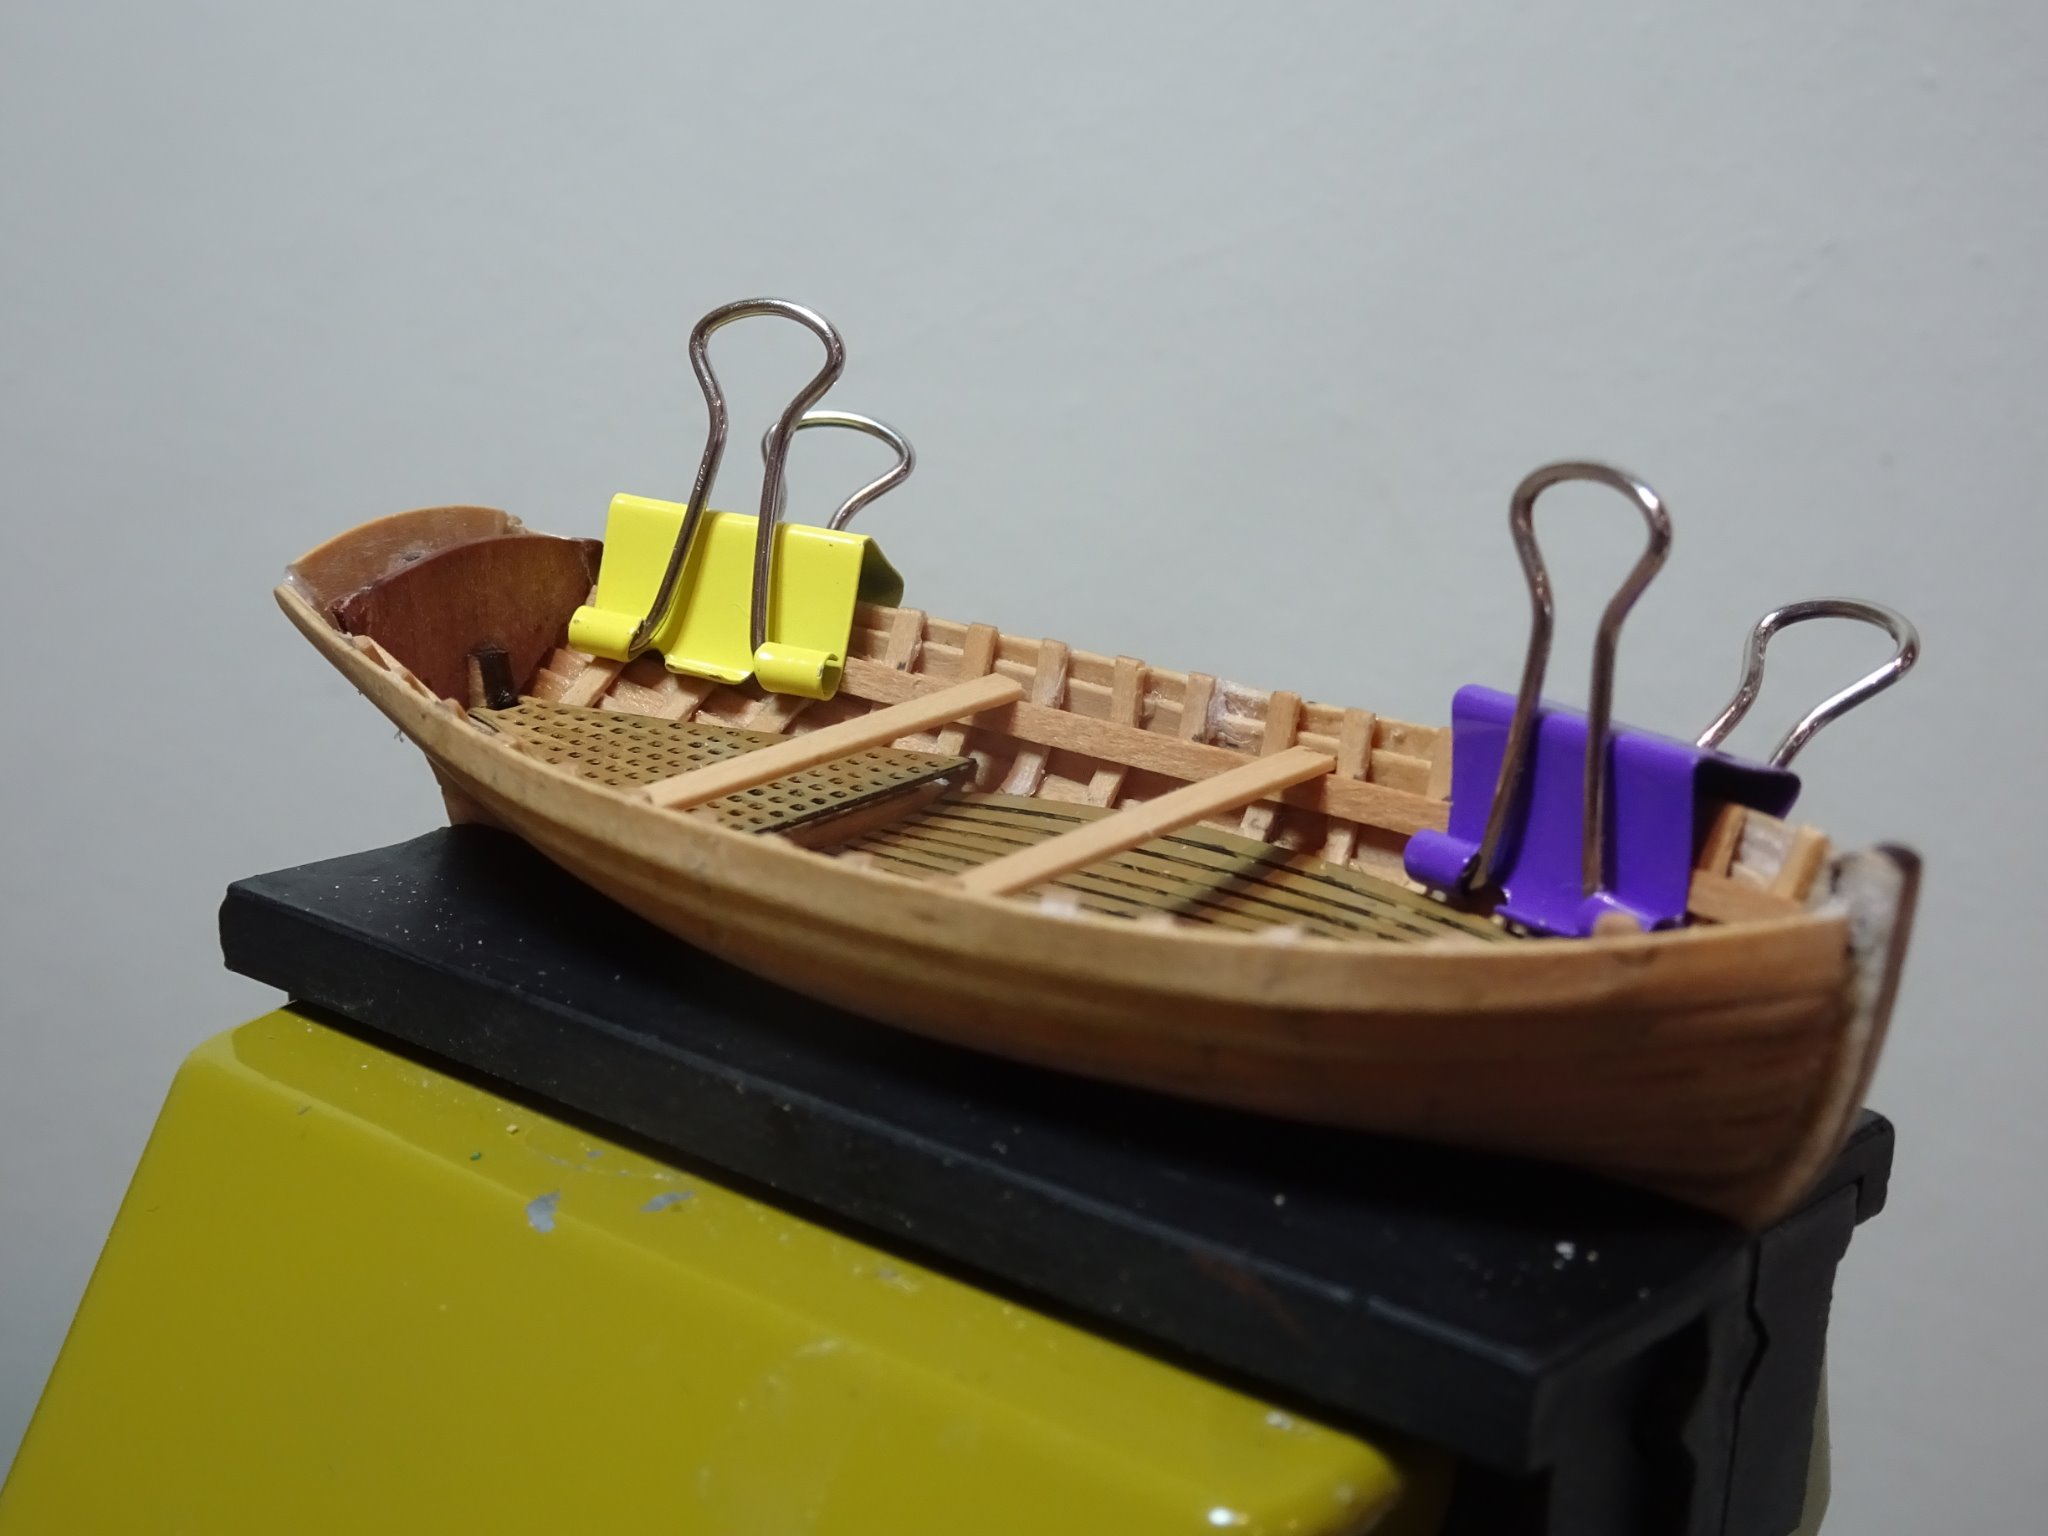
Post Five Fairing and Planking – resumed. With the stem hopefully fixed the boat is once again inverted on it build board. 024 I have taken the precaution of fitting a stem guard to the board, those familiar with Chris Watton’s kits will recognise its origin. 035 Sanding the mdf bulkheads is almost too easy, need to guard against removing too much by frequent checking with a test board along the hull. Despite my soft hands and using fine grade sanding paper the Pearwood stern board (Y11) snapped in two where it fits over the stern post. In this case the vertical grain is a weakness when it comes to lateral fairing. 030 I re-glued the part but took the precaution of using it as a template to make a horizontally grained version if needed. 050 The degree of fairing to get a fair run of planks can be seen in this photo. The kit blurb suggests using pva to glue the planking rather than ca. PVA is my preferred method but securing the planks on this tiny hull is a lot trickier using pva than using spots of ca. 046 048 For the initial planking runs I used inverted Amati clamps and any other suitable holding devices that came to hand, sometimes bent into diverse shapes in an attempt to hold the planks in place. 069 Pins fitted thro’ the base board at the stern hold the plank against the stern board. 062 Heat is used to create the bow curve into the rabbet. 066 The first plank has a convenient shoulder to sit against and doesn’t require tapering. With some relief, once the first planks are on the whole structure becomes stronger with both stem and stern board secured. B.E. 24/01/21


- 70 replies
-
- 13
-
-
- 22ft Yawl
- Vanguard Models
- (and 2 more)
-
Loving that wine stopper boiler. 👍 B.E.
-
Several hours later...….. Post Four Fixing the stem This entails cutting a new stem piece from some spare 1mm Pearwood sheet. 0999(2) Rough cut shape 0004 Cutting the scarph, the etched saw blades are perfect for this scale of work. 0008(2) Fairly easy to shape a new part, final shaping will be done later. 09996 A scarph is then cut in the stem below the level of the break 00998 00013(2) The new piece is glued and pinned. 00018(2) A little bit of shaping. 0019(2) Hopefully, this new piece will be more robust. B.E. 21/01/21
.thumb.JPG.41ccfc01647ff078a53f75577a9fb9ad.JPG)
.thumb.JPG.b2b945b9f724abdccc5ca02867c211ae.JPG)
.thumb.JPG.46fdee81028b055a75334821b675ba18.JPG)

.thumb.JPG.86c5564ea3ae1a7b46fcbec4fb0a1ca5.JPG)
- 70 replies
-
- 12
-
-
- 22ft Yawl
- Vanguard Models
- (and 2 more)
-
Post Three Fairing and planking – on hold. The vulnerable stem piece is on my mind as I prepare to start the fairing. 9990 With good reason, as before I even start the stem piece comes away with the slightest of touch, and then breaks into three pieces. 9987(2) This is not going to work as the stem with its rabbet is a critical piece, requiring lateral strength to hold the plank ends. Once the stage is reached whereby the first planking strake is secured in the rabbet the whole process then becomes stronger but getting there is the issue. 9993(2) It may be that my example is particularly weak, but having this fragile upright extension cut with cross grain is probably a contributing factor. I think I need to remodel the stem cut on the longitudinal grain and form a scarph joint to hold the remade piece more securely. I may be some time. 🤔 B.E. 21/01/21
.thumb.JPG.c494e14a62fe3022df7b8b1b2c3c471f.JPG)

.thumb.JPG.c5db96ebe33fe485e8358850cbbd8bed.JPG)
- 70 replies
-
- 5
-

-
-
- 22ft Yawl
- Vanguard Models
- (and 2 more)
-
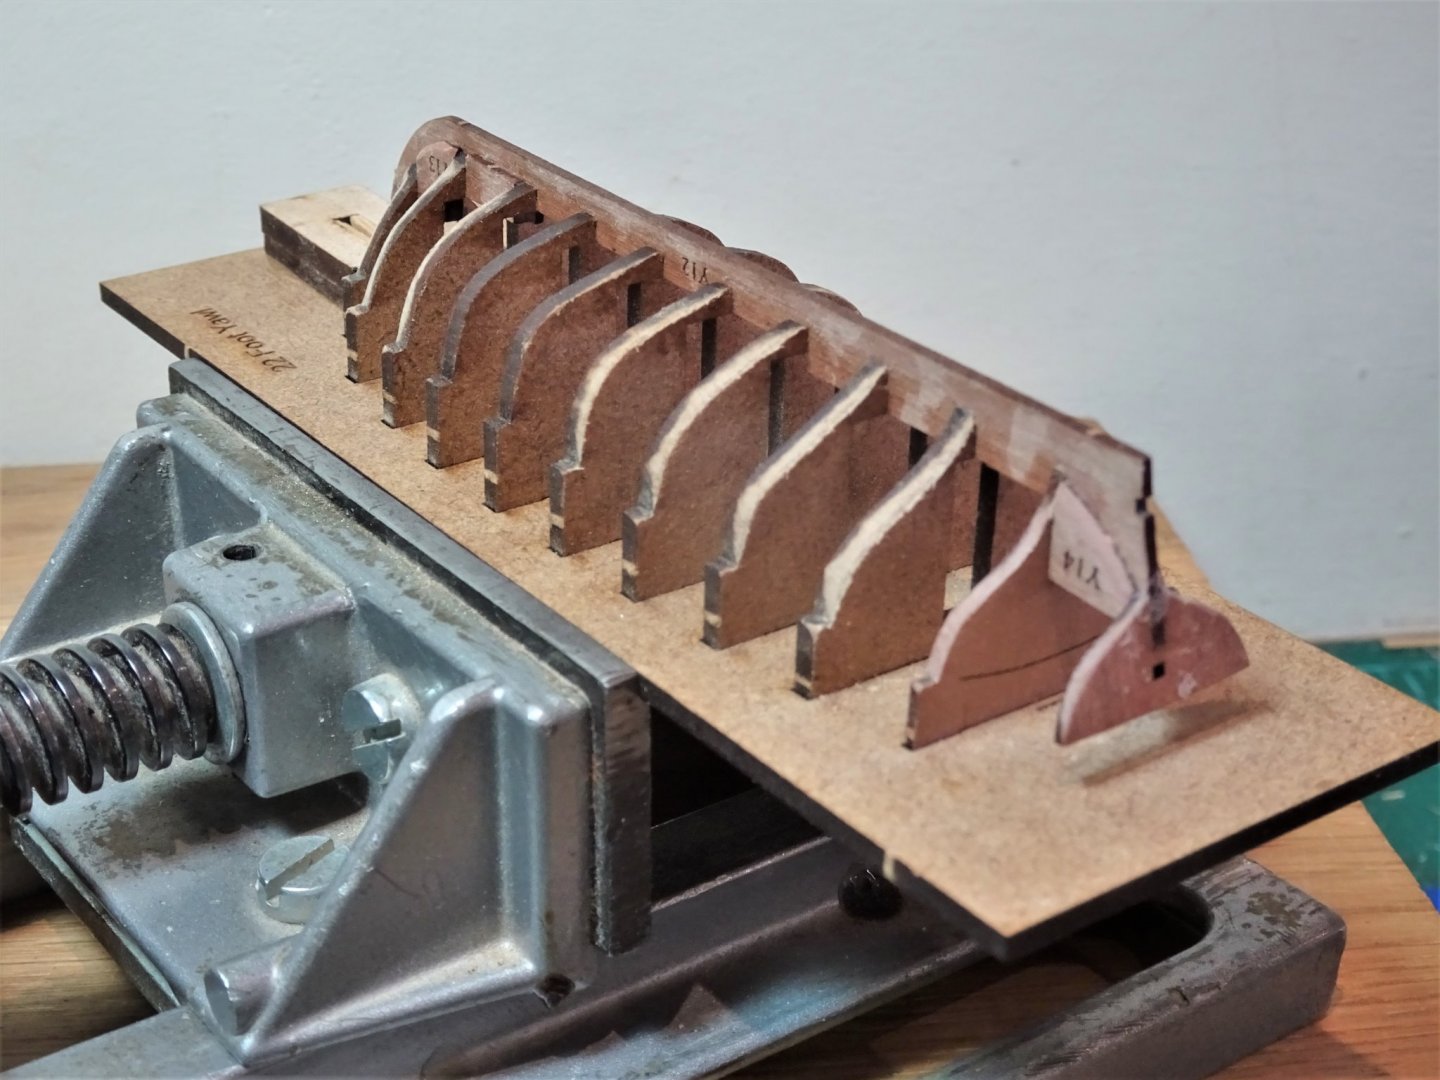
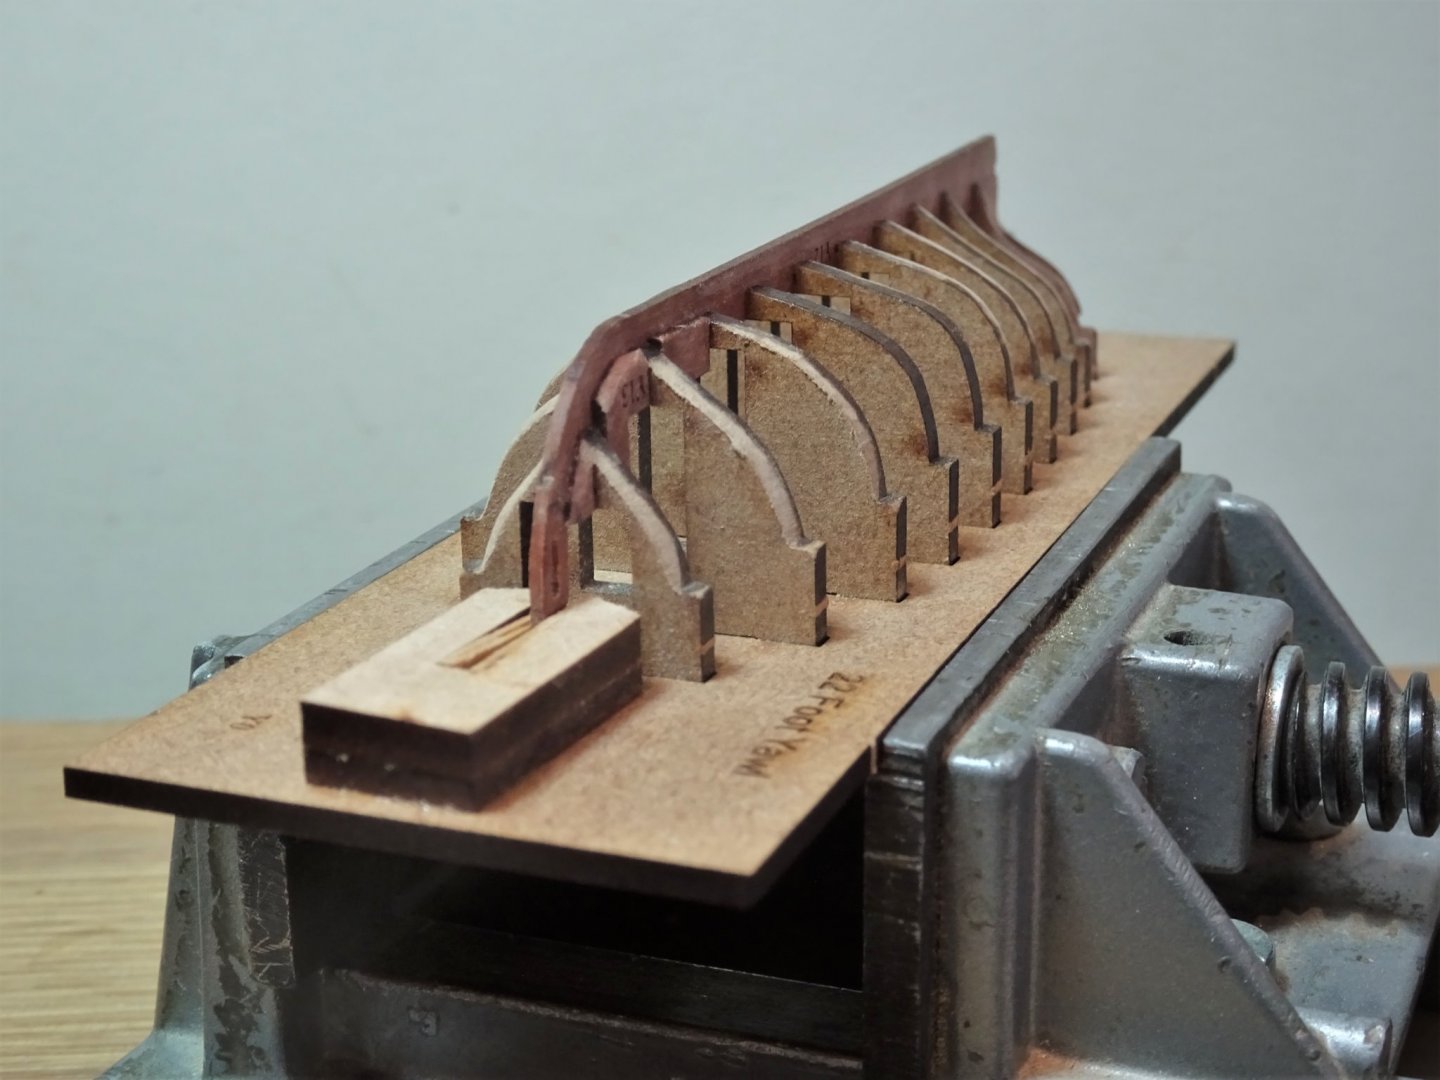
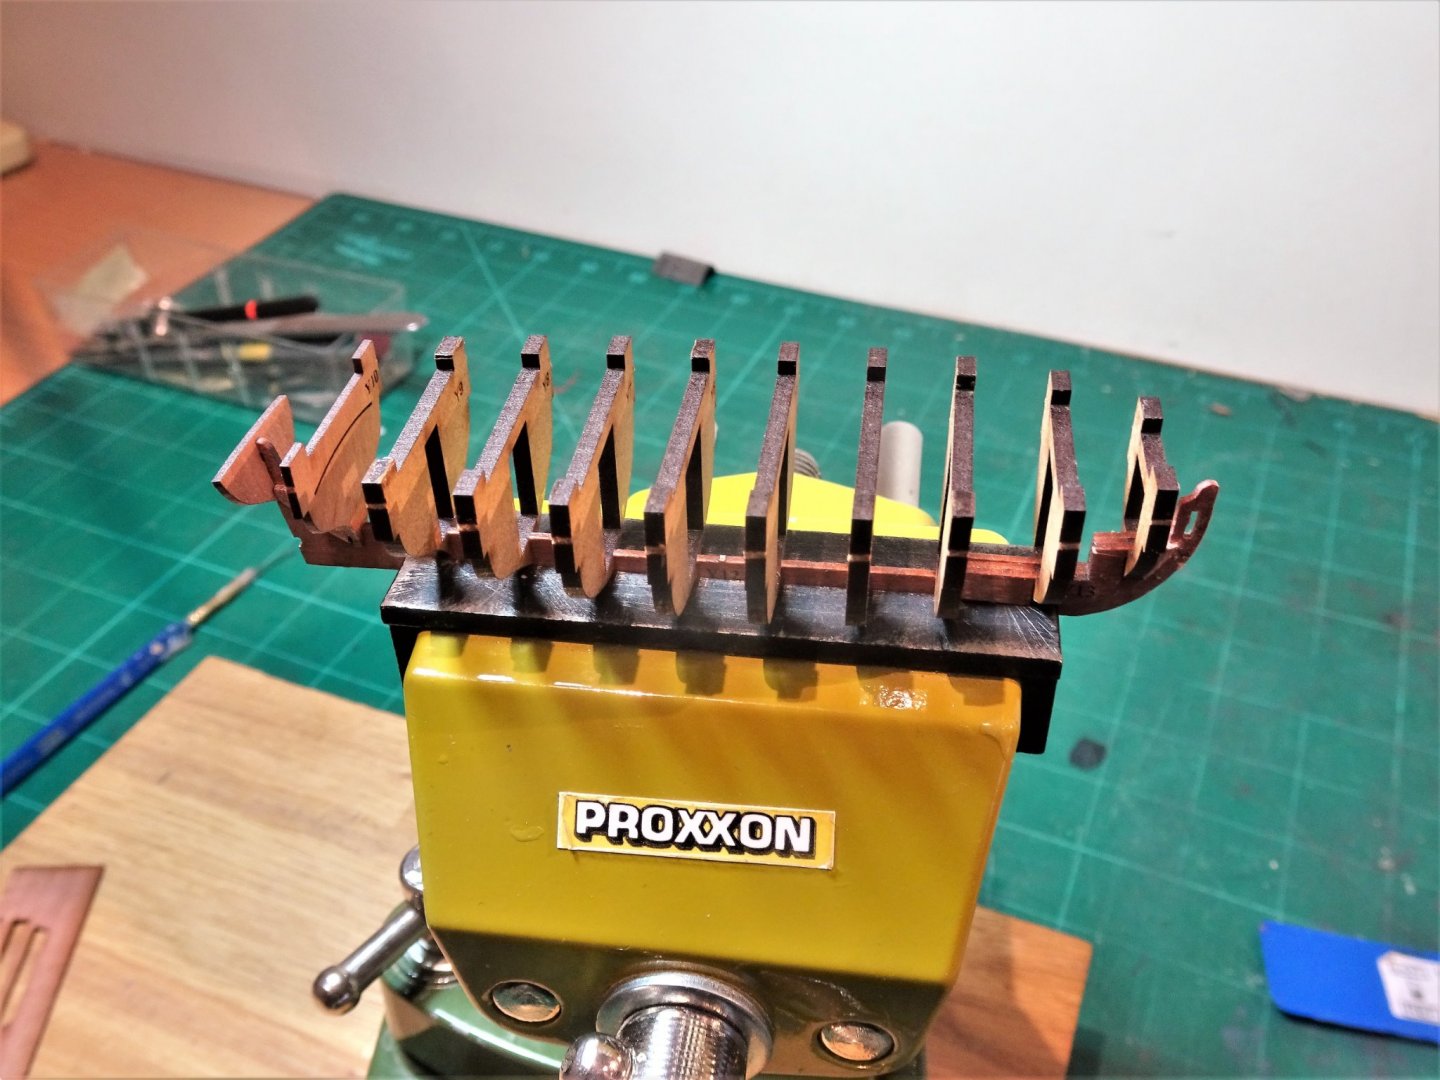
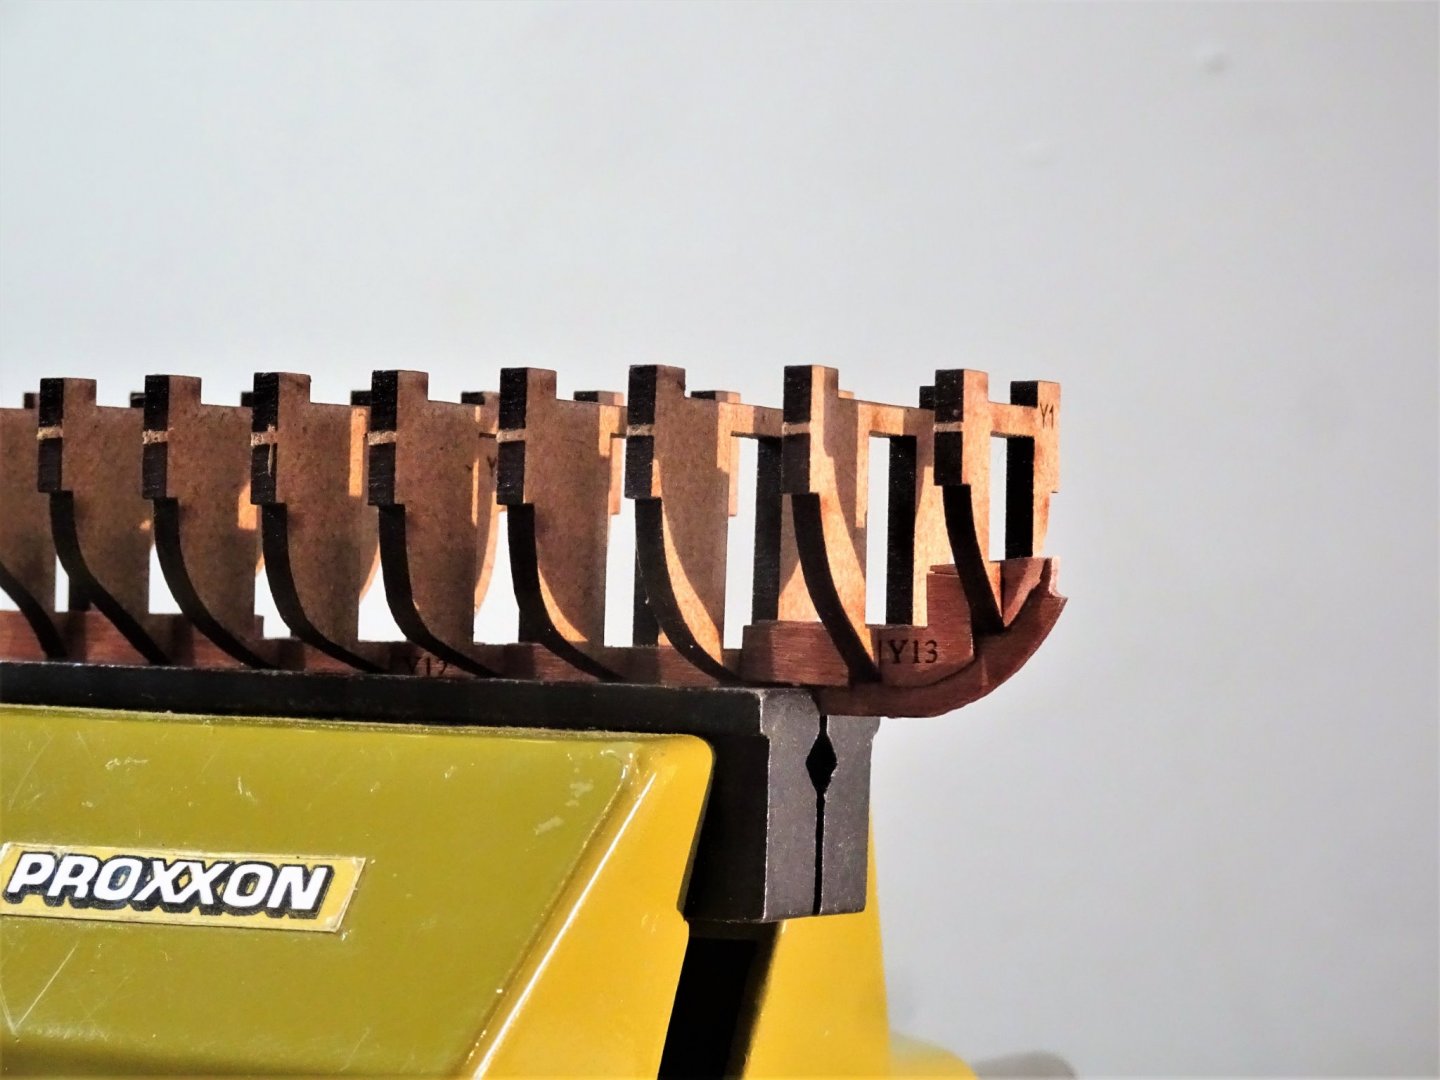
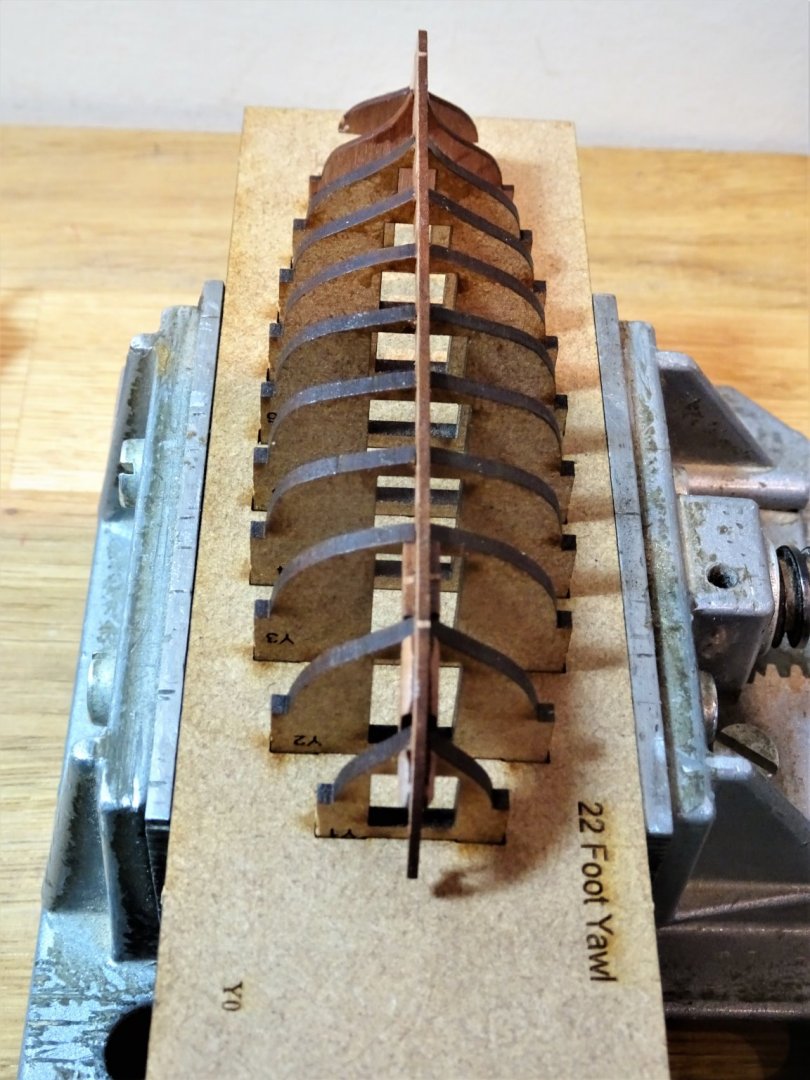
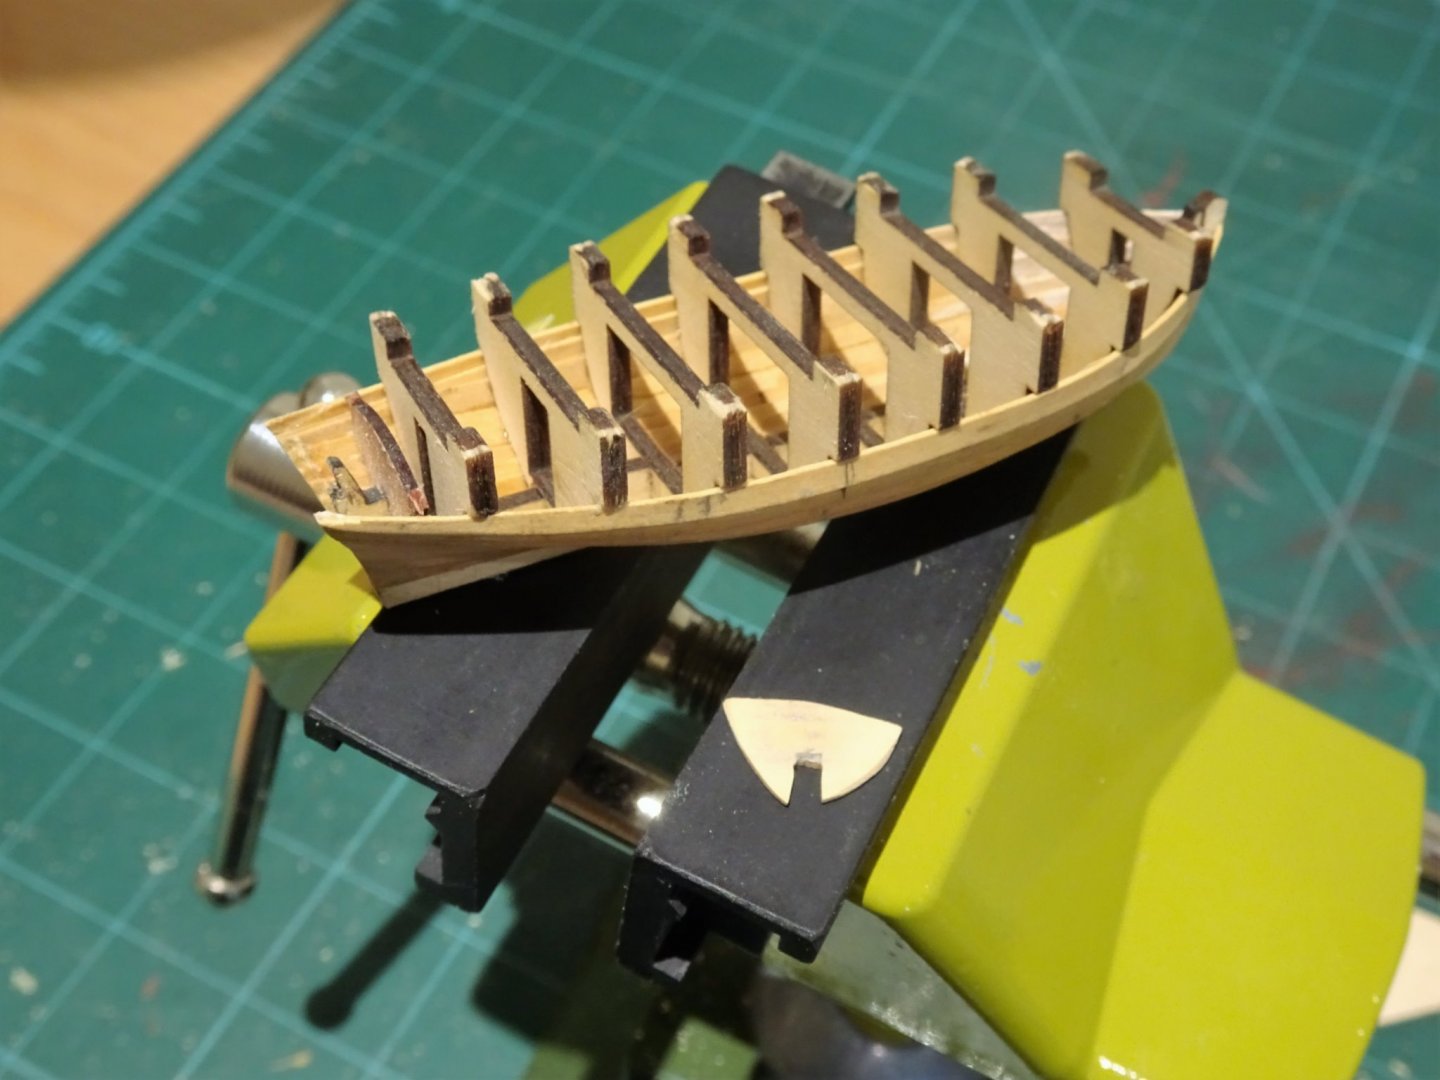
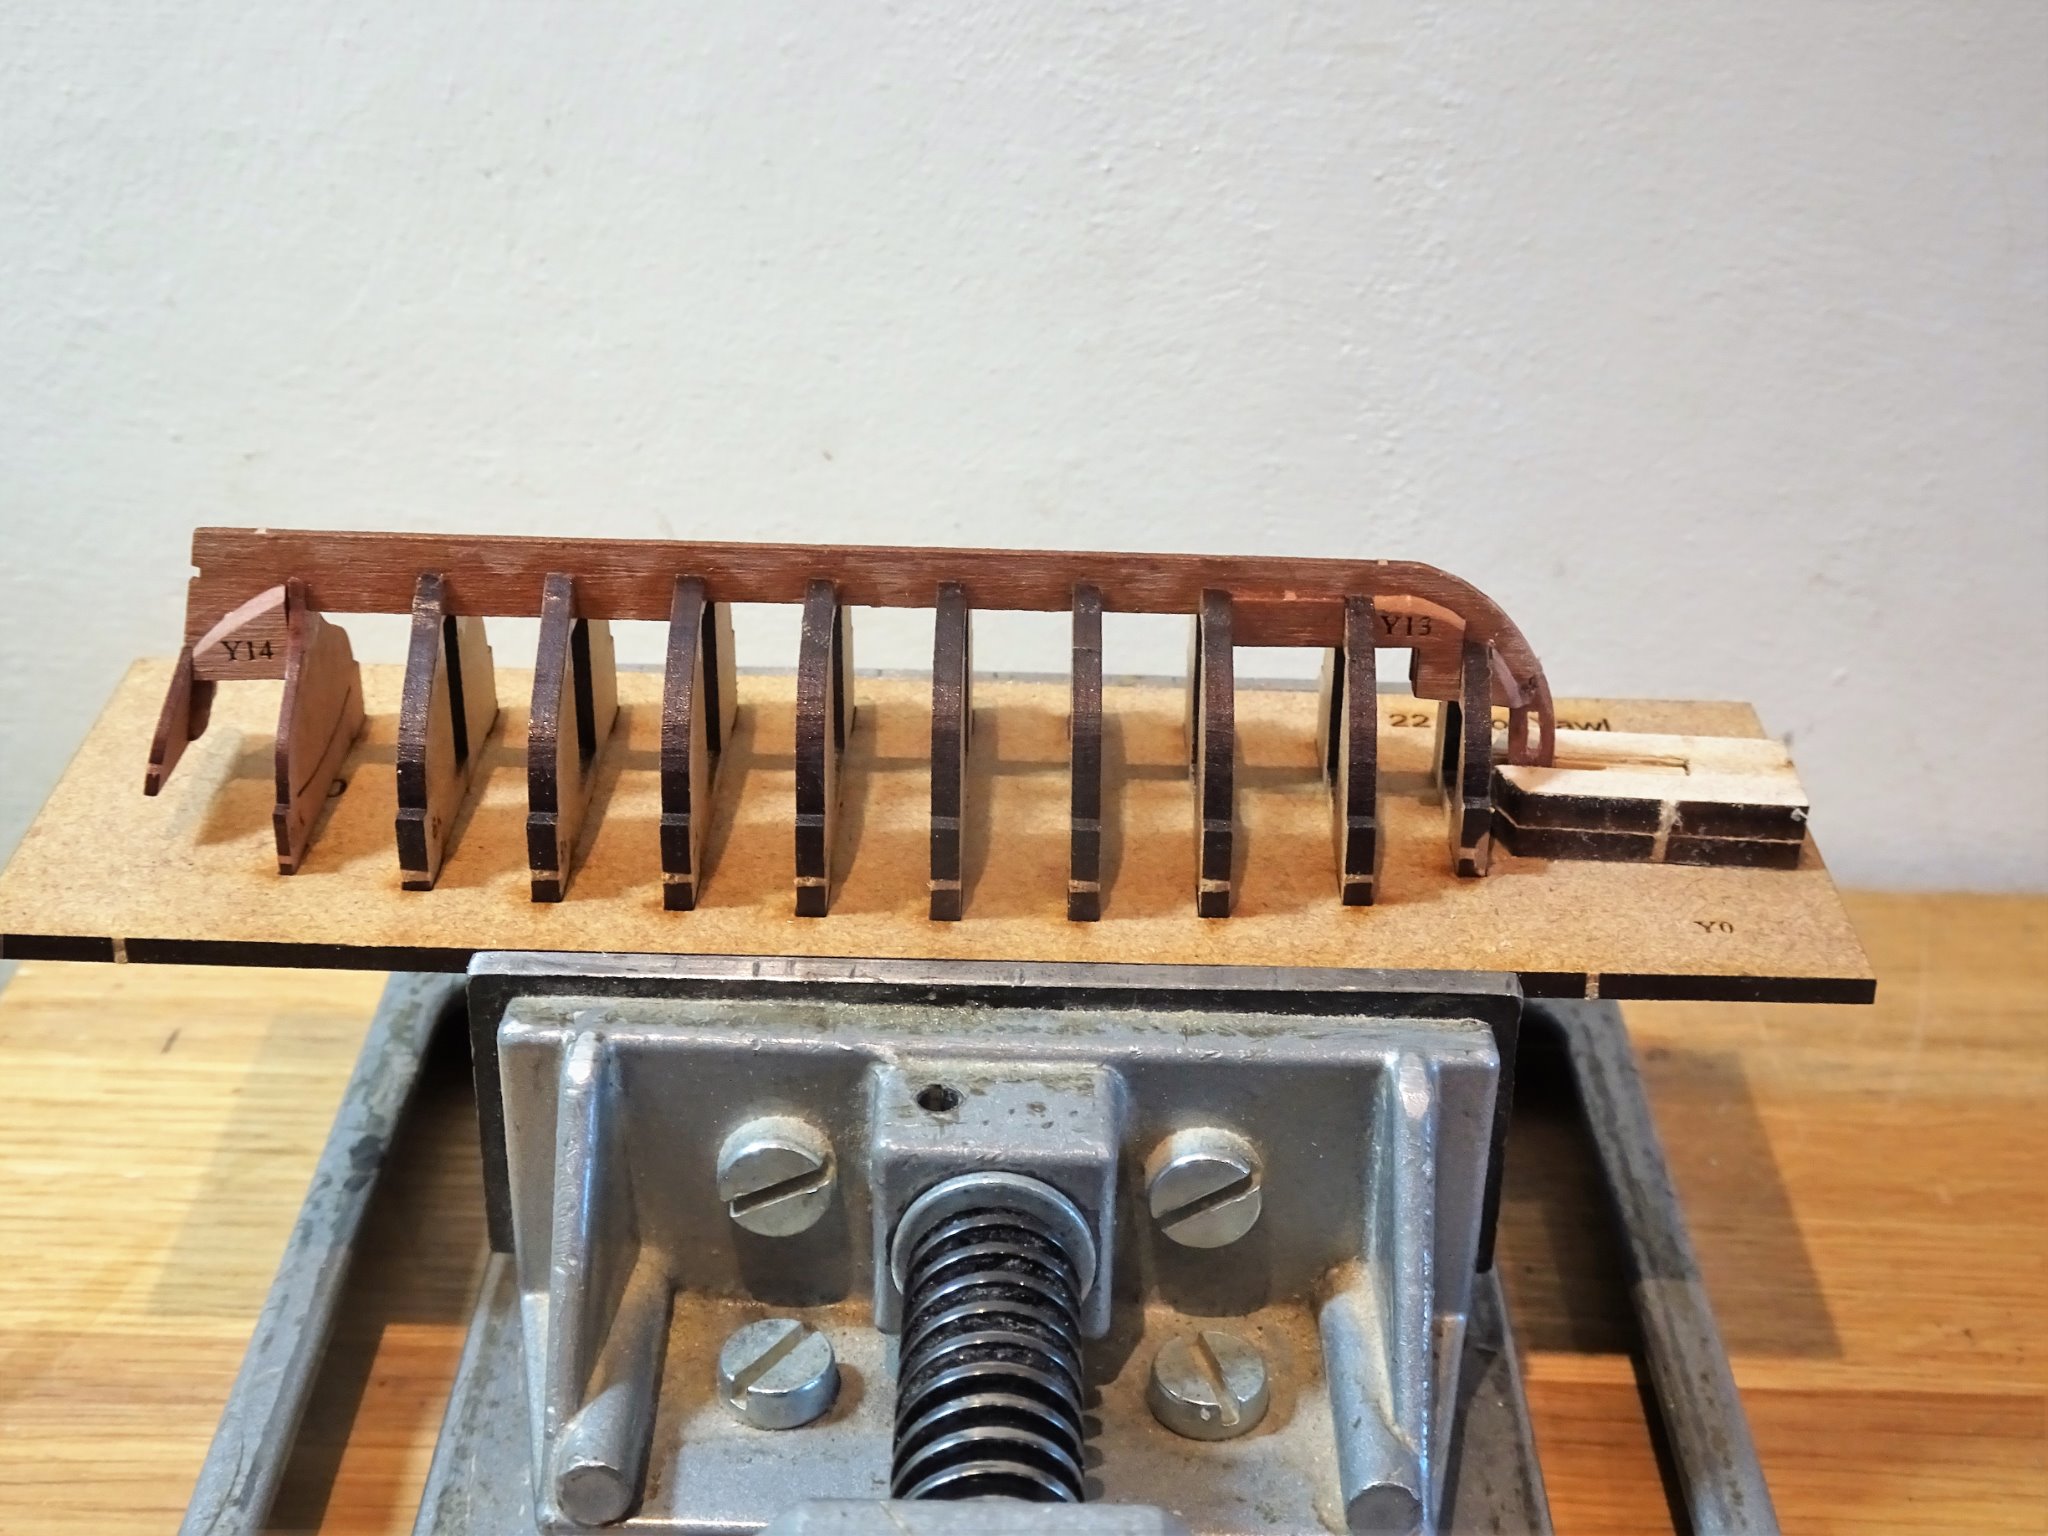
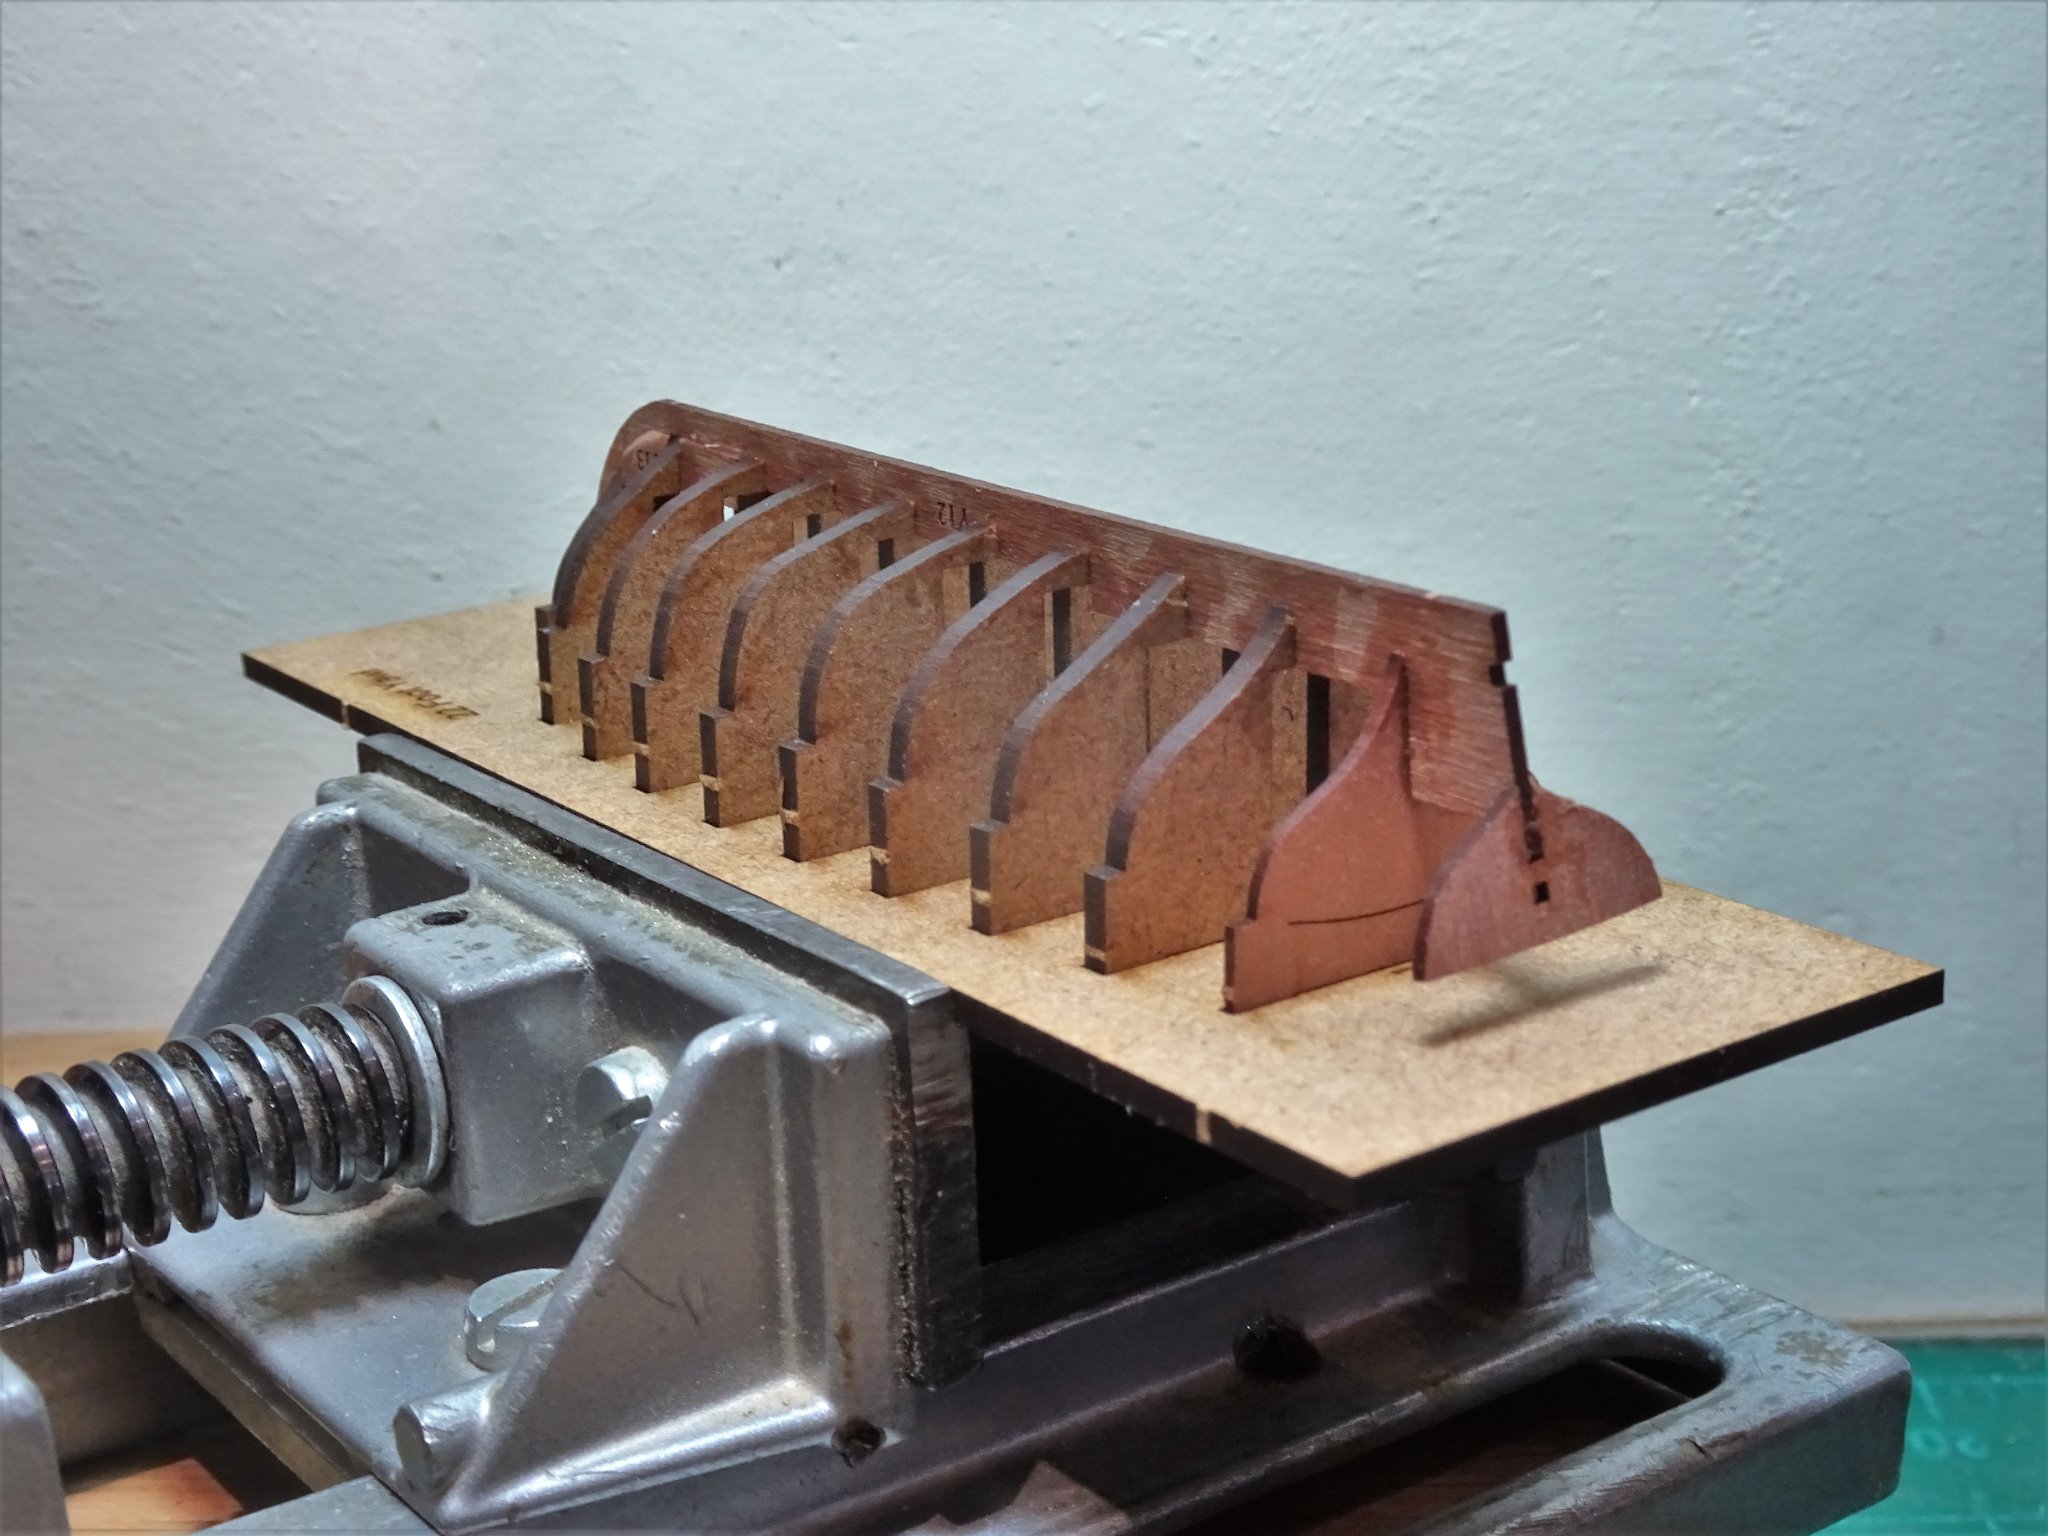
Thank you Jason, Chris has provided a great service to the ship modelling community by producing this range. So many other offering are less than convincing and need a lot of work to make them even half decent. Post two Connecting keel and bulkheads I experienced a little trouble slotting the keel into the bulkheads that have been placed in the slotted board. I found it necessary to fine sand both bulkheads and slotted keel to get the two to come together, and the keel to sit fully down on the bulkheads. Too much pressure could spell disaster to the keel, and slow and easy is the way to go. 9982 Once satisfied diluted pva was applied to the joints, and the stern board was glued into place. 9980 The fit of the bulkheads in the building board is a tad loose so as with the cutter build I added spots of pva beneath a couple of the tabs to secure the boat to the base. 9973(2) With everything set overnight I can begin the fairing process. B.E. 21/01/21
.thumb.JPG.e16927ff40ba010842bdc38d74fc9c48.JPG)

- 70 replies
-
- 5
-
-
- 22ft Yawl
- Vanguard Models
- (and 2 more)
-
I admire your perseverance Mike, what a challenge, but one you're obviously up to. Well done. B.E.
- 179 replies
-
- 7
-
-
- hatsuzakura
- pit road
- (and 2 more)
-
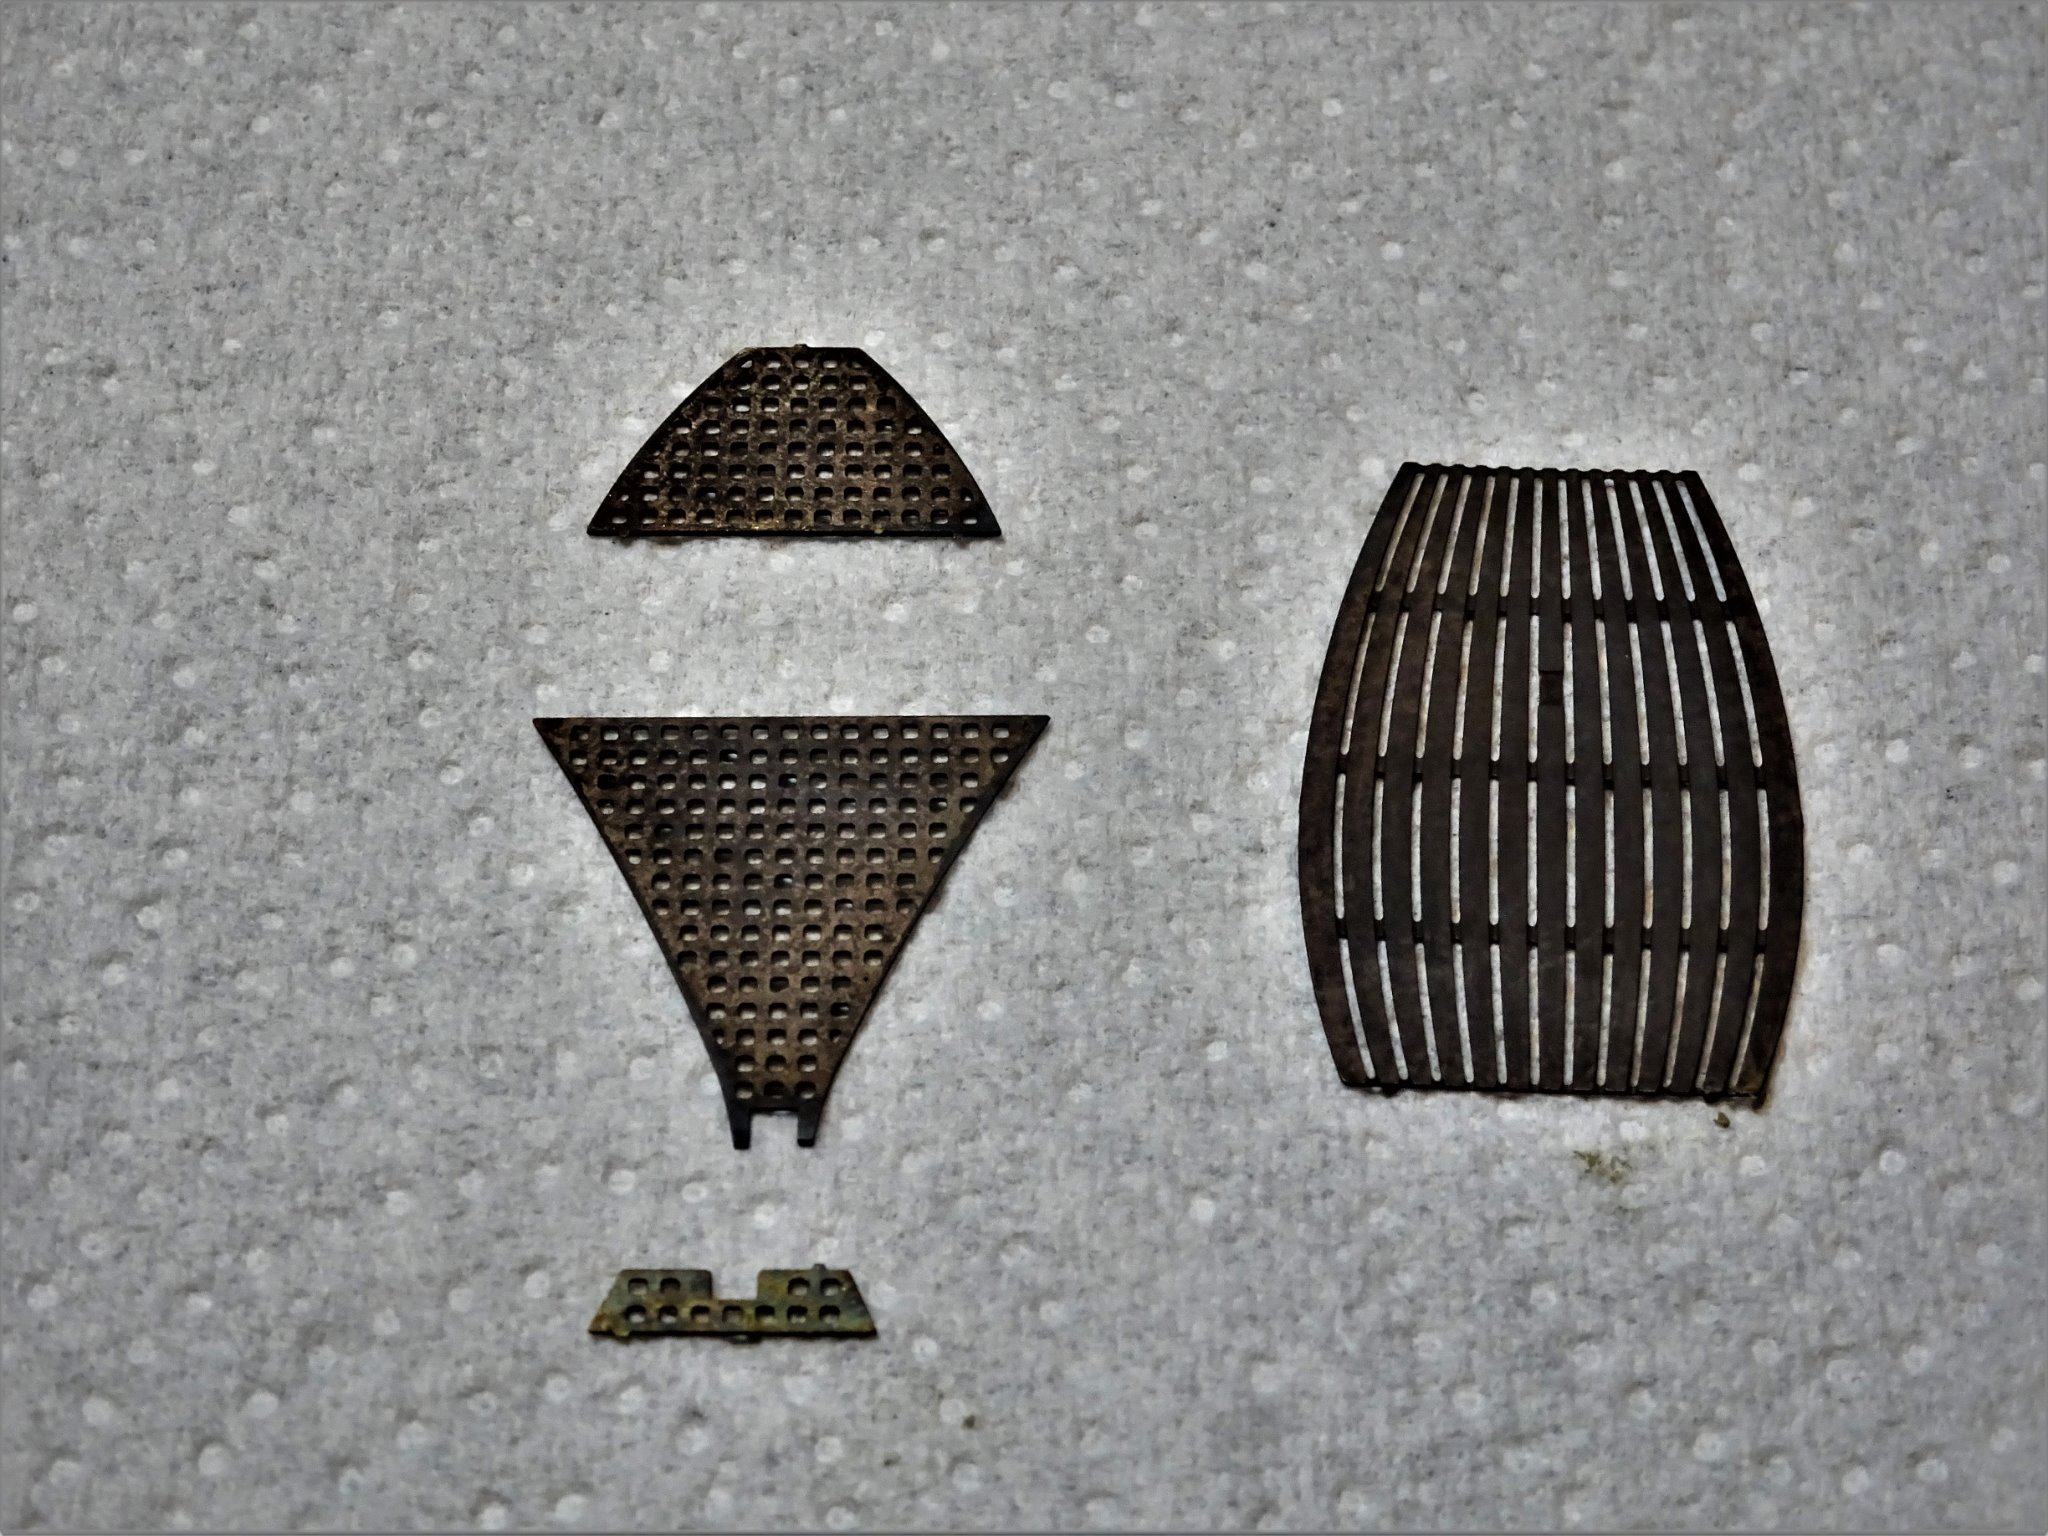
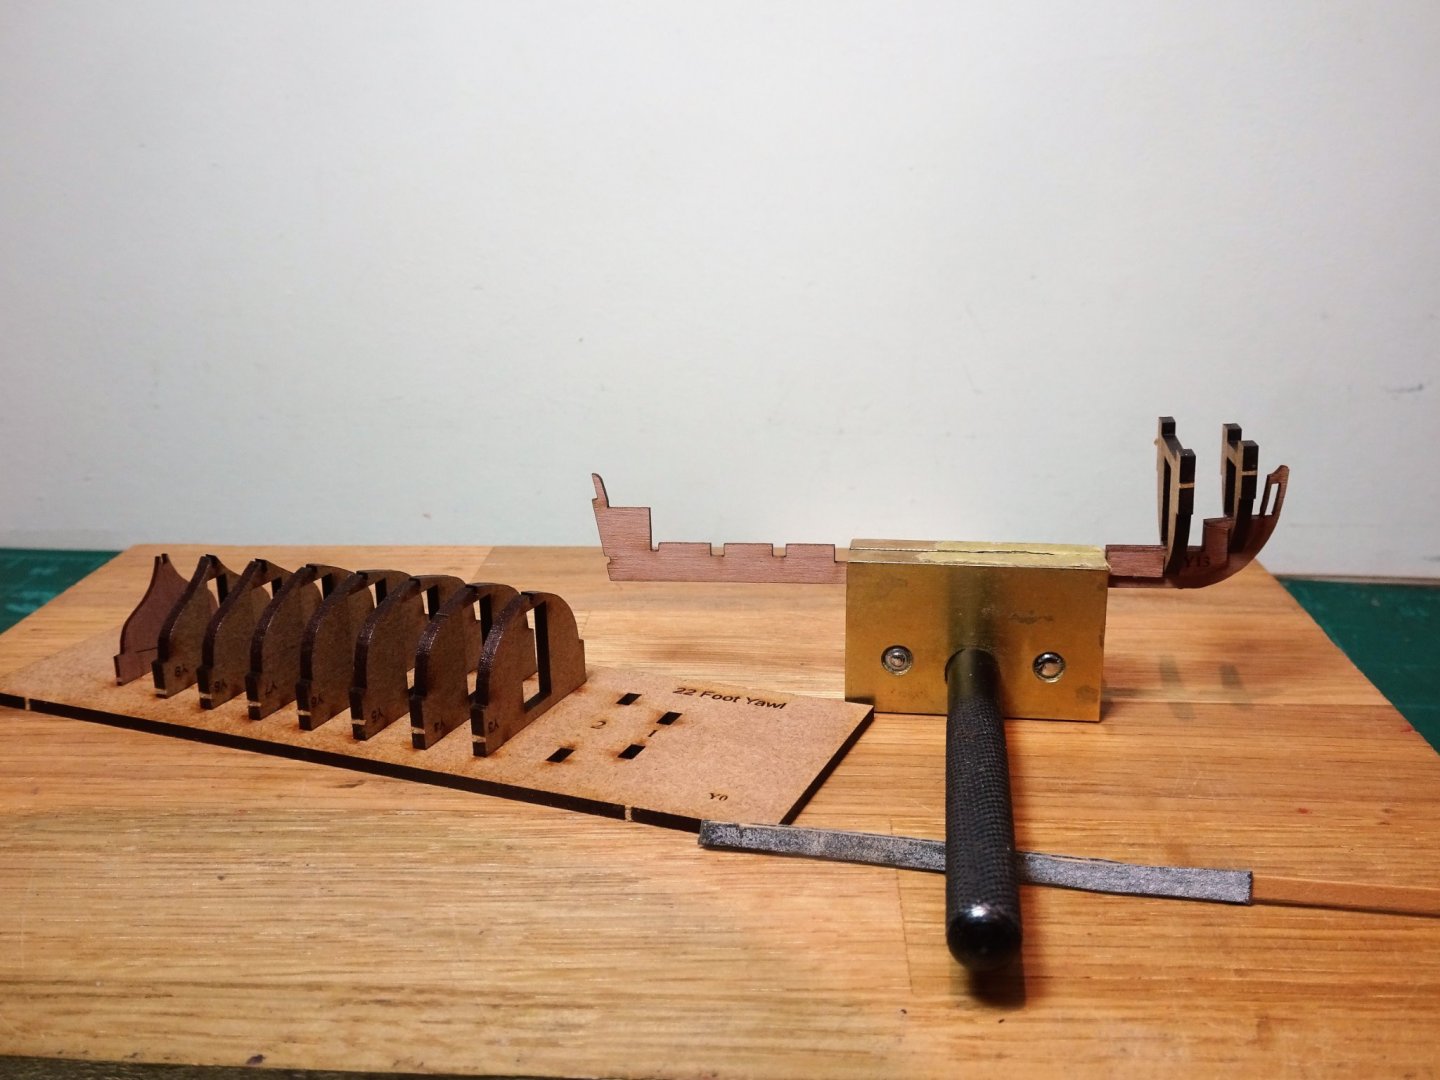
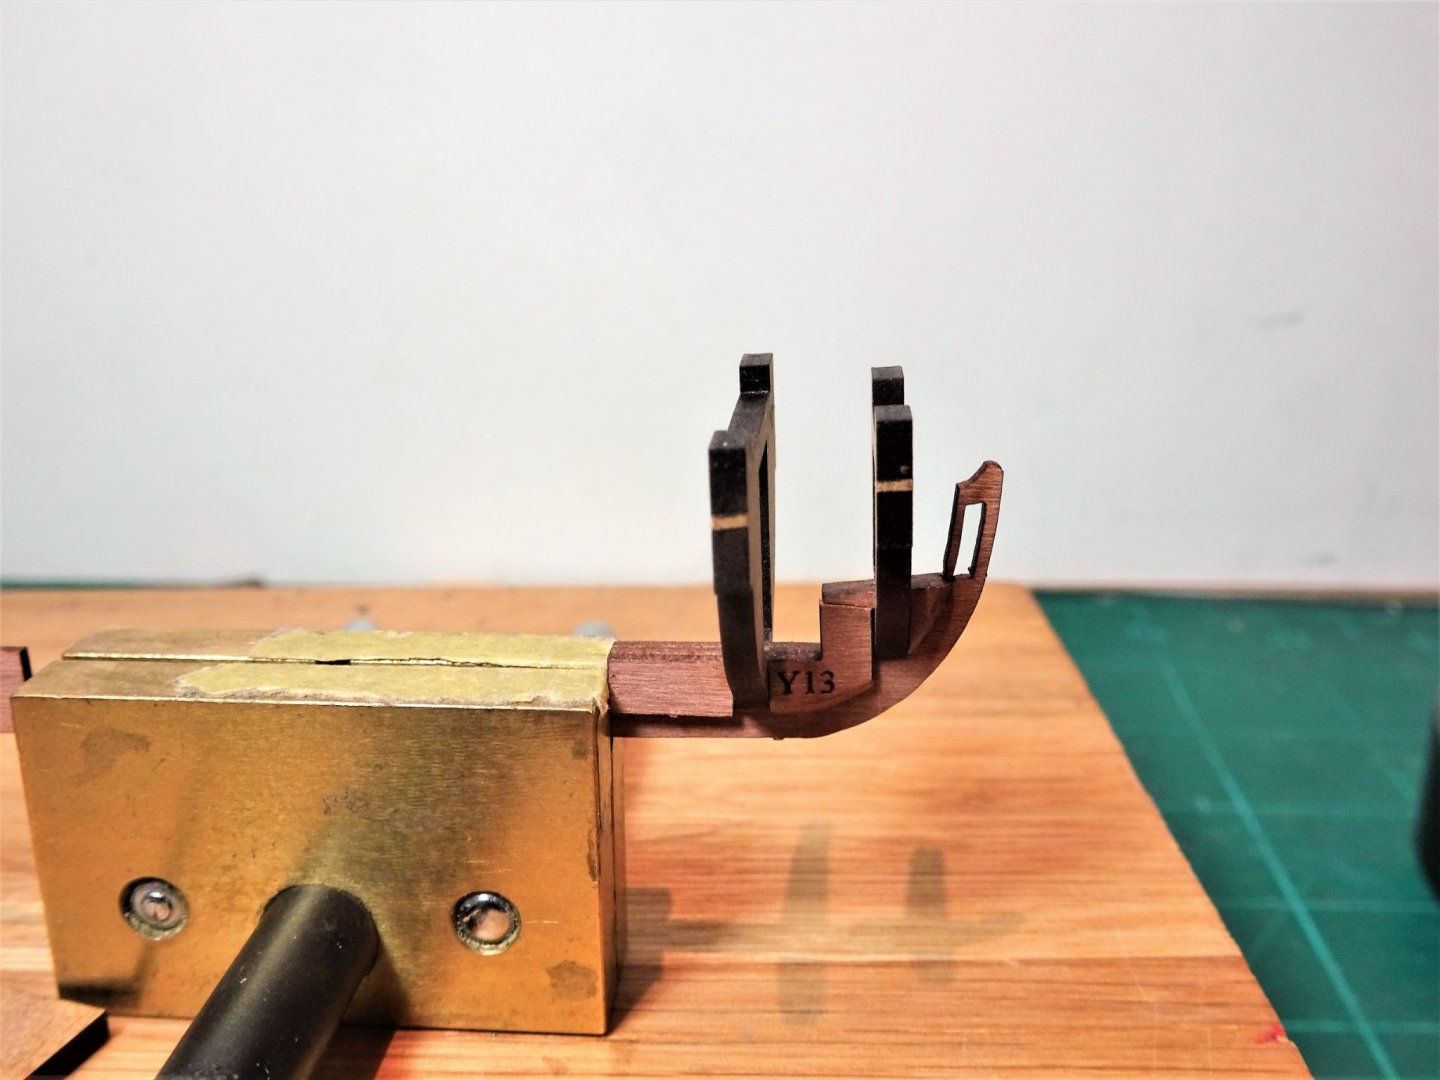
Building a 22’ Yawl. I was pleased to see that Chris had extended his range of ships boats to cover almost everything that the builder of 1:64 scale 18thc ships could want. The only possible exception is a Longboat. Yawl as built by James Hatch. I was instantly drawn to the Yawl, a boat type I have not built, and this mini kit looked too good to pass. 9953(2) Here’s the makings for this mini kit. The first thing I notice is the inclusion of all Pearwood for the keel parts and planking and the much reduced thickness of the timbers to better reflect scale. The build board and sacrificial bulkheads are of PDF. The usual etched gratings and bottom boards are similar to the old cutter kit, but as with that kit I don’t think I will use the rudder covers. A set of Pearwood oars are provided in addition to the brass etched versions. These are very fine but provide a good template to build up the looms. A little history about Yawls. This boat type was developed at Deal on the Kent coast and was traditionally clinker built. The Yawl became part of the Navy boat establishment in 1701 but its form developed over the succeeding years. In terms of naval use, both clinker and carvel planked versions were in operation at various periods and concurrently during the 18th century, but the Navy had a preference for carvel-built boats, and Yawls built in Naval Dockyards took this form. The strength and lightness of clinker boats were often favoured by ship Captains, but the drawback to Clinker built boats was difficulty of repair compared with carvel-built boats, and the Navy only issued carvel versions to ships destined for foreign service. The kit represents a carvel version as built in a naval yard rather than a private yard where clinker would prevail For this build I am going to follow the carvel route. Looking ahead I have a fancy to mast and rig my version. First steps. The first thing that is instantly apparent with this kit is the fragility of the parts, very soft hands will be required at least in the early stages of the assembly. 9965 Even so, in the process of fitting the forward bulkheads and filler pieces, I managed with the slightest touch to snap off the upper part of the stem which contains the rabbet. This is not a criticism of the kit which by its scale nature requires fine parts. 9968 So, first stages comes to a shuddering halt whilst I wait for the Aliphatic resin to hopefully secure the now re-attached stem head. 9967 However, until the boat is secured on its board I will live in fear of the Pearwood keel snapping. B.E. 20/01/21
.thumb.JPG.84b5faa03364a114a20013195341b5a7.JPG)

- 70 replies
-
- 7
-
-
- 22ft Yawl
- Vanguard Models
- (and 2 more)
-
Great progress Glenn, I admire the standard of your workmanship. I too had thoughts about the positioning of the seats of ease, but came to the conclusion that folk of the 18th/19th centuries were far less sensitive about matters lavatorial.😃 B.E.
- 778 replies
-
- 3
-
-
- cheerful
- Syren Ship Model Company
- (and 1 more)
-
18th century bling - a fine job Rusty. B.E.
- 201 replies
-
- 3
-
-
- Duchess of Kingston
- Vanguard Models
- (and 1 more)
-
Hi Tim, The etched saw blades seem to be available from a few sources on the net if you google them. I got mine from here https://www.hannants.co.uk/product/AEM008 There is also a youtube review comparing the airwaves with Tamiya, I've not tried the Tamiya version I find them most useful for cross grain cutting on thin timber strips. B.E.
- 70 replies
-
- 3
-
-

-
- 22ft Yawl
- Vanguard Models
- (and 2 more)
-
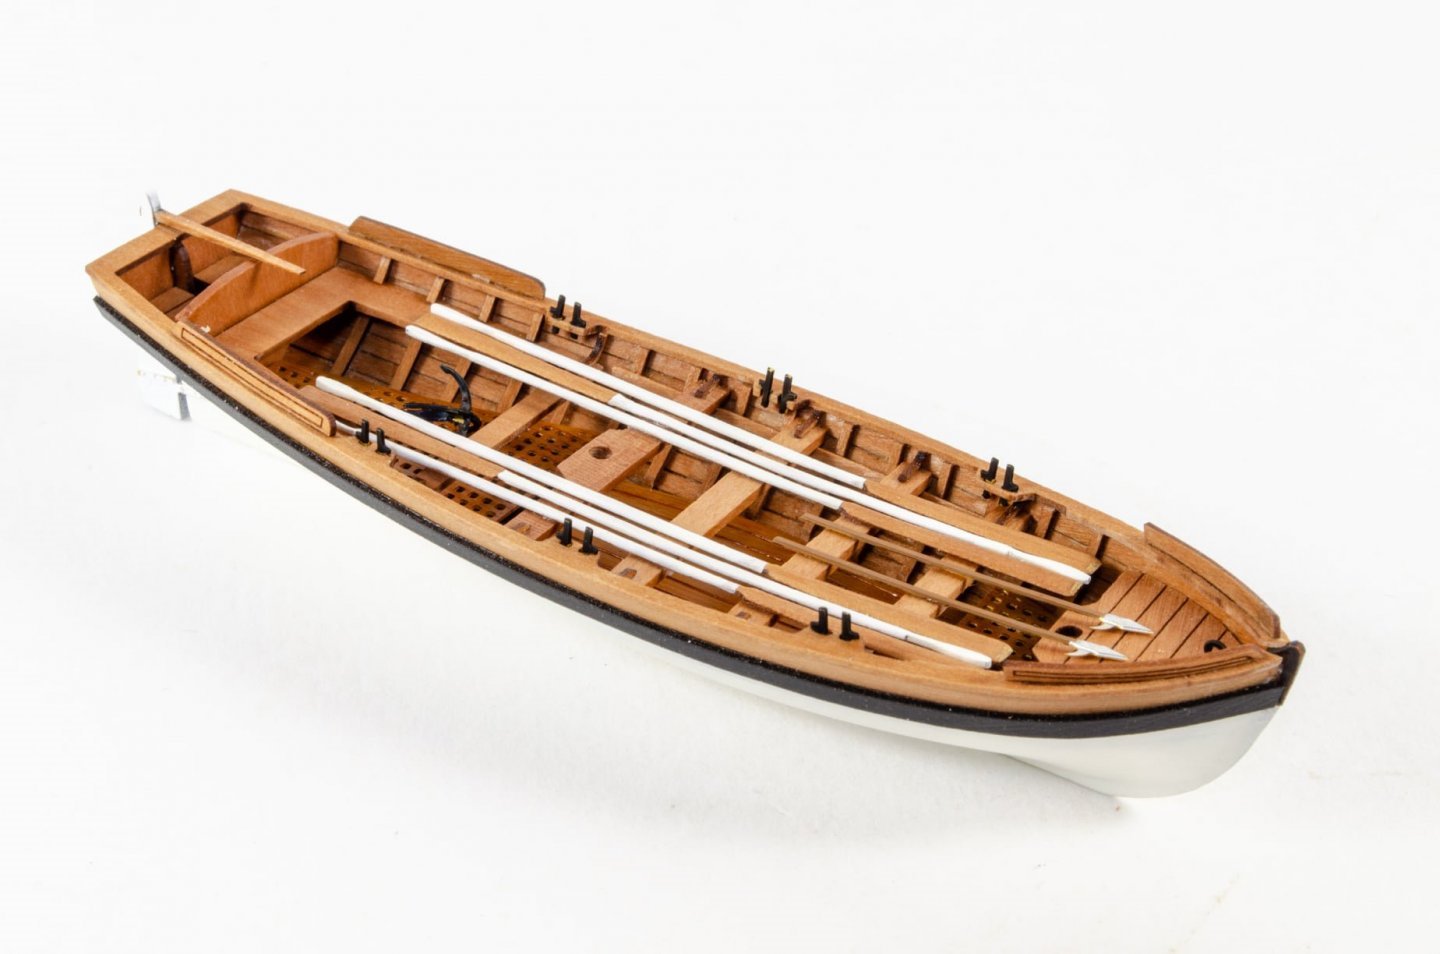
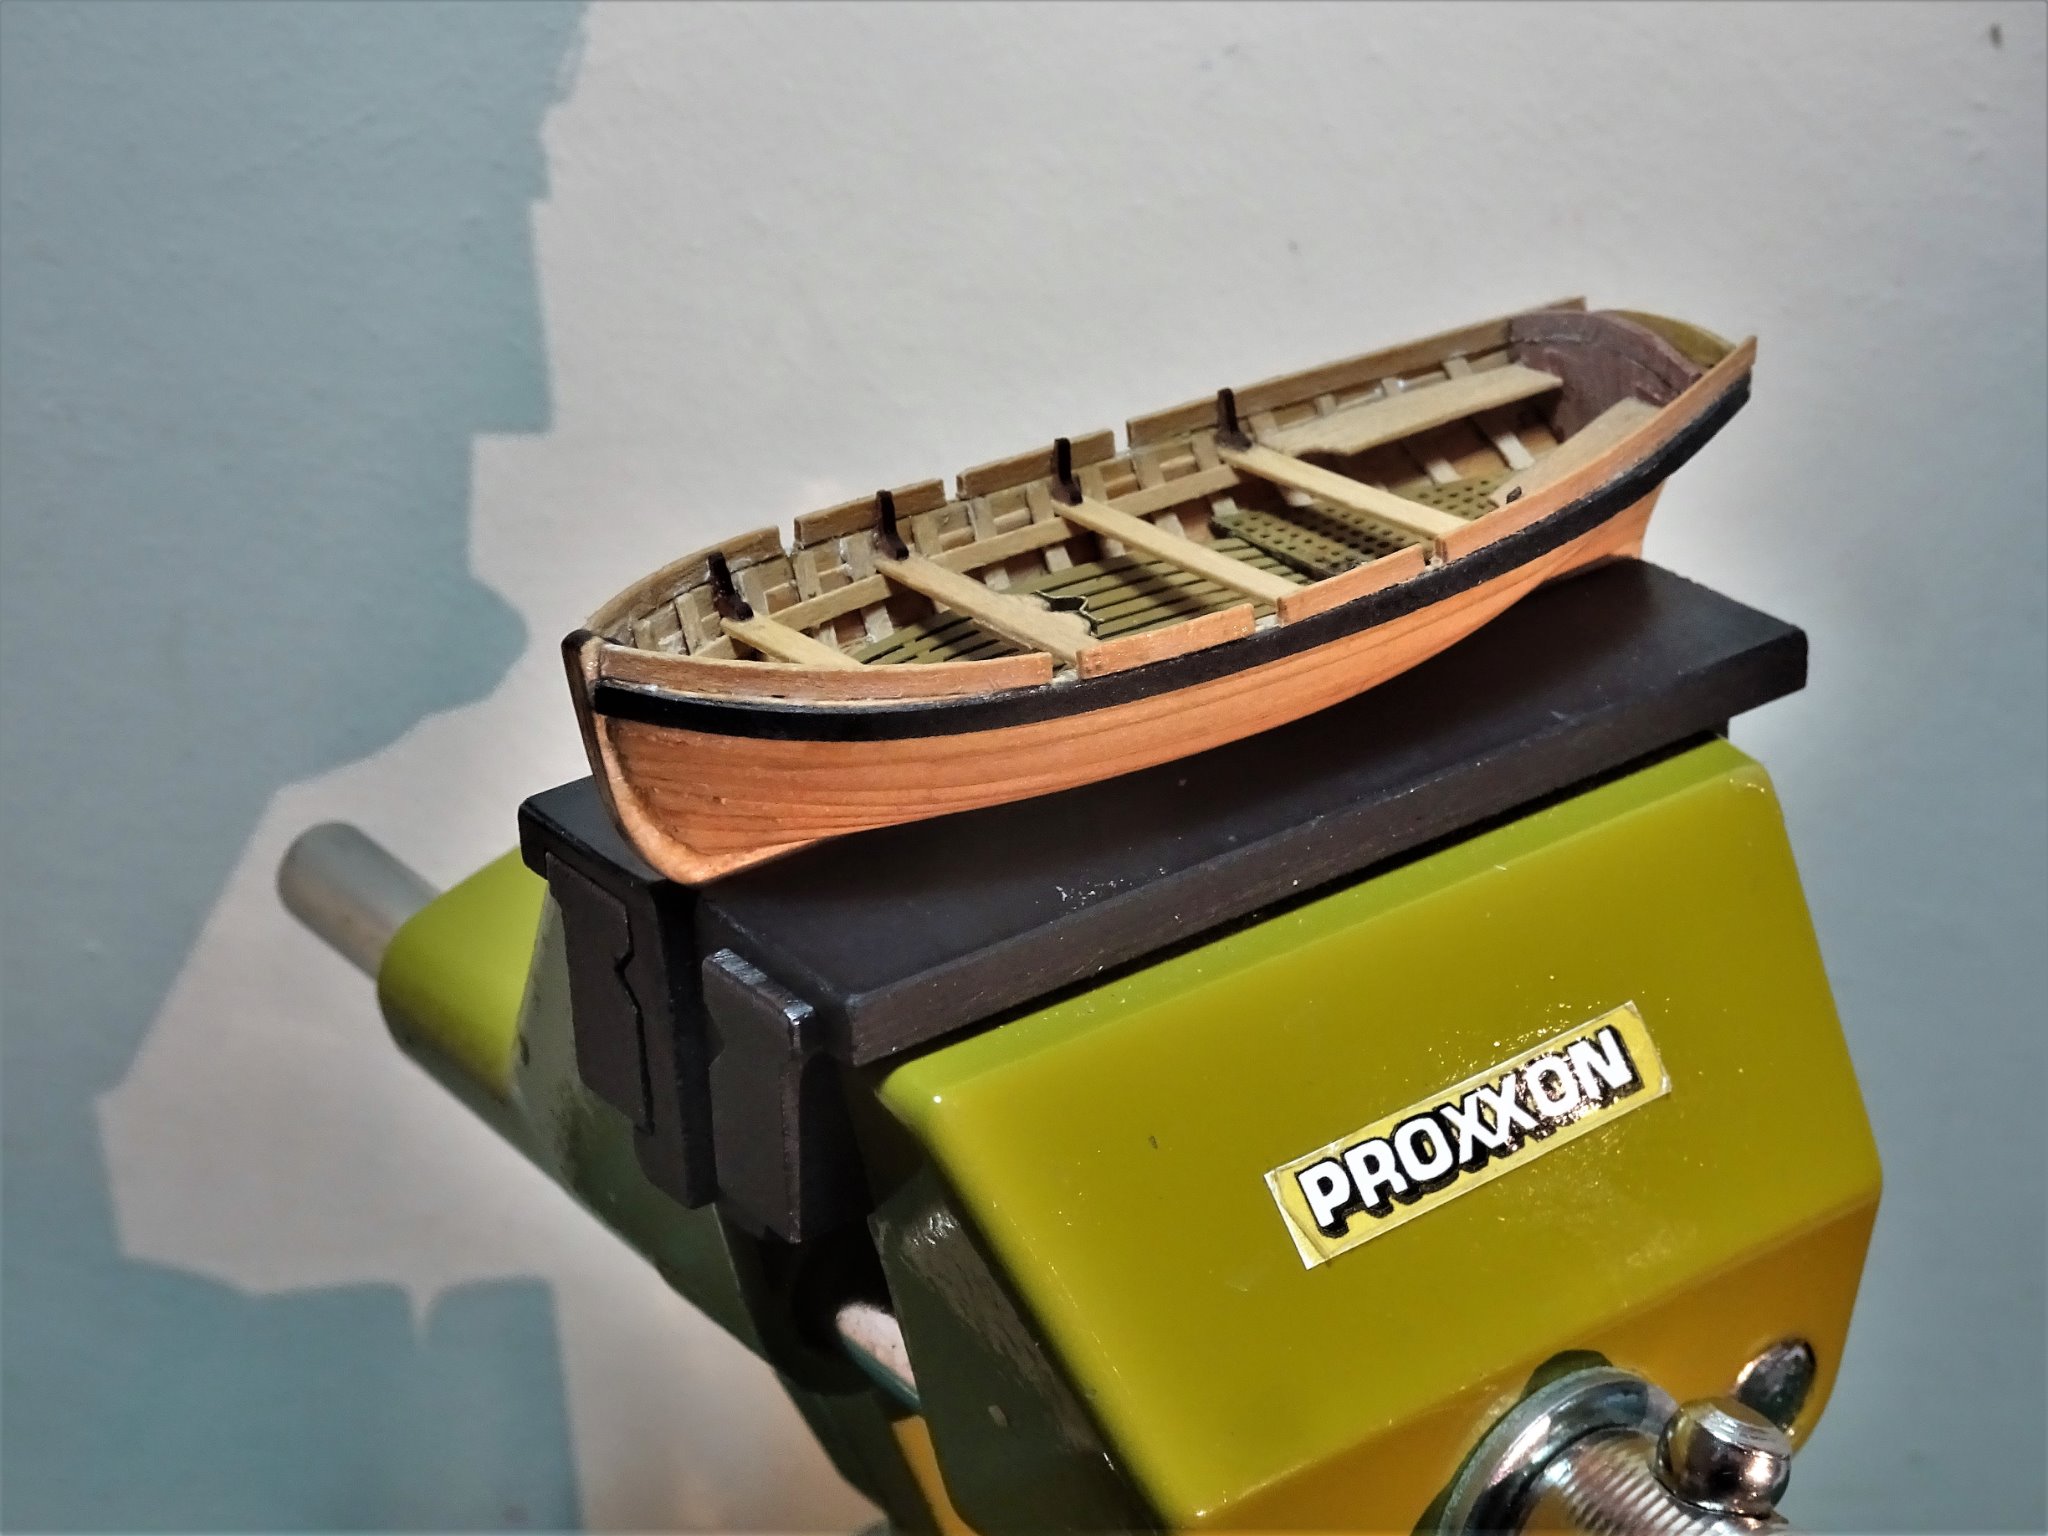
Post Nine Faffing and fiddling to the finish line The rudder is completed with straps and the tiller and can now be set in place. 9919(2) I used thin black card for the purposes of the straps. I decided to make the oars using Boxwood as the brass etched versions lacked the looms, and you can’t get away from the two-dimensional aspect of brass etch. 9943(2) The kit supplies two sweet little etched grappling hooks, I silver soldered the arms rather than use ca which would have been detrimental to the blackening process. The boat hook was fitted in a Boxwood handle rather than use the etched version. The grapnel as provided by the kit lacks the benefit of a ring, easily rectified, which is needed to attach the classic Fisherman's Bend hitch for small anchors, where the line needs to pass twice thro' the ring. Steel gives a grapnel rope circ for ships boats as 3"-3½" I used .30mm ø line for the purpose. 9944(2) The completed set. 9927(2) Wipe-on-poly is used to enhance the natural colour of the timbers, I decided not to use paint on the model. 9928(2) It was necessary to use Light oak wood stain on the keel, which would still have been the case had I used the supplied Pearwood. 9930(2) 9932(2) An enjoyable little interlude to occupy myself during the Bathroom re-fit which looks to continue for a few days more. 9949 A better appreciation of the relative size of this bijou build, I think it will be a cutter for a cutter and join Alert in her display case. As I finish this project Chris has issued his replacement, enhanced, 18’ cutter. Having a Pearwood keel is a good improvement and the use of thinner 0.6mm strip is more scale appropriate. The build sequence is also more logical and I like the inclusion of Pearwood oars, something else I feel is preferable. I have decided to rename this log as 18th c ships boats – 1:64 scale - Vanguard Models, as today I received another of Chris’s little gems, this time the 22’ Yawl. This build will continue in this section. B.E. 19/01/21
.thumb.JPG.802cee78f829a7504e059a16729ce20e.JPG)
.thumb.JPG.2337a2b7070583c4dd46f2d4072a6e43.JPG)
.thumb.JPG.a120317a7d7151bb4abe4b356fb9a915.JPG)
.thumb.JPG.7fd9f14048cd4aeab79ca2d1d08db4e0.JPG)
.thumb.JPG.8921d9a94cb8e8cae86725900fca2d6d.JPG)
.thumb.JPG.2b01eb94a81950a0677d703b77cf78a7.JPG)
.thumb.JPG.b83c32364a658d79d5ca43d9f5a6b5a9.JPG)
- 70 replies
-
- 13
-
-
- 22ft Yawl
- Vanguard Models
- (and 2 more)
-
Hi Chris, The new cutter looks a big improvement on the original, I like the inclusion of the Pearwood keel, and thinner planking, also the inclusion of the wooden oars. Fitting the wash strake as part of the normal planking before the Rowlocks are cut is a much better approach. The text at Instruction 28 needs amending from anchor to Rowlock. I look forward to making your Yawl mini kit which should be arriving today. Cheers, B.E.
-
Post Eight Sheer strakes, Gunwales and Washboards. These terms can be a little confusing in relation to cutters. David White- The Frigate Diana describes the upper strake as the Wash Strake and below this the Upper Strake. The Gun wale is shown as running inside the framing. Peter Goodwin – The Cutter Alert describes the upper strake as the Gunwale (wash strake) and below this the sheer strake. Brian Lavery – Arming and Fitting describes the upper strake as a thicker piece of timber known as the Gunwale, fitted with thole pins or rowlocks. After the mid-eighteenth century a removeable wash- strake was fitted on many boats, above the gunwale. For the purposes of my build I will use the terms Gunwale and Wash strake. Gunwale 9872 I used 0.7mm x 1.8mm ebony strip for the purpose, ca’d level with the top of the bulwark. Wash-strake These are likely to prove tricky to fit because there is little effectively to support them inboard. 9863(2) The knees that fit to the thwarts should run up to the top of the Wash strake, which they don’t on my build unless they are fitted with the long end upwards which I did as I couldn’t face making replacements of these tiny items. 9864(2) With this arrangement there will be support for the Wash-boards but before these are fitted it is necessary to consider the Rowlock positions. The kit seems to indicate three sets of rowlocks serving the forward three thwarts. This would suggest that it is set up for double banked rowing, and the oar length would support this There is a plan for an 18’ cutter in the Cutter Alert book showing this set up. However, there are plans indicating offset rowlocks for 18’ cutters which would indicate a single bank arrangement. There is a plan for an 18’ cutter in the Frigate Diana book (David White) which has this arrangement. I am using 1.7mm x 0.7mm Boxwood strip for the wash strakes. The strakes need to be heat bent to fit atop the bulwark without tension which will greatly assist a successful result. The kit blurb suggests gluing strips of wood along the bulwark leaving 1mm gaps for the Rowlocks. 9880 My approach is to fit the strake as a whole which has the advantage of maintaining a better round to follow the hull. I used spots of ca on the brackets and the strip to secure the strake. 9879(2) A micro-saw is then used to cut the rowlocks. I use an Airwaves etched stainless steel saw blade that has incredibly fine teeth and fits into a Swann Morten scalpel blade. Anything coarser would inevitably break the glue bond or the wood strip. 9887(2) This finishes the basic construction, but the macro’s I took show up areas requiring further cleaning up before the final finish is applied. B.E. 17/01/21
.thumb.JPG.de7dee35a98cdfa63225bee1e3196e4b.JPG)
.thumb.JPG.ad3325a93a8158b80e7f66147fb8935b.JPG)

.thumb.JPG.515b28317979402d15b86eb309ba3ddd.JPG)

.thumb.JPG.255d15af93675d1e2ea1f4b6ab789a49.JPG)
- 70 replies
-
- 11
-
-
- 22ft Yawl
- Vanguard Models
- (and 2 more)
-
That was six years ago and several builds down the line, and the moment has passed. However, I like Chris Watton designs, and I know Amati kits and what to expect. Were the inclination to build Revenge come again it would be that kit. B.E.
-
Yards looking good Tim, 👍 Re:- I'm also pondering how to do the topsail brace. There is a block setup in the AotS book and the instructions, but its a little unclear where the tie off on the bowsprit would be (and a closeup of the bowsprit in the AotS book doesn't show the tie-off point, but that isn't the only inconsistency in the book unfortunately). I'll keep thinking about it, but if anyone has any thoughts I'd love to hear them. I belayed mine at the pin rail above the windlass. B.E.
- 436 replies
-
- 2
-
-
- vanguard models
- alert
- (and 1 more)
-
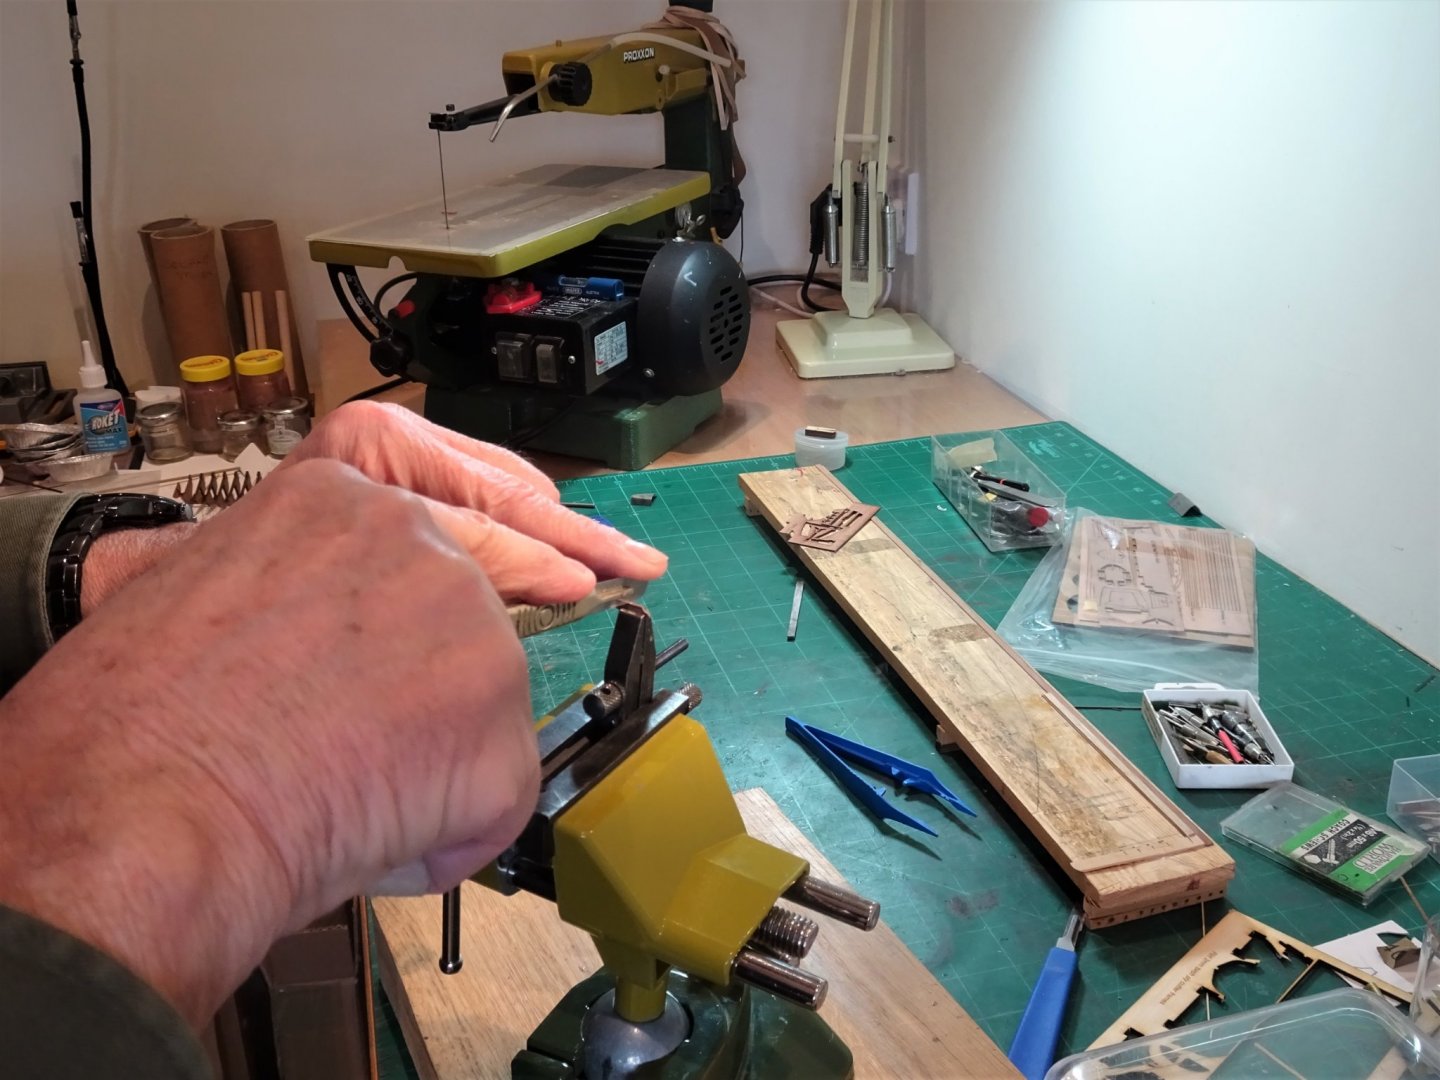
Hi Richard, I can’t for the life of me remember where I got the non Proxxon vice. It opens to 65mm and jaws are 75mm wide. A quick online check shows a few that look like it. The Proxxon has the same jaw dimensions but has the advantage of extra height and the angle swivel, very useful when working on small projects such as this cutter. The Proxxon is quite heavy and I’ve never felt the need to fasten it down. The Proxxon 24260 Bench Vice you mention last I do have, it is much smaller and designed to fit on the MF70 Mill where I use it exclusively. For hand holding small stuff I tend to use an engineers clamp as shown in my first post. Cheers, B.E.
- 70 replies
-
- 1
-
-
- 22ft Yawl
- Vanguard Models
- (and 2 more)
-
Hi Richard, The boat looks ok from about six-inch viewing, even better from 12”; 😉 the macro lens is brutal, but it will allow me to clean up some of the rougher spots. I’ve yet to finish the rudder which I have left long for final fitting. I think Chris was right to withdraw this mini kit, it is not up to the standard of his newly released boat sets, presumably he will eventually add a new cutter to the set. B.E.
-
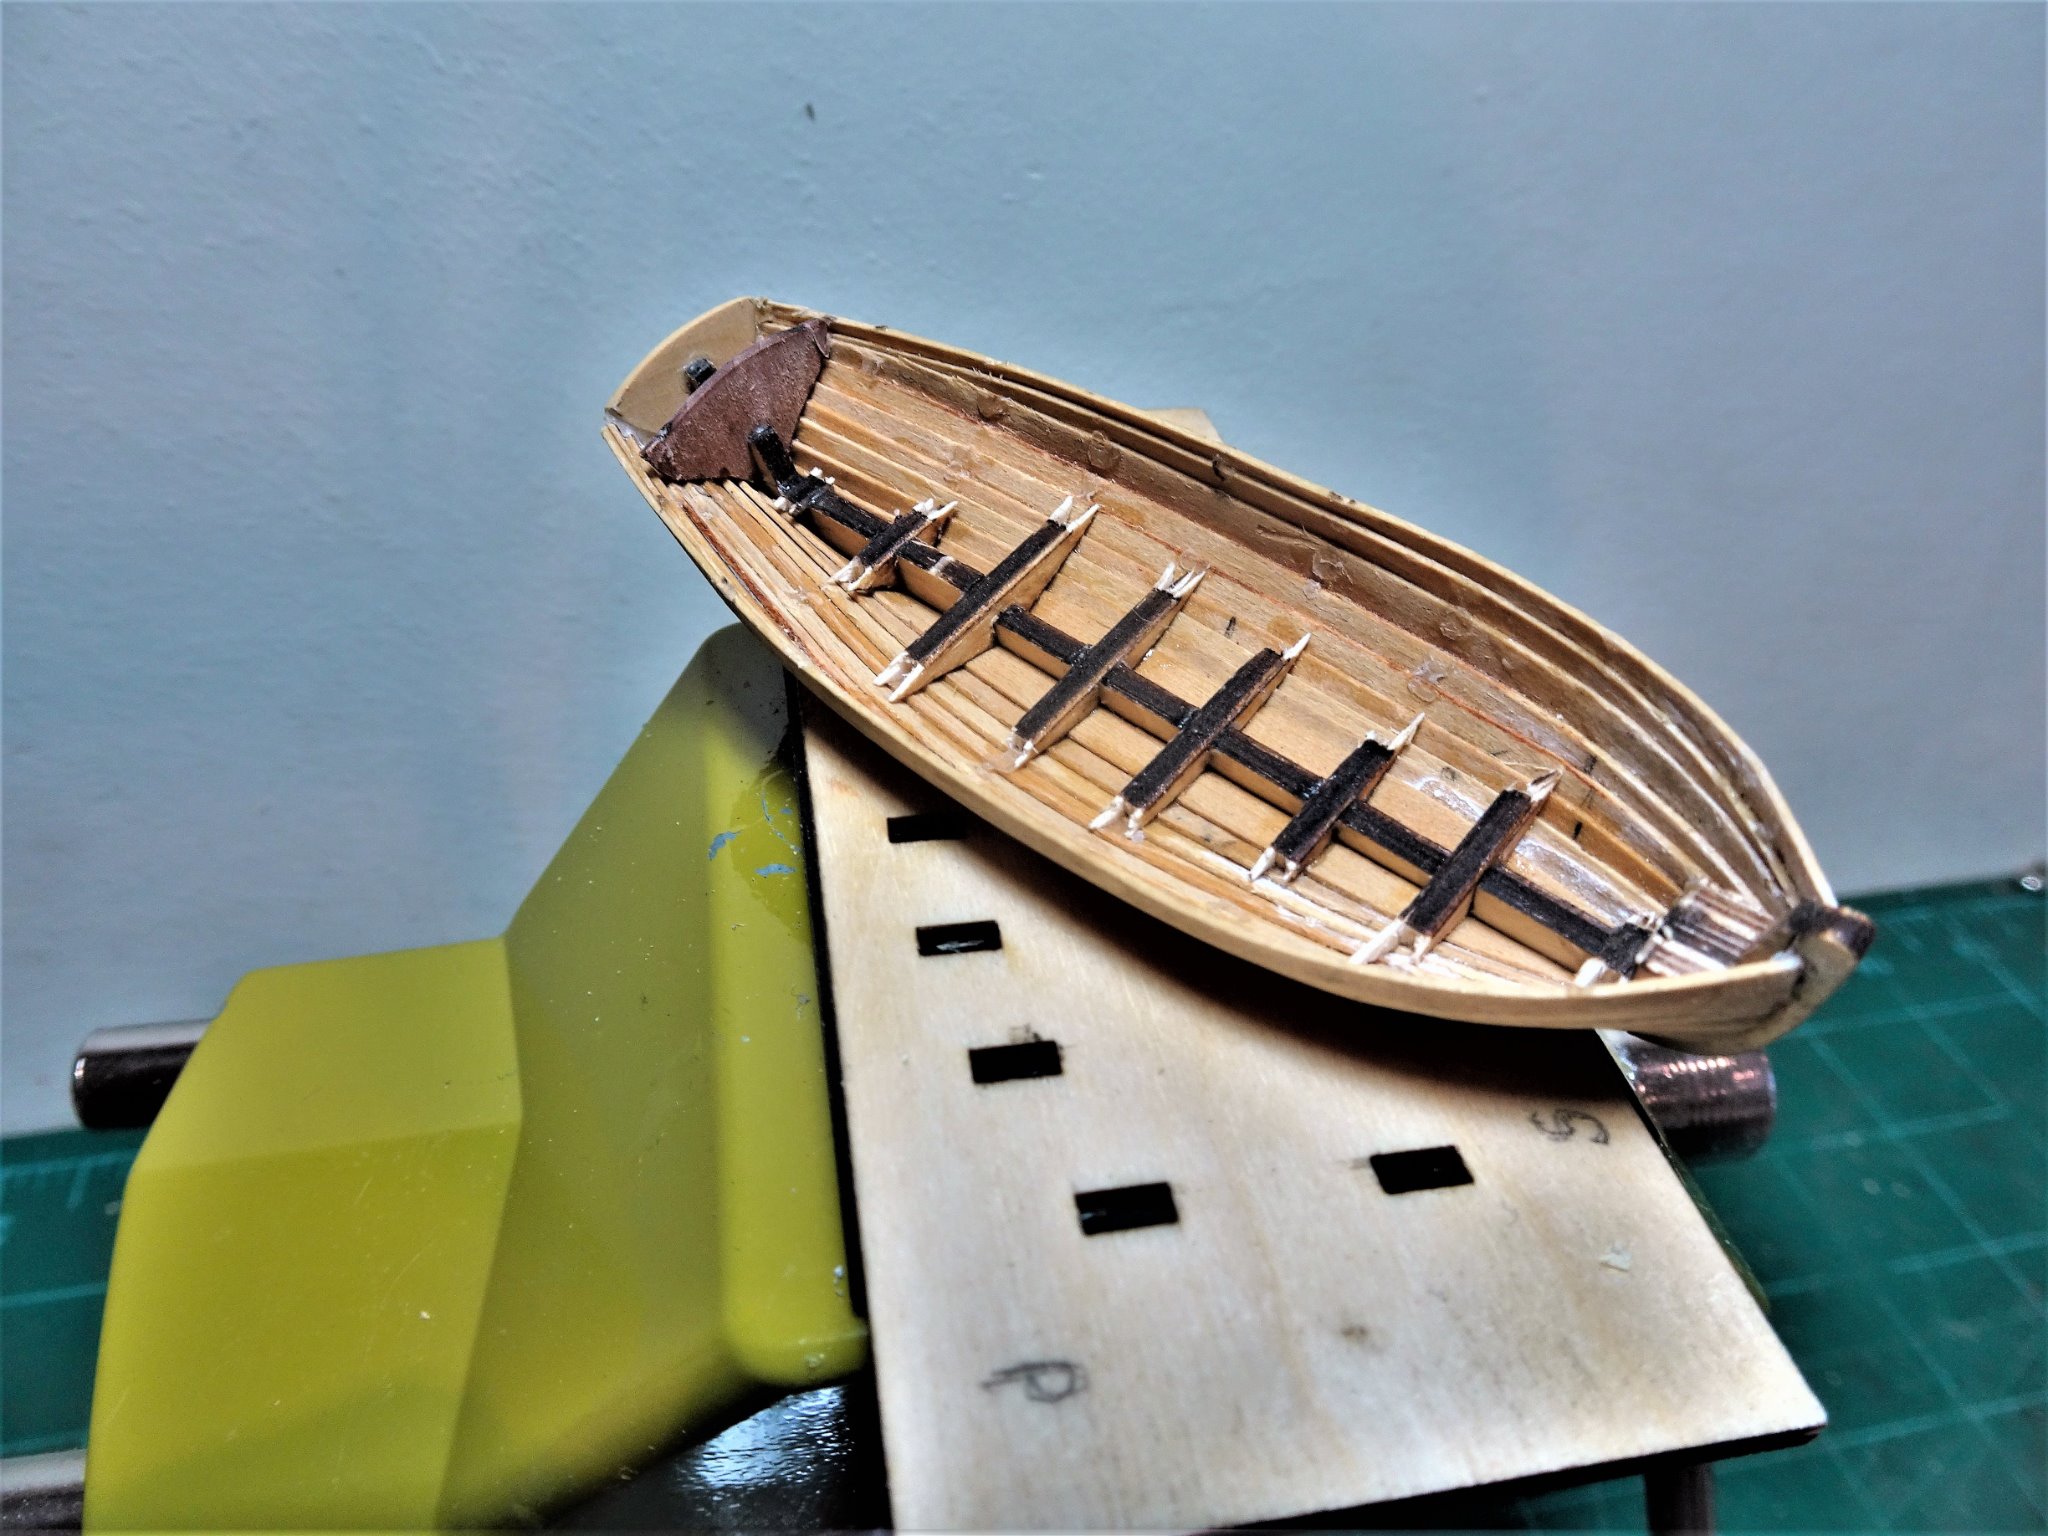
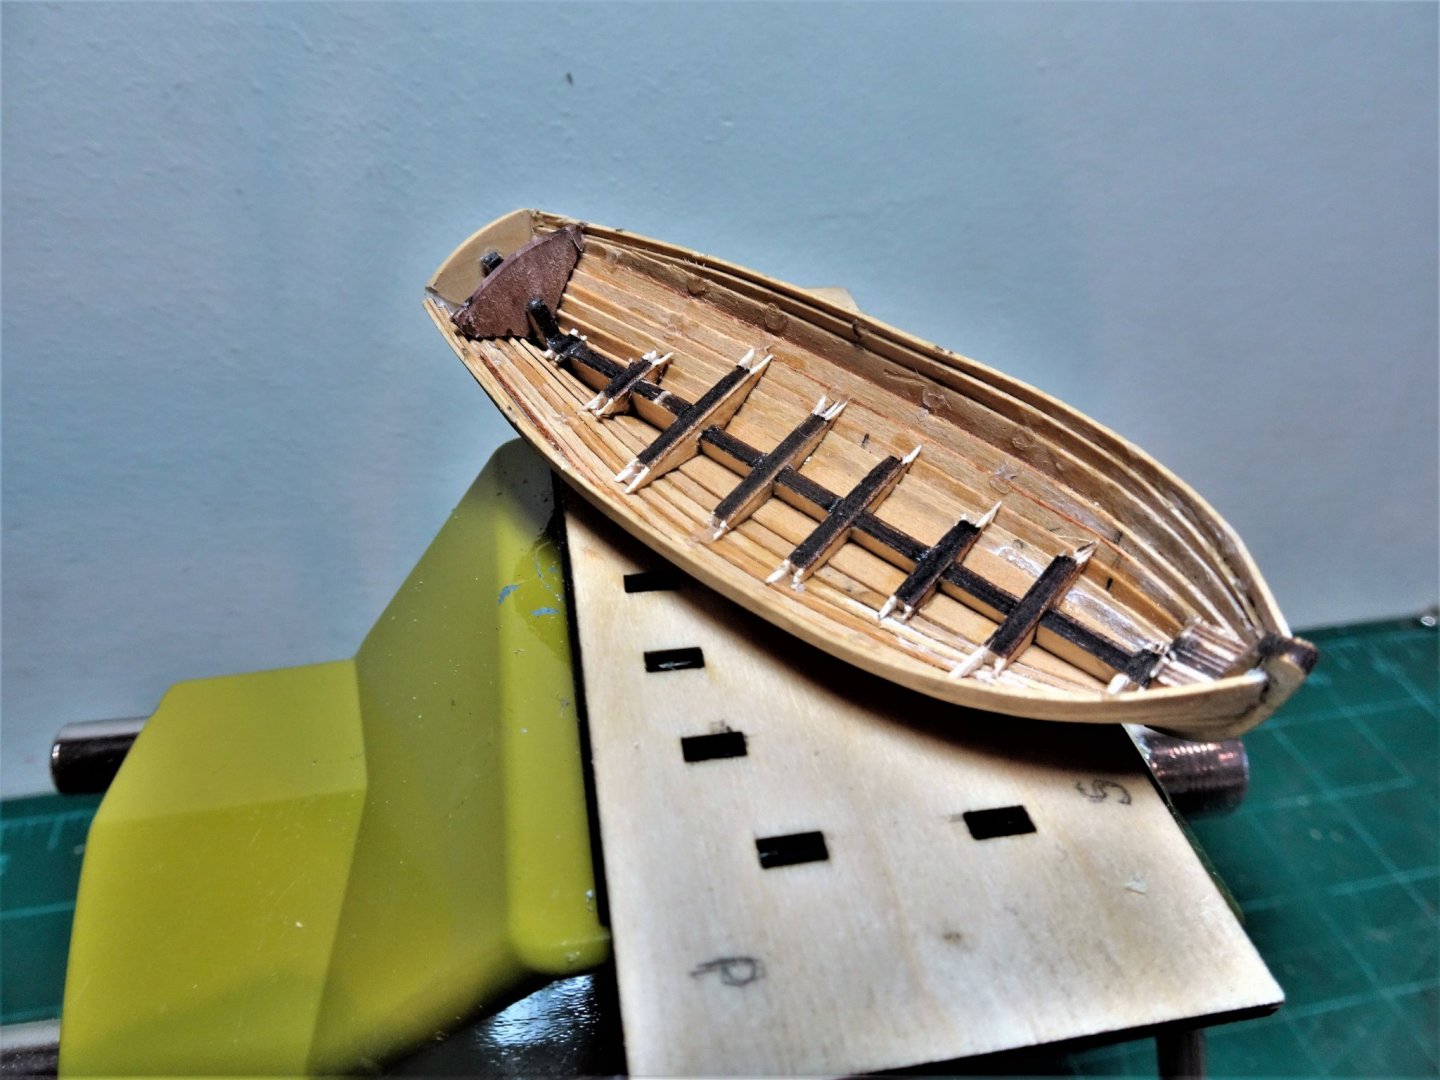
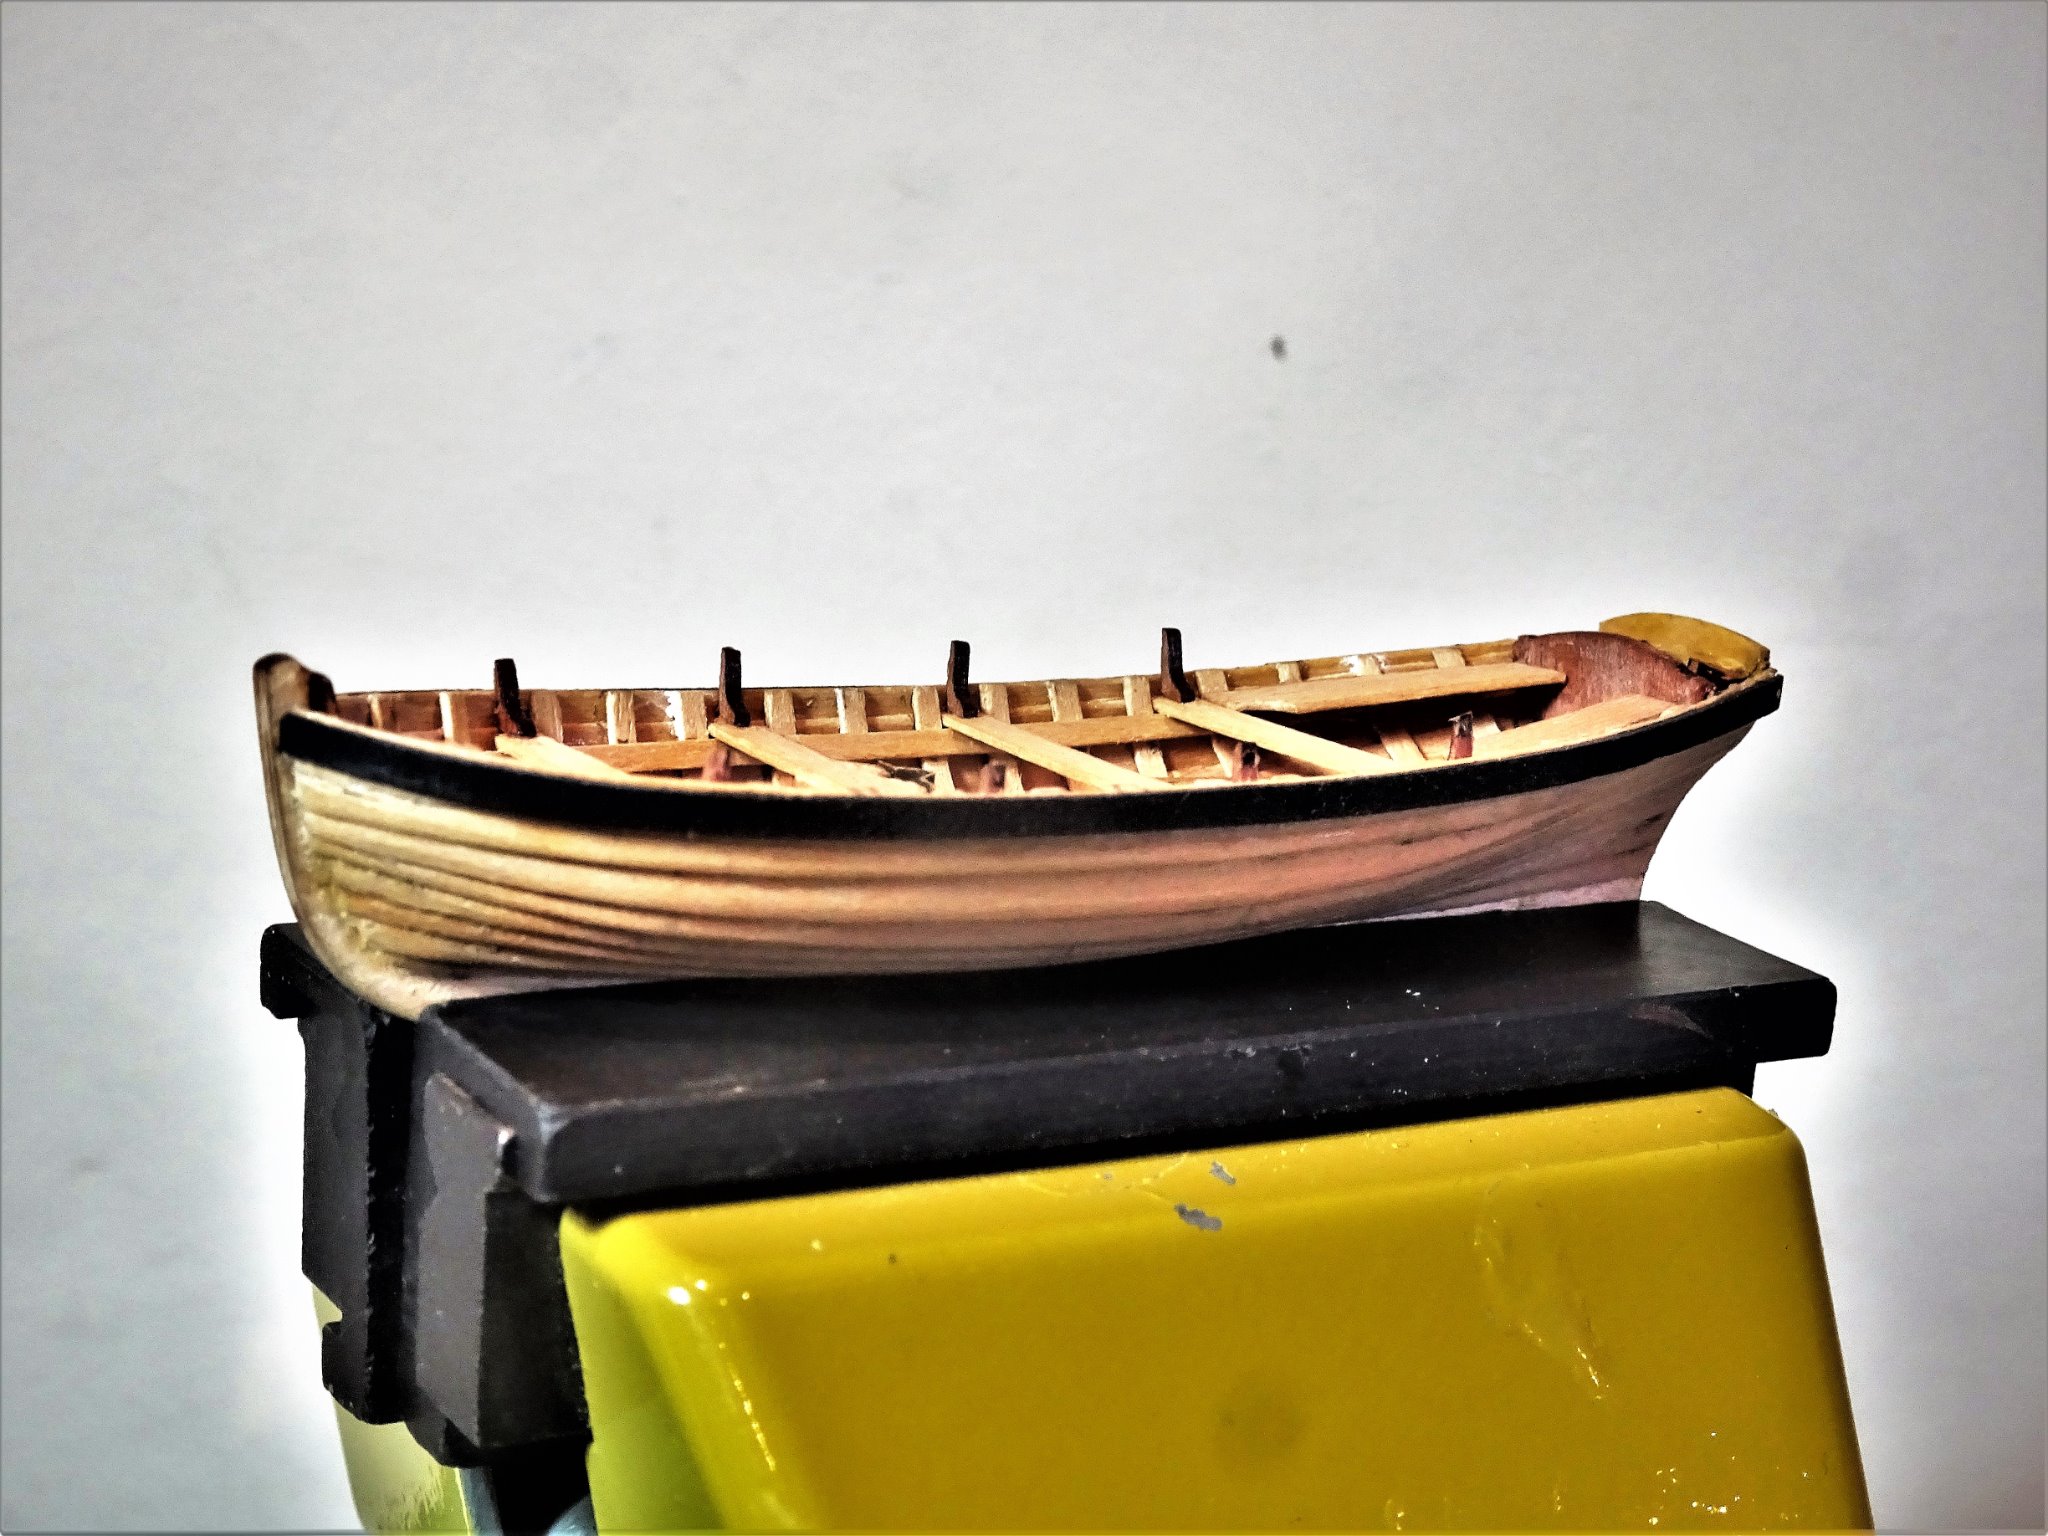
Post Seven A question of rudders I am not too keen on the rudder arrangement whereby a formed Pearwood carcase is faced by brass etch which albeit contains the details of the rudder straps. 9788(3) I replaced this with rudder cut from a 1.3mm Boxwood sheet offcut. 9800(2) The rudders of Cutters and other small boats had a different arrangement to the usual gudgeon and pintles set up. Rudder fitting on one of the Victory’s cutters. Note also the tiller fitting. The lower pintle was fitted to the sternpost, it was longer than usual for ease of location. The upper one was fitted to the rudder. This arrangement was to facilitate ease of removal and re hanging whilst the boat was in the water. 9795(2) On the model a small eyebolt with 0.35mm ø brass wire silver soldered into it made for the pintles, and eyebolts for the gudgeons. 9803 Rudder hung but not finished. Finishing the bottom boards. Having given the etch a base coat of Humbrol 93 I applied a thin streaky coat of Humbrol 94, followed by a dry bushing of sand yellow weathering powder. They were then glued into to the boat using spots of ca. The surface took a little wear during the fitting process and this will need fettlin’ once the rails are fitted. 9813 The internal rails that support the thwarts and provide some rigidity were made from 2mm x 0.7mm strip. These were pva’d to the ribs 3mm below the bulwark. 9817 I always find this a tricky little exercise getting the rails level each side, and I use temporary thwarts to eye along the boat. When it came to fitting the stern sheets the pre-made parts were not a good fit to my hull. 9828(2) In the end I decided that 1mm thick thwarts were a tad overscale and I replaced them with Boxwood strip of 0.7mm. 9826(2) I asked my Fifie Skipper to test the thwarts for height and level. The wash boards have yet to be fitted. B.E. 14/01/21
.thumb.JPG.4c8279c680fbba2c493d866420940f57.JPG)
.thumb.JPG.56a71d673f1eeb968b400afa94d1bd7d.JPG)
.thumb.JPG.a2296fdd8aa669e46cfffb5719ab8586.JPG)
.thumb.JPG.420c279e2a8d8488052b53be51b12e7d.JPG)

.thumb.JPG.353c519022025818973c60095d0ffd9c.JPG)
.thumb.JPG.664660b1f31356e16aec712f5bc50619.JPG)
.jpg.5146163e42be74e0c7f3a94f61314e3d.jpg)
- 70 replies
-
- 11
-
-
- 22ft Yawl
- Vanguard Models
- (and 2 more)
-
You're making good progress Eric , this is not an easy build, but there is a deal of satisfaction to be had from its completion. The Pinnace kit makes a great looking model and I think you will be pleased with the end result. Regards, B.E.
- 123 replies
-
- 2
-
-
- Model Shipways
- Pinnace
- (and 1 more)
-
Thank you, Eric. It can be a little disheartening for the less experienced to see nothing but perfectly planked and finished work so I think it is important to show that what hopefully turns out to be a nice looking model has its less than perfect stages along the way. I’ve always adhered to the adage that a model is more than the sum of its parts, and what we perceive as imperfections don’t necessarily detract from the overall effect. That doesn’t mean I don’t aspire to do better on my next build, and learn from those whose work I admire, and there’s more than a few of those on here - thank goodness.🙂 Regards, B.E.
- 156 replies
-
- 3
-
-
-
- pinnace
- model shipways
- (and 1 more)
-
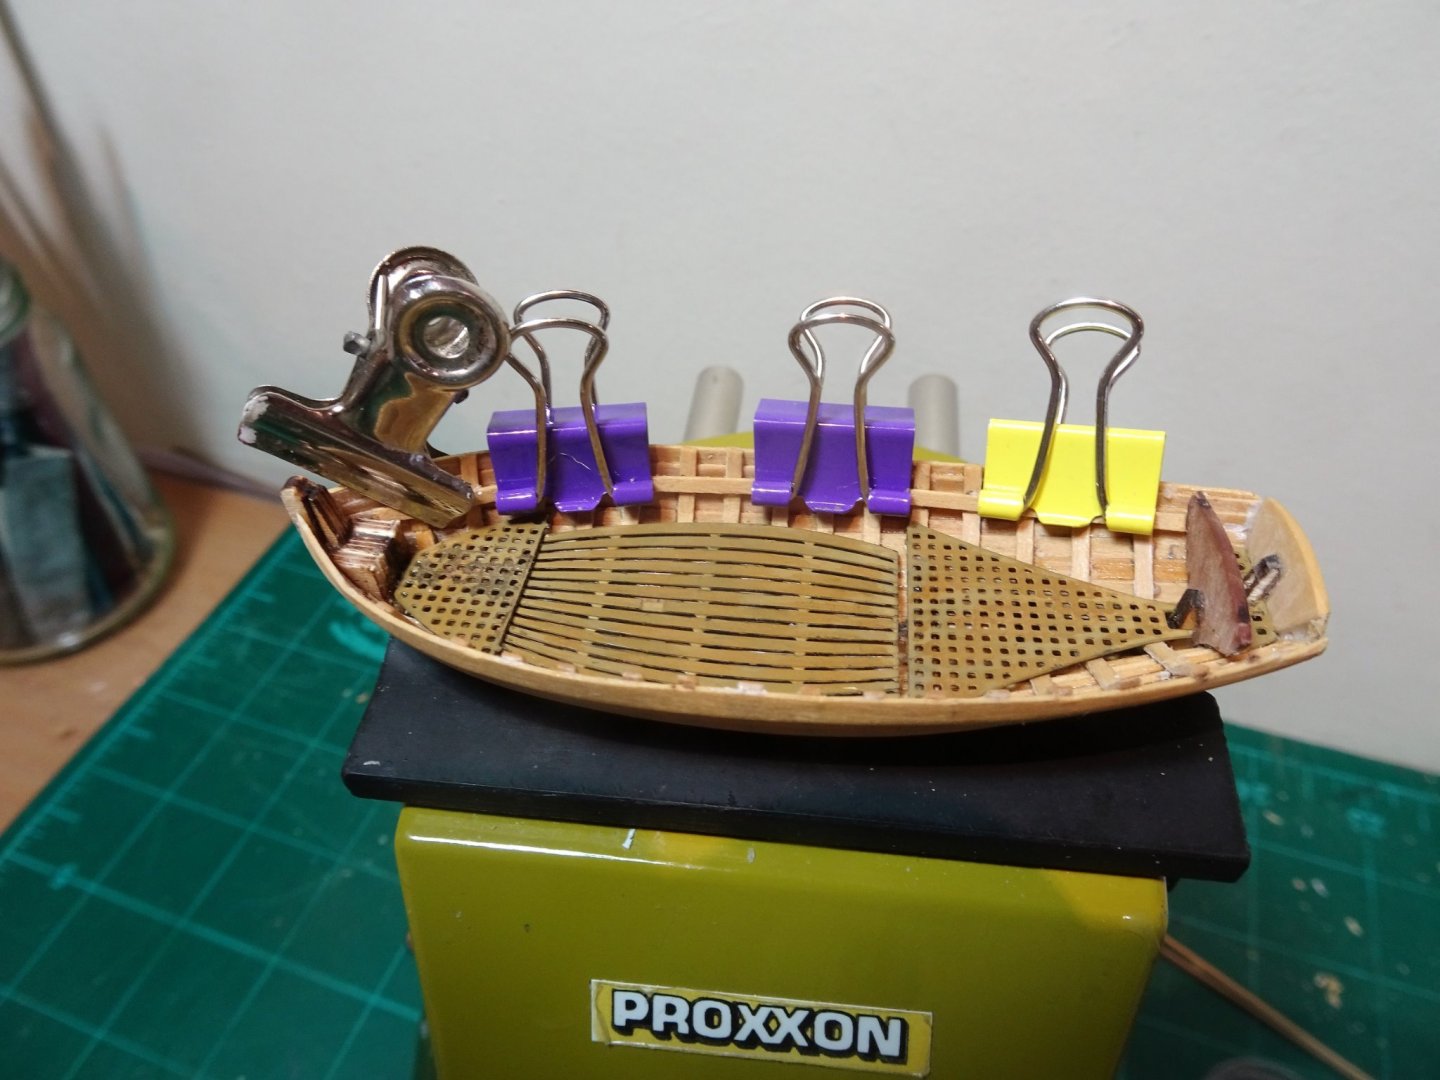
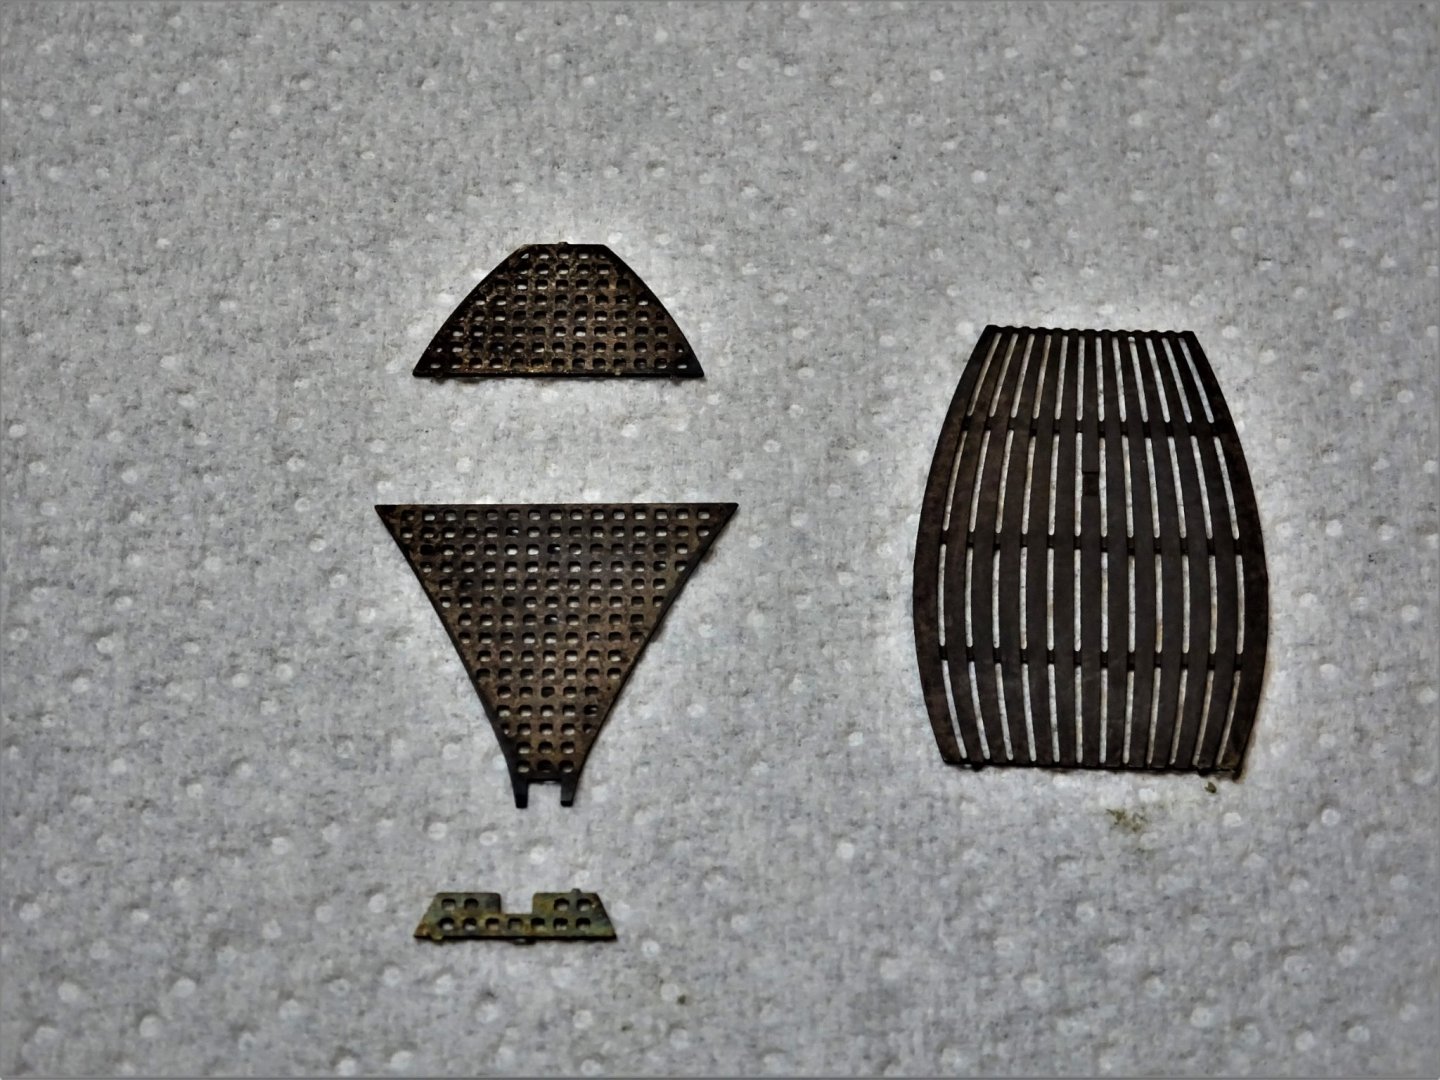
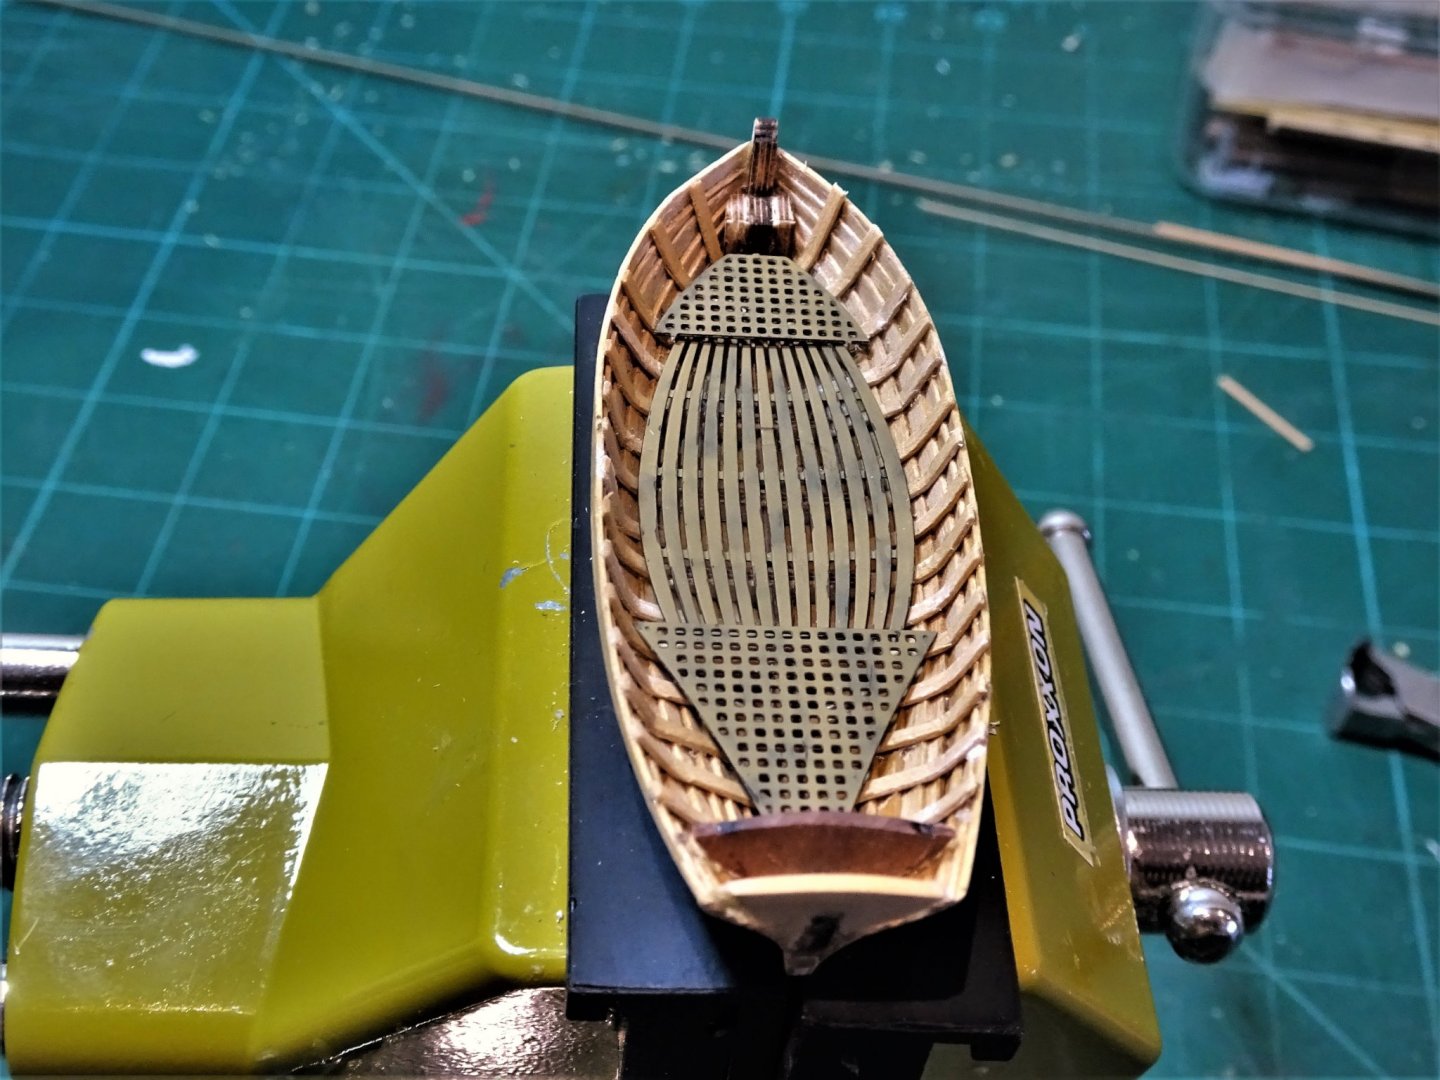
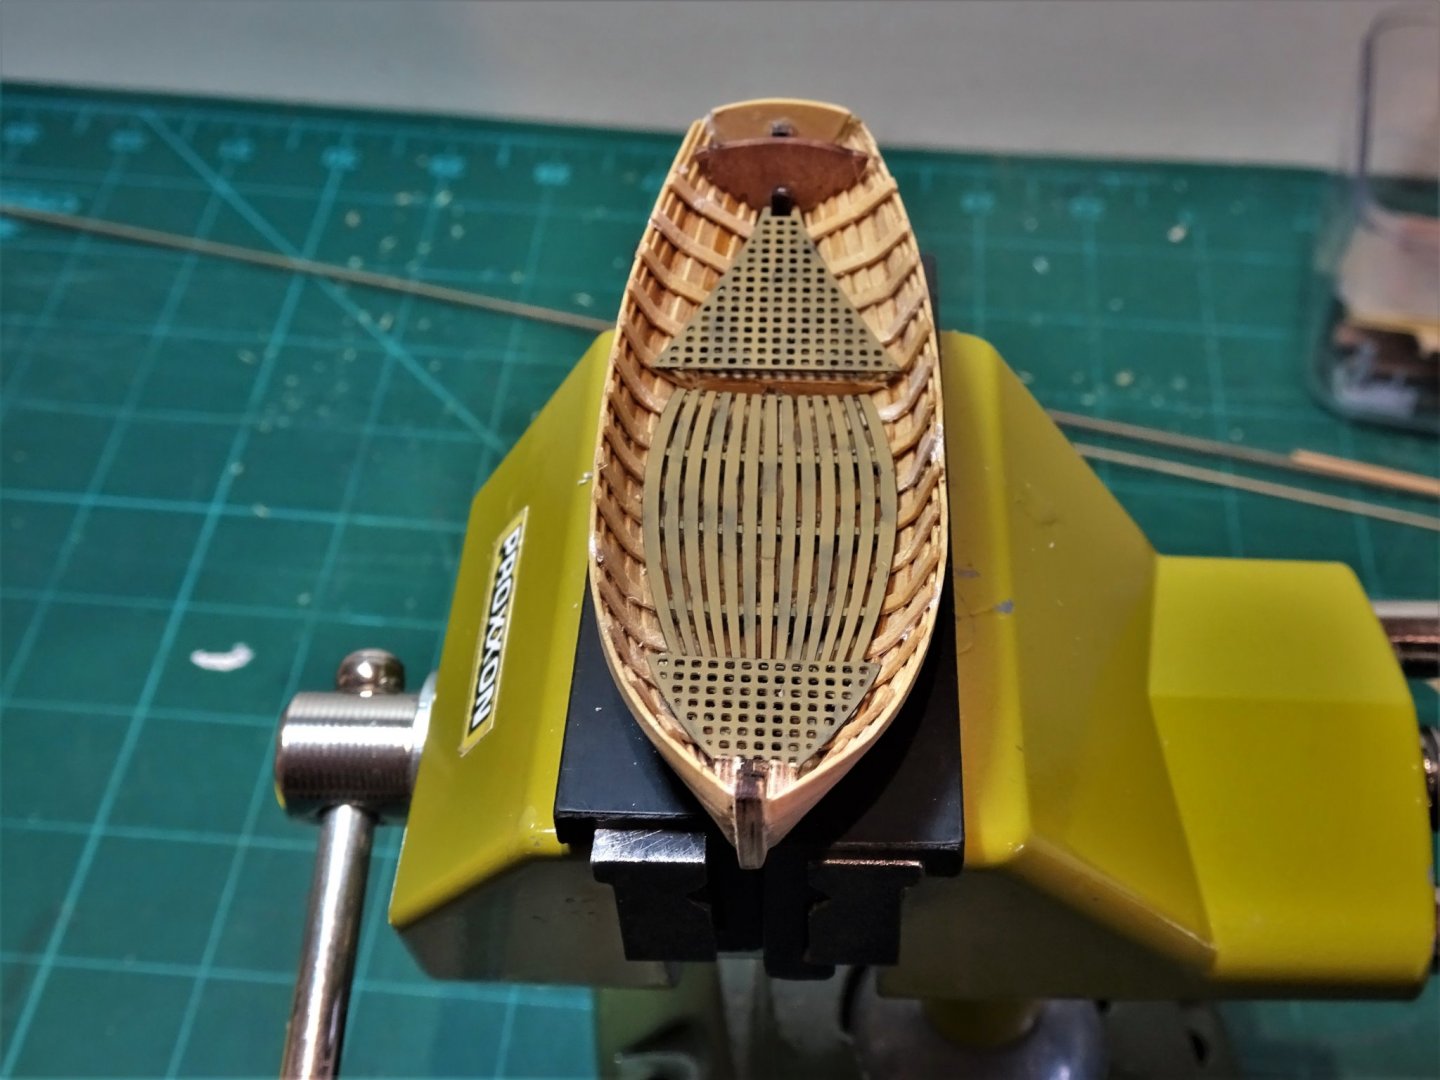
Post Six Internal fittings The kit provides brass etched gratings and bottom boards which are beautifully reproduced and of a finer scale than I could possibly produce using timber strip. 9777 Having thoroughly cleaned the brass using soap, acid, and fine wire wool the parts were chemically blackened to provide some bite for the finish. 9778 The next job is to apply the internal ribs to the hull which run down from the gunwale to meet the bottom boards and gratings. My view is that there are too few ribs indicated in the kit so I fitted one against each of the frame bottoms and one in between. Using etched bottom boards raises the question of getting a realistic natural wood look. 9786 I laid down a base coat of Humbrol enamel (No93) 9783 A dry fit of the parts confirms an excellent fit, no filing or fiddling required here. As I arrive at this point I read that this little kit has been withdrawn from service, presumably ahead of something better in the offing to match the just released small boat kits. No matter we will carry on regardless, but that Yawl kit does look rather tasty. 😉 B.E. 11/01/21

- 70 replies
-
- 7
-
-
- 22ft Yawl
- Vanguard Models
- (and 2 more)
-
Post Five A problem area arose at the transom relating to the fact that the Lapstrake planking refused to make a good fit to the kit part. 9753 This necessitated the kit part being removed and replaced by a Boxwood version. 9754 A fair bit of trial and error to get it to fit anywhere near right but got there in the end. The next job is to remove the internal frames, but I felt very chary about using the suggested twist approach. 9756 However, having cut the central bar and tentatively tested the twist I found that they came away without damage to the outer planking. 9766 Some tidying up inside, but the fittings will cover a lot of the internal planking. 9762 Starting to fine down the Lapstrakes towards the bow and stern, the strakes will be cleaned up using fine sandpaper. 9760 More fettlin’ required on the replaced transom and fining down of the Lapstrakes. B.E. 10/01/21


- 70 replies
-
- 7
-
-
- 22ft Yawl
- Vanguard Models
- (and 2 more)
-
Thanks Erik, a great find, I hadn’t seen it. Some great detail shots of equipment and how it was used, and of the scale. The warp rollers along the rail slotted into sockets are something I pondered about, altho’ I did fit the sockets. I note the relative sizes of the Cran baskets and net floats to the crew. 👍 B.E.
- 222 replies
-
- 1
-
-
- First Build
- Lady Isabella
- (and 2 more)


.JPG.a72181caf40c186d4271611f4bfbc04a.JPG)
.JPG.e788399a23ed5741c821f90235d620c7.JPG)
.JPG.079fde9026ec25297d6cf51430de7d4c.JPG)


.JPG.01b1c365c451cfe8d74547392998e511.JPG)
.JPG.82ad910a0dd588bbfef6f30fb4ec1053.JPG)
.JPG.497bca82add01faa8721ff649e409db0.JPG)
.JPG.e7257412708e0561d3c1a8e5fbb0878b.JPG)

.JPG.329559159d50e06b9dcb73d35f55d10f.JPG)


.JPG.a85142d45e263c19cf07b484221841a5.JPG)
.JPG.b4d822a301ece2d136c8ce86b28eb728.JPG)
.JPG.b31b4dc3d34bd8c1797aacb87e27caf7.JPG)
.JPG.0bd8c99fa28941b975002ea64dc9c5f3.JPG)
.JPG.4a436949d965a0e933a891e84c4bad33.JPG)
.JPG.b65463ee51f0af31853017cc974eb7ed.JPG)
.JPG.0d310378a1cc2fda2d234ca37460f16b.JPG)

.JPG.3e7f5581e8206133493b46a206c754ae.JPG)
.JPG.e35b4b14e789ed663c27138b34d15ffa.JPG)
.JPG.40894b581658d22a058d42f4f3cfdcbb.JPG)
.JPG.bef205bcdb9830c9bfff09295bf74330.JPG)
.JPG.d6e37b70d238efb3008b75f58544050e.JPG)
.JPG.94b47d5ecdb02559fb30f9a45a84c6cc.JPG)
.JPG.014df540dec7f74a99a0b761f178185c.JPG)
.JPG.8dfb8d6e44d5901f4037e39f2f7d8c20.JPG)
.JPG.b61627a606b3bf9a2aeac20dafa1612c.JPG)
.JPG.4cdba76c09094132ccc8ff9b5a384c73.JPG)