
.JPG.ca33079f5815b861e67b9c2cccd37982.JPG)

Blue Ensign
-
Posts
4,575 -
Joined
-
Last visited
Content Type
Profiles
Forums
Gallery
Events
Everything posted by Blue Ensign
-
 We’re of the same mind Richard, I didn’t know what either a Fifie or a ‘nautical’ Zulu were a few months ago. It is the research, the background, and history that is an important part and pleasure of any build I do. I now have seven books on fishing boats and I harbour a hope that Chris may add to his ‘fishing’ fleet one of the English iconic vessels. B.E.
- 49 replies
-
- 1
-

-
- Lady Eleanor
- Vanguard Models
- (and 1 more)
-
Well done Richard, I think you have achieved a nice period look with your scheme. Those reef points are a bit of a pain but I think the sails look better with them. I have seen the odd lifebuoy on old photo's but mostly not. I read that crew were known to attach the floats which were bladders around themselves, but the loss rate due to disasters at sea was very high, it was not unknown for small fishing villages to lose nearly all their menfolk. Sorry I can't offer any suggestions for a capstan rope at present. B.E.
- 49 replies
-
- 1
-
-
- Lady Eleanor
- Vanguard Models
- (and 1 more)
-
Looking good Tim, Make sure you have enough space below the cheeks to allow for the shrouds and pendent of tackles (if you intend to fit them) If you intend to serve the shrouds around the masthead they will take up far more room than the kit indicated 4mm, I placed the stop 14mm below the cheeks. It is also easier to fit the shrouds before adding the trestletrees; seizing the pairs is easier off model, less tiring on the arms, they can then be slipped over the masthead. B.E.
- 436 replies
-
- 3
-
-
- vanguard models
- alert
- (and 1 more)
-
Thank you Erik. If you look on Chuck's Syren site you will see he supplies a Laser cut Pintles and Gudgeons Mini kit at $5.50. He also has many other little treasures of great value to us modellers. ps: I have no association to Dads, sorry, I mean Chuck's business, just a grateful customer.😉 B.E.
- 261 replies
-
- 2
-
-
- muirneag
- vanguard models
- (and 2 more)
-
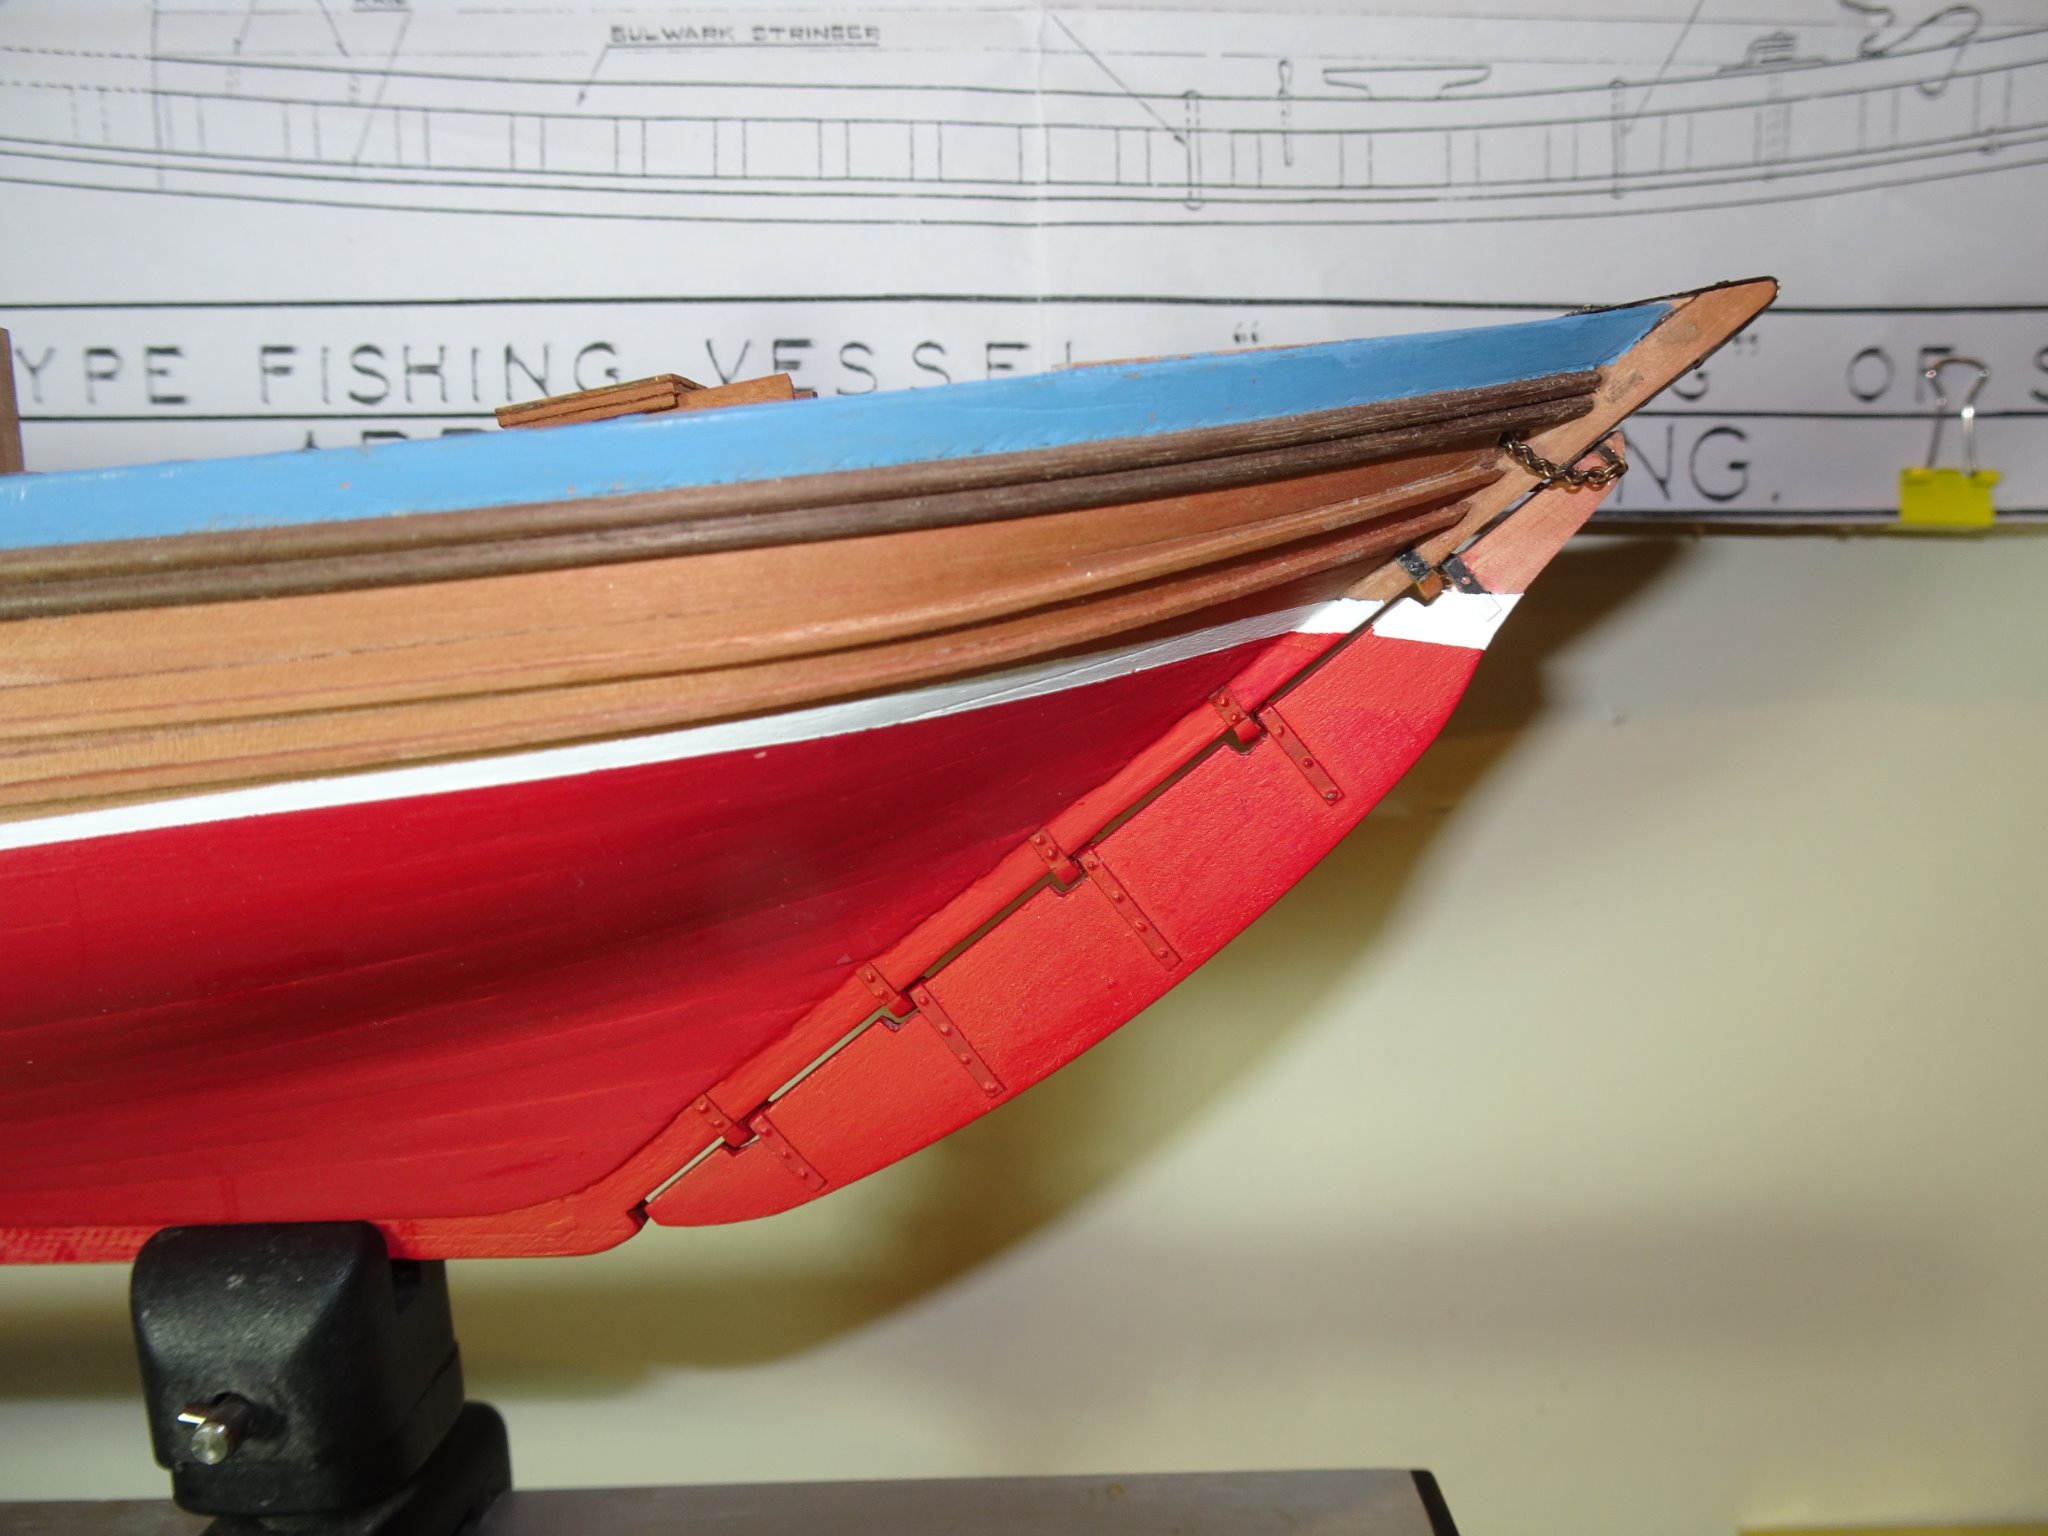
Thank you Thomas and Erik, much appreciated. Post 30 Competing the rudder This entails adding the straps to the gudgeons and pintles. I am using Chuck’s fibre versions rather than the brass etched kit parts. 8387(2) Once these are added small spots of pva are added to represent the bolt heads. As all the straps are painted over this gives a reasonable representation. The final part is to add the rudder chains. The kit provides a flat brass etched tiller arm fitting which fits into a slot in the rudder head. I replaced this with a spectacle plate made from brass strip and small eyebolts. 8389(2) 8390(2) Spectacle plate in the raw. Rings are added to the rudder chains which will attach to the spectacle plate. 8399(2) The straps for the gudgeons are next fixed, short ones only, running the width of the stern post. 8403 Fixing the chains is a fiddly business as there is very little slack, several rings disappeared into the ether during the process. 8408(2) 8404(2) 8411(2) The completed rudder B.E. 31/10/20
.thumb.JPG.2a71216b07bf4abe13cb9bd812015576.JPG)
.thumb.JPG.089fb25110be341673b9b6dbc32d20df.JPG)
.thumb.JPG.e72478a4f25ab8ecefa088a16ccb5778.JPG)
.thumb.JPG.f58d18dc9814038476669866e15d3d8c.JPG)

.thumb.JPG.336633a8c9d36e8d786314ef4cc6bab5.JPG)
.thumb.JPG.203492b3be8a10041f7911bddb1f81f3.JPG)
.thumb.JPG.aedf73825706f57f47de9af2df1329bc.JPG)
- 261 replies
-
- 15
-
-
- muirneag
- vanguard models
- (and 2 more)
-
Thanks for looking in Moab and for your kind comment, and ditto Grant and John, much appreciated. Thank you Jason and Bob. I’m no expert on Silver soldering but using the paste in a syringe is a great help. Basic silver soldering is quite easy, things like making strops and joining rings are quickly picked up. The main things to consider are: Having the metals clean. Working out how you are going to secure the parts during the process. Ensuring a close connection, Silver solder has no gap filling qualities. As soon as the silver flashes, the job is done, remove part and dip. If you want to join more than one part to another, you will need different melt point pastes, so that the first isn’t melted when the second is attached. The piece I was most pleased with was adding two small rings at right angles to a stanchion for the guard rails on my Pegasus build. Cheers, B.E.
.thumb.JPG.186aa9d8c01ac8a10f11c2e1c879195f.JPG)
- 261 replies
-
- 10
-
-
- muirneag
- vanguard models
- (and 2 more)
-
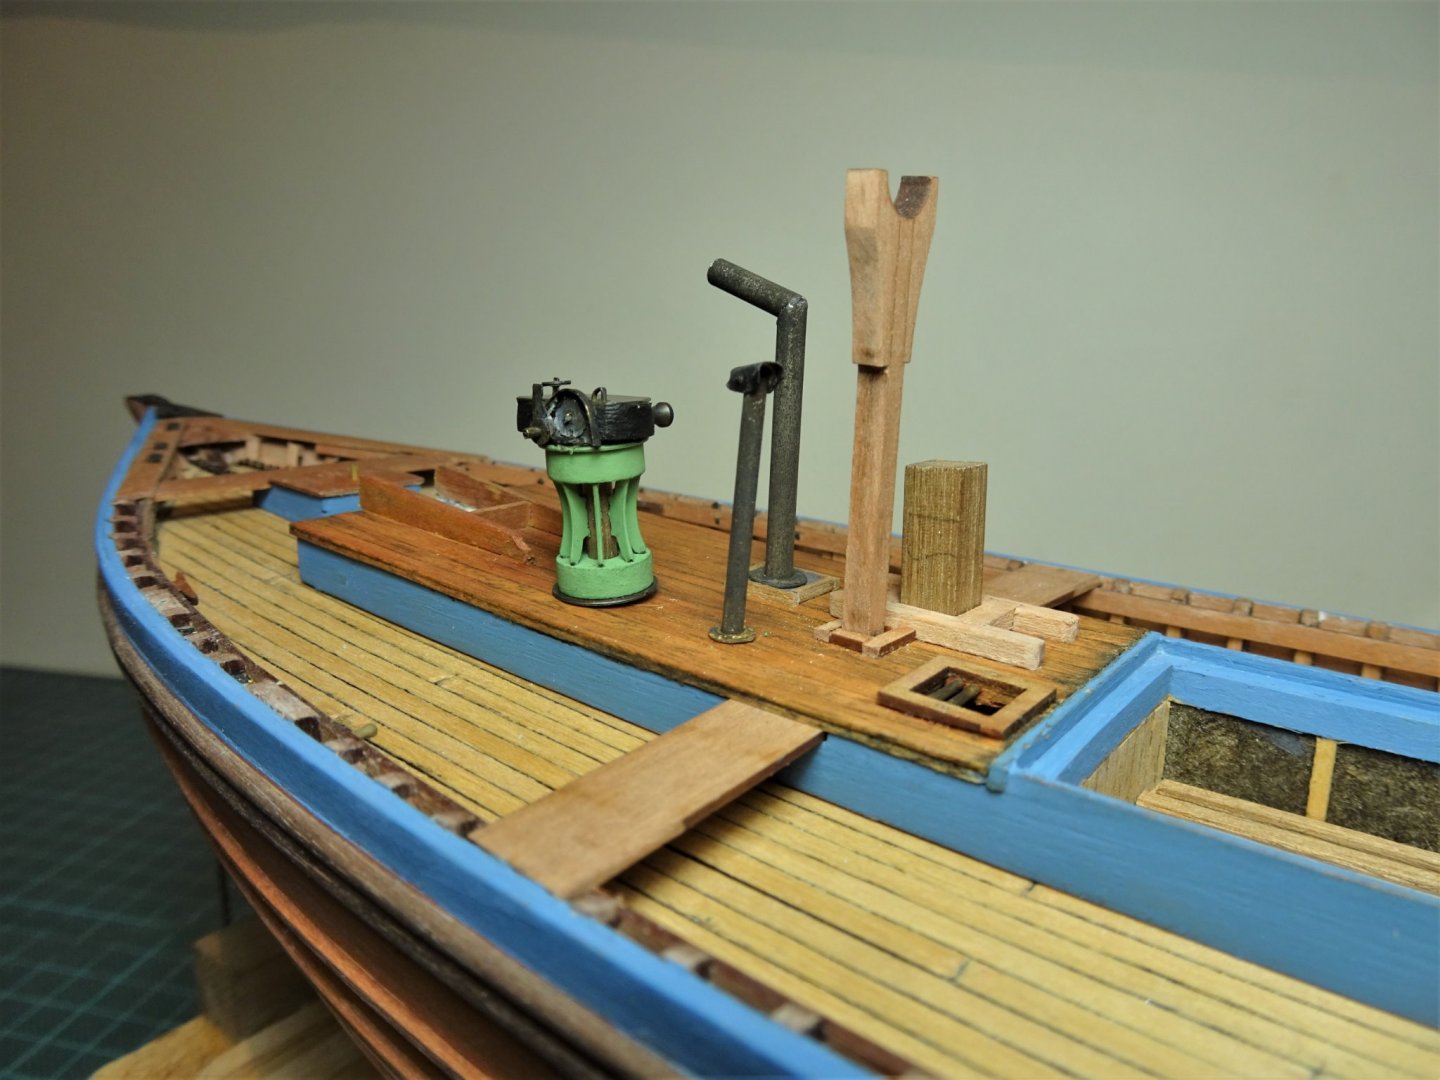
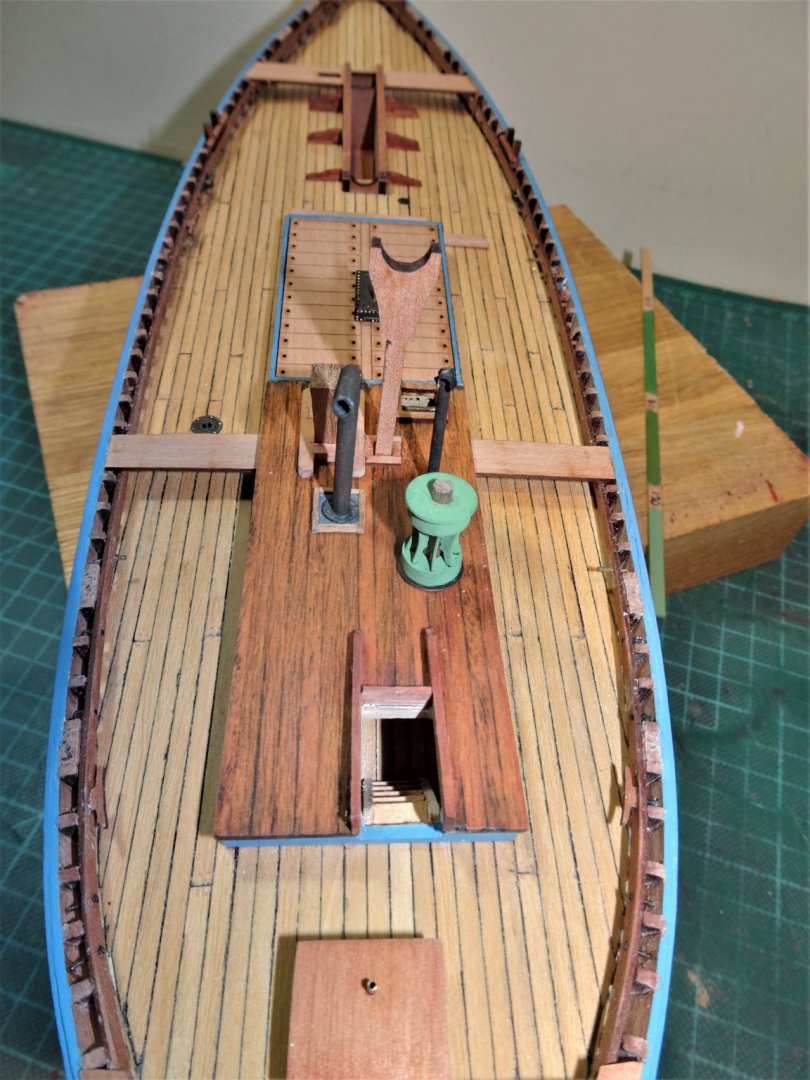
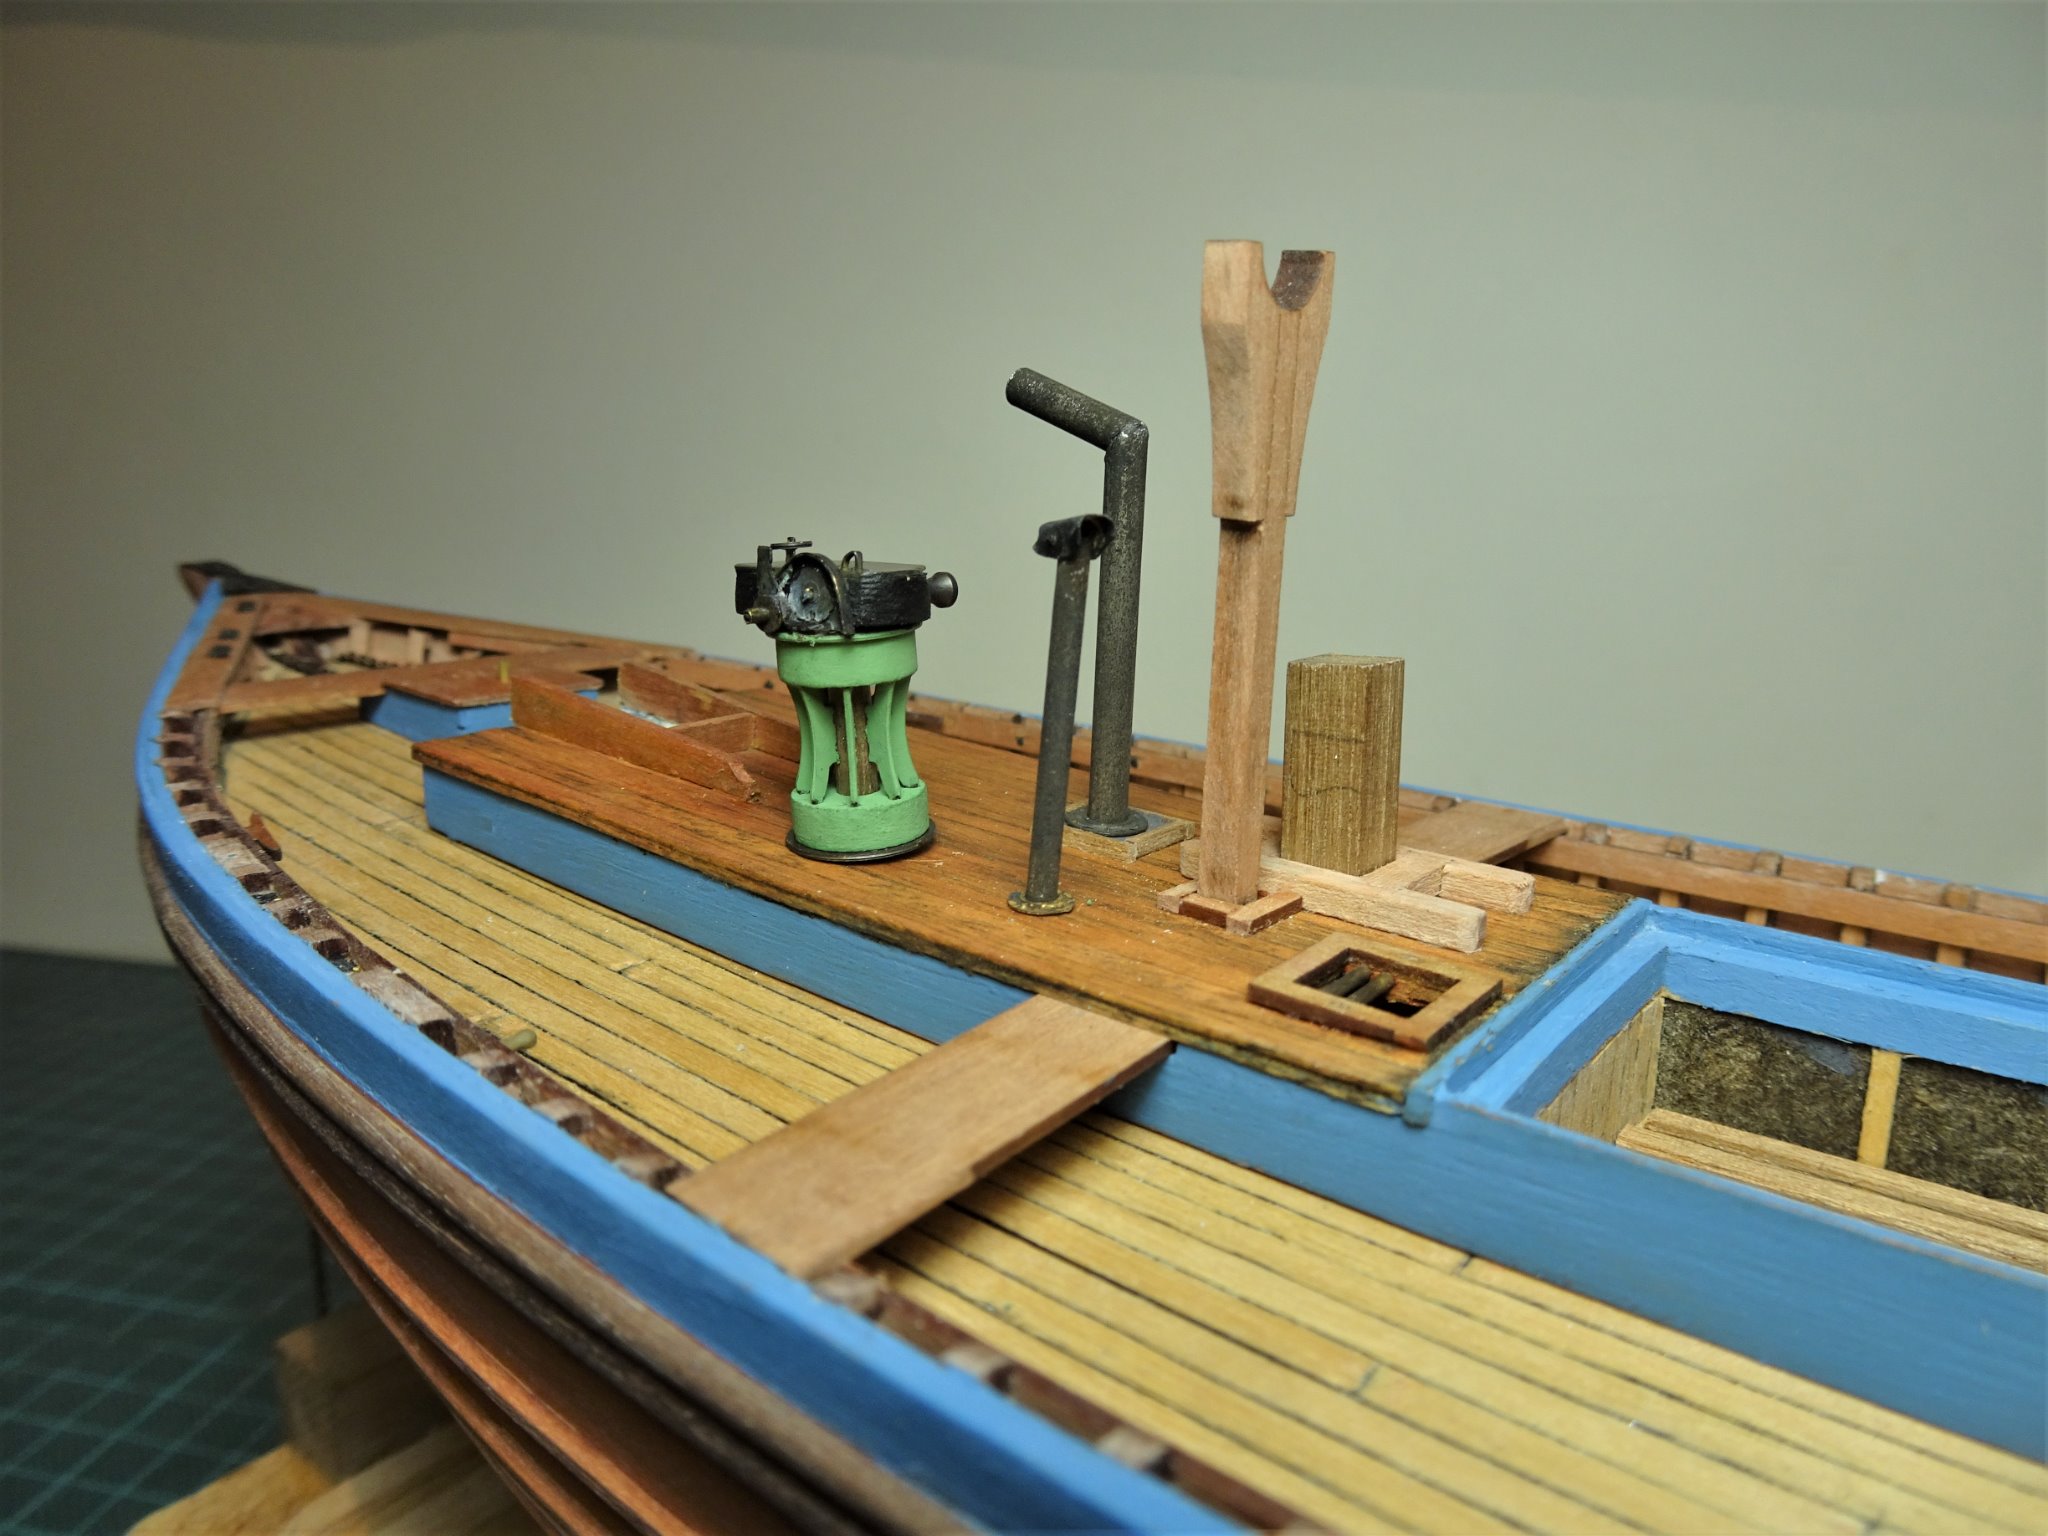
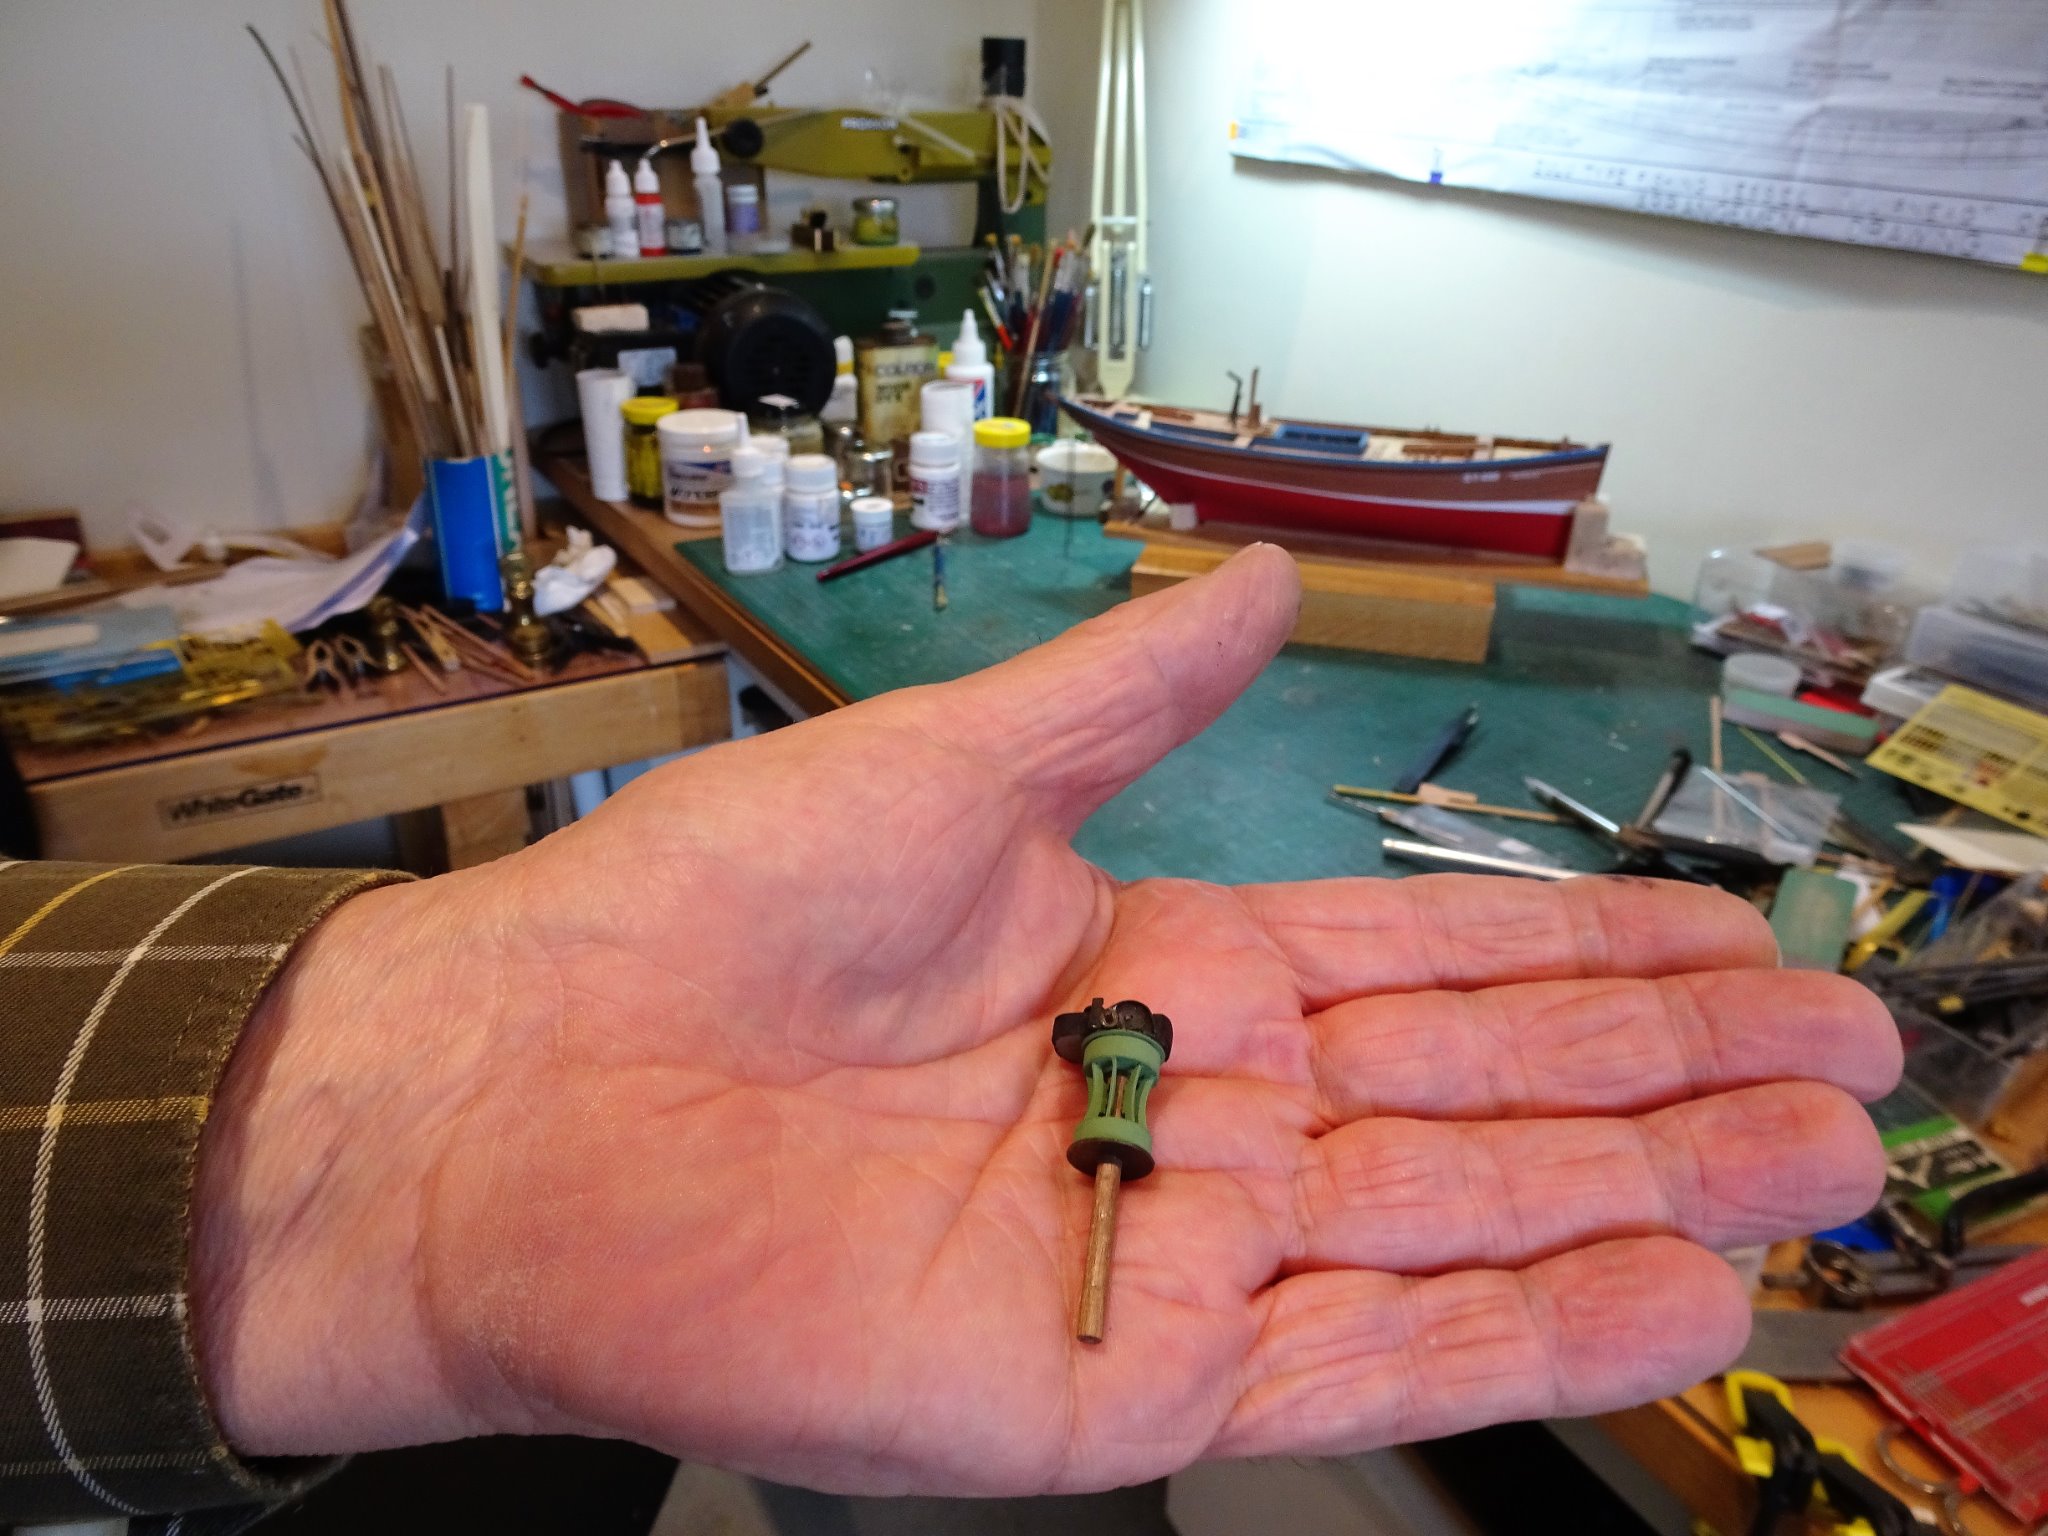
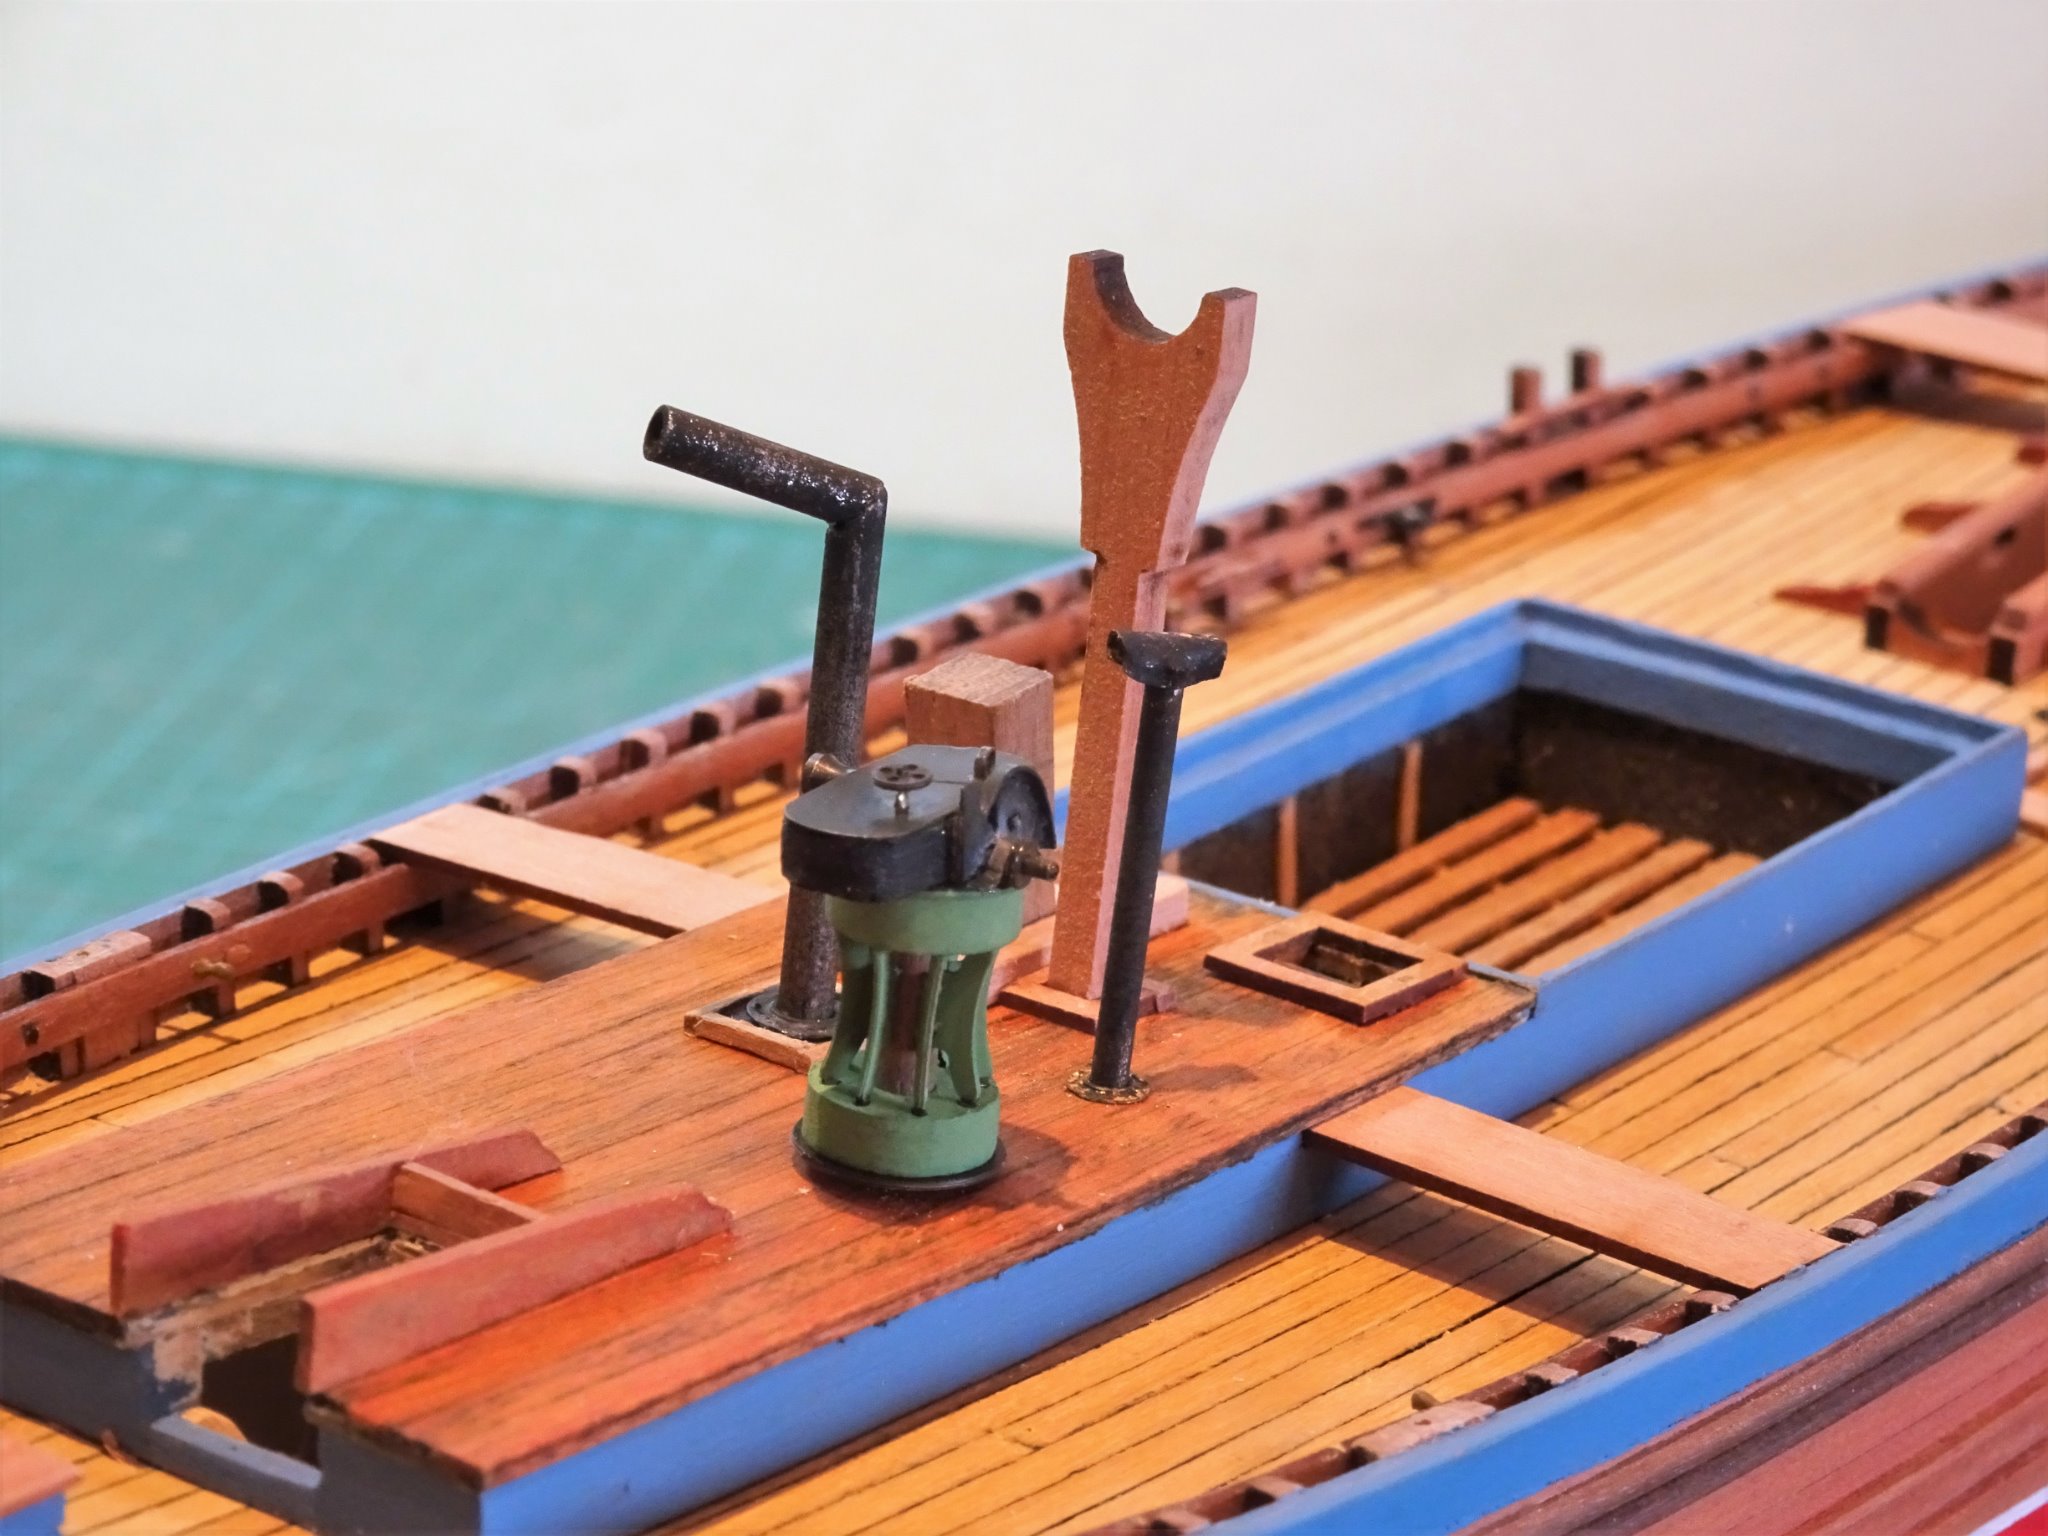
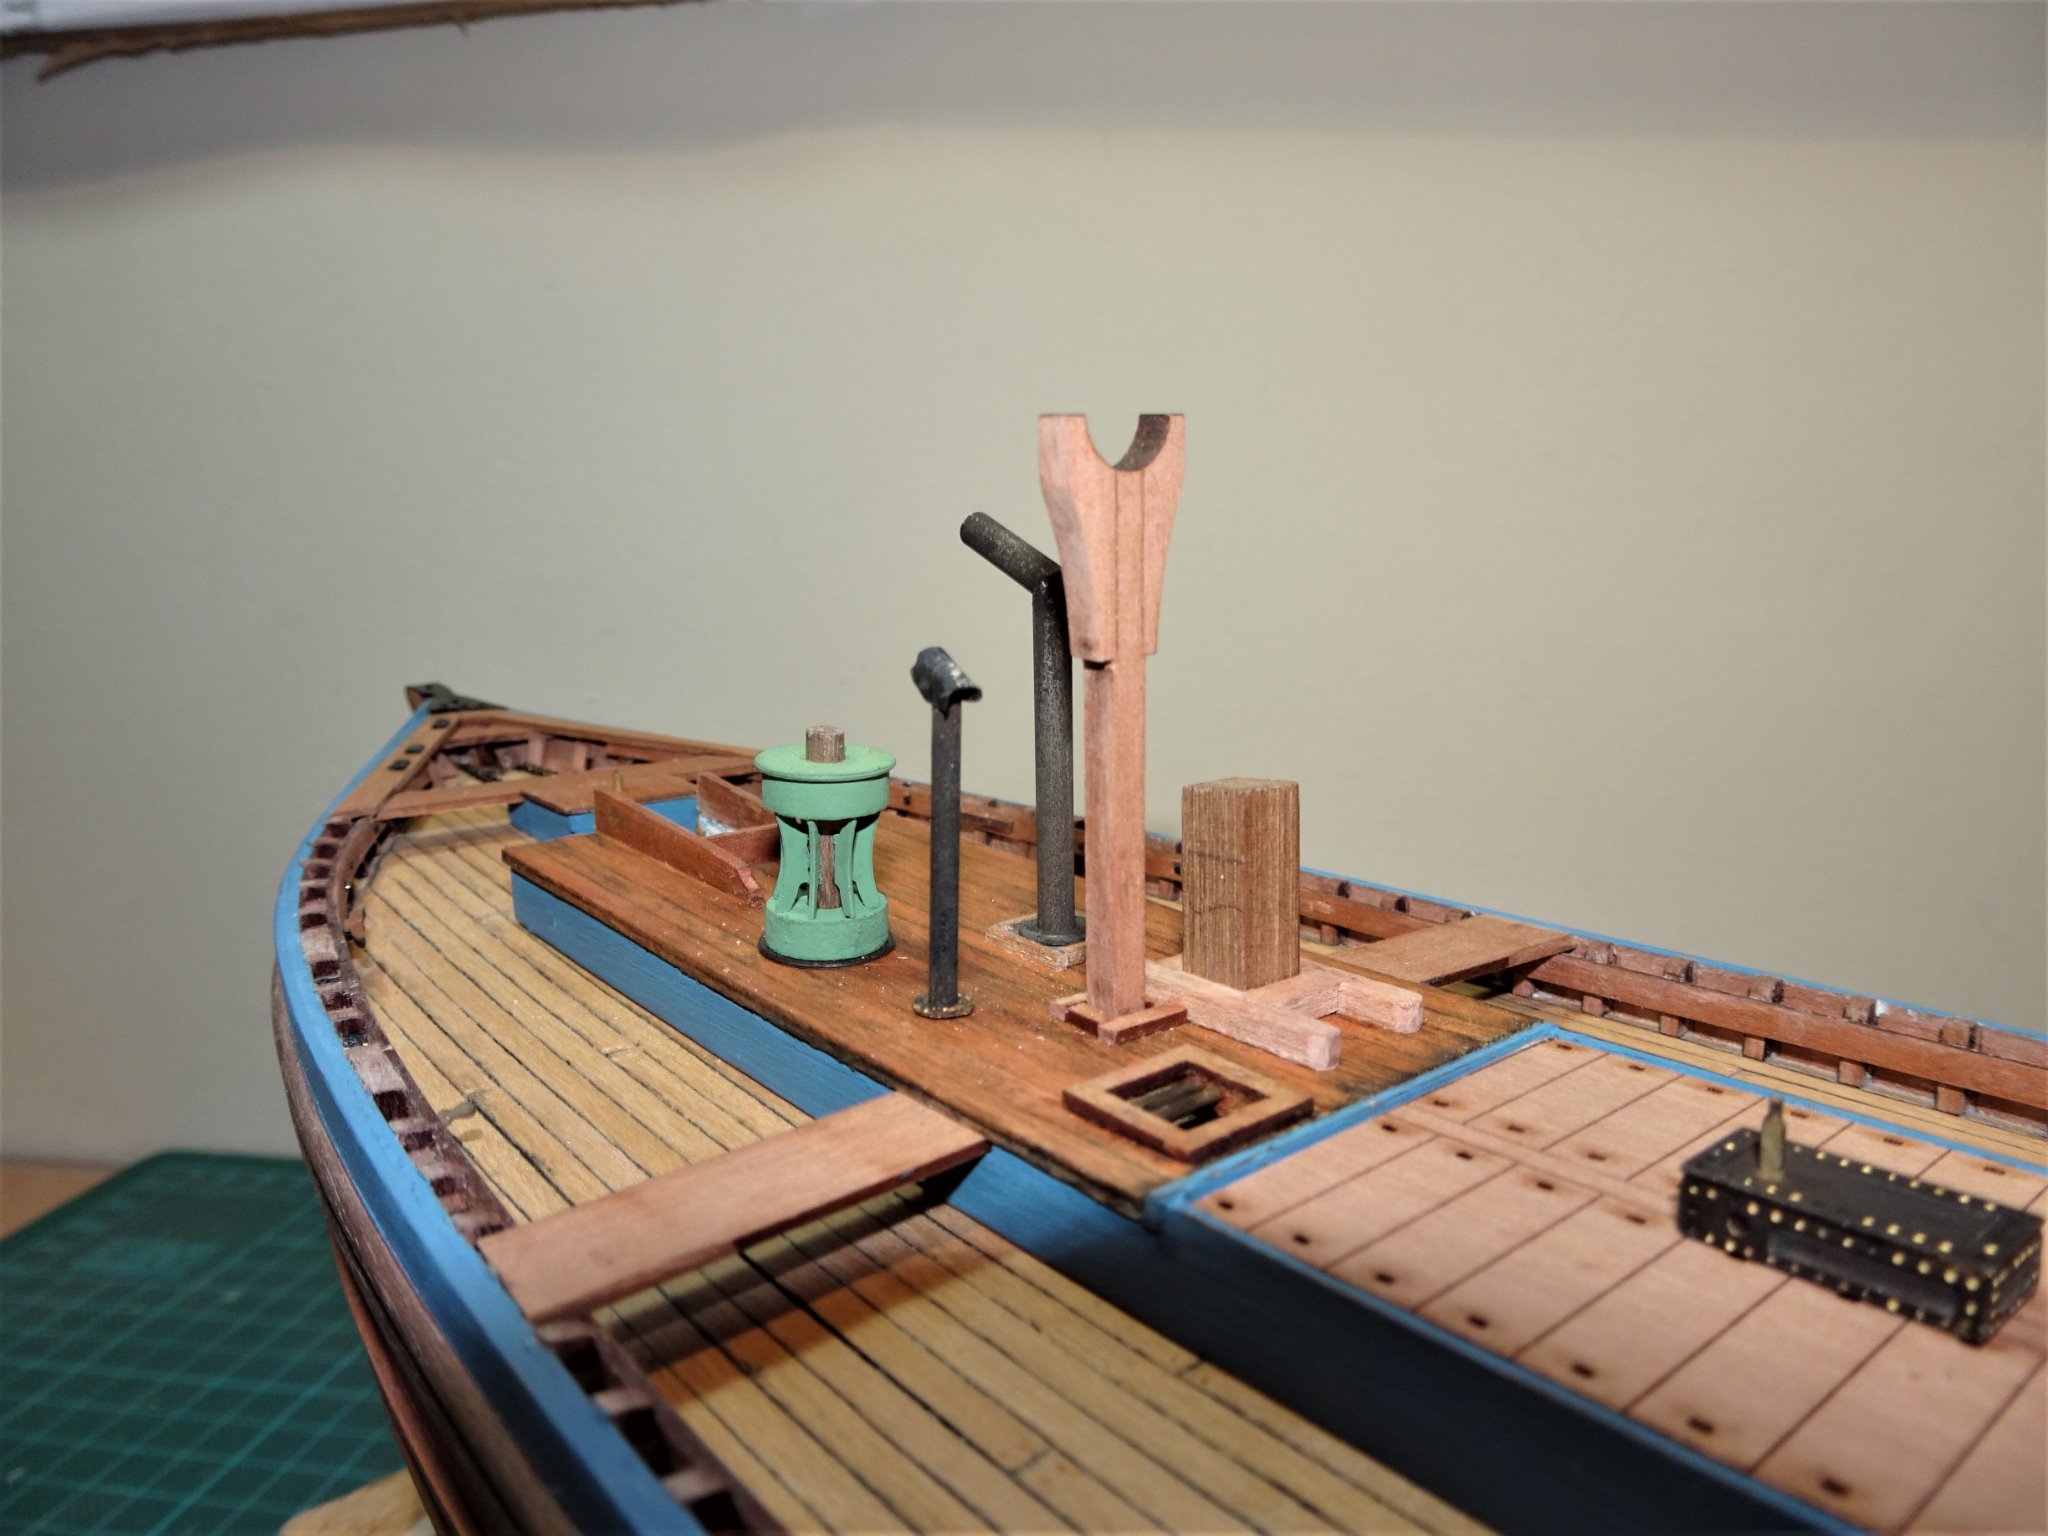
Post 29 Steam Capstan The primary fitting on the Poop is the steam capstan, an eye catching feature which also is supplied with the Fifie kit. Assembly is quite straightforward, built on a central spindle which represents the steam pipe running up the centre of the capstan. For the colour scheme I have used Humbrol enamel (120 Light Green.) I did chemically blacken the brass etch which provides a good primer for the paint. The steam capstan was introduced in 1884 by a company called Elliott and Garrood, a development that the crews of fishing boats must have been eternally grateful for when it came to raising that huge fore lug sail. 8296(3) There is however a difference to the gearbox detail on the Underhill plans, compared to the kit, confirmed by photo’s of Muirneag. Nothing to be lost by having a go to replicate the detail, if all else fails I can revert to the kit part. Working at 1:64 scale presents more of a challenge and the most difficult task is fabricating the gear wheel guard. Here once again 0.20mm brass fret came into use. The pattern was cut out and a piece of narrow strip was silver soldered around the edge. 8299(2) The Blu tack holds the parts in position for soldering. 8304(2) This turned out far better than I thought it might and resulted in a strong bond. 8352(2) 8358(2) The gearbox casing is chemically blackened. 8328 The large gear wheel was made from the brass etched end of a depth charge. 8376 8383(2) 8368 8342 This completes the Poop deck fittings for the present. B.E. 26/10/20
.thumb.JPG.a5f36dfcecebd77b3549cea9c22093cb.JPG)
.thumb.JPG.bca331c411e3fc08398a45fddf630e1e.JPG)
.thumb.JPG.5cef92d42f0ab066c5cc56fffc80b32b.JPG)

.thumb.JPG.fcae0b61b176d1823812c8588bfc02de.JPG)
.thumb.JPG.666e15498ad66b8b329c7dbb751169b0.JPG)


.thumb.JPG.94b8378caee15c728b5169ed86b9af85.JPG)
- 261 replies
-
- 18
-
-
- muirneag
- vanguard models
- (and 2 more)
-
I don’t own any other micro chisels Glenn, but these are fairly cheap to buy, the blades do hold their edge, can be re- sharpened, and are easy to replace. At the scales I work at they are a useful addition. B.E.
- 261 replies
-
- 1
-
-
- muirneag
- vanguard models
- (and 2 more)
-
Fifie steam capstan - for hauling nets, sails or both?
Blue Ensign replied to Rik Thistle's topic in Nautical/Naval History
I think you are correct Richard. The steam capstan was introduced in 1884 by a company called Elliott and Garrood. It must have been a boon to the crews of fishing boats when raising those huge lug sails.. I have also read that it was used to assist in hauling the nets, no surprise given that the nets could stretch for half a mile; must have been quite a drag when they were full of fish. B.E. -
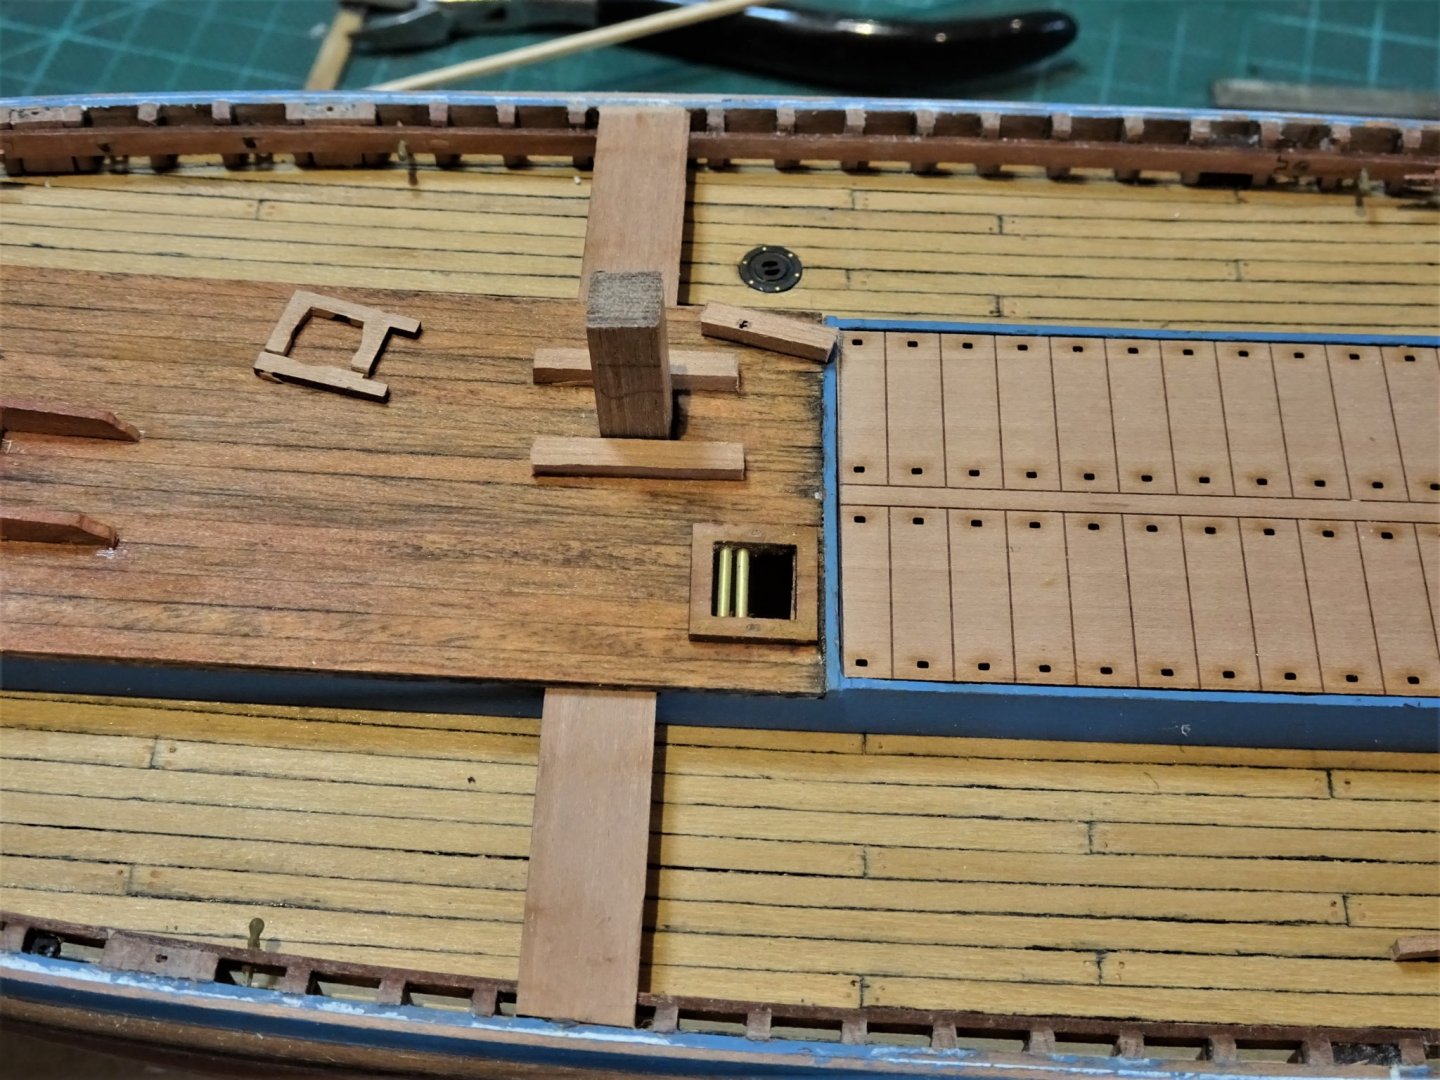
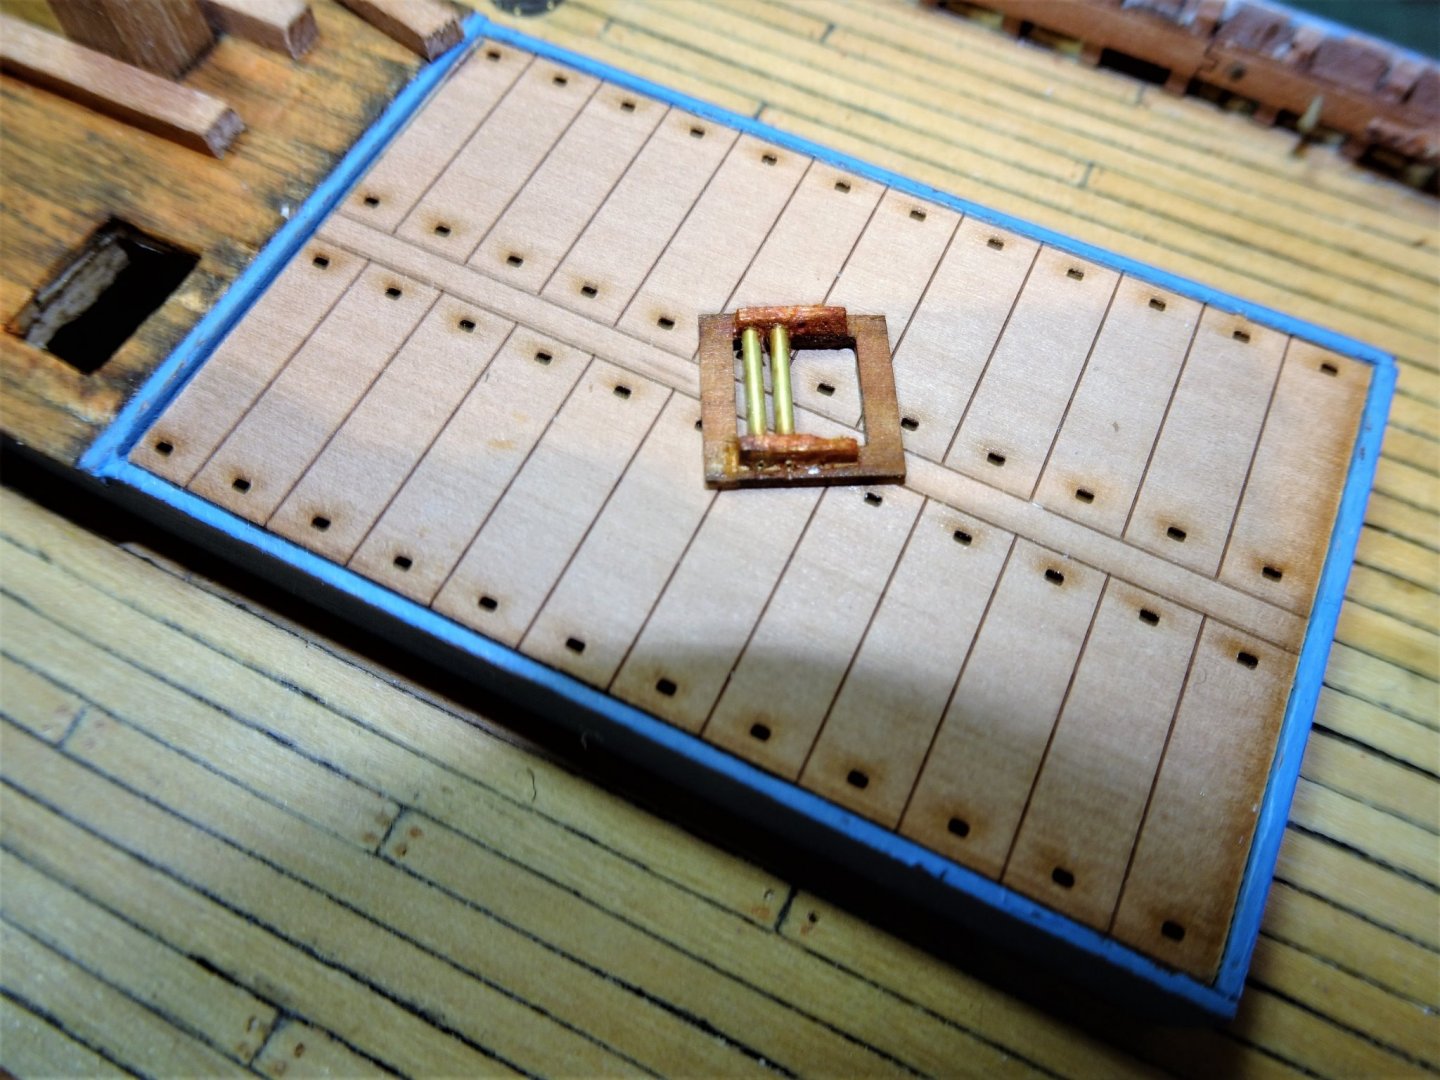
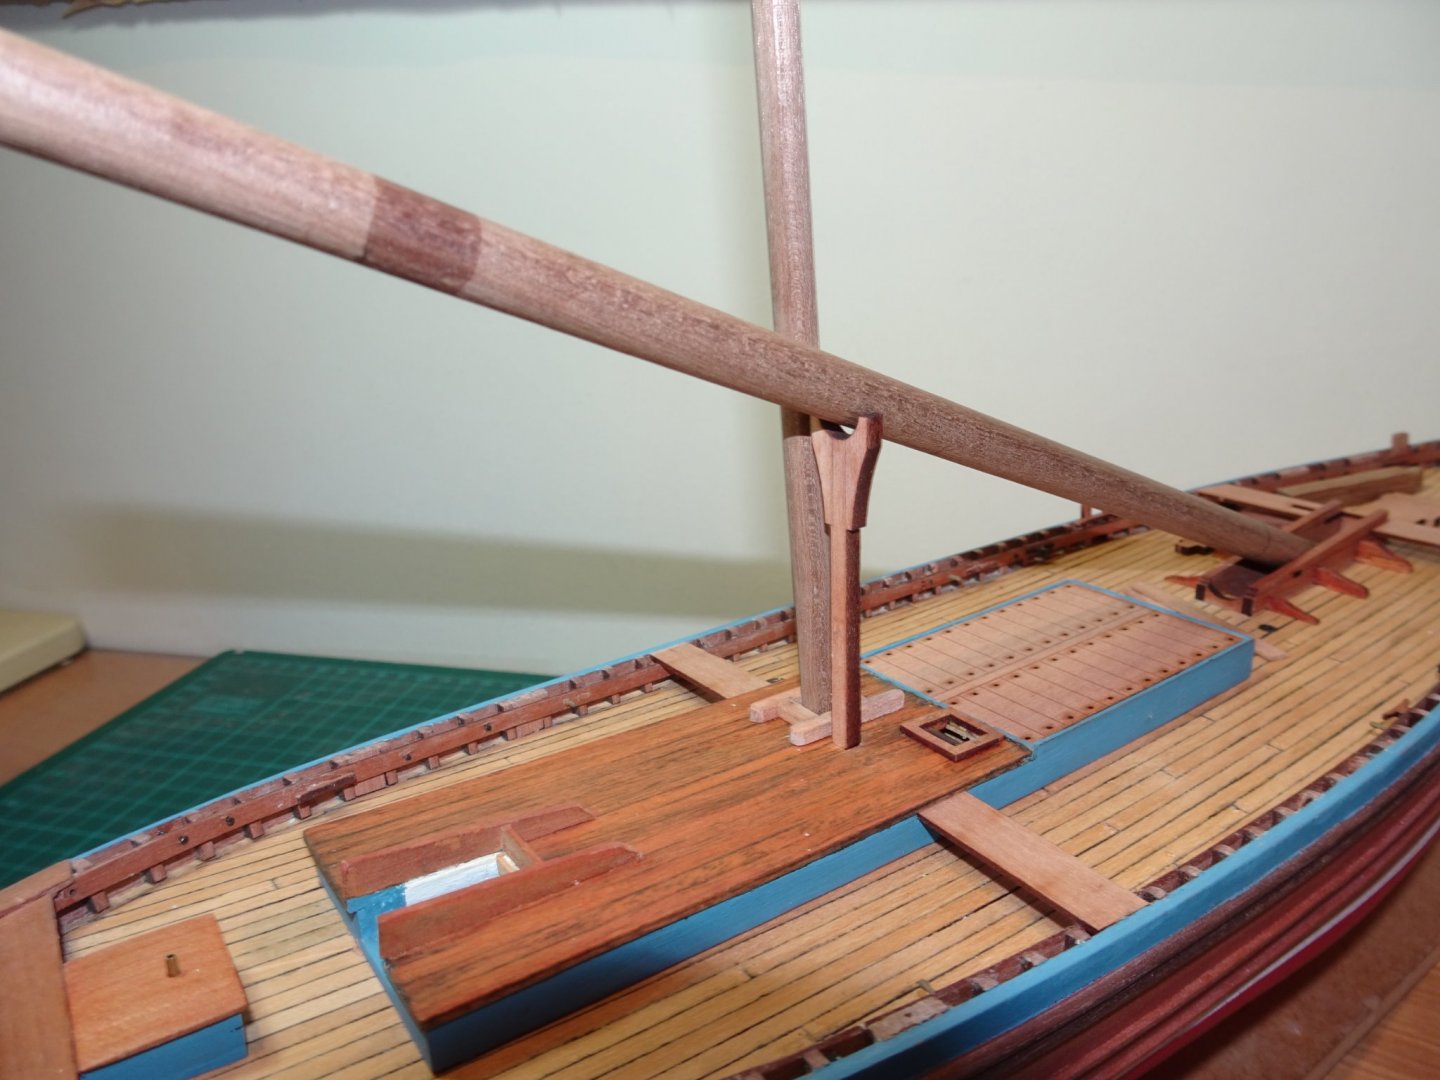
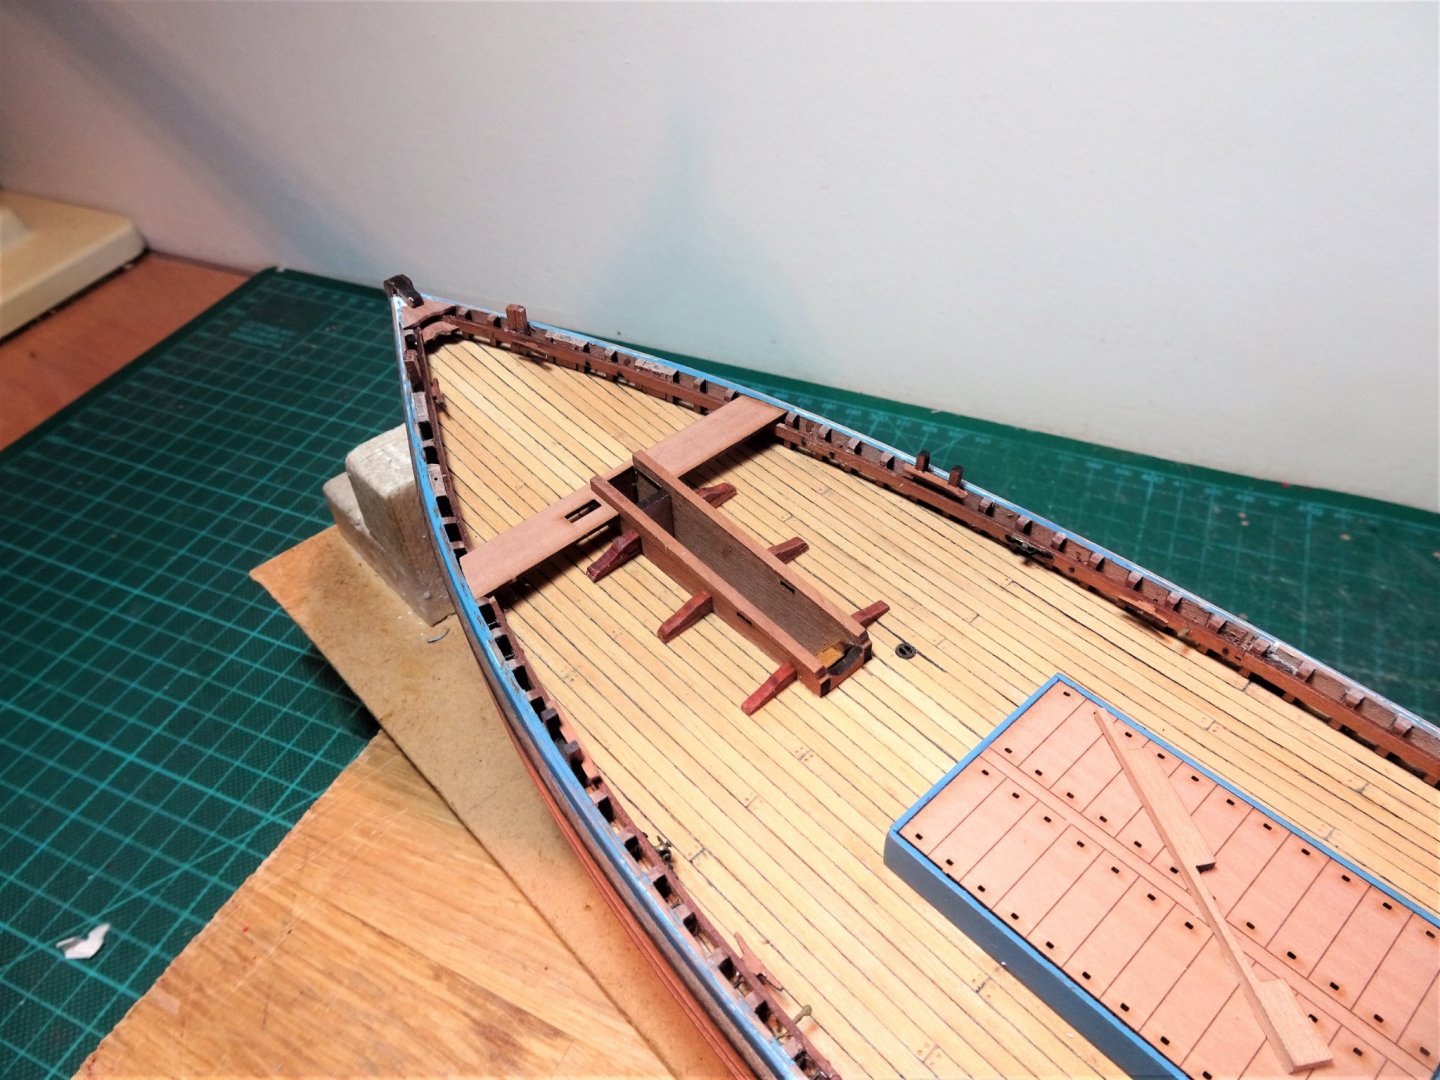
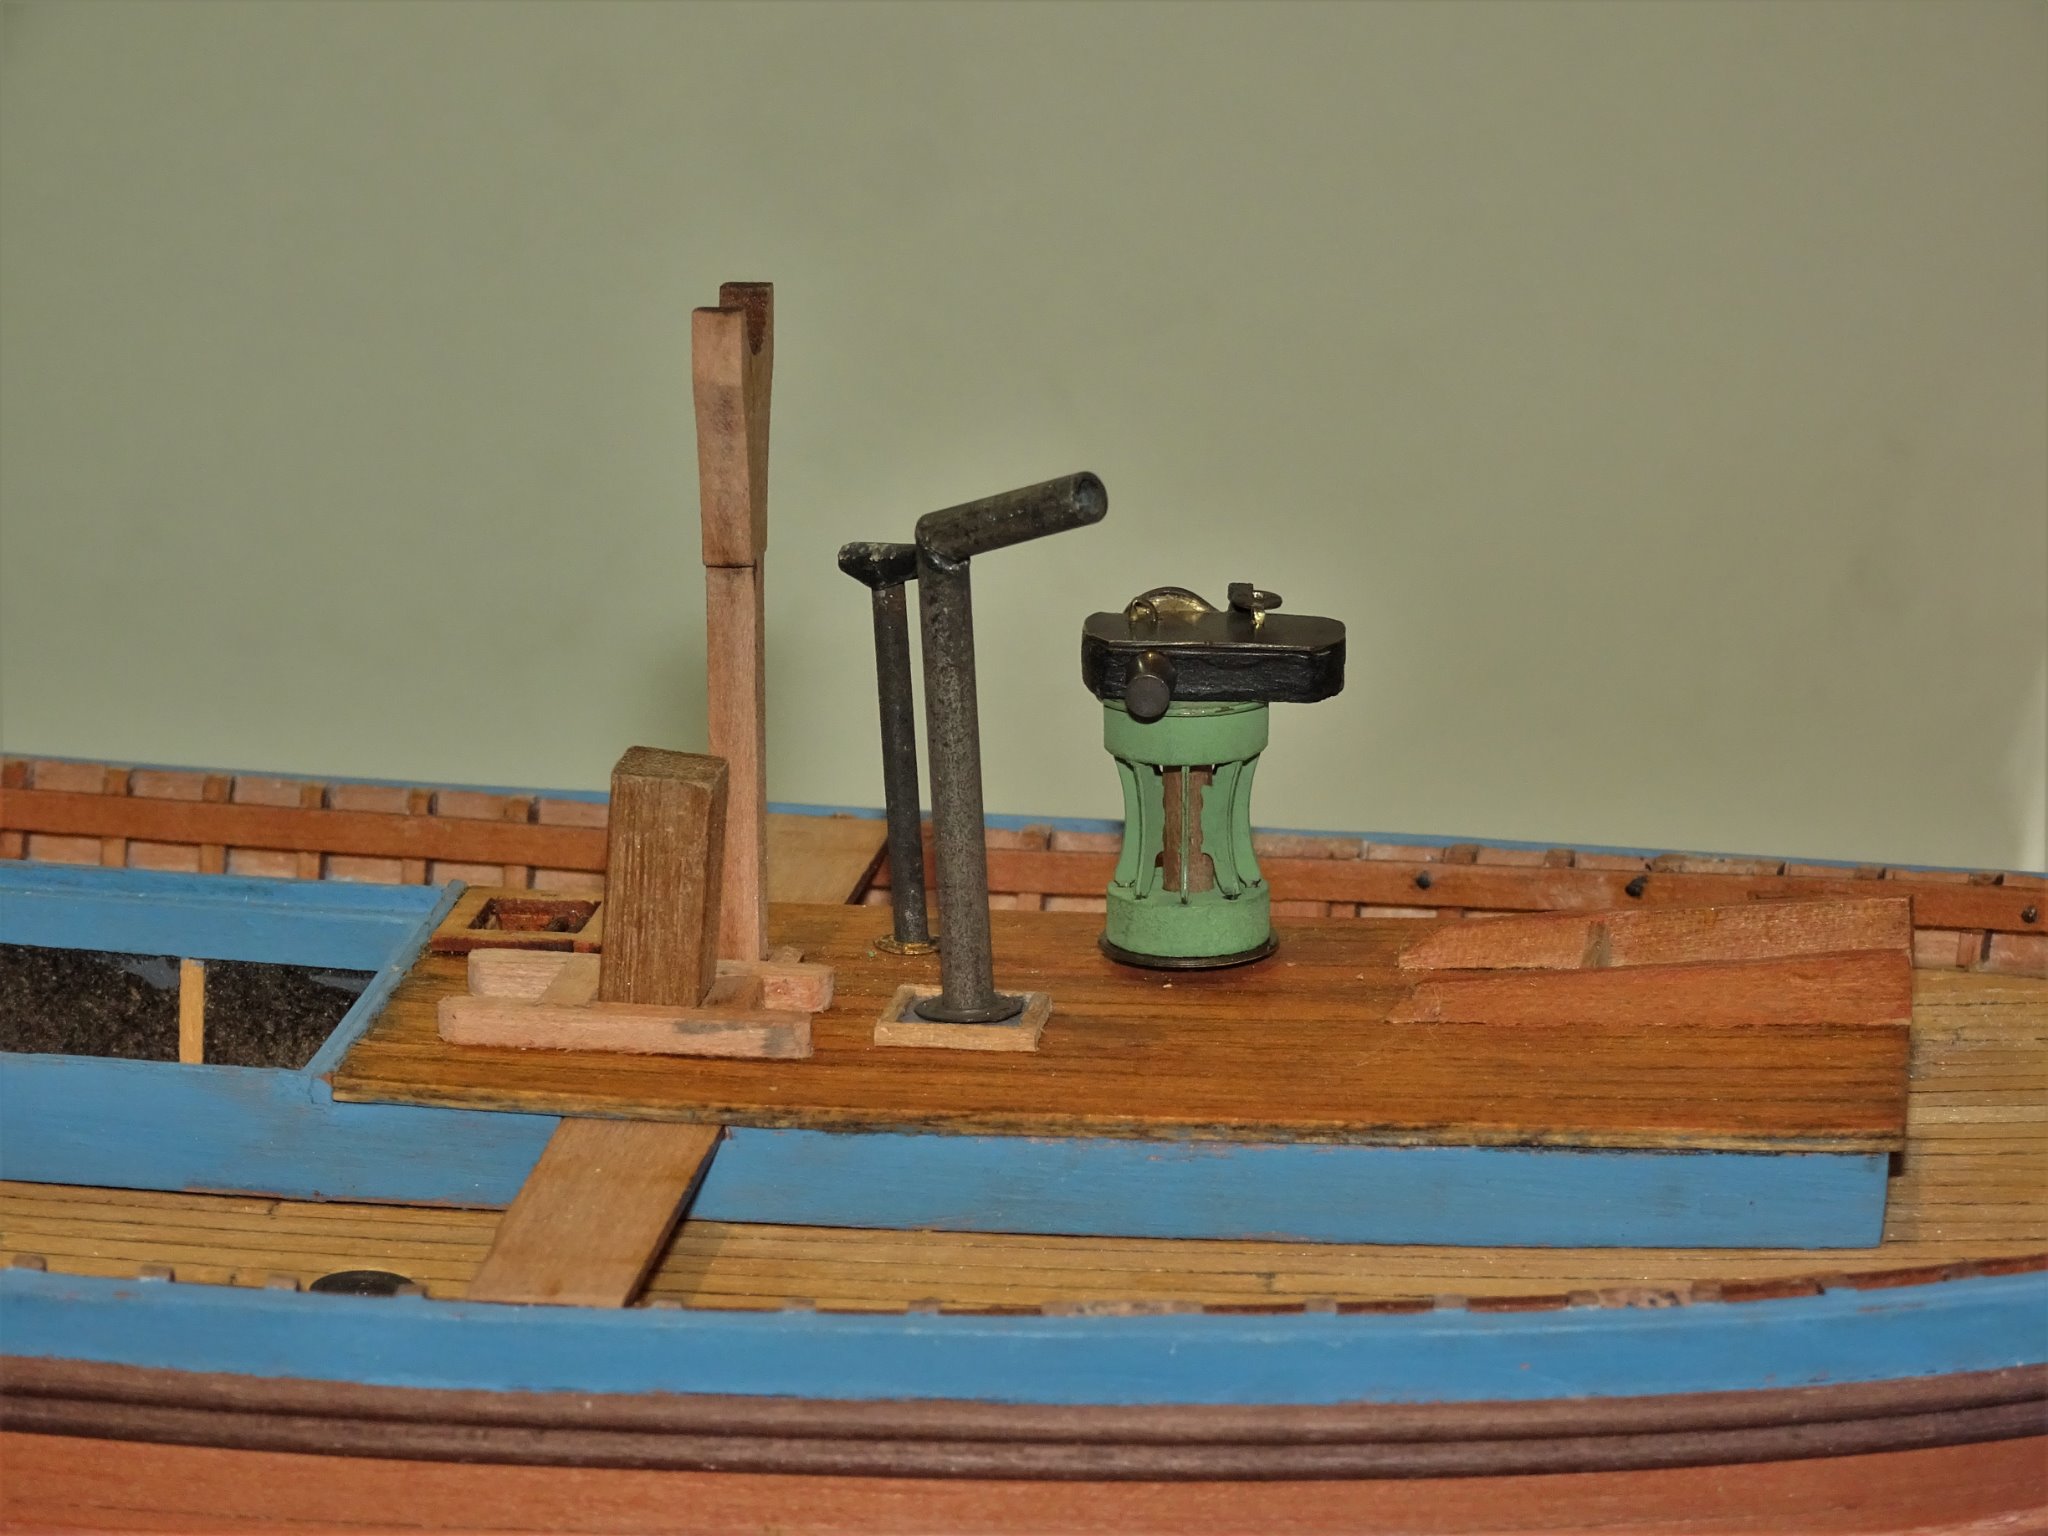
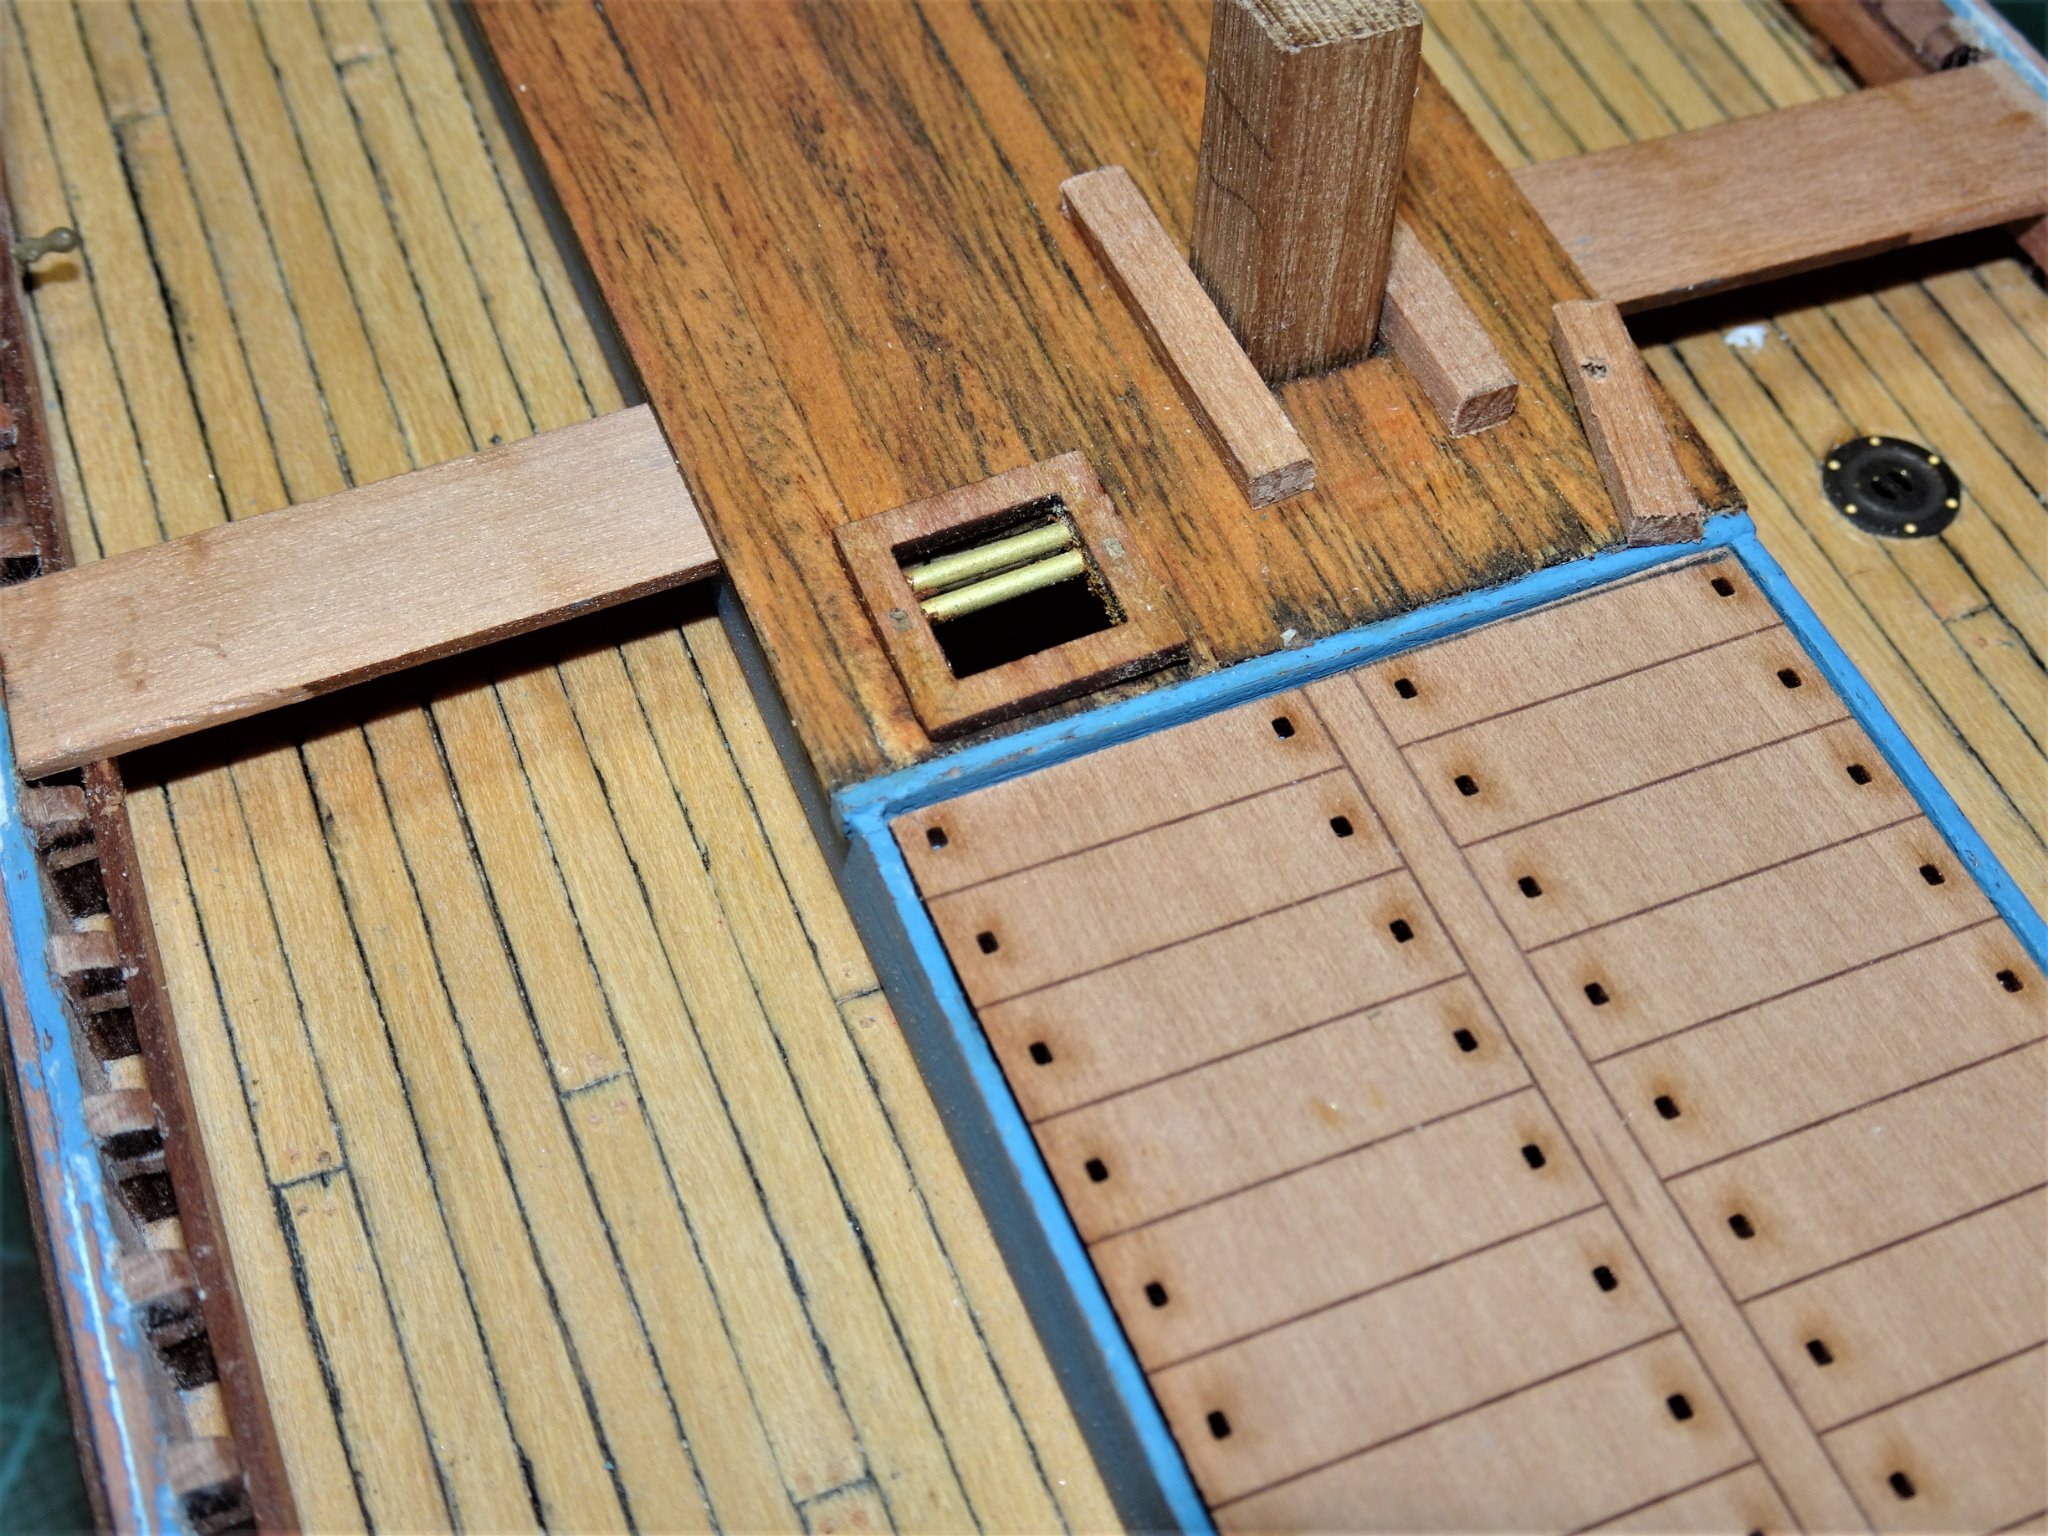
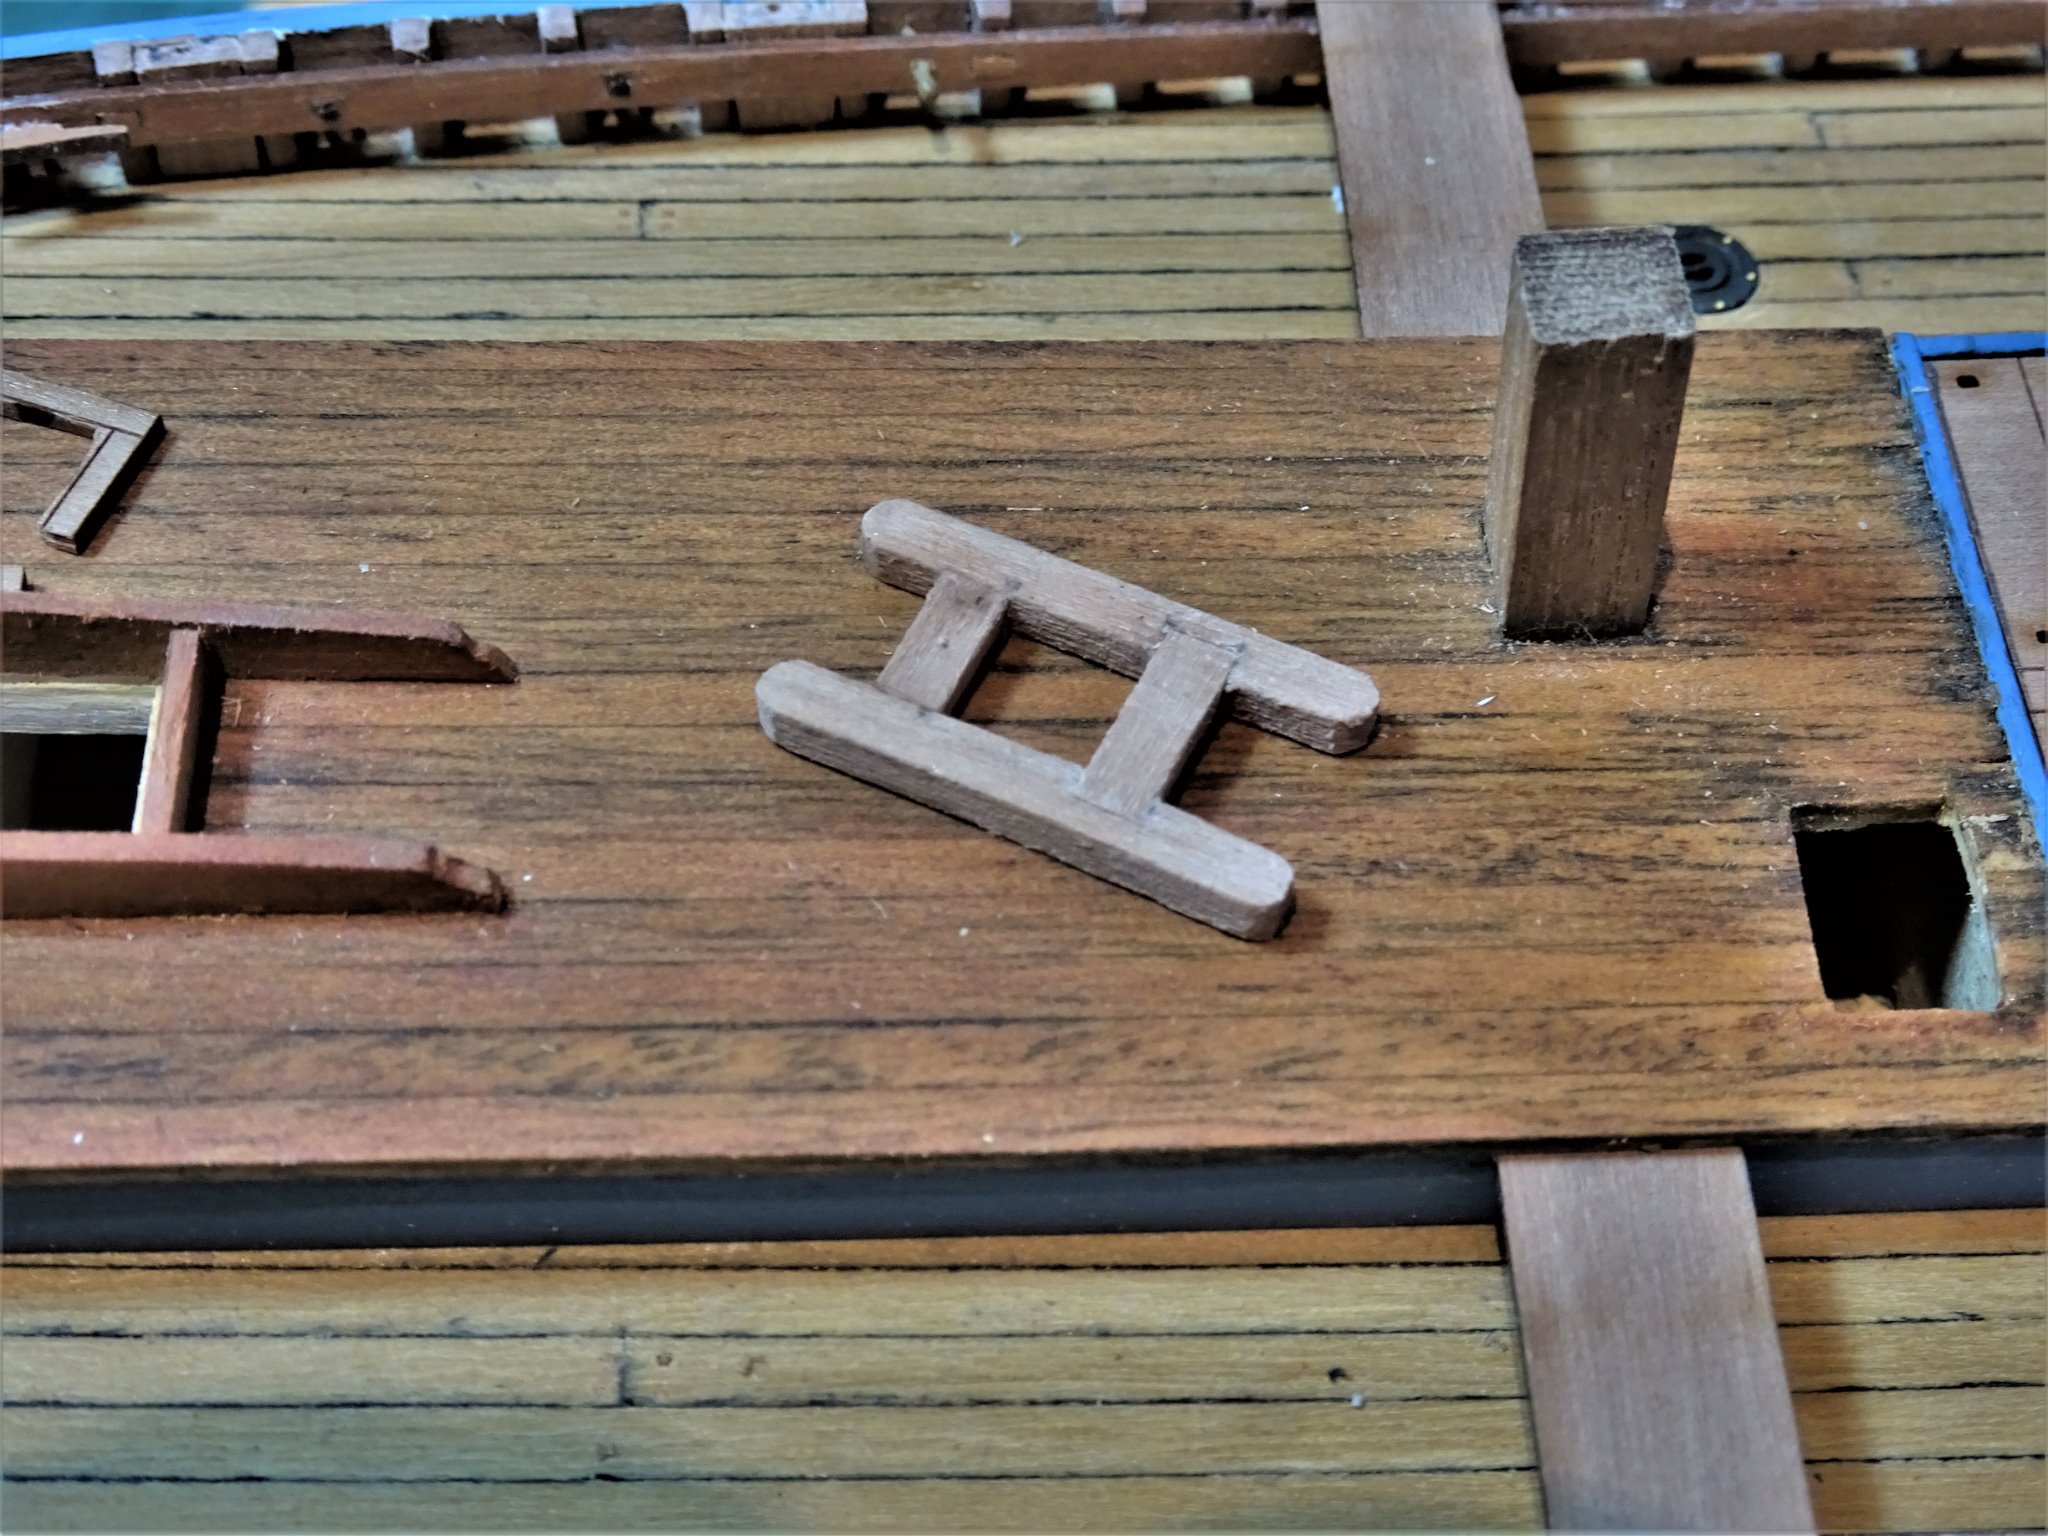
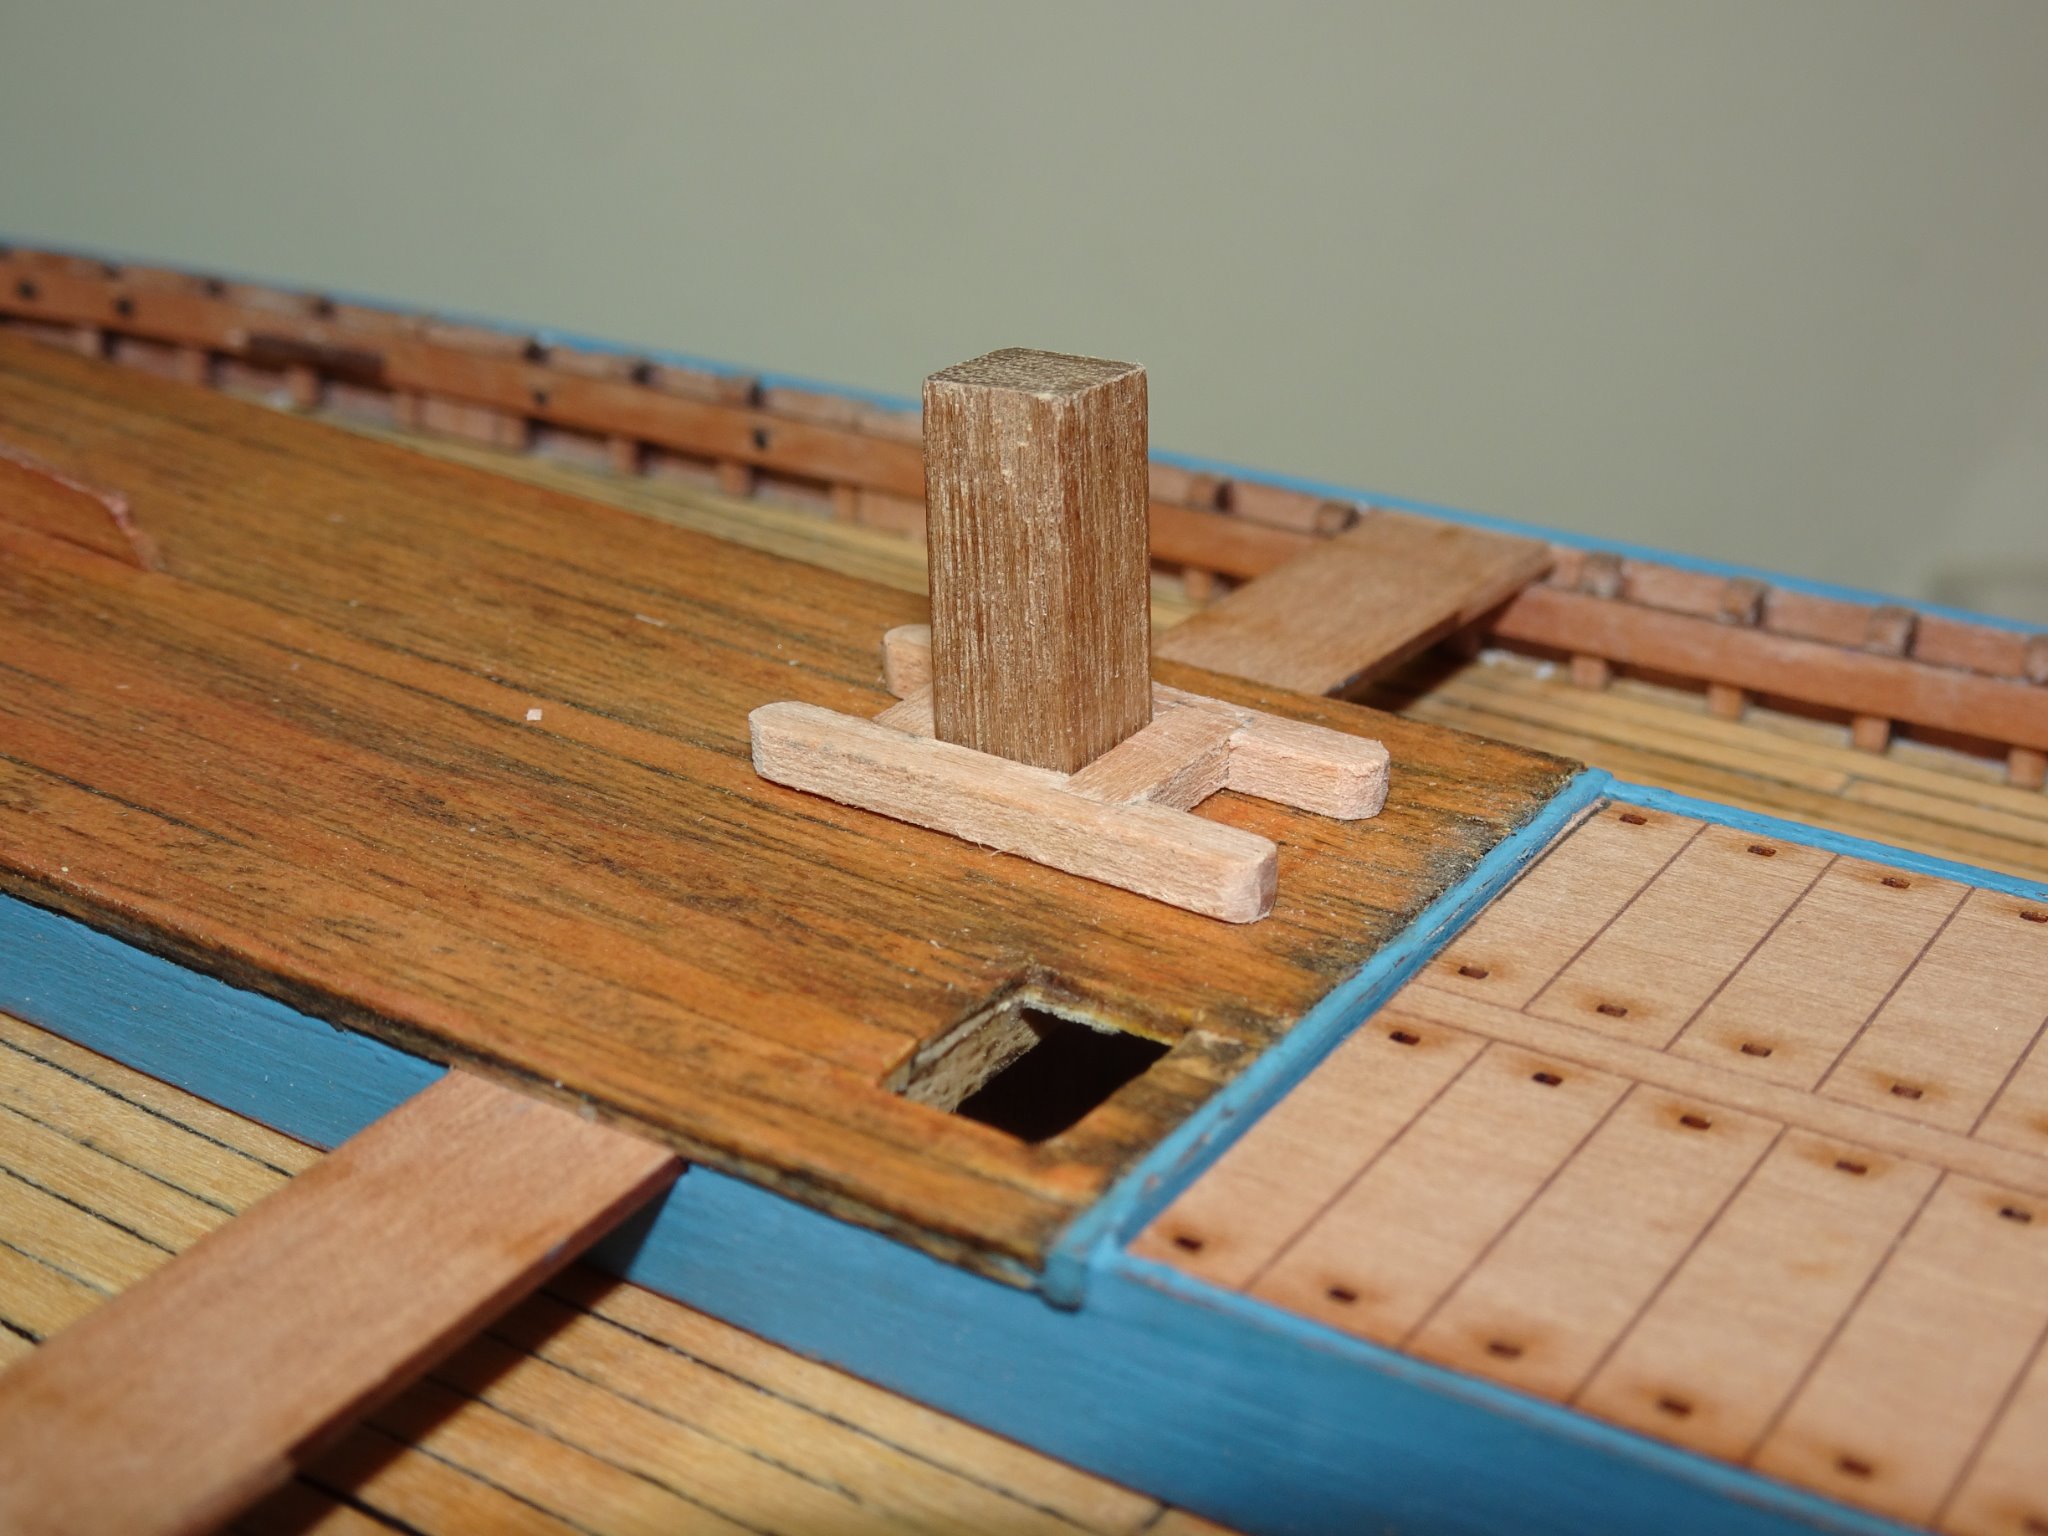
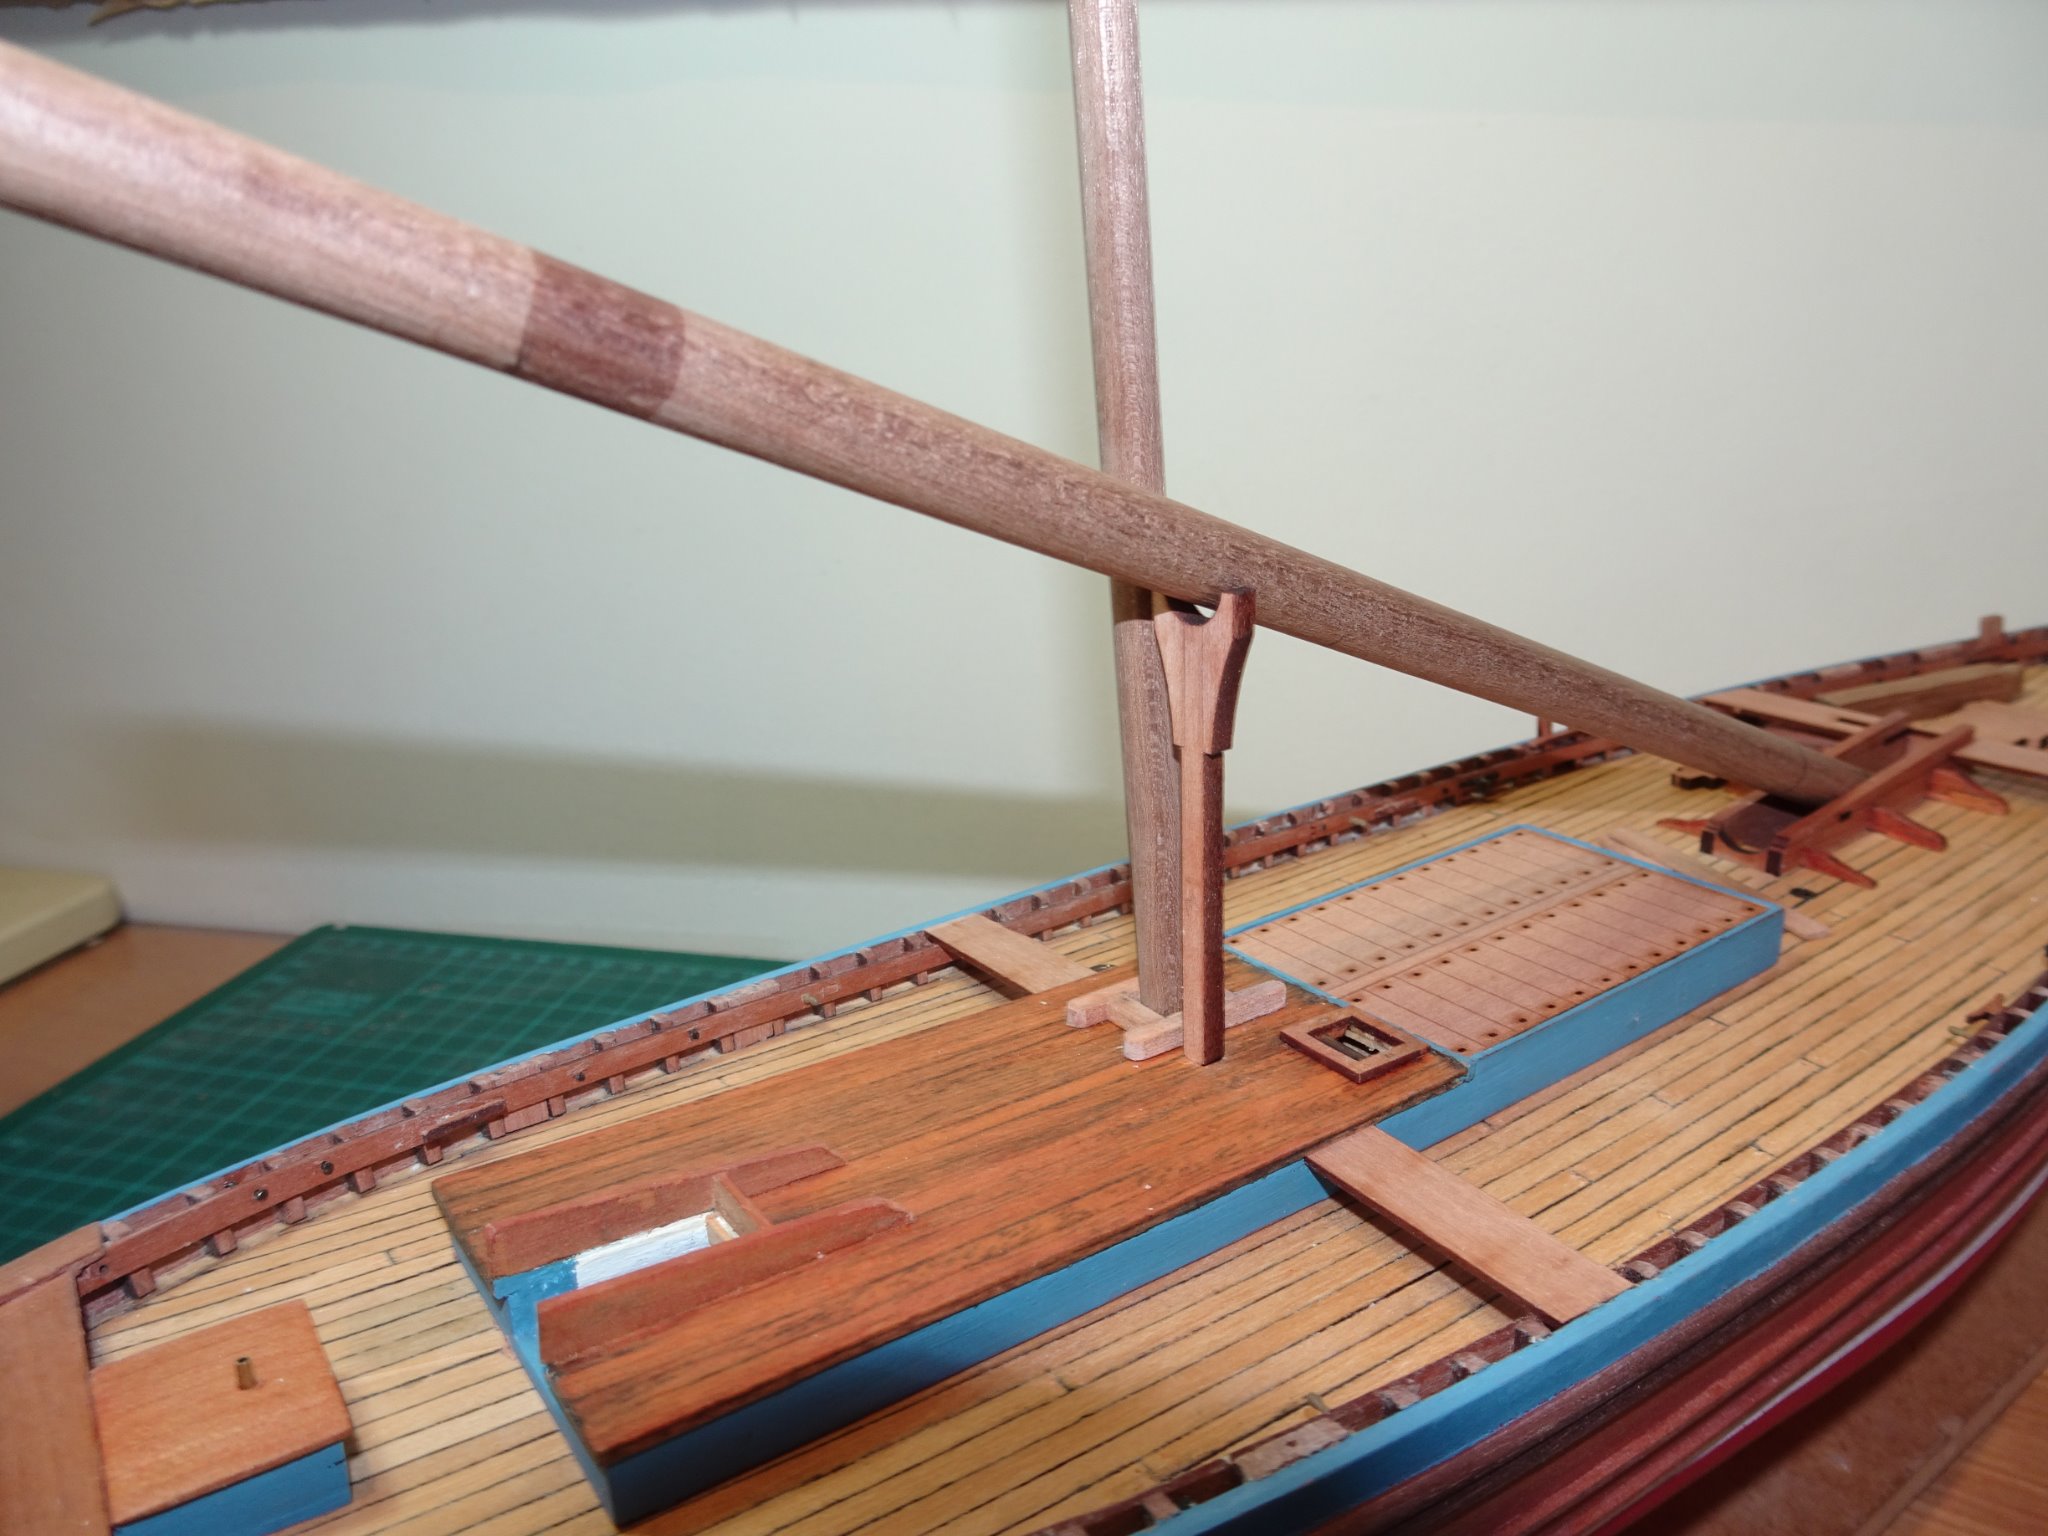
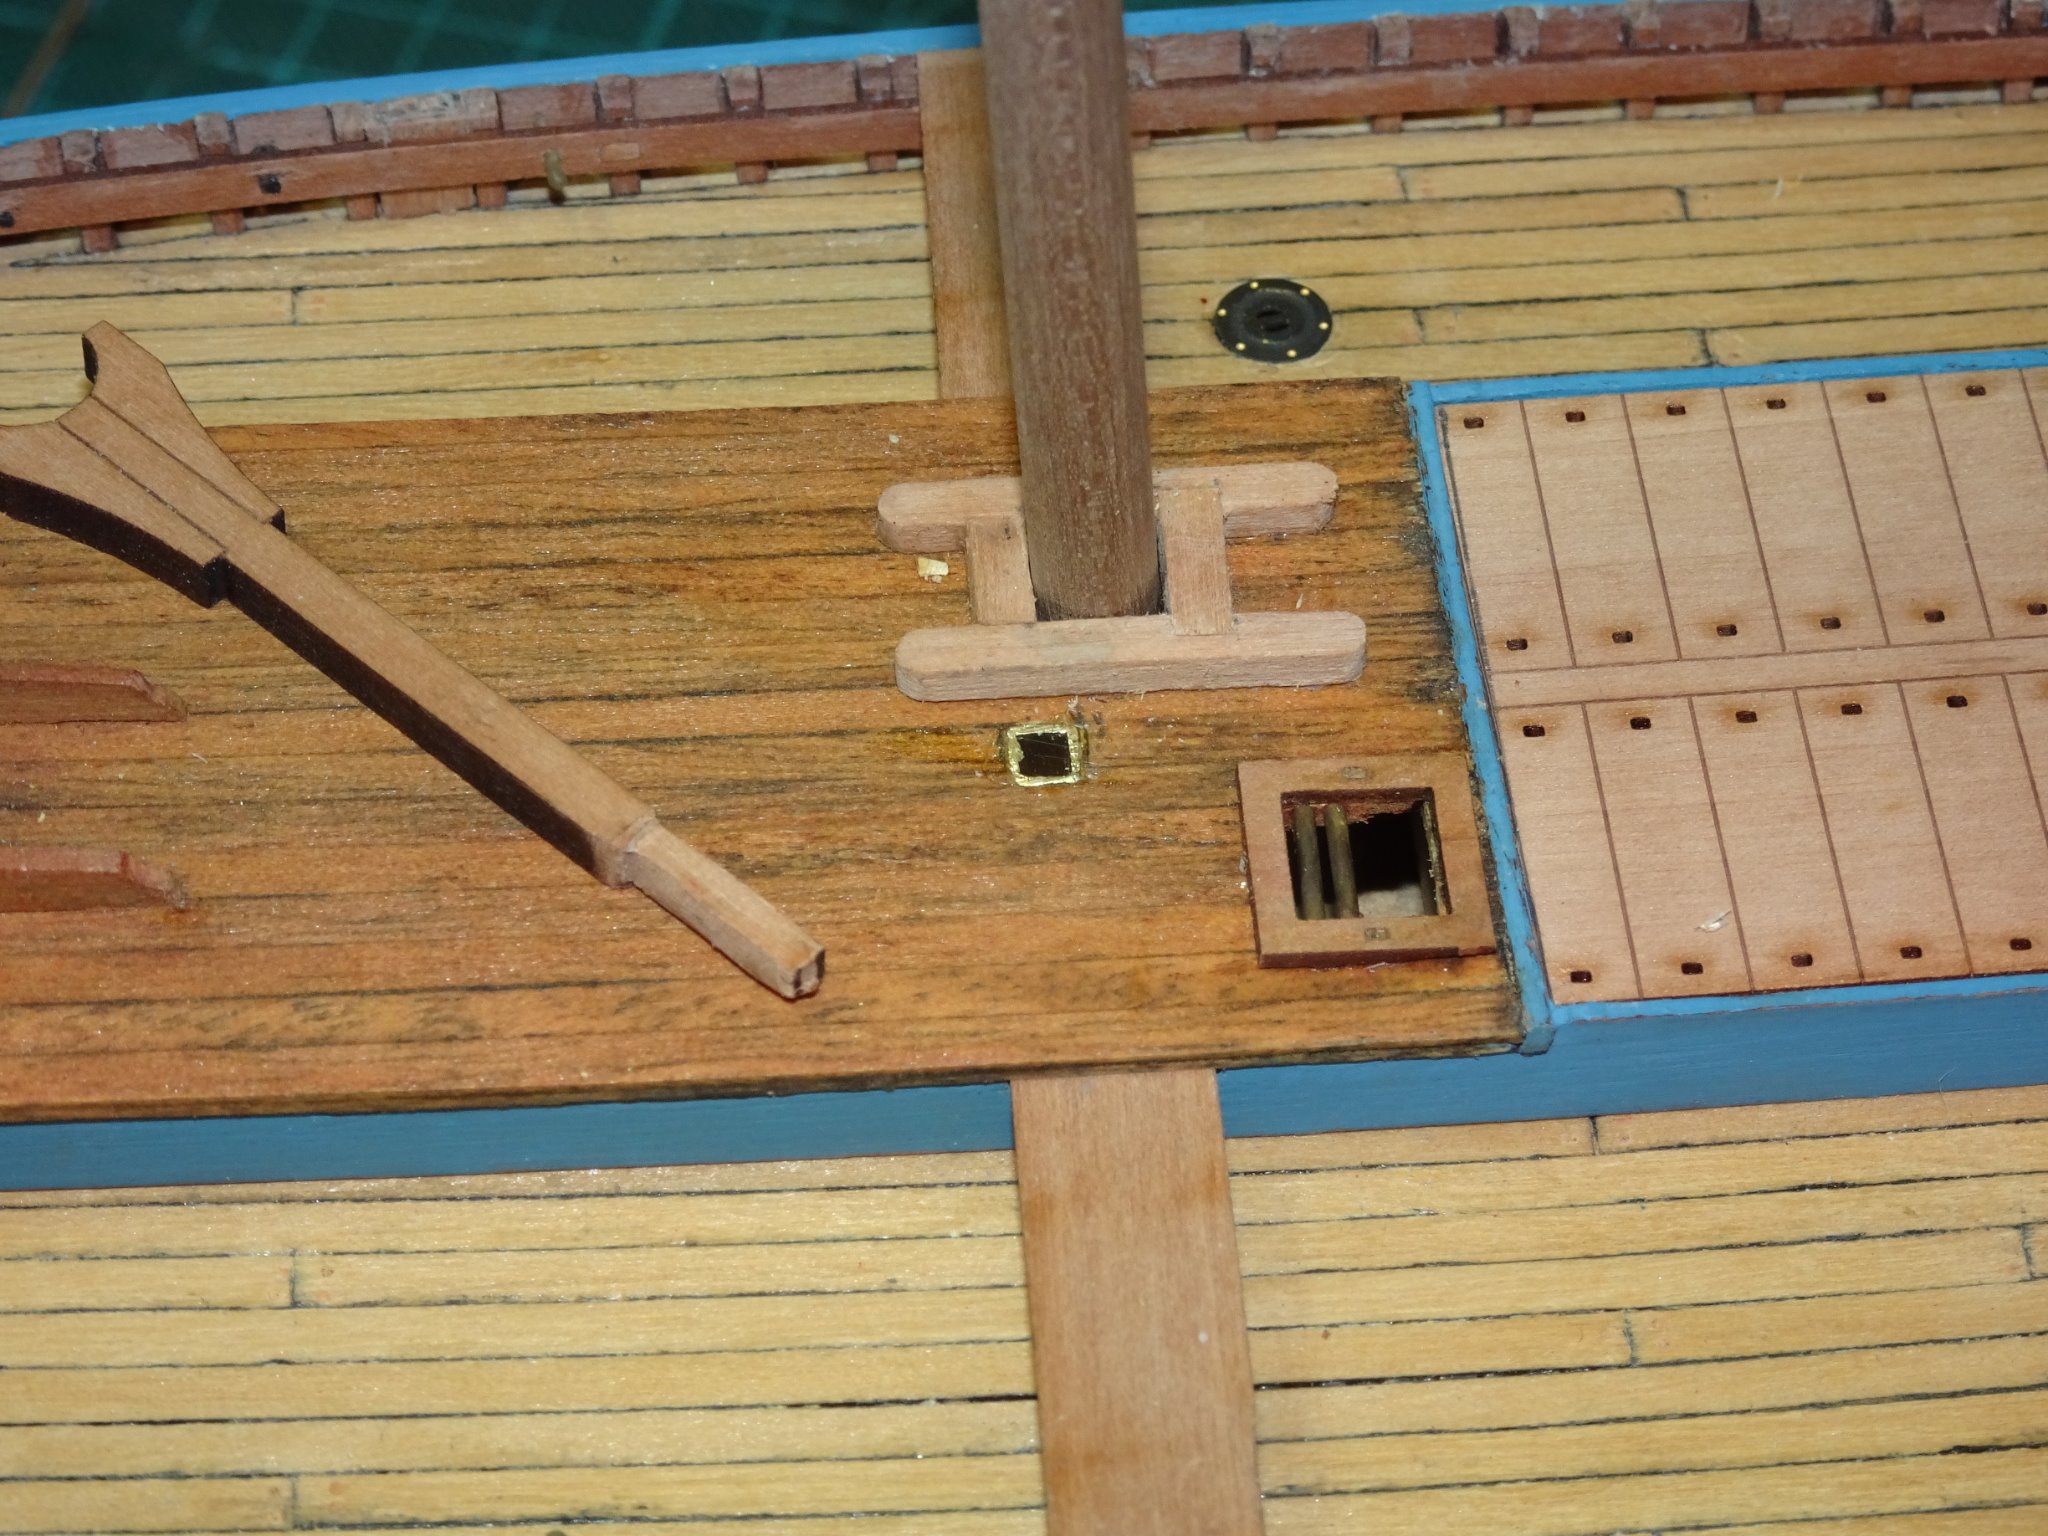
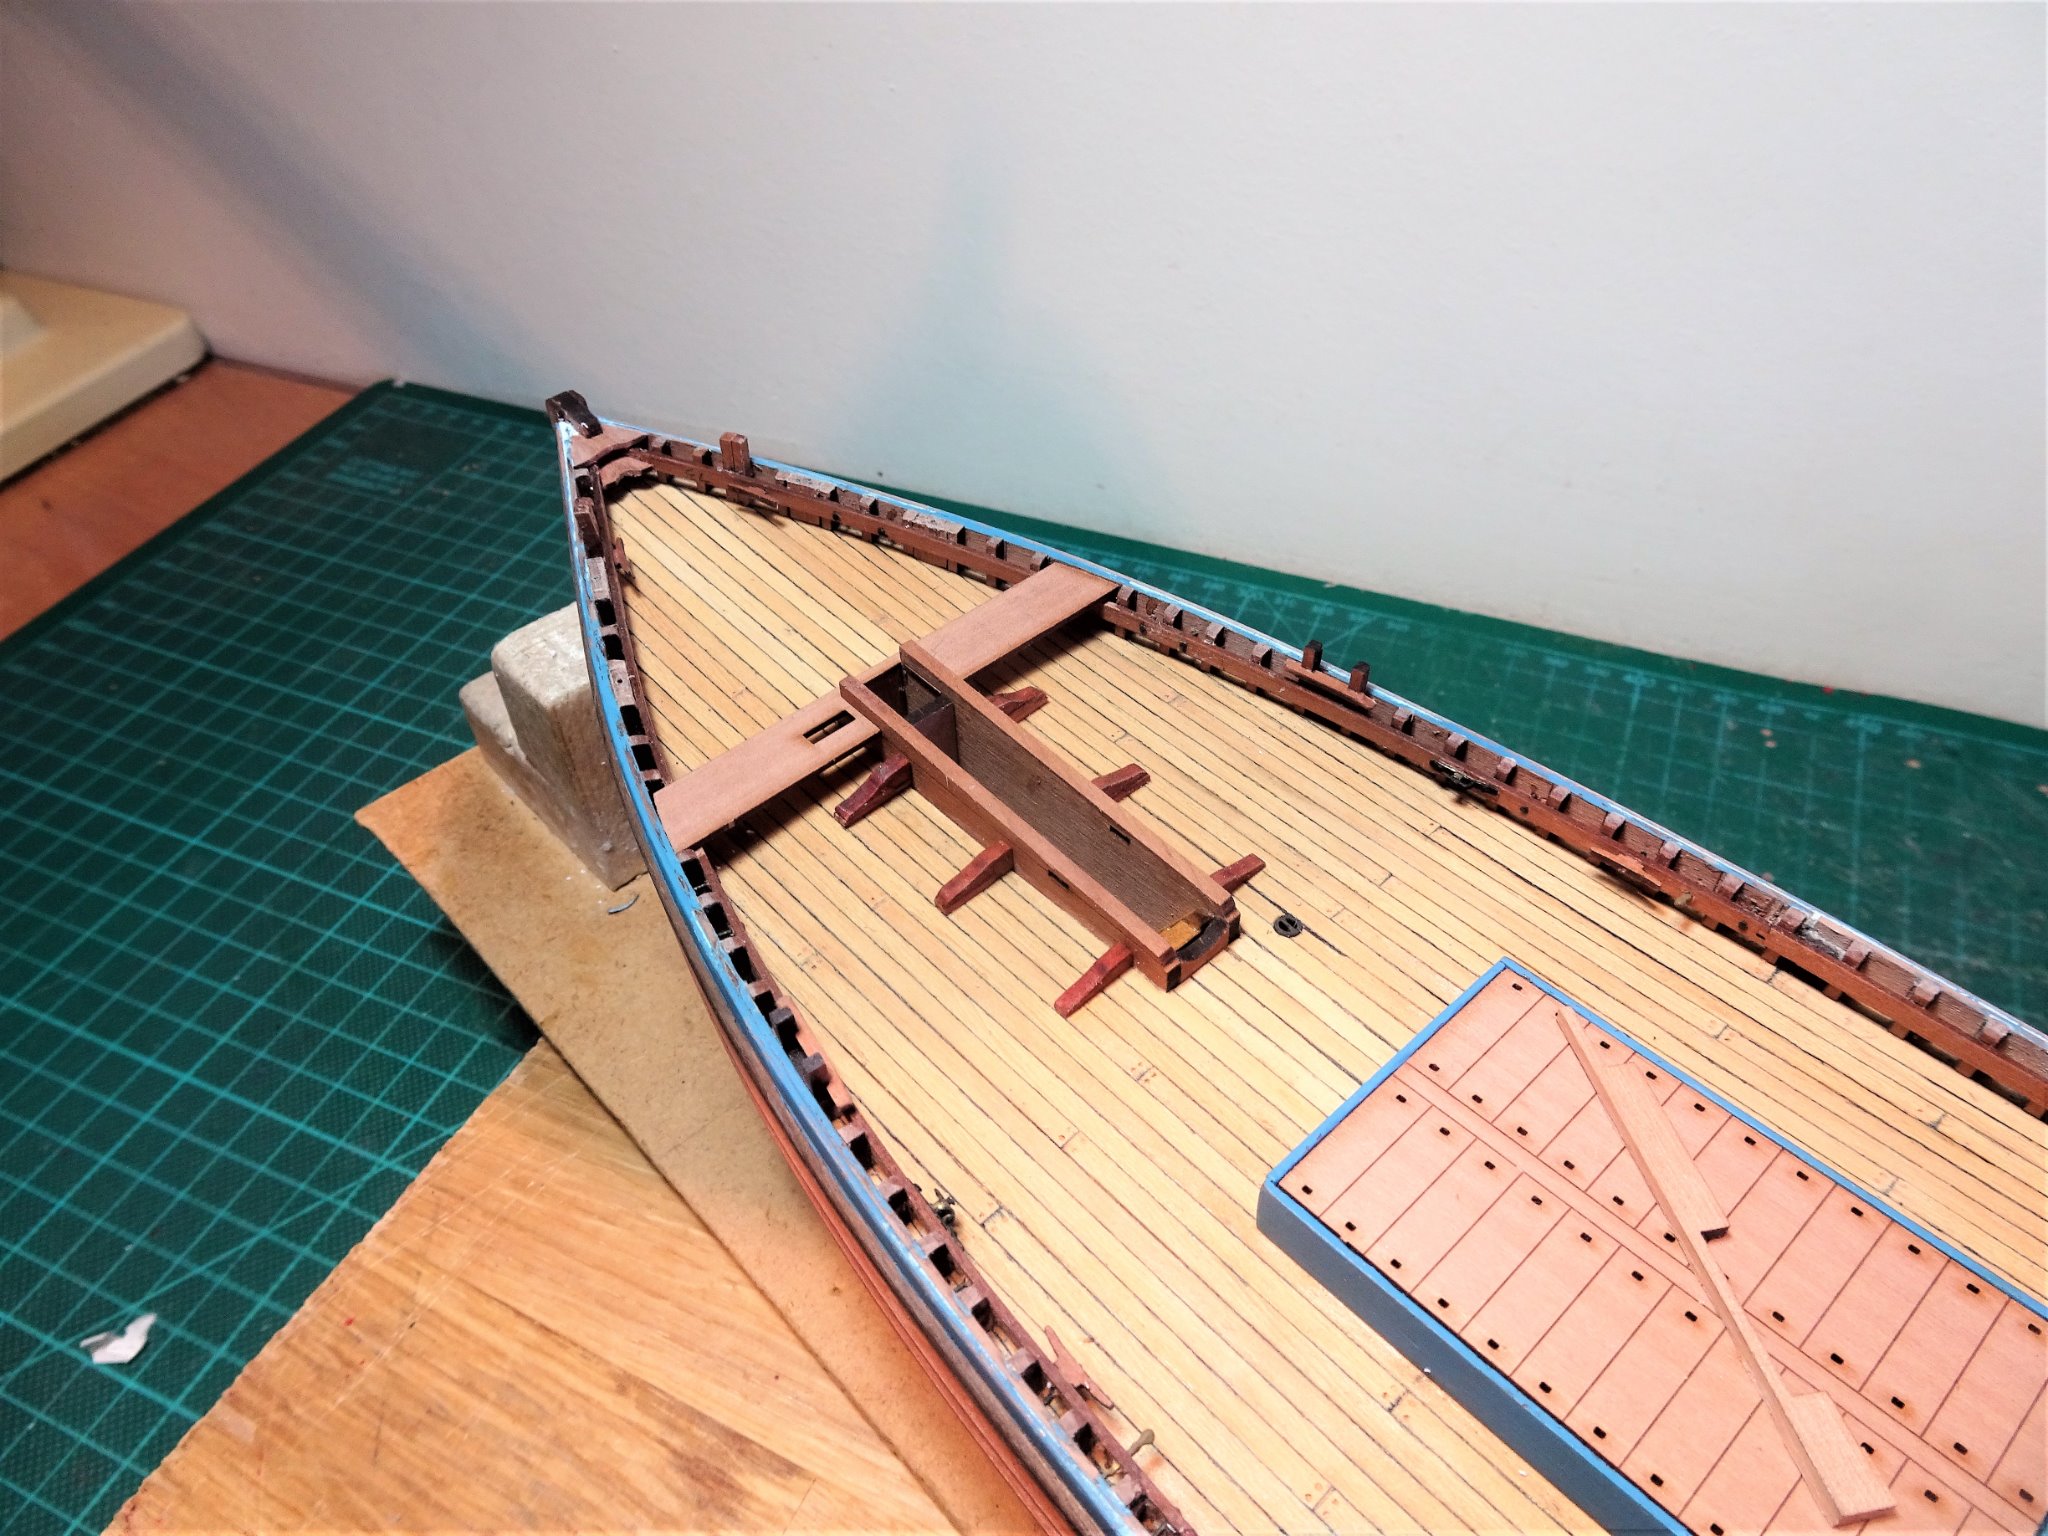
Post 24 Fitting out the Poop I am now into my favourite part of a build, fiddling with the fittings. The Poop deck has a wealth of detail, the positions of which I now need to fix. The kit contains all the right features but not necessarily in the right layout for Muirneag.(apologies to Morecambe and Wise) The Mizen mast is square at the partners which were scratched to suit, and the other fittings positions were tweaked to reflect the layout on the Underhill plans. The kit warp hatch rollers seem to be rather stylised and are represented by etched housings sitting above the level of the coamings covering most of the hatch space. I was able to utilise the provided coaming which is about right for scale, but I had to enlarge the hatchway slightly to accommodate carlings below the coamings to allow for the rollers to be set lower within the hatchway. 8181 False carlings were glued beneath the hatch coamings which were drilled to take short lengths of 0.5mm brass wire passed thro’ 1mm brass tubing from side to side to secure the rollers. 8177 Completed Warp Hatch in place. 8174 Also in this photo the makings for slightly beefed up mast partners, the now defunct kit part can be seen on the Poop deck aft of the mast. 8215 The mast partners were remade using spare 3mm Pearwood from the kit fret. 8217 All the spare wood around the laser cut parts comes in handy for scratching alternative parts. With the Warp hatch and partners glued into place, the position of the crutch can be determined. 8225 The crutch which supported the lowered Fore mast is nicely pre-made in Pearwood and on Muirneag sits immediately to the starboard side of the Mizen, rather than just aft of the partners as indicated on the kit. The Underhill plan indicates a height of 8’ 2” = to 38.9mm at scale. The kit part is pretty much spot on for this. 8226 I used a section of square brass tubing to provide a socket to take the Crutch. 8229 These Swann- Morton micro chisels prove invaluable in cutting small holes. The Boiler flue is provided in the form of Aluminium tubing and a circular etched brass base plate. 8224(2) I have modified this to accord with the Underhill plans where the flue base is a concrete square set in a wooden frame. The smaller stove flue was modified to fit a cowl over the top. Blackening Aluminium doesn’t seem to work as well as on brass, and I do have a jar of Aluminium specific blackener. 8287 May need to re-visit the finish on the flues, but a part of me quite likes the weather beaten look. 8283 The partly completed capstan in place, I have been looking at photo’s of the capstan on Muirneag, and I feel the urge to have a tweak with the gearbox…… B.E. 25/10/20


.thumb.JPG.9f40cc4f60bc39e52c62fd488211d245.JPG)

- 261 replies
-
- 14
-
-
- muirneag
- vanguard models
- (and 2 more)
-
Thank you Glenn and Derek. It's always worth keeping all that pe fret and also any hard wood fret, comes in handy for scratch building many small items. Hi Derek, yes I mix my own, pre-made wop is a bit of a rip -off in my opinion. I use oil based polyurethane varnish diluted with white spirit. There is a load of info on making your own wop on You Tube. 🙂 B.E.
- 261 replies
-
- 4
-
-
- muirneag
- vanguard models
- (and 2 more)
-
What a little beauty, she'll have you wrapped around her paw in no time.😄 B.E.
-
Beautiful job Michael, I really must get around to starting mine which has been sitting beneath the bench for a while now. Your most excellent build has given me the impetus to make the barge my next project. Well done. B.E.
- 221 replies
-
- 1
-
-
- queen anne barge
- Syren Ship Model Company
- (and 1 more)
-
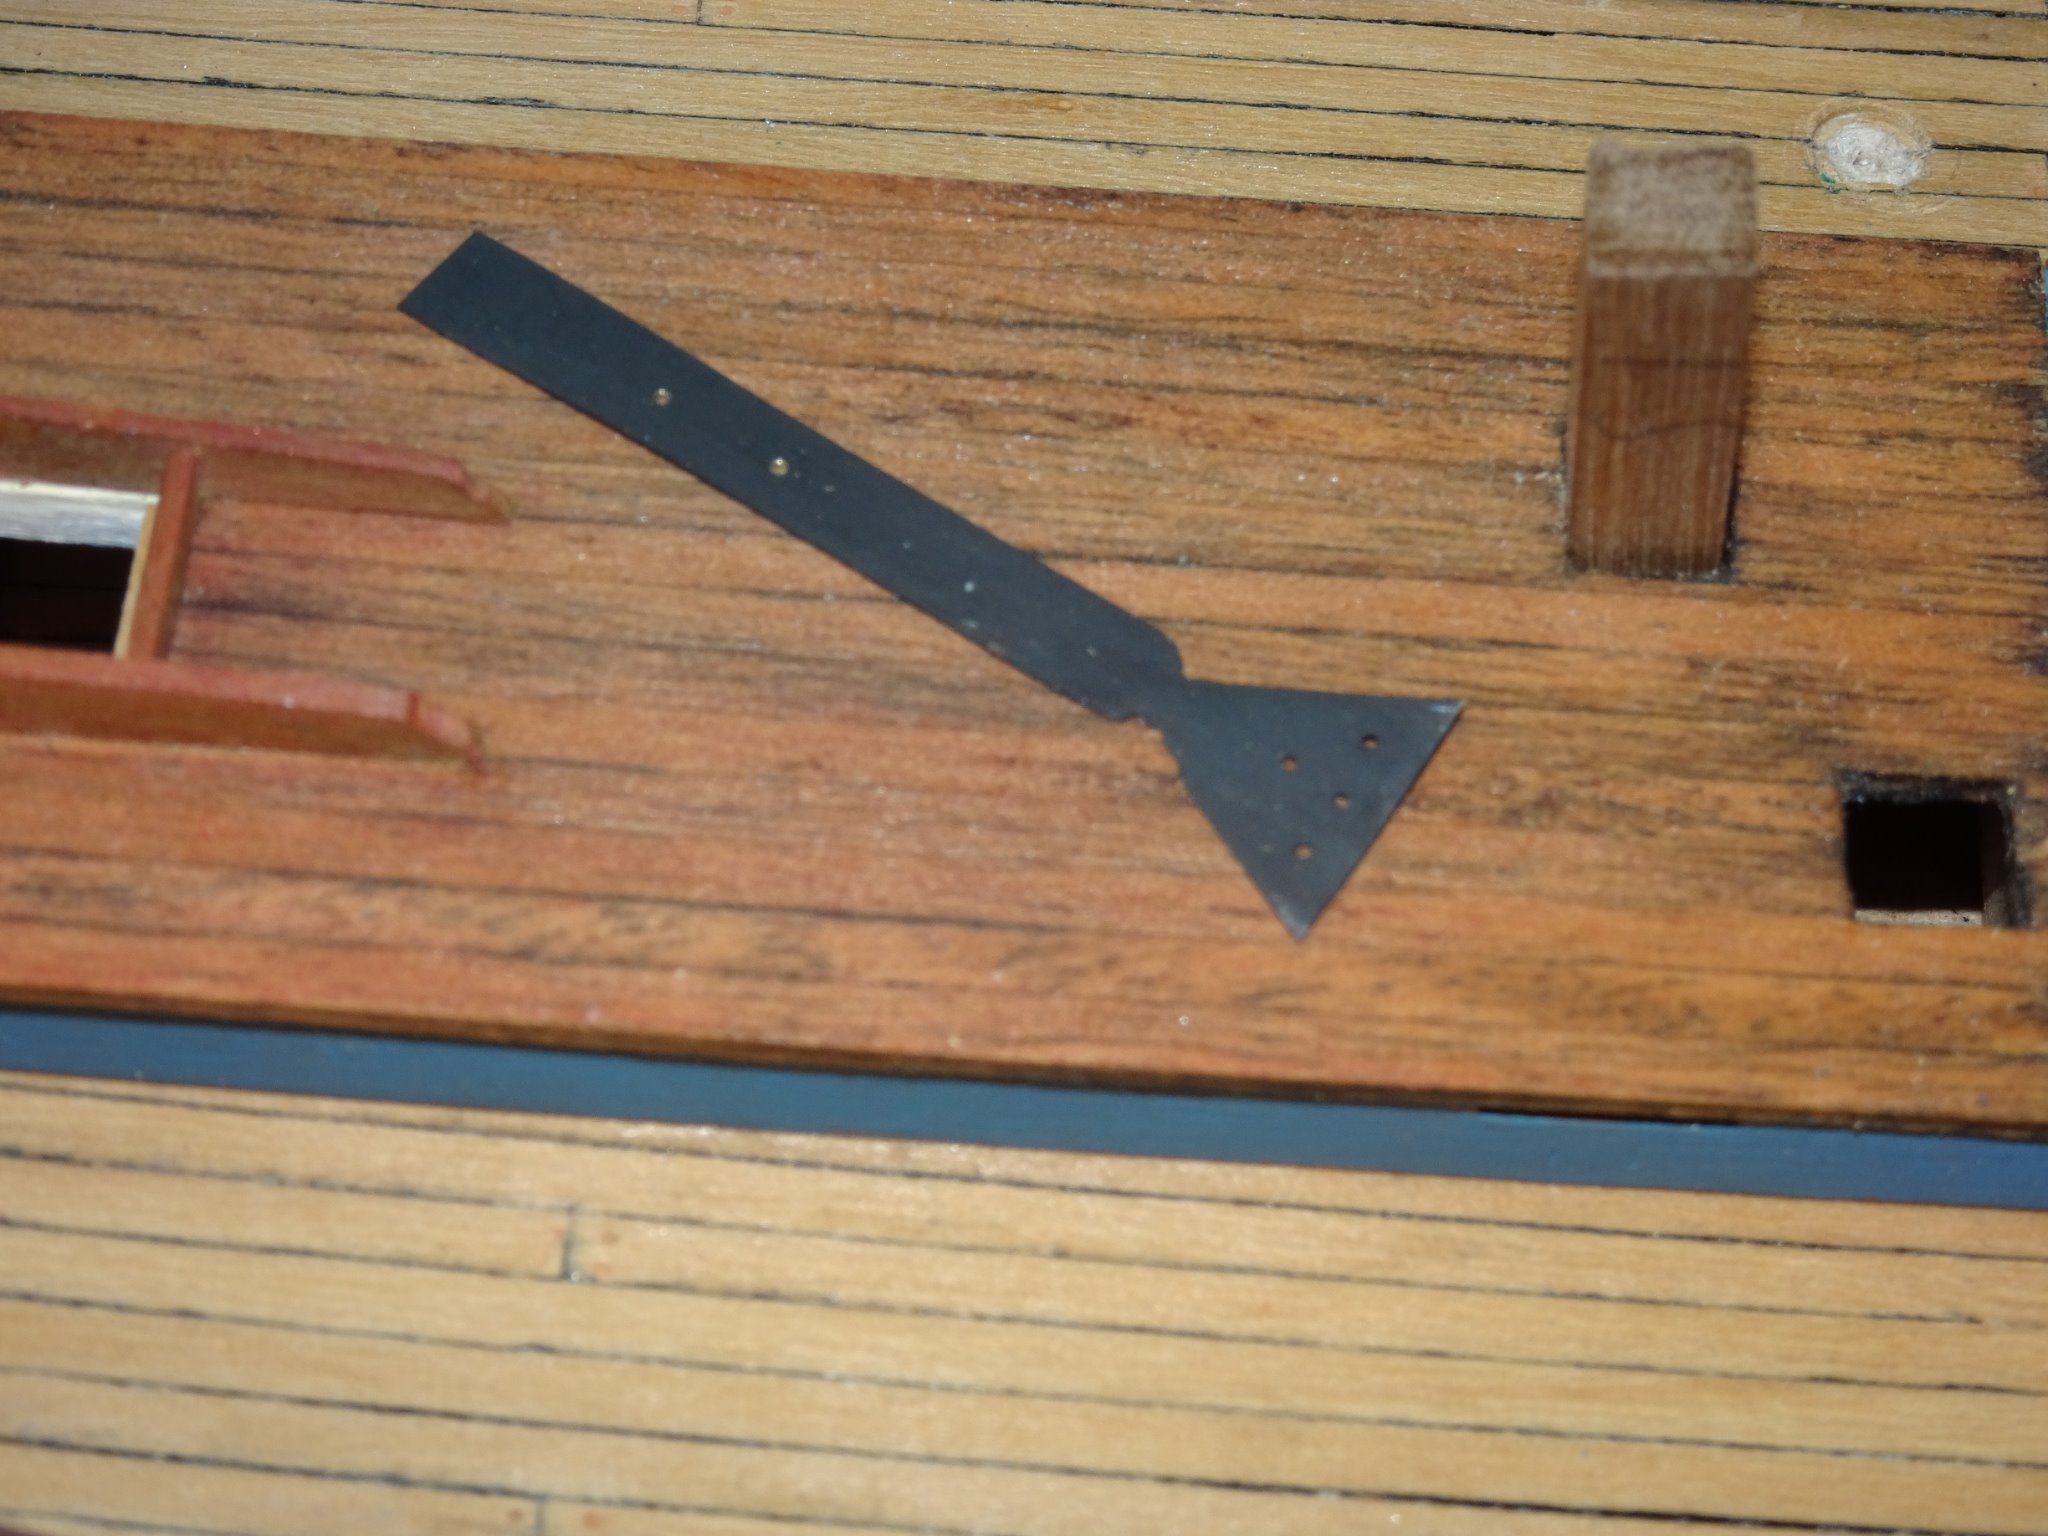
Post 23 Detailing the internal stern area. On the real boat a 1” thick iron strip ran from the stem along the keel and up the stern post where it was riveted to the head of the sternpost. This was fitted as protection when grounding. The kit provides a nicely etched Bow plate which replicates the stem iron but is not carried around the keel or sternpost. The flange on top of the stern post would be visible so I replicated one. 8136 I used the 0.20mm brass fret from around the decoration etch of my Pegasus kit to make the plate. This was then chemically blackened. 8142(2) The stern area nearing completion. A coat of wip has been applied to the stern woodwork. The iron stern plate has been pinned into position Along the Starboard doubler at the stern are three iron plates which take sockets for items I’ve yet to understand the purpose of. 8155(2) The kit provided Coal bunker hatch is inset into the deck. A nice little item this, once blackened it looks the part. 8170 The smaller and plainer pump deck plate can be seen forward on the starboard side just aft of the mast partners. 8146(2) At the bow there are two knees to be fixed. 8161(2) Usually I seal the deck with a flat water-based varnish but I have decided to leave it unsealed. The Boxwood planking will darken with age which is my intention. 8163(2) Yet another fill, sand, and repaint job needed to improve the rail finish but hull completion is not far away. B.E. 22/10/20

.thumb.JPG.6c675f74bd34360fabee3ef4377dffc5.JPG)
.thumb.JPG.6097af4345bac6e3e495da7743e62057.JPG)
.thumb.JPG.c70b08fb9846d5468202758b56e86f17.JPG)
.thumb.JPG.0bb133daac003591e2b17b350582a2b8.JPG)
.thumb.JPG.76676bd522f6d64dac6acd3599d62c03.JPG)
- 261 replies
-
- 17
-
-
- muirneag
- vanguard models
- (and 2 more)
-
As I'm currently into fishing boats Yves, I will follow your build continuation with interest. She looks really good as you have her currently displayed, standing in frame only, and what an elegant setting. Regards, B.E.
-
👏 👏 👏👏 Very well done Glenn, she looks beautiful. B.E.
- 778 replies
-
- 4
-
-
- cheerful
- Syren Ship Model Company
- (and 1 more)
-
Thank you Richard for having a stab, there are also variances of the meaning of Muirneag, which is also named for a hill on the Isle of Lewis. MUIRNEAG (Lewis). G. diminutive of muirn, cheerfulness, joy. Name of a beautiful hill ; the only one near here, which the fishers can see far out at sea. Another definition repeated in several publications is as below. When Alexander "Sandy" MacLeod ordered his Muirneag ("Darling Girl" in Gaelic & also the name of a prominent hill near Stornoway) in 1903, it was his second McIntosh built Zulu - the first being the SY 1108 Caberfeidh, being launched from the Portessie yard by John McIntosh in January 1896. "Sandy" had by 1903, already a reputation as a fine fisherman & mariner, his Caberfeidh being the first Stornoway Zulu to go the English herring fishing. This reputation was enhanced as he fished Muirneag continuously up to the outbreak of WW2, refusing to convert her to engine power & thus becoming one of the last links to the past, being the last British herring drifter to fish under sail power alone. I would like to think that 'Darling Girl' is the meaning given that Sandy Macleod obviously had a great affection for her over many years of ownership, and in 1947 at the age of eighty, took her to sea for the last time before she was broken up. Still, enough of this nostalgia, I've a Zulu to build. 🙂 B.E.
- 261 replies
-
- 2
-
-
- muirneag
- vanguard models
- (and 2 more)
-
Thank you Thomas, By all accounts they were fast and handy vessels, except perhaps in harbour where they proved very heavy to manoeuvre. I find it amazing how only a few men handled these large luggers in the less than hospitable North Sea, and effectively removed all the sailing gear once fishing started. That large out of view rudder was also removed and stored on deck, something I find difficult to visualise. How could the pintles be located on that sharply raked sternpost, particularly in a lively sea. Thank you Martin, We are alike in that respect, Mrs W is convinced that I live in the 18thc in my head. When asked what is my favourite music genre I always reply I love the music of the 80’s, and Wam (Wham) in particular. I quickly follow it up with Wolfgang Amadeus Mozart and the 1780’s. 😉 I am far more familiar with ships of the 17th/18thc than fishing boats of the early 20th. There are terms peculiar to North East Scotland that I still don’t understand. I’m still not sure even how to pronounce Muirneag’s name.🤔 Cheers, B.E.
- 261 replies
-
- 5
-
-
- muirneag
- vanguard models
- (and 2 more)
-
Very nicely done Richard, great detailing on the deck and fittings thus far.👍 Always a relief once the gunport pattern is fixed into place. Regards, B.E.
-
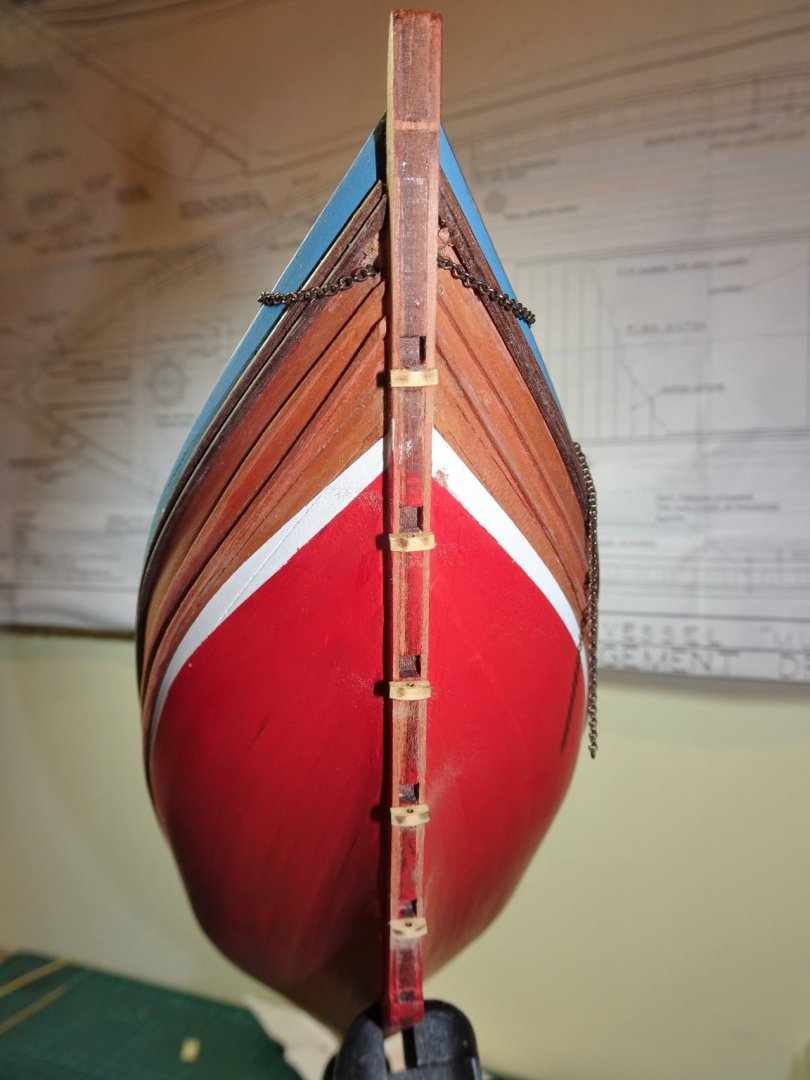
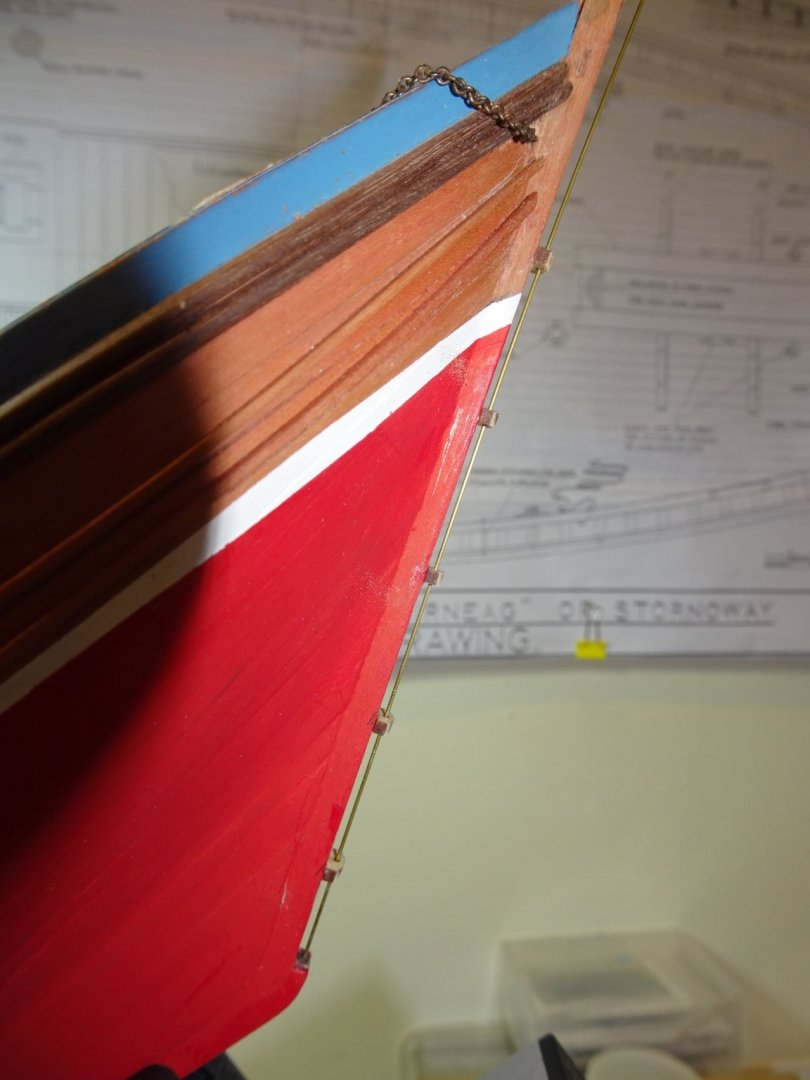
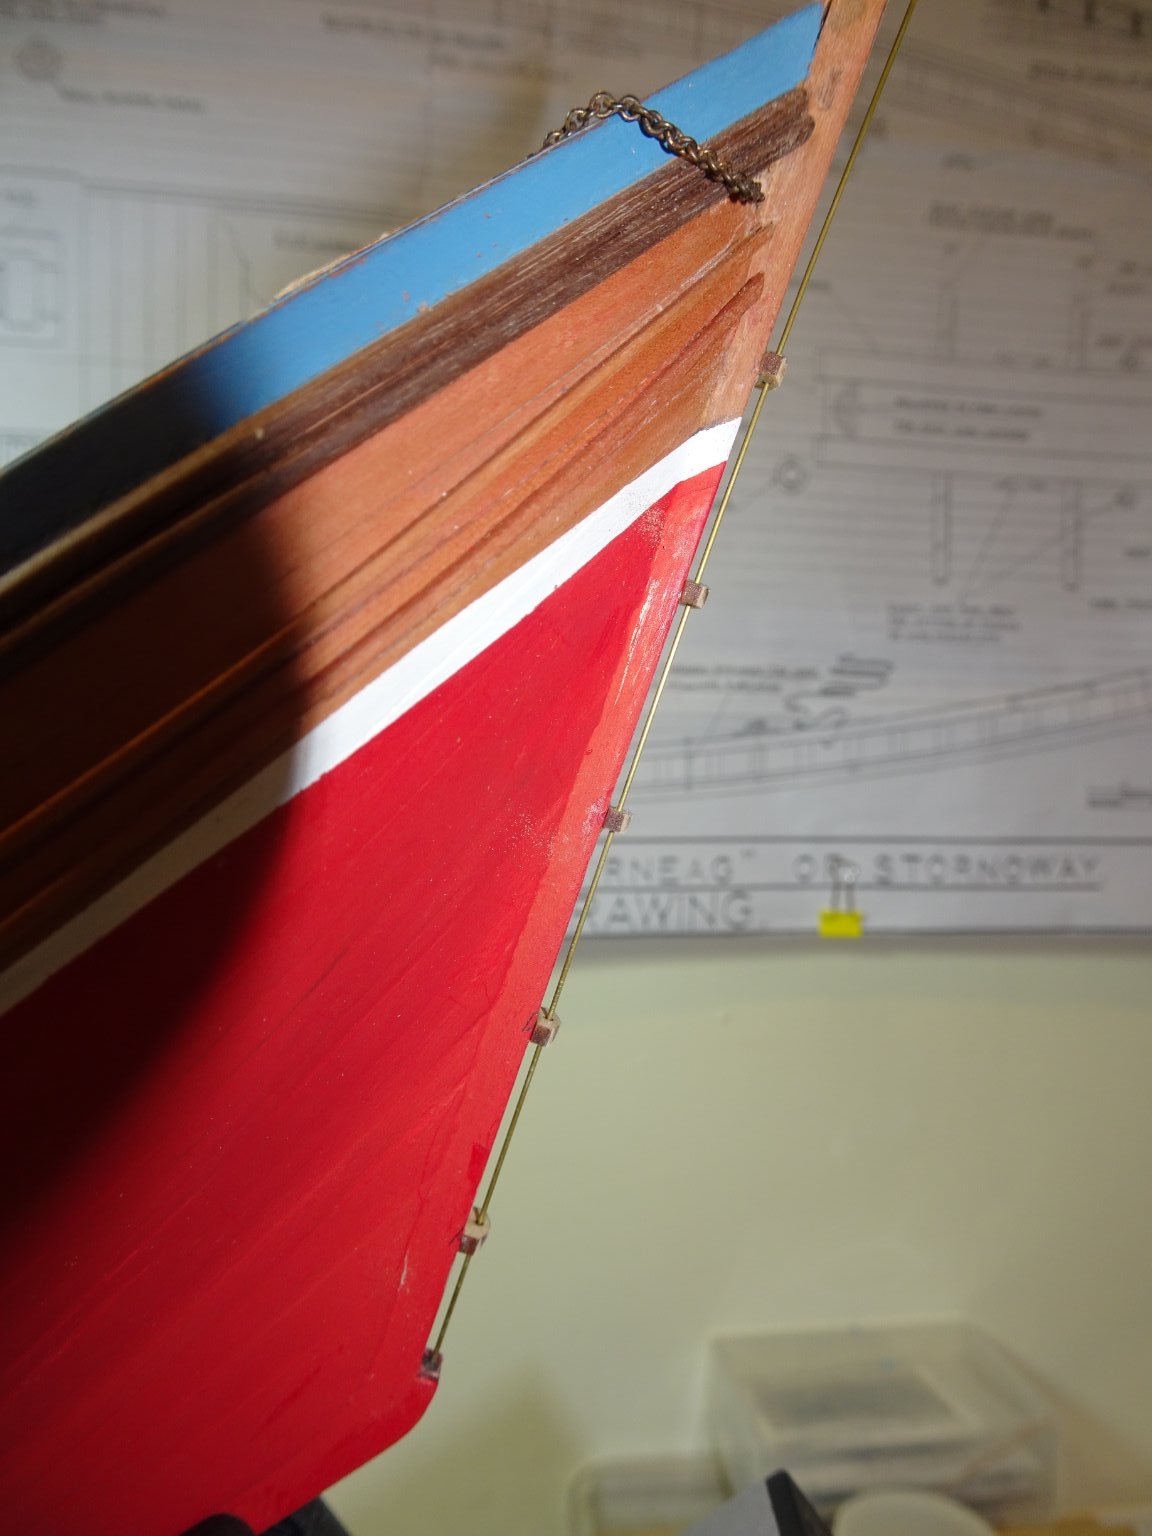
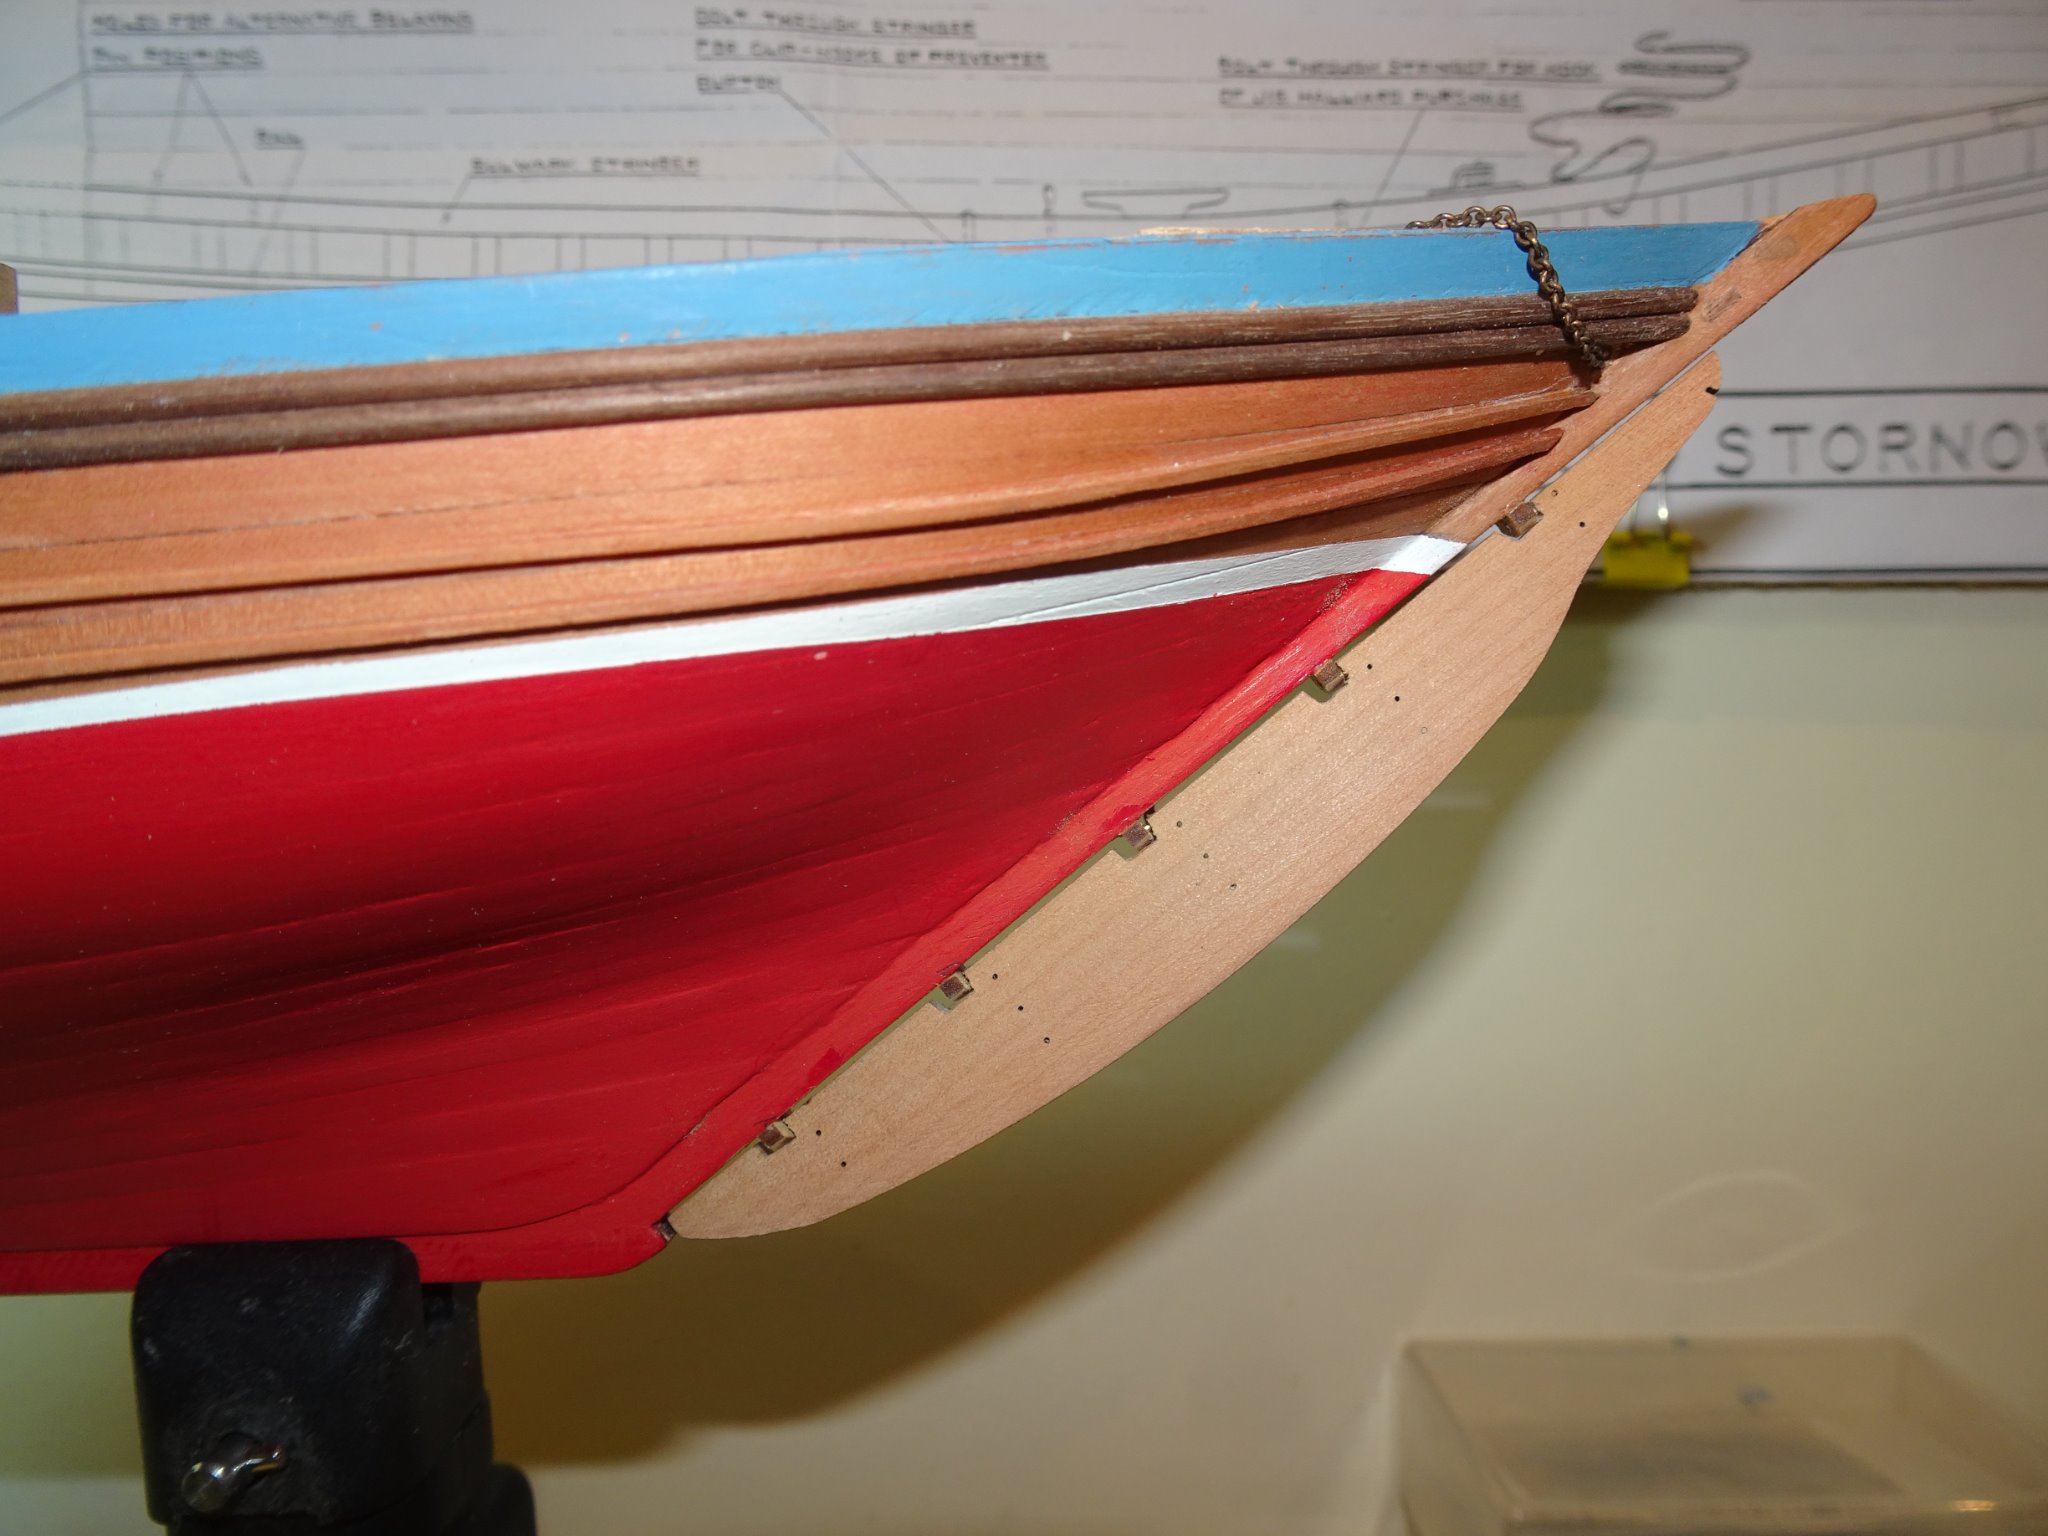
Thank you John 👍 Post 22 Fitting the Rudder. Chris has designed a simplified rudder attachment system which circumvents what can be a fiddly exercise. This has tenons on the rudder that slot into mortises on the stern post and hold the rudder in the correct position. The straps are then added to rudder and stern post to give the impression of a hung rudder. The alternative is to hang the rudder using pintles and gudgeons which is more authentic but a little more involved. To aid the modification Chuck (Syren ship models) sells a neat little rudder kit for his range of models which includes the Gudgeons and straps. These are ideal for a whole range of different model types and scales. 7991 The gudgeons are fitted to the stern post. It is important that the gudgeons are placed at the bottom of the mortises in the stern post for correct alignment. Once the glue has hard set the gudgeons will be shaped to suit. 7993 I use a length of wire to align the holes for the pintles. 8003 The rudder could do with a touch of fettling being tapered down slightly from top to bottom and from inboard to the outboard edge. The tenons on the rudder are removed and will be used to fill the now redundant mortices on the stern post. 7997 Pins have been inserted into the rudder to represent the pintles. 7999 With the rudder hung I can now attend to the painting and make the necessary adjustment to the white watercut line at the stern post. 8116(2) I’ll return to this later to add the straps to the pintles and gudgeons. 8128(2) She looks so much better with the rudder in place. 8130(2) I’m beginning to like this hull shape more and more Back to detailing the internal stern area. B.E. 20/10/20

.thumb.JPG.38cfc4cb808d21e94acee7fe50ad83b2.JPG)
.thumb.JPG.a7eed3bf1708e2b4c4d926b0159f1285.JPG)
.thumb.JPG.98417d874cb45c3be609ce17b02fa29b.JPG)
- 261 replies
-
- 15
-
-
- muirneag
- vanguard models
- (and 2 more)
-
Fascinating subject and a superb job. I have to admire your resolve and commitment to making all those figures, very well done. B.E.
-
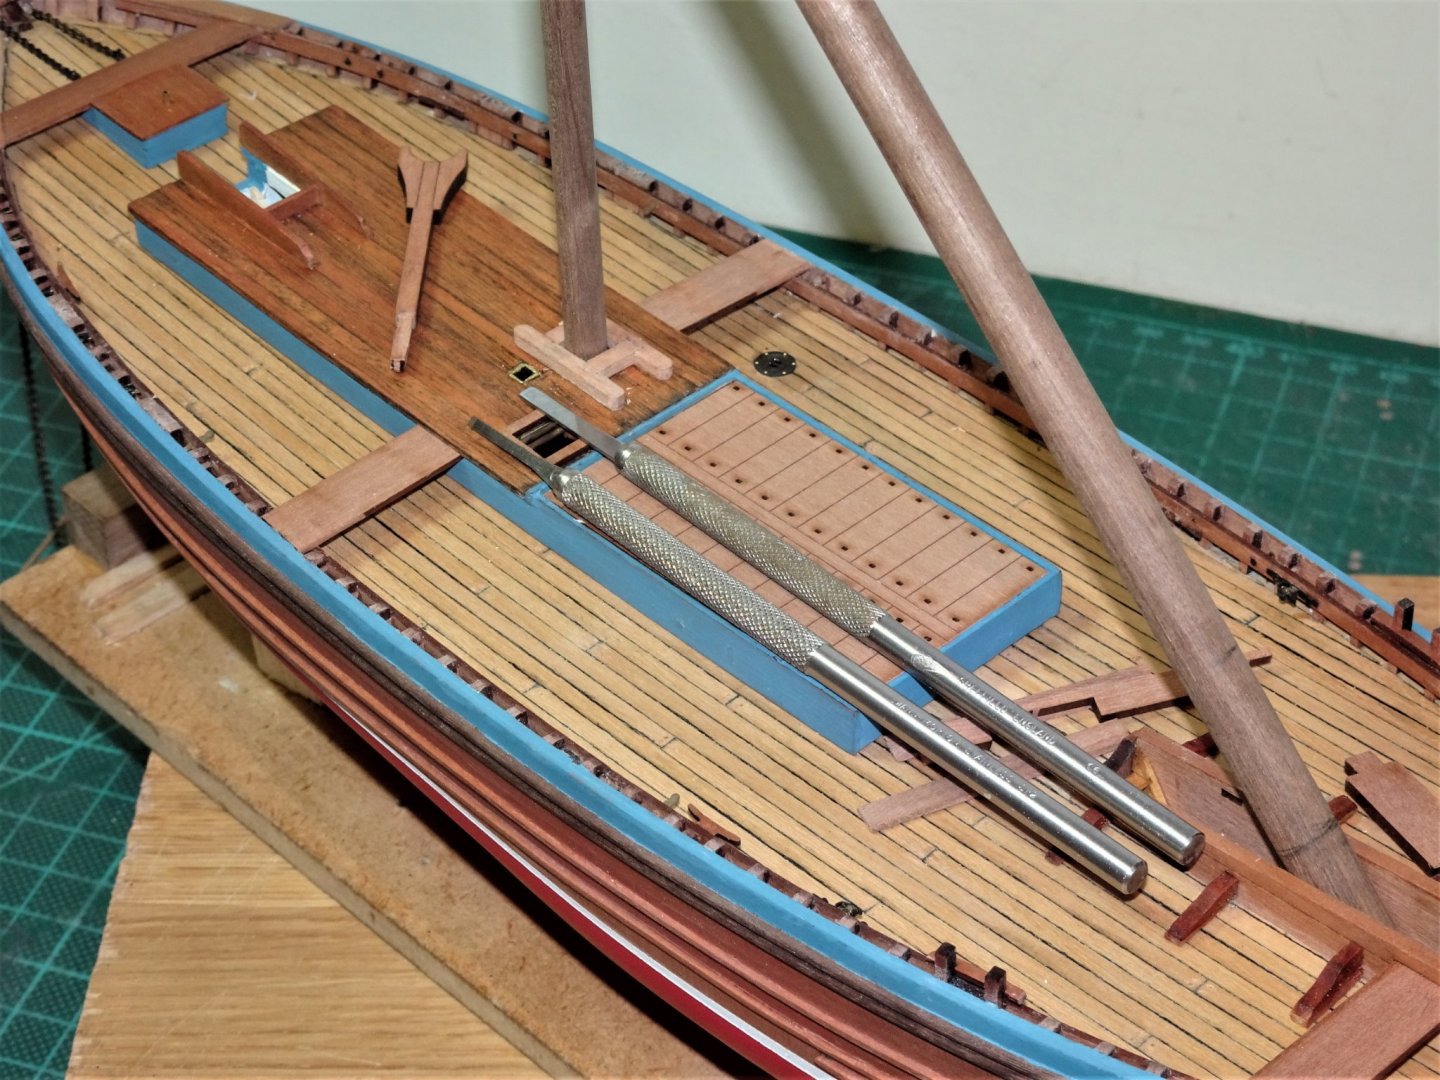
Cutting holes on a deck
Blue Ensign replied to Rik Thistle's topic in Modeling tools and Workshop Equipment
Swann-Morton make very good micro chisels in 1mm and 2mm widths, I wouldn't be without them. 🙂 B.E. -
Cutting holes on a deck
Blue Ensign replied to Rik Thistle's topic in Modeling tools and Workshop Equipment
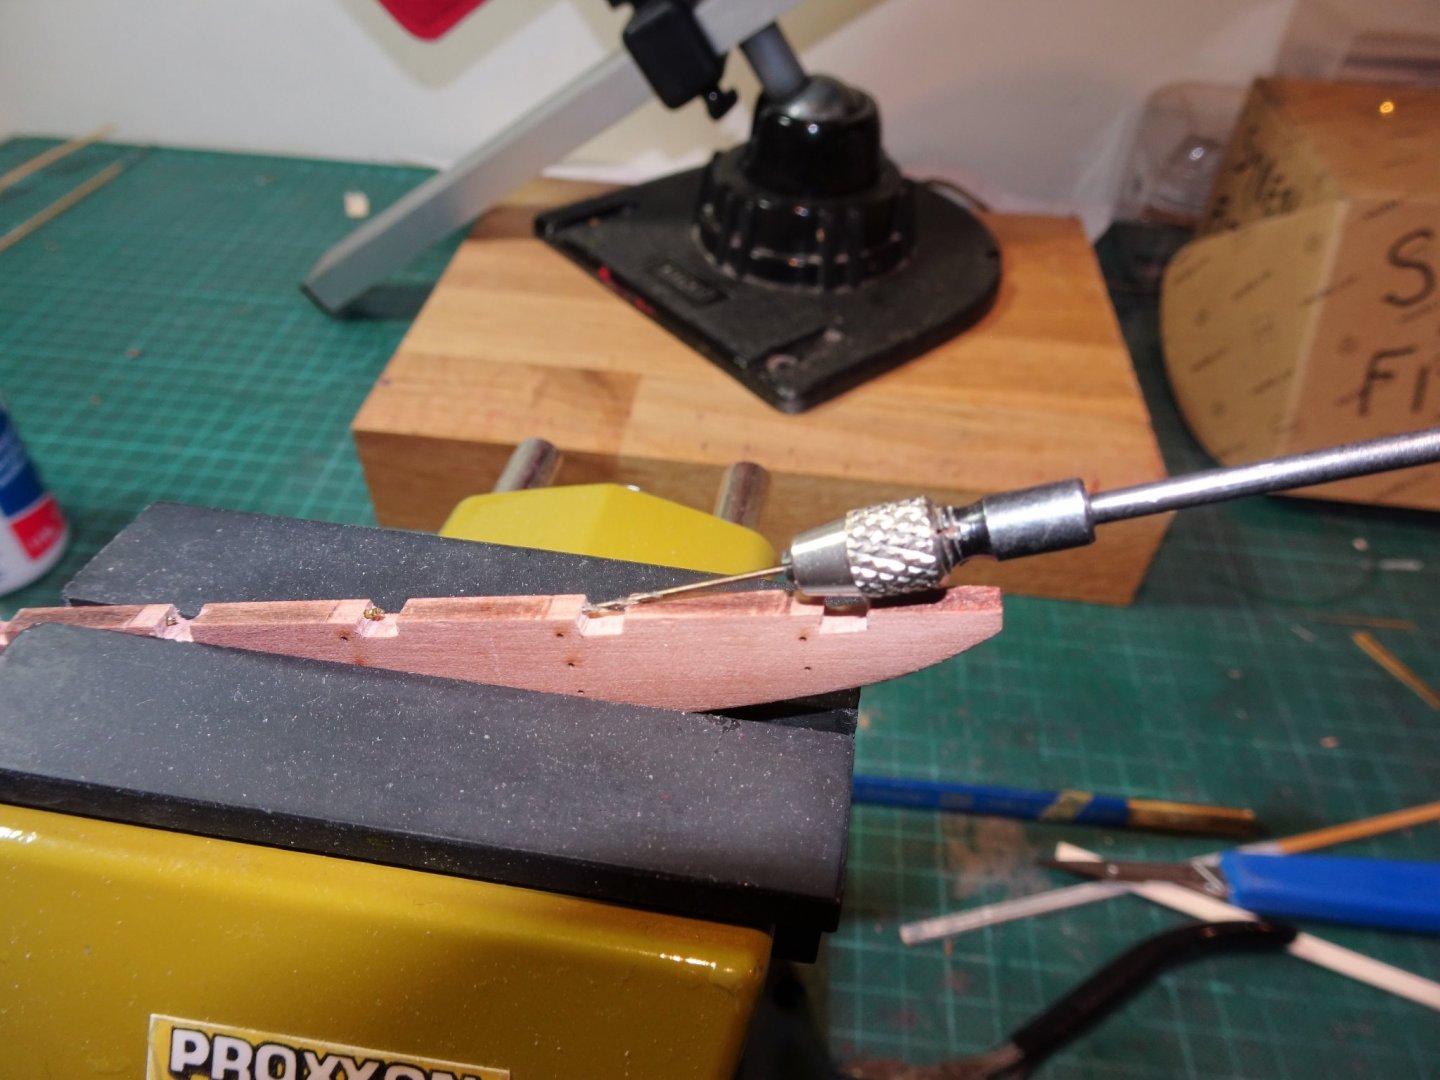
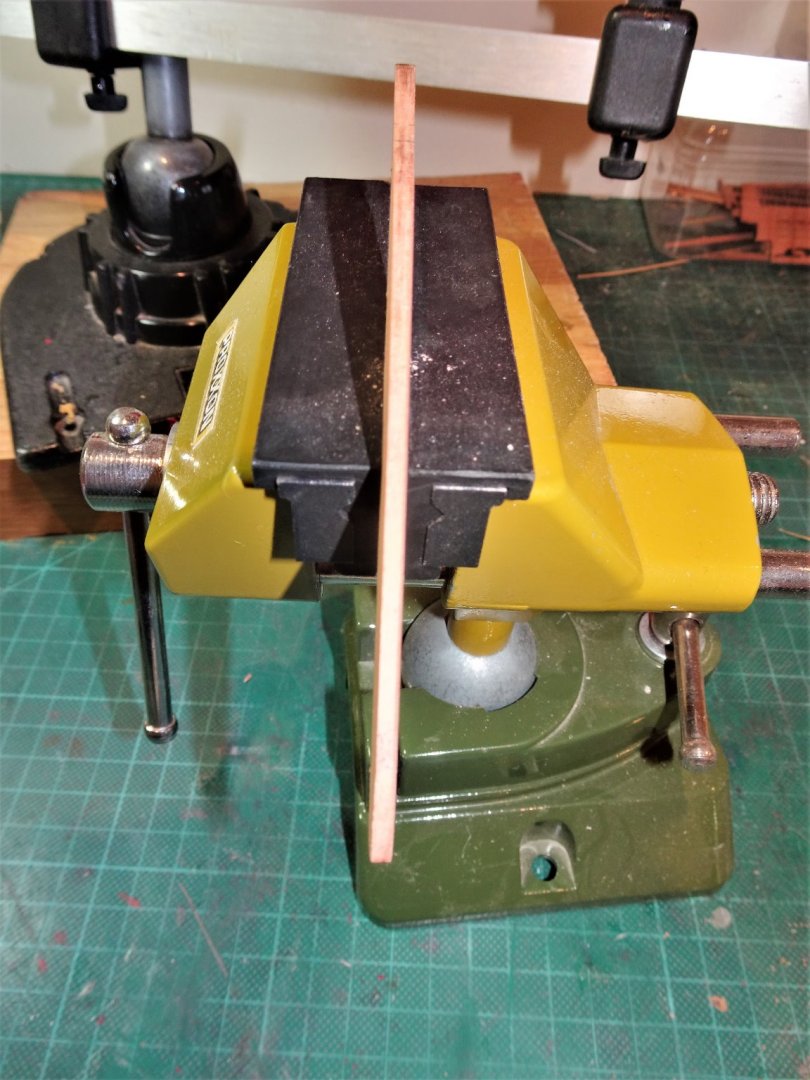
I used the preformed deck as a template , scored the outlines with a scalpel blade, and drill holes to aid the process. I didn't bother with the fiddly little cut outs for the timber knees to the Foremast partners, simply trimmed and glued them on the deck. Final finishing was done with sanding sticks made for purpose and micro chisels. I didn't find the process too onerous. Cheers, B.E.
.JPG.8bf691785c67f0823b12ddd55e415643.JPG)
.JPG.41aad1c4c18a8206014ed98ed05a91c8.JPG)
.JPG.4a2011bb1bdca7204049172cdb4d5615.JPG)
.JPG.f3bcb36a36996ef7a78efe059001afea.JPG)
.JPG.497ca4c688b438e9fa69046d2c8ac61d.JPG)
.JPG.606c852f6eb9edd35f05b6ae728eb638.JPG)
.JPG.7ec7b33b41bd9b8720f05a7bb7f6de78.JPG)
.JPG.60dcfe4a64e86f36f2c356e2cf37b67c.JPG)
.JPG.8246566904a90c7c868094ef30b88820.JPG)
.JPG.276bdeab31336e47acc9664428b6950c.JPG)
.JPG.fddc72459357813e6142a91560c4df29.JPG)
.JPG.4596c0f650c8fd7162e31a6d3efb50e6.JPG)
.JPG.c6b20c1d5dde06835ad2418f38739fac.JPG)
.JPG.60bb8ae3f9348e4a7fd5241688c923b1.JPG)


.JPG.73efff1555309e02a8a7a76bf7e25889.JPG)

.JPG.43d8dfed6f304a32fe224acdfbf0e283.JPG)
.JPG.54df295a11ddfe11158d8f5abca6f047.JPG)
.JPG.9583781e6be93687cf0eef5a979f0f40.JPG)
.JPG.ca0769e0cb0d8d9198d21aacfc73583b.JPG)
.JPG.6eac8f41d9b7126100693442c8450aa9.JPG)


.JPG.44d8516d151003551c7cea7158f0b5ad.JPG)
.JPG.b71b51734bcaae6ad1789633a4076e7f.JPG)
.JPG.d90639bc9714273265da287a814b7260.JPG)