SawdustDave
-
Posts
1,770 -
Joined
-
Last visited
Content Type
Profiles
Forums
Gallery
Events
Everything posted by SawdustDave
-
 Like vths, I find regular toothpicks to be great tree nails. I actually get 4 nails from each toothpick by using a small file and sanding board to create the sharp pointed spike needed to get a deep enough penetration to insure the nail doesn't back out during the sanding process. No glue necessary....each nail is pressure fitted, as the wipe on poly finish applied to the hull will seal the nails permanently. I also wait until after I sand the nail flush before applying a stain. Dave
 -
Mayflower by SawdustDave - Finished
SawdustDave replied to SawdustDave's topic in - Build logs for subjects built 1751 - 1800
So glad to know you see it the same as I do Popeye my friend. Right now, I'm really fighting the urge to work too quickly....always been one of my faults. Trying to take the advise of Remco...."you're working too fast - slow down!" He's right, but that is so hard for me. Spent the morning working on her port side, as I don't want to get too far ahead of developing both sides exactly the same. Meanwhile MF#1 sits over to one side calling for me to add her yards and begin rigging her out. Dave -
Hi Kevin....Just now joining your Vic build.....my favorite, having built her twice. I go to bed each night looking at her in her glass case beside my bed. You are doing a beautiful job, and I have enjoyed browsing through your build log. Very nice photography as well. Dave
- 1,319 replies
-
- 1
-

-
- caldercraft
- Victory
- (and 1 more)
-
Beautiful job Ryland.....top notch clean. Dave
-
Mayflower by SawdustDave - Finished
SawdustDave replied to SawdustDave's topic in - Build logs for subjects built 1751 - 1800
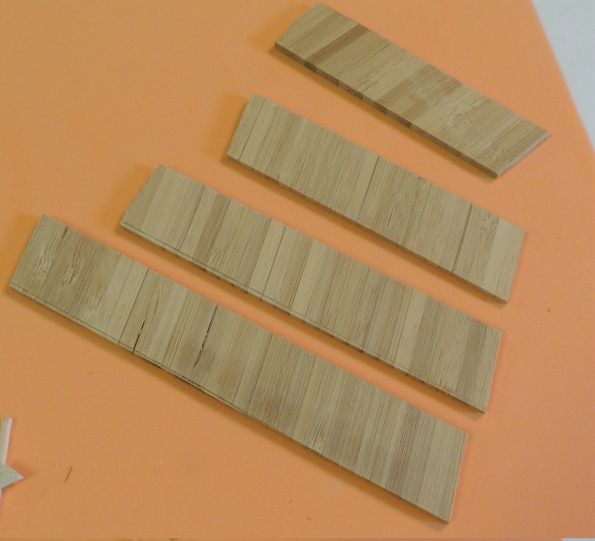
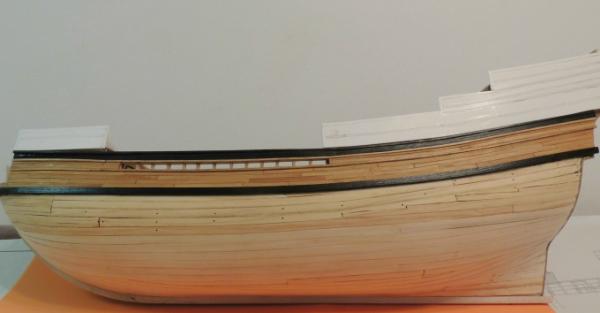
Thanks Russ / Mark.... Really pleased with the bamboo in every way. Did another experiment with regard to applying a stain to it after sanding. After testing a small section off ship, I found that it takes a stain beautifully. Seen in the last photo above, the bamboo planks were stained with Golden Oak, then a single coat of wipe on poly. After tree nailing, I plan to apply another coat of stain which should make the tree nails pop. The poly coat will block the stain from the plank surface. The bulwarks are planked with walnut to match the bulkheads. -
Mayflower by SawdustDave - Finished
SawdustDave replied to SawdustDave's topic in - Build logs for subjects built 1751 - 1800
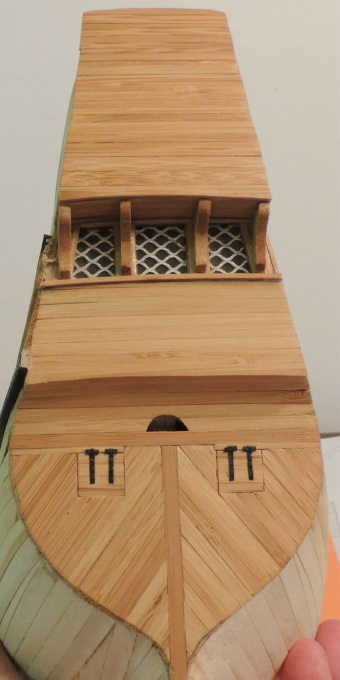
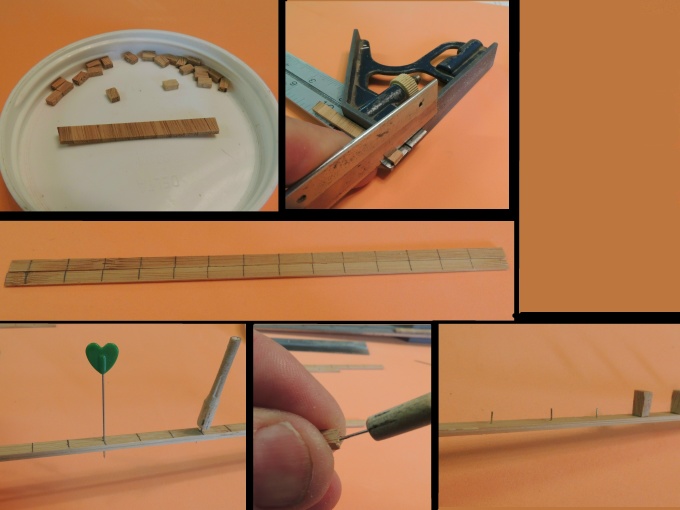
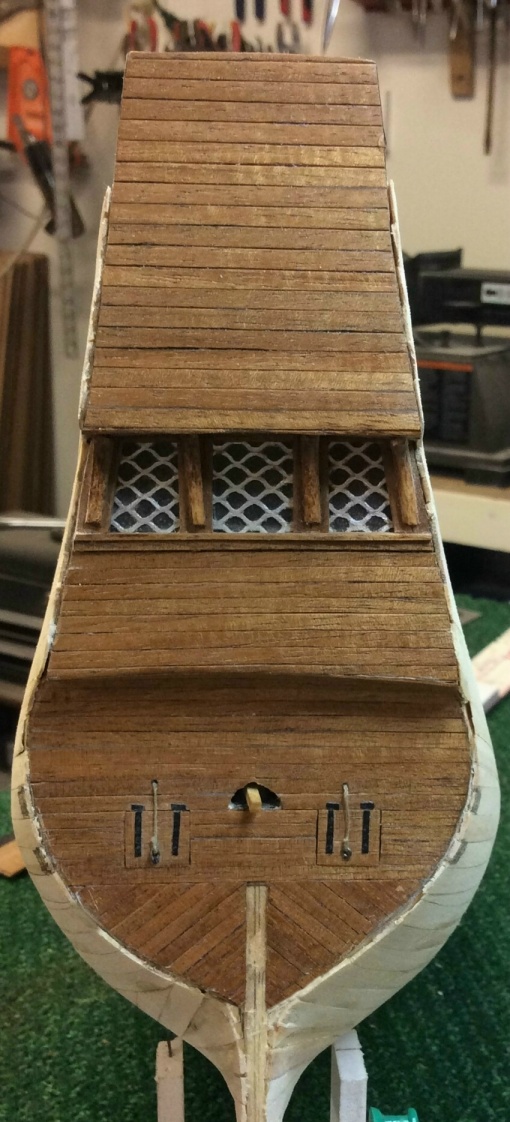
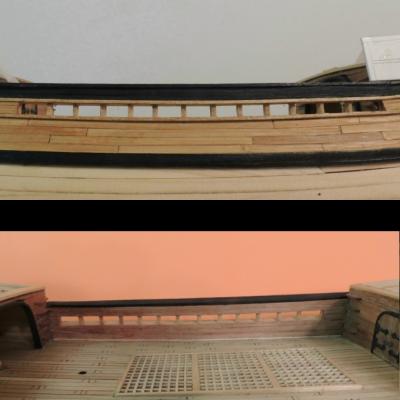
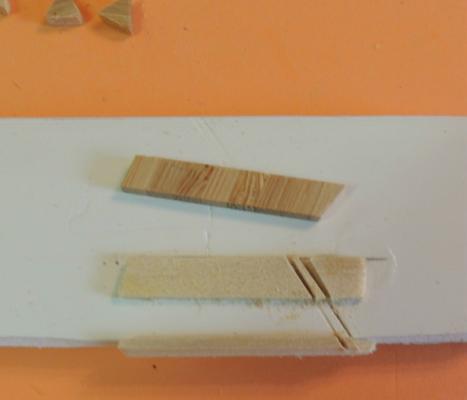
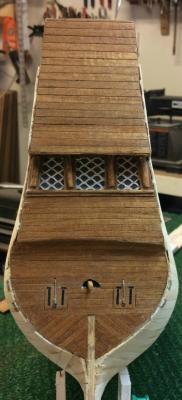
Productive weekend.... First pic is for Popeye.....the re-shaping of the transom issue is resolved. Next pic is a collogue of steps showing the method I used to create the short stansions seen in the mid-ship upper deck port. This was necessary because I opted to plank the inward bulwarks, which is a another slight deviation from Chuck's plan sheets. Finally, I was pleased to see the bamboo planking looking as nice on the side of the hull as it did on the stern area. Tomorrow morning, I will tree nail the area seen here just to see how that is going to look.
- 531 replies
-
- 11
-
-
Piet....your metal working skills are truly amazing. I am thoroughly enjoying your work. This is one of my favorite builds in progress. Dave
-
Oh yes! She looks like a rocket ship. Are you super excited right now Pete? Dave
-
OK Pete...Teaching moment here. Tell me more about soaking planks in rubbing alcohol. Dave
-
Lookin really sweet my friend. She's gonna be some kind of special. Dave
-
Welcome to the forum sir. Very nice work on a beautiful ship. Thanks for sharing. Dave
-
Mayflower by SawdustDave - Finished
SawdustDave replied to SawdustDave's topic in - Build logs for subjects built 1751 - 1800
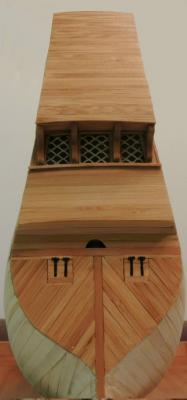
Also note that, as I began to develop an eye for using this material, you can see that the area above the gun ports is more consistent in terms of color and grain. I was able to be more selective in culling out a few of the visibly darker planks. I found, to my surprise, that 90% of the planks! thus far! seem to be very good shade matches. Also.... Easy to see that I was able to correct numerous errors I had made in the layout of the stern.....tiller port was moved up almost an inch; gun ports moved up; corrected the transom plank pattern; and a few other alignment issues. Simple fact is.....this whole thing was pretty much a complete train wreck and I was going to re-work it any way regardless of the bamboo experimentation. -
Mayflower by SawdustDave - Finished
SawdustDave replied to SawdustDave's topic in - Build logs for subjects built 1751 - 1800
Thanks Augie; Pops.... Mark....large 16" x 16" tray at Walmart....$15.00 Can't say enough about how sweet this stuff cuts. As for the possible issue with sanding as pointed out by Steve....no problem. The flat surface above the windows was my test case for that....sanded the heck out of that area just to see if it would be a problem....same beautiful grain. The four knees separating the window units were easily shaped and looks great even with exposed end grain surfaces. -
Mayflower by SawdustDave - Finished
SawdustDave replied to SawdustDave's topic in - Build logs for subjects built 1751 - 1800
I think the final verdict is pretty clear.......... Walnut or Bamboo? What say ye mates? PS....Popeye, I had not completely fixed the re-shaping of the transom on the port side at the time I took this shot. It has, since that time, been taken care of and came out just fine.
- 531 replies
-
- 11
-
-
Augie, you are one very methodical craftsman my friend. I salute you sir. Enjoying your work here. Dave
- 2,191 replies
-
- 1
-
-
- confederacy
- Model Shipways
- (and 1 more)
-
I guess there is no end to the many different paint patterns found on Mayflower models huh, Klaus. That is not a criticism mate, I really like the looks of the one you are using....just haven't seen that one before. Beautiful job on her rudder. Dave
-
Whether the term was "Store High" or "Ship High" (In Transit).... I question whether this story of that being the original source of the crude word, we so often use, actually holds true. Dave
-
Just looking at all the battle scars on you cutting table....Holy Cow! Sign of a real veteran.
-
Mayflower by SawdustDave - Finished
SawdustDave replied to SawdustDave's topic in - Build logs for subjects built 1751 - 1800
Thanks for your input Steve....very interesting information regarding your experience with bamboo. Hopefully, the amount of sanding required in this application and with this particular species of bamboo will not be an issue. We will soon have answers to these questions as I am about to head back to the shop to begin putting the first planks in place. Cheers mate. Dave -
Mayflower by SawdustDave - Finished
SawdustDave replied to SawdustDave's topic in - Build logs for subjects built 1751 - 1800
Russ....so far, I am finding this stuff cuts so clean, really sharp hole drilling, easily shaped.....and nice color. Still playing with it.....will post more as it develops. In past, the only application I have used bamboo has been for tree nails....never considered the beauty of the grain until finding these tray products. Now surprised at how nice it cuts. Dave -
Mayflower by SawdustDave - Finished
SawdustDave replied to SawdustDave's topic in - Build logs for subjects built 1751 - 1800
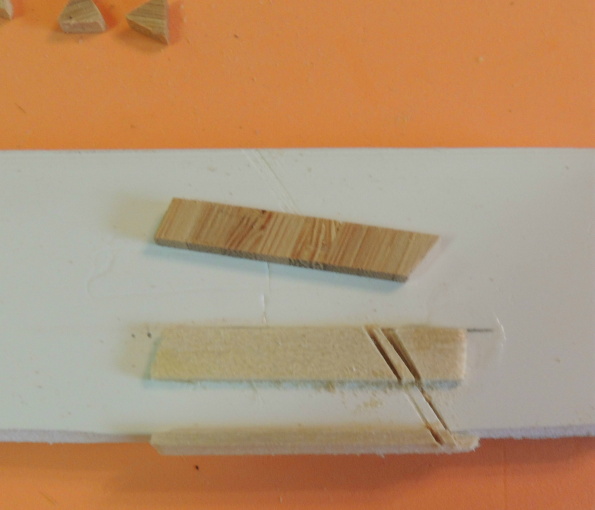
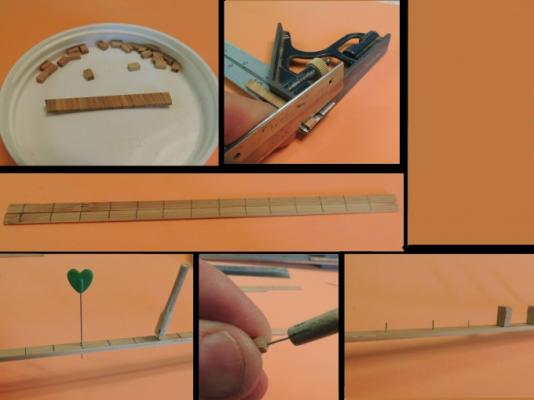
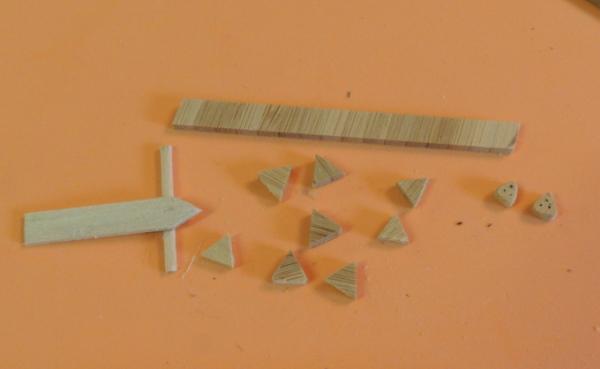
So here's the large bamboo tray I found.... 16" x 16" square. There's another 16" width counting the four side rails. Another interesting discovery....after ripping the two surfaces on the table saw, I get some really neat scrap pieces which, after studying them for use, I determined they are a perfect thickness for deadeyes. Played around with making a jig to cut them into perfect triangles with a little holding jig....then drilling holes and a little bit of finish shaping. I think I am going to like them better than the results I've been getting from the walnut. Got to play with this some more before I decide. So, the stern has now been sanded back down to a point I can begin applying the bamboo planks. Also did some re-shaping of the transom because Popey's sharp eyes pointed out a little cervature problem (thanks mate).....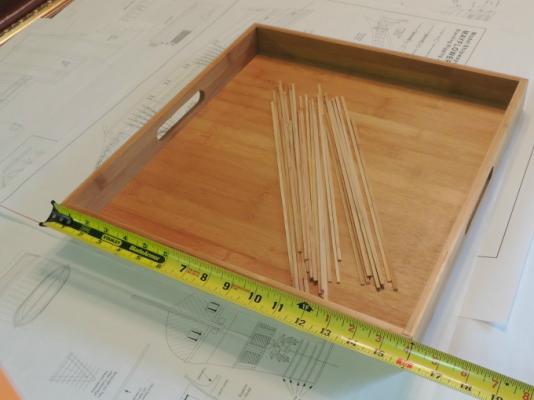
-
Mayflower by SawdustDave - Finished
SawdustDave replied to SawdustDave's topic in - Build logs for subjects built 1751 - 1800
Popeye.....Just returned from Walmart to purchase another of these bamboo trays....bad news - there was not another one to be found. GREAT news, however, I found a.much larger tray of the exact same material....good to go! Yes, the surface is completely sealed with a very fine finish. As for the shape of the transom.....camera's really tell the tale huh. Thanks for pointing that out....we can fix that whilst re-working the other. And for the record.....please do not hesitate to critique my work. In fact, I need all that I can get. Seems like I am more prone to mistakes as I am returning to the shop than I was just a few years ago. Takes a while to regain the required disciplines of measure / re- measure; check and double-check each detail.....But enjoying it more now than ever. Hearing from friends like you really makes my day. Cheers Dave -
Ed....Is this about the time "Store High In Transit" came into use?
- 3,618 replies
-
- 1
-
-
- young america
- clipper
- (and 1 more)
-
Mayflower by SawdustDave - Finished
SawdustDave replied to SawdustDave's topic in - Build logs for subjects built 1751 - 1800
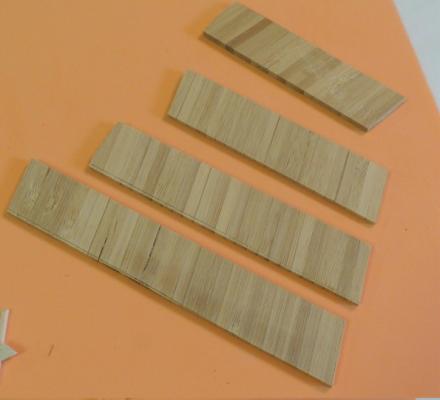
Turning back to MF#2 this morning.... While browsing Walmart several days ago, I ran across this amazingly beautiful bamboo serving board....completely struck by the beauty of the grain, I could not help but invision it as the hull of a ship. So this morning, I experimented with ripping the outer surfaces from two edges and creating planks. I think I love it! The edges are so clean, and the bending quality could not be any better. So, since the stern is the only hull surface I have used walnut planking thus far, I have decided to simply re-plank the stern with these bamboo planks. In fact, I was going to have to re-do that job any how after discovering (as usual) that I had made an obvious error in the original planking with regard to the location of the gun ports.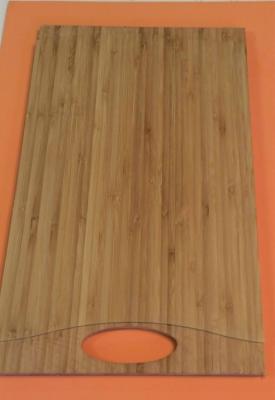

-
Mayflower by SawdustDave - Finished
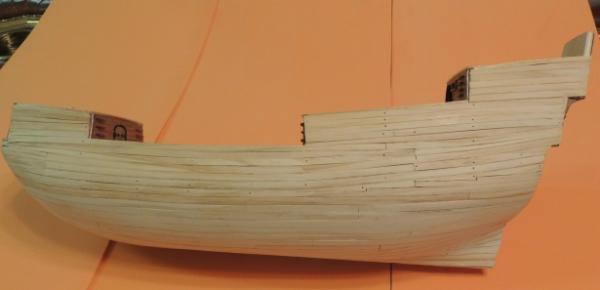
SawdustDave replied to SawdustDave's topic in - Build logs for subjects built 1751 - 1800
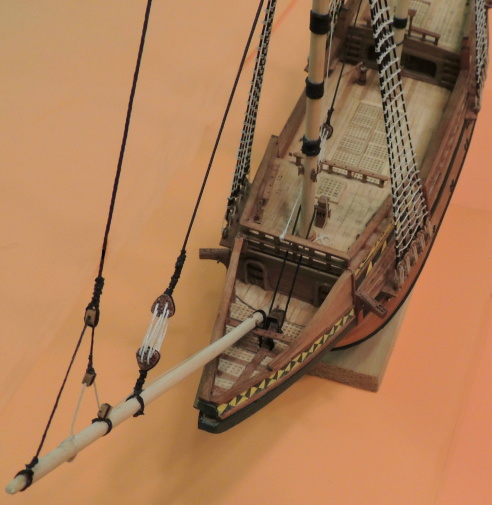
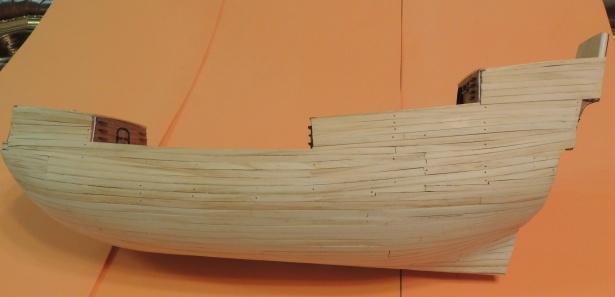
Update on both Mayflower builds.... MF#1 - 1:76 scale.... Finished tying all rat lines....installed preventor stay riggs for all masts. Installed bow sprit and rigged the fore top mast preverter stay. Looks like we are finally ready to add some yards and begin some serious rigging. As for MF#2 - 1:60 scale.... Completed first planking of the hull. Will begin working on keel and beak assembly tomorrow. I have been spending most of my time on MF#1 the last several days. Plan to move over to MF#2 for a few days and develop the hull and bulwarks above the decks.... possibly begin outer skin planking of her hull.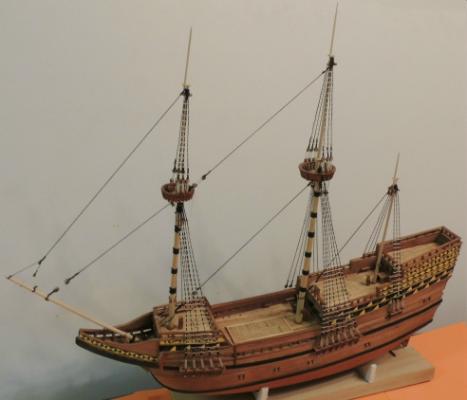

- 531 replies
-
- 11
-