HOLIDAY DONATION DRIVE - SUPPORT MSW - DO YOUR PART TO KEEP THIS GREAT FORUM GOING! (83 donations so far out of 49,000 members - C'mon guys!)
×


Landlubber Mike
-
Posts
4,540 -
Joined
-
Last visited
Content Type
Profiles
Forums
Gallery
Events
Everything posted by Landlubber Mike
-
 Beautiful Jason! That's going to look fantastic. Are you planning on adding carvings, etc. to the stern?
 -
Looks great to me Daniel, the painted thread technique looks to be a good one (I forget where I read about it). Did you cut a groove for the thread? Just curious as I have a red pinstripe to add to the side of the hull of my current SIB build. I'm going to try to cut some very thin redheart using my Byrnes table saw, but if that doesn't work, I've considered the thread technique.
-
New one (and old one actually) look very nice Daniel. Amazing how you are able to get such detail at such a small scale on a complicated ship. I've been working on a 1:250 double masted schooner for a SIB which is much simpler, yet still very hard. Big respect for your skills!
-
Very nice work Mark - the gold and black look really sharp together.
- 652 replies
-
- 1
-

-
- royal william
- euromodel
- (and 1 more)
-
That's a beautiful rudder Mark. Very nice job. I'm about to take up silver soldering too - glad you are finding great results from it.
-
Very nice tutorial Ken!
-
Looks really great Martin. All coming together very nicely!
-
That's some really nice planking work Jason. This is turning out to be a real beauty.
-
Really nice work so far Elijah. The deck plan looks like a good one. Just remember that with the curved planks, you ended up using more wood than if you just used plain strips. With 1/4" planks, they might be wide enough to build in a curve, otherwise, it's a little harder to bend planks laterally with the decks, where the planking is essentially in a two-dimensional grid, than the hull, which is more three-dimensional.
- 701 replies
-
- 3
-
-
- phantom
- model shipways
- (and 1 more)
-
Very nice work Ken! I'm glad the black stain worked out so well. I'm a big convert on using stain over paint for the very reason you described above. Have you thought about what you are going to do with the white and green areas? There are lots of green stains out there. I just bought this product from Minwax to use on a ship-in-bottle build that I will try out in the very near future: http://www.amazon.com/Minwax-30806-Express-Wiping-Emerald/dp/B004CFEBWM White can be a little tricky. To me, even if one uses a "dull white", it still looks a little too garish for my tastes. It's almost like one needs to use more of an ivory color. I saw one model using an ivory paint, but I forget which model and which paint was used You can try bleaching wood, but it's unclear whether the bleach will have long term effects on the wood. There are also pickling stains out there, most of which seem to lighten the wood and not necessarily give a more pure white appearance. One option that I've been very pleasantly surprised with is the "White Wash" stain from General Finishes. Like the other GF stains, it goes on like a stain, but has the coverage like a paint. It worked very well across different woods. Interestingly, it also worked well on metal. The lower portions of the masts on the Charles Morgan, both the mast itself and metal parts on the mast, are painted white. That gave me a little dilemma on "painting with wood" because I wasn't sure how to replicate the metal materials unless I rebuilt them in wood. Amazingly, the stain went on a piece of test brass like a paint. Aside from that, there are woods like holly and maple that seem to work nicely. I'm still undecided on what approach to take with my builds, but I have some time to experiment.
-
Really well done Mark! To me, wrongly proportioned or aligned windows can ruin what is otherwise a nice model. Yours look spot on, very nice job! I like the glazing you used. I bought that same stuff from Micromark a while back because I didn't want to fiddle with plastic film or glass and getting errand glue smudges. The effect is really nice.
-
J, this is the product I have been using: https://generalfinishes.com You can buy it from stores like Woodcraft, or online from Amazon from the Amazon stores like Woodcraft and maybe Rockler. If you flip through my Pegasus and Lyme, I did some tests using GF Black stain, GF Ebony Dye Stain, and Varathane Black or Ebony: -- In terms of coverage, the GF Black was almost like paint, without the bulkiness of paint. It comes out the same on different woods, which is why I used it on my Pegasus (for the same "black" pieces between the MDF, walnut and pear). No need for pre-stain conditioner or anything. -- The GF Ebony dye stain had very nice coverage, but showed the grain more. I'm likely going to use it on my Morgan since all the black areas will be in pear, and I want a more "grainy" look to the ship if that makes any sense. Like the GF black, I don't think you need pre-stain conditioner. -- The Varathane stain was very thin, and you didn't get the coverage and penetration like the GF stains. It operated like most stains where the stain is intended to highlight the grain.
-
Thanks everyone. Ian, my girls are still quite little and play with them often. I had to sneak them the other night - shhhh, don't tell Chris, thanks for the tip. I bought Fieblings, but have had pretty good success on my Pegasus using General Finishes black stain. It goes on easily with great coverage, and without the "thickness" you get with paints. I have a feeling it should last pretty well, as some test pieces still look pretty good with it.
-
The idea I had is to use boxwood for all the ochre areas (bulwarks, deck furniture, etc.), pear stained black for the black areas, and either holly, maple or a wood stained white for the white areas. For example, it's a little tricky in that the first planking appears to serve as the bulwark planking midship - so, I probably will plank the upper hull with boxwood for the first planking, and then plank the outside using pear. Also, the stanchions have portions that are black - meaning I might have to laminate two woods together to create the stanchions. You should try using other wood. I've really enjoyed using pear, maple and redheart on my Pegasus so far. Boxwood sounds like it should be nice to work with as well.
-
Thanks John, that's very helpful, thank you! Since I'm planning to "paint with wood," I need to carefully plan the next steps. It's going to be a little trickier than I first thought, but I think it should be doable.
-
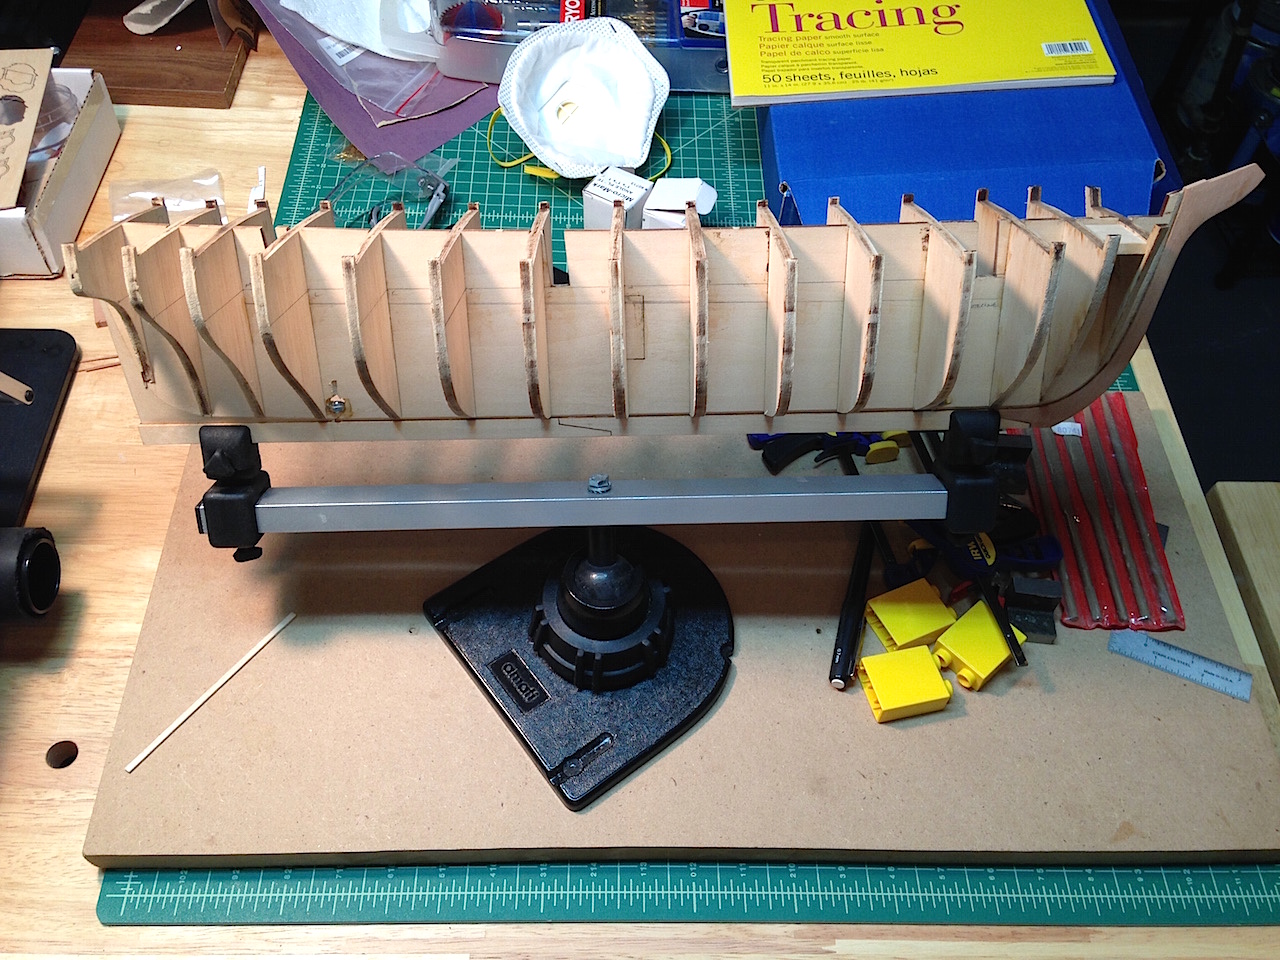
Made a little more progress on my Morgan this week in adding the bulkheads. I found I had to open them up a bit to seat them into the center keel, but nothing too major. The nice thing about the kit is that the plans use a reference line on both the center keel and the bulkheads so that you can make sure that everything is lined up properly. I found that the center tops of the bulkheads ended up just under the top of the center keel, which gives some wood as a margin so that the deck planking ends up smooth. Another nice feature was that the plans give the bevel for each bulkhead. I was a little conservative and didn't sand the bevel completely, but in checking out the planking runs, they actually looked like they were pretty spot on. The first bulkhead ended up being slightly off square, which is why you see a bit of scrap basswood that I put in between the first and second bulkhead on the starboard side to push it back into alignment. I have to say that I'm not a big fan of the use of basswood for the skeleton of the hull. The Caldercraft plywood and the Amati MDF were much better in my opinion. Like other Morgan builders, I snapped off some of the thinner extensions at the top of the center keel Not a big deal in the long-run, but just an annoyance. The bulkheads themselves split here and there (especially near the extensions) too. The bulkheads also seemed to have a bit of flex to them that I did not find with the Caldercraft and Amati kits. I'm considering whether to install additional bracing blocks like the one I used above between each bulkhead to keep them all square. This was not an issue in my Badger and Pegasus kits due to using stronger materials.

-
That came out really nicely Joe, congratulations on a fantastic build! Looking forward to seeing you restart your Morgan
-
Ken, I'm no expert, but I think like the other Ken said, the pre-stain conditioner helps to keep the stain even as well as keep the grain down. On my Pegasus, I haven't found the need for the conditioner when using the General Finishes "Black" stain which goes on evenly on pear and other woods - in fact, it seems to come out the same across woods. Definitely do some test pieces as I'm not sure how basswood handles stains.
-
Very nice Martin. The cannons took a ton of time on my Badger - for a small part of the model, there are so many parts and opportunities to improve on the details. Great work!
- 467 replies
-
- 2
-
-
- fly
- victory models
- (and 1 more)
-
Those Dr. Slick scissors look very interesting. I've tried a few scissors in the past, but it's always hard to get a clean cut just above the knot without leaving little tails. Thanks for the tip!
-
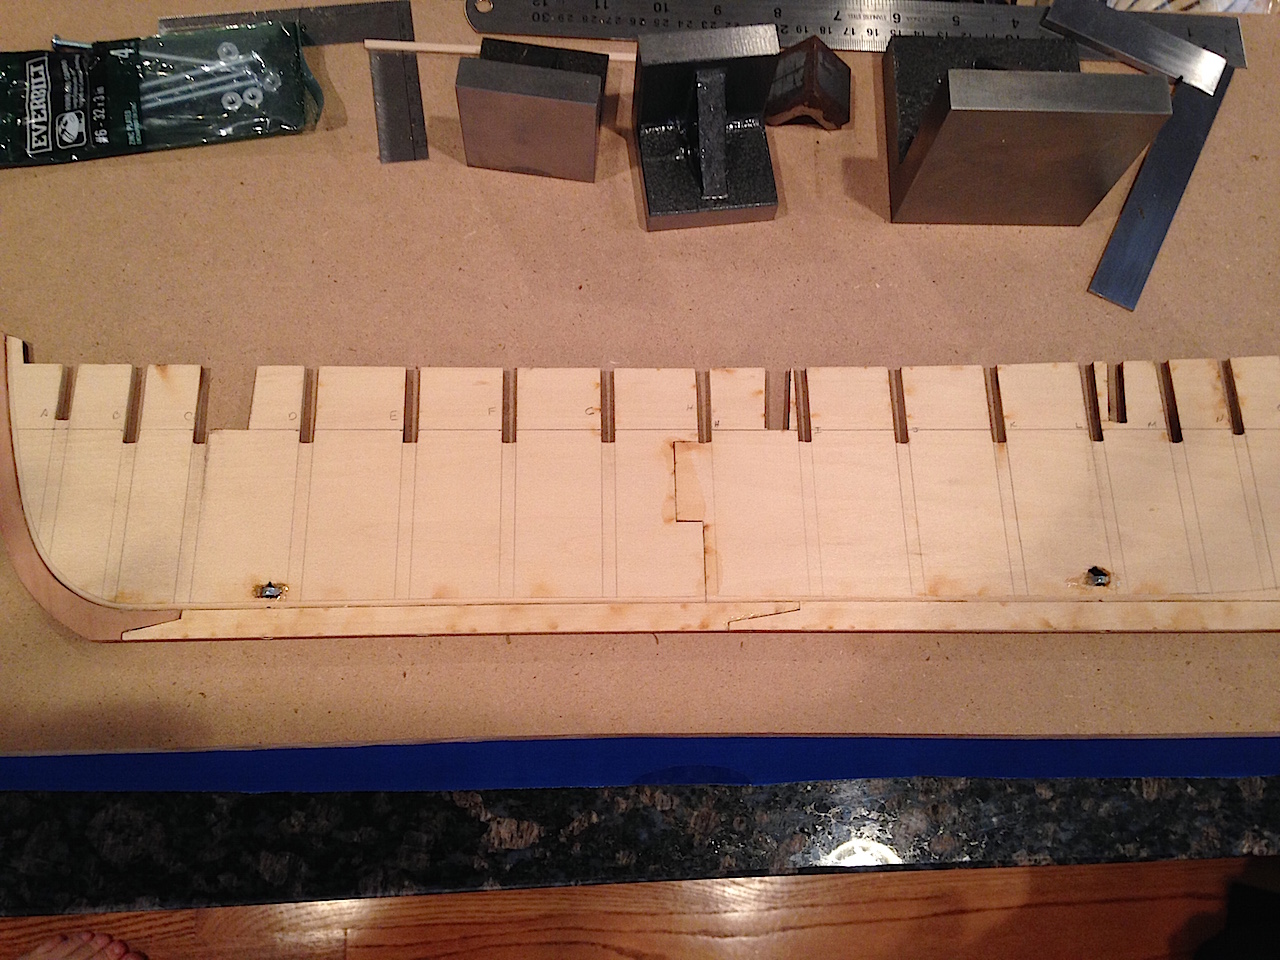
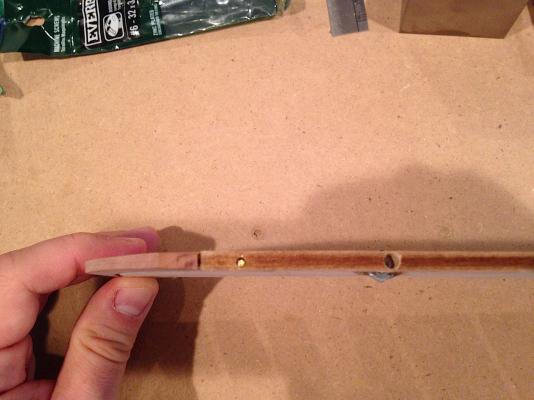
Just came back from a week at Disney with the kids, but had made a little progress on my Morgan before I left. First up was to house some nuts into the center keel for the mounting pedestals. I epoxied a couple of nuts for #6-32 machine screws about 3/4" (18mm) up into the center keel: I ended up cannibalizing the nuts from my Unicorn/Lyme build - the epoxy really held the nuts in place without needing any other support for the nuts. I originally bought 2" machine screws, but forgot that the screws had to not only go through the model and the pedestals, but also any mounting base. Thankfully I was able to find some 3" screws which hopefully should be long enough. The kit's instructions had what I thought was a helpful tip to install dowels or rods to pin/support the keel and stem into the center keel. I never did this on my prior builds, but I figured a little extra support never hurts - particularly since this kit uses basswood for the framing pieces. I ended up going with brass rod. I forget the diameter, but I think it was around 1.8mm or so. At that diameter the rod is pretty sturdy, yet small enough not to disturb the rabbet joint. Pretty easy to do: drill a hole, stuff a little epoxy into the hole, then hammer the brass rod into the hole. Even more fun in that I finally got to use the ball peen hammer that I got as a bonus from my first order with Micromark years ago when starting my first build. I installed four support rods: three along the keel (one near the stern and one through each joint between the keel/stem pieces) and one at the fore end of the stem just below the copper line).

-
Really looks great Ian. The cannons and quarterdeck are much improved! You're a brave man tackling the quarterdeck like that. I never had much confidence in the kit bulkheads. In fact, on my Unicorn, I must have leaned the model against something and now one of the bulkheads is warped. I have a similar splaying issue on my Pegasus because the redheart I used to replace the bulkhead extensions is weak - lot of flex to if and they broke in a few places. The upper hull planking seems to be fixing things but it's a pain because I need to clamp the opposite sides of the bulwarks with the quarterdeck support frames in place to keep the proper shape. I wonder if I might need to install similar posts as you did.
-
Looking really great Charlie. All that work upfront will pay off many dividends in the end.
-
Looking really nice Ken, very nice job! I think you'll like the result you'll get from using stains over paints.
-
I started something like that on my Pegasus and Morgan logs Cathead. Great minds think alike!