Landlubber Mike
-
Posts
4,543 -
Joined
-
Last visited
Content Type
Profiles
Forums
Gallery
Events
Everything posted by Landlubber Mike
-
 Looks really great Don. That lady has a lot of curves! Love the unique subjects that MarisStella is offering.
- 653 replies
-
- 6
-

-
- trabakul
- marisstella
- (and 1 more)
-
Hey Don, that looks like an amazing kit! The plans, wood and fittings looks really top notch. I'd have a hard time not starting it either if it was on my shelf I hope you don't mind me being your first subscriber.
-
Thanks Bob, really appreciate it. Means a lot coming from someone of your skill!
-
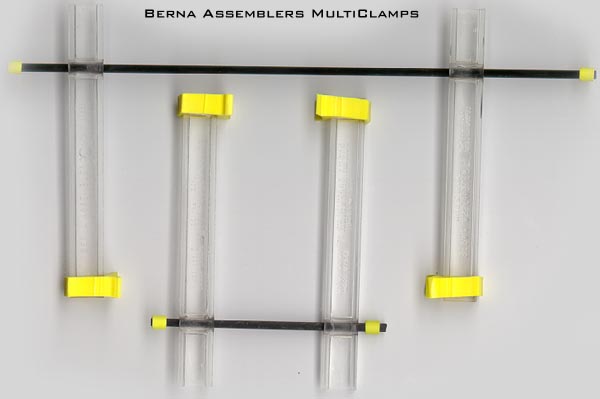
One thing that was a bit frustrating was that I had replaced all the upper bulkhead extensions with red heart, even the ones at the waist that were to be removed anyway. That ended up being a real pain for me as I did the upper hull planking, because a couple of the redheart extensions snapped at the waist. as a result, the gunport patterns ended up slowly pushing outwards to a more vertical position, rather than curving inwards like they should (Ian, similar issue you were having on your Unicorn). So, I ended up having to clamp the tops of the patterns to pinch them inwards as I planked. If I didn't, the bevel on the planks would be wrong which would make it harder to get the tops of the patterns back to the proper position. That sucked in a lot of ways because the Irwin micro clamps I was using were a touch too small and would pop off at the slightest movement. Eventually I found these Zona Berna clamps, which really worked well. They are a bit pricey, but well worth it. Amati has similar clamps on the market, but they aren't very good. As I added the upper hull planking, the gunport patterns began behaving better and staying more or less in the proper position. Once I add in the inner bulwark planking and glue in the quarterdeck and forecastle support beams, things should be fine. A real pain though! I wish I had left the MDF extensions at the waist as I would have avoided these problems. I can't tell you how much I kicked myself for that oversight.
-
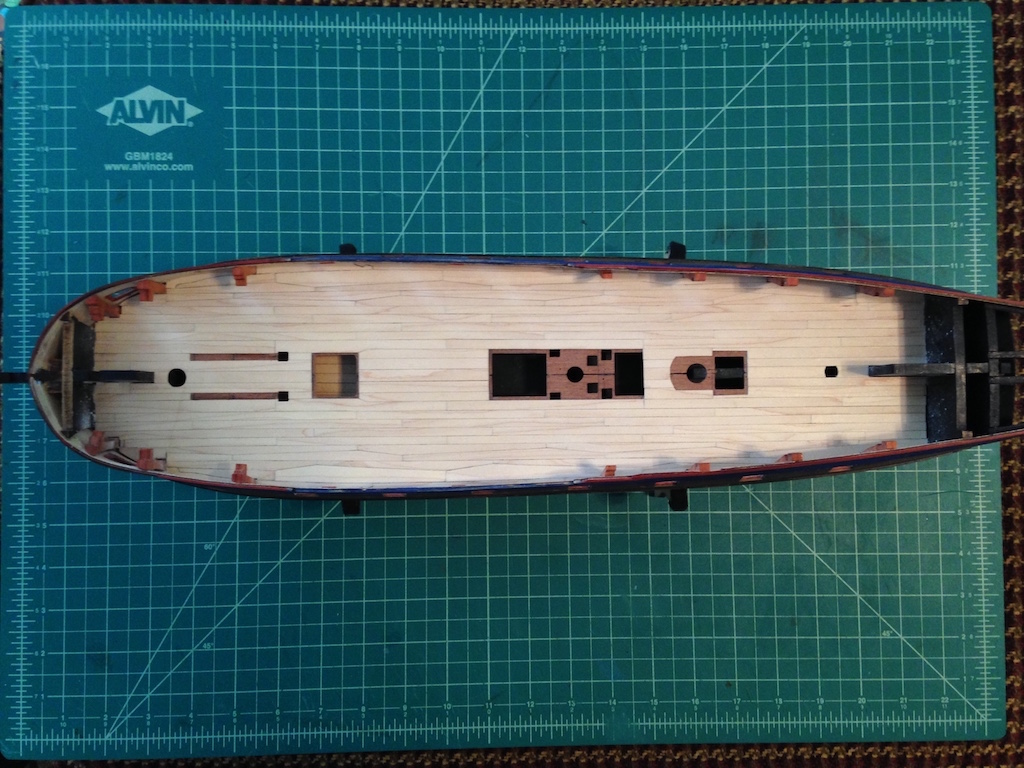
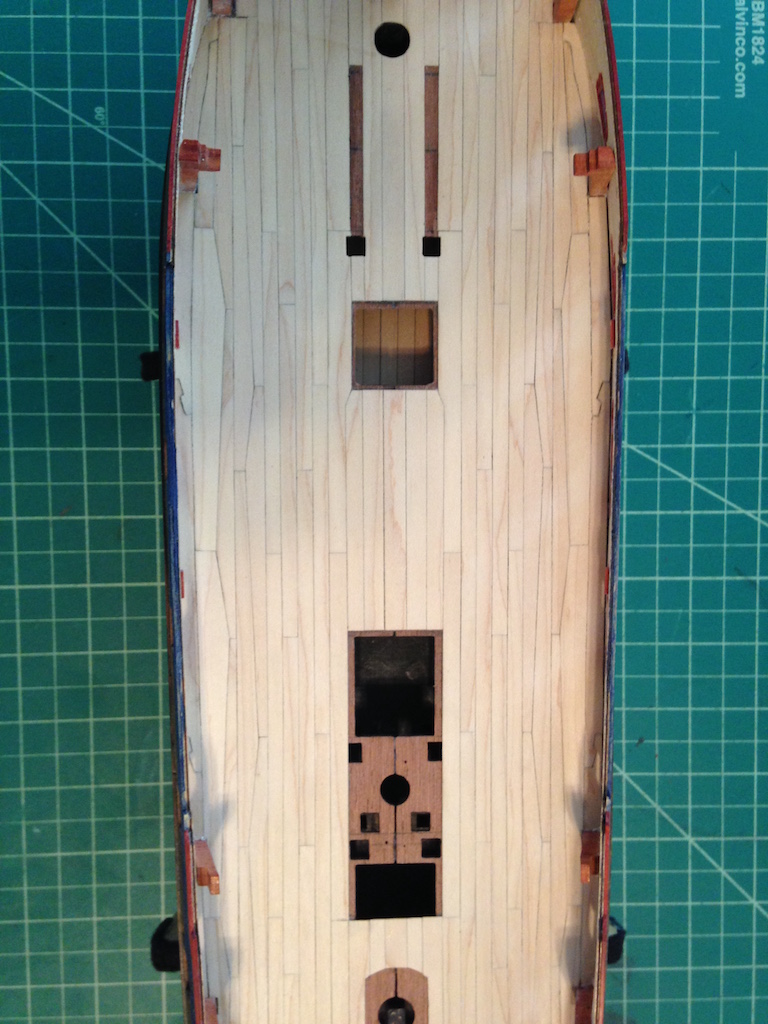
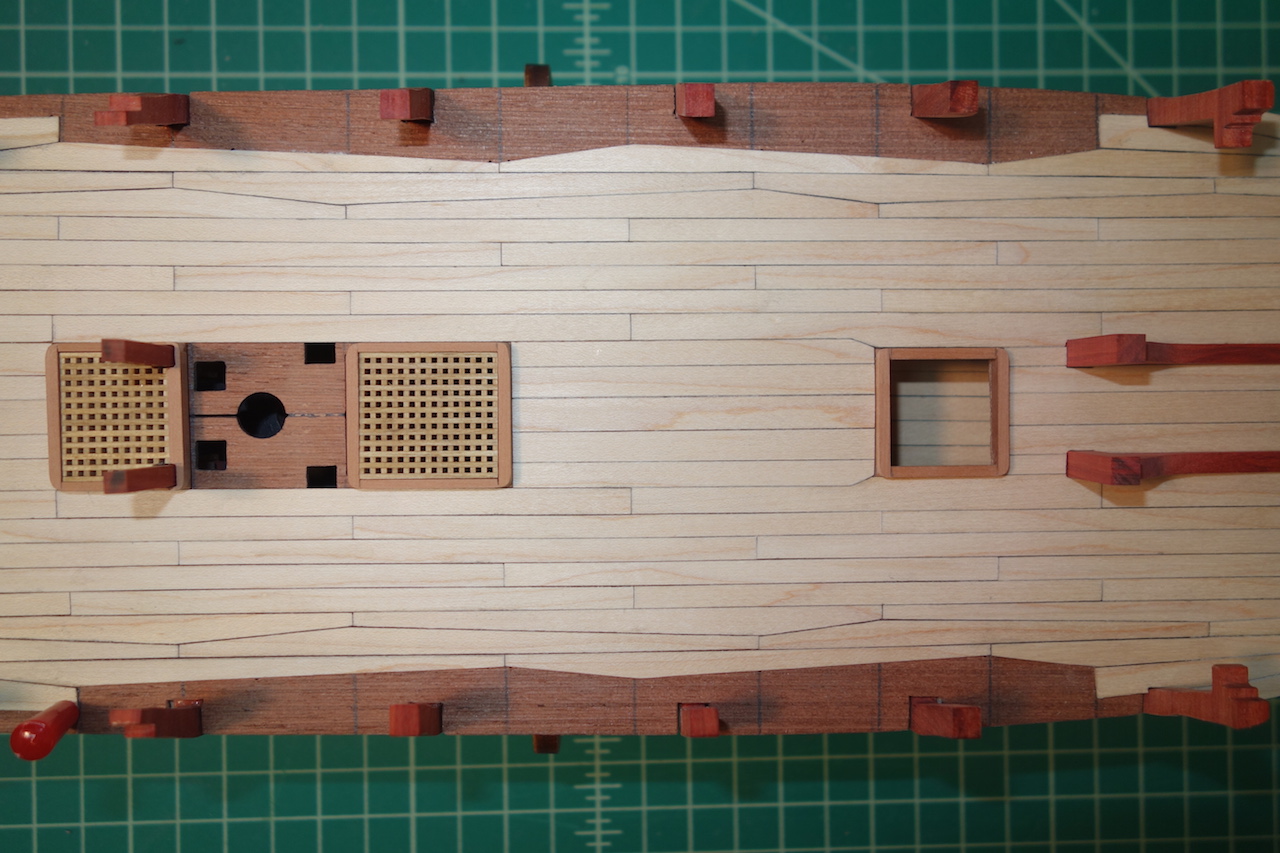
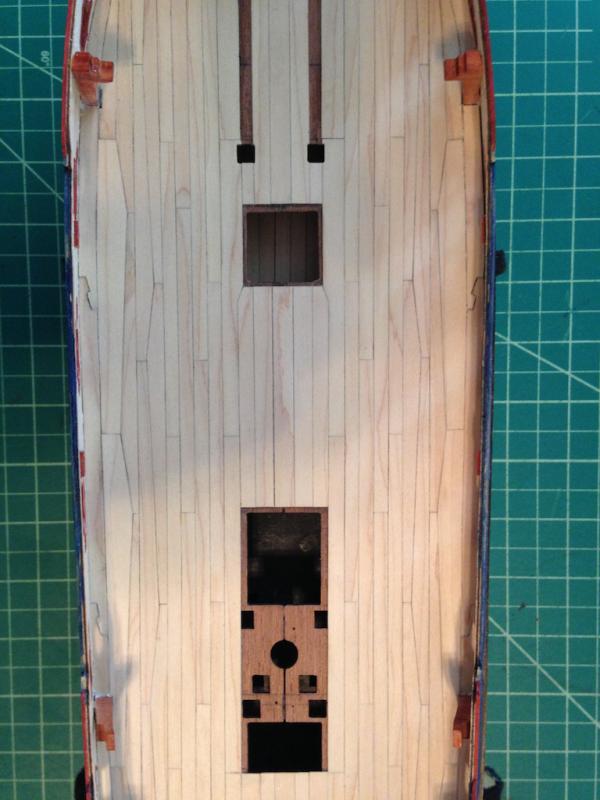
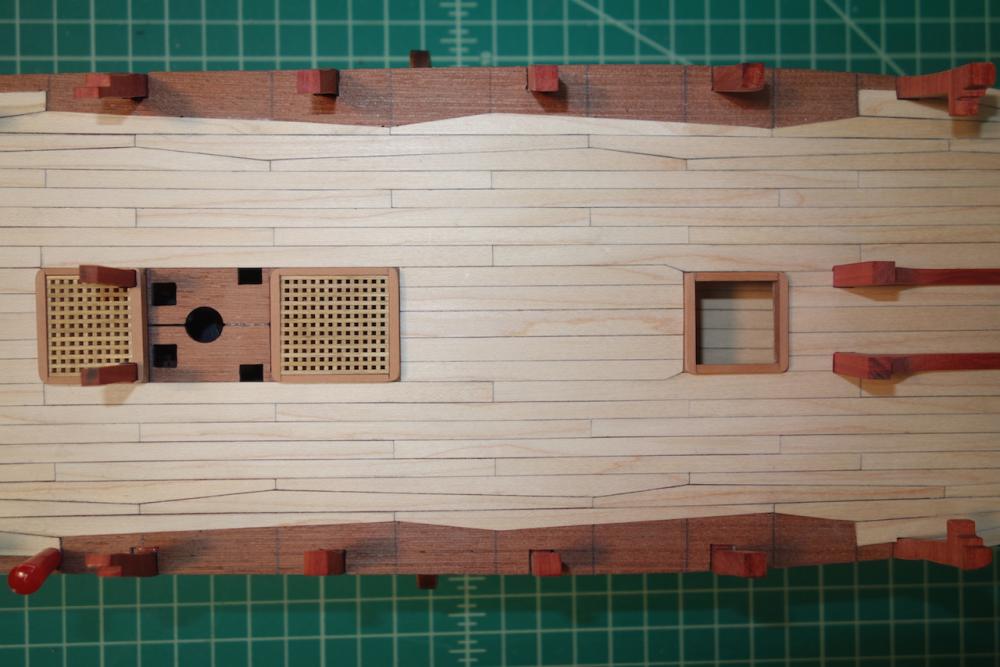
I've been a little busy with work the last couple of weeks, but managed to sneak in some time on my Pegasus. I had left about six planks on each side to keep the bulkhead extensions at the waist. Now that the outer hull planking is complete, I was able to fill in those planks. A bit tricky to fill in the top and butt planking, but it wasn't too bad. I first created card templates, then cut the planks slightly oversized which I then sanded back to get a snug fit. Still need to do a little finishing, but in generally I think they came out pretty well. If I had to be critical of myself, the last top and butt planks are slightly oversized by about 1mm in width or so. I was planking according to the TFFM deck plan, and this is a good example how being off by little increments of even 0.1mm in the prior planks will catch up to you. Luckily, the cannons and other deck details can be used to hide this issue. BE, thanks for the tip on the veneer saw. It made removing the bulkhead extensions a breeze. The deck is in maple, which is a really nice wood to work with. Even at 0.5mm, the planks cut very smoothly with no issues at all with splitting, etc. In terms of workability, I would easily put it on par with boxwood and pear. The only drawback is that the wood is not uniform in color like boxwood and pear, but has waves or a slightly darker brown throughout. Personally I like it as it goes with my preference to show the grain in my build and not cover it in paint. For next steps, I think I'm going to work on the inner bulwark planking and the exterior hull. For better or worse (probably worse), I'm very much a "lap" modeler. Once much of the heavier exterior work is done, I'll turn to the deck details. I learned my lesson on my Badger, where per the directions, I installed the cannons and then worked on the rails, etc. I can't tell you how many times I busted off the cannons and their rigging


-
Really nice tutorial Steve. Looking at the jigsaw patterns in these pictures, mine lined up in the same spot, and I also found that the patterns were a bit long at the stem. I soaked and pinned my patterns twice. I didn't find that they held their shape very well, but maybe I needed to do it a few more times. Soaking and pinning does help loosen the fibers to get a more natural feel. One key point that I missed early in the build was that the outer stern extensions should curve inwards. Use the quarterdeck ply piece to help you line them up. It wasn't a problem to pop them off and realign them, but easier to get them done the right way the first time.
-
Sorry, I think I may have confused things. Don't start at the bow! Start at the jigsaw joint and then line everything up with clamps. The patterns are too long, and you will need to take material off the front end.
-
Herb, I just went back through my log - take a look at this post here: http://modelshipworld.com/index.php/topic/7267-hms-pegasus-by-landlubber-mike-amativictory-models-scale-164/?p=271803 Reading that post, apparently I did start with the jigsaw joint, and worked my way forward: "Here are some pictures when I started with the starboard side. My approach was to get the two halves pinned and clamped, then start with the end of the front pattern and work my way forward. Then I worked the back pattern starting from the jigsaw connection to the stern. When I got to the stem, I slowly sanded the fore edge back until it fit snug against the stem. I don't think you can fit the patterns starting at the stem and working towards the stern - aligning the patterns at the middle was a much better approach I think." Take a look at my pictures in that post to see how I clamped/pinned the pattern. I found it easiest to use clamps at the tops of the bulkheads, and then those planking pins from Micromark for the bottoms. Start by setting up the pattern with the clamps at the tops - the clamps are easy to adjust, unlike pins. Since you can't use clamps at the bottom section of the pattern, once the top of the pattern is clamped to all the bulkhead tops, then use pins to ensure a tight fit against the bulkheads. Once you're done with all that, glue the pattern in sections. Start with the front gunport pattern at the jigsaw joint and work your way forward. Glue the first few bulkheads, let it dry, then finish the remaining bulkheads. Then start with the jigsaw pattern of the back gunport pattern and work your way backwards. Slower, more methodical approach but much easier than trying to glue the pattern all at once. Good luck my friend
-
It's a little hard to tell from pictures given the angle, but my jigsaw joint might have been a tad further back than Steve's, but the front edge seems to be on the bulkhead: http://modelshipworld.com/index.php/topic/7267-hms-pegasus-by-landlubber-mike-amativictory-models-scale-164/?p=271803
-
Scroll Saw question
Landlubber Mike replied to alde's topic in Modeling tools and Workshop Equipment
One thing to consider is buying a good scroll saw off of Craigslist. Many seem to have been used for a weekend kid's project and then never used again. I got a great deal on a Dewalt 788 off of CL a year or two ago. Guy was a hobbyist furniture maker with an amazing workroom, and had bought the scroll saw on a whim at a show, brought it home and turned it on to make sure it worked, and then never used it again. Essentially got the saw, stand and light, and a whole bunch of blades, for less than half retail for a practically new machine. The Dewalt came highly recommended from the folks here at MSW. I like it a lot - it's served me very well on a variety of cuts. I'm in a similar situation as you, though with many more years until retirement I don't have as much time to model as I would like given work and family. I figure when I retire I'll be able to jump into full-on scratch building, but in the meantime, it's still fun to play with machines when I can. I'd also rather spend the money and buy good quality machines that will last a lifetime - the Byrnes and Sherline machines are really great tools, you'll enjoy using them. -
I hate to say it, but Steve is right. Shifting the gun ports is going to be tricky. 3mm at this scale is sort of a lot and it will likely cause you problems down the road. In particular, your planking runs on the starboard and port sides will be different, which could cause you some grief. I forget exactly how I glued mine on, but I think I first clamped both sides to the bulkheads, and after getting them in the right position, I glued the strips in stages - essentially, keep the clamps on the areas that weren't going to be glued, take the clamps off the areas to be glued and re-clamp, then after the glued areas dried and were stable, take the clamps off the remaining areas and then glue and re-clamp. I may have started at the bow and worked my way back, but I might have actually started near the jigsaw joint because it was a relatively flat area to glue, and it's pretty important to get the joint to line up evenly. That was the best way (for me at least) to ensure that the line of the strips remained the same, otherwise trying to glue in one shot can be very tricky. Up to you though. Good luck!
-
There you go, looks much better. Nice job, good to get the step behind you. It's all downhill from here I always get a kick out of pictures showing all the clamps used to set the gunport patterns. I had to empty the clamp box myself.
-
Looks really great Martin! Very nice job! The hatches came out really well too. The boxwood looks really nice against the holly deck planking.
- 467 replies
-
- 1
-
-
- fly
- victory models
- (and 1 more)
-
Thanks very much Dave! Hope you're having fun at Mystic! It's a fun place, I took my oldest daughter there a couple years ago, and she liked going on board the Morgan, or as she called it, the pirate ship
-
Hey Mark, thanks so much for the link and tips. Unfortunately that's the only saw I have. I have a scroll saw but that probably won't cut it (sorry for the pun). I'll have to check some of those sources out. The one thing I liked about Jeff was that he milled your order with wood that all matched up quite nicely. I worry about ordering from other places where you get variations in the wood.
-
Thanks guys for the tips. Really appreciate it. Doc, thanks very much for chiming in. Not sure why I haven't gone through your builds before, but wow! Very nice! Love how you mix the various woods together. I think I'm very much in your camp of avoiding paints and "painting with wood" instead. Few questions if you don't mind: 1. Where do you source your wood? And do you use a mini-table saw like a Byrnes saw to cut blocks into planks? I haven't tried that yet on my Byrnes saw, which is the biggest saw in my shop. I'm wondering if I can buy small thickness wood under 1", saw it into mini sheets, and then cut planks from those sheets. I just don't know how large in thickness I can go with that saw. 2. Do you have any pictures comparing African blackwood with Bolivian rosewood? I did a quick search and most of the Bolivian rosewood that I came across seemed on the lighter side. 3. Given your experience with African blackwood, is it going to be a tough job using it on the Morgan? I'd use it for the upper hull planking (so, there will be plenty of bending near the bow), the cap rails, the stem (which I'd have to carve from 5mm stock), and the beginning part of the bowsprit, which I think is on the order of 6-8mm in diameter. Thanks in advance!
-
JP, welcome back! I picked up the kit off of eBay a while back and logs like yours make it hard not to start it Just out of curiosity, is that blue paint or stain? Manufacturer and name? It looks really nice.
-
Thanks guys. I've seen a couple of European builders who used it on their builds who said it was easier to work than ebony. I can't recall if they were using it as extensively as I would need to on the Morgan though. Not too many people in the states have used it from what I can tell. A lot of people have used ebony for the wales or smaller pieces, but that's about it. Woodcraft had a big sale a while back, and I bought some pen blanks and other sized pieces of exotic woods. I think I've got a pen blank of African Blackwood, and a 1.5"x1.5"x18" of ebony. I might try cutting some planks out of both to see if those woods would be too much trouble. If anyone else has any experience with African Blackwood, I would greatly appreciate hearing about it.
-
I'm so pleased with the "painting with wood" on my Pegasus that I'm all gung-ho for doing the same on my Morgan. My initial thought was for the black areas (upper hull planking, part of stem and cap rails) to use pear that is stained black. Now I'm think about using African Blackwood instead. The black-stained pear looks really nice, but it tends to hide the grain (at least the stain I'm using). I'm thinking about going all natural with my Morgan - holly for the white areas, boxwood for the ochre areas, and something like maple for the deck. You see a little grain with those woods, so I'm thinking African Blackwood might look fantastic. It sounds like it's less difficult to work as ebony, and possibly less of an allergy inducer. It's a decent amount of area to cover, but pretty limited to things that aren't too difficult to craft. Am I crazy? Has anyone else here used African Blackwood on the builds that can share their views on it? Thanks!
-
Hi Don, I just took a look at my build and took some rough measurements of the various top and butt planks. The lengths of those planks and the "normal" planks seem to have been around 85-110mm in length. As for width, most ended up at about 5-6mm at the widest part. If you are spiling, however, you'll need to add a little extra to account for the curves. If I remember correctly, for some planks I went with 8mm wide planks, and even went as wide as 10mm in a couple of cases. Take a look at the spiled plank here - the plank itself is not very wide, but the curvature required starting with a fairly wide plank (for reference, the squares on the hobby mat are 1/2" or roughly 12.5mm in height and width): http://modelshipworld.com/index.php/topic/7267-hms-pegasus-by-landlubber-mike-amativictory-models-scale-164/?p=365802 I got a little better as I went along with using narrower planks so there was less waste, but where there were a lot of curves, like at the bow, I still needed extra material to be on the safe side. For all my planks, I would cut the shape out like in the link above, but then test fit, hand sand, test fit, hand sand, etc. until I got a tightly fitting plank. Took a long time, and certainly spiling uses more material per area than cutting taper into normal square planks, but I think the results are well worth it. Definitely try it if you have the patience. It's really not as hard as it might look, and as you do more and more of them, you get better and faster. The two craziest planks that I had to craft were in the links below. They were at the bow and at the stern, respectively, and not only were spiled, but also had to account for a drop plank above them. The second one almost killed me (and you can see that I probably had to start with planks at least 12mm wide). Those took me a few hours each to craft http://modelshipworld.com/index.php/topic/7267-hms-pegasus-by-landlubber-mike-amativictory-models-scale-164/?p=366765 http://modelshipworld.com/index.php/topic/7267-hms-pegasus-by-landlubber-mike-amativictory-models-scale-164/?p=367440
-
Don, welcome to the Swan Club! Glad to see you starting your Pegasus! Like you, when I saw the kit and the various logs of it, I also knew that this was an absolute must-build for me. And thank you for your kind words - this is only my second kit, so I'm still very much a novice and learning from others on here each day. Great start - the MDF is so precise and fits together like a glove. I wish more kit manufacturers went with MDF for the skeleton of the hull. One bit of caution - when fairing the bulkheads, it might be worth doing so outside and/or with a dust mask on. I usually am not too sensitive to wood dust, but the MDF burned my chest and made me cough quite a bit. Using a dust mask helped a lot. One thing I noticed on your model is that you have the stern extensions square to the ship. Take a look at my post below - I think these actually need to curve inward a bit to follow the hull/quarterdeck line as you can see in the pictures (it's quite possible that I have that all wrong though): http://modelshipworld.com/index.php/topic/7267-hms-pegasus-by-landlubber-mike-amativictory-models-scale-164/?p=267492 One last thing - if you can get your hands on the TFFM books, they are a really nice resource. Volume 2 is probably the one I have been most using as it has lots of great information and tips on the various detail items. Volume 1 is mostly for constructing the hull and its frames, and I haven't referred to it much. Volume 3 shows one guy's journey step by step as he scratch builds a Pegasus which is interesting to see, but probably not critical. Volume 4 is all about rigging and sails, so it's probably worth considering if you are going to add sails to the model. So long story short, I'd highly recommend Volume 2 for the pre-rigging stage. The volumes are pricey and worth every penny, but I was able to find mine on eBay for a good price. The NMM plans for the Pegasus are really beautiful too. Again, not necessary but an interesting resource if you are open to deviating from the kit. For me, I've used them to locate and resize certain of the deck items like the hatches and bitts. I also noticed that the rails were of slightly different widths from the kit, but nothing major. Overall though, the kit and its plans are very close to the NMM plans. Looking forward to following your build! Please don't hesitate to reach out if you have any questions.
-
Very cool project Maury - it's nice seeing other subjects besides the usual 18th century gun vessels on here (I'm one to talk, I know!). I followed your Fair American and Longboat builds, so I only have the highest expectations for this one - no pressure now!
- 525 replies
-
- 3
-
-
- anchor hoy
- hoy
- (and 1 more)
-
It's been a while since I caught up with your build Doug - very nice! Love how the tanganyika deck came out!
-
Nice work Herb. A pain I'm sure to do this, but taking one step backwards here will really make life easier for you down the road. Which manufacturer's gun carriages are those? They look really nice.