Landlubber Mike
-
Posts
4,551 -
Joined
-
Last visited
Content Type
Profiles
Forums
Gallery
Events
Everything posted by Landlubber Mike
-
I have this Panavise - it's very stable with the wide base and weight. With this Panavise, I've never had the need in this hobby to have a bench-mounted vise. https://panavise.com/index.html?pageID=1&page=full&--eqskudatarq=5
-
 That's the one Charlie. For what it's worth, the Unicorn and the Lyme were members of the Lyme class and the first "true frigates" as has been said earlier. Ian, John and many other Unicorn kit builders and I have done quite a bit of research. I purchased the Lyme plans, and the plans in the Chapman book above for the Unicorn match up quite well. So, I think that the Chapman plans for the Unicorn are pretty accurate. Where I think the Corel kit fails is in the various details - particularly with the deck plan and the very narrow waist. Ian and others have suspected that Corel sorta merged the details of later period ships with the Lyme class, coming up with a model that is not particularly accurate. That being said, with a little research, I think the Corel kit can be improved to come up with a historically accurate Lyme class vessel.
- 66 replies
-
- 4
-

-
- resolution
- hunter
- (and 2 more)
-
Looking really great Martin, very nice job! Good idea to test fit things. Cannons were the bane of my Badger build. I can't tell you how many times I popped them off the deck inadvertently. I'm probably going to do everything I can on the hull before adding them.
- 467 replies
-
- 1
-
-
- fly
- victory models
- (and 1 more)
-
Igor, that's incredibly beautiful work. The bottle is fantastic - those lines in the glass make for a really neat background. Well done! What material do you use for the sea? It has a very nice color and translucence to it that makes it look very realistic.
- 64 replies
-
- 2
-
-
- koch
- polar ship
- (and 2 more)
-
Nice work Tom. Love the color of the hull. I built the Hannah SIB not too long ago - it makes for a nice model and introduction to ship-in-bottle building.
-
Looking great Chris - nice set up you have. Welcome back
-
Wow, that sounds fun. Cutting from a billet probably would be better than trying to bend the plank laterally. Good luck!
-
I just fit the wales on my Pegasus in 2mm pear using top and butt planking. It took quite a bit of time, especially as I was cutting and fitting the planks by hand. I was thinking throughout the process "thankfully I'm not using ebony!" For most of the planks, I soaked them, pinned them to the hull, let them dry, and they were ready to go. The planks near the bow were a bit trickier and needed more bending, so I soaked and pre-fit them using the jig in the post below, before soaking them again and pinning them to the hull. I split a couple of the bow planks, until I realized that it really helped to soak the planks, then bend them by hand forward and backward to loosen the fibers in the wood before putting them in the jig. http://modelshipworld.com/index.php/topic/7267-hms-pegasus-by-landlubber-mike-amativictory-models-scale-164/?p=329358 Just thought I'd share, though I'm sure you have a better technique in mind
-
Wow, the treenails look great Nigel. Glad you decided to take that approach. I might have to think about doing something similar on my builds. The ebony black strake looks fantastic. I'm sure it took a lot work to fit, but it looks really sharp against the boxwood.
-
I like the look of tung oil on natural wood. On my Badger build, I thought it really brought out the walnut areas. I also used it on my tanganyika deck, where I used bamboo for the treenails. I thought the tung oil brought out the treenails a little better, though over time, my test pieces using tung oil and wipe on poly looked about the same. For the painted areas on my Badger, I used wipe-on poly. It's a very close second for me to tung oil in terms of finish. I bought some danish oil which I tried out on some test planking, and I noticed that it imparts a little more of a yellow color, particularly on lighter wood like maple. It might be good in certain circumstances, as I've seen others on here use danish oil to good effect. Redheart is another story. With the grain, tung oil gives the wood a gorgeous finish. End grain, however, turns very dark, almost black. For end grain, I found that varnish tends to keep the natural color of the wood: http://modelshipworld.com/index.php/topic/7267-hms-pegasus-by-landlubber-mike-amativictory-models-scale-164/?p=267828
-
Looking really beautiful Ulises. The wales look fantastic with that stain - very nice touch.
- 786 replies
-
- 2
-
-
- Royal Louis
- Finished
- (and 1 more)
-
That's looking really great Martin. The spirketting versus the quickwork is a really nice touch. For the gunport linings, did you run the cranberry strips up to the edge of the plywood of the gunport patterns? A little further past it? I was wondering how thin and narrow these strips actually have to be. Speaking of which, how thin did you cut the sweep port linings? I bet that was a lot of fun
- 467 replies
-
- 1
-
-
- fly
- victory models
- (and 1 more)
-
Interesting, it does look very similar to the Unicorn of the Lyme class. Beautiful ship!
-
Beautiful decorations Mark. I hope you plan to add them to your Licorne! The French ships are really gorgeous. The Corel Unicorn figurehead, while not exactly similar to the Licorne figurehead, should be a good model I would think.
-
Yeah not sure I'd do it with ebony, but 2mm pear wasn't bad at all to work with
-
Thanks Frank. Since I'm going to cut my planking out of pear sheets, I'm going to try spiling. Because I'm going to copper the bottom, I actually don't have to spile all that many rows of planks. It will also give me practice for my Lyme. I'm studying Chuck's tutorial and the Model Expo pamphlet on planking also. Thanks Per. I'm not going to be using paint at all on the build, at least that's my goal, but I will use stains and dyes for colors. I'm planning on staining the wales and planking under the wales down to the waterline in black. The planking above will be a mixture of pear stained a bit darker brown, pear or boxwood stained blue for the friezes background, and I'll be using redheart for the uppermost section of the hull planking. At least that's the idea right now
-
Hi Jason, thanks for checking in. I was pretty happy using one layer of thicker planks for the wales, rather than go with two layers of planking. One benefit is that you only have to do the planking once. Another is that with two layers, you don't run into seeing slivers of the lower planking if the top layer of planks doesn't line up completely with the lower planks. Being thicker, it takes a little more time shaping the planks, especially at the stem. Beveling the planks is much more critical too so you don't have gaps between planks.
-
Looking great Mark. You got a really nice curve to the stern counter too - nice job! She's going to be a really curvy lady!
-
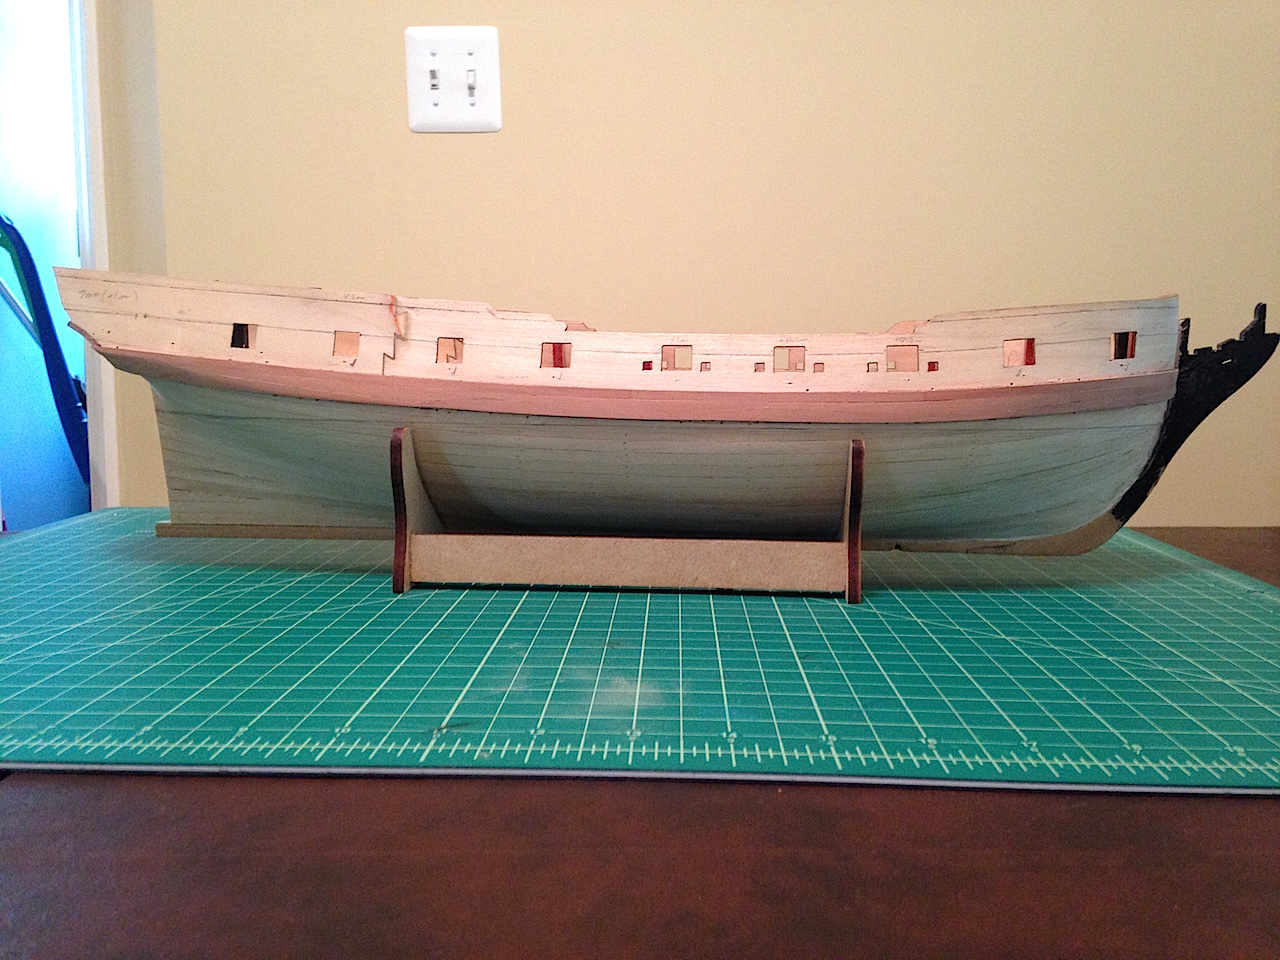
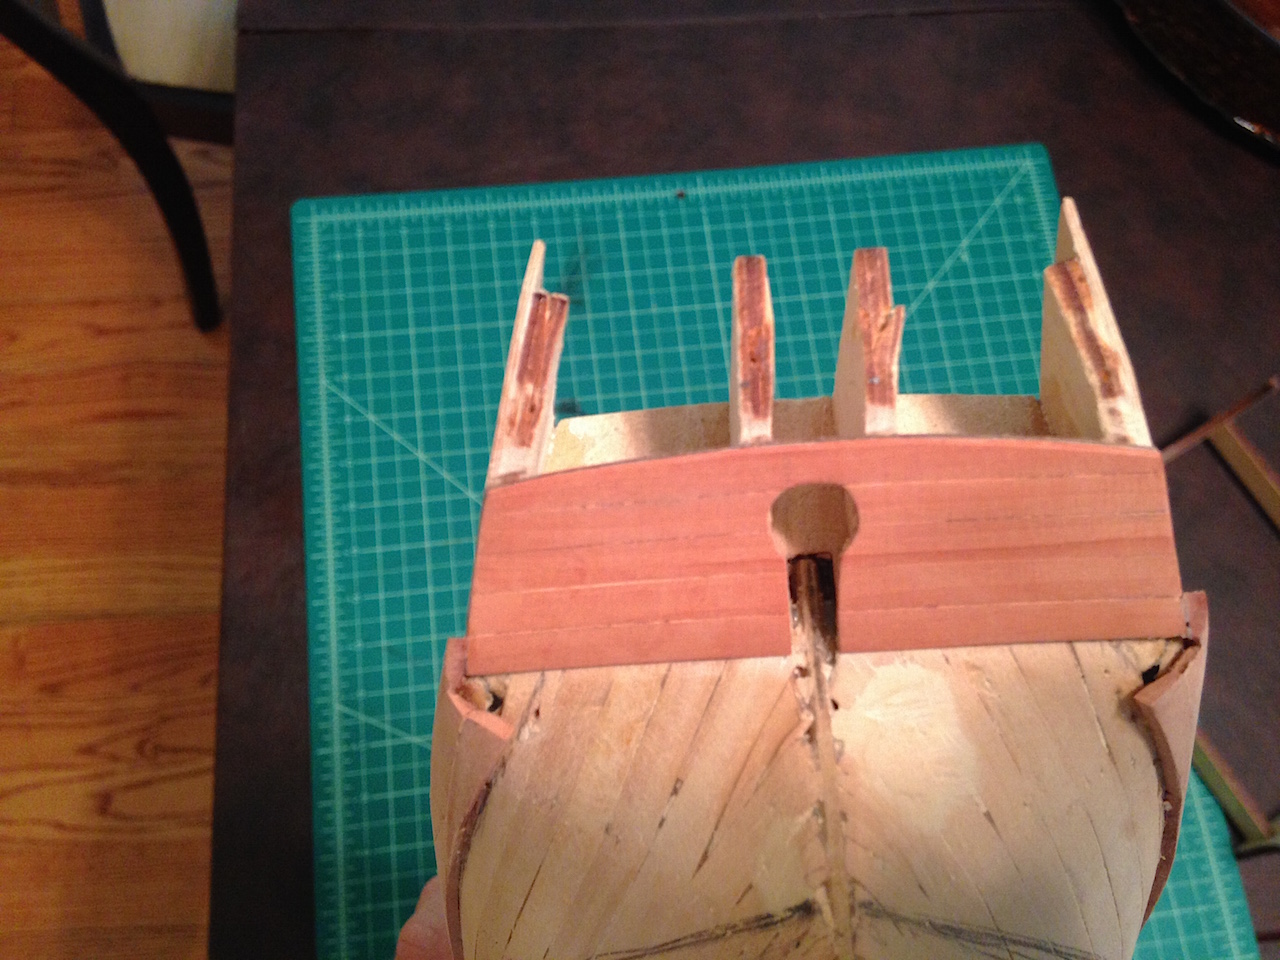
So I finally got the wales done. I used 2mm pear planks, rather than two separate layers of 1mm planks. I went ahead and used the planking pattern from TFFM, with a top row of straight planks, and the remaining two rows using top and butt planking. The Swan class is very curvy, so I took my time with the planks. All planks were soaked and pinned, and then when dry, beveled (bottom two rows) and shaped to fit (the stem end planks got an initial soaking and drying in the jig I posted earlier). I originally thought about using the miter jig on my Byrnes table saw to cut the various top and butt planks, but since each of these planks were generally different in sizes and tapers, I cut and sanded them each by hand. The stern end of the wales is a bit different from the wales on my Badger, which was a single plank and just ended along the side of the ship. According to TFFM, the bottom aft end of the wales curves around and under the stern a bit. After a few rounds of soaking and bending, I managed to get the last plank on using 2mm planks. TFFM suggests, because of the shape, to take a thicker piece of stock and carve and sand it to shape - the approach Martin took on his Fly. It didn't seem too tough with the 2mm planks. The space under the planks will be filled when I add the hull planking in the area between the end of the wales and the stern counter. Here it is after some rough sanding - I plan on eventually sanding it into a more pleasing curved shape. I left the piece a little longer so it tucks probably a bit more under the stern than it should, but I plan to carve and sand it back probably a little bit. So the wales are done, with the initial sanding. Once the hull planking goes on, I'll do a final sanding with finer grades of sandpaper, and work the stern end of the wales a bit more to add a finer curve and end to it. Took me a lot of time, but I think it's critical to get the wales in the proper position. I actually redid the first row of the wales when the line wasn't a smooth run between planks. Was frustrating at the time to do that, but, in the end, I'm glad I took them off and redid them as I think the current wales look a lot better. Now for some fun spiling the lower hull planking!


-
How helpful are these books? In particular, I'm wondering about the chapter on the Corel Unicorn in Volume 3. I plan on modifying the kit to create the HMS Lyme, a sister ship of the Unicorn, so I'm wondering how much detail is included in the volume. As a number of us building the Unicorn kit have noticed, there are a lot of inaccuracies in the kit. Thanks!
-
JC Frankie, it's funny, I was at a liquor store the other day looking at bottles for building a SIB, and saw the Kraken rum bottle. I thought it would be cool to add a ship and kraken to that bottle - looks like you beat me to the idea!
-
Landlubber Mike's technique for furled sails
Landlubber Mike replied to Landlubber Mike's topic in Masting, rigging and sails
Just wanted to add to this thread a link to JerseyCity Frankie's Victory. He uses a mixture of full and furled sails, and his technique gave incredible results. I plan on adding similar sails to my Pegasus and Lyme builds http://modelshipworld.com/index.php/topic/9359-hmsvictory-by-jerseycity-frankie-–-heller-–-plastic-1100-–mostly-rigging-and-sails/ -
Your best sail cloth and technique
Landlubber Mike replied to steven sturgis's topic in Masting, rigging and sails
JCFrankie, thanks so much for your detailed log on your sail techniques. I went with furled sails on my Badger, but was planning on doing a mixture of furled and unfurled on my Pegasus and future builds. Your results are fantastic, and I will certainly bookmark your log for when I get to that point! I experimented with tissue and a few other materials as well, but ended up with cloth as well. Once again, a big thank you!