Landlubber Mike
-
Posts
4,541 -
Joined
-
Last visited
Content Type
Profiles
Forums
Gallery
Events
Everything posted by Landlubber Mike
-
 Hey Nathan, it's looking great. Are you planning to add sea to the bottle? If so, consider filing down the bottom of the ship. That will help you to need less "sea" material, and make it easier to fit the ship through the neck of the bottle.
 -
Coming along very nicely Glenn. Wow, that Victory is huge!
-
Looks good Nathan. I finished my Hannah SIB a couple of weeks ago. It's a nice kit that really tempts you to get addicted to SIB modeling
-
Nice work Carl, good luck with the next step! Would be cool if you joined the rest of us in continuing on with SIBs. I did it as a check the box for my bucket list, but now I'm pretty addicted to it.
-
Thanks Igor. I have the website bookmarked. I might try buying a bag of old used watch parts as well to see if they would work as well.
-
I planked my Badger (both plankings) on my lap, and the first planking of my Pegasus in my lap. I might just do the Pegasus second planking in my lap, but I've been thinking of using my Amati keel clamp for the upper second planking, and my Panavise for the lower second planking (when I flip the ship upside down).
-
Igor, very nice work. Maybe you posted this once before, but for the photo-etched ship wheels, where did you source them from? I haven't seen any at such small scale before. I was thinking of going with old watch parts, but your photo-etchings look much nicer.
-
In case people coming across my log are interested in what goes into SIB models, Igor set up a nice topic here: http://modelshipworld.com/index.php/topic/10011-sib-what-is-necessary-to-start-building-the-ship-in-a-bottle/#entry297548
-
I thought so too Carl. Glad you were able to get it off - isn't it essentially a sticker that you adhere on both sides ? At least mine was. I was also worried that I wouldn't get the ends to line up correctly.
-
Your best sail cloth and technique
Landlubber Mike replied to steven sturgis's topic in Masting, rigging and sails
For what it's worth I got a big roll of model span last year from CornwallModelBoats. Steven, if you're interested in furled sails, I shared my techniques that I used on my Badger in a separate thread: http://modelshipworld.com/index.php/topic/3944-landlubber-mikes-technique-for-furled-sails/ -
Your best sail cloth and technique
Landlubber Mike replied to steven sturgis's topic in Masting, rigging and sails
Is there a difference between silk span and model span? I have a roll of model span, but haven't tried using it yet. -
Thanks Daniel and Igor, that's good to know. Igor, I'd love for there to be a discussion on bottles. Did you want to start one? I'll have to be on the lookout for bottles - or at least start drinking better liquor. I'll stay away from perfume though... Thanks Kester! The kit comes with various ensigns, but I decided not to go with them as the material was a bit bright, and I thought not conducive to adding some folds. Next time I promise
-
Hey Joe, I didn't mean to scare you off. Frankly, the only two things that stressed me out on the build were getting the sea into the bottle and having snapped the bowsprit. I'm sure you're much more careful than I am Other than that, it was a lot of fun.
-
Thanks for the kind words Hamilton. I'm looking forward to your Hannah as you already have a knack at working at small scales. As for the 1-page build log, that probably because I didn't want to embarrass myself by posting a progress log during the build, only to fail in the end. Once the ship is in the bottle, it's not coming out. I was really worried that I would break the bowsprit off again, and when the main mast got bent, there was a lot more finger crossing and colorful language Those would have been repairs that would have been impossible to make.
-
Hey Daniel, thanks so much for the kind words. This was a lot of fun. You're right about the photo-etched parts - in some ways they make things easier, but in others, they make things more difficult, particularly if you end up breaking them like I did If I had to do it again, I would use wood (or possibly brass rod, though brass is a bit heavy), and leave the use of photo-etched parts for small detail pieces. I can see this being addicting - I thought I would do the kit to check the "build a ship in a bottle" item off my bucket list, but I've found myself thinking about future SIBs. Looking at the links on your blog didn't help! Relative to larger sized models, the SIBs are relatively inexpensive and not as time consuming for sure. And no rigging of cannons with 2mm blocks! Just out of curiosity, where do you source your bottles? Antique bottles would be interesting, but I would think that the glass can be cloudy or otherwise discolored. I have some tequila that was gifted to me and is in interesting bottles, so at least I could have fun "sourcing" the bottles that way.
-
After seeing your models, I think I'm inspired to try them out again. Take care my friend, I'll keep a look out for your updates.
-
Yes, you are certainly dealing with a small amount of volume! If you can pull off the sea, I think it would be a really nice touch to the model. For my Hannah, I tried building up the sea around the pedestal base the best I could. I wanted to make it look like the ship was sitting in the sea. It's very tricky to do that though. If there is a next model, I'm thinking of maybe using a plug to ensure the outline of the sea around the ship. I'm not sure how I would do that using the Vallejo water though. I think if I pushed the plug in, and then tried to pull it out, the material would stick to the plug and pull into the space. I probably also couldn't bake the material, as then I would never be able to remove the plug. But the Vallejo water looks beautiful once it has hardened. Something to think about if I do another ship in bottle.
-
Thank you very much guys, I appreciate the kind words. After looking at the model this morning and going through Igor's ship-in-bottle logs, I actually think I might try another SIB some time in the future. I learned a lot going through the process, and have learned even more going through other recent logs like Igor's. Working at such small scale and in such confines is certainly a challenge, but raising the masts inside the bottle is a really cool experience. It's also relatively inexpensive, compared with working on traditional kits. In any event, I hope this log demystifies the insertion process and encourages others to try the SIB approach out. It's a lot of fun, though at times, my wife didn't think would say I didn't sound like I was having any fun
-
Beautiful planking all around Jason, wow! That first planking can stand on its own. Can't wait to see what you do with the second planking.
-
Igor, this is really amazing work. I can't believe that I haven't seen your logs before. Your techniques would have come in really handy when I was working on my Hannah ship-in-bottle. The details you are adding really make for a special model. And to think this is all at 1:600 scale, wow!
-
Very nice work Igor! I like the bottle you are using. If I did another model, I think I would stand the bottle up like you did. It makes insertion slightly trickier, but it would be much easier to add sea to the bottle I think. Great job!
-
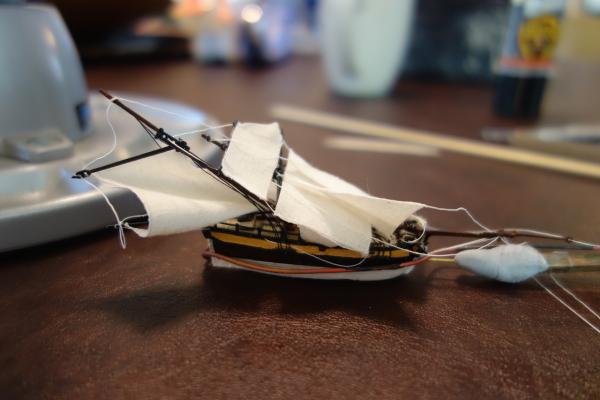
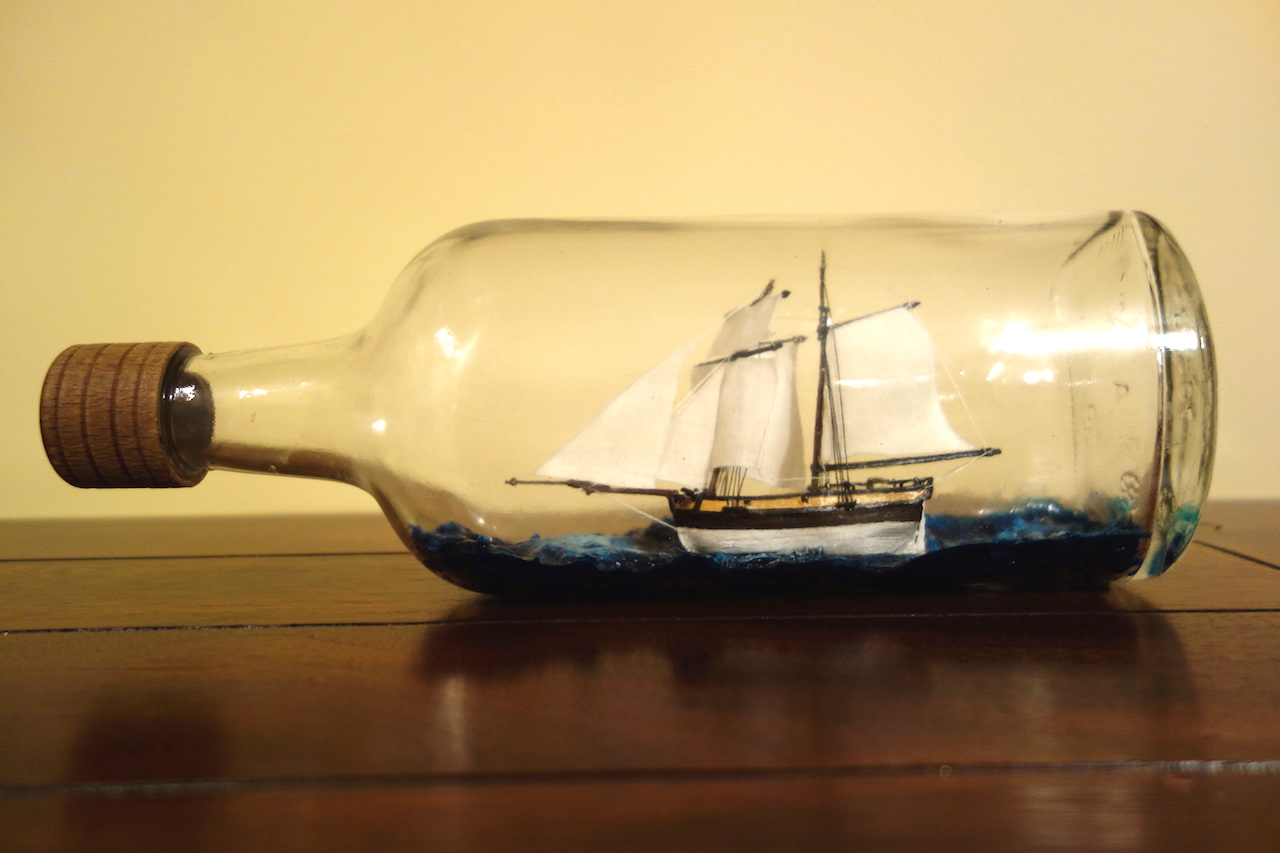
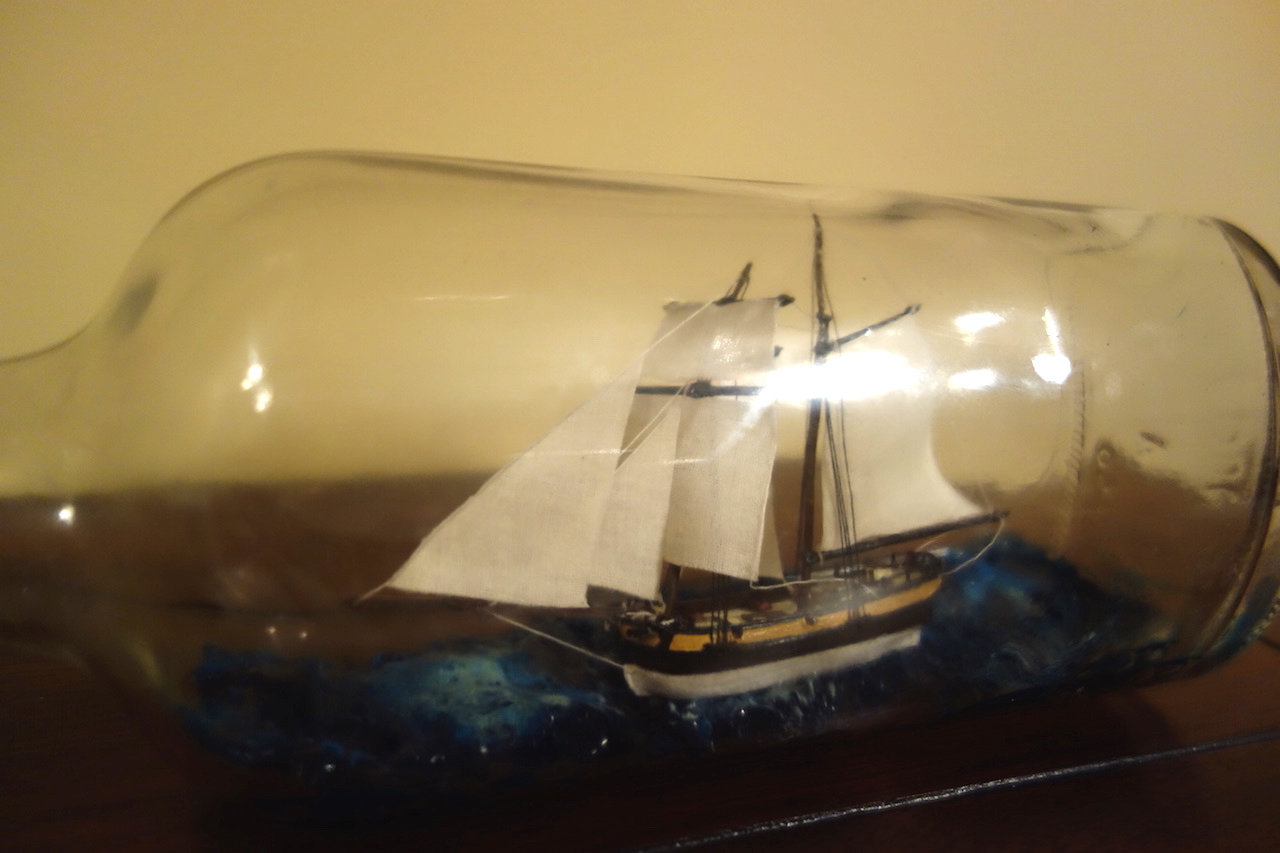
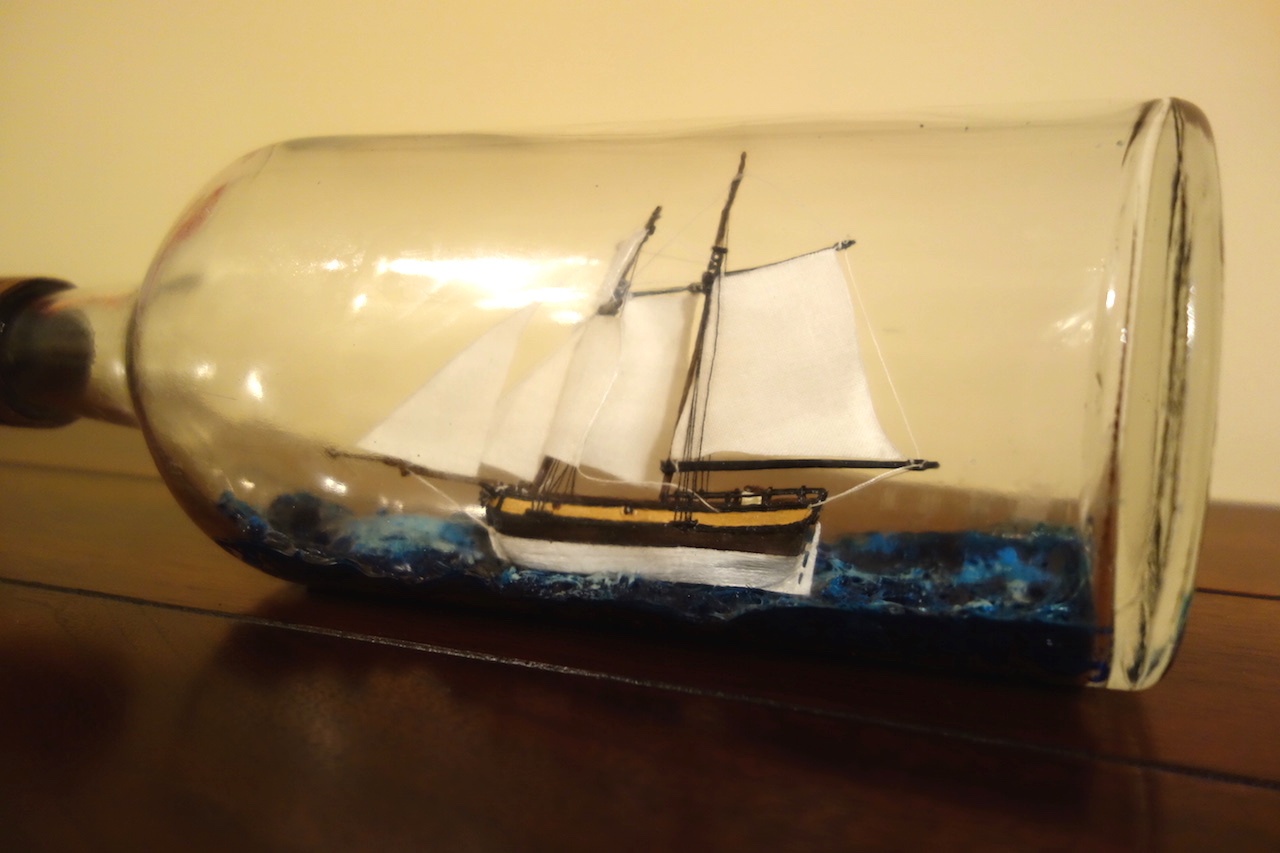
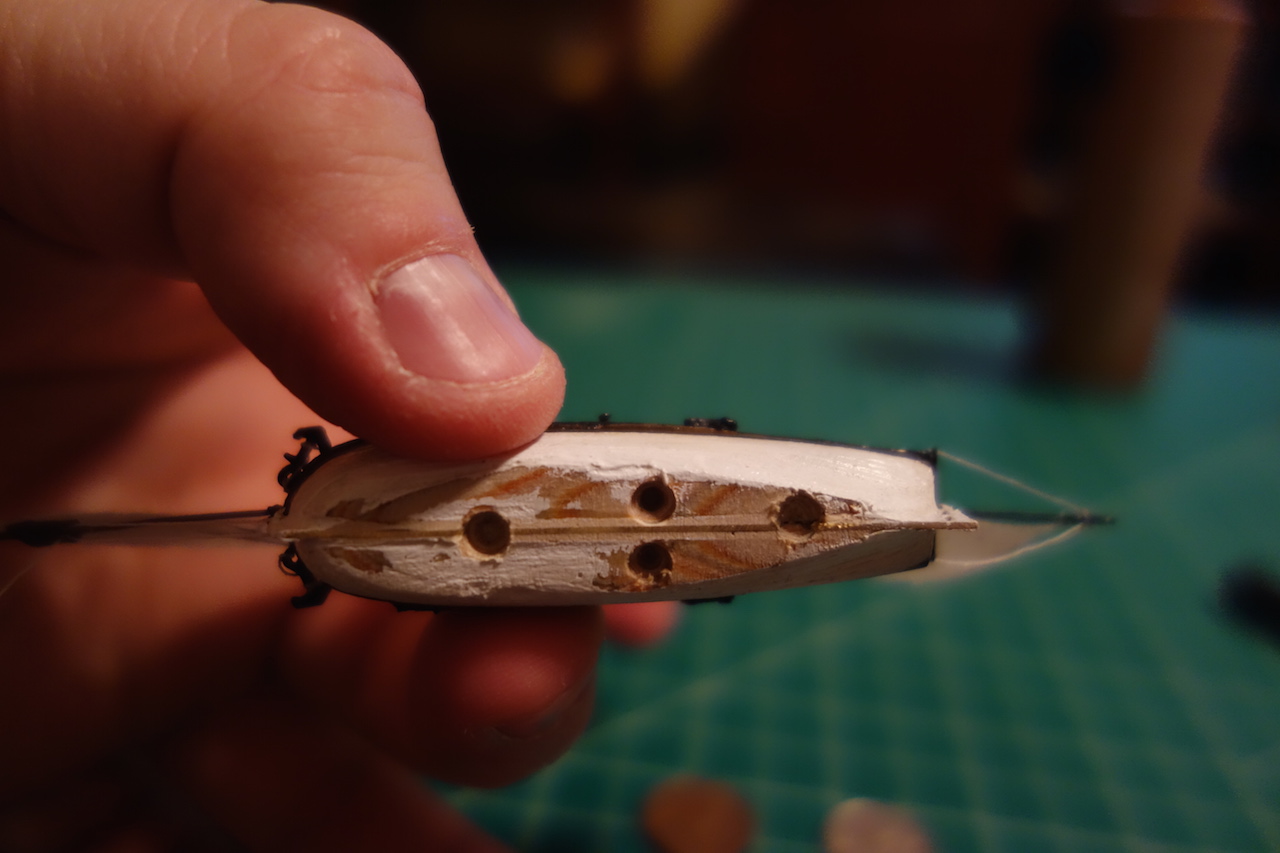
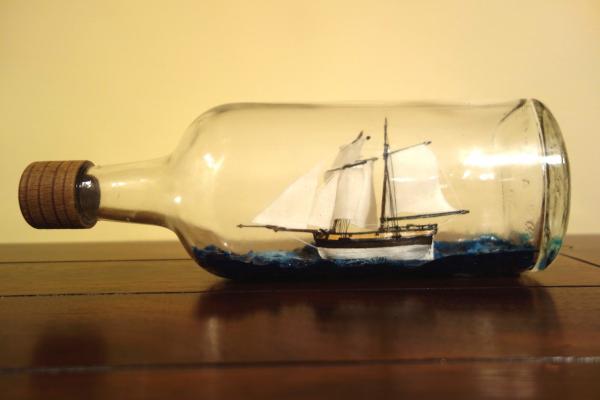
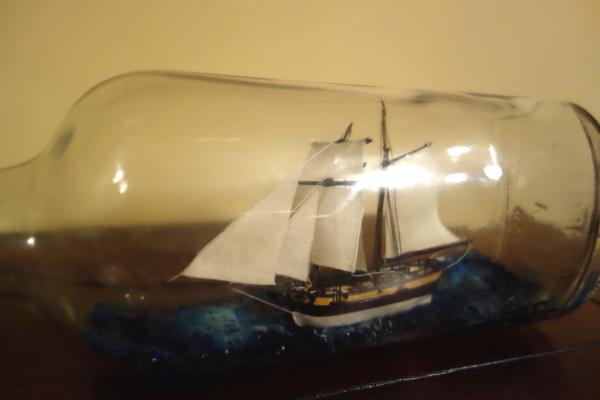
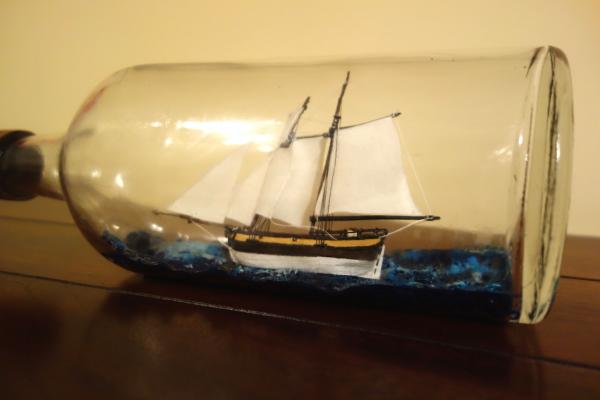
And here is the final product! Overall, this was a very nice kit to build. It's a good introduction to ship-in-a-bottle modeling. I'm not sure if I will do any others in the future, but if I did, I think I would go fully scratch. The photo etch pieces on this model were great, but you bend them a few too many times and you are in trouble. If I had to do it over, I would also have filed more of the bottom off so that the ship would have appeared to be sitting lower in the sea. Filing off the keel was very helpful in this regard, but I think the model could have been improved if I filed another 2mm or so off the bottom. Hmm, I do have a nice bottle of tequila that might be fun to add a model to...or at least drink while I'm thinking about it...

- 28 replies
-
- 16
-

-
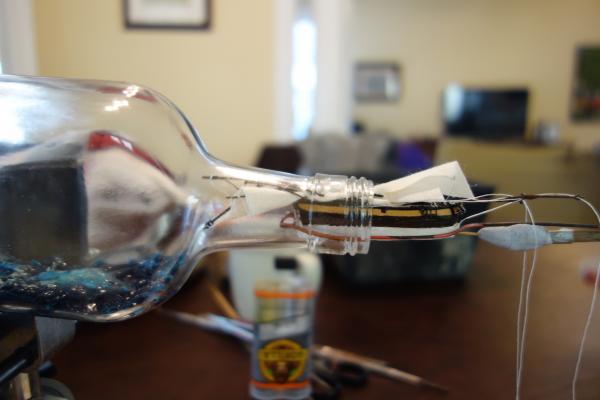
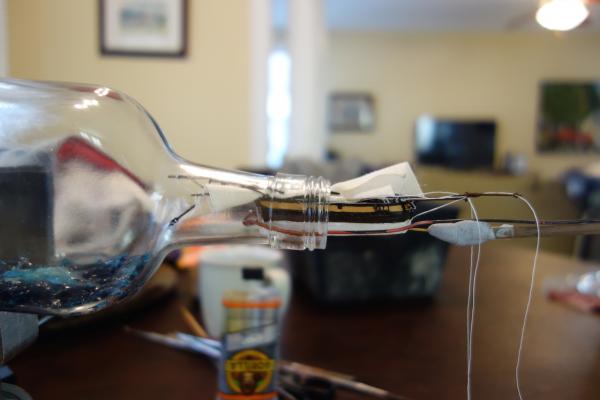
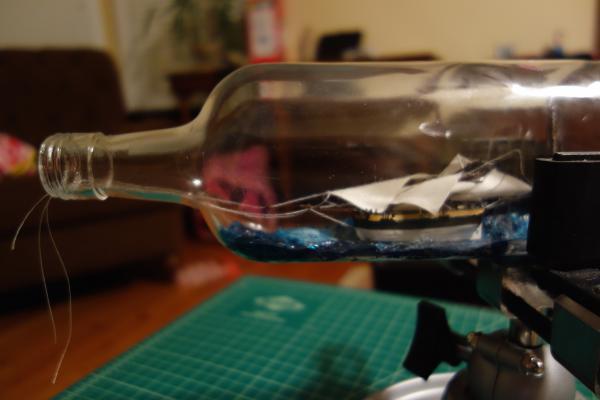
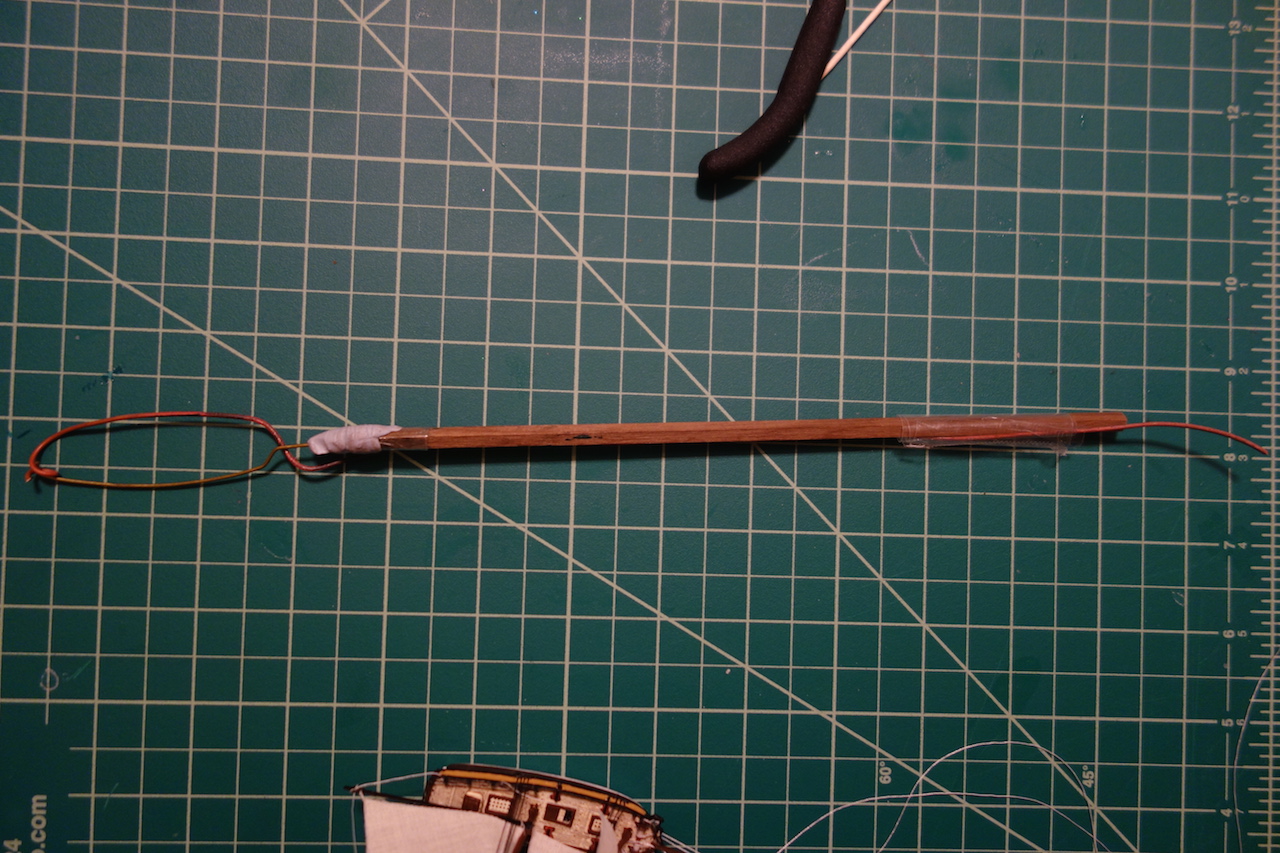
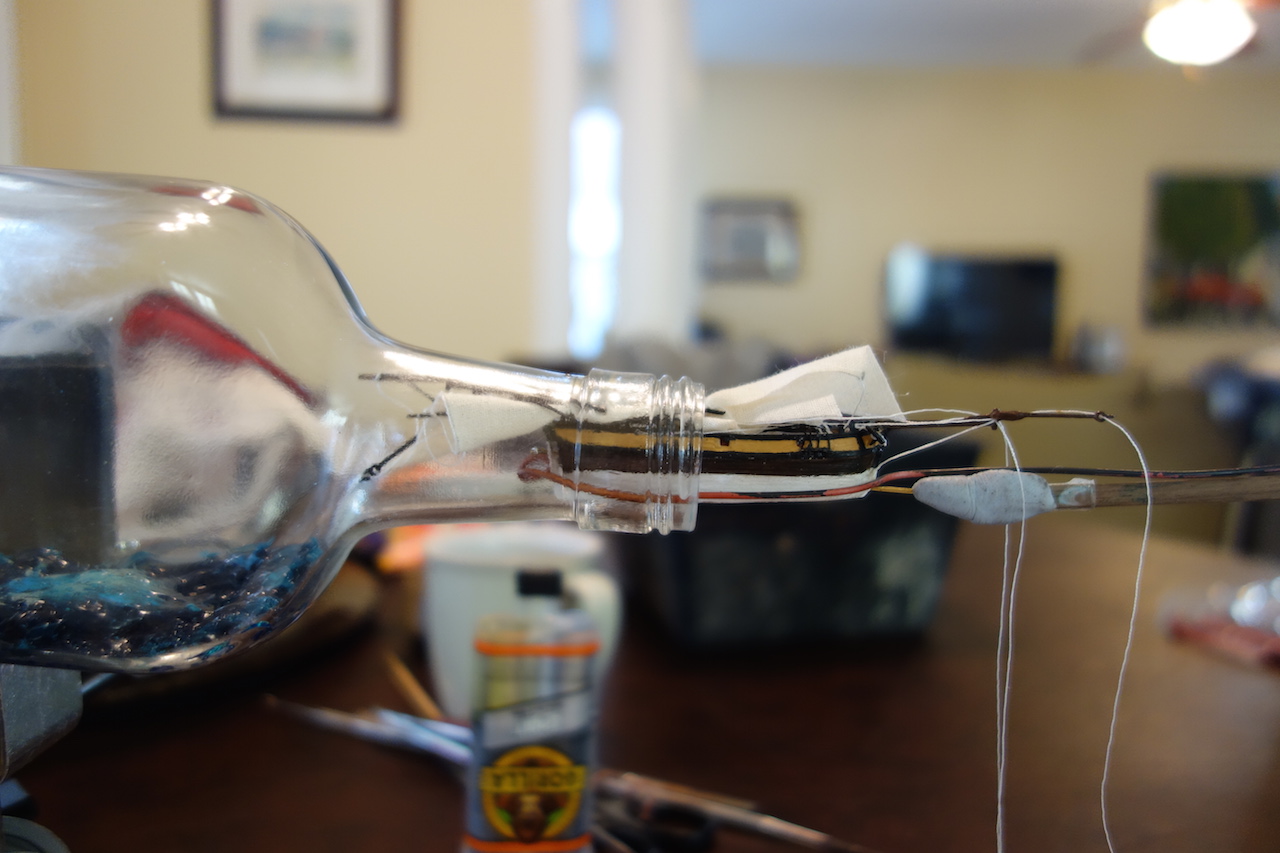
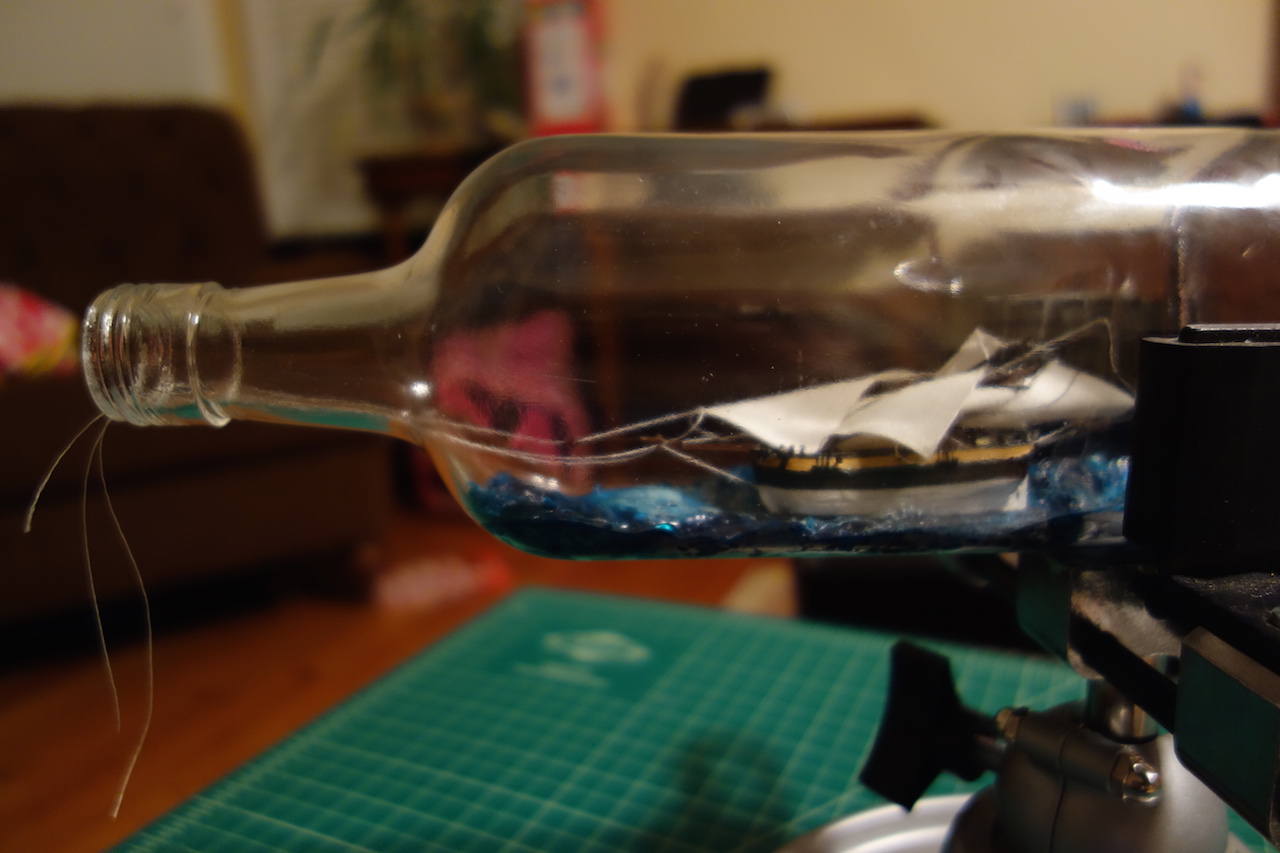
Insertion into bottle At this point, I have the sea in the bottle and the ship is done. Next up, getting it into the bottle. This stage was very stressful. The diameter of the opening to the bottle is less than an American quarter! So, you have to fold the masts down nice and flat to have any chance of getting it in. This process was incredibly stressful. First, I couldn't get the rear mast folded down due to the way that I ran the rigging. For some reason, the jib staysail (the inner one) was restricting the mast from fully lowering. I ended up having to cut the line from the top of the main mast, tied that line (on which the jib staysail was) to one of the spars, and ran a separate line from the top of the main mast to the exit hole. Once that issue was resolved, I tried to figure out a better tool to insert it into the bottle than the string technique the kit calls for. The model is too heavy for the string technique, which essentially involves creating a noose to go around the hull where one side is brass wire and the other, a string that completes the loop around the hull. I ended up taking a piece of annealed copper wire (which i use in my other hobby, bonsai), bent it to the same configuration as the other wire piece, and taped it to the handle. When the ship was in the bottle, I cut the tape and both sides of the tool slipped out. The bottle opening is incredibly tight. I filed down the inside bottom edge of the bottle to help get the ship in. Because I had added the sea, I decided to file off the keel bottom. Even without the keel bottom, it was still hard to get the ship in and required heavier pressure than I thought. A lot of prayers and finger crossing as I pushed it through the bottle's neck! Now my goal was to insert the ship and drop it onto the pedestals. Using the pedestal base as a guide, I tried to build up the sea as much as possible outside the base. But, some of the sea got onto the base, and so I figured I would need some wiggle room with the holes in the bottom of the ship. So, I drilled larger holes to accommodate any necessary shift - since the unexpected usually should be expected. I put some 5-min epoxy into the holes and pushed the ship in. That's where things went wrong. I apparently hadn't gotten the sea far enough from the pedestal base, so the ship couldn't sit cleanly on the pedestals. This freaked me out because the holes had the epoxy in them and I was afraid that it would leak out and get onto the sea or the sides of the bottle. So, I tilted the bottle to its side and using a long bamboo skewer, I quickly dabbed a bunch of epoxy along the pedestal bottom and sea. Thankfully, I was able to position the ship a certain way where it was able to sit on the front post, and lean against one of the middle posts at the back of the bottle. Another nerve-wracking experience, but it went without a hitch. With the ship in the bottle, I raised the masts. I had one problem where the main mast was bent pretty bad. I'm not sure if this was because of the insertion, or that it came about when the masts were raised and the lines pulled taut. I was really worried that bending it back would cause it to snap. Using two putty knives with extended handles, i was able to straighten it out and again, the modeling gods were with me and it didn't snap. I had to do a couple of touch ups of glue and paint (against, stressful while the model is in bottle), but it worked out. After all the touchups and arranging the sails the way I would like to see them, I cut the cords using the blade that came with the kit (pictured below), glued the cap on and affixed the felt circles to the bottle's bottom. [picture of tool to come]