


Landlubber Mike
-
Posts
4,102 -
Joined
-
Last visited
Content Type
Profiles
Forums
Gallery
Events
Posts posted by Landlubber Mike
-
-
Wow where did you find that? That’s one of the best pictures I’ve seen. Interesting how light in color it looks.
The kit includes both a railing and solid wall for the searchlight ring. I used the railing but the solid wall looks pretty cool.
- Old Collingwood, Canute, lmagna and 1 other
-
 4
4
-
Very clean, crisp work there OC, nice job!
- mtaylor, mikegr, popeye the sailor and 1 other
-
4
-
-
Wow, that's super cool Kevin!
- egkb, Old Collingwood, lmagna and 3 others
-
6
-
Looks great - a mask and lots of decals is a great addition to kits.
- Jack12477, king derelict, mtaylor and 5 others
-
8
-
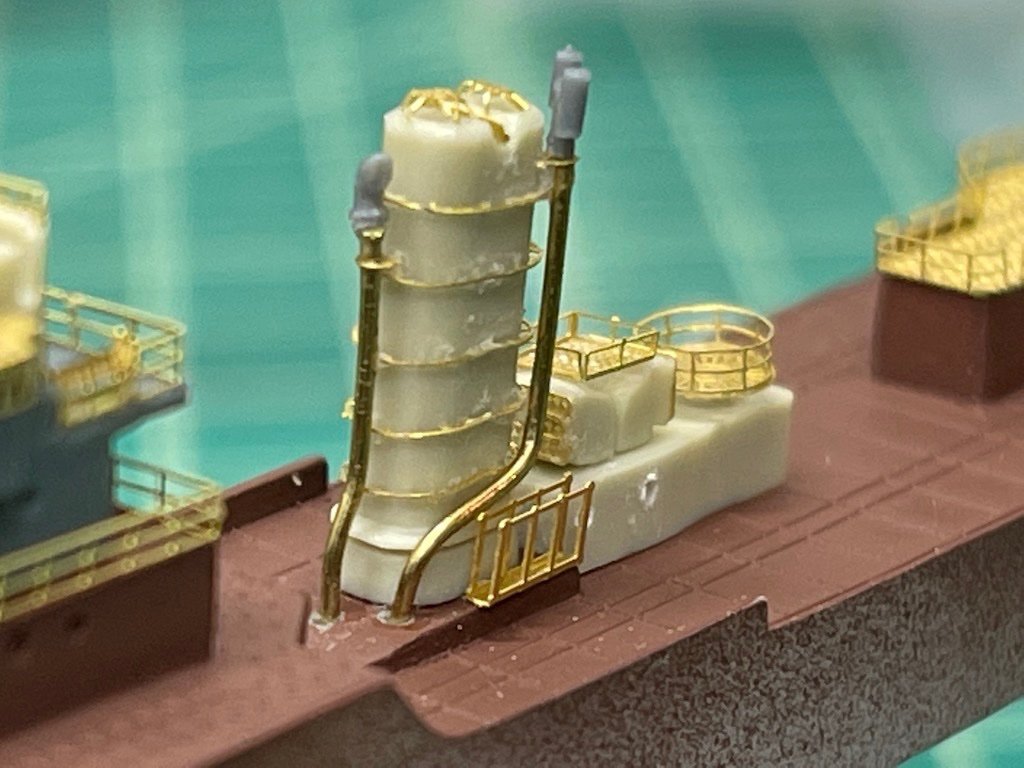
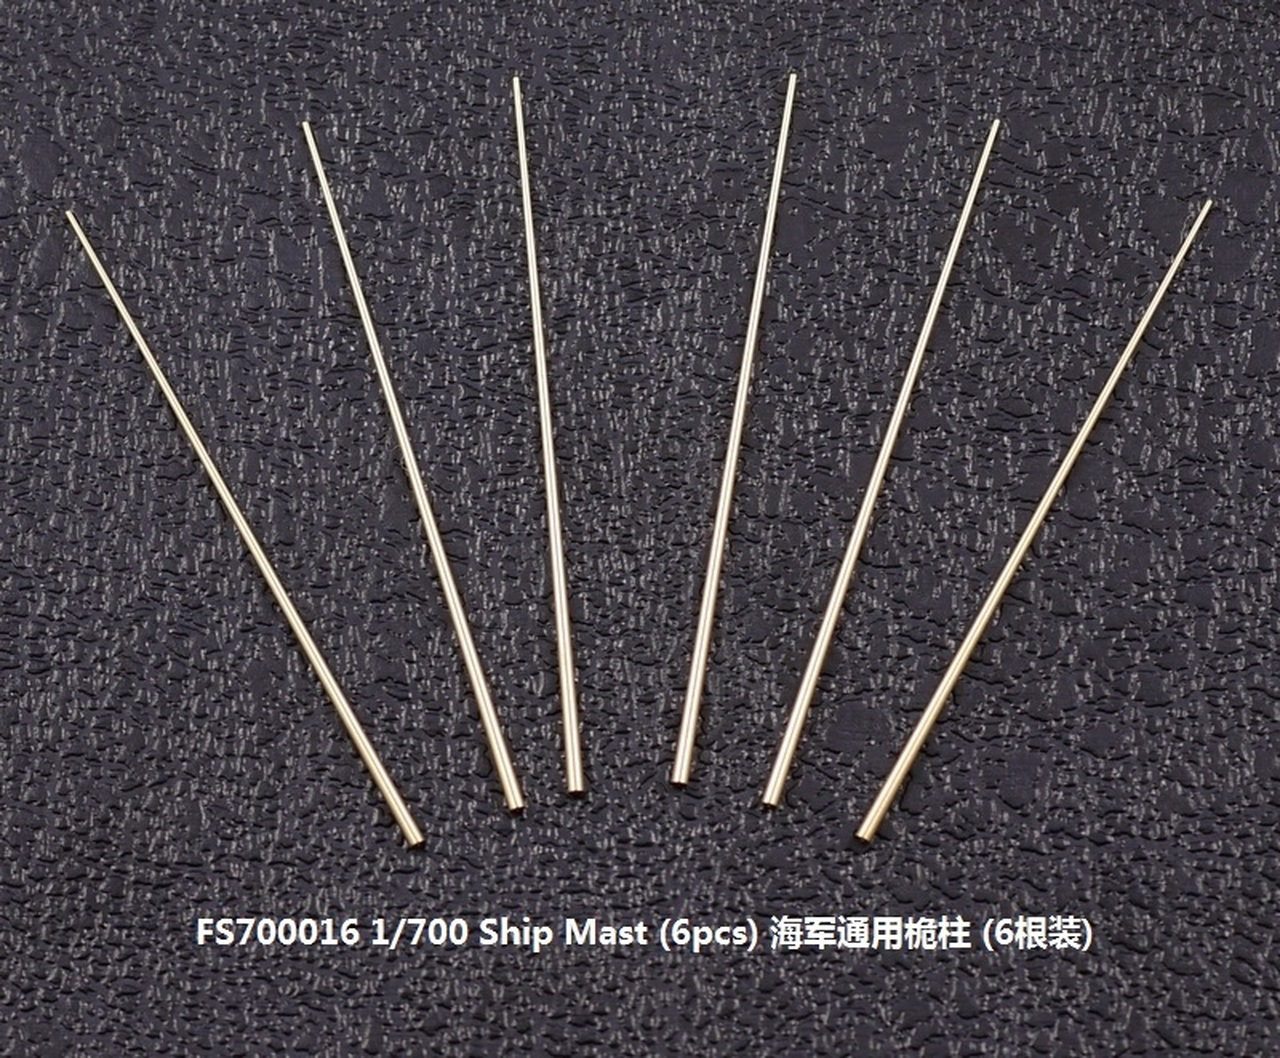
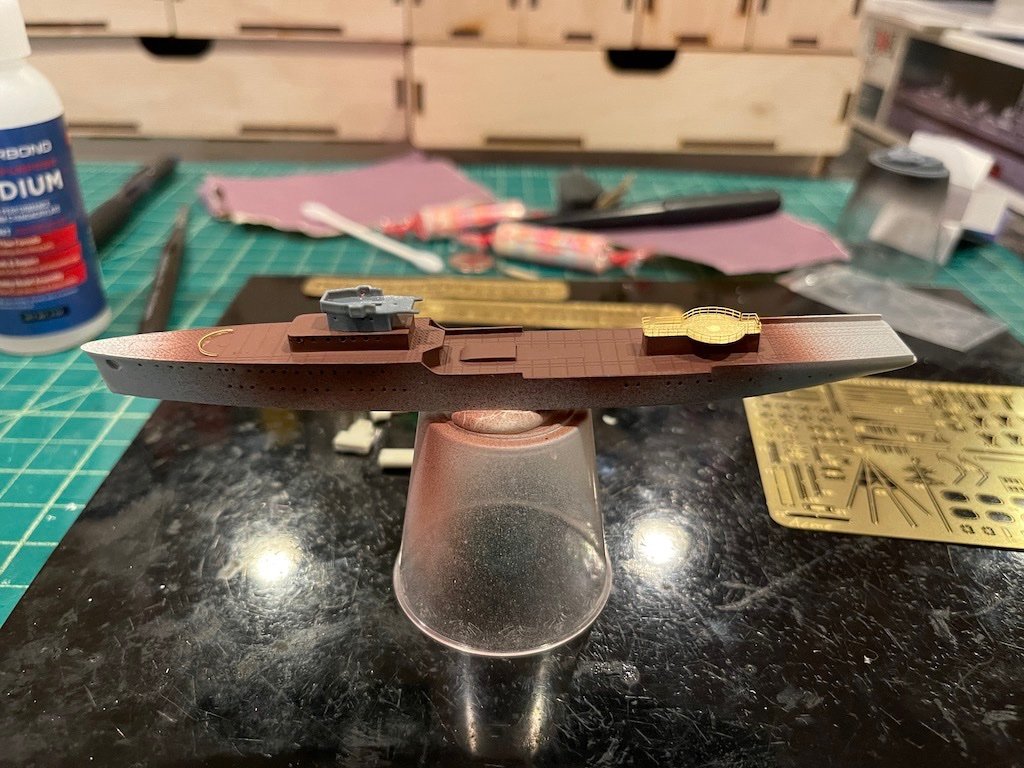
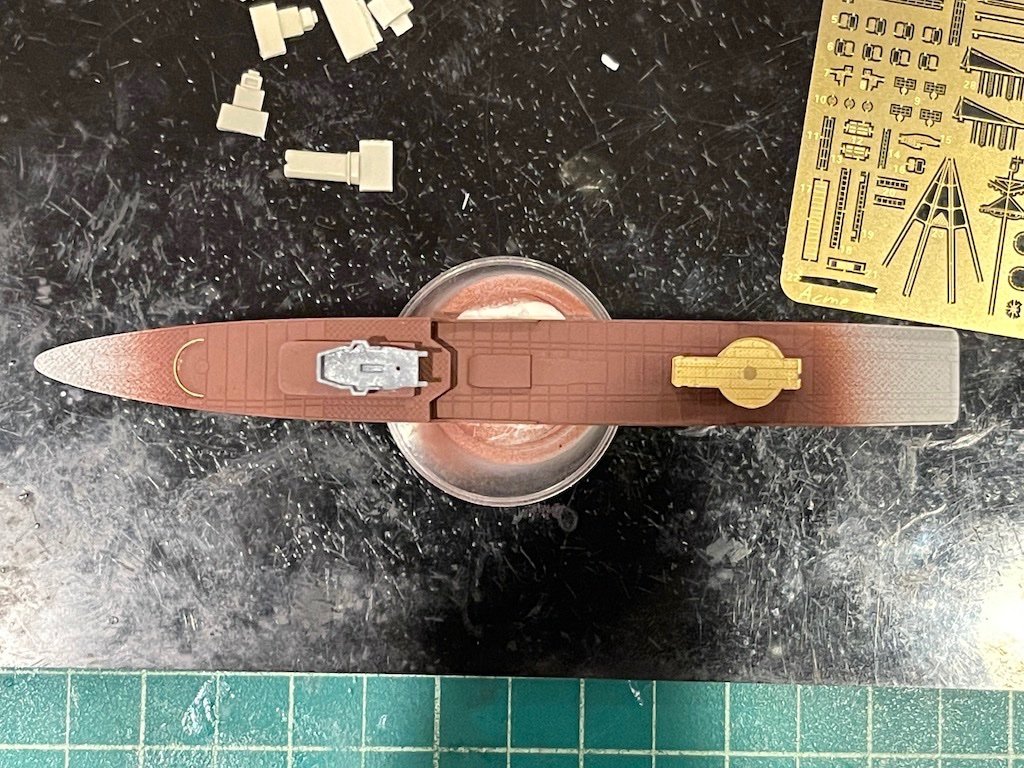
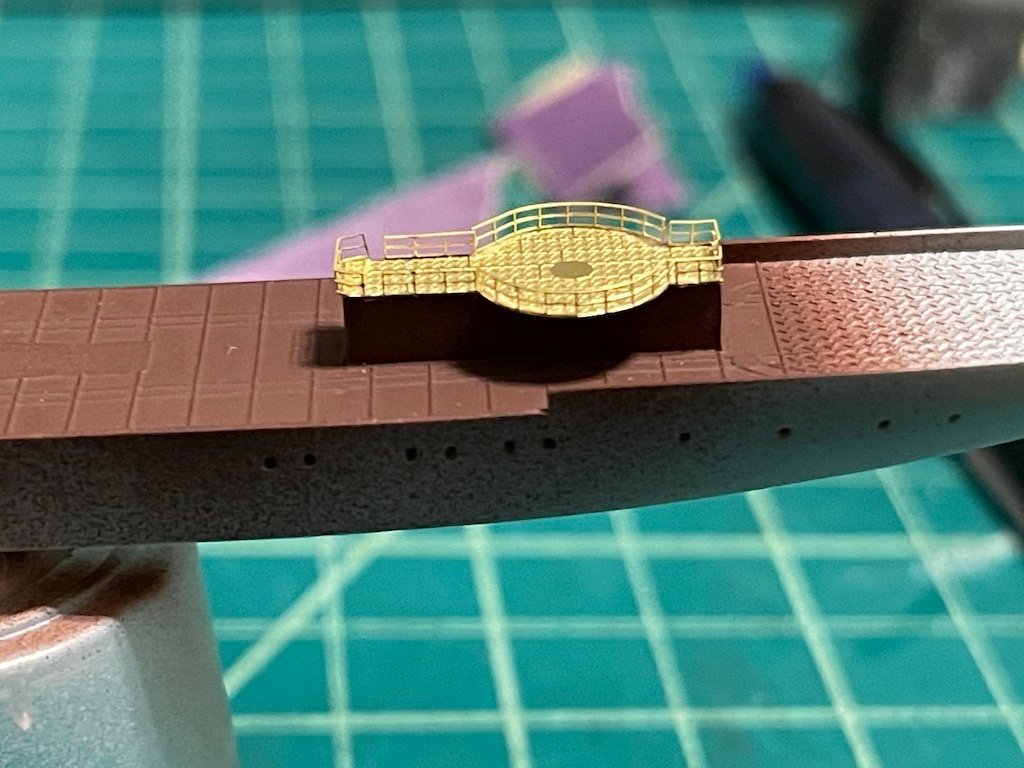
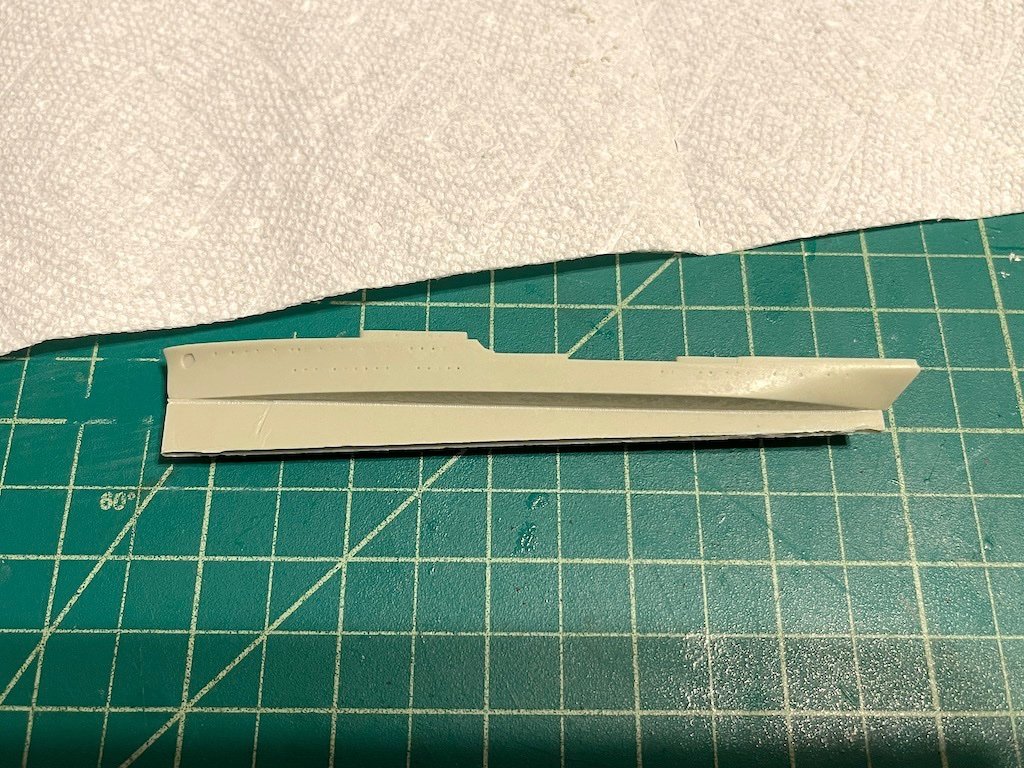
While waiting on diorama bases on other projects to dry, I put in some more time on this one. First I built up the funnel. There are five PE rings that come with the kit, but the two steam pipes do not. Took some very thin brass rod (I think 0.4 or 0.5mm) and bent it to shape, and added the pipe tops to each which came from a Rainbow accessories set. Alongside the funnel is a rack which I think was used to carry wood, so I'll have to add some at the end of the build. Just behind the funnel was another structure which includes two vents, a rack on top, and then a circular platform where the searchlight goes.
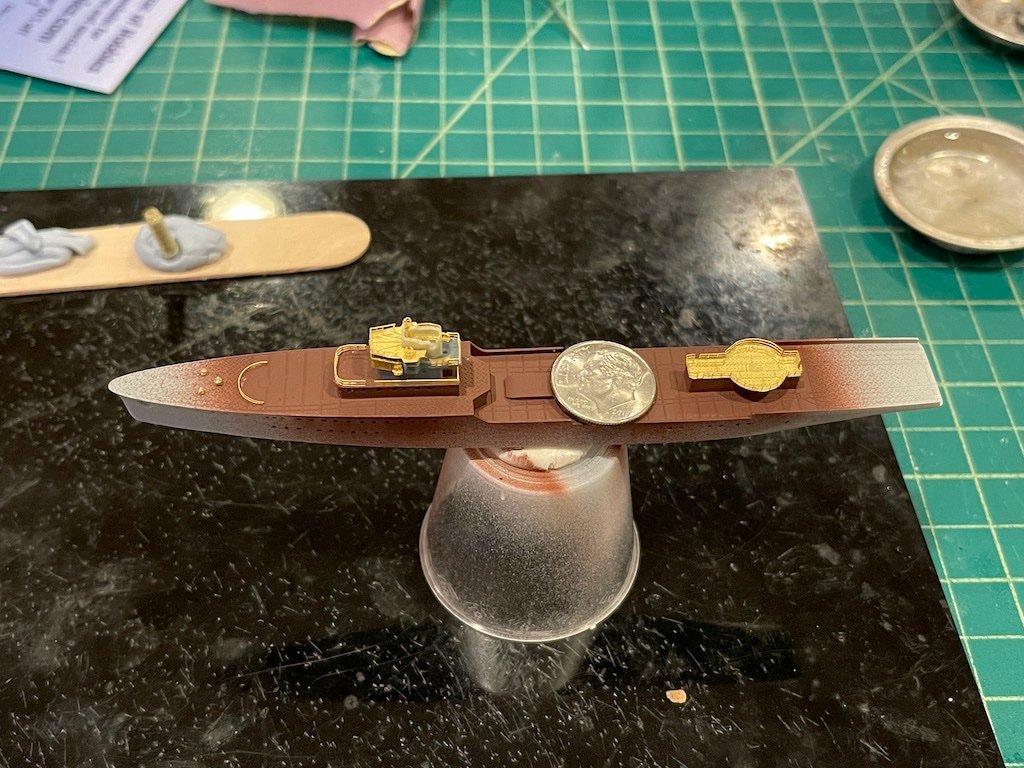
Next I built the stern structure. Not exactly sure what it is designed to do, as there is a rail on only one end and sort of a semi circular extrusion on the port side. The kit includes an opening for the door at the stern side, so I installed it with the door open.
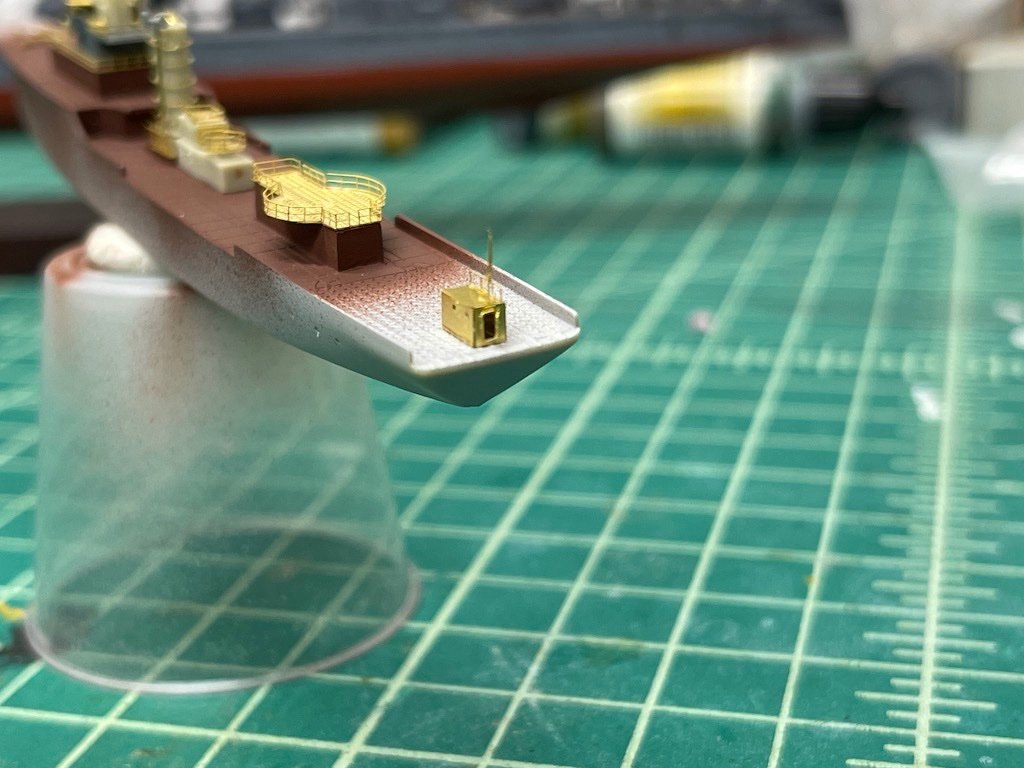
Here's a look at the full model - looking pretty good I think. Before I go too much further, I might add a red stripe at the waterline to avoid accidentally breaking any of the more sensitive things like the masts when trying to mask. Once the lower hull is painted, I can tape the lower hull and linoleum deck, and add the two masts and a few other details, and paint the hull.

Despite the need to add necessary details not included in the kit (like the funnel pipes and the searchlight), I'm really enjoying the build. Five Star makes really nice PE parts which are a perfect fit. The subject also has plenty of open spaces so you can treat it as a blank canvas to add various details.
Thanks for looking in!
- JohnB40, king derelict, AJohnson and 8 others
-
11
-
You've gotten really good at these card models Chris. Very impressive how you can get compound shapes to fit so well together.
- mtaylor, popeye the sailor, Egilman and 6 others
-
9
-
Very nice job Kevin, looks fantastic!
- Canute, mtaylor, popeye the sailor and 4 others
-
7
-
What a cool subject Alan, doing a great job on this one! The design is so simple, it almost looks futuristic or even Mad Max-ish 😀
- Old Collingwood, Baker, Jack12477 and 5 others
-
8
-
Looks great Alan! I'm sure a nice diversion from dealing with the printer...
-
Why not just get something like this from Five Star (this is available from Free Time Hobbies or on eBay):
-
-
I'm in too! Wouldn't want to miss another one of Kevin's epic huge builds
")
- Old Collingwood, Kevin, mtaylor and 1 other
-
4
-
54 minutes ago, Old Collingwood said:
Thanks Mike, even thinking a head to the weather deck - fix all the little bits like ammo lockers etc etc then paint all over first or leave them off paint / mask for the other colour then paint then fit the smaller parts - keeping the seperate build assemblies built and painted as su assemblies - lots of options....
OC.
On my current 1/350 build, I struggled with that question as well. Mostly because I hate taping, I tried to order assembly versus painting to avoid having to tape. For things like ammo lockers, I painted them separately then attached them. I was worried that I wouldn't be able to get the airbrush in tiny nooks, and would try too hard and get globs of paint.
For things like the bridge and other structures, I find it easier to assemble off model and then attach. The problem is sometimes the attaching part can give you difficulties like gaps, etc. I had some problems with my bridge and had to take it off and re-glue it, and knocked off some of the PE details that I had to re-attach.
Sometimes it's best to just go with your gut and figure it out as you go along. Can only plan so much!
-
Nice job OC!
8 hours ago, king derelict said:I think one of the hardest parts of a build like that is working out the flow of work; especially with cross referencing the kit instructions, the PE instructions and when to fit the wooden deck pieces. I got it wrong on the Geisenau and built up over one of teh decks that needed to have the wood deck installed but luckily I was able to retrieve the situation by cutting the wooden deck and installing it in pieces. All a bit nerve wracking.
Good Luck
Alan
Alan, I completely agree. There has to be a lot of planning, I think particularly when working in this scale. I haven't built a Flyhawk 1/700 kit before, but the multiple sets of instructions (one for base kit, one for PE and other details) doesn't have me exactly excited.
-
Thanks guys!
Lou, I find with my big sausage fingers and other clumsiness that I need to do the more physical work early on or off model, otherwise I end up breaking things faster than I can build 😕. The skeg was quite thick, ended up using a scriber to cut through both sides and then cleaned up with a hobby knife.
-
57 minutes ago, Altduck said:
I like the Optivisors, with glass lenses, and the optional LED light frame that has 6 LED's around the lenses (not the single forehead located "Cyclops" light that is also available for those who like to get that light tangled up in their work). Been using them for years for clock repair and other close-up detailed shop work.
I have several, of different focal lengths, #4, 5 & 7, but for general use, and for my eyes, usually choose the #5 lens. 4 gives a little more working clearance, and 7 more magnification but shorter focal length.
I use the Optivisor with LED light frame as well and love it. I thought my eyes had gotten much worse the past month, but turned out the lights weren't as strong. I replaced the batteries and voila! Could see tiny PE again.
- thibaultron, Canute and mtaylor
-
3
-
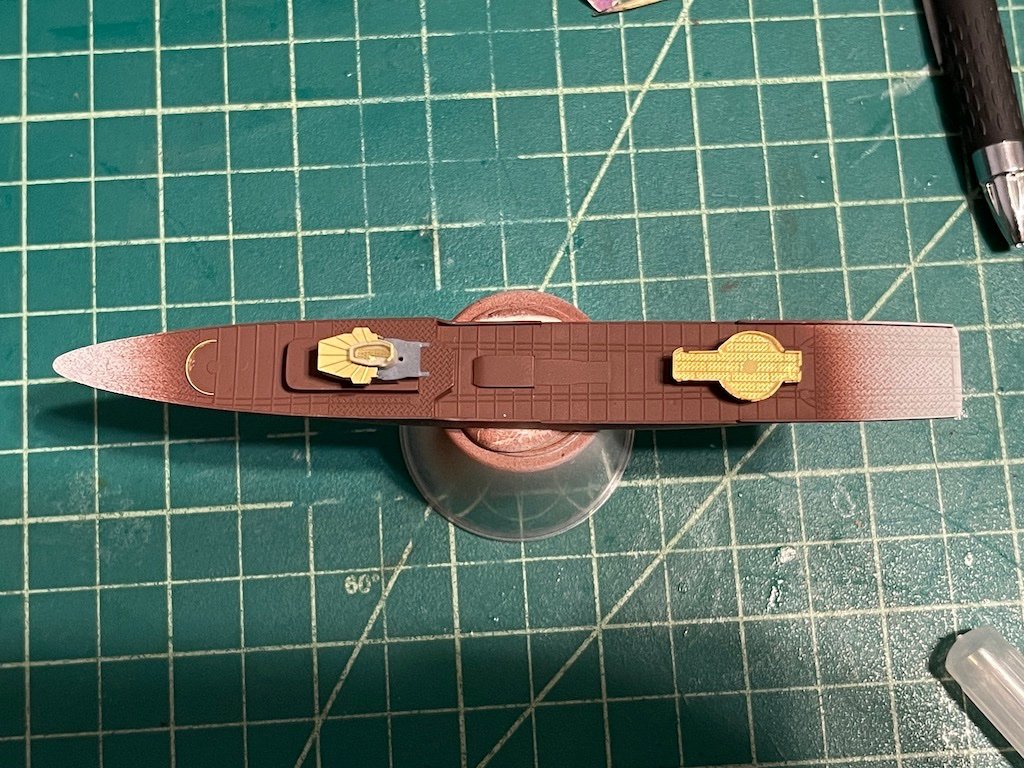
Last night I worked on the funnel to add the five rings, as well as PE components at the top. Sorry for the bad picture, hard to get a good picture at high magnification on my phone. Funny thing is to the naked eye the rings, etc. look perfect, but on high magnification it looks a bit rough!
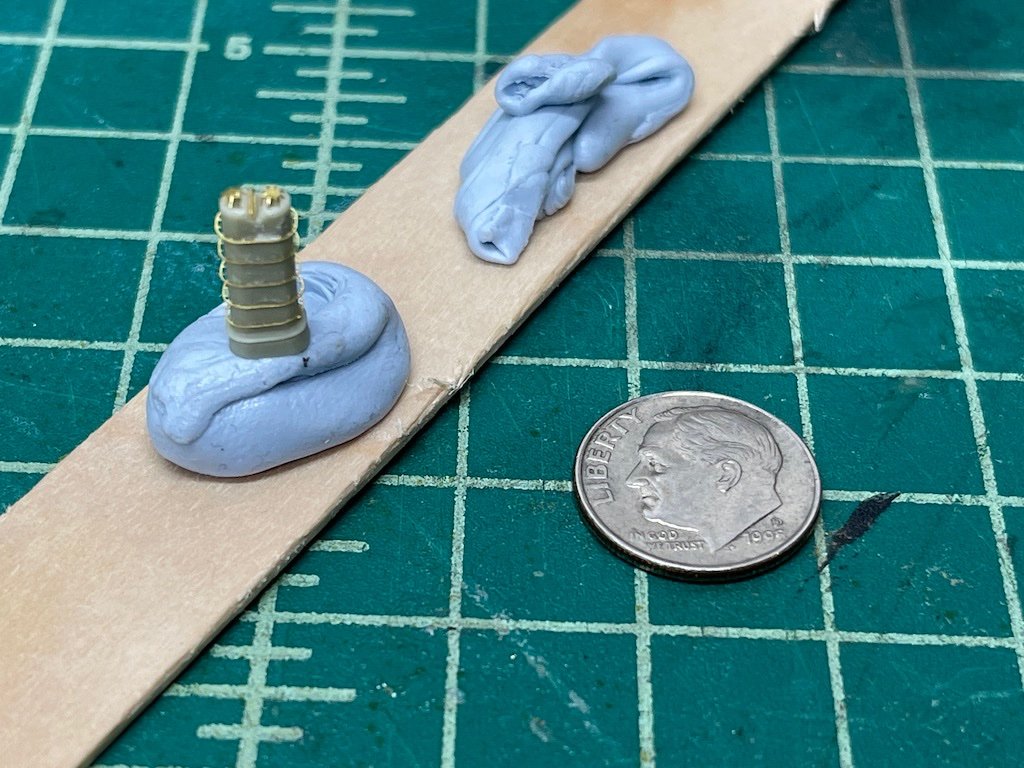
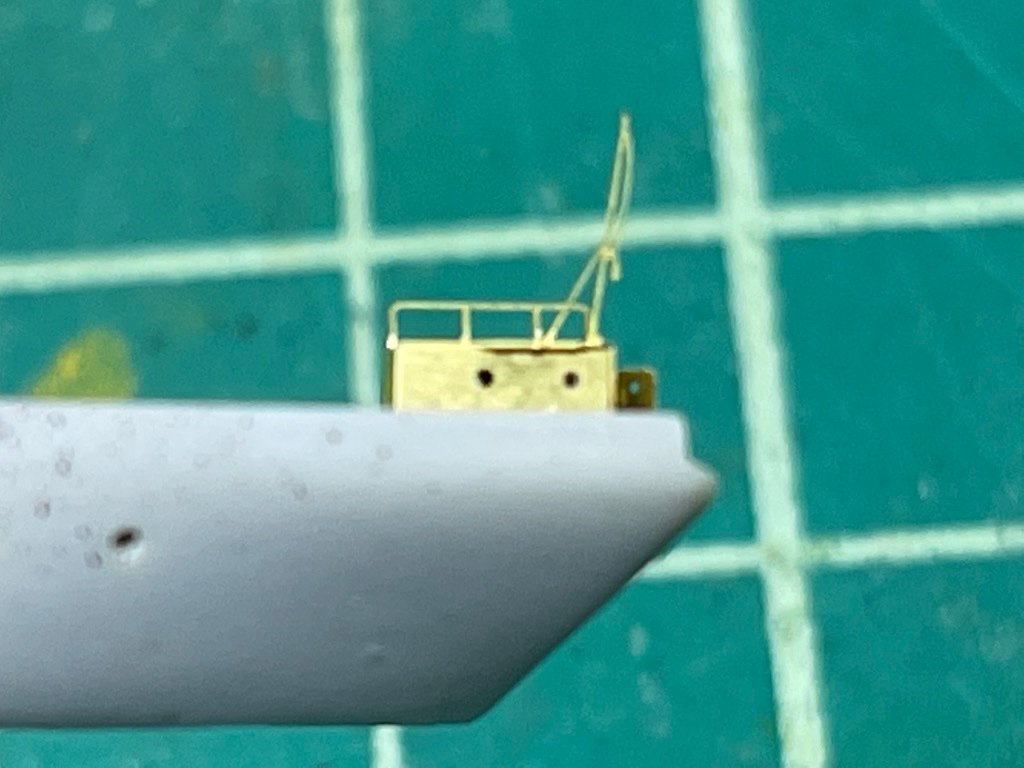
I also added the vents/windlass on the bow deck - these are super tiny turned brass components from Five Star and Rainbow. You could just use a cut off piece of plastic rod, but you get crisper definition with the brass, and not to mention, it's not very easy to cut tiny pieces of plastic rod.
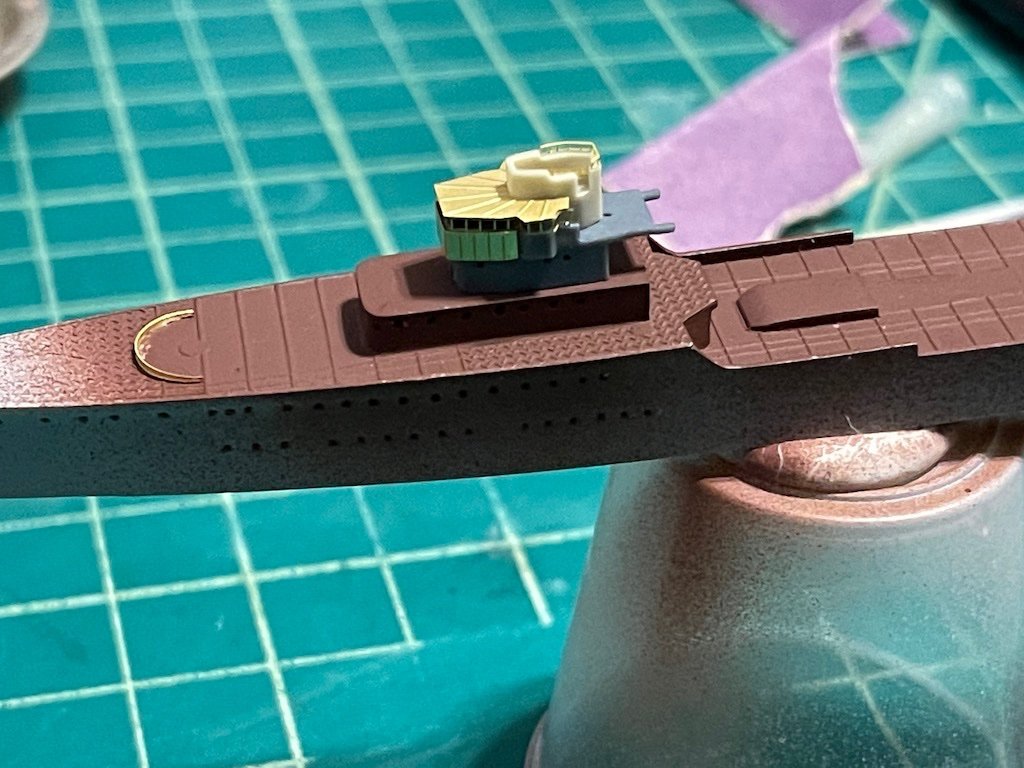
I also added the rangefinder to the bridge. The kit includes a single PE piece that you fold in half. Instead I used an upgrade kit from Five Star which allows you to make it in a more three-dimensional fashion from five pieces - one you fold for the main box on top, a rod for the handle, a turned rod for the pedestal, and then two PE pieces to make the base. Really put the Optivisor to the test on that one! While I think it's a nice improvement over the kit rangefinder, I have to say that given how small it is, I'm not sure that most people would notice or appreciate the extra 30 minutes it took me to put this together over the simple fold and glue for the kit part.
-
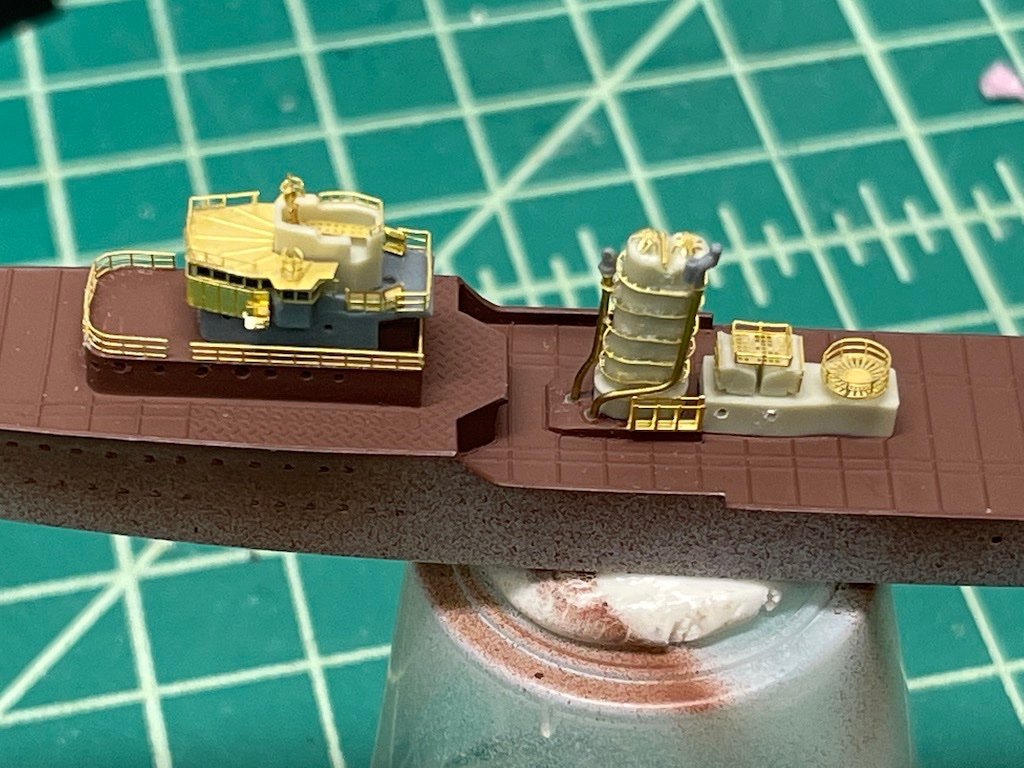
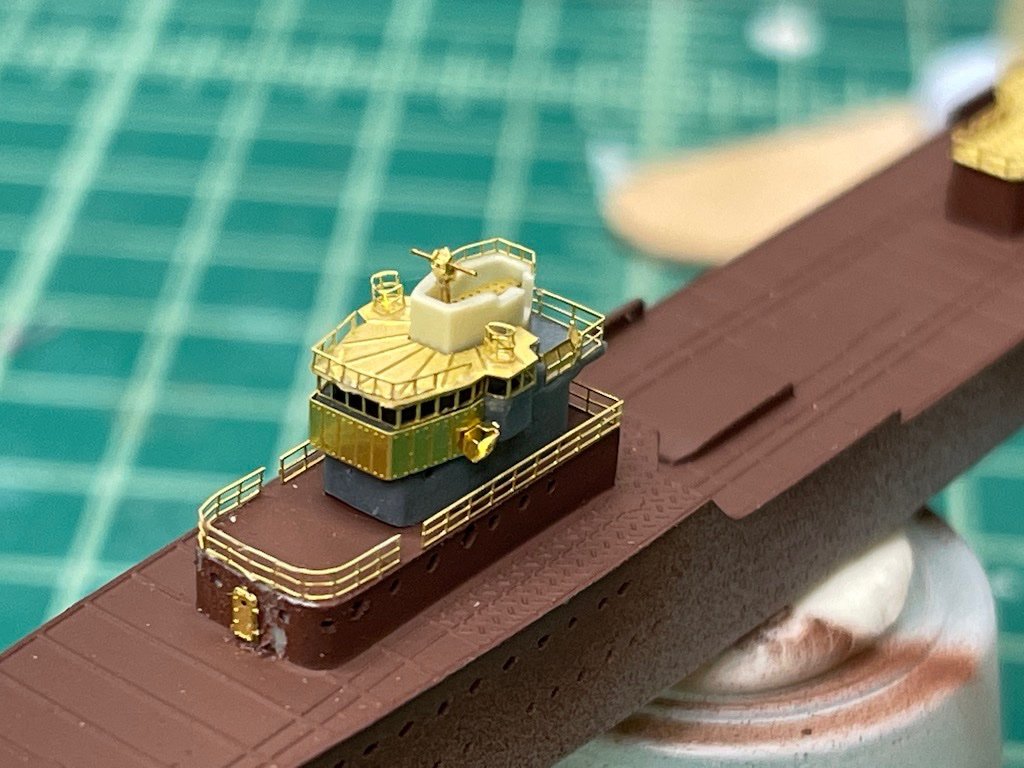
Here are some early build pictures. After drilling out the port holes and priming with Mr. Surfacer 1500, I painted the linoleum sections of the deck with Tamiya linoleum brown. Then I started building up the bridge as well as the rear platform which supports the Type 99 AA gun.
-
Laid down in 1930 and completed in 1932, one of its claims to fame is that the Yaeyama was the first Japanese warship to feature an all-welded hull. Here's a colorized picture of the Yaeyama during its 1932 trials, alone with a black and white picture from the other side. You can see that huge Type 99 10th year AA gun in the back.
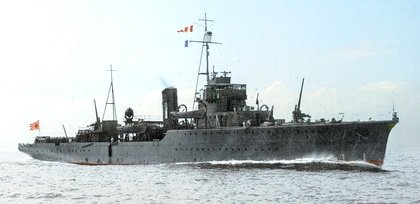
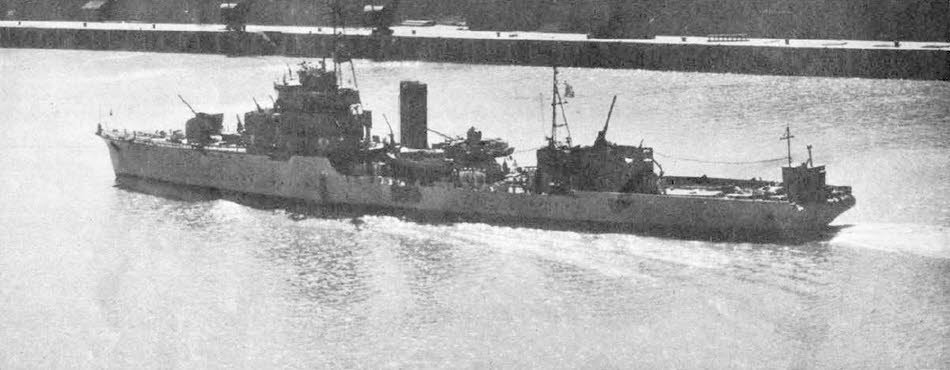
The Yaeyama saw service in the second Sino-Japanese War, and later mined the Suritago Strait in the Philippines after Pearl Harbor. In December 1943, its minelaying rails were removed and replaced with depth charges as part of a refit to an anti-submarine convoy escort ship. While in February 1942 it had survived an encounter with the US PT-32 motor torpedo boat, it wasn't so lucky in September 1944 when it was hit by at least 10 bombs off the Philippines.
- Old Collingwood, Canute, JohnB40 and 3 others
-
6
-
While waiting for paints, etc. to dry on my 1/350 Shimakaze build, I pulled another 1/700 kit out of the stash. It's the 1/700 IJN Yaeyama by Five Star:

I was interested in this kit as it's an all-in-one resin kit with PE upgrade built in the kit box. Five Star makes a lot of PE upgrade sets for other kit manufacturers, but this is one of their newer line of in-house kits with upgrades. I loved the completed model diorama pictures on the box cover, so added it to the stash. I'm planning to push myself to try to model it in a similar diorama setting as the box cover, but include add a small boat or two in the water for added interest.
In the box you have the resin hull along with a few resin components for the bridge, funnel, and other structural items. Also comes with four PE sheets: a medium sized fret for detailing the structures and the deck items, two smaller frets for adding railing and small boat details, and another fret to make the Type 99 10th year AA gun.
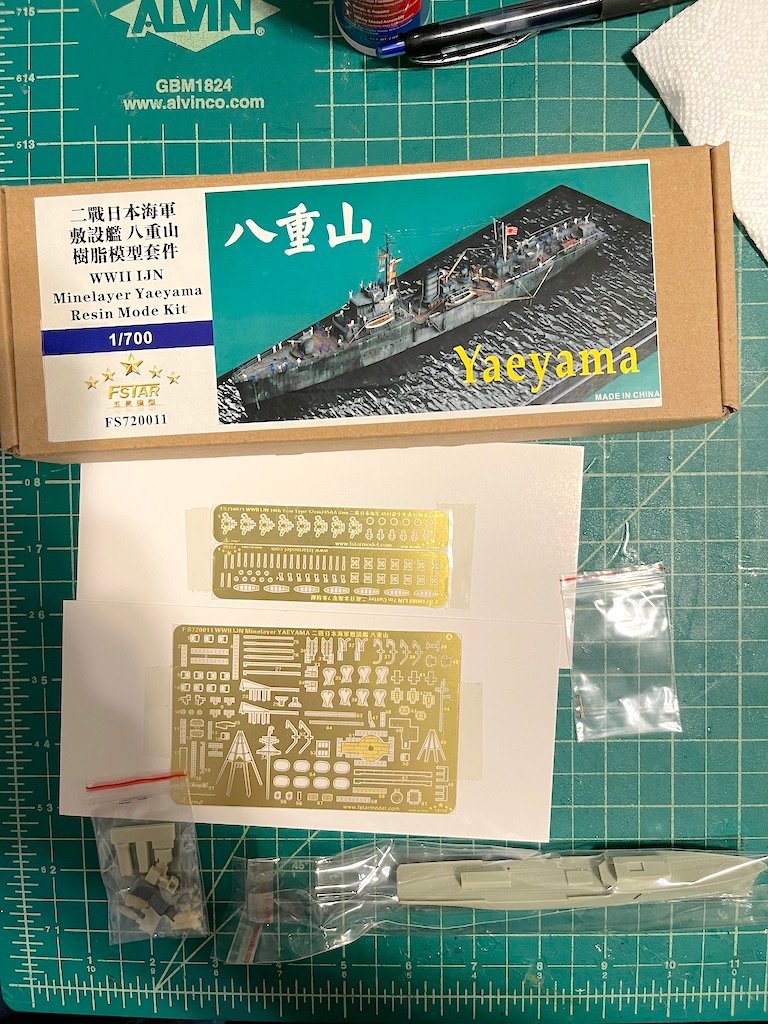
The hull is really nice, just need to separate it off the plug:
The resin parts and PE frets are very nice. The one disappointing thing with this kit is that it doesn't come with everything shown on the box cover, importantly, it doesn't include the searchlight as well as the vent and windlass on the deck at the bow. It also doesn't include the pipe or whatever that vertical structure is on the hull sides even with the bridge. Five Star and others (Rainbow Models, Veteran, etc.) make various add-ons which I had picked up to detail my upcoming builds, so it wasn't too big of a deal for me in the end. Still disappointing though.
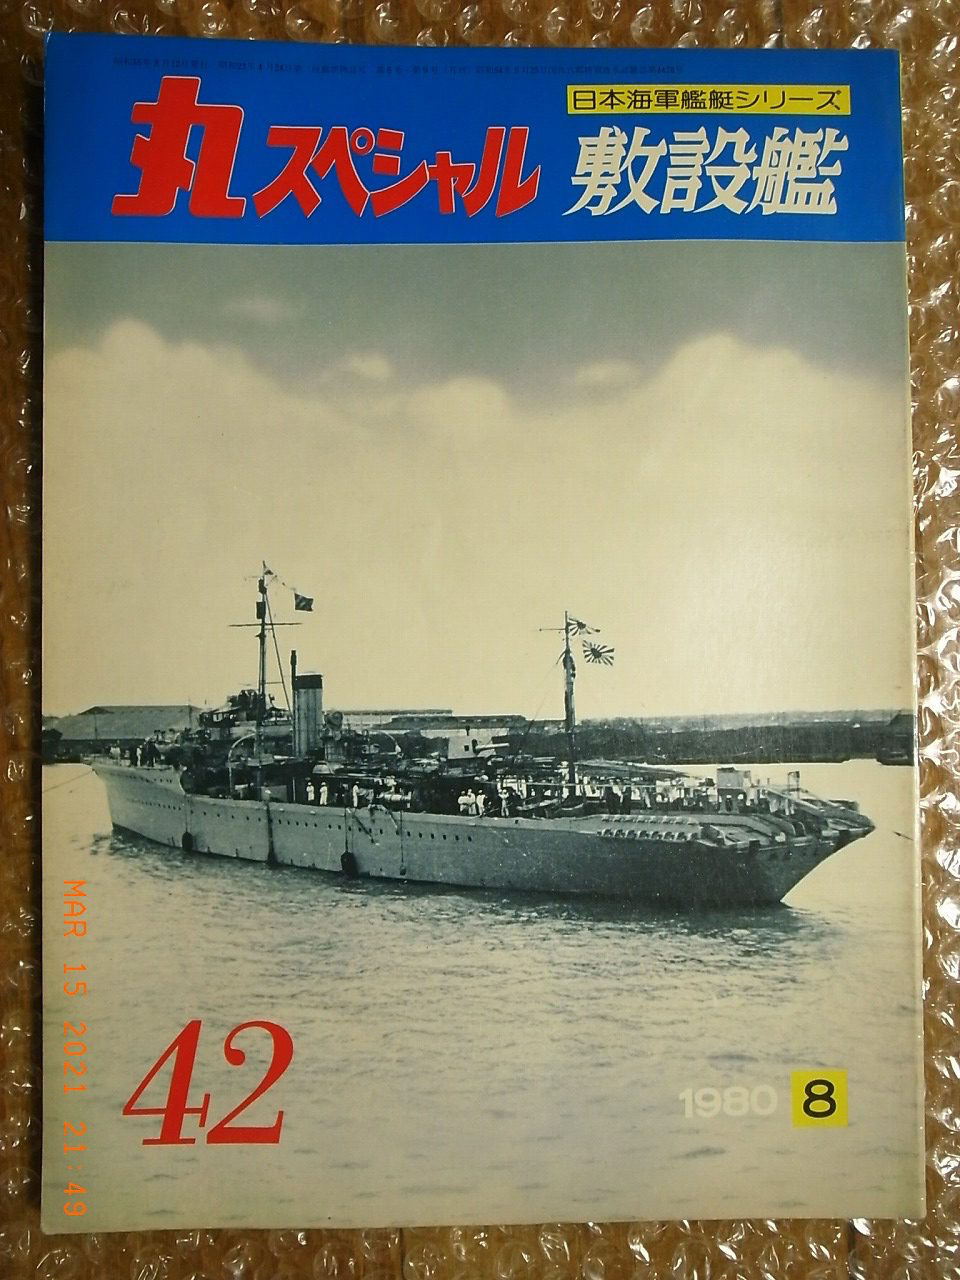
As a reference guide, I'm using Maru 42, an issue that was dedicated to IJN minelayers (happened to come across it on eBay a few weeks ago for a good price). It's actually got about 10 pages with lots of pictures on the Yaeyama, along with line plans for it. The pictures are mostly the usual grainy black and white, but you can make out some nice details in it. The publication is in Japanese, and it's been a long time since I studied the language back in college, plus, I was never very good with the Chinese characters (you needed to know 2000 "kanji" to be literate enough to read a newspaper!). But Google has a translation app that you can download that enables you to point the camera on your phone at text and the translation shows up on your screen. Cool tech!

-
Standards? I have no standards. I just fumble along with the PE like everyone else.
Your stairs came out really nice. Do you have a hold and fold? On my first build I tried doing stairs using tweezers and never could get them looking right. With my 1/350 current build, I used the hold and fold and the stairs came out much much better.
For what it's worth, I use the "Bug" from Small Shop:
https://thesmallshop.com/products/sms002-the-bug-hold-fold
-
25 minutes ago, hollowneck said:
Thanks for the reference to the Russian site...however, I was warned off in three different browsers that it could be hacked.
When I went to purchase it a few months ago, I didn't get that warning. This time around I did. If I recall correctly I did the transaction through PayPal which adds a layer of security, but if I got that warning message a few months ago I certainly would not have placed the order. Guess I was lucky with the timing.
Your Tiger is fantastic by the way! Love the sea!!
- mtaylor and hollowneck
-
2
-
Great start OC!
I recently picked up a few Flyhawk kits. Can't tell if I like the instructions or hate them. What's complicated is when you buy the "Deluxe" or similar upgraded sets, you get a set of instructions for the base kit and a separate set for the upgrades. Would be nice if they were all in one. I wonder if the Pontos sets are all in one? I have their Soya, but haven't opened it.
- lmagna, popeye the sailor, Canute and 1 other
-
4


IJN Yaeyama by Landlubber Mike - Five Star - 1/700 - RESIN - Japanese minelayer
in - Kit build logs for subjects built from 1901 - Present Day
Posted
Thanks John for the vote of confidence. So far I'm hopeful, but don't want to get too far ahead of myself")