Hello everyone,
Let's start with the specs of this ship, followed by her overall history and the final few days in the campaign. I'll also attach a photo of the captain. There is semi comical story attached to my father's association with Captain van Straelen. I hope to share it with at the right moment. Ah yes, memories.
Class overview
Name:
Java class
Builders:
Koninklijke Maatschappij de Schelde, Flushing - Java
Nederlandse Scheepsbouw Maatschappij, Amsterdam - Sumatra
Wilton-Fijenoord, Schiedam (cancelled) - Celebus
Operators:
Royal Netherlands Navy
Preceded by:
Holland class
Succeeded by:
De Ruyter
Planned:
3
Completed:
2
Lost:
2
General characteristics
Type:
Light cruiser
Displacement:
6670 tons standard
8087 tons full load
Length:
155.3 m (509 ft 6 in)
Beam:
16 m (52 ft 6 in)
Draught:
6.22 m (20 ft 5 in)
Propulsion:
3 Parsons geared steam turbines
8 Schultz-Thornycroft boilers
3 shafts
73,000 shp (54,000 kW)
Speed:
31 knots
Range:
4,340 nmi (8,040 km; 4,990 mi) at 11 or 12 kn (22 km/h; 14 mph)
Complement:
526
Armament:
10 × Bofors 150 mm guns
8 (Java) or 6 (Sumatra) x Bofors 40 mm anti-aircraft guns
8 × Browning .50 machine guns
Armour:
7.5 cm (3.0 in) belt
2,5 to 5 cm (2.0 in) deck
12.5 cm (4.9 in) conning tower
10 cm (3.9 in) shields
Aircraft carried:
2 Fokker C.XI-W floatplanes
All float planes were left ashore because admiral Doorman was afraid of the volatile aviation fuel during battle conditions.
In 1937, Java was modernized at the Naval Dockyard in Den Helder, Holland. The modifications include adding an AA-battery of 4 double Bofors 40 mm-guns, replacing the fire control system with a new Hazemeyer set and shortening the masts.
Java could also carry 10-12 ASW depth charges, 36 mines, split – with one third below deck in the ammo compartment and the rest on the aft deck on narrow tracks. She had one smoke machine and no torpedoes.
May 31 1916
Hr Ms. Java is laid down at Koninklijke Mij "De Schelde", Vlissingen [Piet's note: this was also the date of the Battle at Jutland]
August 9 1921
Java is launched [Piet's note: already obsolete]
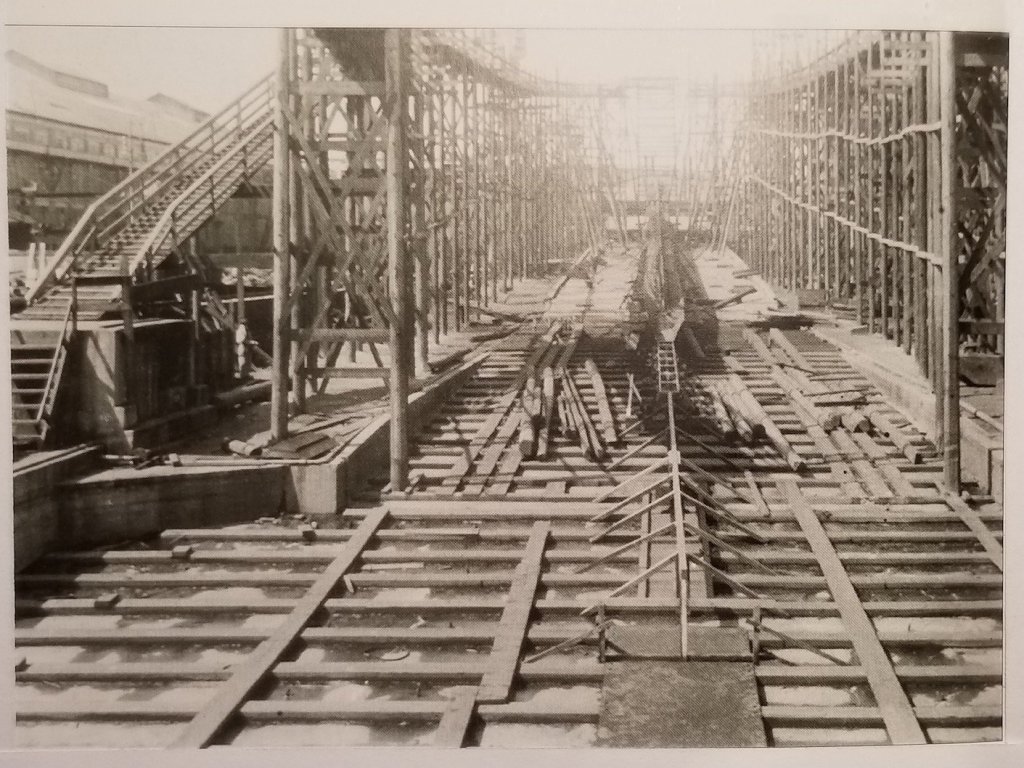
May 1 1925
Java is completed after countless delays, such as strikes by the dockyardworkers, shortages of materials and modifications to the original design.
December 4 1928
Fleet revue at Yokohama to celebrate the coronation of Japan's emperor.
May 20 1937
Fleetrevue at Spithead
1937
The Java is modernized at the Naval Dockyard in Den Helder, Holland. The modifications include adding an AA-battery of 4 double Bofors 40 mm-guns, replacing the fire control system with a new Hazemeyer set and shortening the masts.
January 3 1938
Java is commissioned with her new "look". She was sent to Gibraltar Strait to escort Dutch ships shortly after.
May 4 1938
Java leaves for the Dutch Indies via Suez.
April 1940
The cruisers Java and De Ruyter, the supplyship Zuiderkruis and two divisions of submarines are on stand-by in the Java sea after rumours about a Japanese fleetconcentration near Formosa.
April 27 1940
Commander, later Captain, Ph.B.M. van Straelen assumes command.
May 10 1940
Germany attacks Holland in the early morning. This means for the the NEI, that all German merchant ships were to be captured as soon as possible. A boarding party of the Java succesfully captures the Hapag-freighters Bitterfeld (7659 gt), Wuppertal (6737 gt) and Rheinland (6622 gt) in Padang.
January 18 1941
The Java makes here first convoy trip from the Ajoe archipelago with the merchants Brastagi ( 9247 tons gross weight), Kota Nopan (7332 gross tons ) , Kota Baroe (7281 gt) and Kota Tjandi (7295 gt). The convoy was dissolved on January 23 in position 03.00 South, 161.25 East.[Piet's note: Adjudant Petrus W. van Warmerdam became part of the crew on the first of this month]
March 1941
A refit is hastily broken off after the news the panzerschiff Admiral Scheer was operating in the Indian Ocean. Despite search efforts by both ships and aircraft, nothing was found.
April 23 1941
Java leaves Suva with two merchants, bound for Brisbane, Australia
July 1941
Java makes rendez-vous in Torres Strait with the passengership Jagersfontein (10083 gt), which has a contingent of American aviators on board, which later become known as the famous "Flying Tigers". She escorts the ship to Java.
November 1941
The Java is on escort duty between Suva and Soerabaja.
December 8 1941
The Netherlands declares war on Japan after the attack on the American base Pearl Harbor. The Java was at this time enroute to Singapore where she was to operate under command of the British Admiral Layton. The Java is part of most convoys bound for Singapore until early February, but also makes a trip to the Cocos Islands to find out if it was still free of Japanese troops.
December 12 1941
Java departs Singapore to rendez-vous with convoy SM 1 (3 British, 1 Greek and 2 American ships). She escorts it from December 13 to December 15, together with the Dutch destroyer Evertsen, the Australian armed merchant cruiser Kanimbla, and the British destroyers HMS Encounter, Stronghold and Tenedos
December 31 1941
The Java is part of the escort for convoy BM 9B, but has to break off because of propellor damage.
January 18 1942
The cruiser Java and the destroyers Evertsen and Van Nes make rendez-vous with convoy MS-2, which consisted of the large liner Aquitania with HMAS Canberra as ocean escort. This ship has about 3500 men aboard bound for Singapore. The convoy arrives in Ratai Bay on Sumatra where the troops transfer to six smaller Dutch KPM-steamers and one small British ship. This convoy then leaves for Singapore (now designated MS 2A) where it arrives safely on January 24. The Java is also part of this convoy.
January 26 1942
A report came in about a Japanese concentration of ships off western Borneo, near the Api passage. Admiral Helfrich orders the cruisers Java and Tromp with destroyers Banckert and Piet Hein to intercept and destroy this convoy. Later reports show the "convoy" consists of one freighter and numerous very small vessels, after which the Dutch ships retreat.
January 31 1942
Java joins the the escort for convoy DM 2, which arrives in Singapore on February 5. Java had already detached itself on February 4 due to fuel shortage. She becomes part of the Combined Striking Force on February 3, probably.
February 13 1942
Java joins the Eastern Striking Force (cruisers De Ruyter and Tromp under Rear-Admiral Doorman) in the afternoon while it passed through Sunda Strait. This force is enroute to intercept a Japanese convoy bound for the important port Palembang on North-Sumatra. Doorman decides to wait for destroyers to assist him and he plots a course for Oosthaven on Sumatra. On arrival, the heavy cruiser HMS Exeter and the light cruiser HMAS Hobart join him. The destroyers arrive the next day.
February 14 1942
The fleet leaves Oosthaven in the afternoon for the Gaspar Straits with the following strength: cruisers De Ruyter, Tromp, Java, HMS Exeter and HMAS Hobart along with the Dutch destroyers Van Ghent, Kortenaer, Piet Hein and Banckert and the American Barker, Stewart, Bulmer, John D. Edwards, Pillsbury and Parrott. The ships head for an area notorious for navigational hazards.
February 15 1942
At about 0430 hours in the morning, the destroyer Van Ghent hits the Bamidjo reef in Stolze Strait. Doorman had ordered a relatively dangerous formation with the four Dutch destroyers steaming alongside eachother. Banckert and the American destroyers could barely miss the reef. After leaving Stolze Strait at about 0800 hours, the fleet sets a western course about 45 minutes later. Unfortunately, they are spotted by a Japanese plane at 0920 hours (a catapultplane from the Japanese heavy cruiser Chokai) and a few hours later, the first aircraft attack. It were seven "Kate"-torpedobombers from the carrier Ryujo, this time not armed with torpedoes but with bombs. None of the ships was hit. They were later reinforced by numerous other aircraft, but no ships sustain "real" damage, although the Barker and Bulmer are pretty beaten up. [Piet's note: My father told us about this attack where the captain looked up with his binoculars and when he saw the bombs released he ordered a change of course. I will post a picture of the Java under attack, taken by the Hobart]
February 16 1942
The Striking force enters Tandjong Priok ( Batavia ) at 0830 except for the Java and destroyers, which have a smaller oil capacity. These ships refuel in Ratai Bay on Sumatra from the Dutch tanker Tan 1. Doorman leaves in the night for Tjilatjap.
February 17 1942
Arrival in Tjilatjap
February 18 1942
Departure from Tjiltjap in the evening for an attack on the Bali landingforces. She's accompanied by the cruiser Java and the destroyers Kortenaer, Piet Hein, Ford en Pope. The first ships leave the harbor safely, but Kortenaer is not so fortunate. She stranded on a sandbar and has to wait for the tide. A second force leaves Soerabaja later this day.
February 19 1942
Nightaction off Bali. Read more about the Battle of Badungstrait here. The Java was hit by one 4.7-inch shell during this engagement, which wounded two men and did some minor damage.
February 20 1942
Arrival in Soerabaja
February 25 1942
The Striking force (De Ruyter, Java, Houston and 7 destroyers) goes to sea in the evening to make a sweep off the Madoera coast. No ships are sighted, the ships arrive in Soerabaja on the 26th.
February 26 1942
Nightsweep in the Java sea with the Striking Force. The ships are attacked by aircraft at 0900 in the morning of the 27th and Jupiter is missed by light bombs, but didn't sustain any damage. Arrival in Soerabaja on the 27th. [Piet's note: In the morning of the 27th my father came home to say goodby. That was the last time I saw him.]
February 27 1942
Doorman leaves port in the evening of the 27th to intercept several convoys heading for Java. Unfortunately, he was spotted and engaged by the Japanese covering force, consisting of 2 heavy cruisers (Nachi and Haguro), 2 light cruisers and 14 destroyers. The effectiveness of the CSF was hampered by difficulties in communication. In addition, the Japanese had a 2 to 1 advantage in 8"-guns. The Java was hit by a Japanese "Long Lance" torpedo from the Nachi at about 23.32 hours near the aft ammunitionstack, which exploded. The AA-deck with the 40 mm-guns caught fire and the stern broke off near the longroom, causing flooding in the aft engineroom and a heavy list to port. All electrical equipment shut down and the only thing the crew could do, was to abandon ship as soon as possible. No boats could be lowered without electricity, so all possible livesavers were thrown overboard, such as rafts, bamboosticks etc. The Java sank in about fifteen minutes, taking 512 crewmembers (including Captain Ph.B.M. van Straelen) with her. She sank in position 06.00 S, 112.05 E.
December 1, 2002
A diver expedition on board the motor vessel Empress which initially set out to find HMS Exeter, find the wrecks of the light cruisers Java and De Ruyter. The wreck of Java lies at a depth of 69 metres on her starboard side.
APPENDIX II
CONTACT REPORTS BEFORE AND DURING THE BATTLE OF JAVA SEA
(Times are -7½)
FEBRUARY 26th:
1.
1150:
30 transports, 2 cruisers, 4 destroyers. Position: lat. 04°50' S., long. 114°20' E. (near Arends Islands), course 245°, speed 10 knots. (This was sent to Admiral Doorman at 1250.)
2.
1440:
2 Isuzu class cruisers, 2 destroyers. Position: lat. 06°25' S., long. 117°13' E., course 315°, speed 10-20 knots. (Admiral Helfrich sent this report to Admiral Doorman at 1445.)
3.
1700:
Dutch reconnaissance plane attacked by 2 cruiser catapult planes at lat. 06°05' S., long. 113°15' E., and lat. 05°40' S., long. 113°05' E. (Plane reports upon return at 1900; report forwarded to Admiral Doorman at once.)
4.
1830:
U. S. Army bombers bomb Japanese convoy, course unknown. Position: lat. 05°30' S., long. 113°00' E. (northeast of Bawean). (This report was received at Soerabaja at 2220, after which it was forwarded to Admiral Doorman, who complained of the delay of 6-8 hours in forwarding of reports.)
FEBRUARY 27th:
5.
0255:
Admiral Doorman received the following amplification of No.4: Convoy lat. 05°30' S., 113°00' E., 18 or more ships, 1 possible aircraft carrier or battleship. Six fighter planes protecting convoy reported by Dutch Navy plane at 1440/26.
6.
0510:
Report of Dutch reconnaissance plane after landing broadcast to all Allied warships.
(a)
2030/26 1 heavy transport, lat. 05°20' S., long. 113°38' E.
(b)
2230/26 2 destroyers, lat. 05°12' S., long. 112°20' E.
(c)
0005/27 2 transports, lat. 05°28' S., long. 112°24' E.
(d)
0020/27 1 transport, lat. 05°42' S., long. 113°00' E.
--87--
7.(a)
1340:
20 ships, unknown number of destroyers. position: lat. 04°45' S., long. 112°15' E., course 180°.
(b)
1345:
One cruiser. Position: lat. 04°04' 5., long. 111°07' E., course 220°.
(c)
1350:
Great fleet with 2 cruisers, 6 destroyers, 25 transports. Position: 20 miles west of Bawean, course south (Cf. report No. 10). (These reports sent to Admiral Doorman at 1445 and (c) causes him to go out for Battle of Java Sea.)
8.
1555:
3 cruisers, 5 transports. Position: lat. 06°50' S.,77 long. 112°10' E., course 190°. (This report was sent to Admiral Doorman at once.)
9.(a)
1630:
5 large ships, several small. Position: lat. 06°20' 5., long. 115° 30' E., course 315° (bombed by Allied planes).
(b)
1757:
35 ships, including 1 cruiser, 4 destroyers. Position: lat. 05°I0' S., long. 111°35' E., course 170°. (These reports forwarded to Admiral Doorman at 1805.)
1830:
Admiral Doorman reports that the enemy is retreating and asks position of the convoy.
10.
1700:
45 transports, 3 cruisers, 12 destroyers. Position: 20 miles west of Bawean (Cf. report No. 7c). Bombed by U. S. Army bombers. (This news received unofficially at Soerabaja at 1930 and relayed to Admiral Doorman. Official report not received at Soerabaja till 2125.)
1850:
U. S. PBY-5 (PatWing 10) leaves Soerabaja to shadow enemy convoy.
11.
1955:
3 cruisers and 8 destroyers. Position: 30 miles southwest of Bawean, course north. (Seen by American PBY. Pilot believes this is our striking force and sends no report.)
12.
2235:
28 ships in two groups of 16 and 12, 1 cruiser, 1 destroyer, courses 300° and 330°. Position: lat. 06°07' S., long. 112°05' E. (This report was received at Soerabaja at 2352 and forwarded to Admiral Doorman. The De Ruyter almost certainly sank before he received it.)
2300:
Dutch Catalina Y-67 takes off. Its pilot received with his instructions a list of the above contacts and two not listed above:
13.
1800-0227:
4 cruisers and 4 destroyers. Position: lat. 05°40' S., long. 111°35' E.
14.
2100-0227:
9 destroyers: Position: lat. 06°20' 5., long. 111°50' E. (These were at the time thought to be our own, but this seems unlikely.)
--88--
FEBRUARY 28th:
15.
0130:
2 cruisers, 4 destroyers about 25 miles distant from the convoy on course toward it. (U. S. PBY pilot at first believed this was our striking force and did not report the contact till 0150.)
0212:
U.S. PBY-5 turns back to Soerabaja.
16.
0200:
Convoy position: lat. 05°40' S., long. 111°40' E.78
17.
0335:
Report forwarded from Soerabaja (a composite of the reports of PBY-5 and Y-67): Convoy of 39 transports in two columns 1,500 yards apart, course north, speed 10. Three destroyers in column right flank, 1 cruiser and 2 destroyers in column left flank. Two cruisers and 6 destroyers moving toward convoy at high speed. Position as of 0212, lat. 05°56' S., long. 112°46' E.
18.
1430:
Convoy position: lat. 05°55' S., long. 112°05' E. (Report of Dutch Y-60.)
19.
1552:
Convoy 60 ships. Position: lat. 06°15' 5., long. 112°15' E., course 90°, speed 10. (Report of Dutch Y-60.)
--89--
Table of Contents * Previous Chapter (Appendix 1)
Footnotes
78 This longitude may be an error for 112°40' E. Cf. report No.17. (Report of Dutch Y-60.)
Last updated: June 14, 2002
Transcribed and formatted by Jerry Holden for the HyperWar Foundation
Ktz. P.B.M. van Straelen, commander of HR. Ms. Java before and during the Java Sea campaign.
When the fleet arrived in Soerabaja the evening of February 26 my father got permission to go home in the morning of the 27th for a goodby. That was the last time I saw him. That image is still engraved in my mind - he was dressed in his his dress uniform, with his saber strapped to his side as well as a side arm. As he walked out of the house to catch the steam tram back to the harbor he took me aside and we had a man to man talk. He knew that he was not coming back, the odds were just too great. He ordered me to never divulge anything of our conversation to my mother and sister.
Please folks, don't feel sorry, this is part of life. The good thing is that it formed my own character to what I have become and for that I am very grateful.
Cheers,


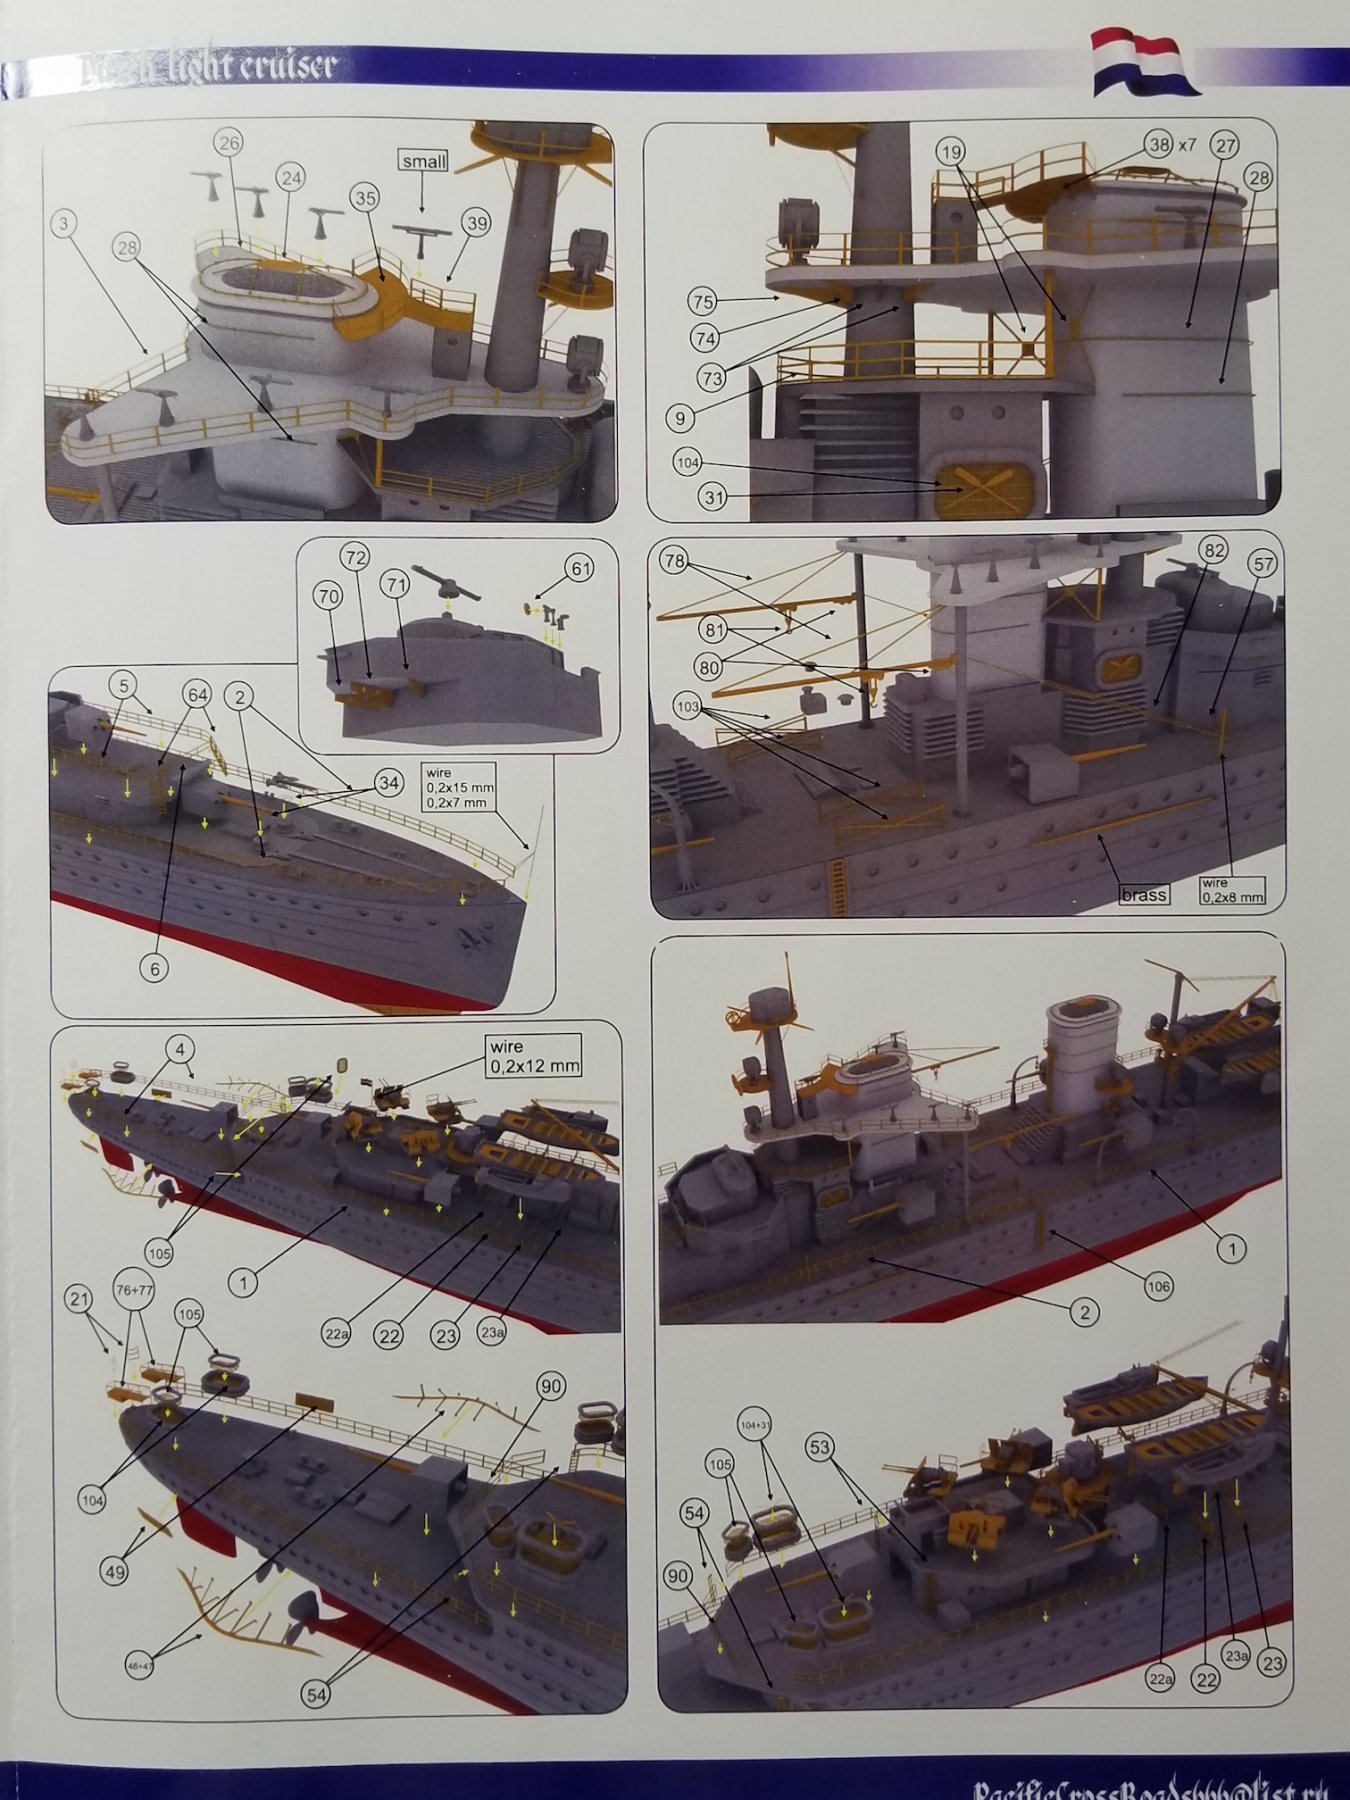
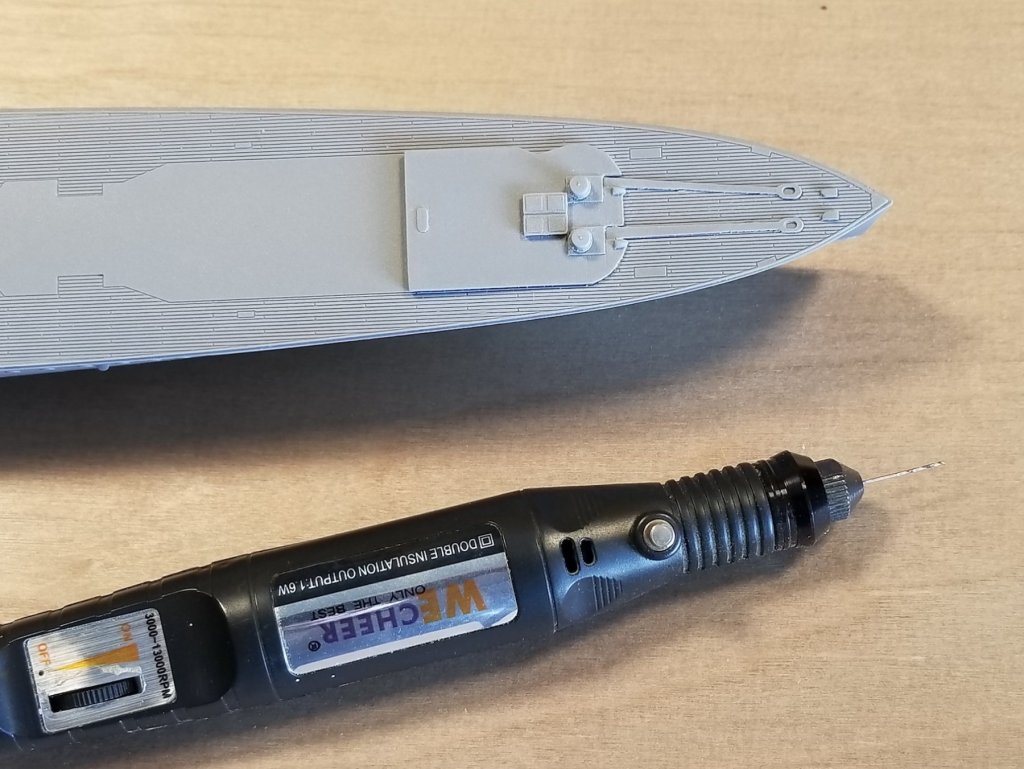
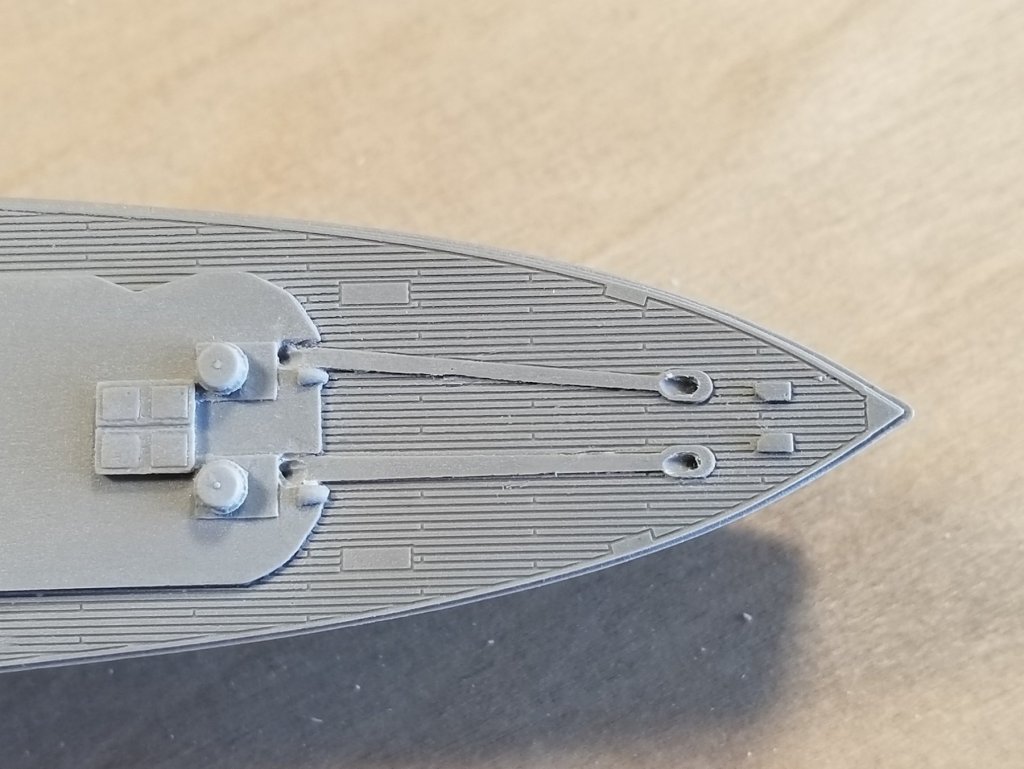
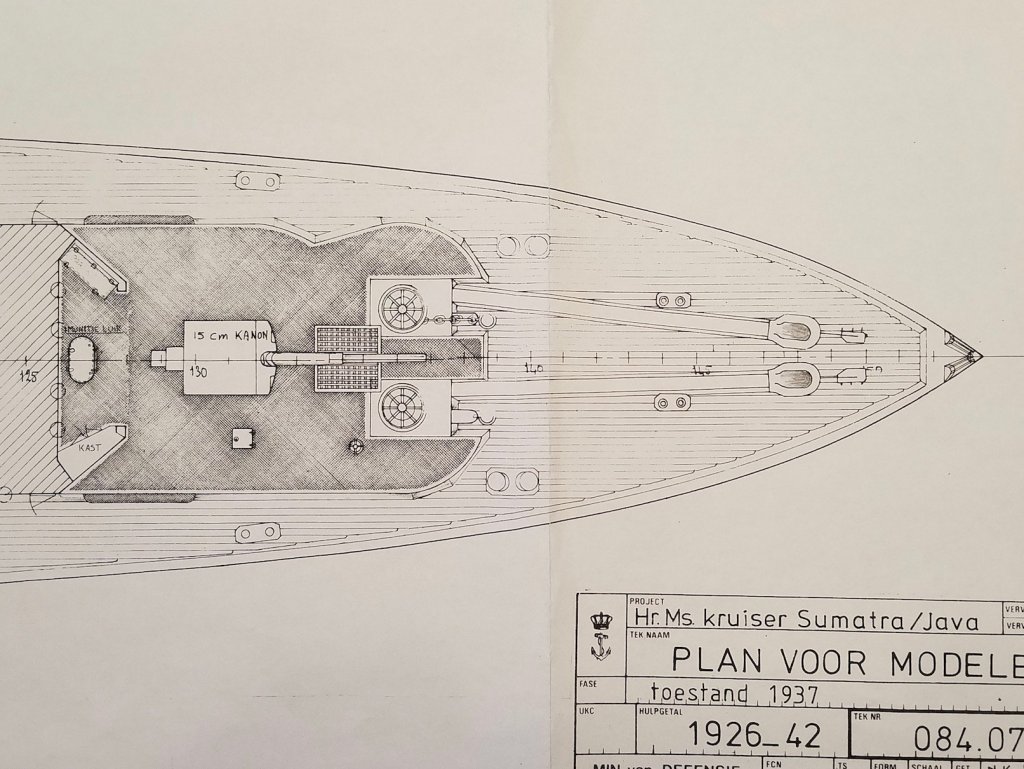
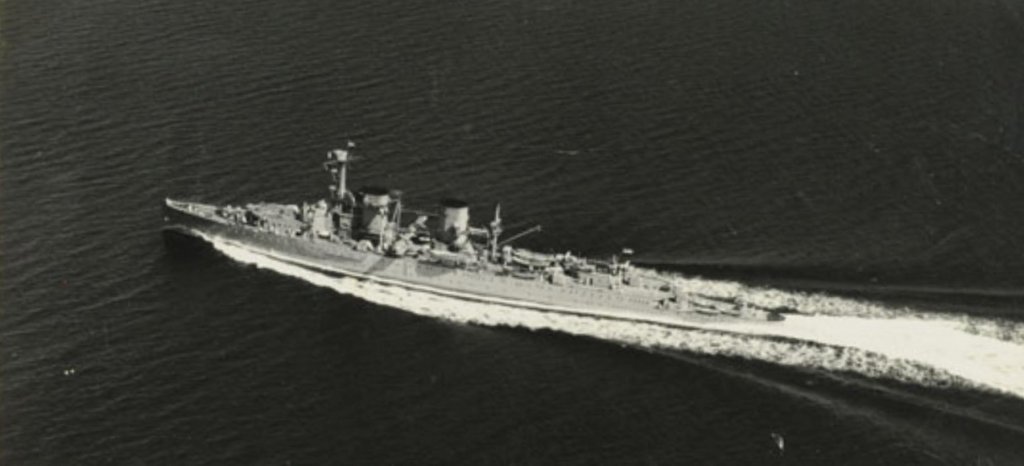
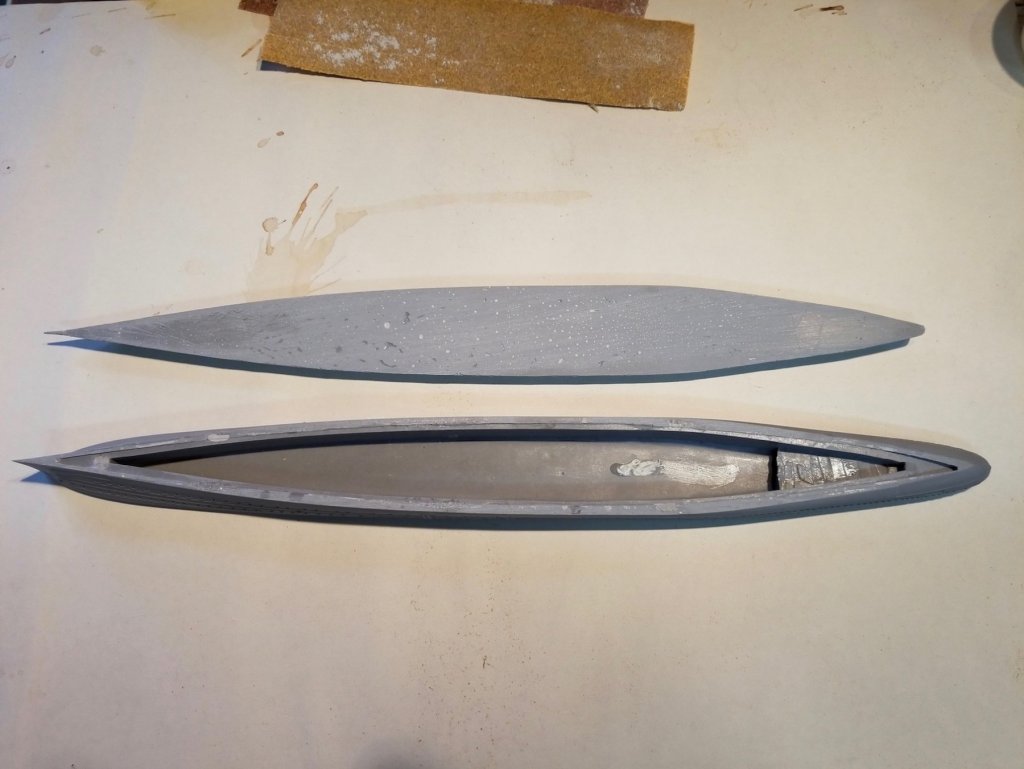
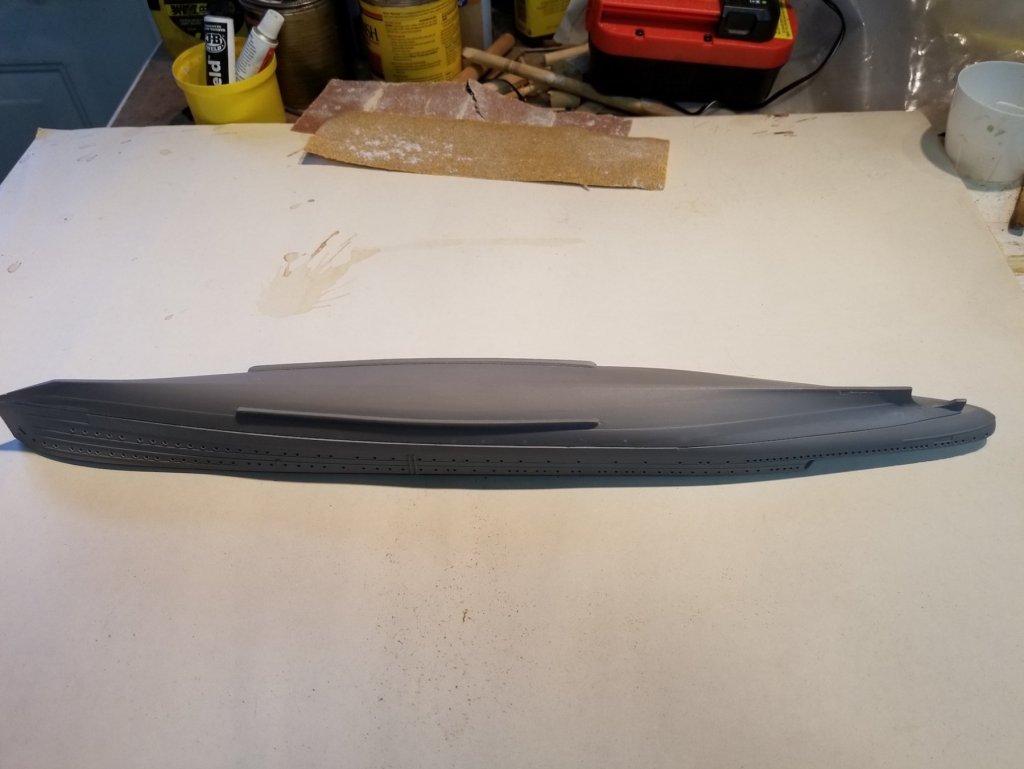
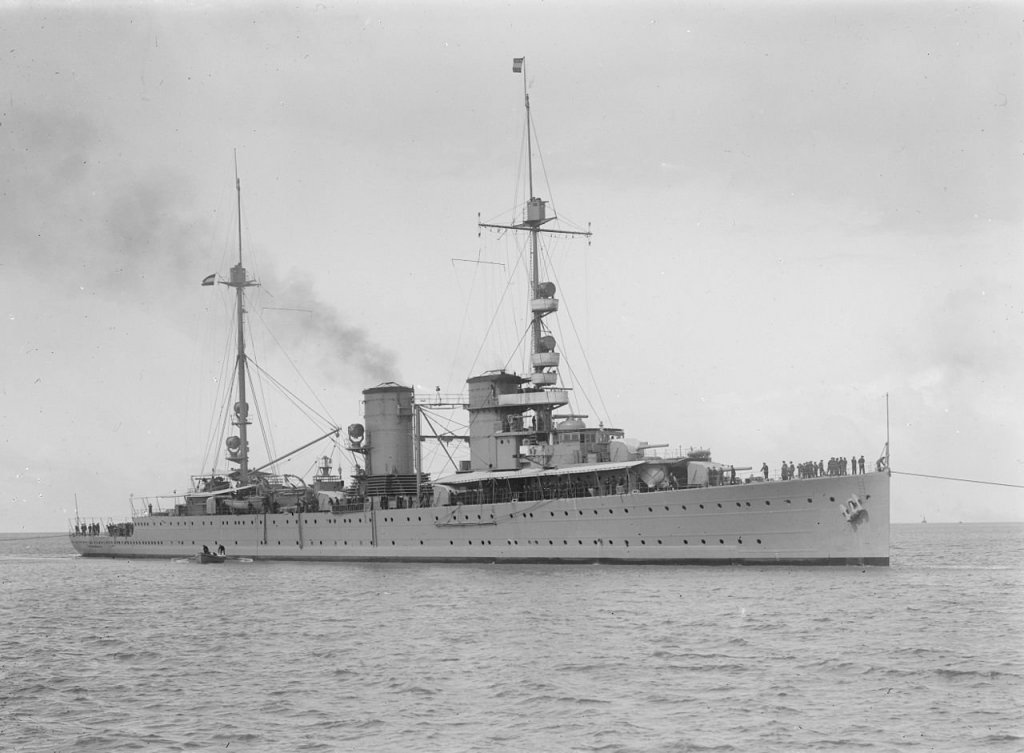
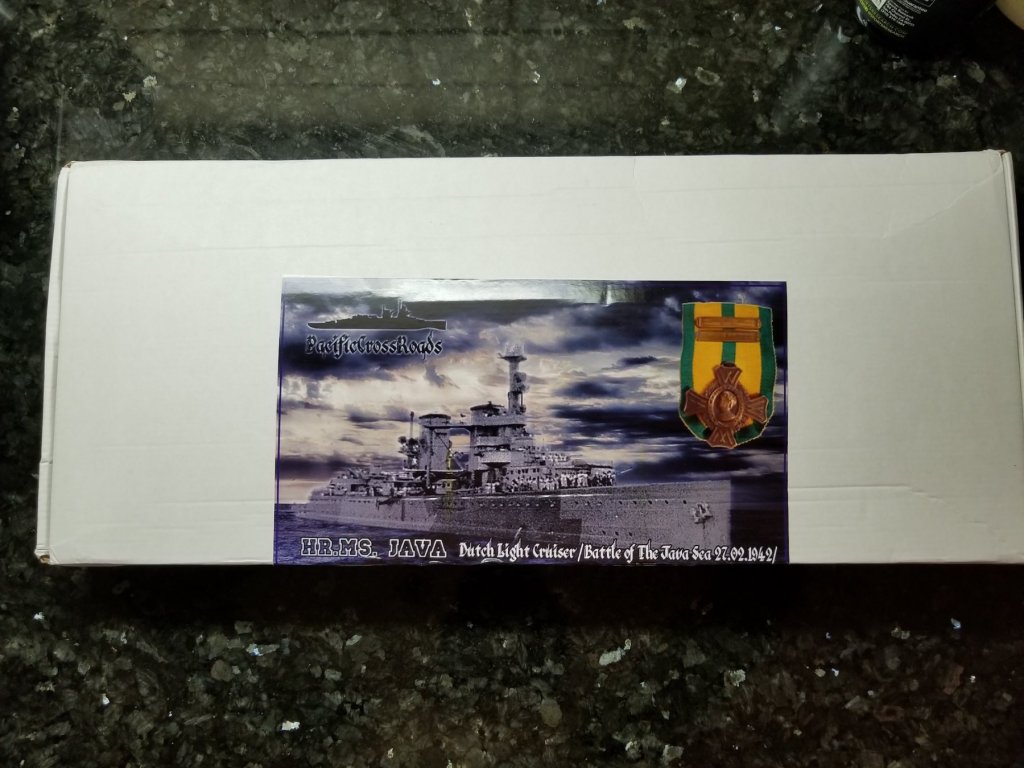
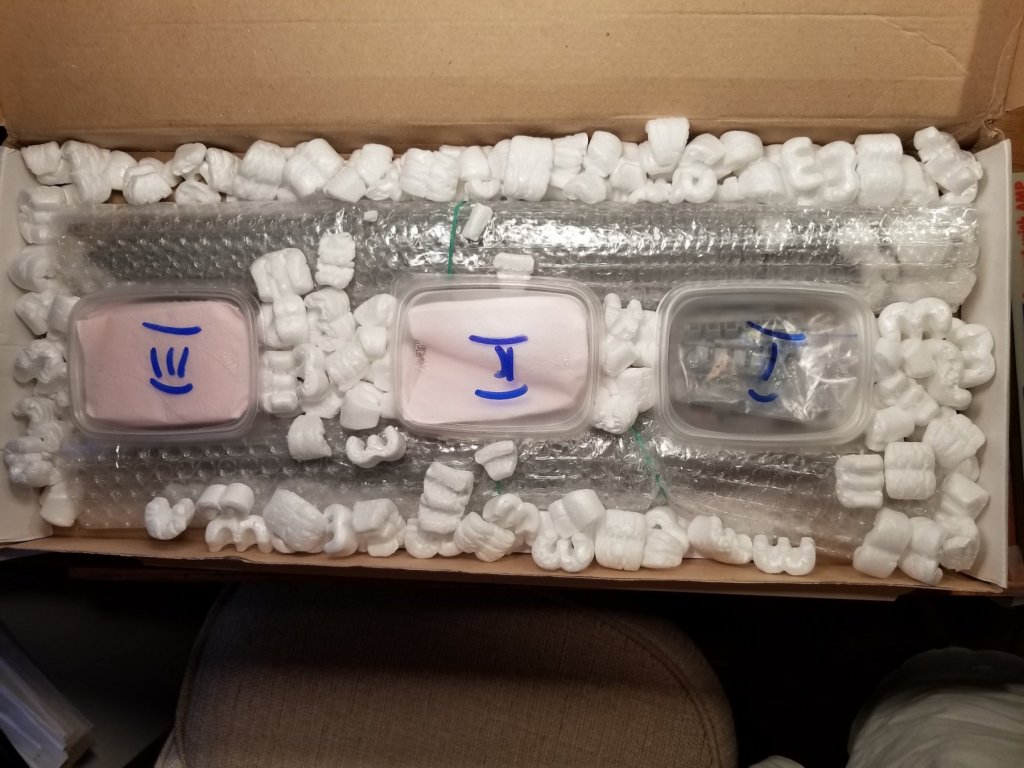
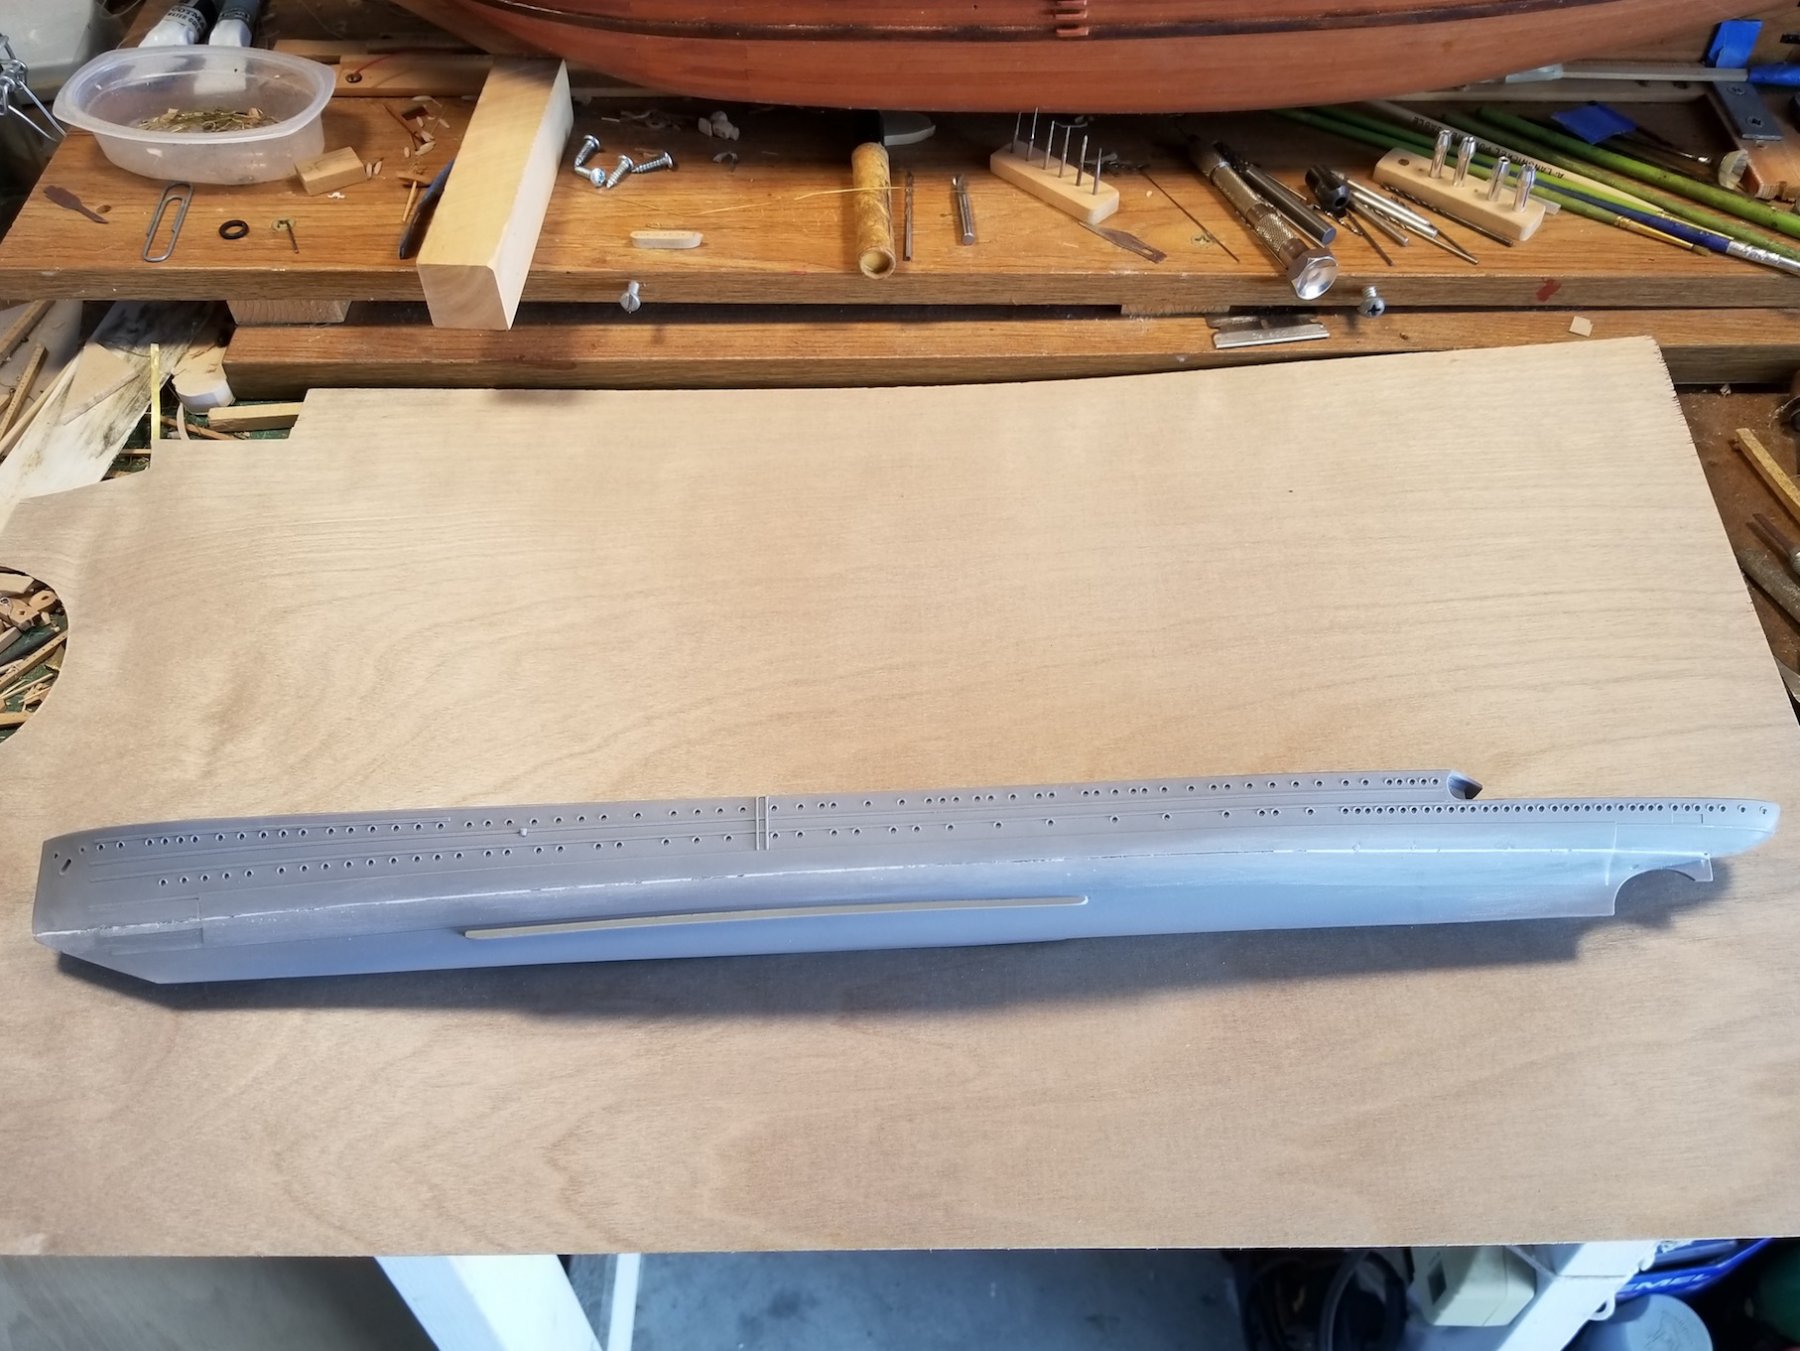
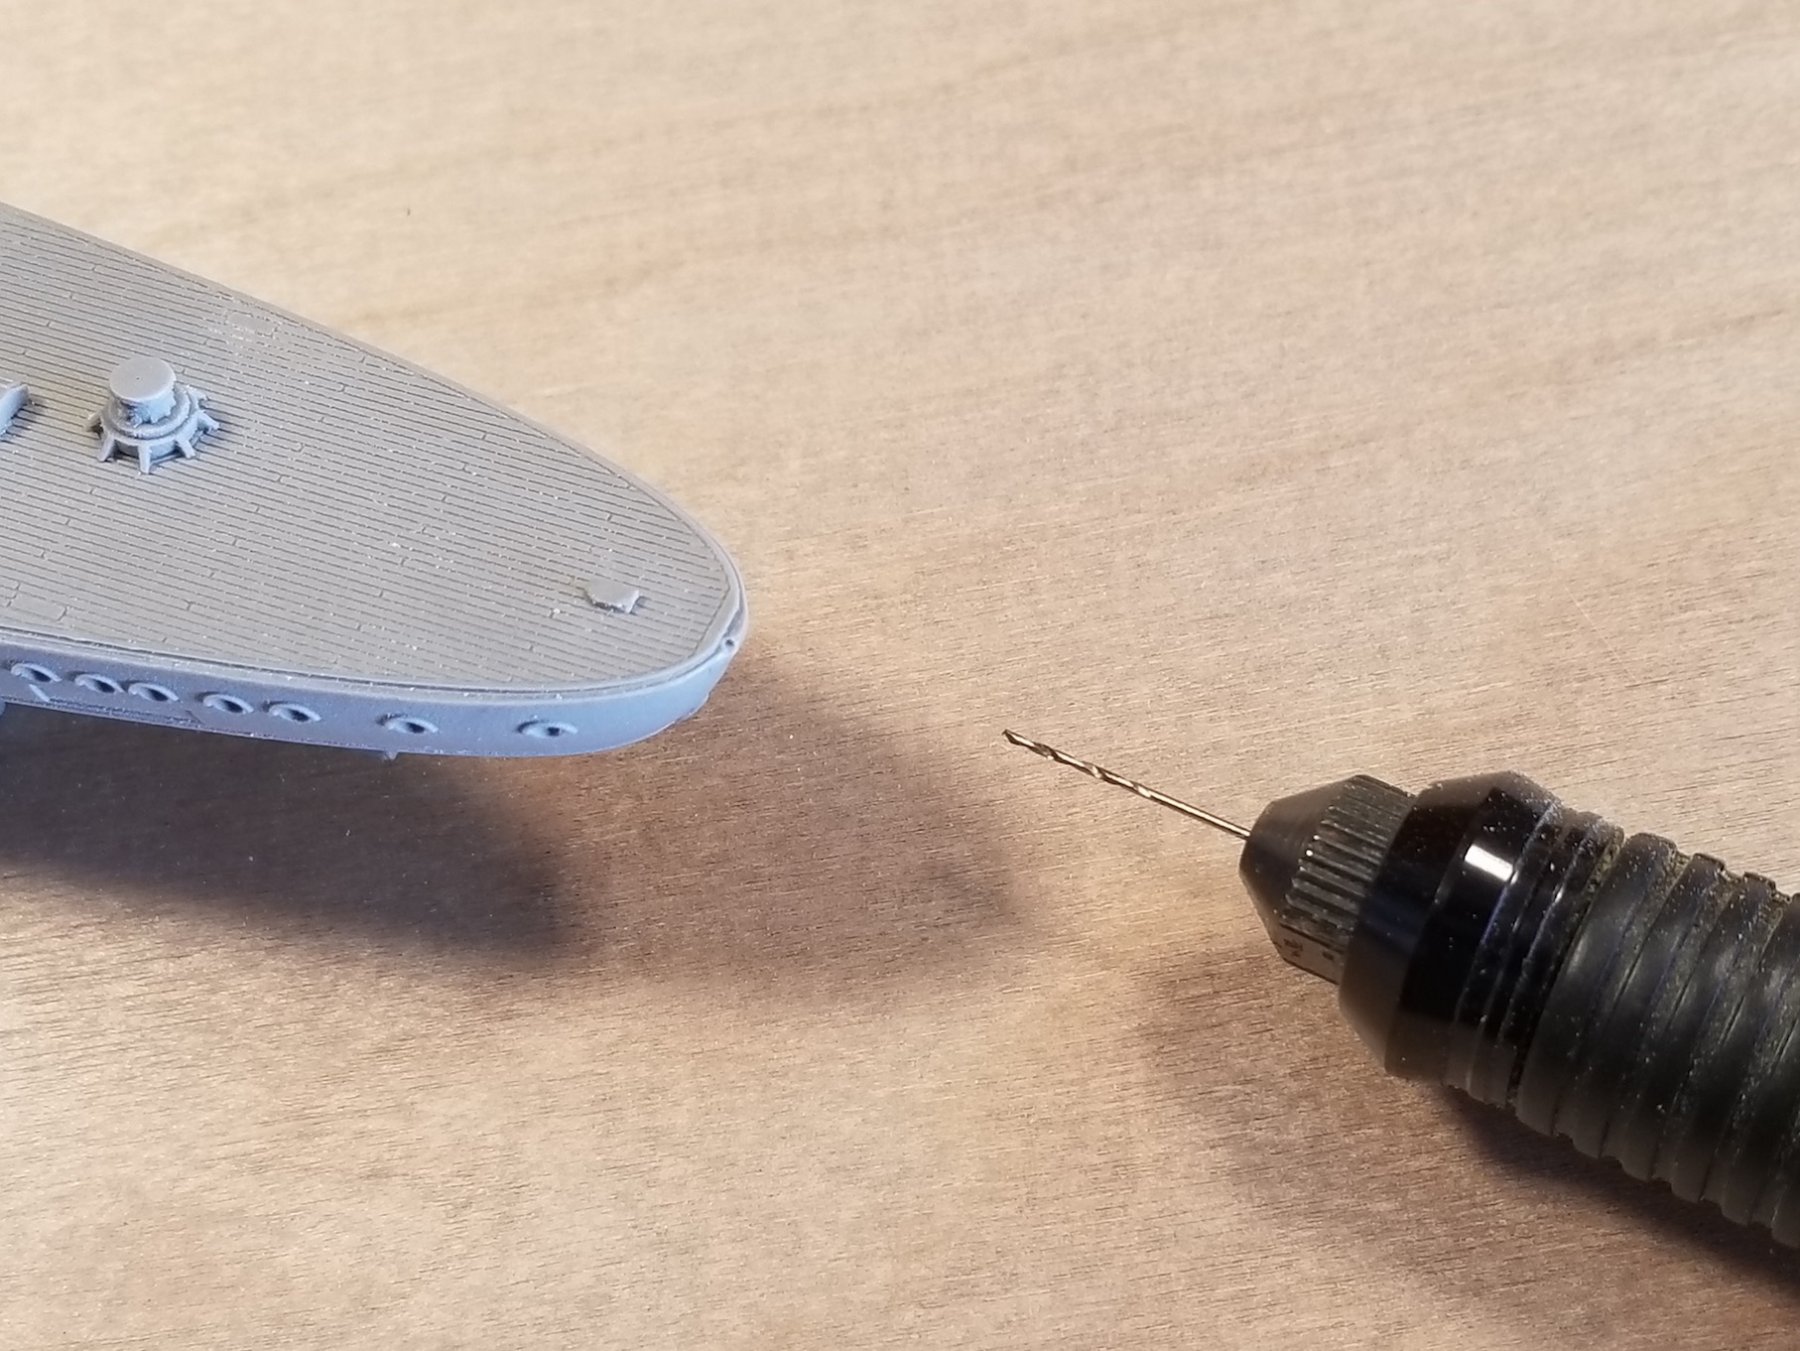
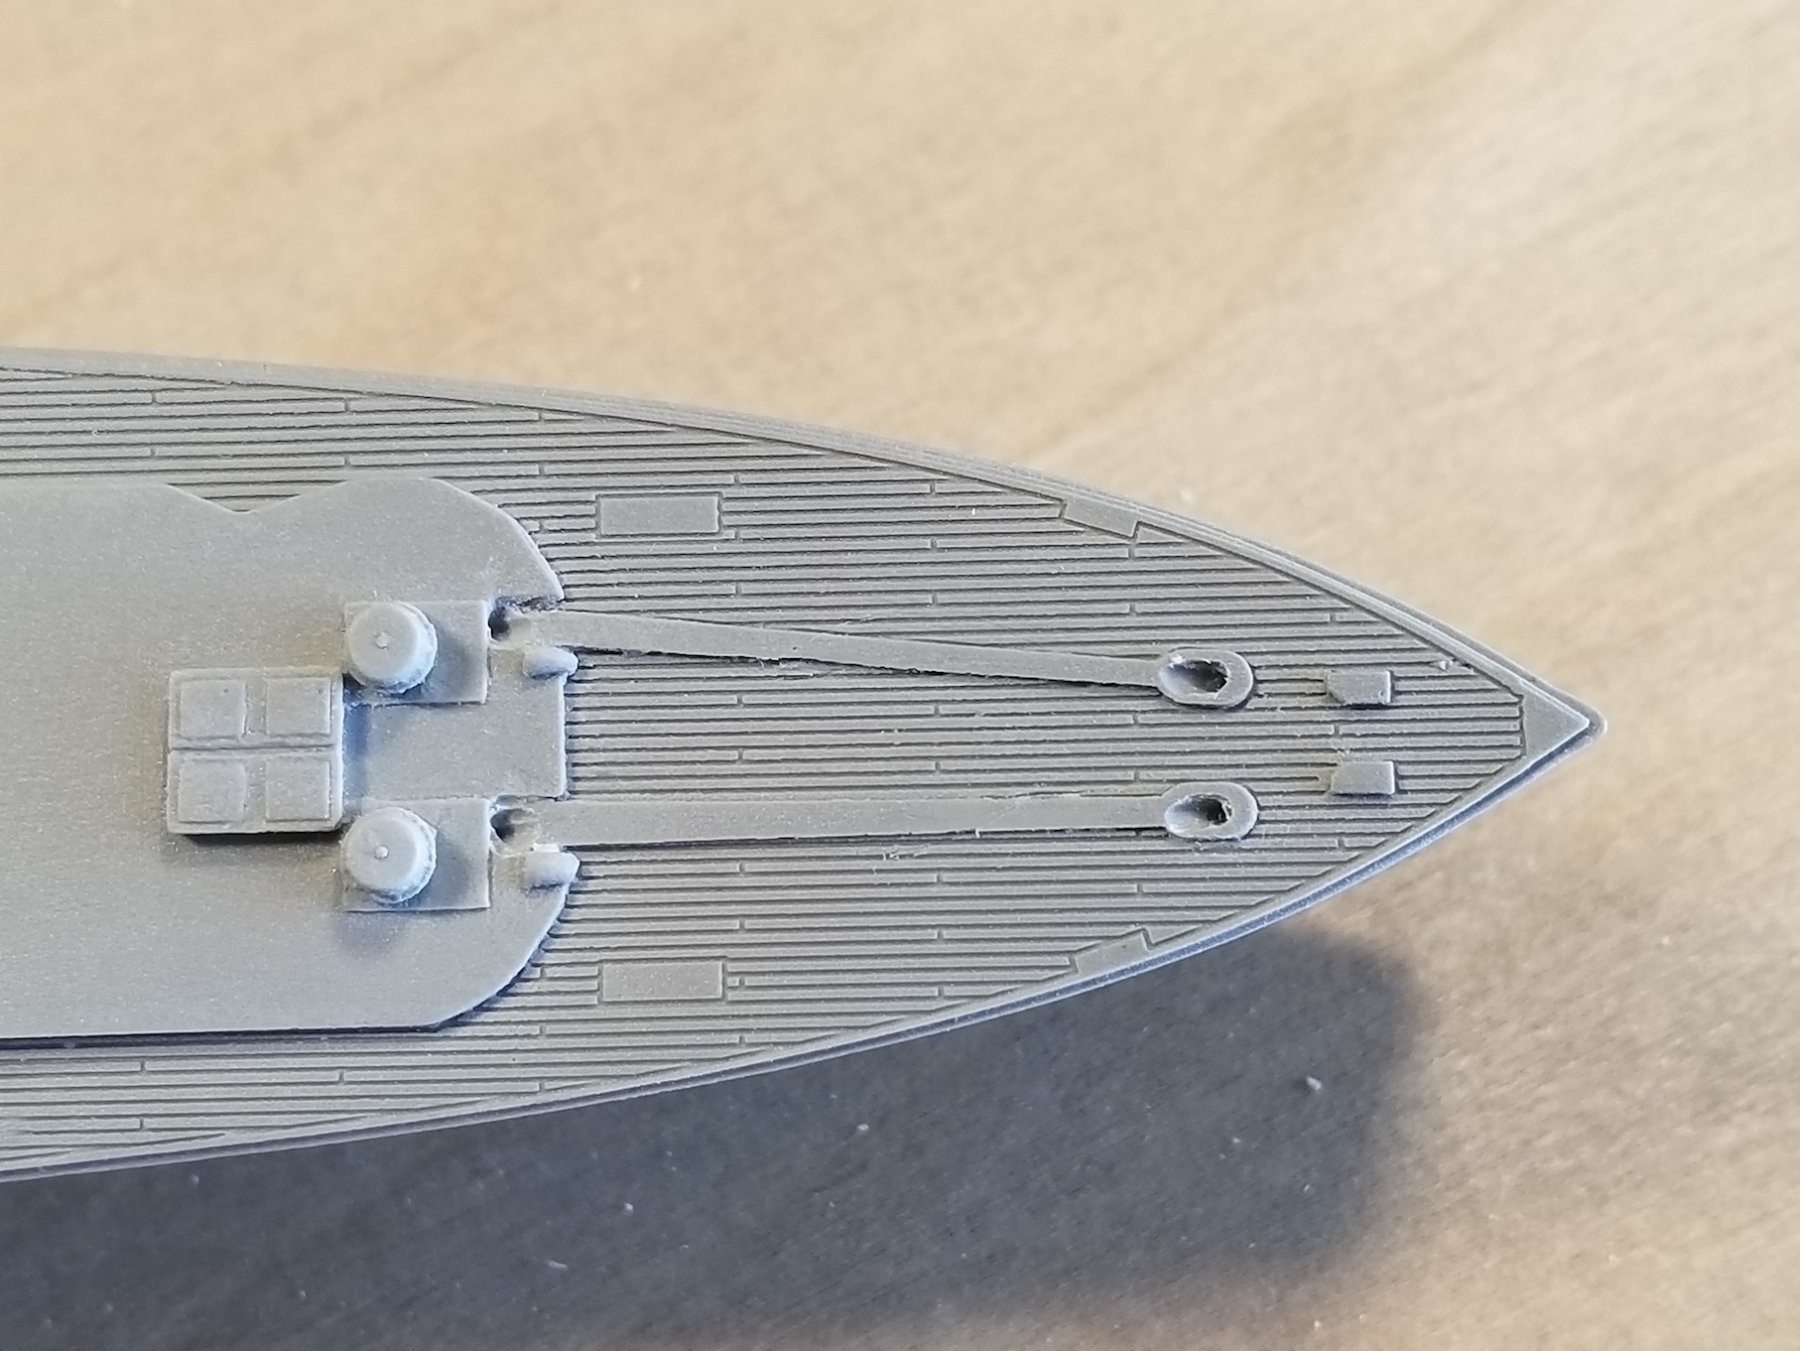
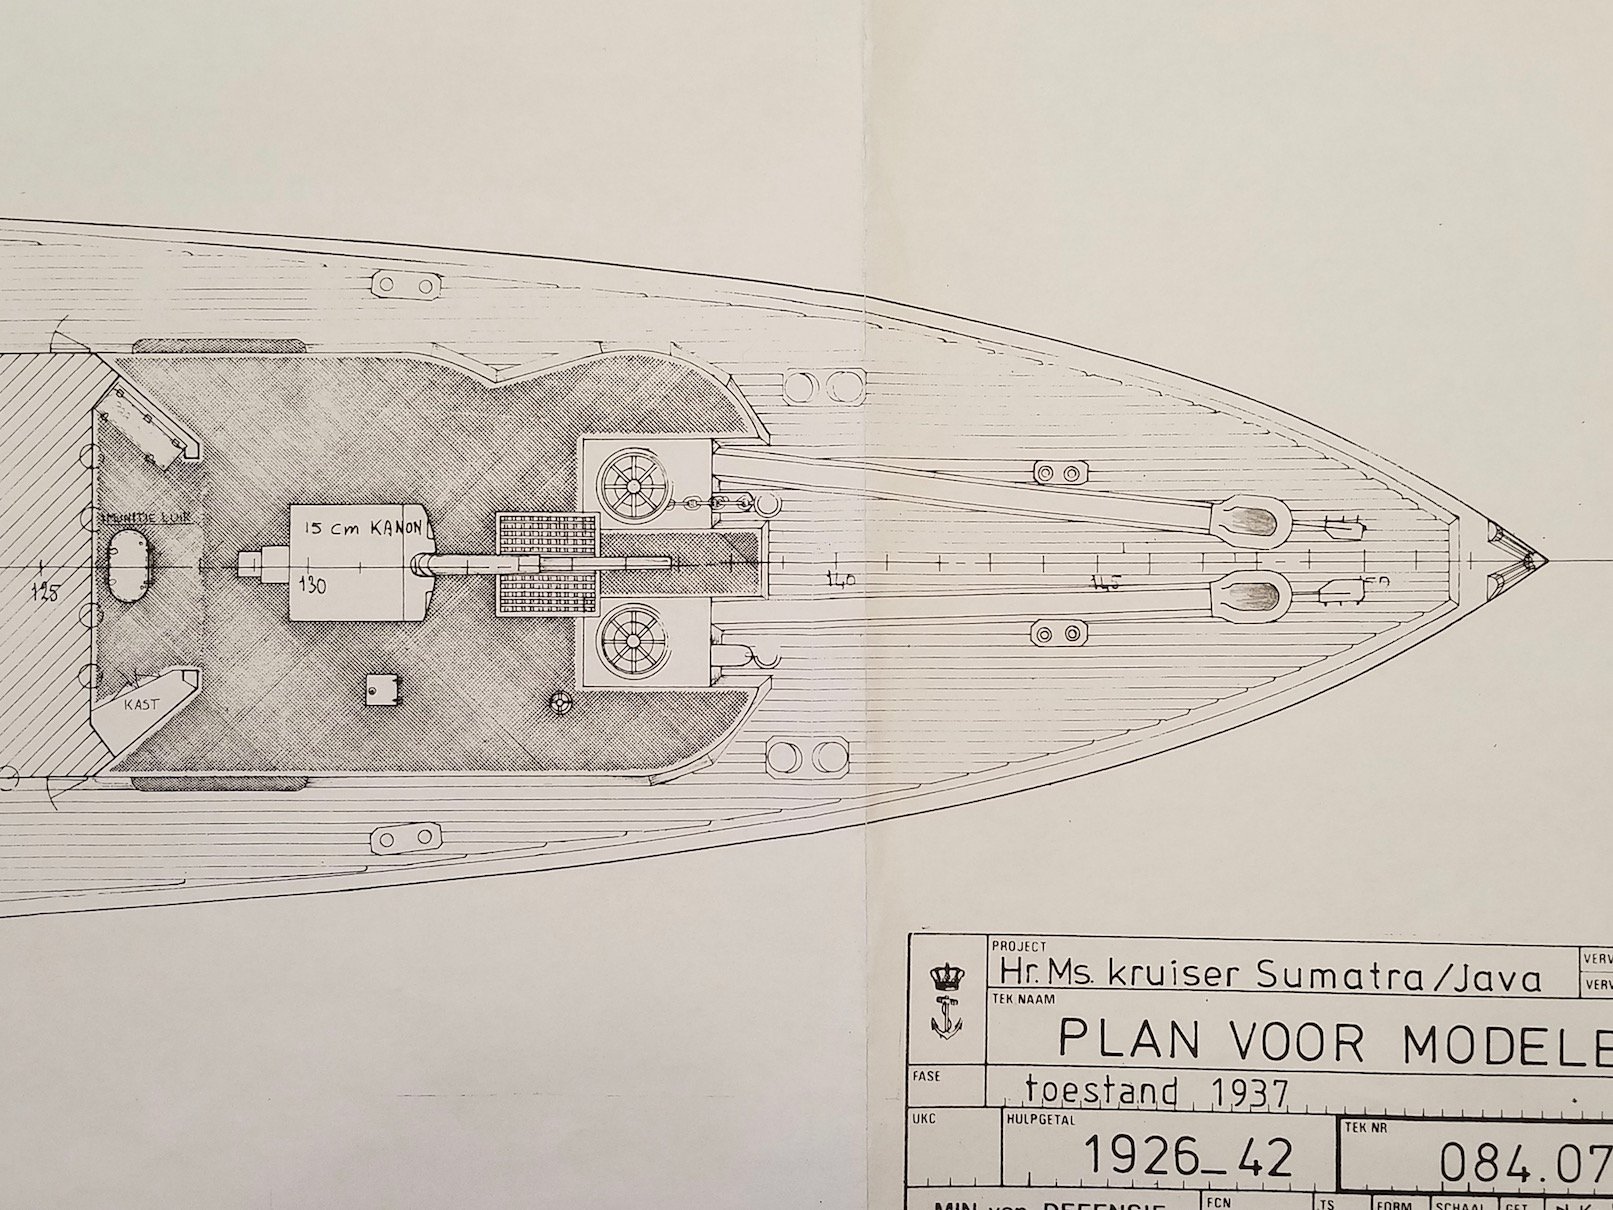
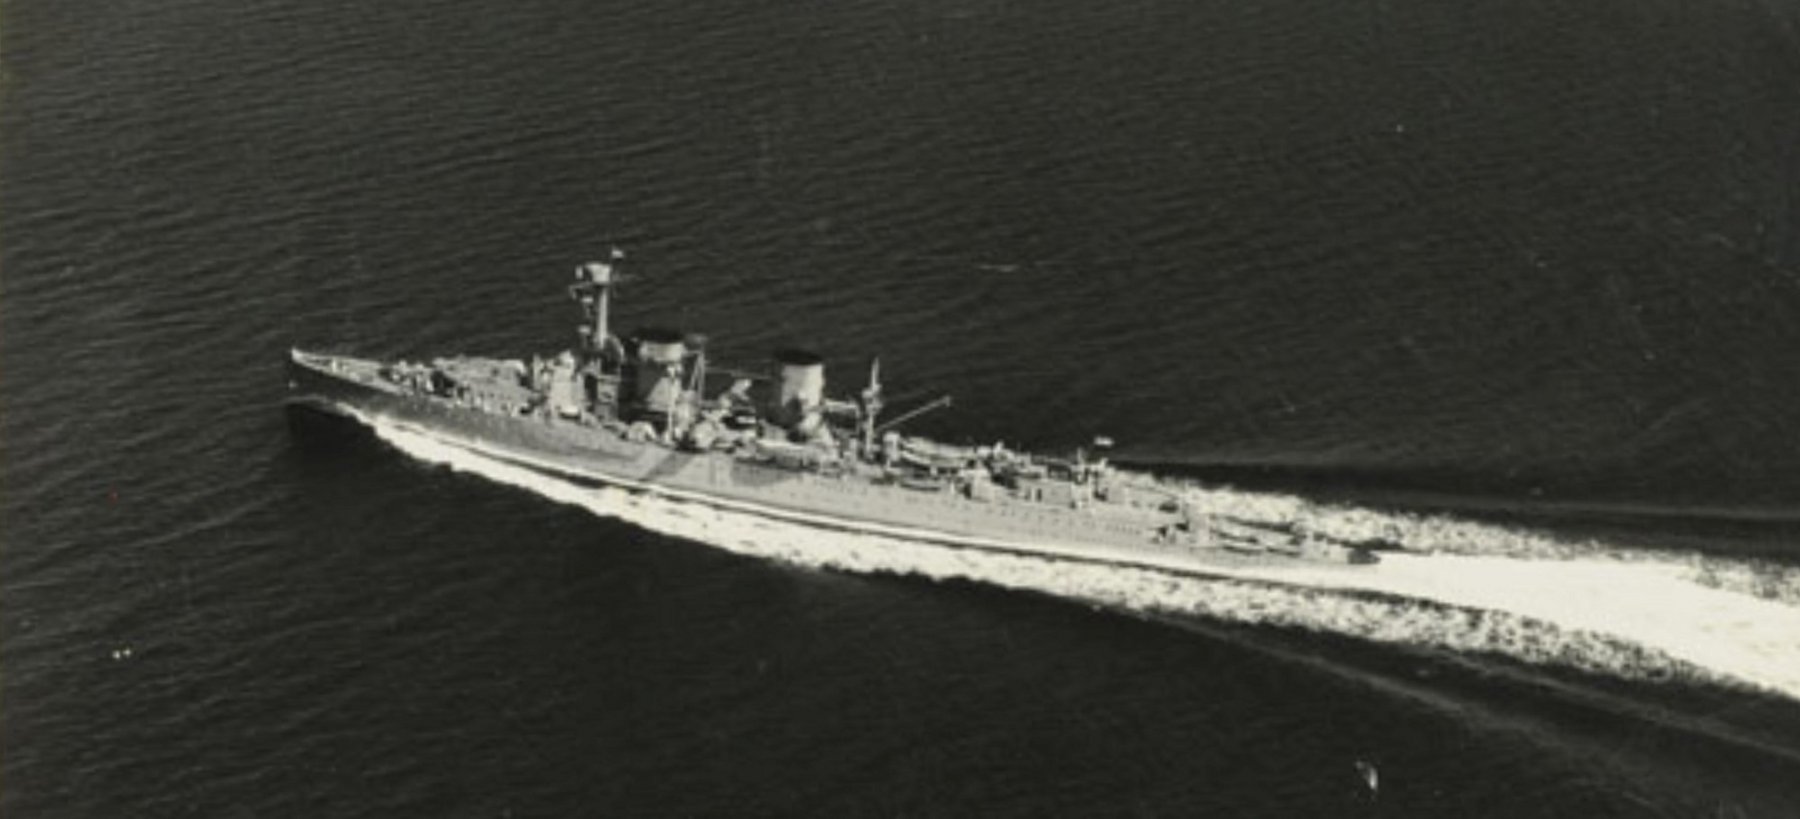
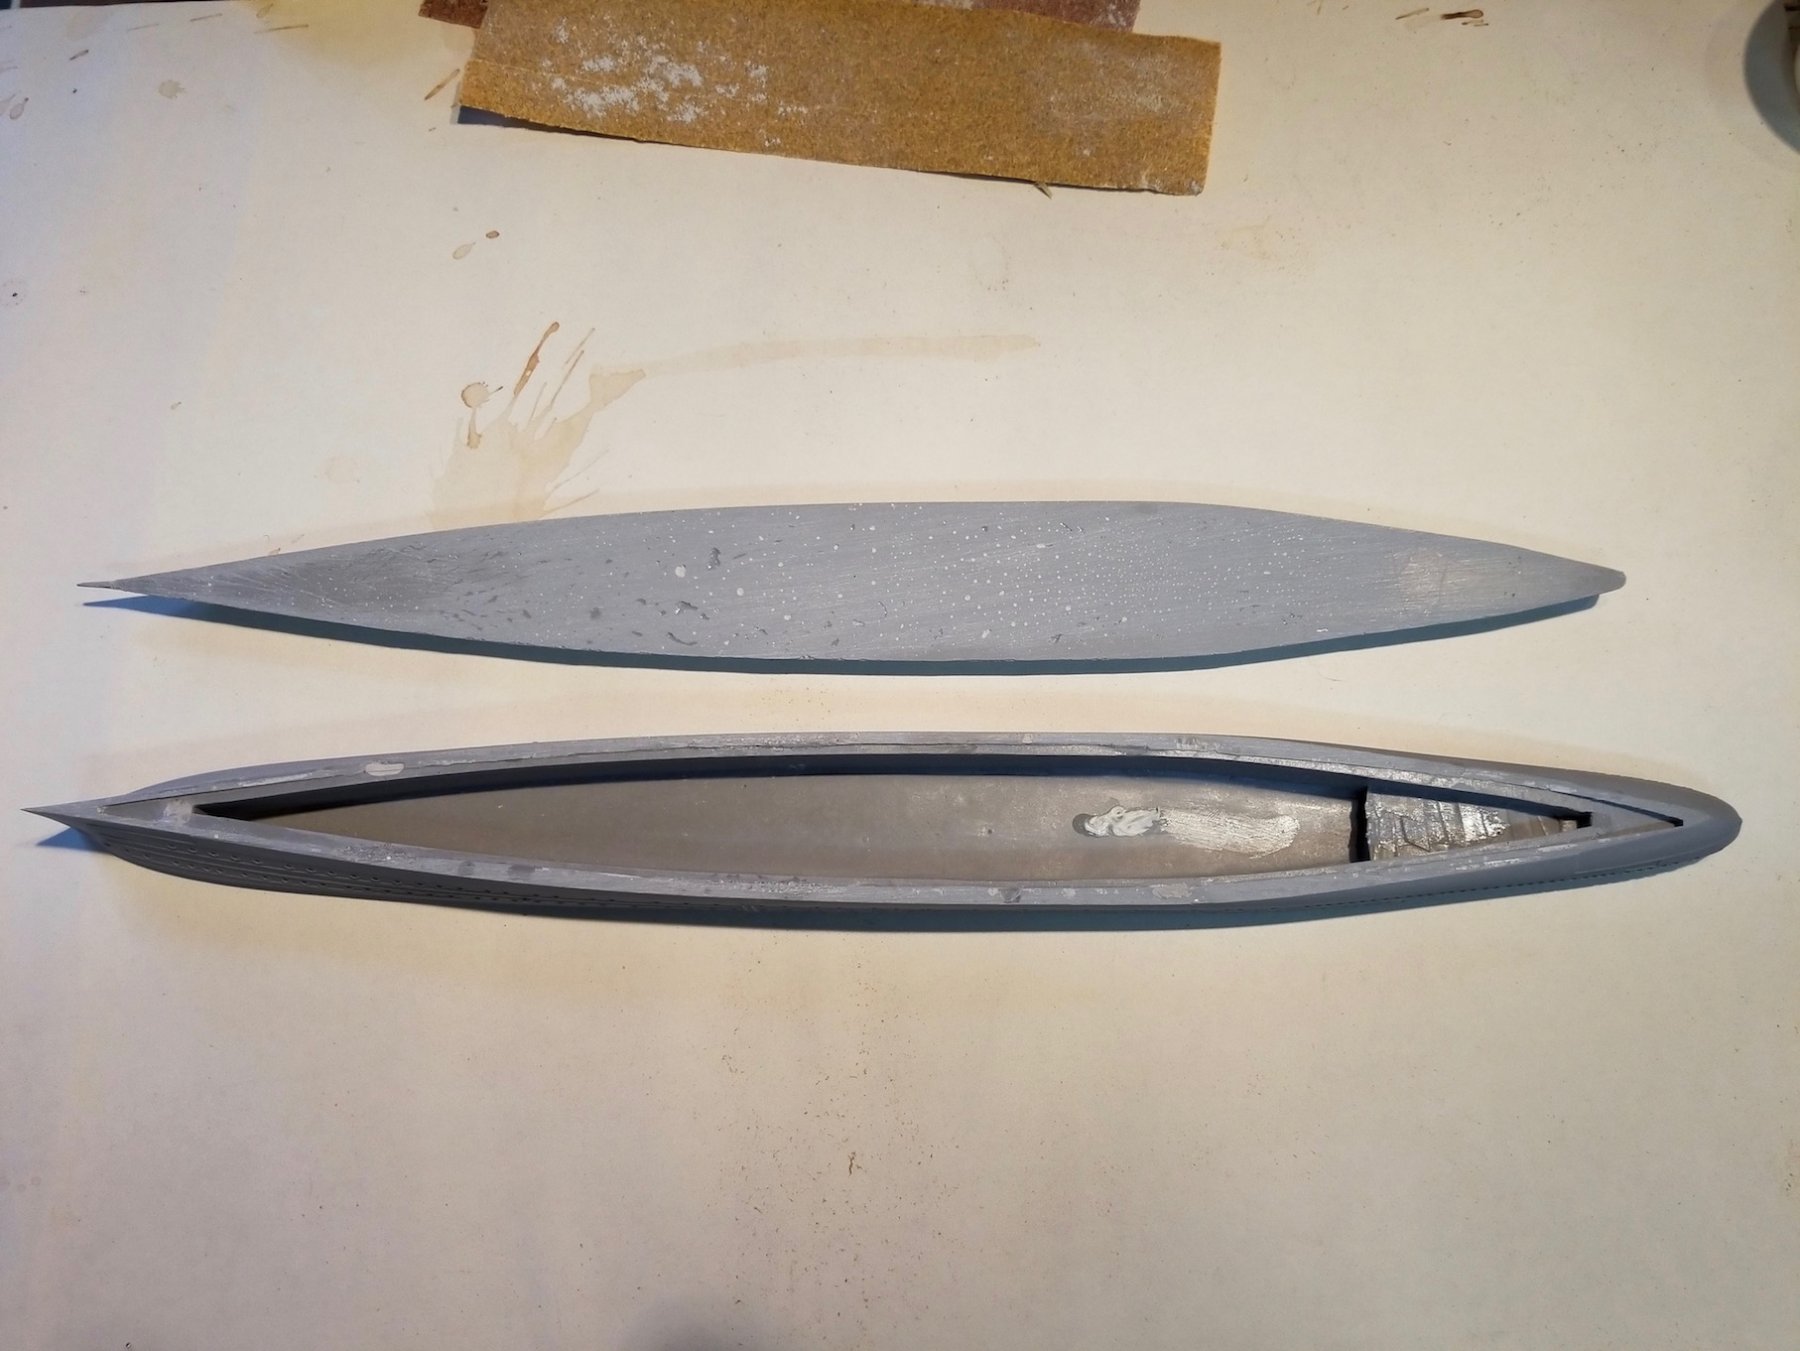
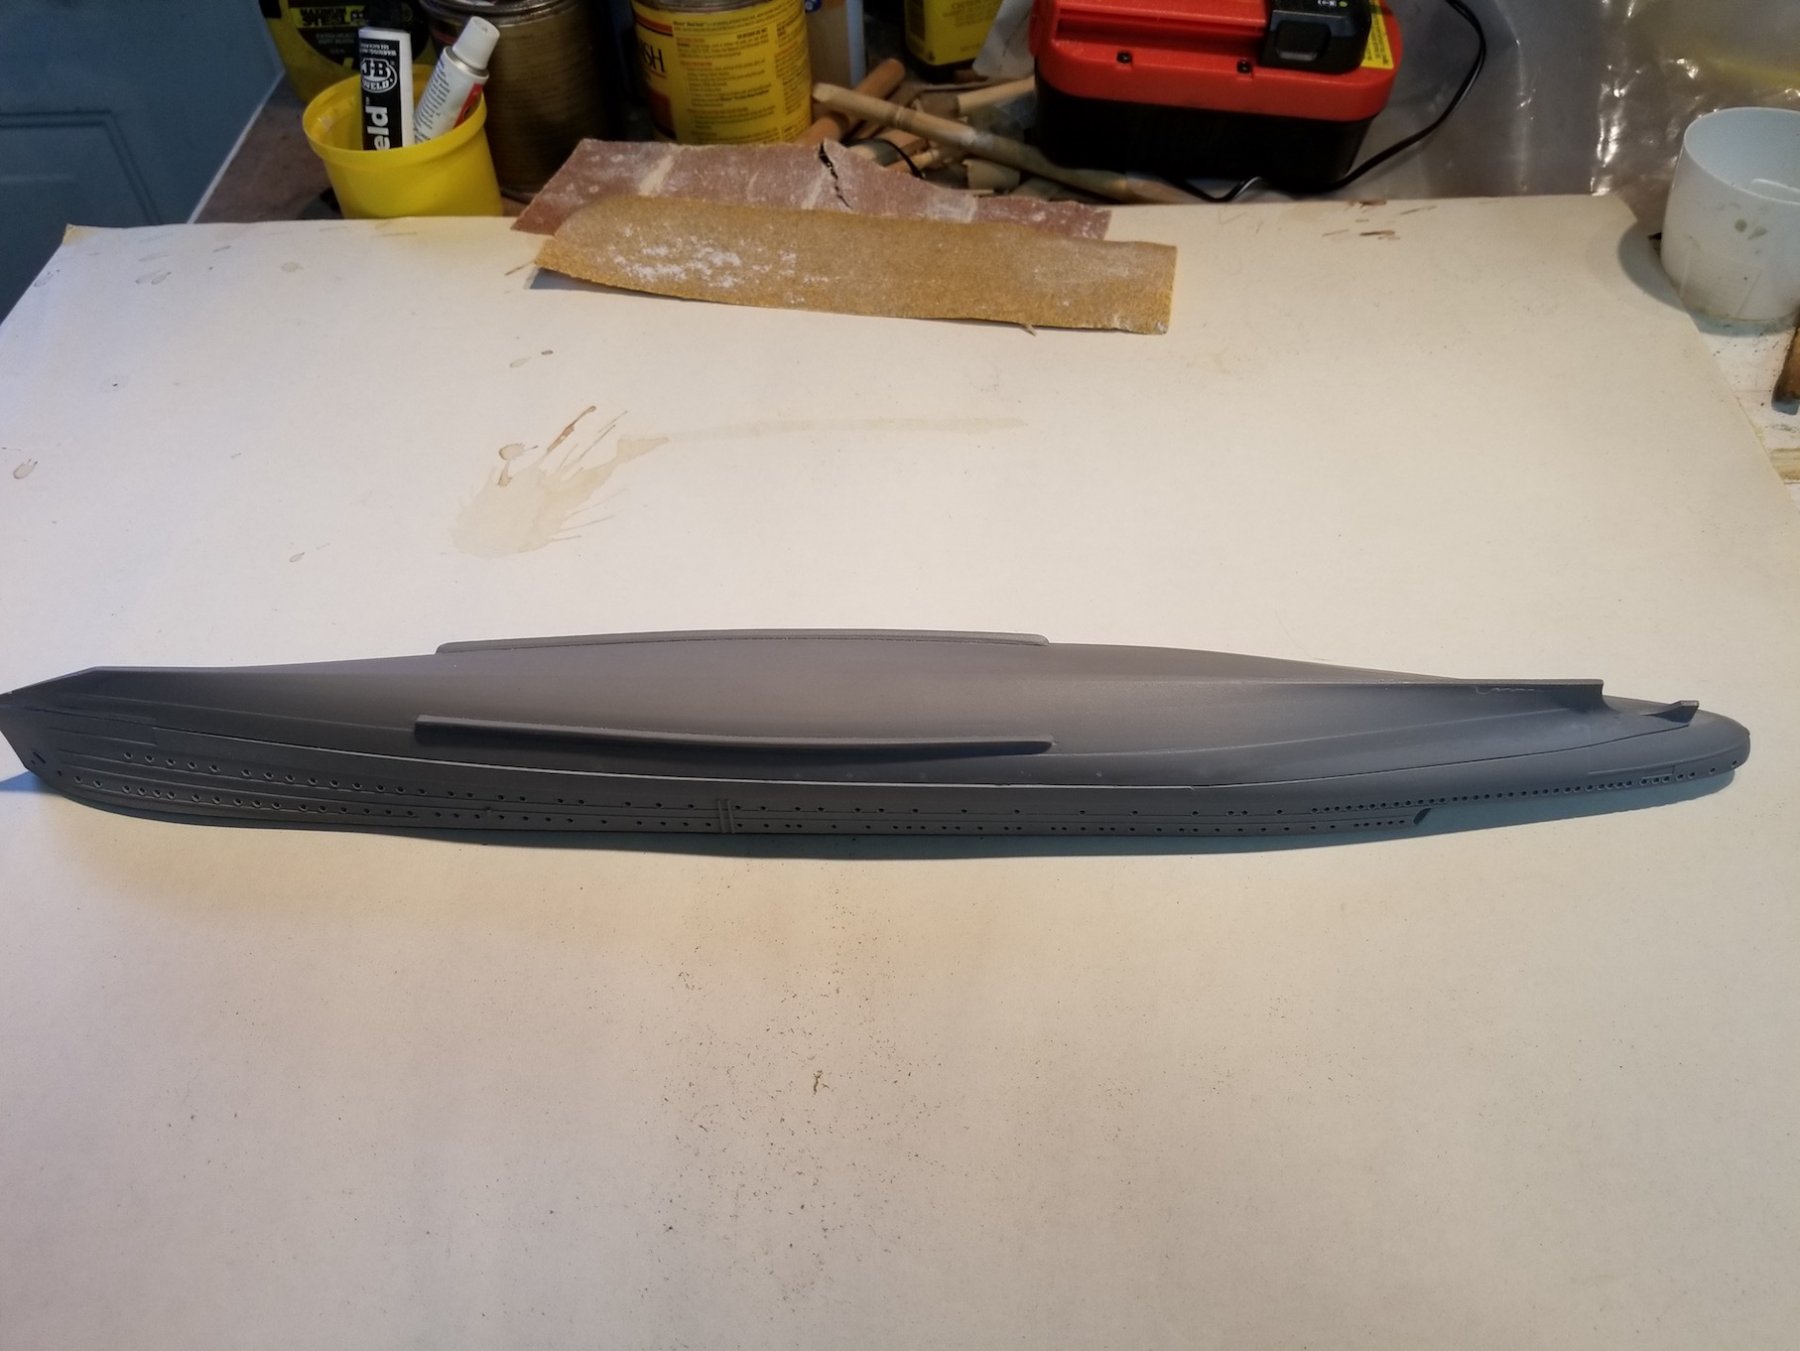
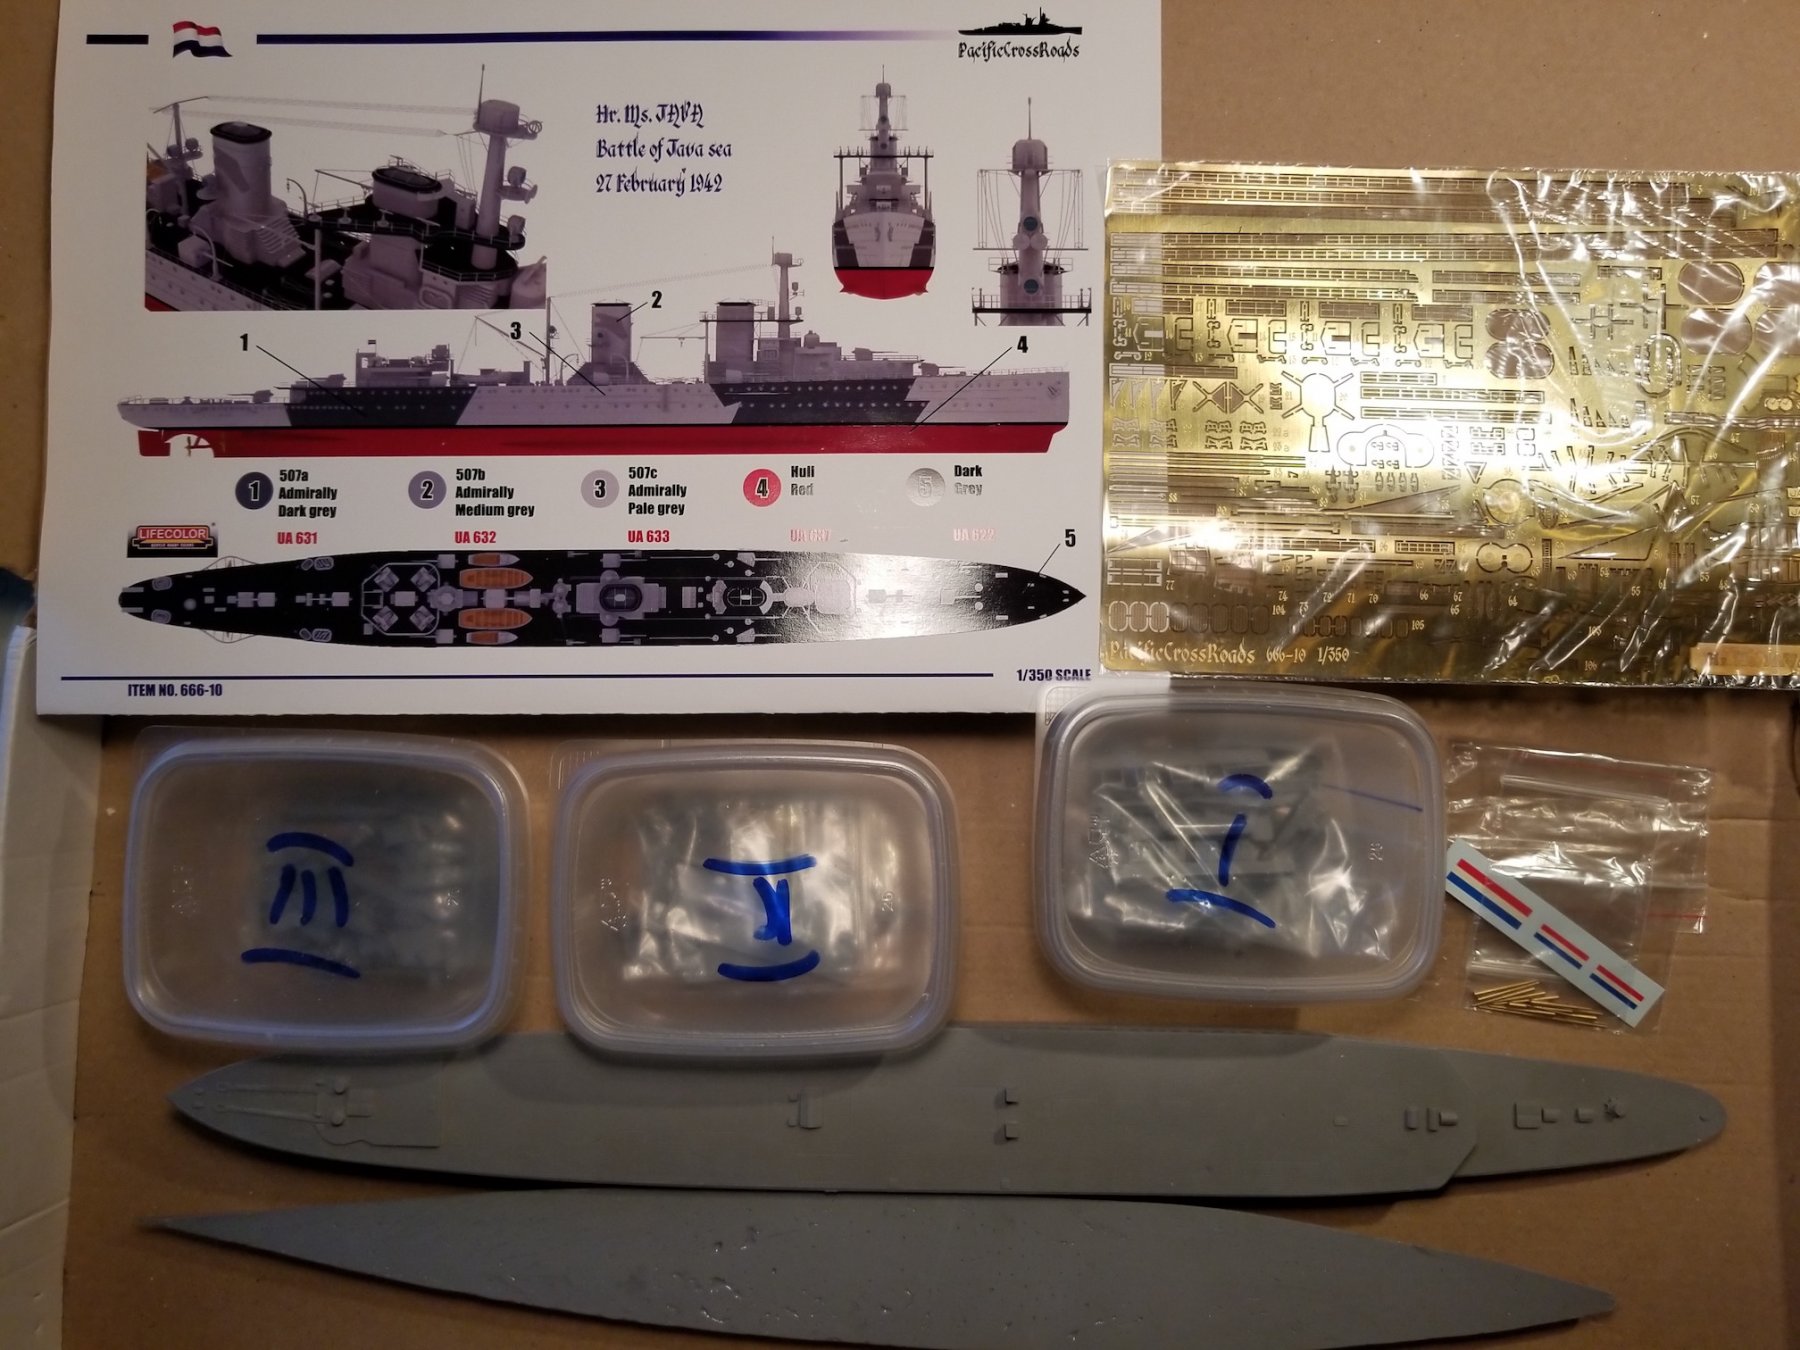
 Yes Jan, and I'm glad they did. They also made a film of gunnery practice in 1941 that showed a brief moment with my father on it. He was asked, or better yet, commanded to observe the result of his gun. Presumably his as my conversation with a surviving officer indicates and a remark from one of the survivors in the water looking for him. I copied and saved the URL but not the YouTube video. The video is no longer accessible by the owner due to pirating. I would love to have a copy. Today I'll cover days 4 and 5, which brings us to November 18, 2017. I carefully dressed down the filler in the glue line from the day before. Carefully, because I didn't want to damage the detail on the castings. Fortunately this line will be painted with a black stripe and the water in the diorama will also partly cover it. Then I drilled the holes for the anchors and anchor chain On day 5 I cemented the keel extension for the paravane attaching hardware, the rudder and the propeller shaft supports. Sorry, no picture of this work. Here are a few pics I made for my archive. I used a slow curing two part epoxy cement to give me enough time to position the two halves perfectly. As it turned out I should have used a extra cement for it to ooze out but allas there were a few spots that will need a little filler. As you can see I brought it inside vecause the garage was a little cool and wanted the cement to cure faster. Cement is cured and I put some filler in the needed spots. The alignment of the hull parts came out perfect, I'm a happy camper. Here is my little electric driven all purpose drill, burr, grinder, etc tool with a small drill bit. I forgot to note the size but think it's around a #70. Ready to drill the setrn anchor hole. I drilled the forward holes a little larger so the chain can be stuffed inside with drop of CA. The chain I bought was a tad larger then scale but we'll work around it. This is a copy of the bow detail from my scratch build drawings. I think that Boris from Pacific Cross Roads a magnificent job did on the detail and accuracy in his molds. Stern anchor hole drilled. This shows "Java" at 30 knots. I added this picture to show why I decided to add the bottom half. I was afraid that in showing "Java" at 29 knots in the diorama there would not be enough hull and wind up with a gap I needed to cover with water, which would make it less realistic. No matter now, I'll have to work with the extra depth of the sea. Another note of interest, at full speed of 31 knots "Java" would kick-up a rooster tale and flood a good part of the stern deck. During the battle the fleet had to reduce speed in order for the slower ships to keep up. Another thing with "Java" was that she had a leaky stern deck and the rooster tale water would leak inside. Yeah, she was really showing her age then. Cheers,
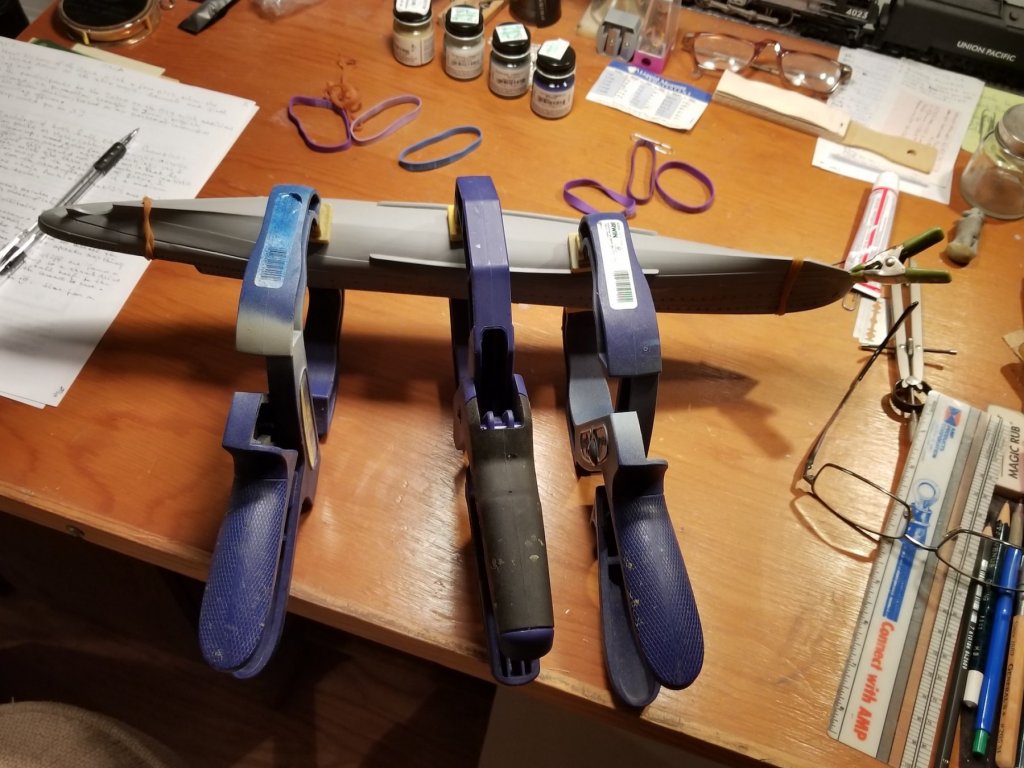


.thumb.jpg.7eb8cefffb999c2249bf3480837ce483.jpg)
.thumb.jpg.8eb8a81e4c579ea8312452a3d0de3259.jpg)
.thumb.jpg.bf46952edf06fb6962c1e56152e80366.jpg)
vlakvoordetewaterlatingbijdeKon_Mij.DeScheldeteVlissingencopy.jpg.f456cba6314df3c422492a3e48dad72b.jpg)
inaanbouwbijdeKon_Mij.DeScheldeteVlissingencopy.jpg.d9491de3e538a1aa5432e4d99a6ae395.jpg)
debijdeKon_Mij.DeScheldeteVlissingencopy.jpg.2a5daf8f3a09c0e2e3f80cc2c9caec80.jpg)
debijdeKon_Mij.DeScheldeteVlissingencopy.jpg.344d5d47cd62b34af0e76e1d7a29b93e.jpg)
tijdensdeafbouwbijdeKon_Mij.DeScheldeteVlissingencopy.thumb.jpg.5e319d95adae95ddbac636bdb54e88dc.jpg)
.thumb.jpg.c93d5e941c3d839e0839a281bcfba1e3.jpg)

.thumb.jpg.5624408cb3065d6503d8e8cec0e602a9.jpg)
indeslagindeJavazee..jpg.b9ab80424115f8bacd351e359c834cab.jpg)


.jpg.7172b494f2b13b665411e986912d4f86.jpg)
.jpg.ac32e3a62f89aa3381c82db0d6fdfe80.jpg)

.jpg.ce56e5646f924a81fc54298bc7c258ab.jpg)

tijdensdeafbouwbijdeKon_Mij.DeScheldeteVlissingencopy.jpg.7a820f99d0172177197f08bfeb606e6c.jpg)
.jpg.e67da38f9506d40dc7eb83432bf1a3e4.jpg)


.jpg.64da17d4a6d8510d1cd6abd14636ec6f.jpg)