HOLIDAY DONATION DRIVE - SUPPORT MSW - DO YOUR PART TO KEEP THIS GREAT FORUM GOING! (Only 13 donations so far - C'mon guys!)
×


Piet
-
Posts
3,568 -
Joined
-
Last visited
Content Type
Profiles
Forums
Gallery
Events
Everything posted by Piet
-
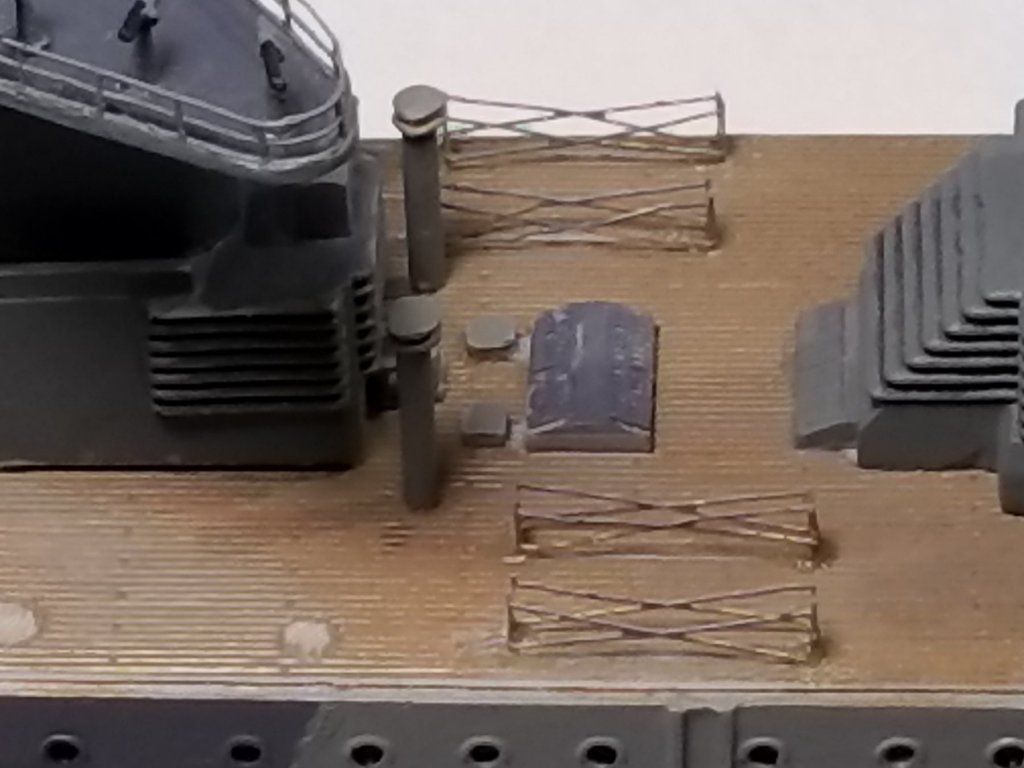
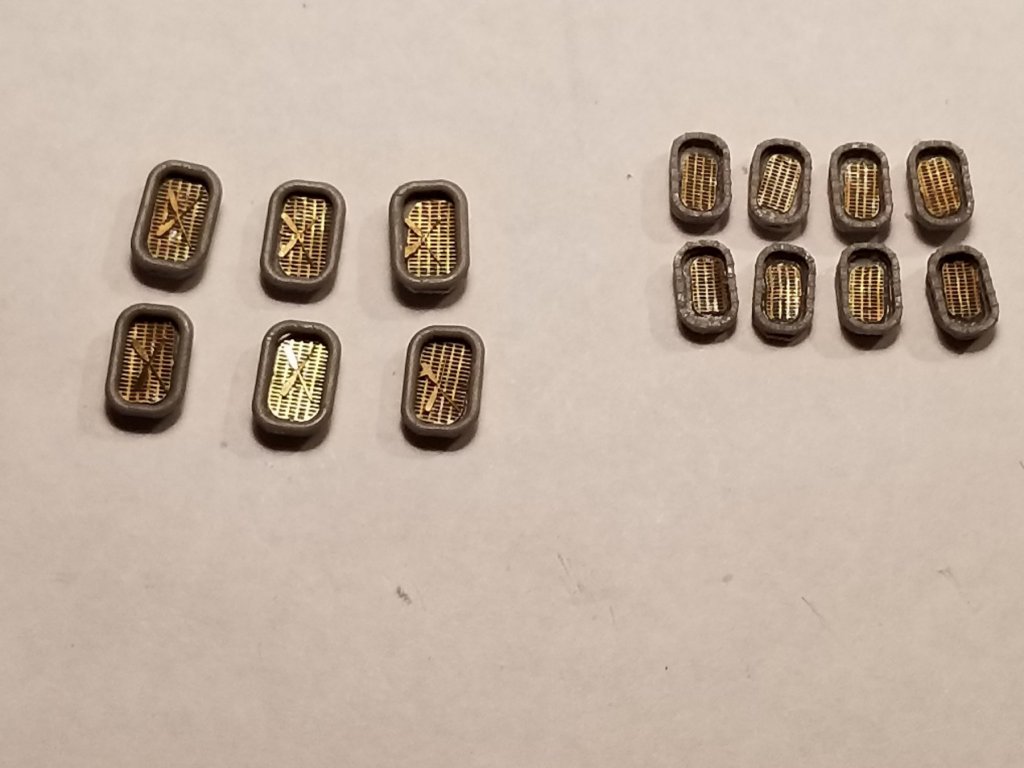
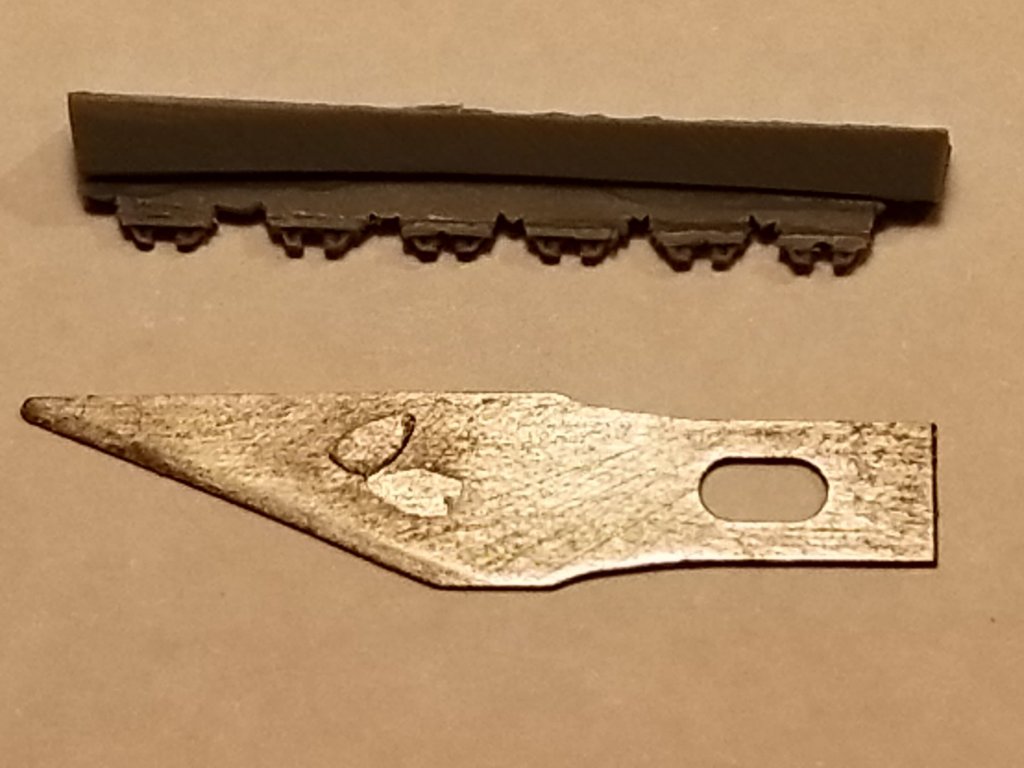
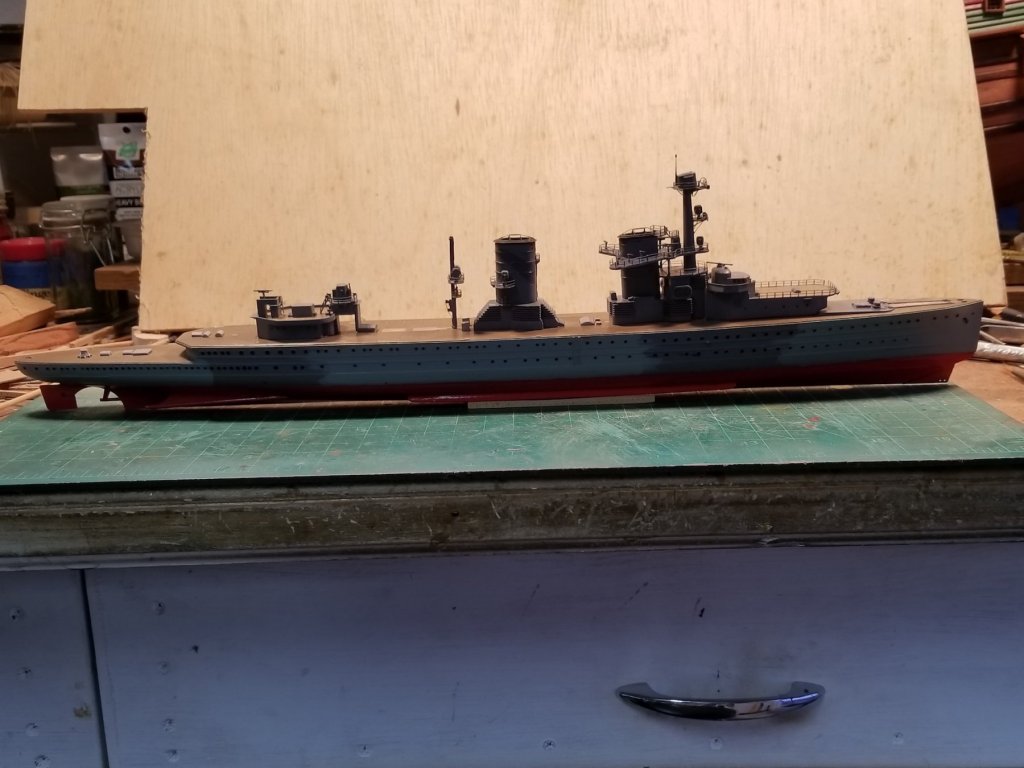
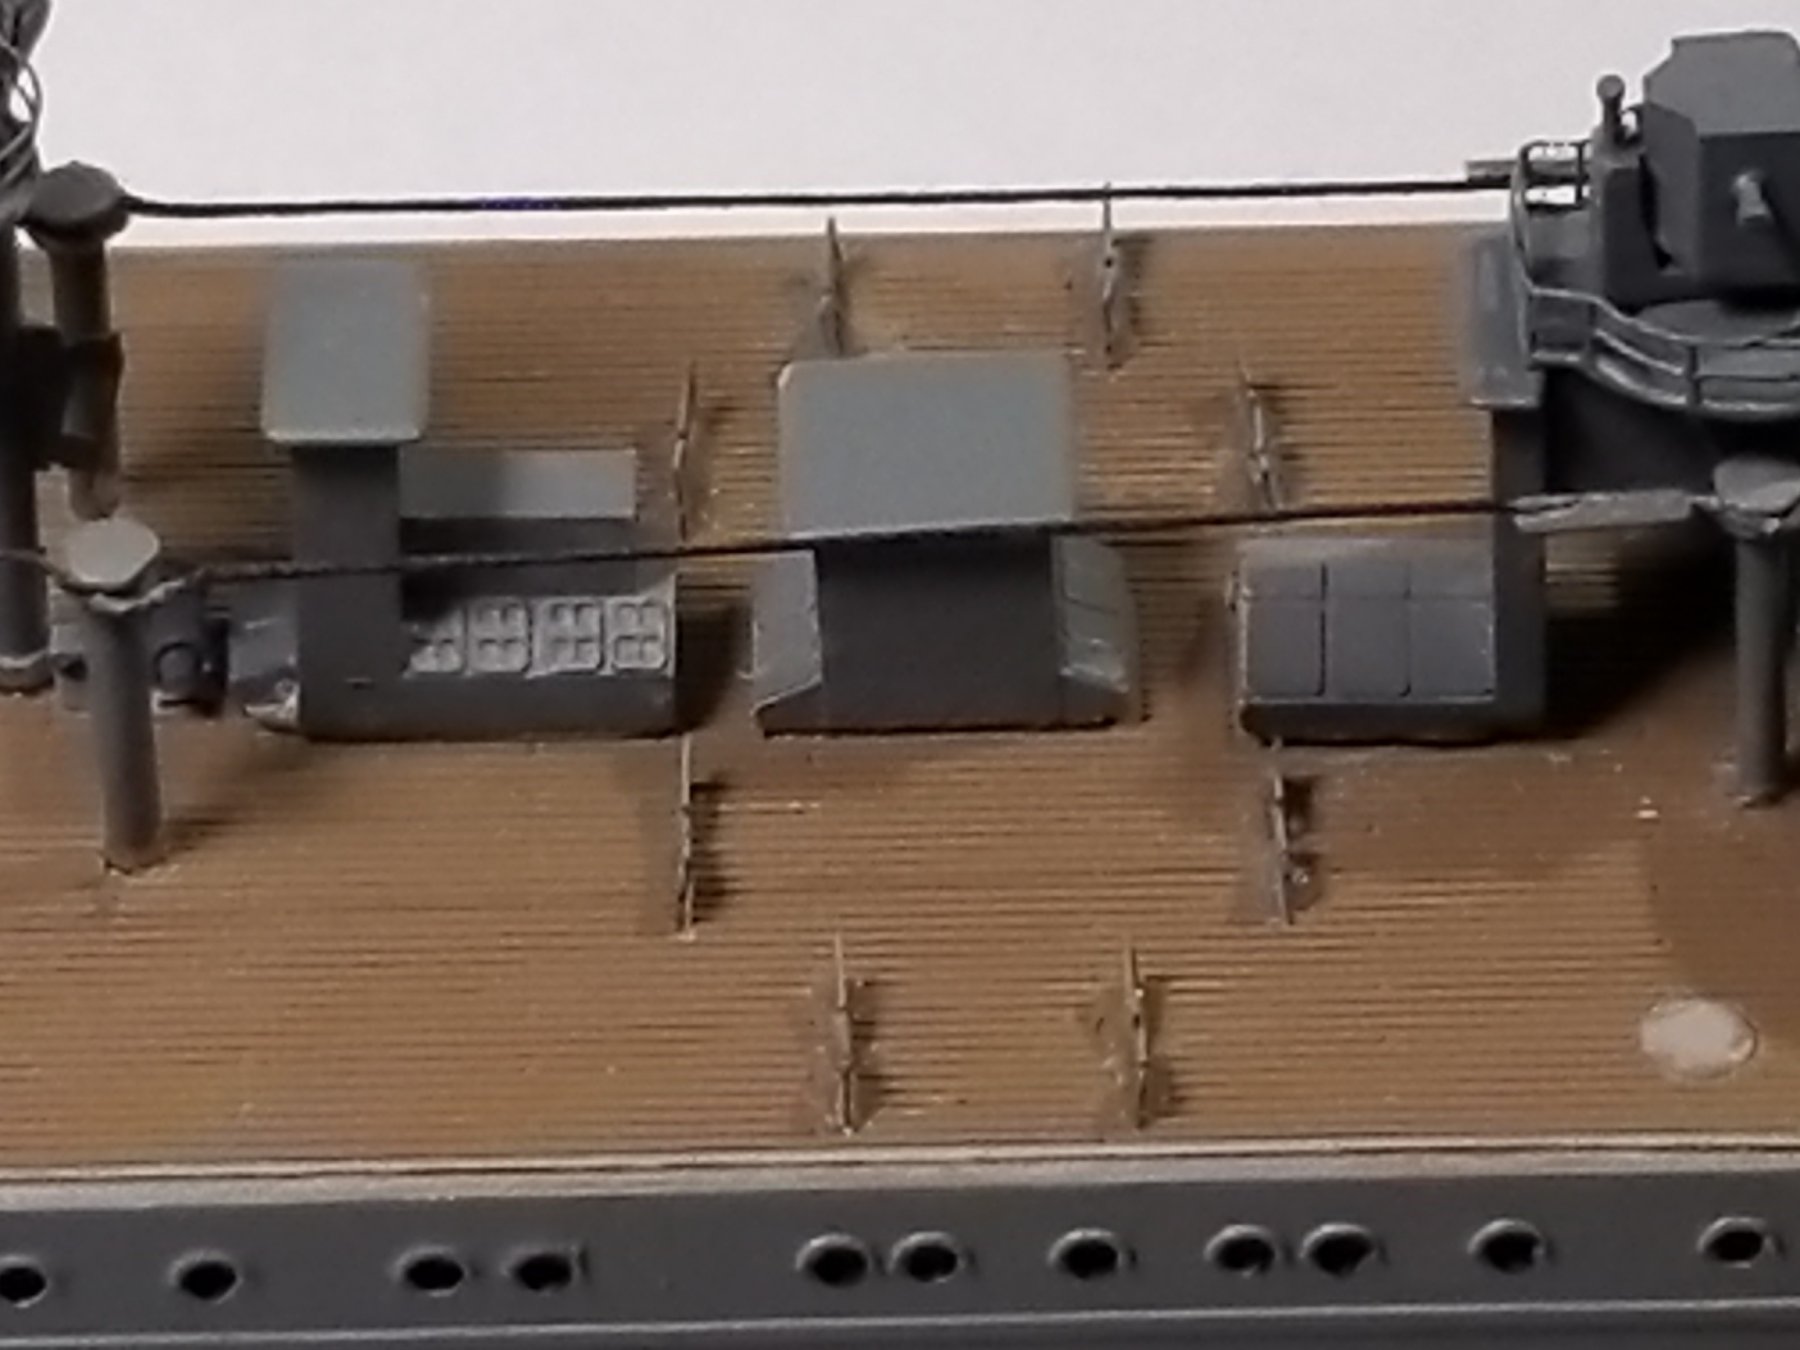
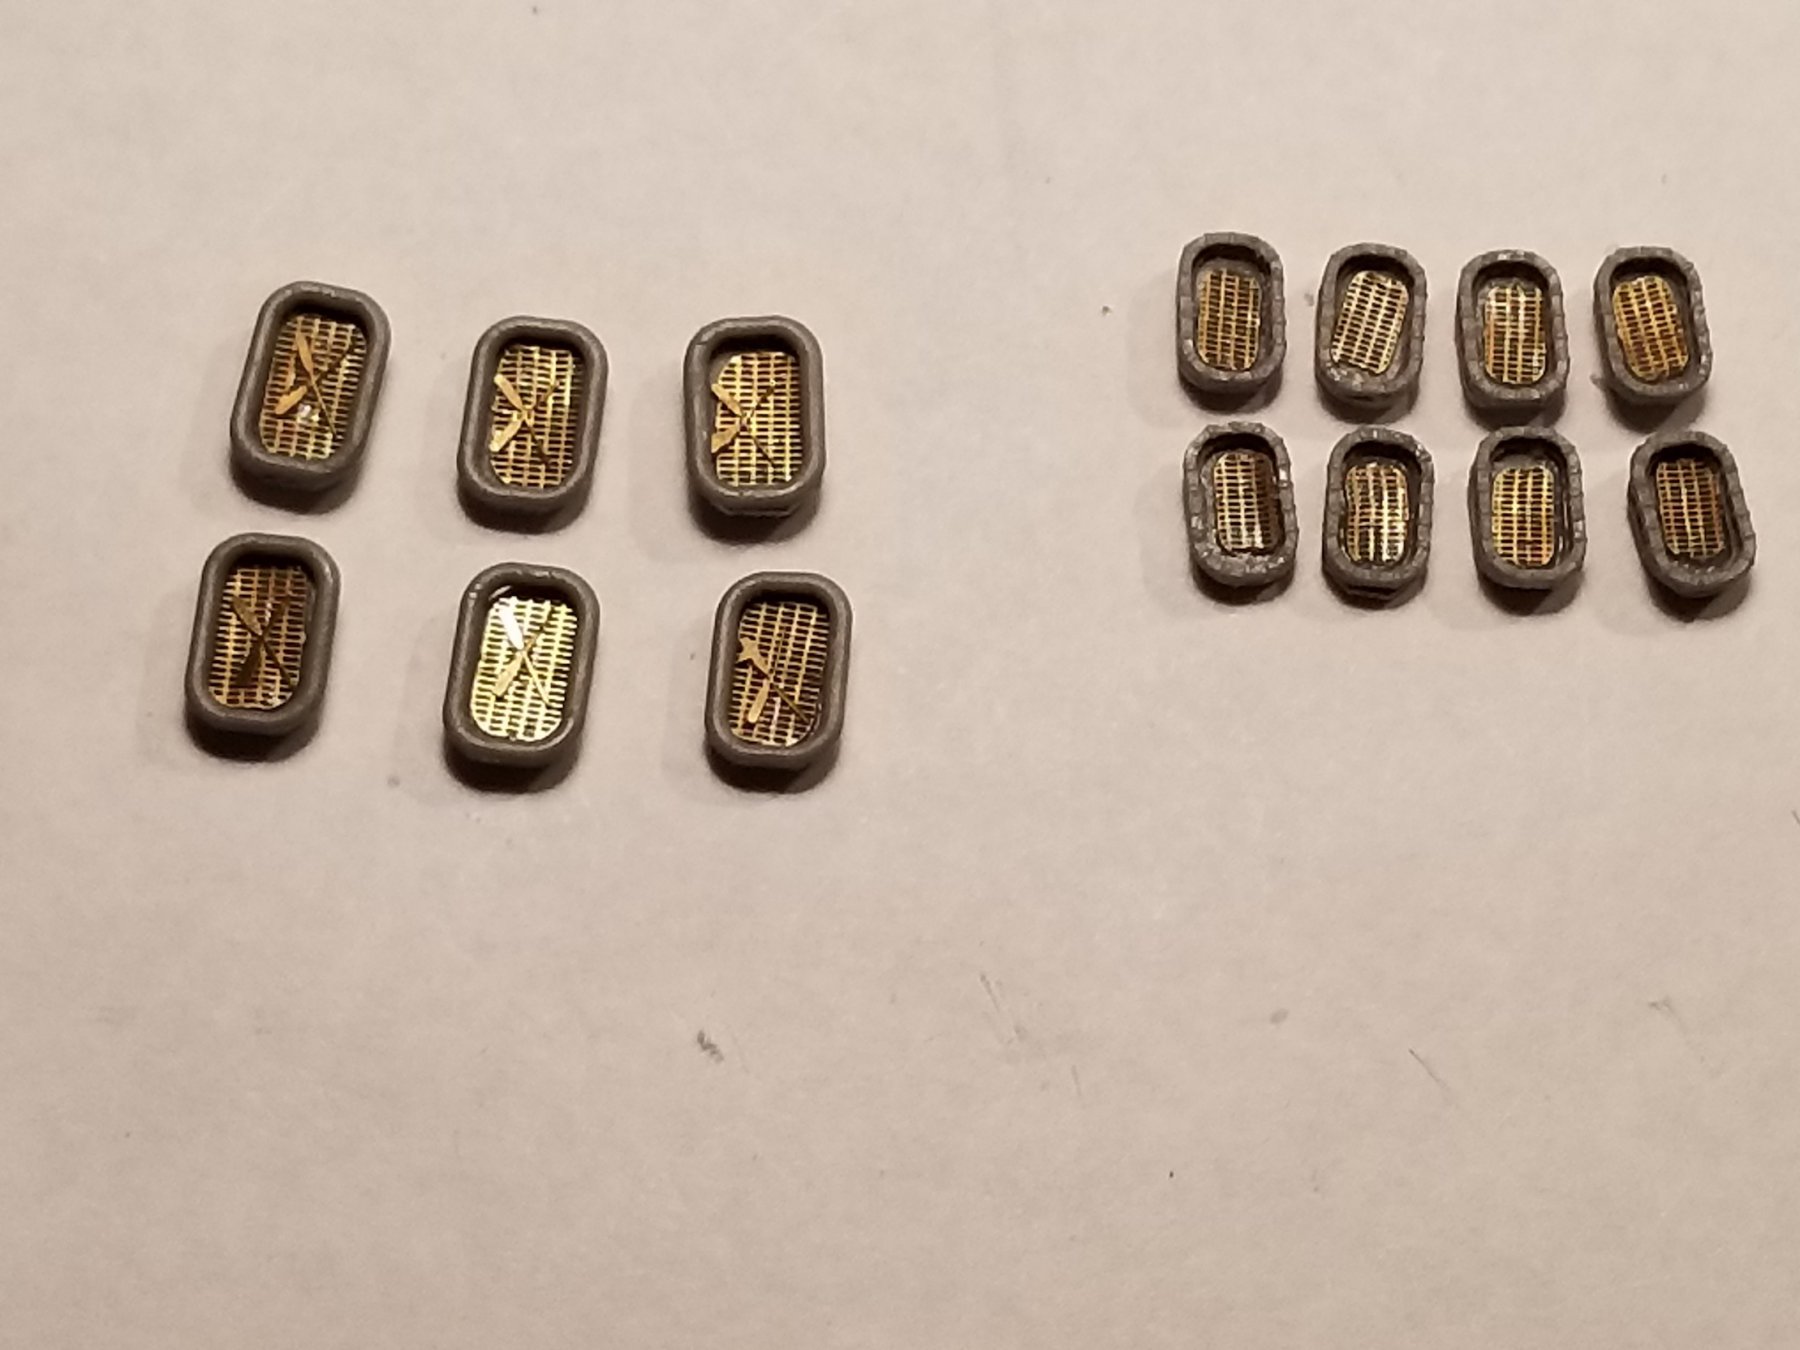
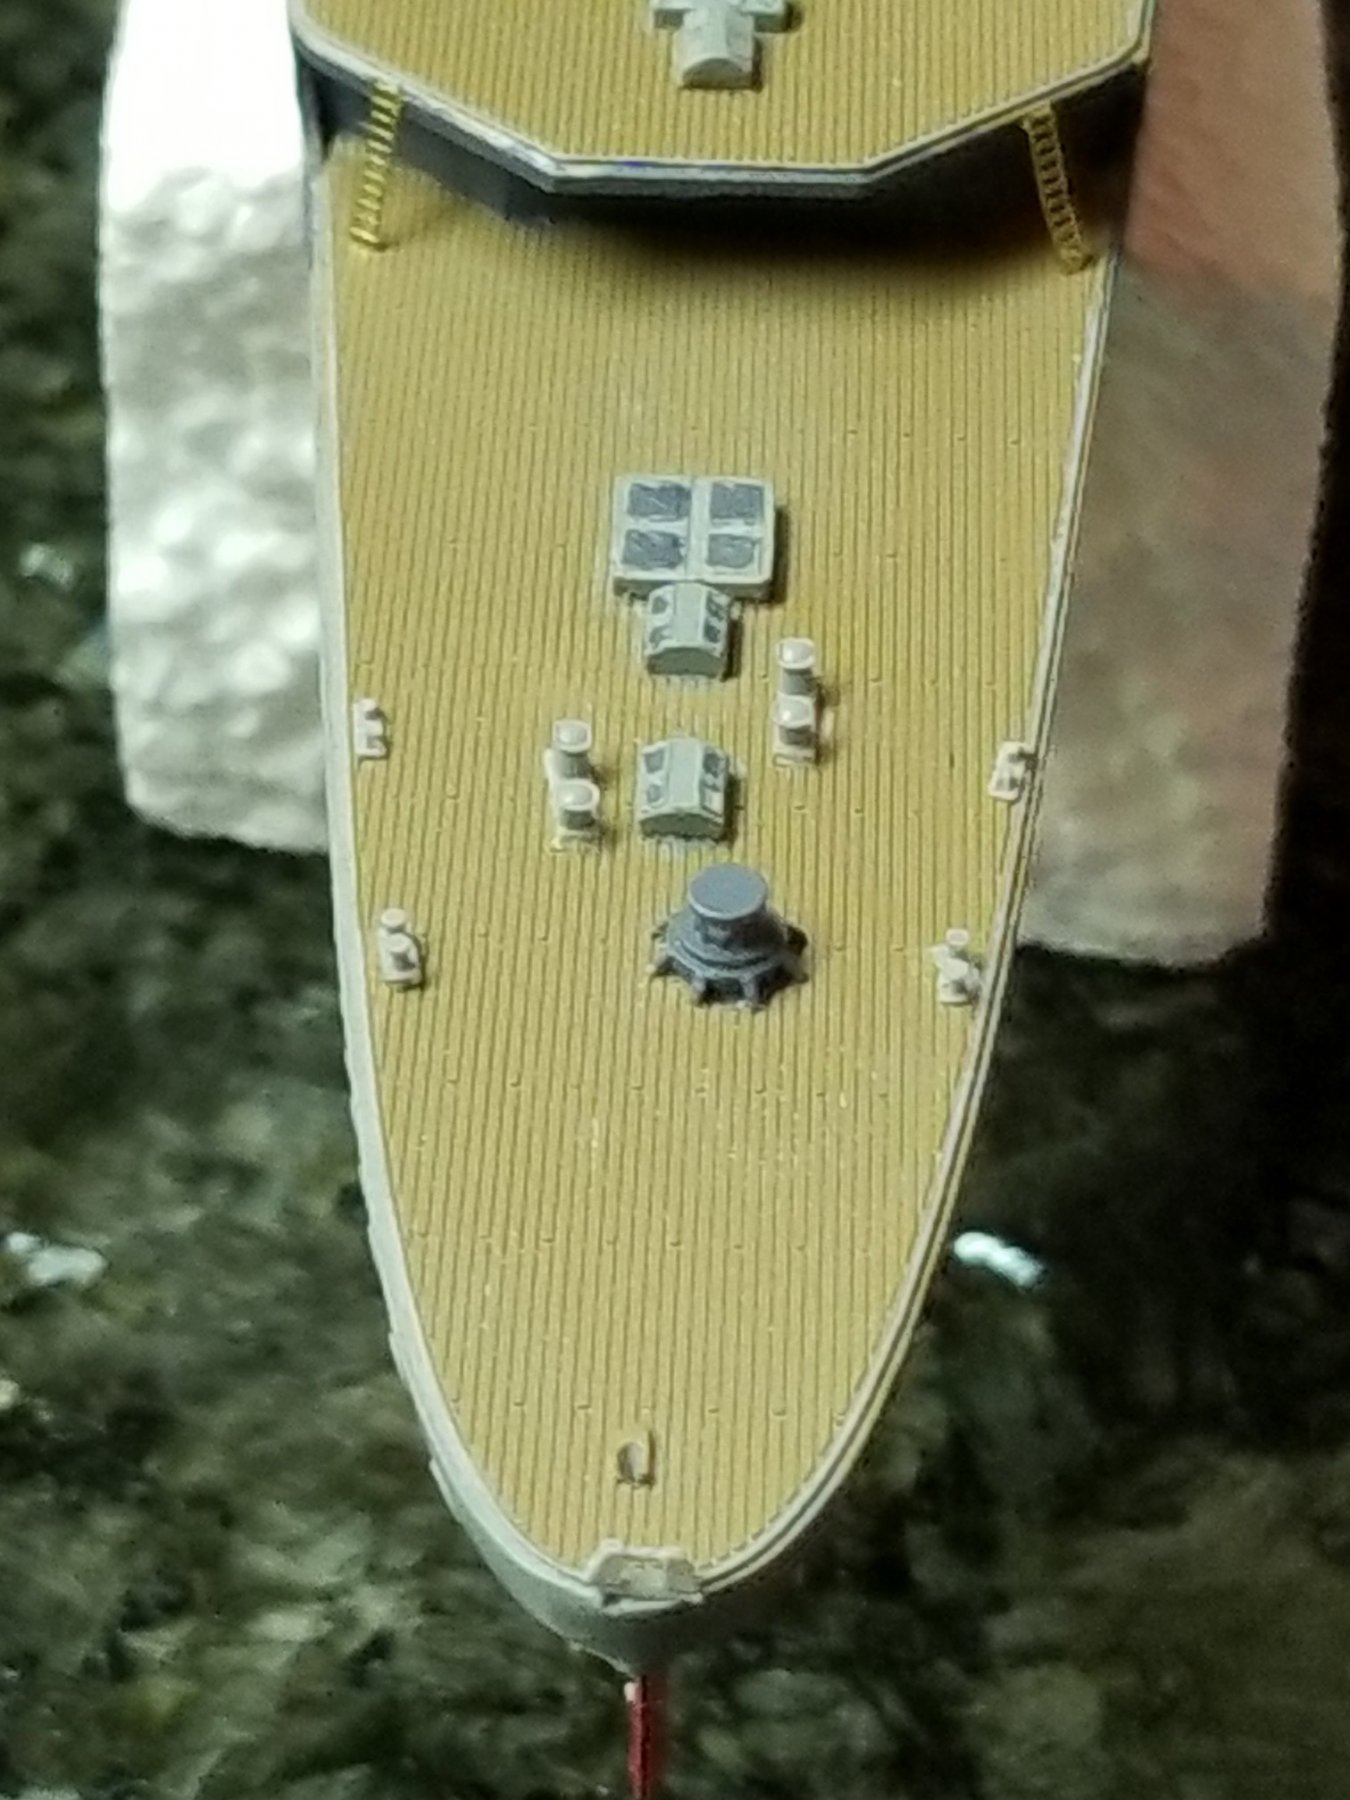
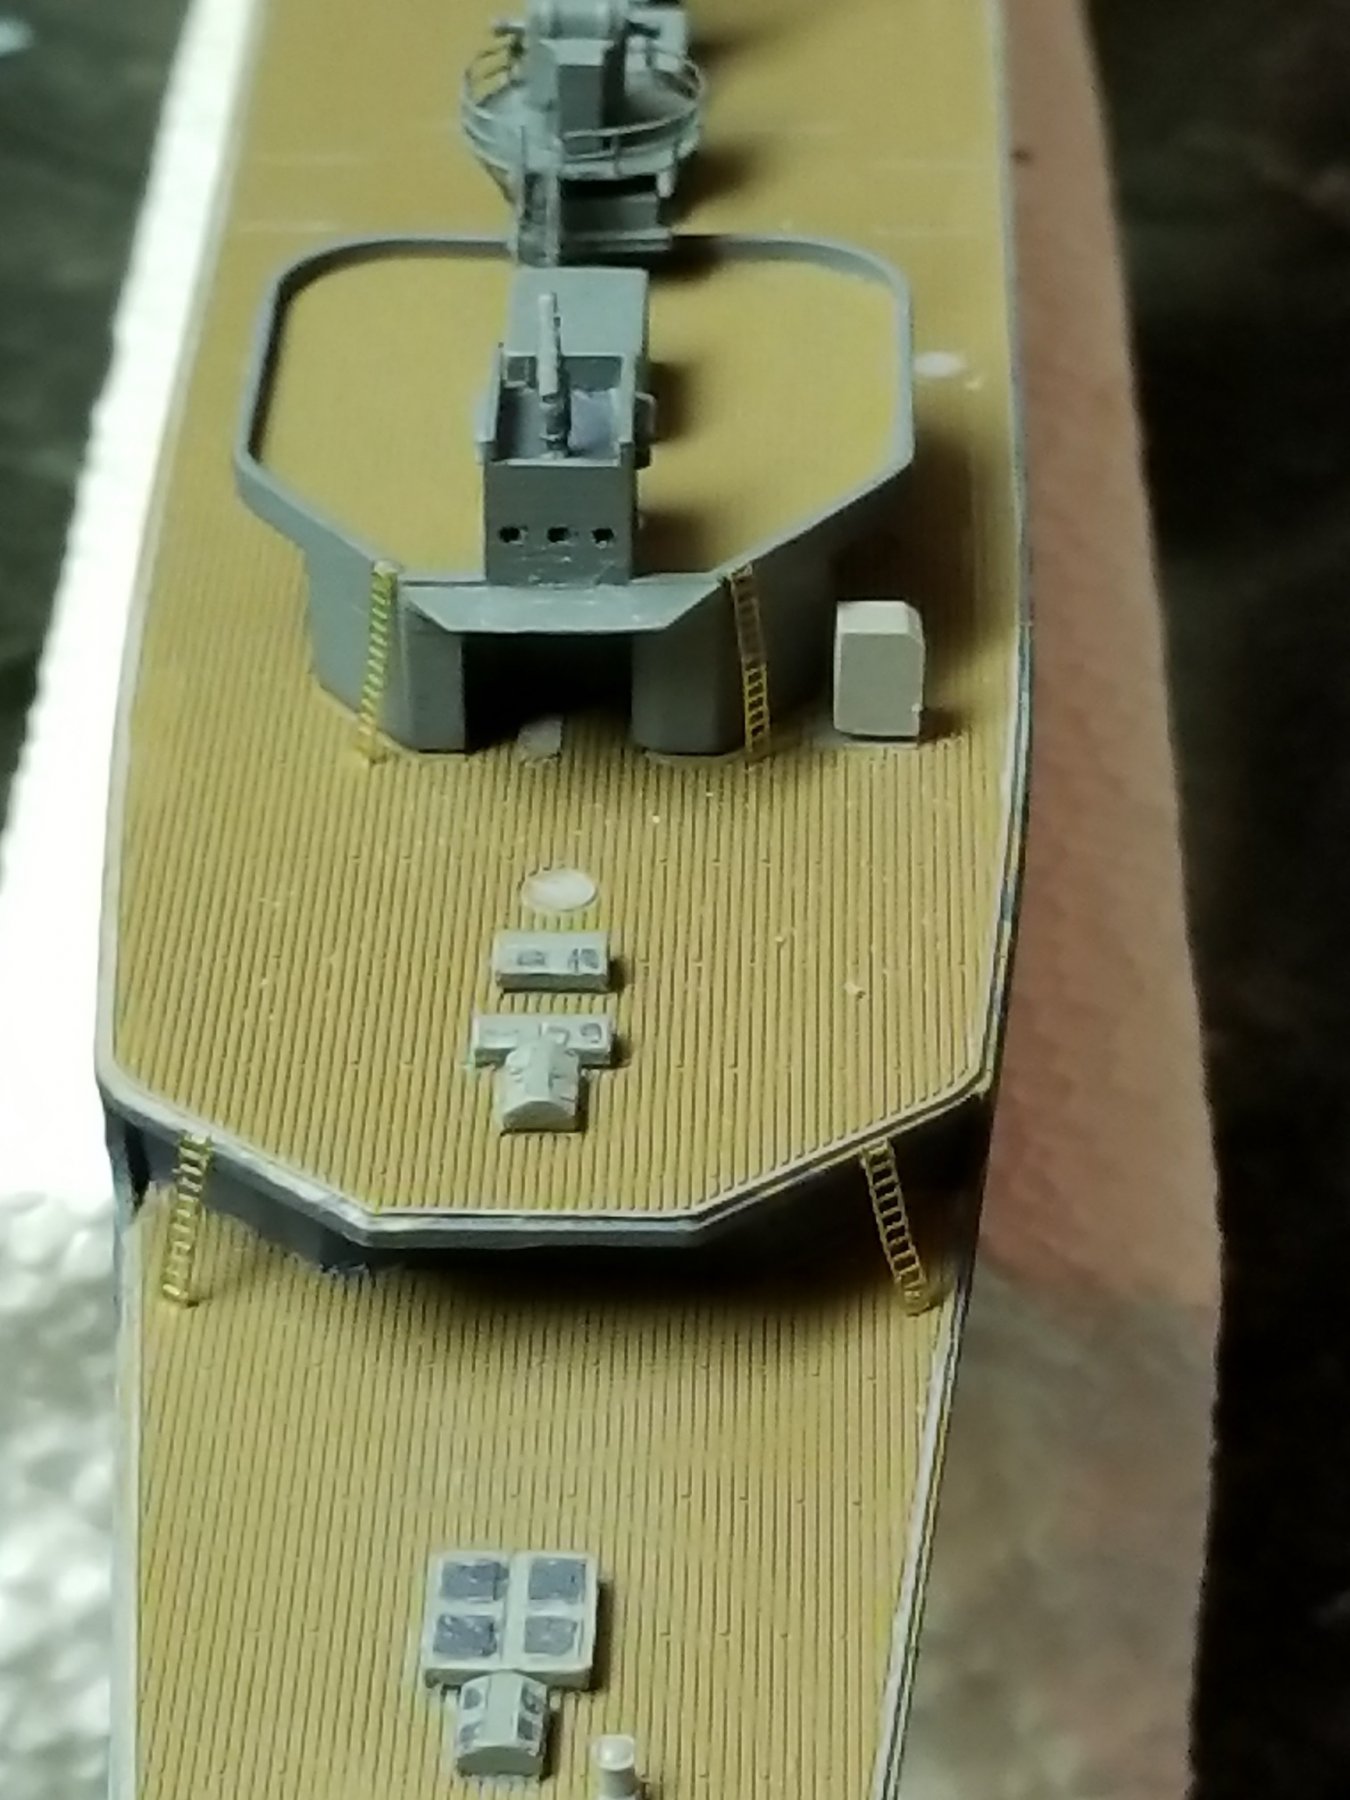
 Thanks to all for the best wishes for Gwen and she says tanks. The surgery was a great success. The doctor had to spend an extra 20 minutes on her hand because of so much scar tissue from the previous surgery a few years back. They wrapped her hand much too tight, which made it quite uncomfortable. She only took two pain pills yesterday, slept okay and is beginning to use her swaddled hand again, against doctor's instructions. She claims it's good exercise for the fingers. Stubborn Dutchman she is So I made a genuine Indo Chinese fried noodle dish, called bami goreng, our made in Indonesia used to make for my father and me, totally awesome. Even these seemingly random things do remind me of him. For tomorrow I'll make herb stuffed salt water fish and hope they have sea bass or orange roughy, with herbed quinoa, asparagus with special sauce, and carrots. Probably have leftovers for Saturday that'll give me a break from cooing. Yes, I'll get an extra fish, hey, my mom didn't raise a dummy For Sunday I plan on a dry-rub roast brisket or flank steak with roasted root veggies, real rustic food. Okay, back to updates of the "Java" build. This will be days 36 and 37, which brings us to January 10, 2018. On day 36 I shaped the seaplane cradles. A most trying job. Folding them into a box from a straight piece of PE and make them come out true was not easy. I managed to mangle two of them. I'm fortunate in having a spare PE. In the end I produced 4 fairly decent cradles. Only when we look close we can see some unevenness but we'll chalk that up to age and handling rash I cemented them to to deck and after the CA had cured enough I could carefully straighten some of the unevenness out. Next I installed the vent pipe cables with fake turnbuckles so they can be unhitched when loading or launching the seaplanes. I then started on the aft mass stays but got only as far as getting the thread for them ready. More on the standing rigging on another day. Day 37 started with a minor setback, no big problem but my own oversight. I send a progress photo to Boris Mulanko from Pacific Cross Roads and he almost immediately send me a message back that the life rafts I cemented to the #9 gun deck are in the wrong place. I placed them more in the center instead of at the edge. I failed to look at the overhead view of the instruction sheet. He did mention though that I am not the only one who made this error. Well, at least that didn't make me feel too bad. Now, how am I going to get them off the deck without destroying it. I used a box cutter to gently wriggle under them and they popped off without too much damage. Most of the residue cement I could remove with my #11 Exacto blade and a knife file. How can we explain the damaged deck to the viewer? Maybe hauling cases of gun shells across the deck?? I cemented the life rafts back to the deck in the right places and painted the deck again. This made me wonder though how these rafts fared during the firing of that 15 cm gun so close by. I guess we'll never know, unless someone has the experience in that. Okay, here are a few pics of the progress so far. Seaplane cradles cemented to the deck. Now you can also see the vent pipes. Some of the unevenness in the paint is from glare of the lamp. However, I suspect the I'll have to do some touch-up after painting the cradles. A more overhead shot. You can also see my fake turnbuckle at the right vents. That bare round spot is where a 15 cm gun will be placed. The erroneous placing of the life rafts. You can see how close they would be to that #9 gun. But even at thair assigned location it still would seem rather close that gun barrel. Here too, that bare spot is the gun location. All life raft relocated to where they are supposed to be. Yep, there is some damage but really difficult to see from an arm's length. This picture is at 5X magnification. Oh well, it is what it is. No sense in crying over spilled milk, eh what? This particular location on the ship has great significance for me. It happens to be near my Father's battle station and this particular section of the ship is missing from the wreckage on the sea floor. Cheers,
.thumb.jpg.2f277b46788966f3a0638d29641dfece.jpg)
.thumb.jpg.76bac2358c622aa7b212065653eb88d2.jpg)
- 378 replies
-
- 10
-

-
- java
- pacific crossroads
- (and 2 more)
-
Hello everyone, and thank you all for your kind comments and also to all who liked my post, thanks. You know Jan, I am not in the least bit surprised that you have not heard or read anything about the battle of the Java Sea. I truly appreciate your friendship and thoughts. Yes Patrick, time does soften things but unfortunately the happy memories are from an 8 year old's mind. It's those not so happy memories that have been a burden. I'm not ashamed mentioned this but a week ago I had a real bad nightmare, mostly triggered by working on this model. Strange how the mind works indeed. Thanks Ken. Yes, many brave souls died, American, English, Dutch and Australian. Some of the survivors died in POW camps. I am touched by you mentioning that a local paper in North Carolina had a small article in their paper. Thank you Lawrence for your kind words, it's really appreciated. Yeah, I think that Boris Mulenko did an outstanding job molding such excellent small parts as well as with the PE. Some of the things I thought missing for the date of "Java's" last day should be added. I am also modifying the guns in a position depicting her in actual battle. I hope I can make it look convincing. Yes Denis, like I also want to make a painting of the wreck of the stern section of "Java" as she was laying on the bottom of the sea. That section was 100 meters behind the main part. Then I want to make a painting of submarine O19 my father served on before the war. So may things on the bucket list, problem is how much time do I have left on this earth. I'll be 84 in April but - - - I have ordered one extra life time, just waiting for the shipment confirmation In real time now, I have not done anything on the model today. I brought Gwen to the surgeon for her carpal tunnel and trigger finger problem. It's in her left hand and she is left handed too, so she is not allowed to do anything with that hand - - for a week I am now the cook and houseboy and other chores Gwen can think of. Can't blame her, hit the iron while it's hot No, I don't mind, she deserves a break and a little tender love and care. Okay, that's all for now. Hopefully I can post Day 37 tomorrow. Right now I have to do some research. Cheers to all,
- 378 replies
-
- 7
-
-
- java
- pacific crossroads
- (and 2 more)
-
Nice going Denis, she's looking good.
-
Nice going Denis. Yeah, those nail clippers are good for many things, including snipping off some brass wire. Cheers,
-
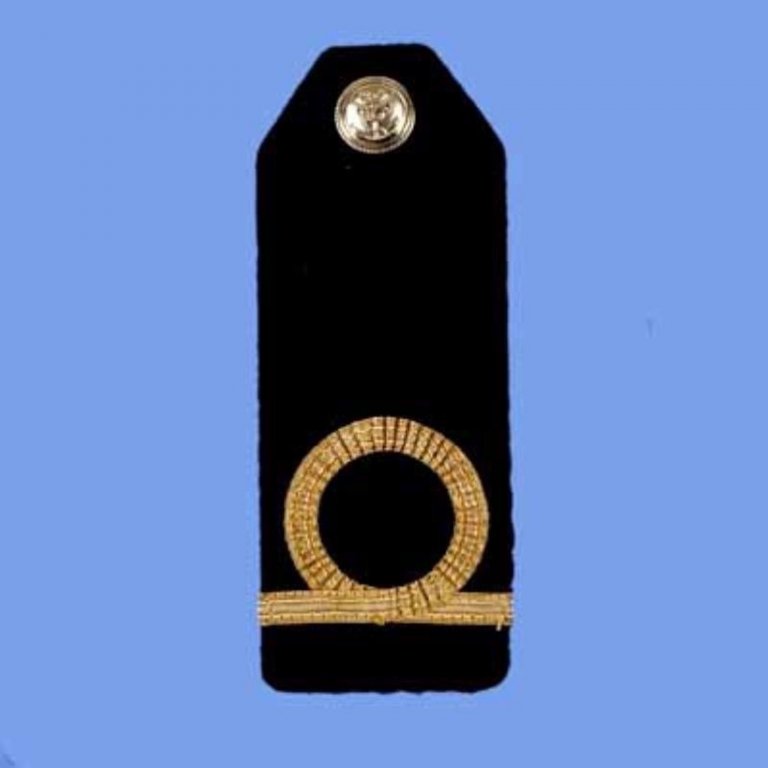
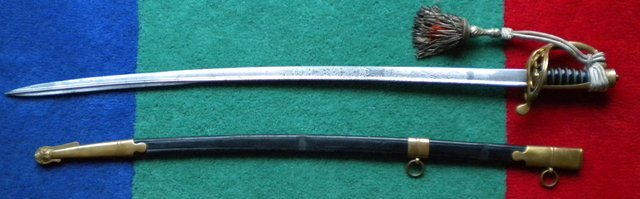
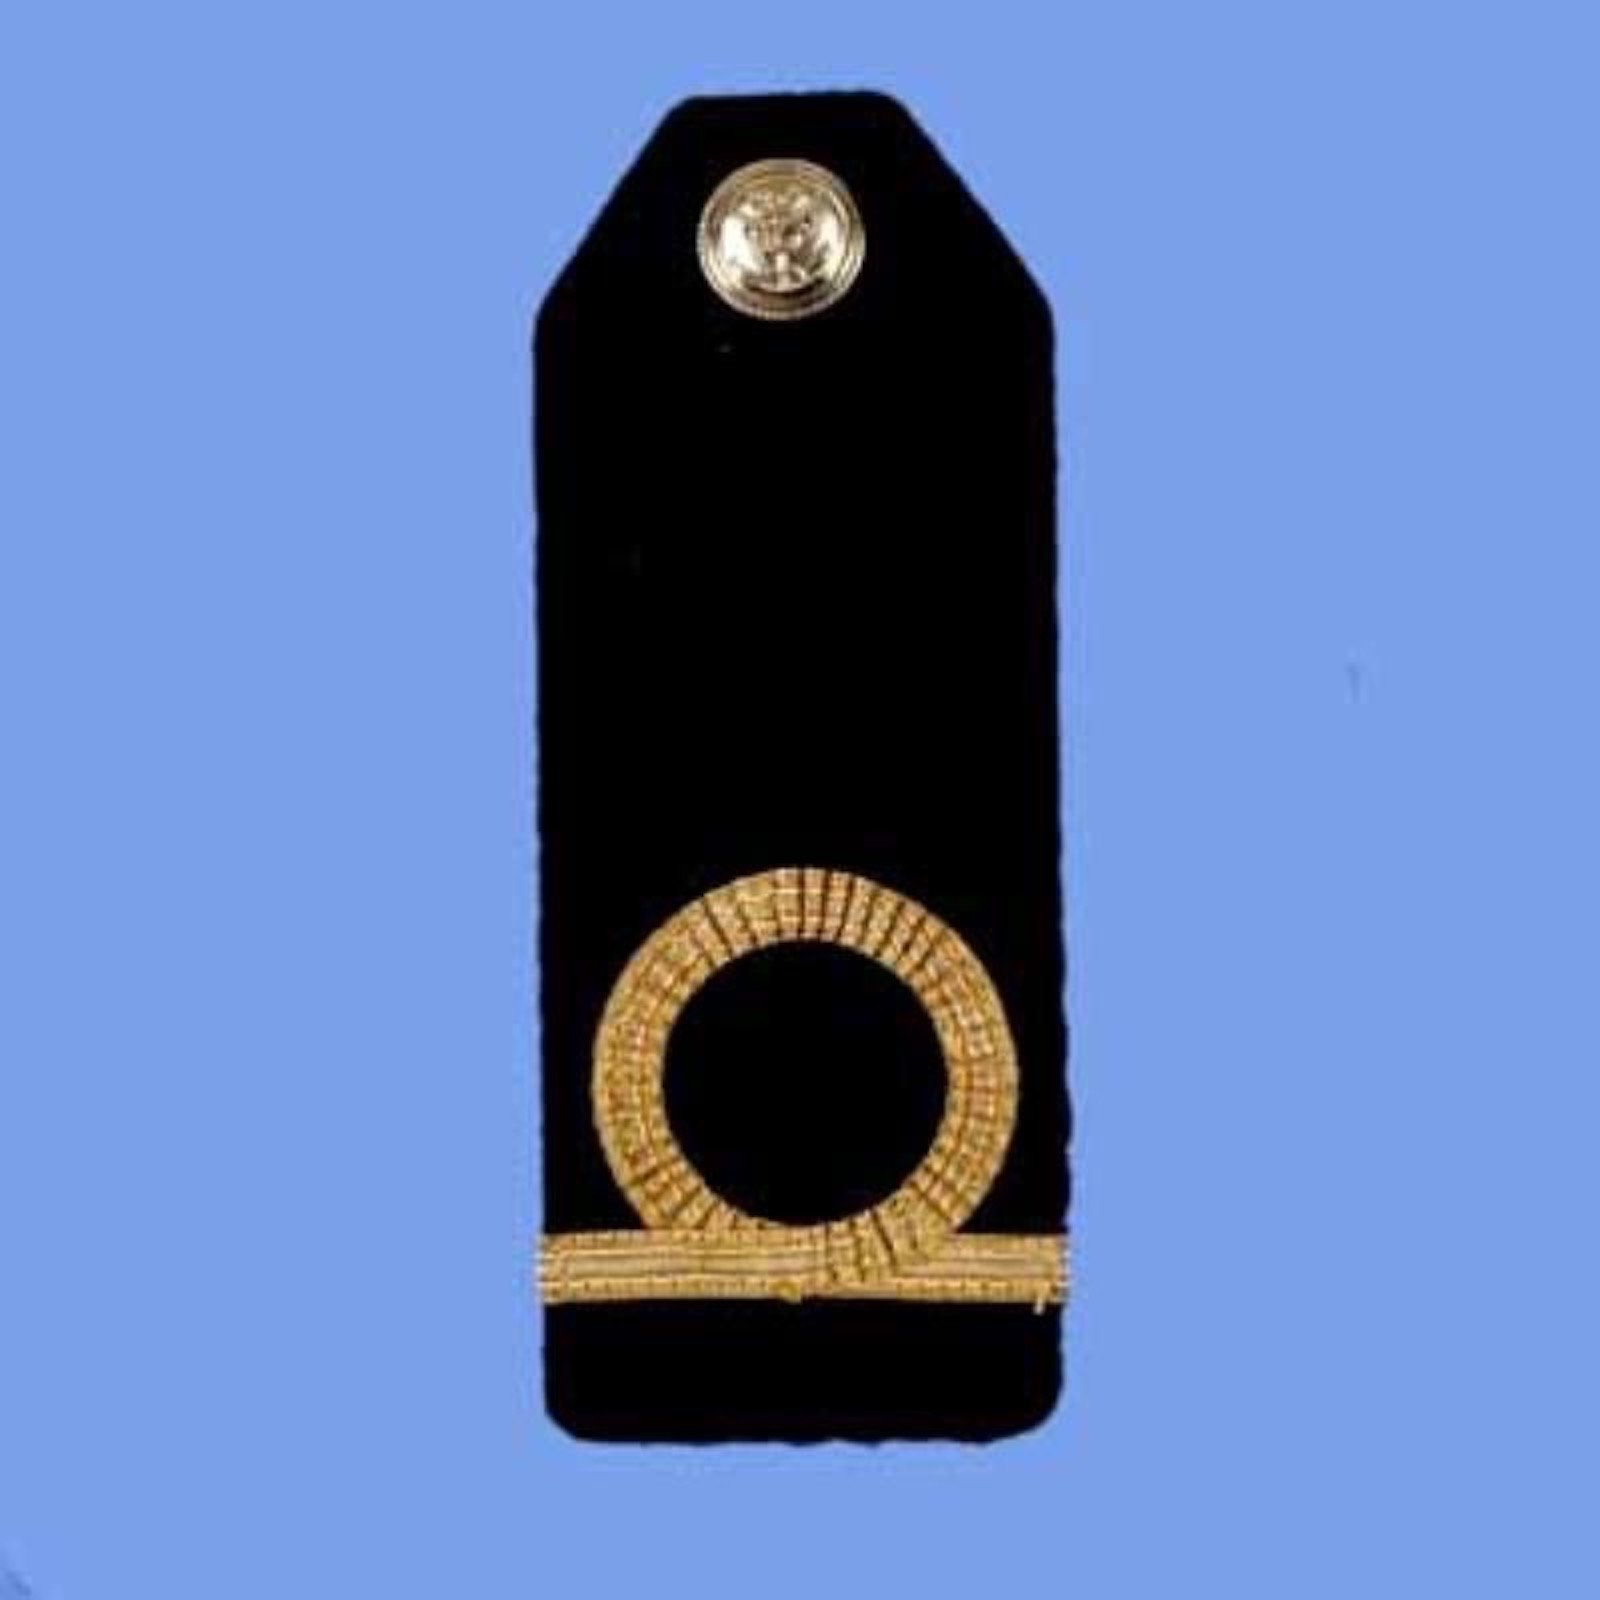
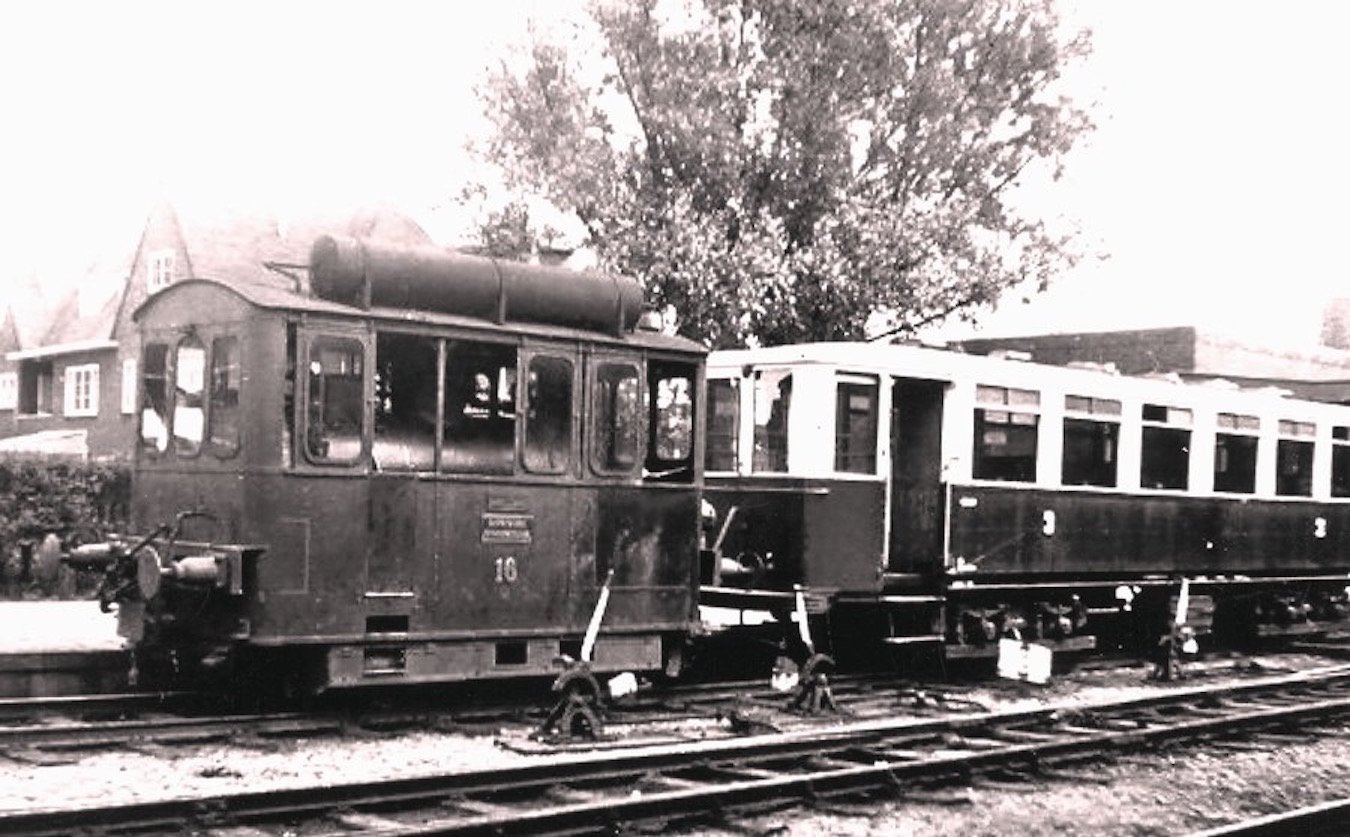
Thank you Jan, Denis, John and Carl for visiting and your kind comments. Also my thanks to those who liked my post. Yesterday and today in real time, February 27, 2018, are for me the most special. Yesterday the 26th was the last day 76 years ago that I saw and spoke with my father for the last time before he went out with the fleet to do battle against the Japanese Imperial Navy. Today, 76 years ago is the day he and over 3,000 Navy men died in the battle on the Java Sea. No, Gwen and I don't do anything special, just some quiet contemplation so once in a while. Nothing we can do about it but remembering the happy times we have enjoyed with him. From our religious point of view we will see each other again in the promised Kingdom of our Creator. In my intro I mentioned about that last day I spoke with him and how he was dressed in his official uniform with his saber at his site. When he left with the local steam tram back to the base. I like for you all to see these things. Now you also see what I see in my mind, except for the picture of the uniform. That's just a standard tropic's uniform, not dress. Dress is long trousers, closed collar long sleeve shirt and jacket with a cap, all in white. I sure hope you wont be too upset for me sharing some sentimental memories. Shoulder epaulet for Royal Navy Adjudant. The Royal Navy Adjudant saber. This is then a picture of the steam tram that used to run between the Navy base to the zoo. It passed our close by. We lived next to the corner house where our street ran into the boulevard where this tram chugged along. My sister and I saw our father standing in the doorway waving at us. I should make a painting of it. Marine adjudant onderofficierssabel 1843 copy.doc Marine adjudant onderofficierssabel 1843 copy.doc


- 378 replies
-
- 12
-
-
- java
- pacific crossroads
- (and 2 more)
-
Nice going on the decking Denis. Cheers,
-
Yes, very curious indeed. Safety first I guess A lot of "busy work" on that ship, which means a lot of time to be spend on all that "busy work." Cheers,
-
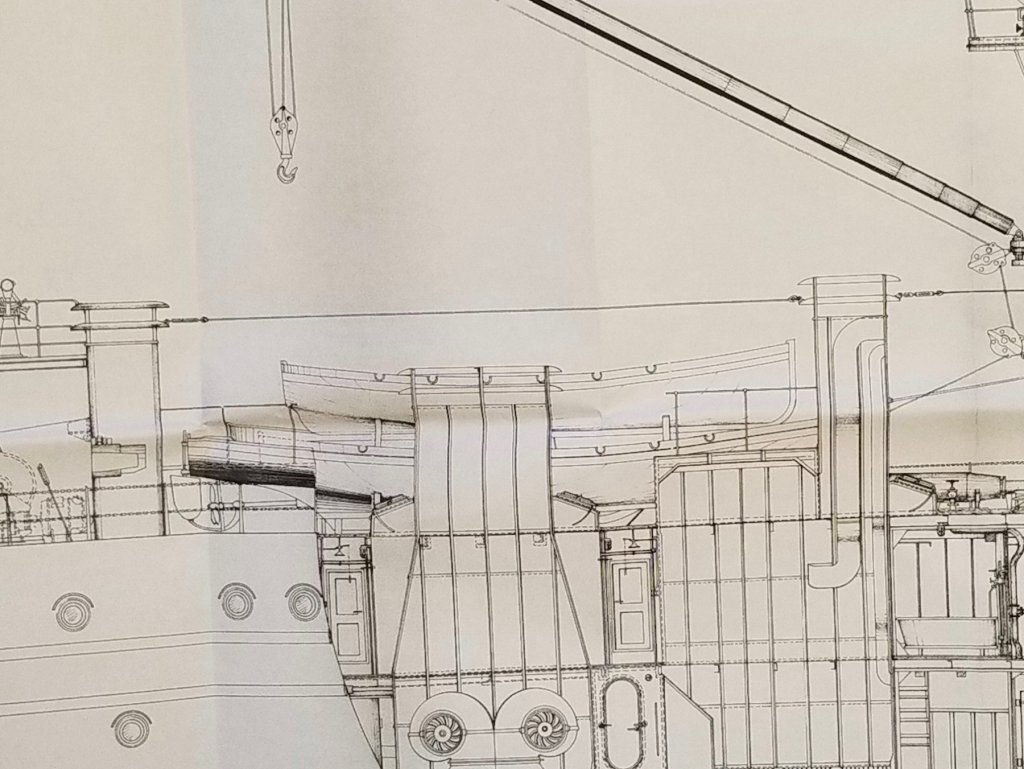
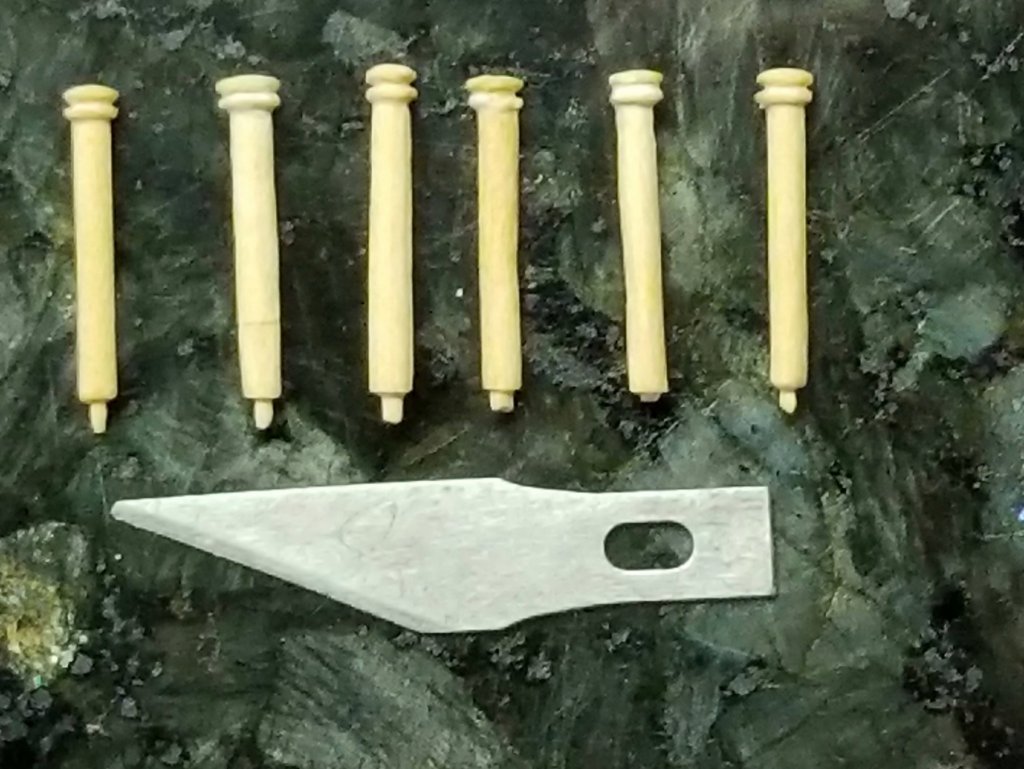
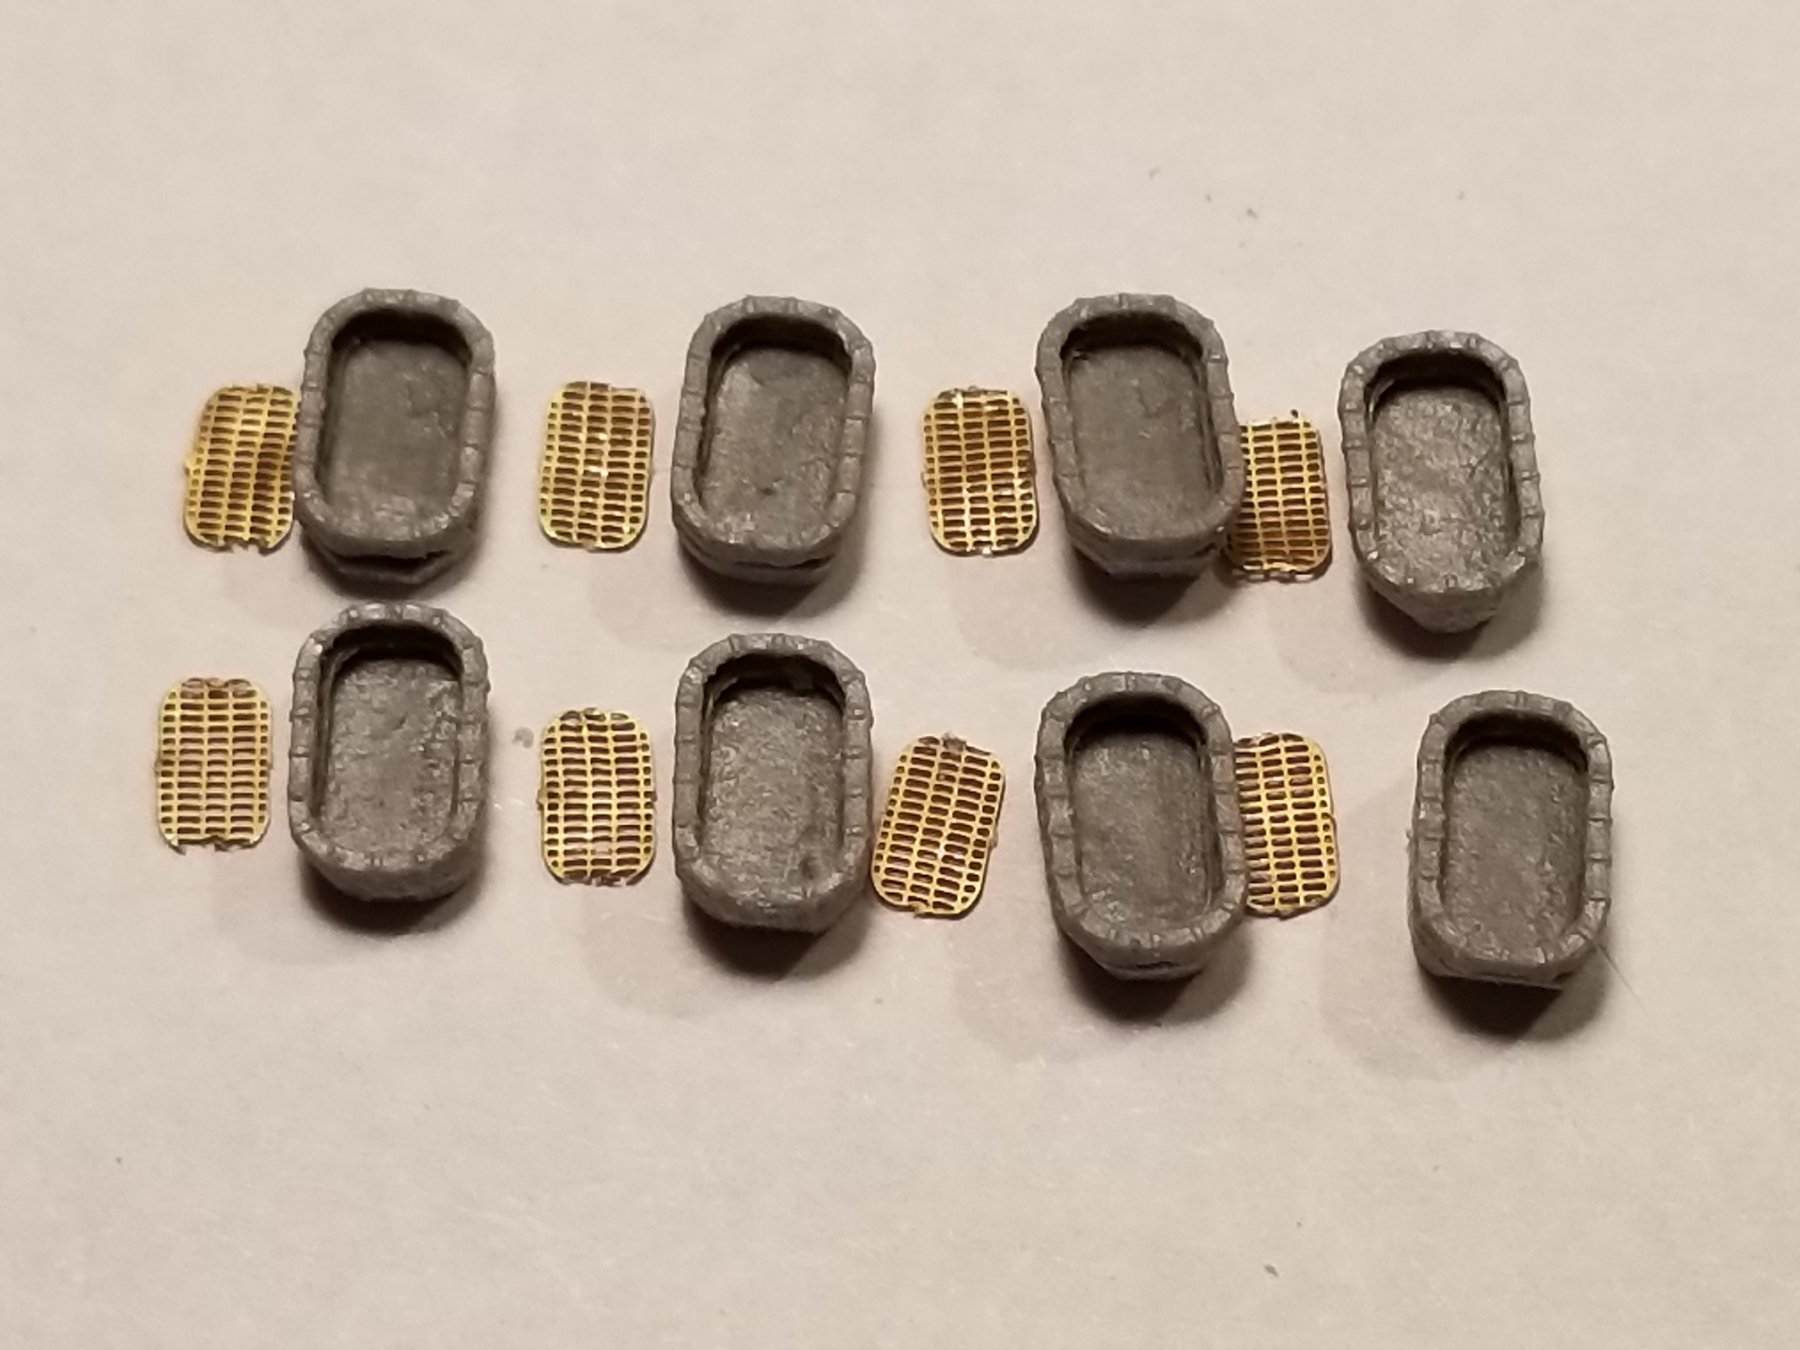
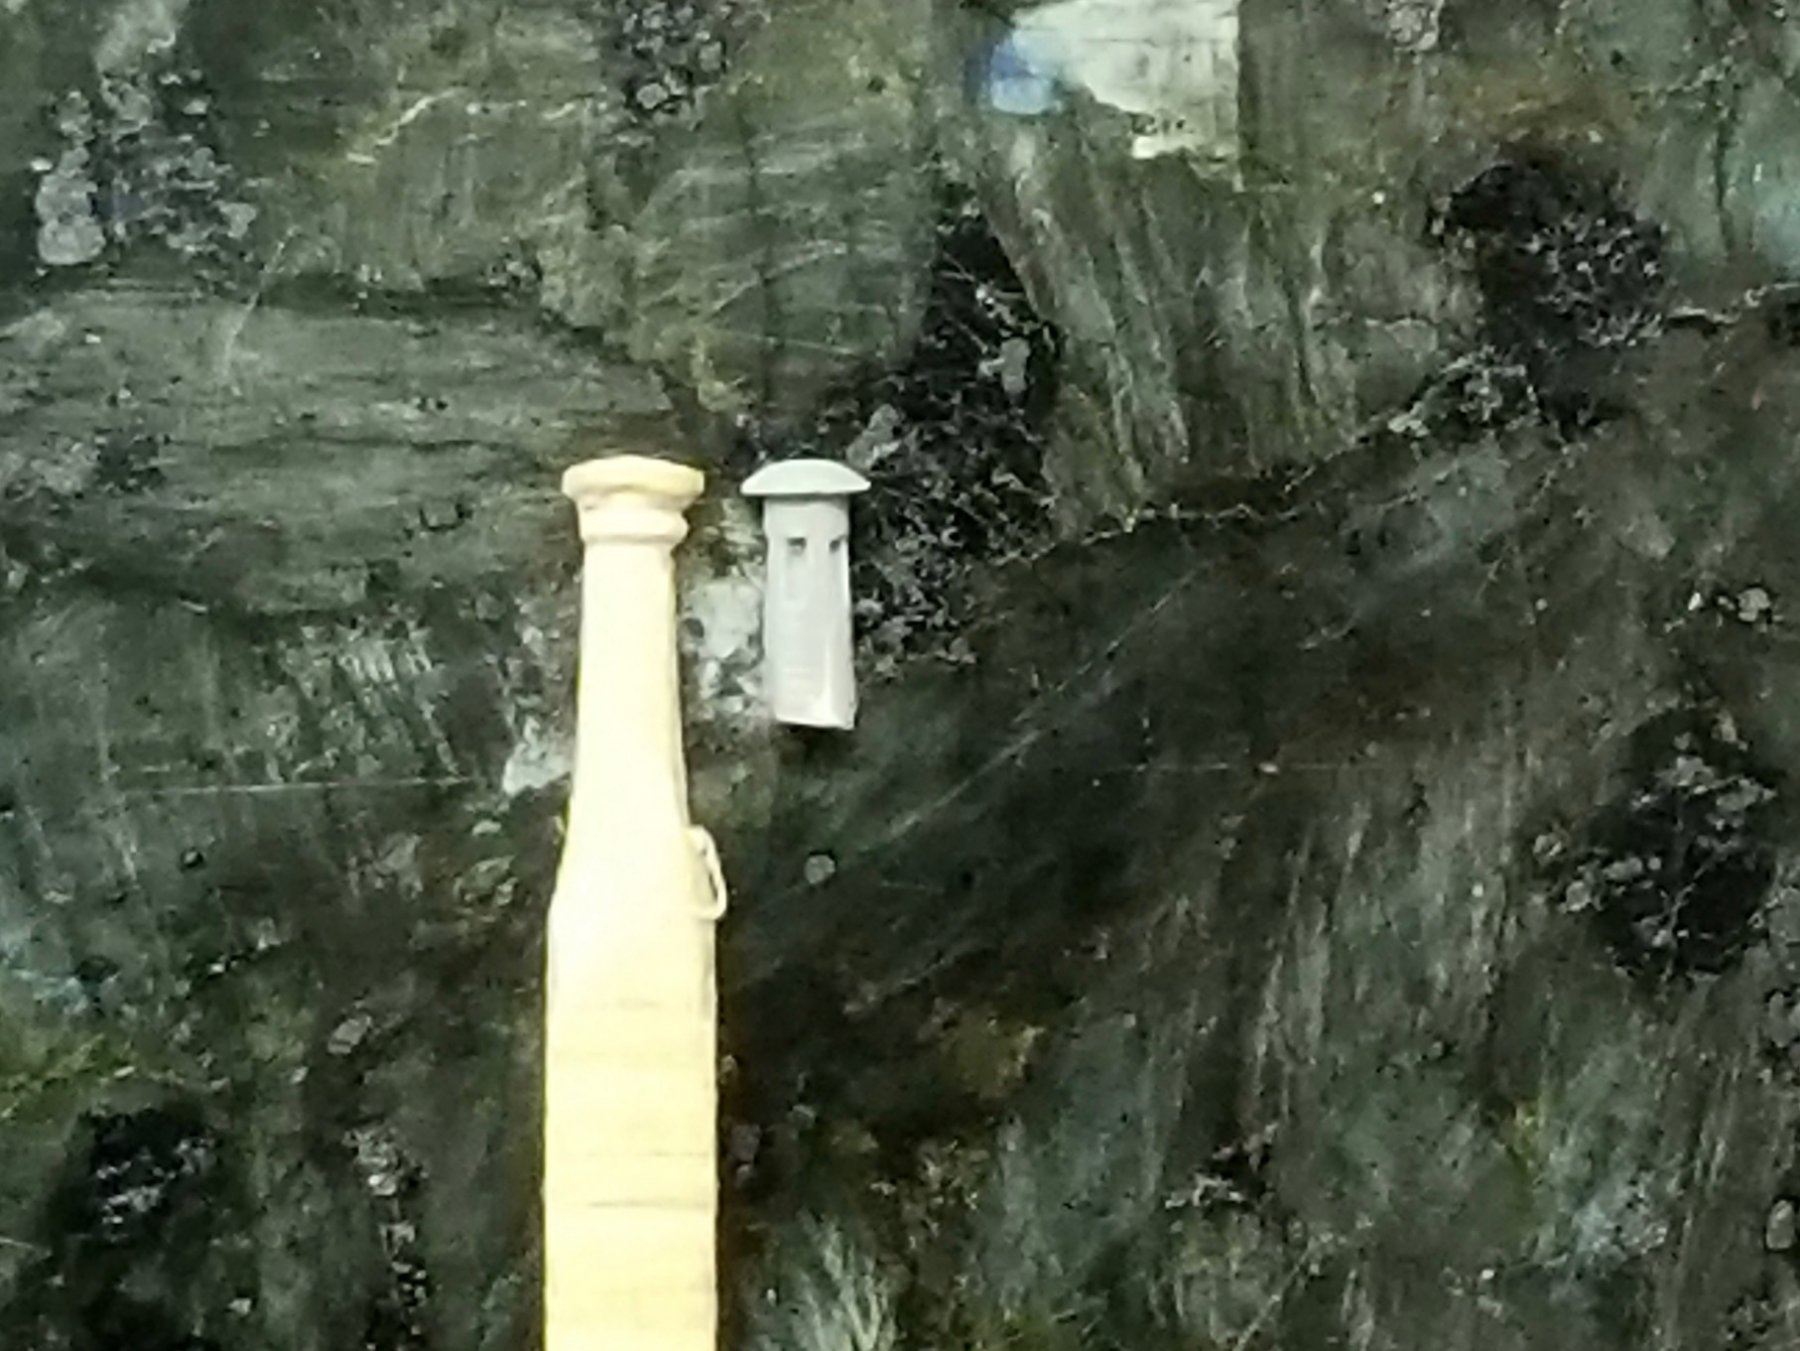
Thanks Denis and thanks to all liking my progress. This post will contain several days of work due to the many extra curricular activities around the house and other things, progress is rather slow. So, I'll combine Days 31, 32, 33, 34 and 35, which brings us to January 7, 2018. I forgot to mention yesterday that I also prepped a bunch of life rafts and separated a few more ladders from the PE sheet and cemented them to their appropriate locations. Okay, on day 31 I painted the ladders I installed the previous day. That's all I could do. Before cementing the life rafts to the ship I looked for any additional parts I can install before they are in the way. I want to work from the inside out you see. There are 6 vent pipes on the center deck but the ones in the kit seem to be rather small. I checked with my scratch build drawings and see that the tops of the pipes come about half way op the AA gun deck railing. On day 32 I tried to lengthen the kit parts with a toothpick but gave op on that because one of the kit parts broke. I decided to make my own to fit the drawings. On day 33 I rummaged through my pile of small pieces of wood and found a square piece of boxwood, about 5 mm. It was too cold in the garage and my lather drive belts are broken anyhow so I used my trusty #11 Execto knife blade and some sandpaper to whittle 6 new pipes as per the drawings. The proto type didn't come out to bad, a little paint and we wont see the difference. Continued on day 34 with the whittling of the vent pipes. I also whittled a 0.5 mm pin on the bottom for extra strength when cementing them to the deck. On day 35 the weather warmed up enough for me to go into the garage to drill the holes for the vent pipes. I then cemented the vent pipes to the deck, making sure they were all square to the deck. In the meantime I removed the ship's boat cradles from the PE as well as those for the seaplanes. The latter will be challenging because they have to be bend into a box shape and act like wet spaghetti I did manage to cement the boat cradles though before calling it quits, it was way past beer thirty The large rafts with wooden floors and oars. Rafts completed and read for paint. This is a copy of part of my drawing showing the vent pipes As you can see they stand rather tall on the deck and are also braced with removable cables. I intend to use a few strands of silk thread I have and a small sliver of wood for the turnbuckles. This shows the comparison between my scratch build pipe and the kit pipe. The background is my very dark green polished granite kitchen counter top. It actually looks black when just casually looking at it. Gwen's choice. Coming close to what I am looking for on the prototype. 6 vent pipes ready to install. Like I said, with a little heavy paint - - - All 6 vent pipes installed and started with the bracing wires. You can aslo see a few life rafts cemented to the deck. Cheers,


- 378 replies
-
- 11
-
-
- java
- pacific crossroads
- (and 2 more)
-
Nice! Cheers,
- 4,152 replies
-
- 1
-
-
- cutty sark
- tehnodidakta
- (and 1 more)
-
What a nice gift Marcus, youl enjoy playing with it. Your sails will look wonderful, love the colors you are using. Cheers,
- 305 replies
-
- 2
-
-
- utrecht
- statenjacht
- (and 1 more)
-
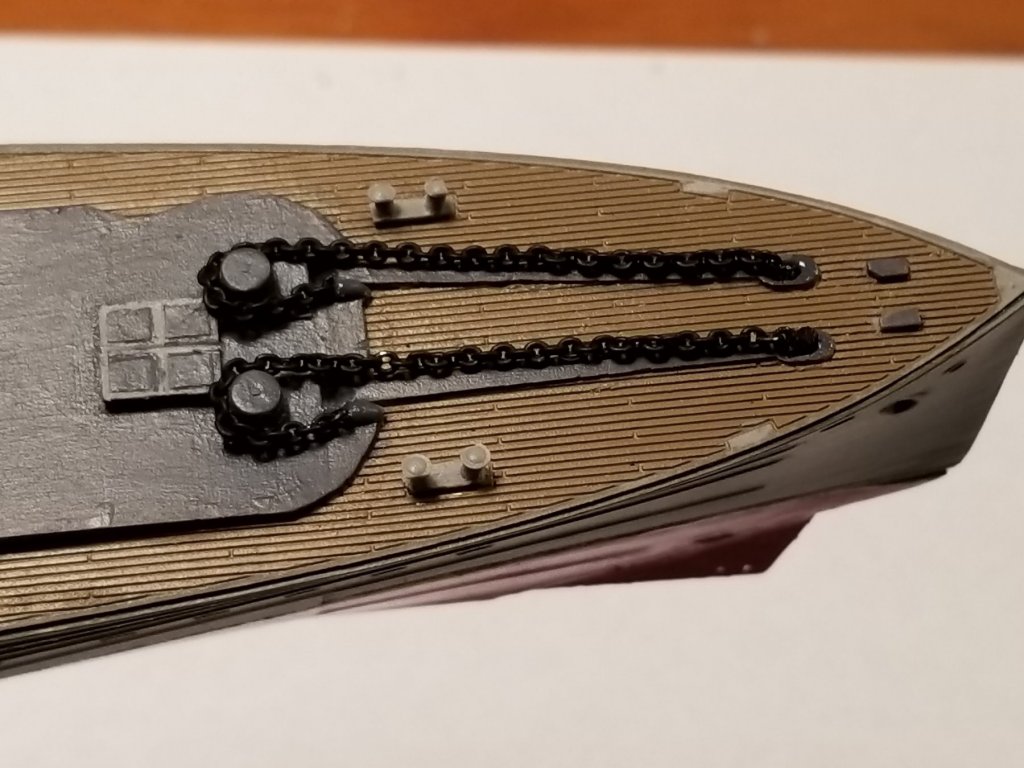
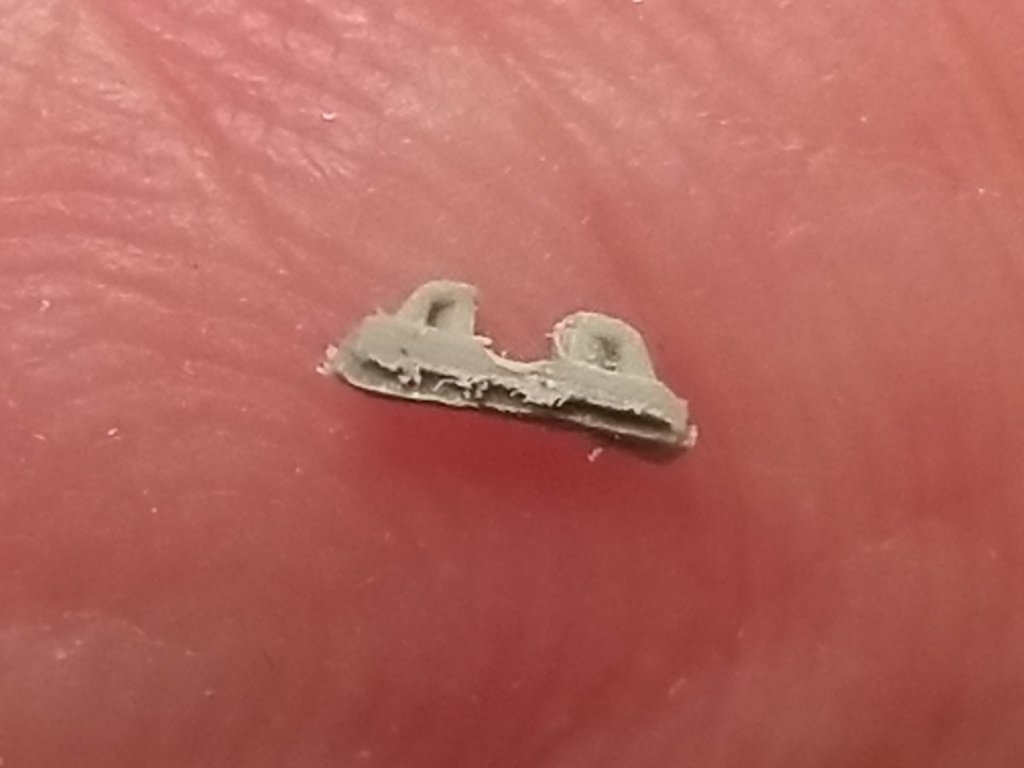
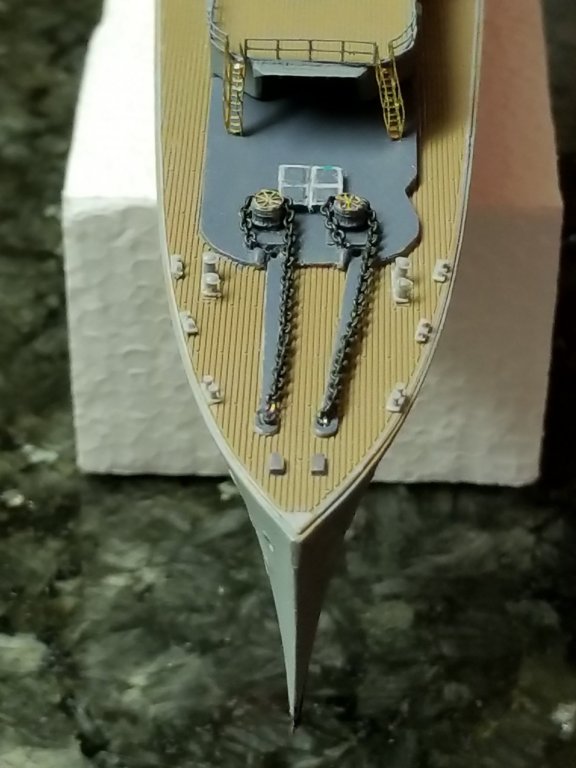
Thank you Denis, Patrick, Wallace and John for looking in and your kind words. And thanks to those who clicked the like button, much appreciated. Today's post will again be a combo of two days. I have only been able to spend a few hours here and there. These will be Days 28 and 29, which brings us to December 28, 2017. On day 28 I commenced cementing the superstructure parts to the deck with a few small items. This took quite some time making sure that everything was squared. I used a black colored slow curing two part epoxy cement to allow me the time to measure the distances from starboard and port side. Then just let it sit till cured. In the meantime I separated the bollards and cleats and started to cement them in place as indicated on the installation instructions. I then painted and installed both anchor chains. They are a tad over size but not too objectionable. The anchors will be painted in the dark grey but I'll wait with installing them till later to prevent damaging them with handling of the model. One of the cleats decided to spring into never never land so I had to scratch build one from some brass wire. I lucked out again, it looks quite good - at least Gwen couldn't tell the difference after I quickly painted it grey. Yeah, call me sneaky Piet. I also prepped a few PE ladders and cemented them into place. Wow, a lot of stuff done these two days. Below are the pics of the progress. The AA gun deck. The aft mast and aft funnel with vent house/ The forward funnel with vent house, mast, the bridge and the #2 15 mm gun deck. A strip with cleats. The two large bollards cemented in place with the anchor chains. 6X magnification of a cleat to show how tiny they are, It is laying on one my fingers. I also had to remove the two small pieces to make it look like cleat. That's how I lost one. Making a new one from brass wire was a lot quicker then cleaning the castings. The stern deck with its bolaards and cleats cemented in place as well as the stern anchor winch. You can also see the two ladders going up to te aft- main deck where the #9 15 mm gun is located. The aft main deck with the AA gun deck and the ladders going up. I may wind up reding them and cement them against the gun deck house as the my 1:50 scale drawings sow. I have no idea what the little doghouse is doing there, the scale 1:50 drawings only show a raised hatch like thing. I think I'll go with that. The forward deck looking down with all the bollards and cleats installed. The only thing left is the railing but all railings will go last for ease of handling till then. The railing on the #2 15 mm gun deck was cemented on several days ago but both ladders were done today. They come as flat PE and have the handholds must be bend up as well as all the treads.


- 378 replies
-
- 9
-
-
- java
- pacific crossroads
- (and 2 more)
-
Those vents and doors look pretty convincing Kevin. Great job! Cheers,
-
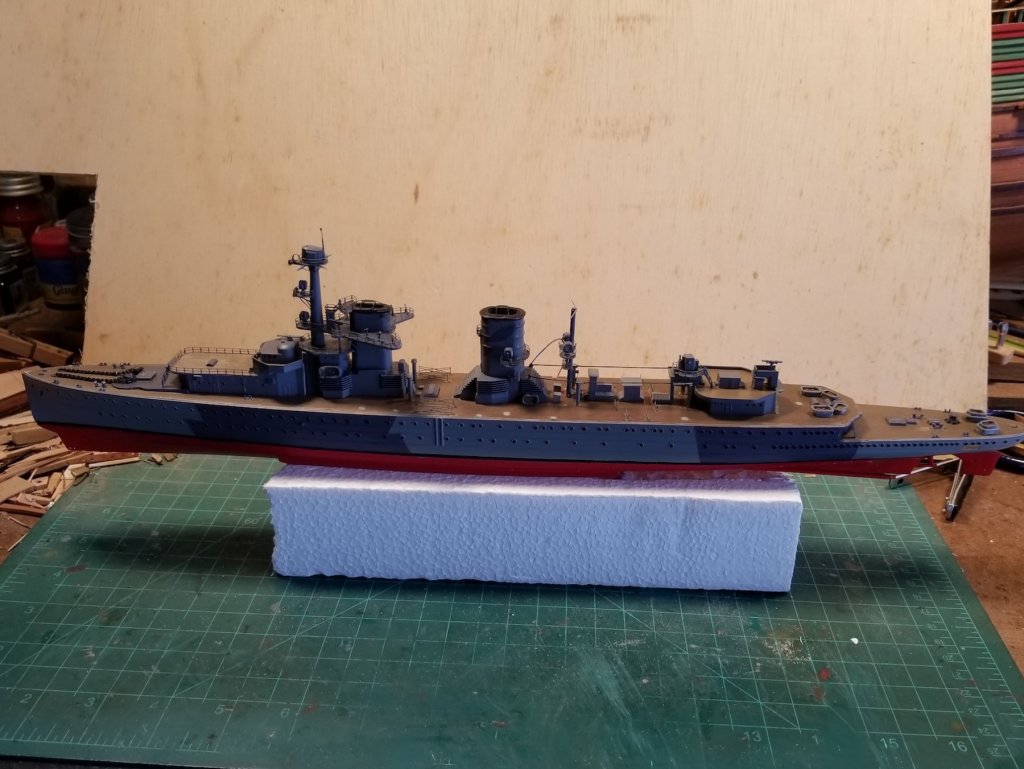
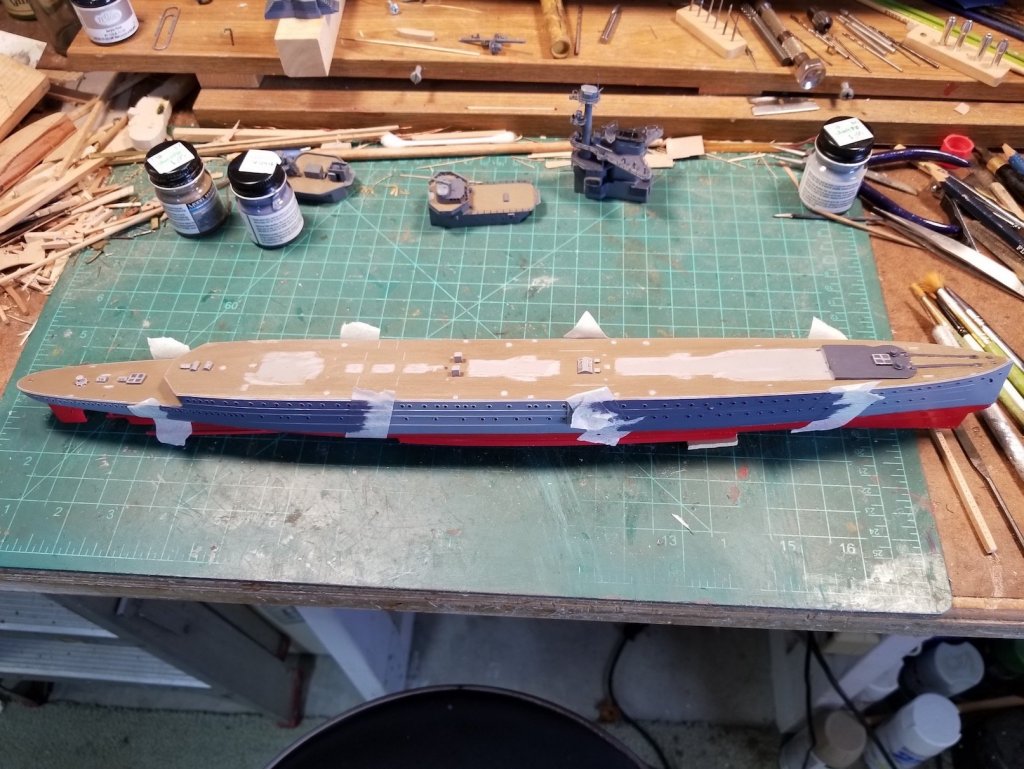
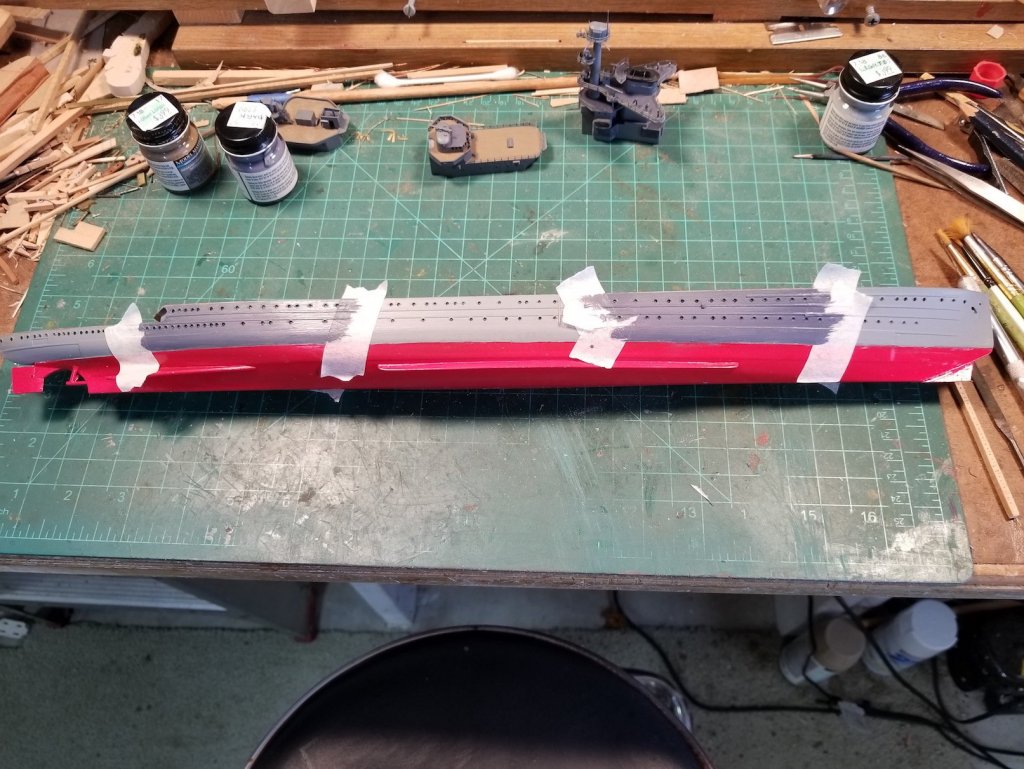
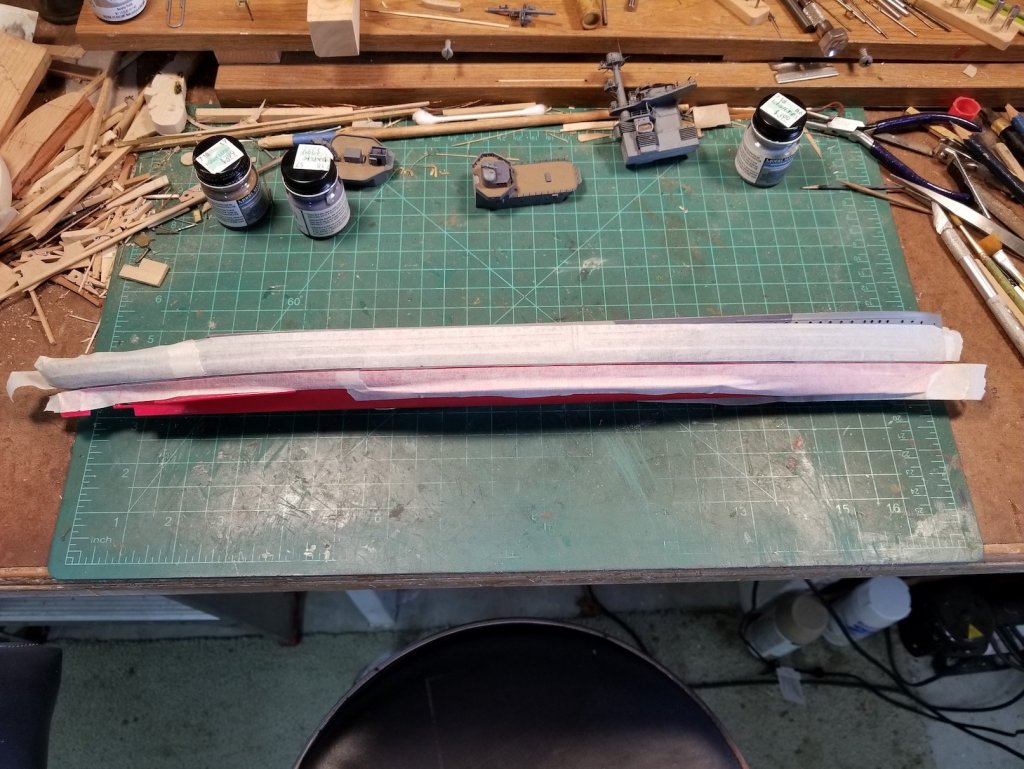
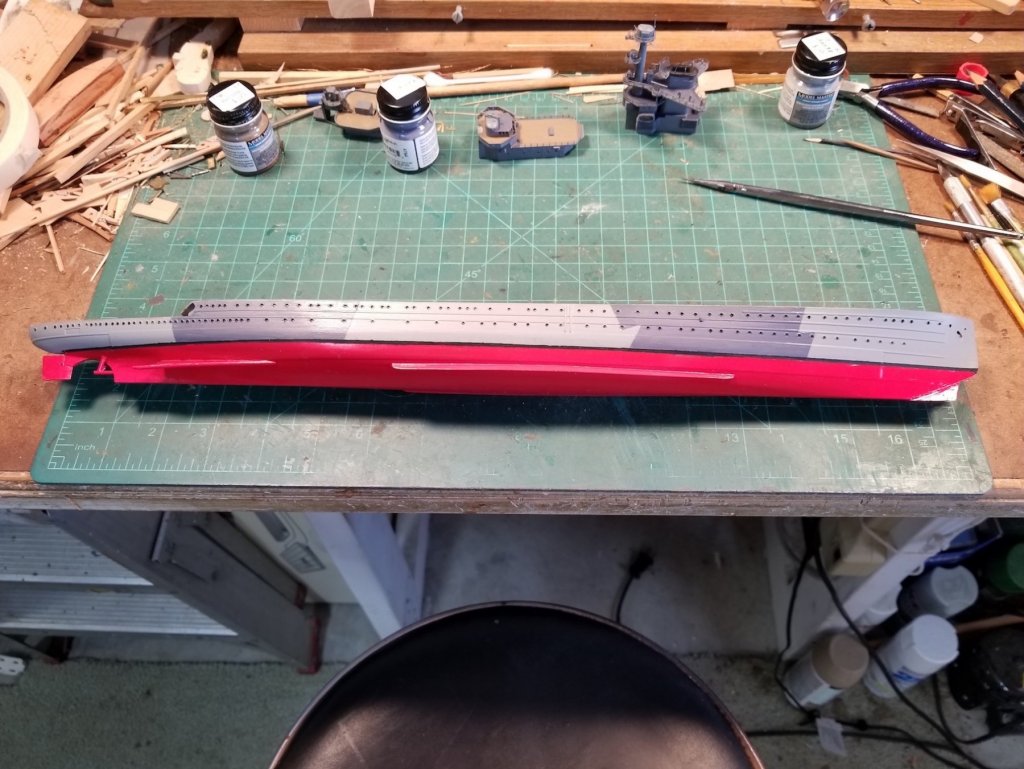
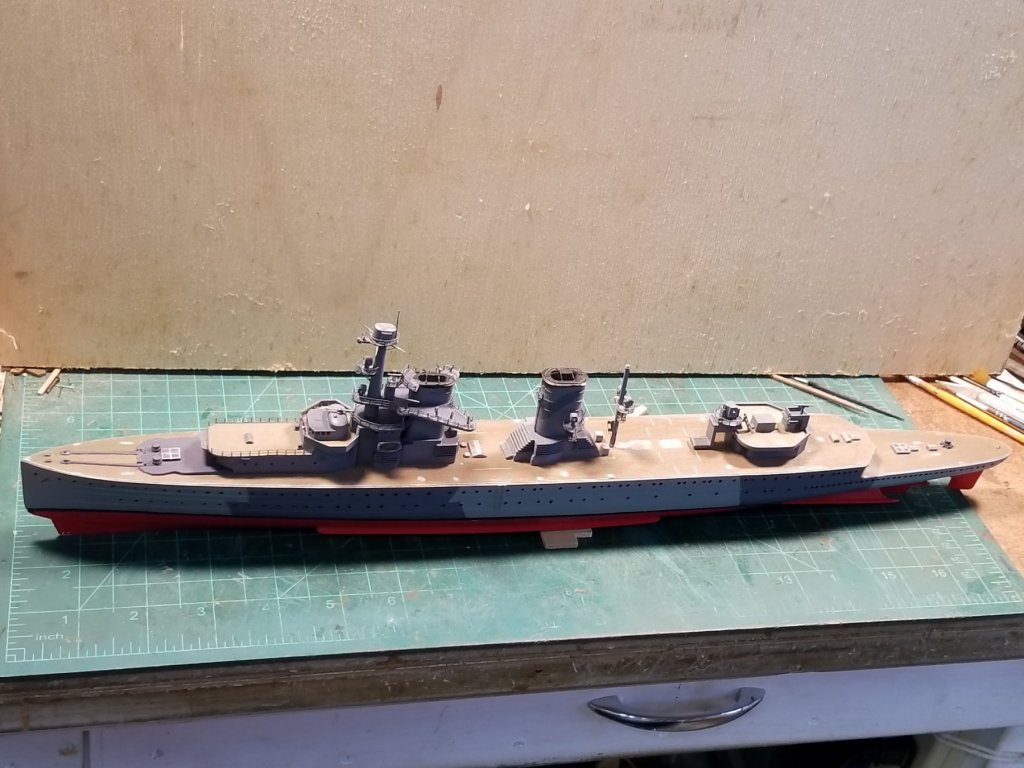
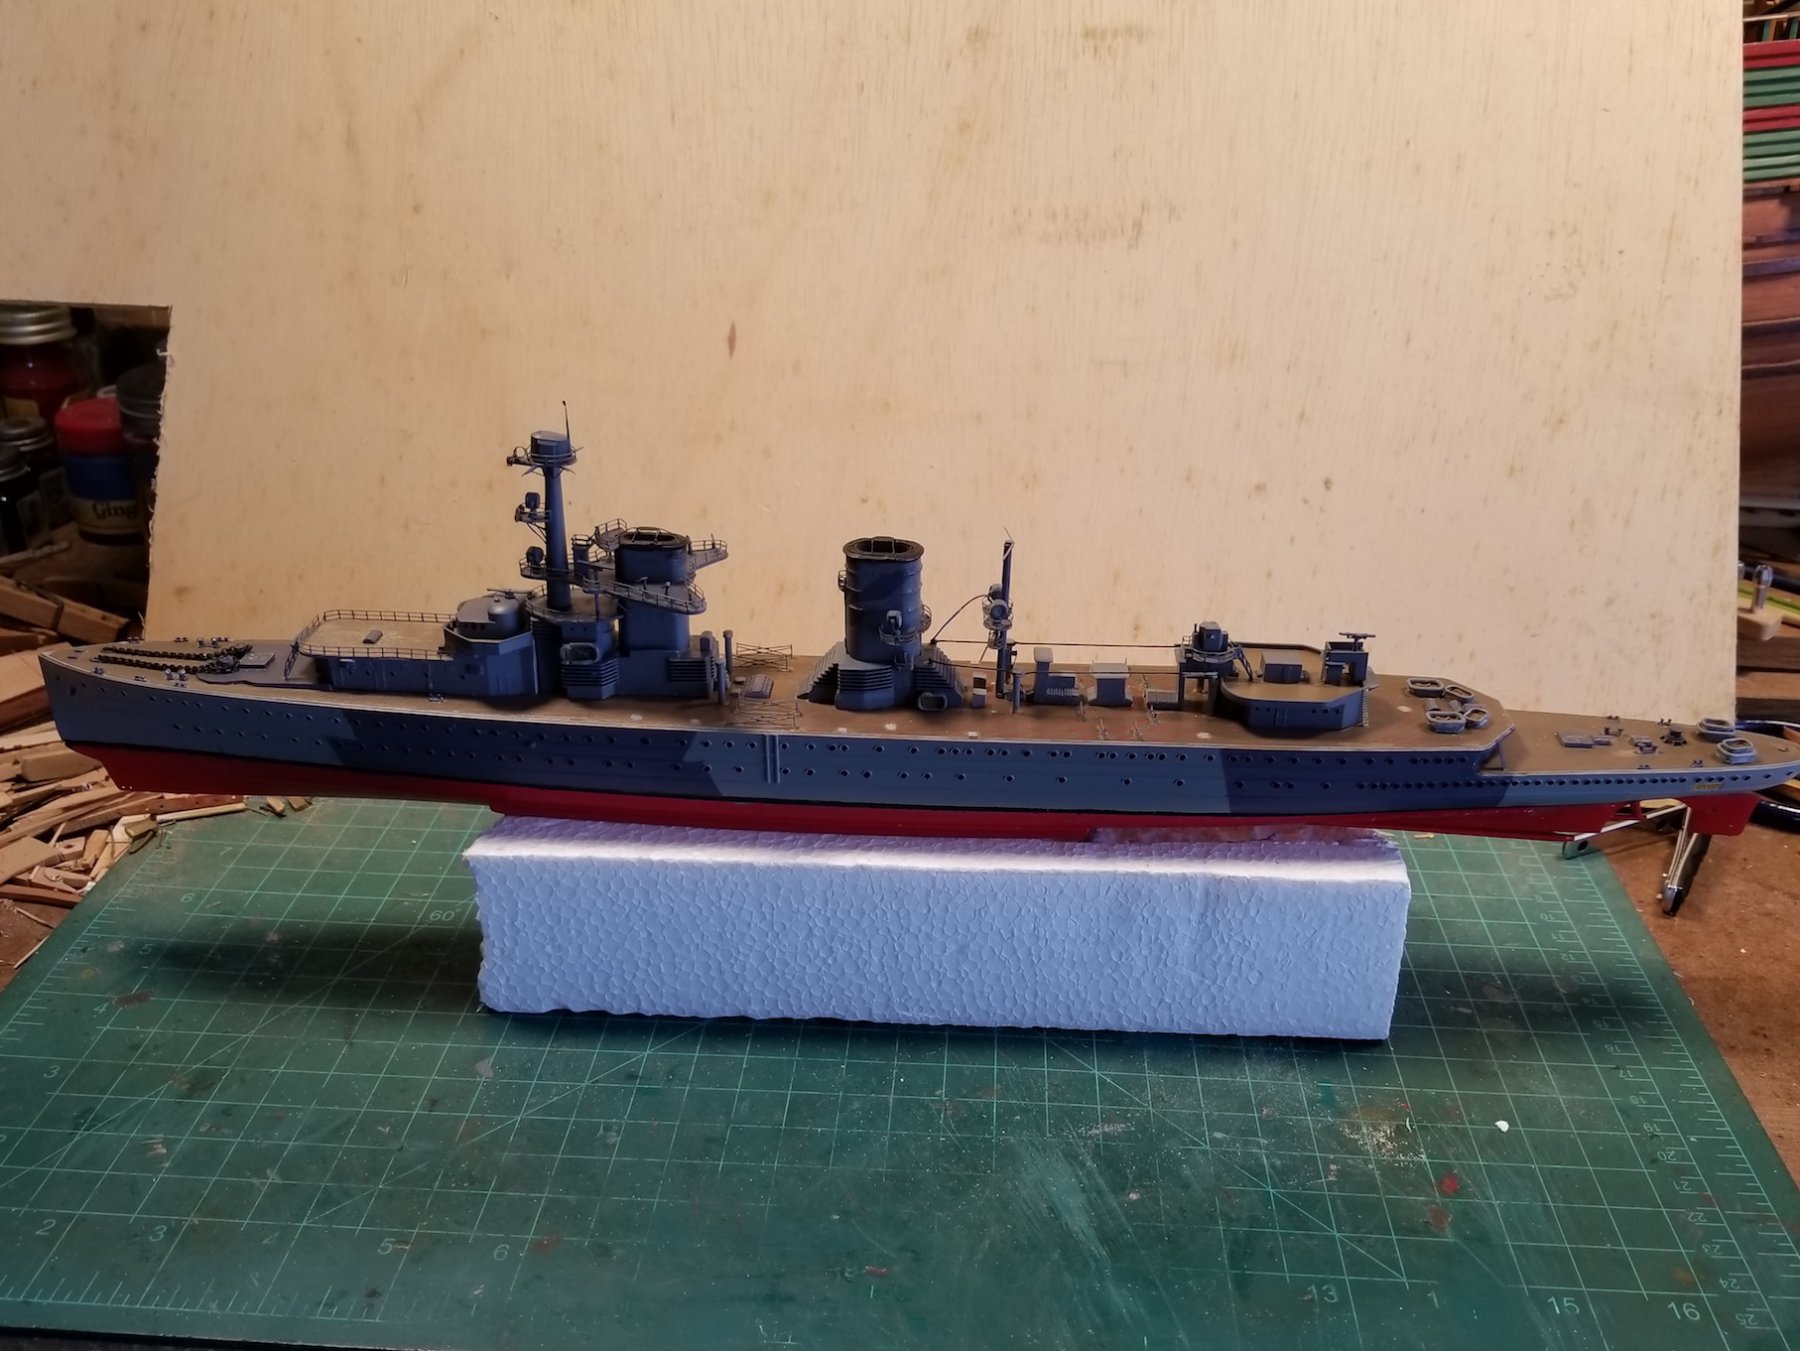
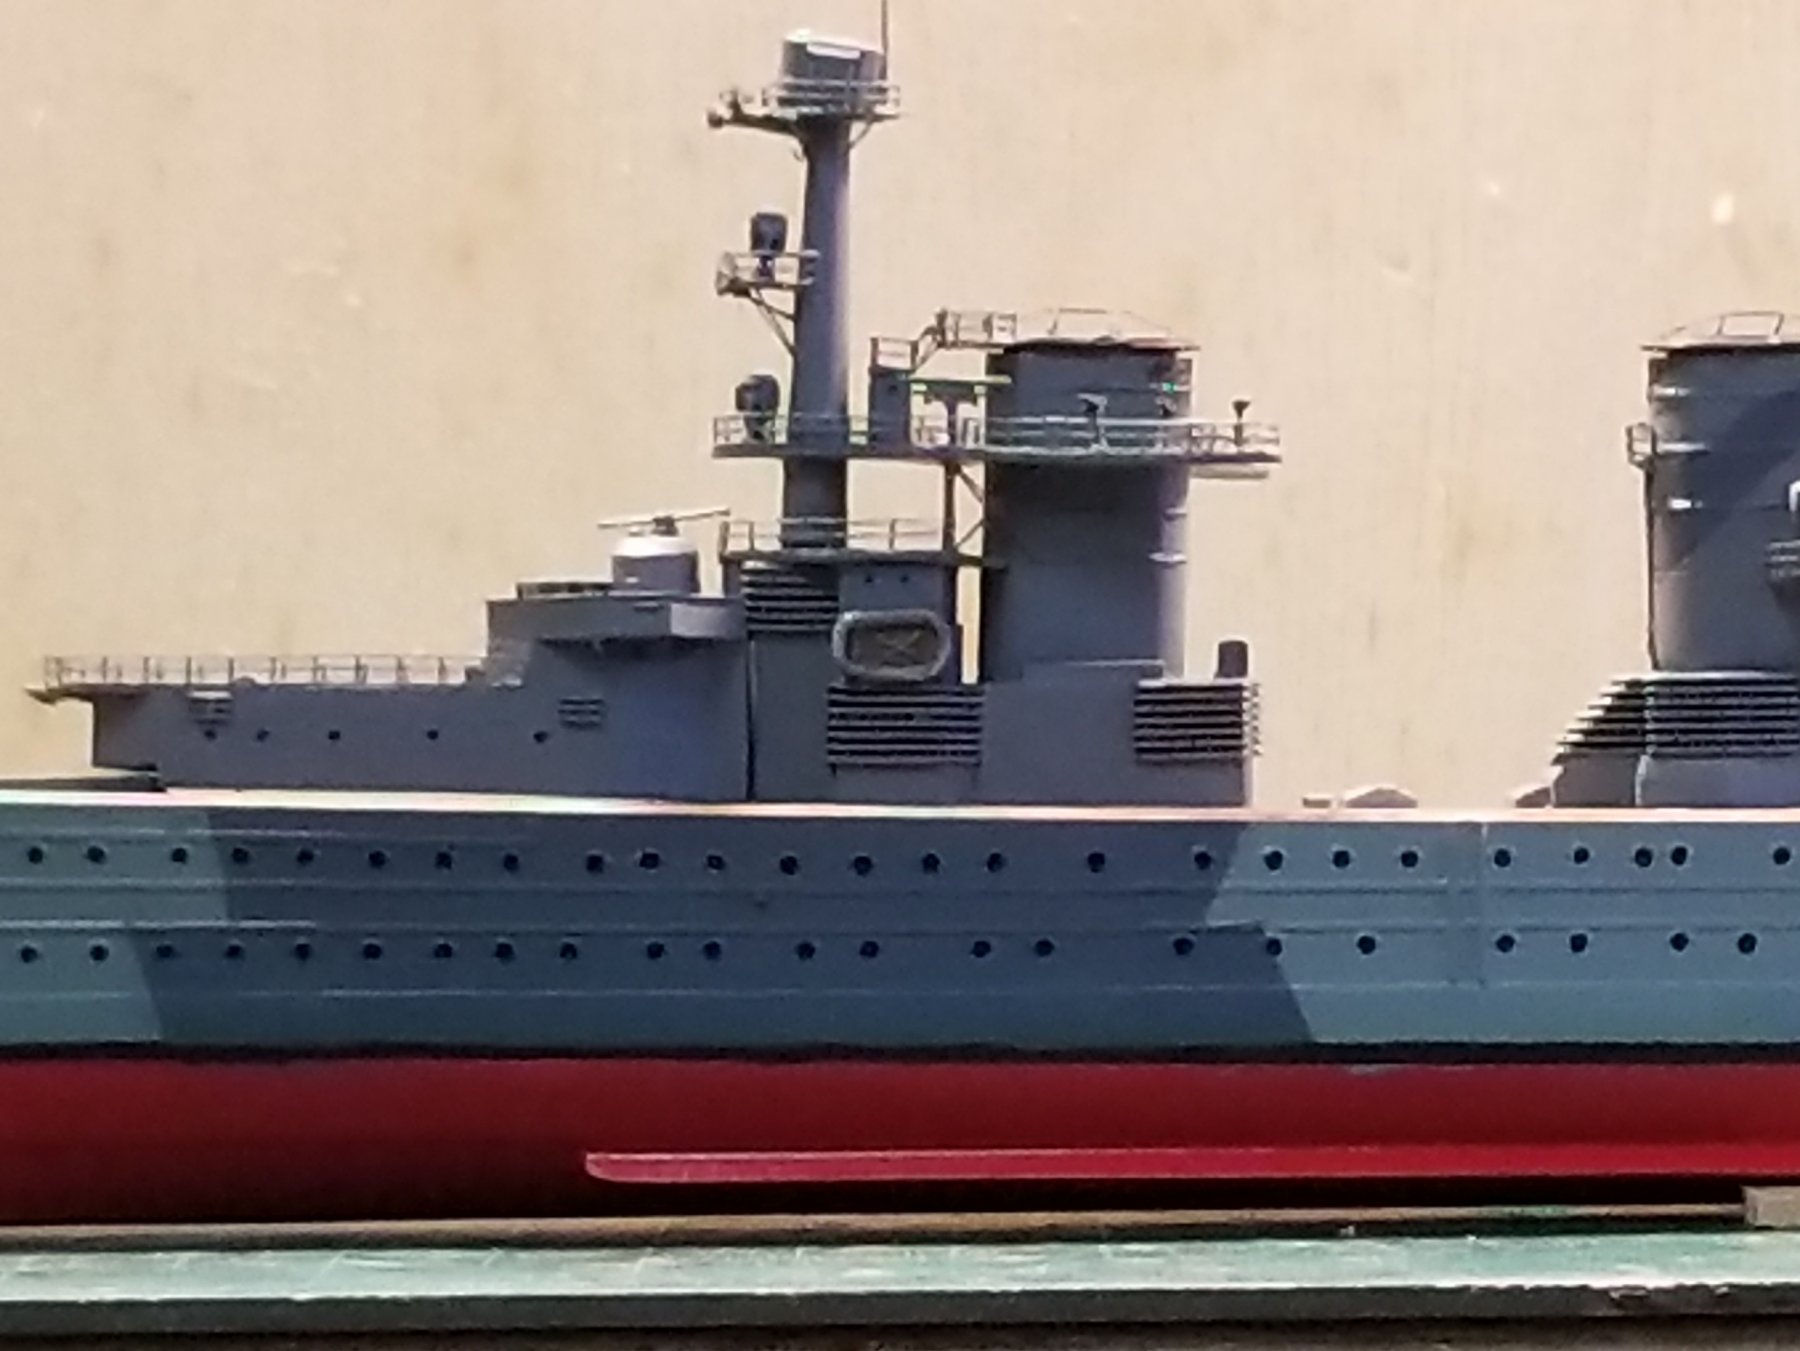
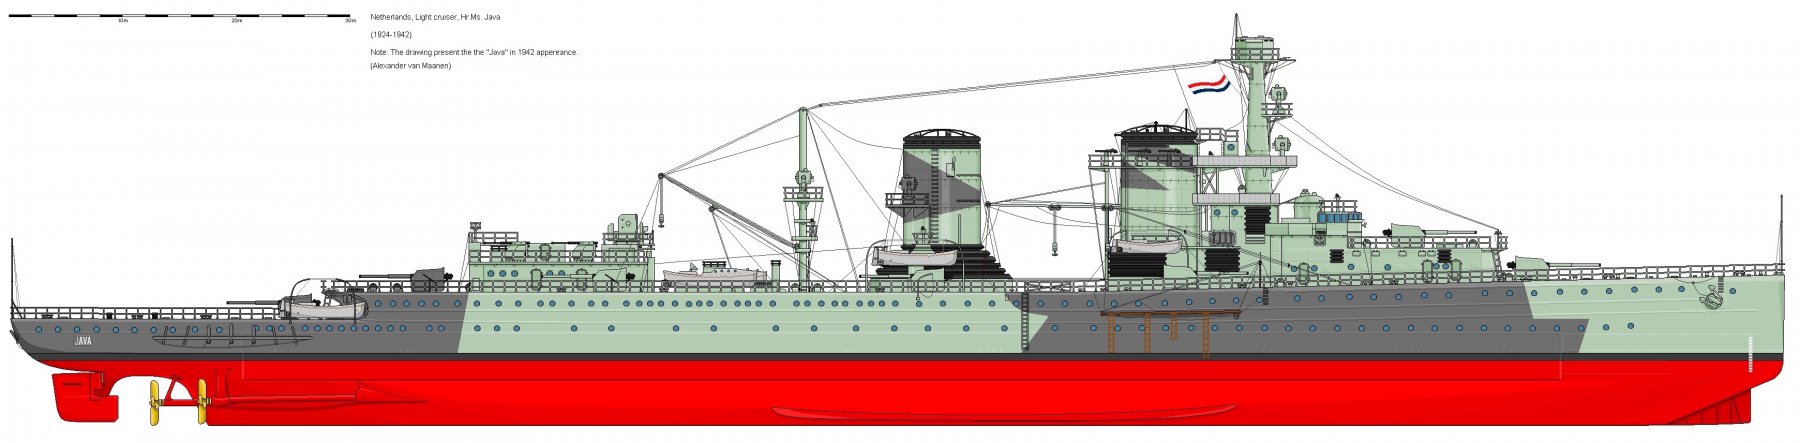
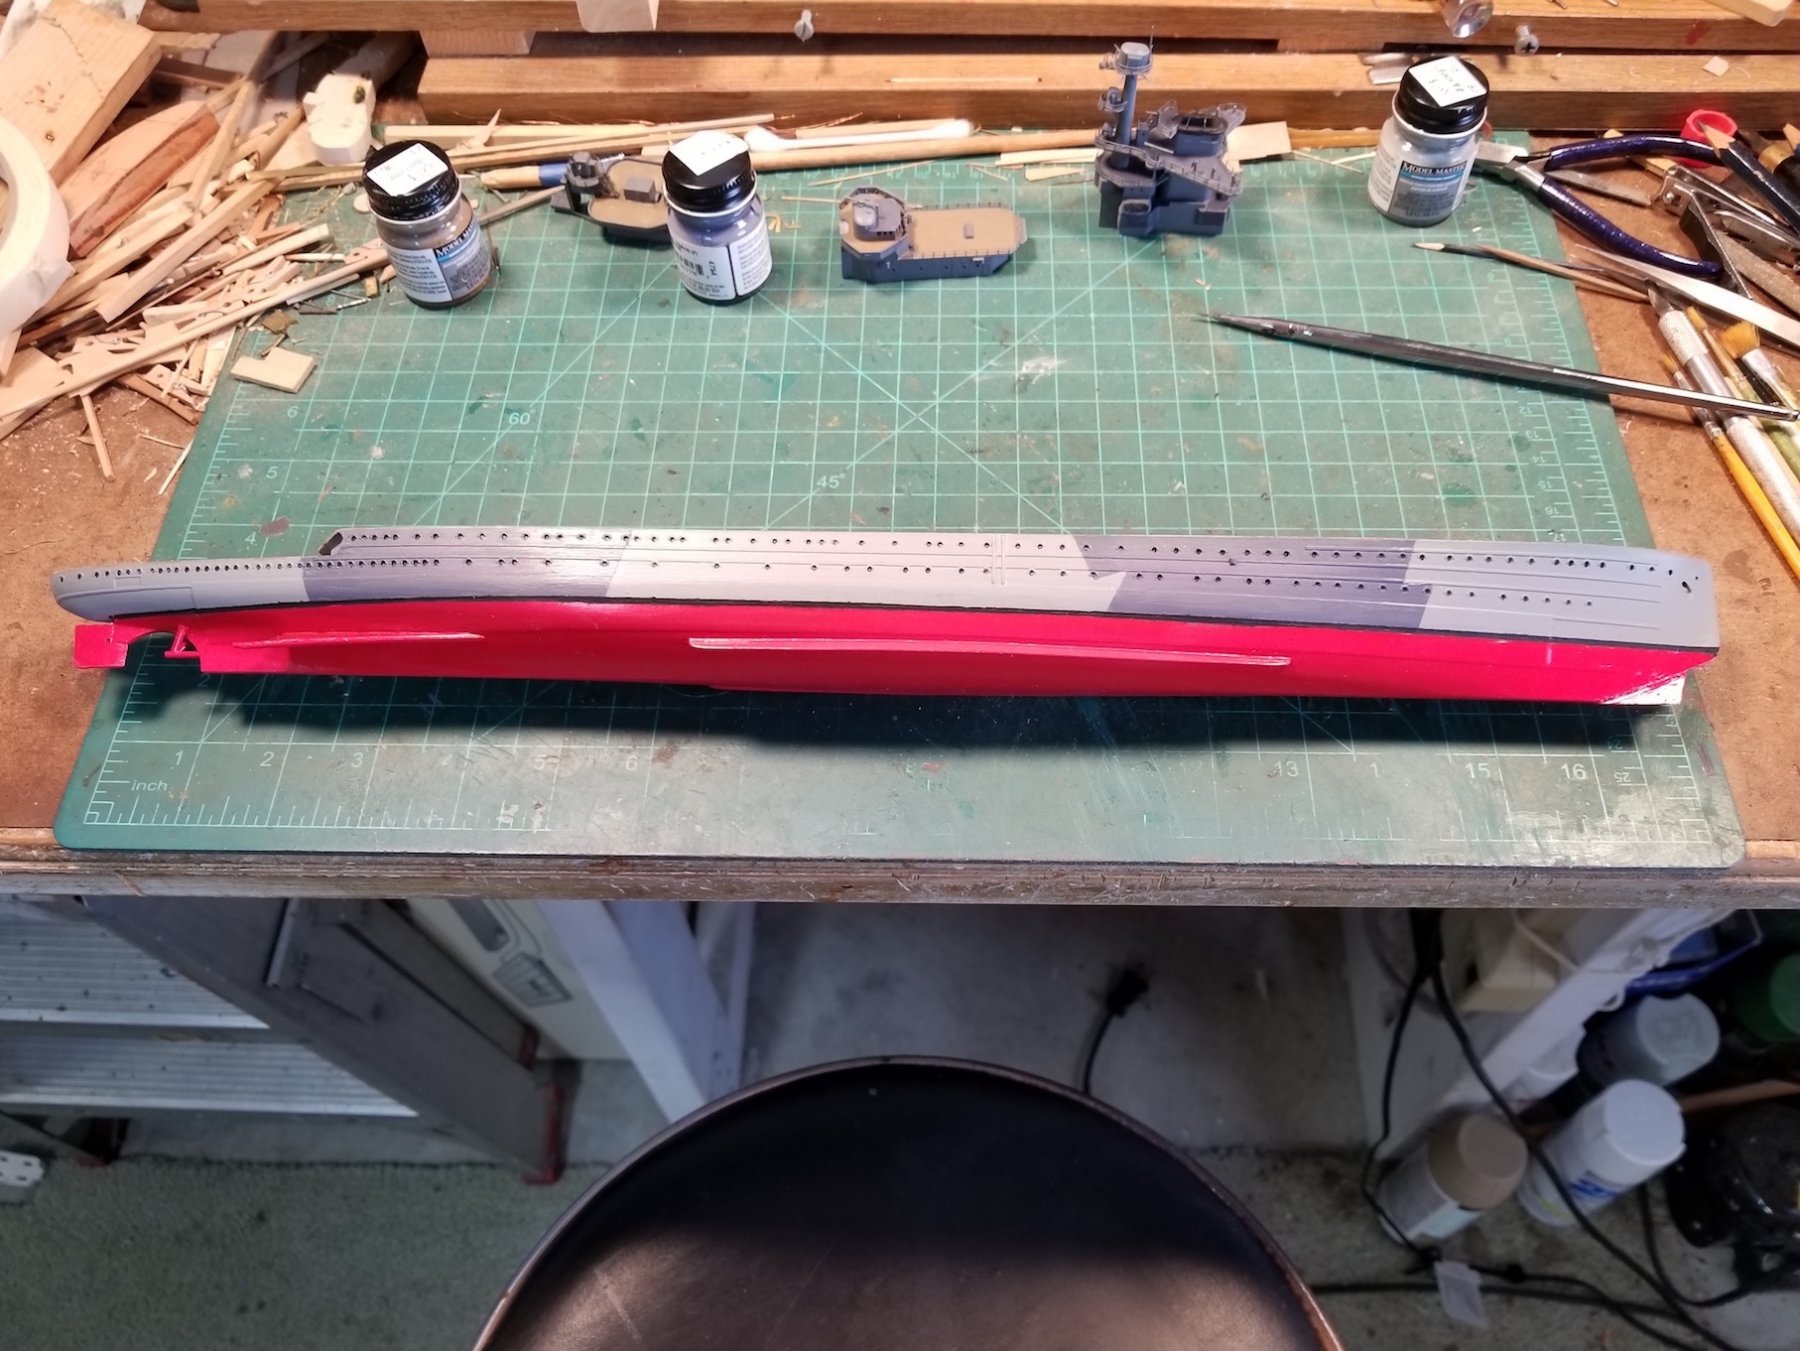
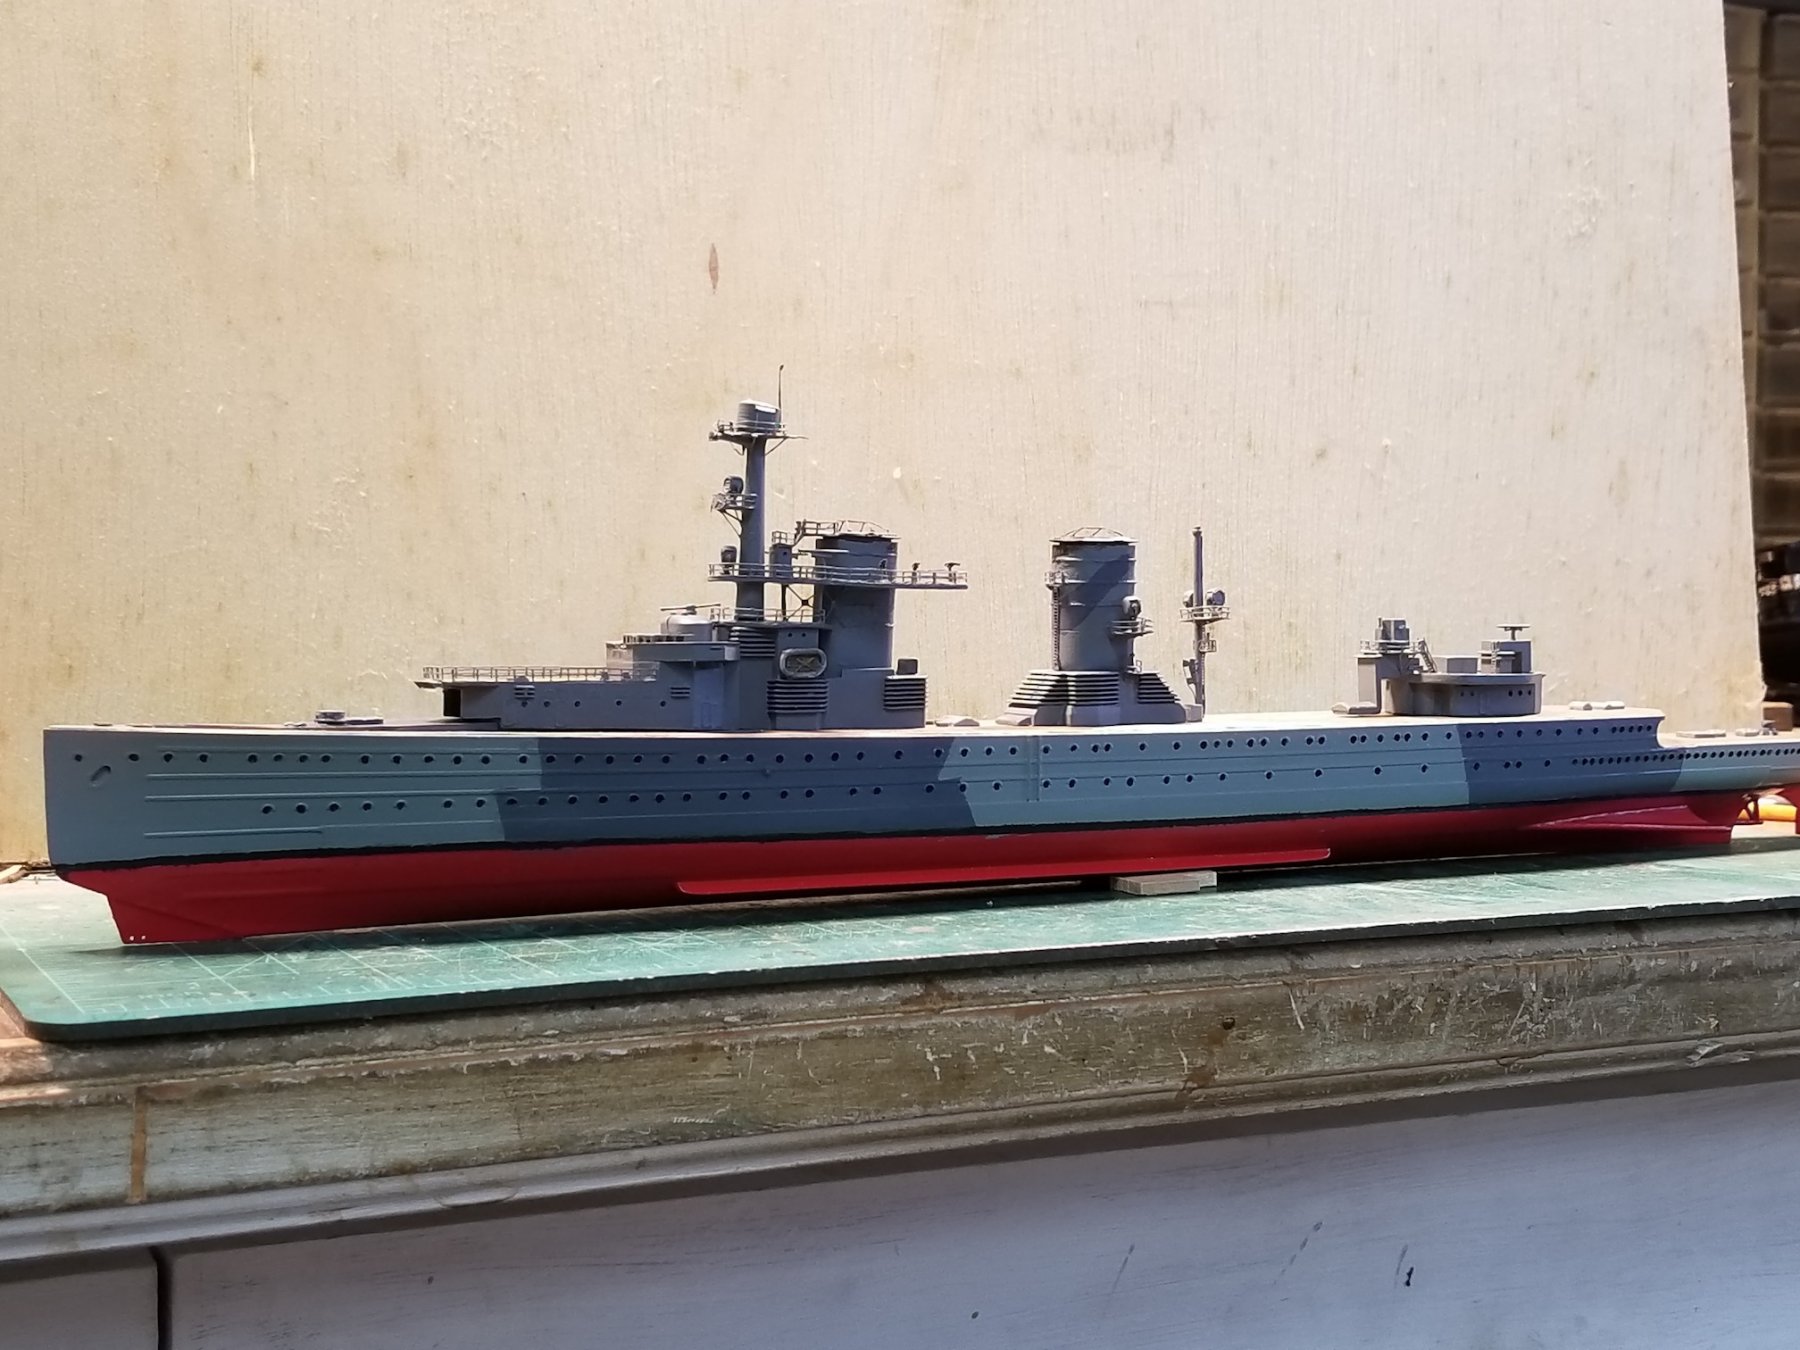
This post is for Days 25, 26, and 27, which brings us to December 25, 2017. Day 25 was mostly taken up with some more PE parts cementing to the most forward deck house section and prepping the hull for the grey camouflage colors. On Day 26 I painted the hull above the red with the modified Model Master's acrylic gull grey. I say modified because it was a little too light so I added some black to it. It turned out that this paint was rather thin and somewhat translucent. It didn't cover the dark grey primer too well and I had to use four coats of the paint to cover it. While these coats were drying I painted the deck of the hull and the other parts with wooden decks with Model Master acrylic wood color paint. This required three coats to cover the dark grey primer and kept the planking feature of the mold very visible. All this took a good part of the day and looks very promising. I'll see tomorrow how well everything looks. On Day 27, 12/25/2017 I checked to see how the paint covered the dark grey primer and everything looks great. I am now ready to mask the hull for the dark grey as is called out for in the instruction folder. Here too I had to add some black to the Model Master's acrylic dark grey. This time it required only two coats of paint. After the paint had dried enough to handle I removed the masking tape and touched up a few seep-throughs. I then masked the hull for the 1.5 mm black waterline. For the purpose of this model as an in water diorama the accuracy of this stripe was not that important so I eyeballed it. As it turned out it came out pretty good, just a few seep-throughs that was be easily remedied. Next I used the toothpick method and painted all the portholes black. It's a good thing I still have steady hands. I am very pleased with the results and can start putting all the superstructure parts on the deck. This is a print of someone's idea of how the Dutch Navy's camouflage was. Boris Mulenko from Pacific Cross Roads may have adopted this scheme for the most part. I followed his as indicated on the kit's instruction diagram. All the superstructure will be painted in the medium grey. No sense showing me painting the light grey so what you see has already been painted light grey with the masking for the dark grey and it having been painted in the dark grey. Another shot of the masking and dark grey paint. The keel extension for the paravane attaching hardware show a glare from the shop lights. Here she is masked for the waterline black stripe. The big reveal! I'm very pleased with the results. Absolutely no brush marks anywhere. You can see the three major components for the superstructure in the background. Here is a semi overhead shot of the ship with all major components temporarily placed on top. Here is a side view. She's beginning to look like a ship! Cheers,


- 378 replies
-
- 10
-
-
- java
- pacific crossroads
- (and 2 more)
-
Hello OC, I'm still plowing through your build log and now you may be abandoning this magnificent ship? Sure hope you have second thoughts and complete her. That last photo you showed where HMS Warspite is delivering a few shells at the Normandy Beach at the invasion, reminds me of Hr. Ms. Java's sister ship Hr. Ms. Sumatra. They used the "Sumatra" as a breakwater for the invasion, an honorable end for that nobel girl. I'l continue looking at your progress though, it's very inspiring to me. Hope your hands are not getting worse so you can continue with your model till she's finished. My wife Gwen also has similar hand problems and will get a second operation next week. Two fingers keep locking up on her that's very painful. Cheers,
-
Thank you folks for visiting and your comments. Also my thanks for those who clicked the like button. Yeah Denis, I jumped the gun with that last picture. A little premature. That pic was taken a few days later but thought it was nice to show "Java" with her super structure temporarily put in place Thanks Ken for looking in and you are always welcome to drop by anytime. It doesn't happen often when a model is build with a very personal relationship. Cheers,
- 378 replies
-
- 4
-
-
- java
- pacific crossroads
- (and 2 more)
-
Nice hull Denis, glad you used the mahogany. Sure looks great. Cheers,
-
Best wishes for the checkup. I understand about your dislike for anesthesia from personal experiences. Frames look terrific. Cheers,
-
HMS ROYAL KATHERINE 1664 by Doris - 1/55 - CARD
Piet replied to DORIS's topic in - Build logs for subjects built 1501 - 1750
So good seeing you post again. Wonderful work as always. Cheers,- 1,035 replies
-
- 5
-
-
- royal katherine
- ship of the line
- (and 1 more)
-
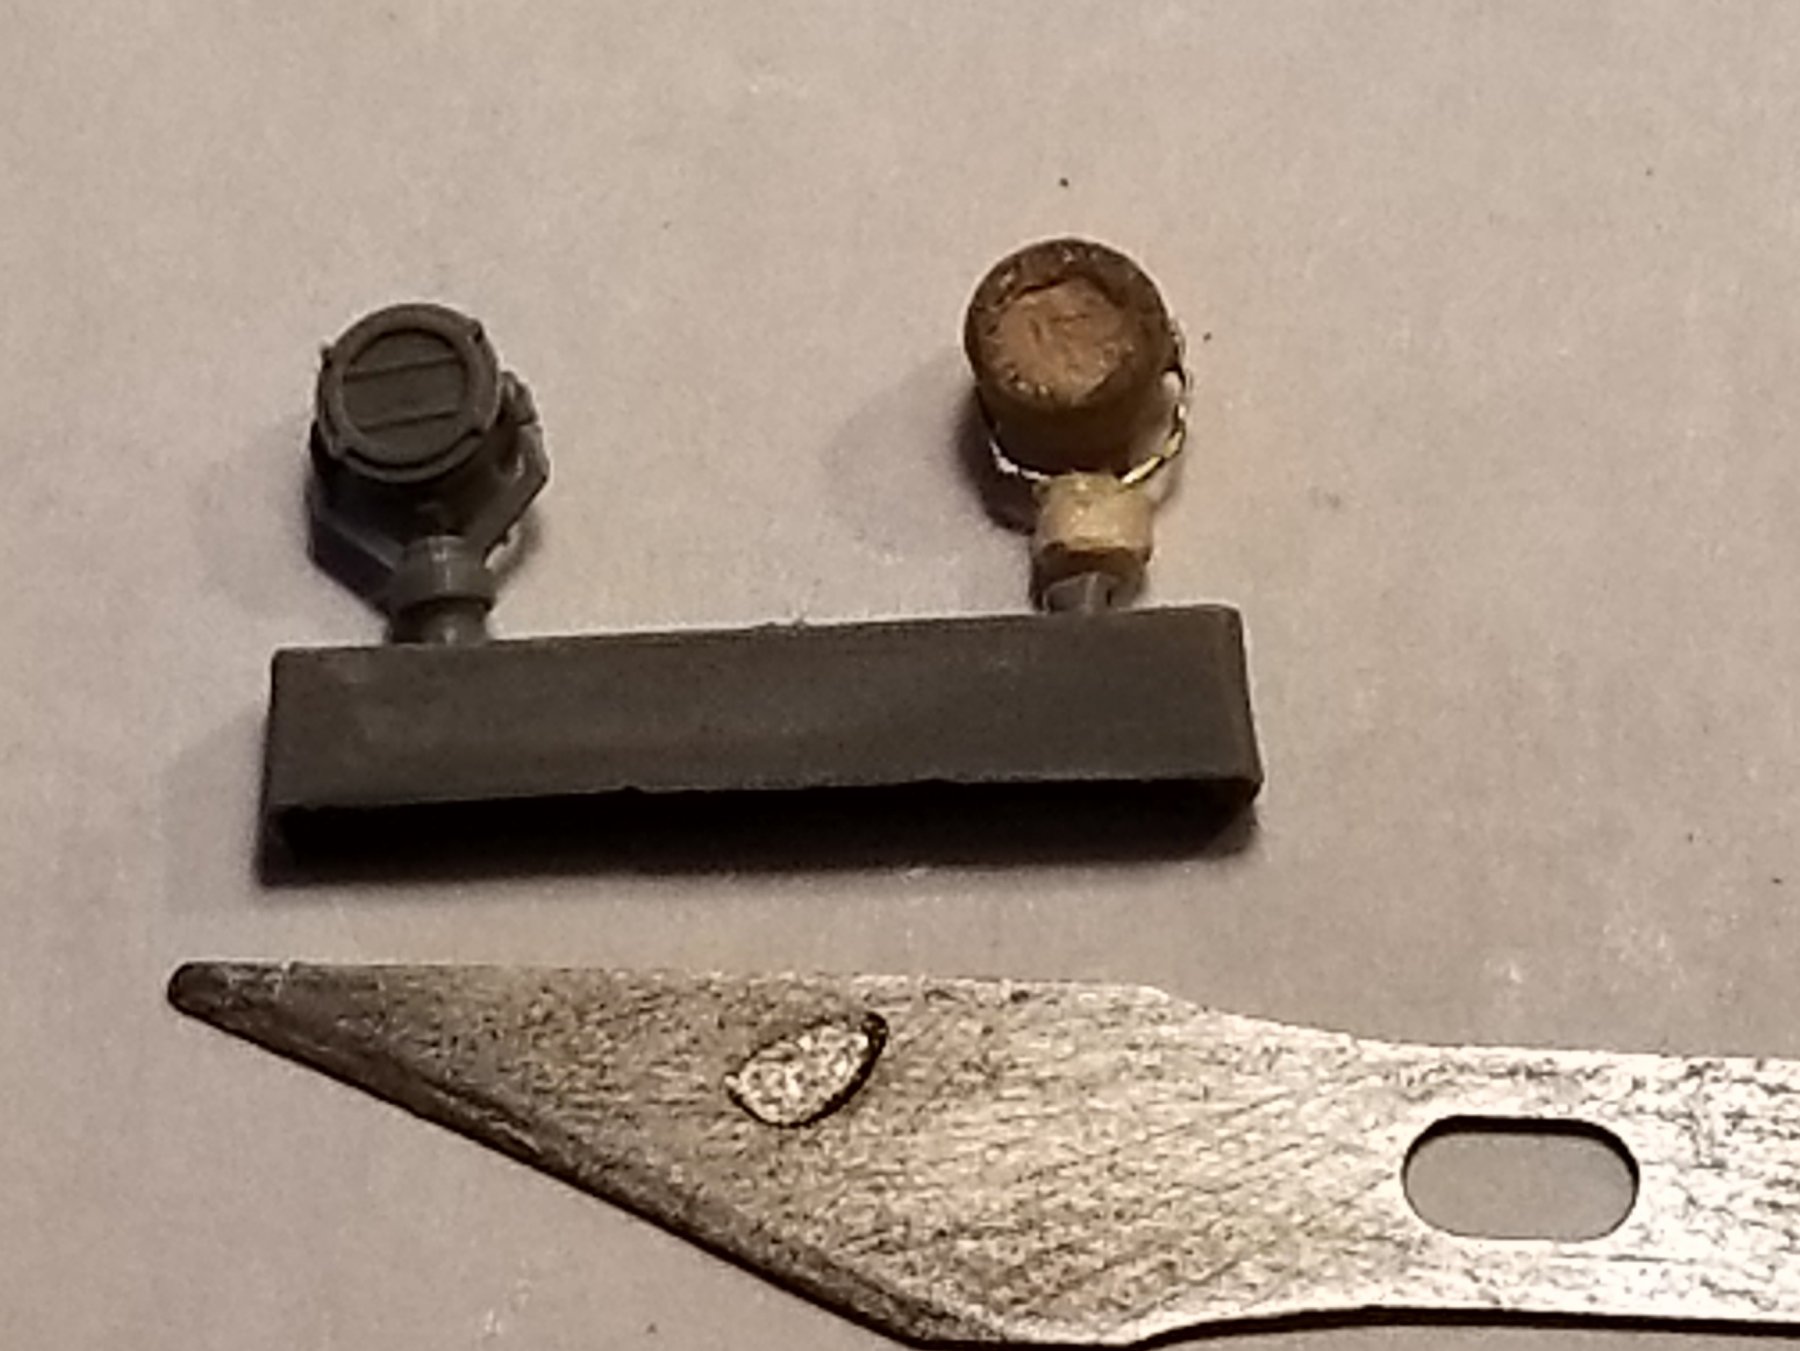
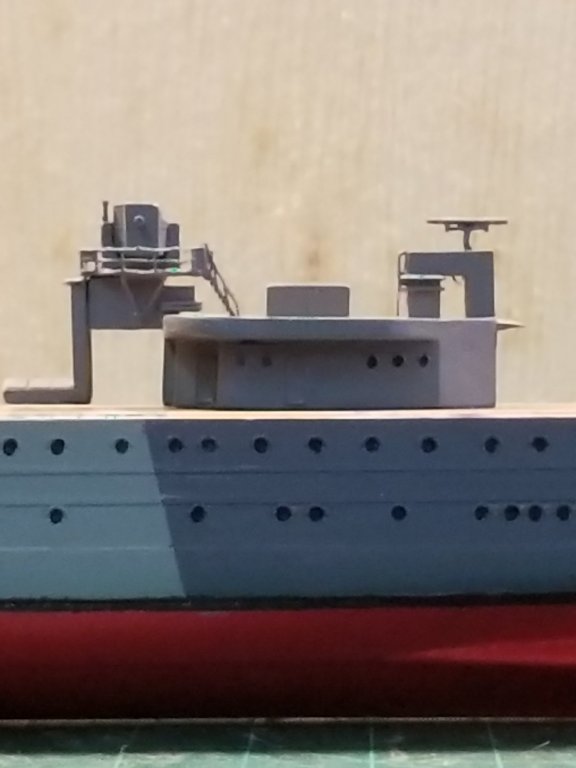
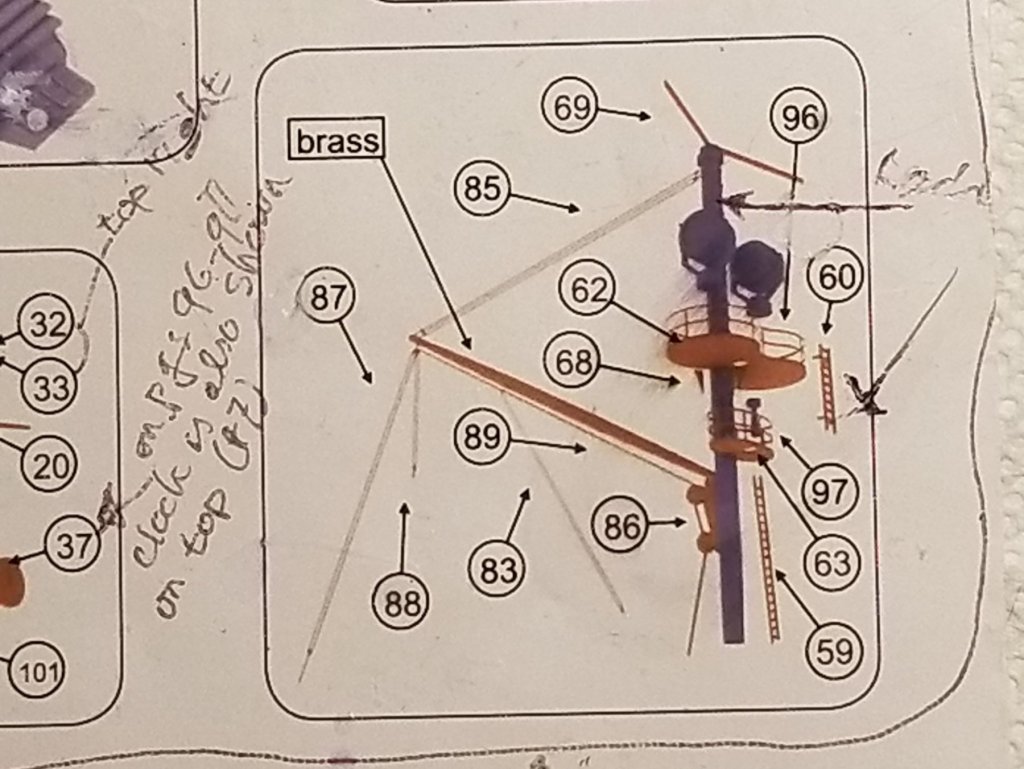
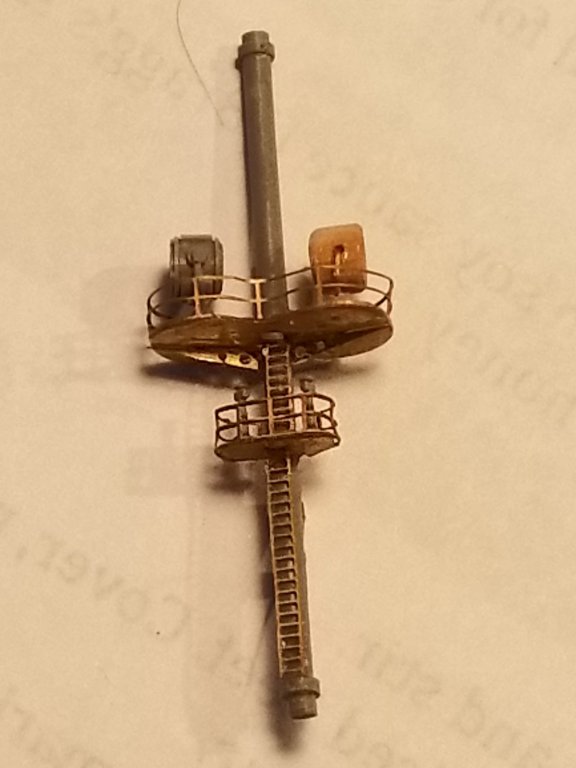
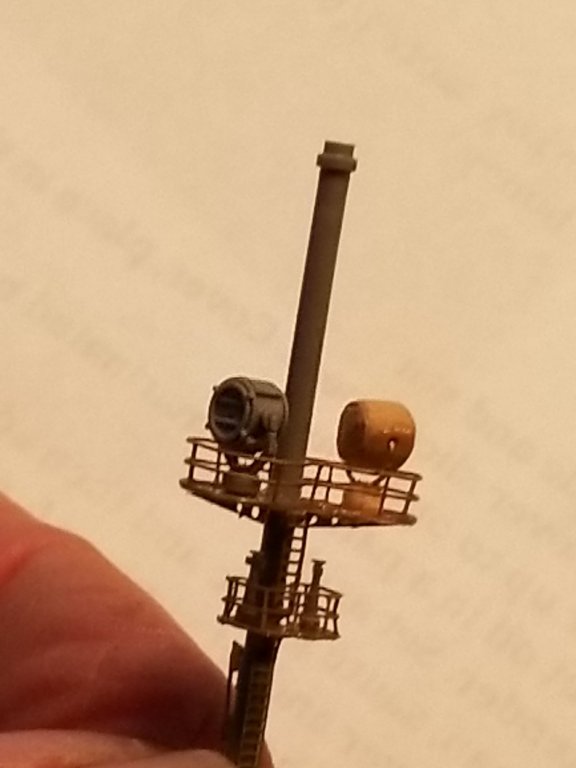
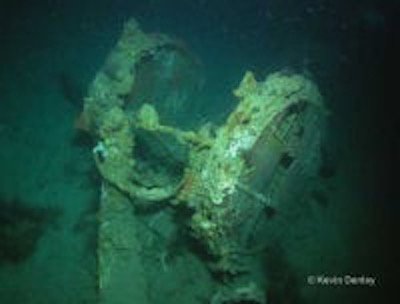
Thank you Denis and Jan for dropping in. Hey Jan, if you mean my Exacto #11 blade? That's for scale reference. I think all of us are familiar with that blade so you can gauge the size of the parts. Well, i hope of still finding that errant search light, it can still be used but I'm not holding my breath though. Thanks also to those who looked in and clicked the like button. Okay, this post is for Days 21 and 22, which brings us to December 19, 2018. The start of the aft mast. I removed most all of the indicated PE parts and drilled a hole in the deck for the mast. This way I can more securely cement the mast in place. I cemented the lower ladder first to the mast then the lower and smaller platform. After the cement was cured enough I cemented the ladder to the upper search light platform. Next was cementing the railing to the small lower platform. This was all I could do for day 21. On Day 22 I continued with the aft mast. I cemented the sear light platform to the mast and when the CA was cured enough I cemented the railing to it. According to my 1:50 scratch build drawings there is another ladder going up from the search light platform to the top of the mast. This is for the crew to get up for work on the antenna wire fixtures. but is not shown on the installation instructions. I found a spare ladder and cemented that also to the mast. I'll wait with the antenna attaching spreader on the top of mast till much later to prevent it from being damaged. I also cemented both search lights to the platform. This completes the aft mast and is now ready for paint. I'll install it when I'm ready for all the deck housings to be cemented to the hull. I also cemented the deck to the most forward deck house where the #2 15 cm gun will be placed. That reminds me to start thinking of painting the hull with camouflage colors and the deck with wood color. I am actually looking forward to this because that means I'm ready to cement all the deck structures to the hull. The instruction picture for the aft mast. I did cement #86 to mast but boom and rigging. The aft mast partially completed and her you can see my home build search light. Another shot of the mast with me holding it. This is a photo just before the six pom poms were replaced with the four Bofors, around 1937. This is a picture Kevin Denlay too on his second dive to the wreck. It's a search light, or what's left of it, laying on the sea bed. He says it's from the main mast. You can well imagine how big a blast that must have been to do damage that far forward. Cheers,
1925.thumb.jpg.3cb650919c9df7b2c40e033ebe5242c0.jpg)
- 378 replies
-
- 8
-
-
- java
- pacific crossroads
- (and 2 more)
-
Am enjoying your banter, keep it up - and your buoys look good. Cheers,
- 378 replies
-
- 4
-
-
- t78 norden
- billing boats
- (and 1 more)
-
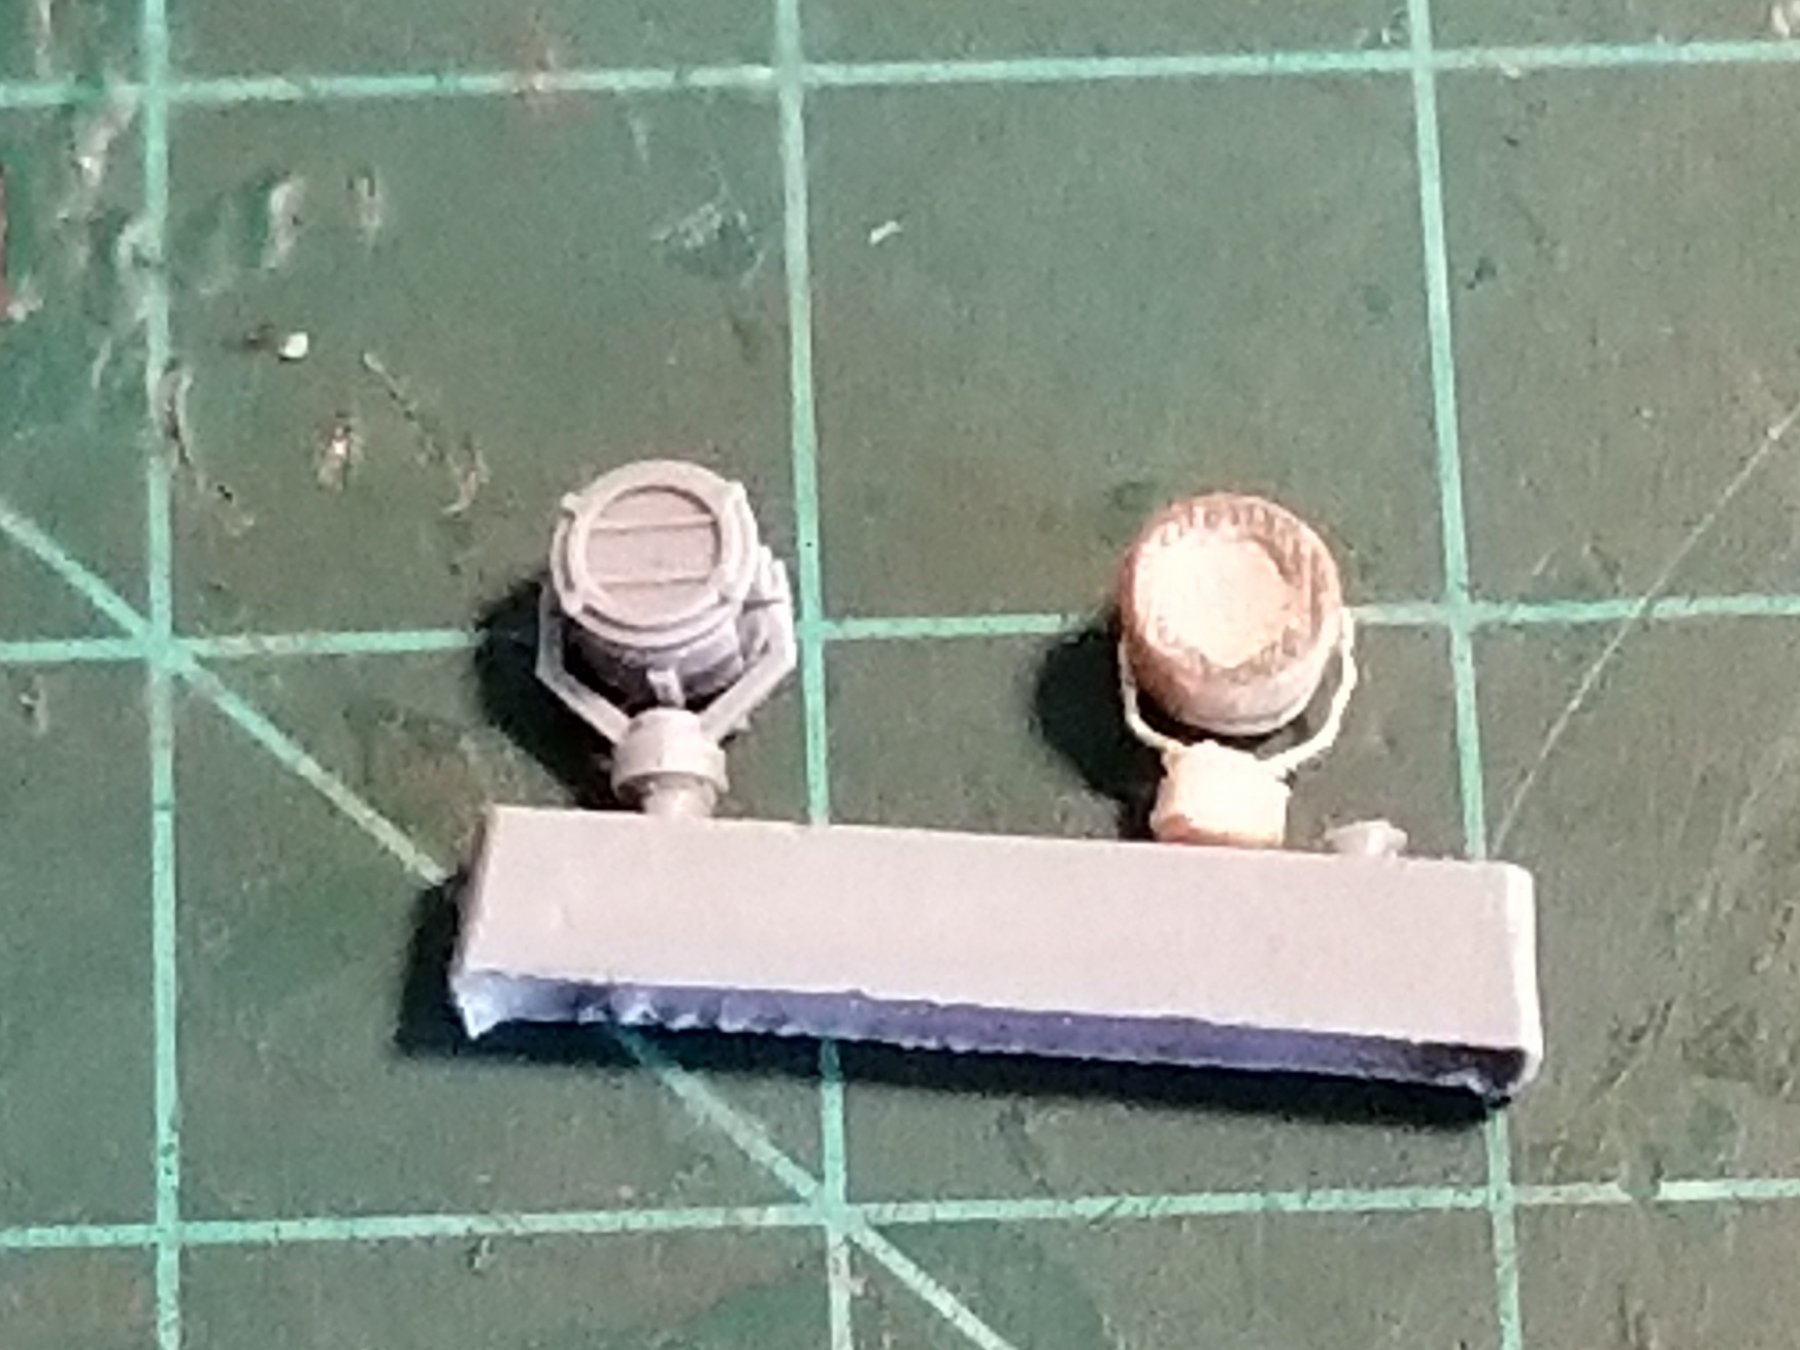
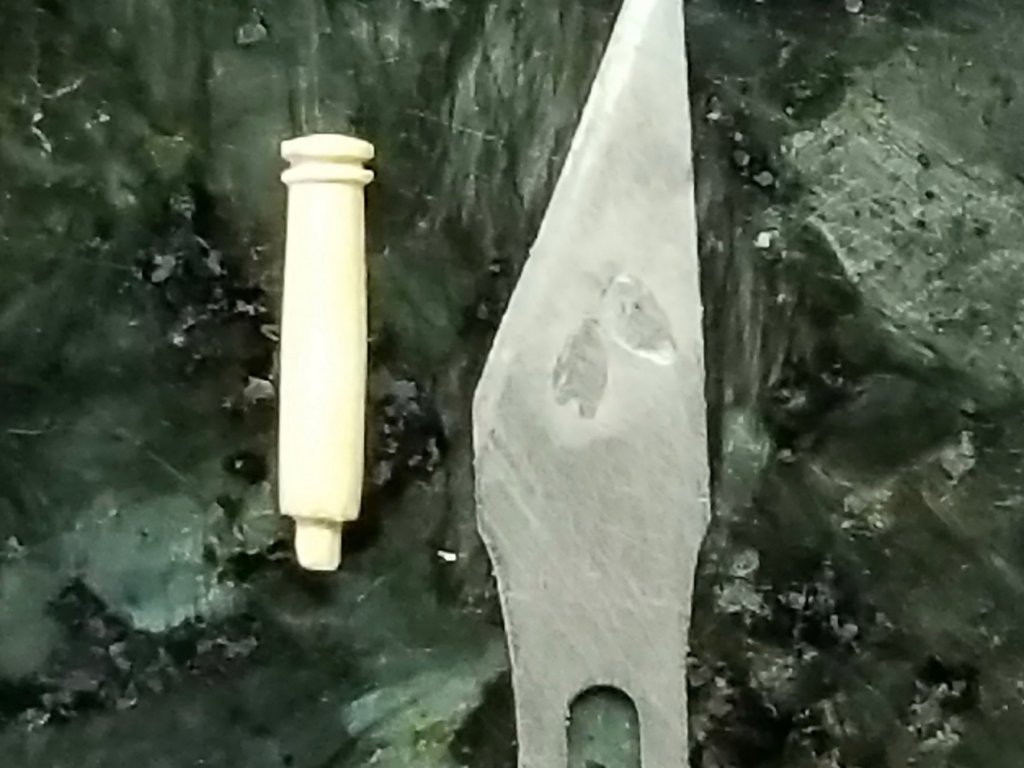
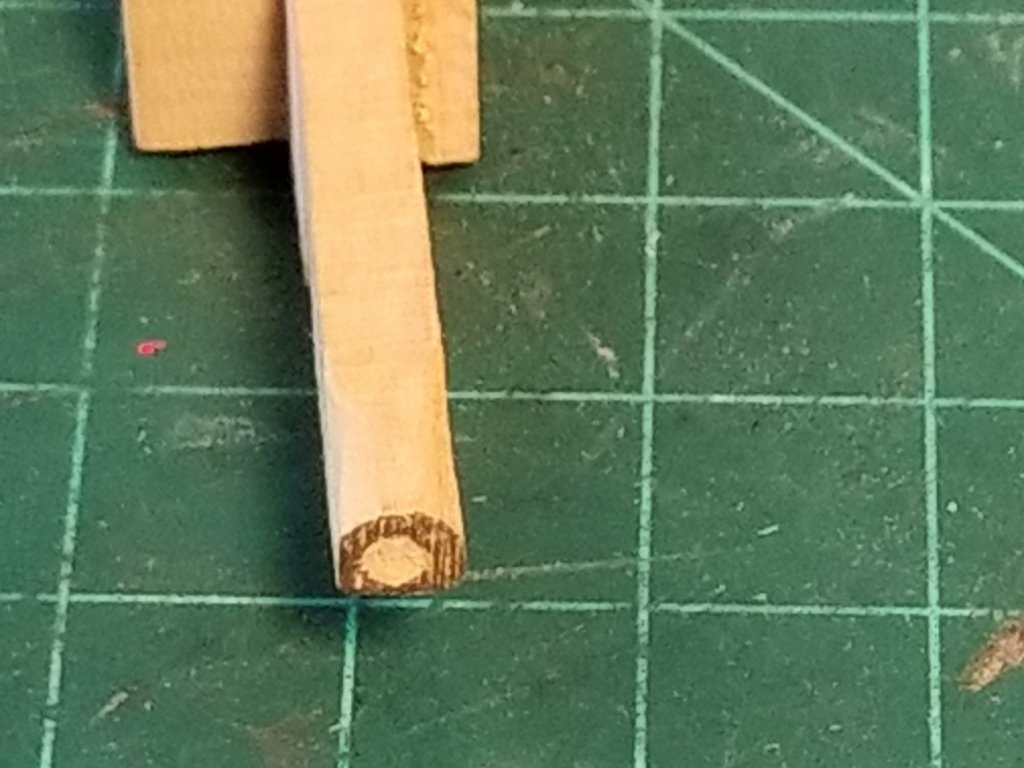
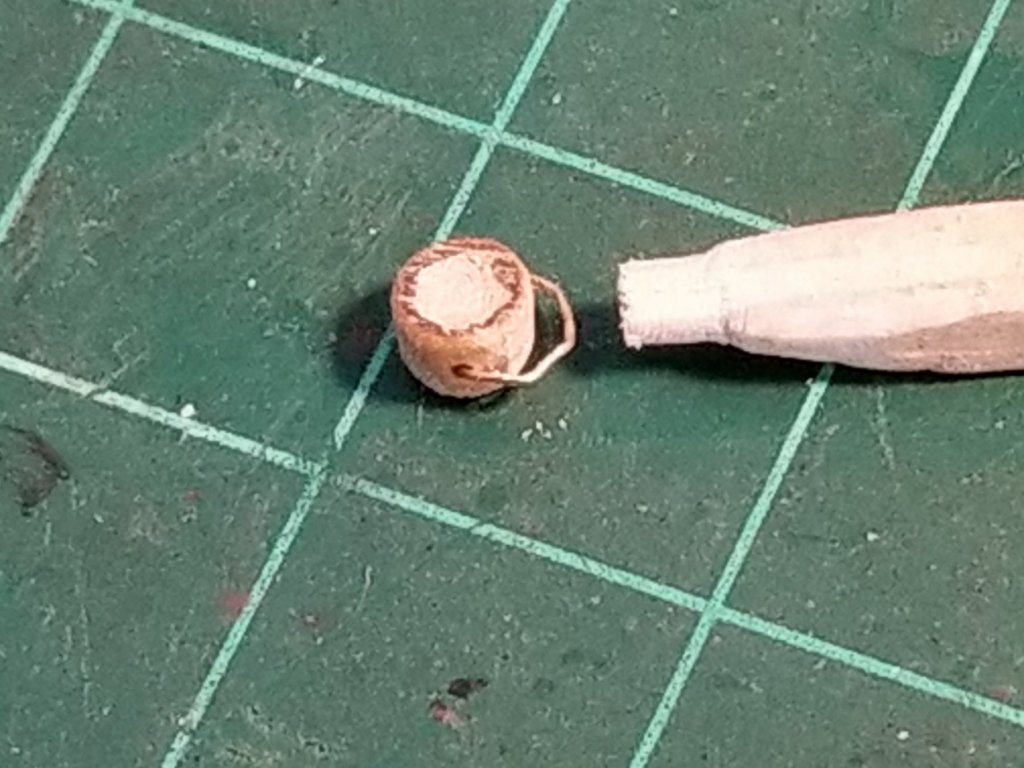
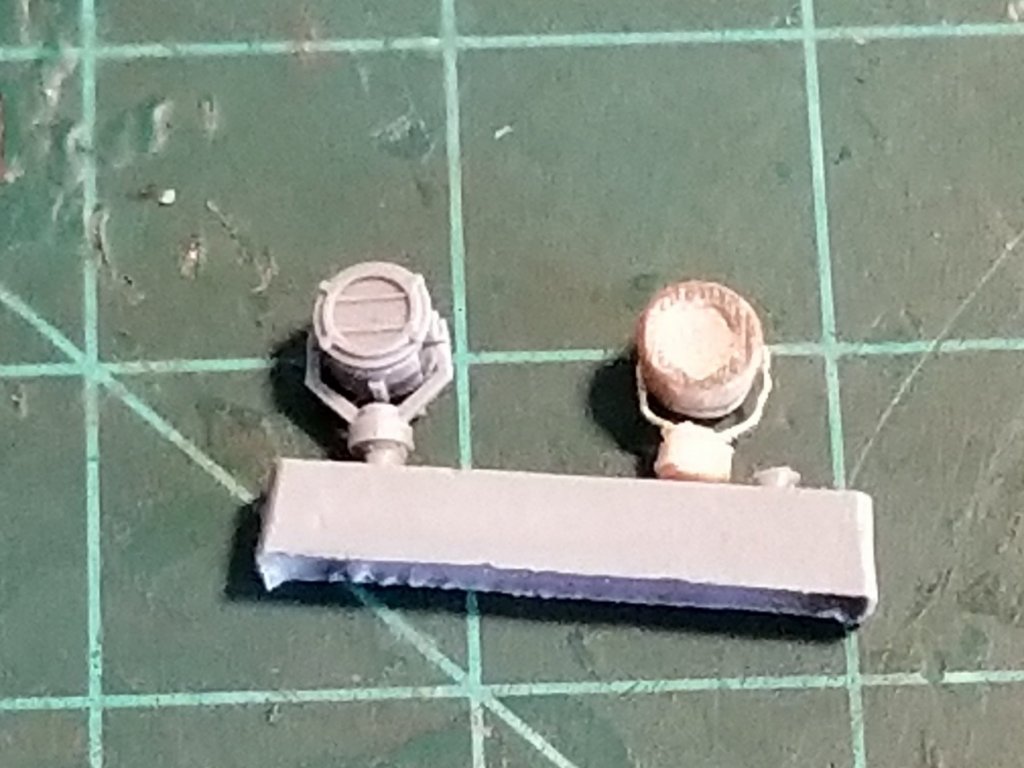
Thank you Denis and John for your kind remarks. Yes, John, there are many tiny parts to be cemented to this ship. The problem with me taking the pics in high magnification makes the work look a but messy. However, when seen at normal viewing distance with the paint on them they look rather acceptable to me. This post id for Day 20, December 12, 2017. In removing one of the search lights the pivot braces broke away from the light body. Now that I am ready for the aft mast, that has two of these buggers on it, I needed to see If I can use some fine brass wire for it but I can't find the part anywhere. Very odd because i have saved almost all the junk the actual parts were attached to for the mold process. So, I had to resort to scratch build a 1:350 scale search light. They are 4.5 mm in diameter and 3 mm wide. I scrounged a piece of hardwood dowel and hand sanded it close to size. With a small dentist bur in my small pencil type drill motor I "routed" the inset matching the kit part. Dressed that end with some fine sand paper. Next was to cut it off the dowel at 3 mm. I used my antique scroll saw with 80 teeth per inch. Again dressing that side with fine sand paper. Now came the forming of the brace from brass wire and the base. I bend the ends to 90 degrees so I can insert them into the sides of the search light so it can swivel. The base was also made from a piece of wood. I glued the assembly to the base with two part epoxy and let cure before I could dress the base down to match the kit part. I obviously painted it immediately and asked Gwen if she could tell which one was from the kit and which on is the home build one. I cheated though because I held the parts at arm length. Only after some coaching she found it. In any case, I am happy with the search light and can continue with the aft mast. I little paint and from regular viewing distance it'll be hard to tell the difference, if you don't know what to look for That was about all I could do this day. The kit search light, 4.5 mm diameter. The dowel left in a slightly larger diameter to give me enough material to route the center with out the edges breaking off. The final diameter was achieved after the center was routed out. The dentist bur having done its job. The proto search light has been made to 4.5 mm diameter, the attaching brace holes drilled and the new part is ready for detaching from the dowel. I first used the #11 blade to carefully whittle away most of the wood before using the scroll saw. The attaching brace is made and installed. Well, not quite the same but it'll have to do. I used a piece of box wood to make the base. The search light is now cemented to the roughed out base with two part epoxy, ready be dressed down. The new search light is ready for paint. Cheers,


- 378 replies
-
- 6
-
-
- java
- pacific crossroads
- (and 2 more)

.jpg.e64cb7242e1c4e86c1bbcd38e11ff929.jpg)
.jpg.68d85289750313031724f17773e7940e.jpg)


1925.jpg.0fd539b27758c777b13d9f9a80d07bd9.jpg)