HOLIDAY DONATION DRIVE - SUPPORT MSW - DO YOUR PART TO KEEP THIS GREAT FORUM GOING! (Only 13 donations so far - C'mon guys!)
×


Piet
-
Posts
3,568 -
Joined
-
Last visited
Content Type
Profiles
Forums
Gallery
Events
Everything posted by Piet
-
 Beautifully done Sherry. You know the routine, if you are not happy - do something about it. From Florida everything looks just fine. Cheers,
 -
Nicely done Popeye, the bolts in the pintels and gudgeons are a nice touch. Cheers,
-
Yeah, I looked at that one with a foot switch but had to hold off for the time being - - budget you know I do have two "snake" attachments though that'll work fine to. The biggest problem at present is drilling the rope holes true vertical, which is a challenge doing by hand. I have been drilling from both ends and most of the time I win Even with that marvelous tool Carl I still face the same problem of drilling true vertical holes. Thanks for trying to help me out, appreciate the thought. I even checked the Dremmel drill press attachment and see if my old hand tools (Dremmel size) will work. yeah perhaps with some retooling but - - - - - So, I'll wait till my little Proxxon comes back then I can place it in the Proxxon mini drill press, no more guessing. Cheers,
-
That's why we are family Dave! Be good my friend. Cheers,
- 962 replies
-
- 5
-

-
- sovereign of the seas
- ship of the line
- (and 1 more)
-
Thanks again everyone for your very nice comments, that'll urge me to continue and hopefully improve. Thanks also so all who clicked the like button. I had to make a decision this morning to start making the blocks for real but now in boxwood. I also came to the conclusion that the rope holes are too far apart. This makes the block too wide for scale, especially the double sheaf blocks. I am also putting this project on hold for a week or so because I had to ship my Proxxon hand drill tool out for repairs. I need this tool in its mini drill press stand to be able to drill the rope holes square through the little buggers. This tool started to scream at me when running and the spindle felt like the bearings had flat spots on them. Sometimes it even refused to run at all. This is two out of two of my Proxxon tools I have, the only two. Not a good track record. I have two similar hand tools but a little larger, that are over 50 years old and still running great. I really like the size of this small Proxxon tool, fits real nice in my hand but if it doesn't last at least for the rest of my life, and using it only on wood and brass, then I need to look for something that'll do that. Well, right now I'm not a happy camper. In any case, I'll be shifting to the gunport lid hinges and see what I can do with them. Oh yeah, silver solder the hinge pin tubes on and making the "pintel" thingies. Still plenty to do, I wint be bored. Cheers,
-
Mighty fine looking whaleboat John. They'll look great on the Morgan. Cheers,
- 2,250 replies
-
- 2
-
-
- model shipways
- Charles W Morgan
- (and 1 more)
-
Thanks everybody for the likes. Yes Carl, that's all I'm using with the aid of my ancient jeweler's scroll saw in some places. With a miniature milling machine I could set up a jig to mass-produce these pulley blocks but alas, I can't afford to spend the mega bucks for any of those fancy machines. Right now I'm challenging myself to see if I can make these small things but am seriously thinking of buying the small ones that are used in large quantities on the model. We'll see. Thanks for the compliment my friend, I try. Cheers,
-
So good to see you on the mend Dave, just take it slow and enjoy. The redo's are a part of what we do, we do and then redo and perhaps redo again. Cheers,
- 962 replies
-
- 8
-
-
- sovereign of the seas
- ship of the line
- (and 1 more)
-
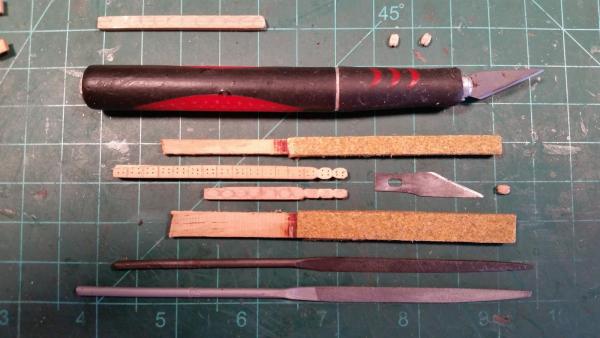
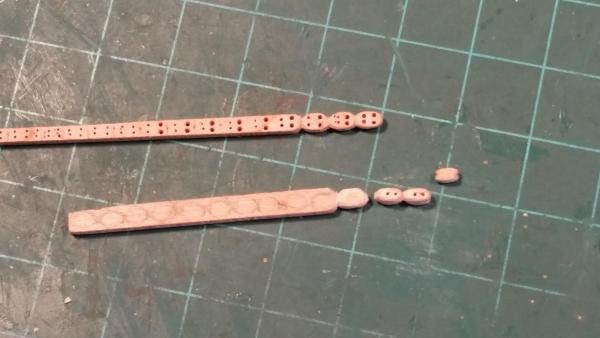
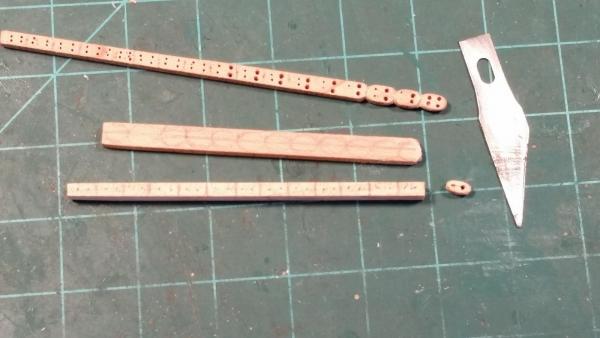
Thank you George, Popeye and Carl for your comments also my thanks to all who clicked the like button. Yeah George, at this pont in the build with the cannons and later the rigging in full view, I think that these little items will stand out like a sore thumb when not done right, at least as close as I can get it. One can always see that they are hand made but that should not be taken as a demerit Thanks for the link about making pulley blocks Carl, - very nice work indeed. I can only wish having those tools in my shop. I was eyeing that crappy pulley block this morning and couldn't resist the temptation in pinning that oversize hole shut. I'll see tomorrow how it'll turn out. Who knows, I may just resurrect it - - IF it looks half way acceptable. Okay, not much being able to do today, just a few hours. I semi finished three single sheaf pulley blocks but they still need some final sanding with 400 grit paper. I'll wait till all 64 pulley blocks are done - I can then do 'm all at the same time. I think I'll dye them a light brown like maple. After three of the single sheaf pulley blocks are done I started with making the double sheaf blocks. So far so good. As it turned out they are only about 1 mm wider then the single sheaf blocks, which makes me rather pleased. I don't like big, clunky pulley blocks that are out of scale. Sorry to bother you all with the pulley block saga but it's also for my own archive, so please bear with me on this. To speed things up I'll be cutting strips of boxwood close to the measurements for each type. Then mark each one off slightly longer then needed. This way i can whittle away whatever doesn't look like a pulley block Pre-drilling the holes is also a must before carving, filing and sanding. No doubt that this is a very labor intensive project. I made two pictures, again for my own archive and remembrance for later days This is a close-up of the work done today. The three semi completed blocks are on top right. I have turned one over to show the rope holes. Looking at them here it looks like I can make them even smaller. Probably not. The two double sheaf blocks were done in 1/2 hour. But yes, they are not even half way done but I'll be working down the strip first to rough 'm out before actually modeling them. I found it's easier that way because I have something to hold on to. Just for the halibut I laid out the tools I have been using except for the drill bits, calipers and pencil. The sanding sticks are for rough work in removing a lot of unwanted wood in a short time. I have some 320 and 400 grit sanding sticks being glued up as we speak. Cheers,
-
Pirate Ship by JesseLee - FINISHED - BOTTLE
Piet replied to JesseLee's topic in - Build logs for subjects built 1501 - 1750
The sails and the flag really pulls things together JesseLee, well done! Cheers,- 71 replies
-
- 6
-
-
- pirate ship
- bottle
- (and 1 more)
-
Thanks Patrick and jesseLee for your kind words and to all who clicked the like button also a heartfelt thanks. Patrick, you'd agree with me that it's a piece of crap when you hold it in your hand. I fiddled a little more with it this morning but it's a waste of time. I started on a few more as a trial and they are looking a little better so I'm on the right track. I think that with the boxwood and the experience gained with these few I should be able to produce some passable blocks. JesseLee - I didn't come with this method so can't take credit for it. I found this particular method about 3 years ago. It would be a lot easier if you just make the squarish looking blocks like those sold on Model Expo or elsewhere on the net. Obviously we could buy some real nice looking blocks from our own Webmaster Chuck or the European supplier Nenad got his deadeyes from but I am looking at the cost. Nevertheless, it would be a real challenge to make these blocks yourself, it's just time. After you get the hang of it it should go rather fast. I couldn't spend much time in the shipyard today. I had to get some "stuff" for my lawn to fight a fungus in the grass and apply it. I am getting a few brown spots and they are most likely a fungus due to an unusual wet summer here. I started with another few pulley blocs to see if I could improve on them and come close enough to scale. I think I'm on the right track now and with a few more under my belt I'll try one or two with boxwood. As I mentioned to Patrick the one I already made is a reject. I worked some more on it and could even glue a dowel in the large hole and re-drill it but it'll still look crappy - to me. I'll wind up with the single blocks a smidgin over scale by a few hundred's of a mm. So they'll be 4 mm long, 3 mm wide and 2 mm thick for the single pulley blocks. The double sheaf blocks will be same measurements except for thickness to account for the extra pulley sheaf. The rope holes will be a tad over 0.2 mm, which should make them look more to scale. My aim with all this is to make them look like real pulley blocks instead of just a chunk of wood with a hole in it. Perhaps crazy to do so when there are hundreds of them to make in different sizes. So, who knows - - I may just wind up buying the real small ones - - - piecemeal - - - one mast worth at a time??? So, for now I'll rip a few strips of boxwood on my bandsaw and make a few trial blocks. The single on to the right is my first effort laying on it's side (to hide the ugly holes) . Below that one are three i am currently working on. They are a slight improvement and could wind up being useable. I'll make a sanding stick for the final sanding and finishing. I might even try a small power tool with a diamond bur, who knows - it may make it go faster then doing everything with a #11 blade and a few small files. The two sheaf strip will be in the scrap heap. There is no way I can make a decent looking block from them. You have to see it to believe it. I have already prepped a new strip of wood to try making a few. Cheers,
-
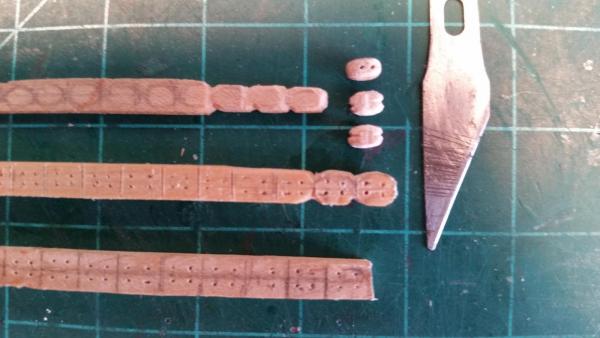
Thanks everyone for your like votes. For a little variety I started with a few trial pulleys instead of the brass hardware. Yeah, i still need to make about 32 or more eye-hooks from 0.3 mm brass wire but just needed a change. I used a few strips of leftover deck planking to fashion a pulley or two. The scale measurements for the single sheaf pulleys are 2.8 mm long, 1.8 mm wide or thick, the rope holes 0.23 mm. This'll be a real test in miniature carving After about 5 hours of work in the garage I managed to get one single pulley done and few others started. The finished pulley is still too large for my scale but after I cut it off the strip it was difficult handling it. No, I'm not happy at all with the result but hey - it's the first one. The rope hole is too large so I'll try the 0.2 mm drill bit and see if the scale rope will go through it. The next one will be better and the third one should be a winner - - keeping fingers crossed When I get the hang of it I'll make the 32 single and 32 double sheaf pulleys from boxwood. Here is a picture of my trial work. The center strip is boxwood and have roughly penciled in the shape of the pulley. For the double sheaf pulley I'll try one at the other end of the top strip and use a 0.2 mm drill bit. Cheers,
-
Thanks everyone for your comments and likes. Comments and suggestions are always welcome and appreciated. I think I have a plan for the soldering process and will show it when I'm all set up for it. It won't be a "lazy susan" kind of fixture though, although that sounds intriguing. Thanks Hans for your accolades. Yes, I know you love these types of ships and so do i. Your comment on the paint is right on. I had already in mind changing it to a more fitting green from that era. I have learned a few things since I put this model aside in favor of finishing the O19 model. I'm now 2 1/2 years further from the point I stopped. What I learned is that most of the exterior green was "Spaans groen" (Spanish green). I have no clue how that looks like but I'll come up with a nice mix or ready-made color. I have plenty of Grumbacher oil paints and will try to match the old green color. Somewhere I have do have a print-ou tof the color that was prevalent in the mid to late 17th century. The final paint type will most likely be in acrylic polymer because that's what's on there now. No, we didn't have the time to visit the Batavia Werf and several other things I was looking forward to like Enkhuizen, Hoorn and Durgerdam. Well, today I spend more time in making hardware and drilling holes to cement the hardware in. I'll use the slow curing two part epoxy cement for this. That way I can mix a batch without it timing out on me. I'm also getting prepped on making the single and double sheave pulleys. No, I'm not going to buy them, maybe later when I have to make a gezillion of them for the running rigging. Cheers,
-
Coming along real nicely John. They'll look great on the ship. Cheers, and say hi to Diane,
- 2,250 replies
-
- 3
-
-
- model shipways
- Charles W Morgan
- (and 1 more)
-
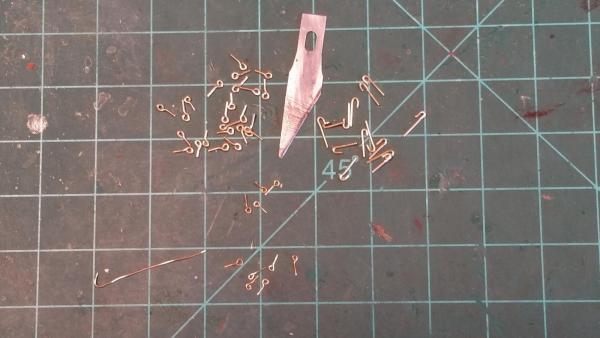
Hello everyone and thank yo all for hitten the like button. Lawrence and Carl thank you for your kind comments. Talking about the guns and the tedious rigging, I have made all the necessary eye bolts and hooks for the tackle. Next will be the pulleys, both single and double sheaved with their associated hardware. I also finalized the gunport lid hinge gudgeons, sans the hinge pin tubes, that's be my next project. I'm thinking about an assembly line method so I can solder all of them at once. It's slow going, it all takes a lot of time to make 24 eye bolts and 16 hook bolts from 0.5 mm brass rod. Then I started with making 32 small eye bolts for the gun carriages from 0.3 mm brass rod. Granted they are not all perfect but will do for me - - - they'll look great from 10,000 feet Actually, I plan to dress them down a little with a file to improve the shape a little. This shows the eye bolts, hooks and lighter eye bolts. The larger eye bolts will go into the deck to haul the guns back for cleaning and reloading. Two will go into the bulwarks for each gun hauling the guns into firing position and the hooks will also go into the bulwarks to hook the thick retainer rope. The small eyebolts will go into the gun carriages, two on the rear end and two on the sides. The restrainer rope will go through the sides of the carriages. These are the semi completed lid "gudgeons." There is still some finishing to do and cutting them to size. Then the job of soldering the 0.5 mm brass tubes to the ends. Cheers,

-
HelloPaul, so good to see you back and congrats with your son. Cheers,
-
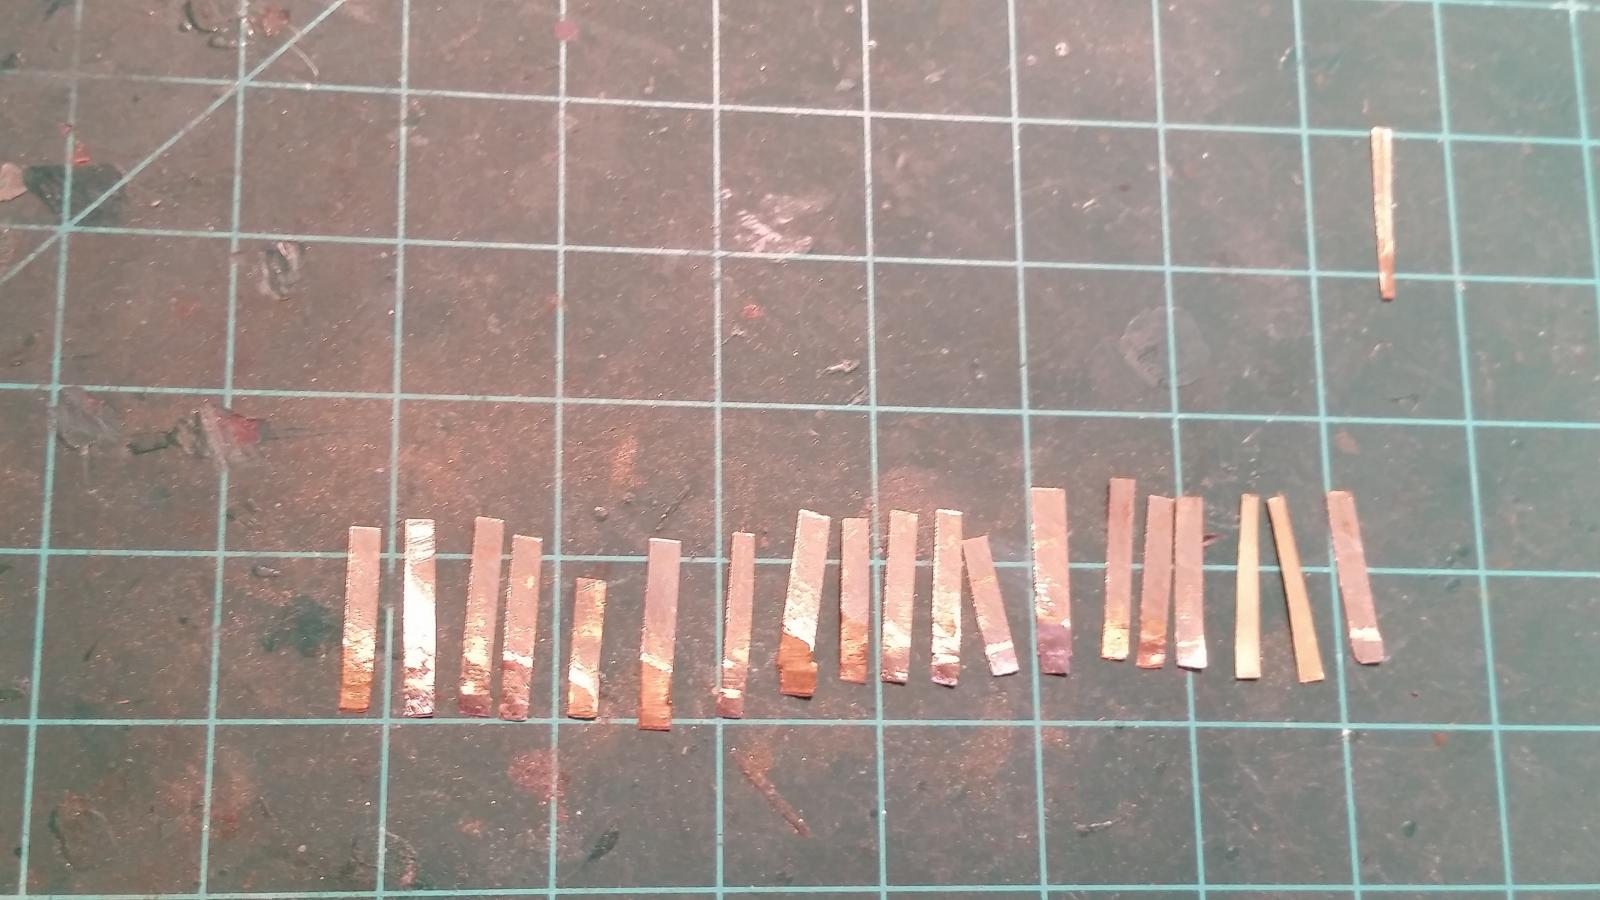
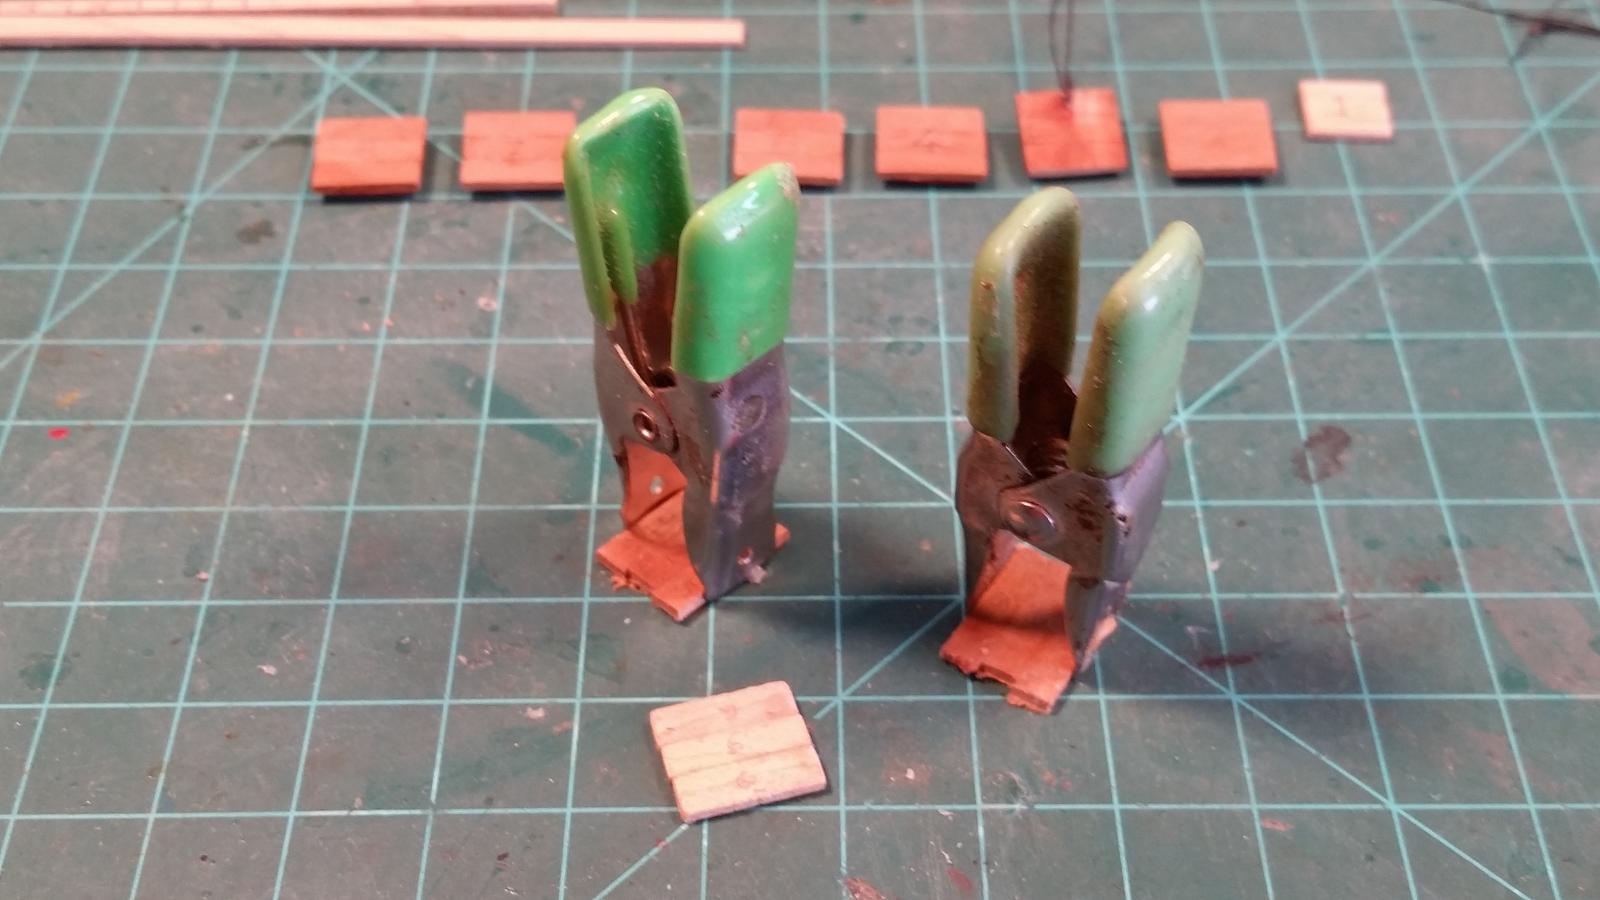
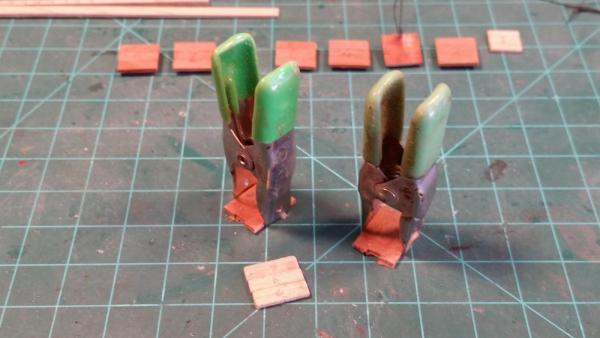
Thanks everyone for your comments and all the likes, it's much appreciated! I probably could have gotten away with leaving the guns as is but it would have been rather obvious that there wouldn't be enough room for cleaning and loading them. The recoil would also cause them to run into the grating structure when fired. Redoing some of the previous work is not a big deal right now because of my rather long absence to the ship. It's kinda like a new project and am loving it. Okay, I have a very minor update. I made 3 new gunport lids so that I have a total of 10. 8 for the starboard gun deck and two for the stern chasers. This ship is equipped with 18 pounders on the gun deck and 12 pounders on the orlop. That's why I bought so many of the larger size guns. I also started with recycling the lid hardware. I pre-made enough in a rough state and are fortunately long and wide enough to do so without running into a soldering problem with silver solder. I'll be using the opposite end for the silver. Yeah, I soft soldered the first batch but it'll work out just fine this way. Well, that's about it for today. Tomorrow I'll continue with the gunport lids and the hinge hardware. I think that I'll be switching back and forth between the gun hardware and gun ports. This shows two of the three lids being glued up. I was fortunate in that I still had two of the hul planks left over and gut three pieces to the same width as the port opening. The light colored piece is for the inside of the lid. This shows the raw hinge hardware with the original 1 mm tubes removed. The one lonely pice on top right is the first hinge bracket cut to size. I used a standard pair of shears to cut the thin brass sheet. The wide end is 1.7 mm and still long enough to be trimmed to the correct length. This also means that I now have to make hinge tube also 1.7 mm or to fit the width. I'll be using 0.5 mm brass tubing for the hinges and 0.3 mm brass rod for the pins. Cheers,

-
Nice progress John. Glad that you can take some time on your build while traveling, it's double the fun Cheers,
- 2,250 replies
-
- 3
-
-
- model shipways
- Charles W Morgan
- (and 1 more)