HOLIDAY DONATION DRIVE - SUPPORT MSW - DO YOUR PART TO KEEP THIS GREAT FORUM GOING!
×


Piet
-
Posts
3,568 -
Joined
-
Last visited
Content Type
Profiles
Forums
Gallery
Events
Everything posted by Piet
-
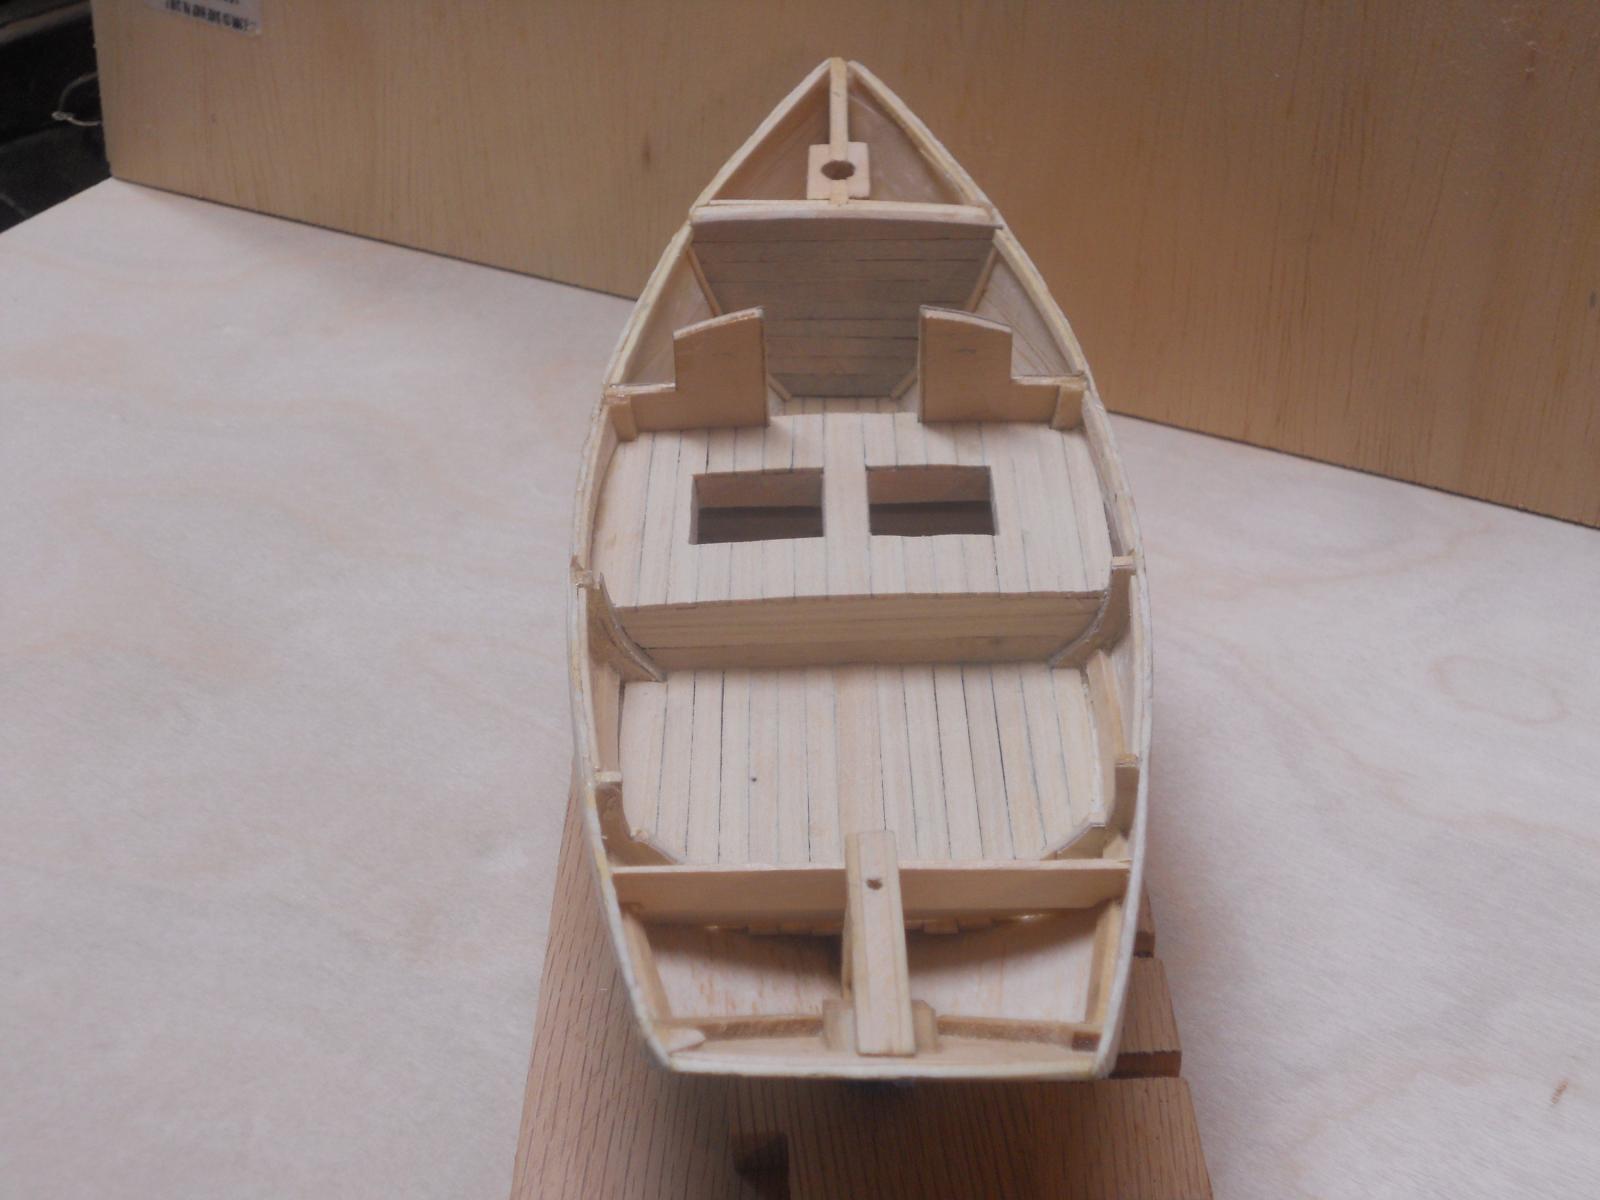
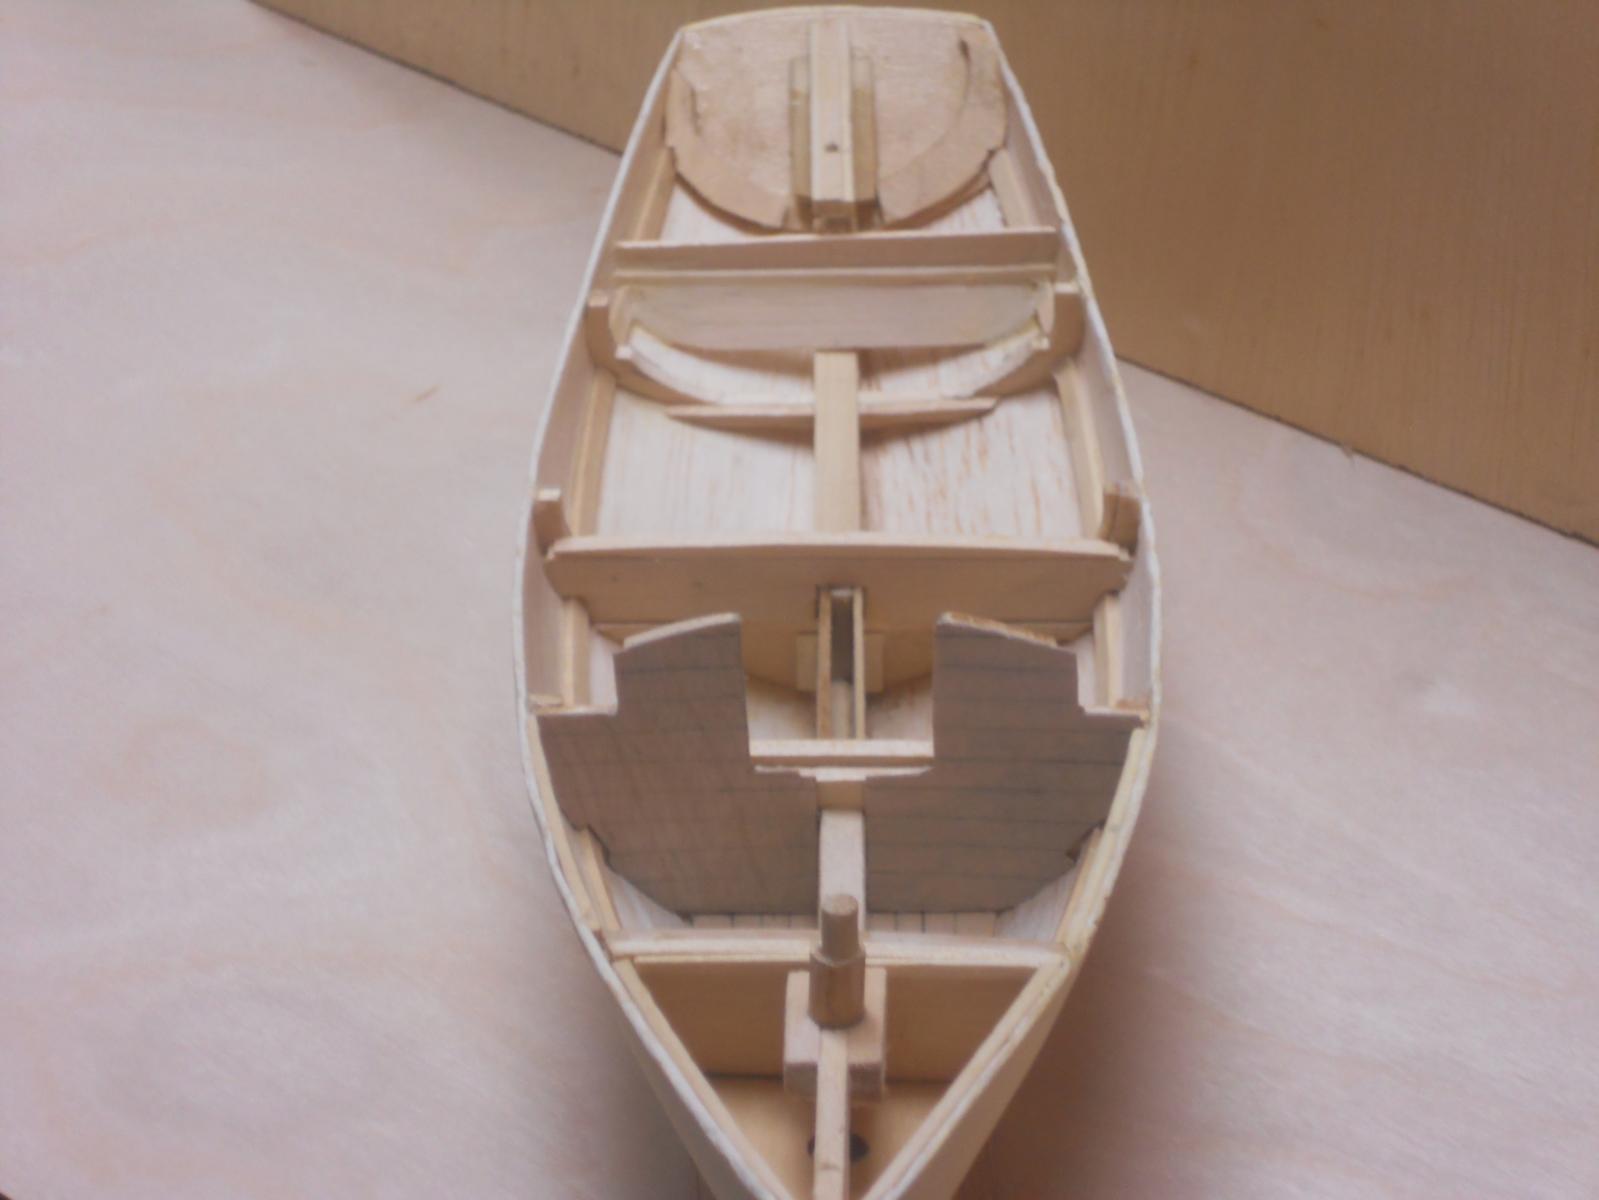
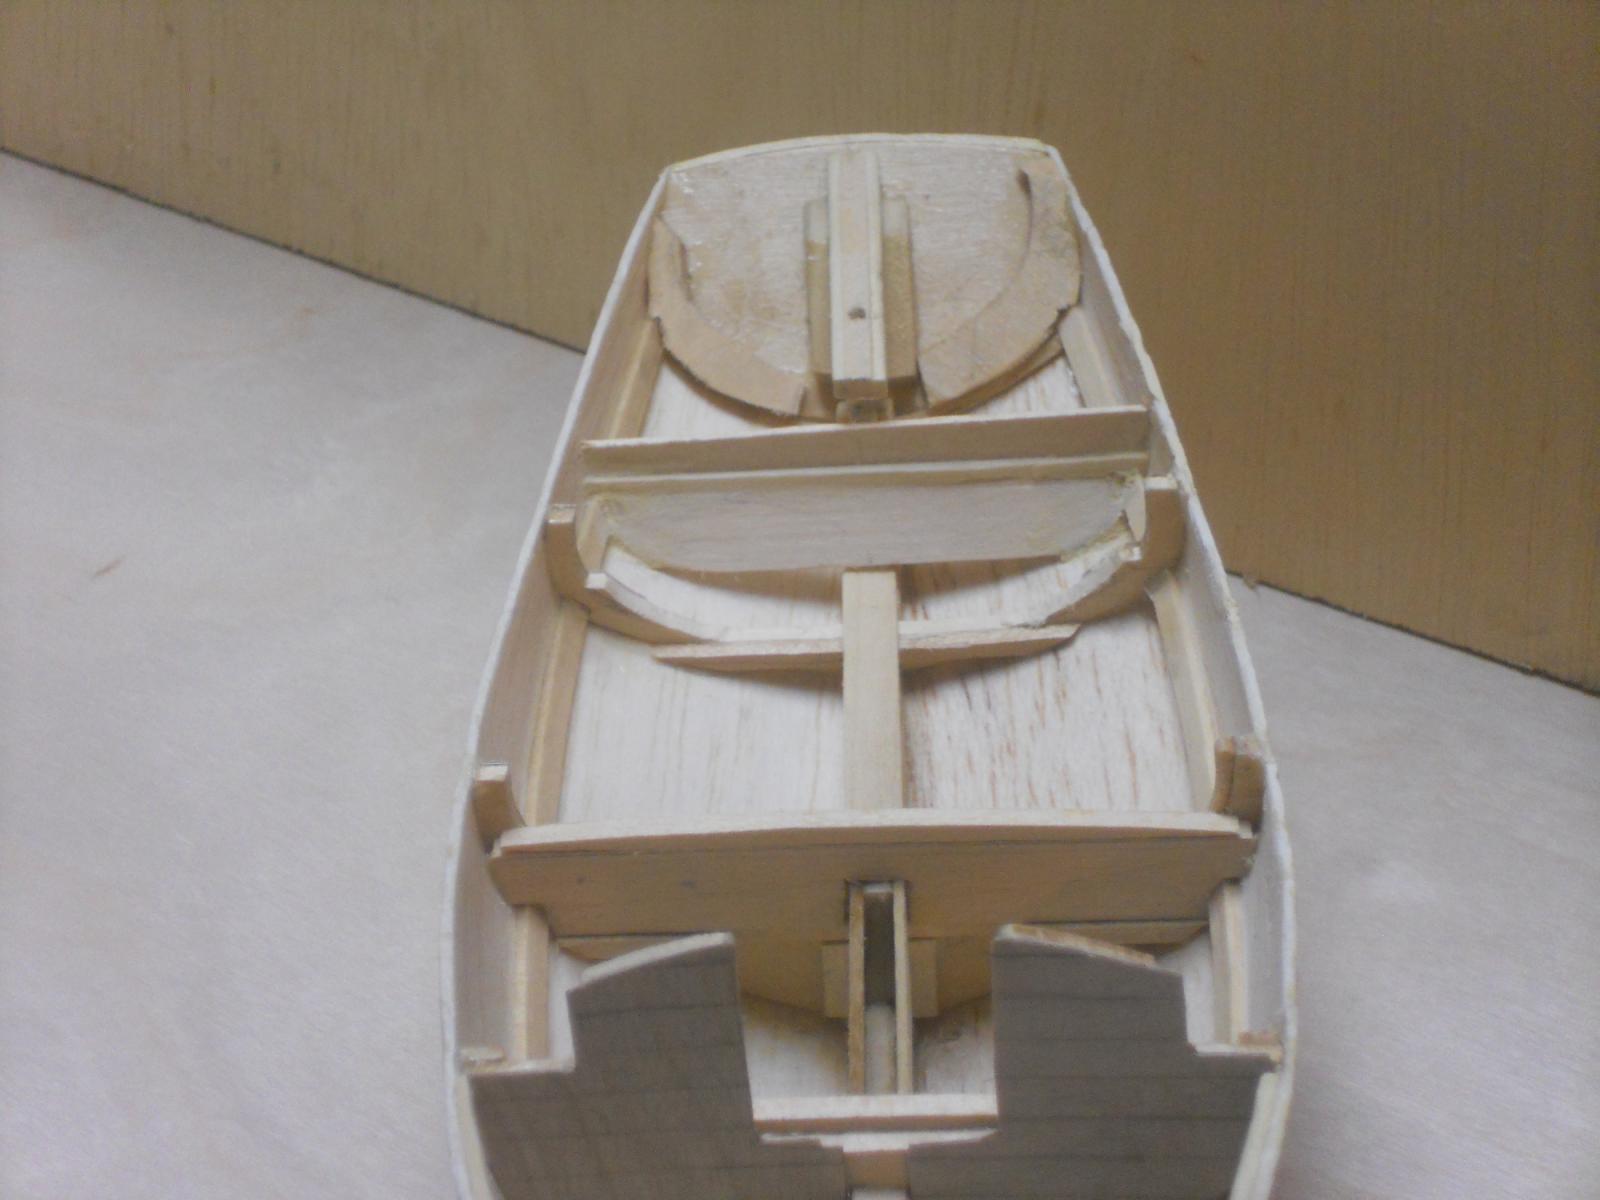
 Thanks everyone for dropping in and clicking the like button. Well, I decided to make the additional "false" frames in the cockpit / work area and at the fish bin. I figured it enhances the look somewhat and will give the deck some more points to glue to. I also installed the framing for the fish bin hatches. Everything is still in the rough and awaits dressing-up. Here are the pics of today's activities. Cheers,
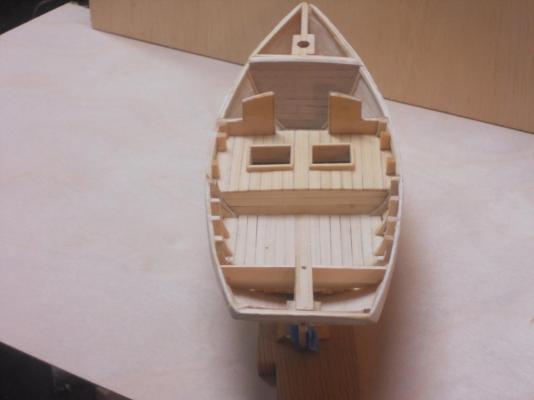
- 176 replies
-
- 11
-

-
- muscongus bay lobster smack
- Midwest Products
- (and 1 more)
-
Thanks everyone for visiting and your like votes. Hello Russ and thank you for your kind words, appreciate it. I'm not in the least thrilled with the balsa side planking and have caused some damage to the top sides in handling. But I guess that's the price i am paying for batching it to this extend. If the boat is build according to the build guidance this won't happen though because the deck'll be on first. Okay, I managed to complete the planking of the cockpit / work area and the fish bin deck. I also made and installed planking to the fish bin aft bulkhead. Next job? that'll be a toss-up right now. I think I need to make a few false ribs for the cockpit / work area to strengthen the side planking. I did glue a strip of heavy paper to the outside at the sheer. I was even contemplating of a sheer nylon cloth over the hull with poly urethane like I did on the O19 sub hull. Well, in any case I'll play it by ear right now and keep plugging along. At least I'm in the building-up stage and not tearing things down Cheers,

- 176 replies
-
- 7
-
-
- muscongus bay lobster smack
- Midwest Products
- (and 1 more)
-
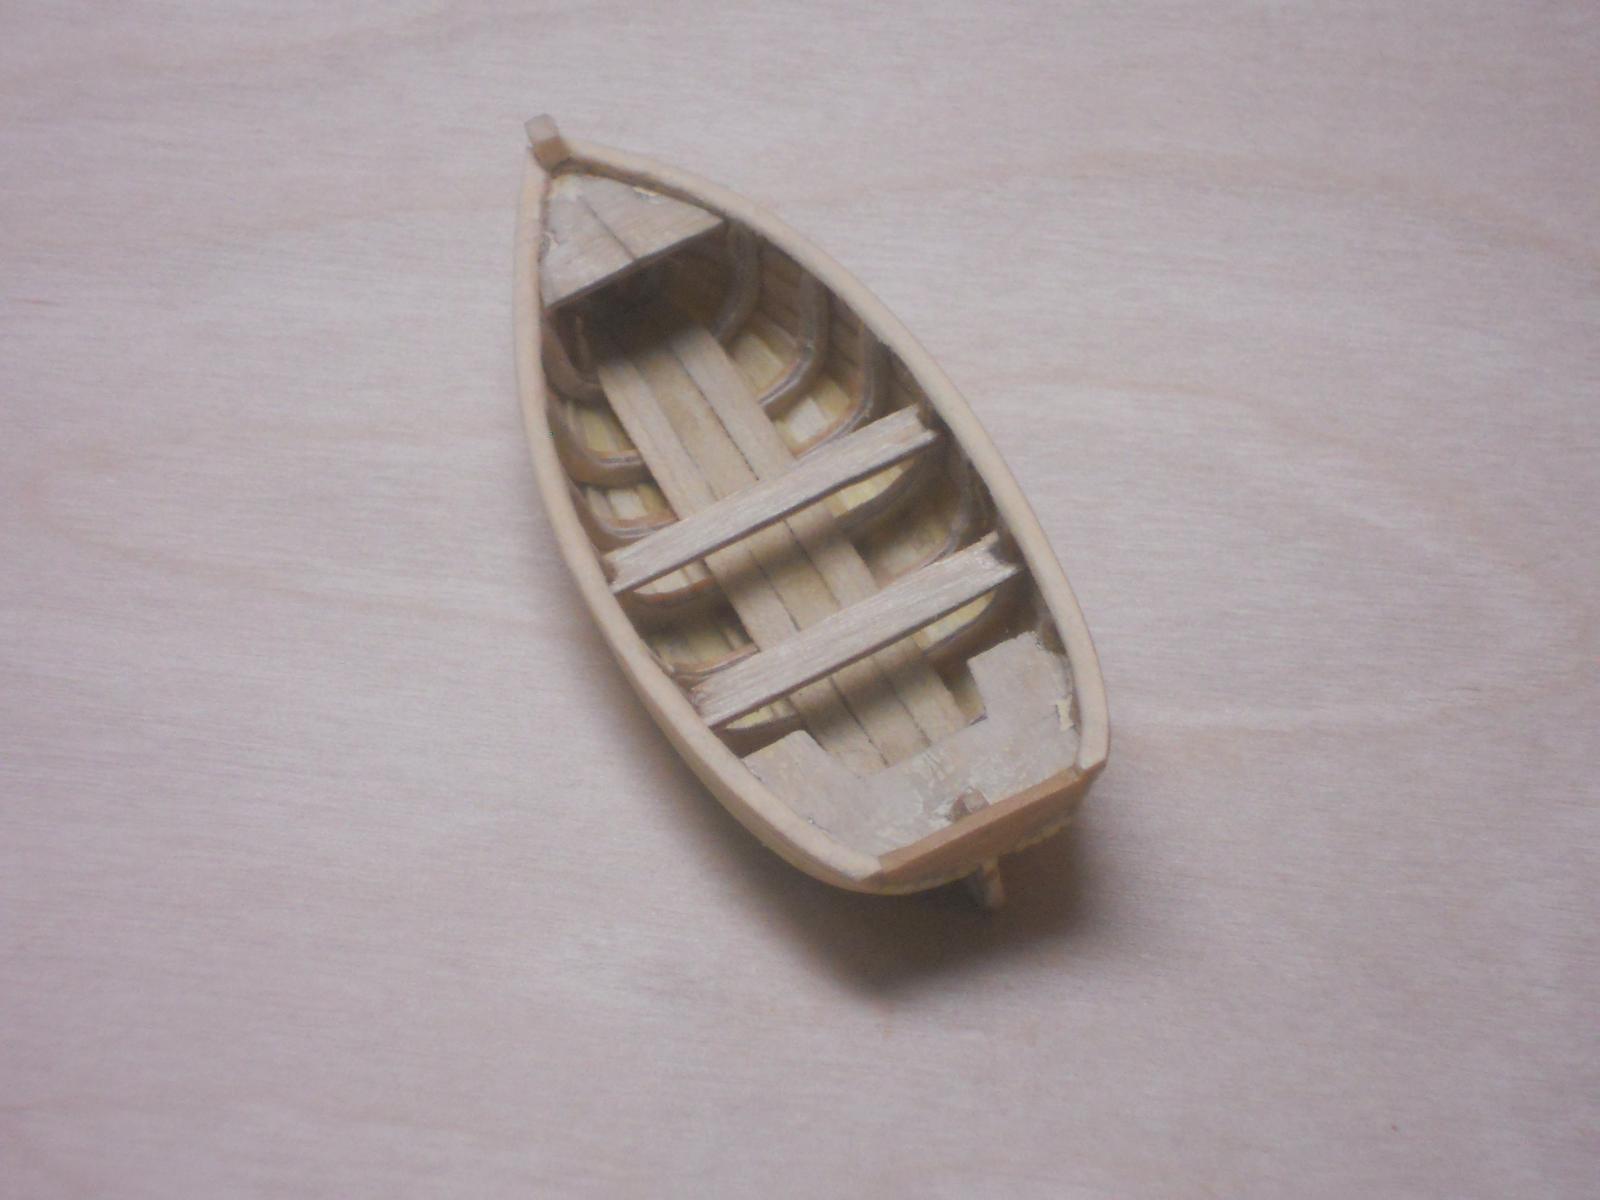
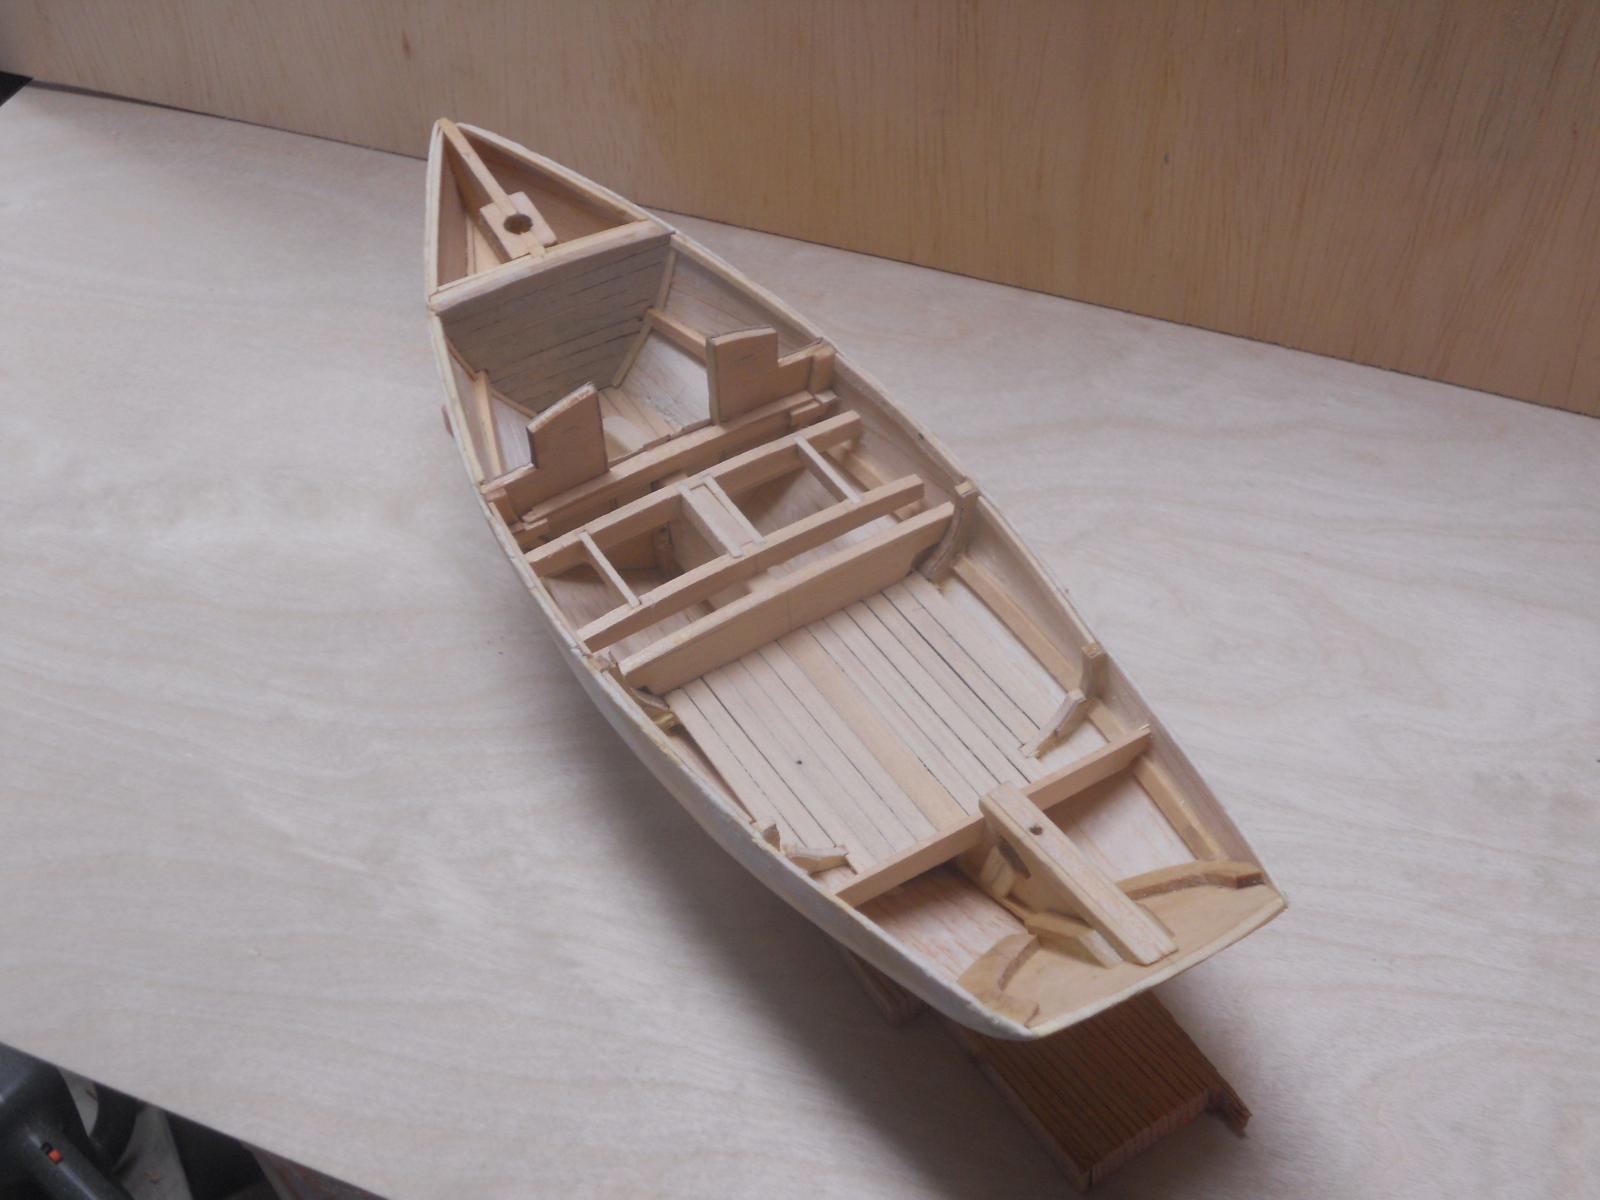
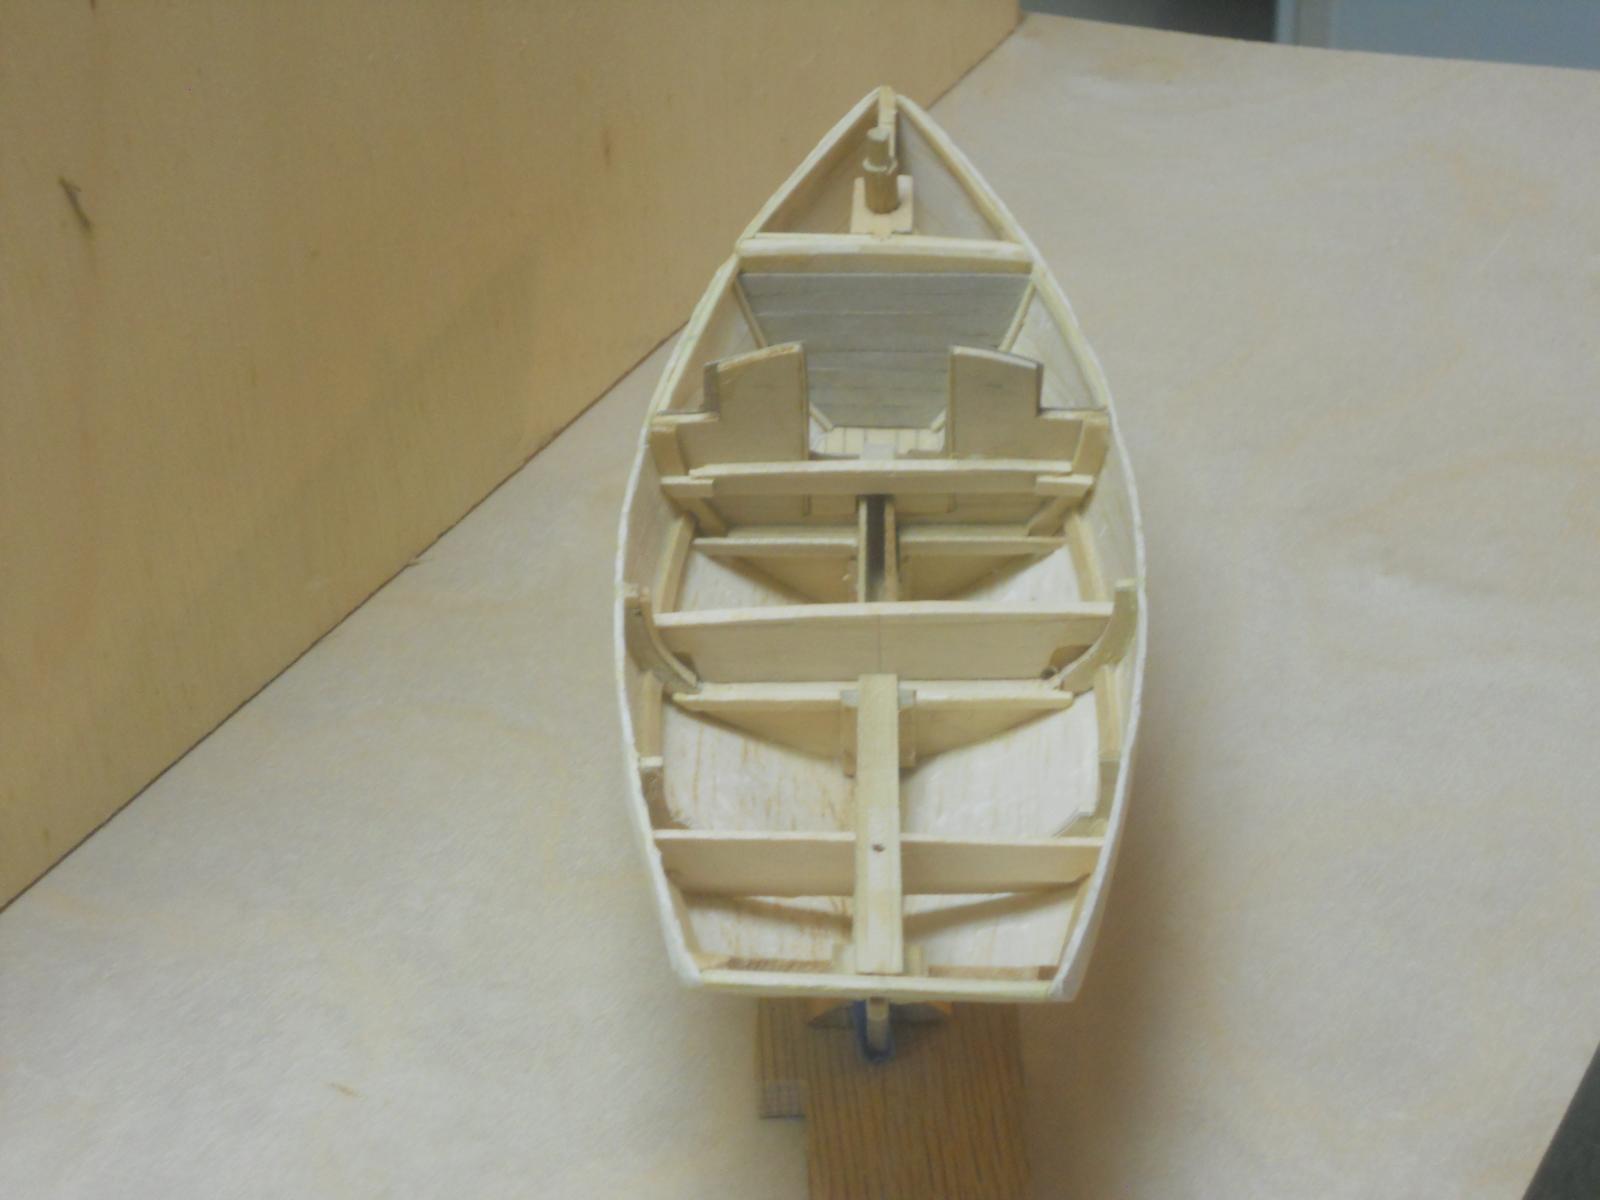
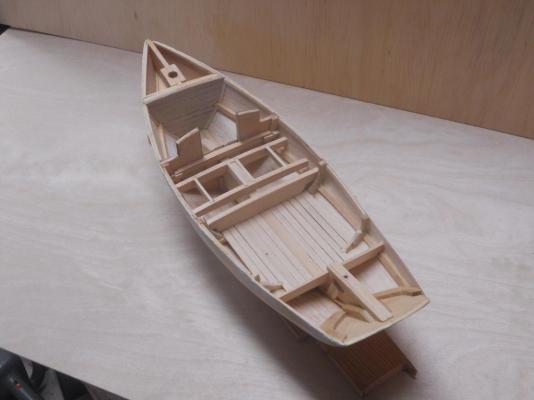
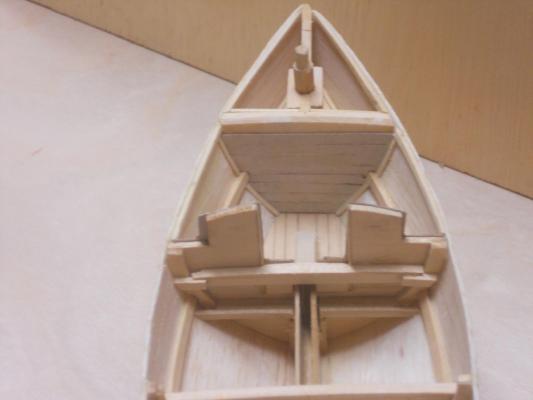
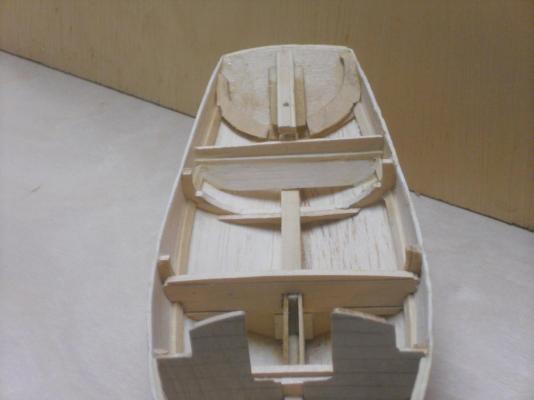
Thank you all for visiting and your like votes, it's much appreciated and encouraging. In between working a few chores around the house and the lobster smack kit I managed to do some more work on the dinghy. I made and installed the bow "platform," the helm's man seat and two oarsmen seats. Due to the gunnel on top of the ribs I had to make the bow thingy in two peaces. I tried to make it in one piece but that turned out to be impossible and after two tries I gave up and just split them. I supported it in the center though with a narrow strip and super glued it in. I had better luck with the helm's man seat though. It is wide enough to be able to bend it enough and it popped right in. I had to remove and install it several times for the fit but it finally worked out kinda okay. I had to add just a little wood filler in spots but after it's painted dark grey all those blemishes will be hidden. The oarsmen seats were rather easy, also because I could bend them to pop them in. But - - - when I closed shop this afternoon and taking a last peek I realized that the oarsmen seats are too far aft. Too much weight in the aft end of the dinghy. No problem, we'll just tear them out and make two new ones and move them up one rib, they'll look even better I also made the rudder and the helm stick and that was all she rode today. Next up, after the oarsmen seats are replaced, is to make the oar locks, rudder gudgeons and pintles. Then a fitting to the upper bow beam for a mooring / lifting ring. Coming close to completion. But I still need to make the cradle on the sub. Cheers,
-
Hello Michael and thank you for the compliment. She came out much better then version 1.0. Season's greetings Michael. Hi Row, thanks for dropping in and your kind words. Hmmmm, neurosurgeon hands - - - not quite but they are rather small with long fingers, which helps with small things Gwen and I wish you a great holiday season as well. Cheers.
-
AWSOME!! Yep, a two pairs of oars with the dinghy would make it complete. Cheers,
- 120 replies
-
- 1
-
-
- mystic
- motor yacht
- (and 2 more)
-
Beautifully done Nils, she'll look great on your Pegasus. Love the added black strip on the sides, nice touch. Cheers,
-
Thank you George. Yup, she's coming along okay, so far. Ready to plank the fish bin Hello bdglantman2, thank you too for your kind words. Don't worry about realism. The people that may get one of these models can most likely not tell the difference between a schooner, a yawl, ketch, sloop or whatever. As long as they have a nice looking model on the mantle and donate to a very worthy cause If I wanted realism I would build one scratch in a larger scale. I just love this type of vessel and I did design my own Freedom sloop model that I build scratch. Cheers,
- 176 replies
-
- 2
-
-
- muscongus bay lobster smack
- Midwest Products
- (and 1 more)
-
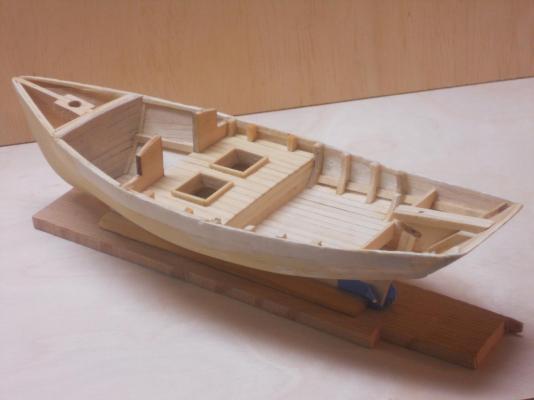
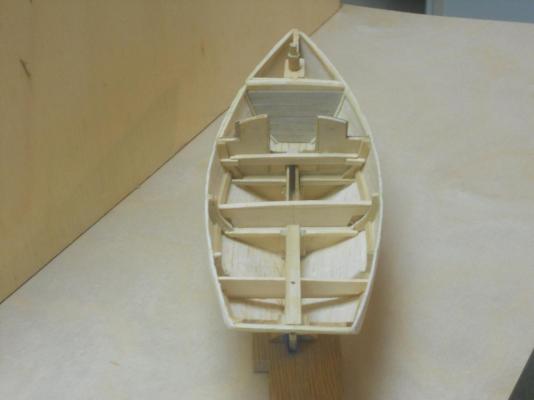
I made some progress between my other activities. I continued planking the cockpit / work area deck / floor, which is almost completed. I also made two deck beams for the fish bin with the carlings for the bin access holes and hatches. I'll be continuing with the planking and hopefully adding a few fake frames in the cockpit / work area. I made the access holes 20 X 20 mm square, the opening will be reduced by 1.5 mm on all sides due to the uprights for the hatch covers that are to fit over them. This'll give me a working opening of 17 mm across. Here is a picture as she looks as of this afternoon. I need to spend some time with the O19 dinghy tomorrow but between glueing jobs I should be able to work both at the same time. Cheers,
- 176 replies
-
- 13
-
-
- muscongus bay lobster smack
- Midwest Products
- (and 1 more)
-
Thank you all for your best wishes. Gwen and I will ry to make the best of this year's end and hope that 2015 will be better. Thanks also to all who clicked te like button. Cheers,
-
Beautiful Remco!!! Looks real, just thinking, that if you lay it on some aged planking you can fool people in thinking it's the real thing. Cheers,
- 1,214 replies
-
- 1
-
-
- sloop
- kingfisher
- (and 1 more)
-
Looking nice Jesse and a good safe with the hot water, well done. Cheers,
-
Thank you all for visiting and your like votes. To all here on MSW, Gwen and I wish you all a very good holiday and a prosperous 2015 in good health. Hello Omega, thank you for your kind words my friend. My dinghy at 7 cm is a giant compared to your 2 cm one. You did great! And no, 'm not going to top that - - - yet Hoi Remco, yes, I agree! V.2.0 is an improvement but still needs a lot more work before I'm REALLY happy. Hi Nils, and thank you for your compliment. Yeah, I figured too, why not add a few words how I managed to build this tiny and fragile dinghy, just in case some other crazy guy or gall wants to give it a try, besides Omega that is Hoi Sjors, keep dreaming my friend Two is enough. I went out to prove something to myself and lucked out, twice actually. Hoi Carl, thank you too for your kind words and no, I won't hide it. She'll be hanging on the sling of the lifting boom. This way I can do a show and tell by actually putting it away and close the hatches. I can do the same with the anchor, the emergency telephone, deck launch torpedoes and AA guns. Oh yes, when you blow on the propellors they rotate!. Oh almost forgot, the trim-planes can be stowed and the rudder and dive planes work. Hell Vivian, cute???? But of course - - - coming from a lady it has to be cute, I like that and thank you for your kind word. Hello George, but I have a second one - version 1.0. That one will be parked on the display board with spare mines, torpedoes, an anchor, cases of ammo and Heineken beer Cheers to all,
-
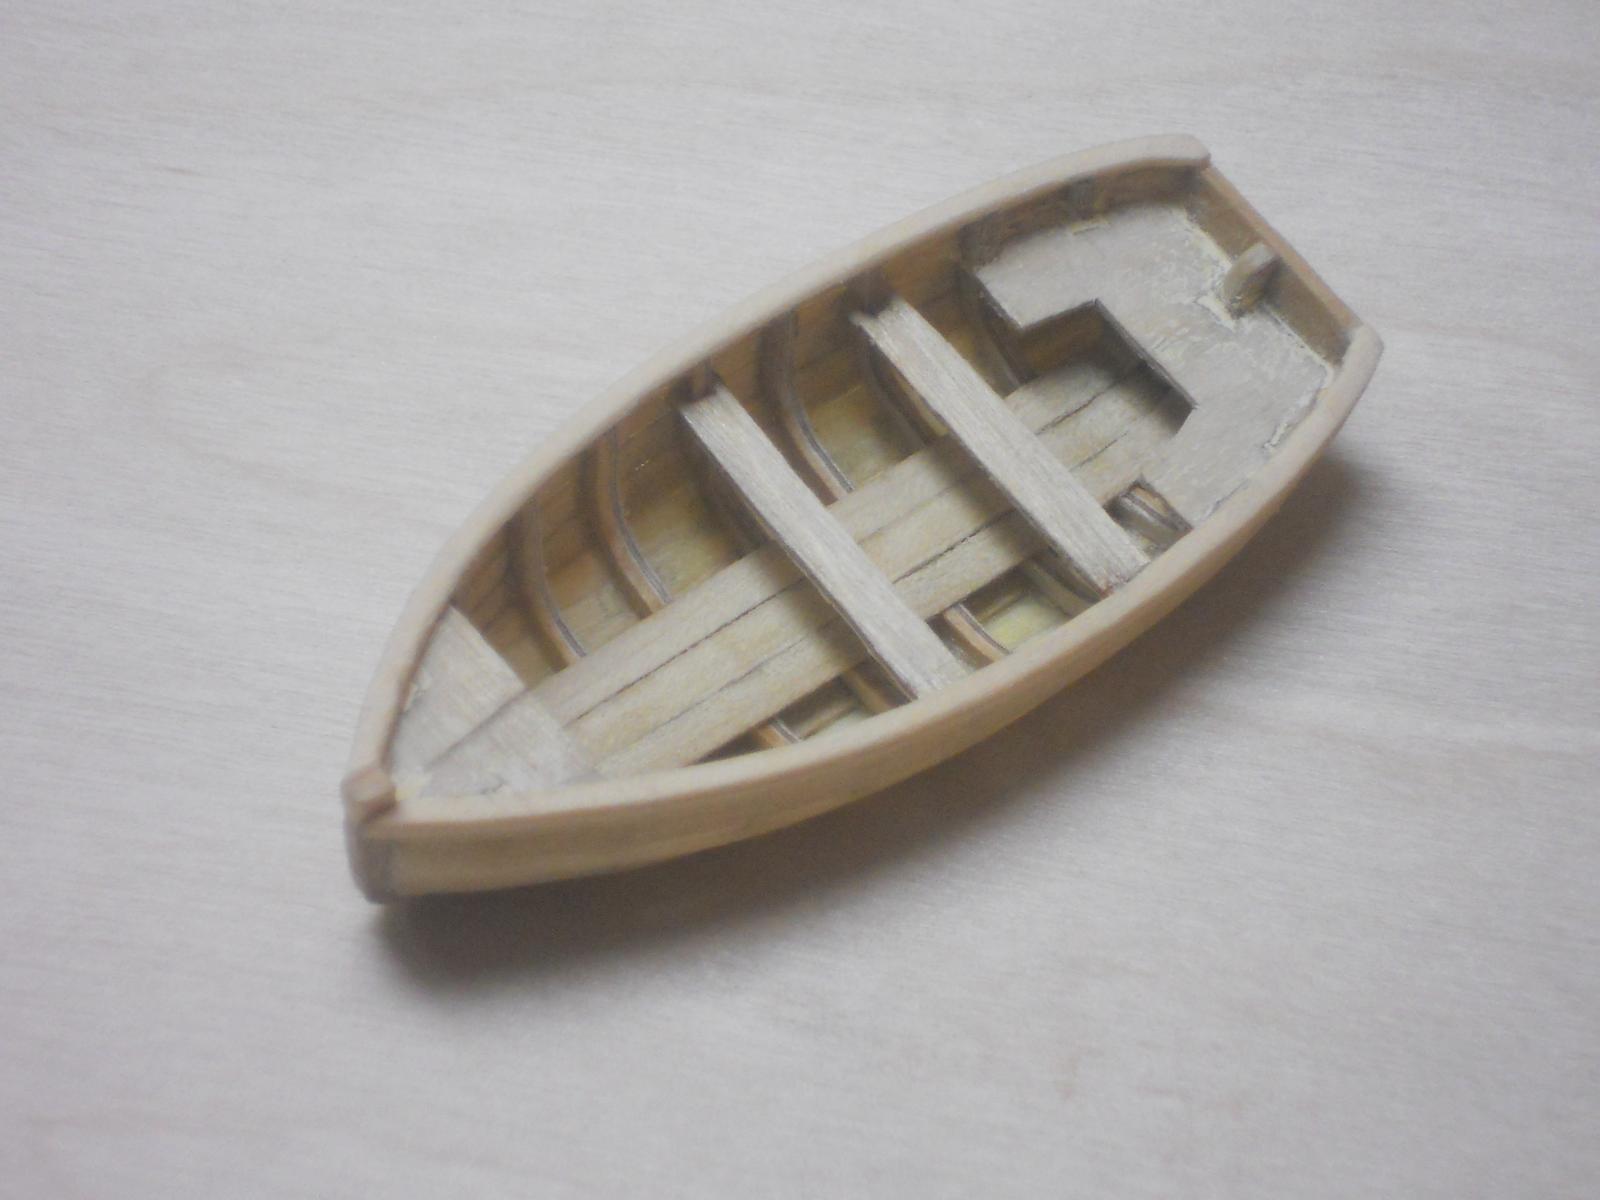
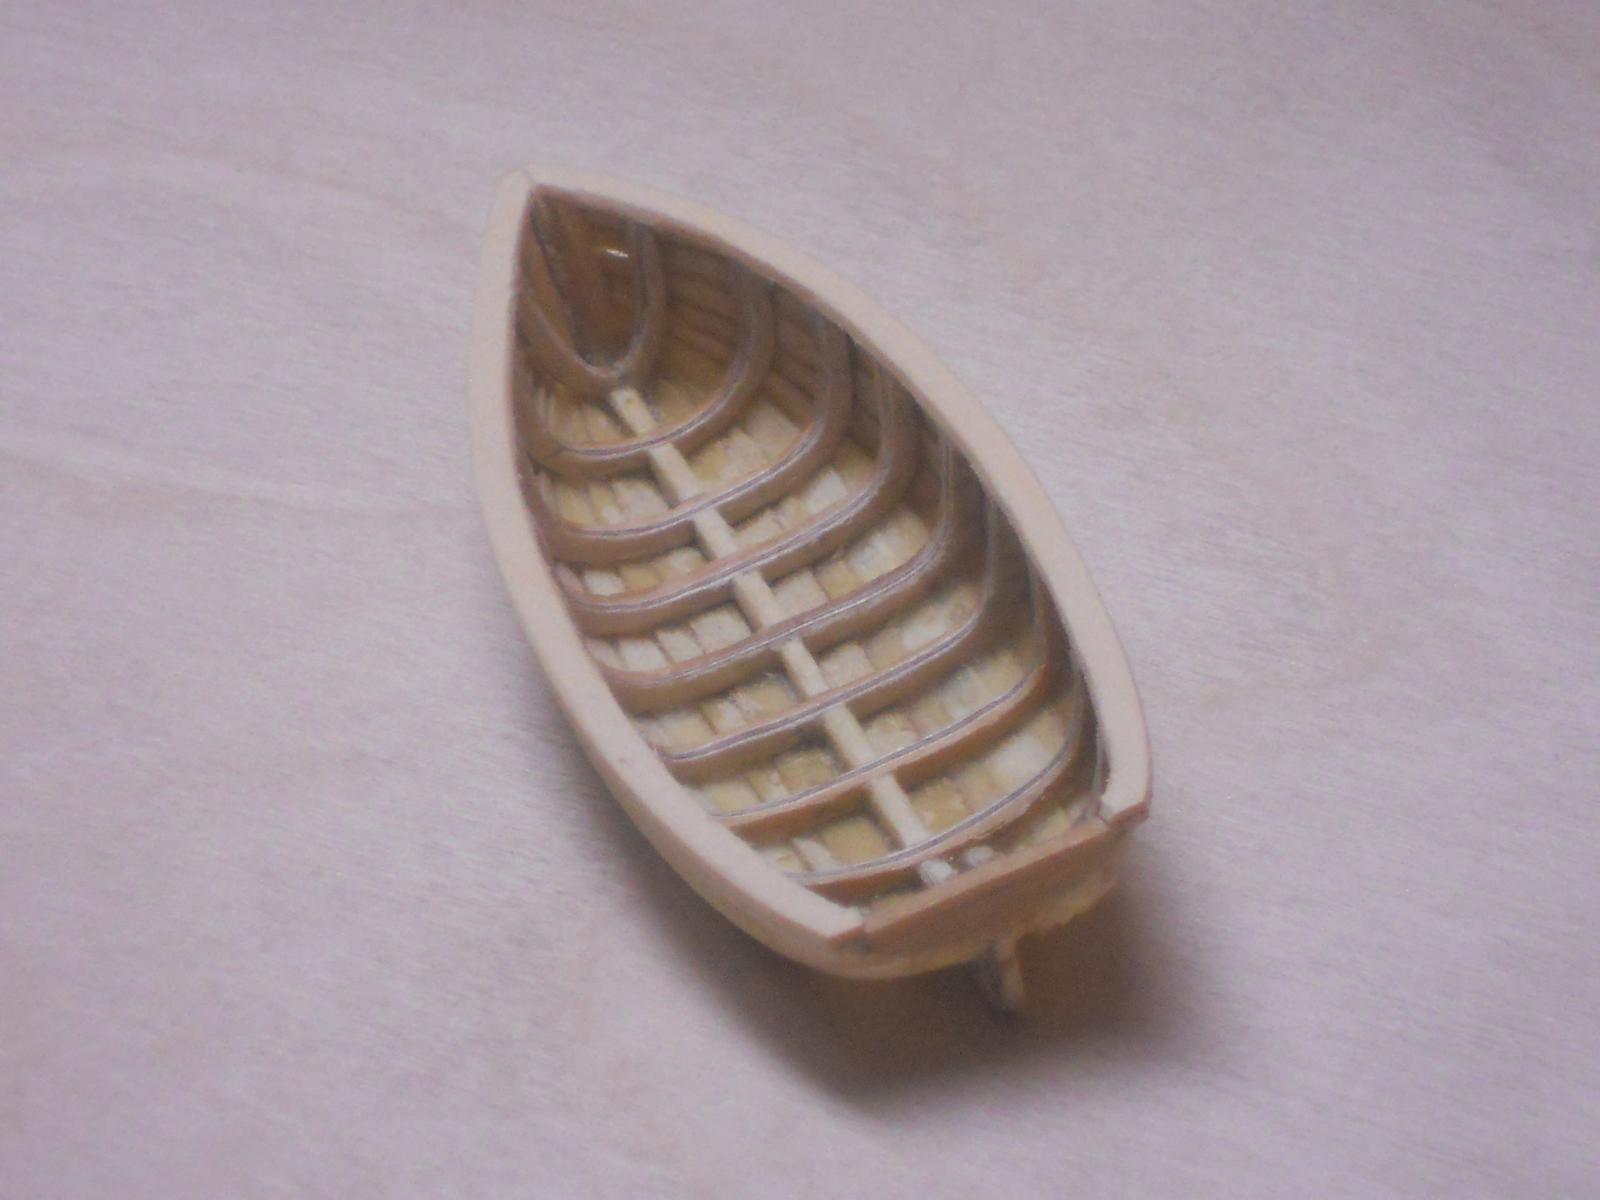
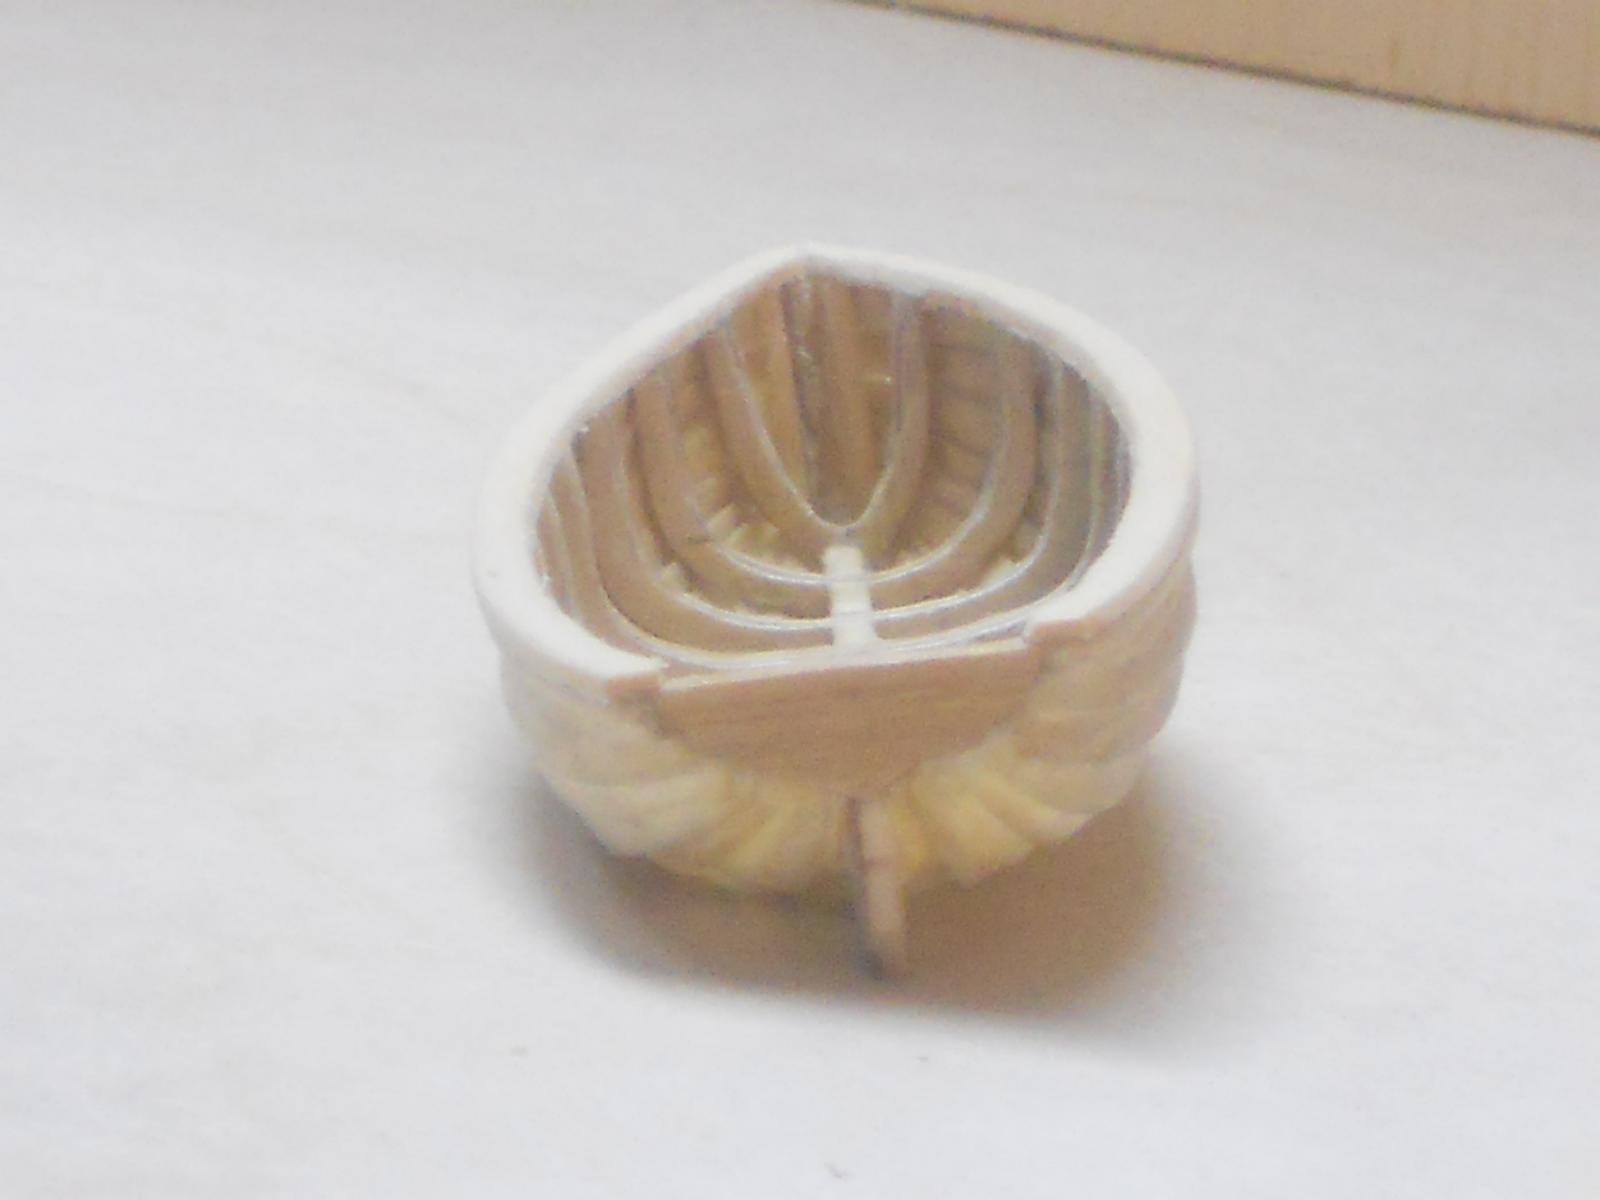
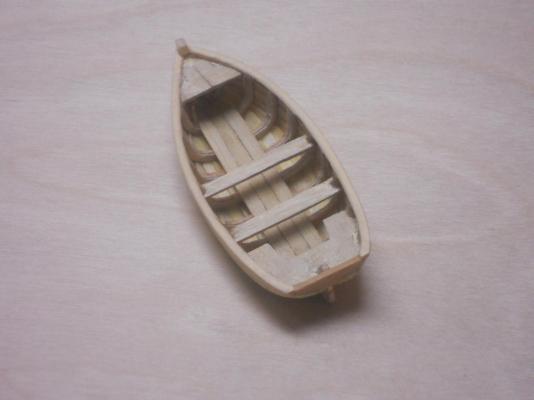
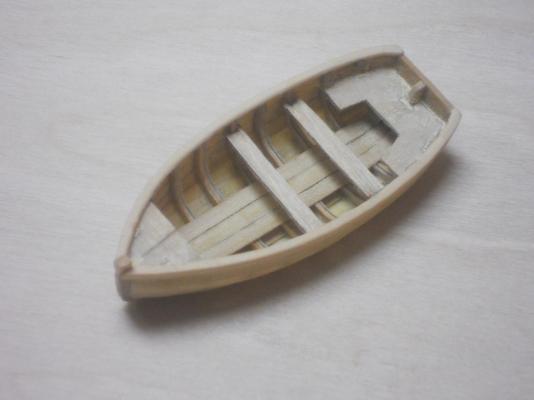
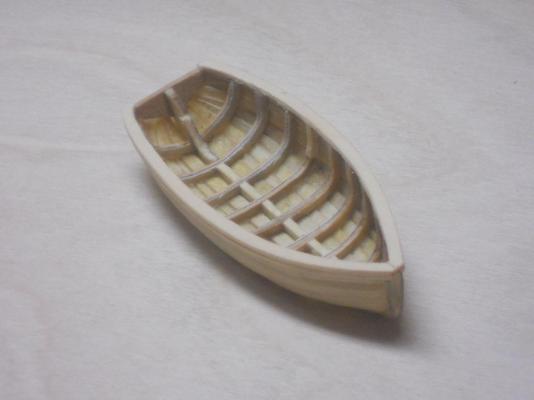
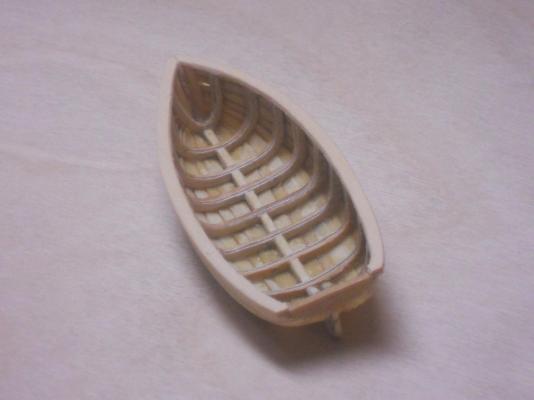
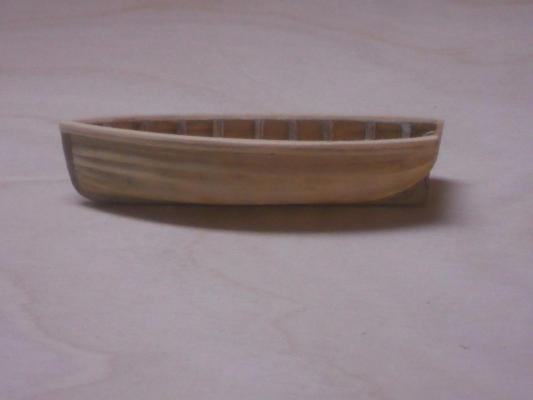
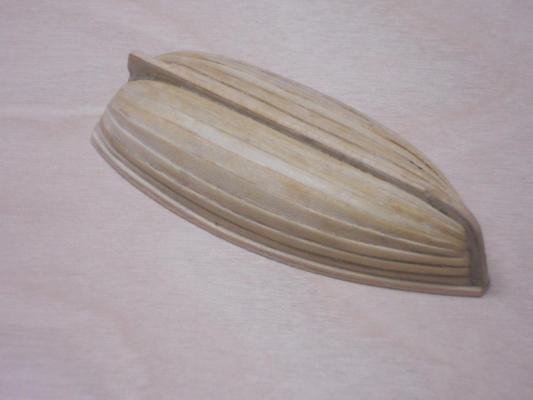
Hello all and thanks for your patience. I have been slowly planking dinghy version 2.0 and it's now all planked but still in a semi rough state. There is a lot of clean-up work yet to be done and perhaps reducing the thickness of the frames somewhat. I think that version 2.0 came out a lot better then v.1.0! Both sides are now equal in height and the planking looks balanced. I think the effort was worth while, at least I am satisfied now. After I'm done tweaking it up to where I'm happy with the looks of it then I'll add the helm's man seat, the oars-men seats, oarlocks, rudder and other things. I wont be too finicky with the way the wood looks because I'll be painting it in dark grey. Well, I don't know about Nils but as far as I can tell my version 1.0 may be the first miniature klinker build boat here As it turned out the planking was actually 0.5 mm thick and 3 mm wide. I tapered one side to 0.5 mm or less so I could lay the following plank on top of the tapered side of the previous plank. I also used CA gel cement to glue the planks on. I found this to work quite well for me. I cemented the plank first to 3 or 4 center ribs while holding the plank firmly in place with my fingers. For some reason I never got stuck to the boat Then after this was holding good I used a fine pointed toothpick to dab some CA gel to the next ribs so I could guide the plank in the proper position, also holding it tight to the rib. This way I didn't need the clothe pin clamps. I added a wale and shear cap. After I have removed some more wood from the ribs I'll put the keelson in and a few planks next to it. Hey, the sailors need to have a ceiling / floor / deck for steady footing Okay, here are a few pixs of the results so far. The length is 70 mm or 2.75 inches. This is big enough or in this case small enough to fit into it's hold. I still need to make and install the cradle for it inside the hold area below deck. Cheers.


-
Very impressive Sjors! She's looking great. Cheers,
- 1,616 replies
-
- 1
-
-
- caldercraft
- agamemnon
- (and 1 more)
-
MAGNIFICENT! Simple and really nice looking boat Dave, Kudos for your efforts and dedication. Cheers,
-
Hello all, it;s been a few days since my last post but I have not been sitting on my hands. Been busy with other projects, one of which is version 2.0 of the O19 dinghy. Also thinking about modding the cockpit area by cutting down the last bulkhead so I can extend the deck / floor of the work area into the cockpit. Dee Dee and Hexnut mentioned it and I saw it on Dee Dee's build. Most things are still in the rough state but tidying-up and adjusting all of the modded stuff should go rather quick. I installed the planking on the cabin bulkheads, or made a start with it. I don't know yet how far I'll go with the cabin furniture, it'll most likely be sparse. Thinking now to put two bunks in on the starboard side, a shelf like thingy for a table and Hexnut mentioned a stove. Hmmmm, yes, a stove - - - but - but - The fish / lobster well is now also almost ready to plank but I need to think about framing for the hatches. Also making a bunch fake frames for the cockpit and work area. I laid the "king" plank already in the work and cockpit area. I'm close to ready for planking that section. Well, here are a few pics of where we stand right now. I started paneling the forward bulkhead and used 0.65 mm birch plywood. I put some moulding on the sides to make it look more finished - - - hmmm - actually to hide a few rough edges I think I'll leave it in thi color and put some clear poly on it. The rest will be done when the sides are installed. Same procedure with the cockpit aft bulkhead. This too is not finished yet. Here is the aft bulkhead cut down with some additional stringers for the deck / floor planking. I am also adding a partition just aft of the cockpit and you see it here loosely put in place. There is still some trimming to be done. I left the space open for the helm. You can also see the "king" plank in place. An overall view looking forward. Cheers,

- 176 replies
-
- 10
-
-
- muscongus bay lobster smack
- Midwest Products
- (and 1 more)
-
Hello Nils, thanks for looking at my dinghy. I'm close to finishing version 2.0 now because the first one did not satisfy me. QUOTE: Piet, yes Piet I noticed your lovely Dinghi build activities in November this year already, knowing it is / was an ambitious Task, but it turned out very good looking, and the scale is even smaller. Does it fit into the appropriate Subs boat- hold ? Answer: Yes, the little dinghy fits in it's housing below the work deck. Version 1.0 is temporarily hanging on its lifting boom, waiting for version 2.0 to be finished. Your little boat is progressing quite nicely. Cheers,
-
Hello Nils, the boats you chose to make look very much like the dinghy I am now making for my O19 model. Mine is half the size as your's though and I am also klinker building it. With your dexterity and skill there should be no problem! Cheers,
-
Very impressive work Janet! Am looking forward to the "top" work. Cheers,
-
Nice looking wine rack there Adriaan. Good luck with the flooding, hope all will be well. Cheers,
-
Magnificent! Yes, it brought back memories from the few years I lived in the Netherlands. Cheers,
-
Hey Omega, good seeing you again and thanks for the kudos! The little dinghy now has 4 planks! Next set is at the bilge!!! Yeah, it's slow going but so what, right? I can only do one set of planks per day, sometimes two but I have other things to do around the house and the lobster smack kit. Cheers,
-
Mayflower by SawdustDave - Finished
Piet replied to SawdustDave's topic in - Build logs for subjects built 1751 - 1800
Wow, that's a whole bunch of "juffers" Dave Hmmm, juffers? What's them? Well Dave, in the Netherlands deadeyes are called juffers. A juffer is a yungish female. Don't they look like a head with two eyes and a pouting mouth???? So, now you have learned a Dutch nautical term Yep, making these small parts take a lot of time and many folks won't have the patience for it. But to us model nuts it's about creating something functional out of a piece of wood or metal. They are looking great my friend. Cheers, -
After looking at the drawing again I realized that I have to make the centerboard well as Hexnut mentioned it. So then, this morning I set out to "modify" the keel portion where the centerboard would be. I removed enough keel material between bulkheads 2 and 3 so the top is even with the cabin entryway. Now to make the side planking for the centerboard well. I took a piece of poplar lumber and ripped-off 2 each 1 mm planks from it. I won't make them stick ip too far above the work deck. Next I shaped the planks is such a way that they can be glued to the sides of the keel and run into the cabin about 3/4 of the way forward. Looks okay to me. I also ripped-off a bunch of 1 X 5 mm poplar planks for the work area planking. These still have to be sanded. I'm also going to add a few more deck beams and a few fake frames in that area. Then make pattern for the cabin side panels and a few knees for the top deck. Oh, so many more small items to add detail, not only in the cabin but in other parts of this lovely little boat. Sorry, no pics today. I got busy cooking a few Indonesian dishes. Both my wife and I love Indonesian food. See all yuns tomorrow. Cheers,
- 176 replies
-
- 3
-
-
- muscongus bay lobster smack
- Midwest Products
- (and 1 more)