Louie da fly
-
Posts
7,990 -
Joined
-
Last visited
Content Type
Profiles
Forums
Gallery
Events
Everything posted by Louie da fly
-
 That will be interesting. Making your own deadeyes can be a real trial (don't ask me how I know), but if your tool works out, it would be worthwhile sharing it with others. By the way, when it comes to attaching the chains that secure the lower end of the deadeyes, be sure to take note of the angles, as in Lapinas's post # 62 above. Also note from the diagrams in that post that real chains are rather different from the ones supplied with the kit. Steven
- 93 replies
-
- 1
-

-
- santa maria
- amati
- (and 1 more)
-
A little, but I don't think terribly much. I'm working on it at the moment, to see how it works out. Steven
- 740 replies
-
- 3
-
-
- Tudor
- restoration
- (and 4 more)
-
You're making good progress, mate. I must have missed this one - I normally keep up to date with the pre-1500 builds. Steven
- 93 replies
-
- 3
-
-
- santa maria
- amati
- (and 1 more)
-
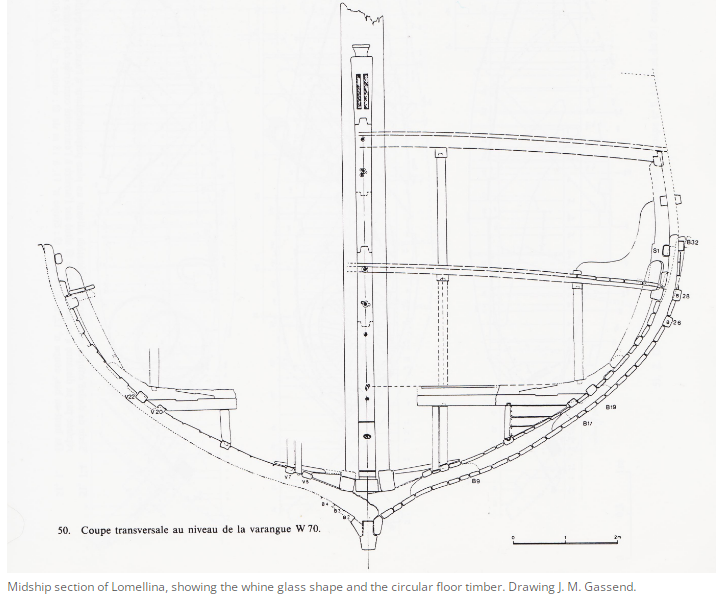
I was going to contact you regarding this, Patrick, but you've beaten me to it. Yes, I'd thought it was a bit off-centre, but I'm following the Lomellina wreck for which they've found the whole of the knight assembly and it appears to have been supported centrally, directly on the keel itself. And despite the risk of chafing, this seems to be the only way to go. By the way, as you can see my knight is considerably bigger (with more sheaves) than that of the Lomellina - just as the Great Harry is much bigger than the Lomellina herself. Steven
- 740 replies
-
- 7
-
-
- Tudor
- restoration
- (and 4 more)
-
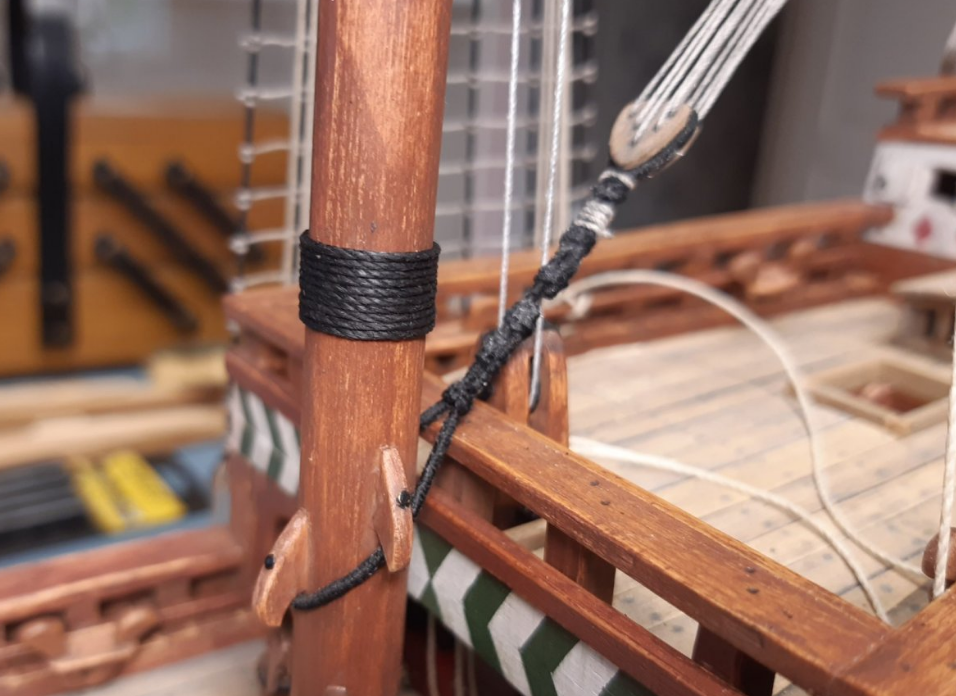
Hmm, this photo of how Patrick did it with his Pelican may show the way forward - and it confirms me in my resolve to move the deadeyes for the mizzen stay further from the mainmast. I note that the knight in this photo is turned at right angles to the one in my Great Harry, but even then I think there may still be possible chafing problems. But I can't see a better solution at the moment. Steven
- 740 replies
-
- 8
-
-
- Tudor
- restoration
- (and 4 more)
-
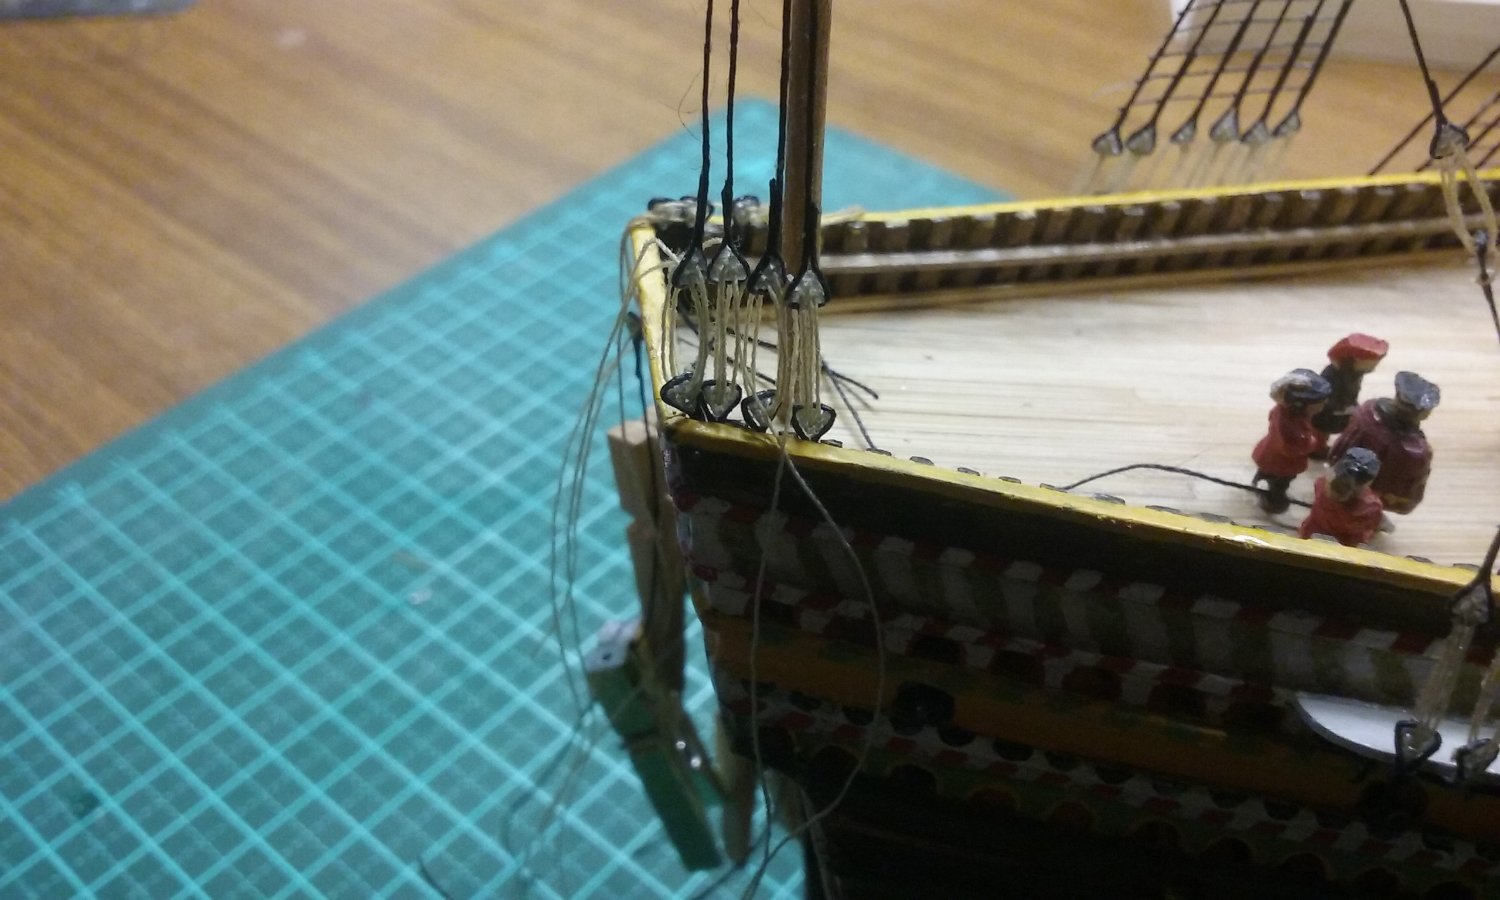
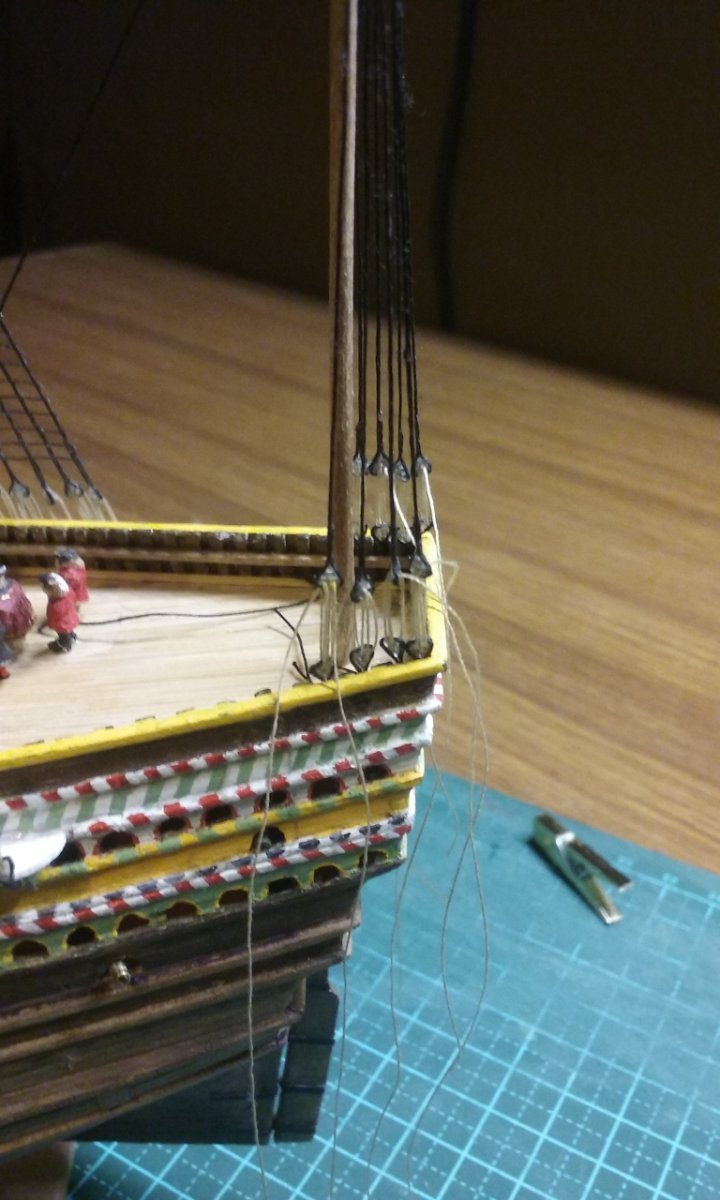
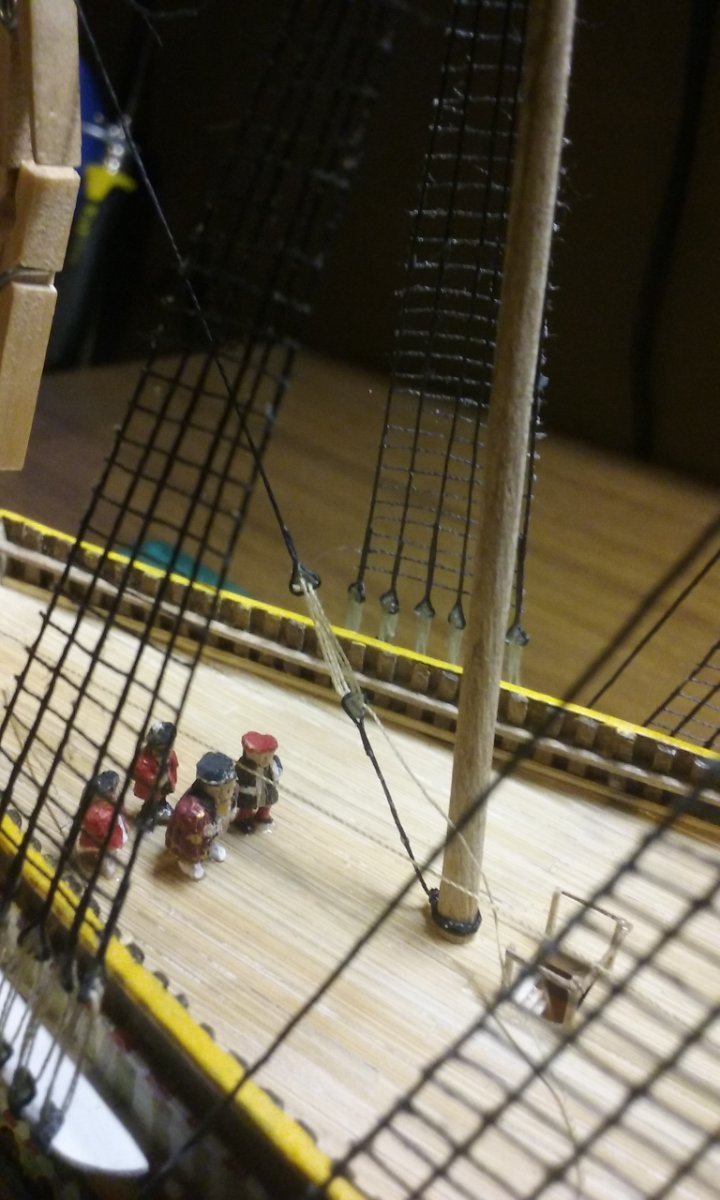
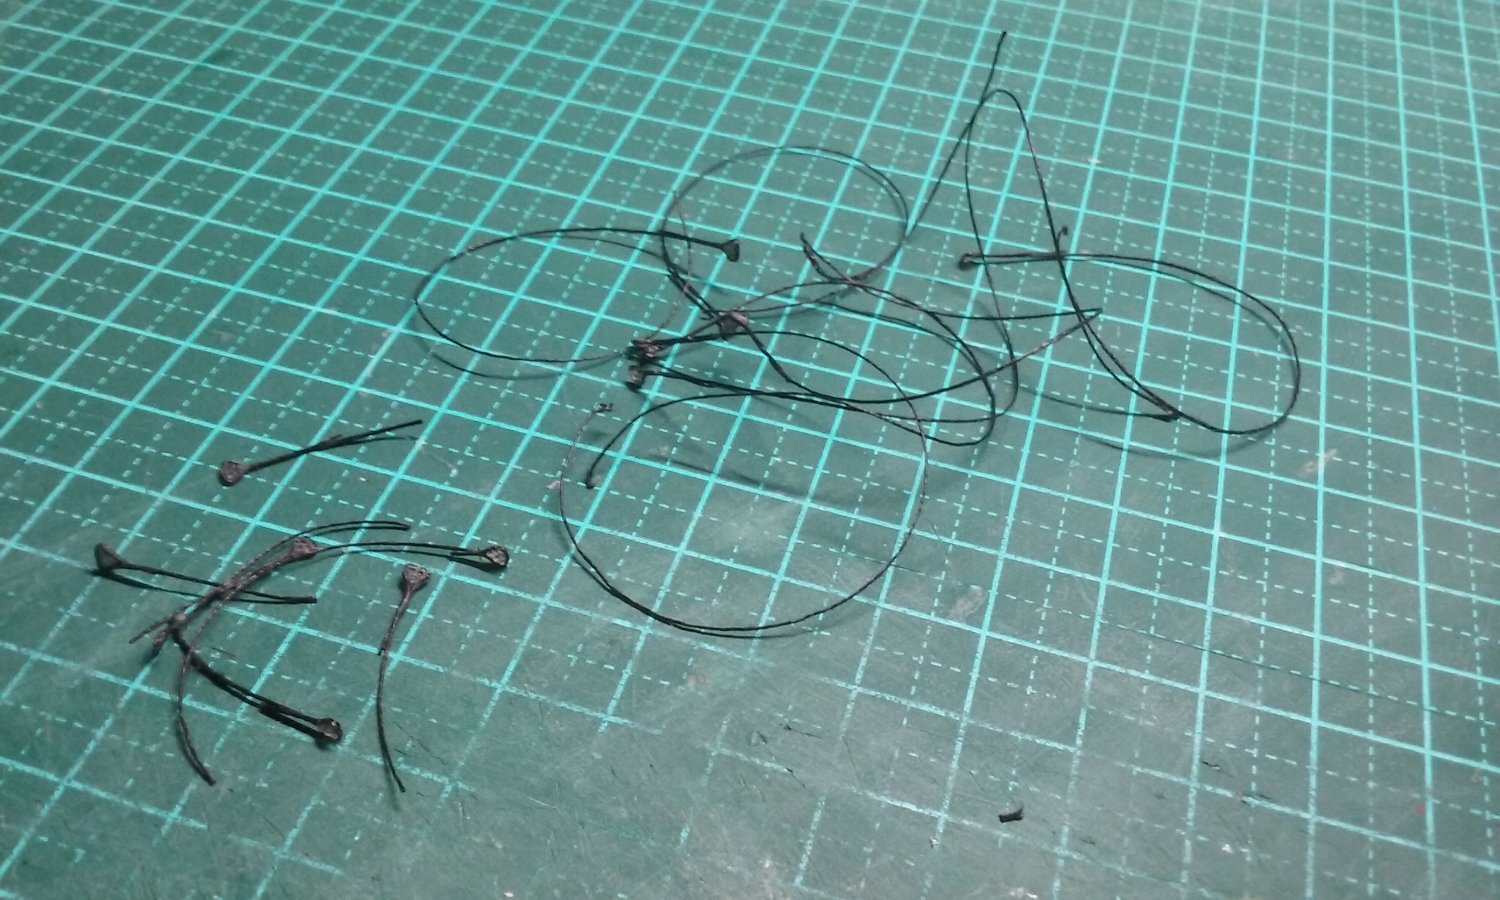
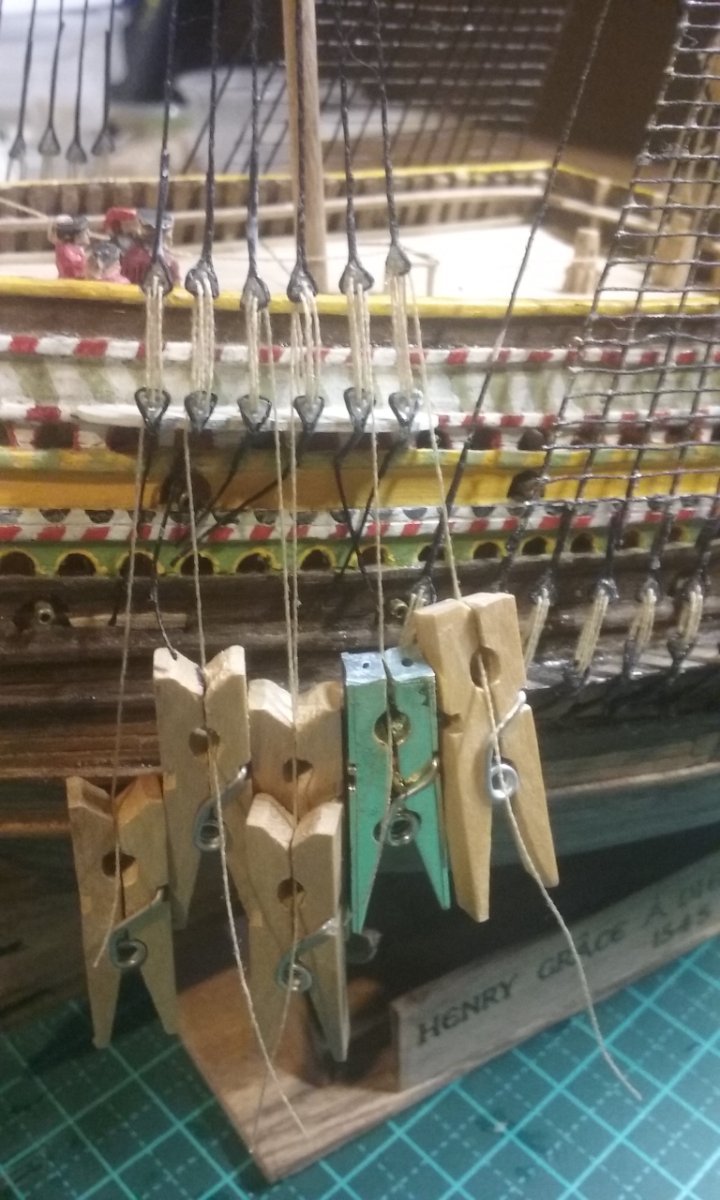
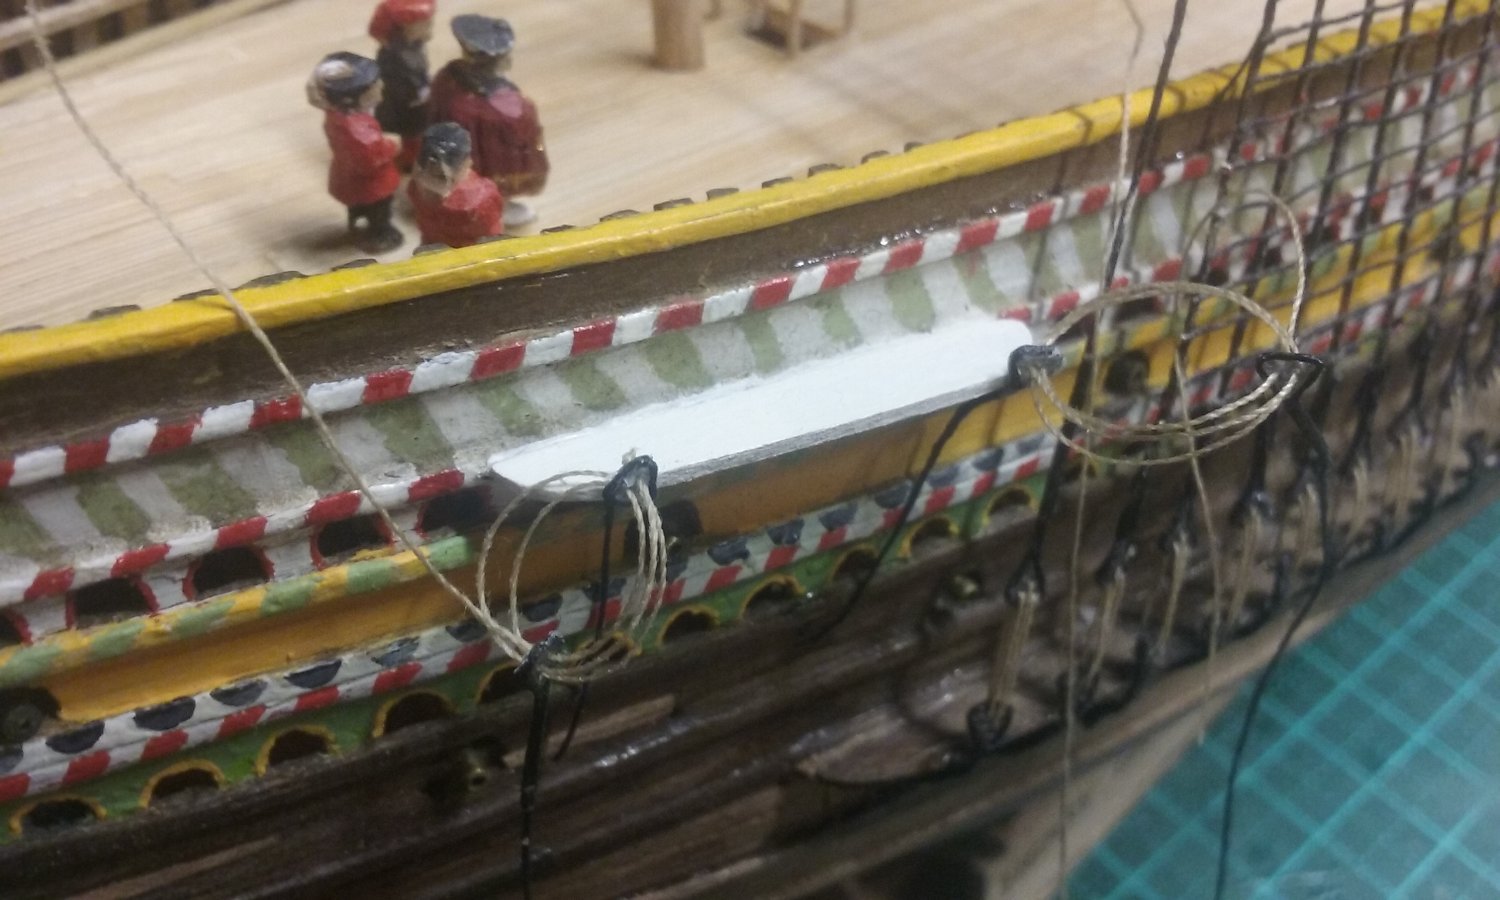
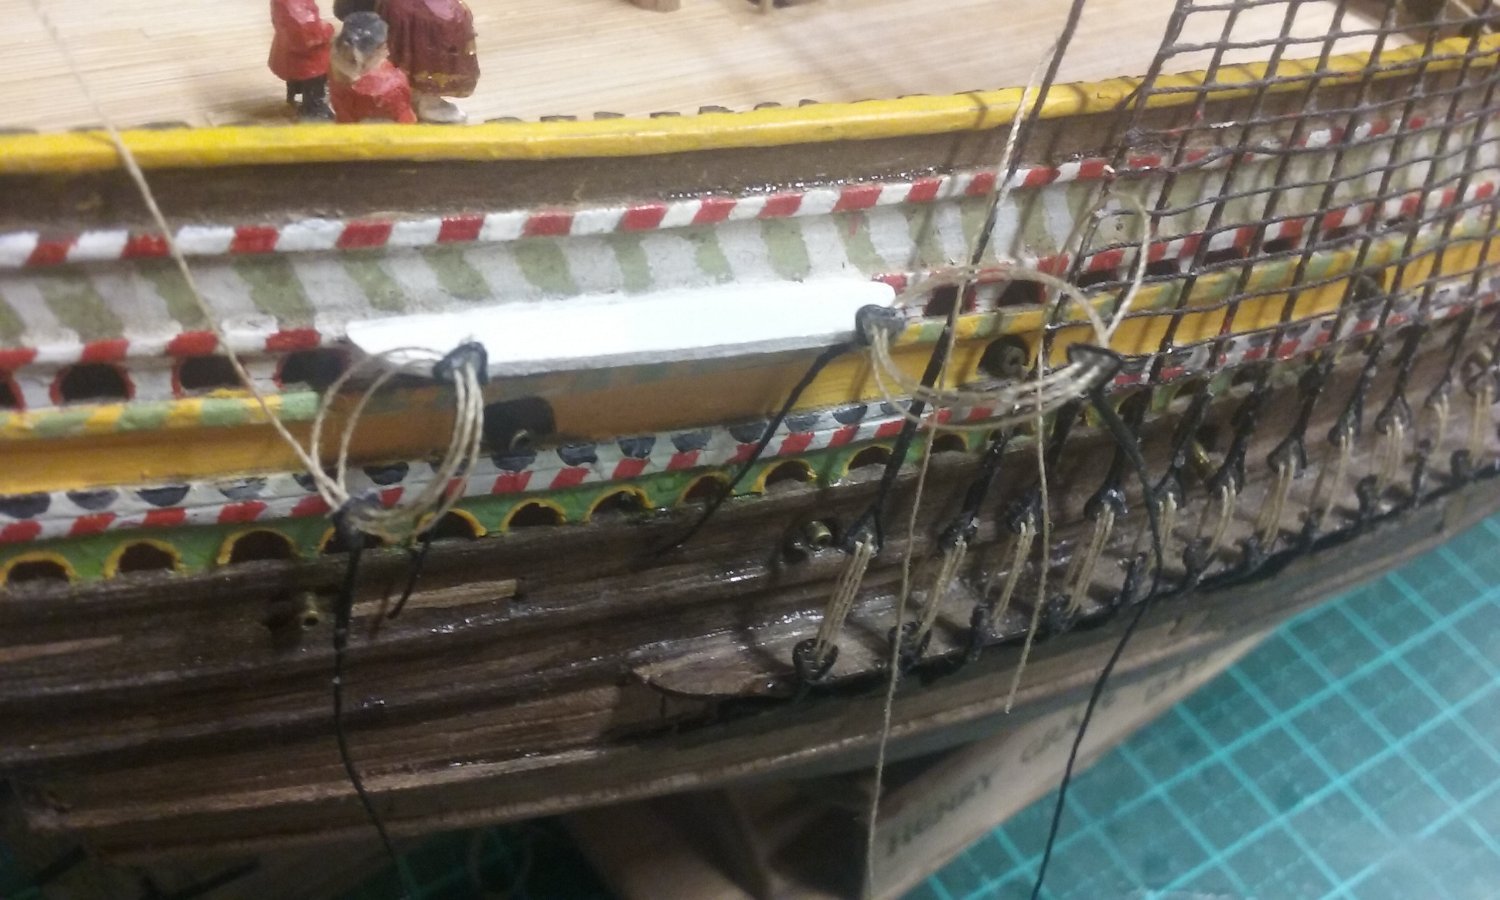
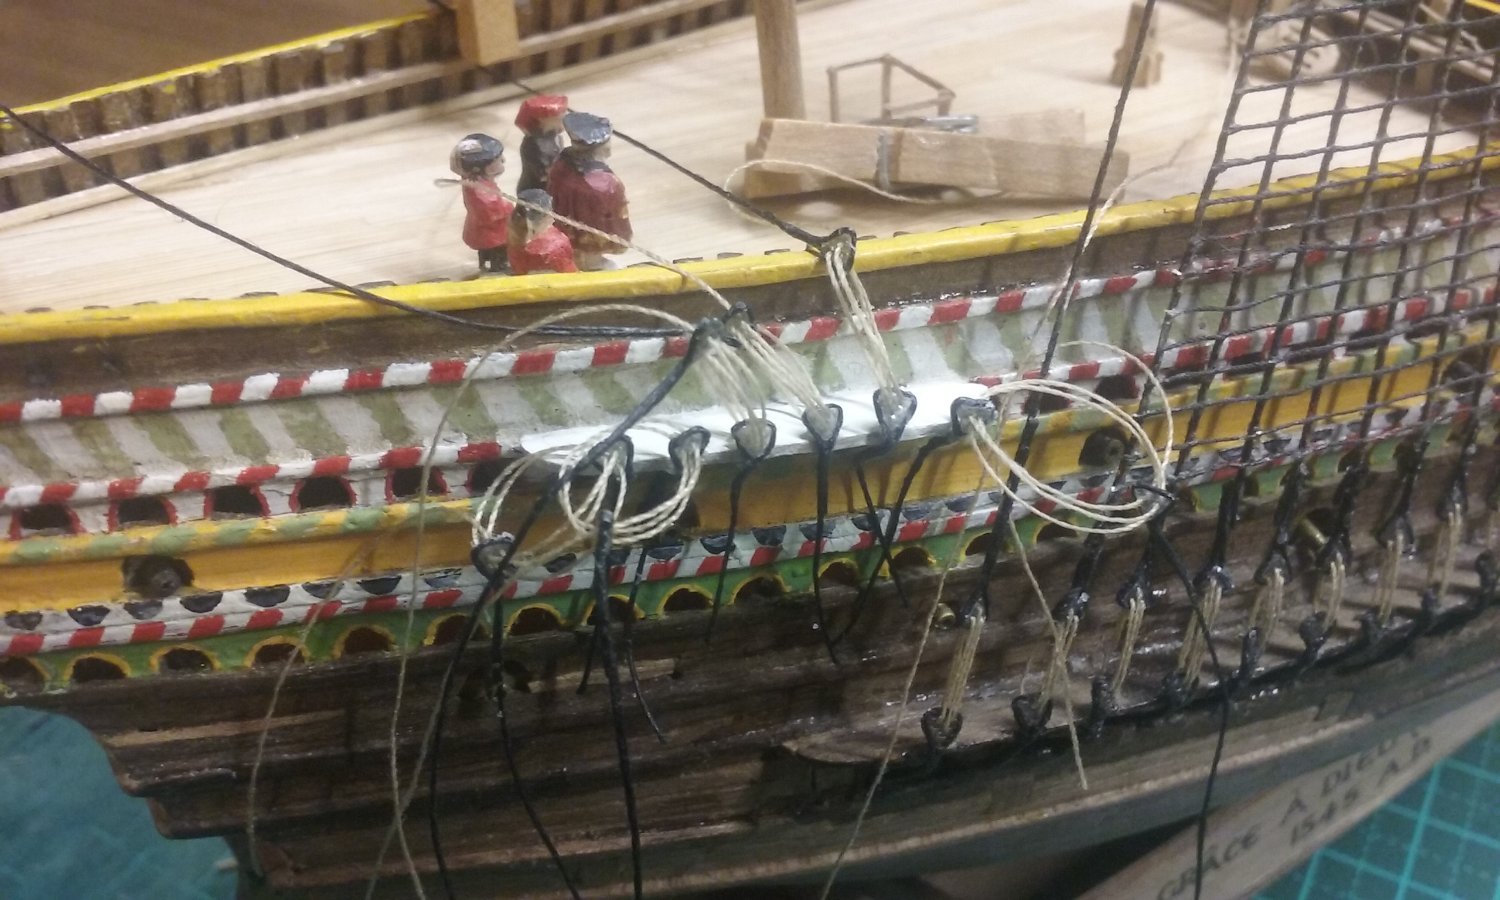
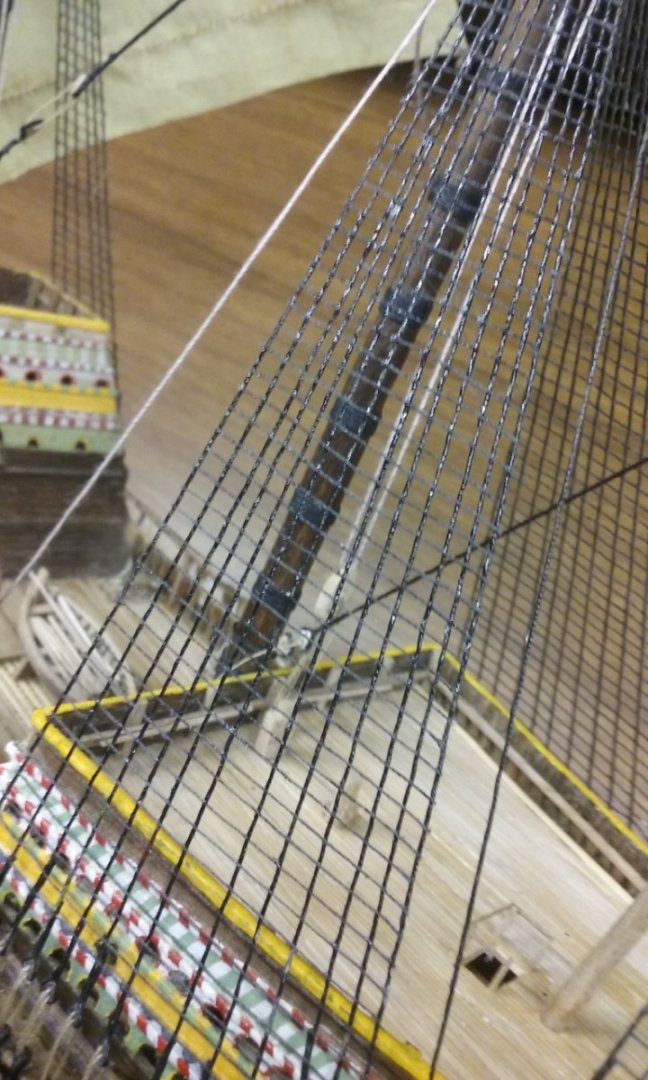
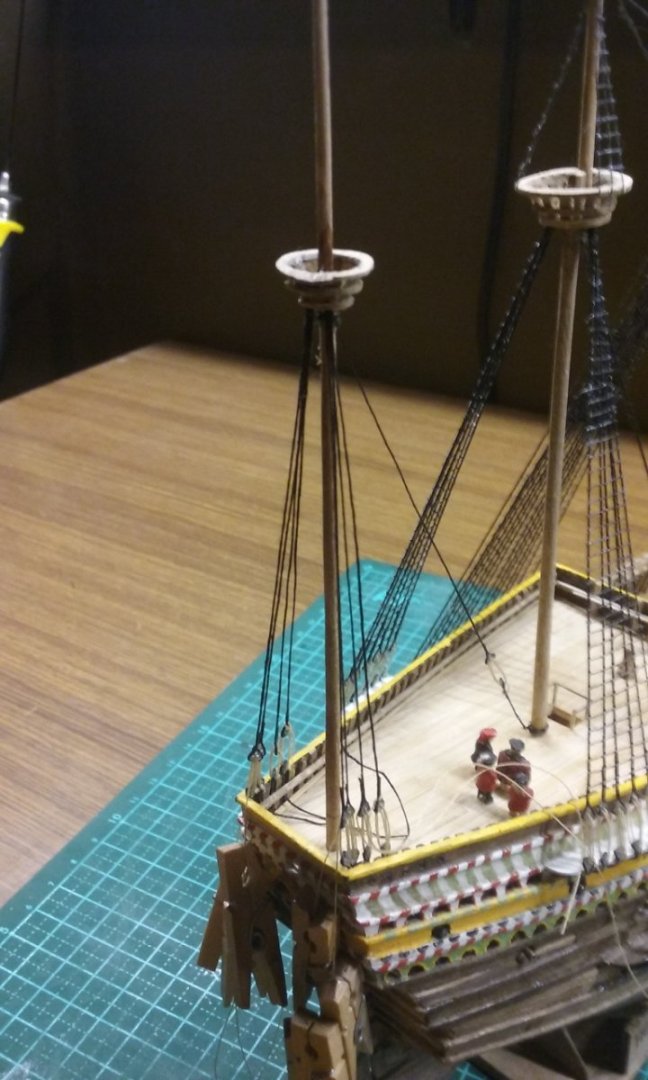
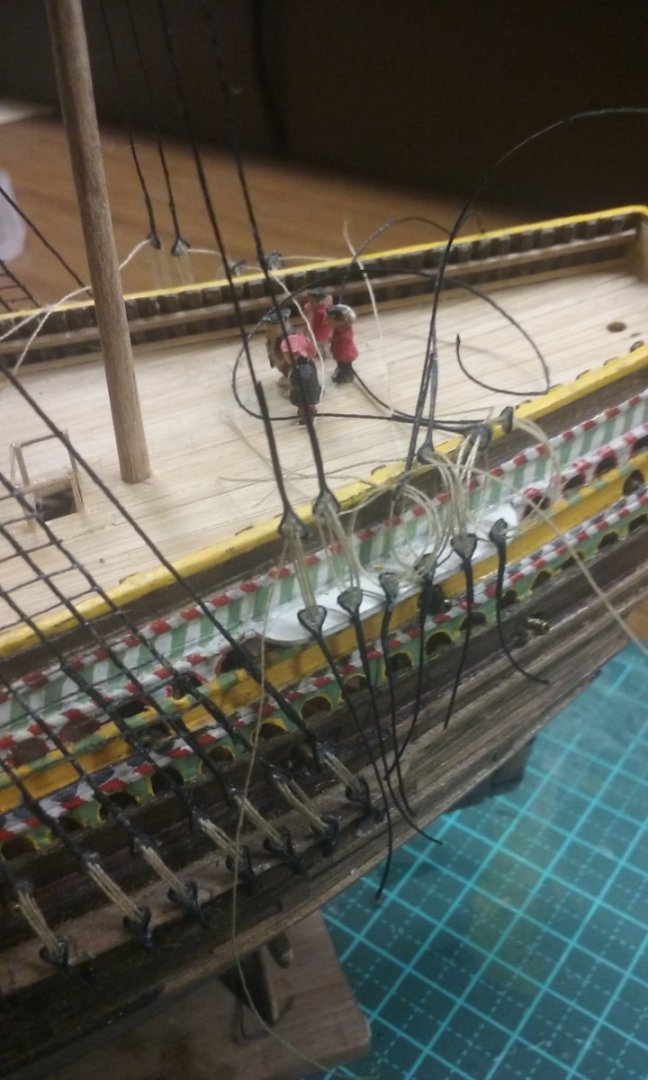
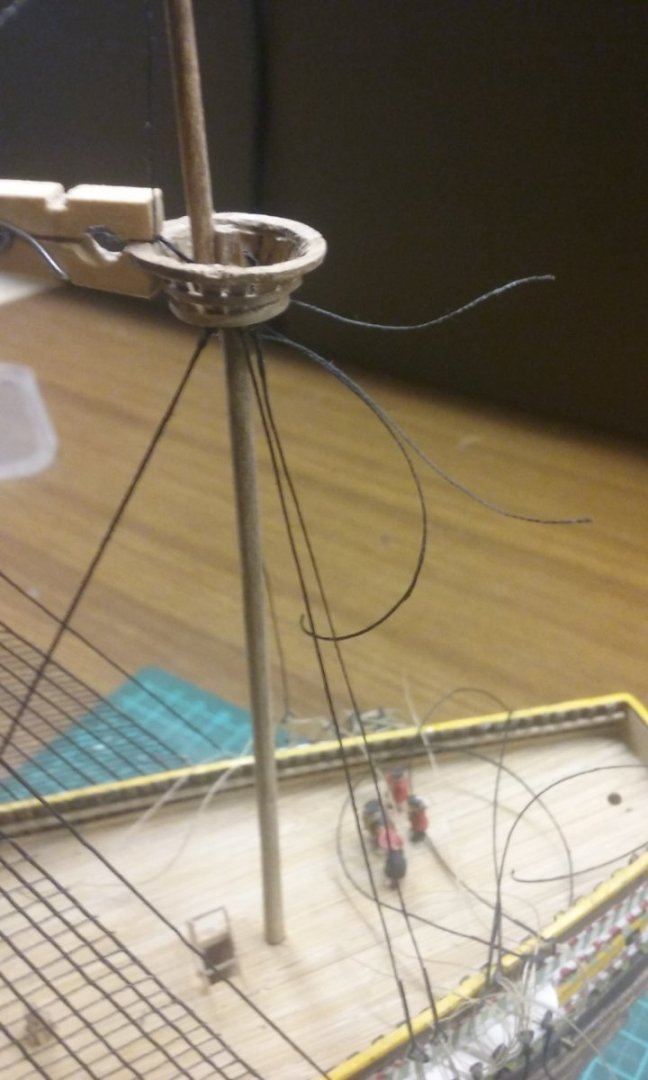
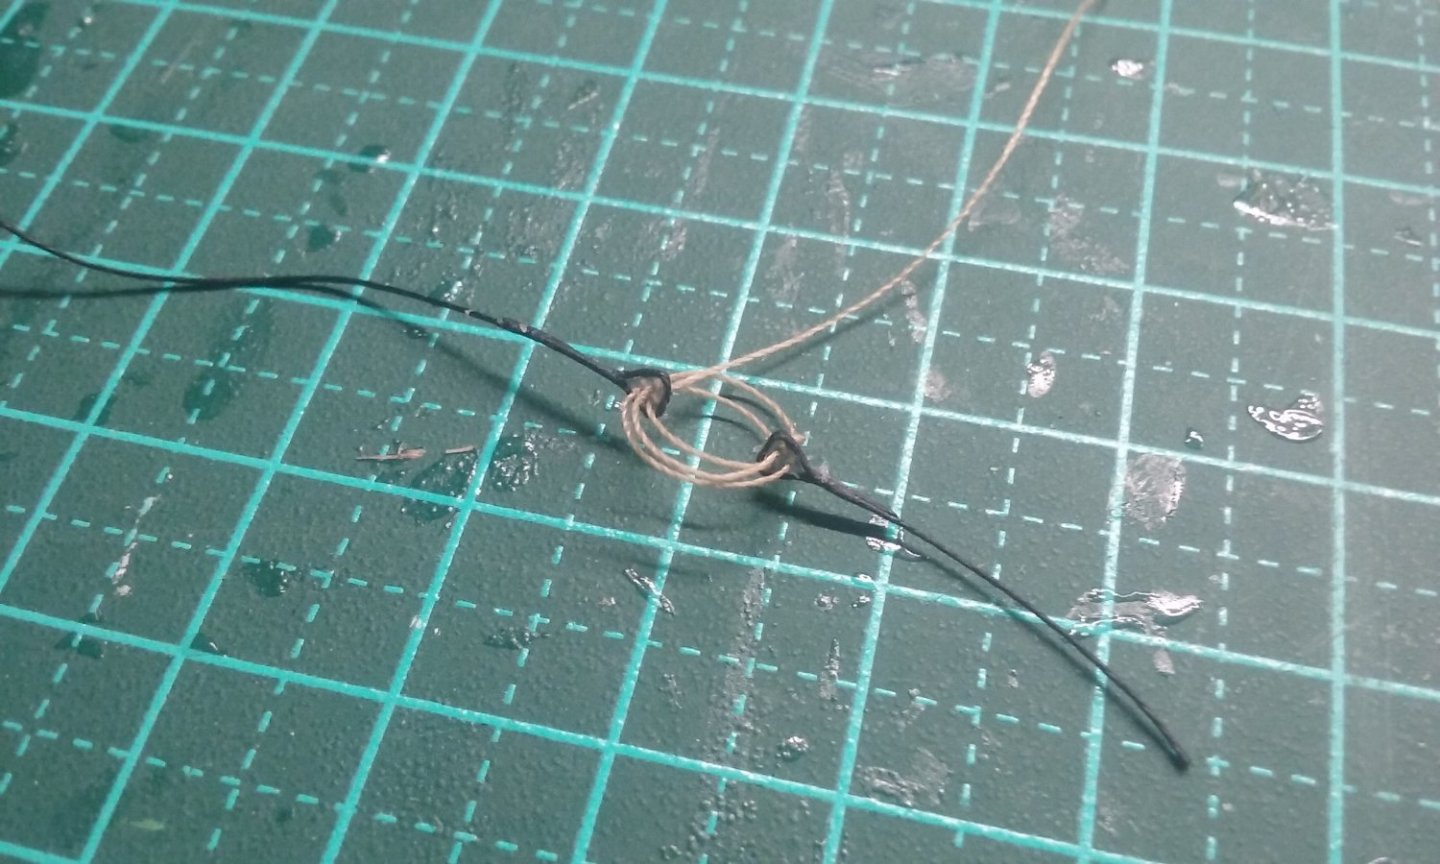
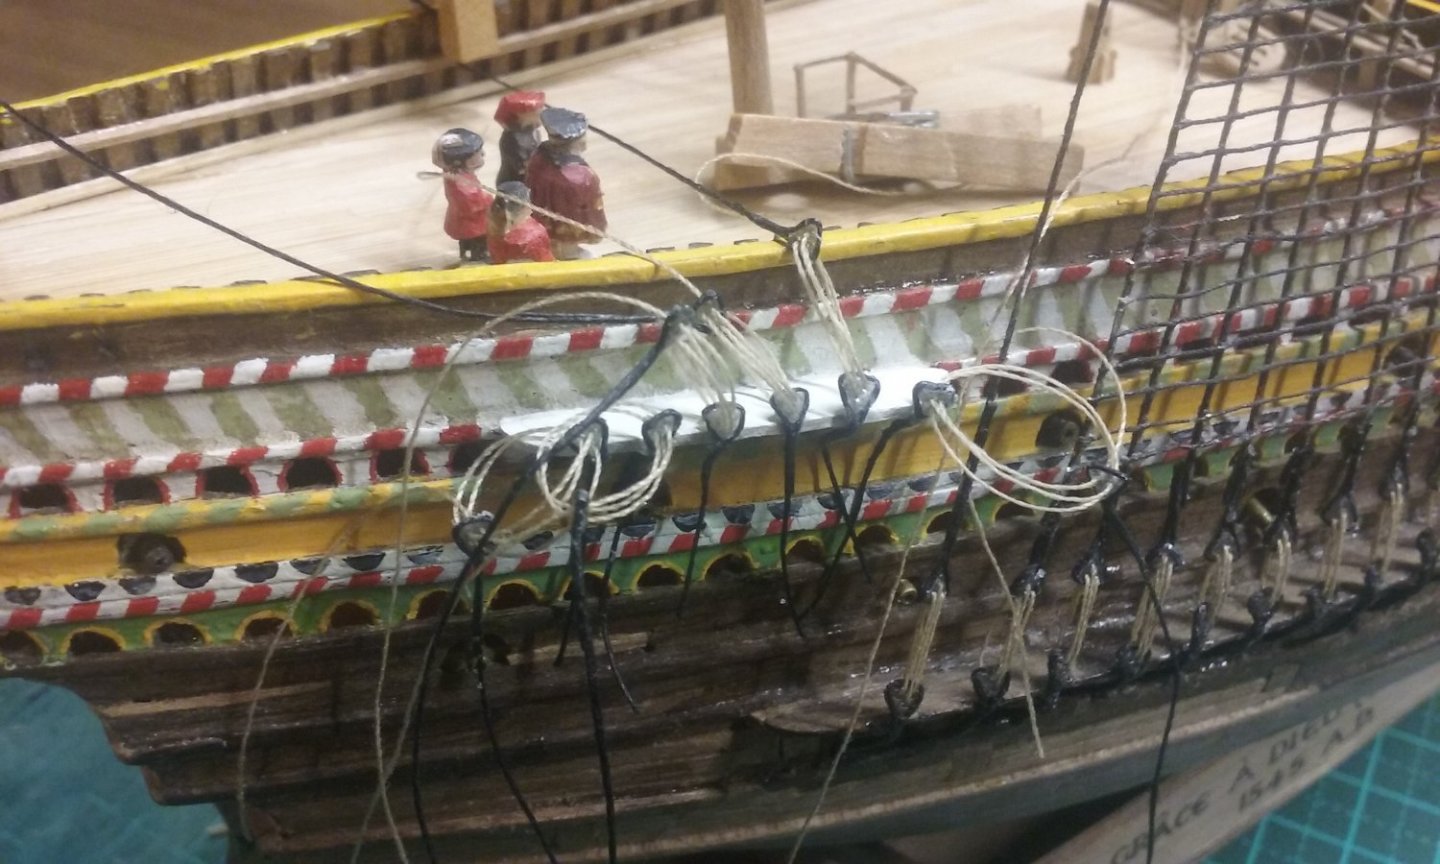
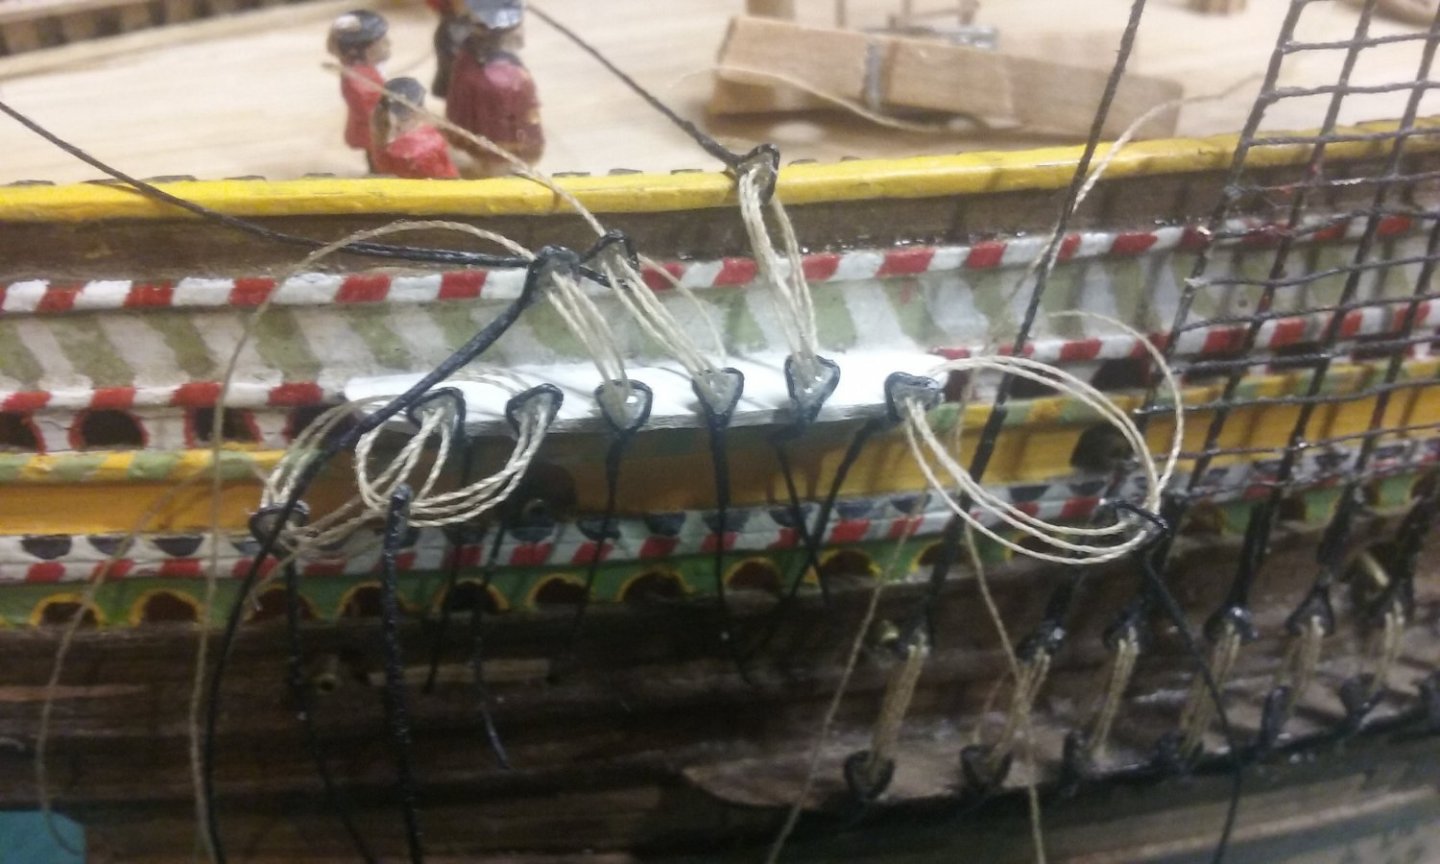
A lot of fiddling with the bonaventure - I made the mistake of gluing the lanyards for the deadeyes before I'd got everything adjusted equally. I tried loosening off the lanyards by dissolving the glue, but all that happened is that the deadeyes "popped out" of the strops as I tried to adjust things - the plastic deadeyes were only held to the strops with PVA glue and friction - not a good combination. Then the holes in the deadeyes got gummed up so the lanyards wouldn't go through. So I had to make two more whole shroud/deadeye assemblies to replace the existing ones. Then tightening the shrouds slackened off the lower bonaventure stay (as you can see in the photo). And I'd already glued in place the lanyards for the deadeyes that tension the stay. Big mistake. So I'm having to remove the stay/deadeye assembly and make a new one. But in the meantime I've been adding ratlines to the lower bonaventure shrouds in the usual way - no clove hitches, just glue (PVA -white glue). The shrouds were unequally spaced - those bits of stick between the shrouds are temporary spacers to keep them apart till the ratlines stabilise the spacing. The trouble with the PVA, however, is that the residue is shiny. So all the new shrouds and ratlines are shiny. The old ones were probably shiny back in the day as well, but 50 years of dust has probably dulled them off. To compensate, I've just been experimenting with painting them with watered-down acrylic black paint. I've only done it on one set so far, but it looks promising. By the way, I'm not totally happy with the configuration of the tackle for lower mizzen stay - the lower deadeye is too close to the mainmast and the two deadeyes are too close together - the lanyards should be longer. I've also decided that the halyard should be belayed to a cleat on the mast instead of to the capstan (otherwise the capstan can't be used for anything else). So I'll have to do a bit of tweaking, otherwise it will all sneer at me later on. Now, a problem I've come across that I'd appreciate help with. The main halyard tackle, which goes to a knight at deck level, seems to foul the tackle of the lower mizzen stay, and I can't figure out what to do about it. I'm sure there must have been a solution to this back in the day, but I can't work out how they could have done it. Does anybody have any ideas? Steven


- 740 replies
-
- 12
-
-

-
- Tudor
- restoration
- (and 4 more)
-
Researching rowing technique:
-
Aah! I see you're master of nautical terminology - a man after my own heart - none of this woossy bow and stern stuff . . . Steven PS: Loving the model and the fact that you're 3rd generation navy.
- 88 replies
-
- 8
-
-

-
- Australia II
- Finished
- (and 2 more)
-
Hard to believe this is your first wooden model. You're doing very well, mate - slow and steady, with attention to detail. Keep up the good work. Steven
-
Thanks for the likes and kind comments. Mark, I find those magnifiers to be invaluable. They have three levels of magnification, but I almost always use the lowest level. You can get them from auto appliance stores or on-line. Yes, I carved all the figures - at 1:200 it was really pushing the outside of the envelope. I mostly use pear wood (because I've got a lot of it, thanks to neighbours' trees), but I've also tried apricot which is even better. I've never tried it, but the general consensus seems to be that box wood is the best for carving - extremely fine grain - almost like carving plastic. You can see the sequence in carving a figure at I hope that helps. Other people go about it differently - there are plenty of alternative methods - but I find this works for me. Regards, Steven
- 740 replies
-
- 4
-
-
- Tudor
- restoration
- (and 4 more)
-
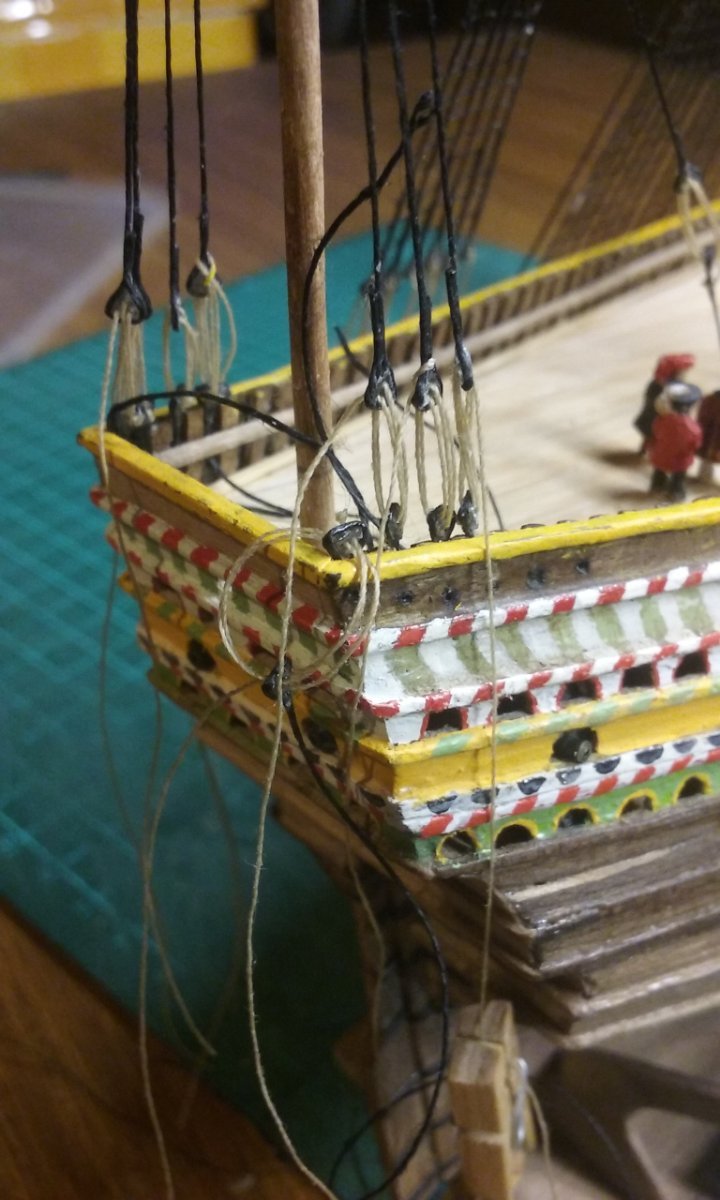
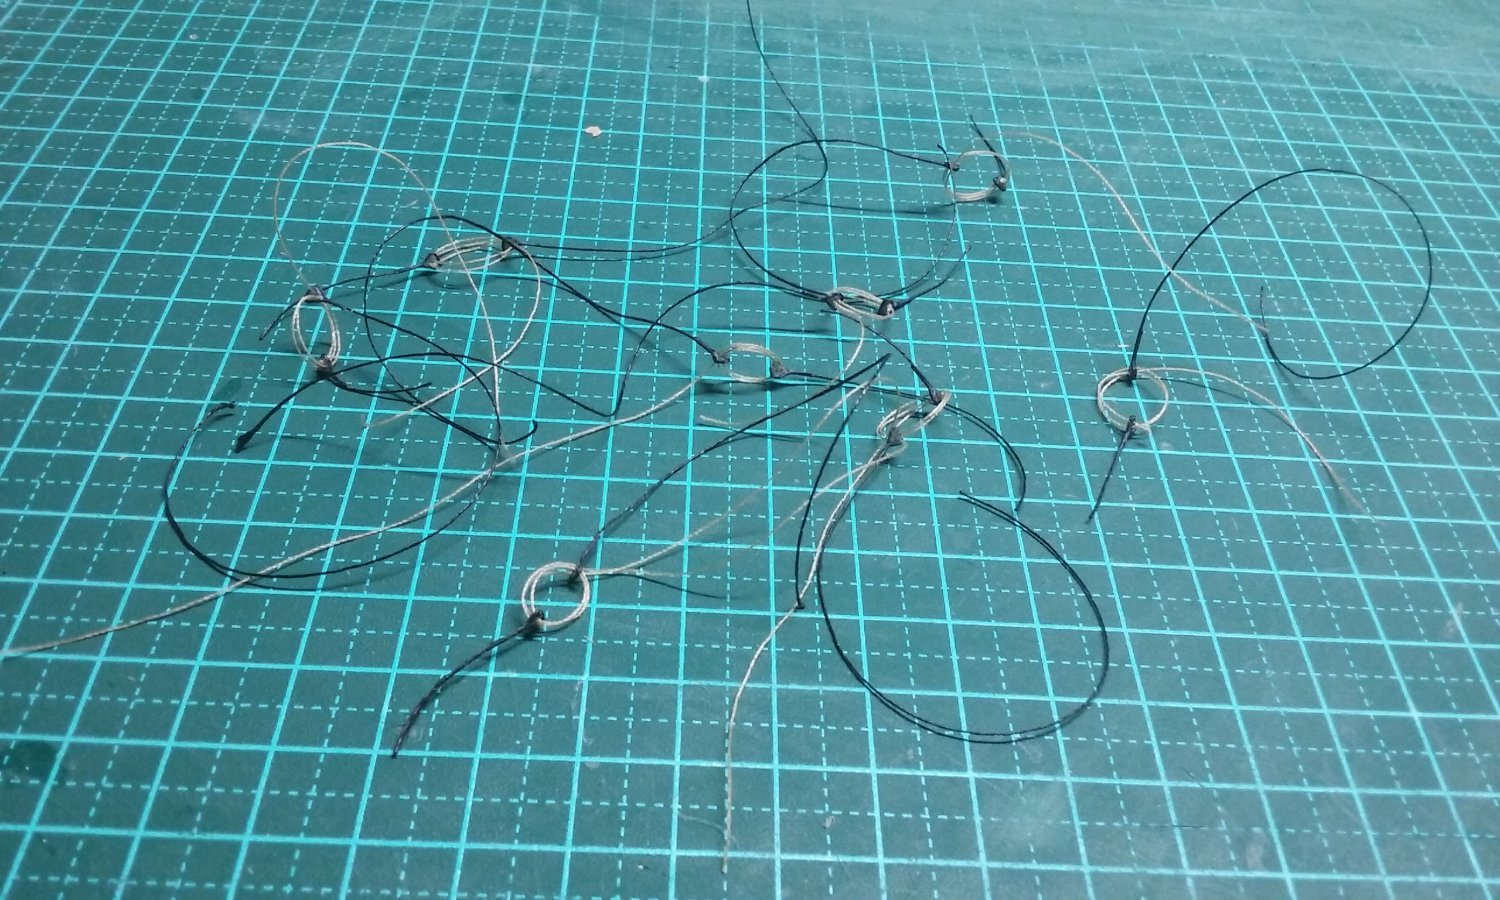
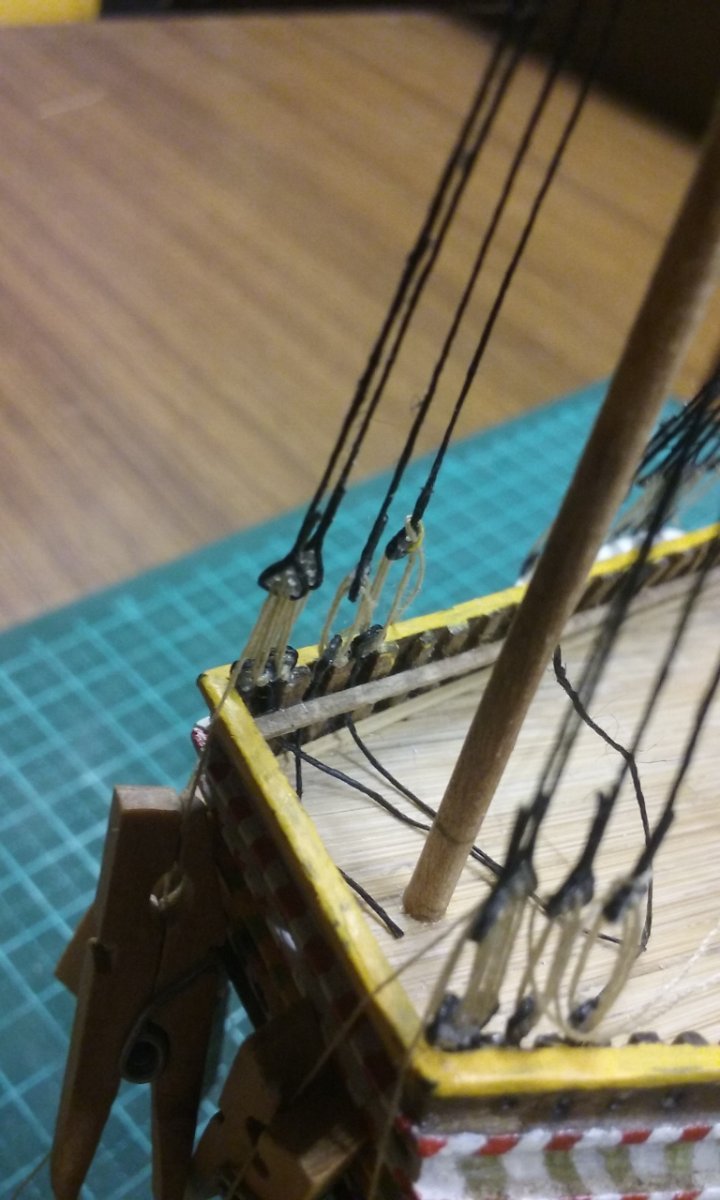
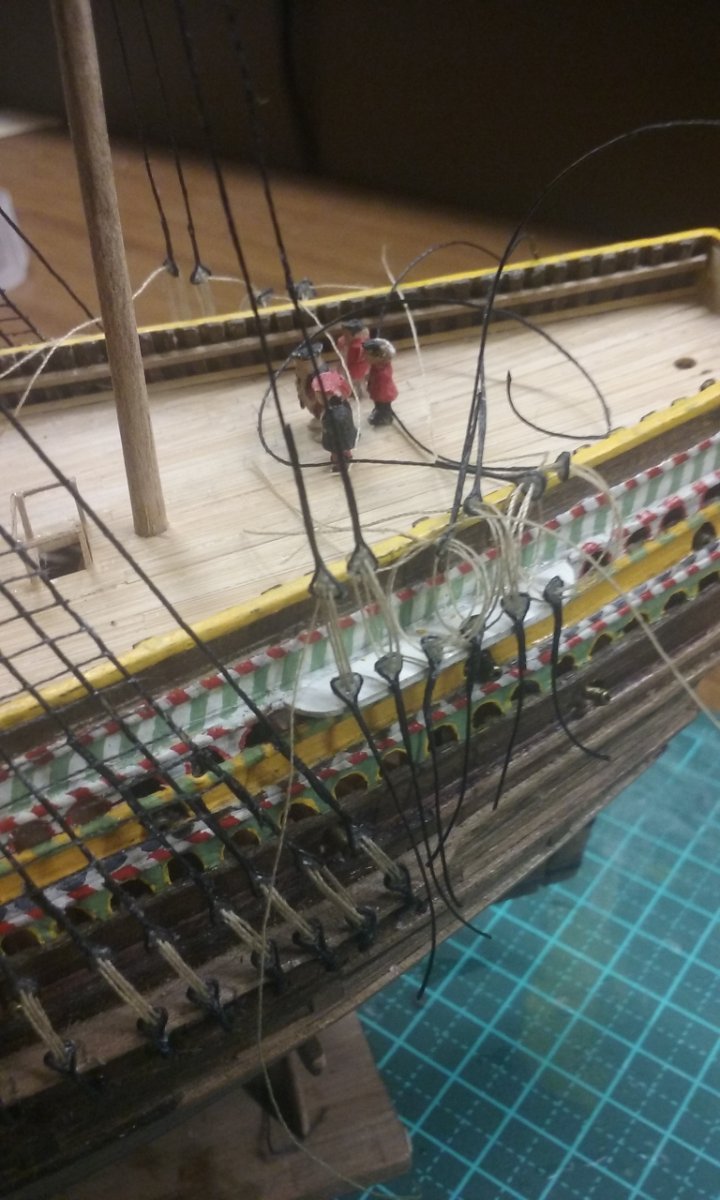
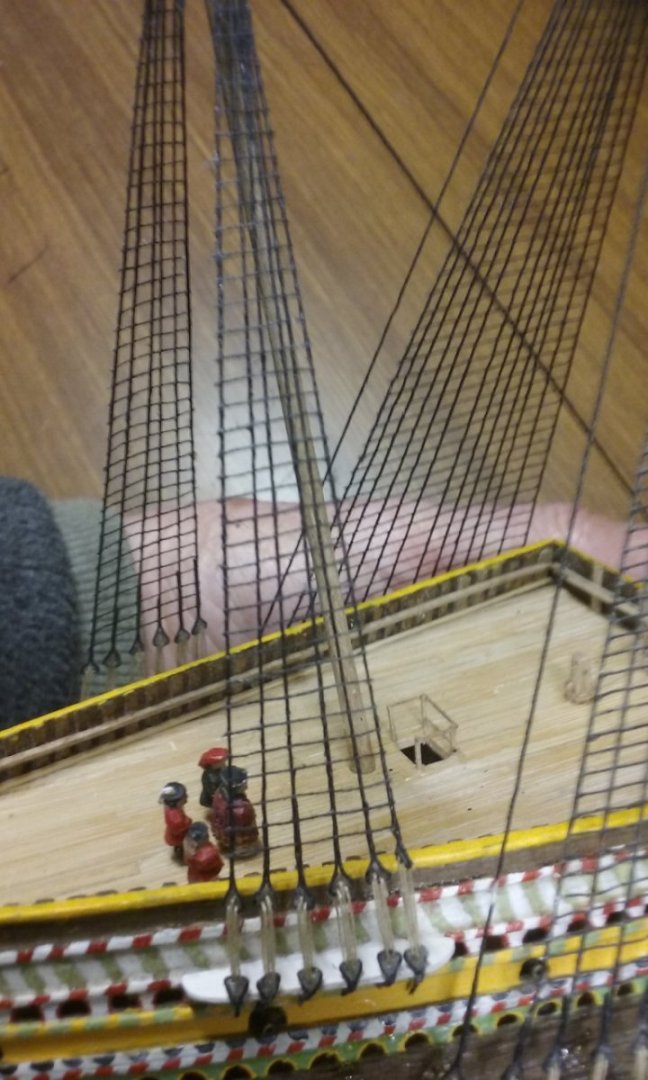
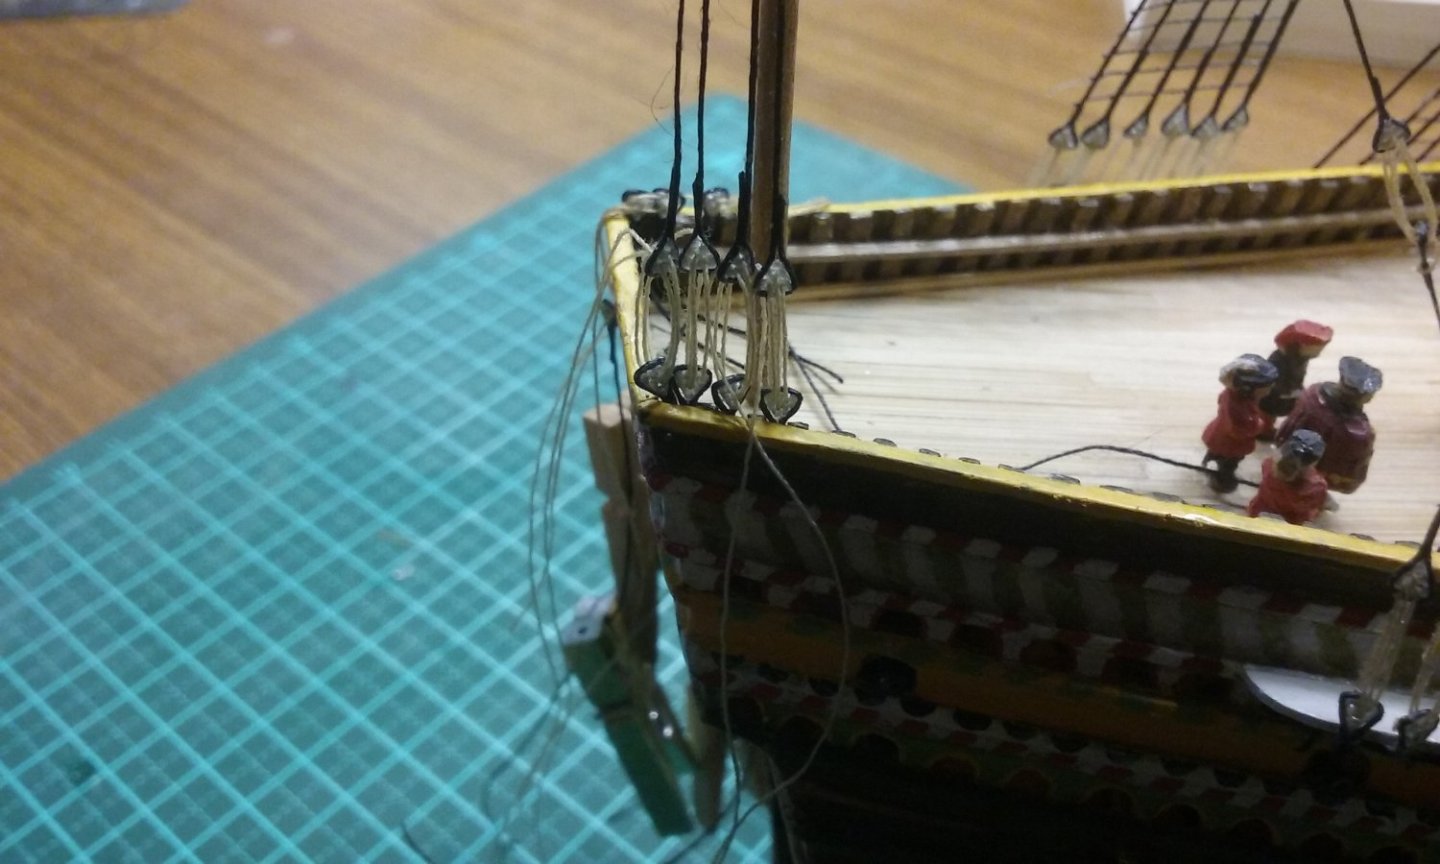
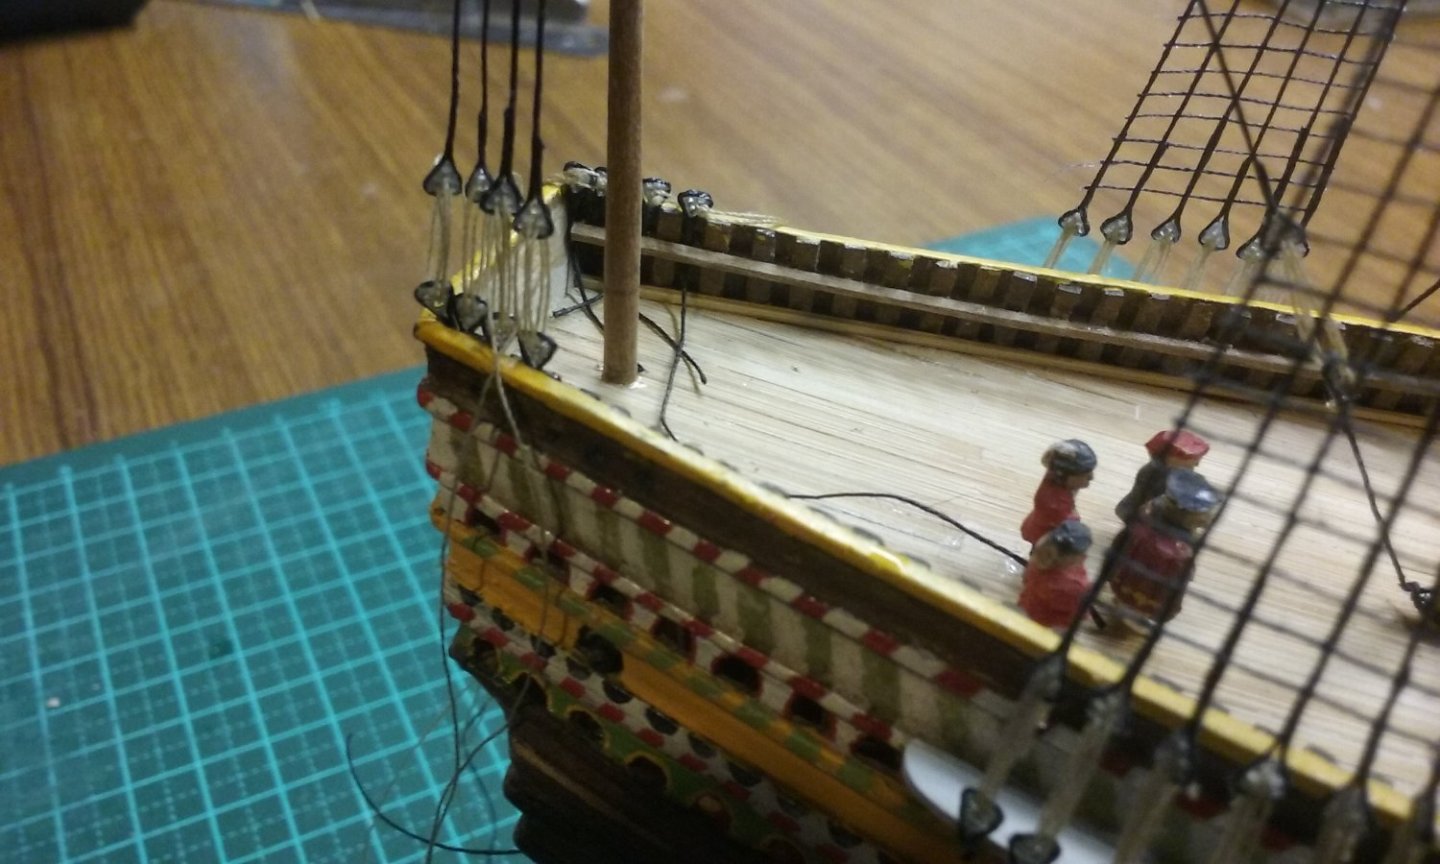
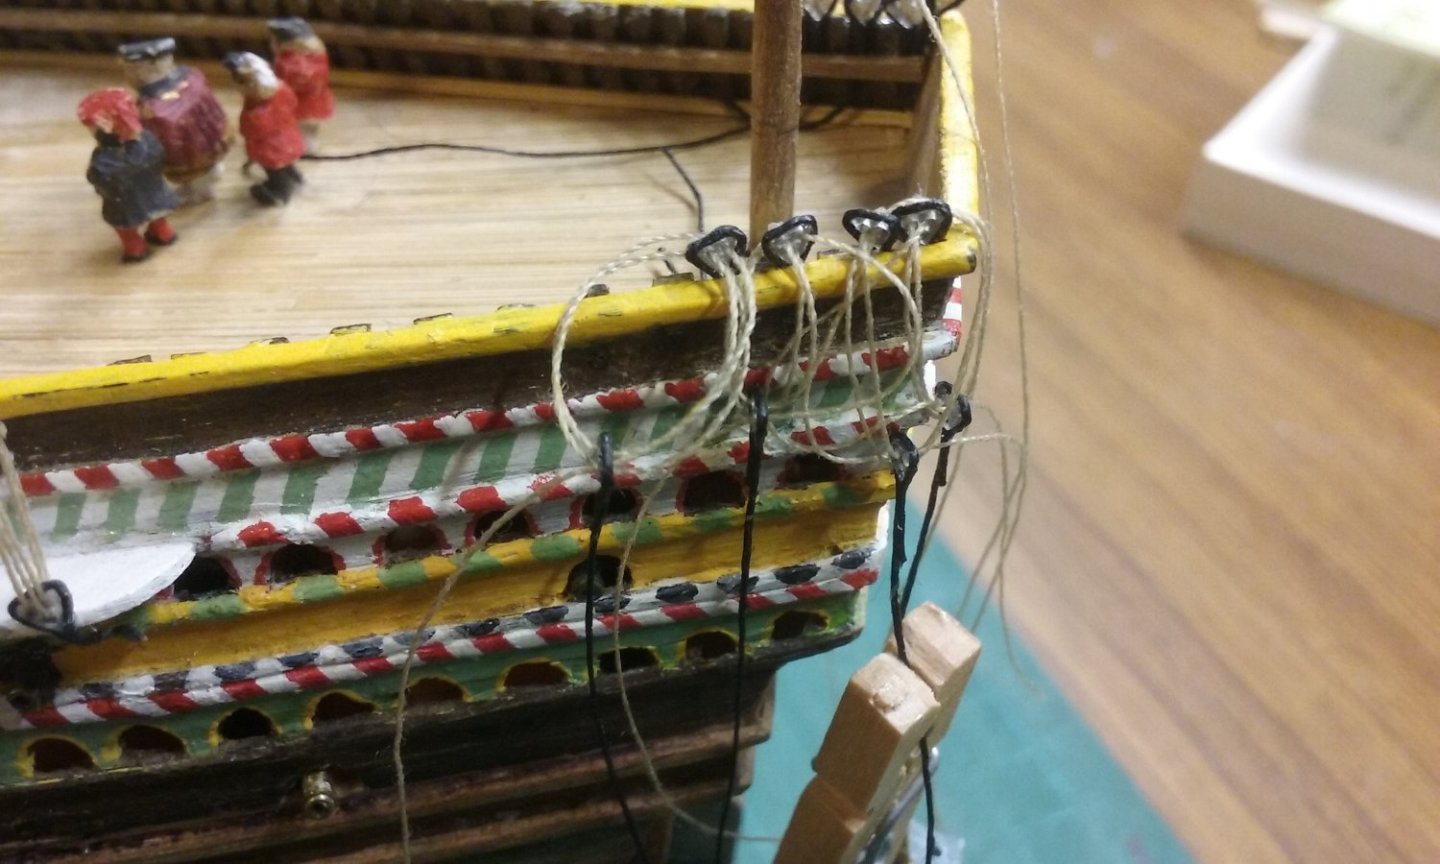
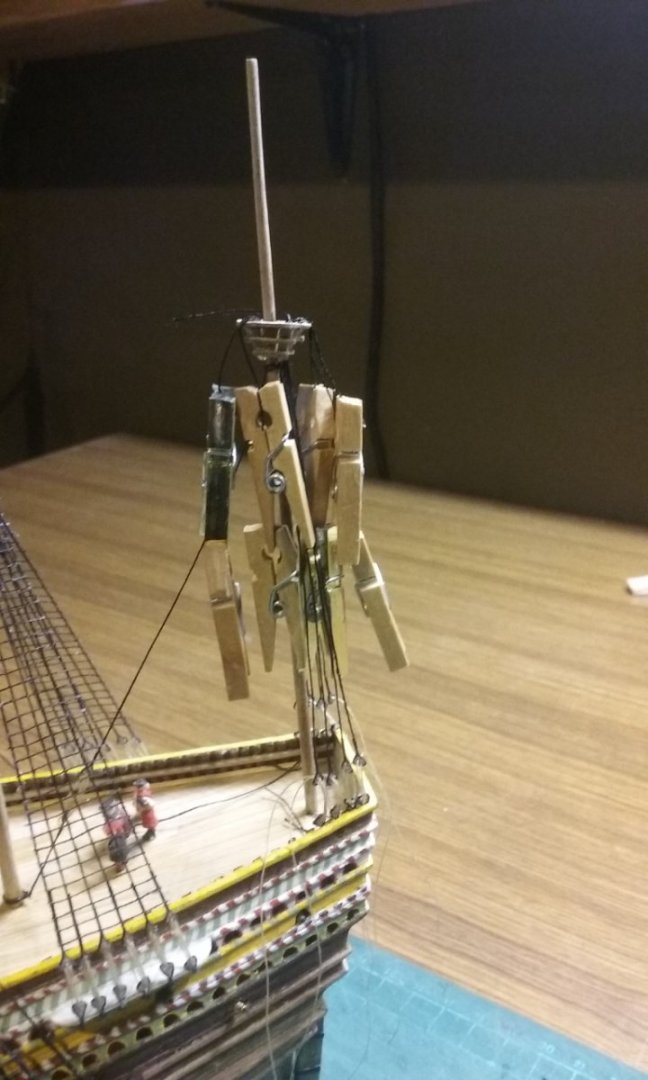
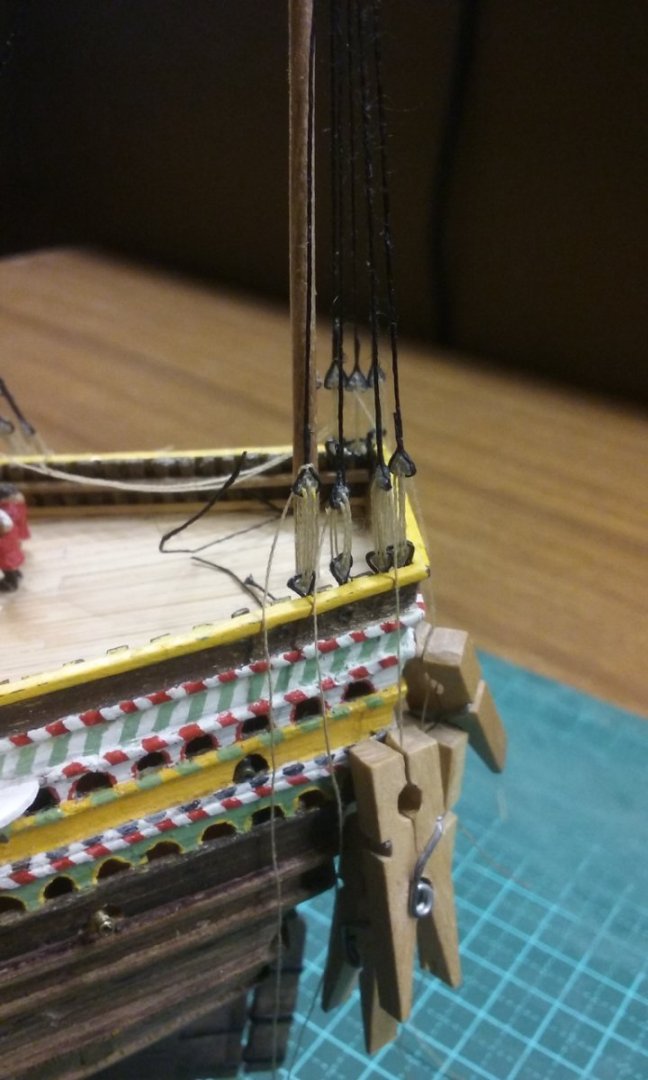
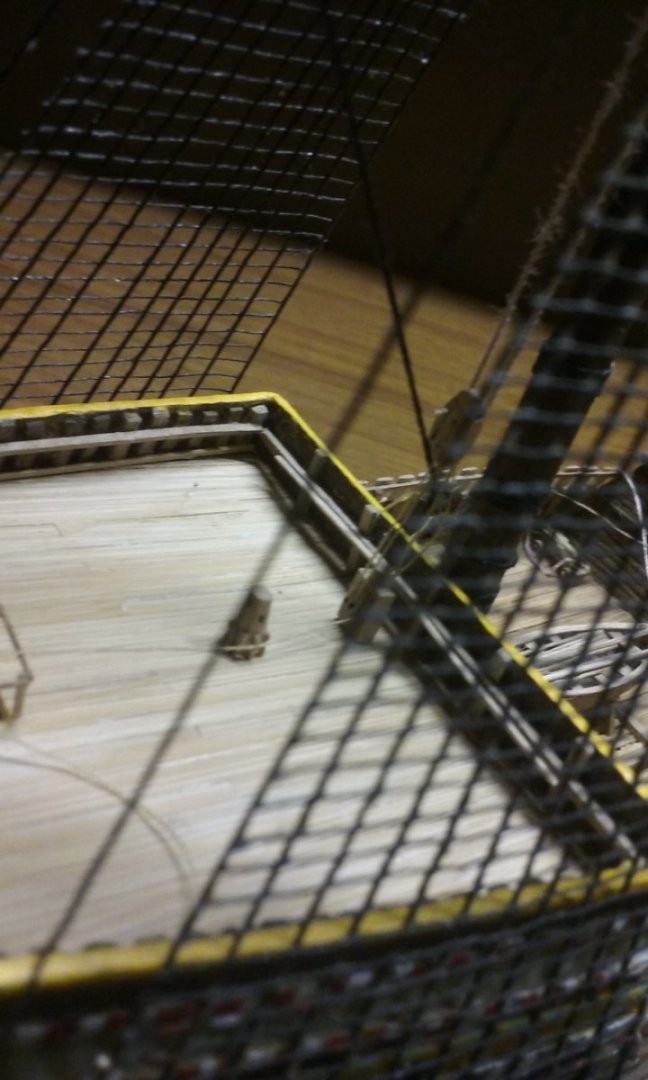
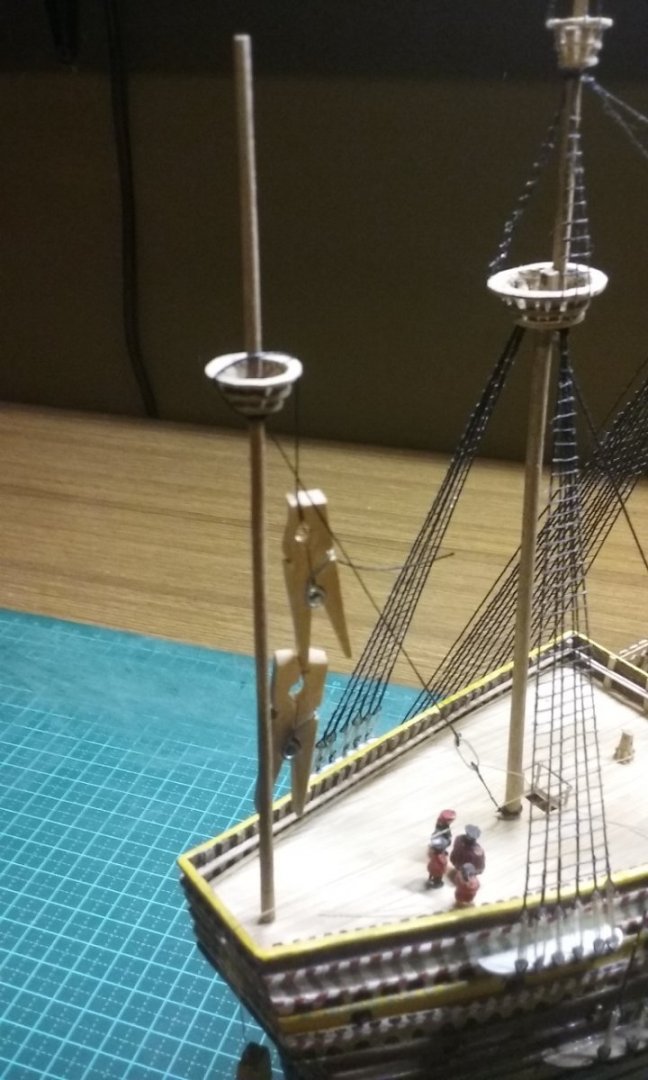
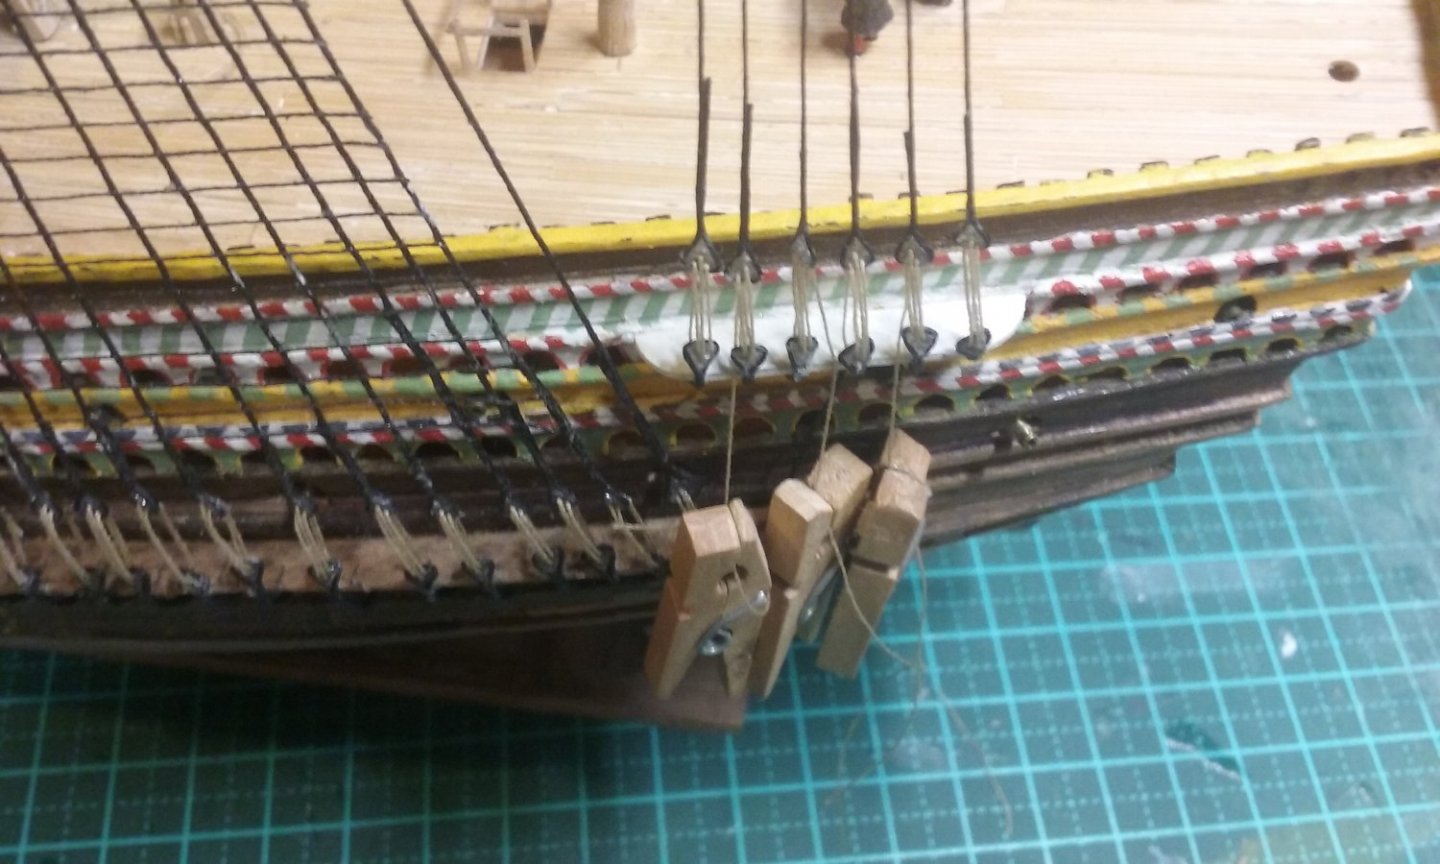
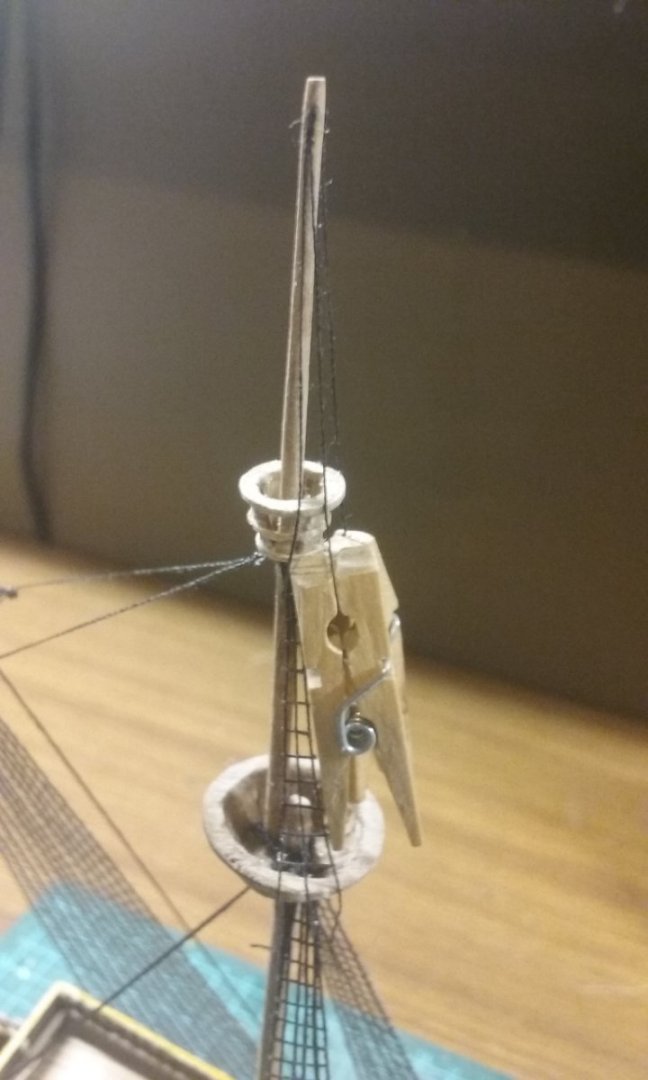
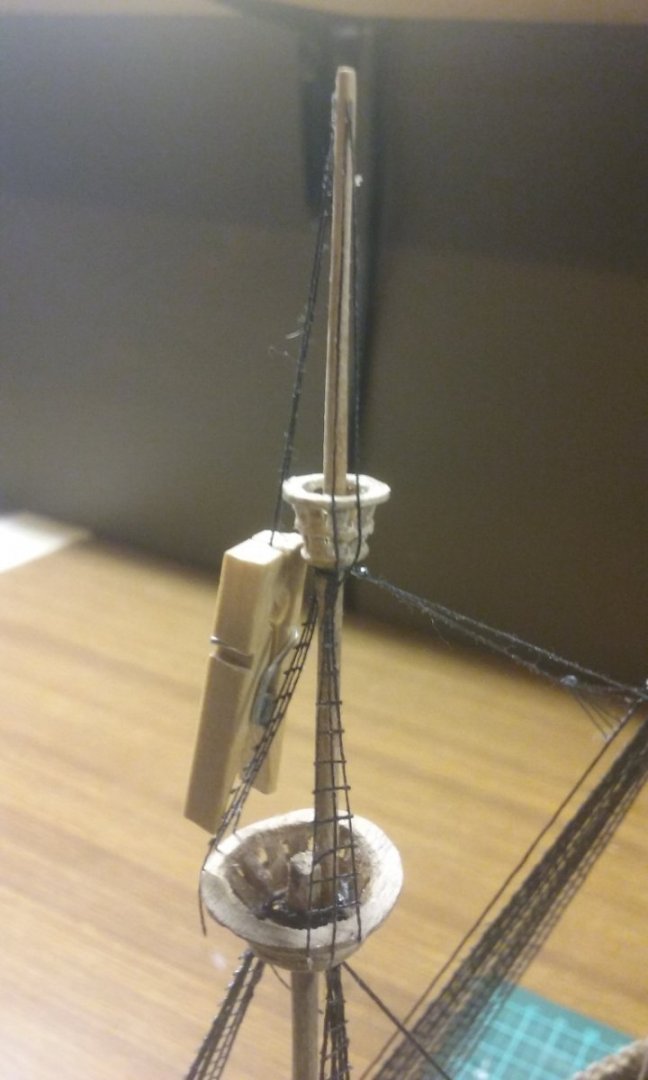
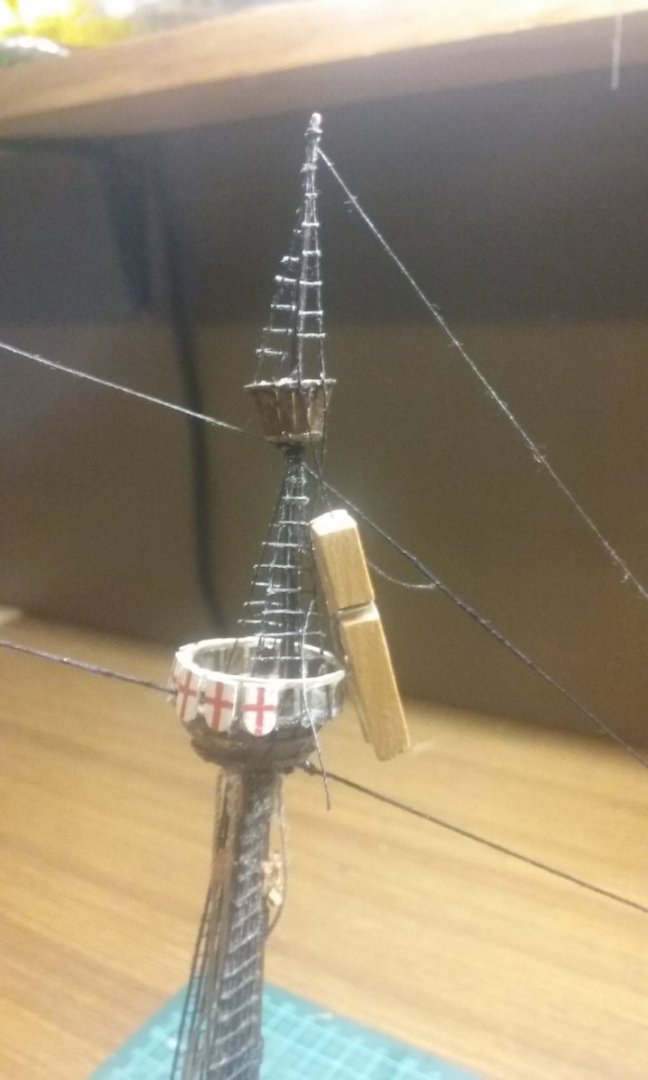
Thanks for the likes and comments, everyone. Here's me with the deadeyes and tackle for the bonaventure mizzen's lower stay. (OK, you can't see them, but they are there, trust me). Now for the shrouds. Fun and games all the way. First I made all the shroud/deadeye assemblies (8 of them) and glued the lower deadeyes into place - except for one assembly which somehow vanished into another dimension - I must have brushed it off with my sleeve - serves me right for leaving them on the tabletop instead of in a container. So I had to make another one. Surprisingly, the lost one didn't turn up as soon as I'd done this. Note that the bonaventure mizzen doesn't have channels, so I had to figure out a way of fixing the lower deadeyes to the hull itself. Fortunately, I'd run a rail along the inside of the bulwark, and the "chains" (really linen thread) fitted through the gaps between that and the upper ends of the frames. But trying to fix the shrouds at the top was a bit of an issue - they should have gone up through the lubber's hole and around the mast, but there just wasn't enough room to do it well, so when I got them through the lubber's hole I just glued them to the floor of the fighting top. Which opened up another can of worms - the top was just fixed to the mast with PVA (white) glue via a circular hole through the floor, so it it tipped over in various directions as I added the shrouds. I had to get fairly imaginative to get it straight, but it ended up ok. Then I was tensioning the shrouds when one of them had the lower deadeye pull out of its belaying point in the hull, so I had to push the thread back in place, which turned out to be very difficult indeed - it wouldn't go through, kept pulling out of place and just when I thought I had it fixed the tweezers turned out to be both sides of the mast so I couldn't close them . . . (I threw my magnifying headset on the floor - first time I've ever done it - and the language wasn't the kind of thing I'd have liked my grandmother to hear) - but I finally got it into place. THEN I discover that two of the shrouds are twisted around the adjoining ones, so I have to dissolve the glue holding the lower end in place, pull the shroud out, take it around the other shroud to fix the twist, thread the lower end back through the gap between the rail and the frame and then glue it back place. Like I said, fun and games. But now it all seems to be pretty good, and I'm ready to add the ratlines (sigh). Steven


- 740 replies
-
- 7
-
-
- Tudor
- restoration
- (and 4 more)
-
Hi Peter, I can't believe it's been a year since your last post. I hope everything's going well for you and yours. Any progress on the carrack front? Best wishes, Steven
-
A very beautiful vessel. Steven
-
Bonjour et bienvenu, Drut. (Hello and welcome, Drut). Have you decided on a particular ship you want to build? Steven
-
Good to hear from you, Mark, and to know you're still on-track, if slightly diverted for the time being . . . Steven
-
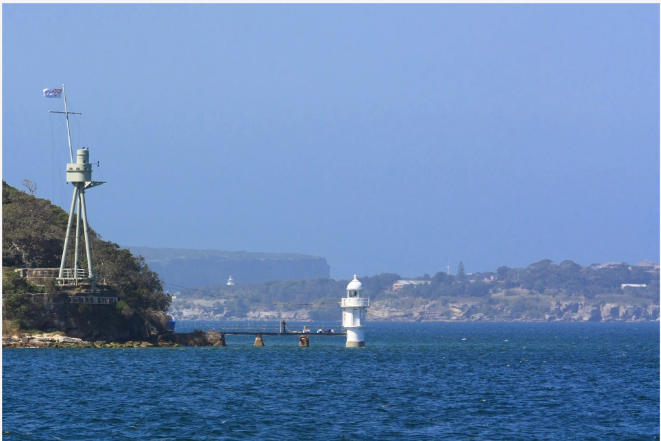
Steven, I've missed your updates recently, and just stumbled upon your build again. She's looking amazing! I have nothing but respect for someone who can do what you can with sheet steel. In a similar tradition, in Sydney Harbour they have the mast of the first HMAS Sydney, which sank the Emden in 1914. It was put in place in 1934. The H.M.A.S. Sydney I Memorial Mast commemorates those who served in the Royal Australian Navy and those ships which were lost in service. On 26 June 2007 the Royal Australian Navy announced that a new naval tradition would commence that day requiring all Australian and foreign naval vessels proceeding into Sydney Harbour to render ceremonial honours to the HMAS Sydney I Memorial Mast. The ceremony consists of bringing the ship's company on the upper decks to attention, and then 'piping' the Mast. Steven
-
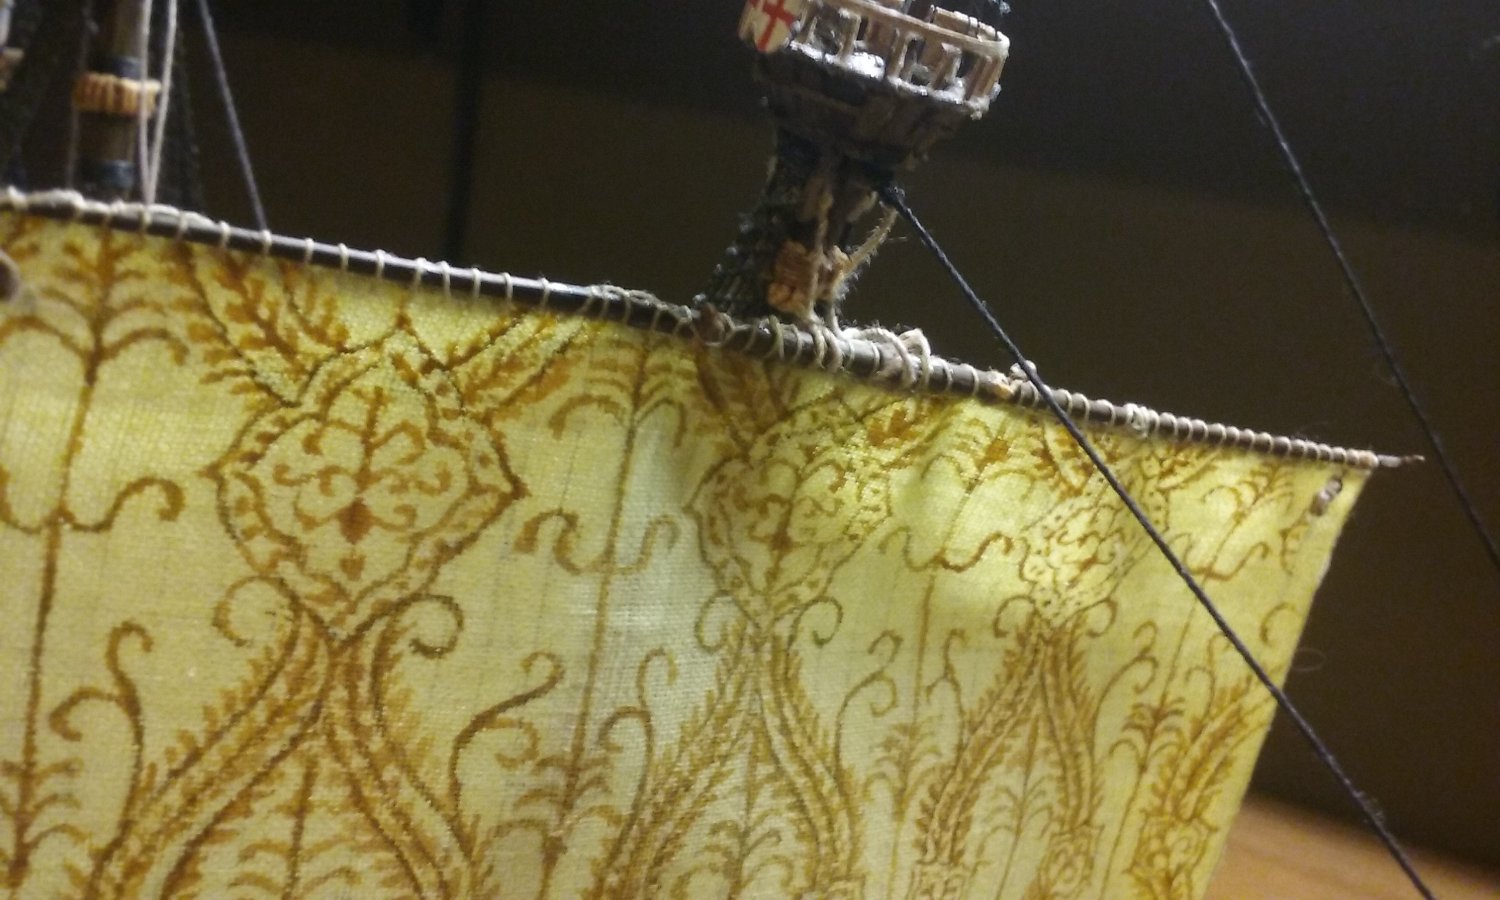
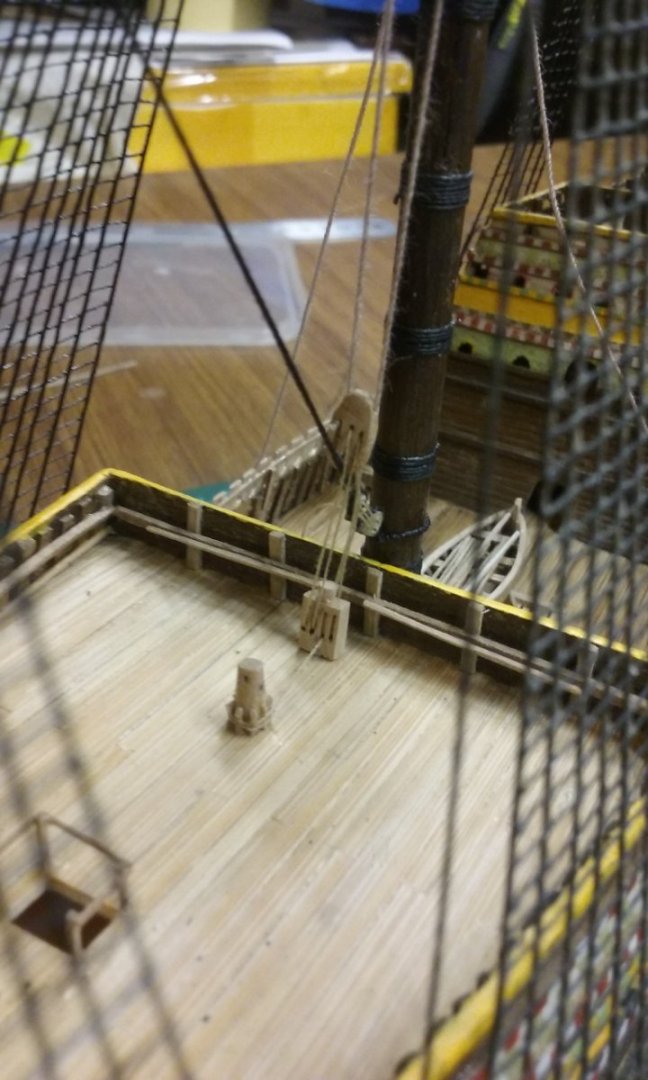
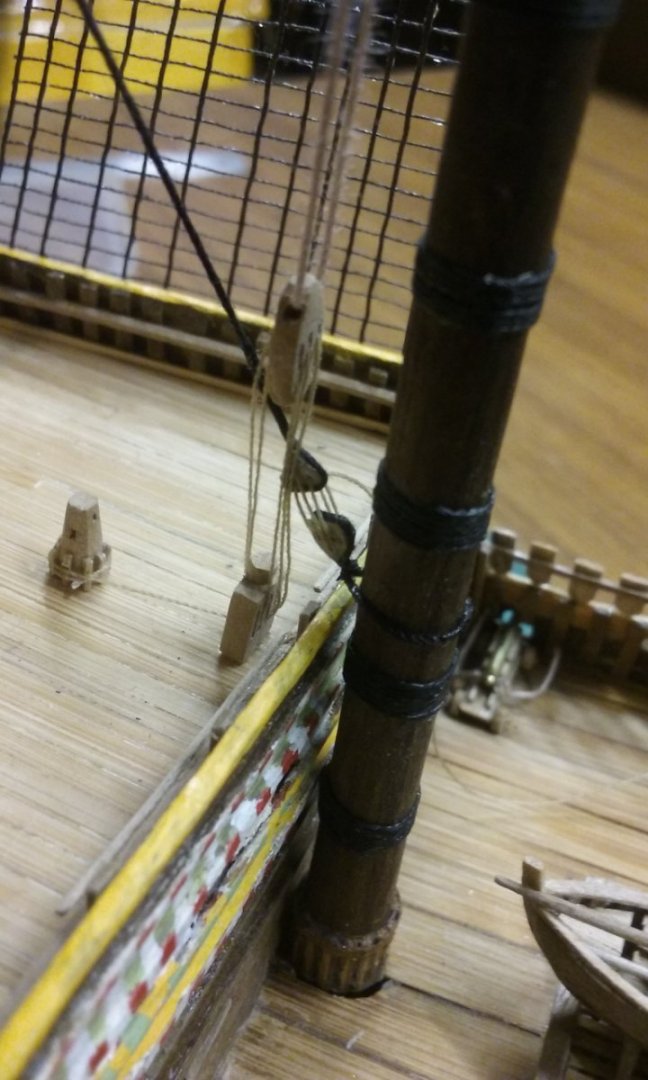
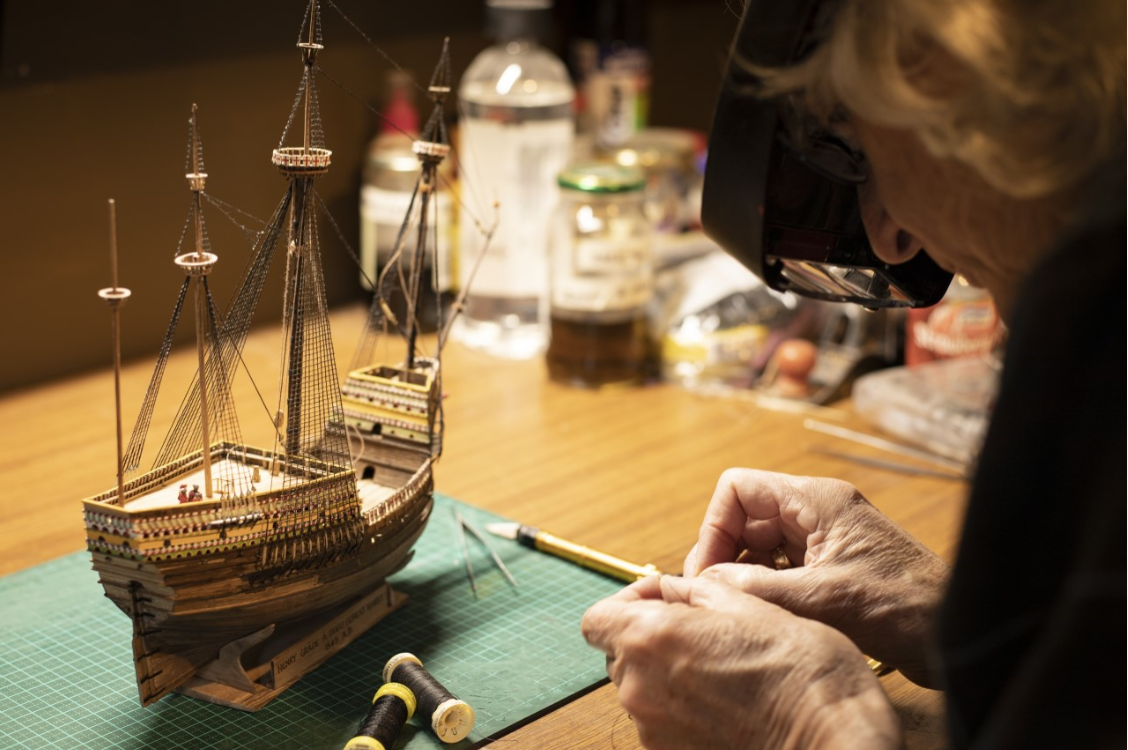
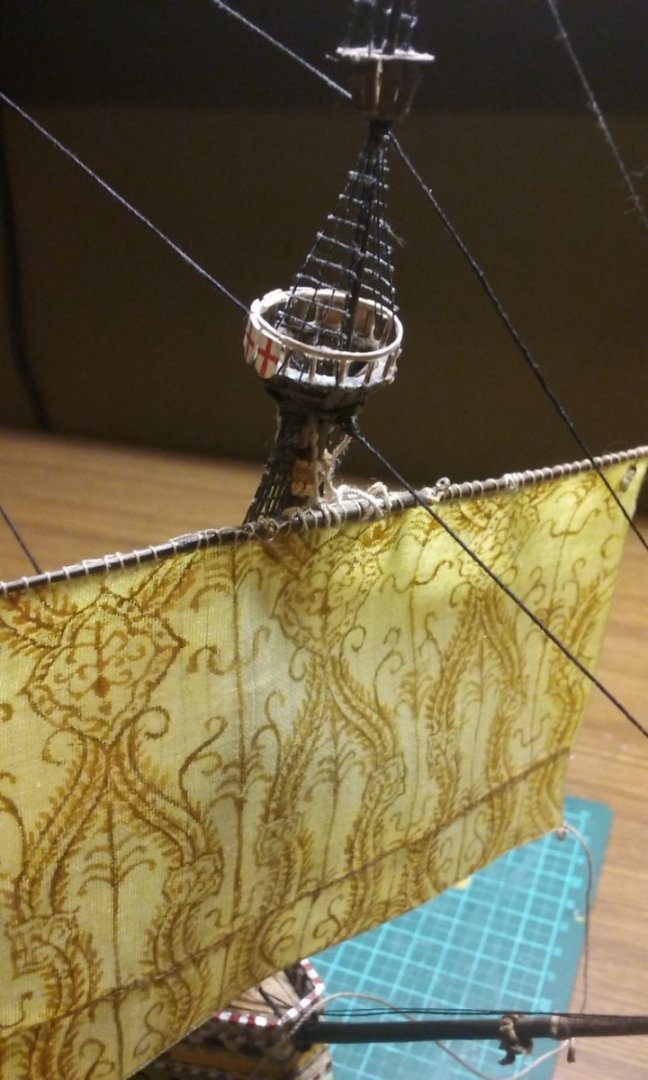
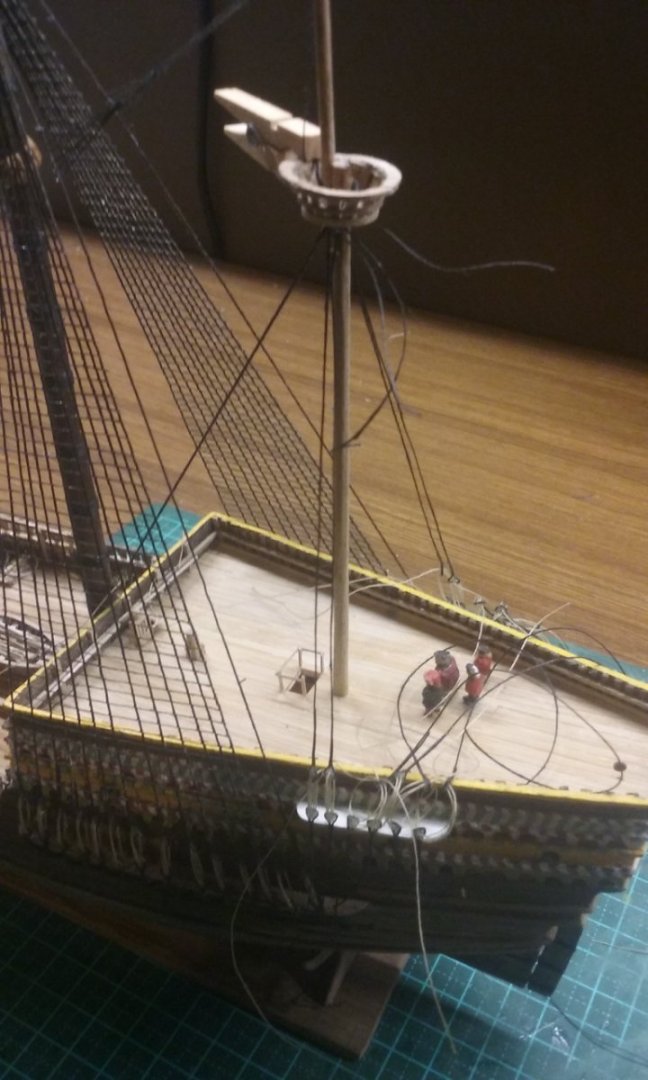
The bonaventure mizzen is now glued in place and the lower stay is being put in position. I have yet to pull the lanyards tight on the pair of blocks that tensions the stay. And I've added deadeyes to the lower bonaventure shrouds; when the glue dries I'll be able to join the pairs of deadeyes and put the shrouds in place. I've begun to attach the main halyard tackle (pendant?) to the capstan - just glued the nearest bit in place, and I'll gradually wrap it around so it looks like it's actually doing its job. And - FINALLY - I'm able to start work on attaching the yards and my beautiful hand-painted "cloth of gold" sails - starting with the forecourse - I've attached the halyards to the yard - still loosely for the time being; I yet have to get them positioned correctly to attach the yard to the (fake) parrel truck. It's interesting - ships of this period don't seem to have hauled their courses up very high - they are usually shown quite a long way below the tops. Steven


- 740 replies
-
- 13
-
-
-
- Tudor
- restoration
- (and 4 more)
-
Questions Before I Buy My First Ship
Louie da fly replied to Magarkus's topic in New member Introductions
Clamps! Get lots of clamps! Steven -
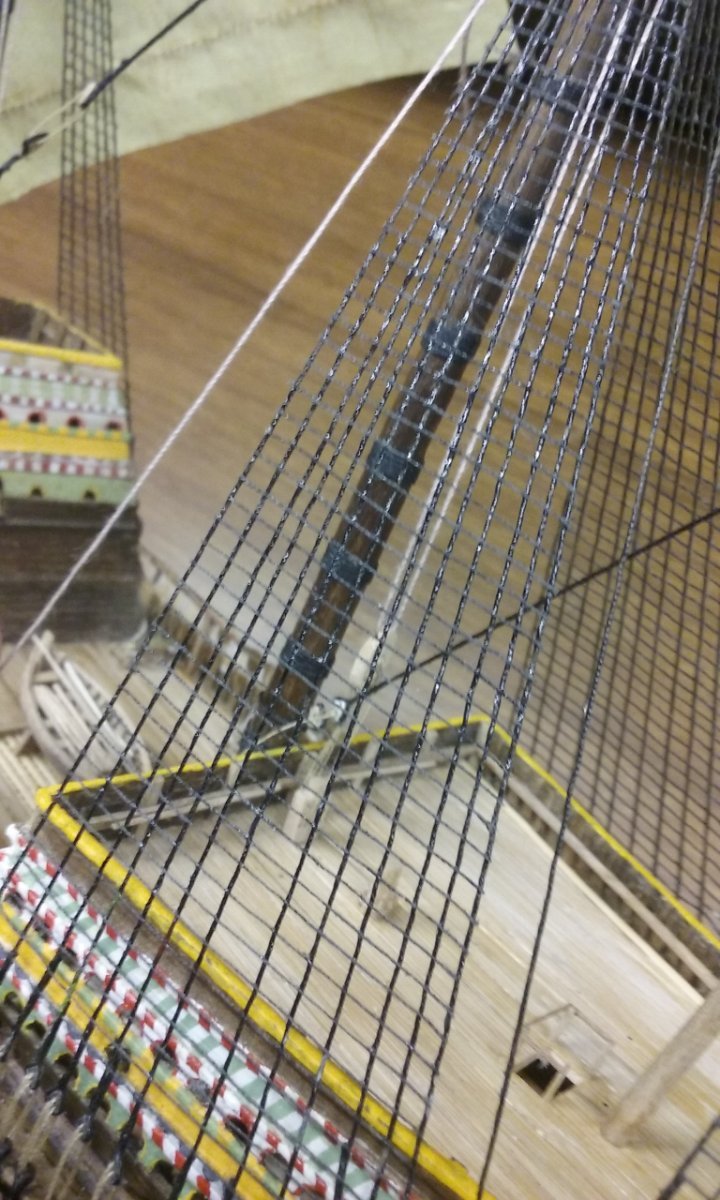
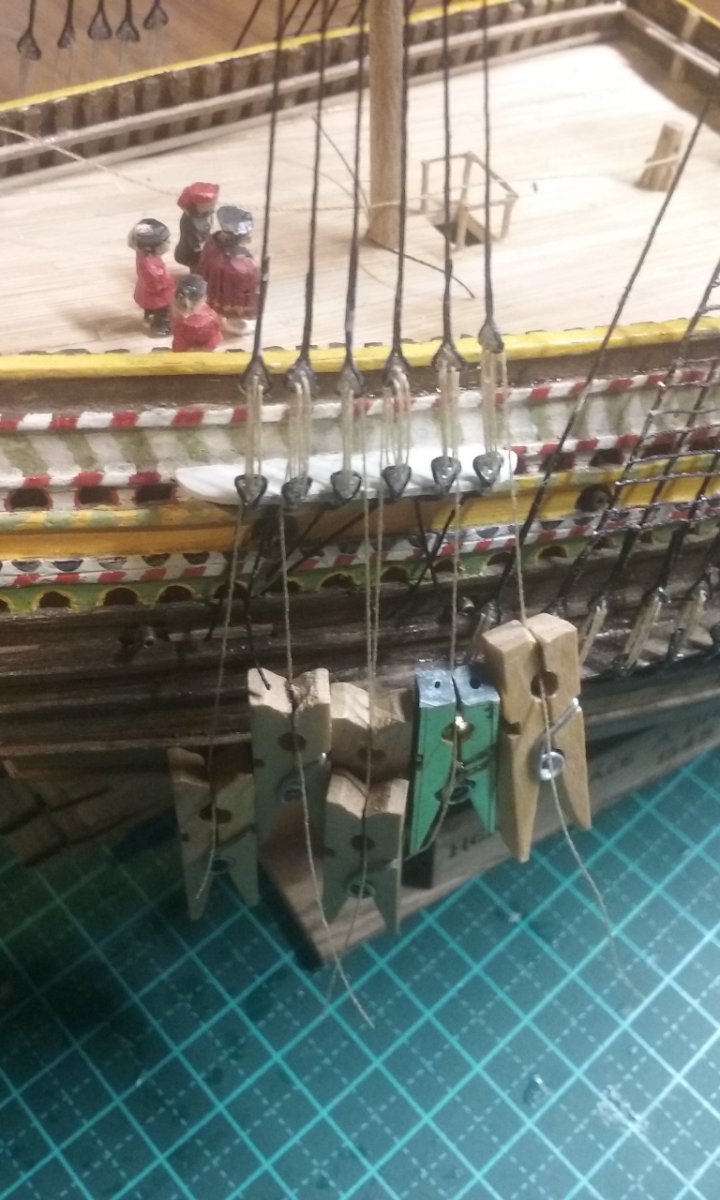
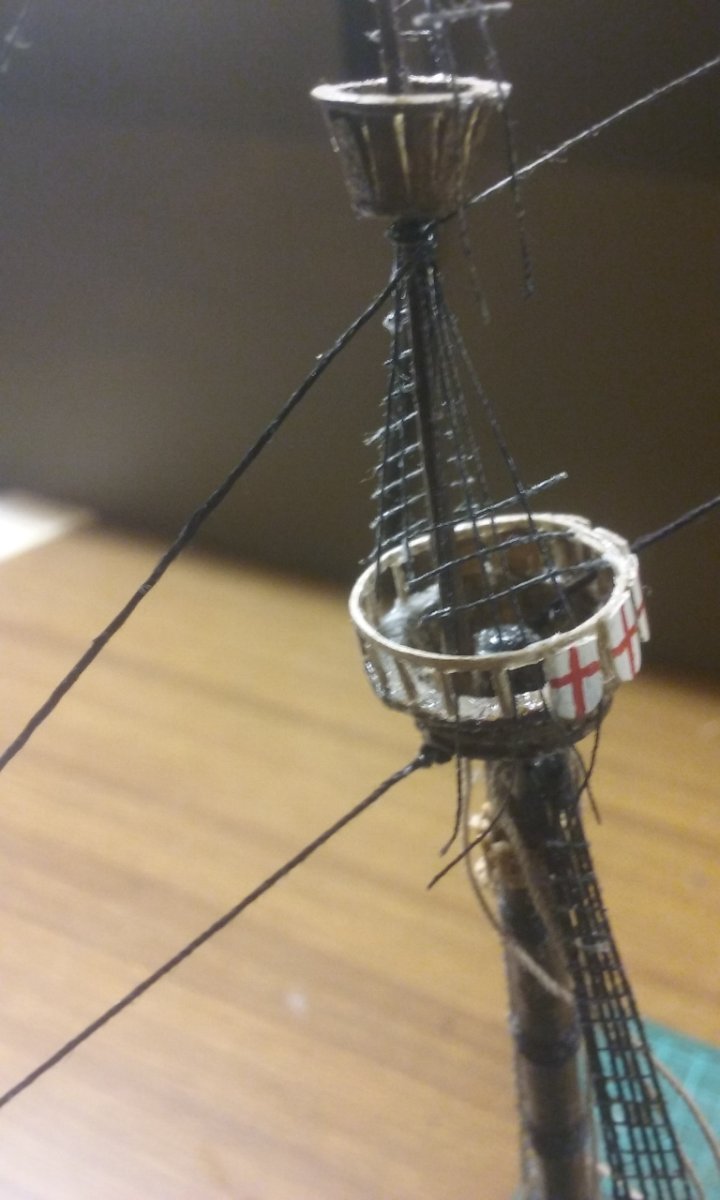
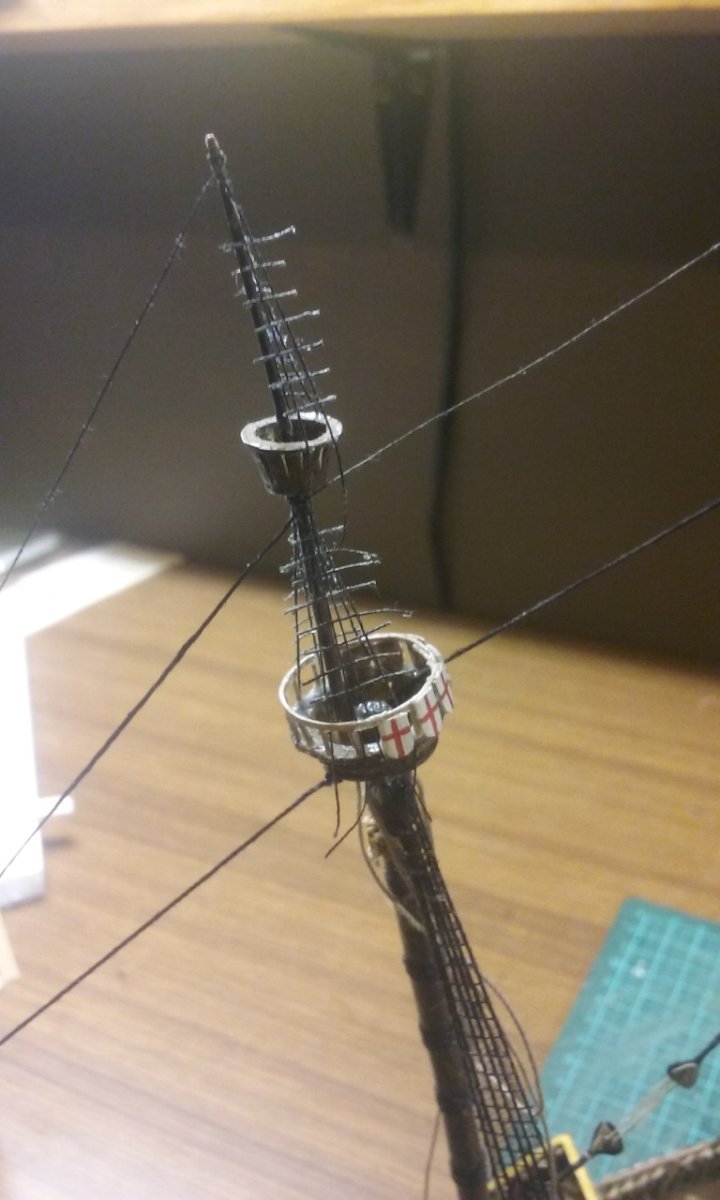
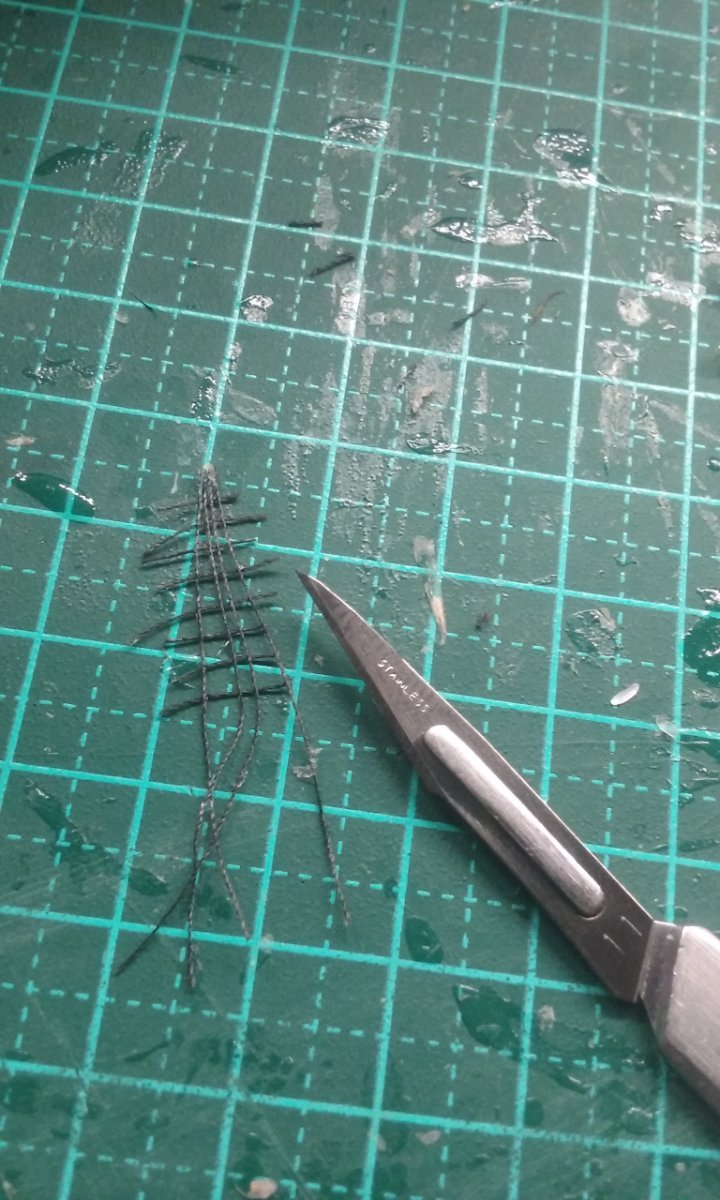
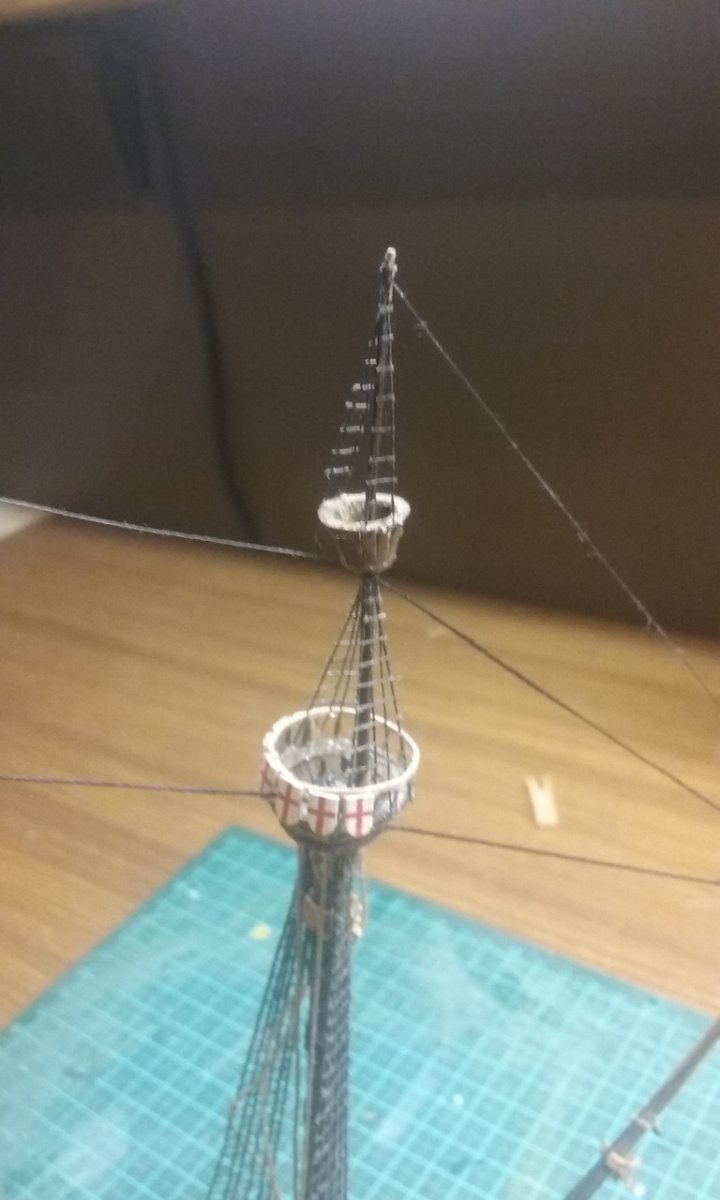
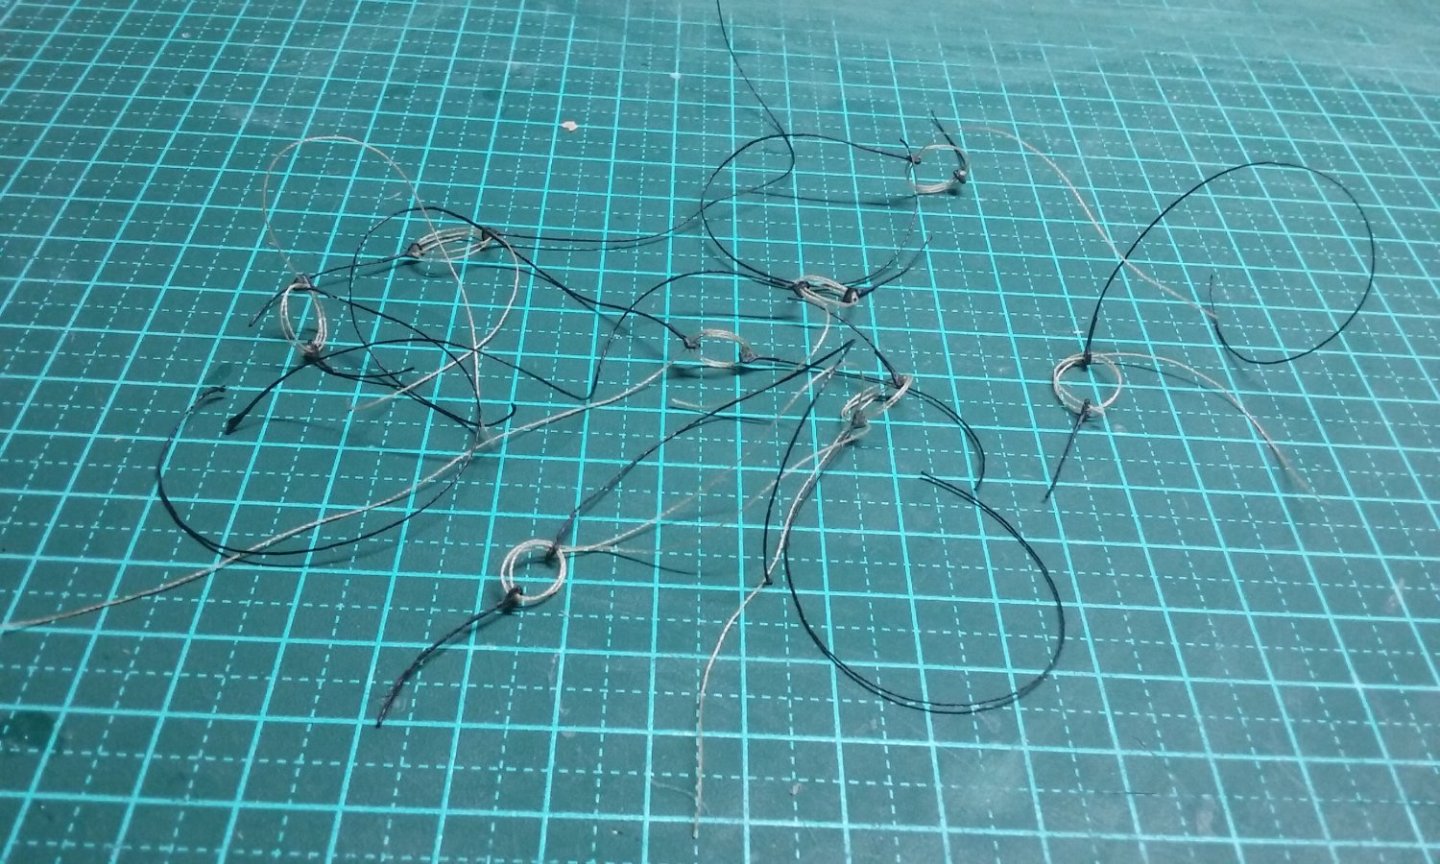
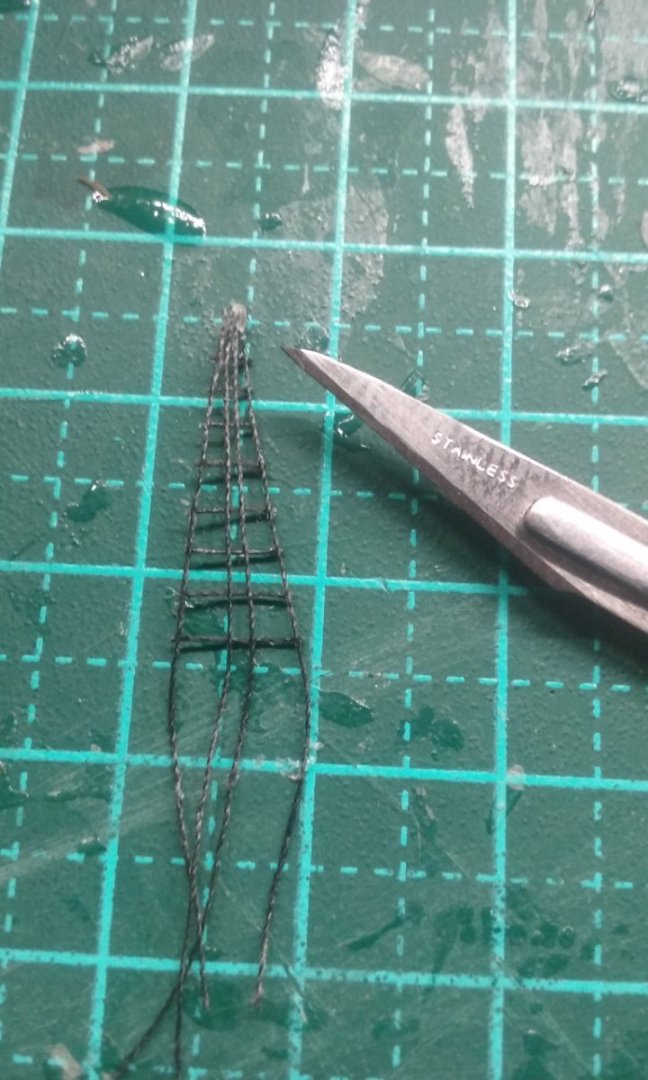
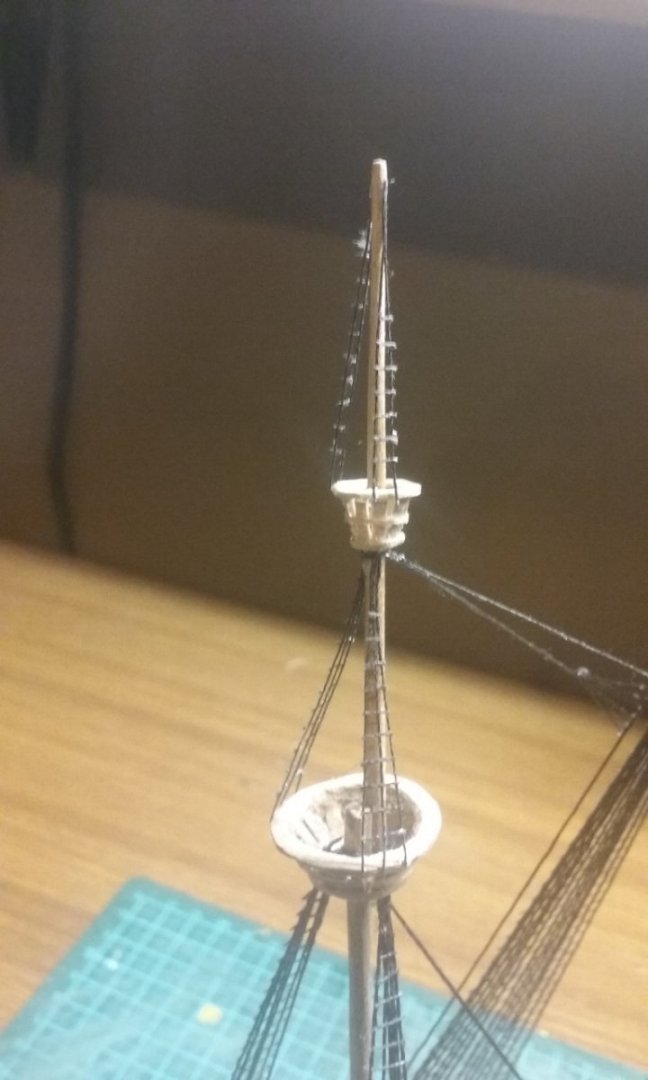
It's been awhile since I posted - I've been doing a lot of fiddly stuff. First, the mizzen shrouds: Threading the lanyards between the upper and lower deadeyes and fixing the assemblies to the channels - Threading the shrouds through the bottom of the fighting top. (Yes, I know I should be threading through first and then adding the deadeyes at each end of the doubled shroud, but at this scale it wasn't realistic. However, it's more accurate than the way I did it on the fore and main. Pulling tight, with tiny pegs as weights to maintain tension, and a dab of glue at the back to keep them in place., I seem to have forgotten to take photos of putting on the lower ratlines. But what the hey, you saw me doing it on the other masts. So here instead are the topmast and topgallant shrouds and ratlines going on - I hadn't been happy with how the fore topmast and topgallant shrouds came out - I cut the ends off the ratlines while they were in place, and it didn't work too well (looked untidy). So I've since been using a different technique - I add the ratlines in place, remove the shroud/ratline assembly and trim off the ratlines with a scalpel blade on the cutting board, then glue the shroud/ratline assembly back on. So here are the new shrouds and ratlines for the fore topmast and topgallant. At this point the shrouds are removed and the ratlines trimmed. And put back in place. The tiny pegs used again to tension the shrouds while the glue dries. Then the shrouds are trimmed to length. All done! Now for the bonaventure mizzen! Steven


- 740 replies
-
- 12
-
-
-
- Tudor
- restoration
- (and 4 more)
-
Interesting name for a ship - in Old English, that's Eg-beorht (from which comes the name Egbert. Probably. Though it may come from Ecg-beorht - bright EDGE - like on a sword). Steven
-
I think your streaking looks very good - at least in the photos. Keep up the good work. Steven
-
Oh, yes. But he's by no means the only one. We have some really stellar modellers on this forum. I won't mention their names for fear of embarrassing them, but they're the kind of ship modellers I want to be when I grow up . . . Steven
-
That's great, Mateusz! Looks like you're well on the way to another really good model. By the way, I love those crewmen figures. Very nice. Steven
-
Here's an opportunity! Anyone live in Suffolk? https://www.youtube.com/watch?v=mM8npYuqt2s And https://saxonship.org/getting-involved/visit/ Steven